

Robert Taylor
-
Posts
211 -
Joined
-
Last visited
Content Type
Profiles
Forums
Gallery
Events
Posts posted by Robert Taylor
-
-
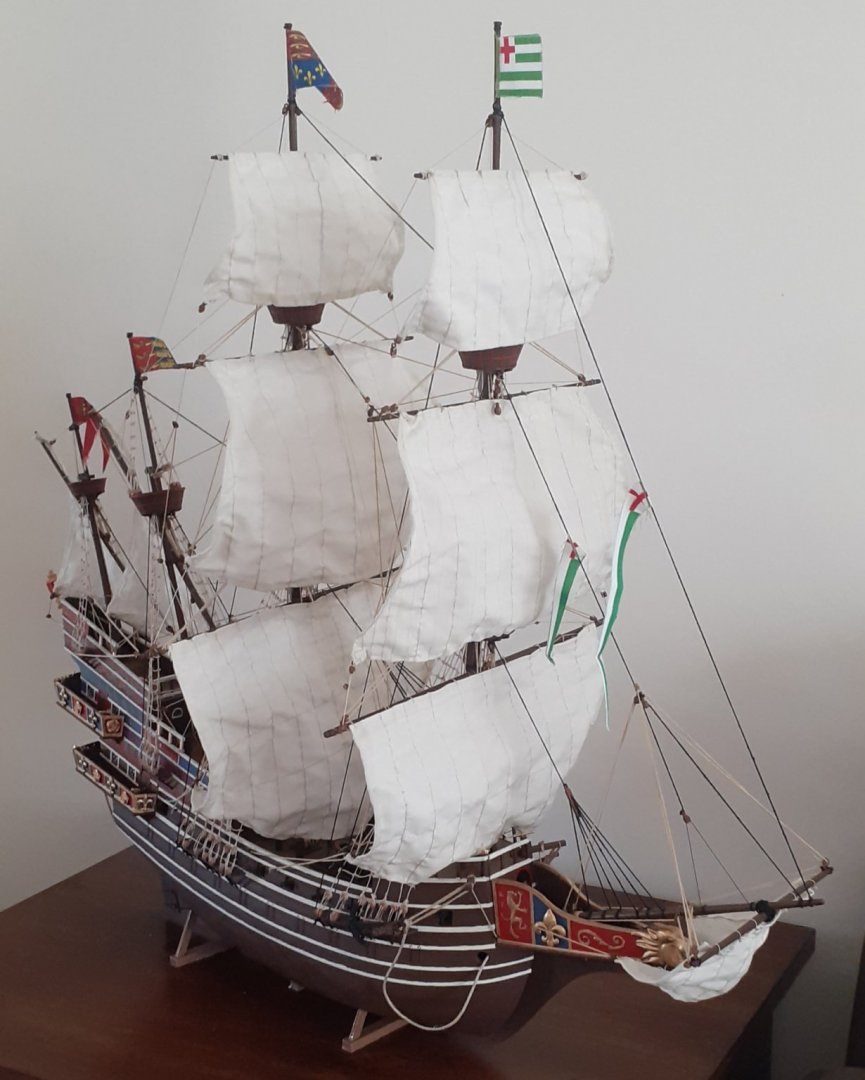
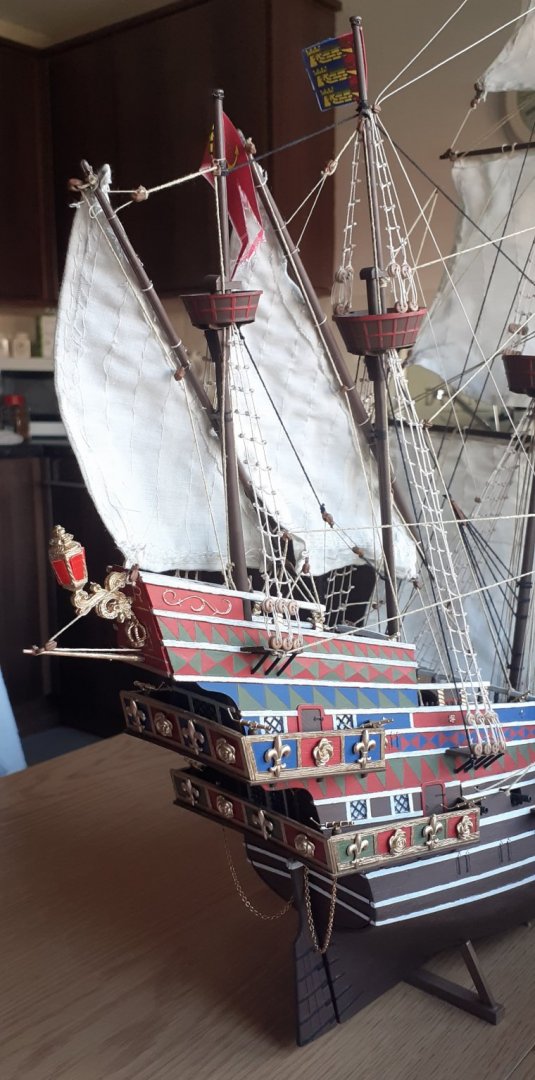
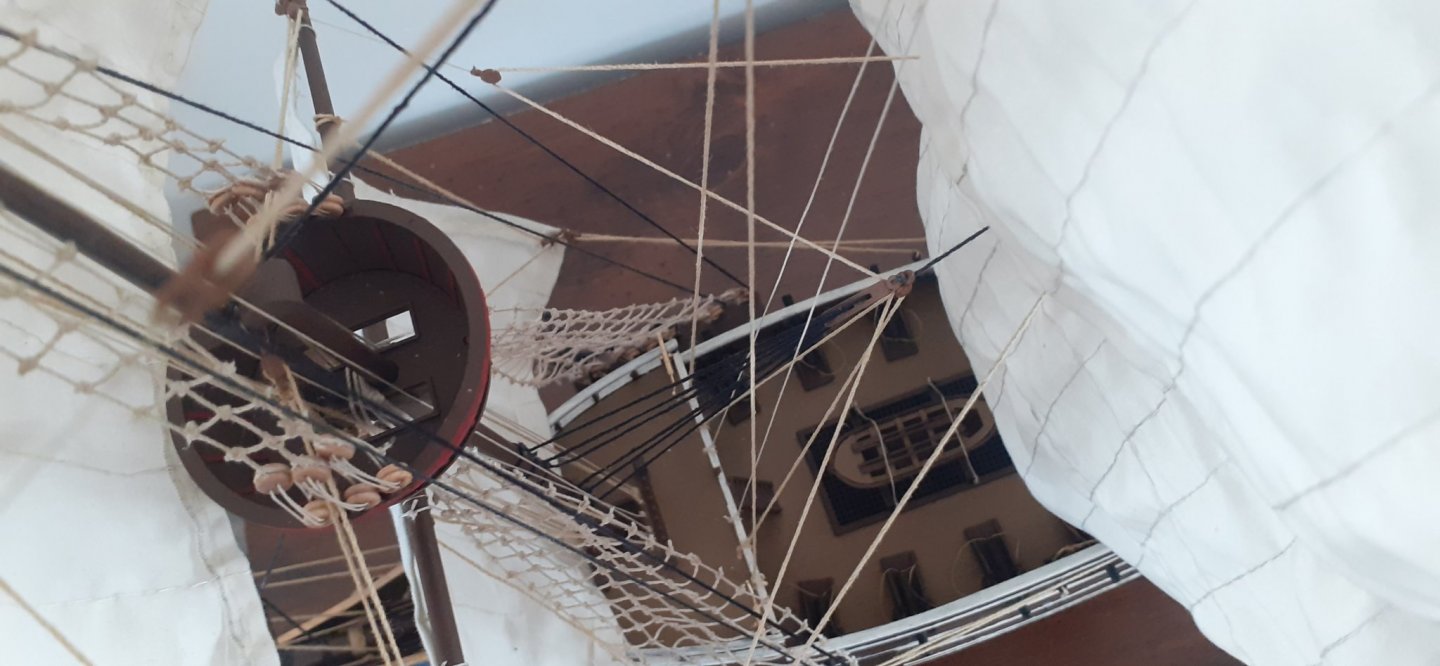
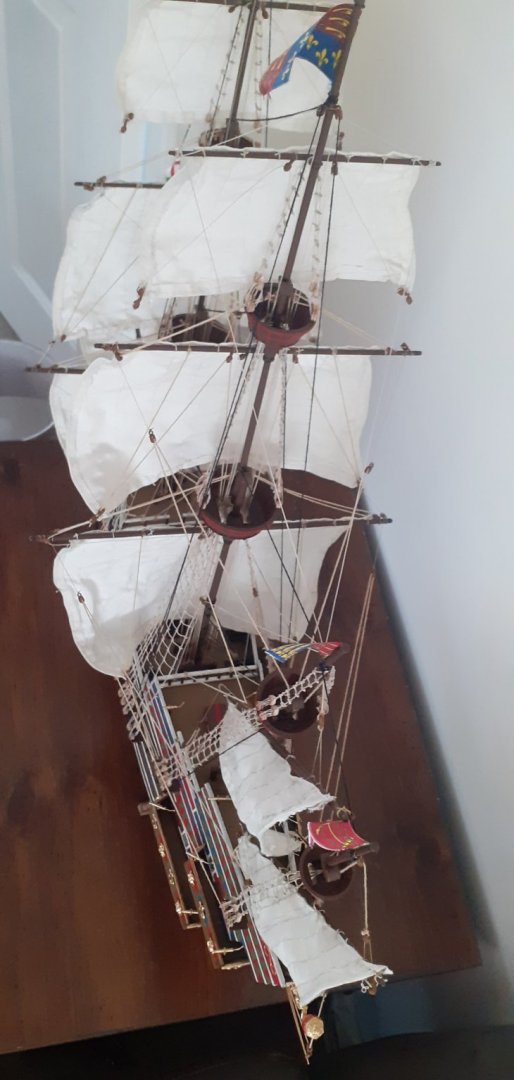
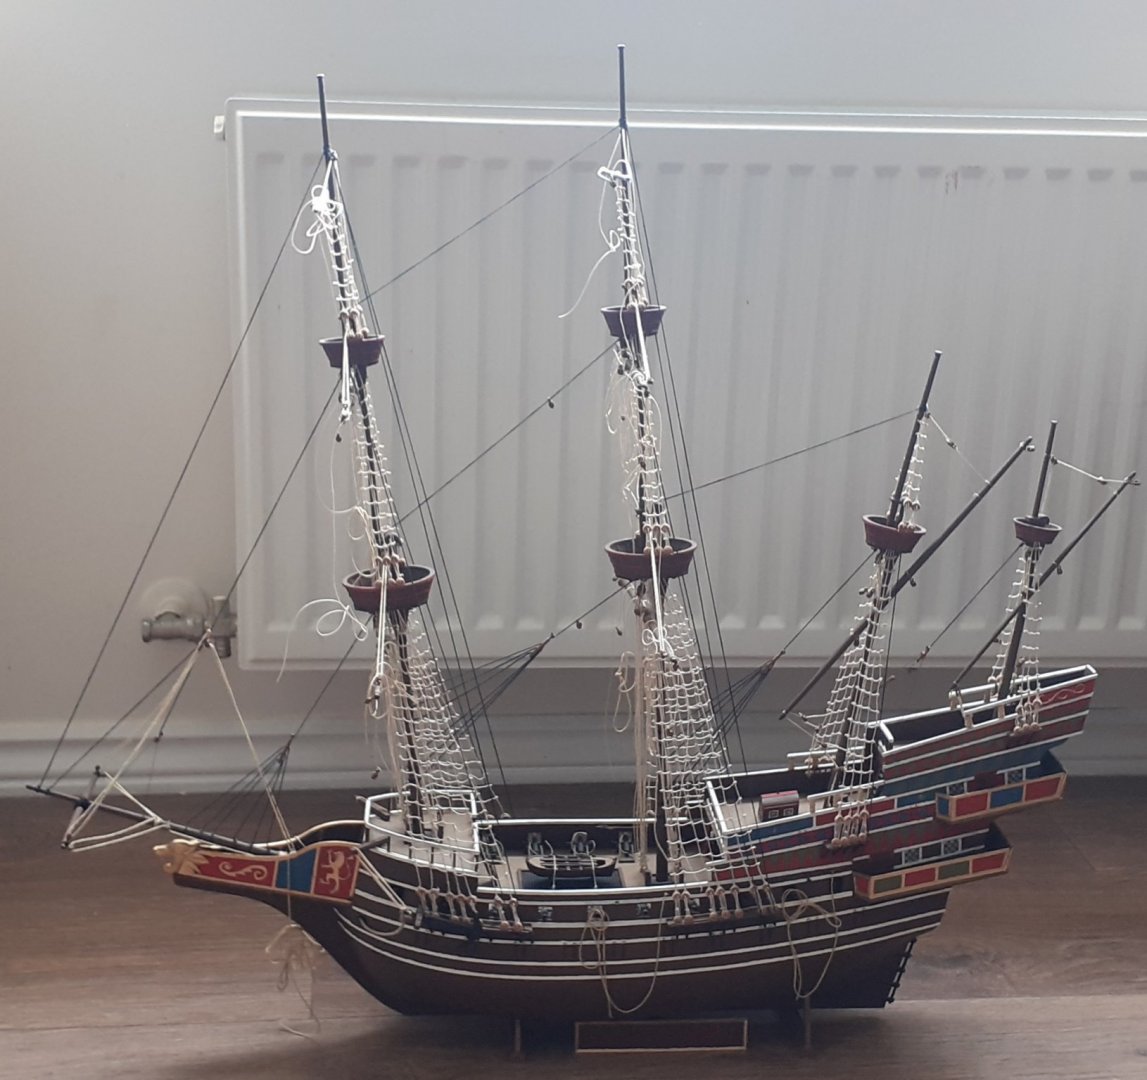
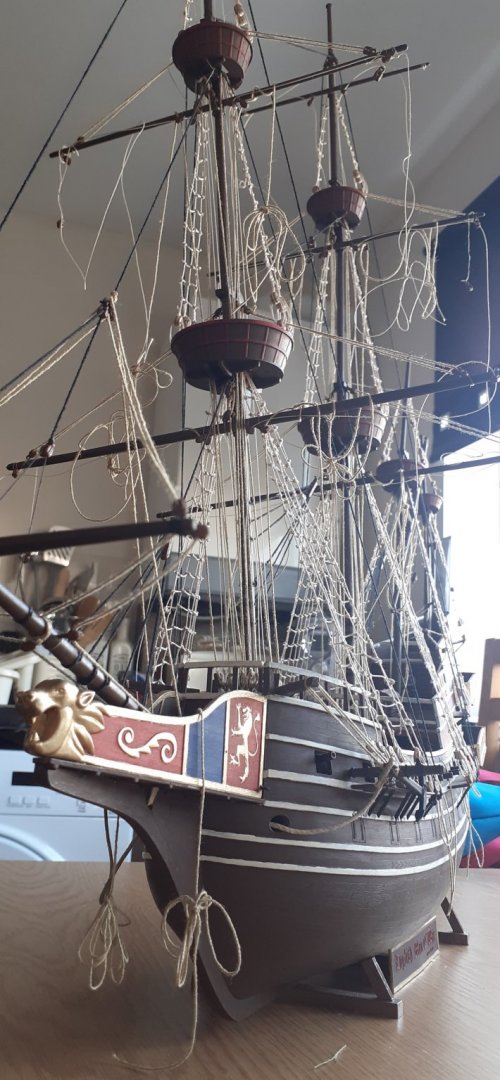
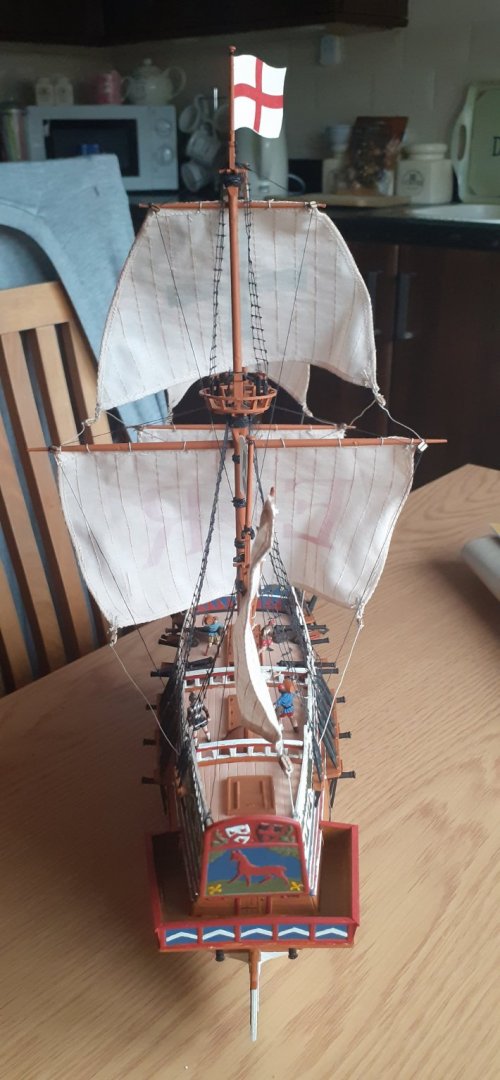
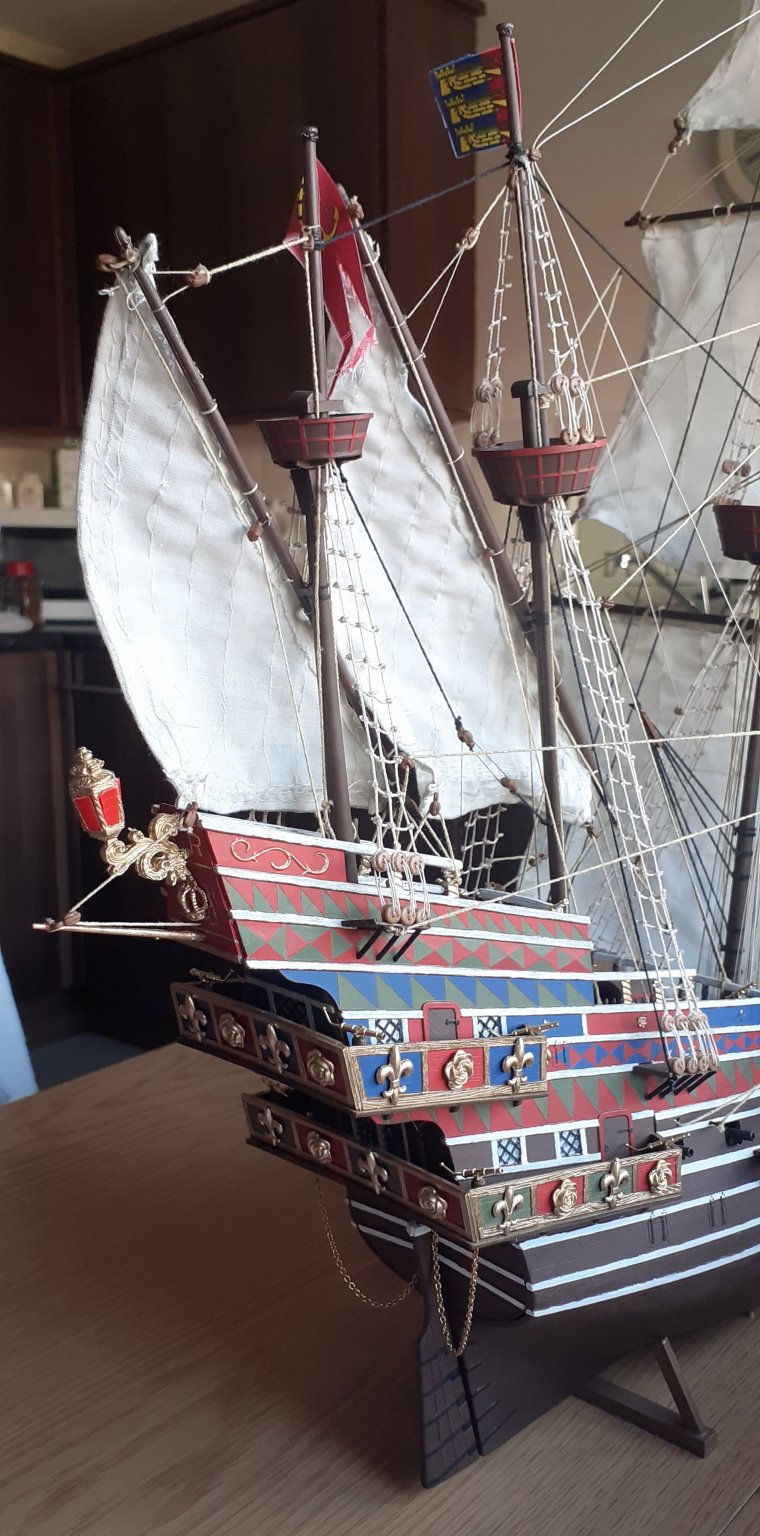
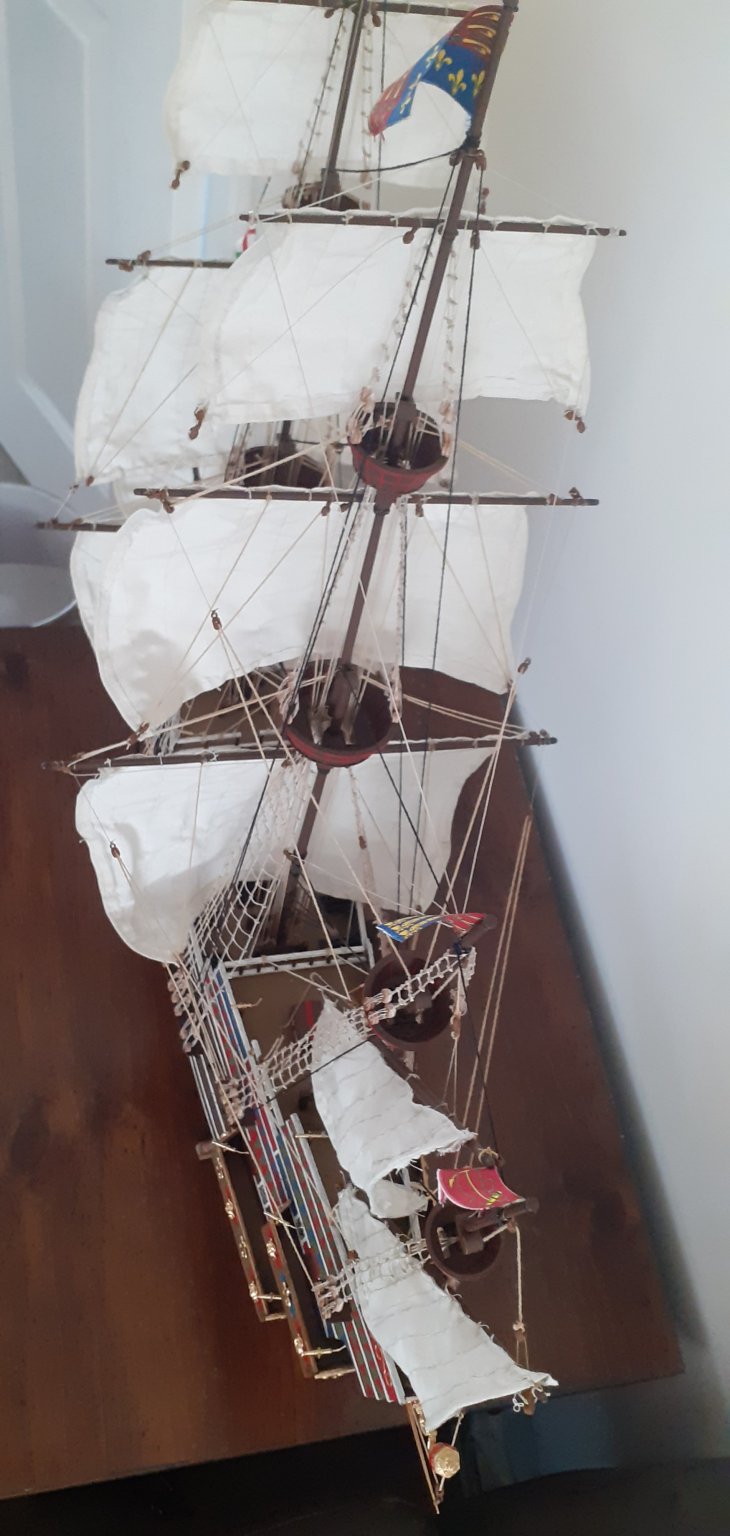
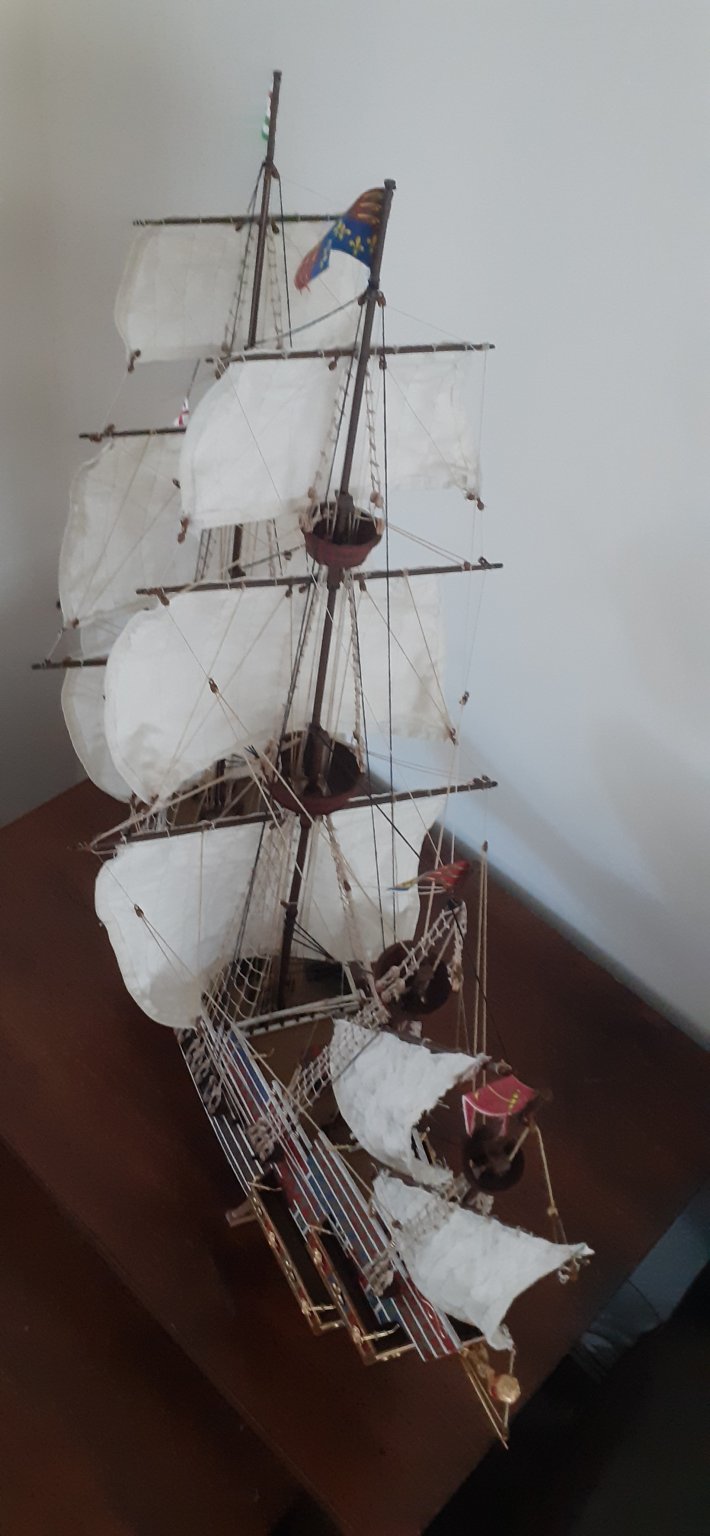
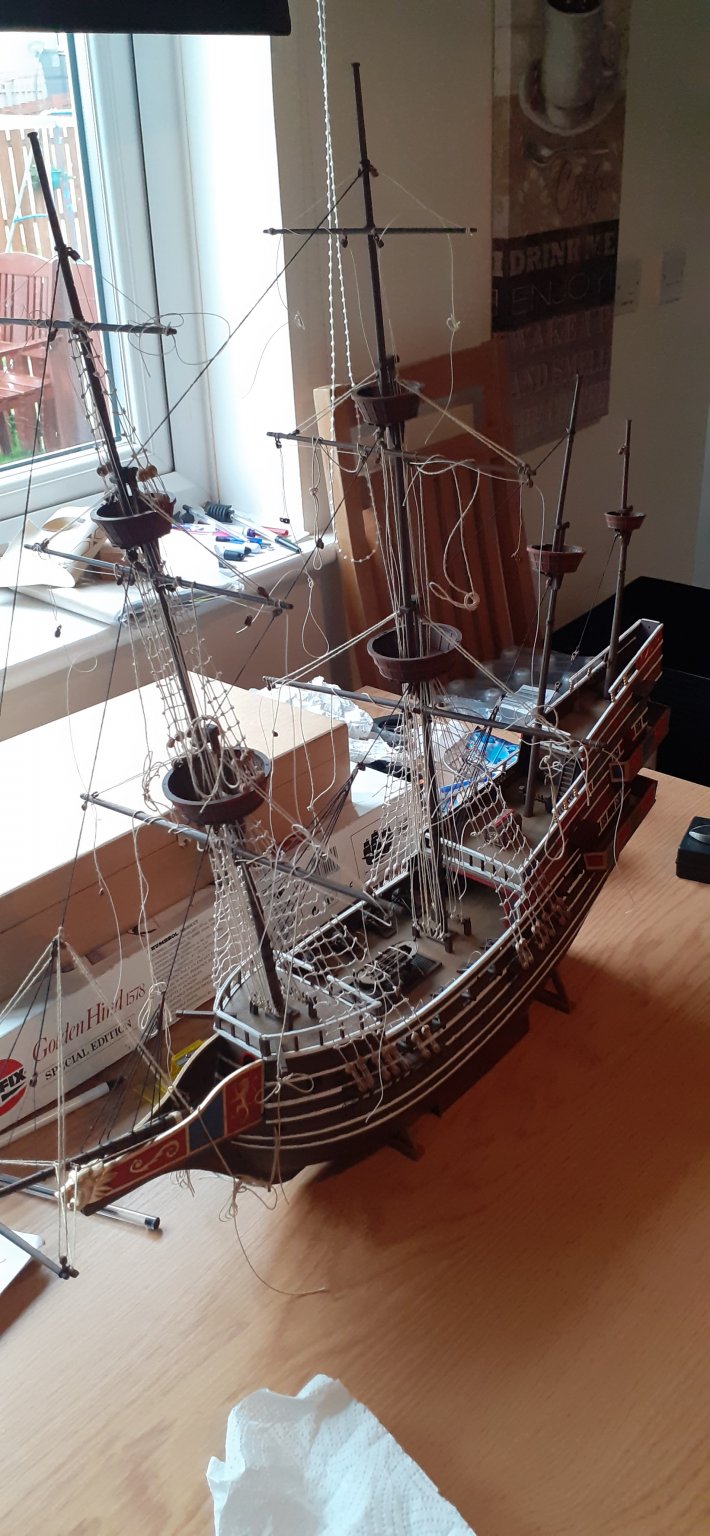
My English Man O'war Queen's Flagship Finished!
Its been another labour of Love in difficult circumstances these past few weeks.
I do have 40 figures for this kit, that I may add some at a later date if I decide to.
All relevant comments are welcome as to what I could improve on or missed out, I am still a novice as to Historical accuracy although this kit doesn't relate to one Specific ship from history.
Happy Modelling everyone and all the best of health and happiness to you all
#staysafe 🤺🤺🤺🤺🤺⚓⚓⚓⚓⚓


- Landlubber Mike, coxswain, Archi and 3 others
-
 6
6
-
Thanks Guys your kind wishes are much appreciated.
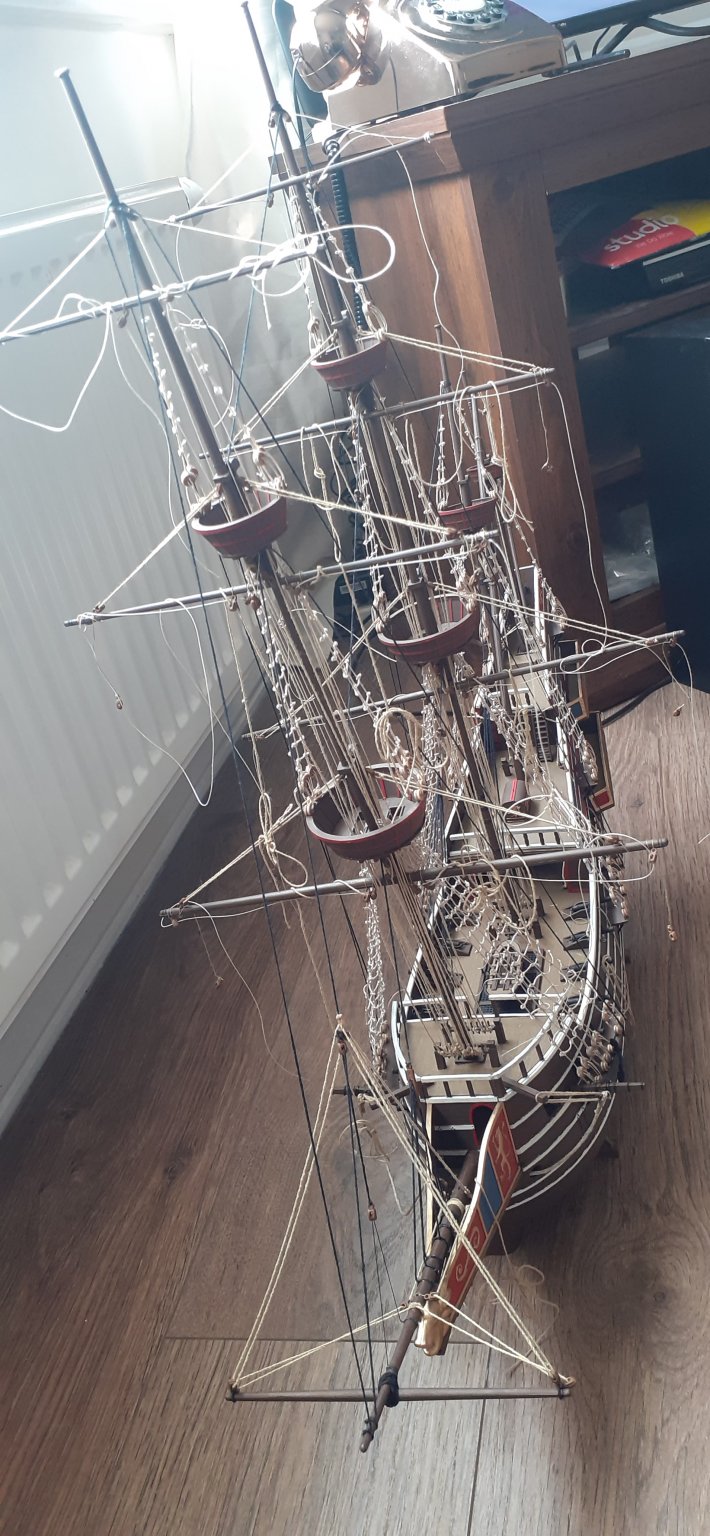
I have been taking time out here and there to keep myself positive, so I have been going forwards with my kit I have added a few architectural features with some more to follow, I have decided not just to make this just a Man O'war but also the Queen's Flagship also with more armoury, even though this kit isn't based on any one historical ship accurately.
On the down side I need to cut and remake 2 sails, rookie and impetus error on the Mizzen and Bonaventure sails, as I have sewn them inside out thinking the yards were on the other side of the masts.
I'll will post pics once the ship is finished.
Happy modelling guys and once again your kind thoughts and wishes are well appreciated. ❤❤❤❤
-
41 minutes ago, Jeff T said:
Robert, I hope your family member recovers soon — my thoughts are with you.
Your model is looking very good — it’s great to see all that rigging in place so far! 👍🏻
Hi Jeff and Ccoyle thanks for your kind words, regrettably it is past that stage in terms of health, now entering "End of life stage" lots of problems re diabetes amputee and cancer.
-
Hi Everyone
Due to a Family member being seriously ill in Hospital, progress has been slowed down to bits and pieces but still managing an hr here and there.
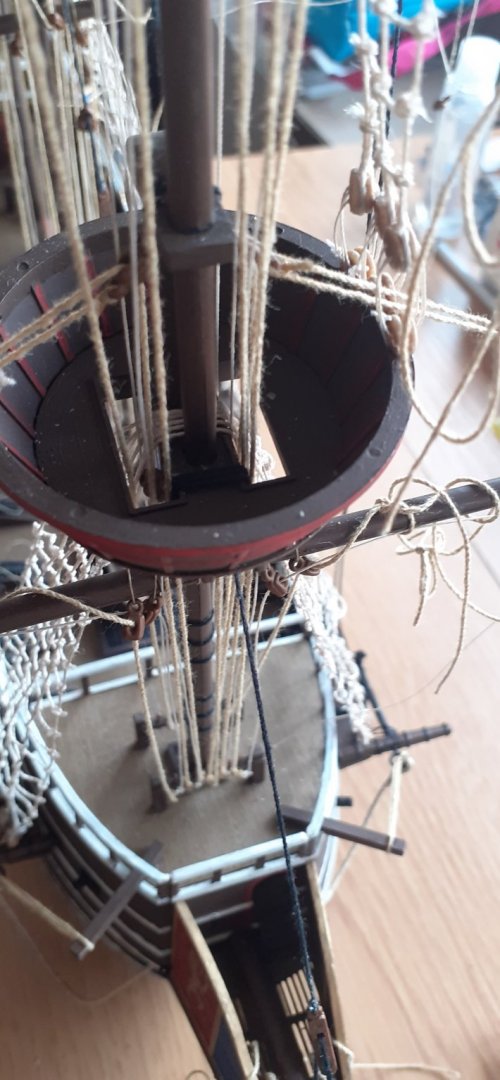
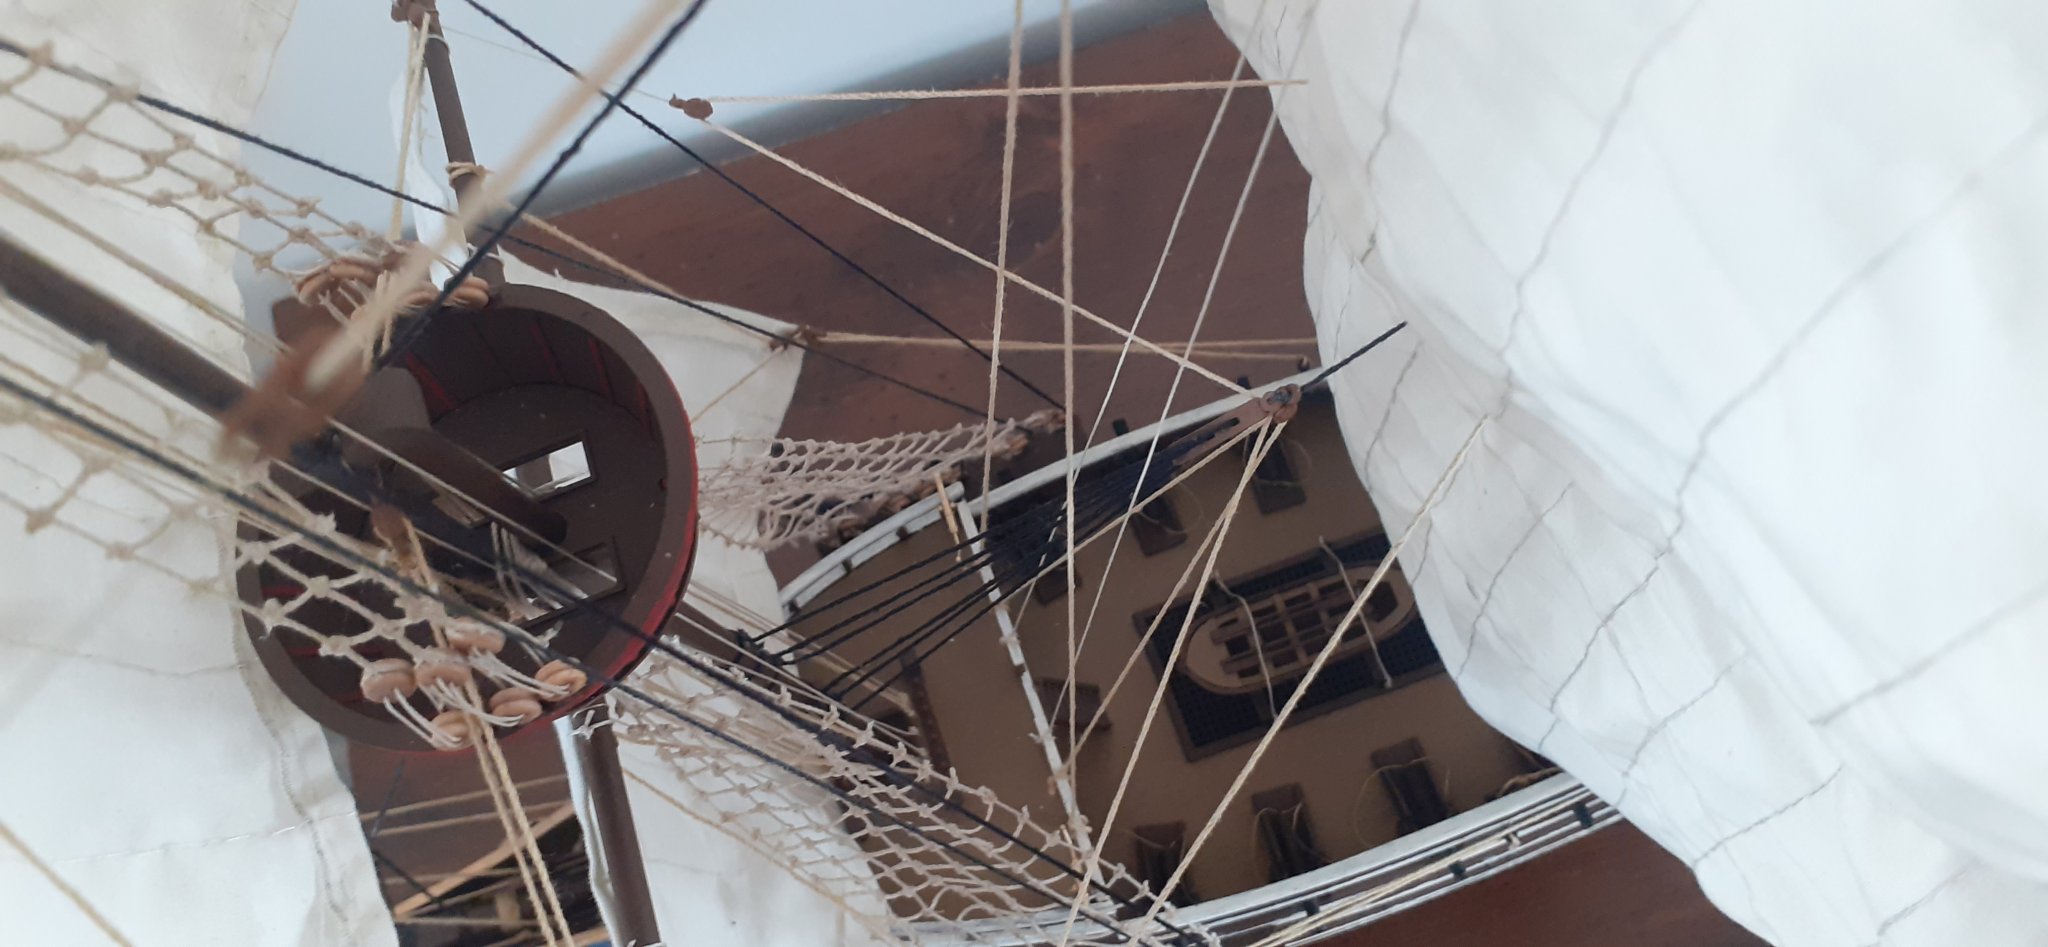
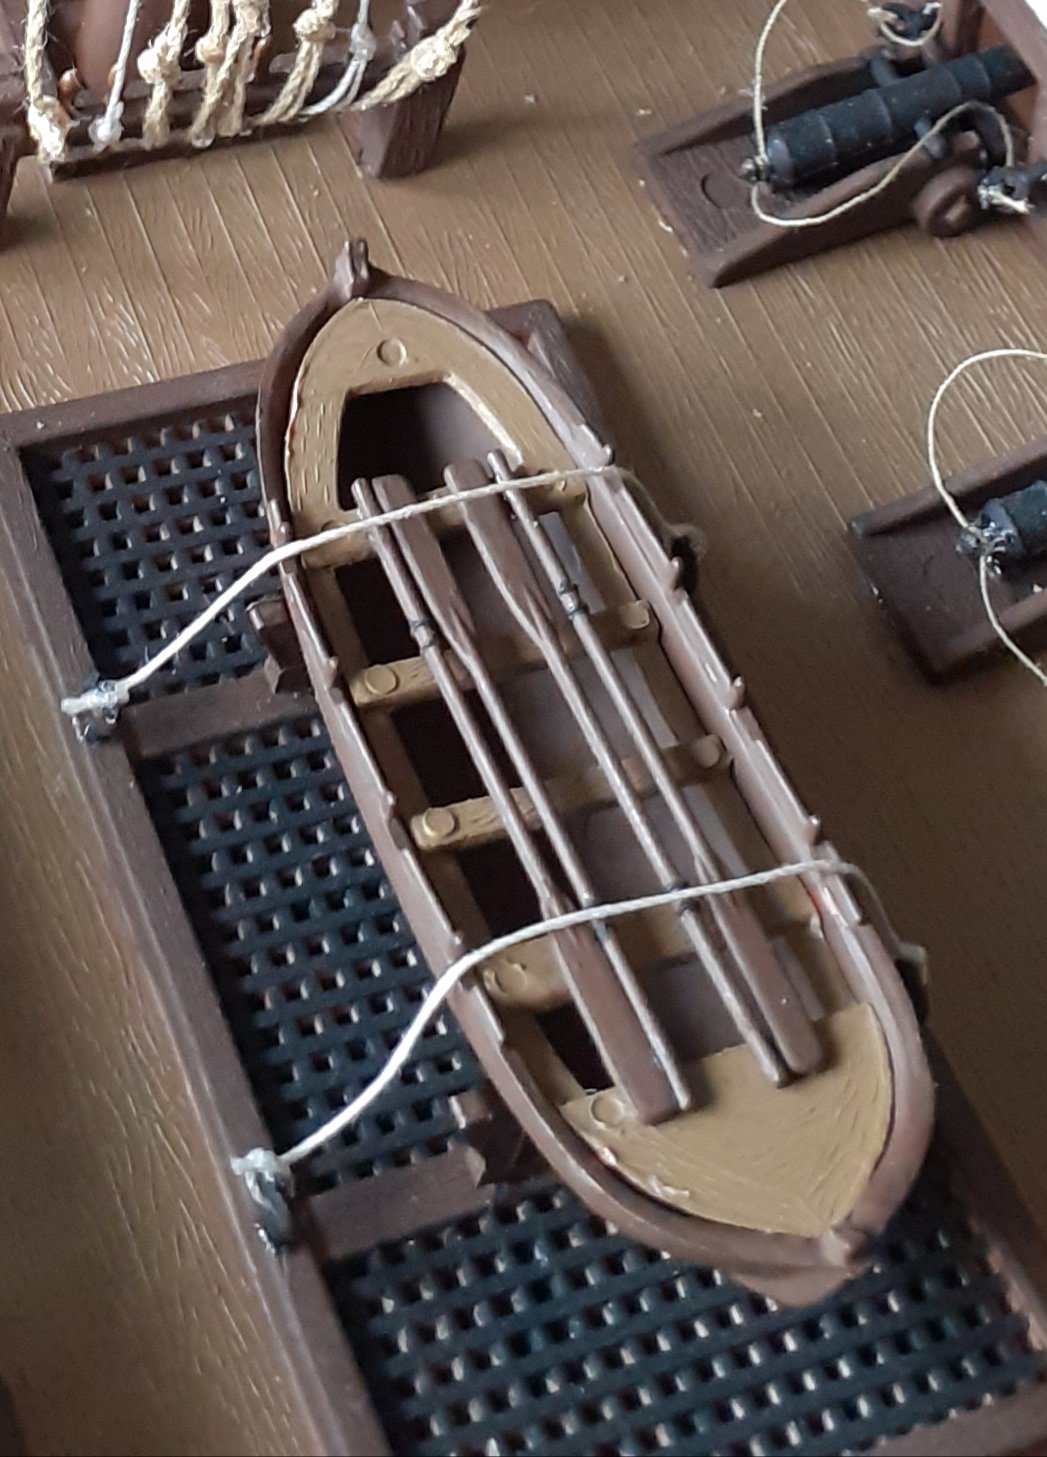
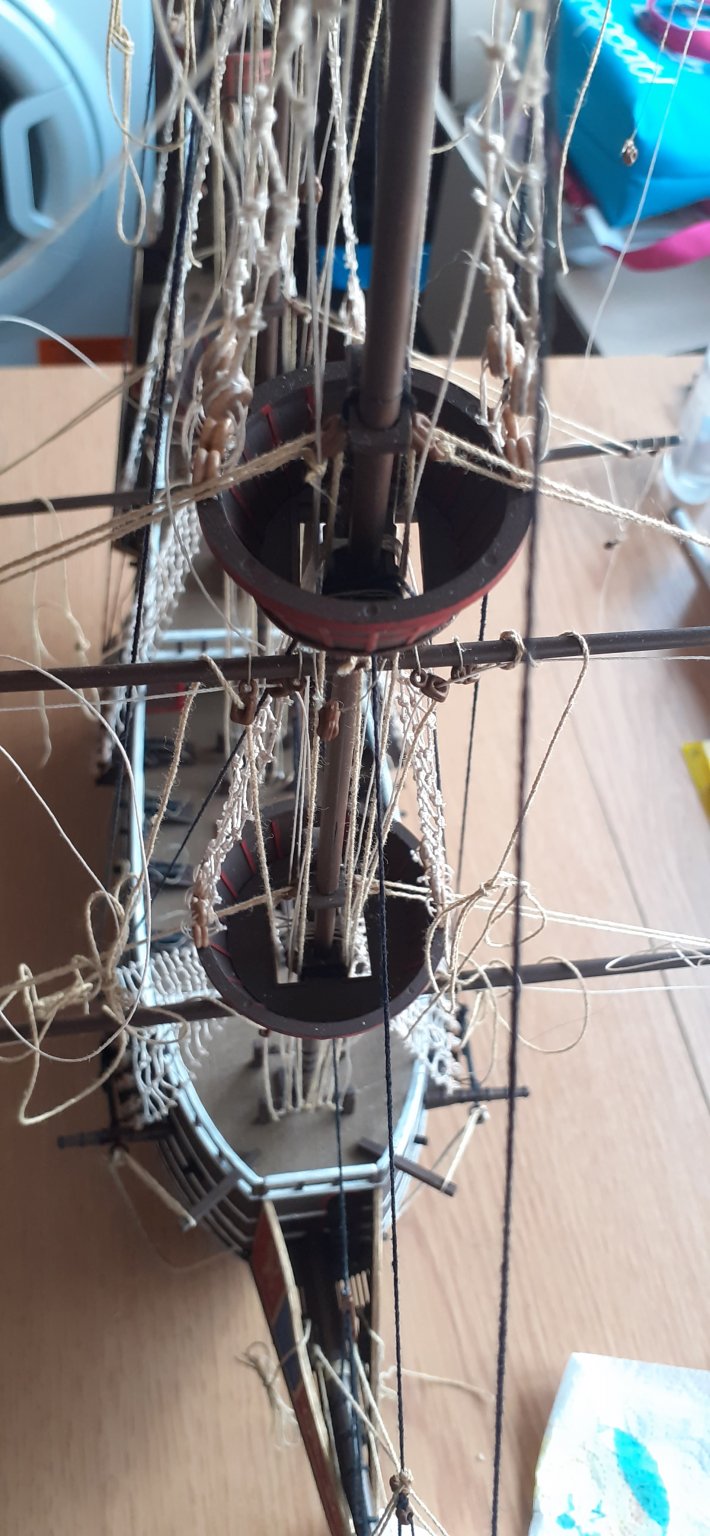
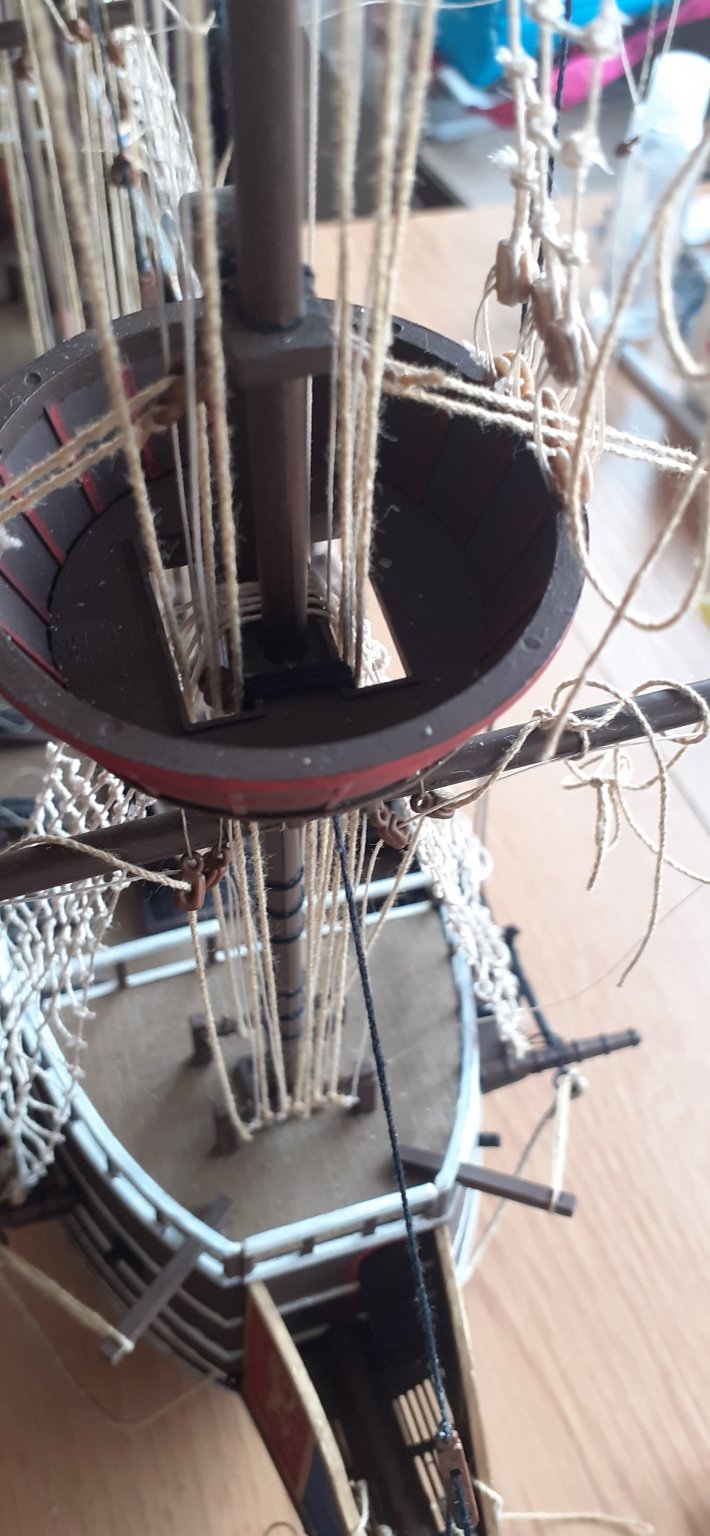
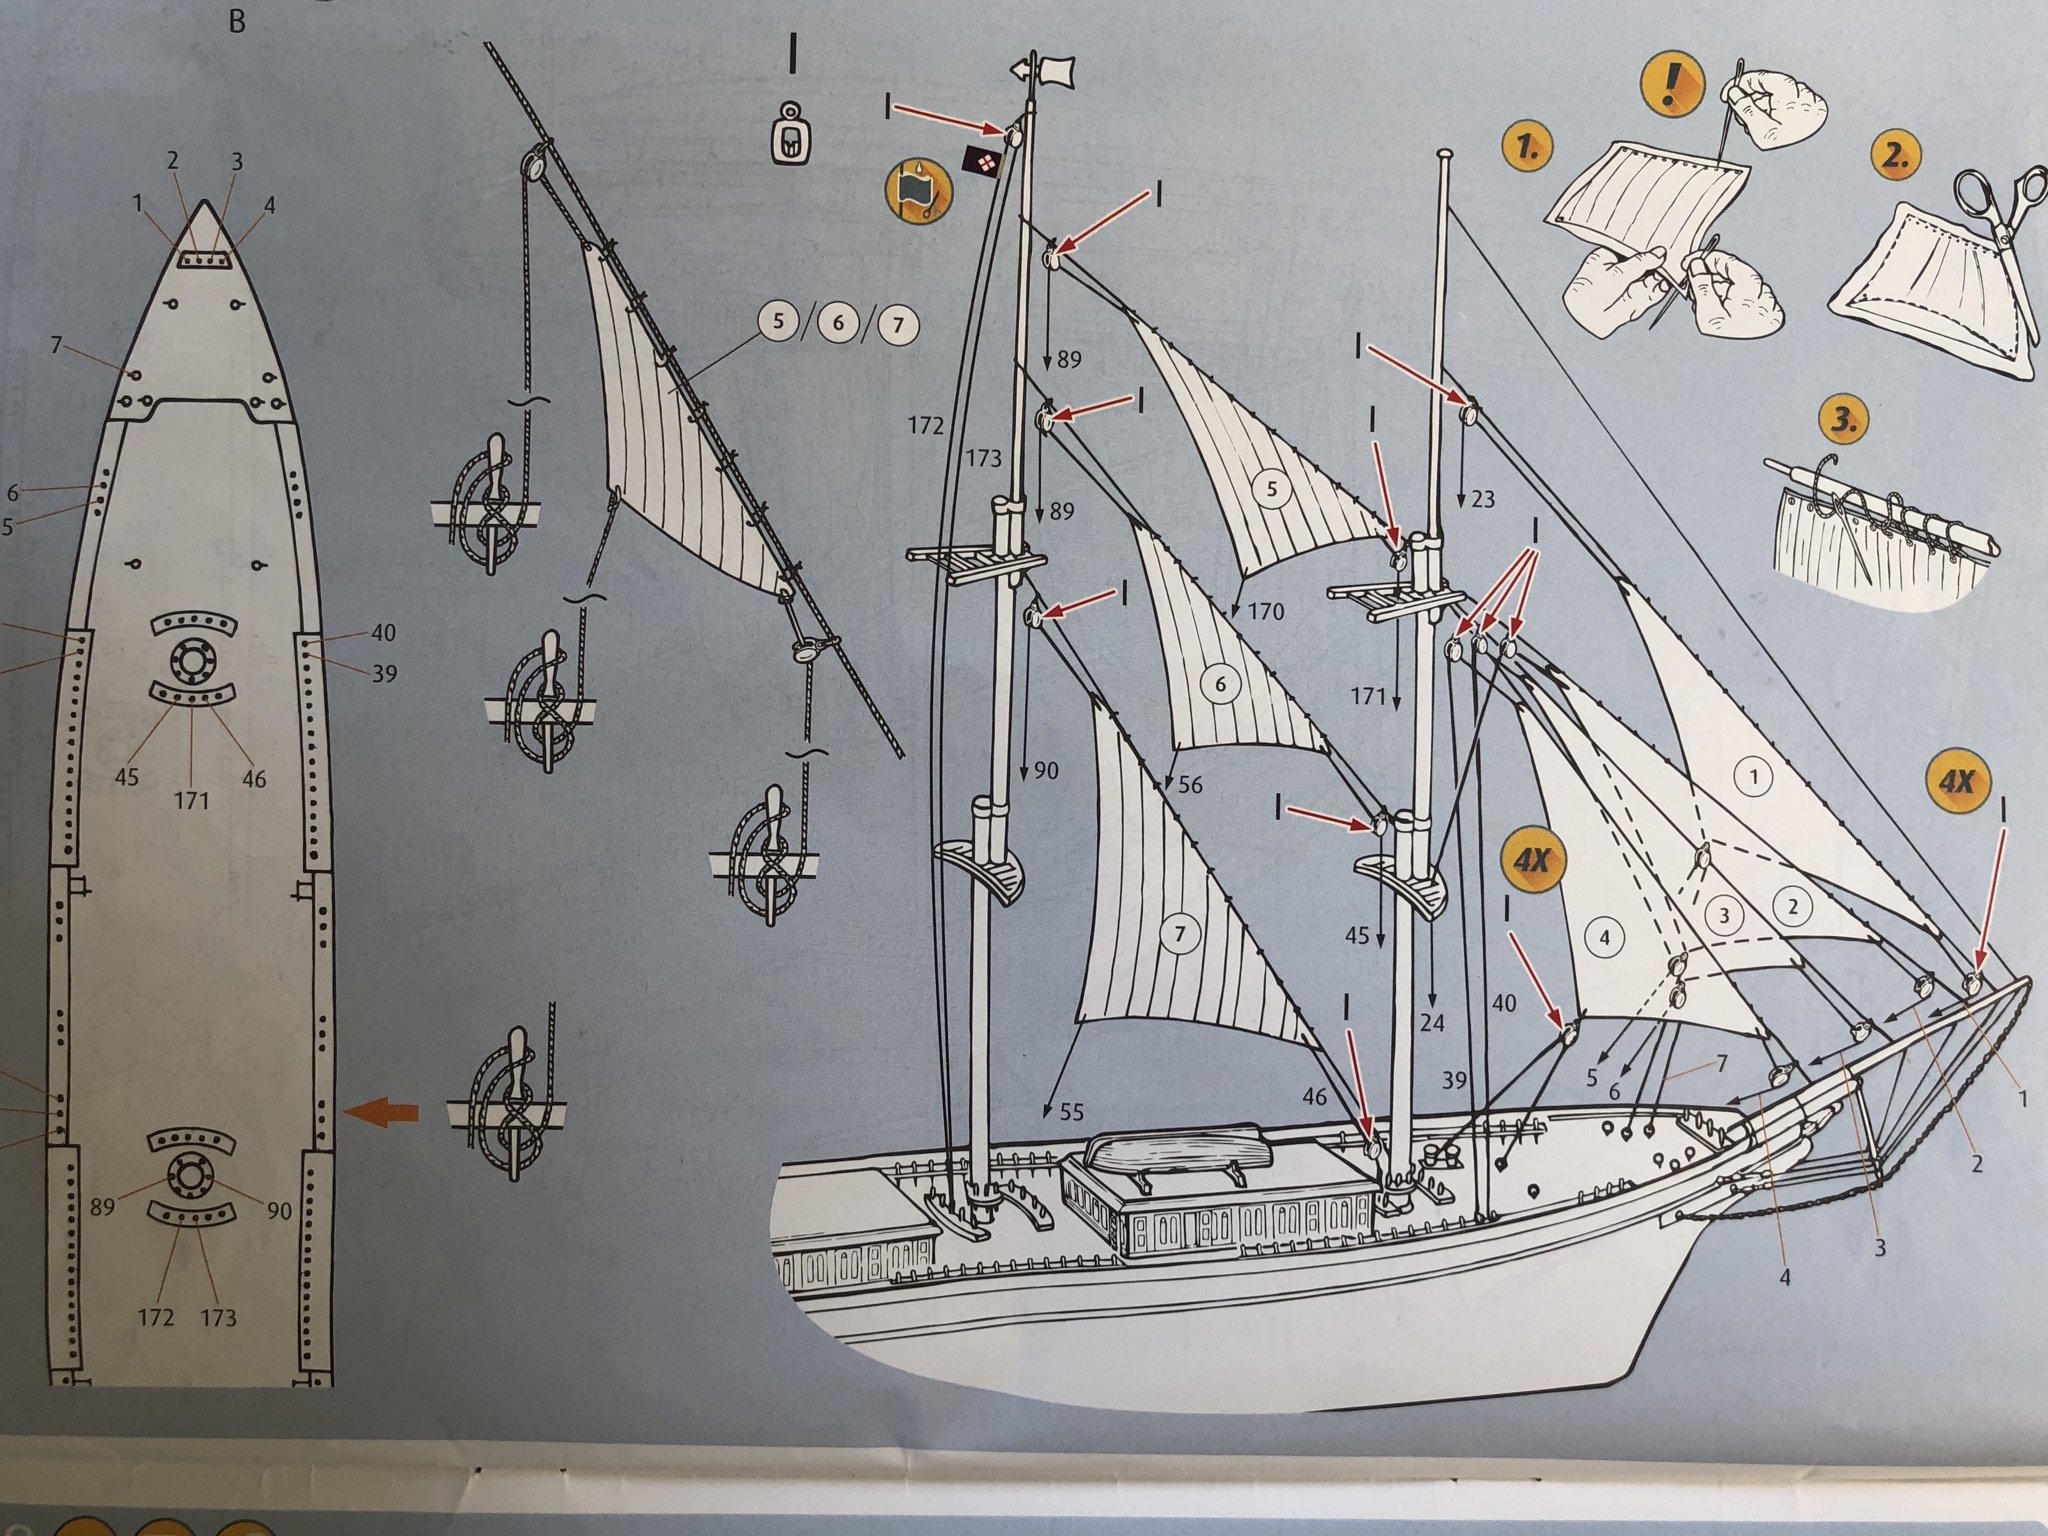
All ratlines are now complete, as well as the Anchors, more running rigging done to Mizzen and Bonaventure masts, still more running to do before rigging the sails, and attaching Rudder and lantern to the stern of the ship.
I will also be attaching a few aftermarket architectural features some of which are on hold as waiting on new stock.
There is now clear skies at the end of the storm.
Happy modelling everyone!
🤺🤺🤺⚓⚓⚓


-
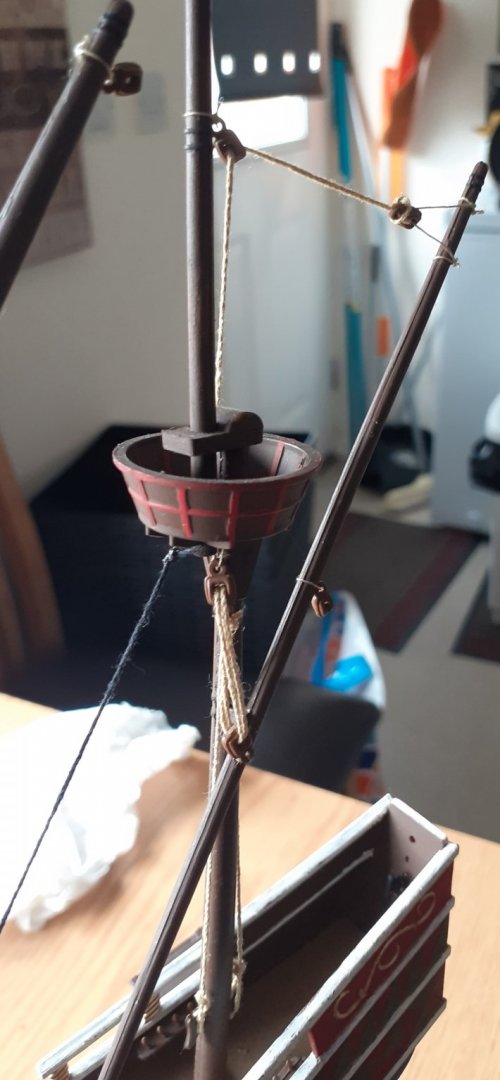
Hi Bill
No the wire should hold it all in place, nevertheless even if it did fold on the top and bottom sides not wired this would be sorted once rigged to the mast yard thus straightening it out to it's natural postion.
-
Hi Bill
First of all thanks for your compliments on my ship.
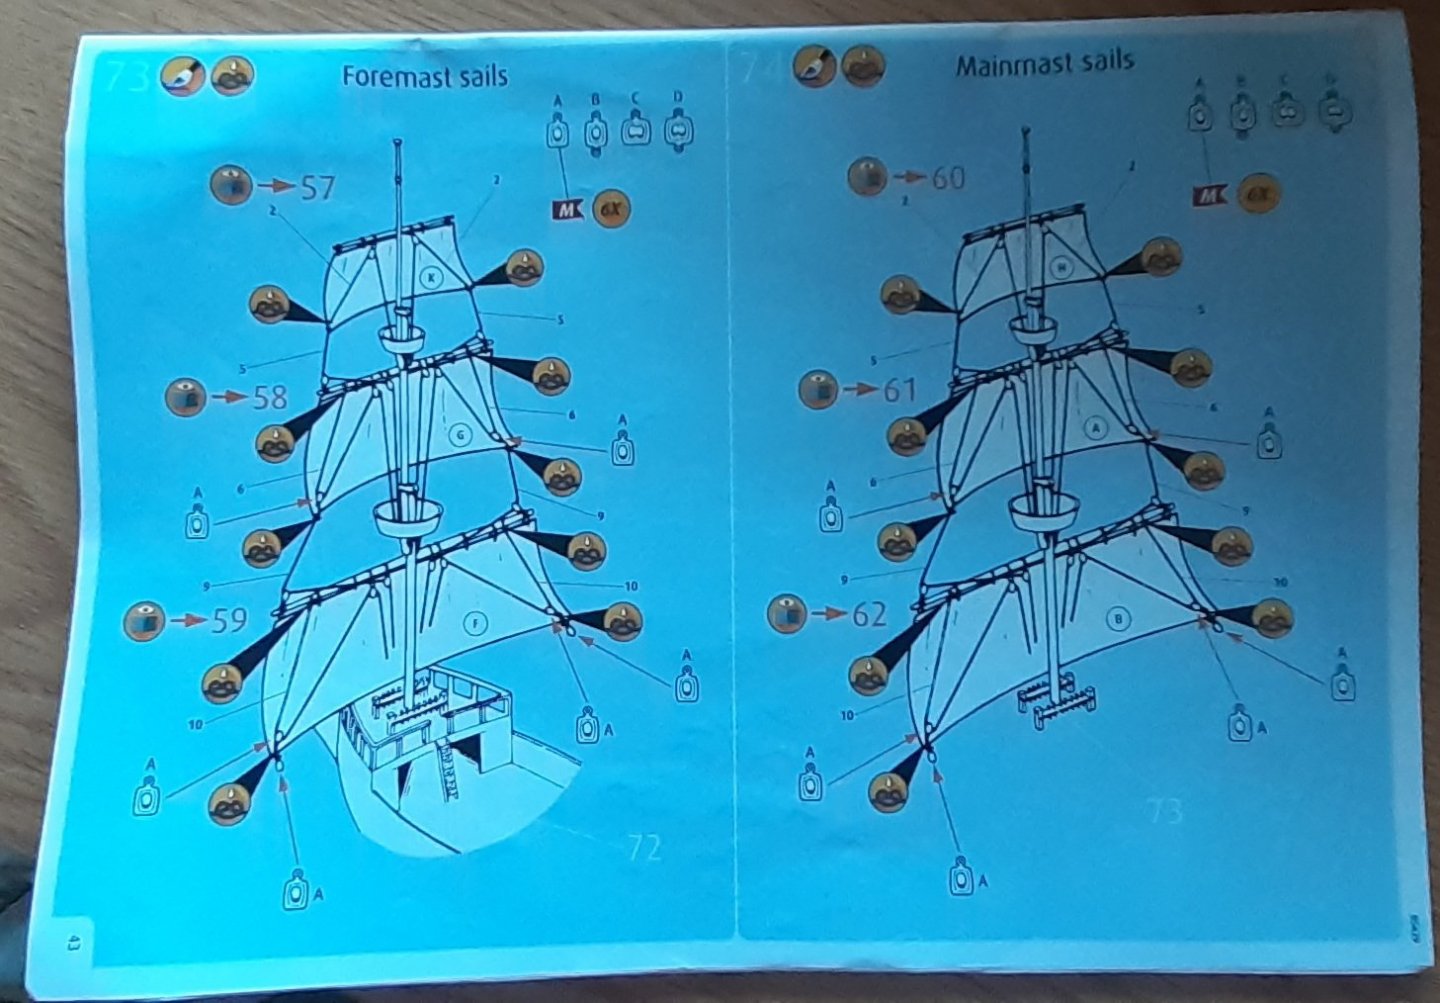
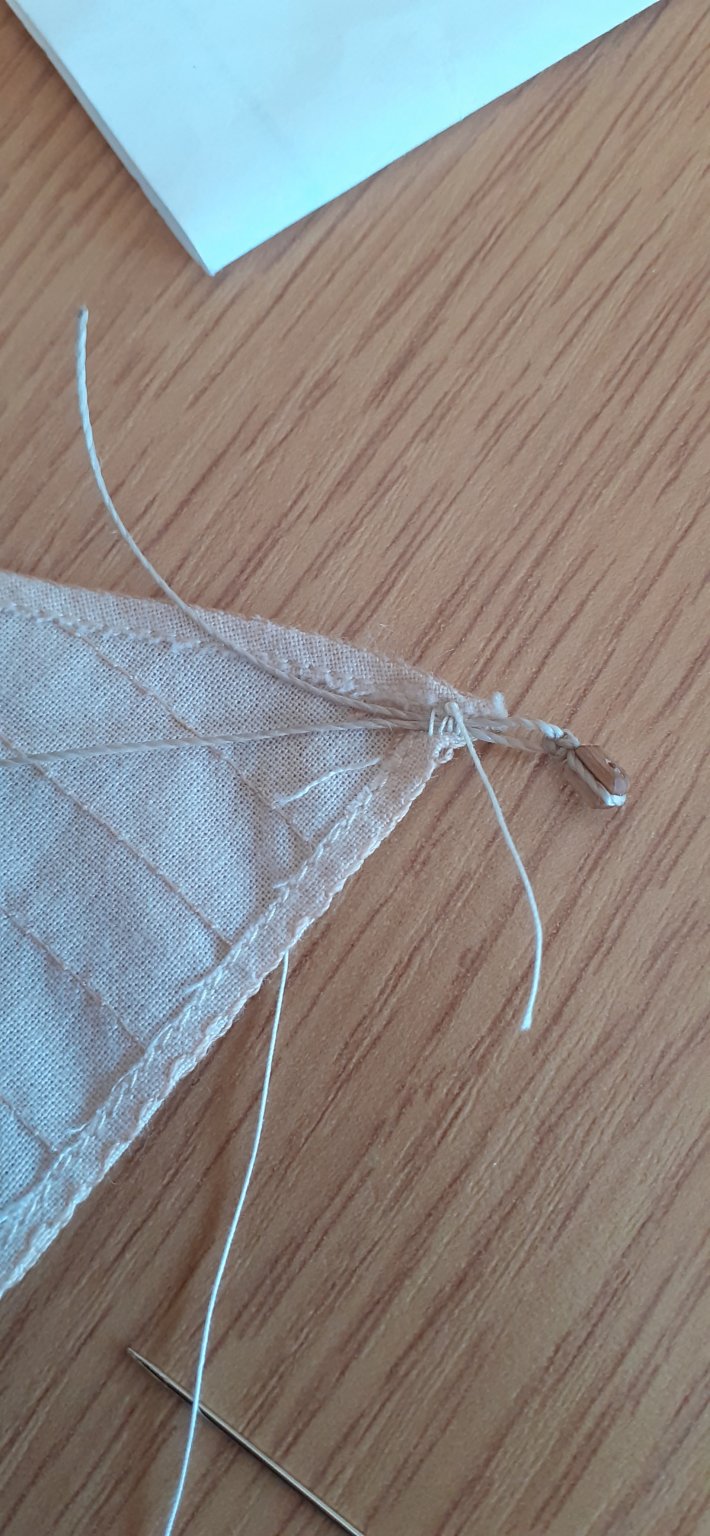
To answer your first question is fairly simple, when you have inserted the wire on the two sides of your sail and sowed it up to secure it, it just a simple process of bending the wire inside from the middle to your preferred shape, the wire should hold in that postion, doing this on both sides gives you the billow effect, then just a case of rigging the top of the sail to the mast yard and securing the bottom corners to the lower mast yard or appropriate fixing point if you are doing the large lower sails, then if needed bend the wire a little more to billow the sail to your desire.
To answer your second question depends on your preference, I certainly do draw in the lines on the cloth (in light pencil) that are on the plastic sails, maybe not as many, but so the sail still measures up to scale, then I stitch on top of all those lines to give that authenticity of hand sewn sails, I usually do this sewing before I do the wiring as the sail is a lot easier to work with.
Hope this has answered your questions Bill.
Happy modelling 🤺⚓
-
On 7/26/2020 at 7:49 PM, Jeff T said:
There is an additional hole on the main deck that has no purpose for this model. I did not initially realize this fact when I painted the deck and glued it in place. I figured that each hole had a purpose for cementing bitts, masts, etc. It appears to be a hole to fit a mast, and it is located behind the rowle where the whipstaff will be attached (to the left of it in this view):
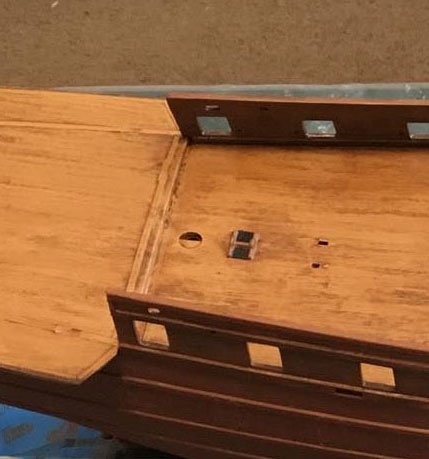
The Revell 1:96 (really 1:64-65) Spanish Galleon shares many of the same molds as the English Man O' War. They probably share the same main deck mold. Spanish Galleon has three masts, with the mizzen mast attached to the quarter deck. English Man O' War has four masts, with the bonaventure mast apparently attached to the quarter deck. I wonder if this "extra hole" on the main deck is meant for the English Man O' War's mizzen mast? At any rate, I needed to eliminate it in the Spanish Galleon.
So here is the technique that I used in "fixing a hole"...
I have a glass jar in which I dissolved some styrene sprue from the kit with Testors liquid cement, which resulted in "molten" styrene that can be used to fill gaps, etc. I placed some of this styrene into the hole and kept it supported and pressed down flat with Tamiya masking tap for over a week (it takes a while for the styrene to harden). When I removed the tape, the styrene was slightly depressed in the hole:
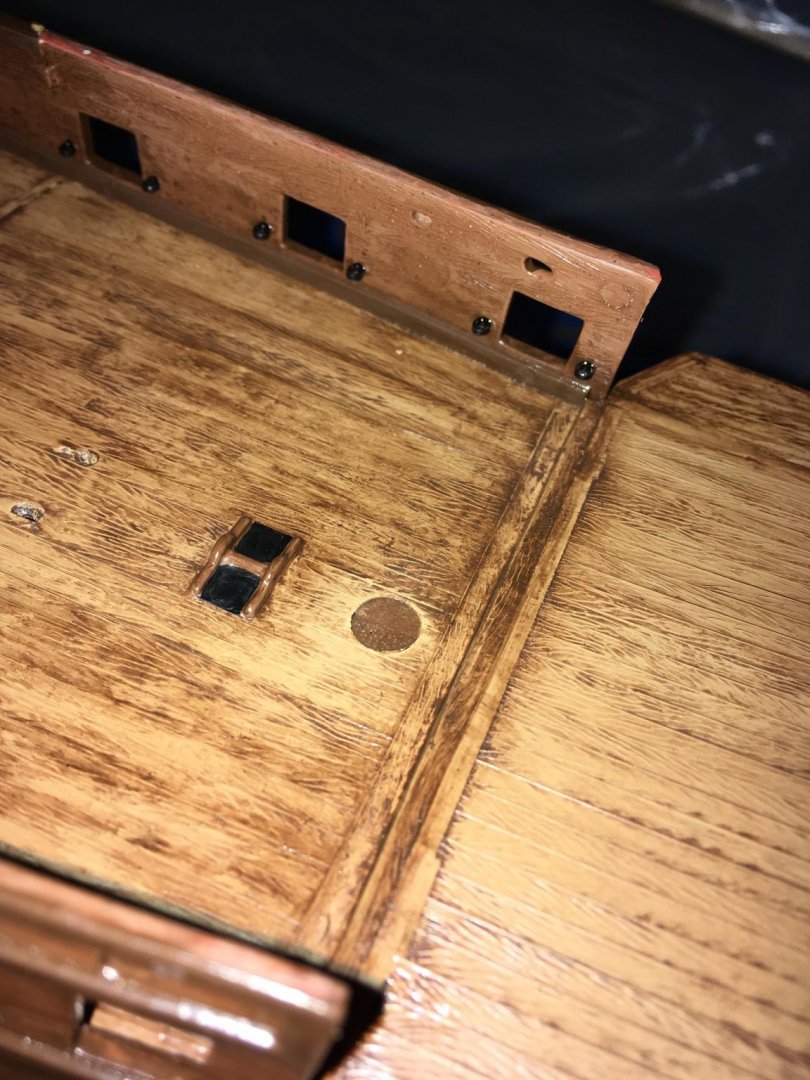
To even it out, I used Bondo Glazing & Spot Putty (907) and sanded it down:
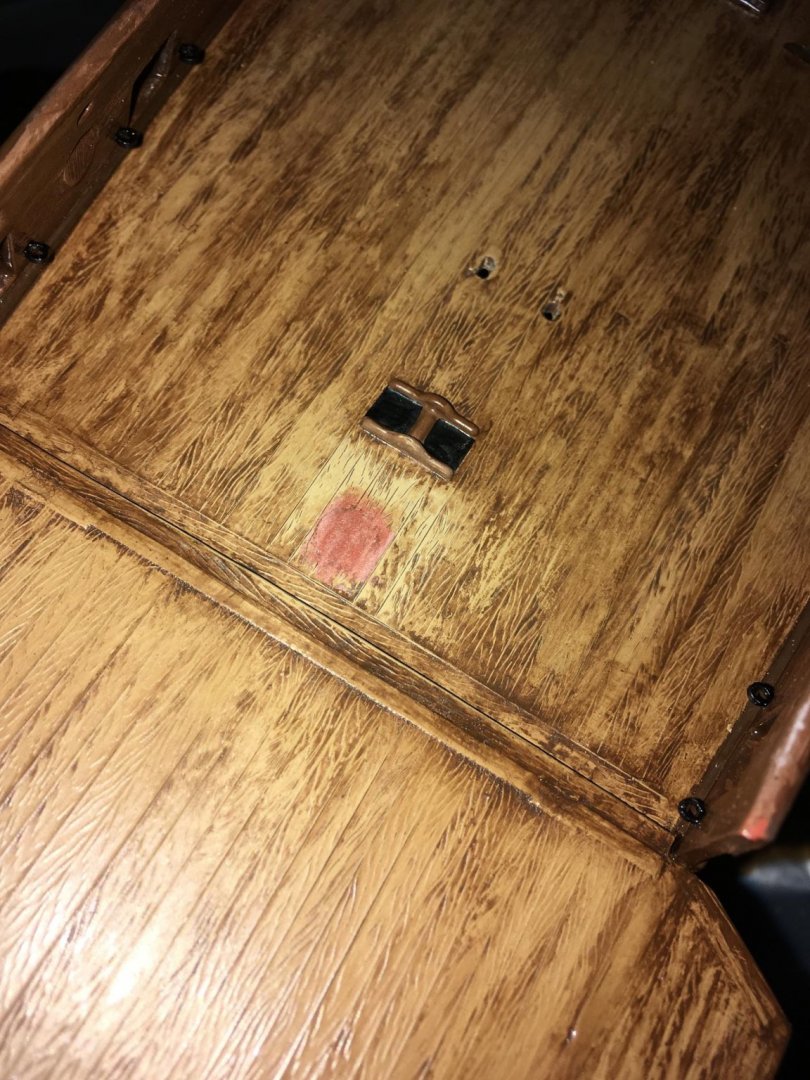
When dry, the putty is hard and crumbles easily, so I coated it with Testors flat clear lacquer, and then, after it dried, I used a knife to "scribe" some "wood grain" into the surface to take the weathering when I painted it. Here is the result after painting and weathering:
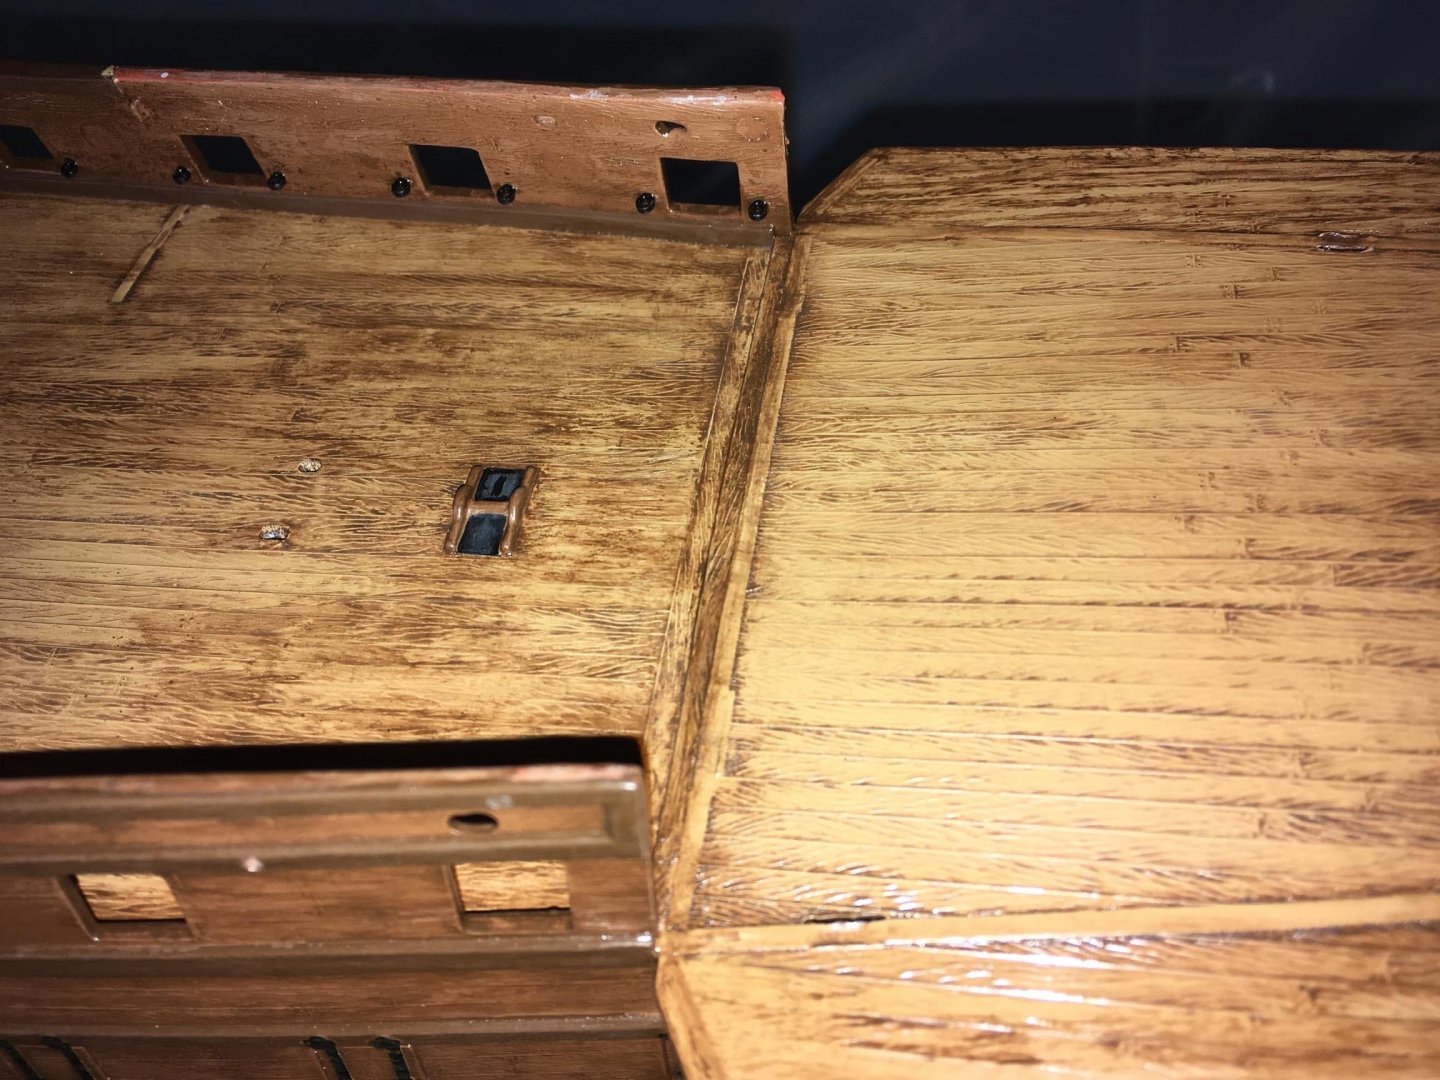
Mat varnish will eventually "flatten" the sheen and even out the black around the rowle (which I had sanded and touched up).
Jeff,
I don't understand you plugging that half hole.
This is important as there is another deck level to be built in which has a full hole where the Mizzen mast goes straight through, but the mast doesnt stop there, it stops at the hole you have just filled, so in order to keep the mast strong and steady it fits into this half hole, you'll need to cut that out again asap.
Regards
Robert.
-
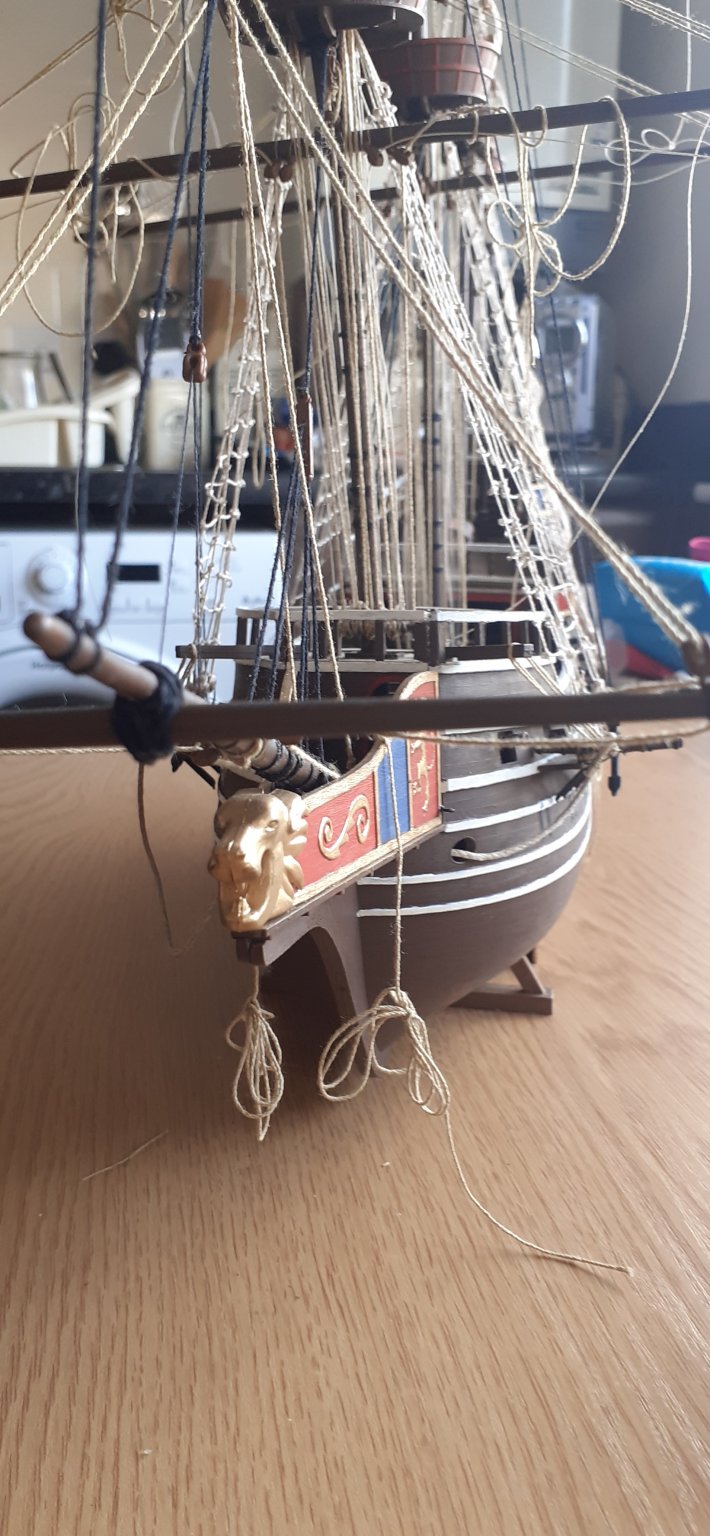
Bill,
The picture of the Sail I submitted at the end of my Golden Hind is a completed kit. I may have bought those sails, but I had to insert the modelling wire down the sides without bursting the stitching which was very tricky, then rig the sails up to the ship.
You can go to my log on here for my Airfix 1/72 Golden Hind kit, which has all the appropriate photos and stages.
Robert.
-
On 8/4/2020 at 3:21 PM, Ian_Grant said:
Very nice! Love the sails - how did you get the sail artwork to be so crisp on the cloth?
This set of Sails I actually bought separately, albeit they are expensive, about the same price as the kit itself.
I only bought them because they were printed with the Elizabethan designs.
Unless I can get printed Sails for other kits I have, I will make my own sails in future.
-
Bill, I am still learning as well, but I have decided that anything I can't do authentically, I will find another way to do it and still making the ship look as authentic as I can without anything being shabby or poor. Sometimes we need to cut our cloth accordingly to what we can and cannot do in all aspects of life.
I too love building these ships, the architecture, the rigging, the sails and of course the historical aspect attached to each one, bringing history to life is a labour of love for me. I have my late father to thank for that, as we always watched the old swashbuckler films when I was child, and that's when I started to build these kits albeit with a lot less patience then lol..
-
No probs Bill, that's kinda why I done my sails before I actually started the kit, to see whether I could do them well enough or if I would need to fork out money for them, as the plastic ones just wouldn't do it justice.
-
14 minutes ago, Bill97 said:
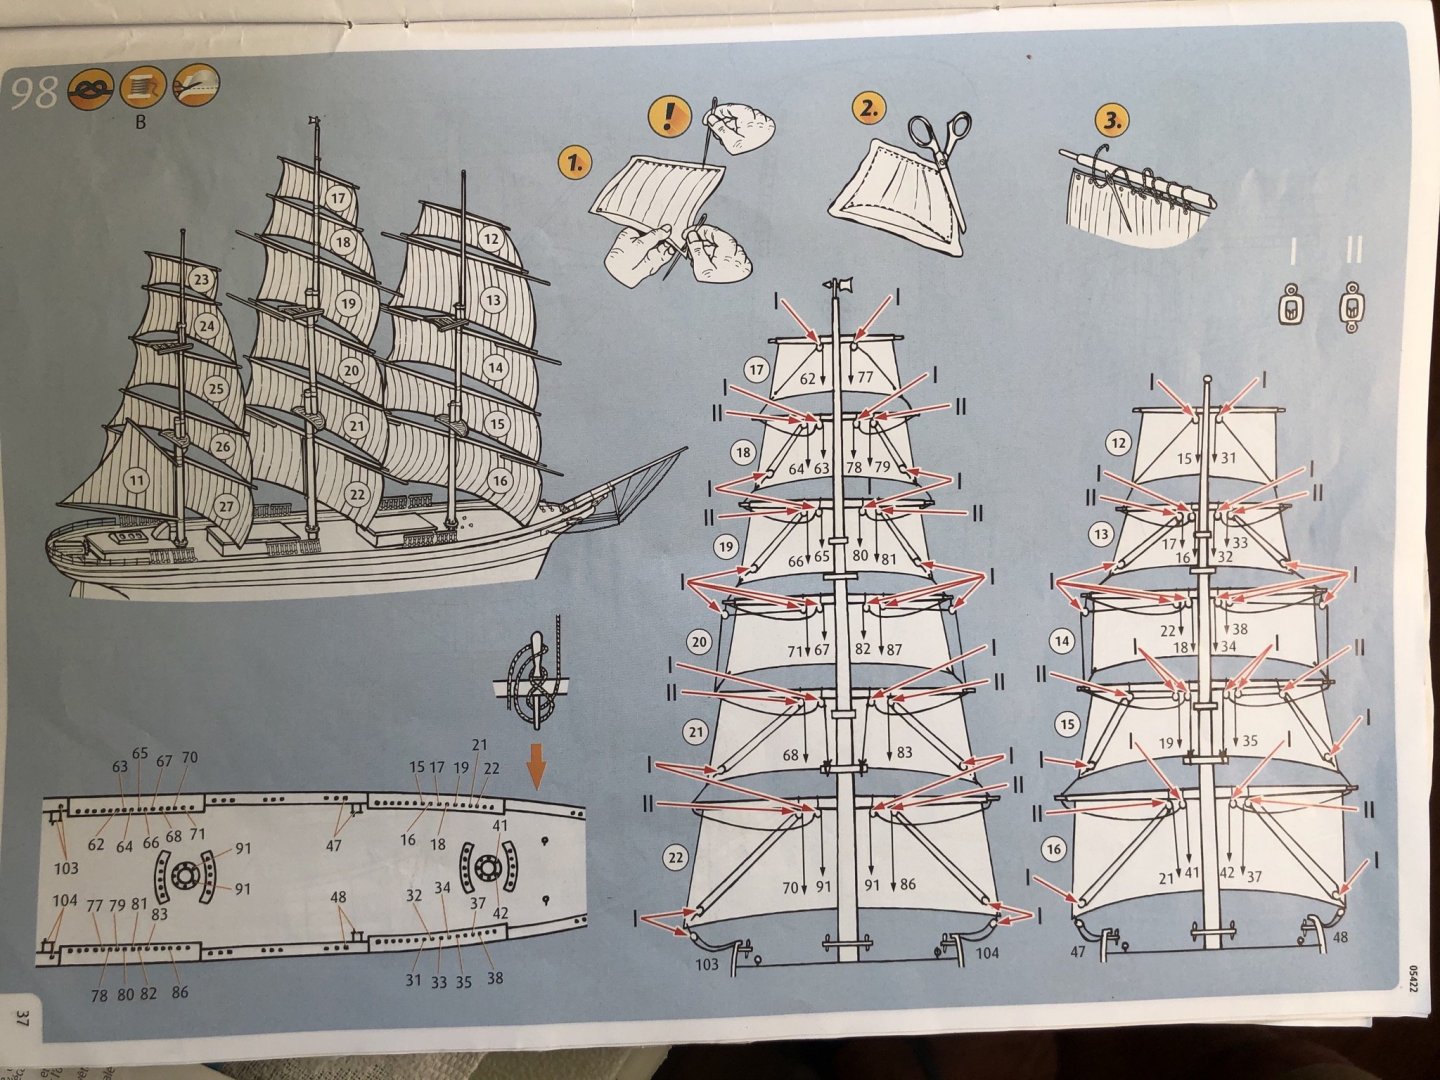
Thanks Robert. I really like your sails and adding the block at the bottom corners. Are you still hand sewing them? In that one close up where you show the block, your stitching is excellent! It looks like you have two rows of stitches along the bottom edge, and maybe the sides also. Is that where you add the 3mm wire on the sides? I like the wood color blocks as well. Still not sure if Ravell included enough of the plastic ones in the kit to rig the sails that way but if not I have a bunch left over from previous builds. I will just use them rather than buy new custom wood or metal ones. However I will paint them wood color instead of the standard Revell brown plastic. I am still studying the pictures in the instructions to determine the different lines in relation to the sails. It is hard to tell if the sails between the masts and at the bow are hung on the previously installed standing rigging or if a second line is run for the sail. How about you fly over here from Scotland and help me rig this thing? 😀
Hi Bill,
Firstly I must say that this set of sails I bought, but they were expensive thus my decision to make my own.
Secondly I can see from your instructions your kit does have blocks with it regards to the bowsprit sails etc.. so it may just depend whether you want to swap them for wooden ones or just paint them, I would just paint them like you have decided mate, saves a lot of unnecessary spending as I have used the plastic ones with this kit.
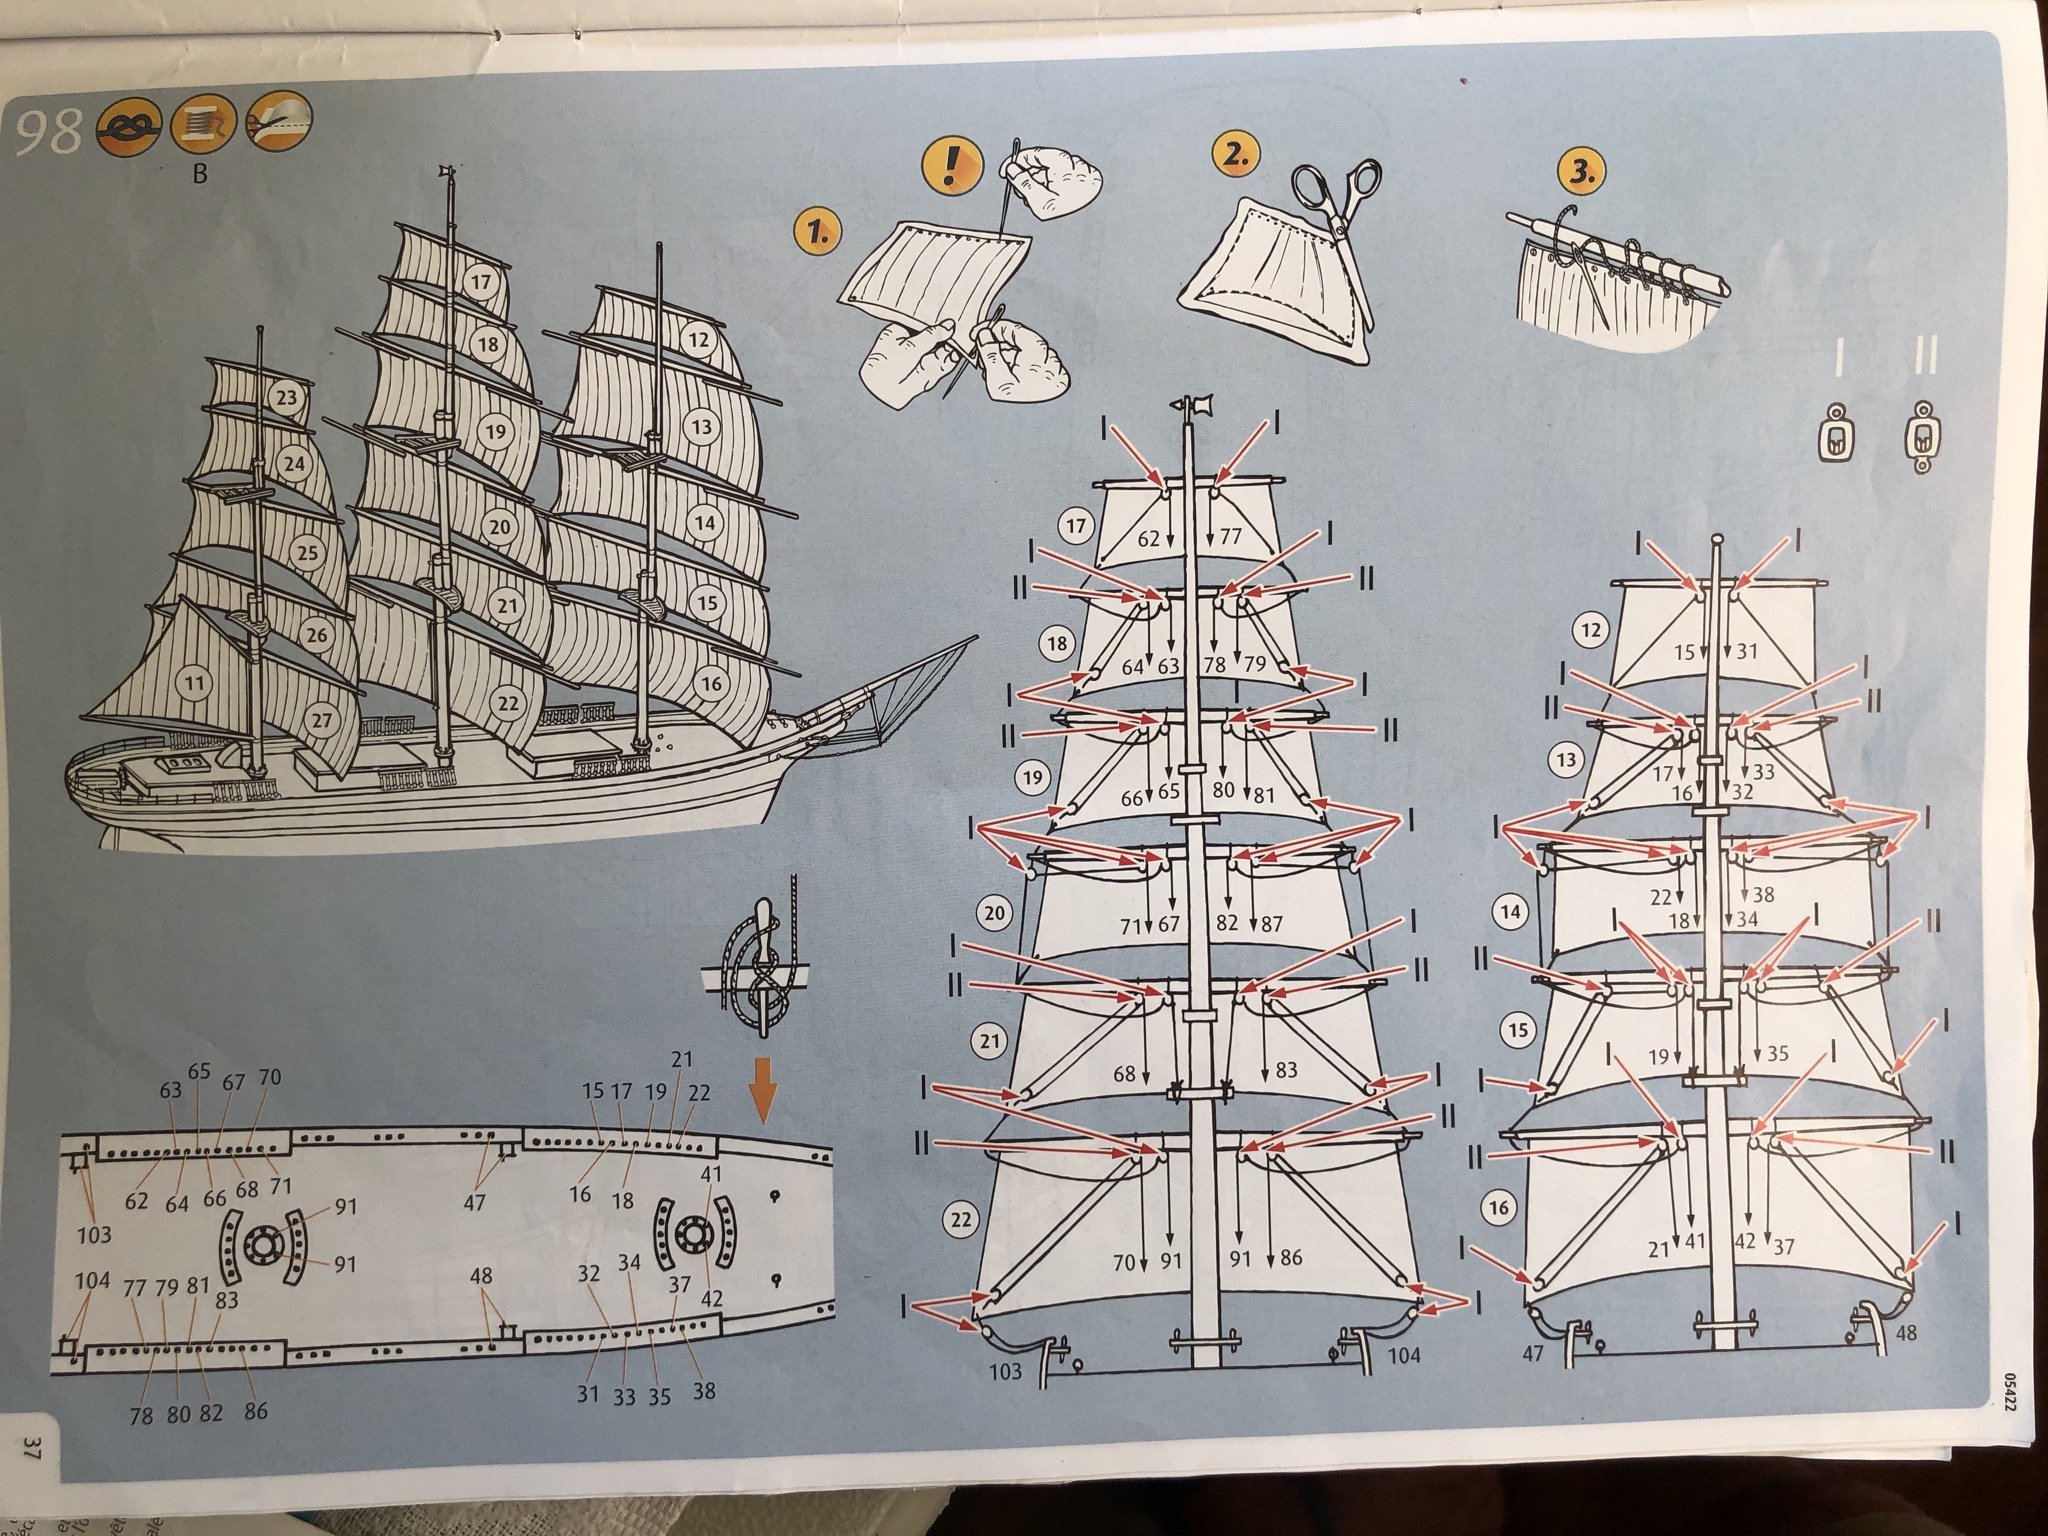
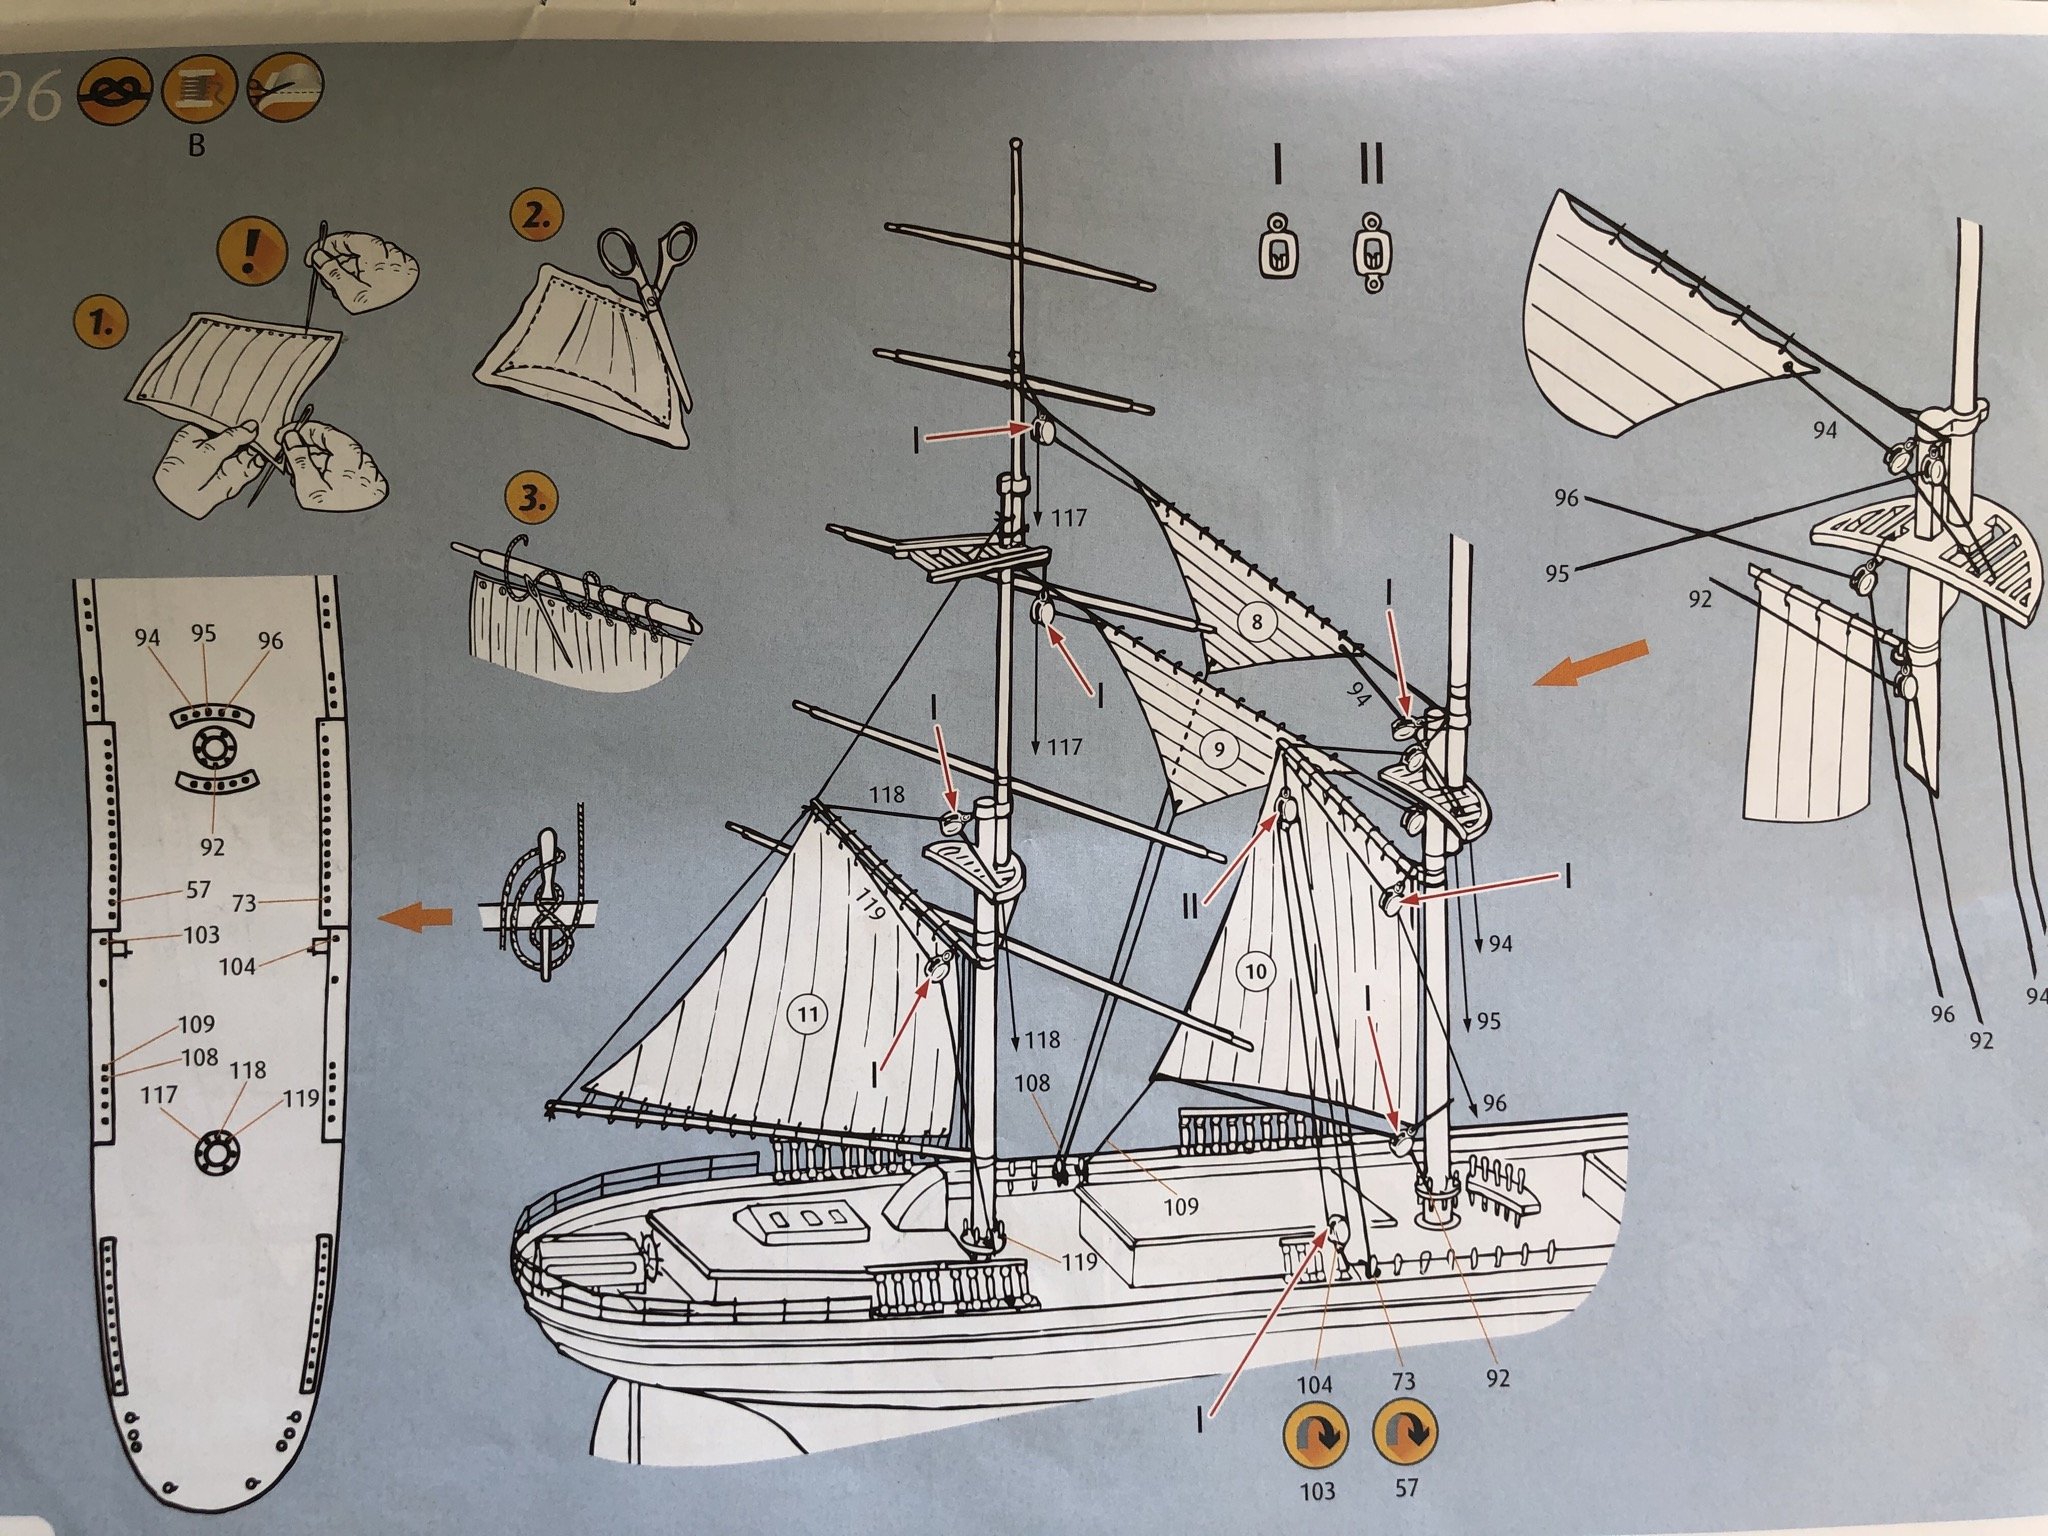
Normally sails will be attached to the running rigging which should be of a tan or brown colour thread, not the standing rigging which is usually black thread, so if you have not started your running rigging you may need to check bk on your rigging instructions to when to do it stage by stage.
P.s.
Just send me over your private jet and I will happily come over to help you out ✈😉
-
7 hours ago, Bill97 said:
Thanks Robert. That is what I thought I understood. My instructions are not real clear on if there are blocks tied or sowed to the bottom corners. May just be thread tied directly to the bottom corners. There is extremely limited text explaining anything. You just have to study the picture. See what you think.
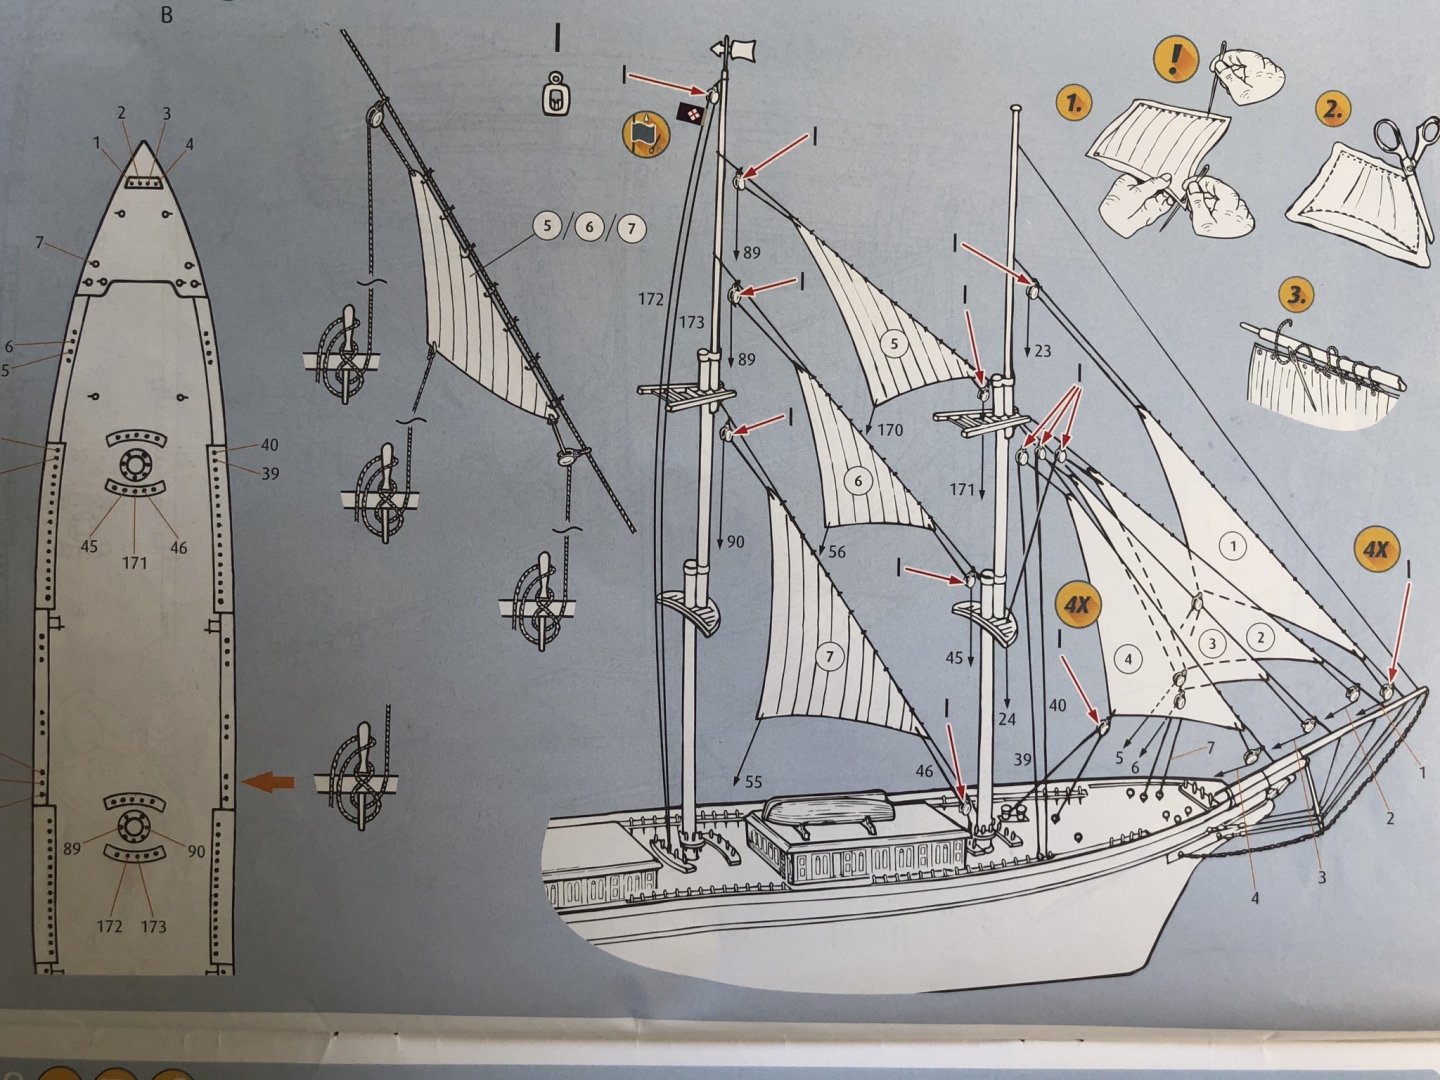
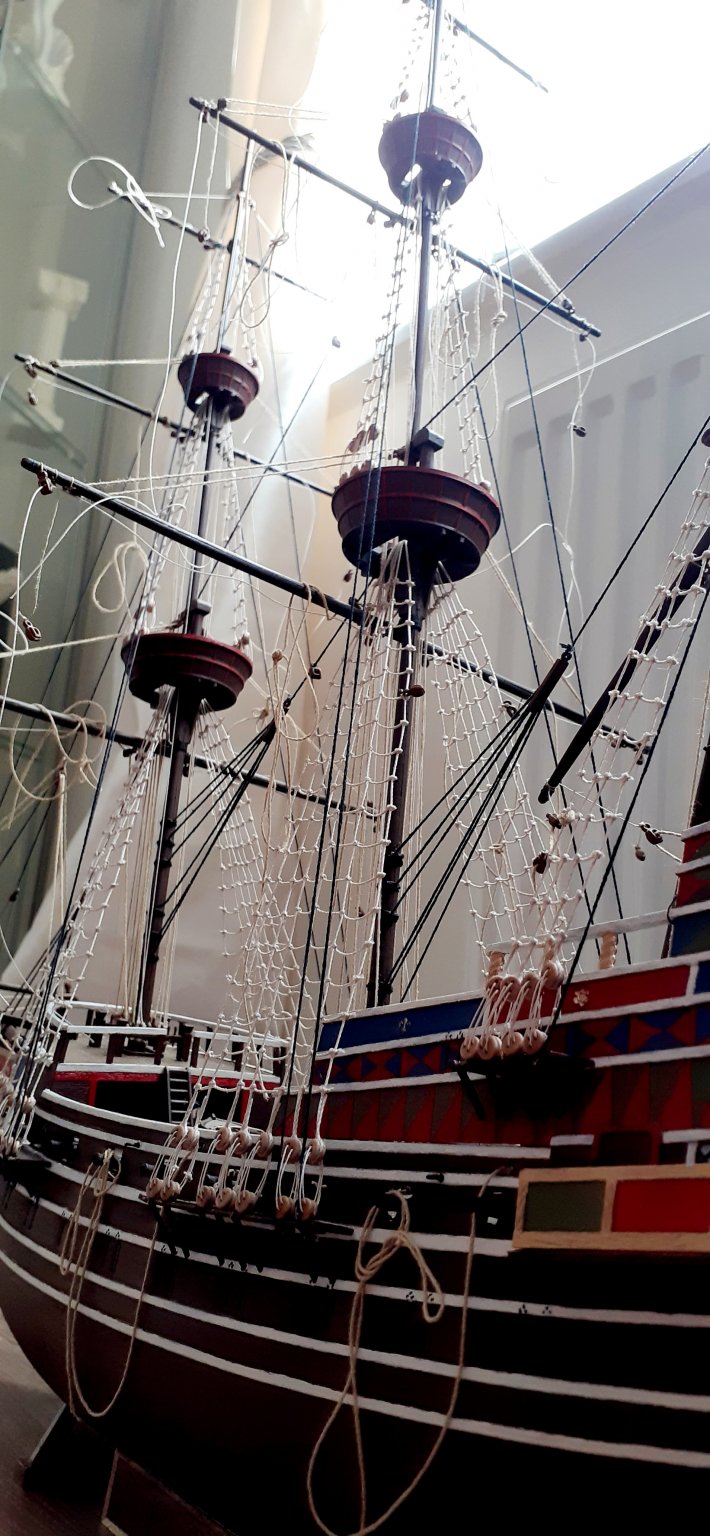
Hi Bill,
Very similar to my own, being a Revell Kit. In mine I have followed the instructions and have blocks rigged to the yards, but I have also still to rigg the blocks to the sails.
In most cases I think it's more down to the individual preference whether sails are just rigged with thread or if you want to add rigging blocks for mor authenticity.
Here's a pic of my instructions albeit the blocks that come with this kit are clearly I identified.
And another pic of blocks I bought and tied to my Golden Hind kit I finished 3 months or so ago.
Myself I prefer to rigg blocks to the sails and take it from there.

-
43 minutes ago, Bill97 said:
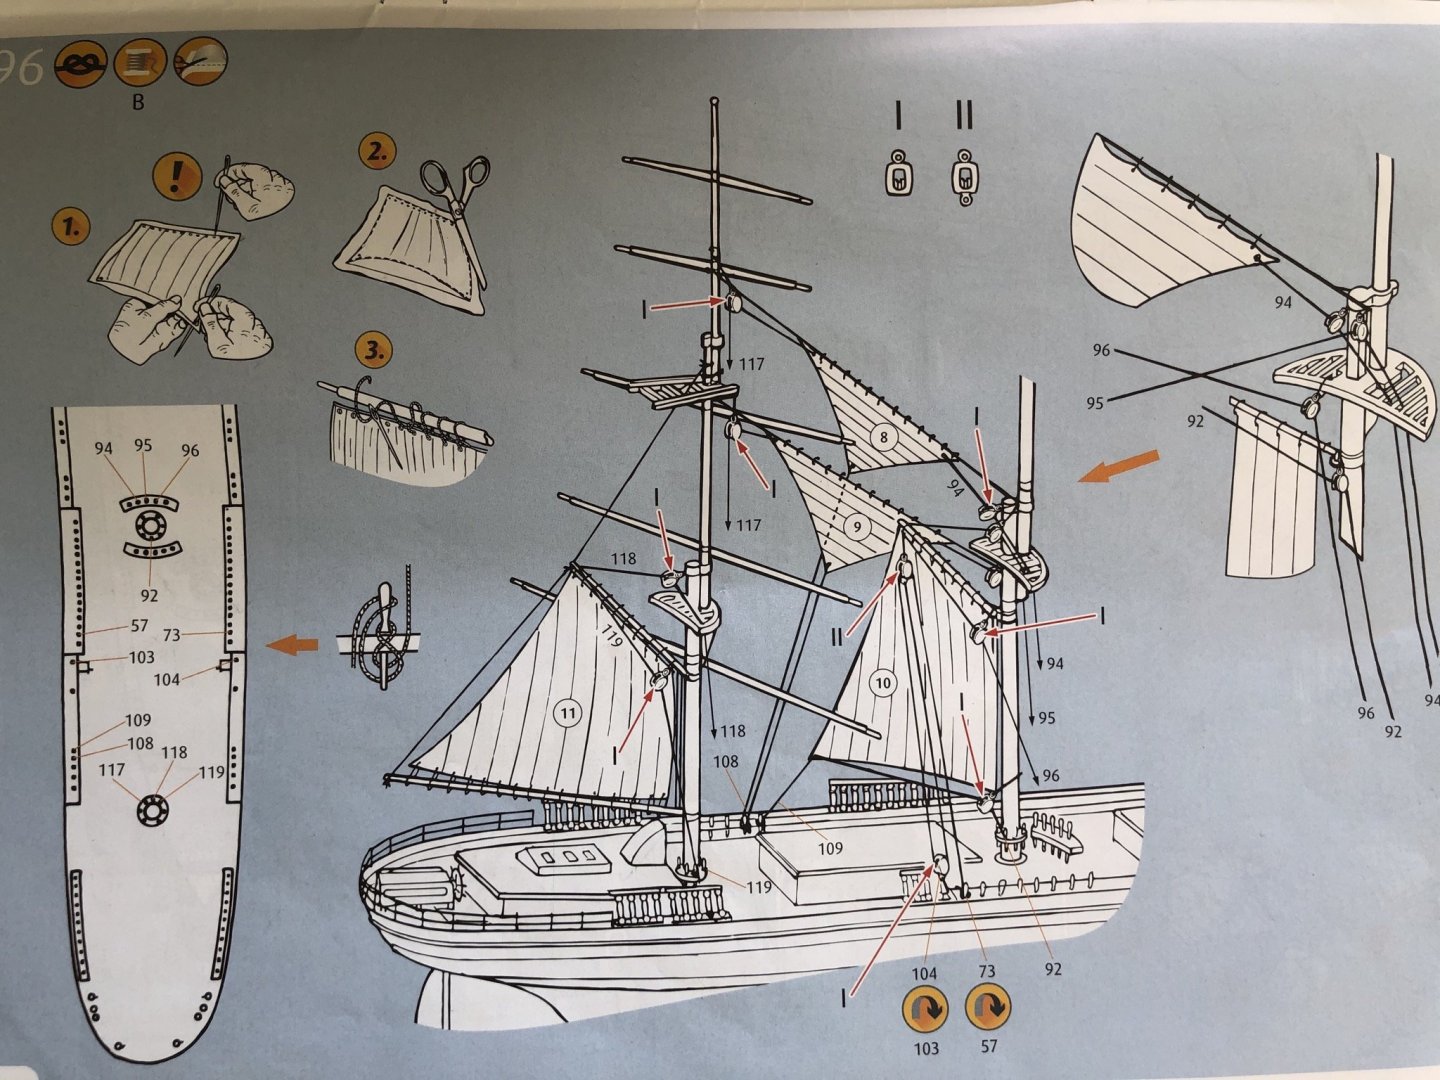
Ok Robert I am going to start practicing making your sail technique later this week. I have to get my 3 mm modeling wire. You said you only sew it into the sides of the sails, not top or bottom, right? I am going to wait to sew in the lines until after I see if my practice sails come out. Will sew the lines in the ones I actually make for the ship.
Hi Bill,
Yes only sew the modelling wire into the sides, top and bottom get sowed as normal, as top will be rigged to yards, and the two bottom corners will probably have blocks sowed onto them to be able to have them rigged, depending on your preference or the instructions in from your kit.
-
13 hours ago, Bill97 said:
I am in Kentuck, USA. May have heard of Kentucky Derby. Track close by my home. Love Scotland. Spent some time in the north. An area called Dornoch, I believe. And of course looked for Nessie!
Nice on Bill, yes I have heard of the Kentucky Derby albeit I am not a horse racing fan. Haven't been to Dornoch myself but have been to John o'groats and wick many years ago.
Did you spot Nessie at all 😉 and have ever been looking for "The Haggis" 😉
-
3 hours ago, Bill97 said:
Good morning Robert, or morning where I am. By the way, where on this beautiful planet might you be? I think your wire and cloth method is the first way I am going to try. I also learned how to sew from my mother many many years ago. Of course machine sewing would be faster and more uniform in stitch spacing. But what the heck. I am sure the original sails were hand sewn back in the day.
I stay in Scotland, Bill, yourself ?
-
34 minutes ago, Bill97 said:
Thanks again Robert. The wire idea does seem less messy than the white glue “paint” on the sail to form it to the molded matching one.
Yes it definitely is. Although I have never tried the Pva glue way, I have watched at least half a dozen videos on YouTube, and i thought to myself that there had to be a less messy time consuming way to billow sails. I've known how to measure and sew since I was 7years old and that's why I decided to do it that way with modelling wire.
-
8 hours ago, Bill97 said:
No I have not. Many years ago (over 50) I built the he USS Constitution and Cutty Sark. I put the molded plastic sails on it that came with the he kits. Now that I am retired and have more free time I recently decided to get back into it. I finished the Constitution a few months ago and decided to leave the sails off so as to fully appreciate the rigging. I think the molded plastic sails don’t really look that good. So when I started the Cutty Sark I was doing some research and stumbled on this web site. Through it I have read of quite a few builders making their own sails. I think all I have seen look really good so I thought would try it. Watched YouTube videos and read instructions from builders like yourself. Anxious to try my hand at it.
Hi Bill
Another cracker in that USS Consitution.
On the Sails part I would suggest also when you use the plastic ones as templates, add an extra 1cm or so all round, this will act as the flaps which you fold over and sew thus keeping the Sails to scale size, also it gives you the space to insert the 3mm modelling wire to billow the sails before sewing up and finishing them off.
-
Enjoy Bill, that's the main thing.
Just wondered have you ever made your own sails before?
-
That looks Fantastic Bill, what make and scale is it? Don't fancy doing all those sails lol..
I've heard a lot of good things about the Heller Victory and Soleil Royal 1/100 kits, I would love to have one of those preferably the Soleil Royal but my budget just now doesnt reach that far and I do have a lot of Galleons in my stash waiting to get built. Also heard that both of those kits usually take between 1-3yrs to complete, obviously depending on how much time you can spend on them, but with both having over 2000 parts it's not surprising I guess.
-
13 minutes ago, Bill97 said:
Thanks again Robert. Again looking at your Man O War it is obvious that large portions would have to be hand painted. Impossible to airbrush unless you did a crazy amount of masking and unmasking. I really appreciate your thoughts and advice. It is fascinating reading the building blogs of different highly talented builders and seeing how each feel very strongly about their preferred way of doing things. As I am honing my skills my mind is fully open to all techniques and methods. I will be making my own sails for my Cutty Sark. This will be my first attempt. I like your cloth sails and I like Ron’s (Great Republic) paper sails. Going to experiment with both methods to see which, if either, I can pull off convincingly.
Nice one Bill, key is just to take your time, no rush mate.
Any more questions don't hesitate to ask.
Btw The Cutty Sark and I think the Victory are two kits I haven't built.
I kinda prefer more period Elizabethan galleons, even Carracks and some of the Heller kits are cracking.
-
3 minutes ago, Bill97 said:
Robert do use acrylics or enamels, or a combination of both?
Bill
Enamels all the time, while Acrylics are to a certain extent easier to work with, they are brittle and easily scratched unless you want to double or triple your work by putting a clear gloss or lacquer finish o top.
To me Enamels incorporate all of this in one go, ok slightly longer drying time, but long term made to last.
I try and use Matt enamels all the time as gloss ones are the worst for drying and mixing sometimes, so where I can, i try and substitute one for the other as long as it doesn't take away that original look.
Hope this helps Bill 👍
-
3 hours ago, Bill97 said:
Robert I just keep looking back at your build log. I am so impressed with your work. It is making me want to get to my Man O War build. I still have a ways to go on my Cutty Sark and need to be patient. I have so many questions and I hope you won’t mind me asking. If you do, please say. In the first part of the log you show all the hand made cloth sails. Are those the same ones you show later on the ship? Also was the ship painting a combination of airbrush and hand painting? I saw you holding a brush in one photo and I expect some areas are so detailed it has to be hand painted. Other areas look so smooth and even it looks like airbrush.
Hi Bill,
That's ok, i don't mind you asking questions.
Yes the sails in my first log is the same ones I will be rigging up for this kit.
I also inserted 3mm modelling/jewelry wire in the sides only before sewing them up, so I can bend/mould them so that it makes the sails billow out. A lot less time consuming and less messier that pva glue on cloth etc..
The Kit is all hand painted, it's all I have ever done, as usually Galleons is all i ever build and with these kits you can't really airbrush much, the time you do take to set up paint &airbrush then mask pieces off, you could have painted by hand. I also don't own an airbrush, which is kinda weird as I was a spray painter for 10yrs.
Everyone has their own opinion on airbrushing regard finish etc.. but for me i think its lazy. I guess it just depends on what Kit and size your making too.
Hope this helps Bill 👍
-
19 hours ago, Bill97 said:
Good morning Robert. I just received this Ravell kit as a very pleasant surprise. Will be starting it in the Fall. Currently working on the Revell 1/96 Cutty Sark. I guarantee I will be referring to your build log as I tackle the project. Excellent job! I am curious about your sails. What technique did you use? Are they cloth or paper? Very realistic. Paint color scheme is fantastic as well.
Hi Bill
I made my own sails using a cream coloured pillow case, just a mix betwee cotton and linen, using the plastic sails with the kit as templates, then hand sowed everything.
Also the paint colour scheme I thought long and hard about as I definitely thought it needed changing from the kit instructions, took me a lot longer than I thought. I knew what I wanted to do with the hull, and a little of the galleries but most decisions were done stage by stage per the instructions. Sometimes you can have a vision in your head but it's not till it's in front of you that you can decide for definite sometimes. I also done a little rengraving of the architecture on the galleries too.
Like any model though you can paint it whatever way you think suits.
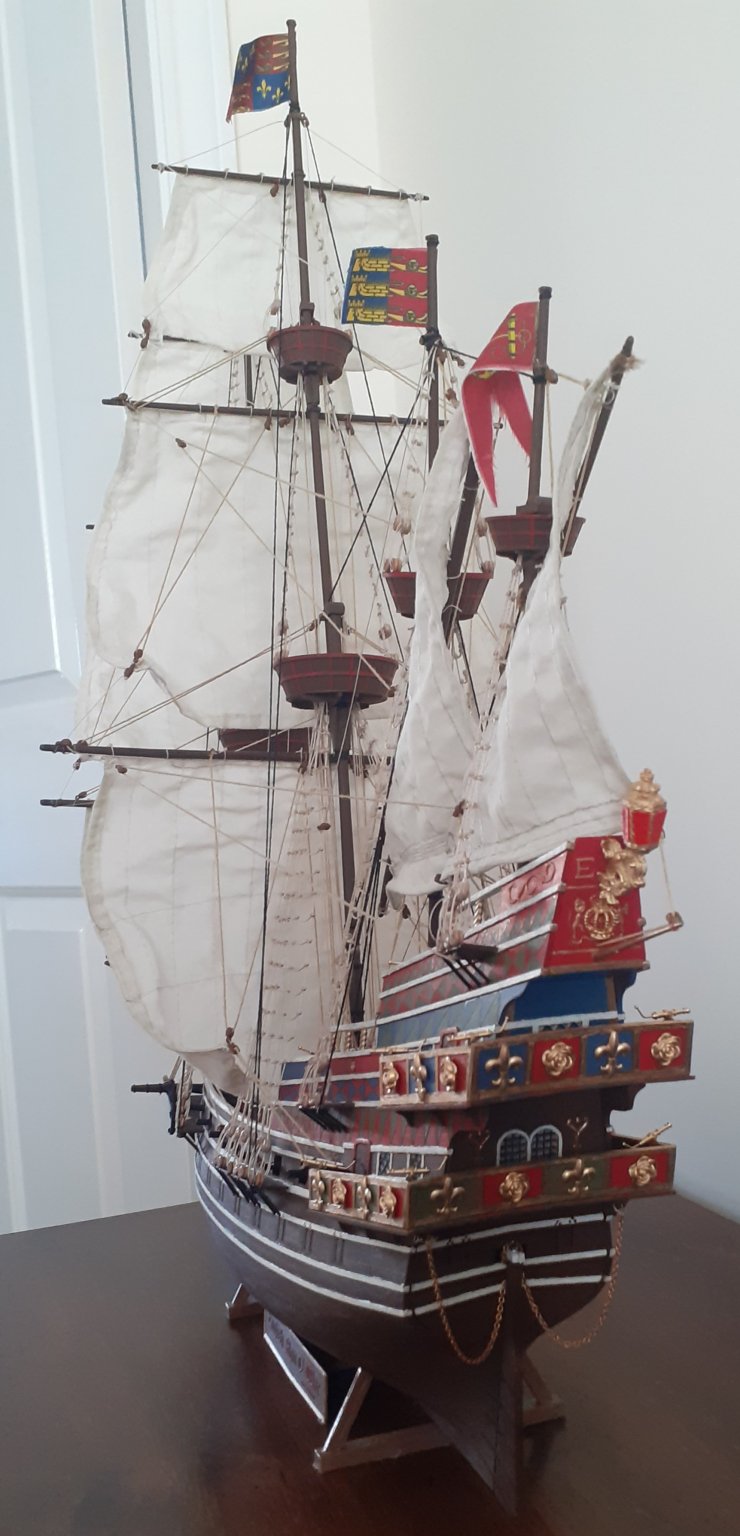


ENGLISH MAN O'WAR by Robert Taylor - FINISHED - Revell - 1:96 - PLASTIC
in - Kit build logs for subjects built from 1501 - 1750
Posted
Thank you very much, I am touched that it brought back Happy memories for yourself.