


Jeff59
-
Posts
452 -
Joined
-
Last visited
Content Type
Profiles
Forums
Gallery
Events
Posts posted by Jeff59
-
-
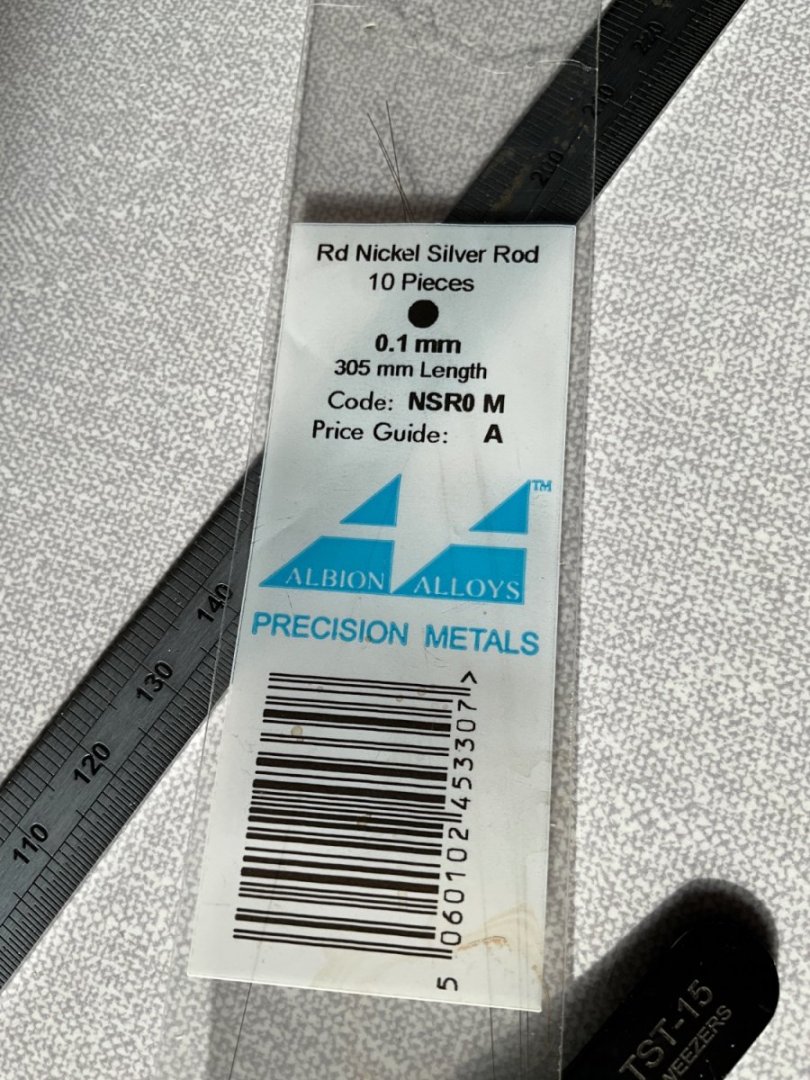
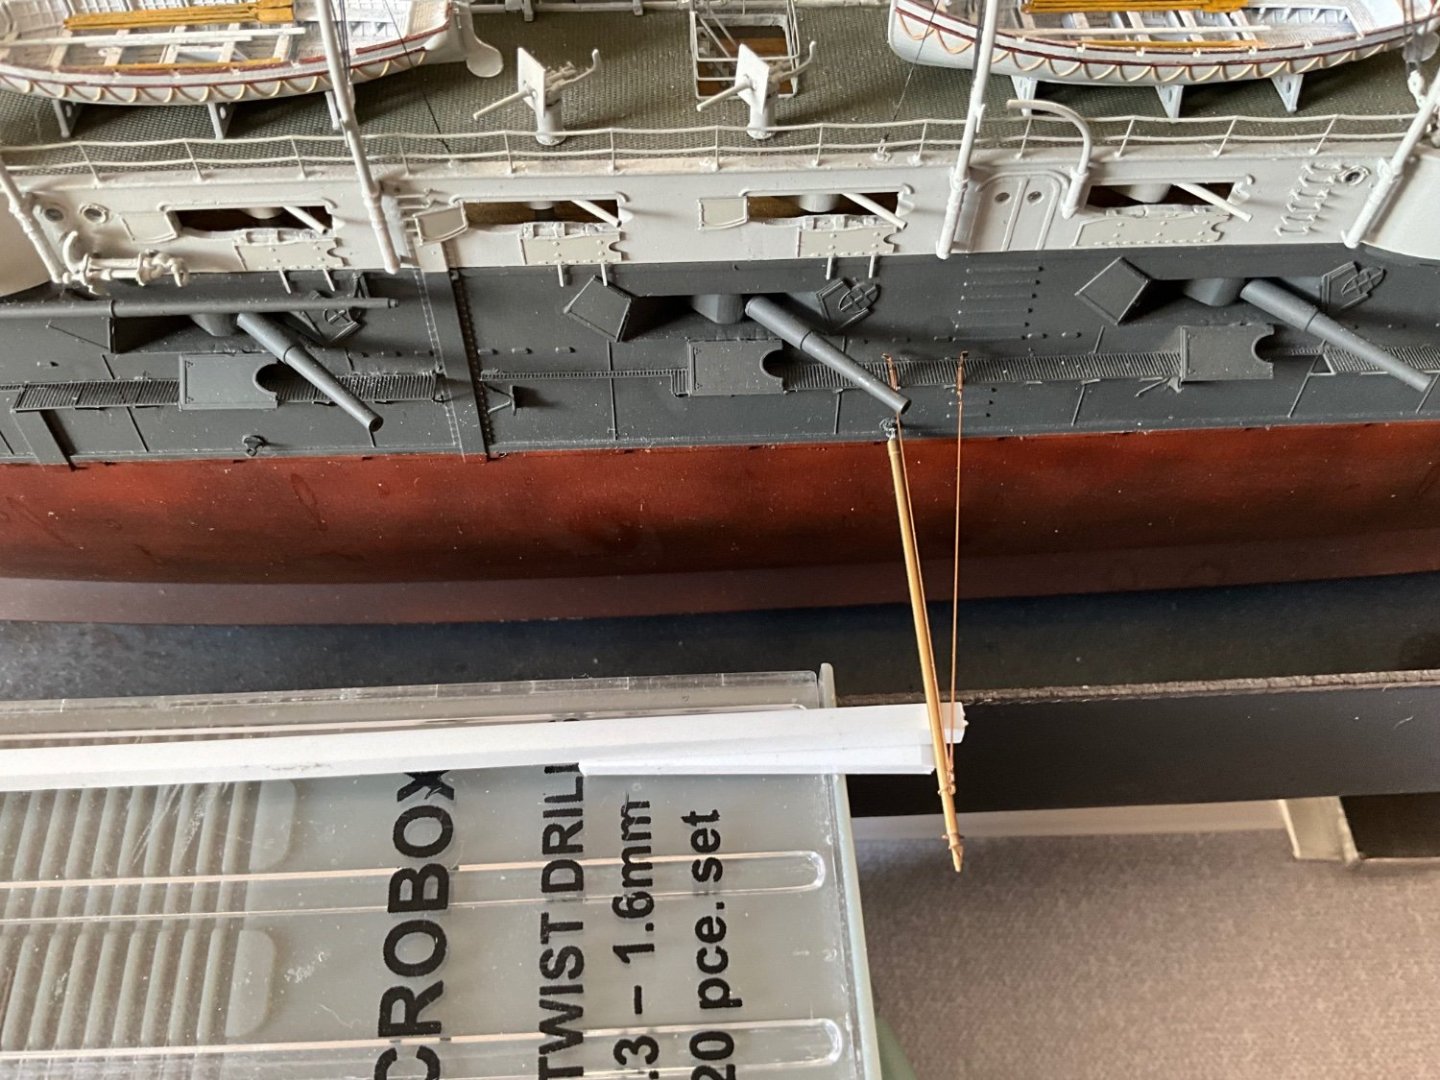
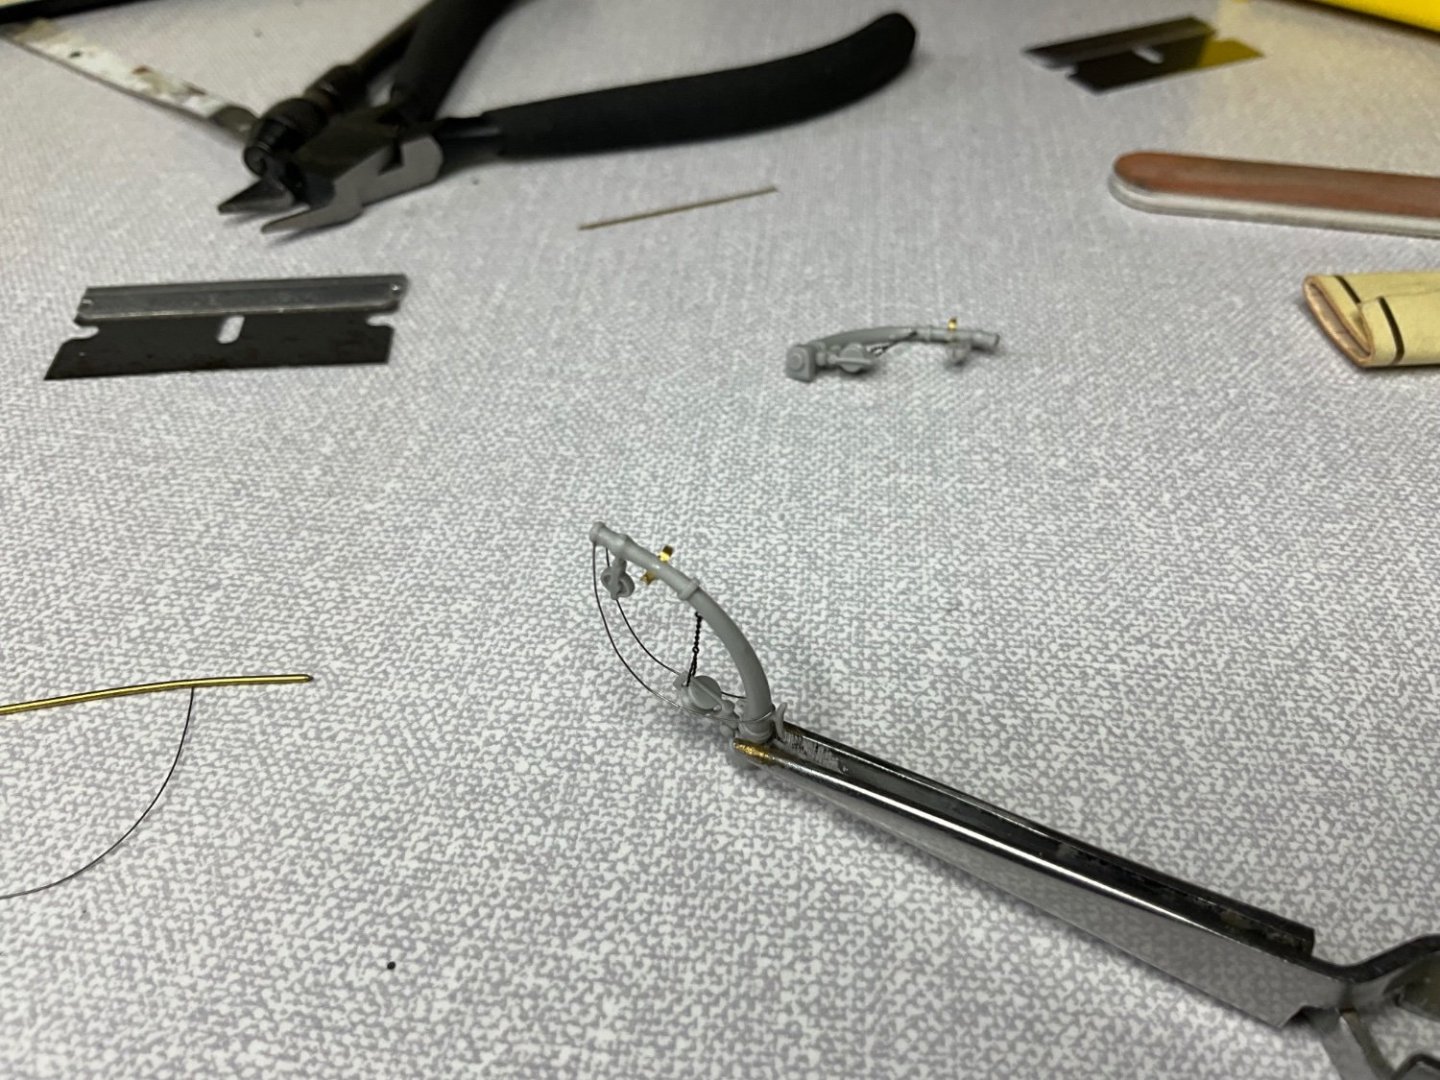
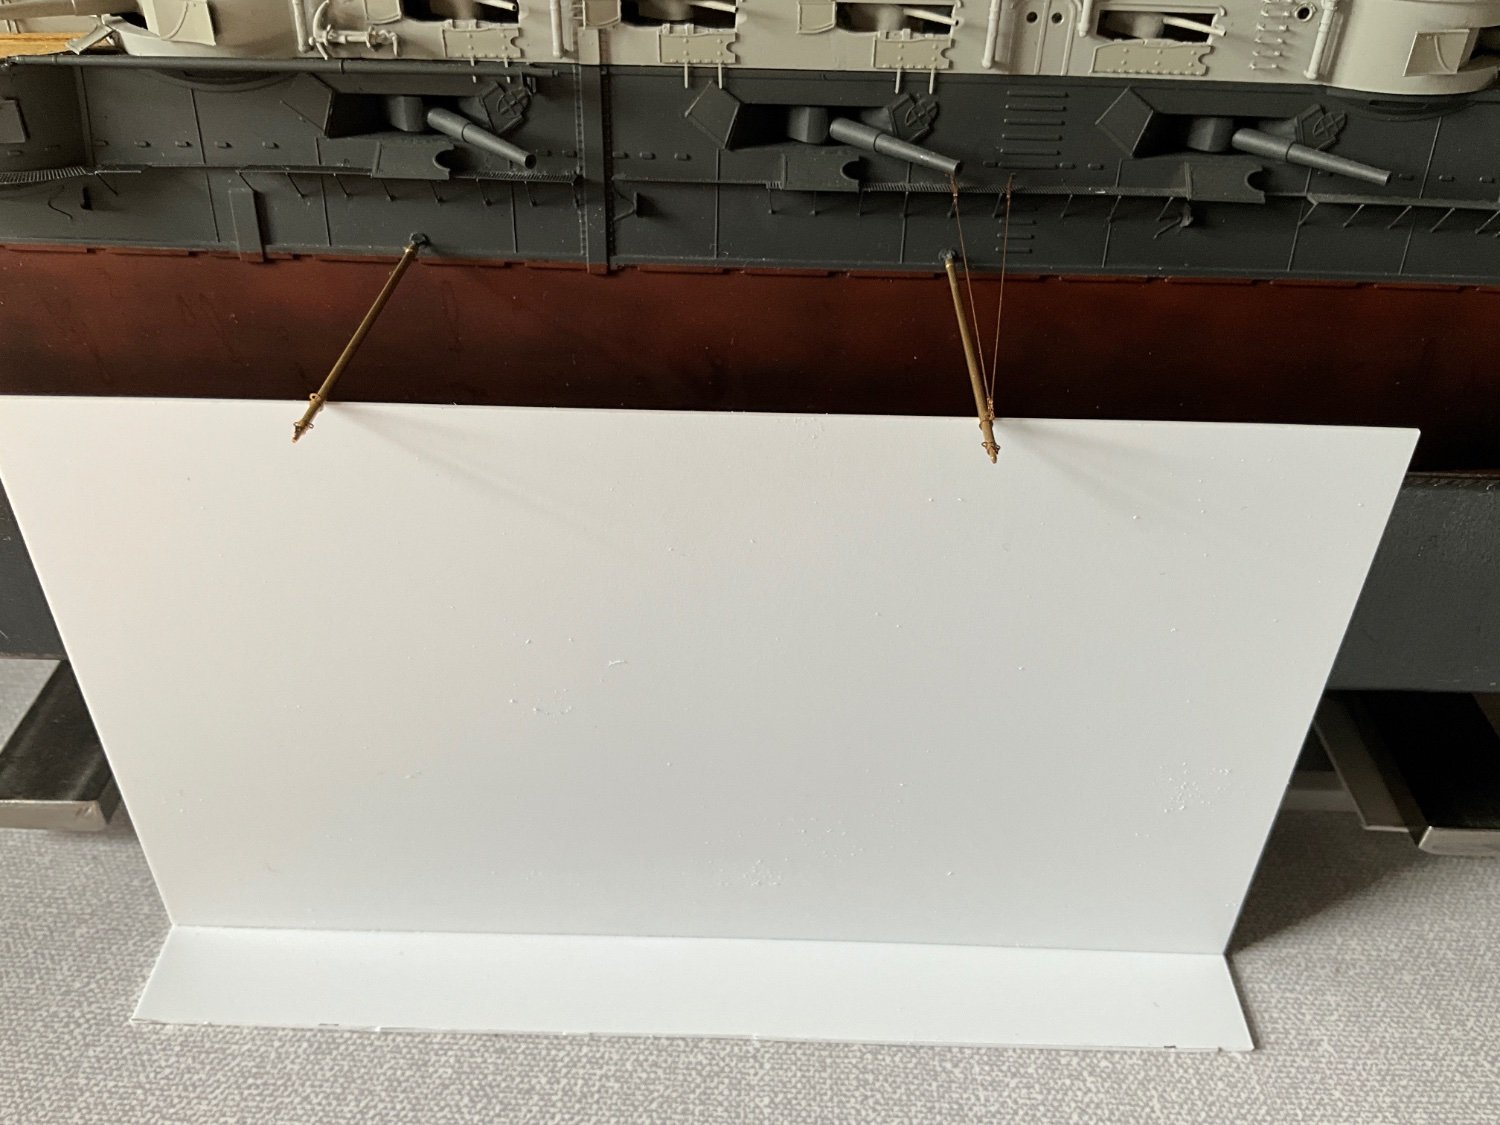
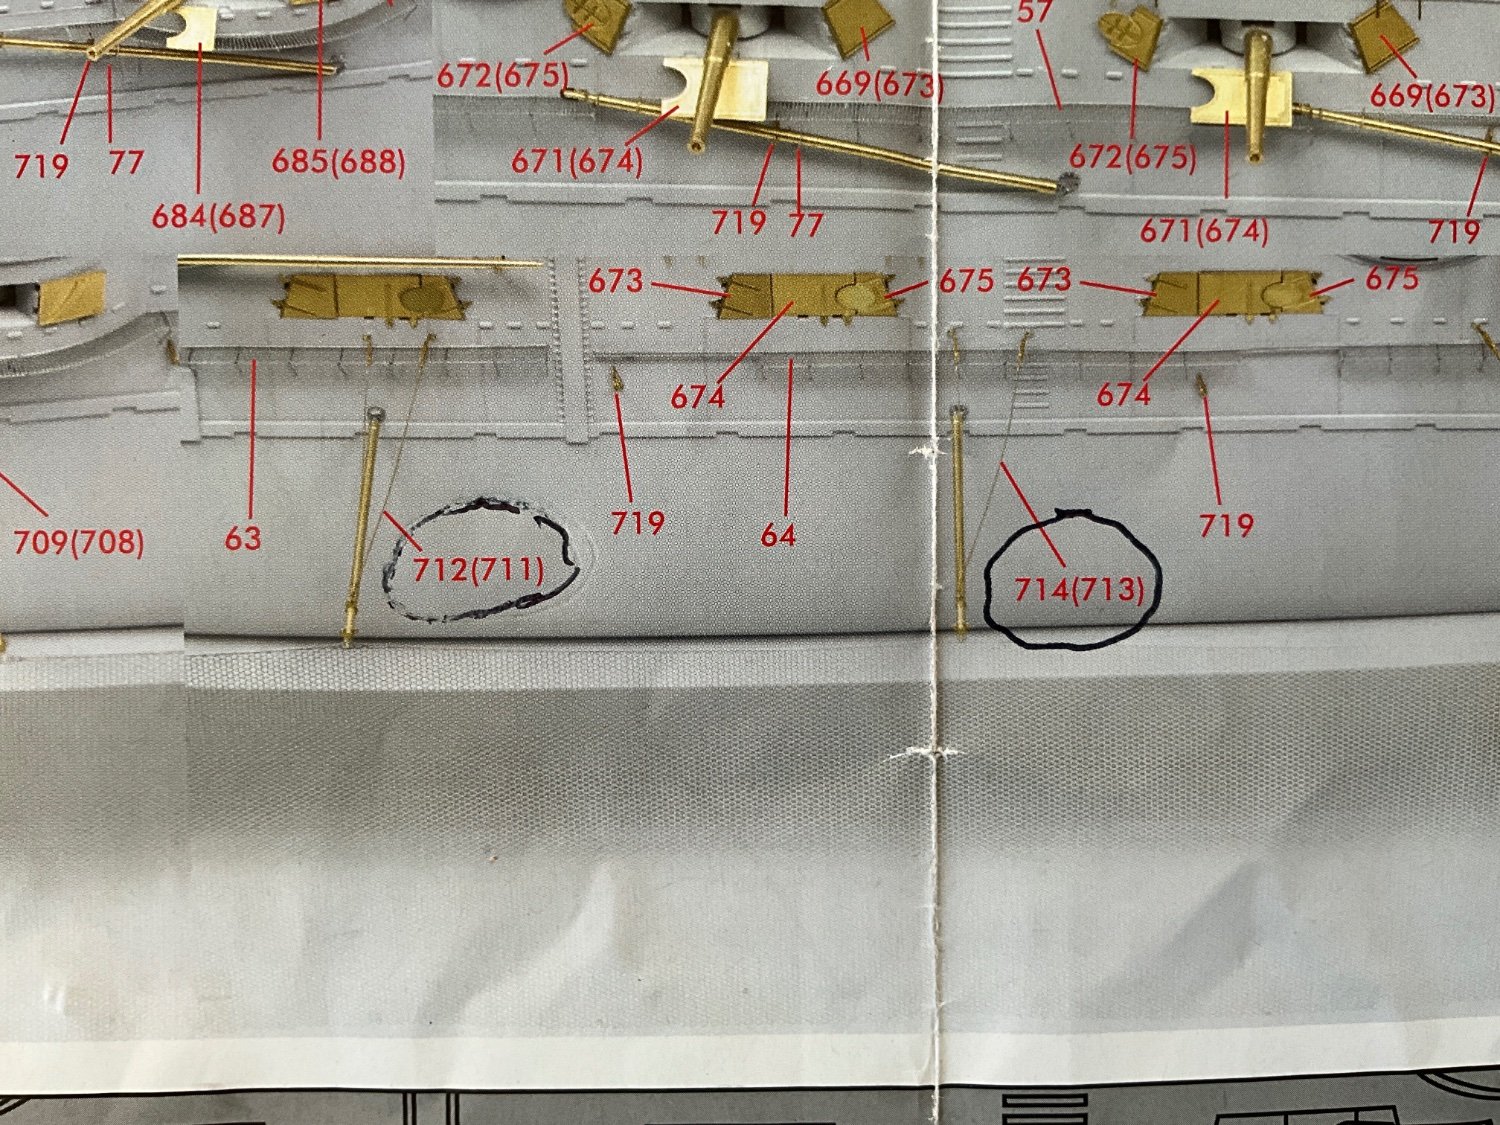
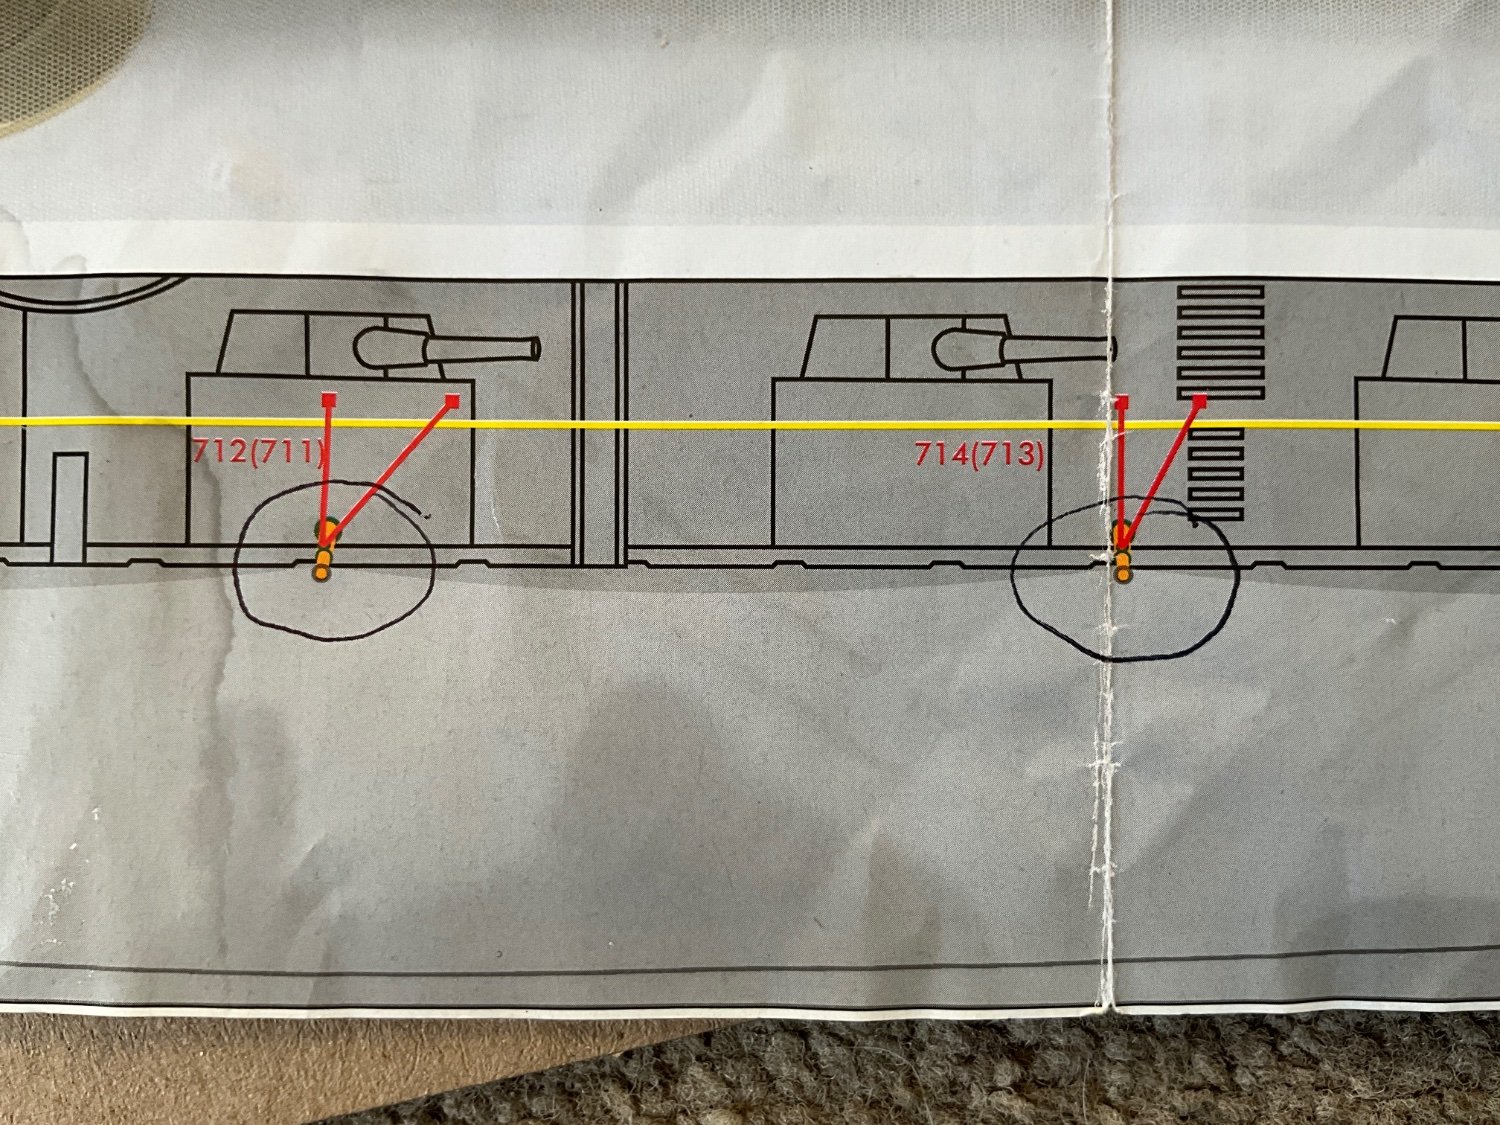
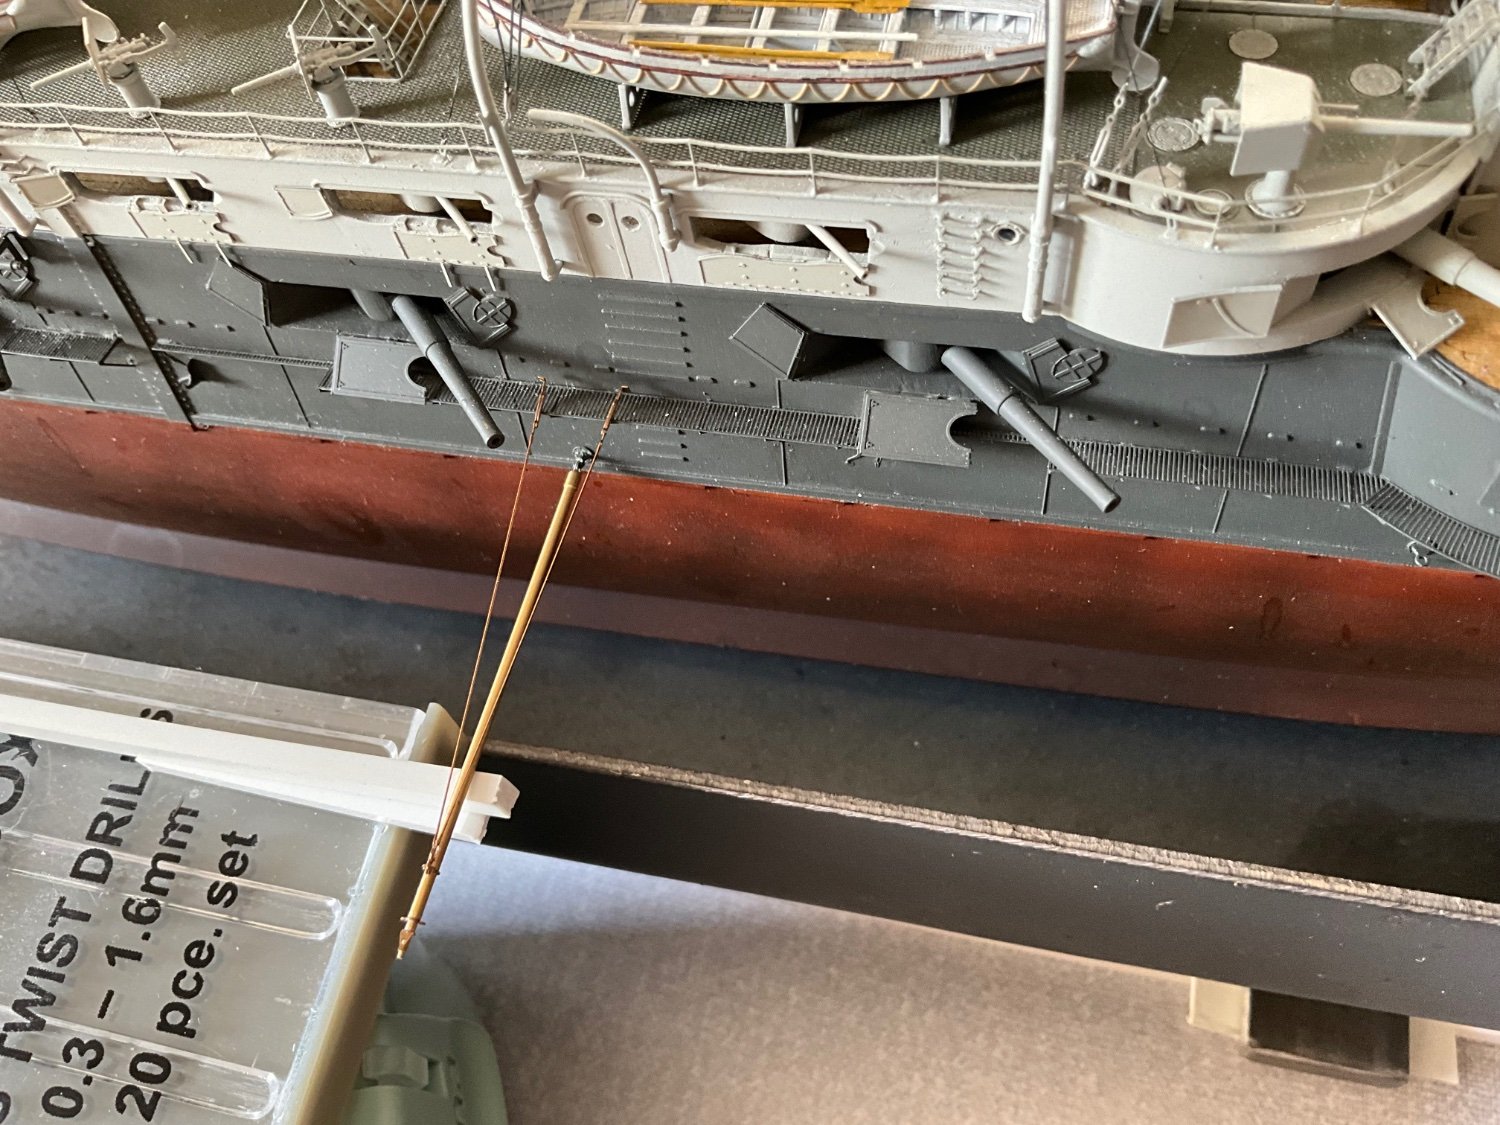
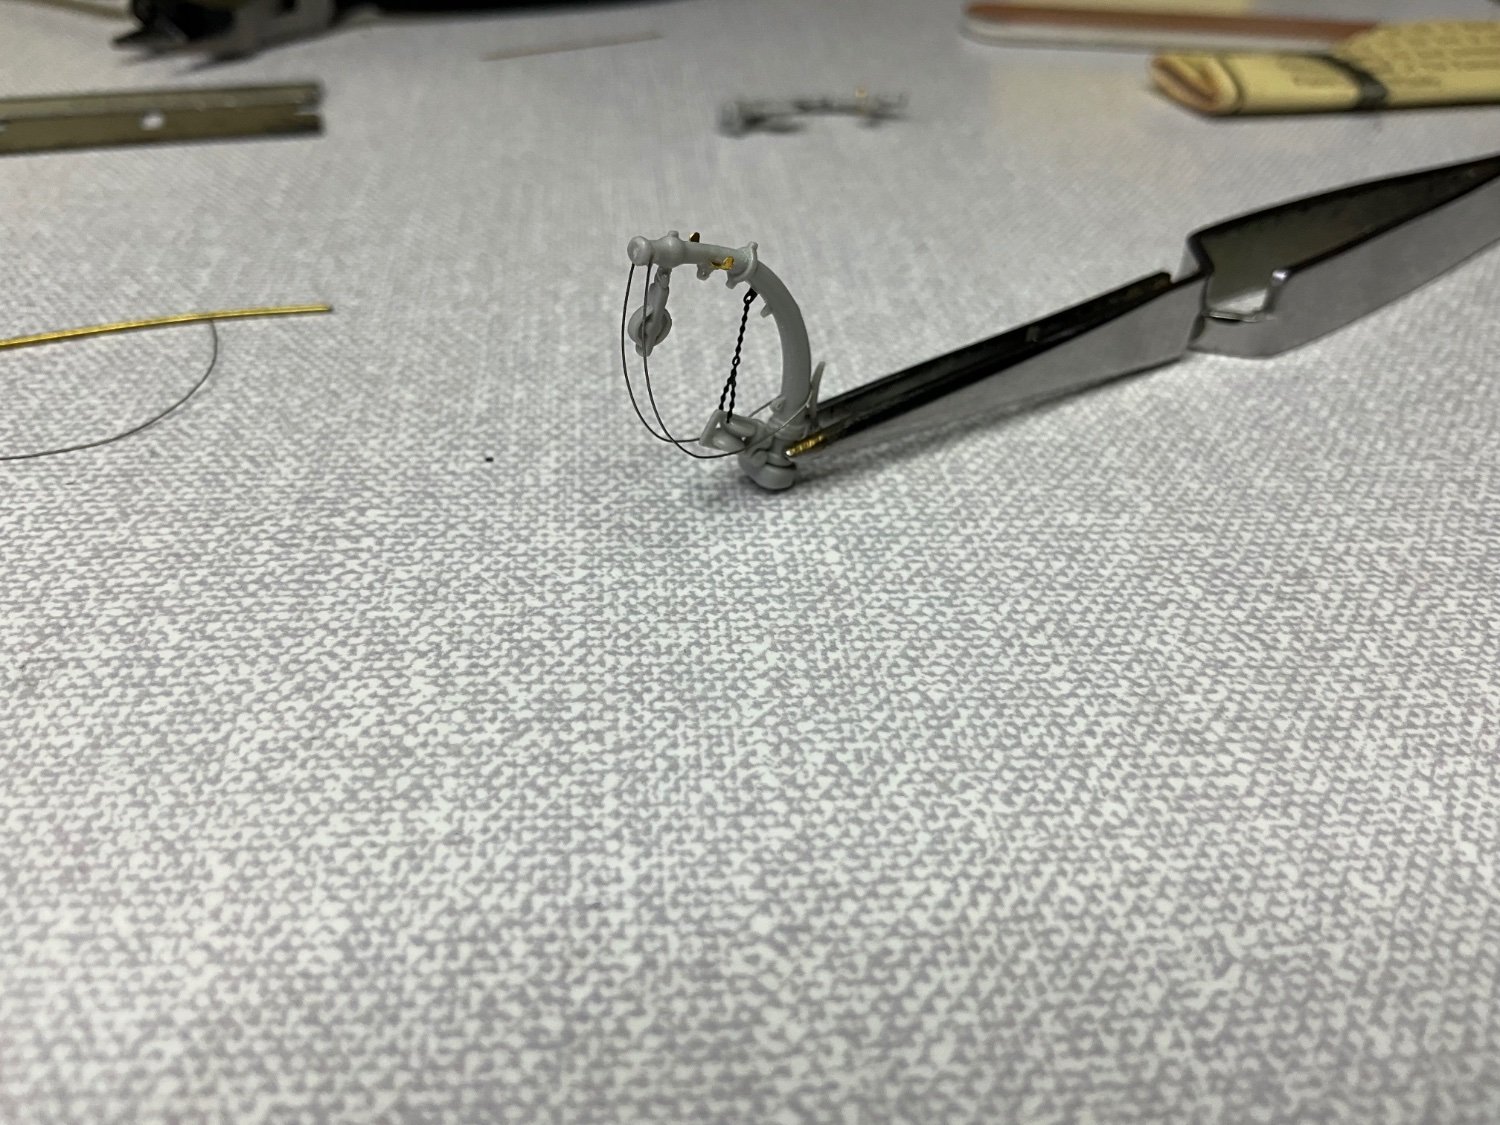
Back again, note point 714 is my datum and starting point, at this point the boom is 90 degrees from hull in both planes and the guy wire on left is vertical above boom so as good a place to start as any, well with this set up as is, it’s 1.5 mm short of hull, think my only option is to cut the etched wire and replace with 0.1 Nickel Silver Rod, not going to be easy, fingers crossed 🤞


-
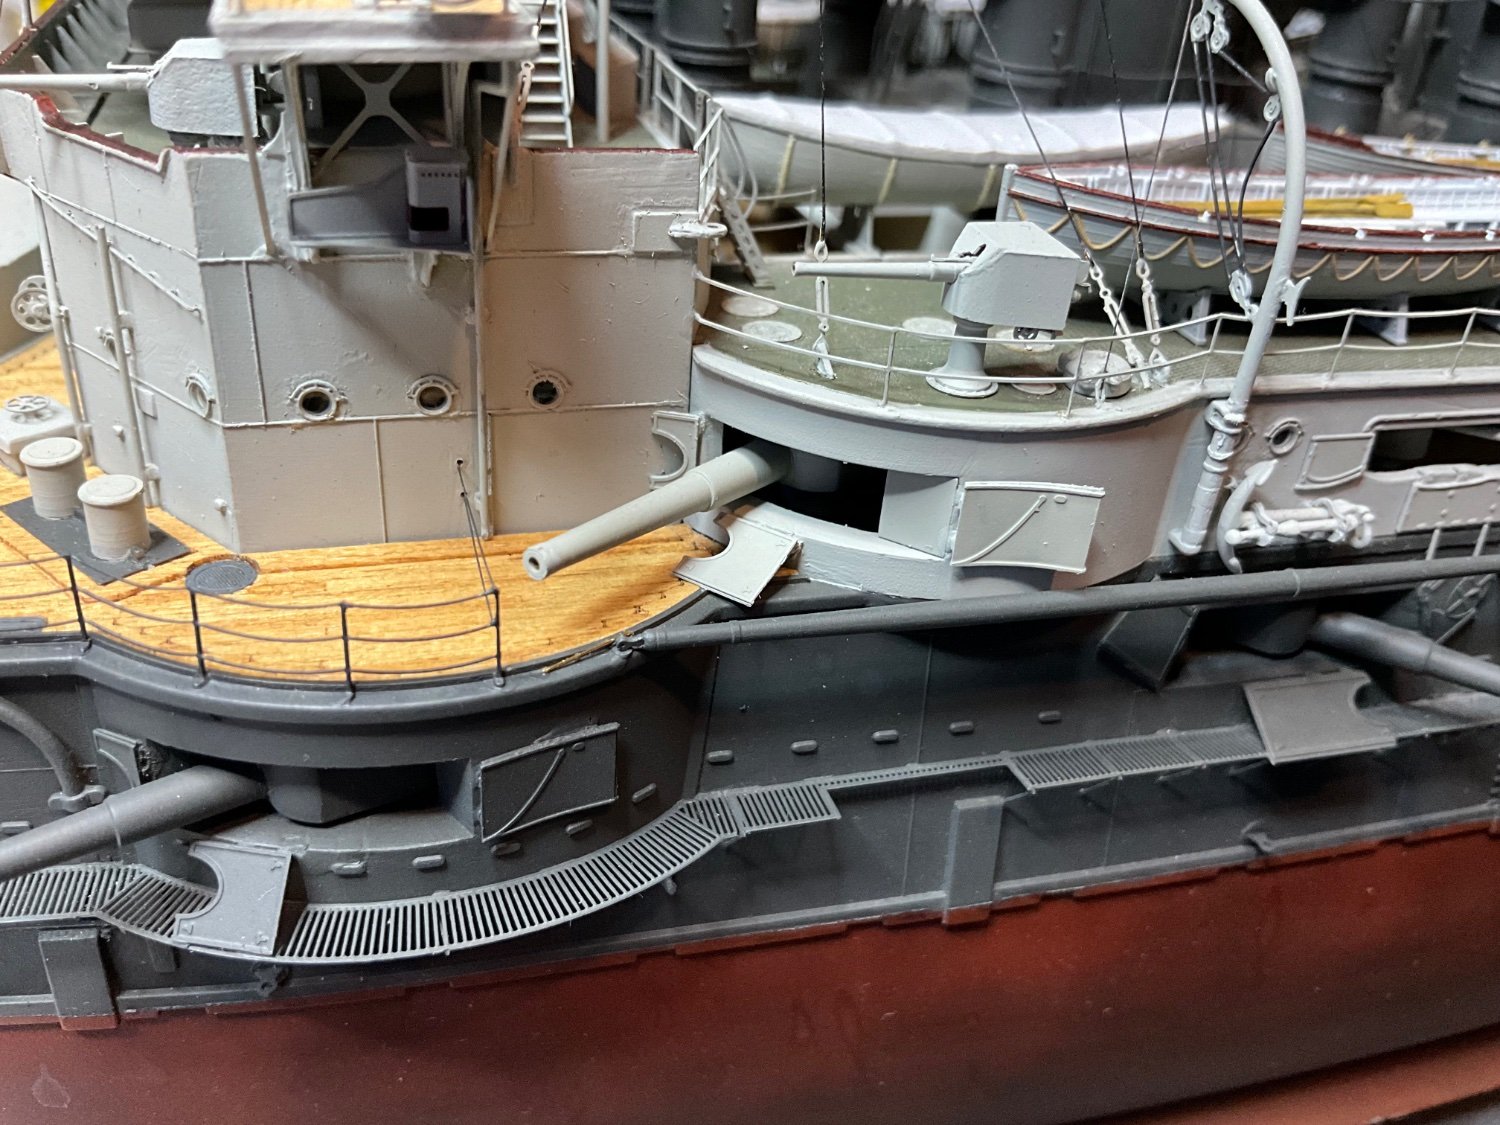
Just point out that nobody mentions that the shielding at point number 712 has to be in closed position to get the fixing points on hull, think l will have to ease this part of to fit guy ropes then reinstall it resting on the wires, still working this out, trying to set up a sort of jig so I can work on this, ongoing 👍
- Haliburton, Herby63, mtaylor and 1 other
-
 4
4
-
-
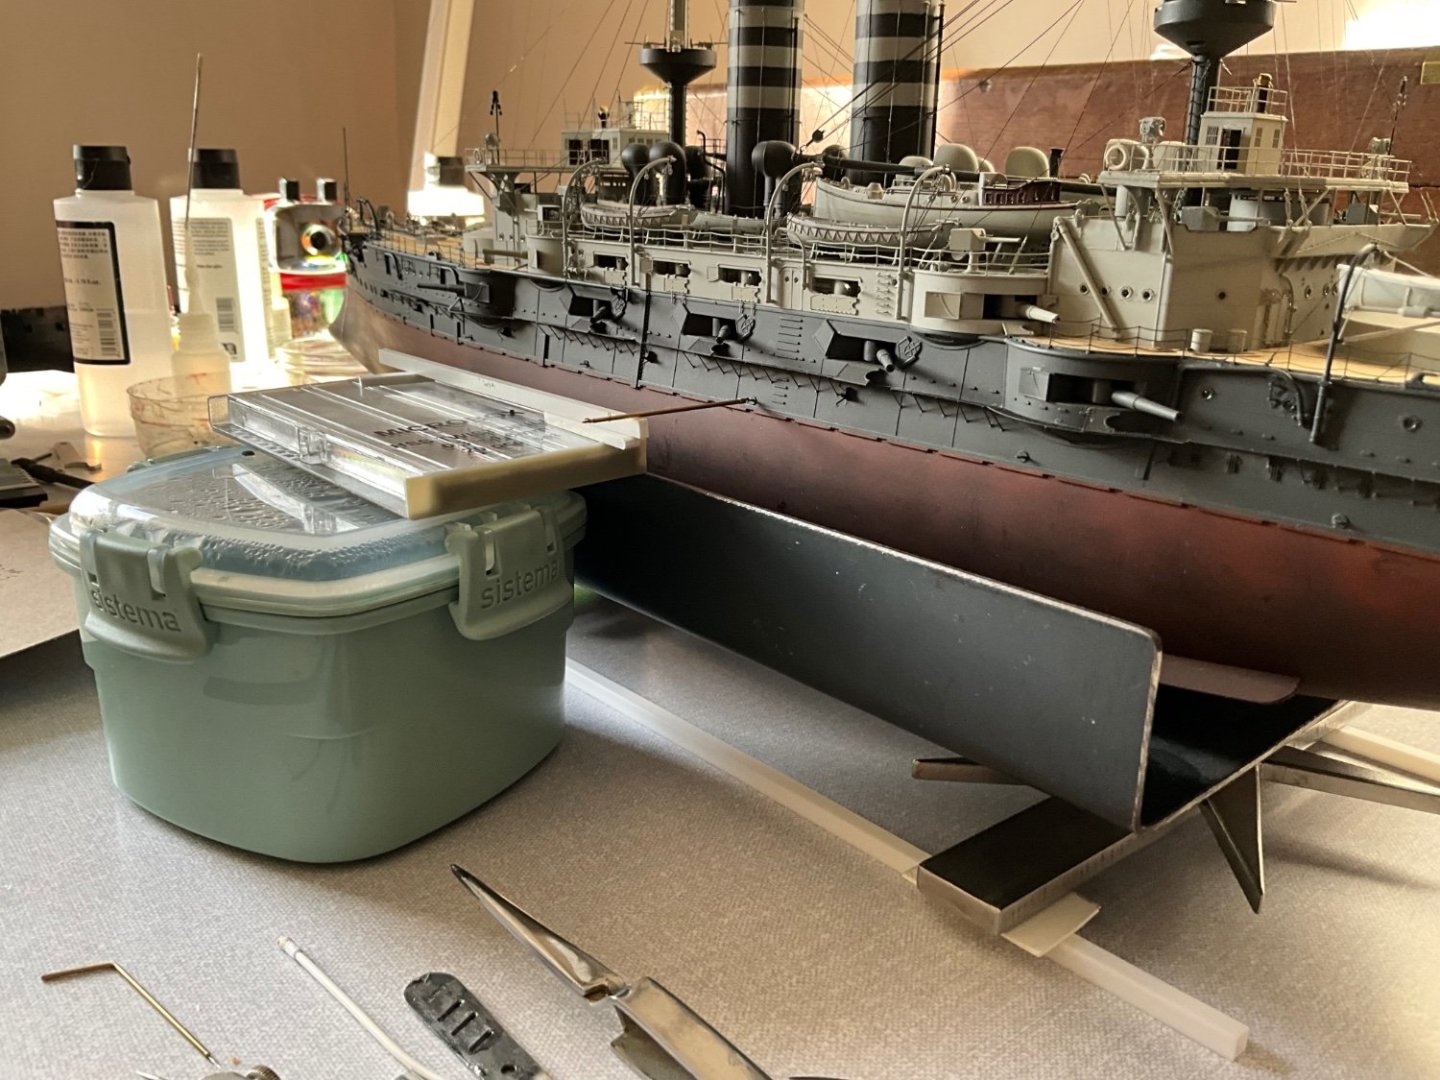
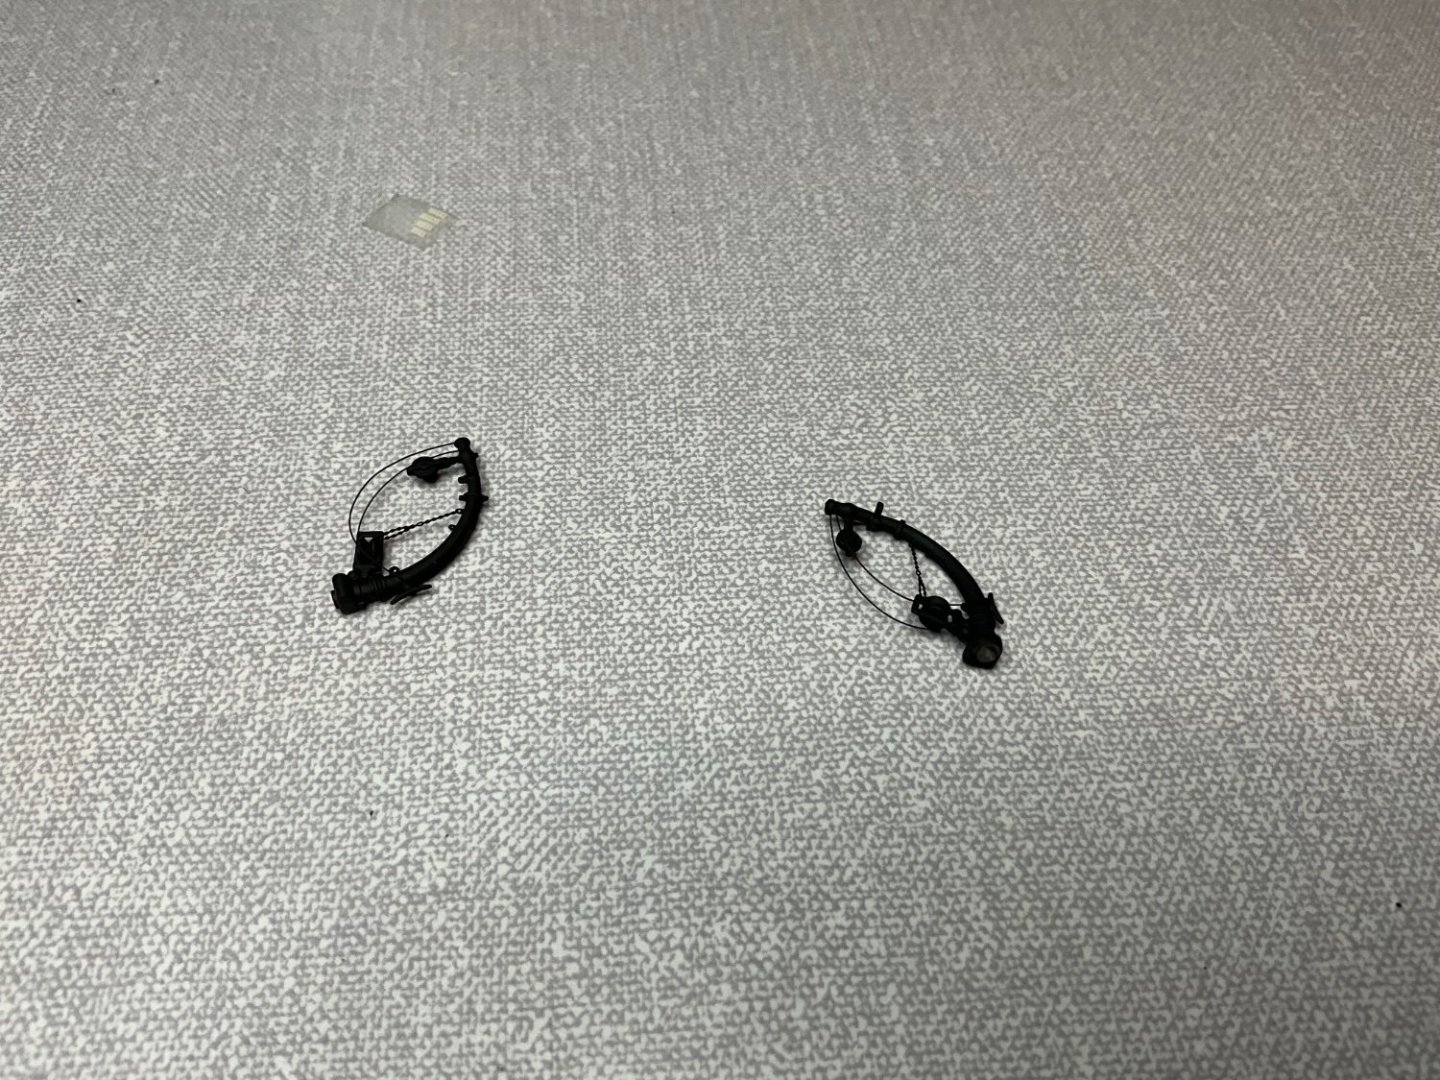
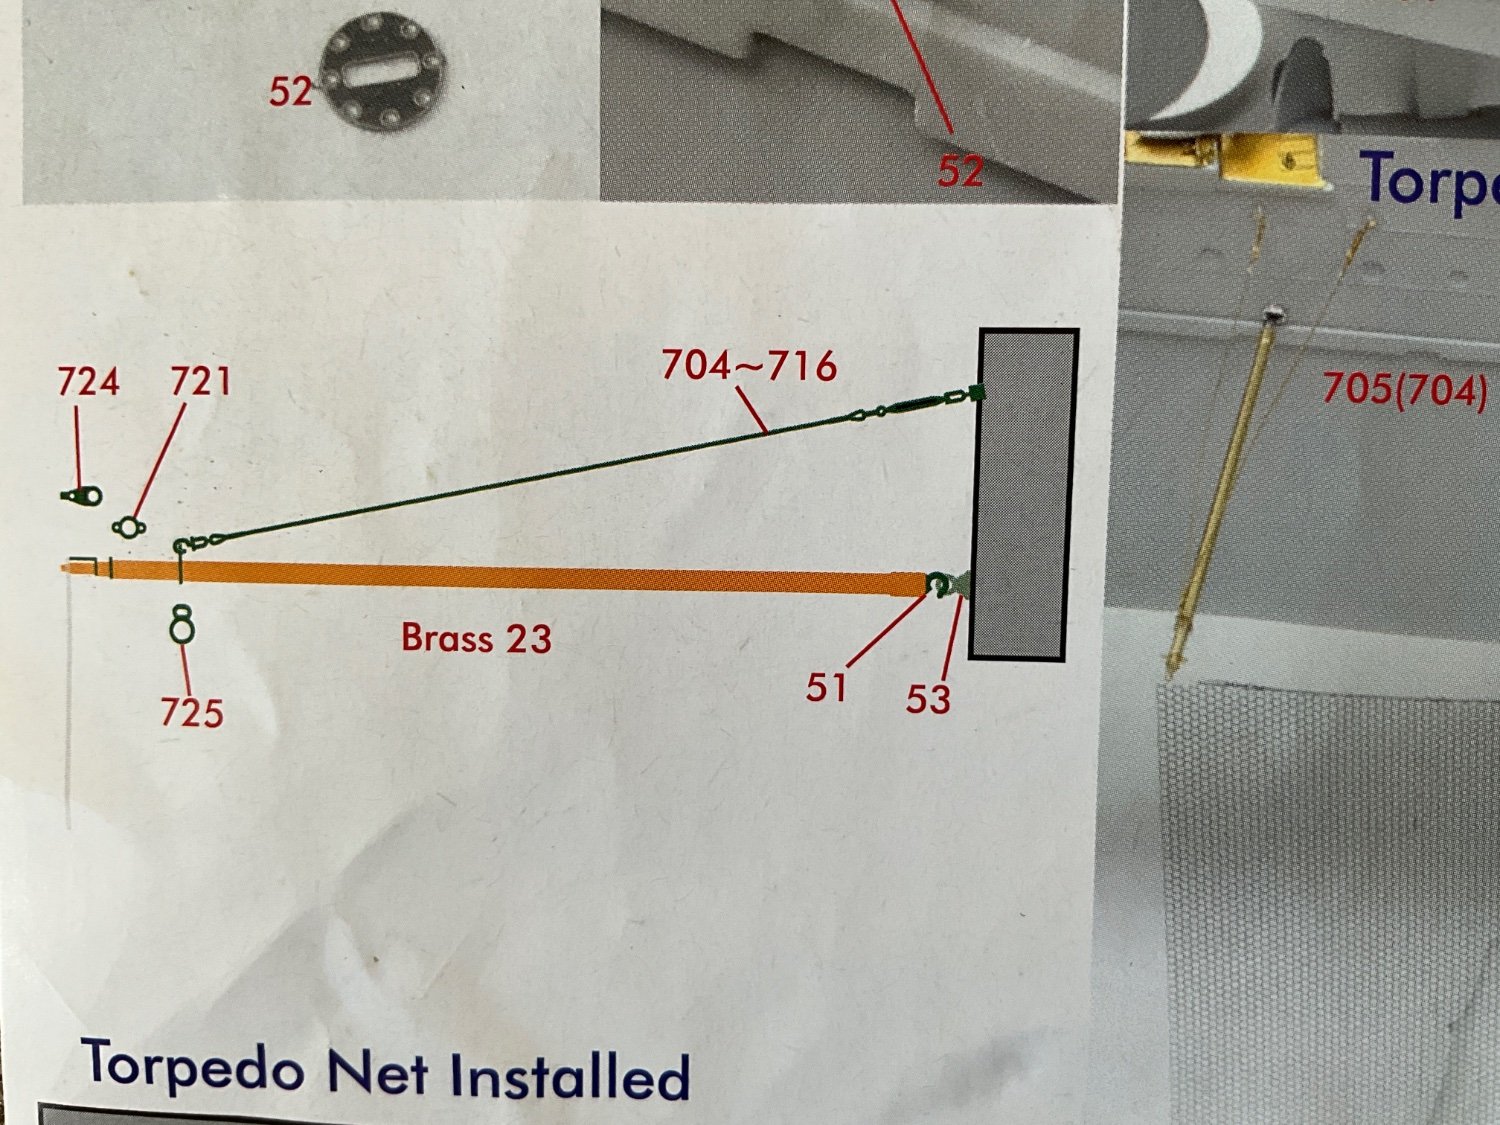
Working on solutions to get the booms to sit right for torpedo nets, drawings show booms hanging down from hull on elevation drawing and level on end elevation drawing, think level would be the one l would opt for, the etching wires as they are end up pulling booms skyward. Think l need to lengthen these for it to work, so working this out just now. 🤛


-
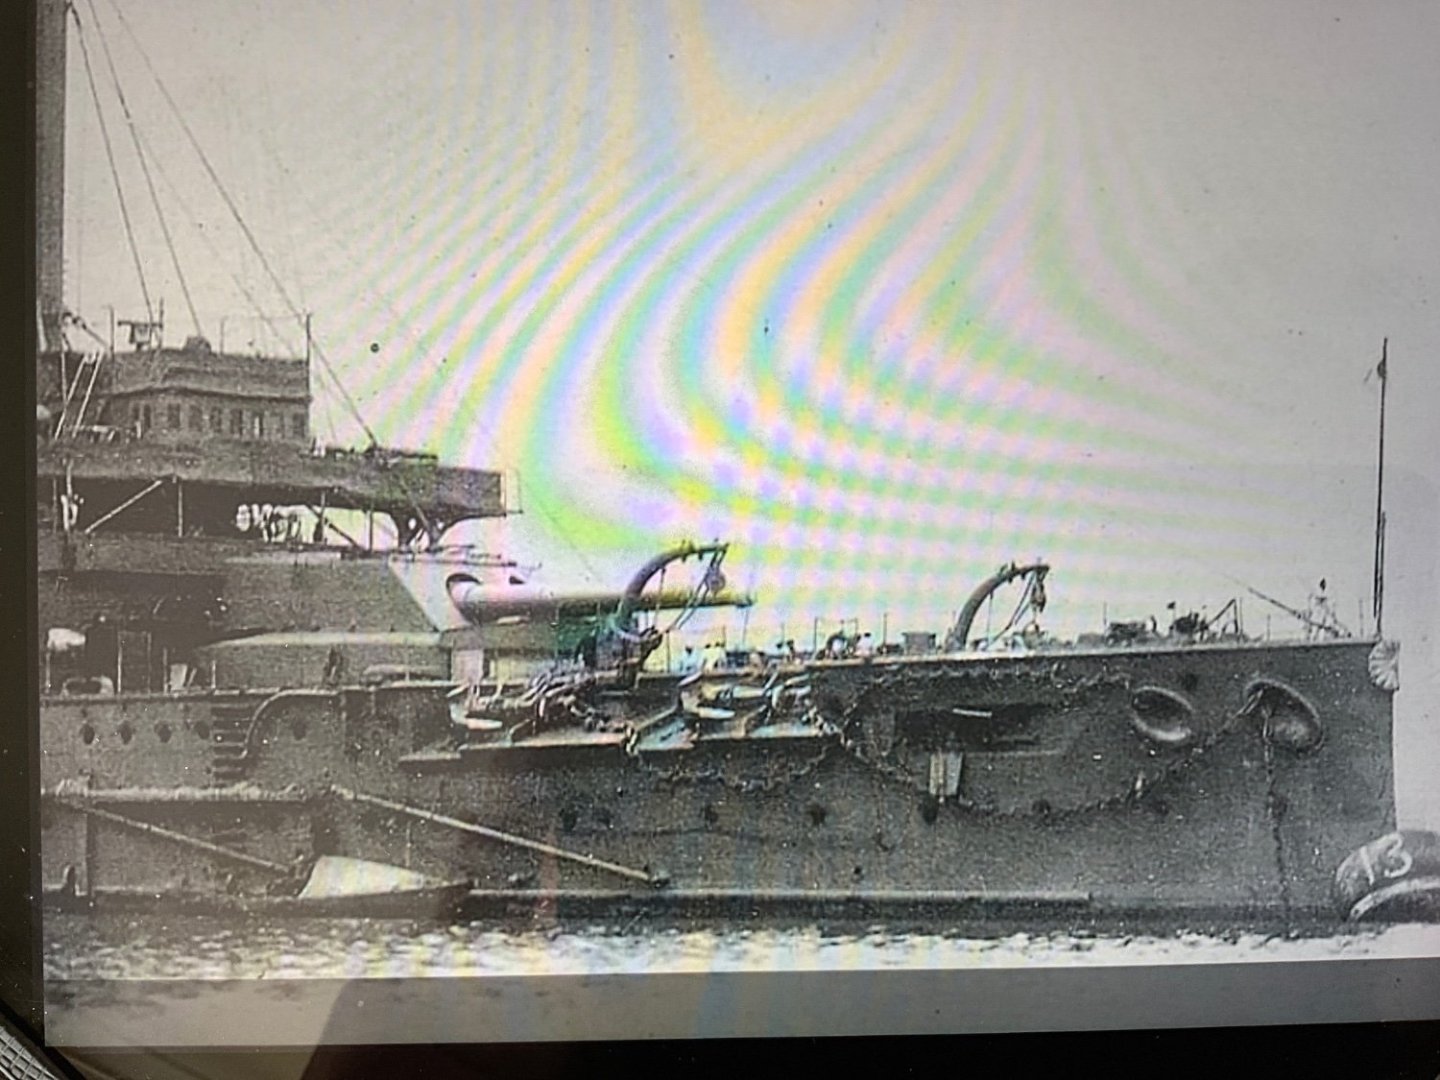
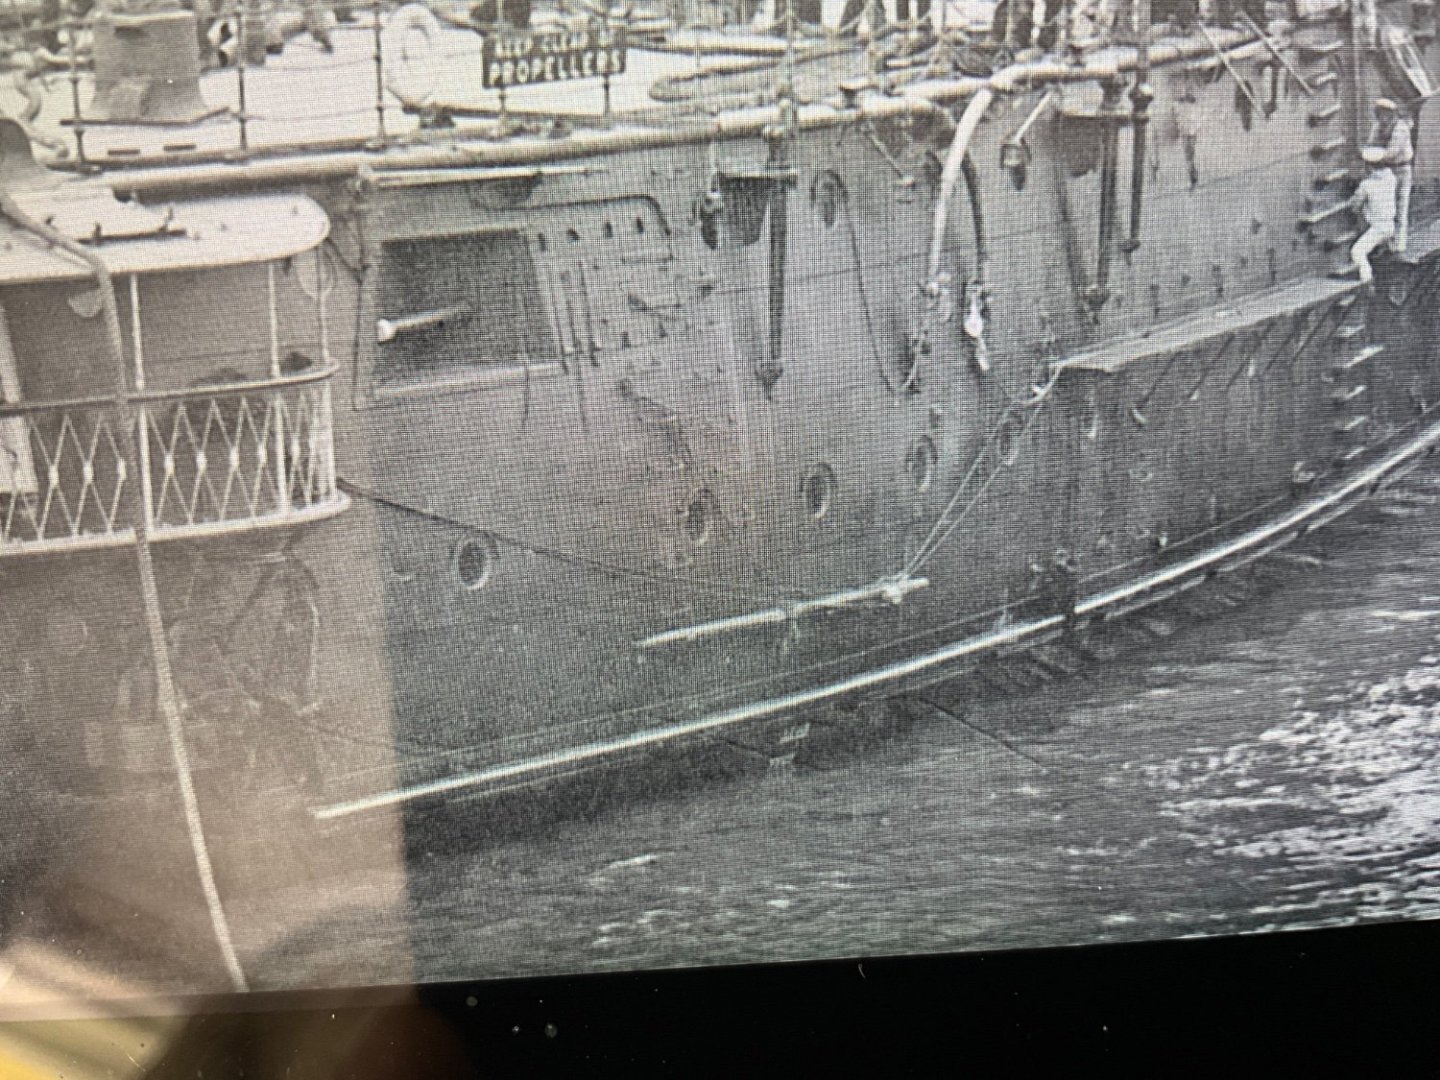
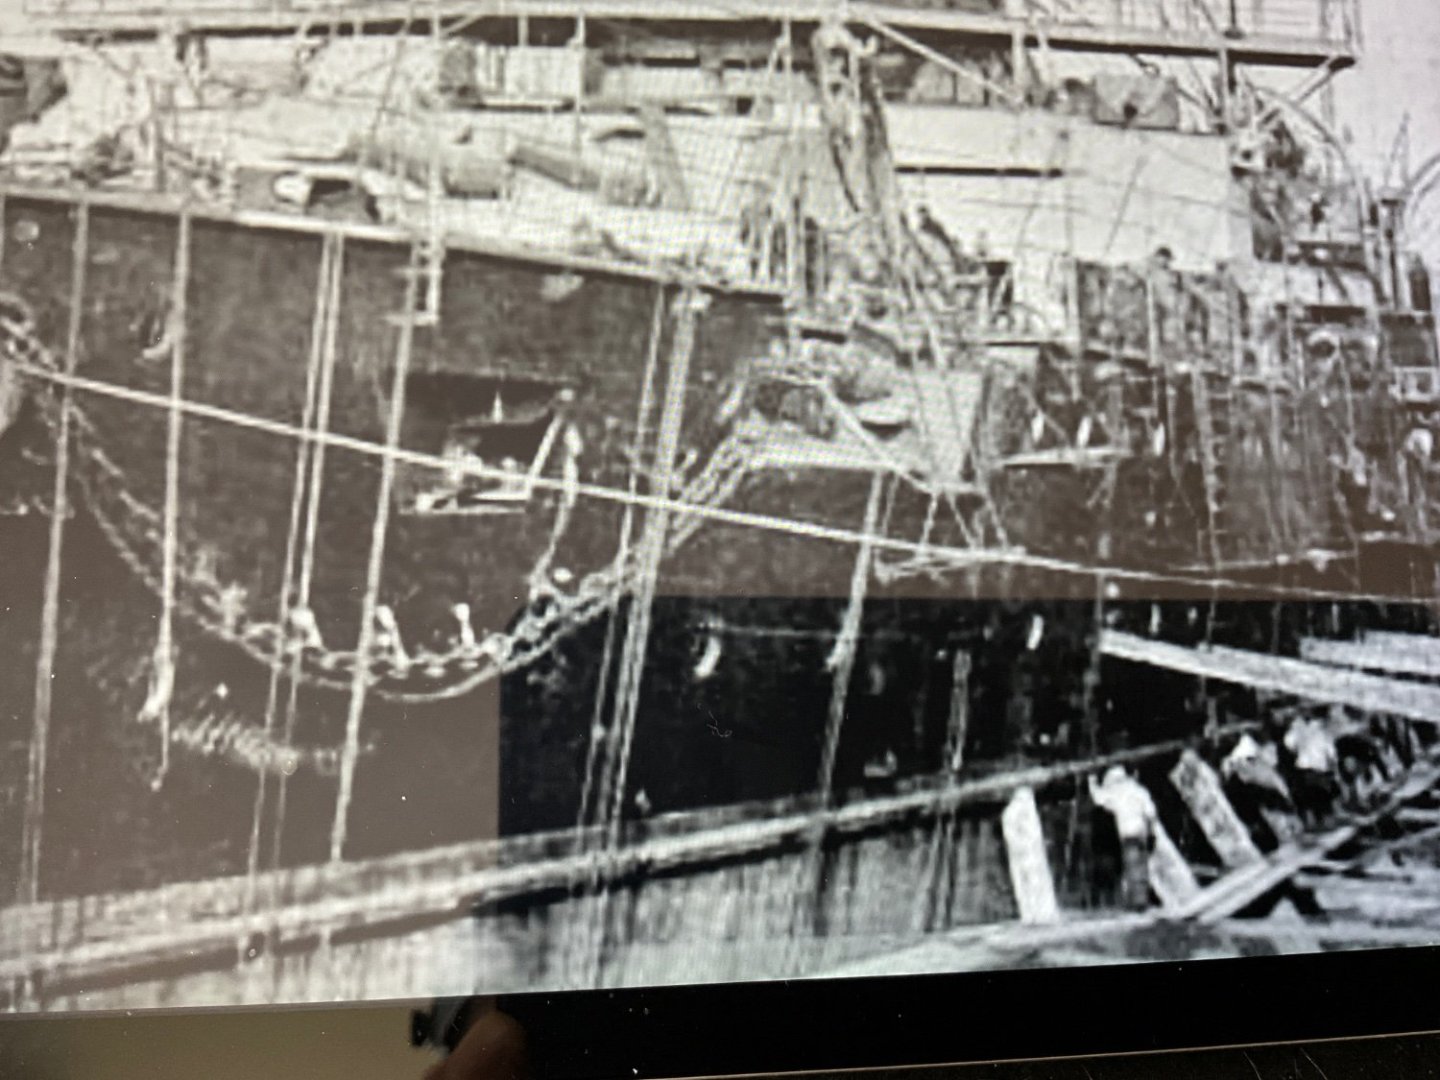
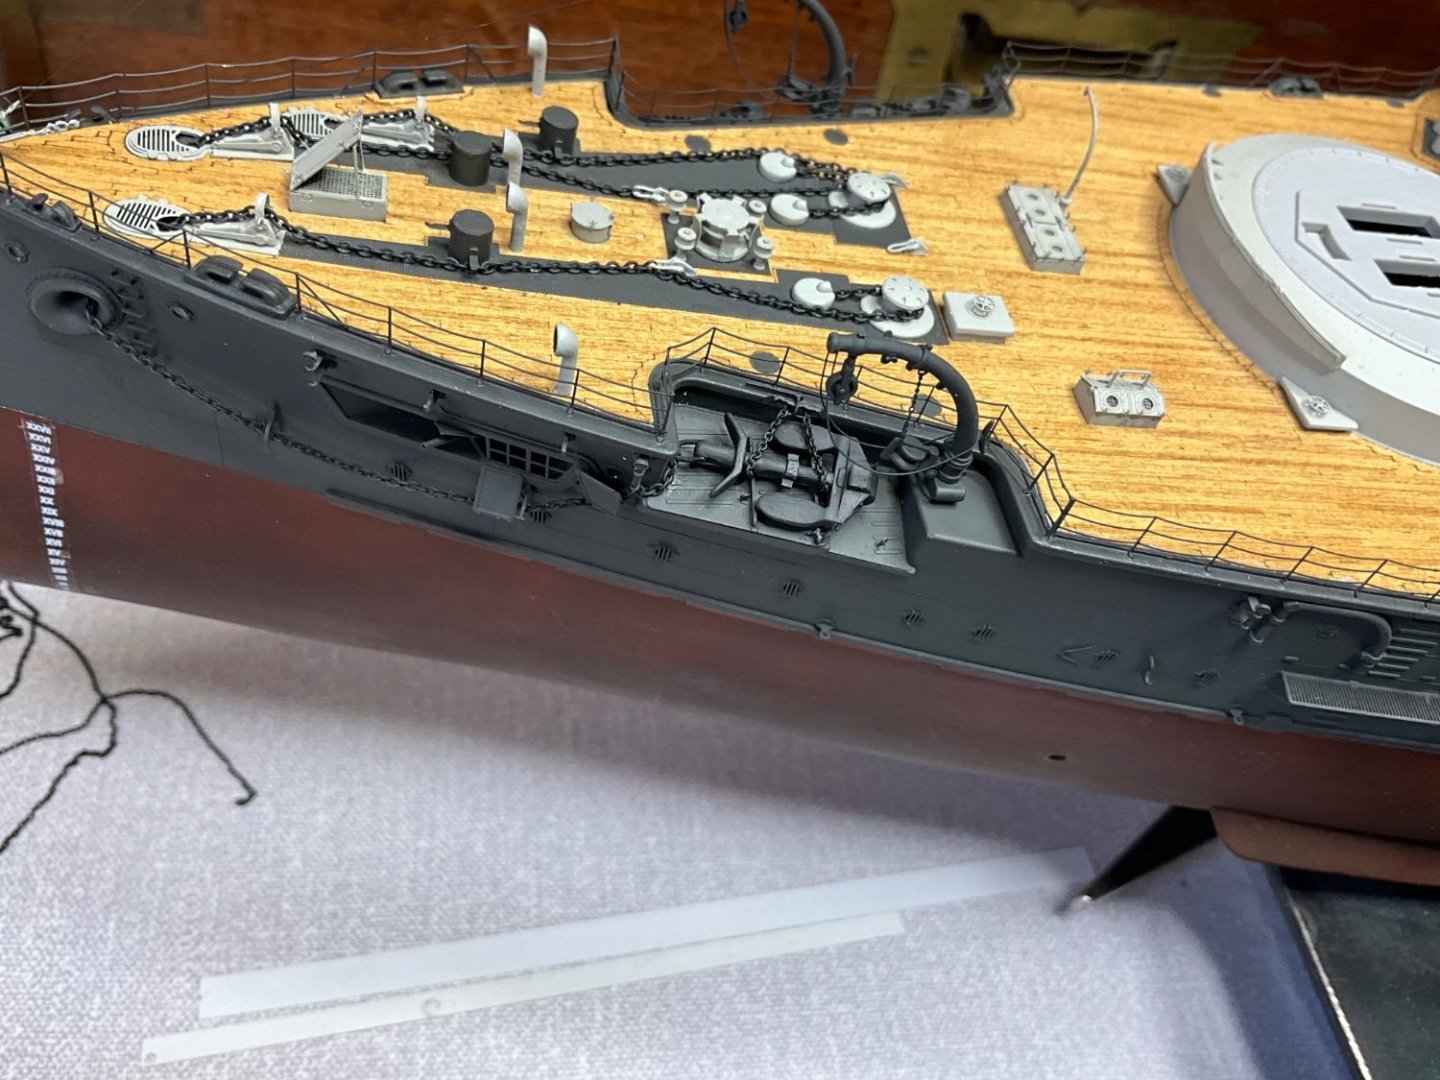
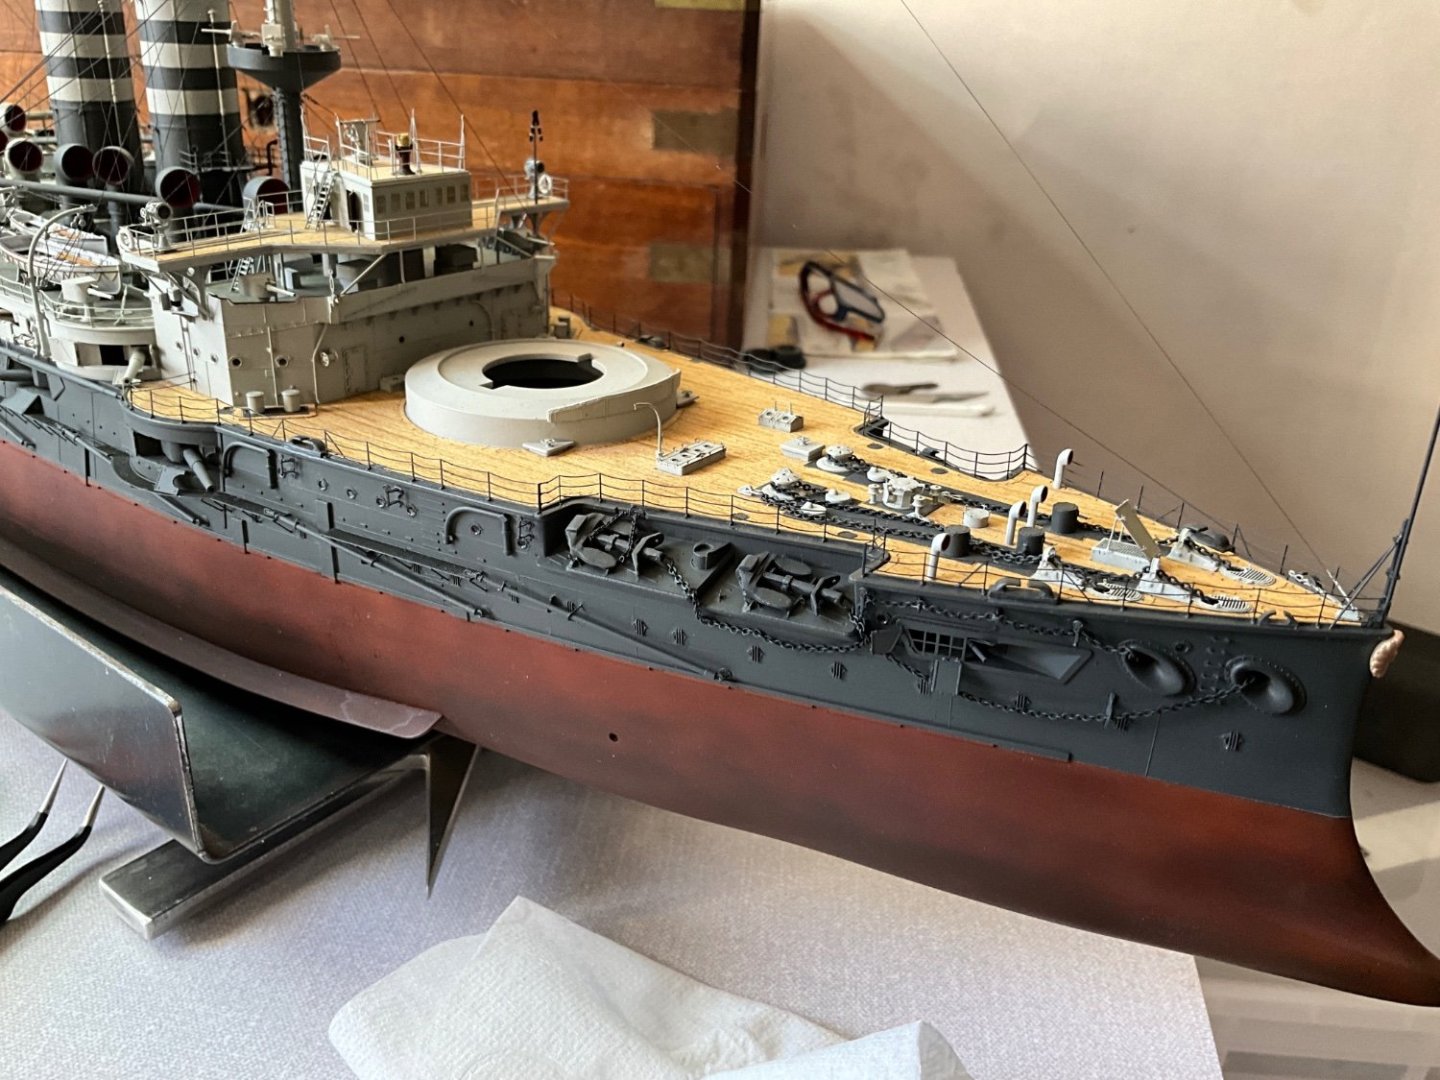
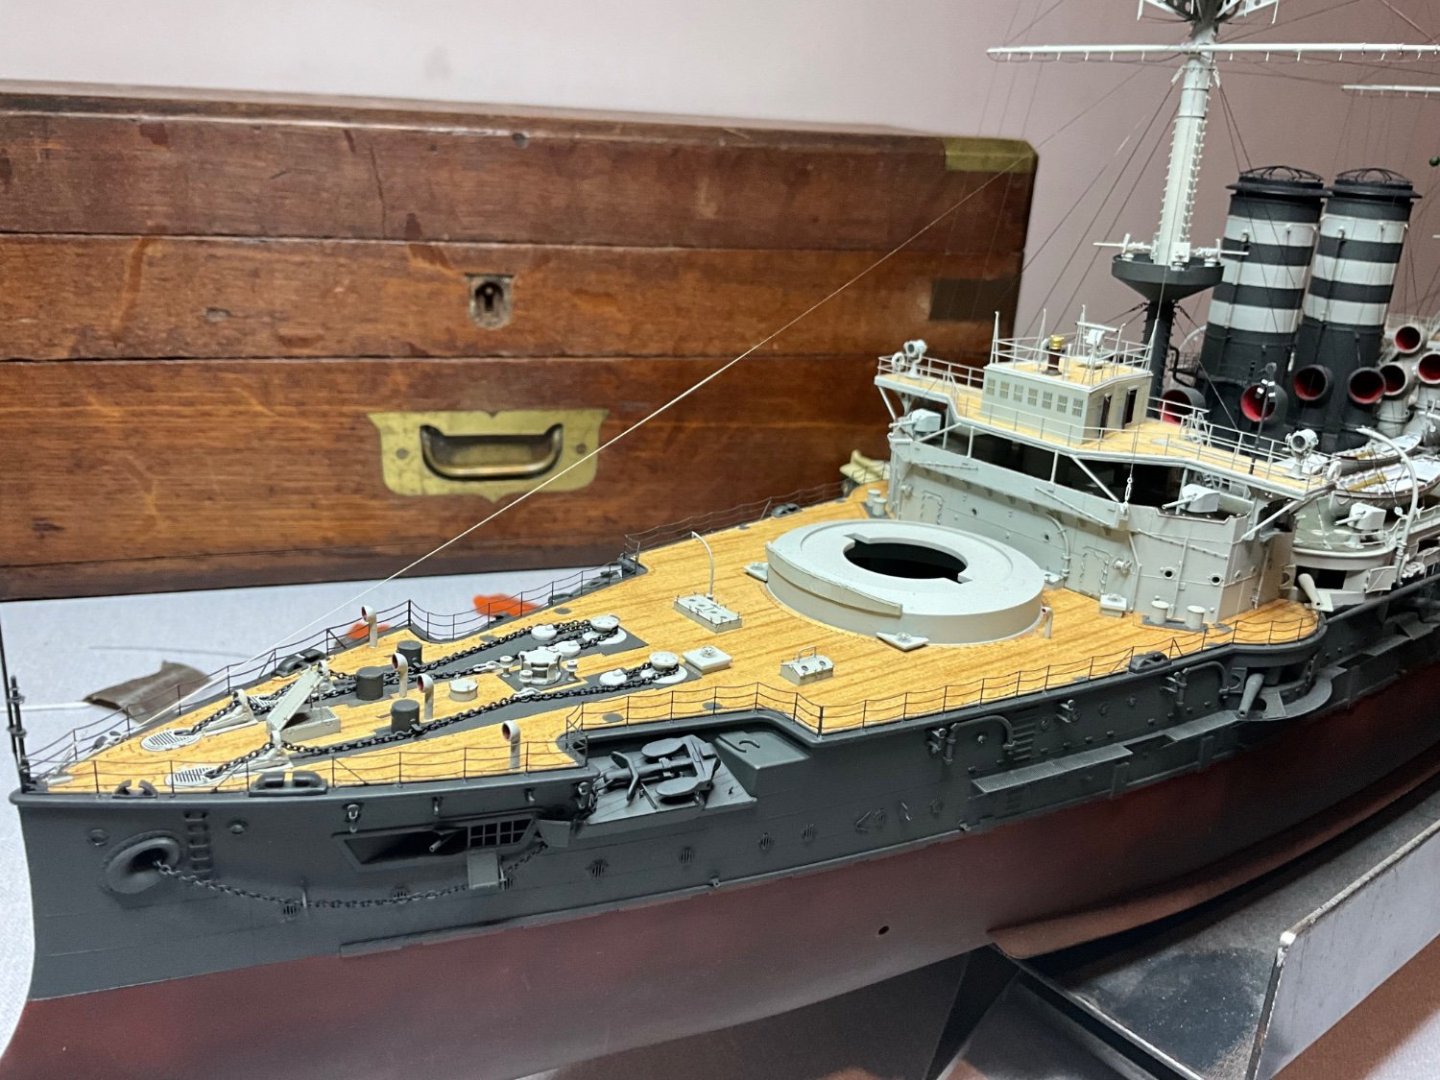
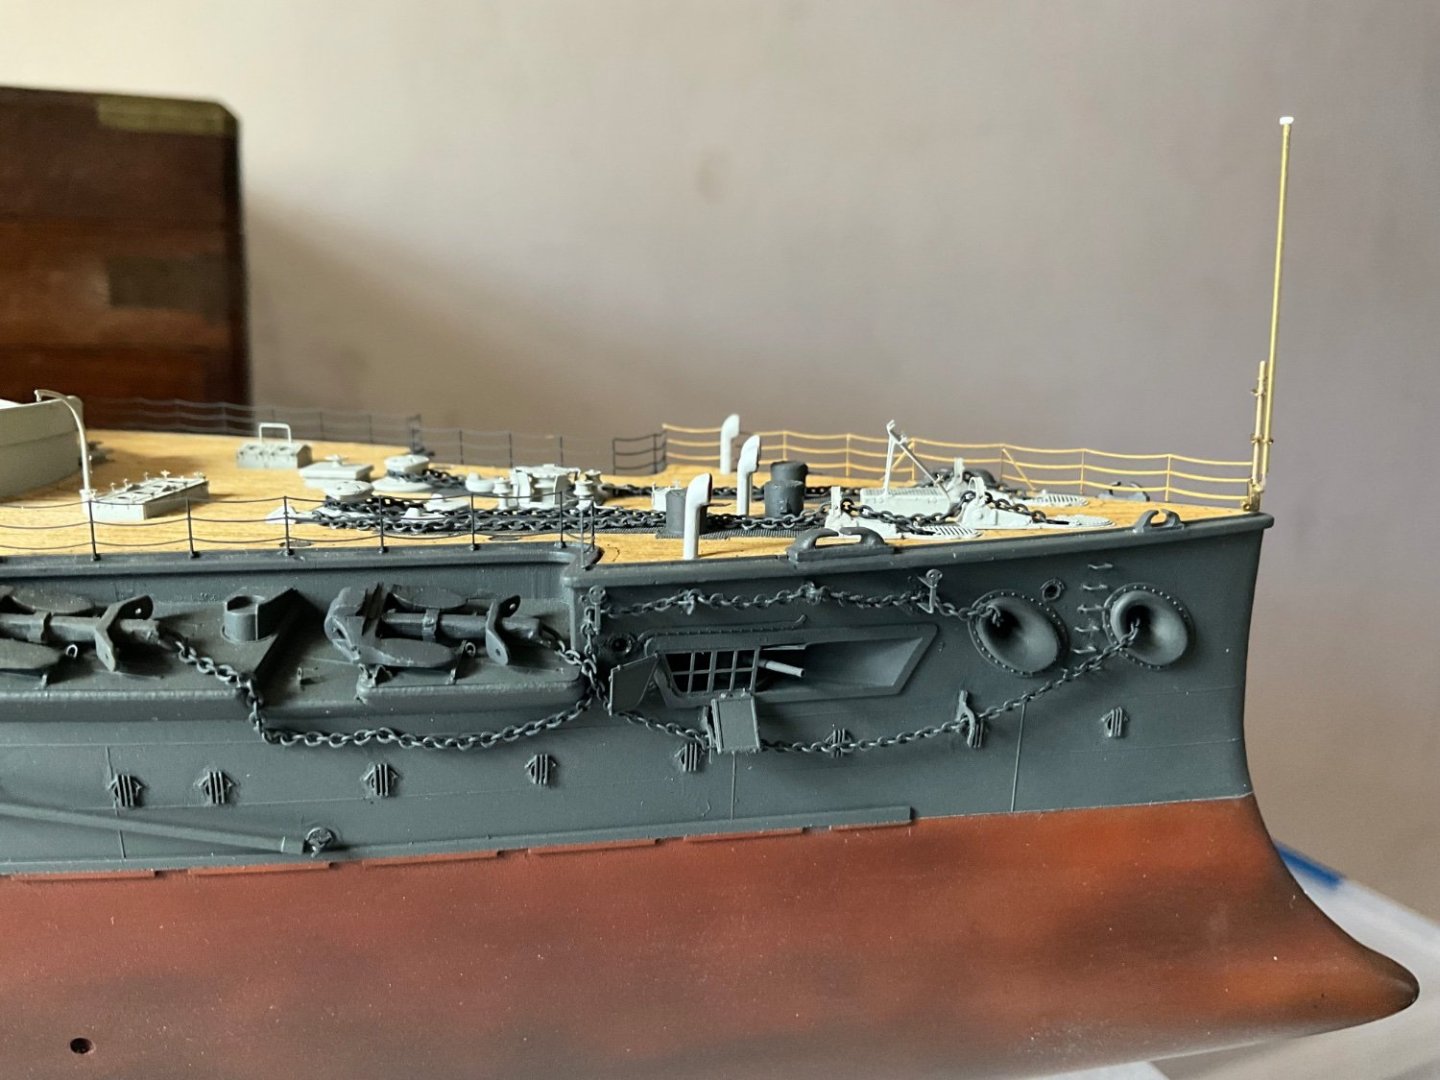
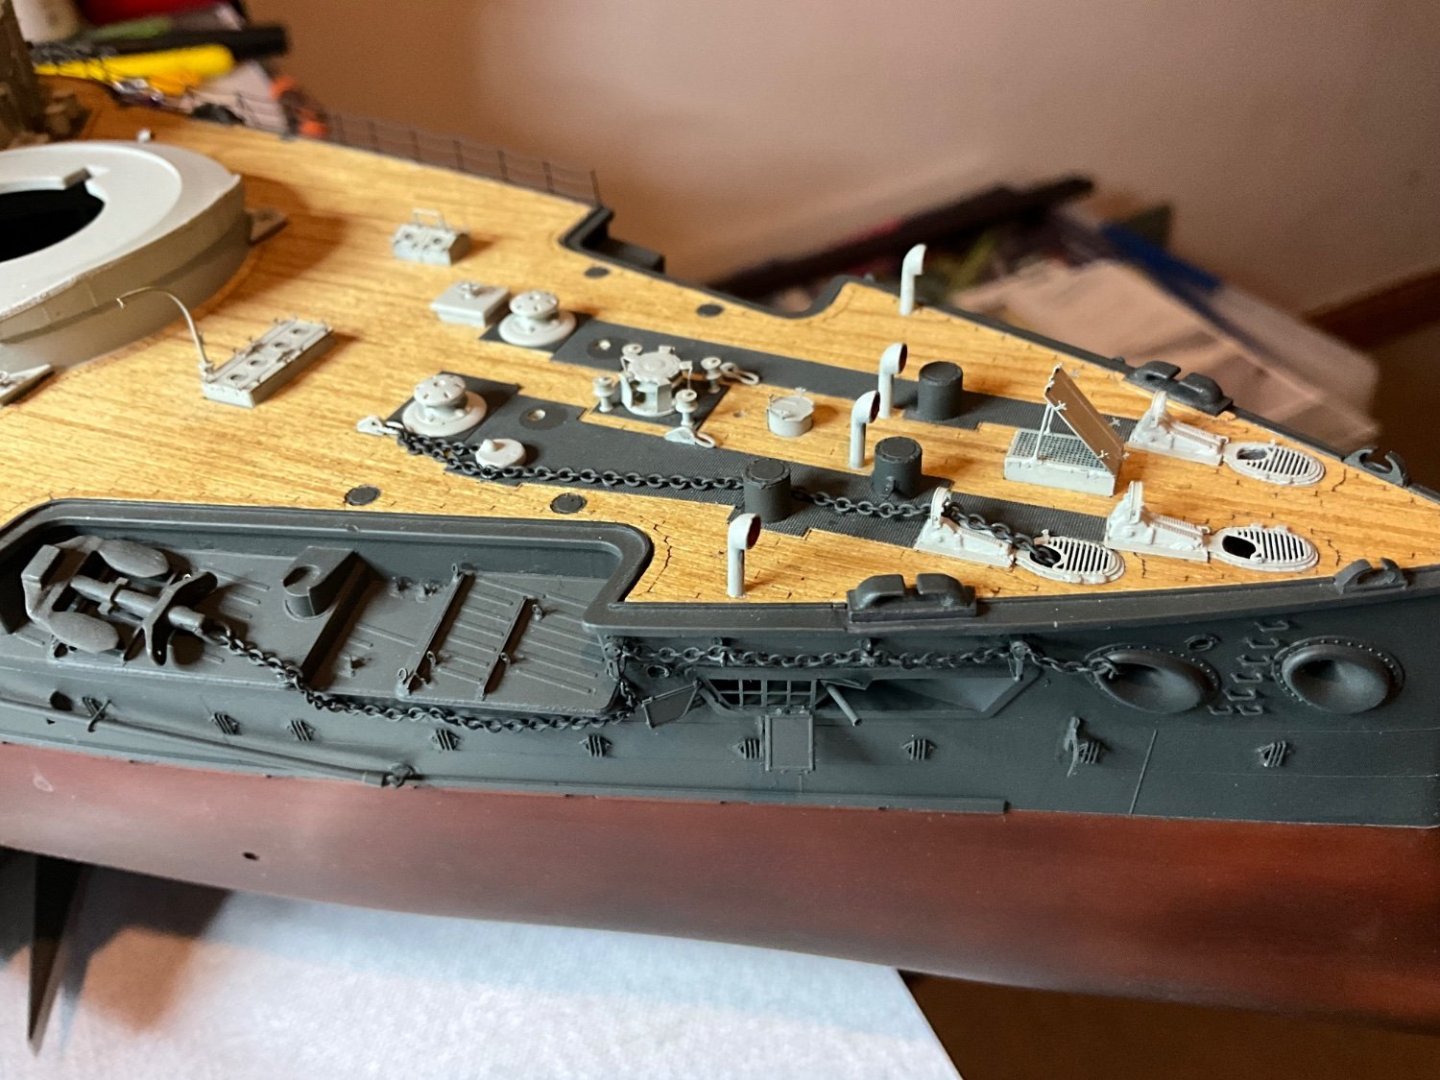
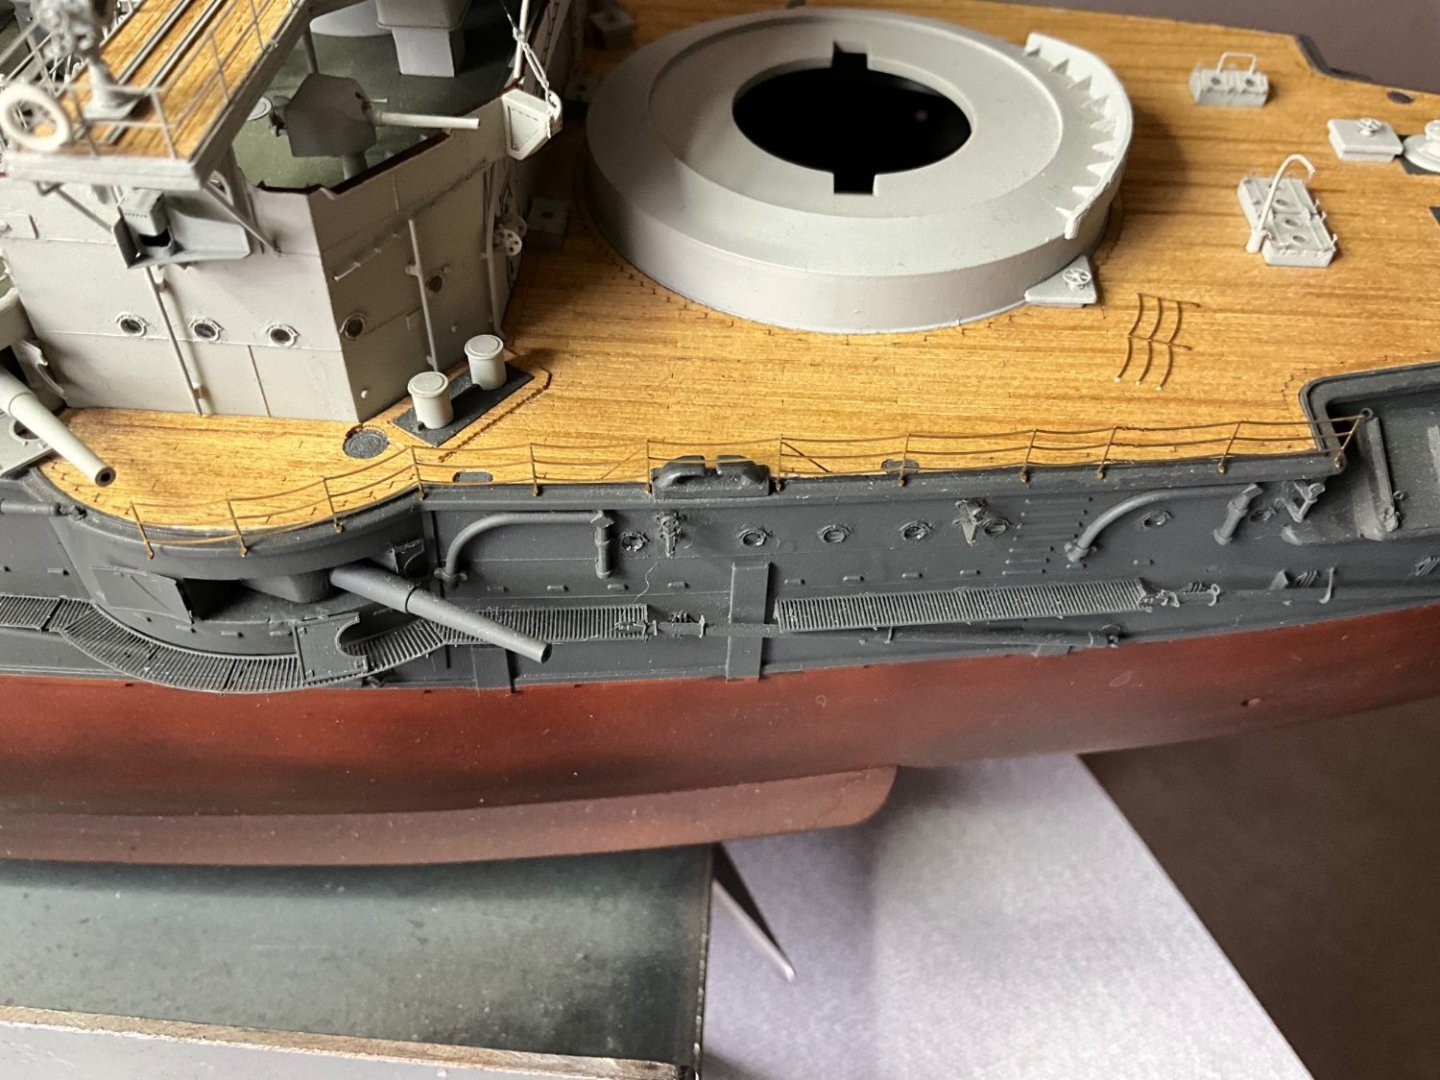
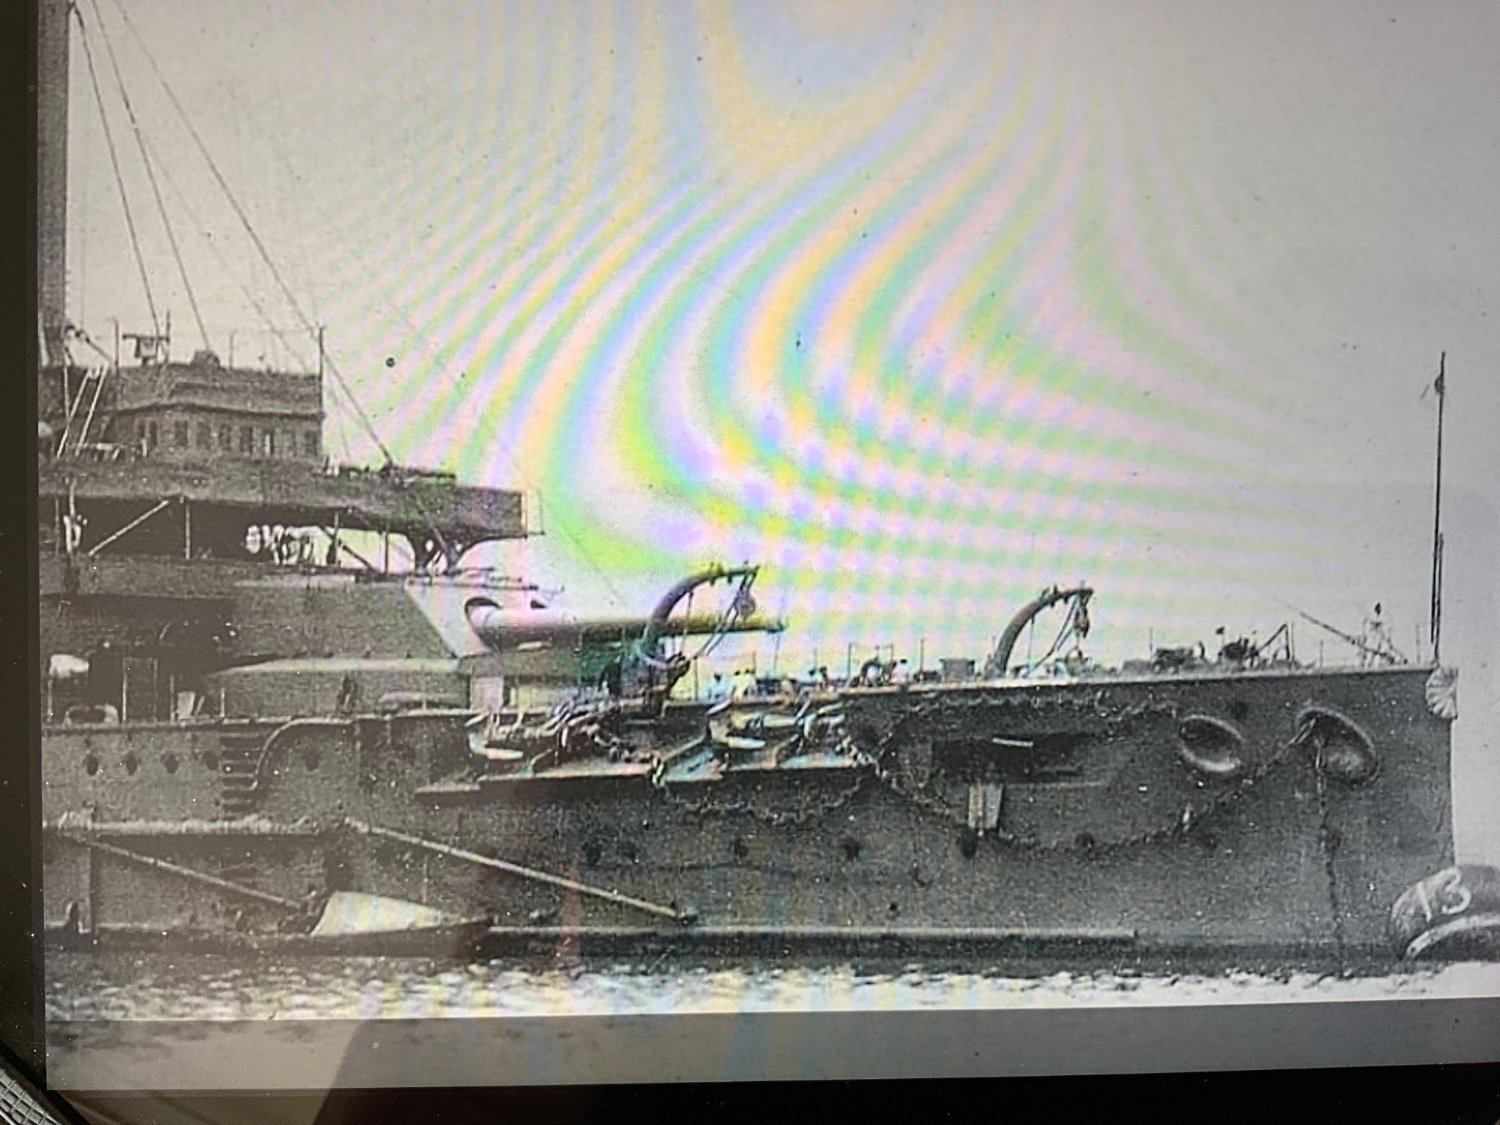
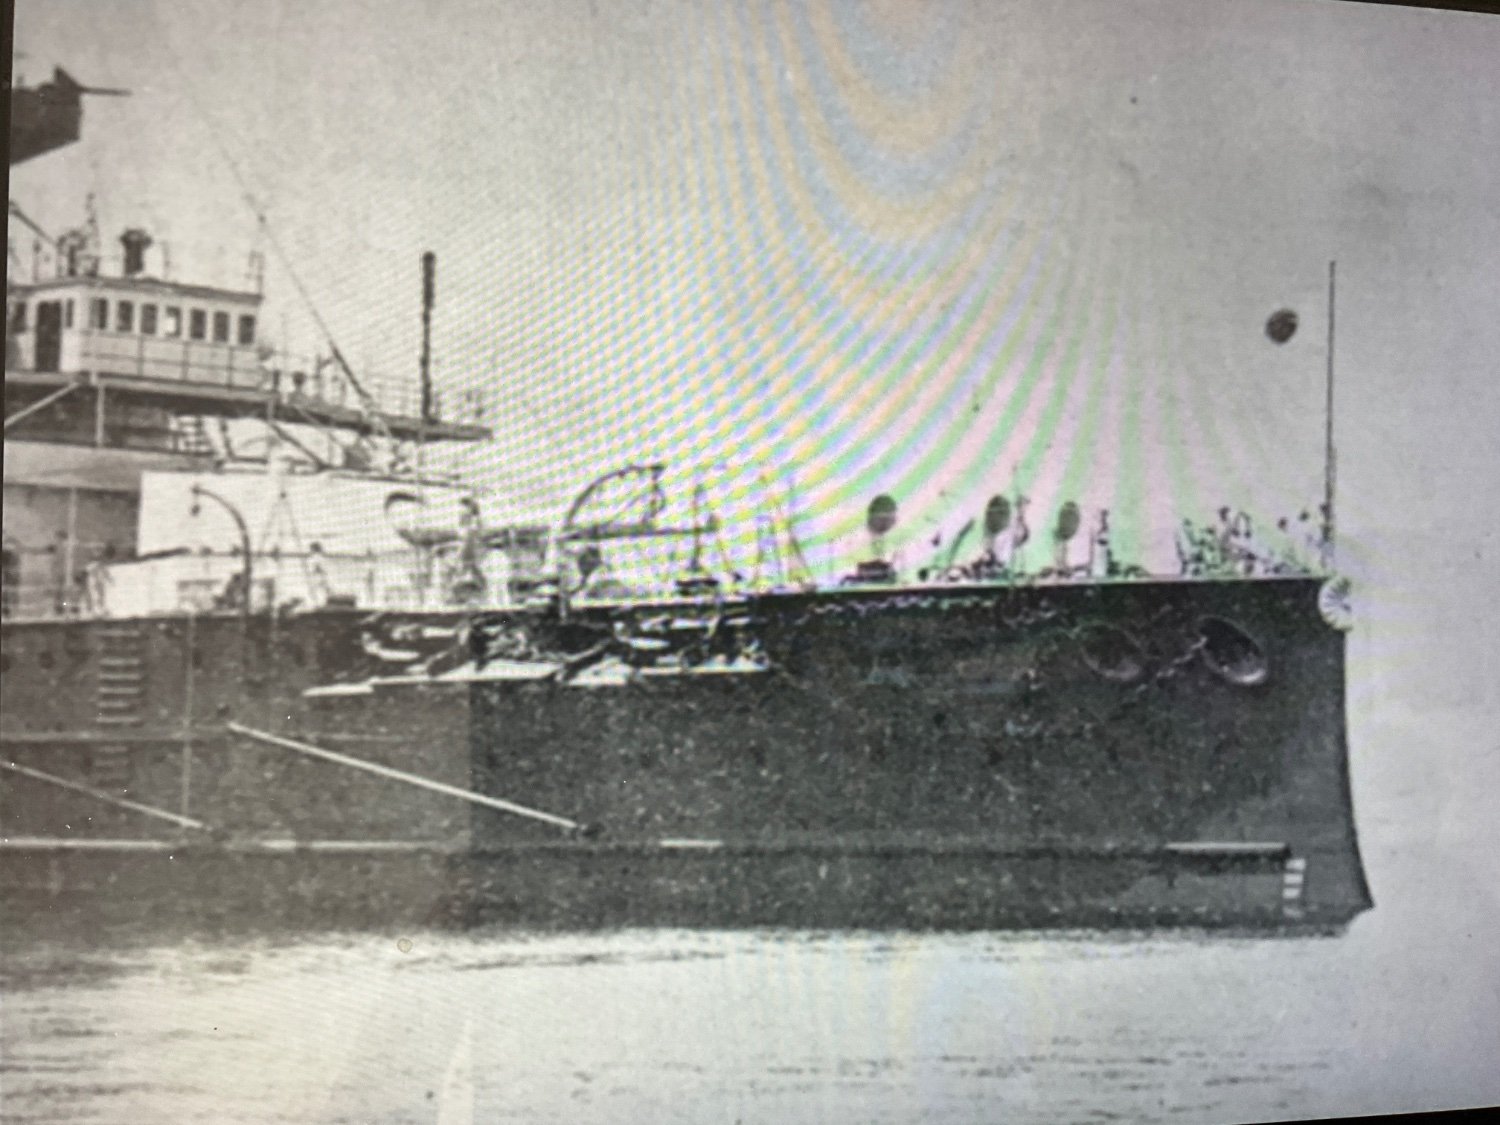
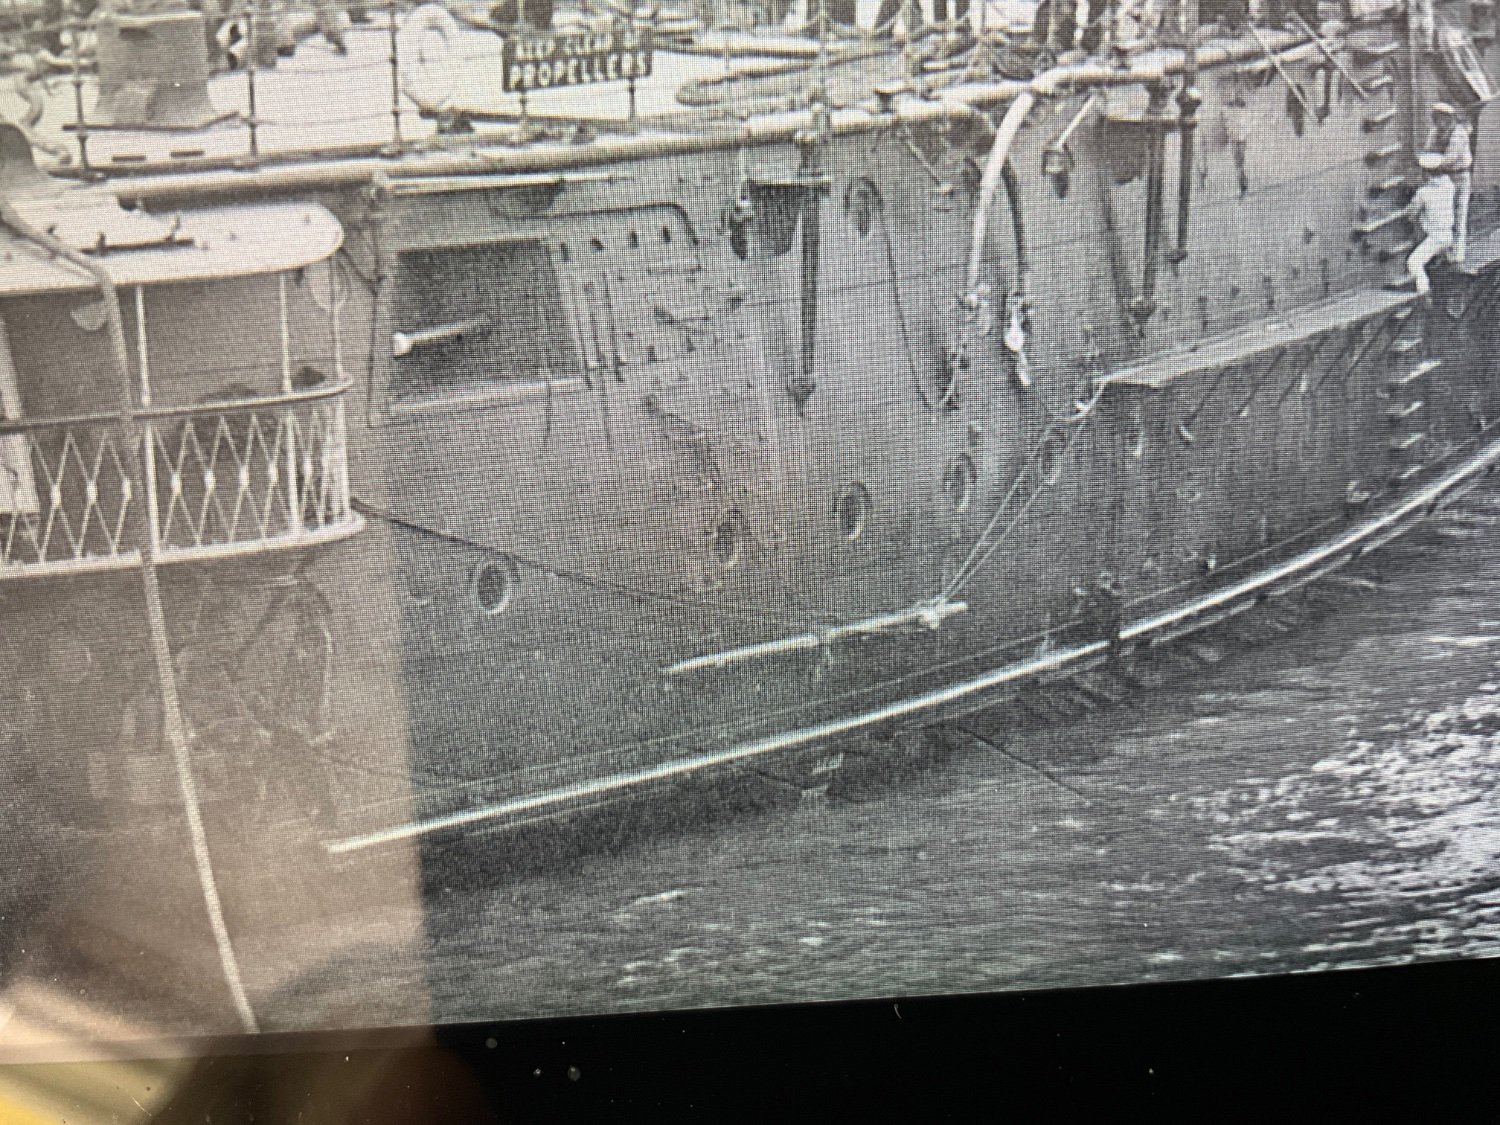
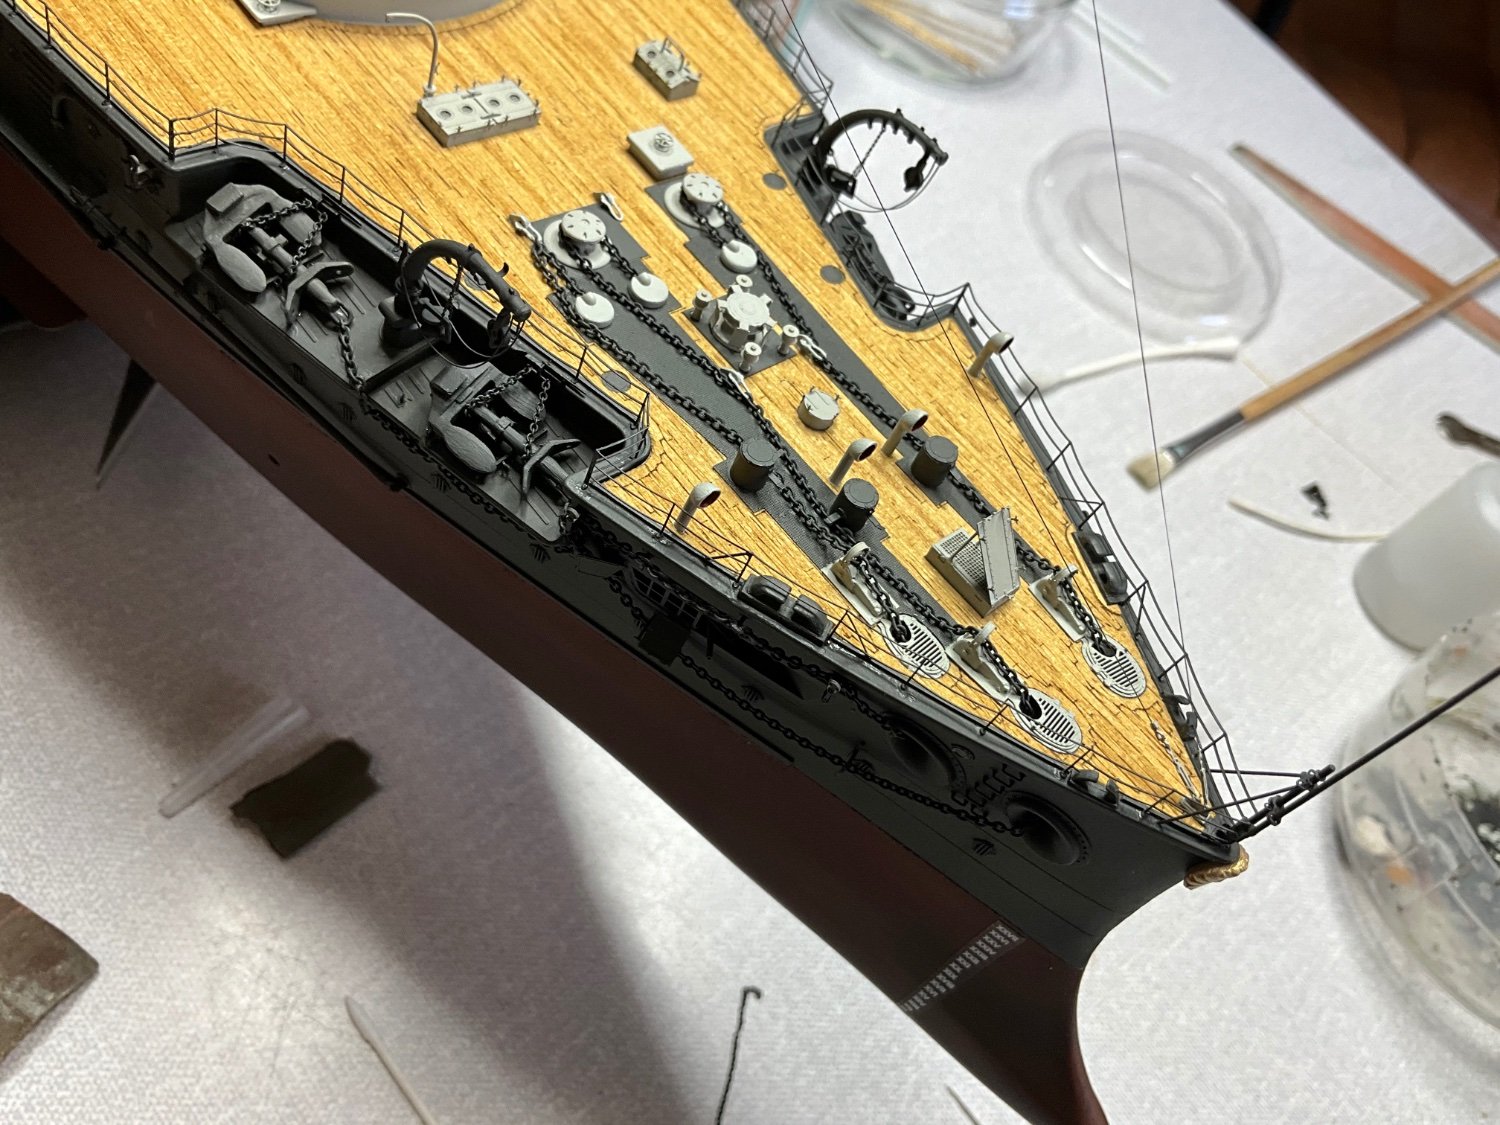
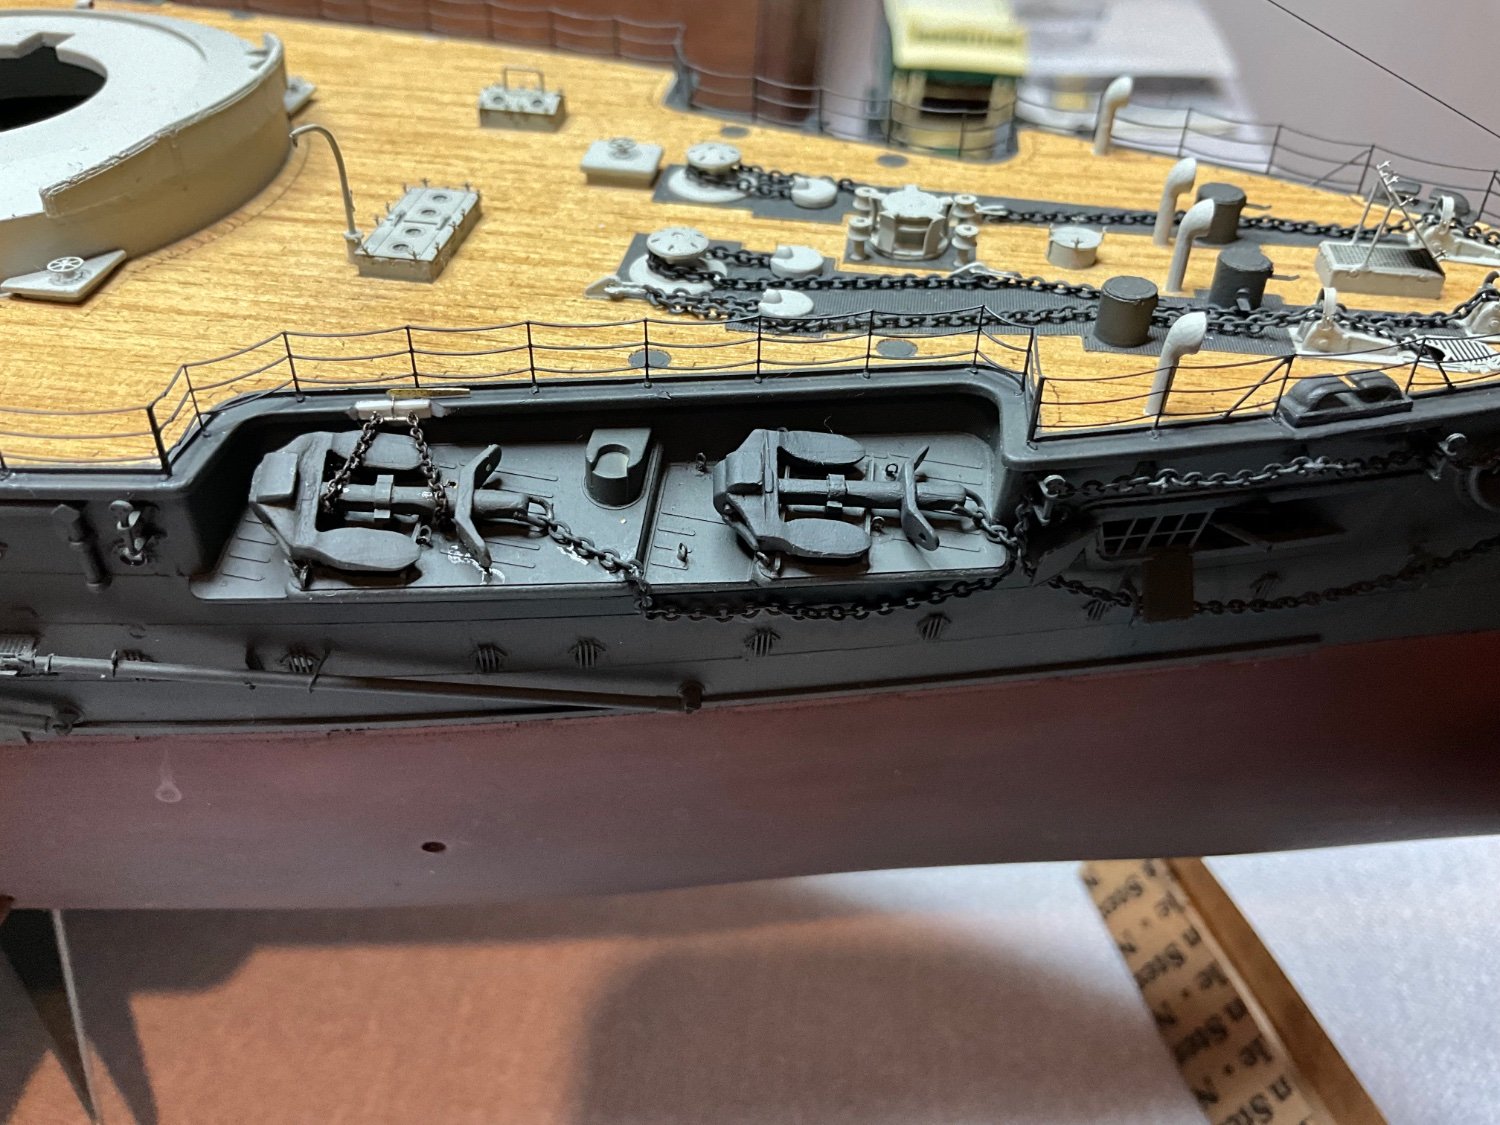
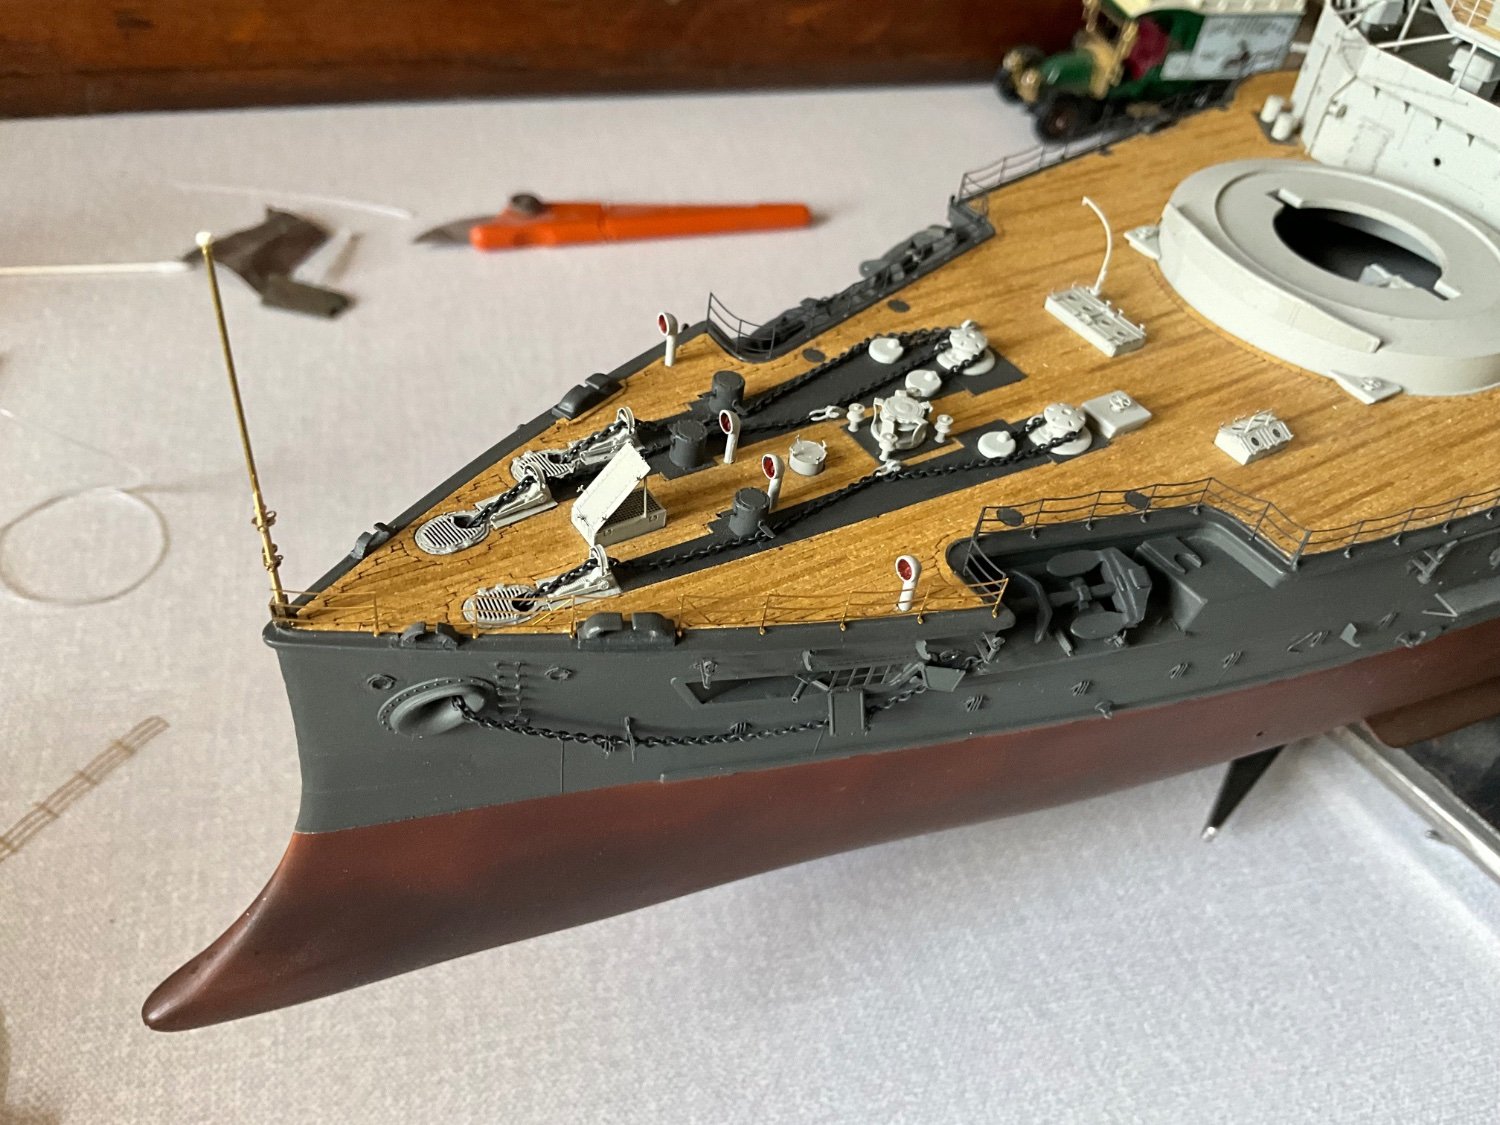
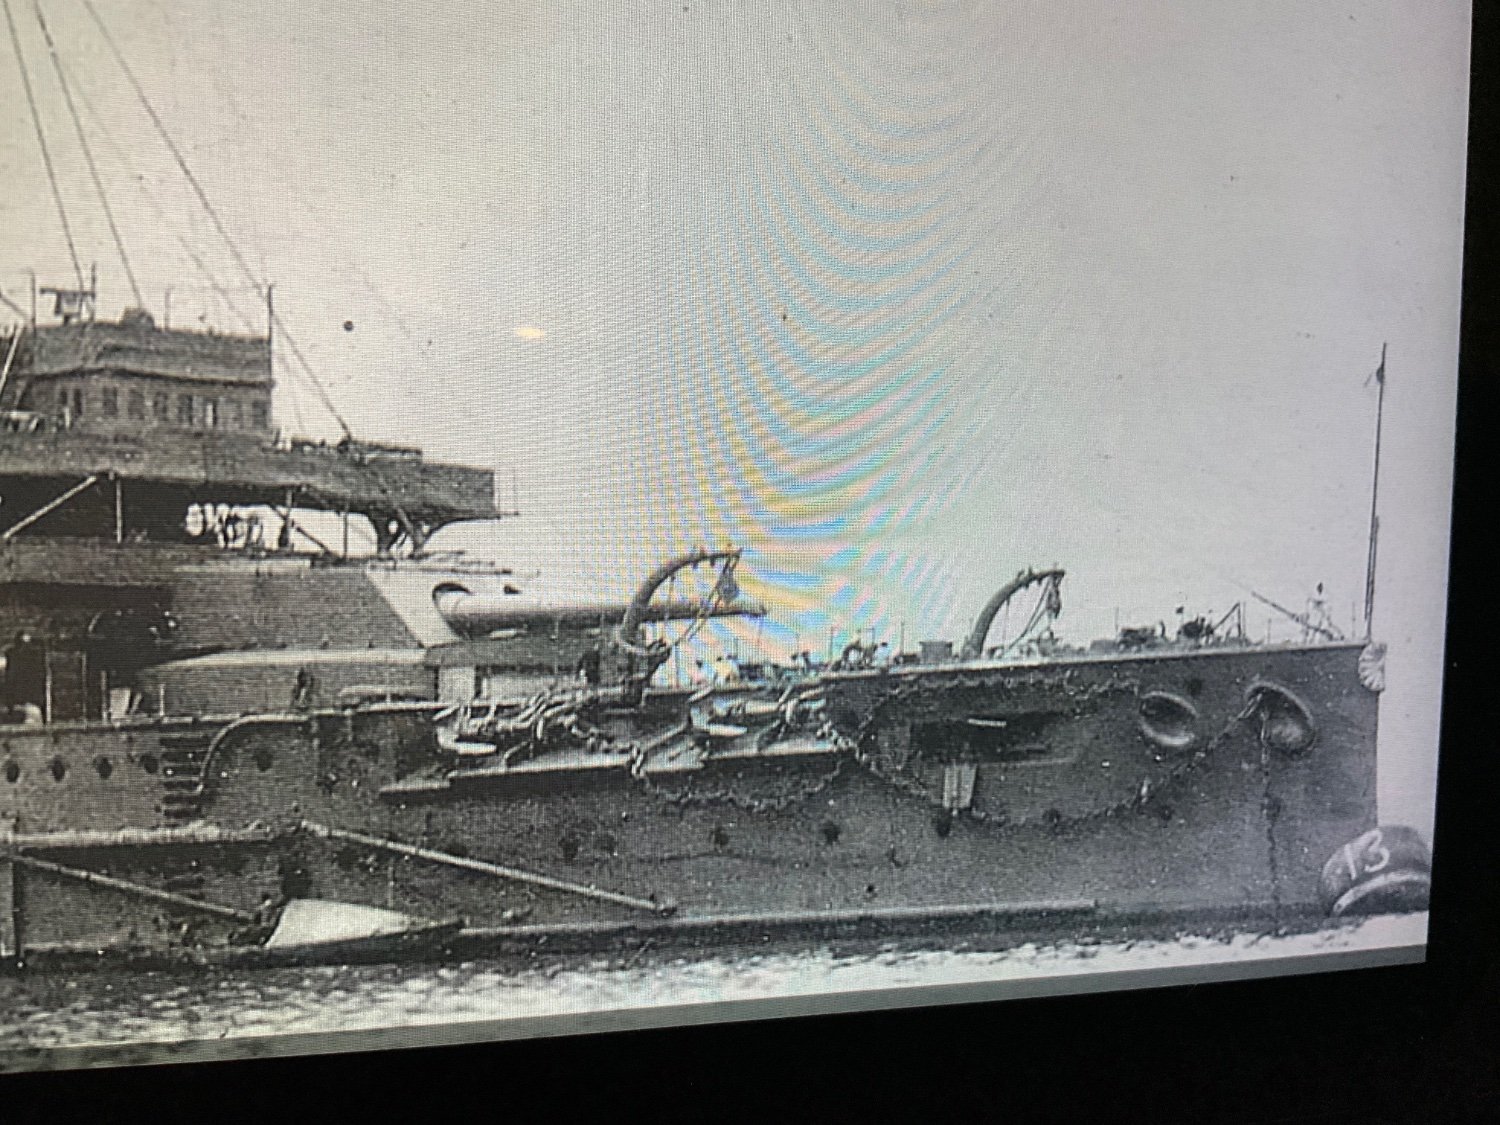
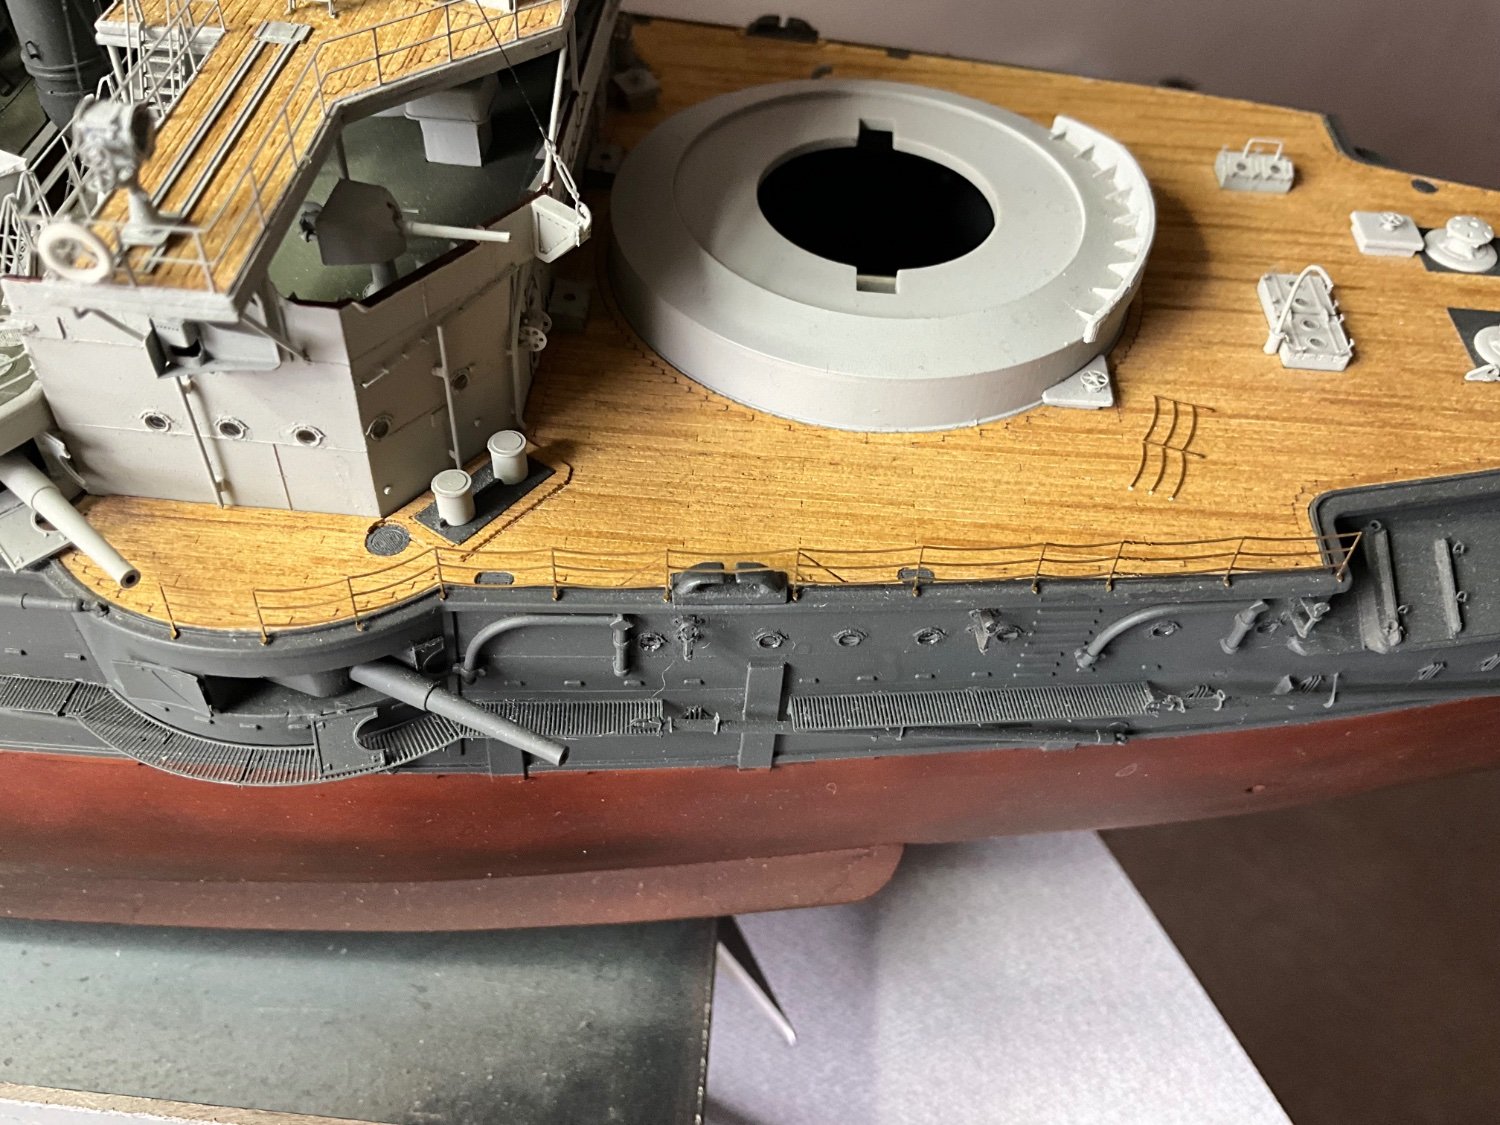
Morning guys, putting four photos up of Mikasa to show my reference points for draught markings and anchor davits, also noticed two other minor points, my chrysanthemum is lying about 5 degrees out at top , should be sitting vertical, think shall have to ease it of and trim this part to correct it , also noticed another small difference at waterline were the draught mark is at bow, rib running along hull is closer to bow at this time as a-posed to later photos, you can see this in the four photos just putting up, also all those notches to the underside of this rib are for shoring whilst in dry dock. 👍

-
-
-
-
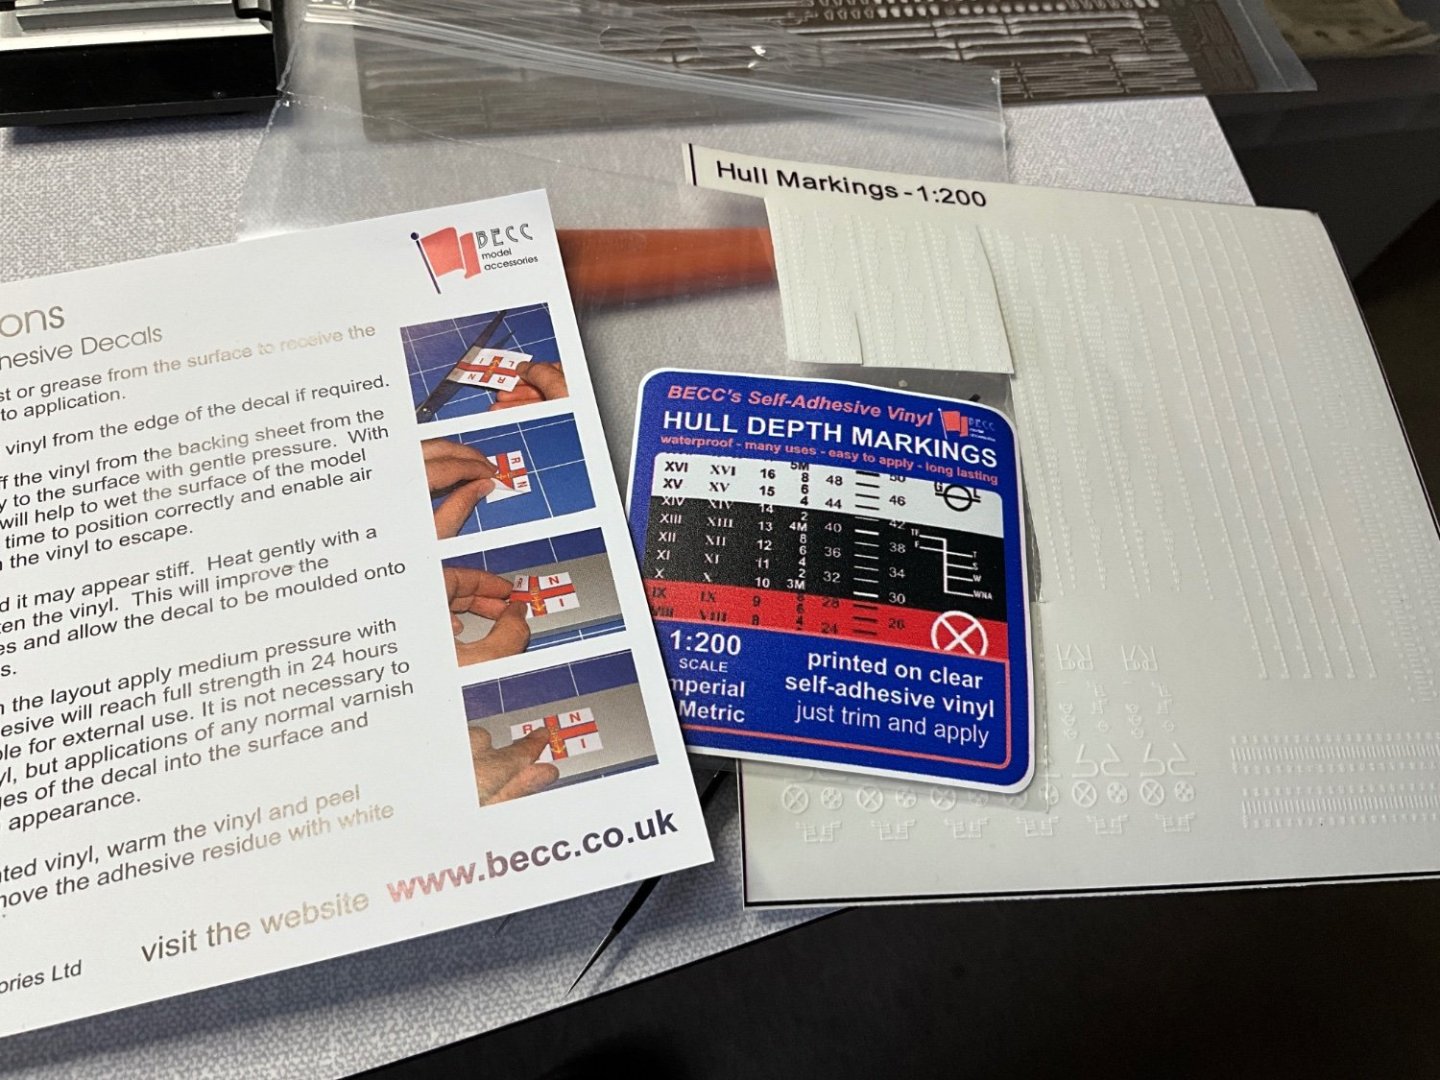
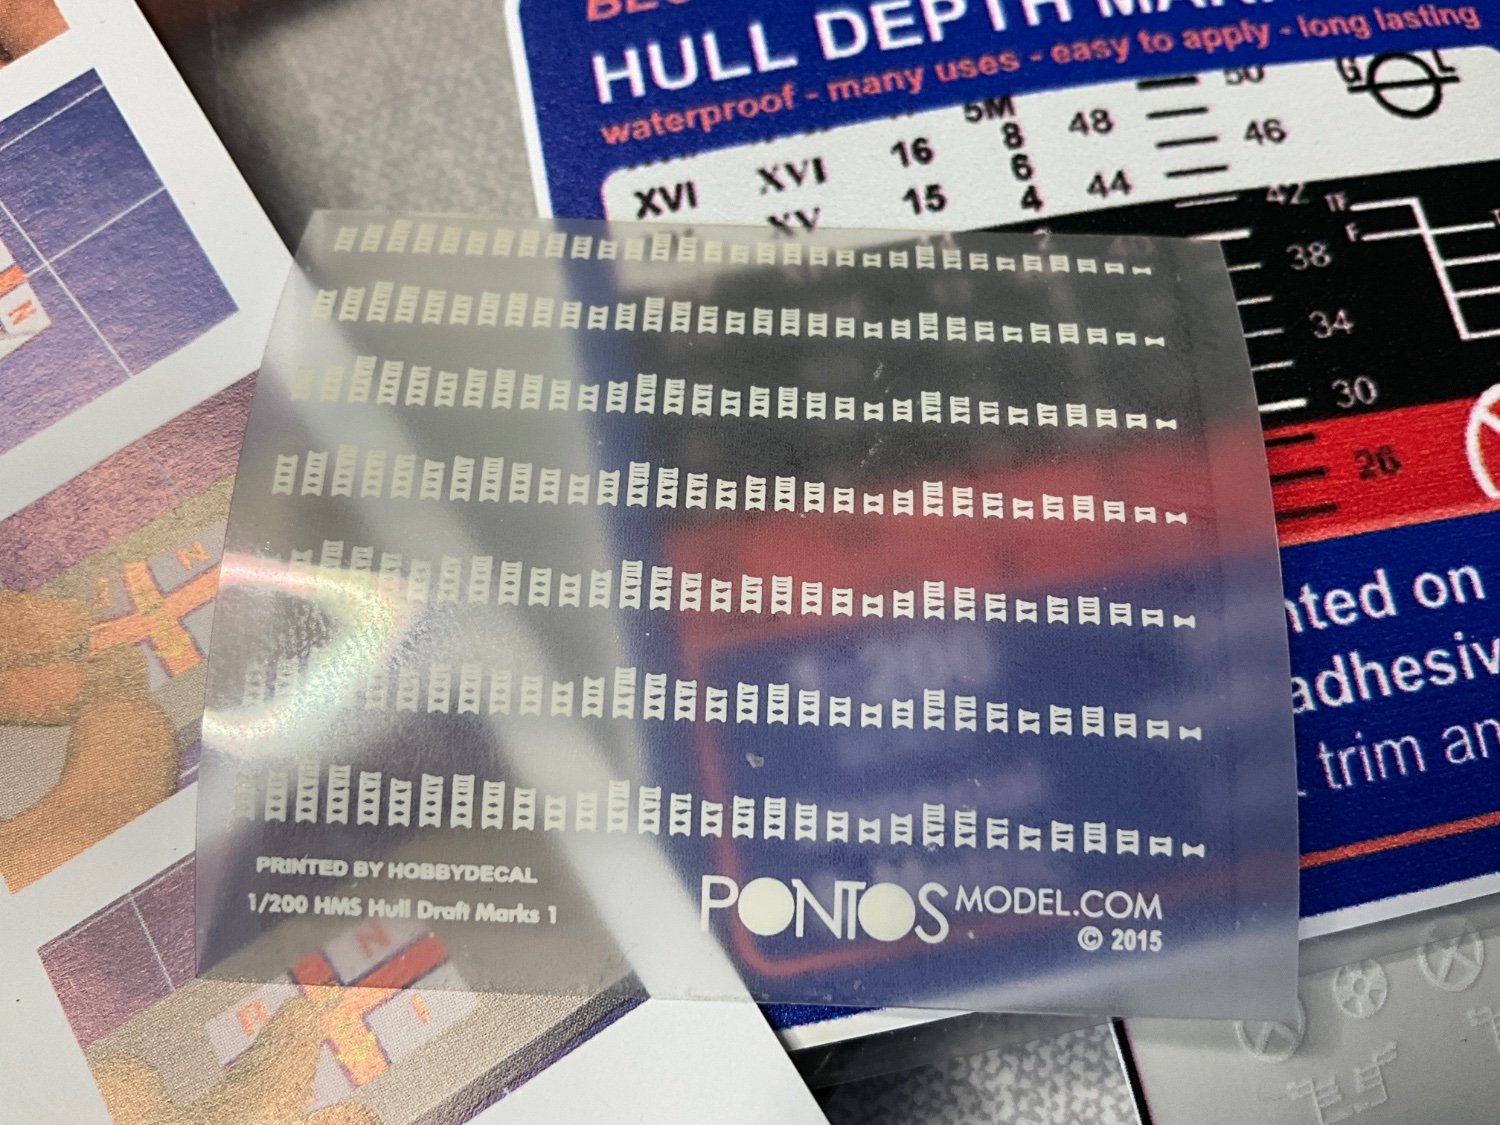
Also stuck on the draught line marks, she has a draught of 27ft waterline to keel, this is vertical , if you’re following the curved surface at stern this becomes more than this because sloping size. Put them at proper positions according to photos of ship. Pontos instructions as to position bit vague, plus you’re not 27ft at this point at bow, at stern it lines up with A Frame on propeller shaft, so have done my best here, don’t know if this looks ok or not, opinions welcome? Pontos draught decals no instructions as to what to do, l thought they were water slide decals till l put them in water and they just looked at me as if l was daft 😂 said sod this and bought some from this company
- GrandpaPhil, scrubbyj427, yvesvidal and 2 others
-
5
-
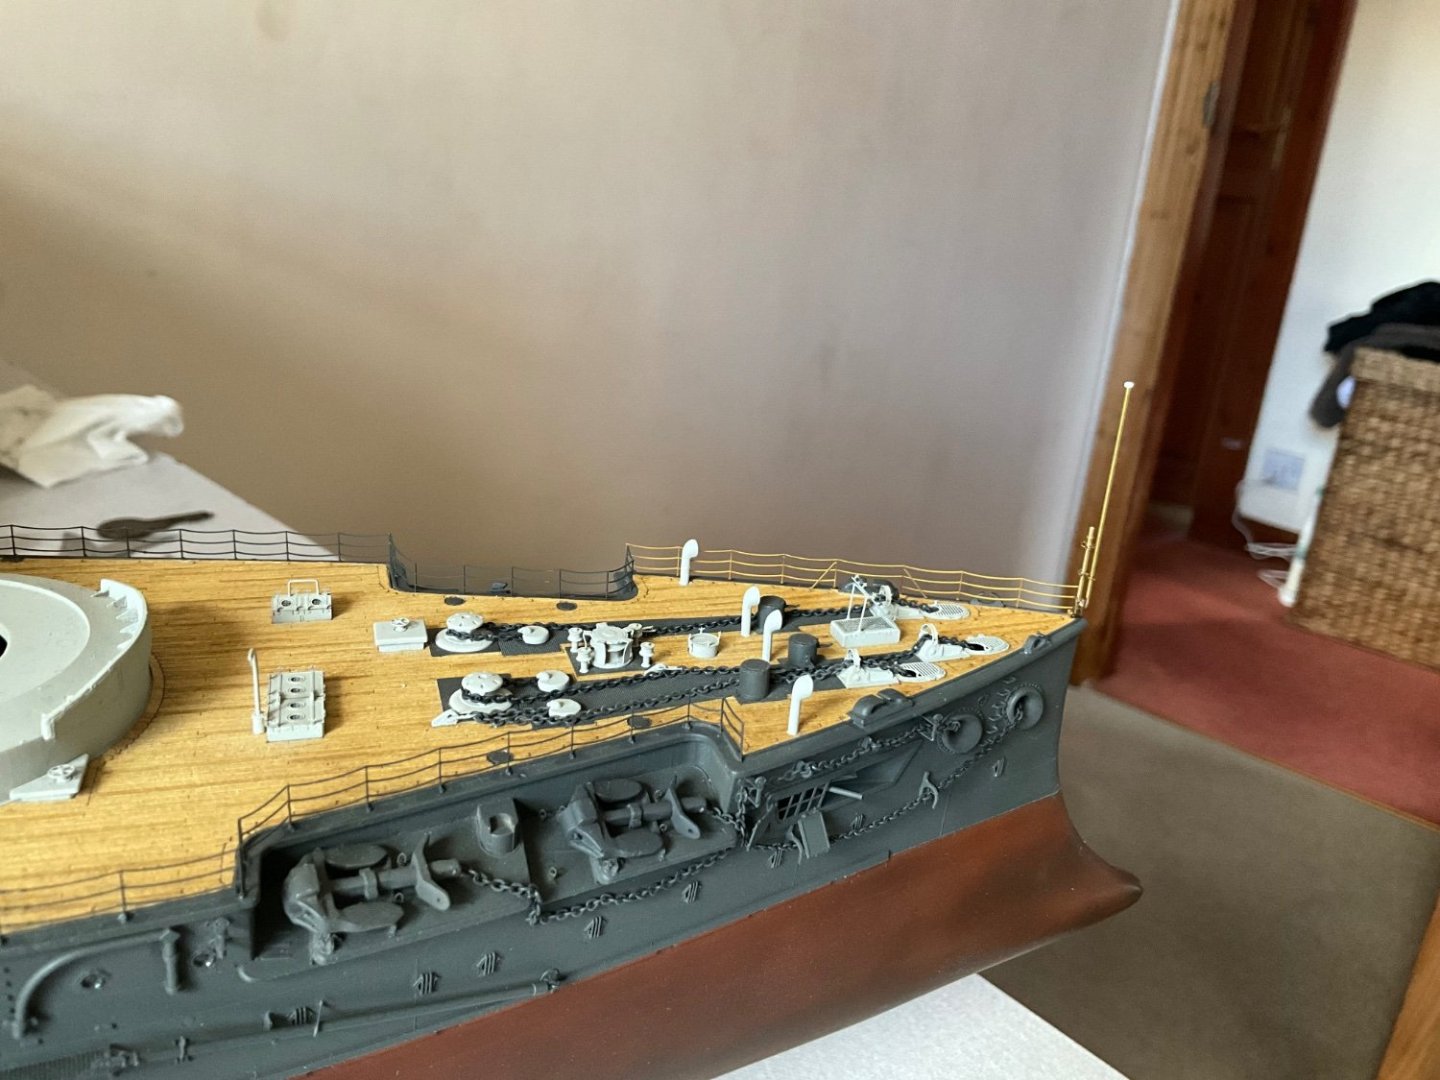
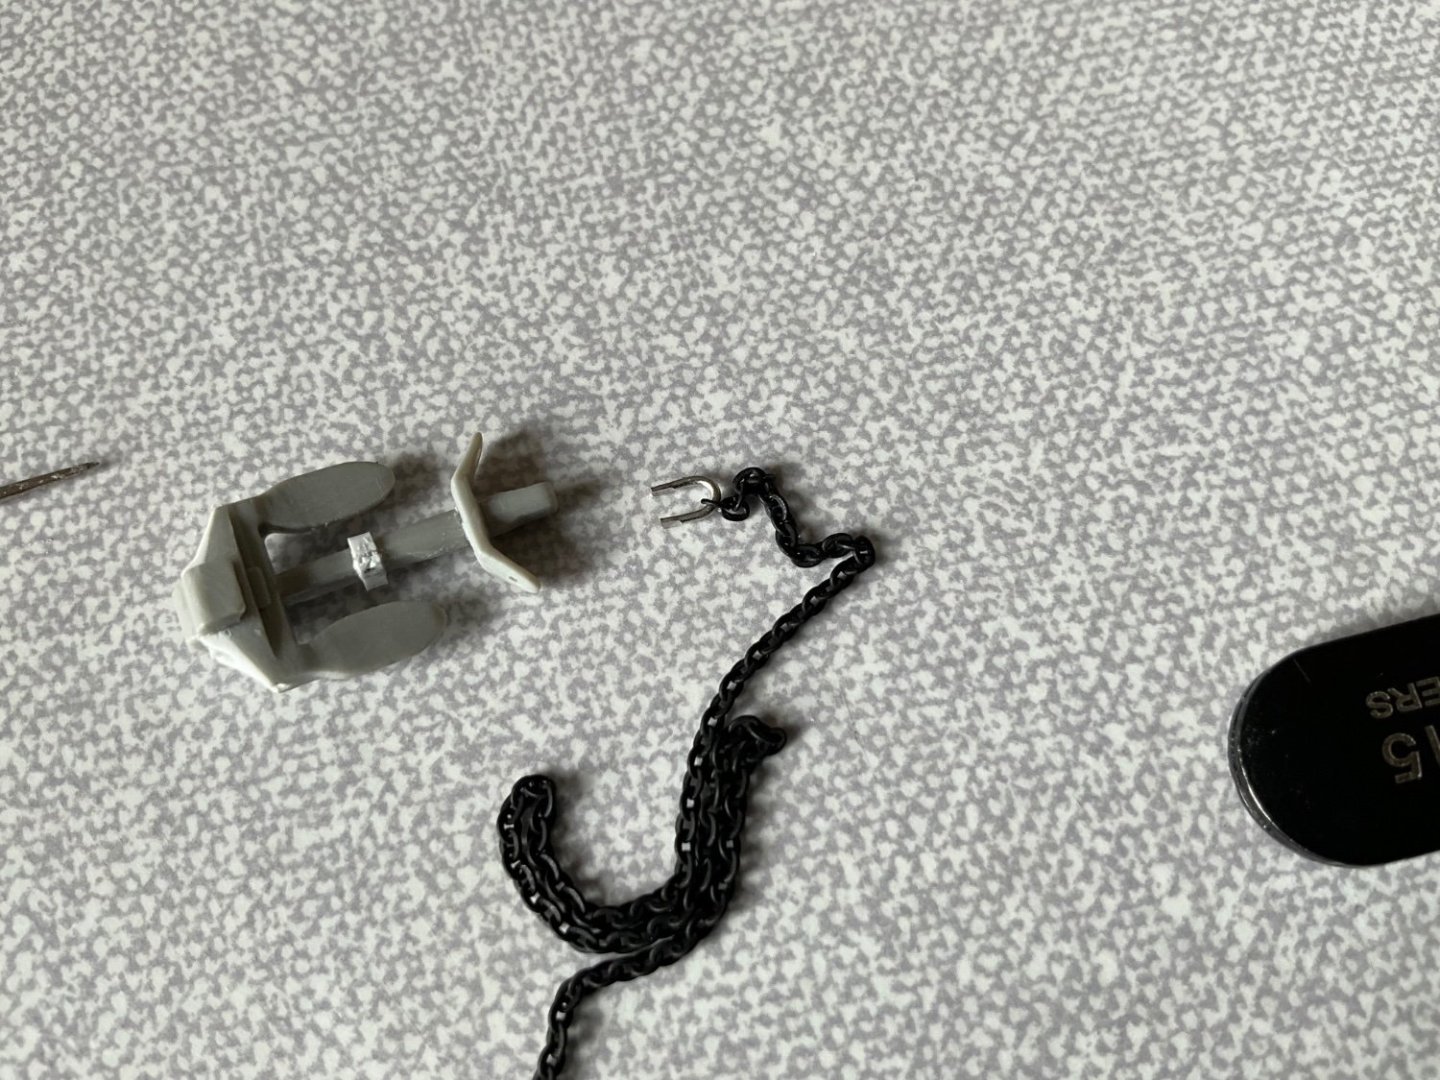
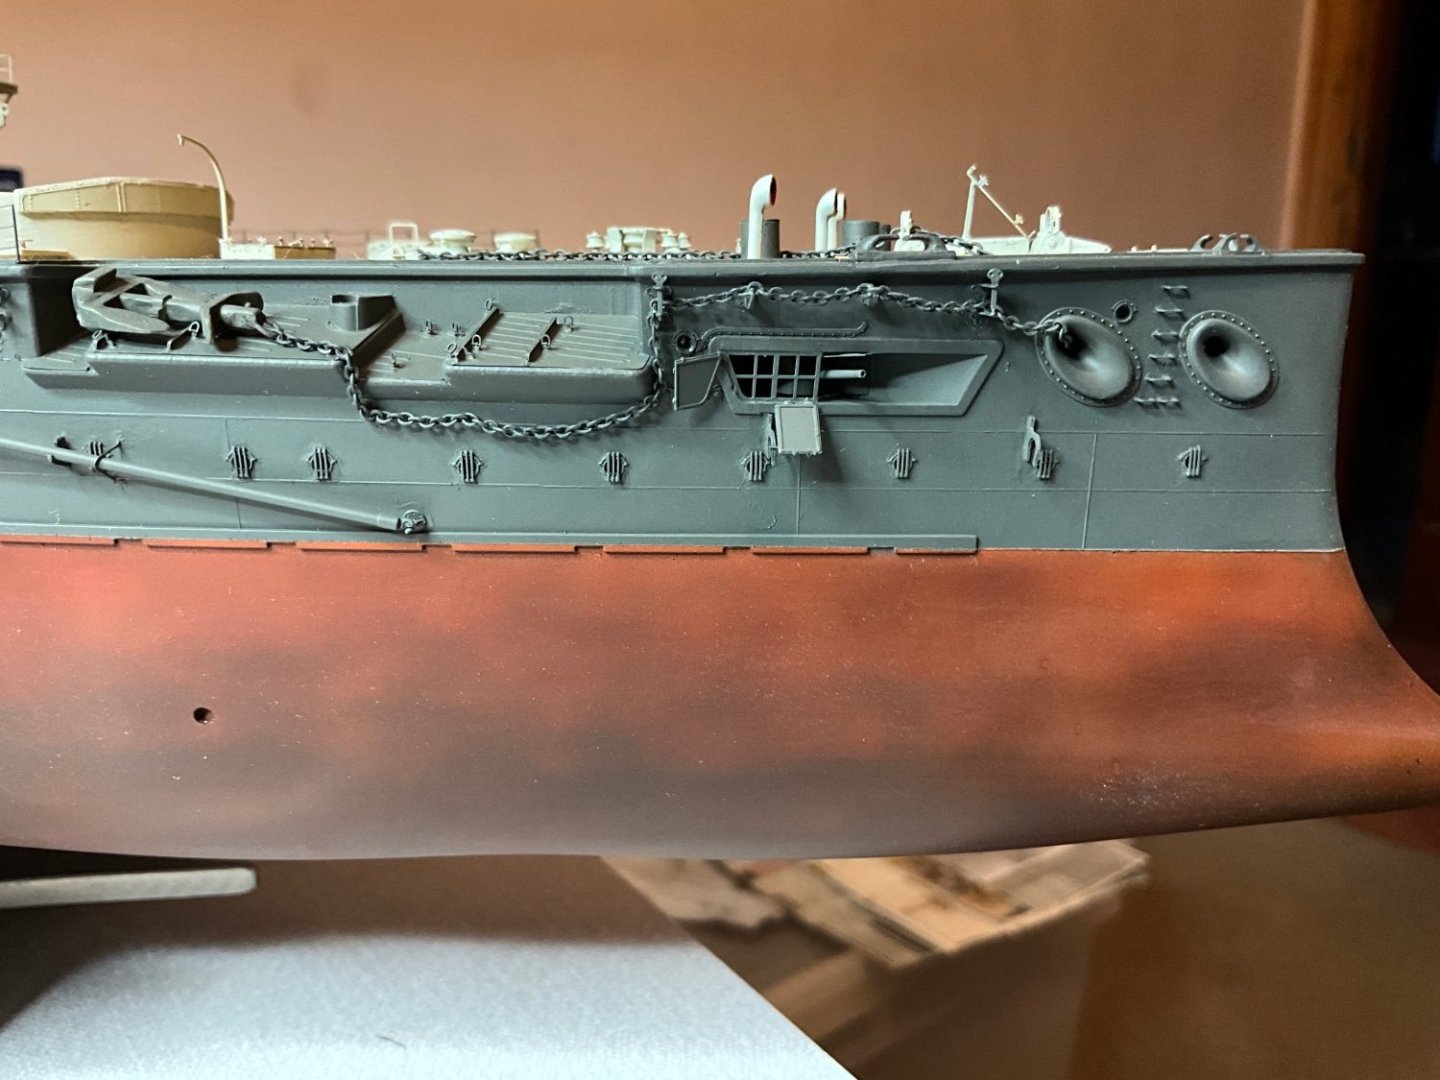
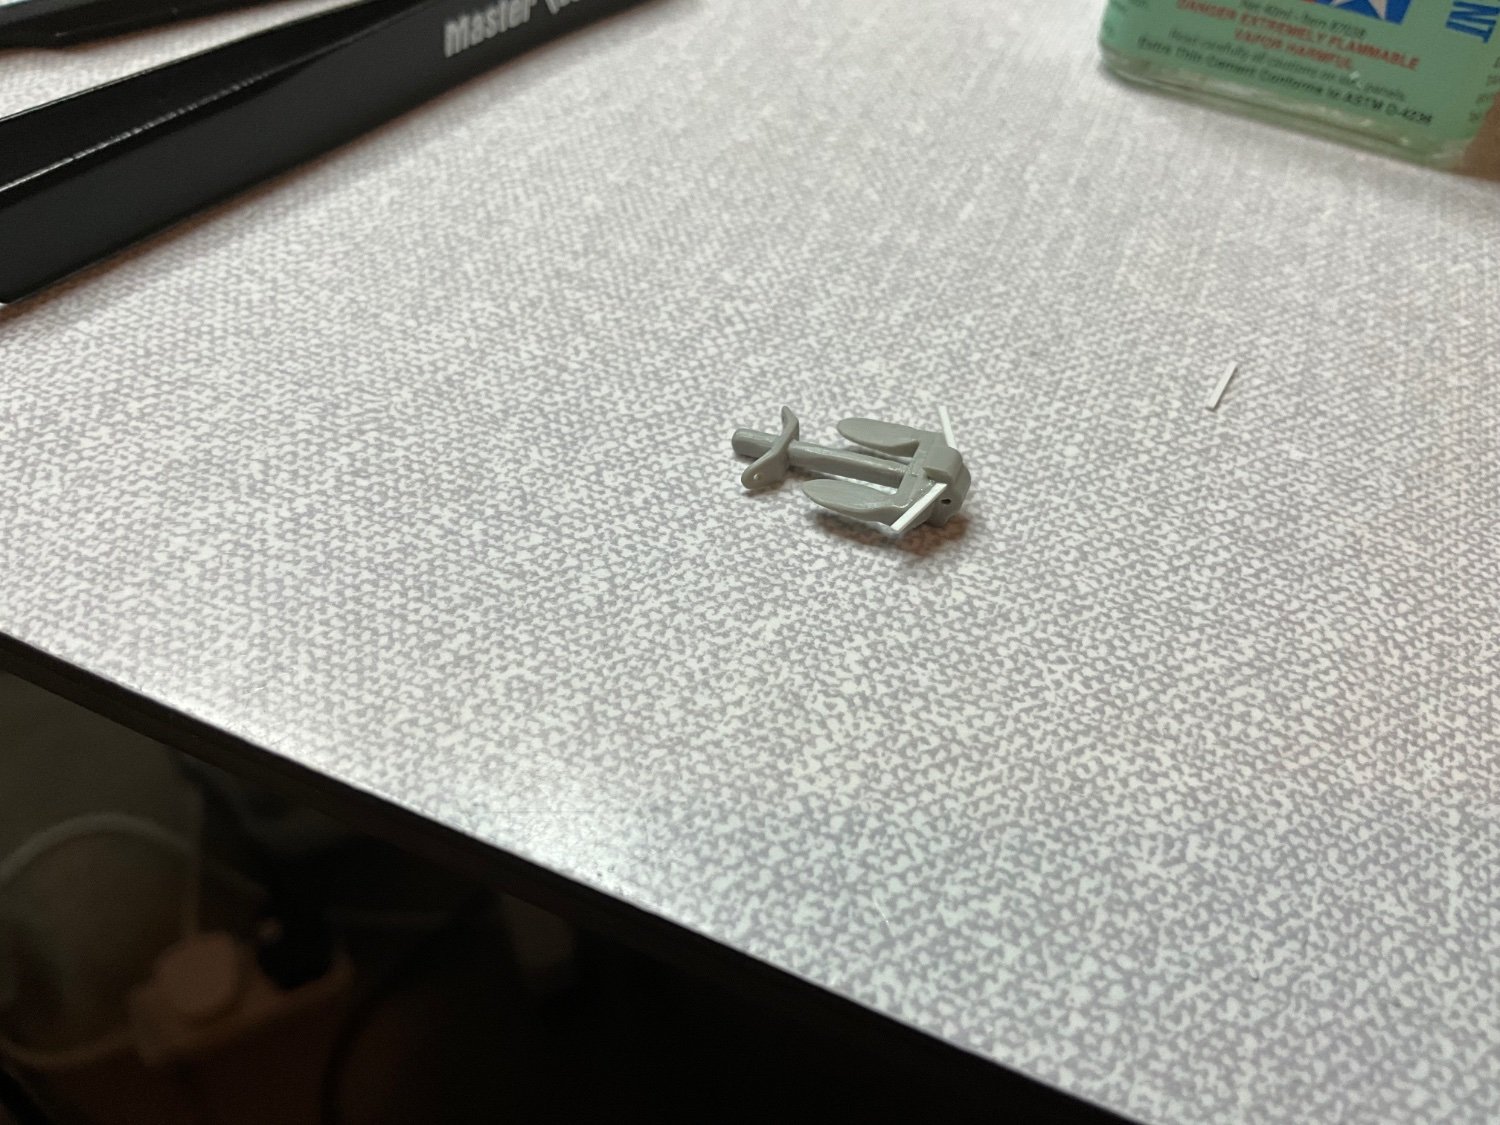
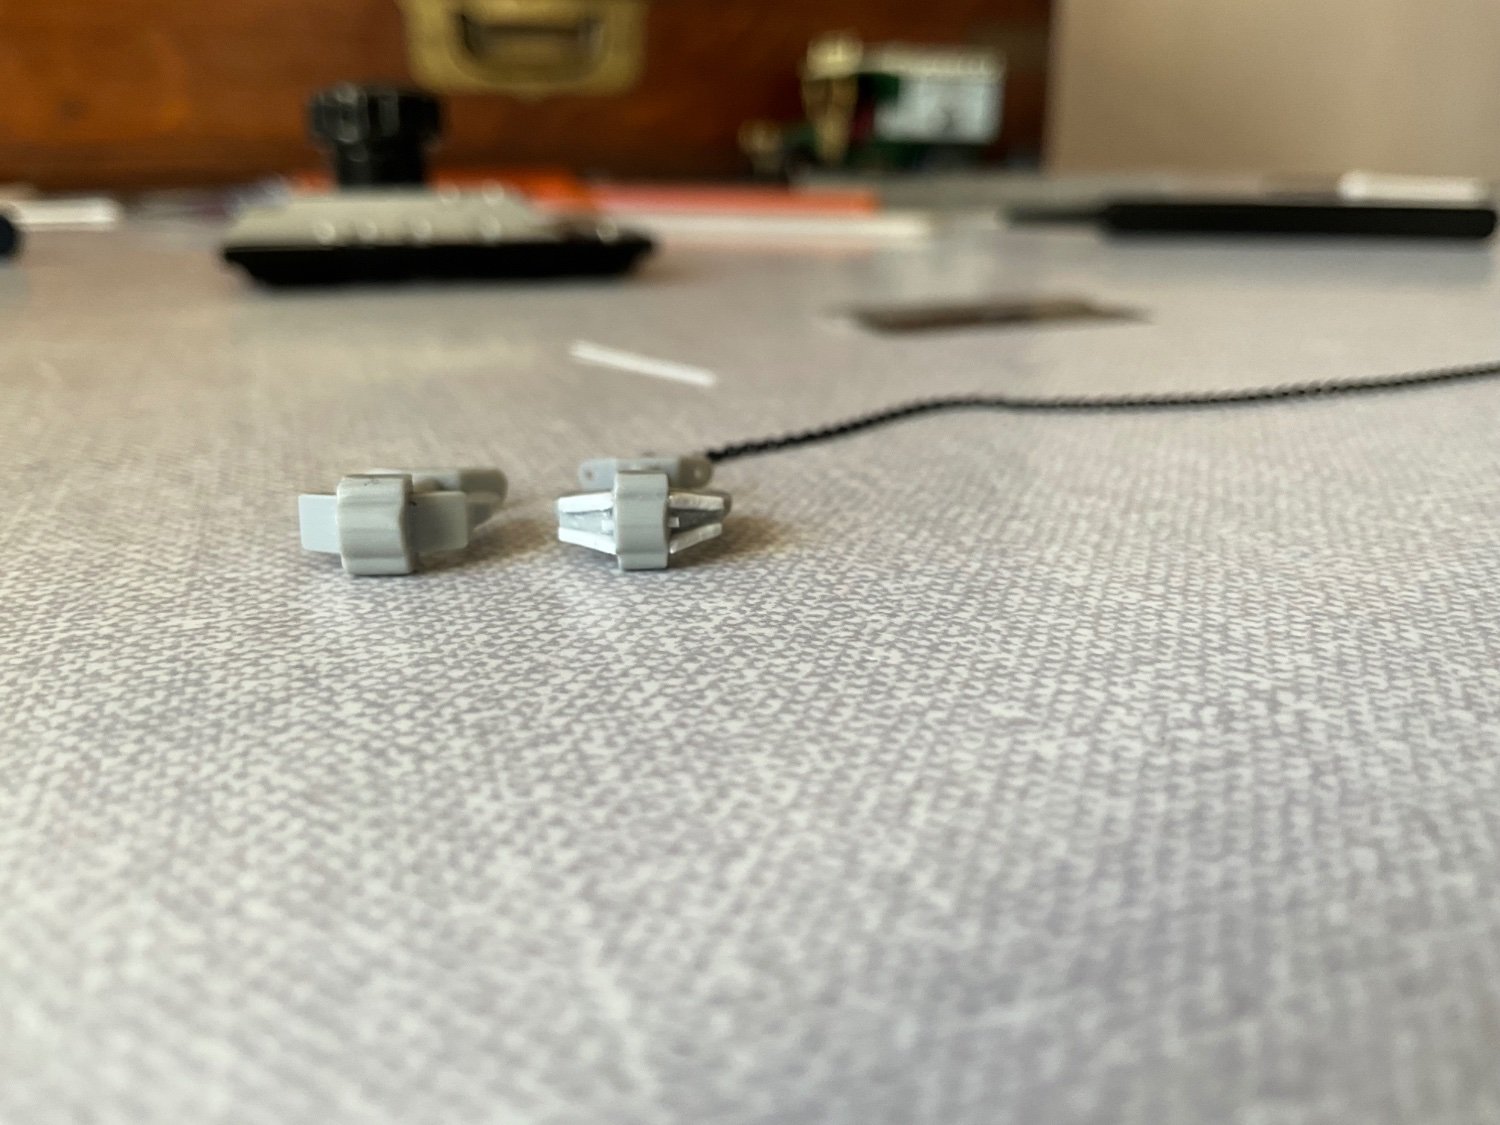
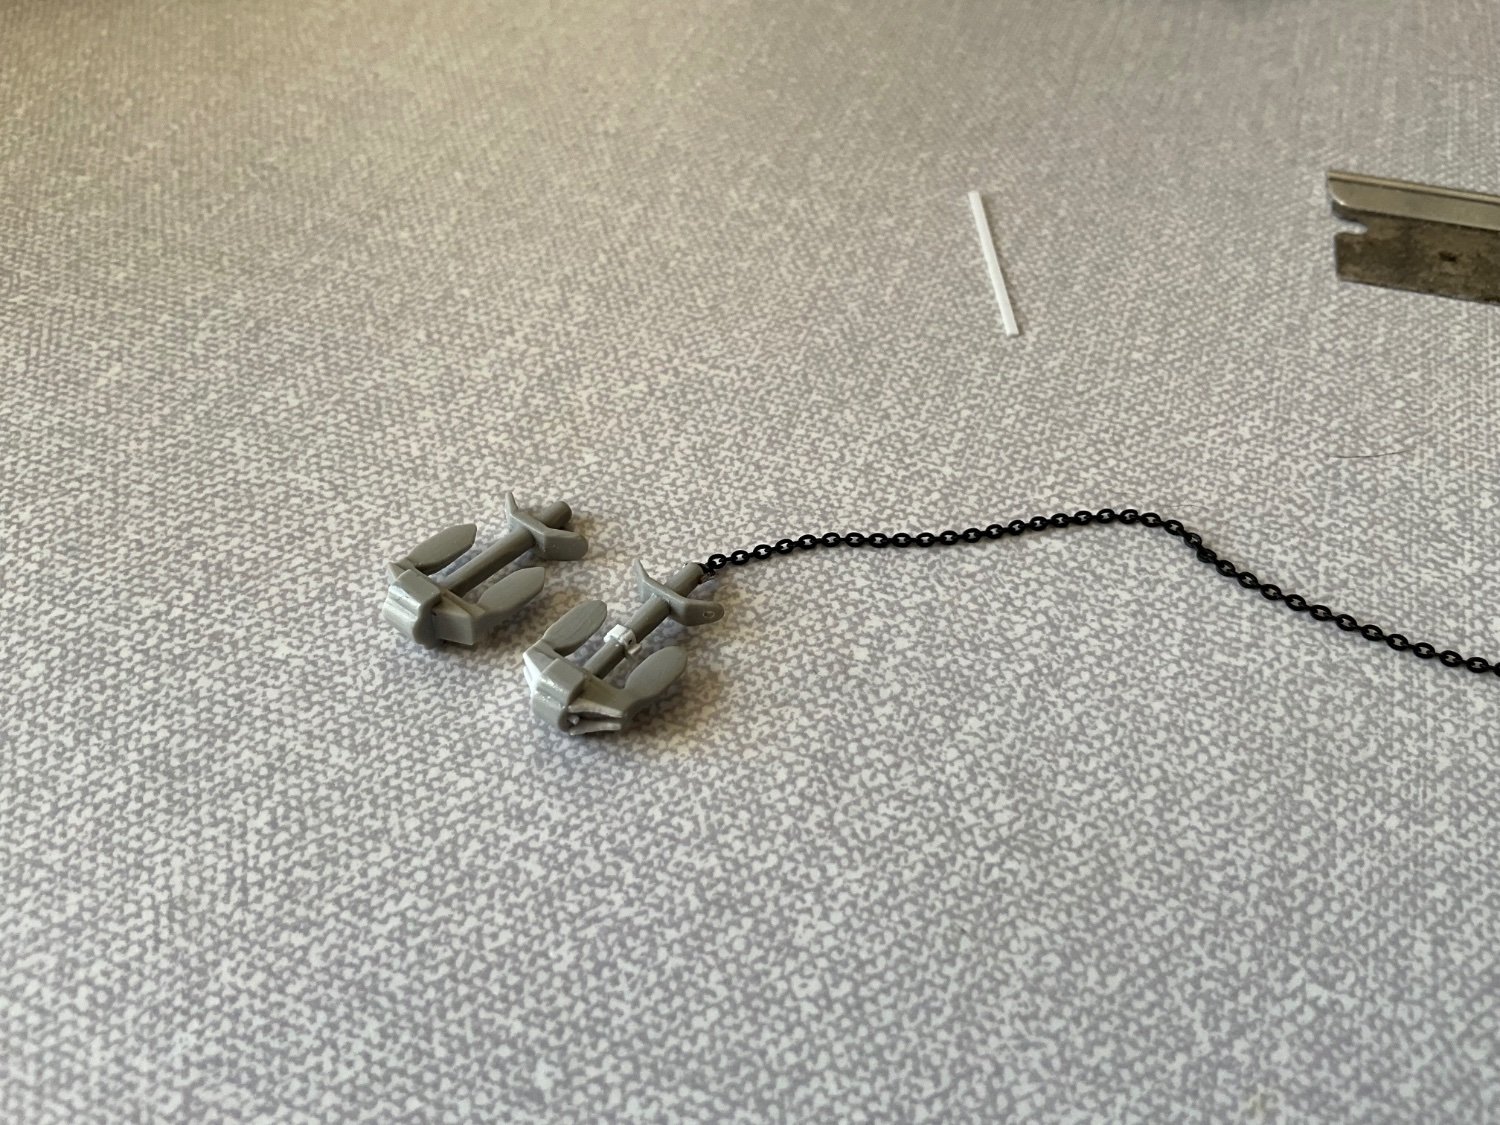
Hi guys, short up date on progress, got the anchor securing chains finished, then started the anchor davits, these parts from the kit weren’t to bad, just needing cleaning up, did manage to add a bit of fuse wire to make it more interesting, looks convincing , best l can do for something quarter mile away.


- ccoyle, scrubbyj427, Canute and 5 others
-
8
-
1 hour ago, scrubbyj427 said:
Hi Jeff, I have just saw this reply. Thank you for looking in on Portland. I will send you a PM on the project if you are interested.
Would like that please. 🤛
- mtaylor, Canute and scrubbyj427
-
3
-
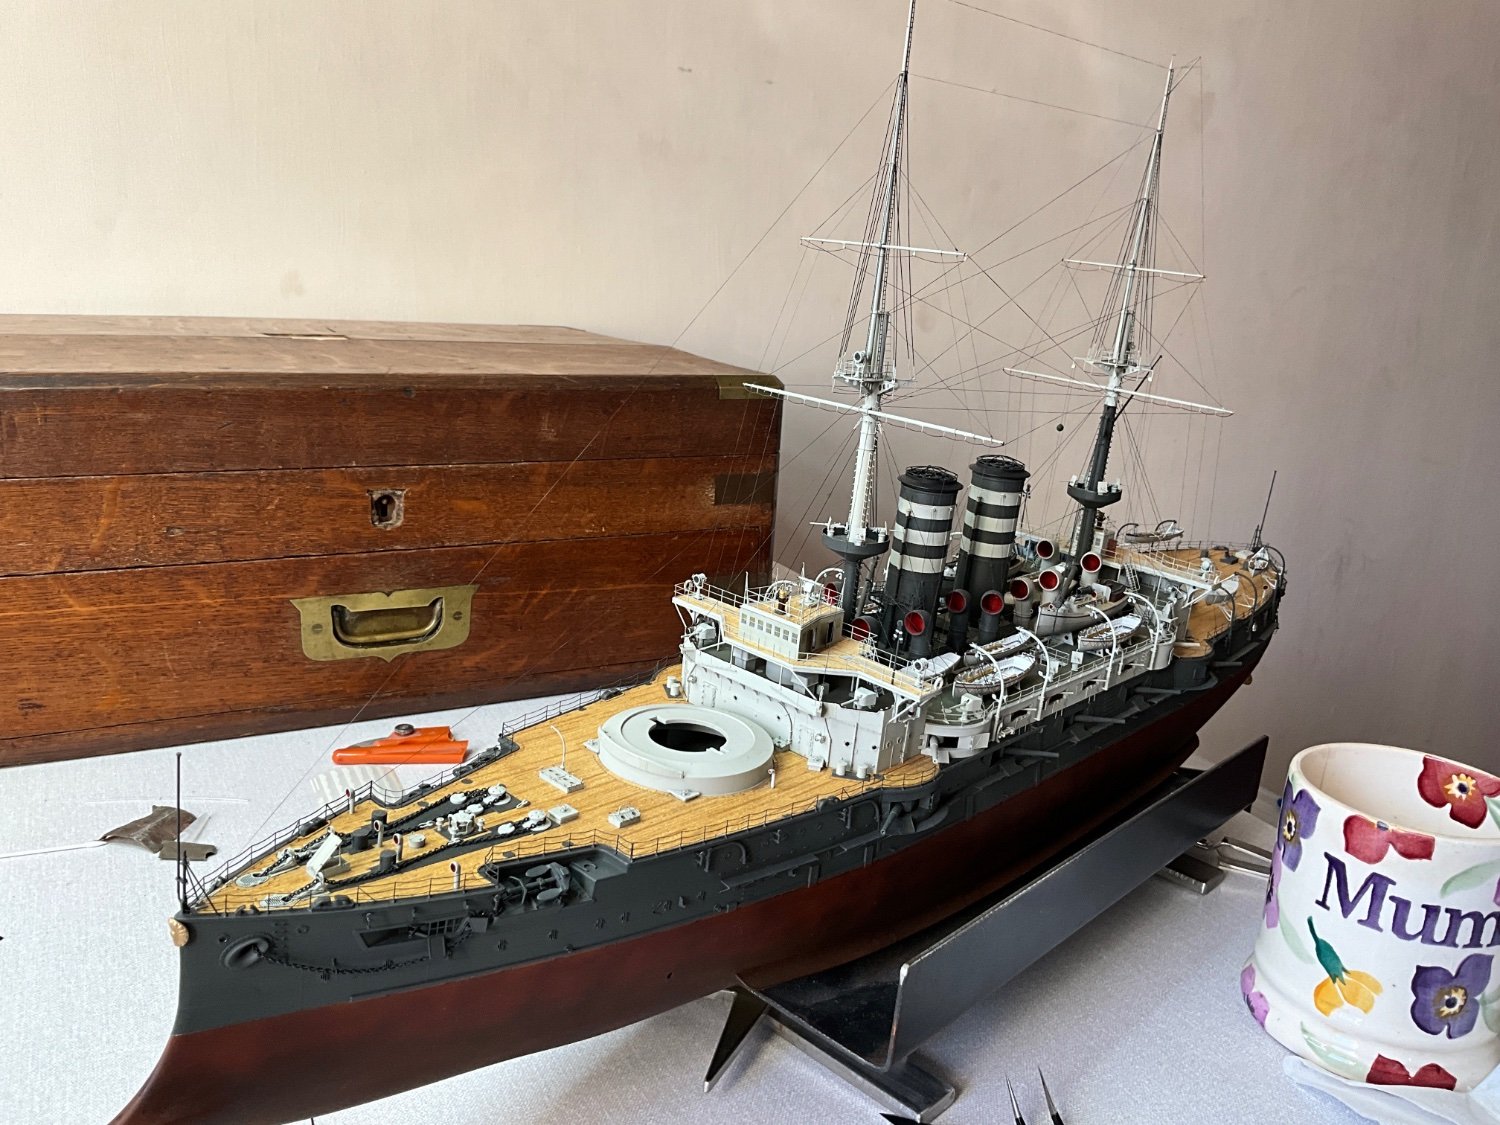
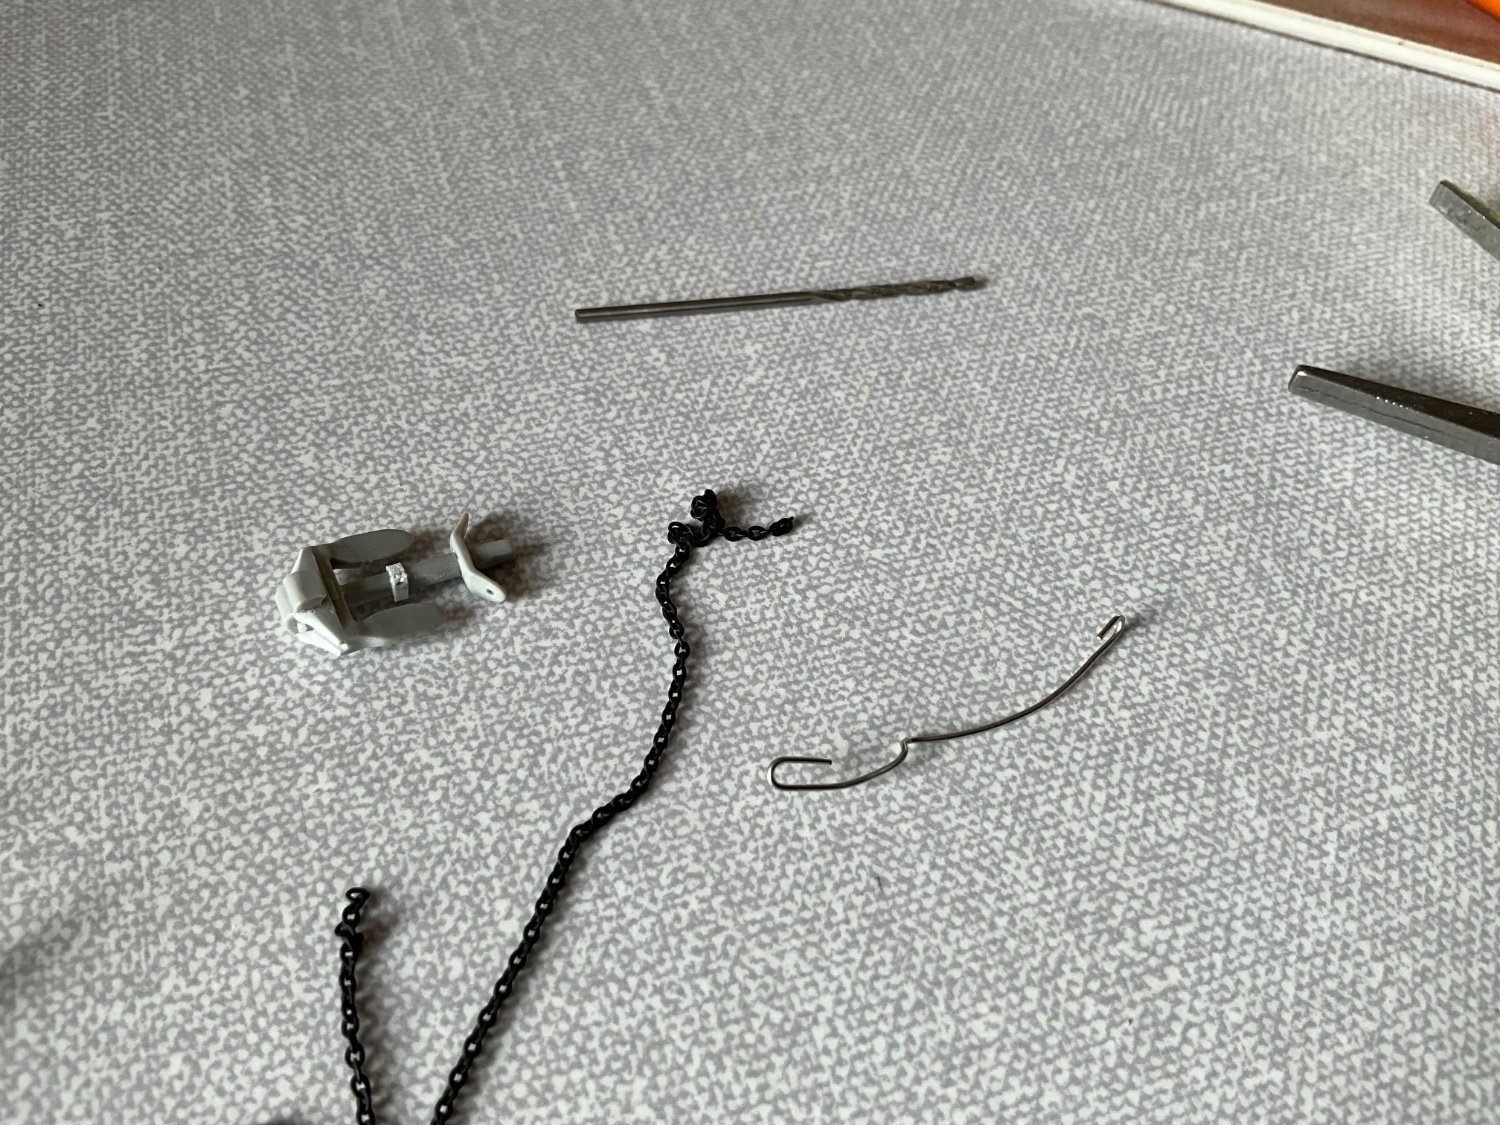
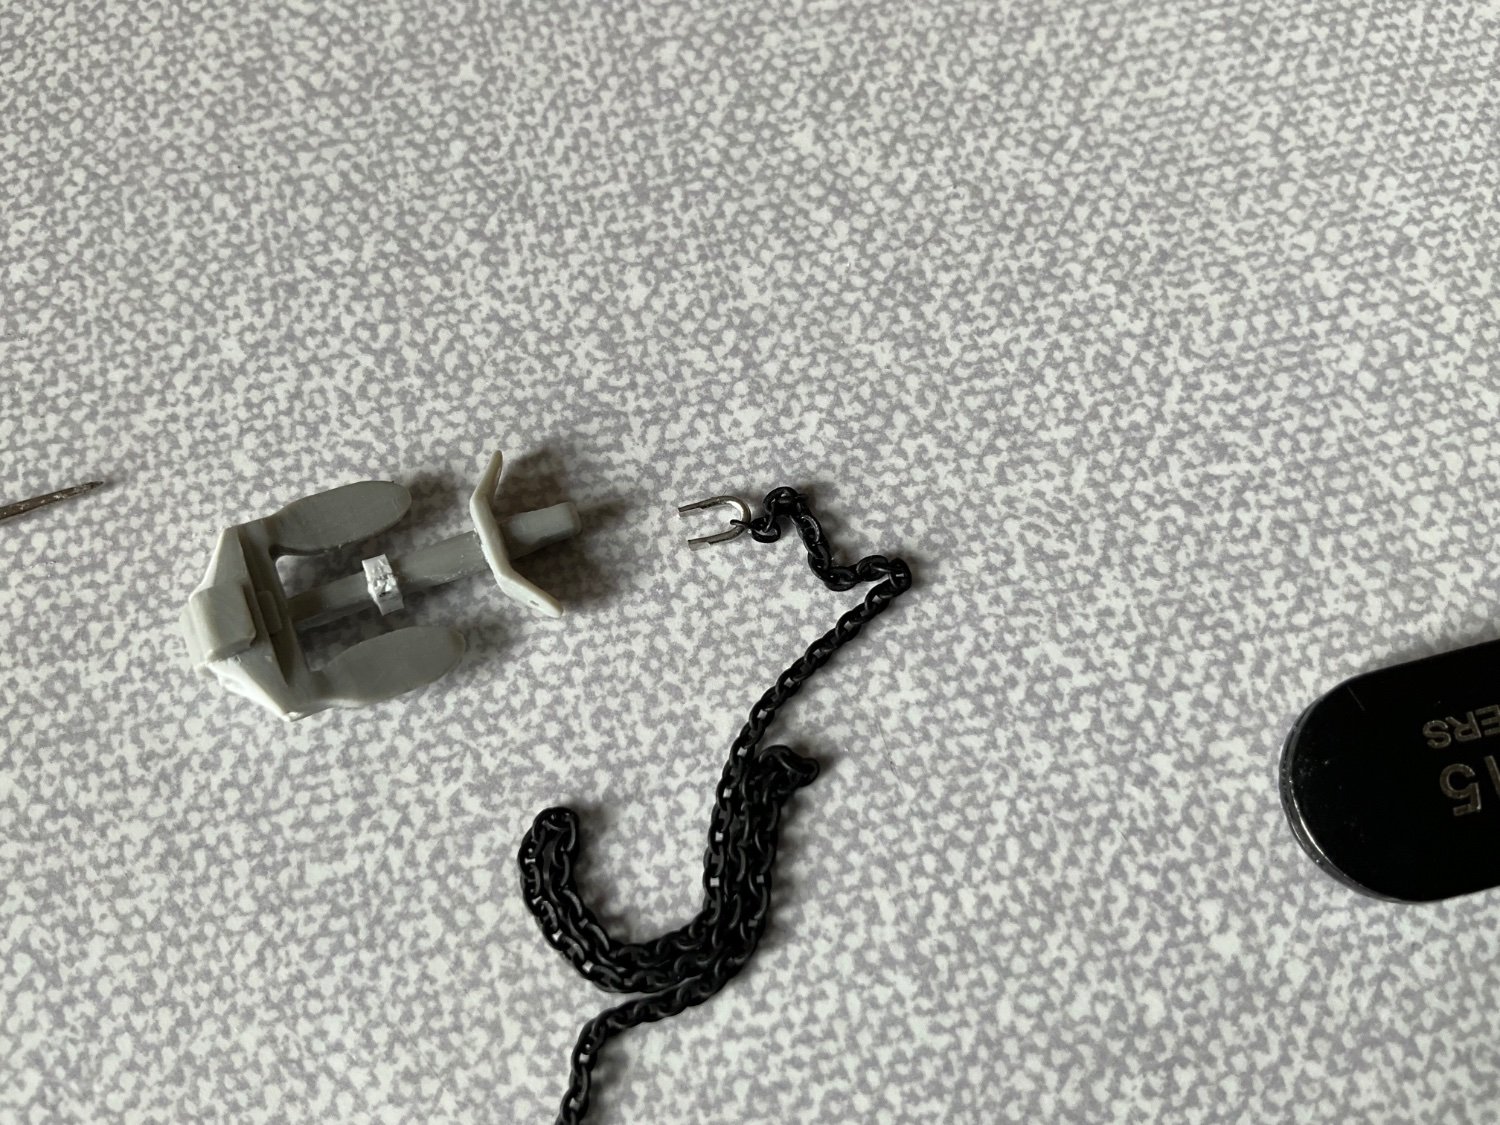
Finished the jackstaff using finer tube and bracing wire, bit more to scale when you compare to photos of ship. 👍 even got the chrysanthemum painted and fitted, it’s now a Japanese warship 😂 finally l am trying to add small chain for securing the anchors, 42 links to the inch smallest l could find so kind of works 50 links to inch would be better if you can find it ? This is a lot more fiddly than l was expecting, worth it ? Done one and dragging my feet to do the other two. That’s me for the moment, shall push myself forward 🤛


- Canute, GrandpaPhil, scrubbyj427 and 6 others
-
8
-
 1
1
-
Also tied in the rigging from here up to mast, used 0.2 wire on the heavier cable at lower point but after painting wasn’t happy, looked too heavy so removed it and used 0.1 wire instead, this worked for me, reason for wire rather than lycra was the wire gives a slight sag when you get it the right length, again a lot of care needed as it’s easy to knock and damage things at this stage, which is what l did 😡 more of that French language, once calmness resumed fixed everything and happy again. 😂 used my trick with using photo etch on ends of wire and Lycra again, ok.
- Herby63, Canute, scrubbyj427 and 4 others
-
7
-
Could see from previous builds that the bow rail number 1 was an issue with the jackstaff same as stern so opted to this before handrail, worked out well 👍 also noticed how it’s strange when the brass etch is on the model it looks larger before painted, seems to look more delicate after paint applied.

- ccoyle, scrubbyj427, mtaylor and 4 others
-
7
-
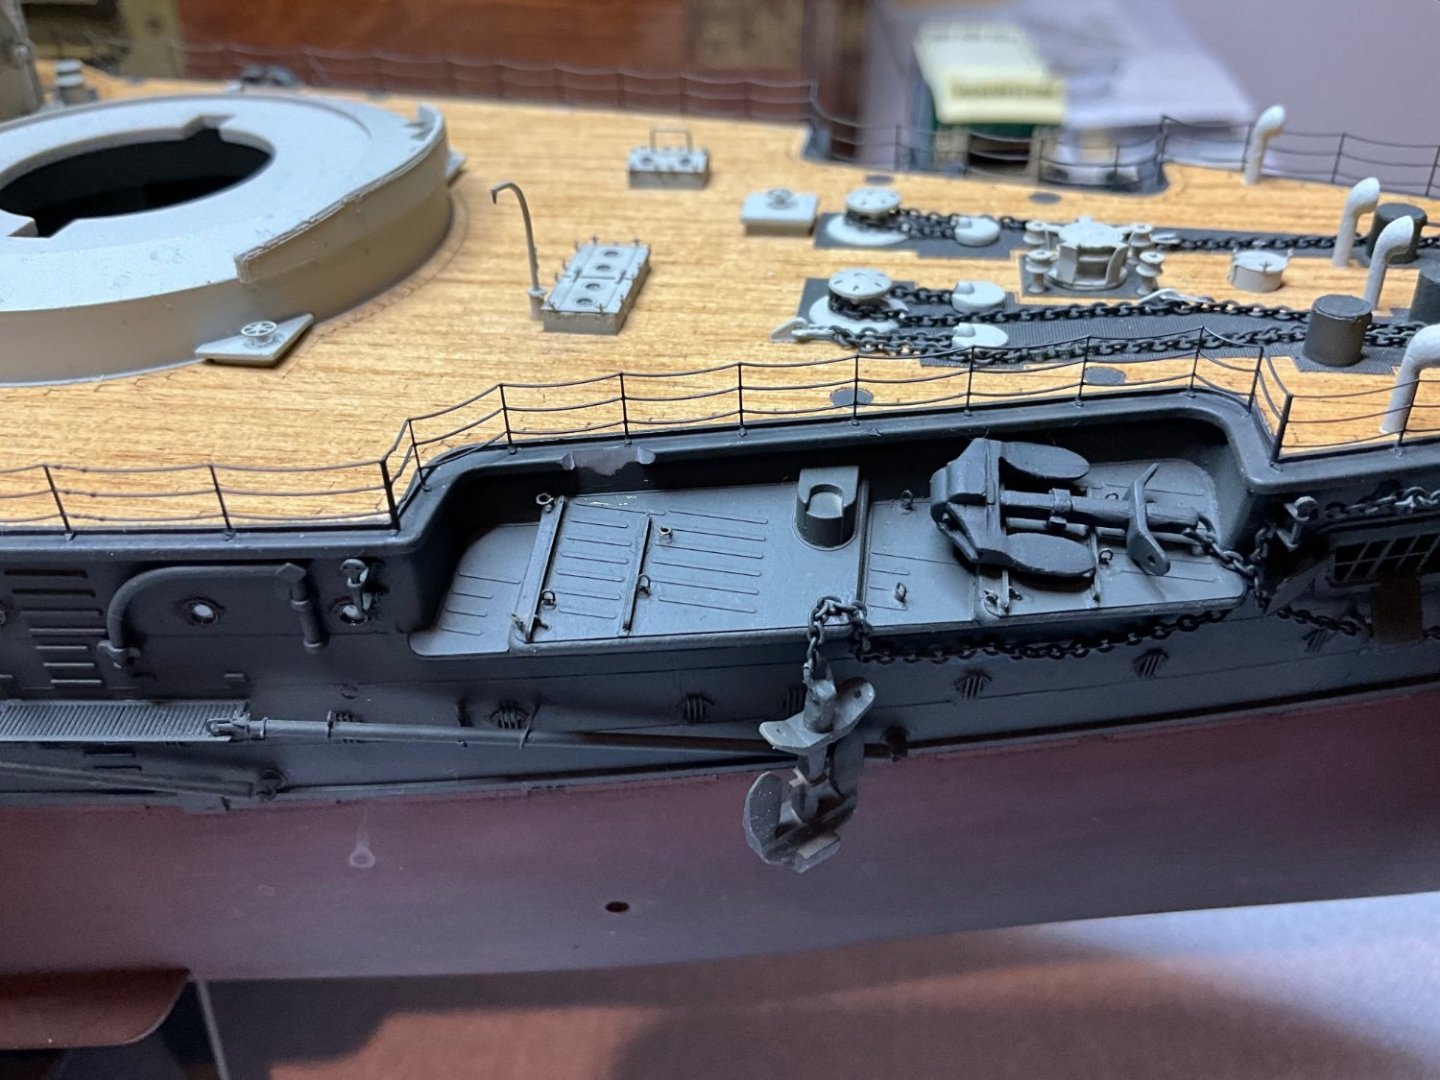
Fitted these to model before doing the railings around the anchor mounting points, these railings aren’t as straightforward as you would think so take care here, keep checking when you’re bending them , they do fit spot on eventually.


- yvesvidal, scrubbyj427, Herby63 and 4 others
-
7
-
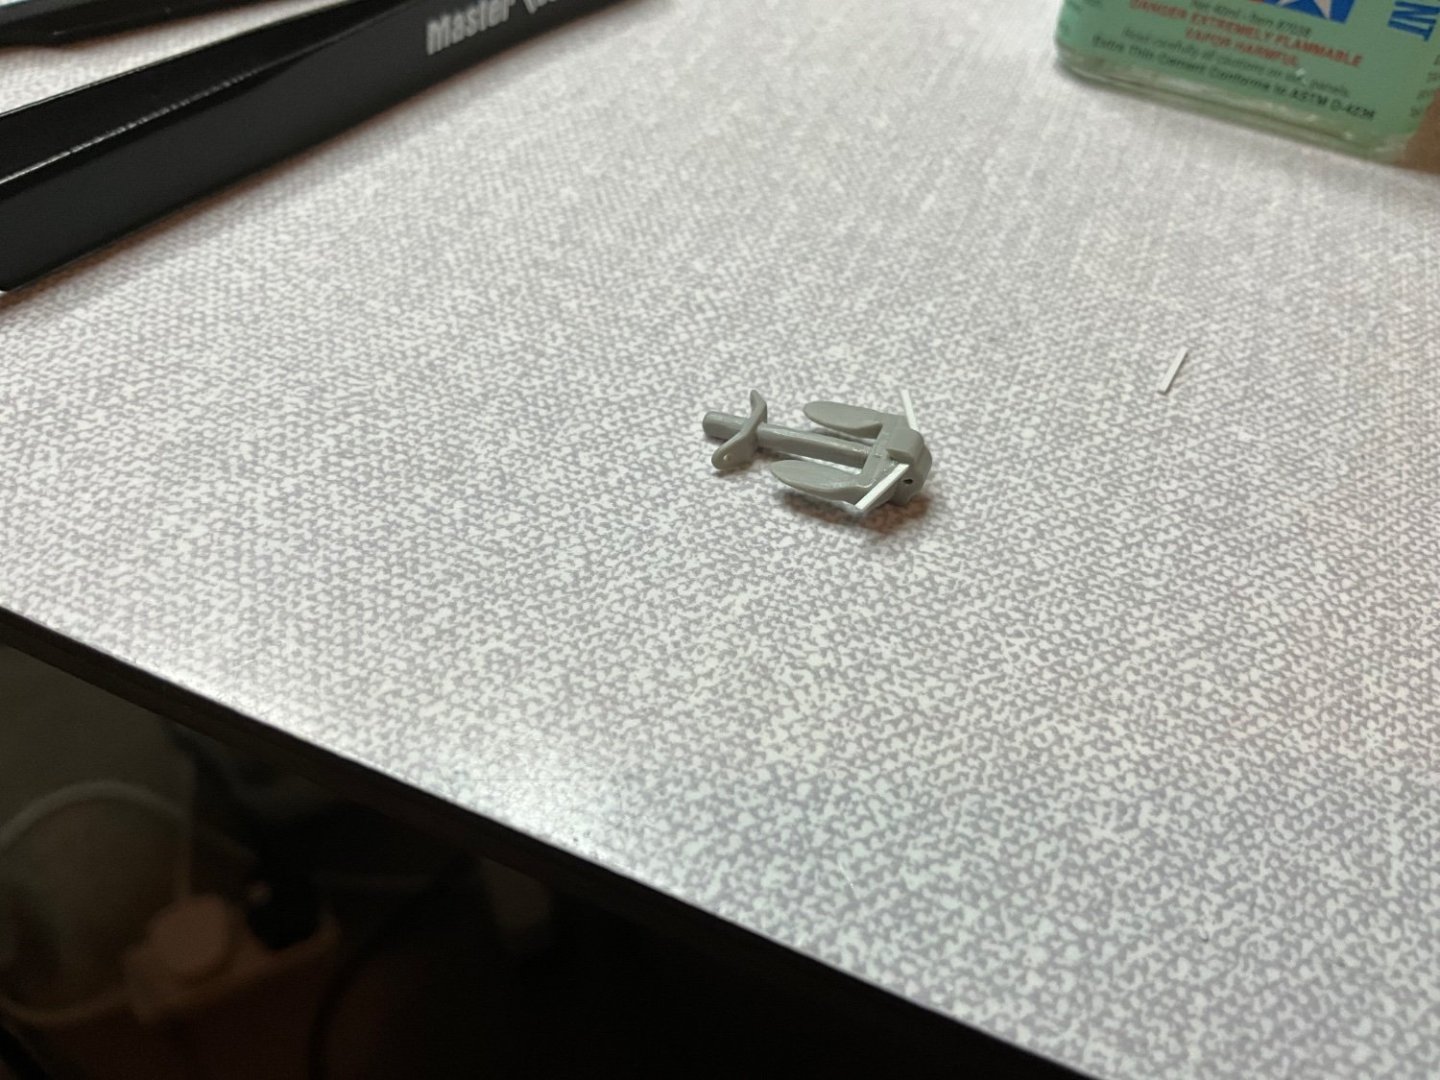
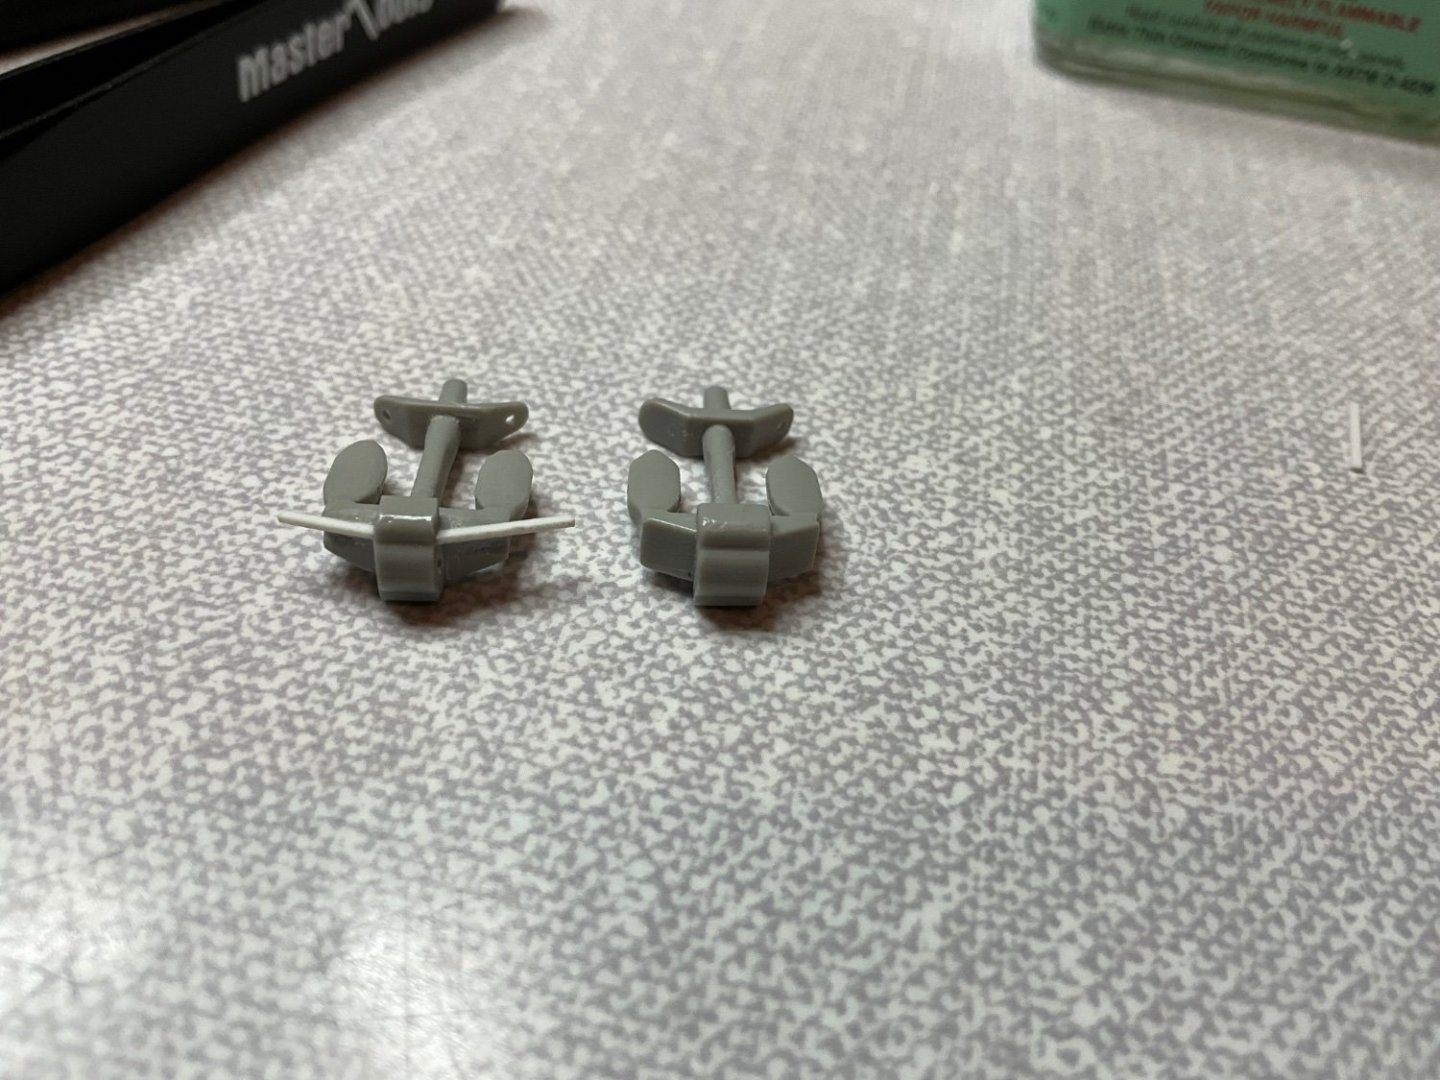
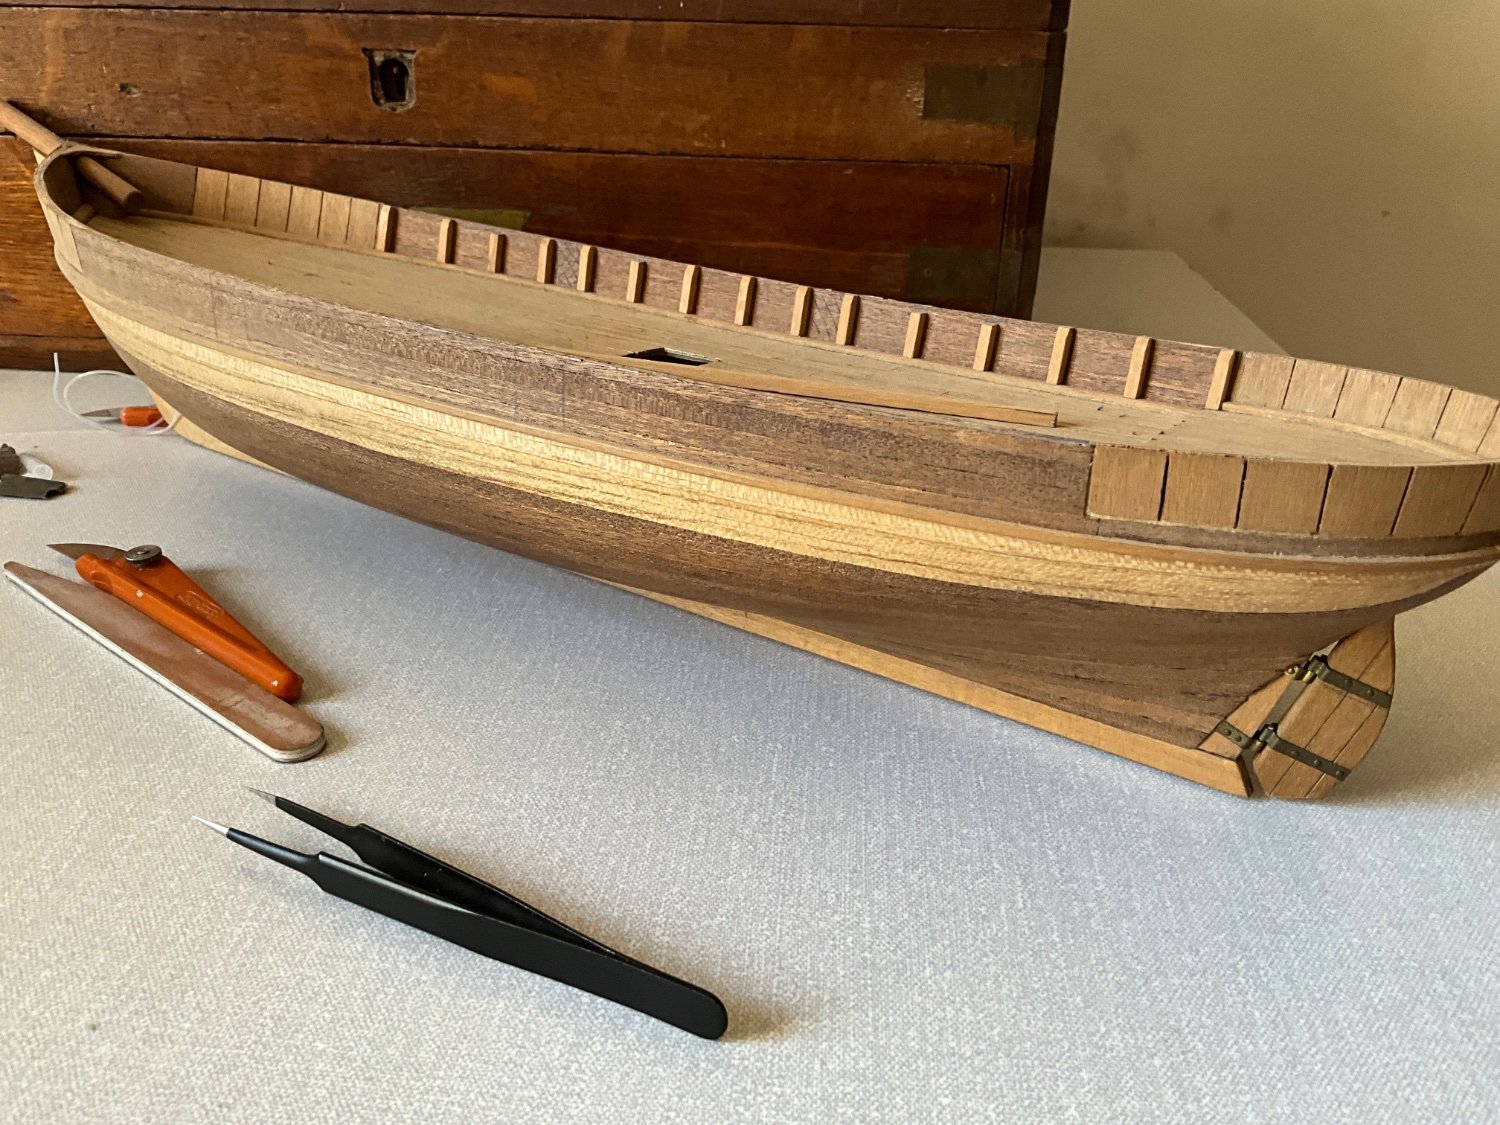
Short update on progress guys, seems a lot of work with not much difference, just about there with forward deck area details. Finished reworking the anchors, good to get that out of way, that let me paint and fit to model with chains.


- Canute, GrandpaPhil, mtaylor and 3 others
-
6
-
I am so impressed with your Portland project, could l offer to put my name down for first one of you produce 👍 Do have a model of knorsk Love to build in my collection, a rather nice two decker and also like Joe Tika’s model of HMS Victory, so not adverse to biting of more than I can chew. That does look awesome though. Well done, like that enough to take it on. 🤛
-
On 2/11/2024 at 10:07 PM, scrubbyj427 said:
Very impressive.
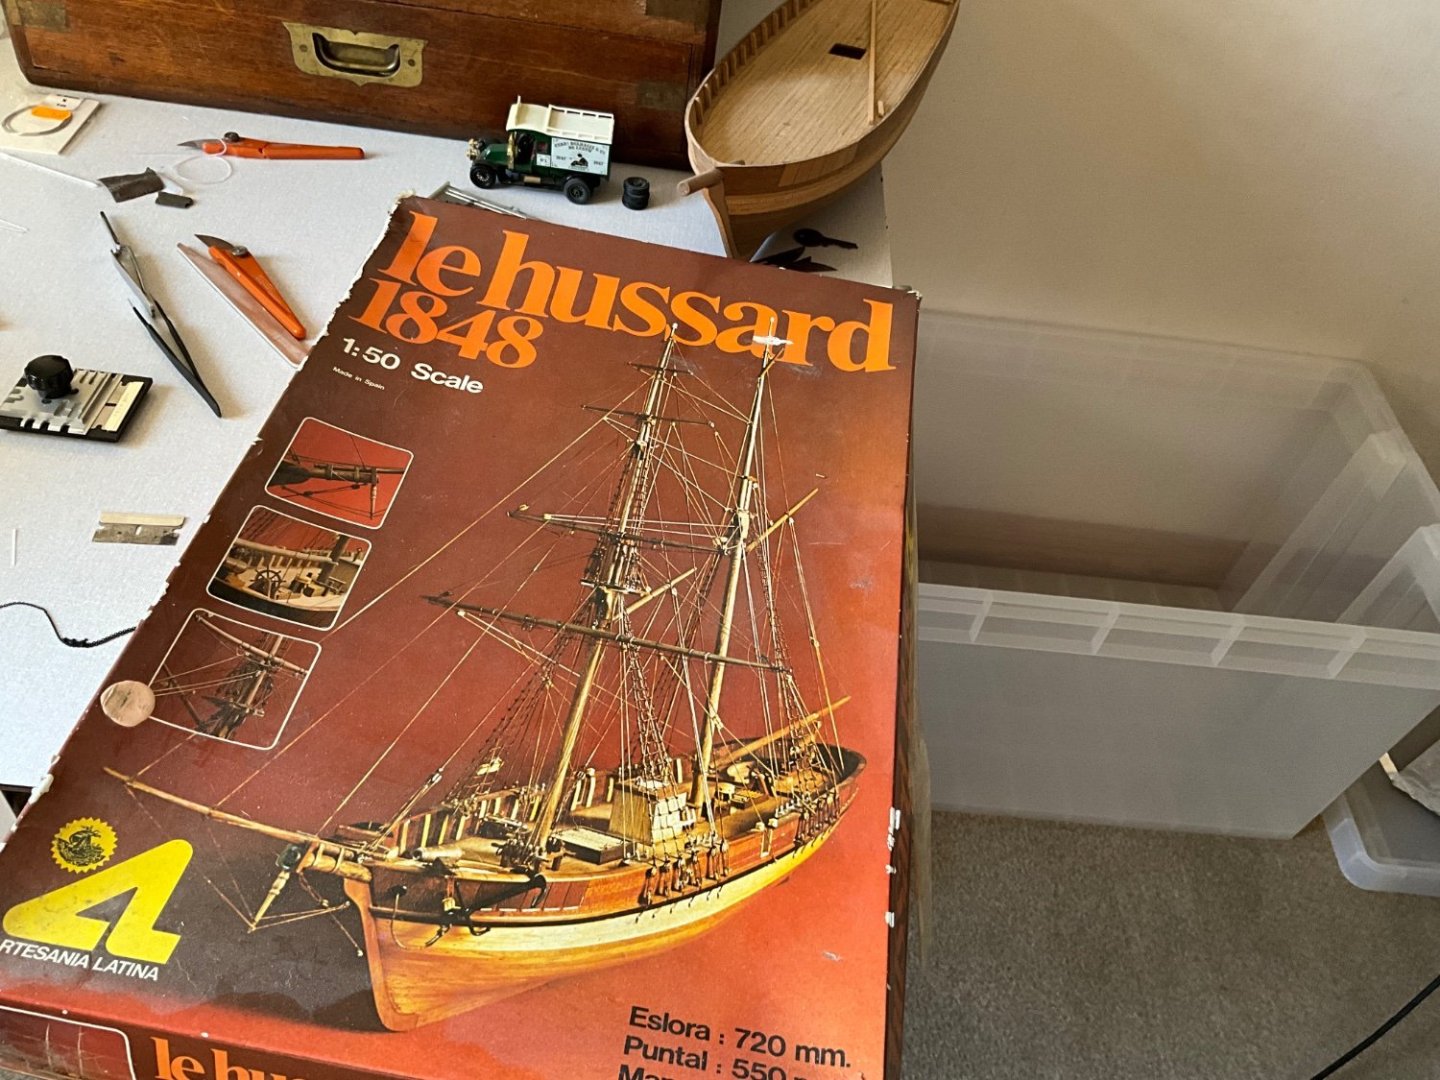
Thanks, had a look at your project, awesome, know how much work goes into works like that 🤛 have a laugh, here’s one I started in 1982, Le hussard, promise to finish it some day 😂

- Canute, ccoyle, scrubbyj427 and 3 others
-
6
-
On 2/4/2024 at 10:44 PM, Herby63 said:
I am not planning on doing extensive research on the differences between the 1902 and the 1905 version, but I am going for the black and white (light grey) paint sceme, in order not to have a house full of grey hulls. 😀
Bad news for you Herby, it’s two shades of grey 😂 well one is Tyre Black but really a dark steel grey. But I know exactly what you mean. 🤛
-
That’s me for a bit, have to back track and see what l did with the anchors earlier in build and do the next two. 👍 take care guys, shall return when l have some more progress. 🤛
- mtaylor, Canute, Ryland Craze and 1 other
-
4
-
-
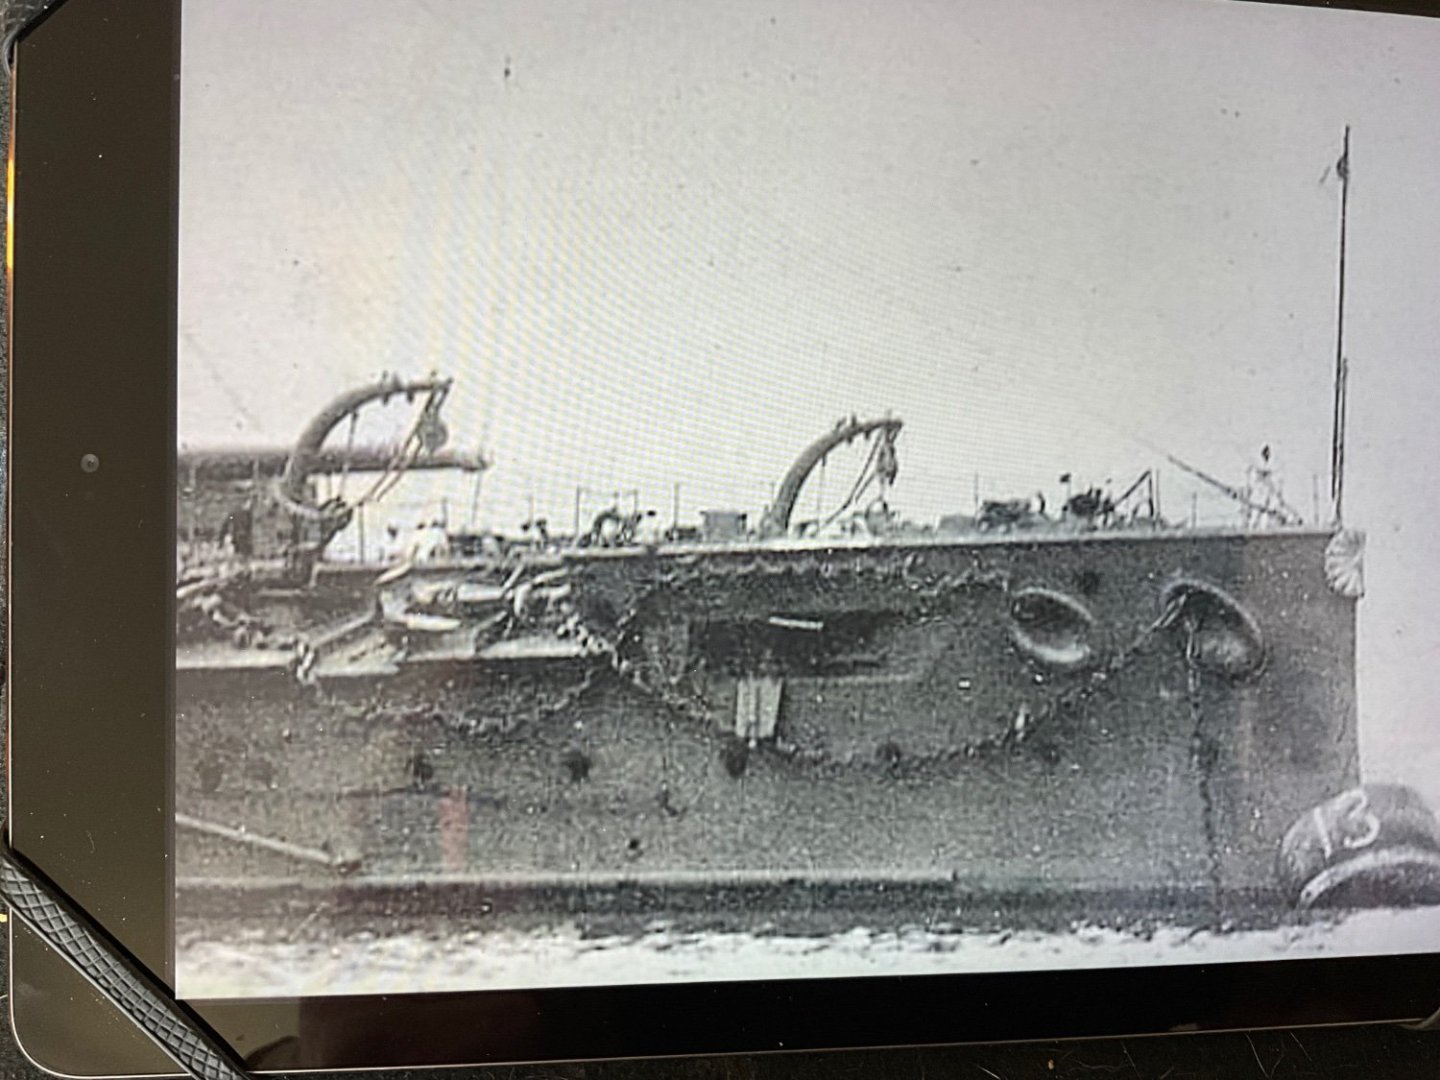
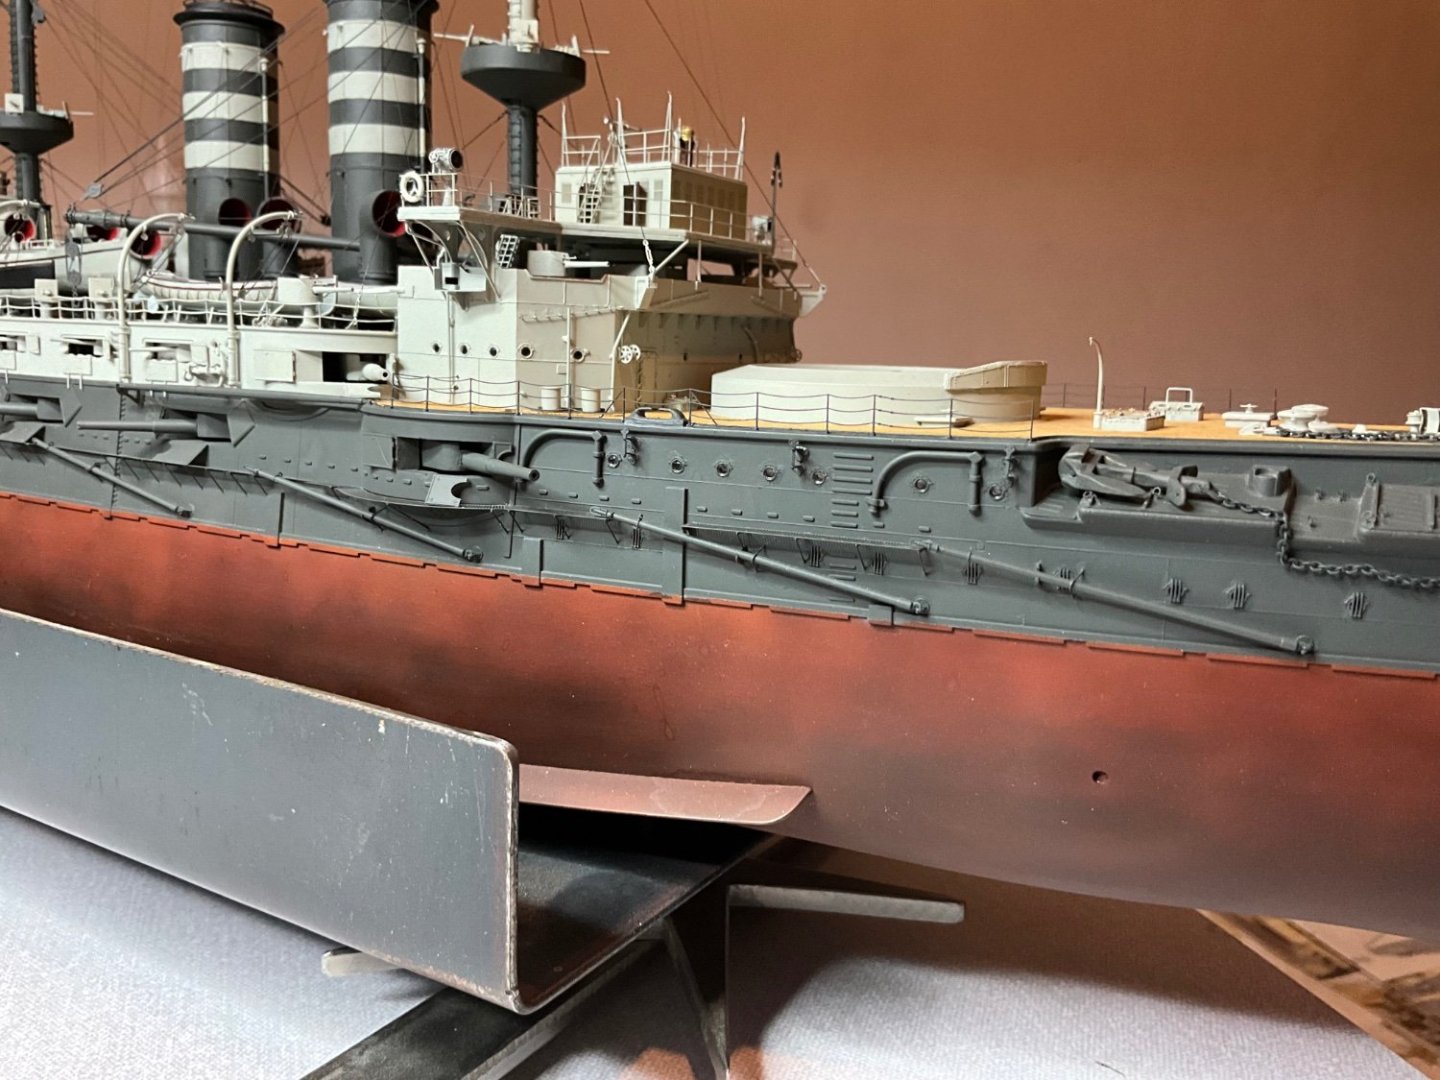
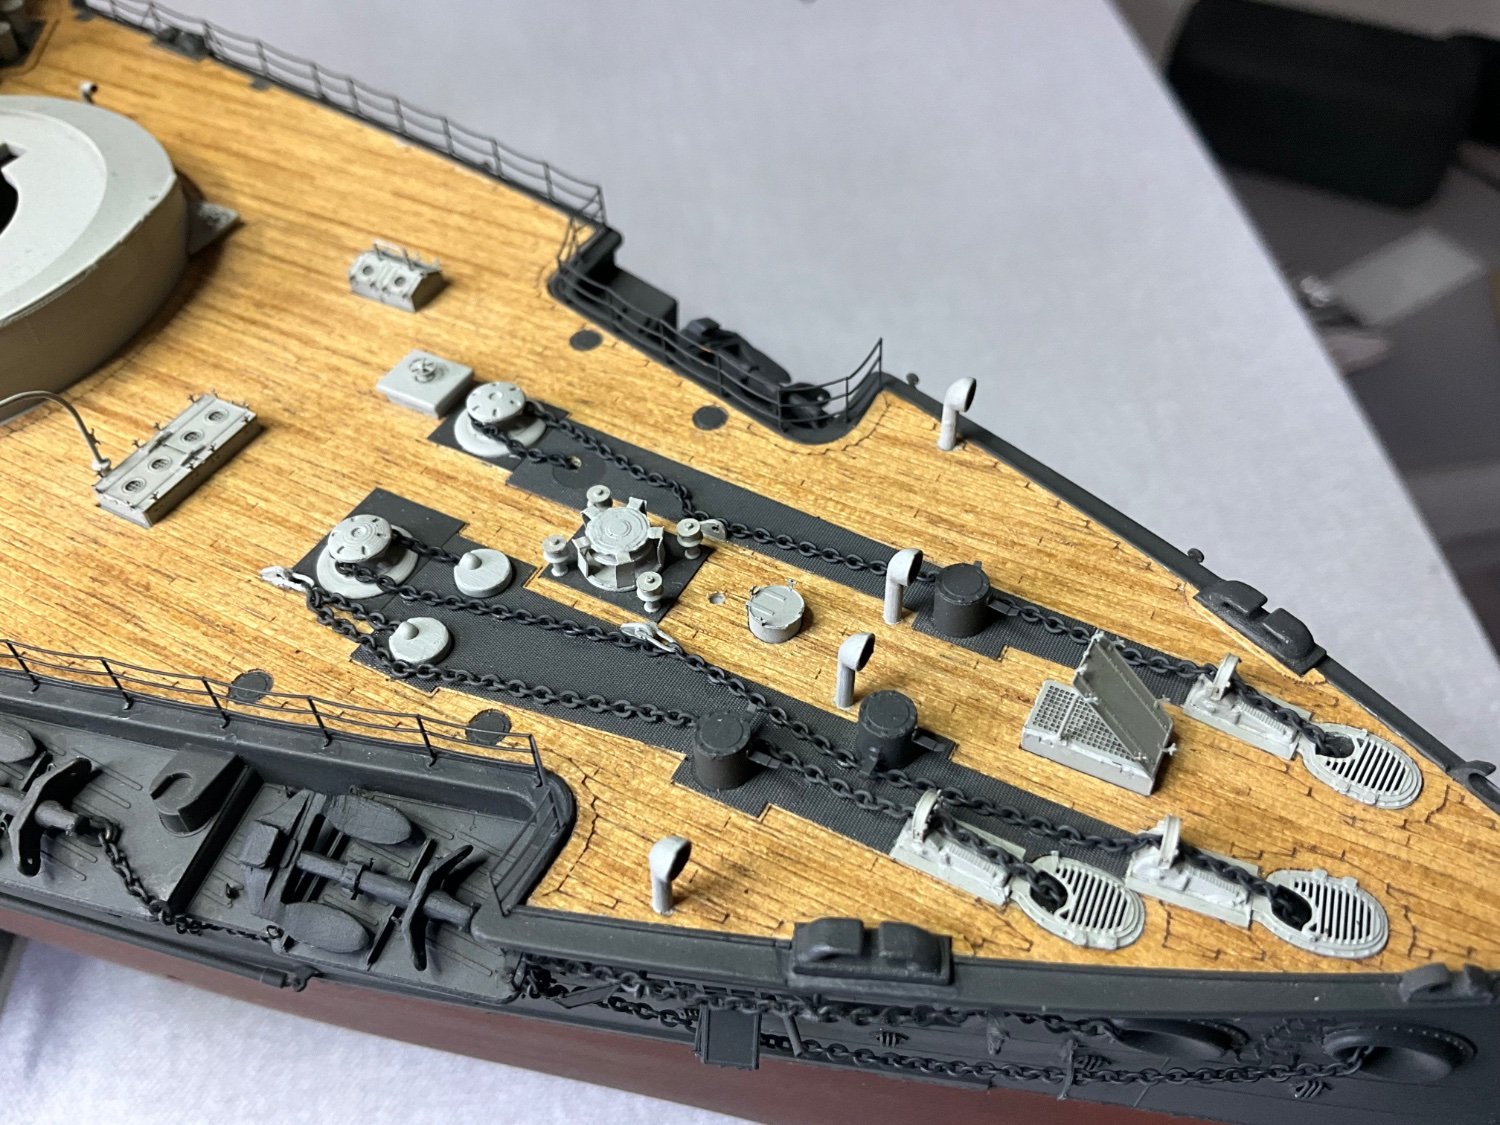
The part of railing removed for this then gave me the stanchions for folding down on side of ship. 👍 the 0.1 wire was cut about 16.5 mm and a very slight curve added, this was then fed through the small hole in superstructure and rested the other end on rail, added a touch of glue and then nudge wire into place. Plenty coats of paint till you think it matches the thickness of the etch railings 🤛 better than going to 0.2 wire and it looking heavy. 👍 still to finish painting these yet. Next part l have done is fitting an anchor and chain made ages ago, this is the spare anchor that is not connected to the capstans, bit of a blind one on this part of build, no photos or references to go on, so again this is just my solution, feasible though, you would just swap the chains over the capstan next to it, think that would work. Even the ship today doesn’t show this or indeed the heavy bosses further forward, bit of a dark horse this one. Last photo shows Mikasa at anchor, used this image as reference for the chains on the side.
- yvesvidal, scrubbyj427, GrandpaPhil and 8 others
-
6
-
5
-
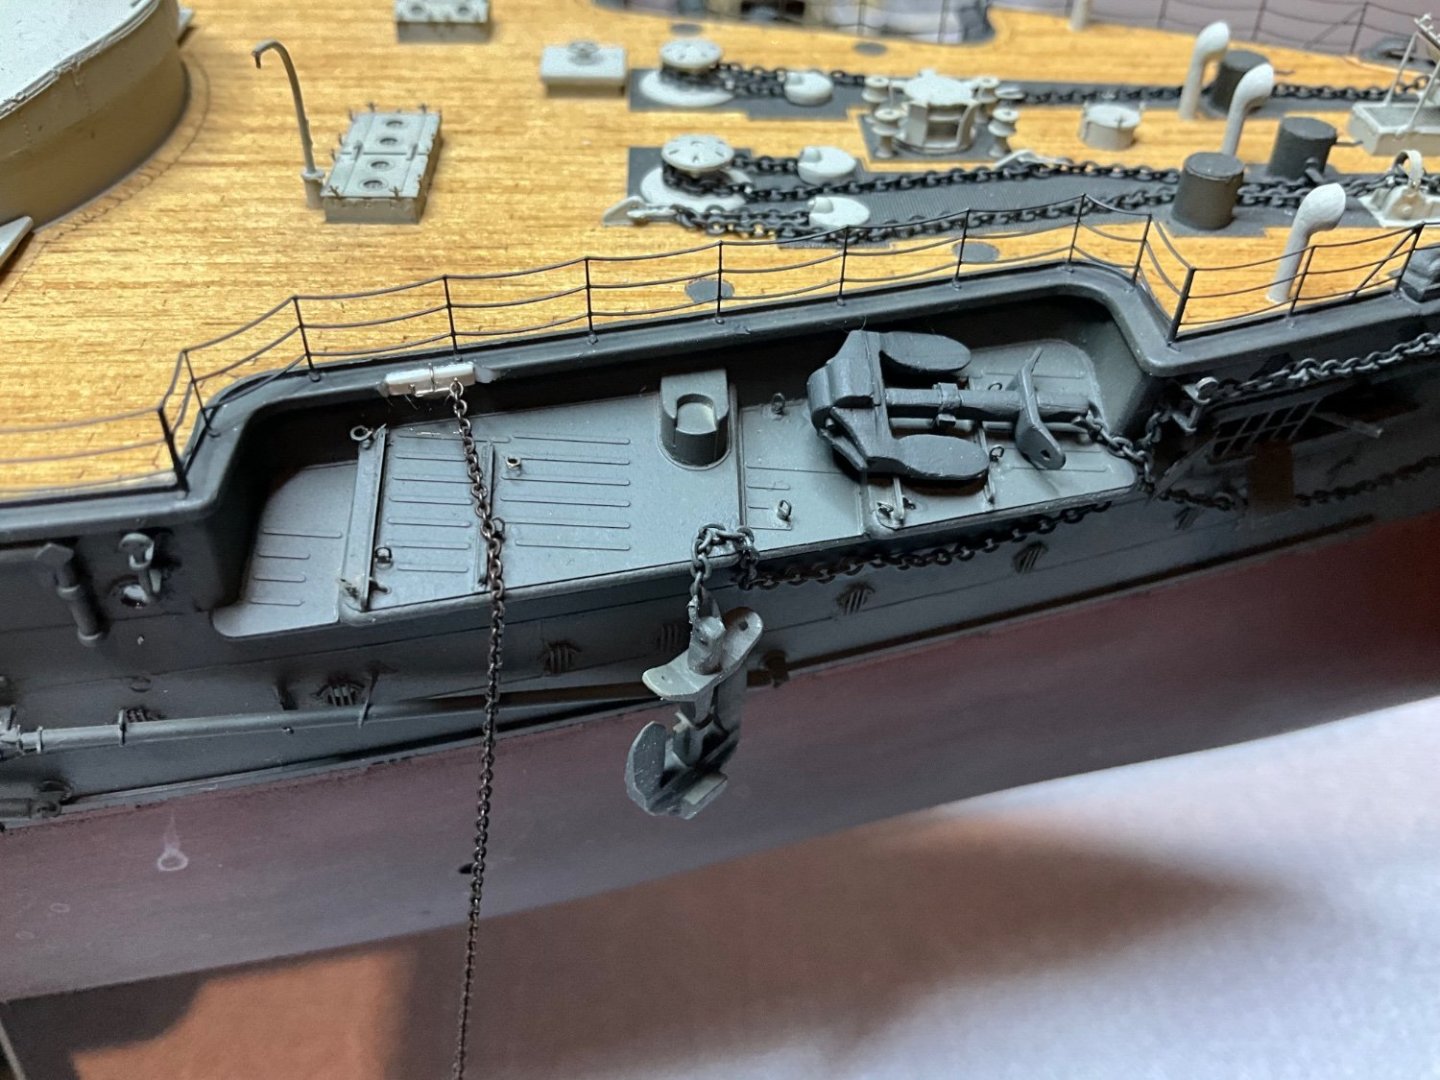
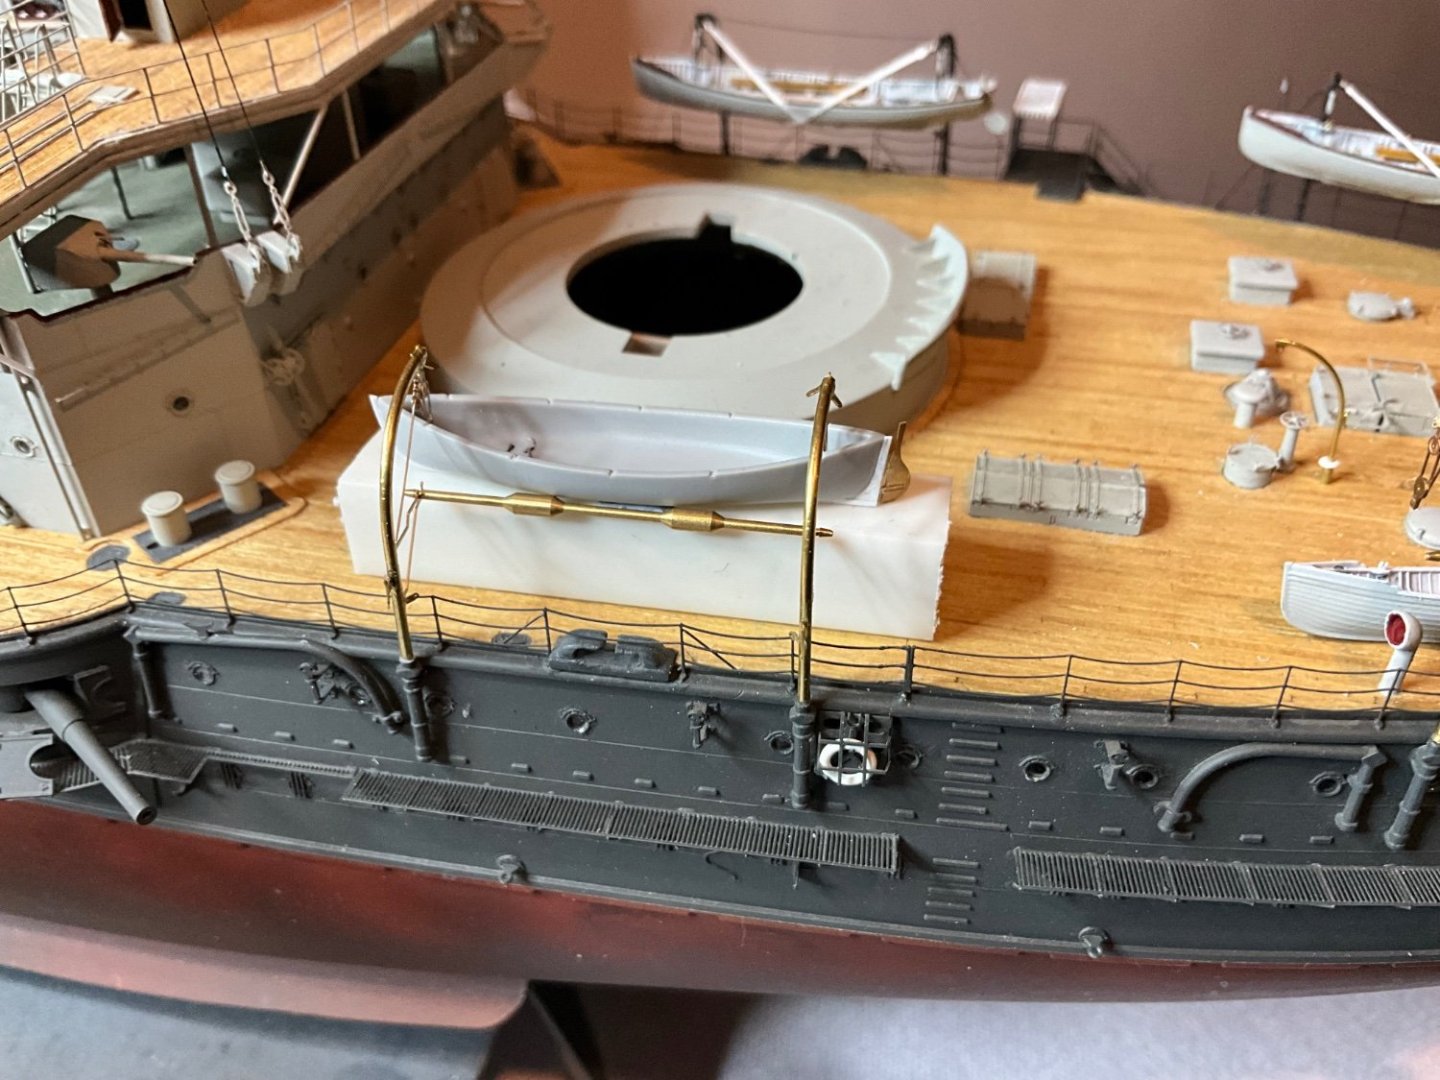
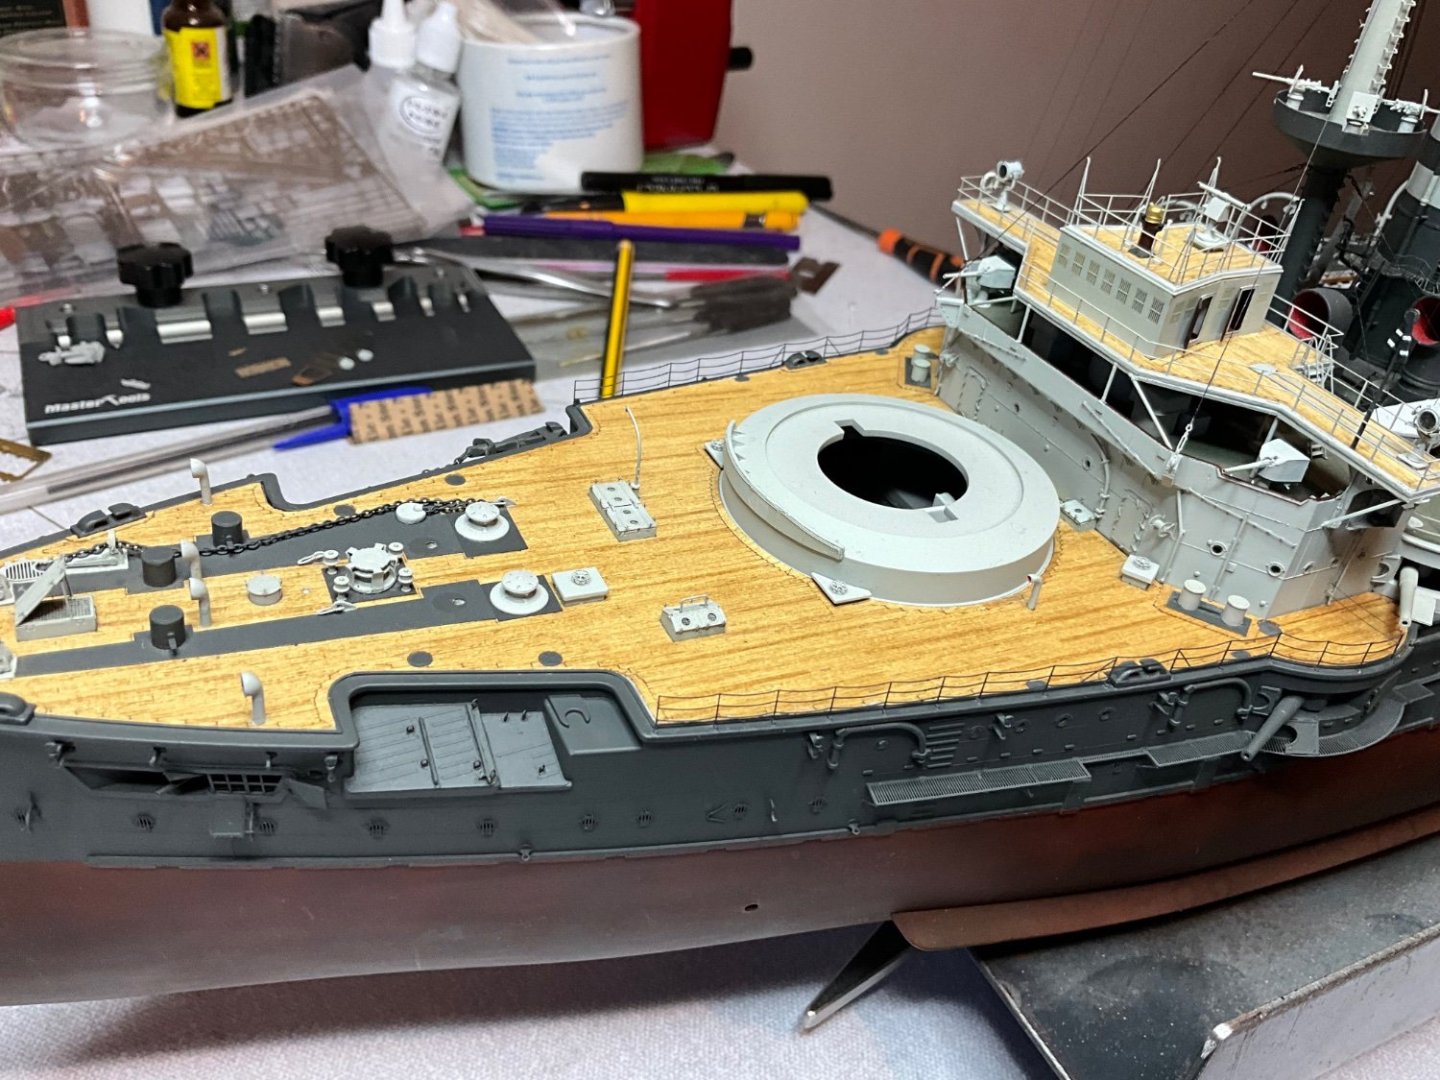
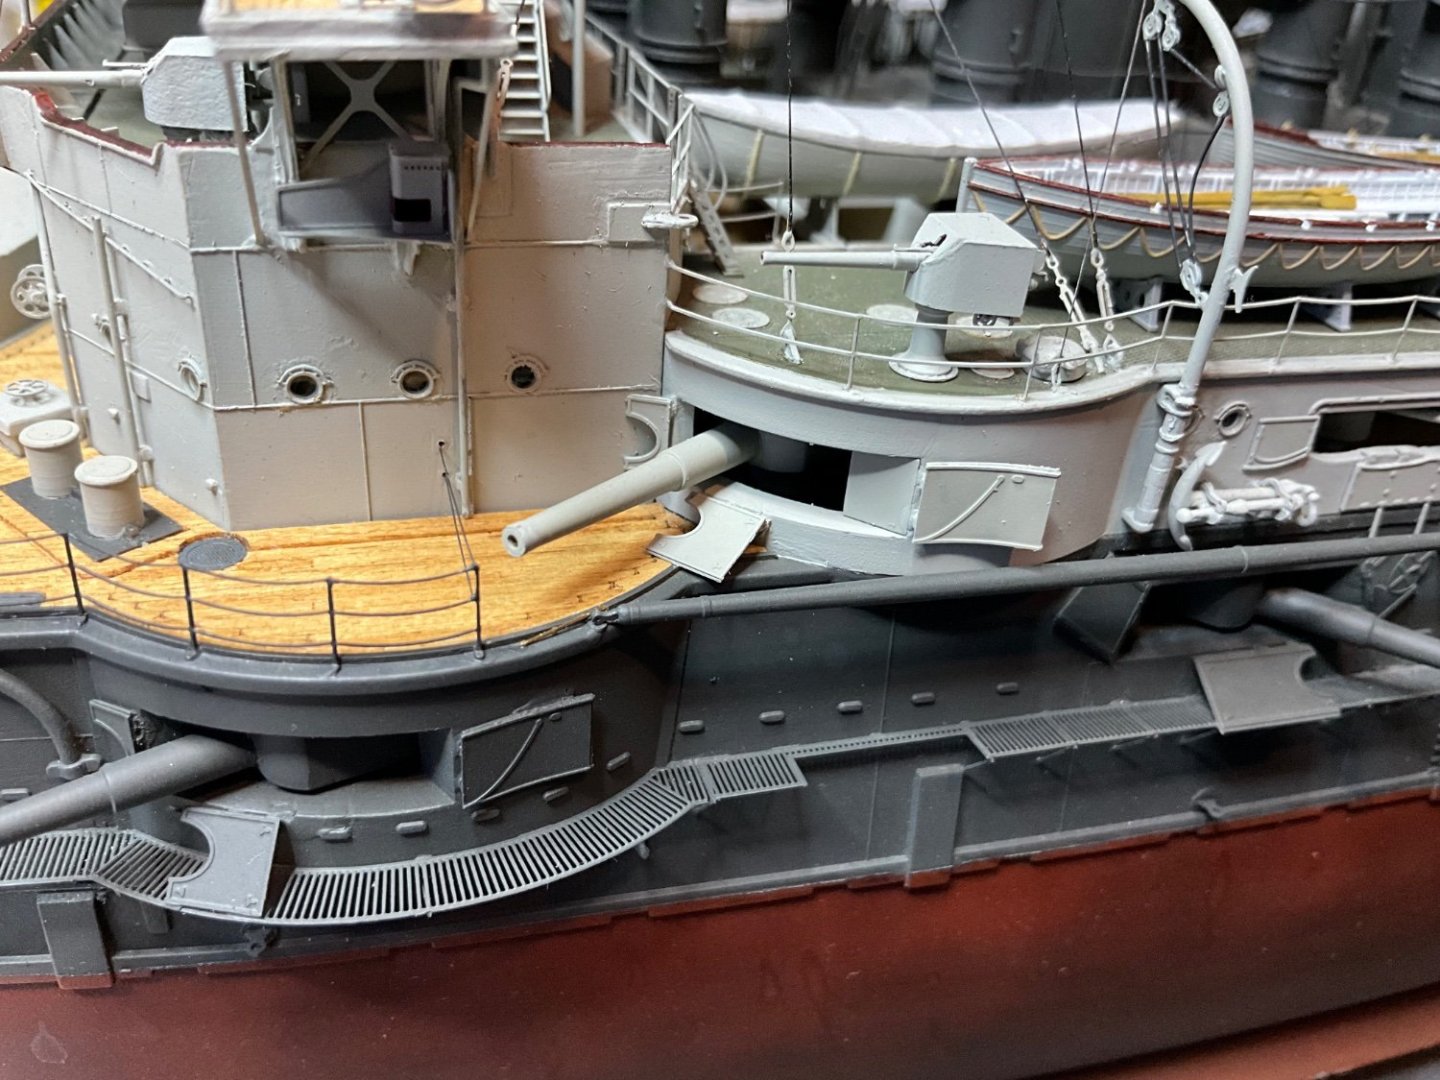
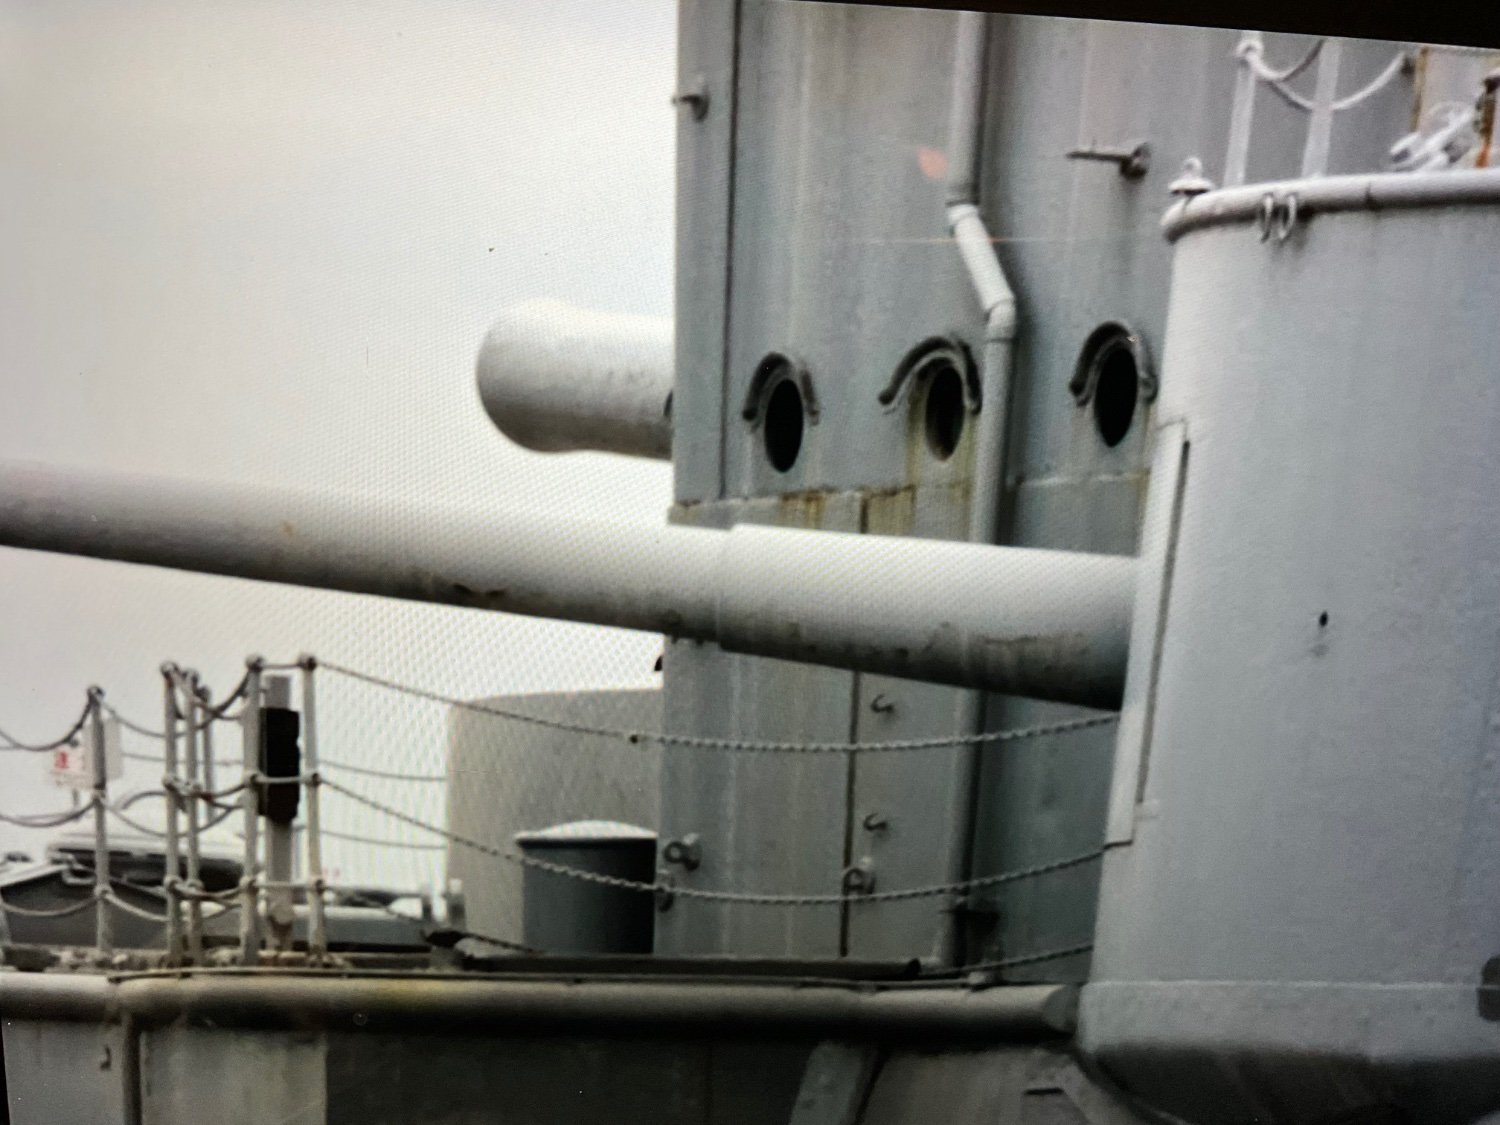
Another thing l noticed when browsing through photos of Mikasa as she is today, were the two small hooks on side of superstructure, l am totally guessing on them being for the rail chains after the gun shields lowered for operation of the guns in action, well at least they are right height and position for this to work, totally my choice to do model this way, doesn’t mean it’s right but works for me. Had to mark and drill two holes through side of bridge to let wire pass through. 0.3 or less for 0.1 wire.

- Haliburton, coxswain, mtaylor and 5 others
-
8
-
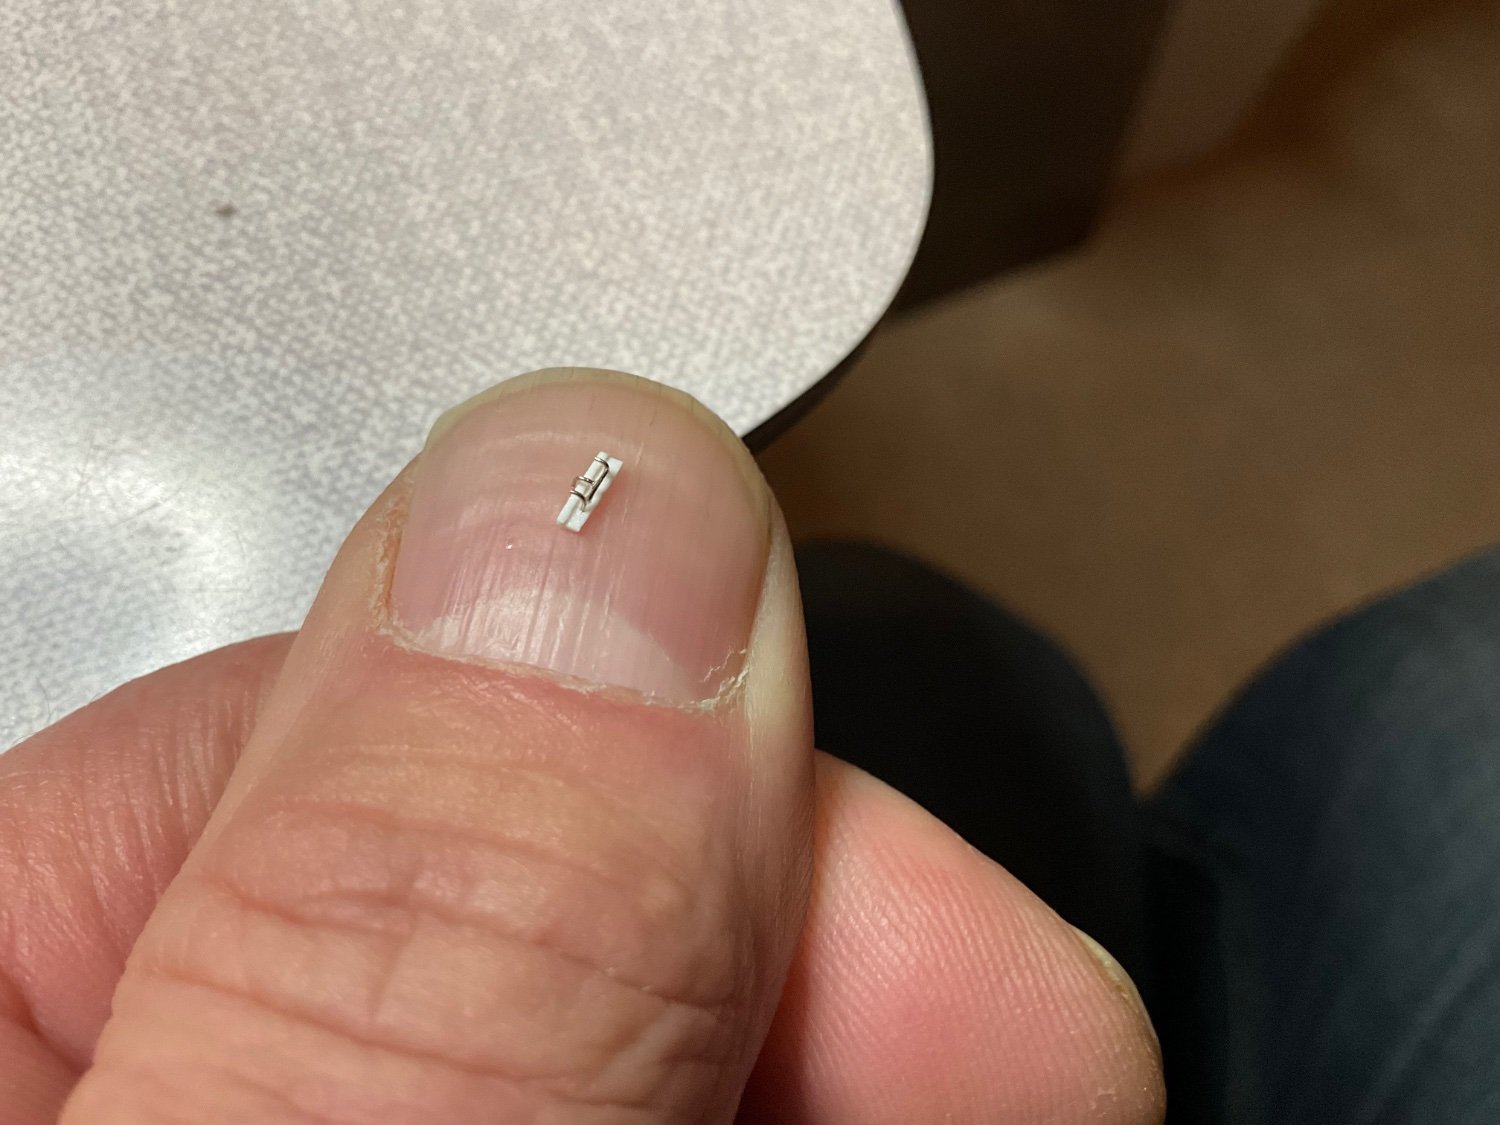
Take care when doing these rails, no extra ones in the box, indeed l had made some of the rails here ages ago, one must have fallen on the floor and didn’t notice in time, Jacqueline came in and stood on it, didn’t tell her though, she turned it back to IKEA, flat pack with a few extra kinks, unsalvageable 😂second set to the rescue 🙄 Once the rails were bent up and before painting did dry fit up on model, one photo shows it needing slight adjustments, the second showing adjustments made, happy at this stage to paint them, just don’t knock them if you can🤞

- GrandpaPhil, Canute, Haliburton and 6 others
-
8
-
1


HIJMS MIKASA 1902 by Jeff59 - FINISHED - HobbyBoss - 1/200 - PLASTIC
in - Kit build logs for subjects built from 1901 - Present Day
Posted
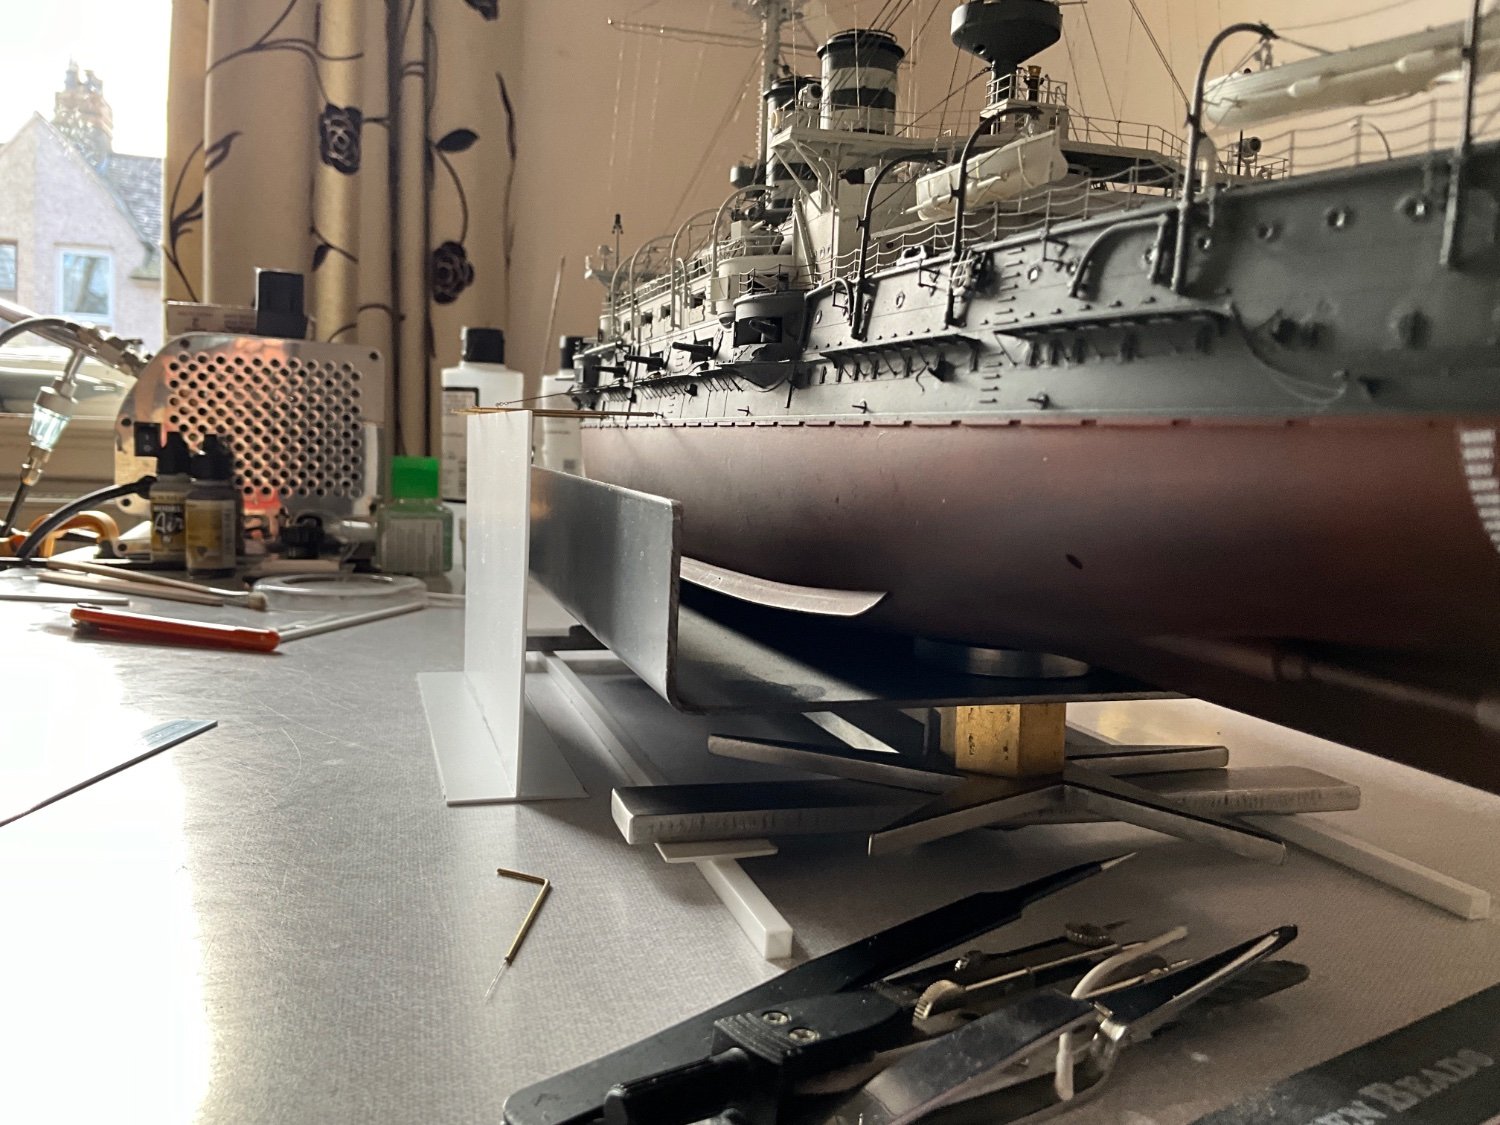
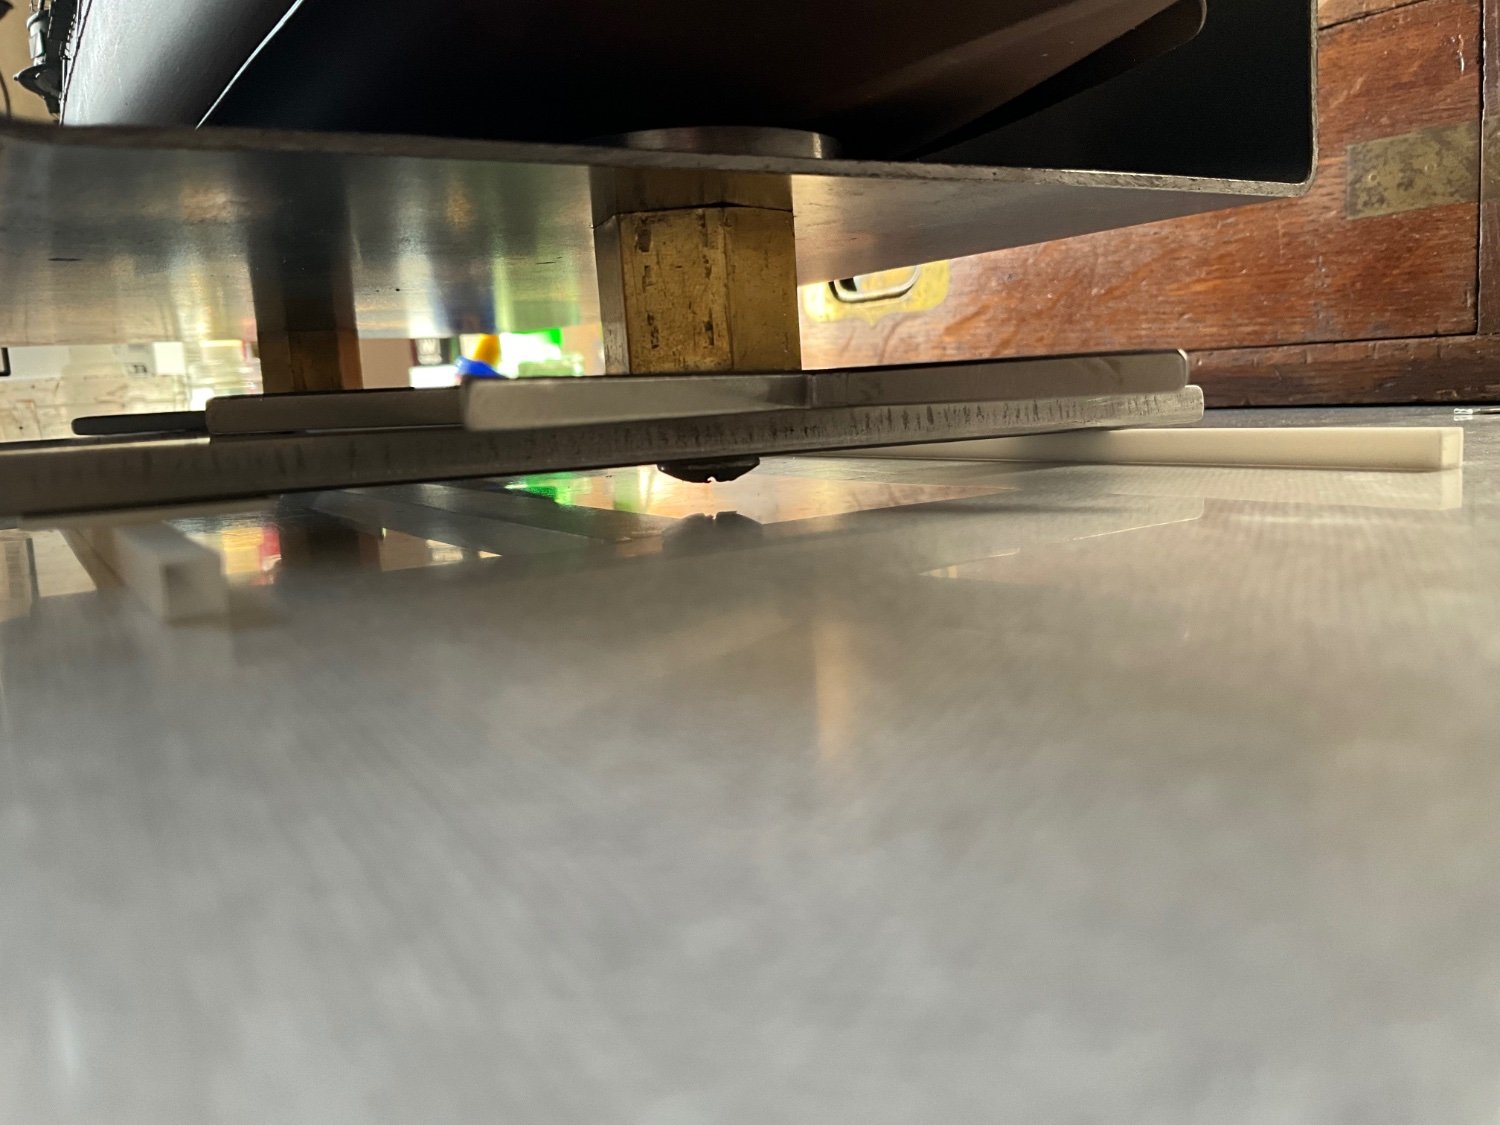
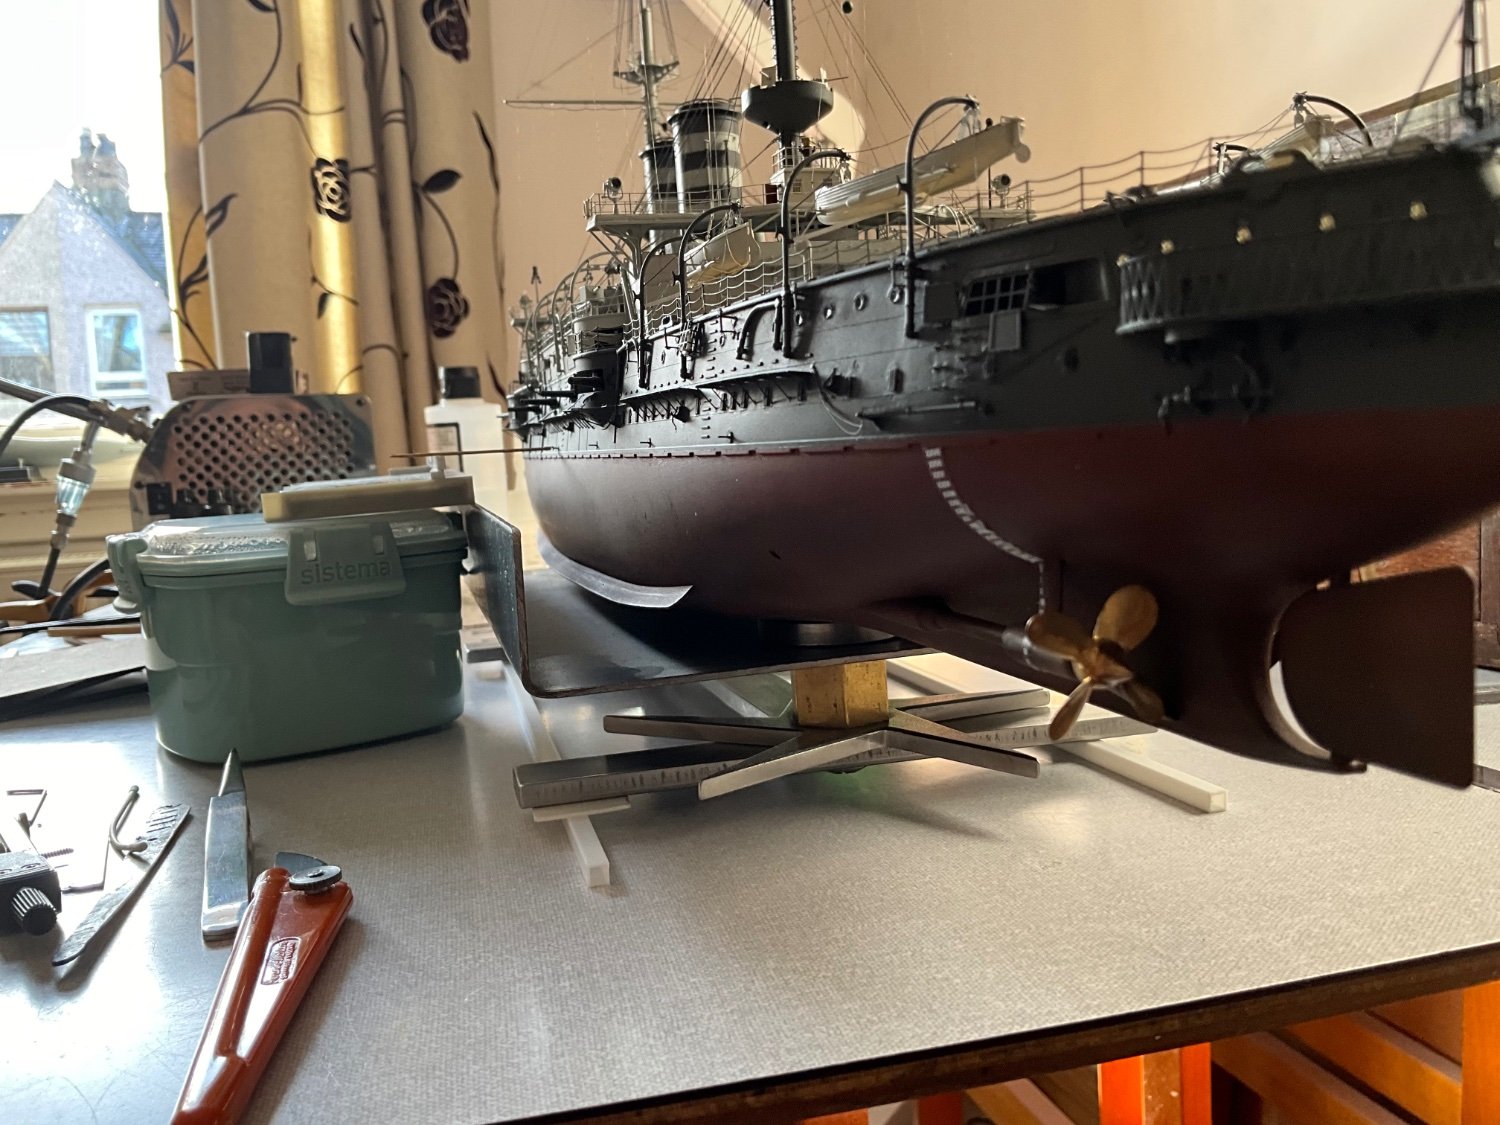
As good a jig as does job, at least everything is steady now, if l can get this to work will be a bonus, here’s hoping.