


Jeff59
-
Posts
453 -
Joined
-
Last visited
Content Type
Profiles
Forums
Gallery
Events
Posts posted by Jeff59
-
-
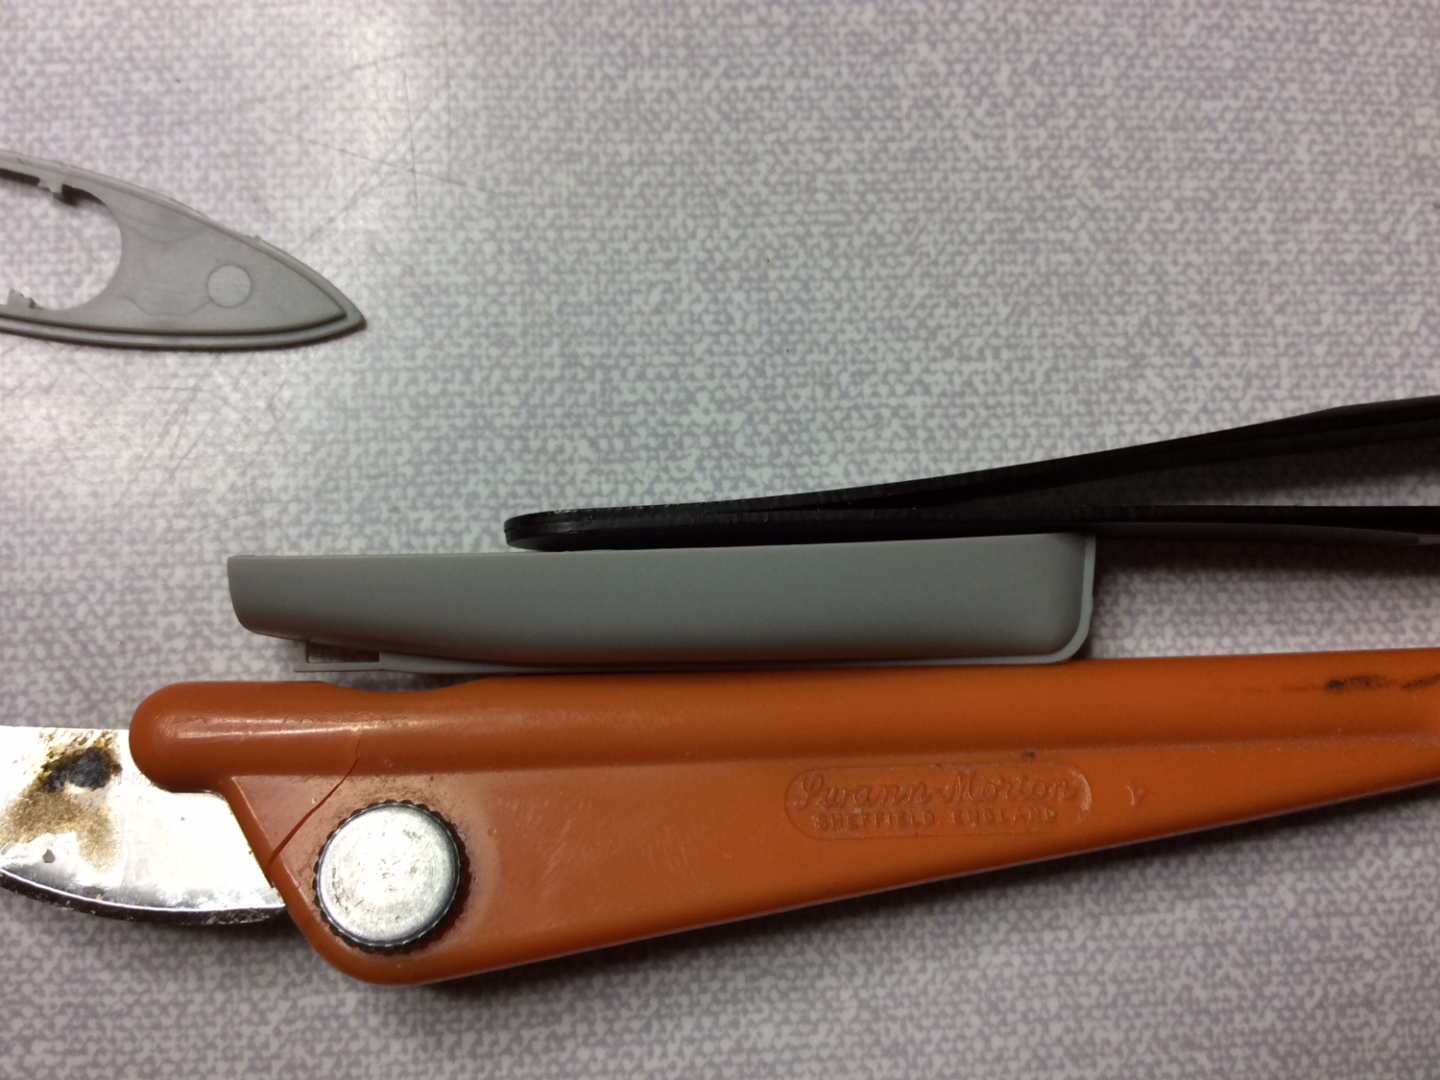
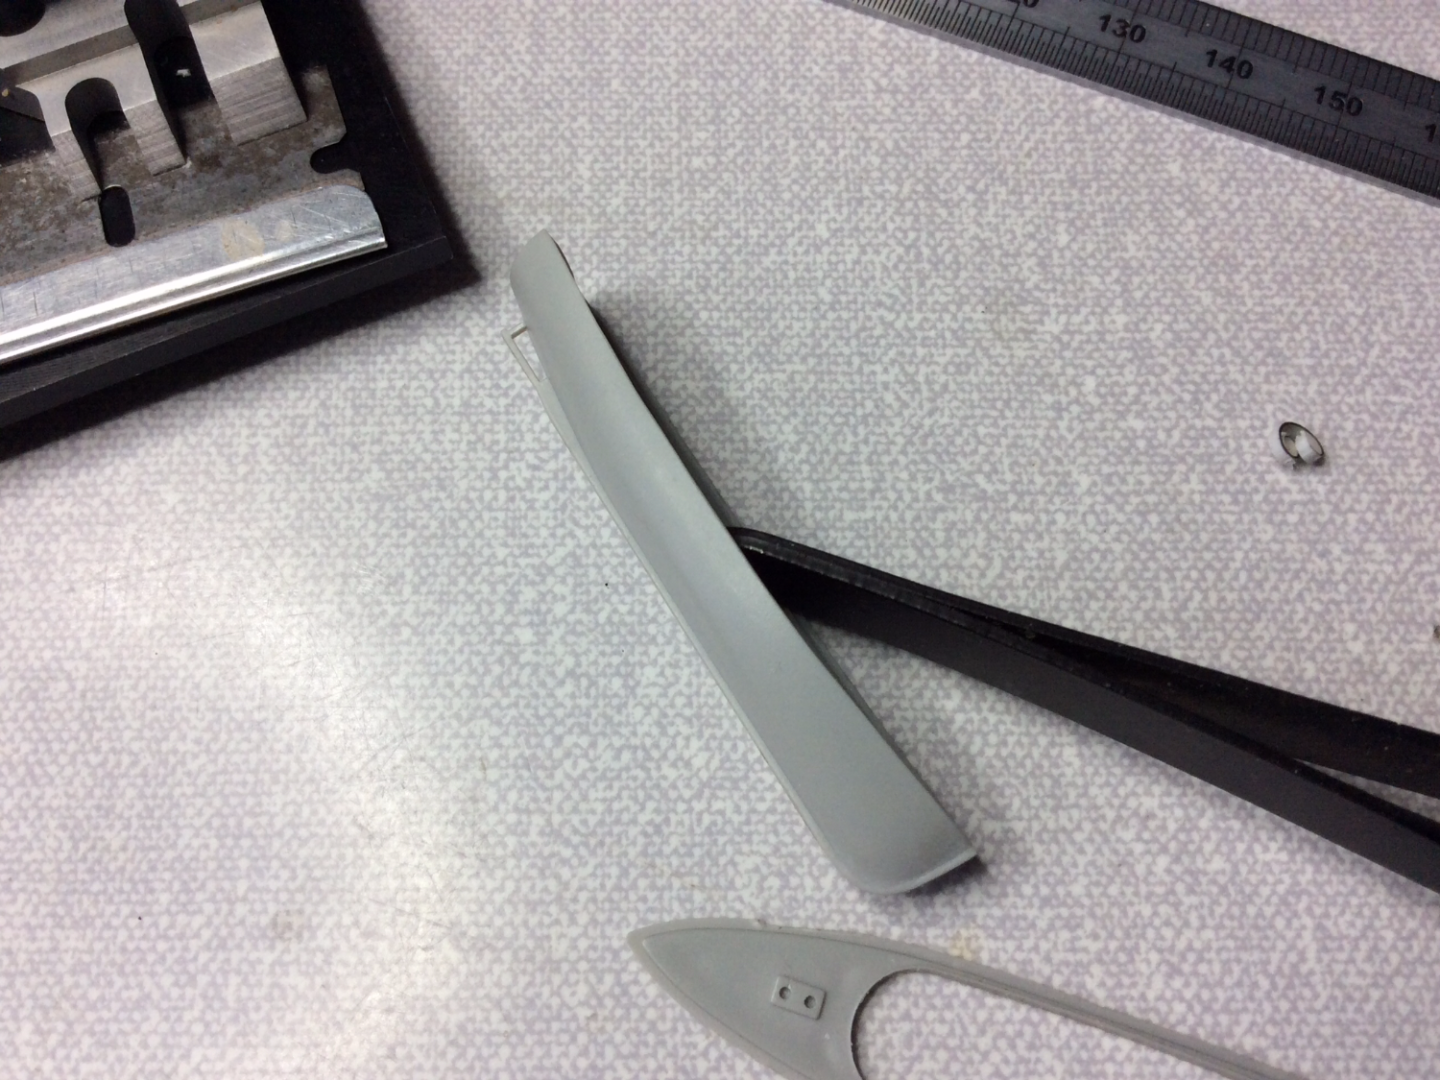
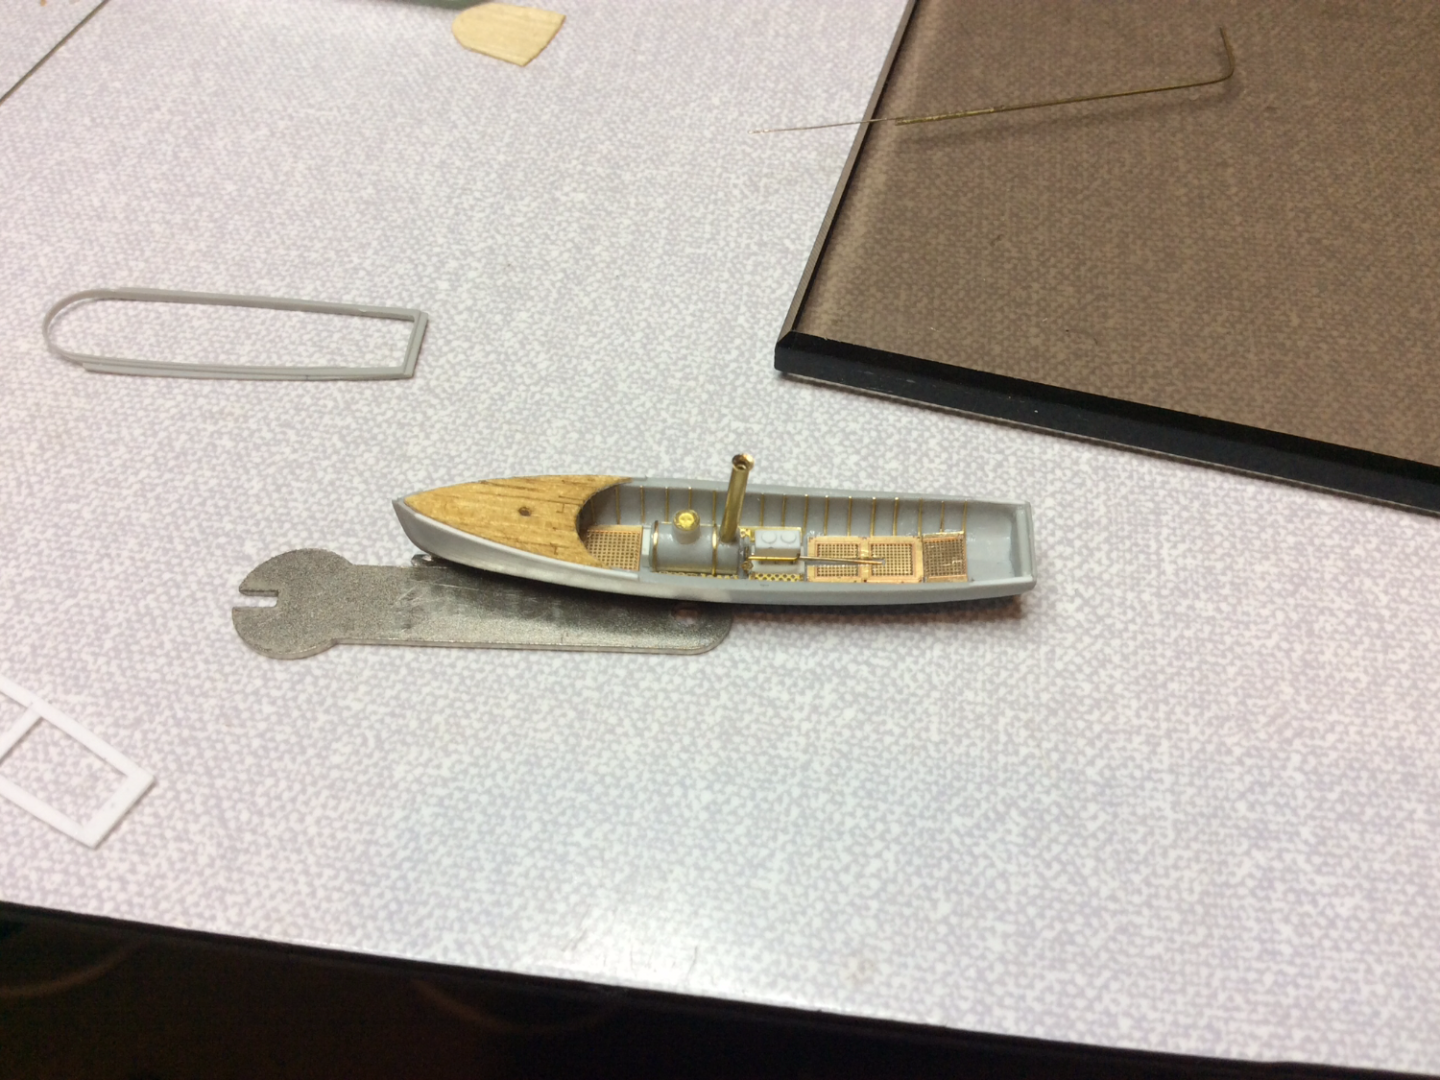
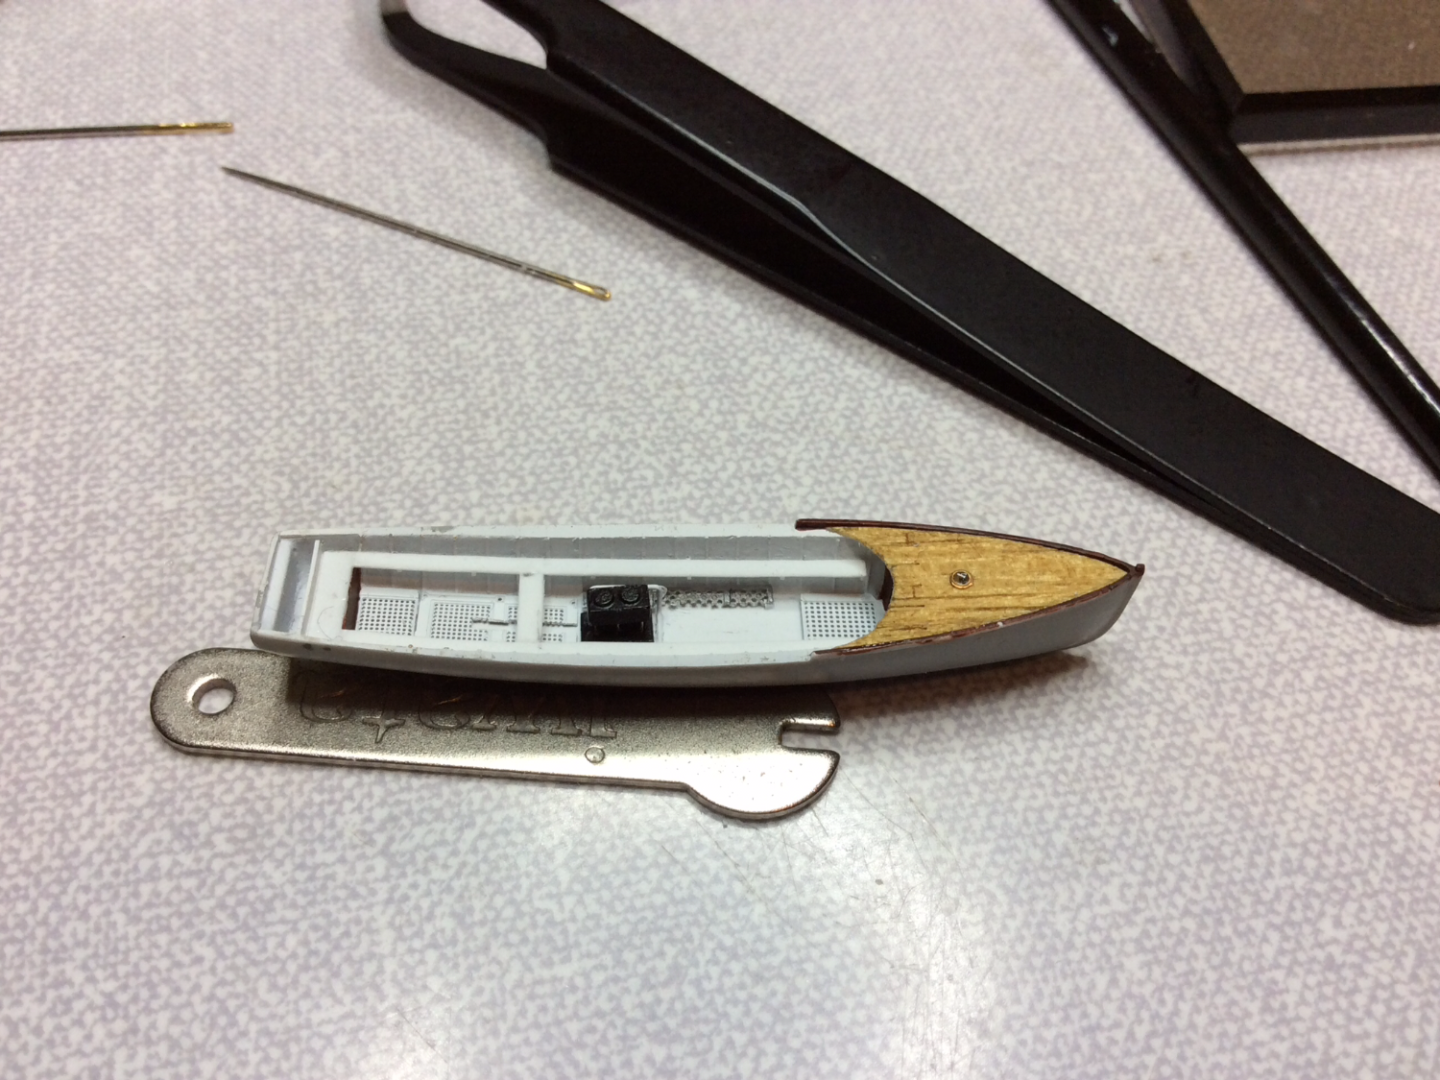
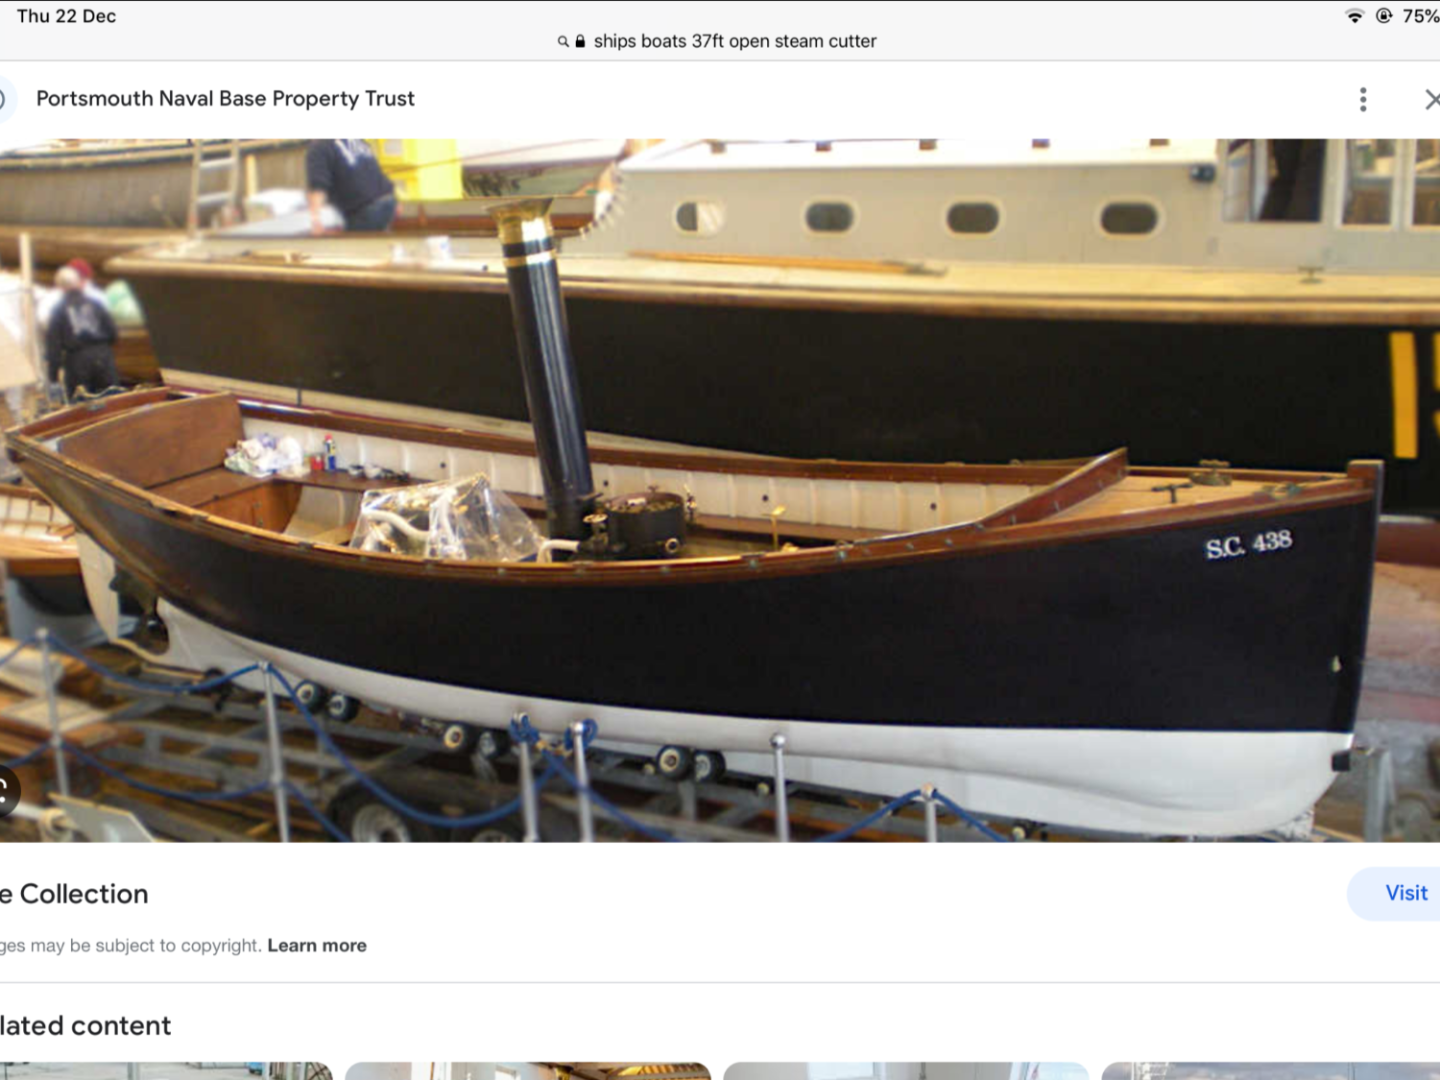
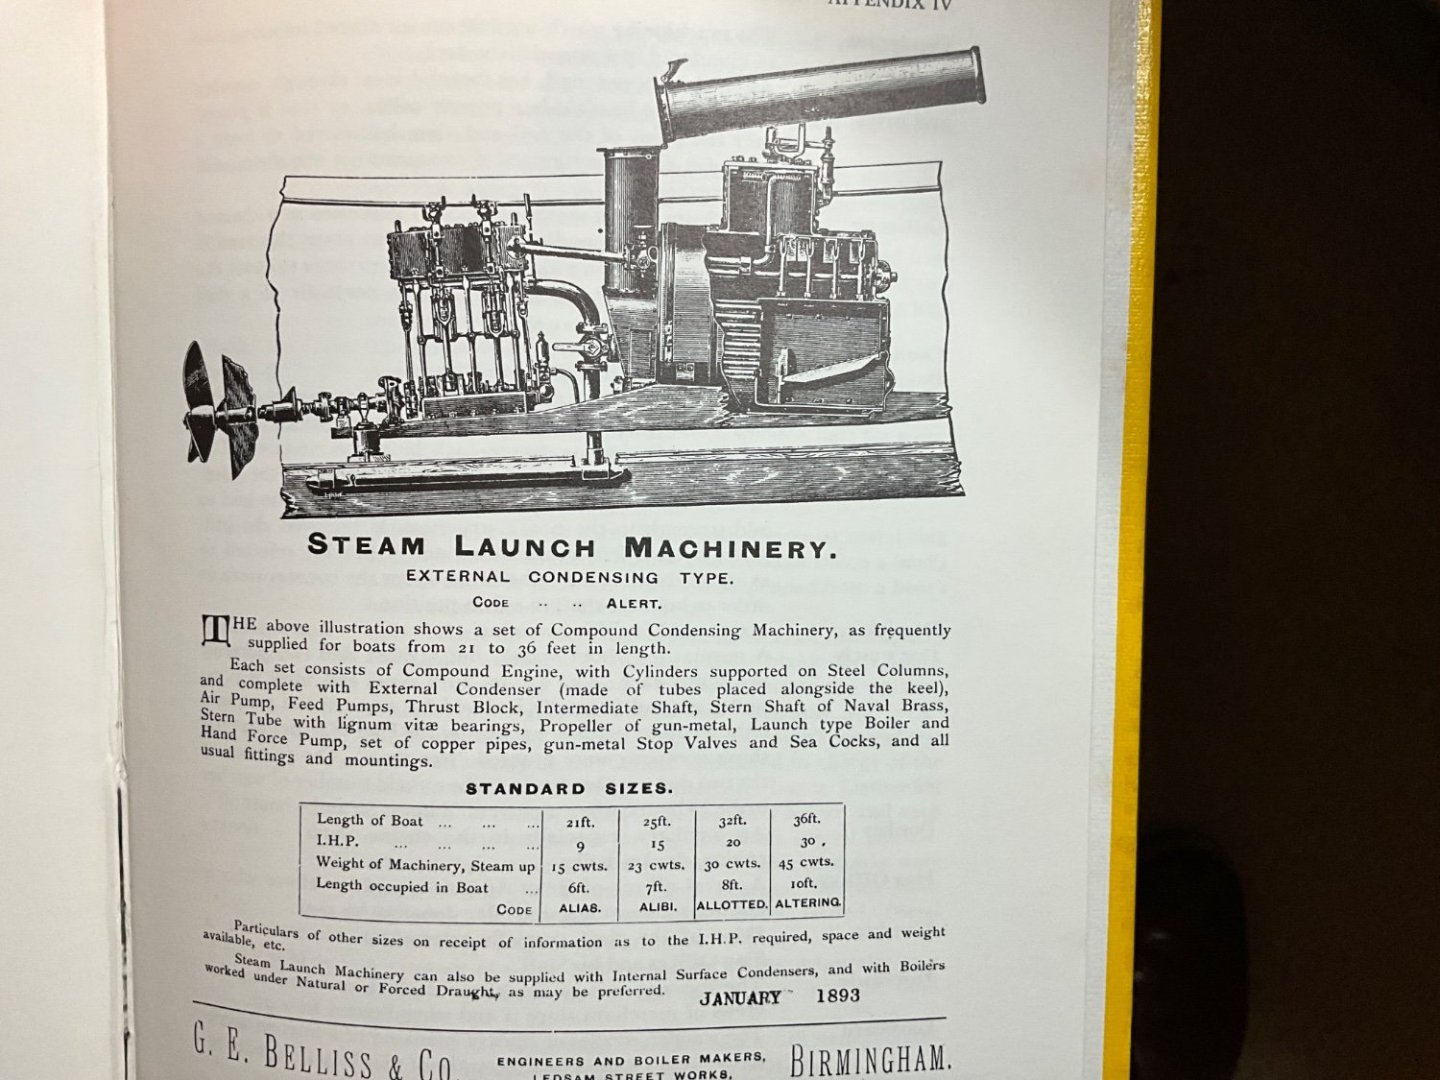
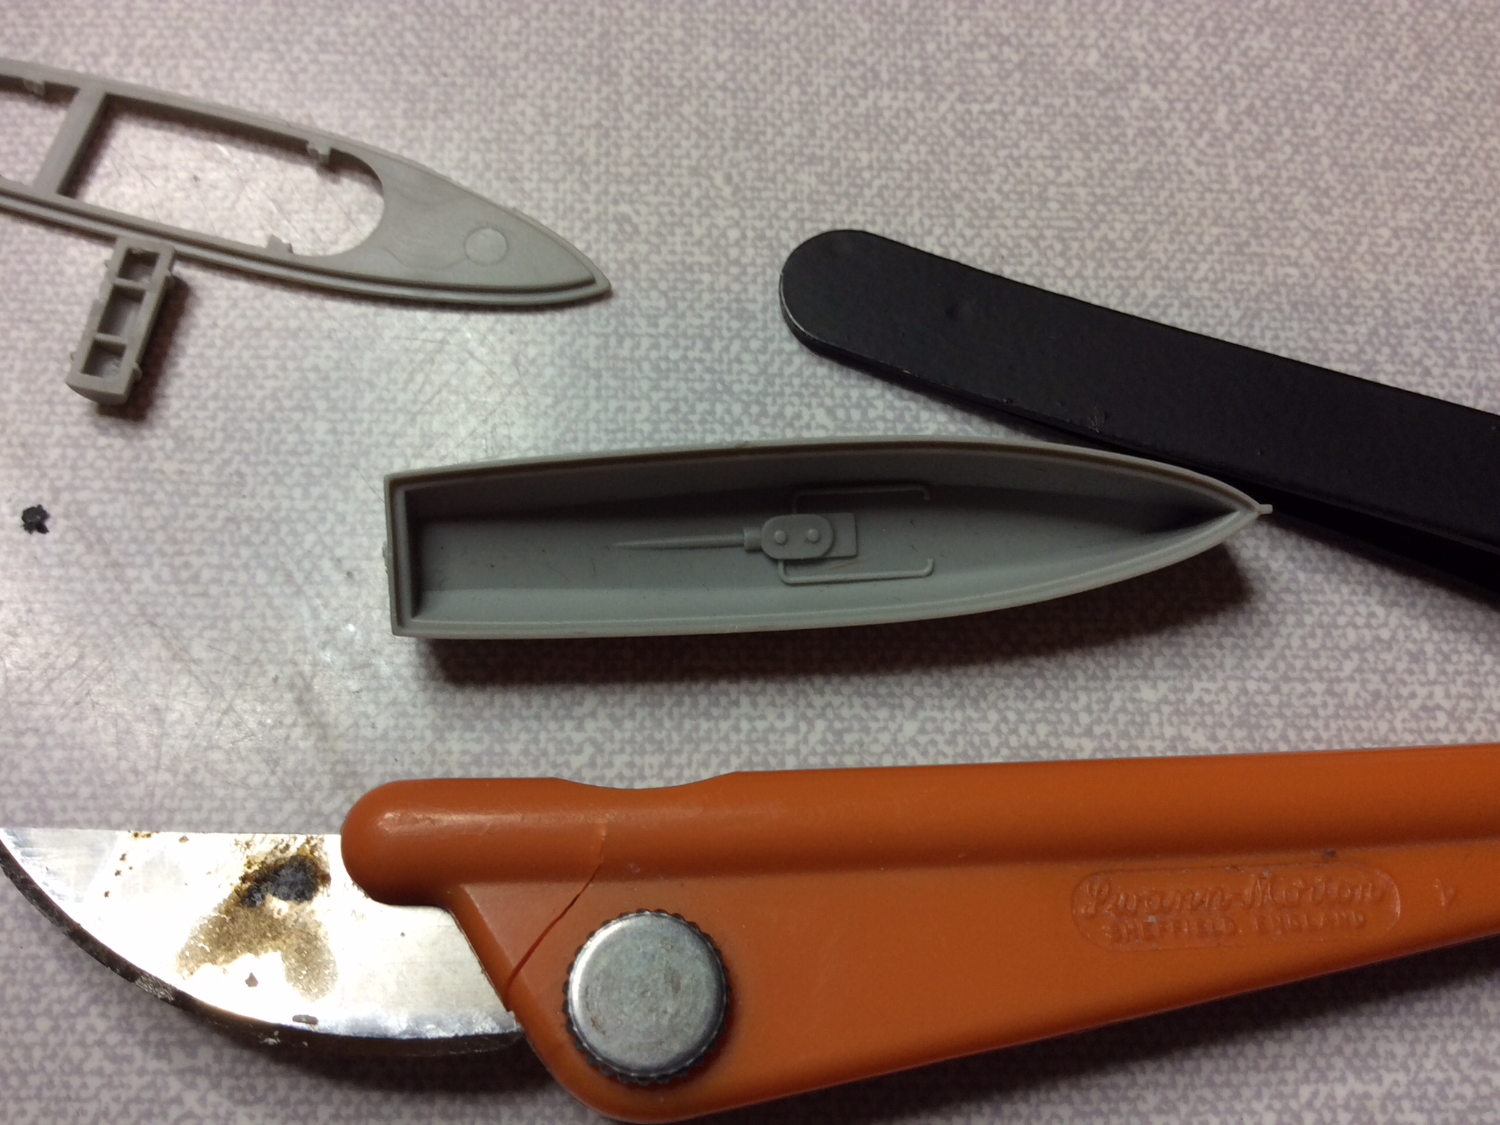
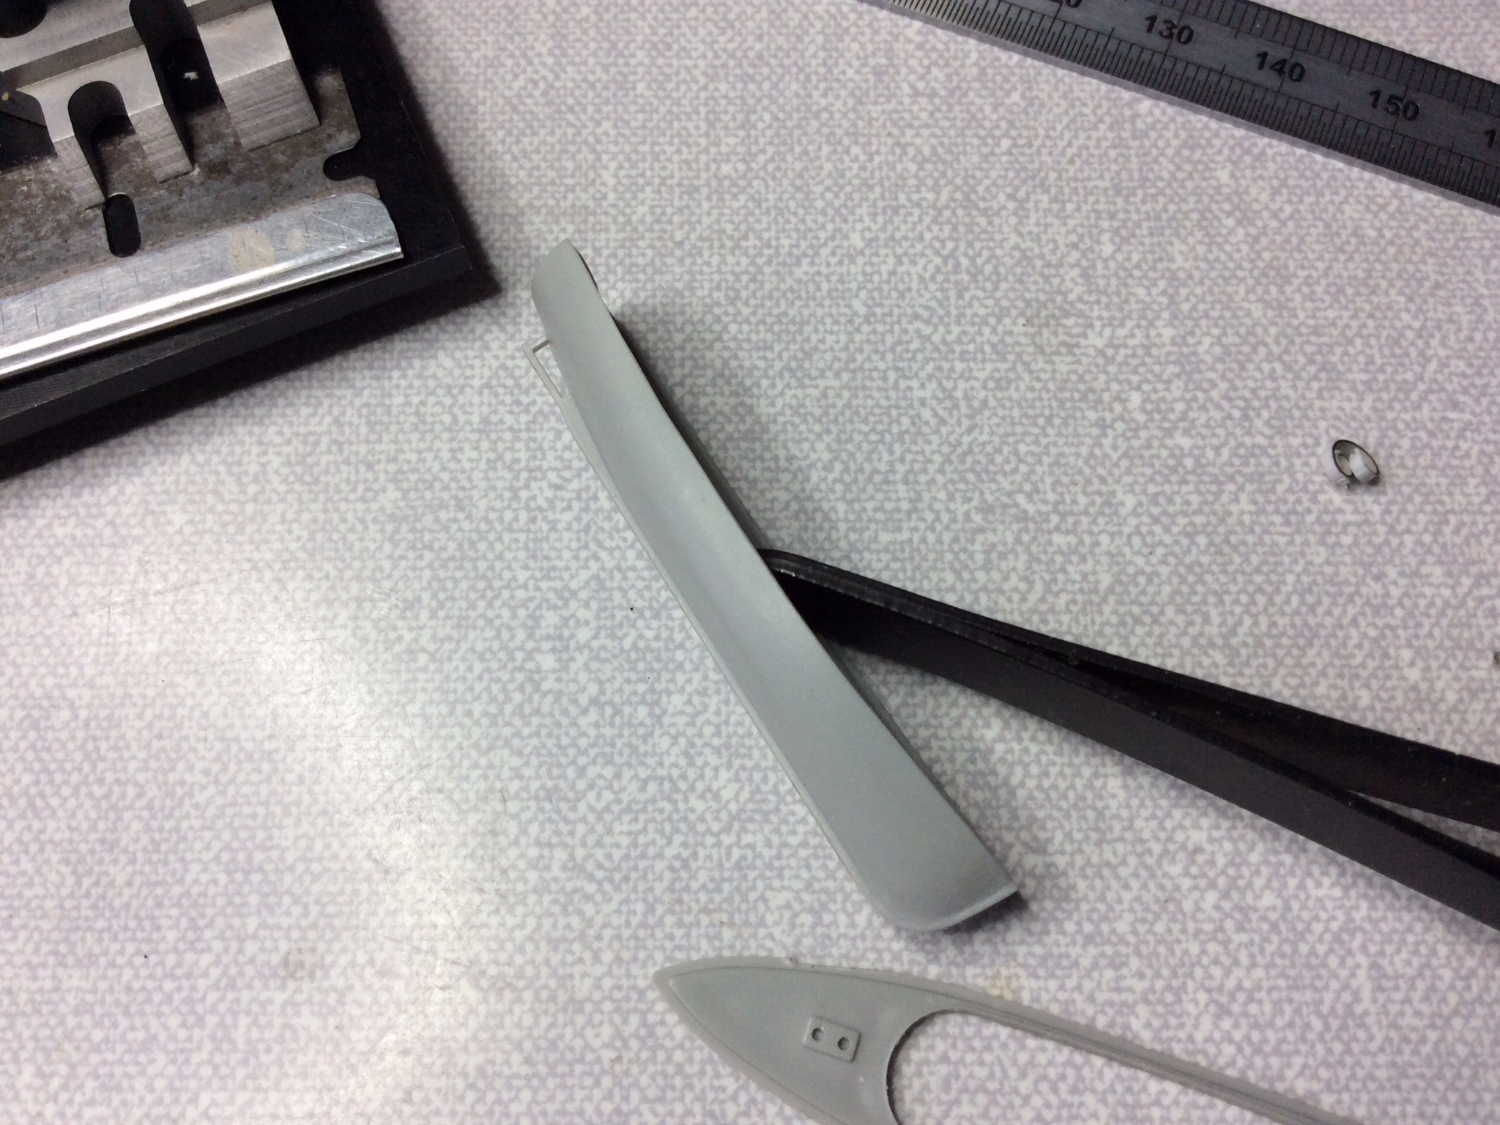
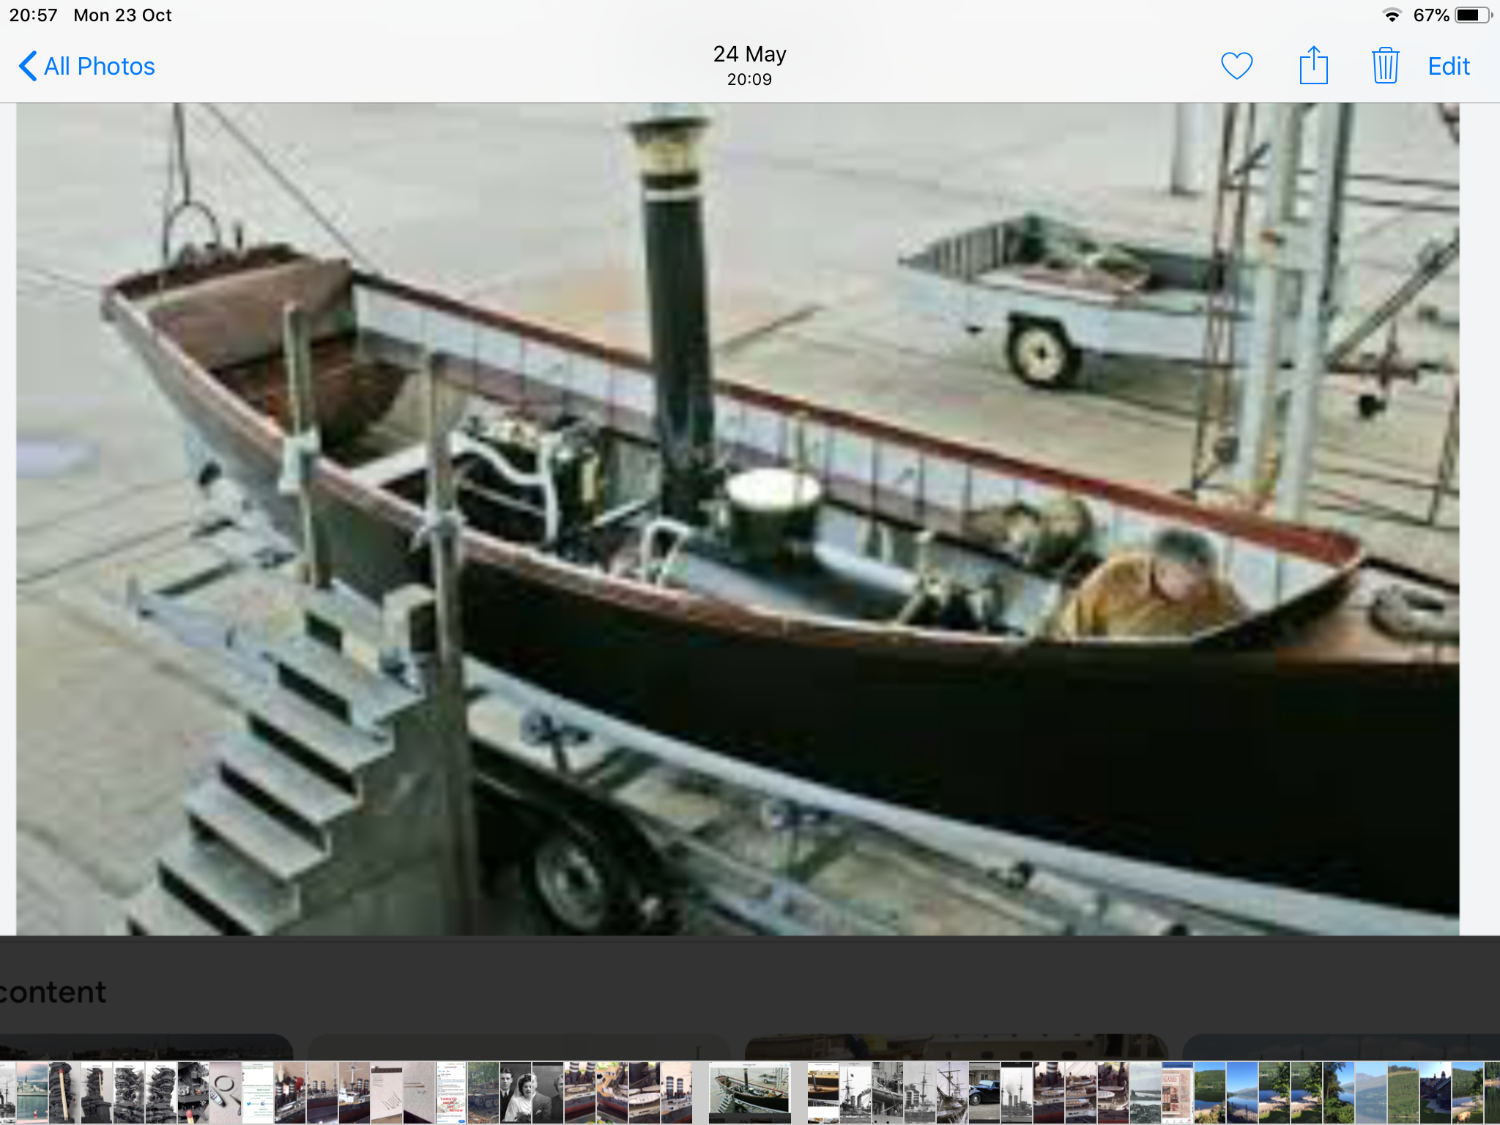
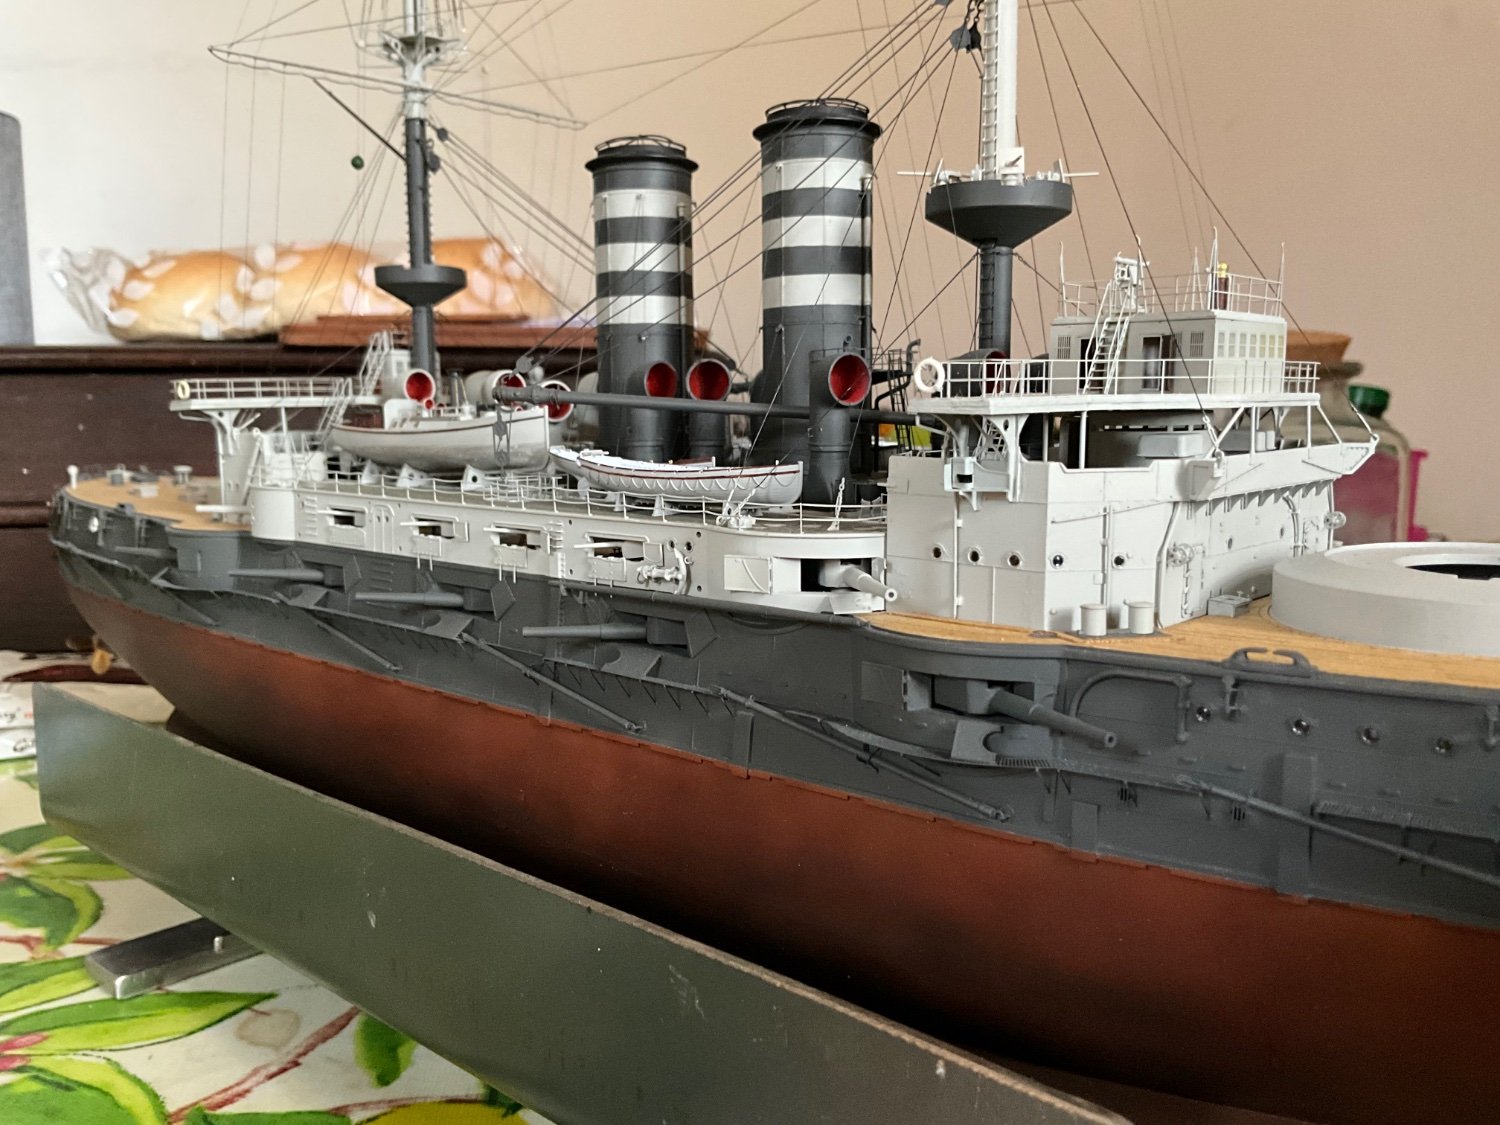
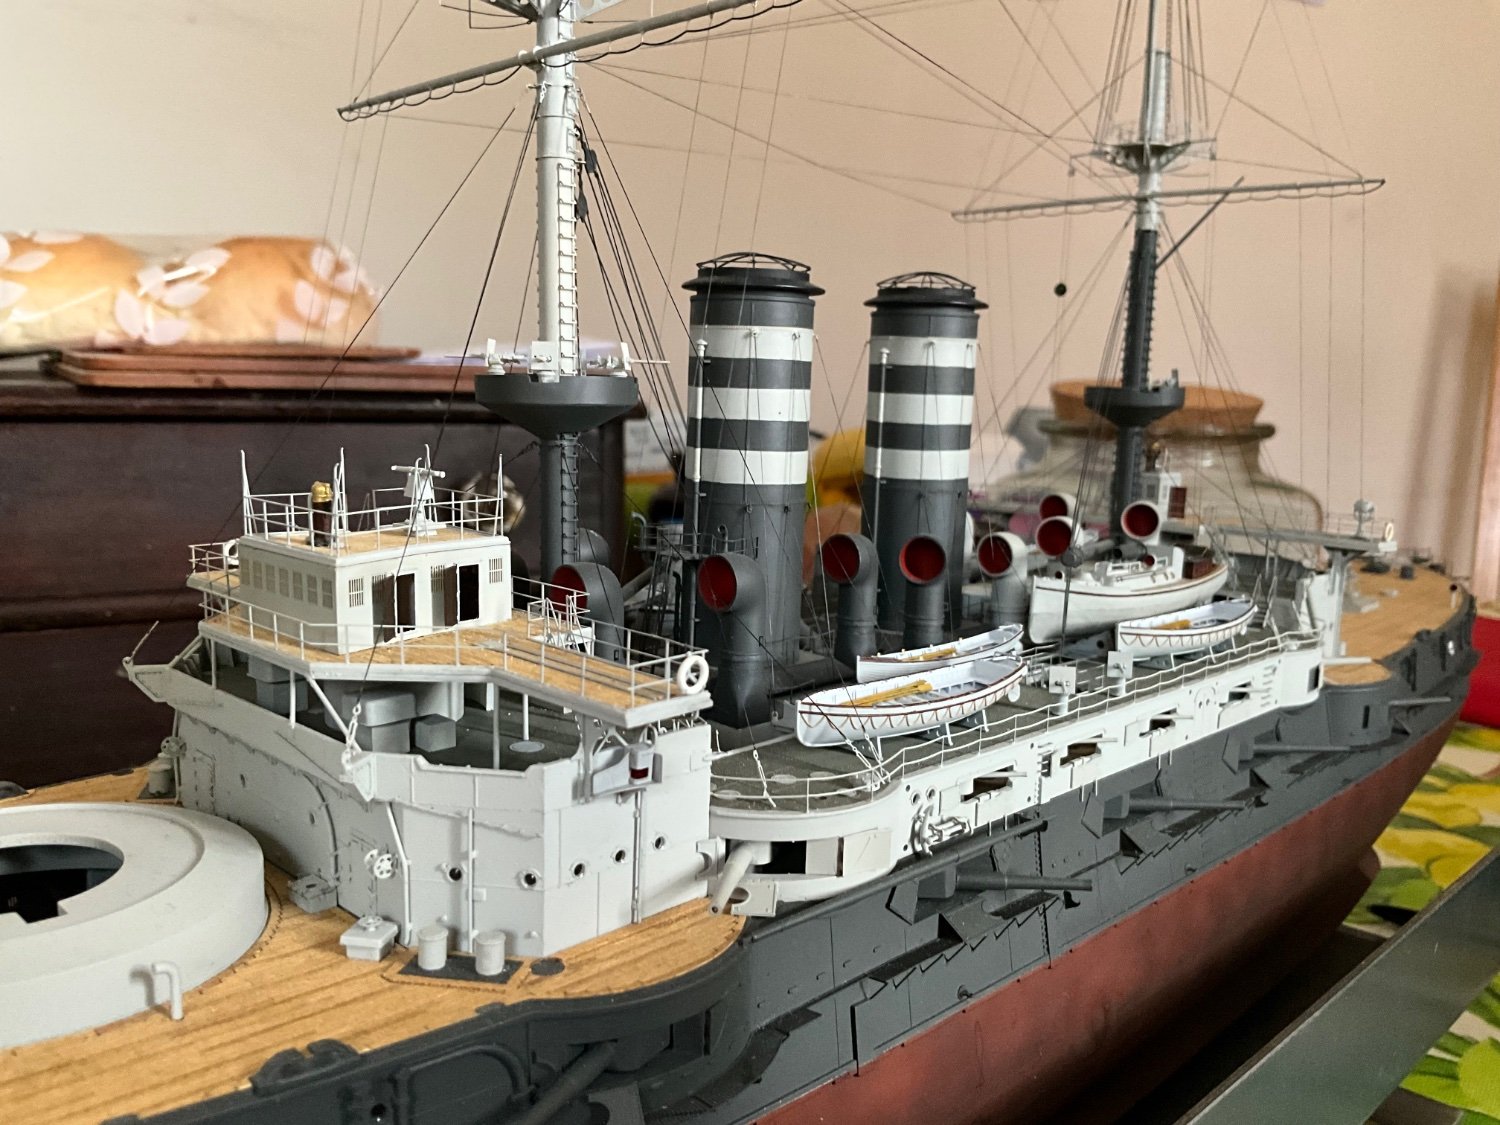
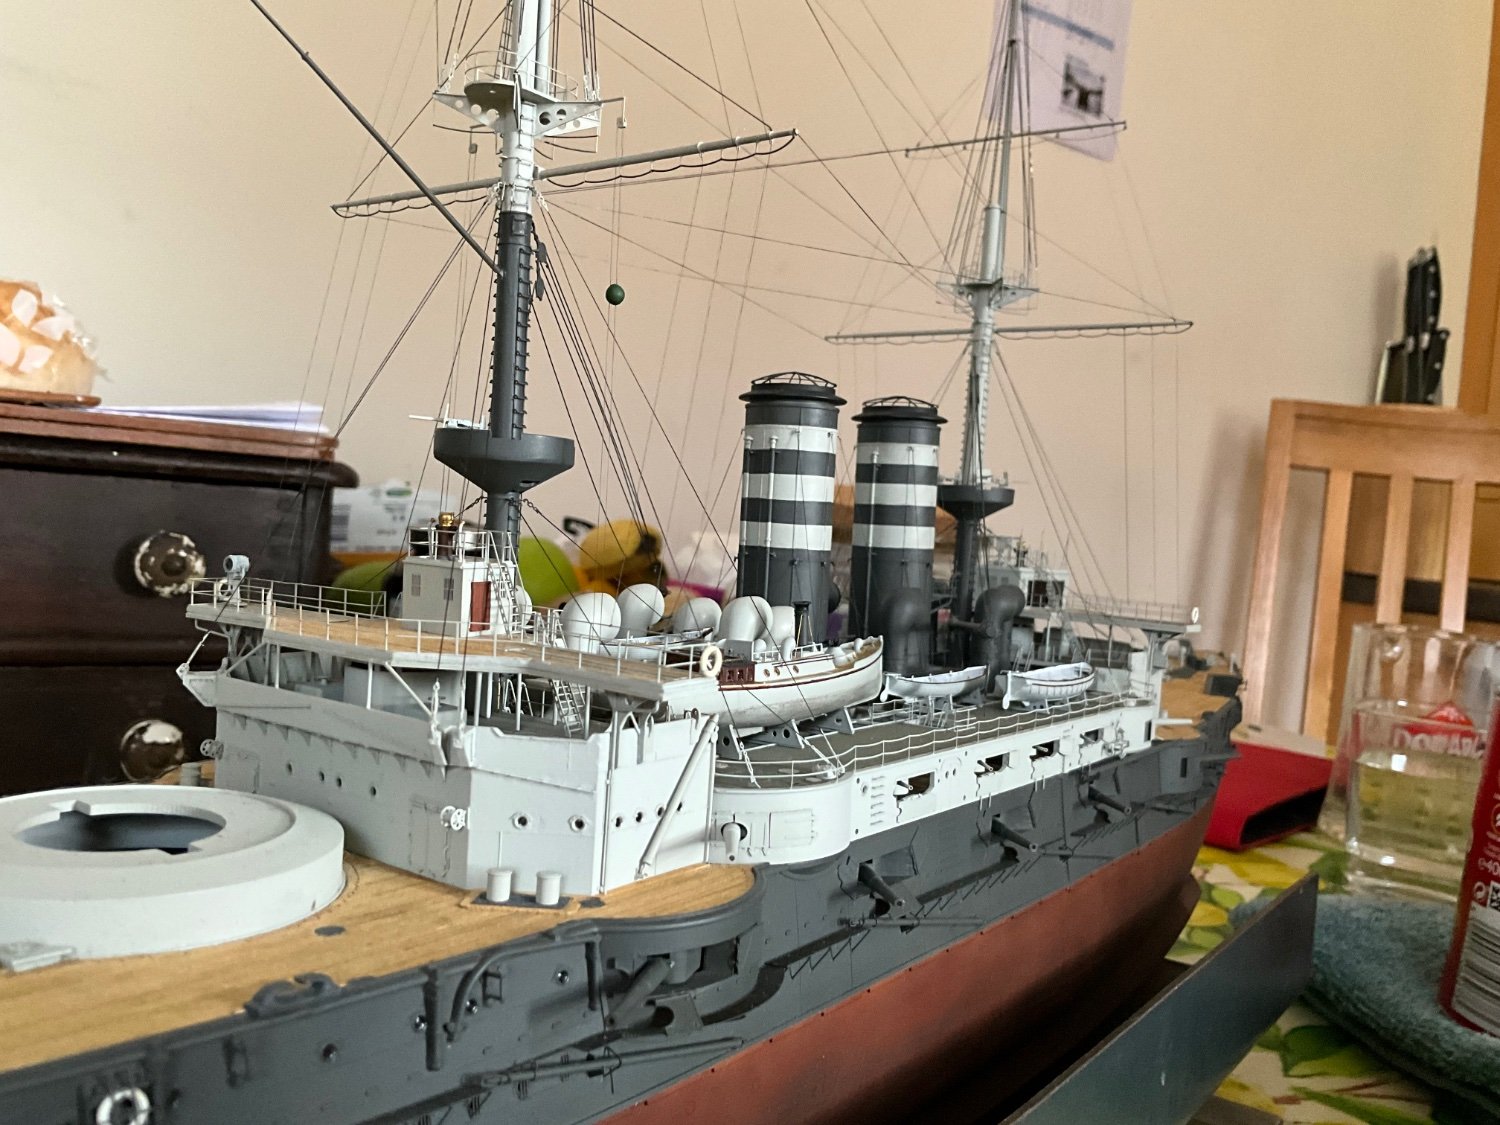
Most of the work on this is guesswork and artistic licence, started by marking the hull with a black marker pen so I could get an eye on the shape I was getting, then slowly cut this away, right away I could see results starting to happen, also used sanding sticks and my trusty knife to contour the hull, almost sanding through the lower hull on bow, you can gauge how close you are to going too far by holding it in front of your light to see how thin the plastic is getting, just take it slow like Tina Turner - slow and easy 😂Still was too square at transom end, best I could do was drill a line of holes down port and starboard sides at rear transom just inside thickness of hull plastic, drill about 2 to 3 mm down each side with 0.3 drill then clean out the fine slot, the gap left was then gently squeezed together in vice then glued. Once dry again attacked with sanding sticks and knife, the whole purpose was to try and get a nicer shape to the stern, you just have to keep looking at it and keep trying🤛Won’t keep going on, or I will end up with a book and publishing rights 😂 The hull is the important bit though, this is where all the shape kicks in.👍 The rest is straightforward insanity, looking at the actual boat I counted out 18 ribs inside the hull, simulated these by using original handrail etch from my Trumpeter 1/200 Arizona cutting ribs out of top rail, see, nothing goes to waste😂The funnel I made from brass tube, drilling out the top 2 to 3 mm to thin it out so I could try to flare the end out, partially successful here, didn’t think that tapered funnel from the kit or Pontos looked right, the one on the real boat and illustration of engine proves I was right to question tapered funnel. The rest of the boat was scratch built from anything at hand, so will put some photos up in sort of order, bear in mind this took me 3 weeks, the end result turned out better than I hoped for, doesn’t look too bad against the Micromaster boats, happy chappy. 😄


- Haliburton, Canute, mtaylor and 2 others
-
 5
5
-
At this stage I’m wondering if l can make this look better 😢 next post will show me cutting it to pieces 😂
- Canute and Ryland Craze
-
2
-
Can see the hulls are basically same grey as the ships themselves with some crafts painted out in dark blue or black. Next photos are of the shapeless kit boat which matched the shapeless fifty foot Steam Pinnaces.


- Ryland Craze, Canute and mtaylor
-
3
-
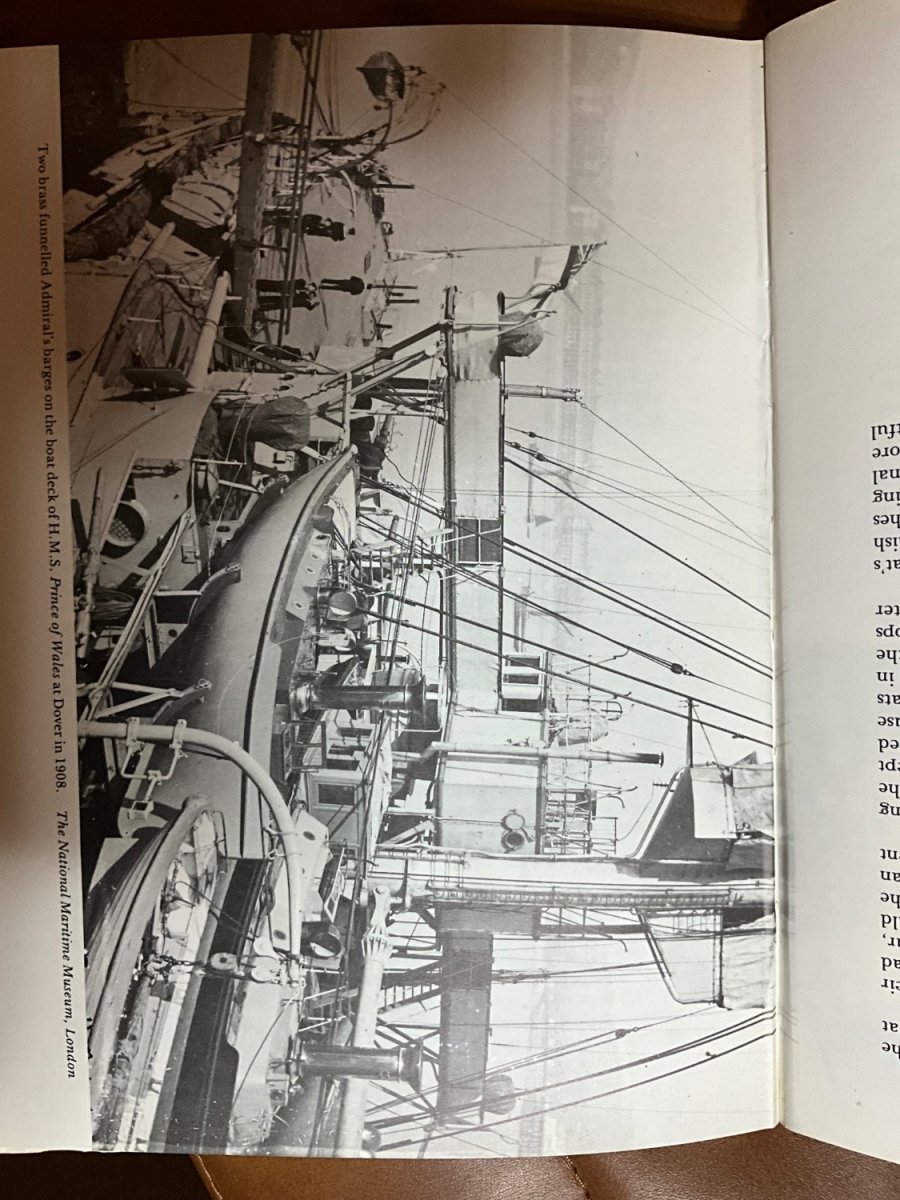
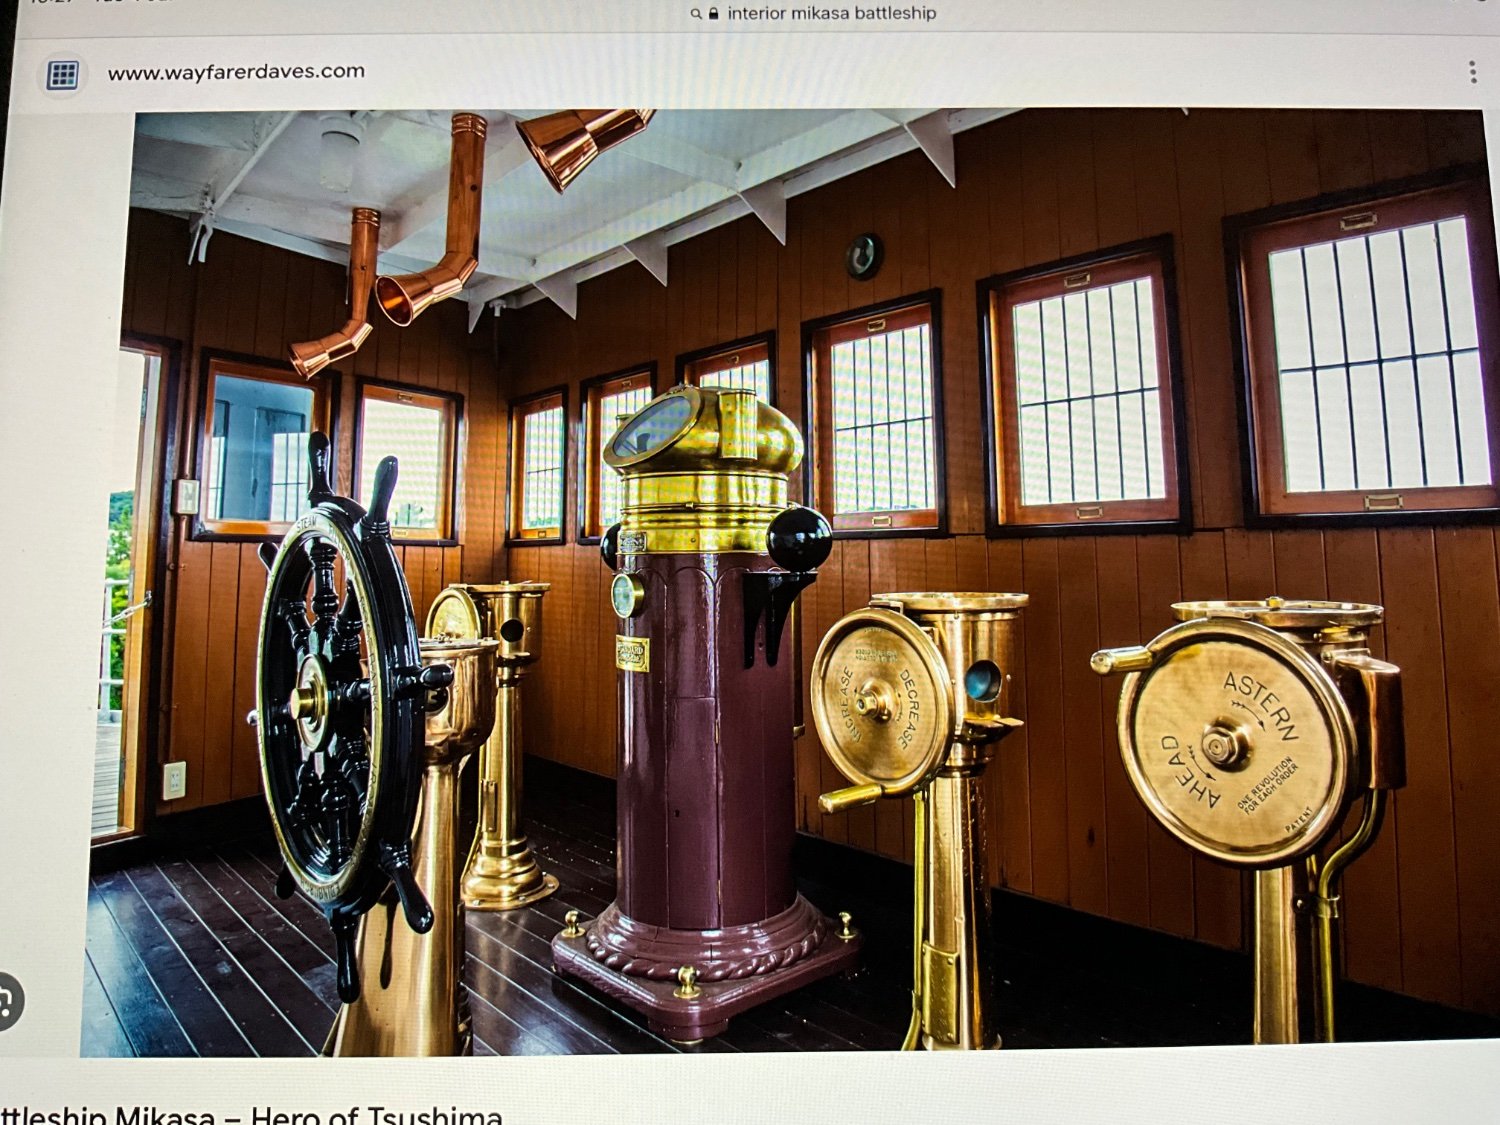
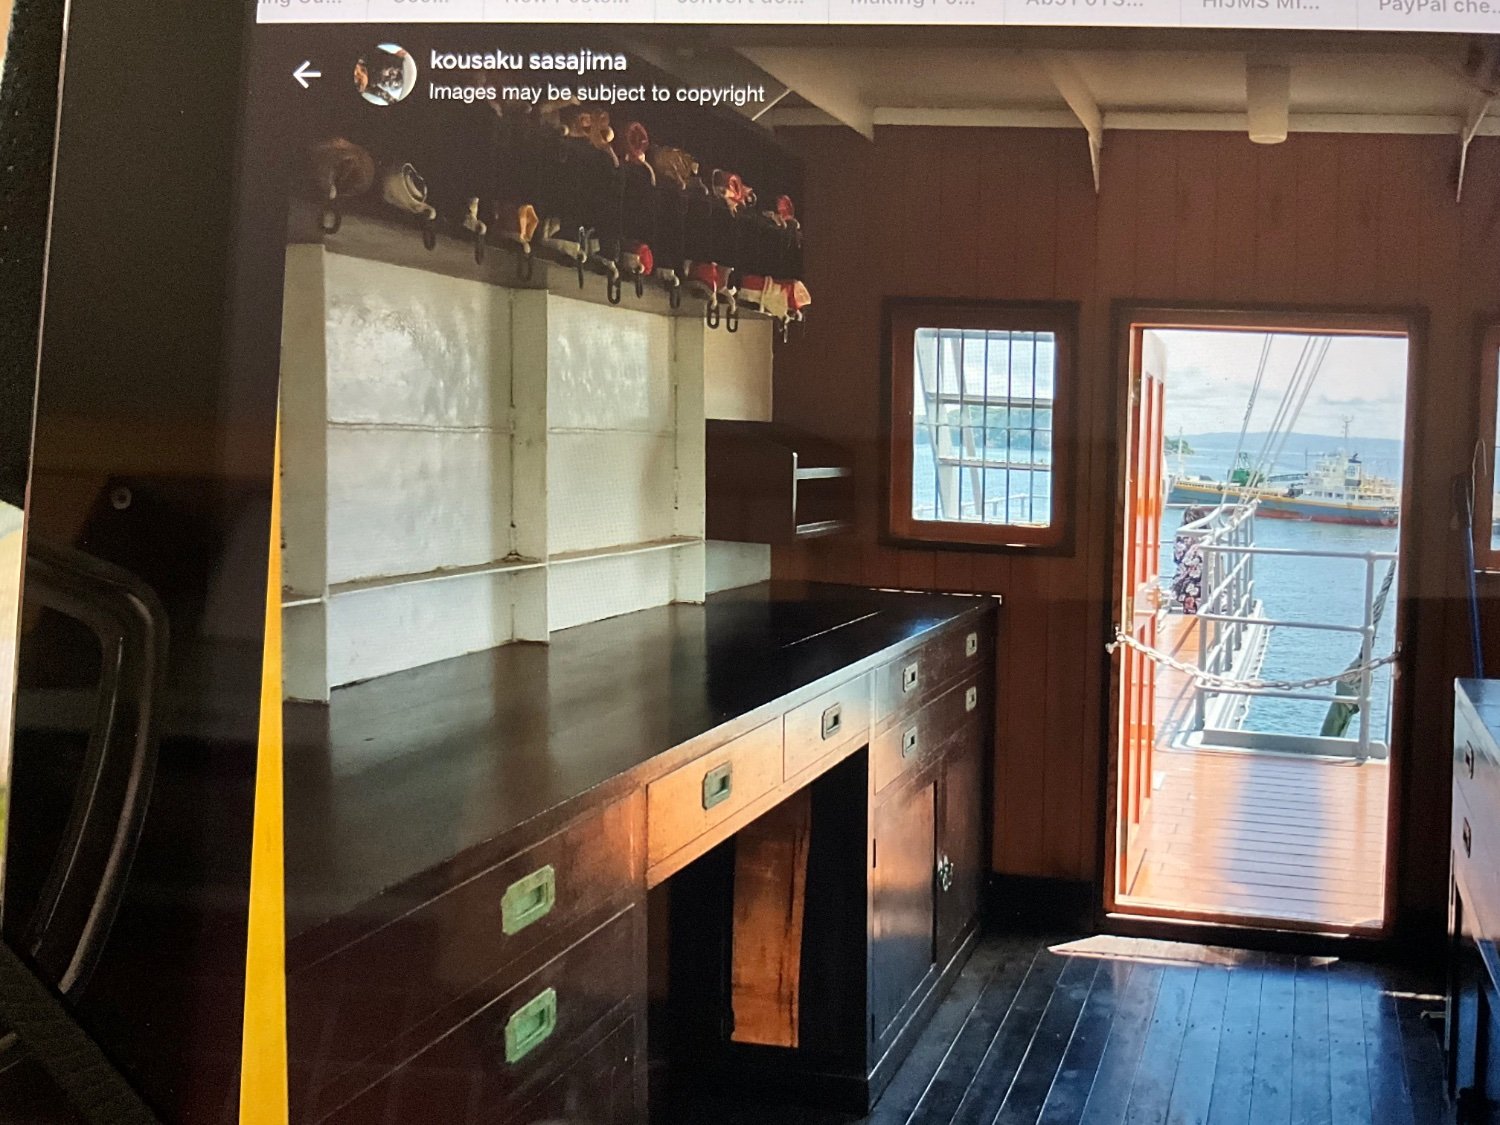
As you can see it’s a rather lovely little steam launch with plenty curves, now you can understand why l wanted Micro Master to make it 👀 but alas the answer was no, said they don’t do Japanese boats. Guessing they don’t realise the MIKASA is actually a British built Battleship supplied to the Japanese under contract, fact is there are lots of these Battleships look very similar at this period in time, was like a production line rolling these ships out, shall put another photo up showing HMS Prince Of Wales built 1903 this photo was her in 1908, you can see the similarities, this photo also swayed me into how I’d paint this small boat.

- Ryland Craze, Canute, mtaylor and 1 other
-
4
-
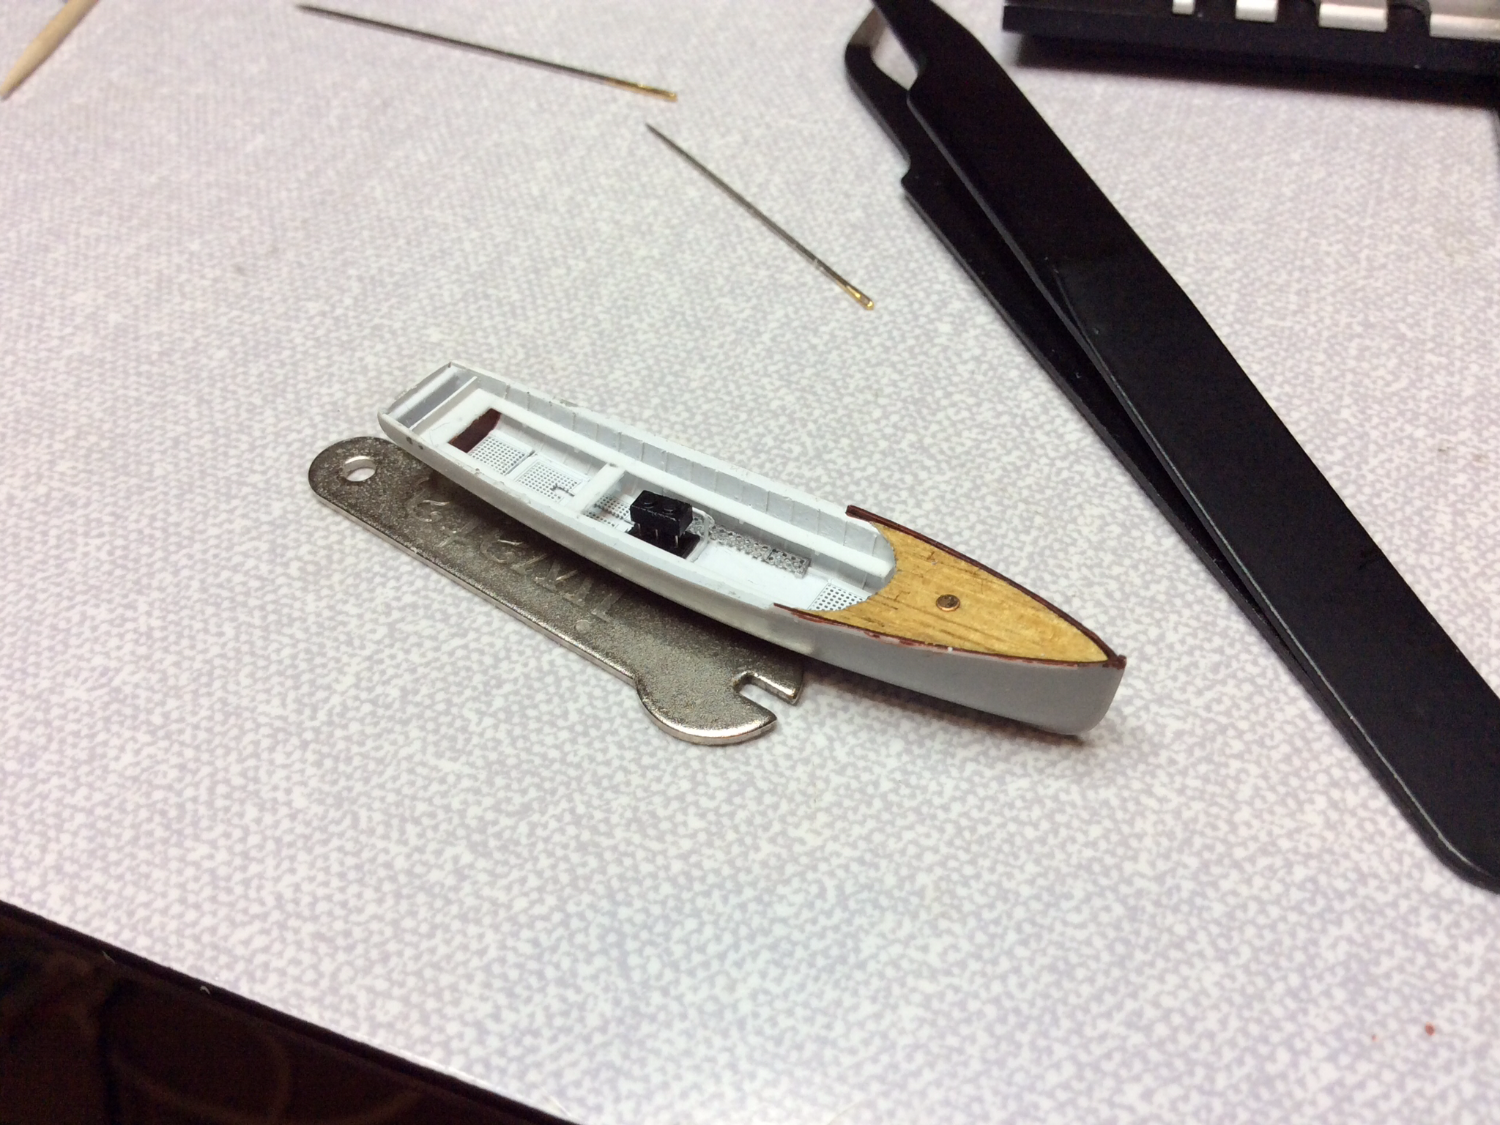
Shall put some photos up of the Open Steam Launch and it’s boiler, engine layout that l think is the boat require, well it goes up to 36ft and the layout looks right 👍

- yvesvidal, Ryland Craze, Canute and 1 other
-
4
-
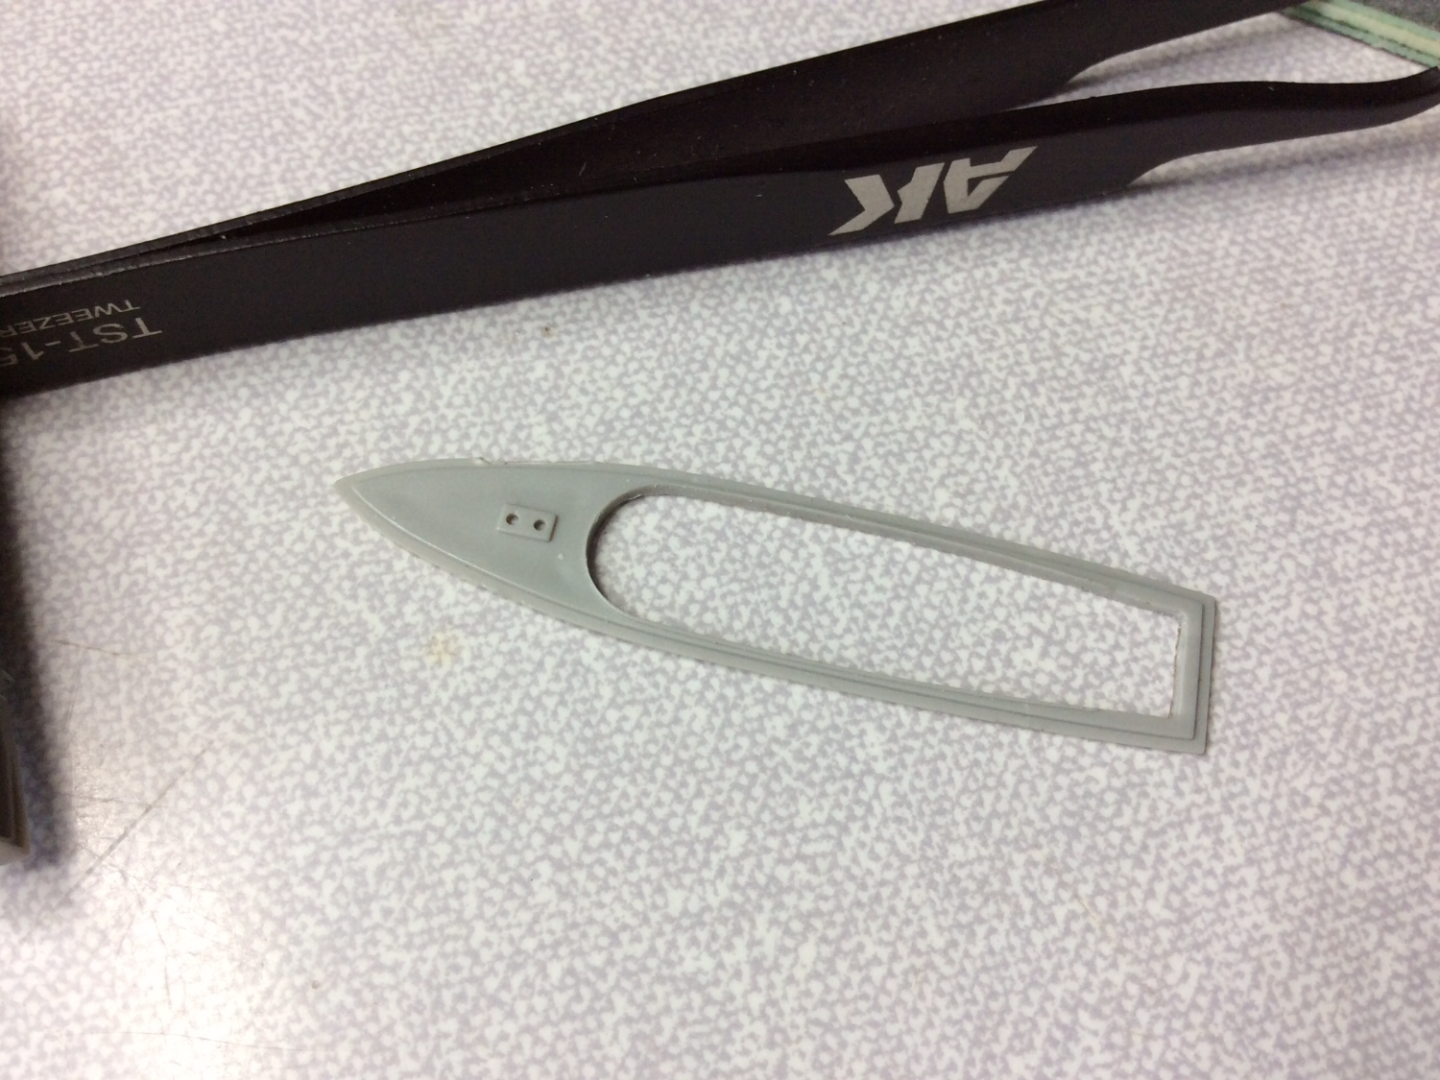
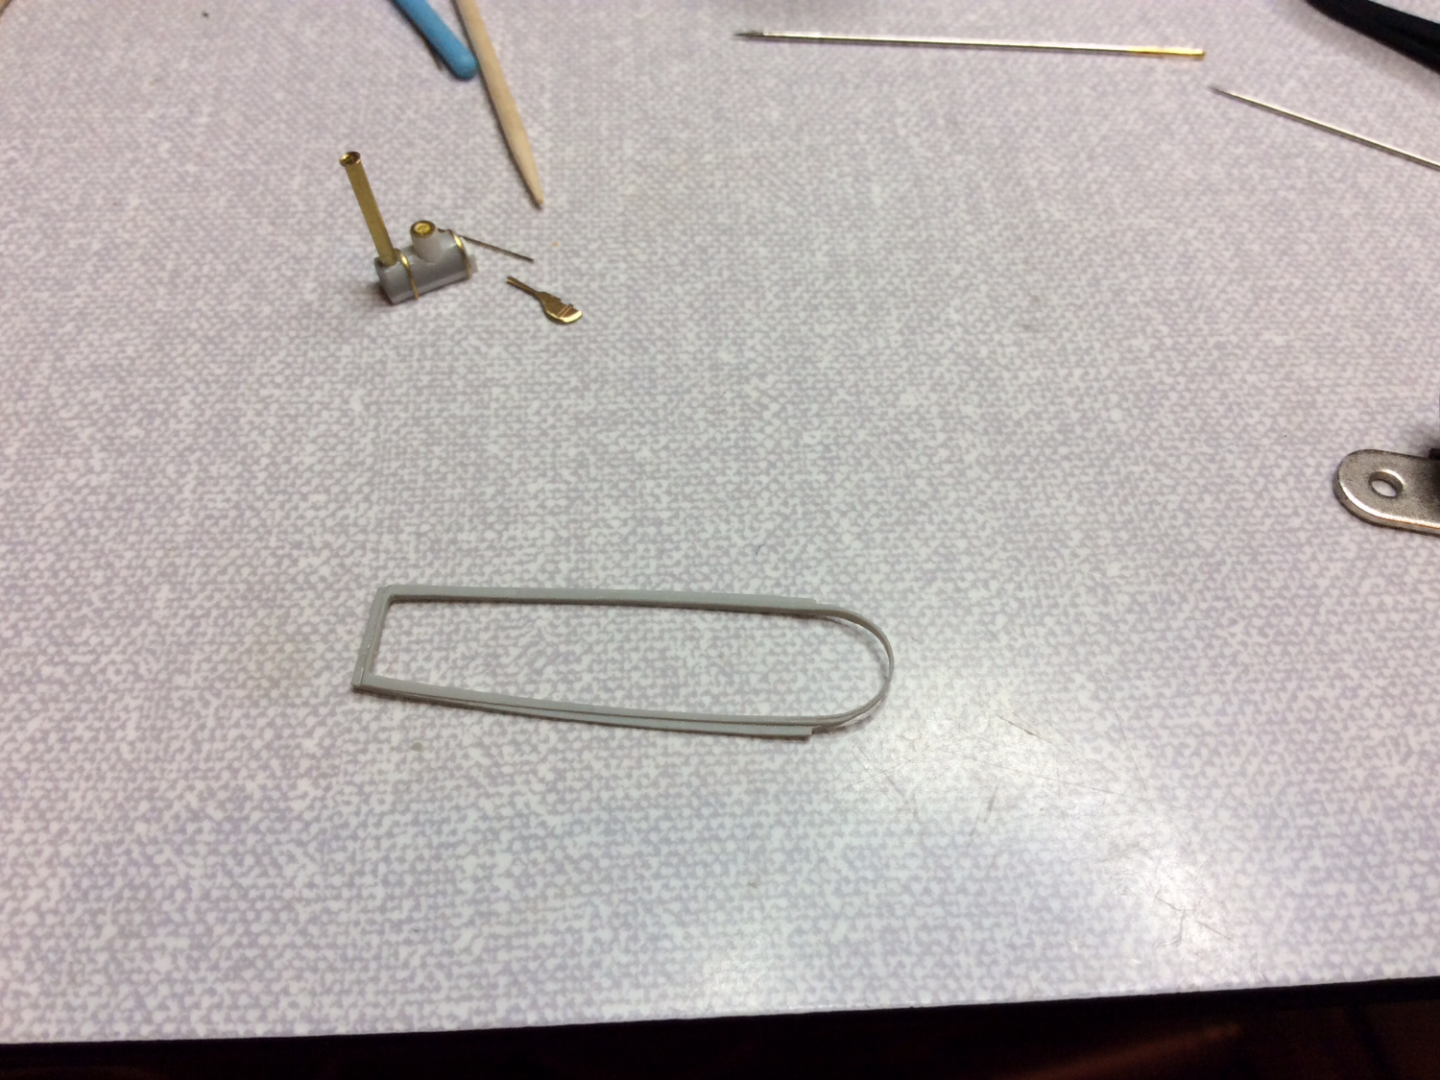
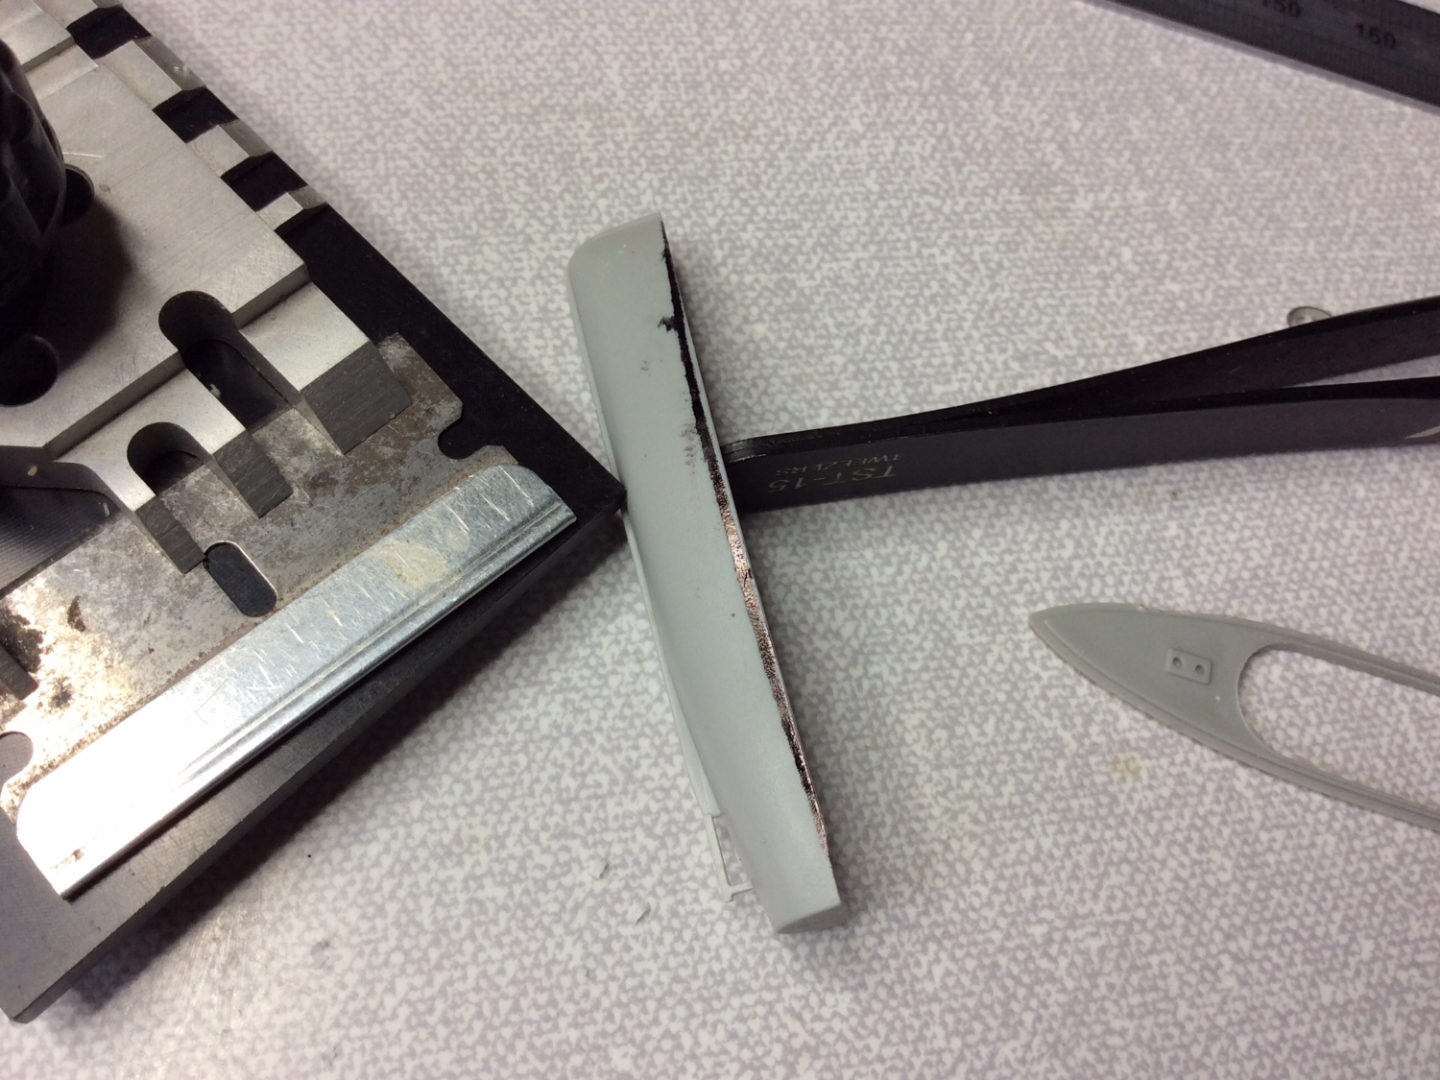
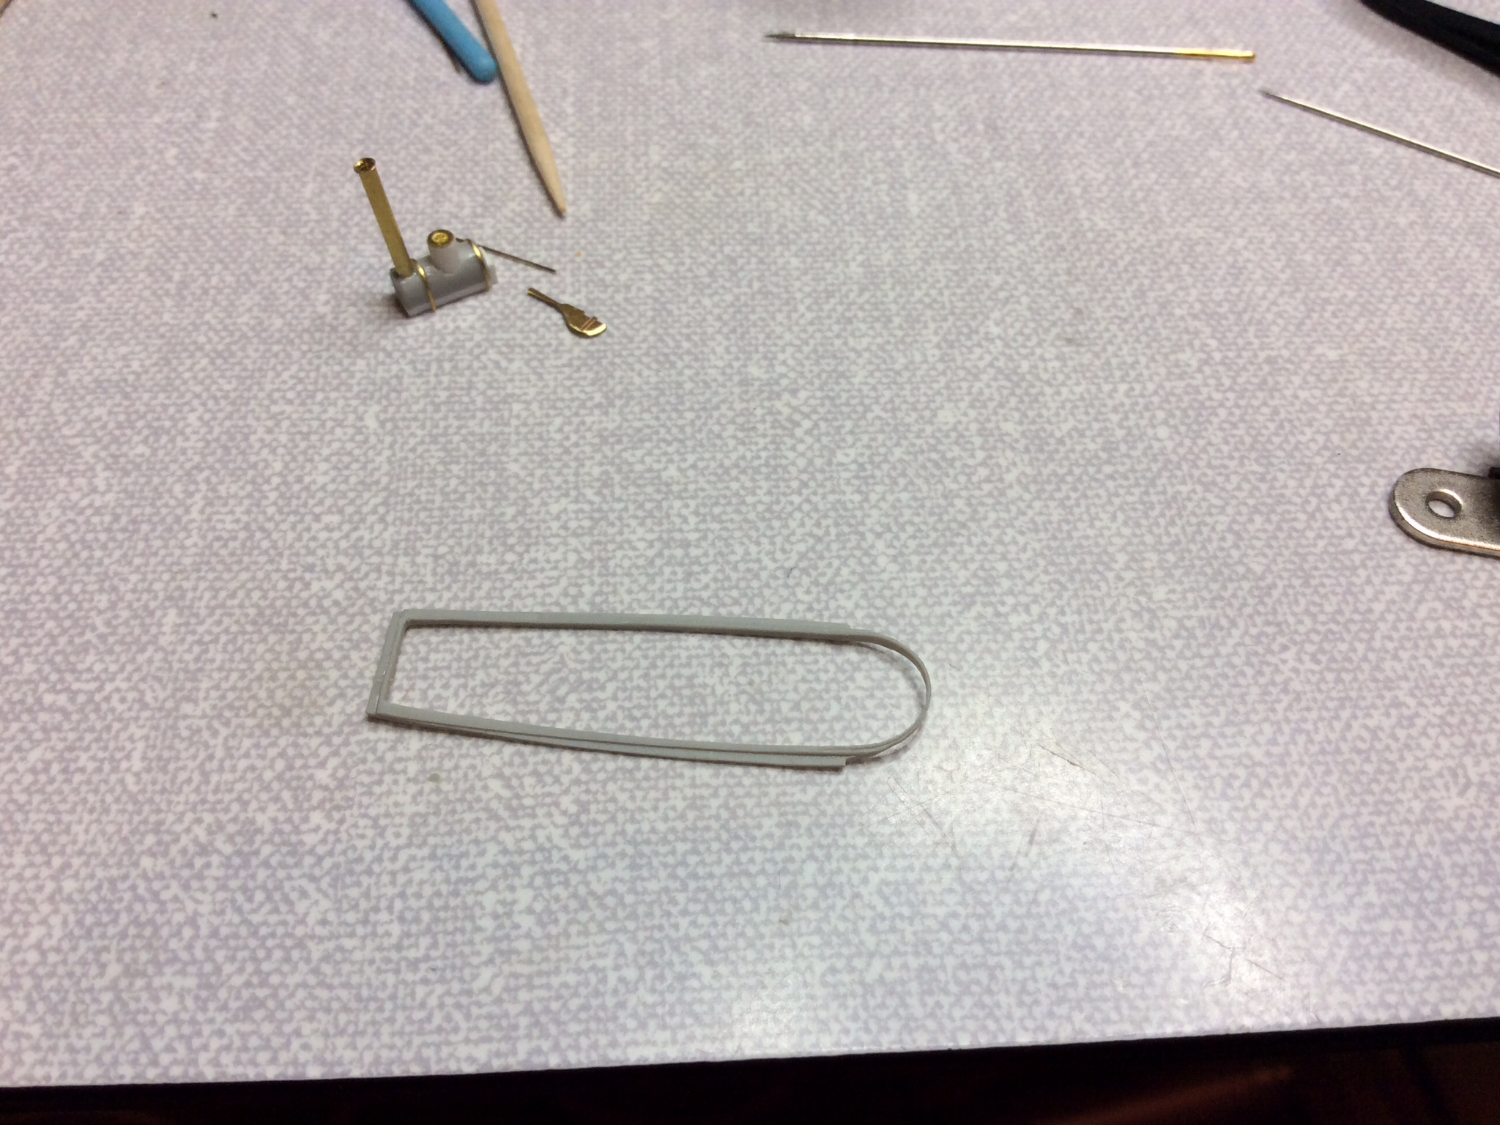
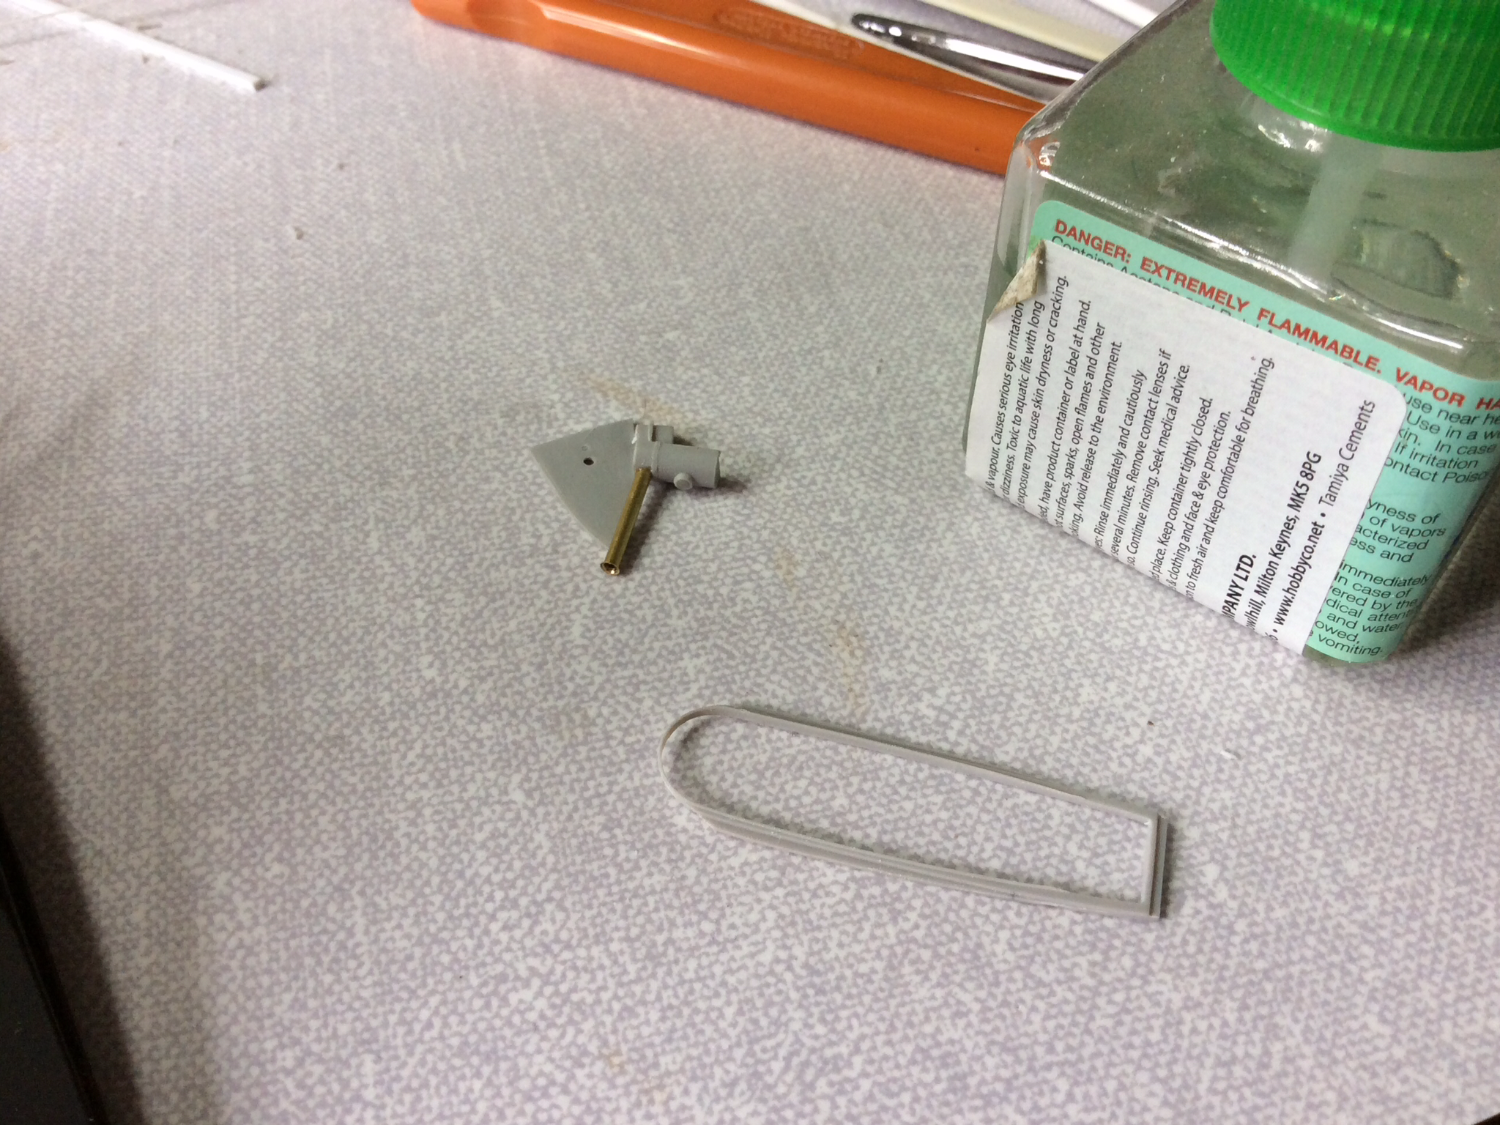
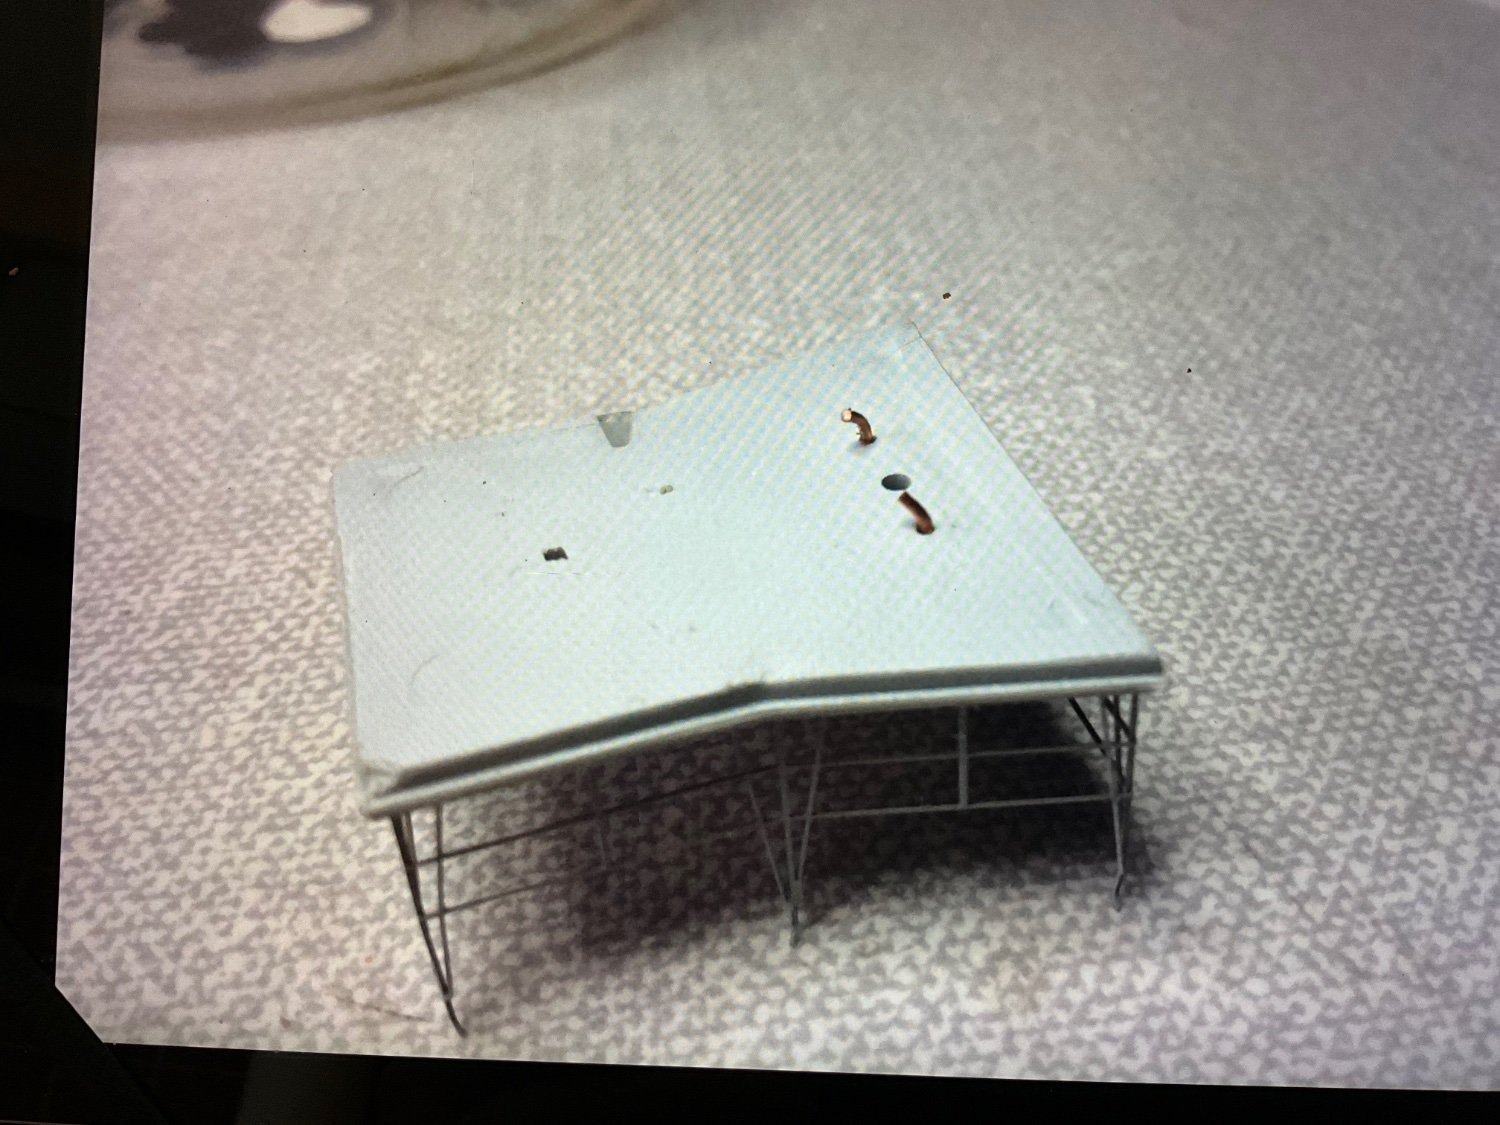
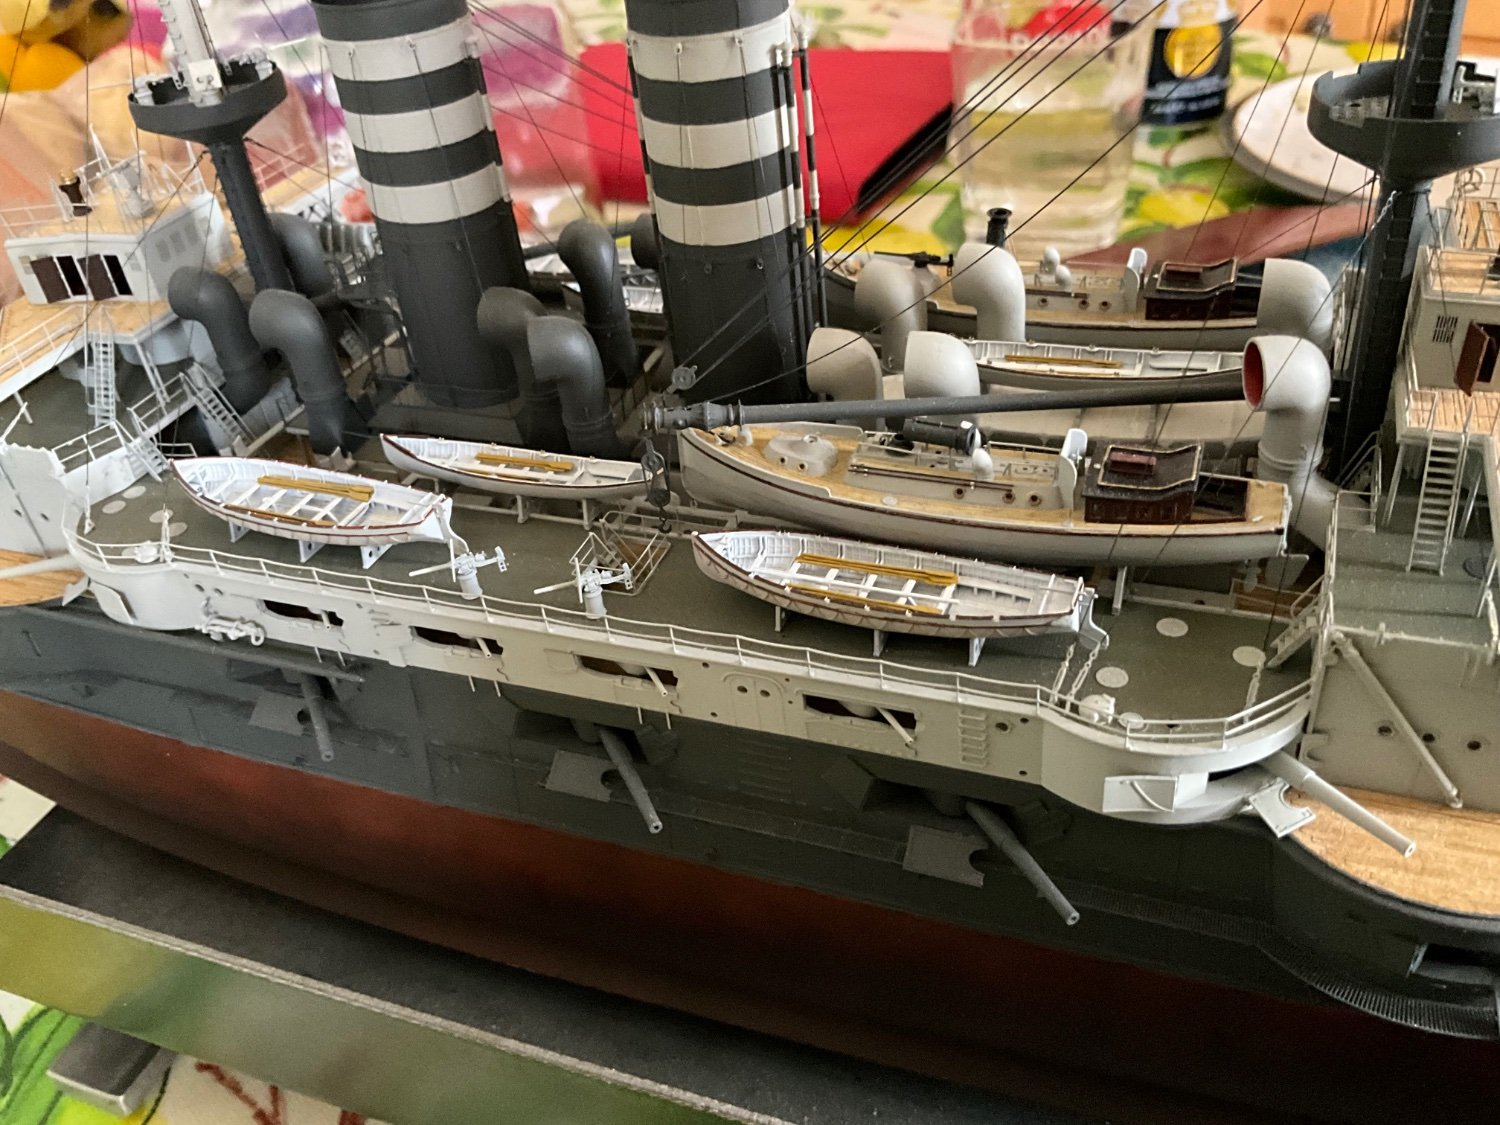
Thought I had taken more photos of the small boat work, can’t seem to find them, only one photo of upturned boat with over heavy rope and keel in the process of being removed, once removed, the keel and stem posts were replaced with styrene stock that l thought more to scale, also contoured the hull a little bit, just scraping and sanding till l was happy. Used fine thread for ropes holding down canvas covers, then glued parts together then fitted Pontos etch rudder which l trimmed and filed to shape.
-
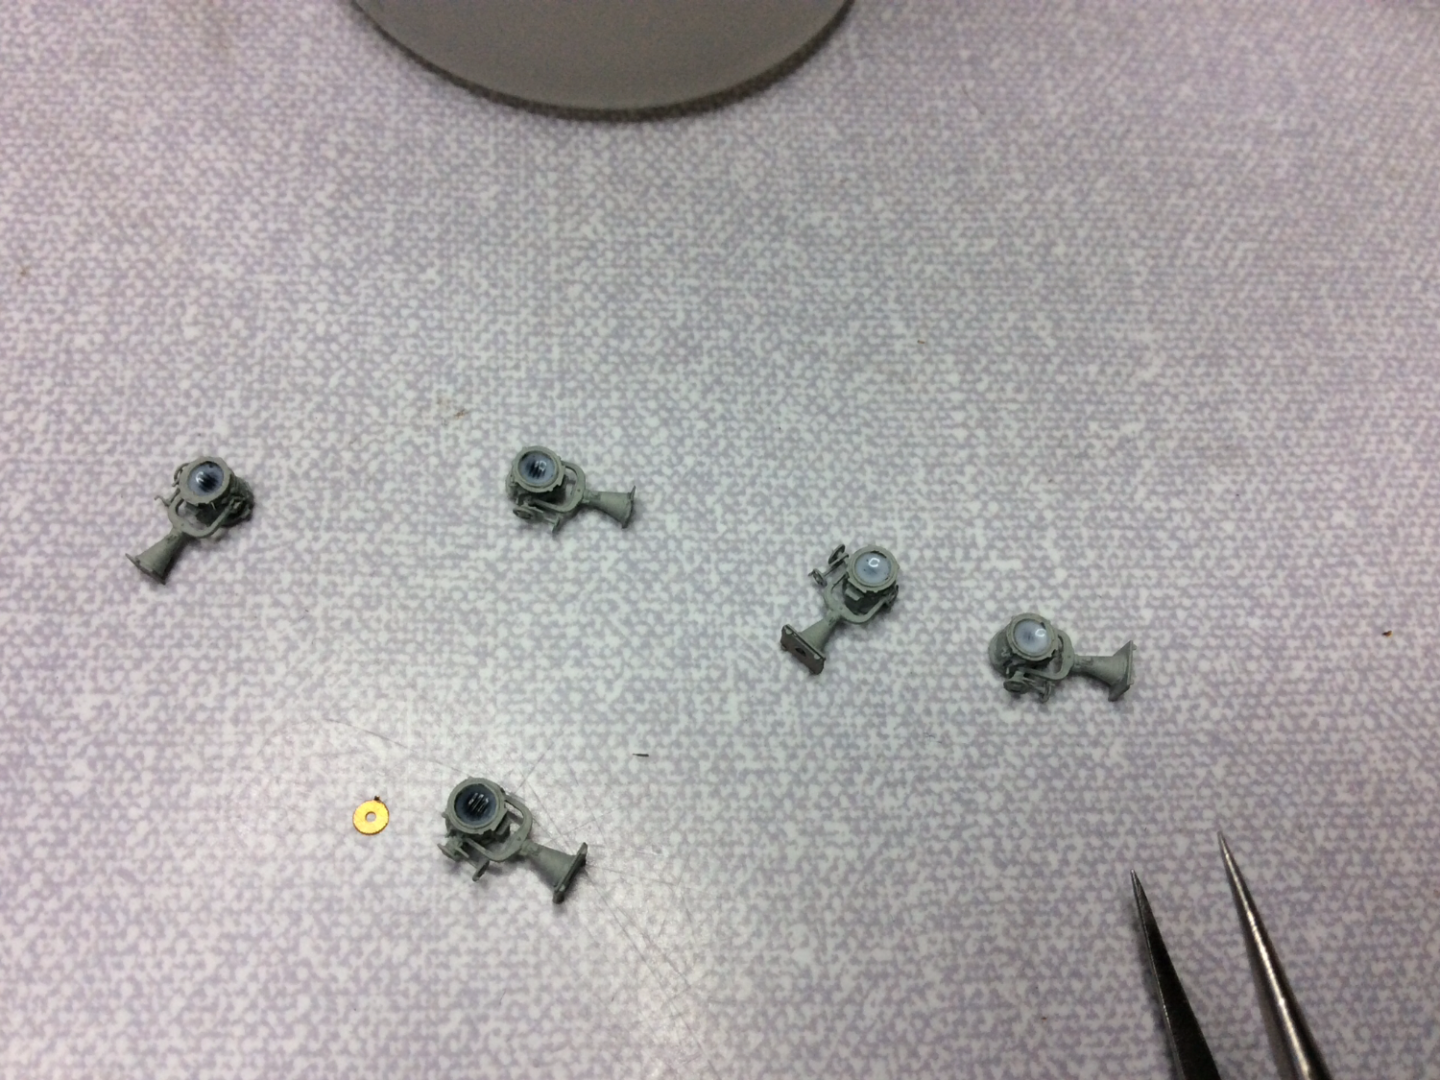
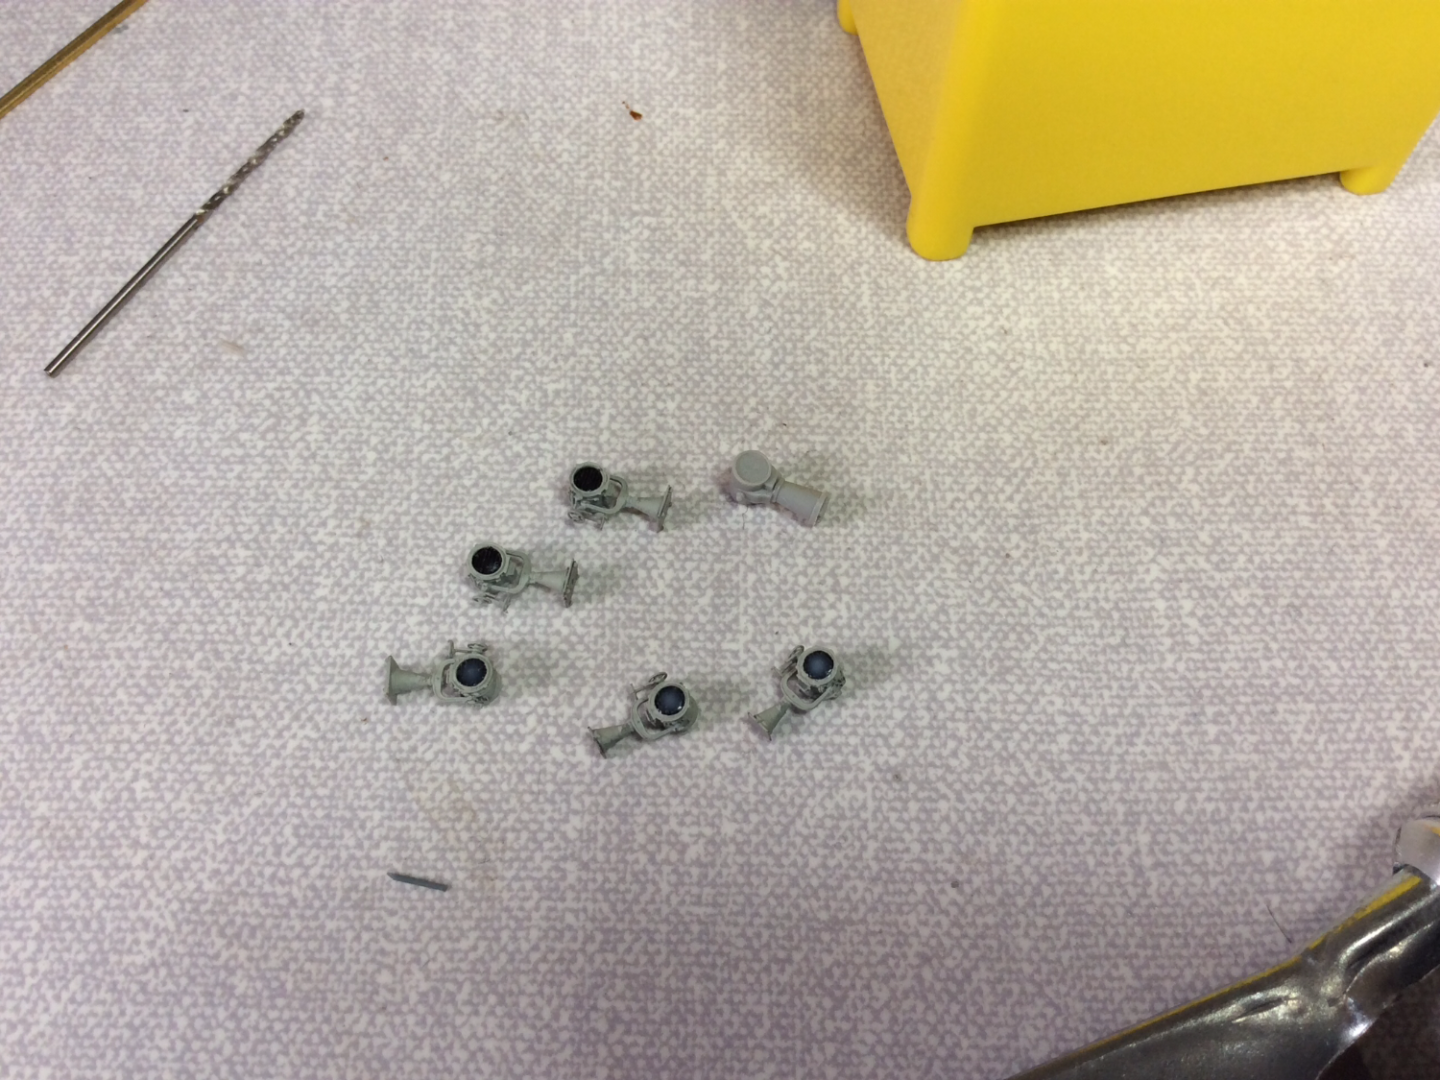
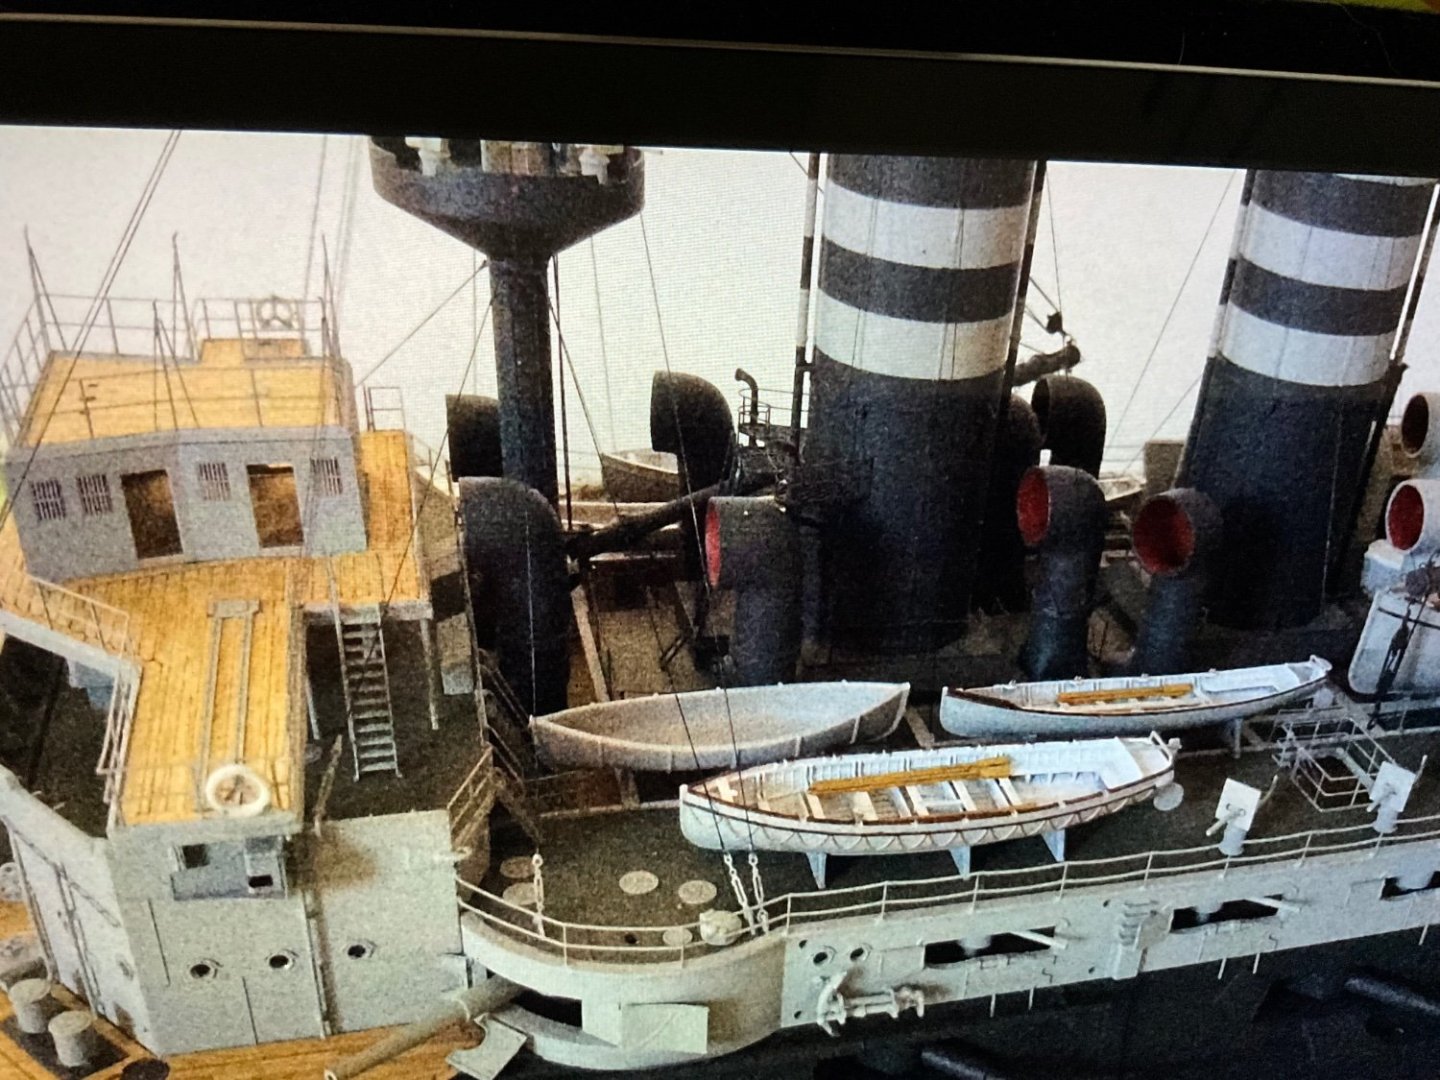
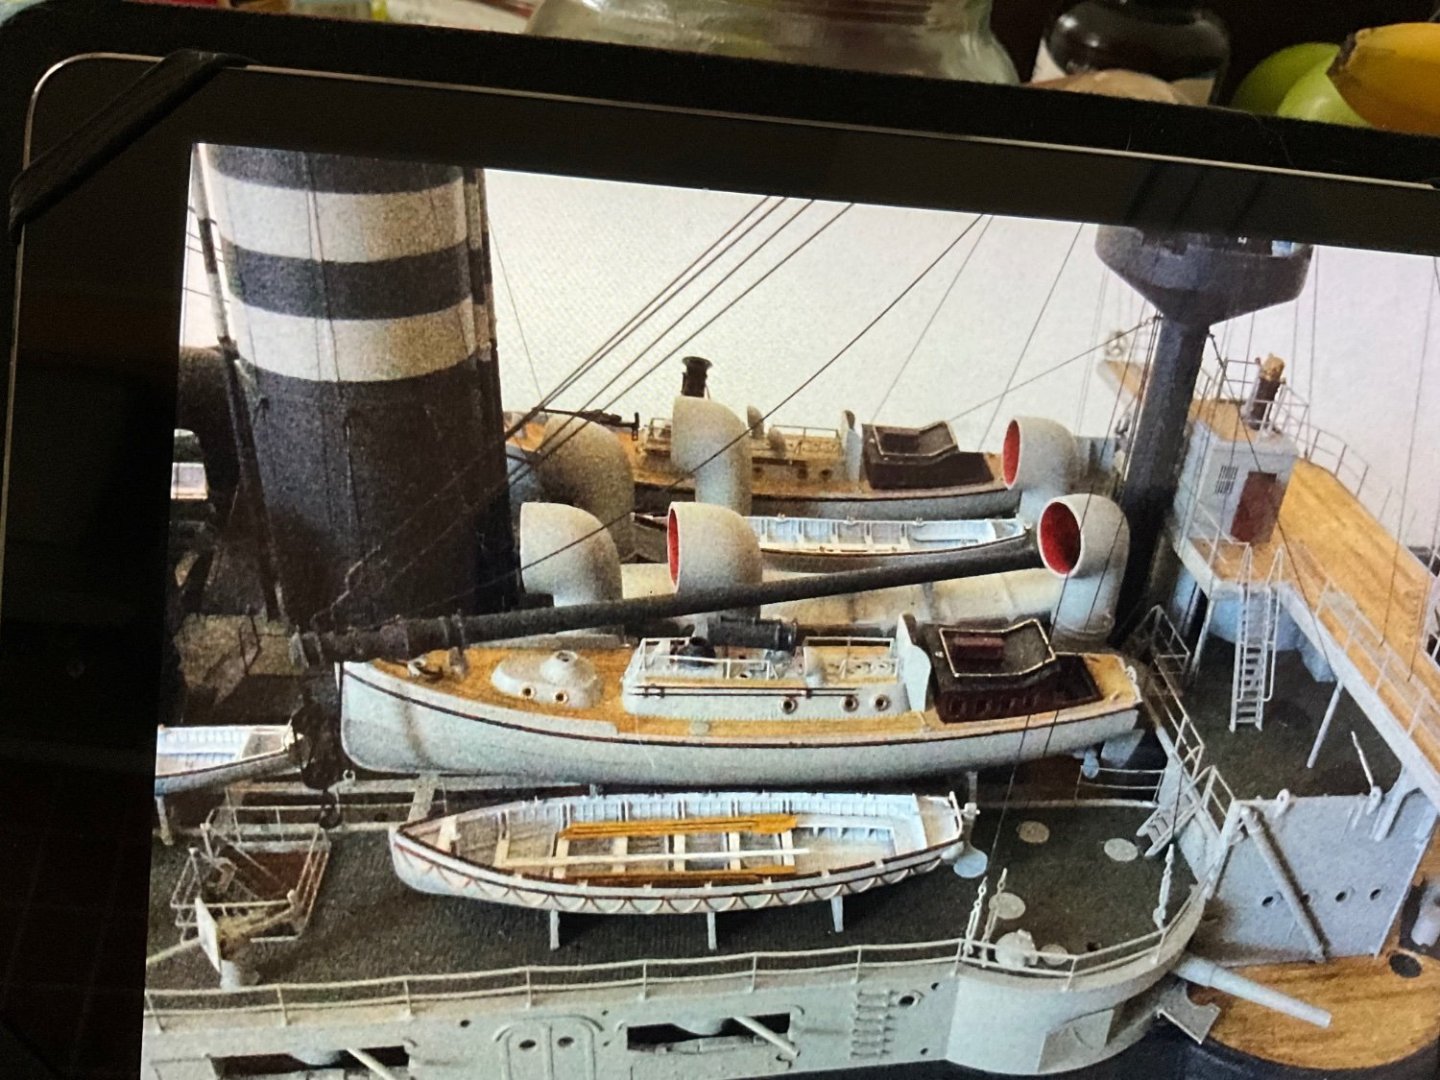
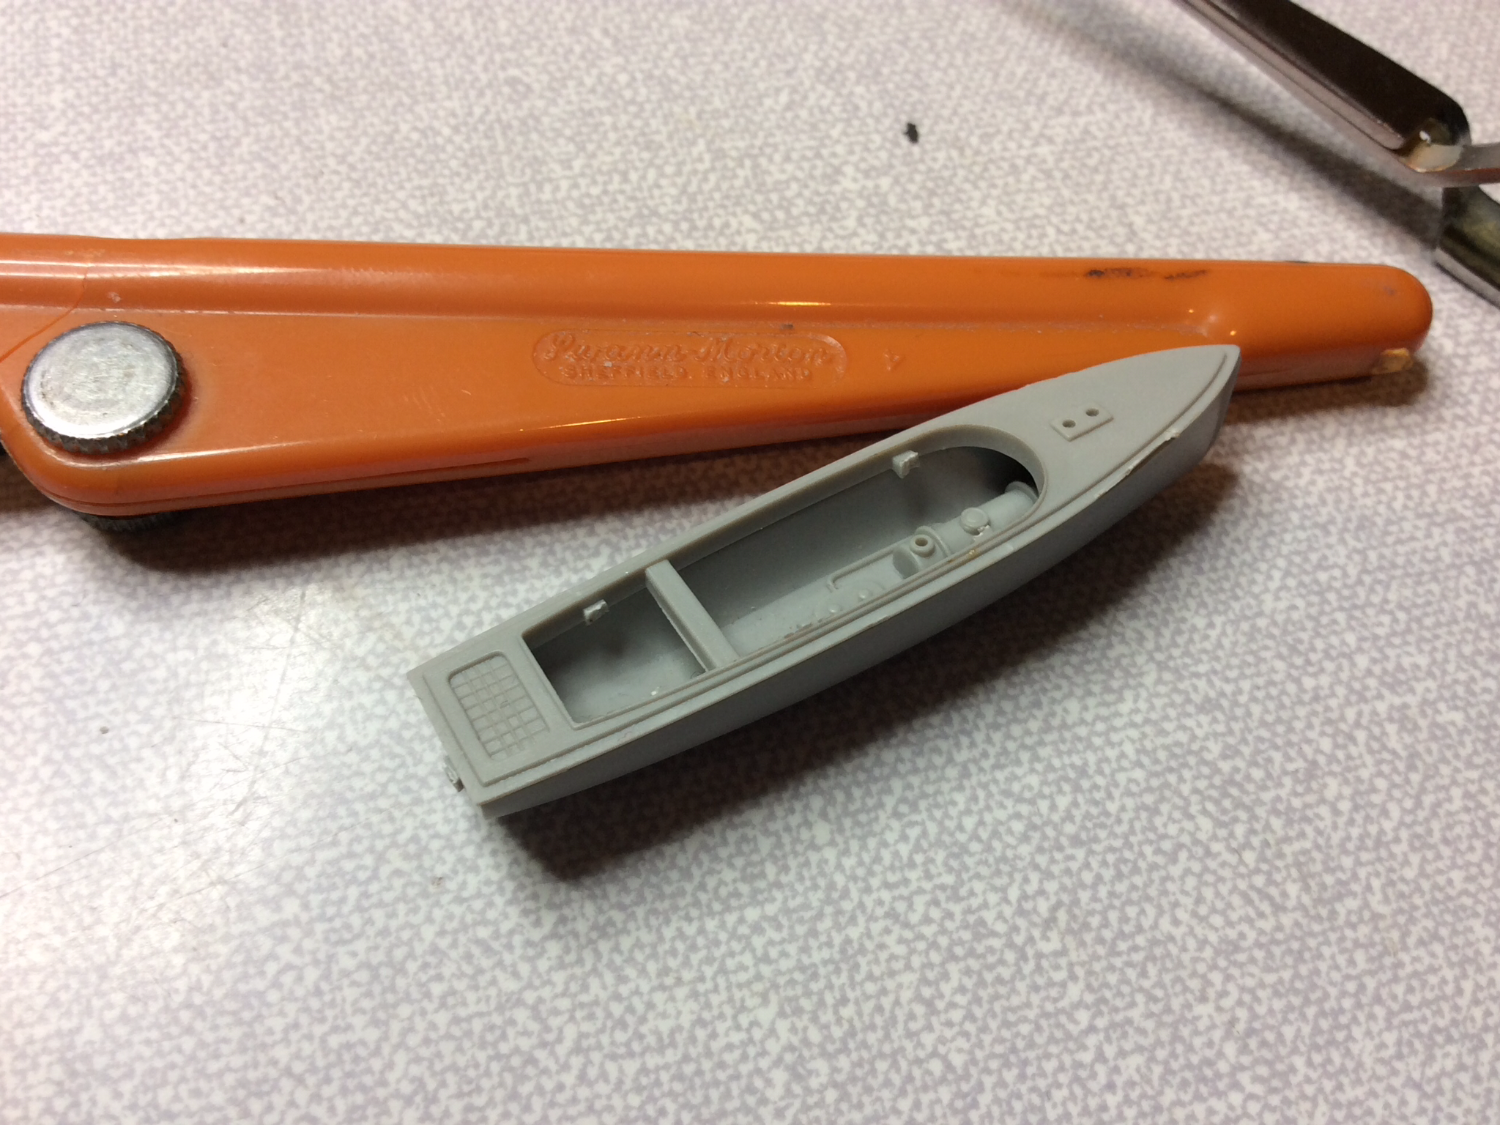
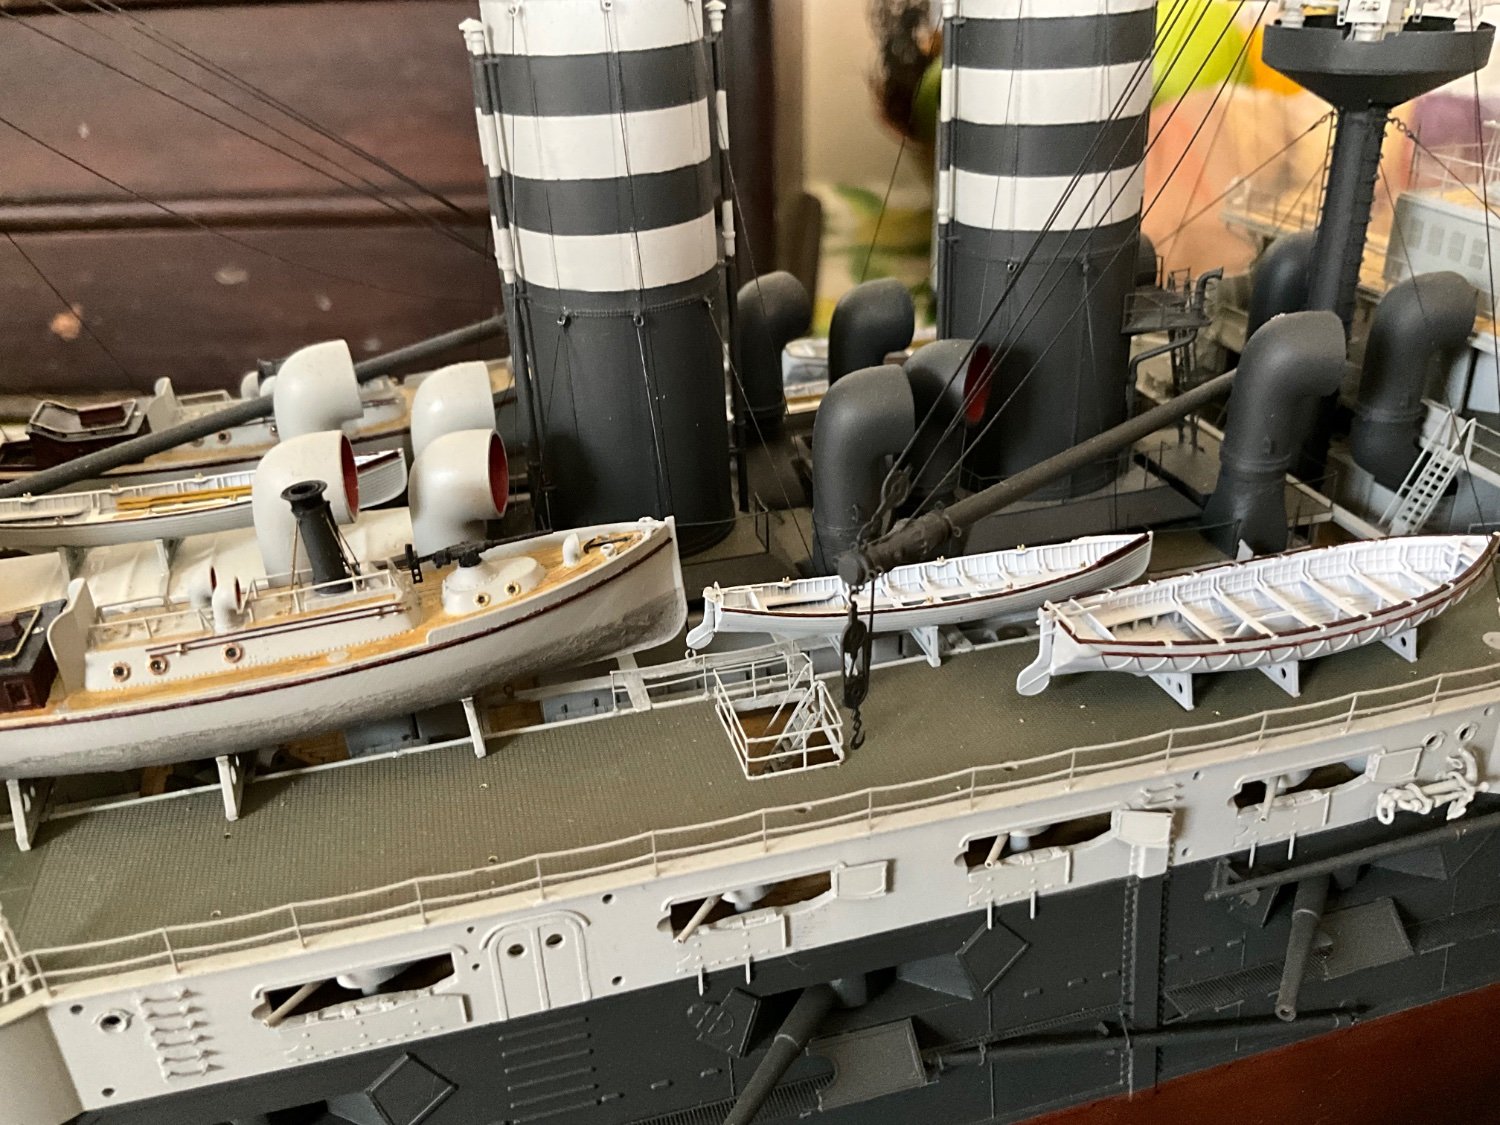
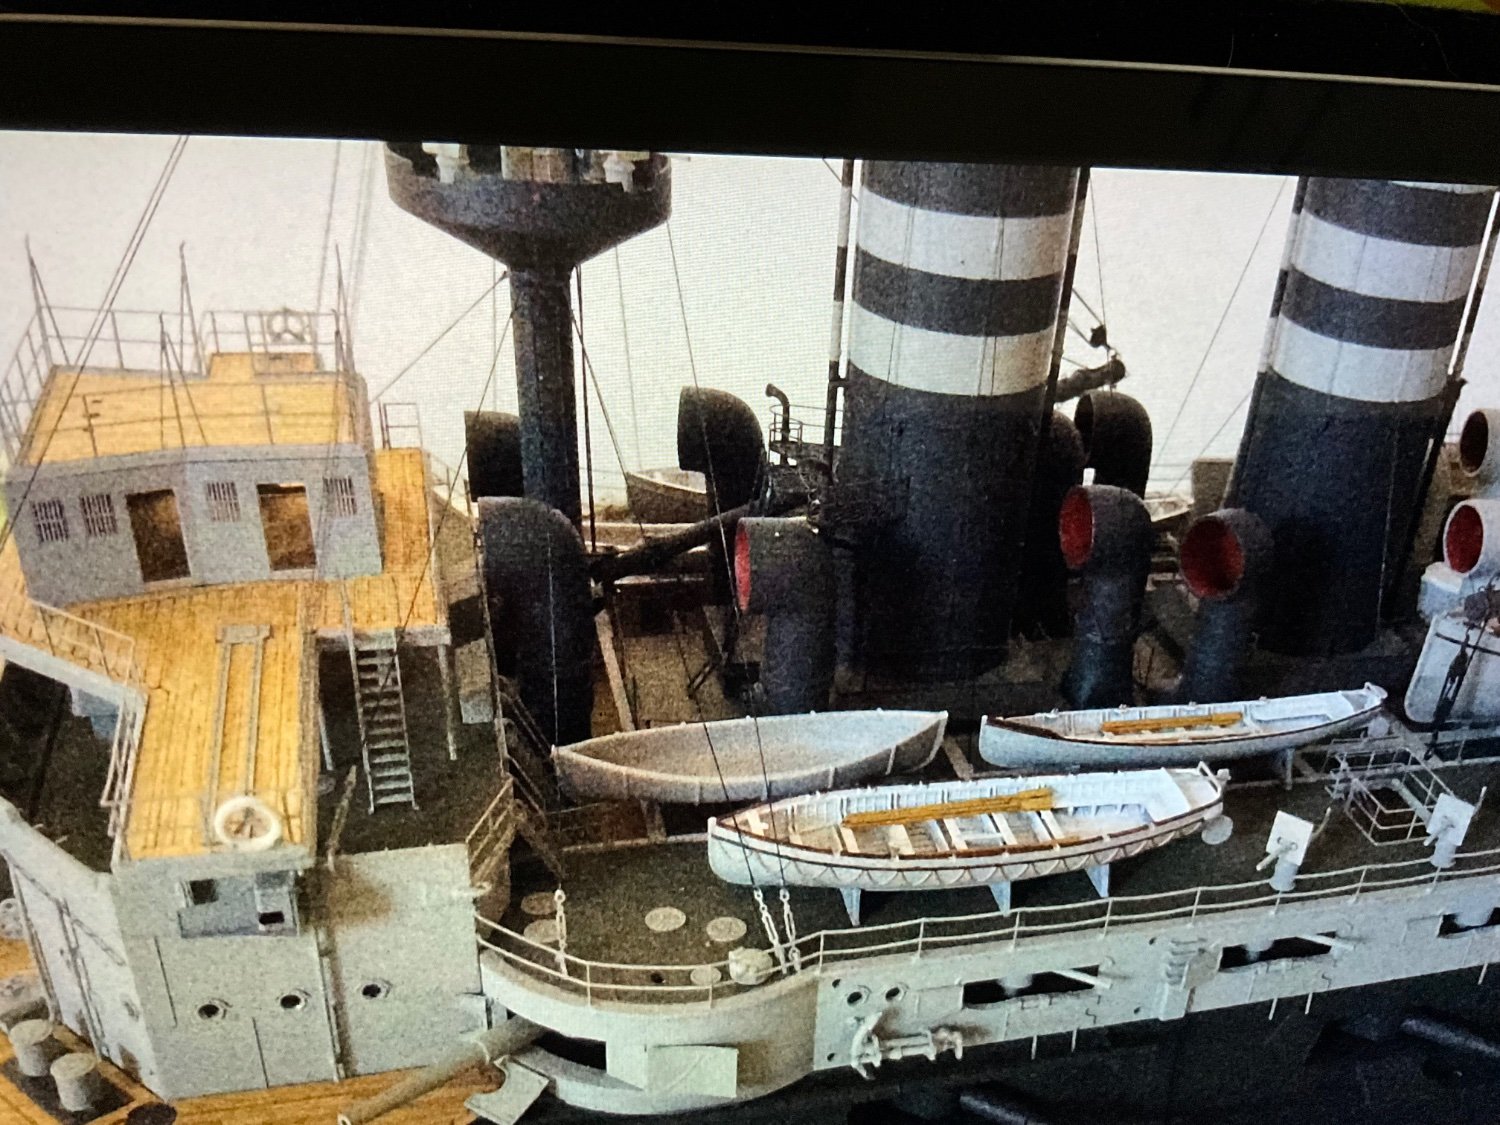
The last photo shows them complete, I sprayed them with light gull grey, then painted the inside lens area black, once dry I applied Micro Kristal Klear, gradually filling it out till flush, they are still drying out at this point, also original kit part sitting here, so the size is in the ball park. Next part to get built was another five 3 pounder hotchkiss guns same as previous fab, also scratch built two Semaphore masts one for each bridge wing, port and starboard, just used small brass tubing here and small pieces of etch, scaled it from photos of ship with dividers on photo, kind of worked 👍 Next quest was finishing of ships boats on boat deck, had been waiting on 0.3 soft solder coming from China to complete the oars, now have plenty. One issue I had was Micro Master don’t do the 25ft boats needed or the 37ft open steam boat so l was stuck with the kit boats, joy 🙄 the best option for me was use canvas covers for 25 footers, no way on earth l was getting the open boats to compete with those Micro Master ones 😂 l remove all the plastic simulated tie ropes and the over heavy keel and stem post, replacing the latter with finer styrene stock, then painted the hulls and canvas covers. Before gluing these together l fitted fine thread for tie down ropes like l did on my first boat a good while back. The open steam pinace was a different thing all together, this took me three weeks to complete, shall post some photos tomorrow of boats and make a start going through the build on the steam boat. That’s me for now guys 🤛
-
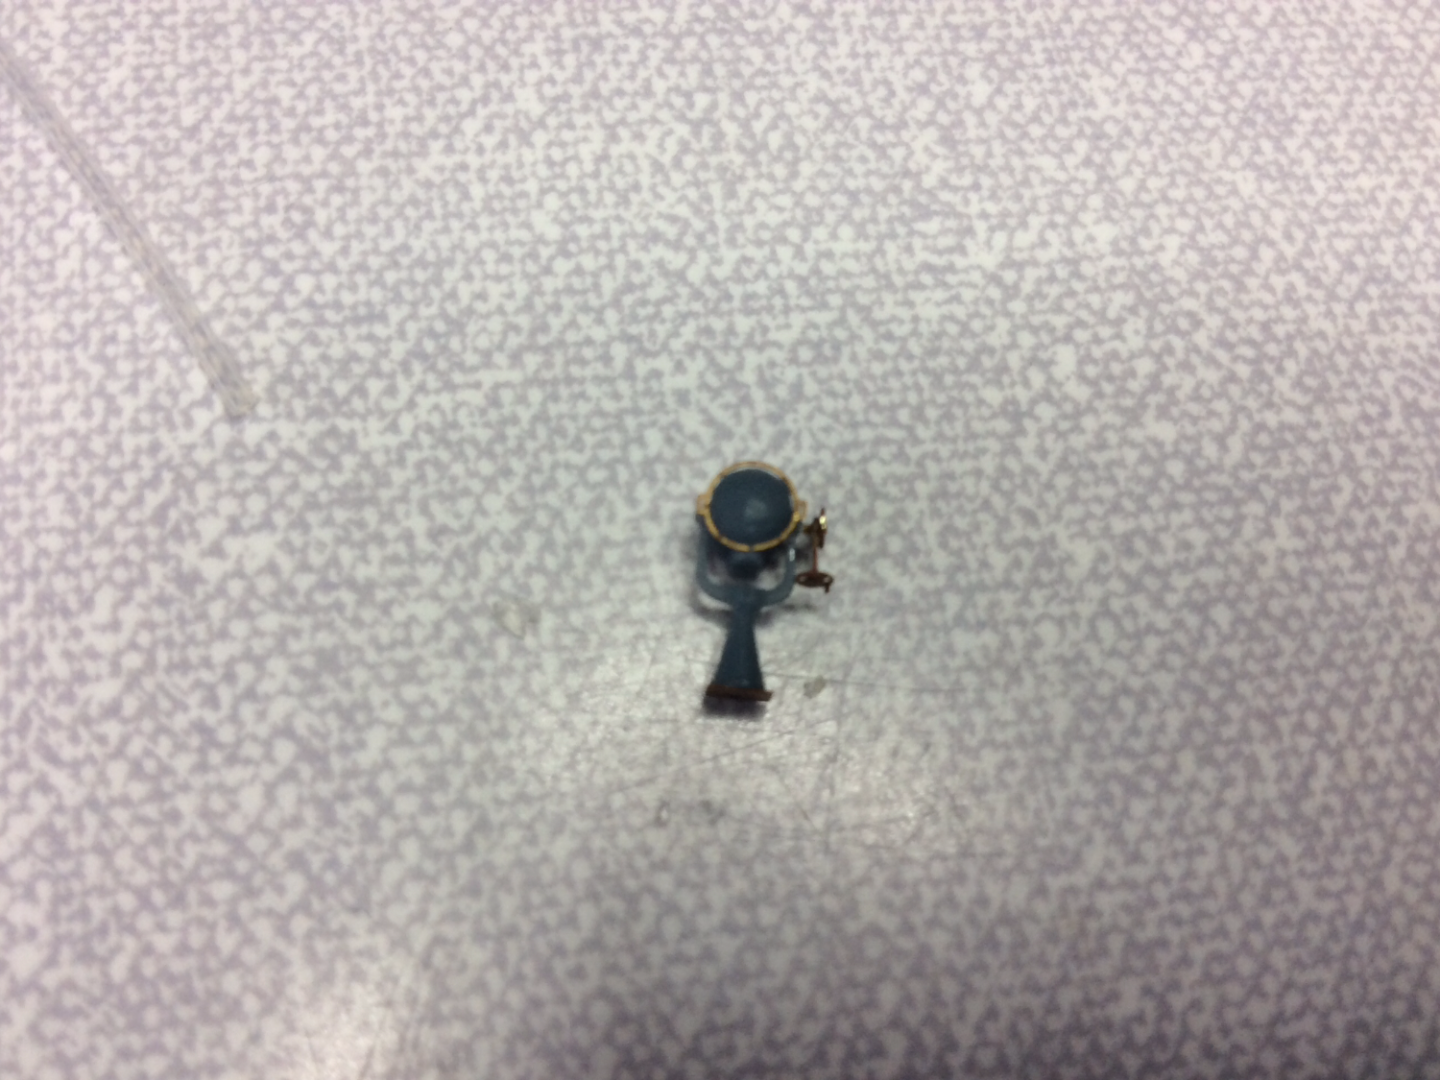
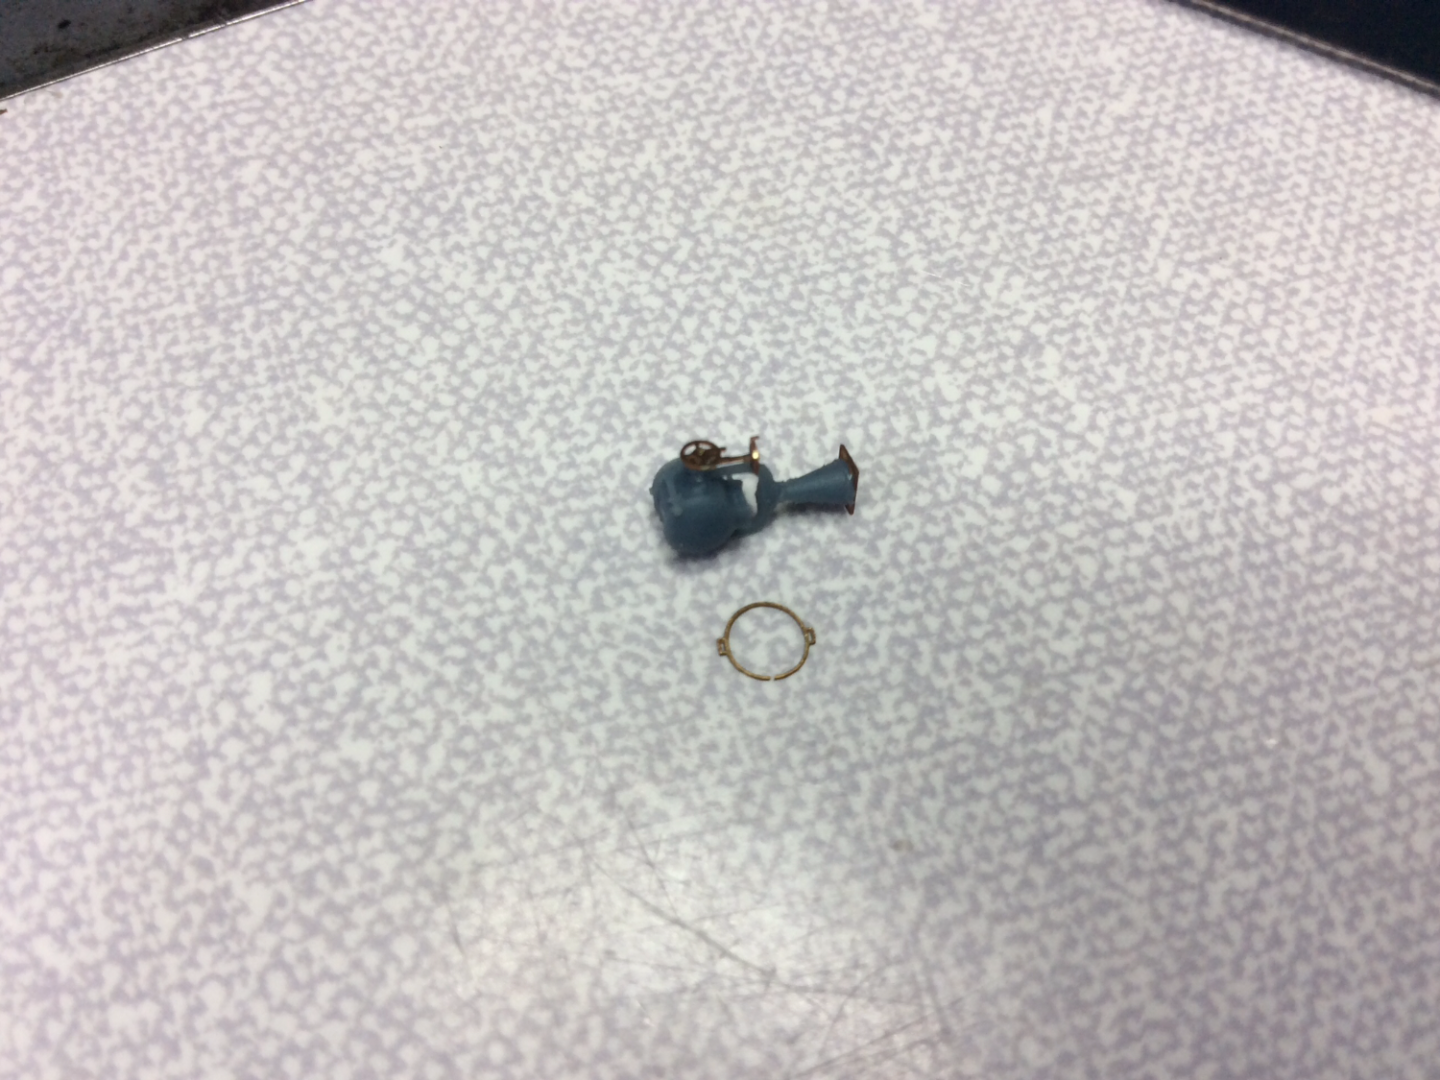
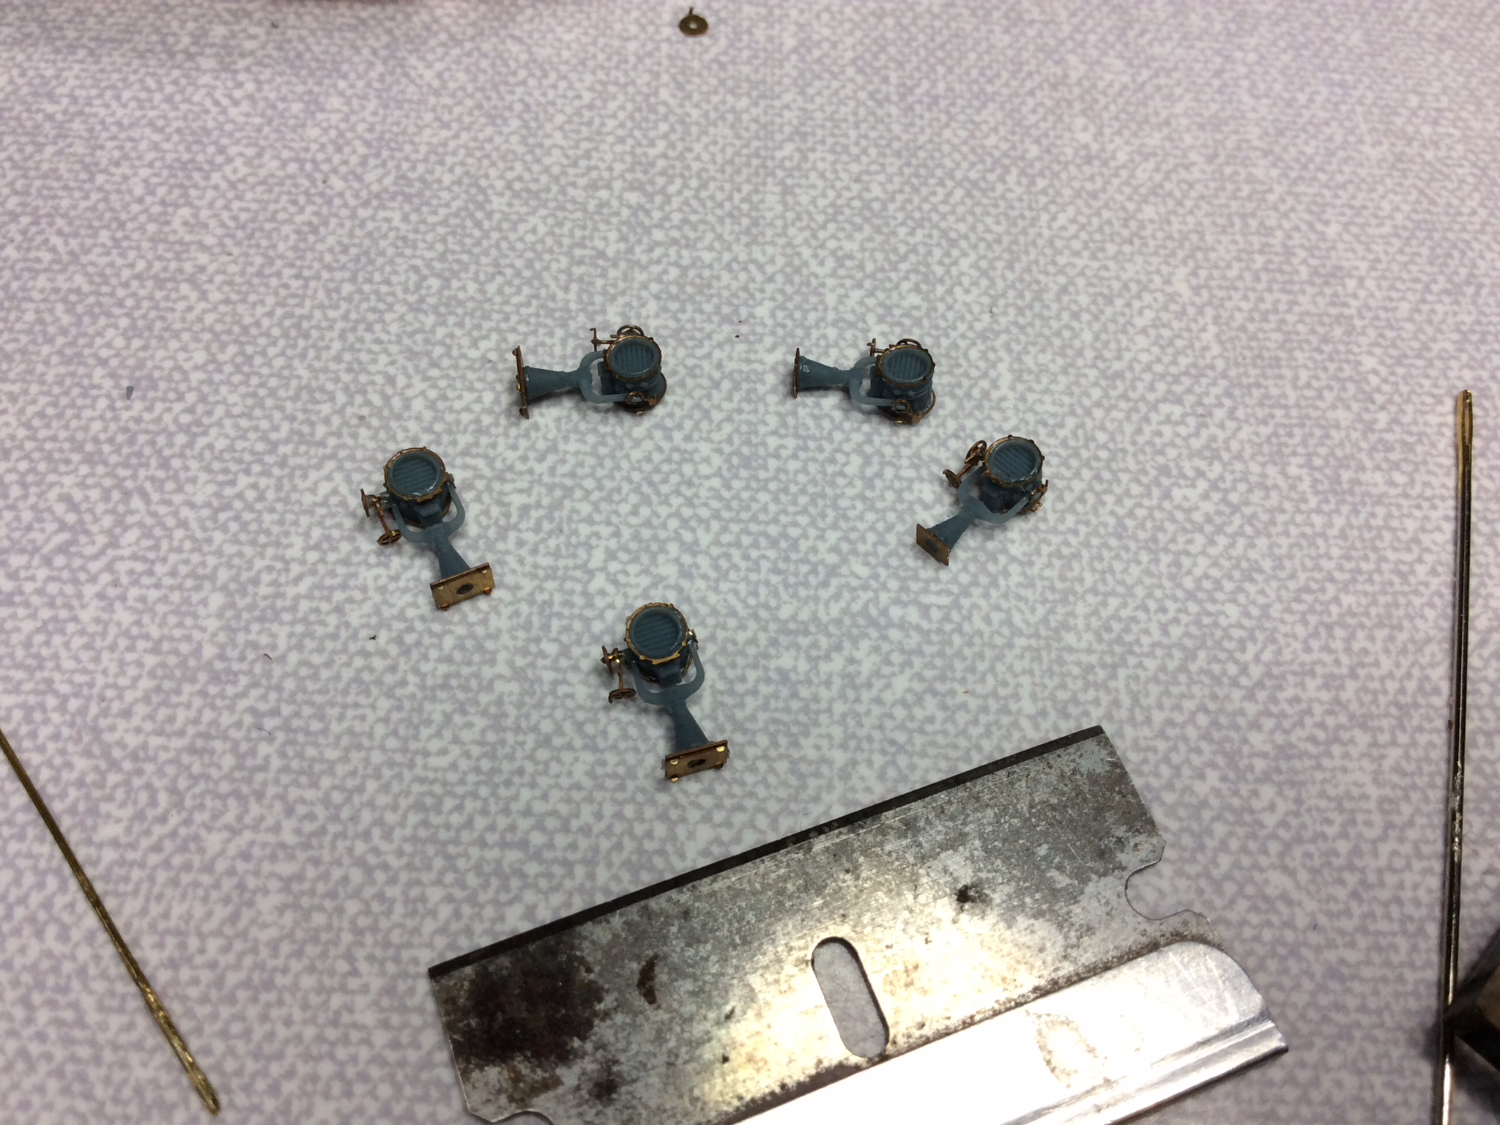
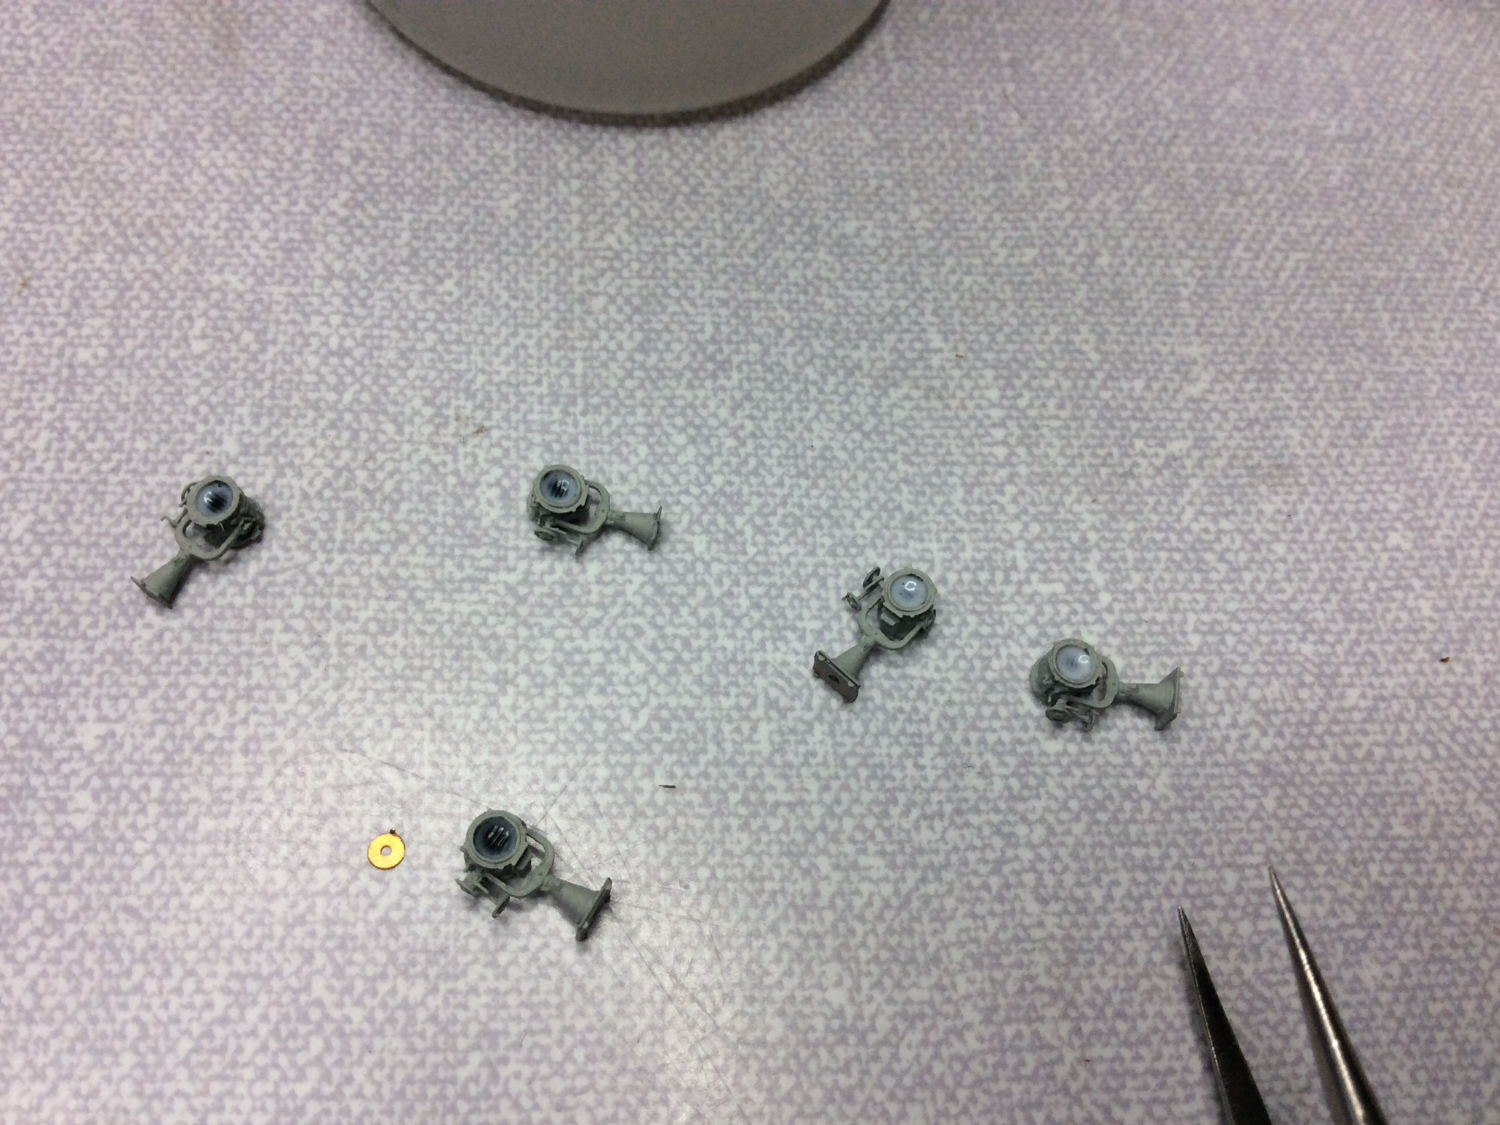
Hi guys, got help from boss to start getting photos on board so I can sort things into some sort of order, so bare with me please, this isn’t my forty 🙄 I felt the Pontus searchlight etch and resin parts didn’t quite work for me, so I ended up trimming the Micro Master part and altering the Pontos etch to fit on it. After removing some parts of the Micro Master searchlight to be left with basic shape I started to make the etch work for me, some parts required nicking a tiny piece out to reduce circumference to suit.


-
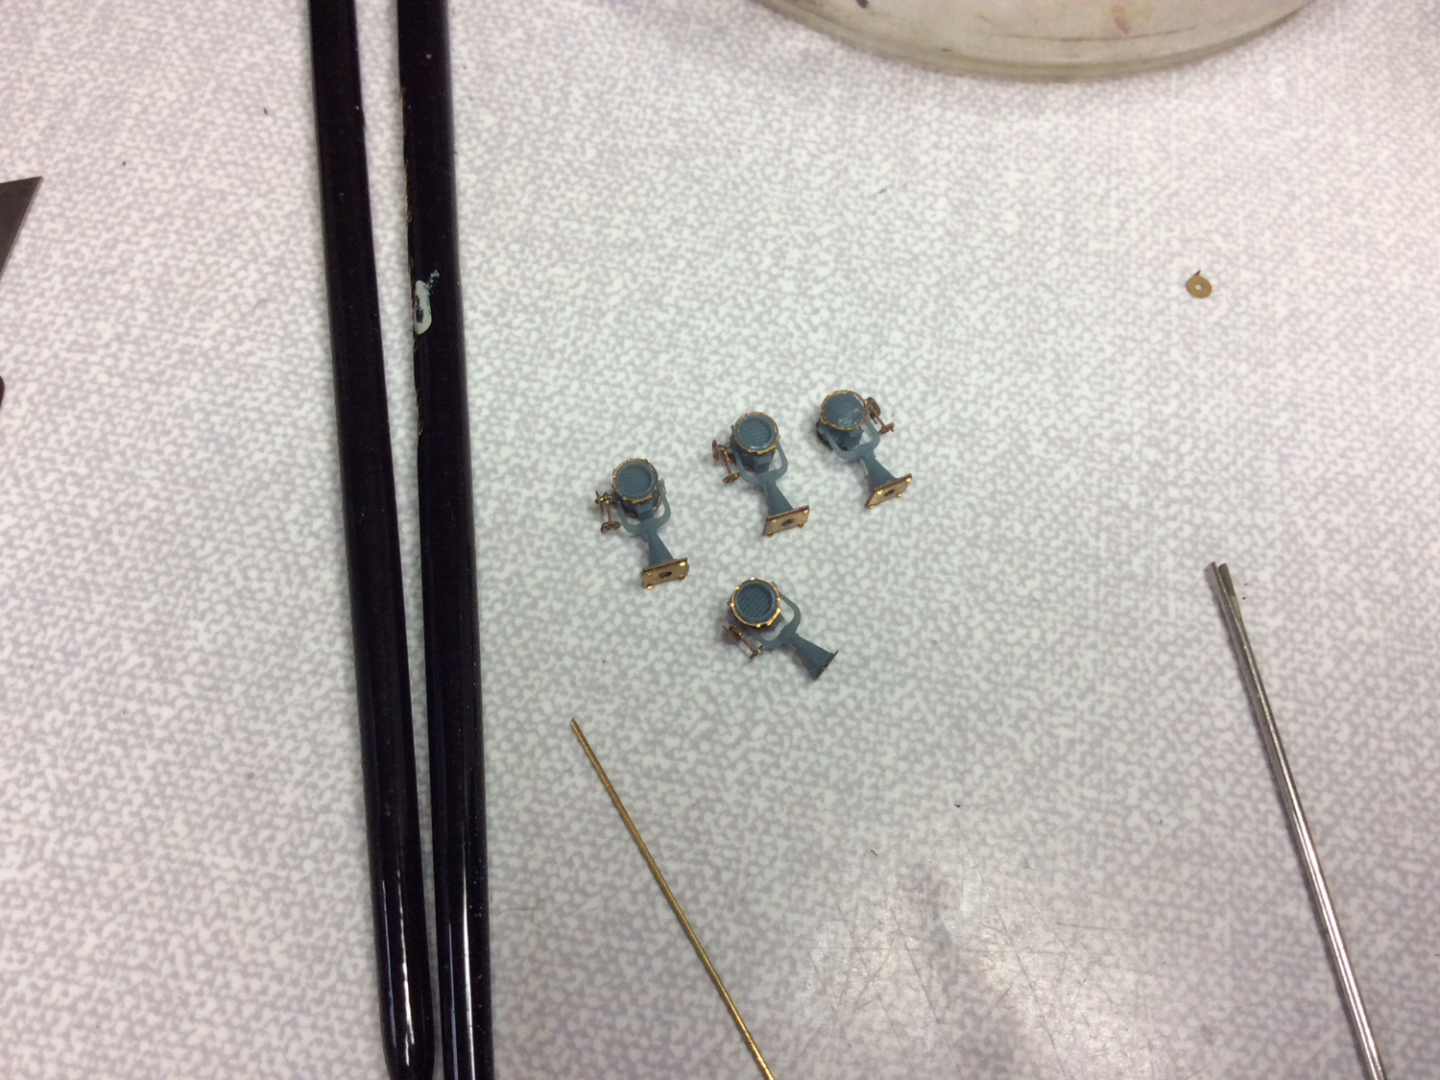
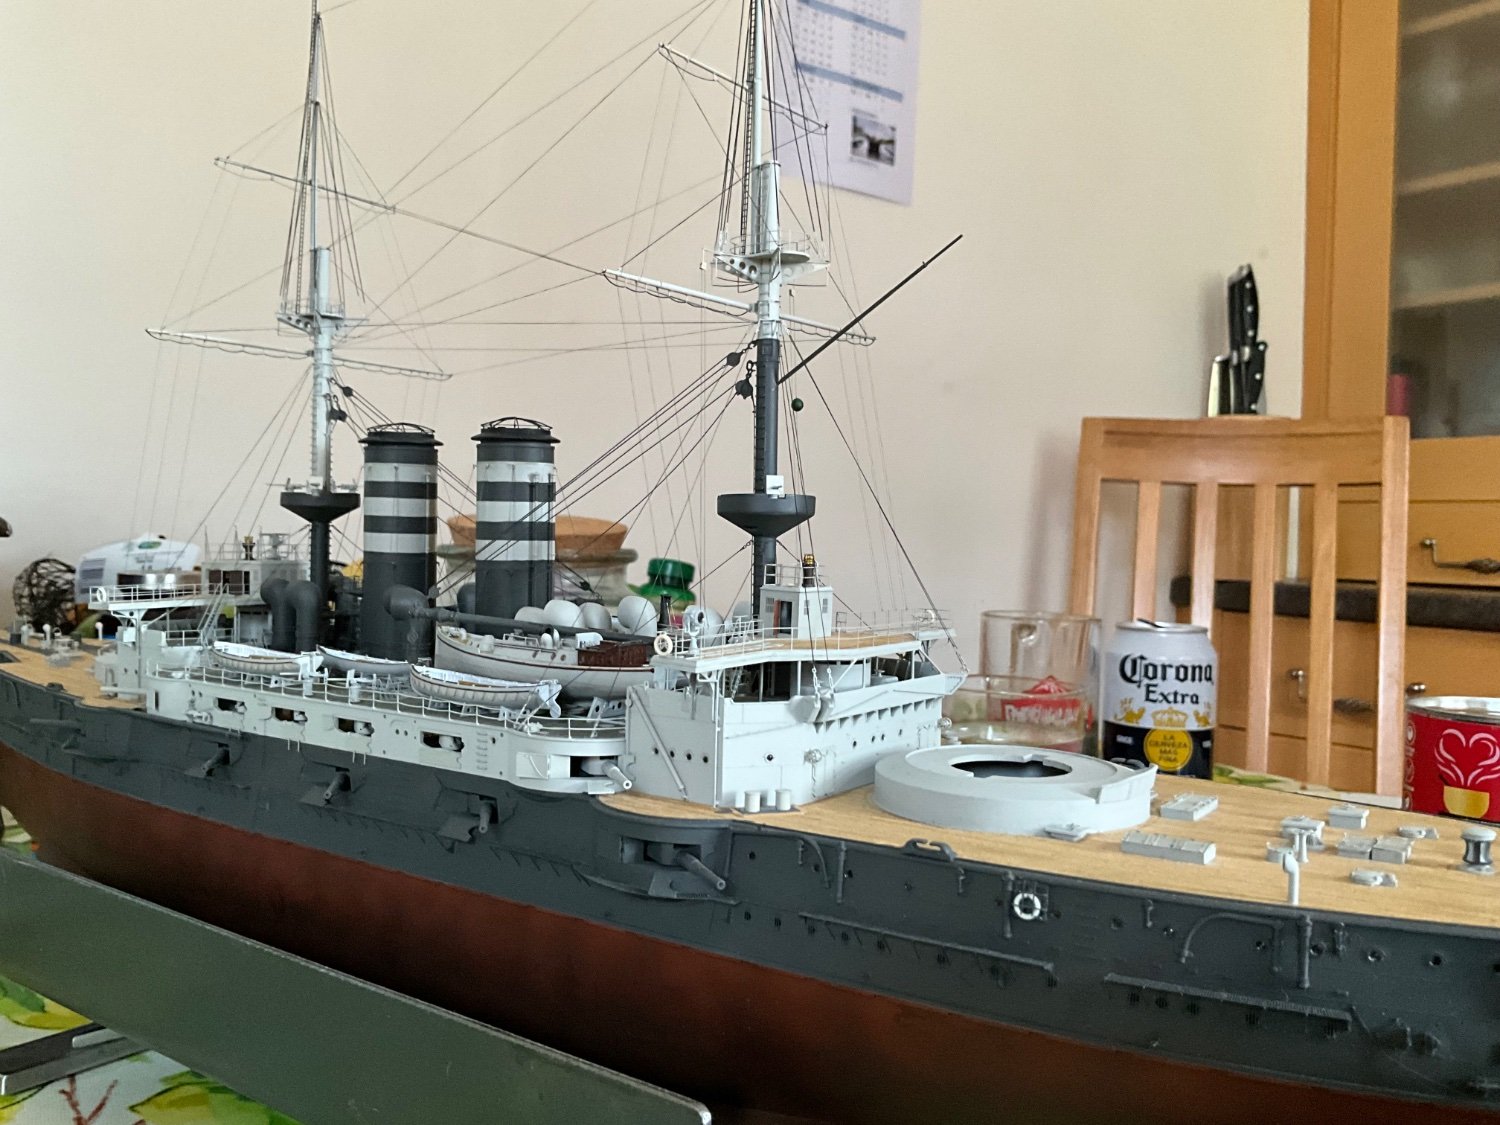
Hello again guys, hope everyone is keeping well and being more productive than myself, on my last post I said it would be a while before I got back to the model again due to other commitments, think about six or seven weeks past before picking up were I was but have been working on her steady up till now and at last can show some progress 👍 Think I’ll show how the individual parts were constructed then show photos of them all fitted at end, hopefully you’ll see some progress. 🫰First thing I’ll start with are the remaining search lights, these are parts I have purchased from Micro Master and tinkered with to resemble roughly what they might have looked like, as we are all aware she’s a hard ship to pin down for details, so it’s down to photos and best guess for anything we make, unless we want to live in archive files for ever, me, I want to see it completed, anyway the parts purchased are British searchlights probably from 1916 to 1940s period. Shall do a post tomorrow when my helper is awake and sort this first bit out, bedtime now. 🤛
-
Well that’s all, up to speed with progress. Can’t see me getting much time for this just now, to many things going on just now, but definitely looking forward to progressing. Thanks for the comments guys, great to see someone’s still interested considering the time lapse. You all take care, and promise I shall return as soon as poss. 👊
-
-
-
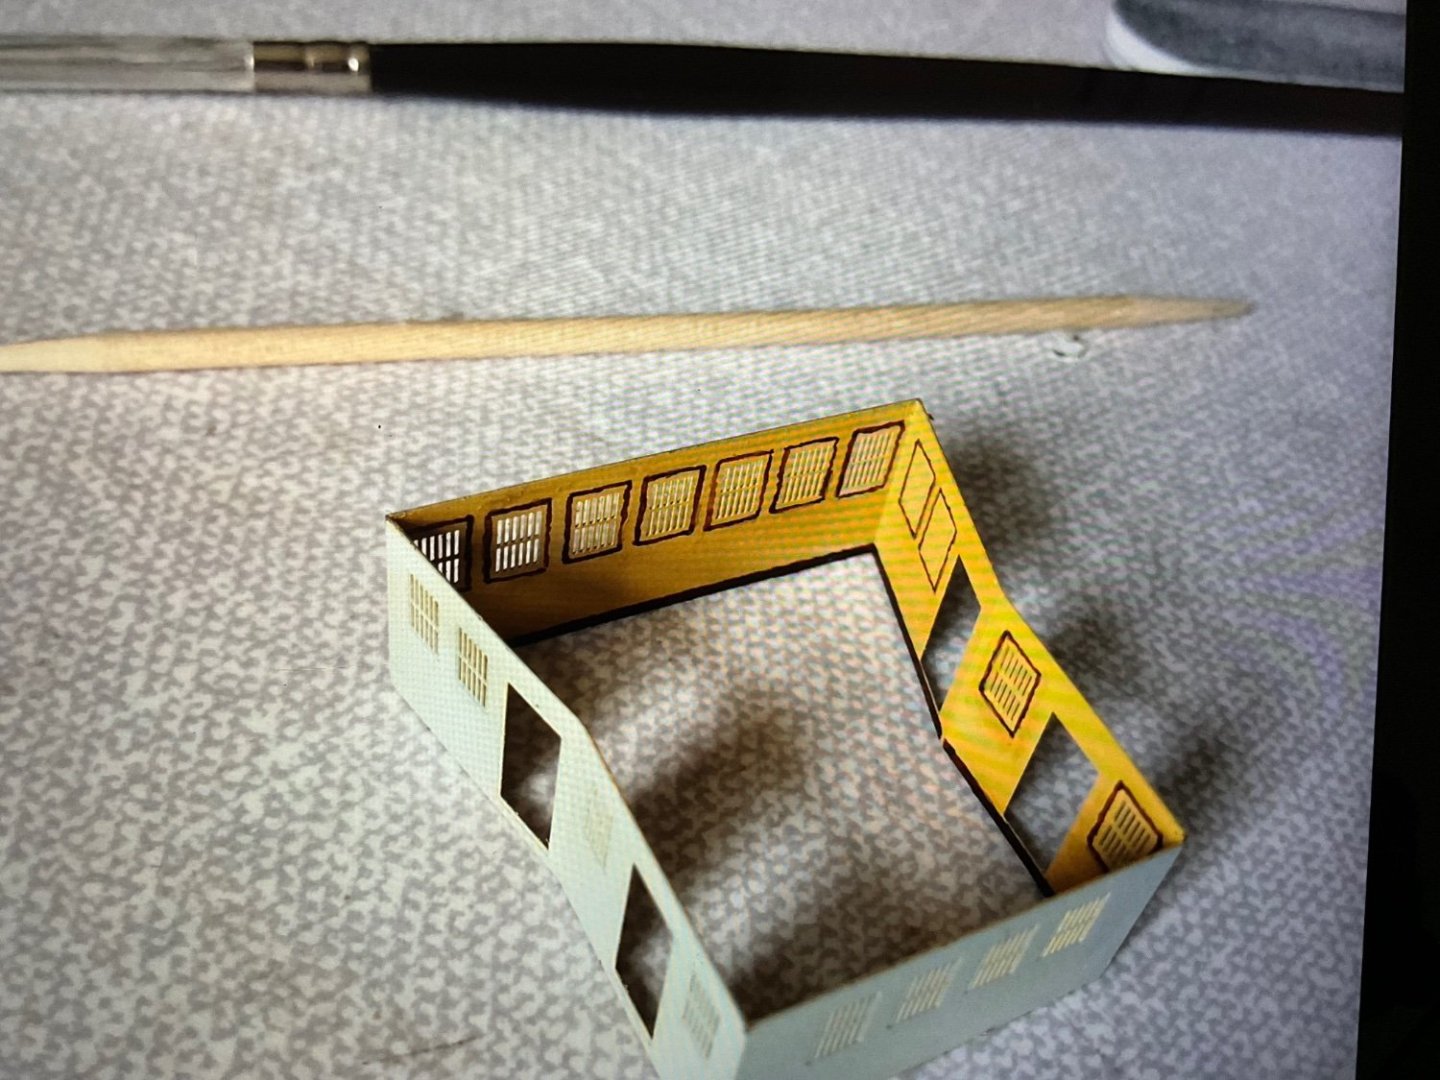
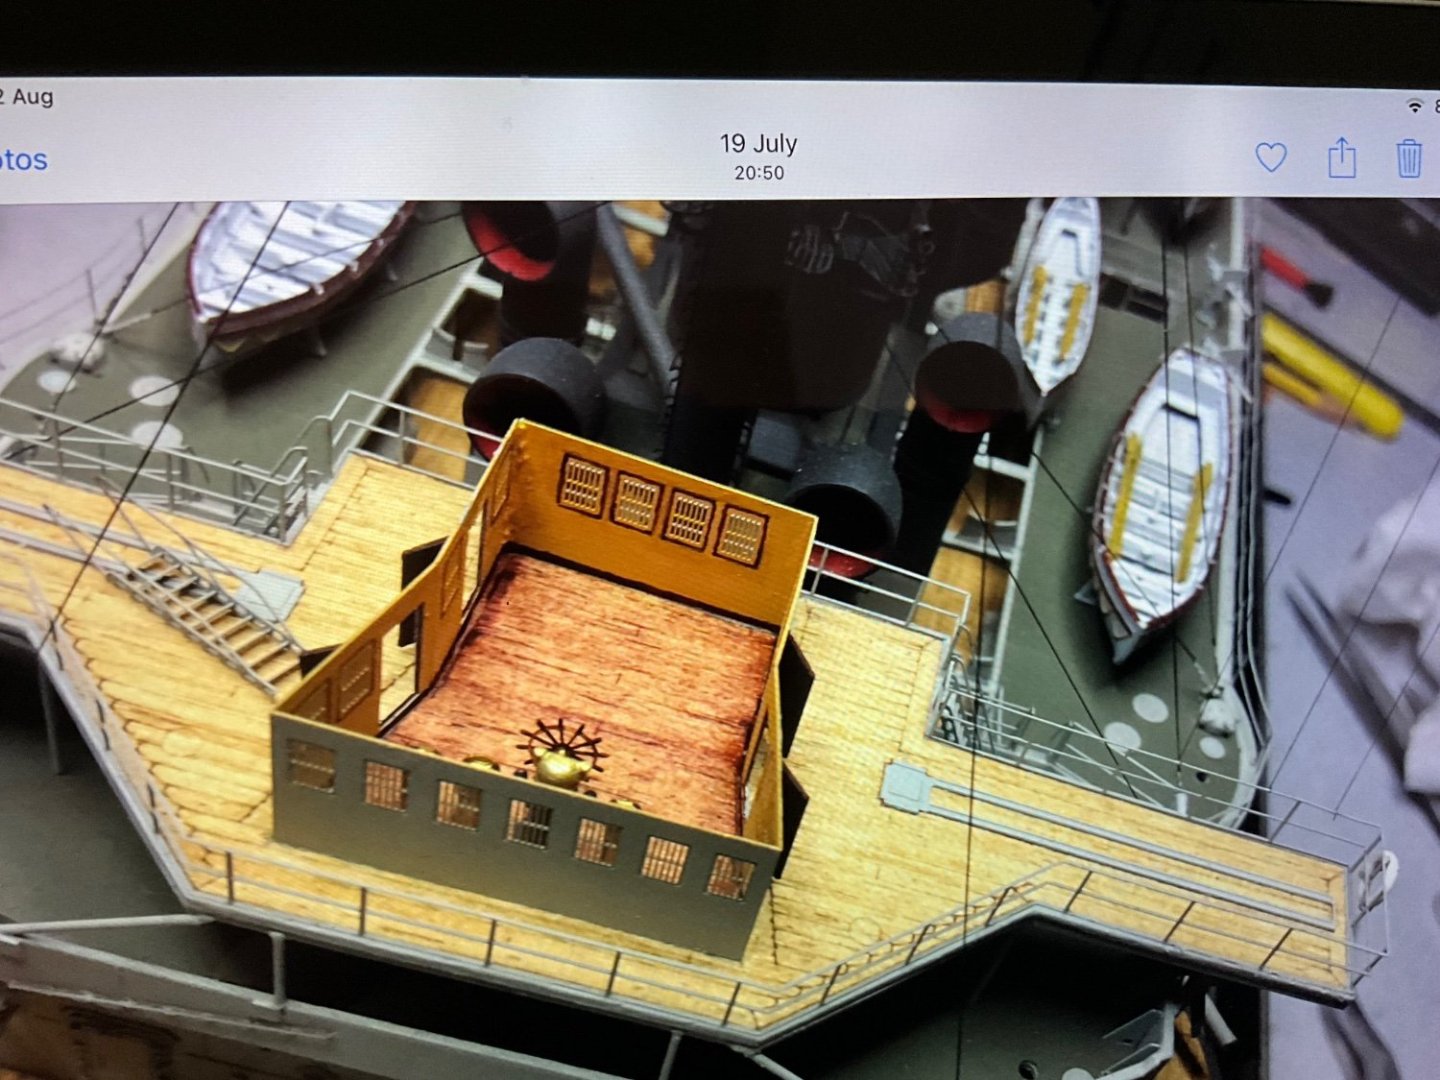
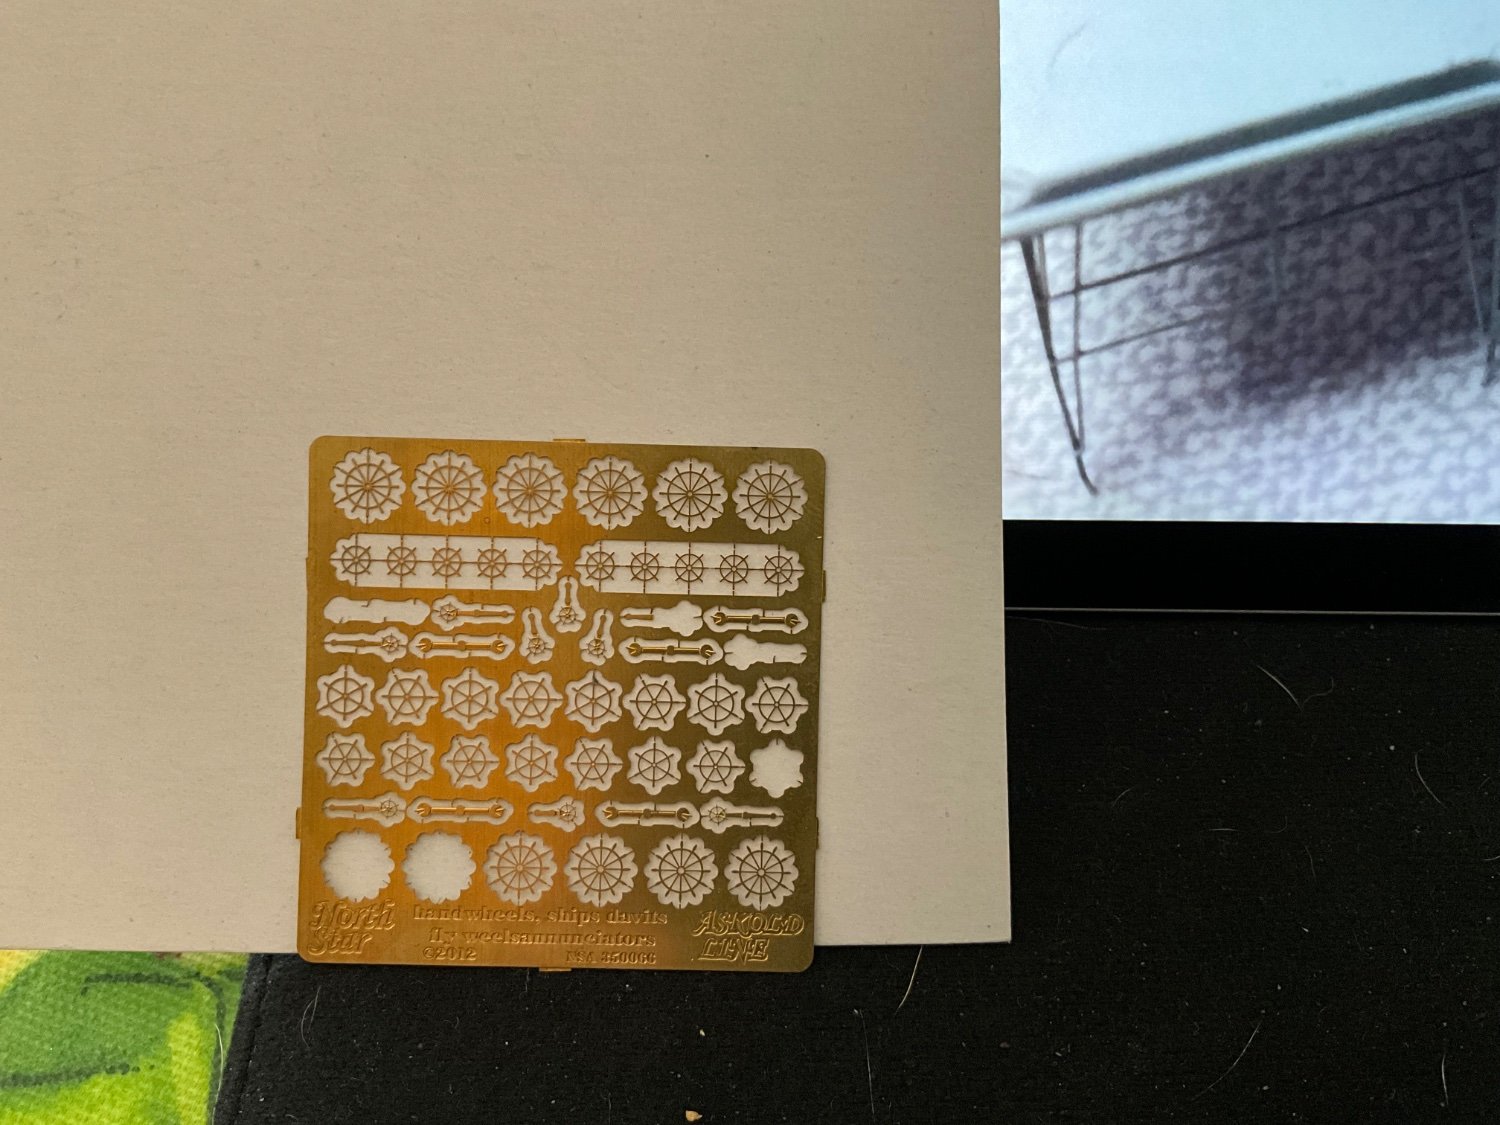
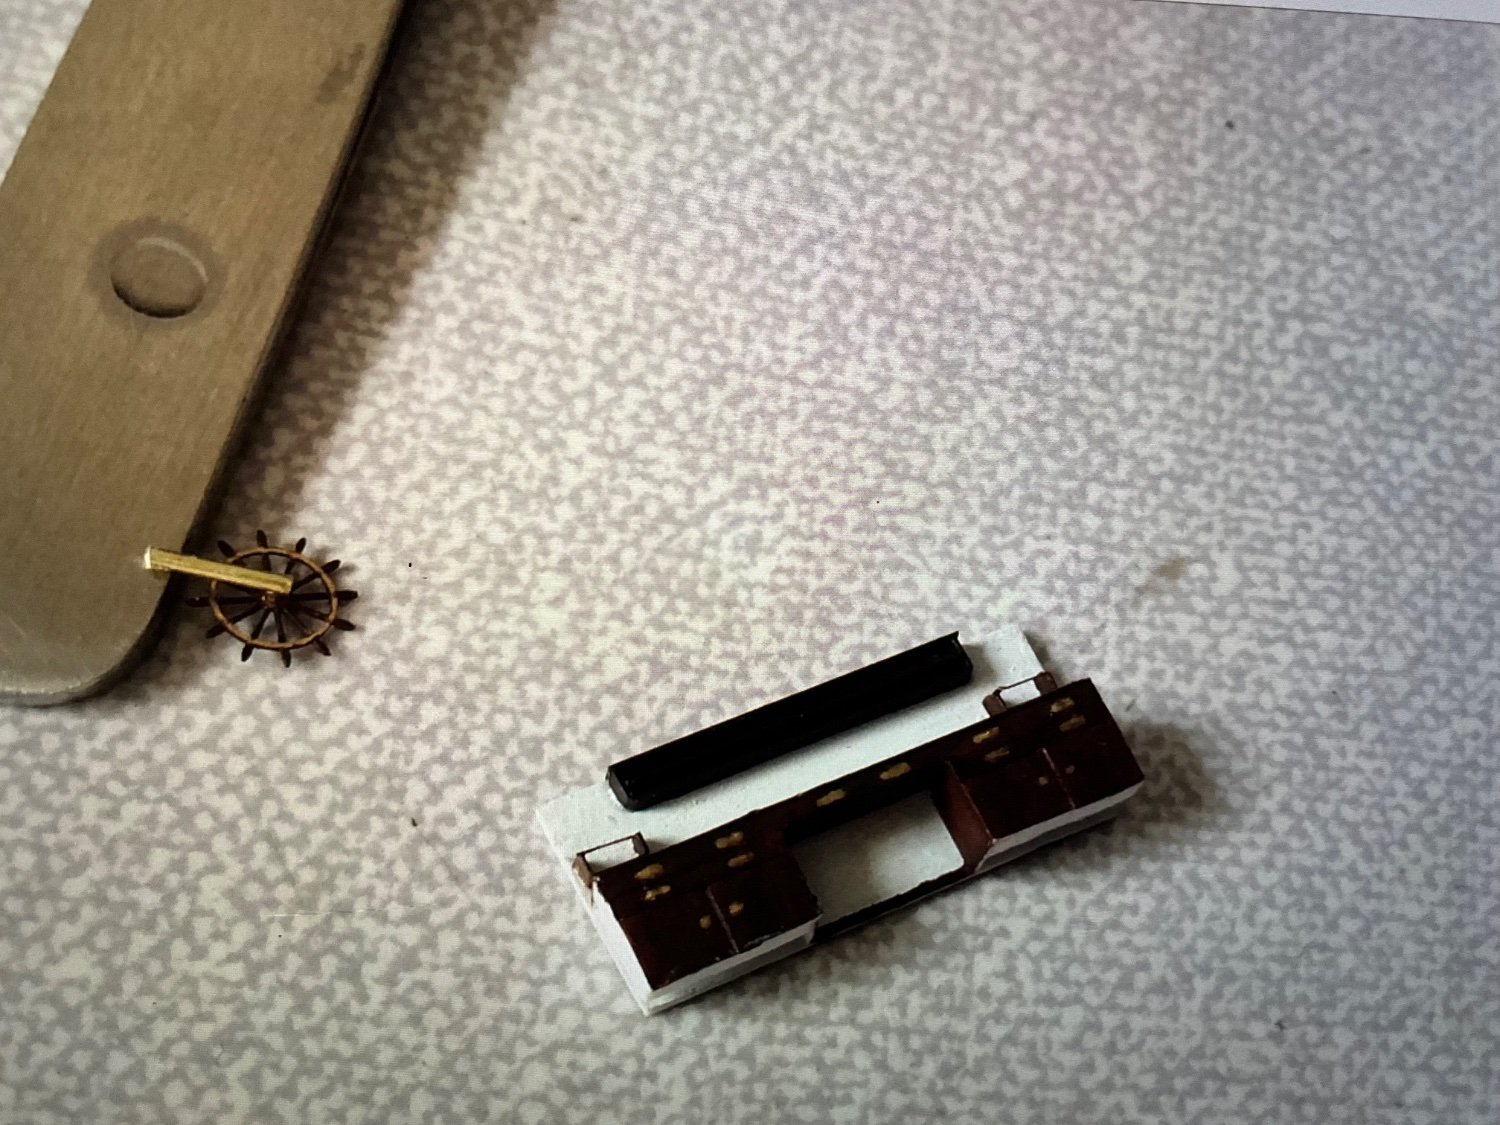
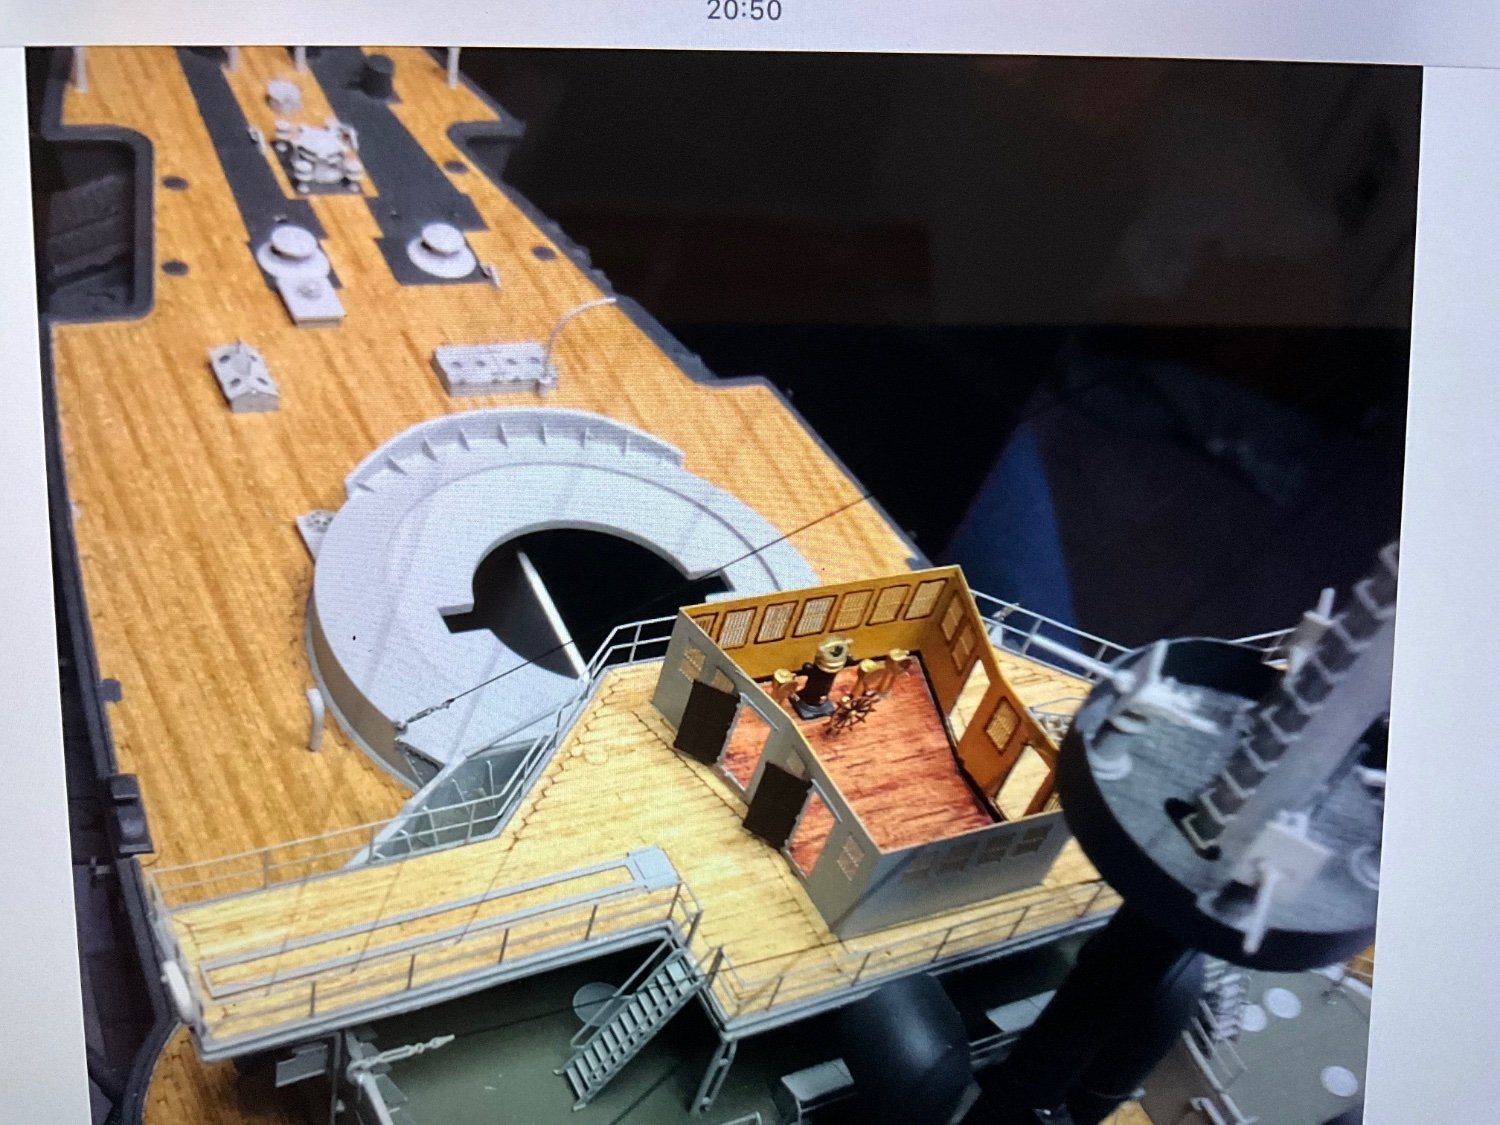
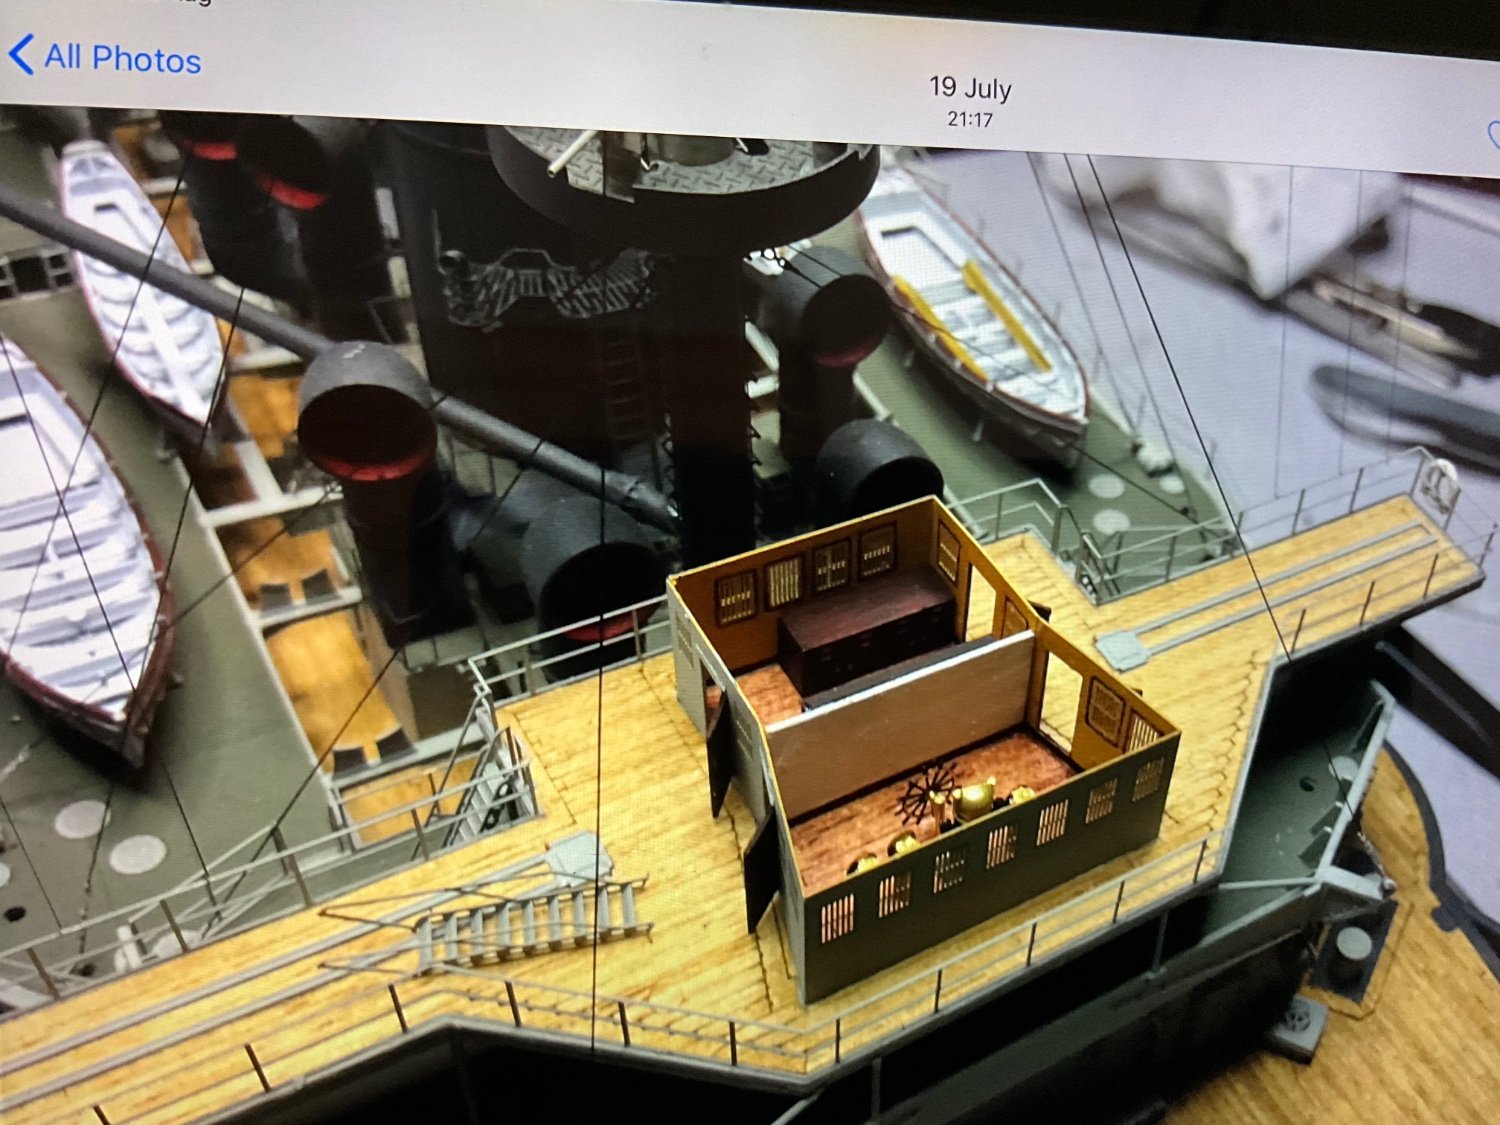
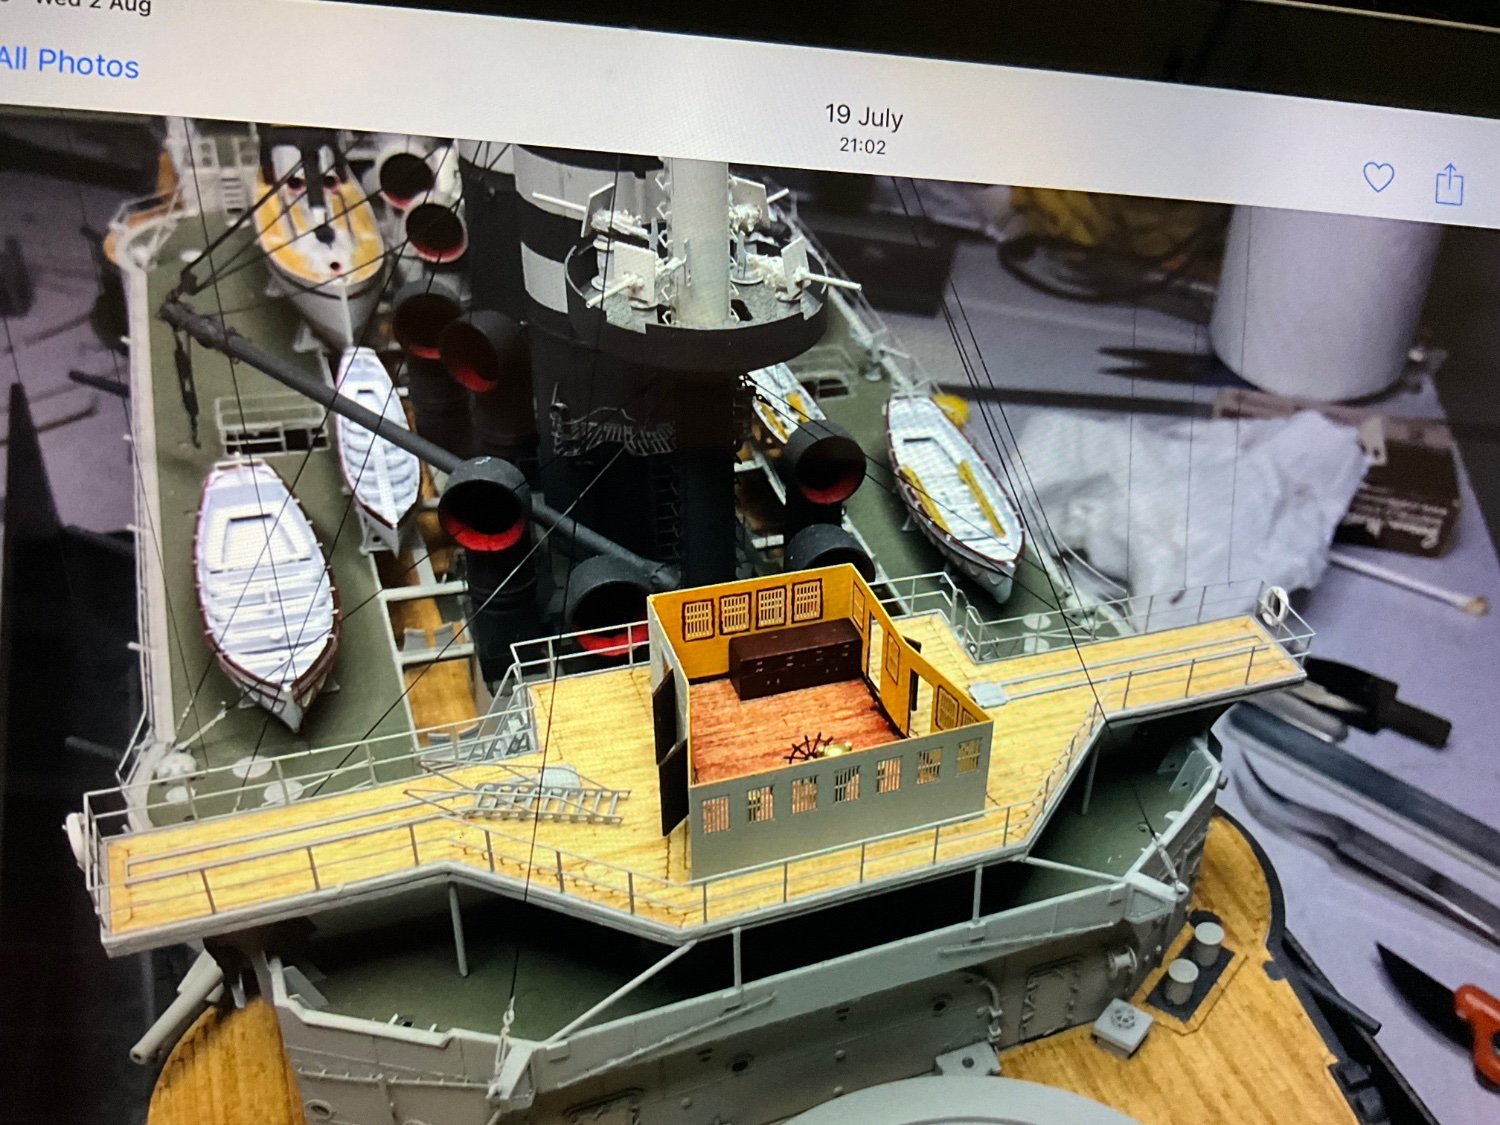
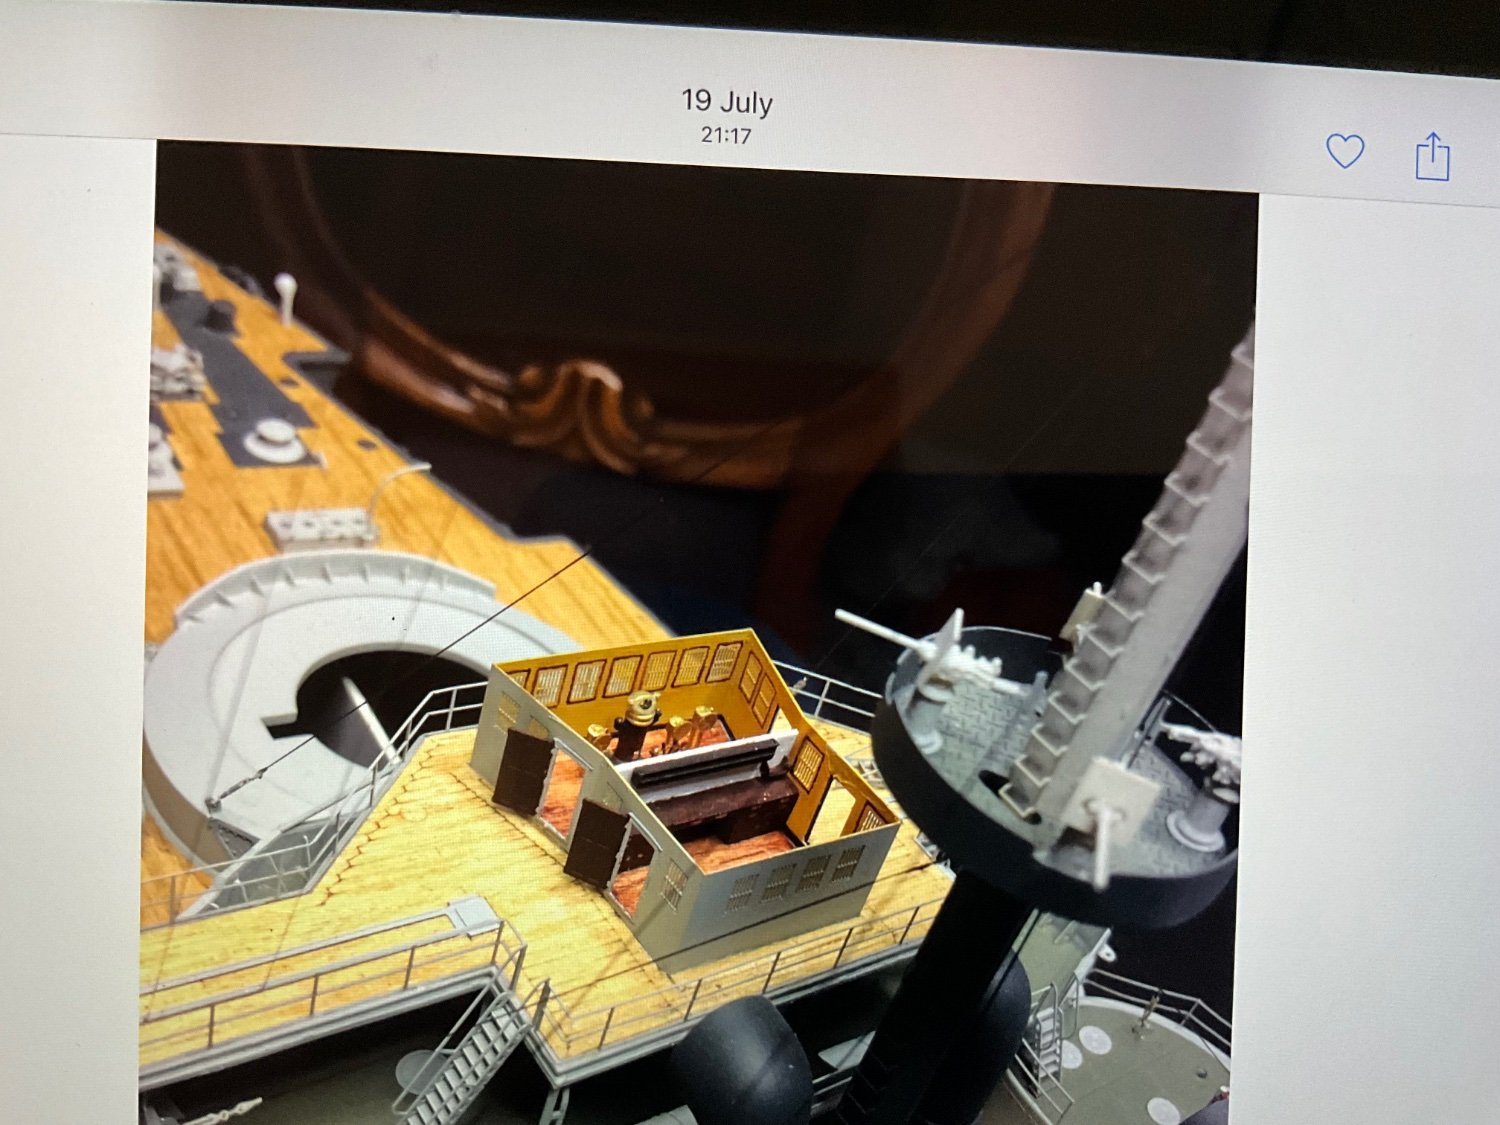
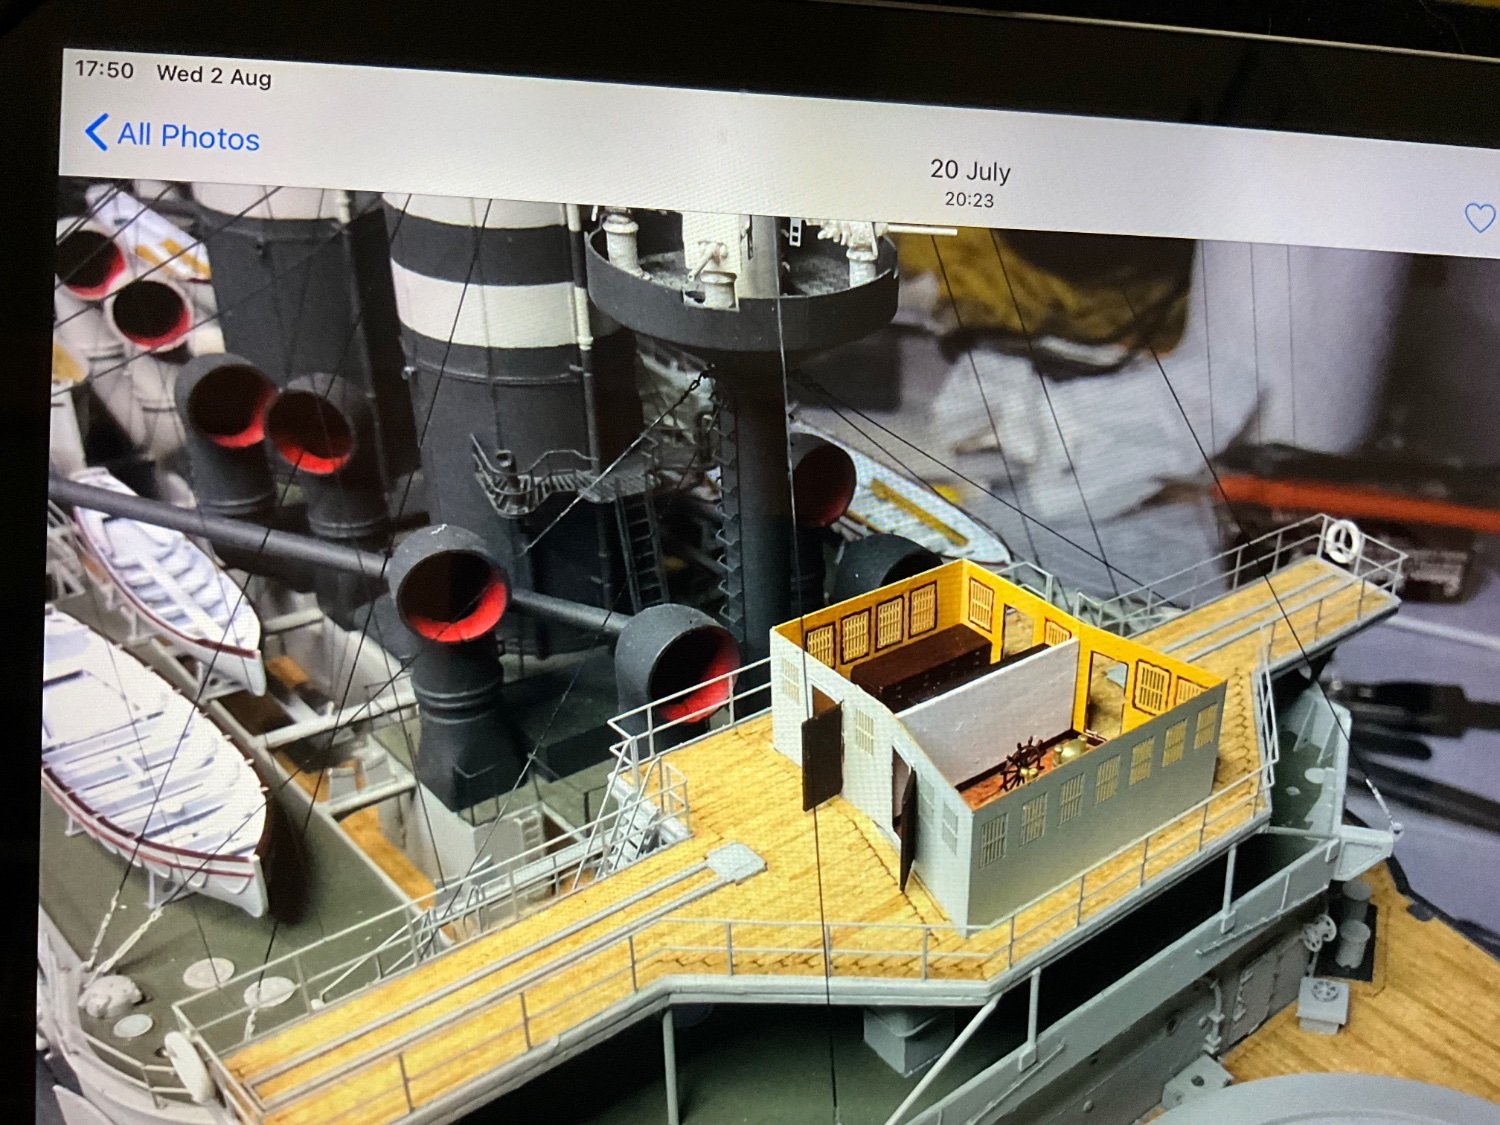
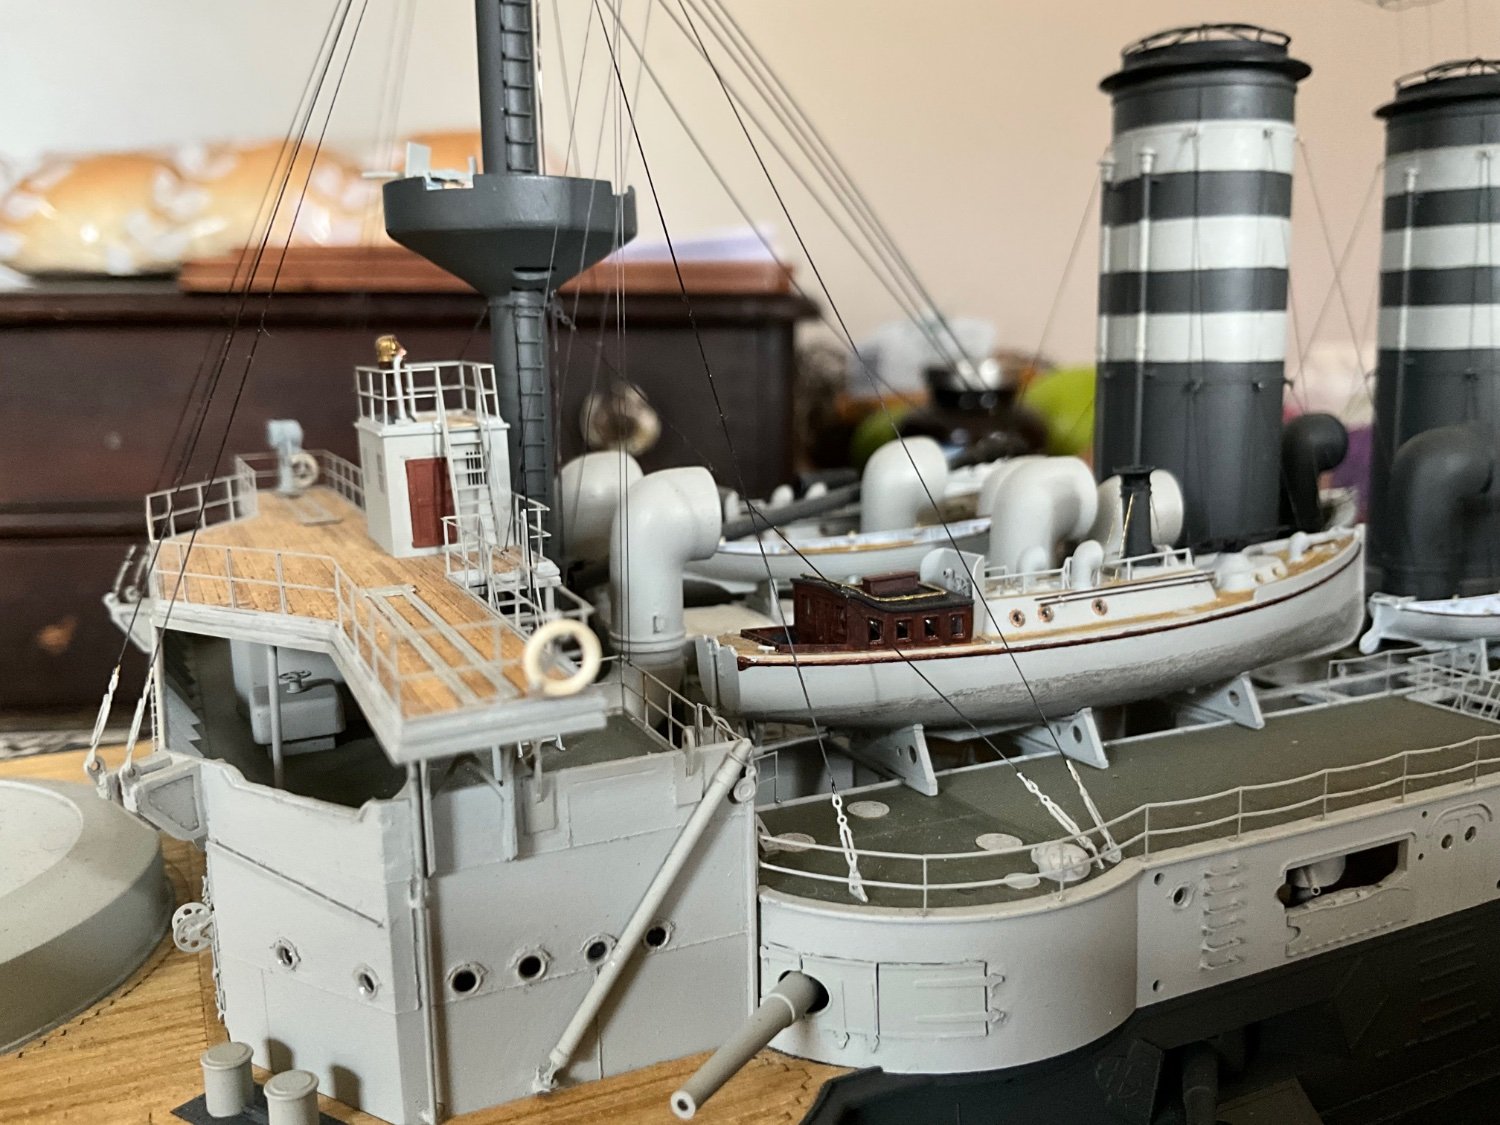
Nothing available for any of this so it was down to trial and error, bulkhead easy enough, just cut a piece of styrene stock and paint white. Compass, actually a third one in the kit, just paint, telegraphs bit more faffing about just trying brass wire and extra etch from Pontos set, ships wheel was from a selection from North Star, glued two together to give it some body and painted mahogany colour, trying to use actual brass for detailing rather than painting it brass, same idea as the nameplate on the stern from ages ago. 👍 then glued this onto more brass wire, the voice pipes in the roof, just copper wire with a little kick, glued into same point as on deck above. Wheelhouse sorted. Navigation and signals room, basically just used styrene stock and pieces of suitable size etch to make furniture, best stab with dividers trying to scale things from photos. Painting was just another guess, but end result looked all right, was on holiday with family when I found time for all of this, hence I even braved trying to paint the mahogany around the window frames, was actually surprised at the end result, no pain no gain as they say, even used one of my Labrador’s dog hairs, which are not in short supply , to make a bit, that’s his DNA into the model for ever 😂 painting same as before, paint furniture mahogany and drawer handles brass. Finally stained the floor with Teak stainer. Try and sort some photos in some sort of order. 🤛


-
First obvious part is the bulkhead separating the wheelhouse from the navigation room. Wheelhouse needs compass, wheel and three telegraphs and two voice pipes from the roof 🙄 the navigation room has two main desktops, signal storage bin high up on bulkhead and two filling docket’s and a mahogany floor. Half of you would say a waste of time and half of you would be right 😂 Shall try post tomorrow getting an earful, it’s too late. 🙄
-
-
-
-
That’s repeated itself some how, right some photos of progress on small boats with oars painted and fitted 👍
- DocRob, Canute, GrandpaPhil and 2 others
-
5
-
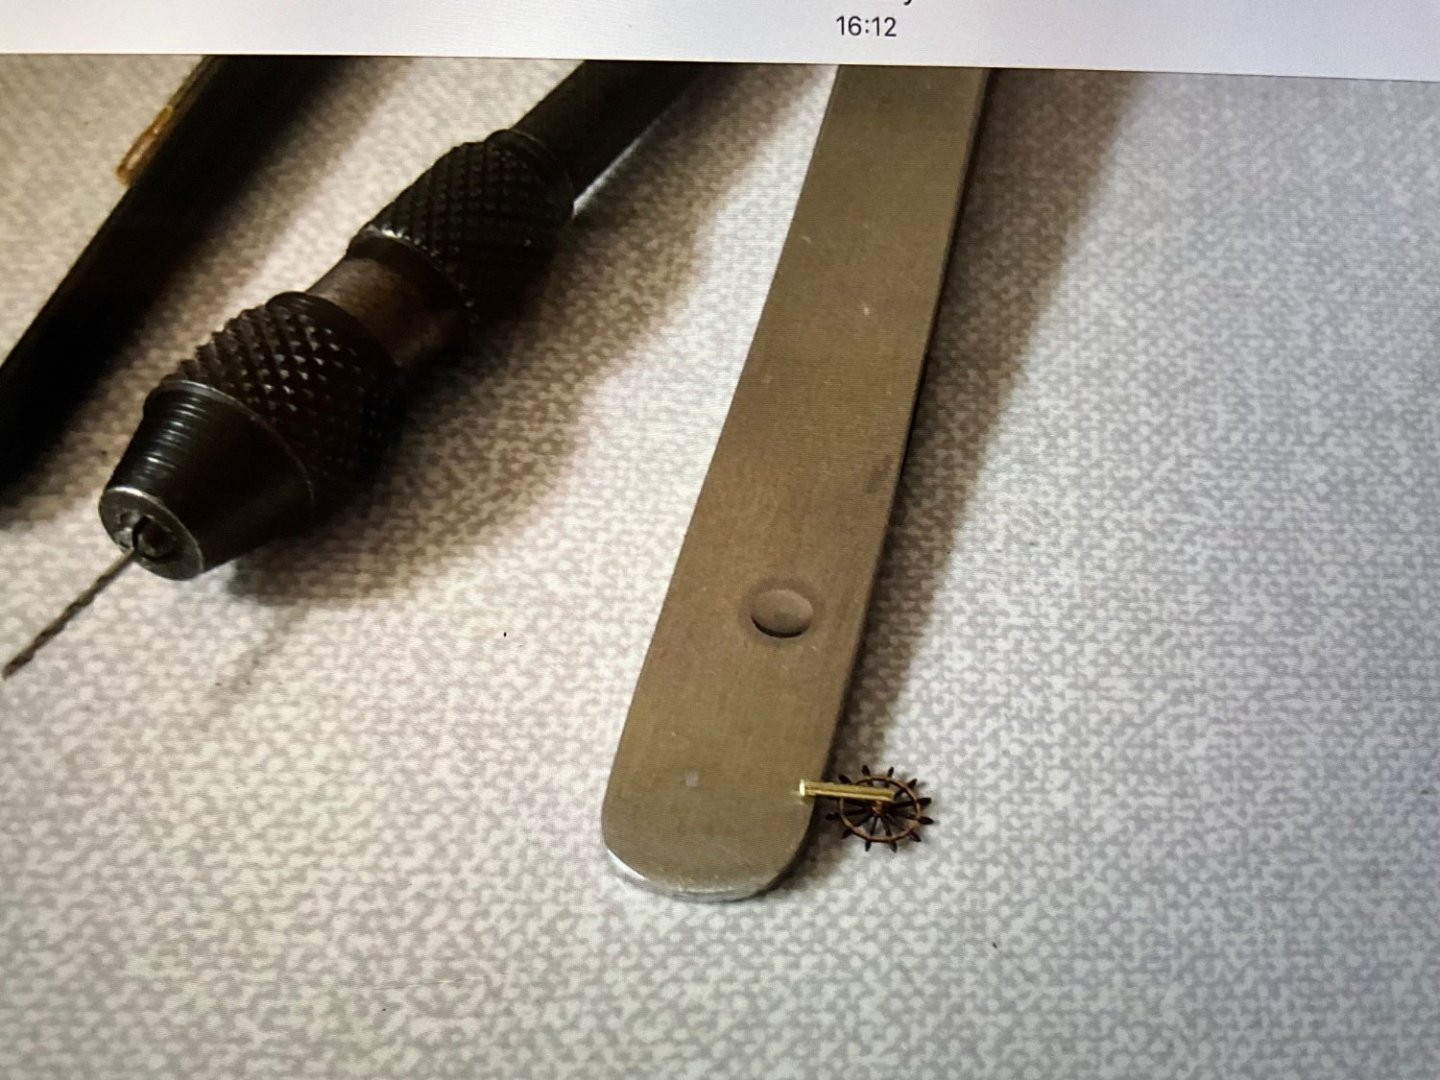
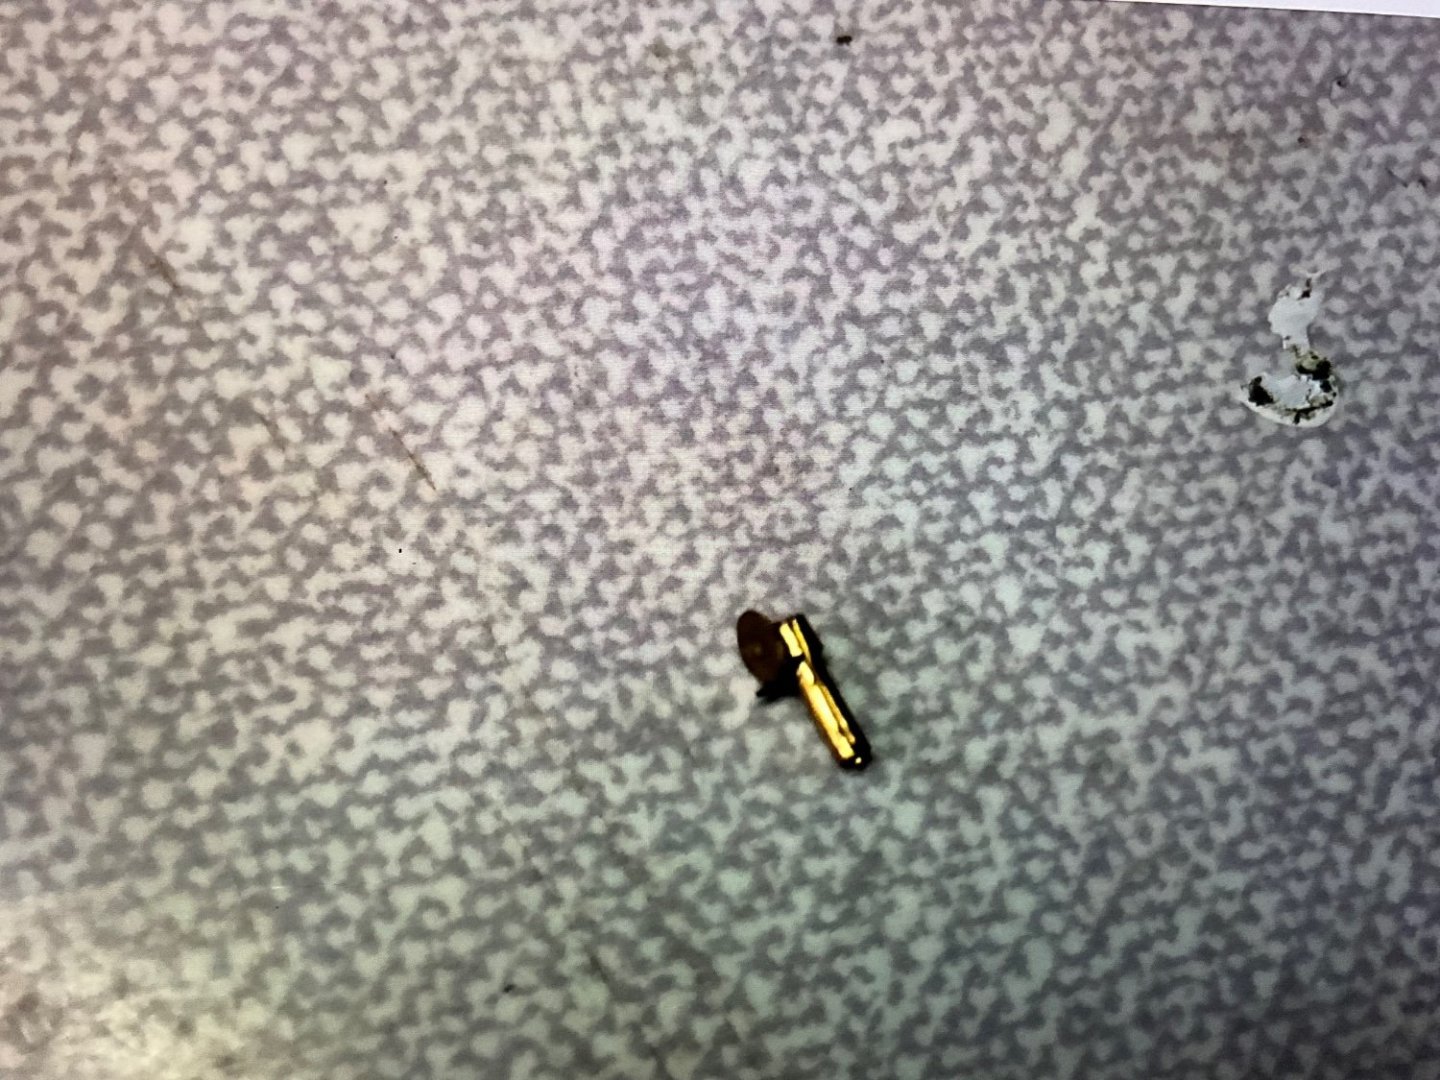
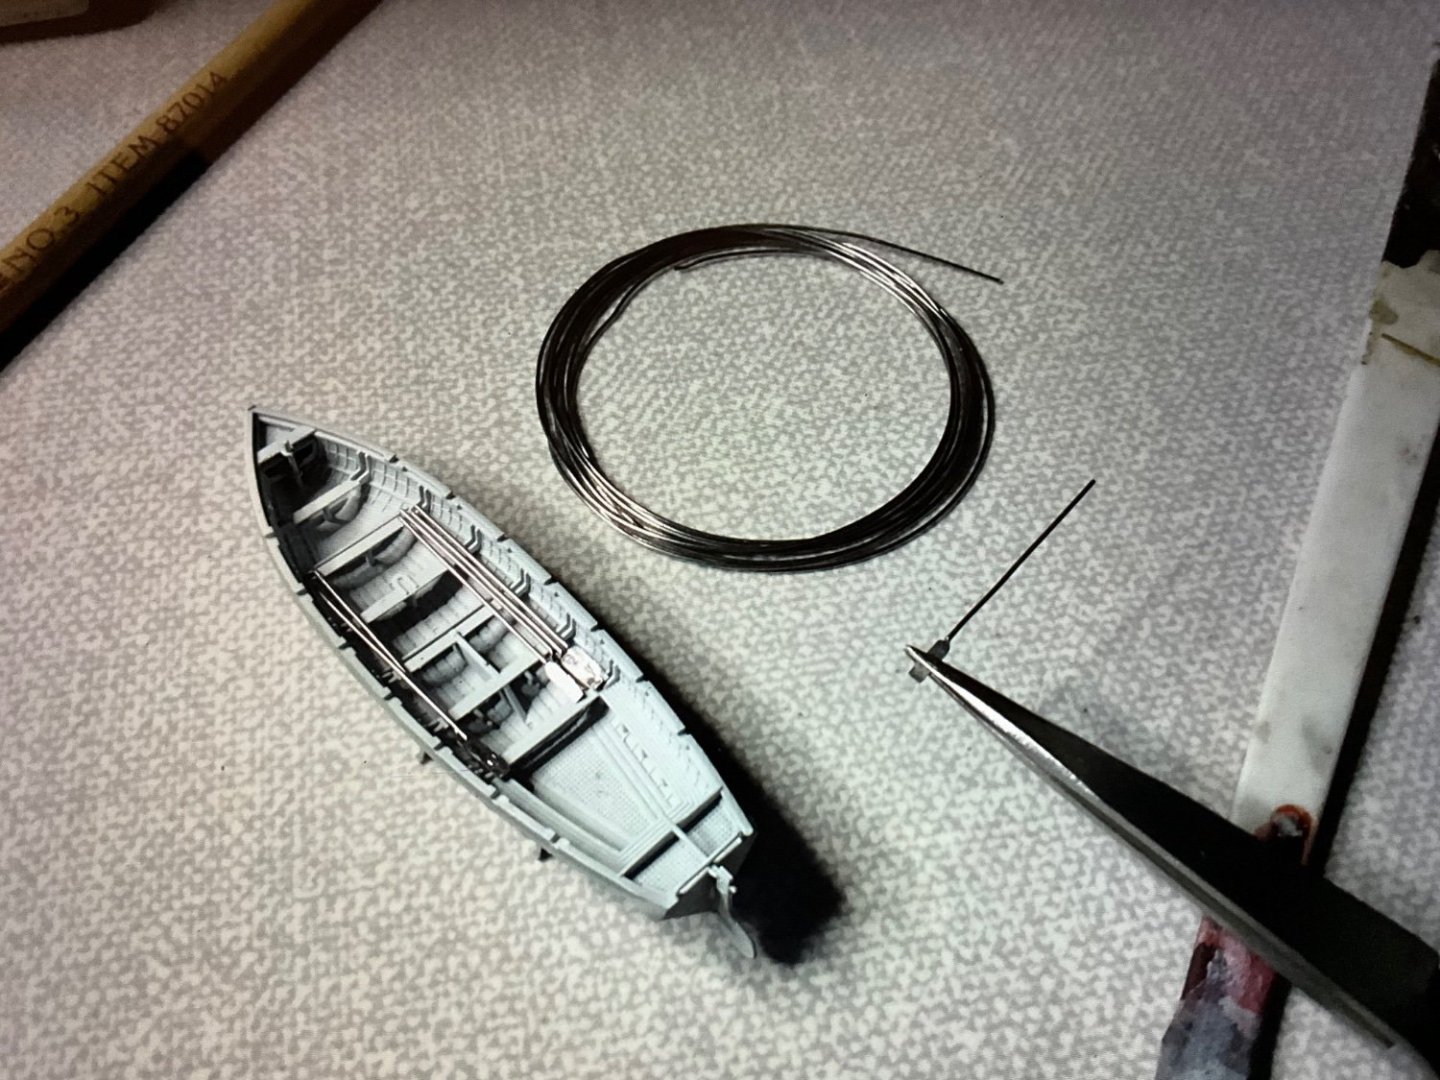
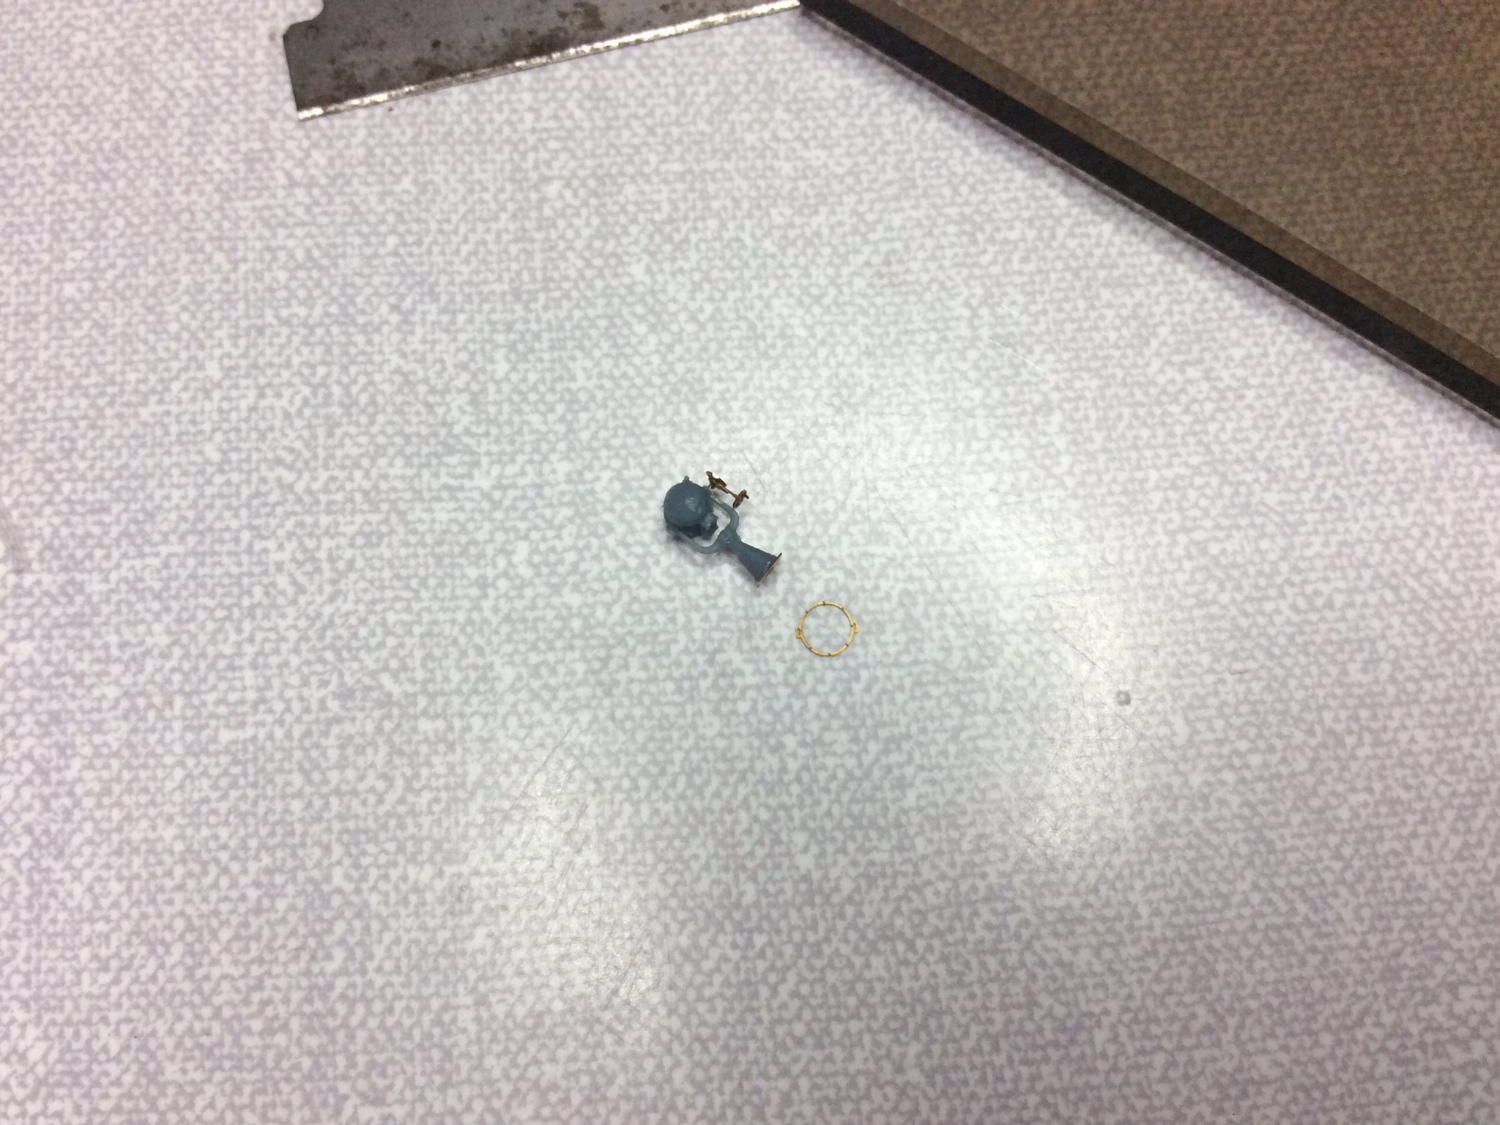
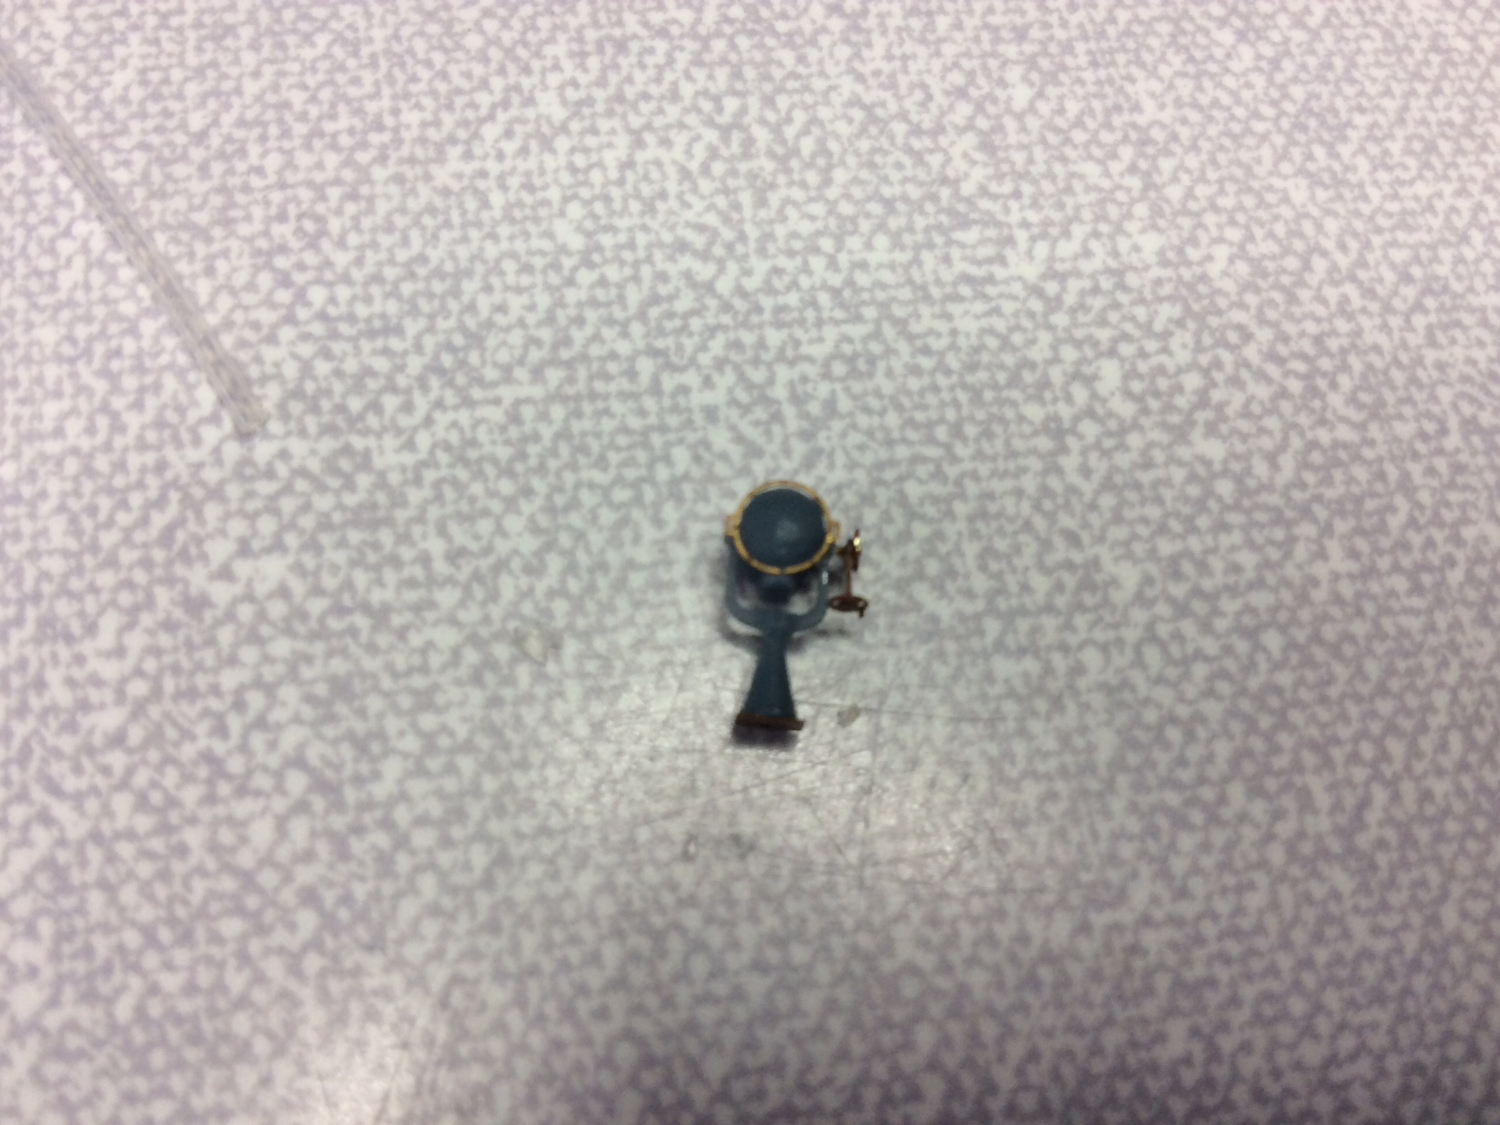
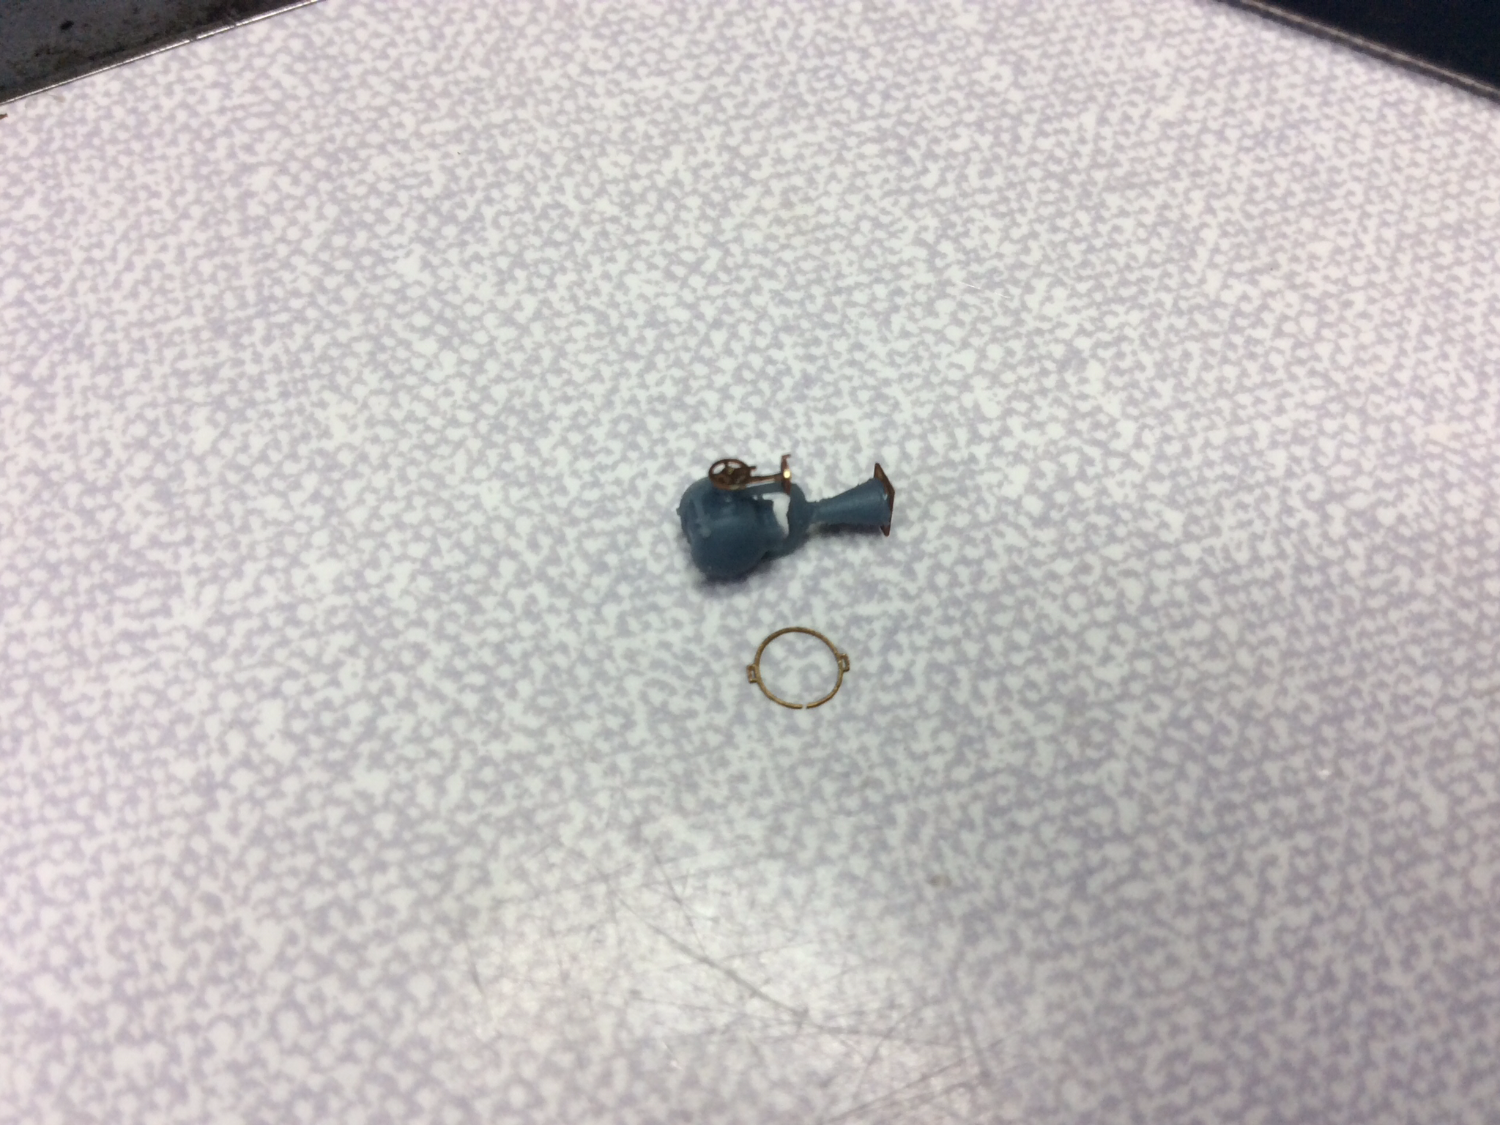
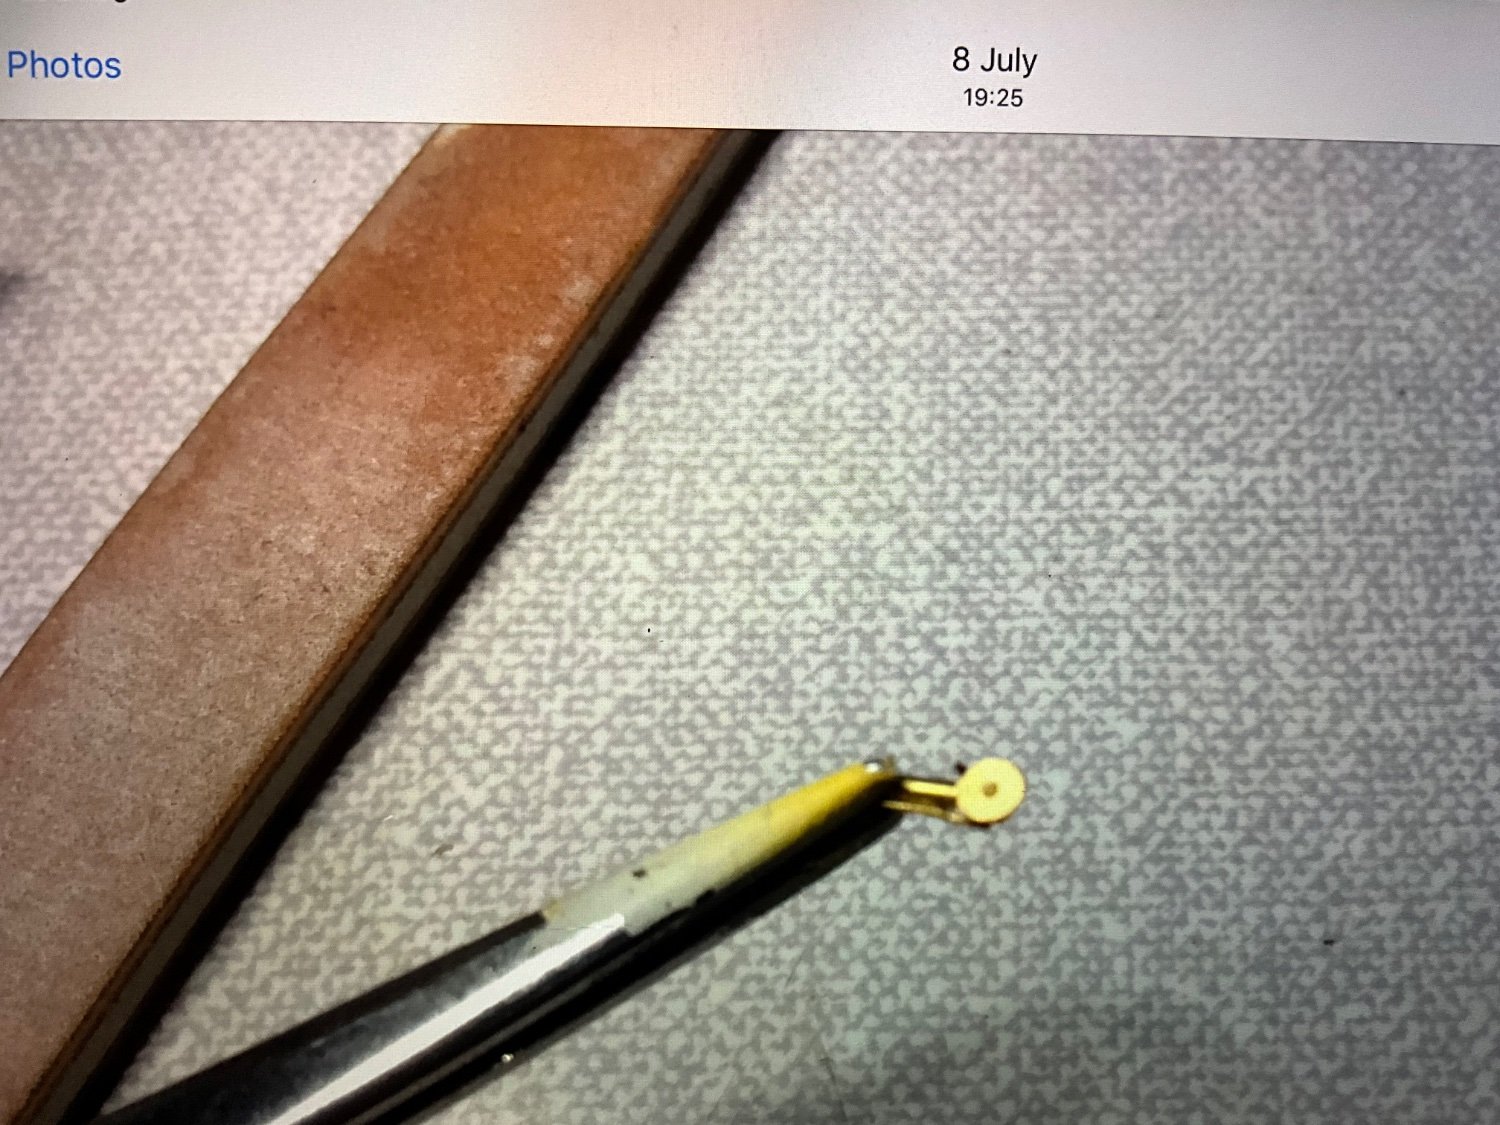
P Hi guys, hope everyone is in good health and still enjoying modelling. Myself I haven’t found much spare time for it unfortunately, to many chores happening just now, only managing a small amount whilst on holiday. On the last question on making oars for small boats, a member in my local modelling club suggested using fuse wire and squeezing the ends with flat nose pliers, fuse wire just a little to hard so tried Soft Solder, think it was 0.2, bought it at modelling show, worked well, just a bit hairy straightening the wire and keeping it straight but with care possible.👍 then paint them with a small brush, glue in place with a tiny spot of super glue, time consuming but it turned out okay in the end. Try and post some photos of this, bear with me while I try to remember how to do this again. 👀b
-
-
Hi guys, hope everyone is in good health and still enjoying modelling. Myself I haven’t found much spare time for it unfortunately, to many chores happening just now, only managing a small amount whilst on holiday. On the last question on making oars for small boats, a member in my local modelling club suggested using fuse wire and squeezing the ends with flat nose pliers, fuse wire just a little to hard so tried Soft Solder, think it was 0.2, bought it at modelling show, worked well, just a bit hairy straightening the wire and keeping it straight but with care possible.👍 then paint them with a small brush, glue in place with a tiny spot of super glue, time consuming but it turned out okay in the end. Try and post some photos of this, bear with me while I try to remember how to do this again. 👀b
- Canute, yvesvidal, GrandpaPhil and 6 others
-
9
-
Apologies for the long absence, afraid it’s the summer months and modelling seems to fall by the wayside. I definitely have not given up on her, I shall try to do a post shortly to show the little progress that has been made. I shall be retiring soon so shall have more time to do my chores 🙄
-
-
Thanks for the kind remarks, nice coming from someone who has built this model to a standard that was inspirational, you never said it was as hard as I found it to be, well certainly has had some hairy moments. 🤪 looking at all the (completed) models to your name and thinking my next build log shall have one 😂 Starting to see the light at the end of the tunnel now me thinks, must be the etch sheets are almost empty. 😂👍


HIJMS MIKASA 1902 by Jeff59 - FINISHED - HobbyBoss - 1/200 - PLASTIC
in - Kit build logs for subjects built from 1901 - Present Day
Posted
Thought I had taken more photos of the small boat work, can’t seem to find them, only one photo of upturned boat with over heavy rope and keel in the process of being removed, once removed, the keel and stem posts were replaced with styrene stock that l thought more to scale, also contoured the hull a little bit, just scraping and sanding till l was happy. Used fine thread for ropes holding down canvas covers, then glued parts together then fitted Pontos etch rudder which l trimmed and filed to shape.