HOLIDAY DONATION DRIVE - SUPPORT MSW - DO YOUR PART TO KEEP THIS GREAT FORUM GOING! (Only 72 donations so far out of 49,000 members - Can we at least get 100? C'mon guys!)
×


Papa
-
Posts
1,305 -
Joined
-
Last visited
Content Type
Profiles
Forums
Gallery
Events
Everything posted by Papa
-
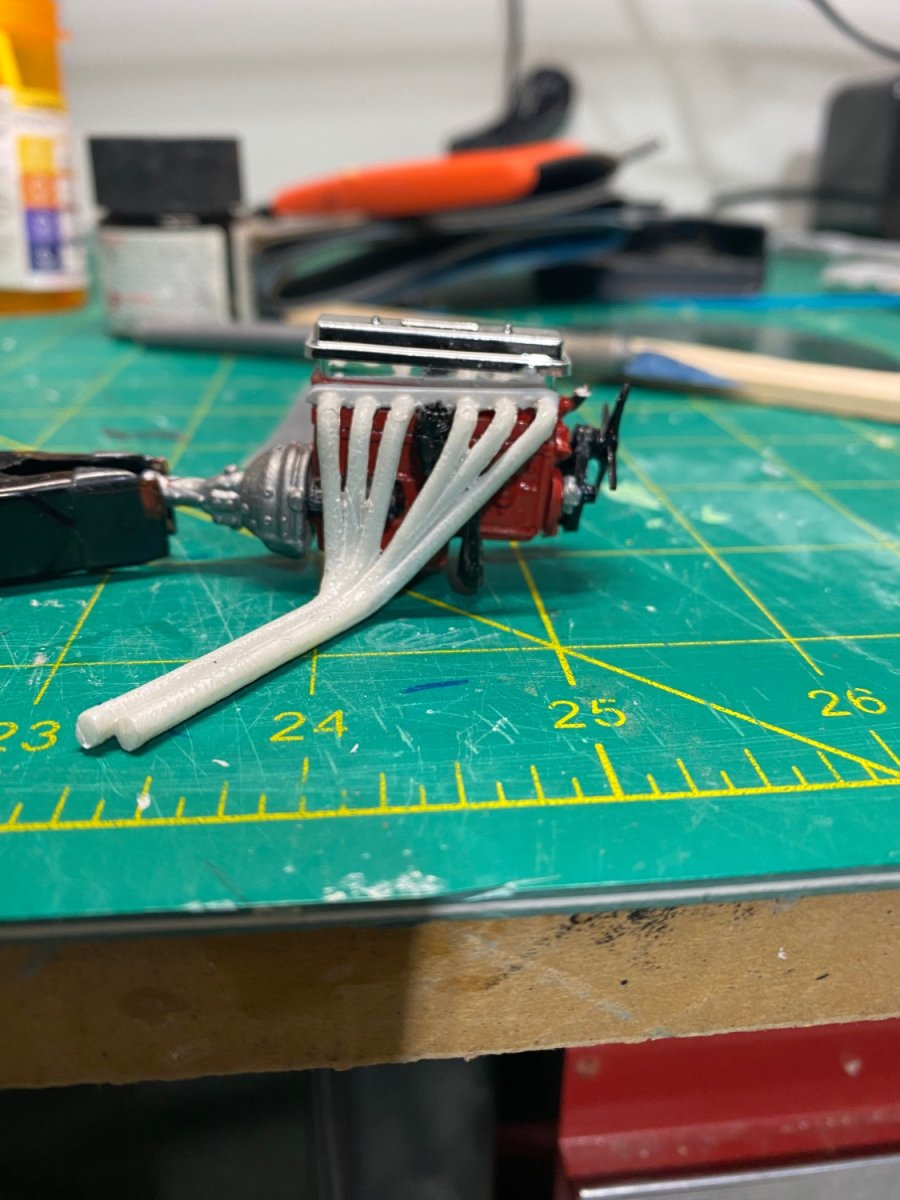
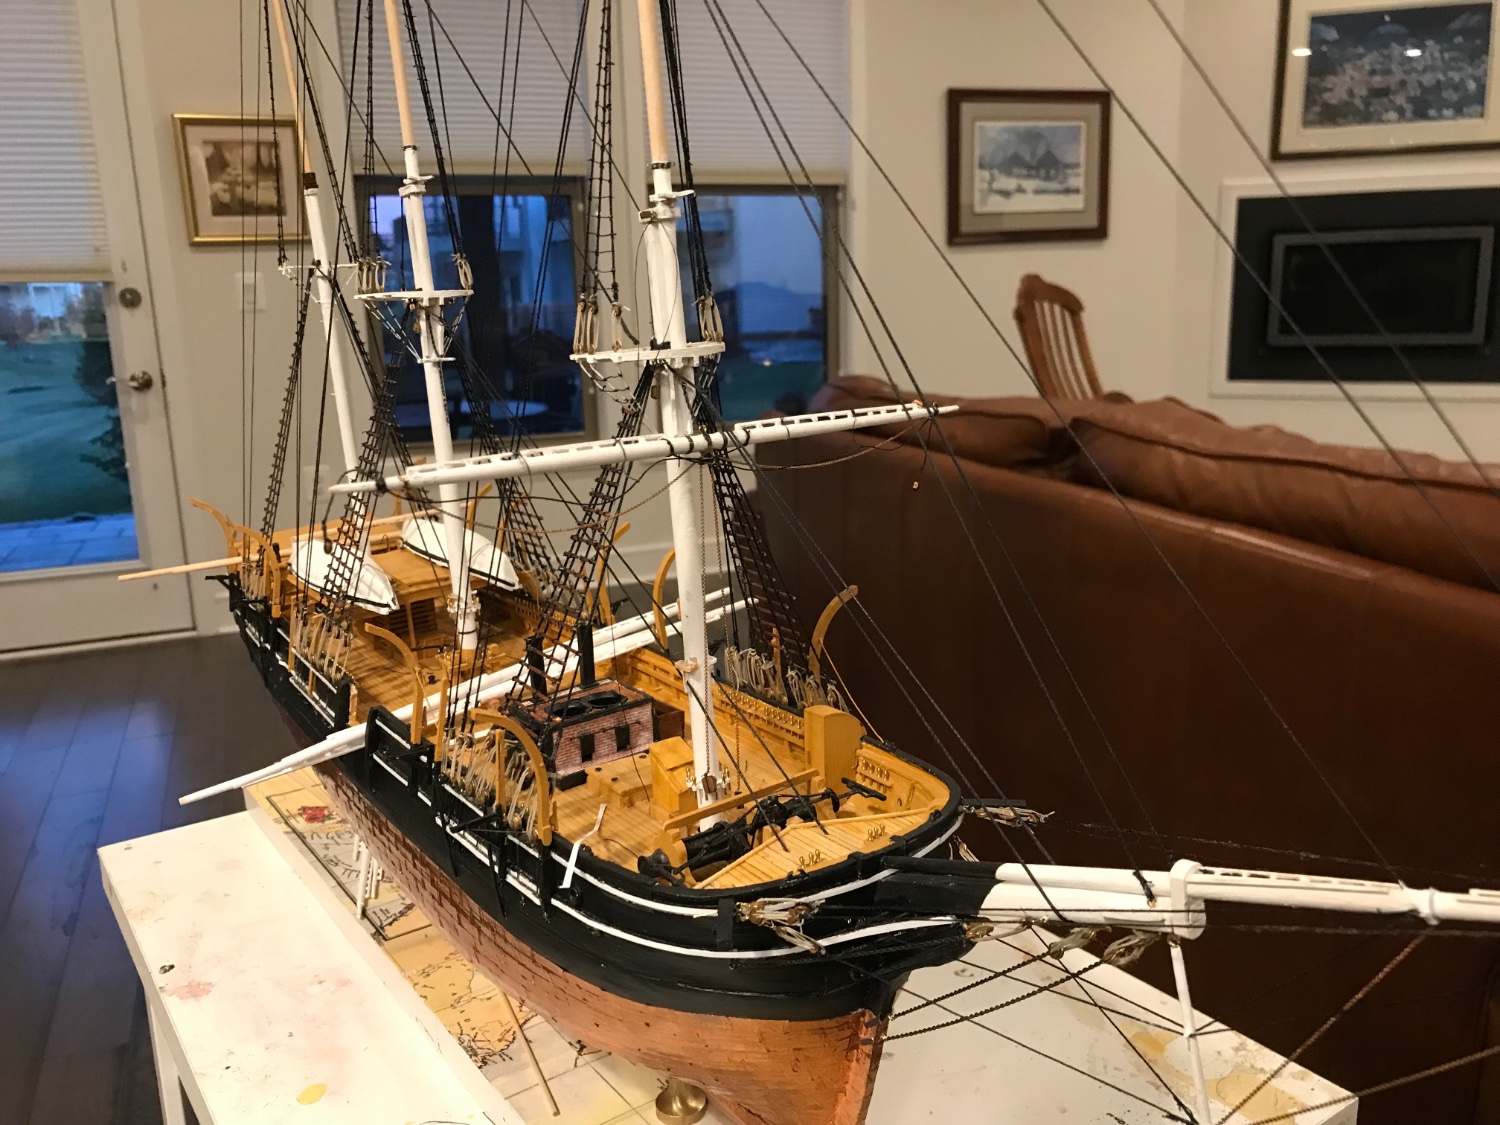
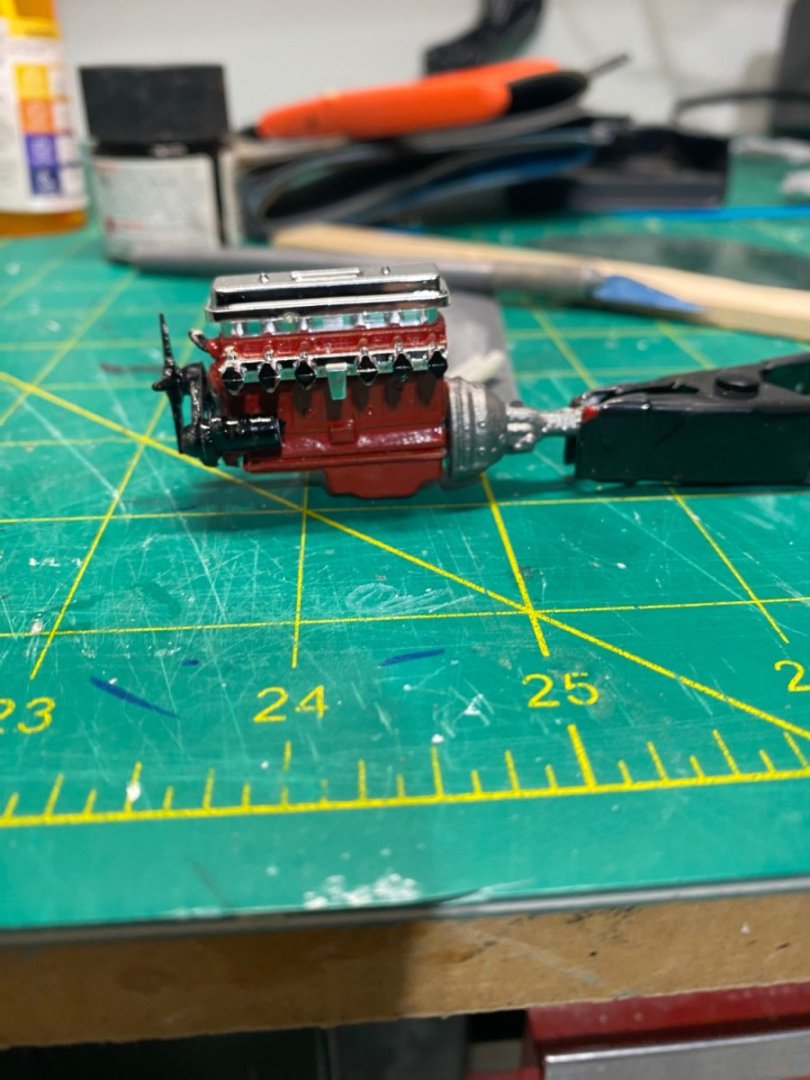
Finished engine. I am going to drill holes in the ends of the exhaust pipes or paint them black to simulate holes.

- 37 replies
-
- 13
-

-
 By the way. The bent tweezers seen on the work table I have had for over 50 years. Good tools last forever. I purchased them from James Bliss Co in Boston. Bliss was mainly an outfitter for real boats but they did deal in Model Shipways “Yellow Box” kits, hobby tools, and some other ship kits whose brand I no longer remember. I purchased Young America, Newsboy, and the Essex there. Sorry to say the Young America and Newsboy were badly damaged after several house moves and are no longer around. By the 1970s Bliss moved outside the city and eventually closed up I think.
- 294 replies
-
- 2
-
-
- charles w morgan
- model shipways
- (and 1 more)
-
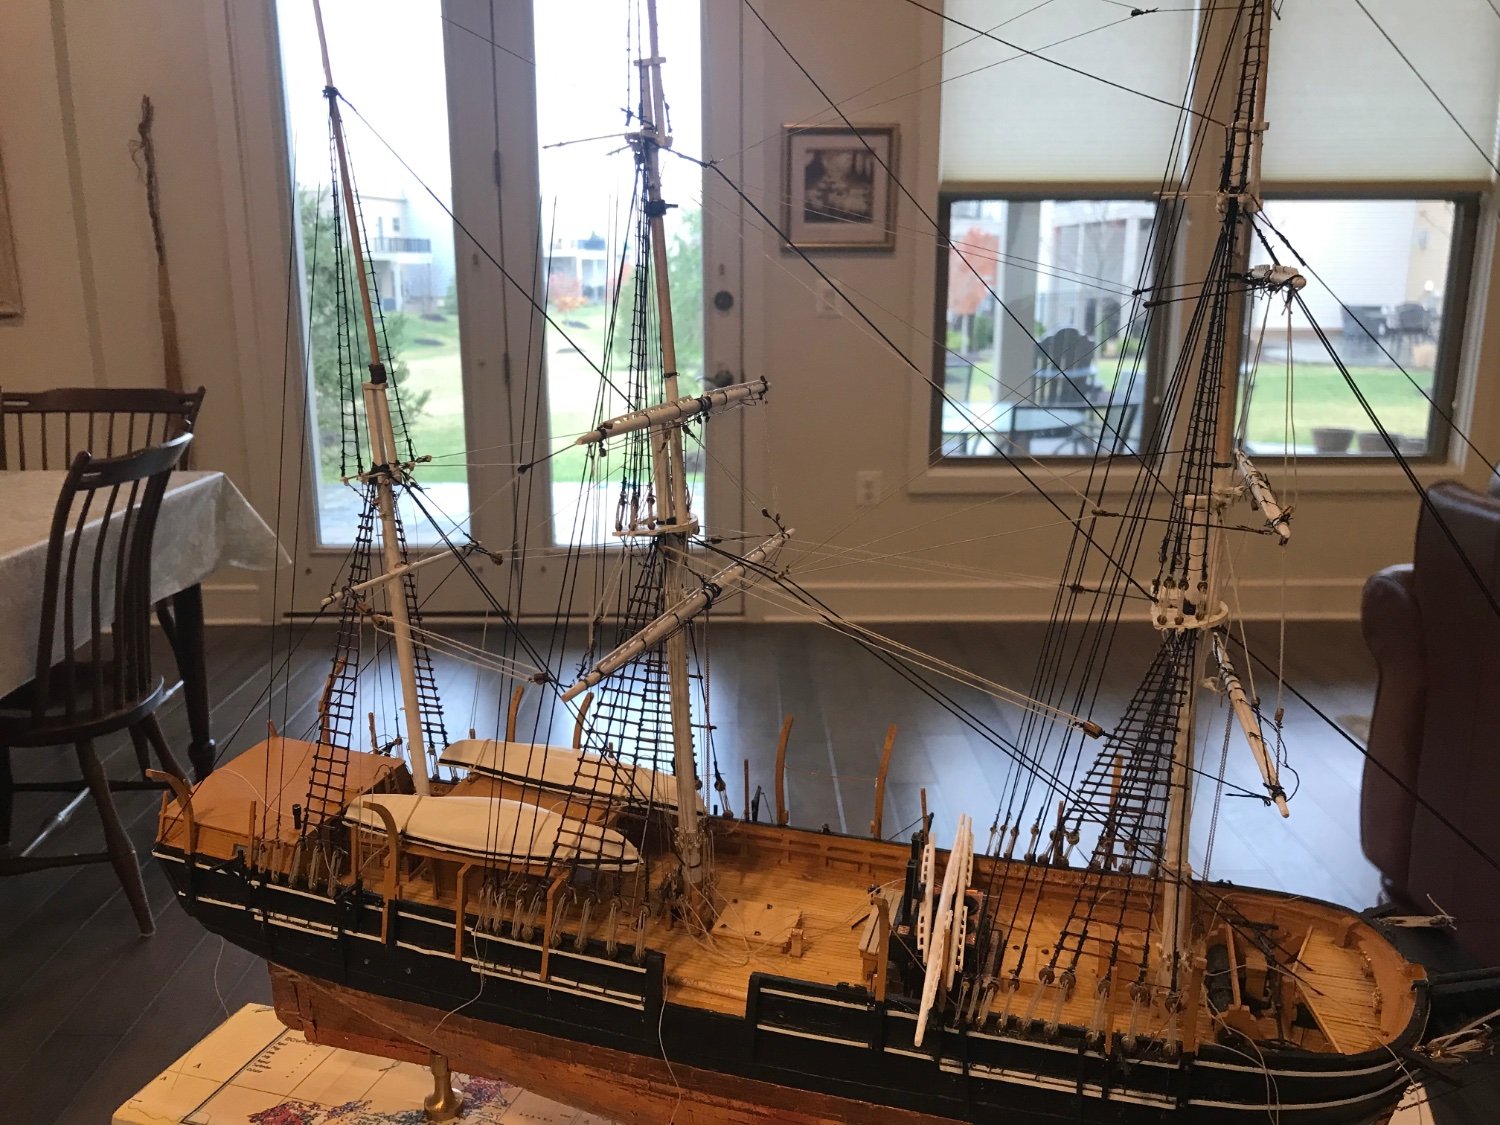
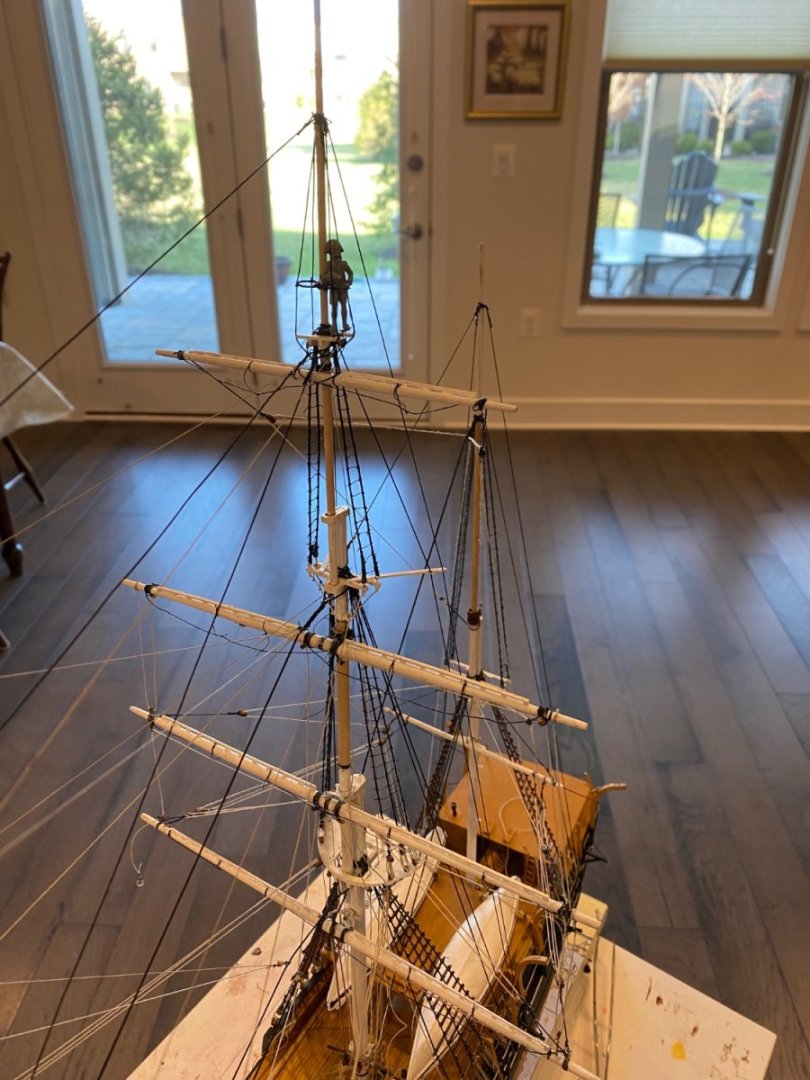
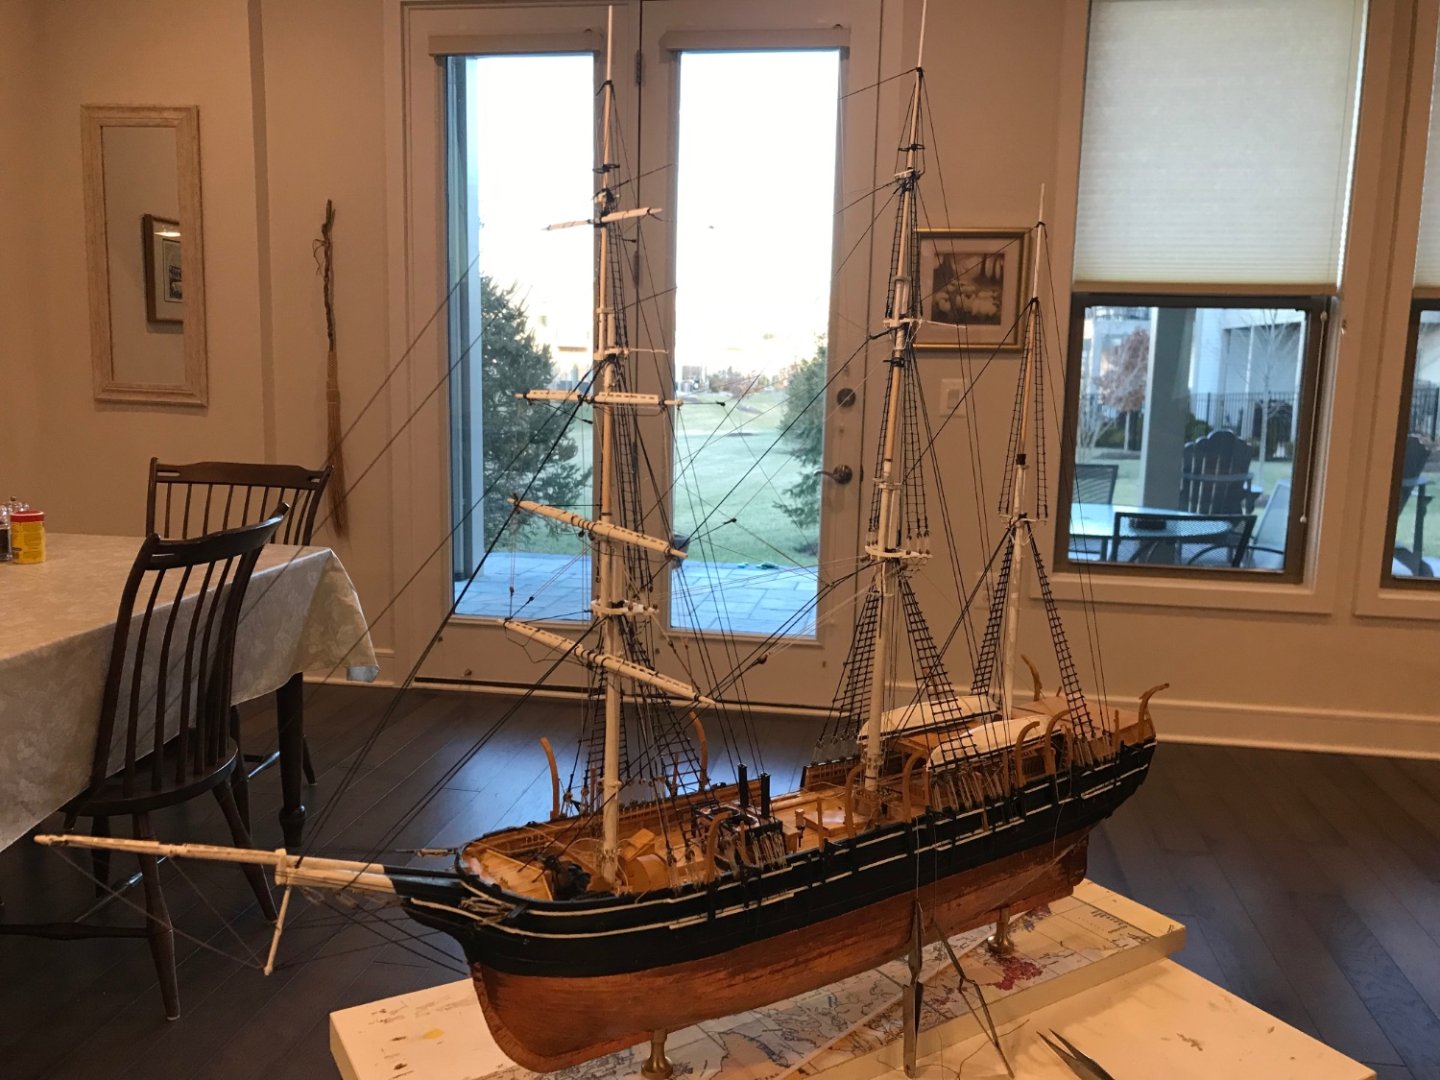
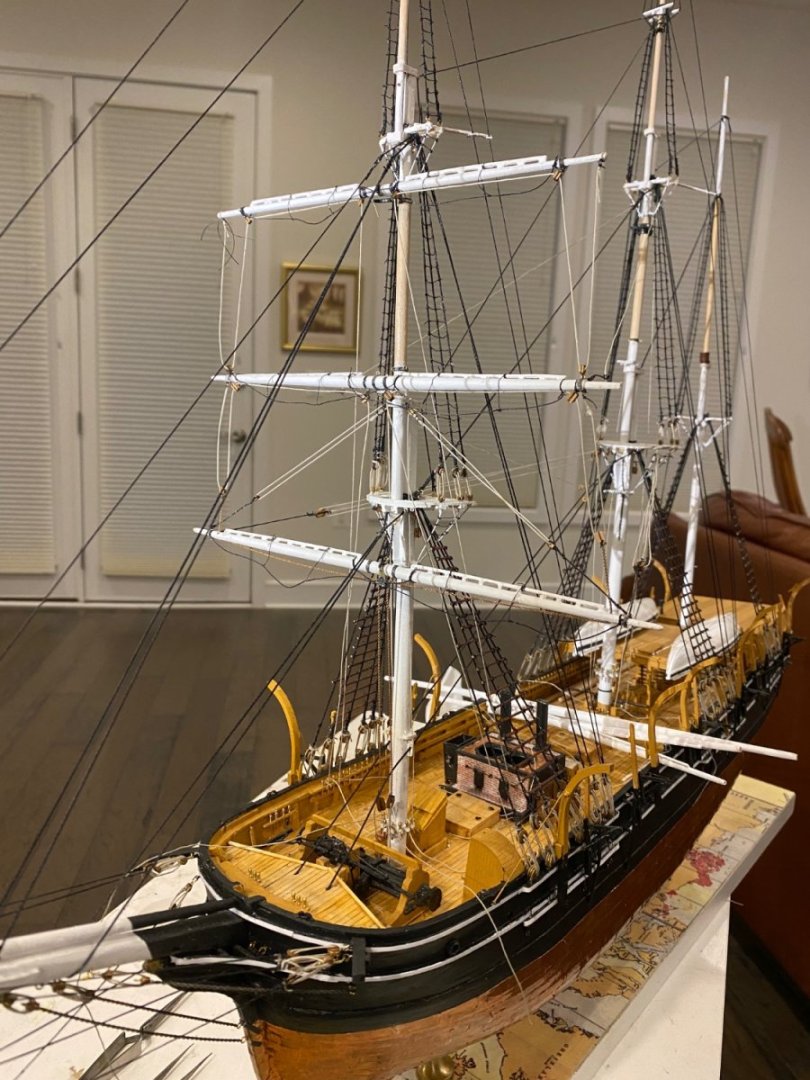
Thank you. I now have the topgallant yard in and braced.
- 294 replies
-
- 4
-
-

-
- charles w morgan
- model shipways
- (and 1 more)
-
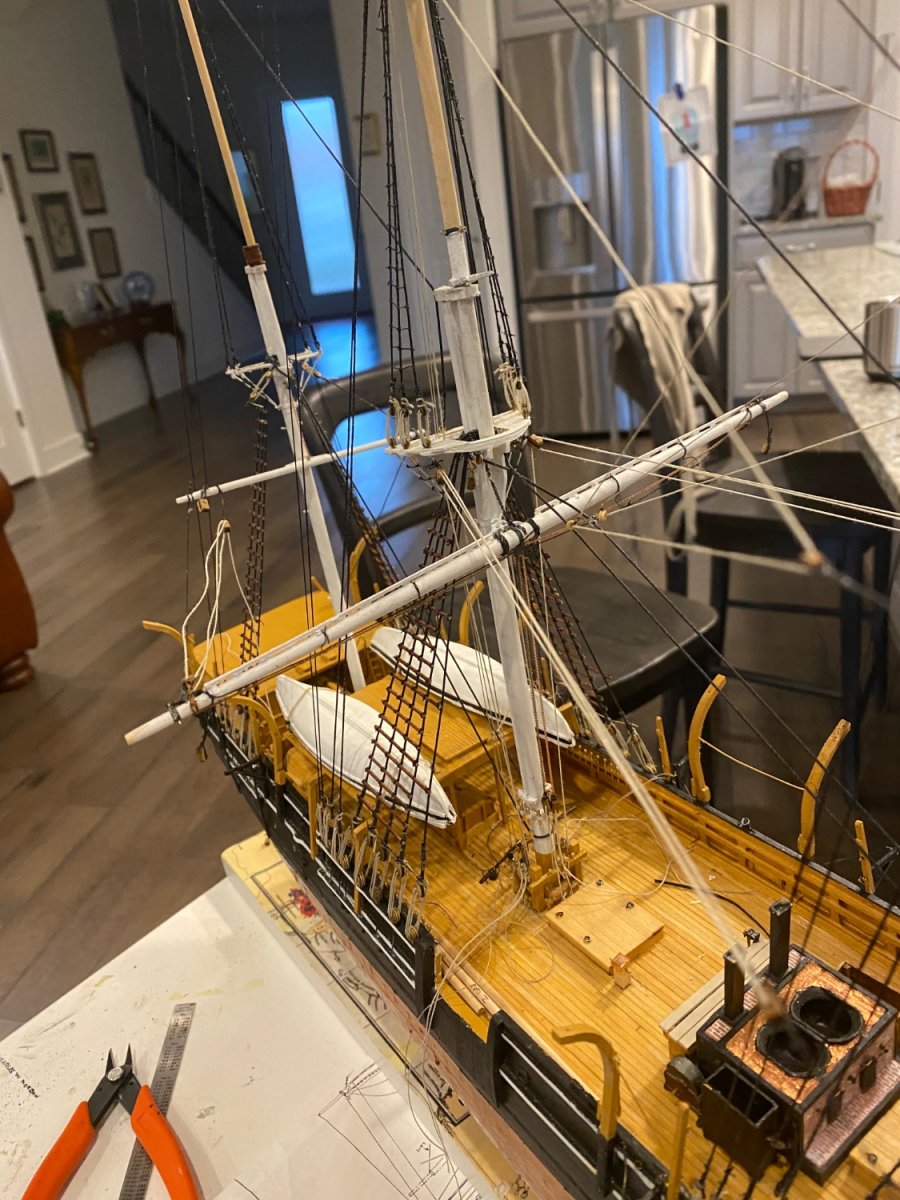
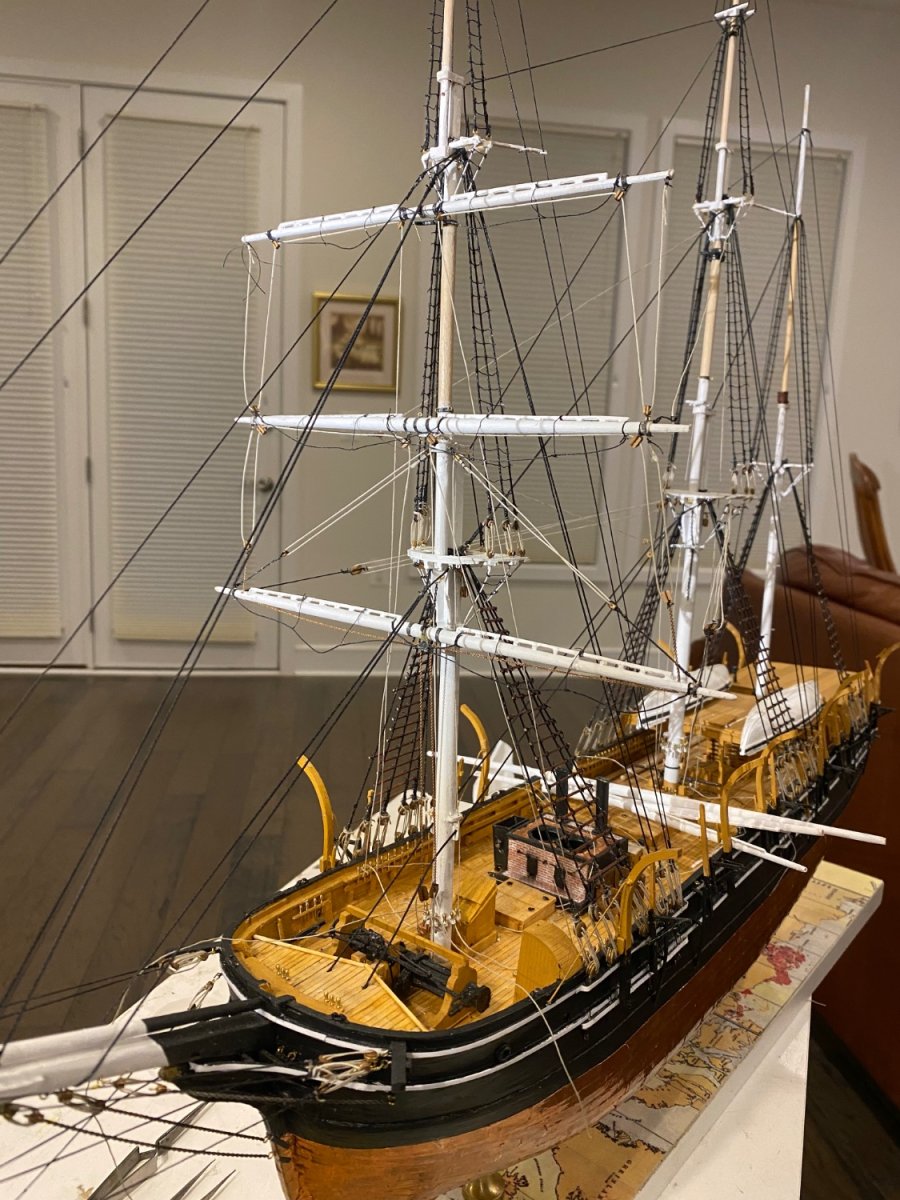
i am learning the hard way that I should have left all the whaleboat davits and paraphernalia until after the masts and yards were rigged.
- 294 replies
-
- 1
-
-
- charles w morgan
- model shipways
- (and 1 more)
-
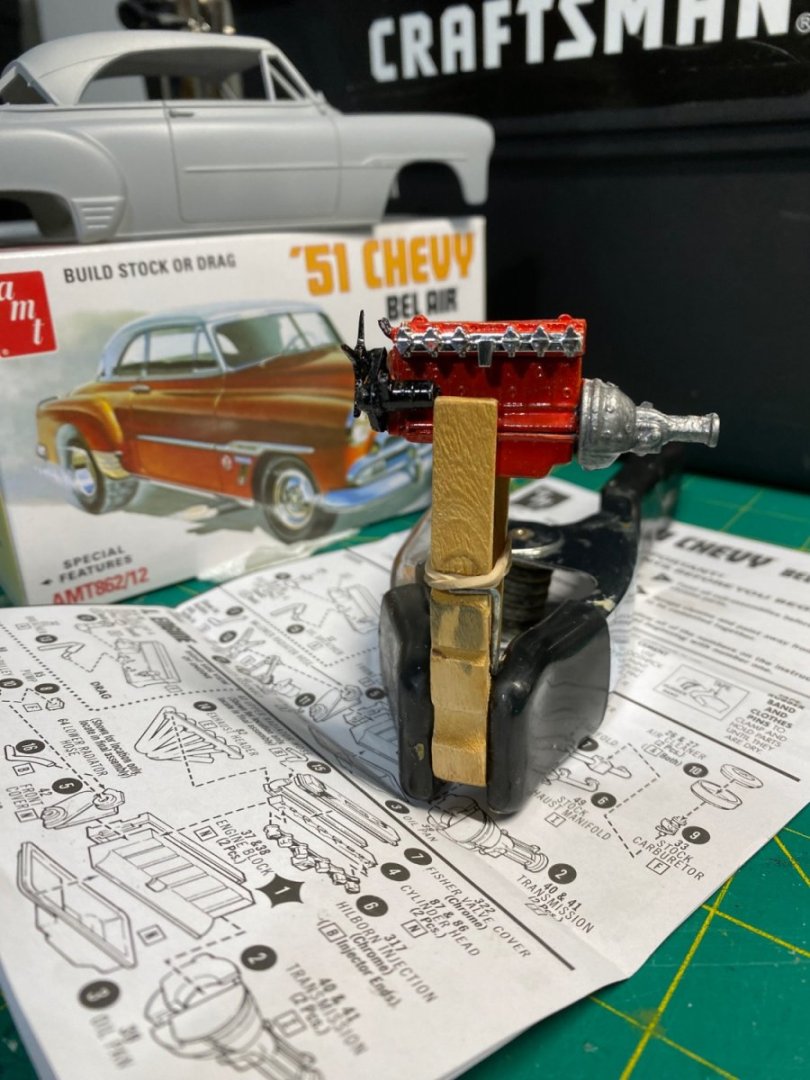
In the early 1960's I had a 52 Plymouth sedan that my parents purchased from an uncle. It looked a lot like the Chevy. I seem to remember that they only paid $25 for it but that seems ridiculous now. I had to cover the holes in the floor with plywood. Anyway, it lasted until I finished college and it even made a round trip from Massachusetts to Washington, DC where i had a 3 month summer job with the DoD. I purchased the Chevy kit planning on making a custom car version. Eventually I realized that such a job was way beyond my skill set. So it's "out of the box" Dragster version. Papa
-
Taking a break from rigging the C.W. Morgan with this car kit I’ve had in my stash for a while. The dragster engine is almost complete.
- 37 replies
-
- 14
-
-
Lower main topsail yard is in place. Good grief it is so difficult to belay the lines in the stern! Ratlines, davits, sheds, boats are all in the way

- 294 replies
-
- 3
-
-
- charles w morgan
- model shipways
- (and 1 more)
-
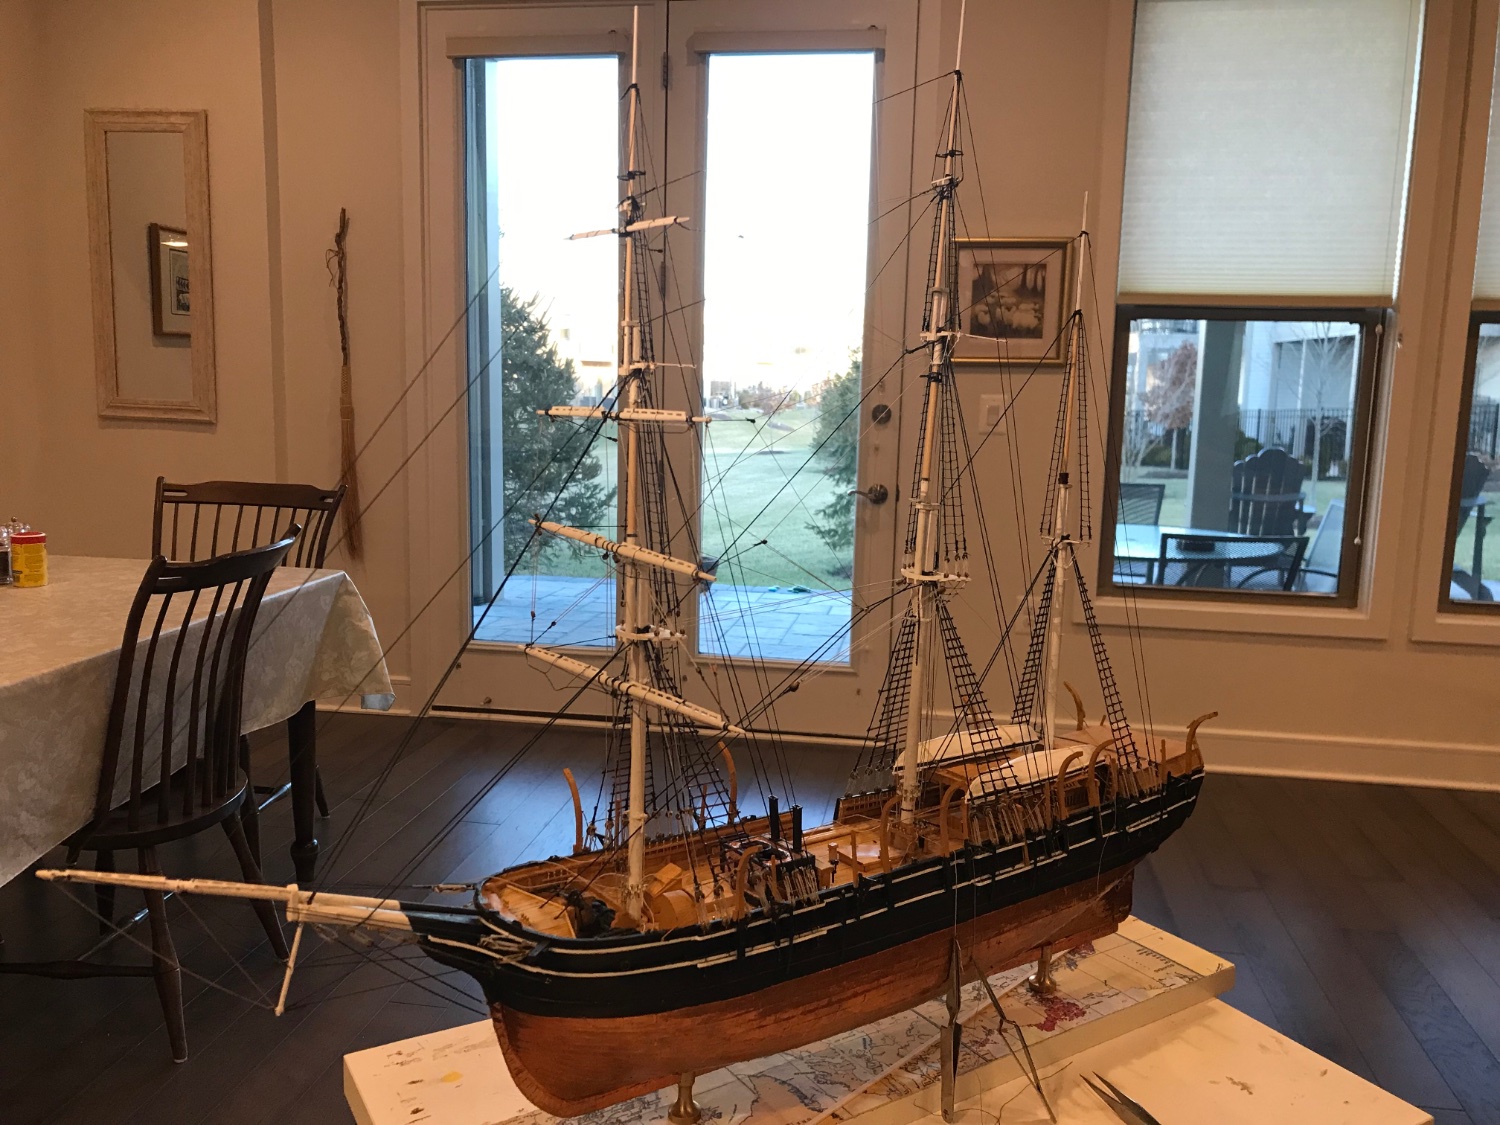
I really need to be better organized. After waiting a couple weeks for replacement line i discover that i had a new spool of exactly the size i needed in my box of rigging. Actually 1 of 2 boxes. I kinda forgot that i had 2 boxes of line; one was not enough for all the stuff left over from 50 years of modeling. 😬😖🤪
- 294 replies
-
- 2
-
-

-
- charles w morgan
- model shipways
- (and 1 more)
-
I realized that one needs the mizzen crossjack yard in order to rig the main yard braces. I ran out of the size line i was using for the braces after the starboard side was in. So things are a bit lopsided until the line arrives.

- 294 replies
-
- 5
-
-
- charles w morgan
- model shipways
- (and 1 more)
-
Hello from a displaced Yankee. i spent the first 23 of my almost 80 years in Saugus.
By the way the 3d renderings a mind blowing. I can't imagine doing something that intricate.
-
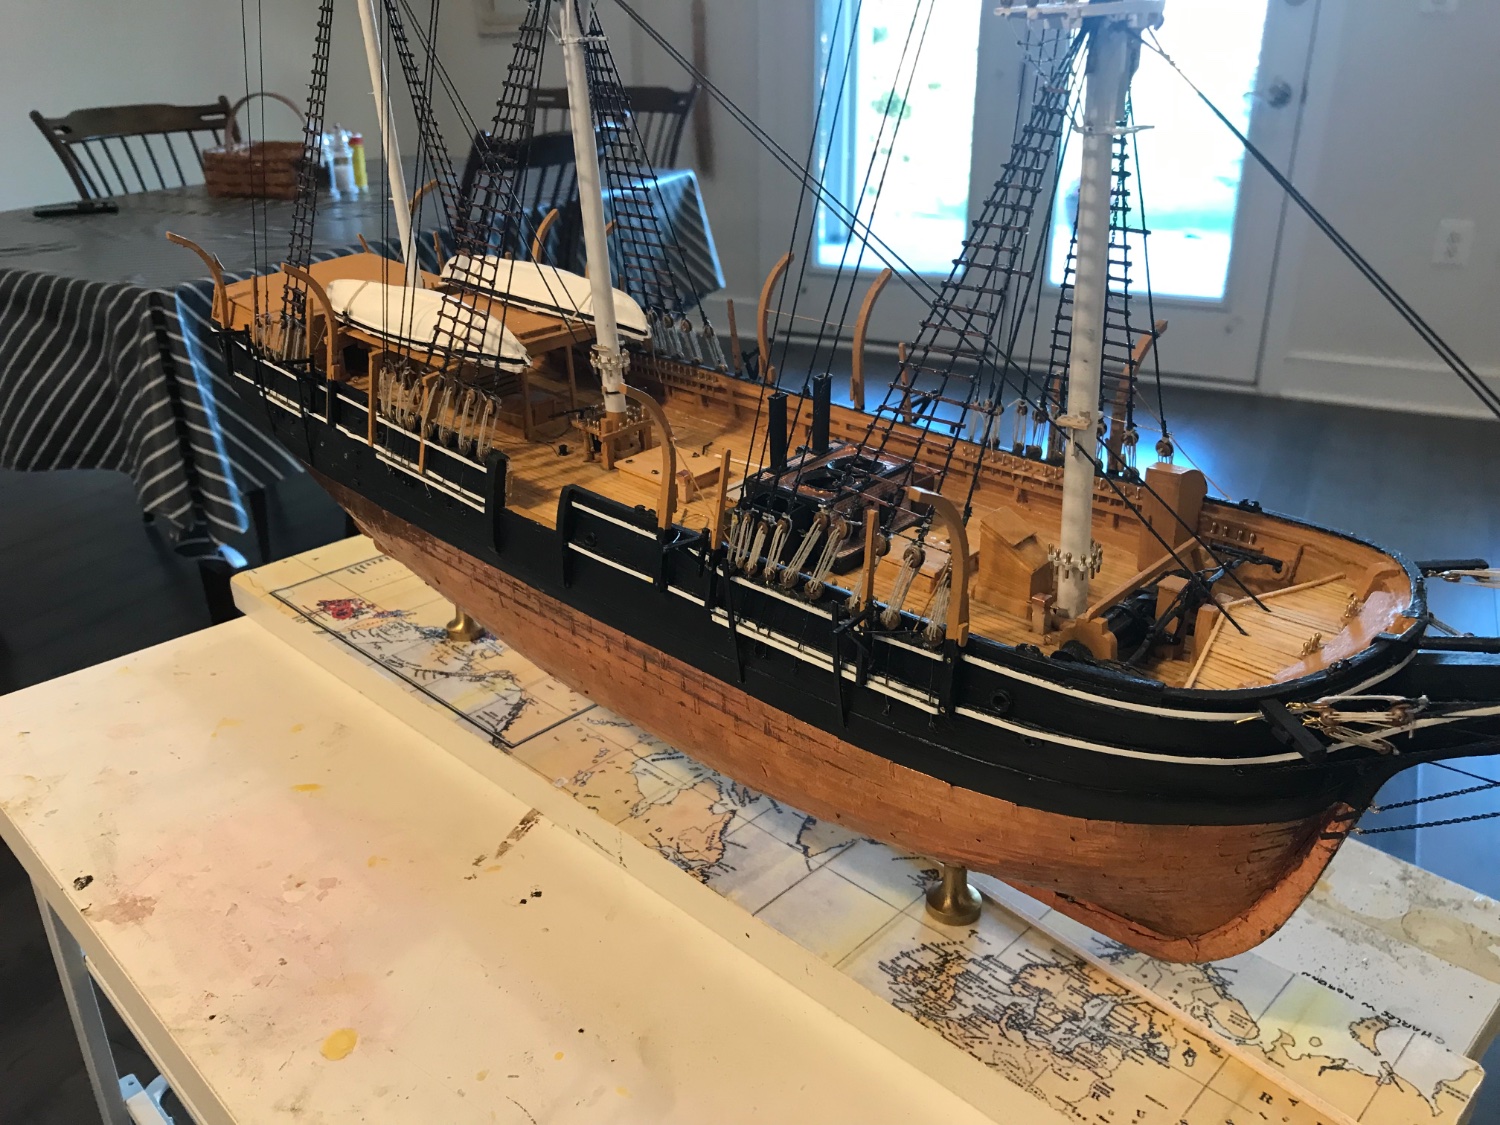
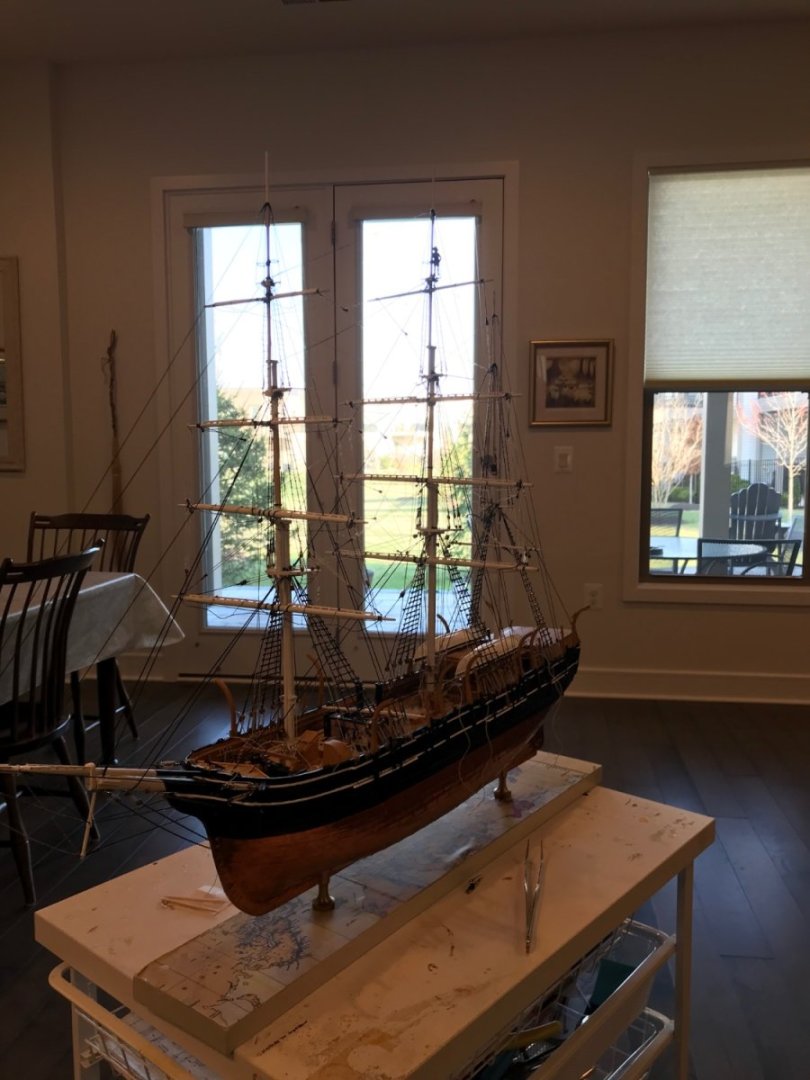
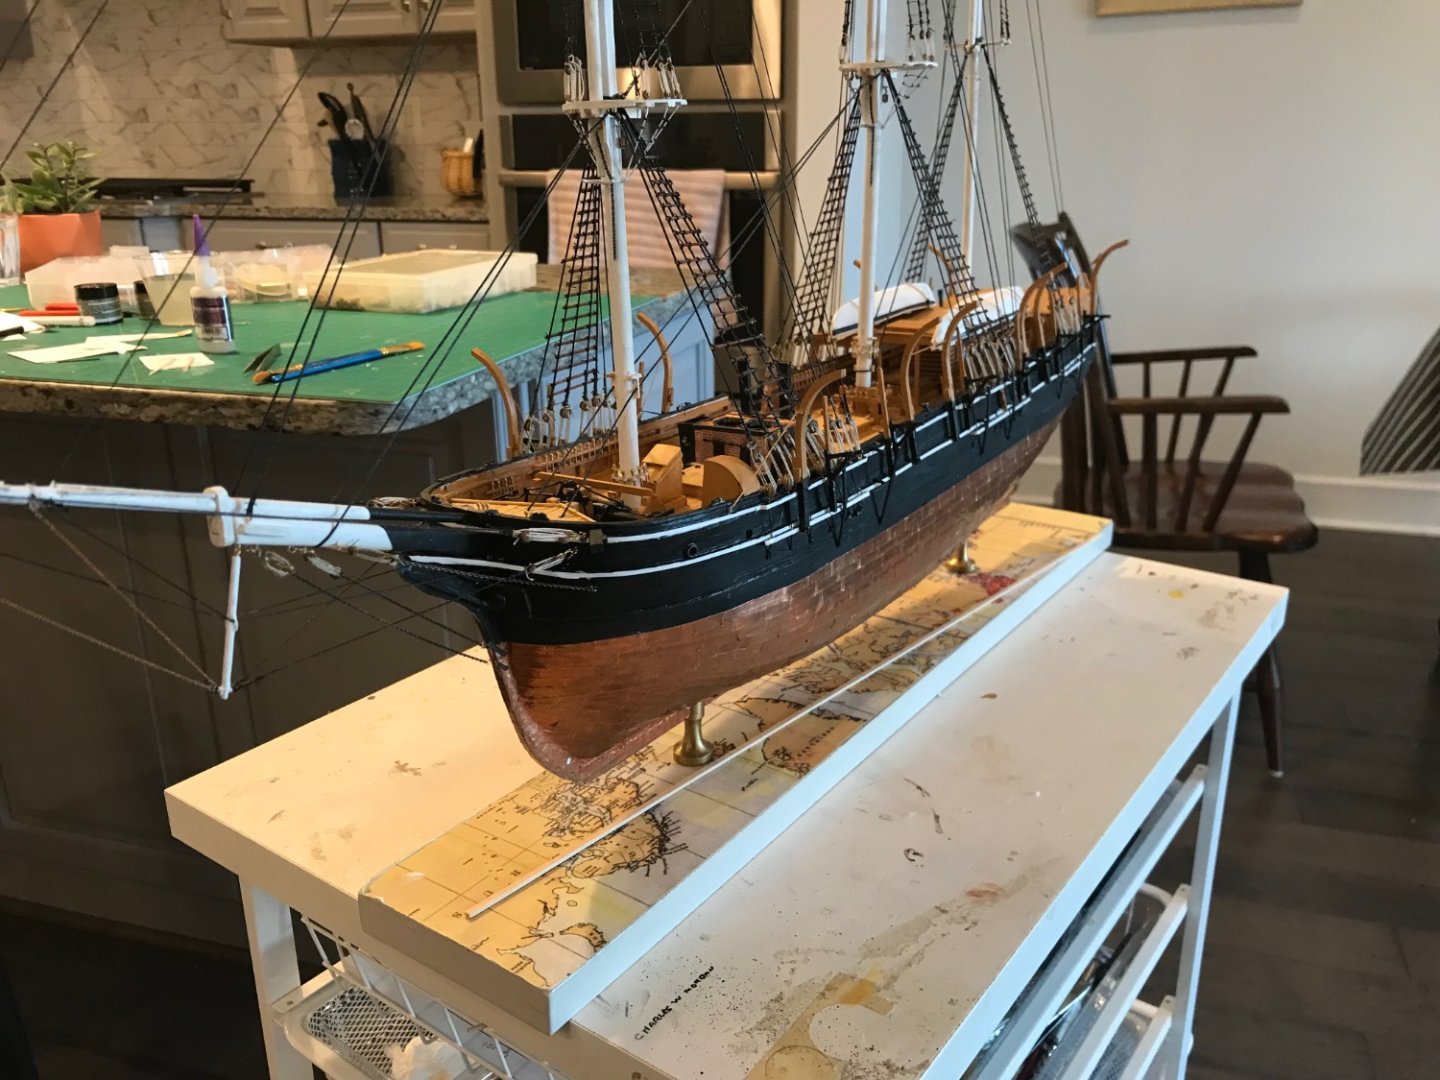
Fixed up the broken davits, reset the upper topsail and finally rigged all the fore mast yards
- 294 replies
-
- 3
-
-
-
- charles w morgan
- model shipways
- (and 1 more)
-
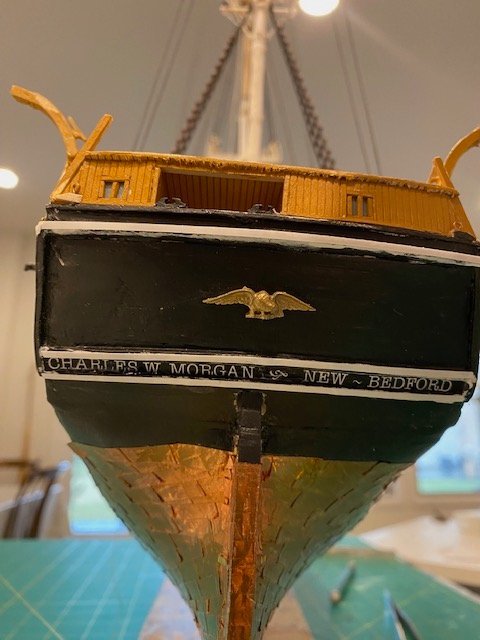
I ran out of small rocks for painting so I am back to the Morgan. In trying to rig the top gallant sail I manage to break two davits and knocked the upper top sail off the mast!!😬. So some patching up is in the schedule. I did manage to get the ship name on the stern without breaking anything. Laser printed white font on black background.
- 294 replies
-
- 6
-
-
- charles w morgan
- model shipways
- (and 1 more)
-
It sure is a cool building! I no longer have trains. I finally realized that it was building models that i liked not running a railroad. 😀
-
Have you ever done a kit from Fine Scale Miniatures? I wonder how you would compare them? They have similar craftsman kits, but have closed up shop now. This one seems more detailed and the instructions that you show look more extensive. I built several FSM kits when I had some HO trains and enjoyed the construction more than running the trains. I am sorely tempted to purchase a kit from Sierra West and just do a diorama as you are doing. Ron Gove
-
Yards are coming along slowly. The lines all need some tensioning and adjusting. I am planning on simplifying the rig. Basically if it attaches directly to a sail it isn’t going on.
- 294 replies
-
- 3
-
-
- charles w morgan
- model shipways
- (and 1 more)
-
The lower fore yard now has lifts and braces.

- 294 replies
-
- 4
-
-
- charles w morgan
- model shipways
- (and 1 more)
-
the fairlead it will be then.
-
The lifts for the fore lower yard belay to the pins on the mast ring, 19 and 20 on the belaying plan. should they go through the fairlead mounted on the foremast?
-
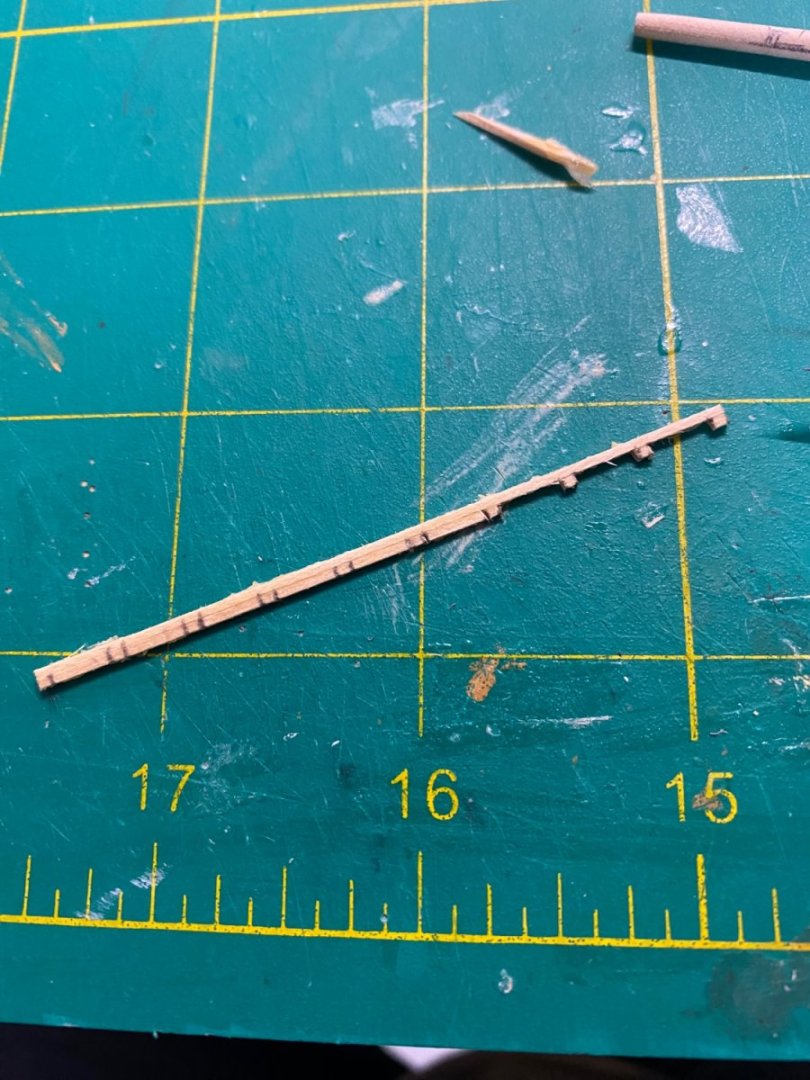
Using John Ruy’s technique. Not as easy as it looks. The little nubs keep breaking off. Takes lots of superglue and patience.

- 294 replies
-
- 3
-
-
- charles w morgan
- model shipways
- (and 1 more)
-
Thanks. That looks perfect And I believe I have a stash of 1/32 square strips many thanks again
- 294 replies
-
- 1
-
-
- charles w morgan
- model shipways
- (and 1 more)
-
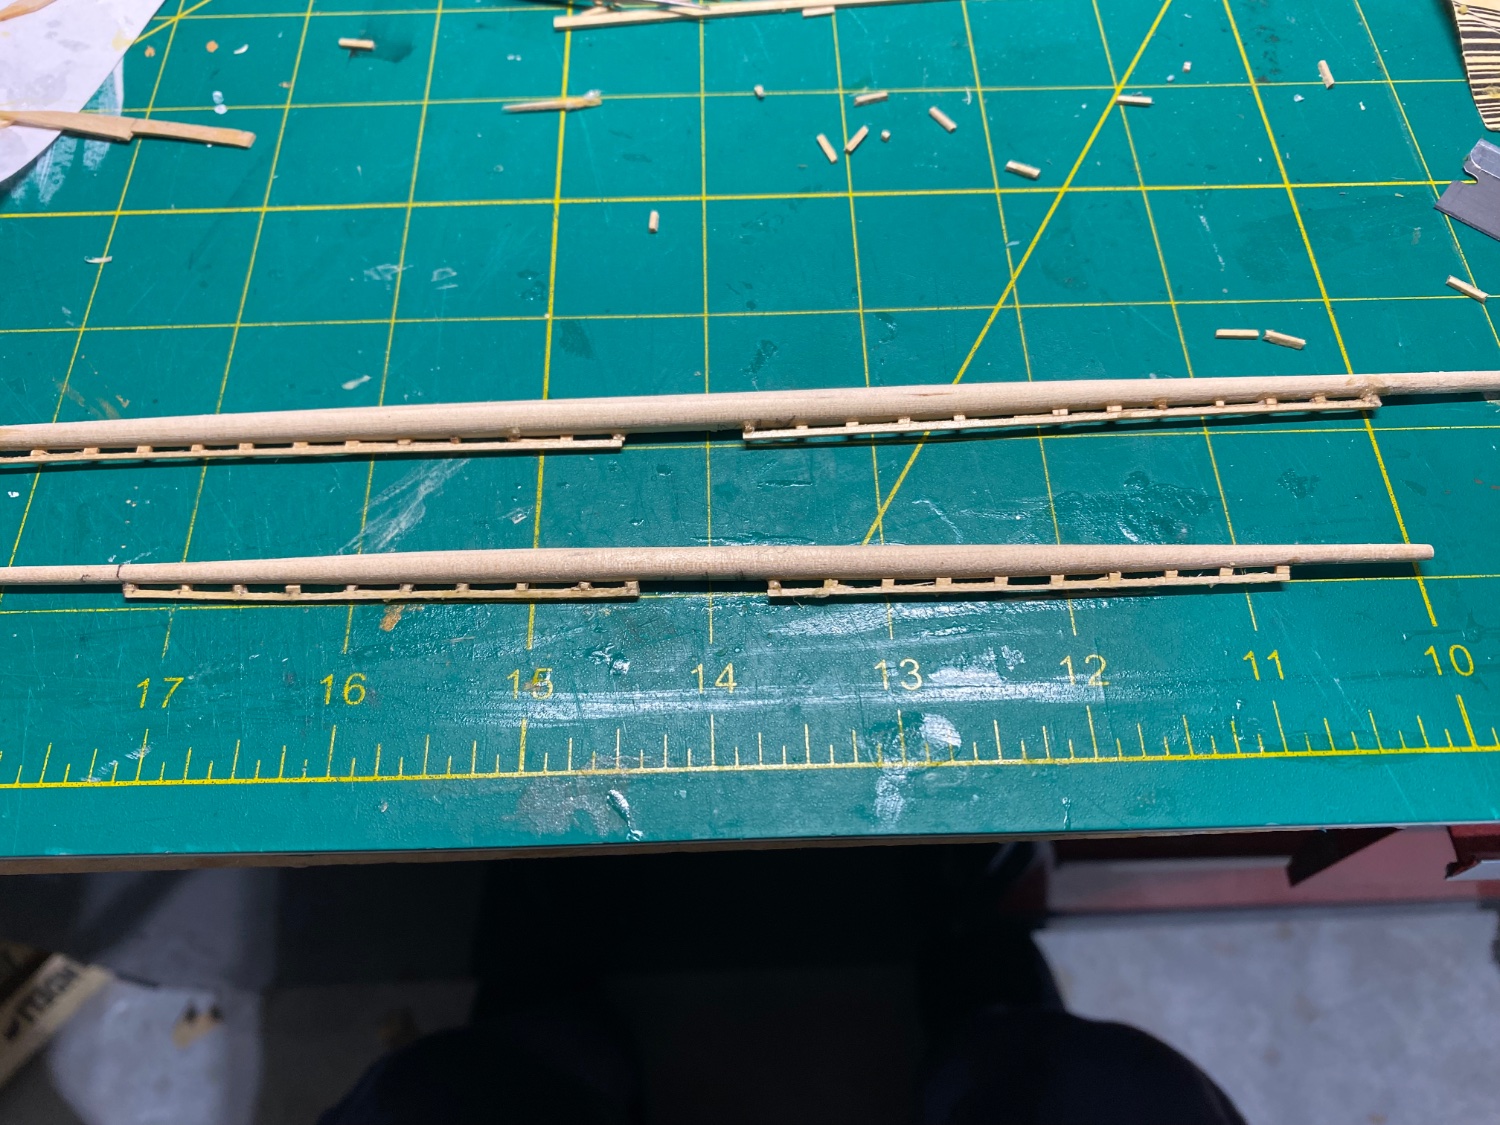
The kit contained several strips 1/32" strips of jackstay material that I used them all up on the mizzen and bowsprit (or possibly lost some over time). Now I've noticed that the yards all need the strips also. Model Expo does not seem to sell the strips separately, nor does any other fitting supplier I've look at. Any recommendations on how to scratch build these? Could they be 3D printed?
-
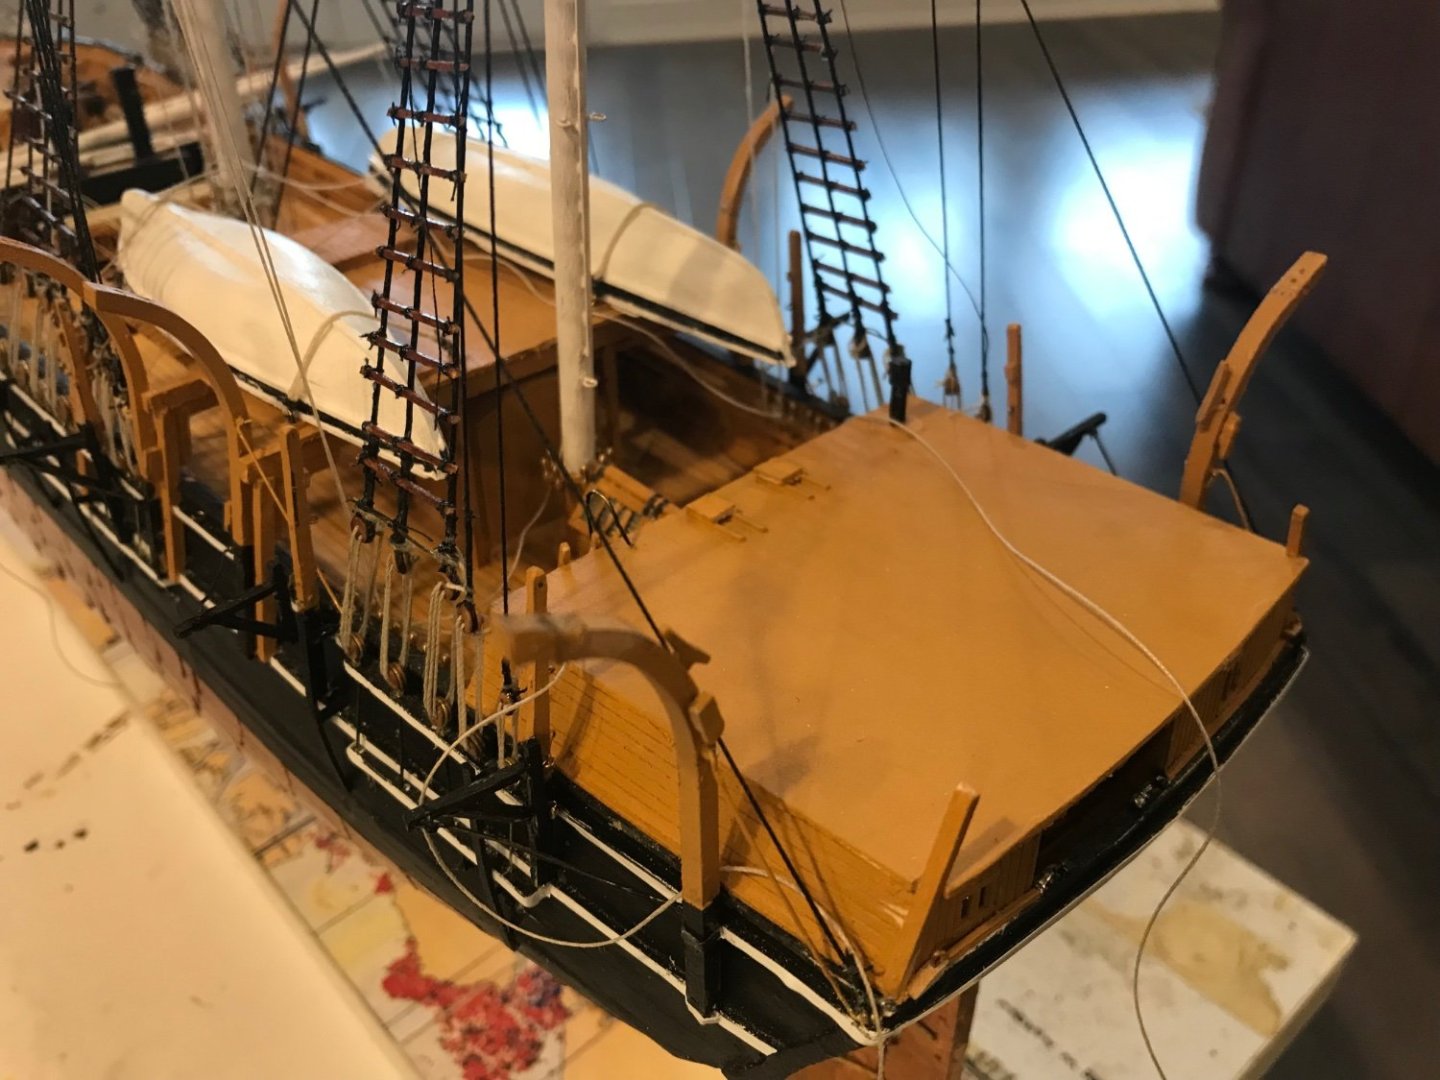
All the whale boat davits etc. are in. Next step will be the yards

- 294 replies
-
- 5
-
-
- charles w morgan
- model shipways
- (and 1 more)