Bill97
-
Posts
2,731 -
Joined
-
Last visited
Content Type
Profiles
Forums
Gallery
Events
Everything posted by Bill97
-
NekO I love that sentence as well. Will very much further emphasize adding the word “grandchildren”. Every other word in that sentence applies to them also. I have 7 ranging from 11 to 21. I had to miss a lot of things when my 3 kids were growing up because of work and general life requirements. Now that I am retired I have been and will continue to be there for all 7 of them regardless of age. I showed over on my AV build the model of the Golden Hinde I am building with my young 11 year buddy. That is pure joy and quality time.
- 2,699 replies
-
- 2
-

-
- heller
- soleil royal
- (and 9 more)
-
Yes Marc as age begins to chase us body parts need rejuvenate. Visited my eye doctor the other day for my annual check up. He has convinced me it is time I get cataract surgery. Been procrastinating for last couple years. My left eye late September and then right eye a couple weeks later. No idea yet how this may affect my ship building during the couple of months until full recovery. Maybe none maybe a lot. We will see. May need to spend the time cleaning my nasty garage.
- 2,699 replies
-
- 1
-

-
- heller
- soleil royal
- (and 9 more)
-
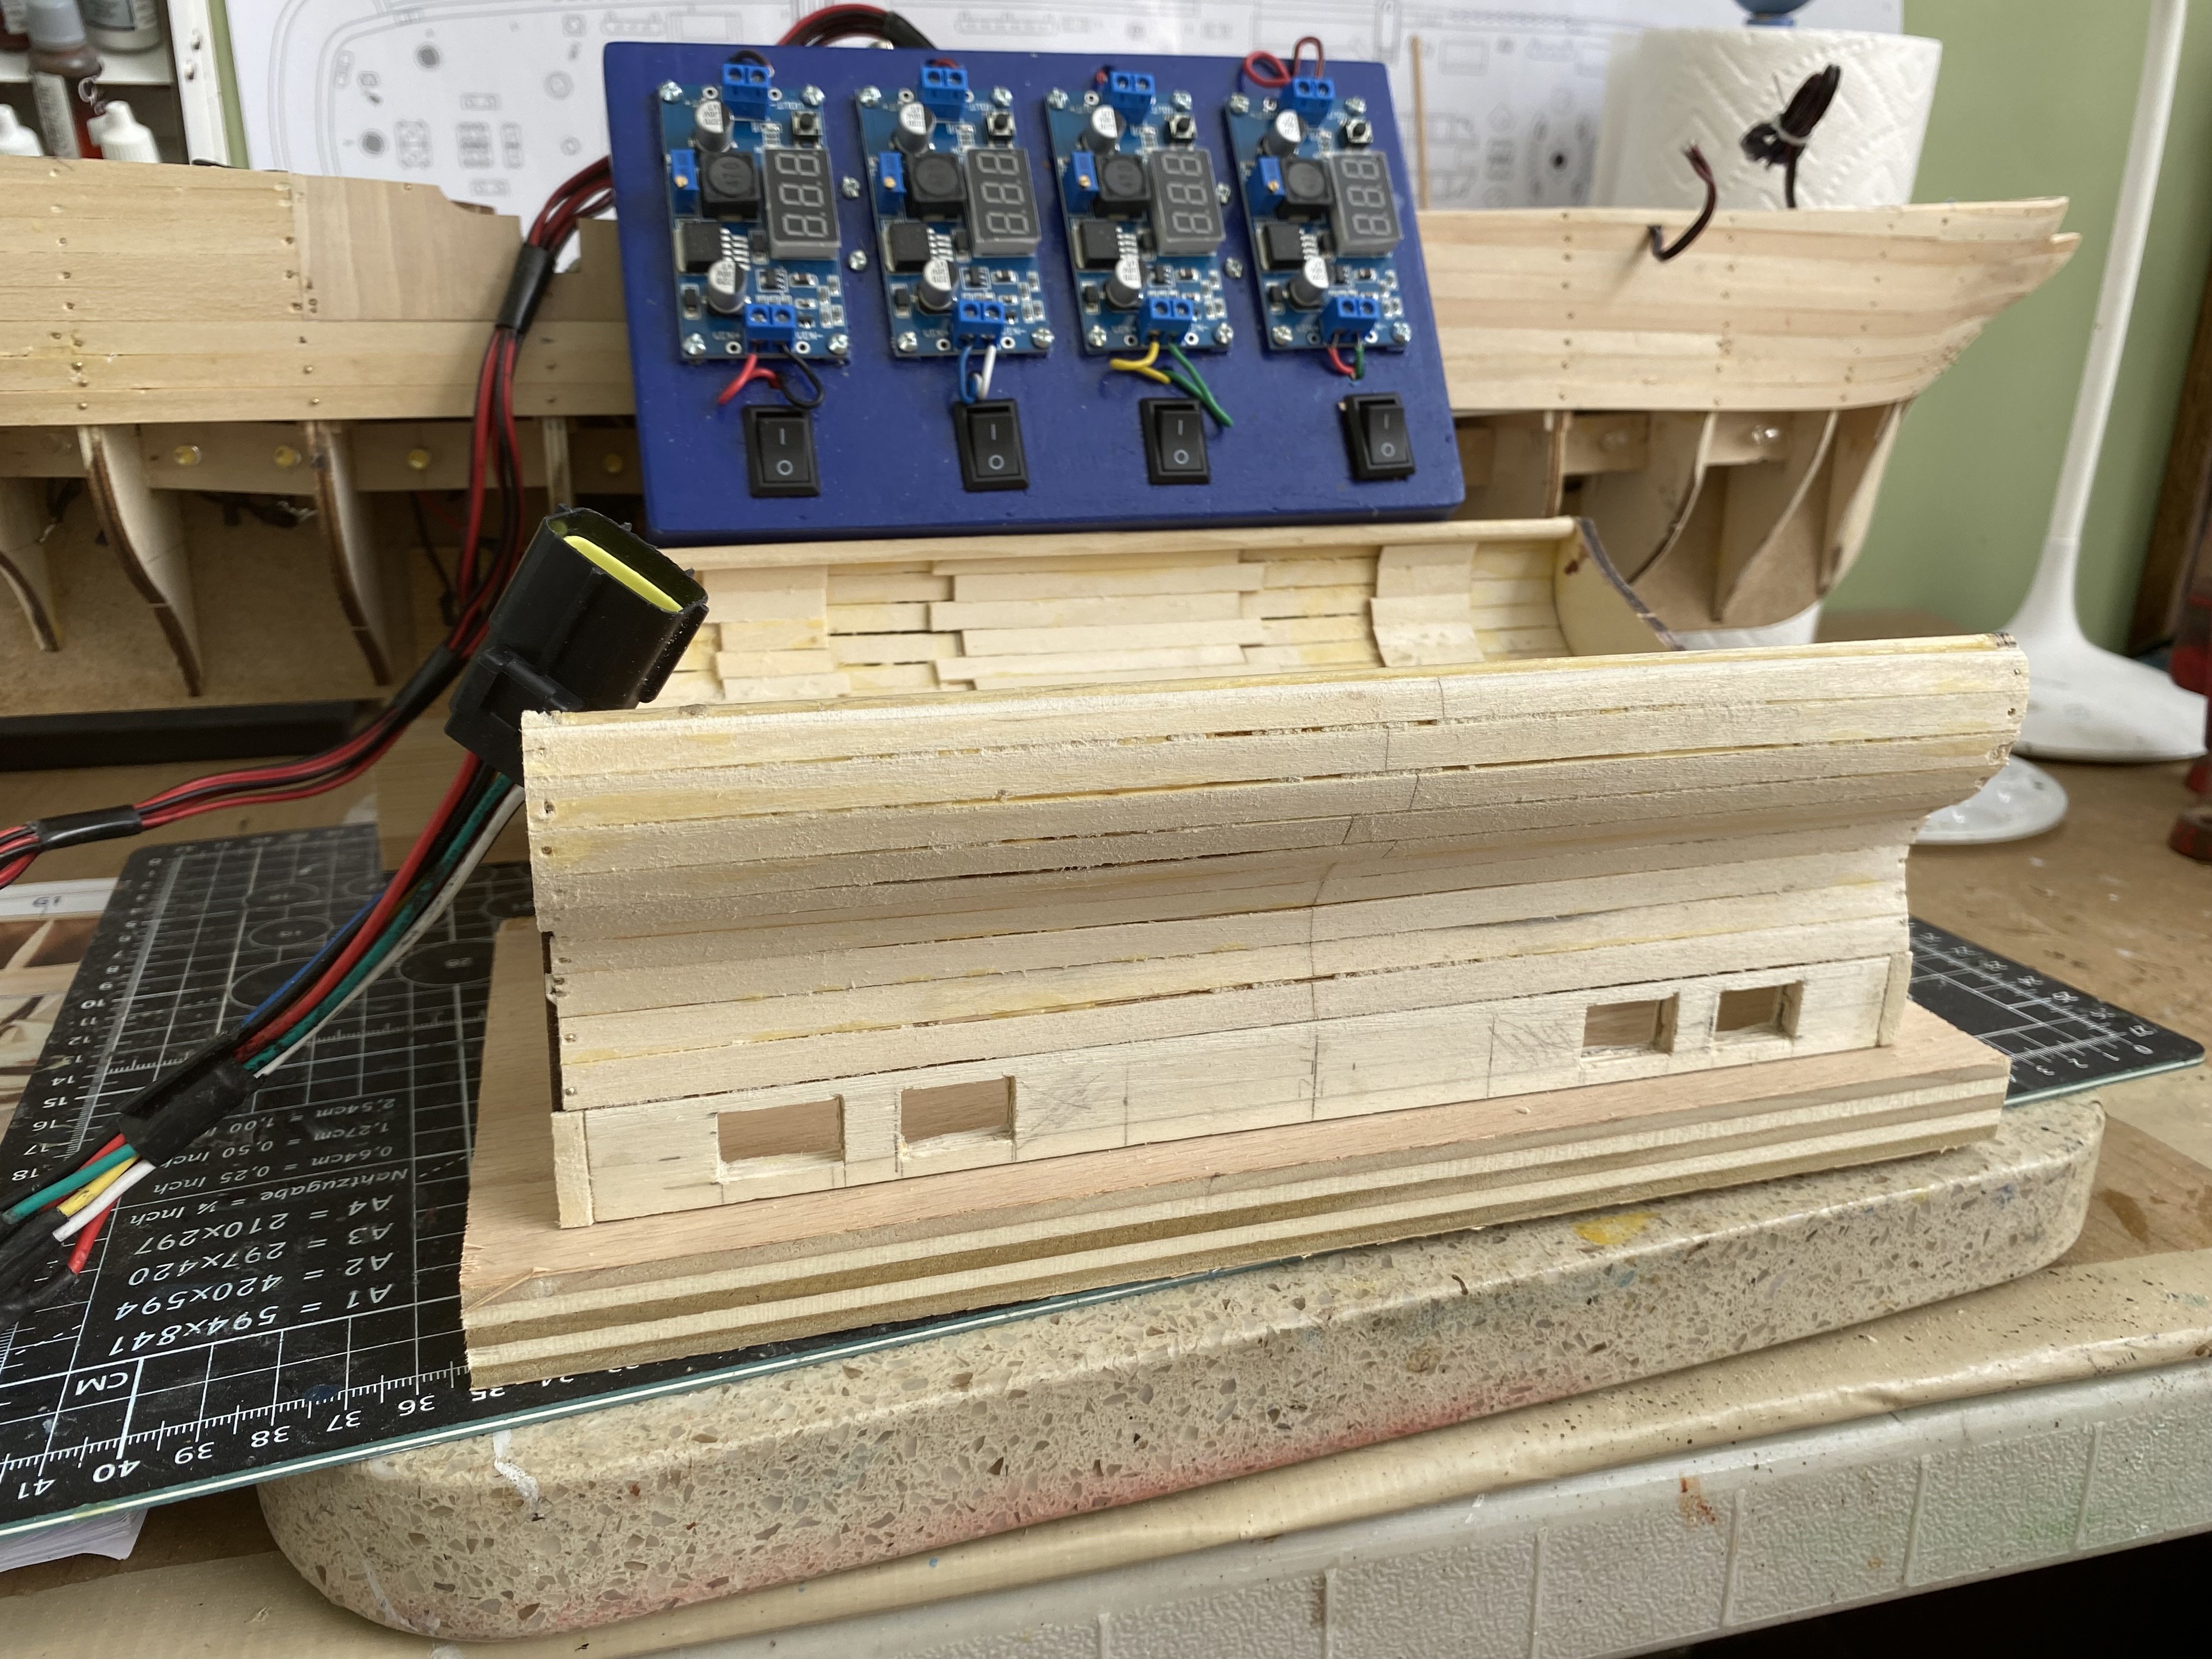
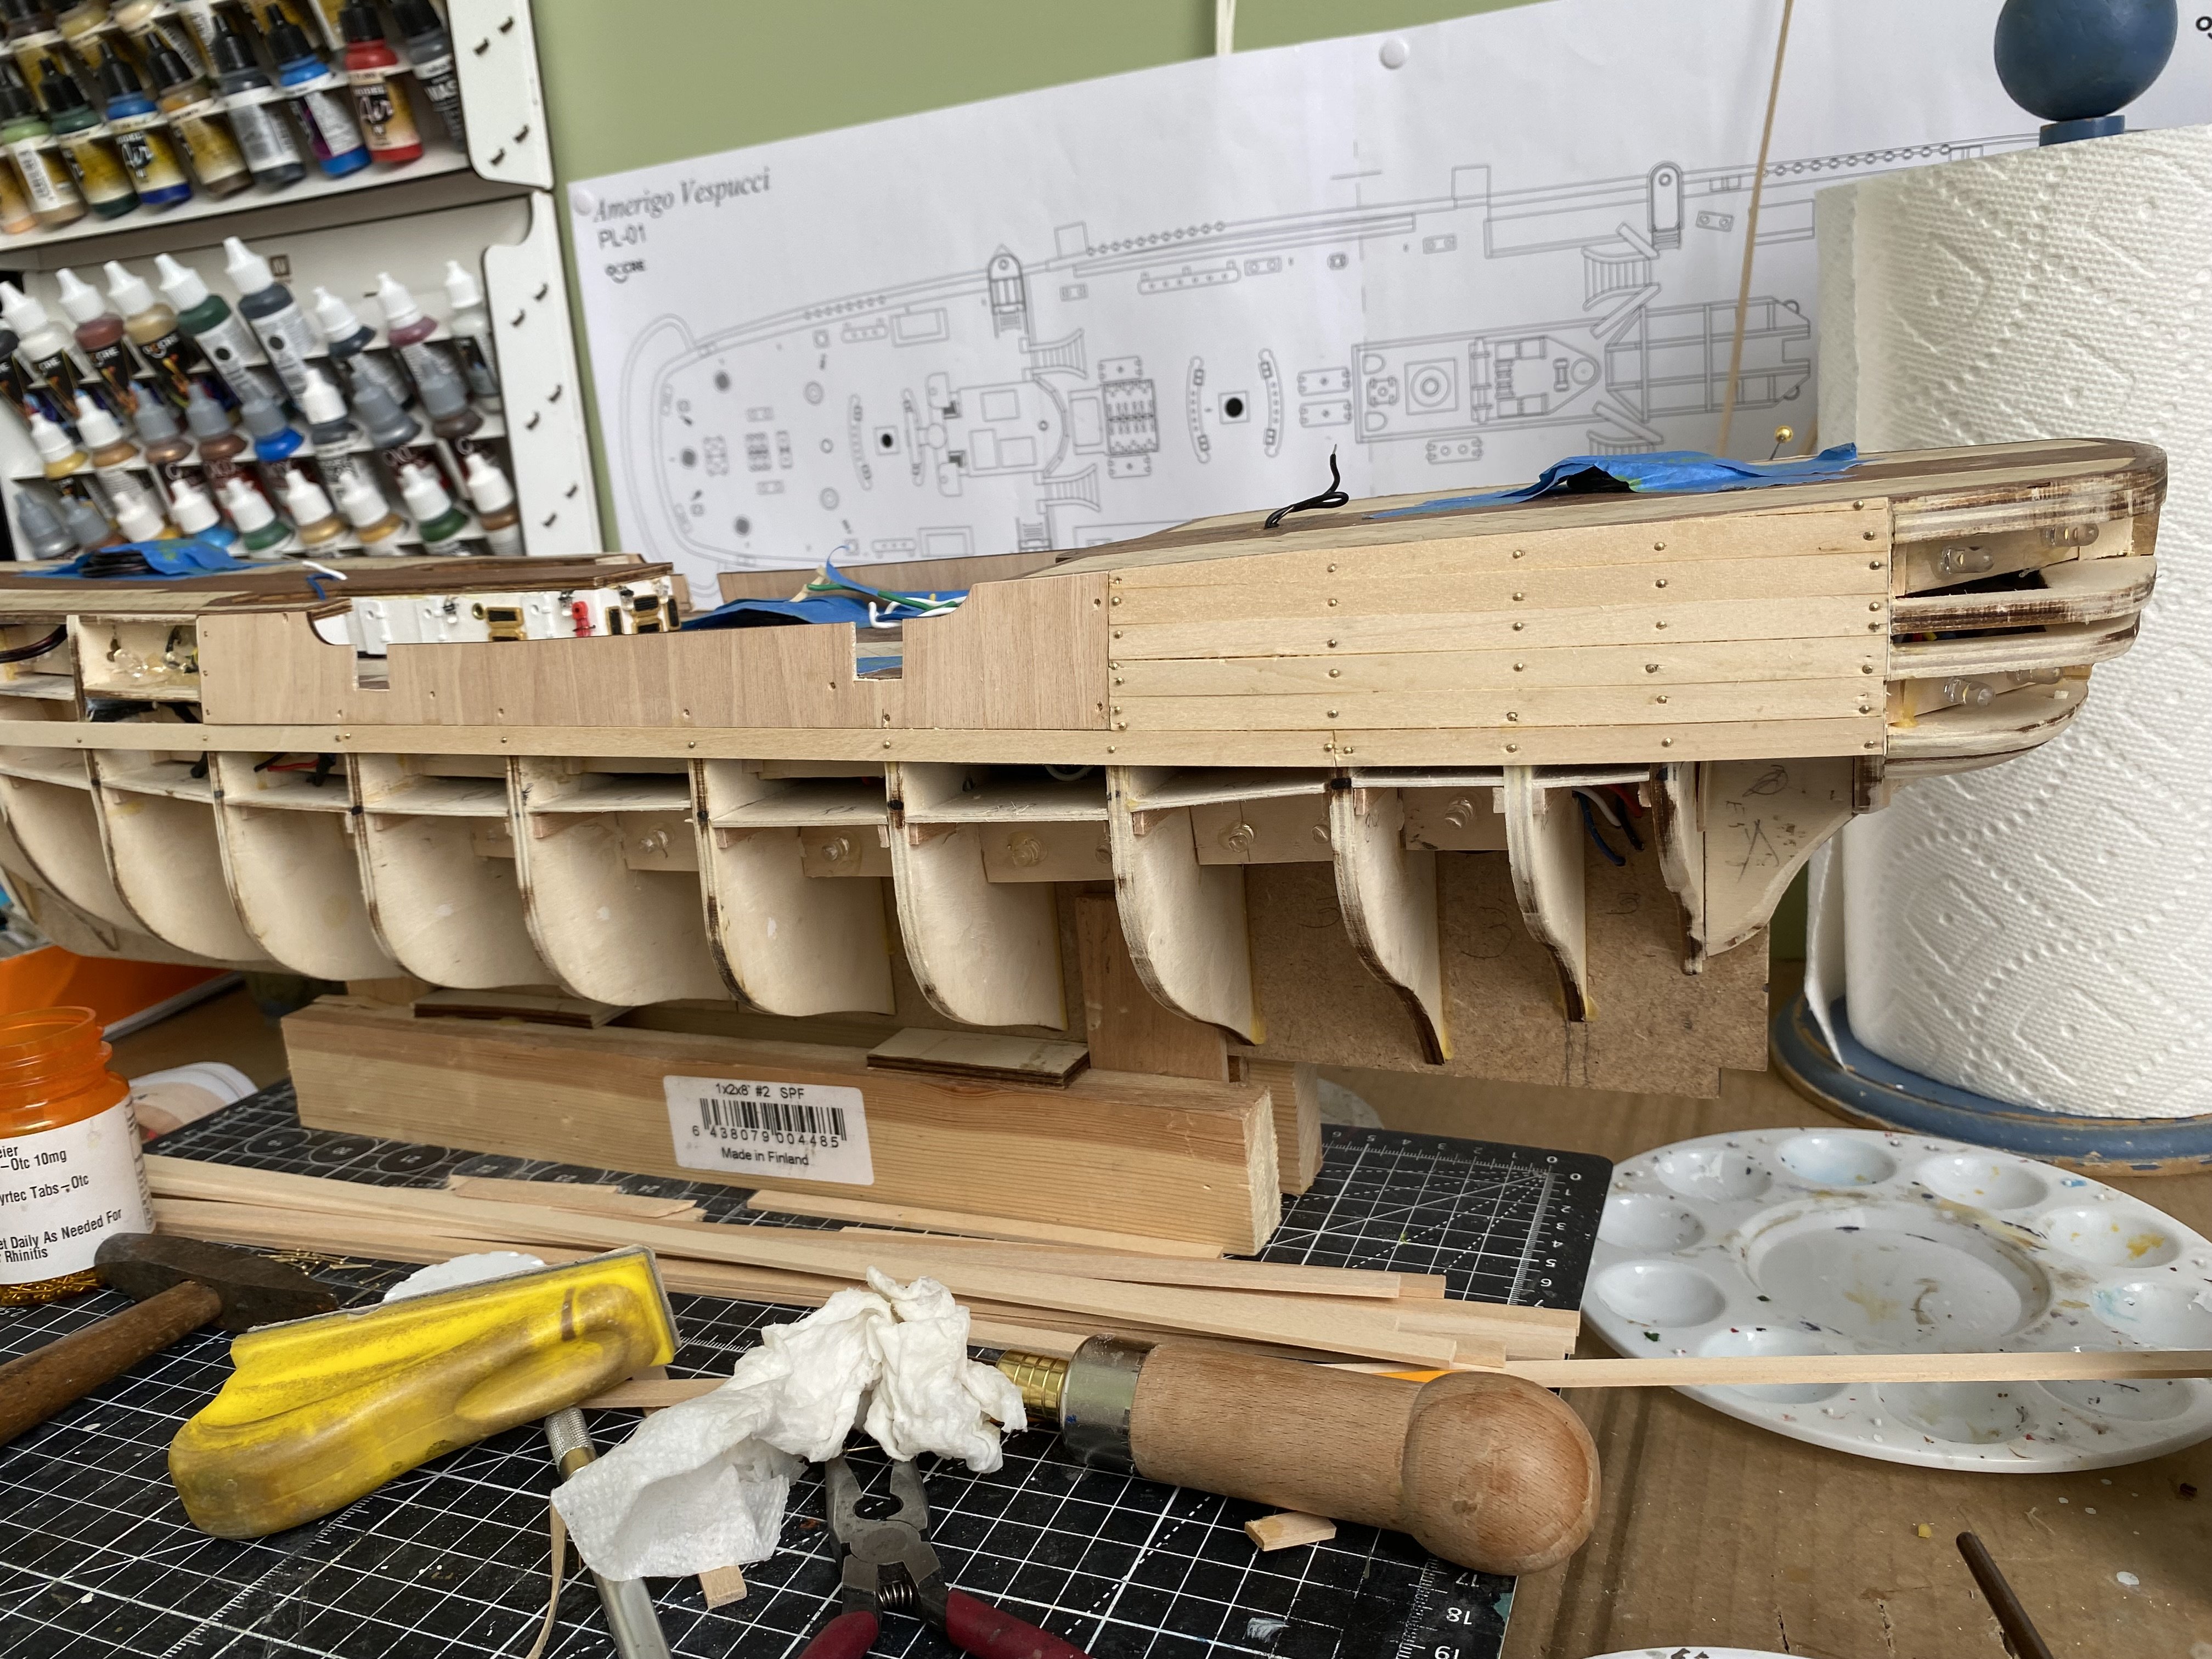
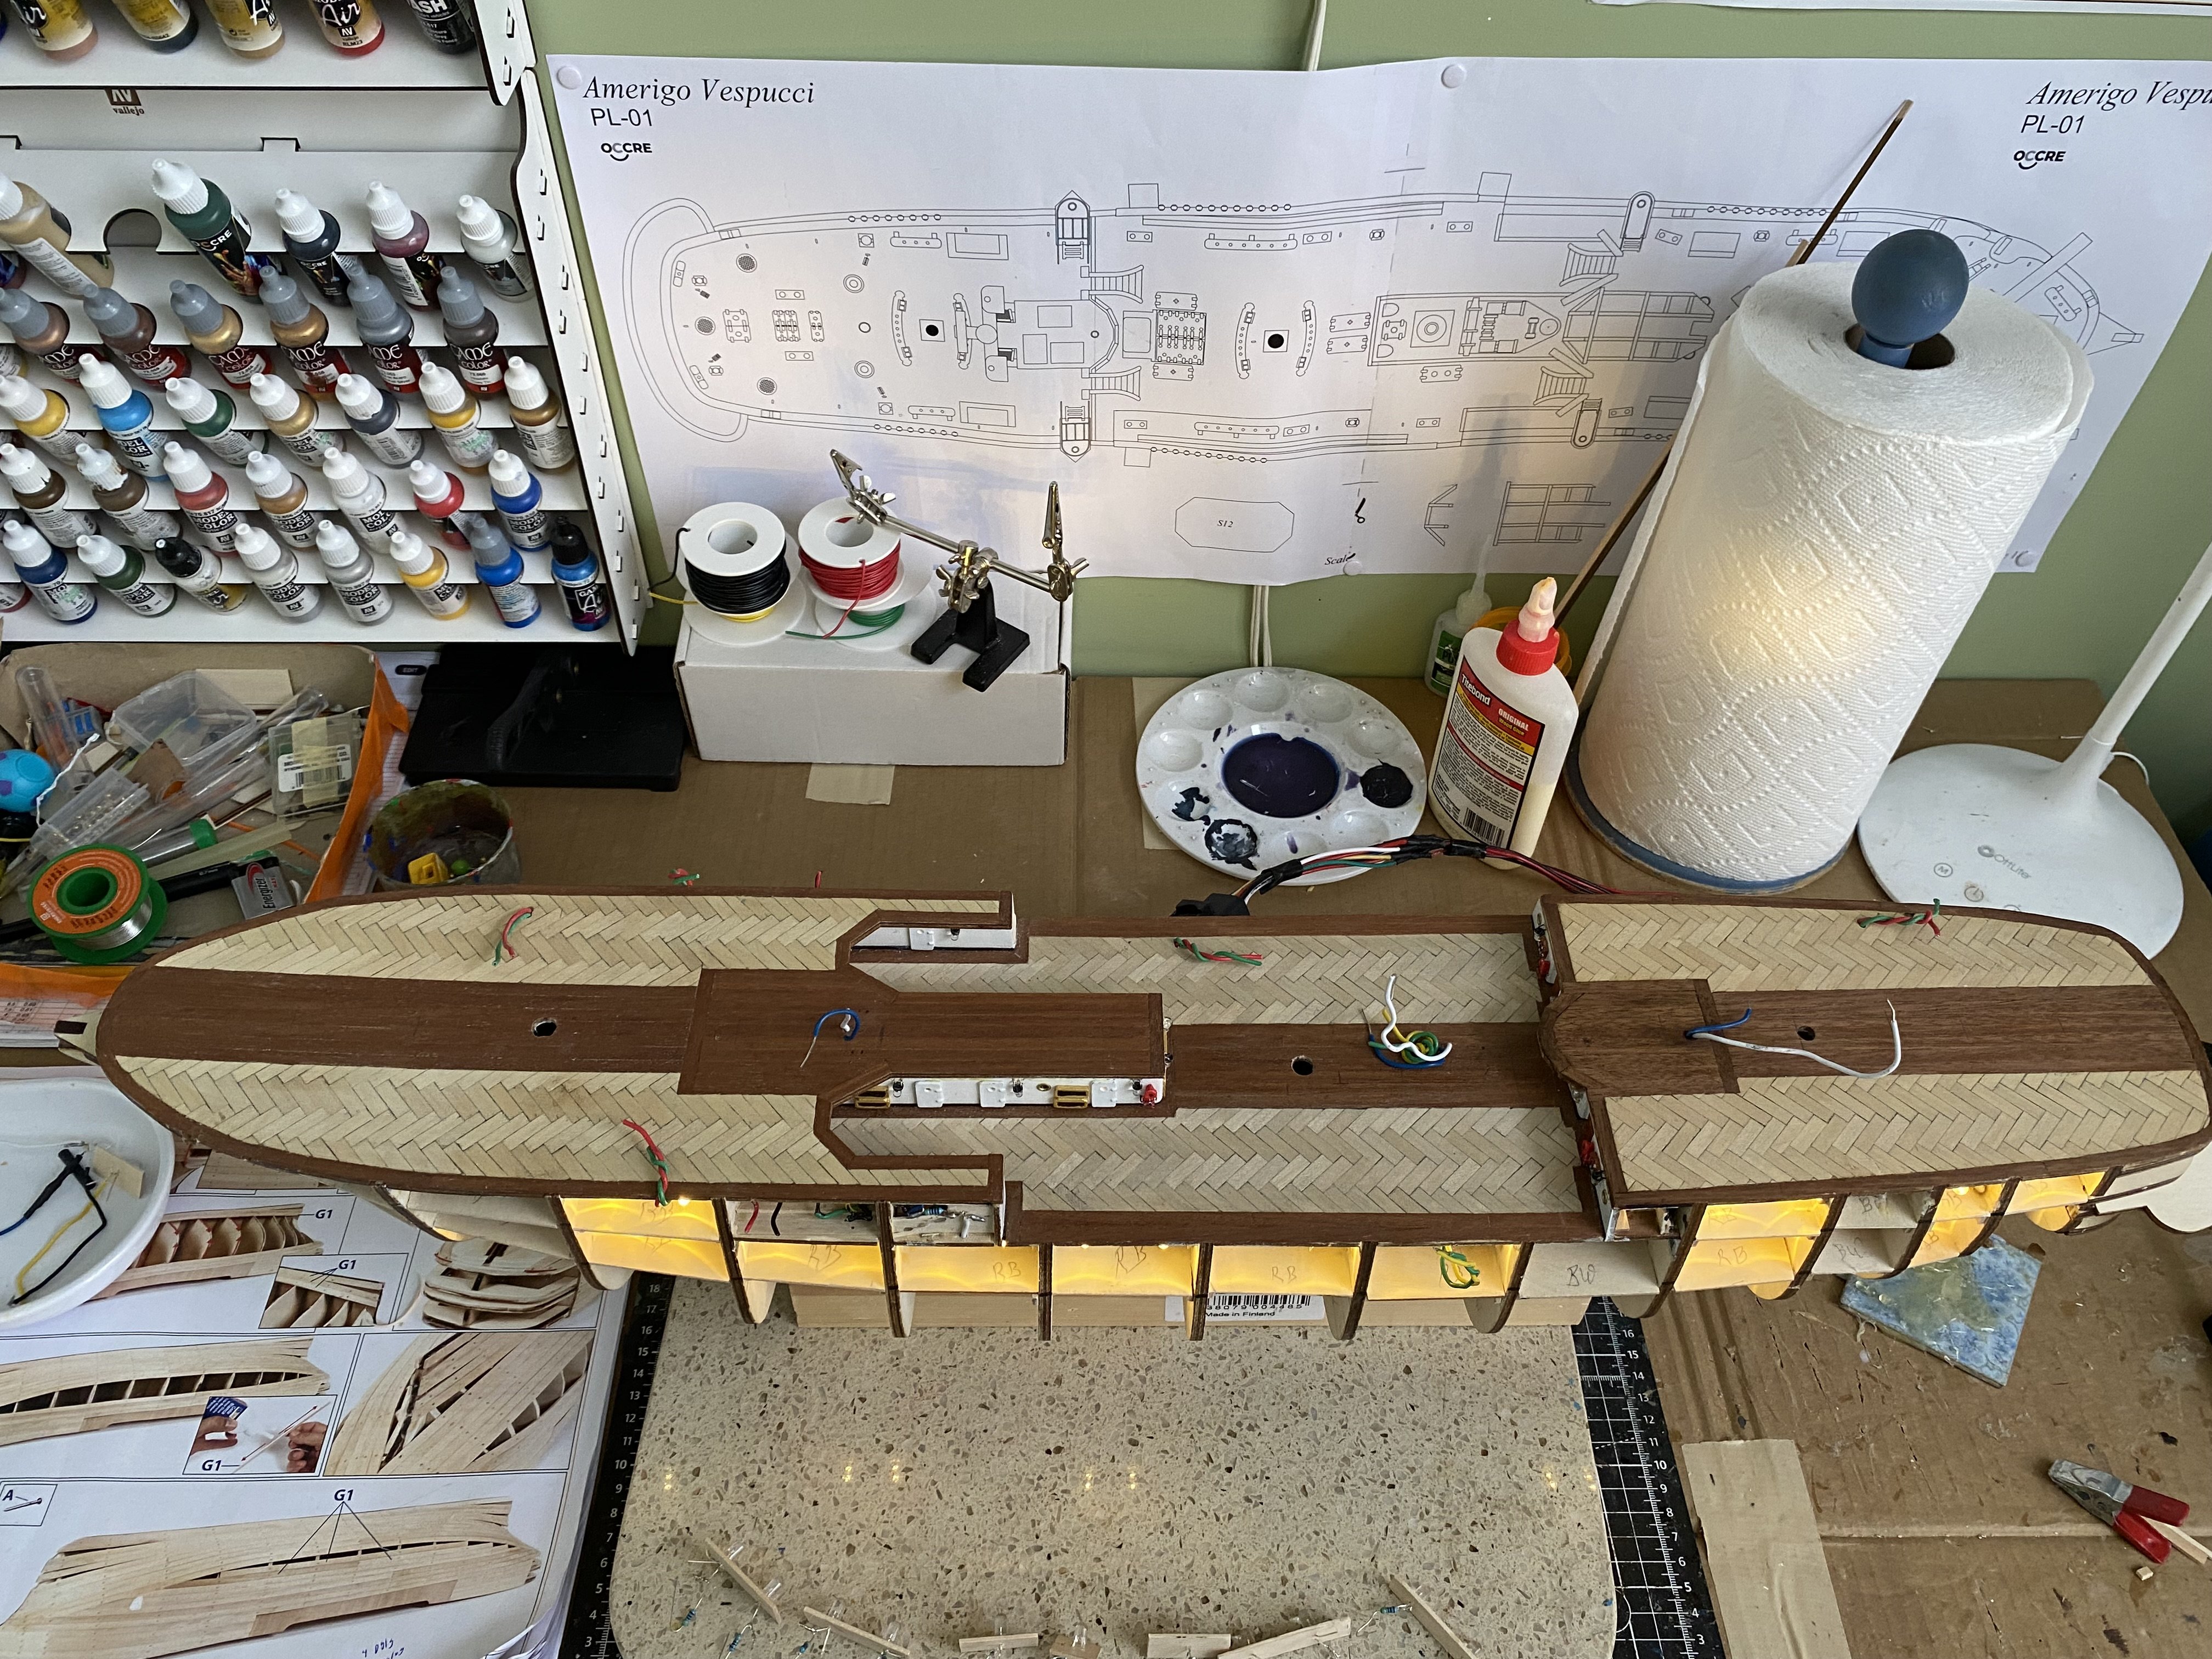
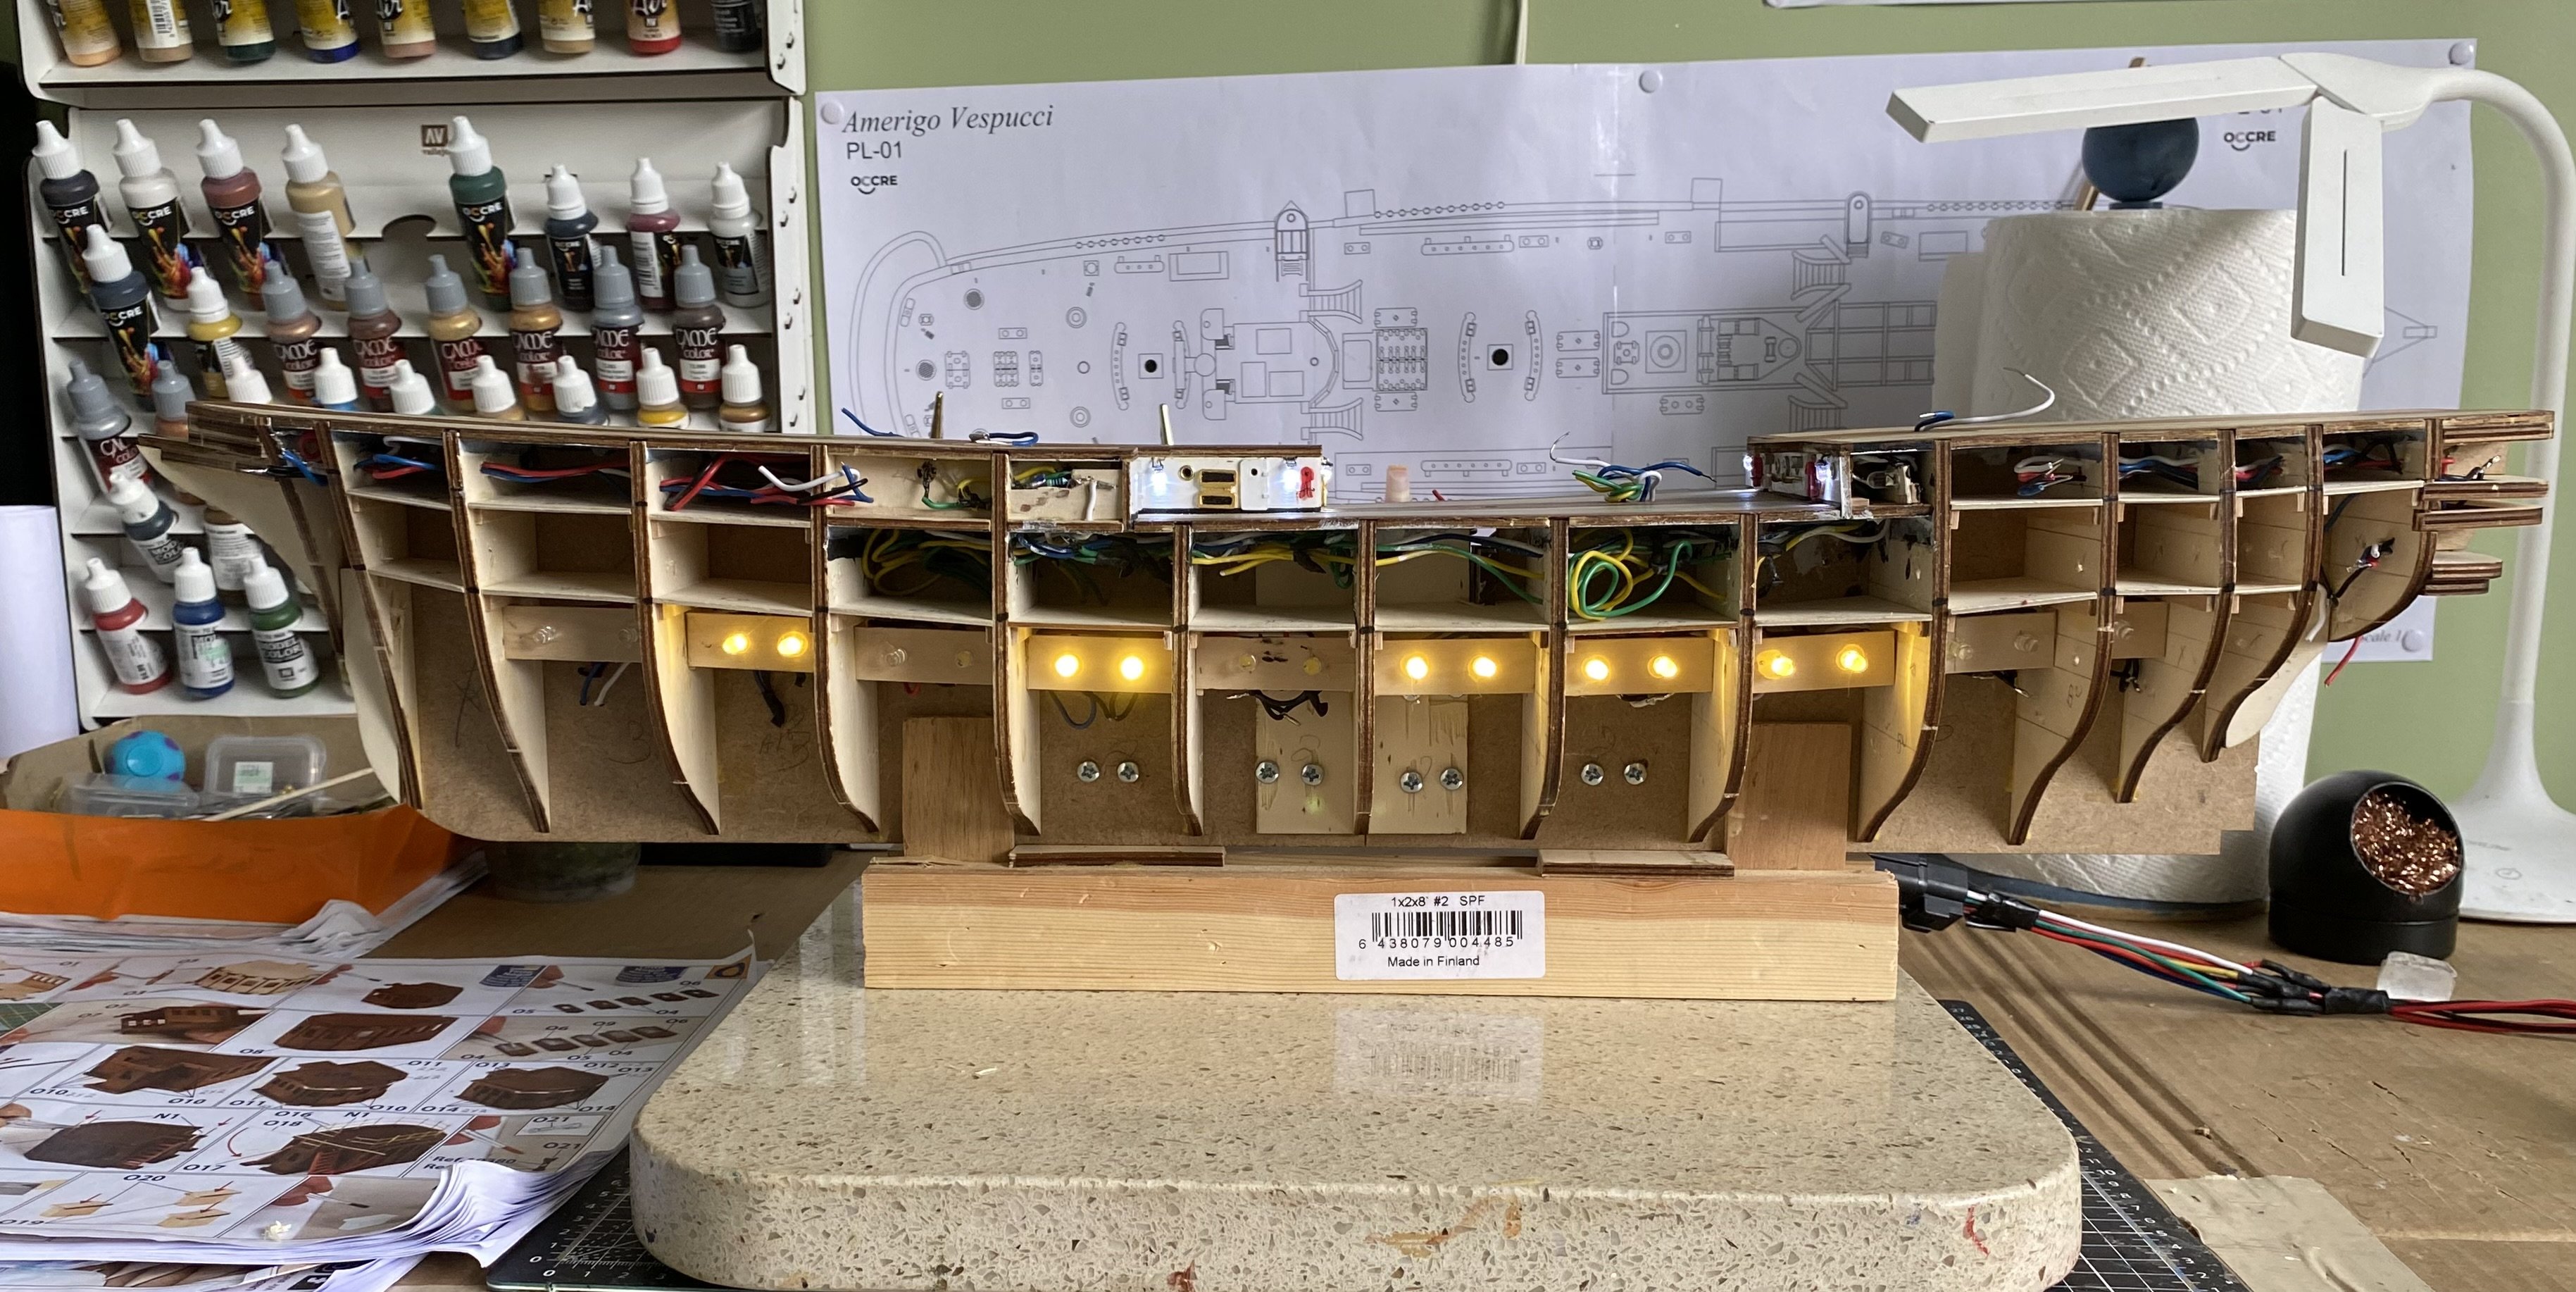
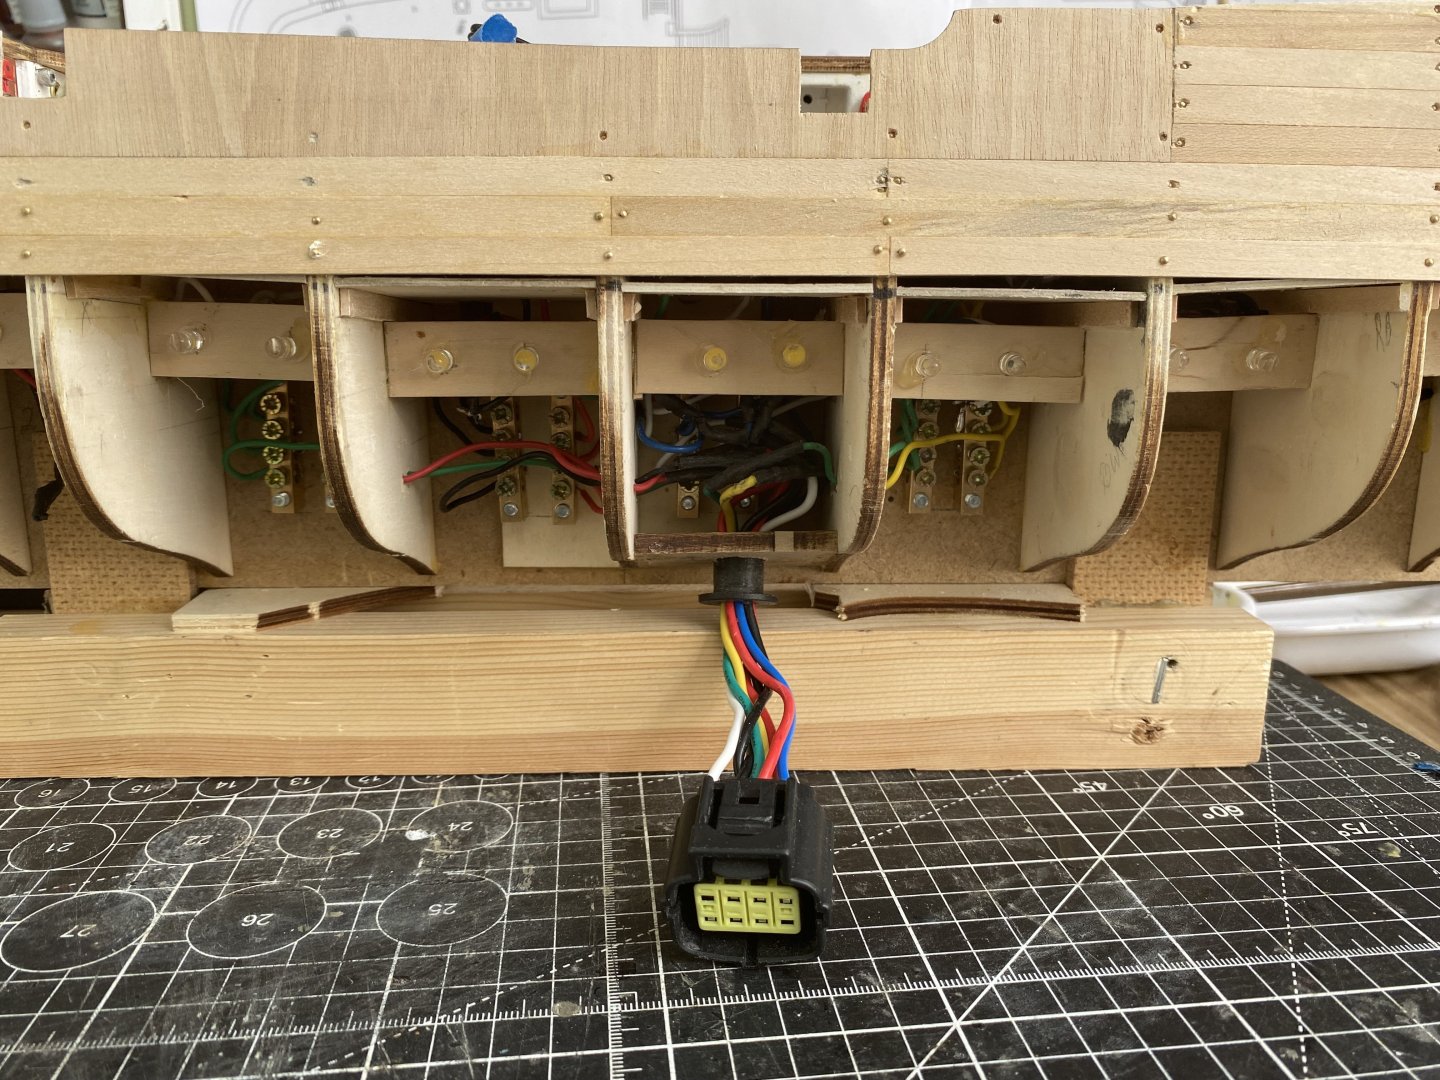
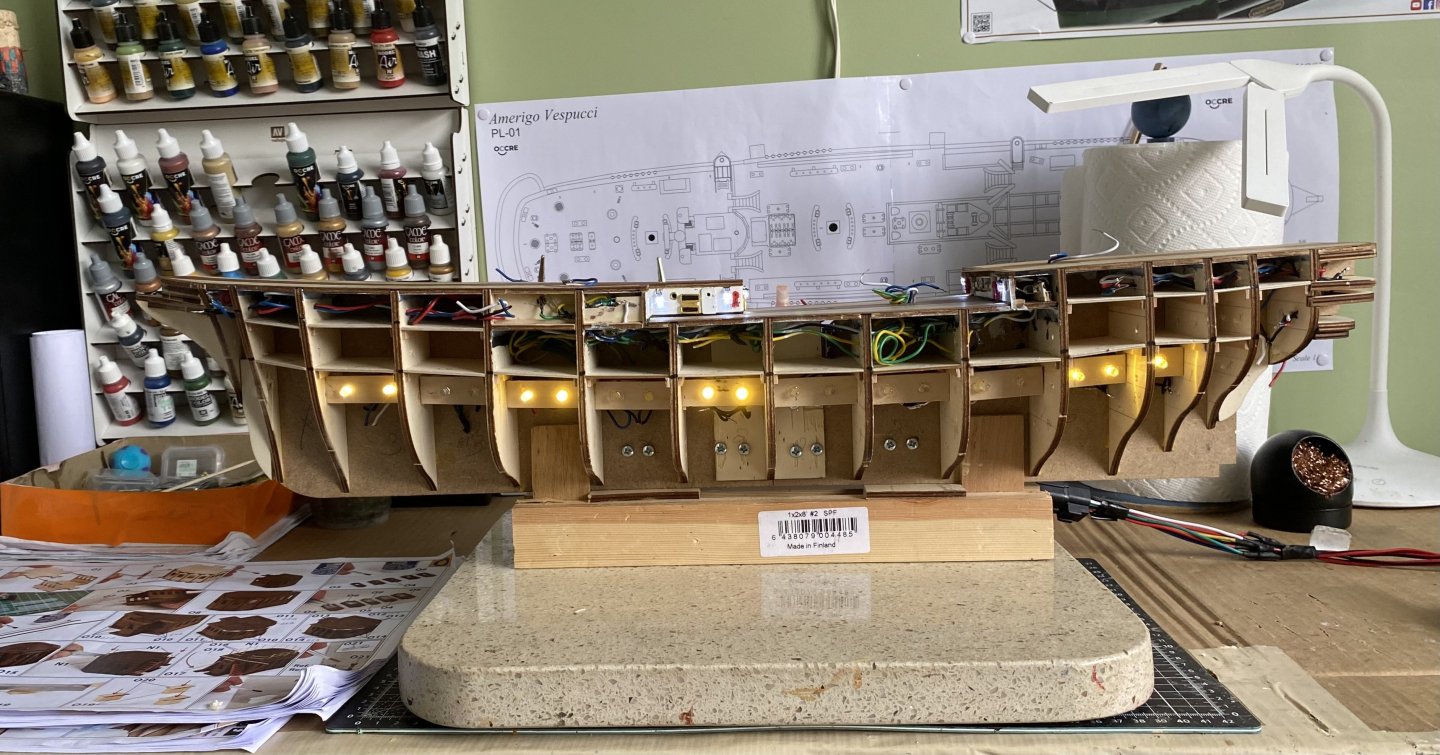
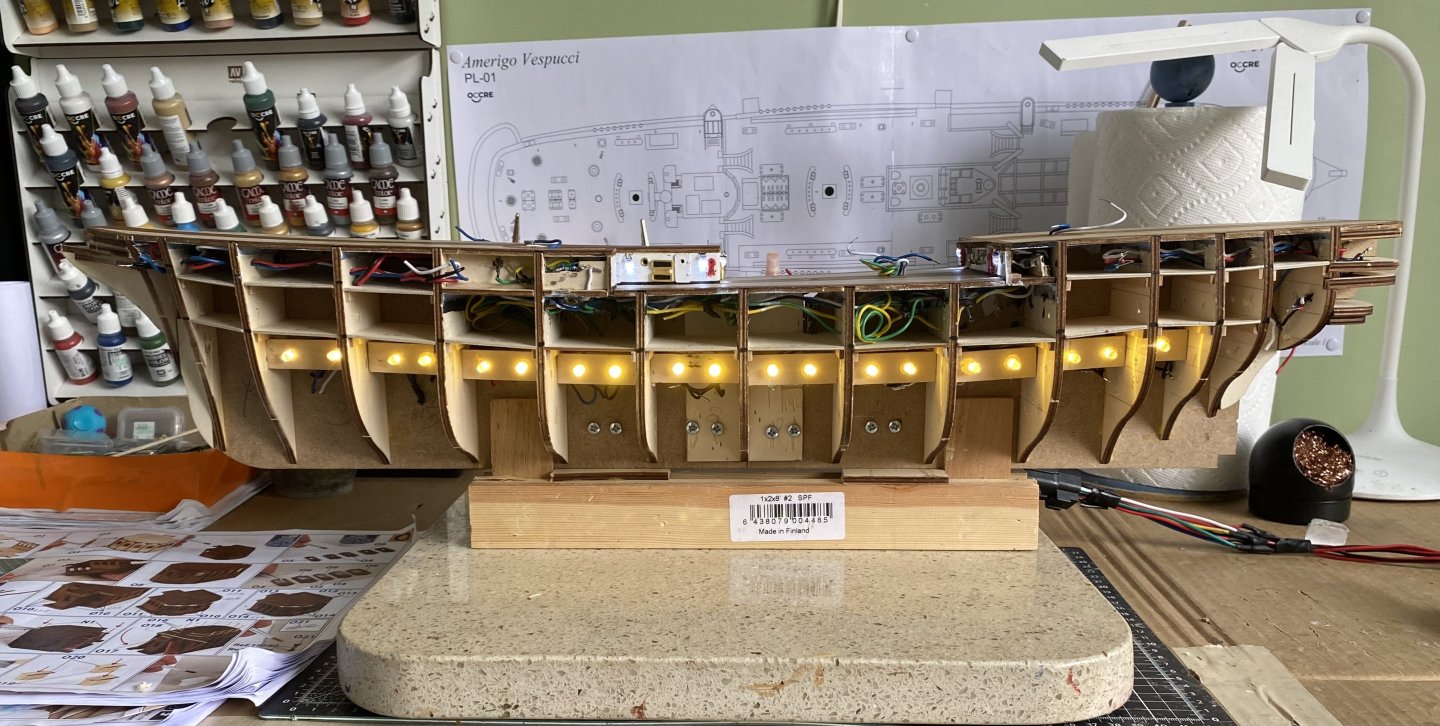
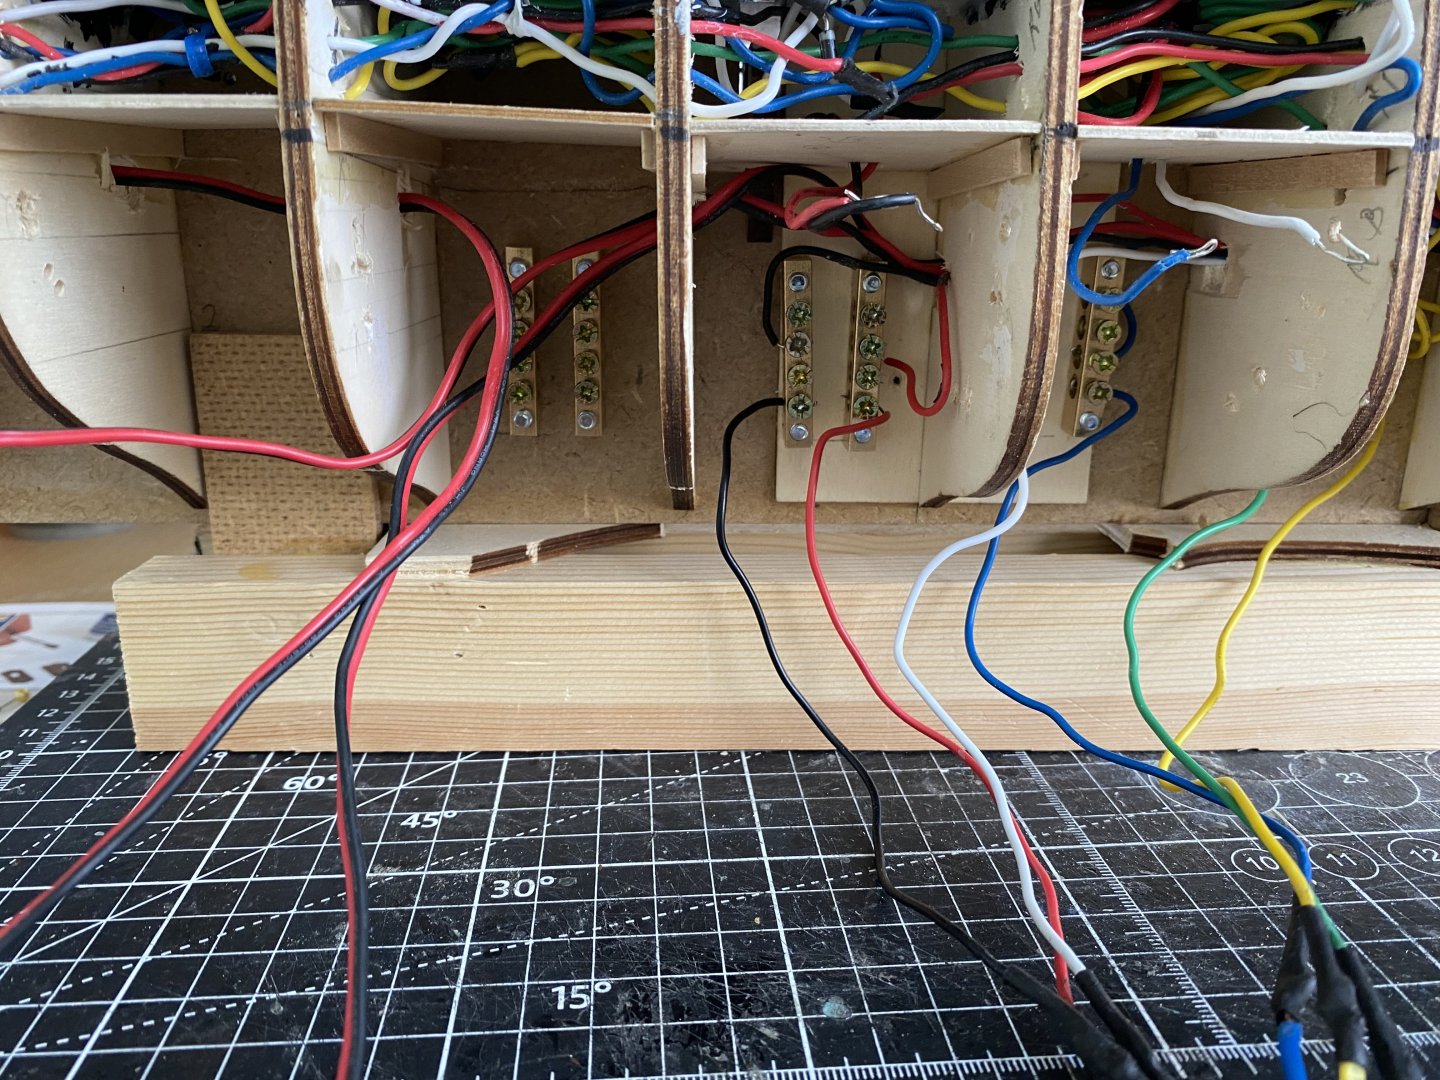
An update of sorts. Stepped away from planking this week to finalize my design for the base. The wiring inside the hull is complete and I have lead the connector that goes to the bus bars out through a hole in the bottom of the hull with a rubber flange that will press up tight to the planking once finished and painted. The connector will be hidden inside the base. The rough base will be covered with a nice wood veneer. The voltage regulators will also be hidden inside the base. The switches that will turn each circuit on or off will be along the bottom of the base with the Amerigo Vespucci name plate centered between two on each side. The power cord from the power block will plug into the back of the base. My plan is to just have the ship set in the base per chance I would need to lift it to access the voltage regulators. May use some type of removable pin to fasten the ship to the base. Not sure about that yet.


-
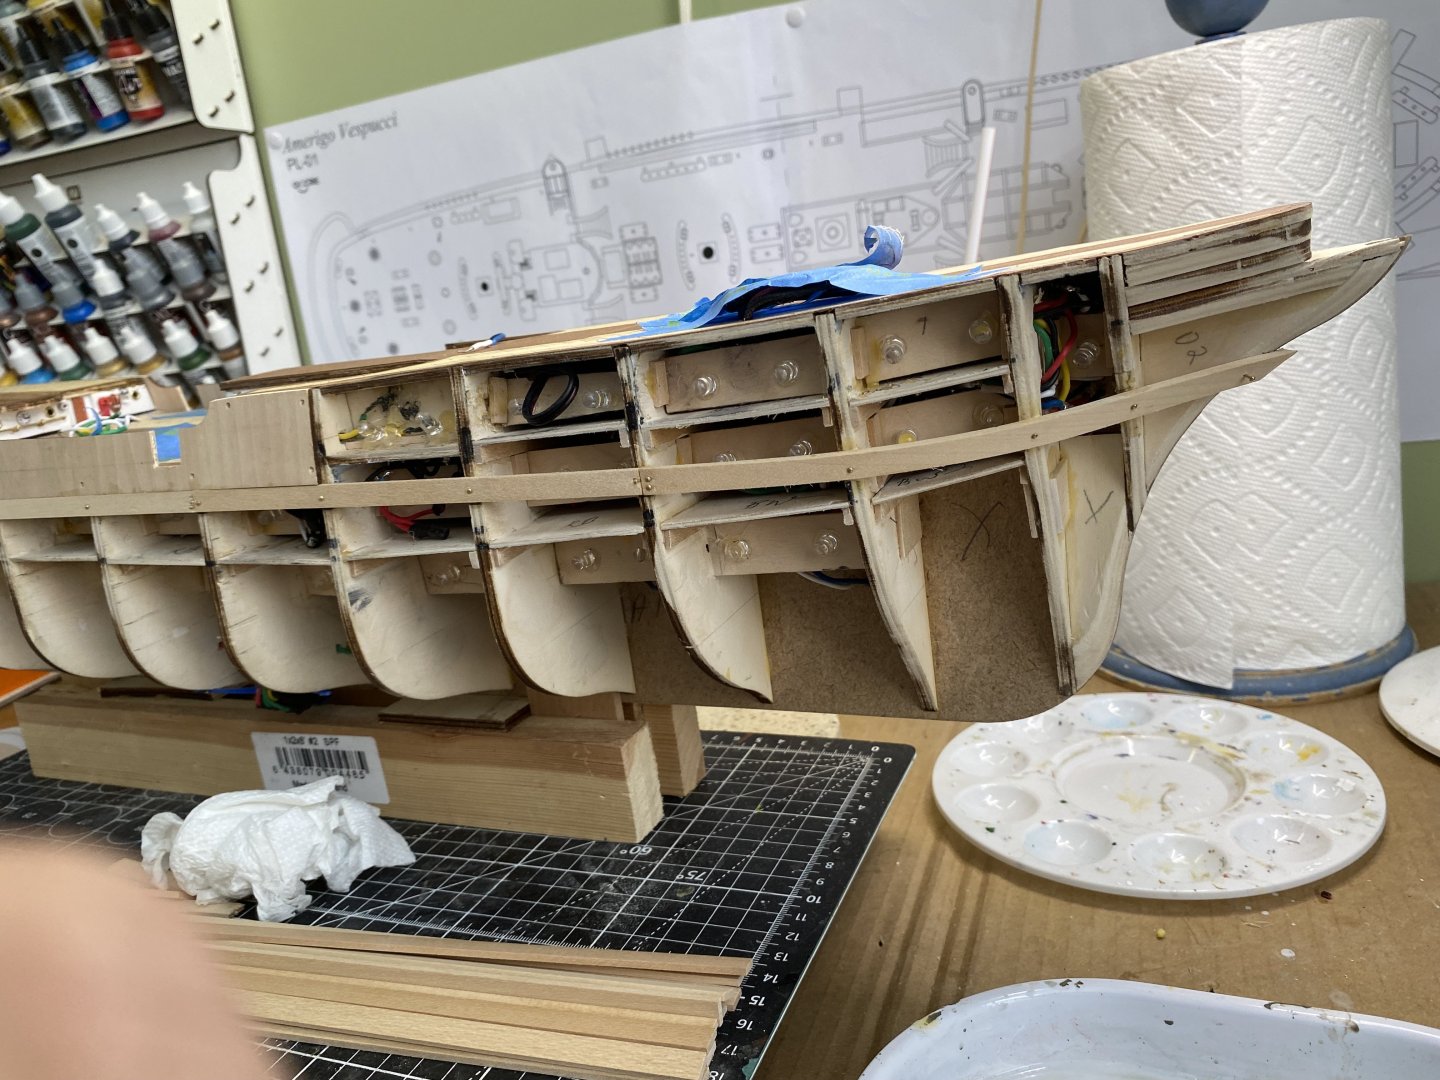
And so the first planking begins. Take my time to get the first row just right and it is smooth sailing after that.


-
Daniel I am looking ahead to how I plan to design my base so as to obscure the voltage regulators and other electrical items but have ready access to the circuit on/off switches. Kicking around some different ideas. What do you envision for yours? My plan will be to just have the cord from the power pack plug into the back of the base and the switches on the front. Nothing definite after that. Do you foresee a need to have easy access to the voltage regulators!
-
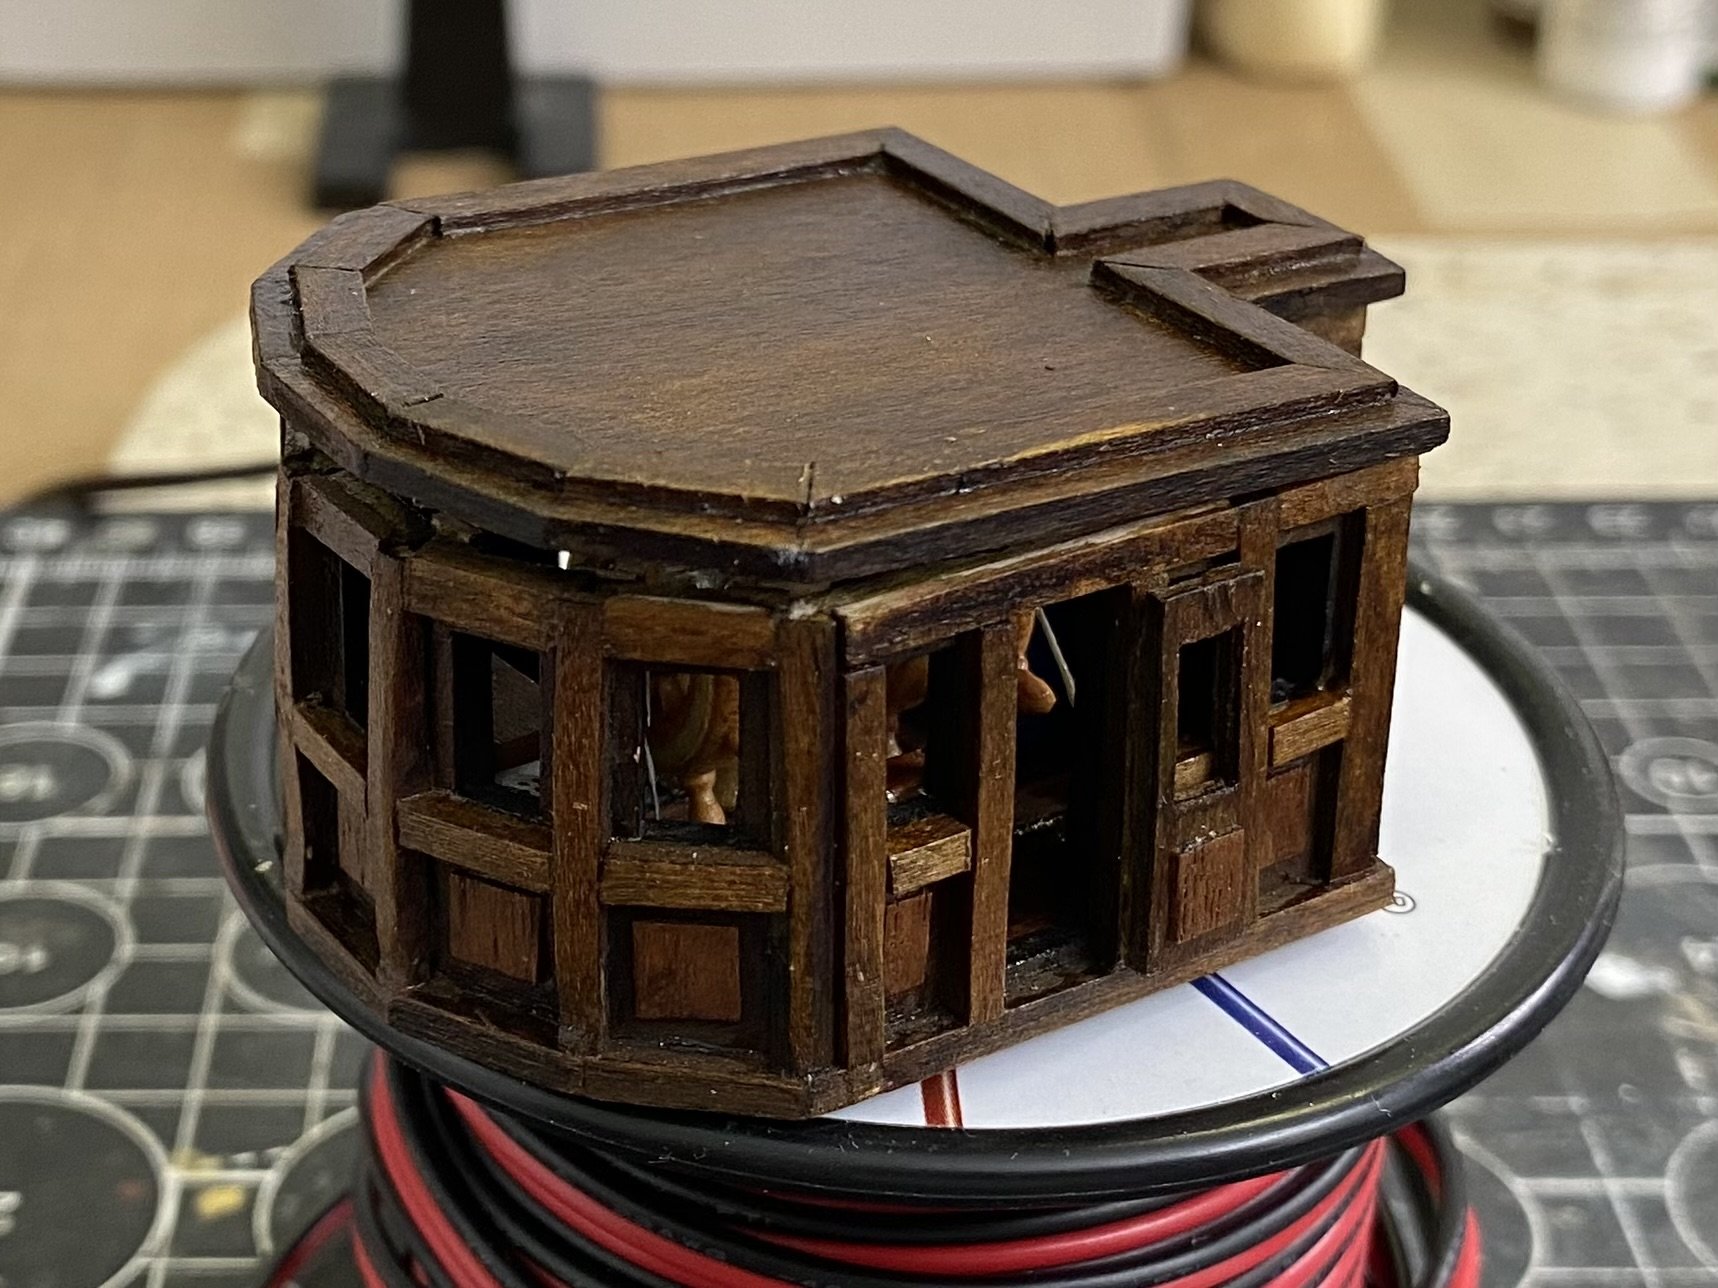
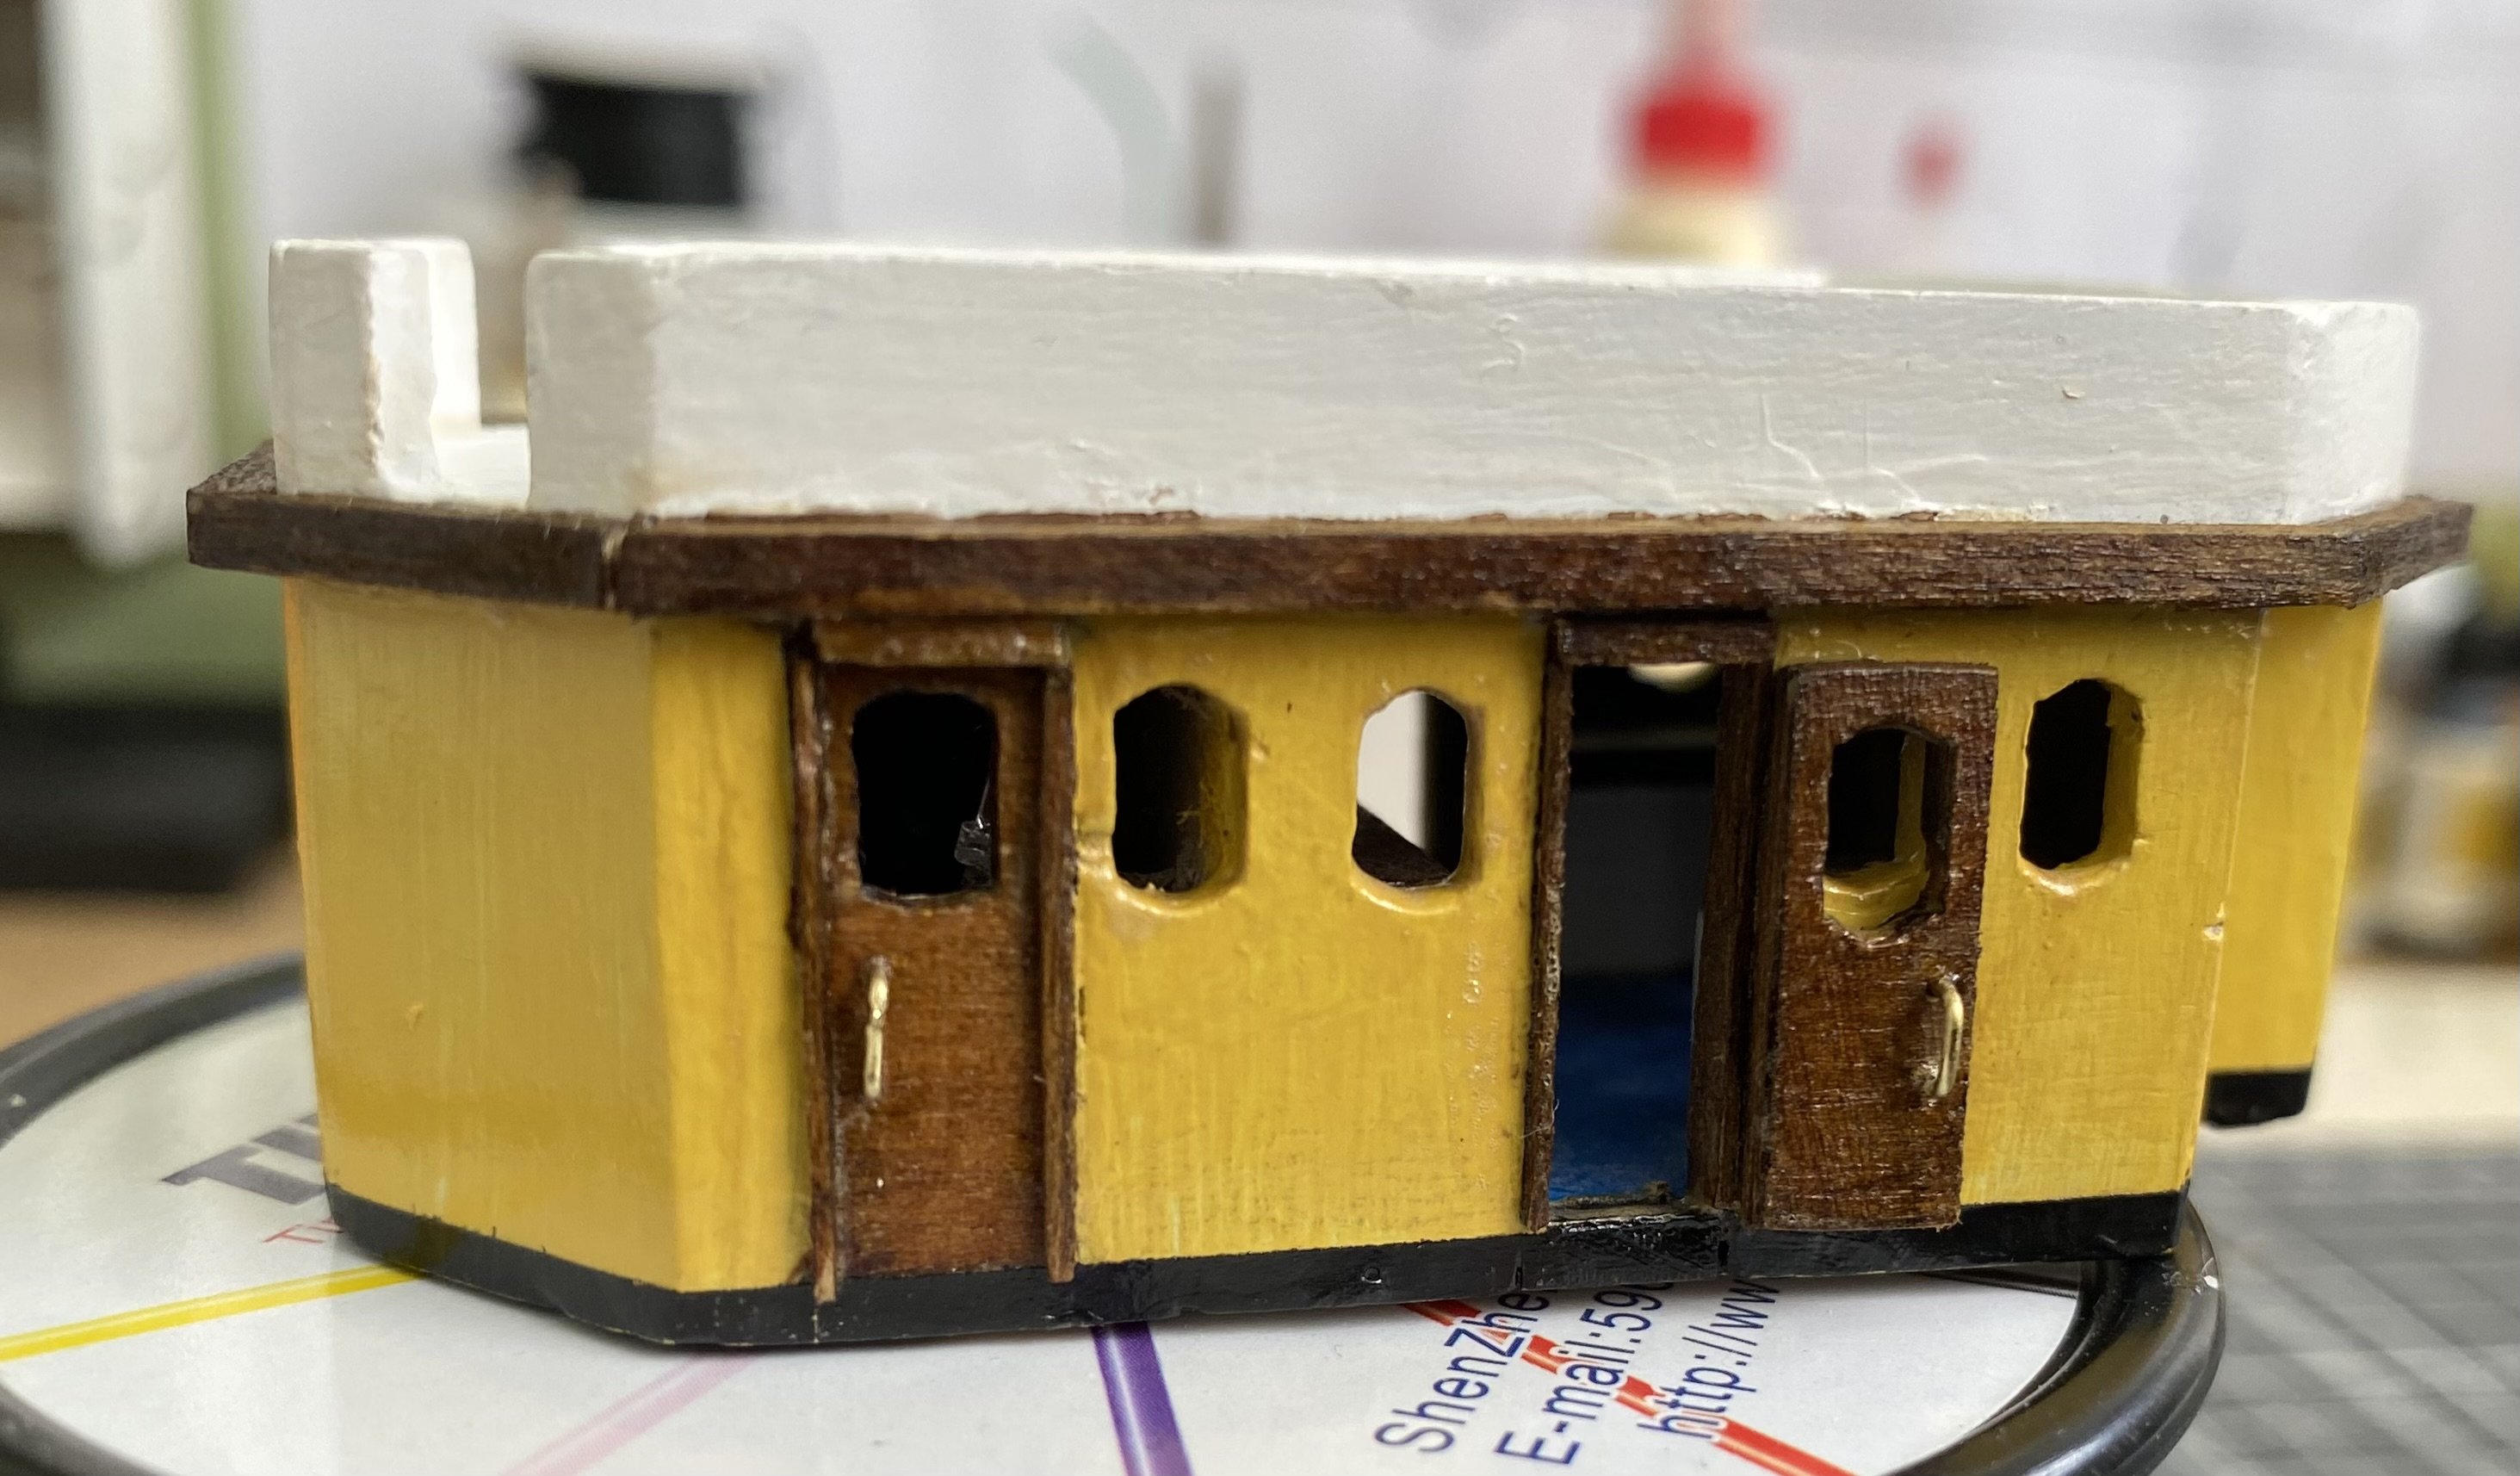
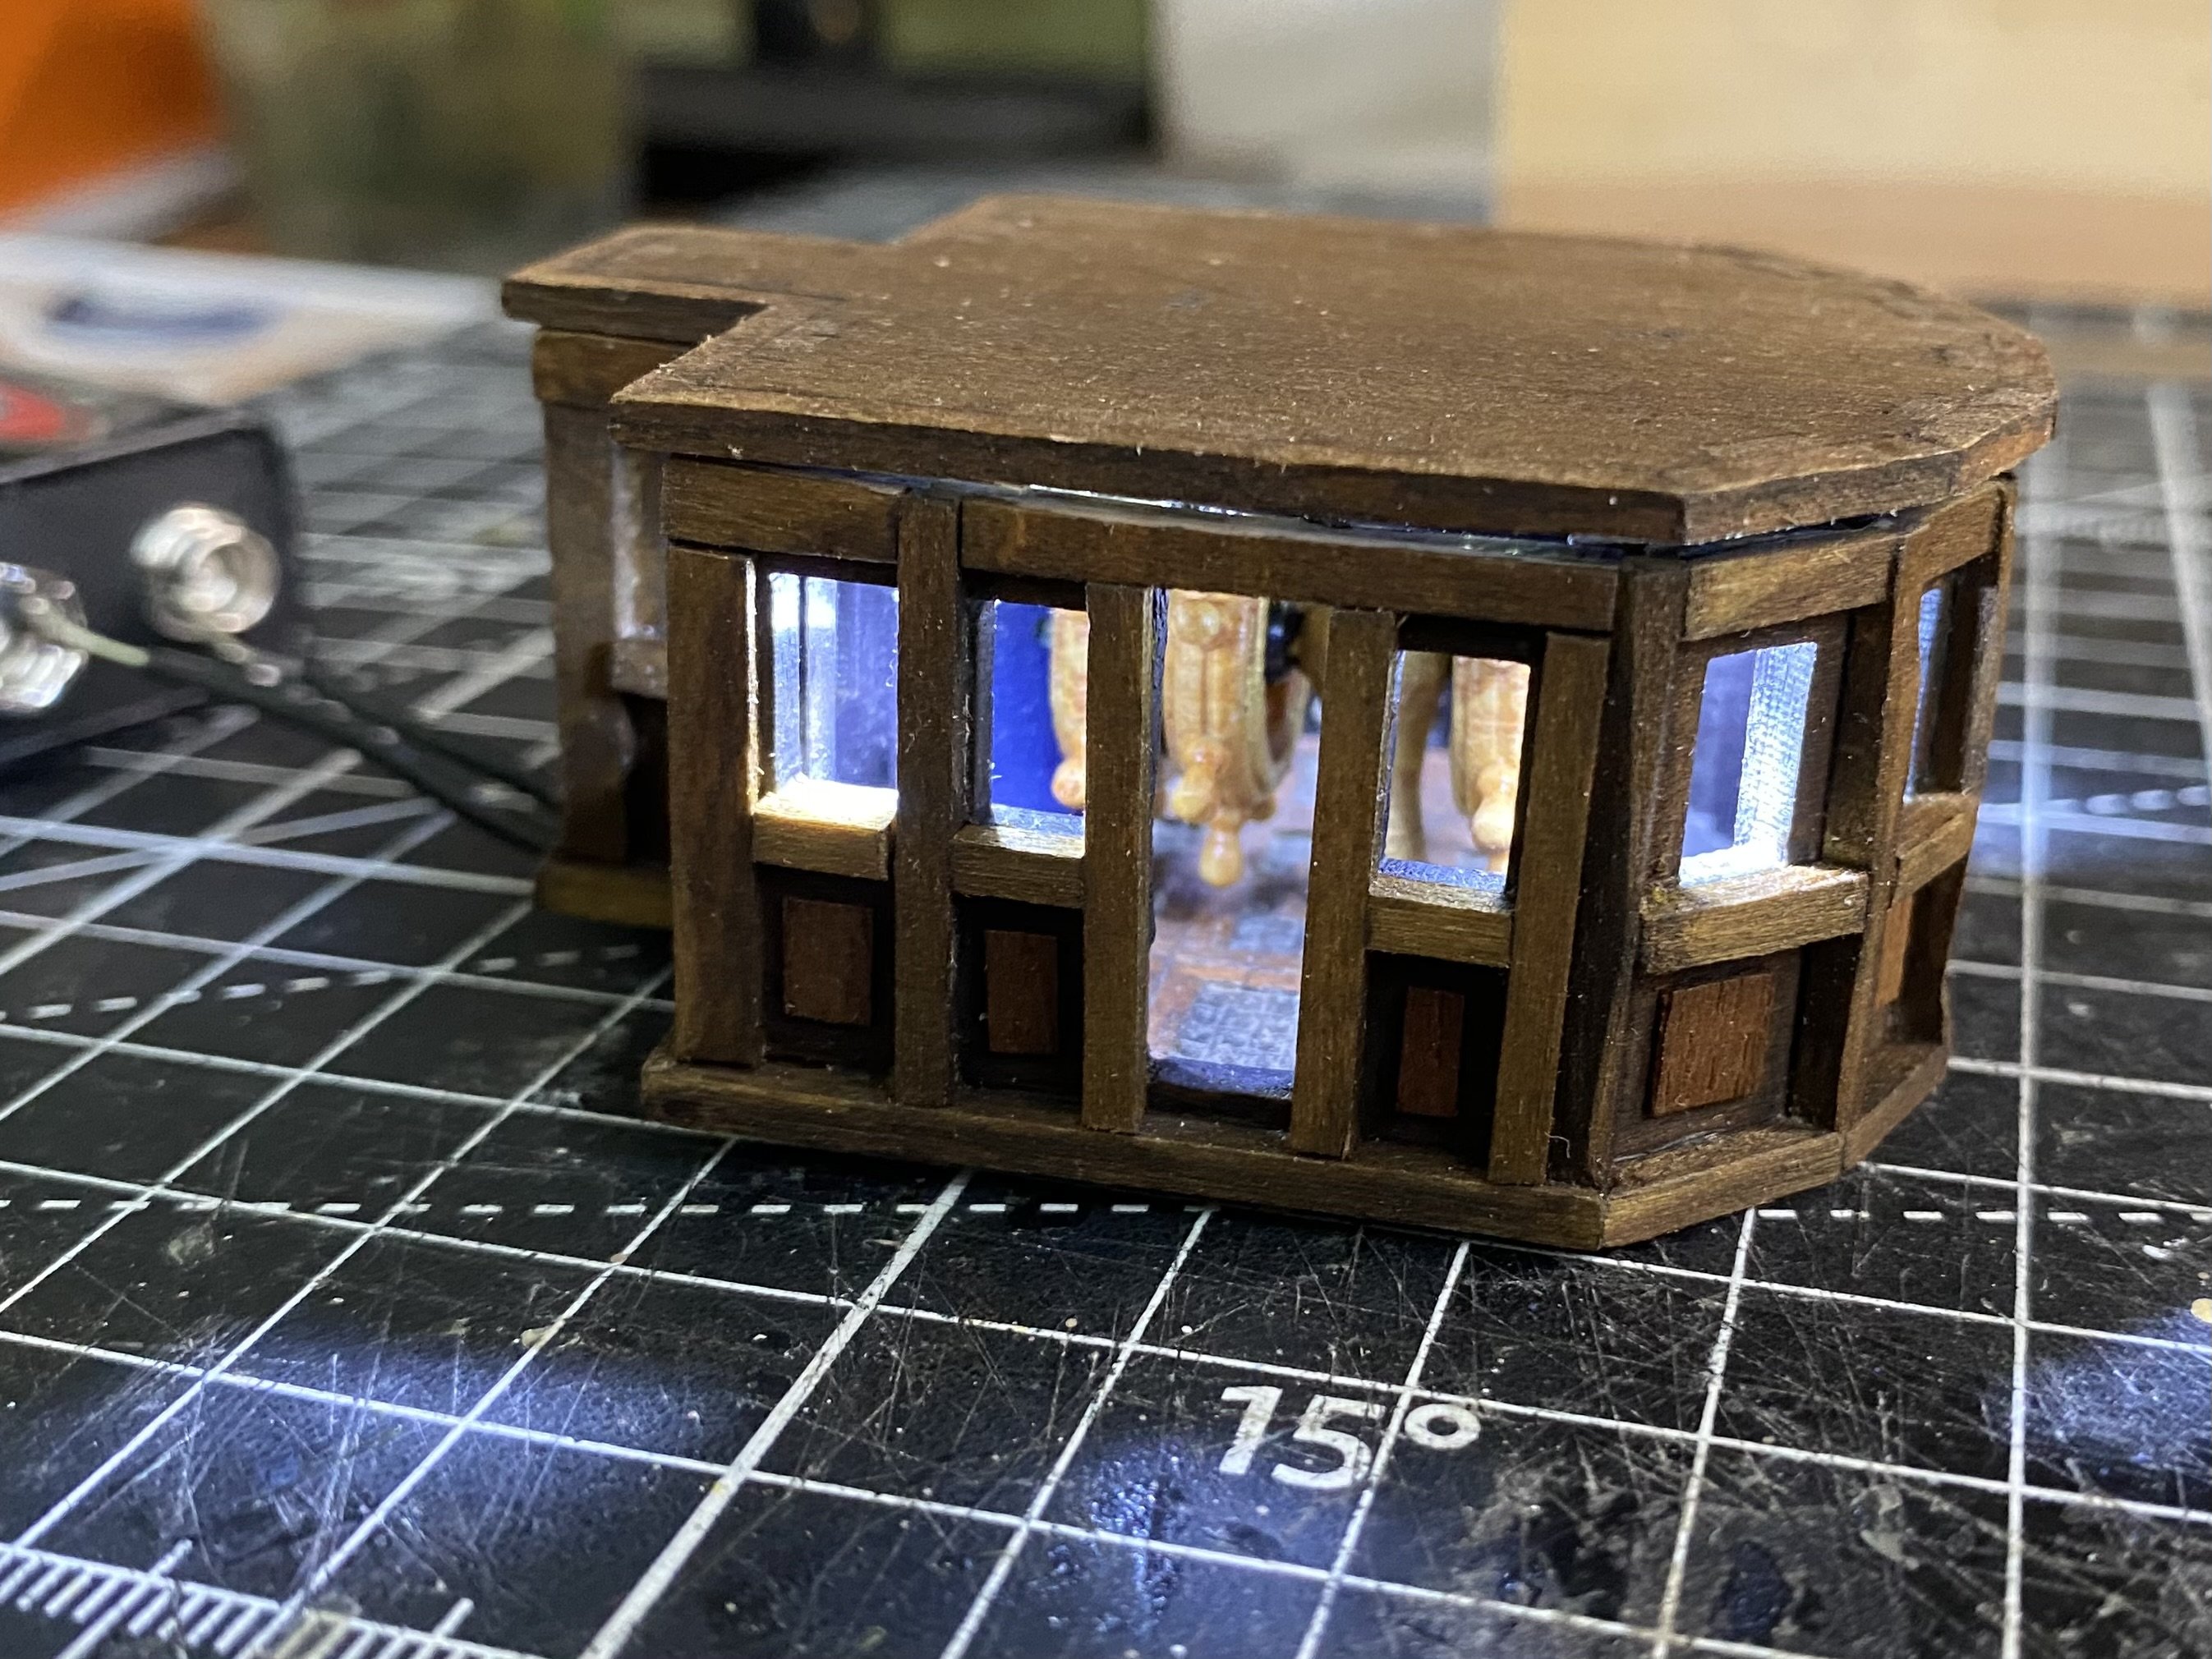
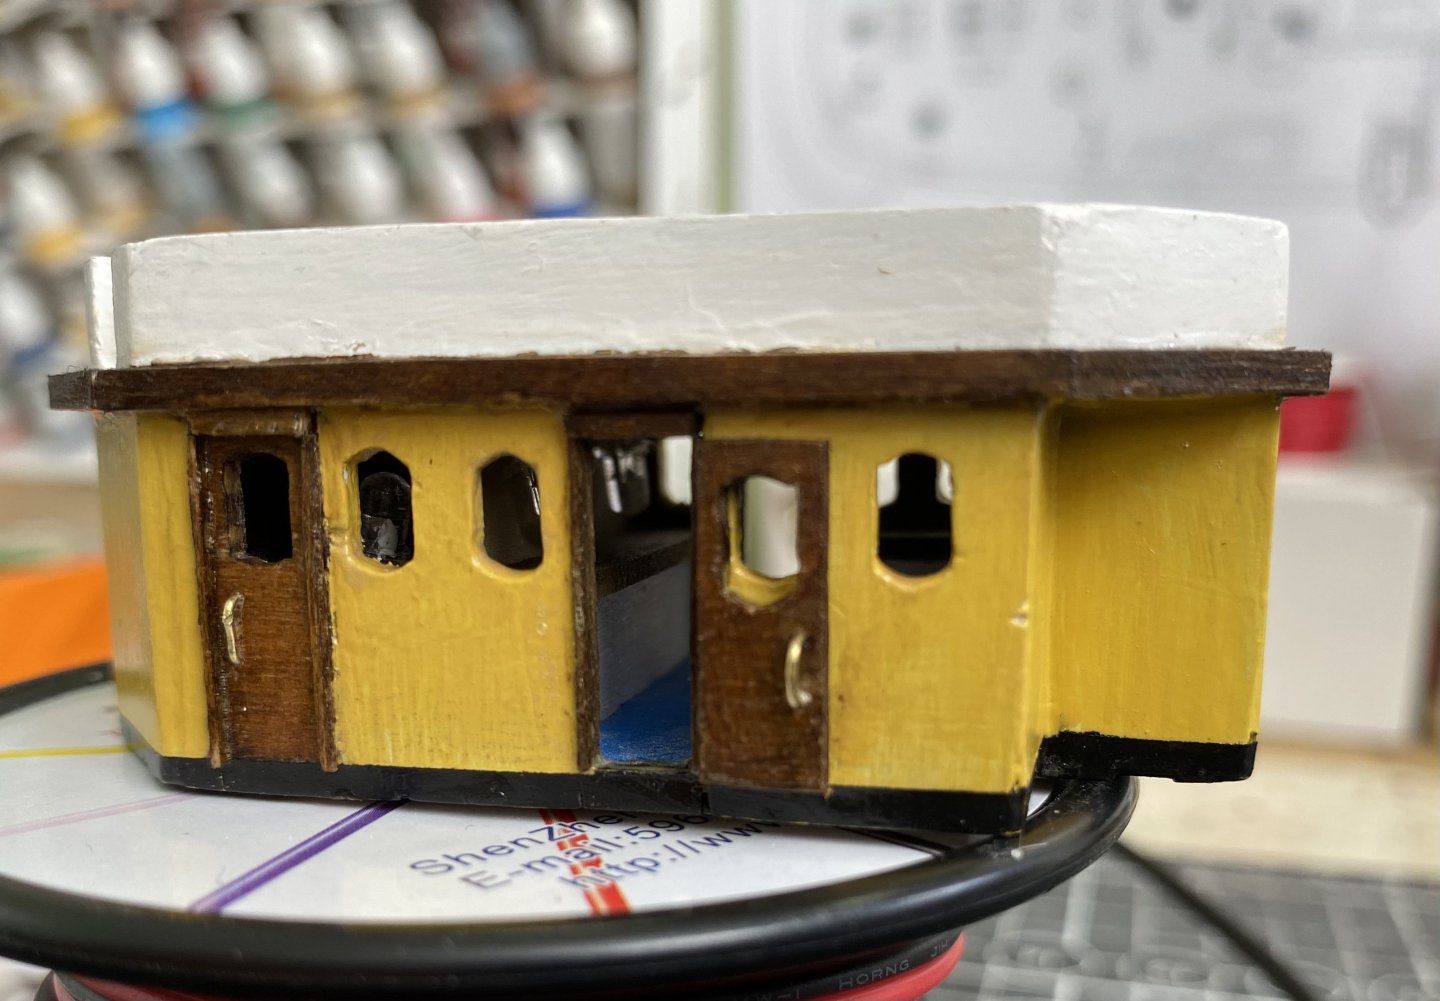
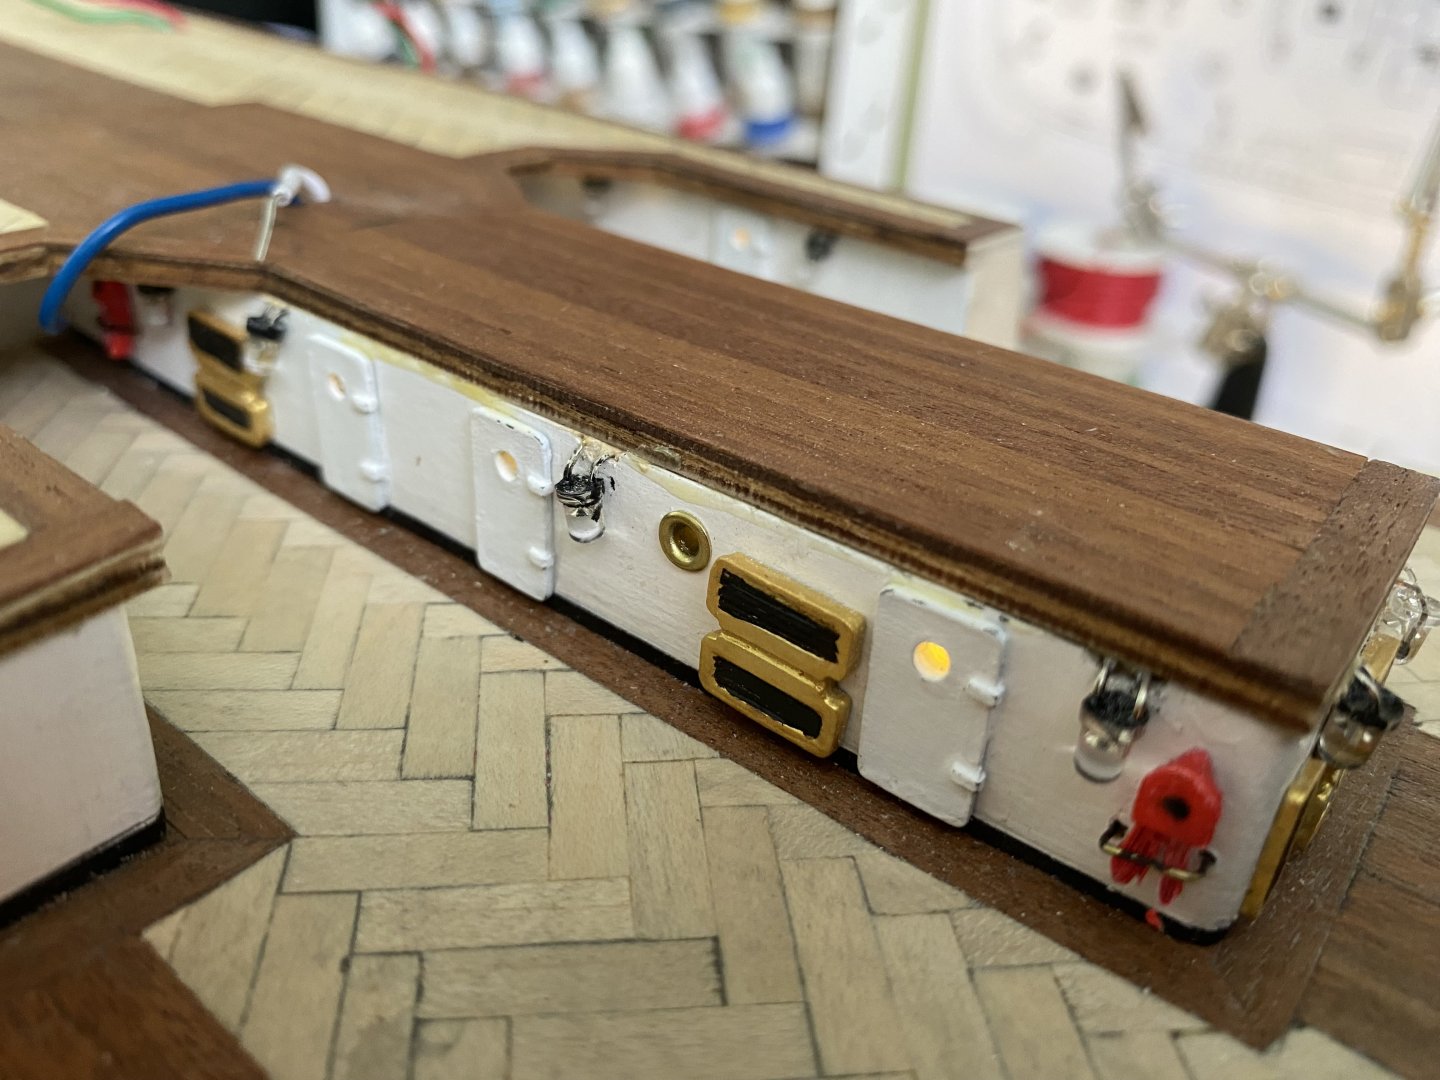
Finishing up building the bridge and castle superstructures. They have interior lights that will come on with either of the port hole light circuits.


-
Thanks Daniel. I used warm white for my port hole lights and standard white, as in my pictures, for the deck lighting. I will give the standard white (5mm possibly) a try. Have to see if I can find the Testors liquid glass.
-
Daniel what, if anything, can I do about getting the interior lighting brighter? Did you have a problem with that. I am leaving the clear plastic off the windows.
-
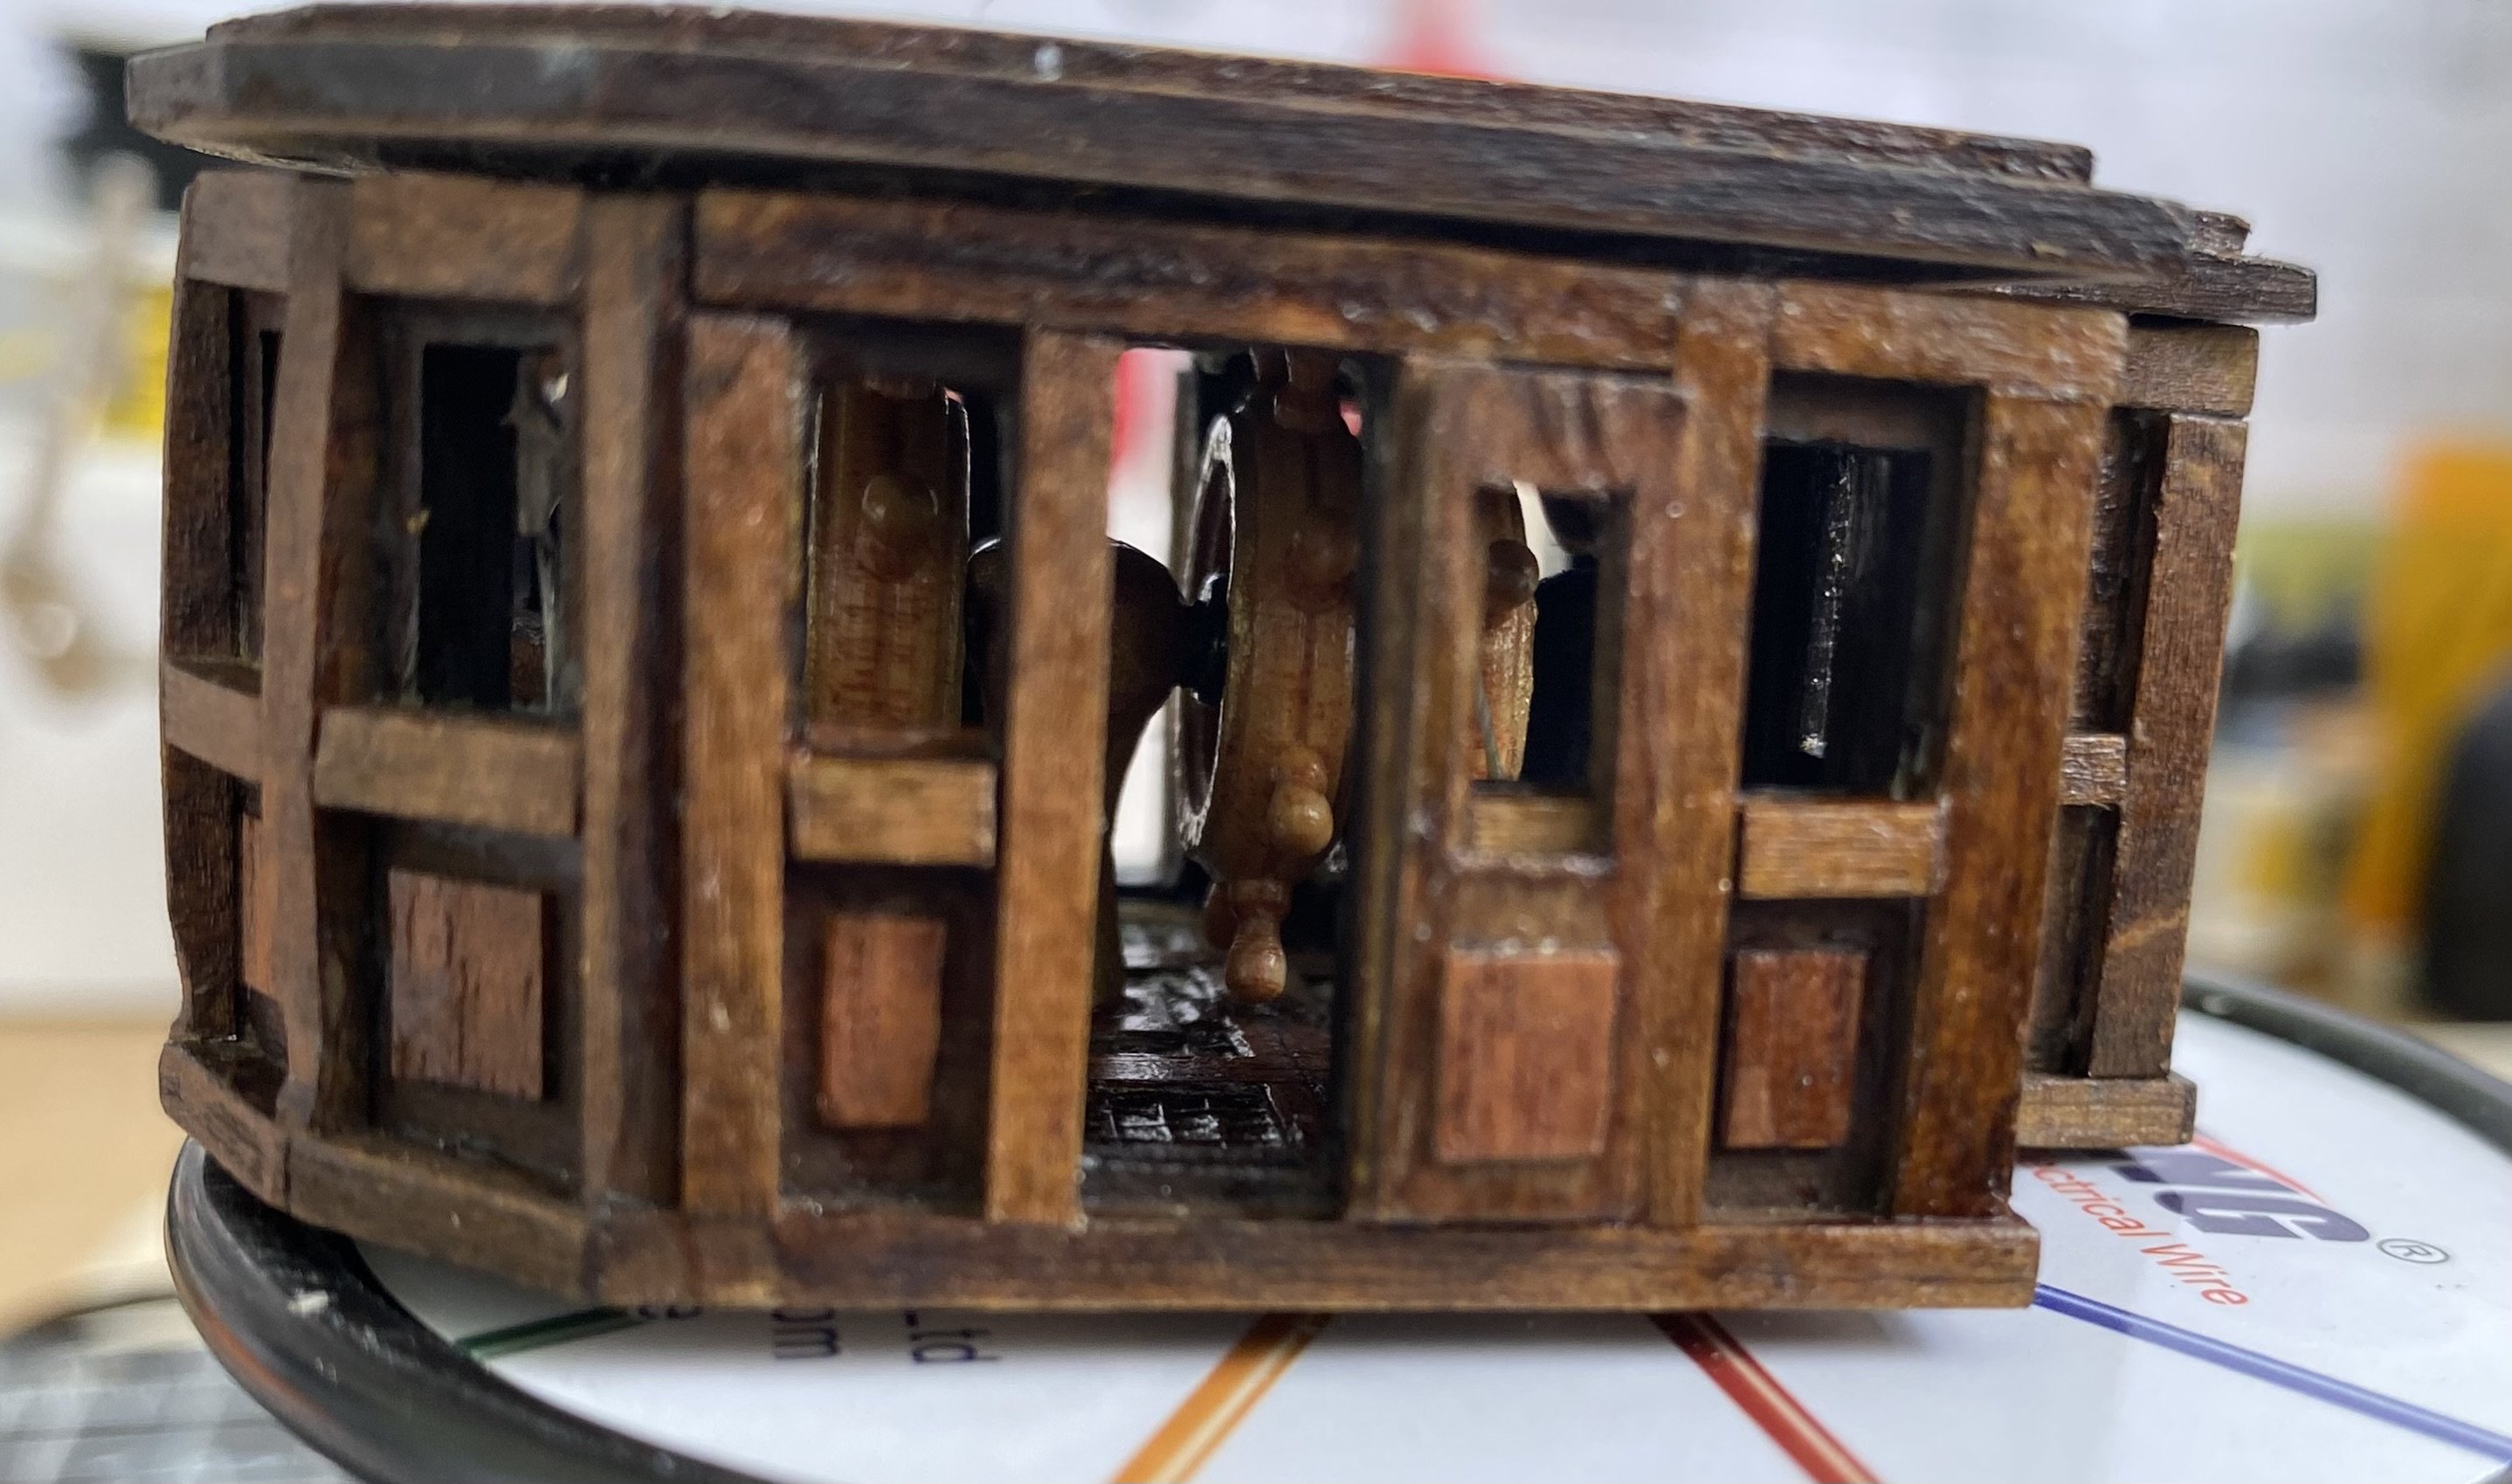
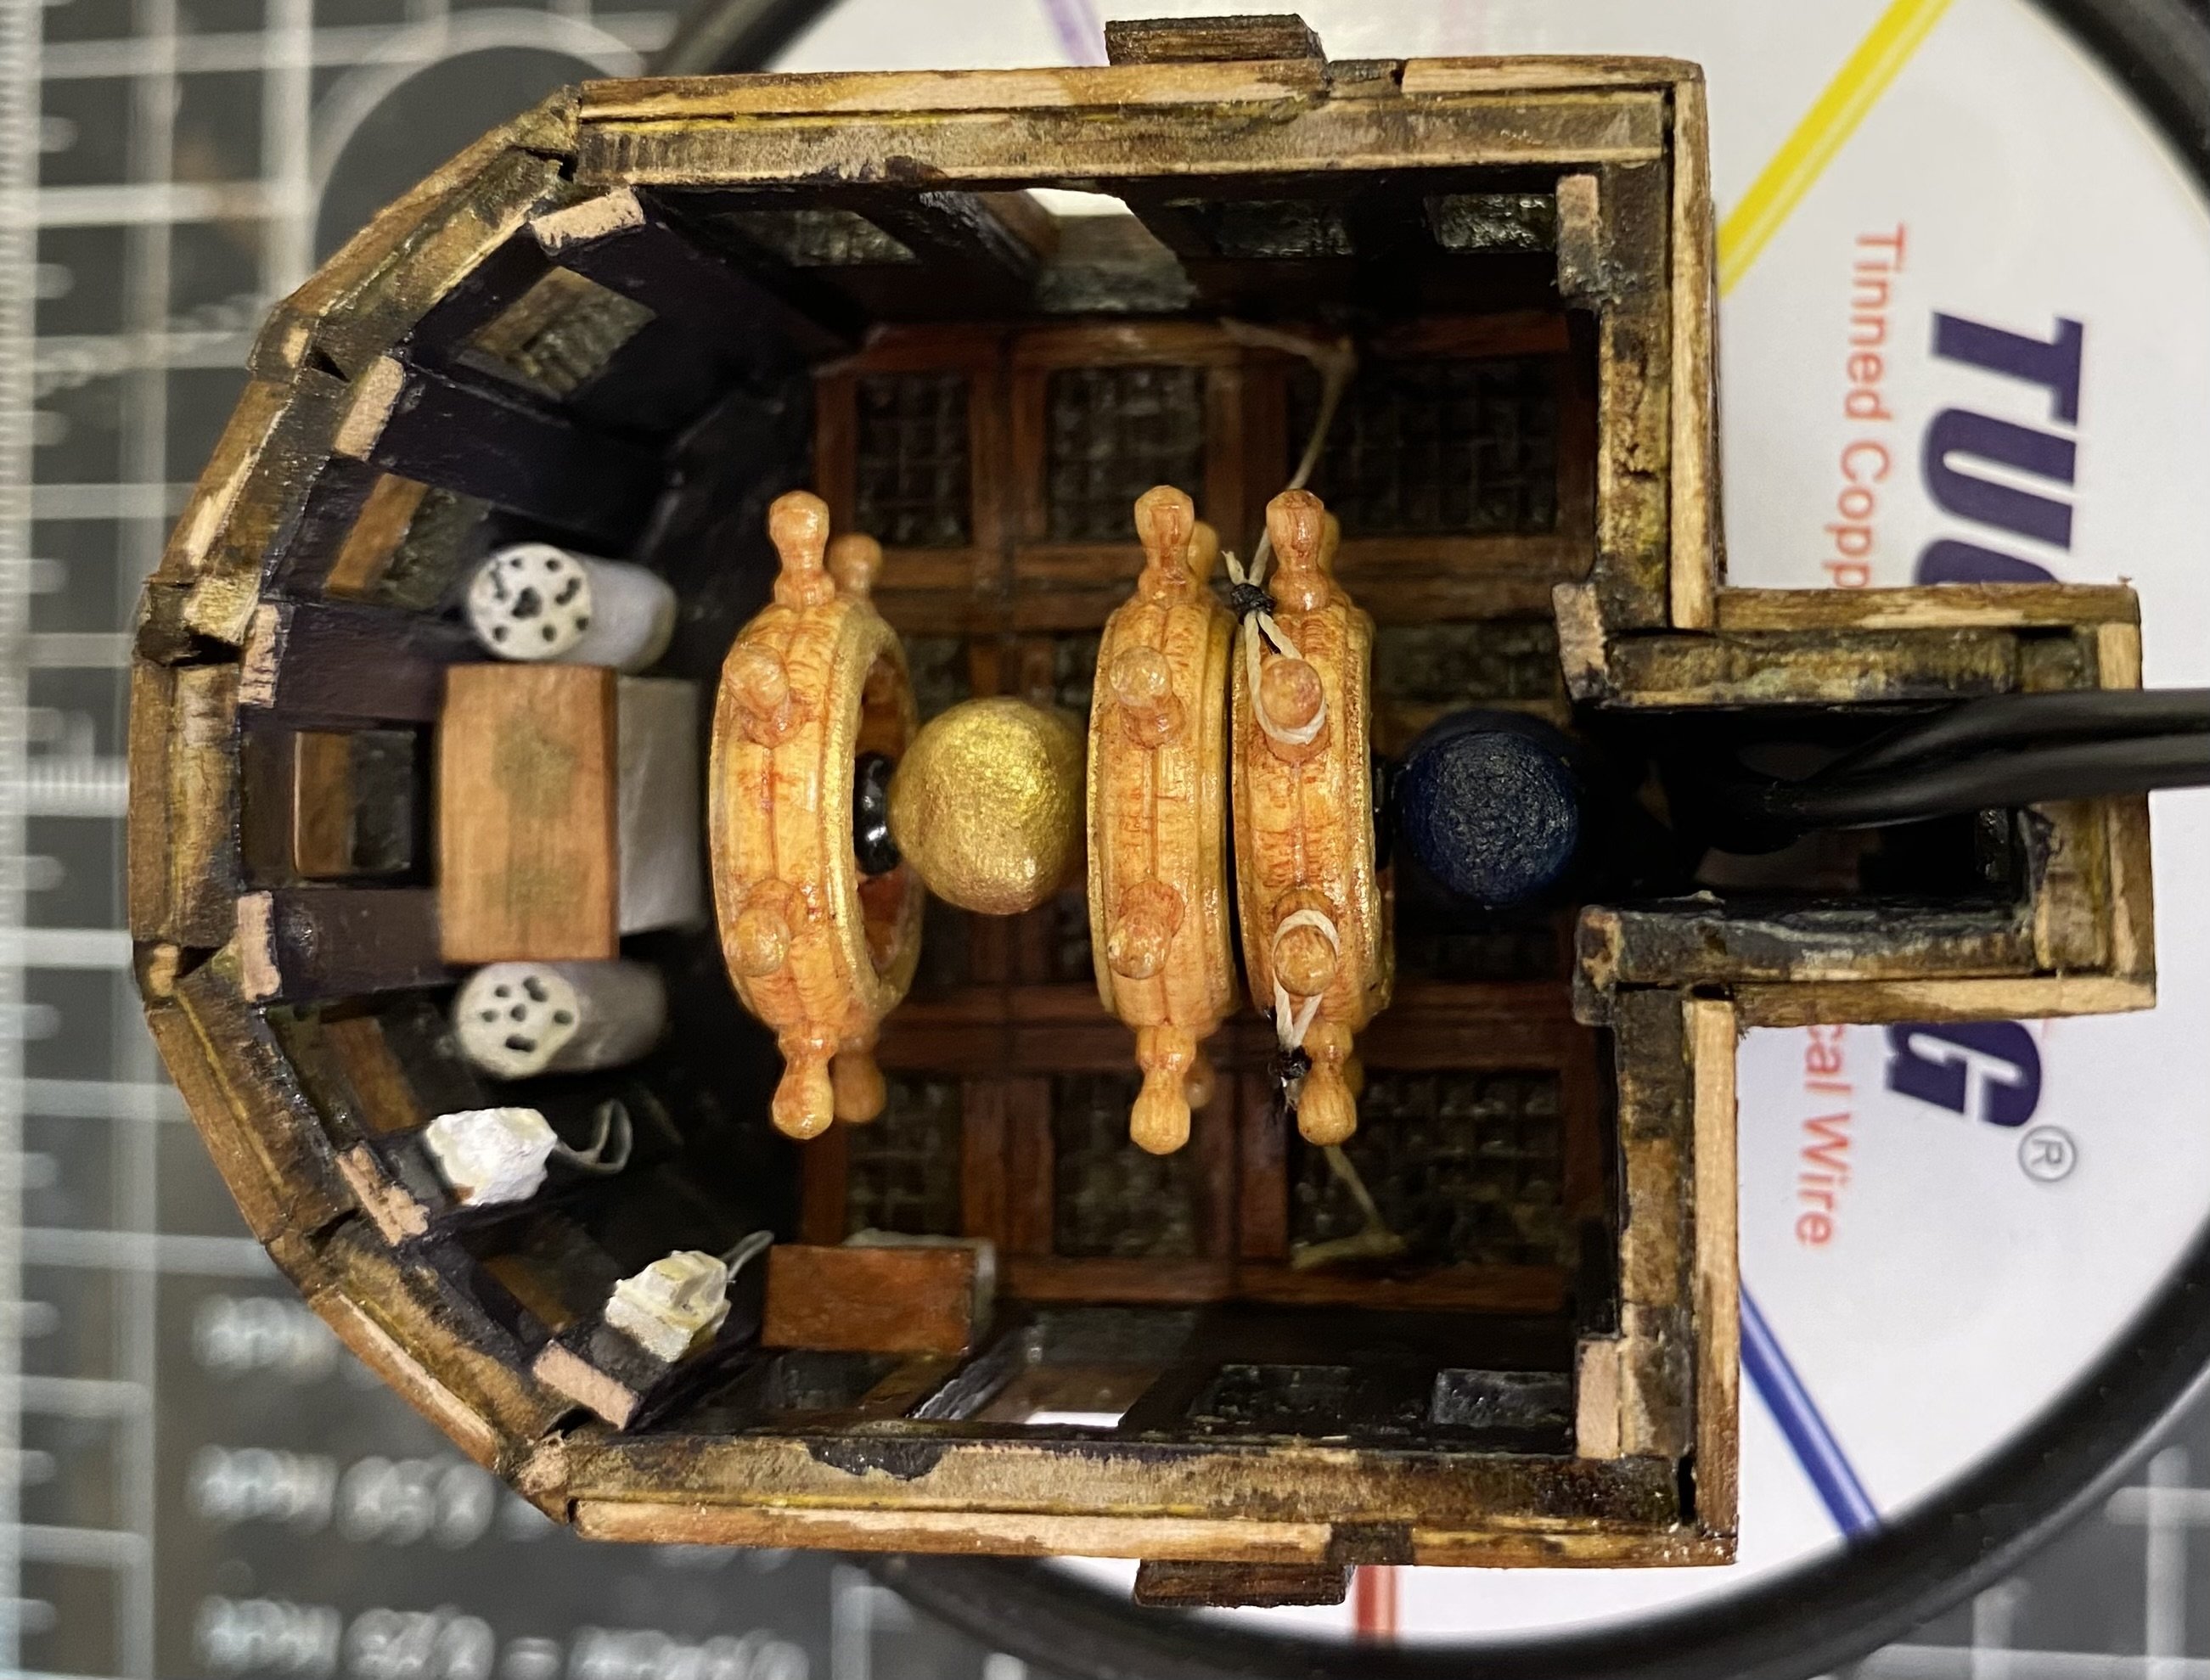
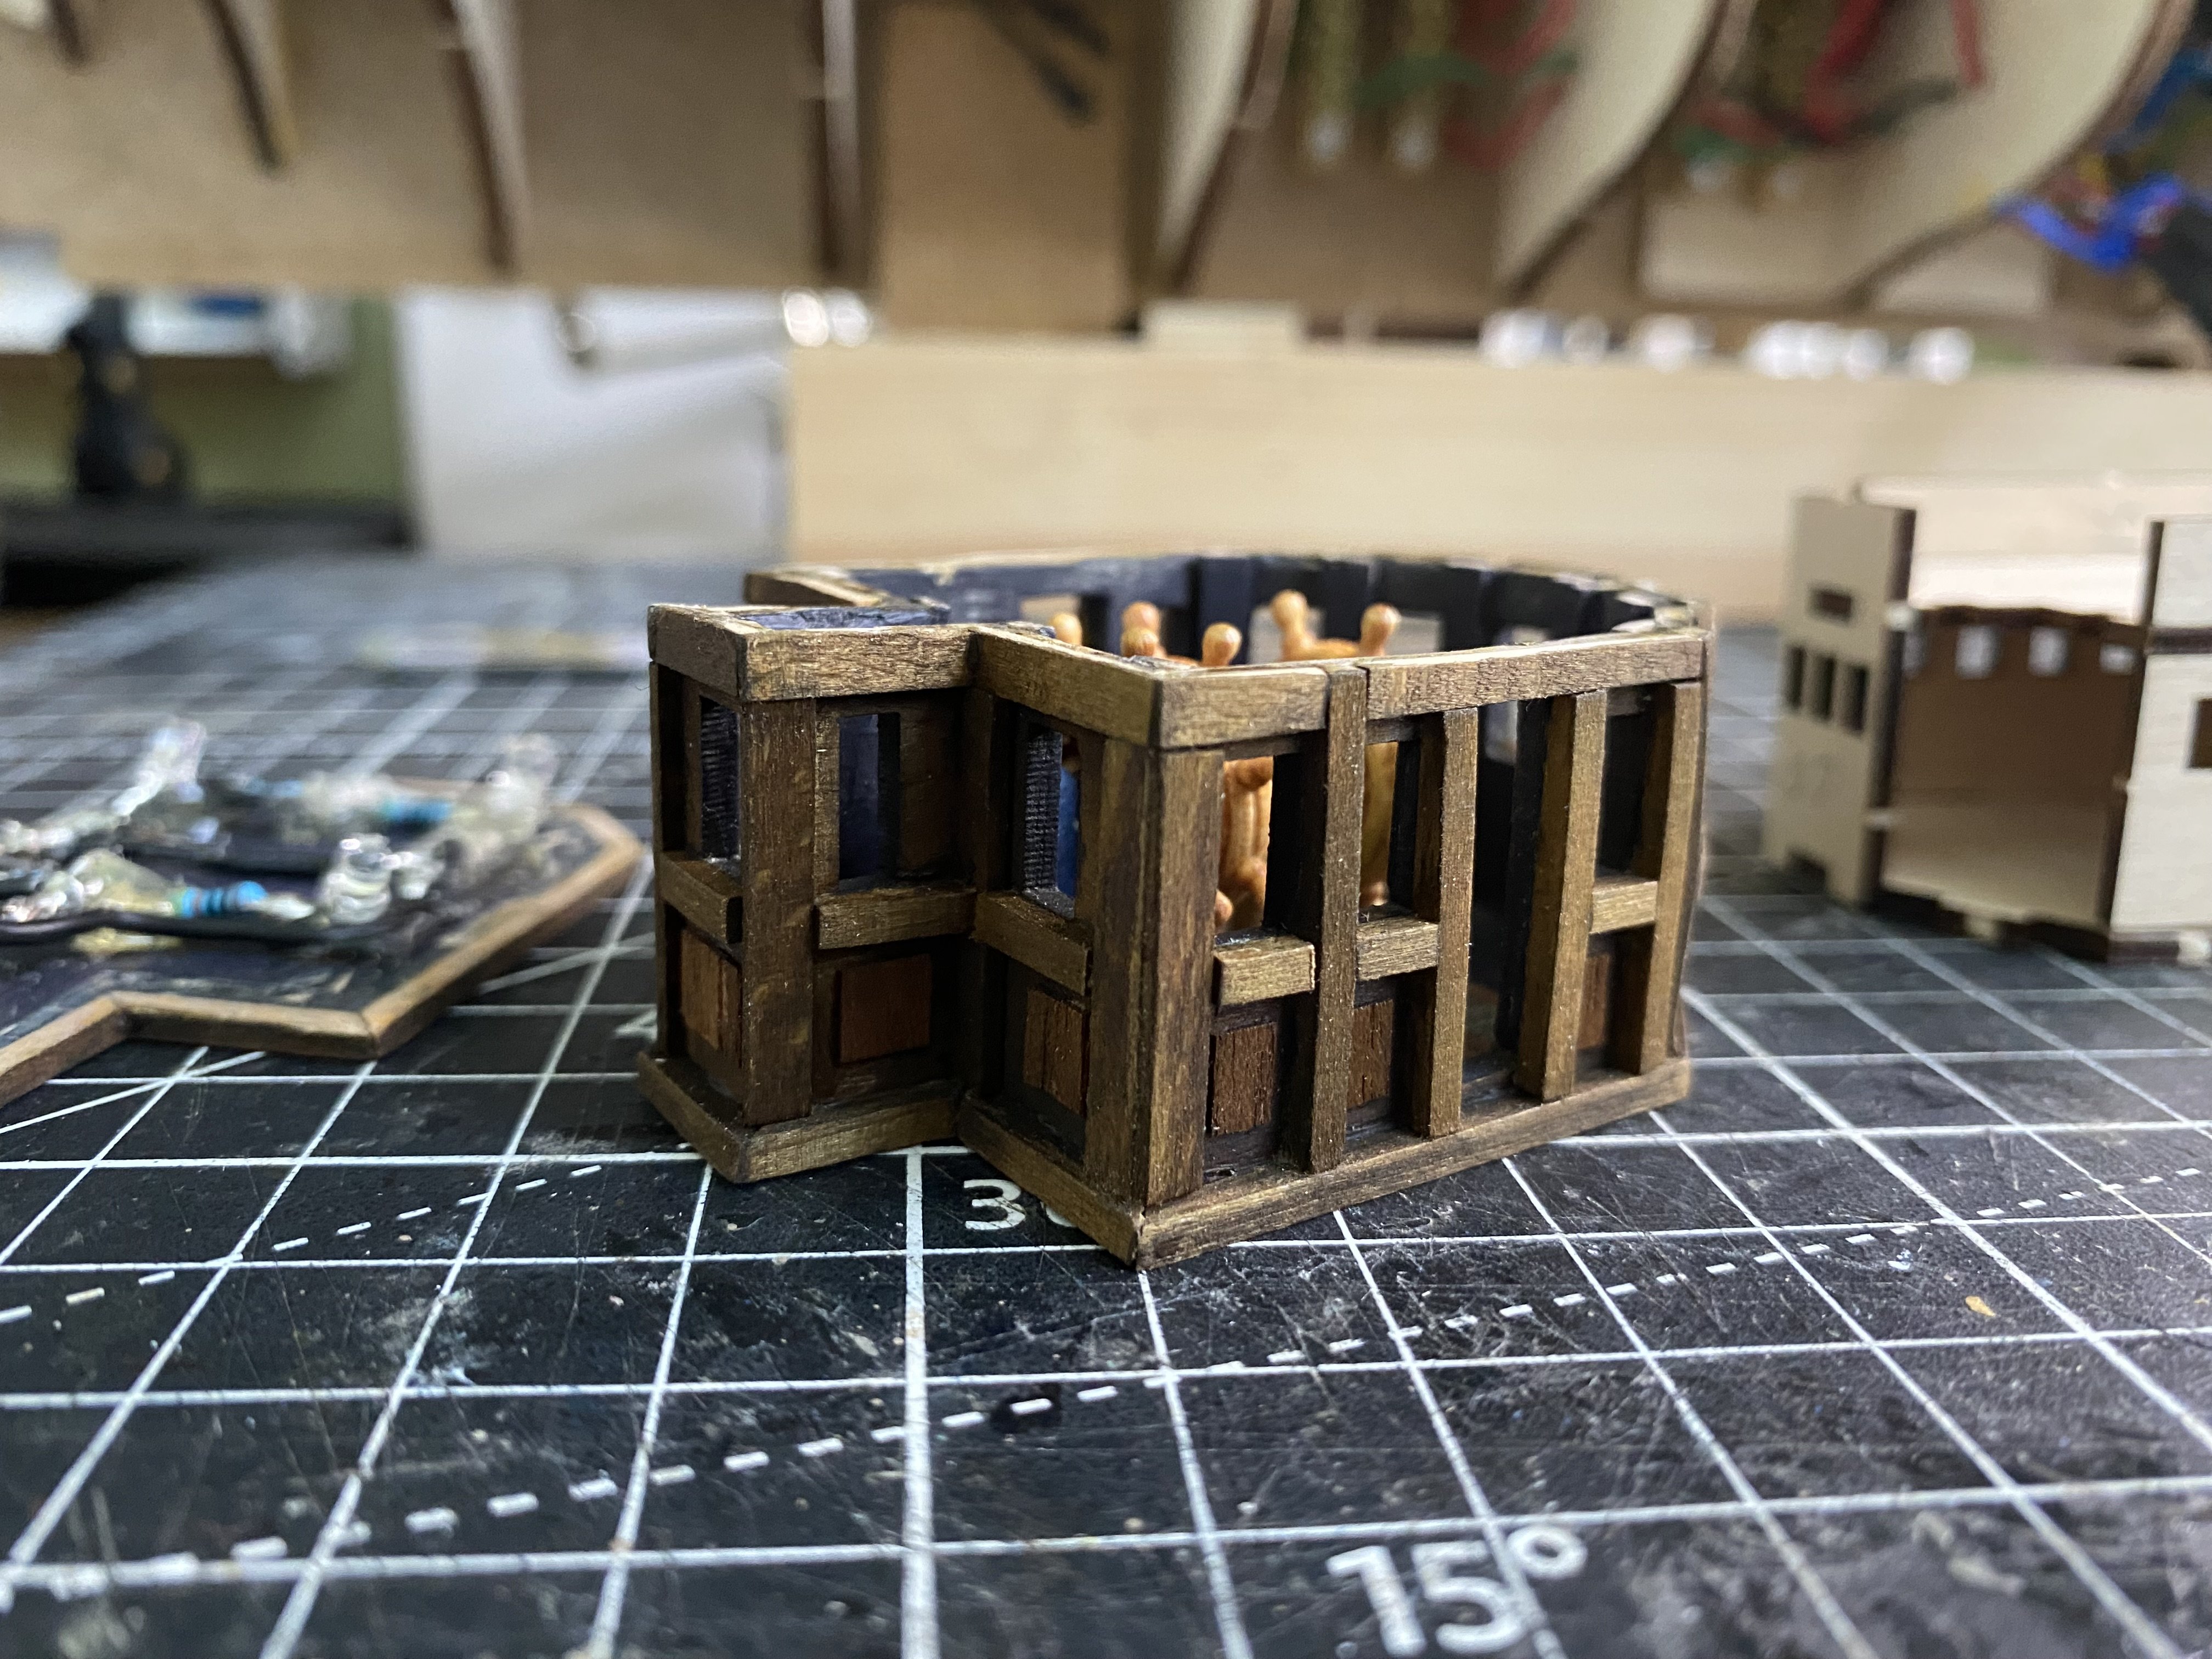
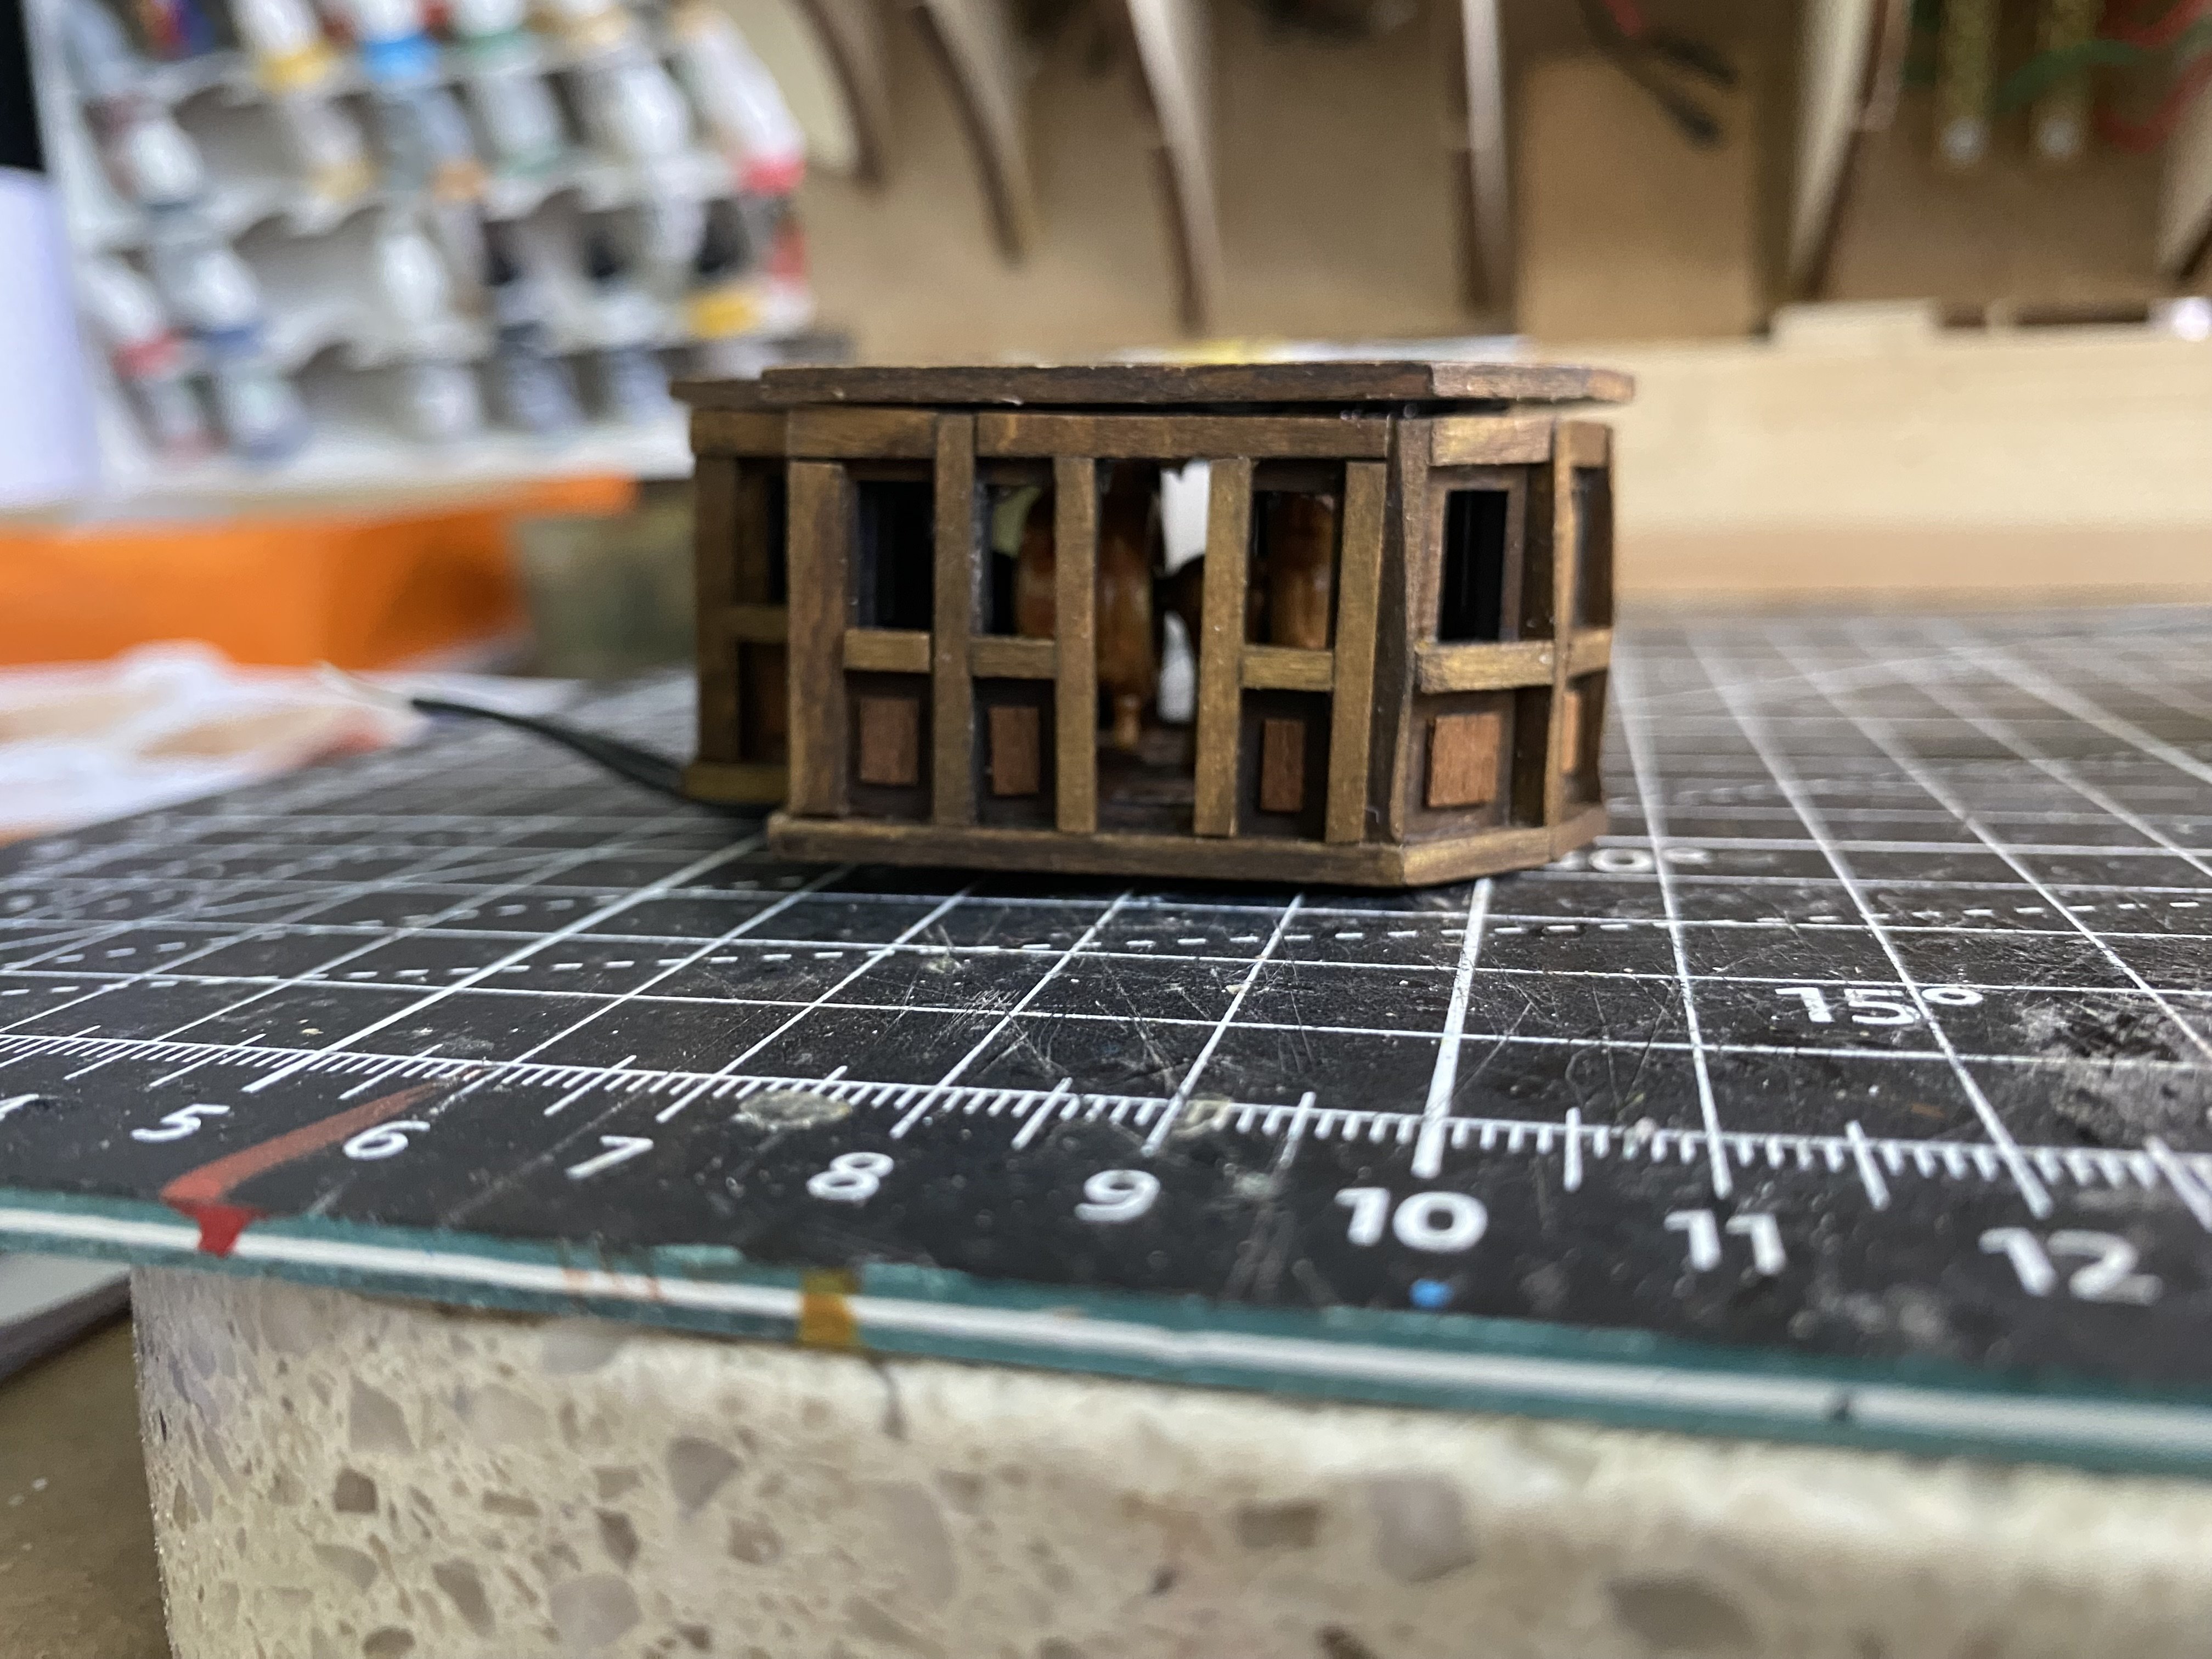
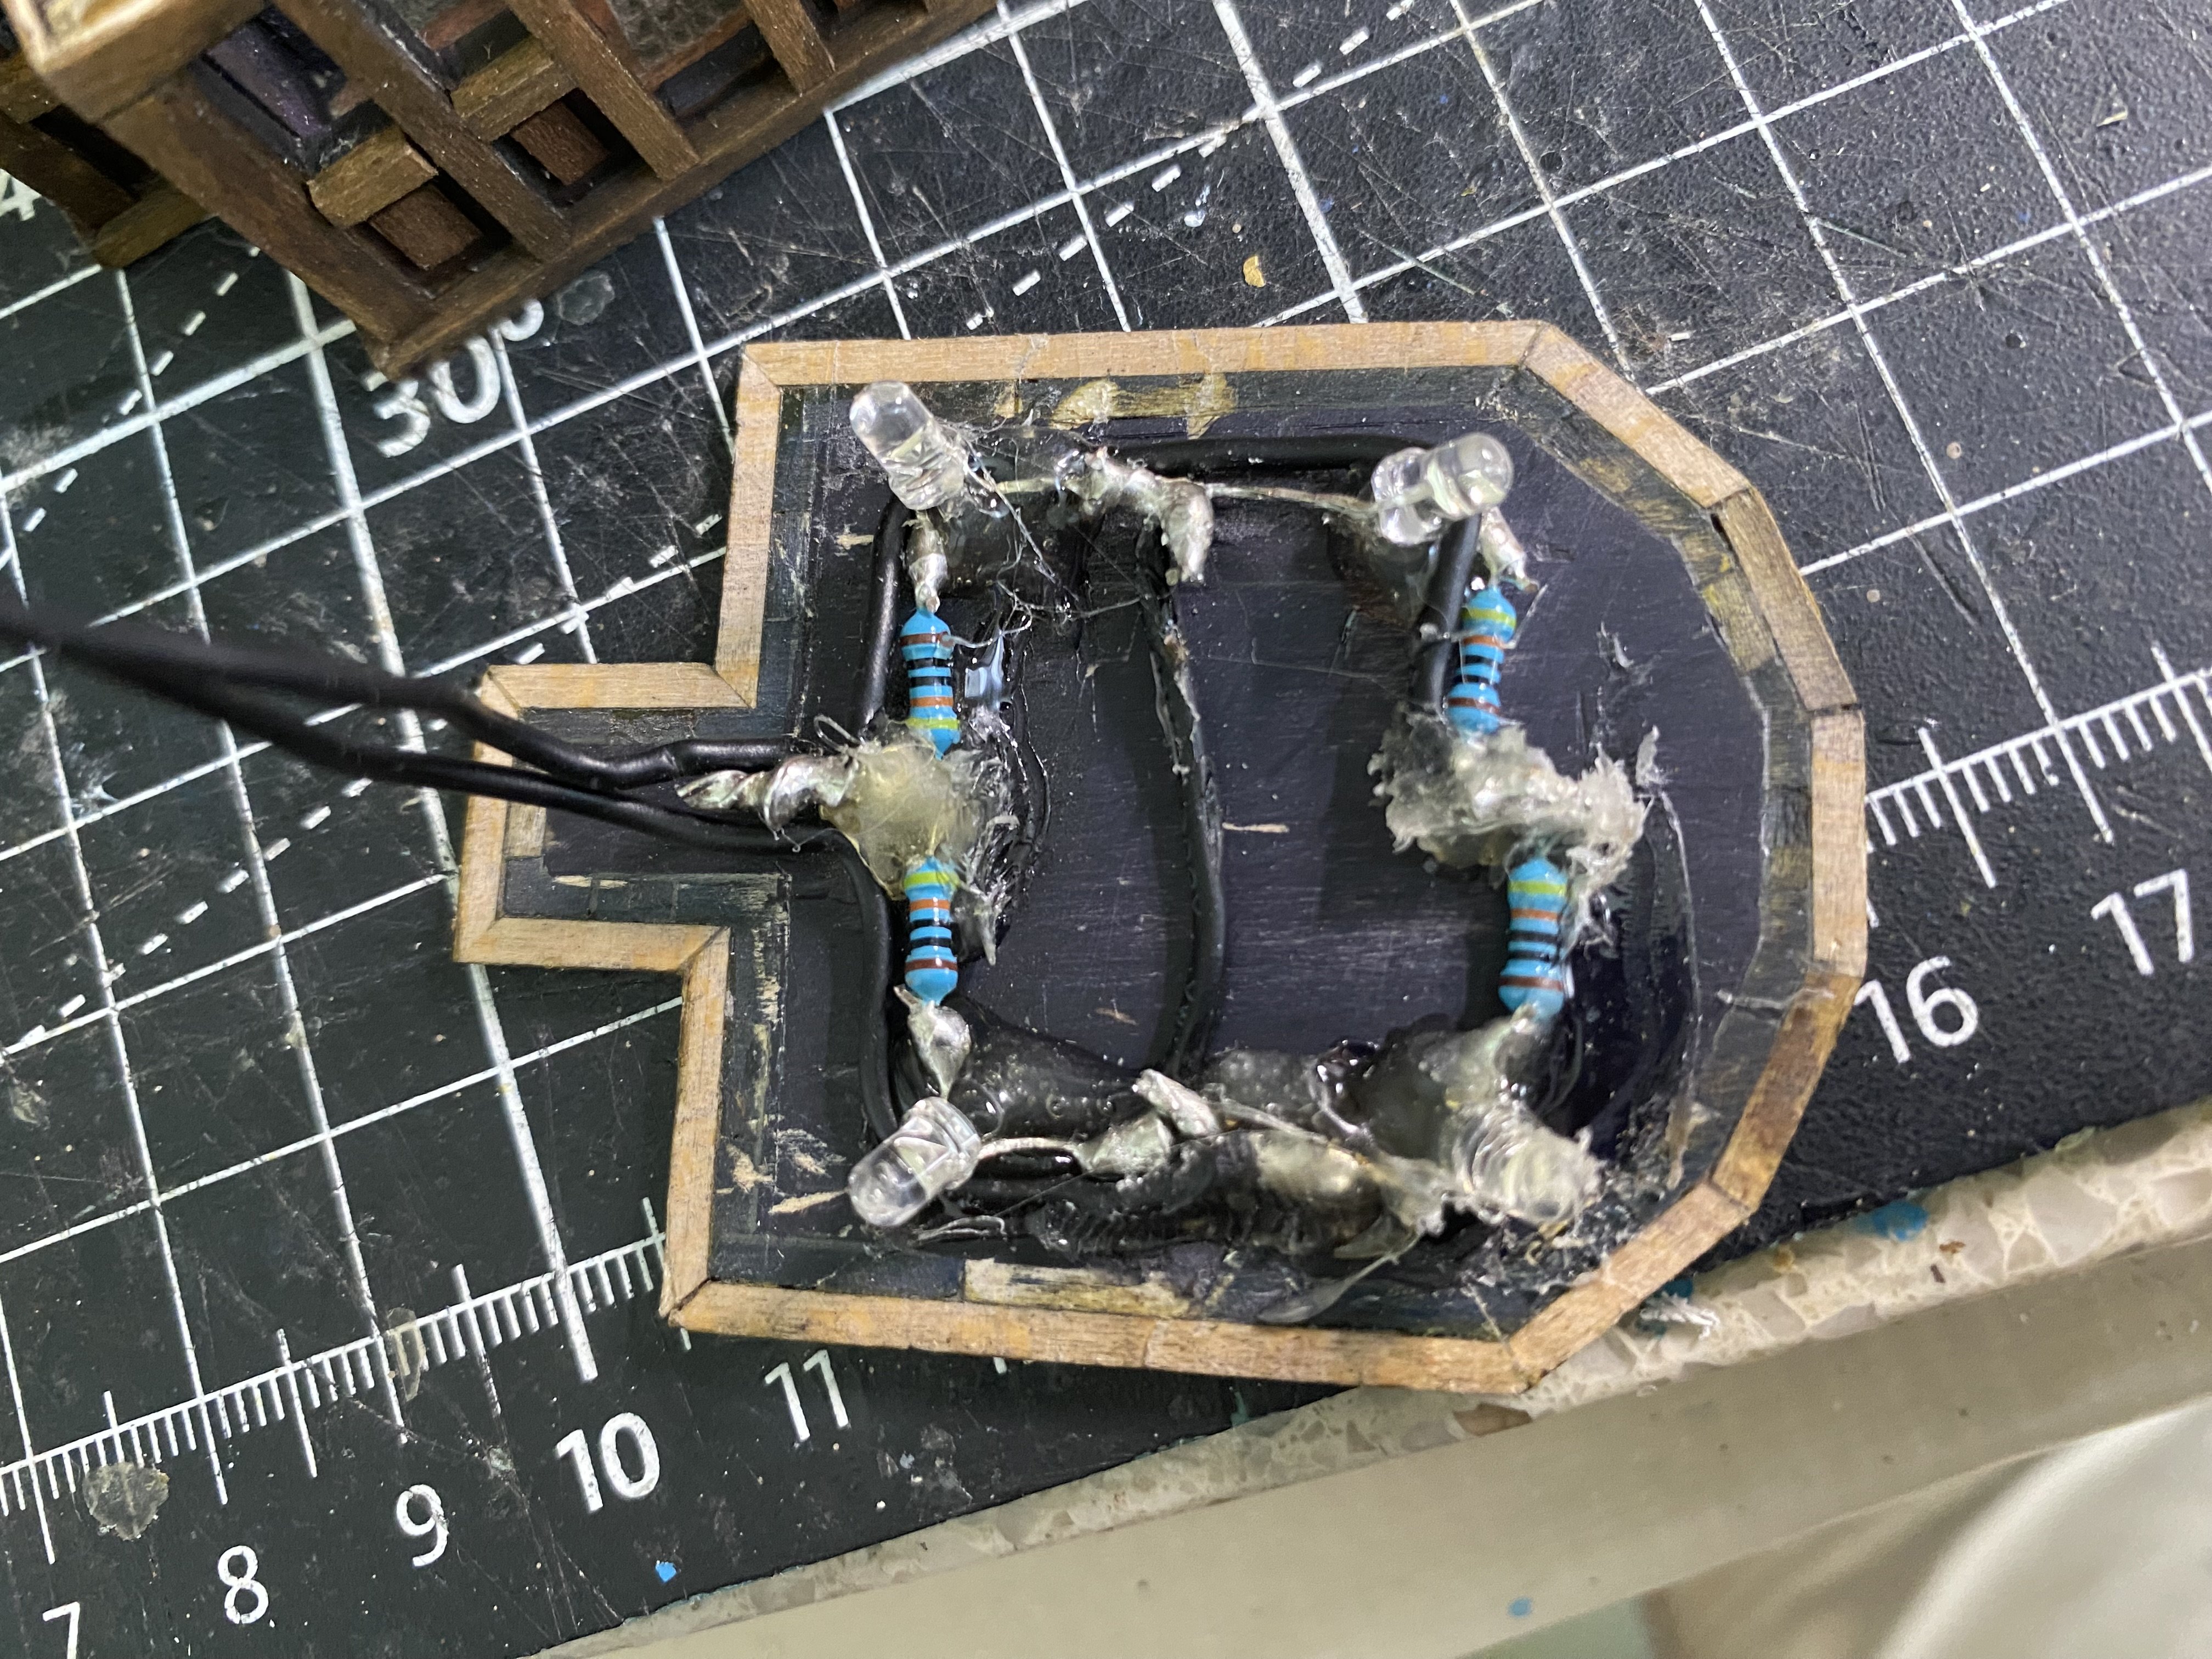
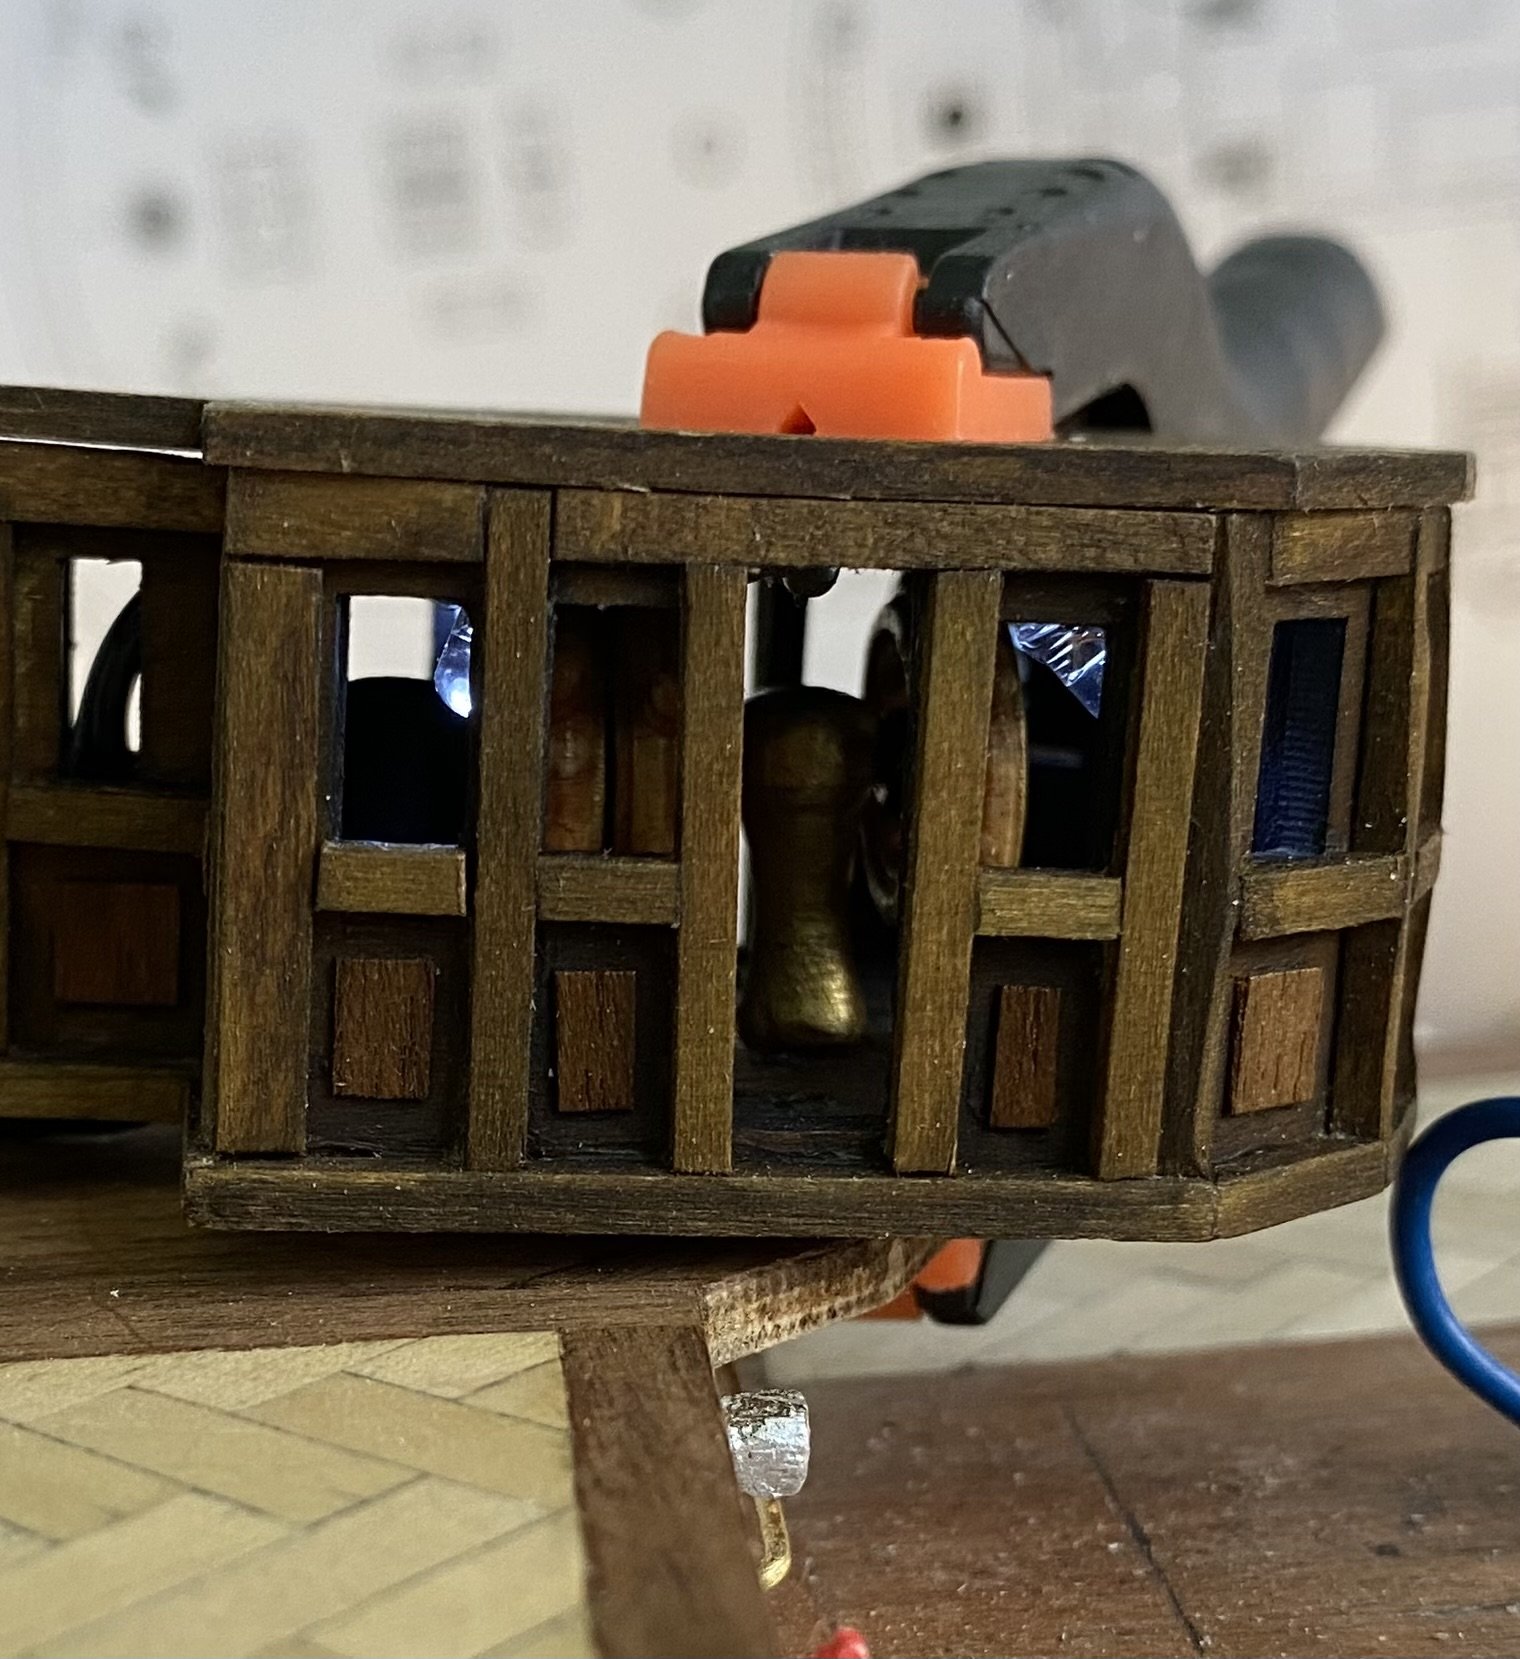
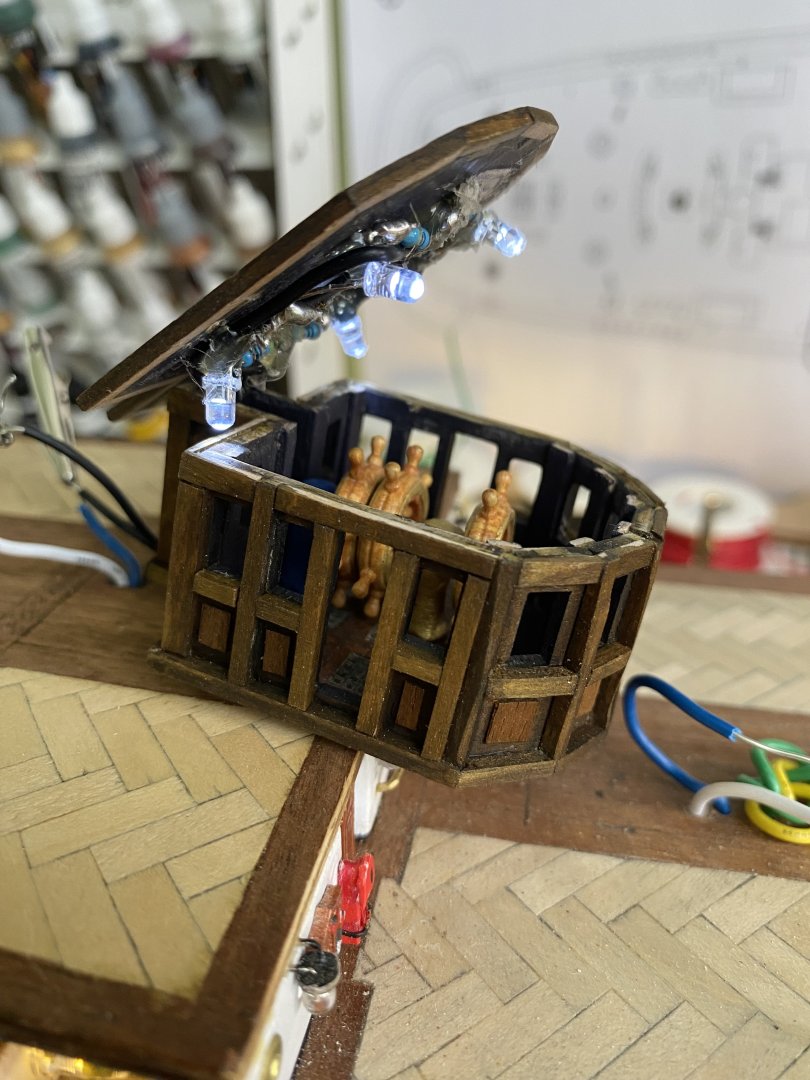
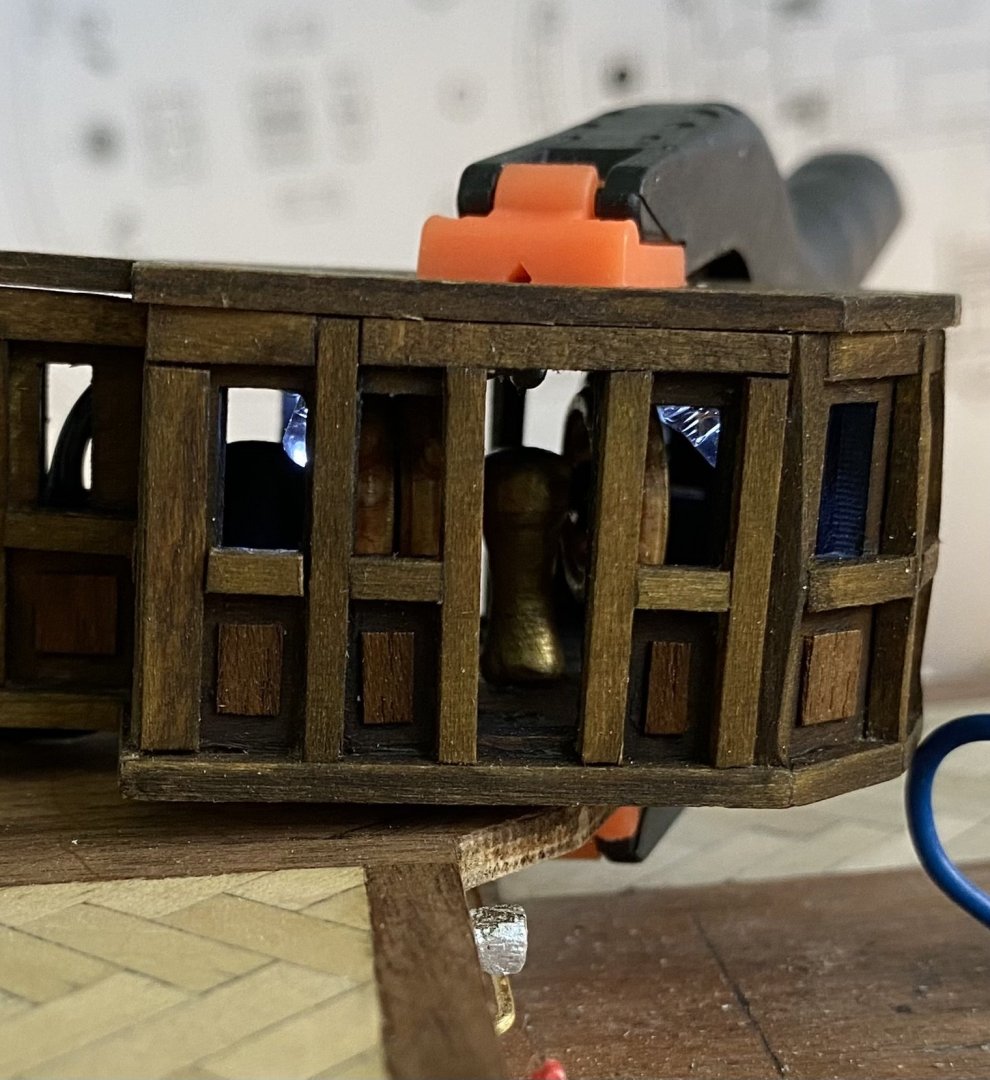
Little update on my lighting of the wheelhouse. Bit of a struggle getting the level of interior light I would like. The brightness is good but maybe too bright to be authentic using a 9v battery. However when I connect the wheelhouse to the OR ship circuit that is controlled by a voltage regulator set at 3.2 volts the wheelhouse interior is barely illuminated. I tried two 5mm warm white and now four 3mm white (shown in picture). Can’t turn the voltage regulator up much higher. Going to add additional furniture inside the wheelhouse and also working on next deck structure which will also require figuring out the lighting.


-
Well my AV building has been temporarily put on hold. Just temporarily. My grandson (10 years old) enjoys helping me build my ships when he is at my house. He asked me the other day if I would help him build one of his own. Of course. Absolutely! What grandfather could say no to that. So picked up the Airfix Golden Hinde. We were in London recently we saw the replica. So we started it and will work on it from time to time when he is here. School starts next week so he will not be here real often. But when he is my AV will take a back seat to the Golden Hinde. He wants to go with a modified color scheme that a white hull and colorful top similar to other galleons we see pictures of.   On a side note I now have all the hull lighting installed on my AV.


-
Thanks Ian. It is fun to learn as I go. DanielD was my “electronics professor” 😁 Hopefully they all still work after I add the planking 🤞
-
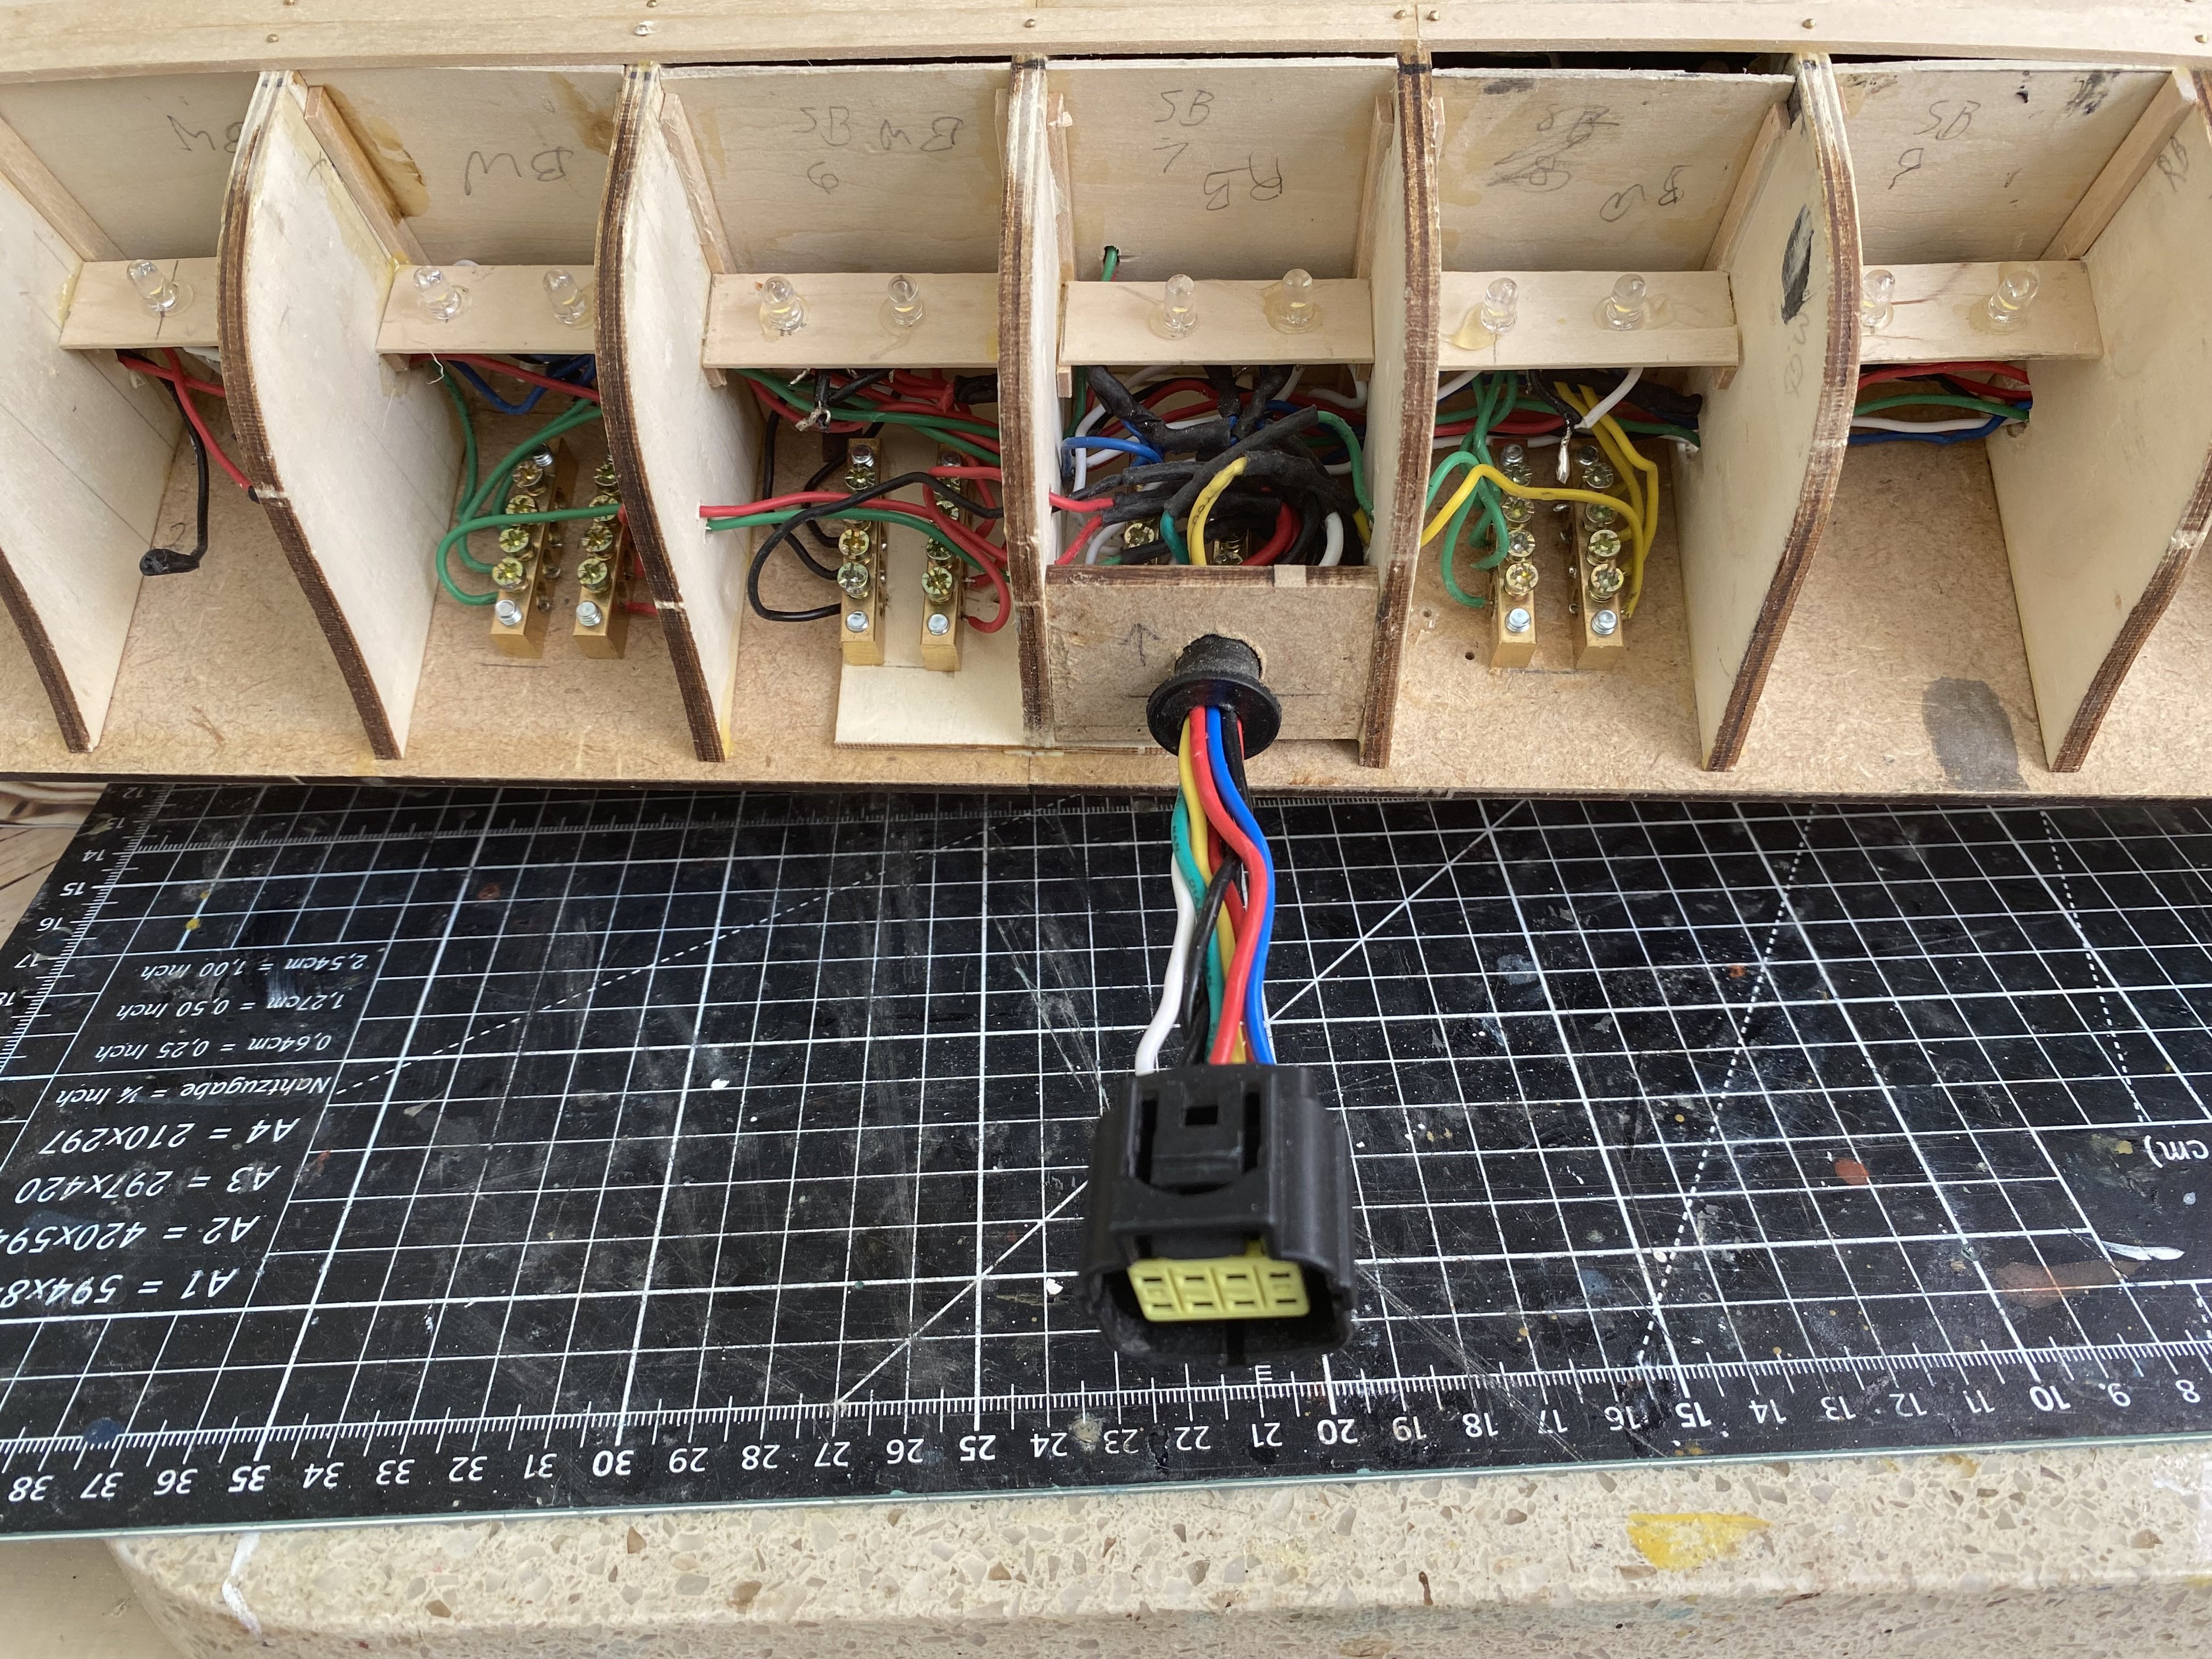
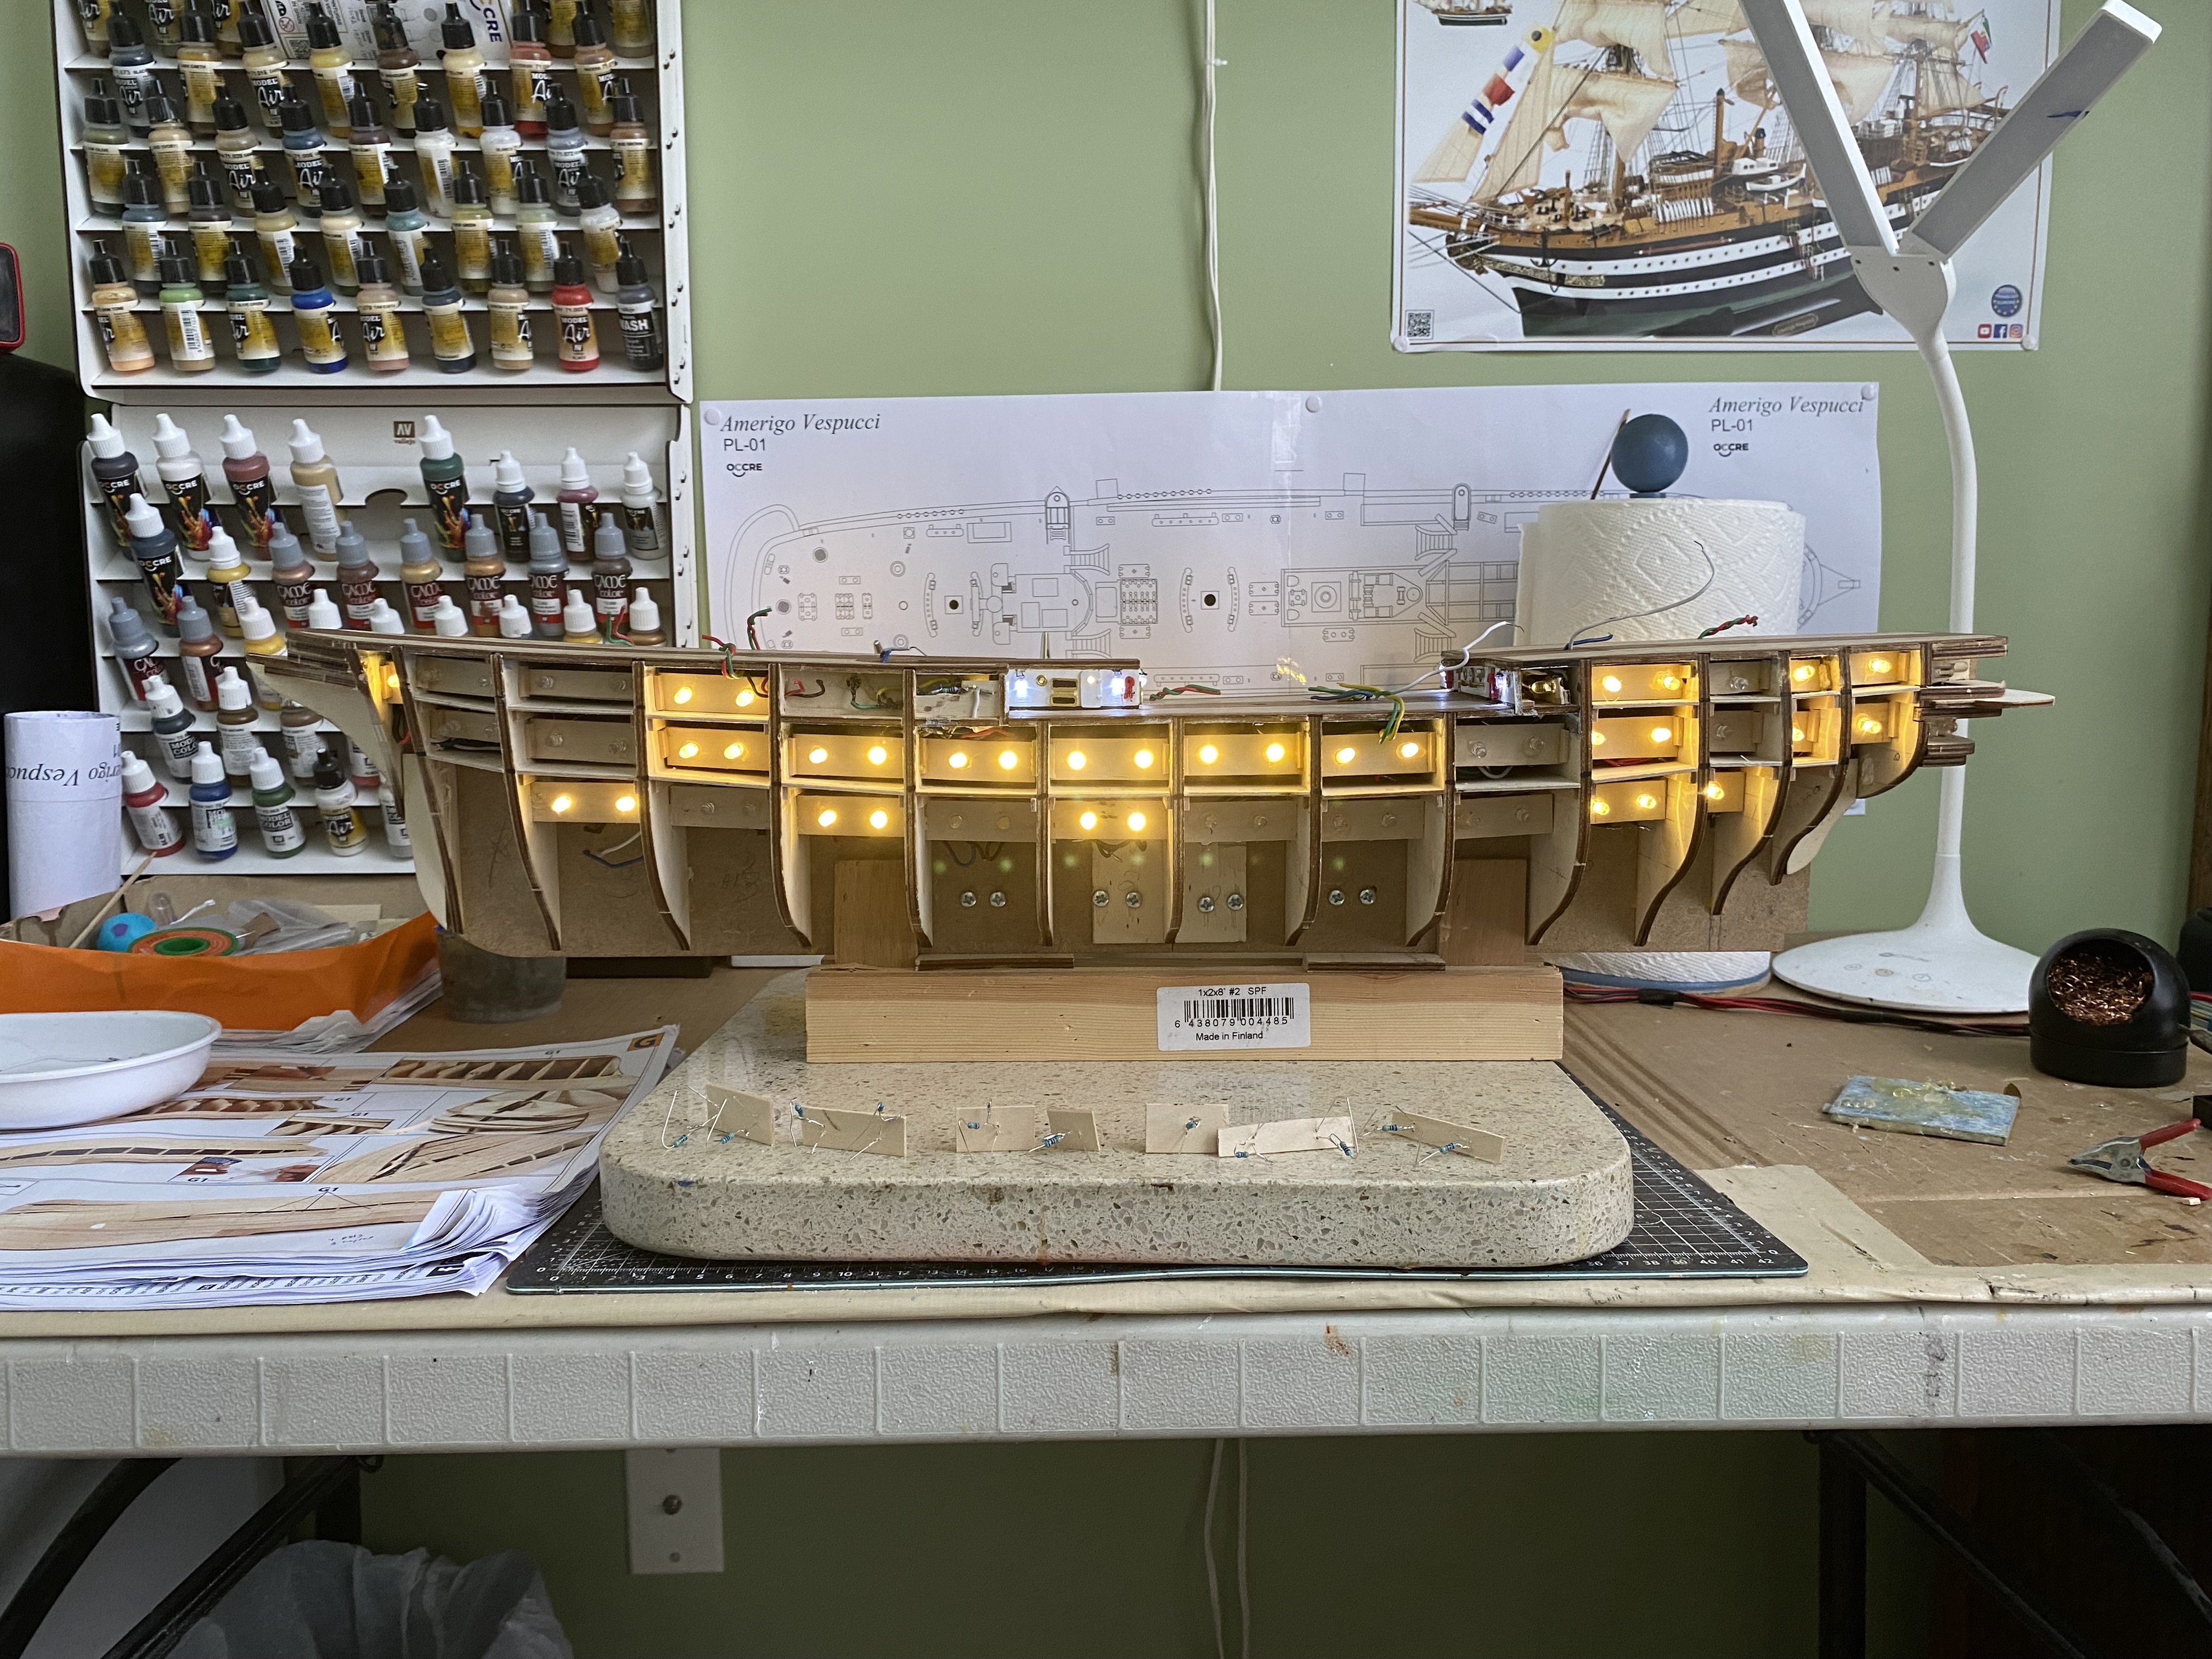
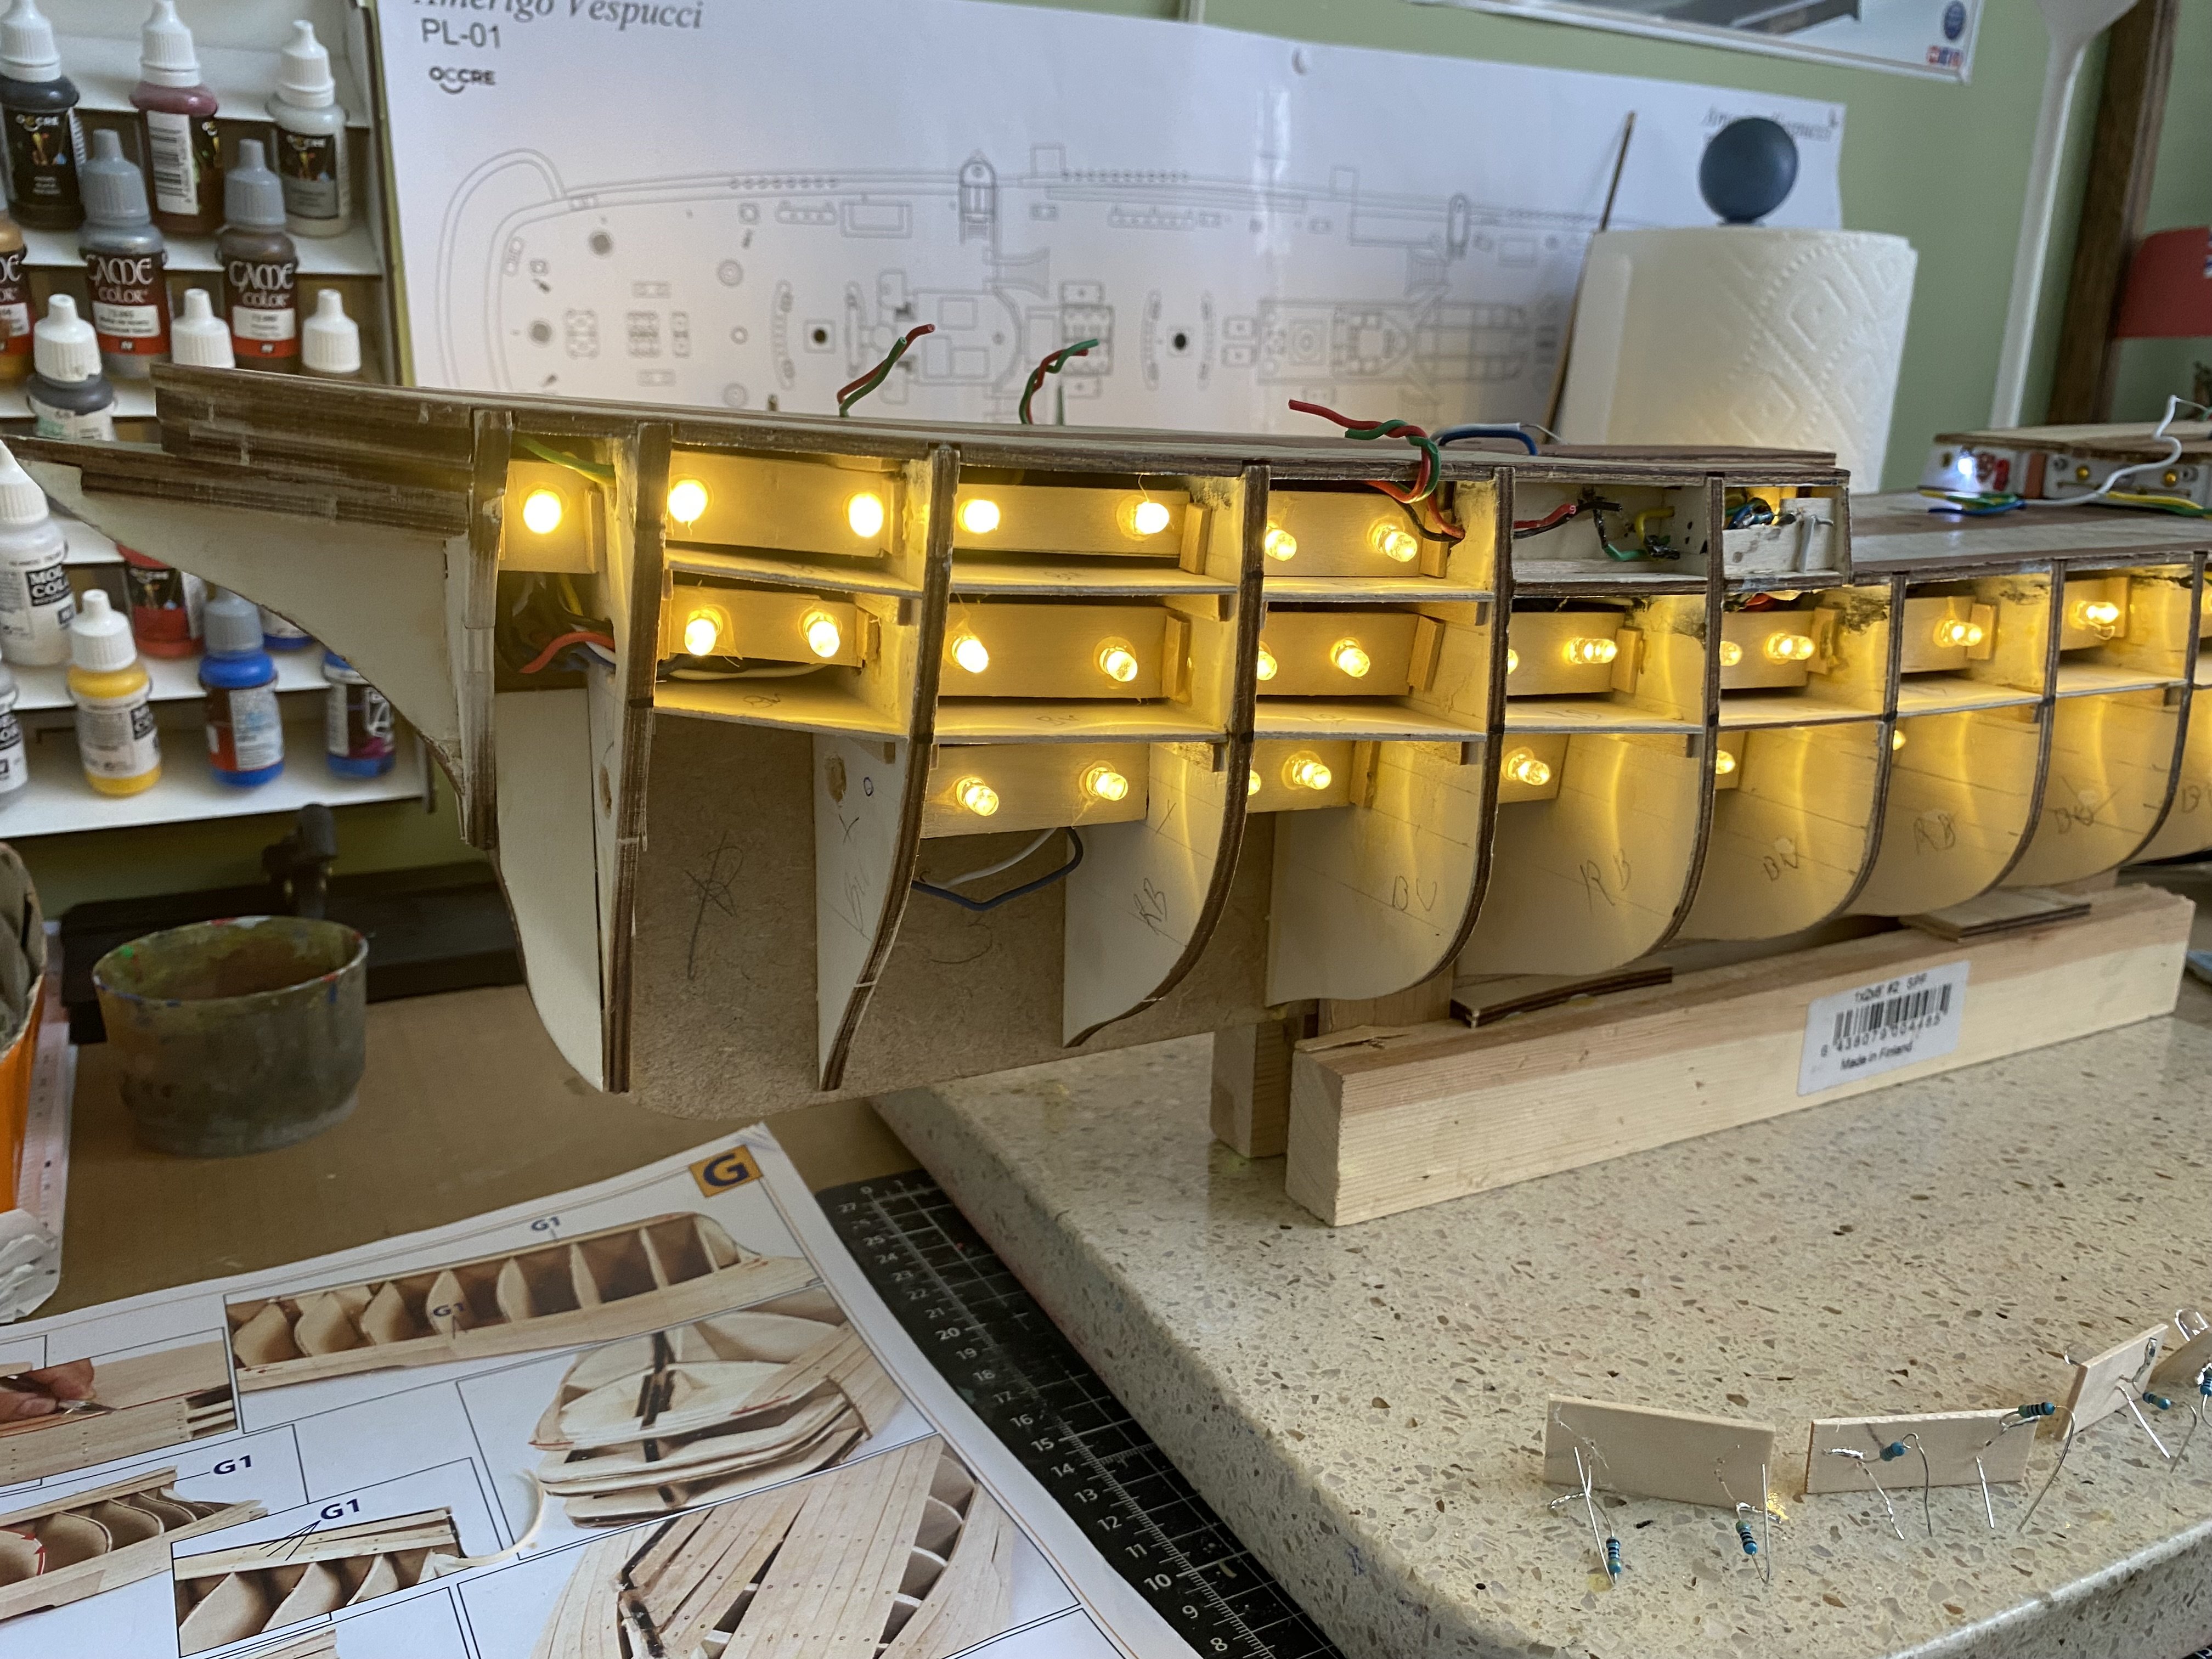
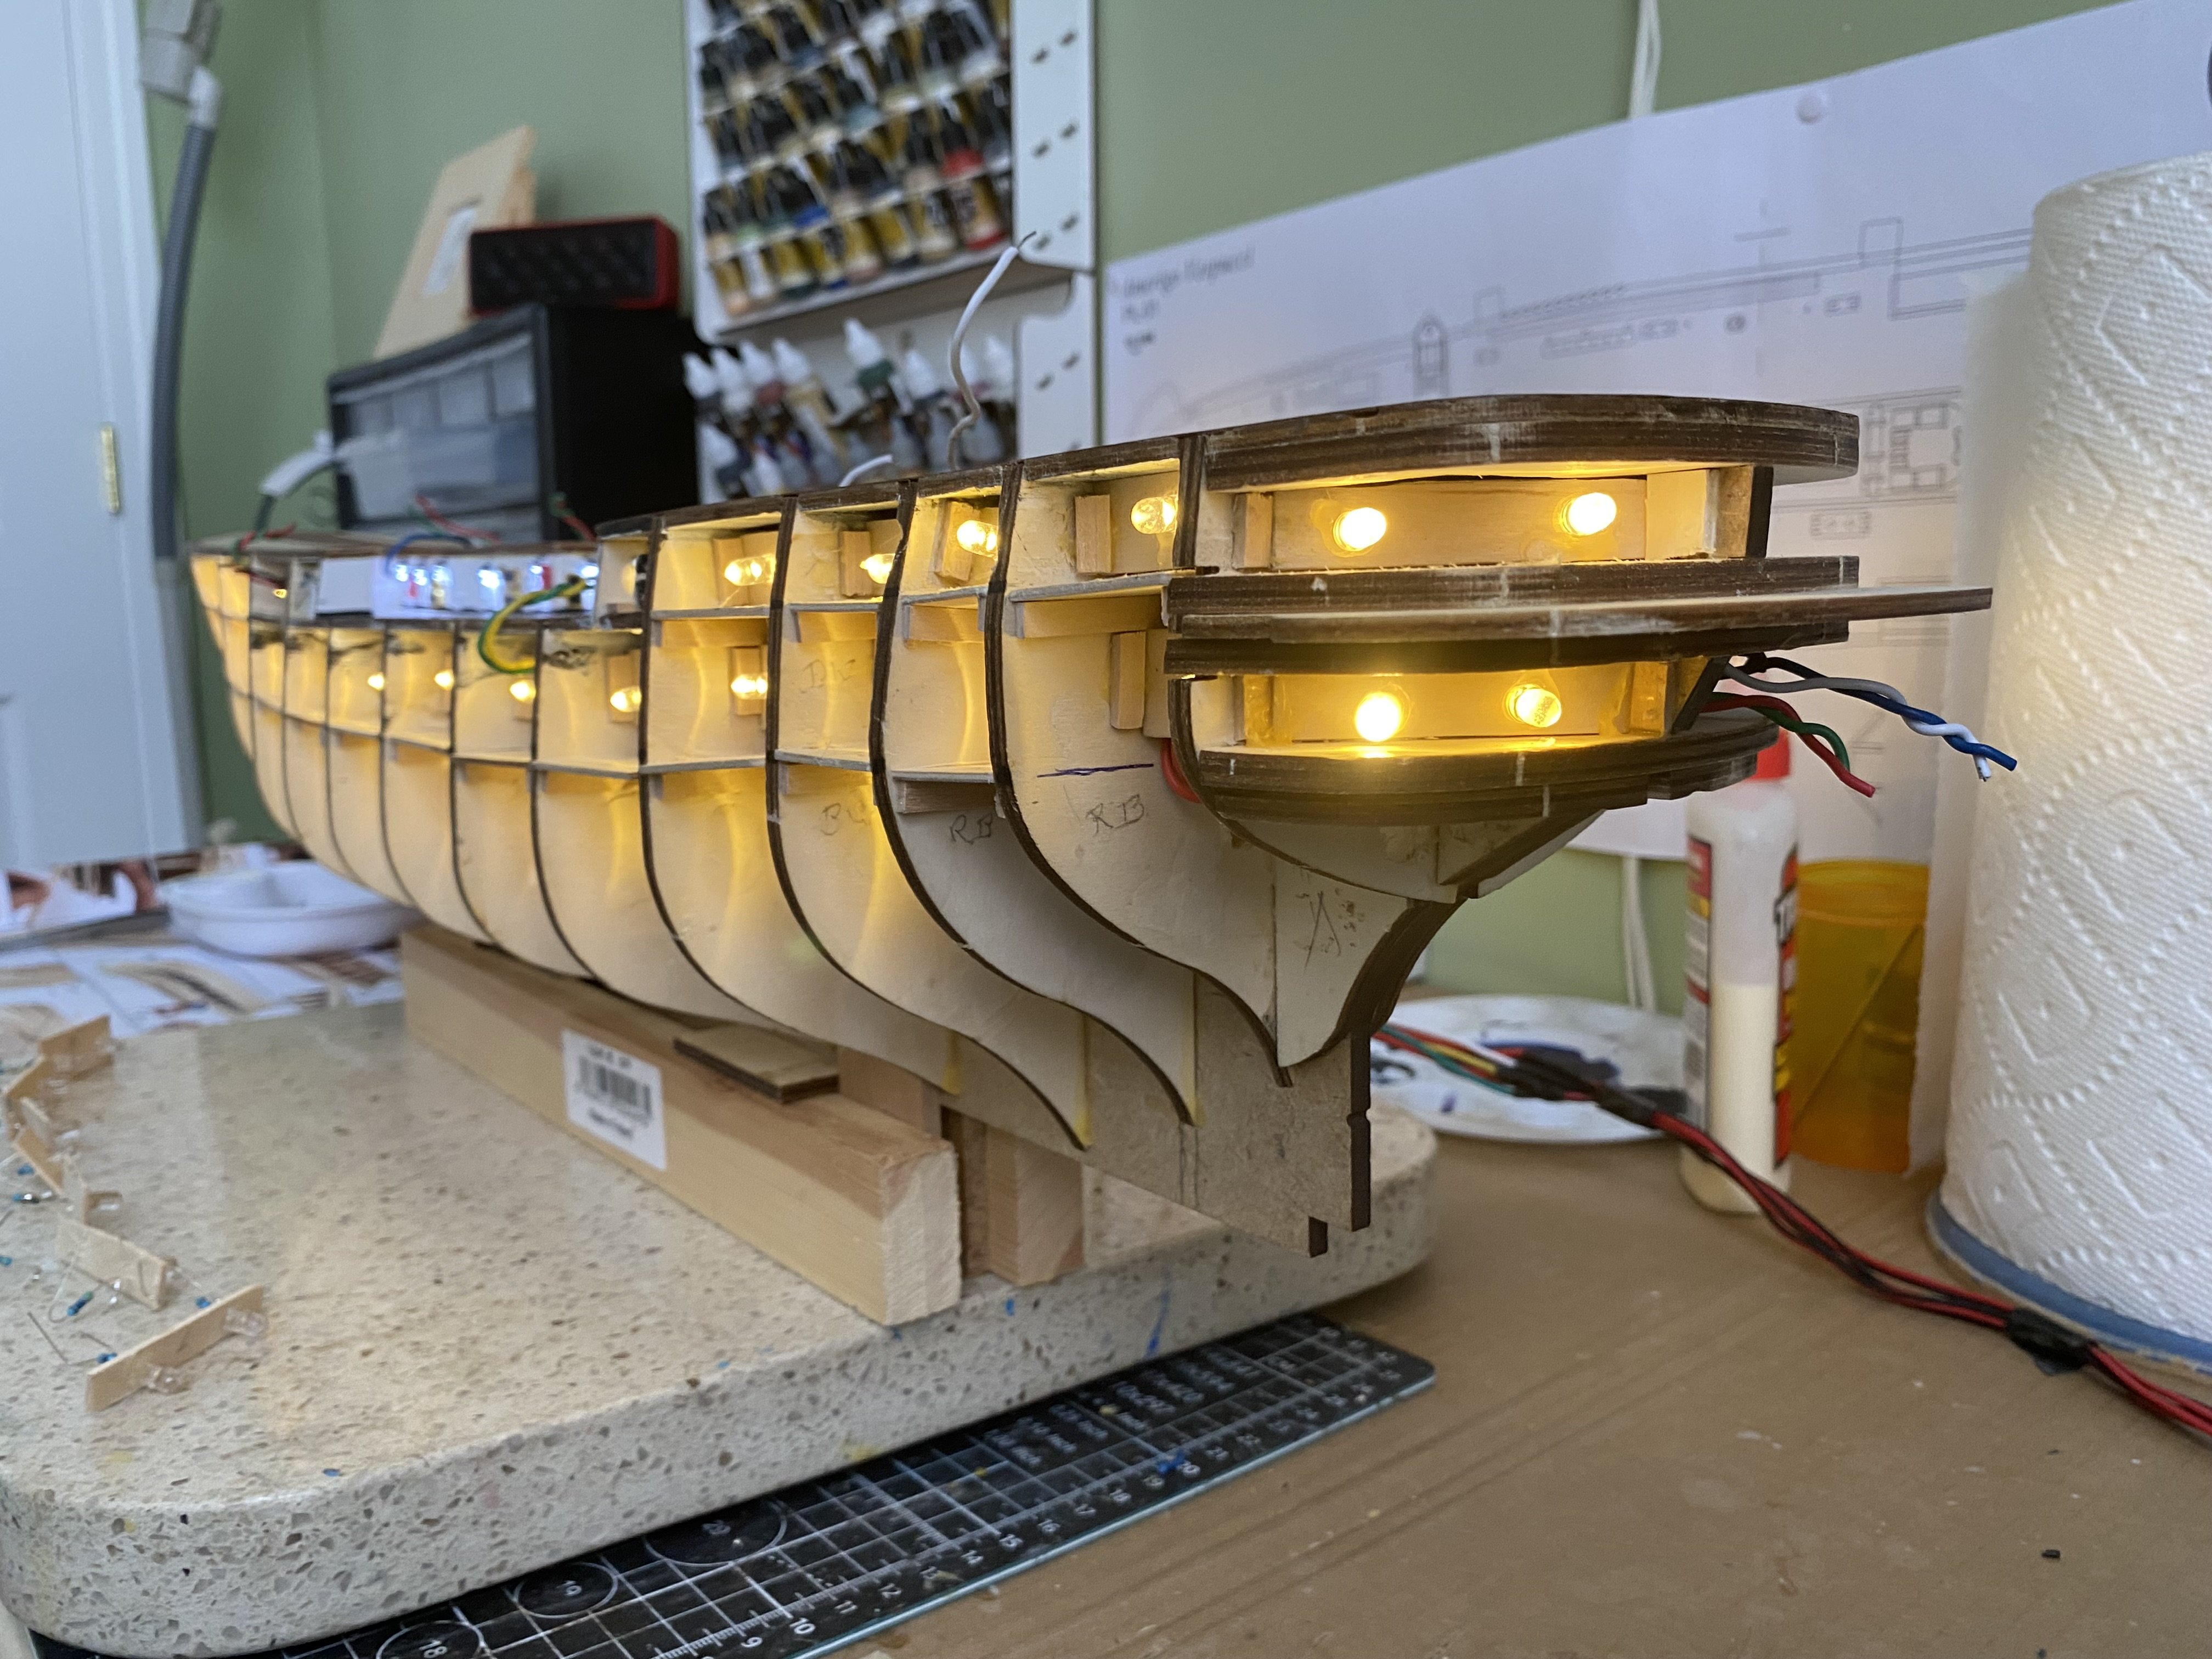
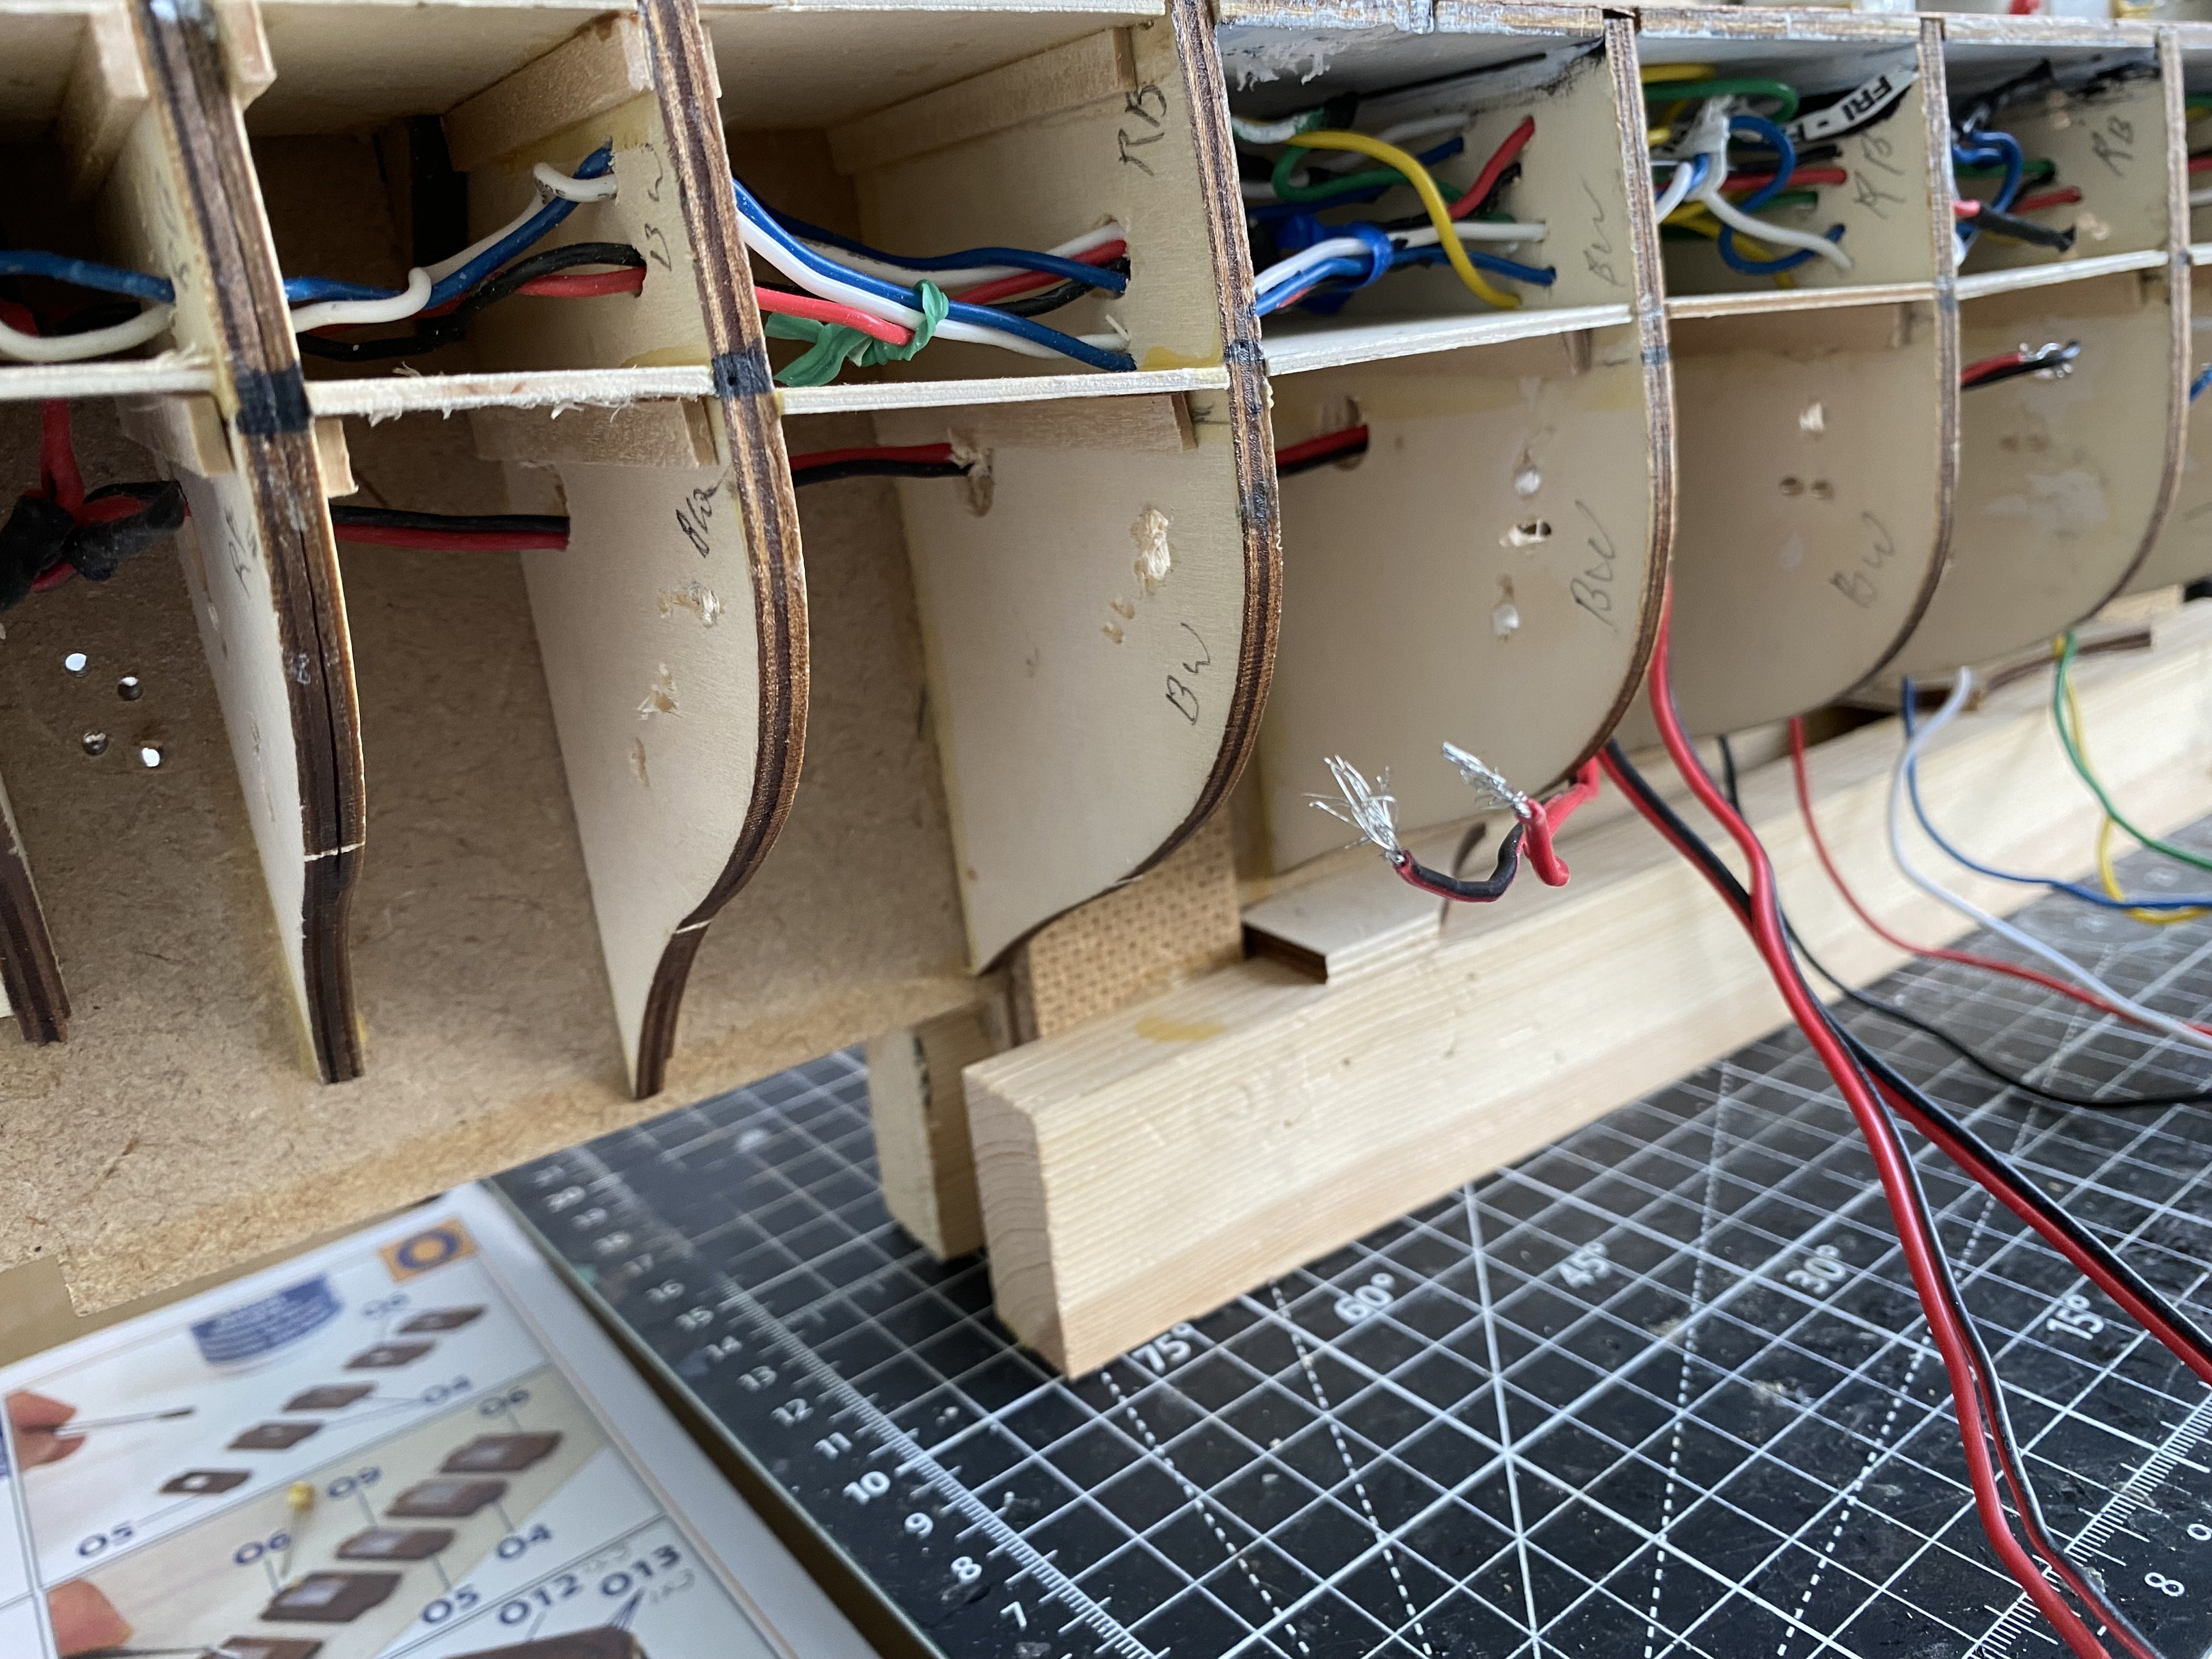
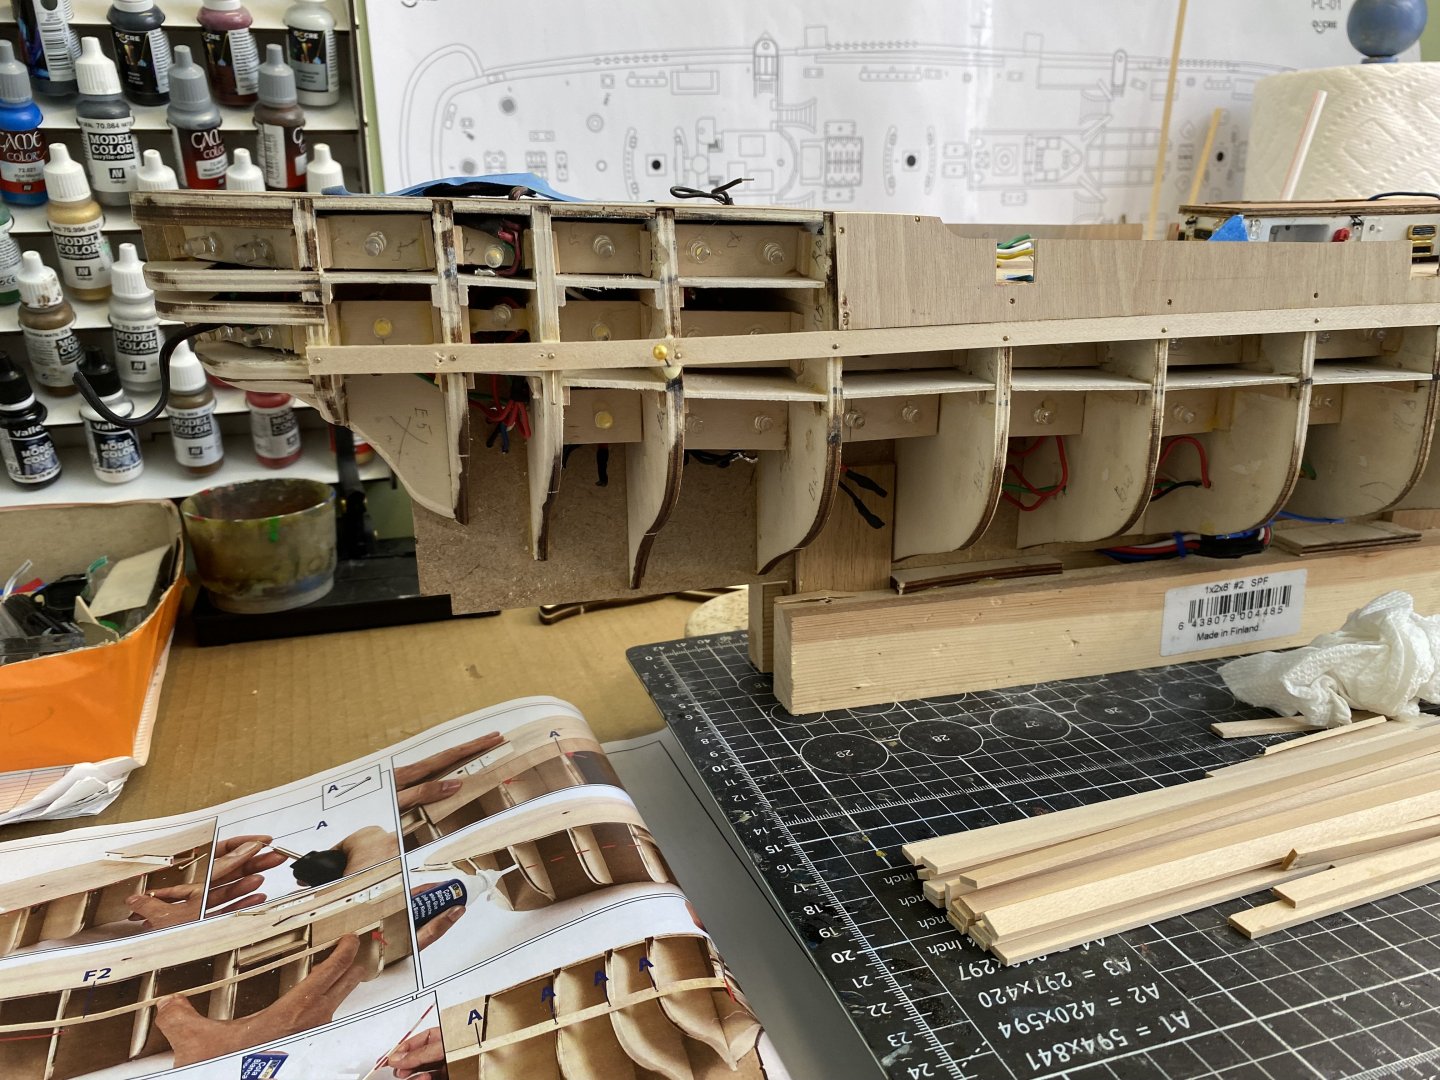
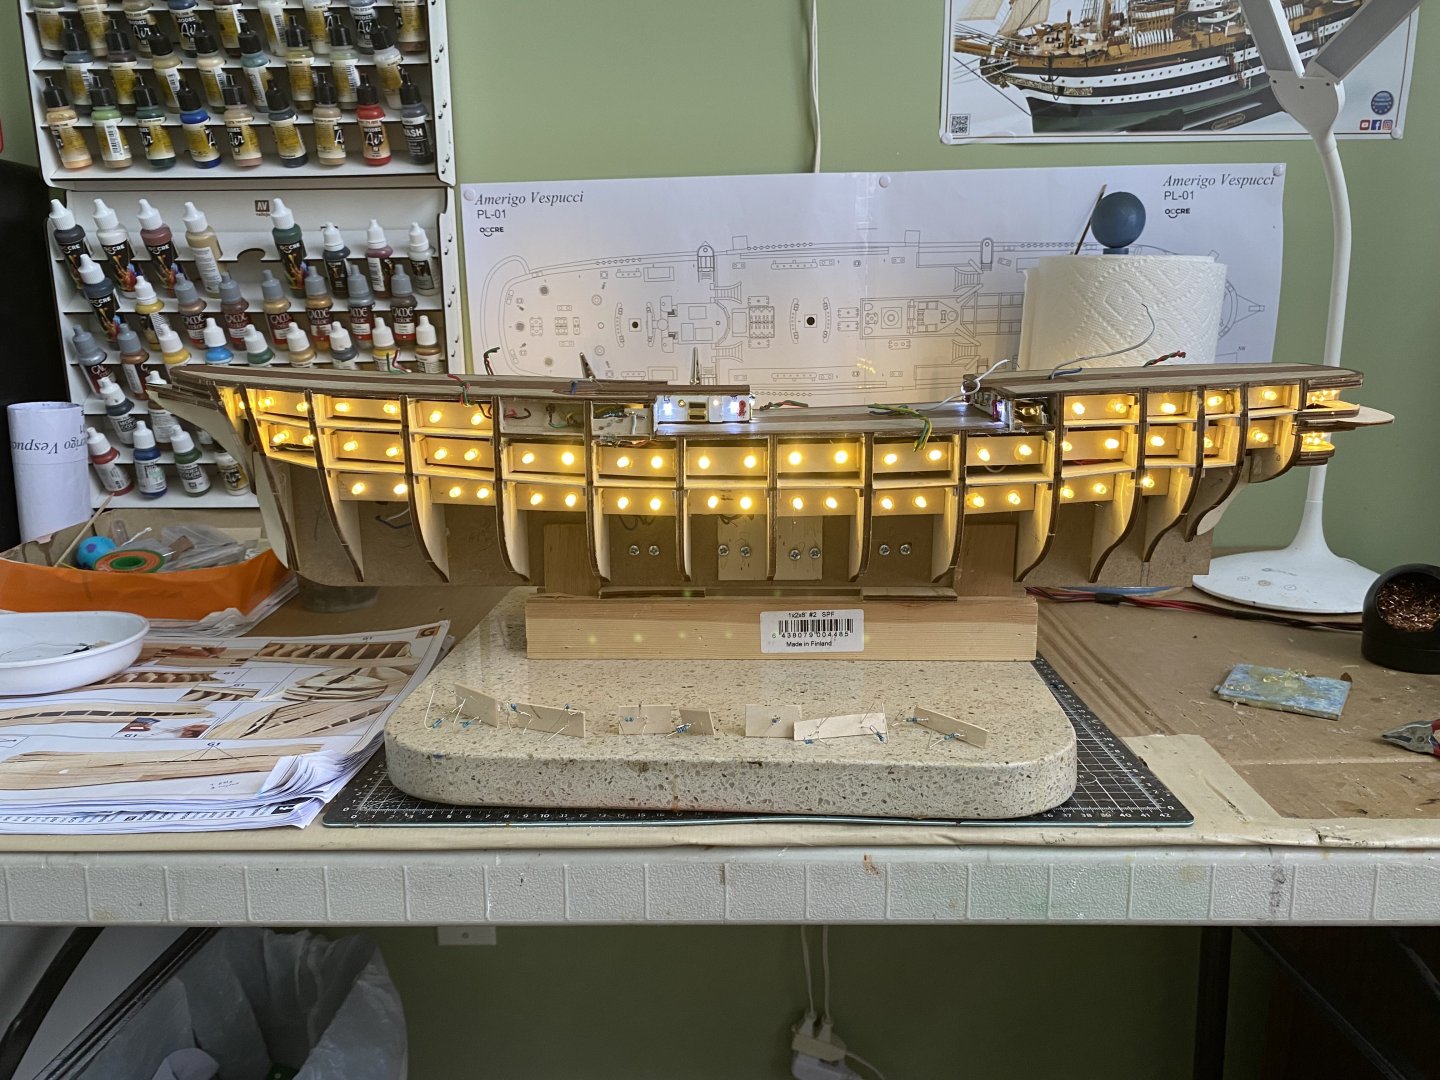
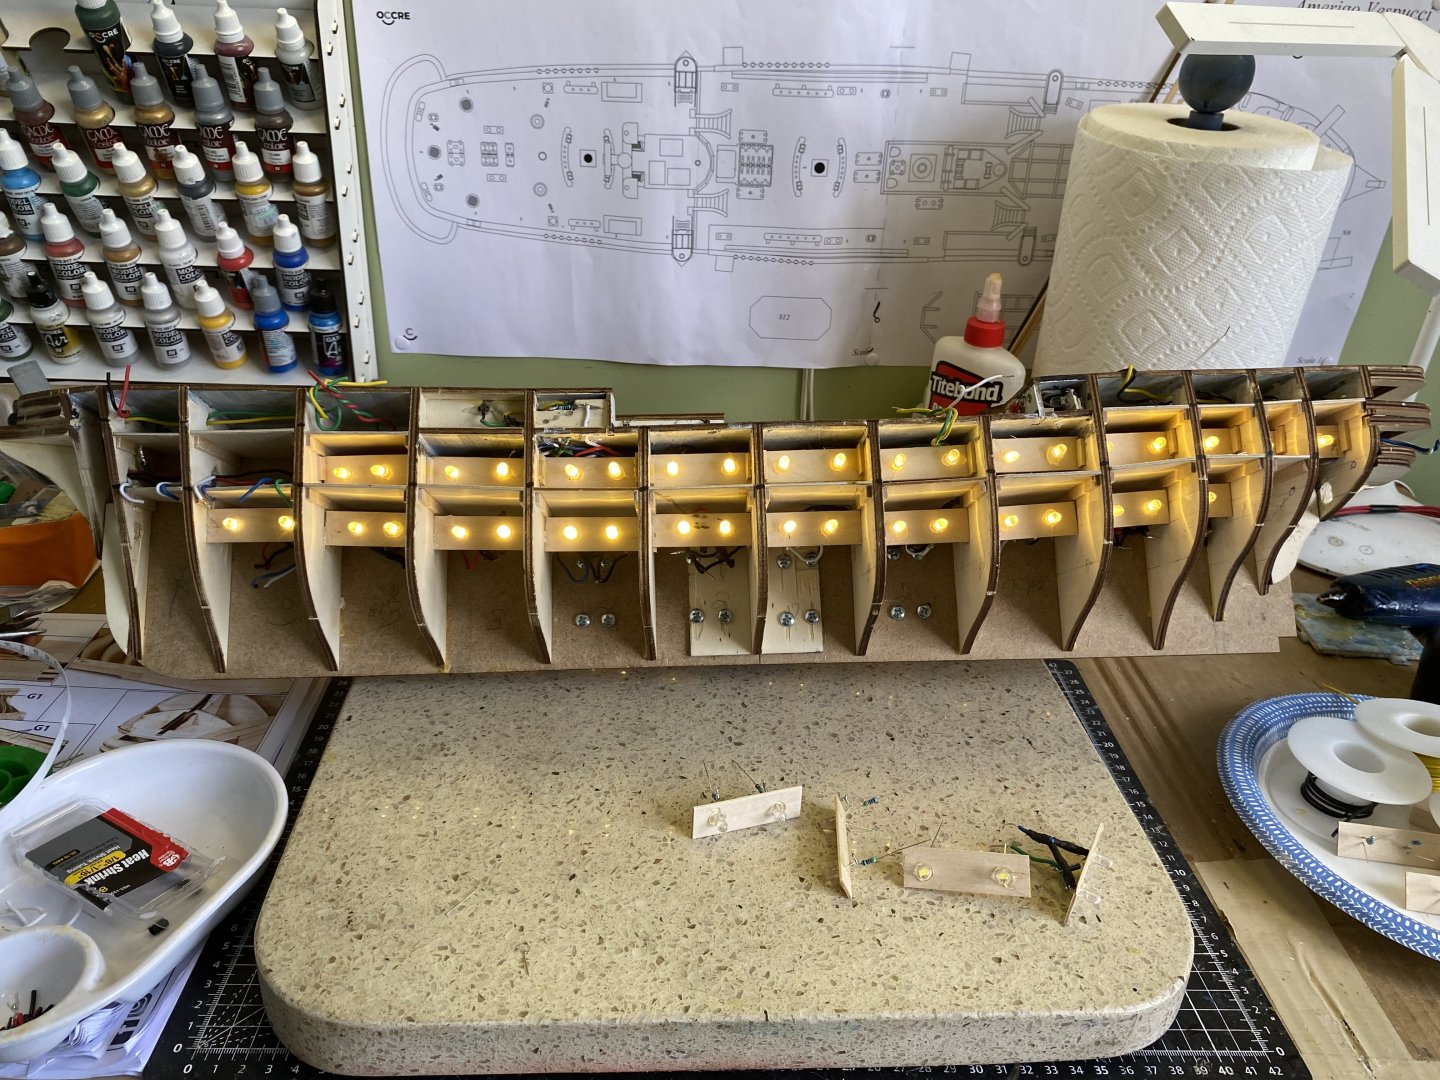
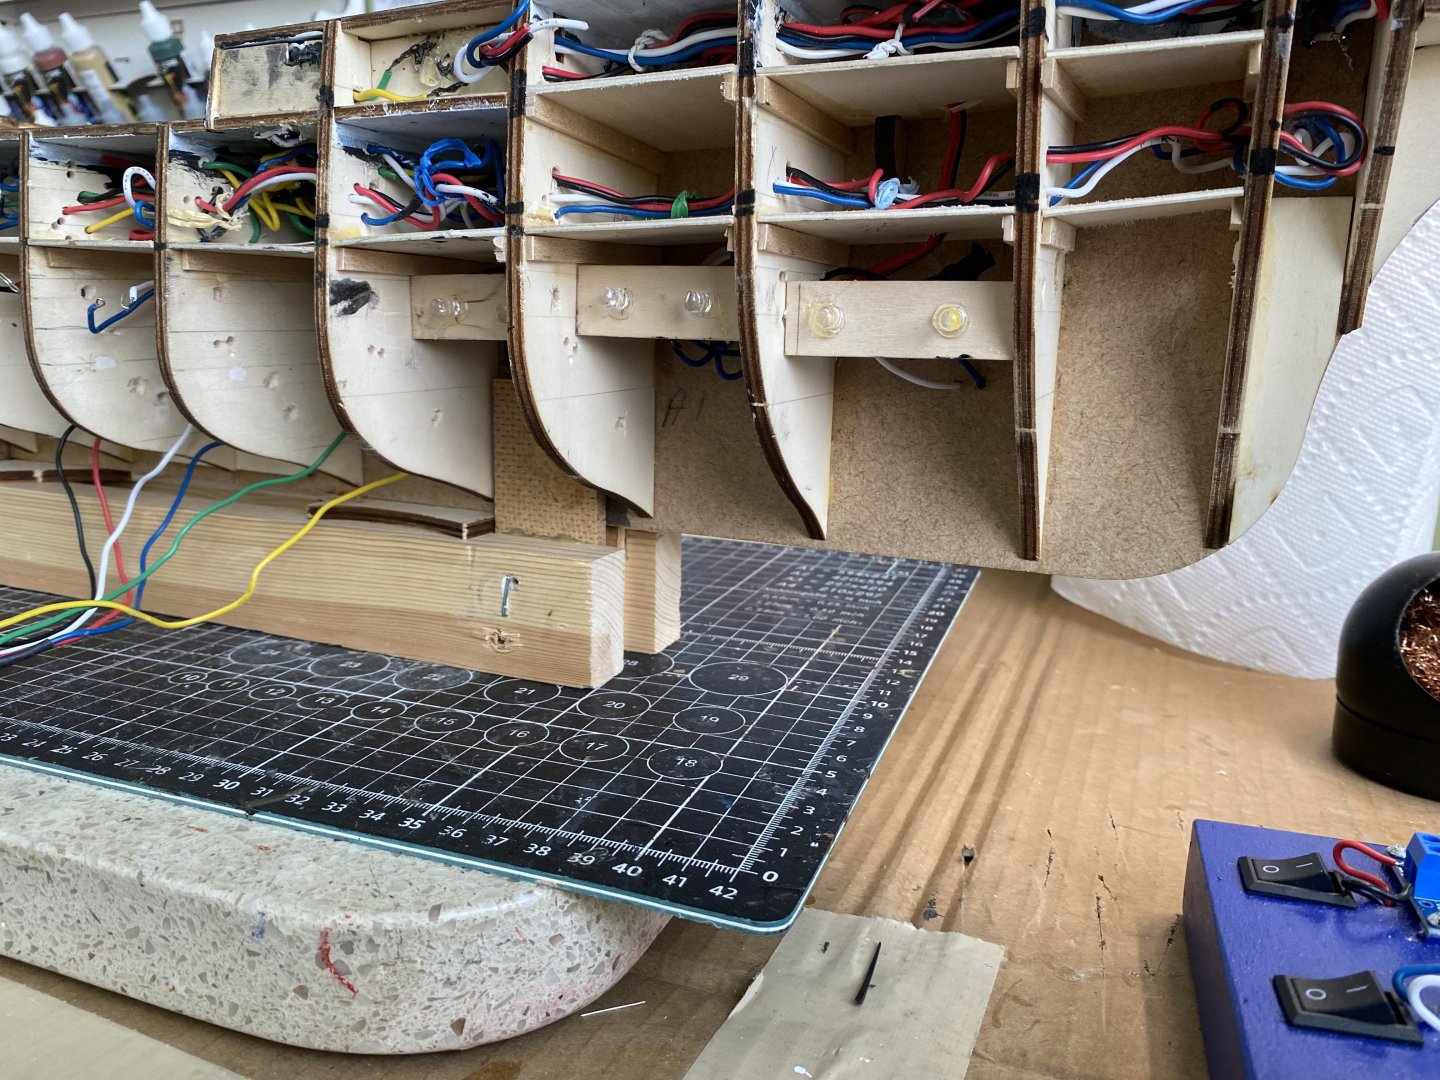
Slowly but surly adding all the warm white 5mm LED’s to the lower decks which will highlight all the port holes. There are around 60 in each side. I have them powered by two separate circuits so I can have some lit, the opposite lights lit, or all on. I have the interior lights in the deck houses wired using diodes so they will be on regardless which below deck lights are on. Wires are run ti accommodate the future deck structures that will be added.


-
Ok Daniel thanks. It just looks like you have a bunch. Still plugging away at all the lights on the lower decks. Almost done with them.
-
Daniel I keep flipping back to your early lighting photos. There are a few you put in at the bow and stern that look tricky. Also it looks as if in your later photos you drilled more port holes than the OcCre diagram suggests. Did you have enough of the metal inserts for the portholes you drilled or did you need to get more?
-
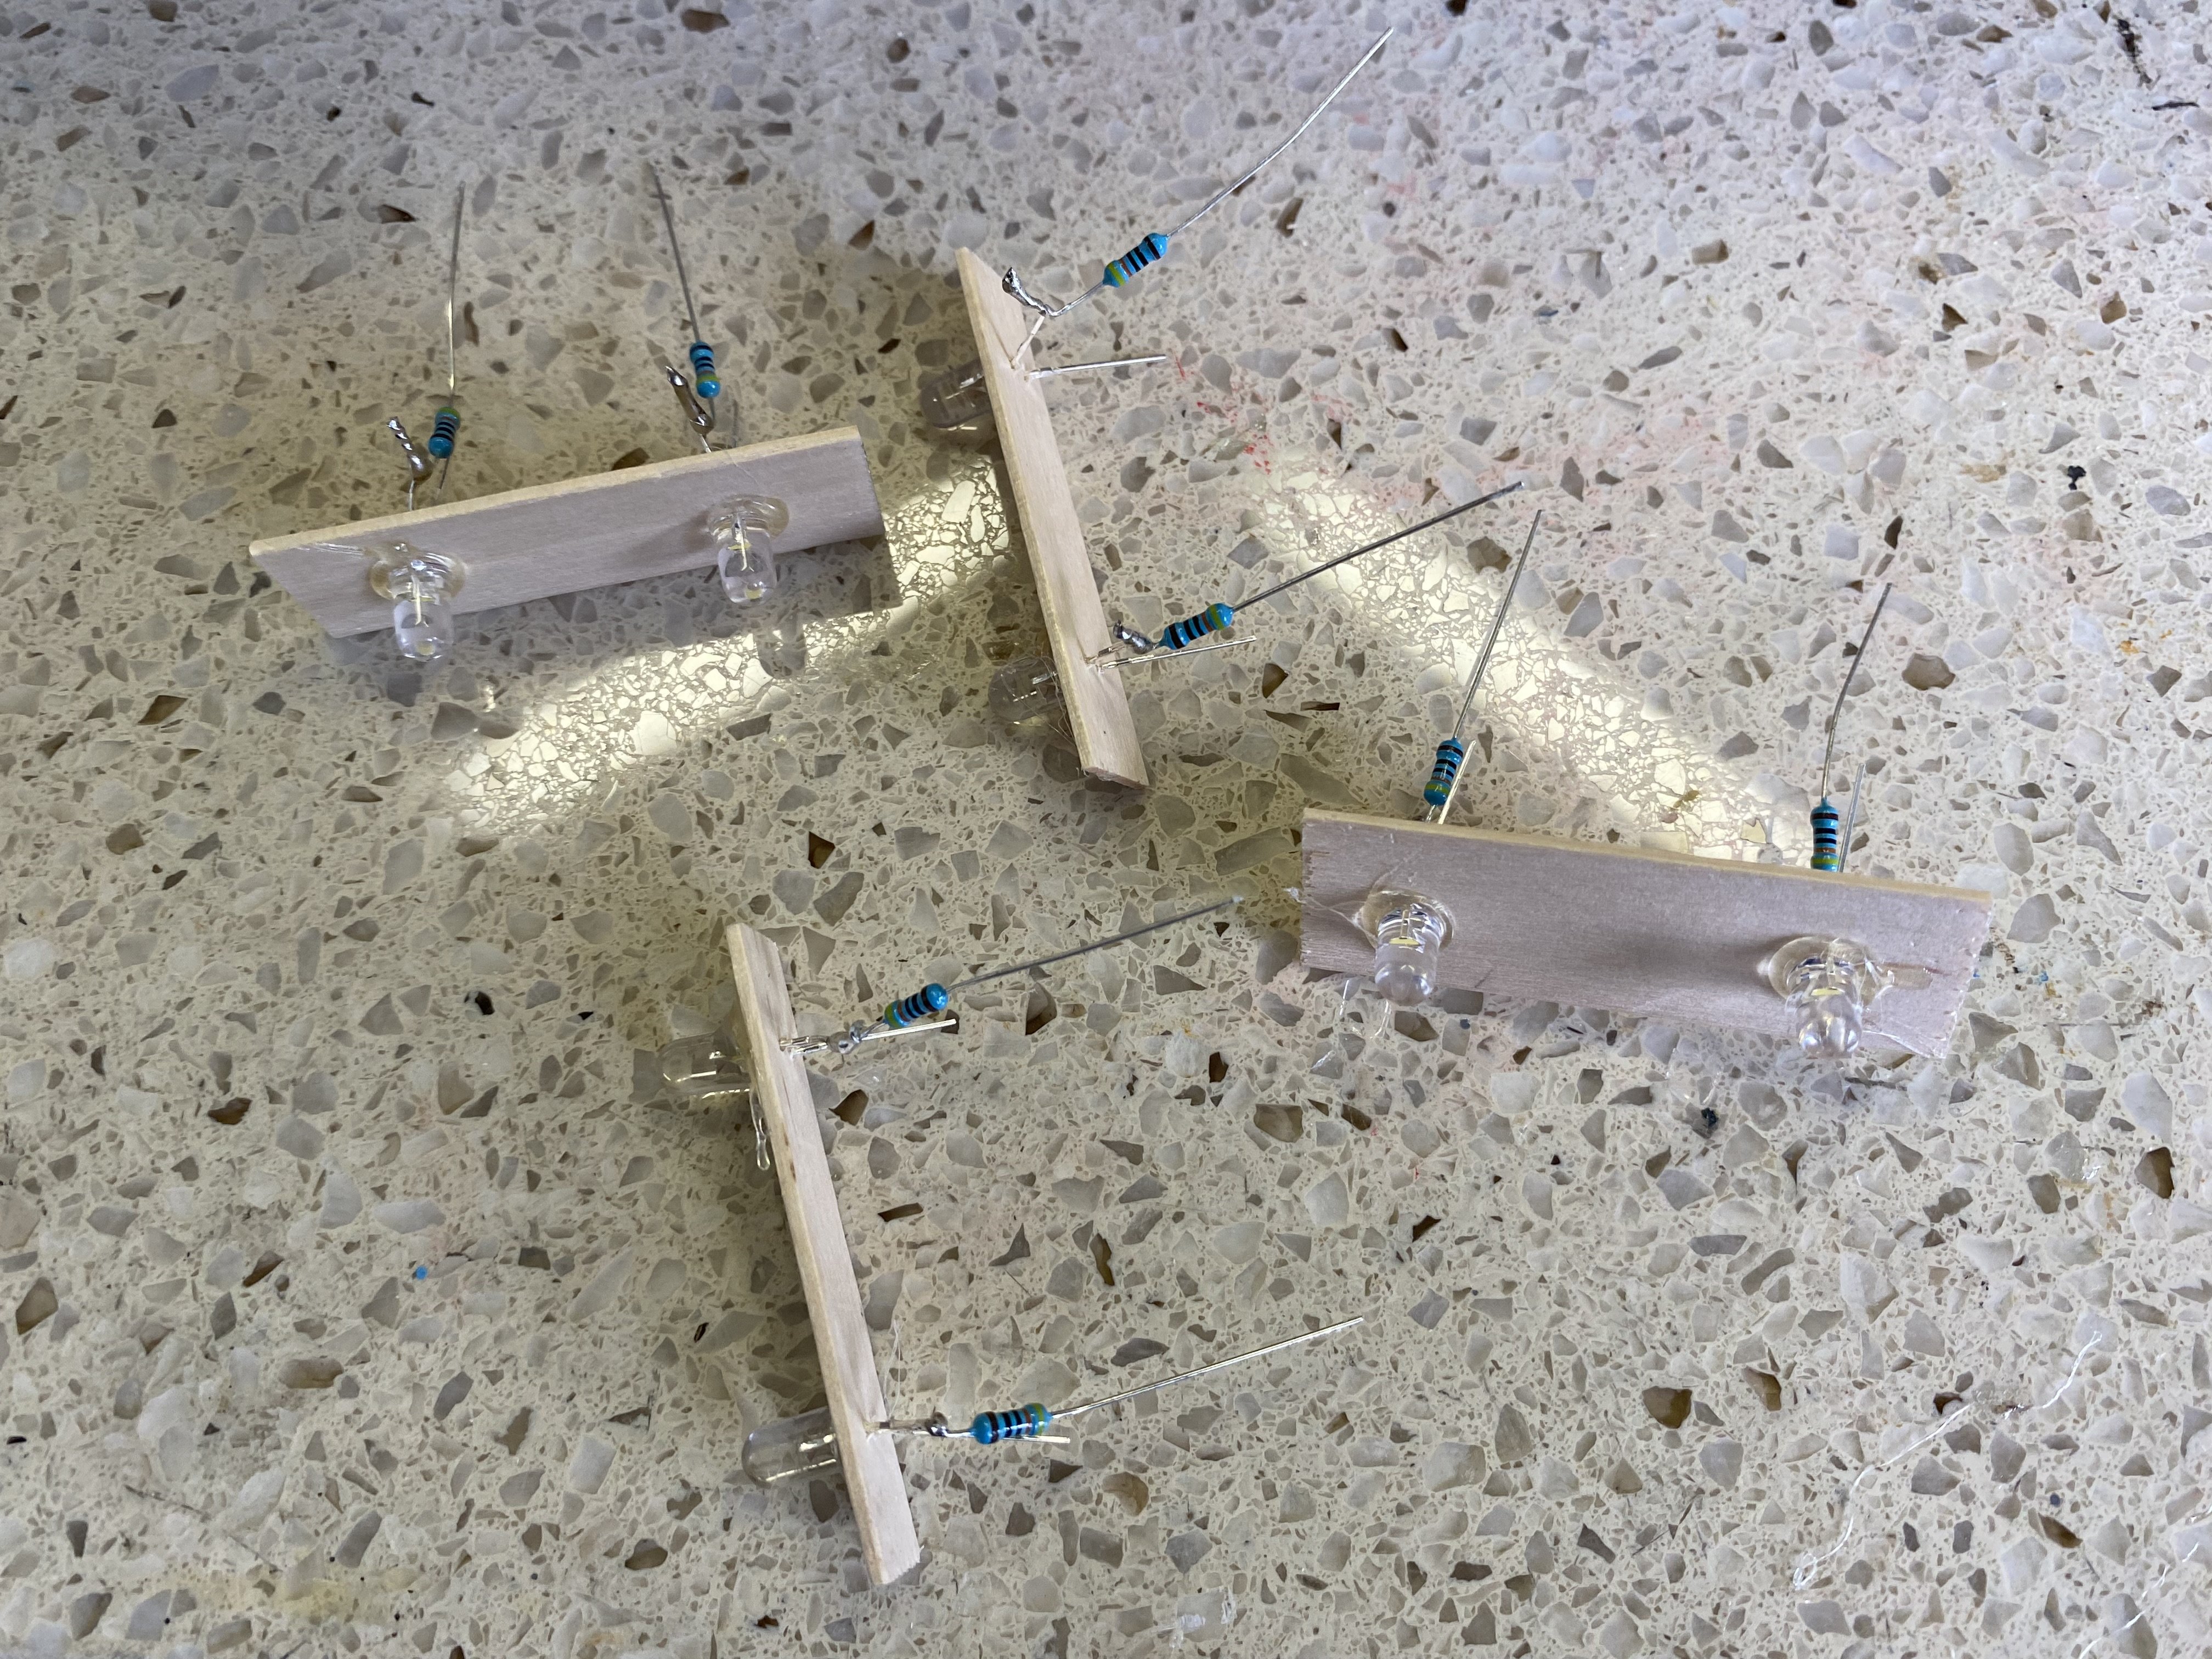
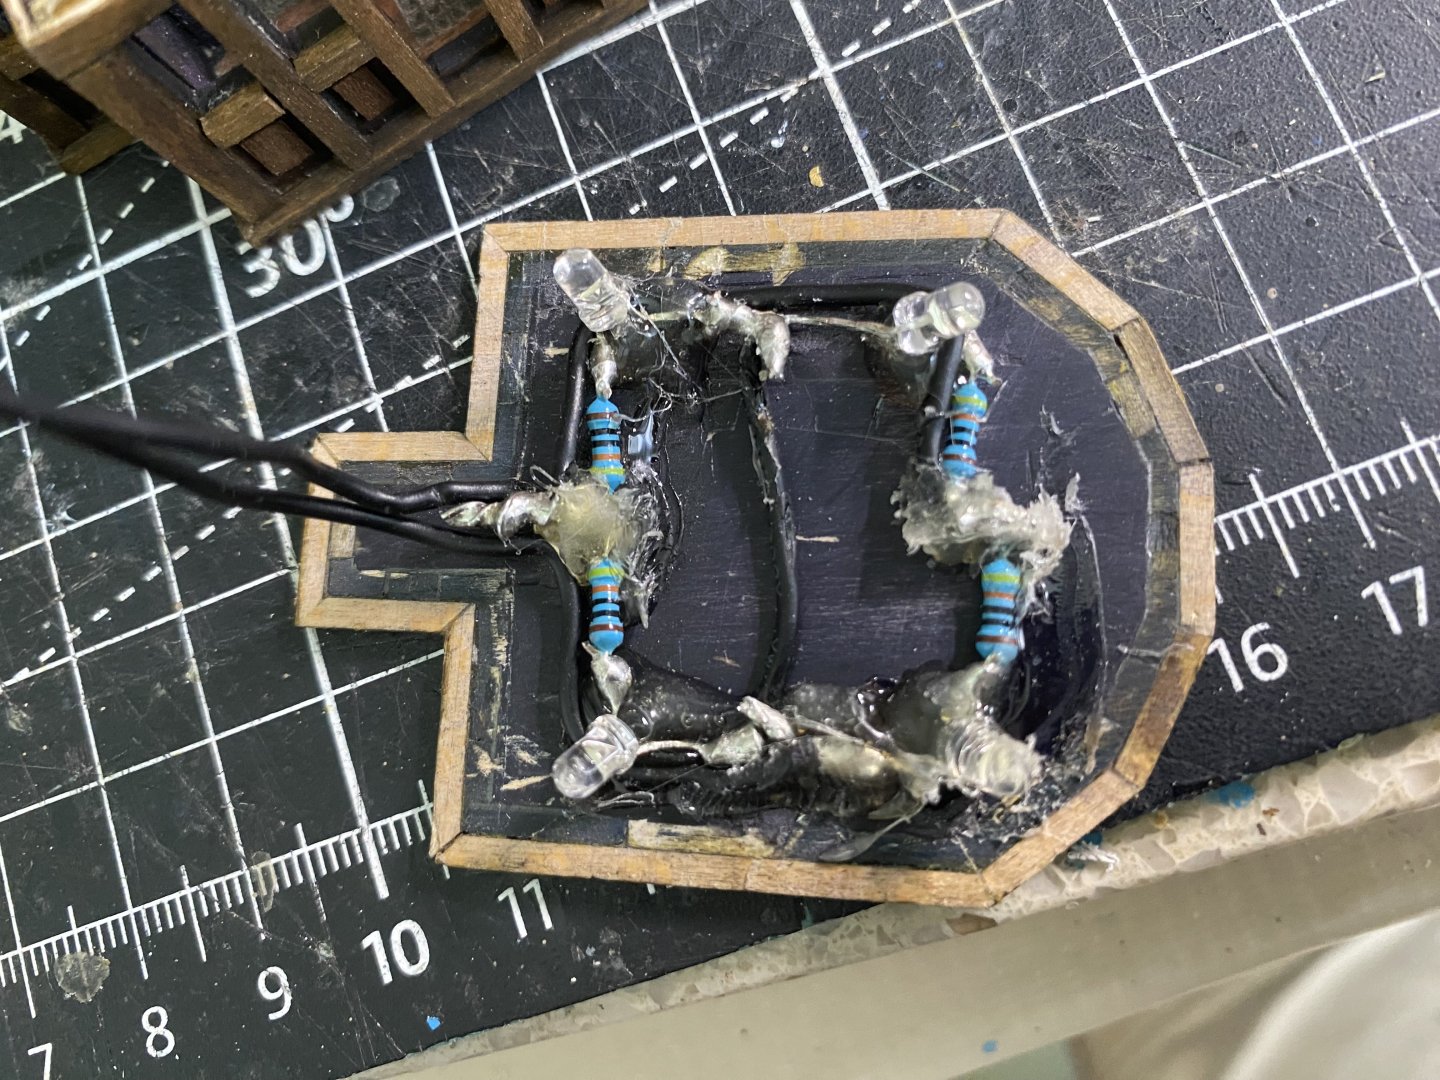
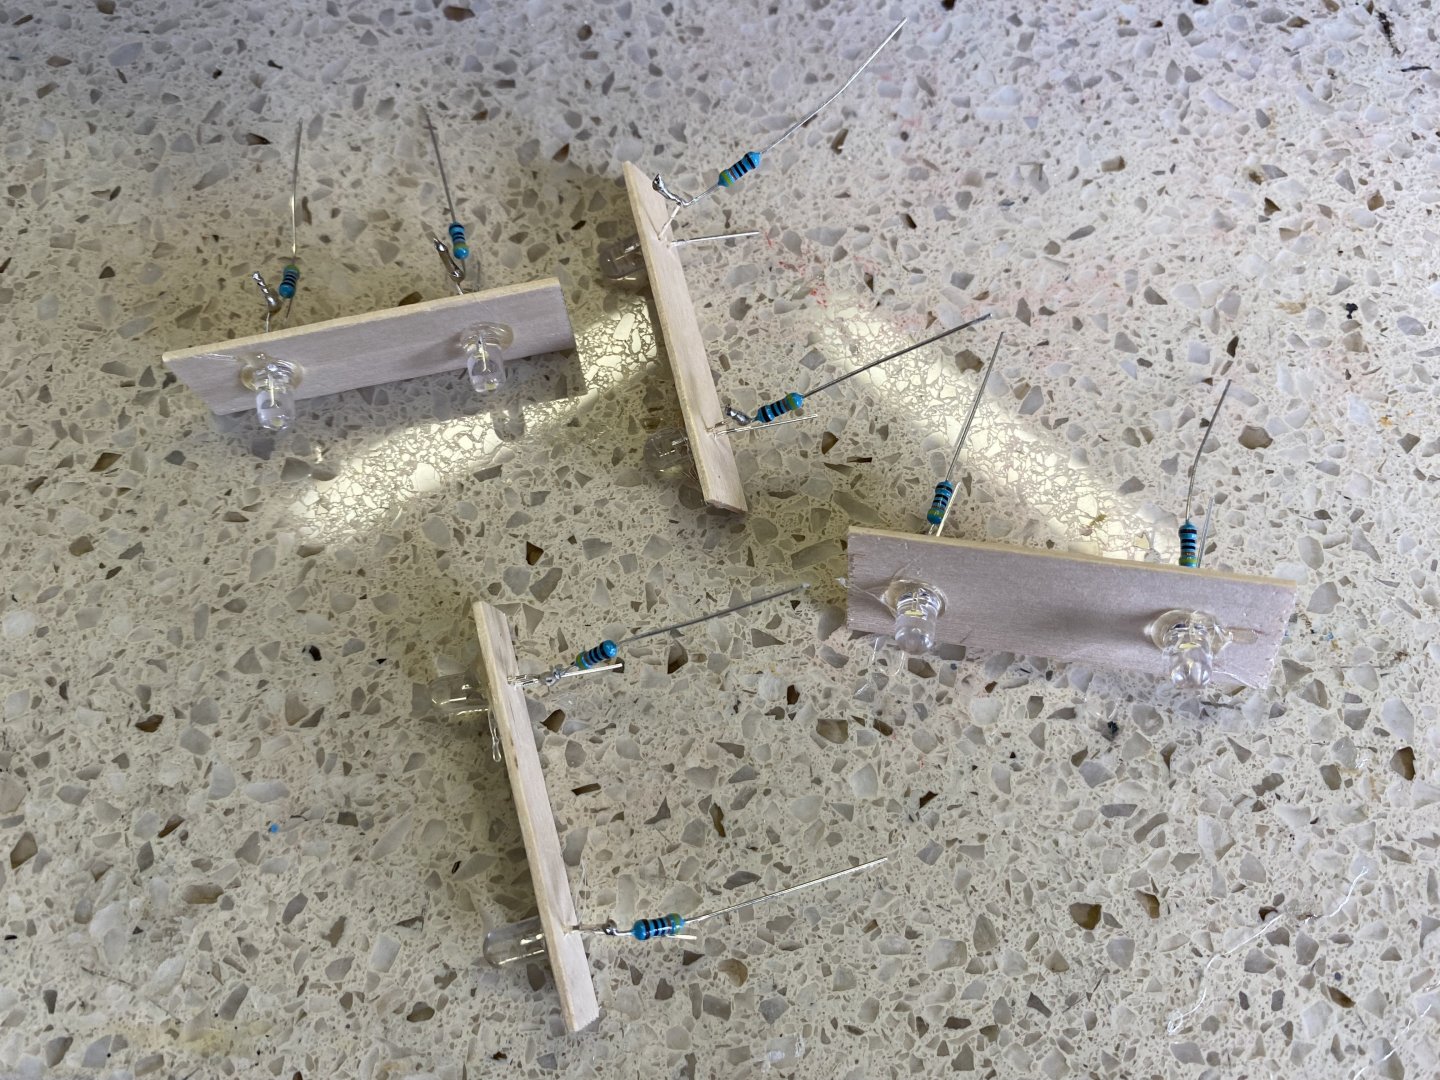
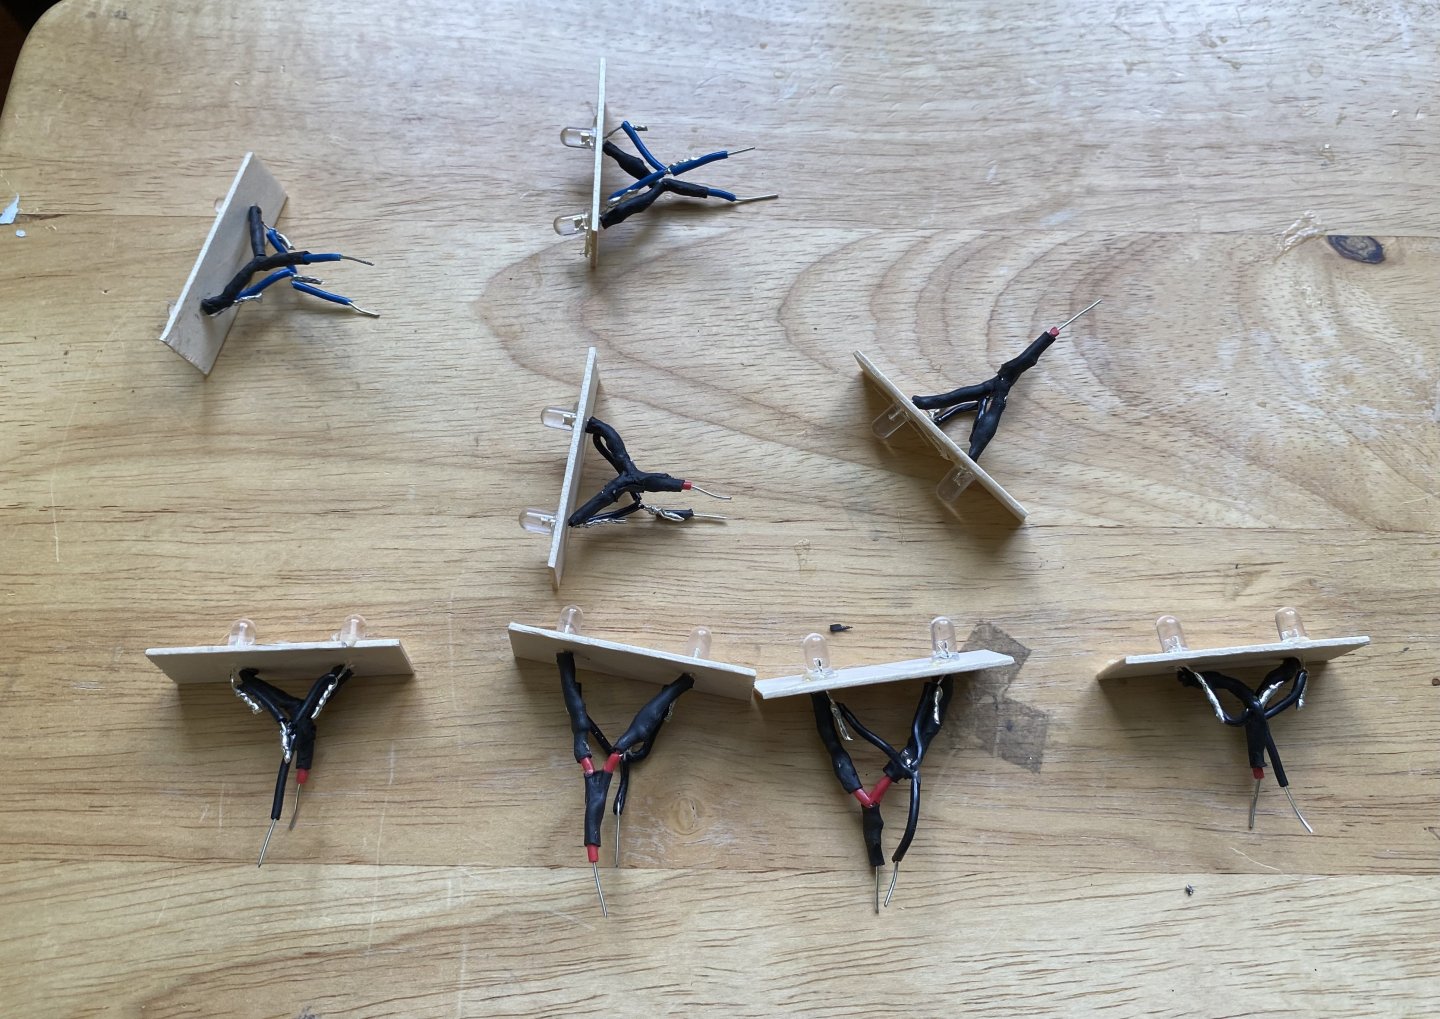
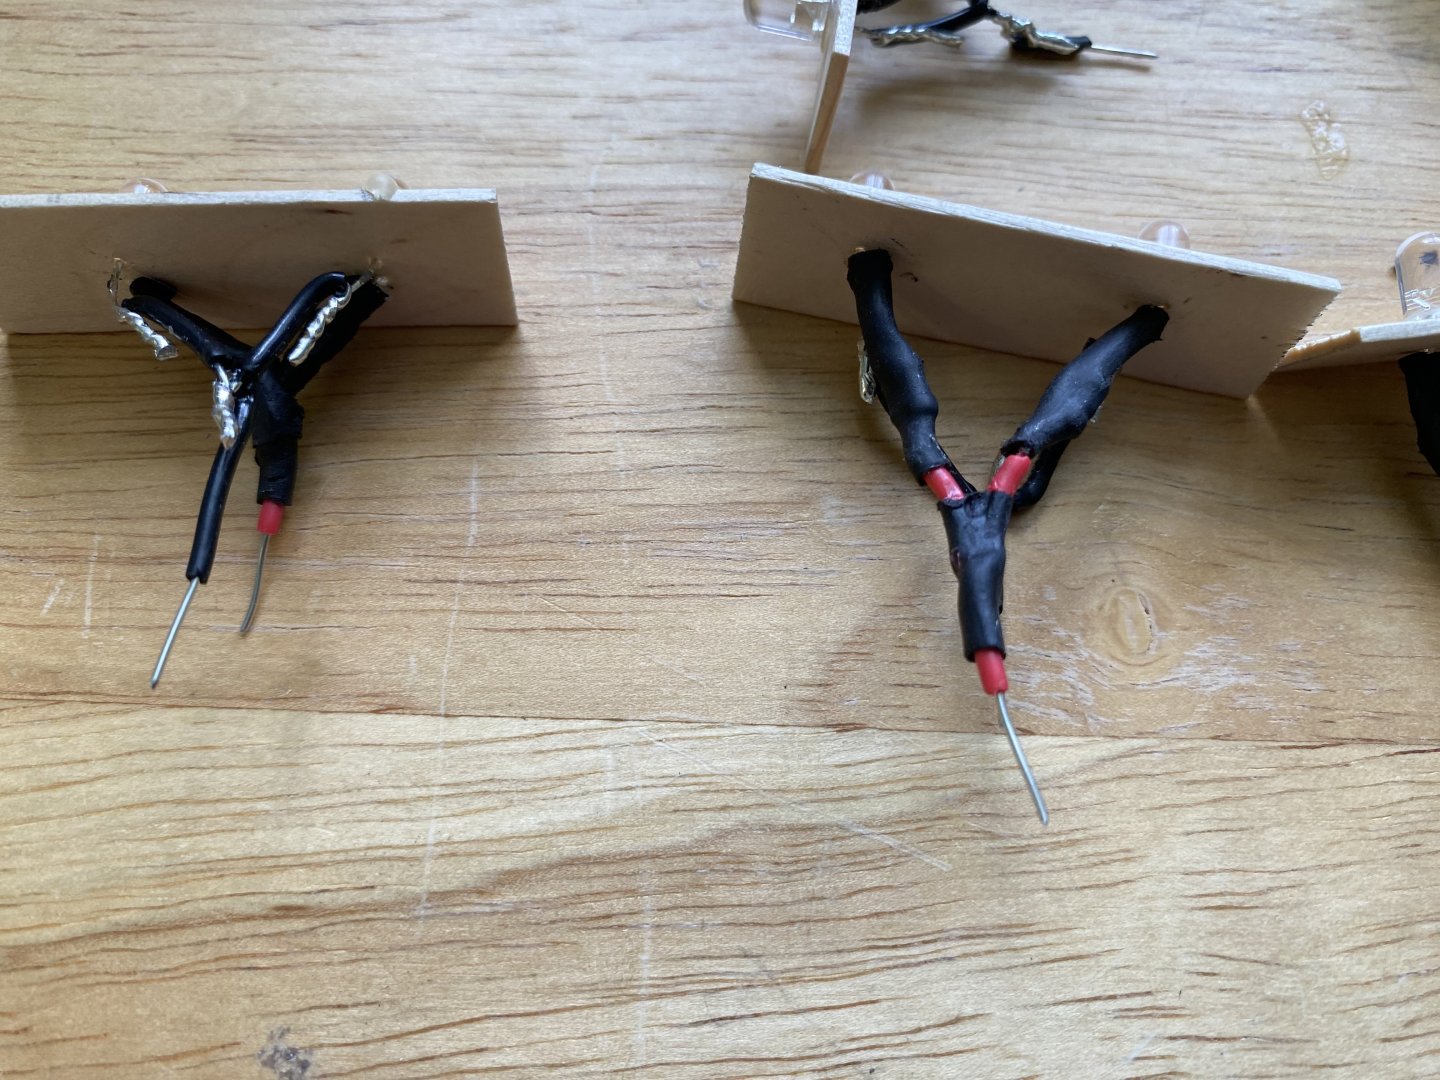
Slowly making my way through making all the LED light strips for my lower deck portholes. I decide to use two warm white LED’s at each section in the hull in hopes of getting more uniform light shining out. Each 5mm LED gets it’s own resistor and heat shrink tubing that is then shaped and soldered into “Y” shapes to accept the positive and negative circuit wires at each location set up as circuit 1 or circuit 2.


-
Beautiful job Daniel. So from what you explained your process looks like tying ratlines on shrouds but at a VERY small scale?
-
Daniel how did you make your nets? On a different subject Daniel, I am sure you have given some imaginative thought to the base you are going to make to incorporate your circuit board. I think about it often but yet to settle on something. All my ships are in cases I built. If I make a case for my AV like the others I will need to open it to access the switches. That would not be an issue. Or I could do something different where the switches are on the outside. Either way I am thinking I will have it sit in a diorama so the cable coming from the hull does not show.
-
They look great Daniel.
-
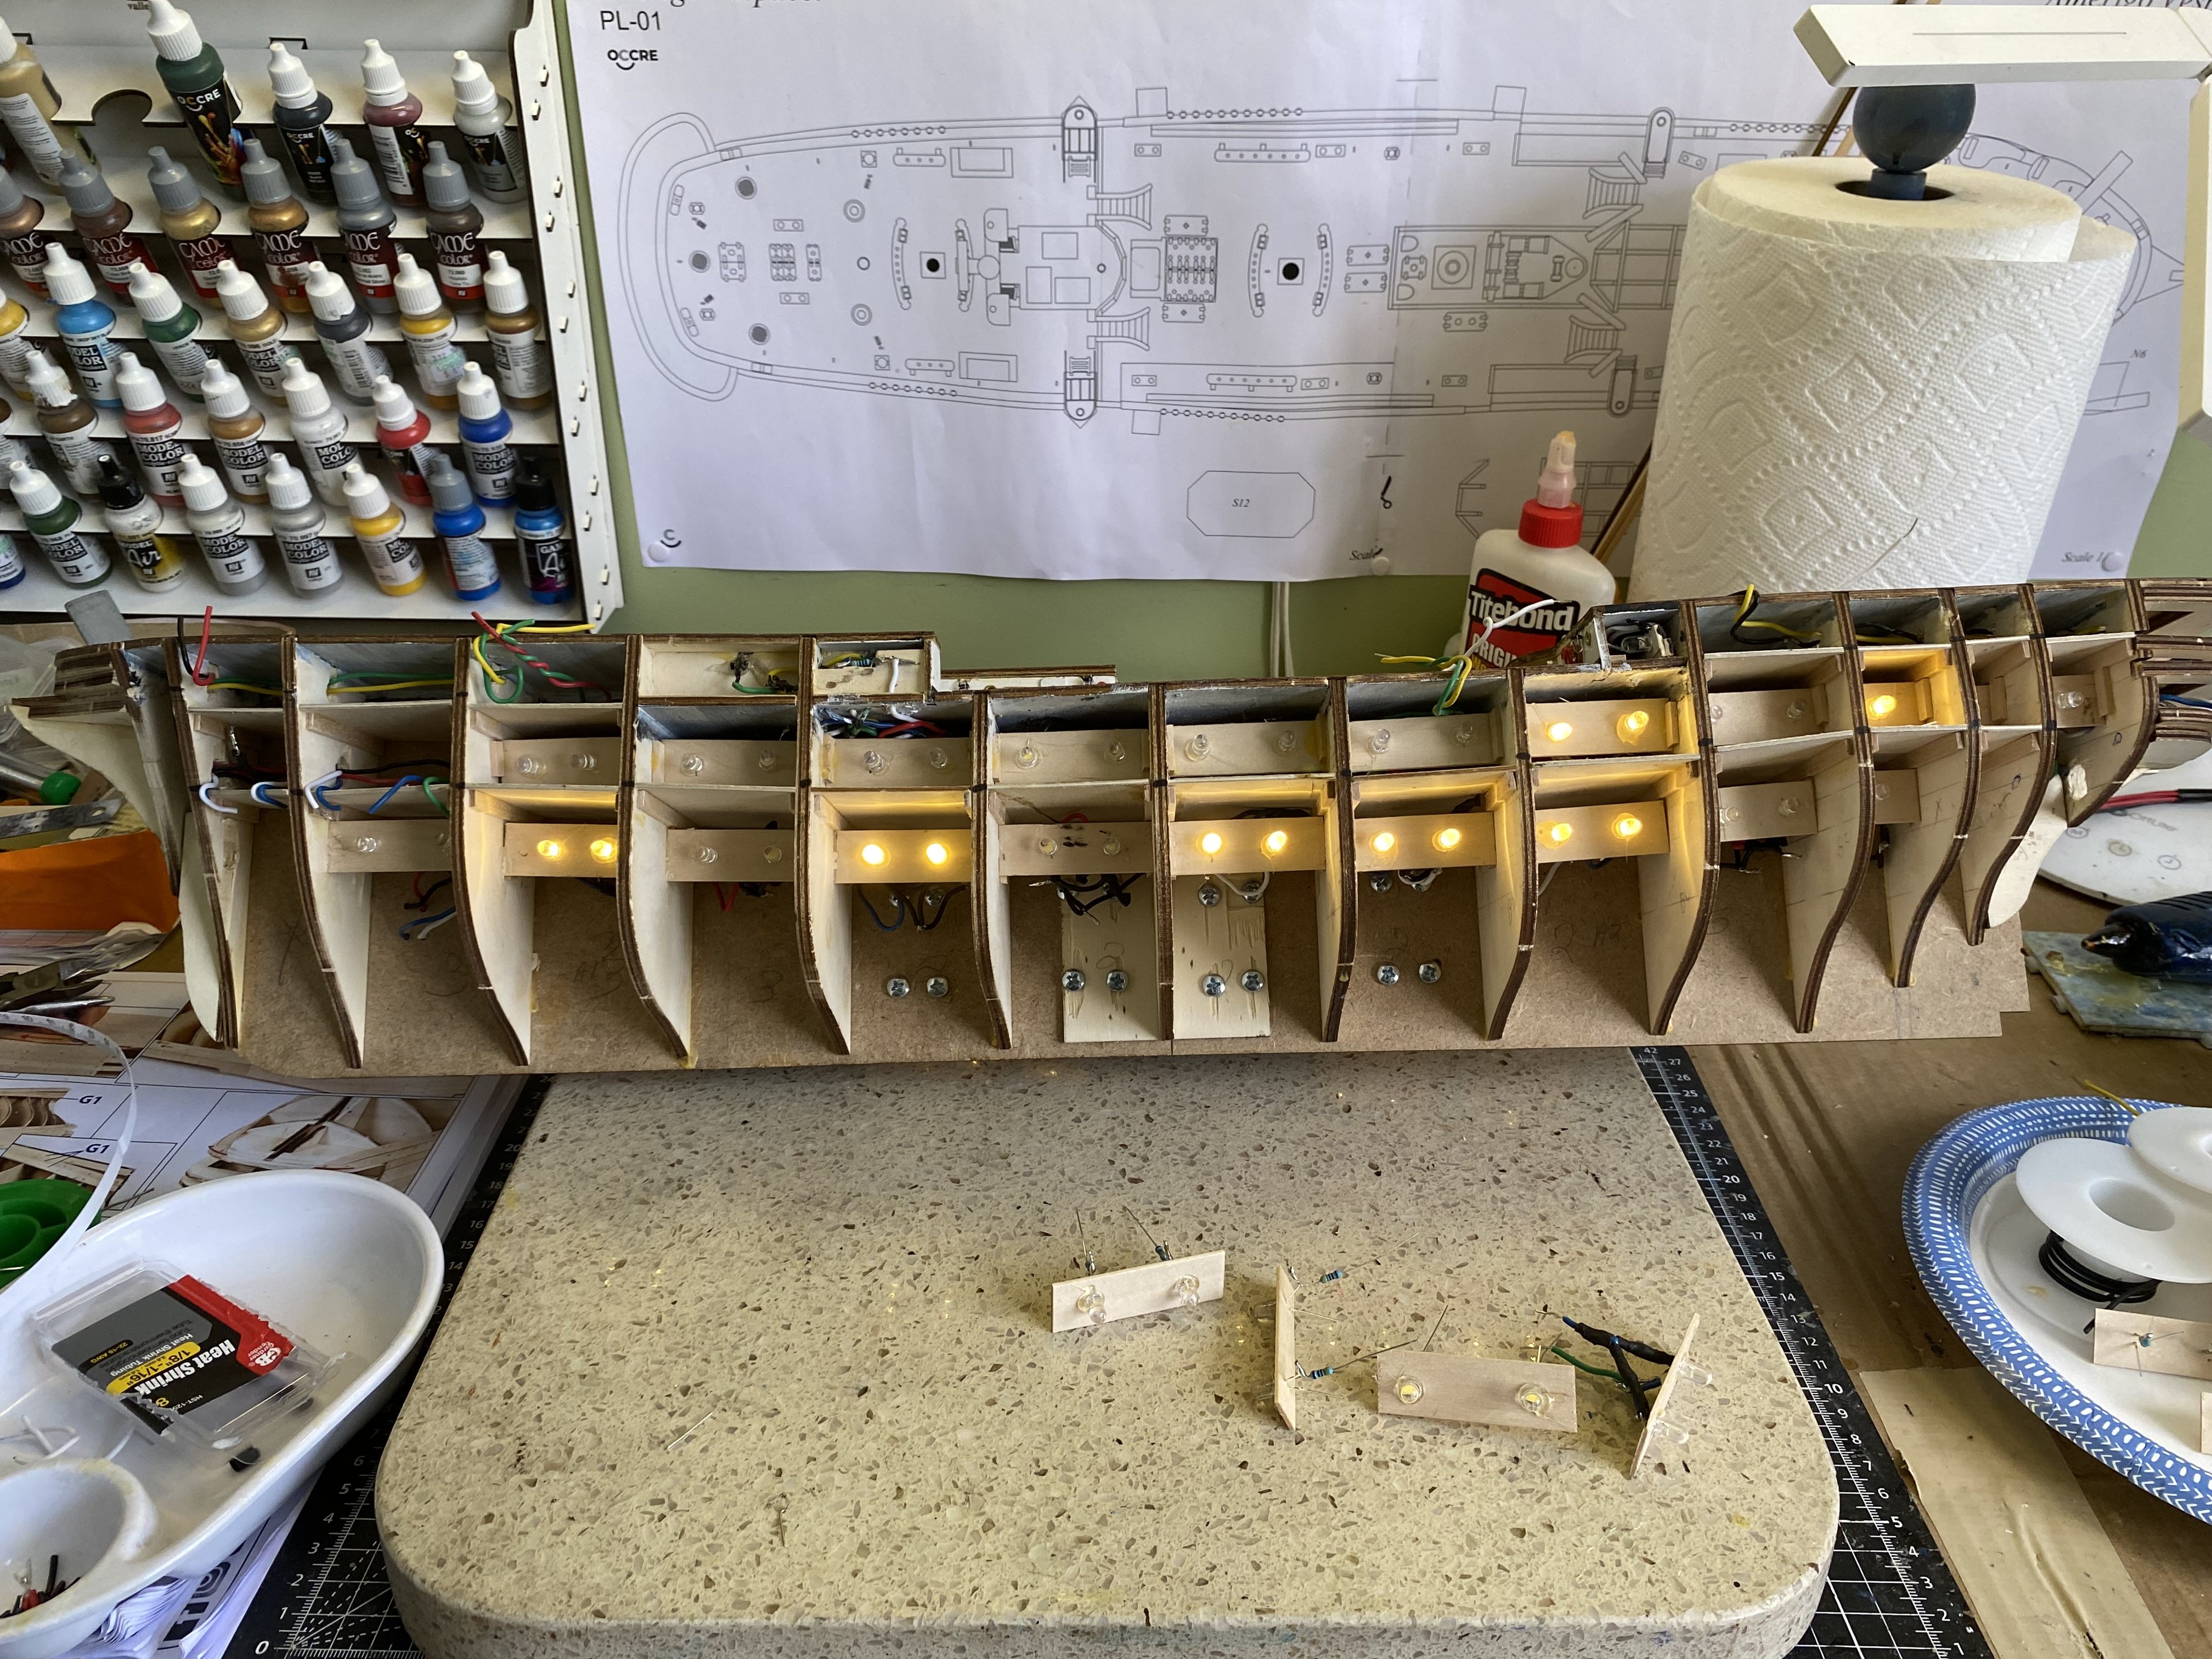
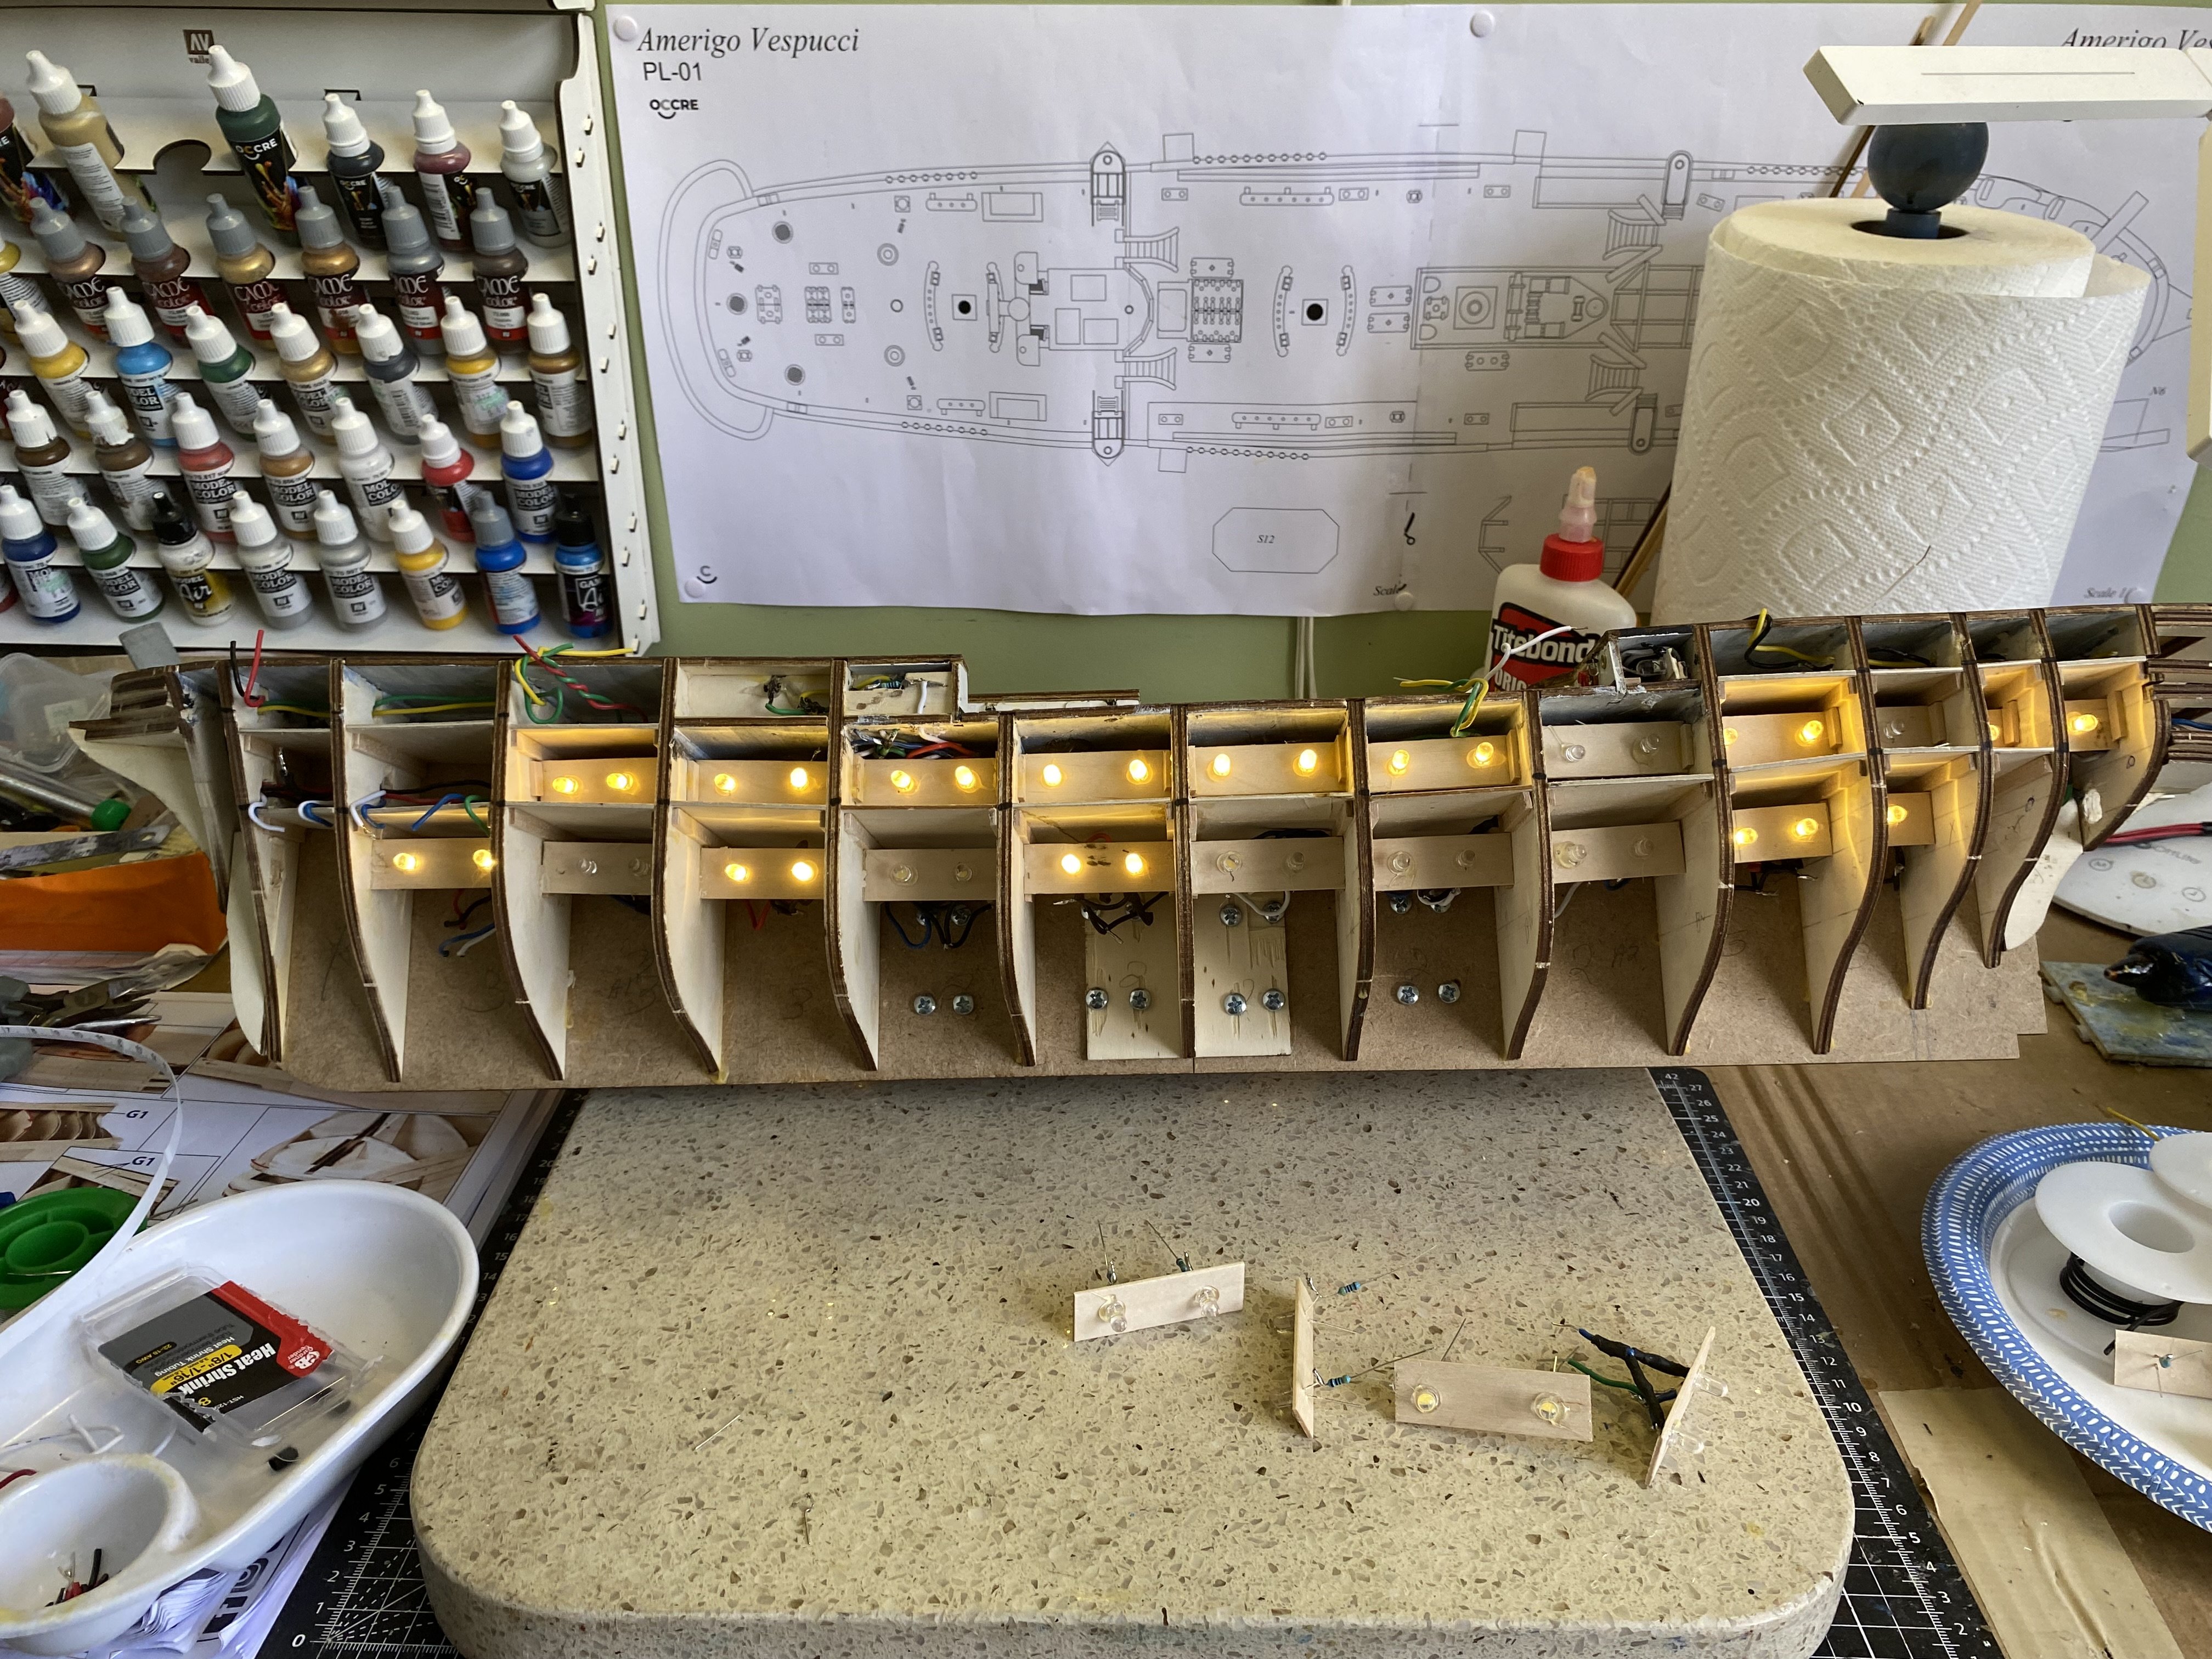
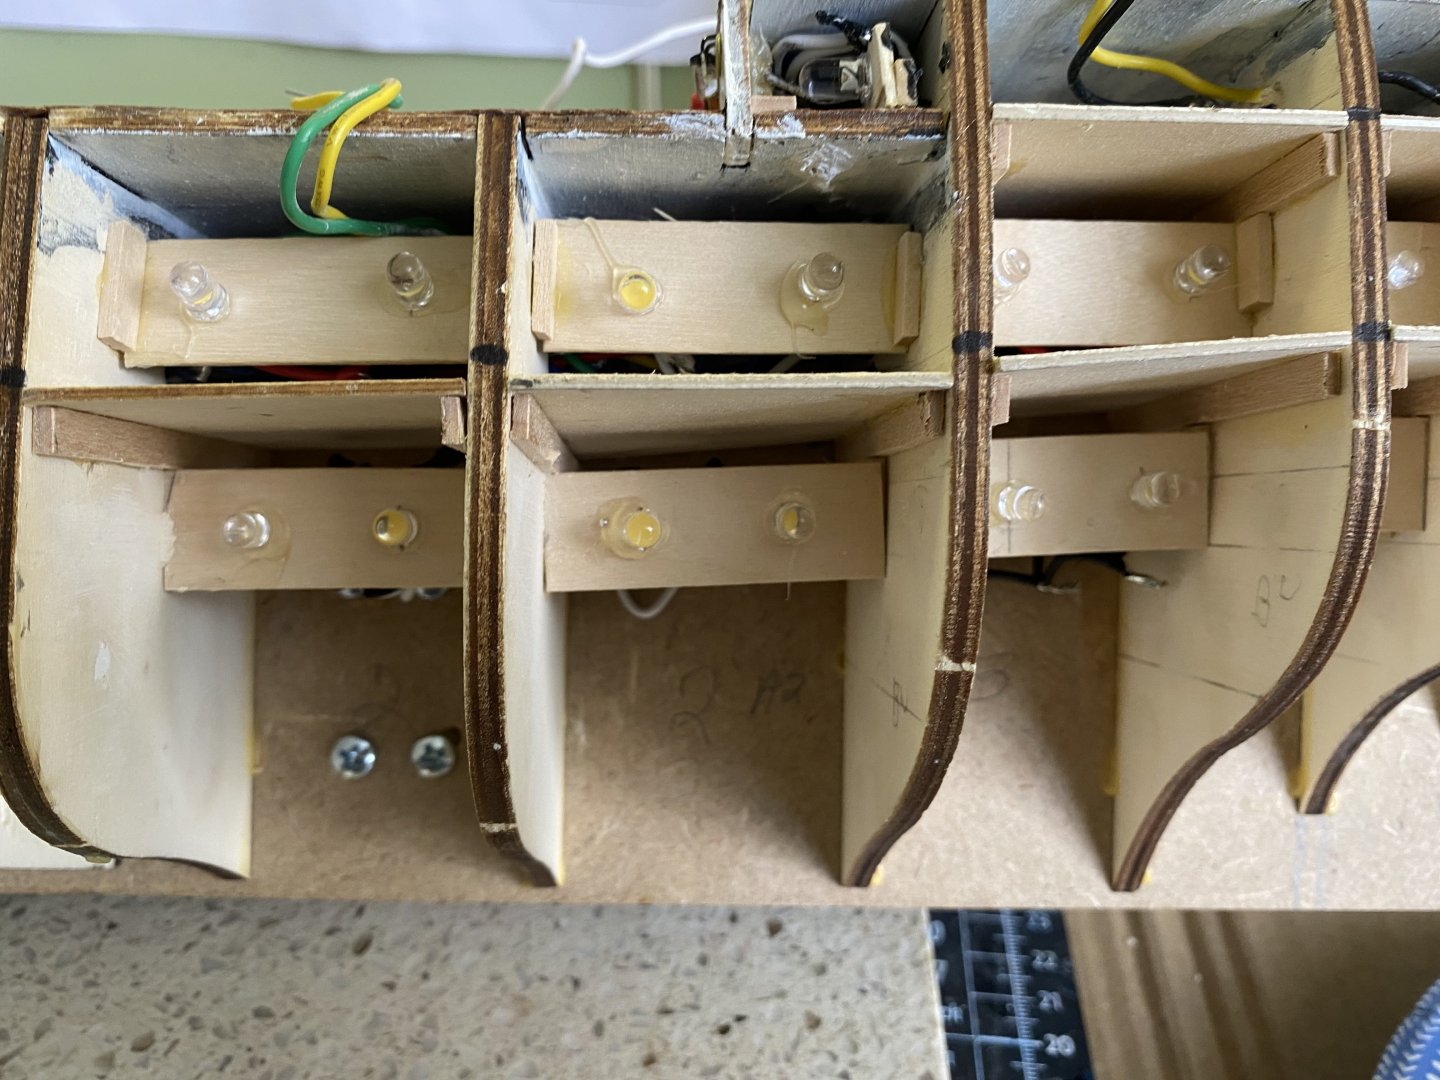
Warm white LED lights installed on the port side lower deck which will eventually shine out through the port holes. I used two separate circuits so I could display with some lights on, some off, or all on. This will more keeping with what it might look like at night. I made deck sections to separate the lower and middle decks so light from one deck will not shine through the port hole on the deck above or below.

-
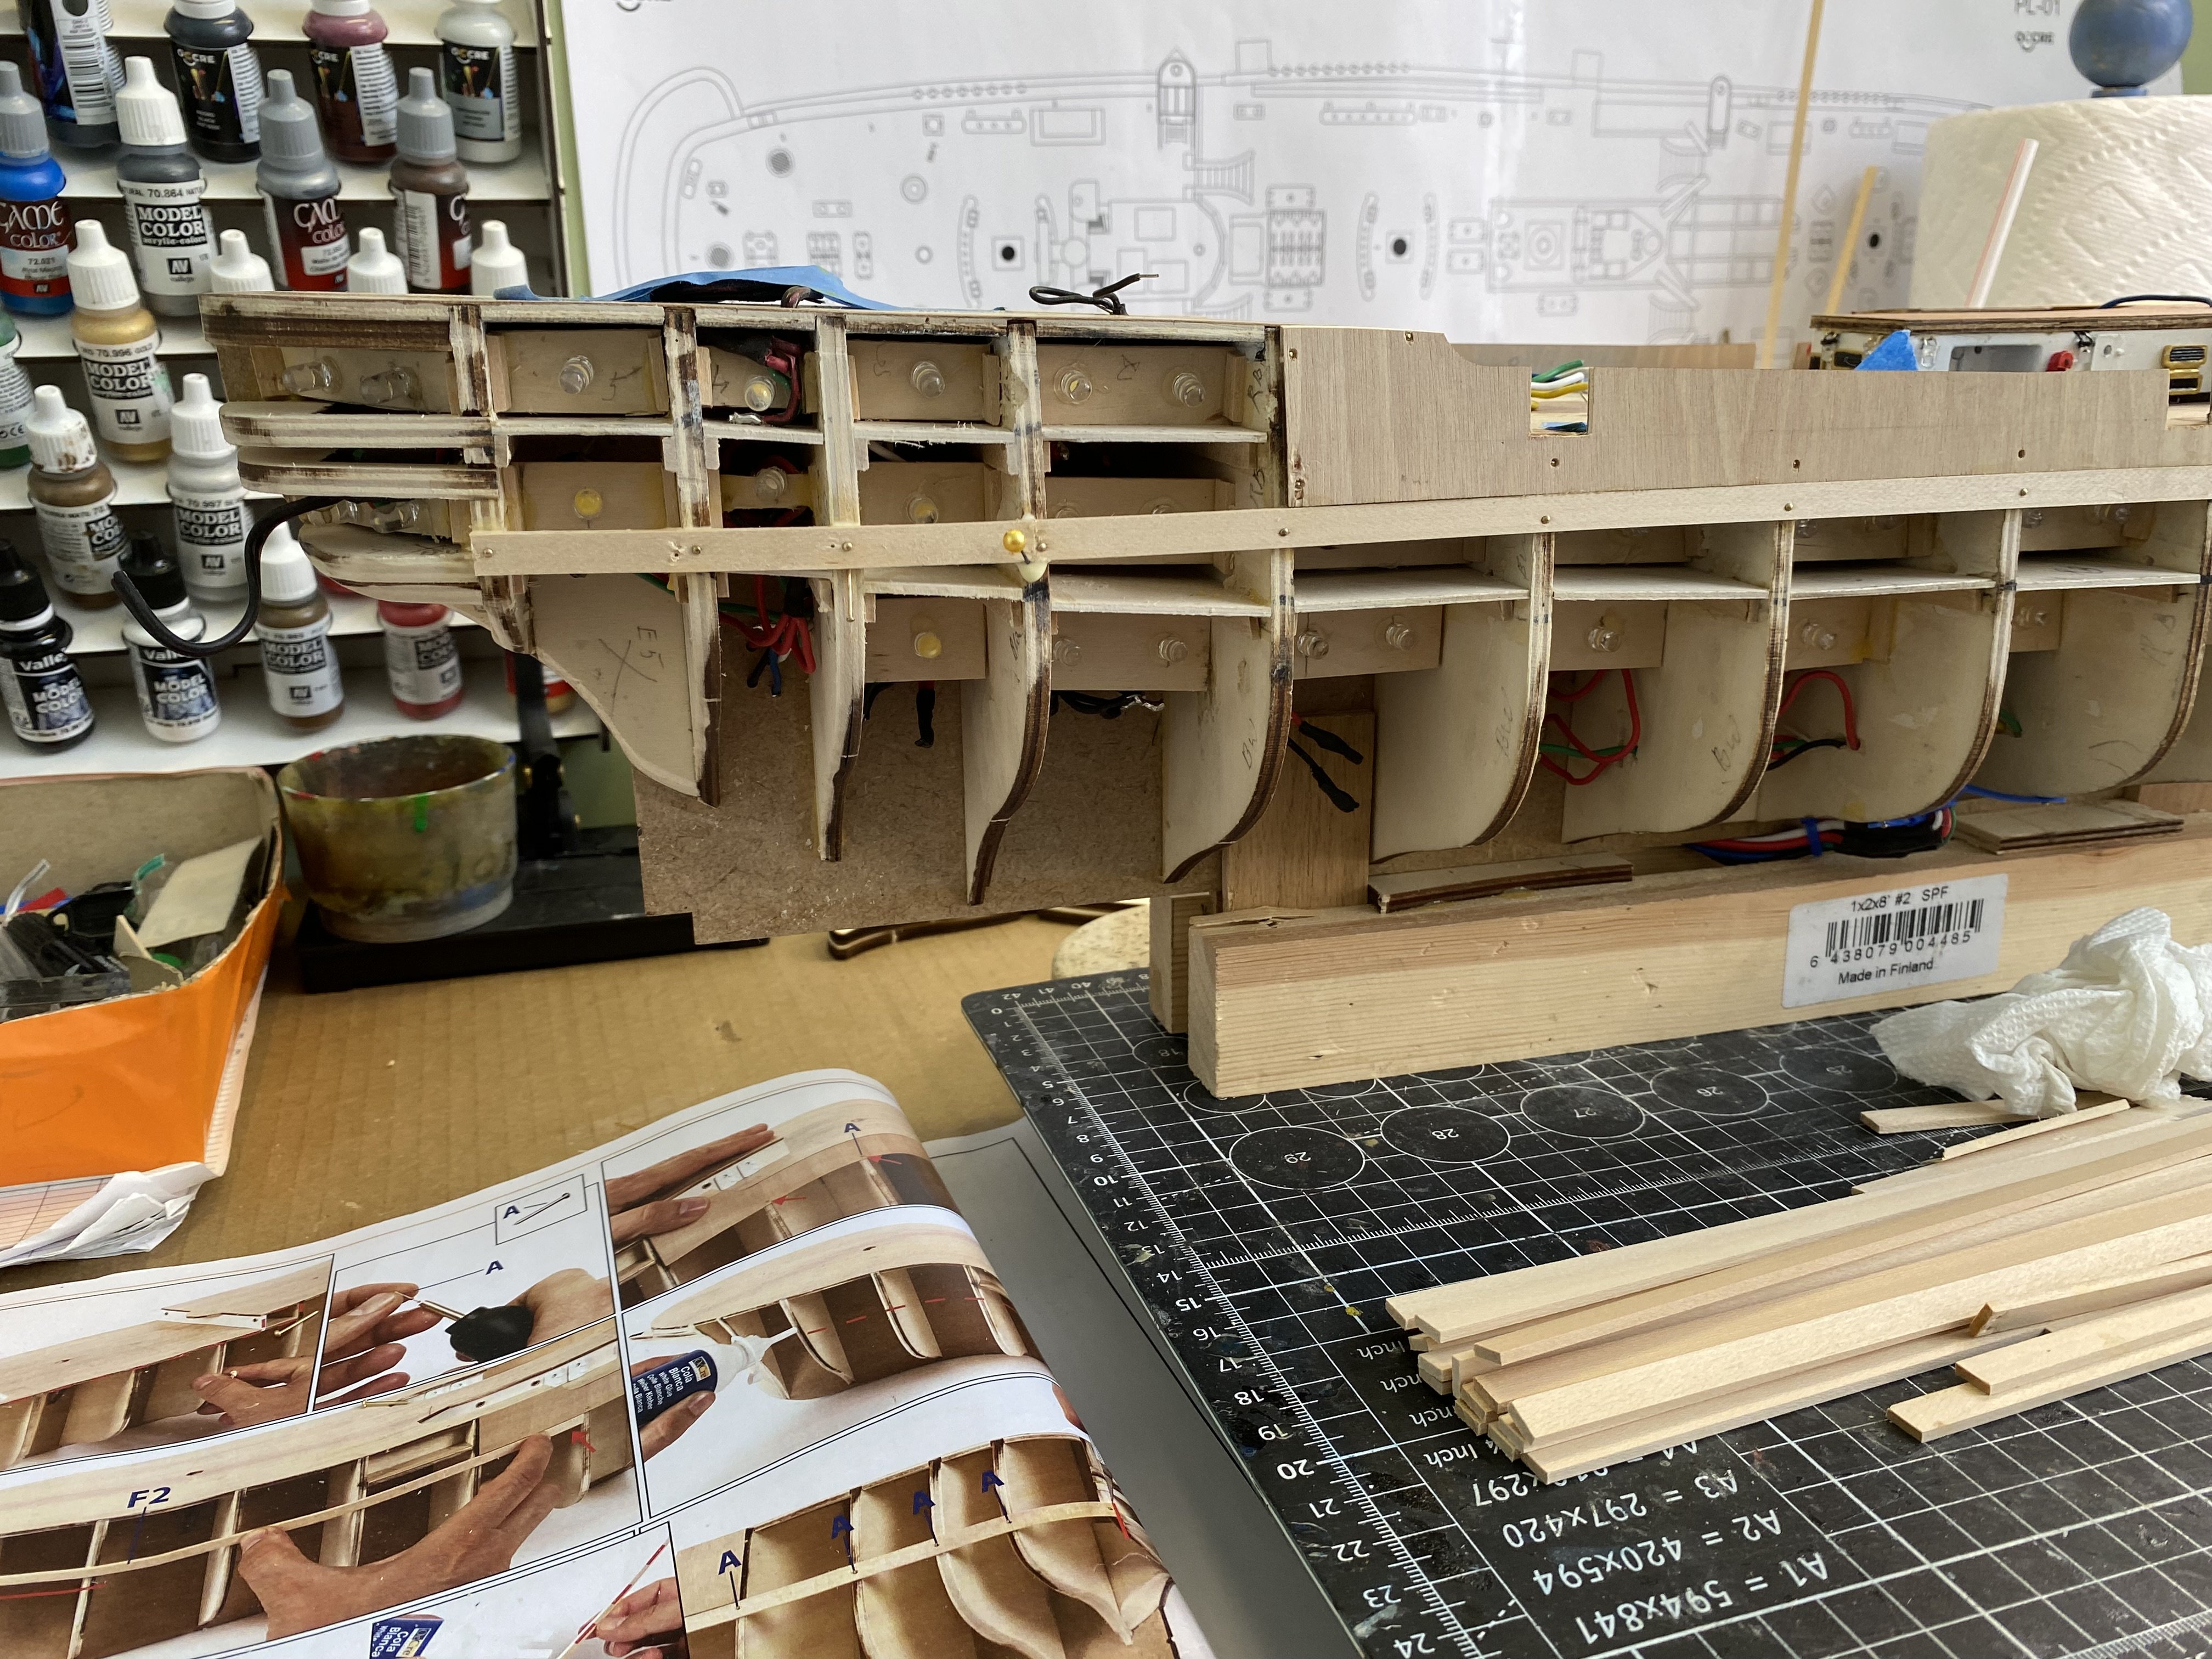
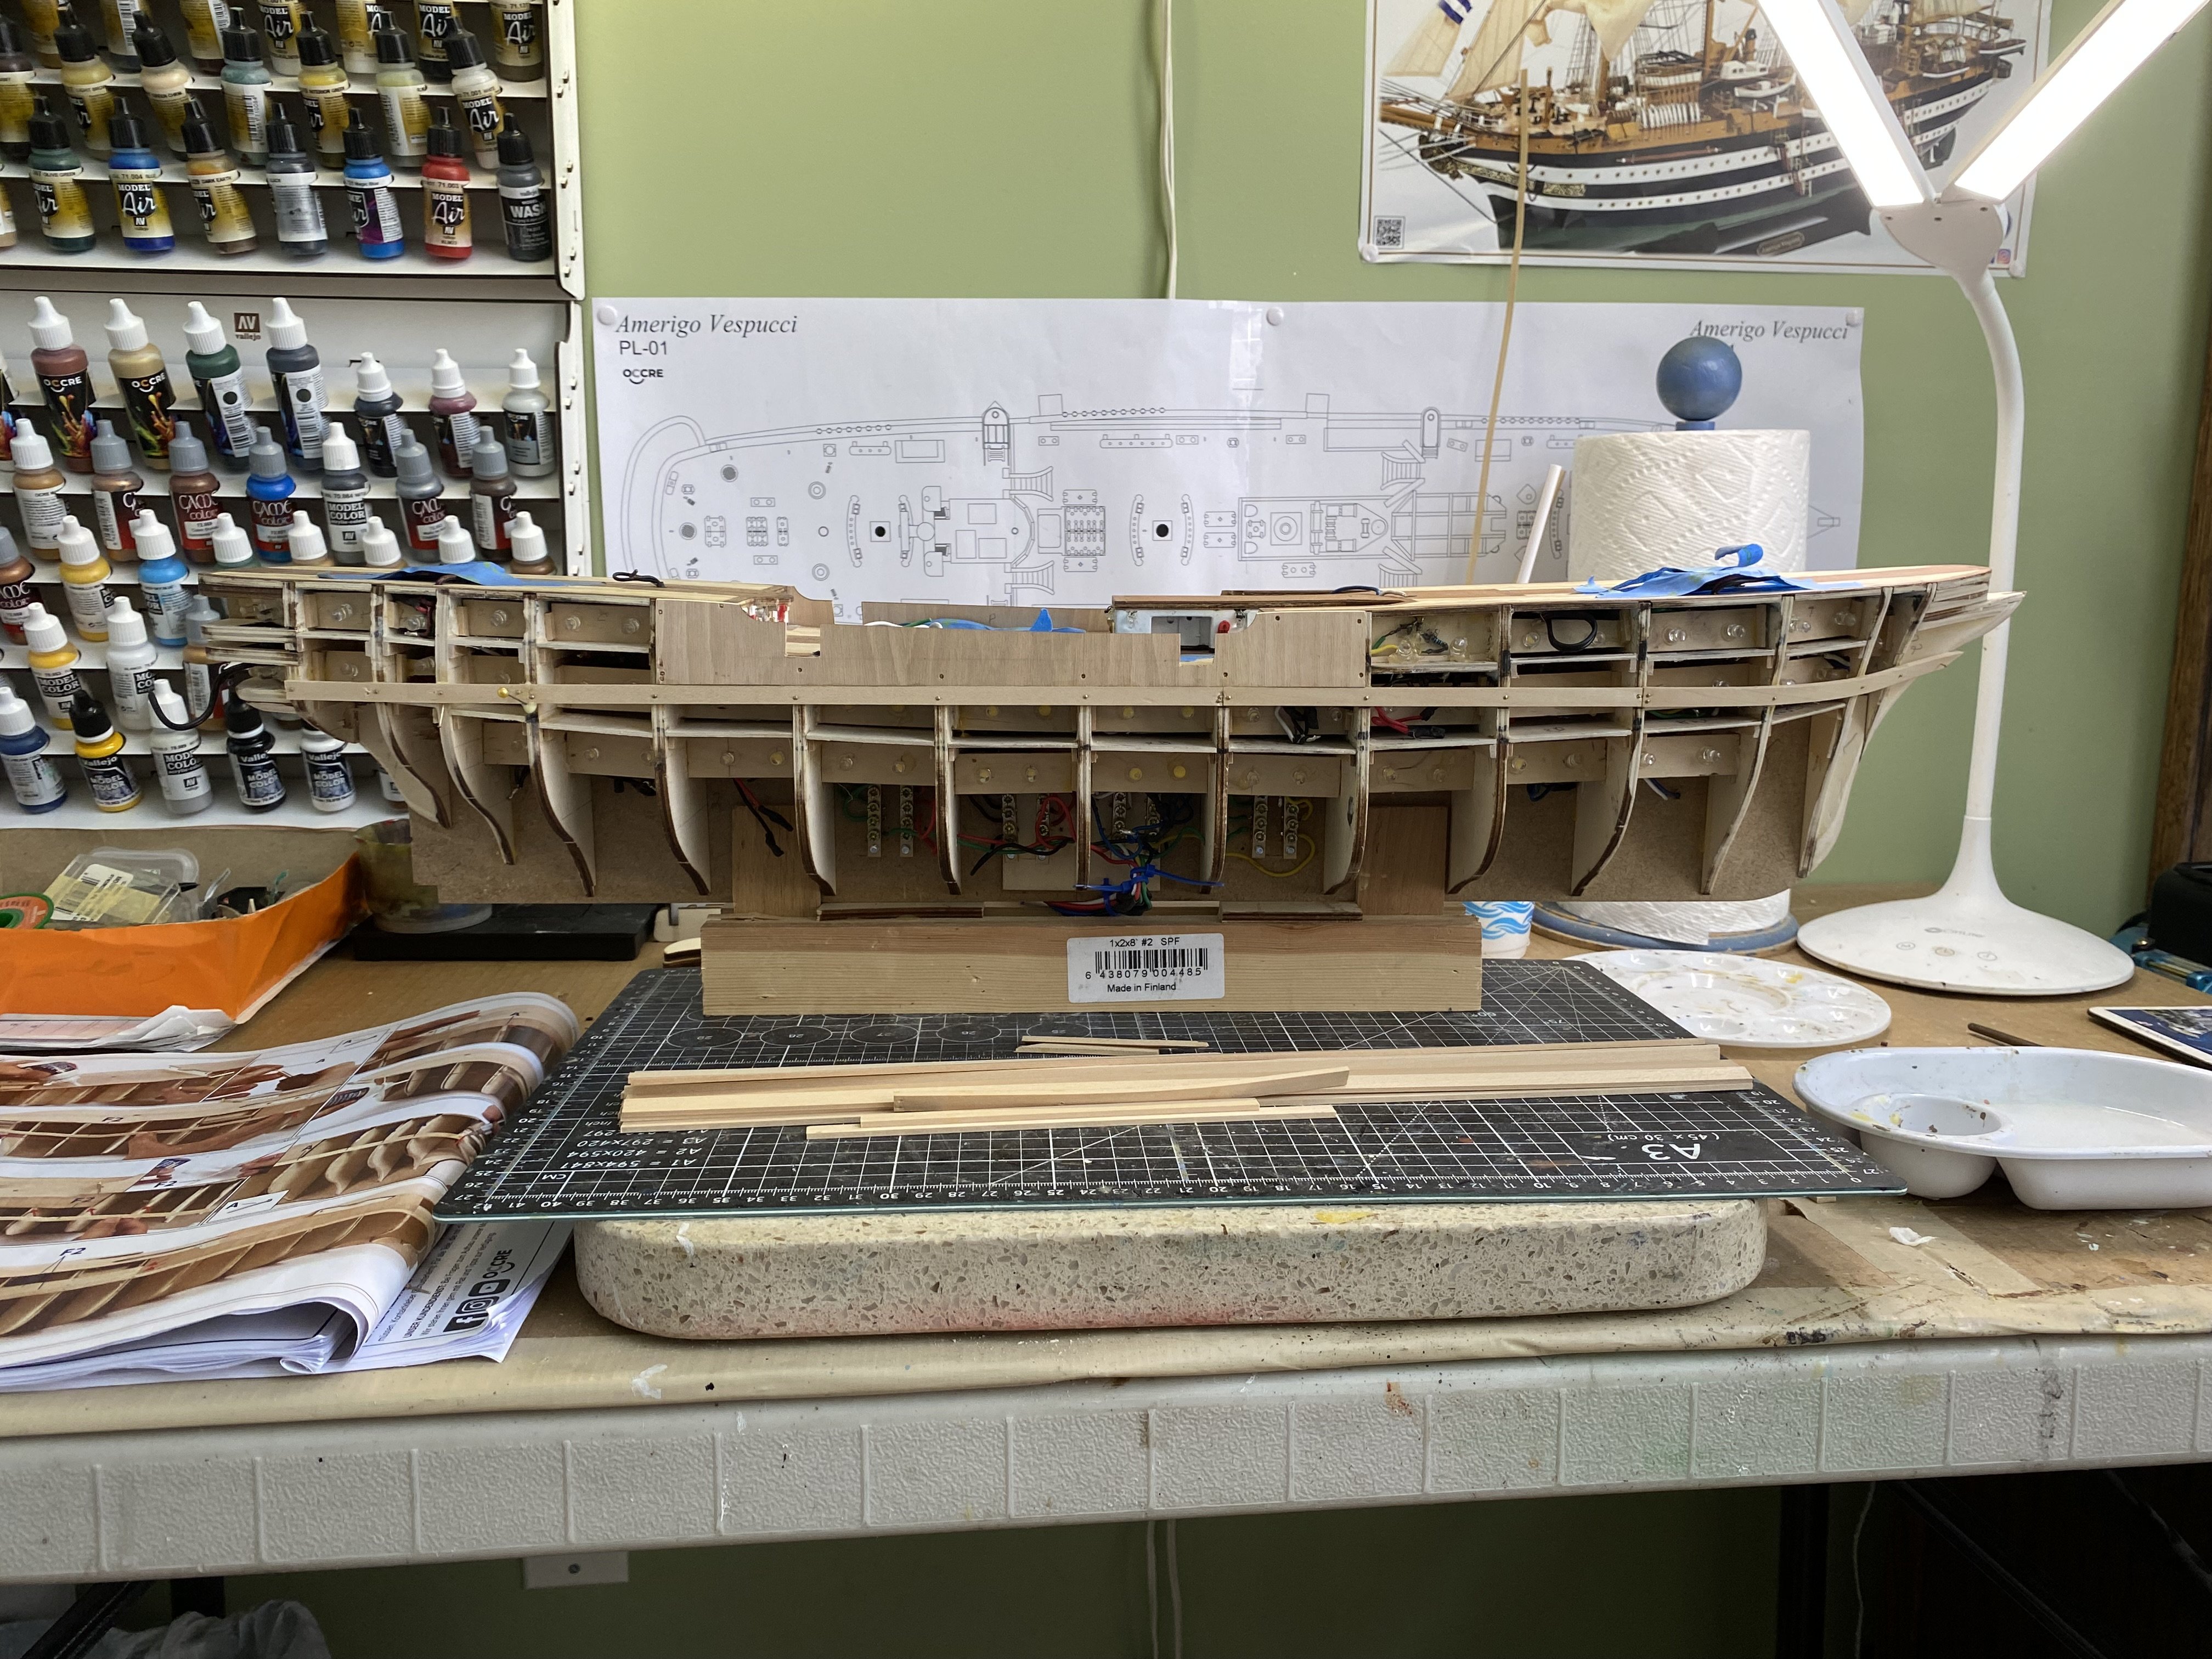
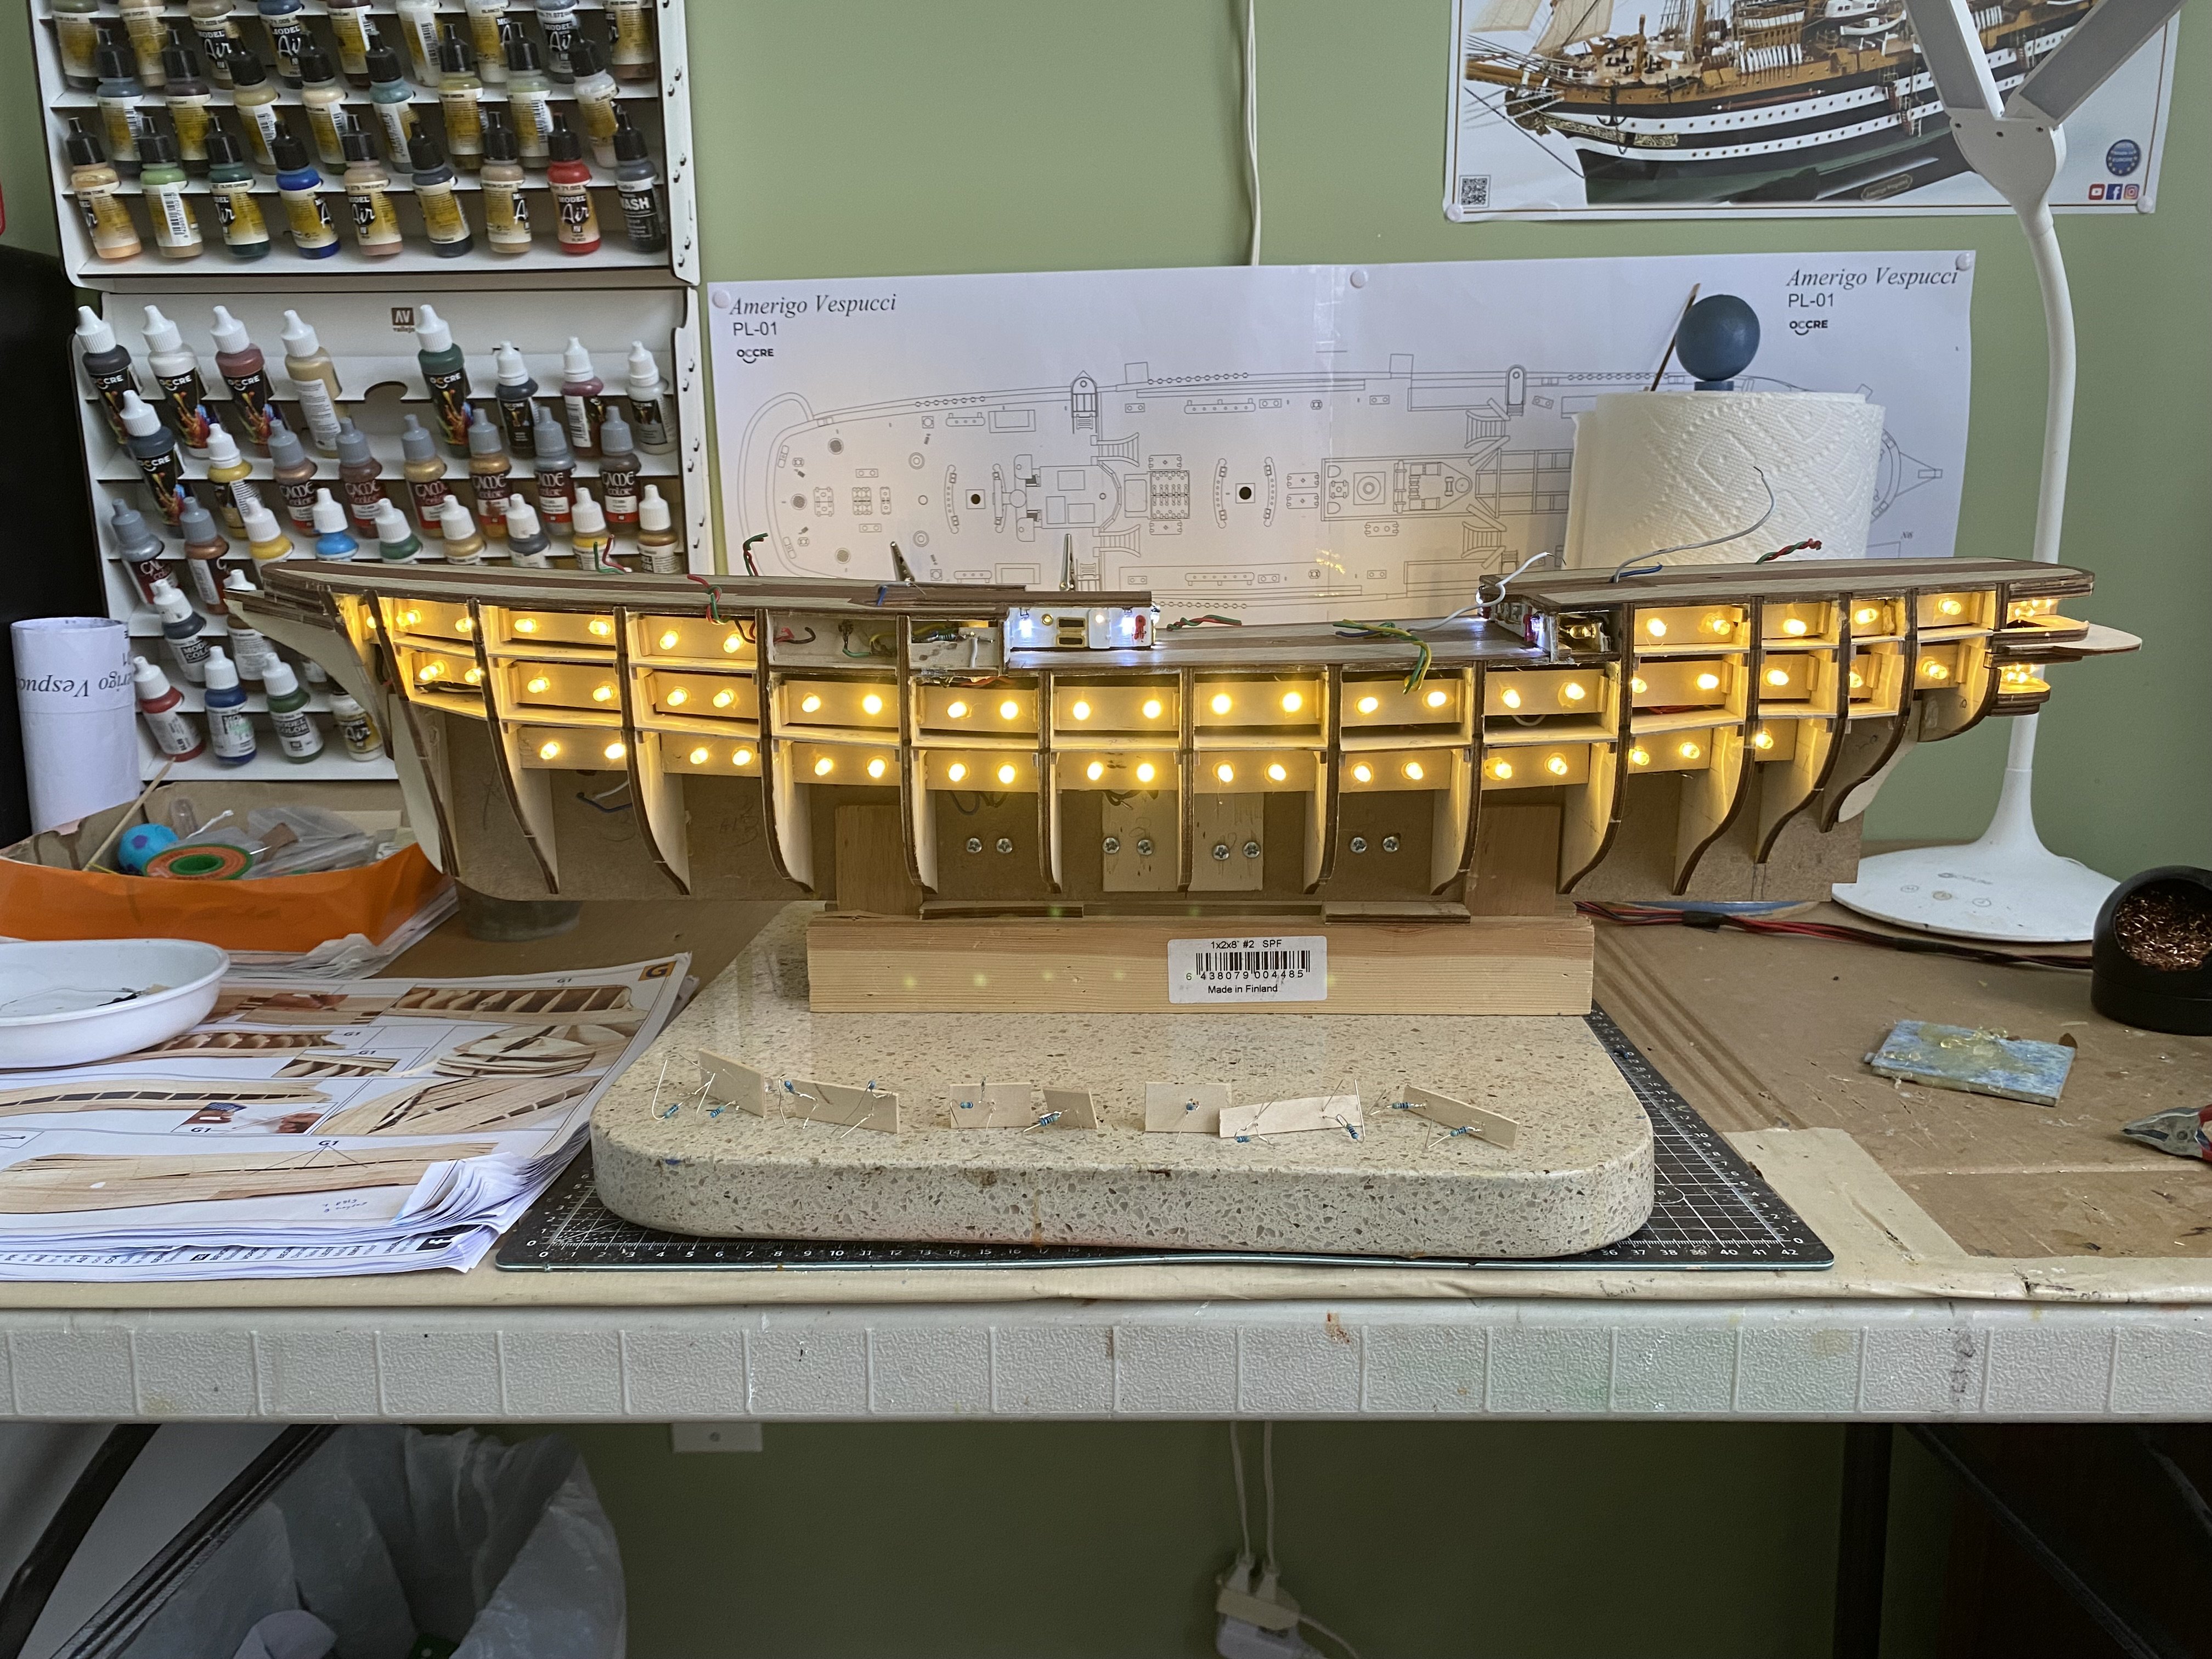
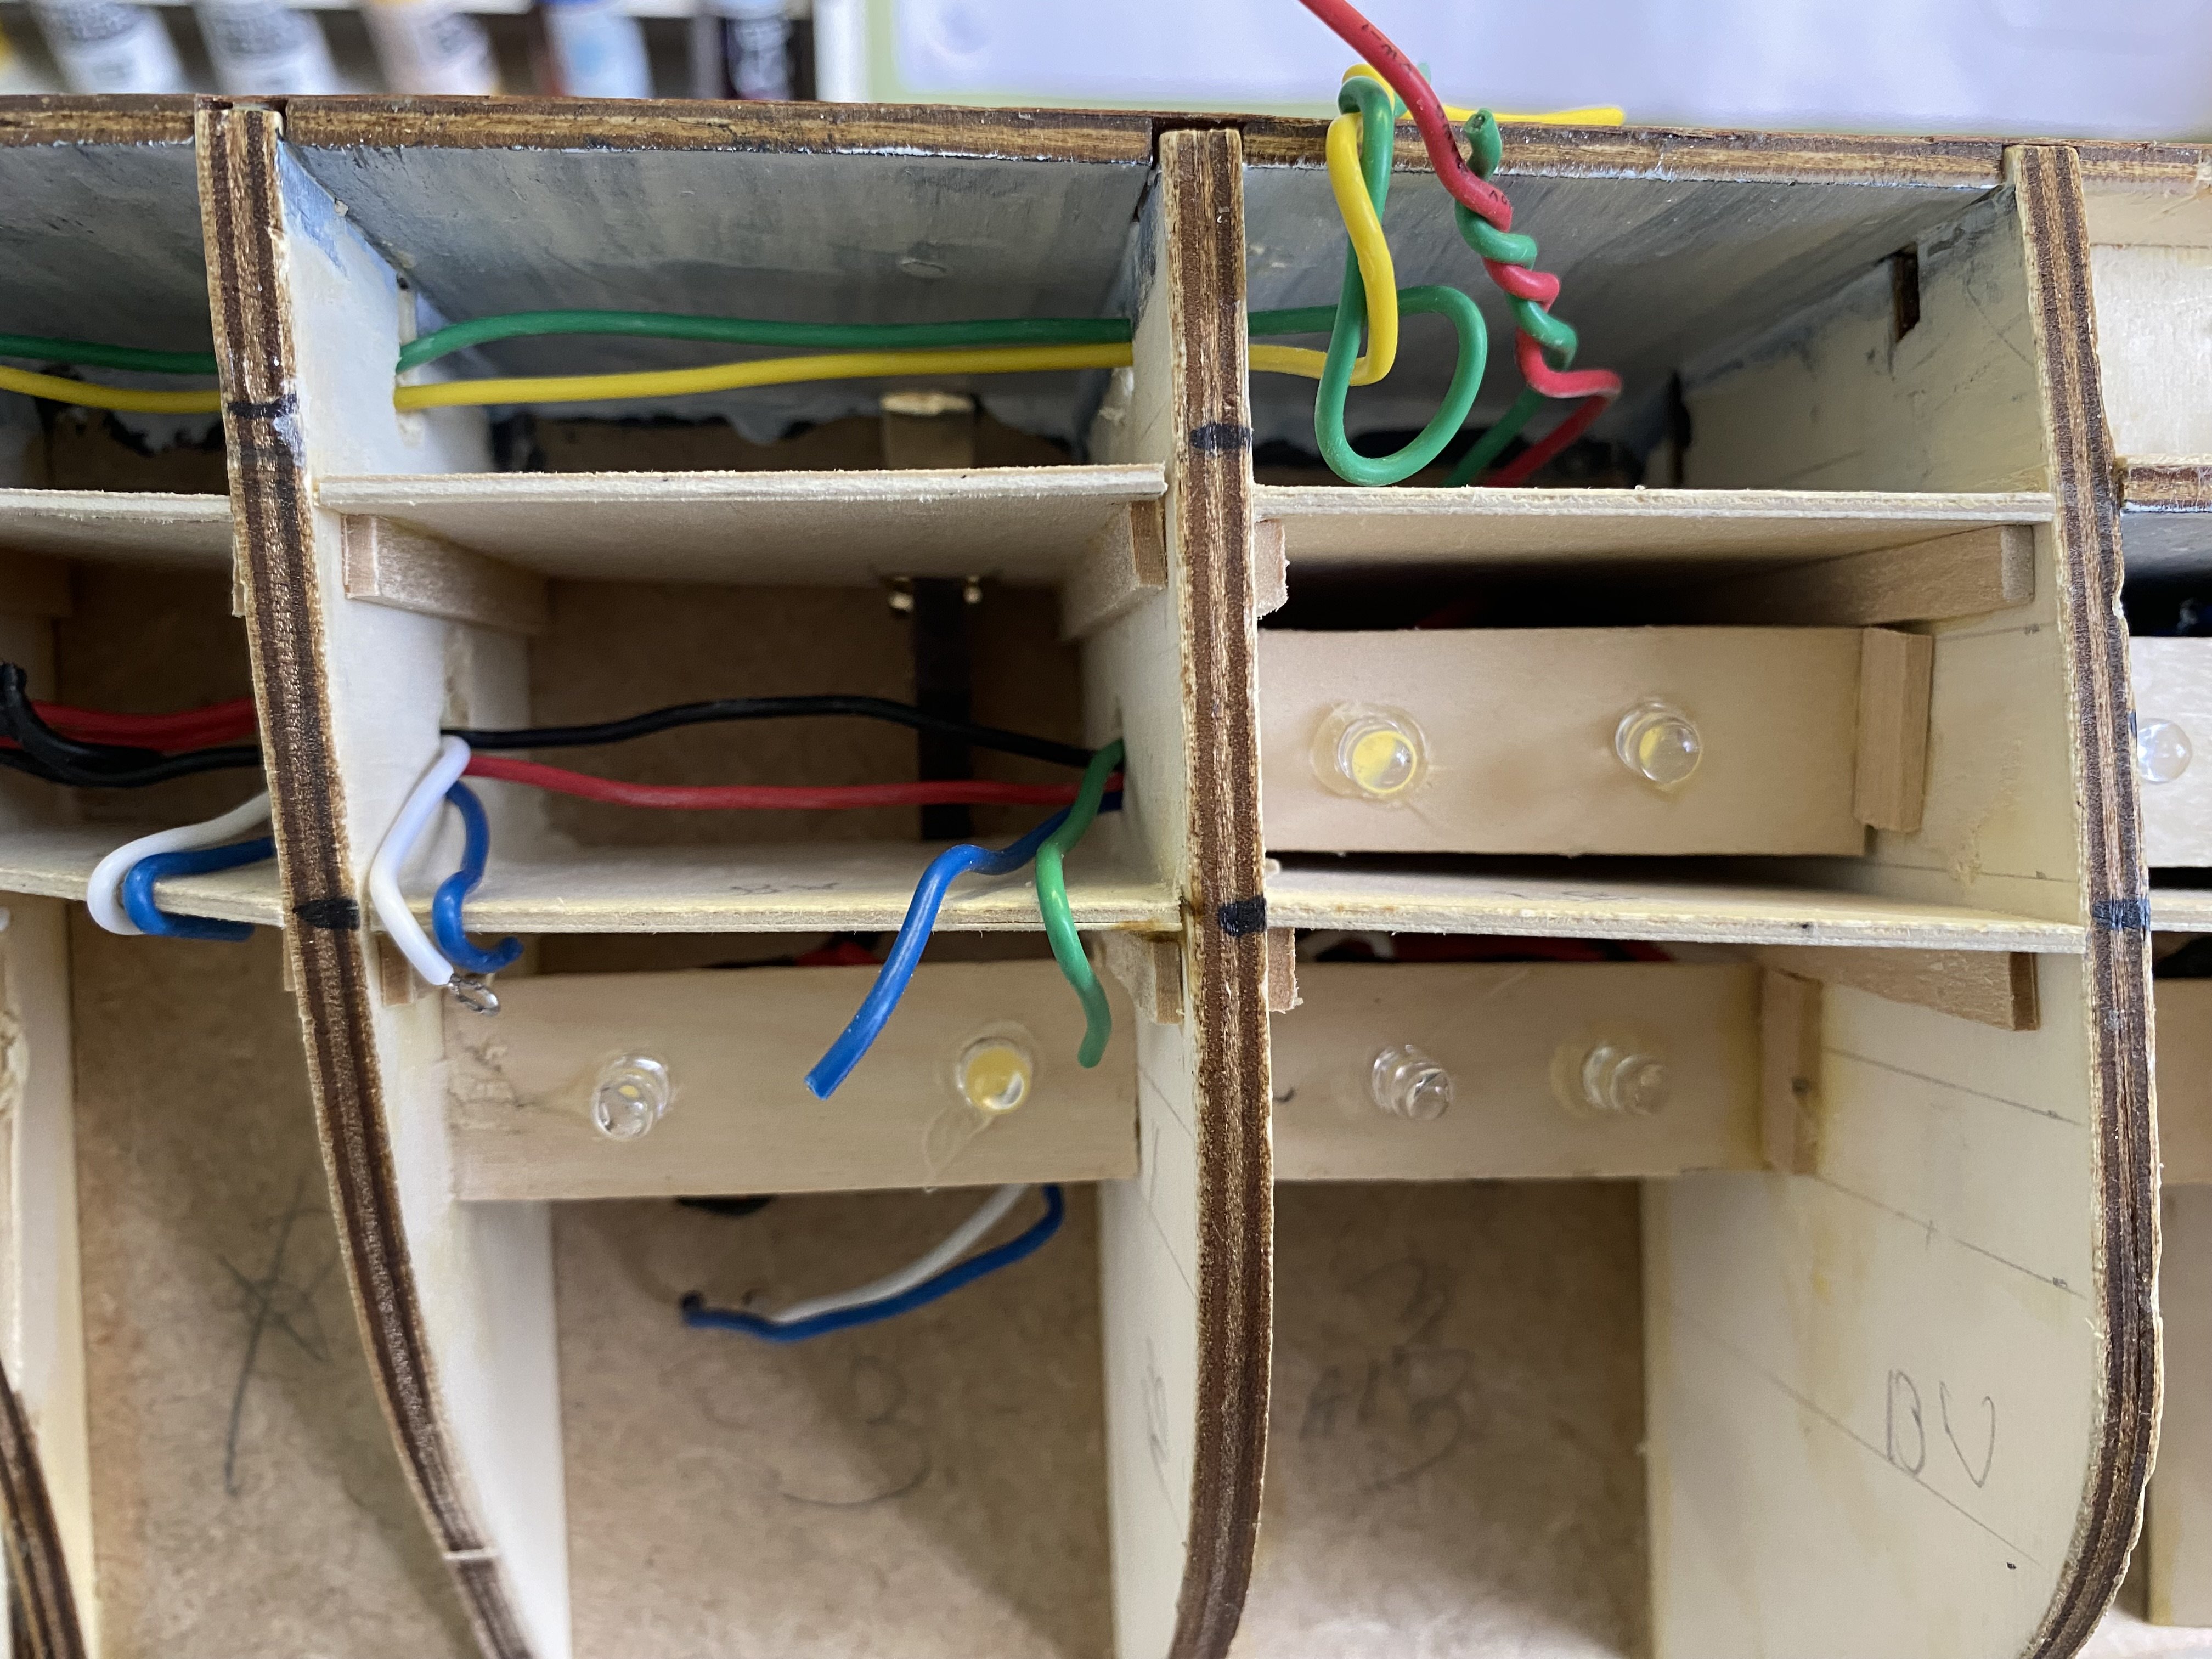
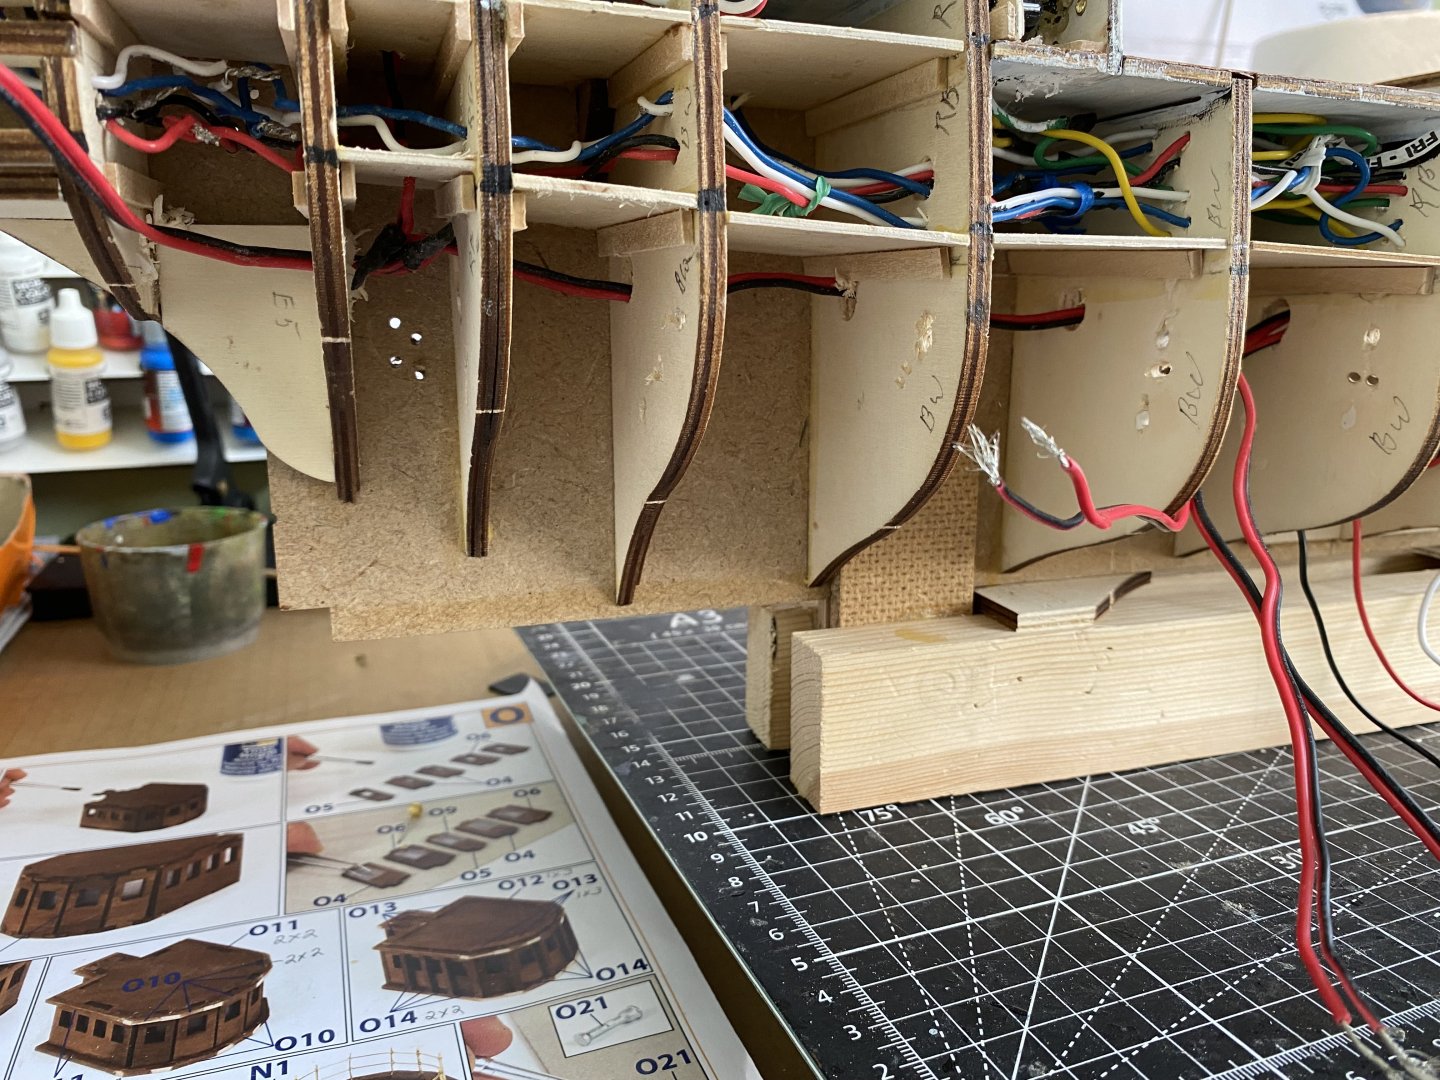
I noticed it has been about 3 weeks since my last update. Never fear I have not given up on this beautiful model. However I have spent time going backwards. I came to the conclusion that I really was not pleased with the installation of my lighting for the lower deck port holes. After Daniel expressed his concern with the circuit distribution little plastic clip things I was using I started feeling less confident in them. I therefore purchased and installed bus bars. I think I will be more confident in them and even considering putting a drop of solder at each screw to prevent ever coming loose inside the hull. Next I realized when I drilled all the holes in pieces that make up the hull (forget nauticle name) before gluing it all together I drilled them too close to the outside edge. When u started running all the wiring I had no place to put my LED light supports. So I just decided to pull out all the wiring and start over. Fortunately I have an 18 inch long small hole drill bit I was able to start at the bow and stern to drill all the way through close to the center of the ship. Now I am running the wiring through these new holes which leaves plenty of room for the LED supports. I have just done the lowest deck so far. The middle and top decks are still to follow. You can see in my photos how crowded the wiring is in the middle deck. I also decided to go with two lights in the wider sections of the ship to get better light uniformity.

-
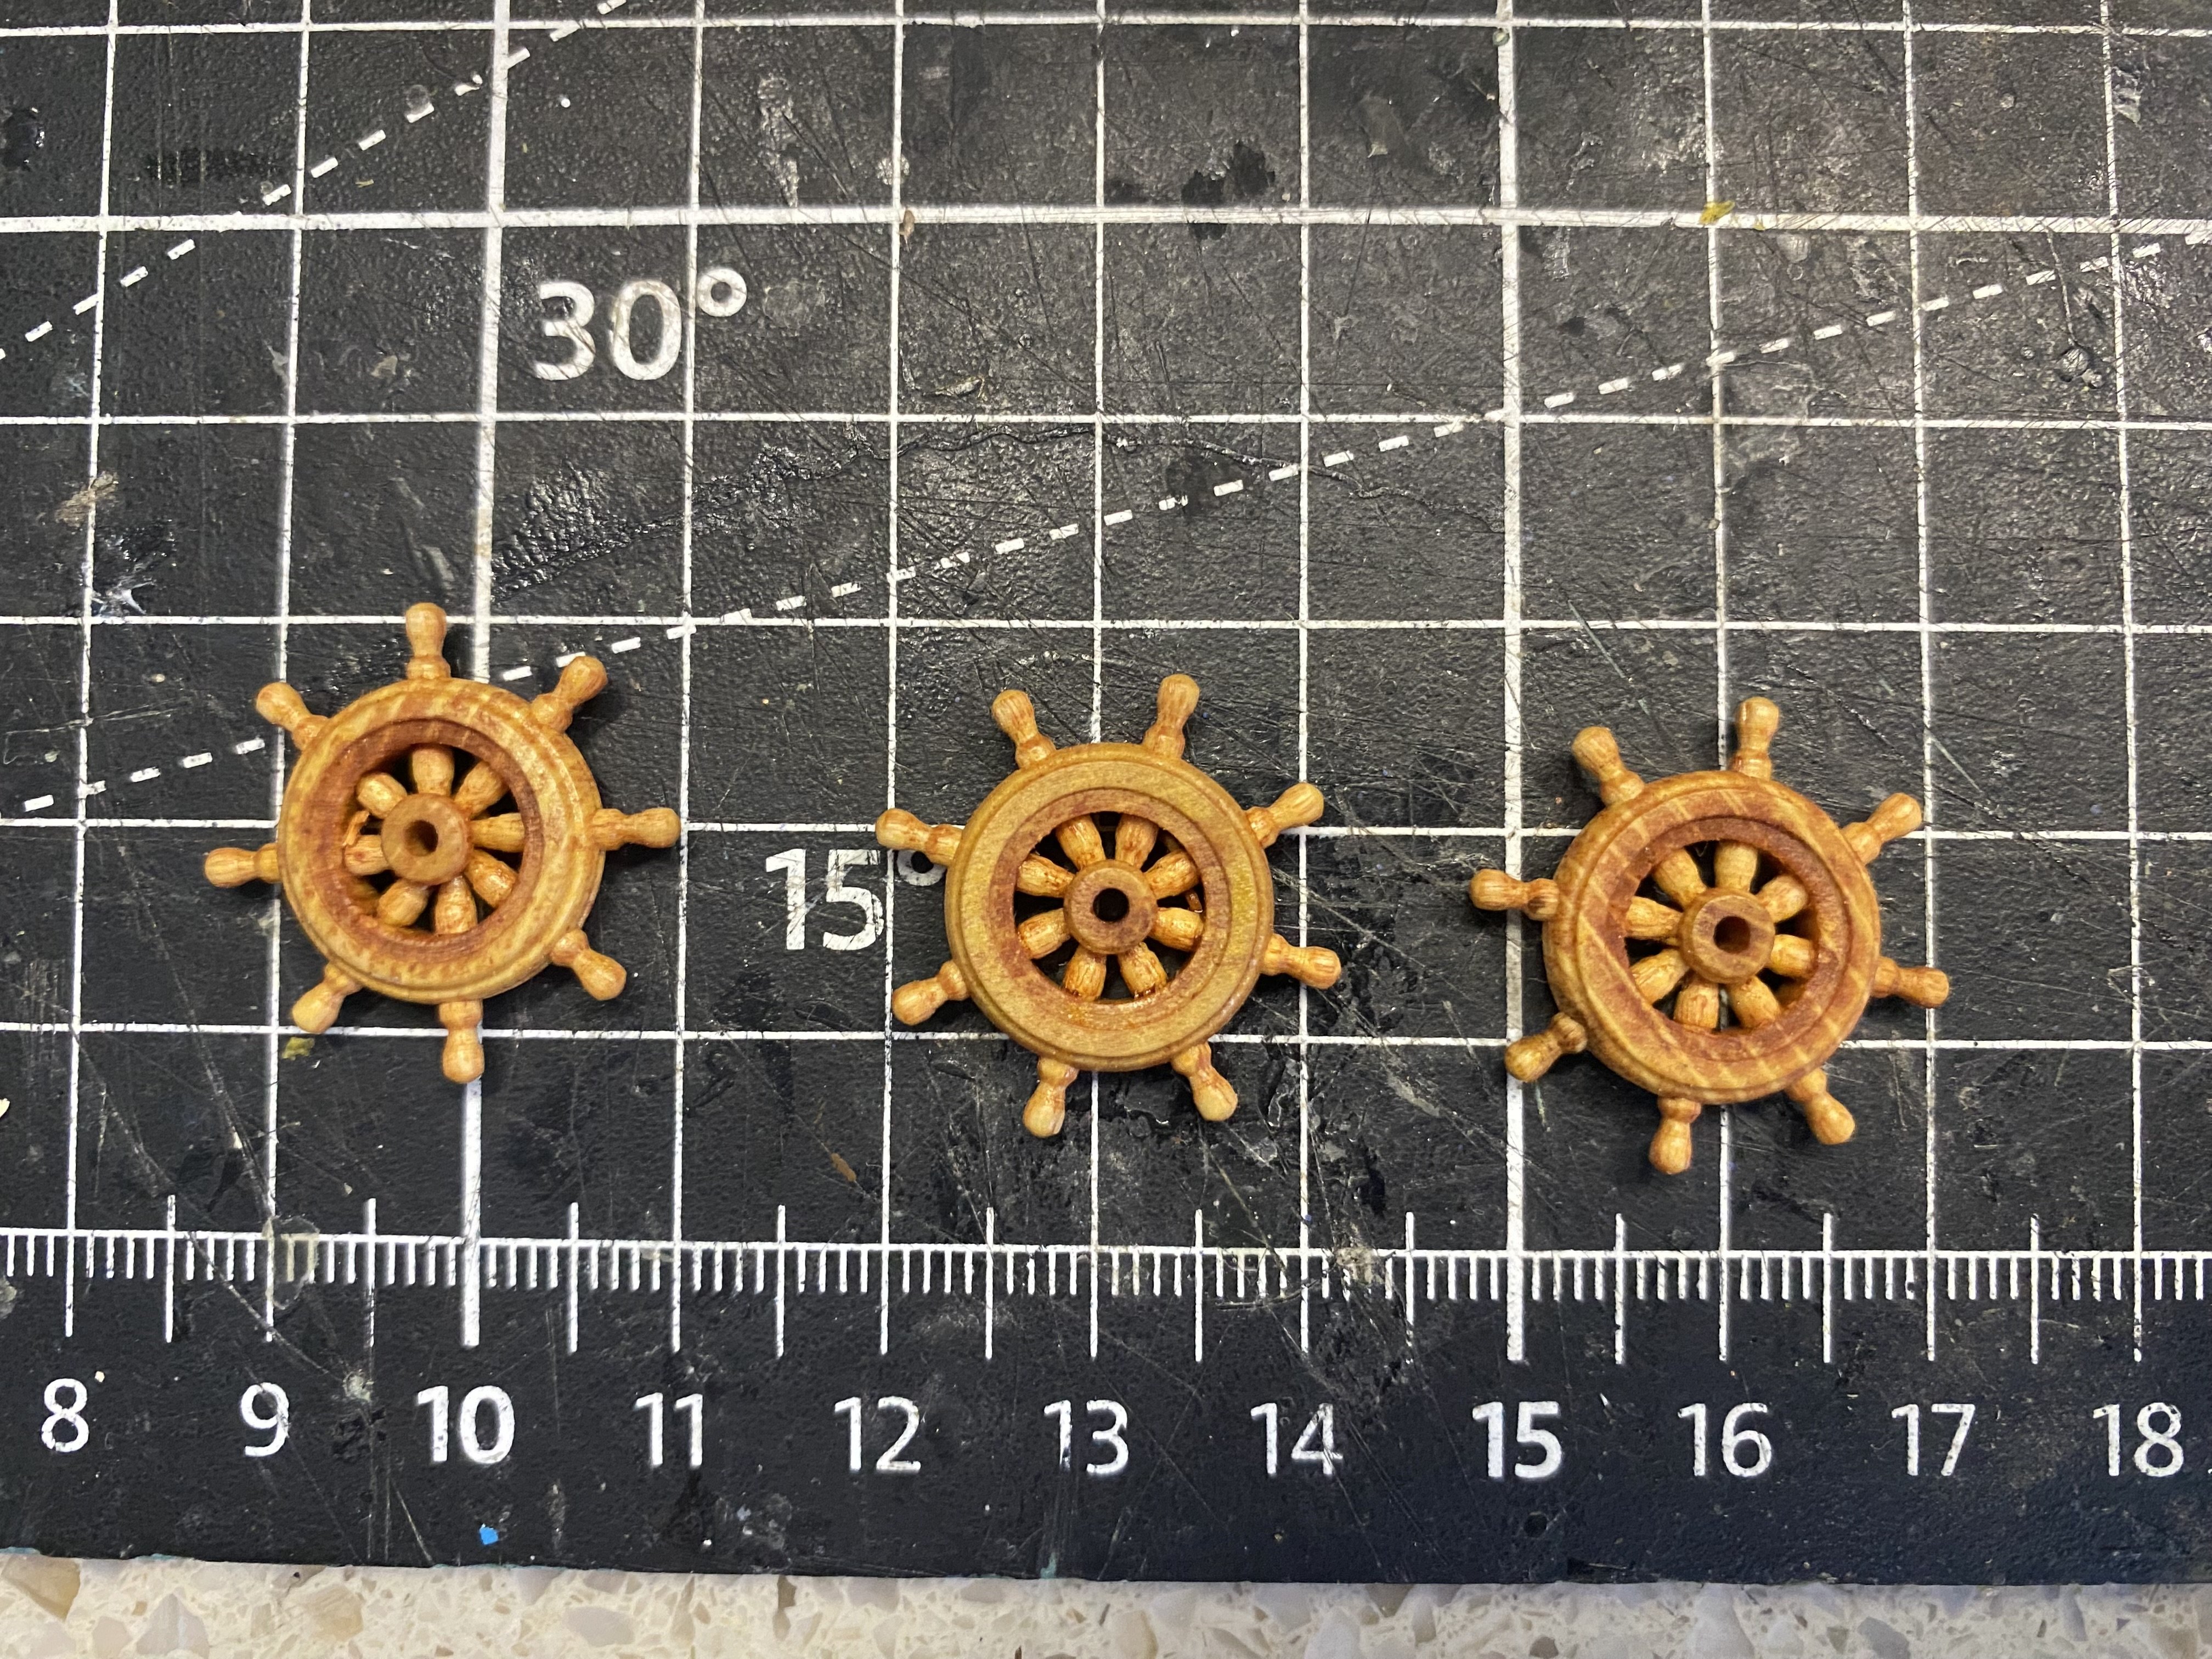
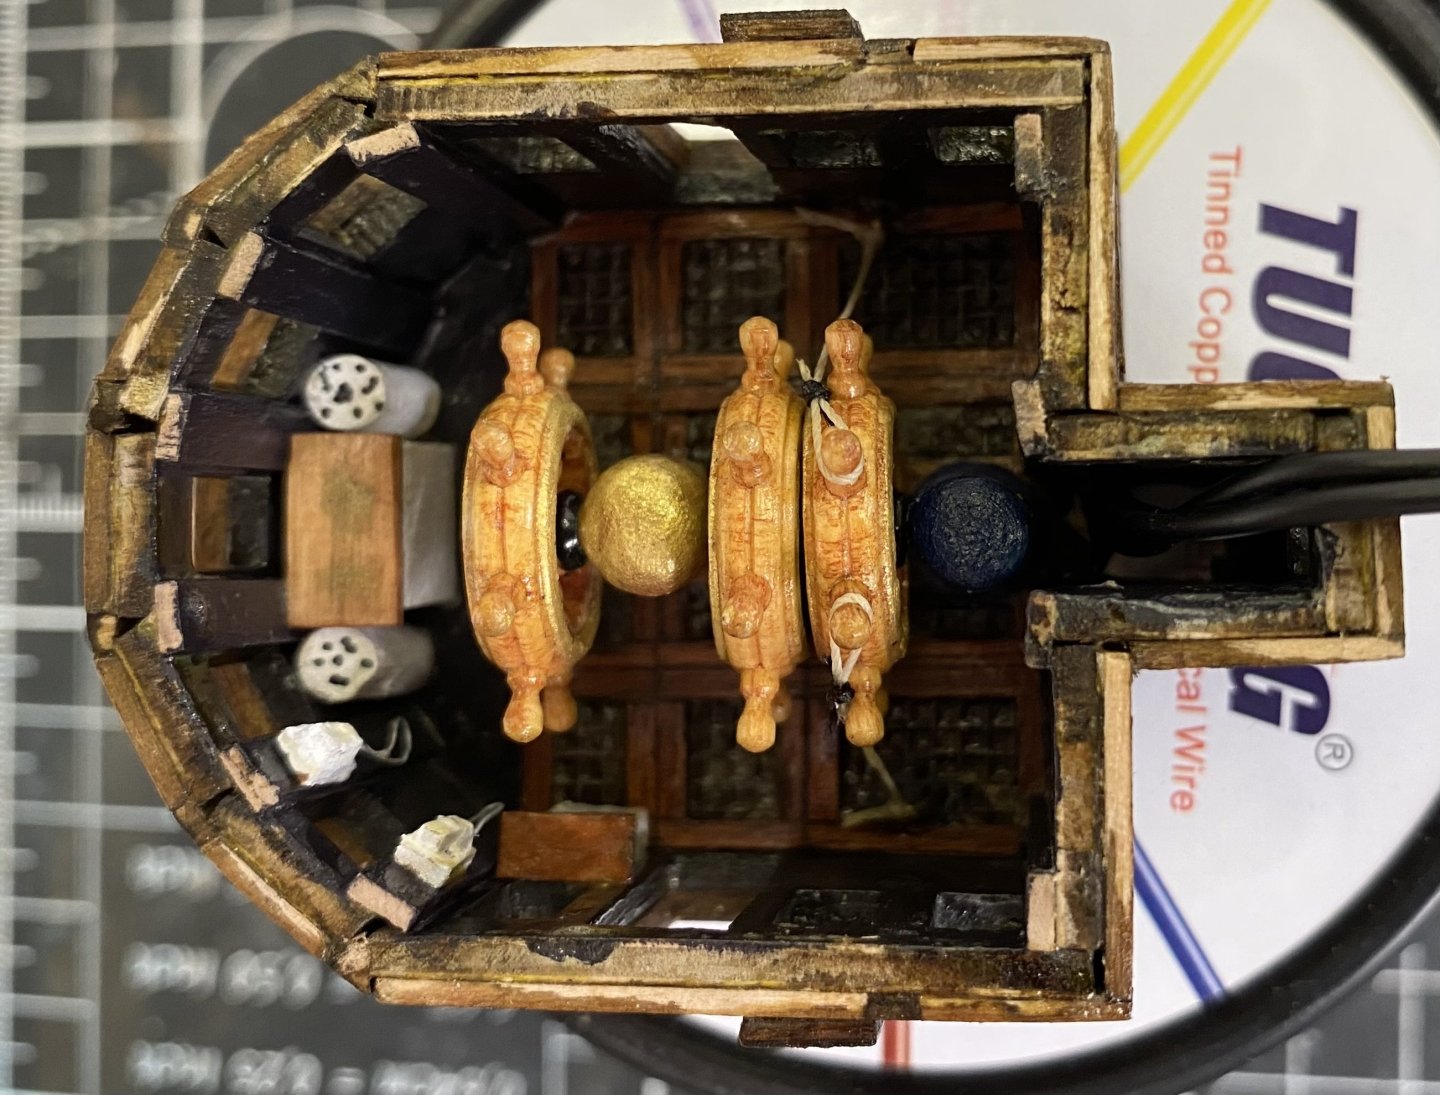
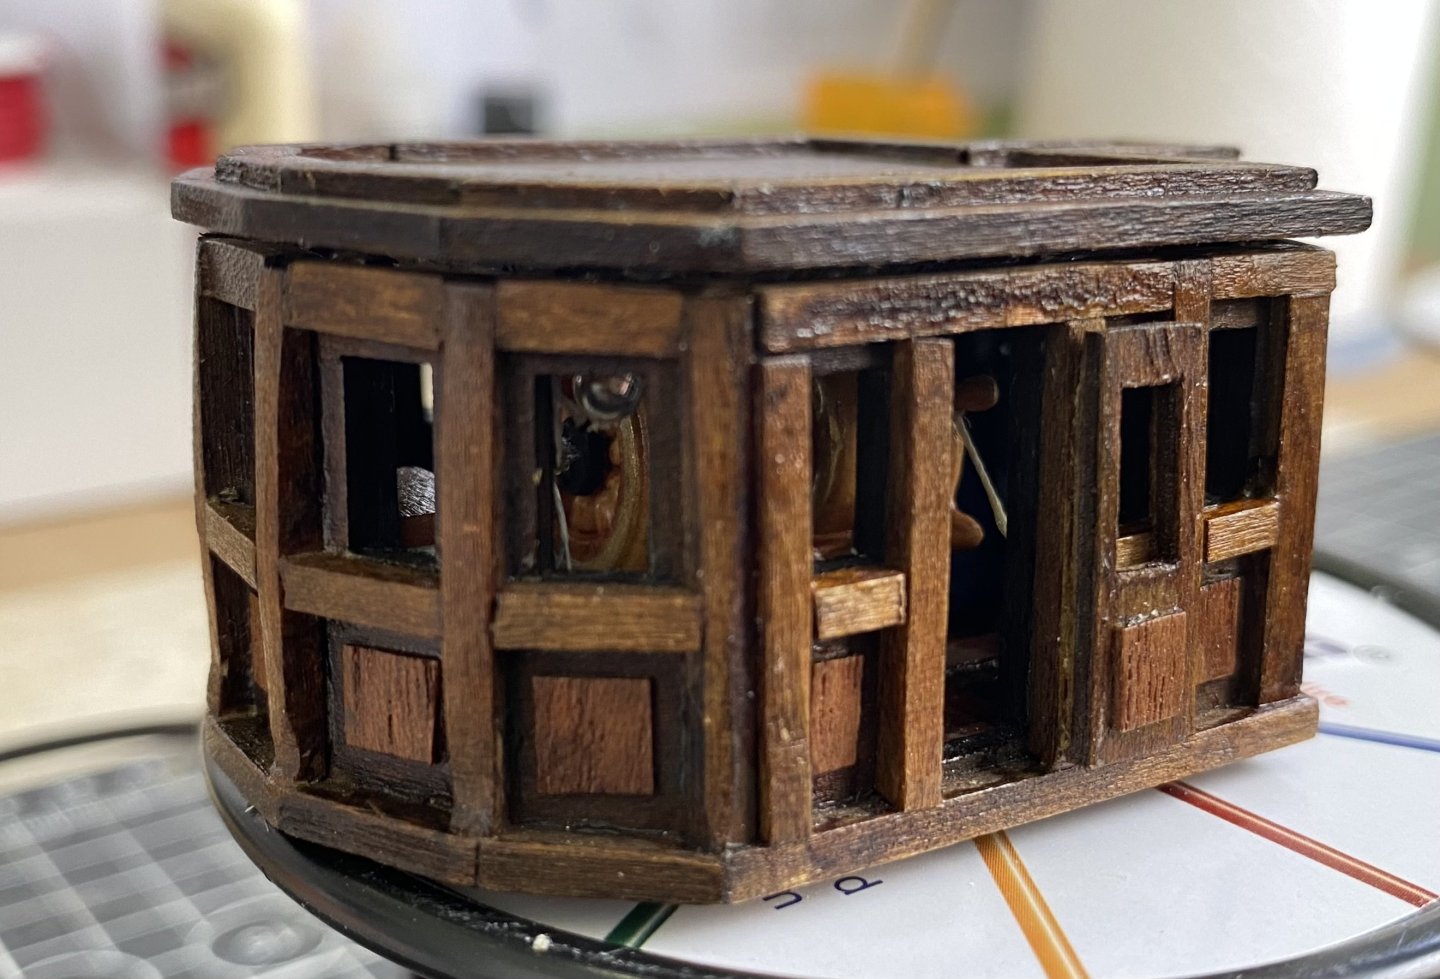
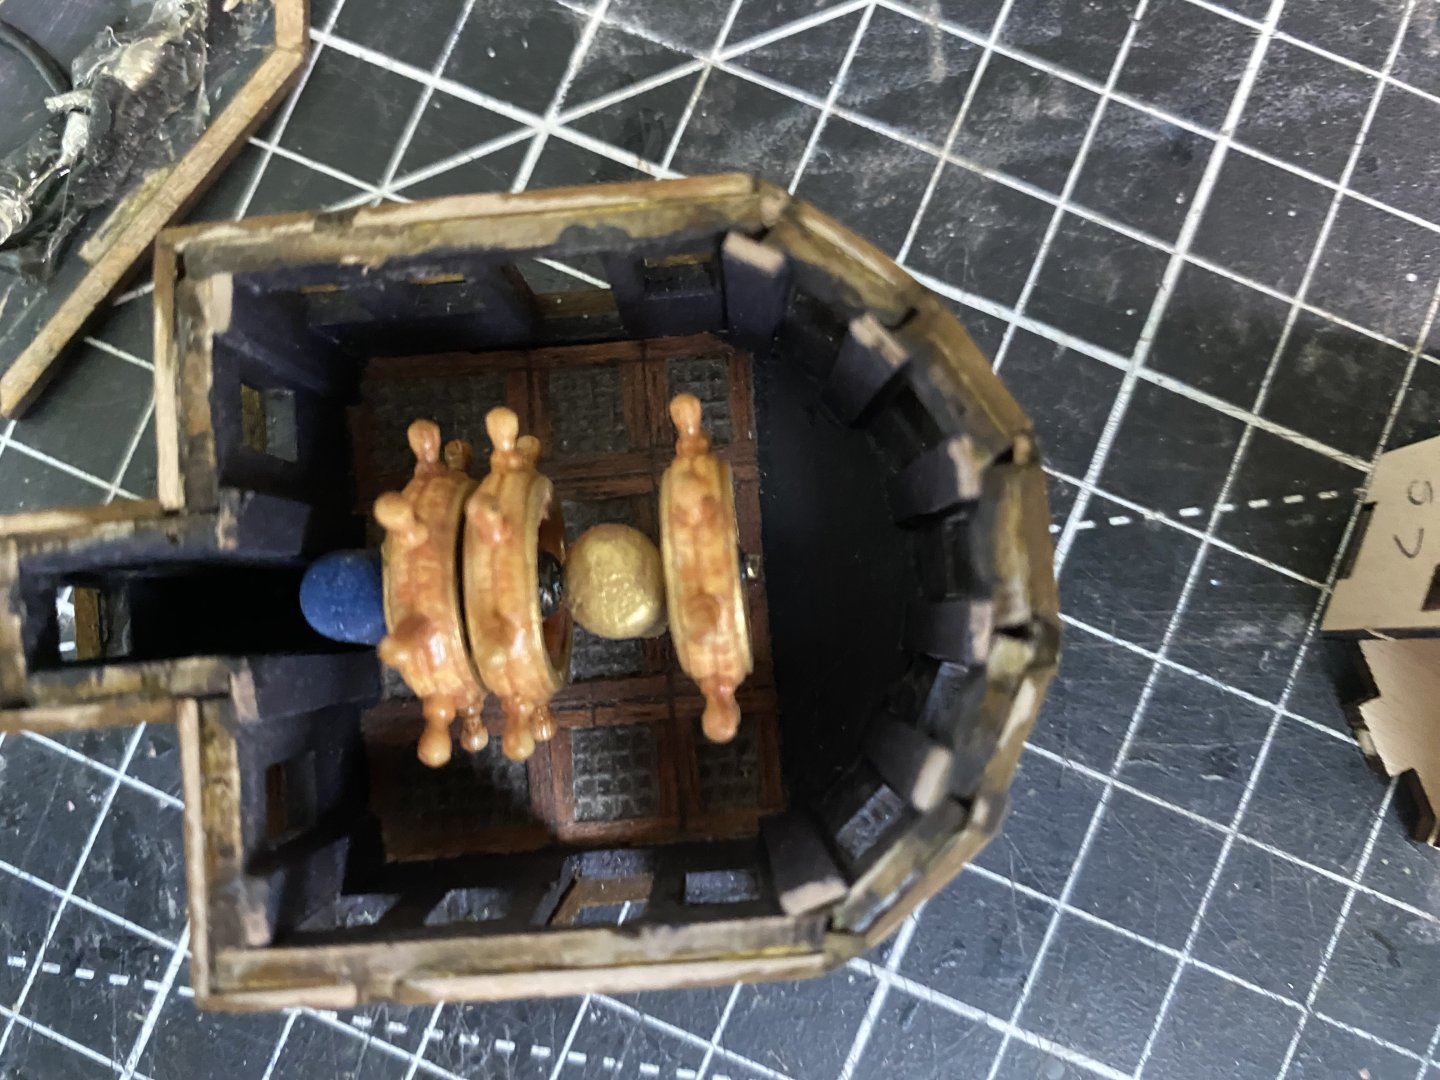
Daniel I too did not like what I thought OcCre provided for the wheels at the helm. I see later in the instructions that those wheels are intended to be used on the area with the clear top on the structure that sits on the fire control structure. However since I am going to have the helm open so I can see inside it I did want more authentic wheels. I found these. They are a slight larger than I hoped for but will fit. I purchased 4 as in the actual ship but may only to use 3. I too am struggling with if to put the windows in or not.


-
Thanks Daniel. I would expect that now you have the hull planked you are limited to what you can do additionally with electric?
-
Ok Daniel next question. You really have my curiosity up now. Reading back through your build (for the 100th time maybe 😊) I see you have the 3 main deck “houses” positioned on the deck and lit with your LEDs before you started planking the hull. Later in your build you show planking and the deck covered with the blue painters tape. It is obvious the “houses” are not under the tape. So should I conclude you temporarily set the “houses” in place and wired them and then later disconnected them from their circuit so you could take them off the deck?
-
Same with me Marc on the 3D printing. My 13 year old grandson has one and can do things I marvel at.
- 2,699 replies
-
- 1
-
-
- heller
- soleil royal
- (and 9 more)