Bill97
-
Posts
2,731 -
Joined
-
Last visited
Content Type
Profiles
Forums
Gallery
Events
Everything posted by Bill97
-
Good morning Marc. What I was referring to is this paragraph in your post above: I’m working on deck furniture. A considerable amount of time was spent, as always, on de-plasticizing the appearance of these parts; flash removal, in-filling of injection mould marks,softening of sharp edges, and general detailing. From that I was thinking maybe you 3D printed all new parts instead of working on the kit supplied parts. So with that thought in mind I just wondered how you set up the 3D printer. Understand all the life trials you are dealing with right now my friend. I battle the old high cholesterol as well (my doctor finally put me on a statin). I had to smile when I read about your paint issue. Just today I needed to use a bit of black enamel. I have a number of those little bottles of different colors. It had been a while and the lid was very much stuck. I thought my crescent wrench will fit around this square little bottle perfectly and then I can turn the lid with my pliers. BAD IDEA!! The lid did not turn. However the bottle did and broke right in the middle dispensing black enamel in places I wish it had not. Fortunately none got on my model.
- 2,699 replies
-
- 2
-

-

-
- heller
- soleil royal
- (and 9 more)
-
Oh Daniel I thought you were 3D printing all new pieces not modifying what came with the kit. I know very little about 3D printmaking but am thinking you have to program the printer to make the piece you want, either an already made program or design your own. Is that correct?
-
Marc as long as you keep working at it we will continue to check in. Are you needing to come up with the CAD for the pieces or can you find CAD software already available? Hope my question makes since.
- 2,699 replies
-
- 1
-

-
- heller
- soleil royal
- (and 9 more)
-
Alright Daniel. So my quest begins. I ordered the new wheels. Going with 4. Thanks again Bill
-
Yes Ian you are correct on the heat shrink tubing. I am using that product extensively on my newer soldered connections. Before I was fully knowledgeable of it I had a number of connections already soldered. For those I found a liquid rubber product I can just paint on a soldered connection. When it dries it forms a rubber coating to protect. Many many soldered LEDs to go in 4 separate circuits. Thanks Kevin. It did in fact take a bunch of plank cutting. The electric lighting really is not extremely difficult. Once you learn the basics and if you have a great tutor like I had in Daniel.
-
Yes Ian I am. I am tackling the OcCre Amerigo Vespucci with some artistic privileges venturing outside the box. I am also doing an extensive lighting plan I hope works out. Here is the link if you want ant to take a peek. https://modelshipworld.com/topic/38262-amerigo-vespucci-by-bill97-occre-1-100/ Bill
-
Looking great Ian. Had to do a little searching to find what you were into now. This is battle cruiser is a new direction do you.
-
QUICK-FIND INDEXES to BUILD LOGS FOR KITS
Bill97 replied to Dan Vadas's topic in - Index of all kits by brand and subject
Hey JeffT, you helped me before and I always appreciate it. Next time there is an update to the index would you include my OcCre Amerigo Vespucci build? Thanks in advance for all you do. Bill https://modelshipworld.com/topic/38262-amerigo-vespucci-by-bill97-occre-1-100/ -
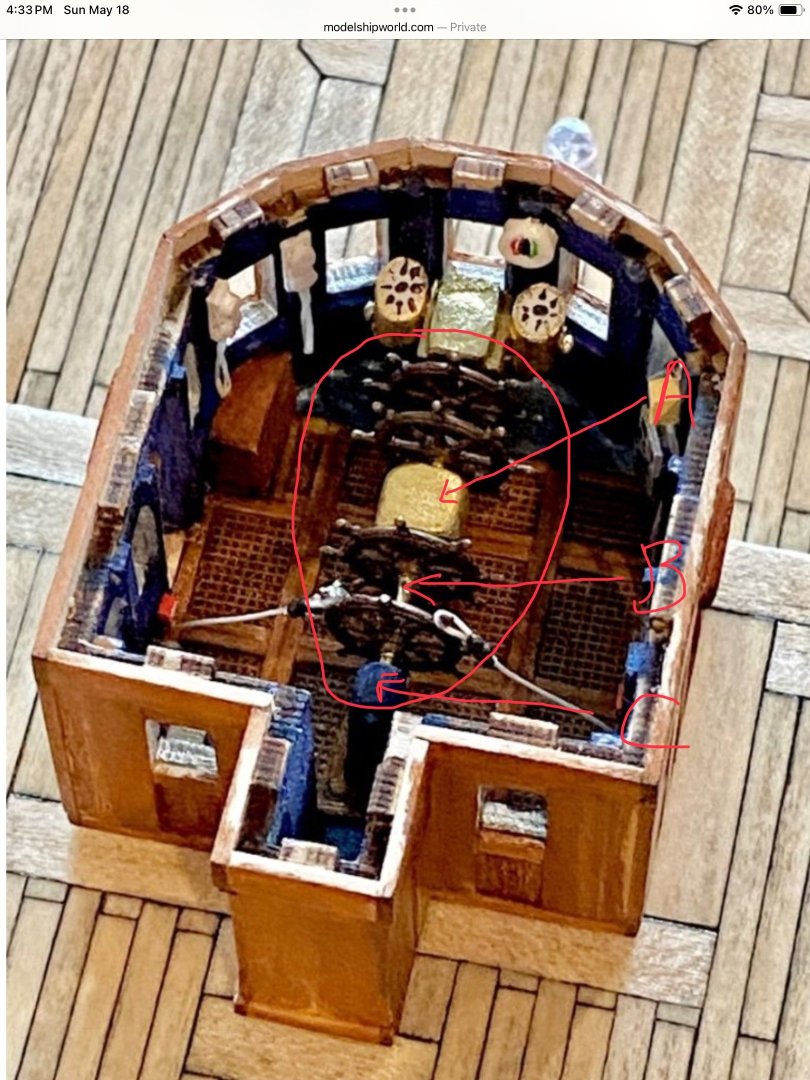
Beautiful job Daniel on the bowsprit netting. More for me to try to use as reference. Daniel I am working on the helm and referring to your work here as well. As you are aware the OcCre instructions are very limited as to what to do with the inside, even if I just wanted to follow the basic instructions. As you mentioned the included wheels are kind of sad and I know I will need to do something differently there. The instructions don’t even show how to mount them if I were to have wanted. But were there any parts included in the kit you did use to make parts B and C in the photo? Or did you purchase and or fabricate the entire mechanism?
-
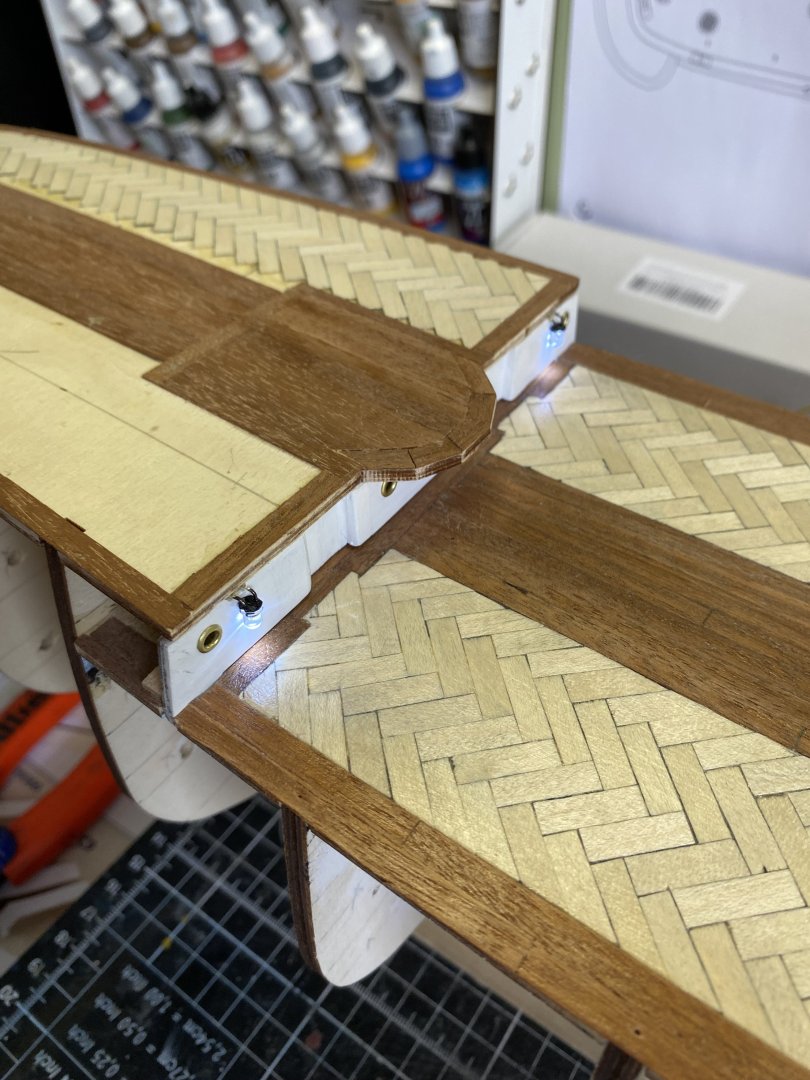
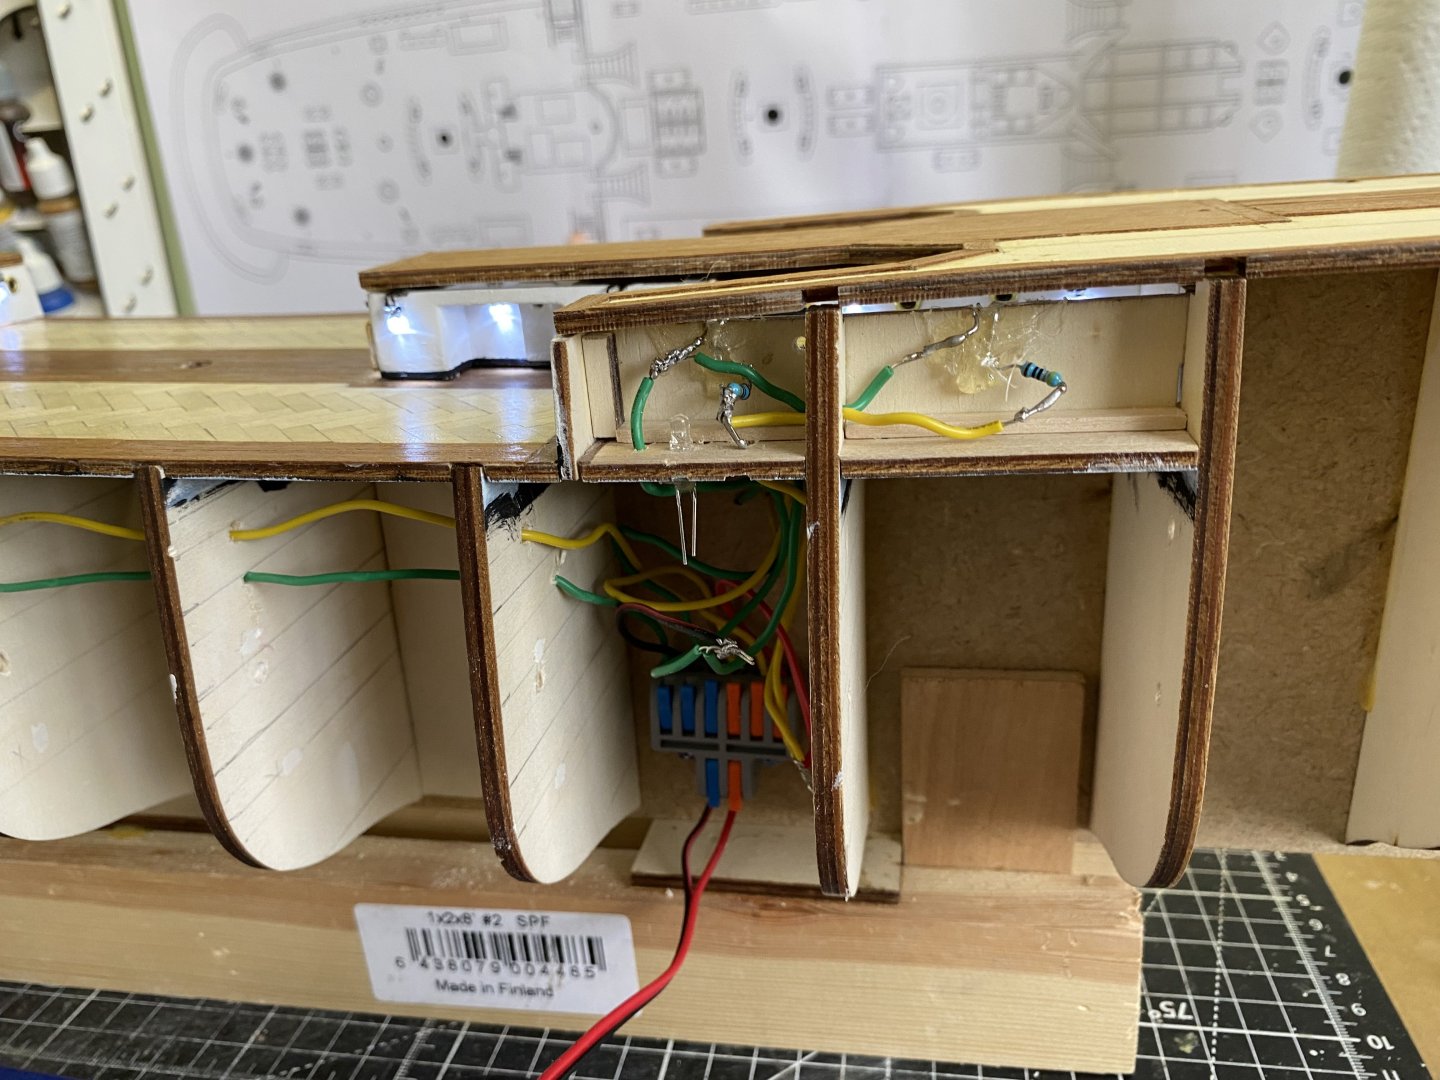
Been a bit since my last update. Have been working on the issue I described above. I noticed I was not getting a uniform level of light from the port holes on the deck structures if I had the LED bulbs mounted vertical. I am also using 5mm lights. I have 8 holes in the fire control room including port holes and holes at the top of doors. So I really wanted to mount a LED at each hole. It is a bit of a snug area. The wiring for the outside down lights is also I closed in here. After a number of iterations I finally got what I wanted. I am using 5mm warm white lights for the interior of the deck structures and will use this same LED for the port holes on the two decks. The deck lights are 3mm white bulbs.


-
Daniel I made an interesting discovery. LED lights are brighter viewed from the top rather than the side. I researched this a little and found it is definitely true. This will add a degree of complexity to my lighting plan if I want uniform brightness. My plan for the side portholes is to mount the LEDs horizontally close to where the port hole will be. This will give maximum brightness through the port hole. However for the deck structure interior lights, that will be on the same circuit(s) using diodes, my plan was to mount them vertical in the deck inside the structures. This plan results in dimmer light shining through the windows and portholes compared to what eventually will shine through the hull portholes. So if I want uniform brightness I will need to mount them horizontal as well
-
Daniel I made an interesting discovery. LED lights are brighter viewed from the top rather than the side. I researched this a little and found it is definitely true. This will add a degree of complexity to my lighting plan if I want uniform brightness. My plan for the side portholes is to mount the LEDs horizontally close to where the port hole will be. This will give maximum brightness through the port hole. However for the deck structure interior lights, that will be on the same circuit(s) using diodes, my plan was to mount them vertical in the deck inside the structures. This plan results in dimmer light shining through the windows and portholes compared to what eventually will shine through the hull portholes. So if I want uniform brightness I will need to mount them horizontal as well.
-
Thank you Daniel. I will give it a look.
-
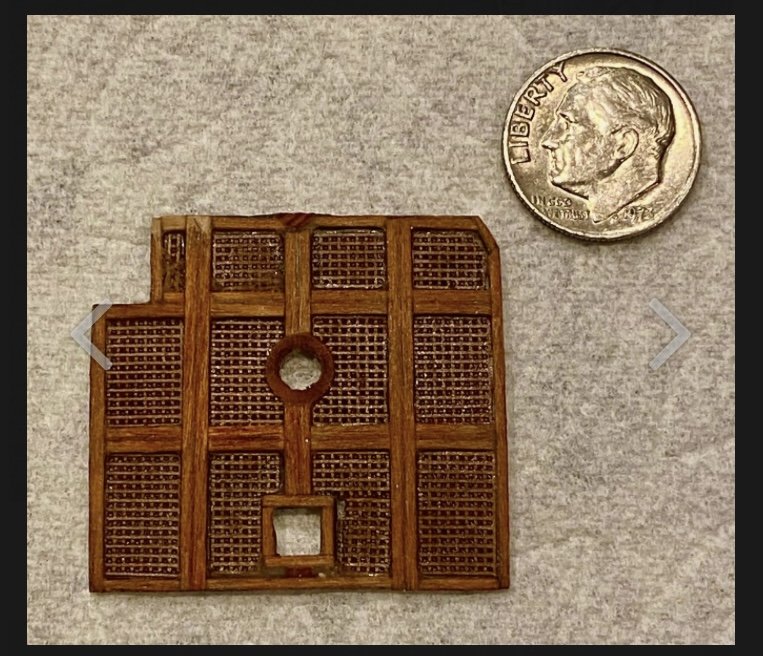
Daniel I spend a lot of time perusing your build to get inspiration and ideas. I am curious, maybe fascinated, by this floor. What did you do to make it? Looks so similar to the original on the ship.
-
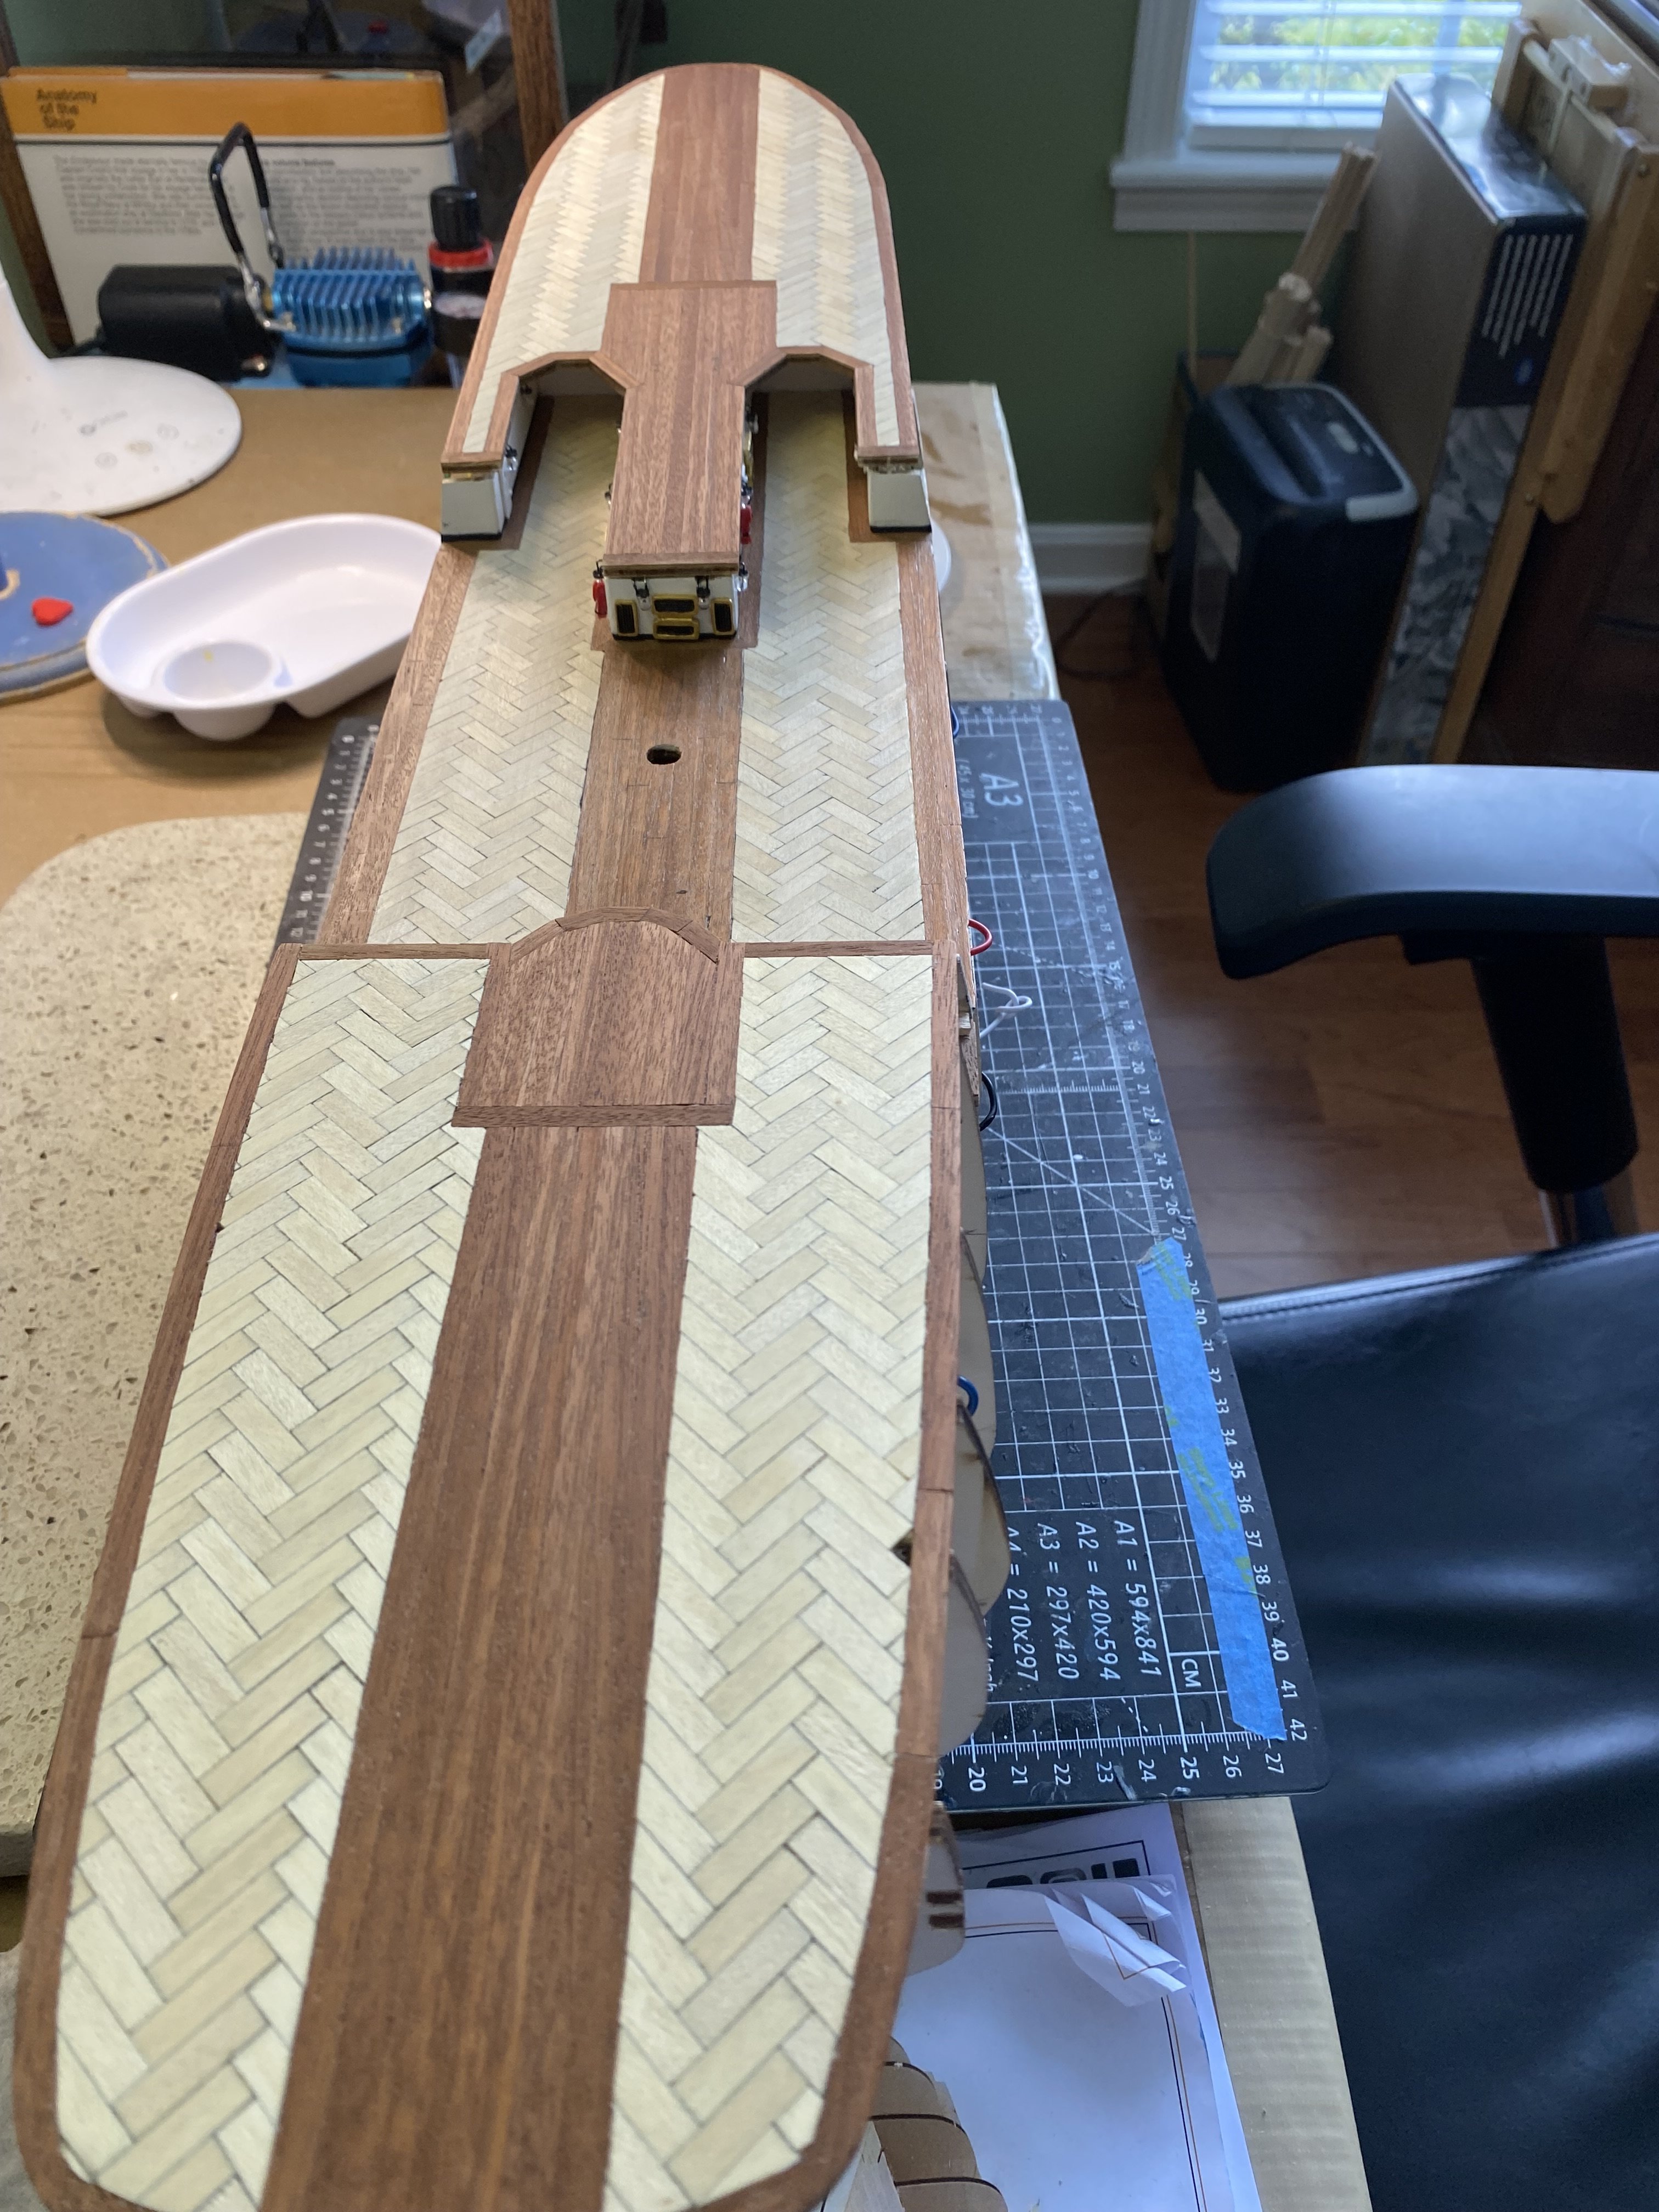
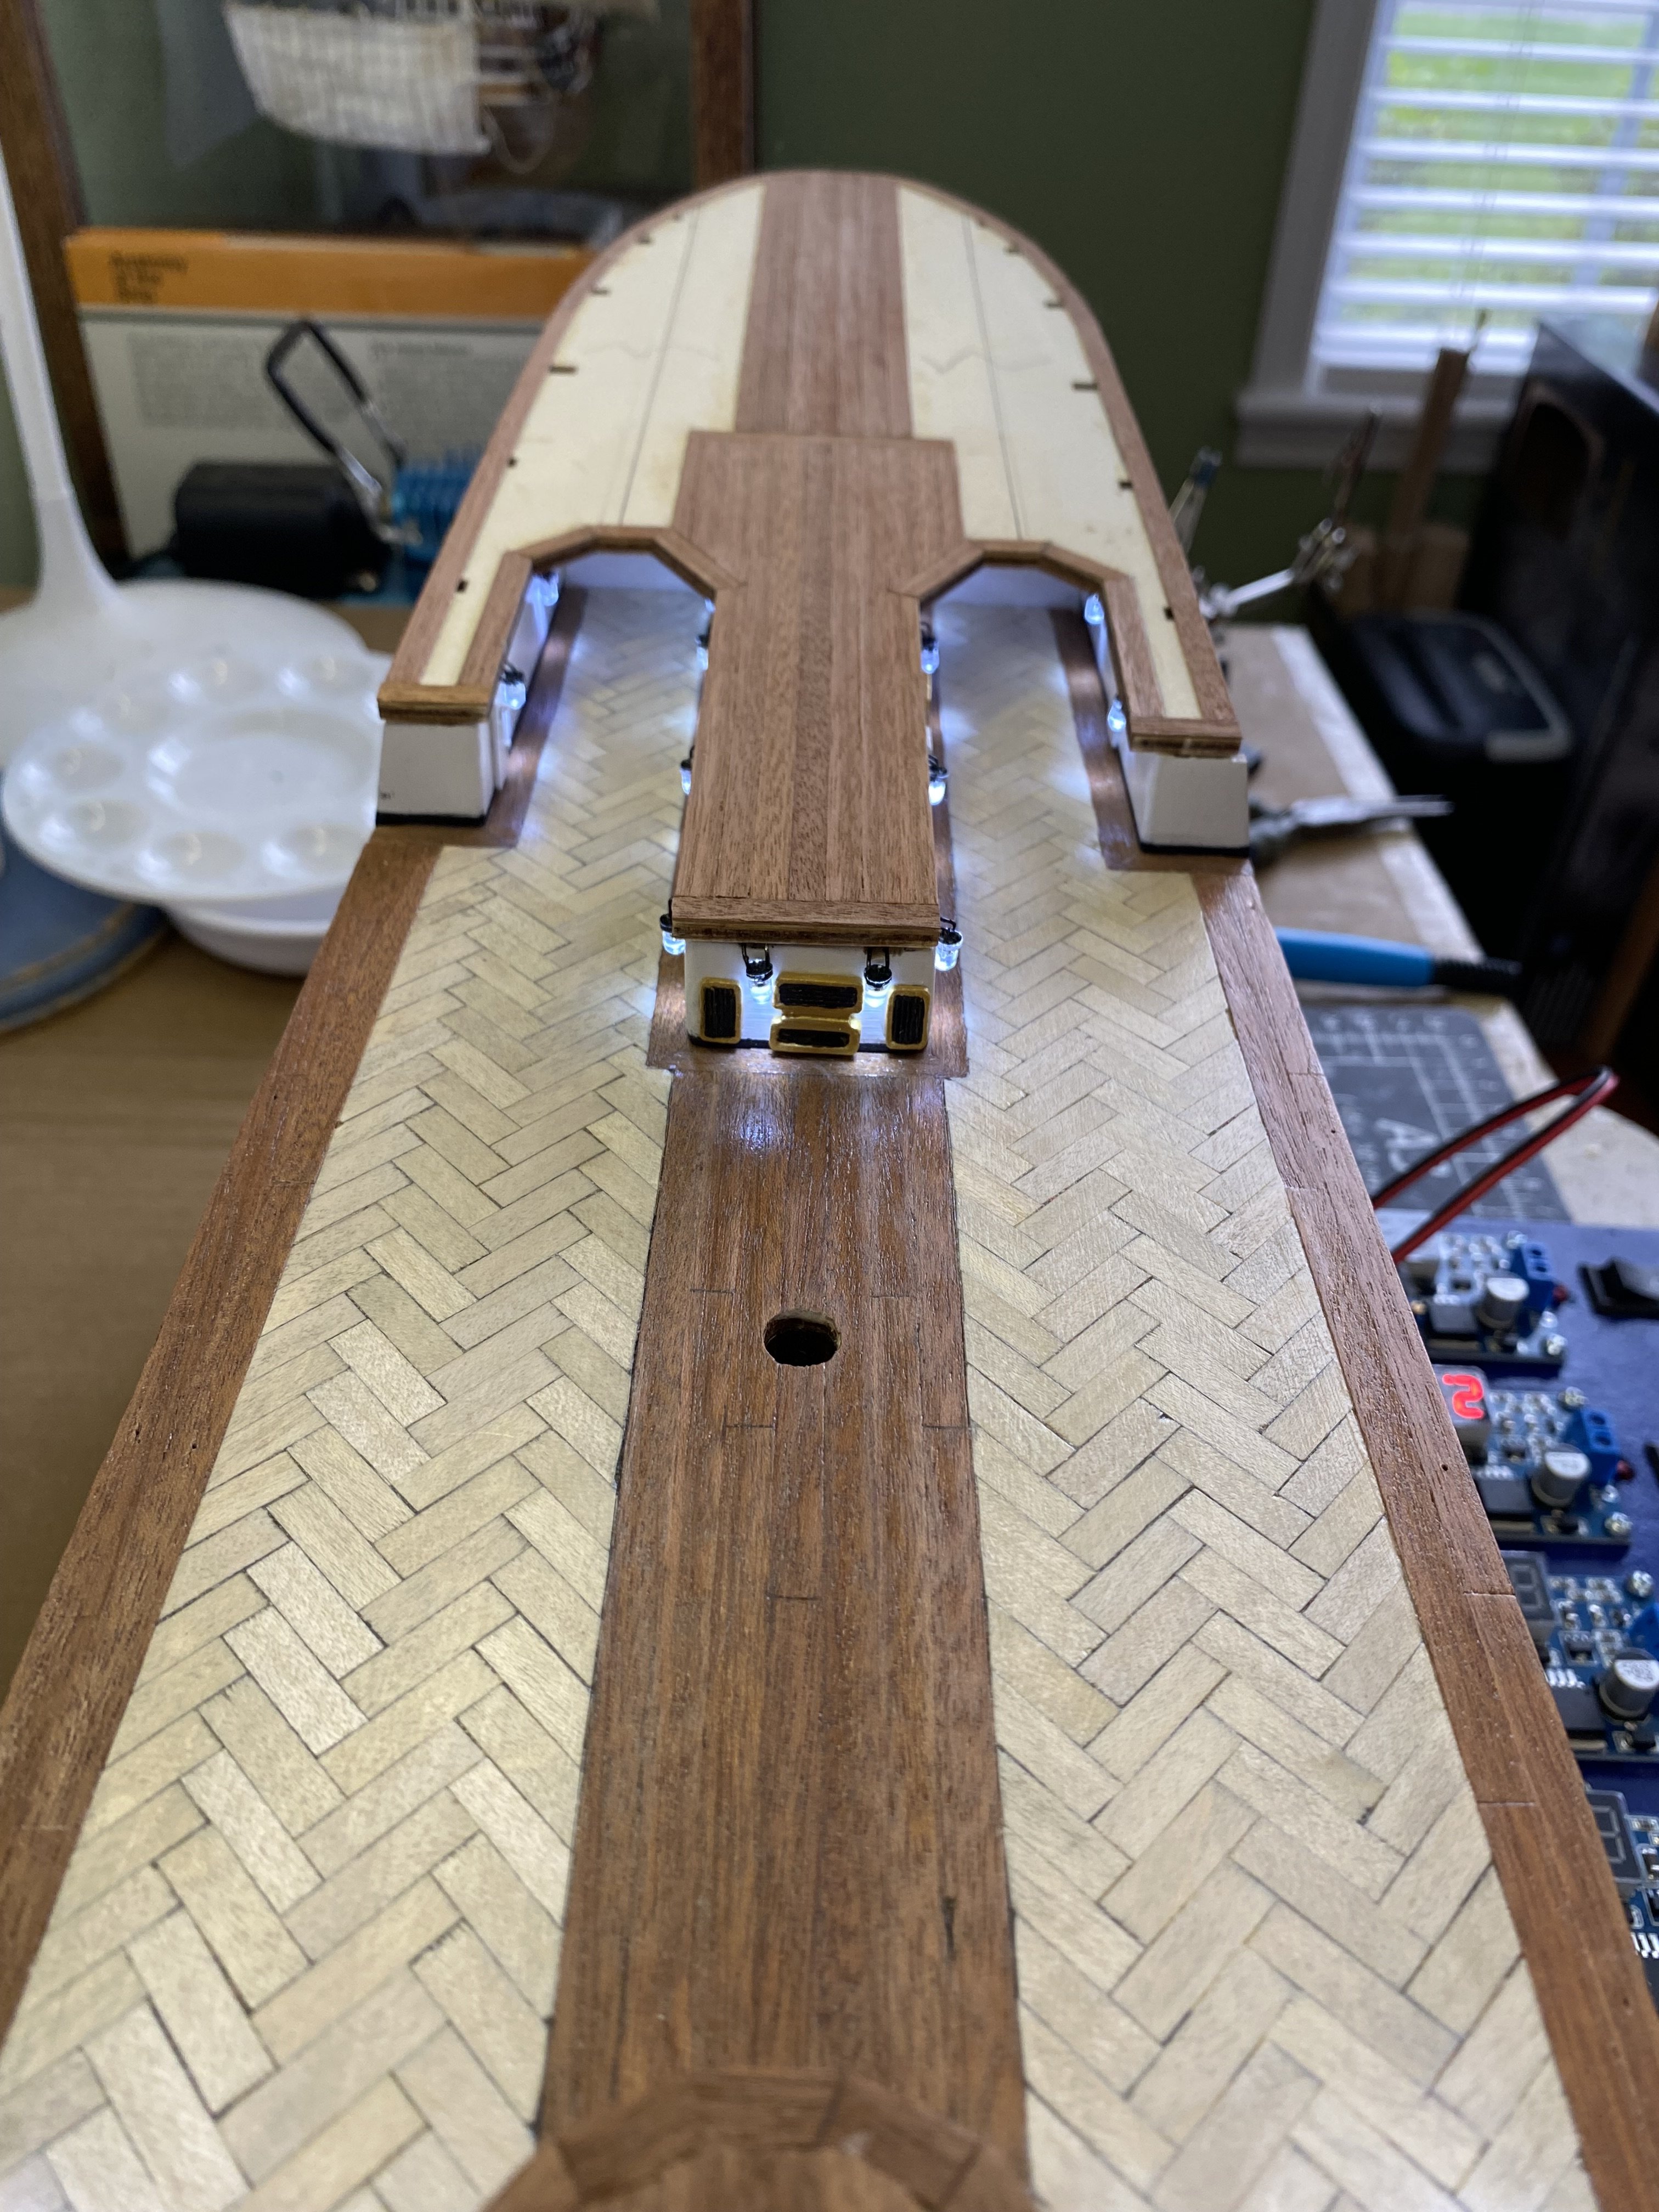
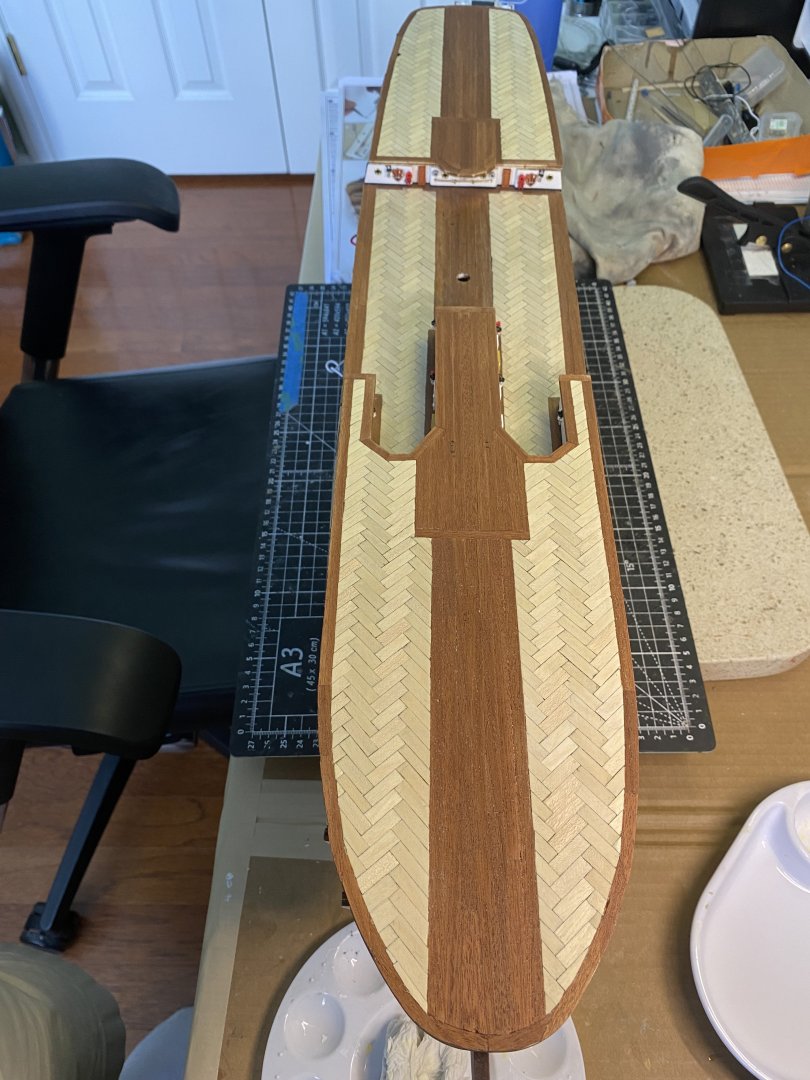
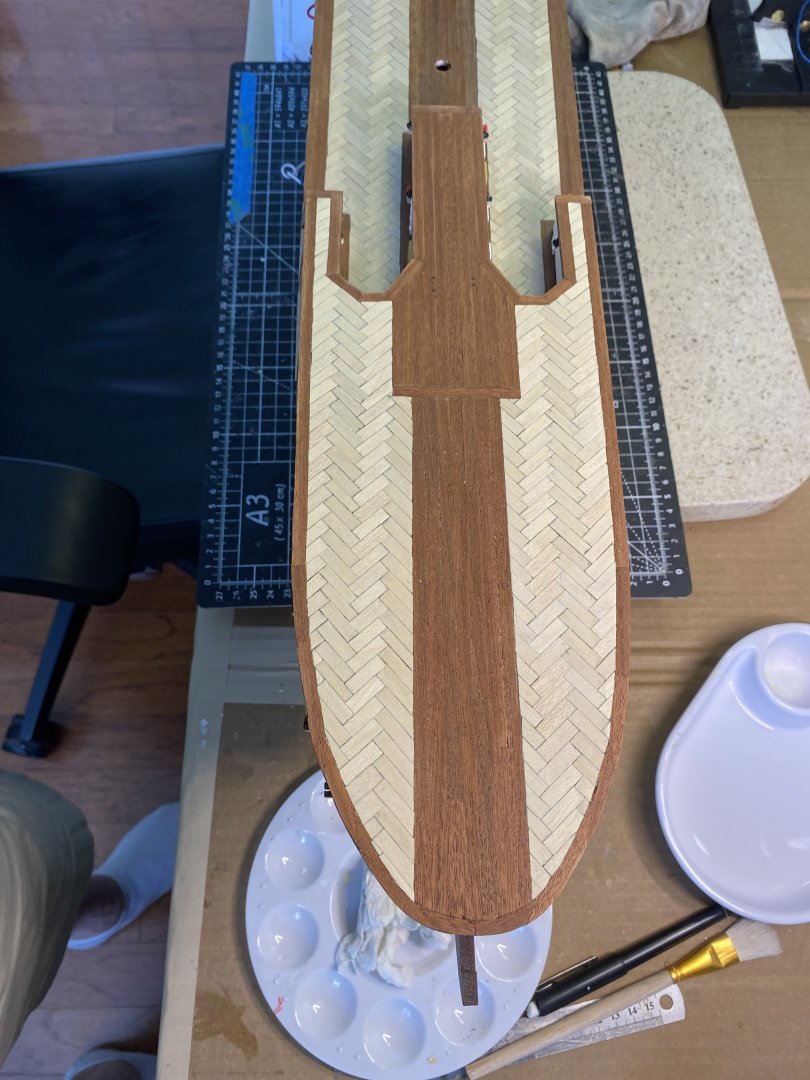
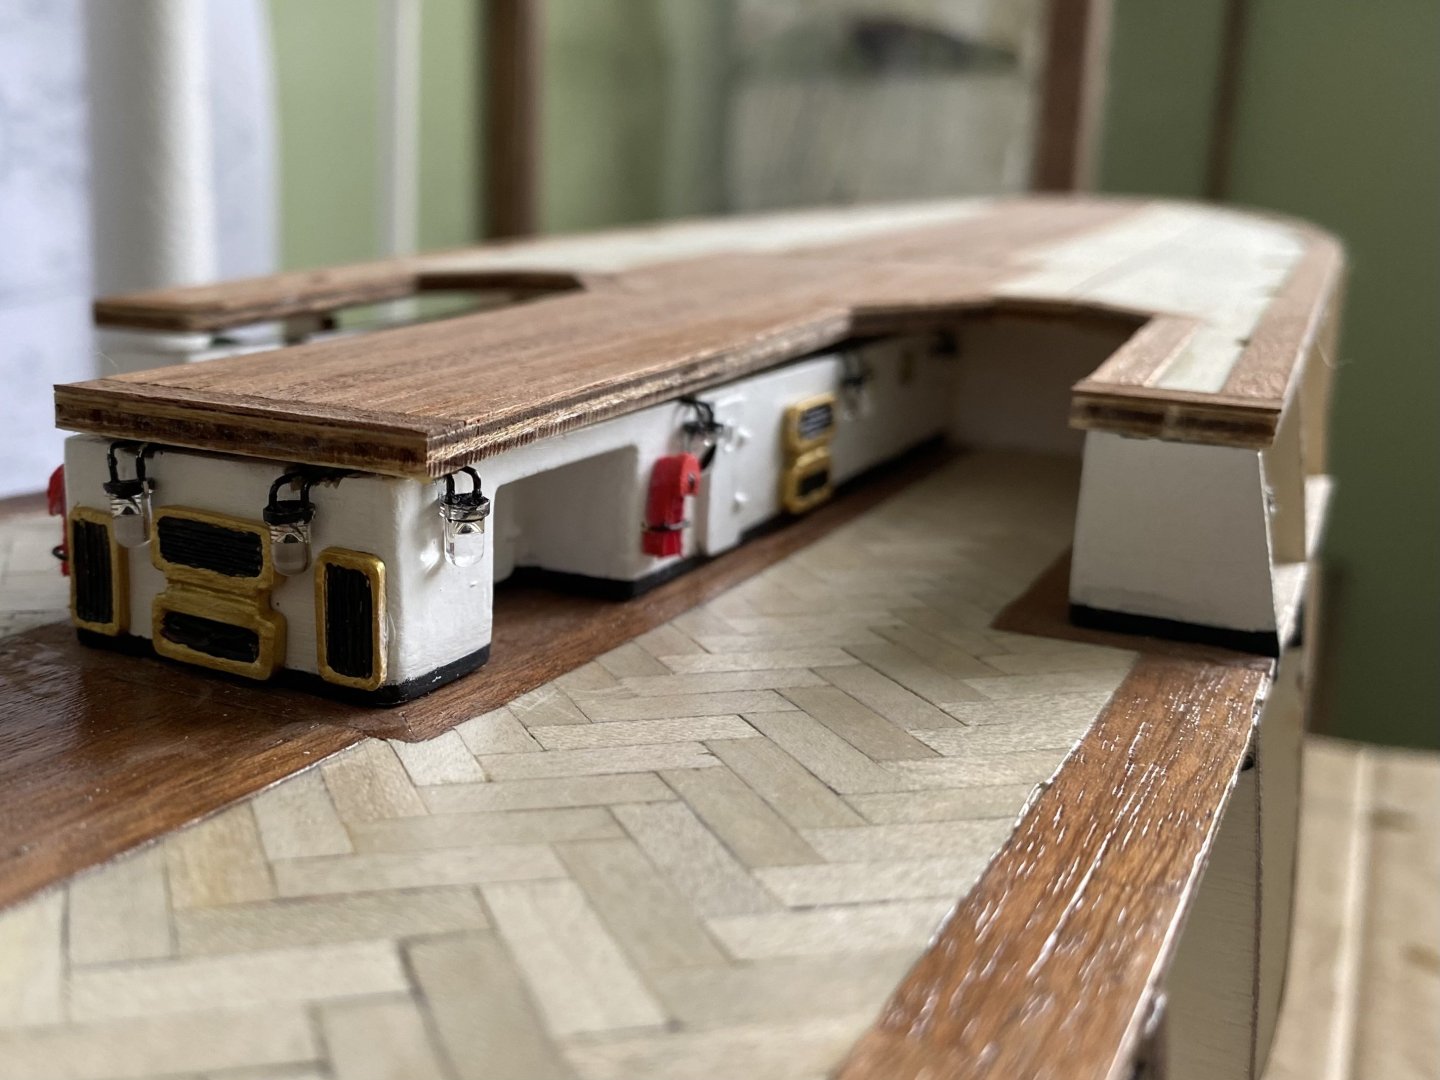
Finished the planking of the three deck sections. Many will call me crazy for doing it but as you can see I did a herringbone pattern using 3mm x 6mm planks laid in opposite direction on the port and starboard sides. I also laid contrasting walnut planks down the center and outlining the edge of the decks. This is obviously not authentic but I want to venture outside the box on this build. The fore and aft deck sections are dry fitted at this point. A little more work to do below deck before I put them permanently in place. After I glue them in place I will add a coat of black paint followed by an additional coat of white paint to the underside. This will hopefully prevent light bleed through the thin deck from the LED below deck lighting I have planned.

-
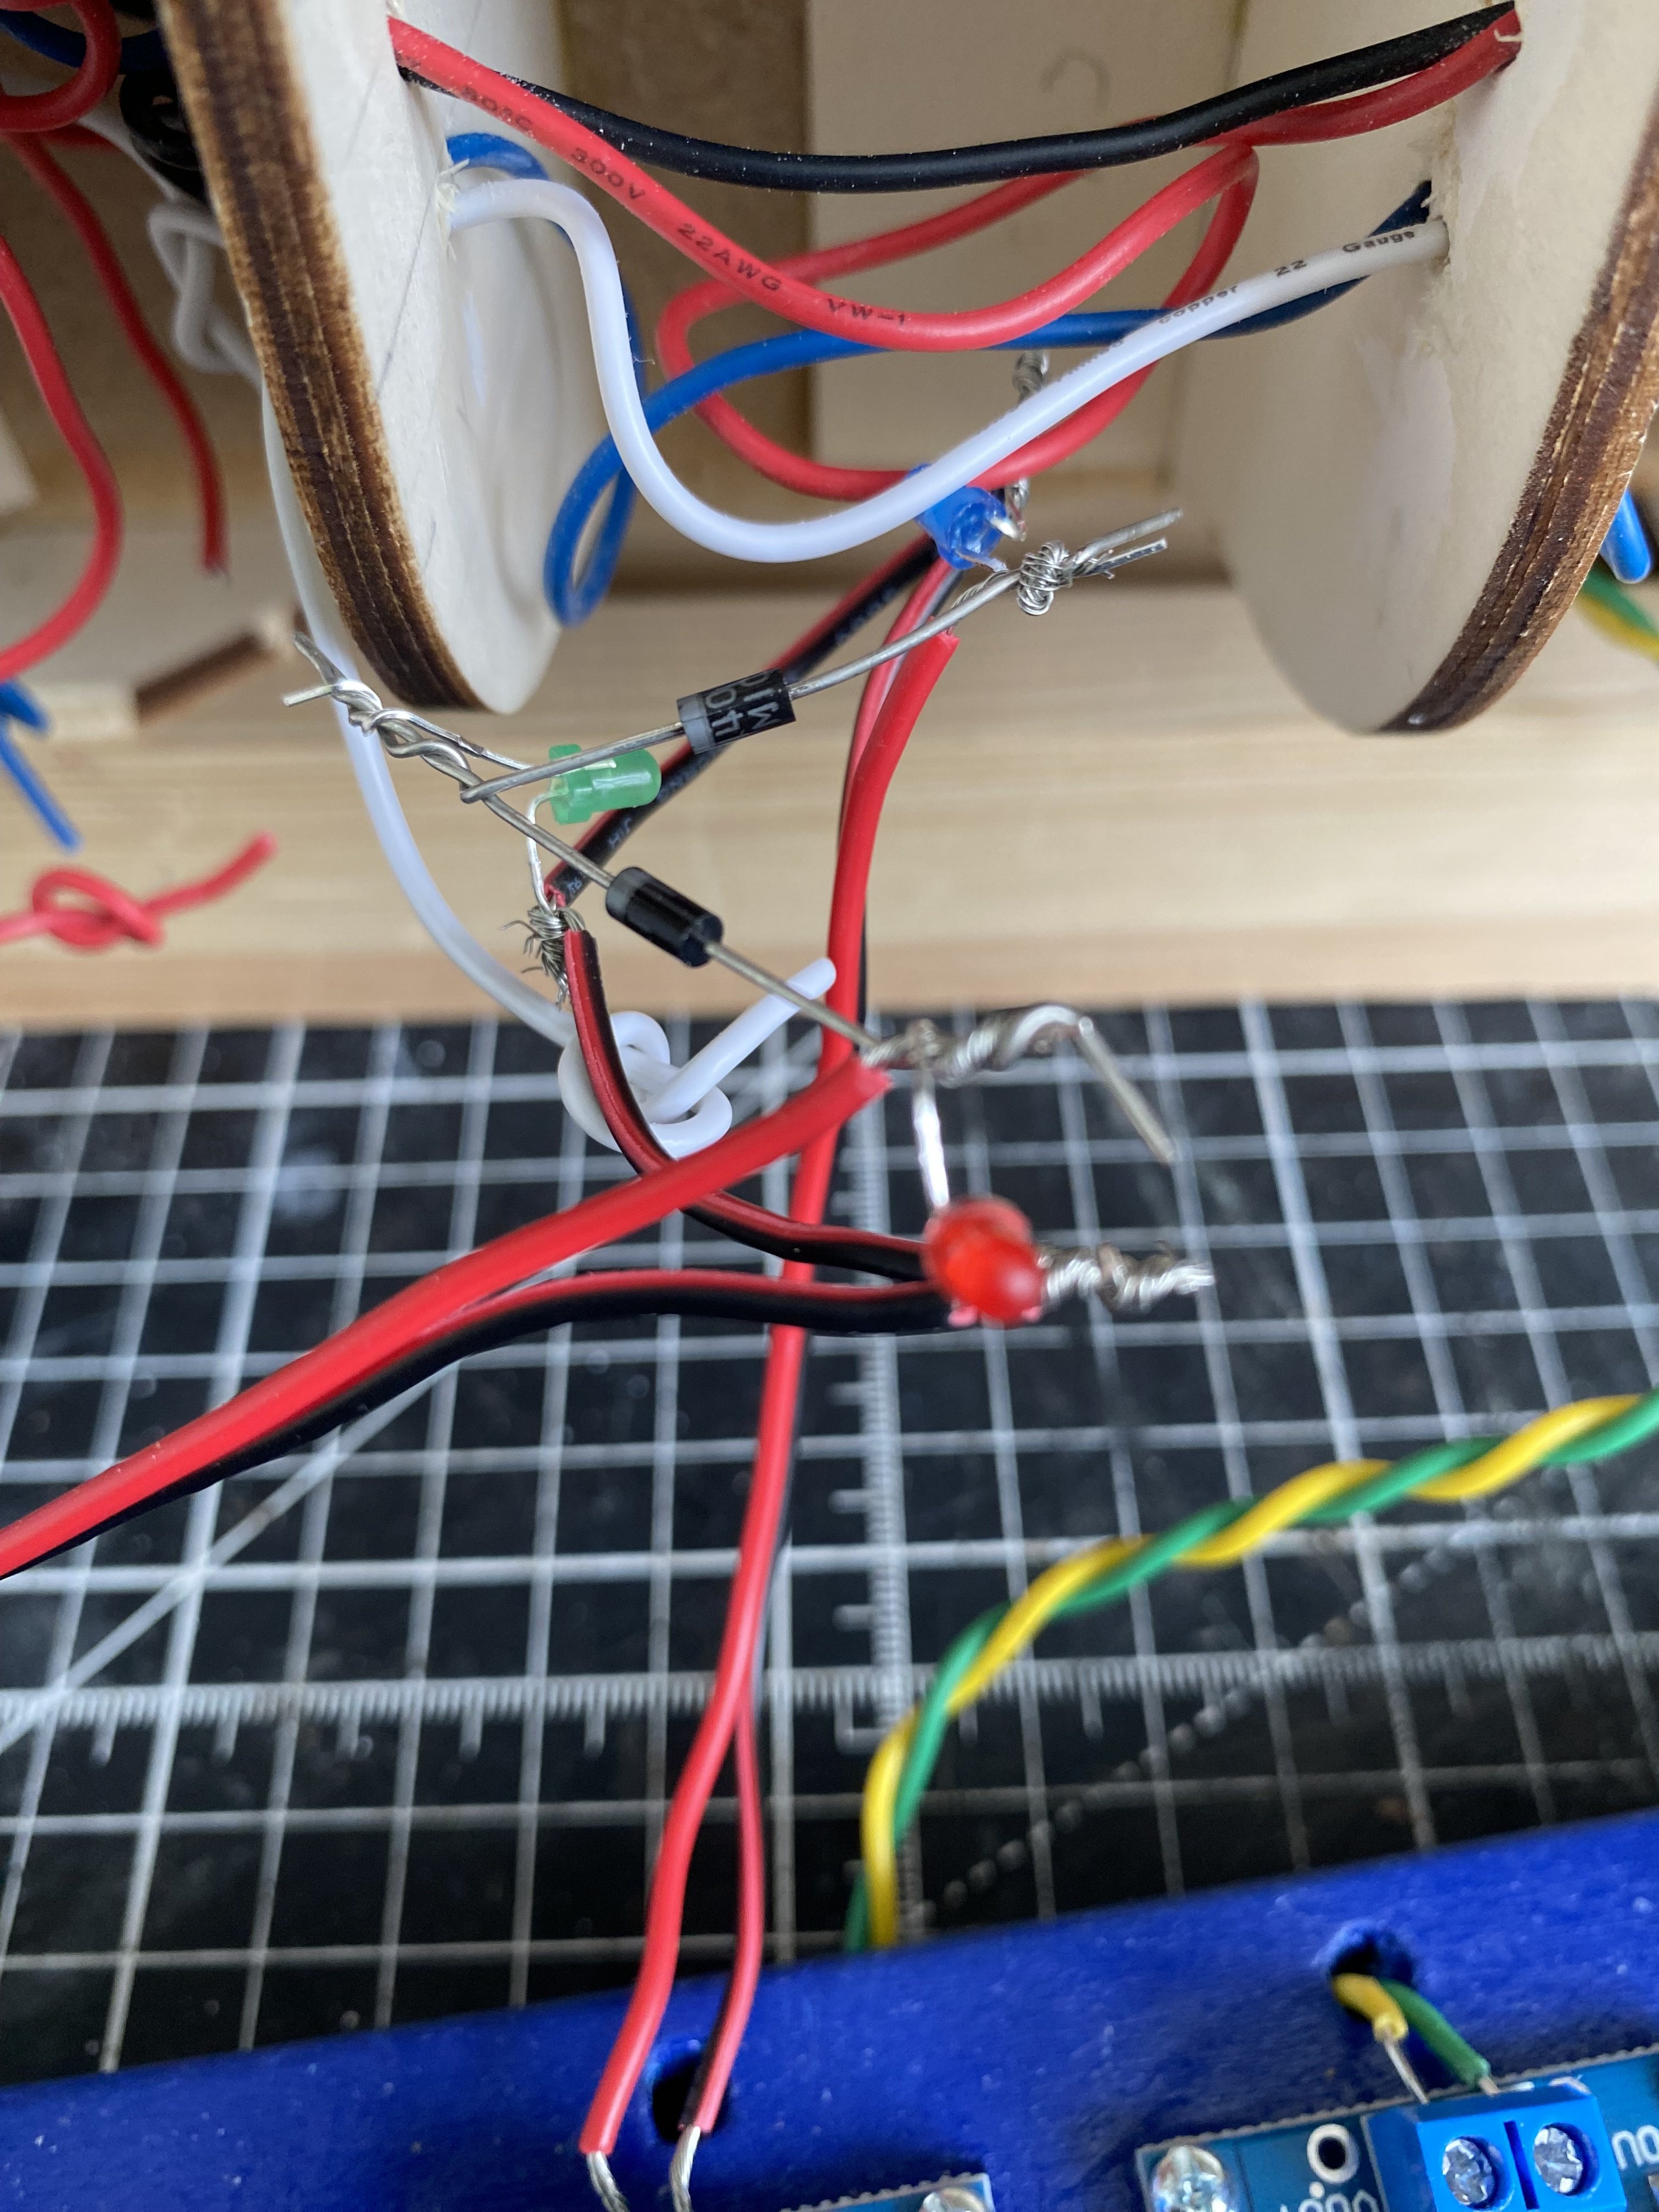
For my plan to light my Amerigo Vespucci I had an issue I needed to figure out. I am running two separate circuits for all the port hole lights on the two lower decks. I want some on, some off, or all on. I think this will give a more true display. However I have or will have interior lights in the deck structures (map room, fire control room, helm, etc. I want the lights in these structures to come on with either of the port hole circuits, not just one or the other. With Daniel’s guidance I discovered diodes in my elementary electrical skills. These little guys are perfect I making this circuit(s) plan work perfectly. Photo is just my test of how they work. The diodes are the little black cylinder shaped guys

-
Daniel after reading your comment about OR with diodes I did some research, purchased some, and did a little test circuit. It works great. Thanks for the advice.

-
Ok Daniel here is another curiosity I wonder if you experienced. I have installed and provided current to the 6 LEDs inside the structures on the main deck (stern end well, fire control room, and the two rooms on the side). These lights are on the same circuit as the deck lights on the outside if the structures. I think this is the same way you wired them. All 4 of these structures have port holes or holes in the doors. When the lights are on the exterior lights visually over power any light coming from the port holes. Basically my eyes can’t adjust to seeing both. I could put the interior lights on these structures, as well as the future structures A,B,C on a separate circuit but realistically I don’t think you would have the interior lights on and the exterior lights off. I am just scratching my head as to seeing light shine out the port holes on the deck structures. How is it on your’s? I am reading about the diode idea for OR and think what I would like to do is set up my circuits to have all the deck structure interior lights come on with either port hole circuit. Somewhat similar to what you talked about above for structure B, but for all the interior lights. Watching YouTube videos to try to understand how it is wired. Still confused.

-
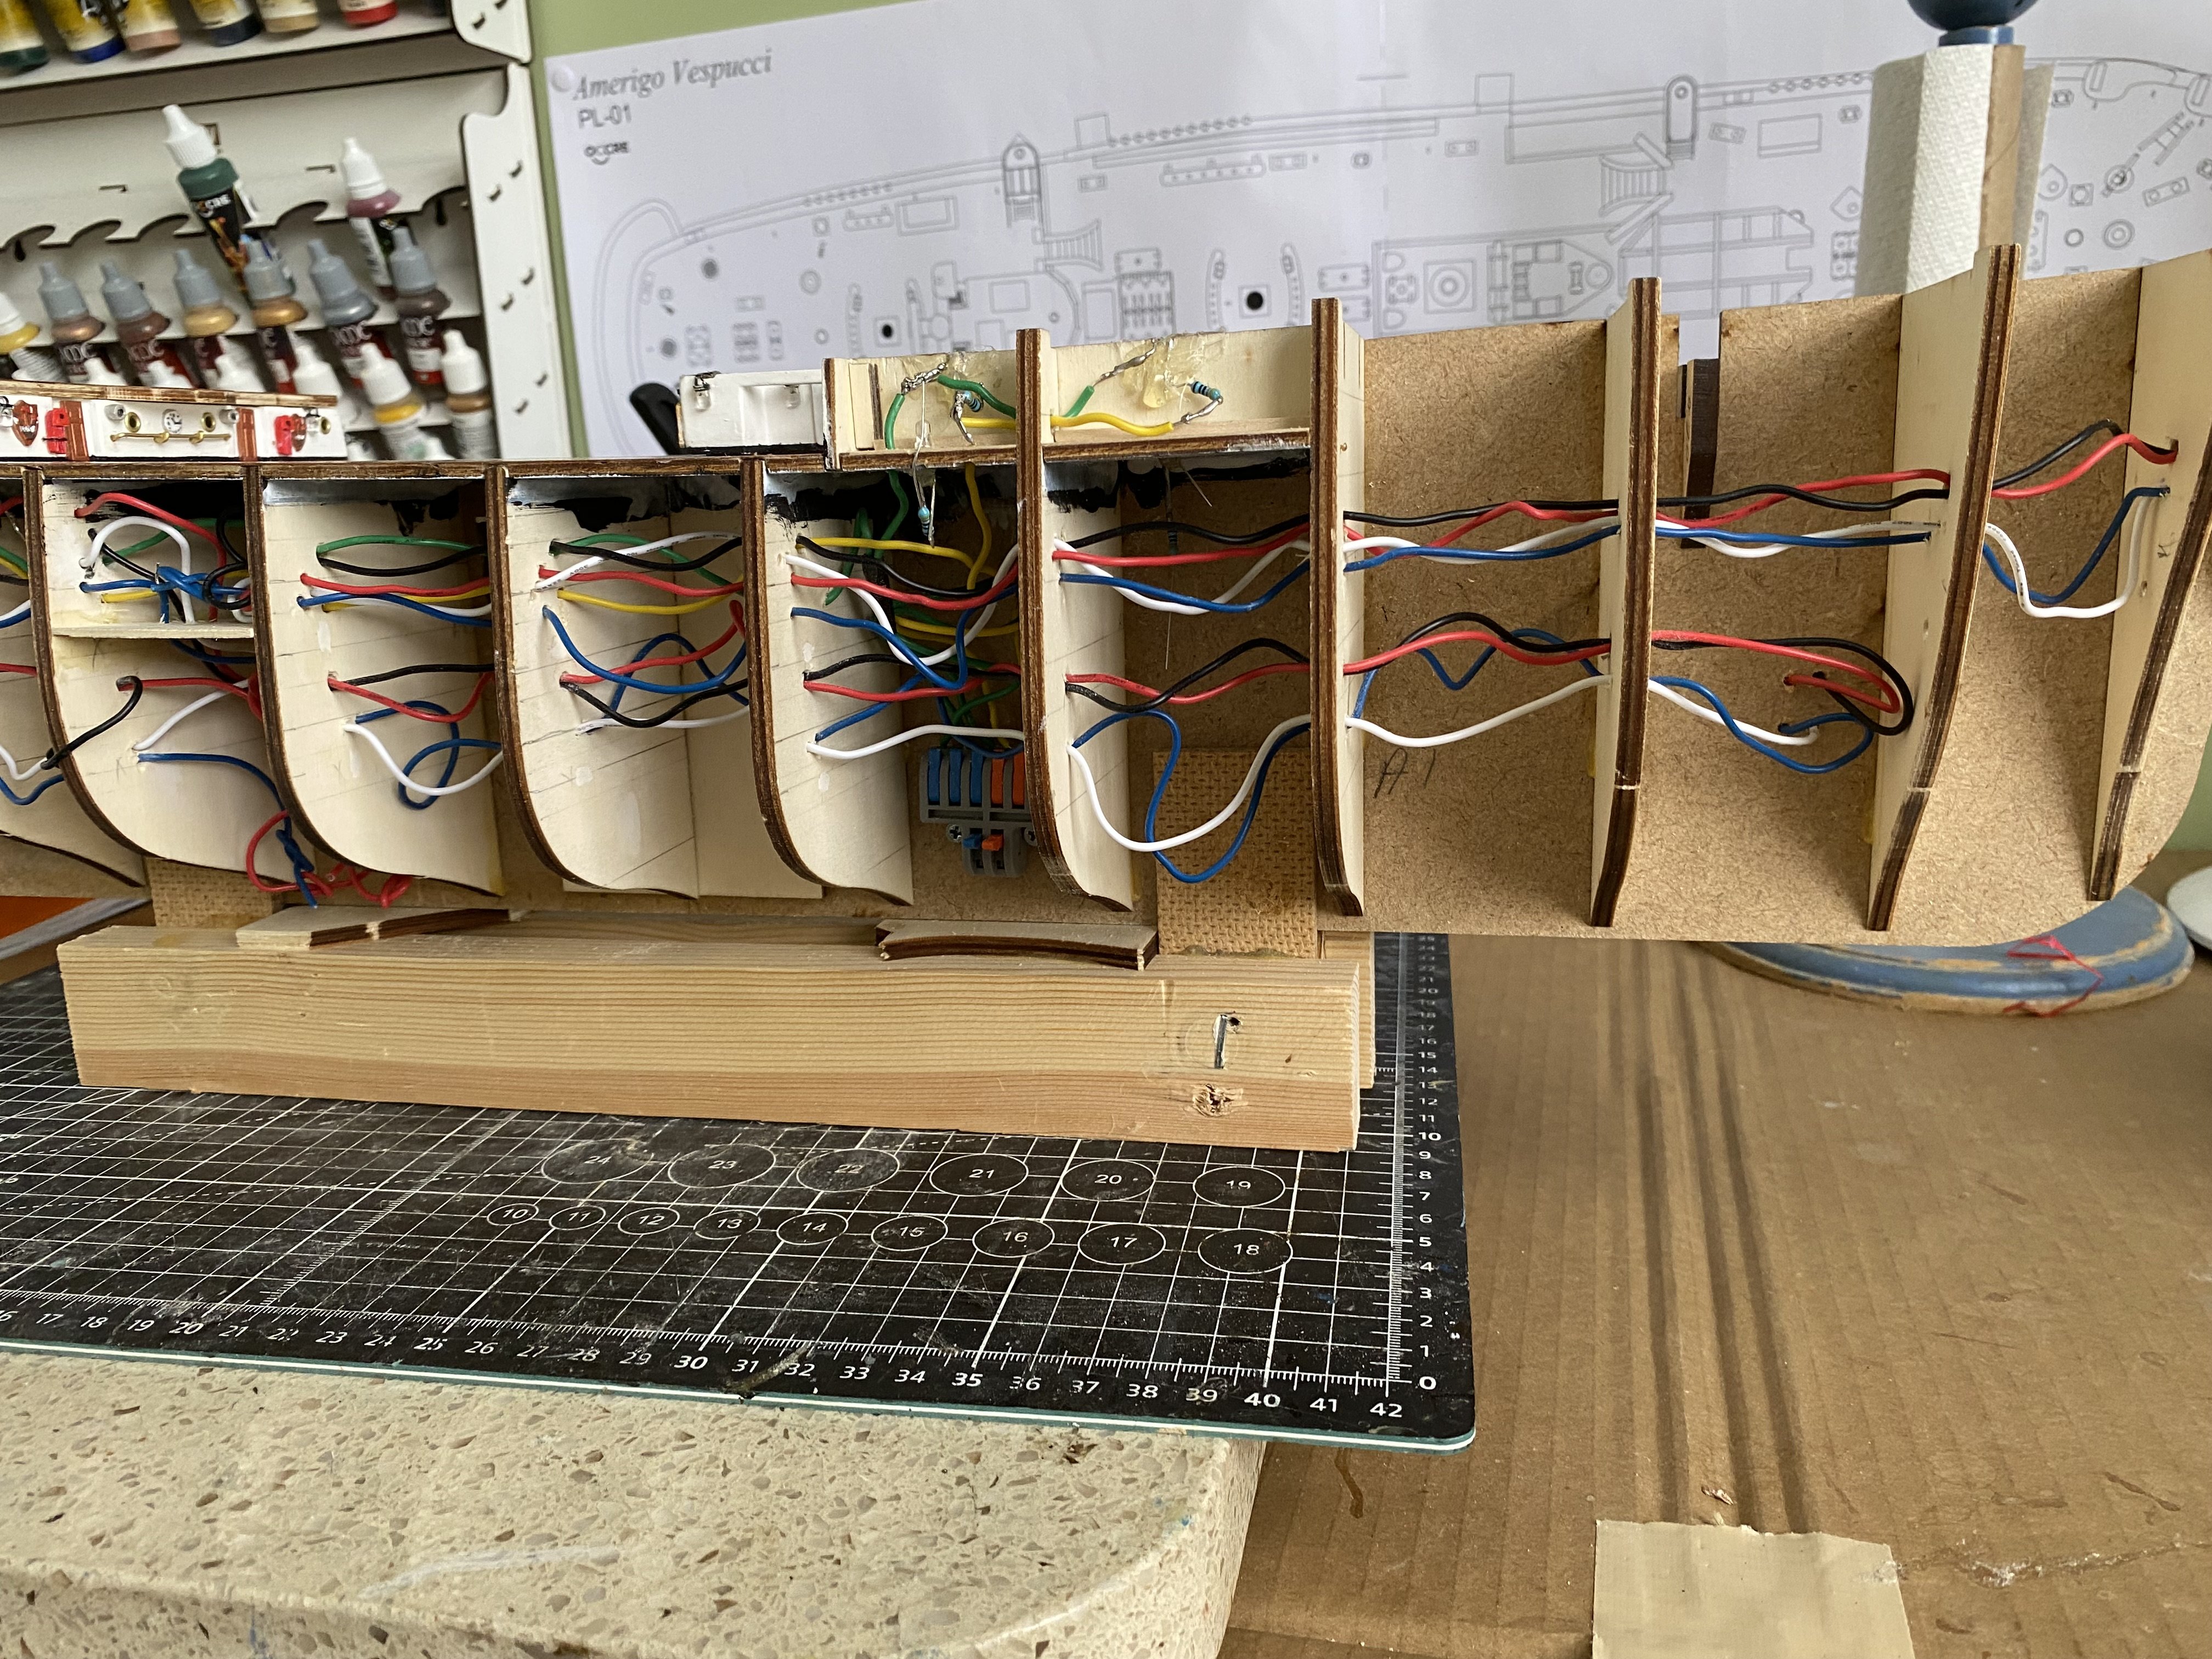
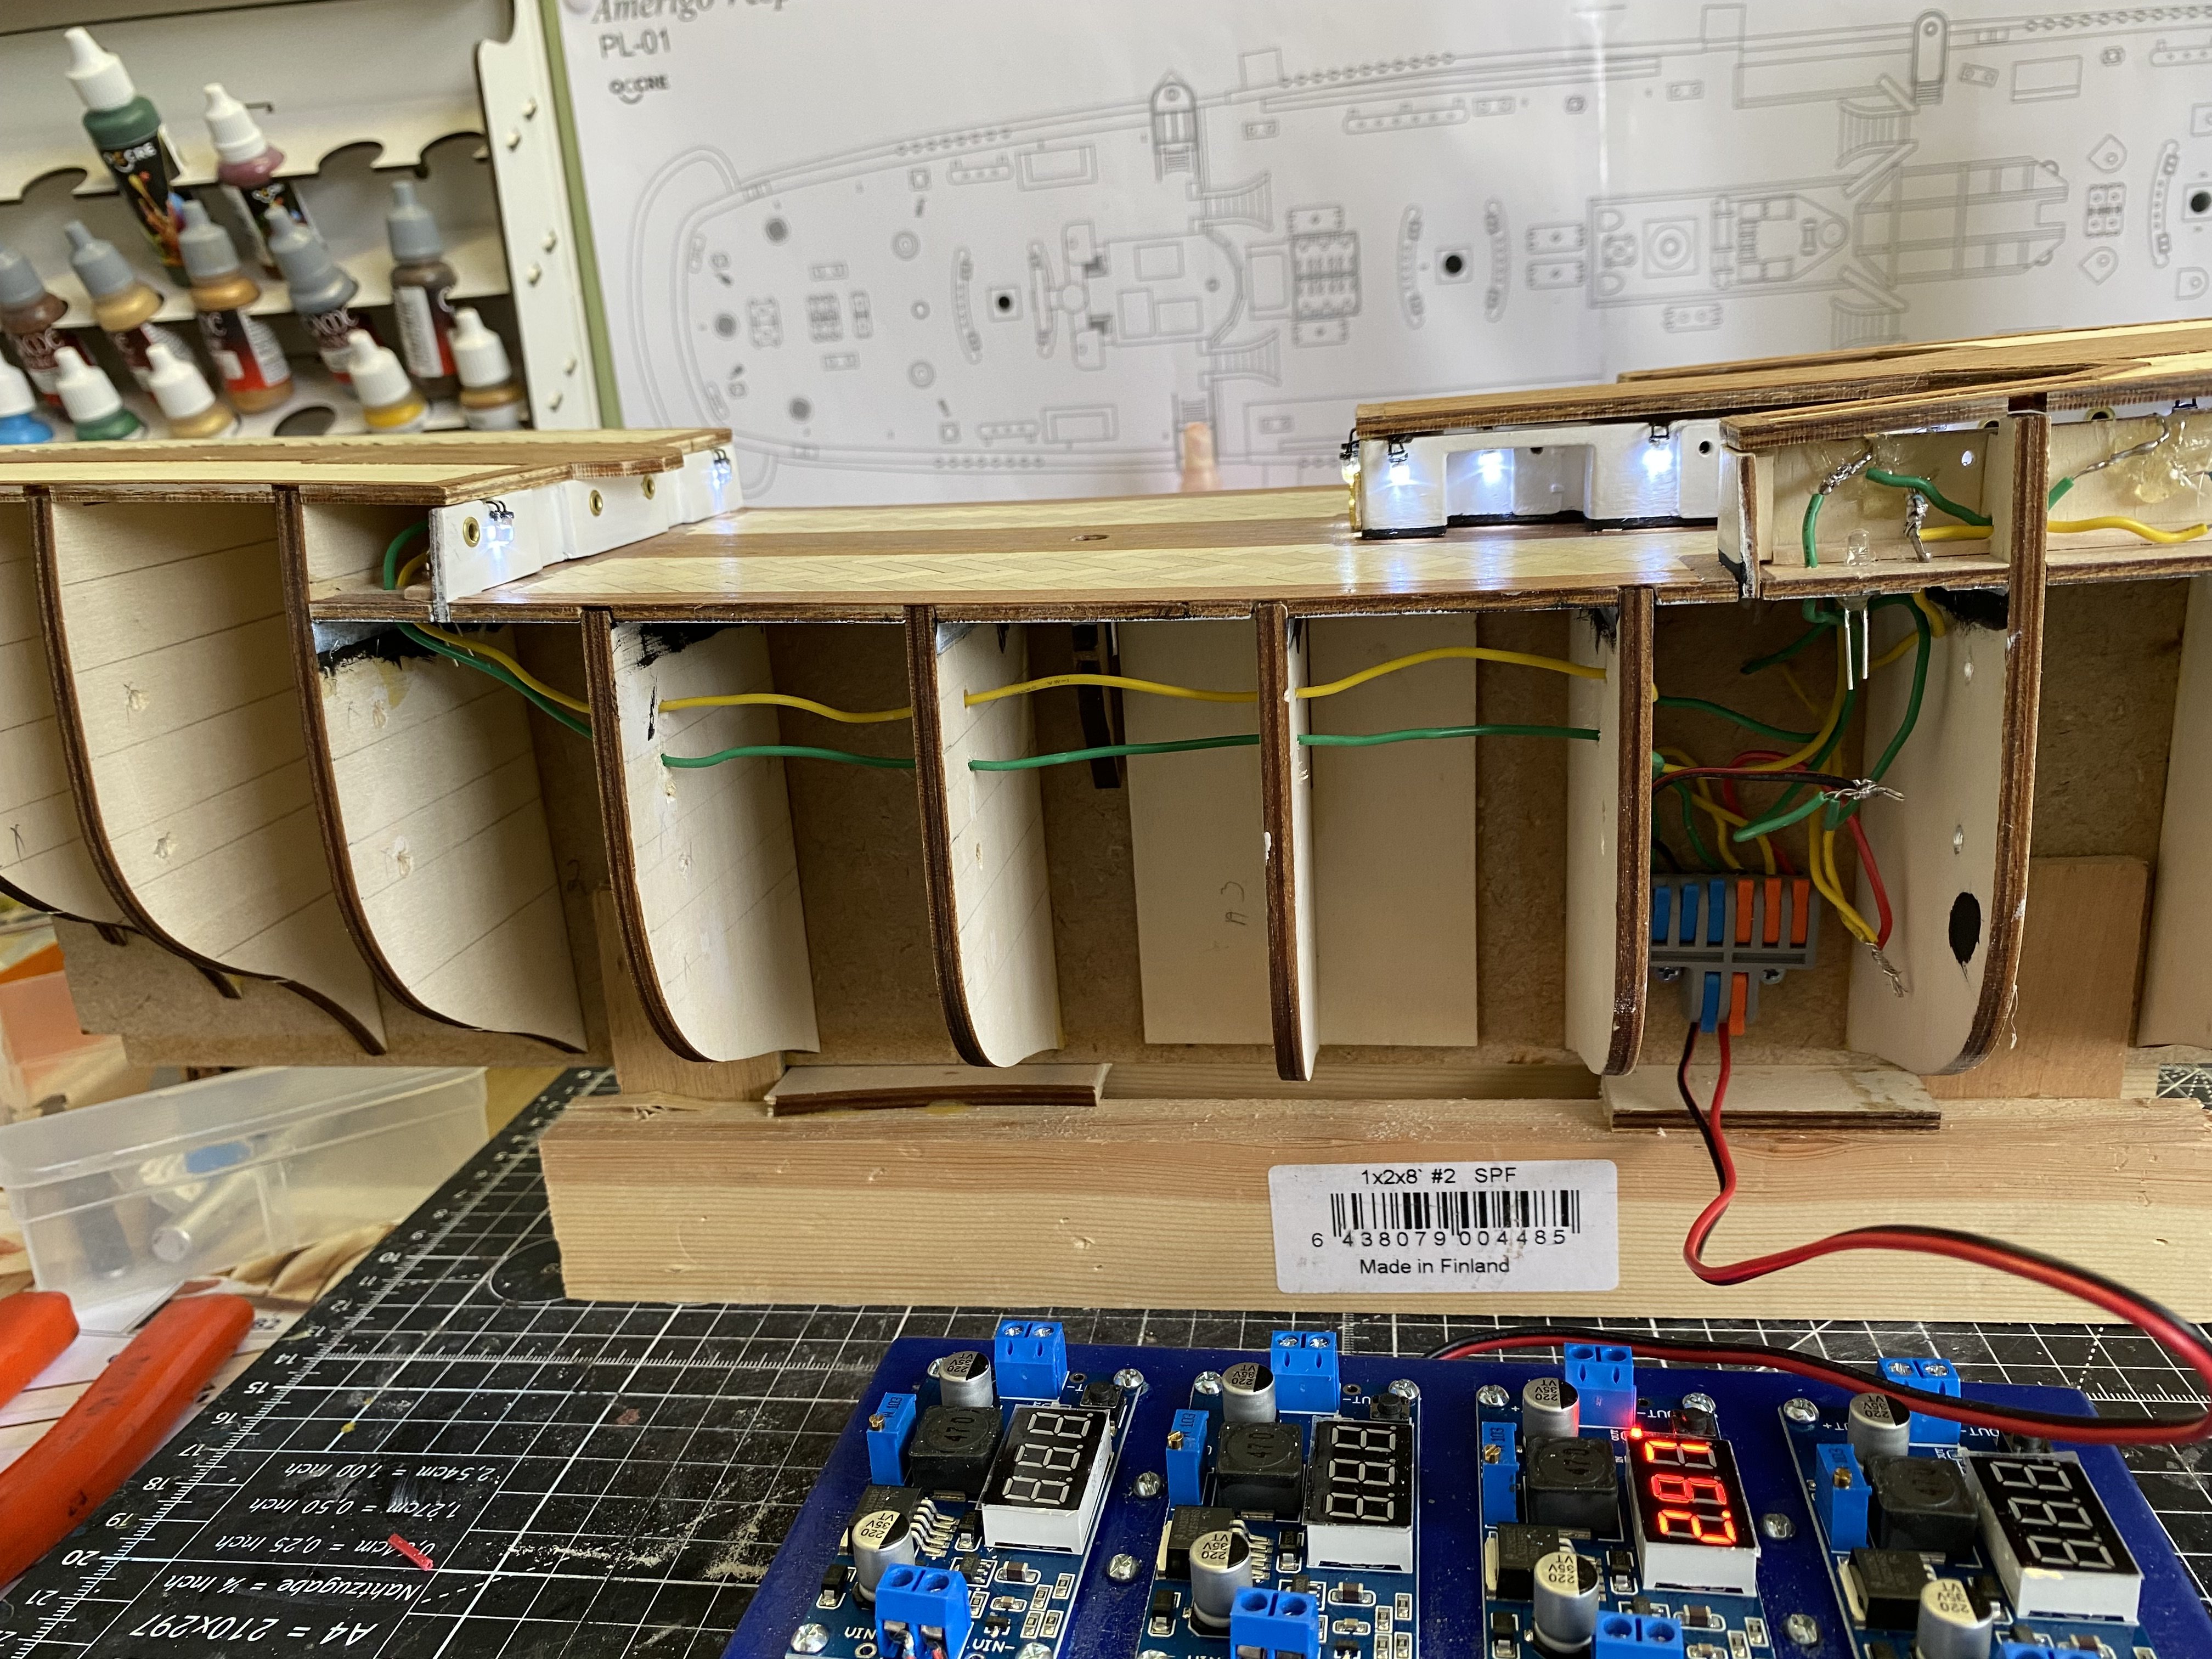
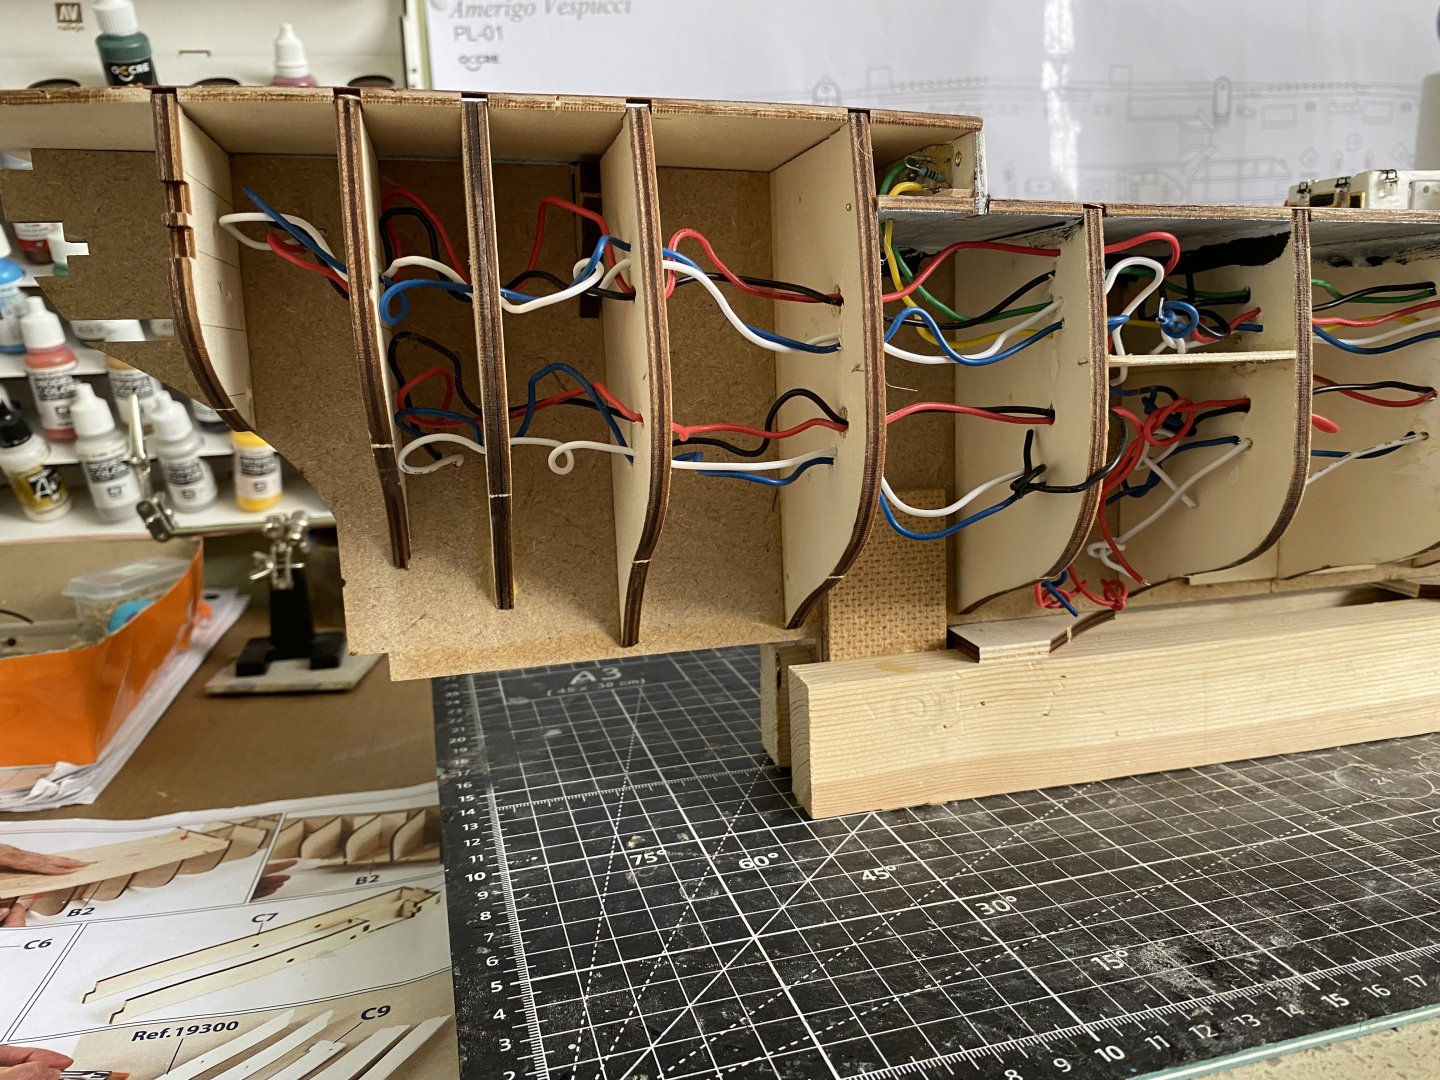
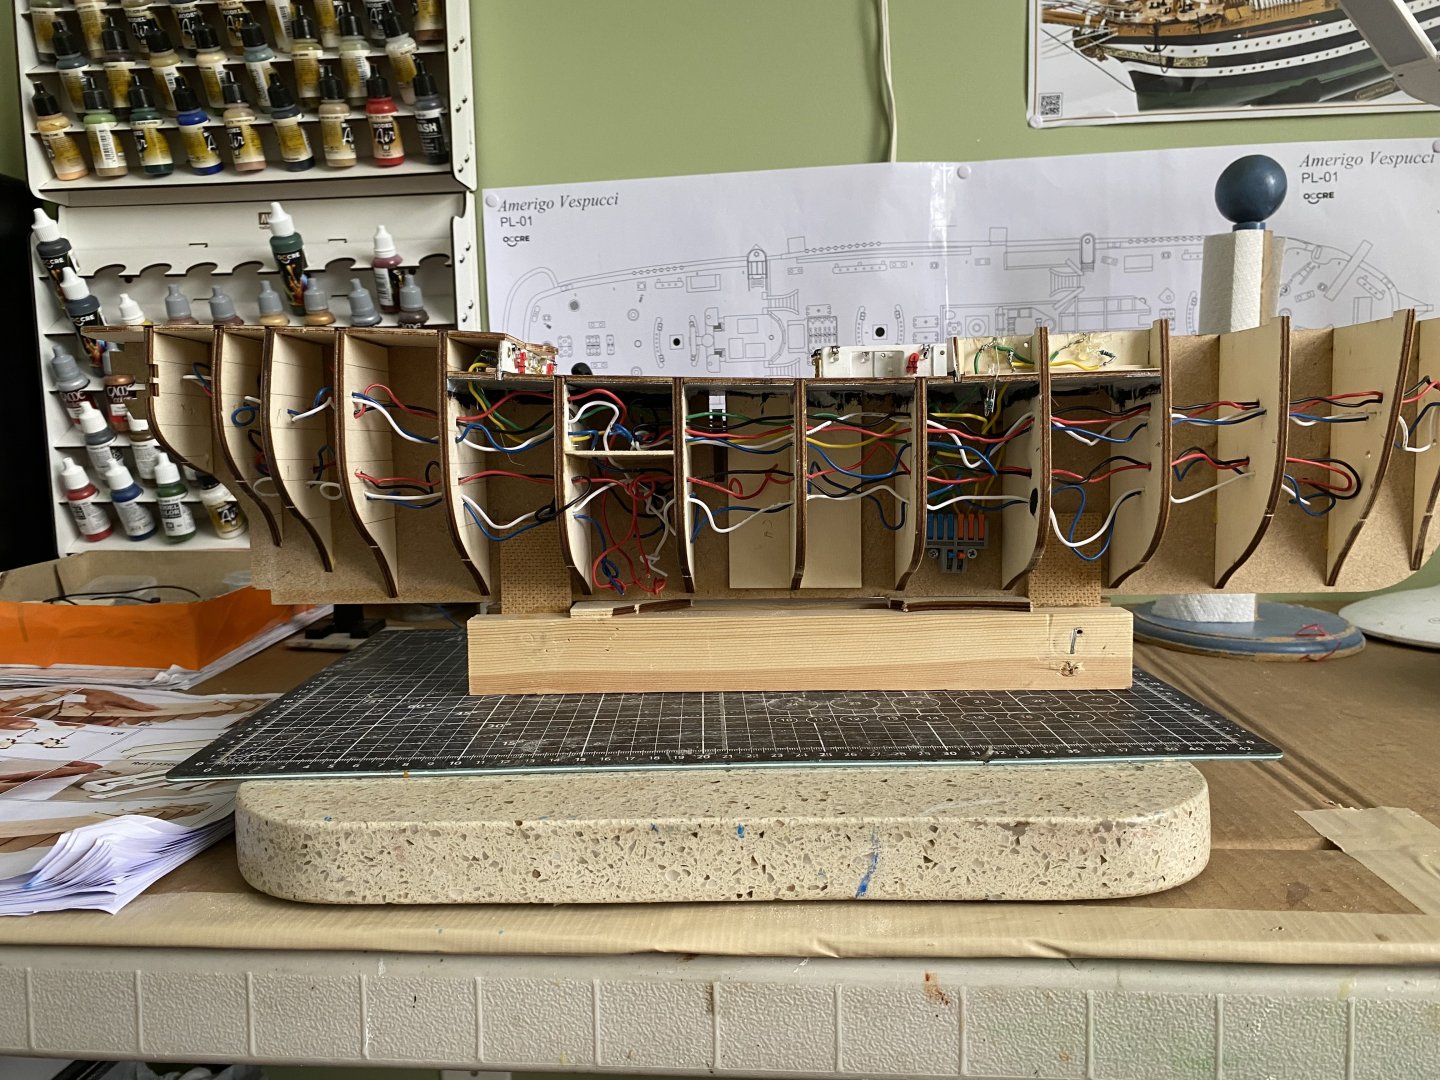
Definitely a lot of electrical wire going to the hull of my AV! Running wire for my future plan to have three separate circuits of LED lights. One is the deck lighting (green and yellow), two is selective port hole lighting on both decks (black and red), three is the other port holes not lit with circuit two (blue and white). The goal is to not have all port holes lit at the same time. Some on, some off, or all on. A forth circuit will be added eventually for the navigation lights and the distinctive mast lighting.

-
Thanks Daniel. To be honest I have no idea what a diode is nor what I would need to do to wire it in my scheme. I just mentioned the additional circuit because I knew how to do that. Would you care to share a little more reference the diode idea?
-
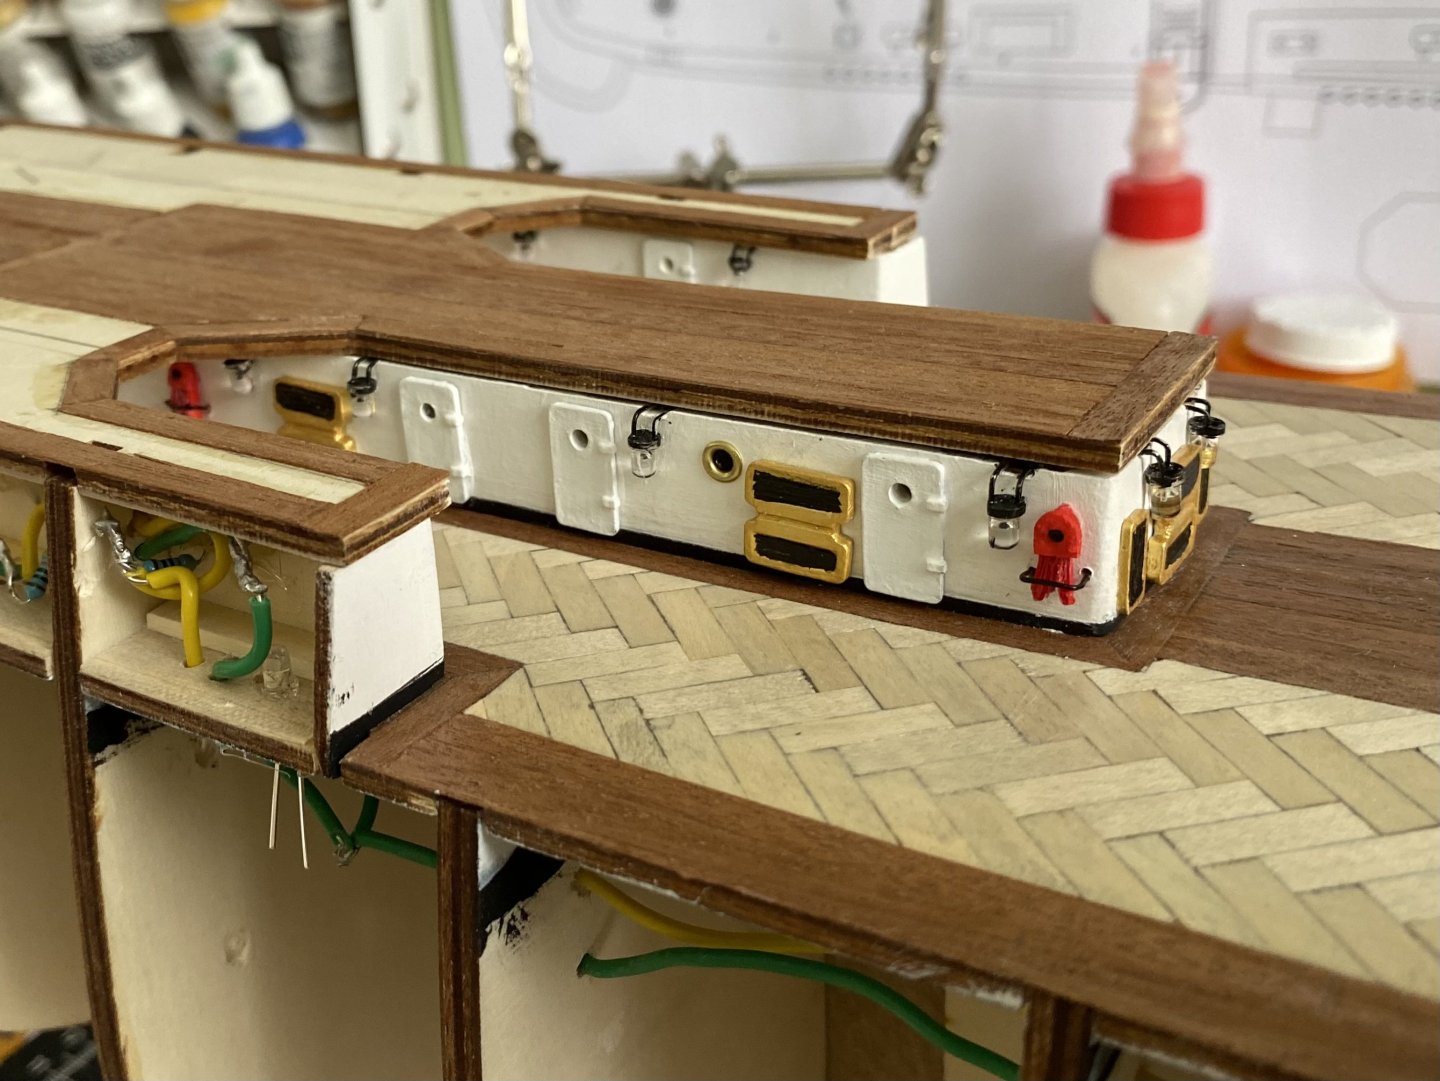
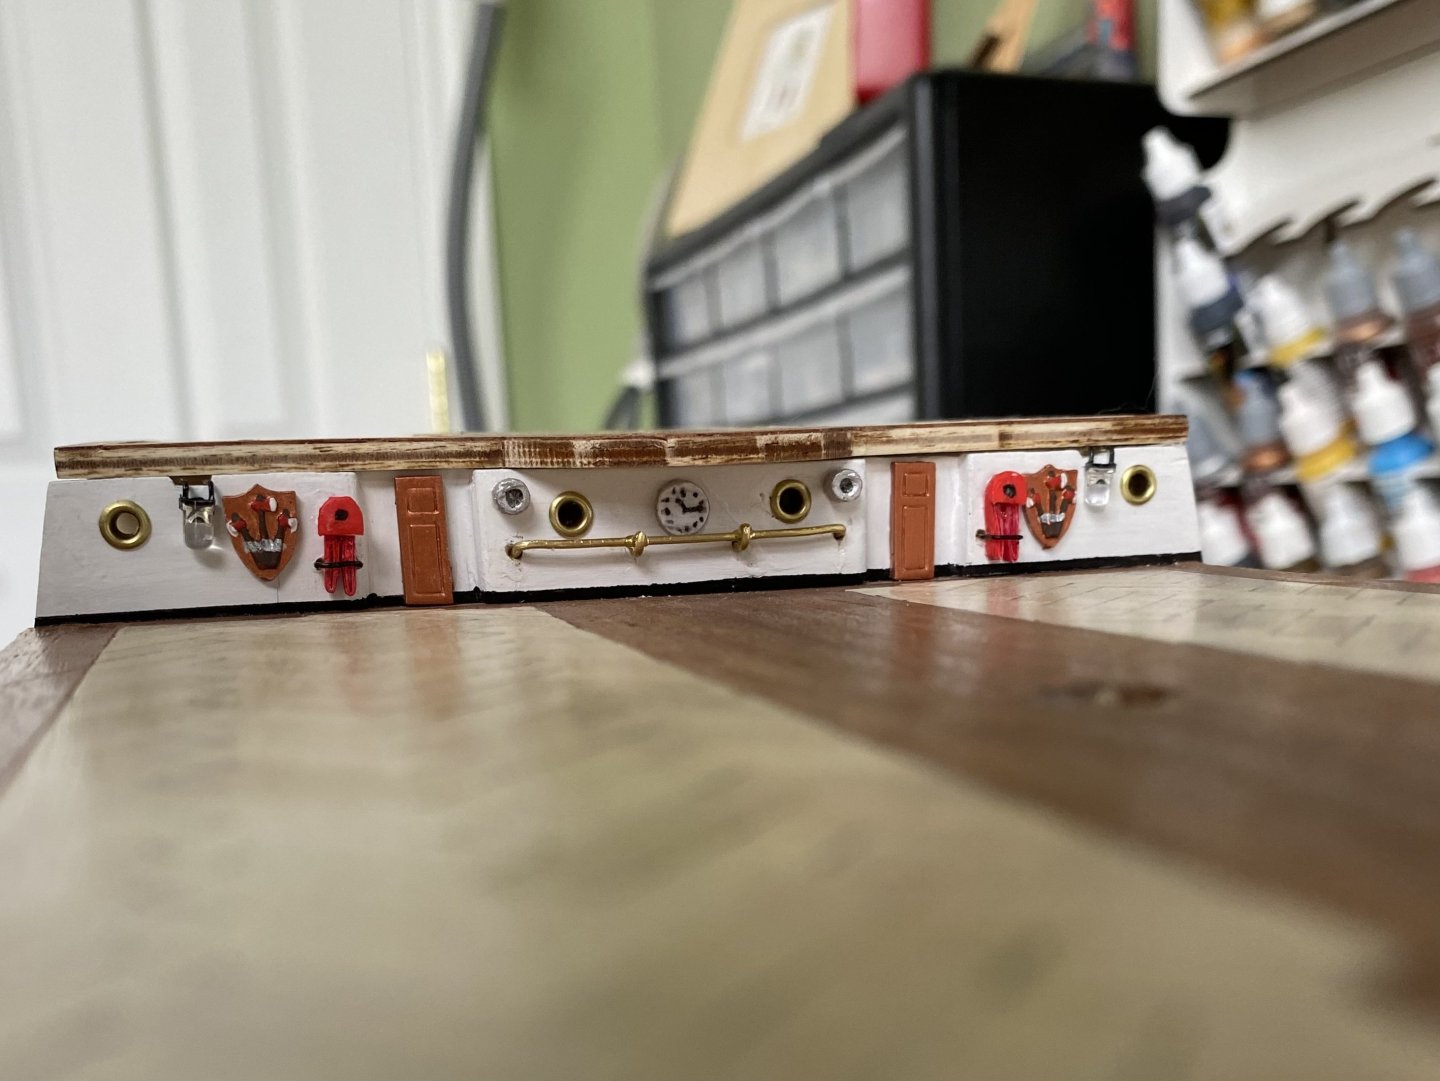
A little main deck work continuing. Stern walk finished with adding the two axe holders and fabricating firehose mounts which are not part of the OcCre kit. Fire hoses also added to the fire control center. A few more trinkets added here and there. Then will see where I want to go next.
-
Excellent idea Daniel. I will be using at last one for every circuit. Rather than the diode idea would it work just as well to have a separate circuit for the internal lights of Structure B and the storage compartment of structure C? I could just turn that circuit on with either port hole light circuit.
-
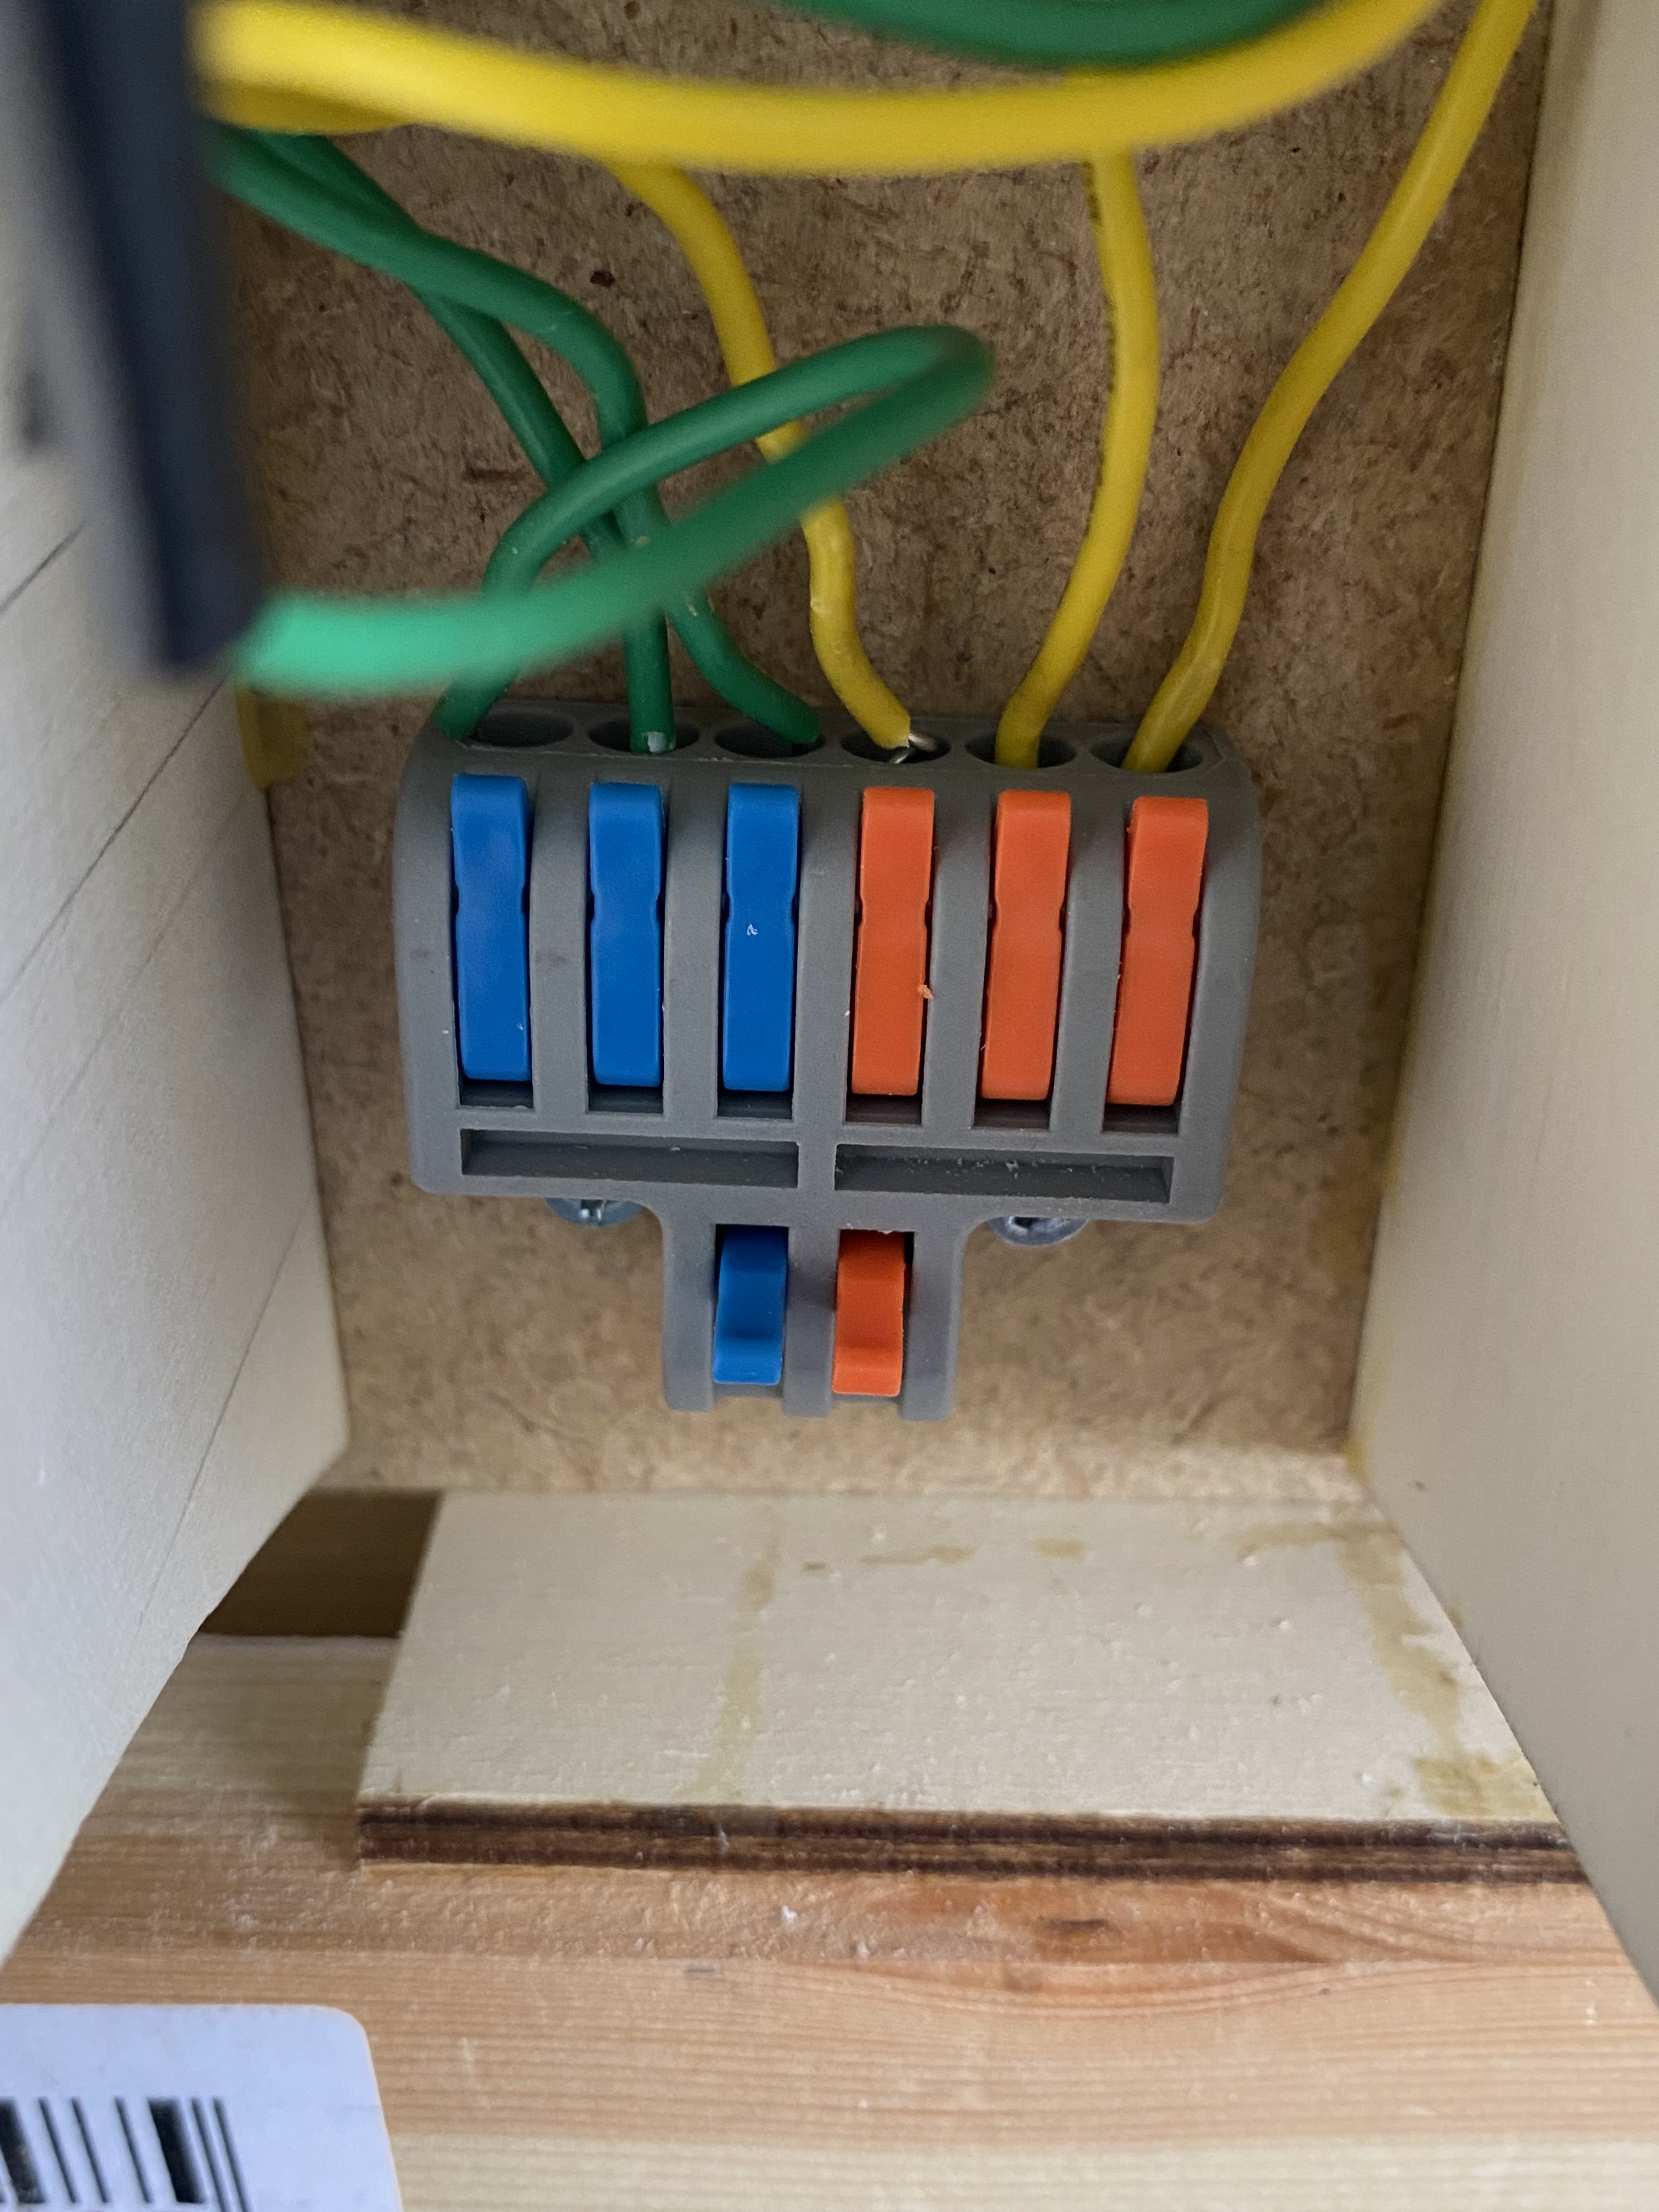
Well thank you Daniel. Just trying to immolate the great job you did! This diode situation I will surely need to study. Always appreciate your help and patience. On a side note Daniel, I found these handy little things on Amazon for making a sort of bus for my circuits. With these I can introduce one line (+/-) in and have 3 come out.

-
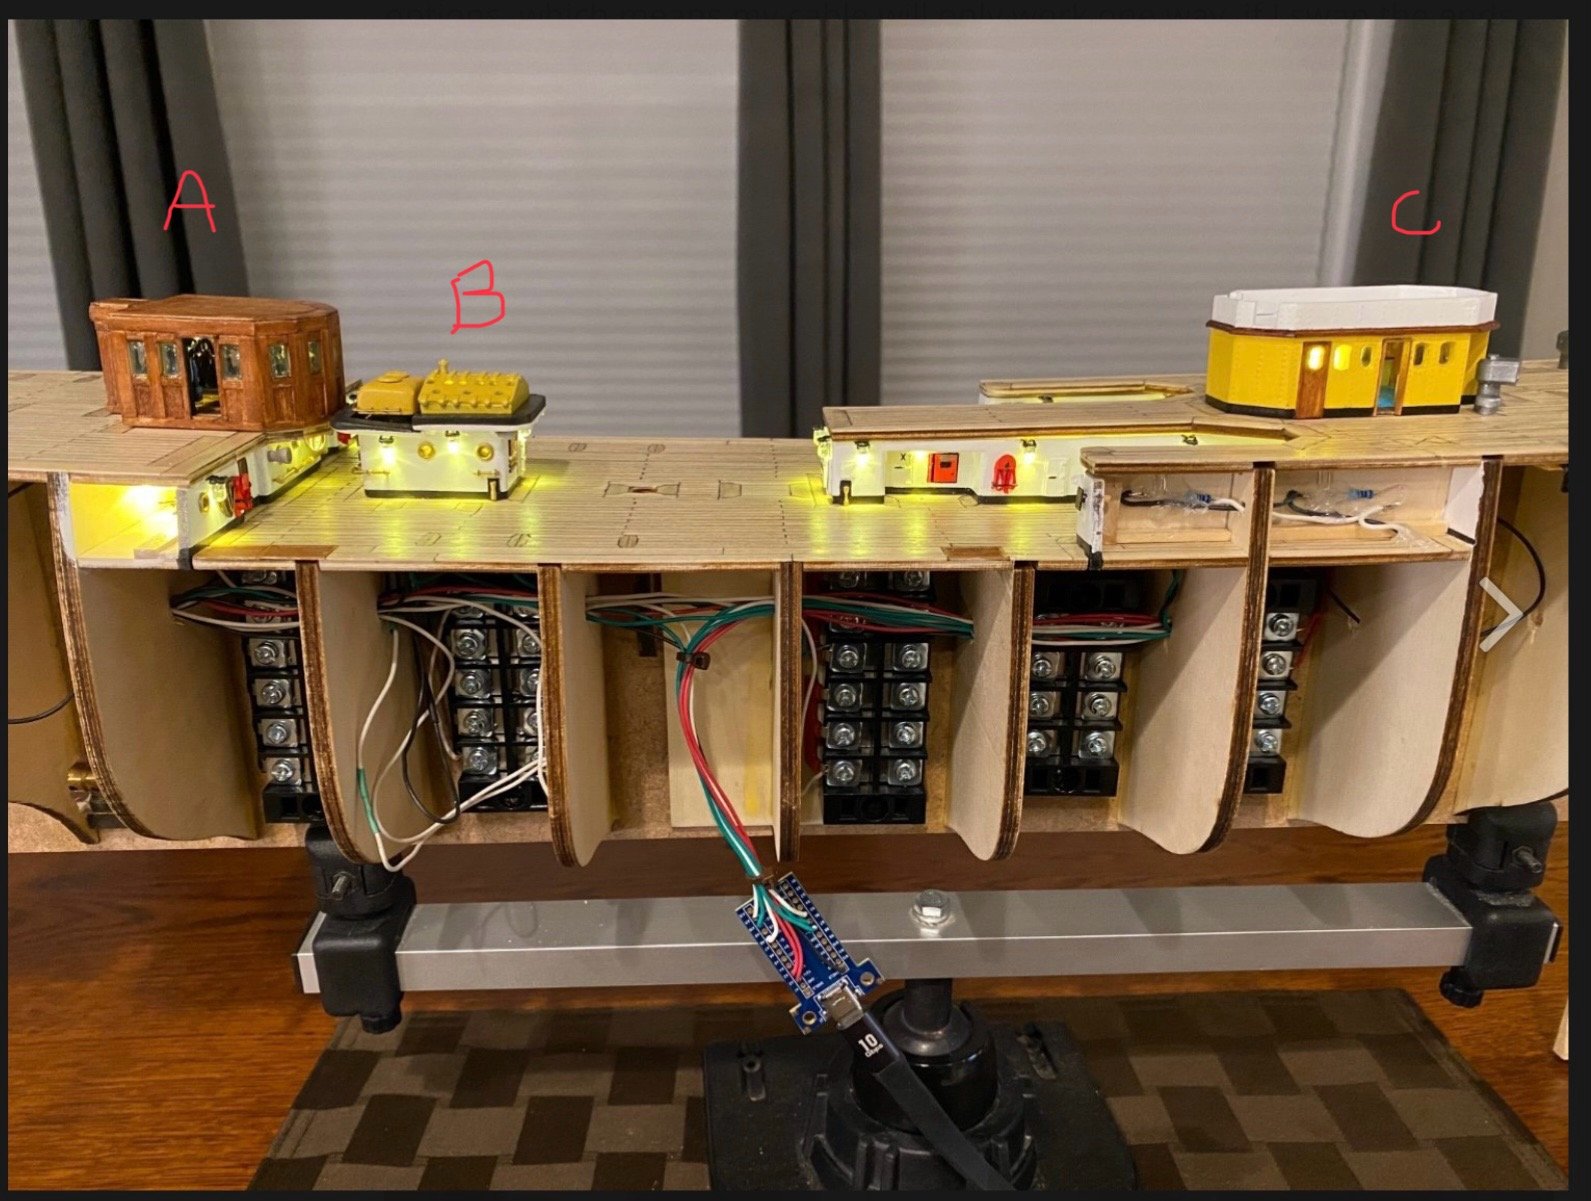
Daniel I want to pick your brain a bit if you don’t mind too much. Again I am coping your work I am so impressed with. My curiosity deals with your lighting of the three structures I show as A, B, and C in the photo. The electrical logistics I have no problem with. I am just trying to figure out which lights are on which circuit? Structure A, You put LEDs in the ceiling. Is it on one of the two port hole circuits? Structure B: You have LEDs on the outside. I suspect you have those on the main deck light circuit. Which circuit do you have the interior lights? Structure C: I read in your building you separated the lighting into two separate circuits. One for the chart room and one for the storage room? Bill

-
Continuing the deck lighting with the LED’s on the stern wall and the side rooms next to the fire control room.