Bill97
-
Posts
2,722 -
Joined
-
Last visited
Content Type
Profiles
Forums
Gallery
Events
Everything posted by Bill97
-
Thanks Marc. If I zoom in I can get a good idea from the photo.
-
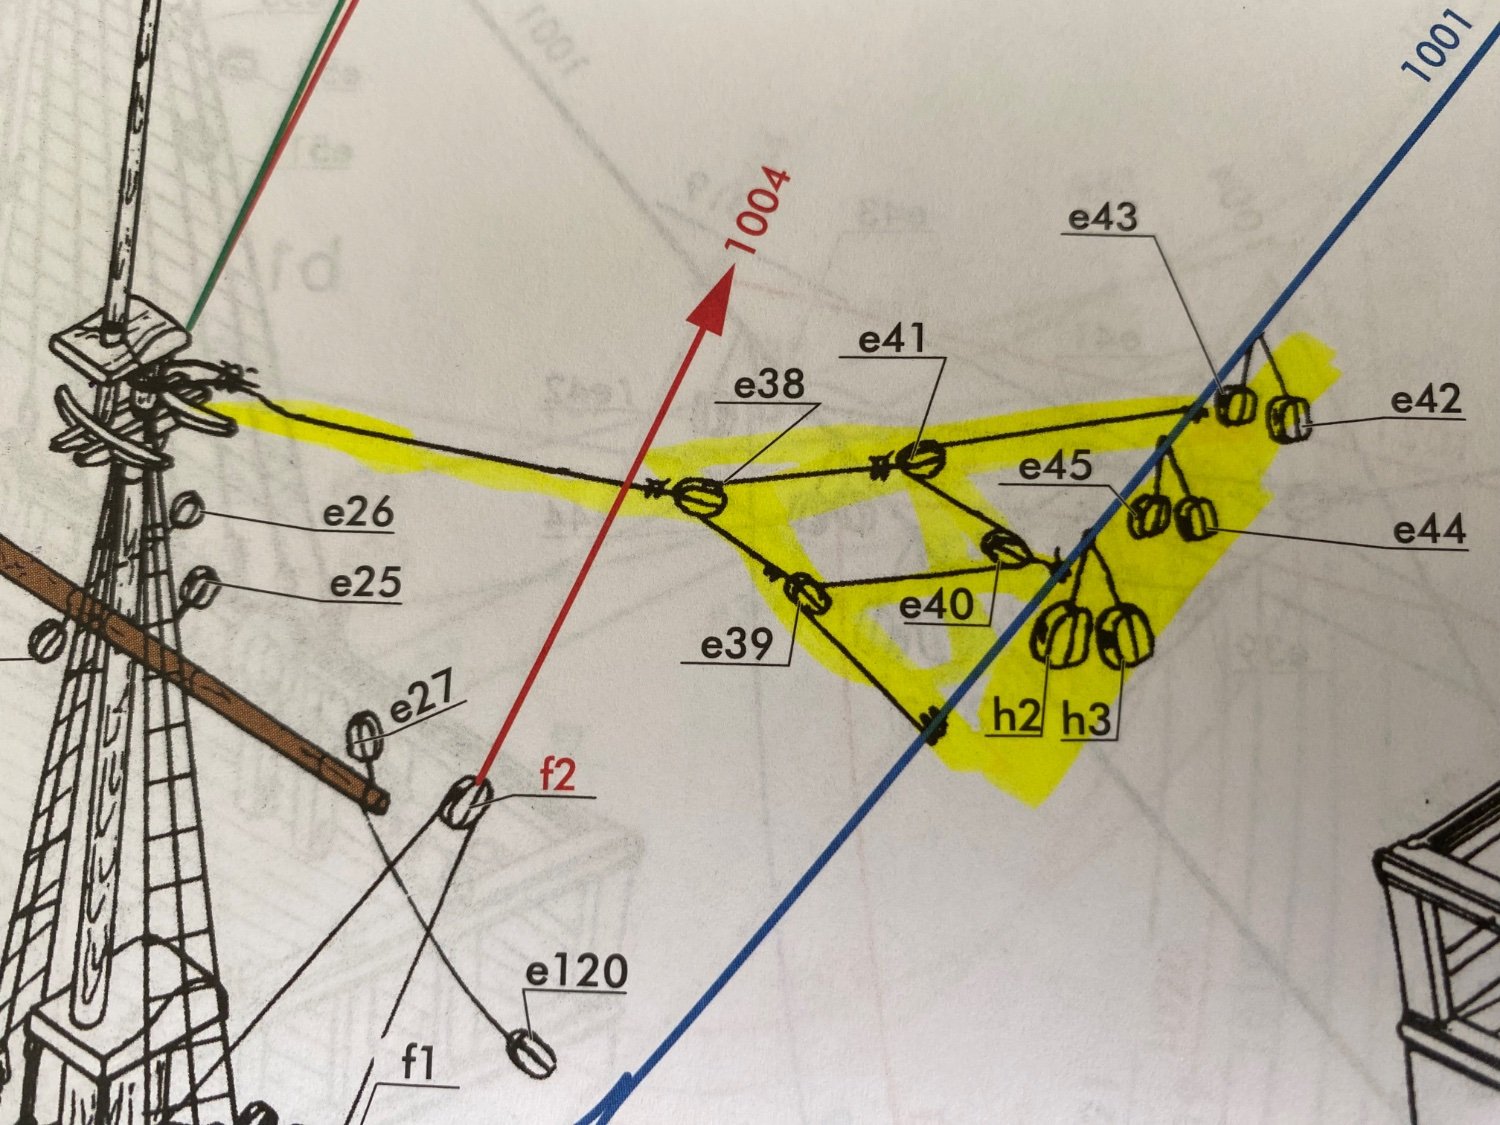
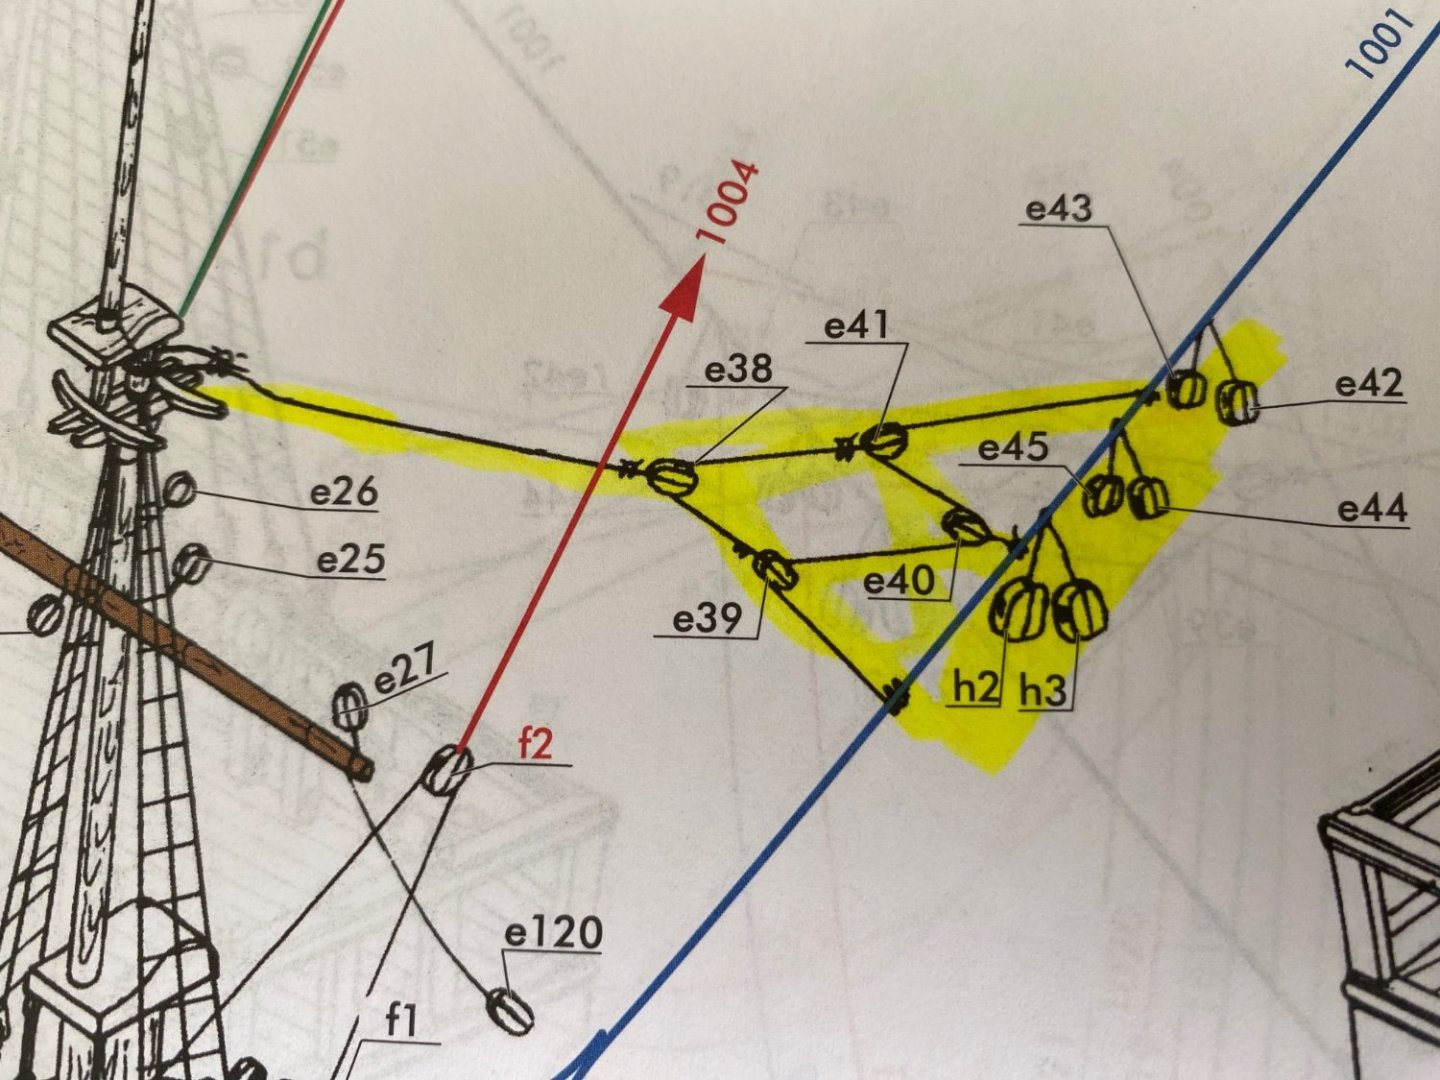
Thanks Henry. 👍 It would be blocks e4 and e2 on the bowsprit you are referring? So e42 would be above e2 and e44 would be above e4?
-
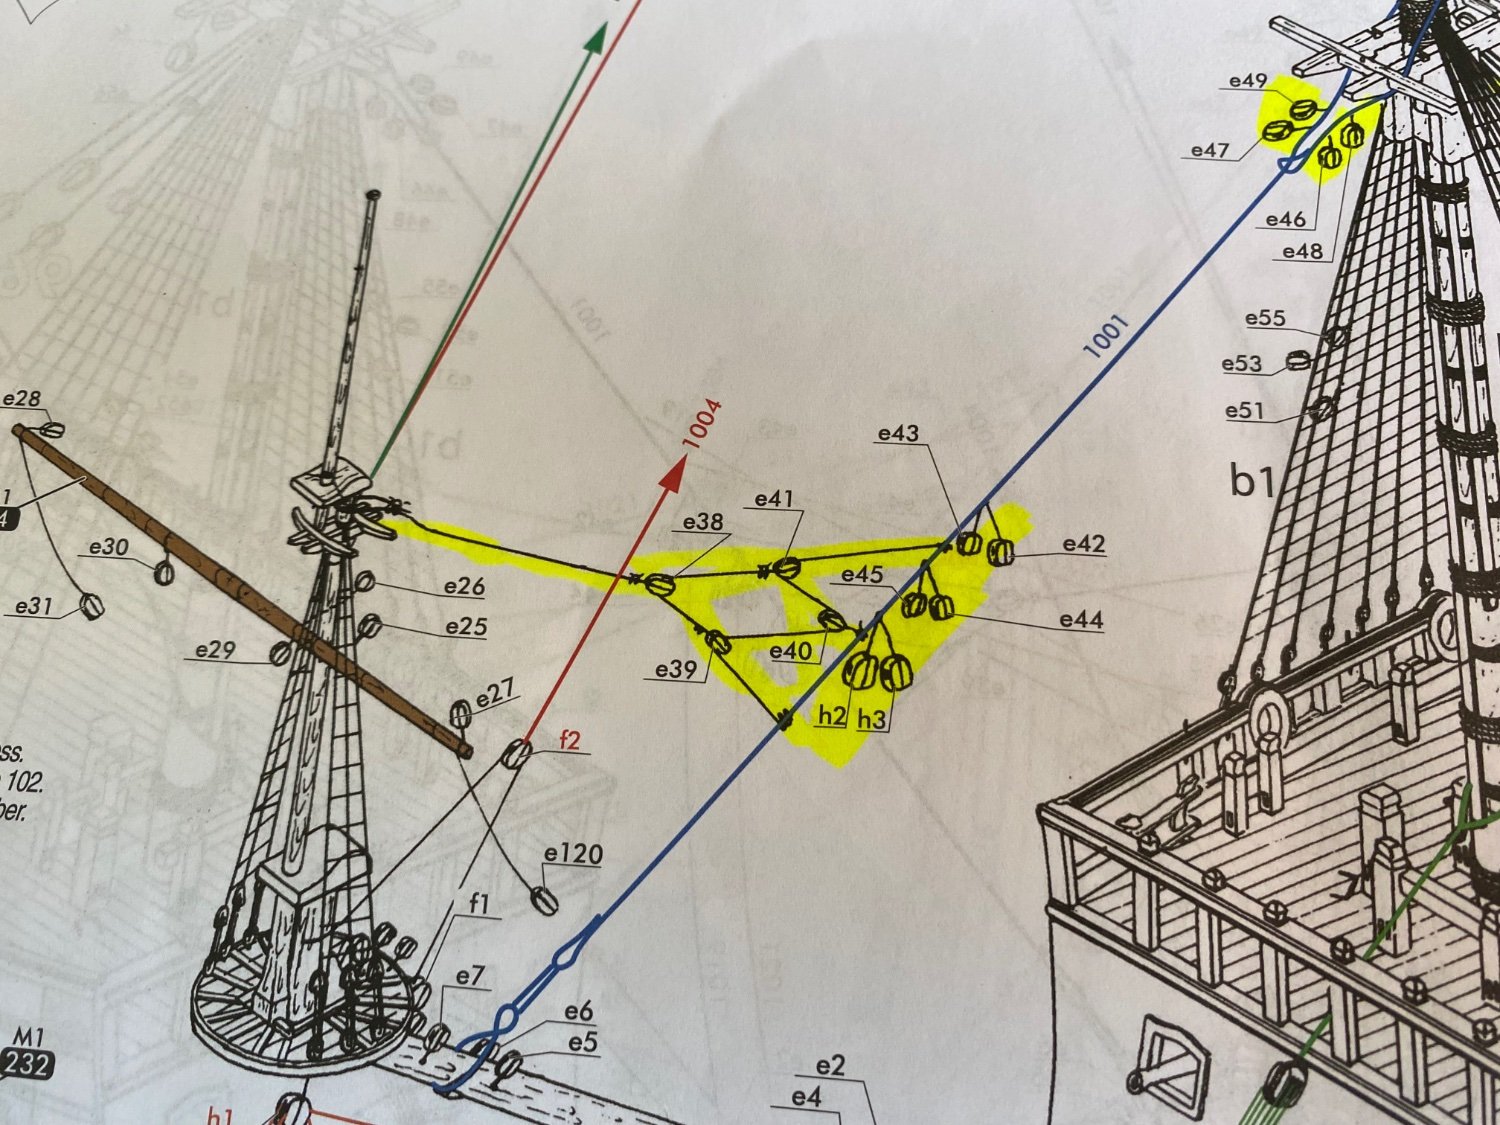
Thanks Henry. Hopefully with your’s and Ian’s help I can get this. As you mentioned the instructions show the upper leg of the spritsail topmast backstay just below blocks e42 and e43. Does it matter where on the forestay that upper leg is tied to begin its route? And then of course I would tie e42 and e43 right above that on the forestay. I guess what I am trying to determine is if there is an optimum angle of the rope leading from the spritsail topmast to block e38? That would then determine where in space blocks e39-e41 would on a horizontal line through the spritsail topmast. Should this line be horizontal or angle down toward the forestay, or does it really matter? Hopefully following Ian’s recommendation I can get a good representation. Henry if you would not mind I would very much appreciate a little further clarification of the second part of your second paragraph. The sentence that starts: The blocks at the forestay should be .... . I got a feeling this is something I need to know an understand. Not sure if it pertains to the spritsail topmast backstay or the braces you refer to. I also have have not found a use for h2 and h3. Will wait to attach them until we have an answer. Oh oh and yes very creative naming of the mast tackles. I see they connect to a eyebolt using a hook on the tackle. What were these mast tackles used for? I assume cargo lifting like the tackle pendants? Always learning from you guys Bill
-
Thanks Ian. As always you are the best my friend. Will look to those references. These are a few different versions I found on line.

- 1,508 replies
-
- 1
-

-
- Le Soleil Royal
- Heller
- (and 1 more)
-
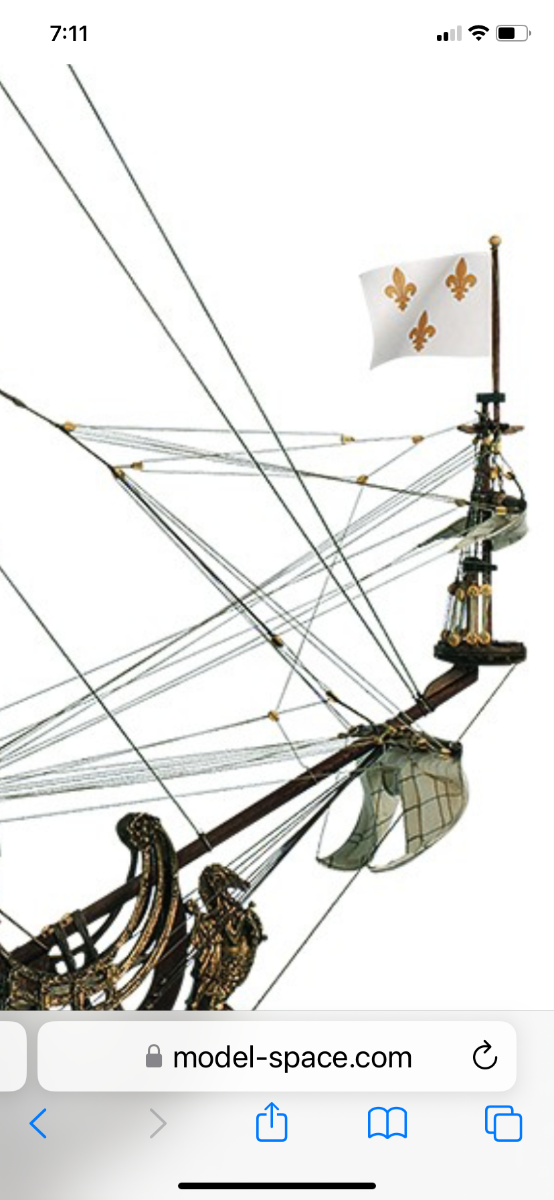
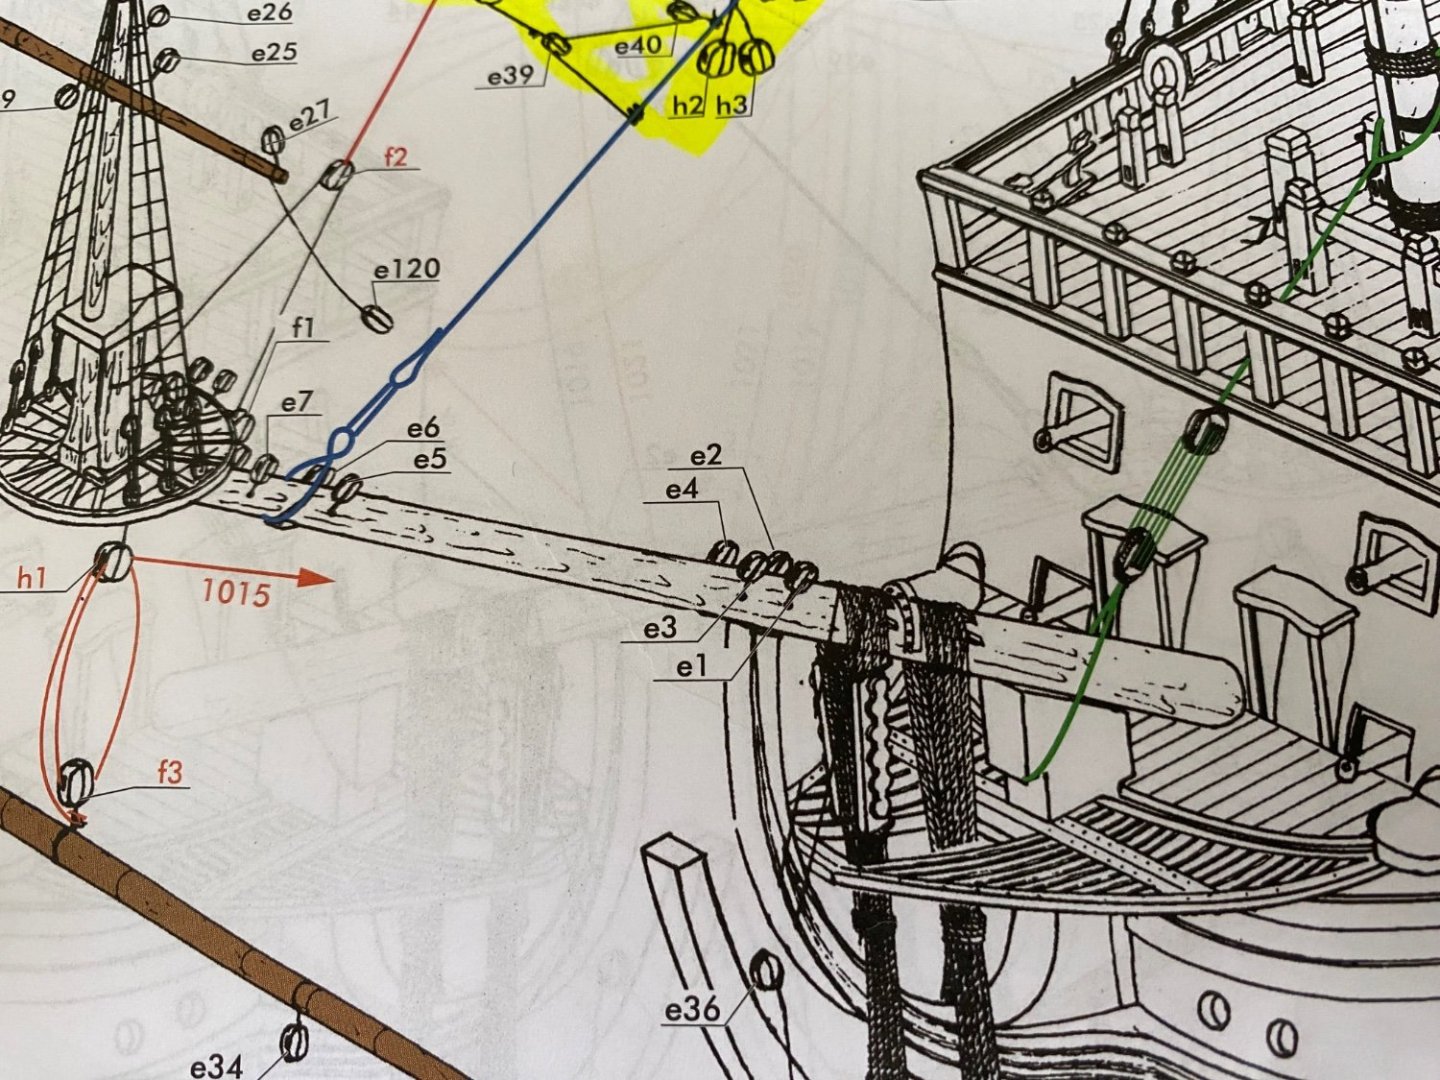
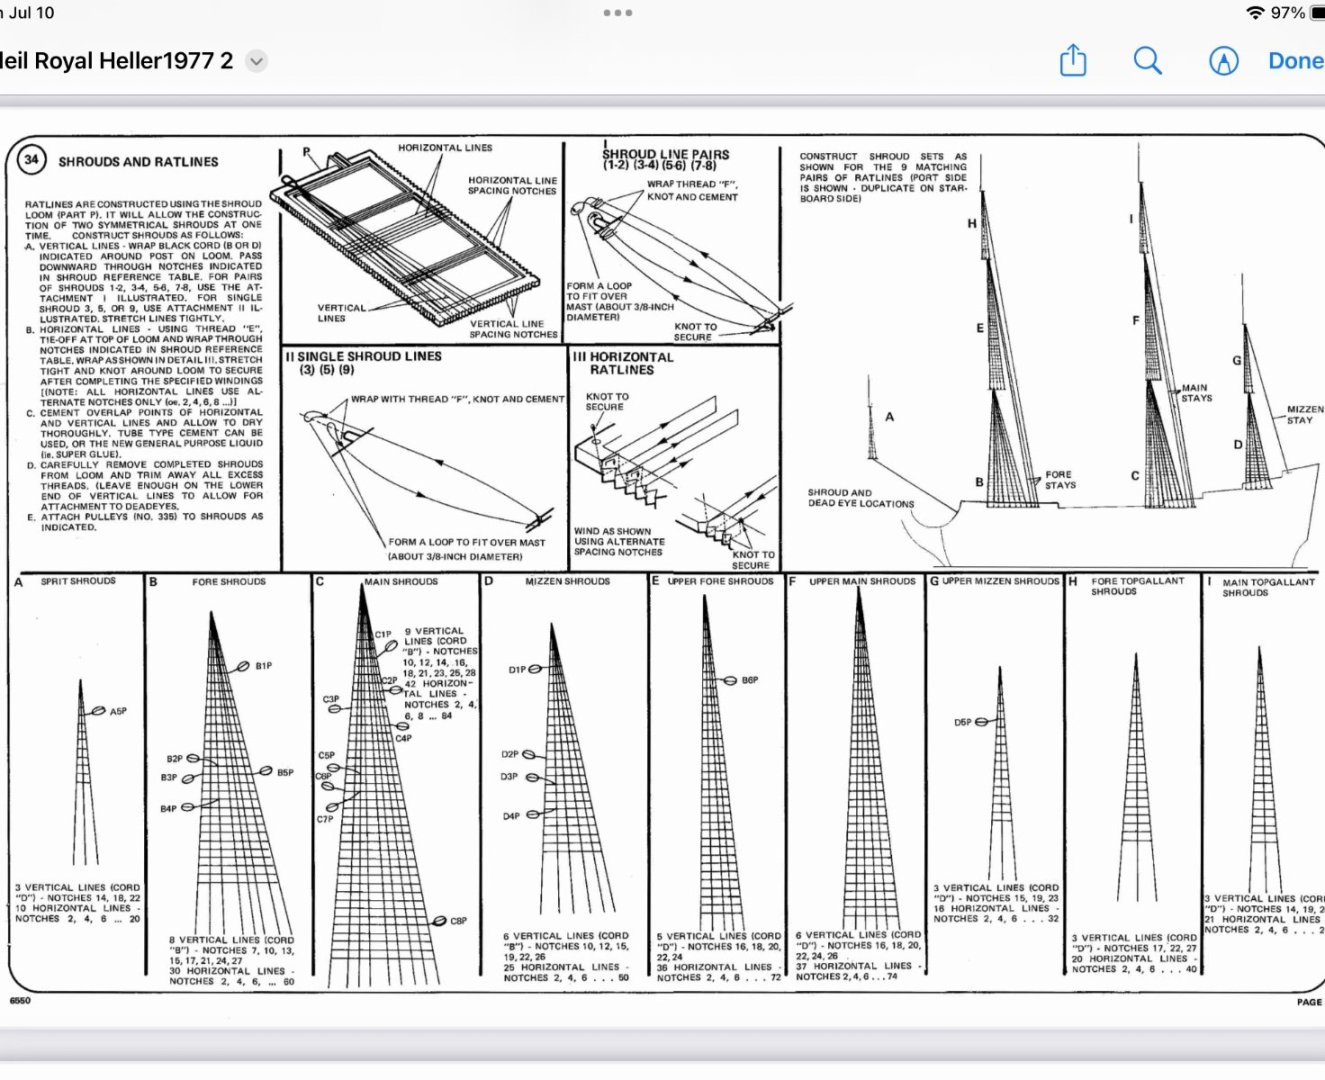
I am searching for a good picture of this rigging done on a model to see the right spacing and block positions of the ropes and blocks. It is difficult to tell how it is supposed to be by the instructions drawing. Looked for help in Anderson’s book but found no luck. Several different versions on-line. Not sure how it should be. Any help would be appreciated.
- 1,508 replies
-
- 2
-
-
- Le Soleil Royal
- Heller
- (and 1 more)
-
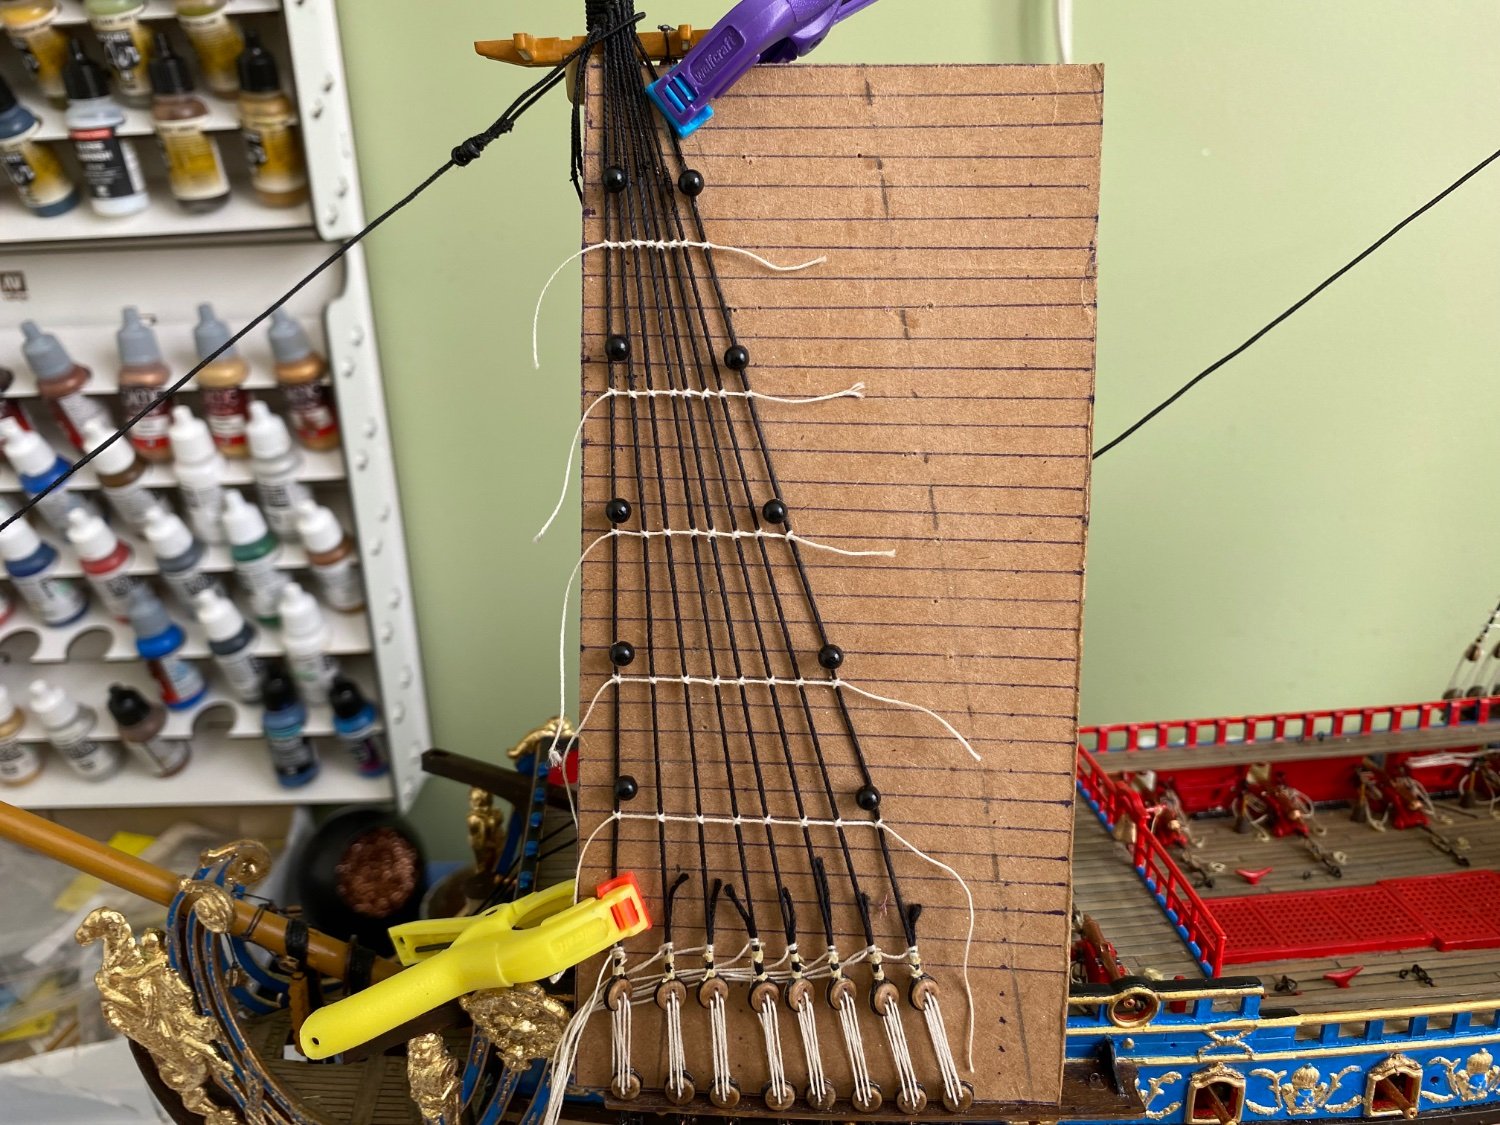
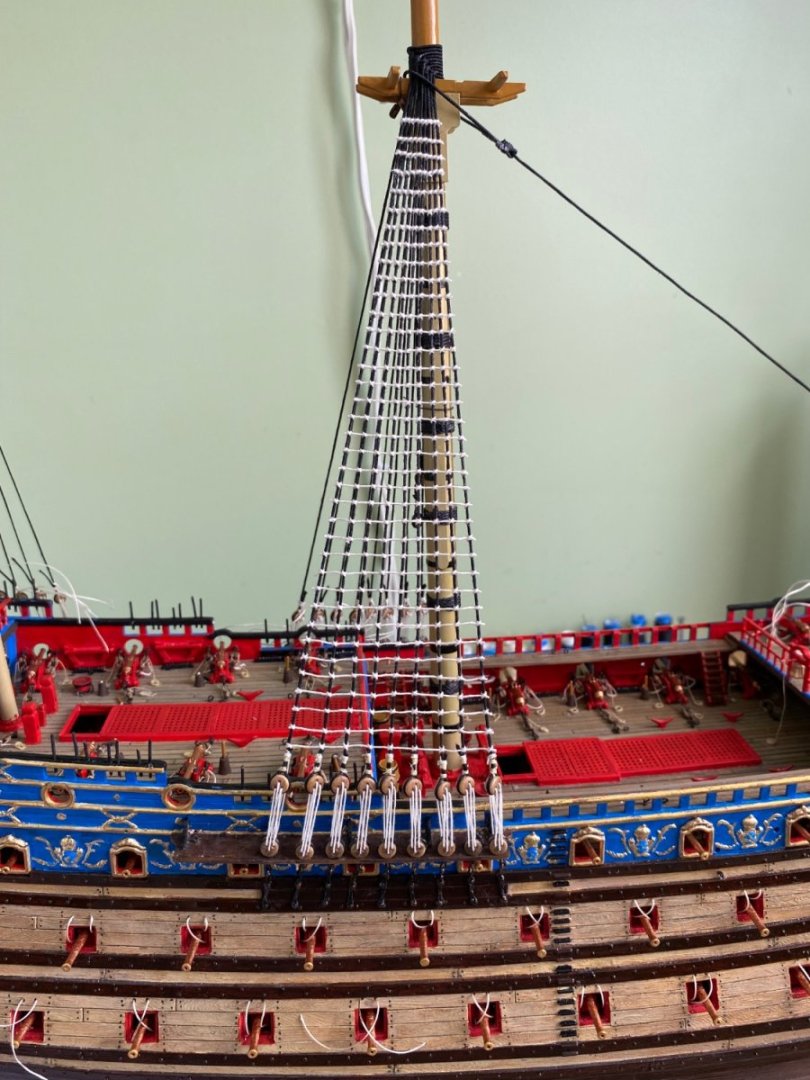
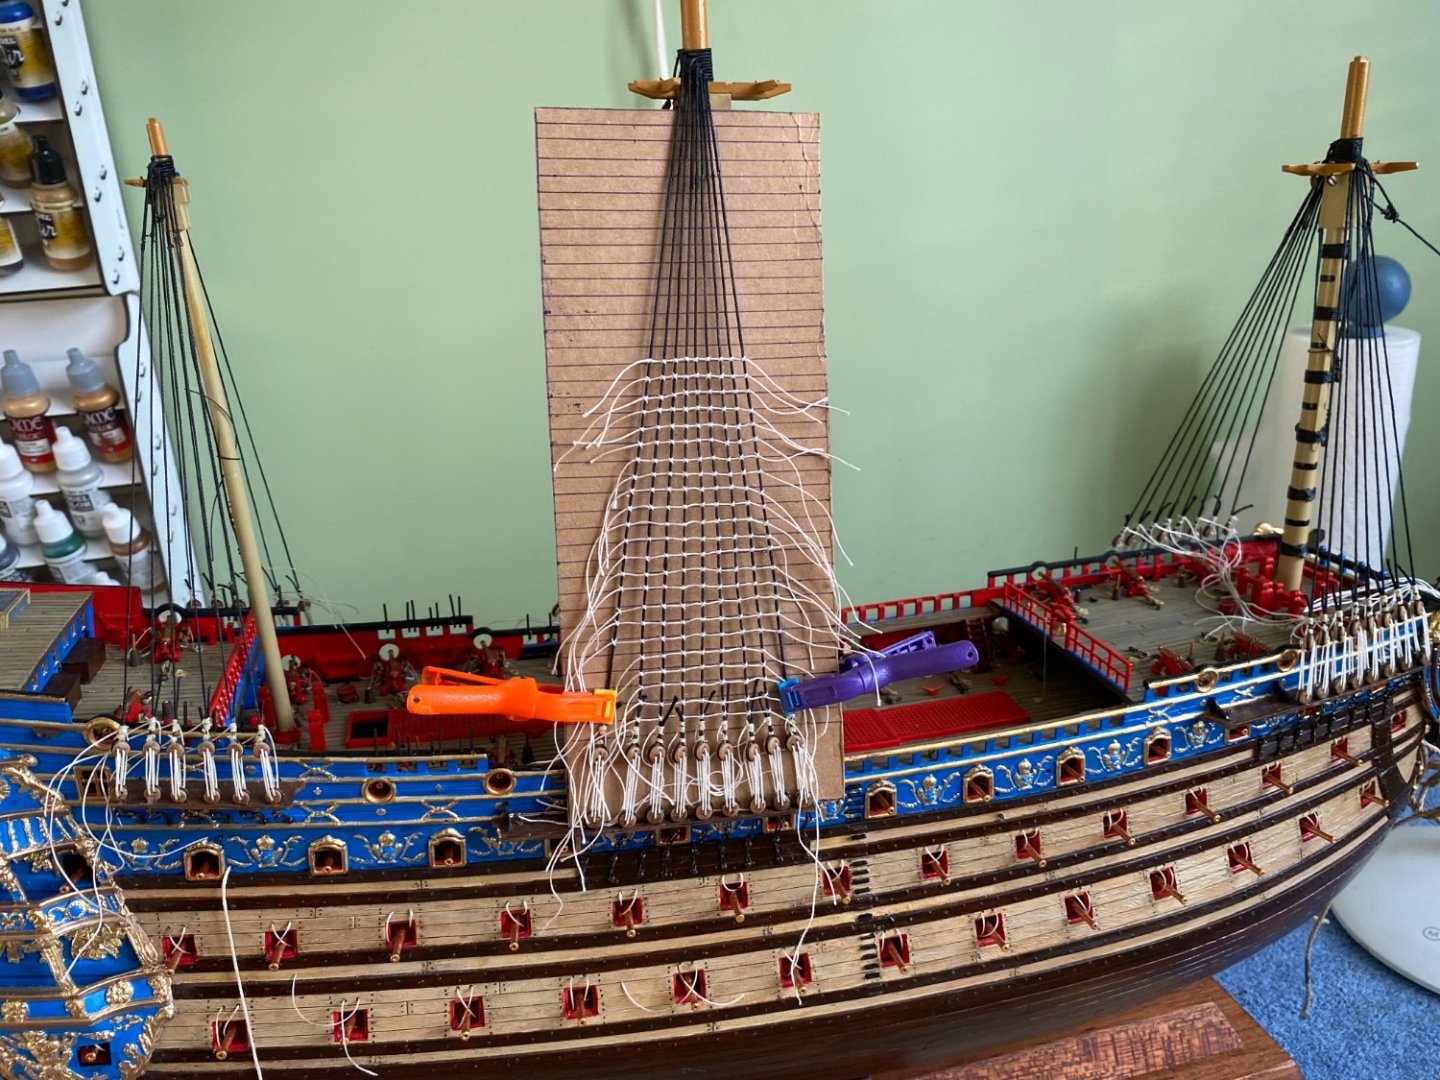
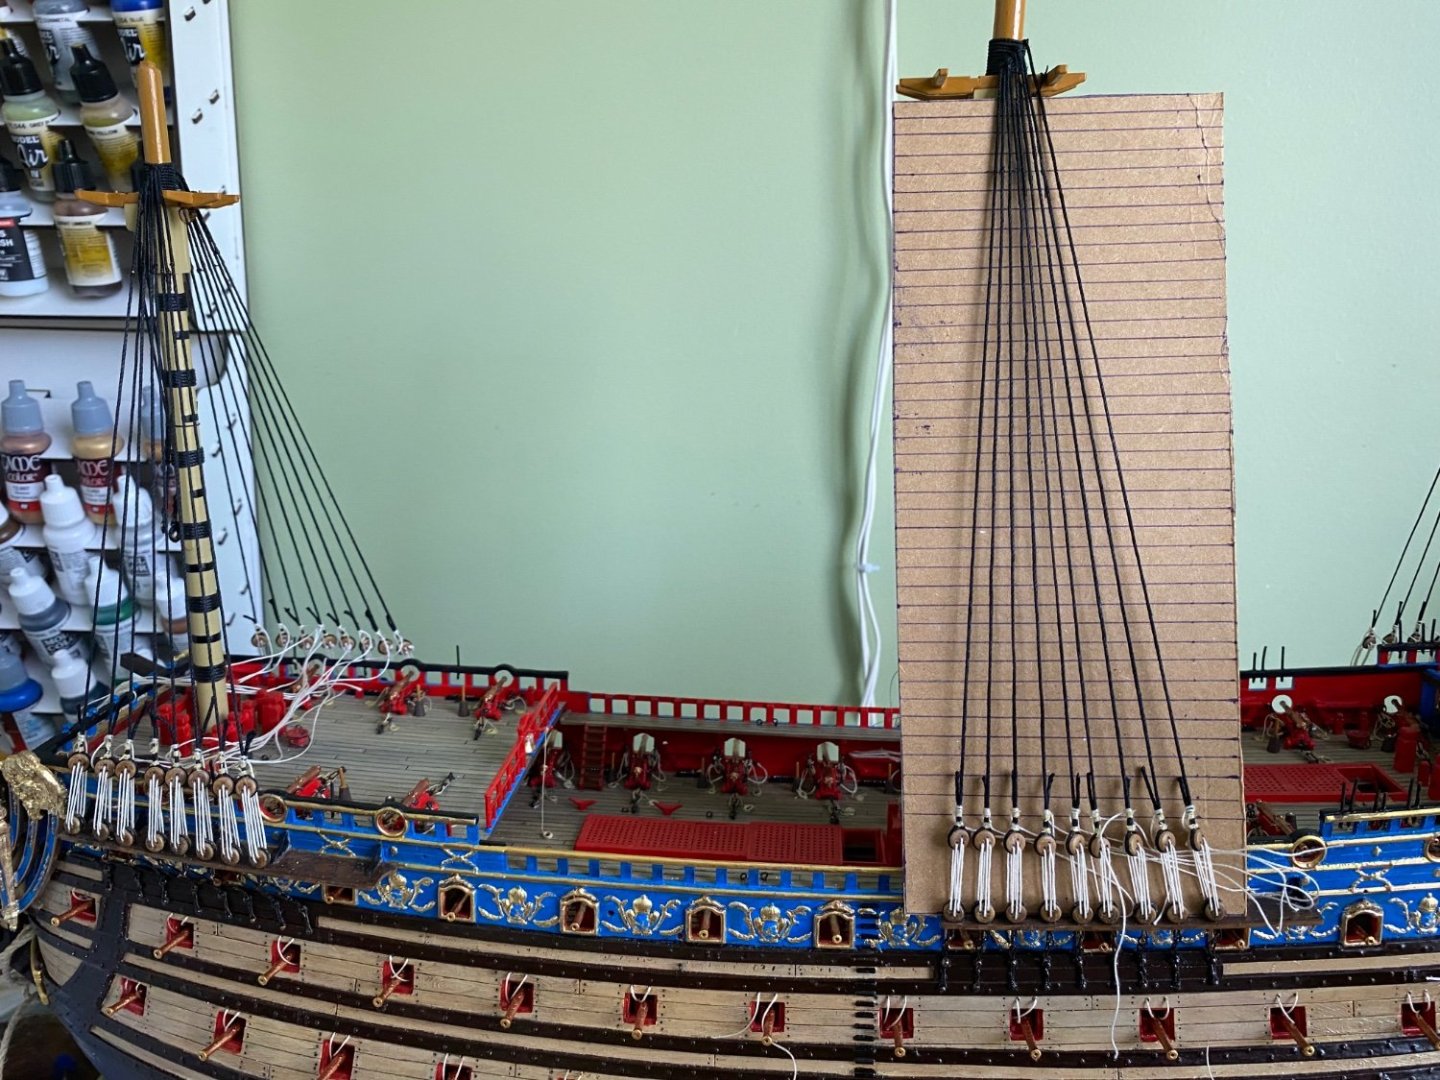
Thanks my friends. Don’t know if any new builders looking in are curious of a methodology for tying the ratlines and, very importantly, keeping the shrouds from bowing off their natural line from deadeye to mast top. This is my method I have used for years that I find works well for me. I am sure other experienced builders have their tried and proven method. This is what works for me. First I determine my line spacing based on the ship scale. I have read that the ratlines were spaced anywhere from 14 to 16 inches apart, and some instances maybe more. I settled on going with a distance of close to 15”. When I convert that to the 1/100 scale the Soleli Royal is, I get a measurement close to 5mm. Selecting a distance that matches a standard mark on my ruler instead of a fraction makes laying out my card stock a bit easier. 5mm points is simply easier than trying to determine a 4.3mm measurement consecutively as an example. So in this case I laid out my card stock with as many lines spaced 5mm apart to fill the card. I then place the card behind the shrouds and mark the top and bottom of the fore and aft most shroud. I then remove the stock and draw lines between the points. This now forms the natural line for the length of the first and last shroud. Returning the card back behind the shrouds I use clips to lock it in place with the drawn line directly behind the first and last shrouds. I then use push pins at every fifth line to lock the outer shrouds in place so when I start tying the ratlines the outer shrouds will not be pulled out of their natural lay. I then go ahead and tie and glue the ratlines at these positions. Once the glue drys I start filling the space between the already glued ratlines. This also serves to reduce the monotony of tying by providing little goals of finishing a section. When I am finished I remove the pins, make any small adjustments to keep the ratlines straight with the line behind it followed by a thorough application of diluted white glue to each tie. Then I remove the card stock. Later after the glue has dried I trim the excess off the ends of the tied ratlines. I hope this helps any builder that has decided to tie their own ratlines. I learned it from a builder on MSW and paying it forward.

- 1,508 replies
-
- 2
-

-
-
- Le Soleil Royal
- Heller
- (and 1 more)
-
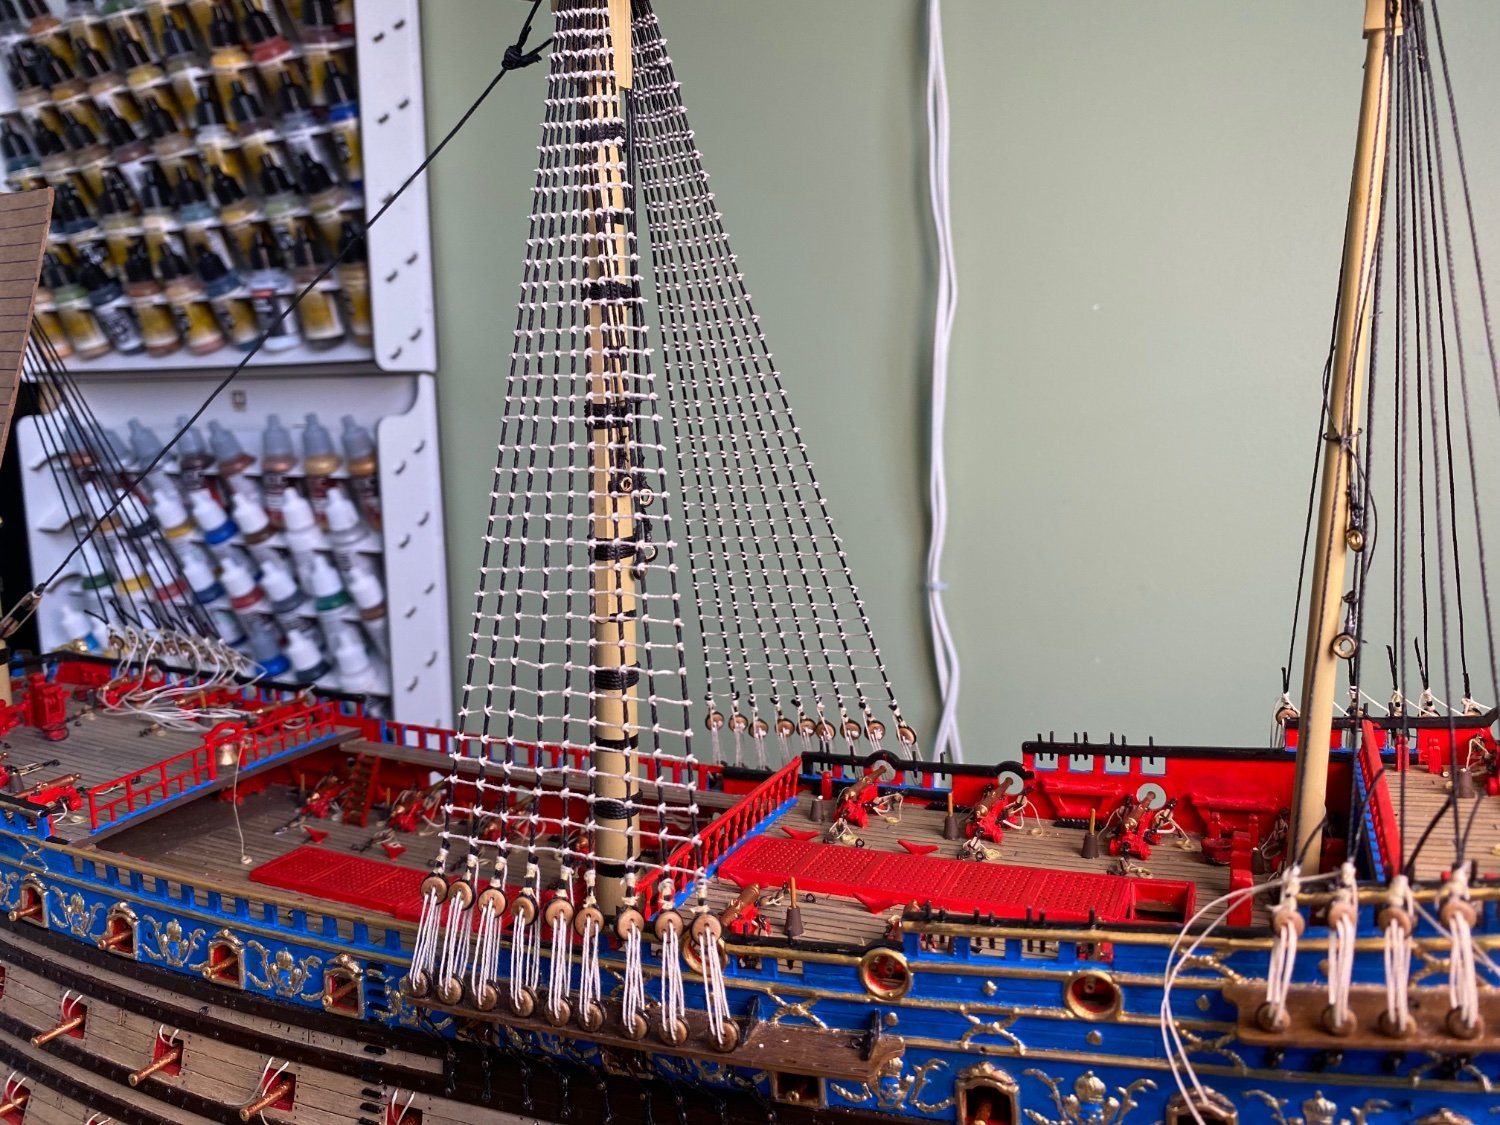
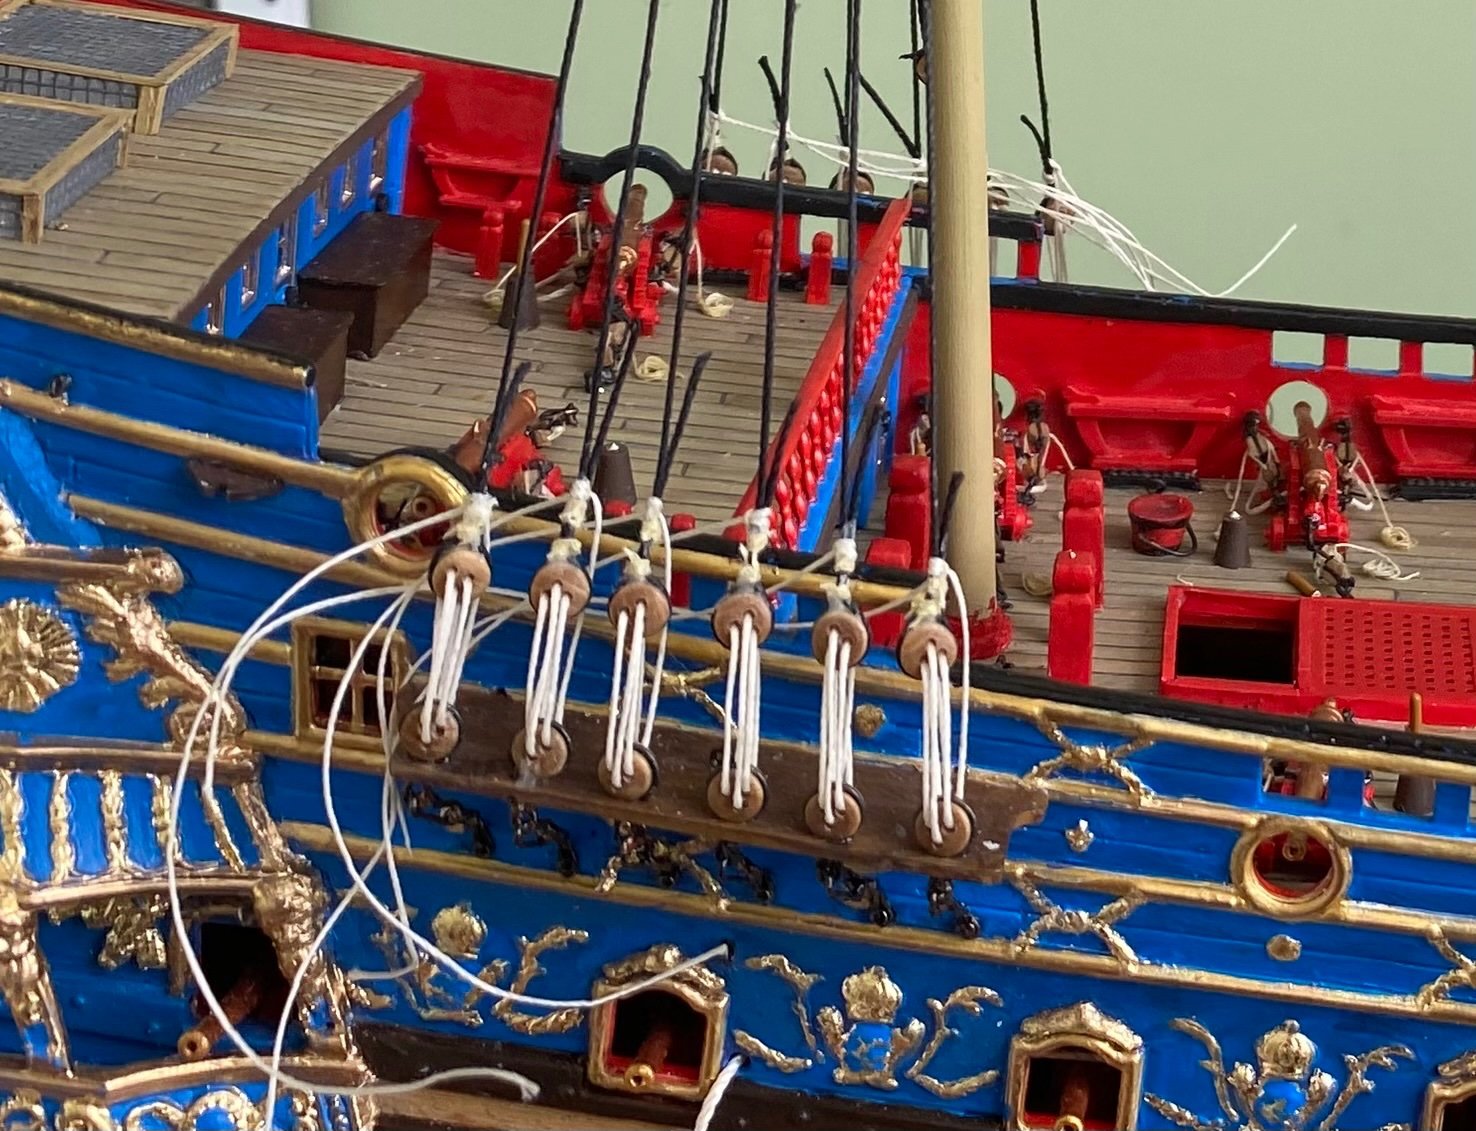
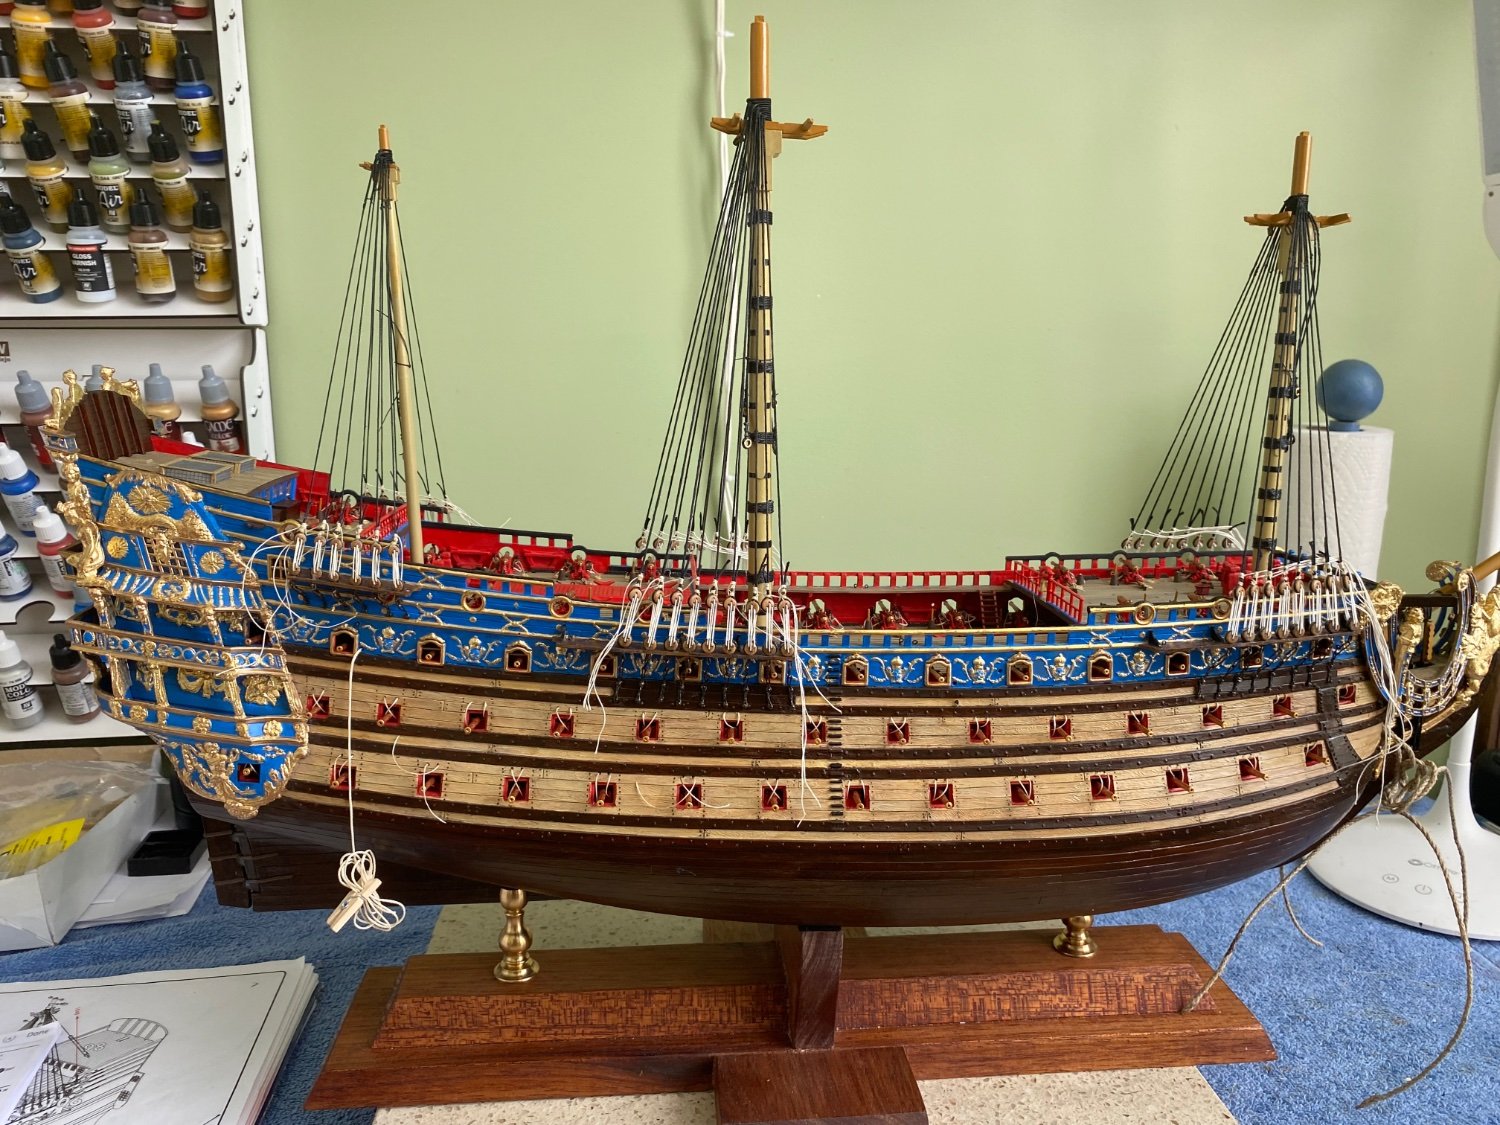
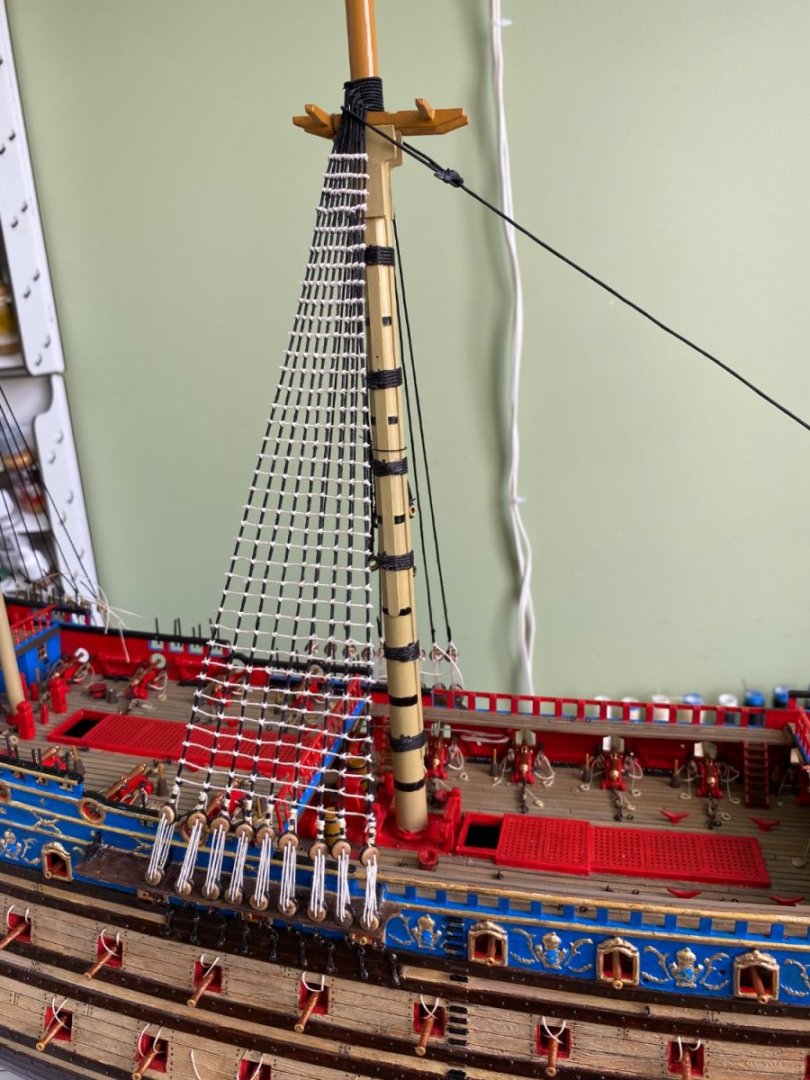
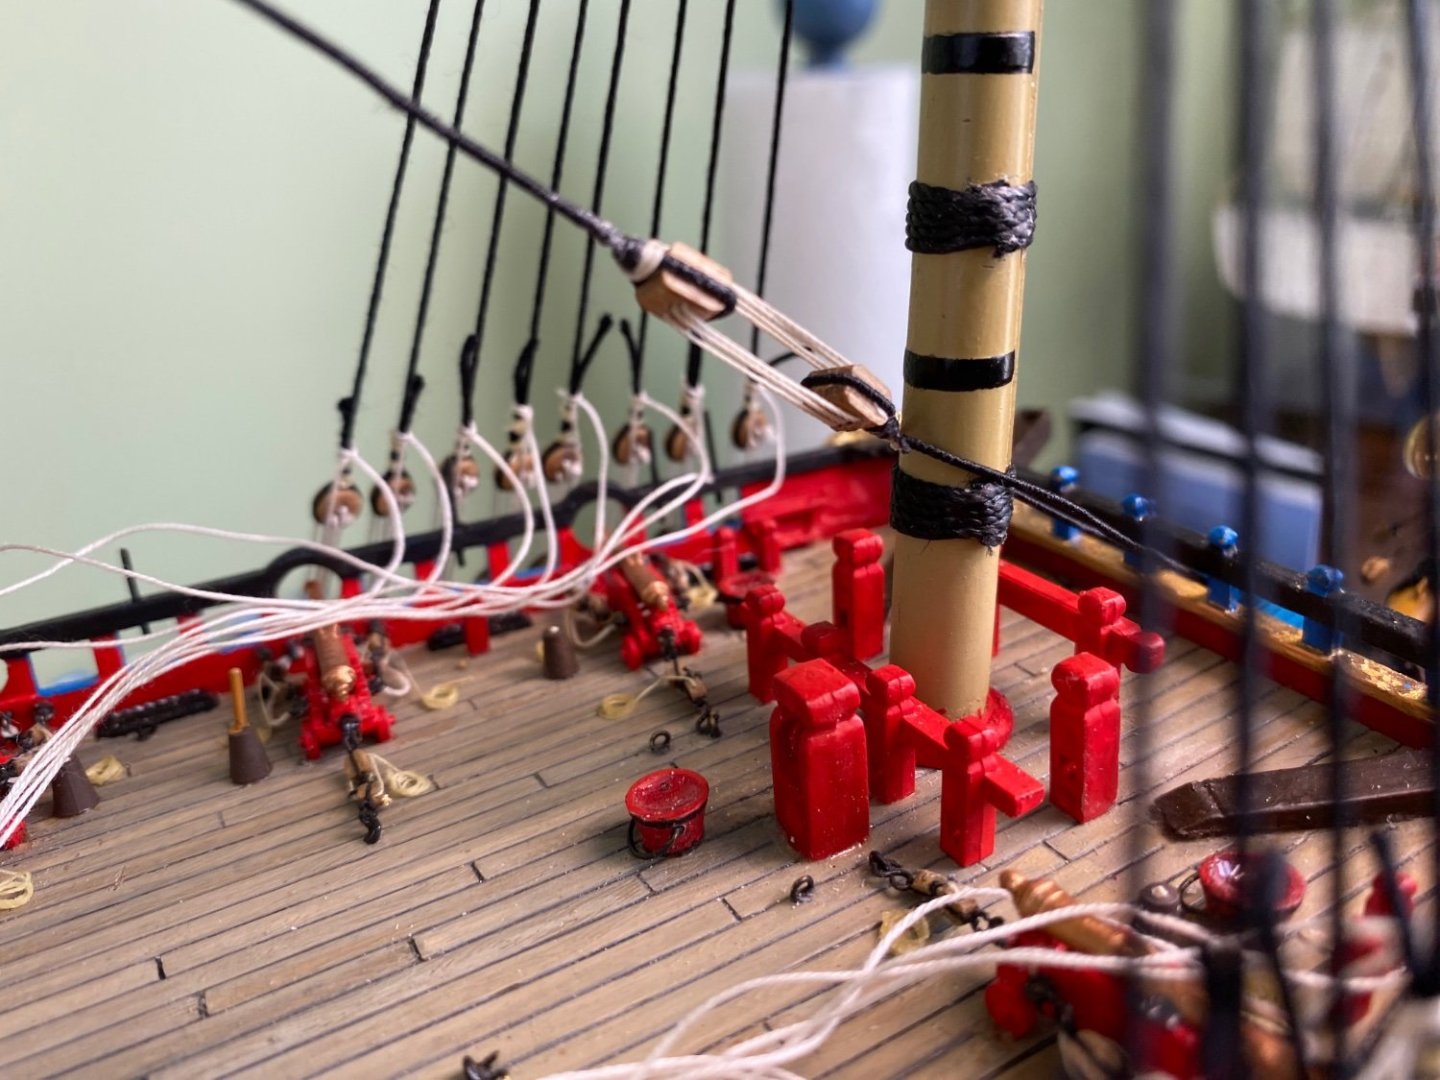
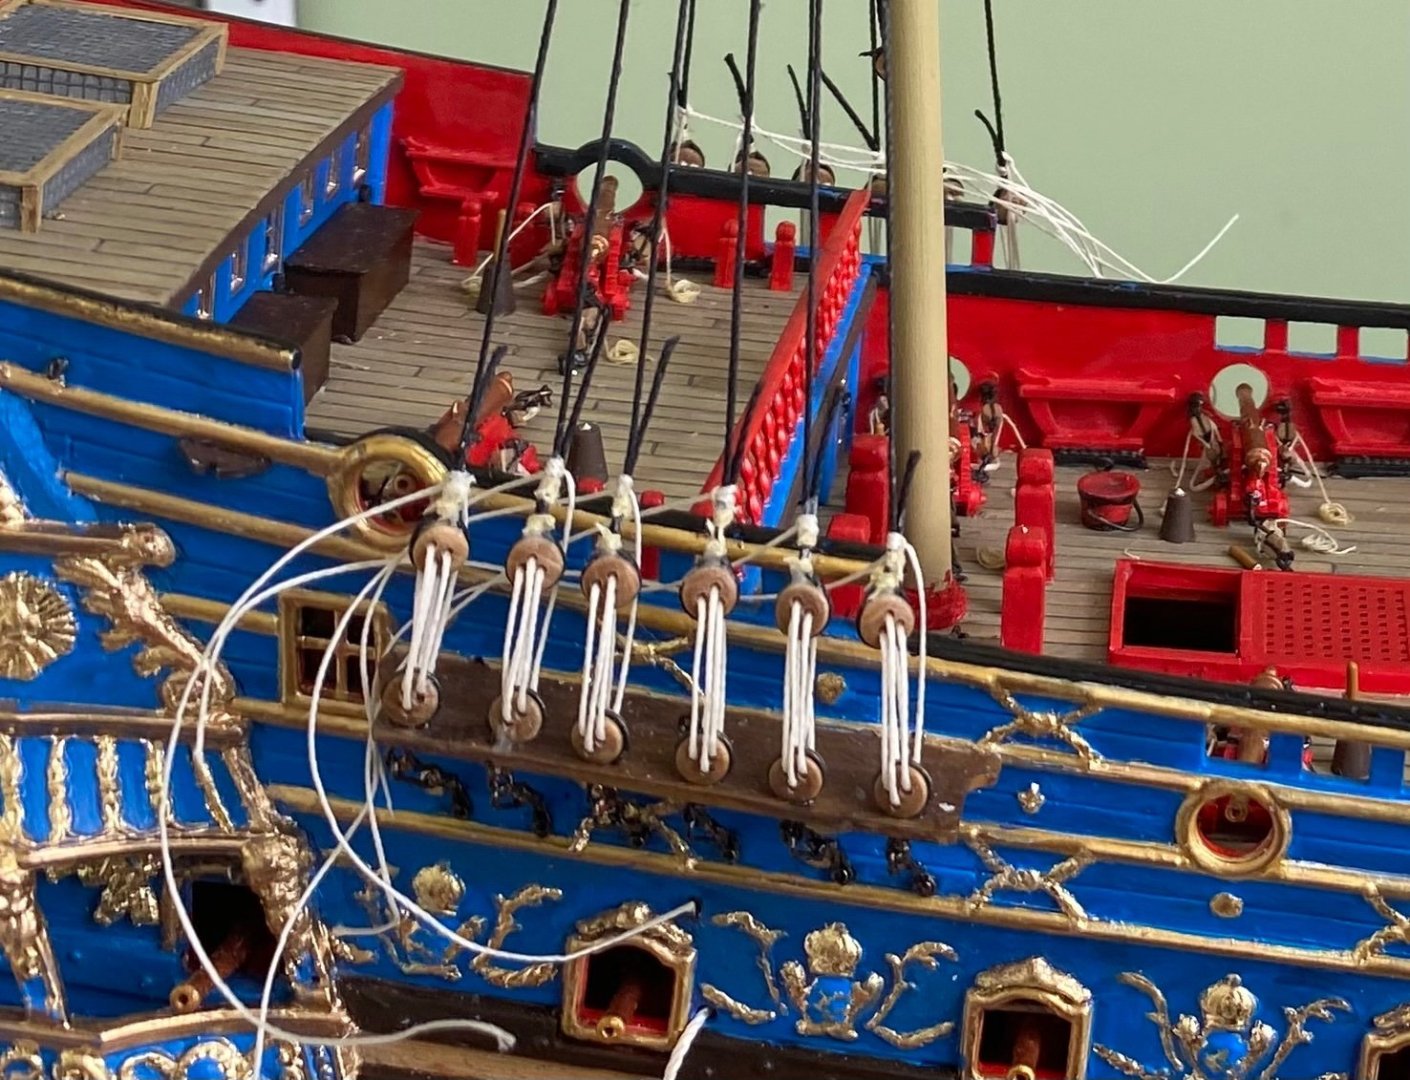
Not to much to report. Just finished the ratlines on the port side of the main lower shrouds. Now to move to the foremast ratlines and some of the select rigging pieces like the ones highlighted in yellow (whatever they are called).


- 1,508 replies
-
- 3
-
-
- Le Soleil Royal
- Heller
- (and 1 more)
-
Three hundred fifteen half-hitch knots on one set of shrouds, but who’s counting? 😊
- 1,508 replies
-
- 2
-

-
-
- Le Soleil Royal
- Heller
- (and 1 more)
-
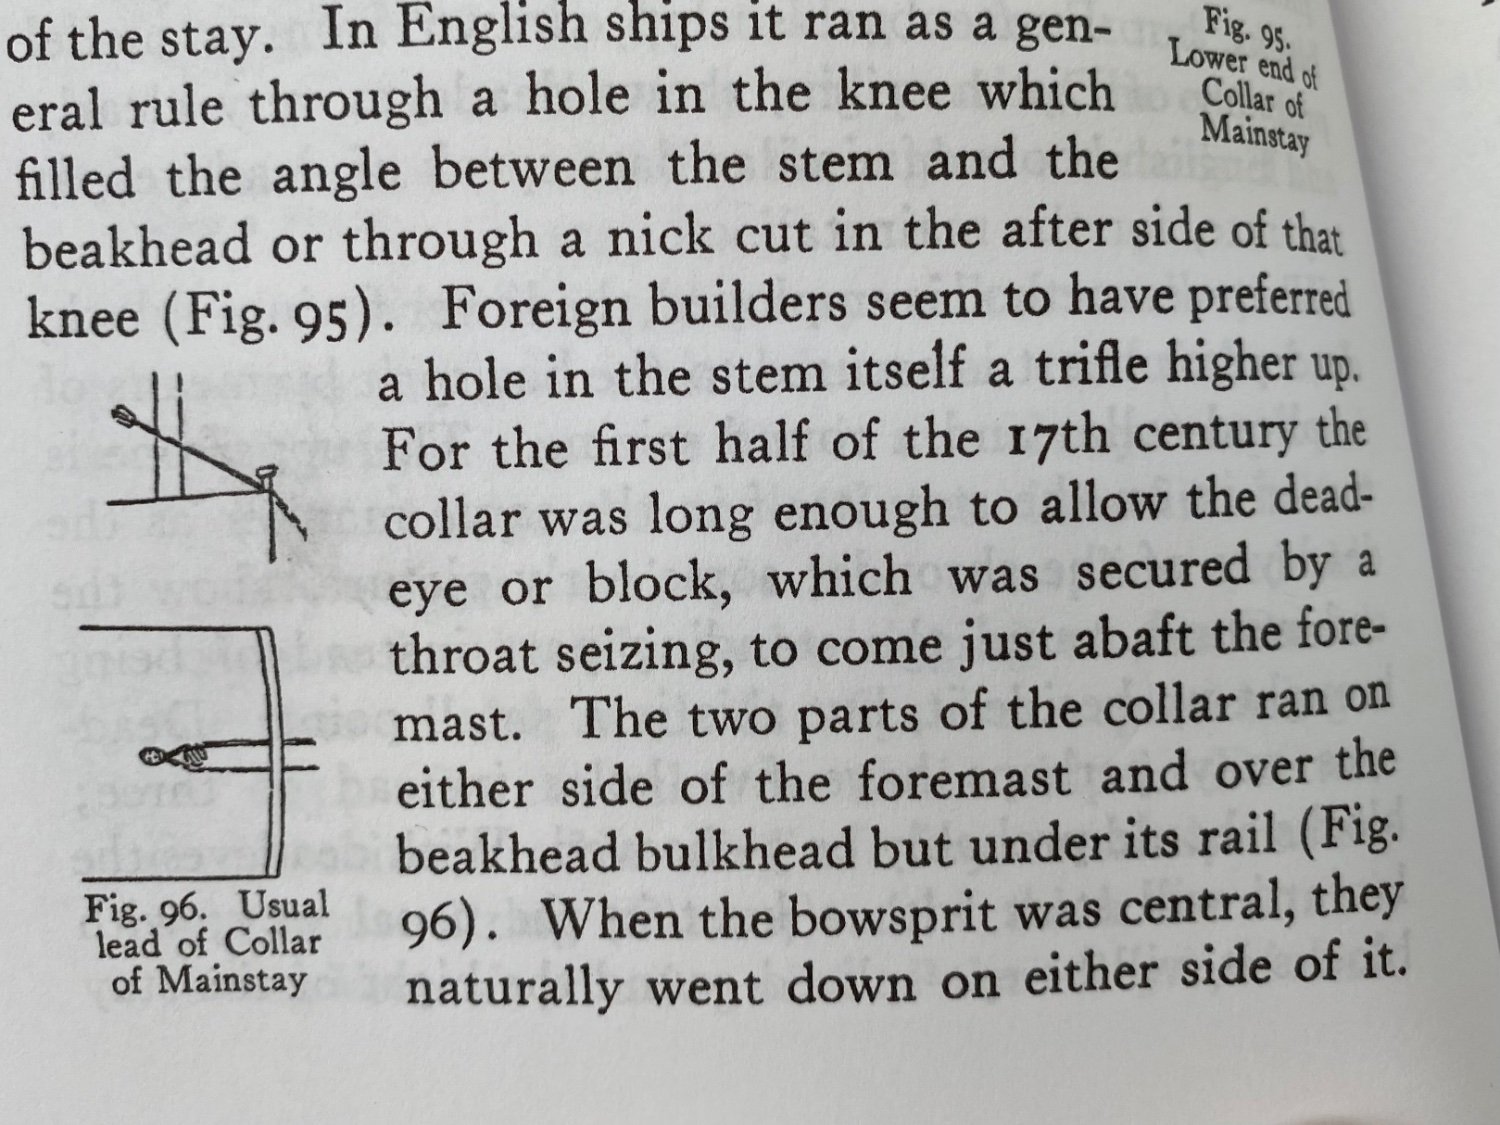
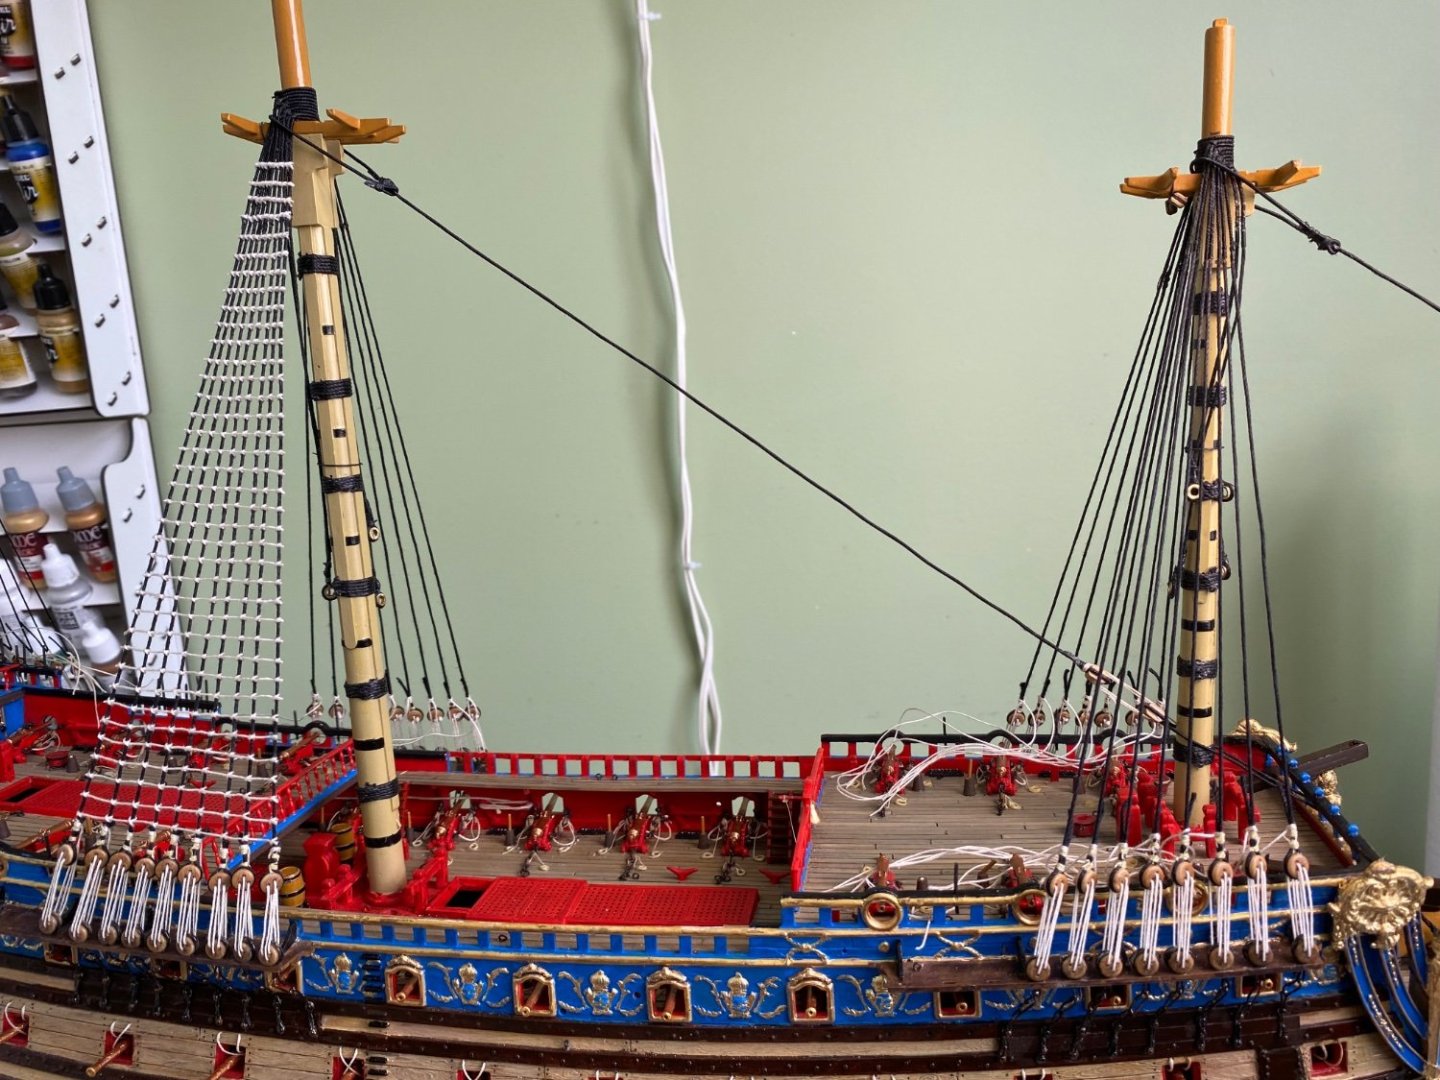
Fore and mainstay completed in accordance with Anderson’s book. This rigging if the mainstay does seem to make better sense than Heller’s instruction. Also finished the ratlines on the starboard main lower shrouds.

- 1,508 replies
-
- 4
-
-
- Le Soleil Royal
- Heller
- (and 1 more)
-
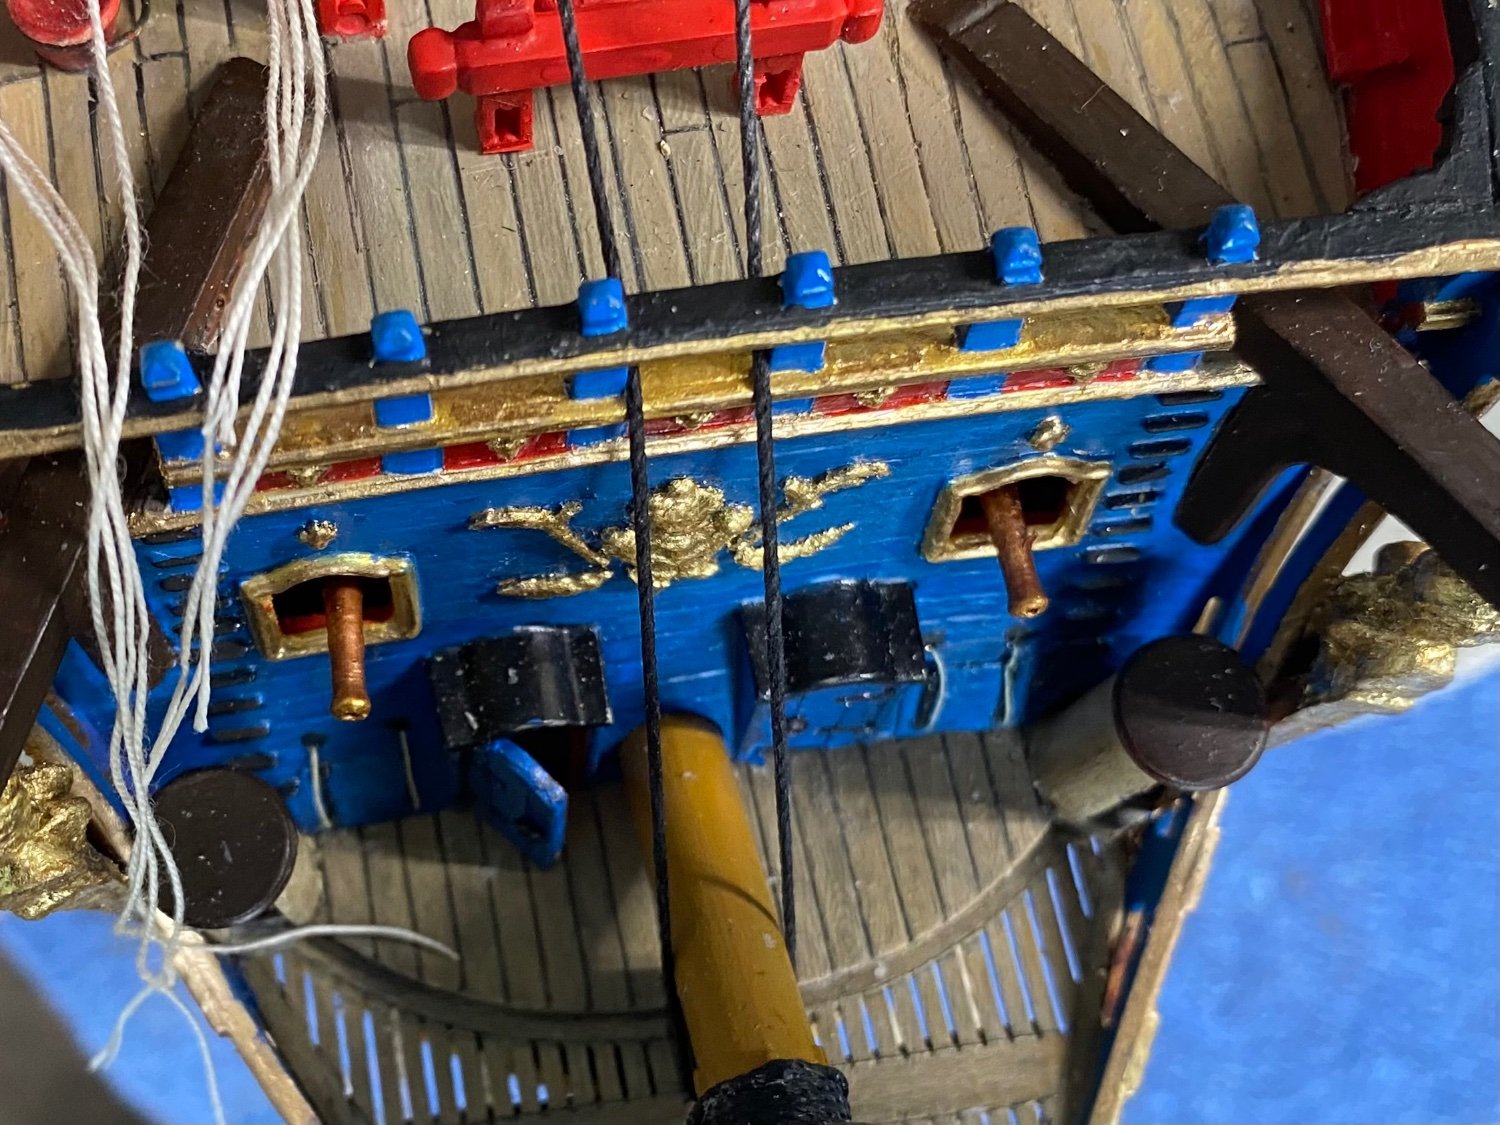
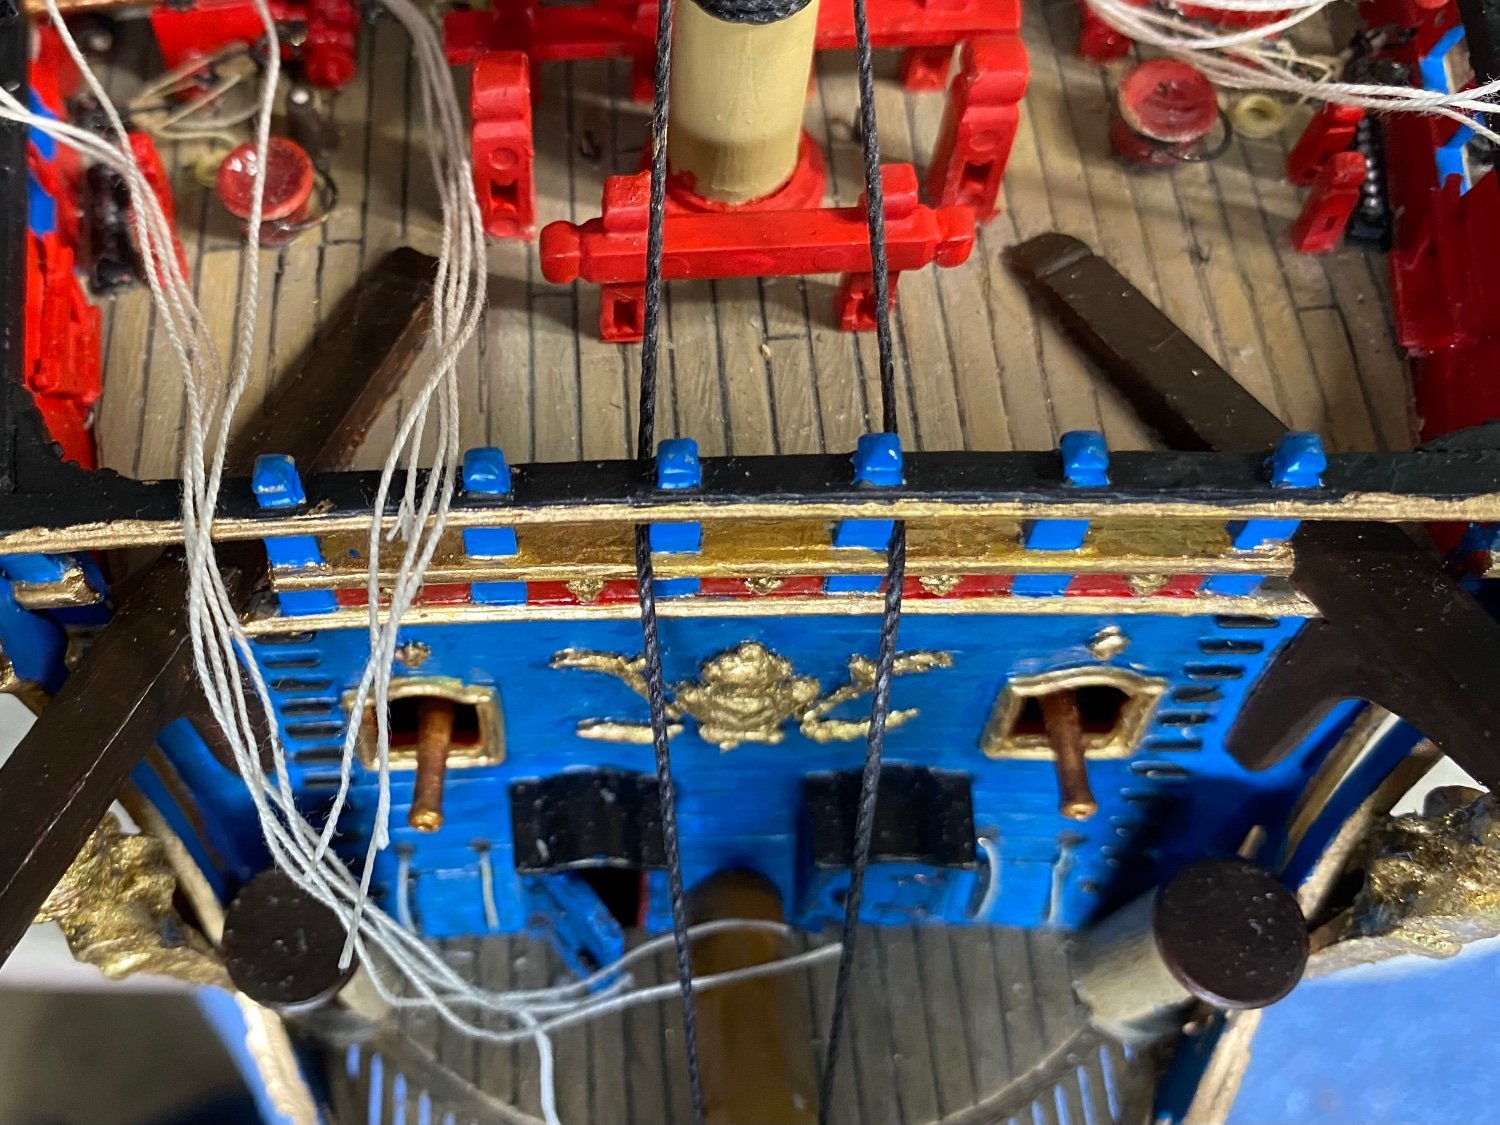
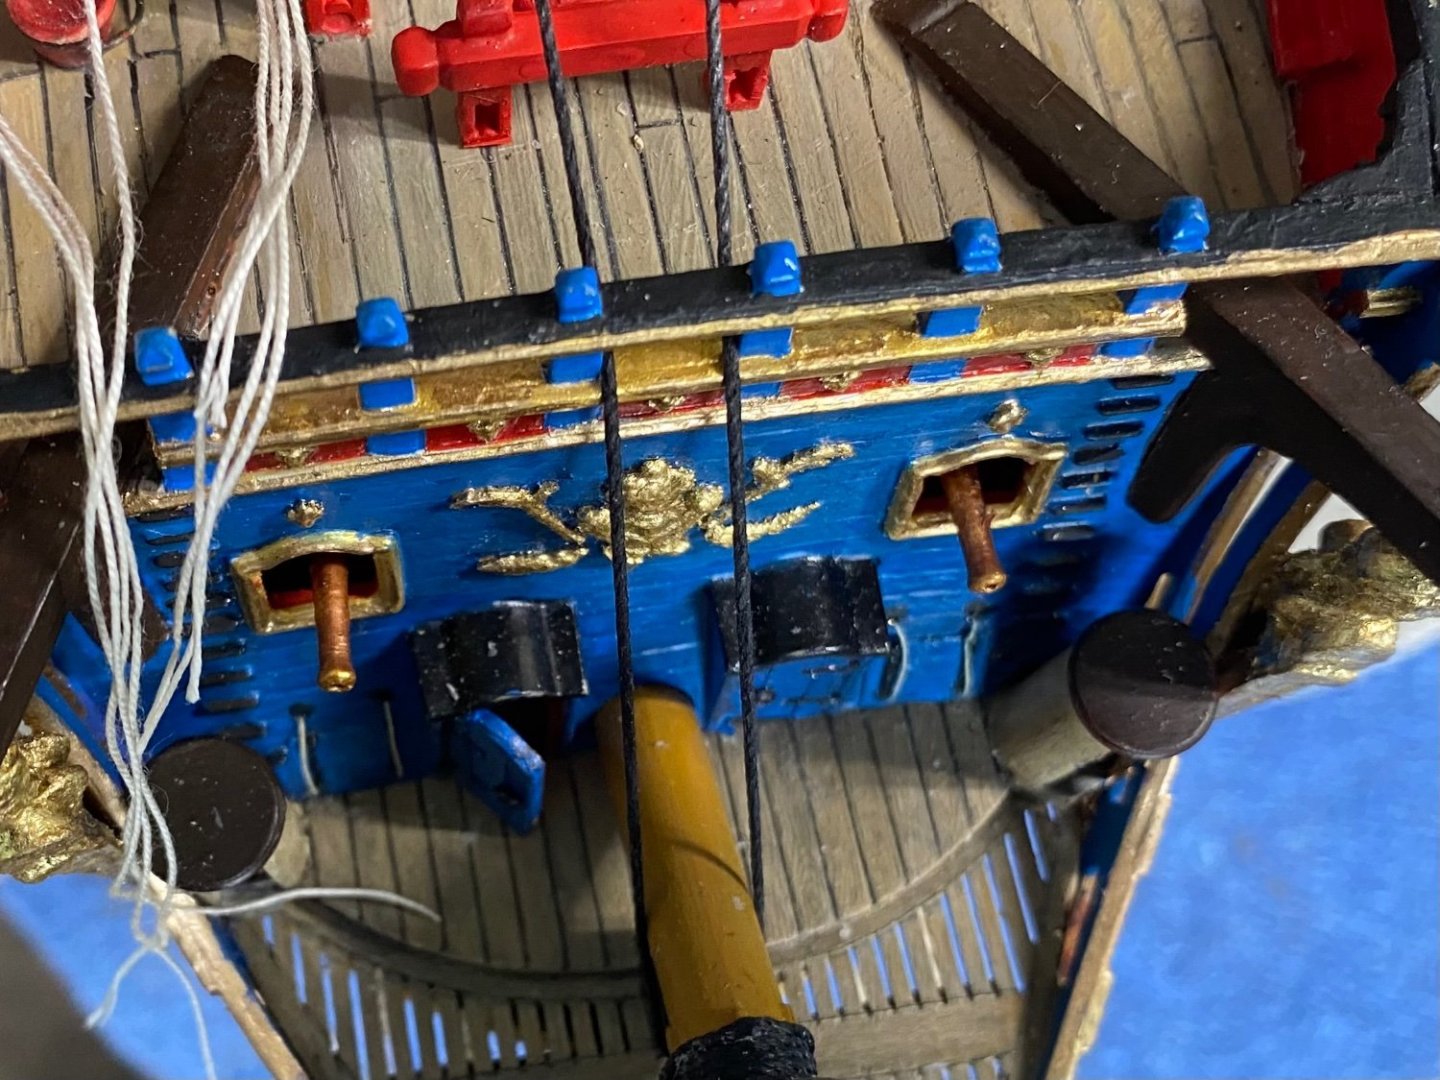
Should have included this photo as well showing the collar going up through the rail.

- 1,508 replies
-
- 3
-
-
- Le Soleil Royal
- Heller
- (and 1 more)
-
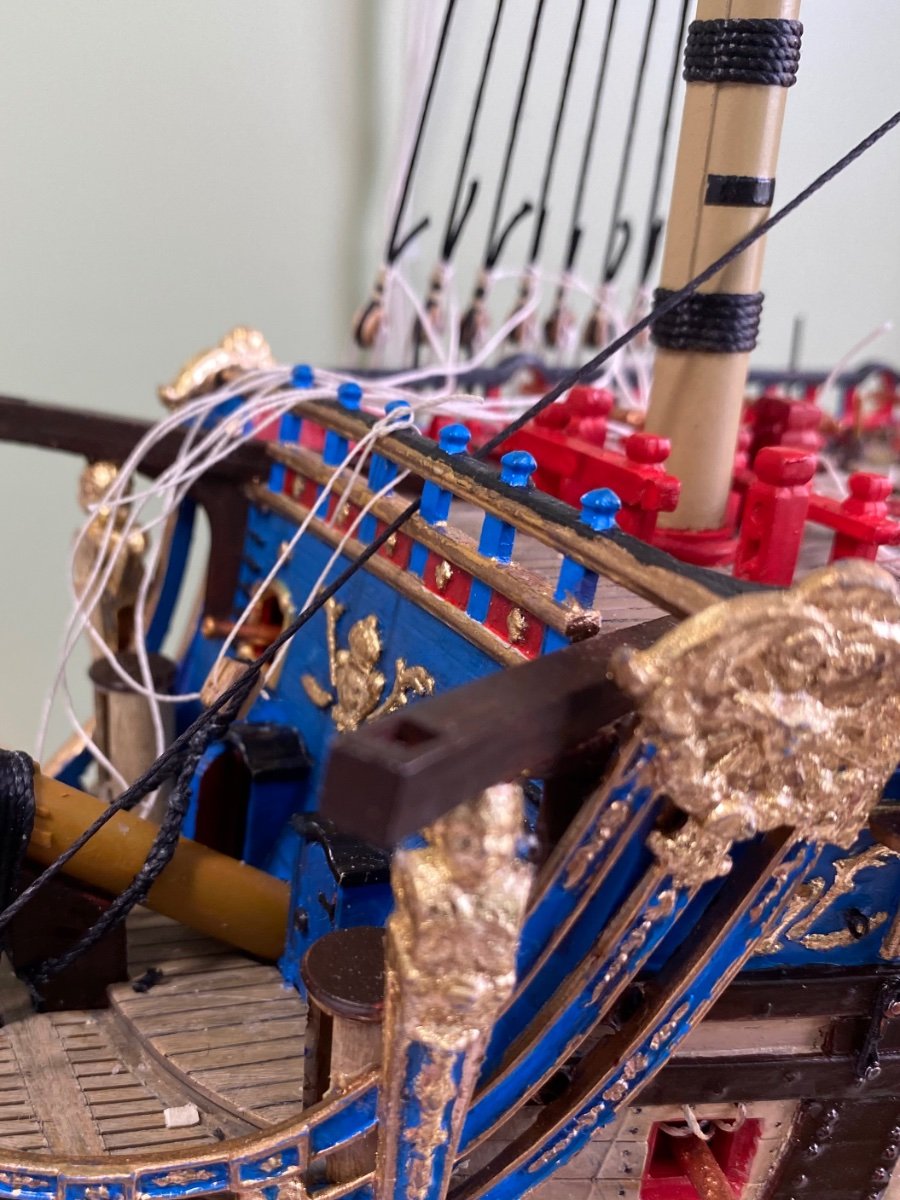
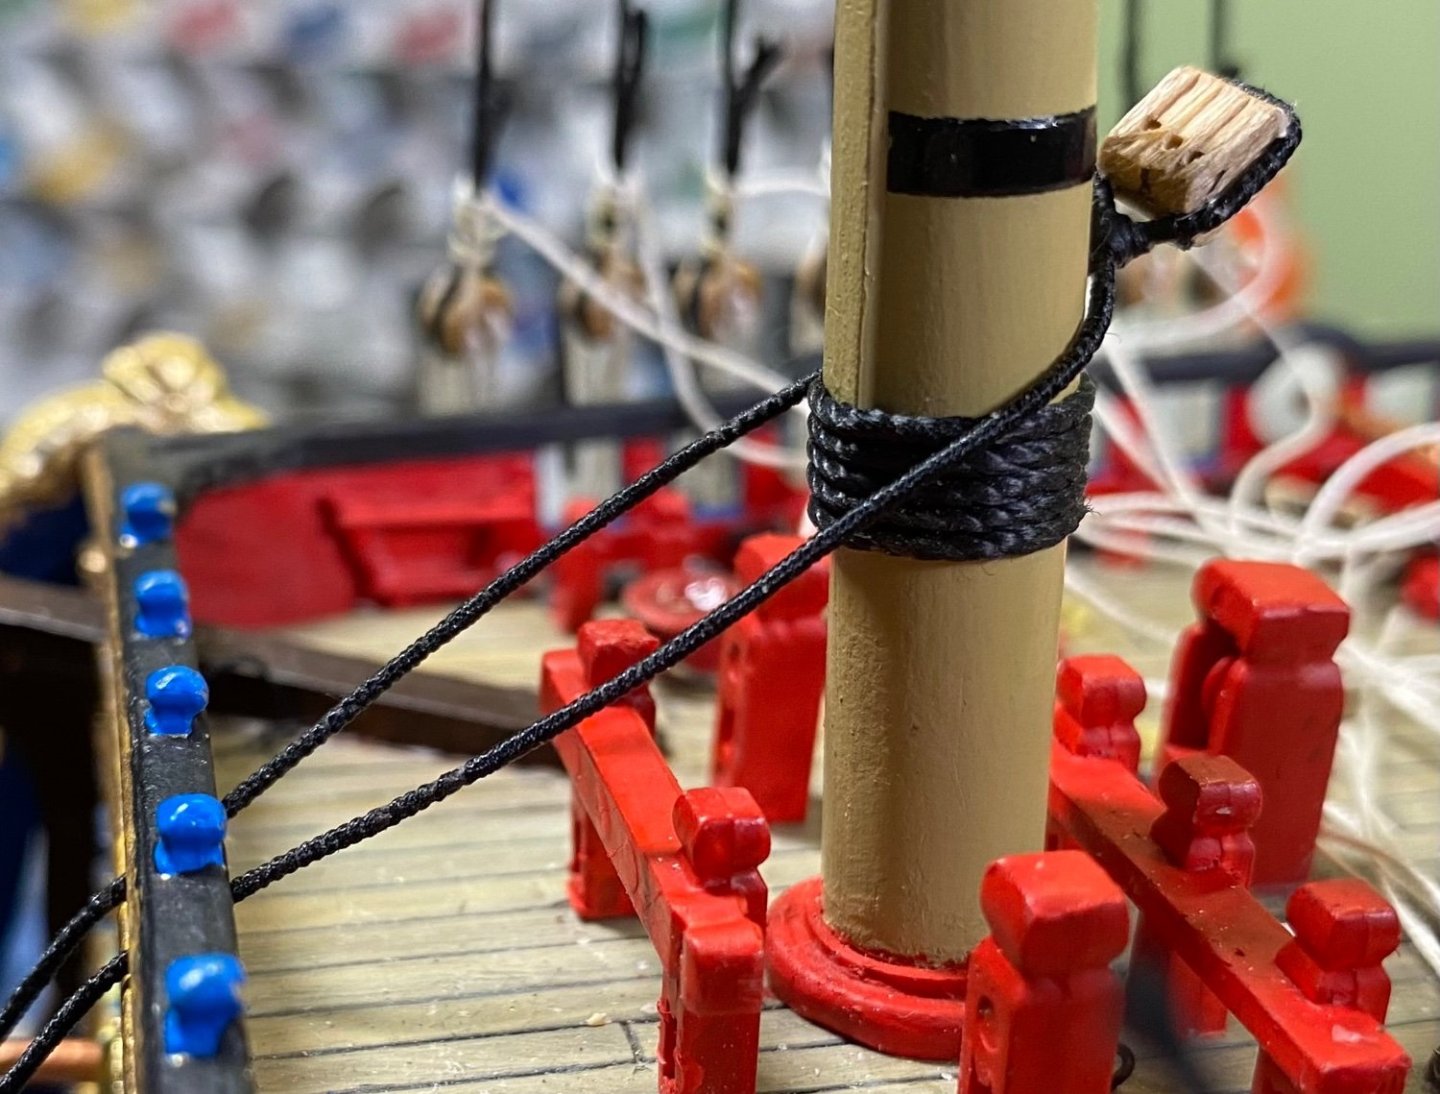
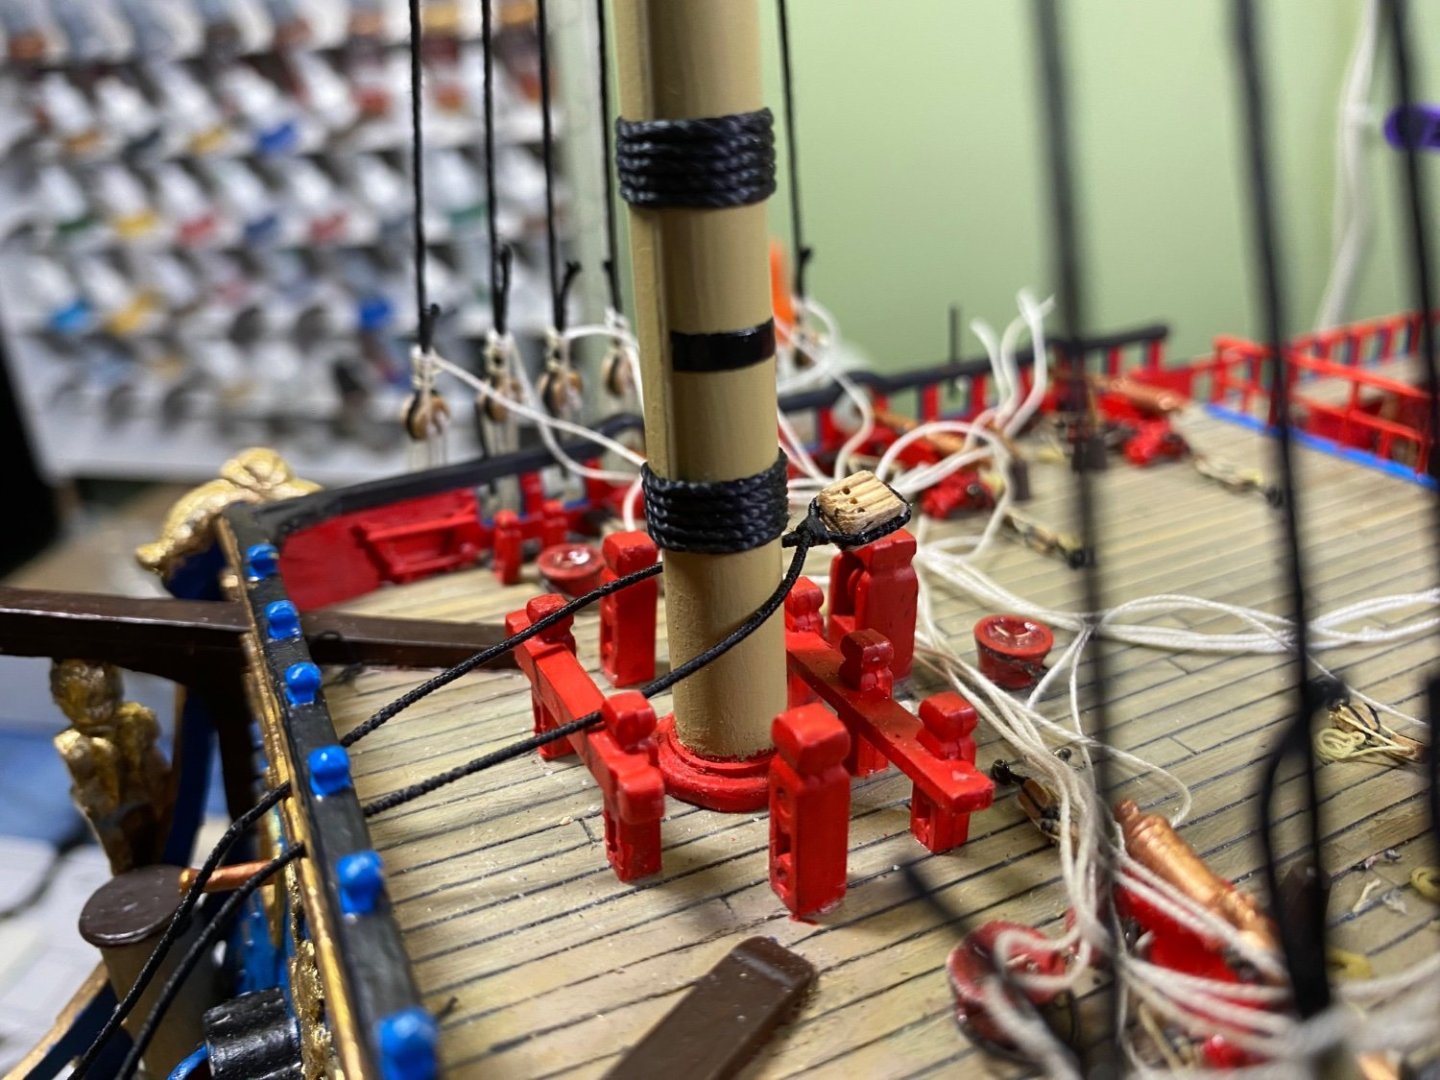
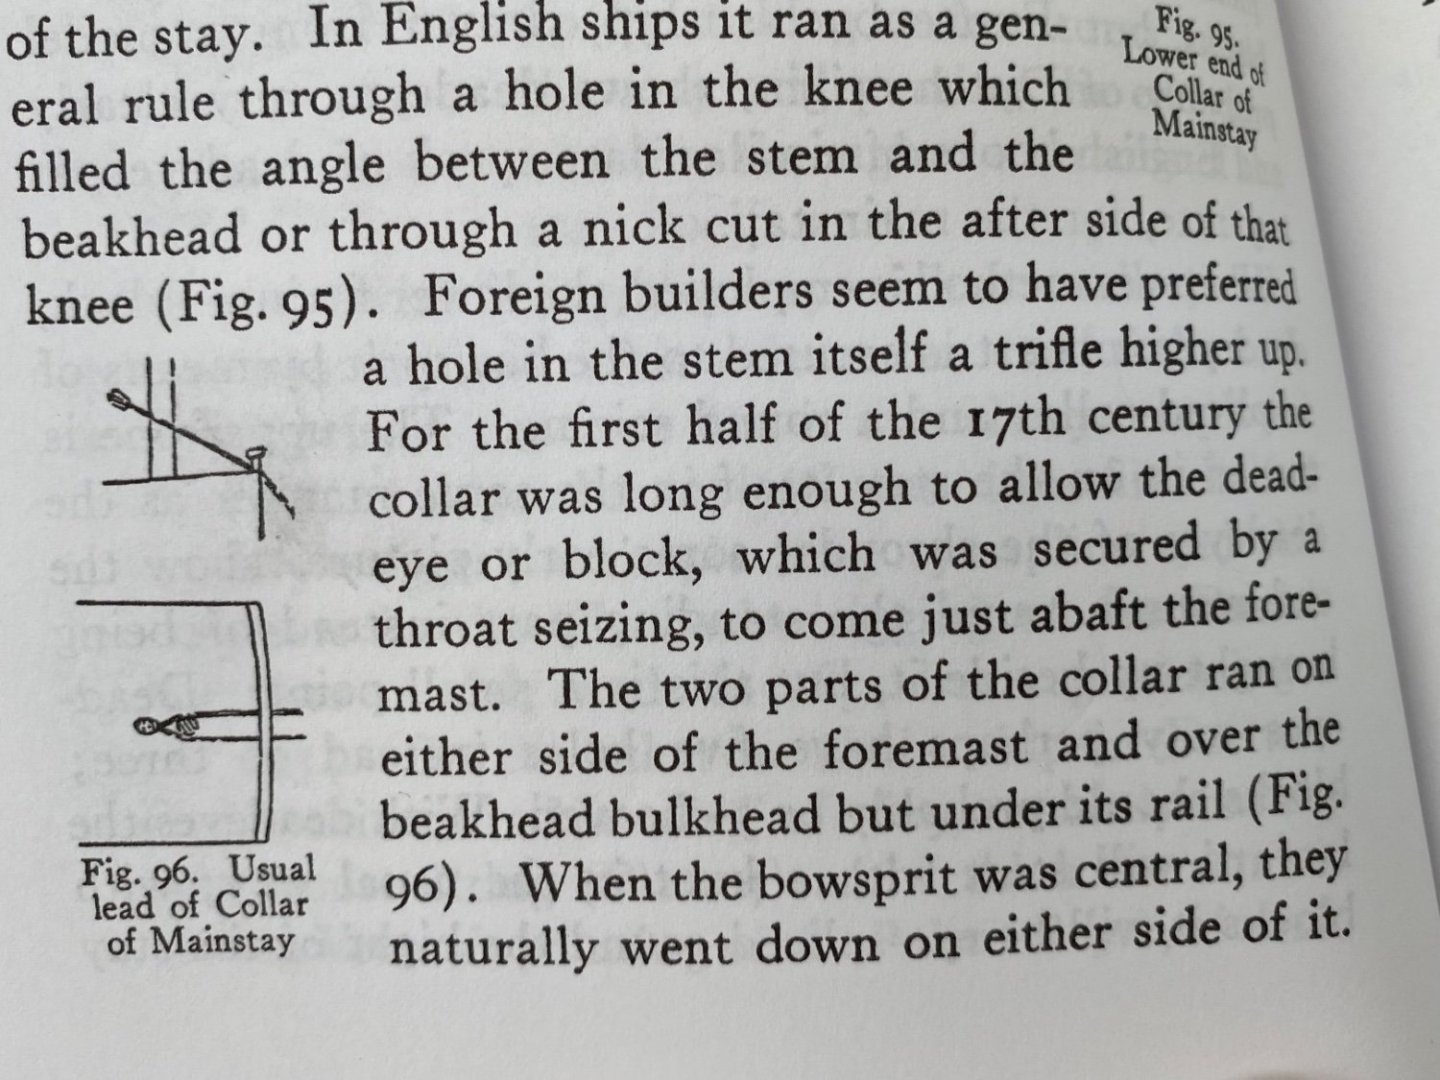
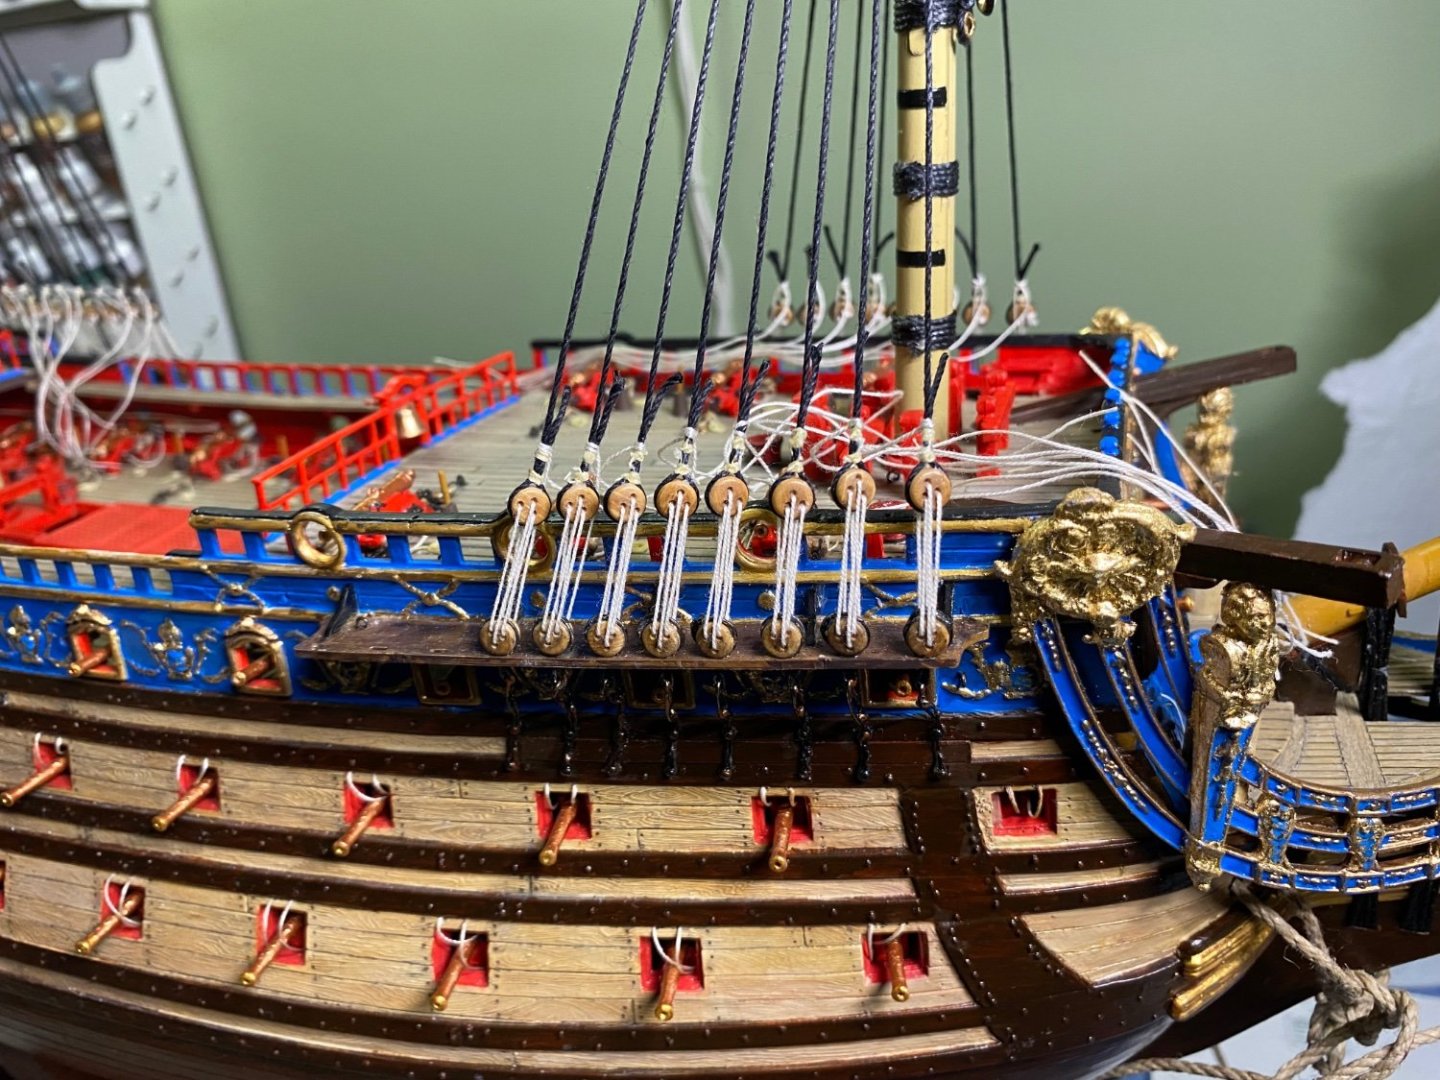
Marc I am glad to hear that about your dad. Mainstay collar complete. Double cable where it went around the bowsprit. Then up through the center most opening in the bulkhead beakhead rail, then to the aft side of the foremast where I added a 3 sheave block that will fix to a similar block on the fall end of the mainstay.

- 1,508 replies
-
- 3
-
-
- Le Soleil Royal
- Heller
- (and 1 more)
-
Thanks Marc. The last picture (3rd) is very helpful showing the mainstay collar. Going to work on that today. I know I am going to take both sides of the collar under the rail of the beakhead bulkhead. Trying to decide if I will take both through the center opening between the balusters or one to the port side and one to the starboard side of those two center balusters. The diameter of the foremast base causes the collar to bow out just slightly and touch against the inside of the two center balusters. If I go to the next opening port and starboard they touch the outside of the baluster. To my eye going through the inside just looks more refined maybe. I know in action this collar would not move and rub the balusters so I guess it would not really matter. On a much more important topic, how is your dad doing. Glad you are enjoying your vacation. Keep your son shooting hoops. Maybe someday he might be a Cardinal 😀

- 1,508 replies
-
- 2
-
-
- Le Soleil Royal
- Heller
- (and 1 more)
-
HMS SUSSEX by KarenM - FINISHED - 1:48
Bill97 replied to KarenM's topic in - Build logs for subjects built 1501 - 1750
KarenM I am building the Heller Soleli Royal. I am working on the fore and Mainstay. I like the way you extended the length of the mainstay collar to go around the bowsprit over the beakhead bulkhead (under the rail) and aft of the foremast. I see in your pictures you have a heart on the end of the mainstay. I cannot tell in the photos, do you also have a heart attached to collar? I am wondering if that is how you set the mainstay up to the collar? I am using large 3 sheave blocks instead of hearts. -
HMS SUSSEX by KarenM - FINISHED - 1:48
Bill97 replied to KarenM's topic in - Build logs for subjects built 1501 - 1750
Gregory the only reason I say that, usually I want to wait as long as possible so I am more easily able to access the interior during rigging, is because the Soleli Royal instructions show a large number of blocks tied to the shrouds at particular ratline positions. So I am assuming before I can I can do the rigging that uses those blocks I will need to add the ratlines so I know where to tie the block. -
About 60 percent of the ratlines on the starboard side of the main lower shrouds tied. A little adjustments before applying a touch of glue at the knots. Now with Henry’s advice I can rig the mainstay correctly, and then back to tying ratlines.
- 1,508 replies
-
- 5
-
-
- Le Soleil Royal
- Heller
- (and 1 more)
-
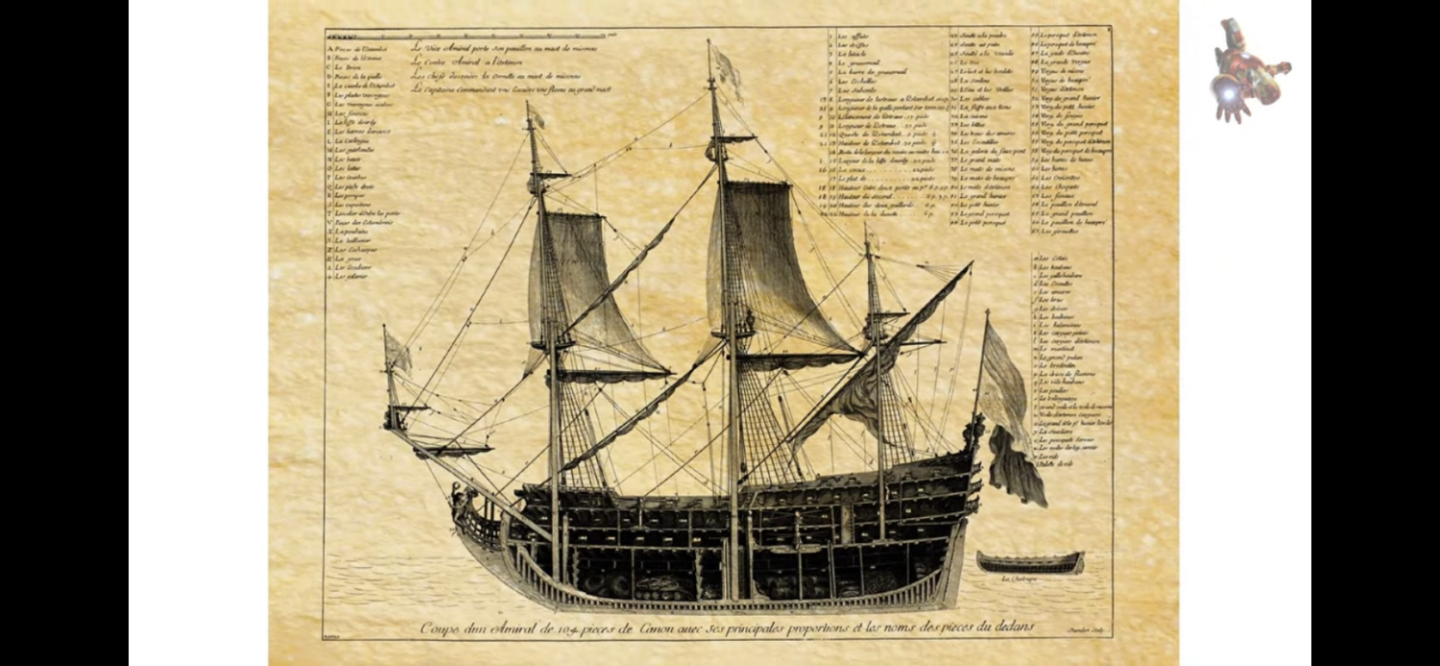
Wow Henry there is some good stuff here to unpack. I think I understand. Are you explaining like Anderson shows in this example?
- 1,508 replies
-
- 1
-
-
- Le Soleil Royal
- Heller
- (and 1 more)
-
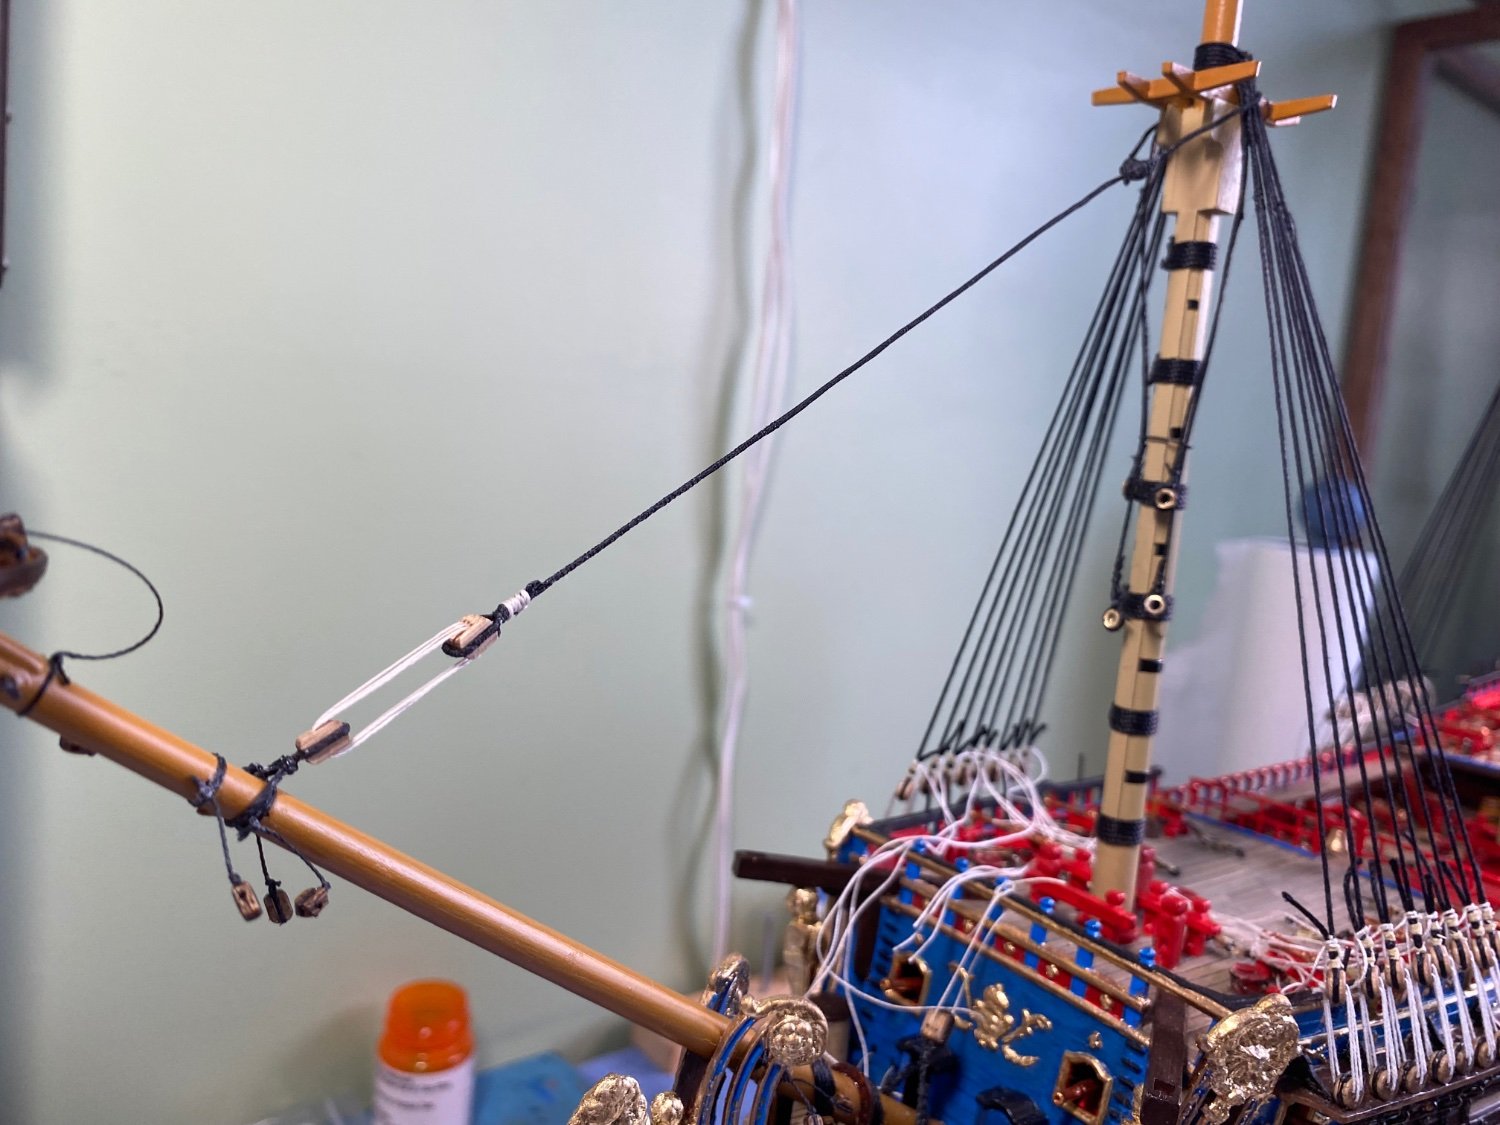
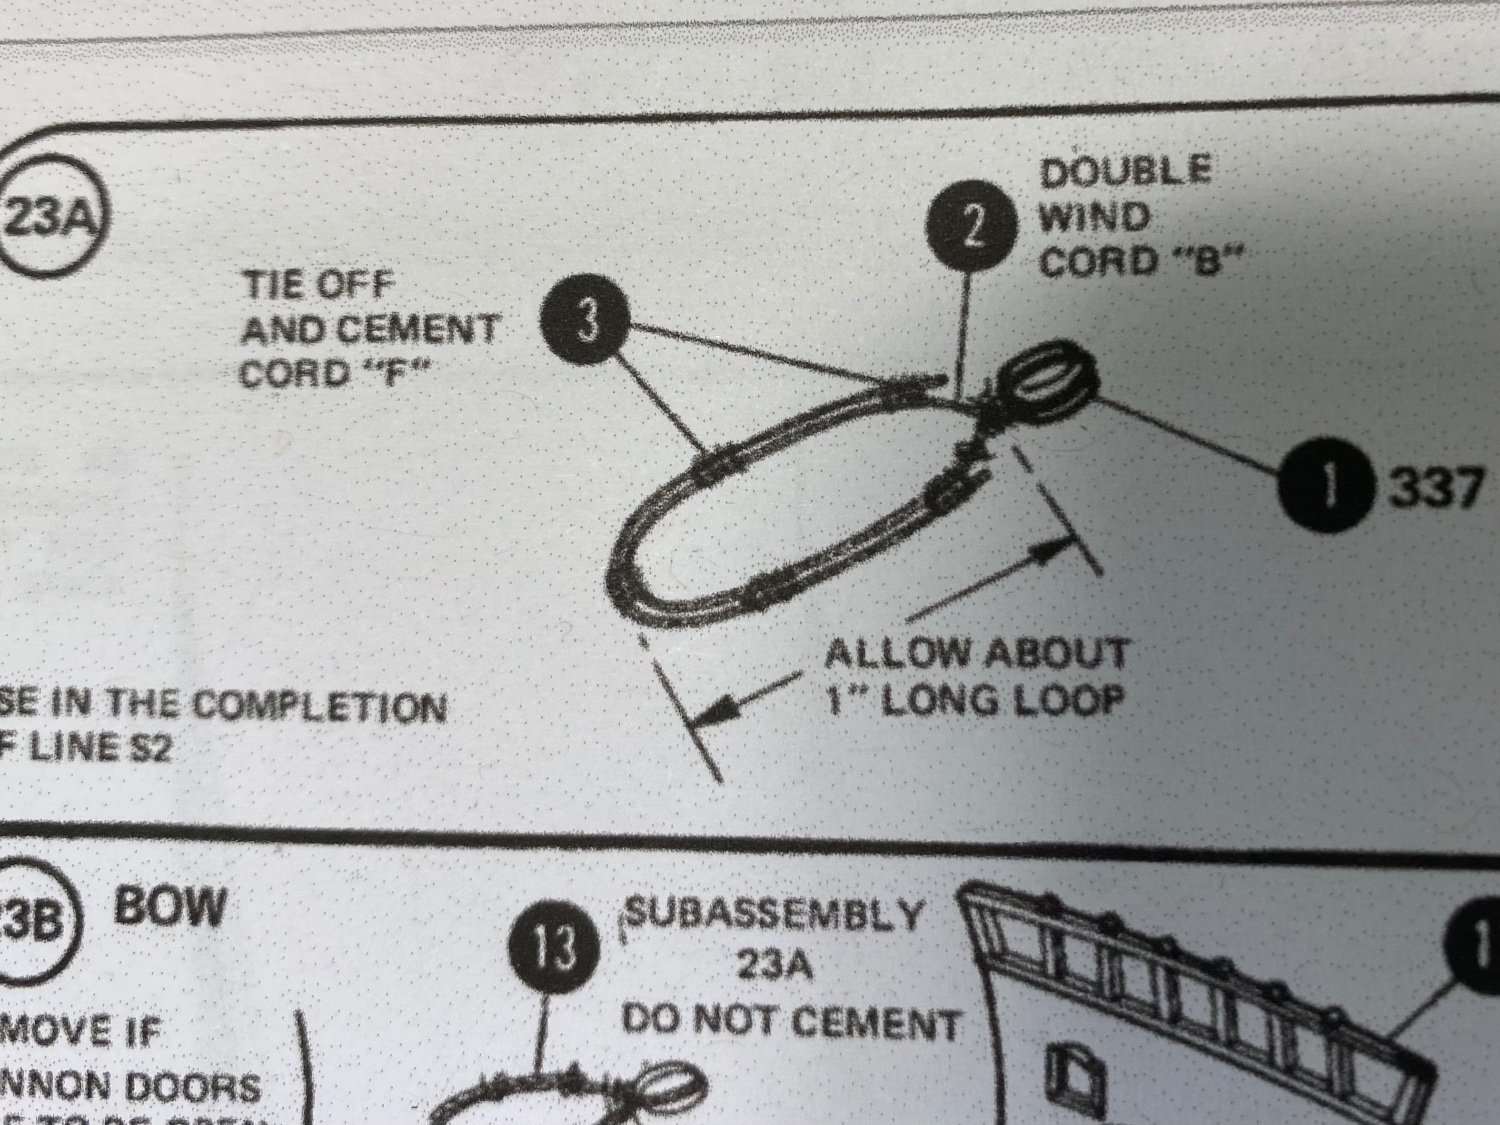
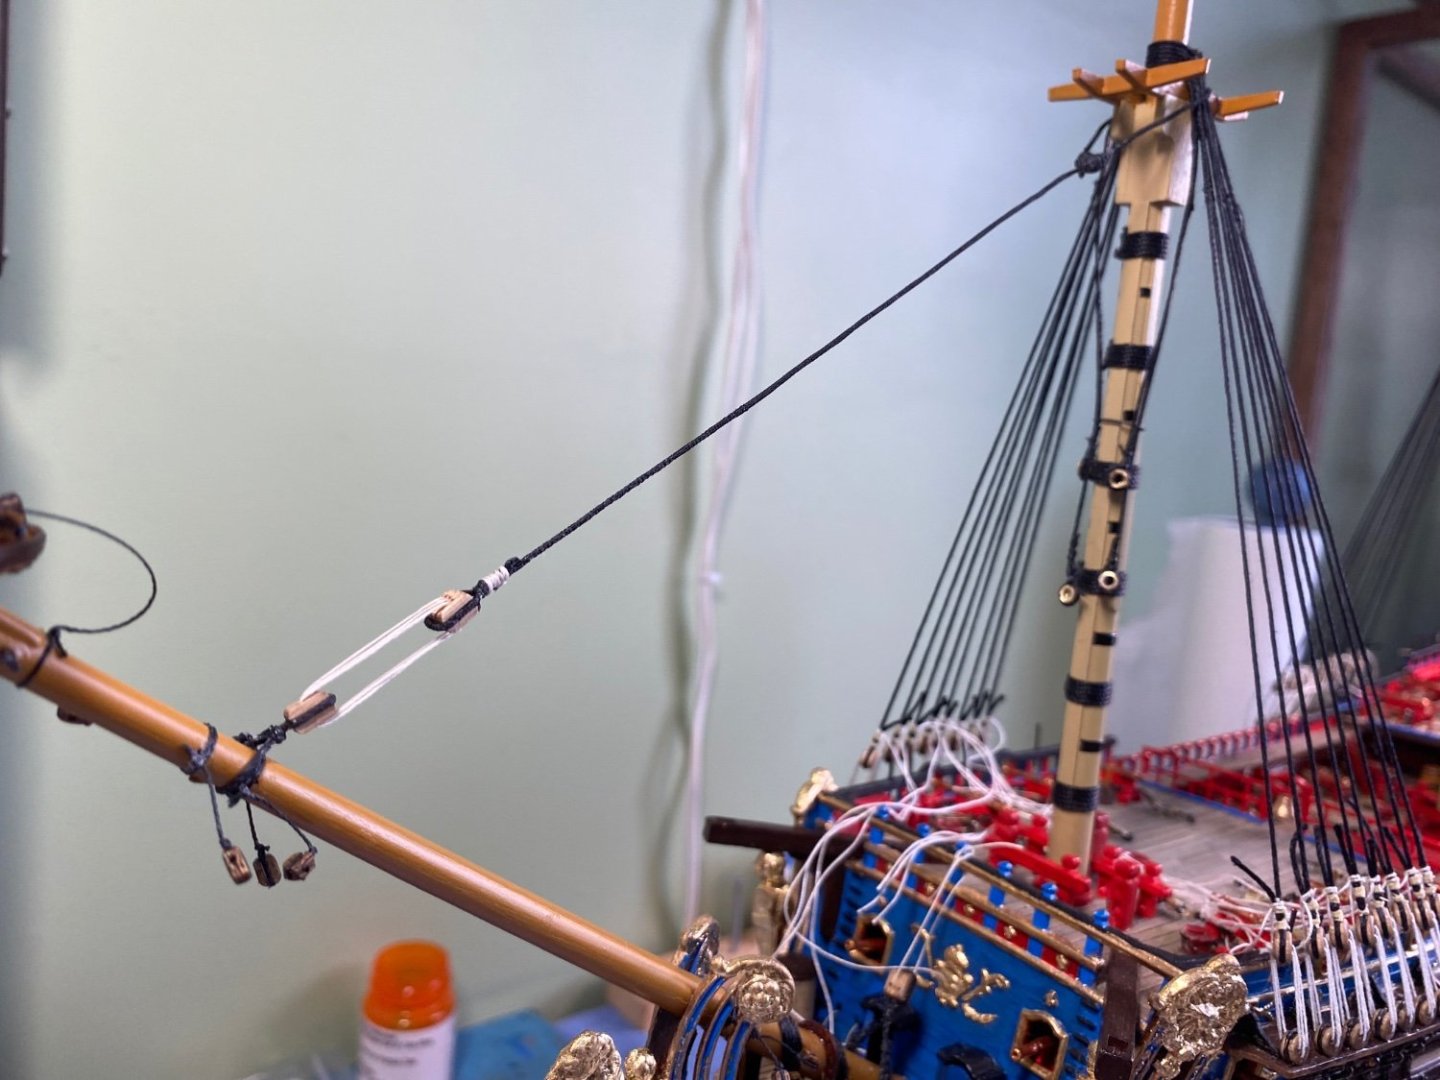
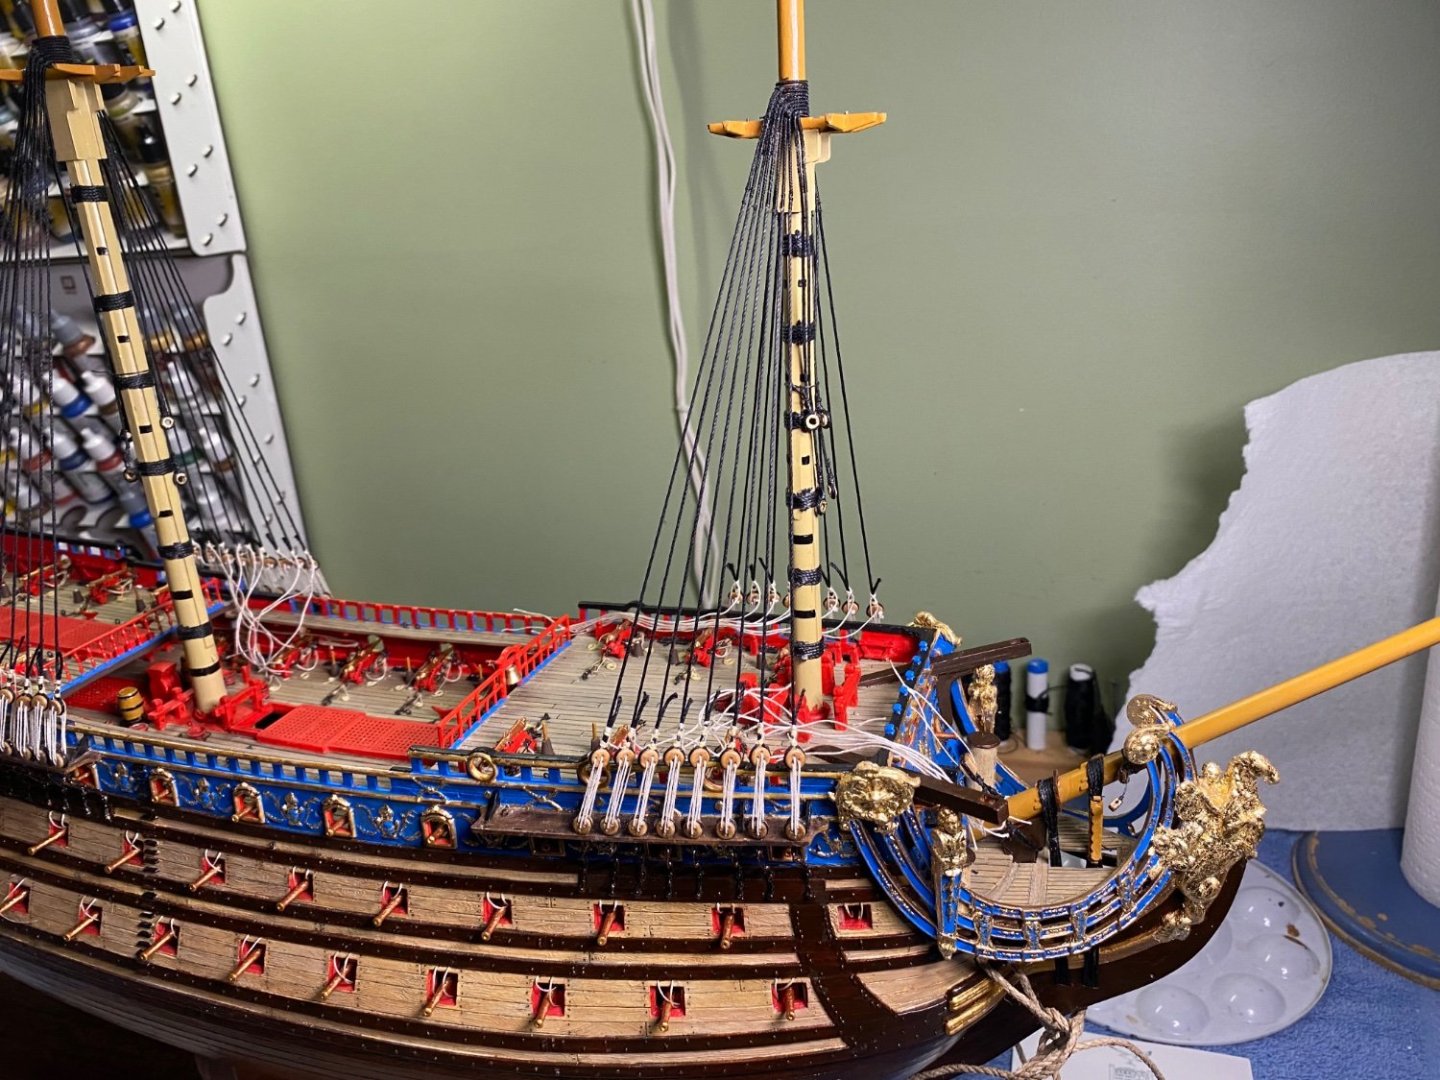
Before I get heavy into the ratlines I decided to add the forestay and the mainstay. Using a combination of the Heller instructions and Anderson’s book I installed the forestay. Please be kind and don’t tell me I did something wrong 😀. This was not a simple process. The mouse and loop at the top was OK and not real difficult. It is the same as on my HMS Victory. The largest thread I have is 1mm. I wanted something for the two stays a bit larger so I served the entire length of the predetermined length of 1mm thread and a .3mm thread together inside my serving thread. The result is about a 1.4mm thread that I like for the stays. This was a bit more trouble than just purchasing larger thread but since these two applications is the only time I need anything that big I just made it. The Heller instructions showed just making a simple eye in both the stay and the collar. Then reeve it together with thread. Anderson says on page 99 of his book that the forestay was set up with blocks, deadeyes, or hearts. I thought that makes more since so I went with a two 3 sheave blocks. The same block and process Heller describes for the mainstay setup. For visual interest I spaced the deadeyes the same distance apart as the foremast lower shroud deadeyes, 13mm. I am now studying the mainstay setup. The loop and mouse at the top is the same as the forestay. The mainstay collar is going to take some research and head scratching. Heller shows making a stay that has a two thread composition that goes around the foremast then to an additional length of thread to continue on toward the collar. Three sheave blocks are used to connect the stay and the collar. Anderson on pages 100 and 101 describes several different collar configurations. All of them seem to have the block attached to the collar being as high as the rail on the beakhead bulkhead. Heller describes this collar only being 1” long. This shorter length results in the stay breaking over and rubbing on the beakhead bulkhead, which I don’t expect was the case. Please enlighten me.

- 1,508 replies
-
- 3
-
-
- Le Soleil Royal
- Heller
- (and 1 more)
-
Yeah Patrick you’re probably right. I just sometimes think when I am rigging “gosh if those ratlines were not in the way it would be so much easier to get to that…..”. I think I love me your idea to alternate between doing ratlines and other things. Mainmast lower shrouds ratlines underway!
- 1,508 replies
-
- 3
-
-

-
-
- Le Soleil Royal
- Heller
- (and 1 more)
-
HMS SUSSEX by KarenM - FINISHED - 1:48
Bill97 replied to KarenM's topic in - Build logs for subjects built 1501 - 1750
KarenM your build was referred to me by Marc (Hubac’s Historian). He suggested I read through your build to witness the master job you are doing. I must compliment you your beautiful ship. I am building the Heller Soleli Royal as can be seen here on MSW. I had a general opinion question about how long do others wait before adding the ratlines? Once they are in place it does make accessing some of the rigging around the deck a bit more difficult. However it is important to add the ratlines as soon as possible. I see on your build you have added the ratlines soon after the shrouds. -
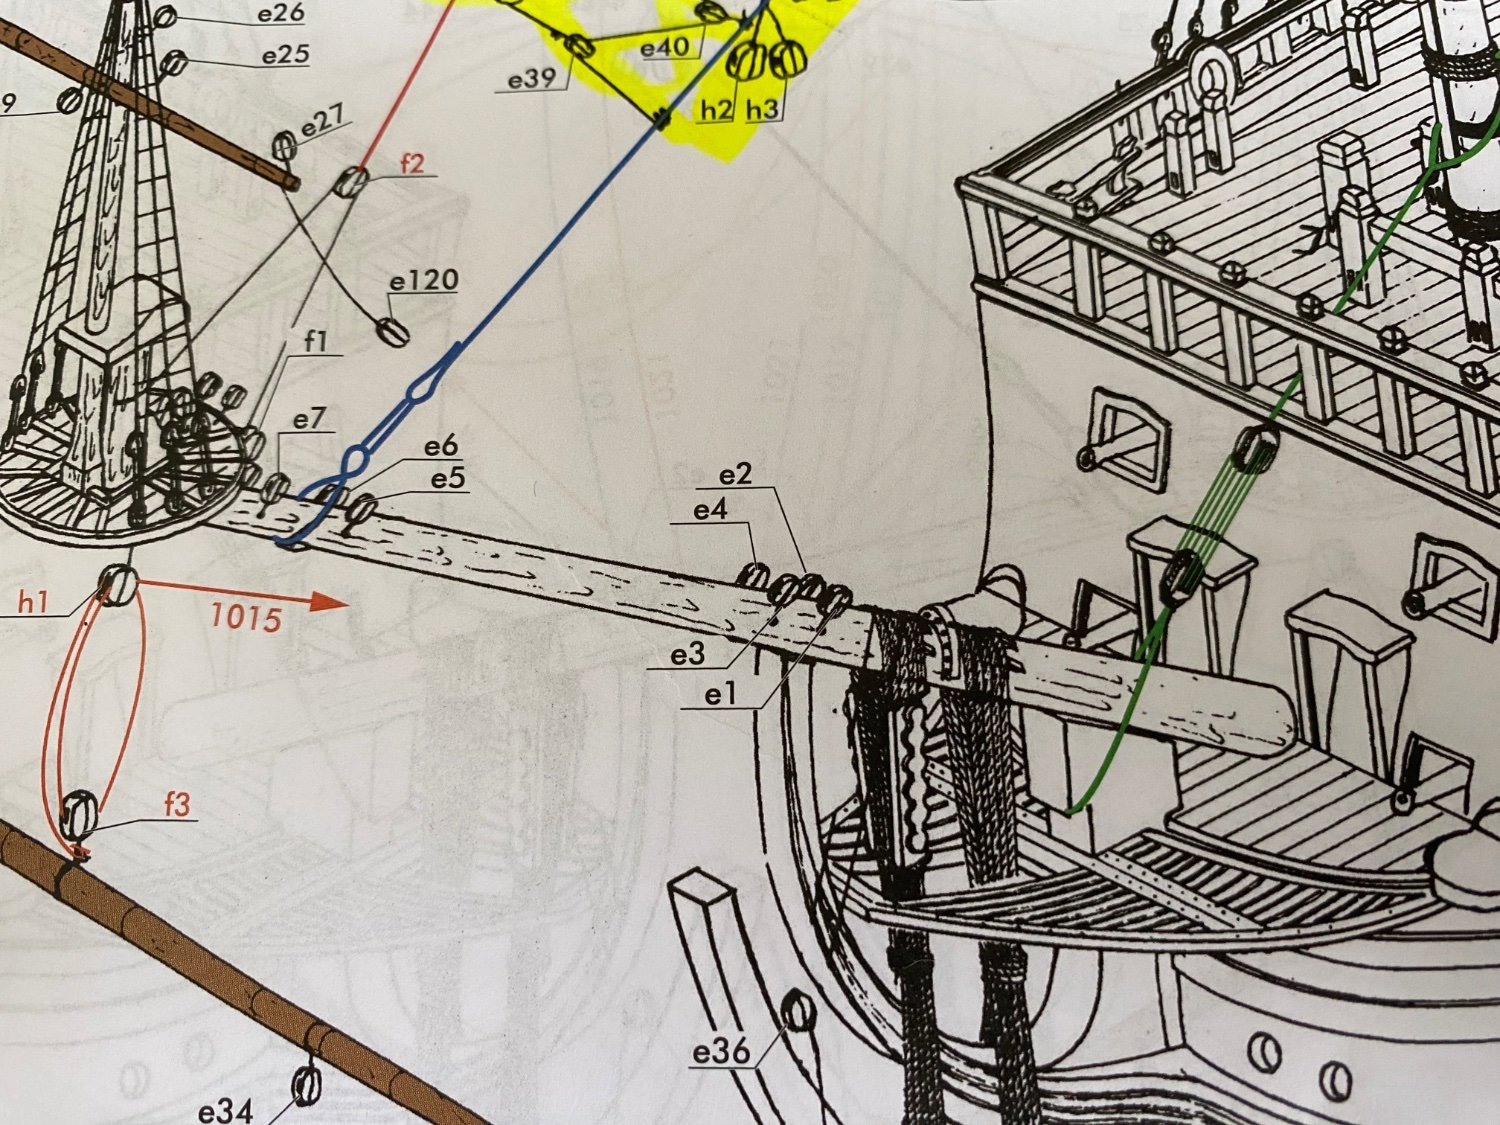
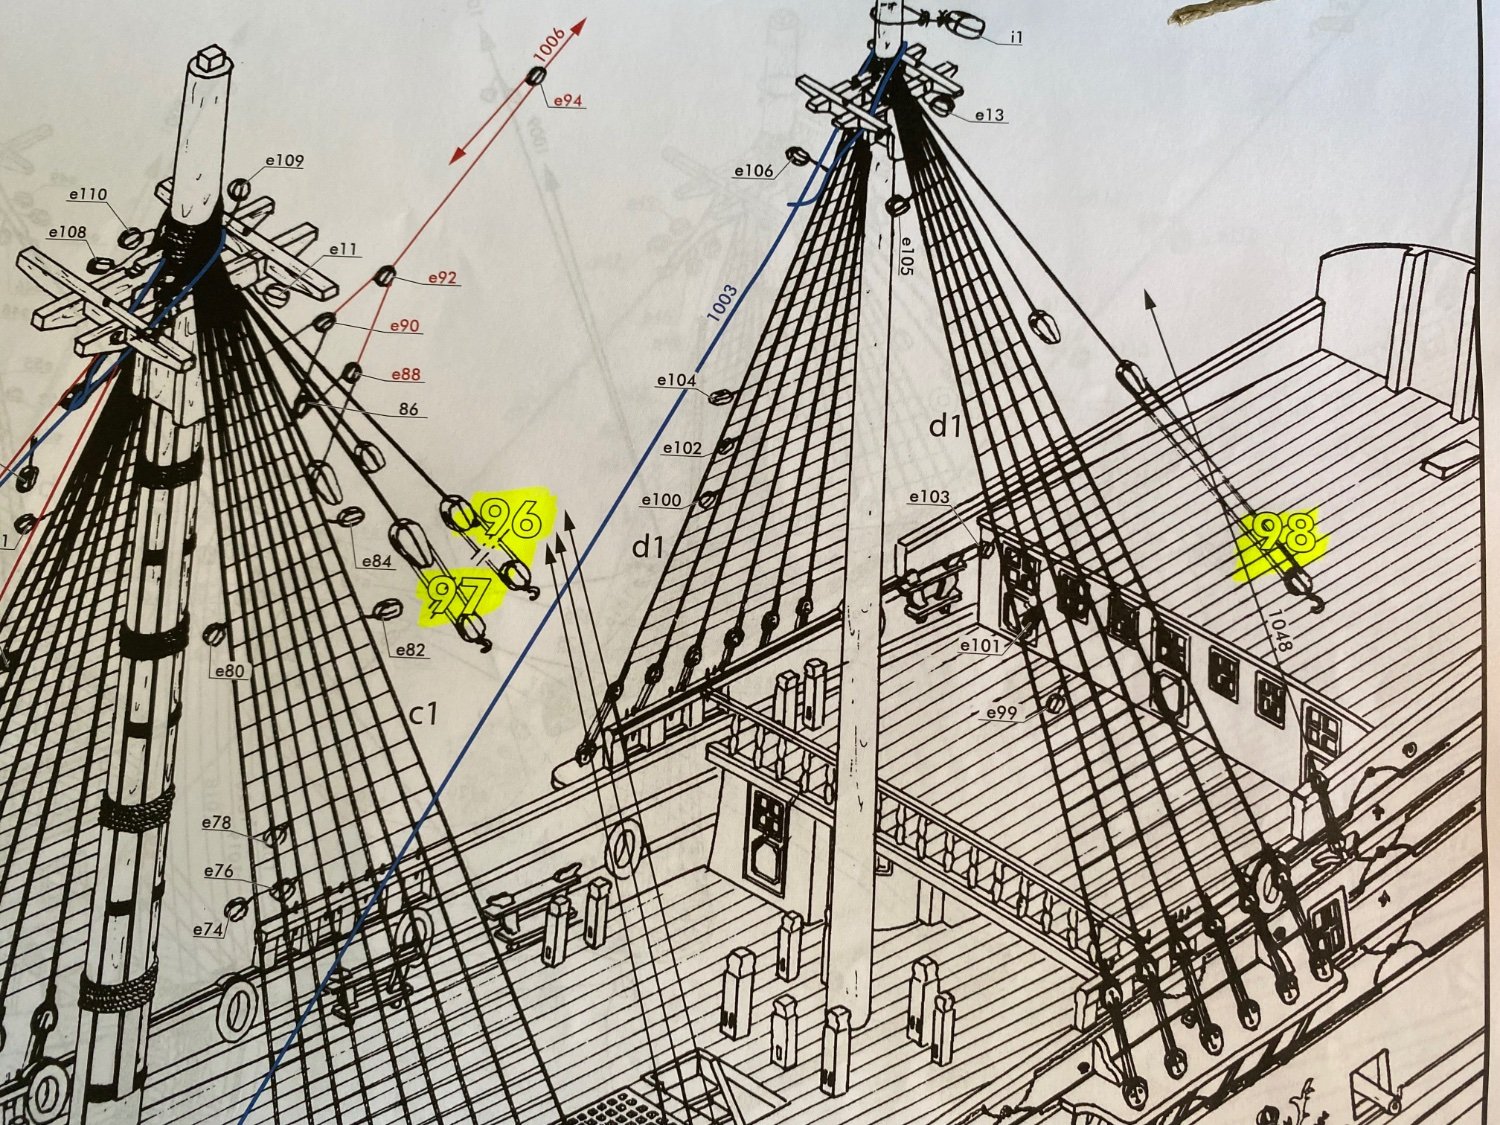
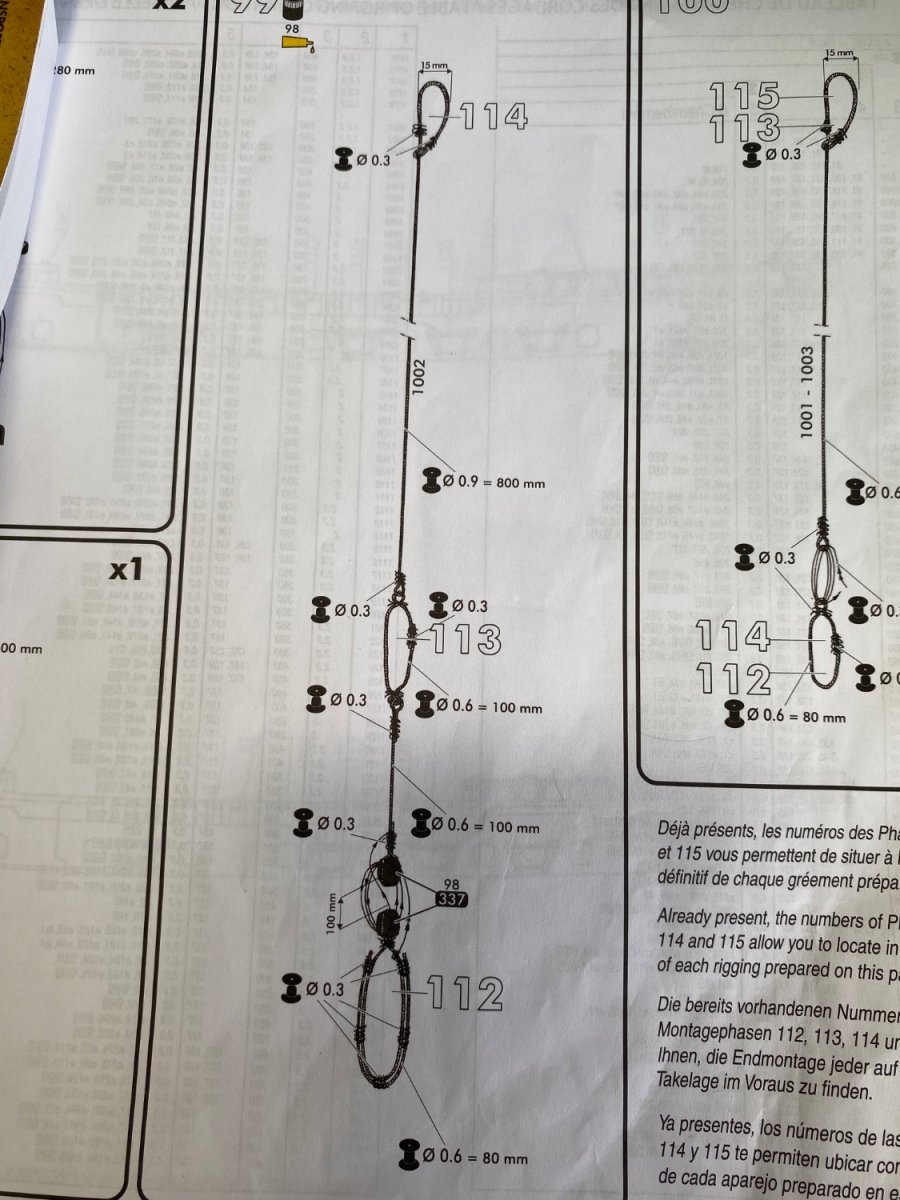
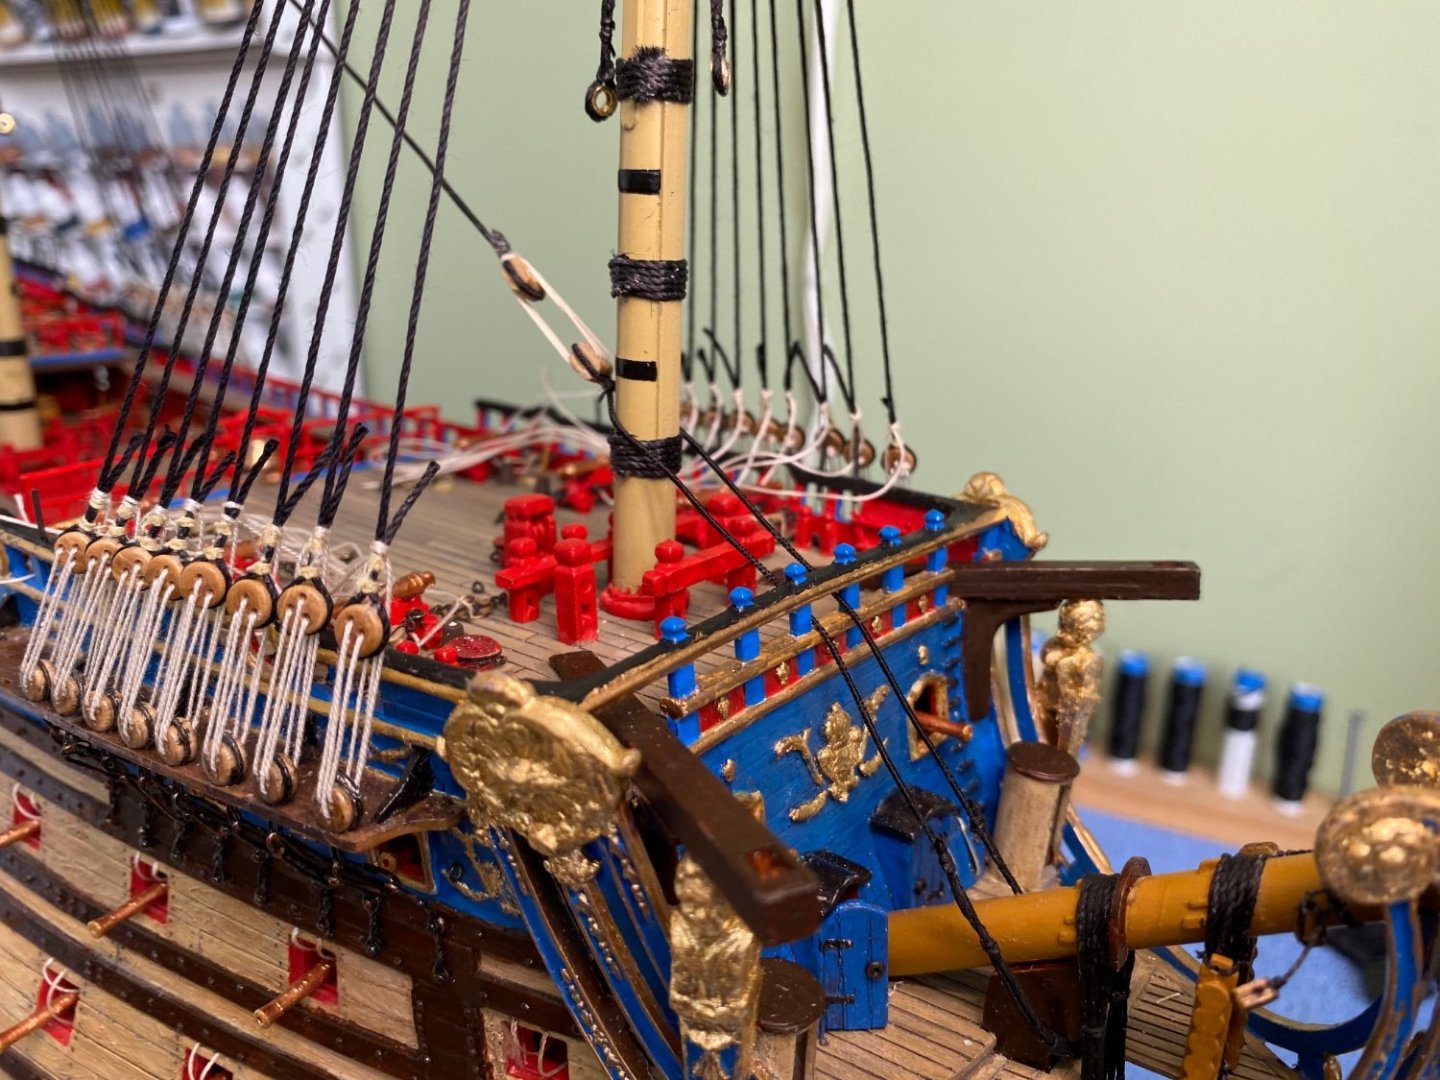
This is the issue that has me. The attached photo shows the shroud/ratline sets and the blocks to be attached. I almost have to tie the ratlines in order to determine the block placements.
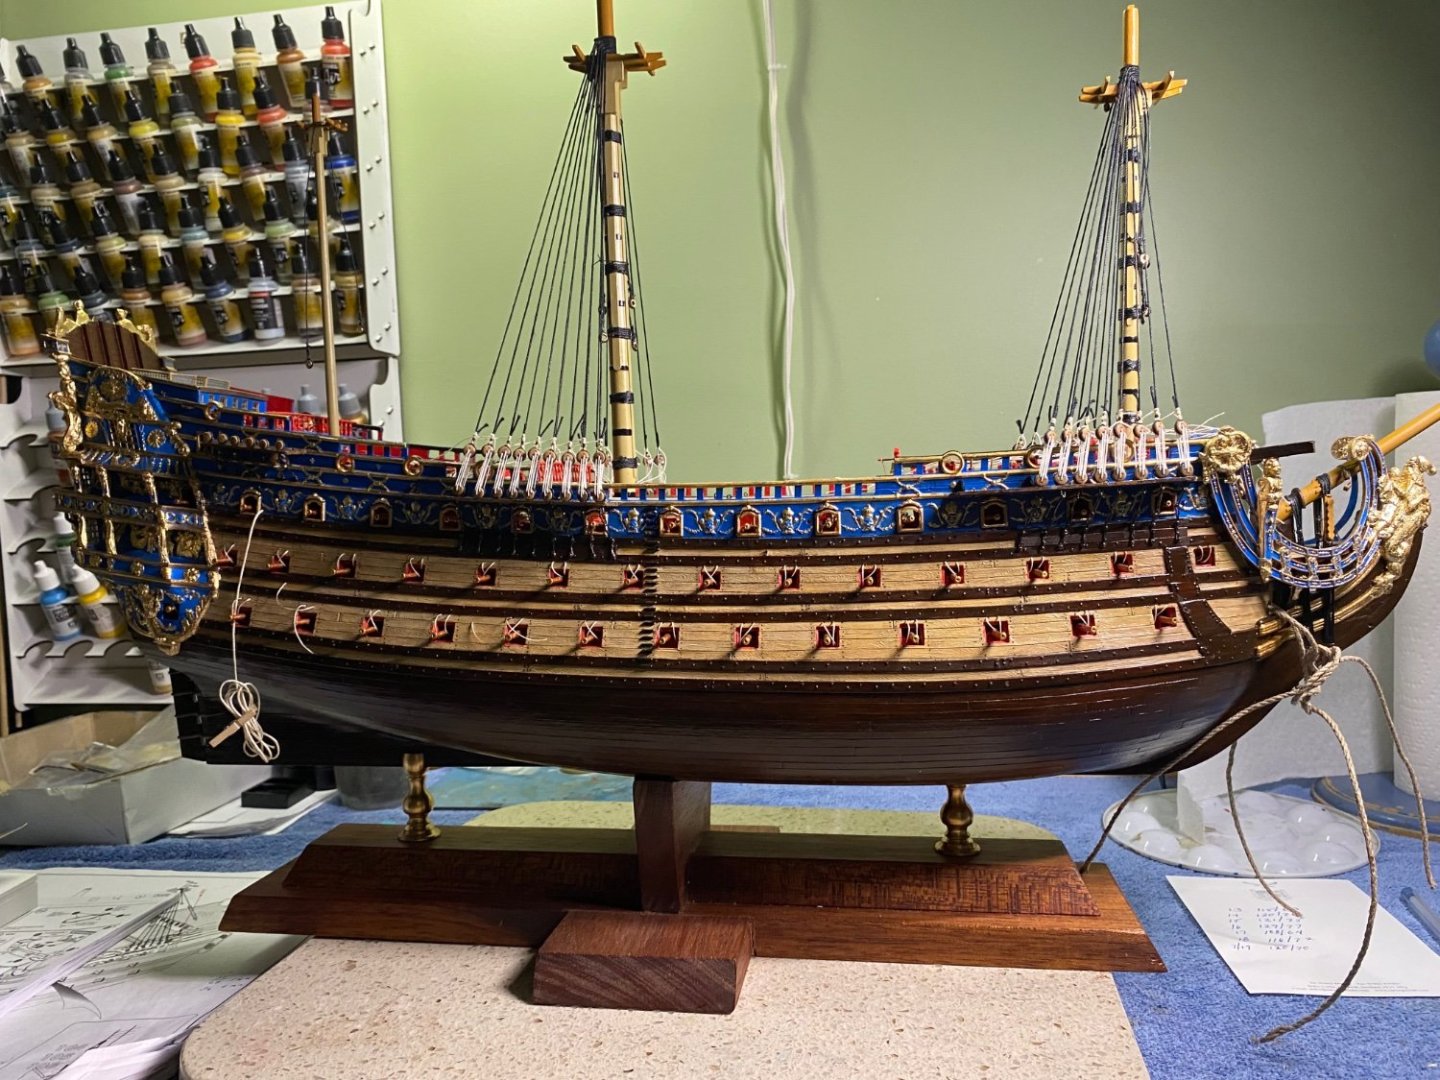
-
Thanks Ian. Appreciate the comment. I saw the design for the stand somewhere on the internet. Used mahogany to make it to go along with the mahogany paint I used on the different areas of the ship. Marc I waited until I was almost finished rigging my Victory before I did the ratlines. I planned to do the same on my SR until I saw the number of blocks to be tied to he shrouds around he ratlines. That is what gave me pause for my plan. Will look through KarenM’s build. Enjoy your vacation.
-
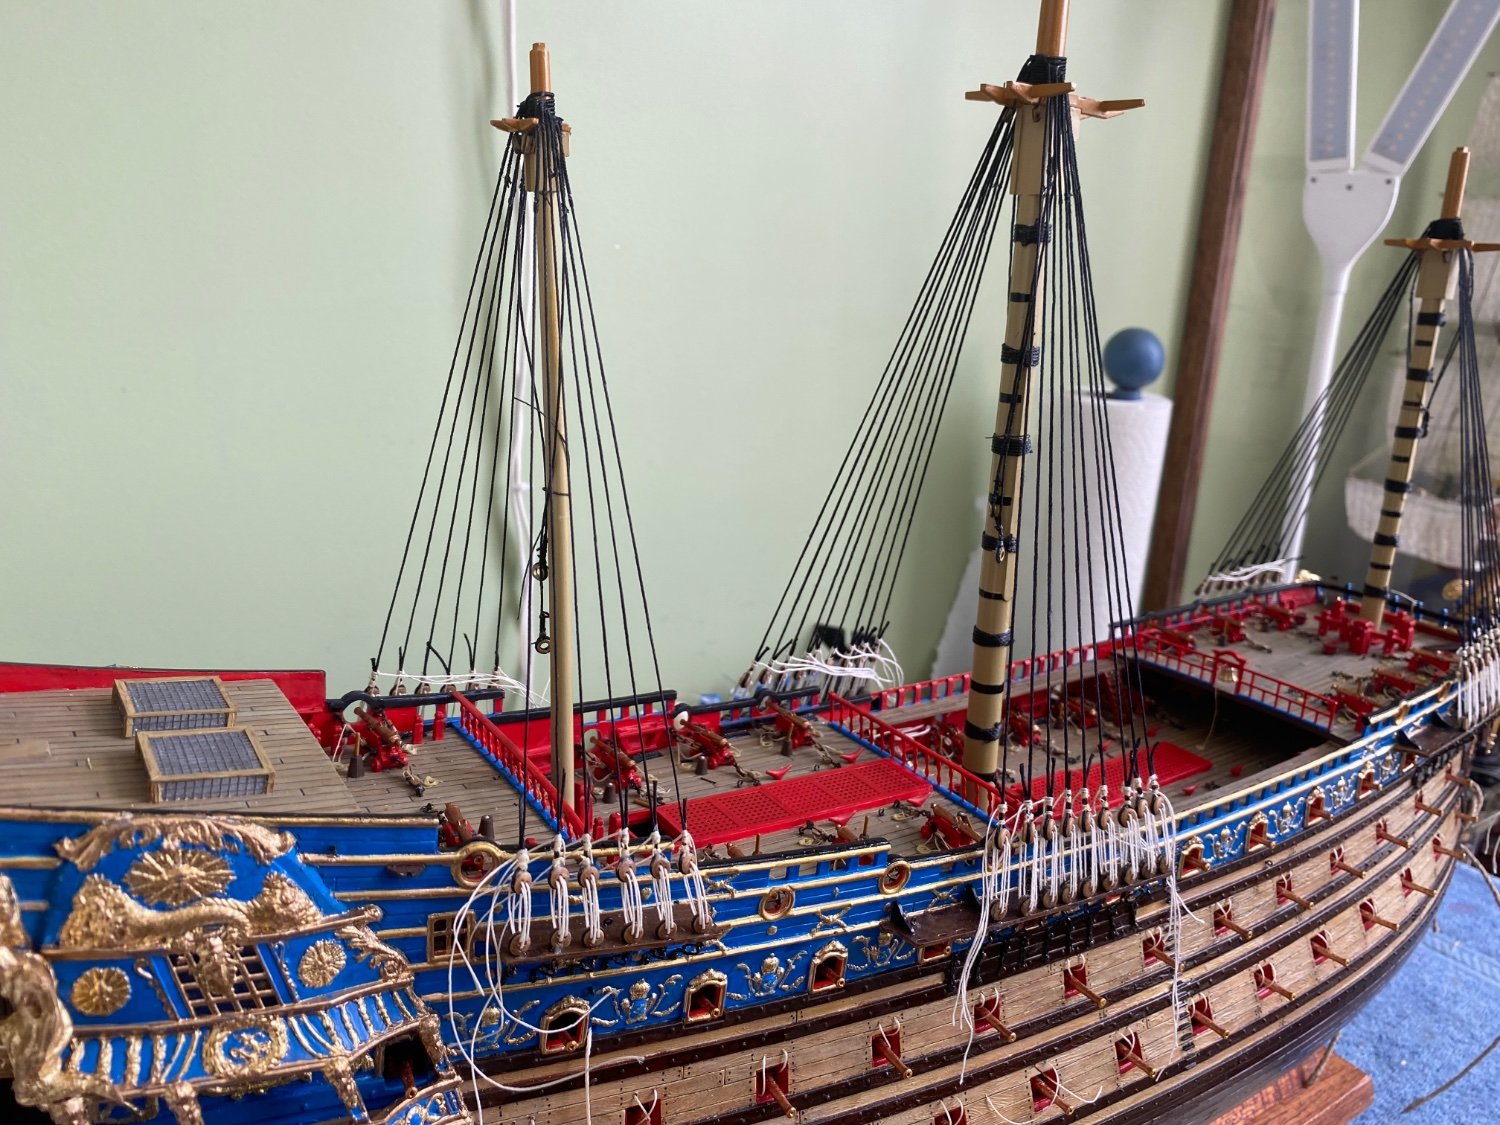
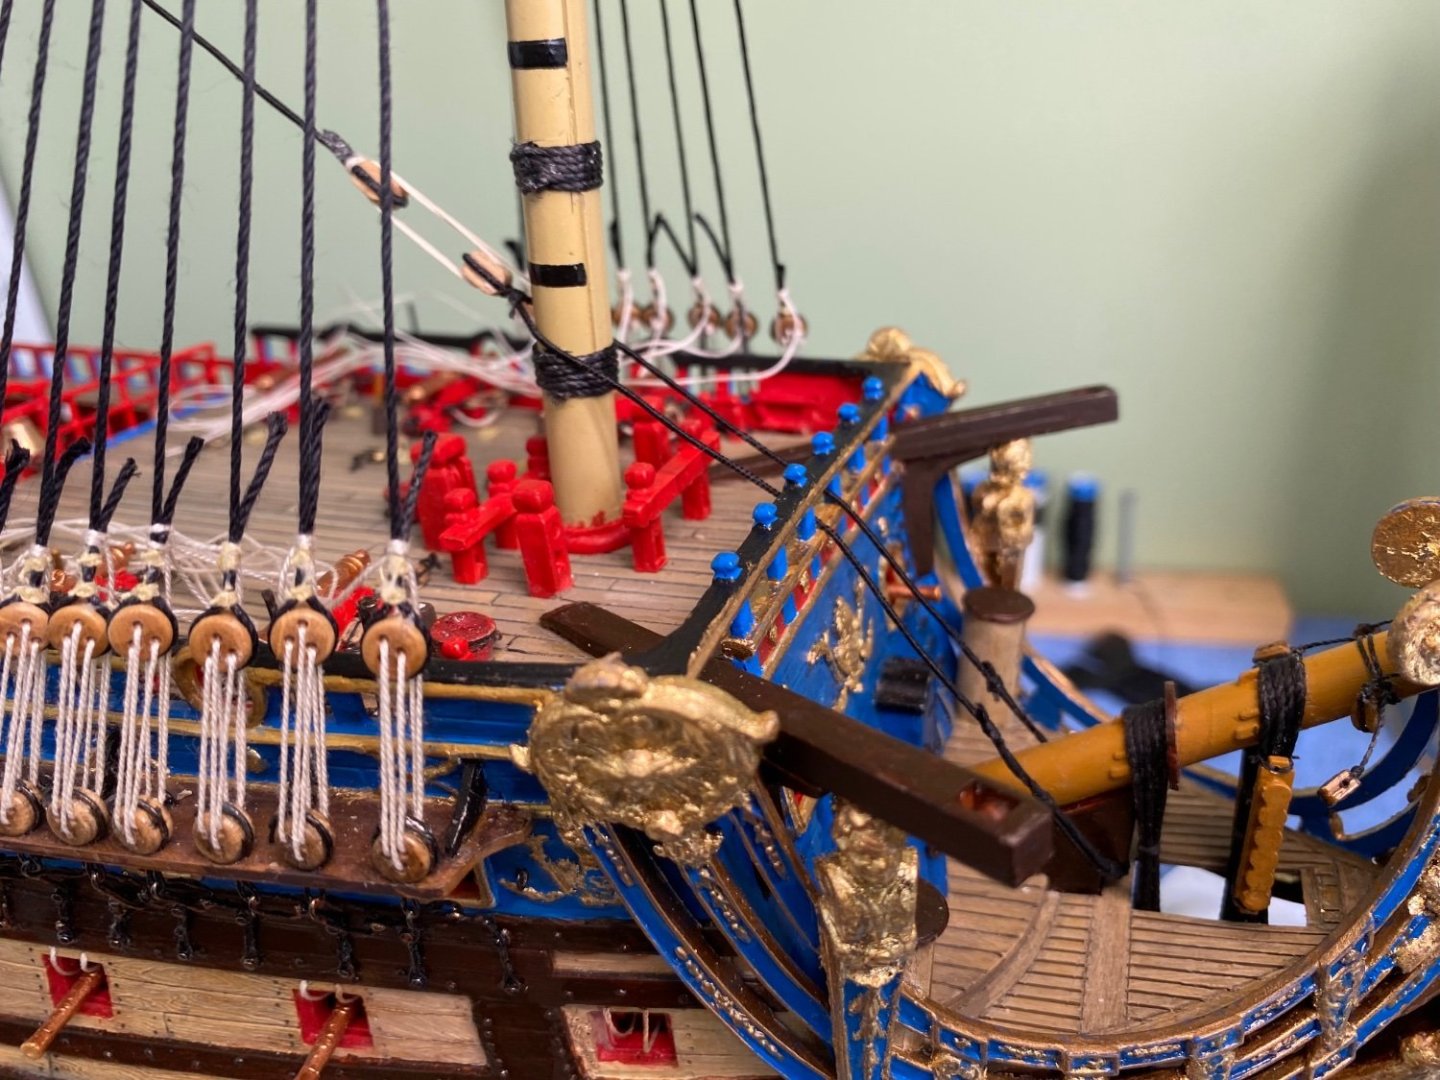
Mizzenmast lower shrouds now rigged. Never know if I should go ahead and tackle the ratlines or wait until after more rigging is complete. My curiosity is the instructions show a number of blocks tied to the shrouds for future rigging. Their placement seems to be very in specific locations on the shrouds that are determined by where the ratlines are. I suppose there is not a reason to tie all the blocks on now. I can just add them as I am rigging each line but that still makes me curious as to when to add the he ratlines.


- 1,508 replies
-
- 7
-
-
-
- Le Soleil Royal
- Heller
- (and 1 more)
-
Marc this is the way I have done it in the past that should work very well for you to get the dramatically billowing topsail. Find something that resembles the shape you want like a soup can, shot glass, etc. for a mold. Something that has a roundness roughly the shape of the arc you want. Cut out and do what ever sewing needs to be done on your sailcloth. Then simply lay the sail over the mold and apply numerous coats of diluted white craft glue (Elmer’s). The more coats you add the stiffer the billowed sail will be. Once it drys hard you can do further trimming and shaping. Then paint it to achieve the aged effect you desire. This process always works great for me.
- 2,699 replies
-
- 3
-
-
-
- heller
- soleil royal
- (and 9 more)
-
Foremast lower shrouds rigged. Again, as with the mainmast, I am waiting to do the final tie off of the laniards and add the ratline until later in the rigging process. Would any of you guys know how to keep the deadeye on the end of the shroud from turning? Most of mine on both the fore and main mast are turned about 10 to 15 degrees off parallel to the channel. I rigged the deadeyes to where the shroud ends lay forward on one side and aft on the other. Just curious if this small amount of turning is OK? I know during this time period a bar would not have been used/added above these deadeyes.
- 1,508 replies
-
- 4
-
-
- Le Soleil Royal
- Heller
- (and 1 more)