HOLIDAY DONATION DRIVE - SUPPORT MSW - DO YOUR PART TO KEEP THIS GREAT FORUM GOING!
×


Bill97
-
Posts
2,704 -
Joined
-
Last visited
Content Type
Profiles
Forums
Gallery
Events
Everything posted by Bill97
-
Yes Henry I see those in the kit. No idea what they were for! MSW comes to the rescue again. 😊
- 1,508 replies
-
- 1
-

-
- Le Soleil Royal
- Heller
- (and 1 more)
-
Thanks Ferrus. So I just close them up like a flower around the base of the lantern? Will let you know how it comes out.
- 1,508 replies
-
- 1
-
-
- Le Soleil Royal
- Heller
- (and 1 more)
-
Ferrus is this the little guy you are talking about? Marc, Ian, and Ferrus thanks for the thumbs up on leaving the doors alone. I really did not want to mess with them, but I was concerned if I didn’t you guys would demote me down to rank amateur! 😀
- 1,508 replies
-
- 2
-
-
- Le Soleil Royal
- Heller
- (and 1 more)
-
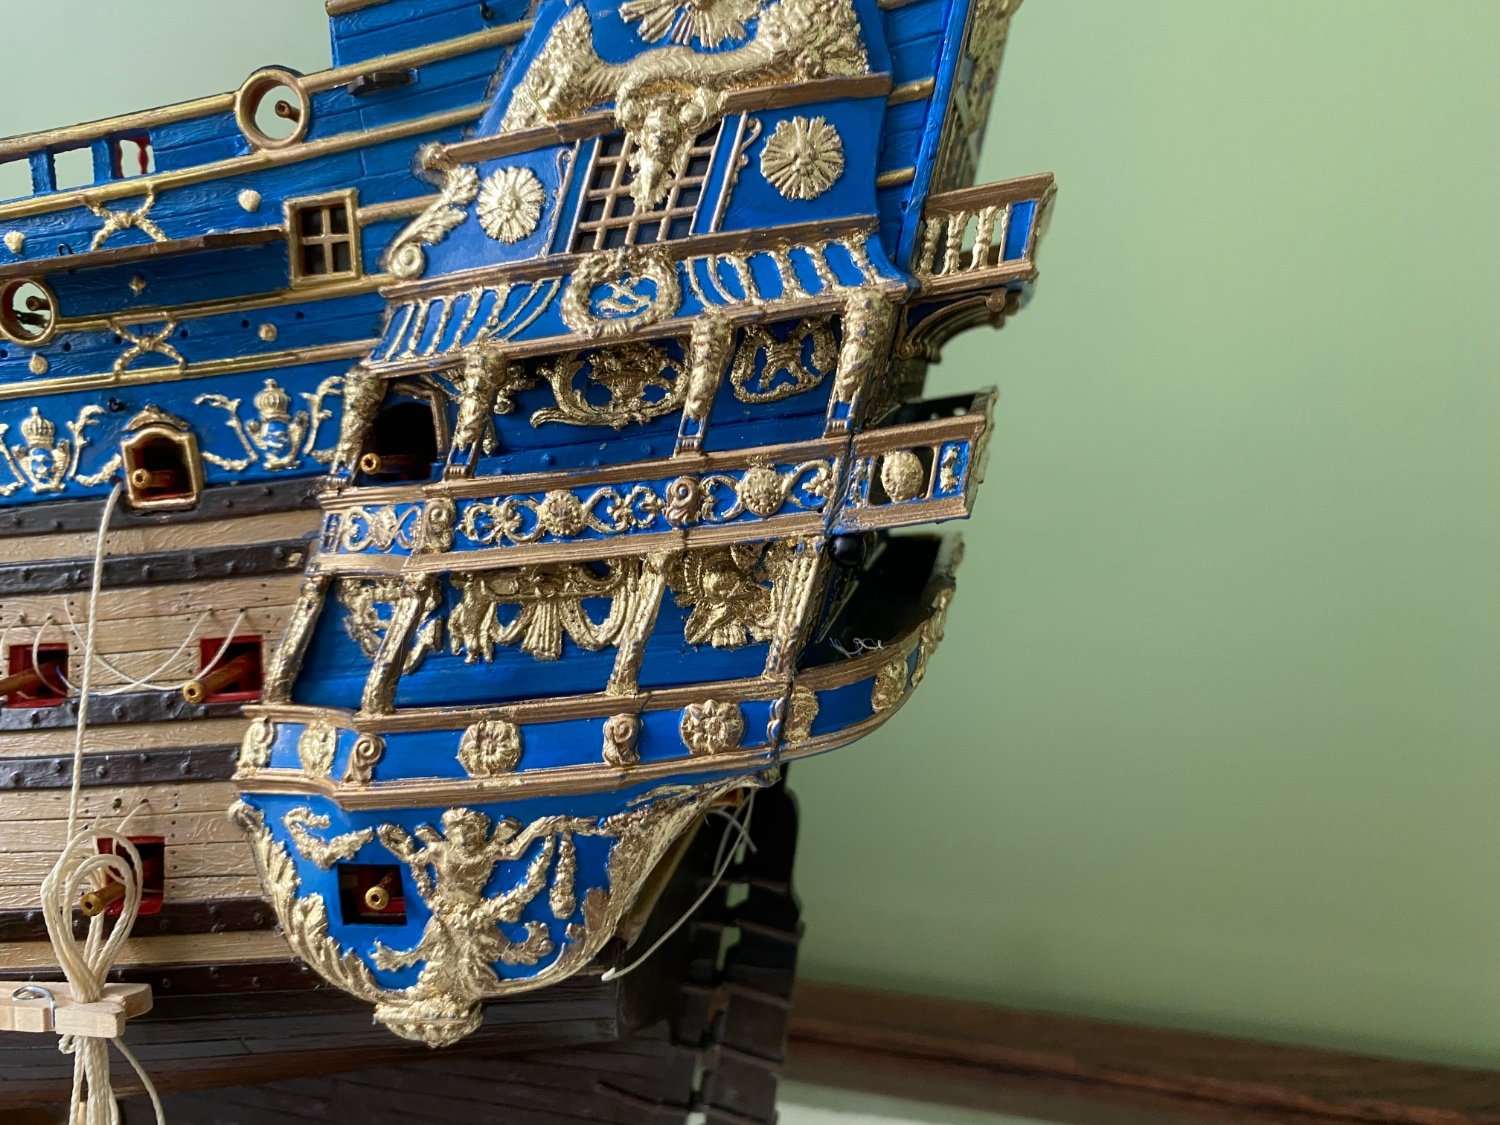
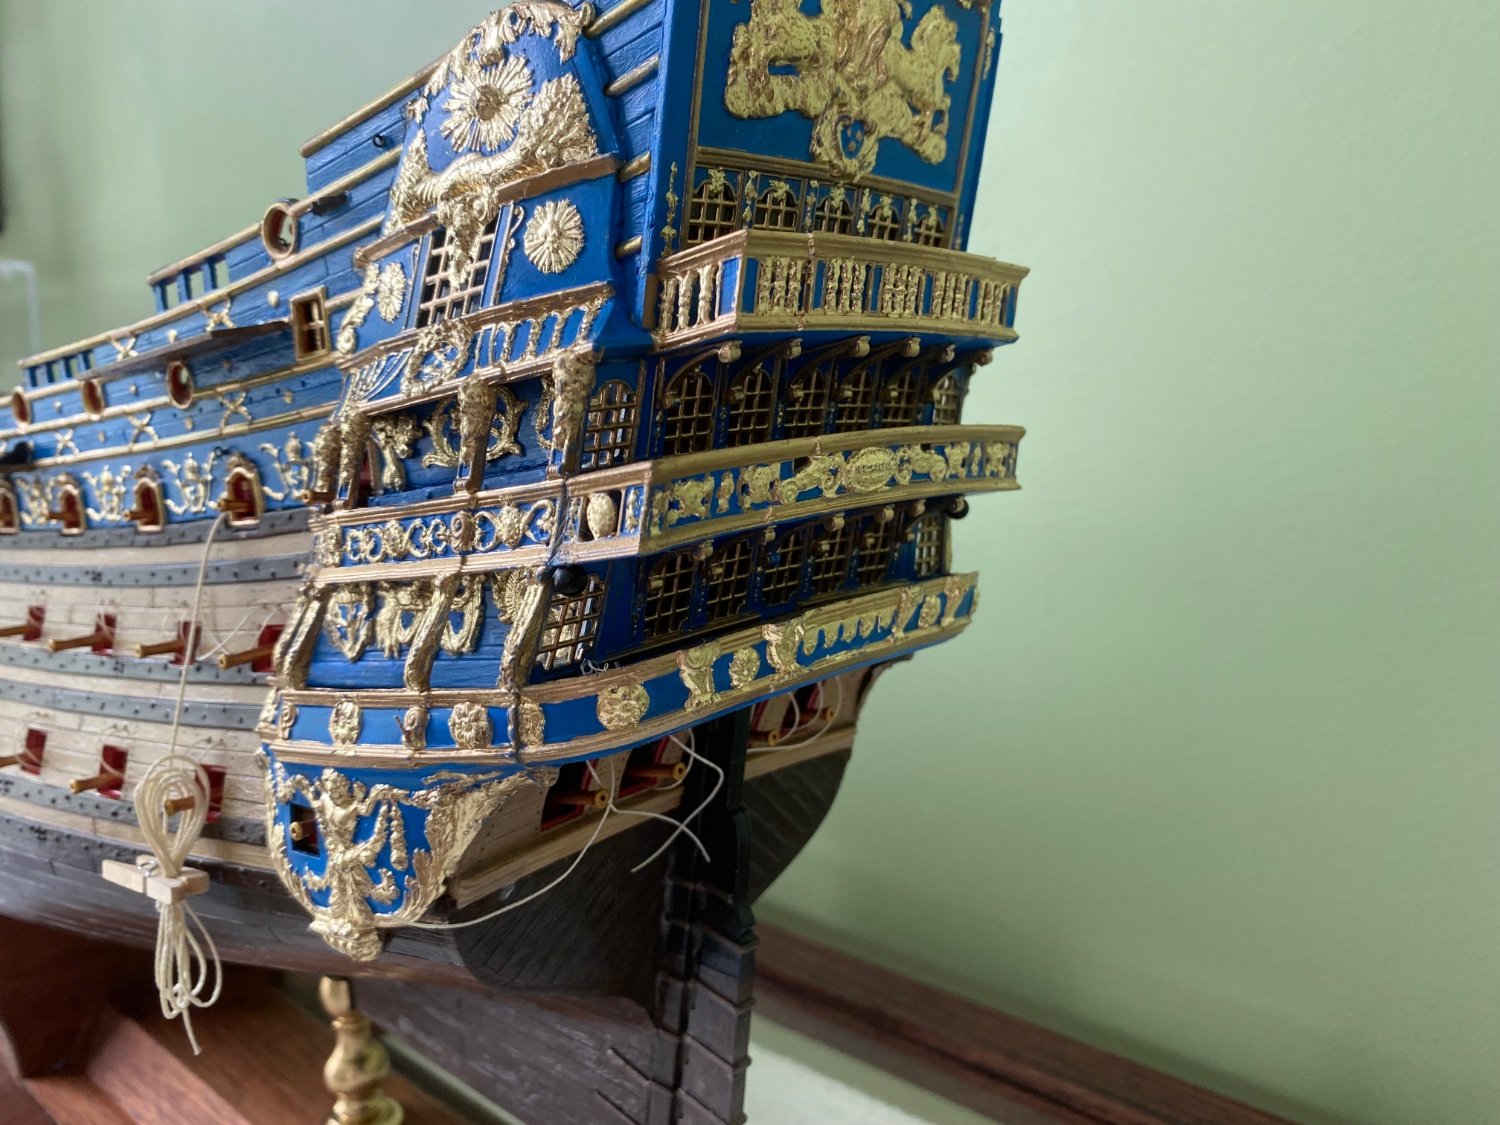
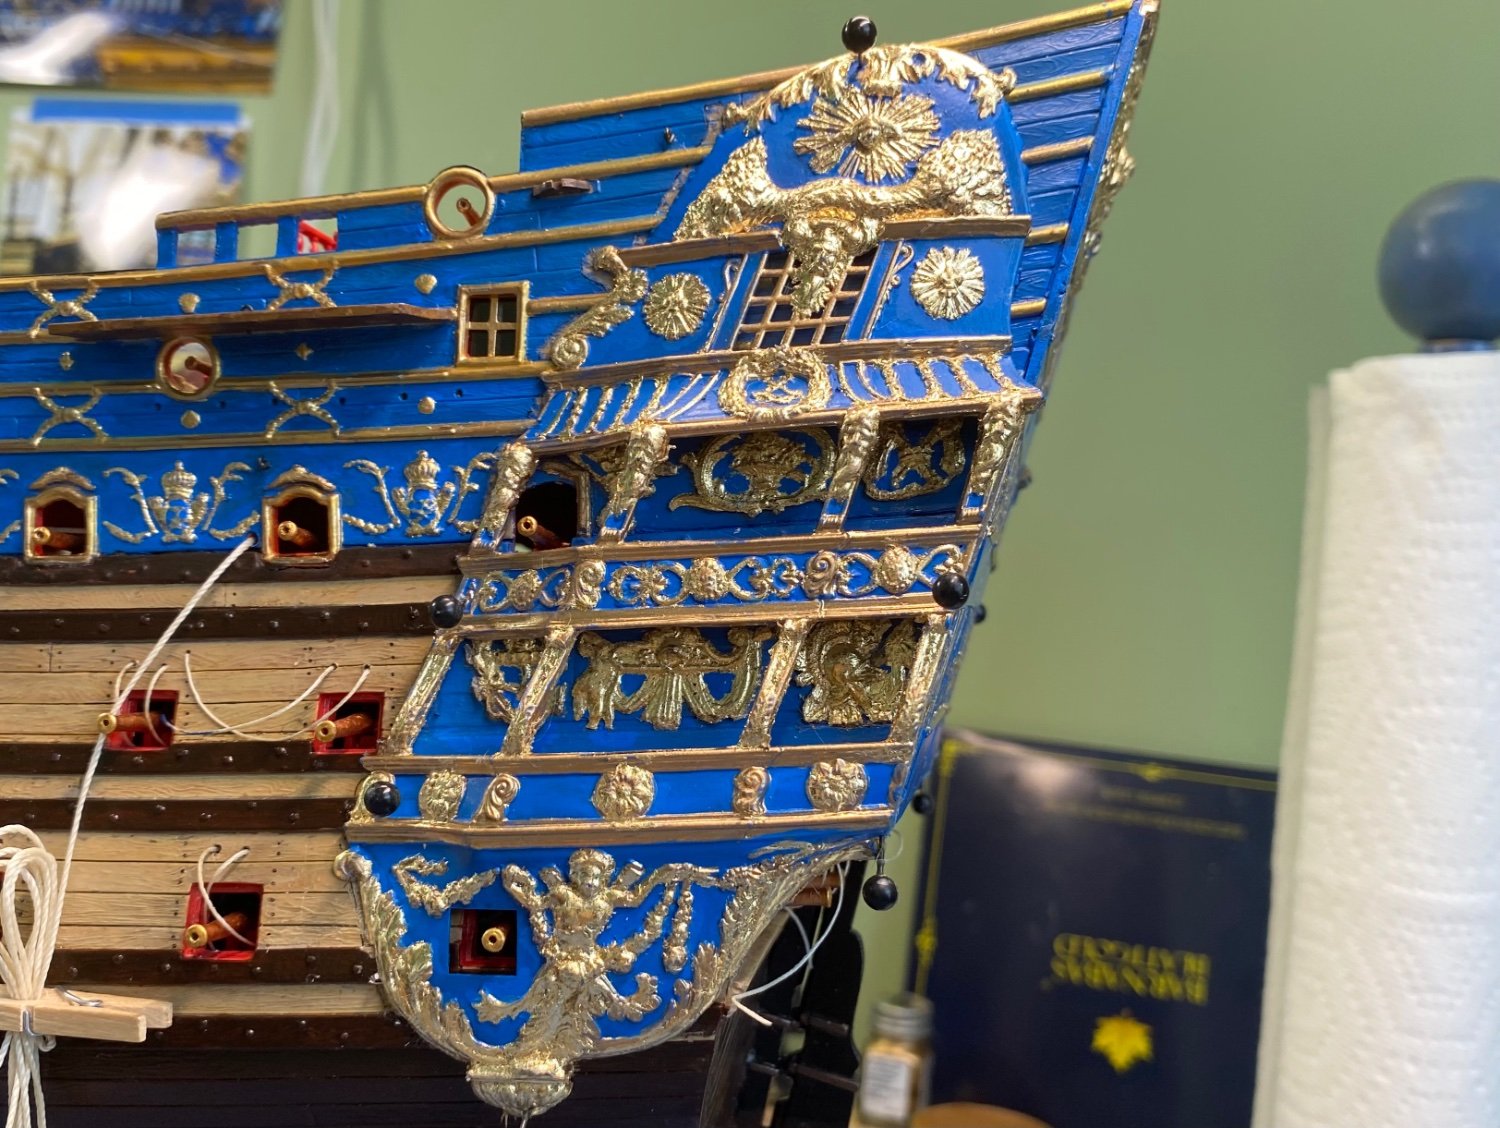
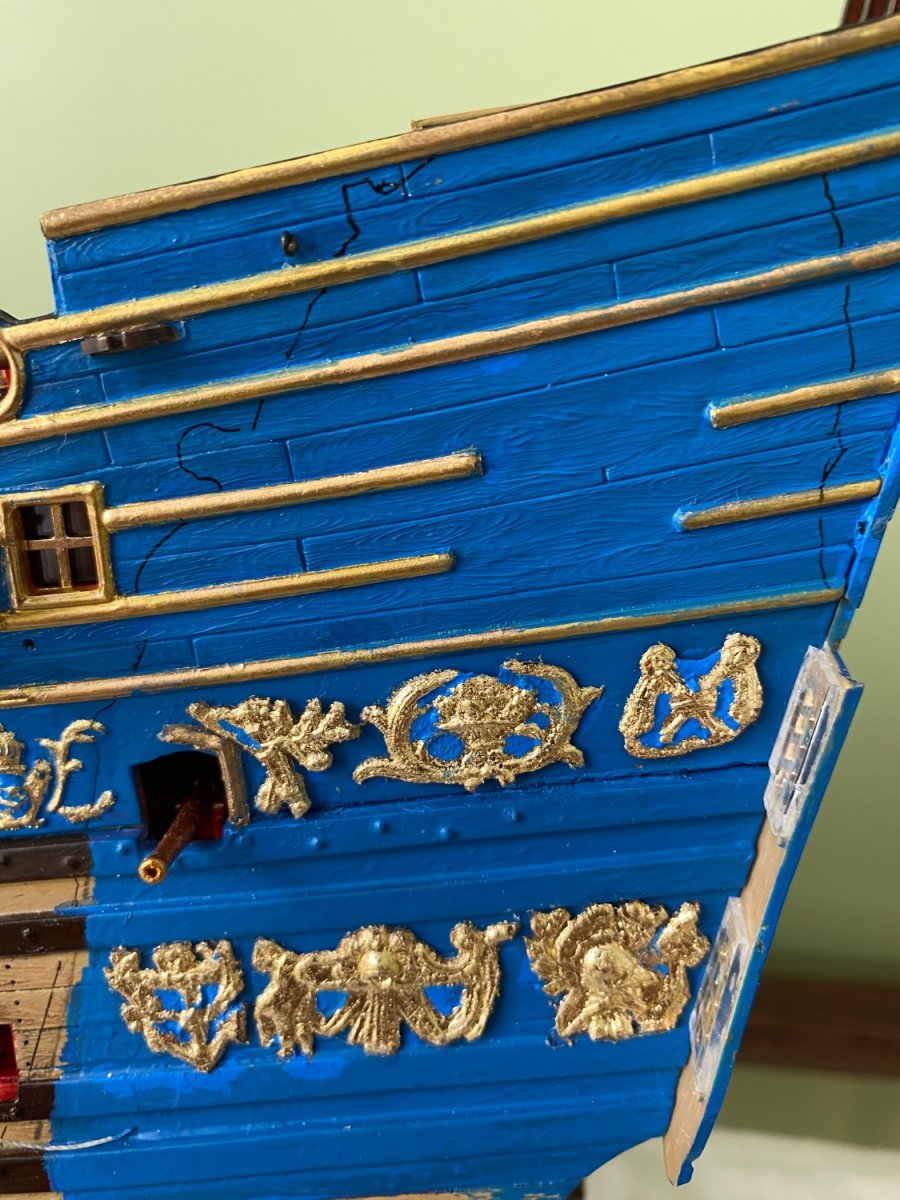
Henry do you have anything in your kit that looks like the item circled in my photo? It is the bottom of the large center lantern. I have the four numbered parts but my 199 and 200 don’t have the same bottom end.
-
You know Ian, you now have me contemplating if I should attempt to remove those 4 doors? I wish I had thought about it before I put the balconies on. Would have been pretty easy. On the other I wonder if I should just leave well enough alone and not risk tearing something up.

- 1,508 replies
-
- 2
-
-
- Le Soleil Royal
- Heller
- (and 1 more)
-
Ian I wondered that same thing. I assumed there were doors there regardless. I probably should have looked at more pictures. I started to cut them out and glue them back in in the open position similar to the doors on the beakhead but I was concerned it would weaken that section of the stern plate. I am going to pretend, and tell people, that the doors were there to secure the rear balconies to ship officers only. What do you think? 🤔 By the way I don’t believe I will ever feel a need to tell you, my dear friend, to SFU! 😊
-
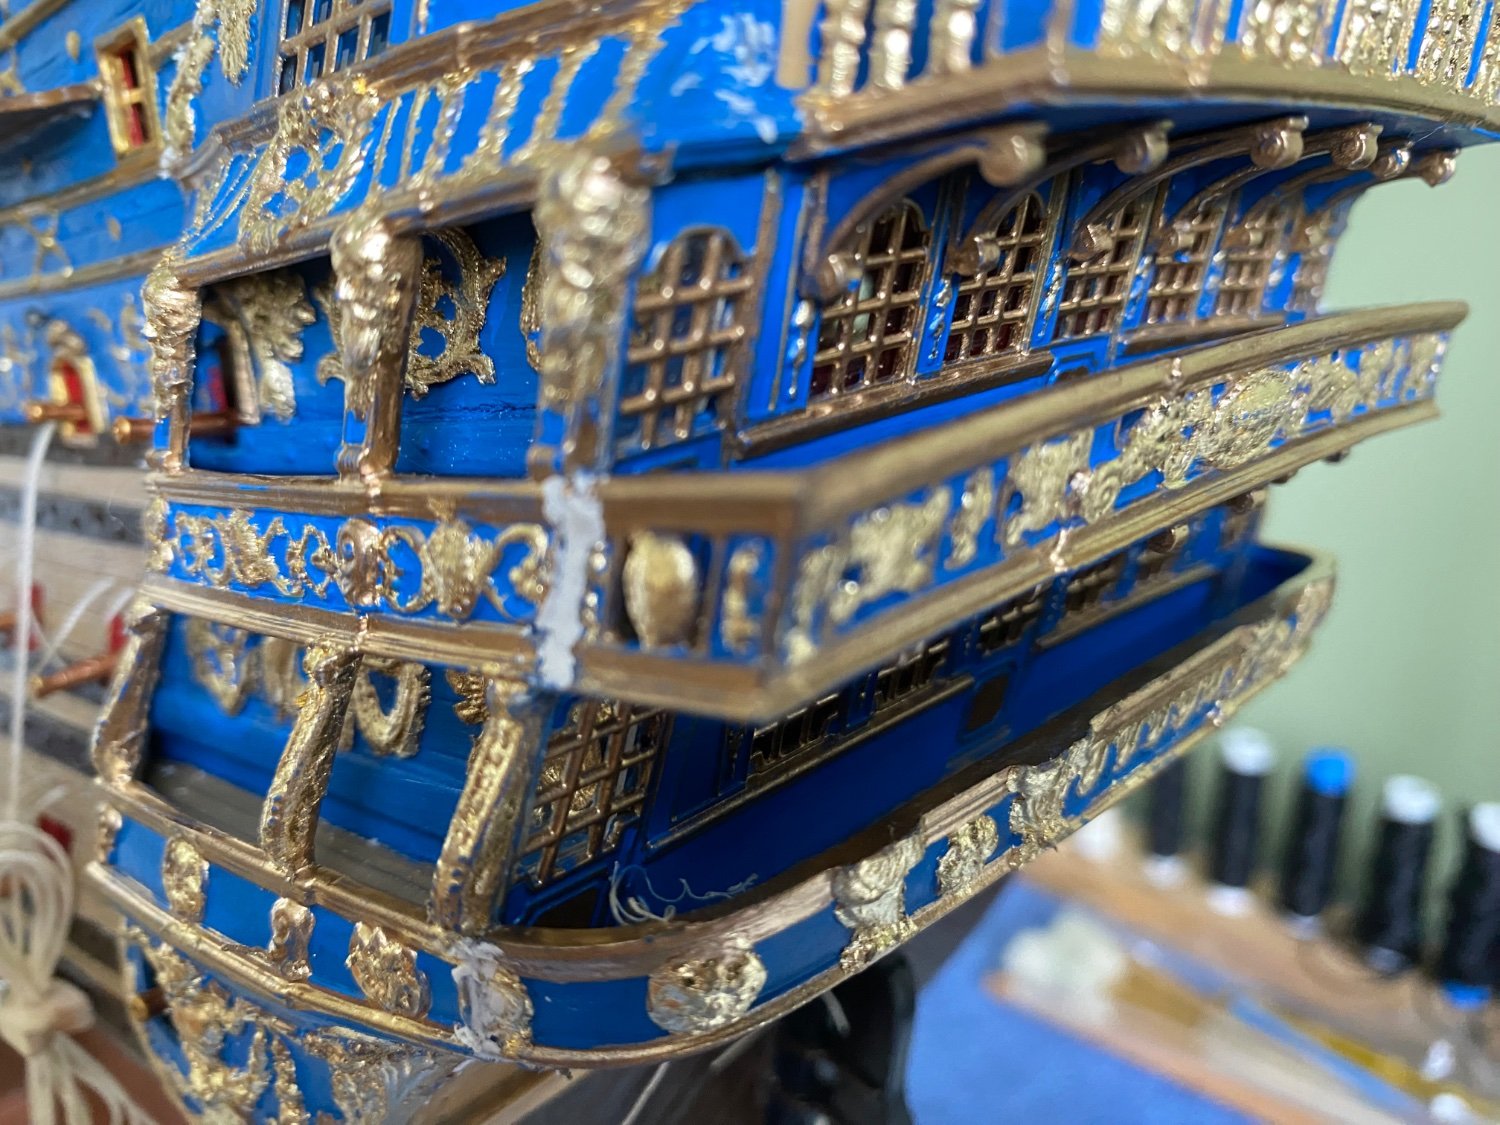
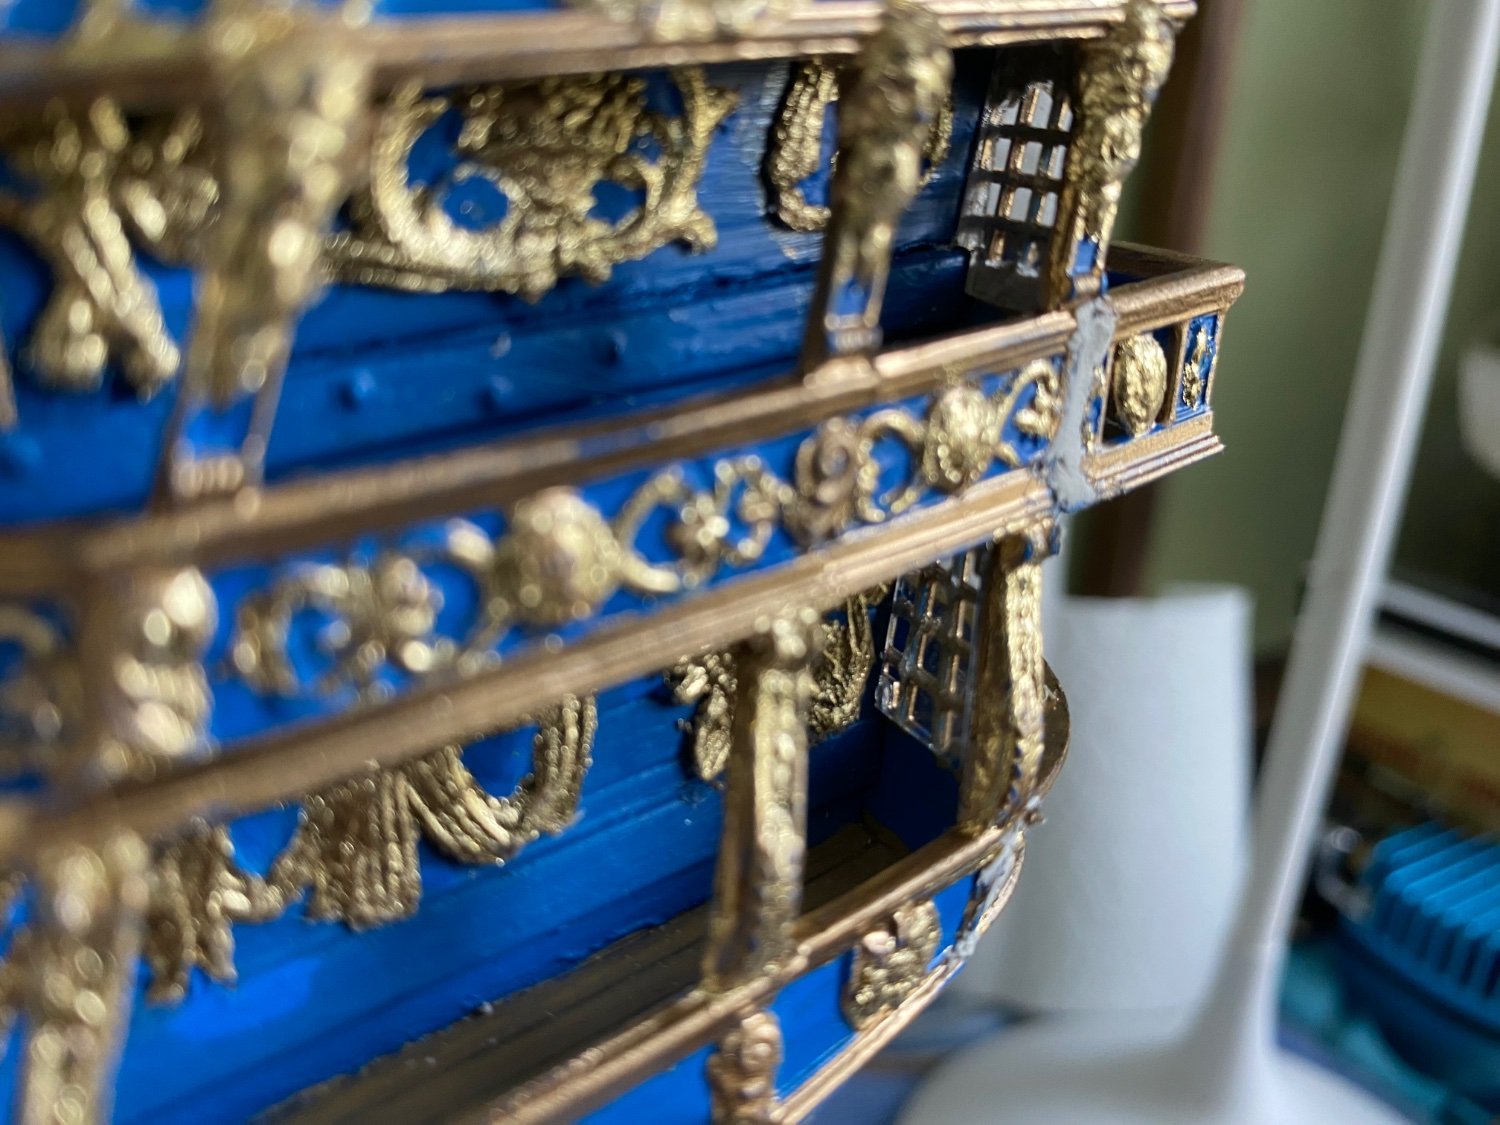
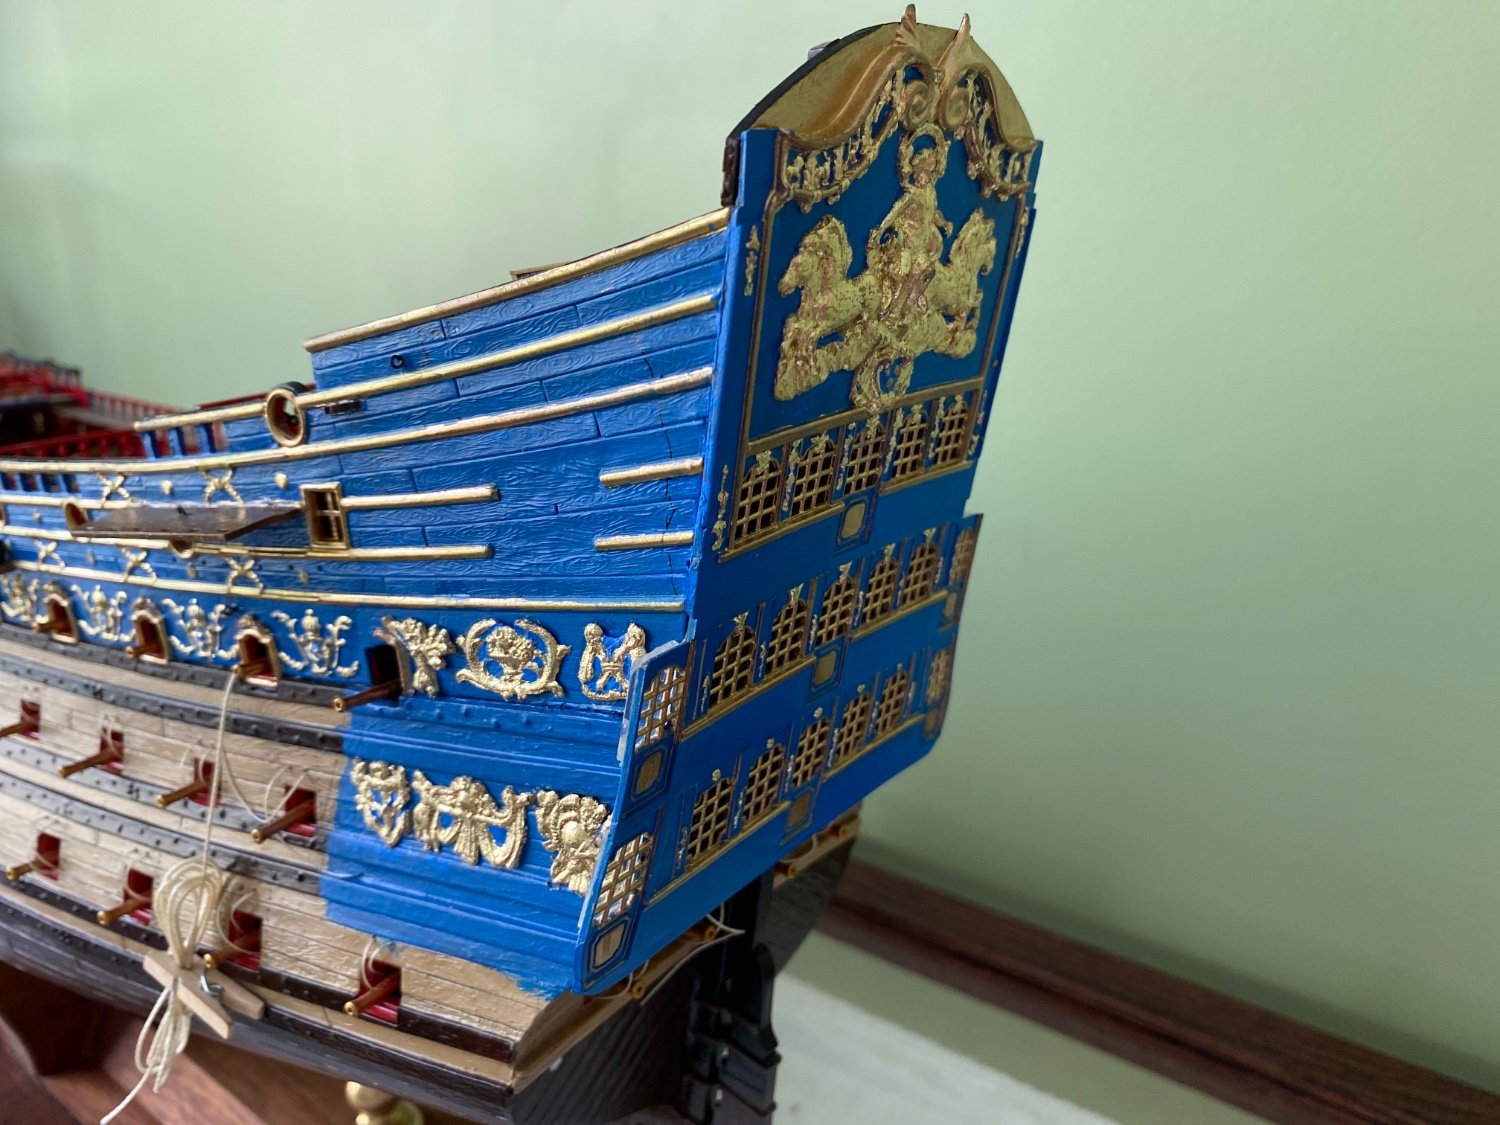
And the three balconies. Next up will be days and days of touch up of gold and blue paint, and gold leaf. Then I will get to all the statuary.


- 1,508 replies
-
- 5
-
-
- Le Soleil Royal
- Heller
- (and 1 more)
-
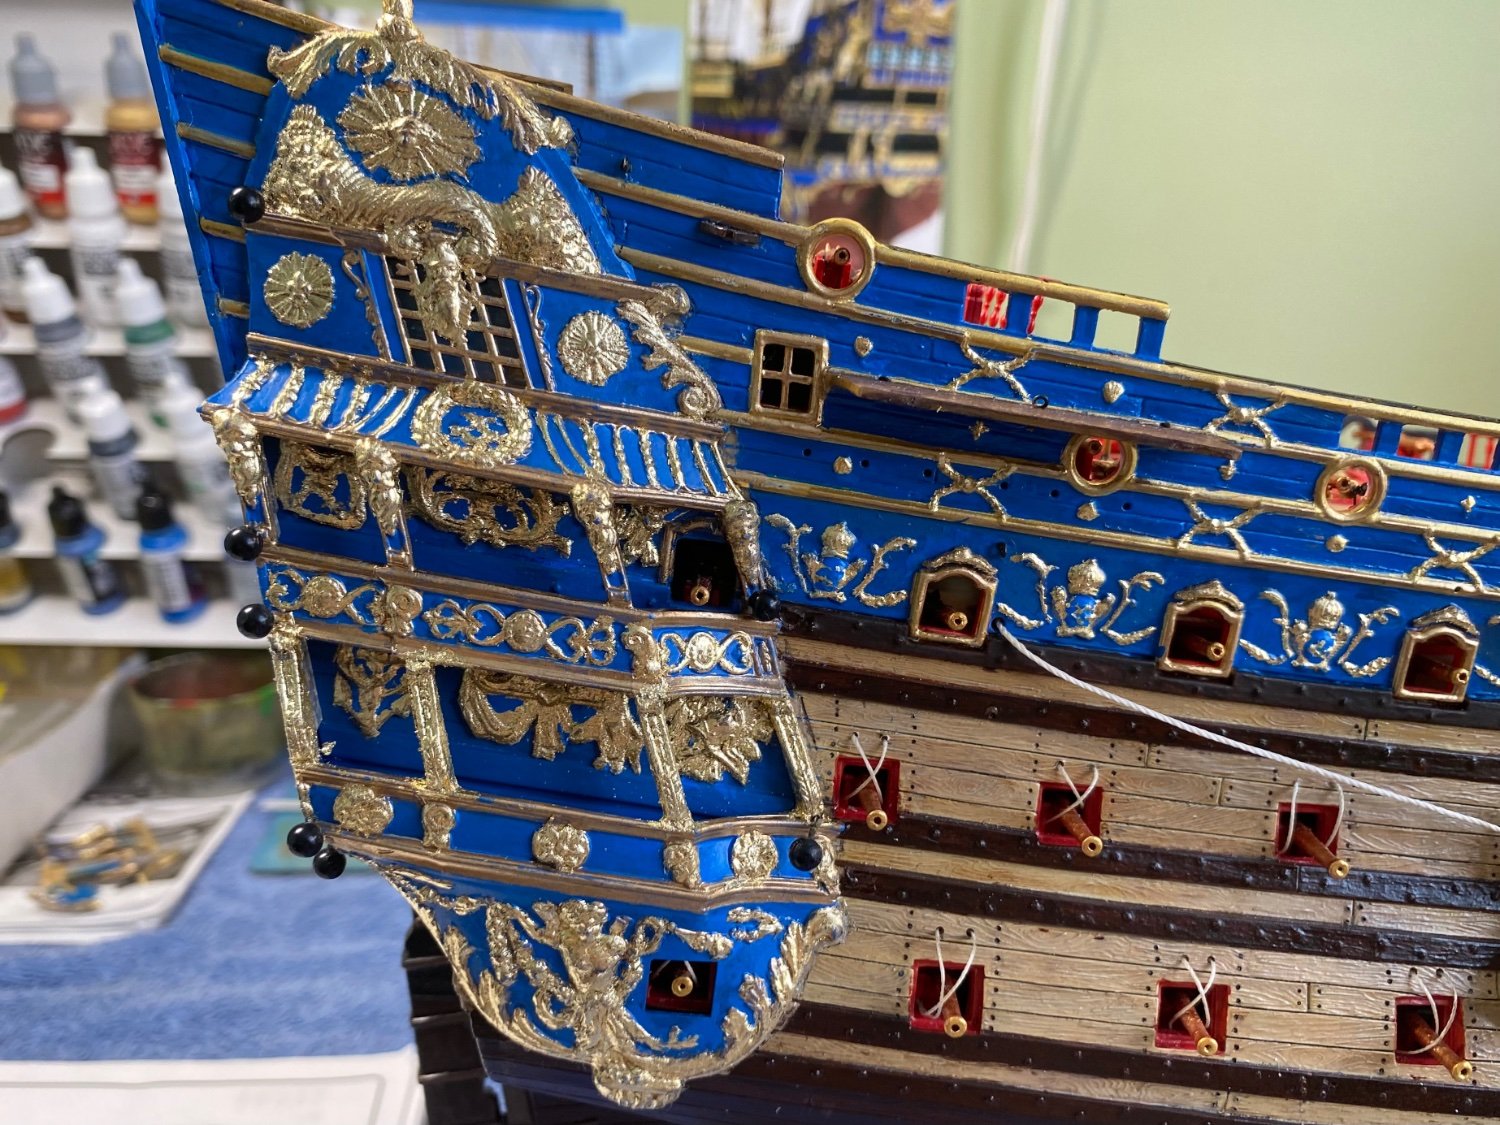
Side galleries in place and waiting for glue to dry. I used a series of push pins to hold the galleries tight against the ship. One small thing I noticed, which has to be a mistake I made somewhere, is the hatch at the bottom of the port side gallery does not line up perfectly with the corresponding hatch opening in the hull. The side gallery is flush with the edge of the stern so I did not want to push it back slightly to line the hatches up. Then the balconies worked not have fit flush to the stern. The starboard side is great so it has to be something I did. Oh well once I put the hatch cover on the bottom of the port side gallery it should not be that noticeable. I could attempt to move the cannon over to center of the gallery hatch but may not be worth the trouble.


- 1,508 replies
-
- 2
-

-
- Le Soleil Royal
- Heller
- (and 1 more)
-
Gallery floors made and installed. Paint edge scratched for good adherence to side galleries. Tomorrow May be the day they go up!
- 1,508 replies
-
- 4
-
-
- Le Soleil Royal
- Heller
- (and 1 more)
-
Kevin what I seem to run into very often is breaking off the tiny drill bitt in the hole I am drilling. I have a pen vise I use but the slightest tip to left or right will break my bit. Maybe I have not found/purchased the strongest tiny bits. 😊
-
Thanks for the like Ian. Do you think my gold leaf application looks OK? I seem to have lost some of the small detail in areas I applied it. Faces of characters, etc. not as sharp and detailed. But I guess that is a compromise if I want the leaf?
-
All pieces painted and gold leaf applied on the areas where I wanted it for the next step in construction. Made the four deck floorings and painted them, along with the floors of the three balconies to match the decks. Now to carefully scrape glue lines to get bare plastic. Then see if I can do a good job of getting these side galleries and balconies installed.
- 1,508 replies
-
- 4
-
-
-
- Le Soleil Royal
- Heller
- (and 1 more)
-
Thanks Henry. I did that with a fine point ink marker already. Will go over it with x-acto. I just noticed when looking at this picture that I have the knight heads reversed! 😳 They are looking toward the rear. Ol well. They will be inside the side galleries.

-
Do any of you have a best practice for scratching/removing a straight line of paint to make for a good glue line? All over the process of adding the side galleries, balconies, corbels, etc. there is going to be the need to scrape away a glue line on previously painted areas.

-
Hey Kevin so glad you are back. I have been checking your build from time to time to see if you posted. I was thinking you and the new King were off somewhere on holiday! How is the ankle feeling? As always your 3D work is impeccable. I admit have absolutely no idea about the process and can only imagine crafting the entire ship (except hull halves). Very impressive work my friend!
-
Robert she is beautiful indeed. I am reading through your build with very keen interest. Like you I have only built plastic models to this point, with the Heller HMS Victory and LeSoleil Royal being the most complicated and time consuming (see builds here on MSW). I am researching attempting my first wooden model and the OcCre Endeavor is the one I keep coming back to. I really like it and want to attempt building it. As someone who had not built a wood model before, what did you think of it? I have many years of woodworking experience and hope that experience serves me well. Is pretty much everything you did straight from the instructions? In comment #25 you did list a number of things it sounds like changed. What was your thought process for making these changes? Also did feel a need to purchase after market items for he kit or was everything you needed/wanted included? I am surprised at how quickly you finished it! My Victory took a little over 18 months and I have no idea when I will finish my Soleil Royal. I would have expected the Endeavor to take a couple years maybe. If and when I do purchase my Endeavor I hope you will consider it a compliment if I were to ask you for advice.
-
Yeah Henry that is what I am tinkering with now. Wish me luck. If I get it right I want to scribe lines and paint to match decking. Also trying to scribe and paint the floors of he three balconies before I add them to the stern. Will see how this goes.
- 1,508 replies
-
- 1
-
-
- Le Soleil Royal
- Heller
- (and 1 more)
-
Thanks Baker. Wishing to be at Mons street market place this morning. Sunday mornings were always my favorite!
- 1,508 replies
-
- 1
-

-
- Le Soleil Royal
- Heller
- (and 1 more)
-
Baker your model is beautiful. Yes you are correct on the comment number in your build. I want to have my hatch covers fully open to show the fluer-de-lies I am placing on the inside of each cover. I guess I could just bend the wire close to a 90 degree angle, or if a wire flexible enough I could bend the cover up or down to achieve the cover angle I wanted. Did you drill small holes in the top of the hatch cover to accept the wire? I would not want the wire to show on either side of the cover. Let see, two holes in each hatch cover and two at the top of each hatch multiplied by 56 hatch covers 🤔. Would that be 224 tiny holes? Hummm!
-
Marc I know you did but Henry I could not tell from your build. Since you opened the side galleries did you create floors/decking inside for the two levels on each side?
-
Baker in your solution what did you do with the two metal pins? Drill a pair of holes in the hull right at the top of the hatch? Do they show on inside of the cover. I plan to have my hatch covers open.
-
Thanks Henry. As you see above in the picture from my instructions all my corbels, regardless of size, are numbered 150. I will be following your direction, as well as my other friends, and do the four large in the center and the 8 small flanking the larger. Yeah Ian I seem to remember you recommending doing the hatch covers like that on my Victory. I believe I did follow your recommendation.
- 1,508 replies
-
- 1
-
-
- Le Soleil Royal
- Heller
- (and 1 more)
-
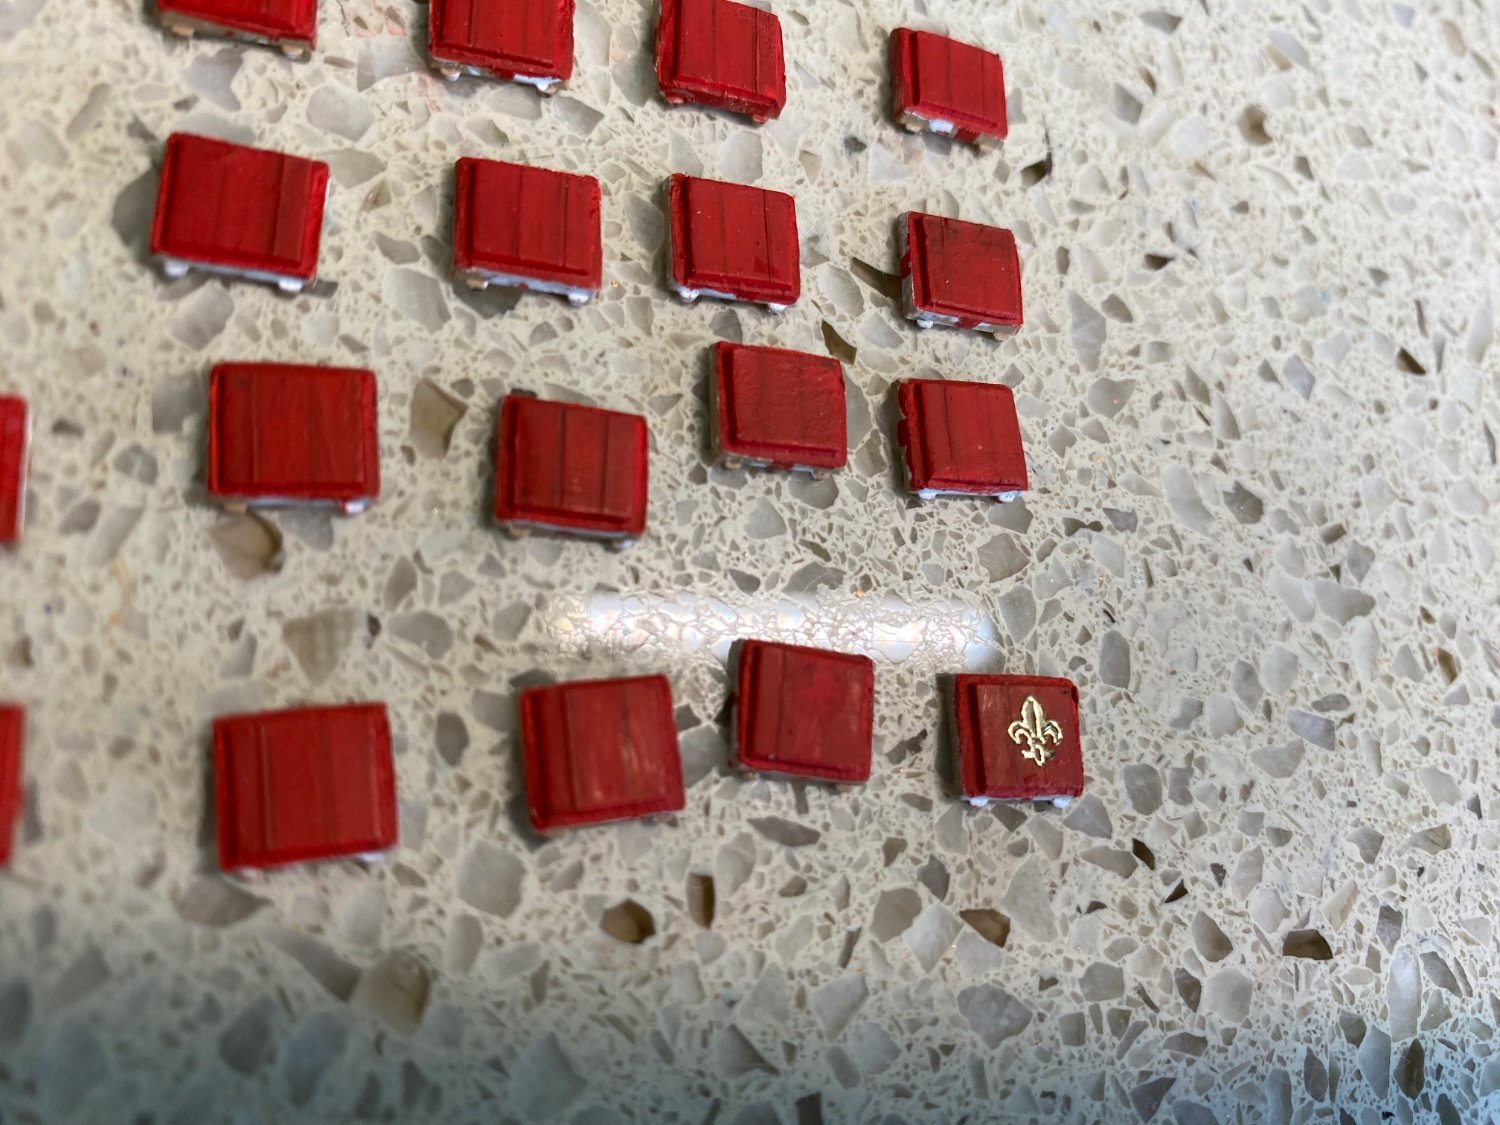
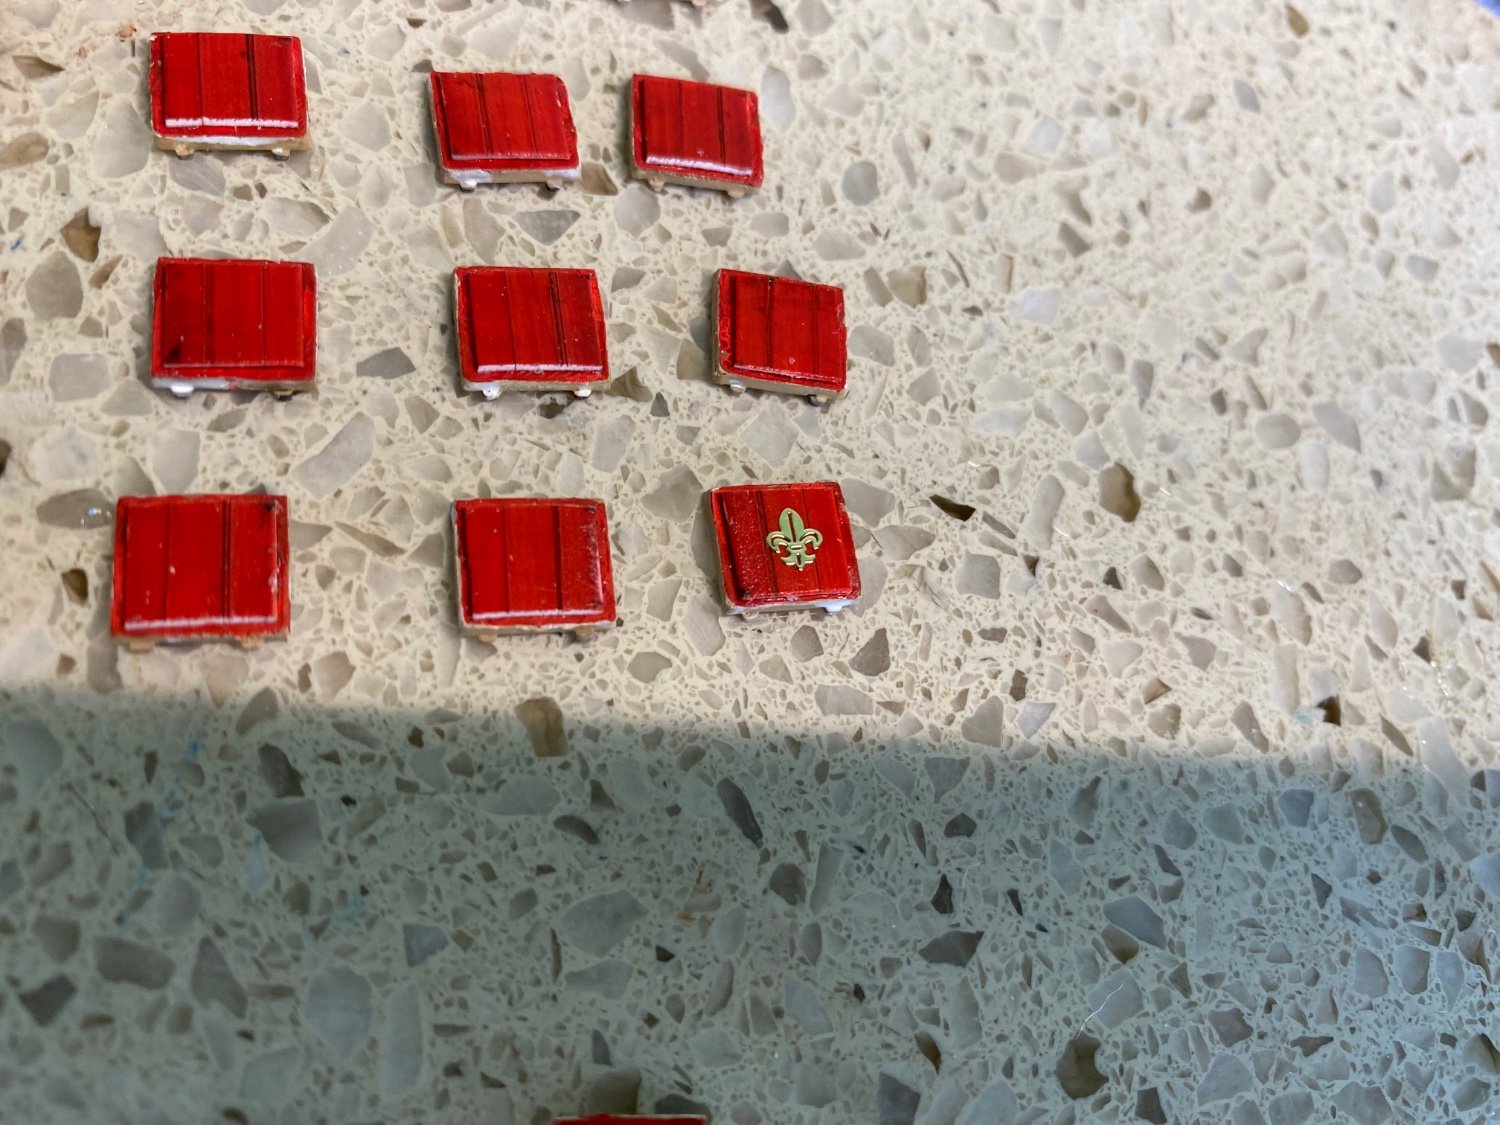
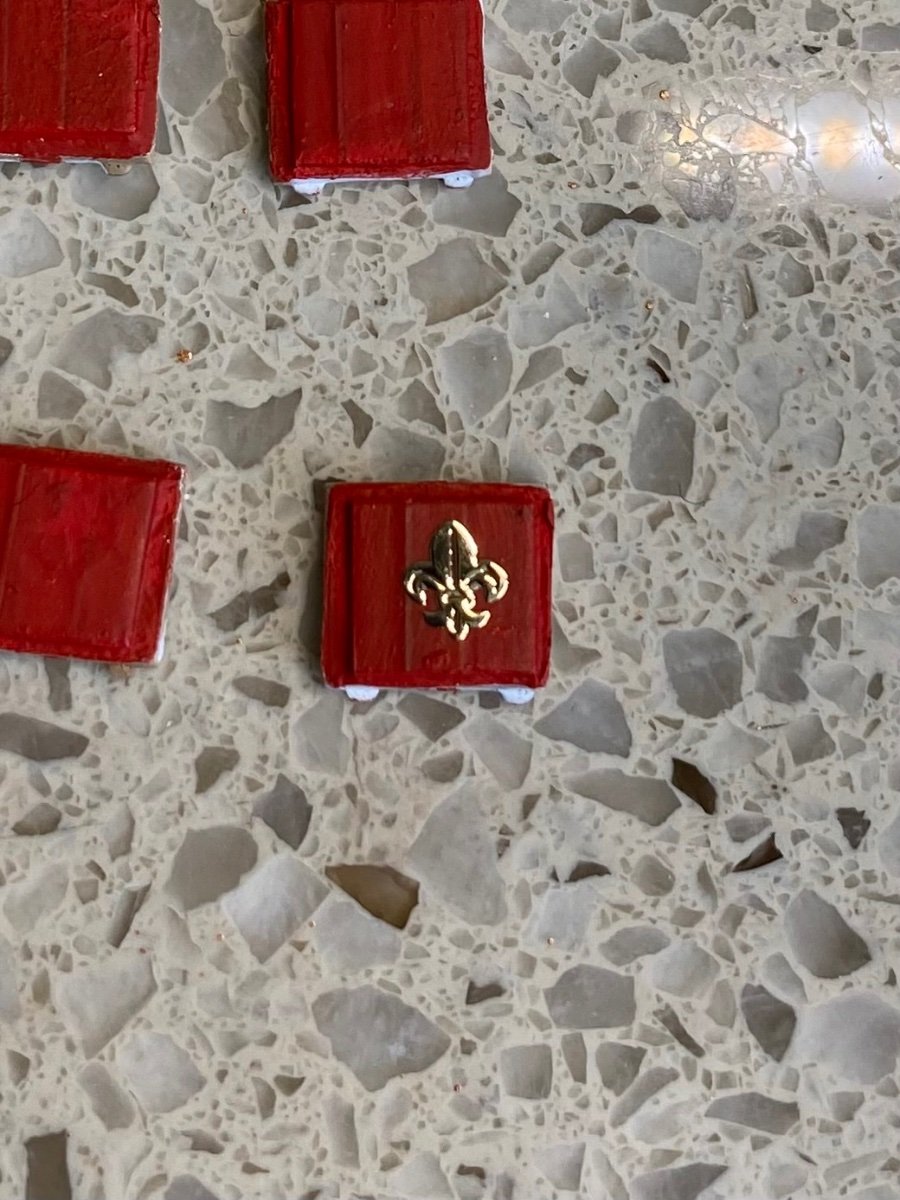
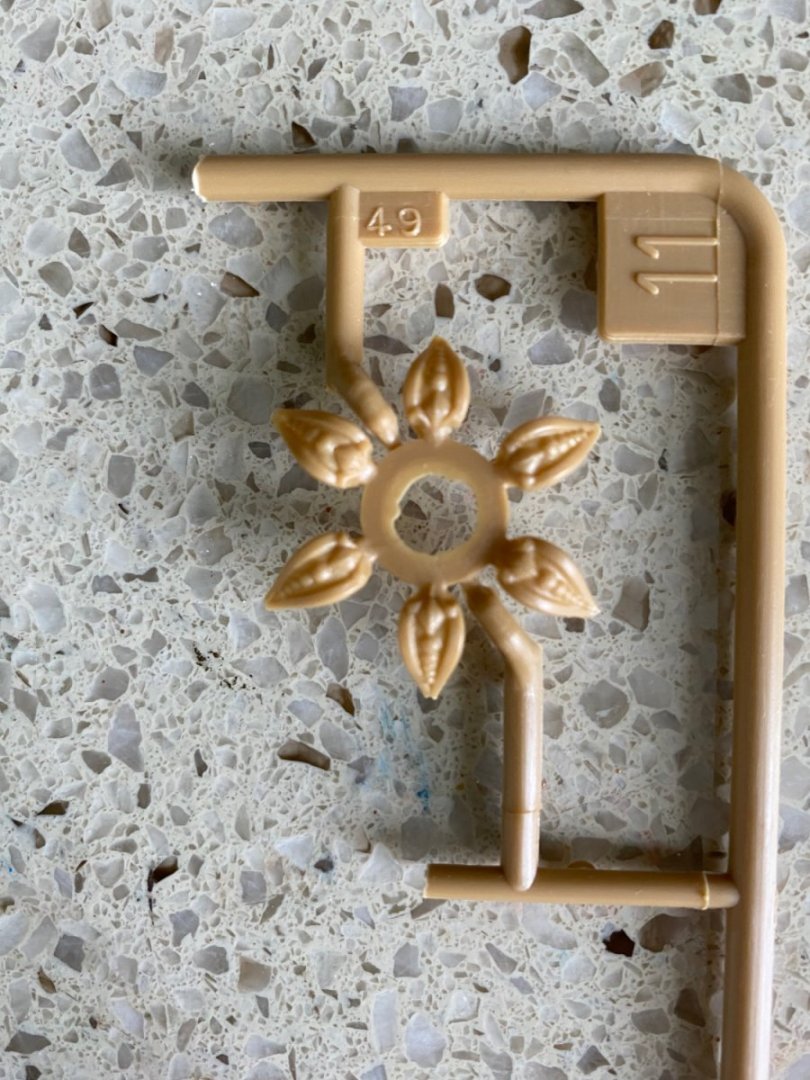
Marc that is my plan as well. Of course my plan very much resembles your’s! 😊 Hope you don’t mind my plagiarism! Here are my hatch covers so far with a couple fluer-de-leis appliqués setting in place. Still need some touch up painting and my making 112 tiny hatch eyebolts. I too plan to attach them much later in my build.


-
Marc or Henry did either of you add any material to improve the cannon hatch cover glue service at the hull?