Bill97
-
Posts
2,722 -
Joined
-
Last visited
Content Type
Profiles
Forums
Gallery
Events
Everything posted by Bill97
-
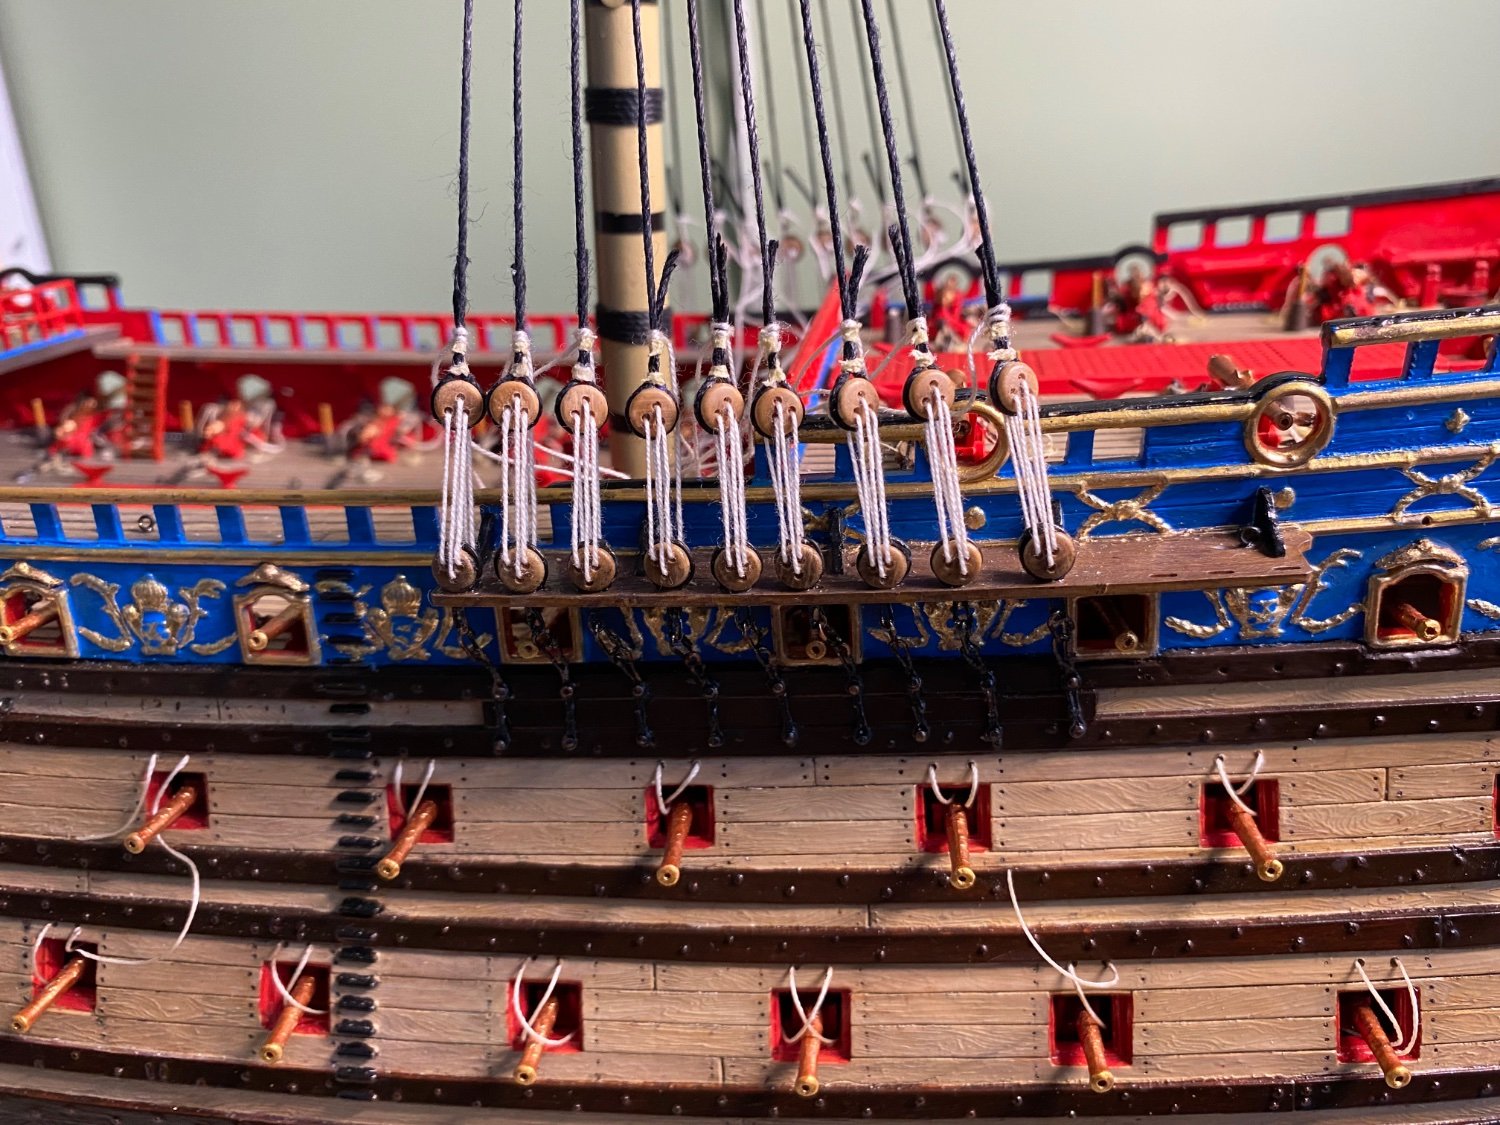
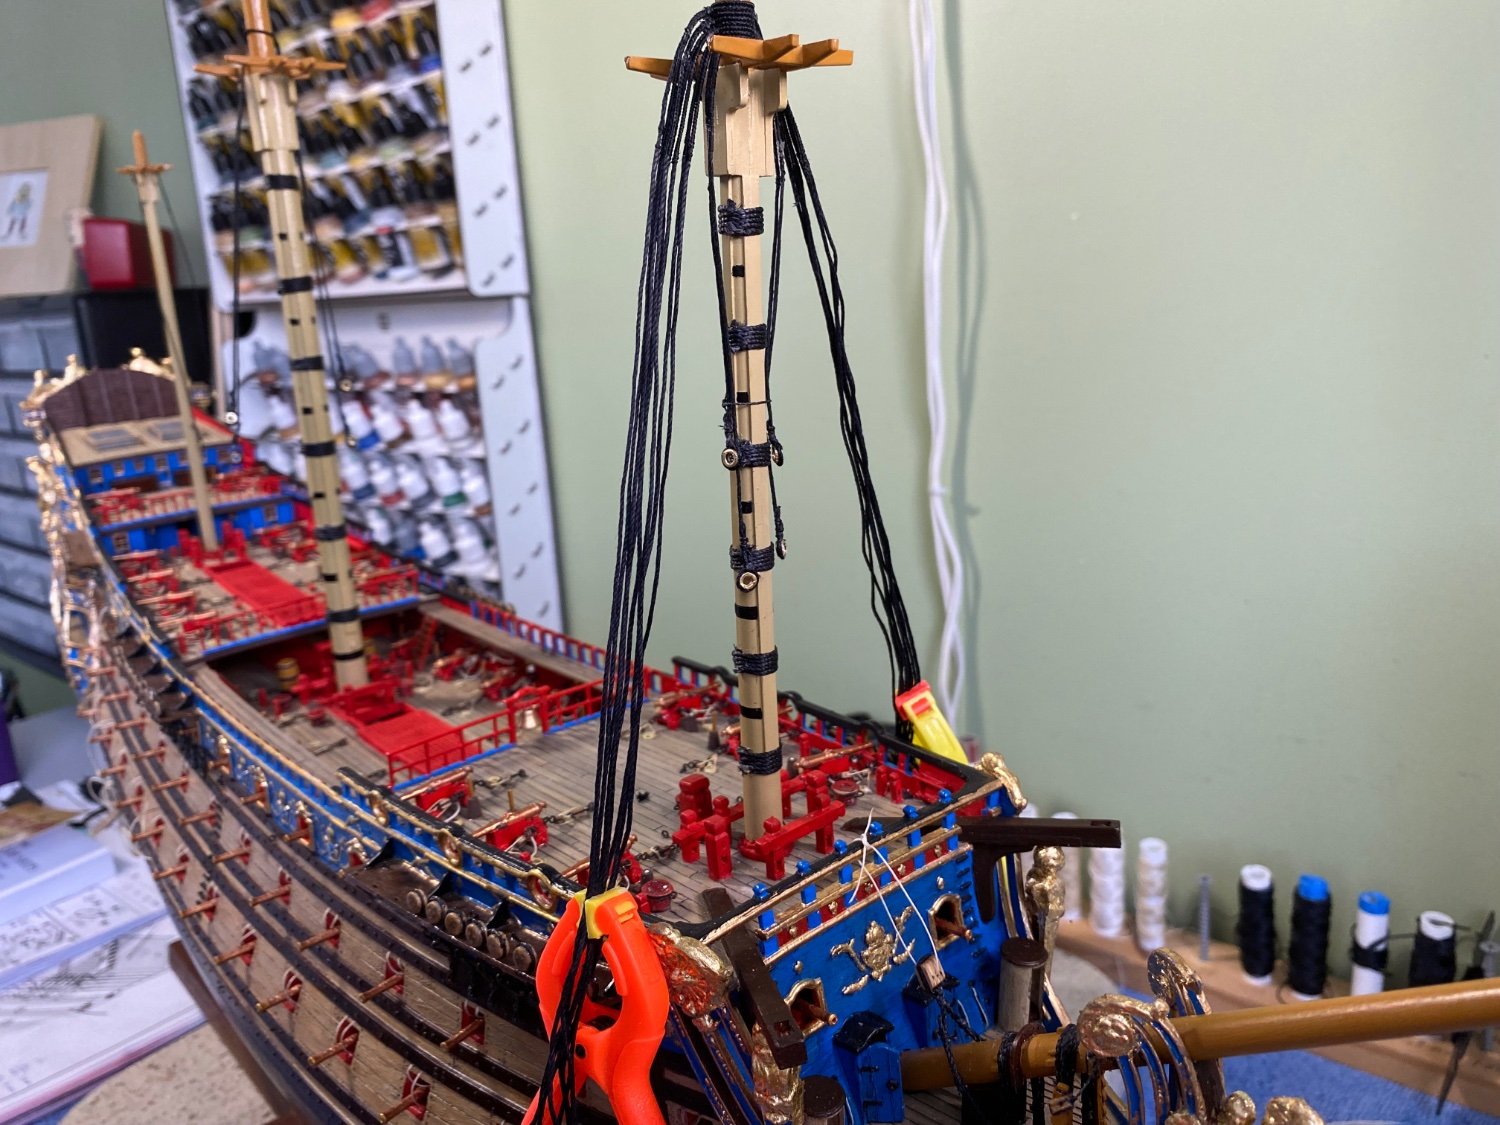
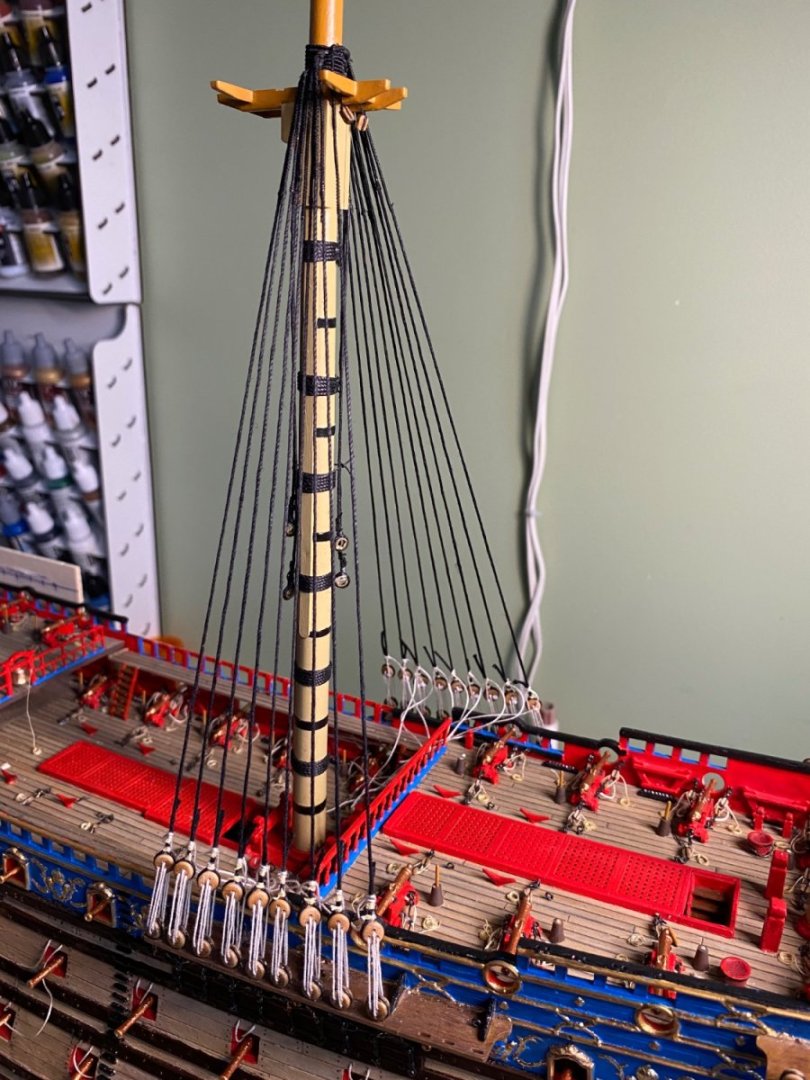
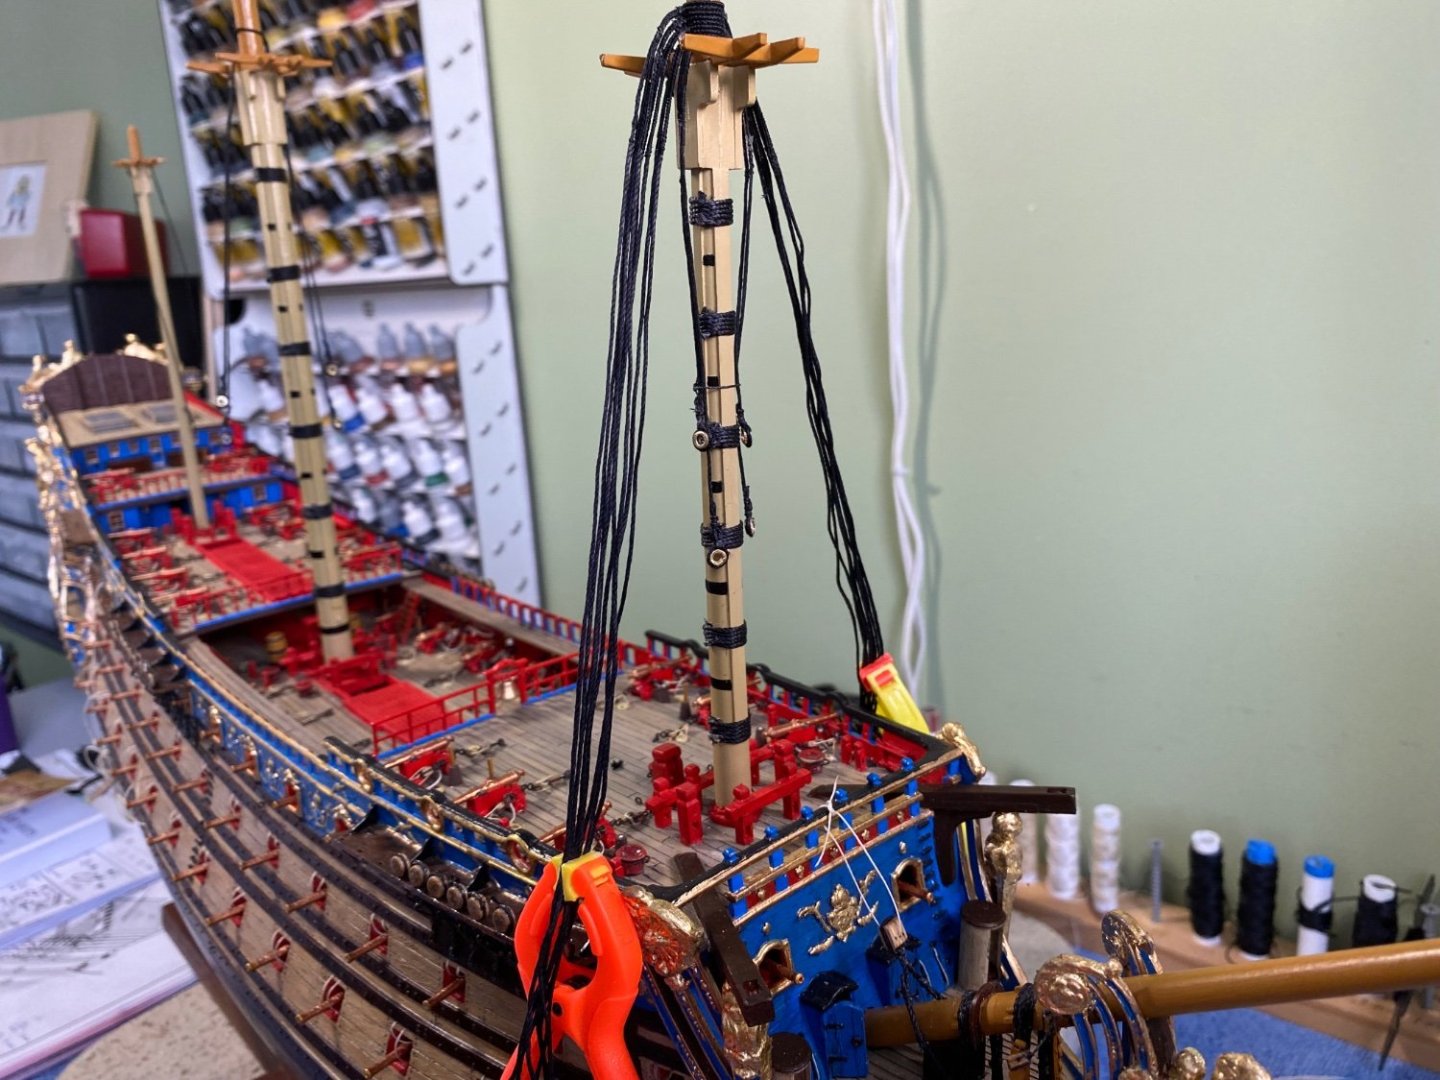
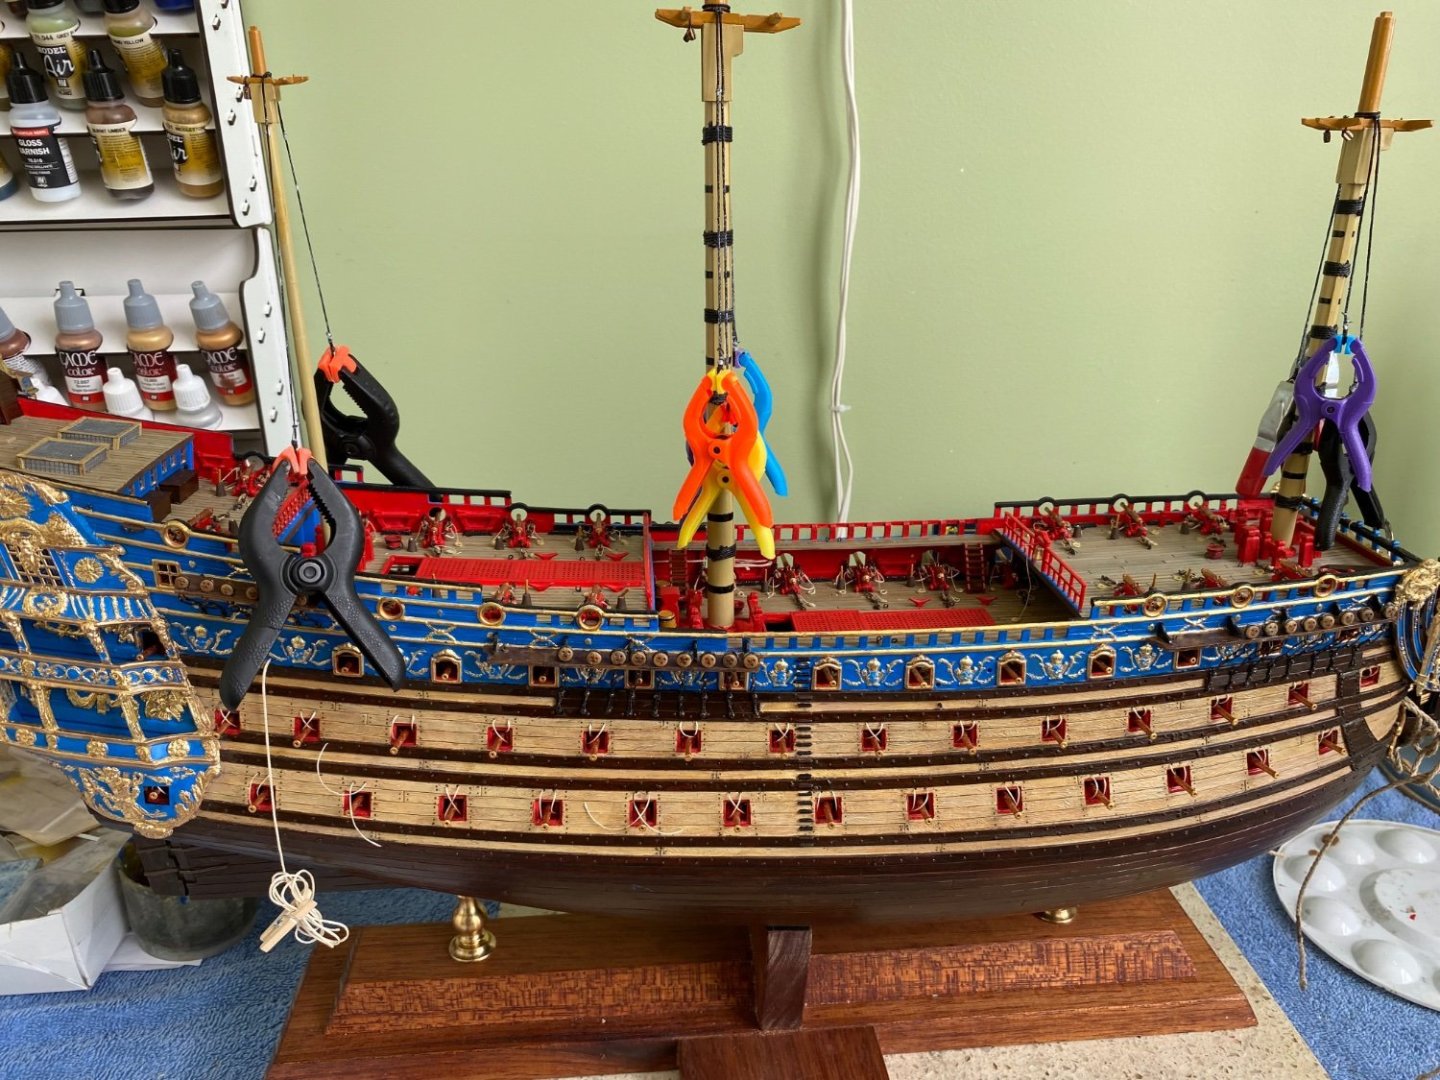
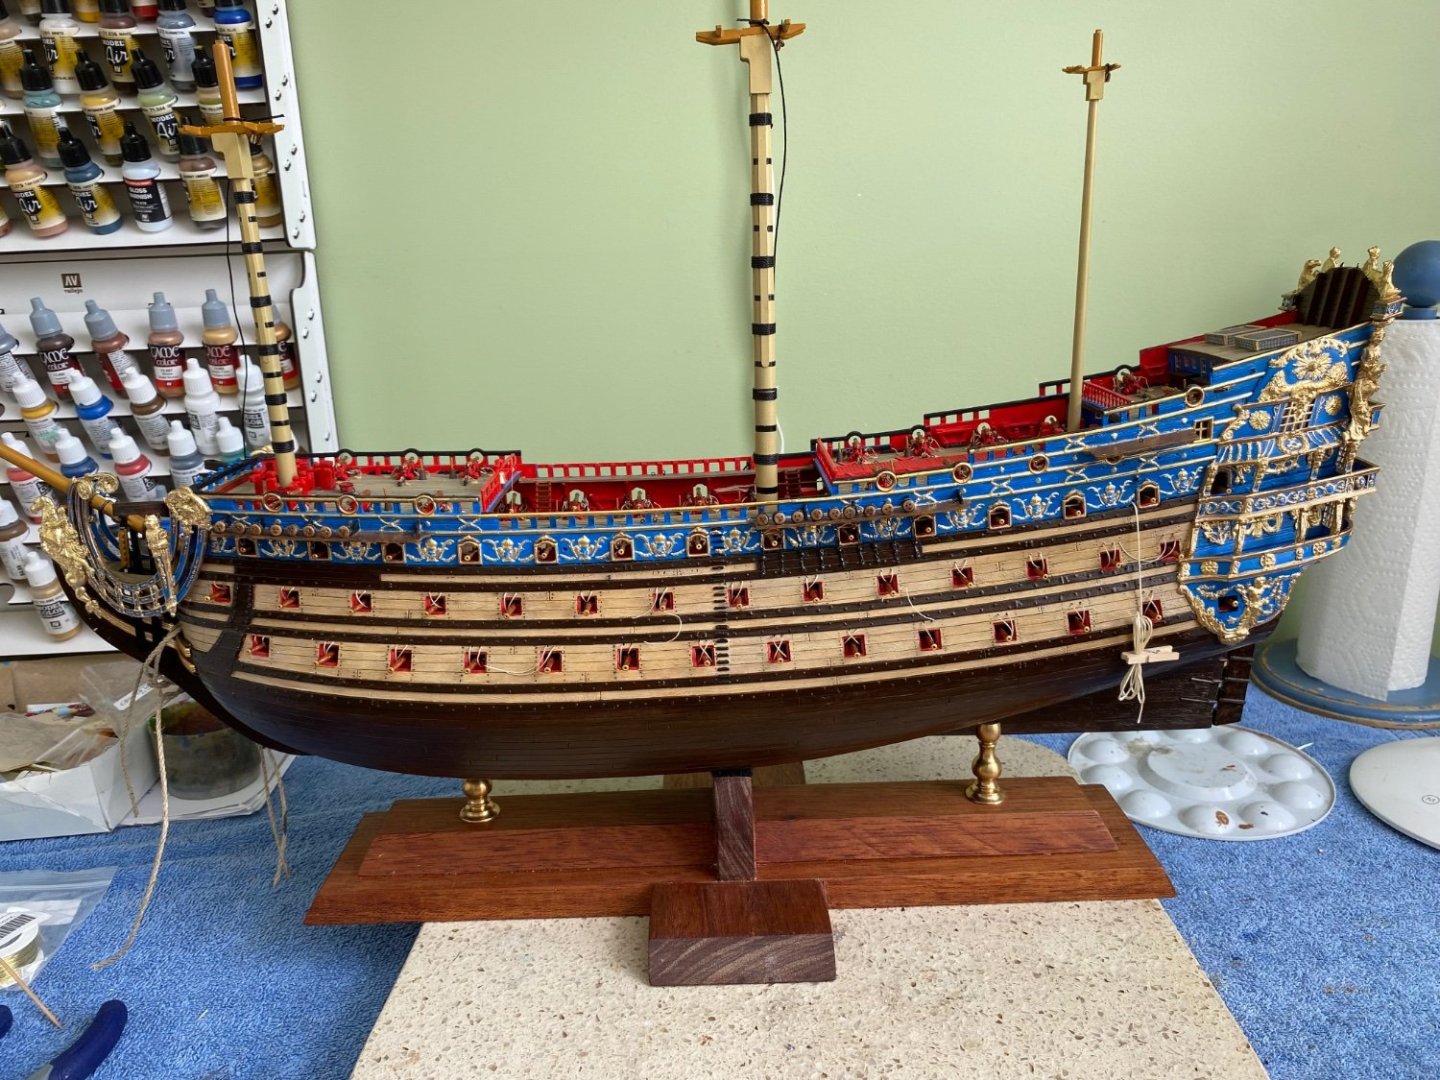
Lower shrouds for mainmast rigged to deadeyes. Leaving laniard ends long until all adjustments in the future are complete. Then I will clip and add a spot of glue. Will wait until further into the rigging to add the ratlines. I am satisfied with the pretty straight line of the upper deadeyes. Now on to the foremast.

- 1,508 replies
-
- 6
-

-

-
- Le Soleil Royal
- Heller
- (and 1 more)
-
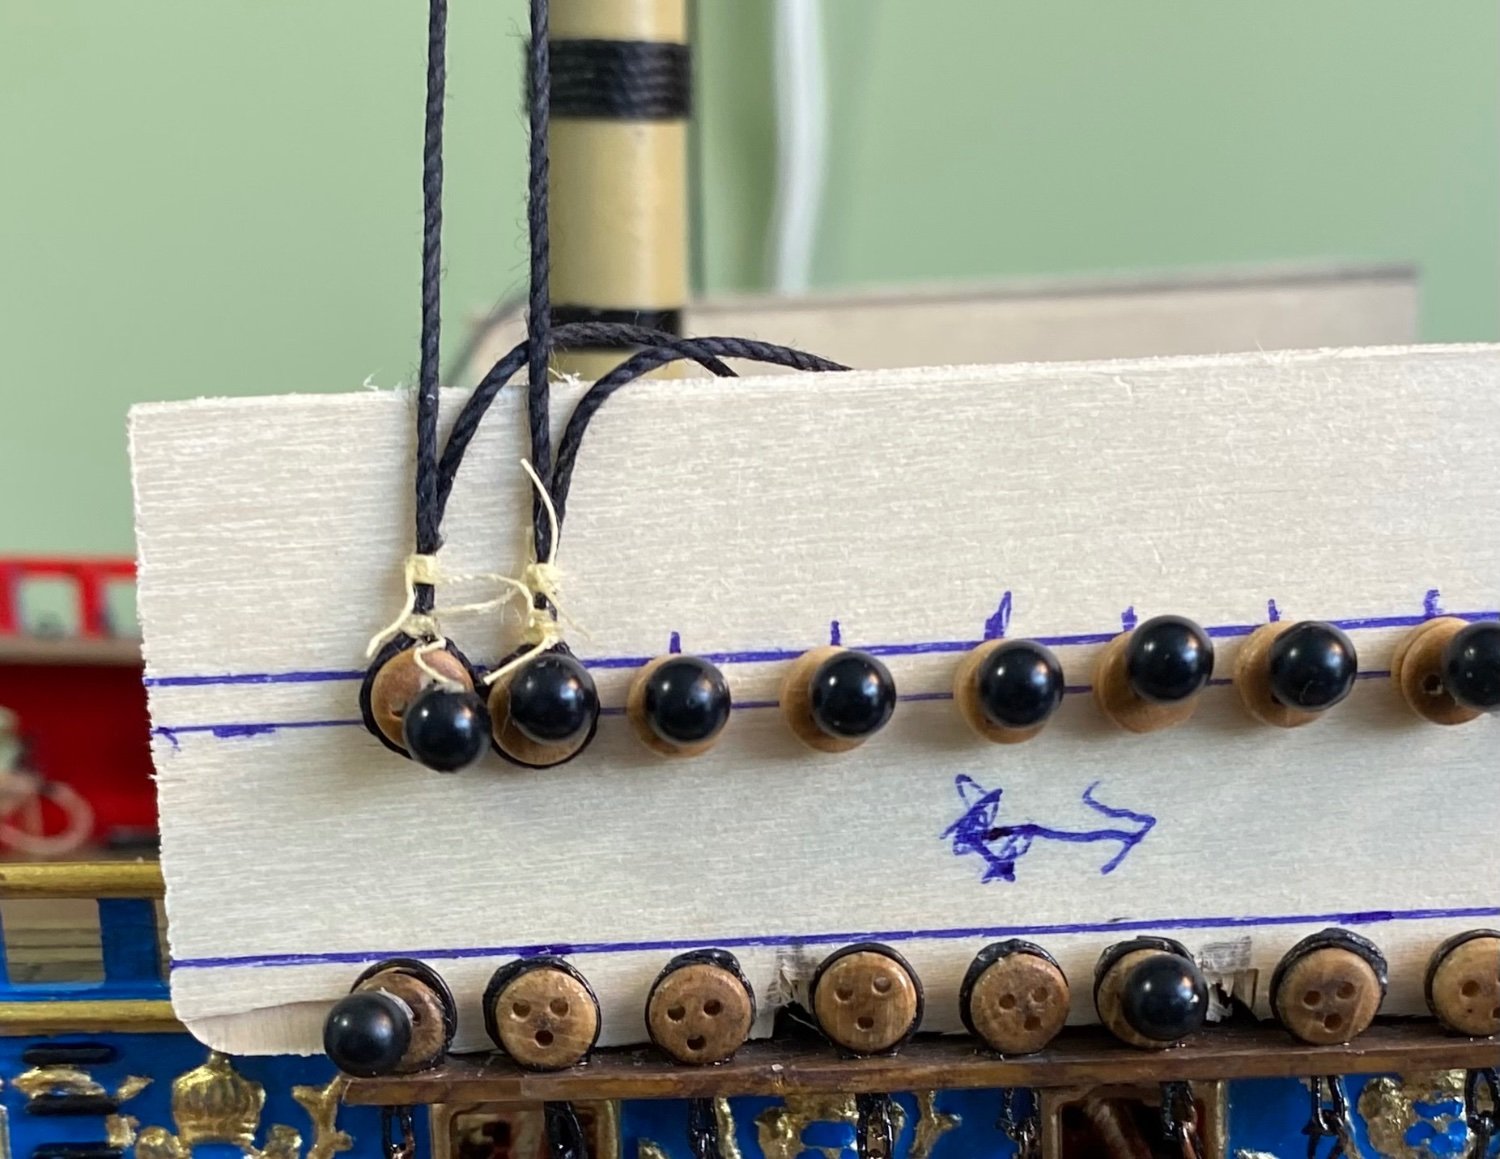
Process underway. Arrow is to remind me which direction ends lay

- 1,508 replies
-
- 6
-
-
- Le Soleil Royal
- Heller
- (and 1 more)
-
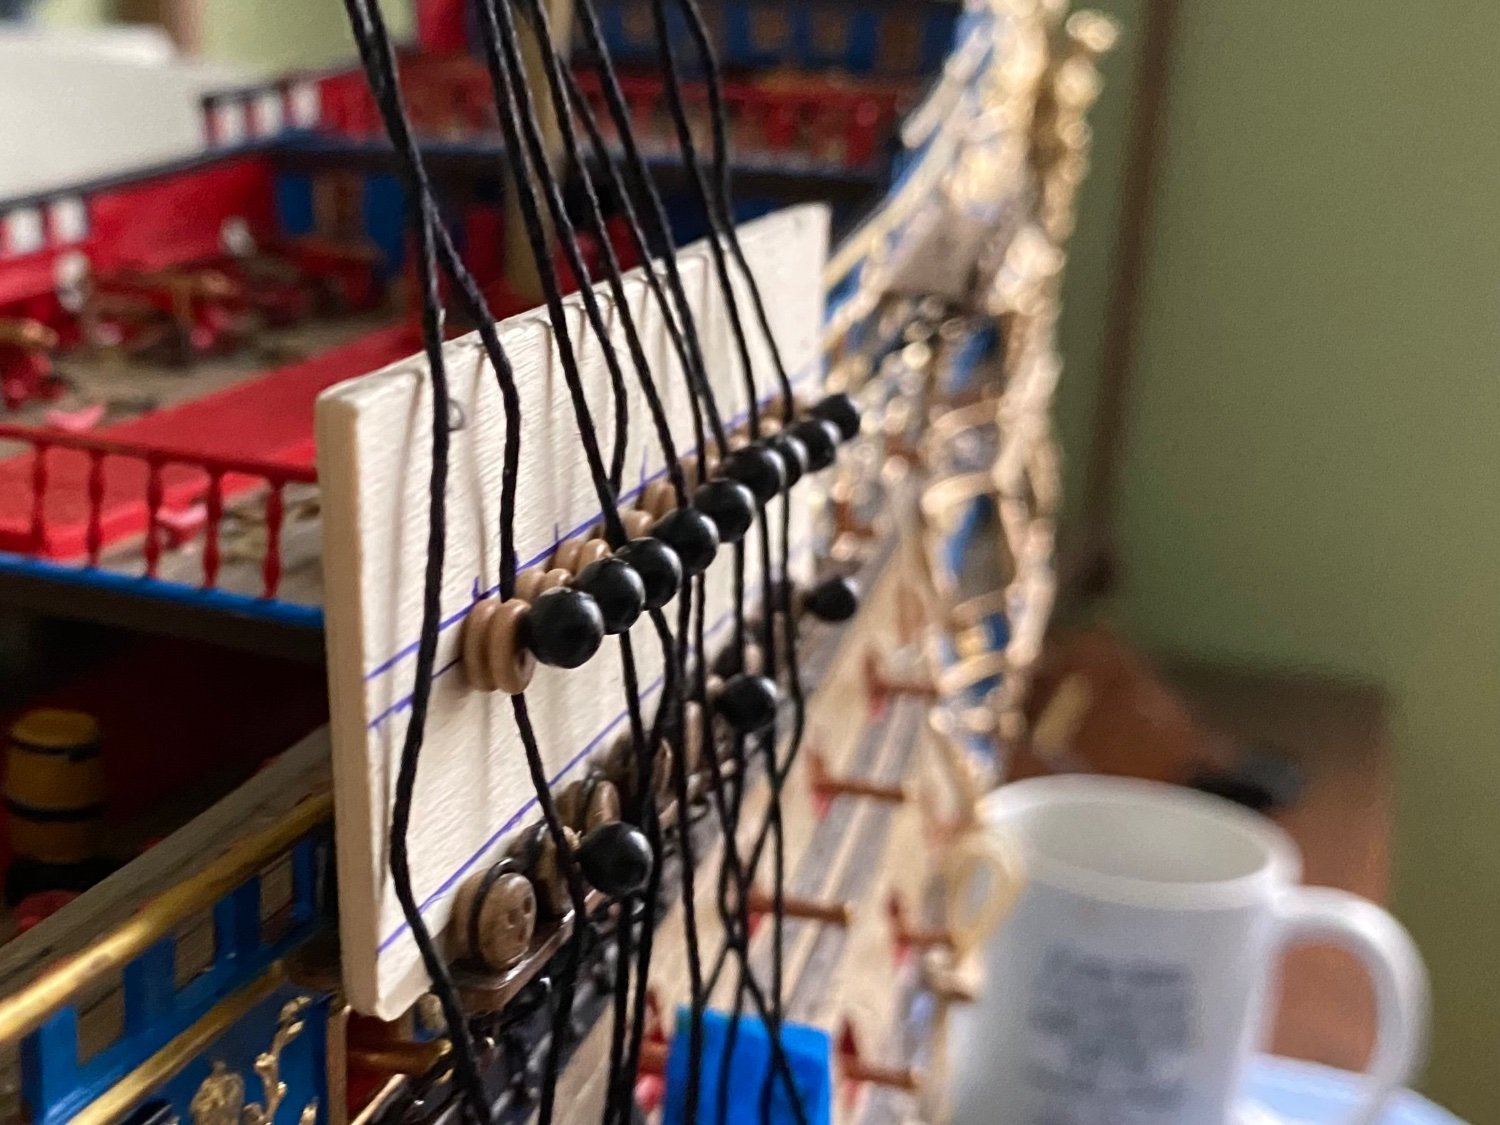
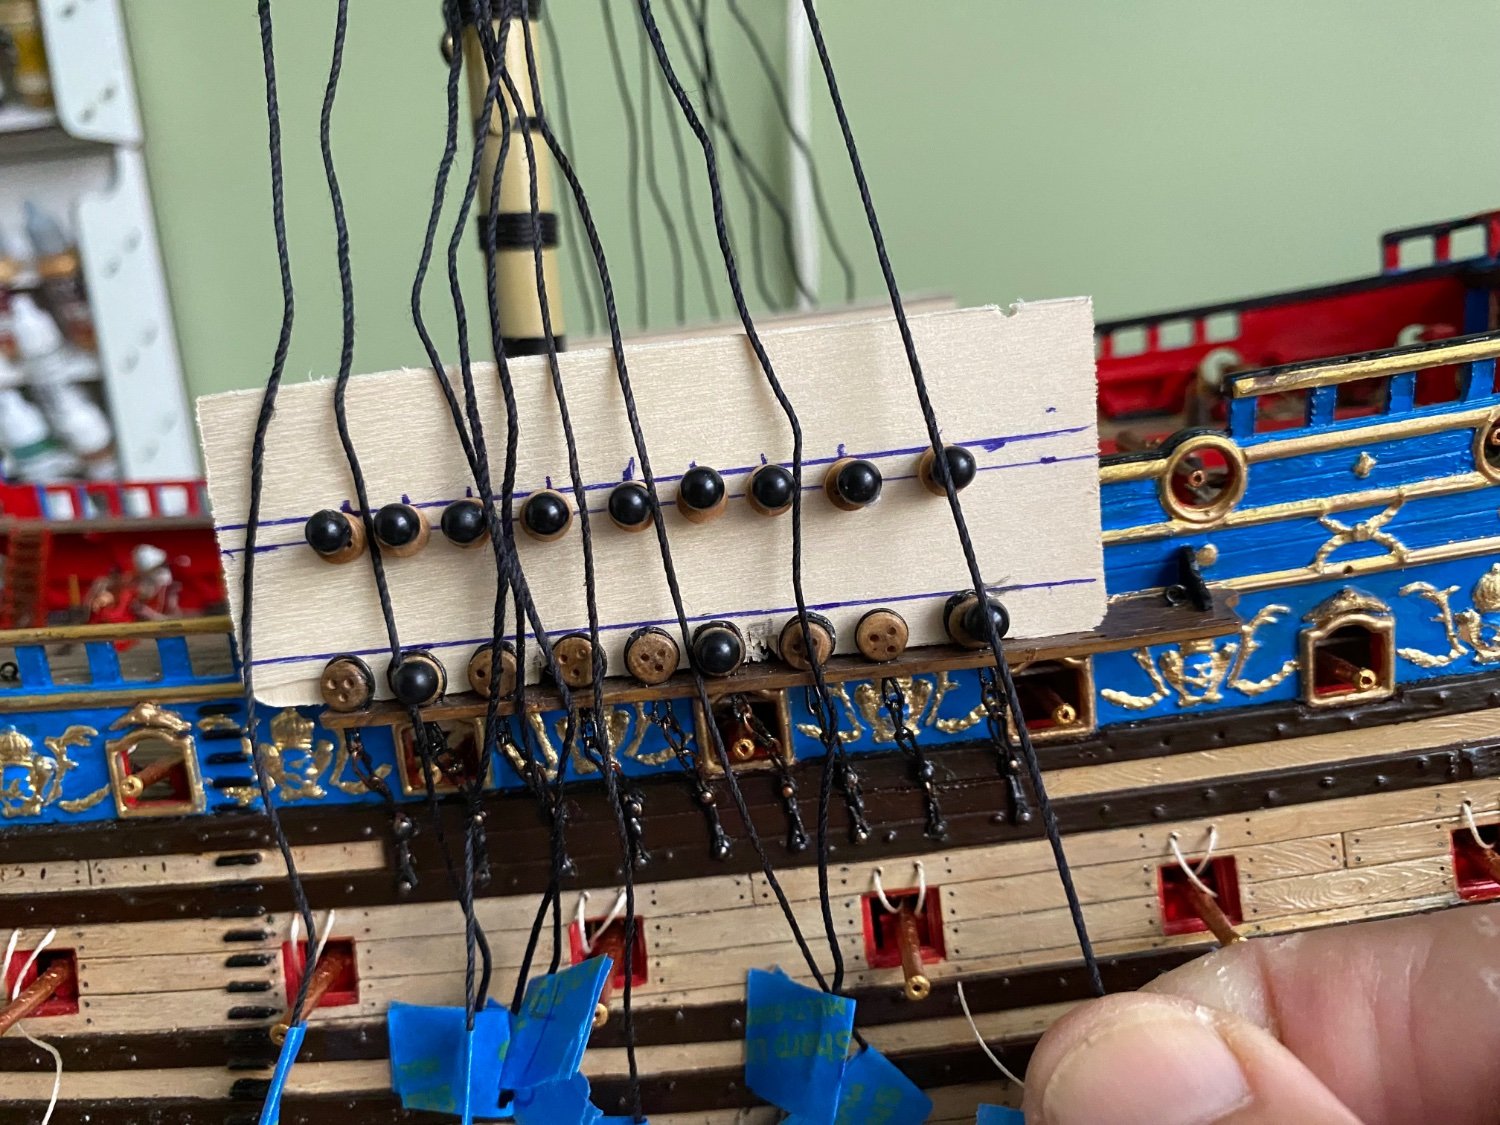
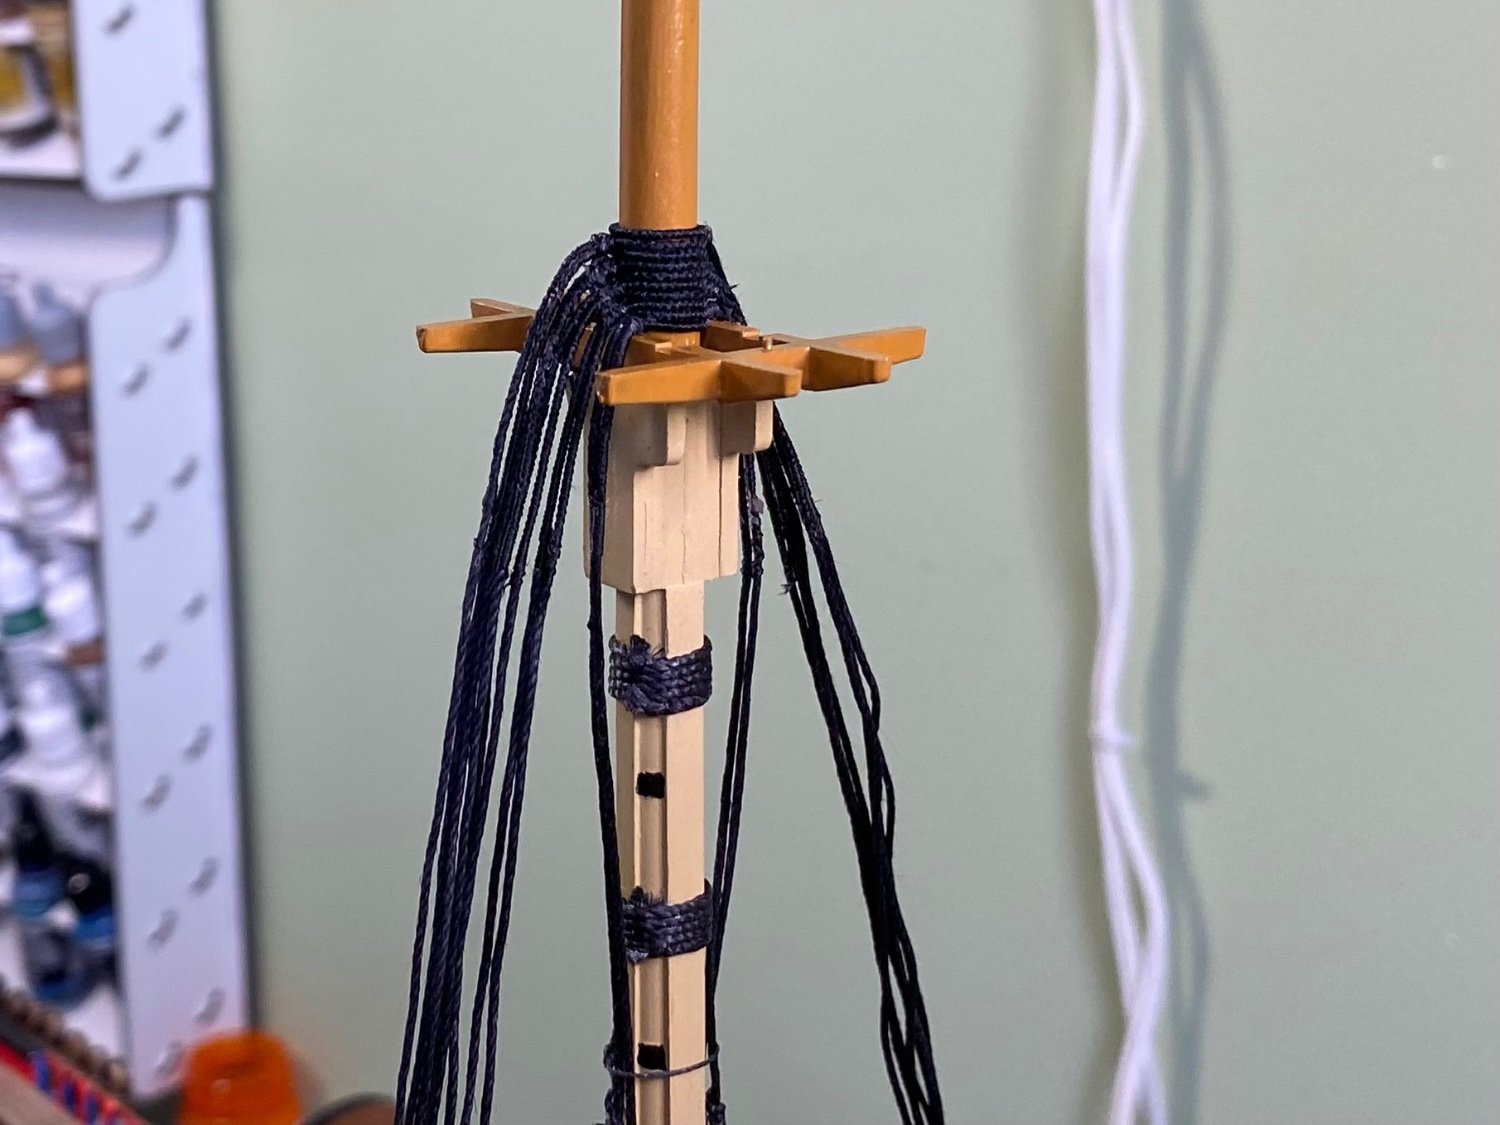
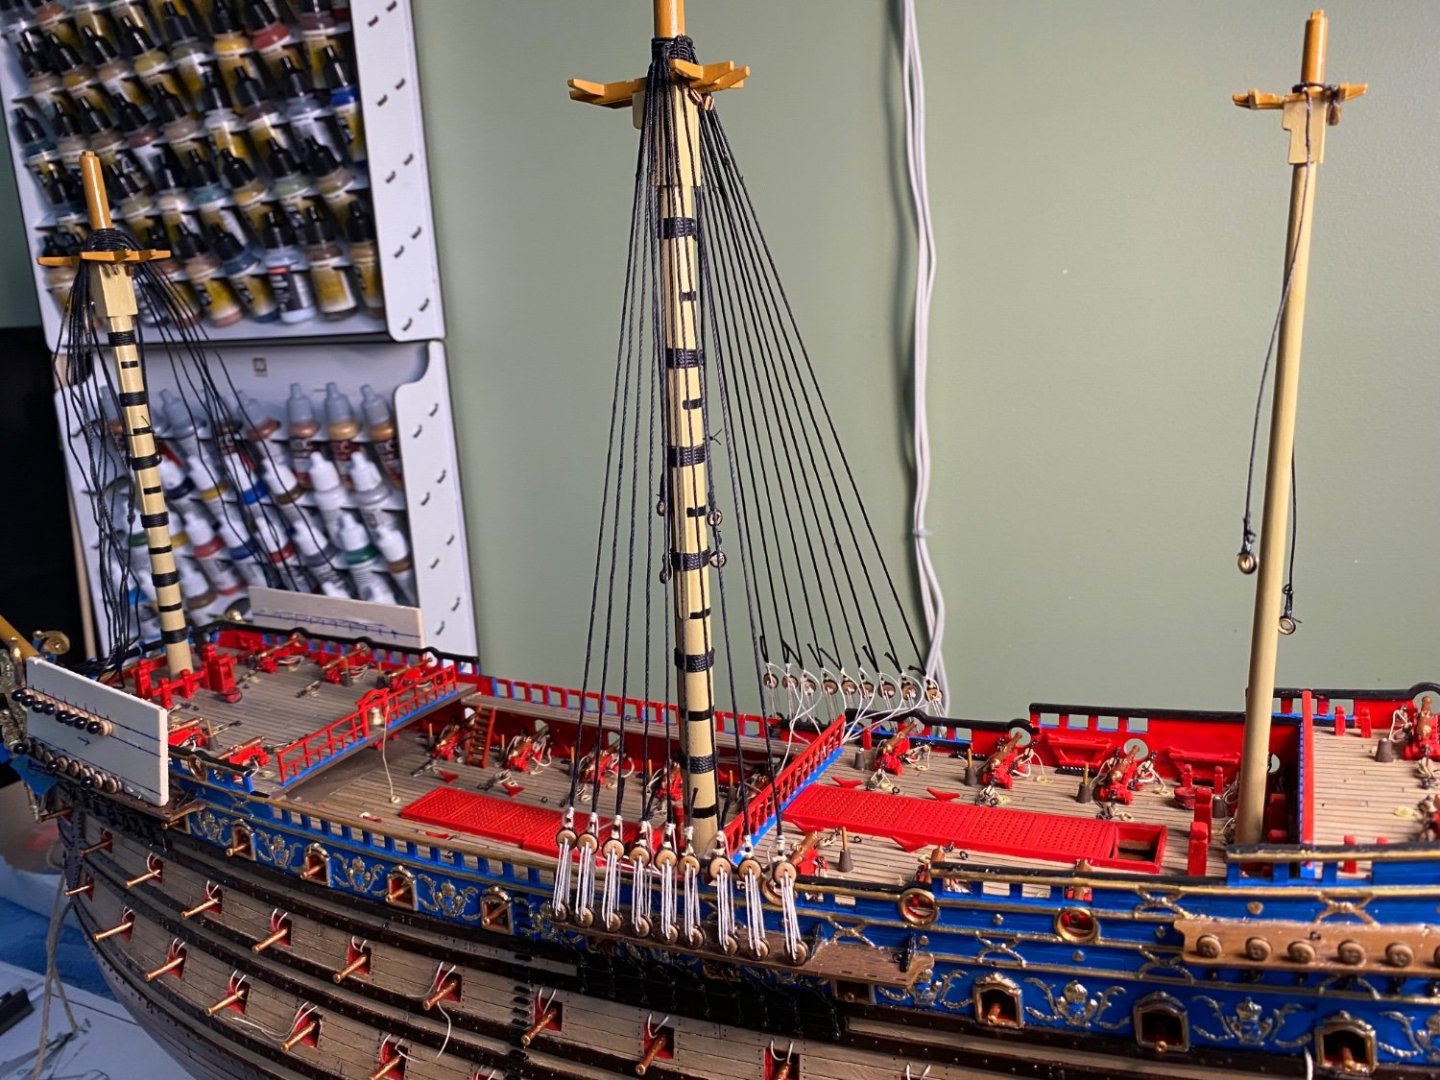
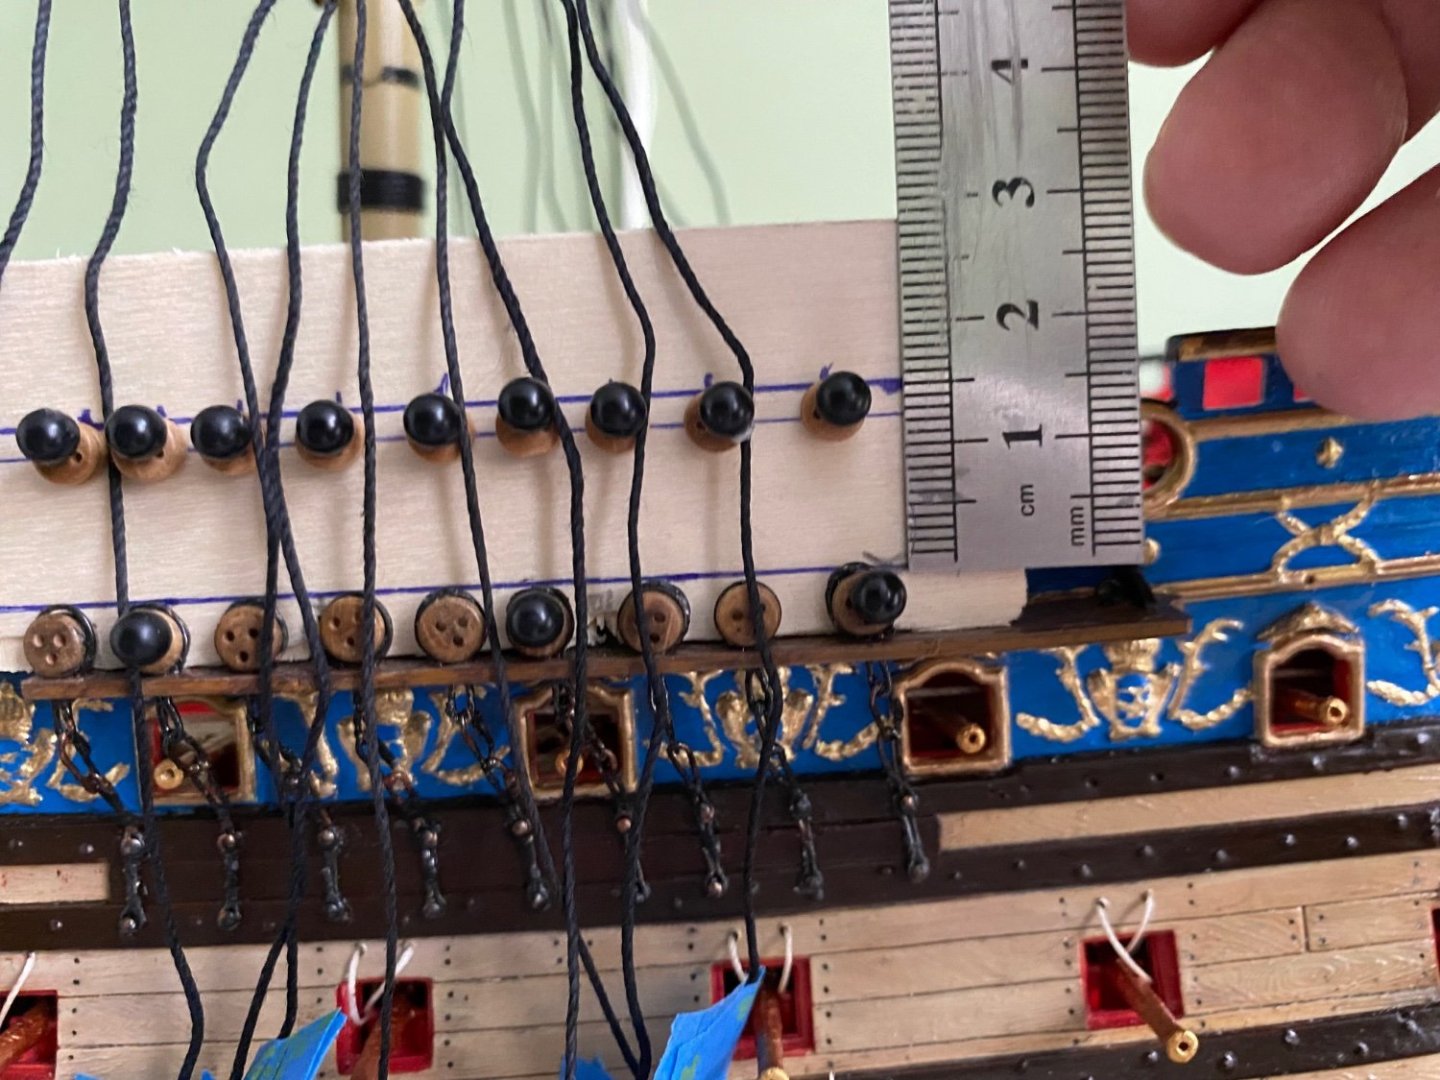
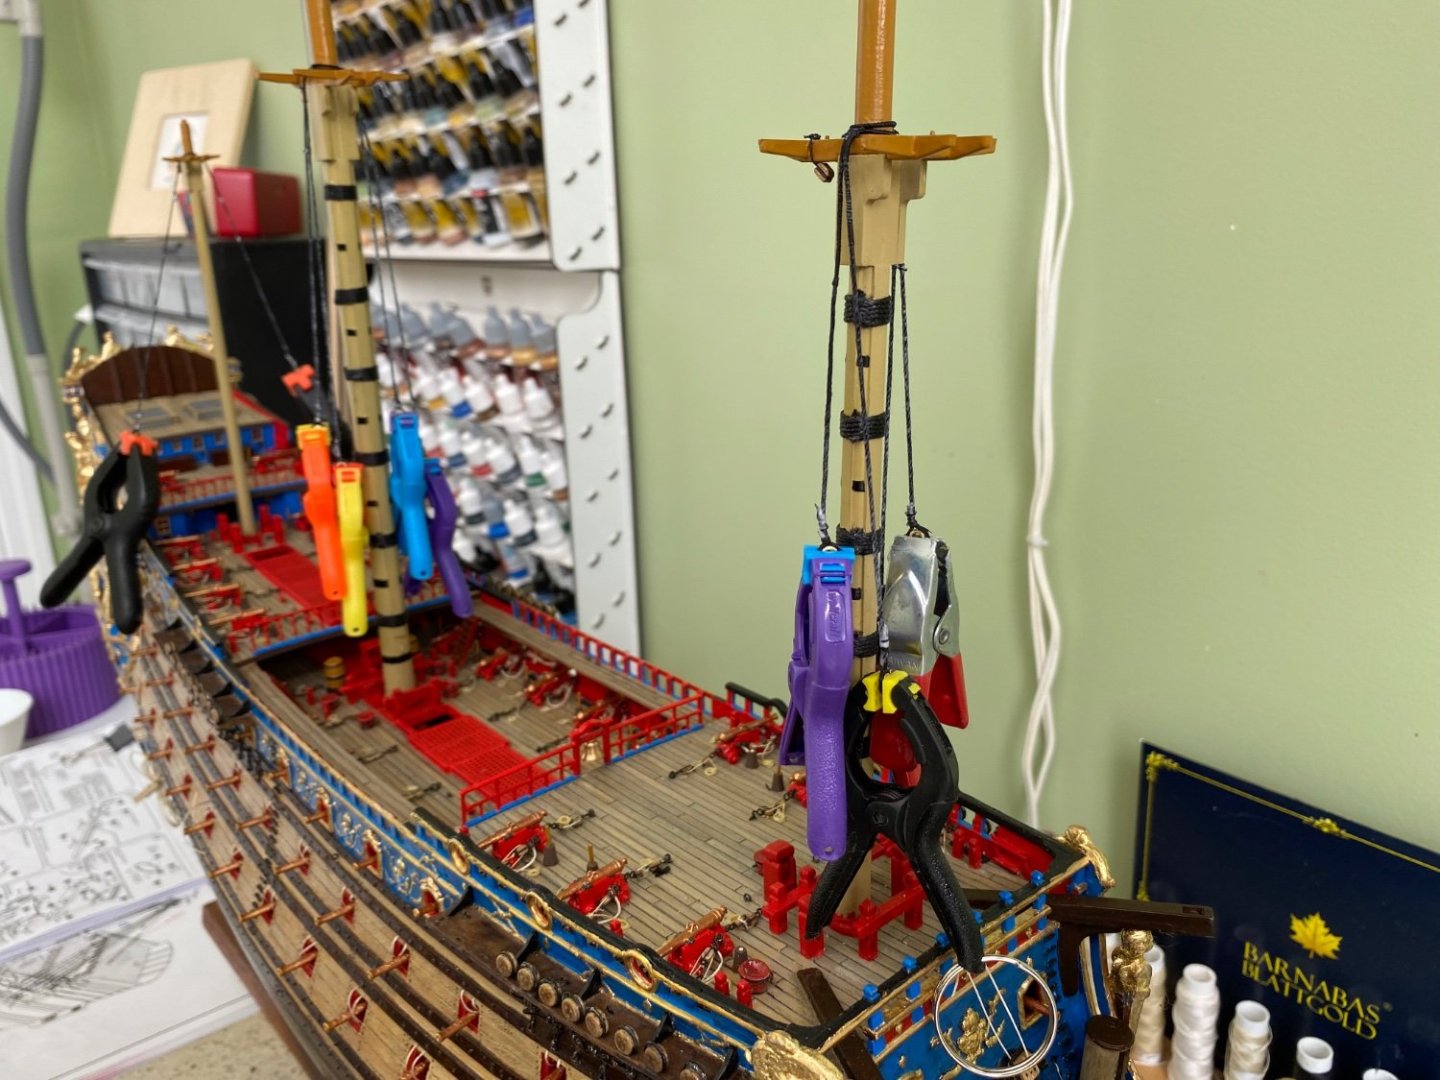
I have the lower shrouds on the fore and main mast served hung and numbered. I also have the main mast deadeyes set up for rigging using the method I have long used that works great for me. I take a thin piece of craft wood about the length of the channel and a bit wider than what I expect the deadeye spacing to be. I then fit this piece of wood on the channel behind the lower deadeyes. If there is any obstruction like the little knees on the SR I just notch them out for a flush fit. I make a mark above a deadeye then remove the piece of wood. I am using 5mm deadeyes for my mainmast so I expect the mark to be close to 5mm from the edge. I then draw a line using this mark parallel to the bottom edge of the wood. This line represents the top of all my lower deadeyes. I then determine the distance I want between my upper and lower deadeyes. I like between 2 and 3 times the diameter of the deadeye I am using. So in this situation I am going with 13mm between my upper and lower deadeye. I draw a line on the piece of wood parallel to the bottom line and 13mm apart. This new line represents the bottom of my upper deadeyes. I then place the piece of wood back on the channel behind the deadeyes and use several push pins through the holes in the lower deadeyes to lock it in place. To determine the proper position of the upper deadeyes I stretch out the numbered shrouds over the appropriate lower deadeye and mark the top line where the shrouds cross it. This mark now represents the bottom of each upper deadeye. Again using push pins I simply pin the upper deadeye at the mark insuring the center hole of the deadeye is up. Sometimes a second pin the the deadeye is necessary to keep it from turning. Once all of the deadeyes are pinned in place they are locked in the desired parallel position I will want. Now it is just a matter of rigging each deadeye to it’s shroud. I have a matching arrangement on the opposite side as well. So as I rig the deadeyes I can work side to side to insure the lower mast stays vertical. With the wood reinforcement in the mast it really does not move and the pins hold the deadeye tight enough that I can put as much tension on the shroud as I want. Once a shroud is rigged I can remove the pin and set it free if necessary. It is very important to maintain numbers on the finished shrouds. Once all are rigged the pins are removed and the piece of wood is removed. The shrouds are now ready for the laniards. The final result will be the deadeyes lined up just as they were on the piece of wood.


- 1,508 replies
-
- 6
-
-
- Le Soleil Royal
- Heller
- (and 1 more)
-
Yes yancovitch that is one I forgot that does fit perfectly.
- 2,699 replies
-
- 1
-
-
- heller
- soleil royal
- (and 9 more)
-
Marc there are no more adjectives to use that have not been used over and over when commending you on the job you have done. Absolutely stunning.
- 2,699 replies
-
- 2
-

-
-
- heller
- soleil royal
- (and 9 more)
-
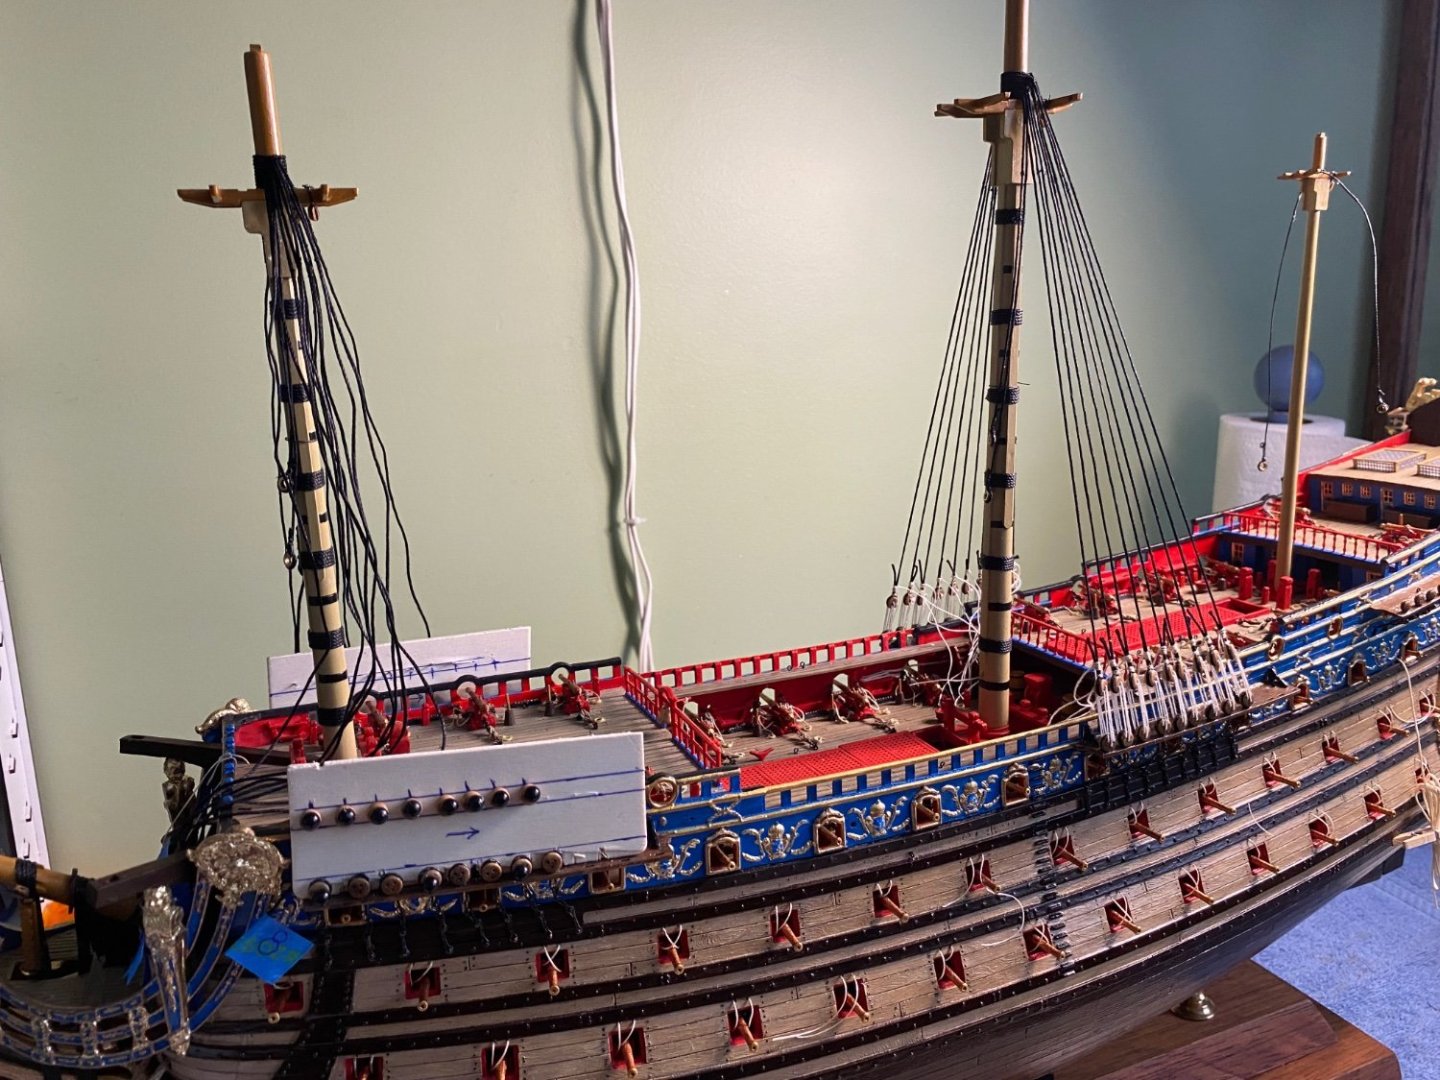
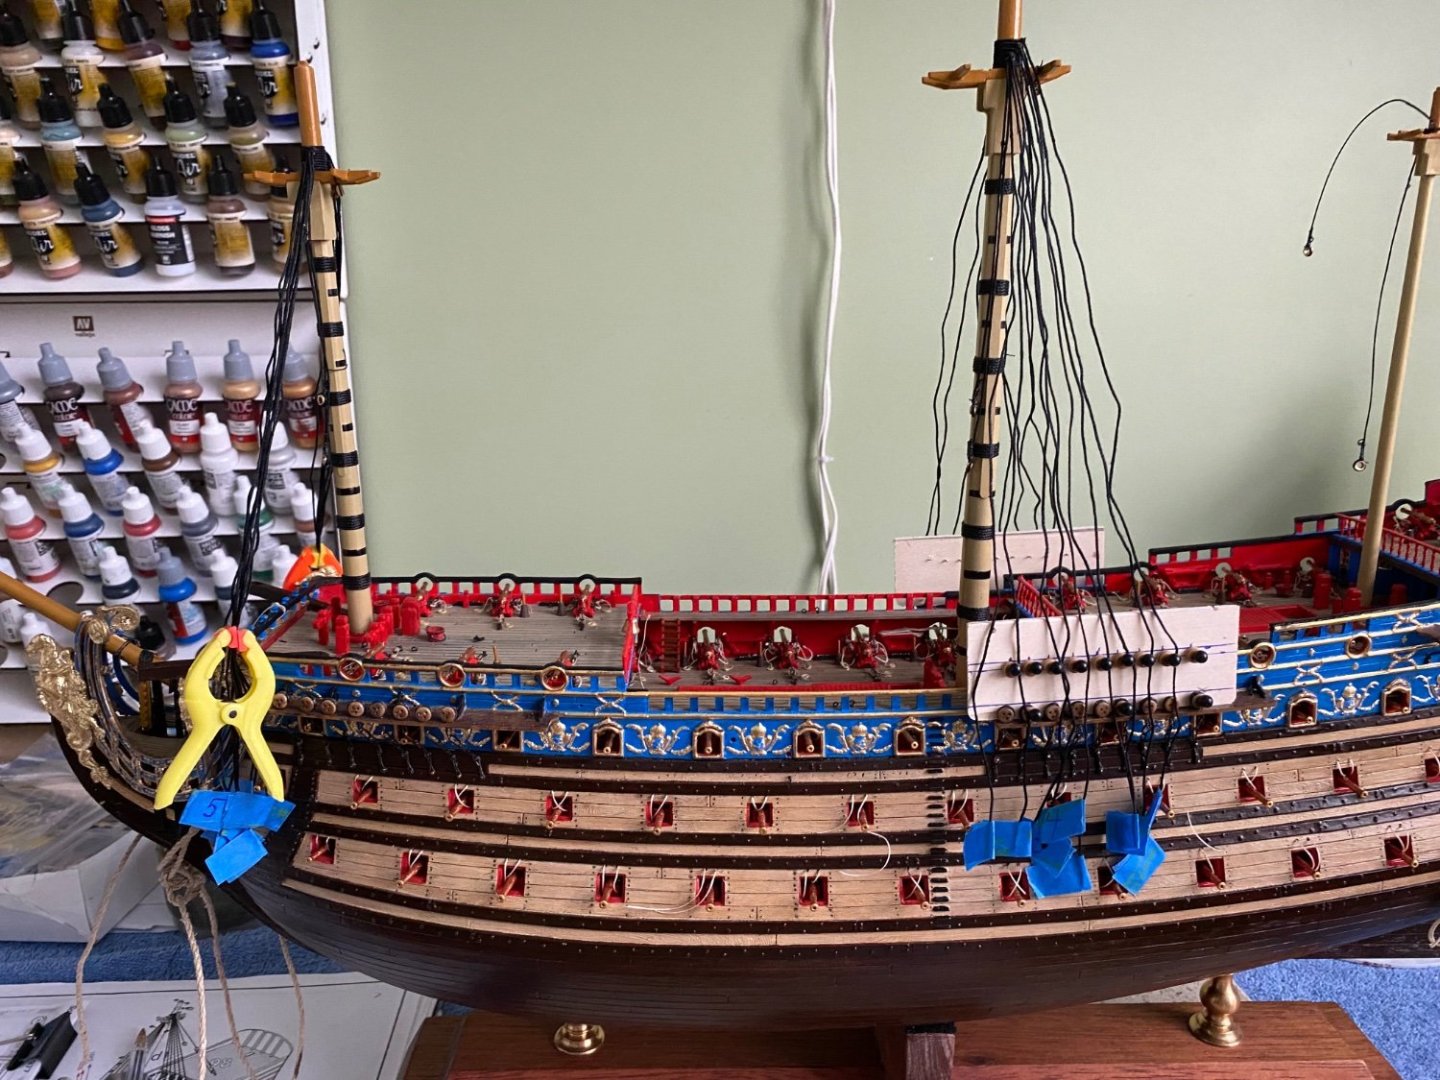
Lower shrouds for fore mast served, hung, and numbered. Ready for rigging the deadeyes and lanyards.

- 1,508 replies
-
- 7
-
-
- Le Soleil Royal
- Heller
- (and 1 more)
-
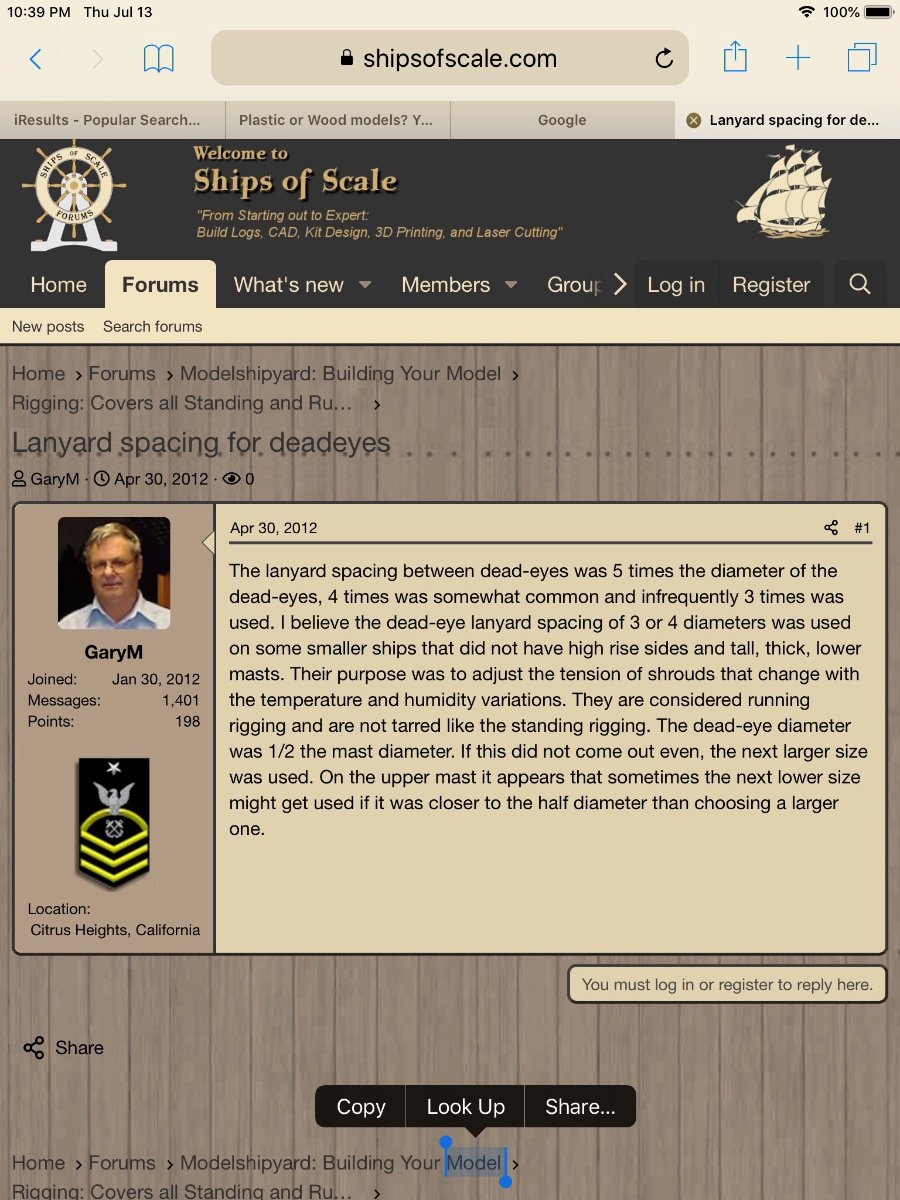
Thanks Henry. I had just fond this online. Gary M replied the distance was anywhere between 3 and 5 times the diameter of the deadeye, with 4 times the diameter being the most common. I held up a test of 5 times and thought that looked way to wide. I was looking more at something between 2and 3 times the diameter which is more in line with your trusted opinion.

-
Ferrus Manus Covid is not a very nice birthday present. Hope you recover quickly my friend.
- 279 replies
-
- 4
-
-
- Spanish Galleon
- Imai
- (and 1 more)
-
Is there a standard amount distance between the lower deadeye on the channel and the upper deadeye at the end of the shroud? I have read through the corresponding sections in Anderson and Longridge’s books, as well as the Heller instructions. I even attempted Googling it. Find no definitive answer. On my HMS Victory I just estimated what I thought looked good. But I have no doubt there was a general standard plus or minus a bit for laniard tightening. I can convert for scale if I had a general idea. You guys know?
-
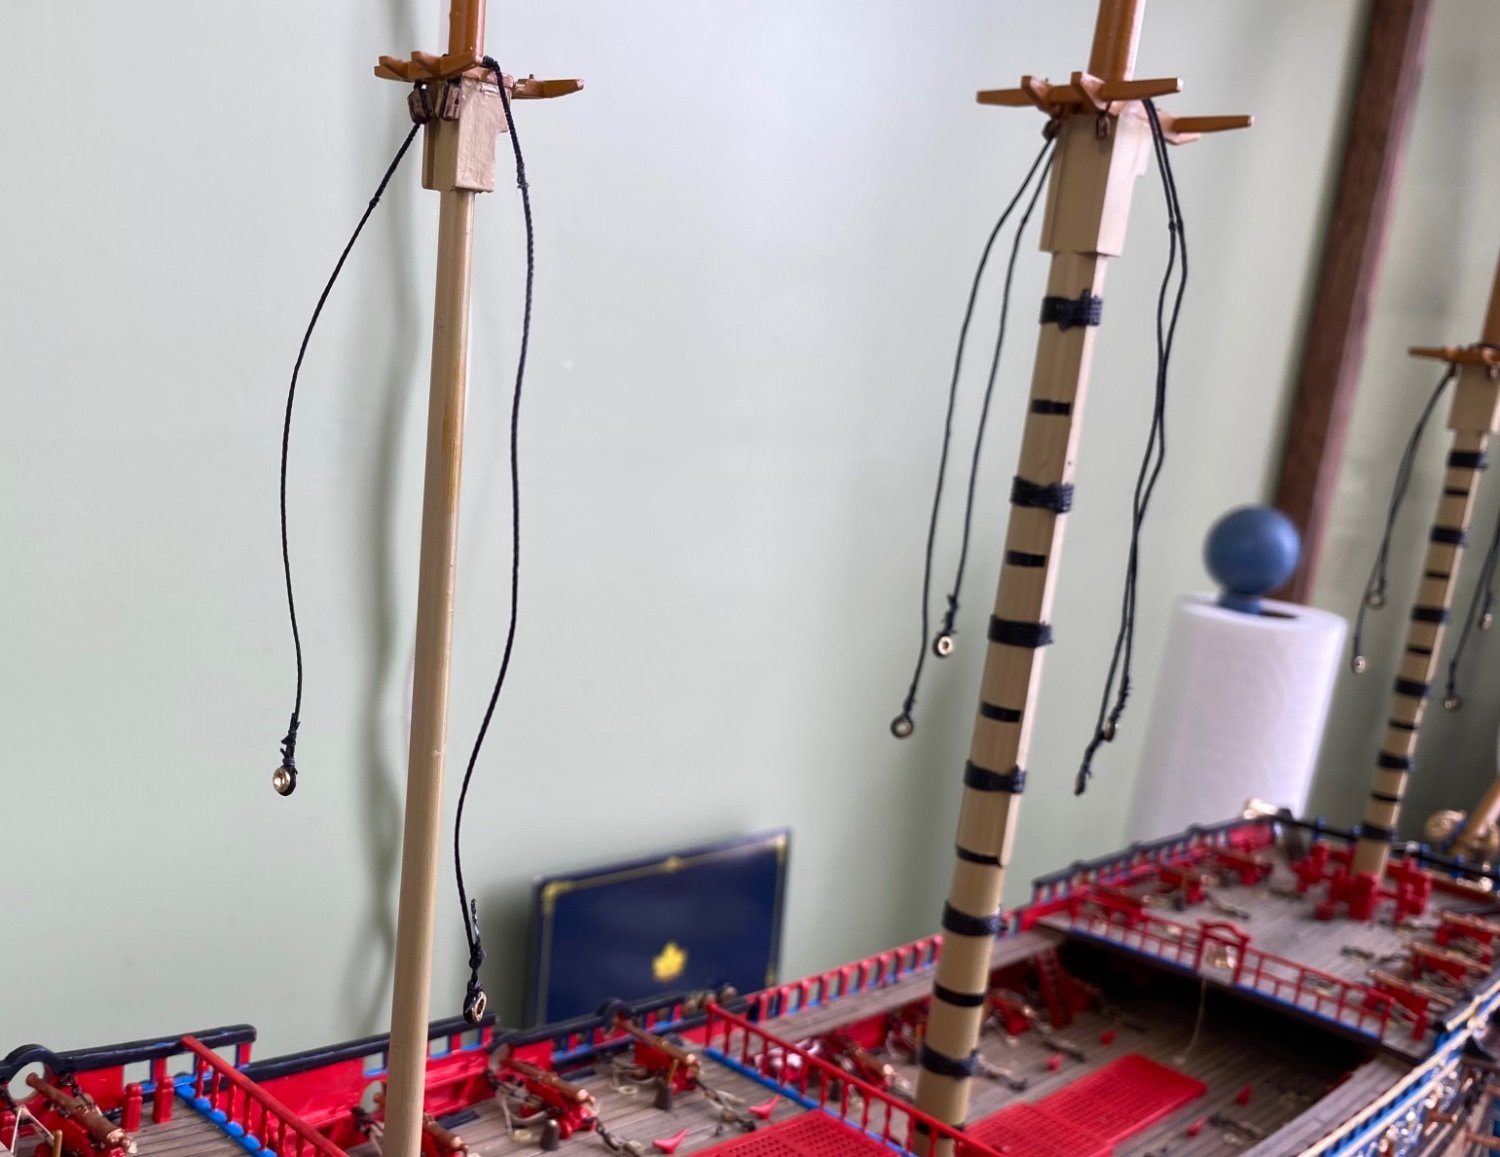
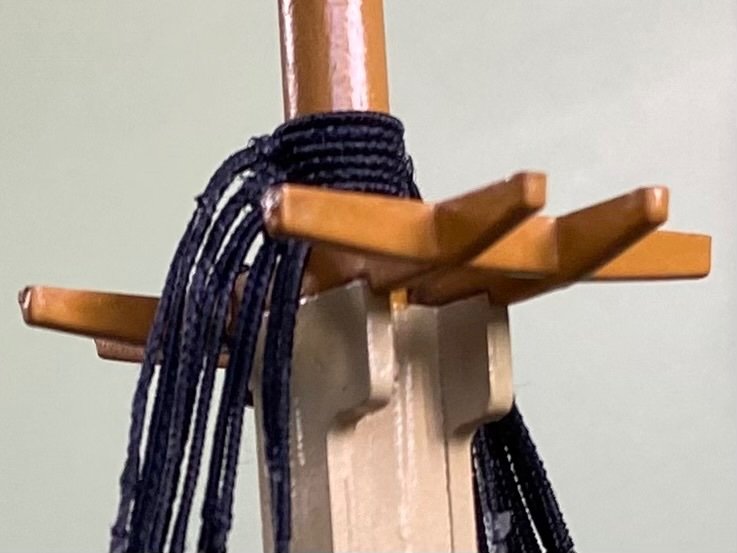
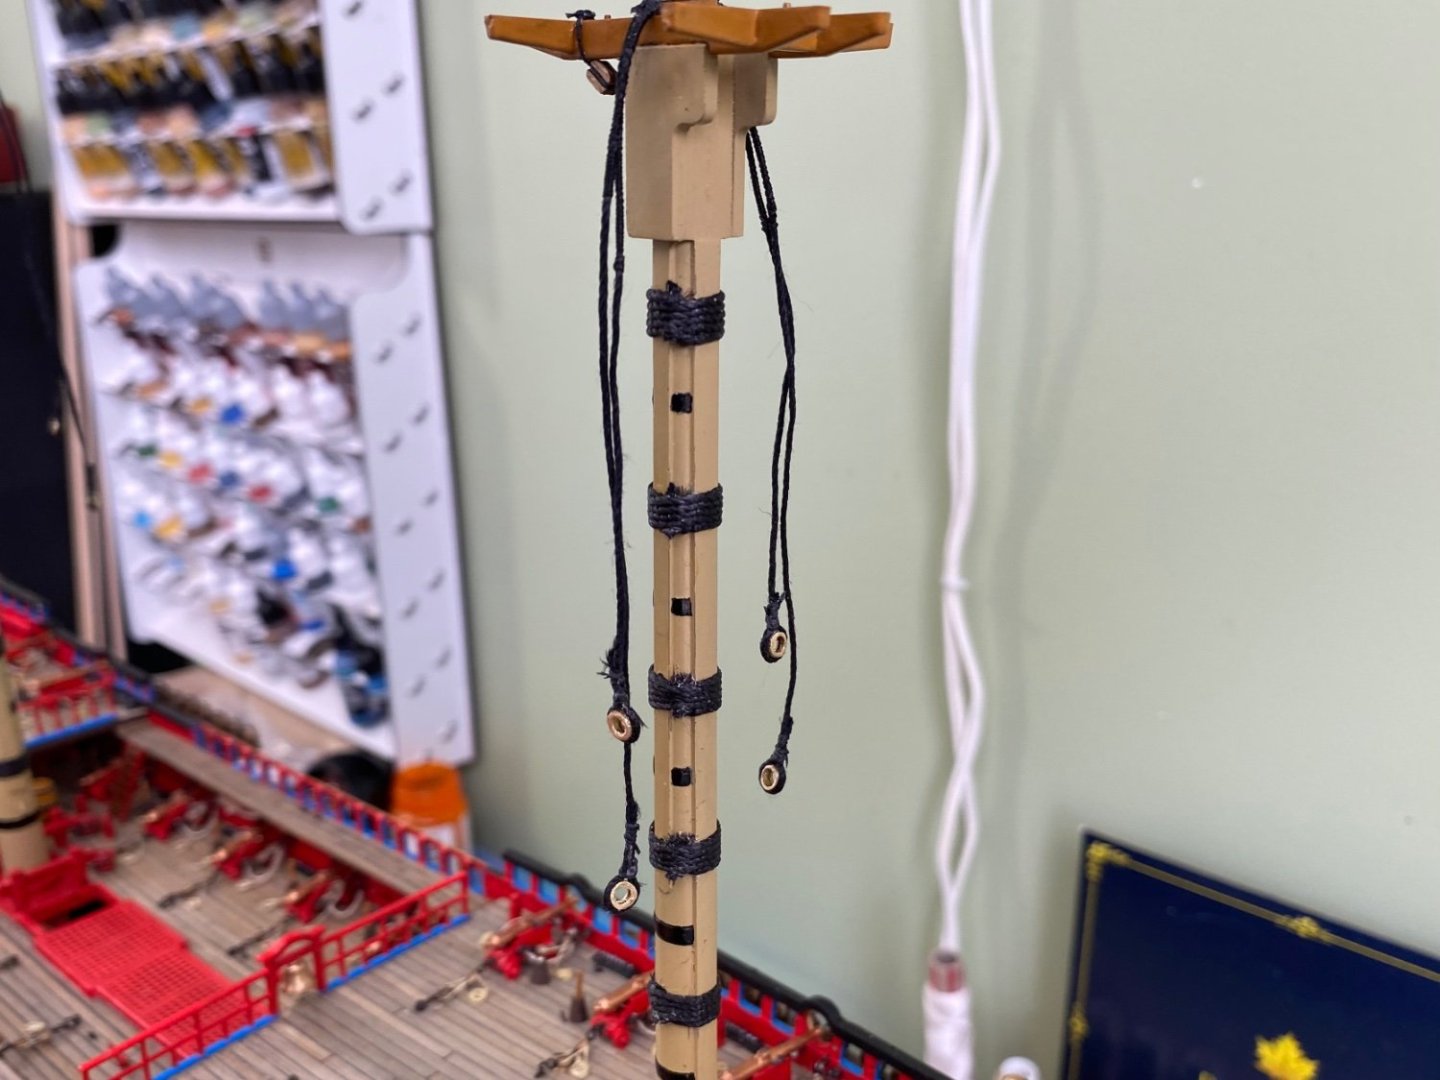
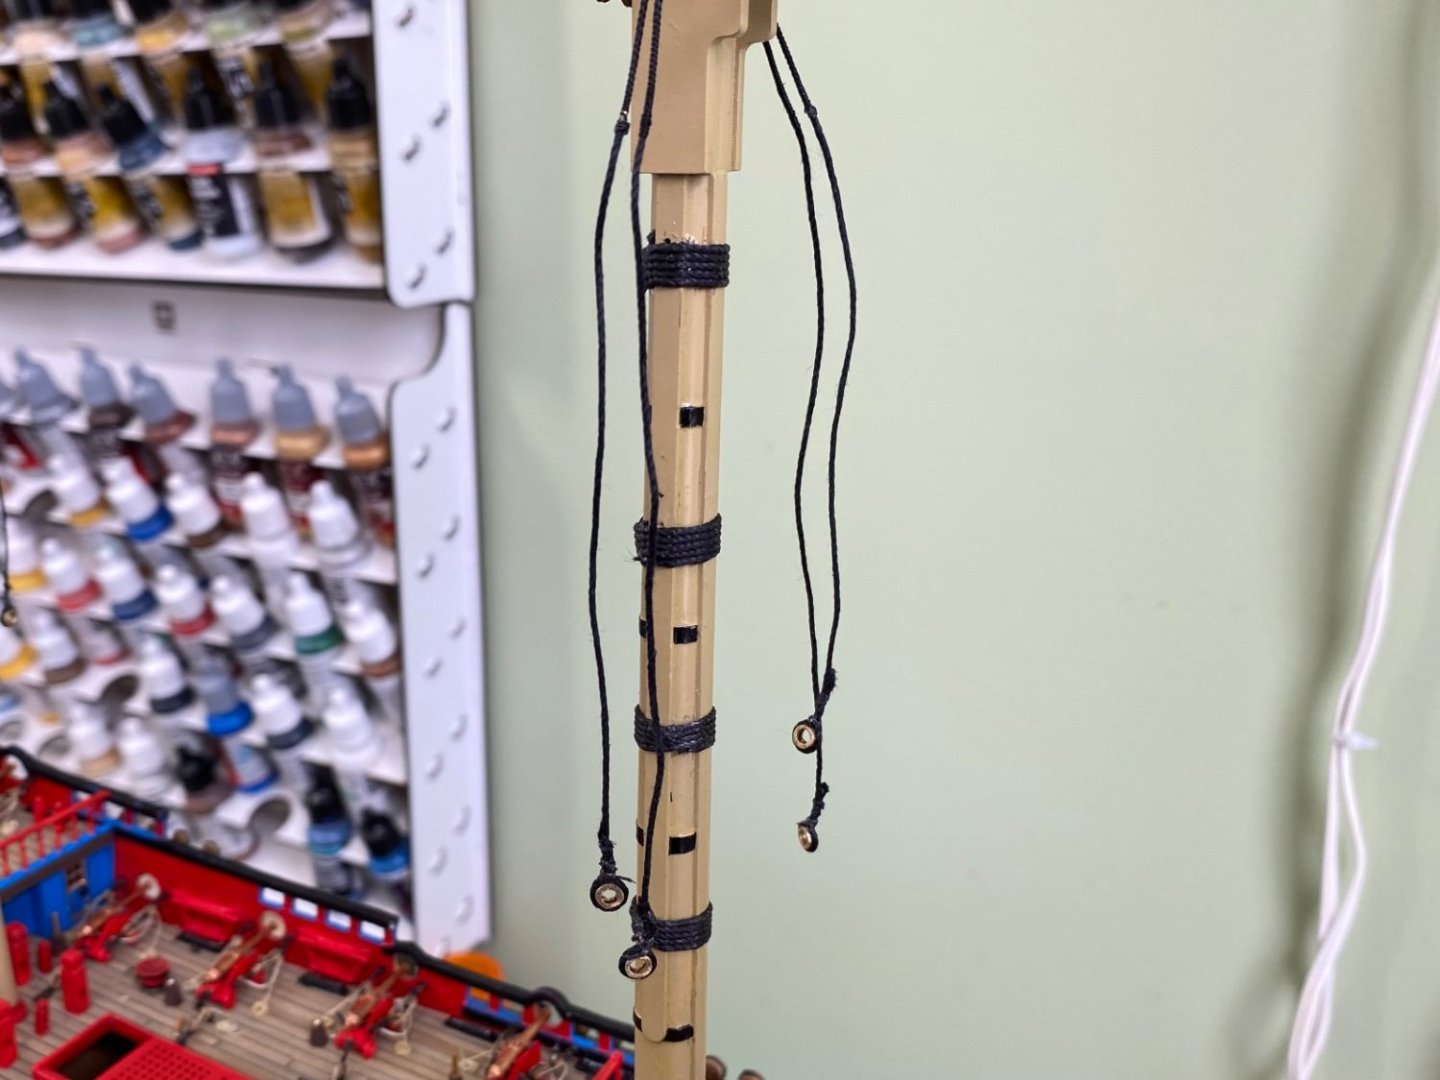
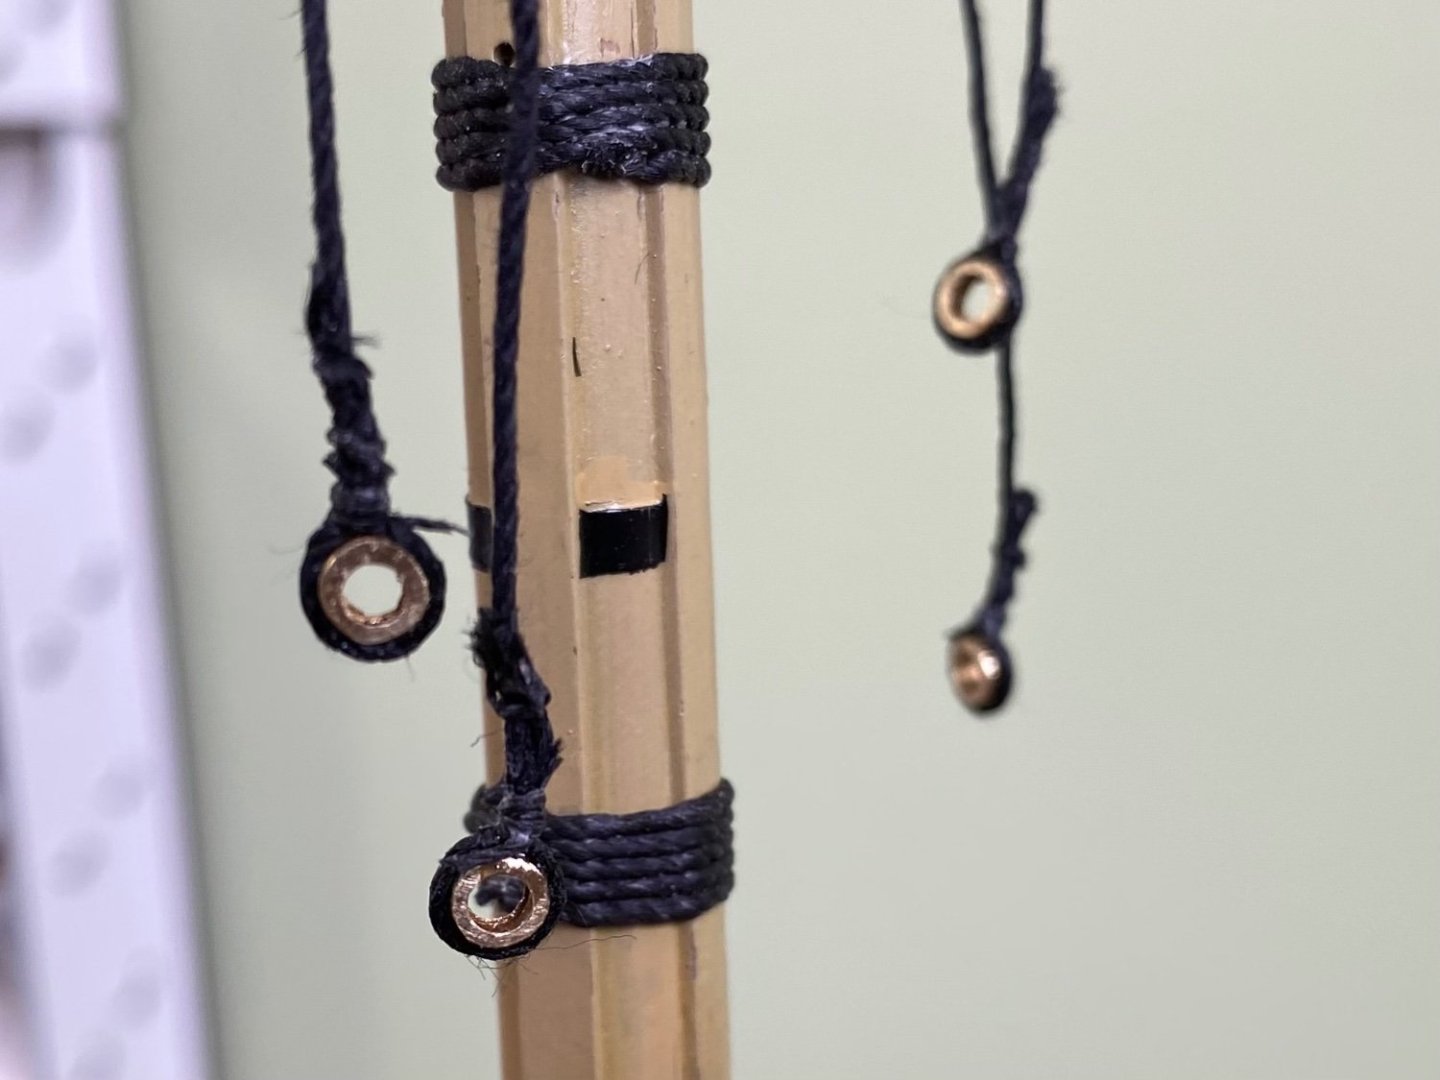
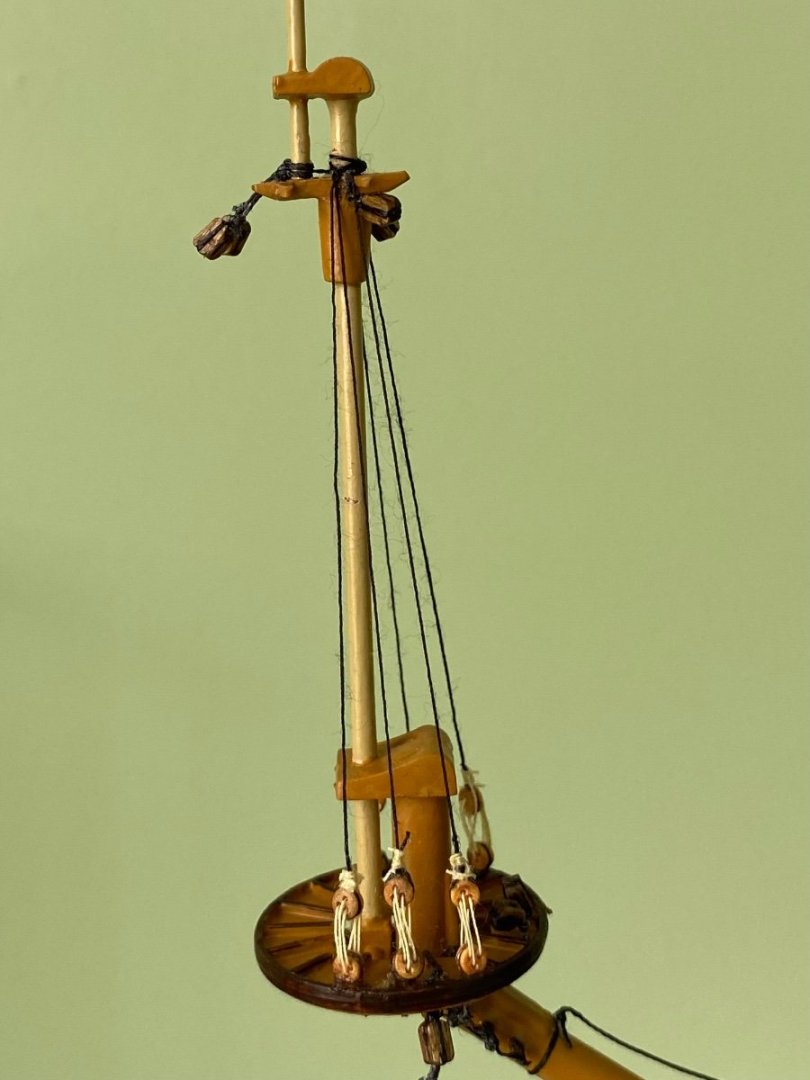
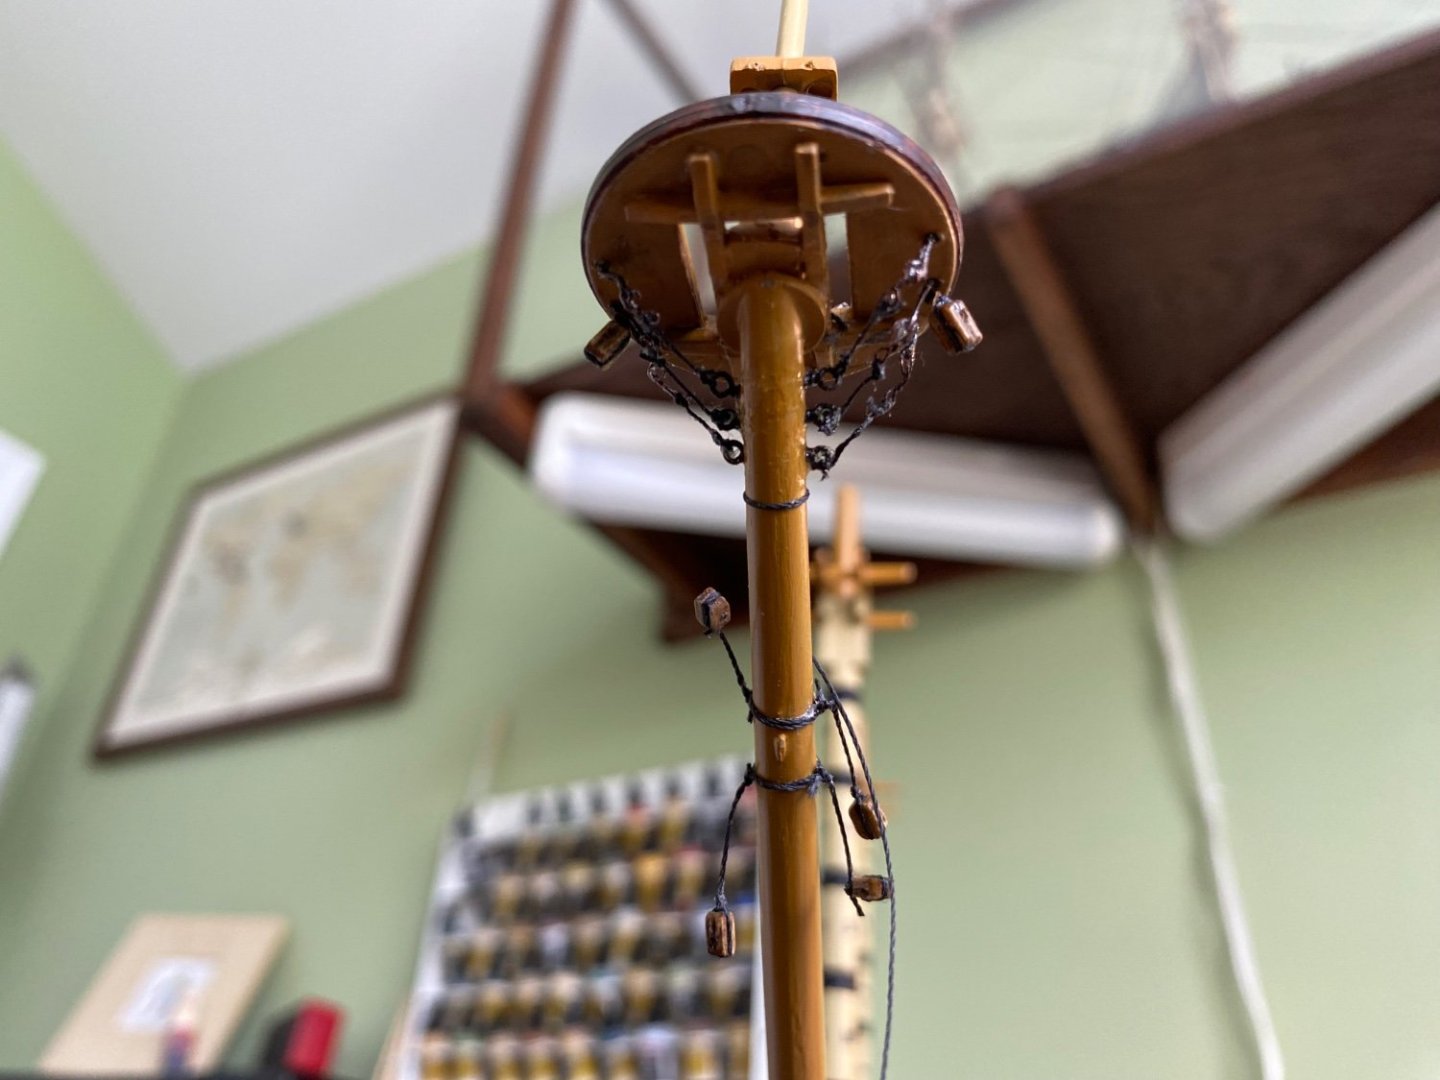
Anderson says the first thing to go on the mast is the pendants. Two on each side of the fore and main mast, hung just like the shrouds will be. One on each side of the mizzenmast. That was my task for the day. I am using the same thread sizes for the SR as I did on my HMS Victory since they are both the same scale. Henry I liked your idea of using pieces of a copper tube to make thimbles. I used a size of copper tube that I thought made a good looking thimble for the pendants. Started out serving each of the threads a couple inches in the middle where it went around the mast. After they were all hung I applied weight to each one and painted them liberally with diluted white glue. Hopefully when dry they will hang naturally.


- 1,508 replies
-
- 1
-
-
- Le Soleil Royal
- Heller
- (and 1 more)
-
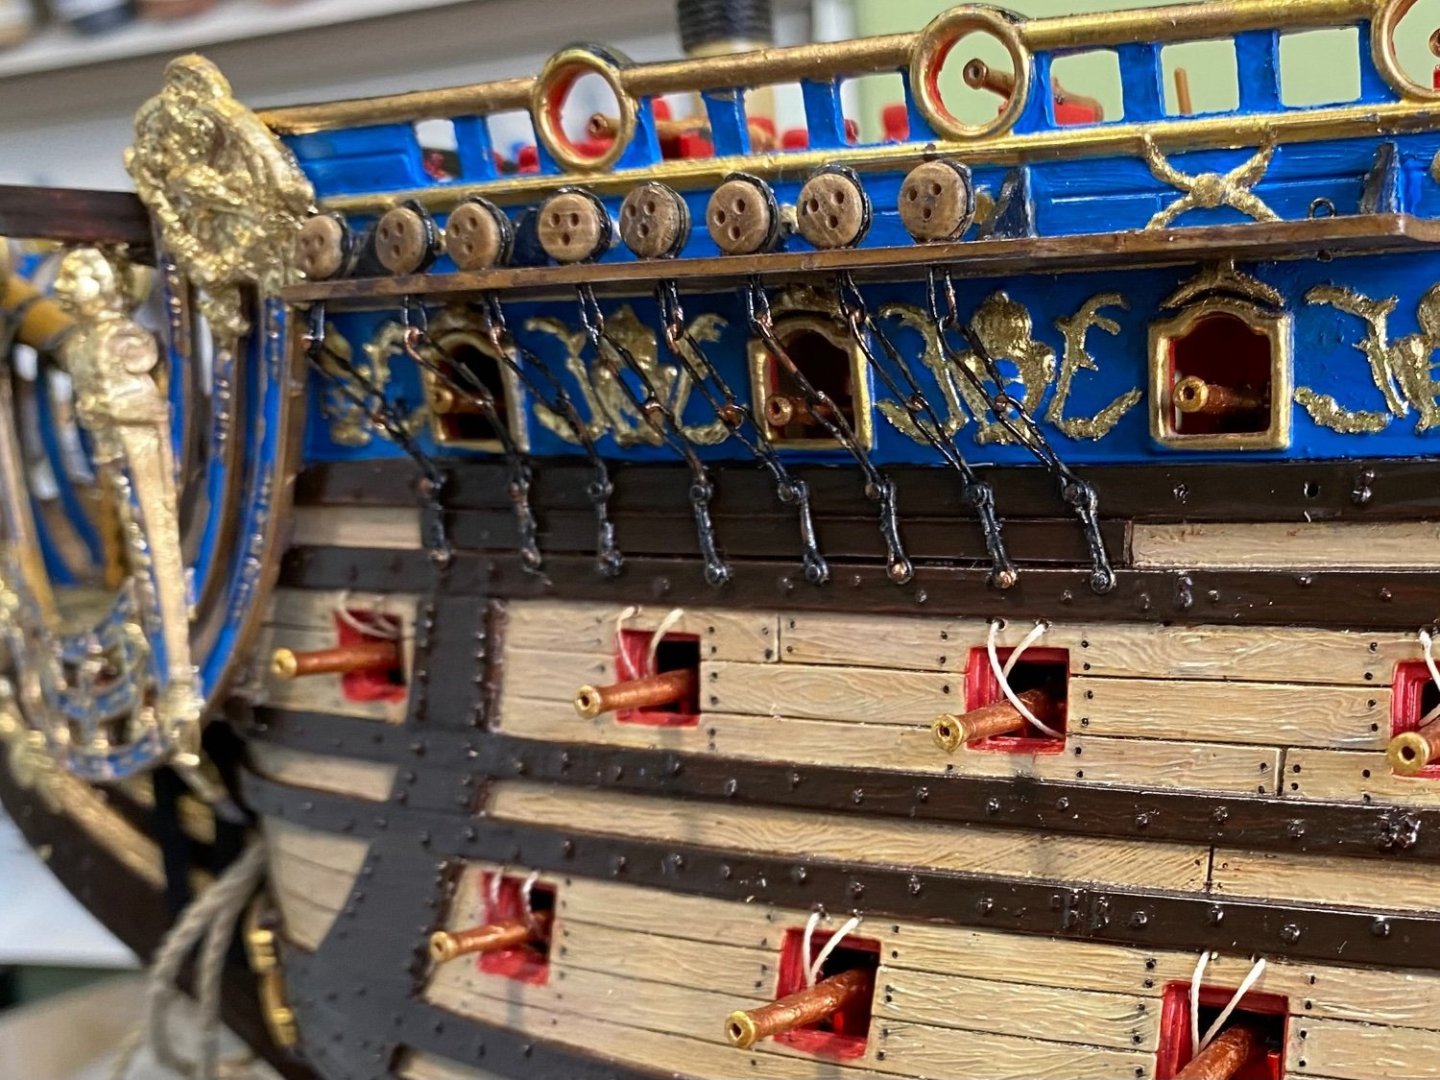
Deadeyes and chains installed for the shrouds for all three masts. Waiting to put in the deadeyes and chains for the backstays until I add the next section of masts. Want to make sure I get the correct angle. Now on to fixing some of the rigging steps i unfortunately missed. Then serving and adding installing shrouds.


- 1,508 replies
-
- 4
-
-
- Le Soleil Royal
- Heller
- (and 1 more)
-
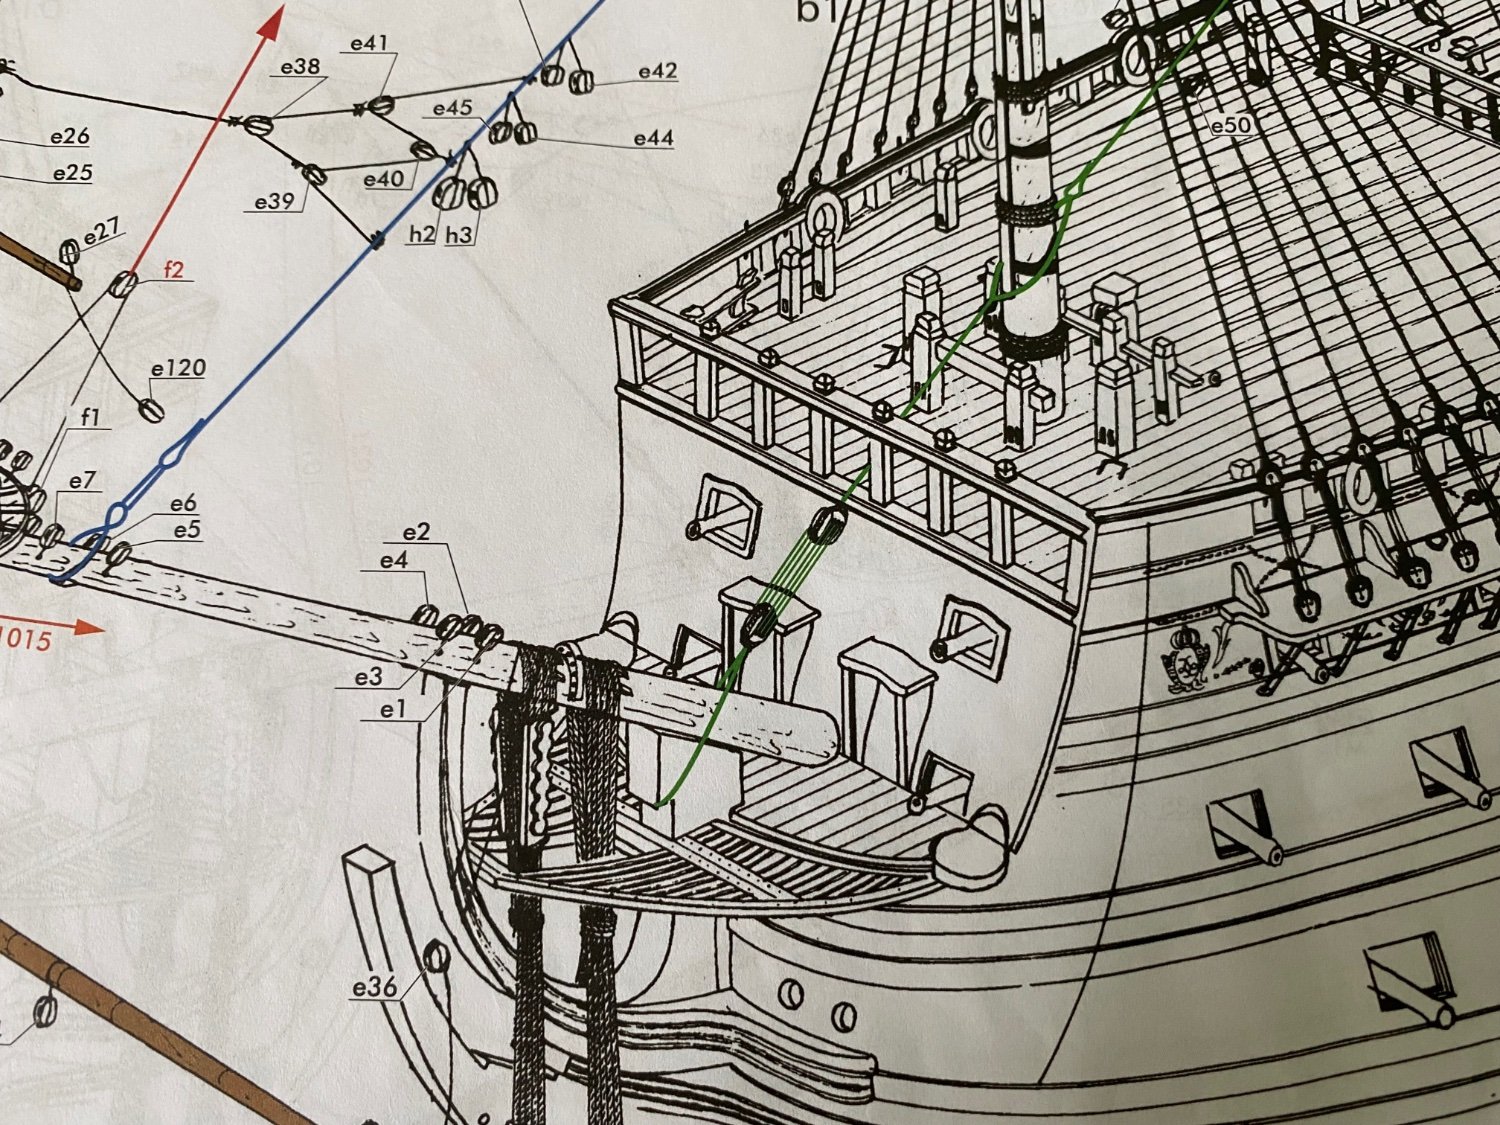
I am looking at the molded holes Heller put below the mizzen mast channel to accept the toe of the chains. The holes do not appear to be in the correct place. On the fore and main mast the holes line up under an invisible line running from the mast top down through the deadeye. Using these holes for the toe link and preventer plate creates the desired straight line from the mast top all the way to the bottom nail in the preventer plate. However at the mizzenmast, if I use the molded holes the chains will go off at an angle from the line of the shroud. Unless it is supposed to be that way, why I can’t imagine, I am going to make new holes. A reference picture I found shows the straight line.

- 1,508 replies
-
- 1
-
-
- Le Soleil Royal
- Heller
- (and 1 more)
-
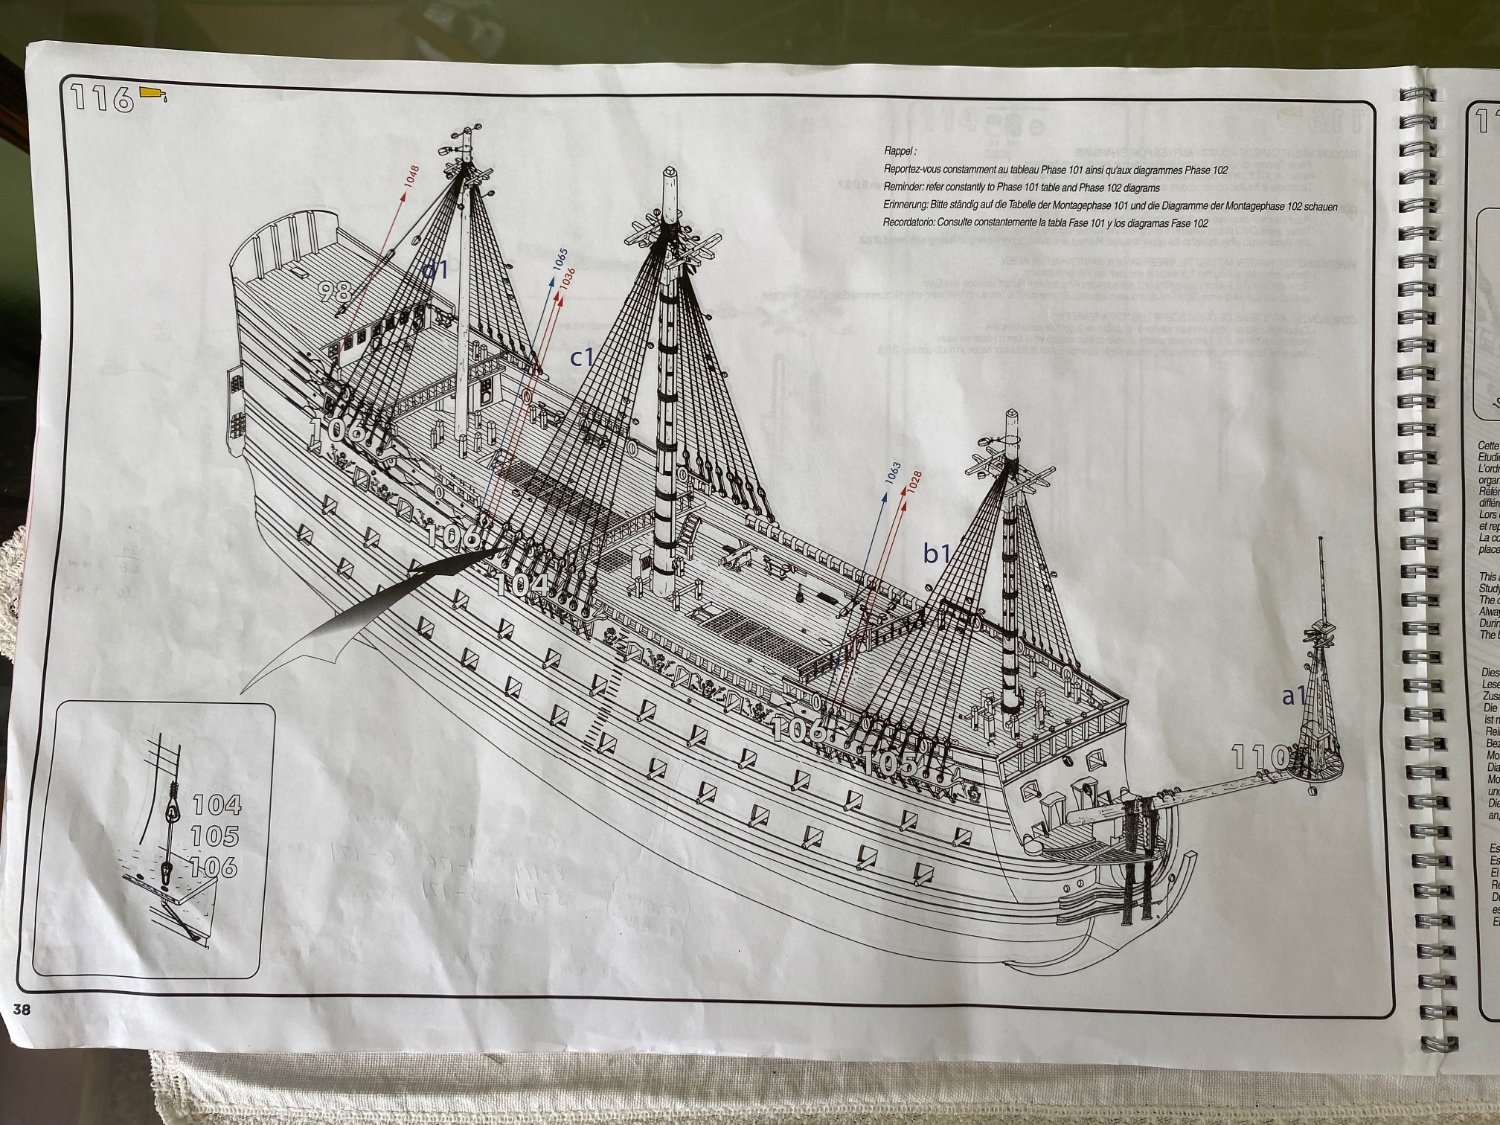
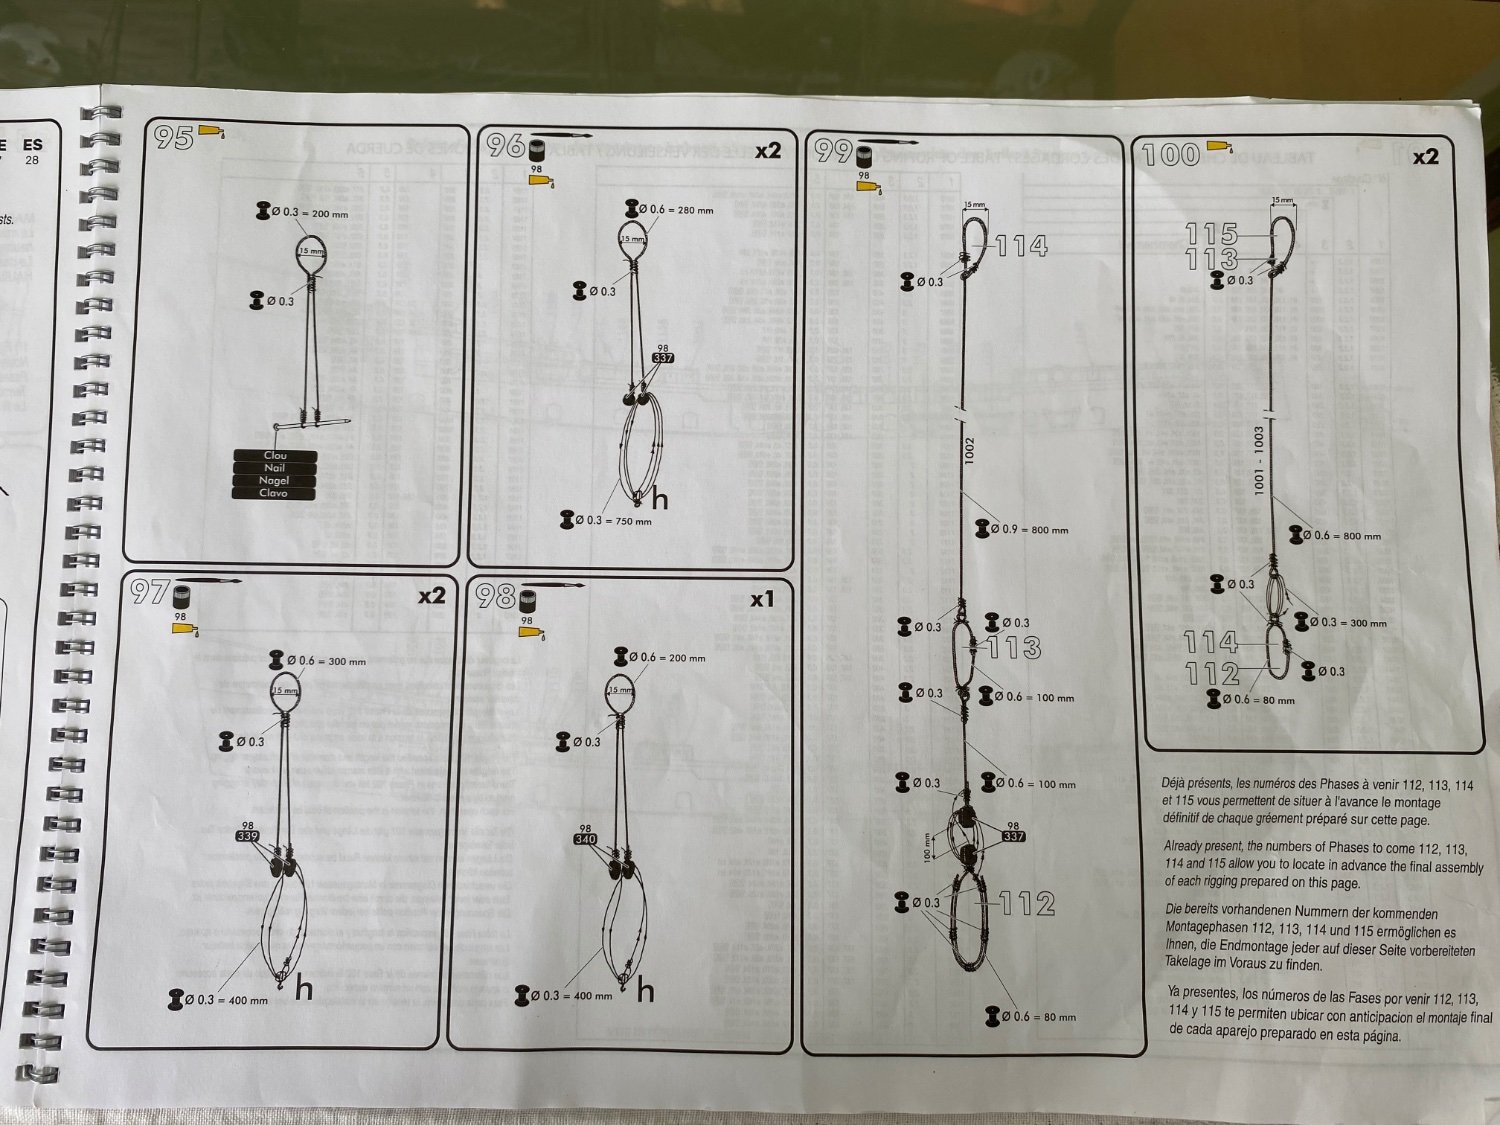
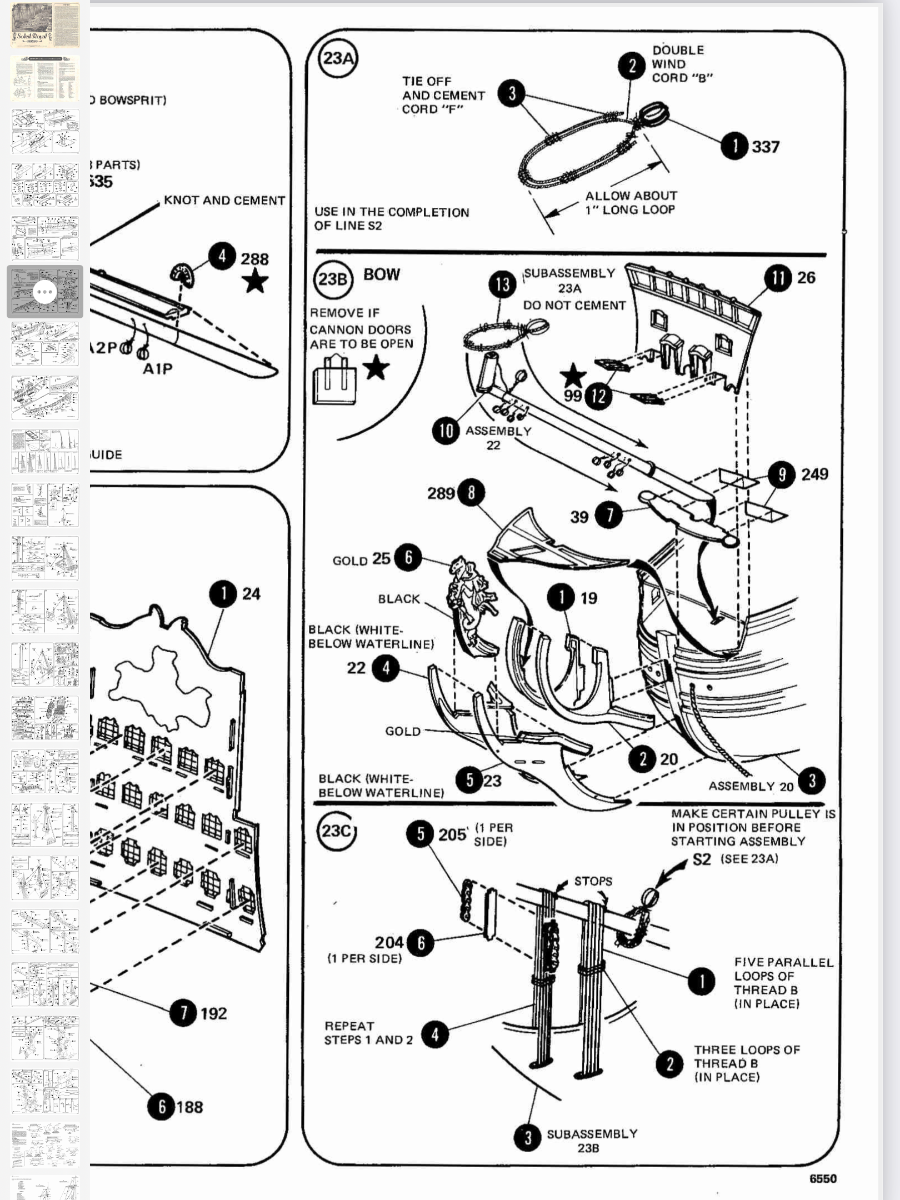
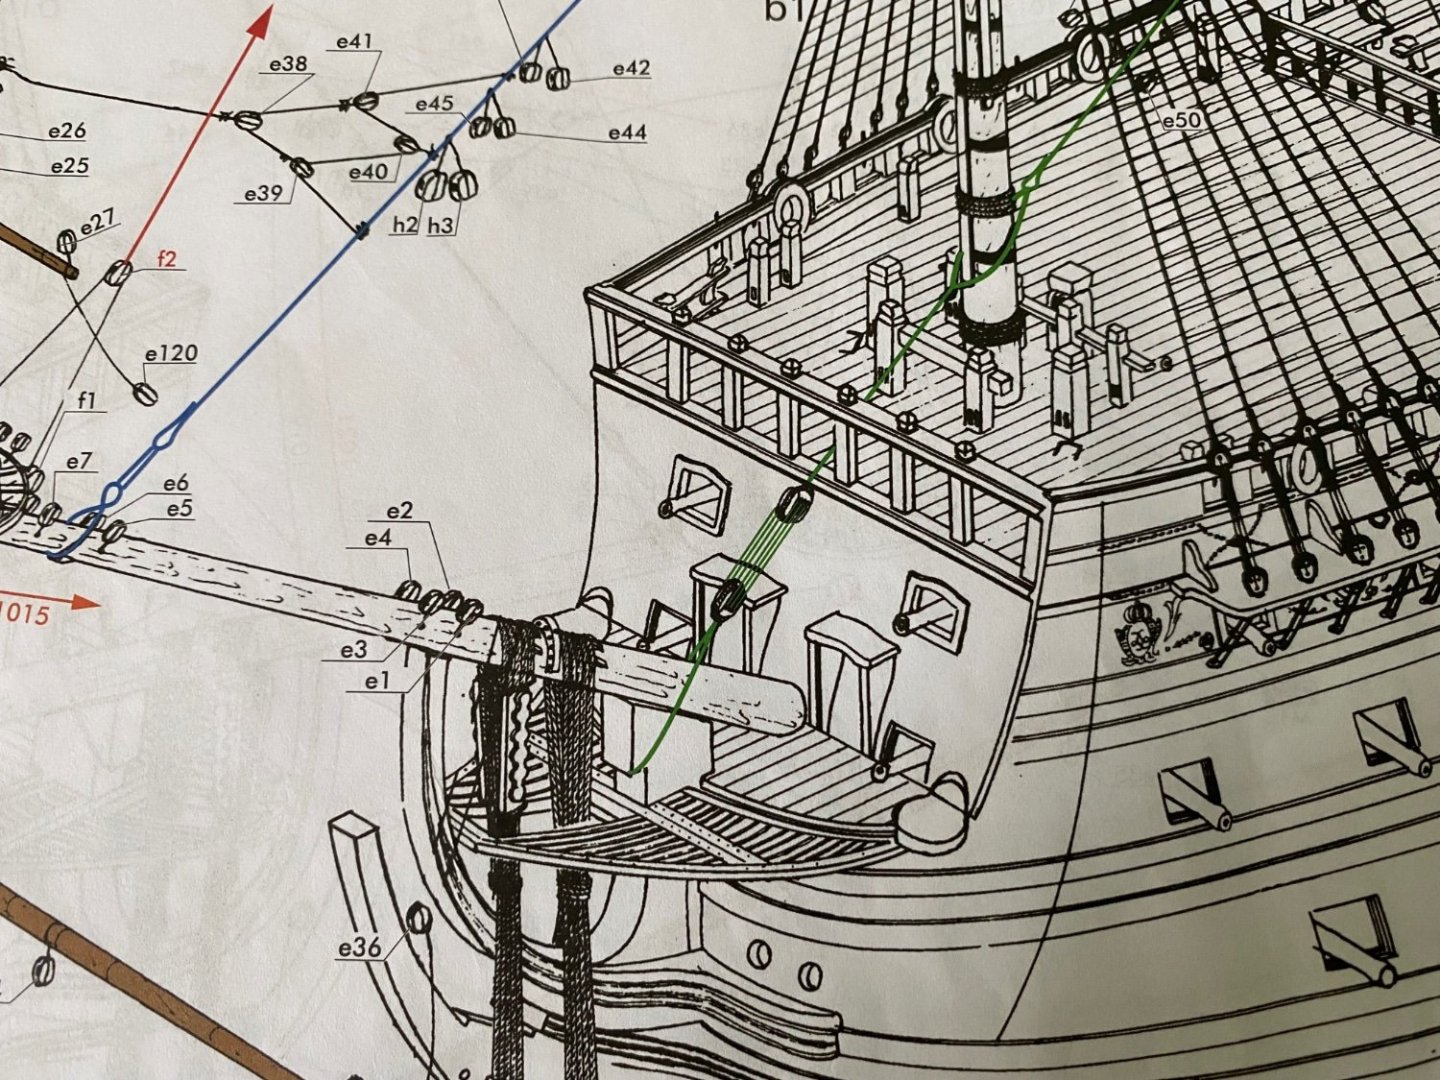
Yep Ian sprit-topmast and gammoning is already in place. As I said the new Heller instructions do not show making nor reference making this collar for the mainstay until step 117 which is the step partially shown in the photo above. As you can see in step 116 (the step right before 116) there is no indication of the mainstay collar. Looking further back in the instructions step 95 through 100 show how to assemble various rigging pieces for later use, with step 99 showing how to assemble the mainstay. I guess I will just do it the best way I can.


- 1,508 replies
-
- 3
-

-
-
- Le Soleil Royal
- Heller
- (and 1 more)
-
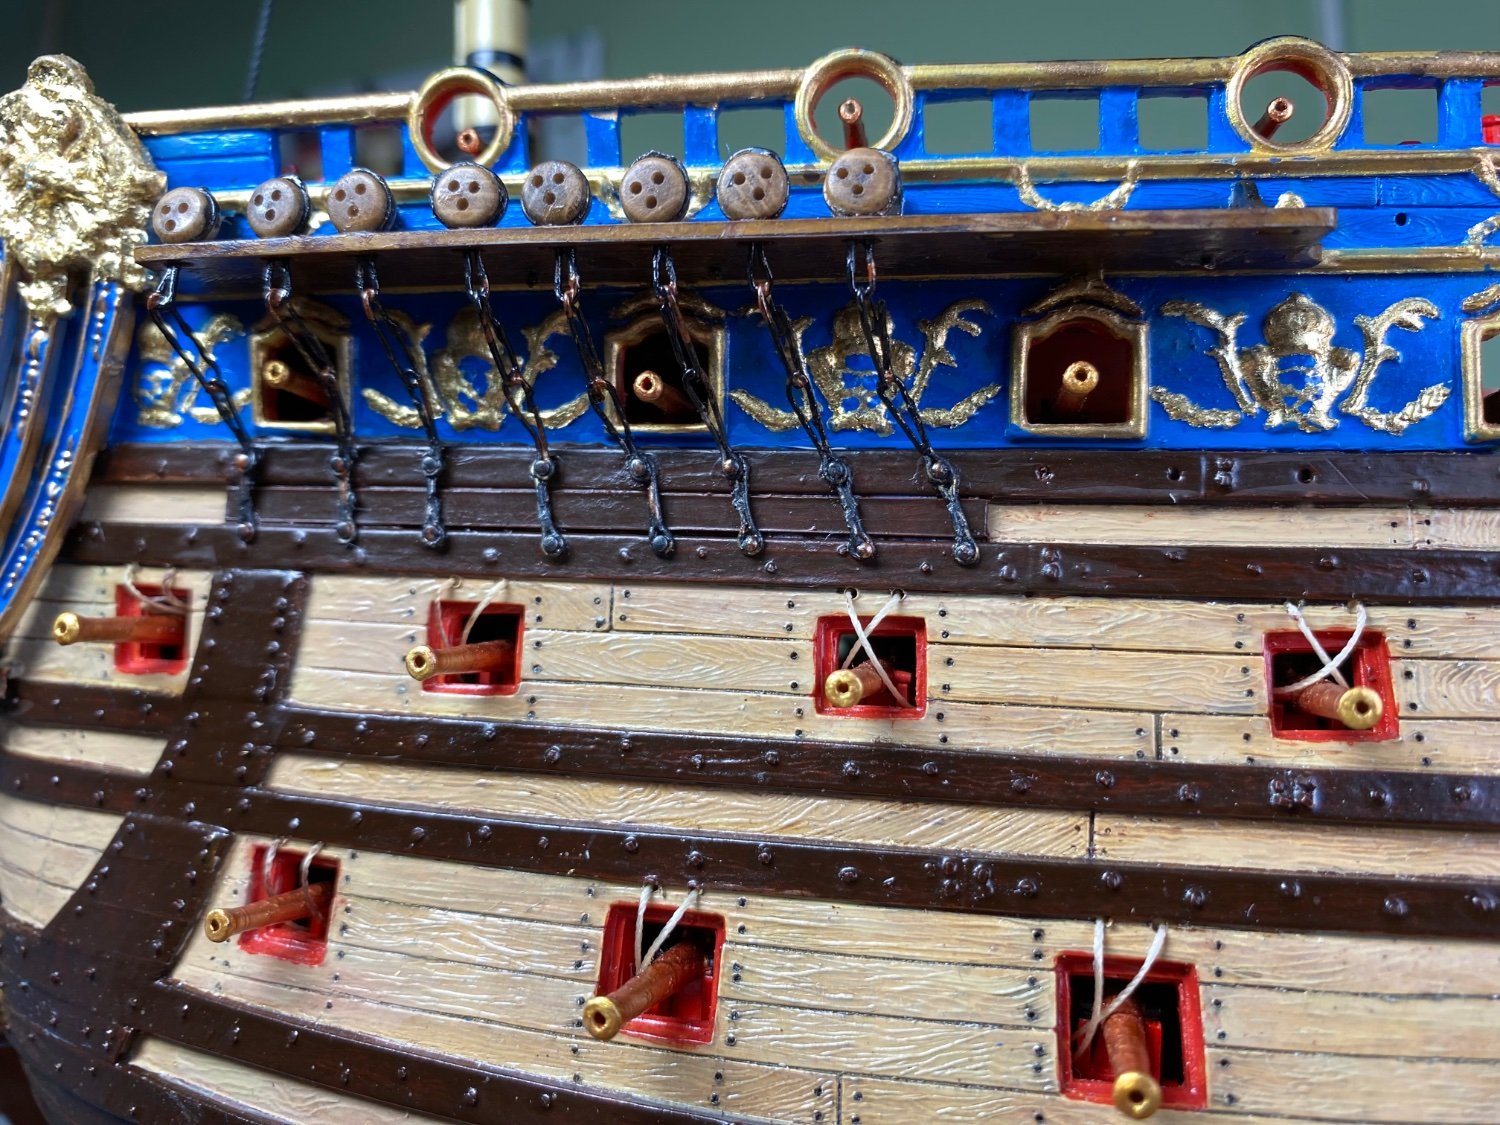
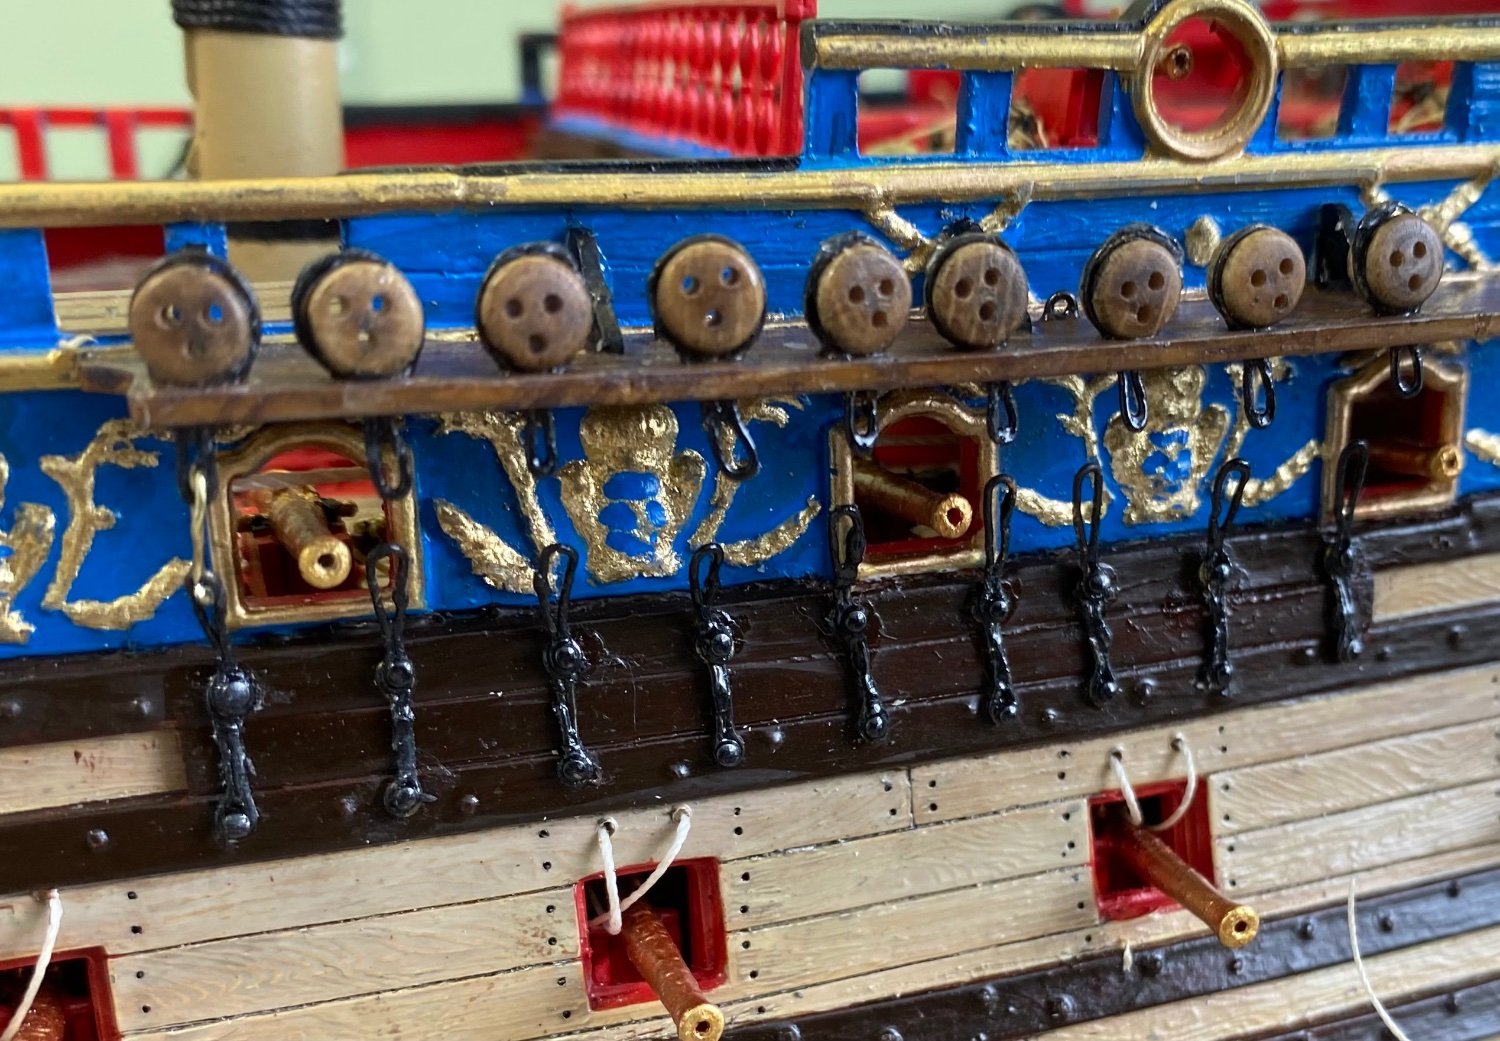
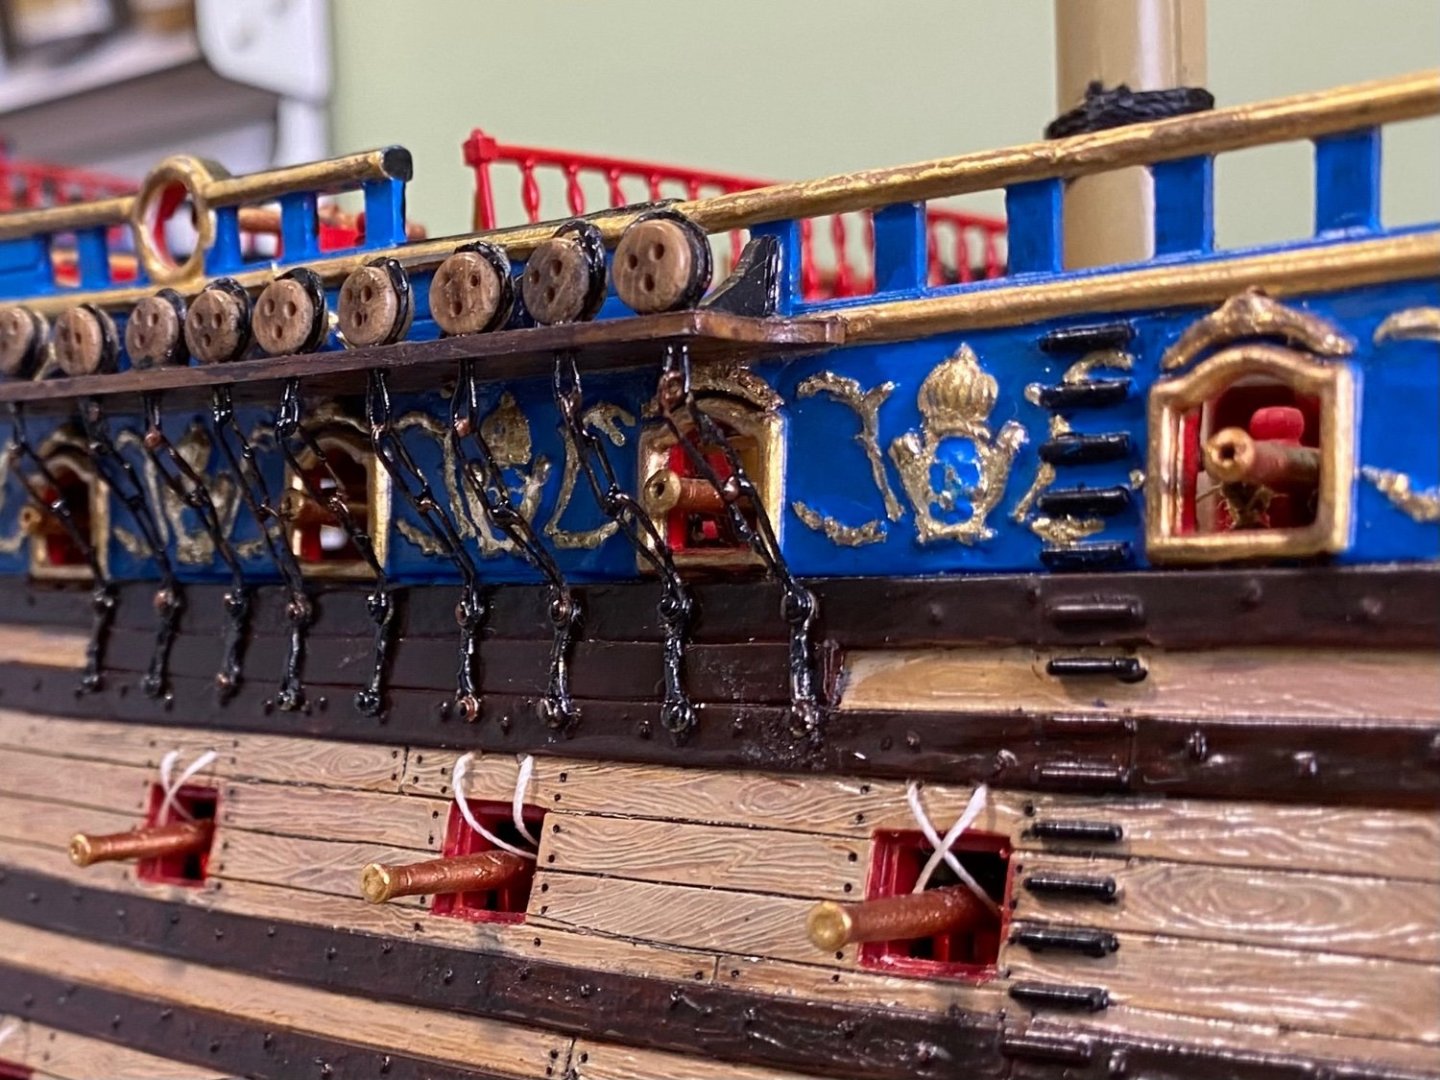
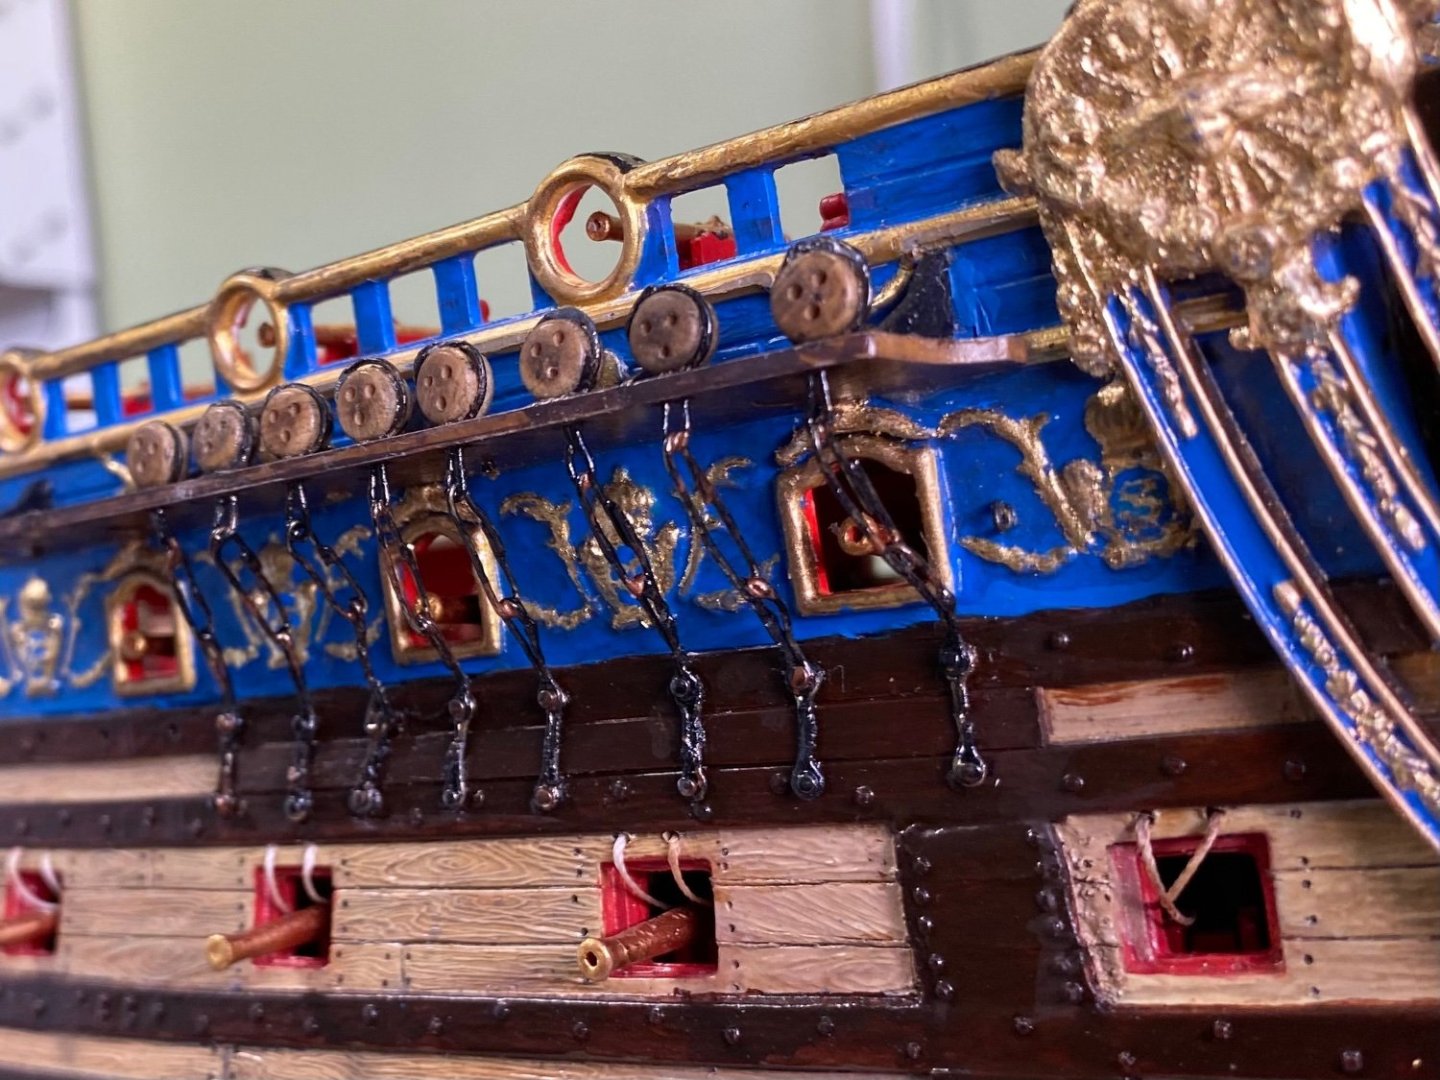
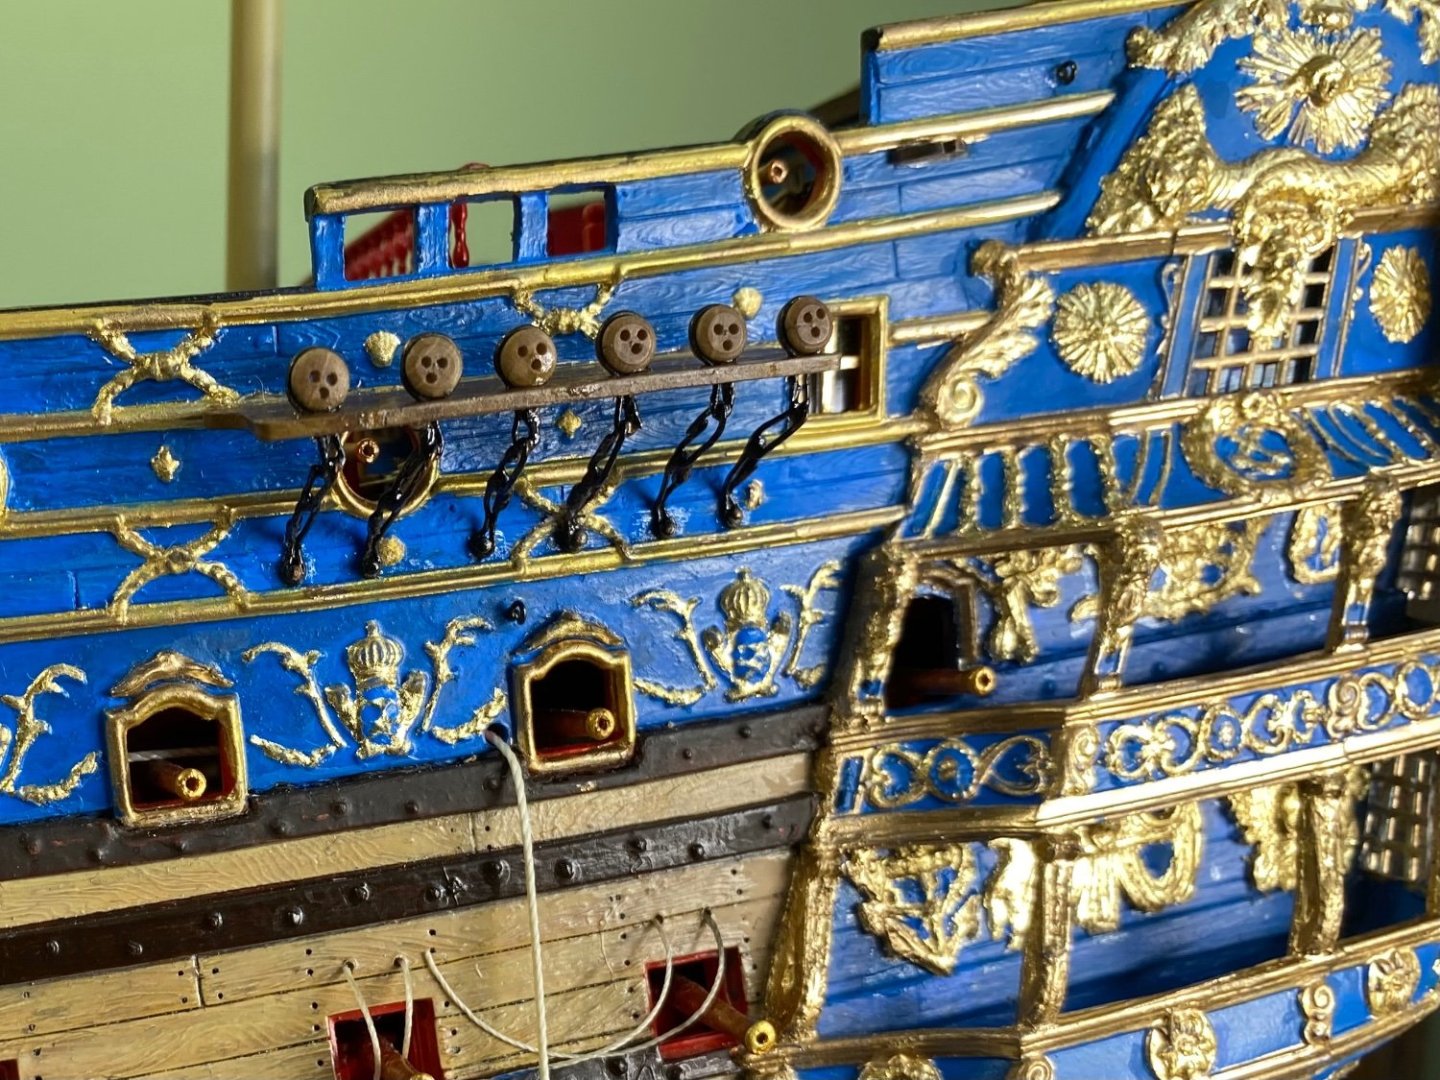
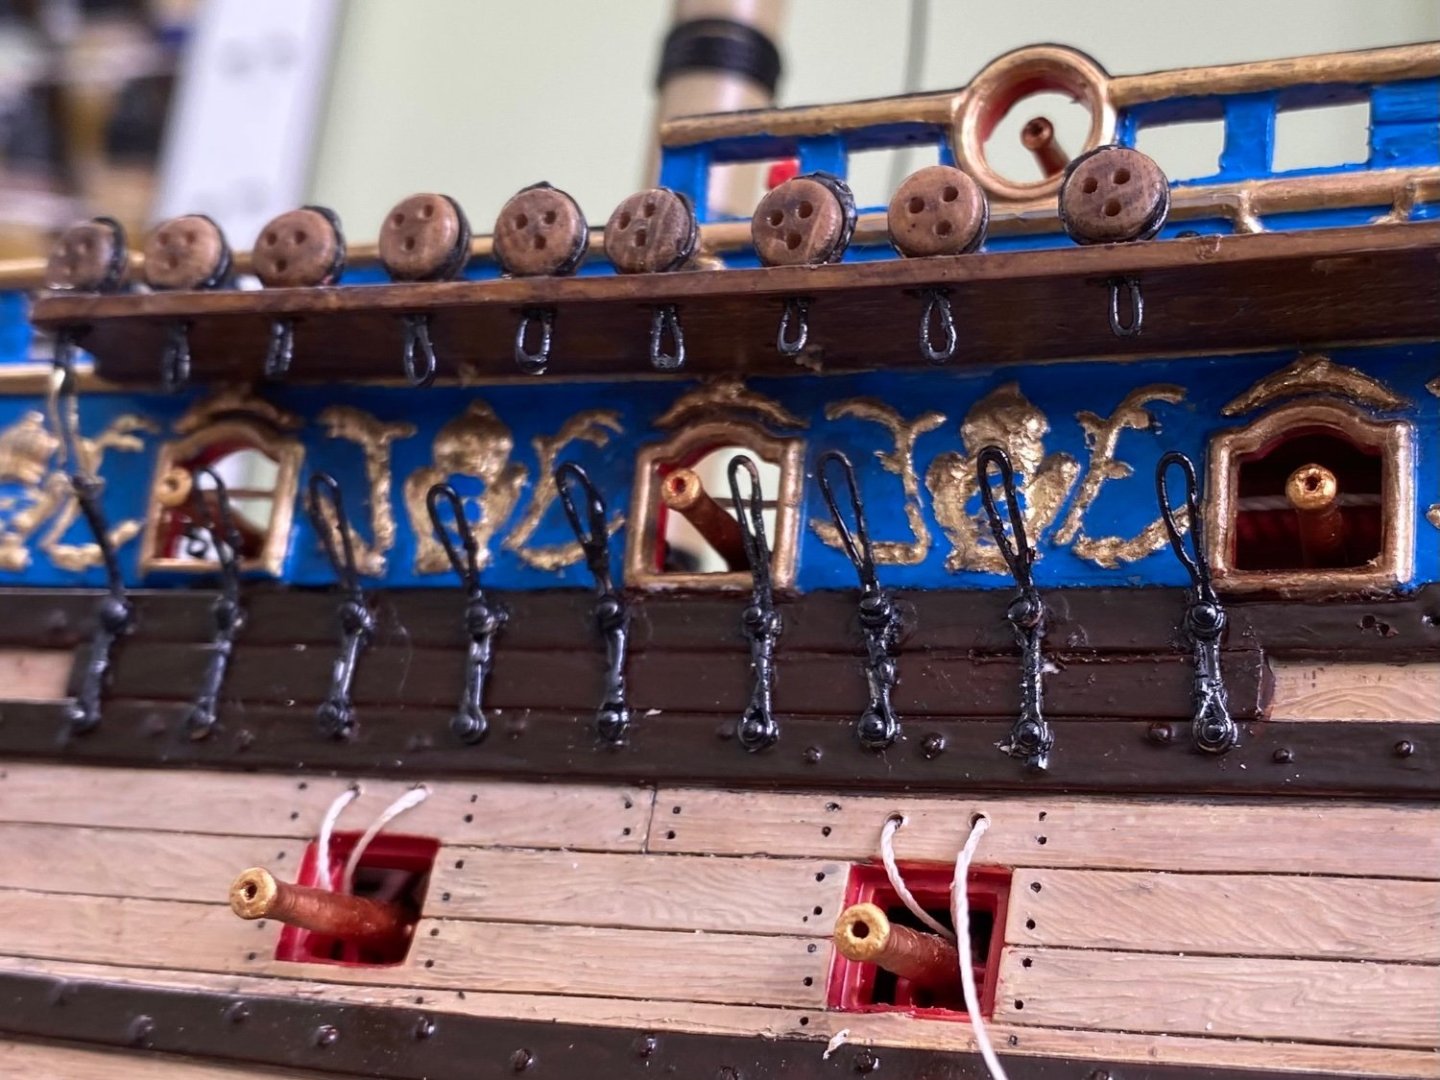
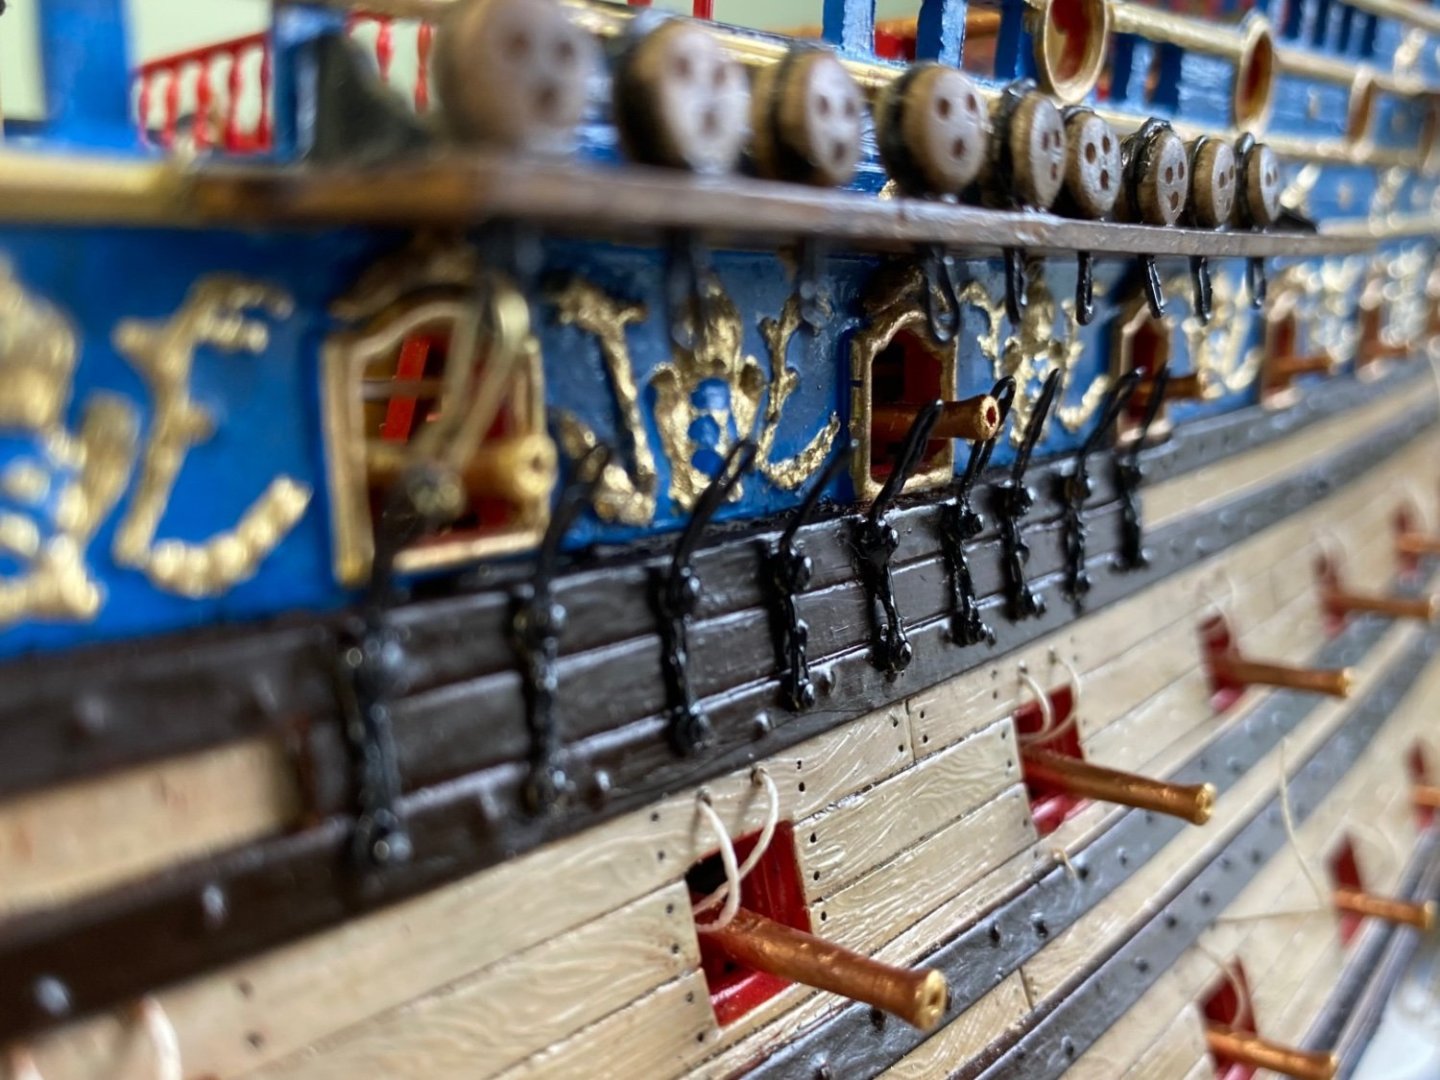
Chains for the fore and mast port side complete. The method I used seemed to work fine for me. Will probably become my personal method on future builds. Added just a touch of rust on the links even though I doubt King Louie allowed very much rust anywhere on his ship! 😊 Now to work on the starboard side


- 1,508 replies
-
- 4
-
-
-
- Le Soleil Royal
- Heller
- (and 1 more)
-
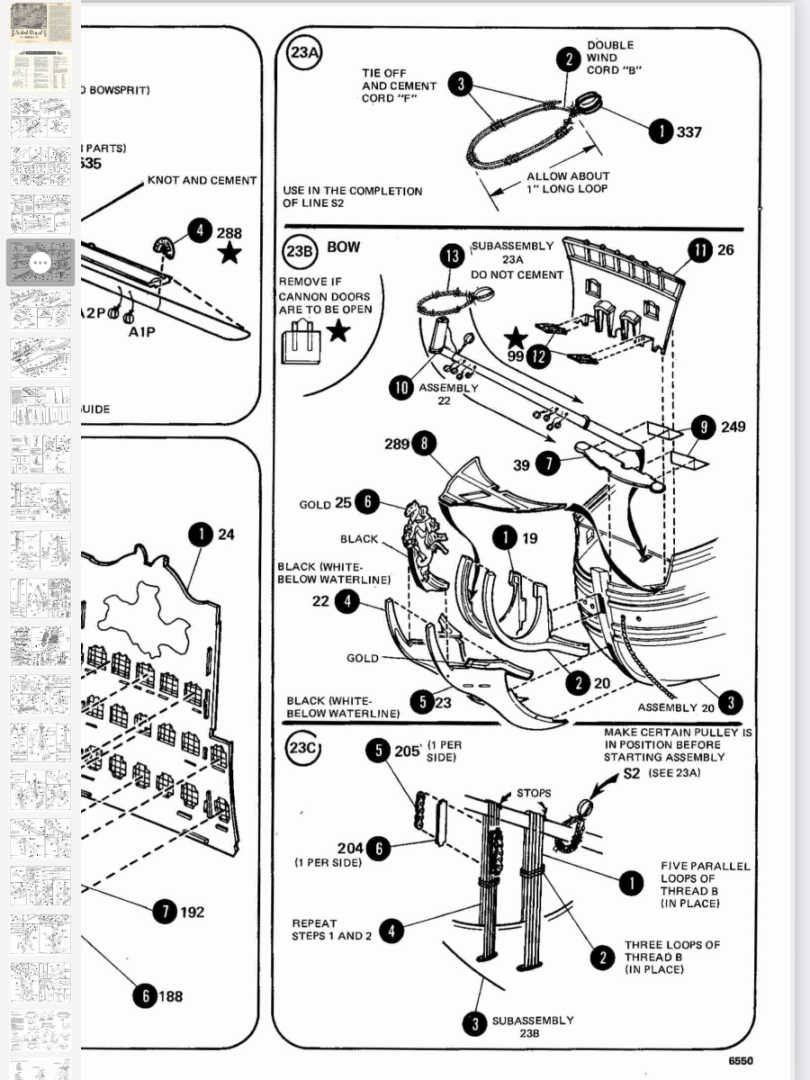
This is interesting. I am looking at the 1977 instructions. First of all let me say I am finding them very helpful! It shows a rigging step that was not in the current instructions, or at least I was not instructed to do it yet. In the old instructions it shows the loop made in step 23a was to be made and placed around the bowsprit before I continued with construction. I have not done this. I assume it is a block that will later be used for rigging the main stay as shown in the current instructions. I need to look ahead to see when and where. I guess I will attempt to make this loop now
-
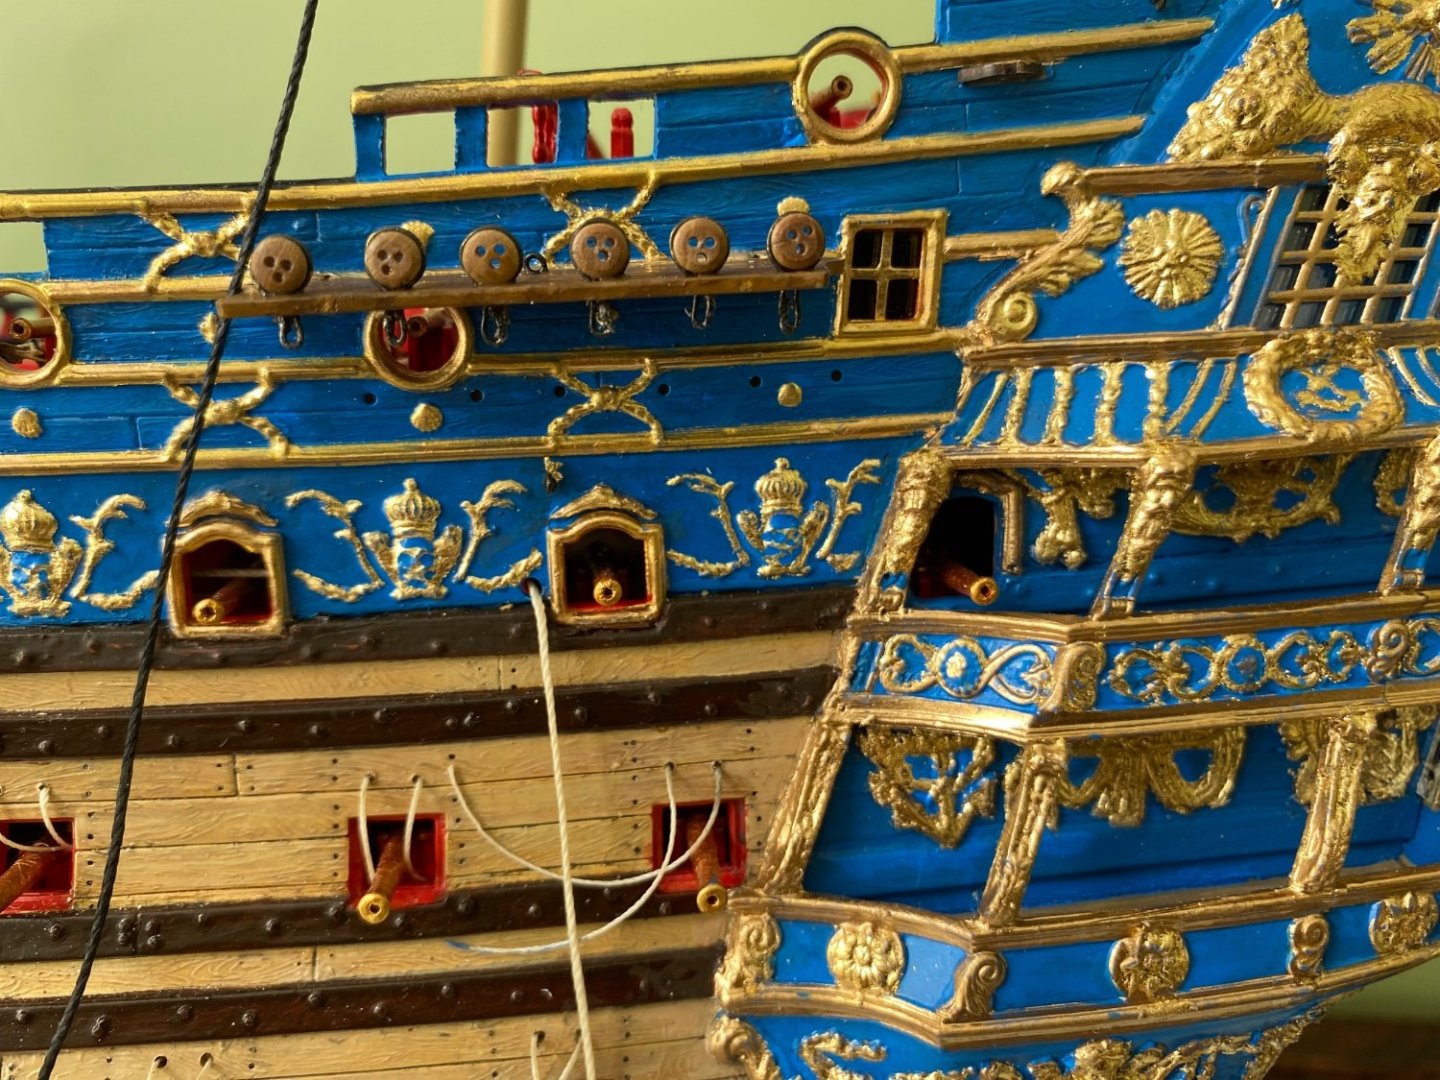
Marc do you think the way I filled the area between the wales looks ok?
-
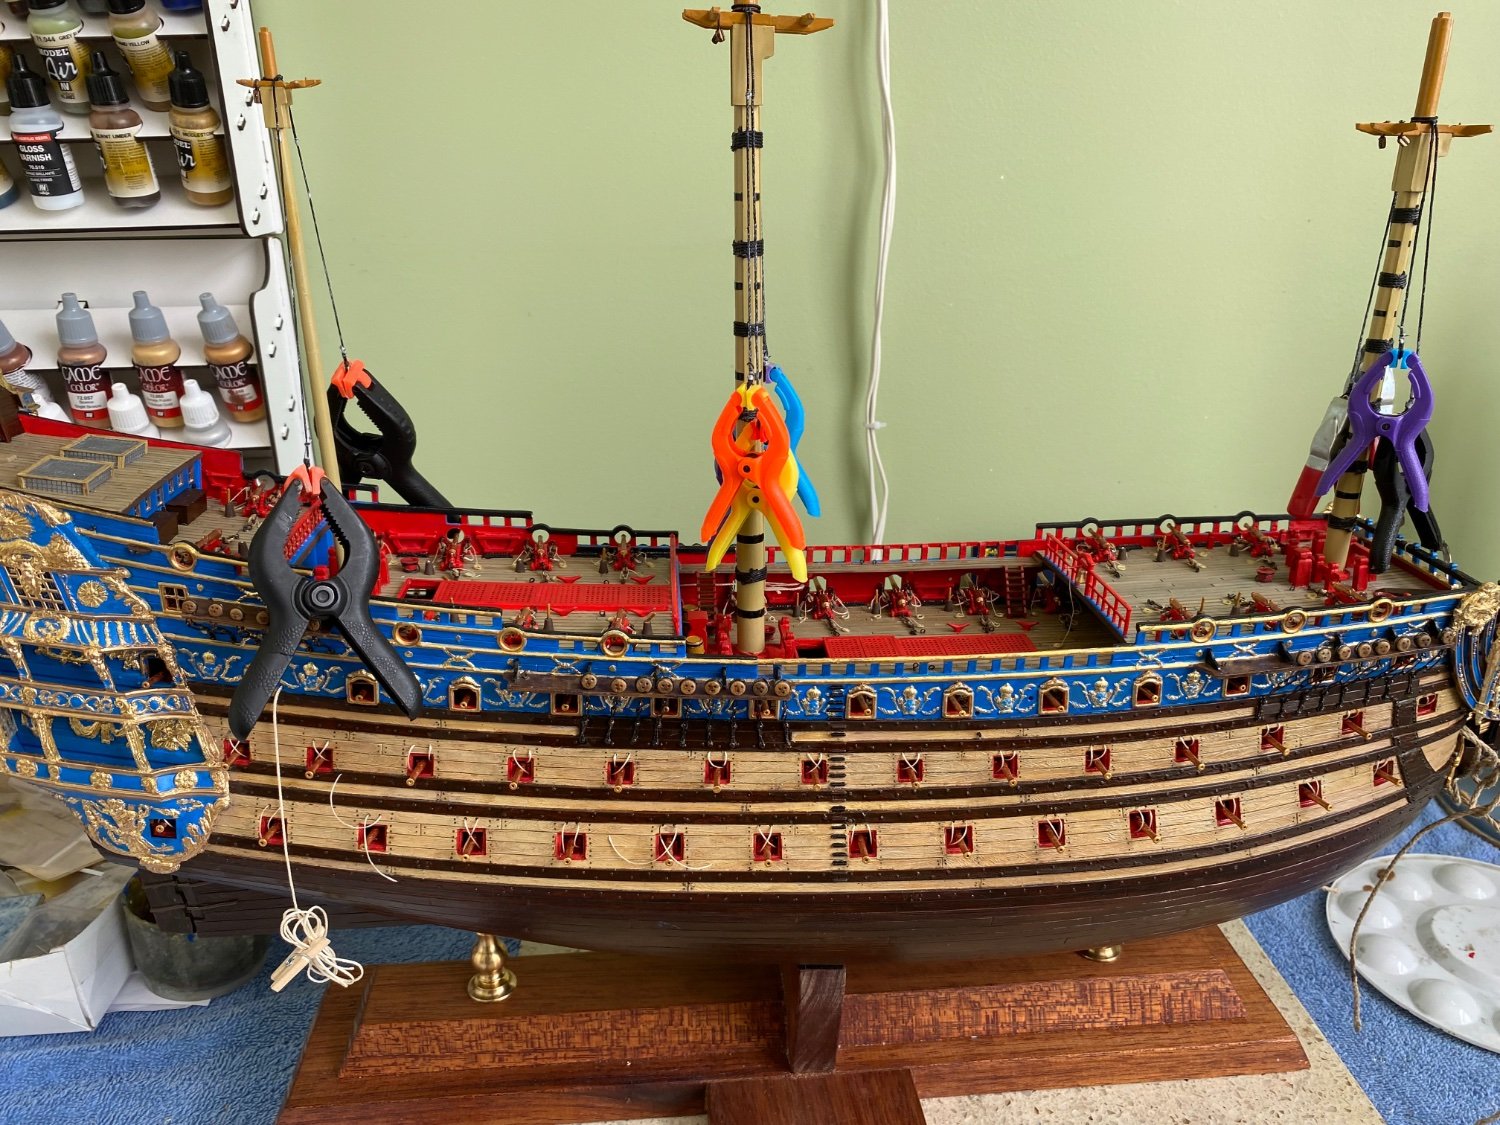
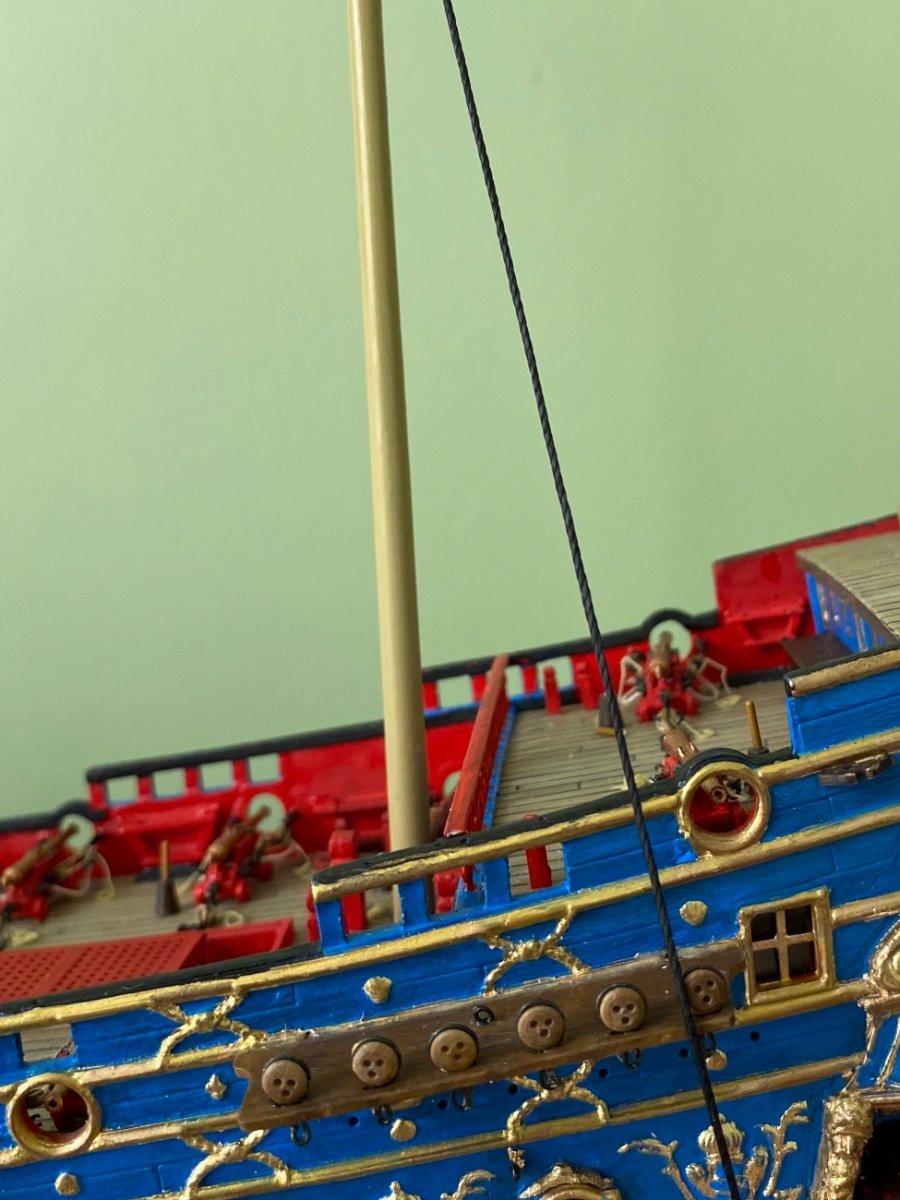
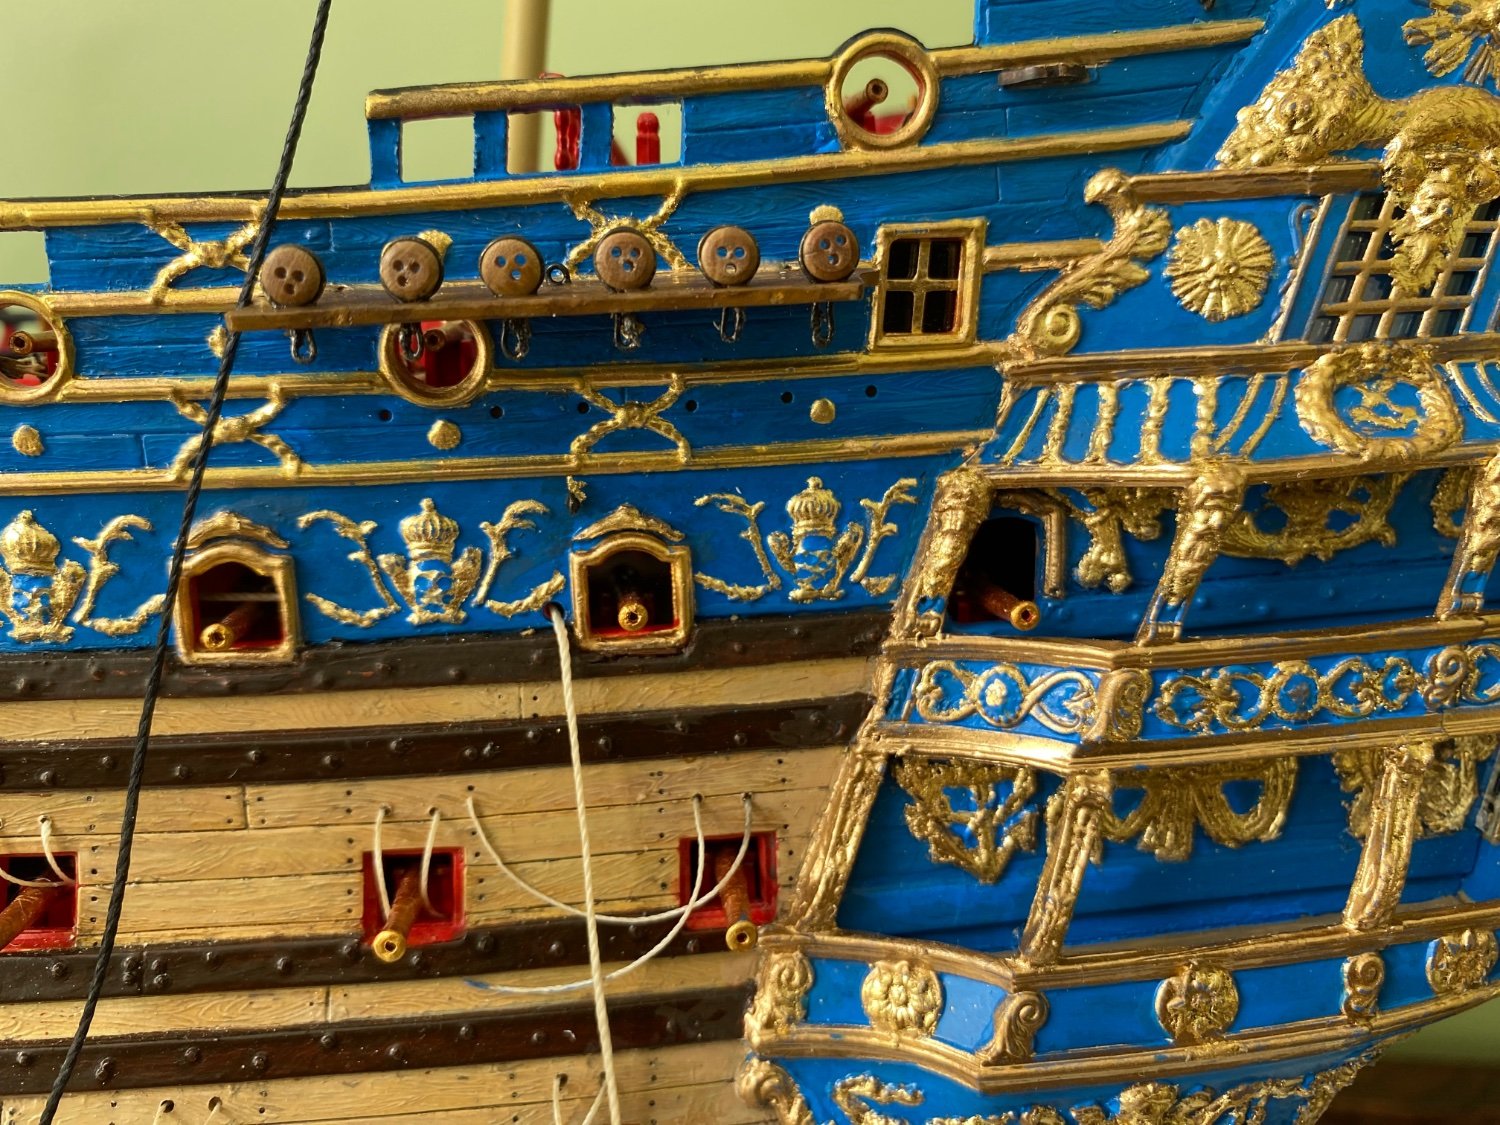
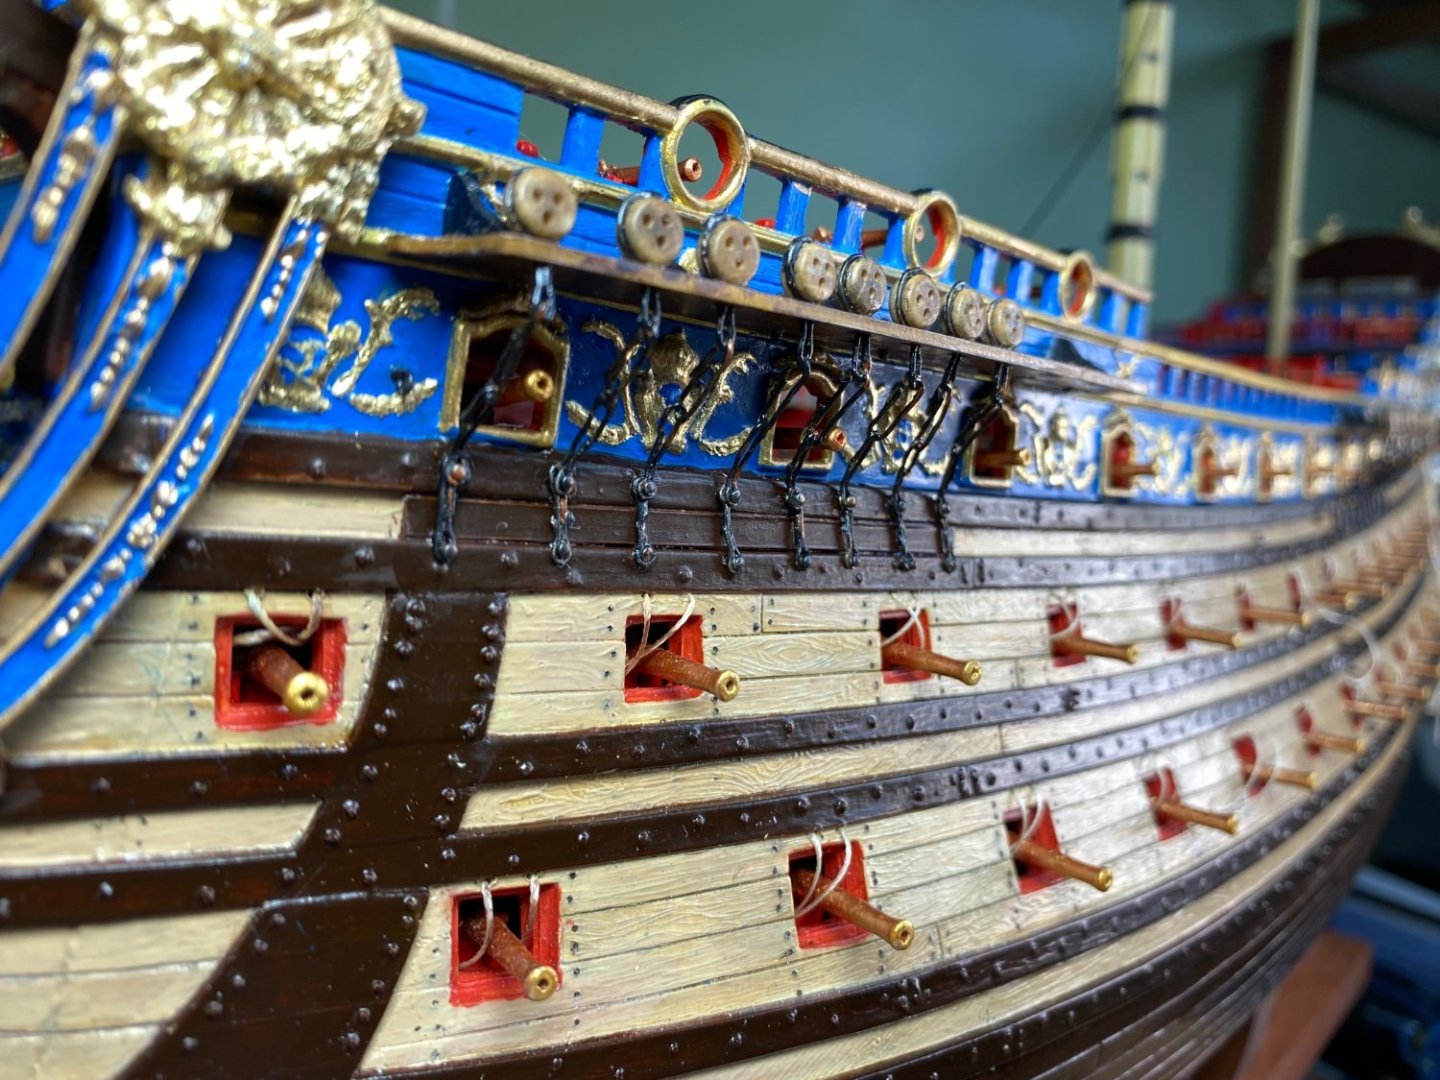
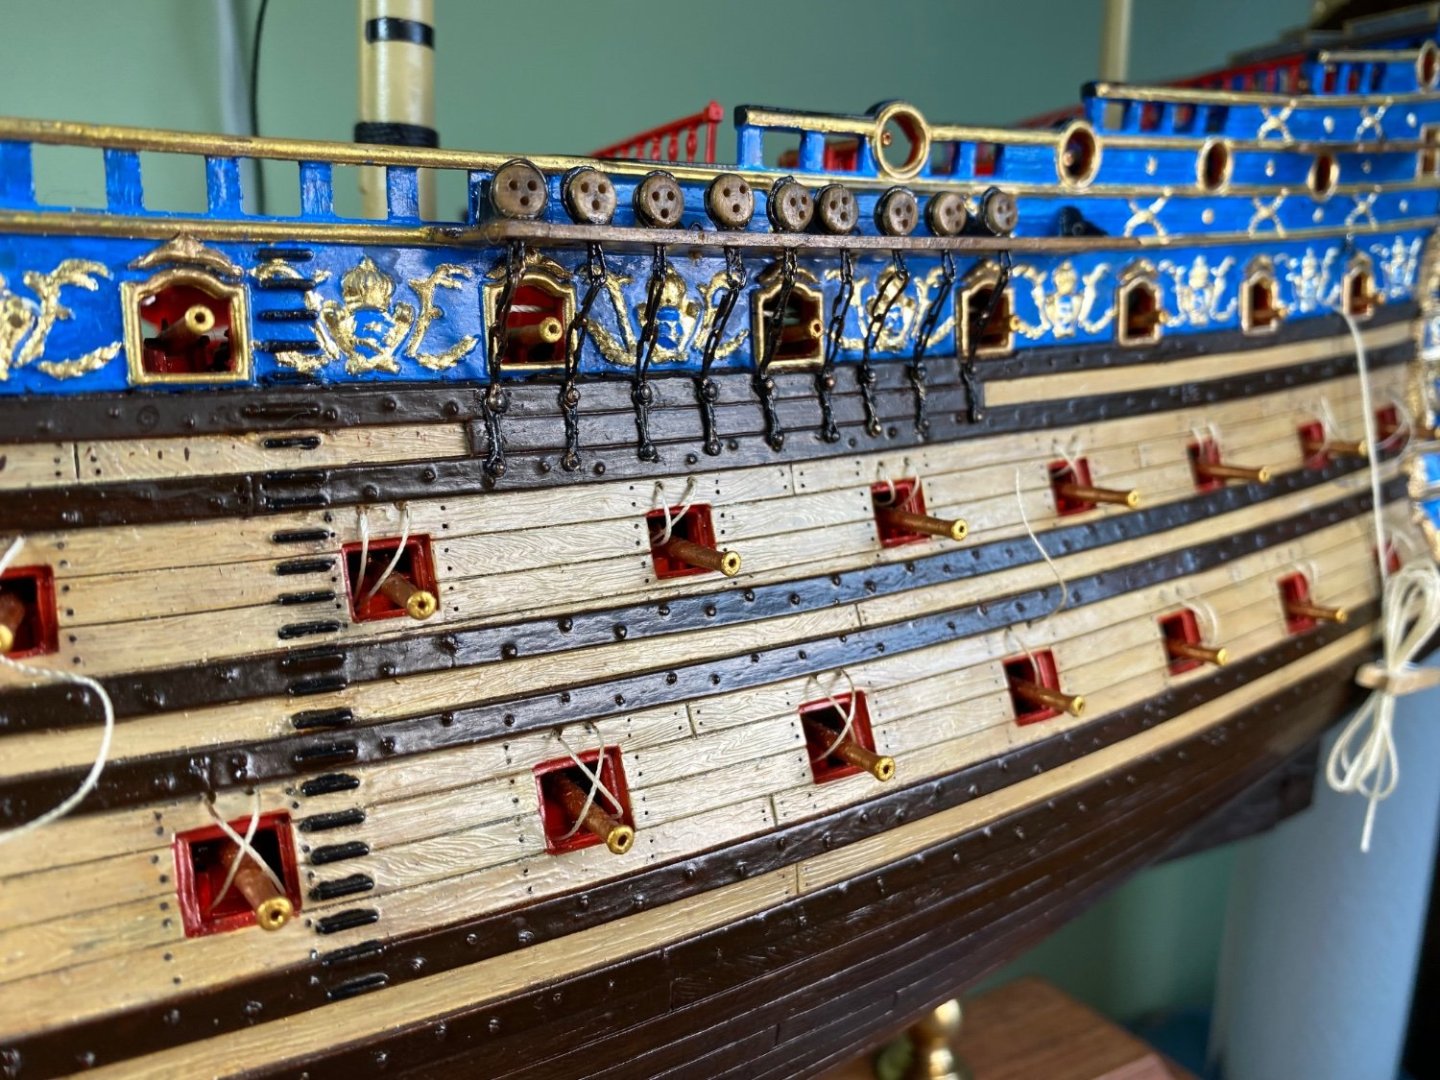
So here is the route I took for my chain plates. Marc I really liked the idea of filling the space between the wales where the preventer plates go. I used pieces of Evergreen to fill the sections and brought the front pieces up to match up with the flow of the anchor protector thingy (nautical term 😊). Then I painted them to march the wales. I previously made the strops for the fore and main mast lower deadeyes. I had also made the preventer plates and the toe links. Using a string tied at the location where the shrouds will attach I lined up the deadeyes so the 3 holes were properly aligned with the string at each place. Next, using the same string I installed the toe links and the preventer plates. An invisible line runs directly from the mast (where shrouds will connect) down through the deadeye, the toe link, and the preventer plate. I glued and positioned the strop and pins with CA. I will now go back and custom make the center link for each chain out of blackened wire and use CA instead of solder on this link.


- 1,508 replies
-
- 3
-
-
- Le Soleil Royal
- Heller
- (and 1 more)
-
An interesting particularity of French practice: on the Frolich model, you can see that the preventer plate spans two wales. The French fill the space between wales, flush to the surface of the wales, and for the length of the channel above. Marc I really like this idea. I am going to do just that for the fore and main mast. Since a preventer plate is not used for the backstay deadeyes do you think the area between the wales is only filled in the section below the shroud deadeyes not the full length of the channel above?
-
Ok gentlemen, thoughts and opinions. I am fiddling with my chains for the main and foremast. Here is my curiosity. Do you make the complete chain except for the bottom piece that will shape over the wale off the ship. Then drill a hole in the channel large enough to get the section of the chain where two links come together through, or do you put the strop of the deadeye in the hole and then complete the chain under the channel. On one hand my concern is making the hole in the channel too large. On the other hand I am concerned with soldering the link of the chain while on the ship. I use a soldering iron and it would be most difficult to solder a link here. Henry I think I remember you cut your channel in half along the holes, put your chains in and then glued the halves back together. I can no longer do that. Here is my current concept of how to do it. I have all the deadeyes for the fore and main mast stropped and soldered. I now am going to make and solder the bottom link and the extra link (whatever it is called). I can put the deadeye in the hole and use a string from the mast top to determine where and the rake of the bottom link and the extra link. Once those pieces are in I can custom fit the connecting link. Instead of solder I will use CA glue to hold it together instead of risking soldering iron heat. If I use CA glue to hold the strop there should not be much, if any, strain on the chain and the glued link.

-
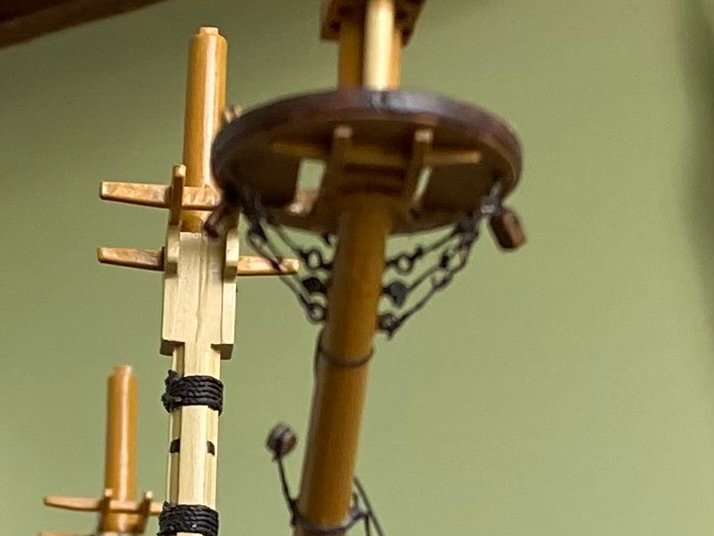
Spritsail Topsail in with shrouds. Will add ratlines later. Those tiny 2.5mm deadeyes are challenging to work with. Now as I look head it looks like a long stretch of making chainplates and lower mast shrouds. Wish me luck this is going to be a fun.

- 1,508 replies
-
- 4
-
-
- Le Soleil Royal
- Heller
- (and 1 more)
-
Any of you who zoom in will notice the tiny deadeyes are upside down. That will surly be corrected before the shrouds are added.
- 1,508 replies
-
- 1
-
-
- Le Soleil Royal
- Heller
- (and 1 more)
-
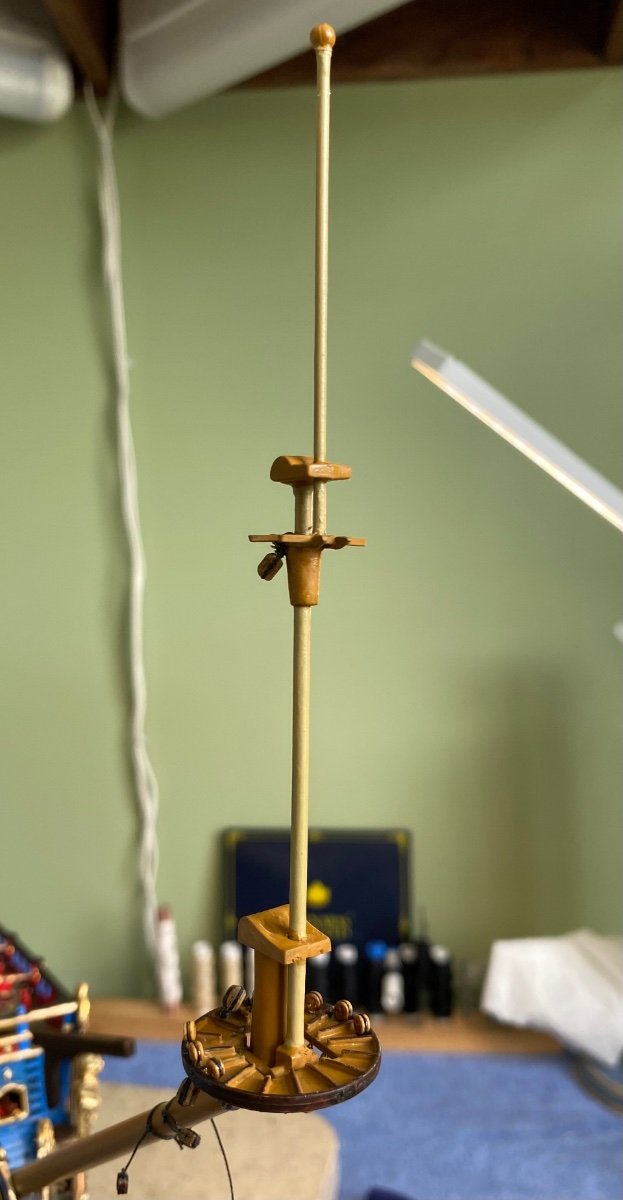
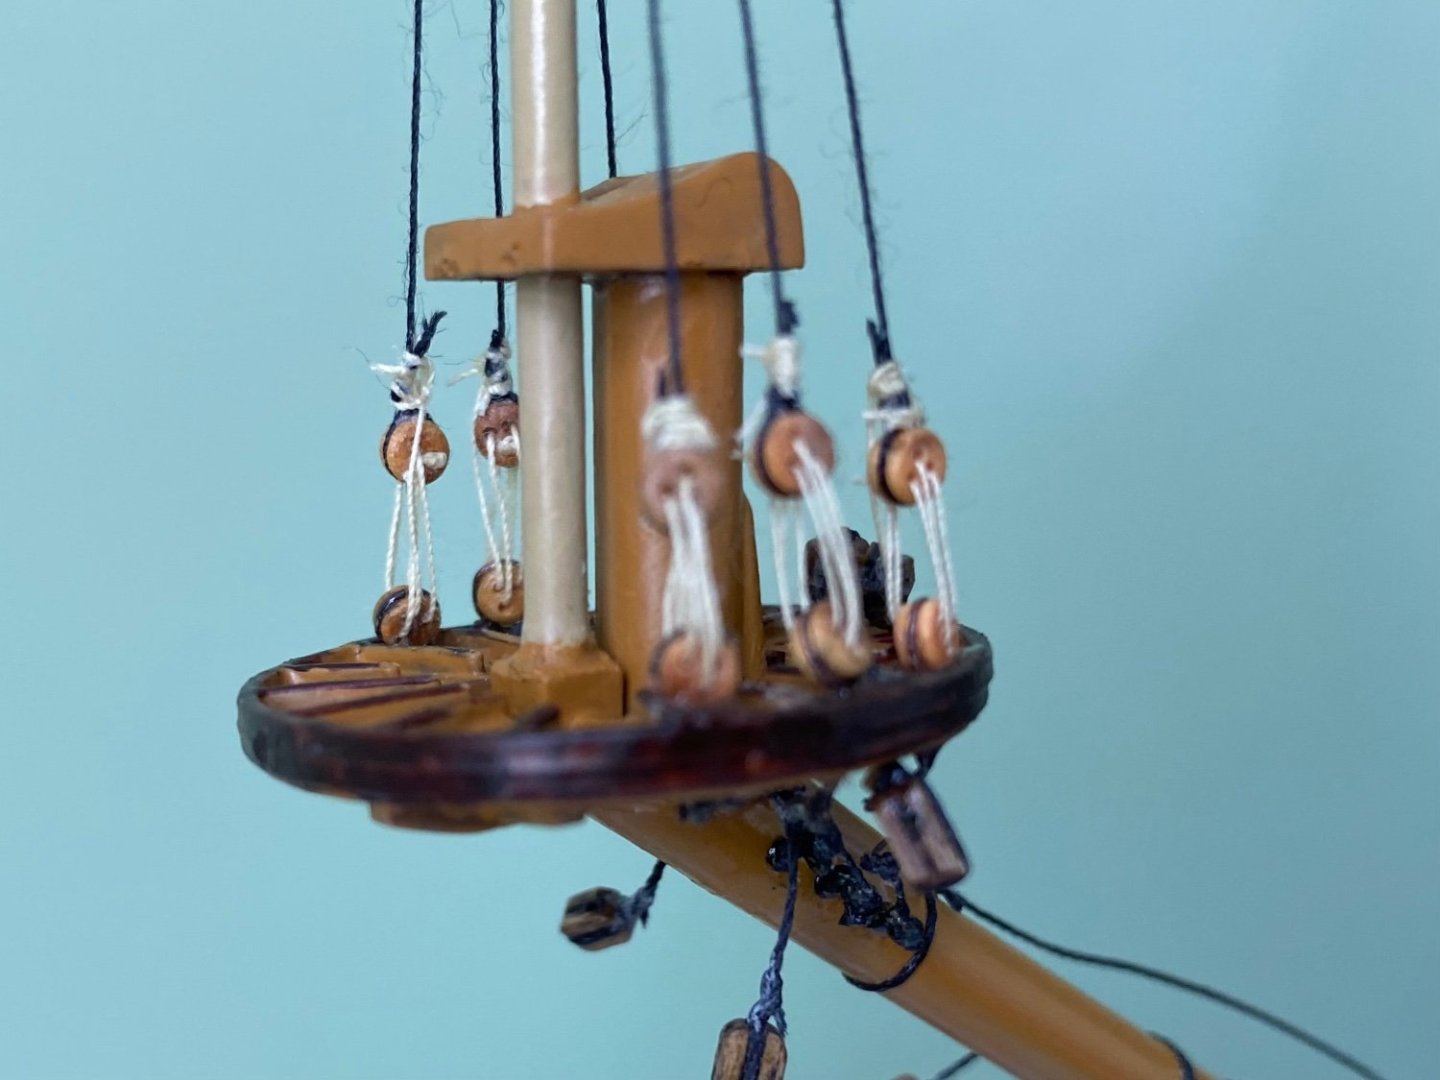
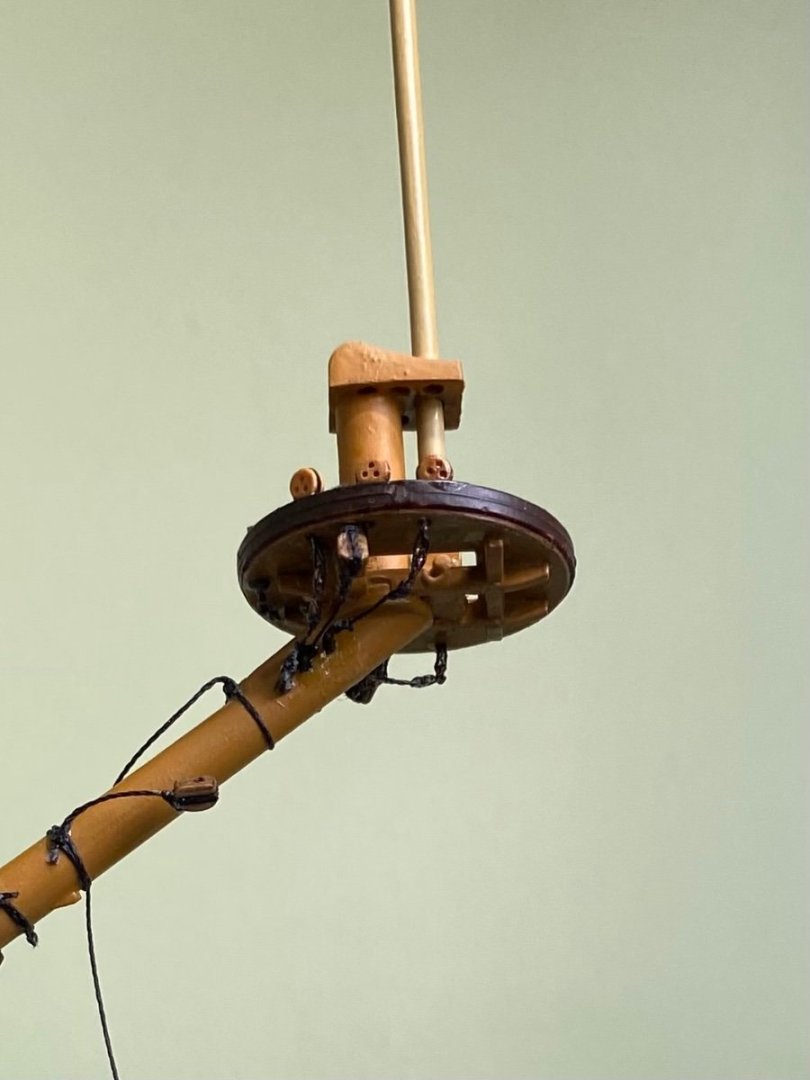
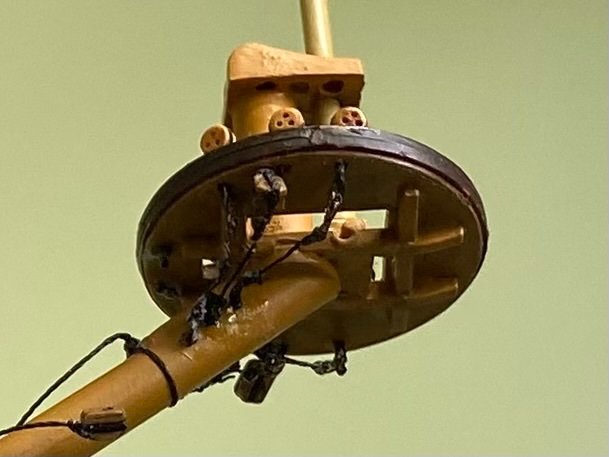
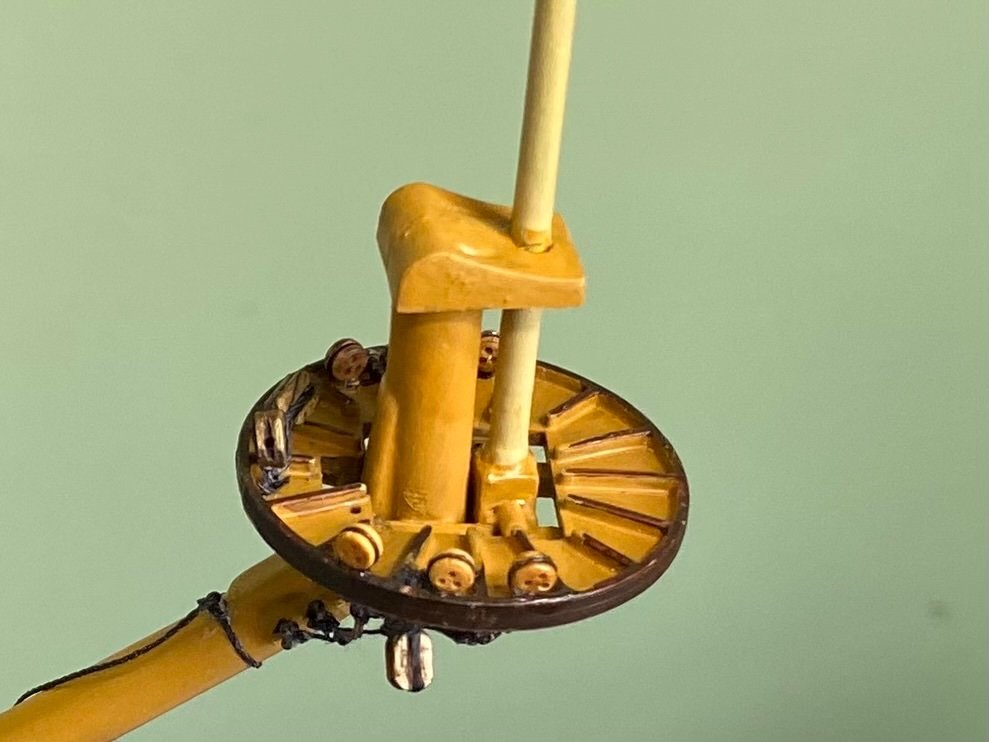
Spritsail topmast installed. Happy that it lines up perfectly behind masts. Lower deadeyes for shrouds installed using 30 gauge blackened copper wire to make strops and hooks. Decided to go with the 3 eyebolts on each side of the bowsprit to tie off the futtock shrouds. Used standard black sewing thread for the futtock shrouds. In the picture it is difficult to see what is thread, hook, and eyebolt. I must say 30 gauge wire is very flexible and difficult to withstand much pressure and manipulation. Gets to the point where you say to yourself “just leave it alone, it’s fine, you are going to break a very tiny wire if you don’t stop manipulating it”. Most of the time I listen to myself 😊.

- 1,508 replies
-
- 3
-
-
-
- Le Soleil Royal
- Heller
- (and 1 more)
-
Henry your explanation above about how you make your strops and futtock is really good. I have read through blog, especially when you get into rigging, several times. I have it bookmarked for quick reference. I find your process explanations fascinating and want to copy your practices where I think I am able. A question I have for you is if there is a minimum size thread you use that you will attempt to serve? I have not been successful serving over a thread smaller than about a .4mm thread.
-
This is just my first prototype. The actual ones I use will have the strop shaped a bit better and blackened. This prototype used 2.5mm deadeye and 30 gauge copper wire. I think the 2.5mm blocks look fine and the 30 gauge wire is a good size for the strop and the little hook. I must say soldering that tiny little strop was fun.

- 1,508 replies
-
- 1
-
-
- Le Soleil Royal
- Heller
- (and 1 more)