


Sparky21
-
Posts
47 -
Joined
-
Last visited
Content Type
Profiles
Forums
Gallery
Events
Posts posted by Sparky21
-
-
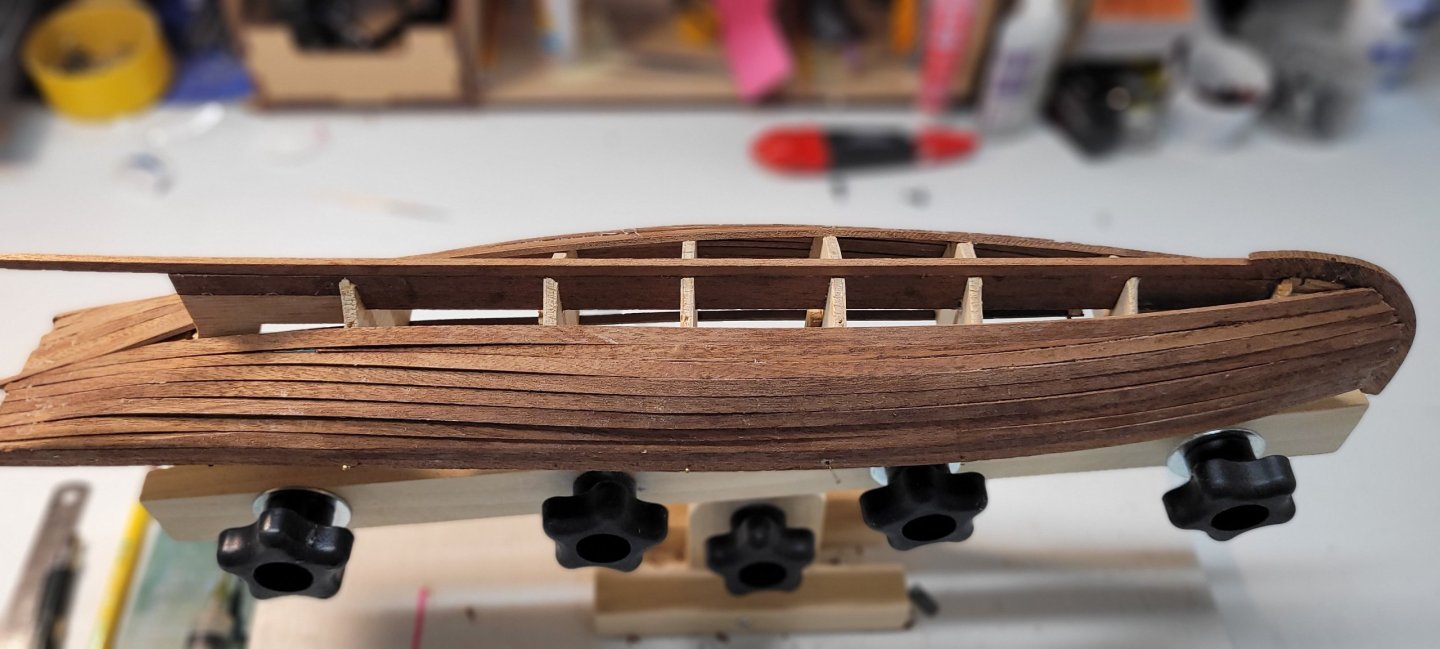
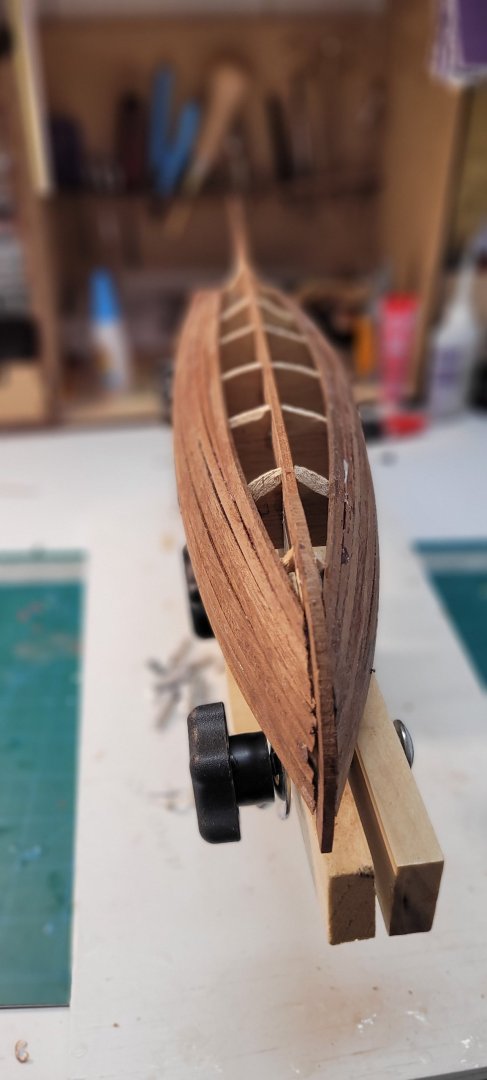
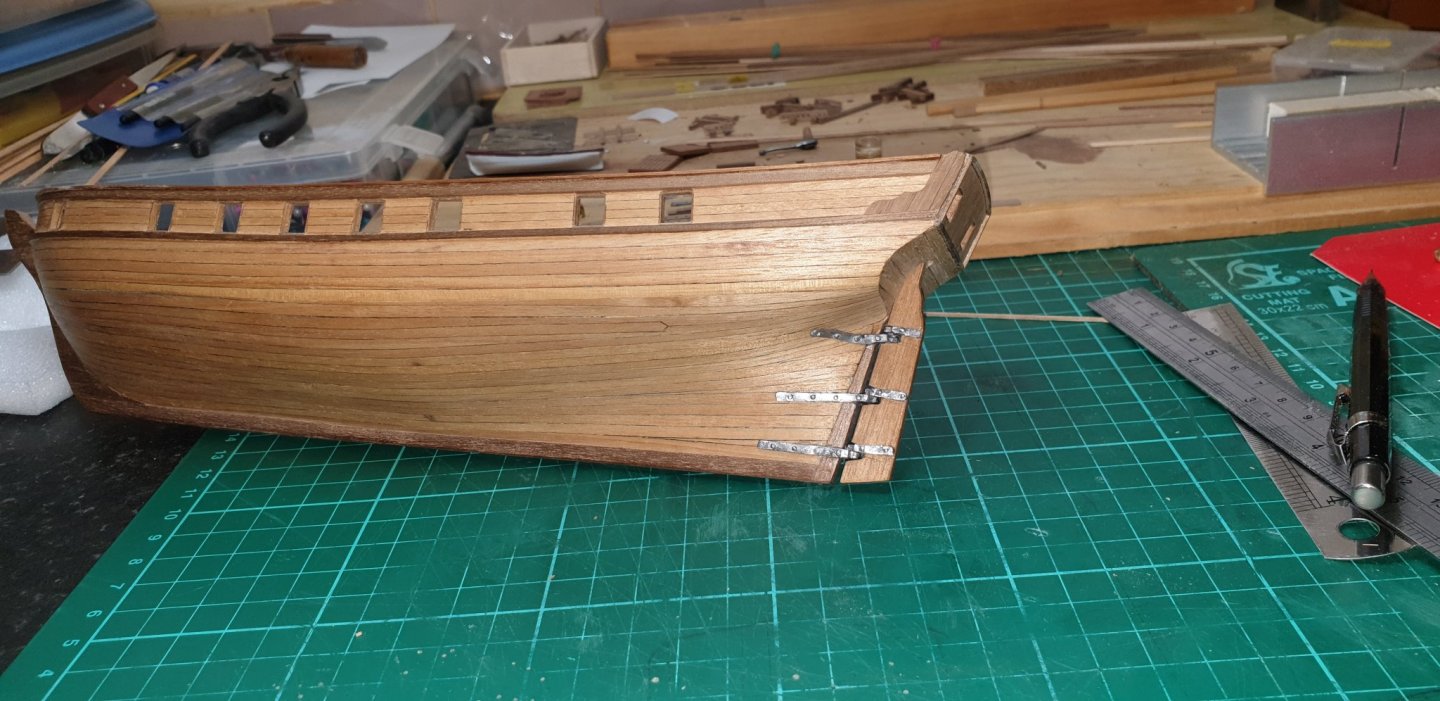
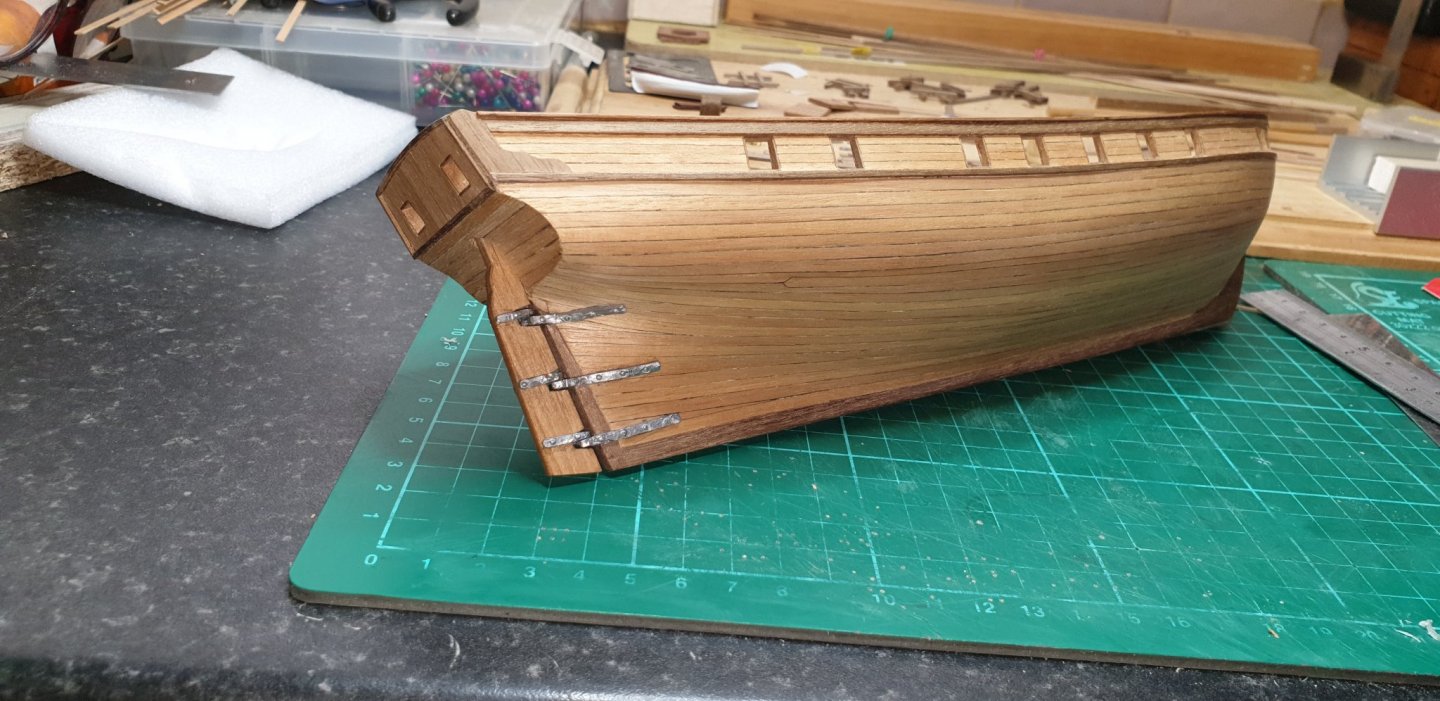
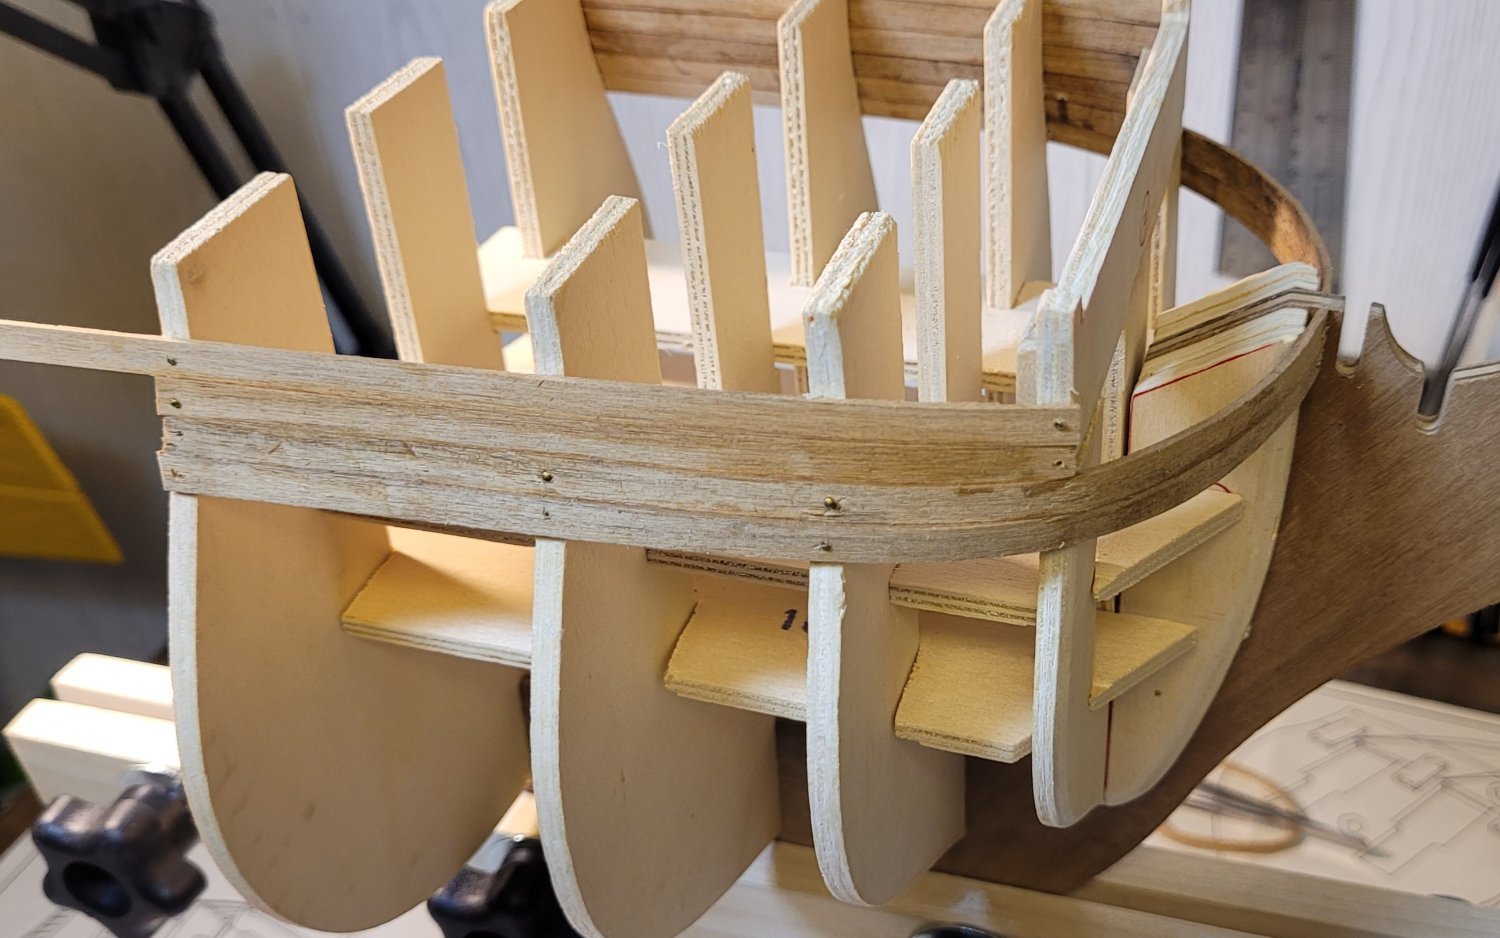
Missing Components: After completing the hull planking, I discovered that some key components were missing. This was unfortunate, as I hadn't checked the inventory first.
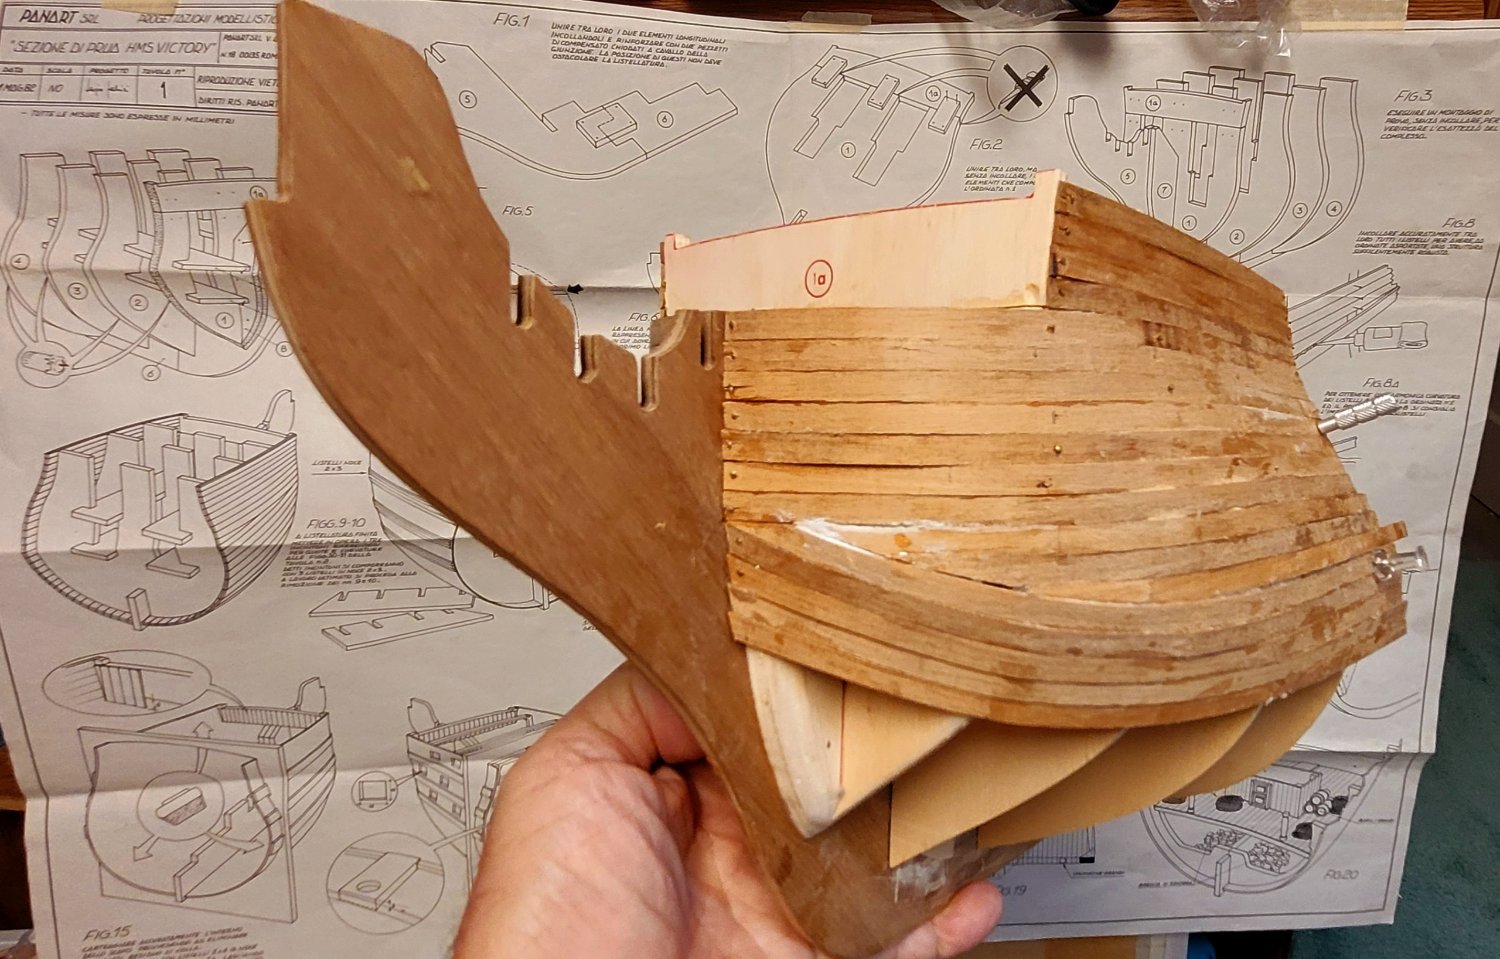
Another member of this group believed he had the same kit and kindly offered to share parts. However, after further investigation, he found that his kit was actually the Louise, which was a renamed version of the Elidir by Constructo. Fortunately, he sent me the entire kit. It also contained better instructions, a sheet plan, and photos of each step to complete the build. But some of the dimensions of this kit are slightly different for the Elidir kit. So now the kit is going to be a combination of the two kits.
- Paul Le Wol and ccoyle
-
 2
2
-
 This is my 11th build
I purchased the Elidir by Constructo kit online. After receiving it, I noticed that the box had already been opened. Unfortunately, I did not take an inventory of the parts before starting the build.
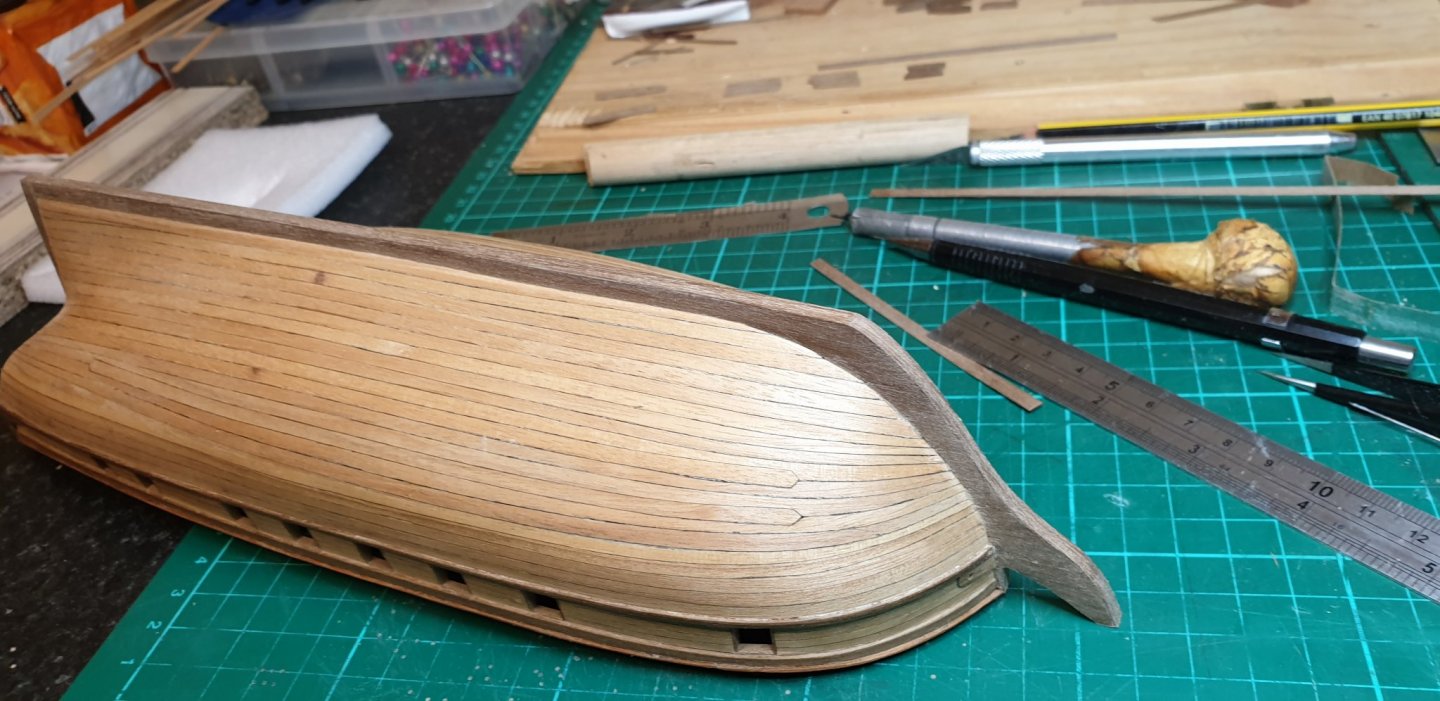
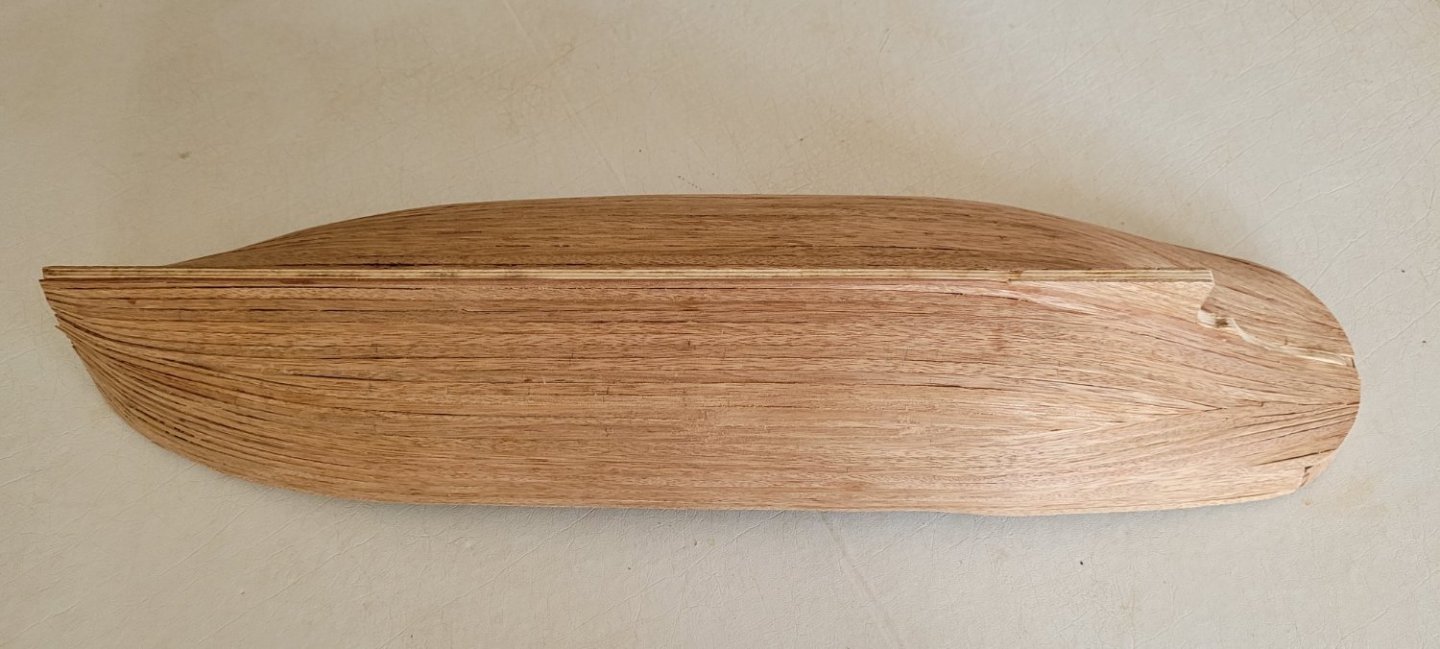
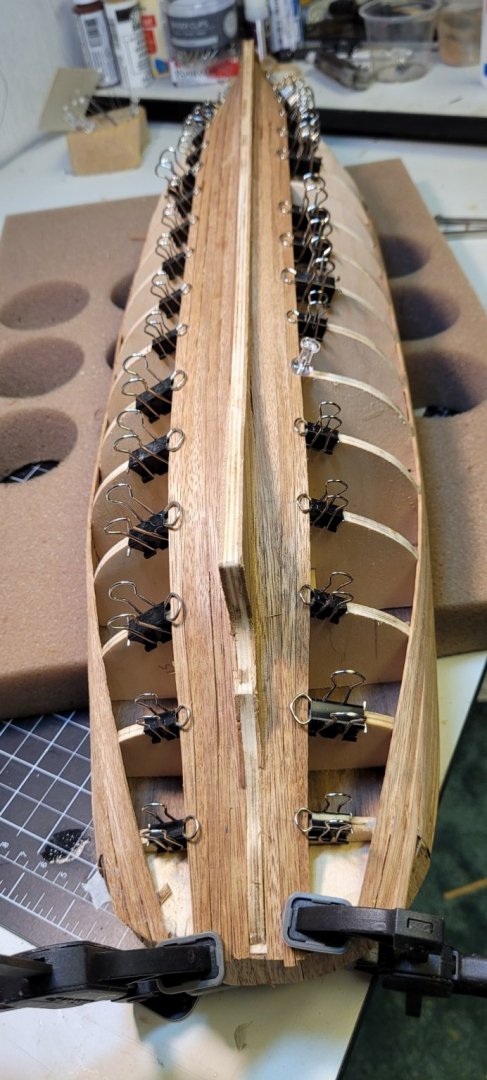
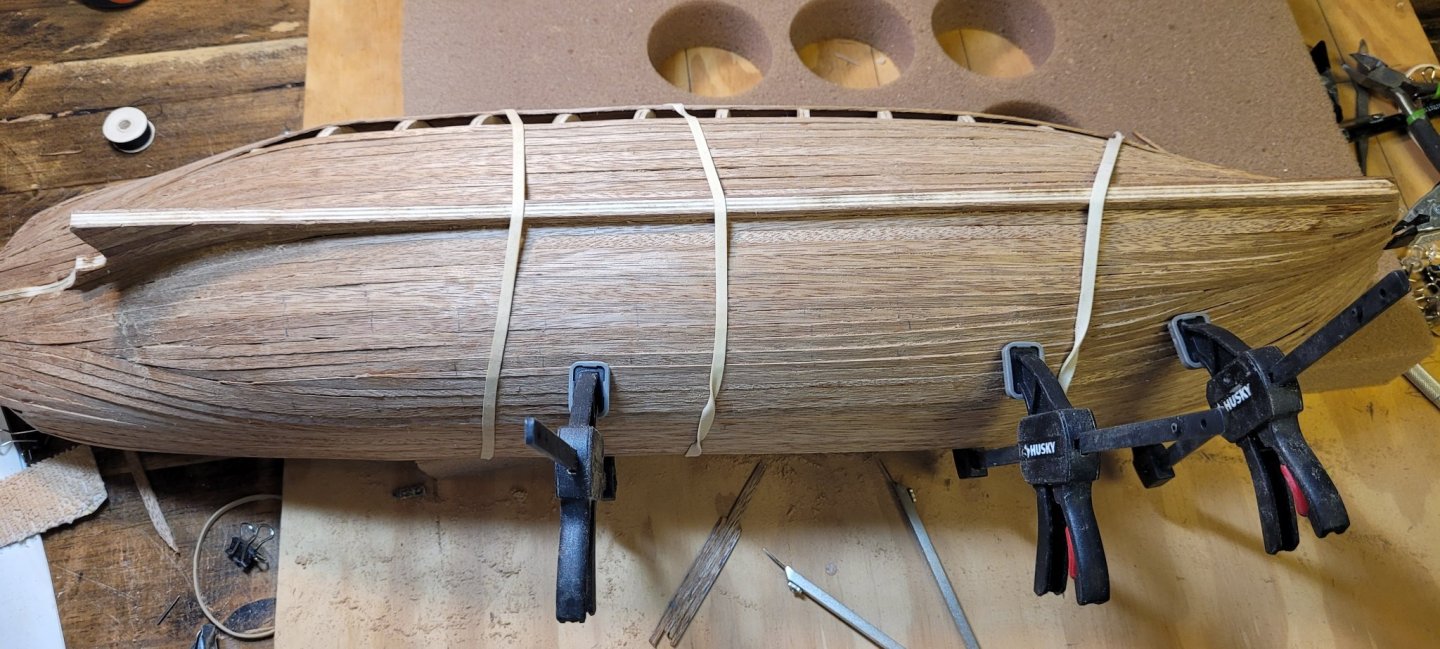
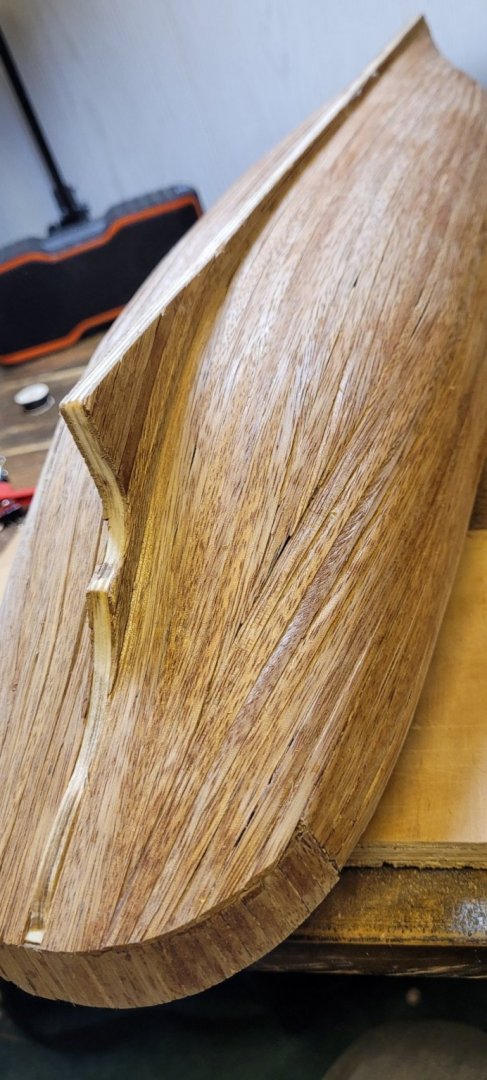
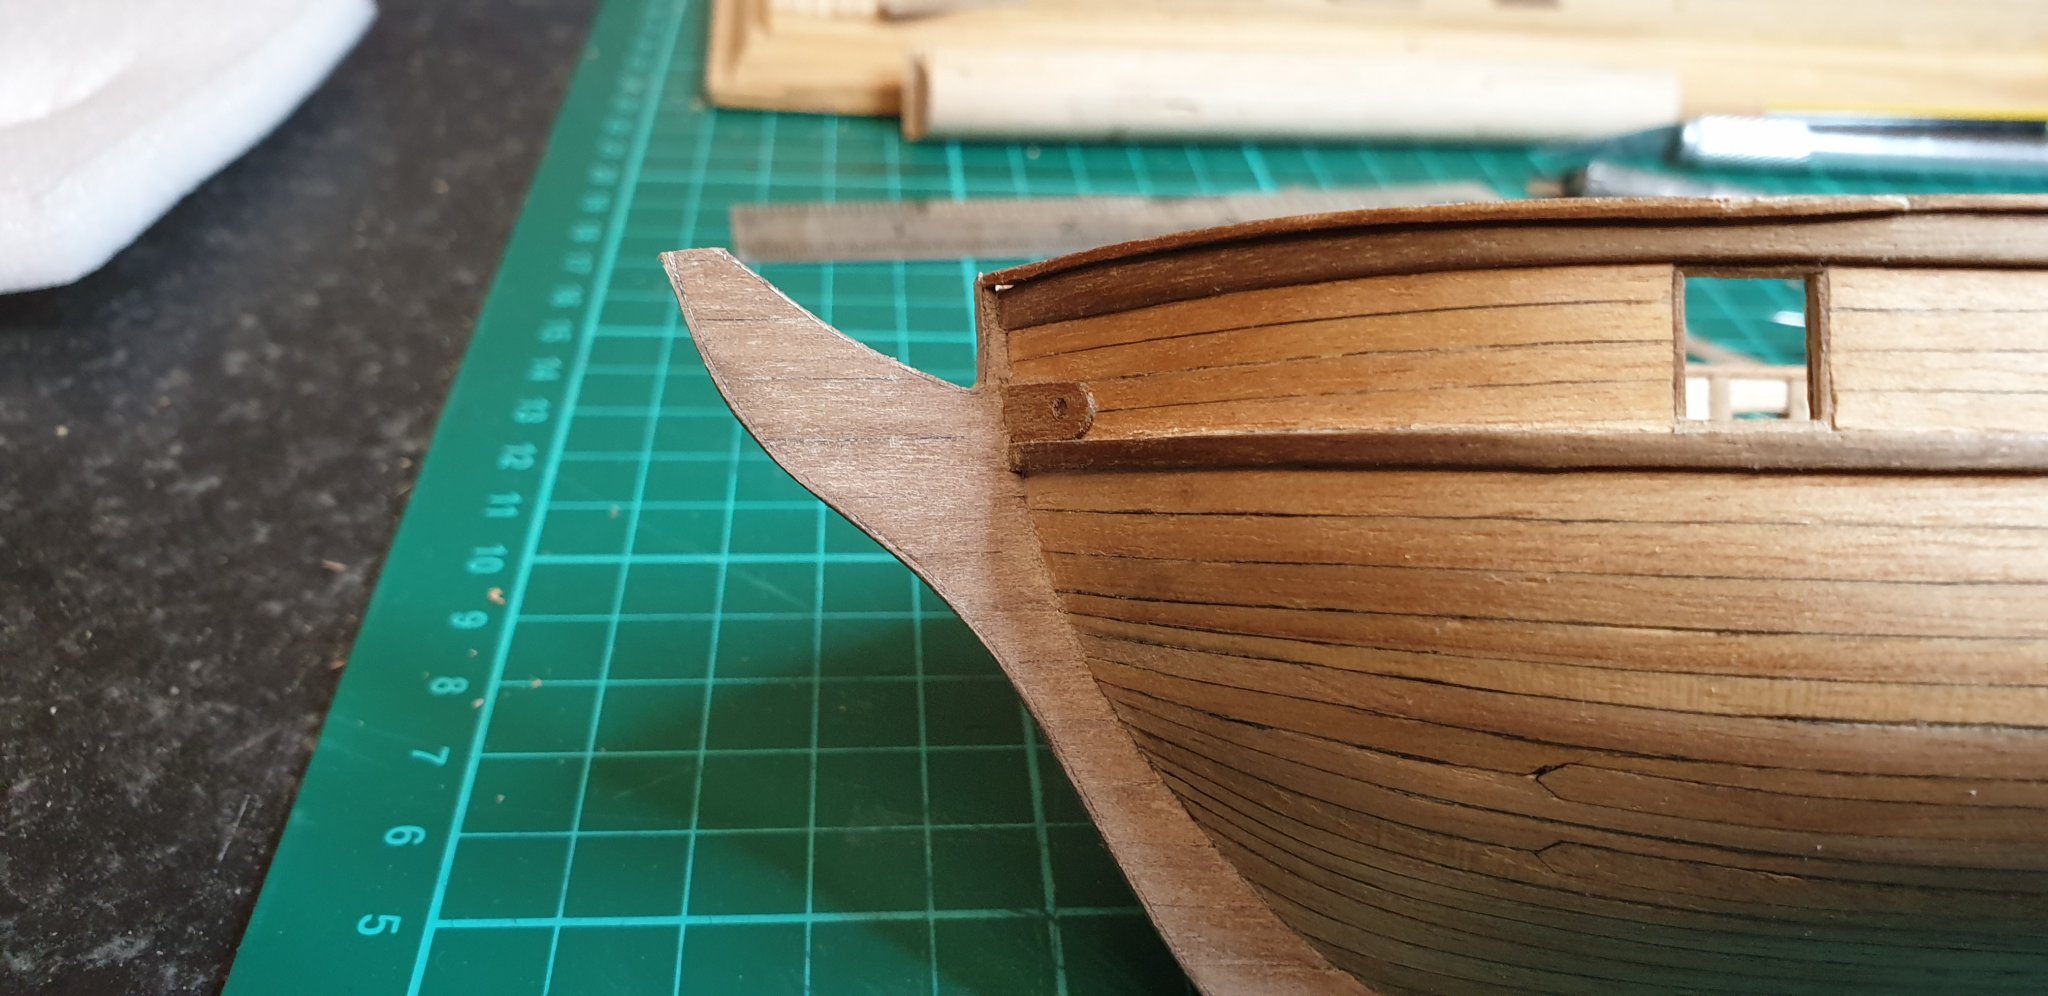
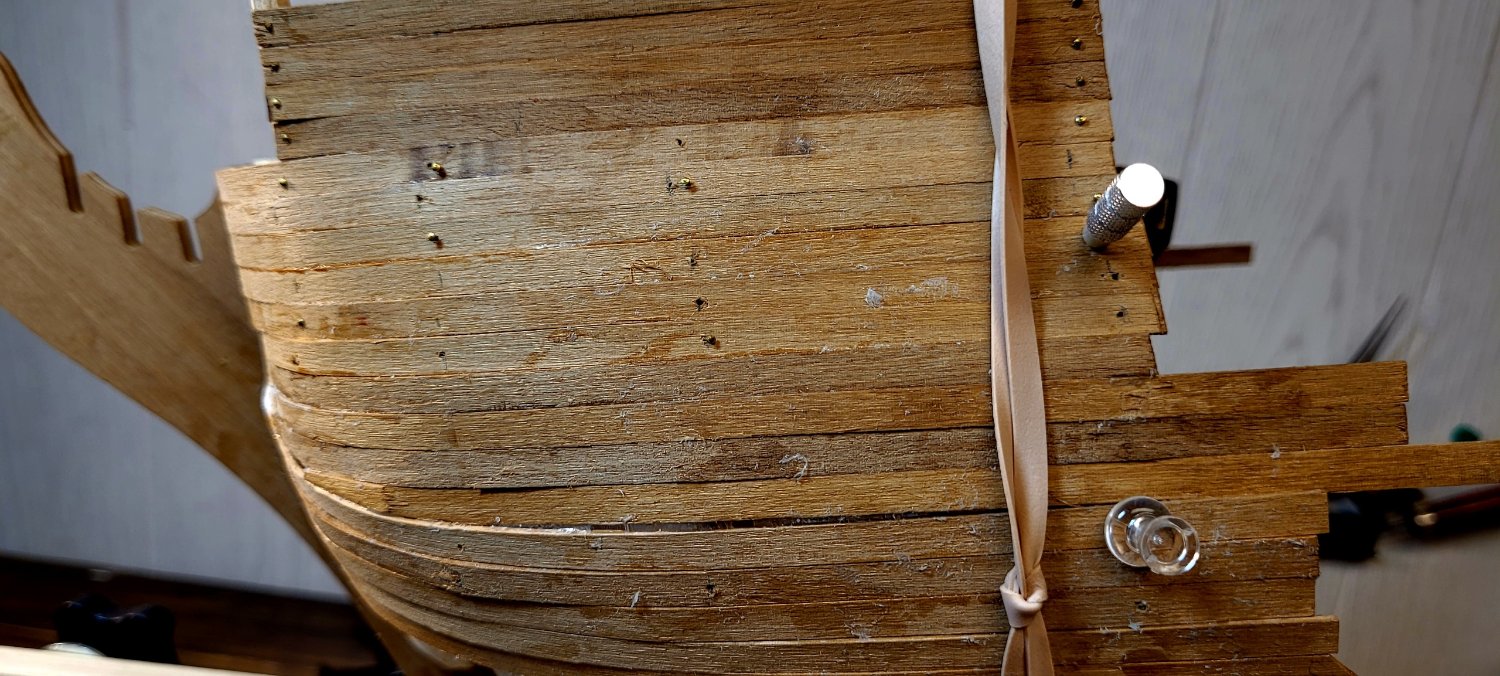
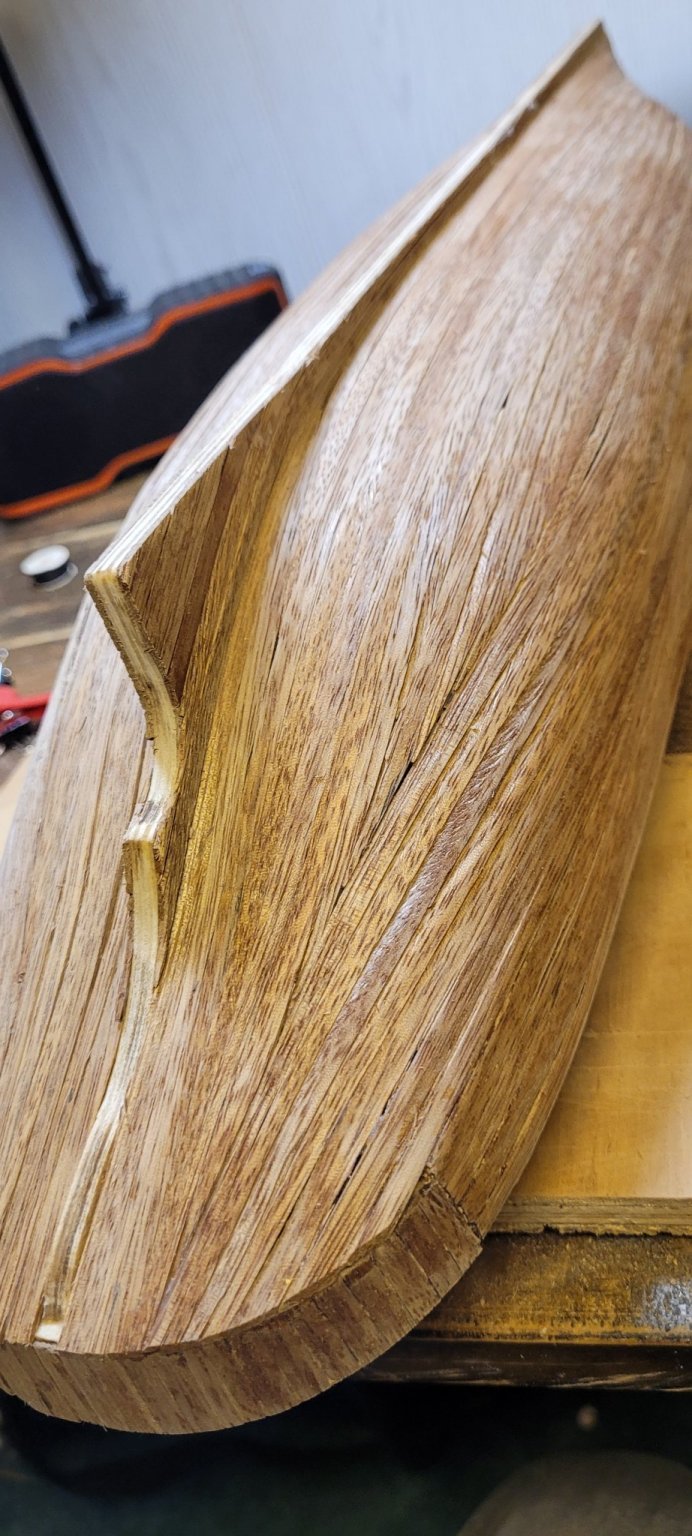
I proceeded with the hull planking, This phase did not go smoothly, I have never worked with planks that are 2X5mm that are made out of Sapelly. I had to do extinctive sanding to get the hull looking decent. After sanding I found some cracks that need to be filled. I couldn’t find the correct color. So now there are color variations in the hull. I don’t want to paint the hull. They do give extra thin planking to do a second planking. I’m not sure at this point if I will be doing a second planking.
- ccoyle, petervisser, yvesvidal and 2 others
-
5
-
I recently purchased the Elidir kit by Constructo online, the box had already been opened. I’ve completed the hull planking, but unfortunately, I didn’t take an inventory of the parts beforehand. Now, I’ve discovered that some key components are missing. Does anyone know if the company is still in business or where I can find replacement parts?
Thank you -
-
On 7/30/2020 at 6:01 PM, Davy Jones said:
Finished the keel. I think it looks ok now its sanded.


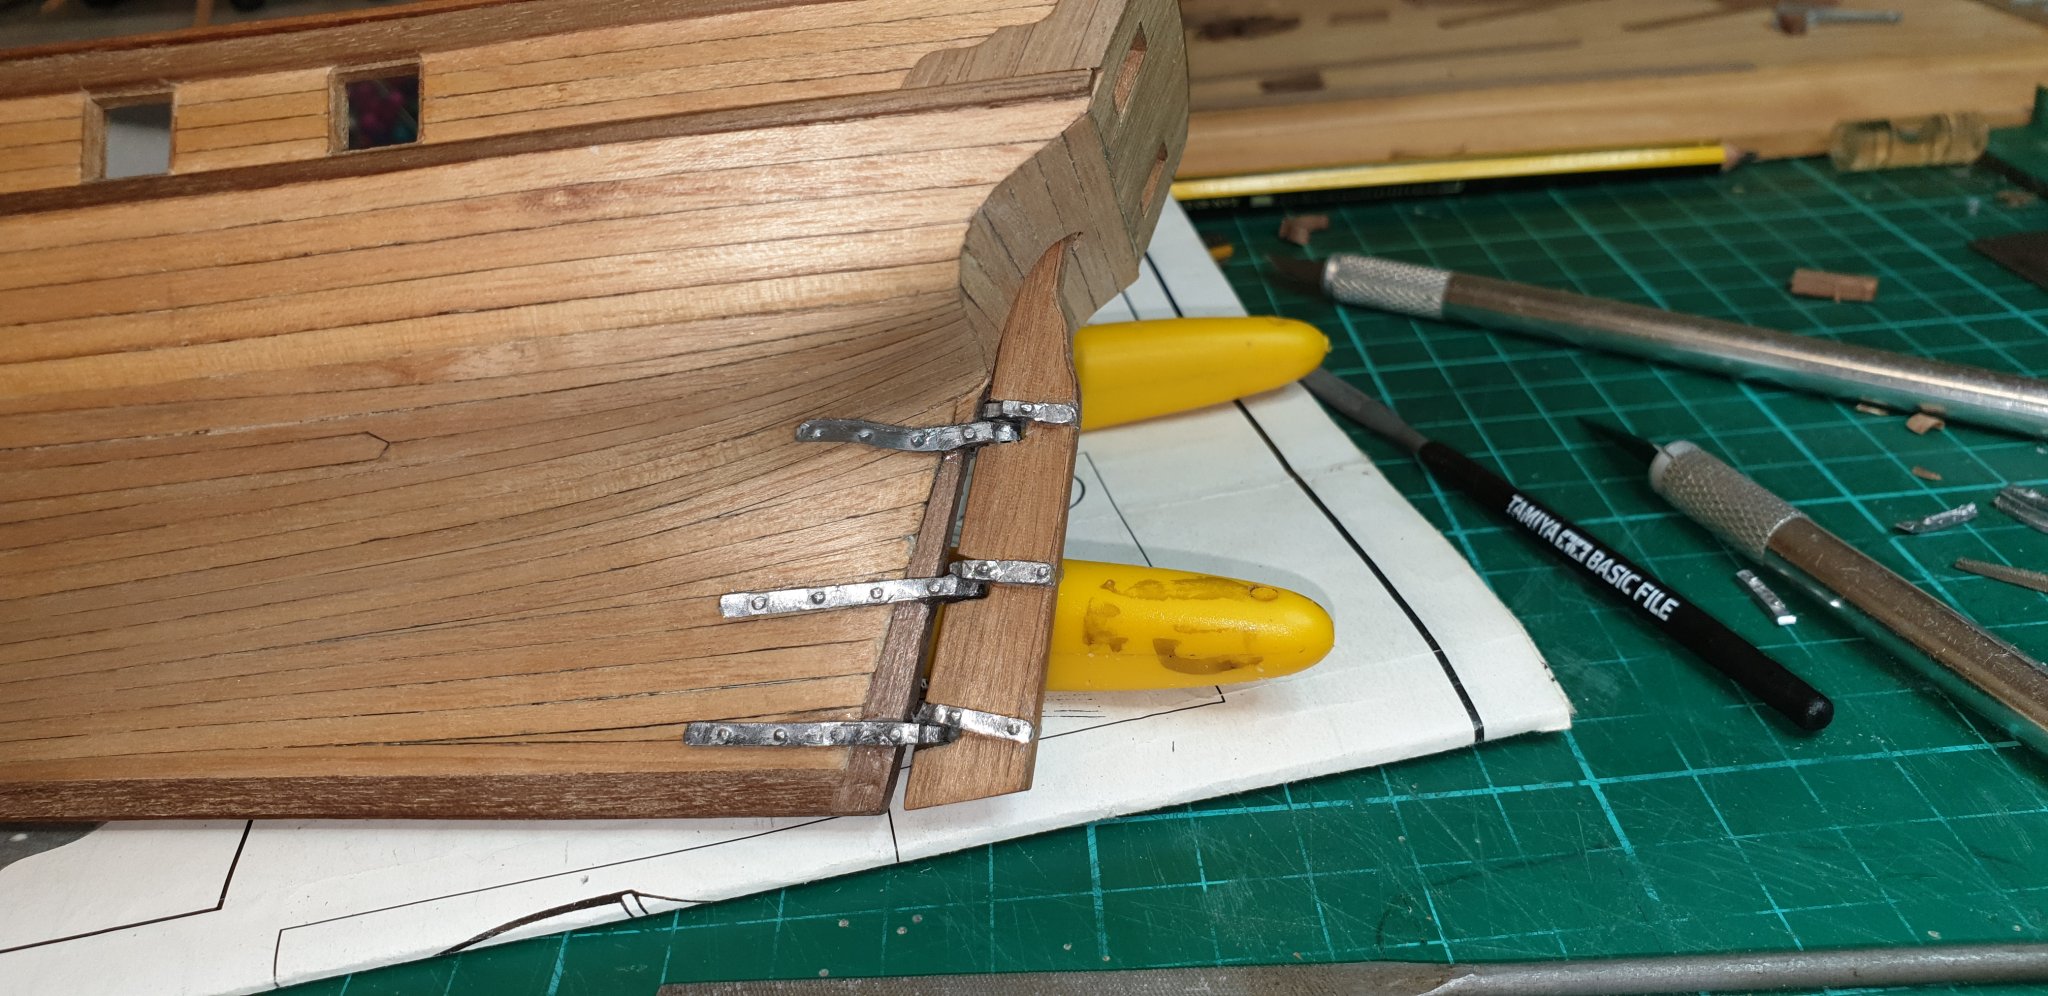
I also attached the rudder This was quite fiddly, it took alot of fitting the re-fitting but all went well I had to be quite carefull with the rudder Gudgeons i think thats what they are called, These are made out of a lead type metal and marked very easily.

Davy.
I am making the same model, I am up to attaching the rudder. The directions for this model aren't the best. I can't figure out what to use for the pintles for rudder Gudgeons. What did you use for the rudder pintles? Thank you David
-
Have not worked on the HMS Victory for most all of the summer. Almost finished with the first layer of planking. I have a lot of prep work ahead for the second planking. I and wondering about the second planking methods.


When adding the second planking how do you fasten the planks while the glue dries?
-
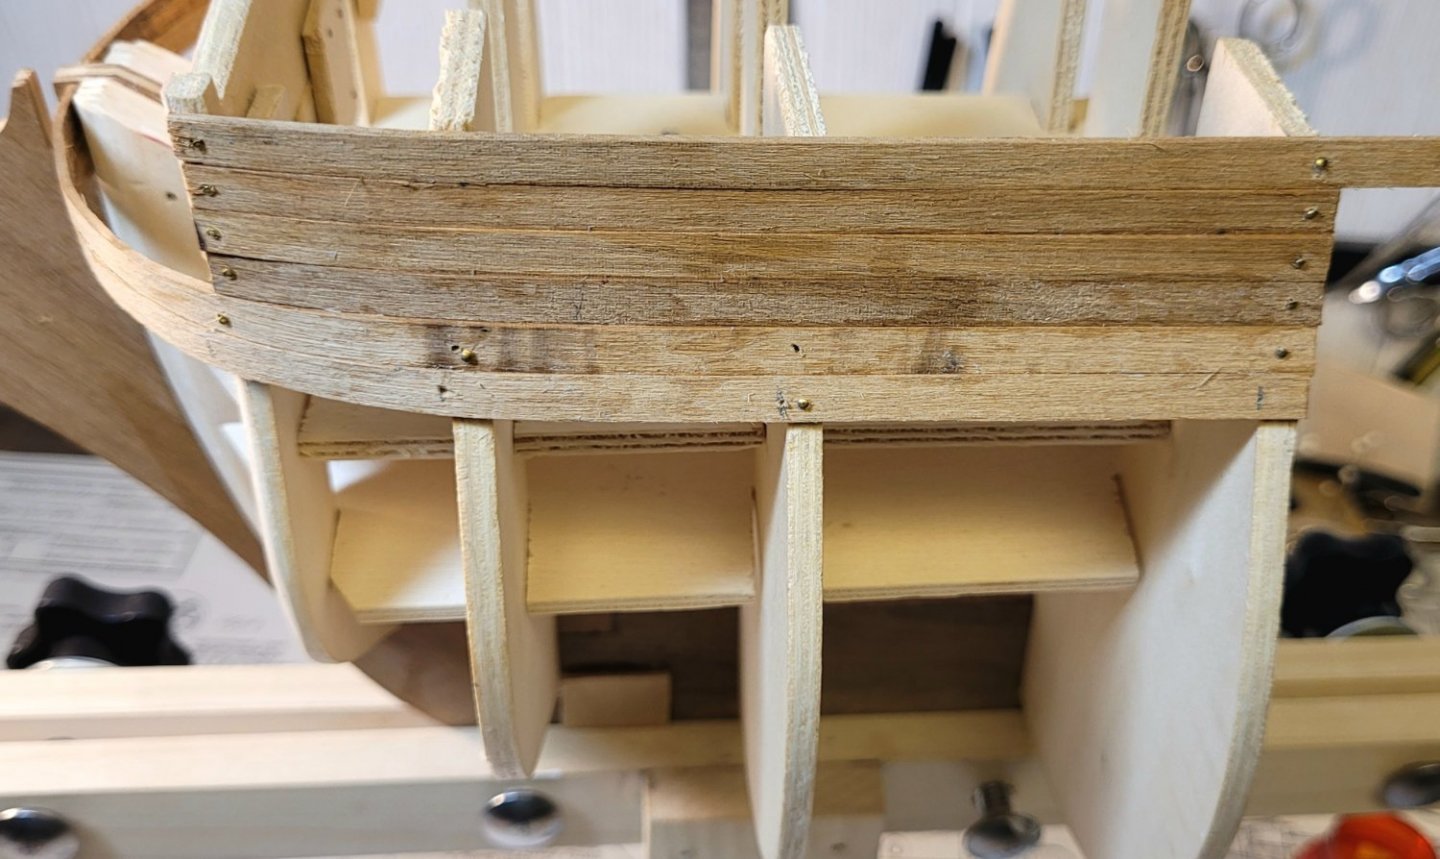
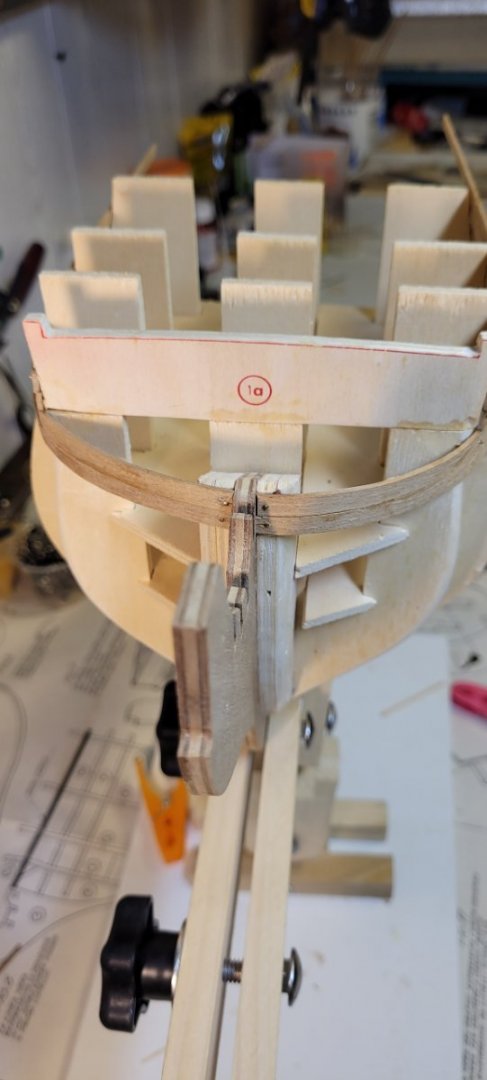
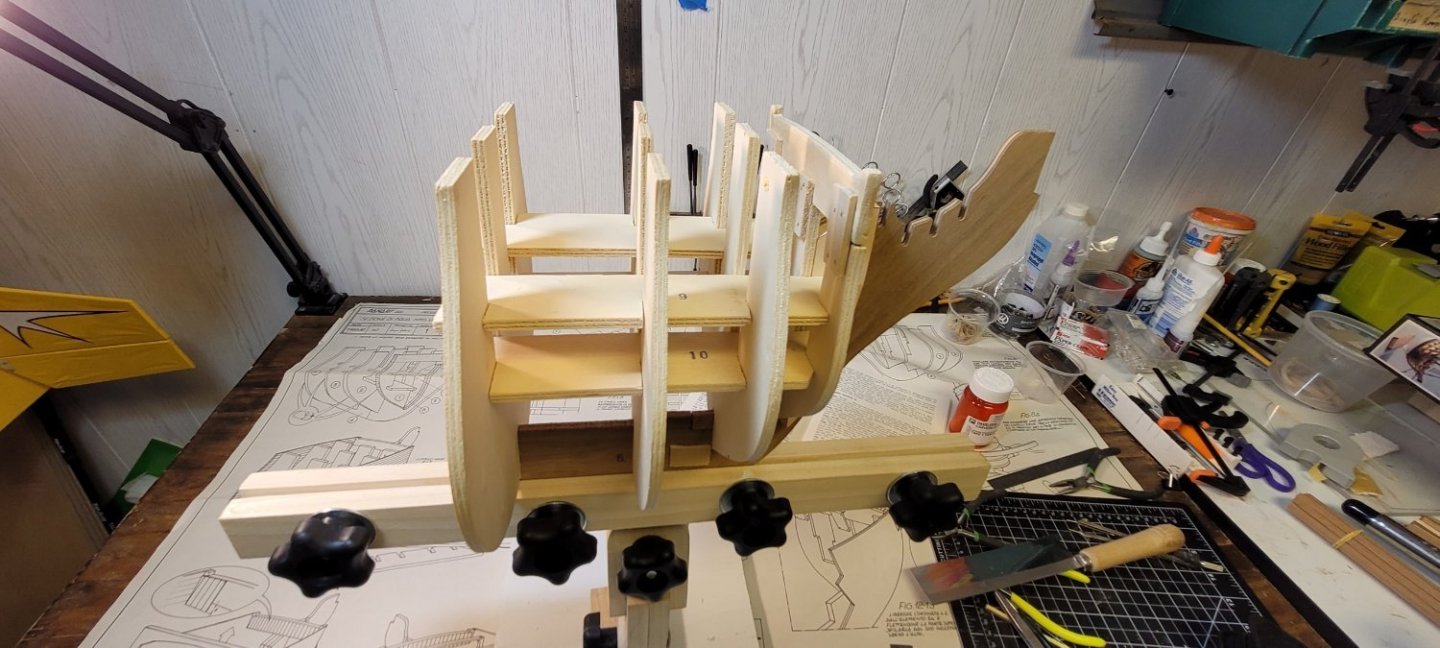
Started the first layer planking. It was a learning curve for me on how to use the soldering iron as to when enough heat was applied as to not burn the planks. As you can see in the second photo I scorched the planks.
Also the written directions said to wax the frames so the frames can easily be removed after the planking is done. But in the sheet plans it show tiny nails into the frames. I'm not sure if I'm doing the planking correctly or not, time will tell
- Henke, mort stoll and GrandpaPhil
-
3
-
This is my seventh build. I do believe it's above my skill level but for better or worse I'm going to give it a try. I've never done a second planking so this will be interesting. Also, the sheet plans are all in Italian. I've been using the Google translator which works really good. I started using a soldering iron with a jig that I made for the bending of the planks. I've found that water soaking the planks before I heat them to bend work quite well. More photos to follow as I progress.


-
Could that piece be reversed? Looks like the longer flat side might be placed towards the bow. I'm probably way off on suggesting this.
-
On 3/16/2022 at 11:41 AM, Dave_E said:
Words to live by in this hobby for sure! Thank you for the reminder. Beautiful boat! 👍😀
Thank you very much.
-
23 hours ago, JerryC said:
I still need to work on the rigging. I couldn’t figure out what went where from the plans provided.
The plans for the rigging are difficult to follow. I did my best to follow it, but I guessed where they should go from past builds and sailing experience.
I just do the best I can and learn from my mistakes.
-
Your model looks great!!
Not sure of the type of wood that came with yours, I'm thinking mine came with walnut. I purchased it on eBay and I think it was laying around for a log time a all of the wood was very fragile and kept breaking when I used an exacta knife. I ended up sanding most all of the planks into shape
-


I finished
I have found out that it's not a race to the finish line to complete the model, it's about finding out that I need to be more patient with myself while model making and not to rush any of the stages so I can better understand and slowly master techniques for future models.
- mtaylor, Landlubber Mike, Ian_Grant and 6 others
-
9
-
5 hours ago, BobG said:
Nice job on this interesting model, Sparky!
Thnk you
-
8 hours ago, SaltyNinja said:
Did you fill in the gap? What about making a piece to fill it in and gluing it in? I think I read somewhere about using glue and sawdust for filler.
It's looking like nice progress anyway.👍
Thank you,
Yes I did fill it with wood fill
-
-
-
-
-
I have to admit that I am not good at keeping up with my build log. Finished with the planking, will be clear coating the planks for the finish coat.
- mtaylor, BobG and SaltyNinja
-
3
-
Coming to the end of the planking process. . The kit had been in a small hobby shop that went out of business during the pandemic; he was ready to retiree. Not sure of what type of wood the kit came with (I think its walnut). I found that most of the wood is very brittle. Learning curve has been frustrating at times. I'm mostly happy with my results. I'm planning on clear coating the planks with either shellac of varnish. There are a few gaps in the planking, not sure if I should leave them or fill with wood fill or sawdust fill. Any input would appreciated
Thanks,
David
- Ian_Grant, king derelict, ccoyle and 3 others
-
6
-
I have them, wondering how I can get a copy to you.
- thibaultron, mtaylor and Canute
-
3
-
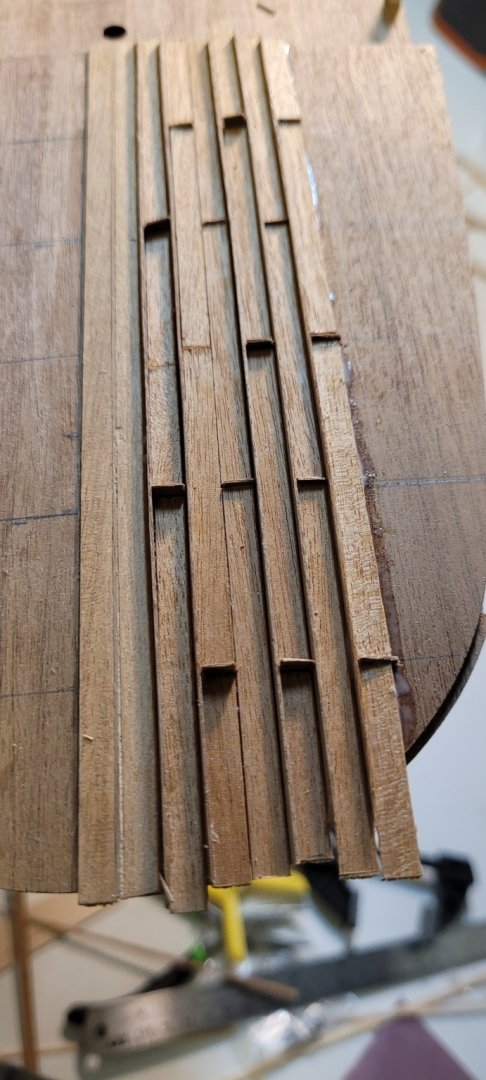
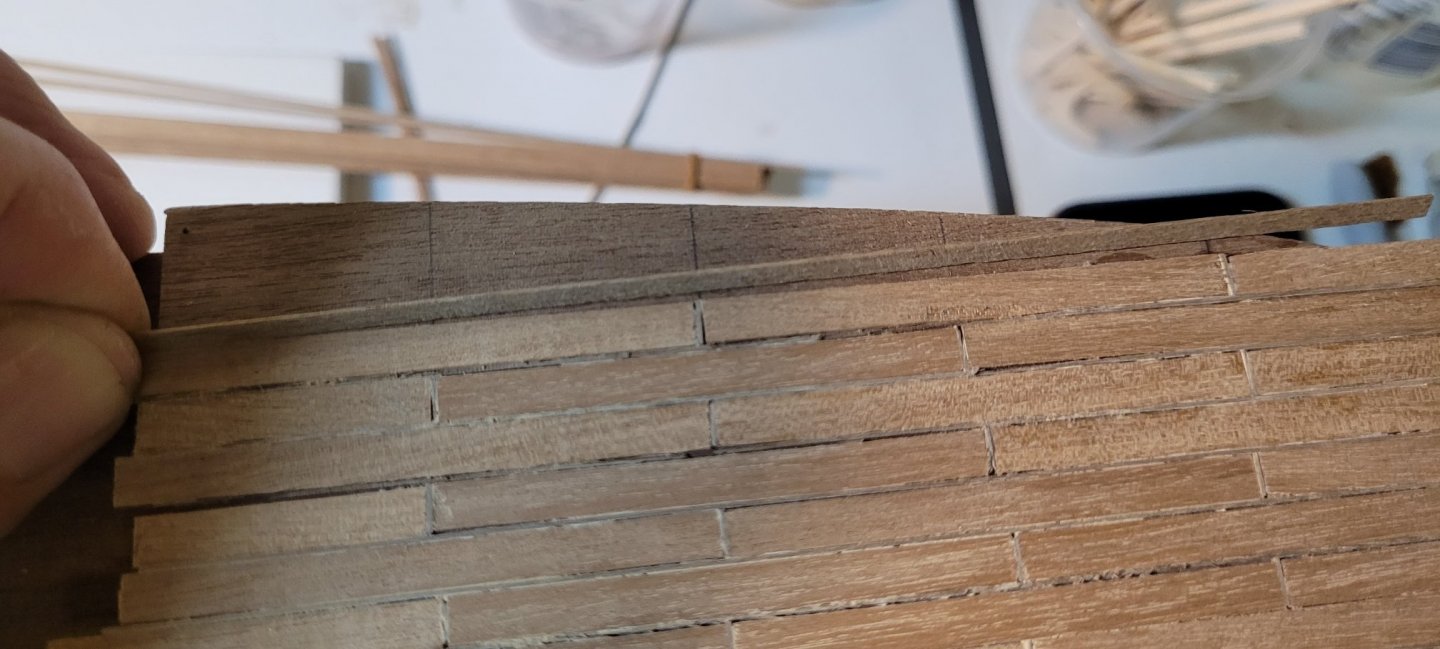
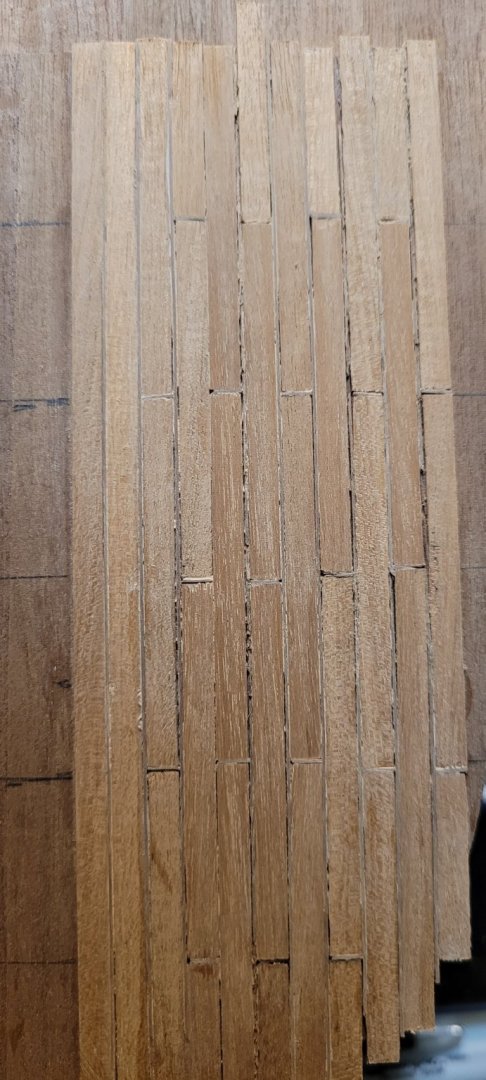
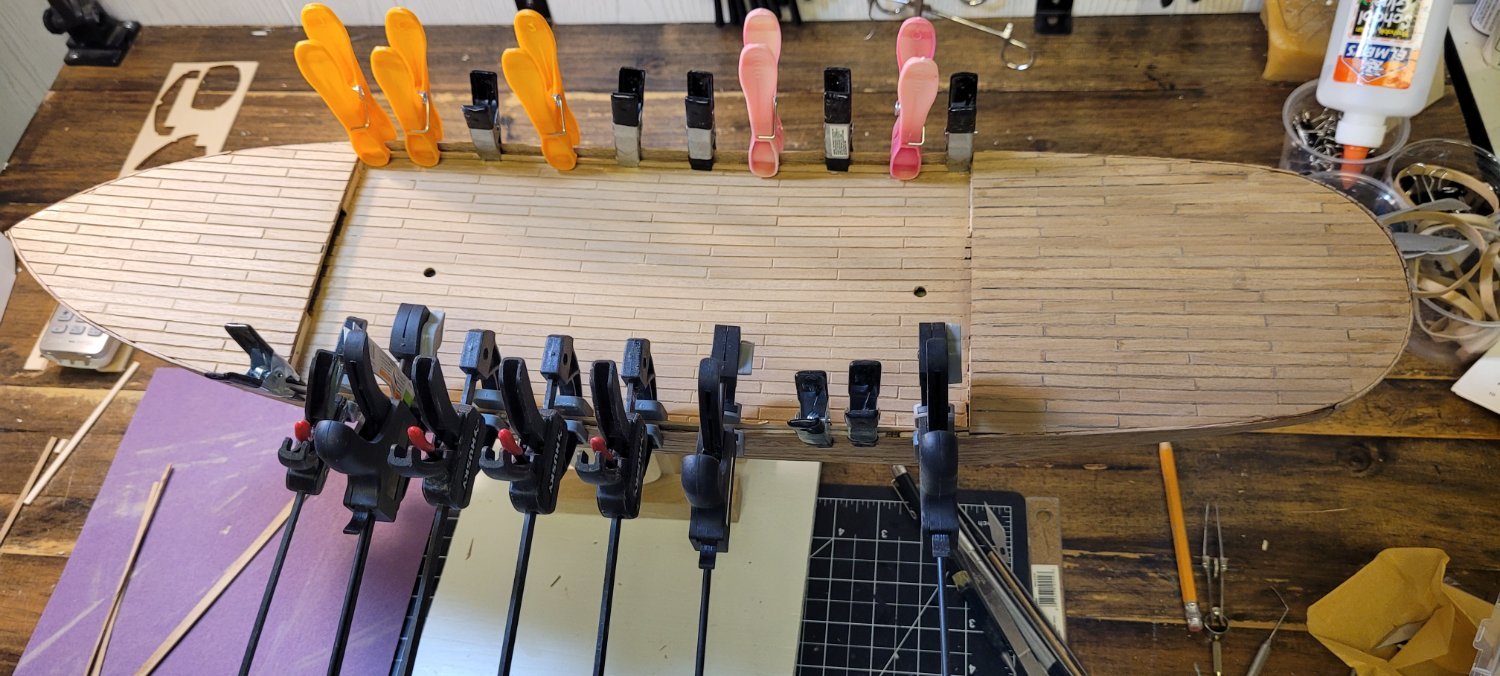
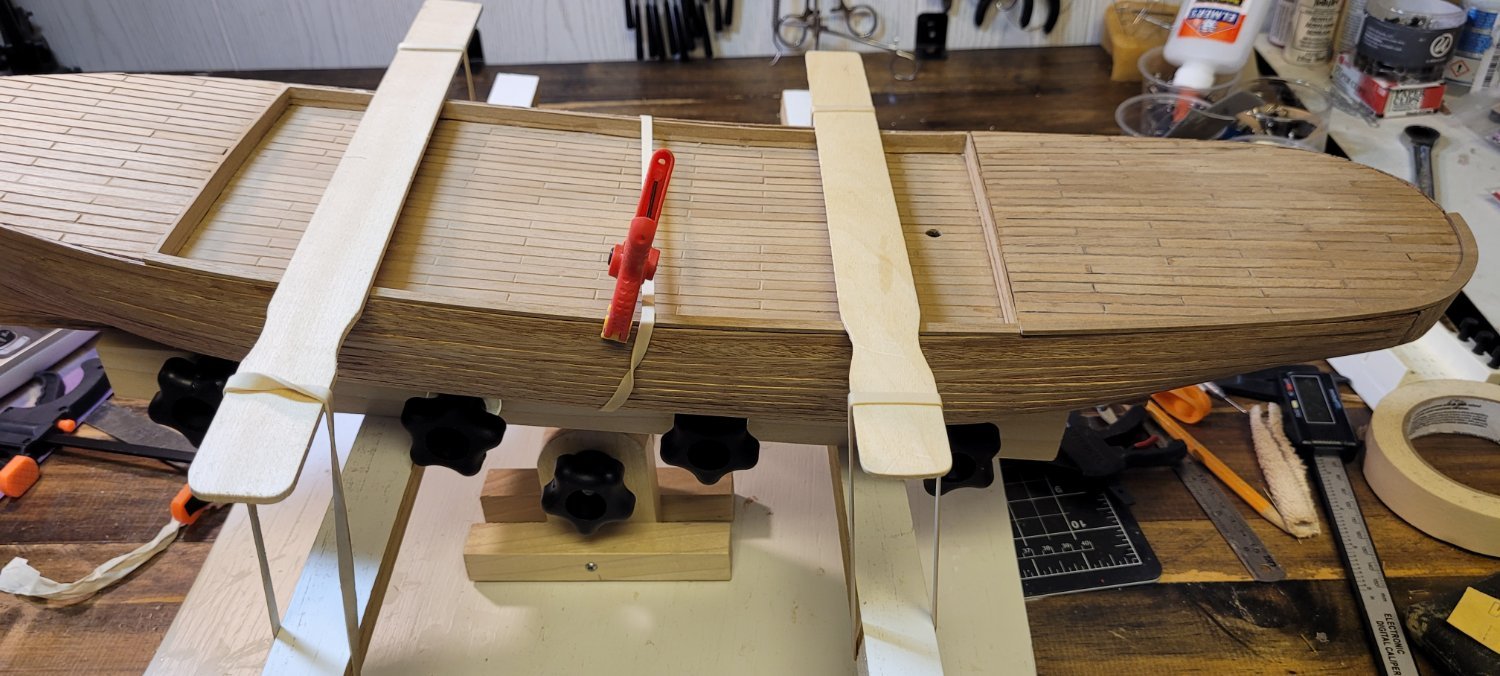
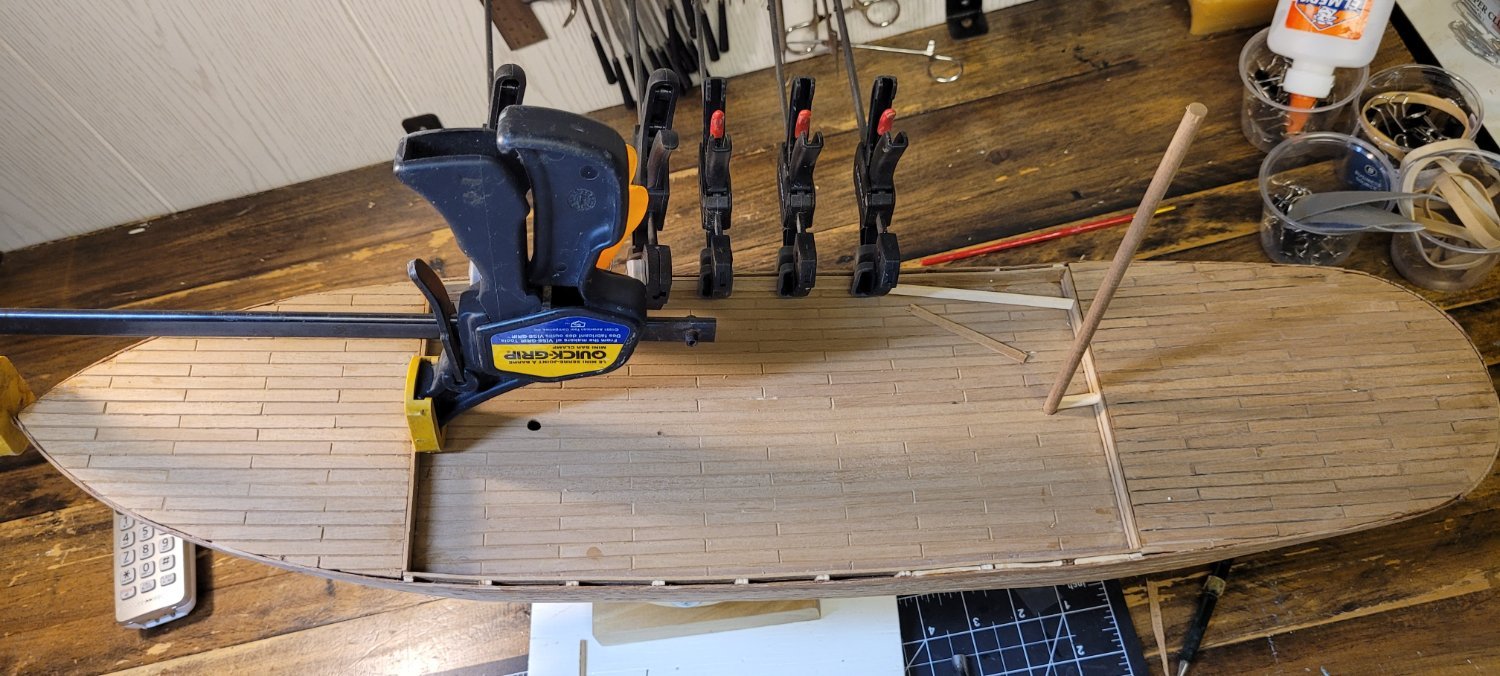
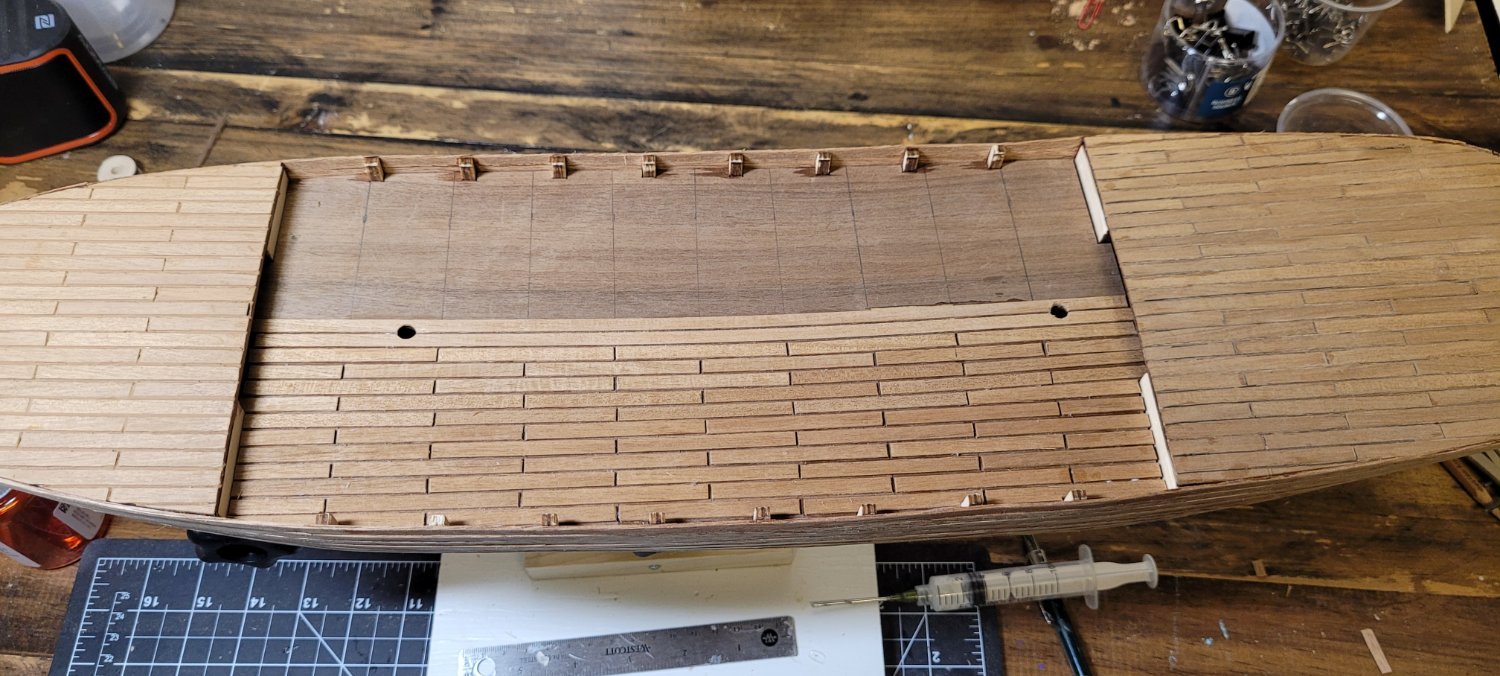
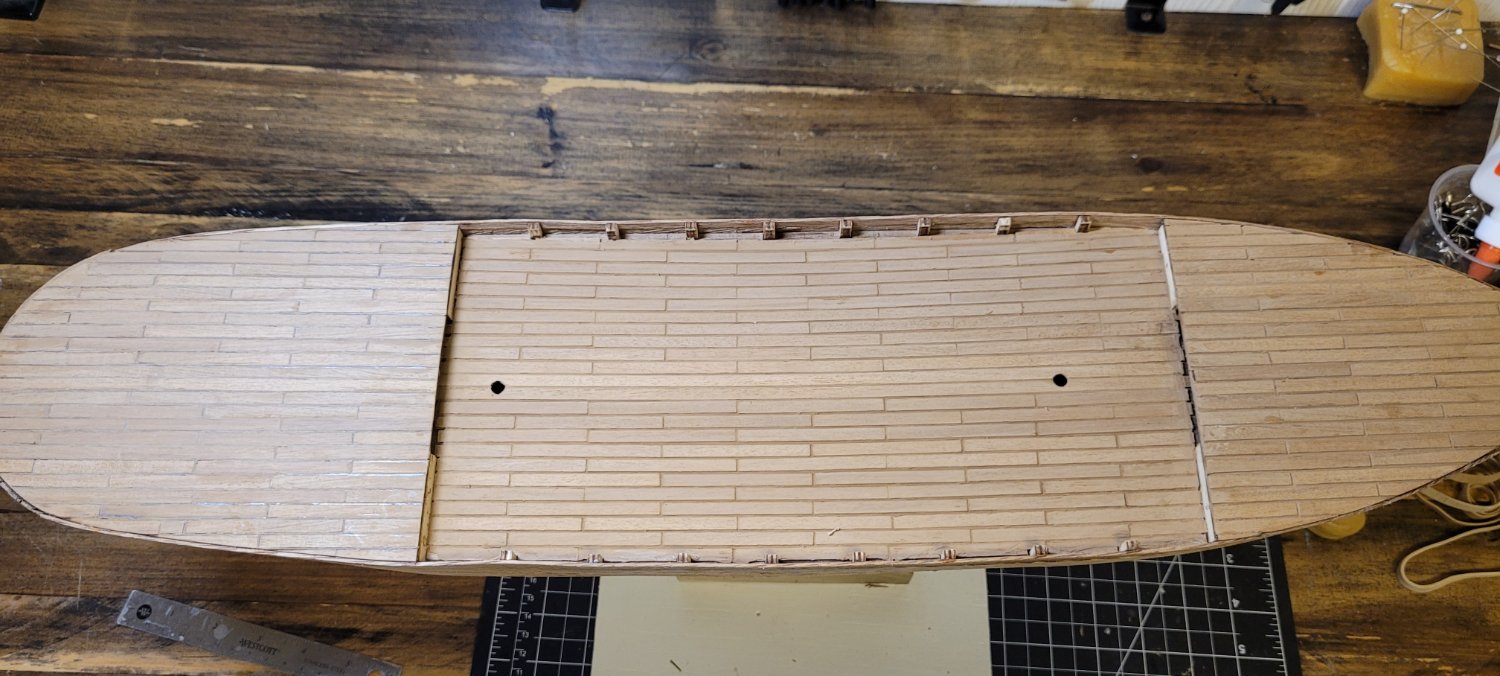
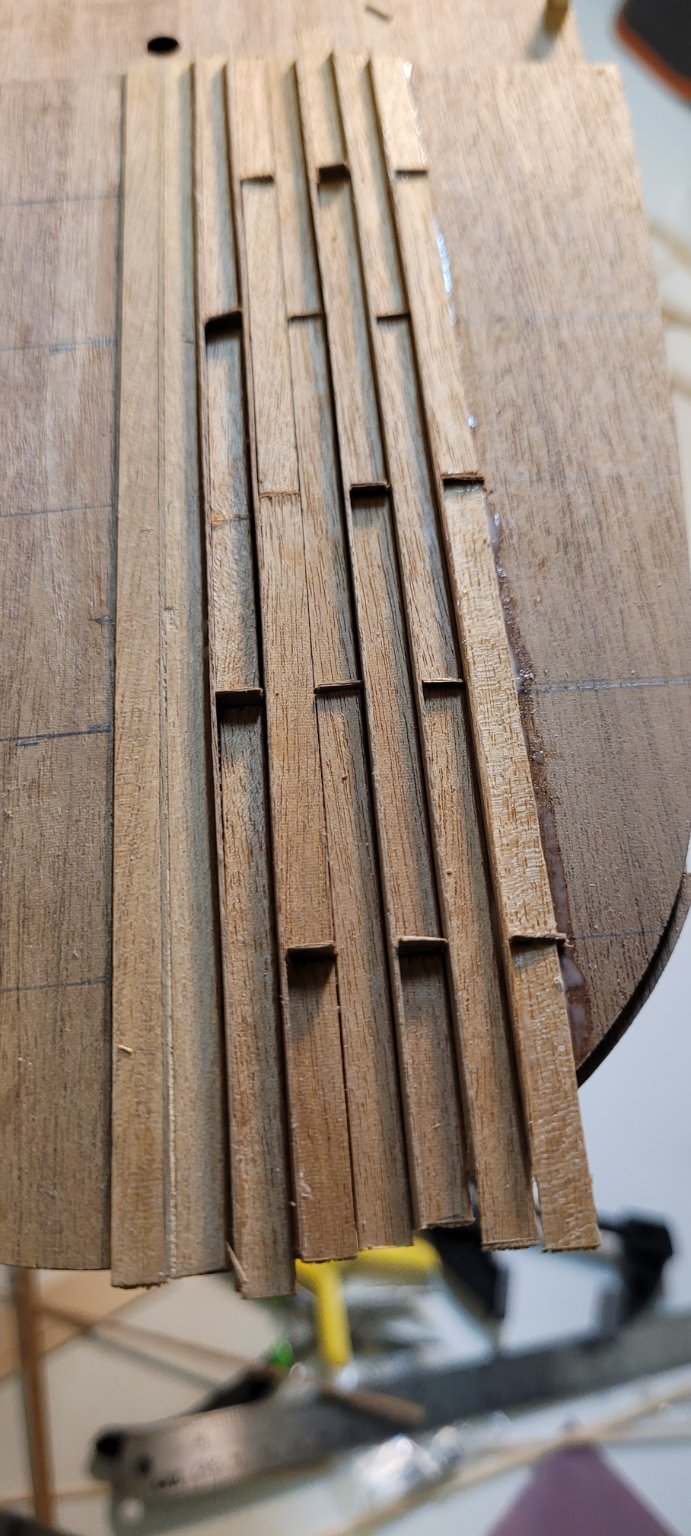
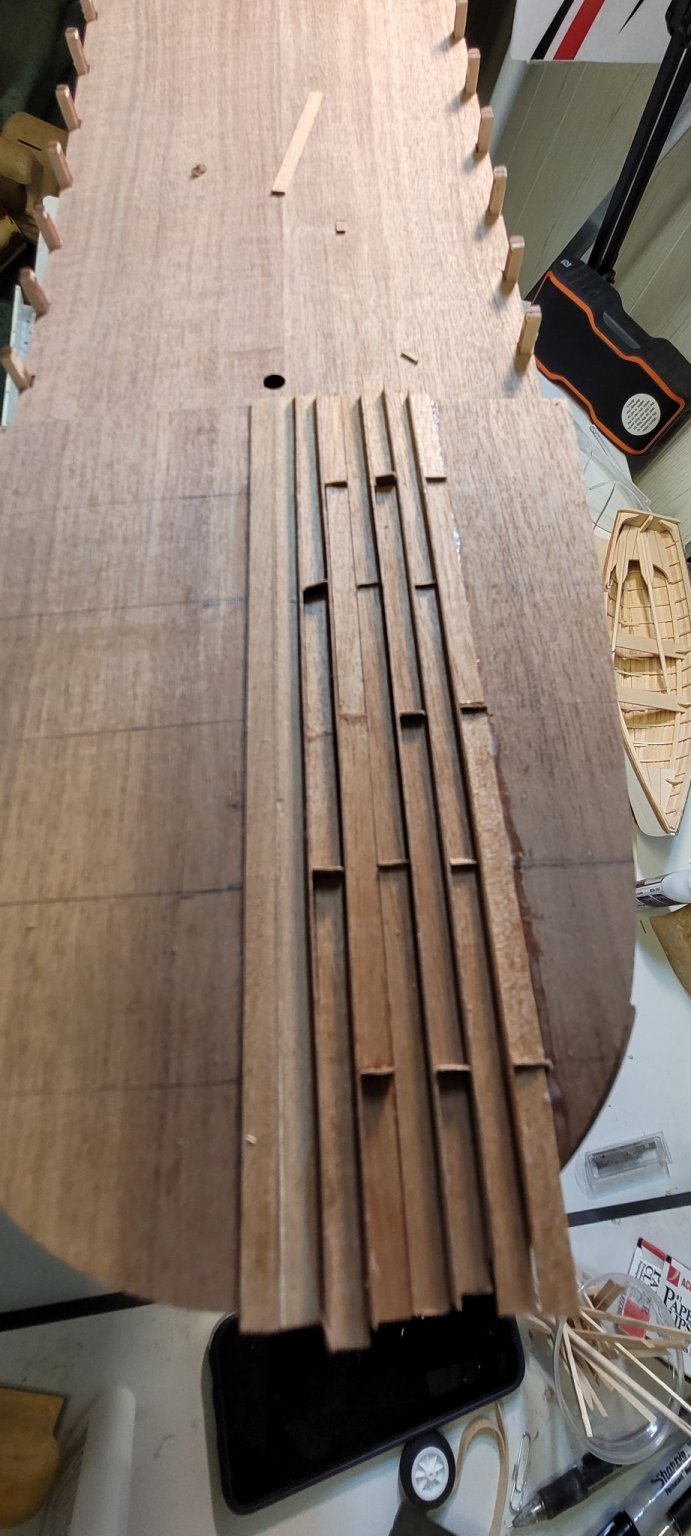
Following the instructions it says to plank with strips 1.5X5mm and space with0.5mm strips. I glued in place, then as per instructions cut off excess spacers that were above the planks. After cutting off I then proceeded to sand, After sanding I noticed that I had not done a very good job of gluing the spacers. Now there are large gaps where the spacers fell out.
Not sure what to do at this point. As you can see I haven't made much progress.
Photo #1 shows the spacers and planks glued
Photo #2 shows a spacer with planks
Photo #3 large gaps where the spacers fell out
Not sure what to do at this point. I used white glue, I'm thinking about trying to remove the planks and spacers by soaking with water. Then gluing planks in place with no spacers then pencil line in spacers.
Any advice?
Thanks,
David
-


.jpeg.816912f399adb1a03a72ce835cafcbde.jpeg)


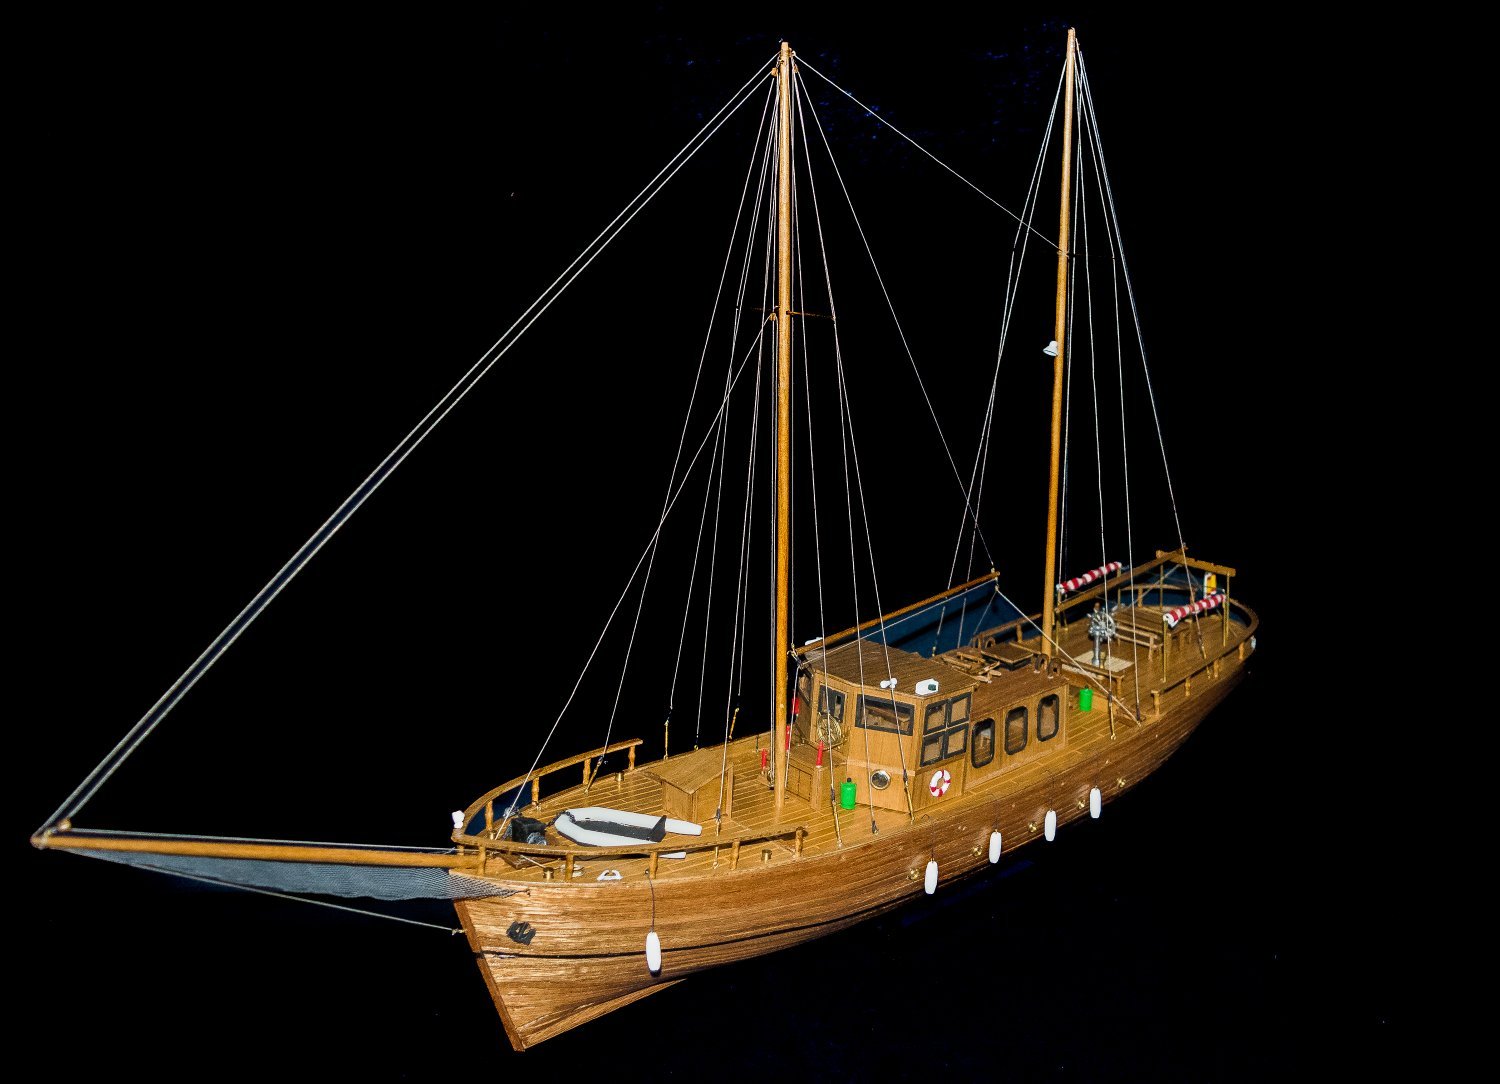
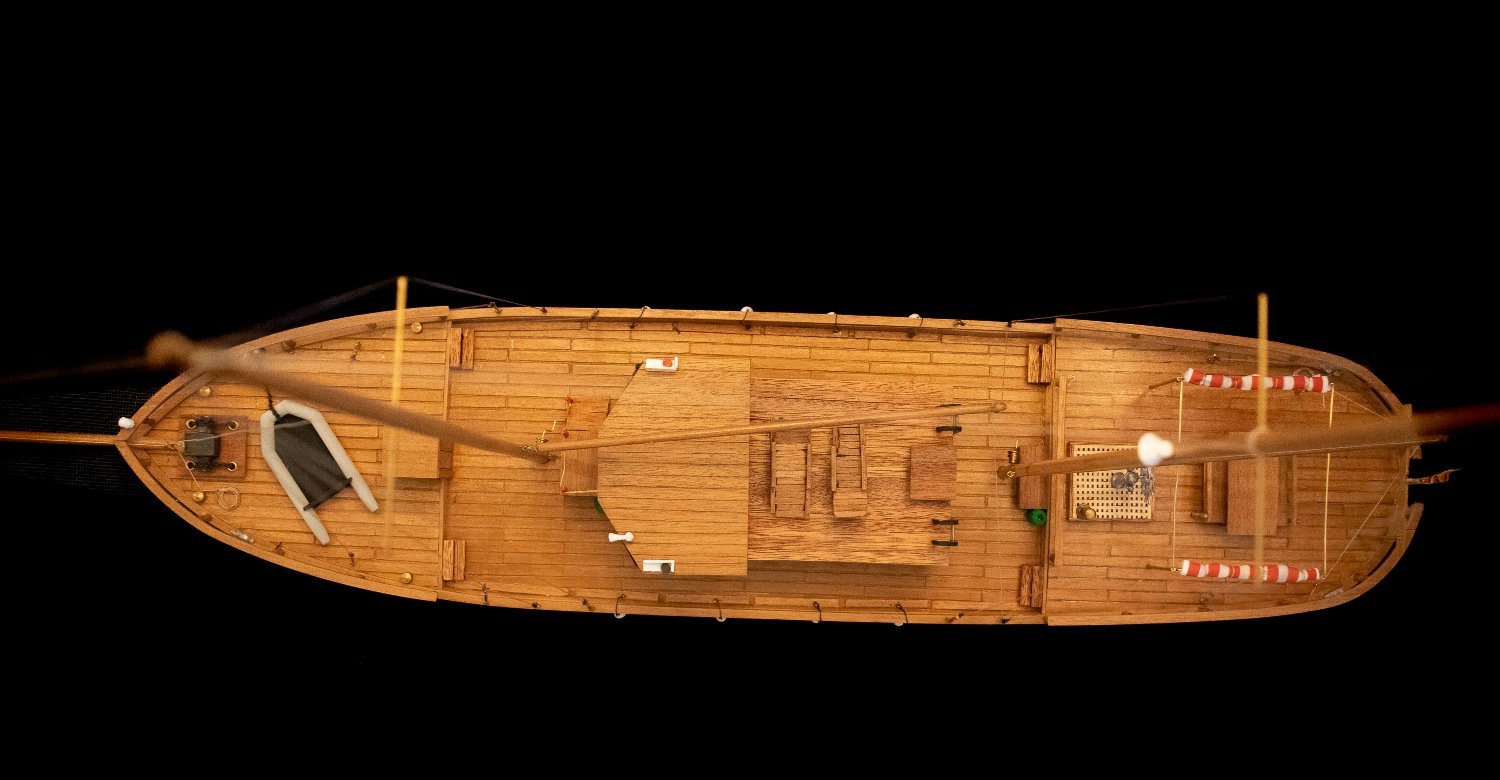
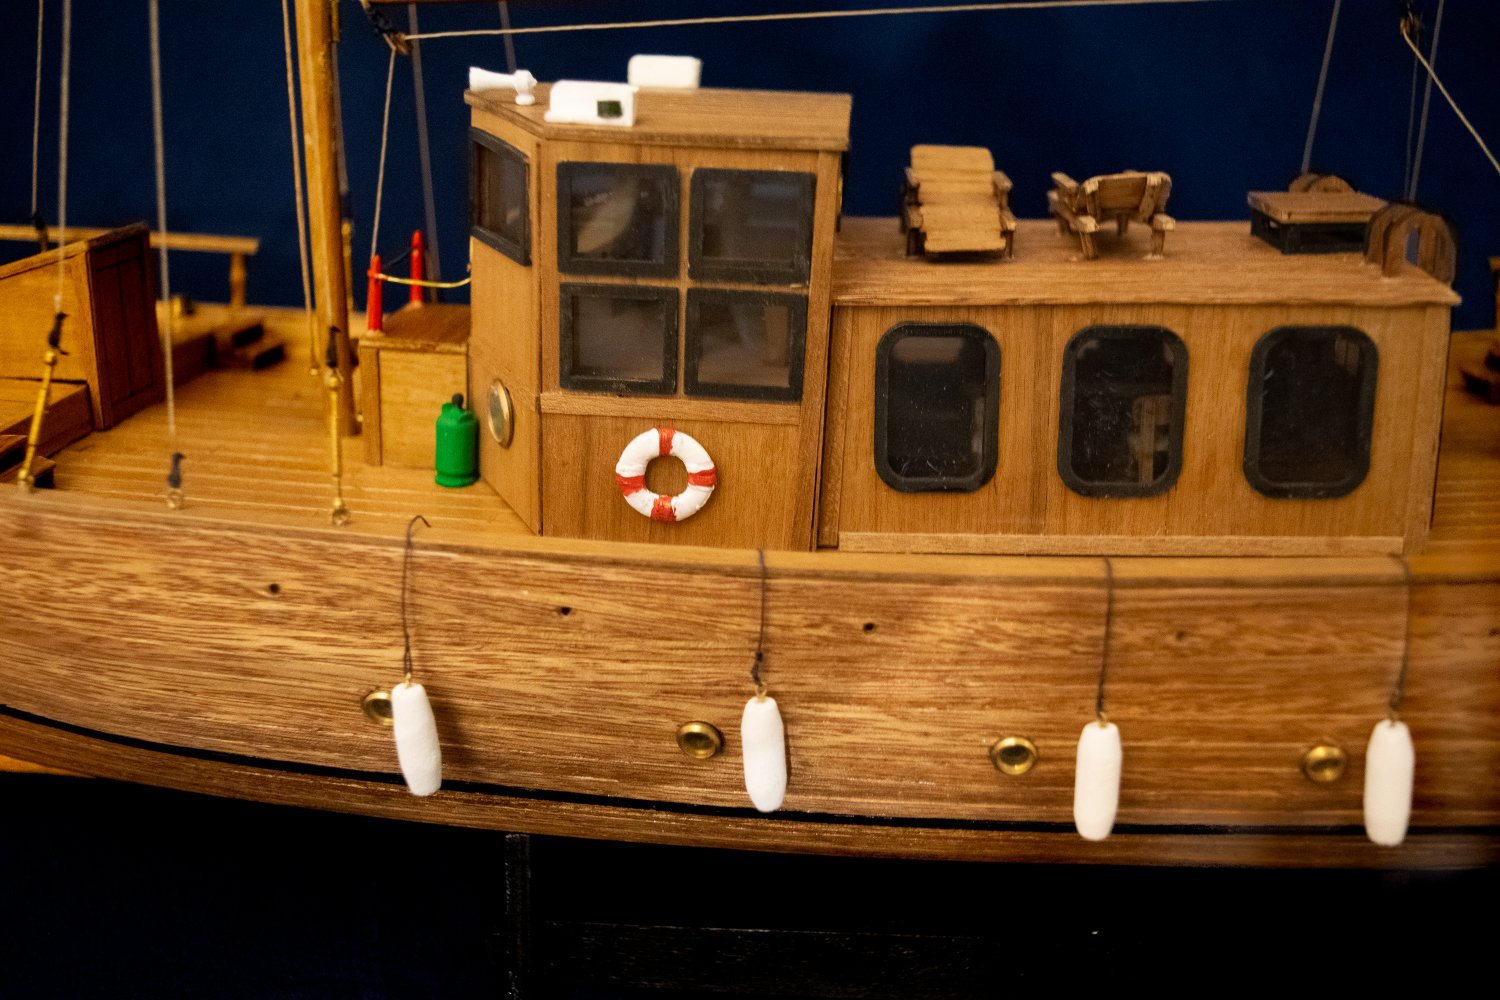
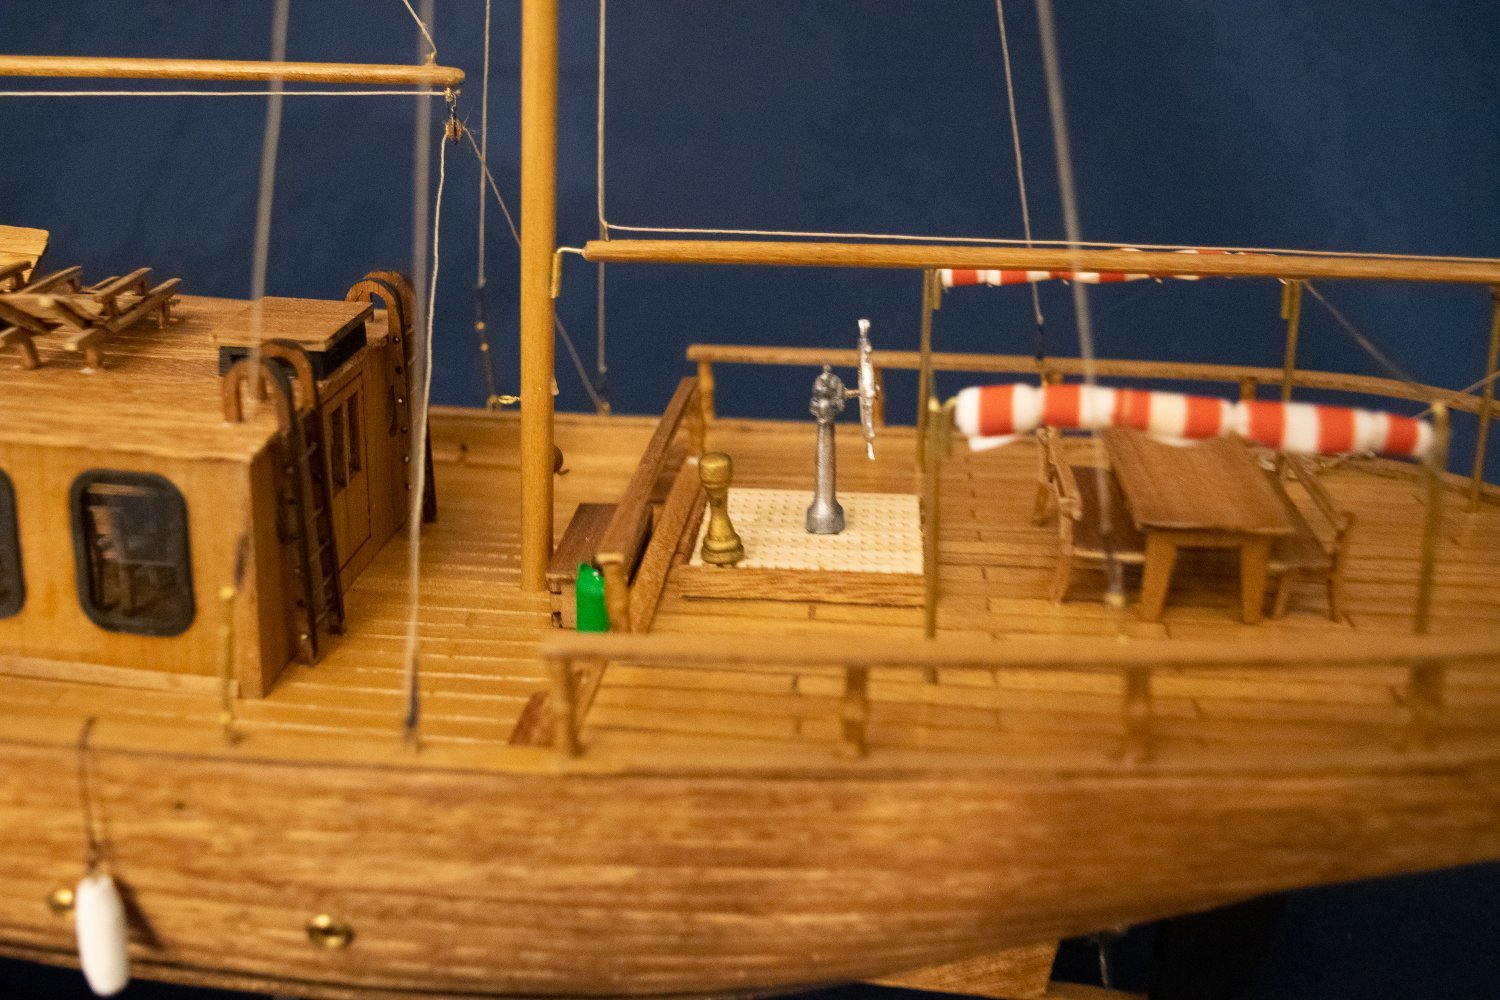
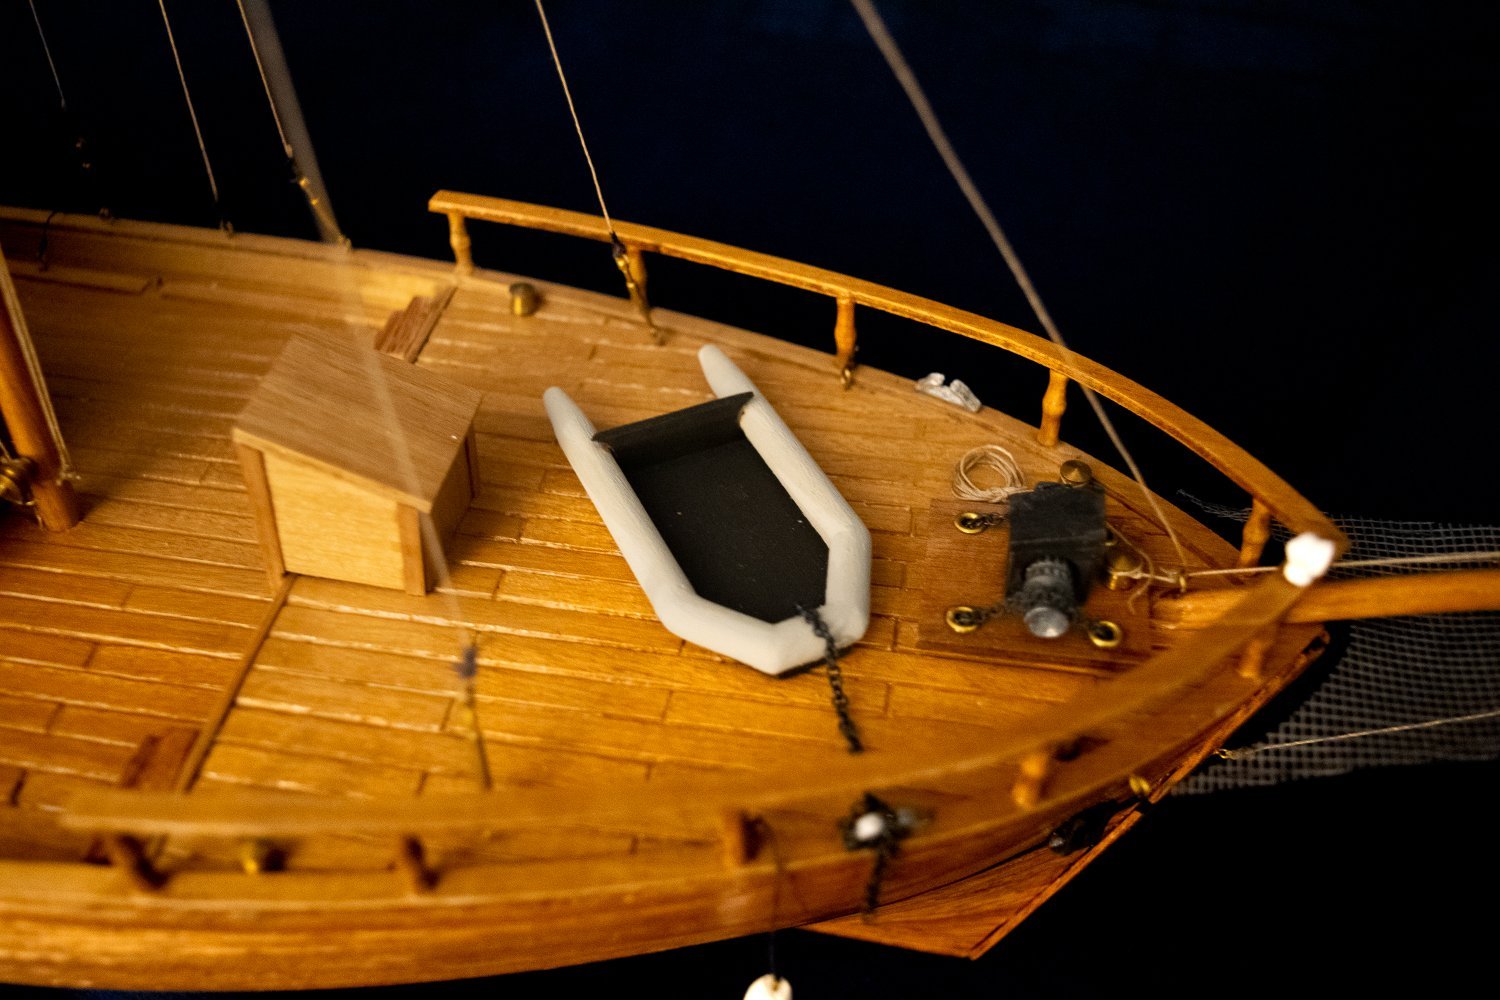


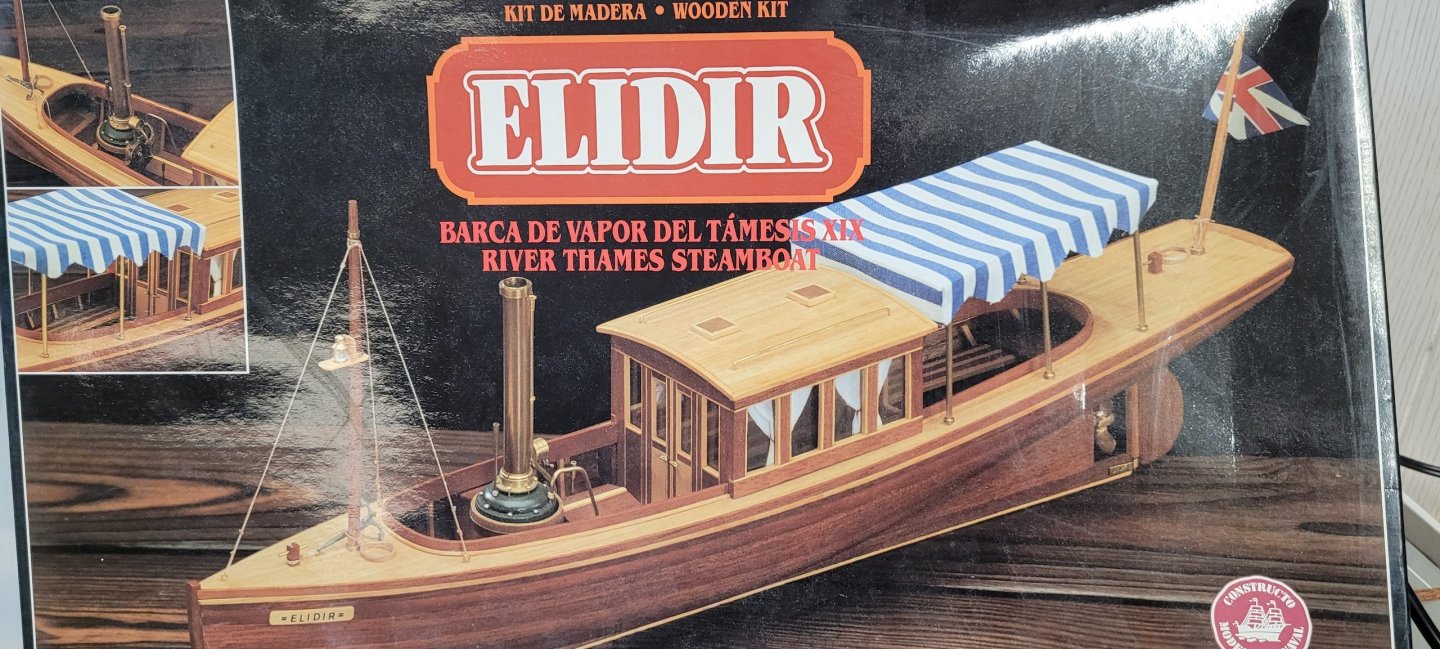
Elidir/Louise by Sparky21 - Constructo
in - Kit build logs for subjects built from 1901 - Present Day
Posted