pwog
-
Posts
223 -
Joined
-
Last visited
Content Type
Profiles
Forums
Gallery
Events
Everything posted by pwog
-
 @CTYankee Hi James, I’m sorry you’re having a difficult time regarding the painting. Hang in there! Have you tried calling Bluejacket? They’re very helpful.
 -
@VTHokiEE I’ve started researching acrylics for my next build.
- 87 replies
-
- 2
-

-
- bluejacket shipcrafters
- red baron
- (and 3 more)
-
@BobG Hey Bob I am also a former Coastie (1974-1978). I was a boat coxswain on the Outer Bank of North Carolina. I ran 44 footers, 41 footers and 30 footers. Dumas still has the 44’ and 41’ listed on their website and a couple of other USCG vessels.
-
Thanks VTHoklEE! The brand is True North Precision Enamels, they came with the kit.
- 87 replies
-
- 2
-
-
- bluejacket shipcrafters
- red baron
- (and 3 more)
-
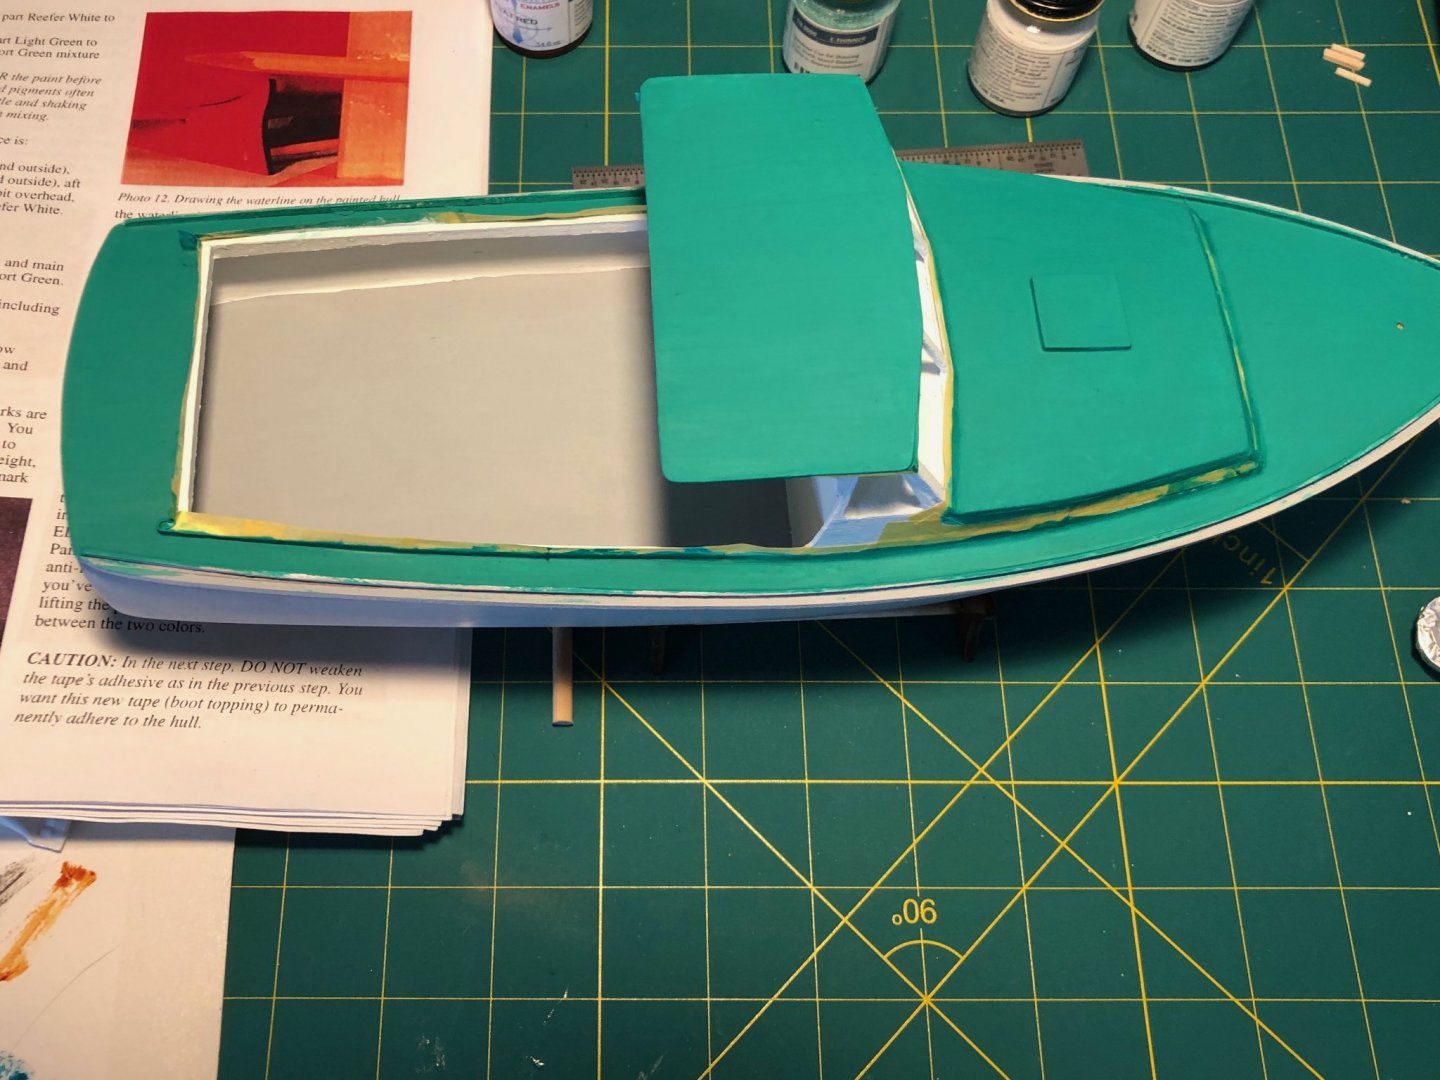
Just a quick update... I'm still in the painting process. I finally got the deck to look (probably) as good as I'm going to get it. The image shows seven coats of jade green. As I previously mentioned, the jade green was so much thinner than the other paints I've used on this boat, so far. I'm not sure if that is something that is normal across model paint manufacturers or not. I started to paint the hull a flat red and that paint is very thick compared to the jade green (all from the same manufacturer).
- 87 replies
-
- 6
-
-
- bluejacket shipcrafters
- red baron
- (and 3 more)
-
Welcome Sam! I'm originally from Philly, but live in Maine now. Great job on the USCG boats! They look fantastic.
-
ISO: Enamel tips for beginners
pwog replied to CTYankee's topic in Painting, finishing and weathering products and techniques
@ThirdCoast I didn’t thin the primer. I did thin my first coat of white, but probably not enough. With the other coats of white, I dipped my brush in thinner every four-five brush fills. The jade green is much thinner than the white and primer right out of the bottle. All paint is from the same manufacturer. Keep in mind the first three to four coats looked pretty bad, but then started to even out. -
ISO: Enamel tips for beginners
pwog replied to CTYankee's topic in Painting, finishing and weathering products and techniques
Excellent question ThirdCoast. I scoured the Internet trying to find the answer, but, I couldn’t find anything definitive. I did find information on some enamel manufacturers websites that suggested waiting at least 24 hours between coats. I’m on my first build and here is my experience with brushing enamel on wood, so far, as I’m still in the painting process. I am also following the prescribed painting plan that came with the kit. I primed all the wood using grey primer. Next, I painted flat white. It took me six coats to satisfactorily cover all the primer. I waited 24 hours between each coat. The next step was to paint the well deck primer grey. Since, the well deck was primed it only took me two additional coats to get the finish I wanted. Again, I waited 24 hours between coats. I am currently painting a jade green over the grey primer. Today I will be painting a fourth coat and I suspect it will need at least two - three more. It’s a long process. I hope this was helpful. -
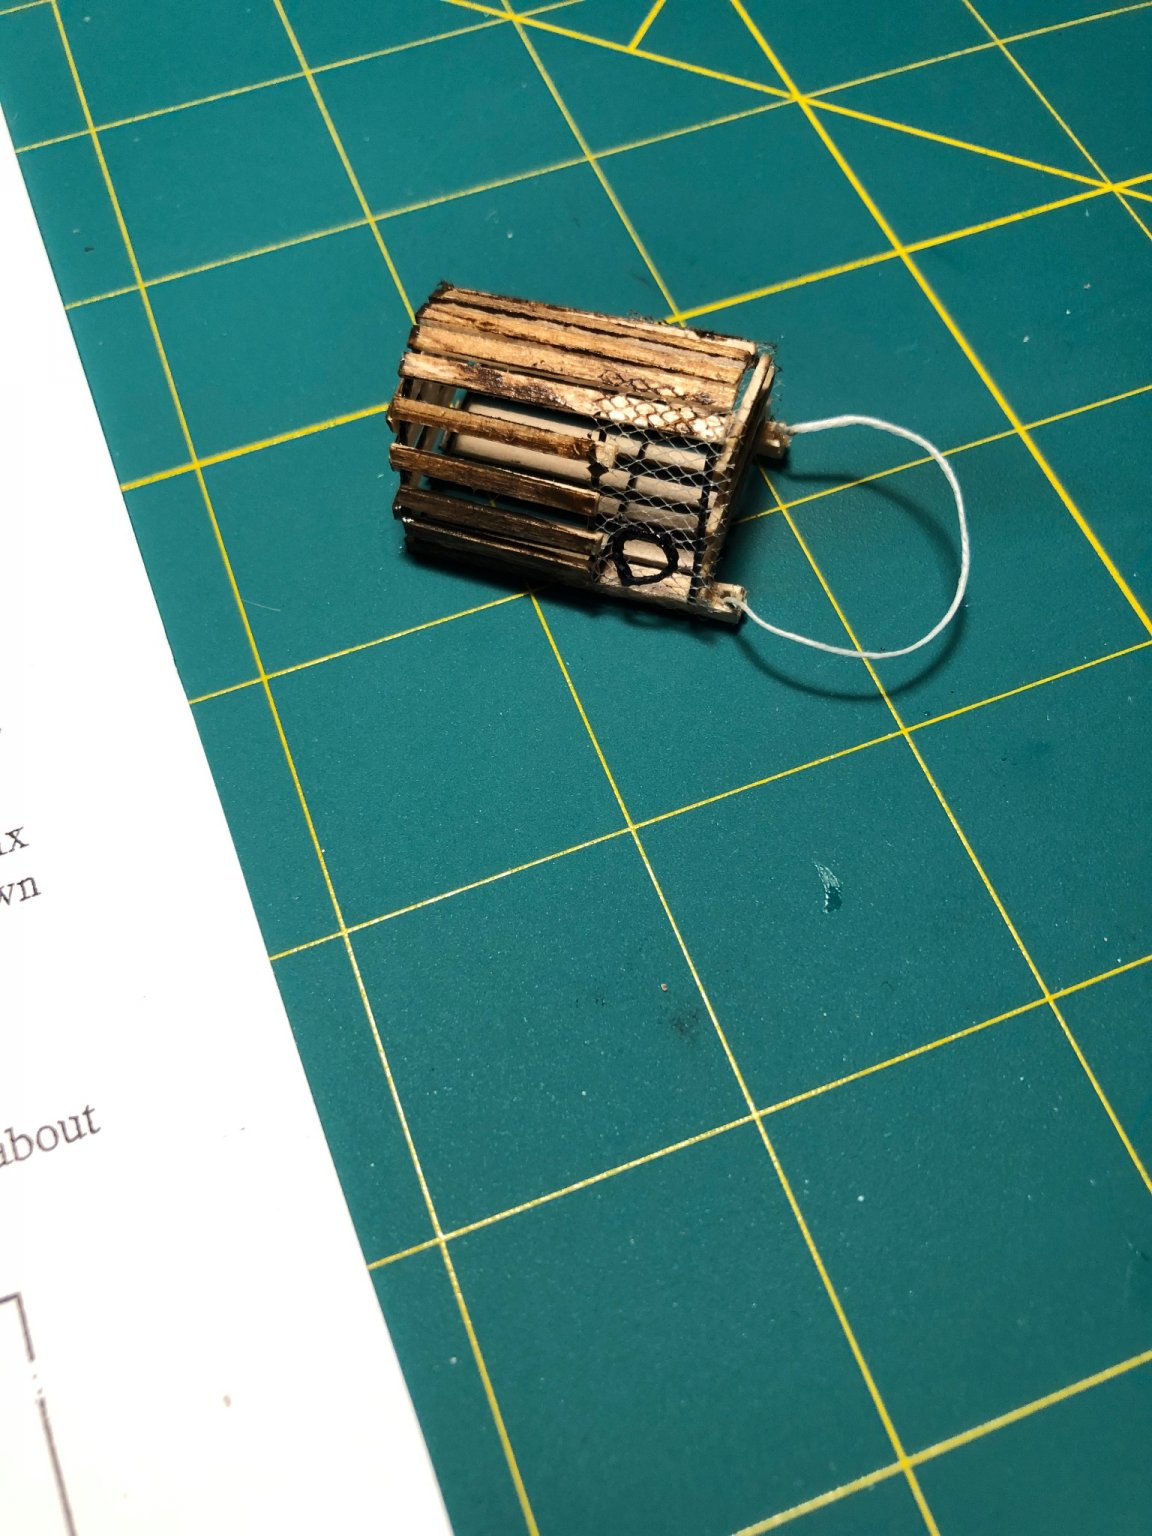
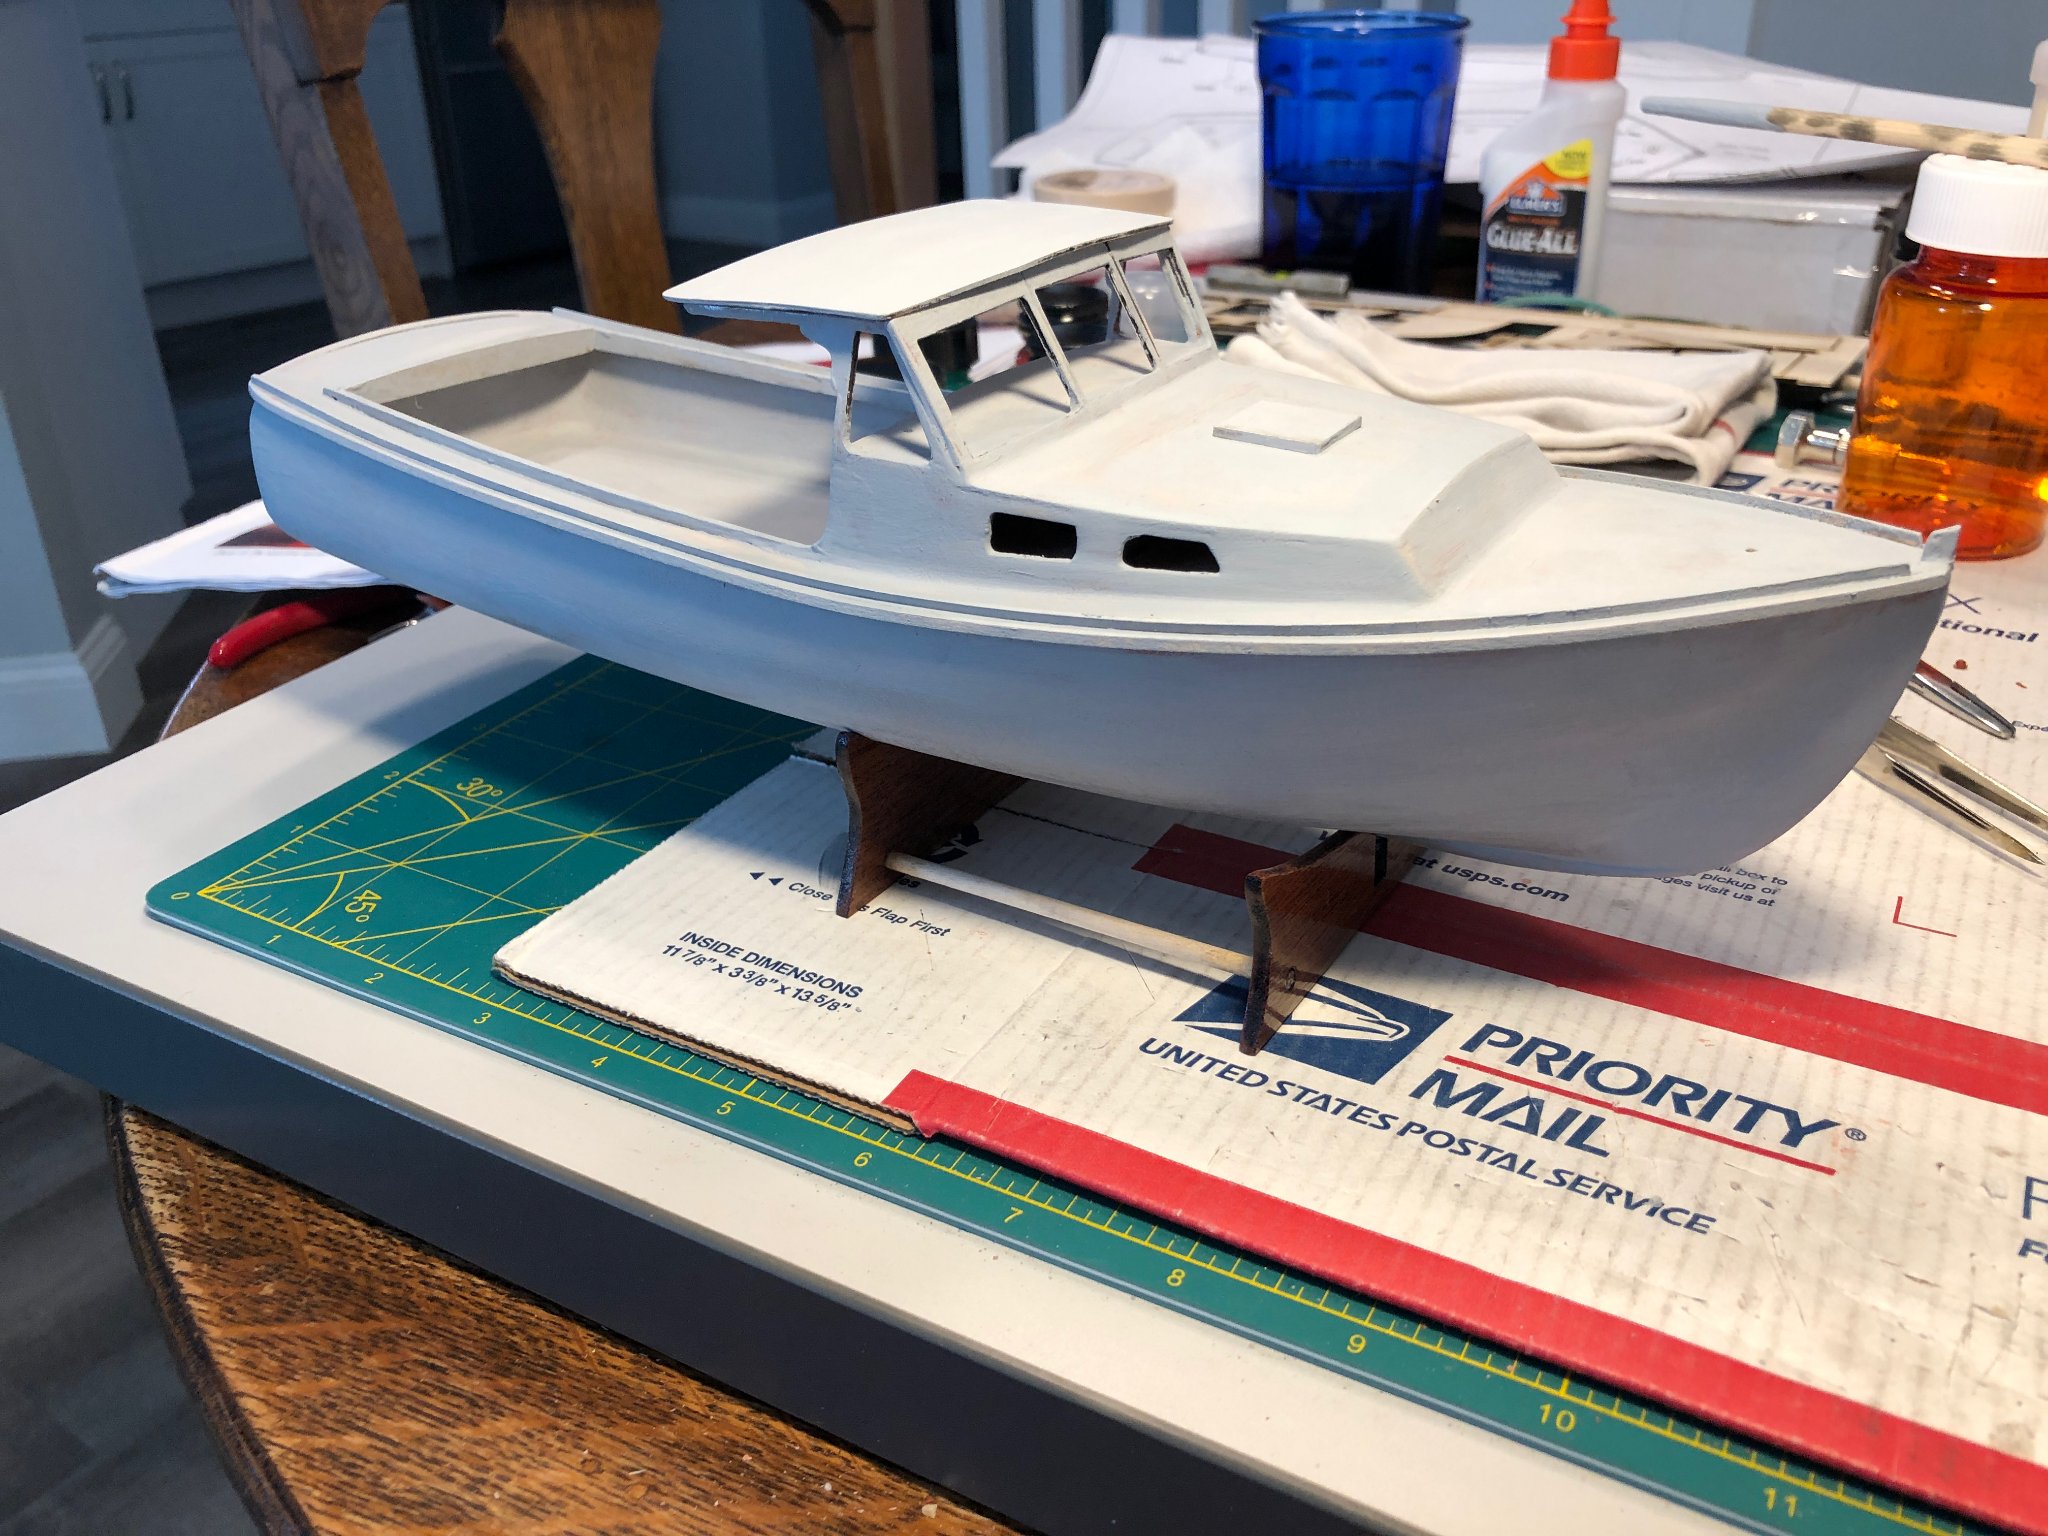
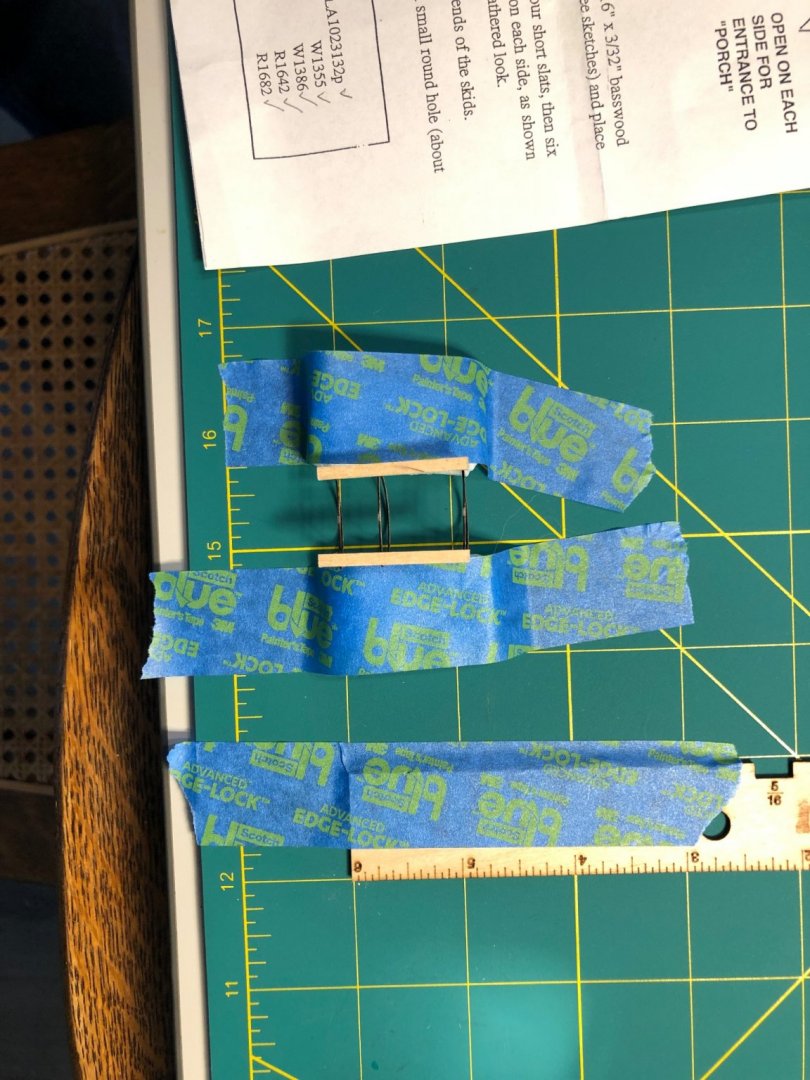
The painting is going slowly, as I wait 24 hours between coats. I finished the well deck and moved on to the main deck, cabin roof and pilot house roof. I decided to stray from the original color scheme and not mix the flat white paint with the Jade green. I did mix both for my first coat. Also, the difference is very subtle. The Jade Green paint is thinner and goes on so much nicer than the primer and flat white. While waiting between coats I built the lobster traps, stained them and scratched some lobster buoys, to scale, from a dowel and bass wood.

- 87 replies
-
- 8
-
-
- bluejacket shipcrafters
- red baron
- (and 3 more)
-
Jeez James, I wish I could add something useful here. I’m new to this hobby as well and the painting part is not so straight forward. I’m painting the well deck with primer gray currently. I have two coats on (over the primer coat) and I hope I have enough to finish the model. I believe one more coat will do it for the well deck, then just a few more areas to prime. i don’t dare use spray paint!
-
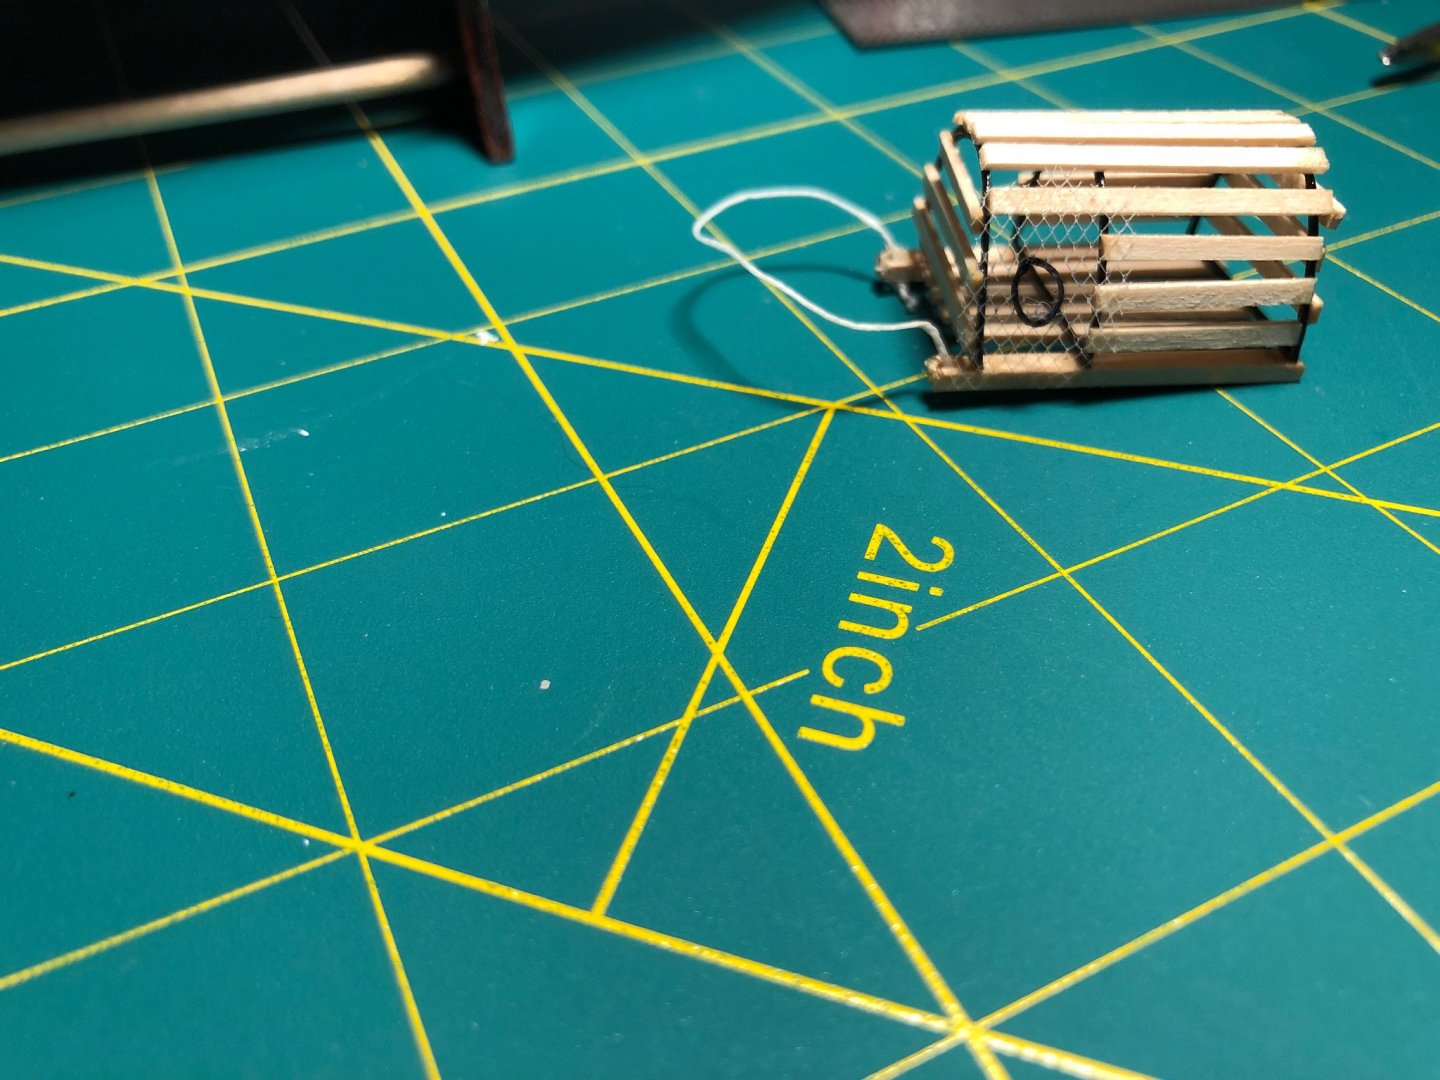
Continuing on with my build... I decided to start building my lobster traps between coats. I broke one of the hoops in three places taking it out of the fret! It took me a while, but I was able to repair it. I’m not impressed with my first trap, but hoping to do better with the next two. On the first trap, I put a coat of clear on thinking it might make the wood look a bit used. I was wrong, so I rubbed it with a stain using a q-tip. I have six coats of white on now and I am moving on to the next step on the recommended painting sequence; the well deck. I’m still upset at the way my pilot house roof lists to starboard due to the mishap mentioned in an earlier post. Overall, I am happy with my results and I am really enjoying the process!

- 87 replies
-
- 6
-
-
- bluejacket shipcrafters
- red baron
- (and 3 more)
-
ISO: Enamel tips for beginners
pwog replied to CTYankee's topic in Painting, finishing and weathering products and techniques
Hi James - You are correct. The man in the videos was using Vallejo Model Air acrylic paint. I believe Model Air is pre-thinned for air brushing, even so he diluted the paint more with water. -
Thanks so much for the explanation VTHokiEE!
- 87 replies
-
- 3
-
-
- bluejacket shipcrafters
- red baron
- (and 3 more)
-
Hi Nic, I‘m not sure what you mean by “paint either clear of the color under the tape”? Can you explain further.
- 87 replies
-
- 1
-
-
- bluejacket shipcrafters
- red baron
- (and 3 more)
-
VTHokiEE - Yes, I plan to use painter's tape. I only have the blue tape. Does the Tamiya do a better job?
- 87 replies
-
- 1
-
-
- bluejacket shipcrafters
- red baron
- (and 3 more)
-
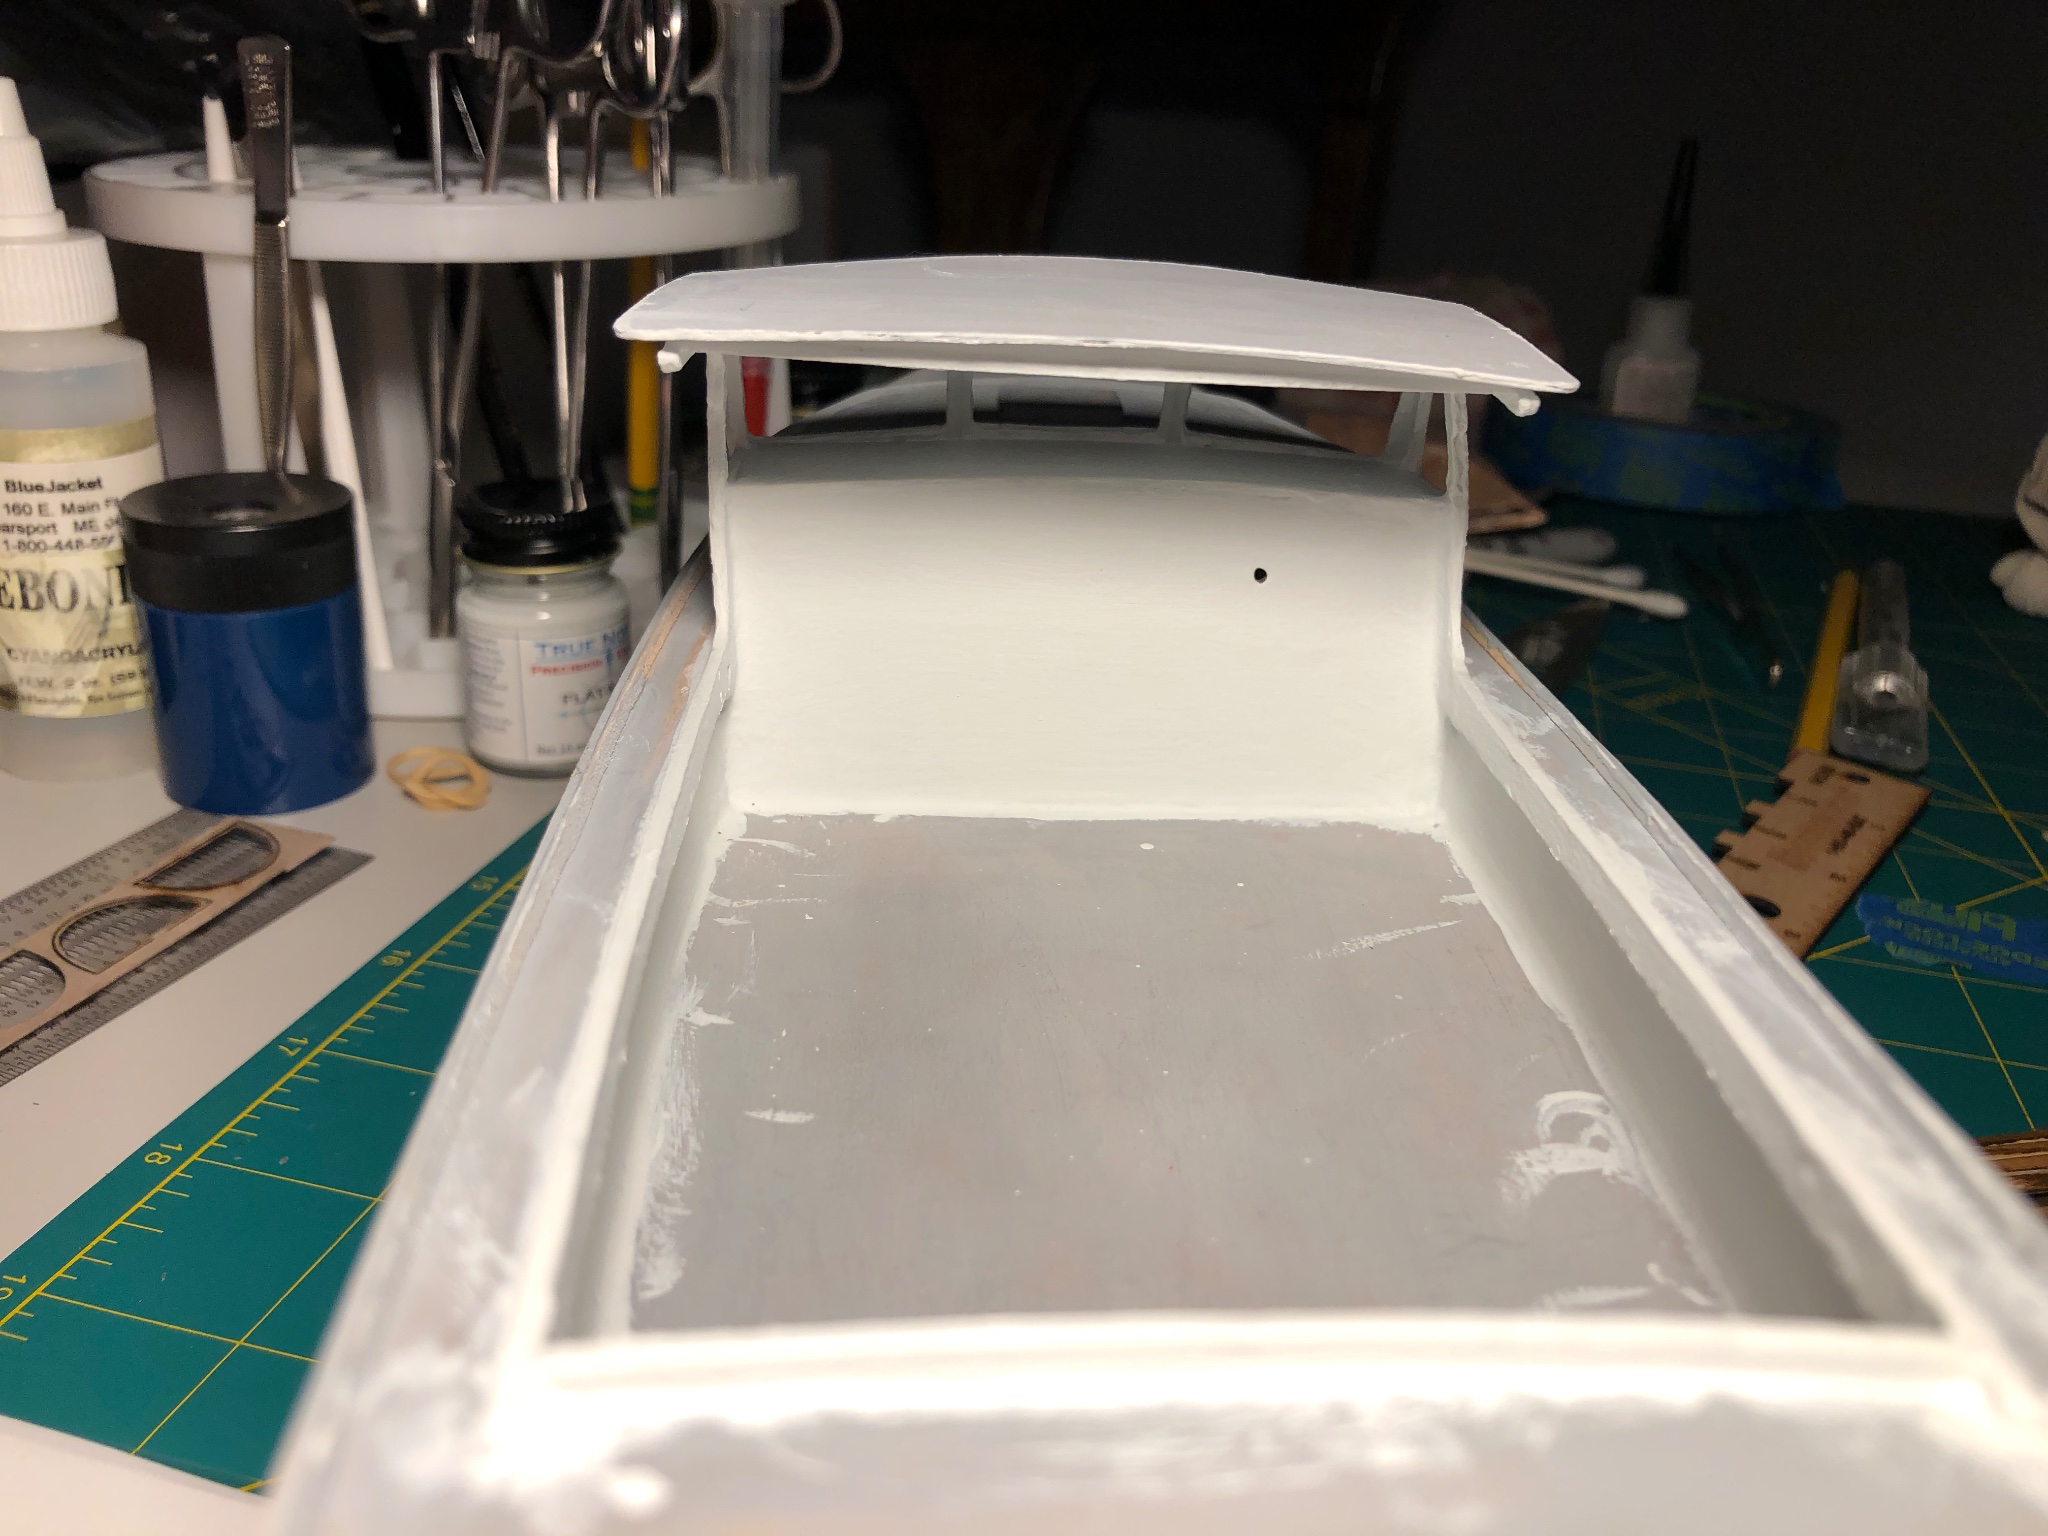
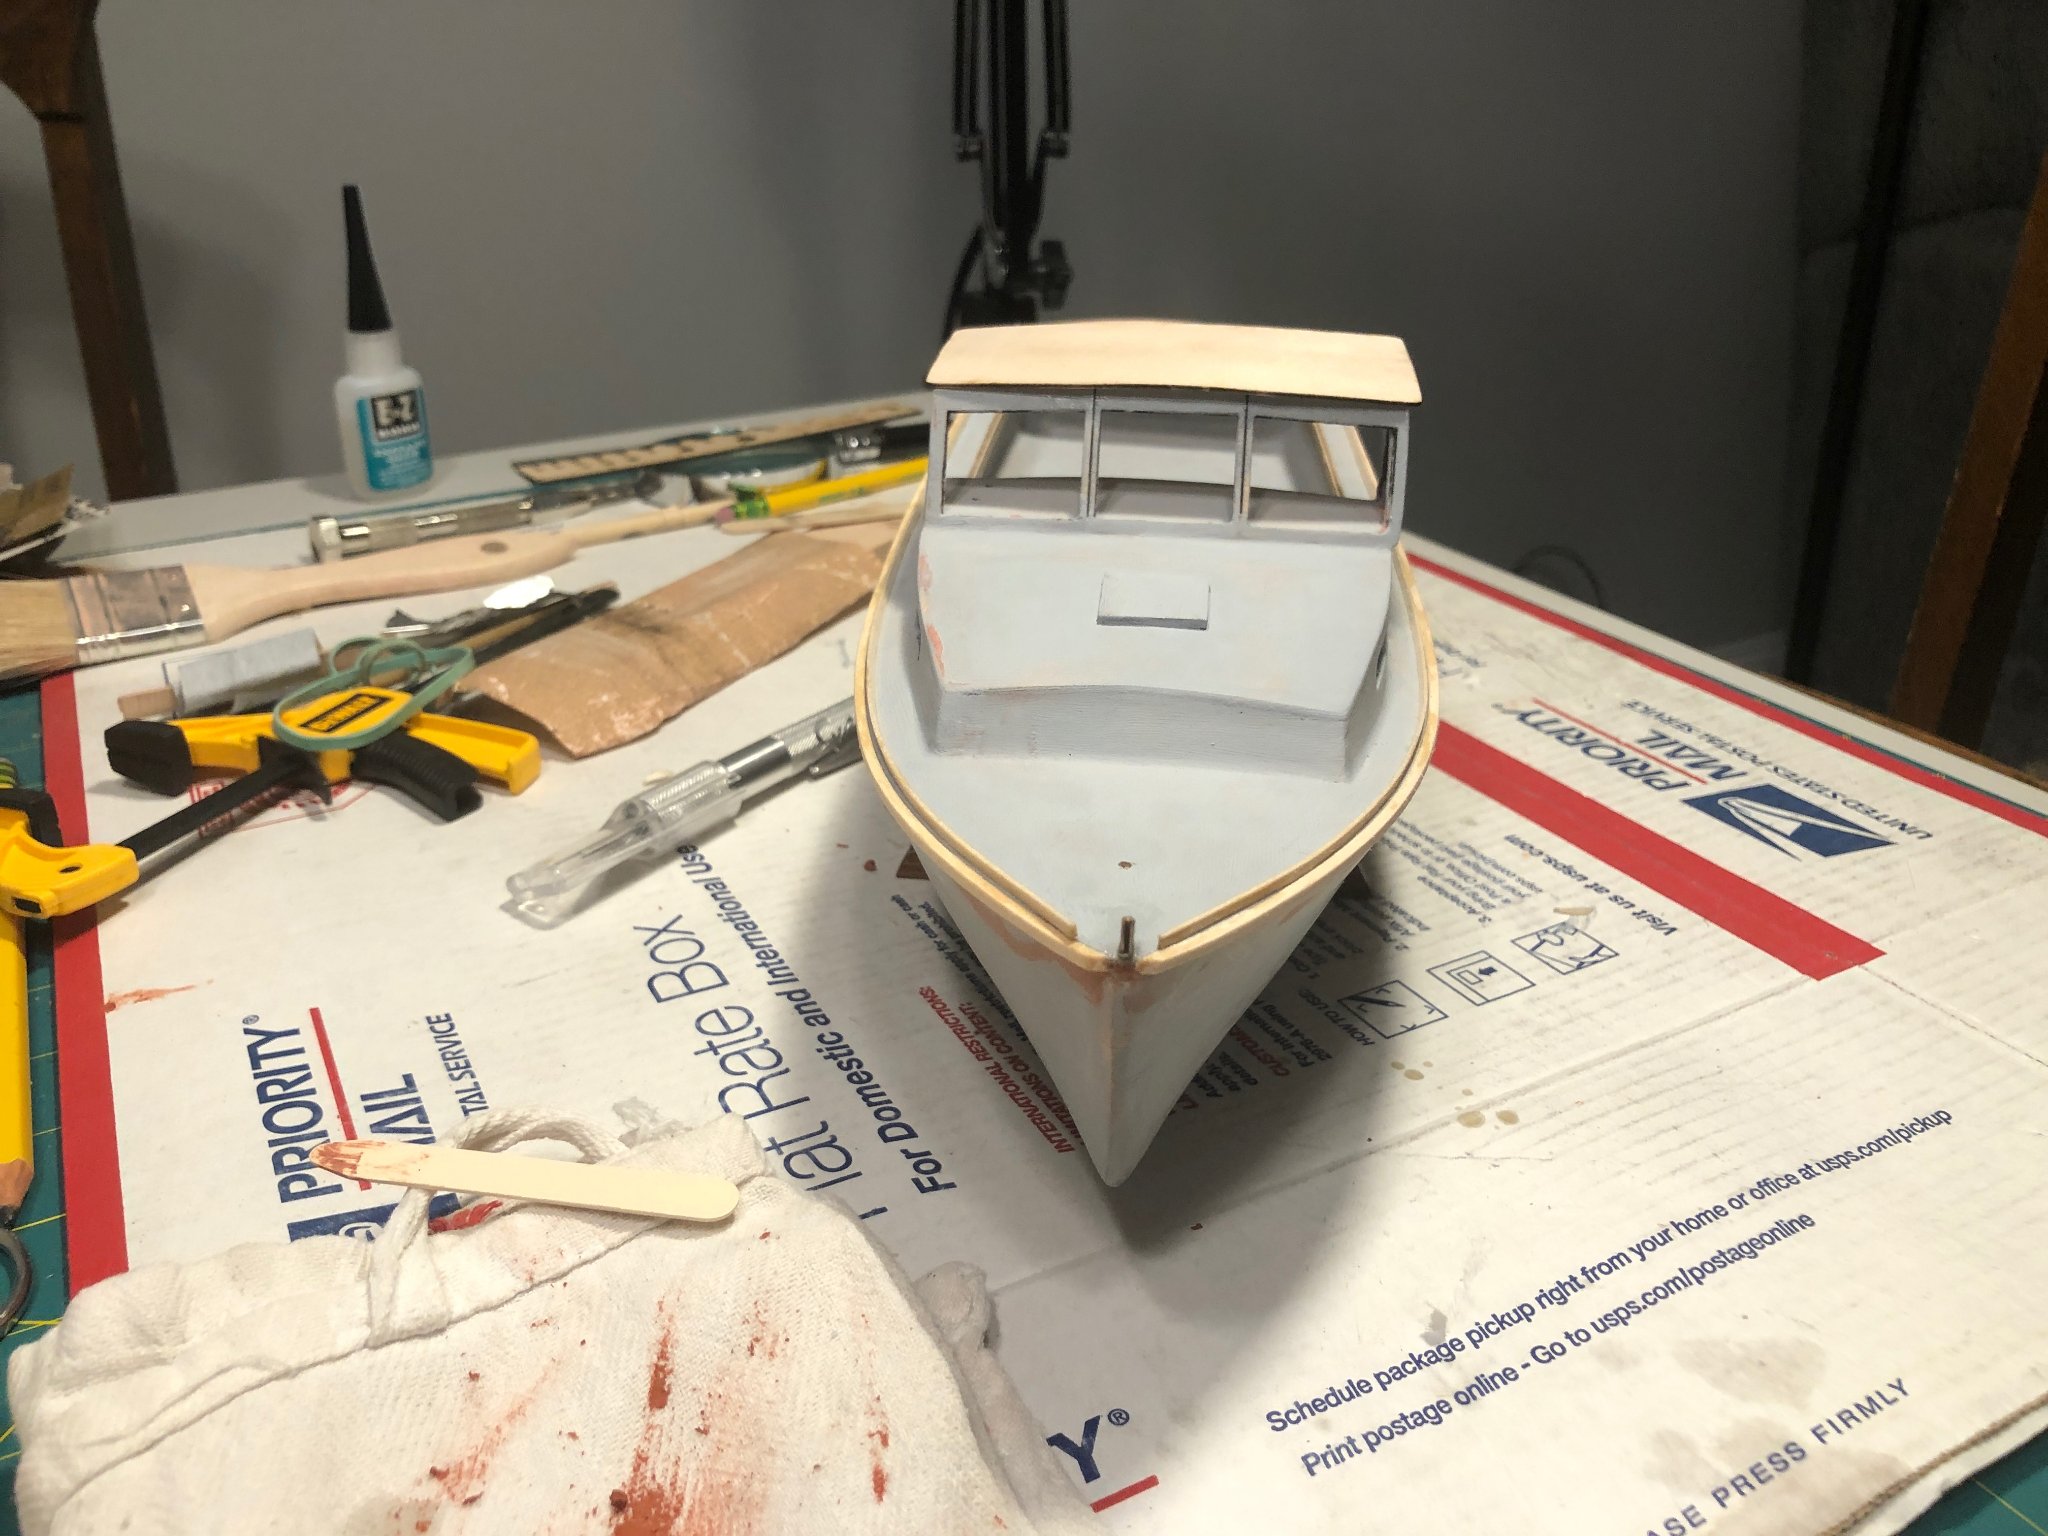
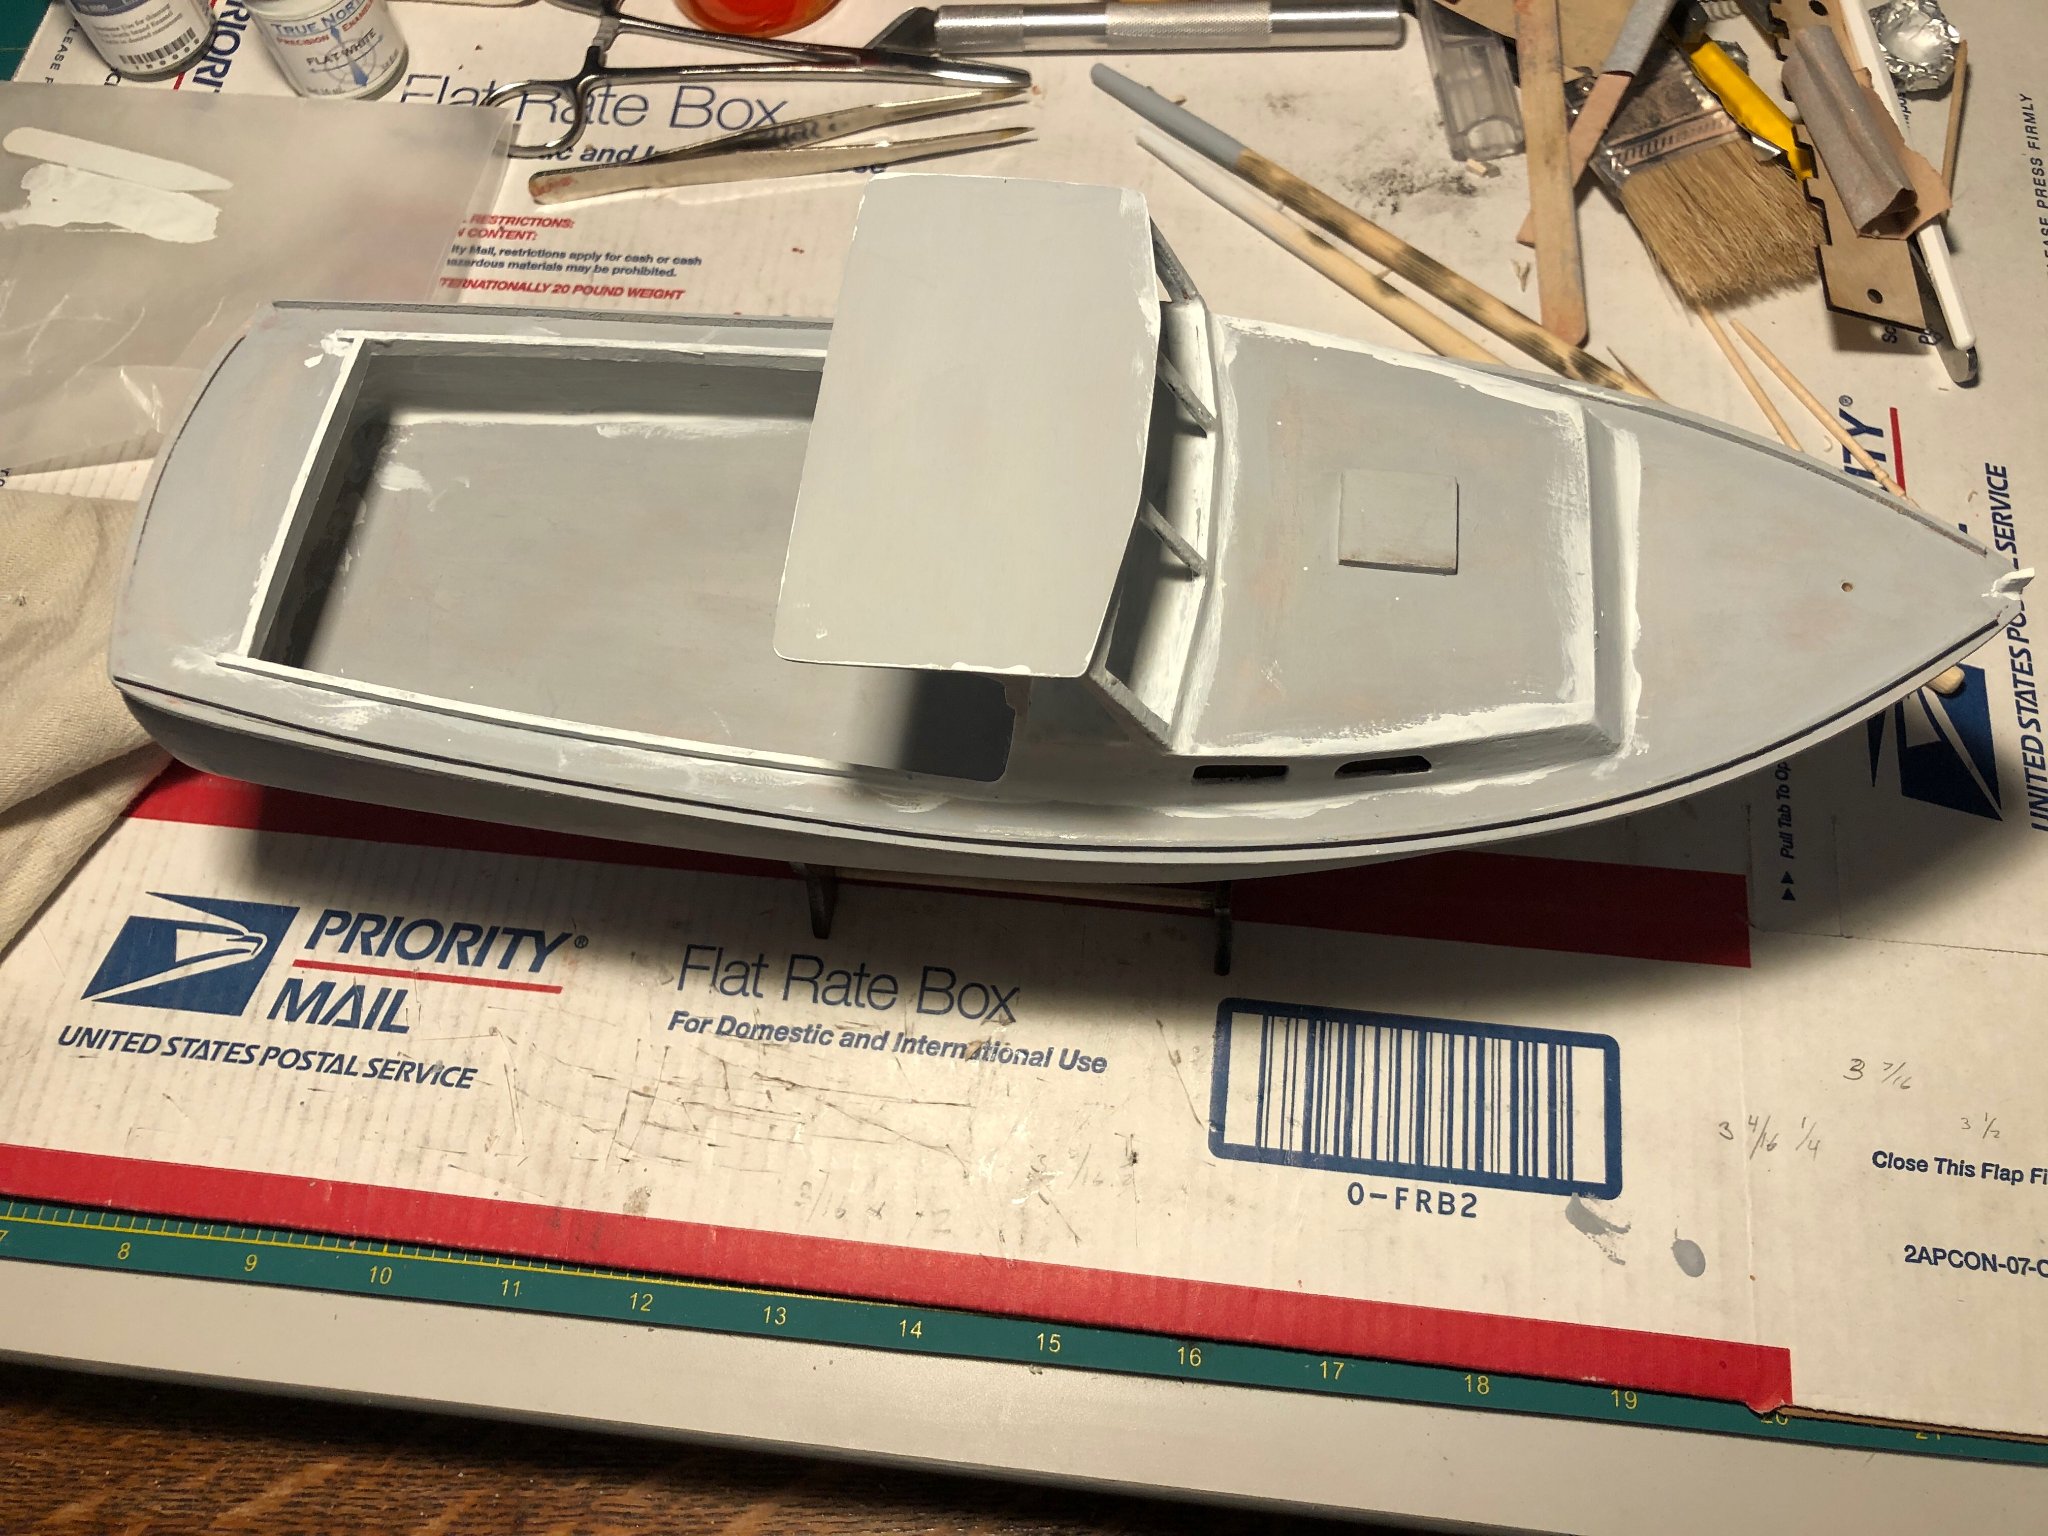
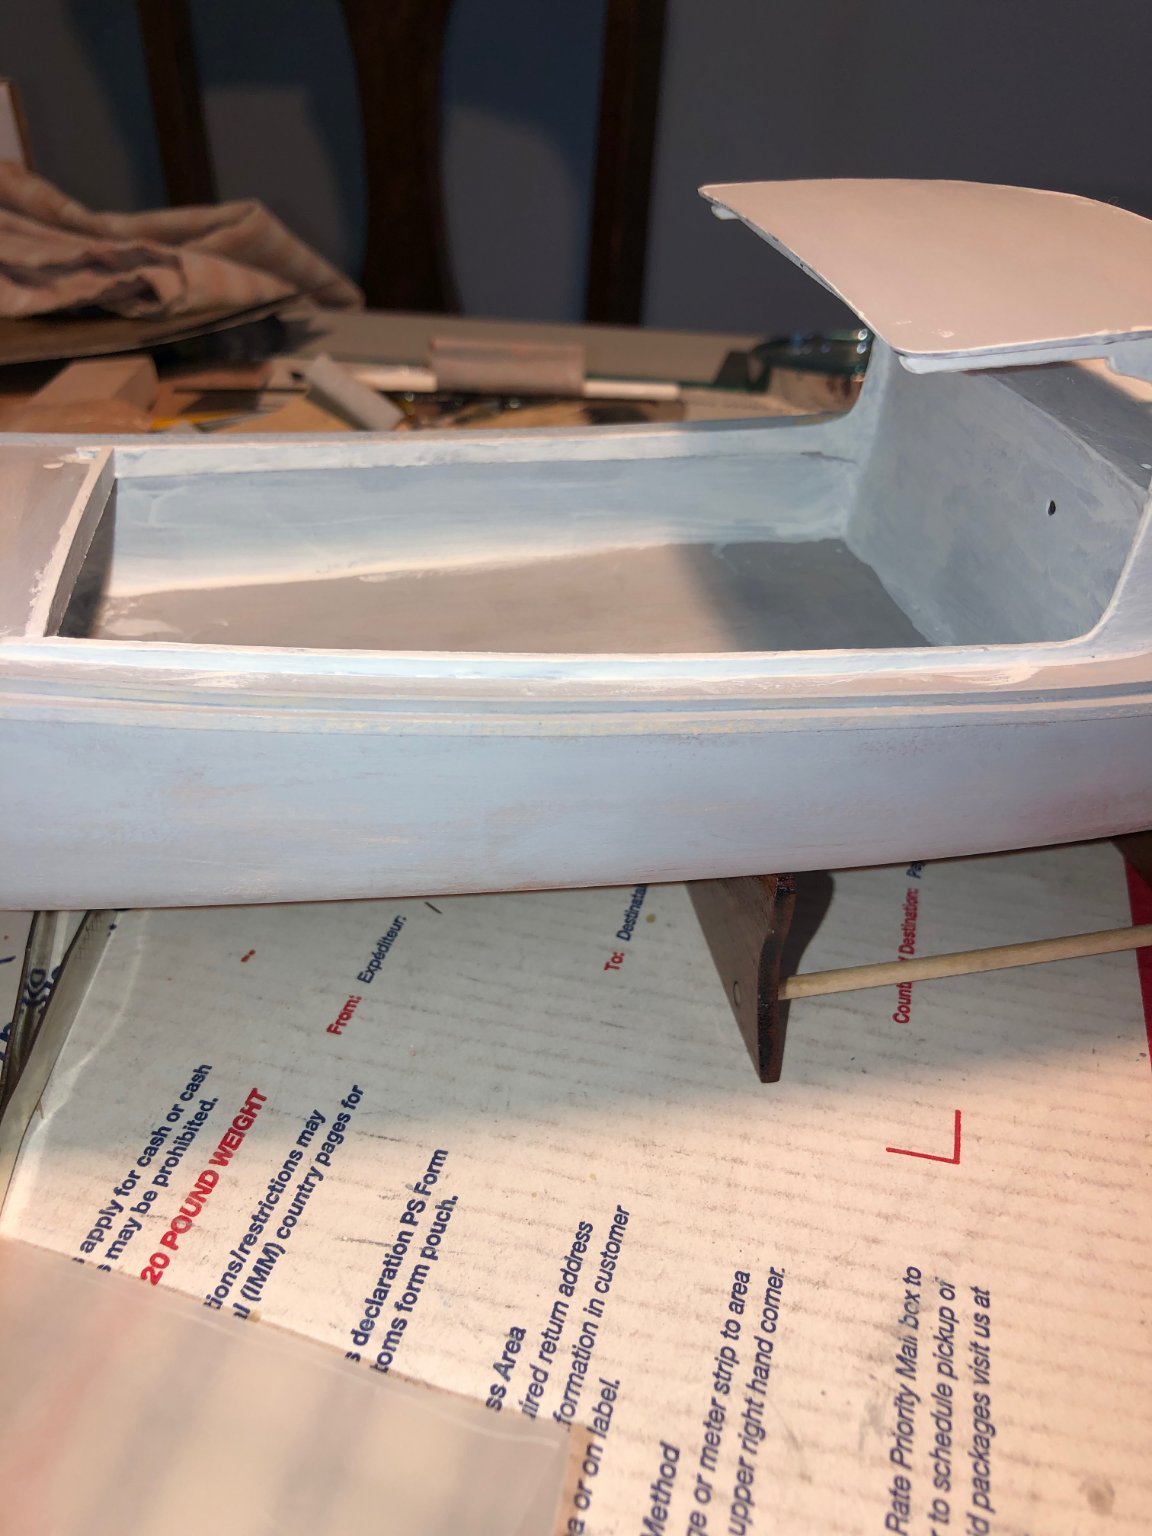
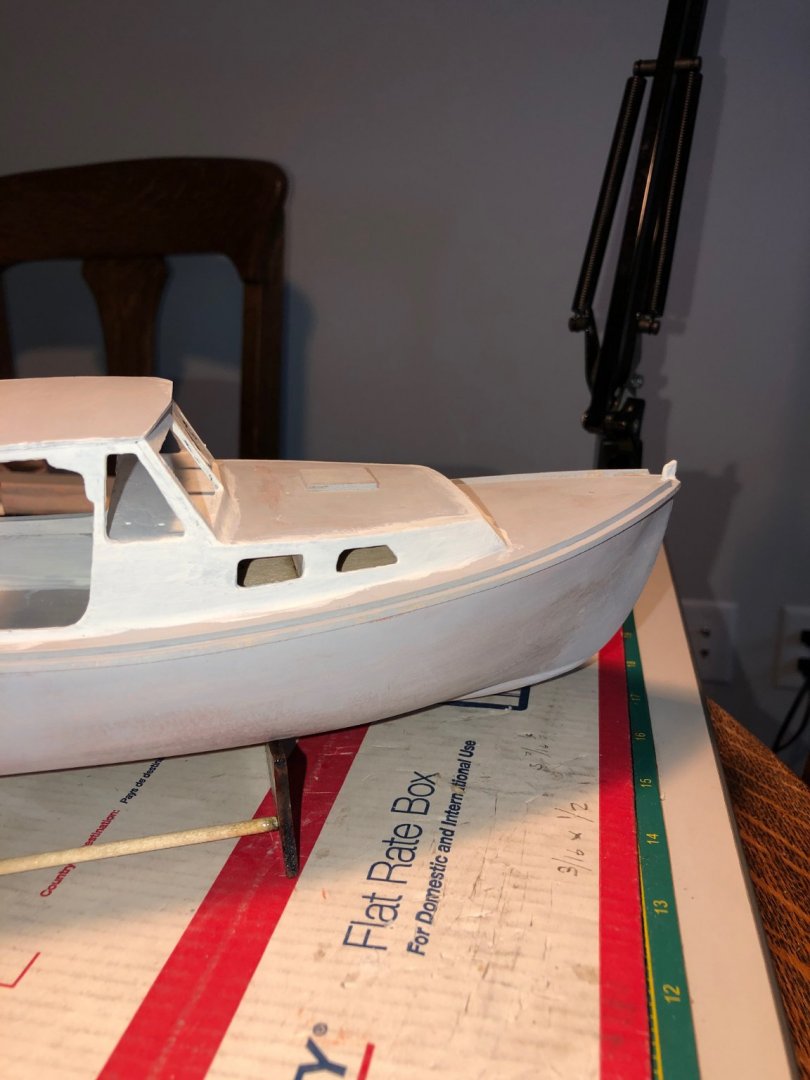
After a major catastrophe I've completed the structural build and started to paint. Someone, who will remain nameless, tripped and fell on the corner of my work table. The ensuant chain reaction caused the boat to land on the floor breaking off both cabin sides and added a few dents to the hull. After more than a few choice "sailor terms", I glued the cabin sides back on, but now there is a slight starboard list to the pilot house roof. The sheer guards and toe rails went on easier than I thought they would, as I'm still working on my gluing chops. I added the side coamings, transom guard and pilot house roof. Then there was more filling, sanding and priming. So, it's time for vulnerability. I am embarrassed to post the next images, but they're part of my log, so here we go... My painting skills need a lot of work apparently. I don't know if it's the paint, my application, method of paint prep (thinning, not thinning) or a combo of all, but the next images show the build after two coats of white on the cabin, windshields, coamings and well deck walls. I find that some of these areas are very difficult to get to without "painting outside the lines". I'm counting on my being able to cover the overflow when painting the rest of the boat. Any comments and/or suggestions and/or tips on brush painting with enamels would be greatly appreciated. Now on to coat number three!


- 87 replies
-
- 8
-
-
- bluejacket shipcrafters
- red baron
- (and 3 more)
-
ISO: Enamel tips for beginners
pwog replied to CTYankee's topic in Painting, finishing and weathering products and techniques
Hi James, Yes, the entire boat is primed, even under where I started the white. -
ISO: Enamel tips for beginners
pwog replied to CTYankee's topic in Painting, finishing and weathering products and techniques
Hi James, Great question! As you know, I’m working on the same kit and it’s my first build. I started priming my Red Baron using the supplied brushes. I then bought some decent synthetic artist brushes. The brush change helped. I had the same concern with the amount of primer I was using, between applications and sanding per instructions. I finished my priming and still have enough primer left to paint the well deck floor, as required. I started to paint the parts that are to be painted white. My first coat looks horrible! At this time, I am waiting for that coat to dry. This is going to be a long process. As I’m doing that I’m researching brush painting with enamel. That’s how I found your post. if I find any ideas/suggestions that seem to work, I’ll let you know. Please do the same for me. Good luck. Paul -
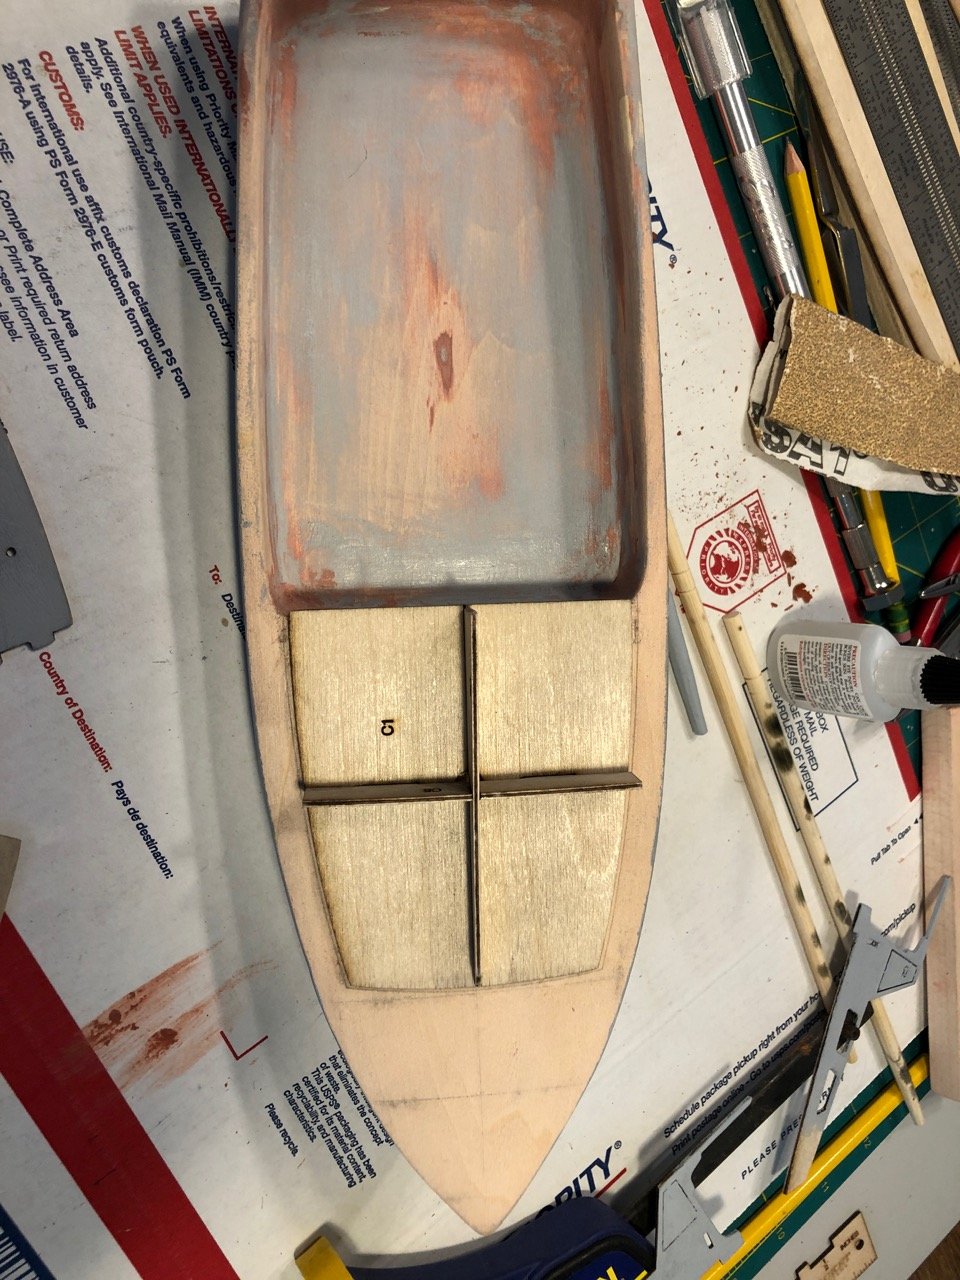
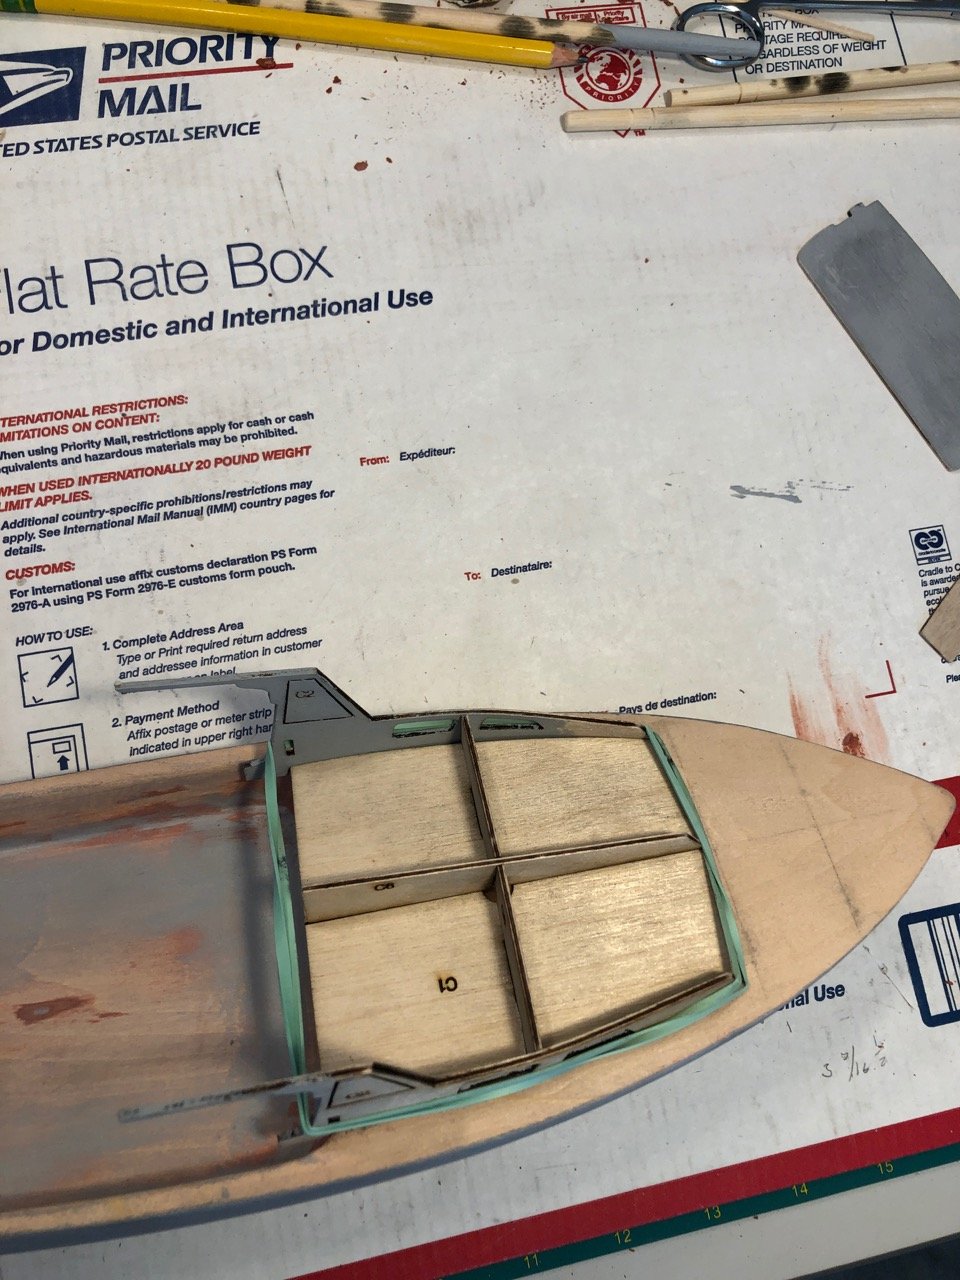
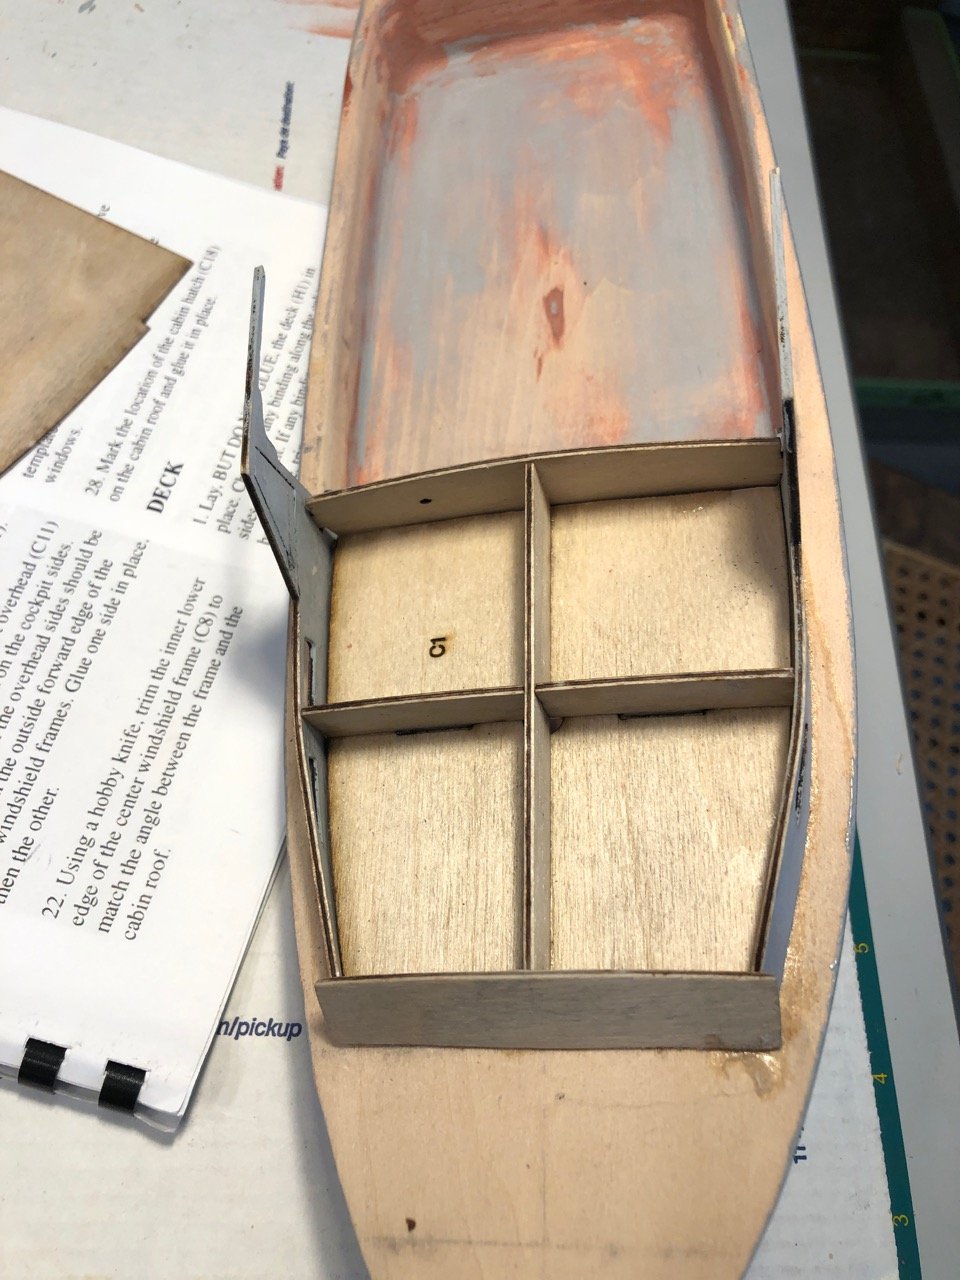
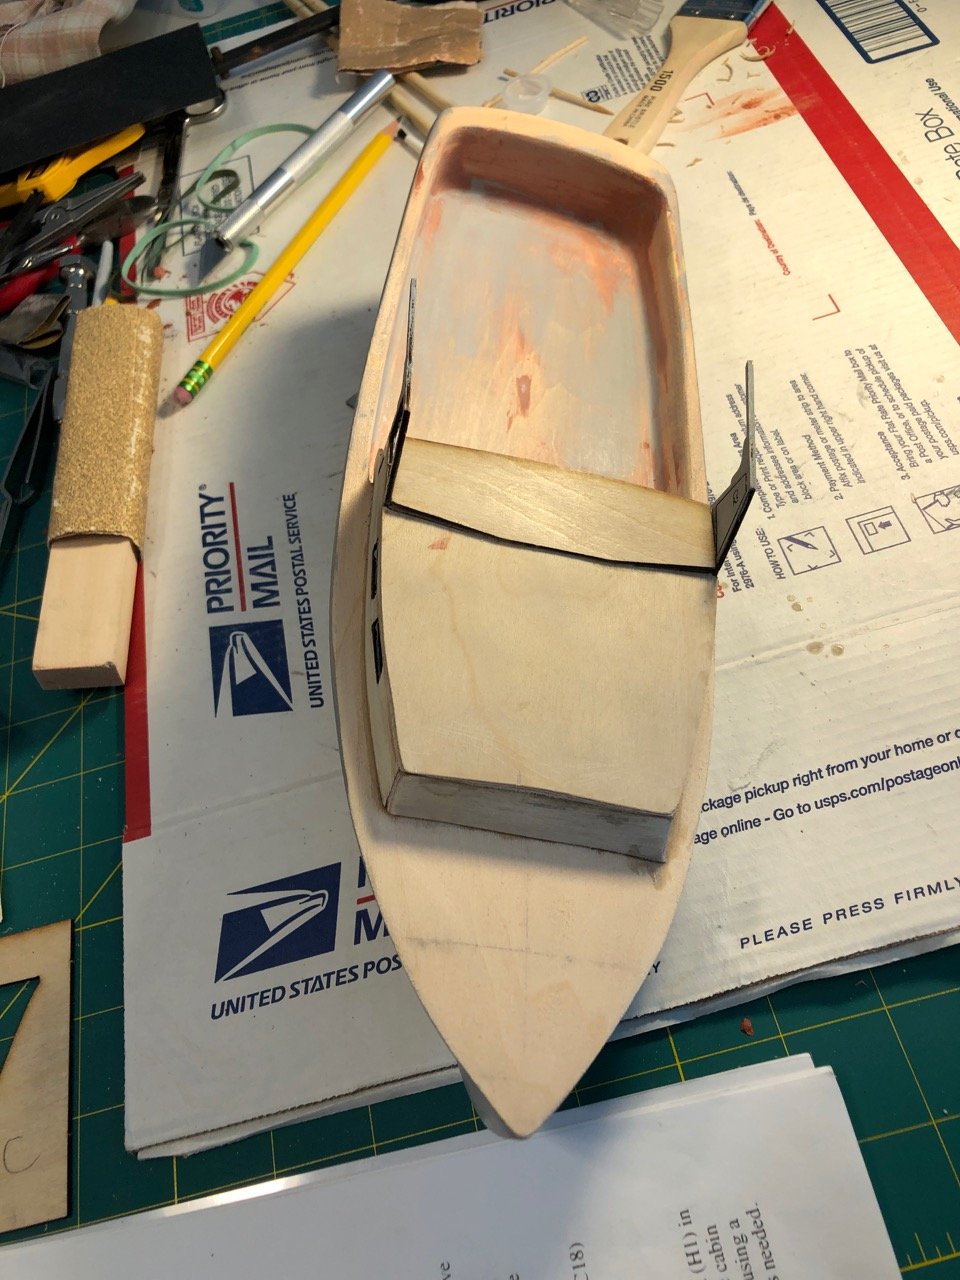
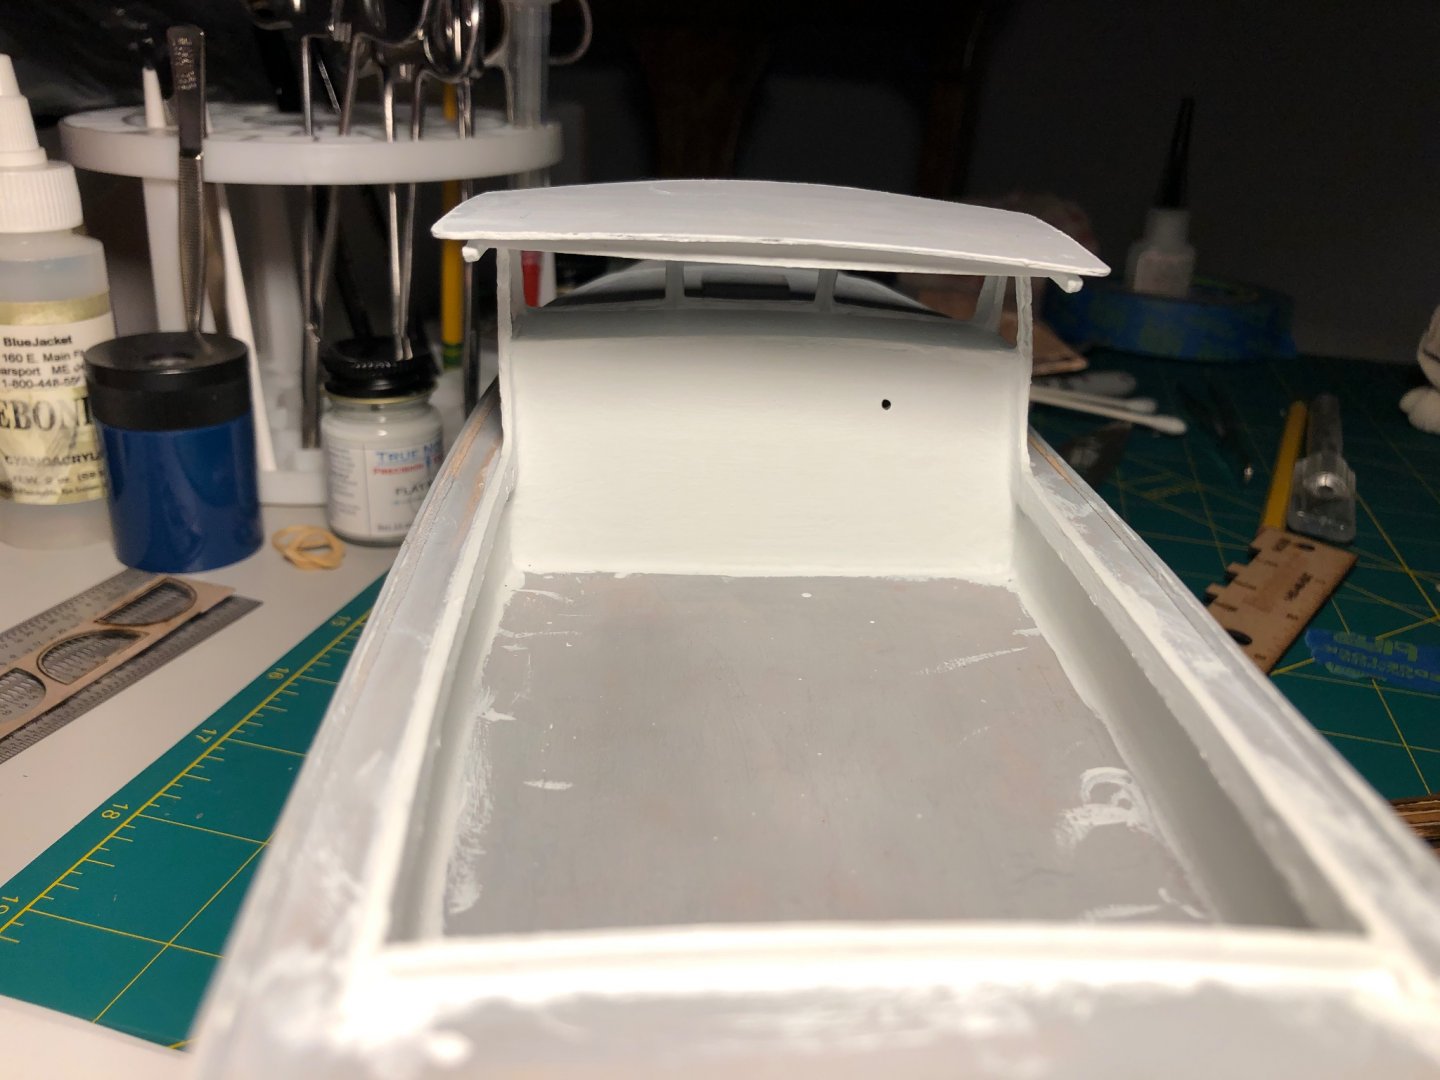
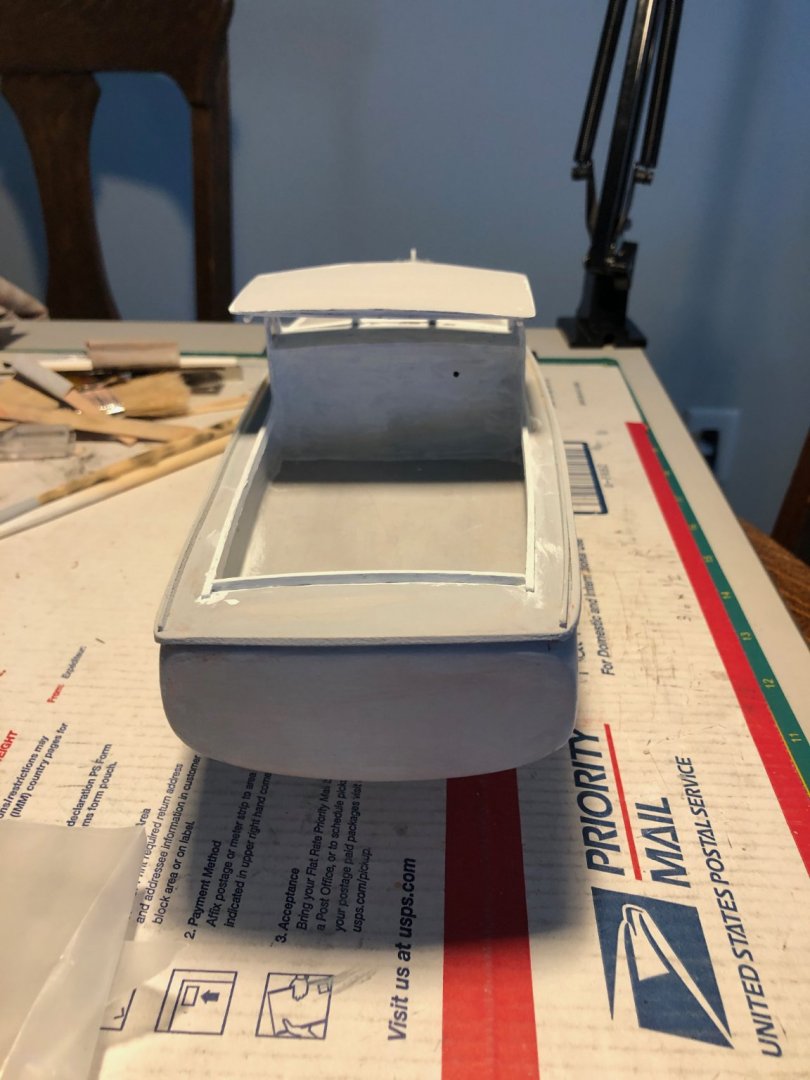
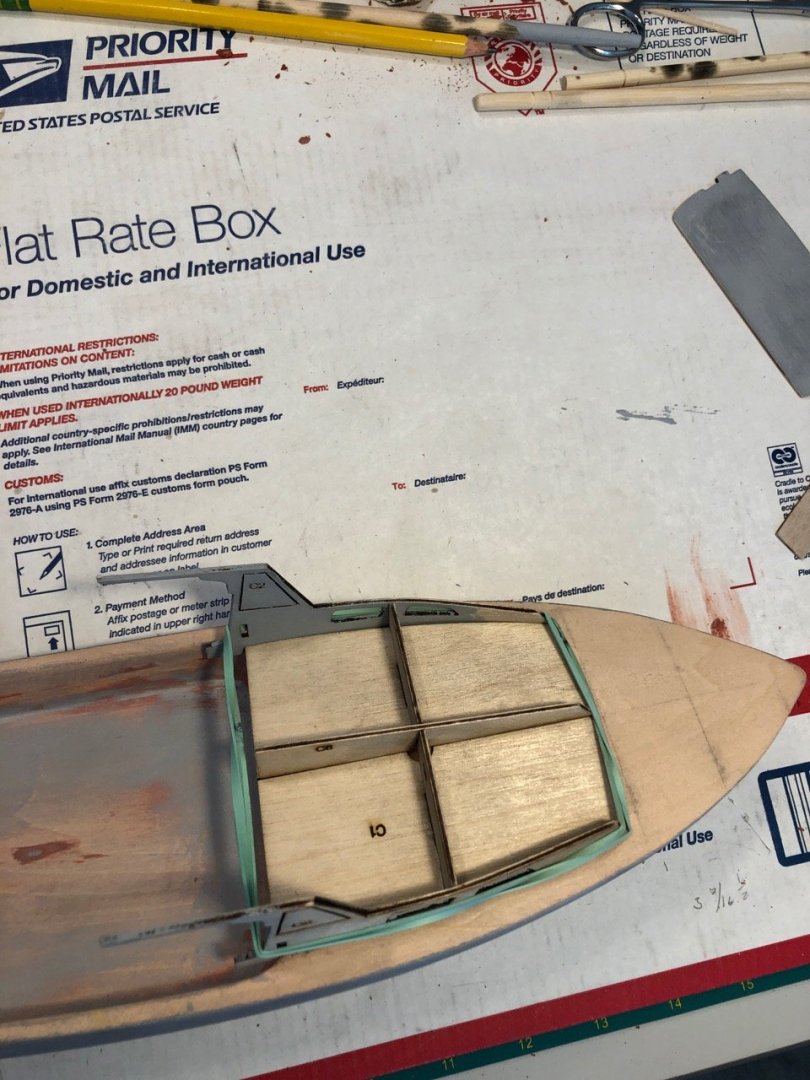
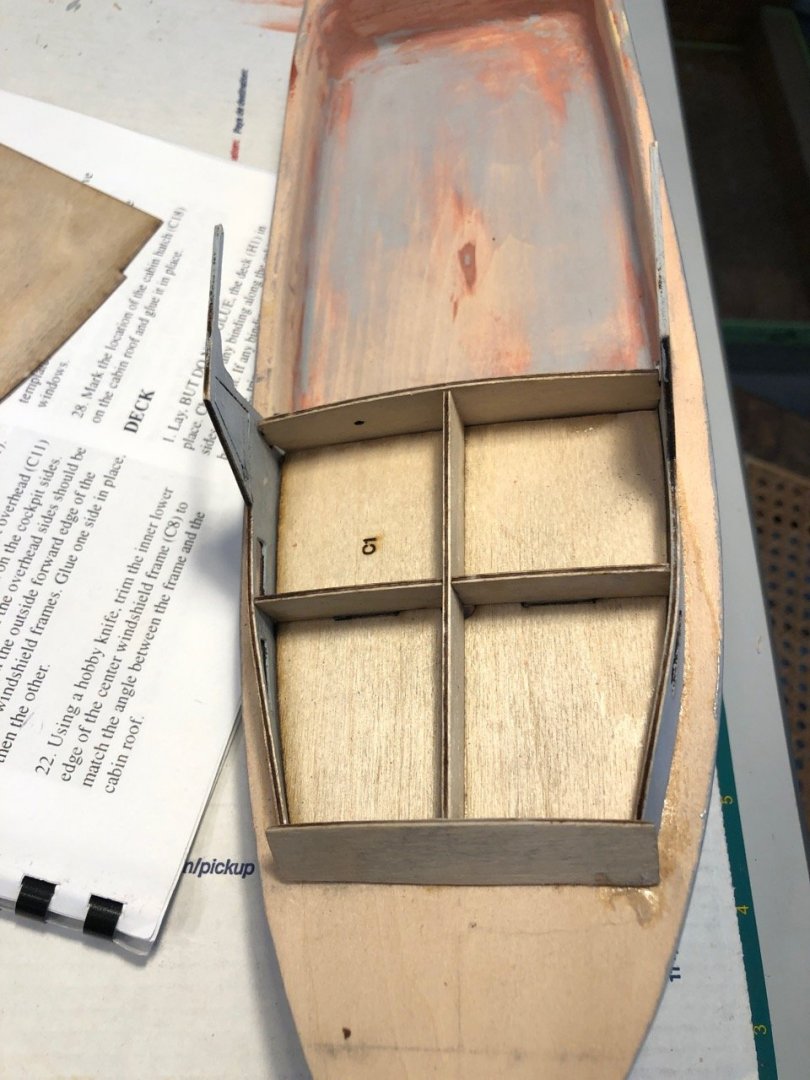
I got the well deck sanded to satisfaction. No, tricks, just slow and patient work. I am planning on sanding and priming the hull and well deck again after the cabin is completed. That being said, my next step was to attach and build out the cabin former and the cabin. Following the instructions, I aligned and glued the lower cabin former and then attached the transverse and longitudinal cabin formers. I then soaked the cabin sides in hot water in order to make them pliable to bend into shape. I struggled a bit with bending the cabin sides into shape. They were easy to bend, but my issues were with getting them to hold their shape. I solved my issue by using rubber bands to hold the sides in position until the wet wood dried. This worked very well. Once the cabin sides were shaped, I glued them in place. With the sides in place I went back to final fitting of the aft cabin bulkhead, which fits into tabs that are on the cabin sides. Getting the two sides and bulkhead to fit nicely was a challenge! It took a lot of carving and sanding to get a satisfactory fit. The instructions warn a few times about how the windshield area of the cabin sides are fragile. I confirmed this fact while fitting the three pieces. One of the sides got stuck in my shirt while sanding and broke off. I glued it back on and continued my build. The forward cabin bulkhead needed to be bent to fit the cabin former. I got as good a bend as I could and glued it in place. Finally, I was able to put the cabin roof on and attach the windshield former. That was very straight forward. The next step was to sand the cabin roof and bulkheads to be flush with the cabin sides. I'm pretty happy with the way that all turned out, this being my first build. Although, I'm pretty sure I'll need to do some more adjustments to get the deck piece to fit nicely. One very important lesson I learned during this part of my build was that when my hobby knife starts to roll off the table, ignore my reflexes and don't try to catch it; let it fall. Ouch, the red smudge you can see on the cabin roof, is blood! I am really enjoying this build. I am learning a lot and starting to get better with sanding.


- 87 replies
-
- 6
-
-
- bluejacket shipcrafters
- red baron
- (and 3 more)
-
That's fine work, Paul. She looks great!
-
It's coming along nicely, James. I'm about where you are on my build. I had a lot of carving/sanding to get everything to fit. I also broke one of the fragile cabin sides. I was sanding and it got caught on my shirt and broke off! I will be updating my log later.
-
Alan, Nice! I was thinking of breaking out my dremel and a sanding drum, but I don’t trust my control of it. I’m afraid I would go too far. let me know how you make out with the Proxxon. Paul
- 87 replies
-
- 2
-
-
- bluejacket shipcrafters
- red baron
- (and 3 more)
-
Hi James, Thanks for checking in, I appreciate it. I'm getting ready to start my cabin assembly, so warning noted! I sanded and filled and sanded the well deck three times and I am finally happy with the results, at least before painting. You are correct - smooth decks on real boats tend to be very slippery when wet. As far as sanding goes, I've learned to be patient and take my time. As you can see from my post I have been using spot and glazing putty for filling cracks, etc. and that has been working fantastically! After I did the initial priming of the pieces still on the card I went and bought some artist paint brushes and the new brushes made a world of difference when I primed the hull. The primer went on much easier and covered better. Paul
- 87 replies
-
- 1
-
-
- bluejacket shipcrafters
- red baron
- (and 3 more)