HOLIDAY DONATION DRIVE - SUPPORT MSW - DO YOUR PART TO KEEP THIS GREAT FORUM GOING! (Only 13 donations so far - C'mon guys!)
×


mathewp
-
Posts
209 -
Joined
-
Last visited
Content Type
Profiles
Forums
Gallery
Events
Everything posted by mathewp
-
 Looking good Xyxuz. I like the work on the stern. Nice and tidy.
 -
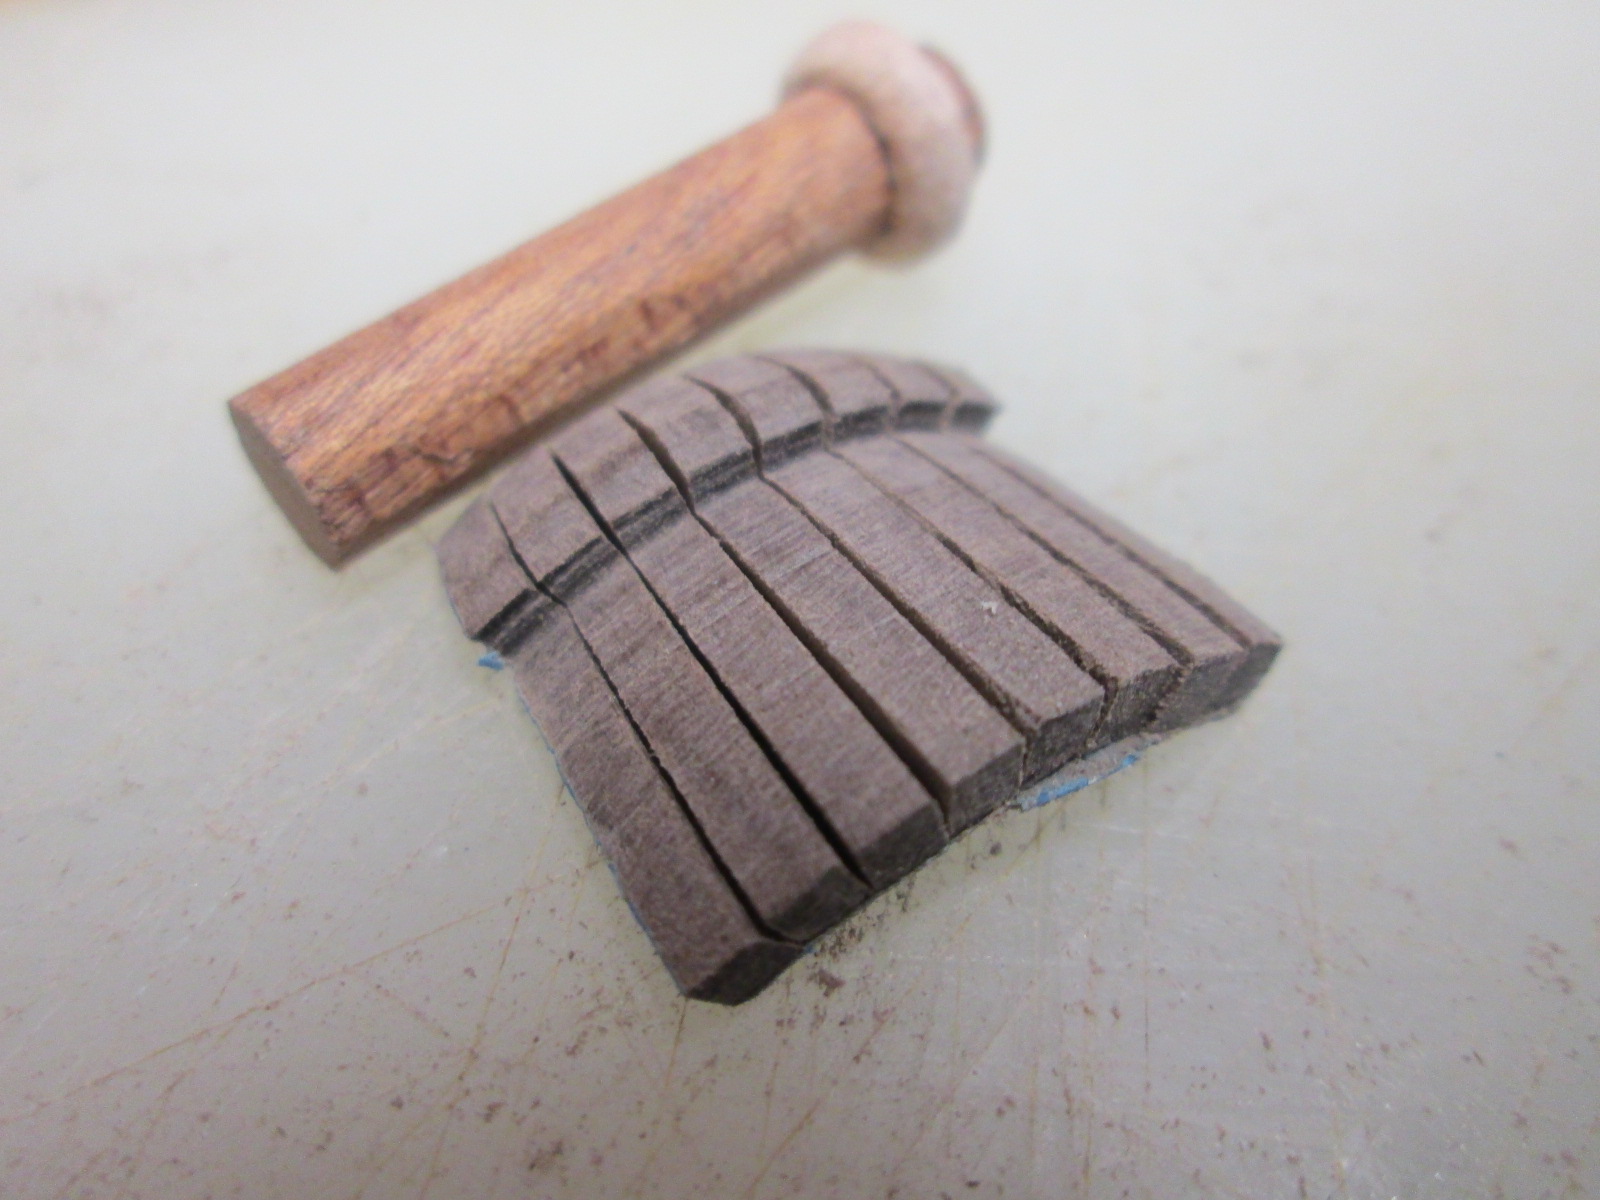
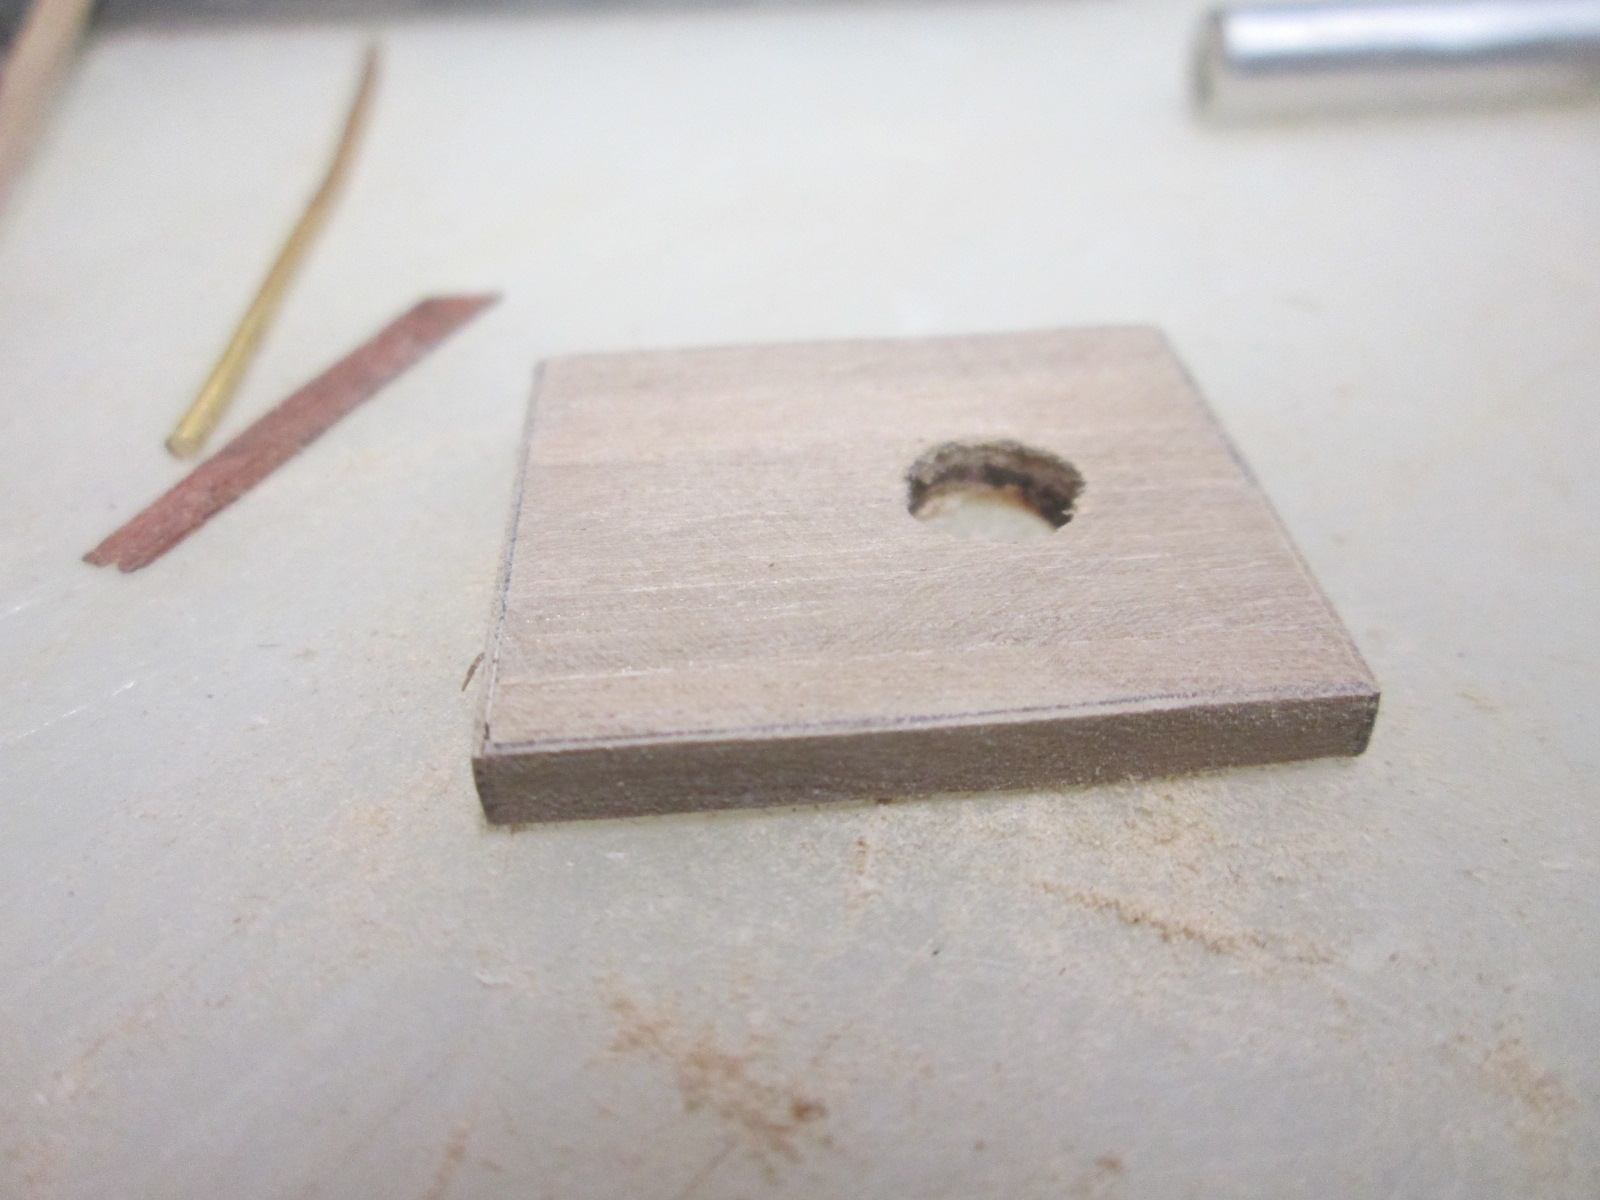
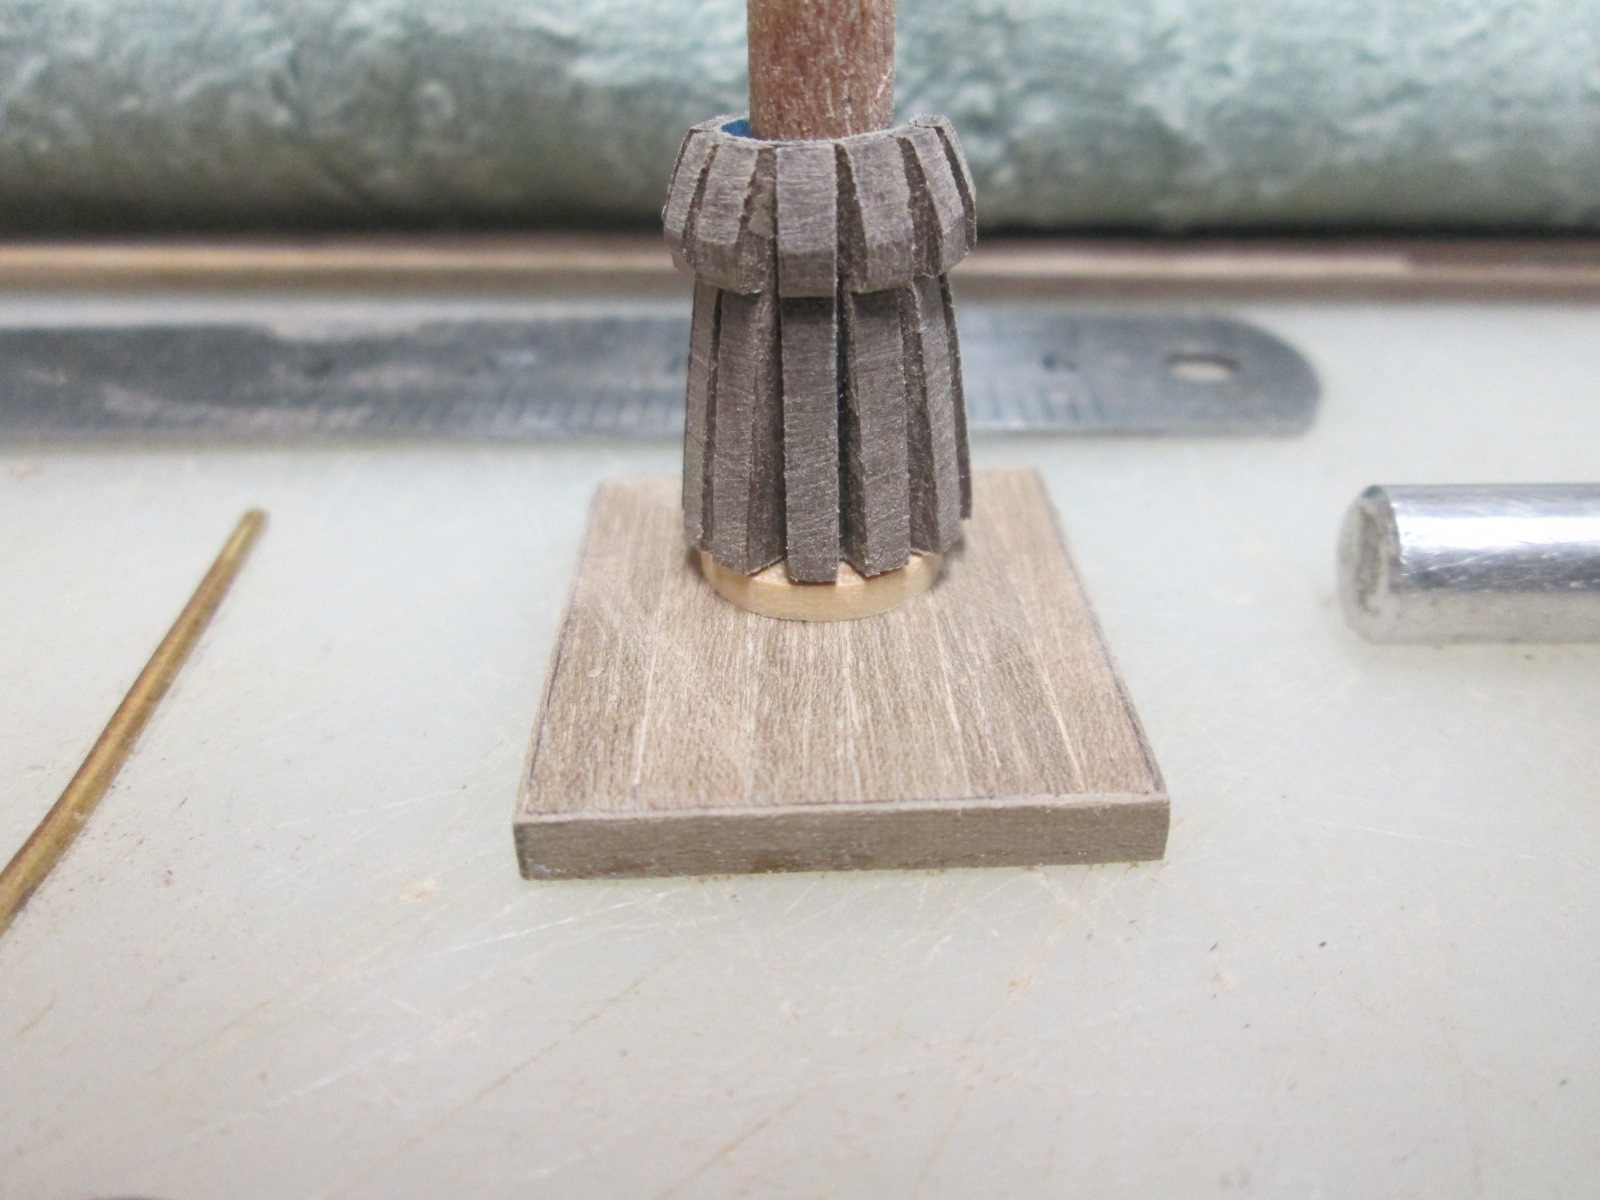
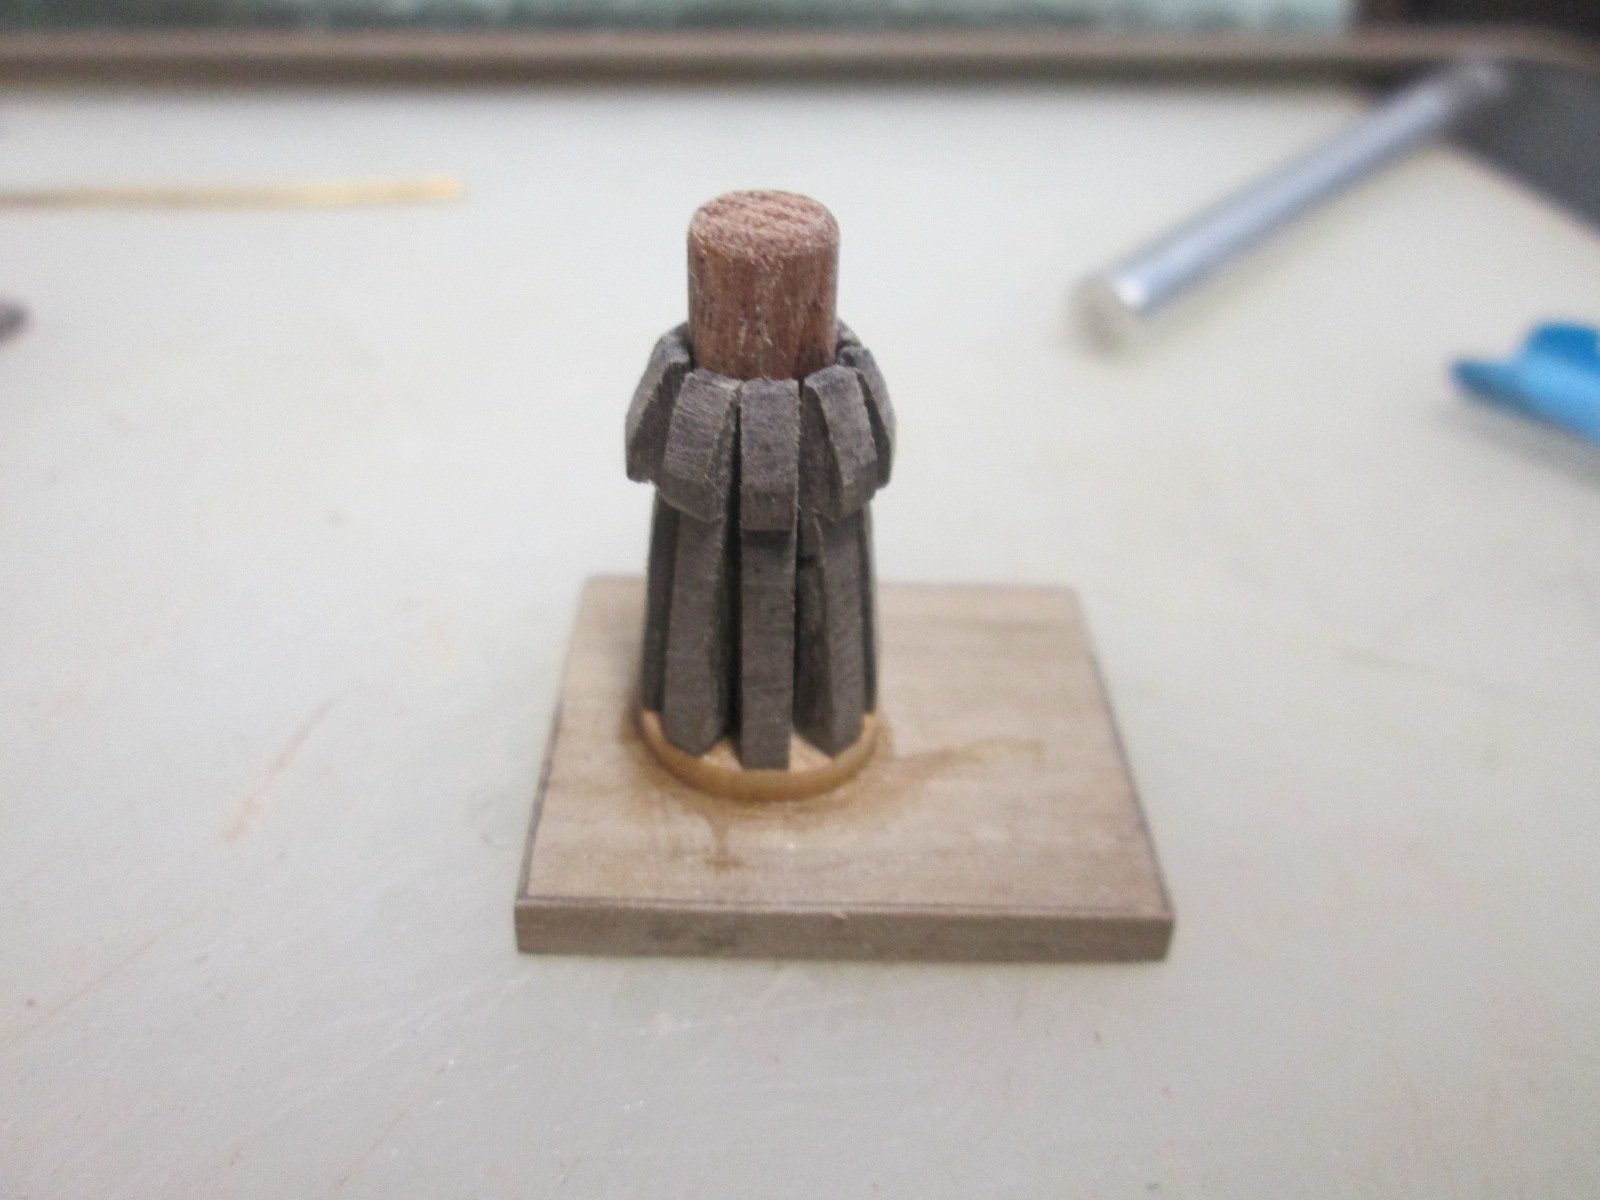
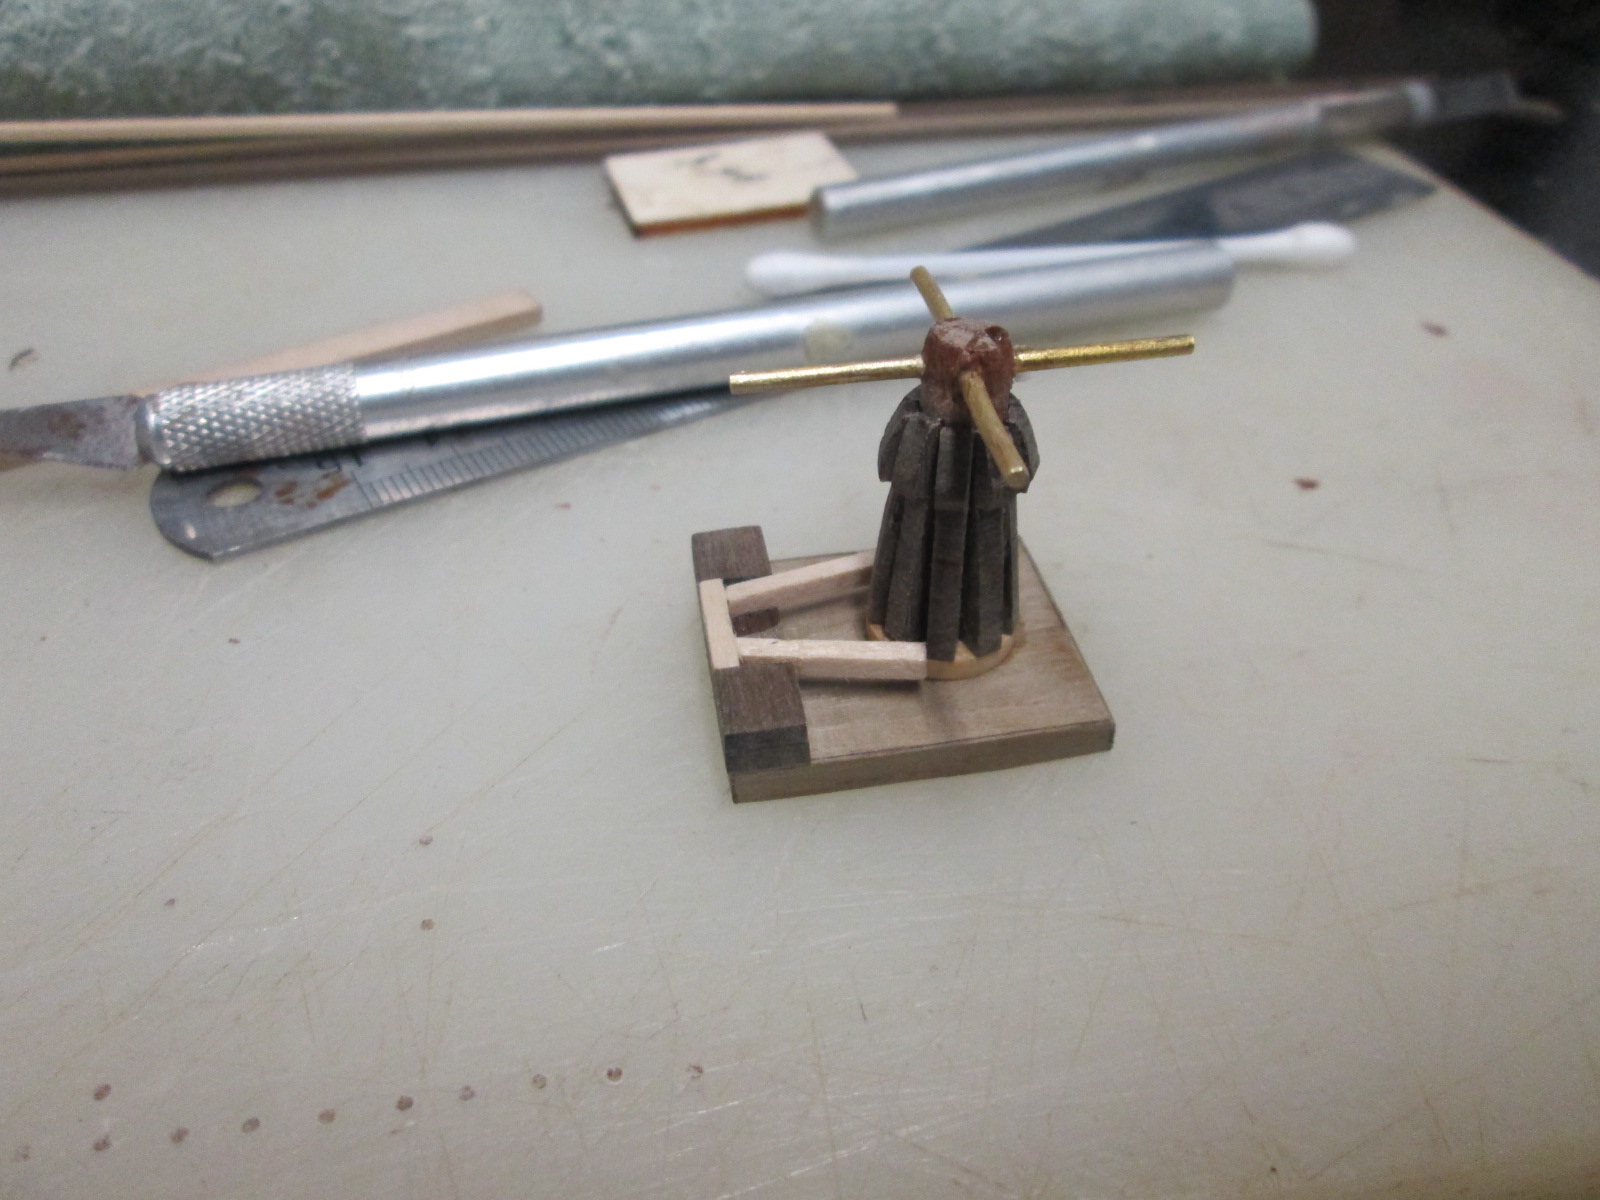
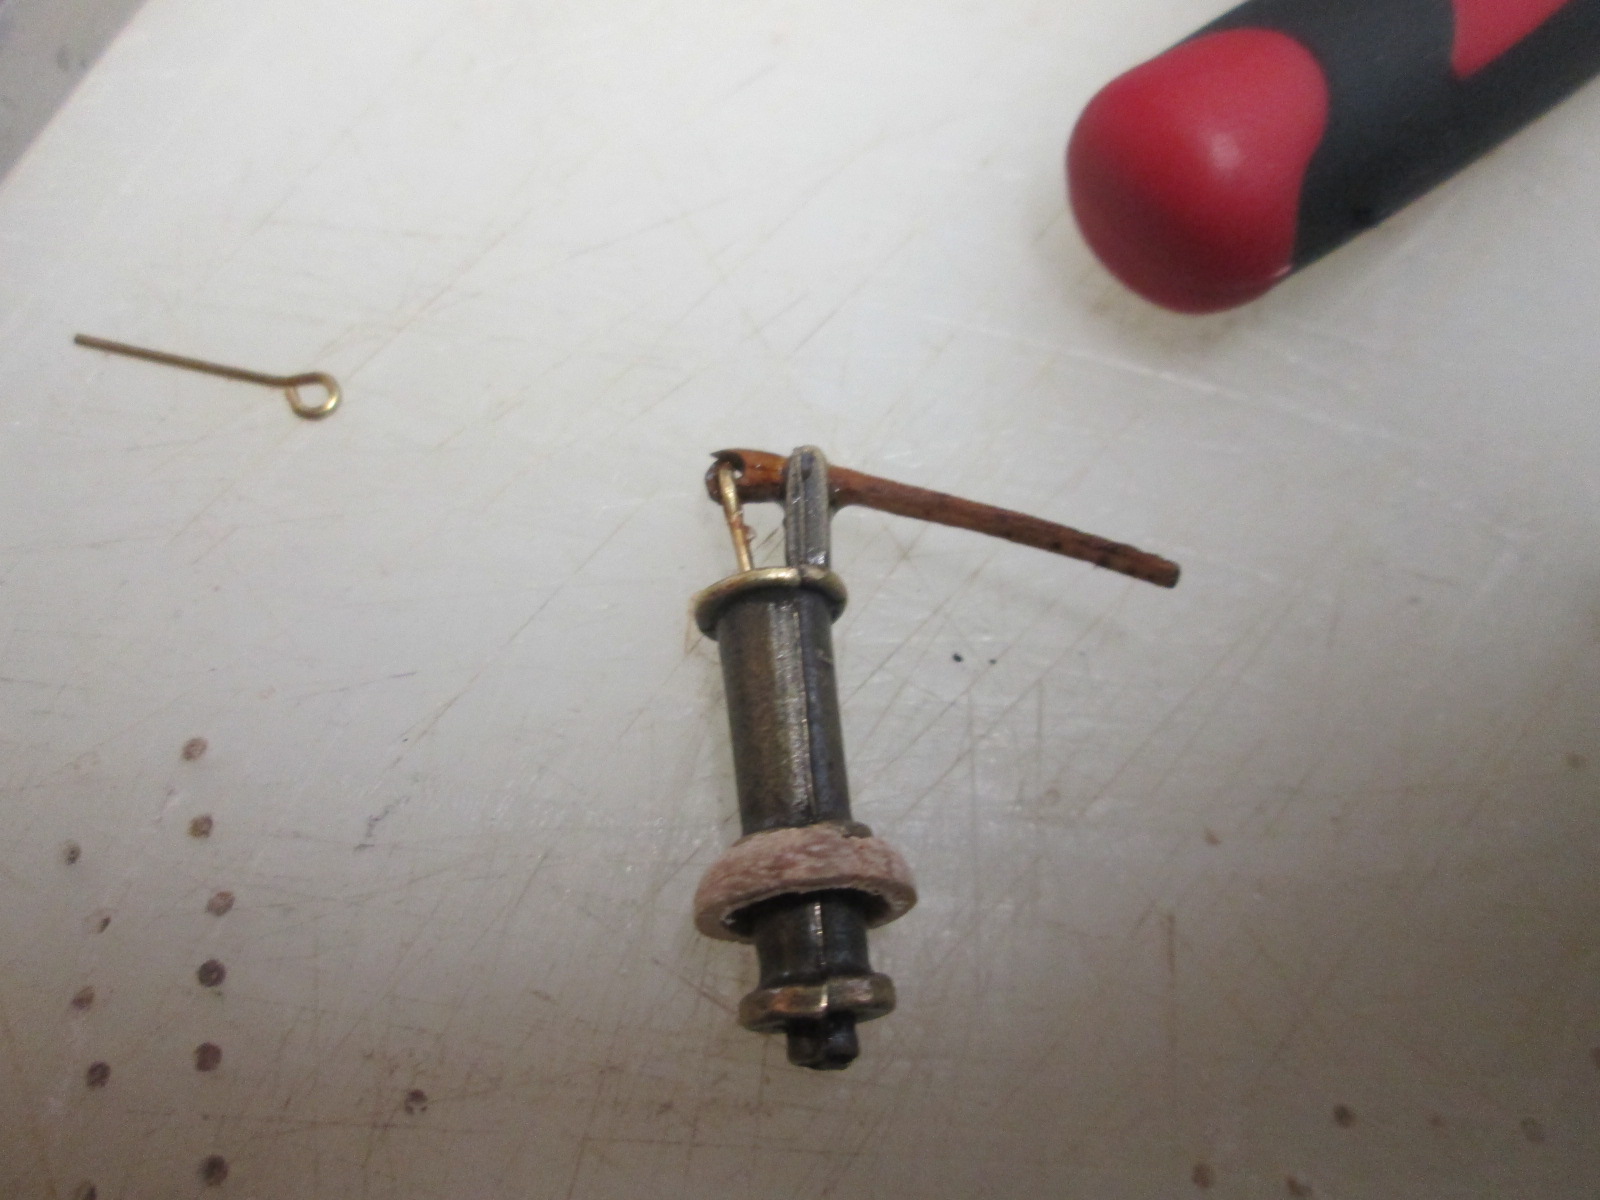
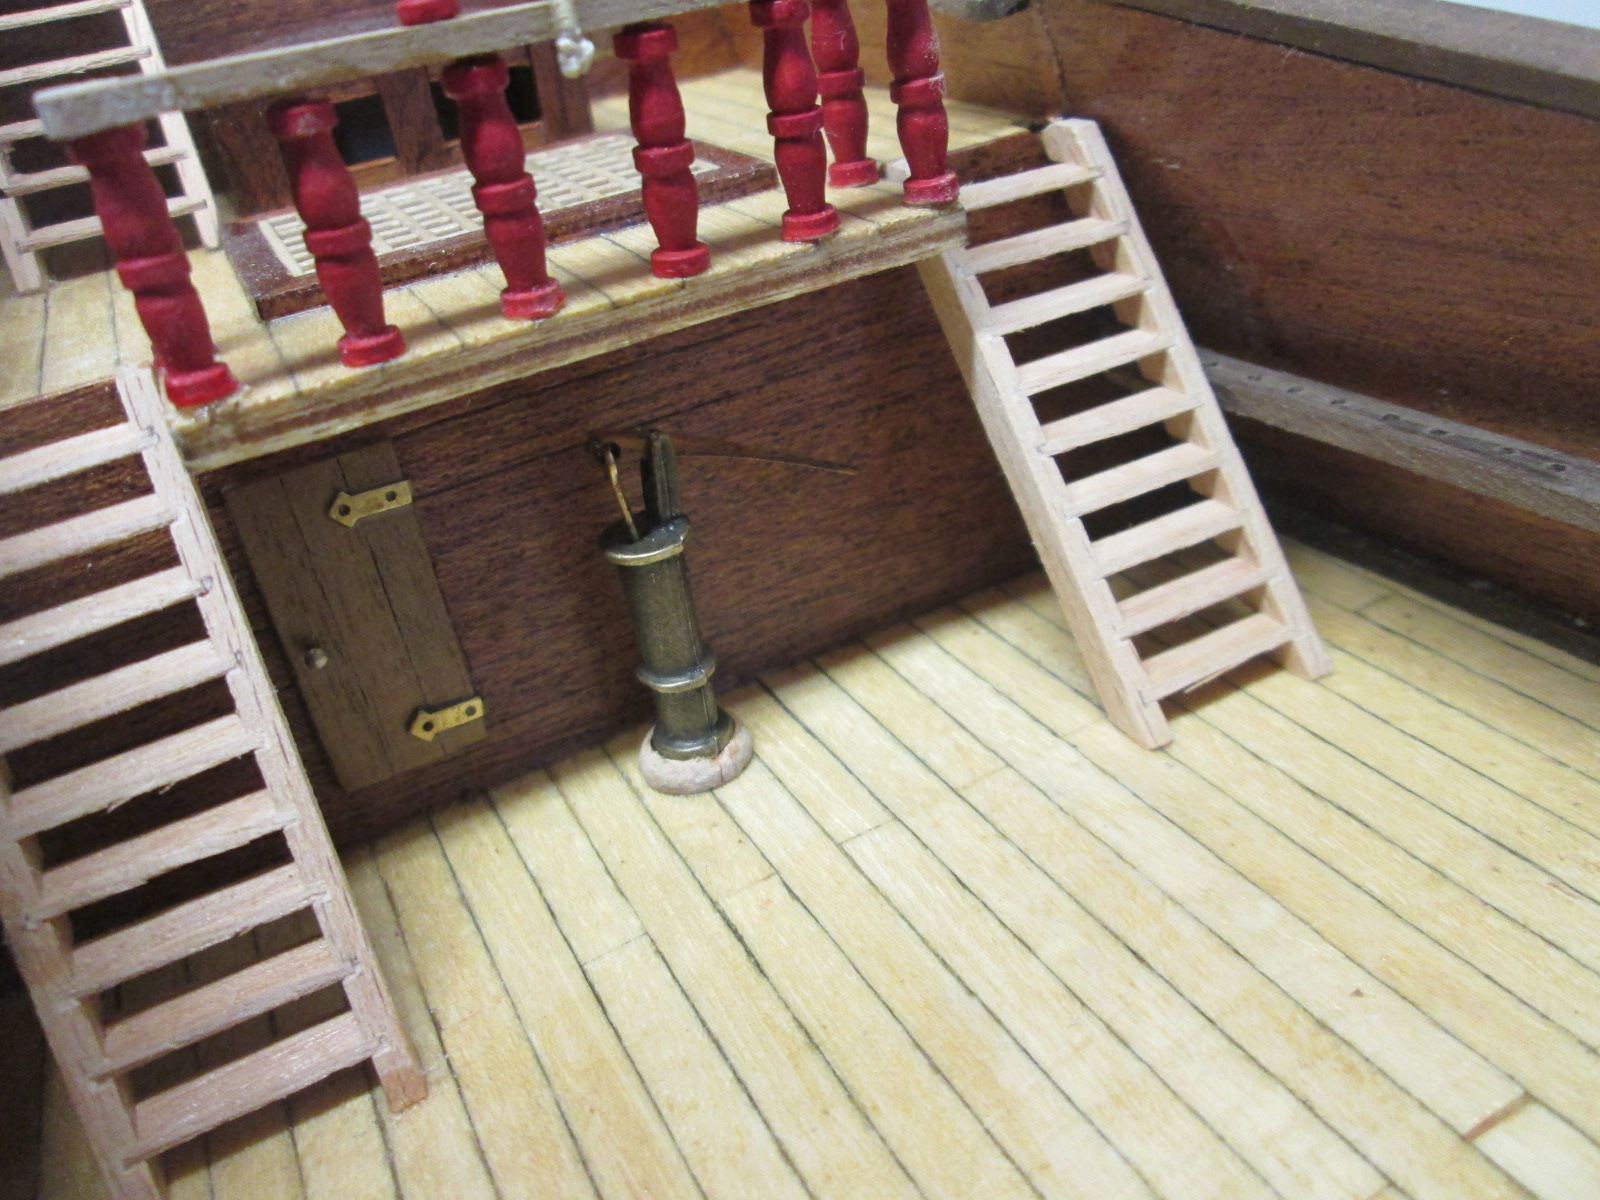
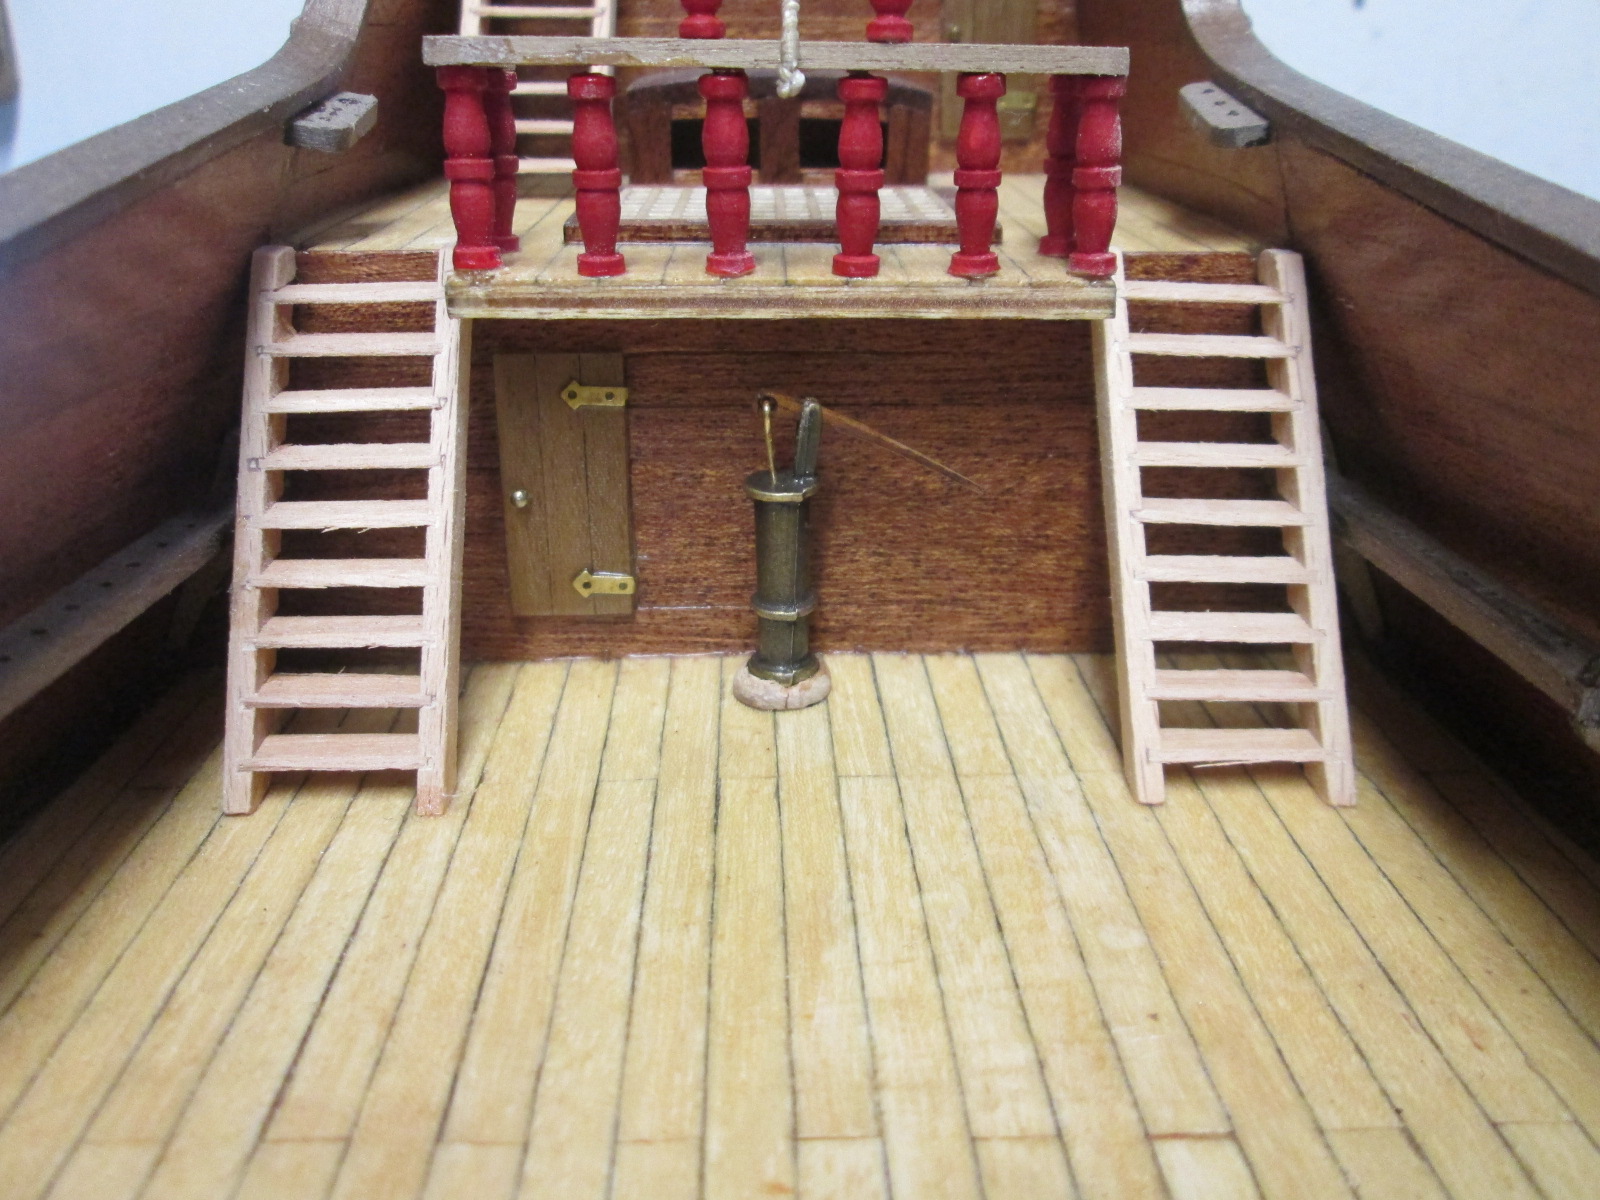
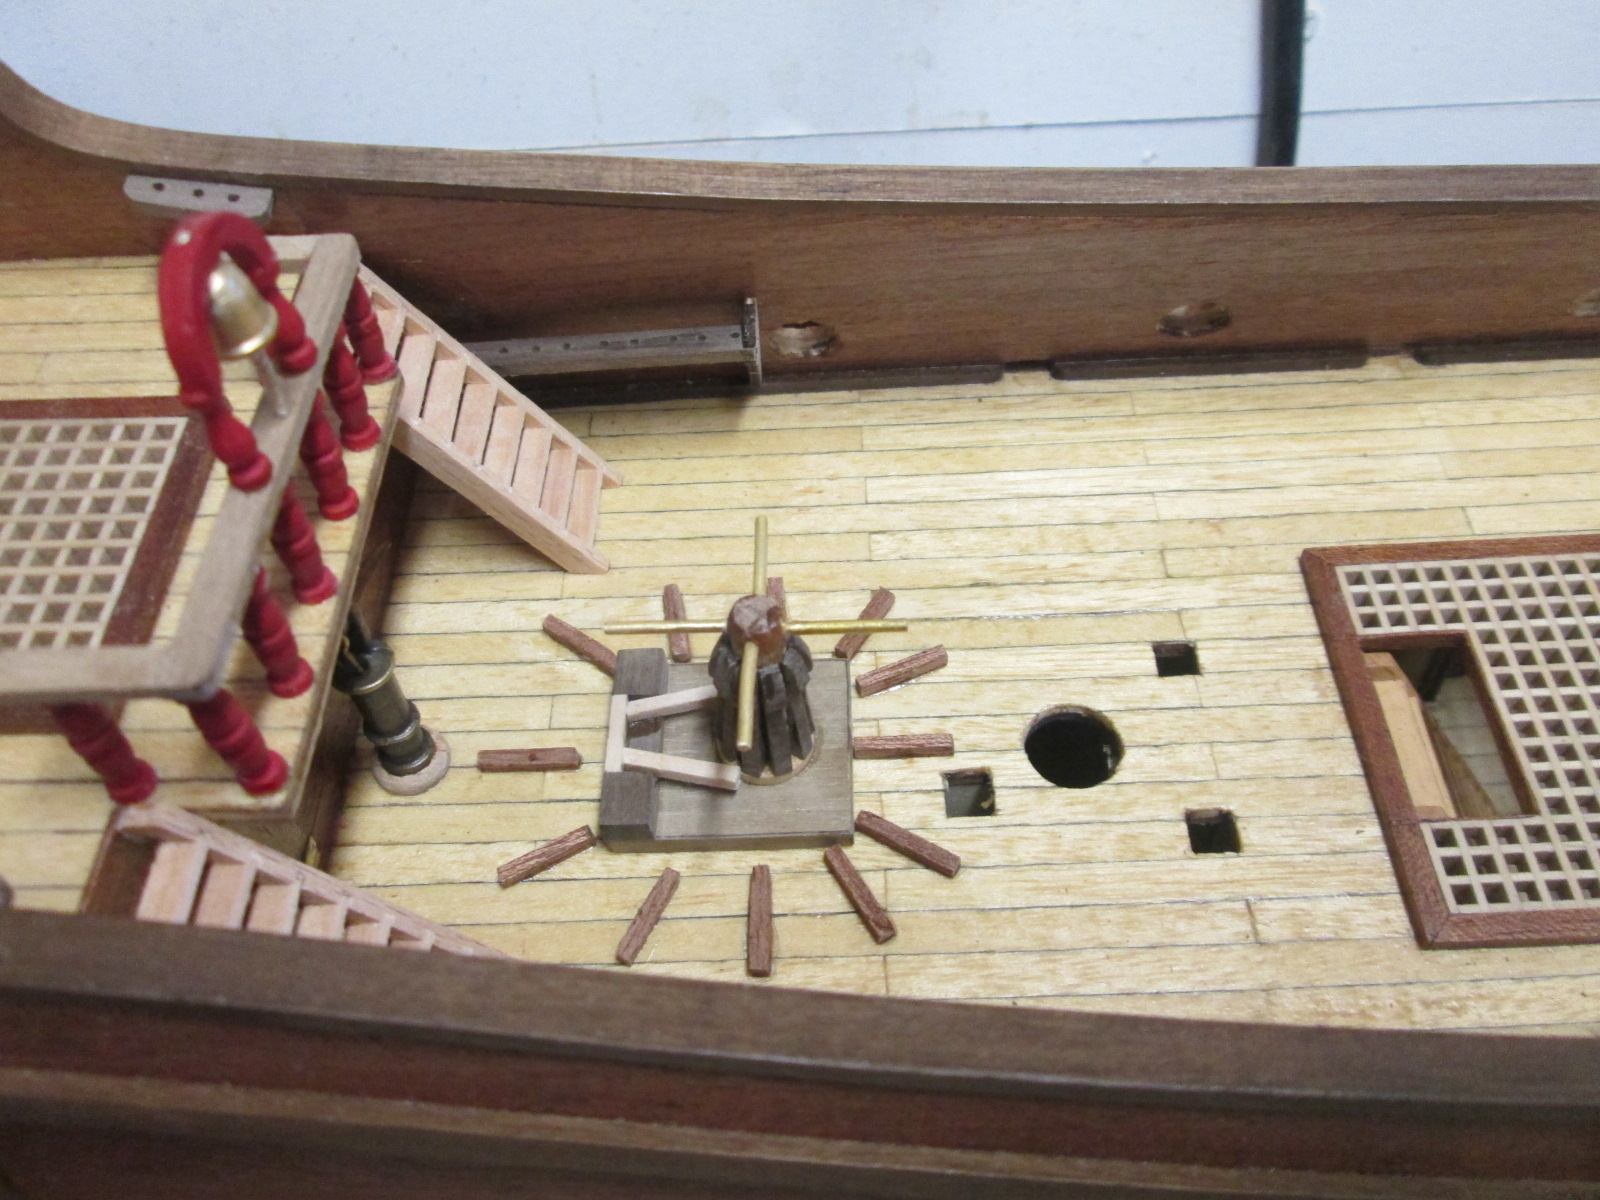
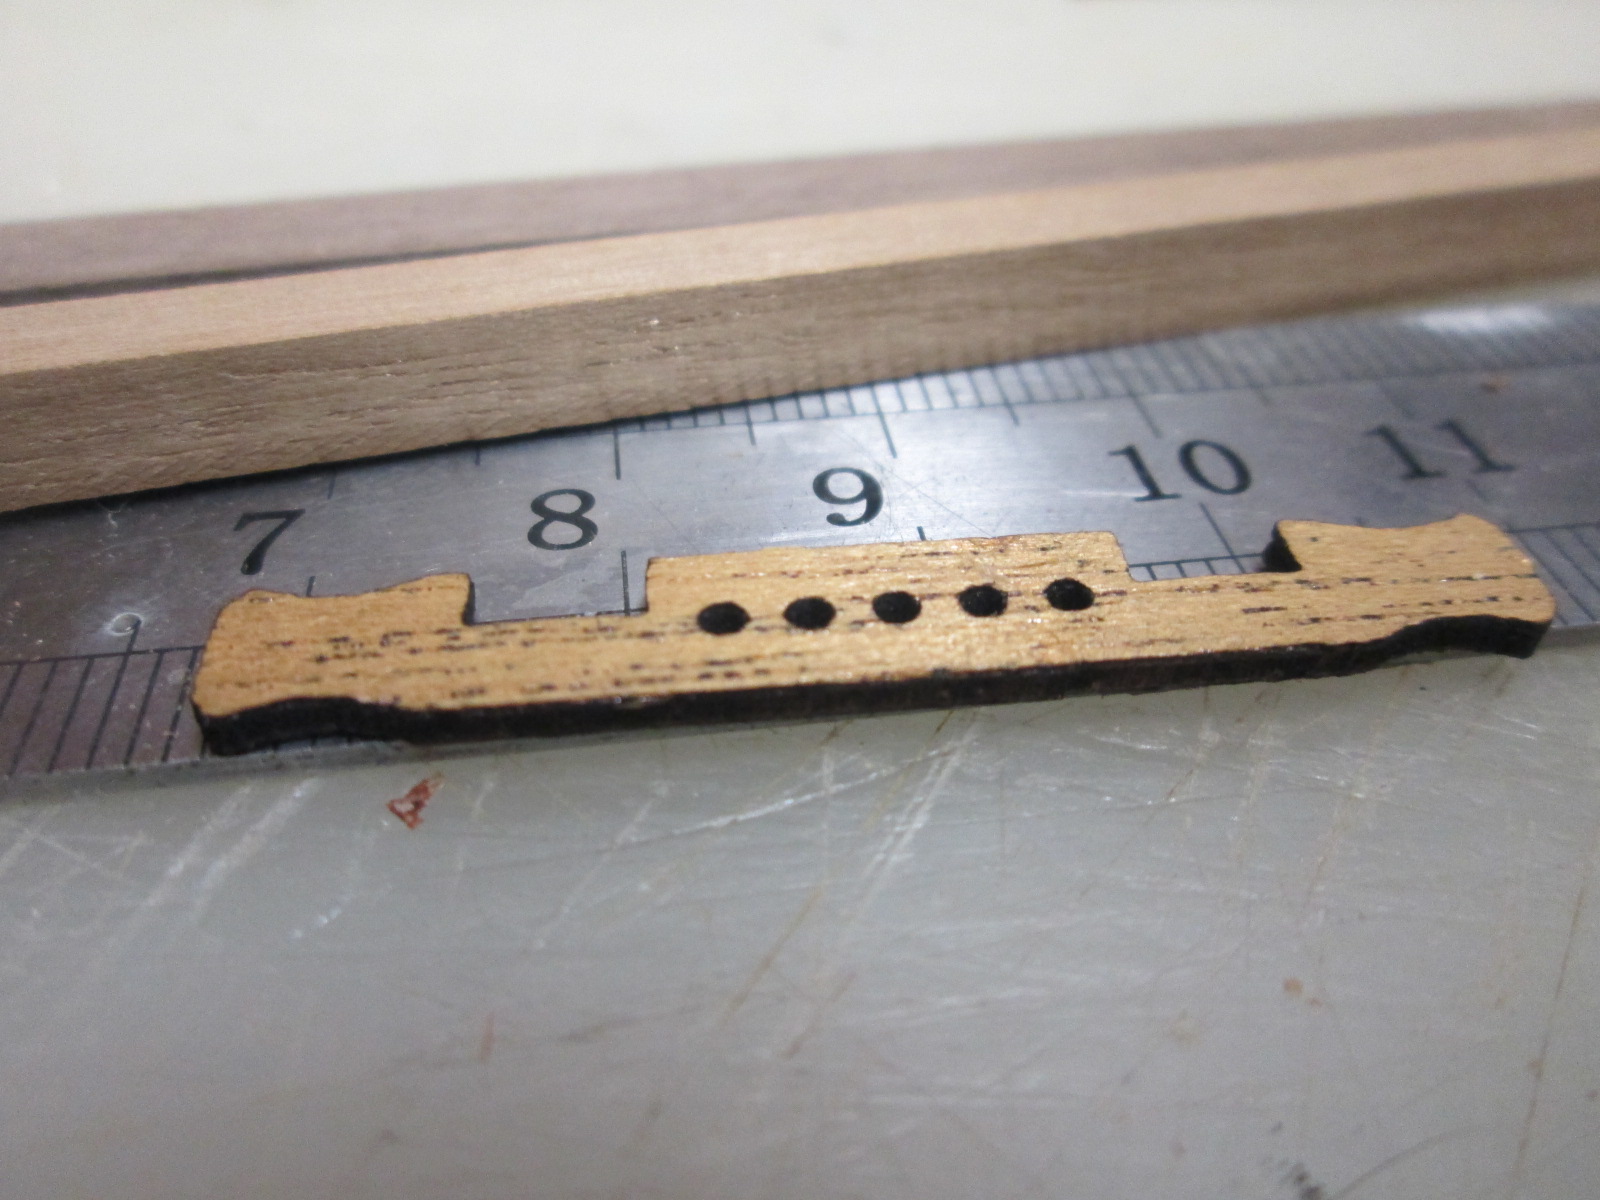
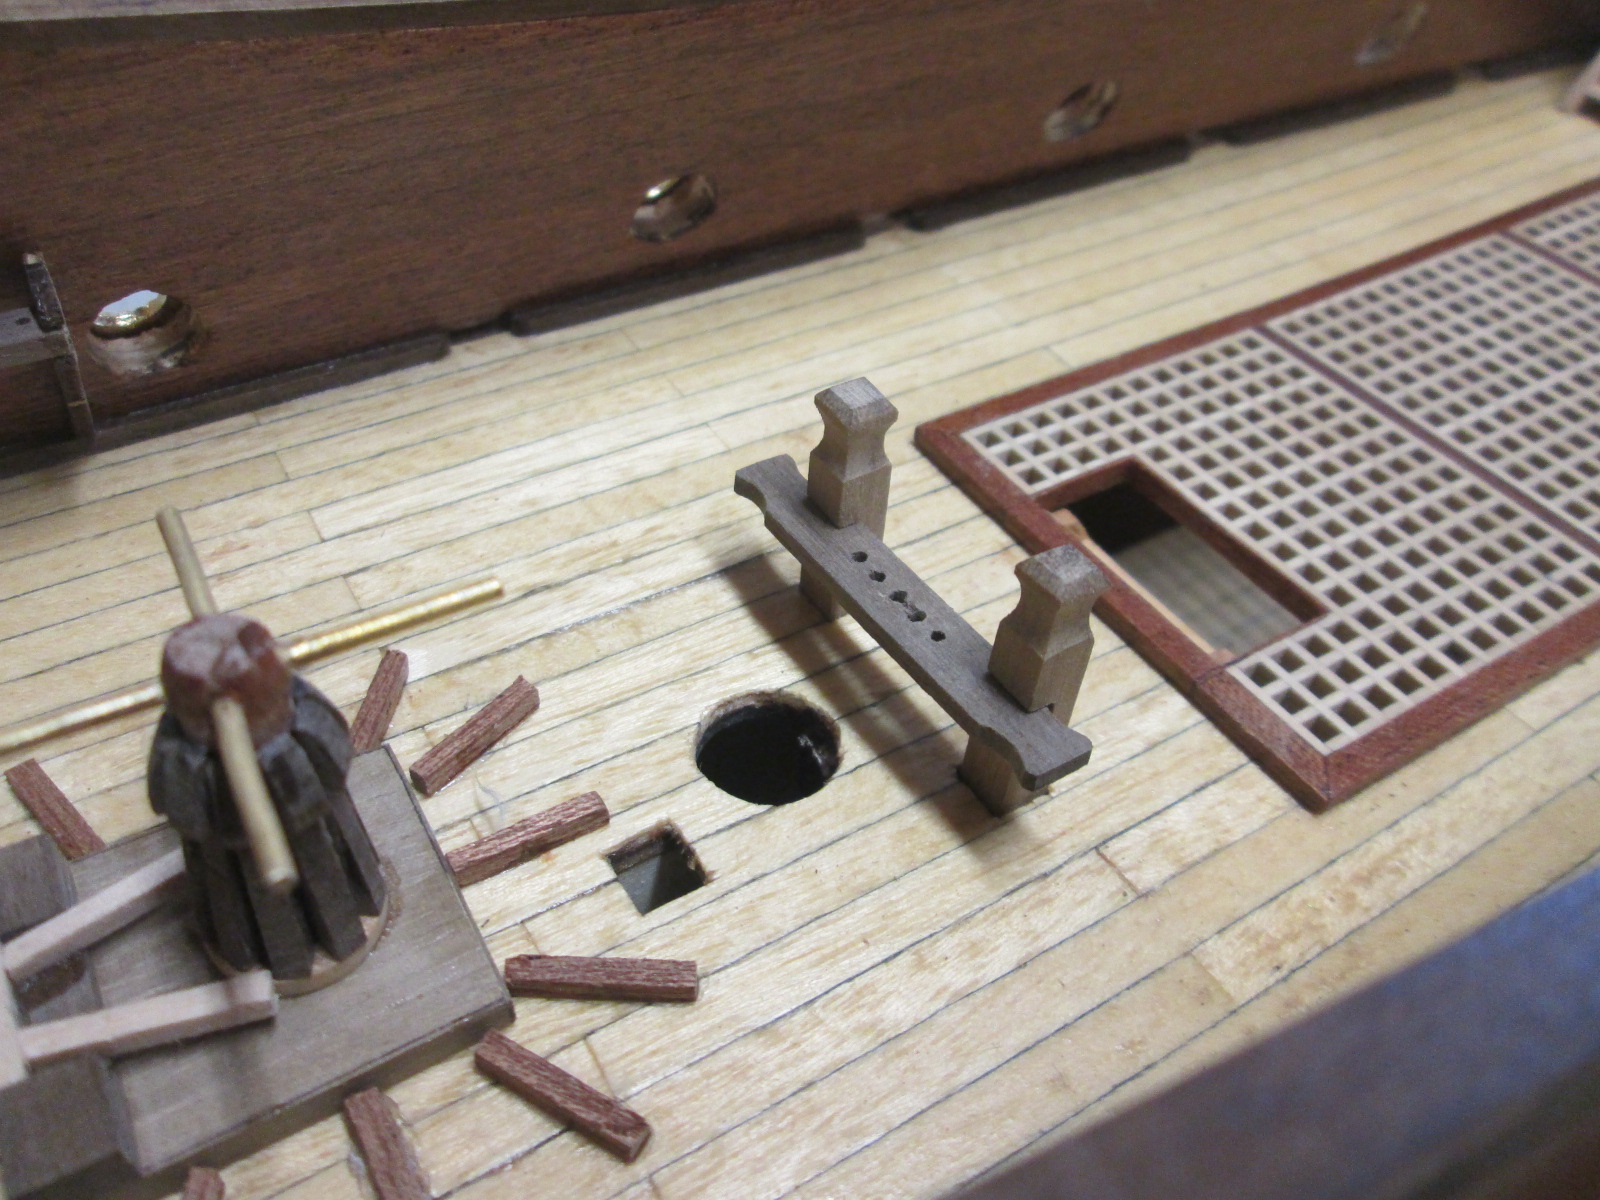
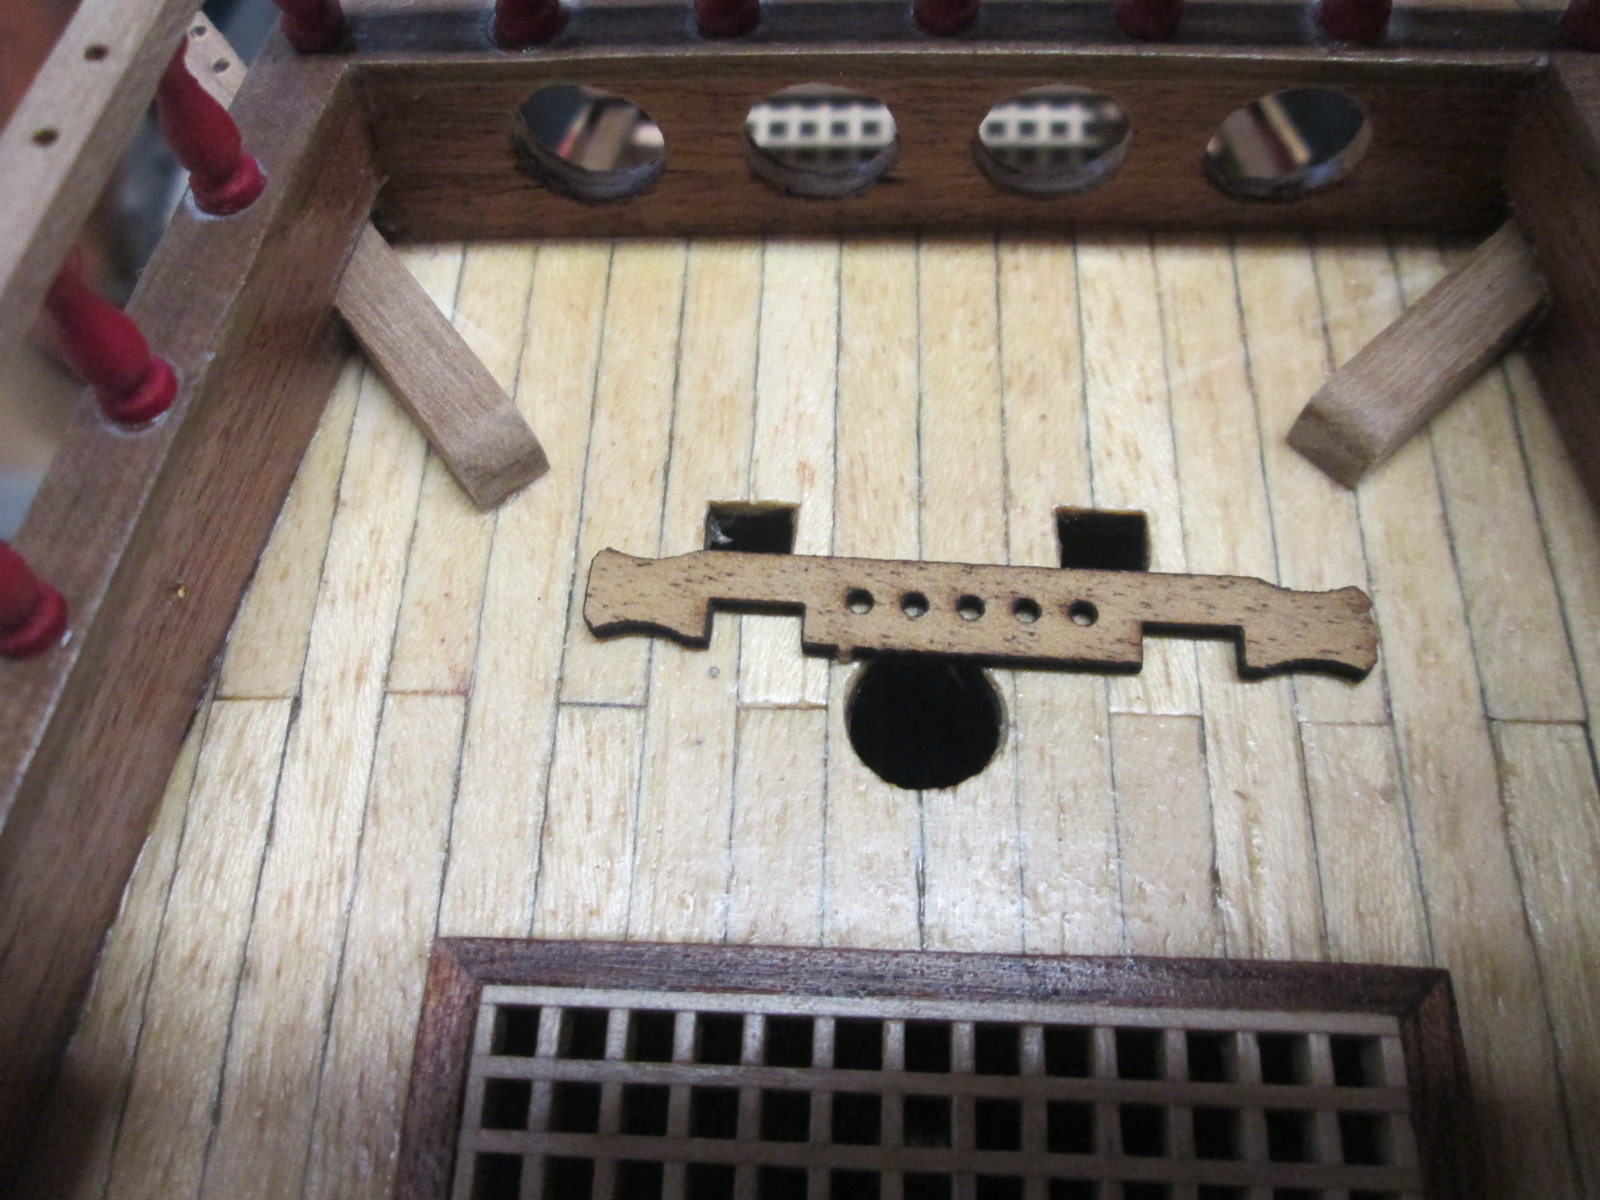
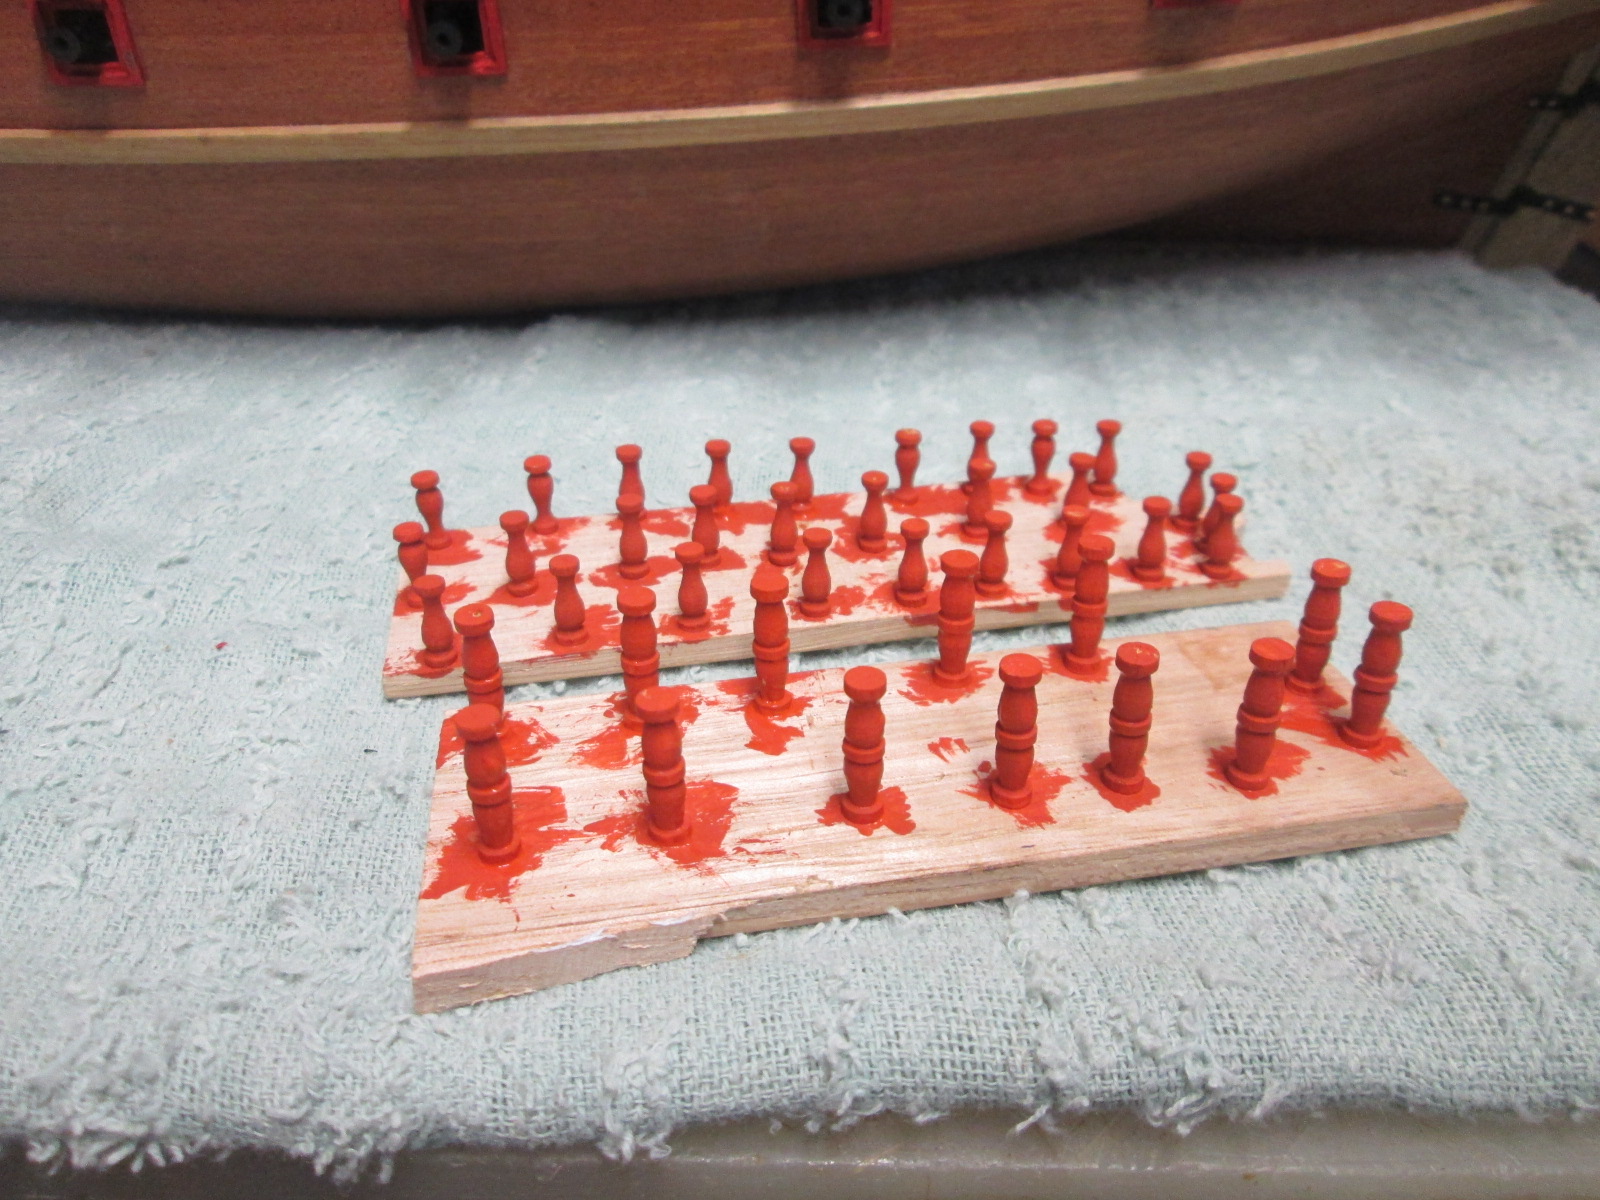
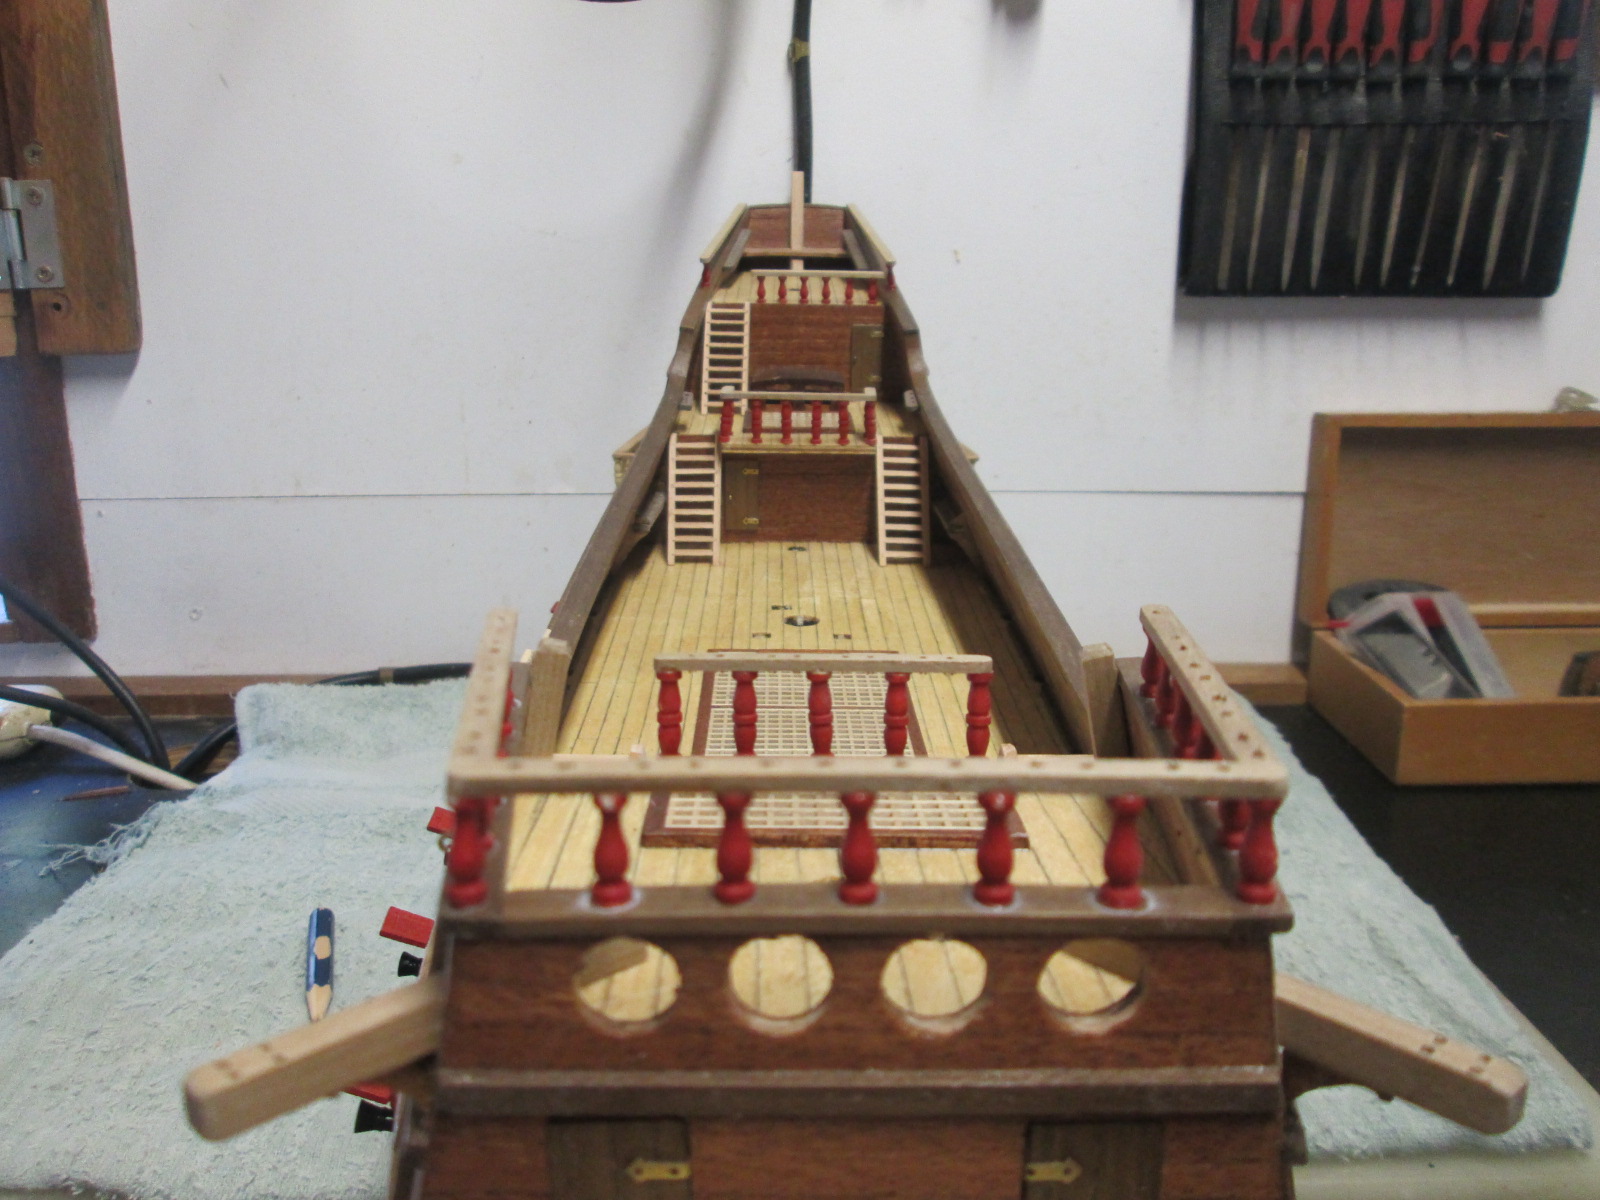
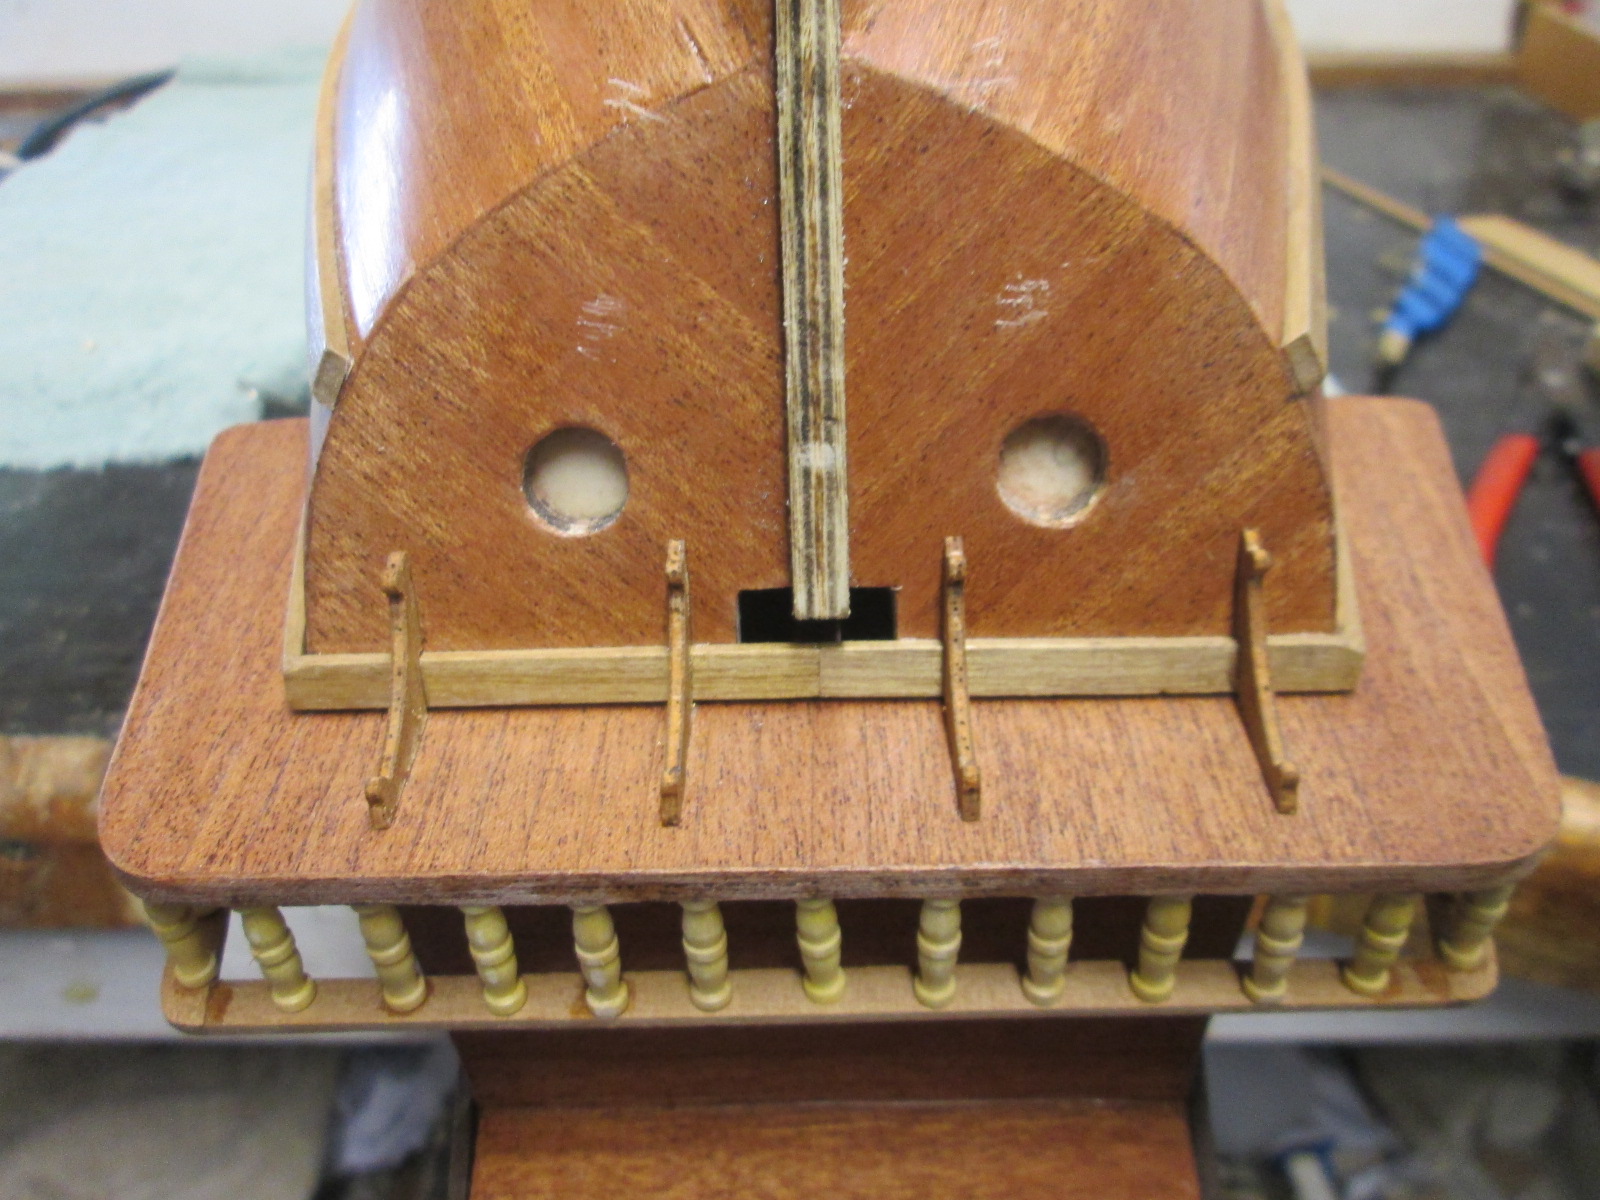
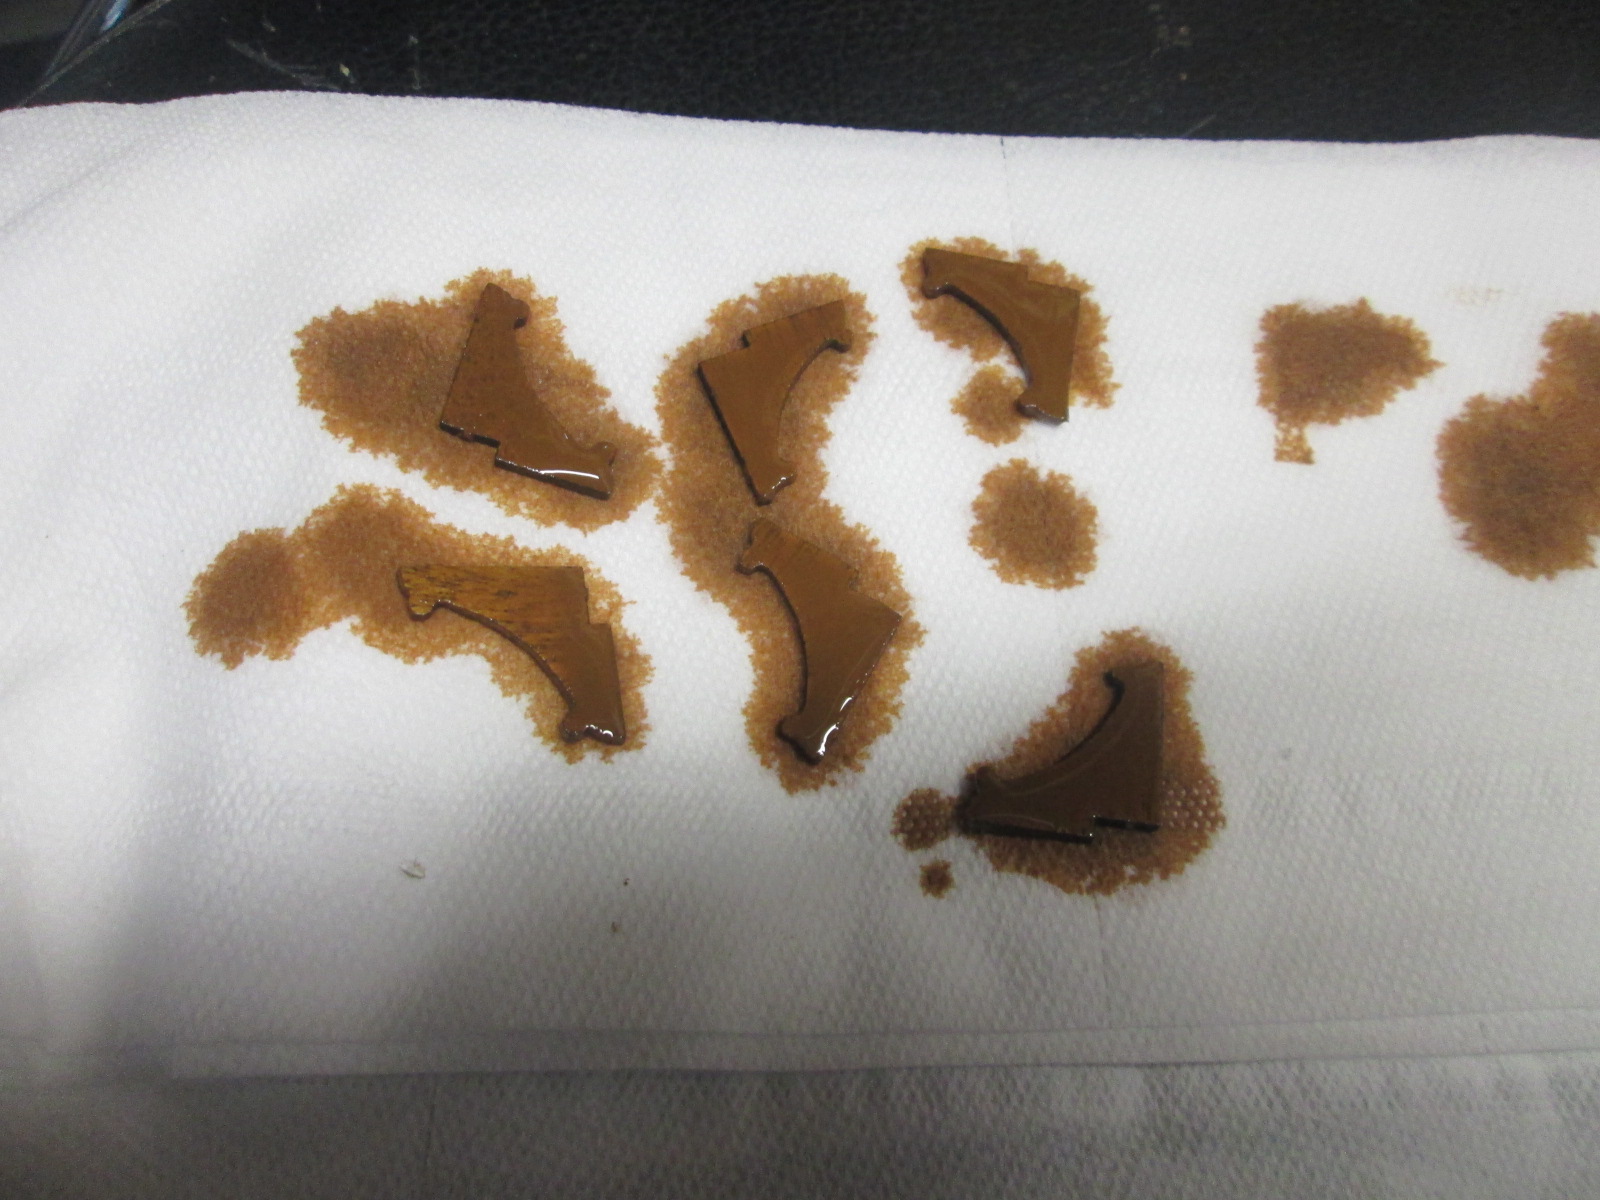
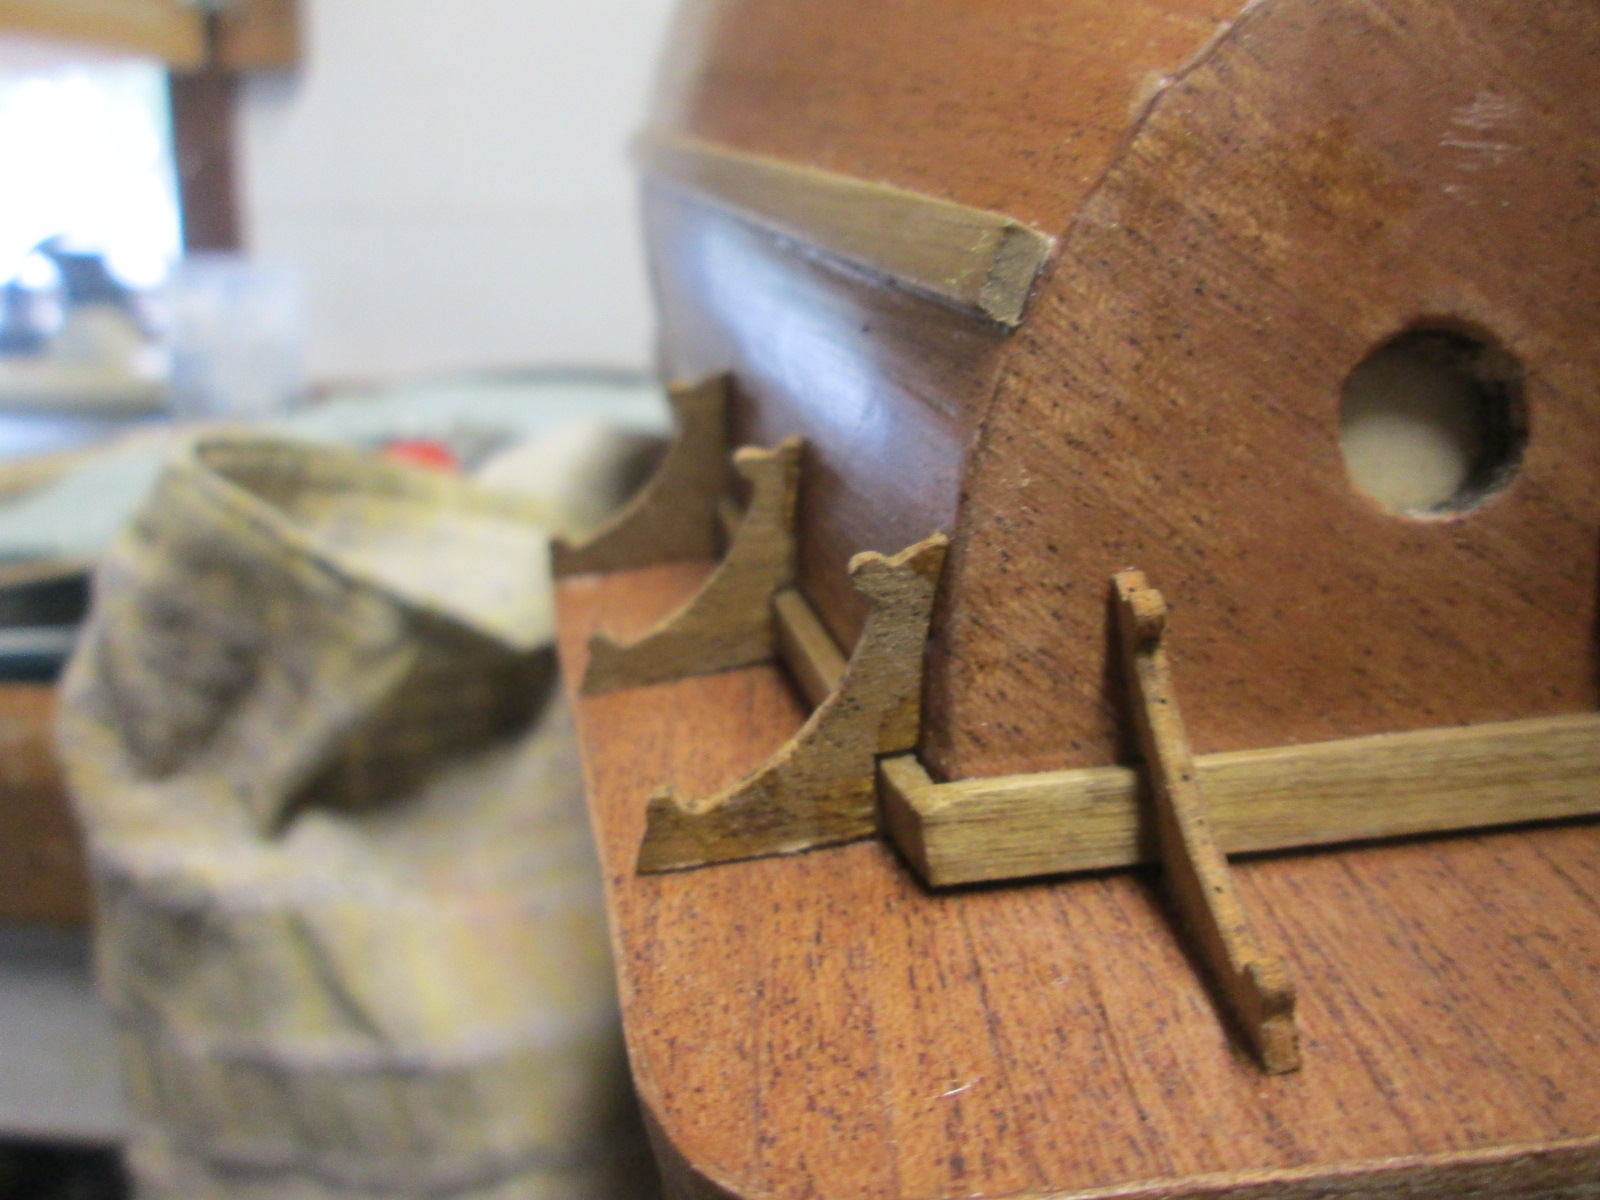
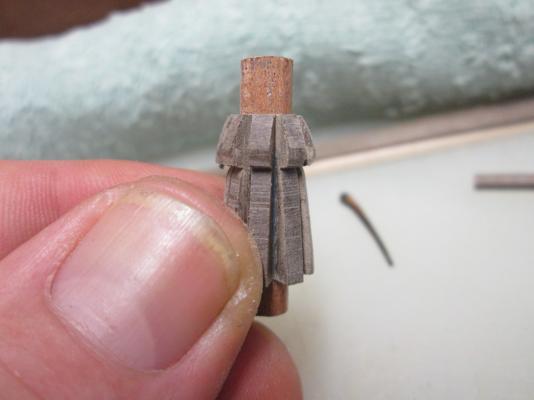
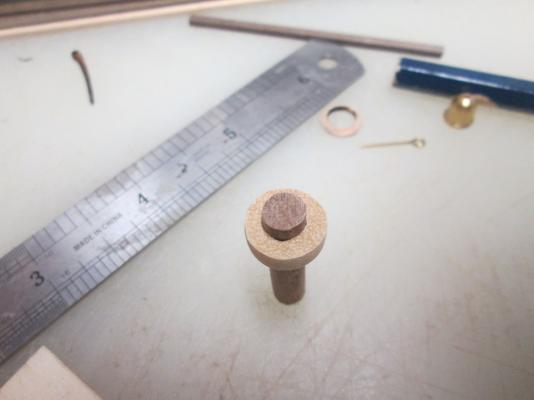
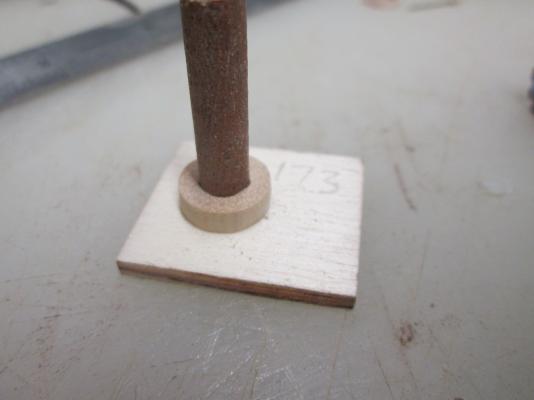
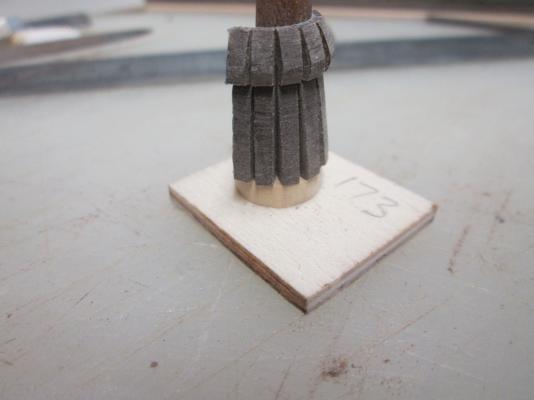
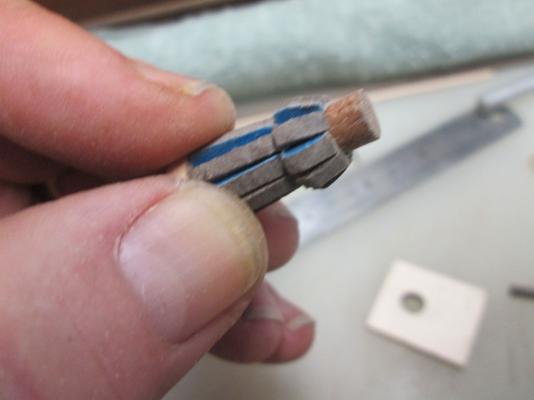
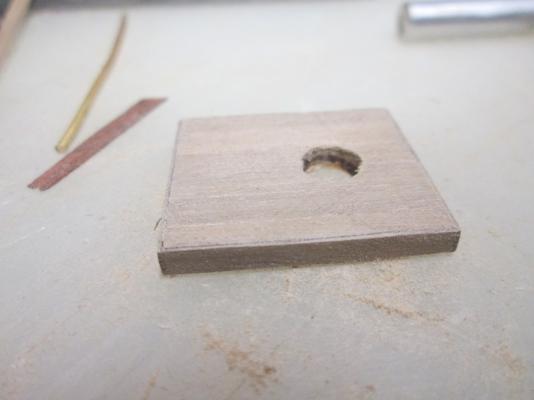
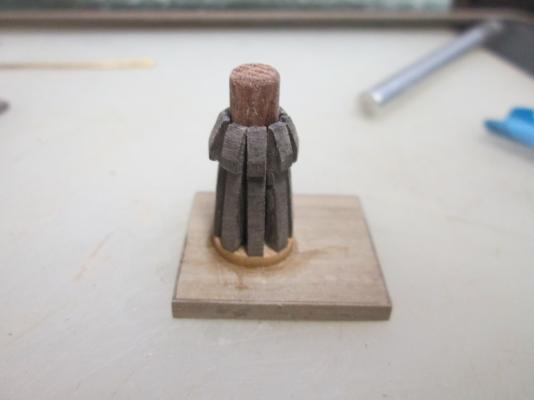
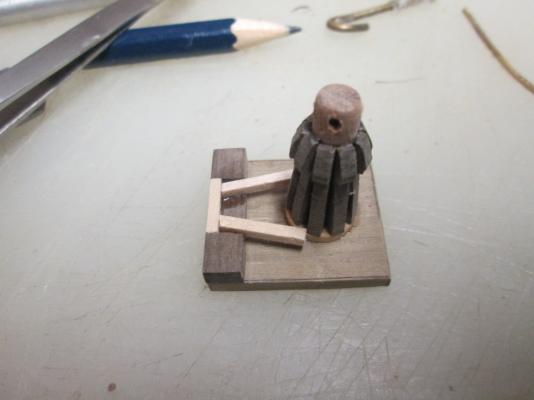
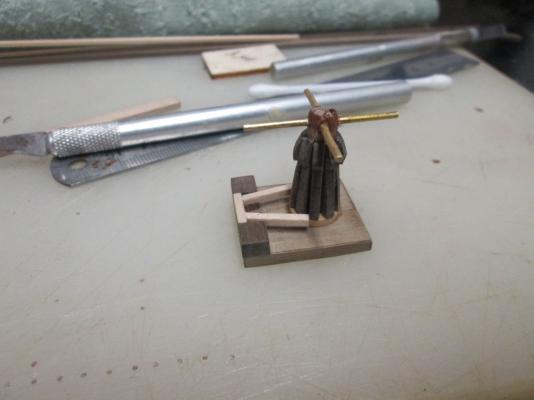
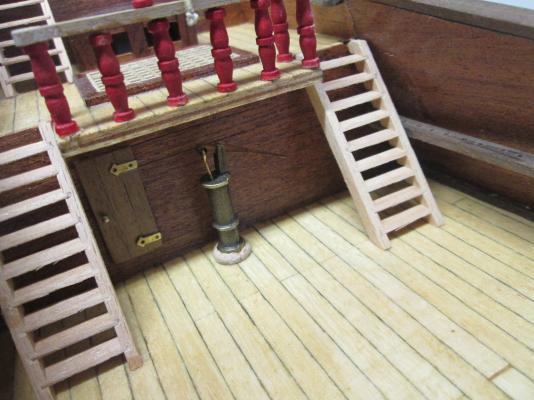
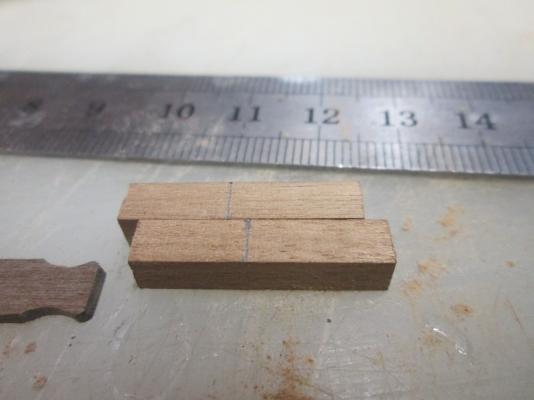
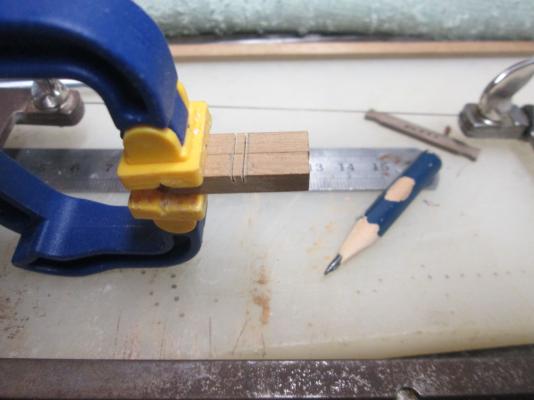
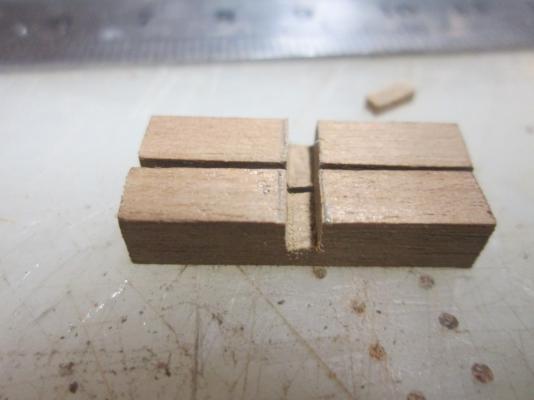
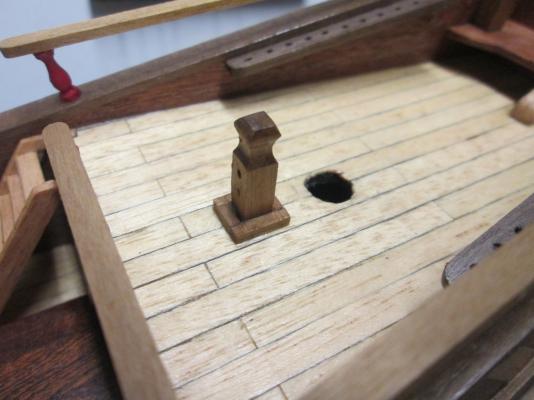
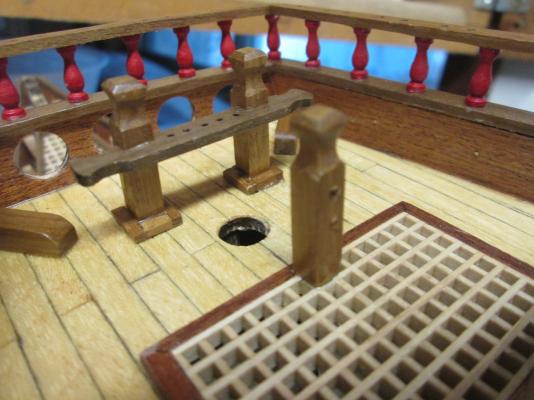
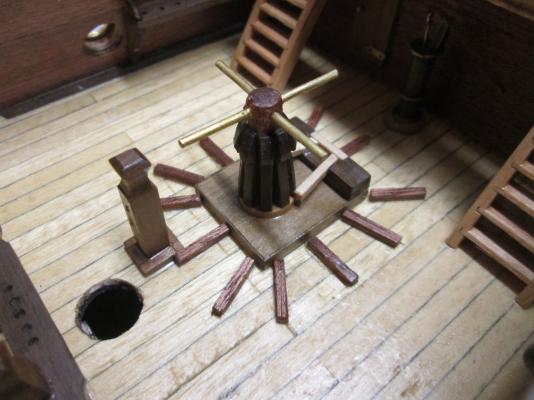
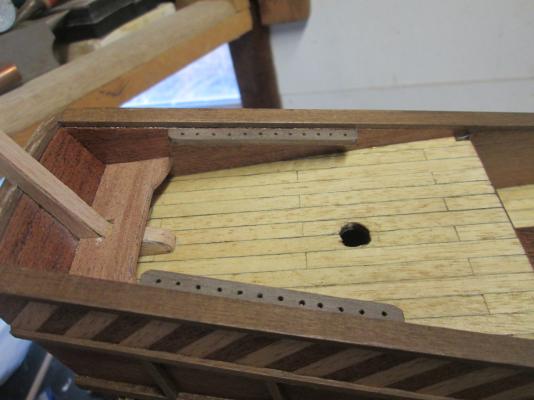
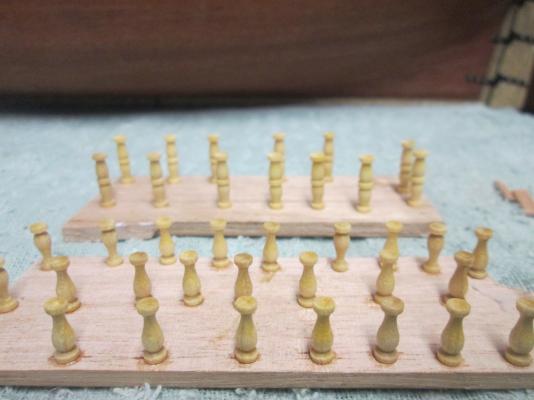
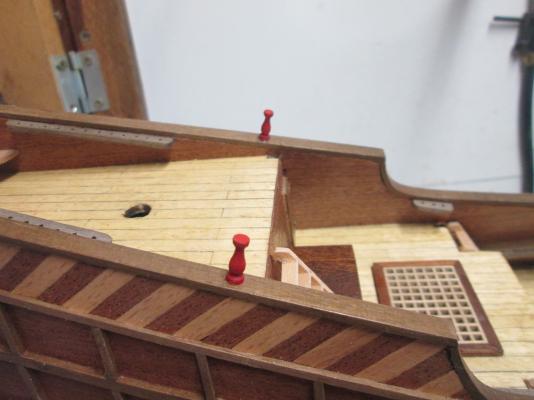
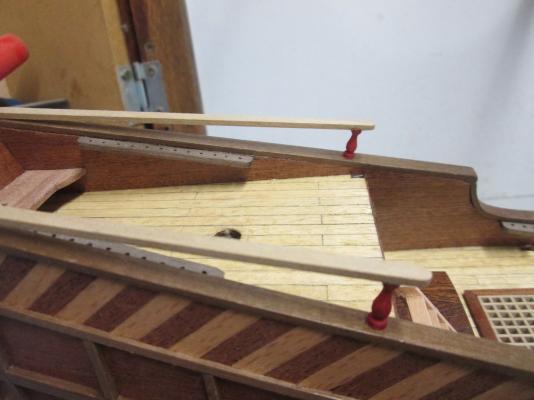
Thanks everybody. I'm having a ball with this build, apart from a couple of small issues The last two days have been spent on deck fittings. The pump, Capstan and mast pin rails and posts for each. and a belfrey. The Capstan parts supplied aren't the best. The round washer at the base was too small, so you can make one from a scrap of 12 mm dowell. That fit quite well allowing for the diameter of the dowell in the centre, and the thickness of the whelps. I made 8 to start with by cutting them and placing them on some tape, and shaping them to the same profile was easy from there. It beats making them one at a time. * wasn't quite enough to go around the pole, so I made an extra that fit nicely in the gap. This was easier than spacing them so they all fit. The pump and belfrey were fairly easy, with no issues. The mast pin rails were a problem. The pre cut plywood ones don't fit the holes precut in the deks. The best way around this is to make some from 2mm by 6mm walnut, but make them without the slots , and to put the slots in the posts. Then you can slide the posts along the rail until you have a good fit. Worked like a charm, however the holes in the deck were too big, and would leave unsightly gaps. The only fix I could think of was to put some 2mm by 2mm around the base of each pole that went into the deck. It seems to have done the trick. That's it for now Matt.


- 64 replies
-
- 2
-

-
- occre
- san marcos
- (and 1 more)
-
G'day Greg. I.ve finished this kit recently. The log is still in the kit logs in progress. It's a tricky little kit, and some of the parts are not very good quality. I just used them the best I could. Feel free to check the log out, and let me know if you have any problems I might be able to help with. Have fun with your build, Matt.
-
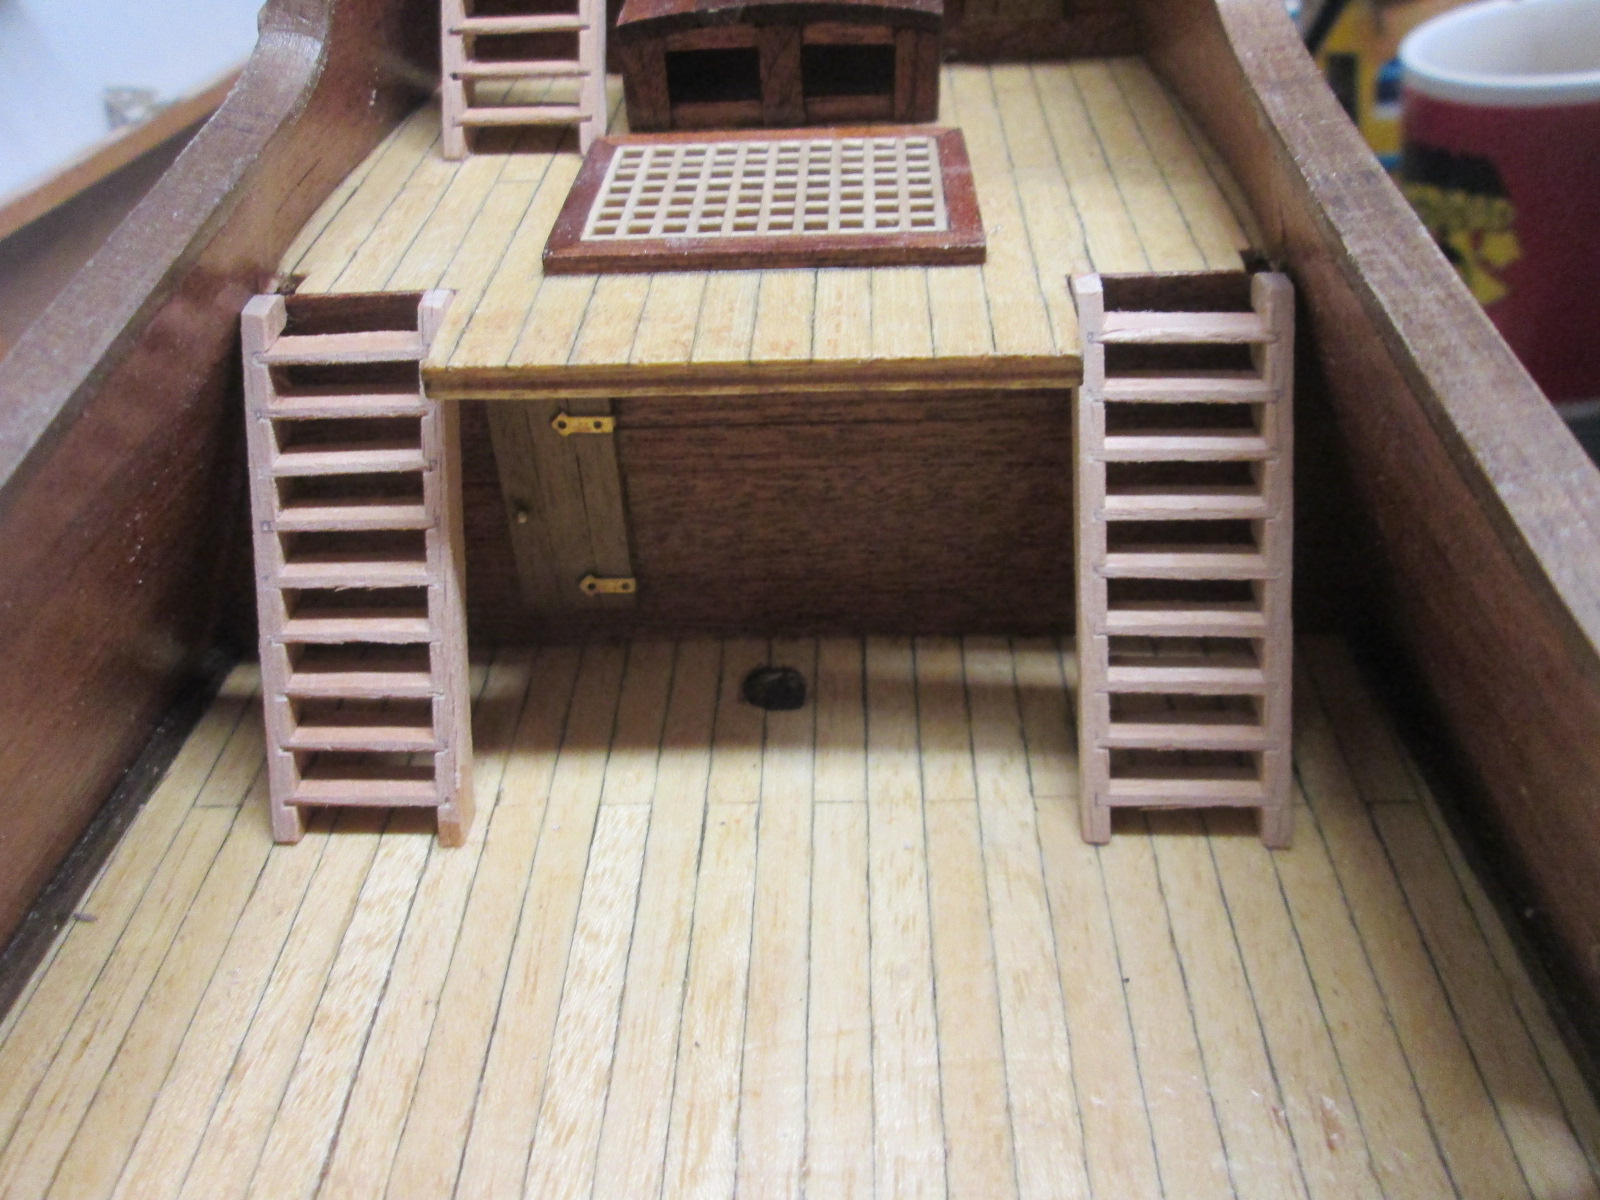
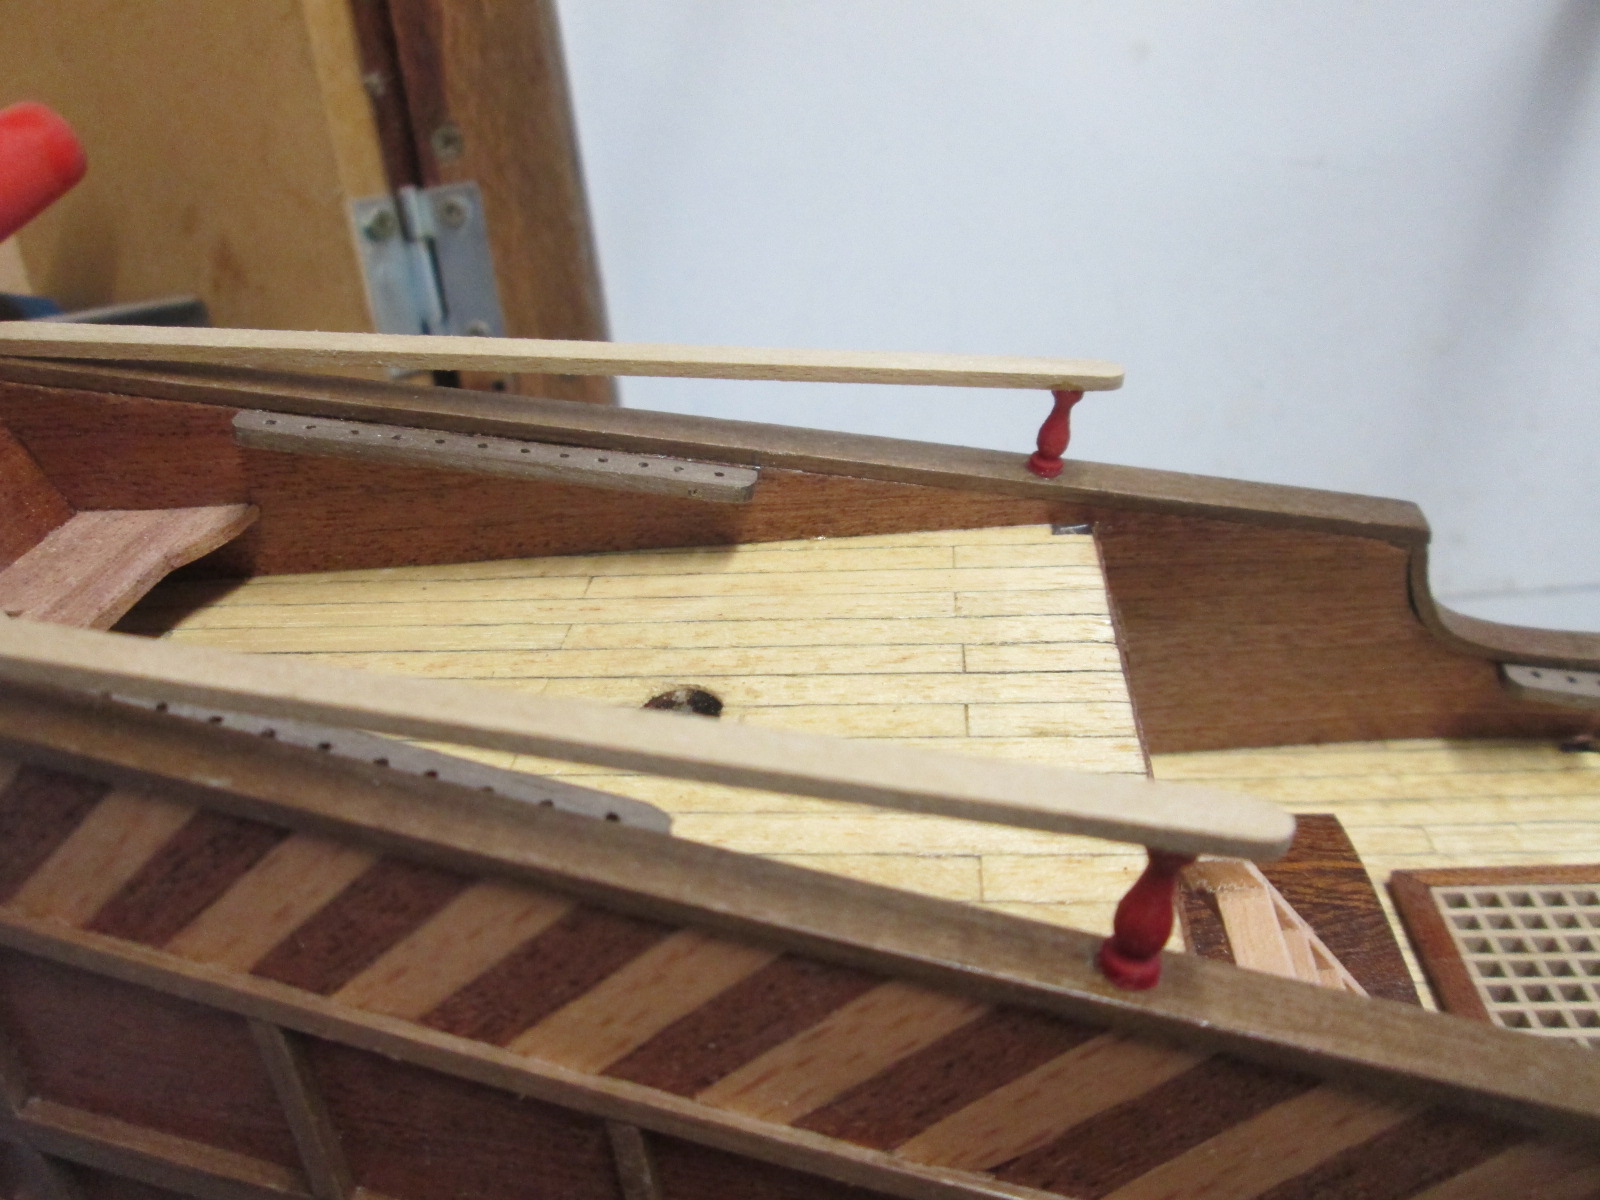
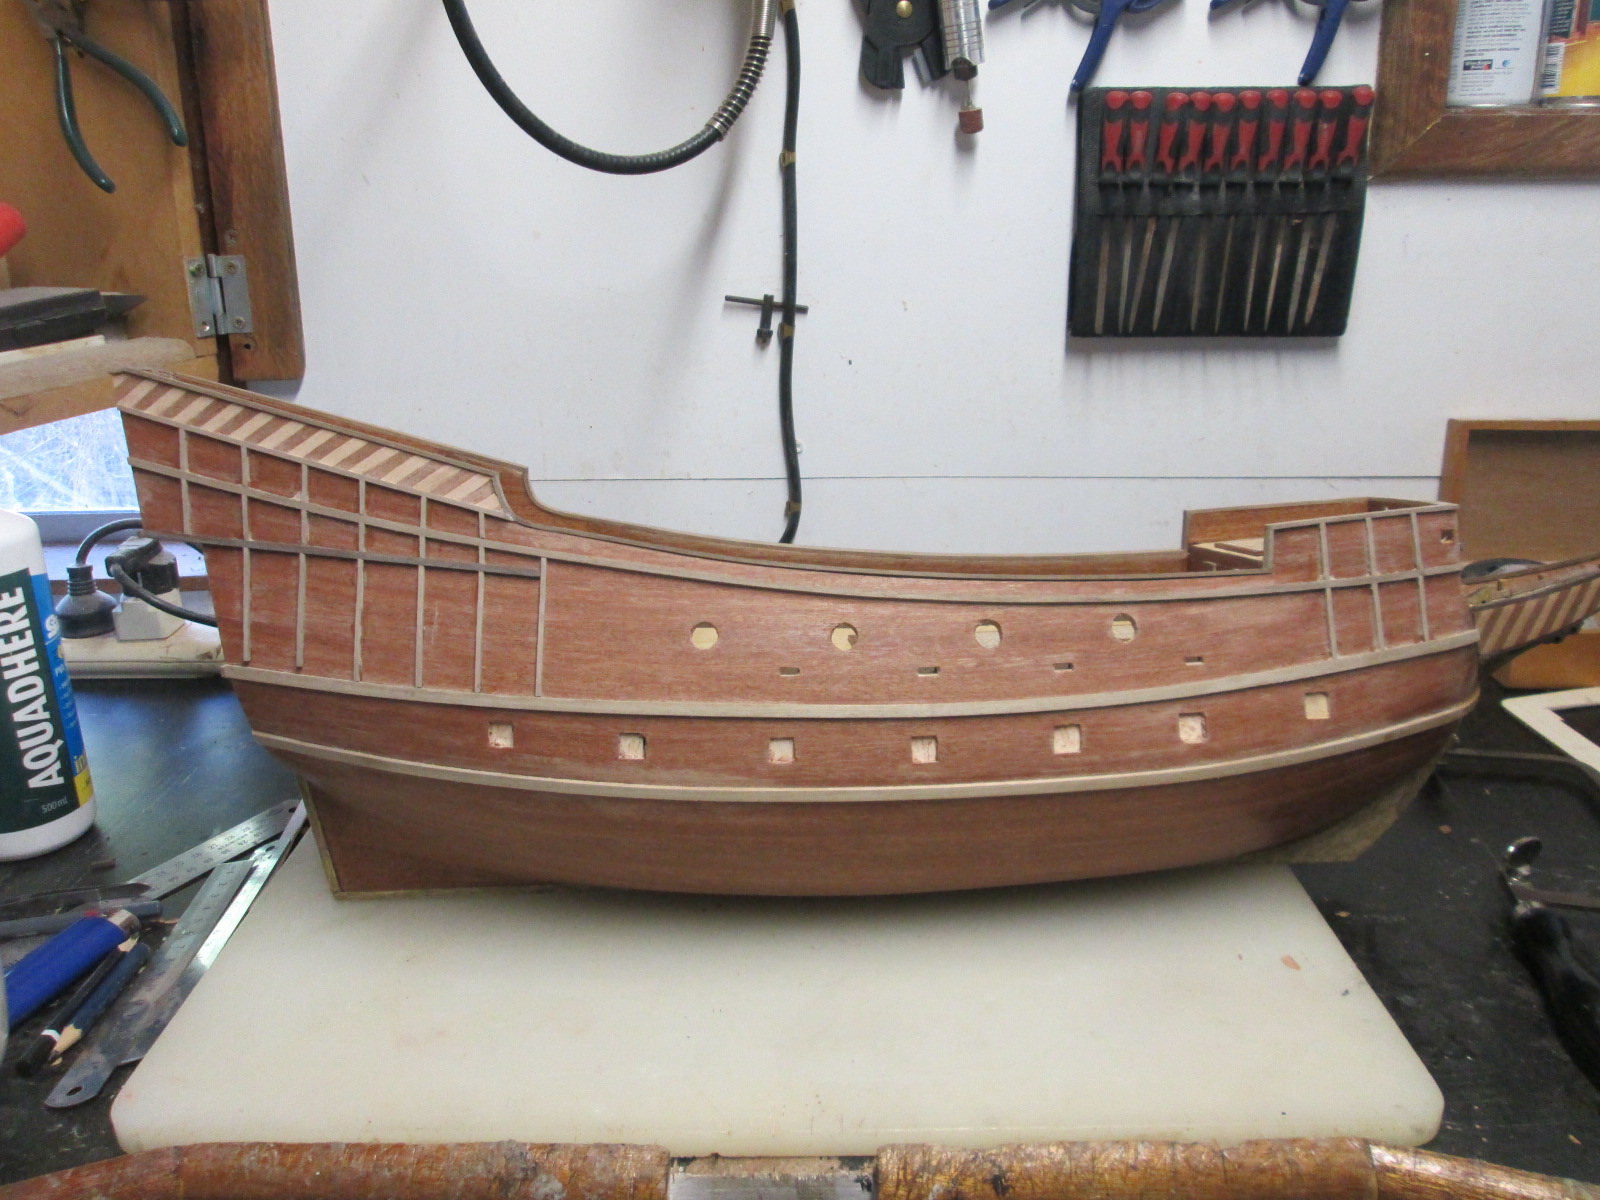
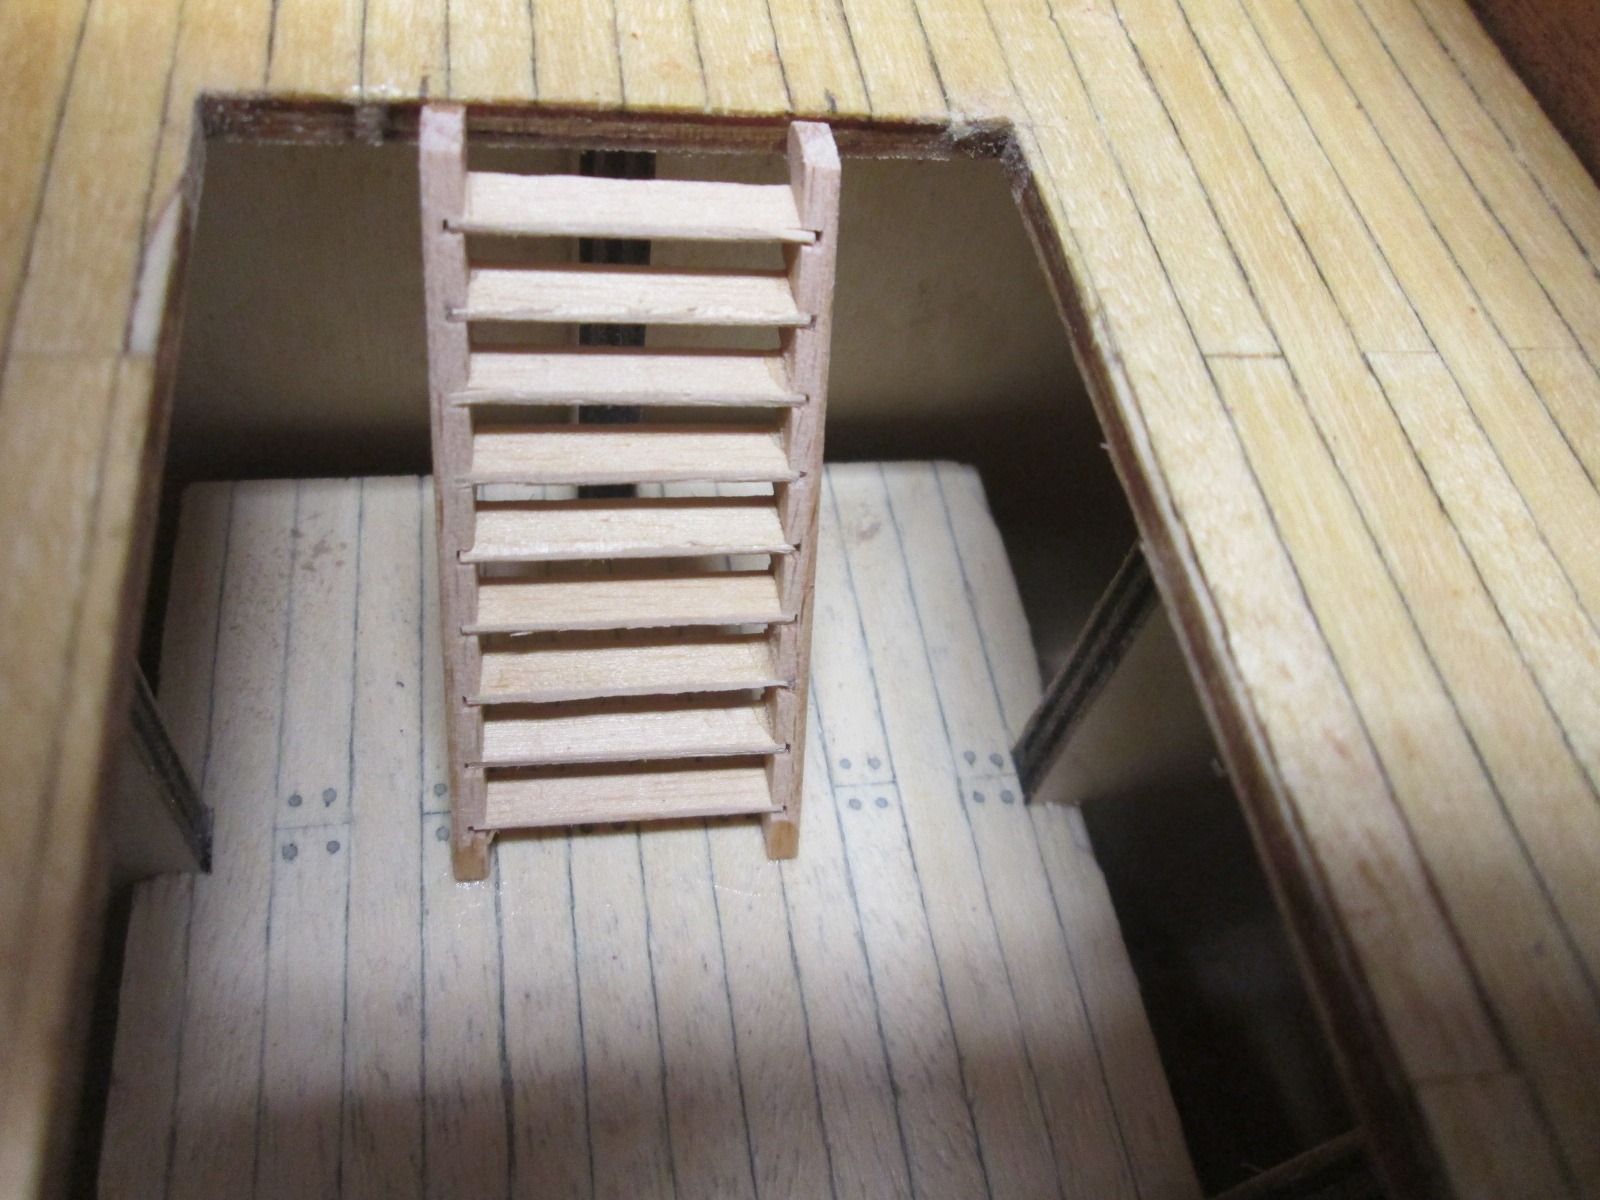
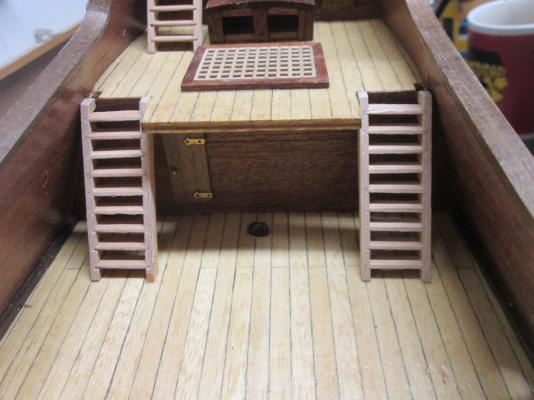
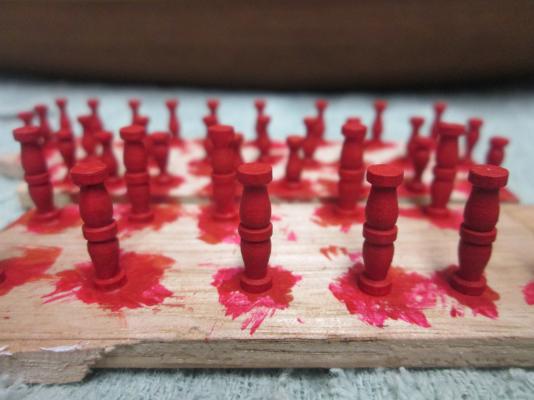
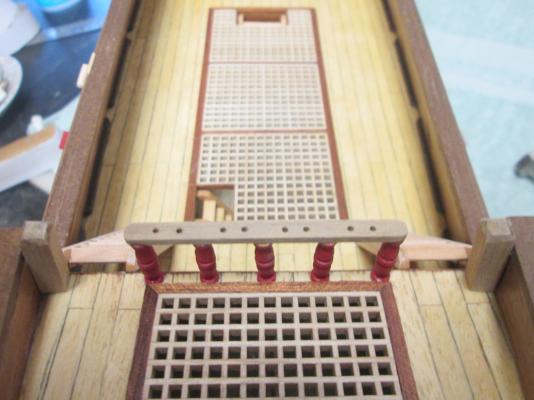
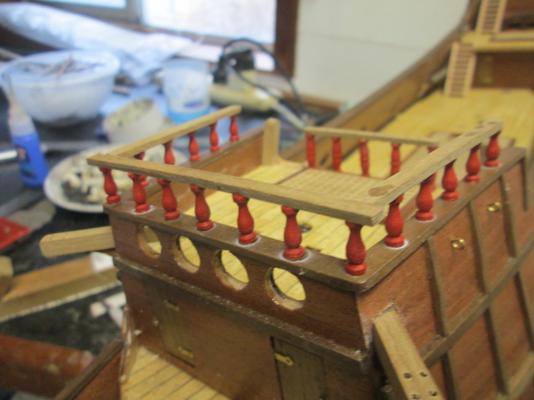
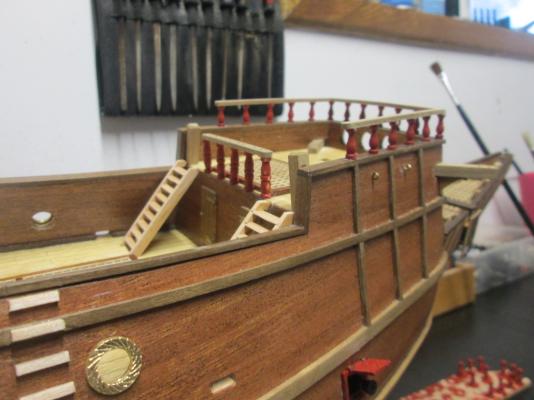
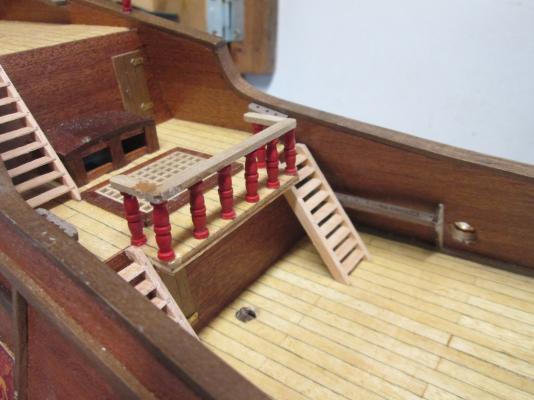
I spent some time today dong the ladders and the hand rails for the decks. Some of the hand rails double as pin rails. The plans call for 22 mm wide ladders. Don't make them this wide. They won't fit. There's only room for a total of around 18 mm in width for the half deck, so I made 15 mm rungs for them and they fitted ok . There is room on a couple of spots for 22 mm but I wanted all of them to be the same size, so that's what I did. I painted the columns as indicated on the instructions a red color, the same as the gun ports. The instructions don't give you a specific color though. You have to find one for yourself. I've also added the main pin rails. Looks can be deceiving as there is now a total of more than 90 pin rail holes. It doesn't look like a lot, but they add up, and there's still more to do. That's it for now. Matt..


- 64 replies
-
- 3
-
-
- occre
- san marcos
- (and 1 more)
-
Thanks Joe and Jeff. I already fixed the hand rails so they're better now. Have you been away fishing Jeff? Leave some Barra for me. Joe, do you have a build log somewhere. I've had a look and haven't seen one. I'd like to see yours. I'm really noticing the difference in the quality of the parts in this kit. They are making the model look much better.
-
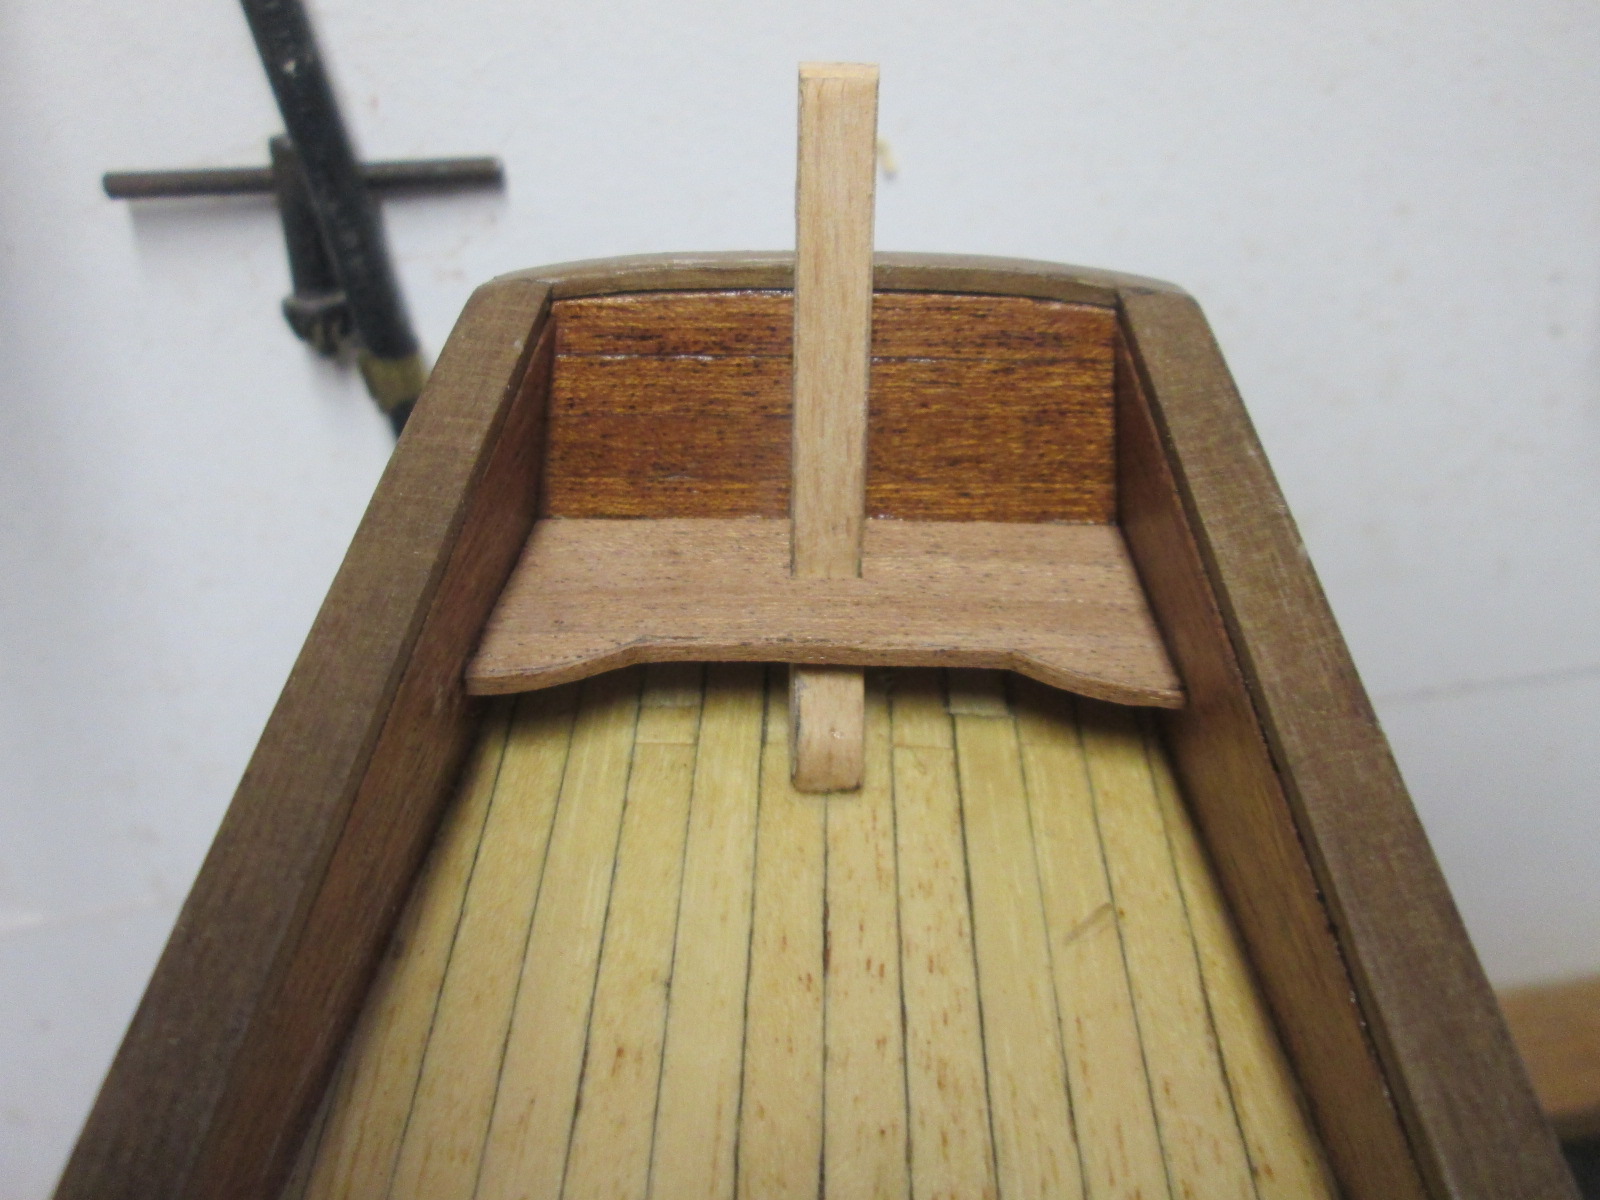
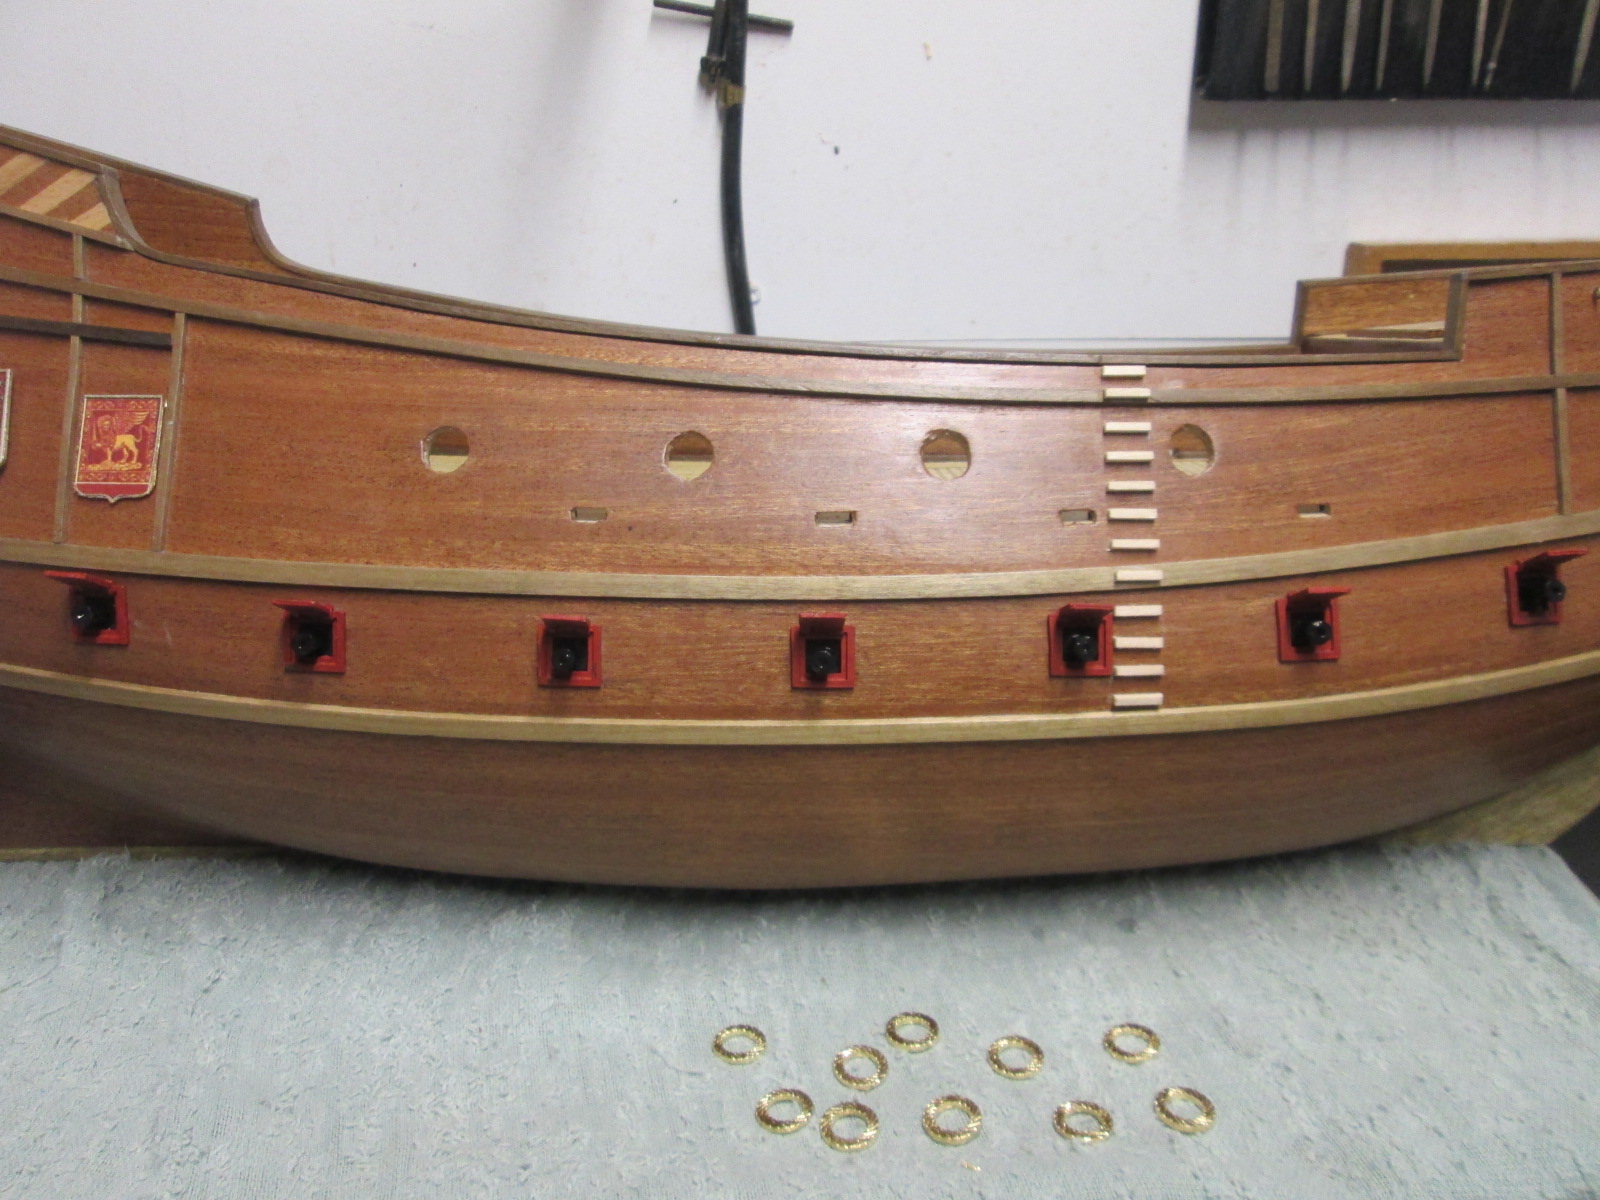
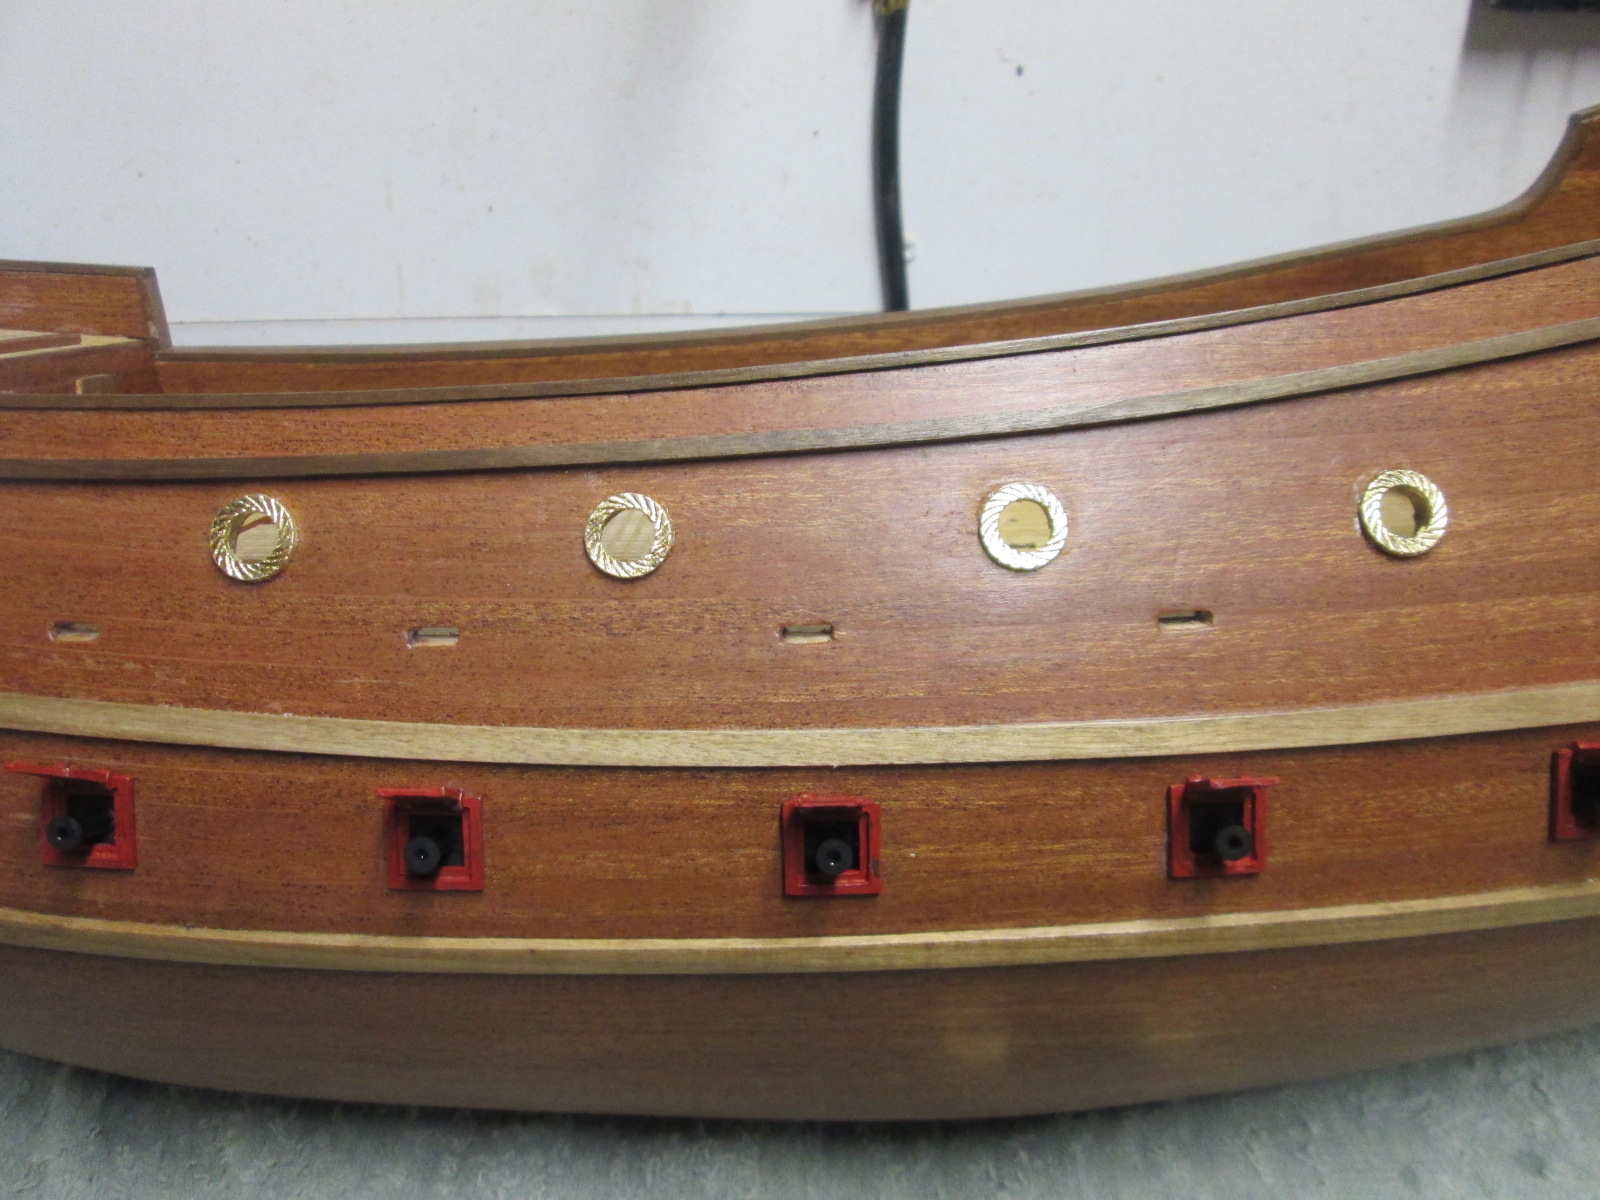
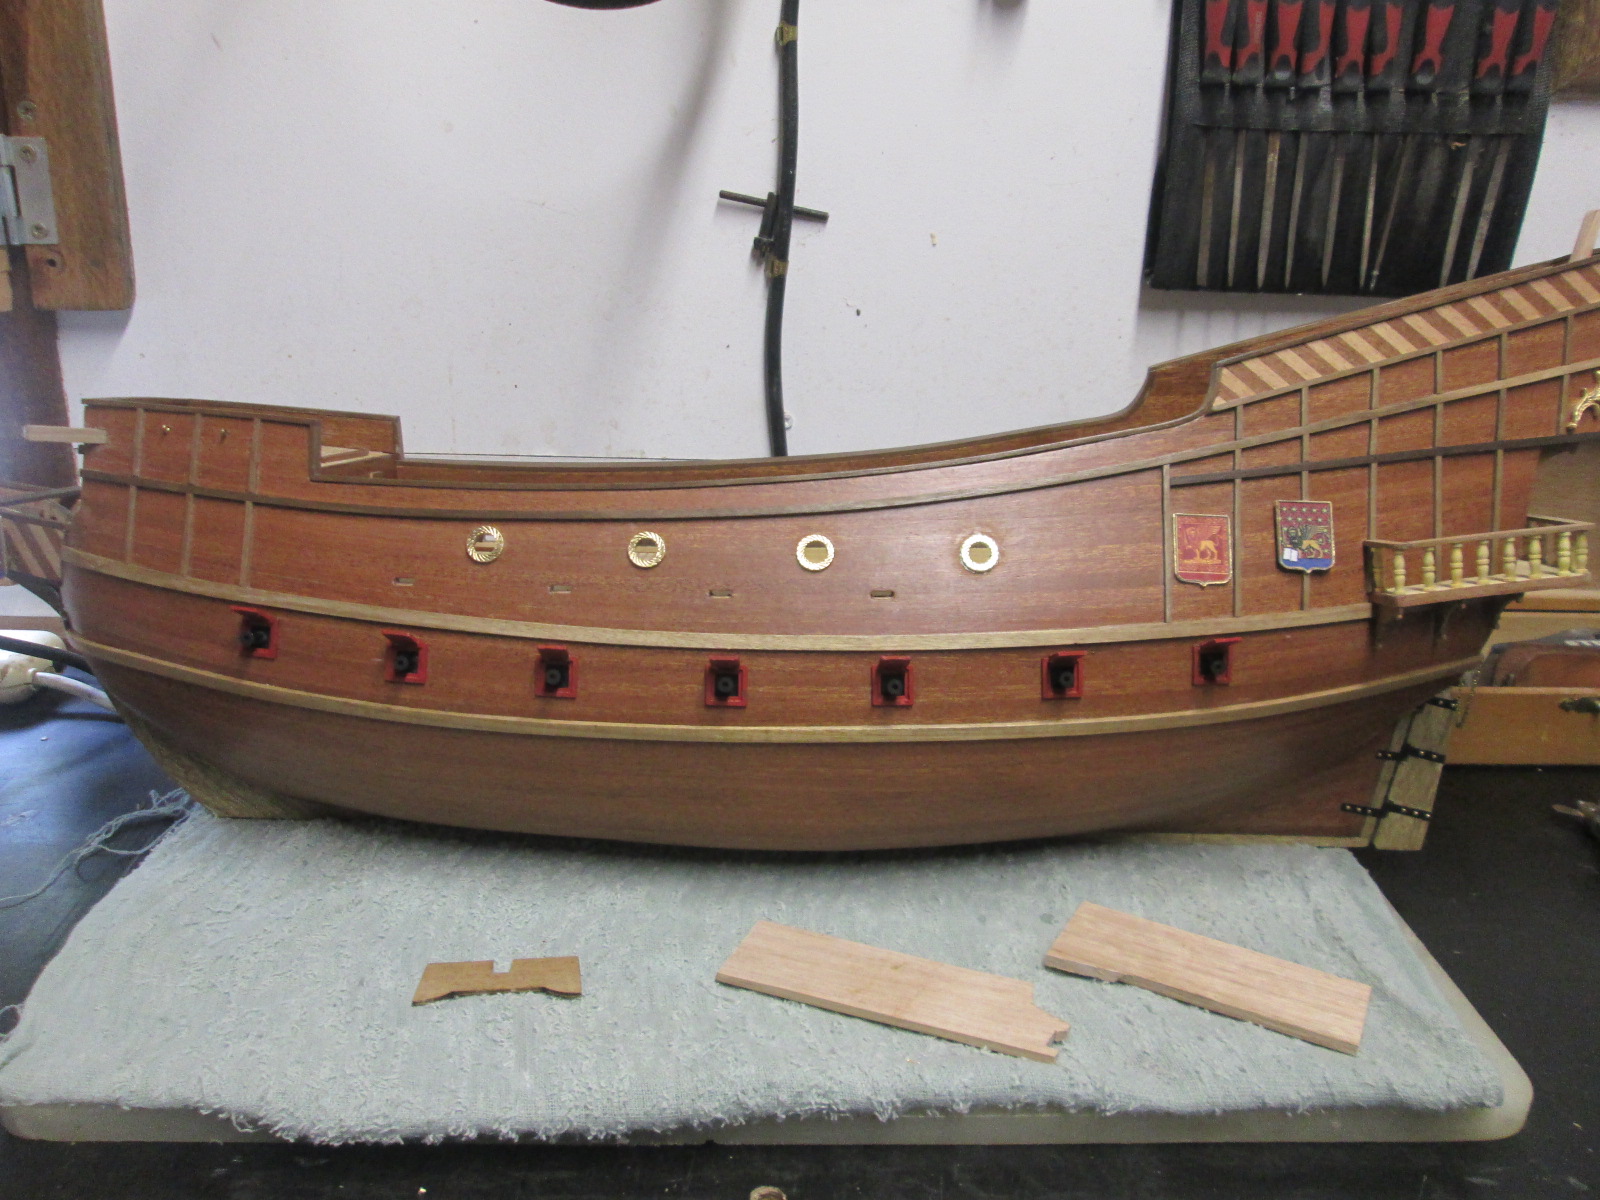
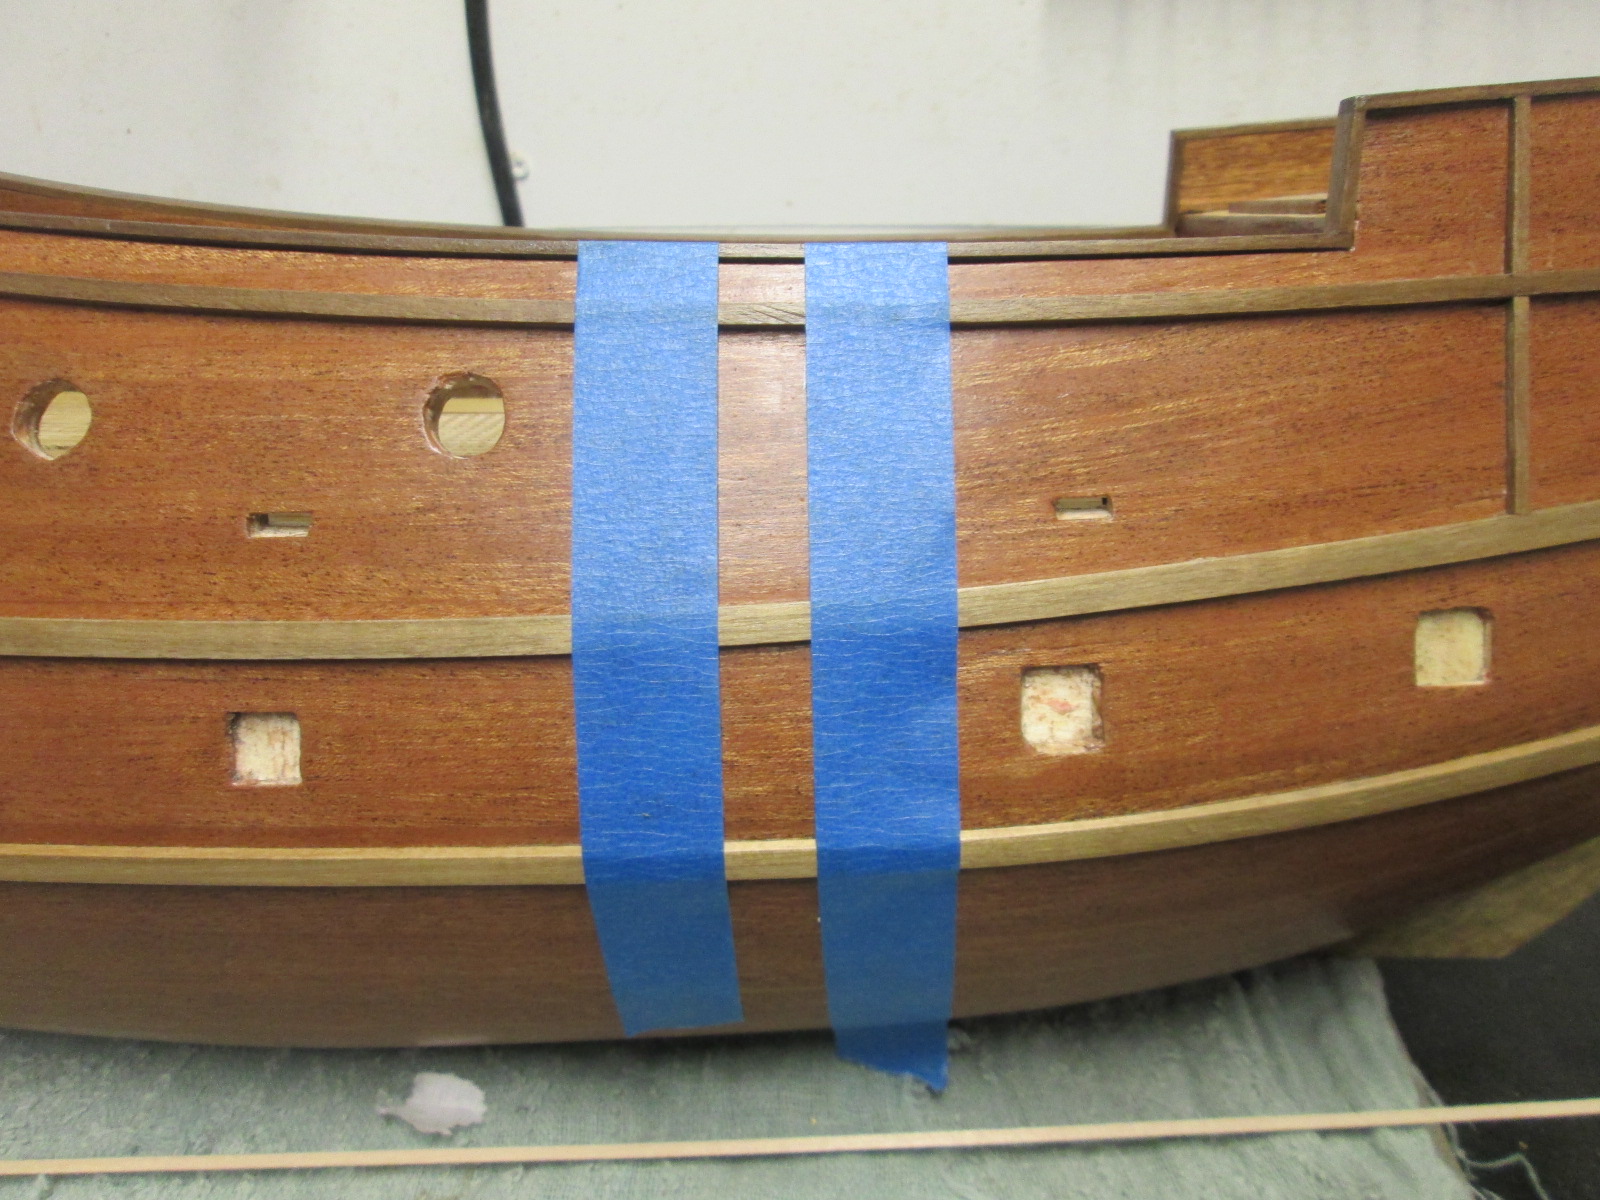
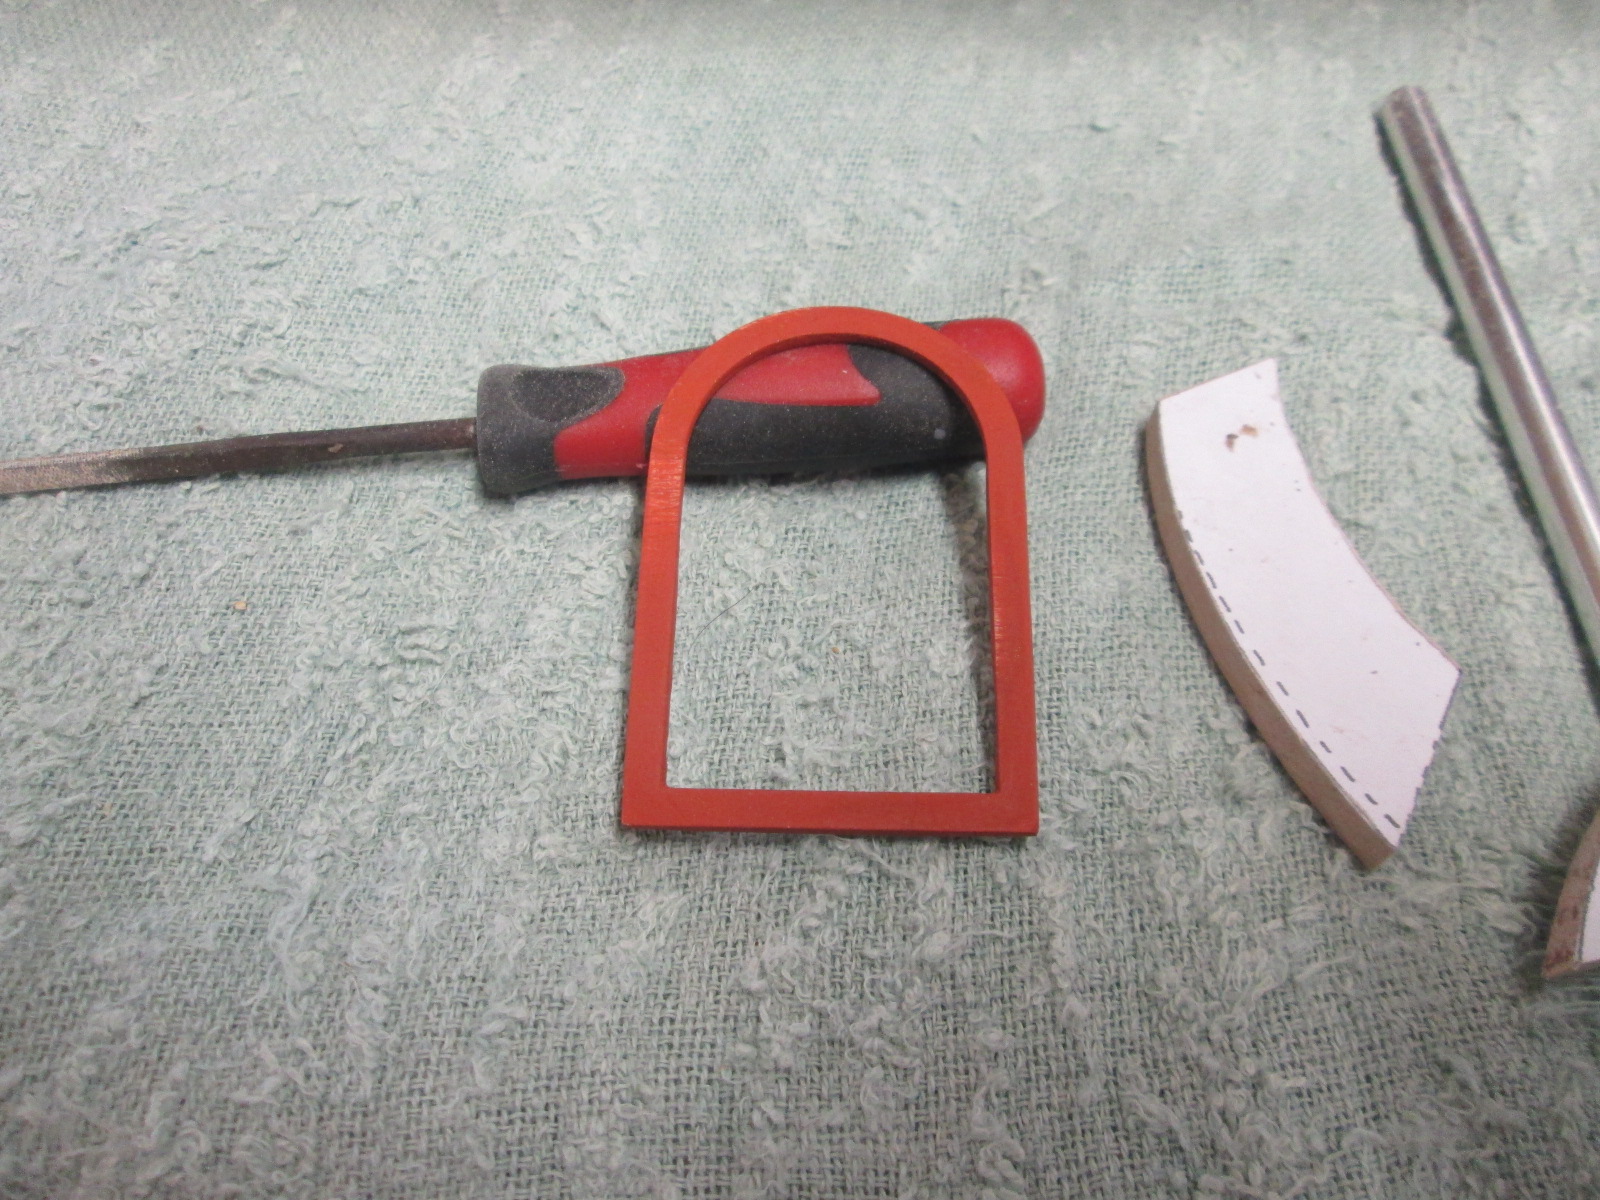
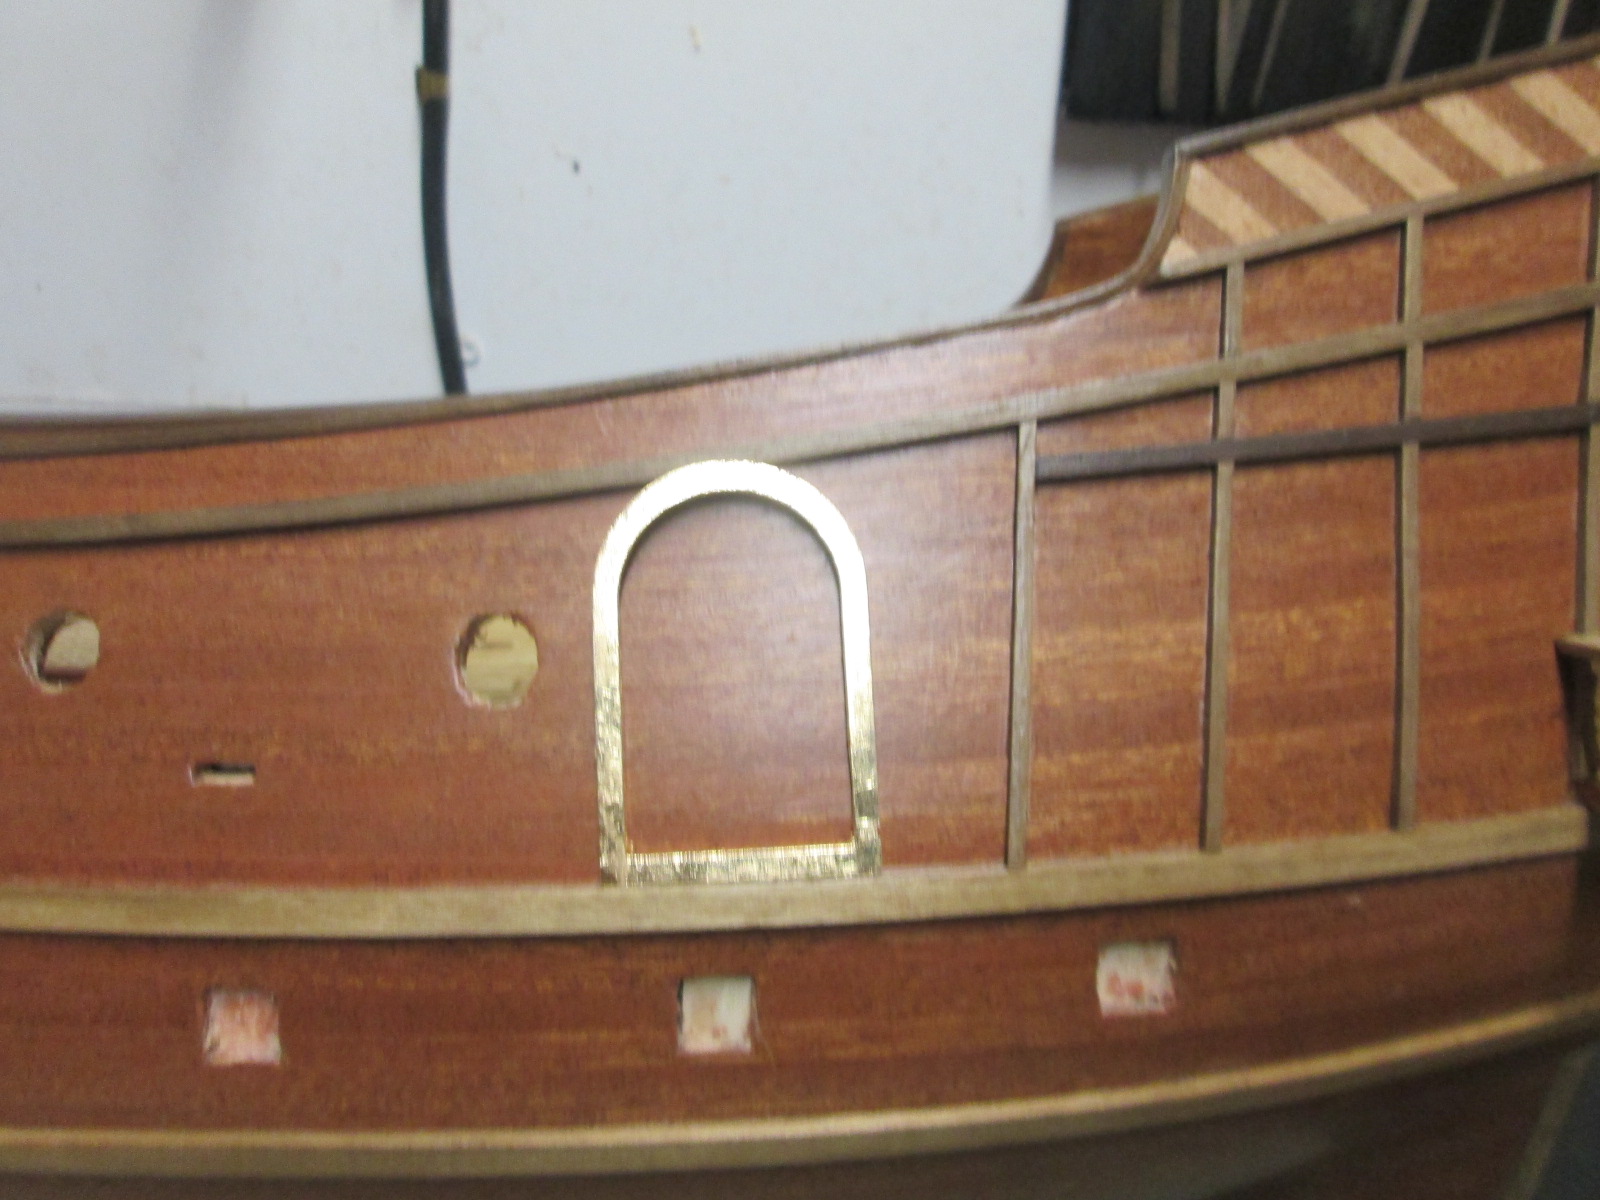
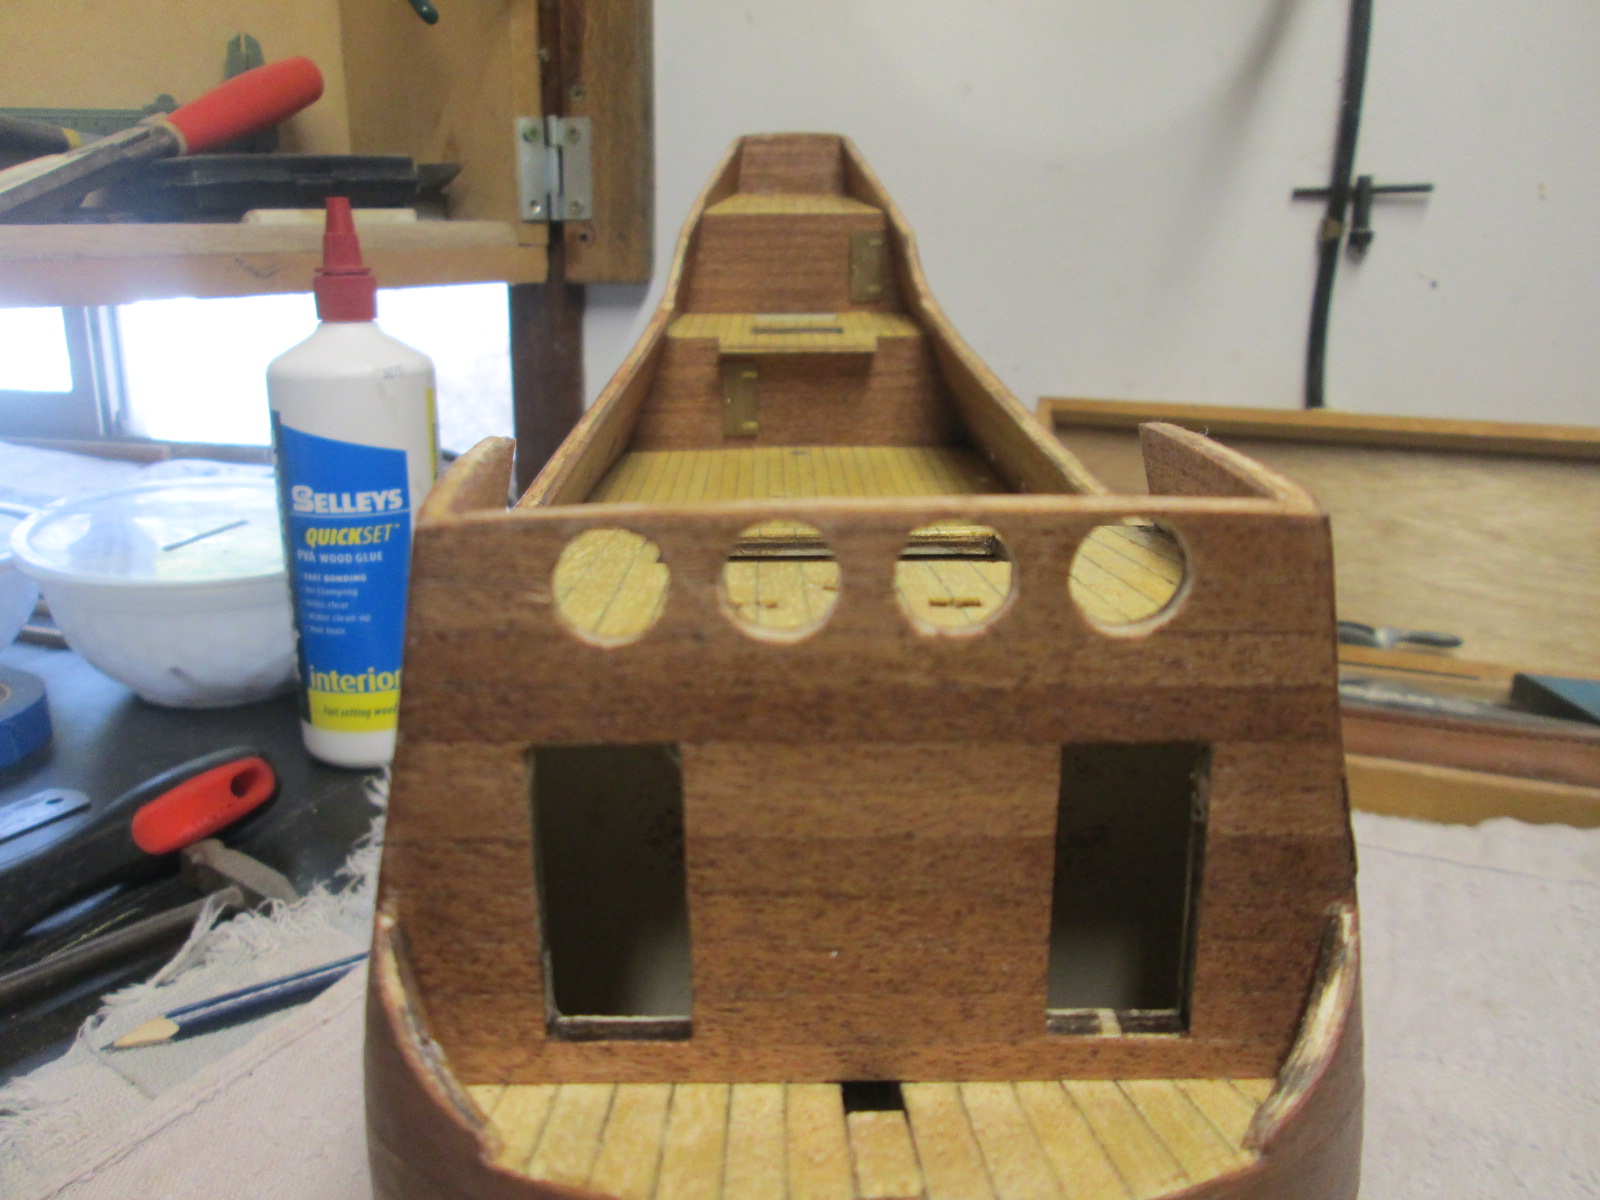
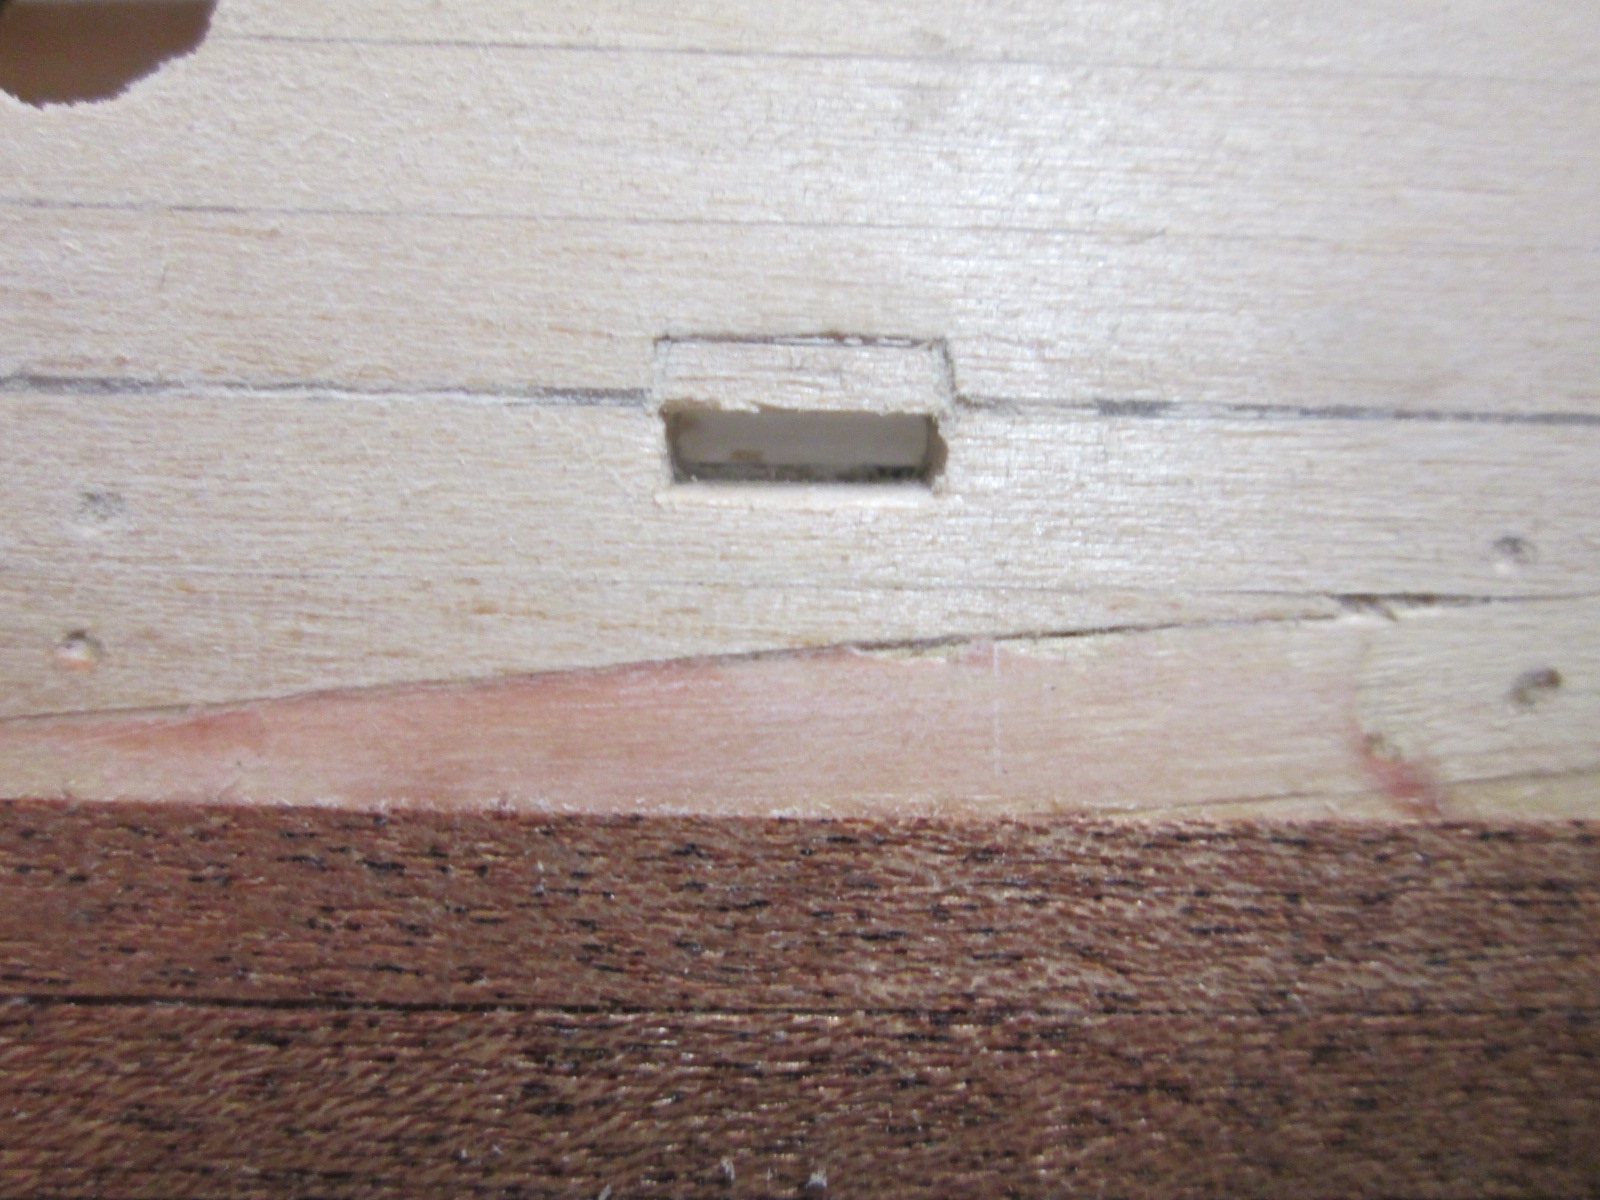
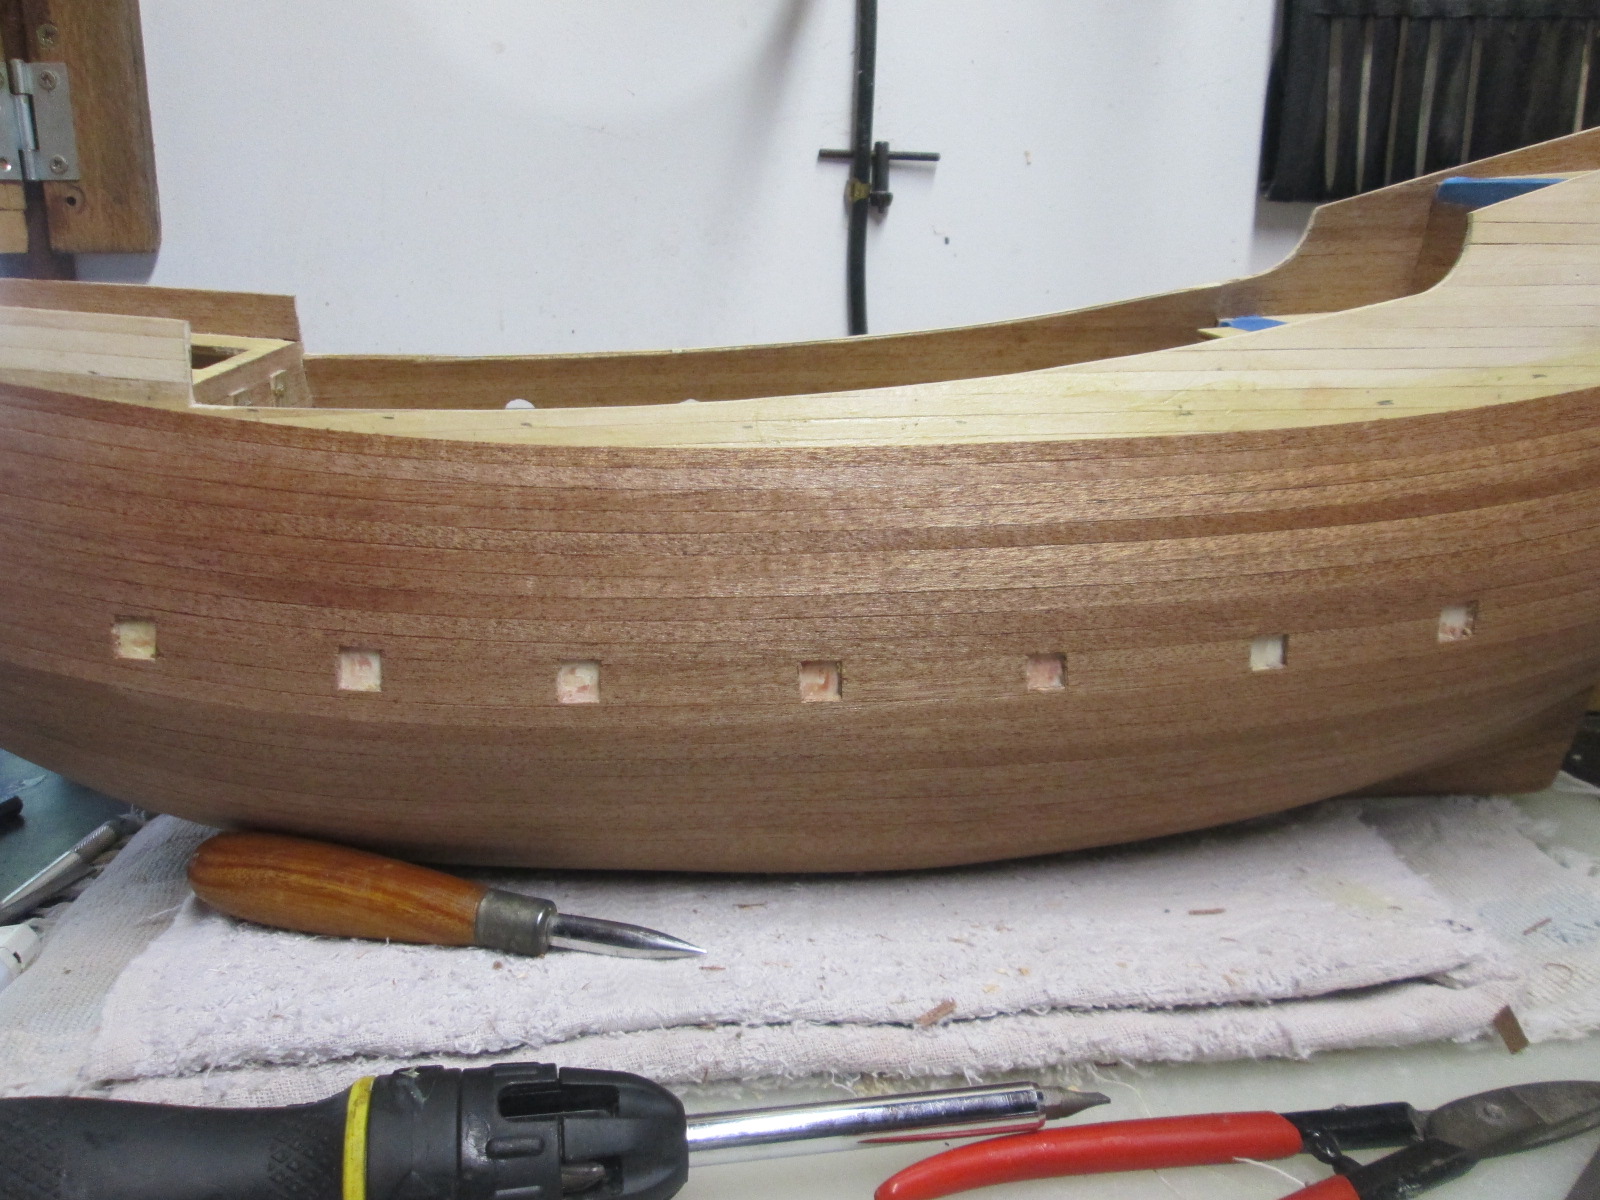
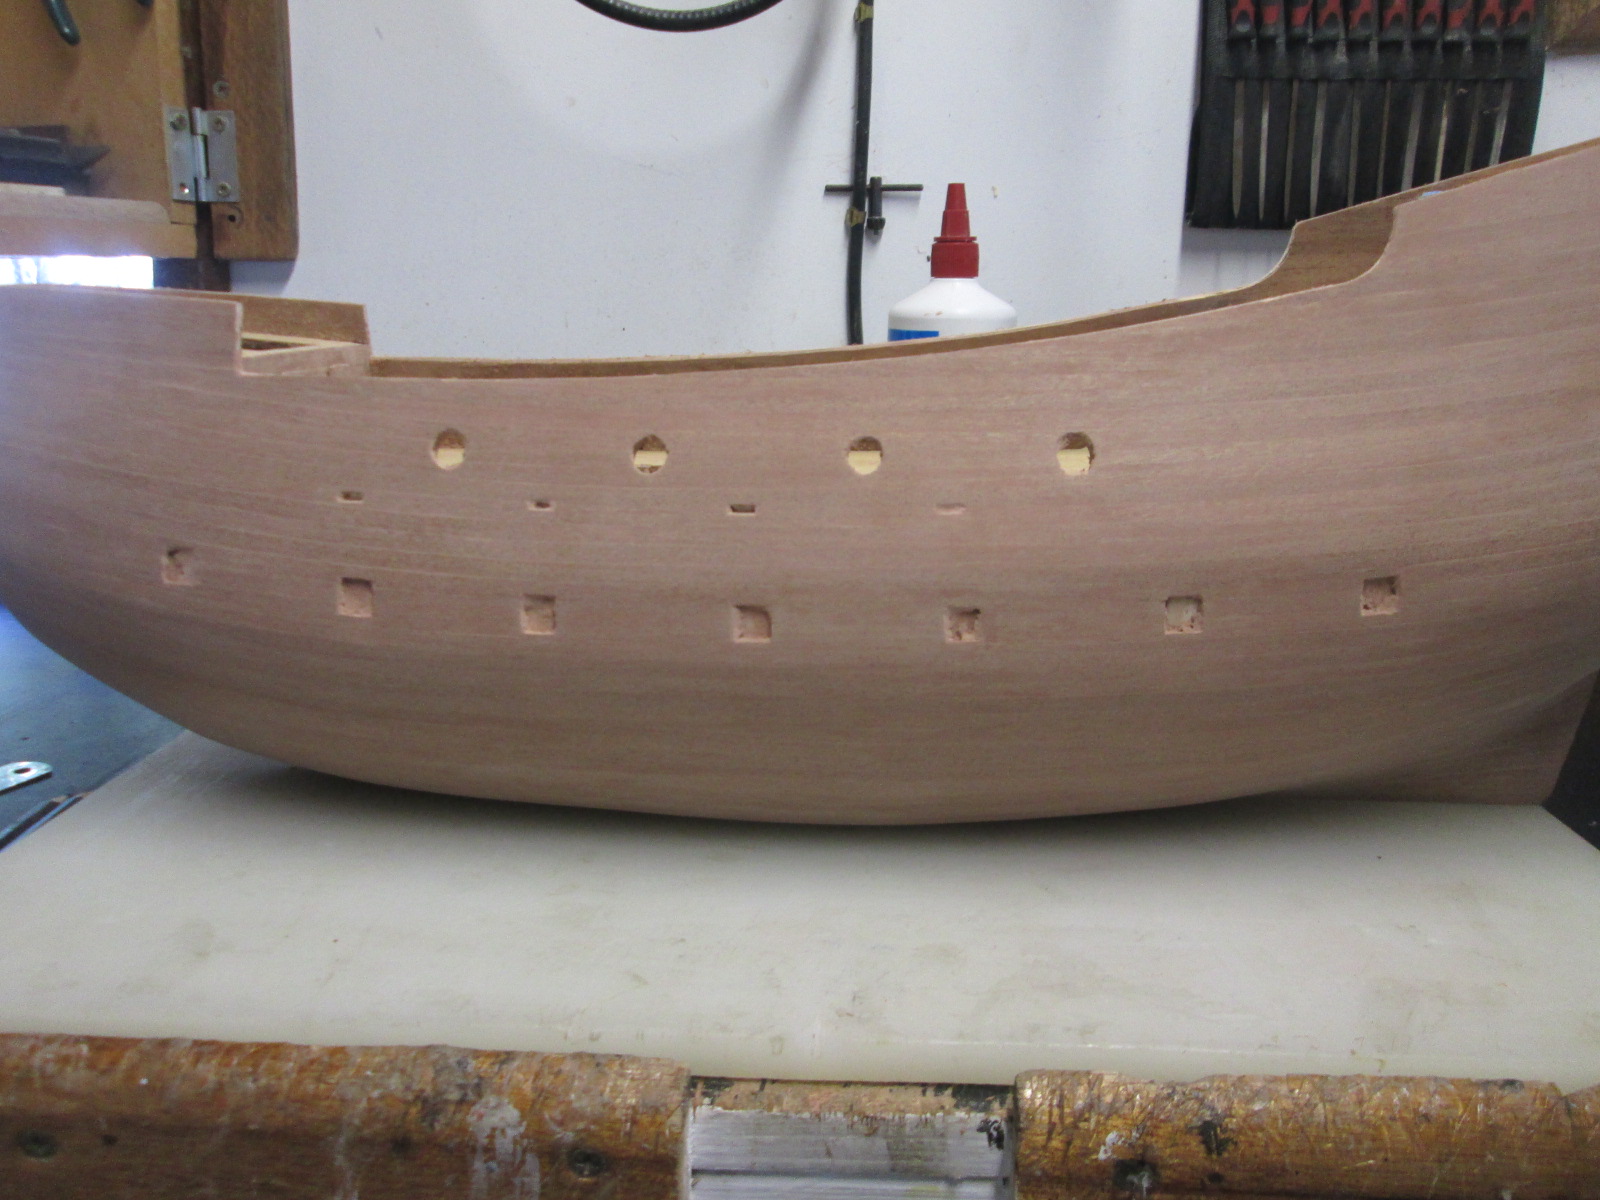
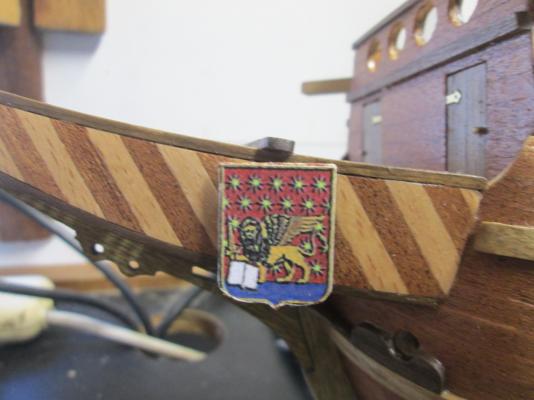
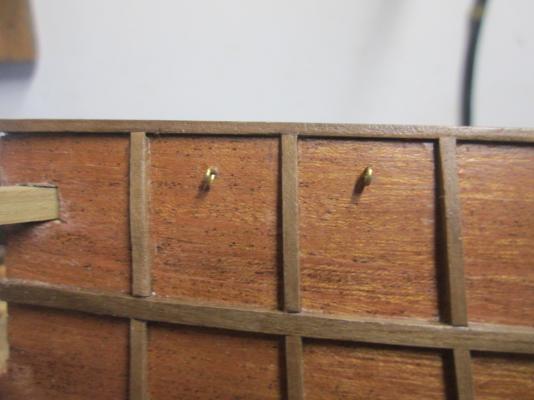
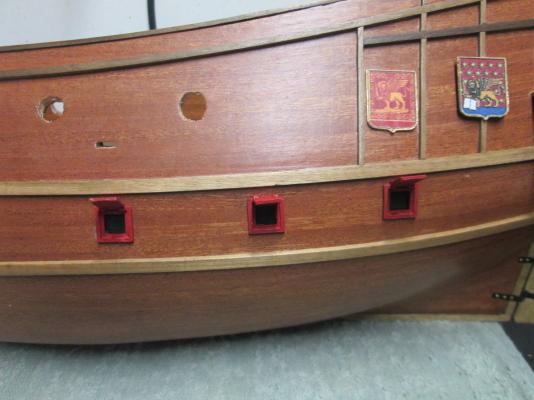
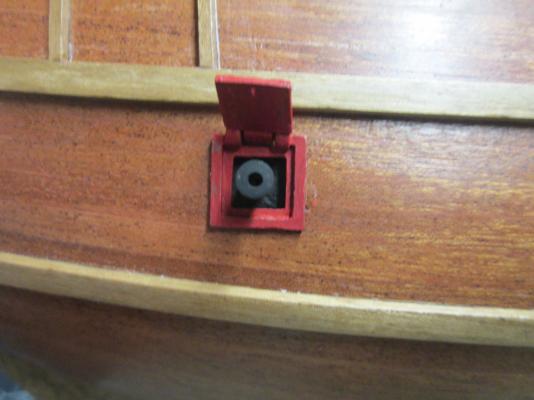
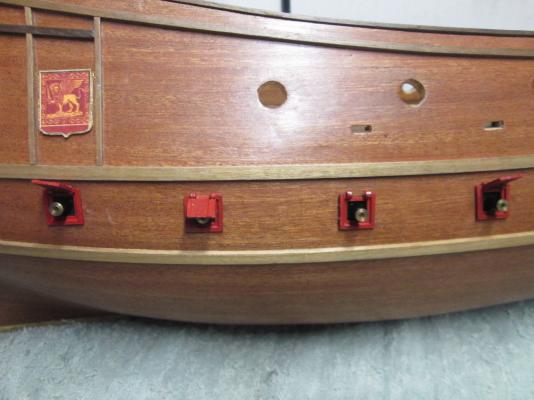
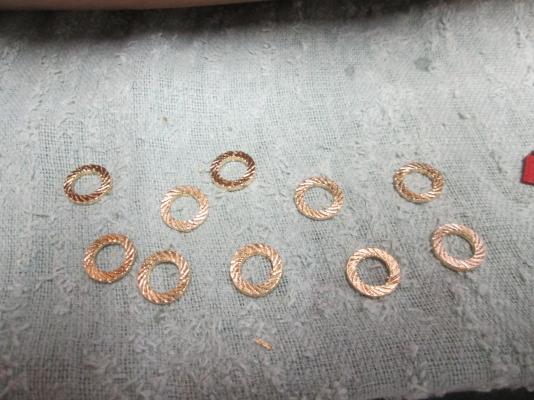
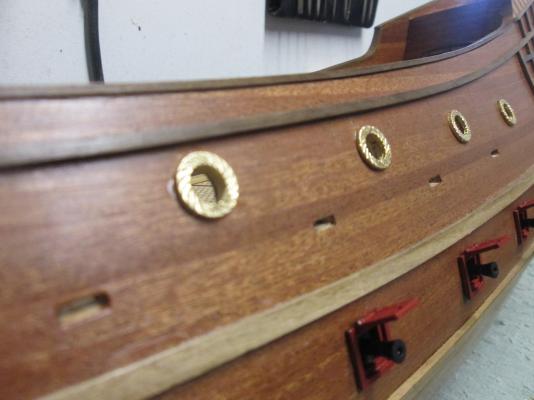
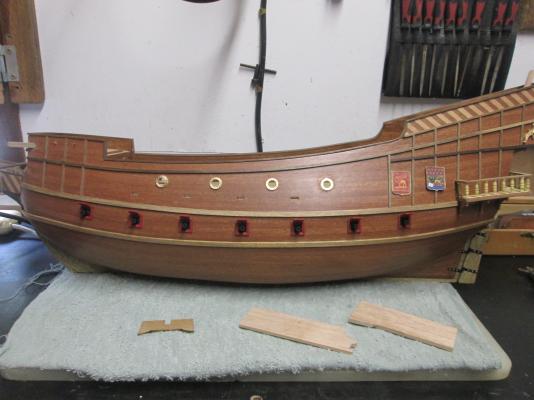
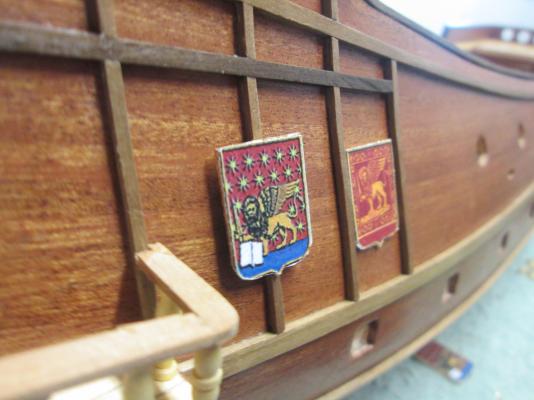
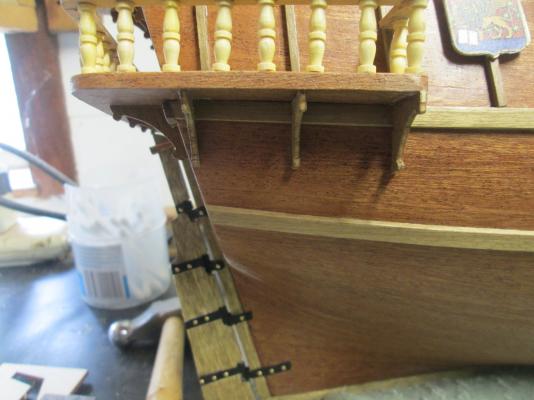
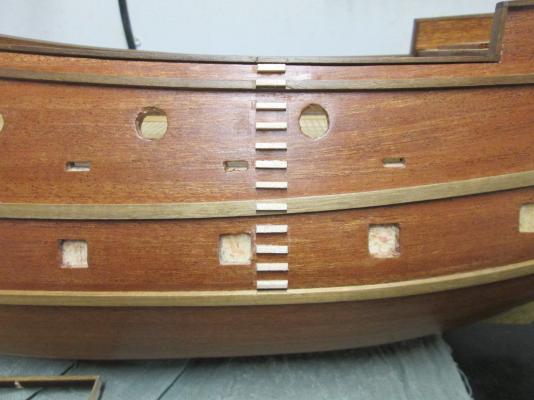
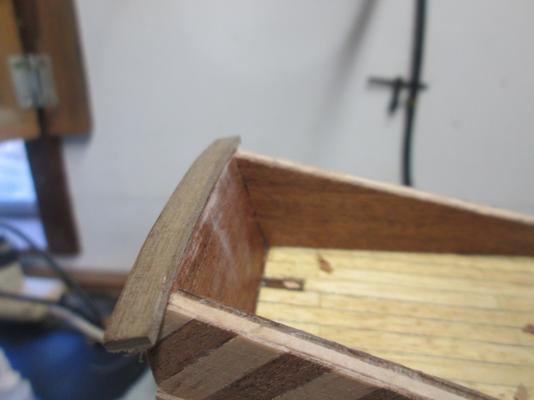
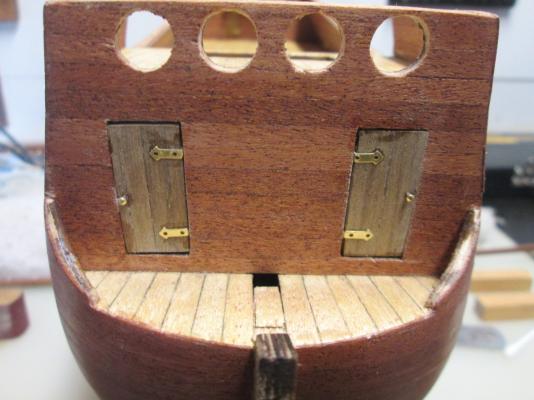
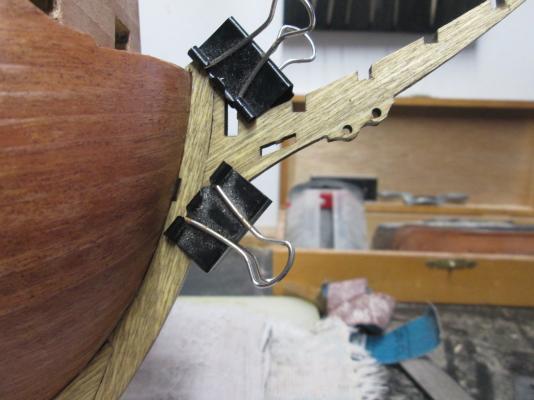
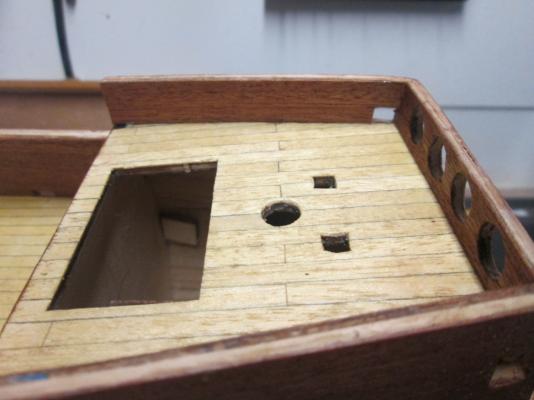
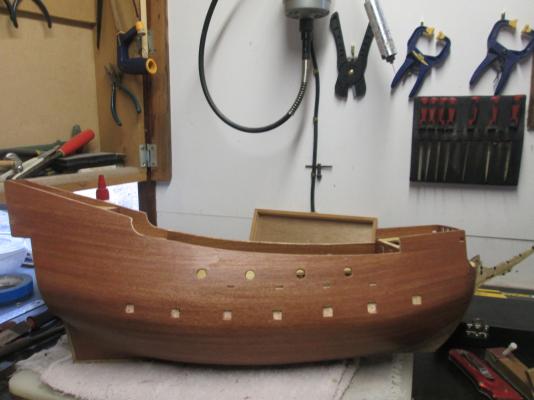
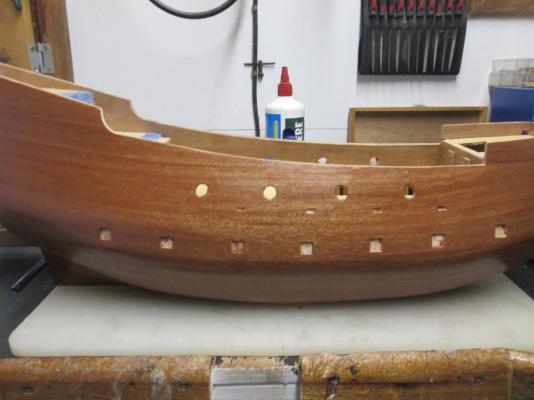
Had a not so fun day with the lower cannons, as one of the backing pieces went inside the model. I didn't have much fun fixing that one. The gilding on the upper gun ports is done and they're glued on. The lower gun ports were a bronze color, so I thought they needed a better finish. I painted them first with a red earth matte and then a coat of cool red over the top. It turned out ok. I just couldn't be bothered going to the art shop to get a red ochre. The stern part that holds the flagpole is on. The part that is supposed to cover up the missing pieces of deck plank, sits too high, so I'll have to patch two pieces in the gaps. The shields on the bow are on, and to even the angle and to bring them more upright, I put two pieces of 2 mm and 3.5 on the back. The larger piece at the bottom to bring it further out. I'll touch up the paint on the gun ports later.


- 64 replies
-
- 1
-
-
- occre
- san marcos
- (and 1 more)
-
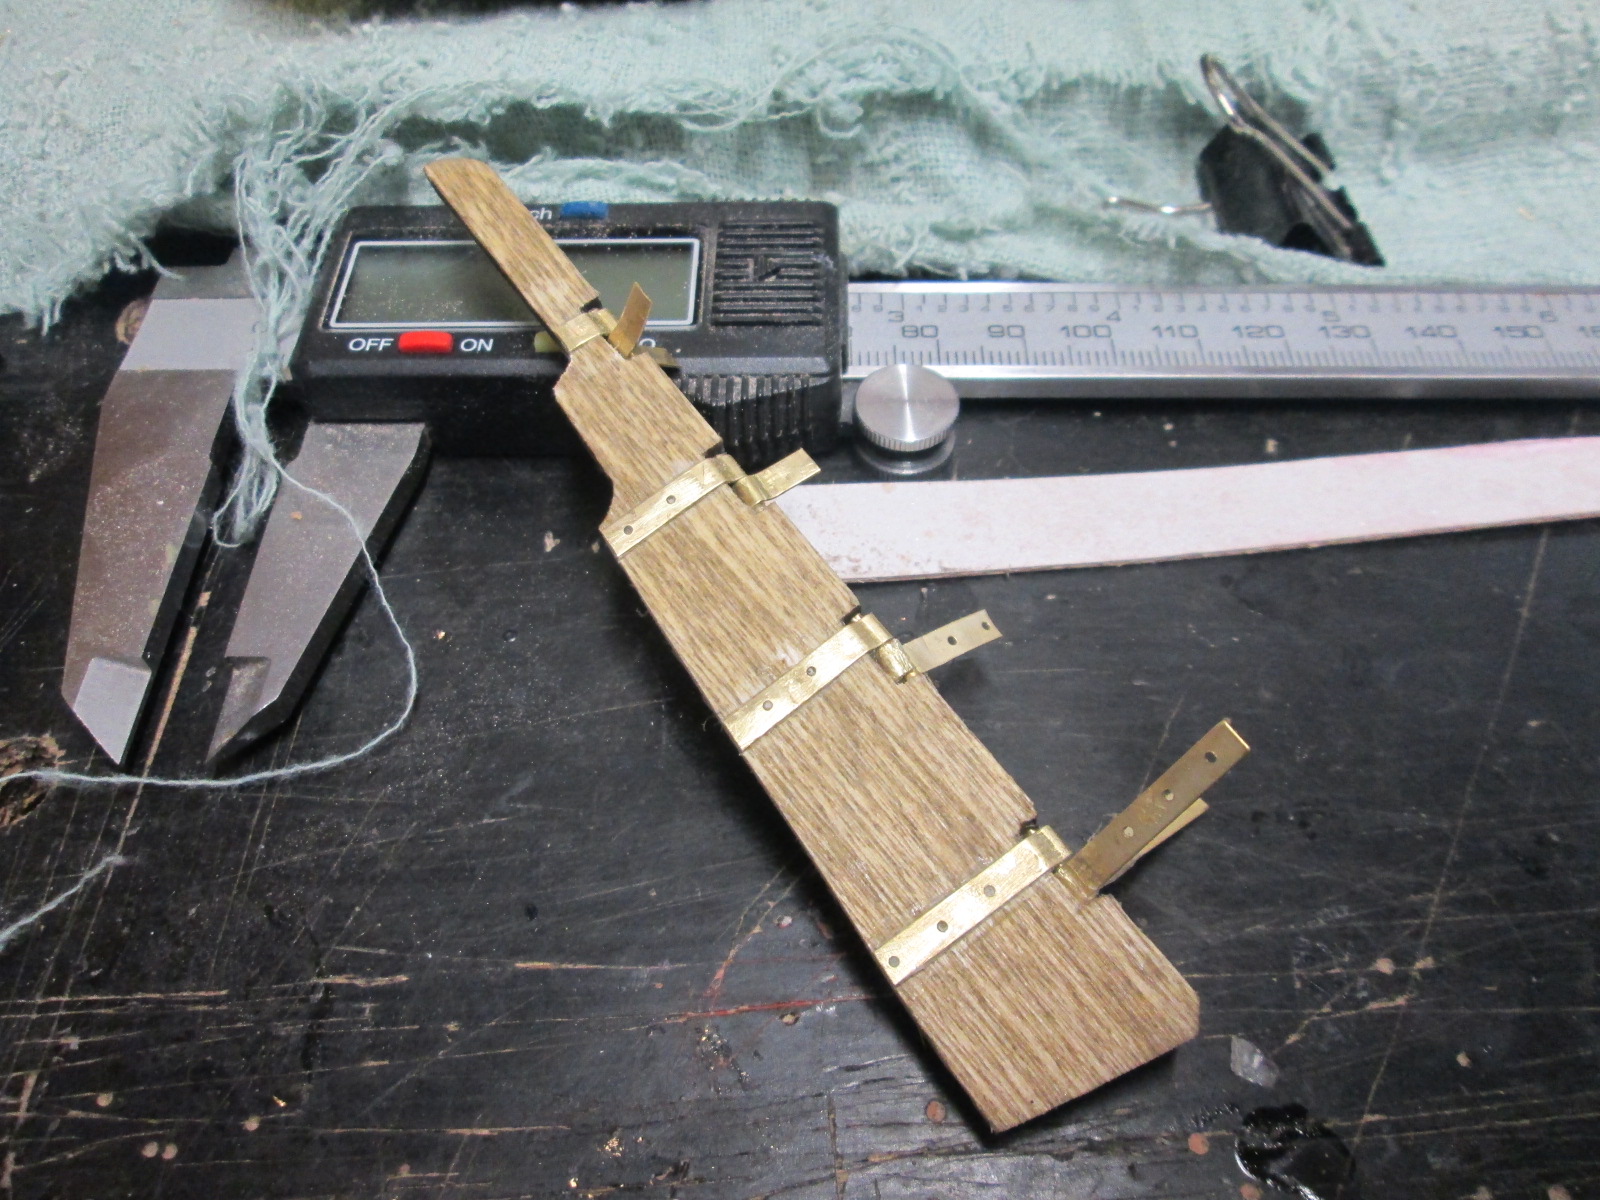
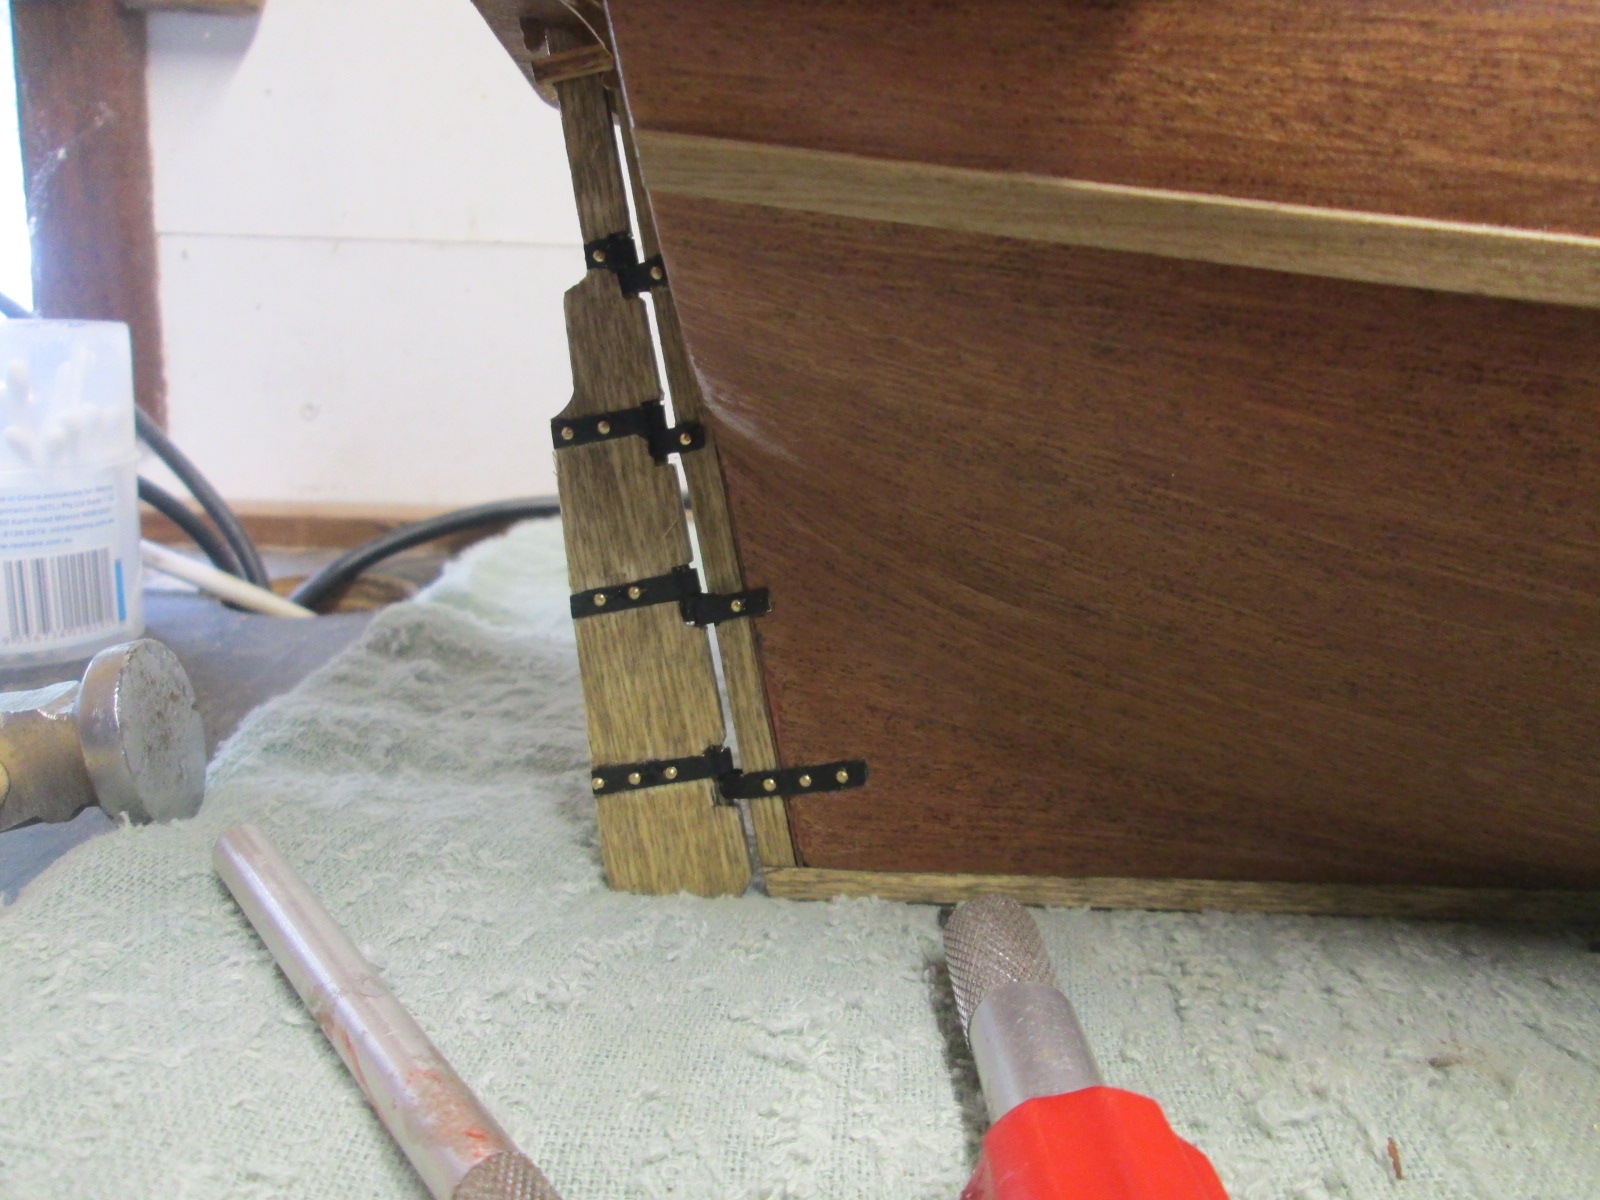
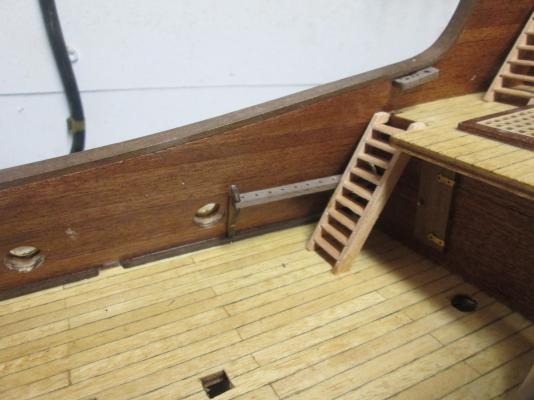
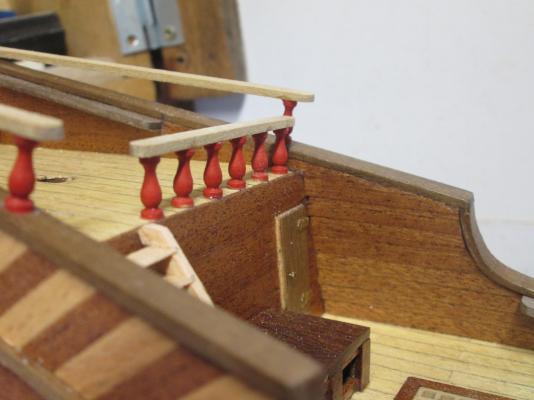
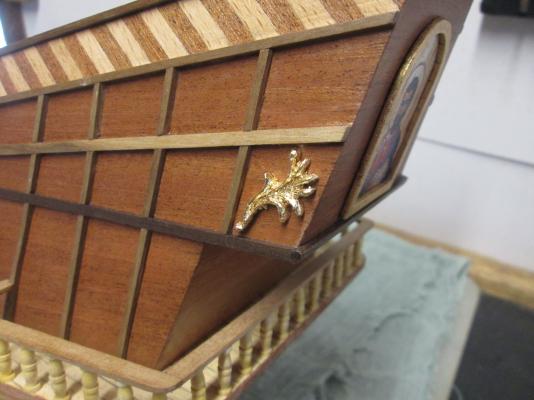
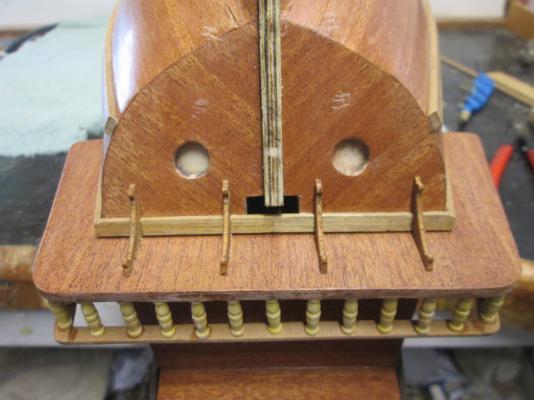
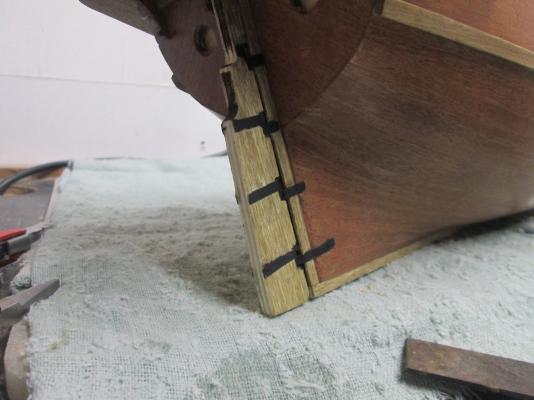
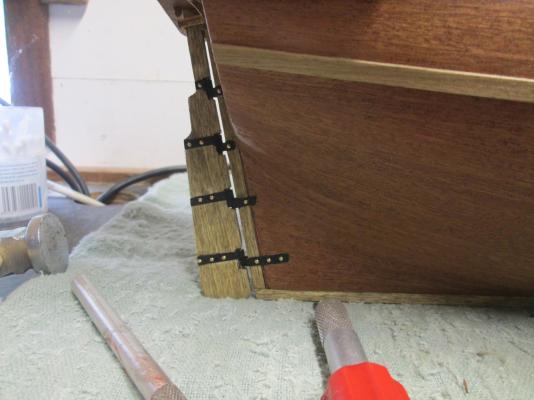
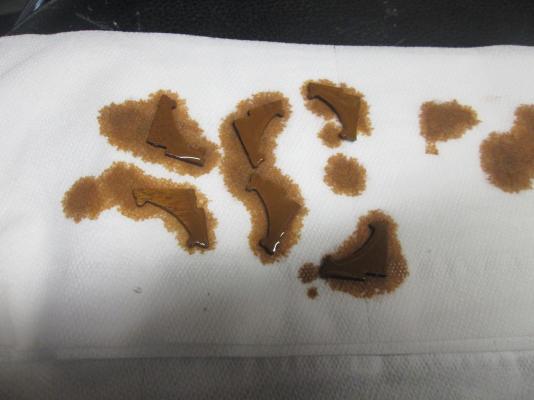
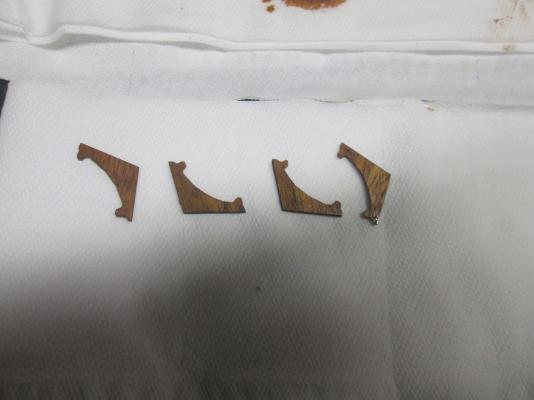
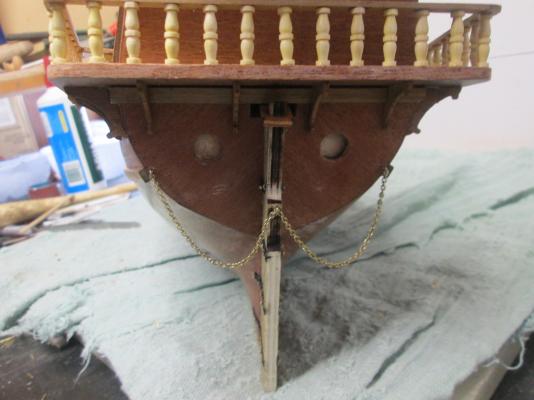
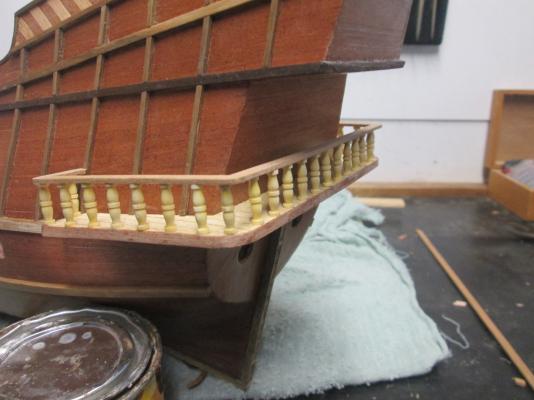
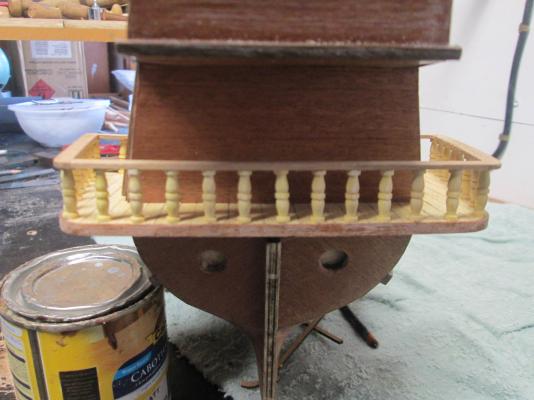
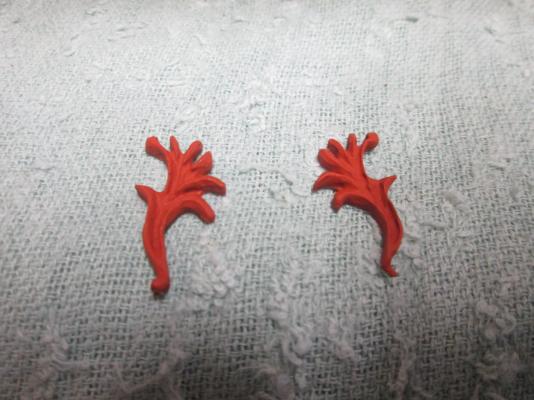
I'm not a great fan of doing rudders it turns out. I always seem to have some problem with them. Never mind, I got there after I broke a hinge and scratched the paint and sent dozens of little 2 mm nail pieces flying all over the workshop. Lucky I've got a few thousand to do that. So the rudders done, and the support pieces that go under the stern gallery. I've managed to gild the decorative pieces, and they're not perfect but still look way better than painted ones. The shields that go near the stern are done, nothing difficult there, and the chain pendants on the rudder. The ladder was a little difficult to place as it goes near a gun port. The only thing to be sure of there is to leave enough room for it. I also fixed the hand rails for the stern gallery as they were hanging over the end too much. I could have sworn I got them right when I fitted them. That's all or now.


-
Cheers Louie, Sound interesting, and an opportunity to add some more authentic detail to the ship. I'll follow up on your info. Thanks for your help. Stay away from the pea beu. Matt
-
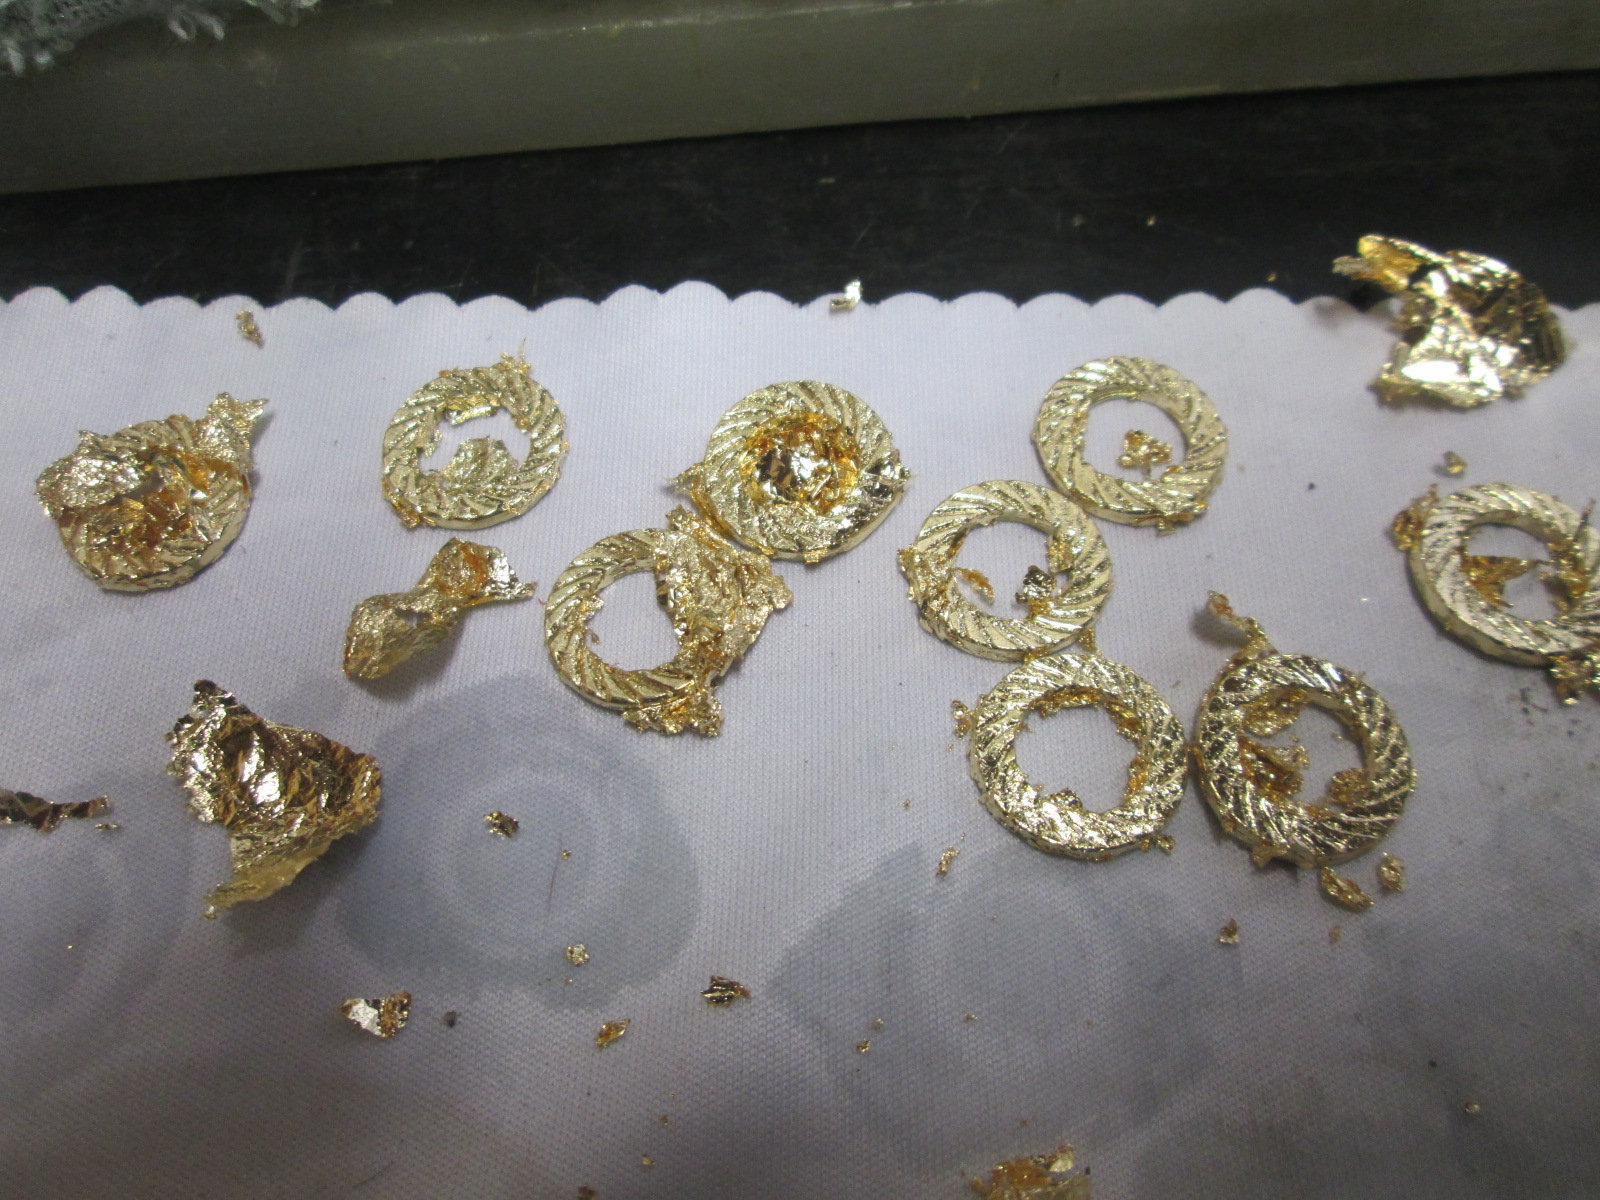
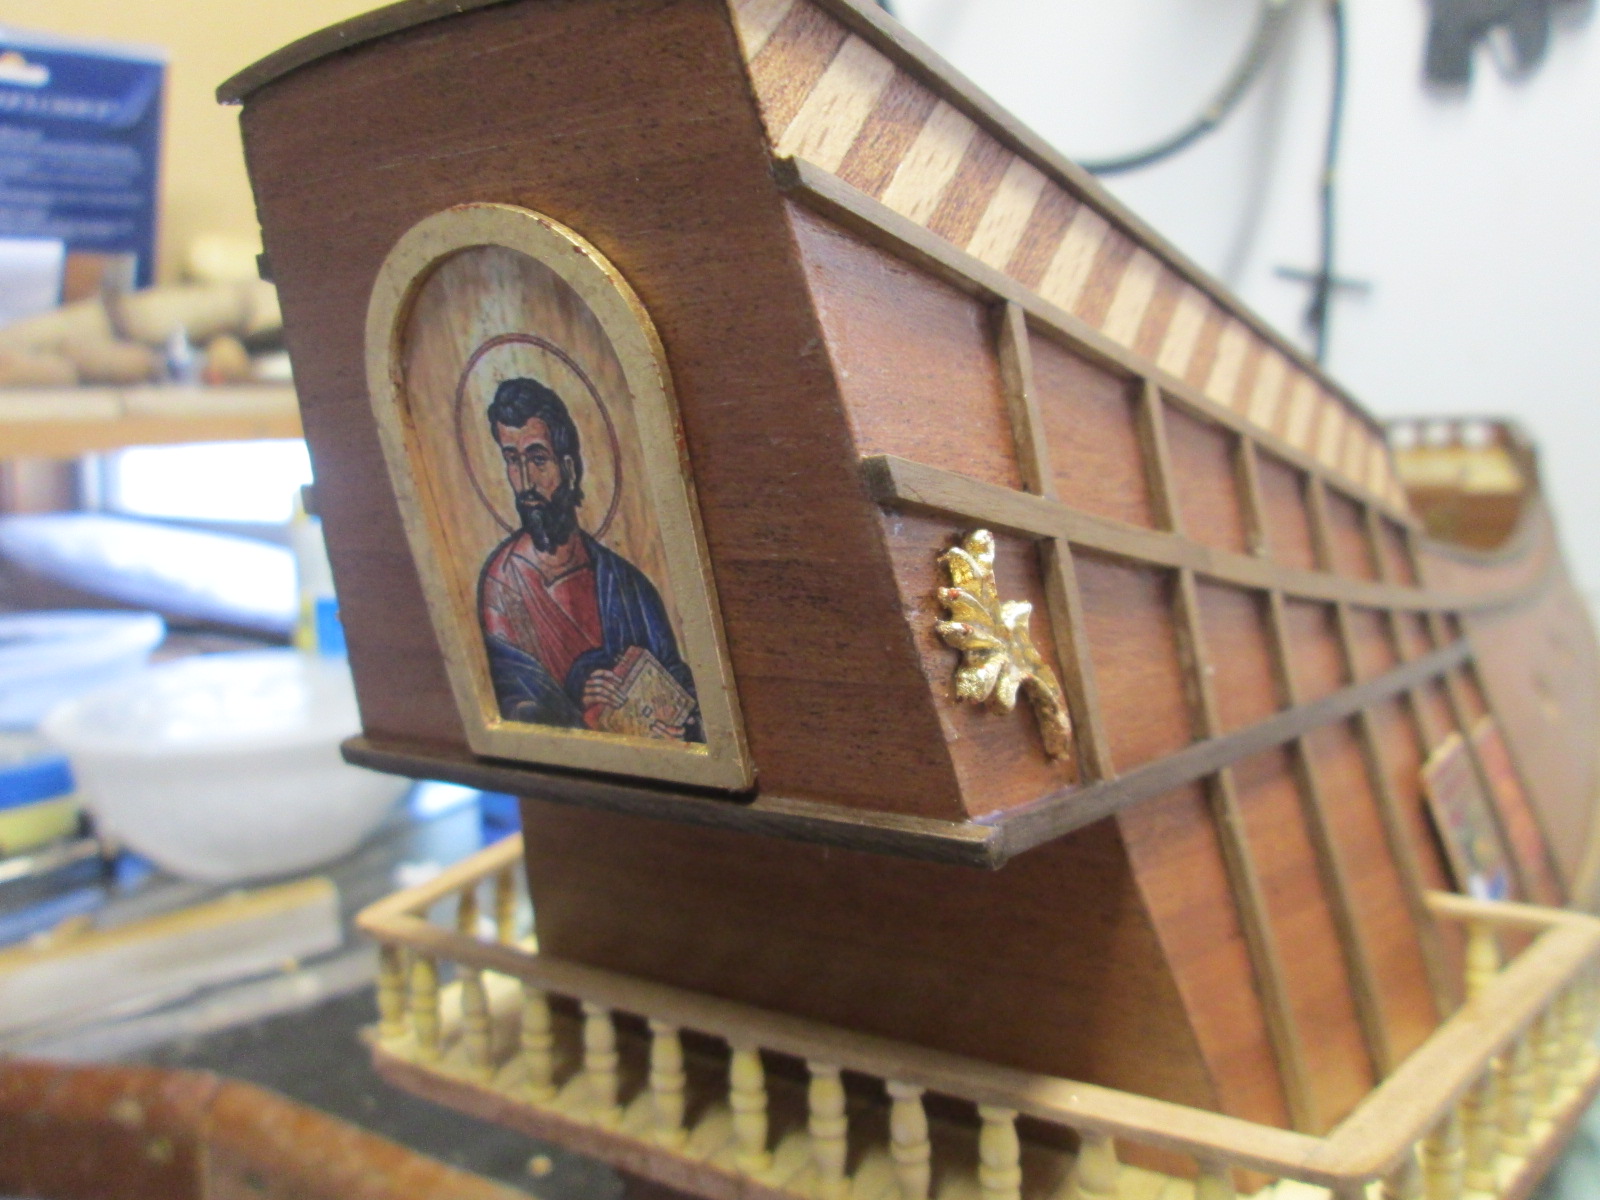
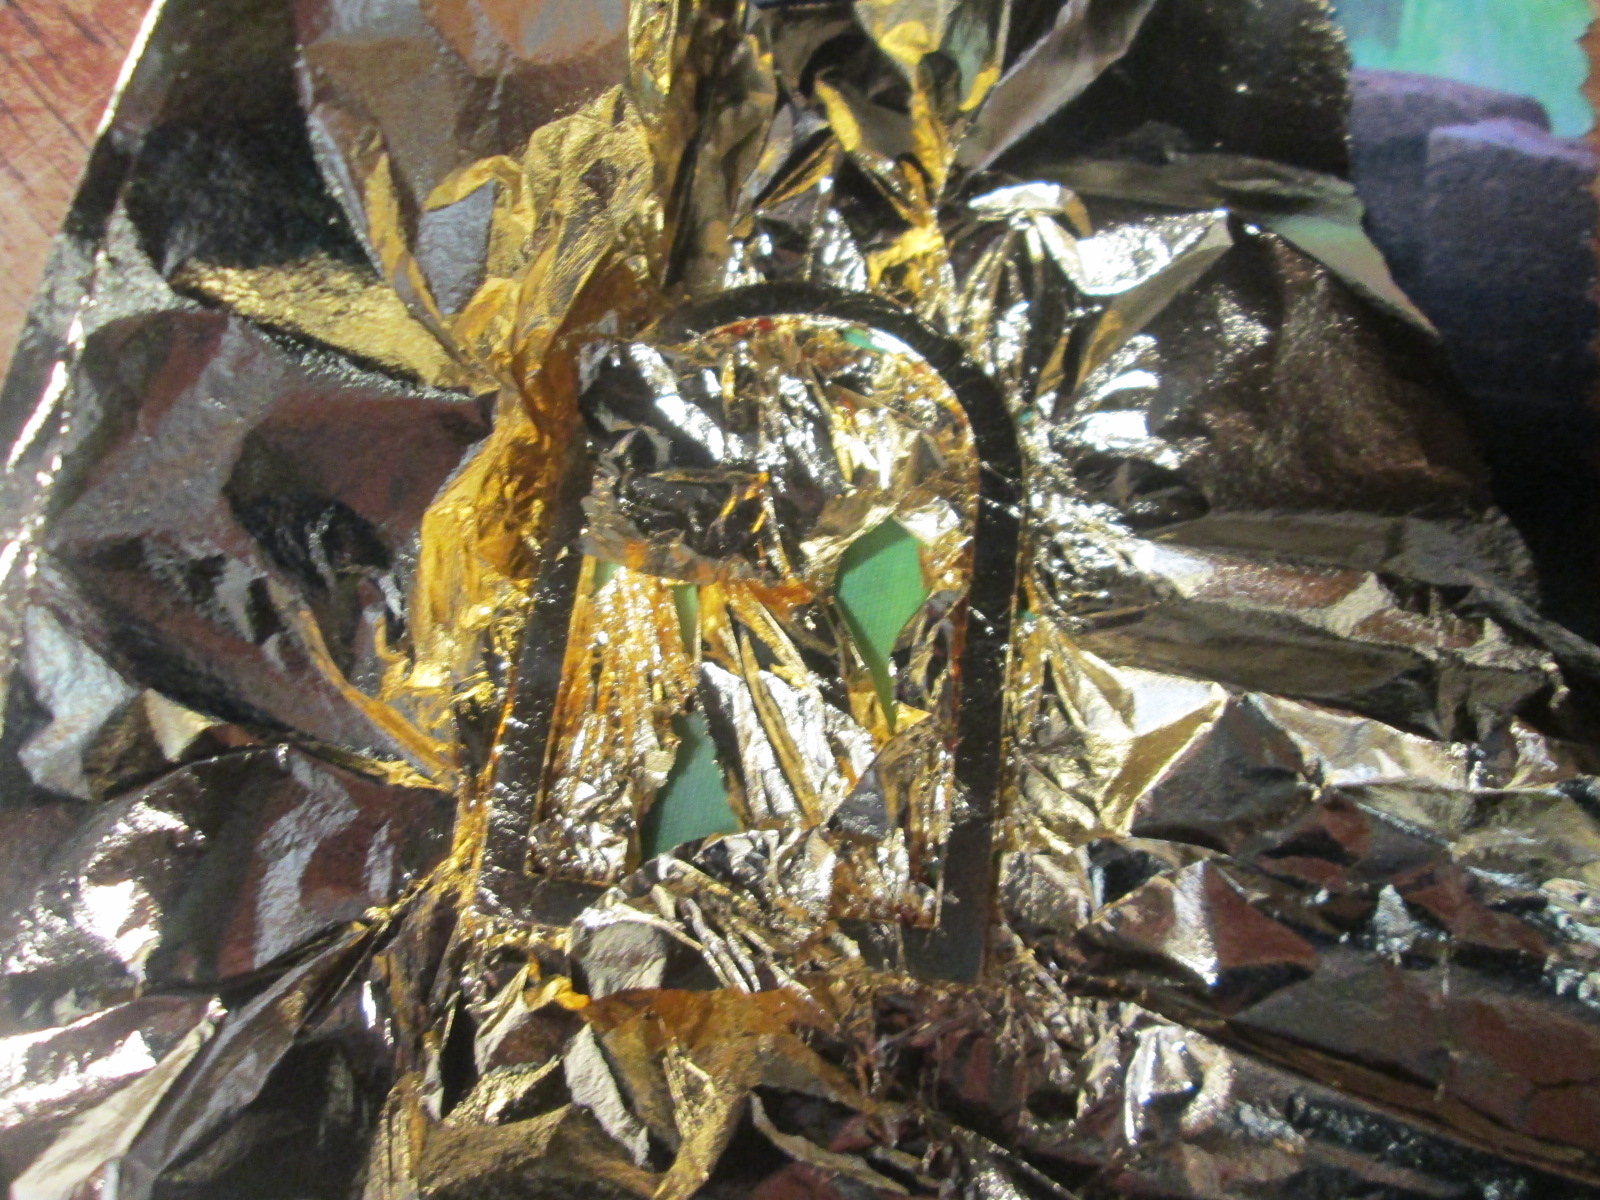
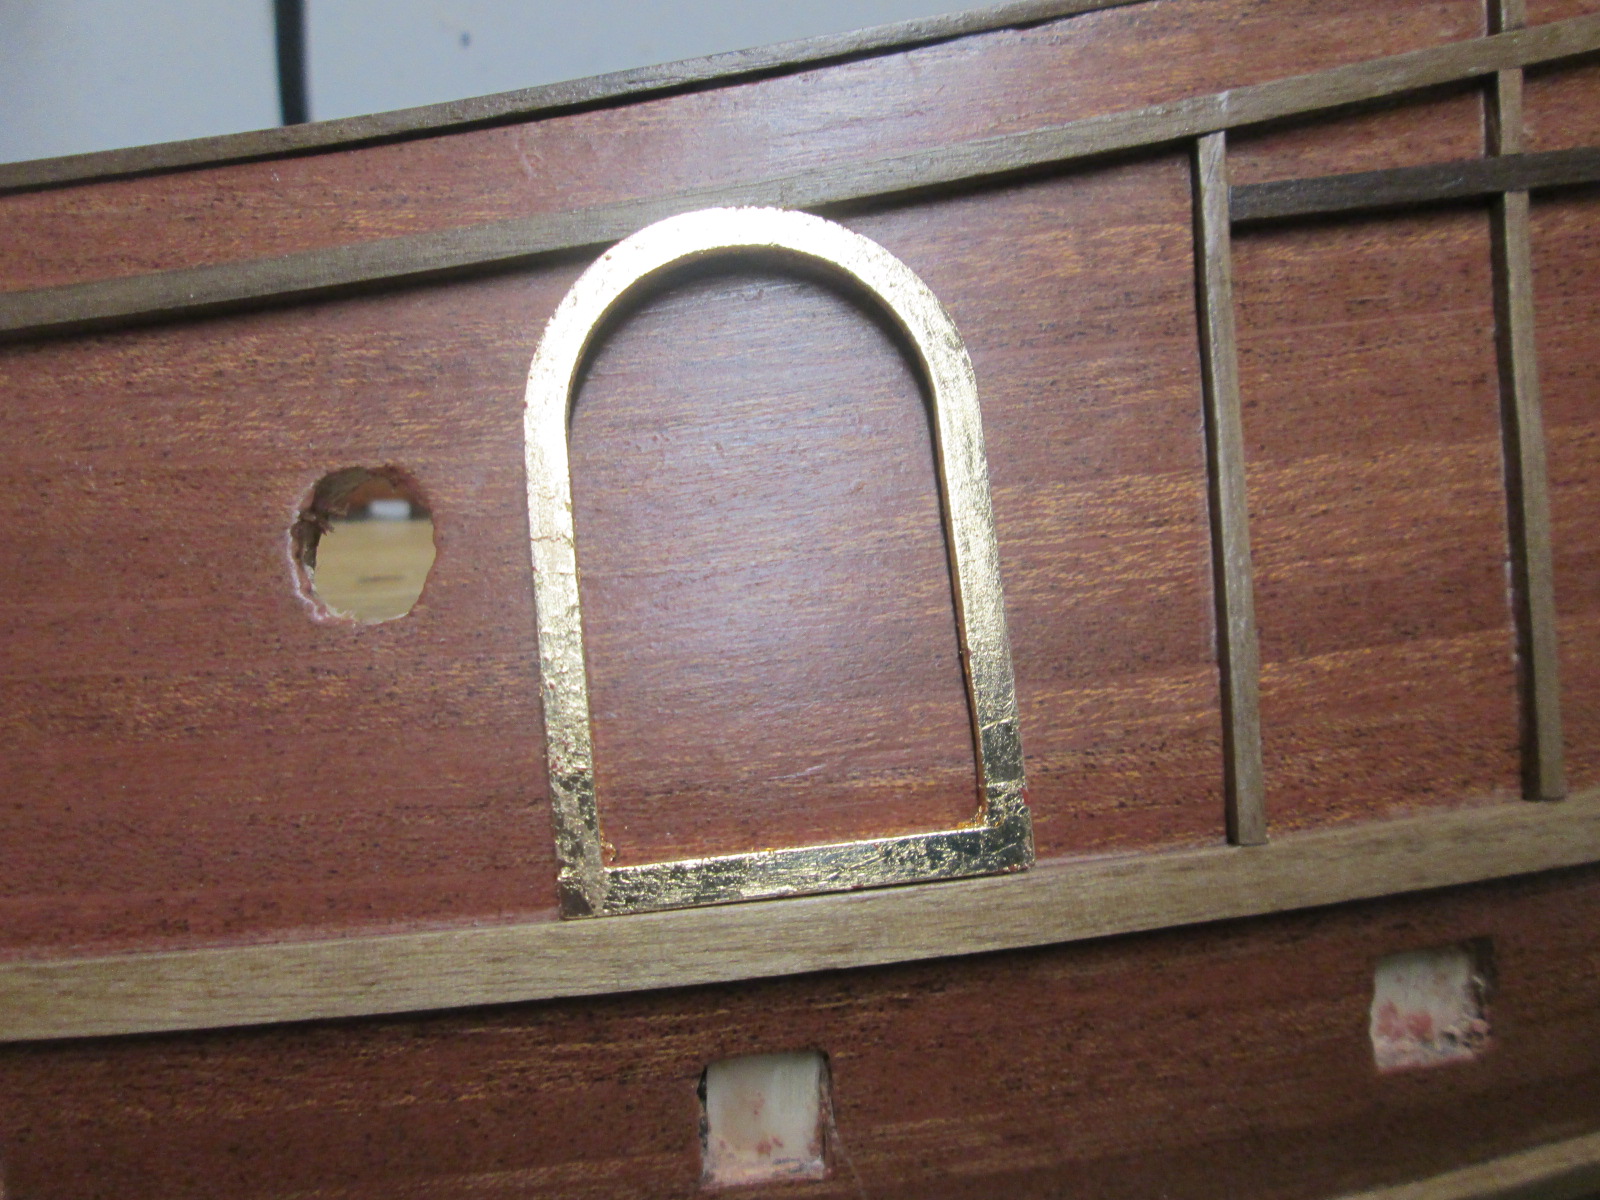
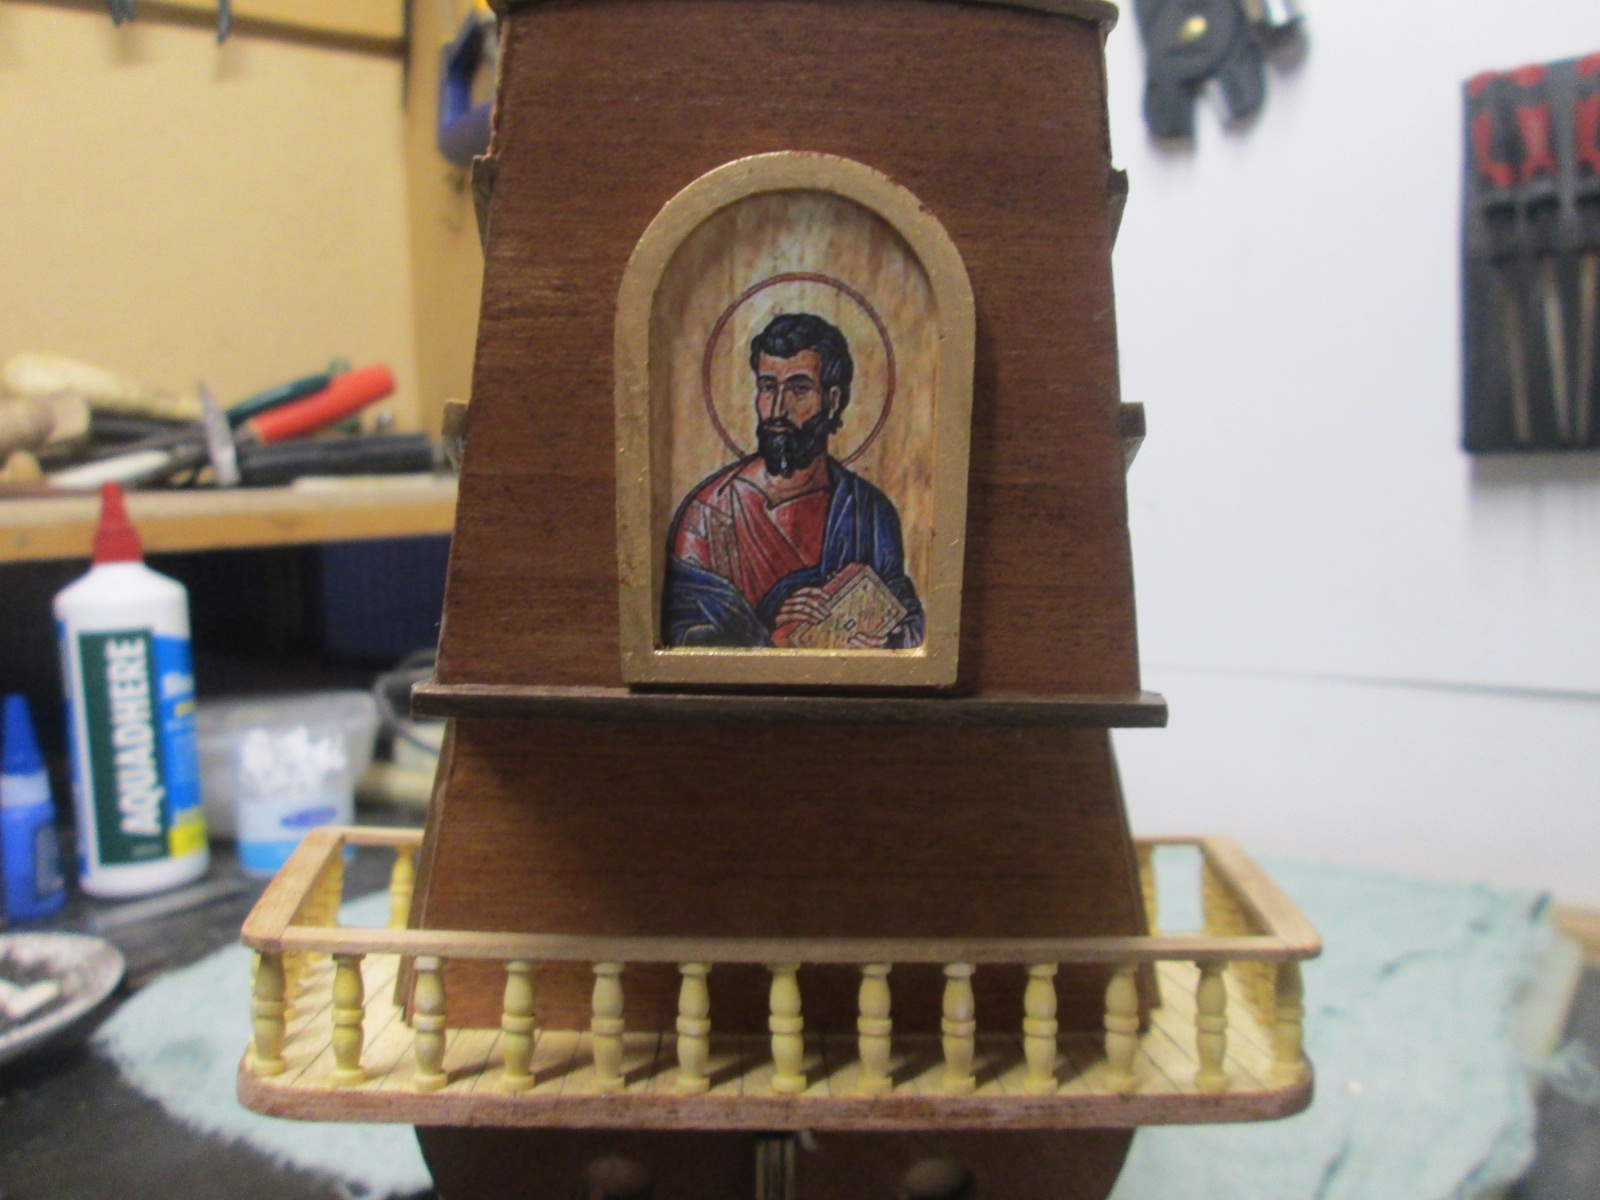
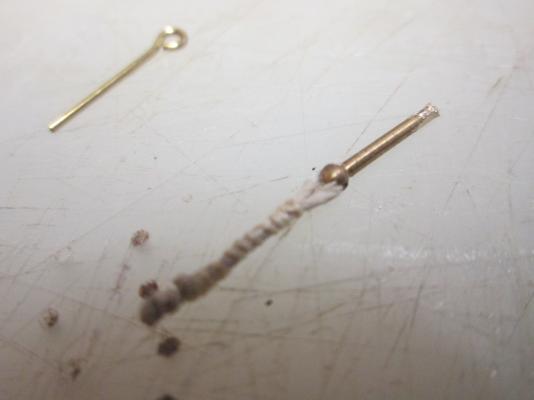
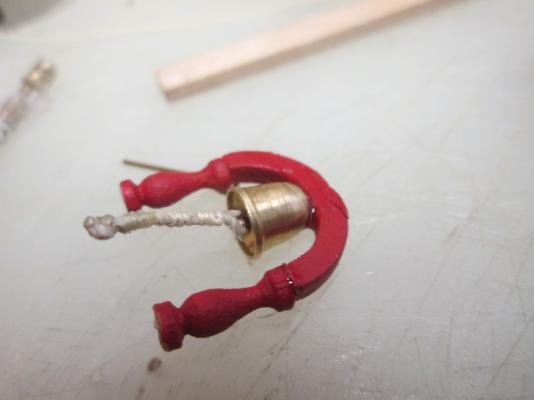
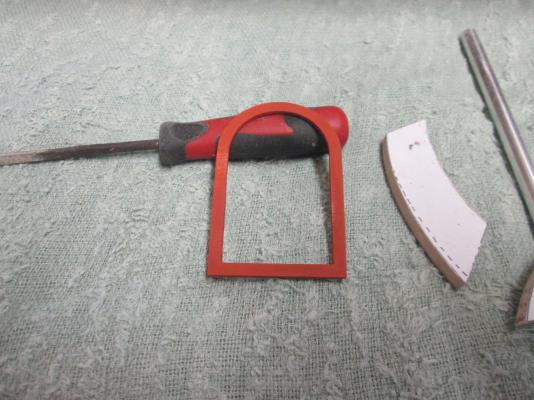
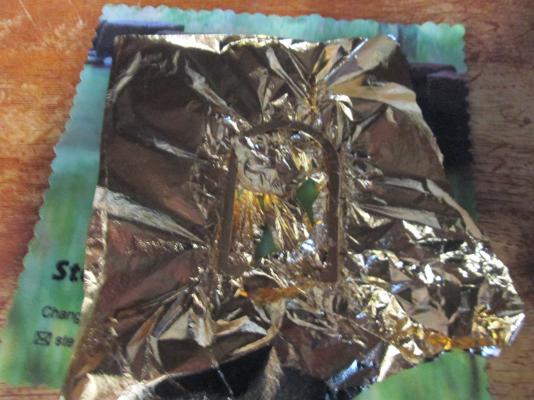
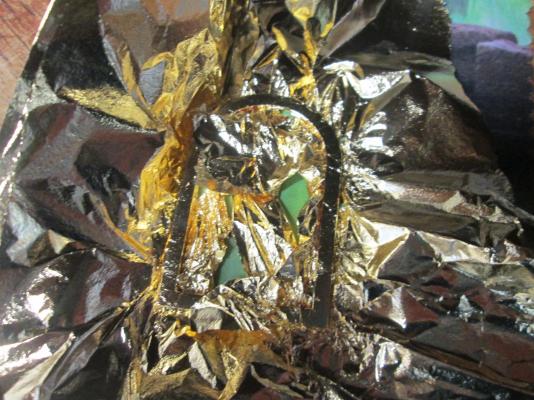
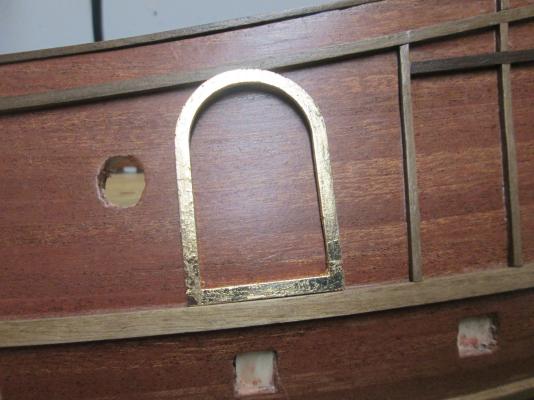
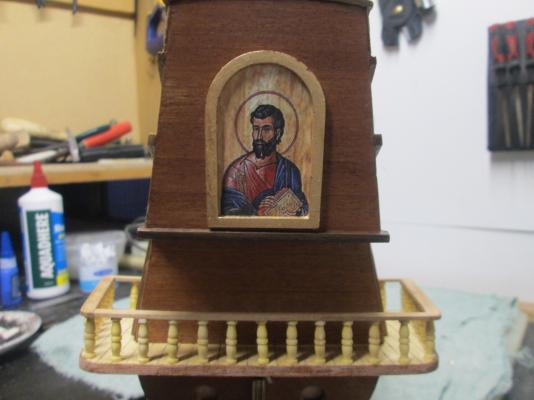
Haven't felt like building much so I decided to do some research on how to do the decorations better, namely the gold paint, which usually fades and looks pale after a while. I did some research on gold leaf, which is very expensive, but has a less expensive alternative. I bought a booklet of imitation gold leaf and the other stuff used, like a red bole used to paint under the leaf to make it brighter, and some gilding paste. The result was ok I think, it's definitely brighter than the gold paint, and with a coat of clear over it should hold it's color for a long time. The stern gallery went on ok. I replaced the plywood handrails with some walnut left over from the Bounty build. I might rip them off yet, and do them again. I also glued the picture of St Mark on the transom.


- 64 replies
-
- 1
-
-
- occre
- san marcos
- (and 1 more)
-
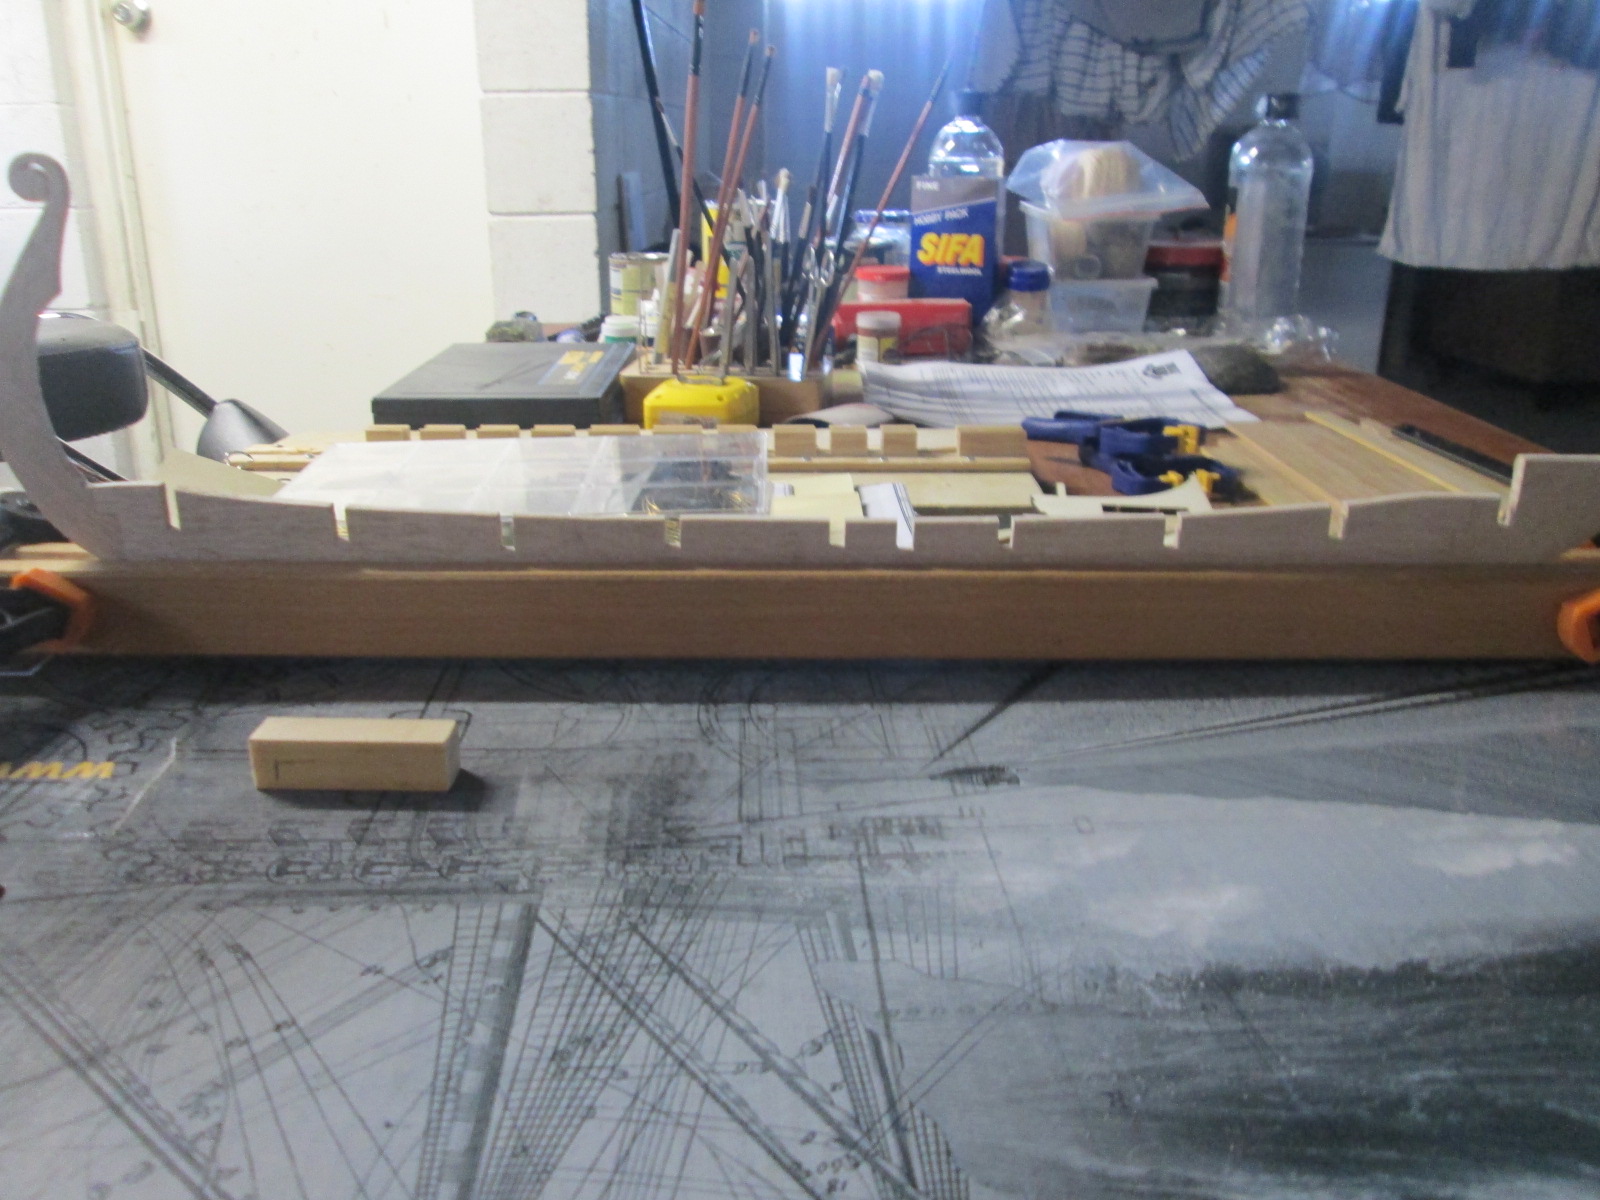
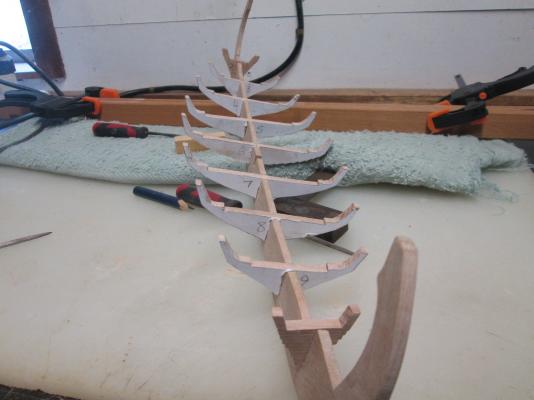
Moving along with it now, so I,ve got the bulkheads cut out, and I'm now gluing them in. Once they are in I'll straighten the keel, as it has a slight bend, by putting in a couple of planks flush to the deck level while it's clamped. That should sort that little problem out. Then I'll fair the frames. In the meantime it's a little difficult deciding on which timber to go with for the planks. I've looked at some cherry veneer, but i've never used it before. I also like the look of Jarrah, it's got nice red color. Then there's Teak? Choices Choices. As always I hope you are all having fun with your builds, Matt.

-
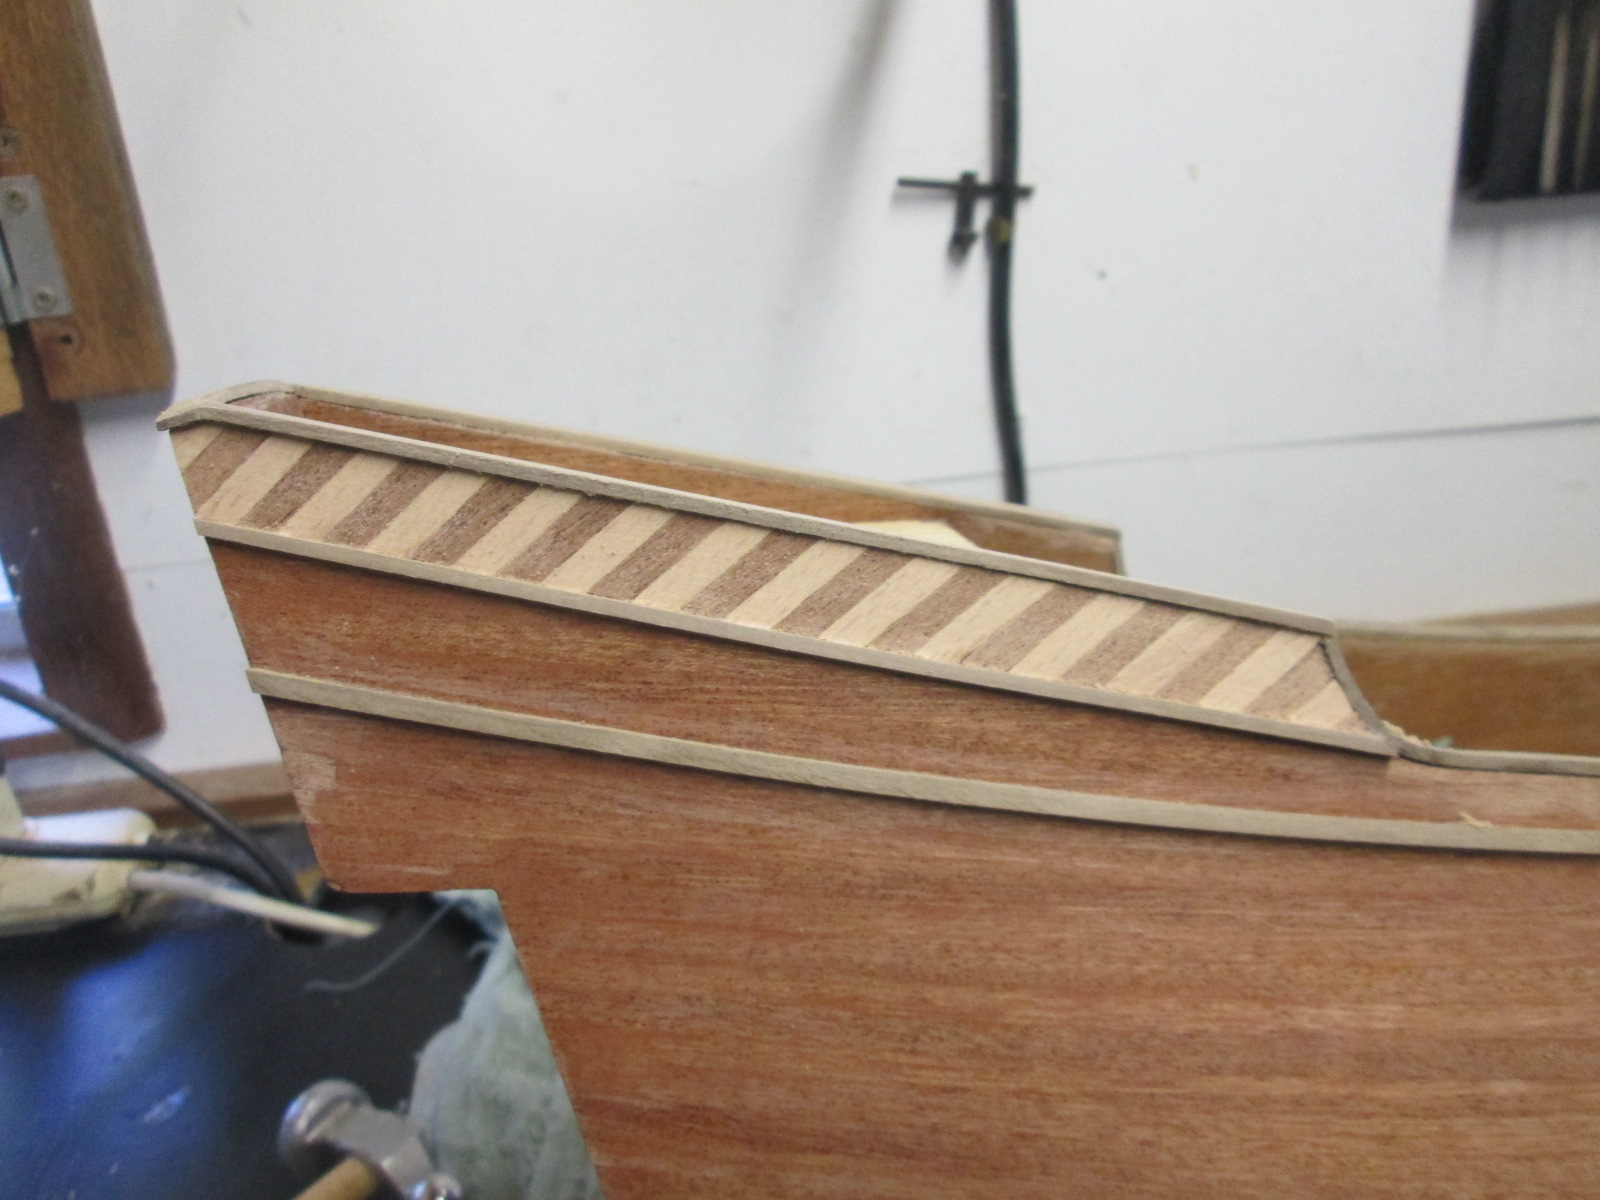
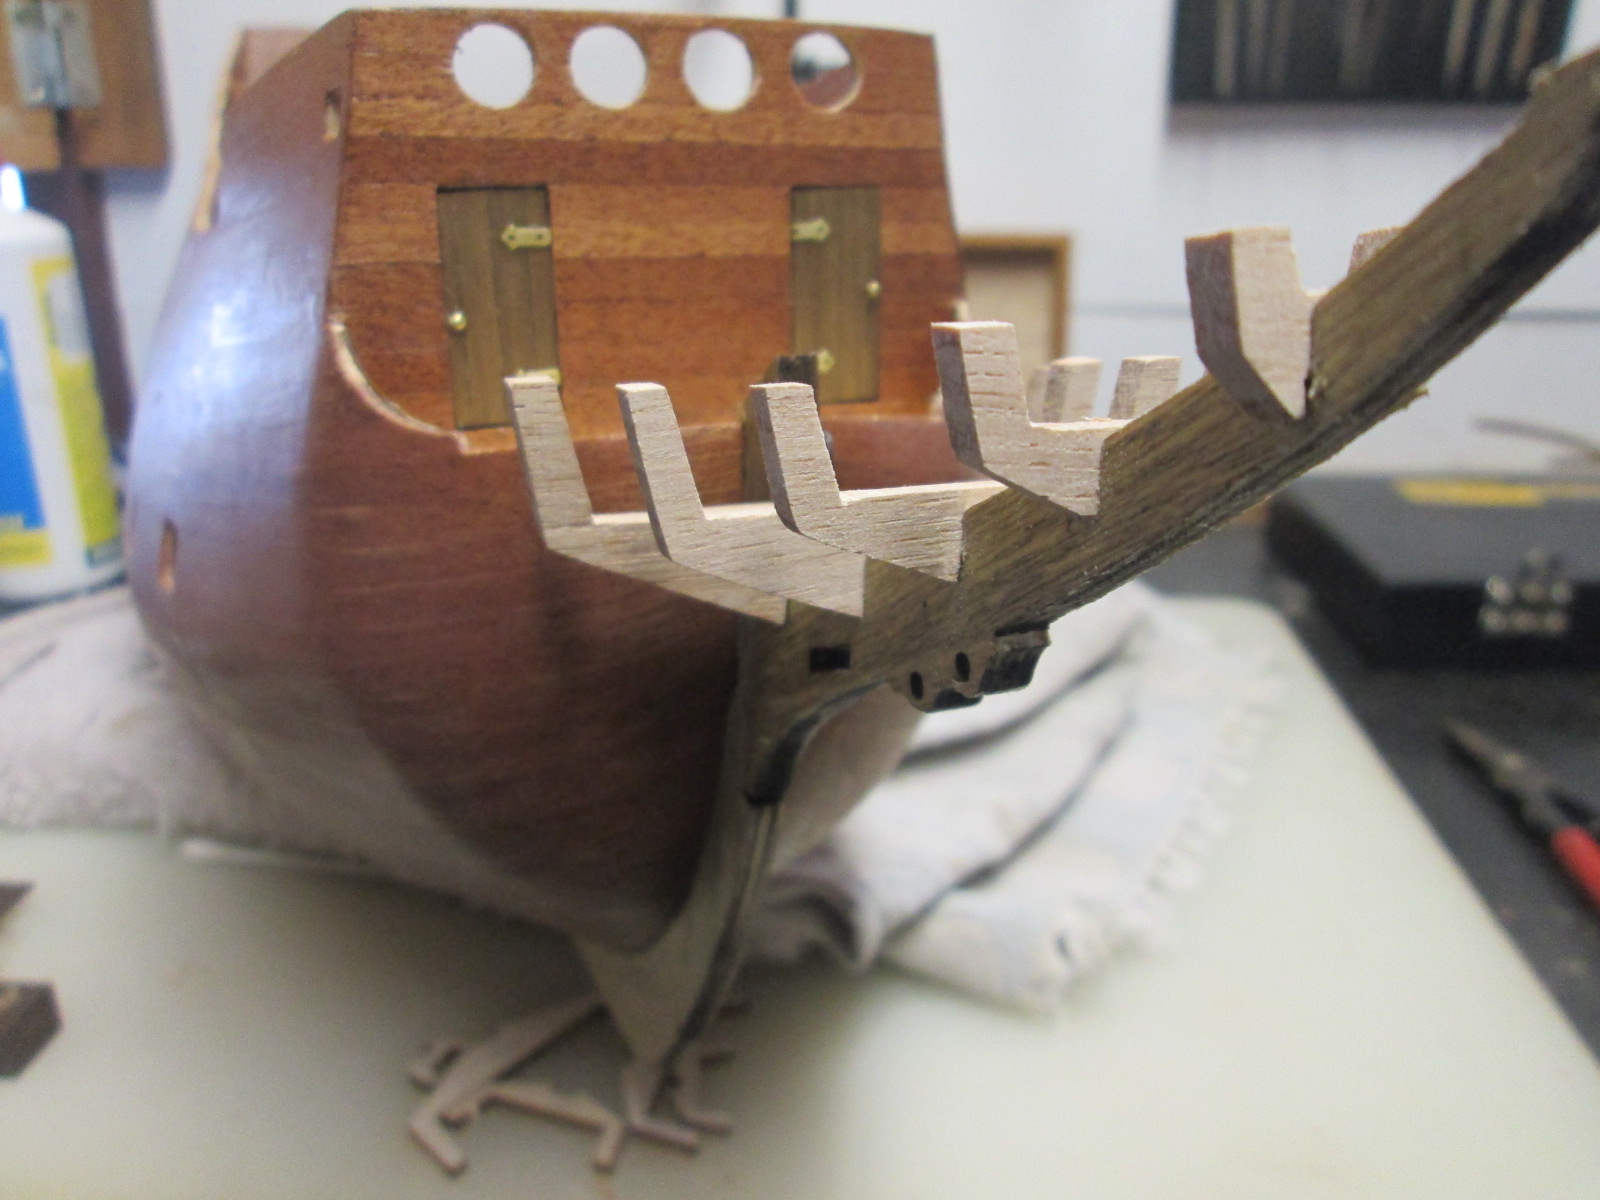
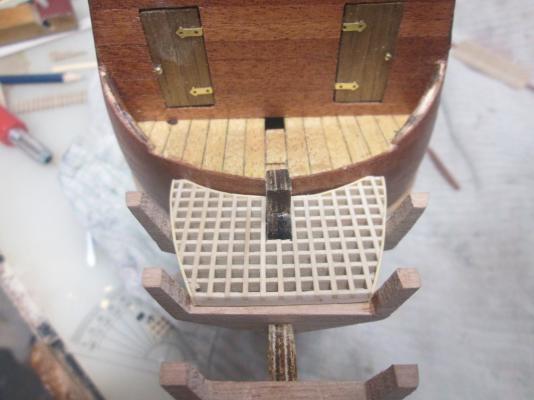
It's gunwale time, and fenders. The instructions call them fenders, so I'll go with that. There's no real easy way to place the first (lower) gunwale. The others aren't too hard to get on. There was also the decorative angled timber at the top of the stern. I also added some extra pieces in the bow section along the grating I think it makes more sense having them on there so that a person would be less likely to lose their footing off the edge of the grating and down the side of the side rail. It tidies up the edges as well, so if your edging is a bit wonky like mine, you can cover it up this way. The Cap-rails were fairly east to get on, apart from the curved part near the half deck.


-
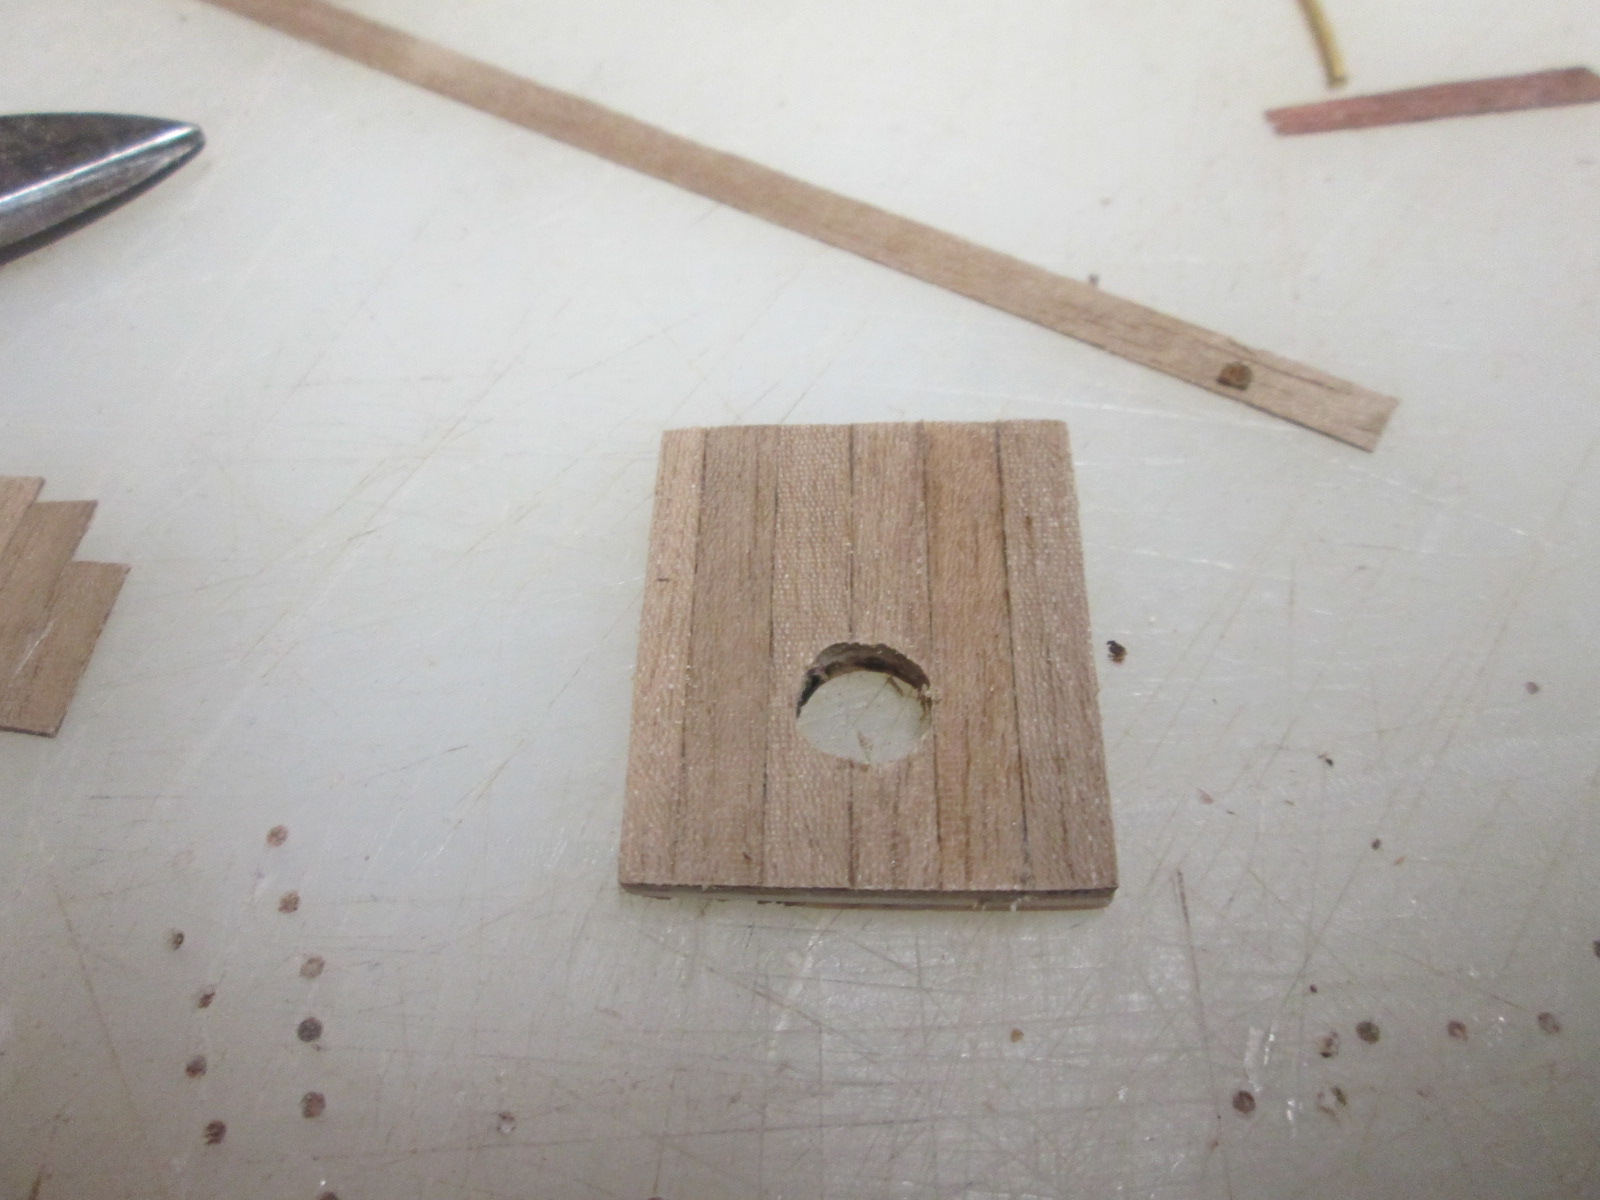
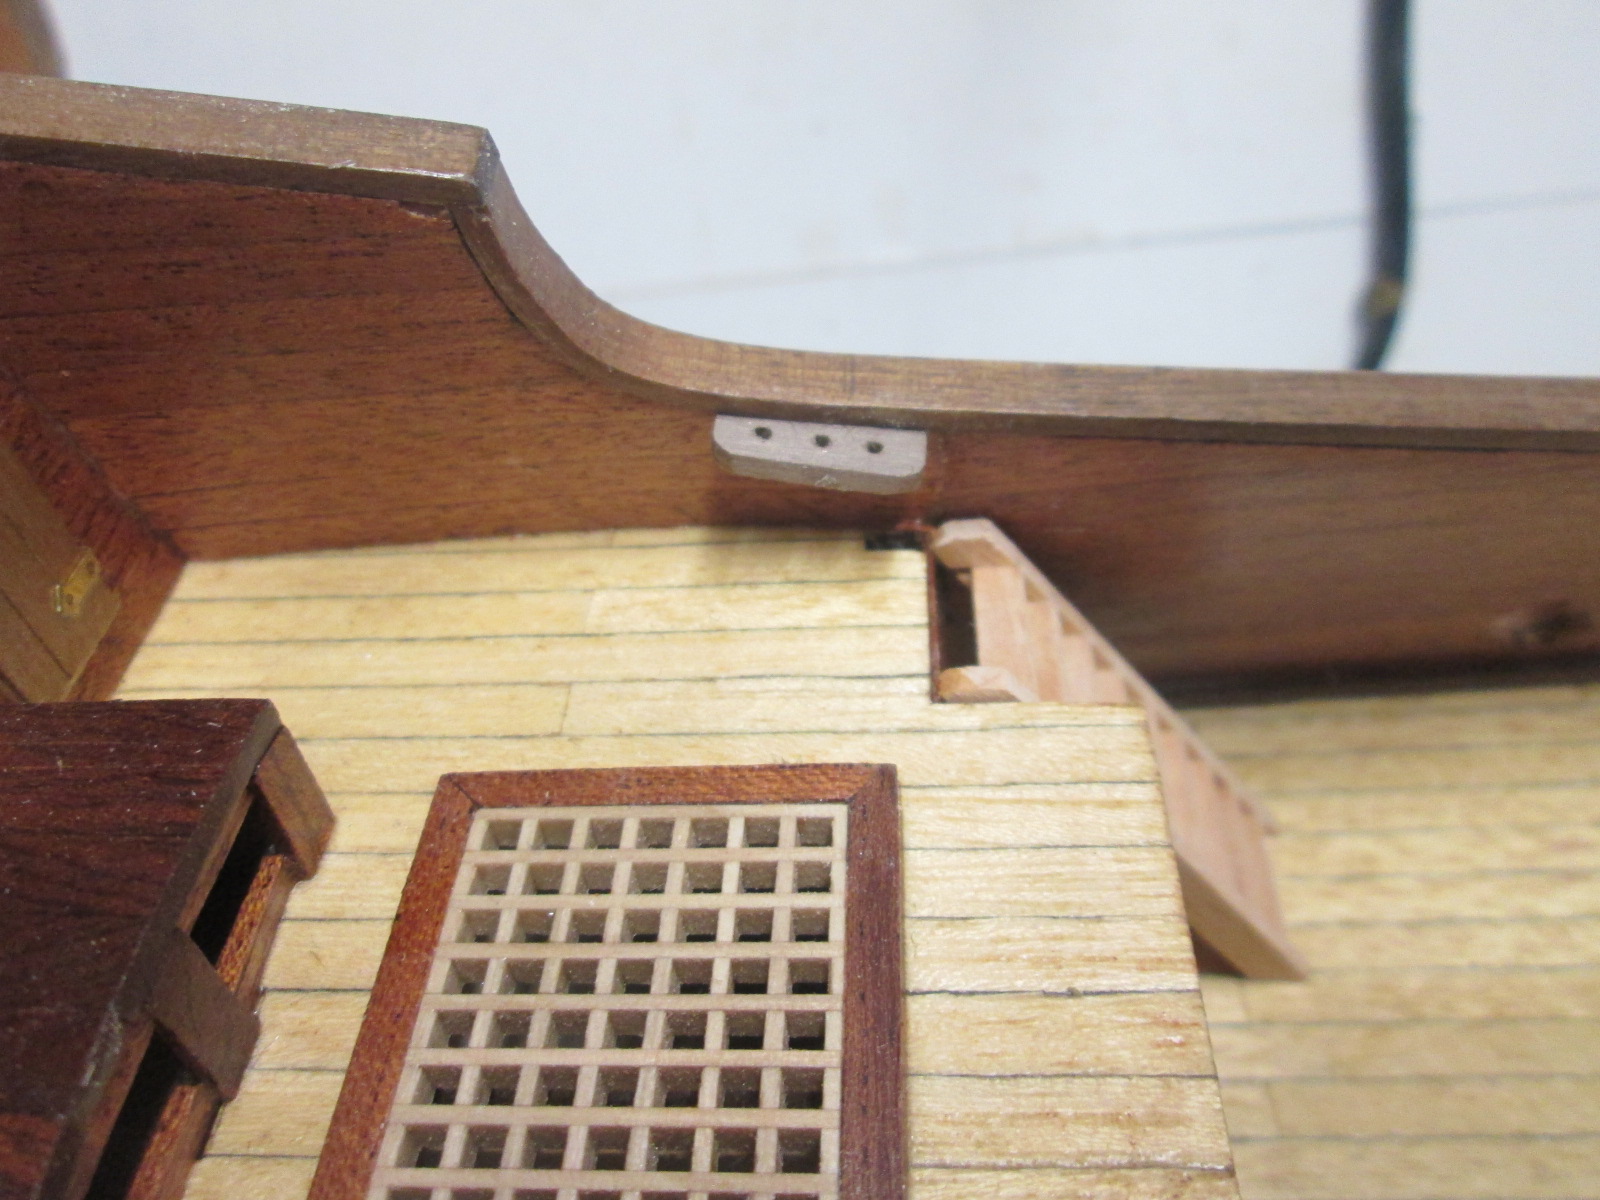
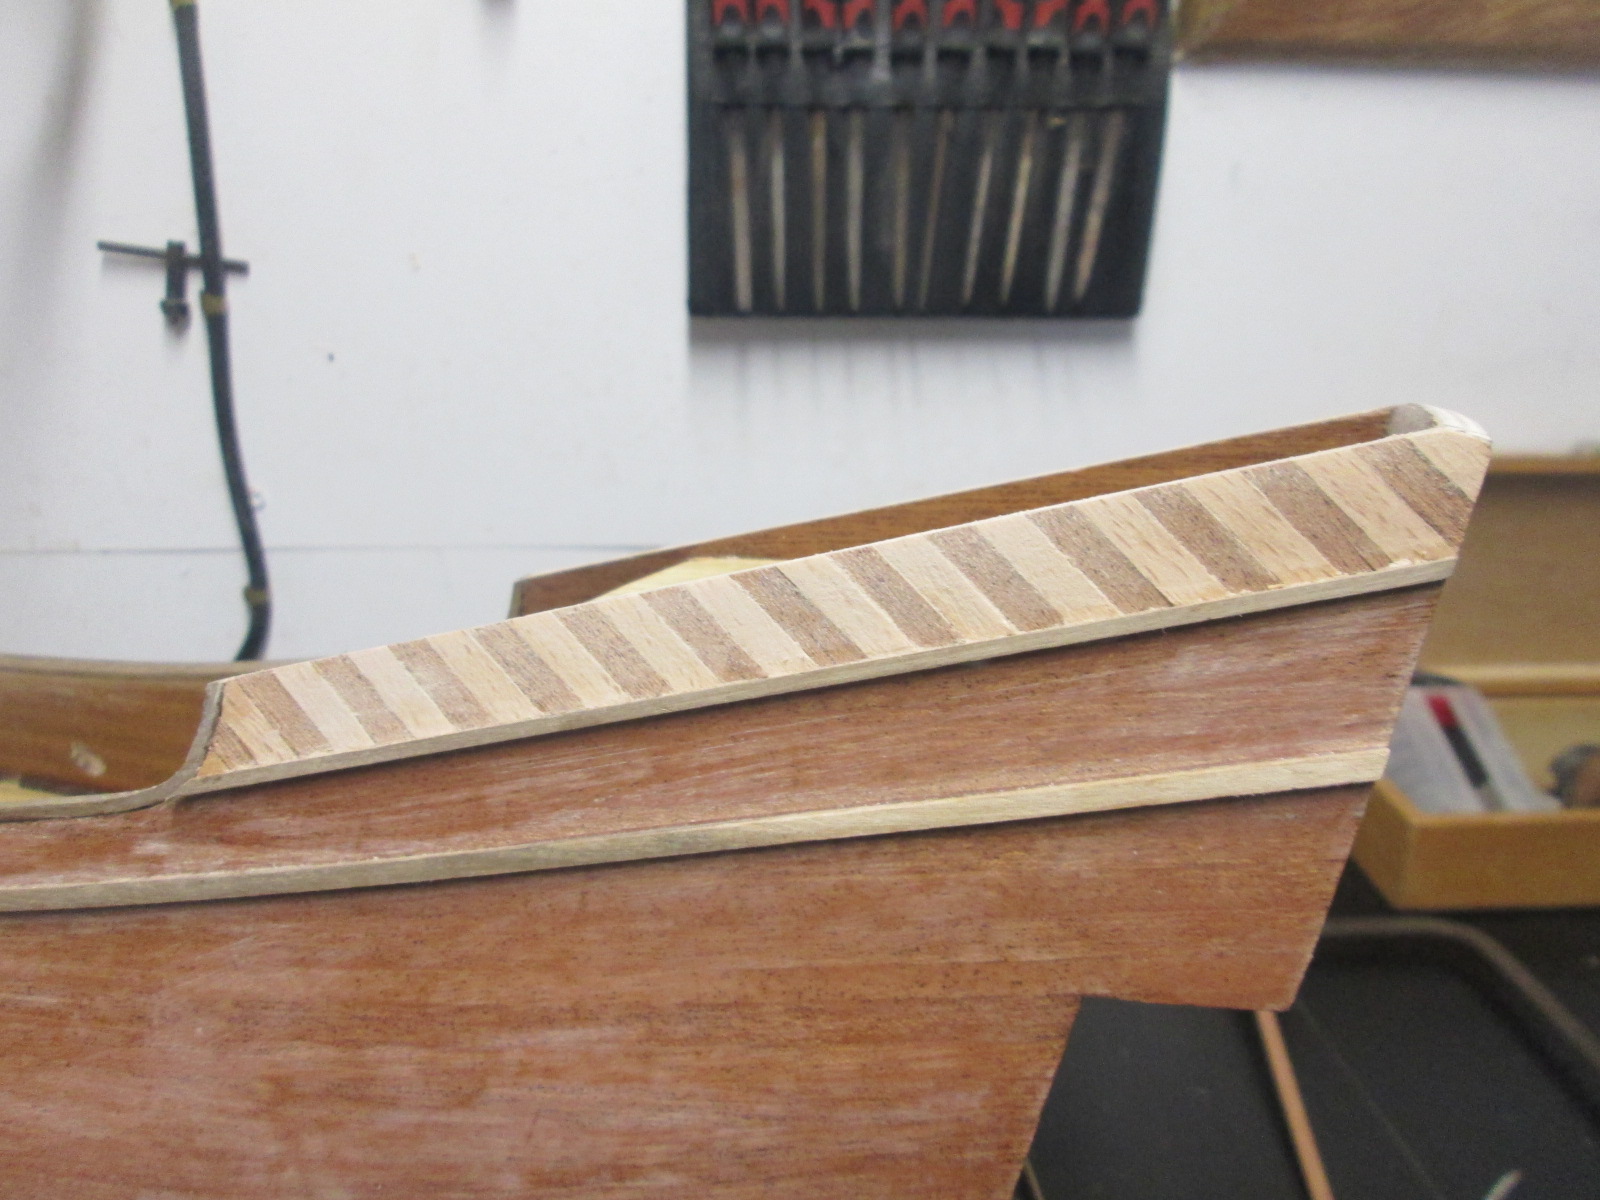
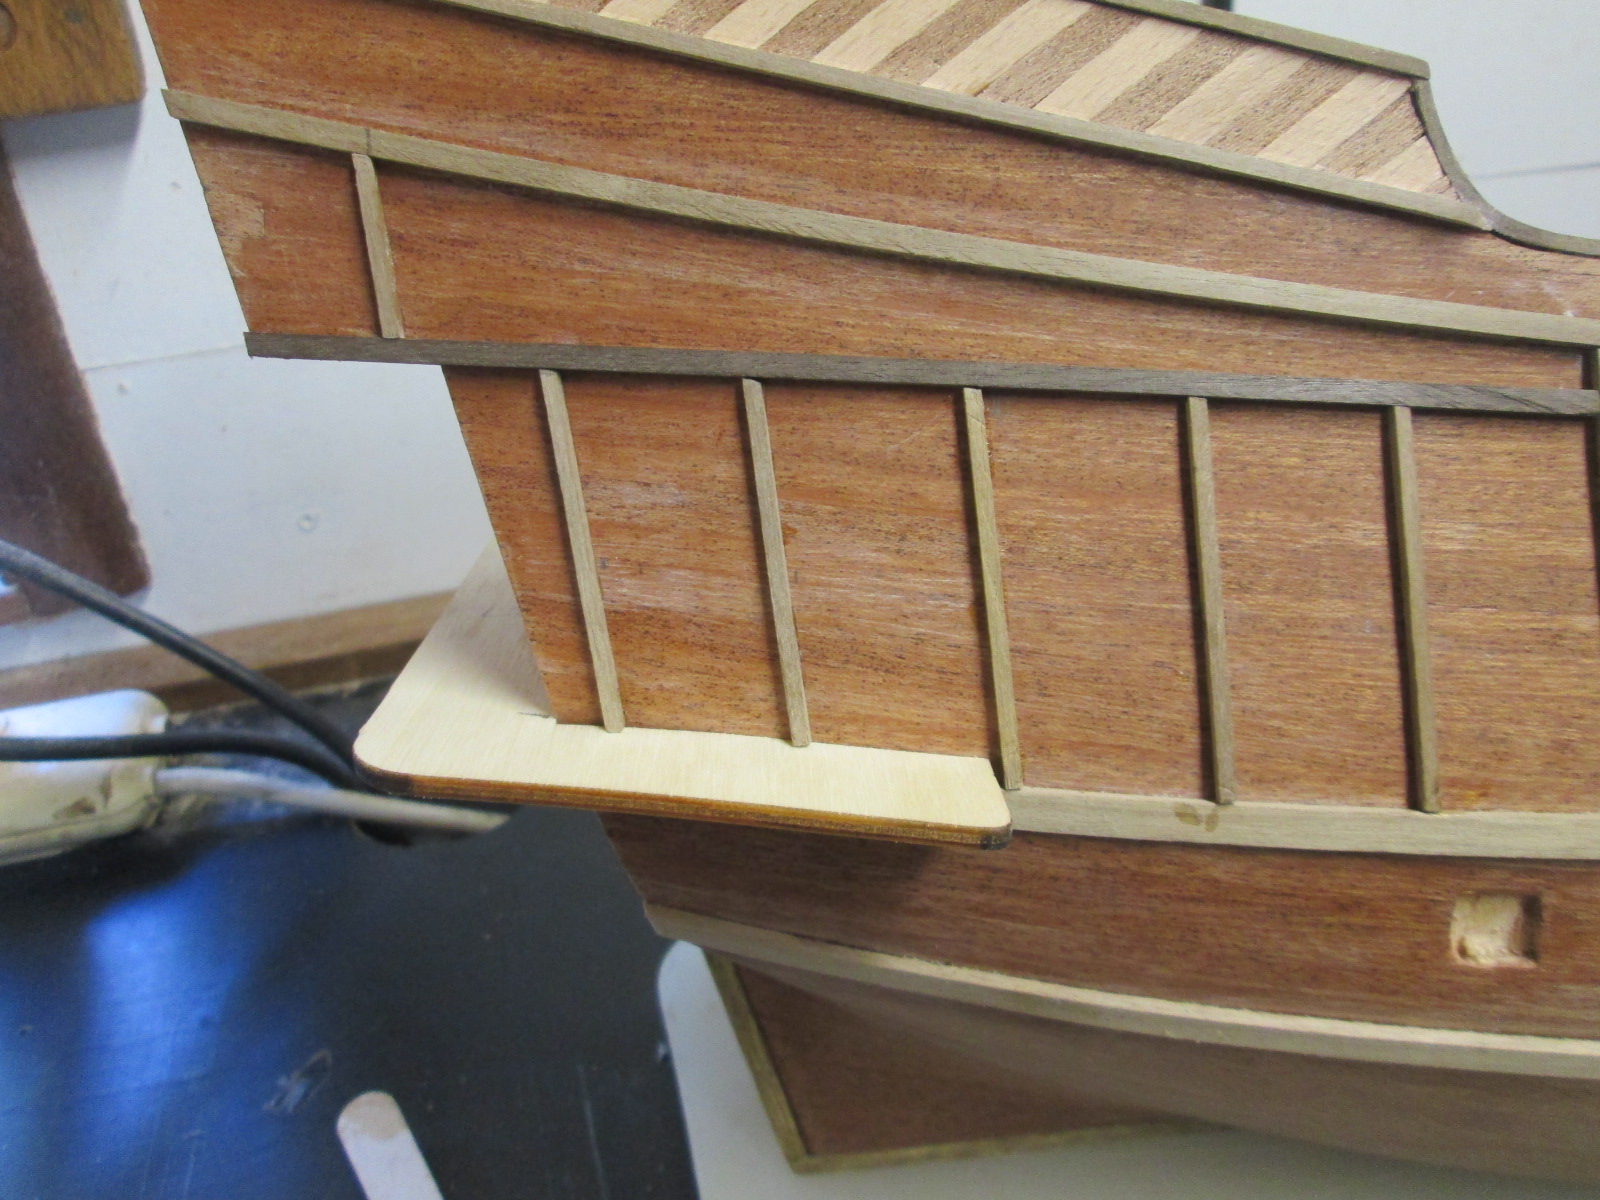
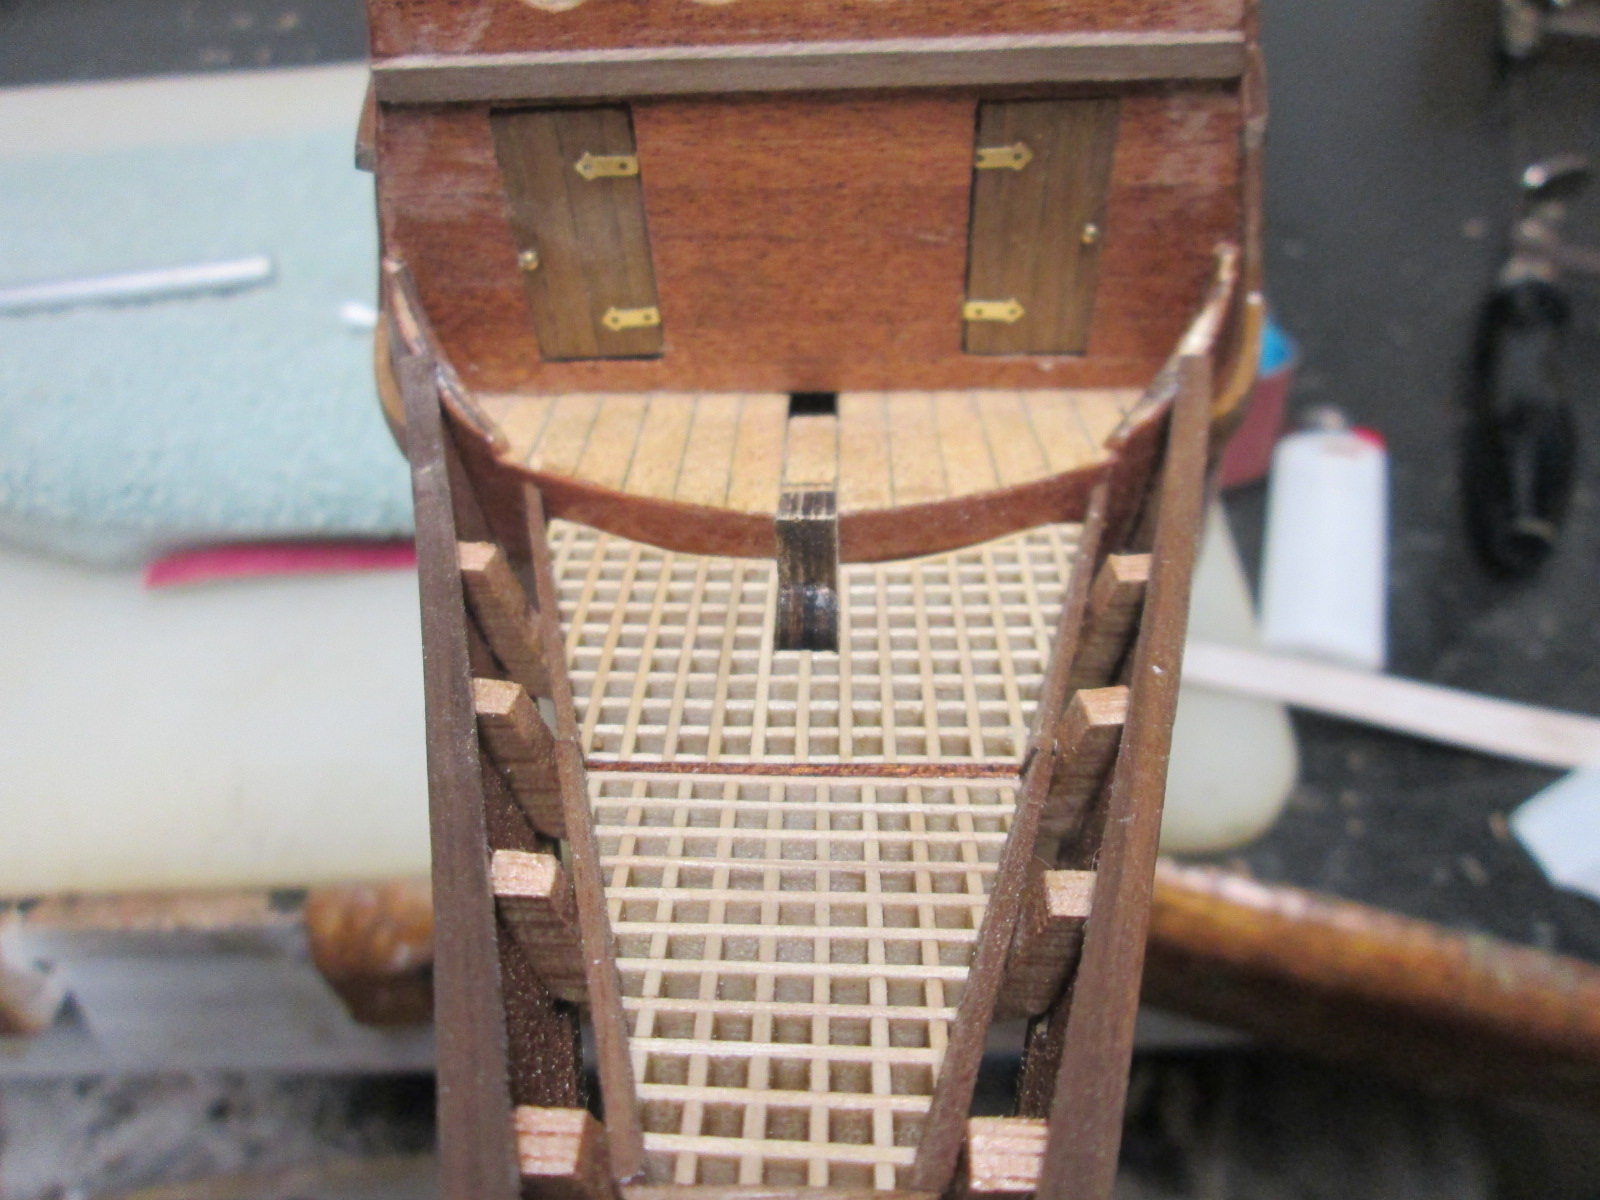
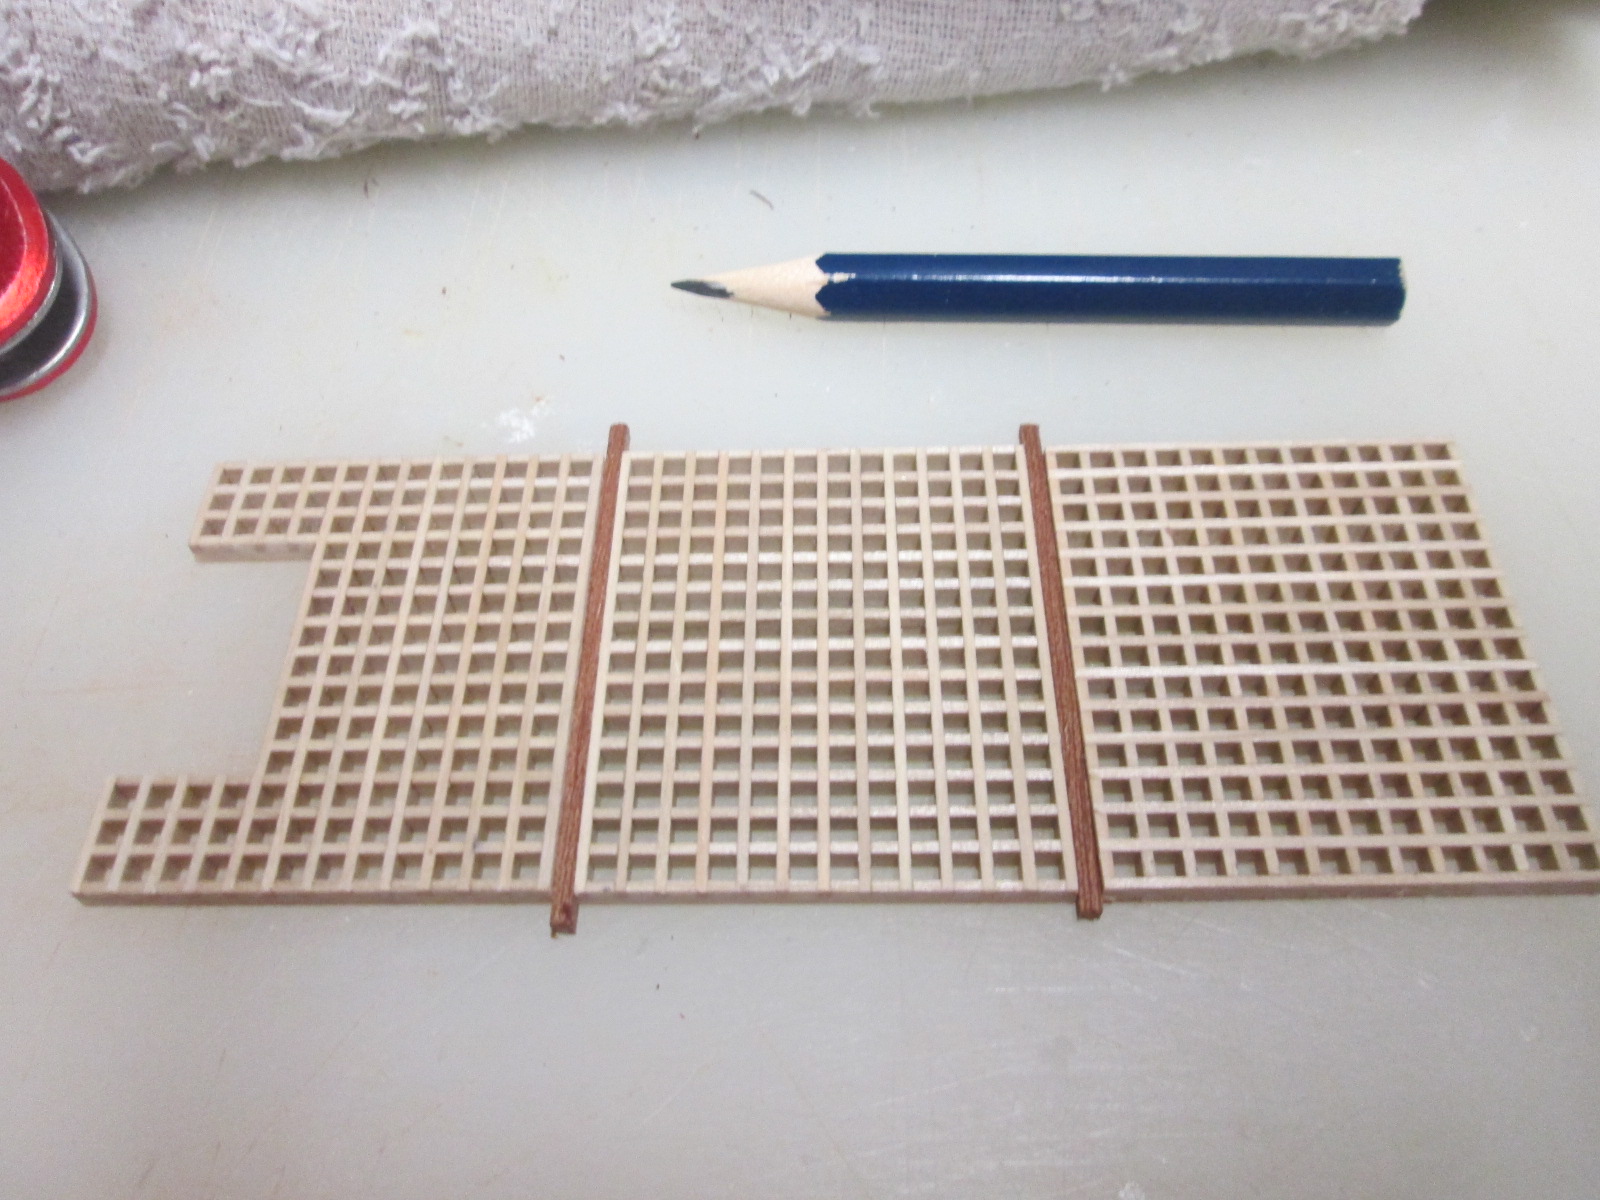
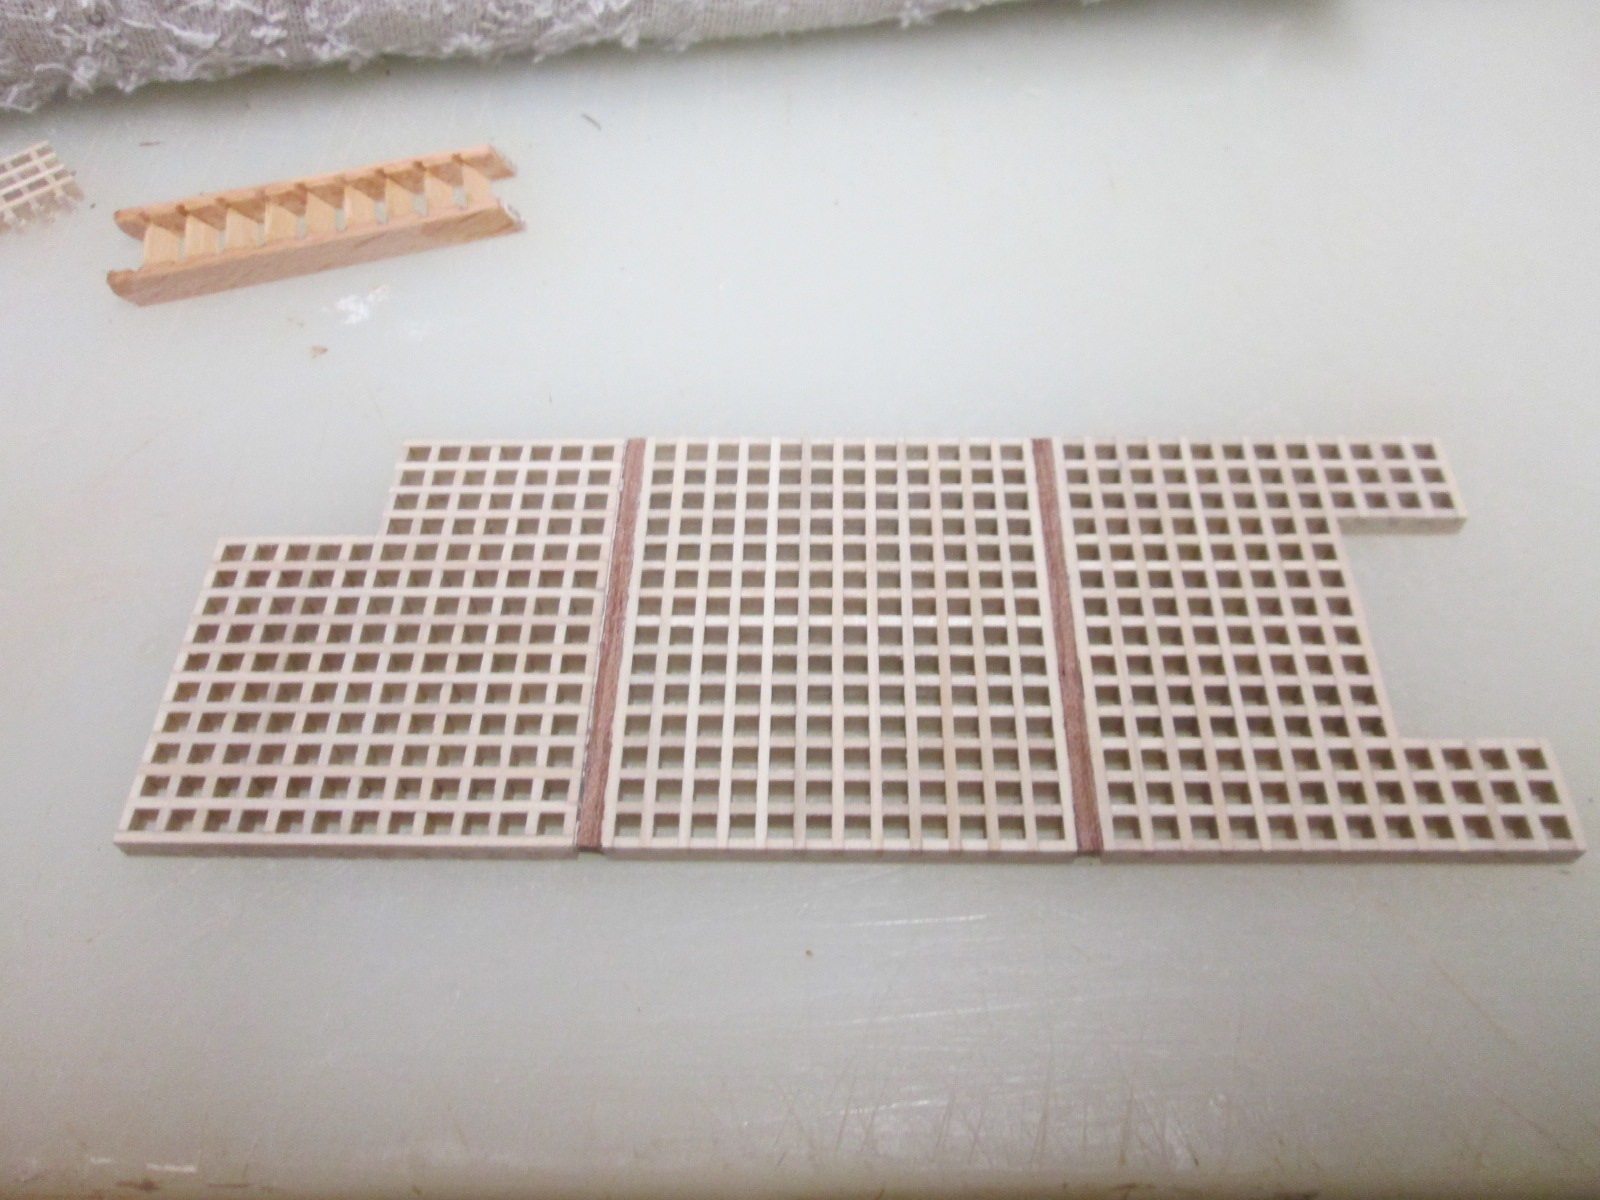
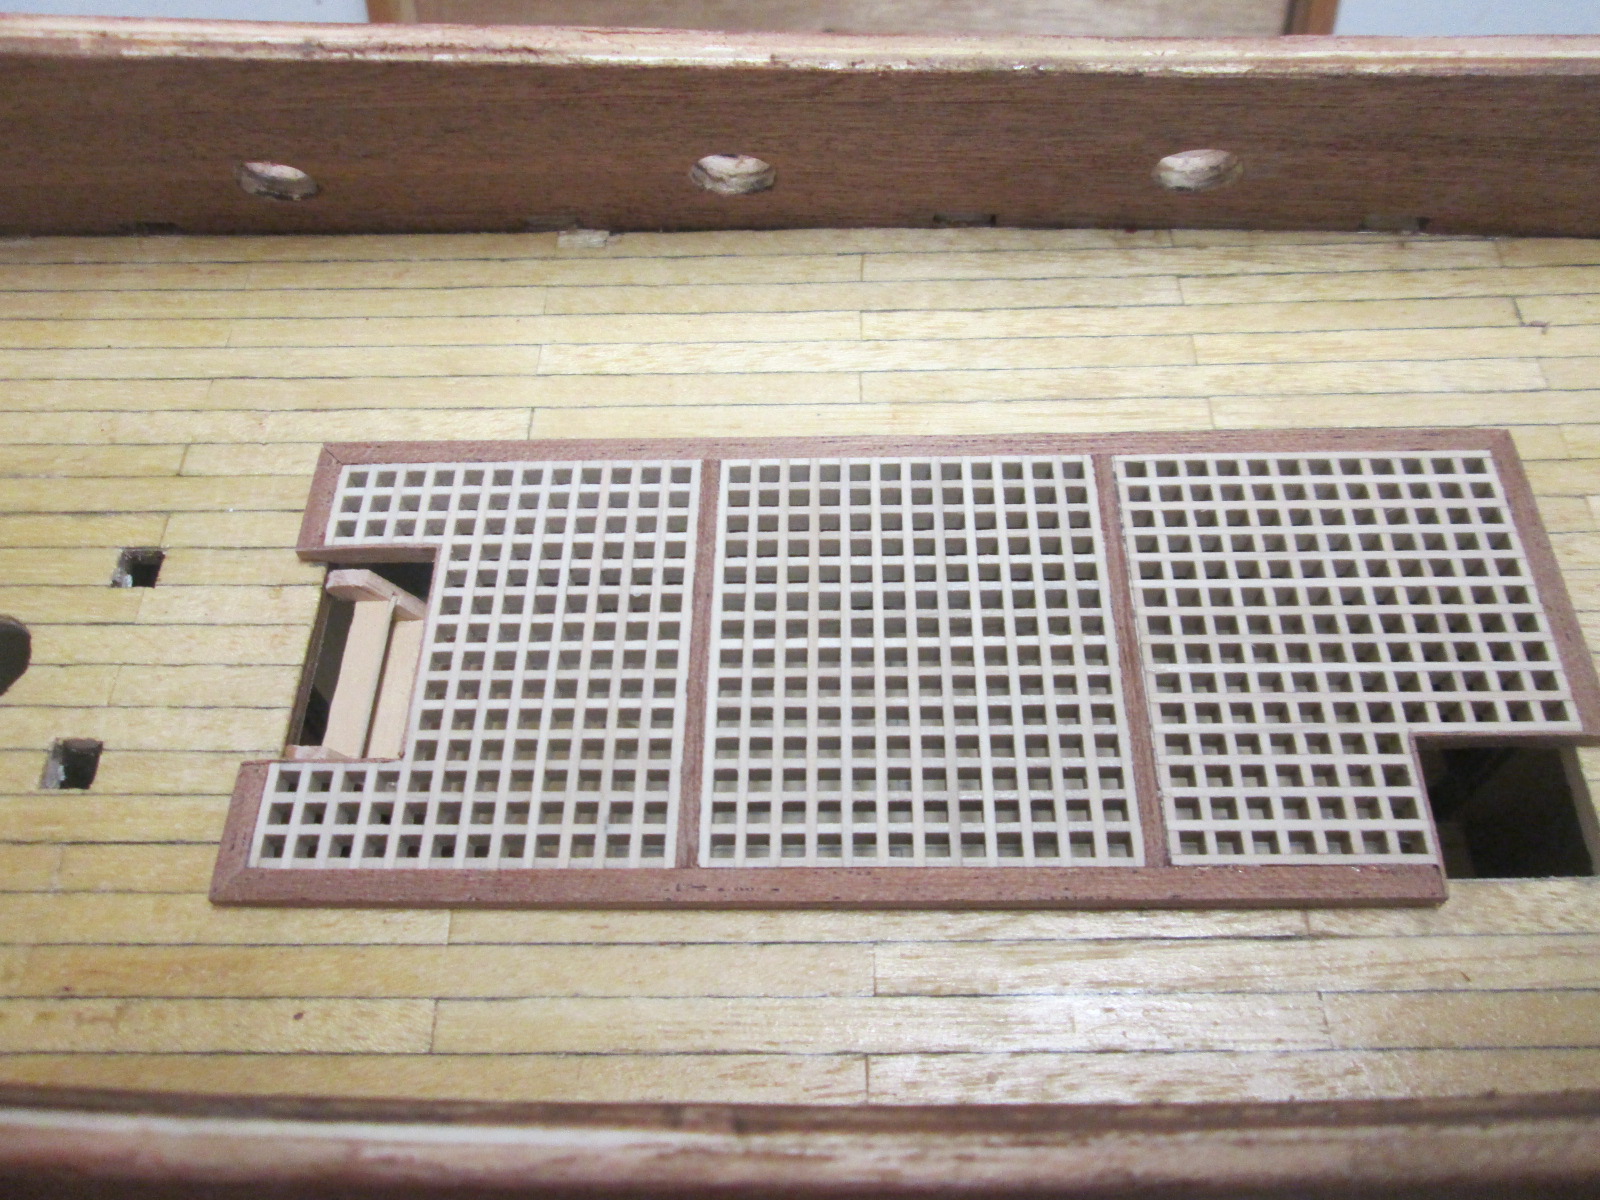
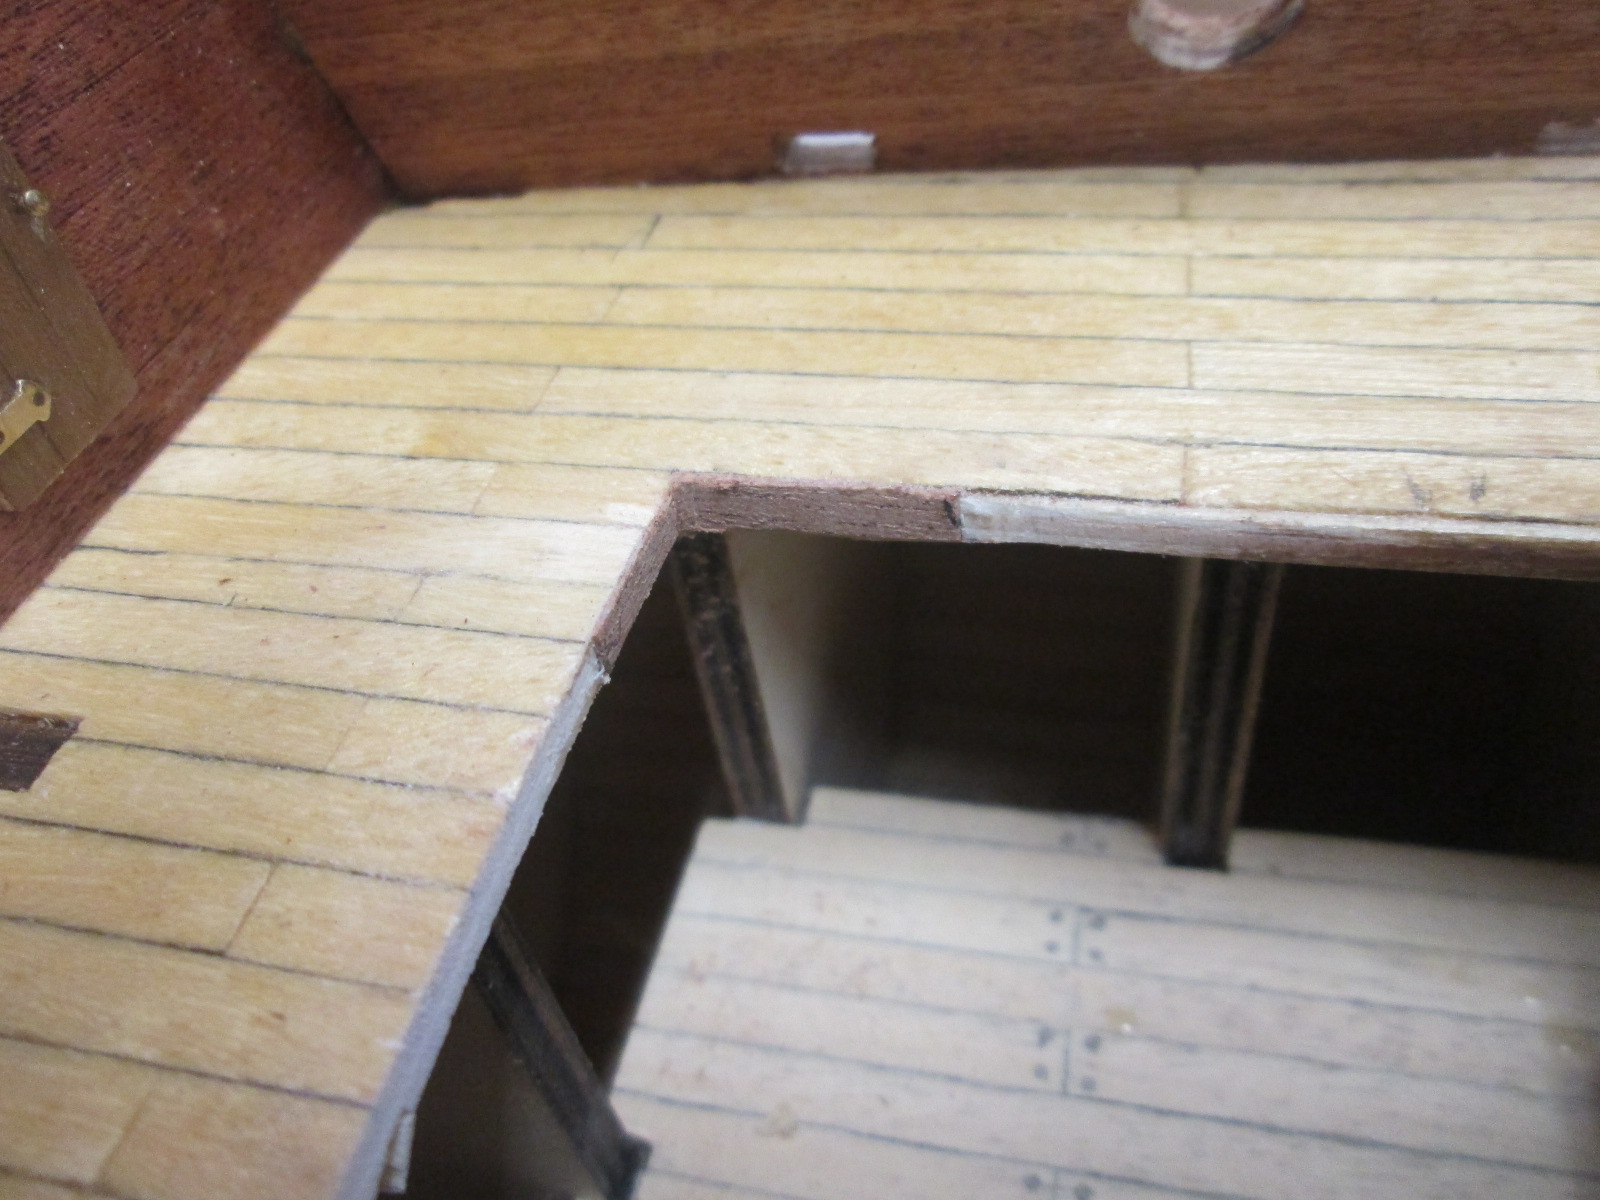
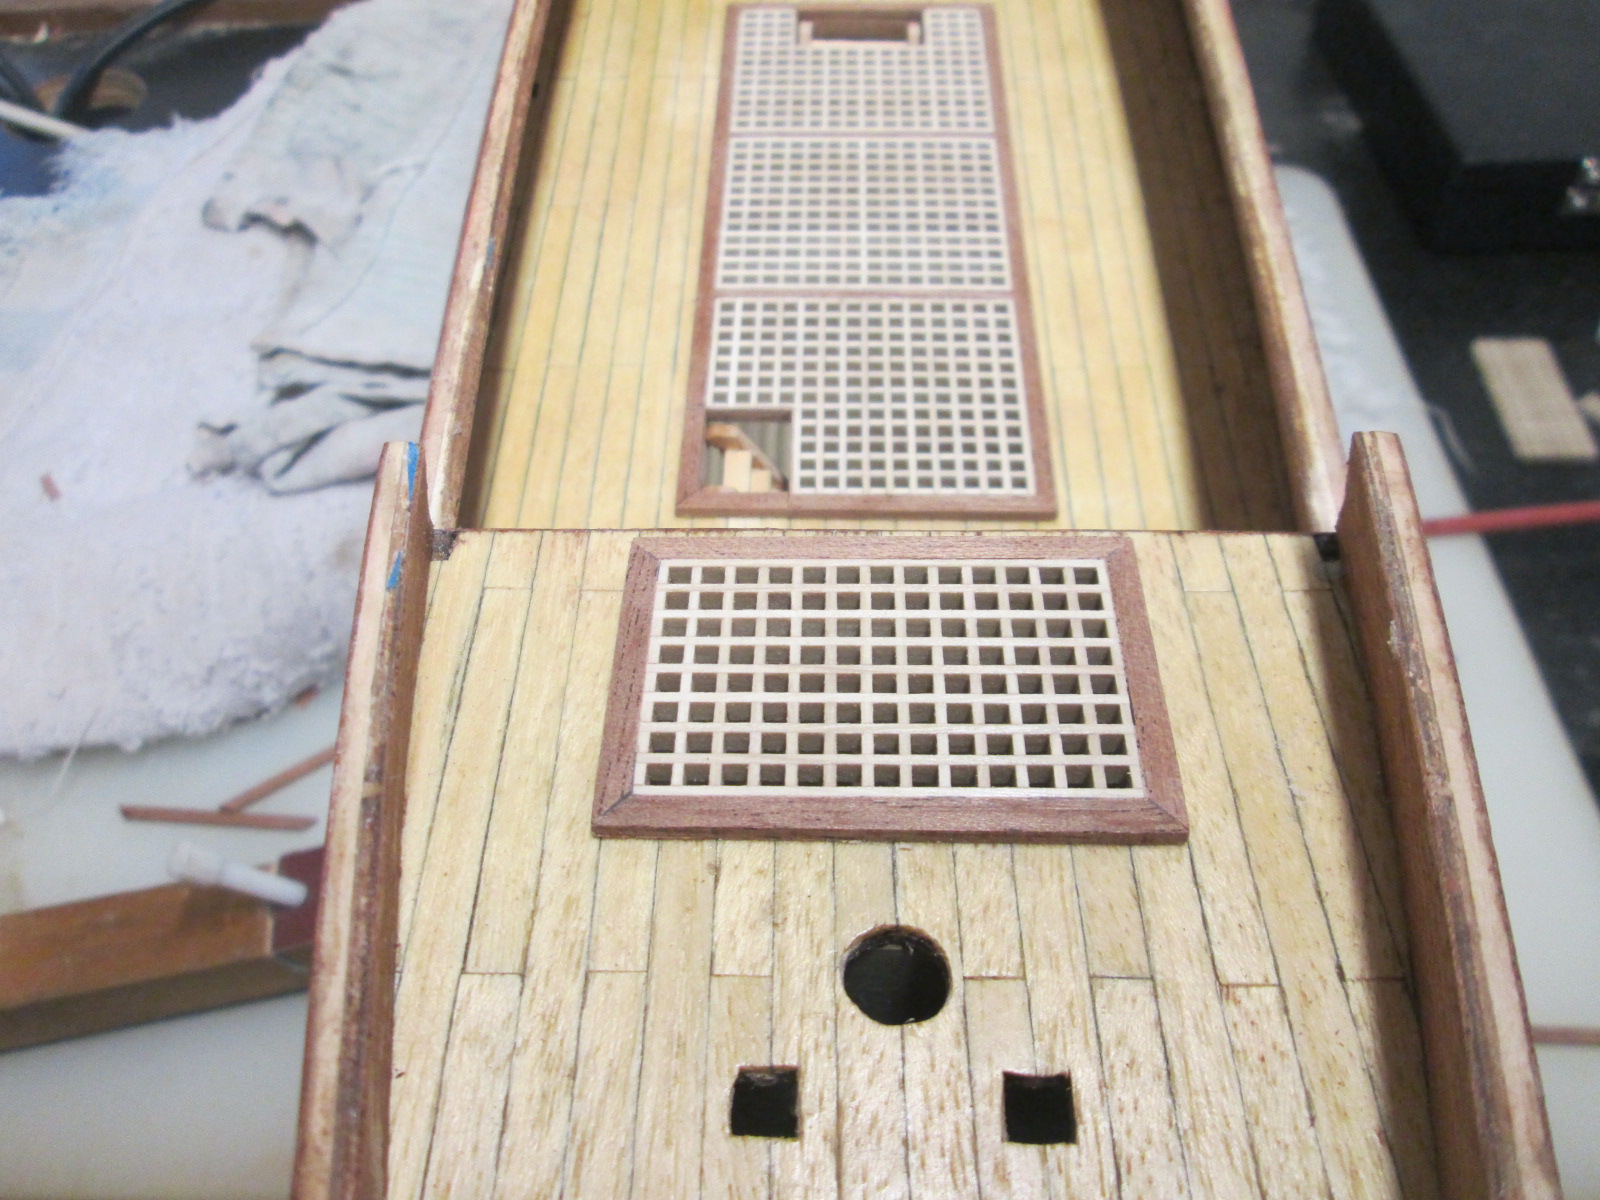
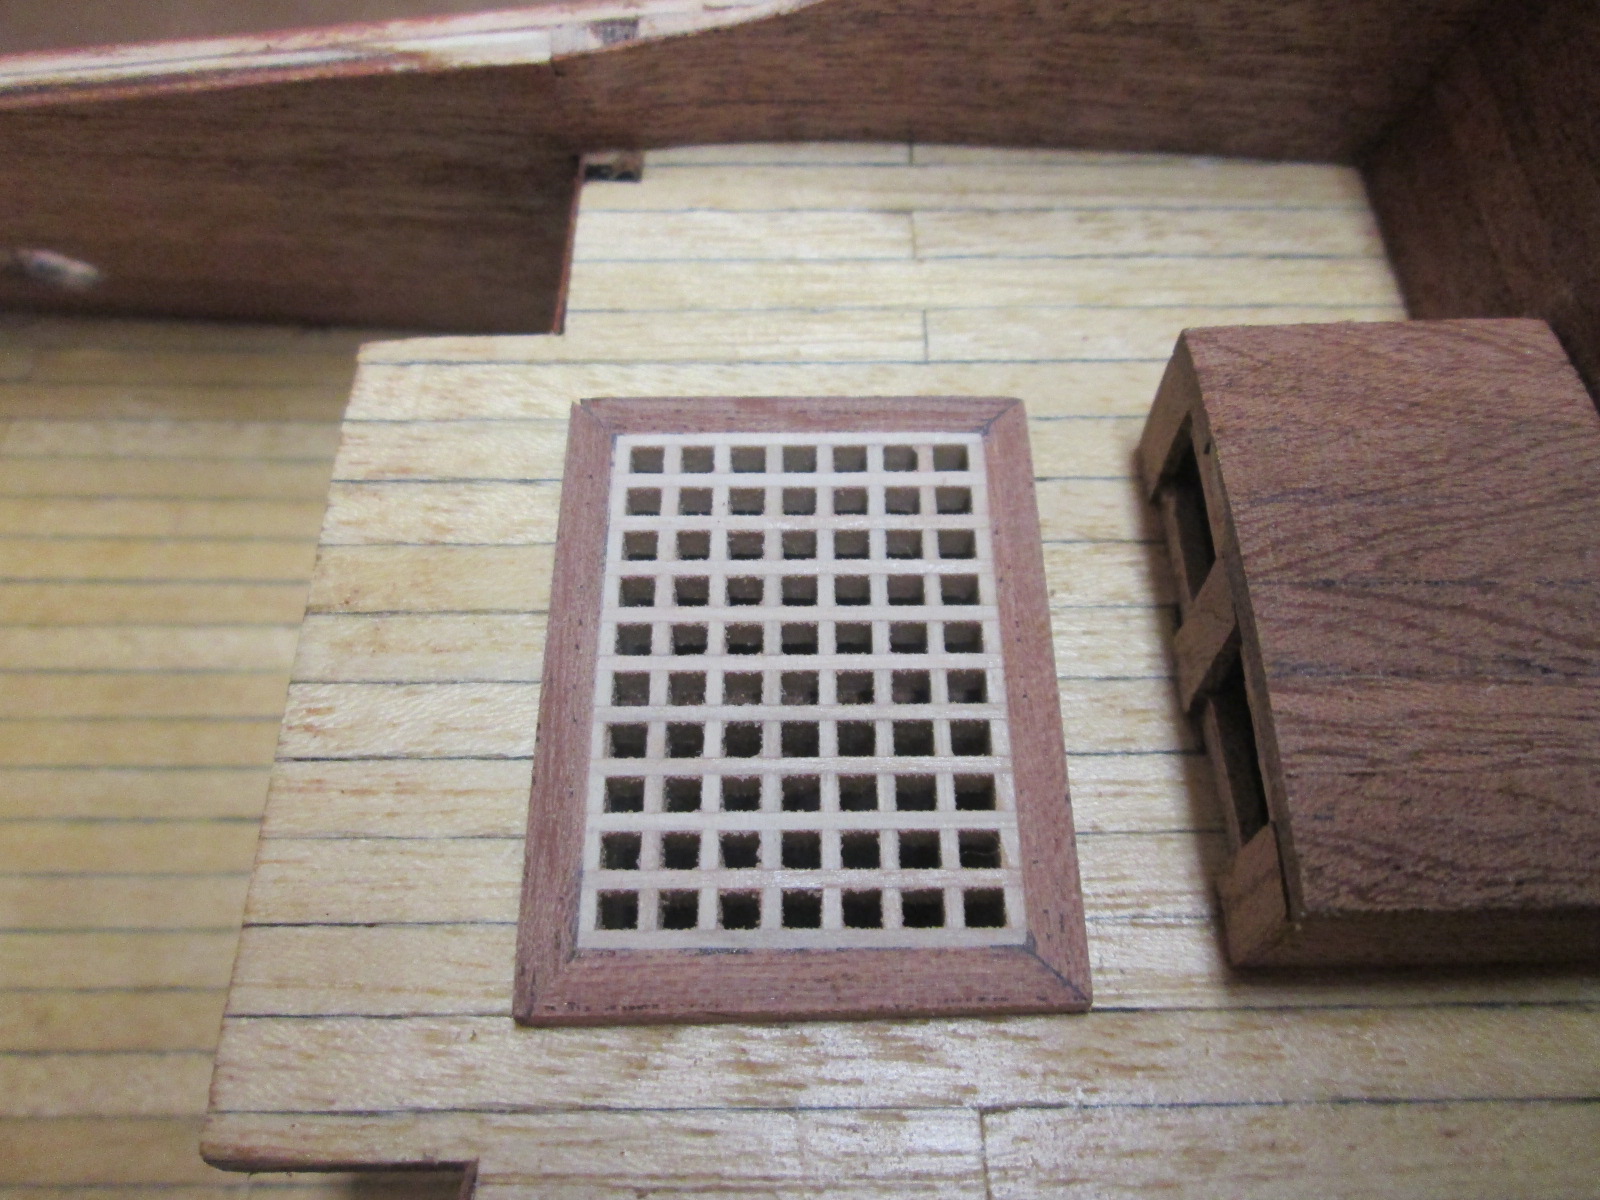
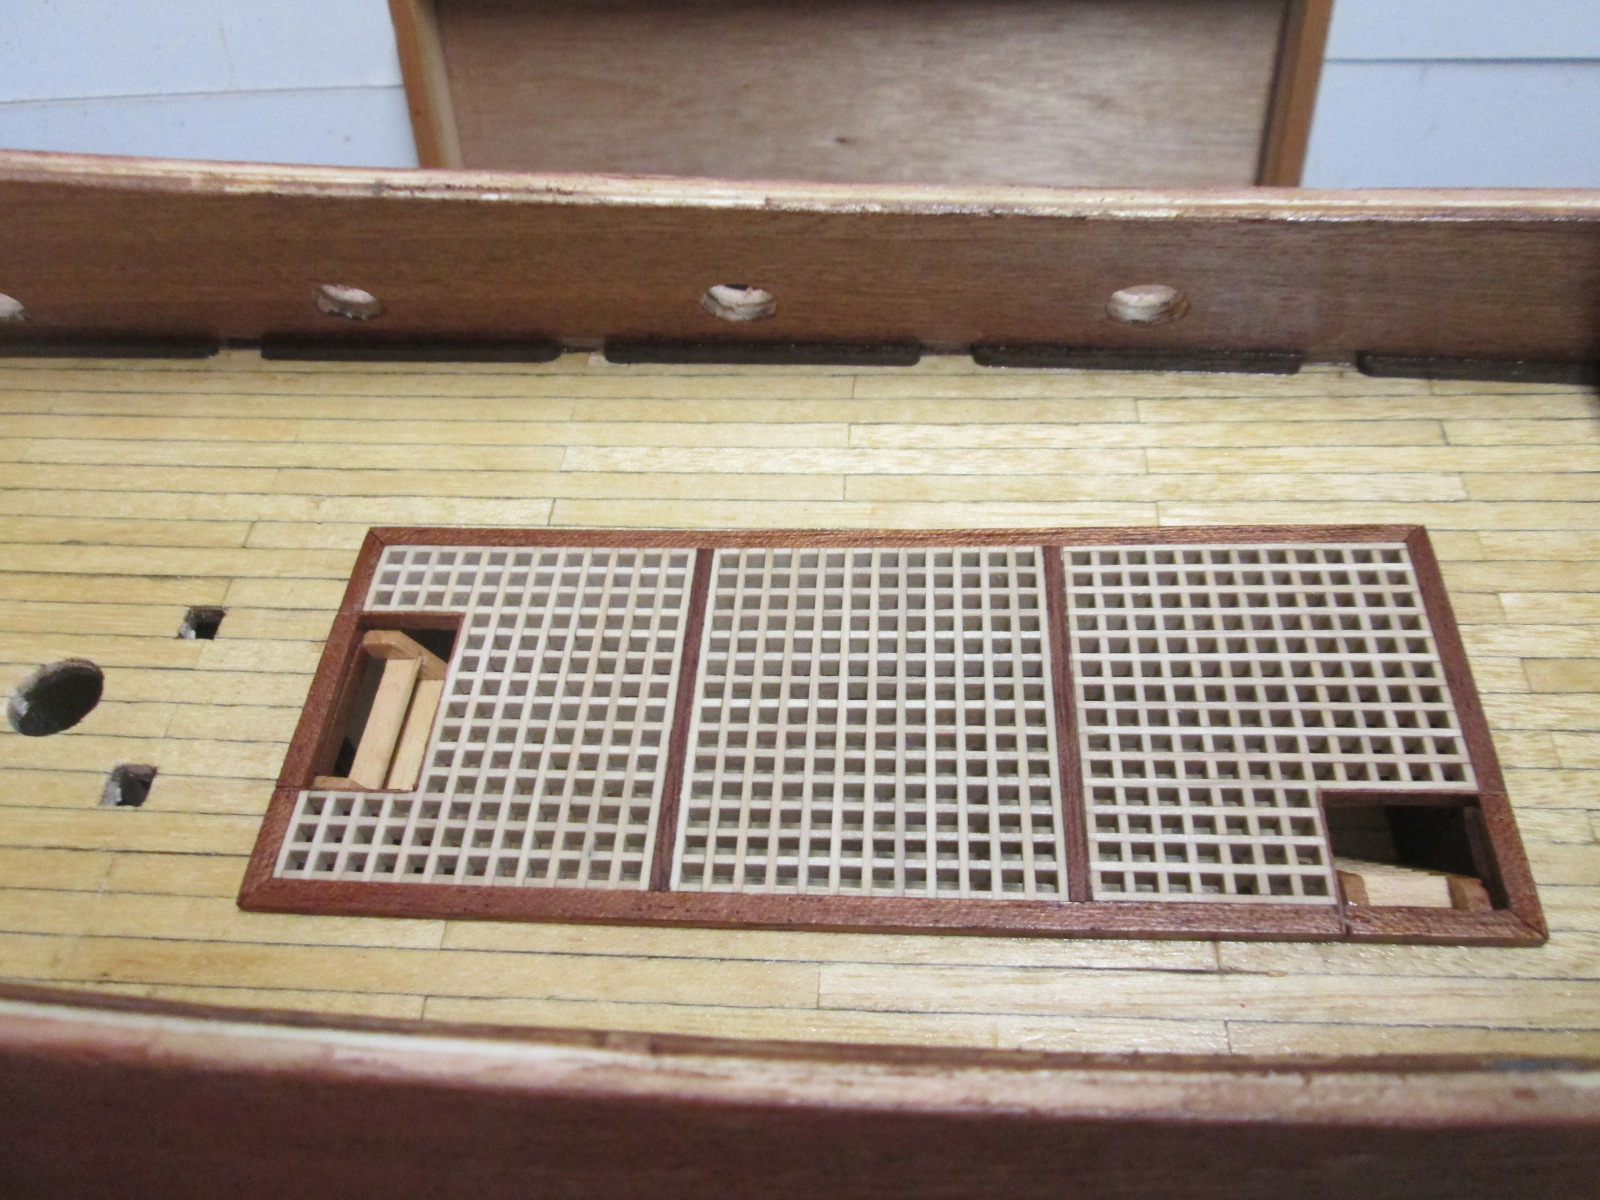
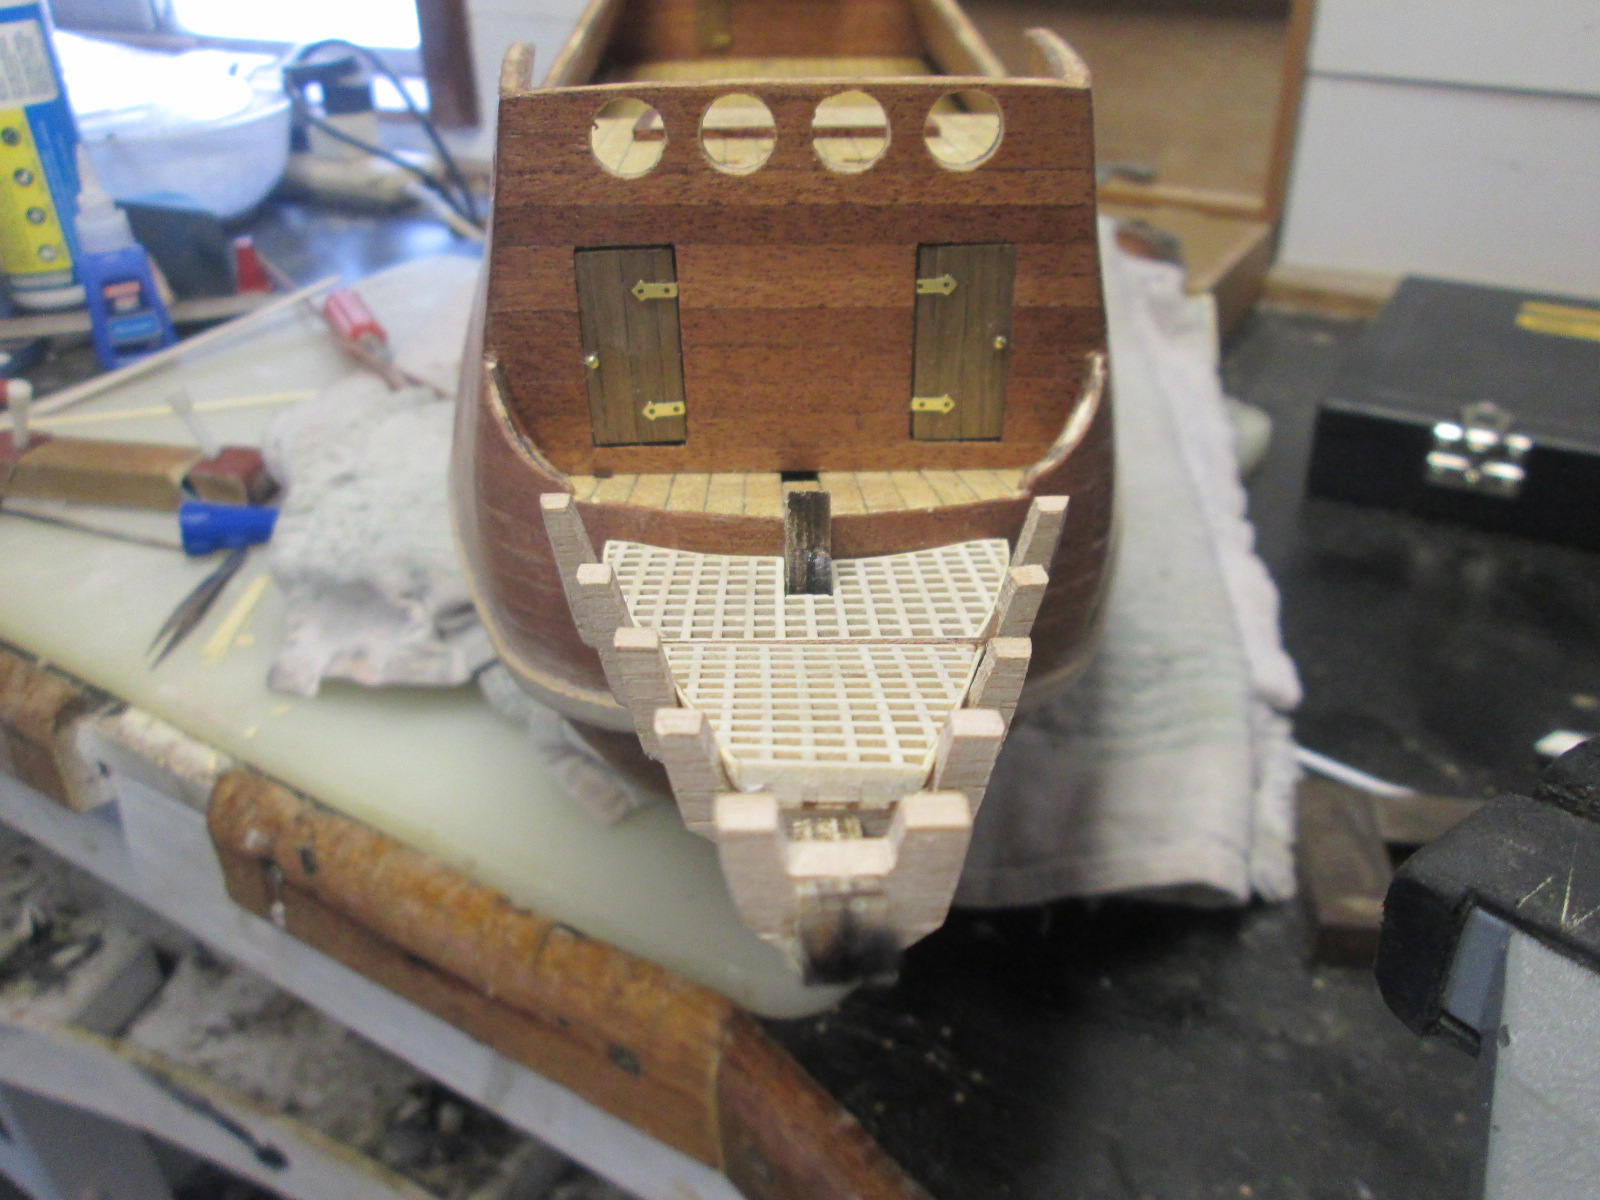
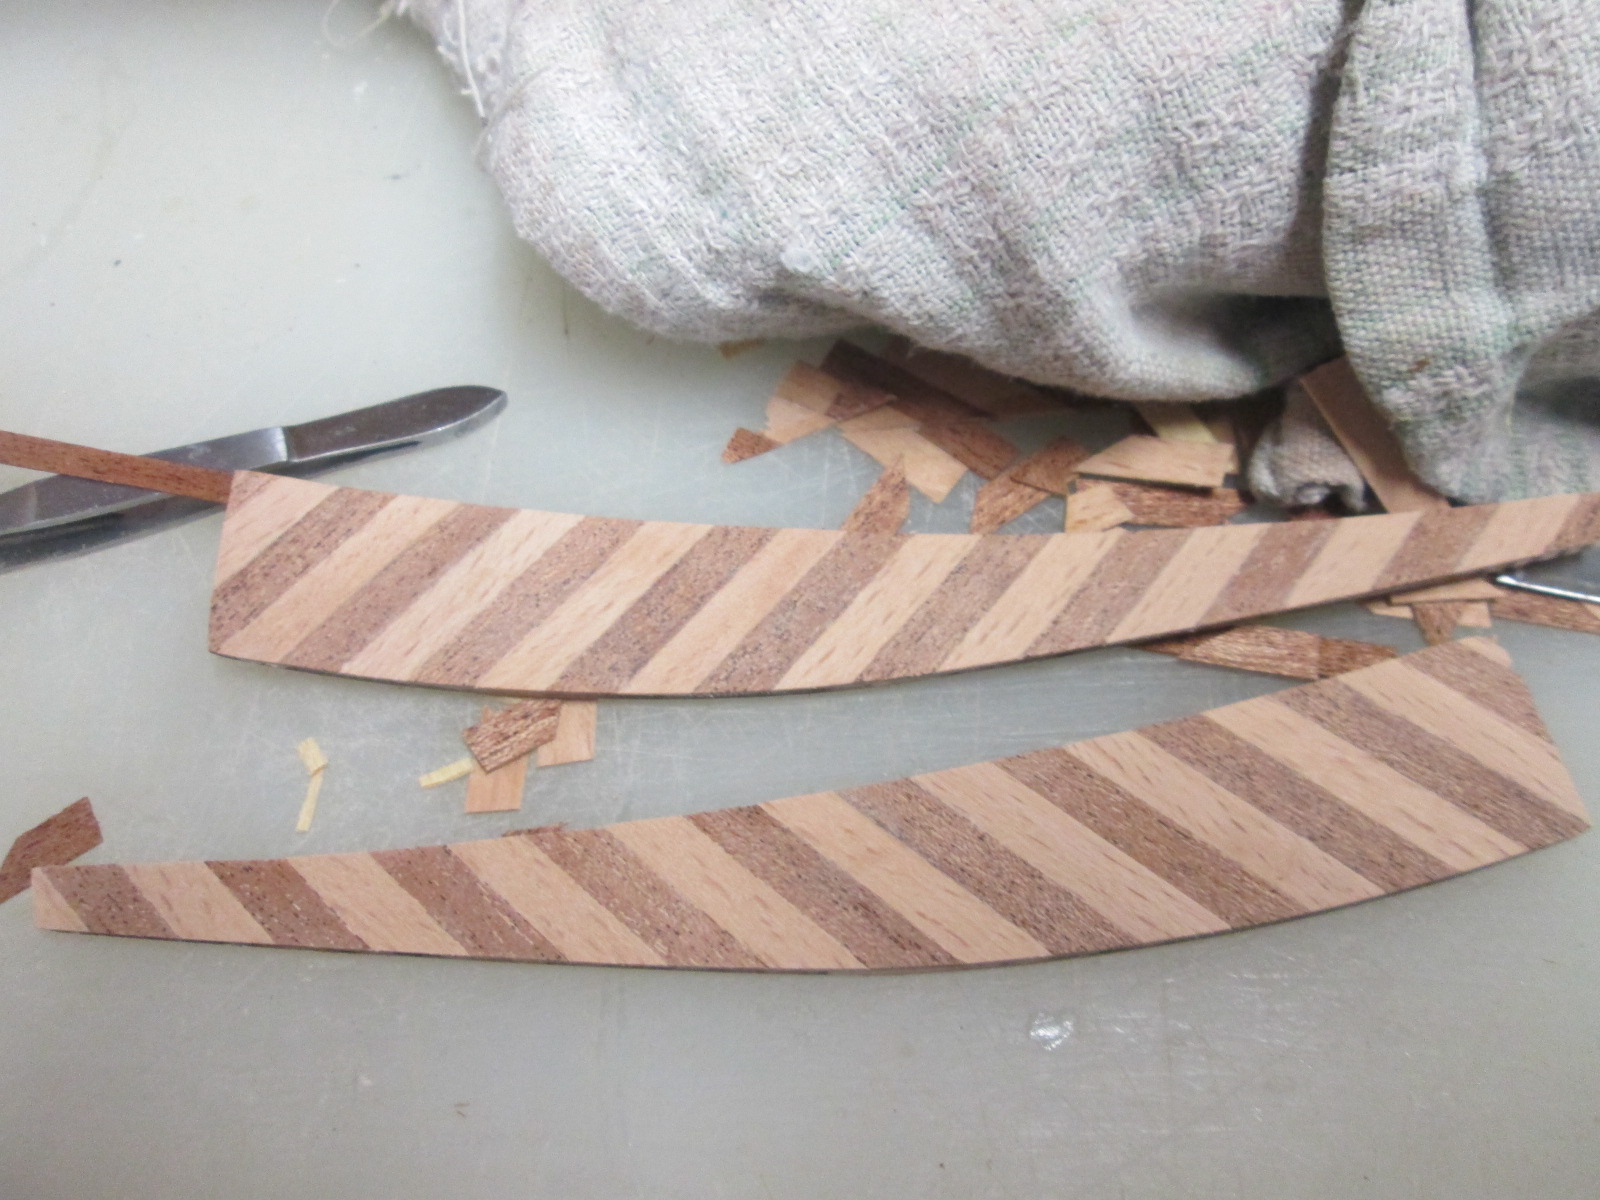
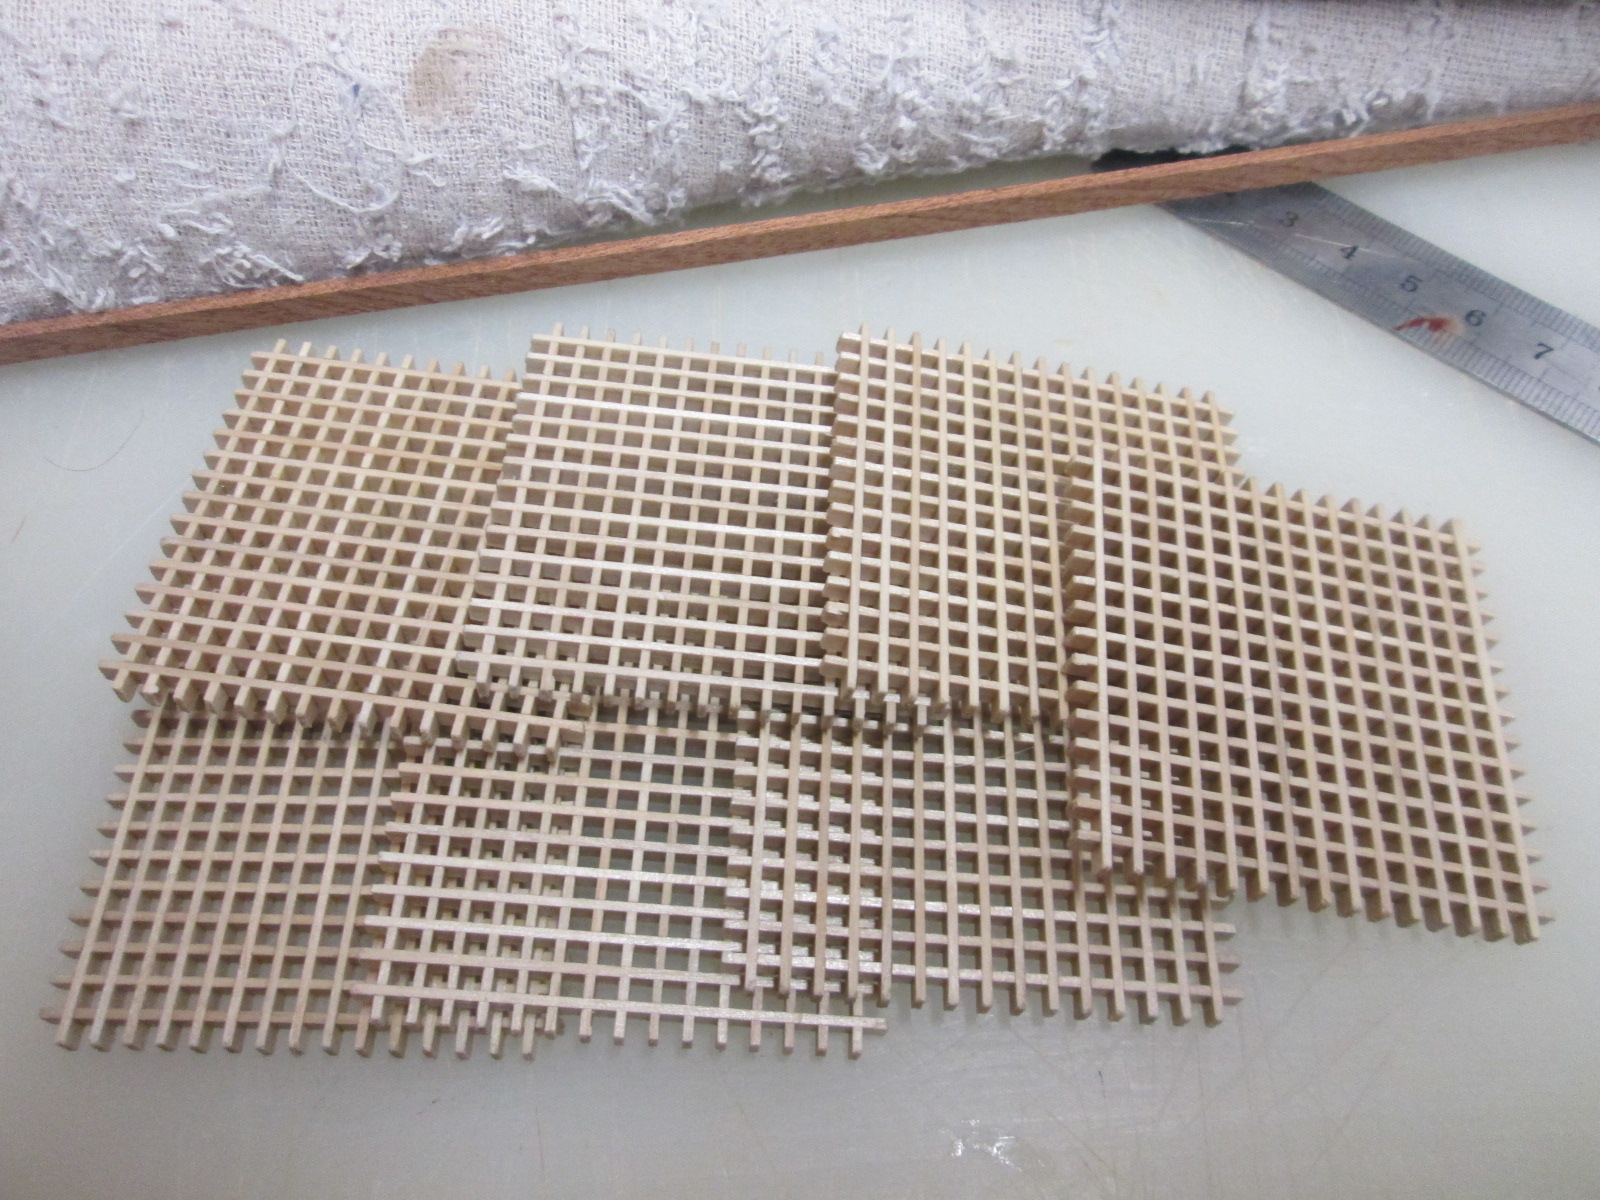
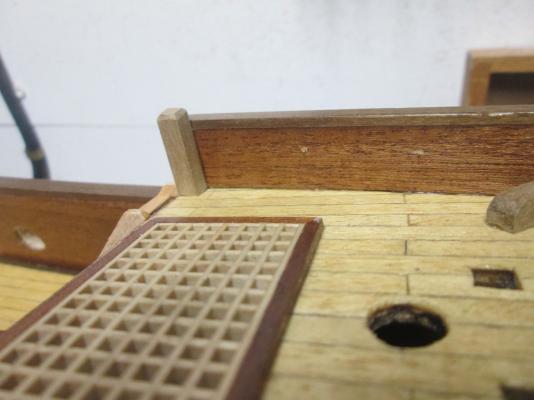
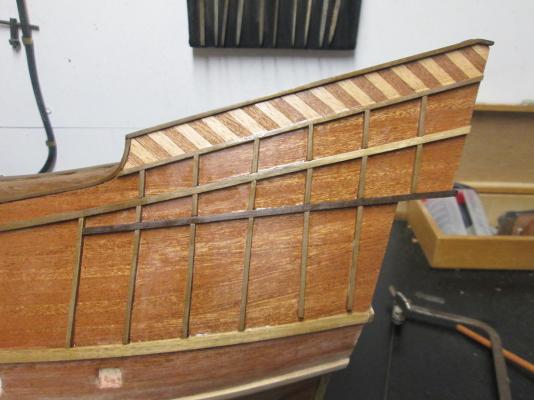
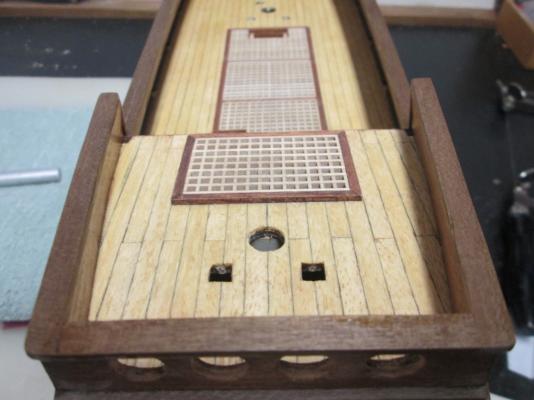
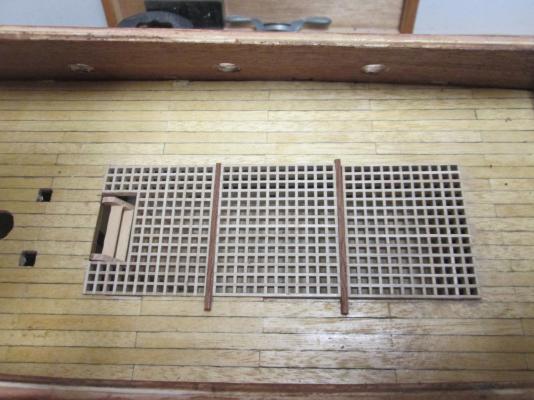
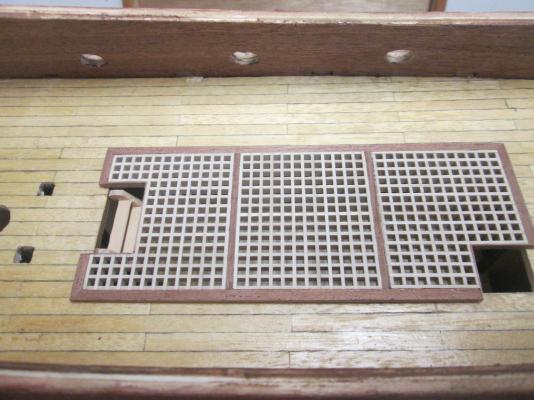
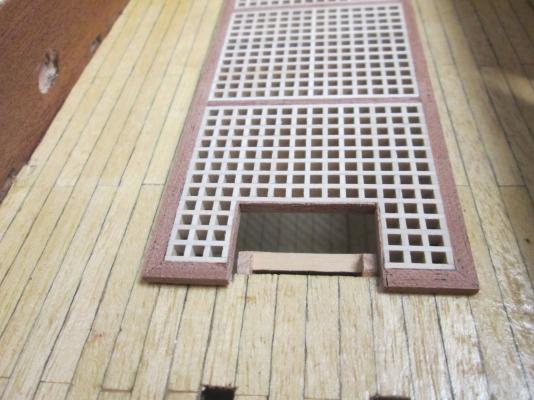
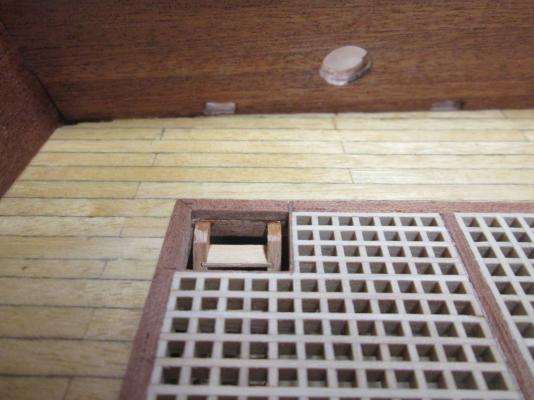
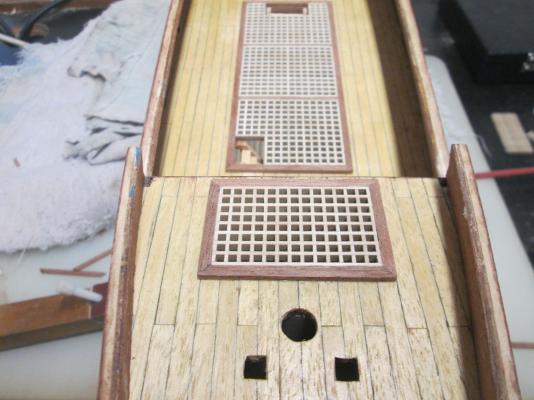
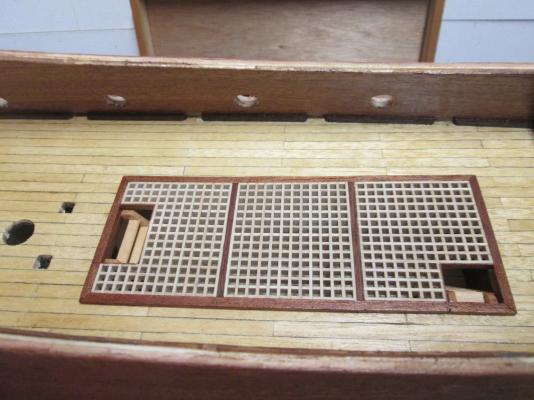
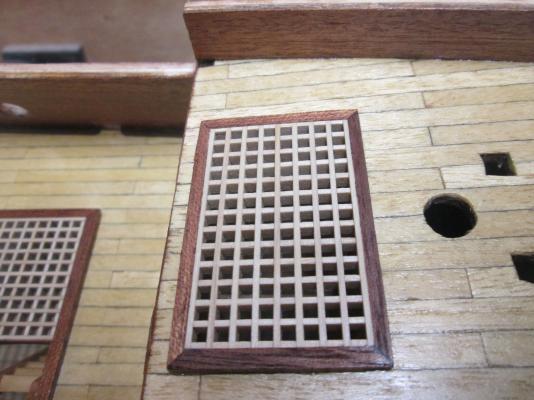
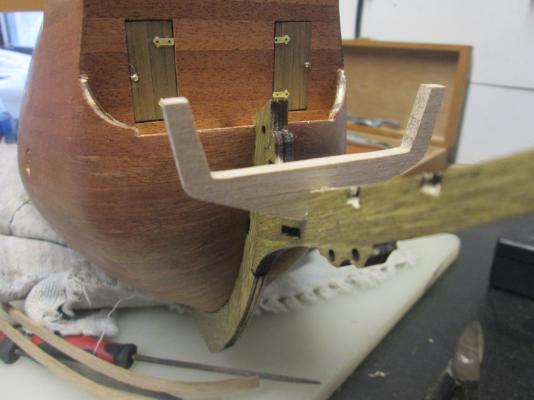
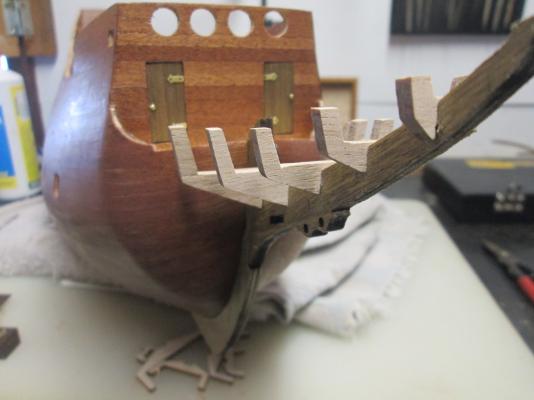
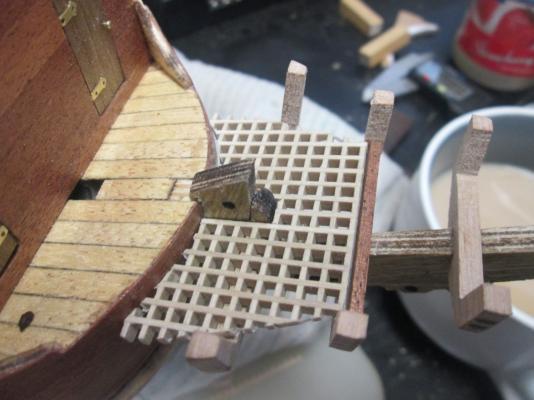
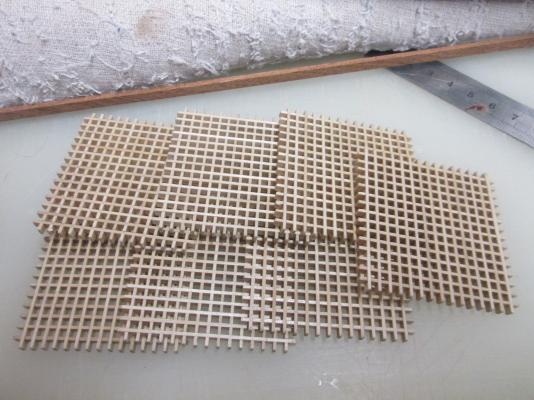
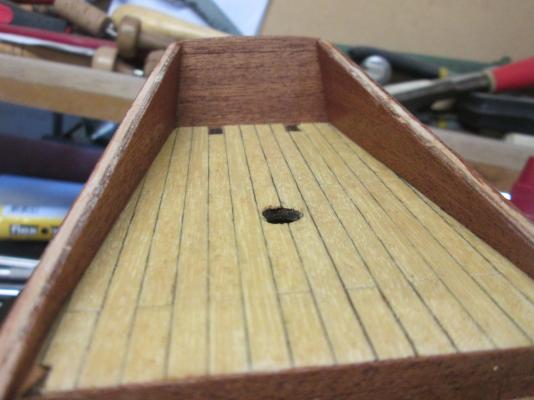
Time to do the grates on the decks, and the bow section. The main deck pre cut hole was a little bit small to fit 3 sections of grating of equal size, so I cut a small section from the deck to fit. According to the plans, it doesn't interfere with anything. The result was ok I think. The other two grates were less complicated, just rectangle, and the holes in the deck didn't need changing, just a little filing. The bow section was a pain. The plywood frames I didn't like so I replaced them with wood ones. Then the plans let me down as there's no real indication of what line they should be placed in, so as to fit the side rail. Basically I just lined it up by eye and only had to change one frame position. That done I did the grates. Not a brilliant job, but I'll tidy it up with a bit of 2 mm by 1 mm walnut or something. Then it was on to planking the side rails that have sections of planking on an angle. I used some tanganika and mahogany so I can save some of the ramin planks to stain for the keel. I've also added the lower gunwale and the 2 mm by 2 mm walnut that goes in between the scuppers. Thats it for now Matt


-
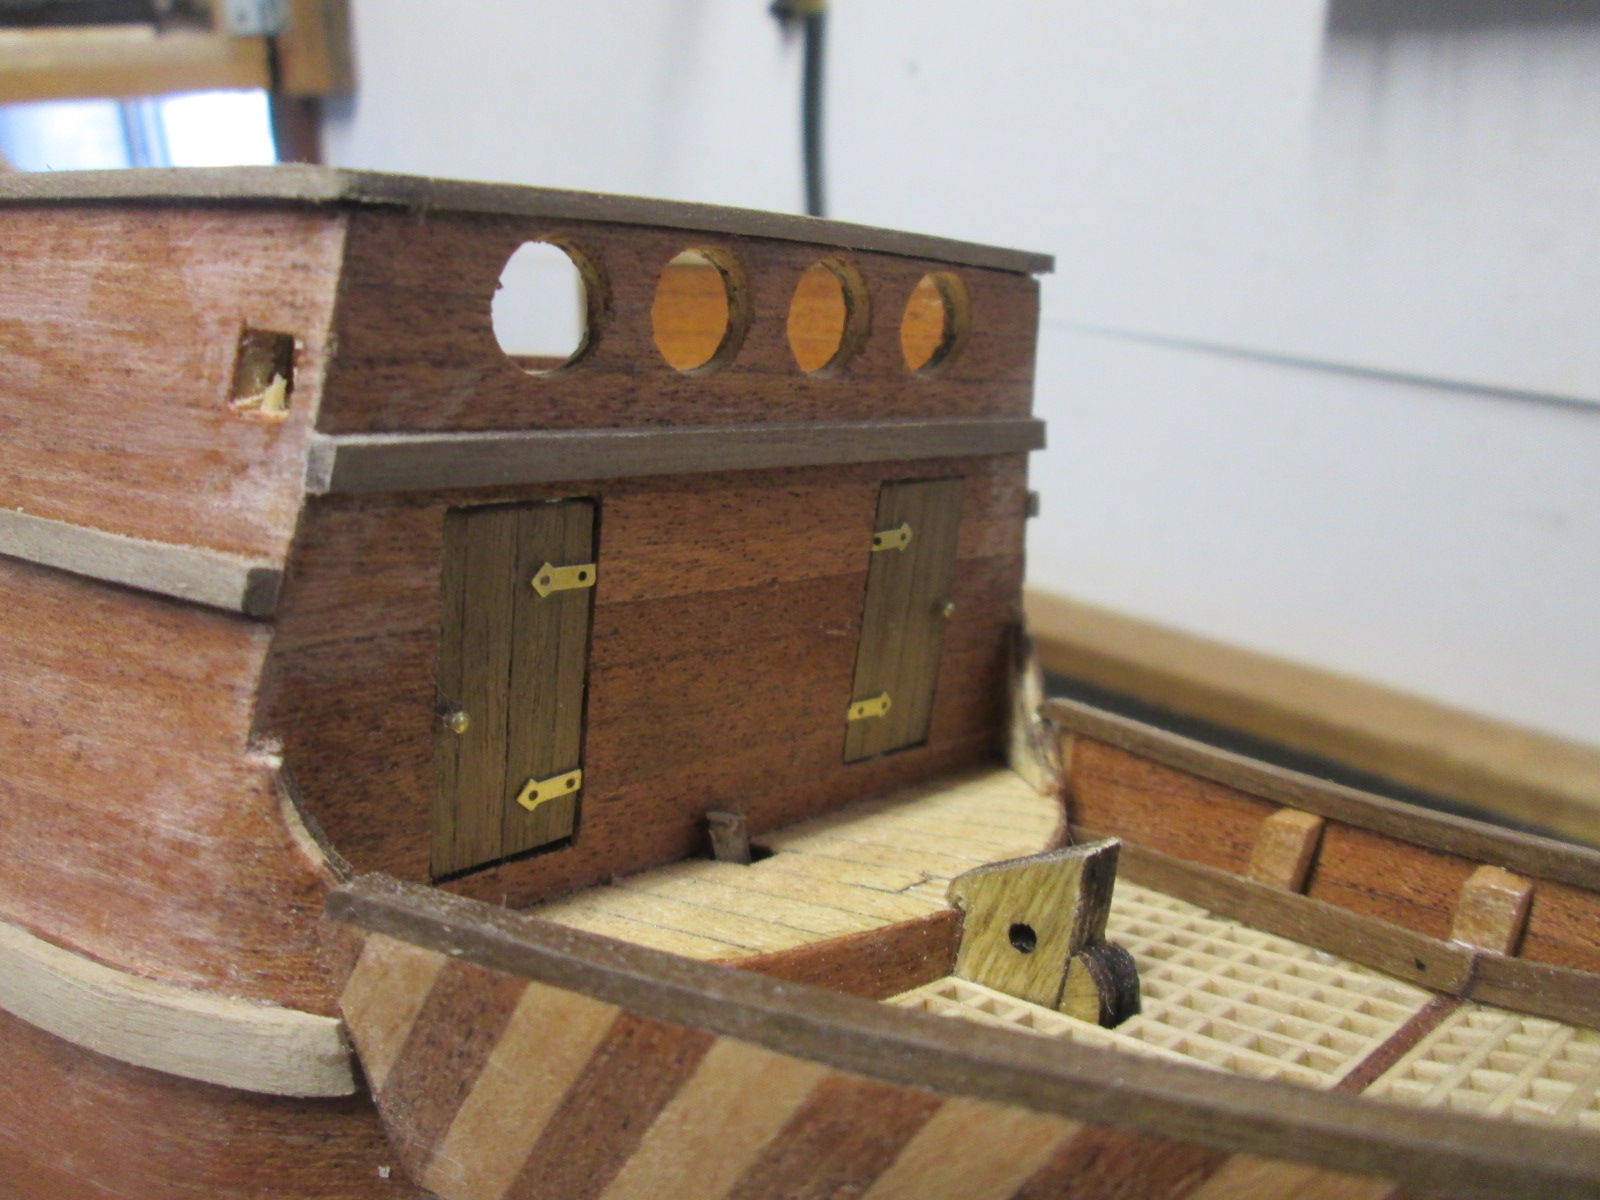
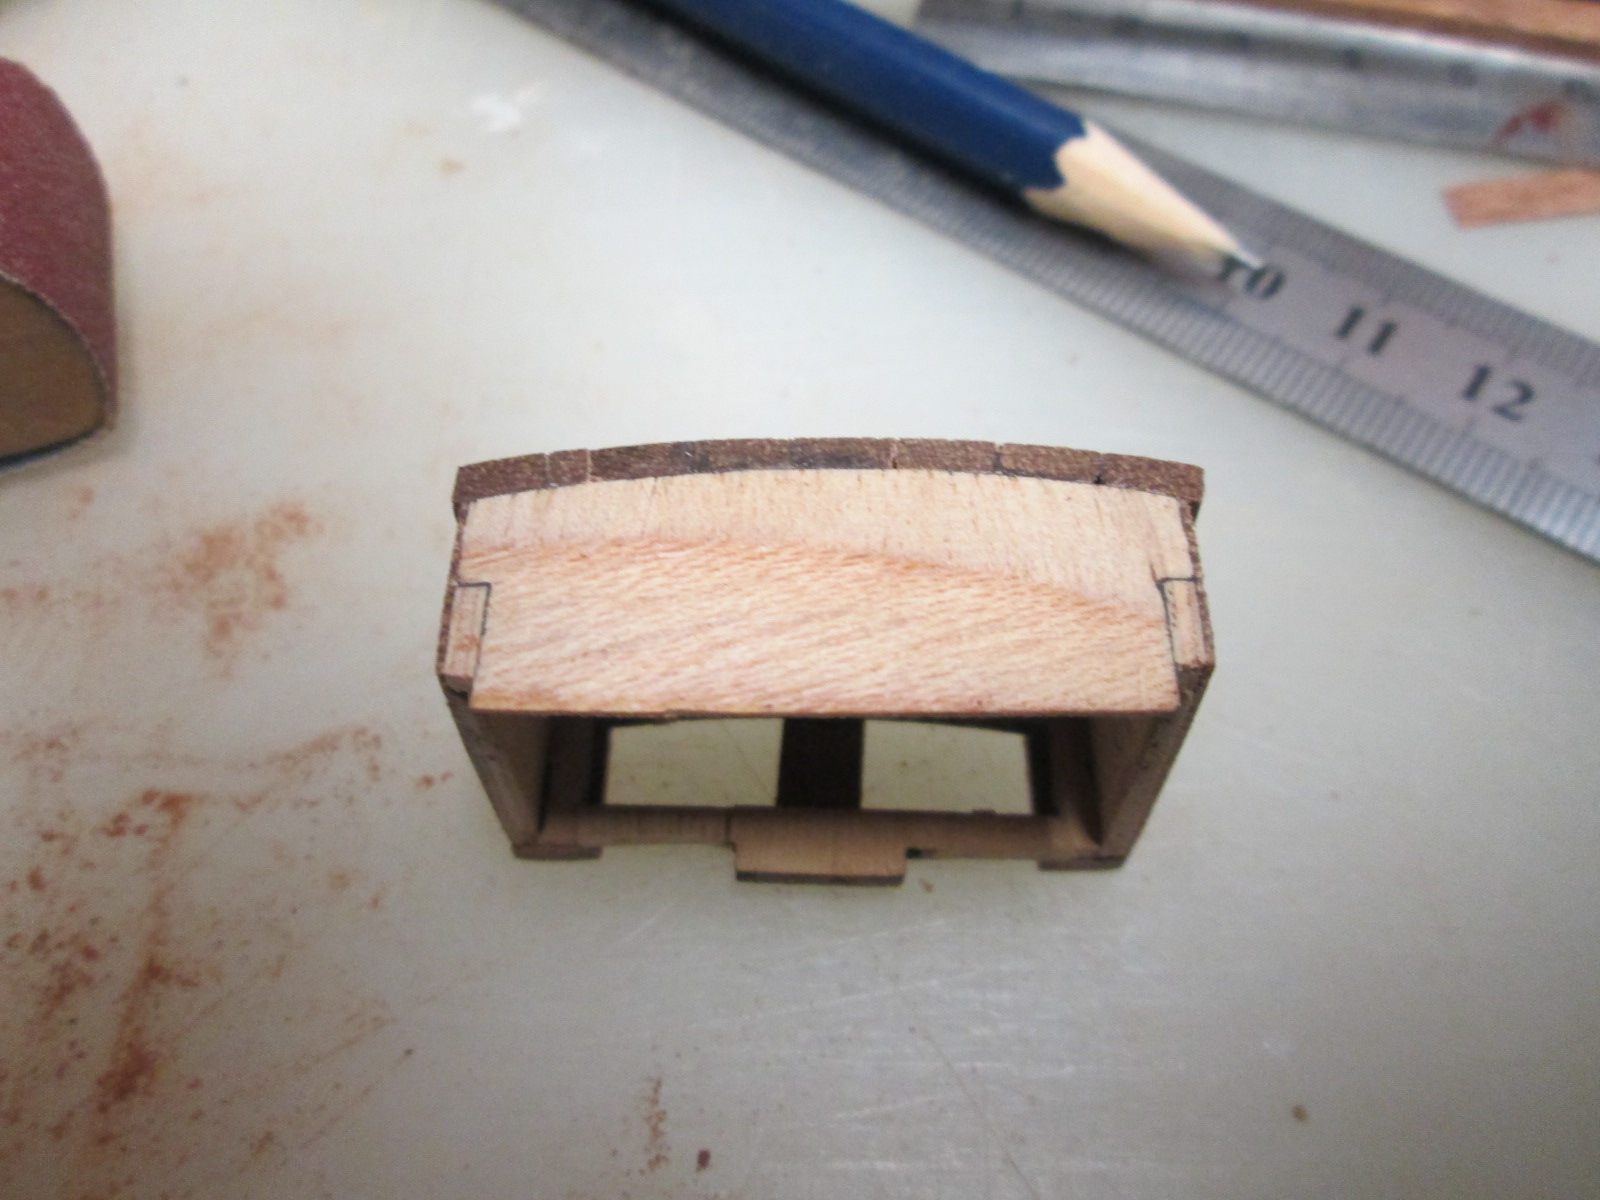
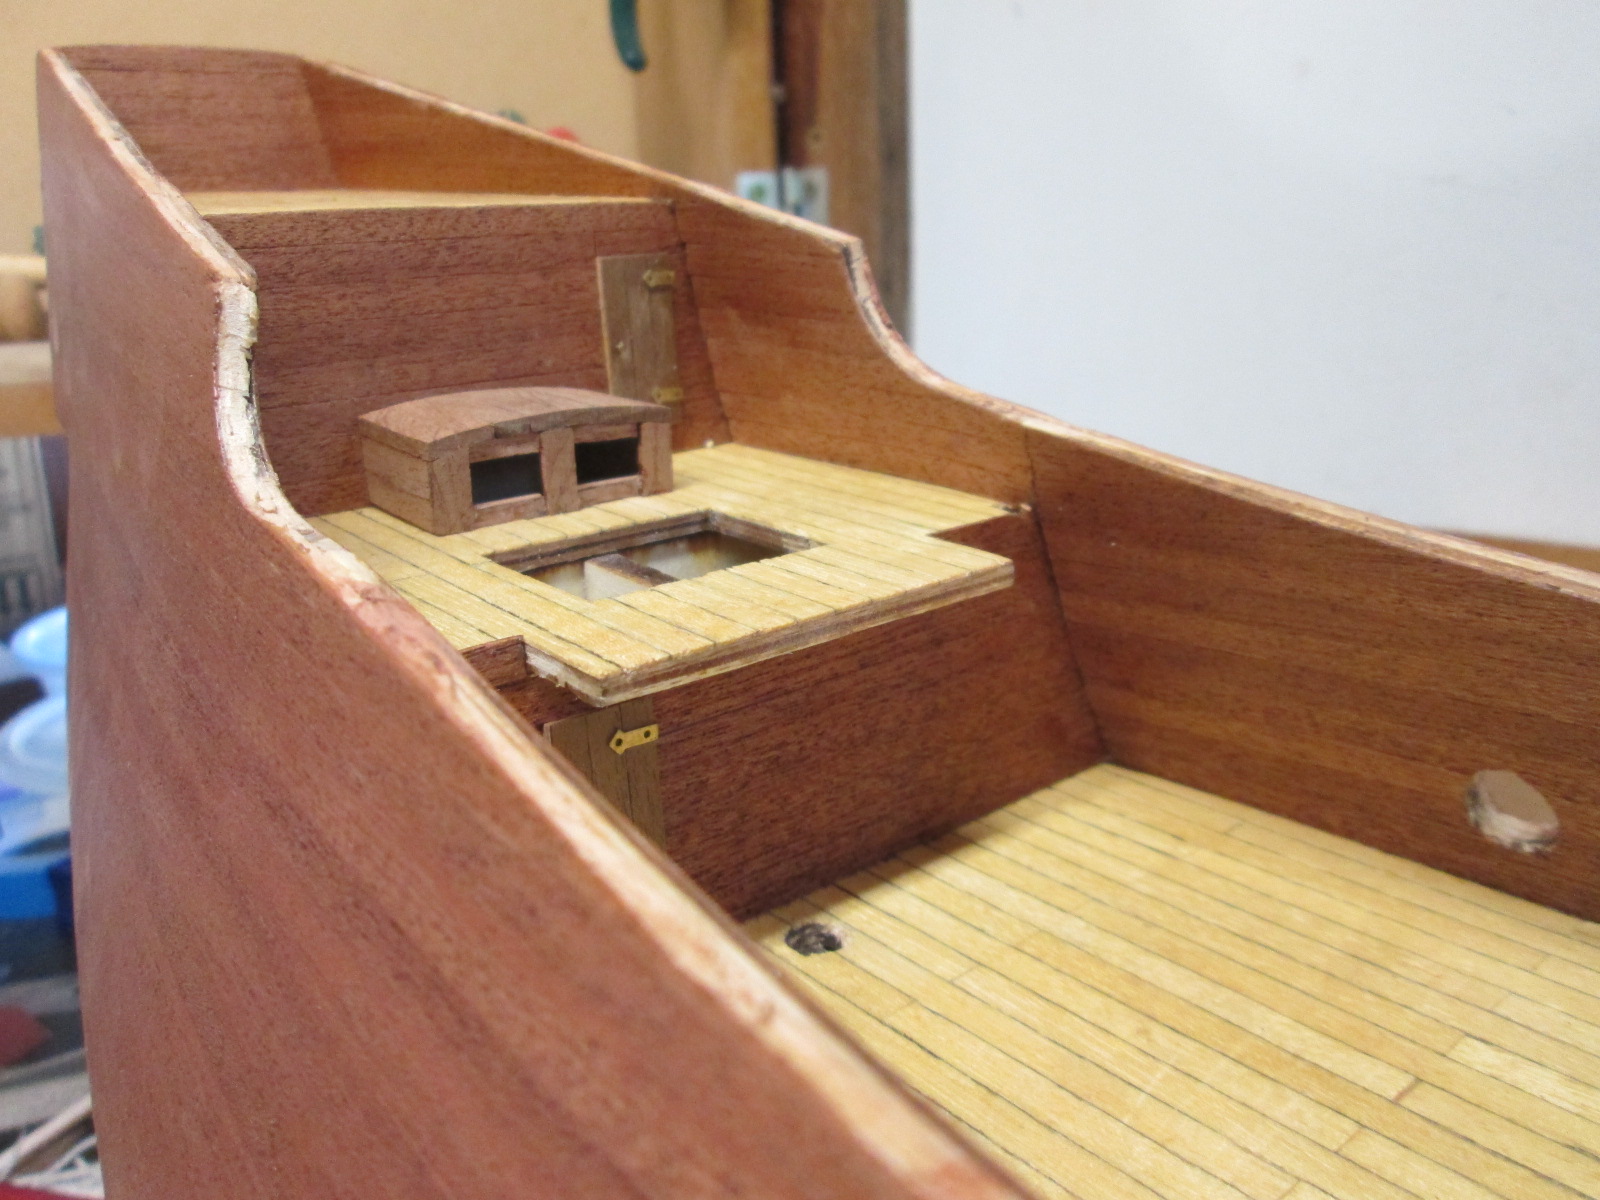
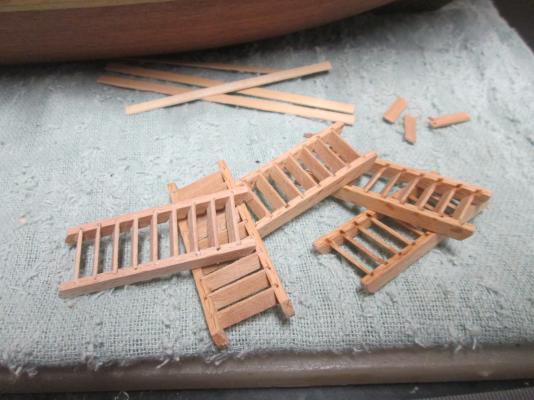
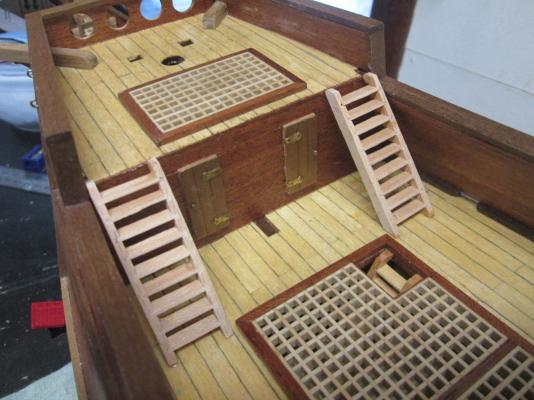
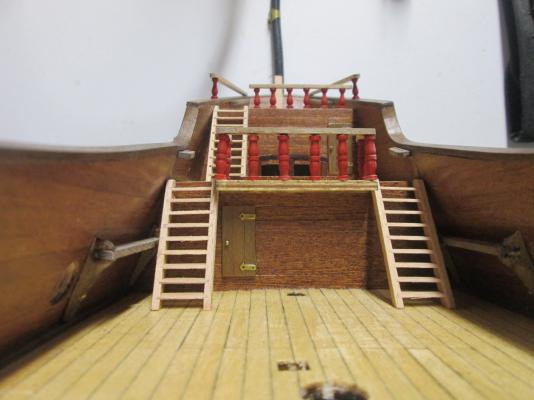
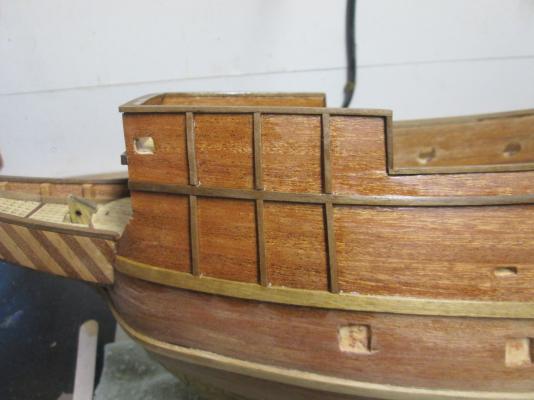
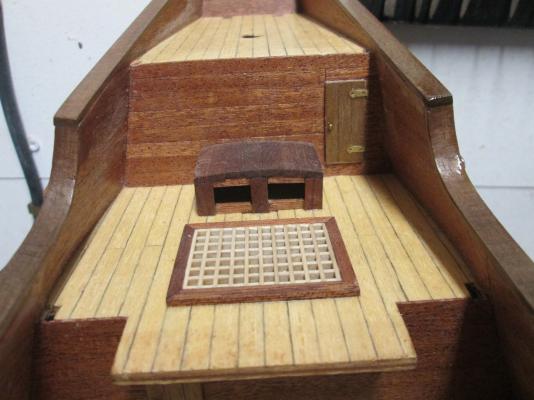
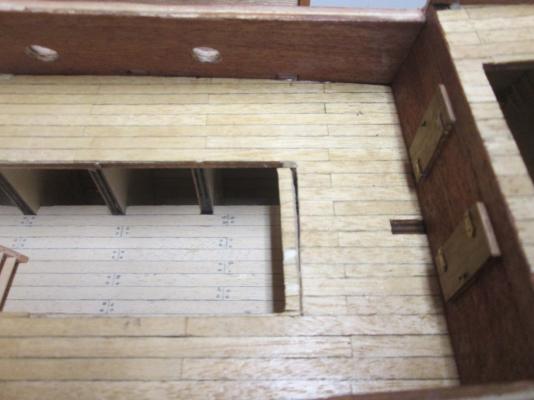
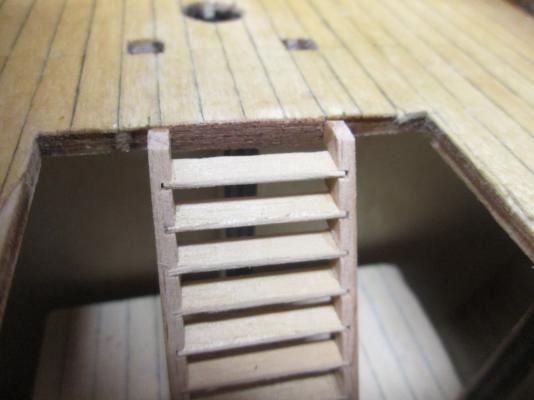
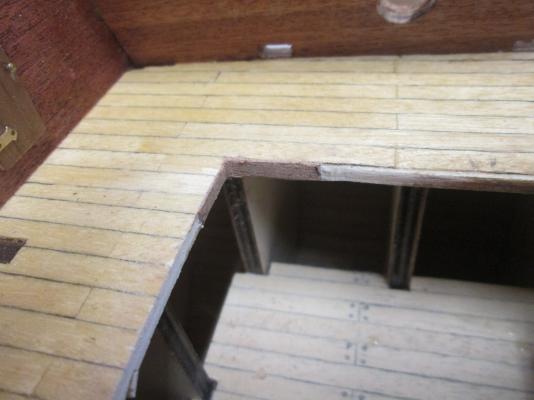
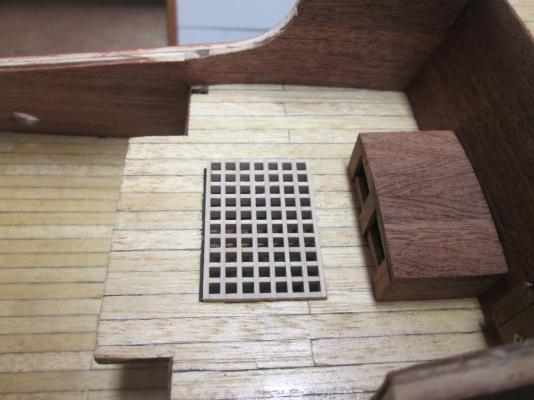
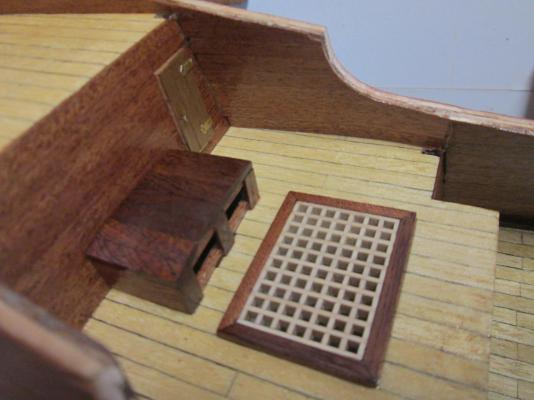
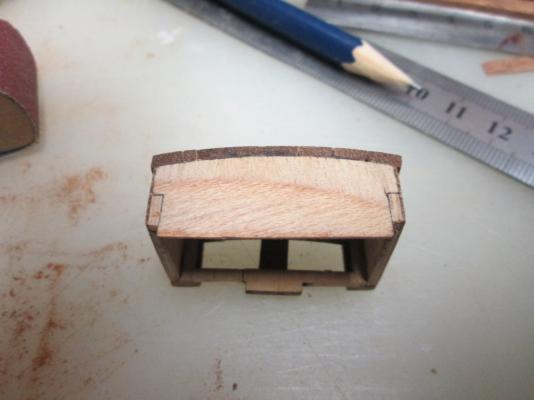
Thanks Jan, I haven't seen this Ship anywhere either. Maybe I have the only one in Australia. I took extra care this time cleaning up glue while i was planking. Today I did the bow deck doors, the ladders that go below the main deck, glued the grates and put together the wheelhouse. With the grates I just soaked them in half water half pva glue for an hour and left them to dry. the ladders are pretty straightforward. The wheelhouse needs to be sanded on an angle so that it fits flush to the bulkhead, otherwise you will leave a gap. The plans say use 5mm by 2mm mahogany for the roof, which seems like overkill to me. The roof will need it's parts beveled to follow the curve. I think I got it mostly tidy Matt.


- 64 replies
-
- 2
-
-
- occre
- san marcos
- (and 1 more)
-
Looks very good. I would definitely go with it. Nice planking there too. Are you thinking of doing a full model of the Victory? Even the bow section looks like a tricky build.
-
Thanks for the input it's much appreciated. The deck plank sounds like the way to go. Maybe a light stain on them that i try to match at the hardware shop.I'm wishing i ordered a 5 mm board when I bought the kit.
-
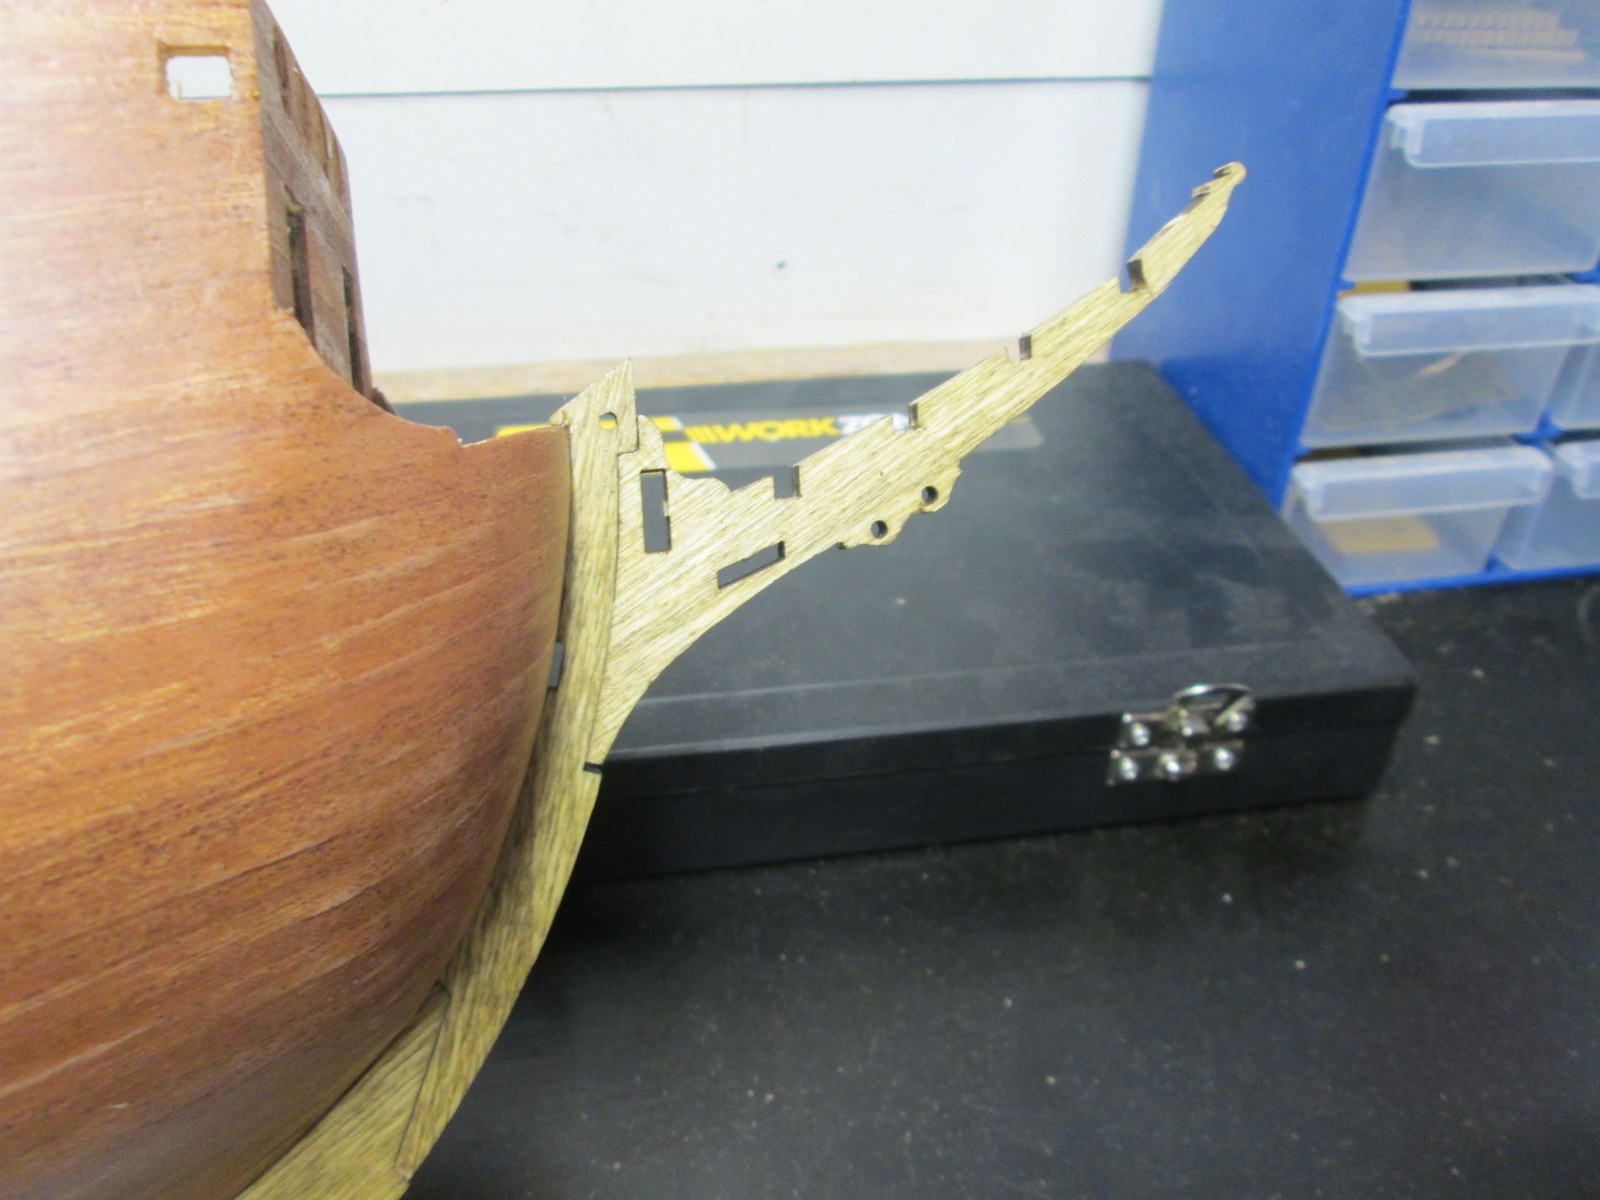
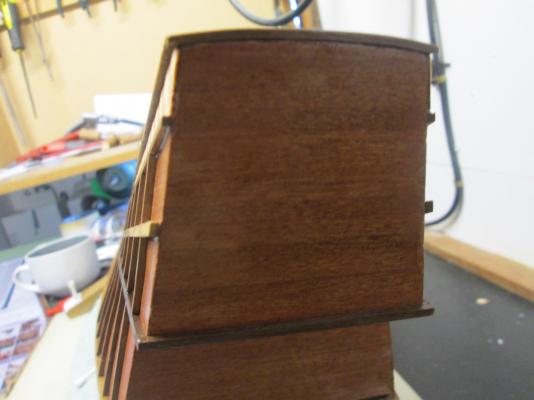
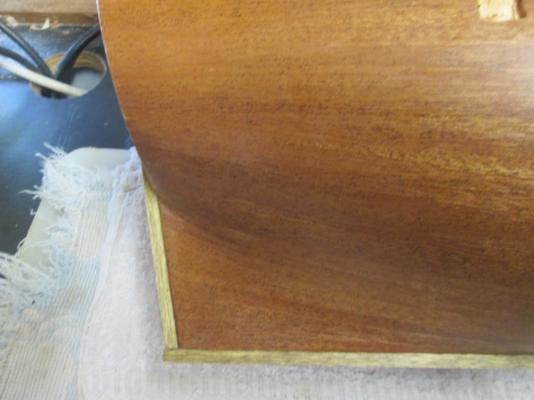
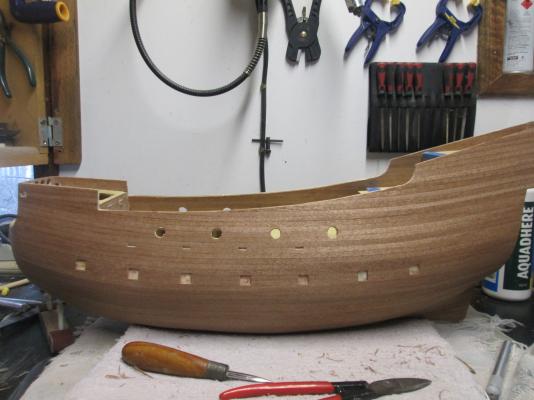
Just a short post today. The next step in the plans was to put on the keel, which are plywood. I'm not sure how i'm going to cover the edge yet so that there is no exposed ply, but i'll think of something. The color of the ply has been stained or something, and I'm not sure if I can match it with anything. I then gave the inside bulwarks and the other planked parts a sand and a coat of varnish to help stop this damn mahogany from breaking off, as you only have to catch a tiny bit and a big chunk will break off.The stem has a small problem as there is a gap left after fitting. There's not much you can do as it's laser cut, so I'm just going to put a small patch in the 2 mm gap that's left.The end of the stem is very easy to break off so be careful. How do I know?, I know because I did. It's ply, and so where it narrows to about 2 mm on the end of the stem it's a weak spot, and having a boat with a big nose hanging off it, you are therefore bound to knock it like I did. Matt


- 64 replies
-
- 3
-
-
- occre
- san marcos
- (and 1 more)
-
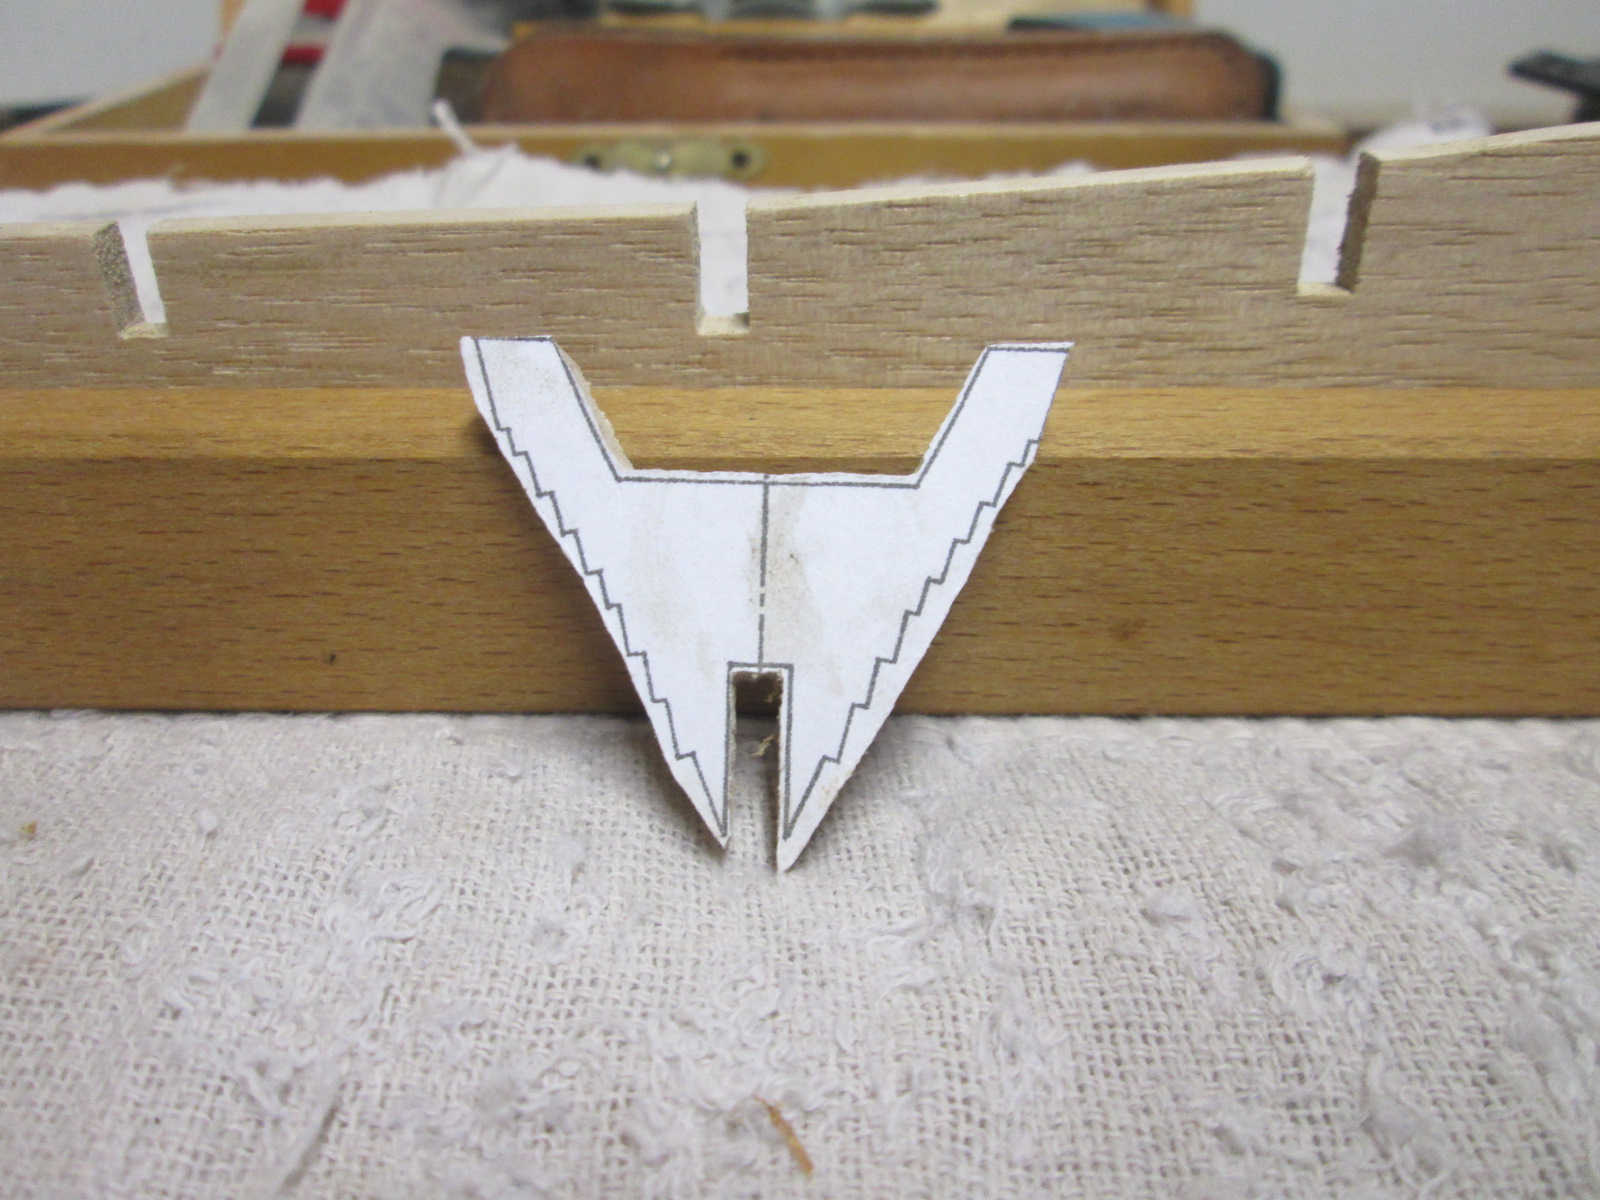
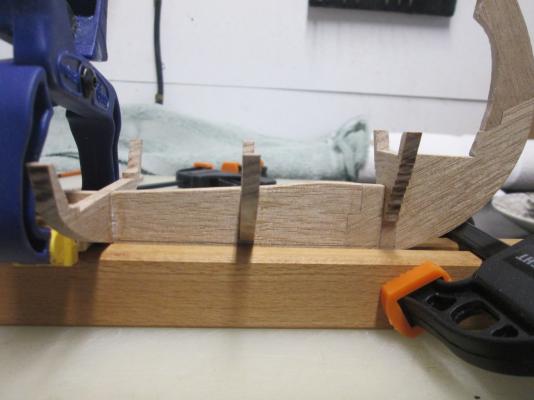
I'm enjoying this so far. I've managed to get the keel and the first bulkhead cut and fitted. I;m not gluing anything in yet, as I've found a couple of spots that need trimming on the keel. I did cut the next bulkhead but broke it while filing it down.


-
G'day Sjors, I'm not sure I did give the sizes, anyway they're 810mm long 650 high and 300 wide. Thanks for your kind words ans for dropping in
- 64 replies
-
- 1
-
-
- occre
- san marcos
- (and 1 more)
-
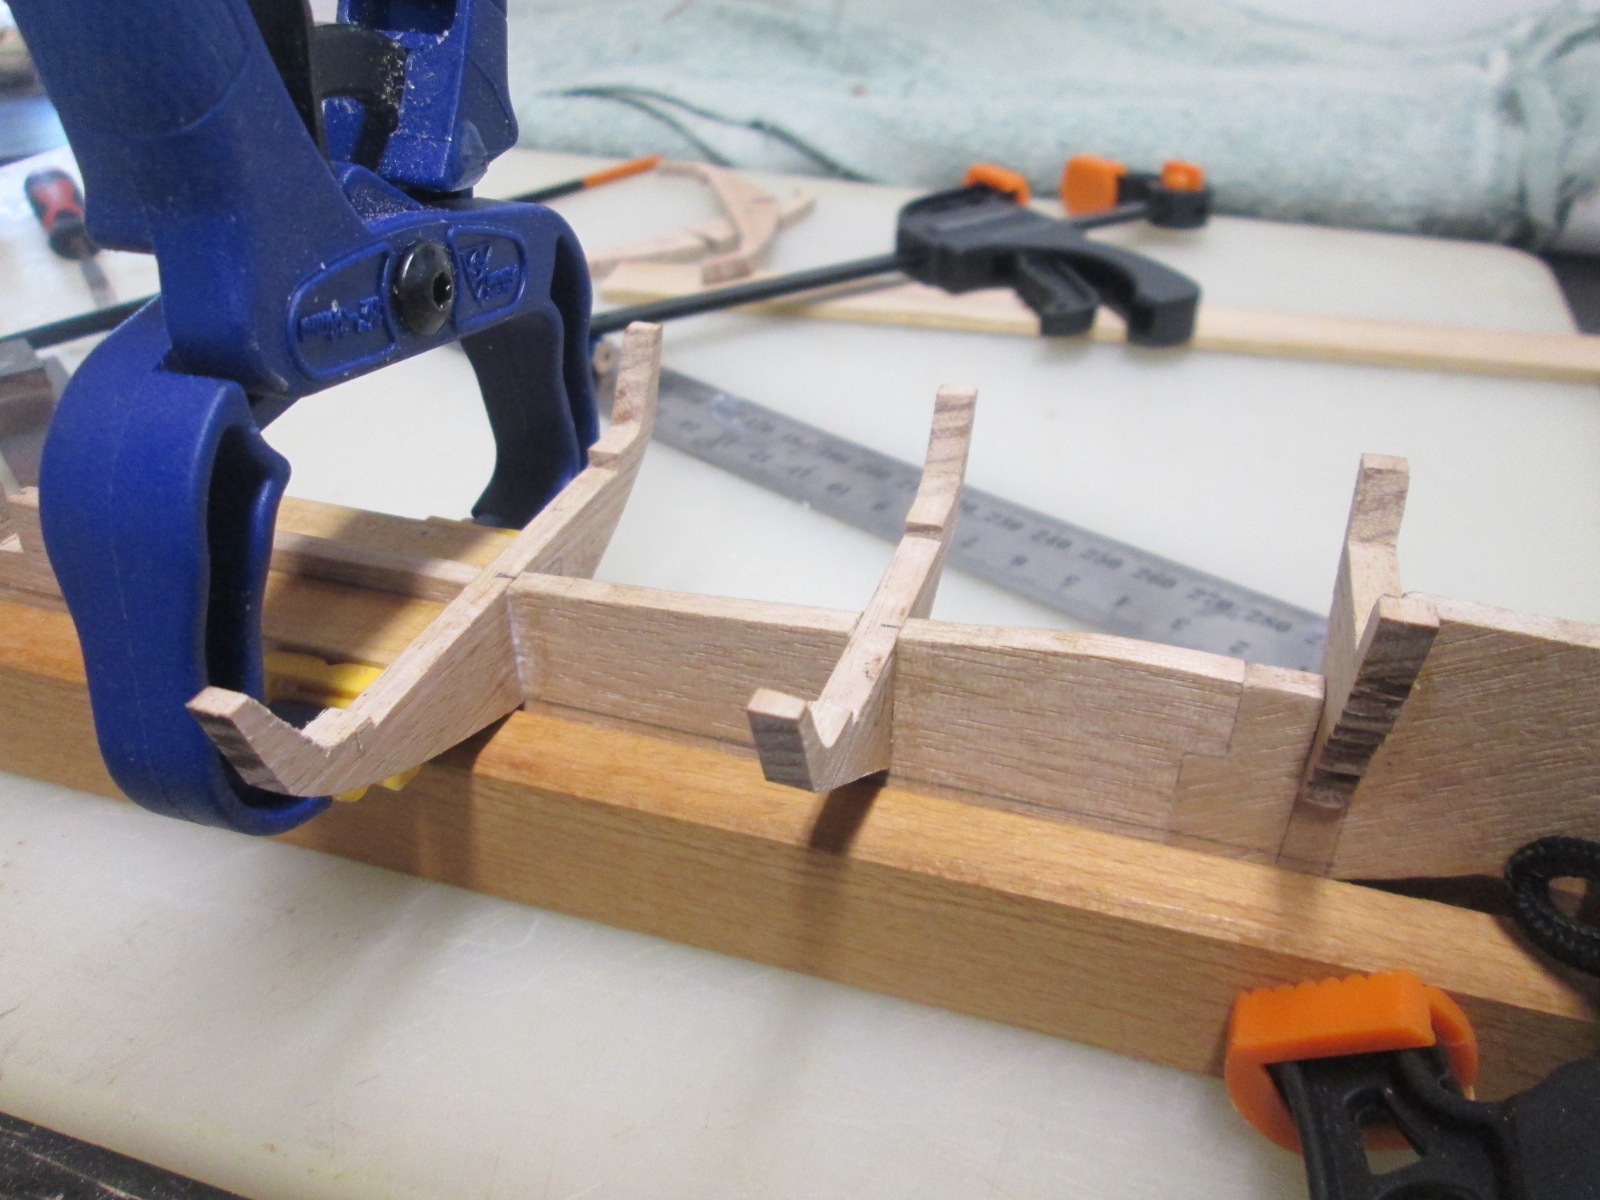
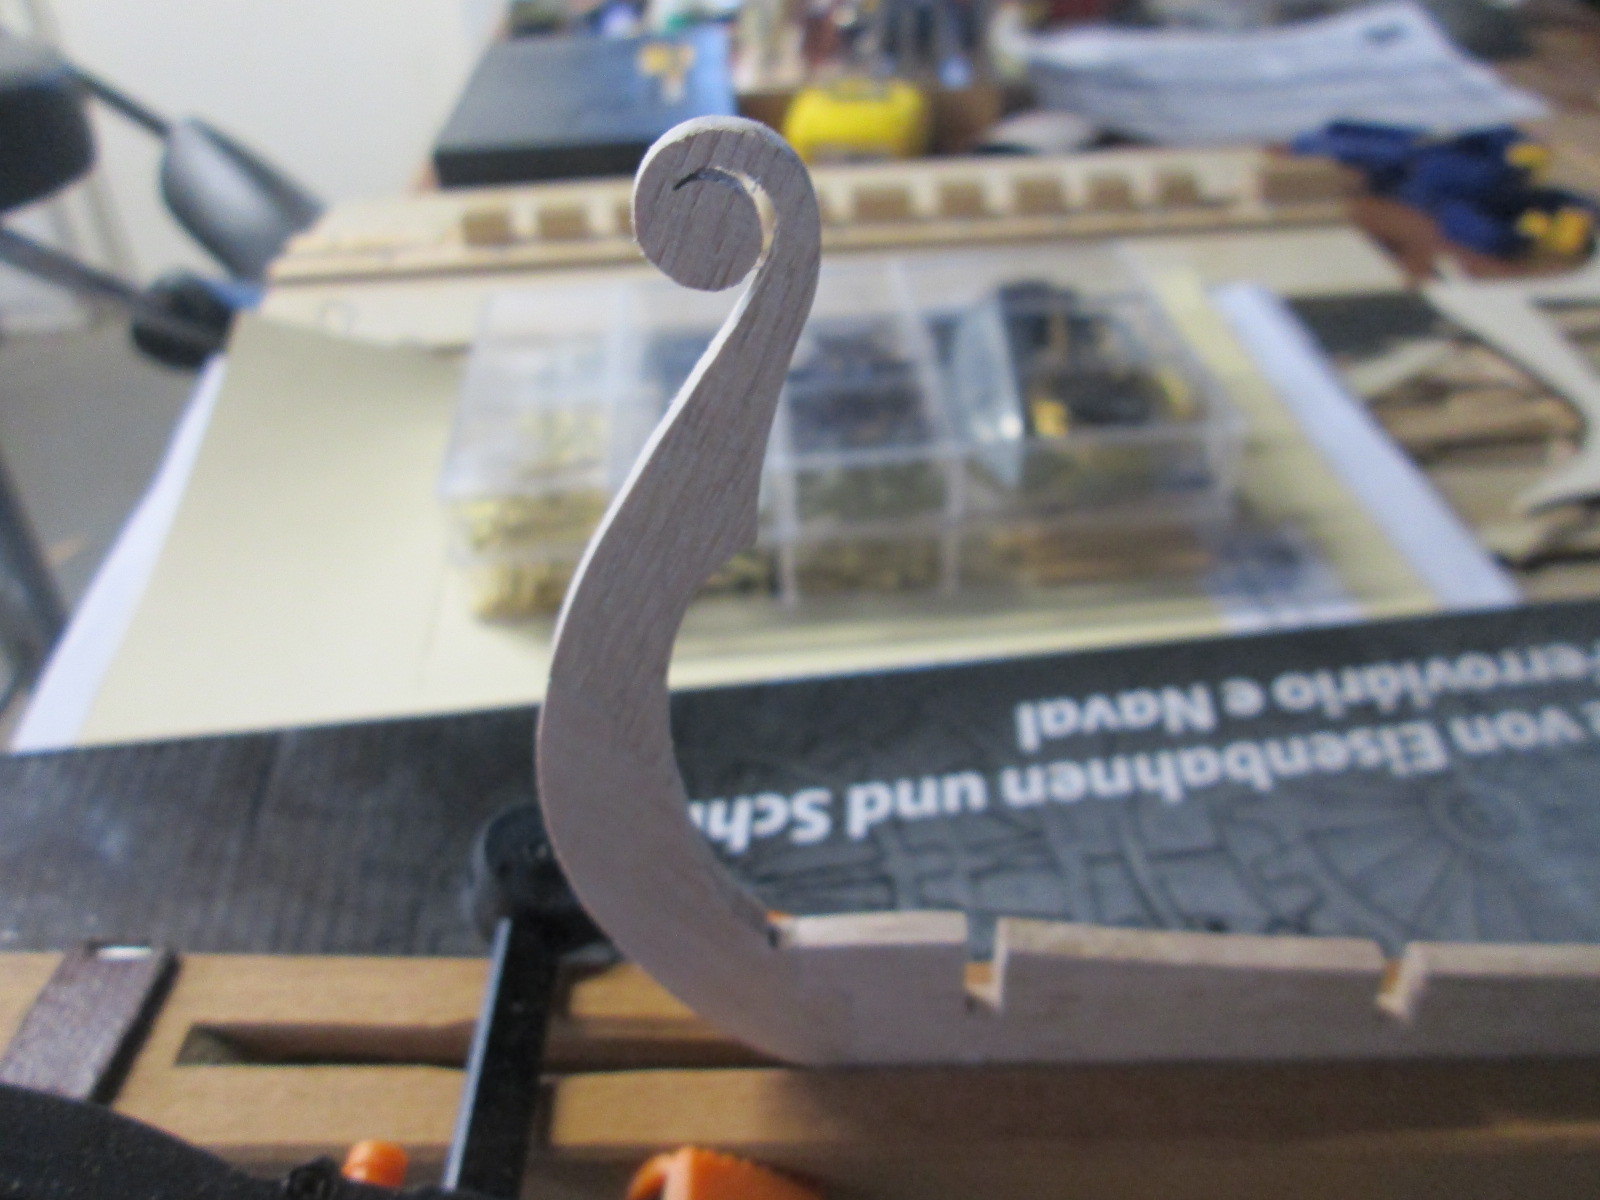
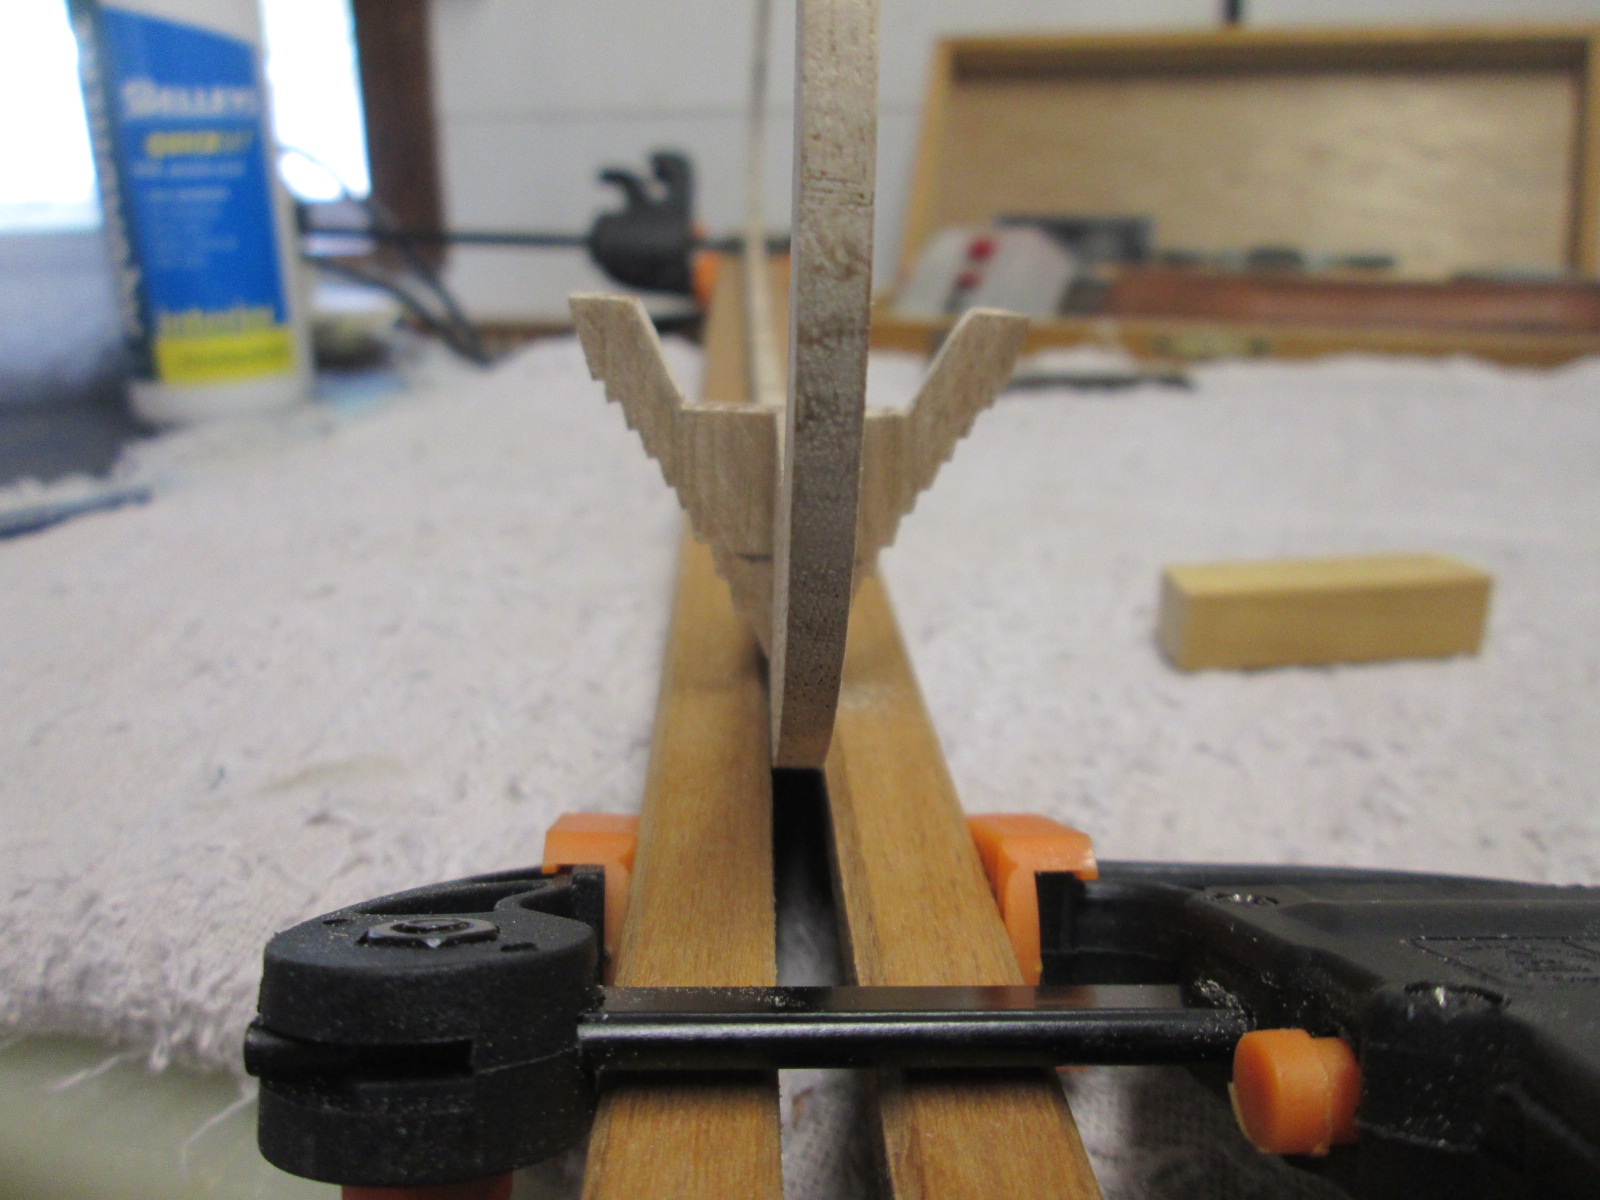
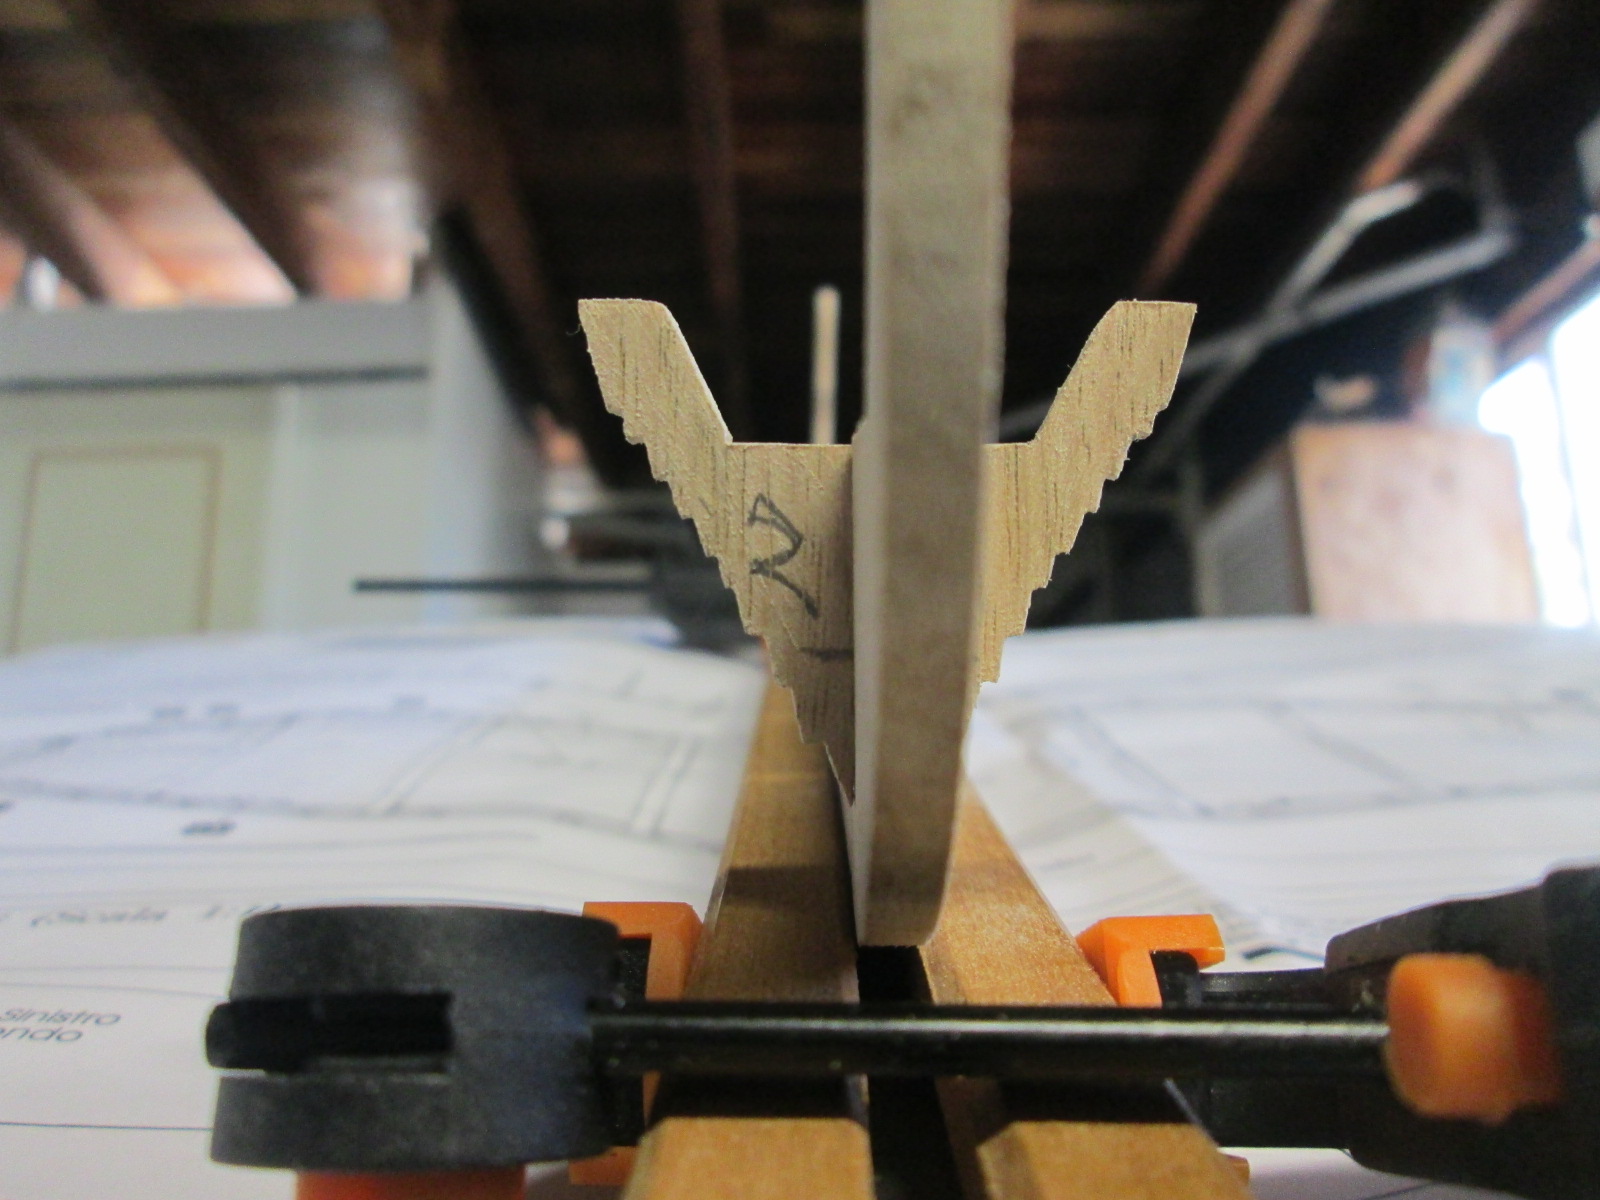
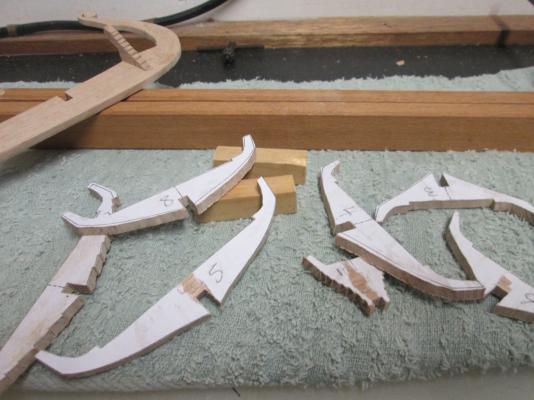
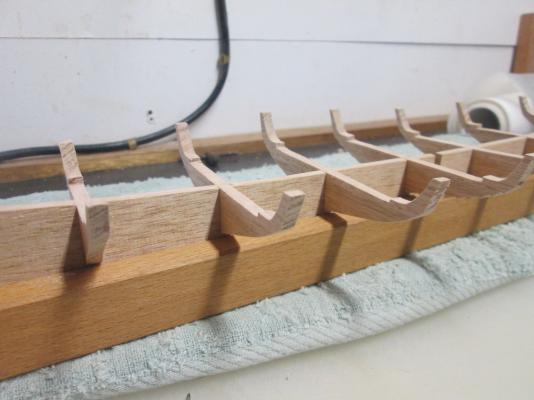
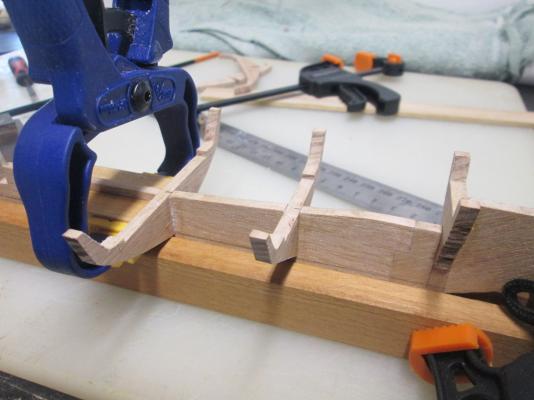
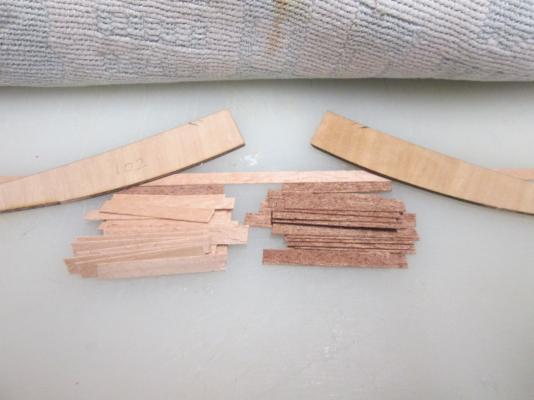
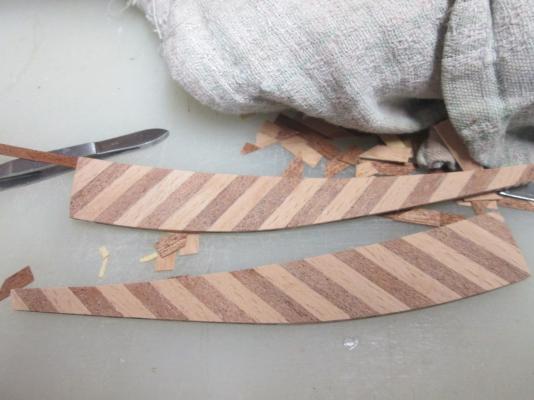
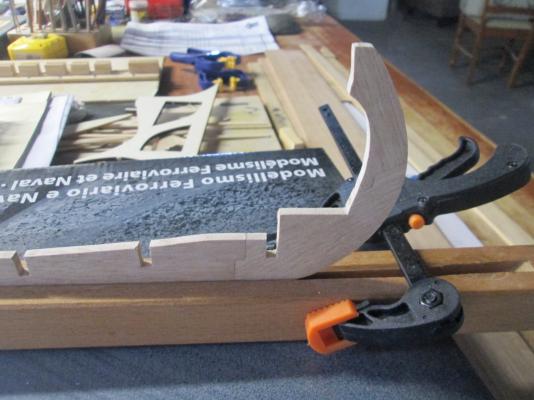
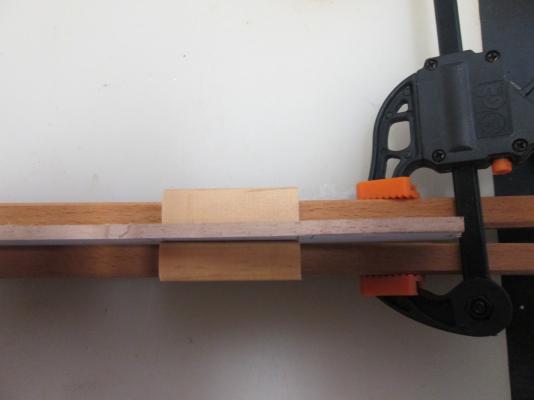
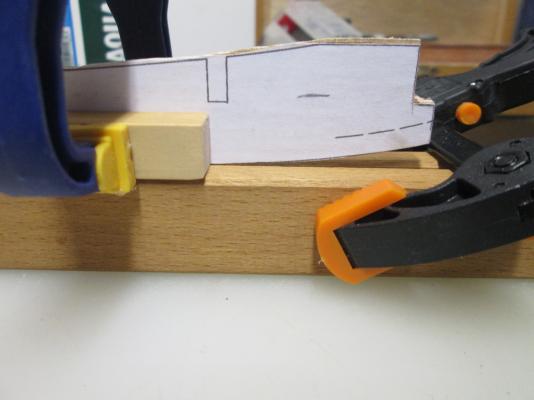
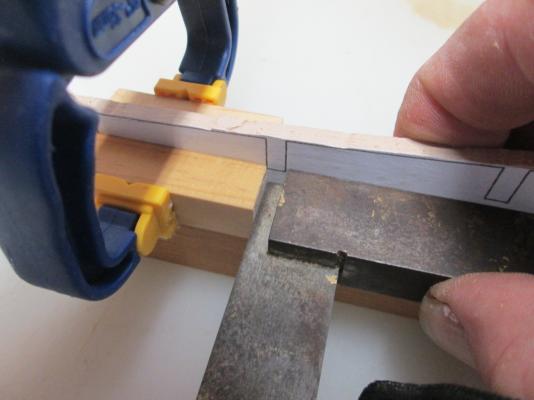
Thanks for dropping in Everybody. I'll definitely check that video out when i get a spare moment. I've decided to go with the keel in 5 pieces. The longer main part that holds the bulkheads in one piece, and the curves at the bow and stern in two pieces each. As far as I've been able to research, this is the way they were. I'm hoping this will give a more realistic look.Even though this is not a complicated build, making this look more like the real deal will still be quite tricky. I've managed a very basic start. I.ve dismantled my wifes painting easel, to make use of one of the legs to clamp the keel. She can have it back later in one piece as I better not cut it into pieces. I only needed a simple squaring jig for putting in the bulkheads, and then I'll transfer it to a keel clamp for planking. I should now be able to glue them in one at a time nice and square. I'll see how it goes, but I'll finish the keel first.
-
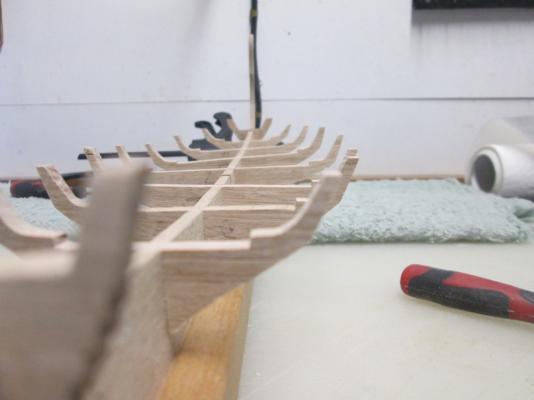
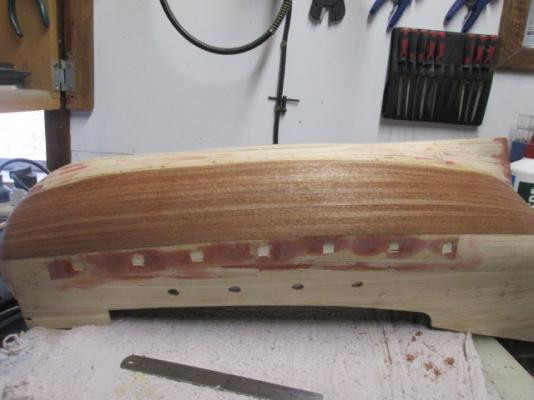
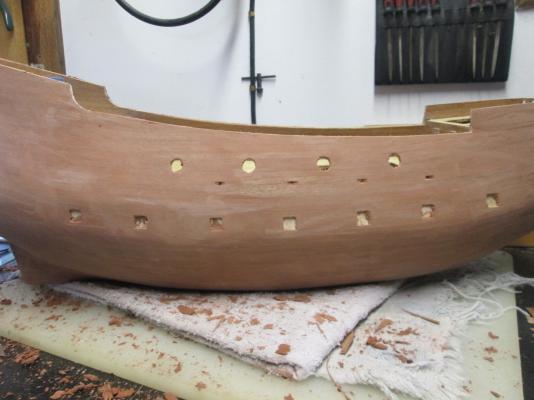
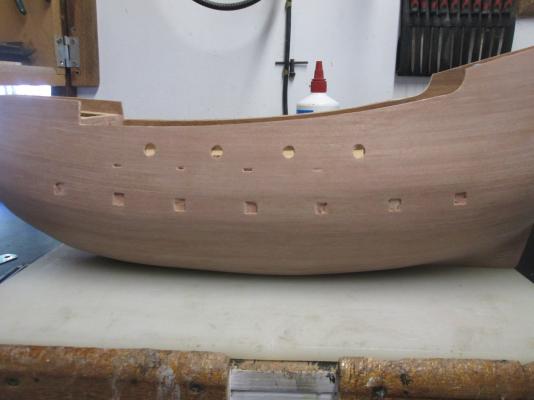
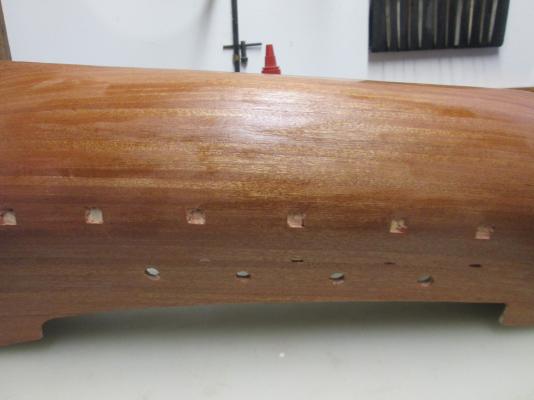
Thanks Joe. Now i'm done planking and puttying and sanding and have a coat of varnish on her. Mahogany is so brittle, I think it's a good idea to get a coat of varnish on as soon as possible, because you're bound to break a piece off somewhere. I only had one little piece do that so can't complain really.I ended up with larger scupper holes than I should have so I blocked a small piece of 2mm in the holes and refiled them, and they're ok. I'll let her dry for at least 24 hours and give her a light sand.


- 64 replies
-
- 1
-
-
- occre
- san marcos
- (and 1 more)
-
Not much of a warm welcome in this section. I'll persevere though, and I'll get this Ship built. A short progress report for you. I should have a nice basic squaring jig and the keel cut out in a few days. Have fun with your builds, Matt.
-
Cutty Sark by NenadM
mathewp replied to NenadM's topic in - Build logs for subjects built 1851 - 1900
I've looked at you whole build. I like the way you have persevered with your build. I think you will end up with a very nice model.- 4,152 replies
-
- 1
-
-
- cutty sark
- tehnodidakta
- (and 1 more)
-
Beautifully detailed model. Impressive stuff Bruce. Look forward to the rest. Matt
-
Have to agree with Patrick, wooden liners would look good with a contrasting colored timber perhaps?.That buckling you mentioned is a problem with bluff bows like Bounty, Victory , Endeavor etc I've had problems myself..