HOLIDAY DONATION DRIVE - SUPPORT MSW - DO YOUR PART TO KEEP THIS GREAT FORUM GOING! (Only 75 donations so far out of 49,000 members - C'mon guys!)
×

.jpg.2c2c29e54623bd7b752bc2cdab599665.jpg)
Danstream
-
Posts
747 -
Joined
-
Last visited
Content Type
Profiles
Forums
Gallery
Events
Everything posted by Danstream
-
.thumb.jpg.c459ce4140b54c12eddb8eedfd446df3.jpg)
P-51D Mustang by CDW - FINISHED - Dragon - 1:32 Scale
Danstream replied to CDW's topic in Non-ship/categorised builds
One example might be in the following video: P-51 with puttied wings Said that, I should have puttied the wings of my Starfighter, but for laziness I didn't 😂 @CDW, sorry for having highjacked your post. Cheers, Dan -
P-51D Mustang by CDW - FINISHED - Dragon - 1:32 Scale
Danstream replied to CDW's topic in Non-ship/categorised builds
Sorry, I don't intend to contradict you, but I cannot see your point. Just fill the engraved details and then paint the wing with a paint that mimic the original one as, for example, shown in the following article: https://www.ipmsstockholm.se/home/north-american-p-51d-mustang-in-detail-revisited-part-2-wings-and-tails/ Best regards, Dan -
P-51D Mustang by CDW - FINISHED - Dragon - 1:32 Scale
Danstream replied to CDW's topic in Non-ship/categorised builds
It is perfectly fine if you leave it as is. It will be a nice model anyway. However, as far as references, for your next build, you might find plenty on the web. Just an example: http://www.aviation-history.com/north-american/p51.html Cheers, Dan -
P-51D Mustang by CDW - FINISHED - Dragon - 1:32 Scale
Danstream replied to CDW's topic in Non-ship/categorised builds
Yes, even the metallic ones had the wing surfaces puttied and painted with aluminum paint (with the exception of removable panels). This was intended to get the maximum advantage from the newly introduced laminar wing sections. I don't know whether you might want to implement that at this stage. Very nice finish and I love the blue nose with its glossy finish. Cheers, Dan -
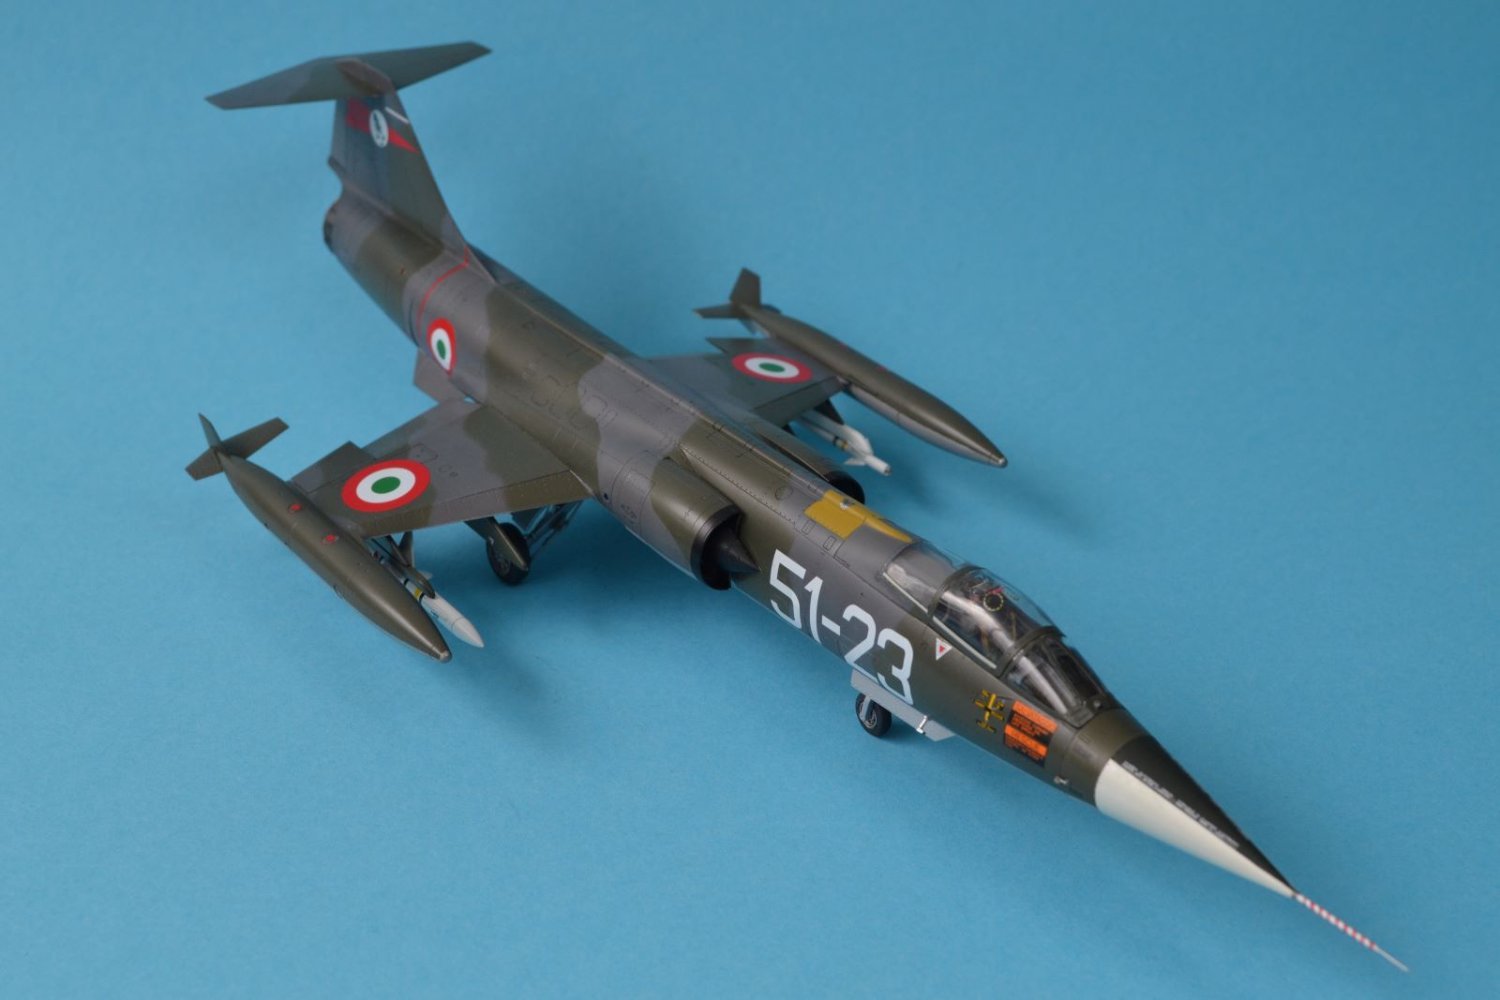
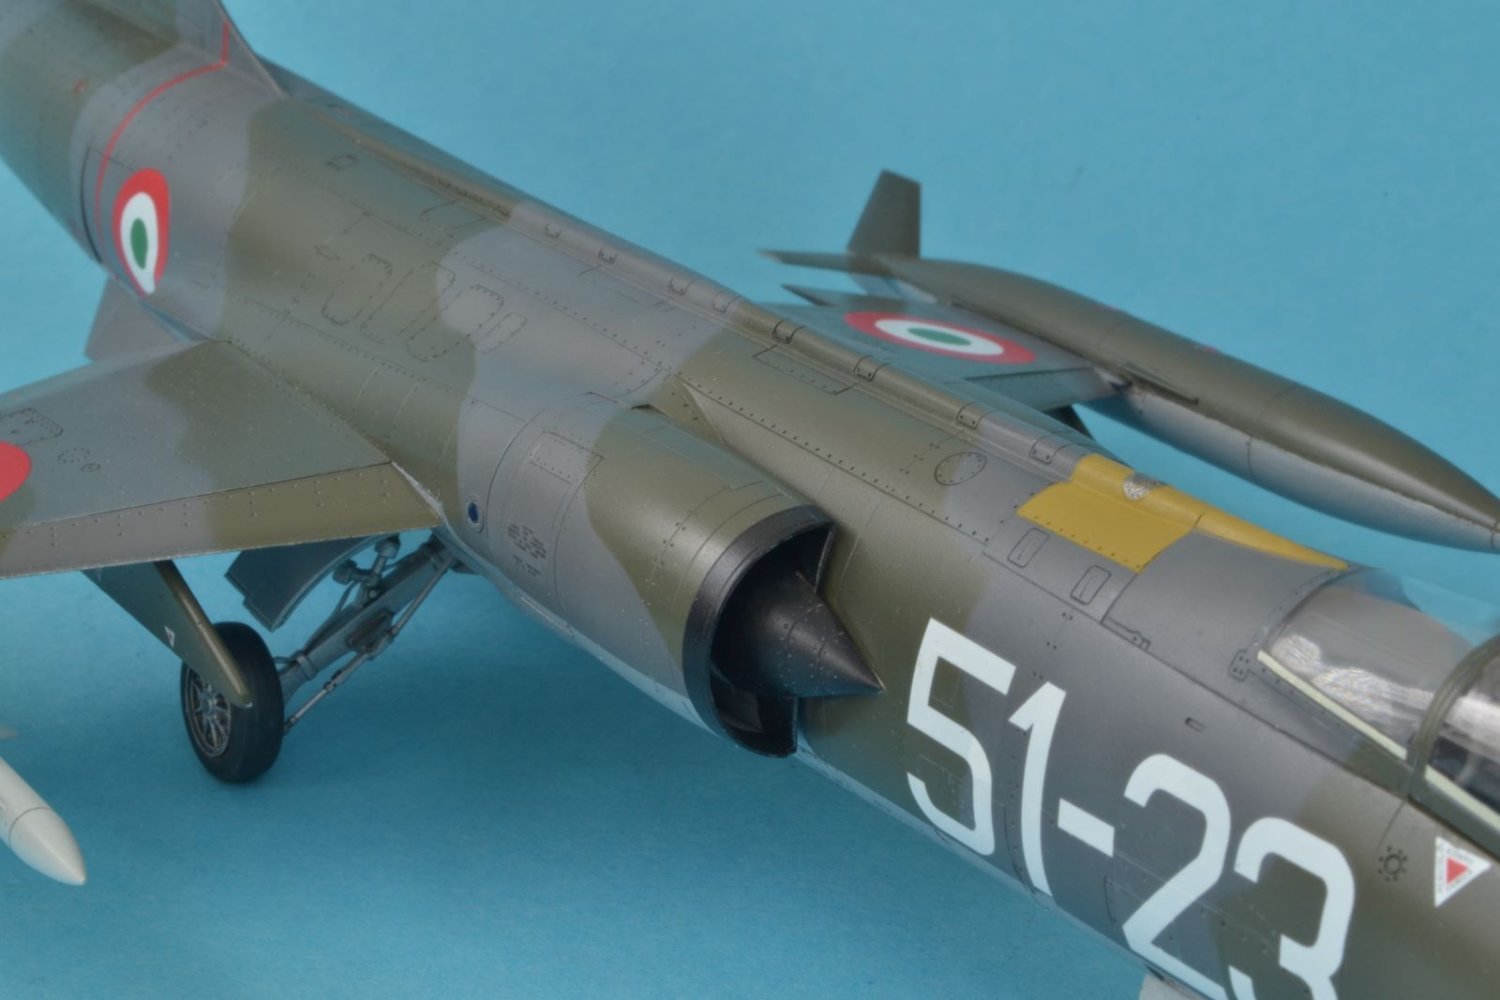
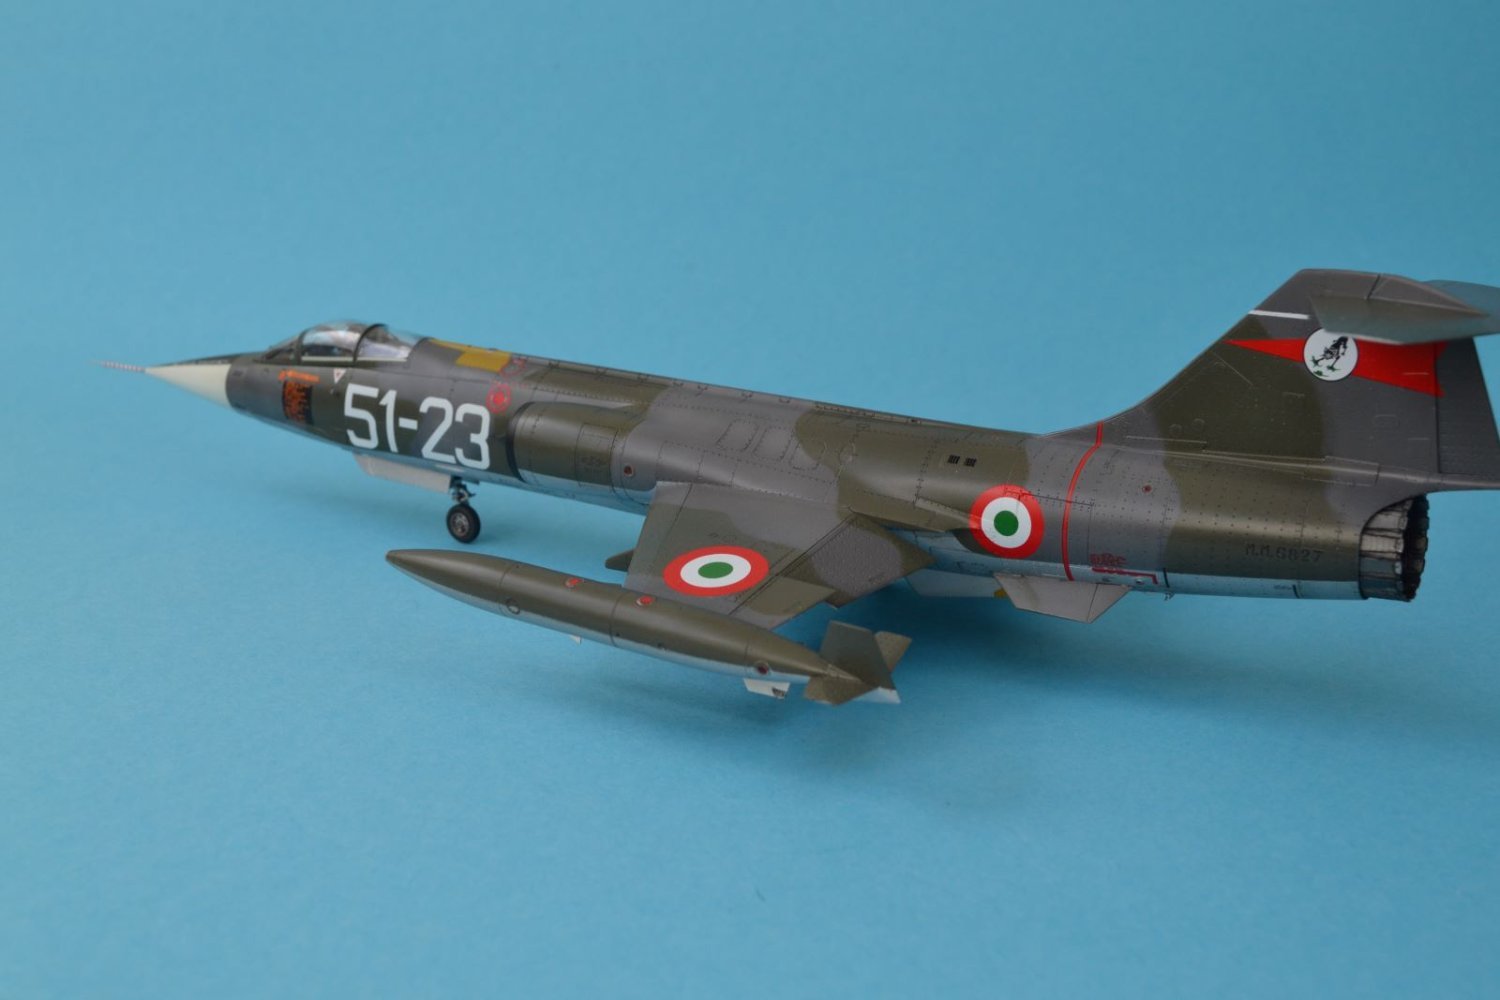
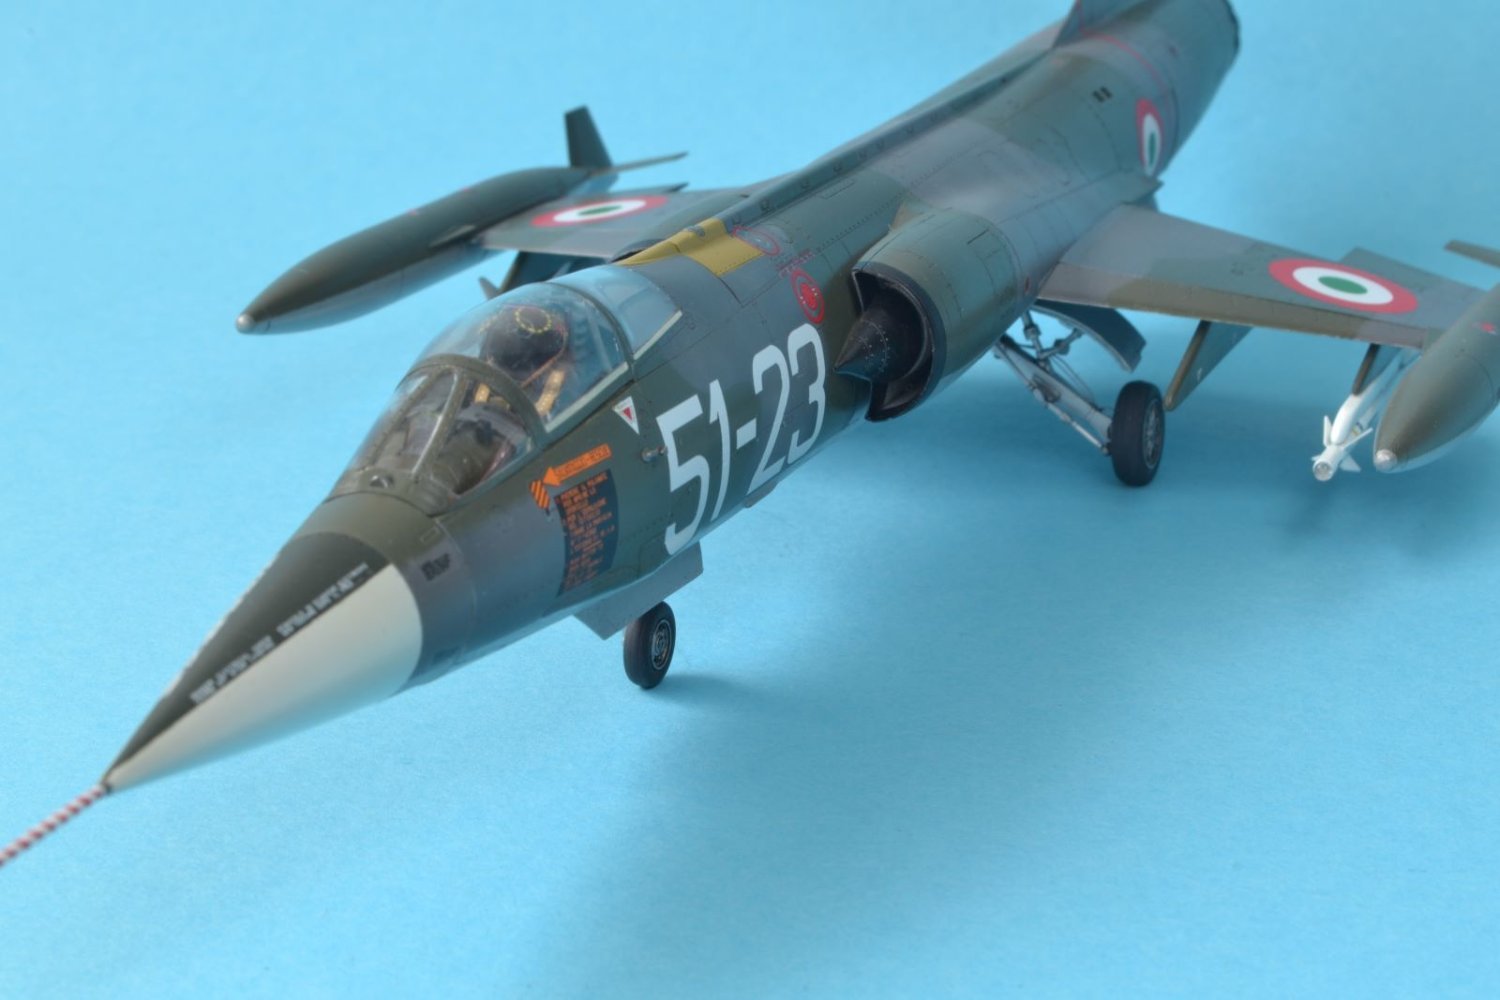
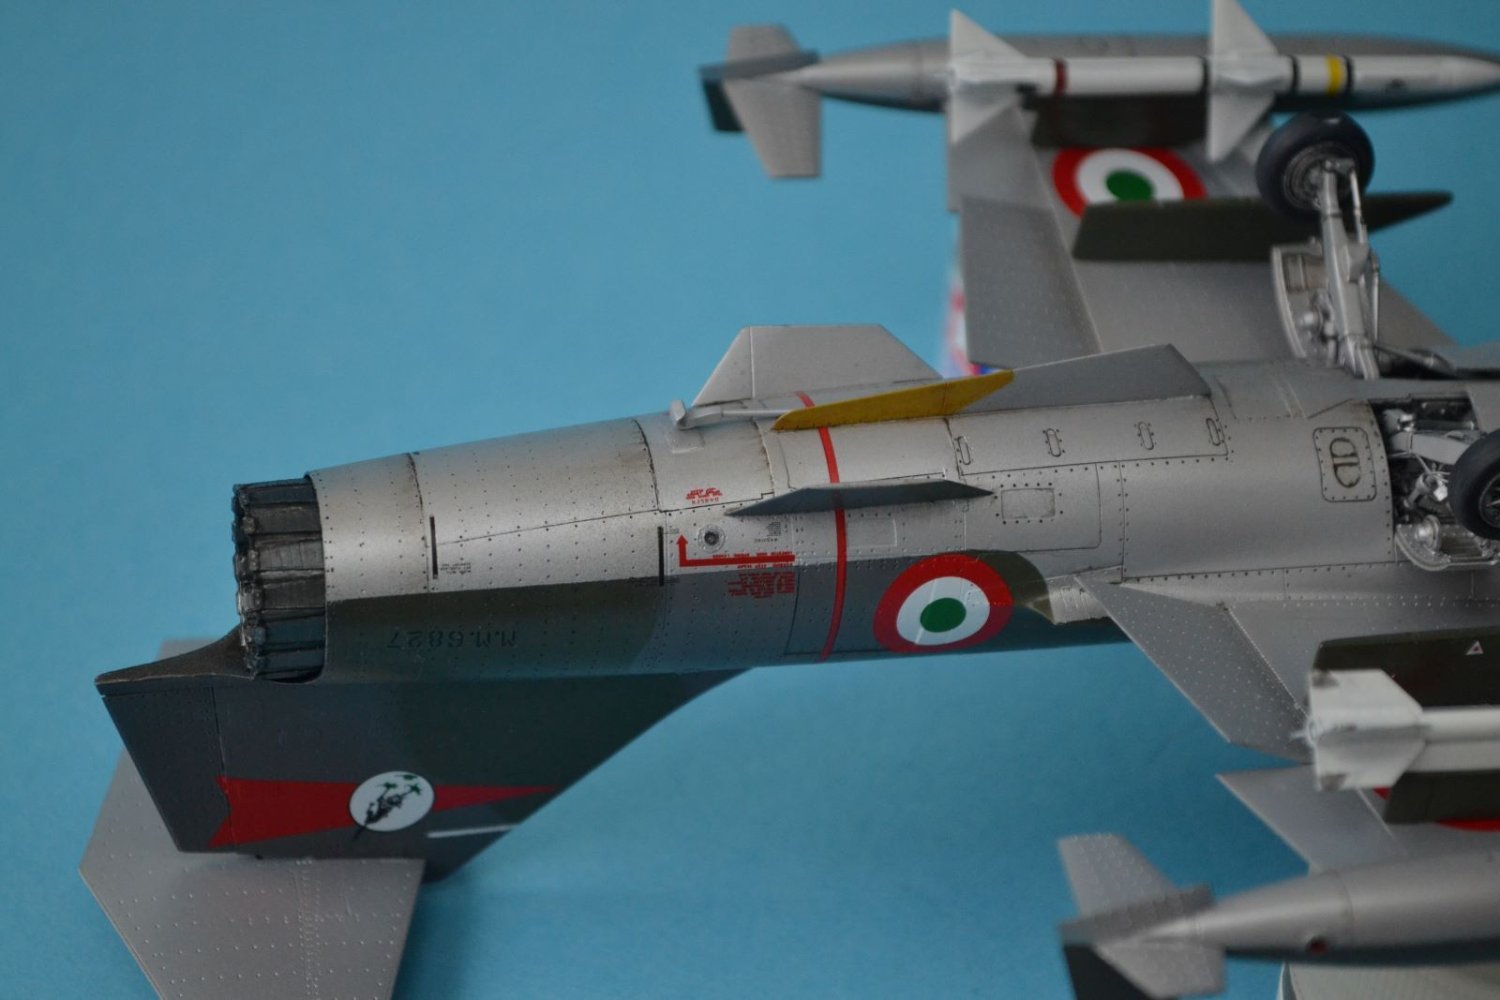
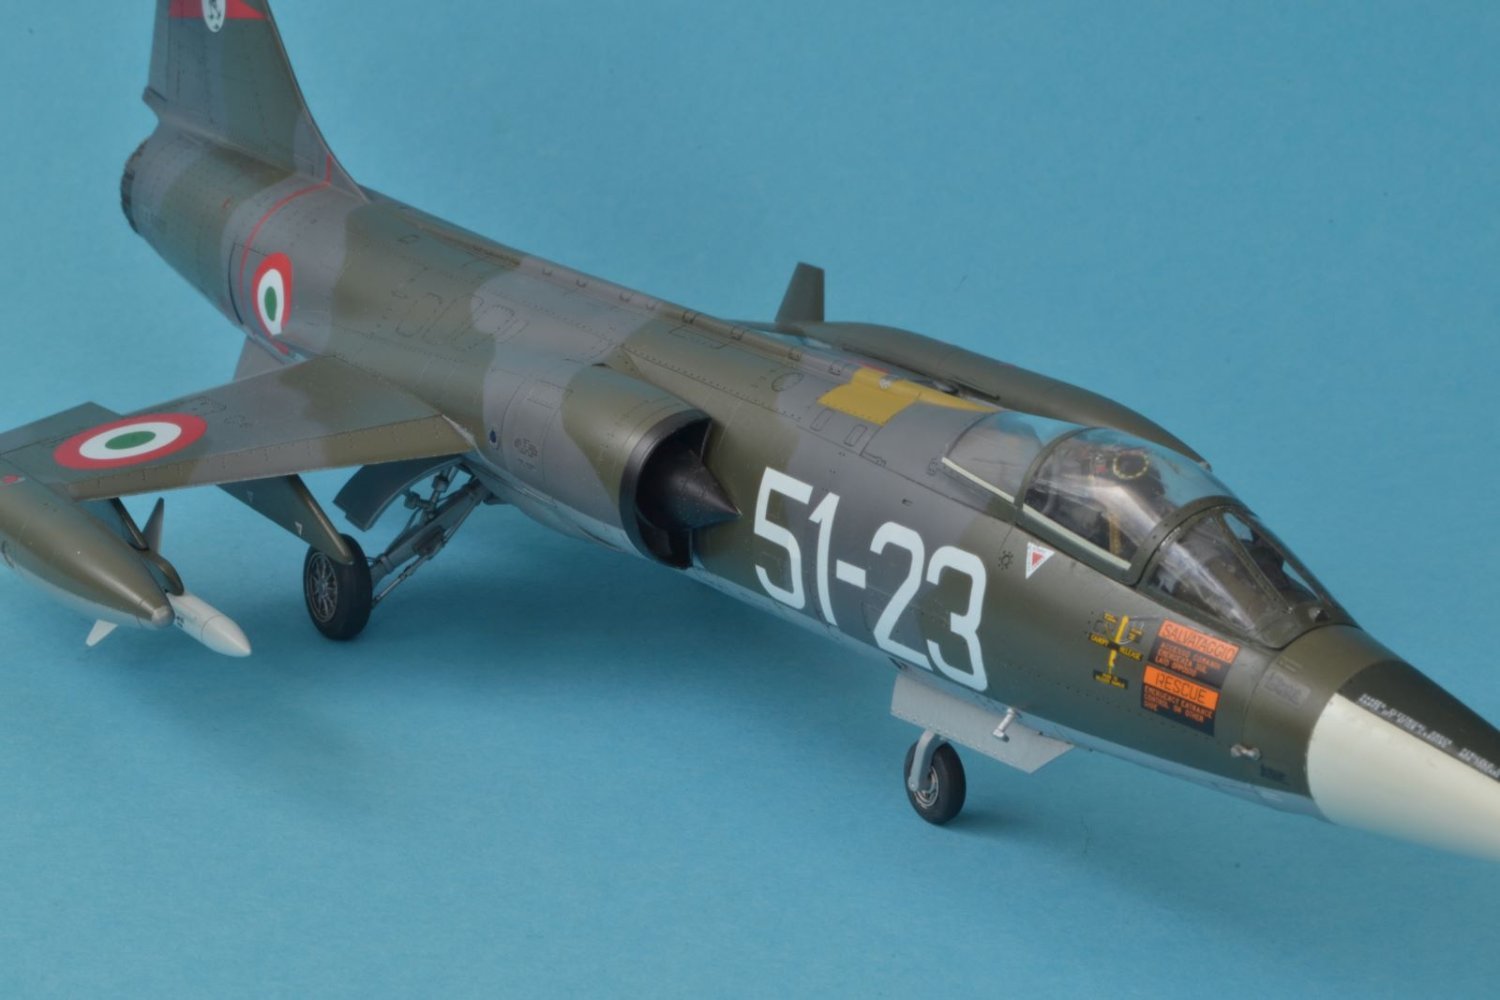
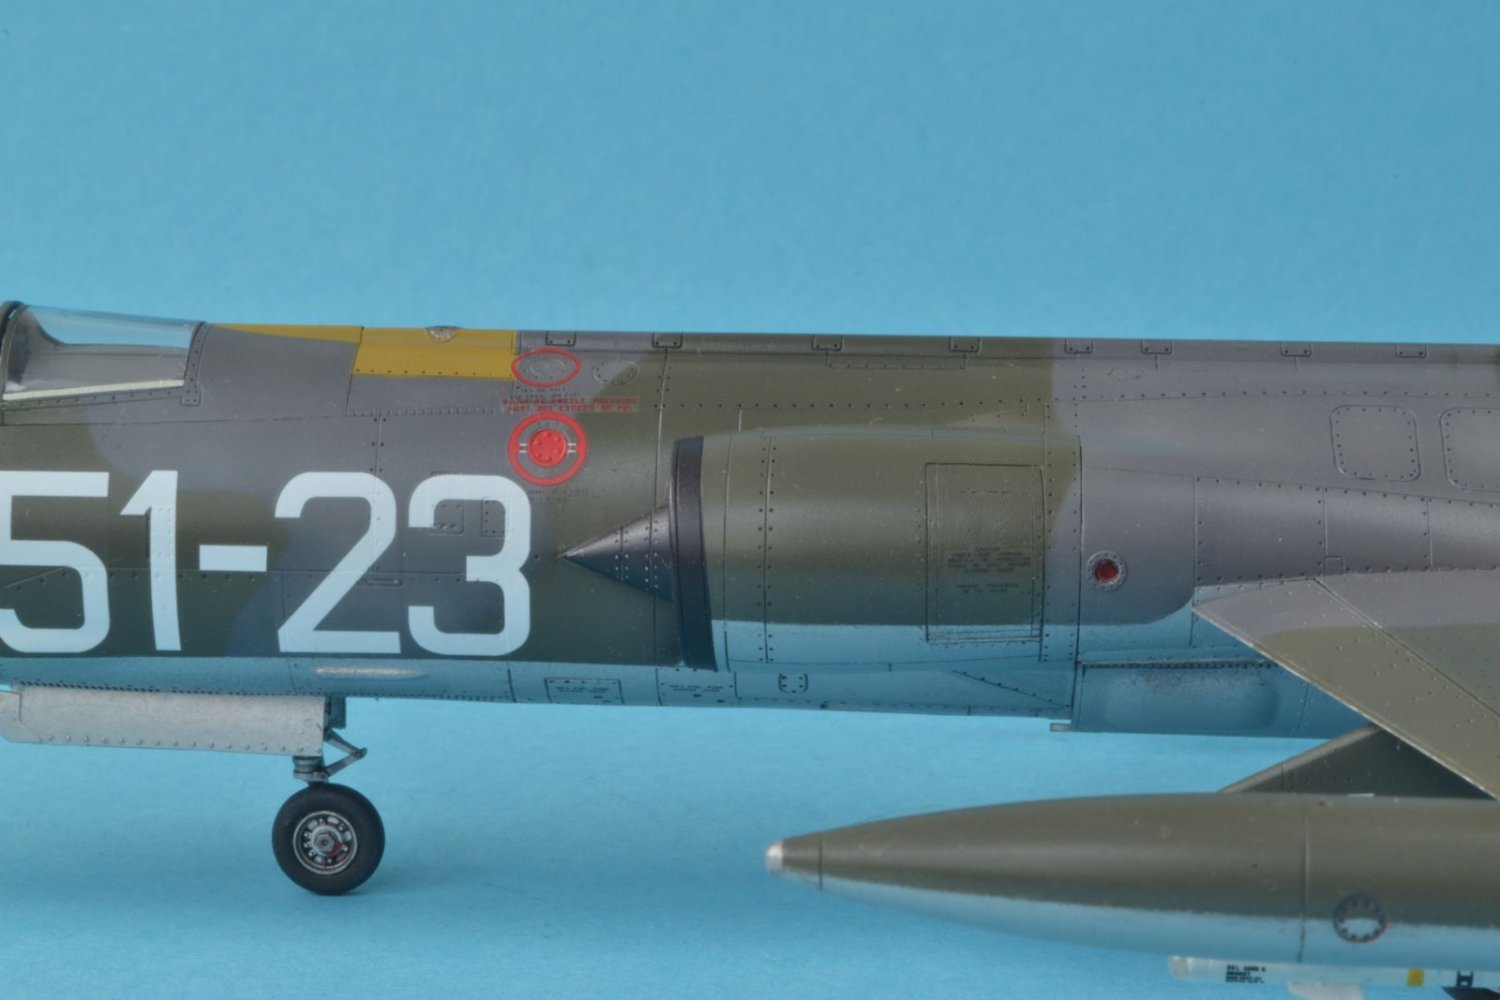
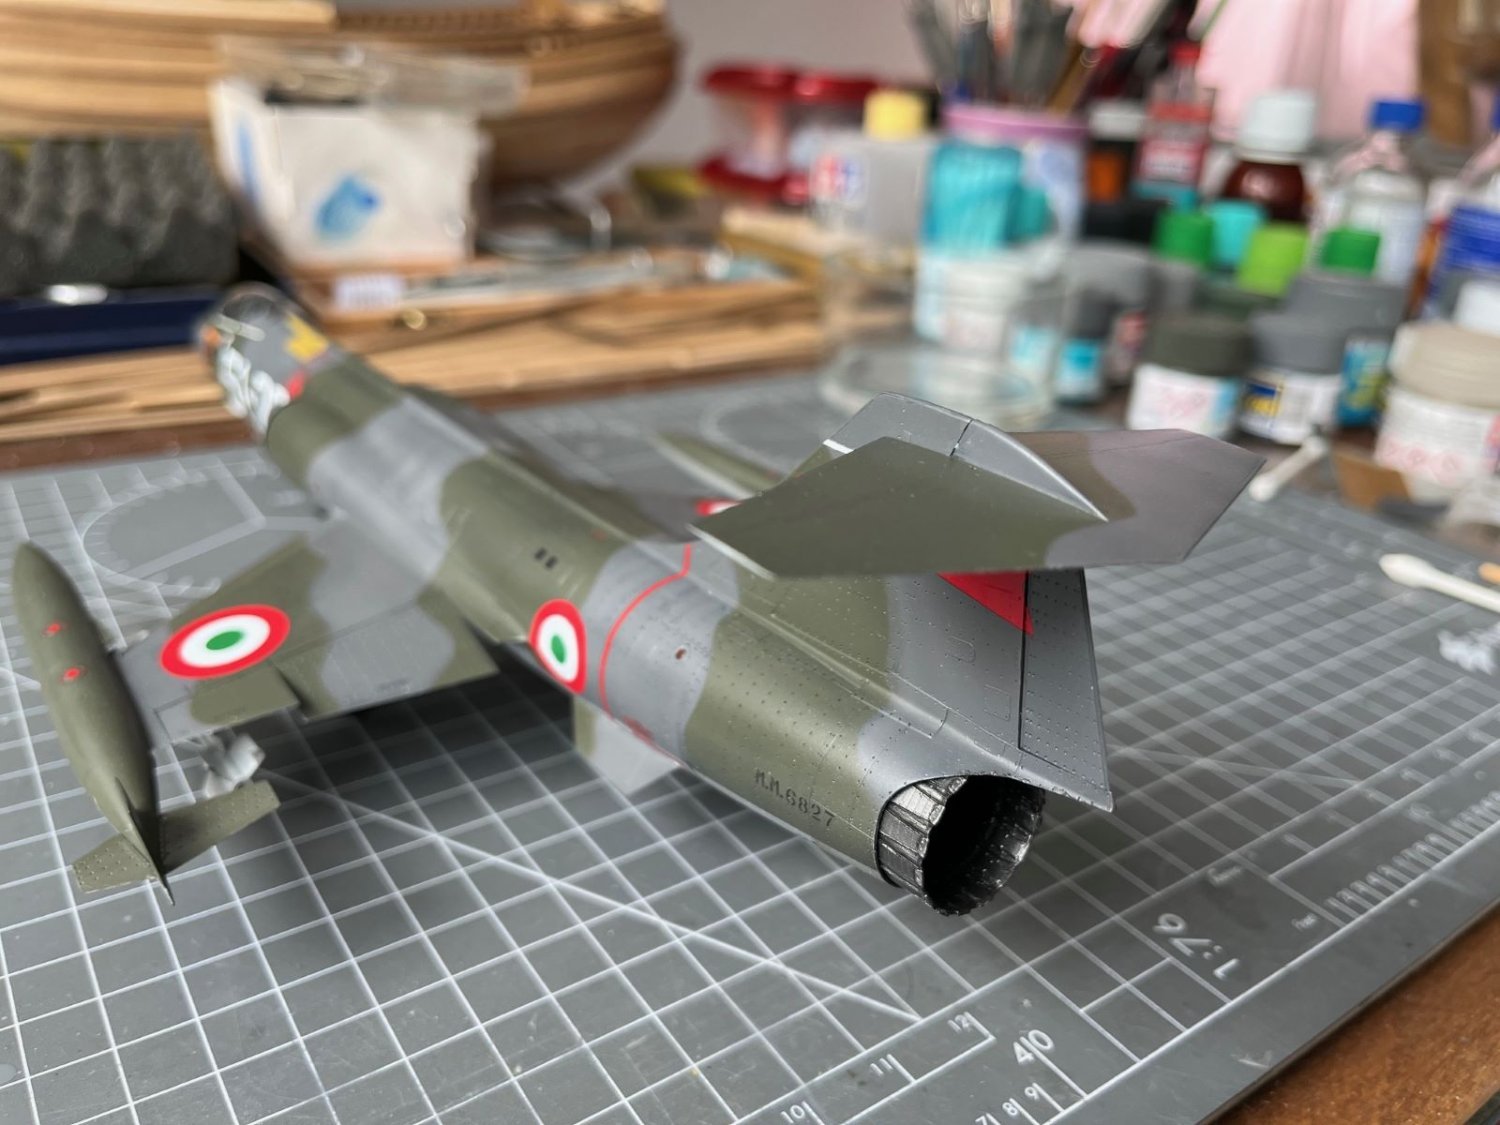
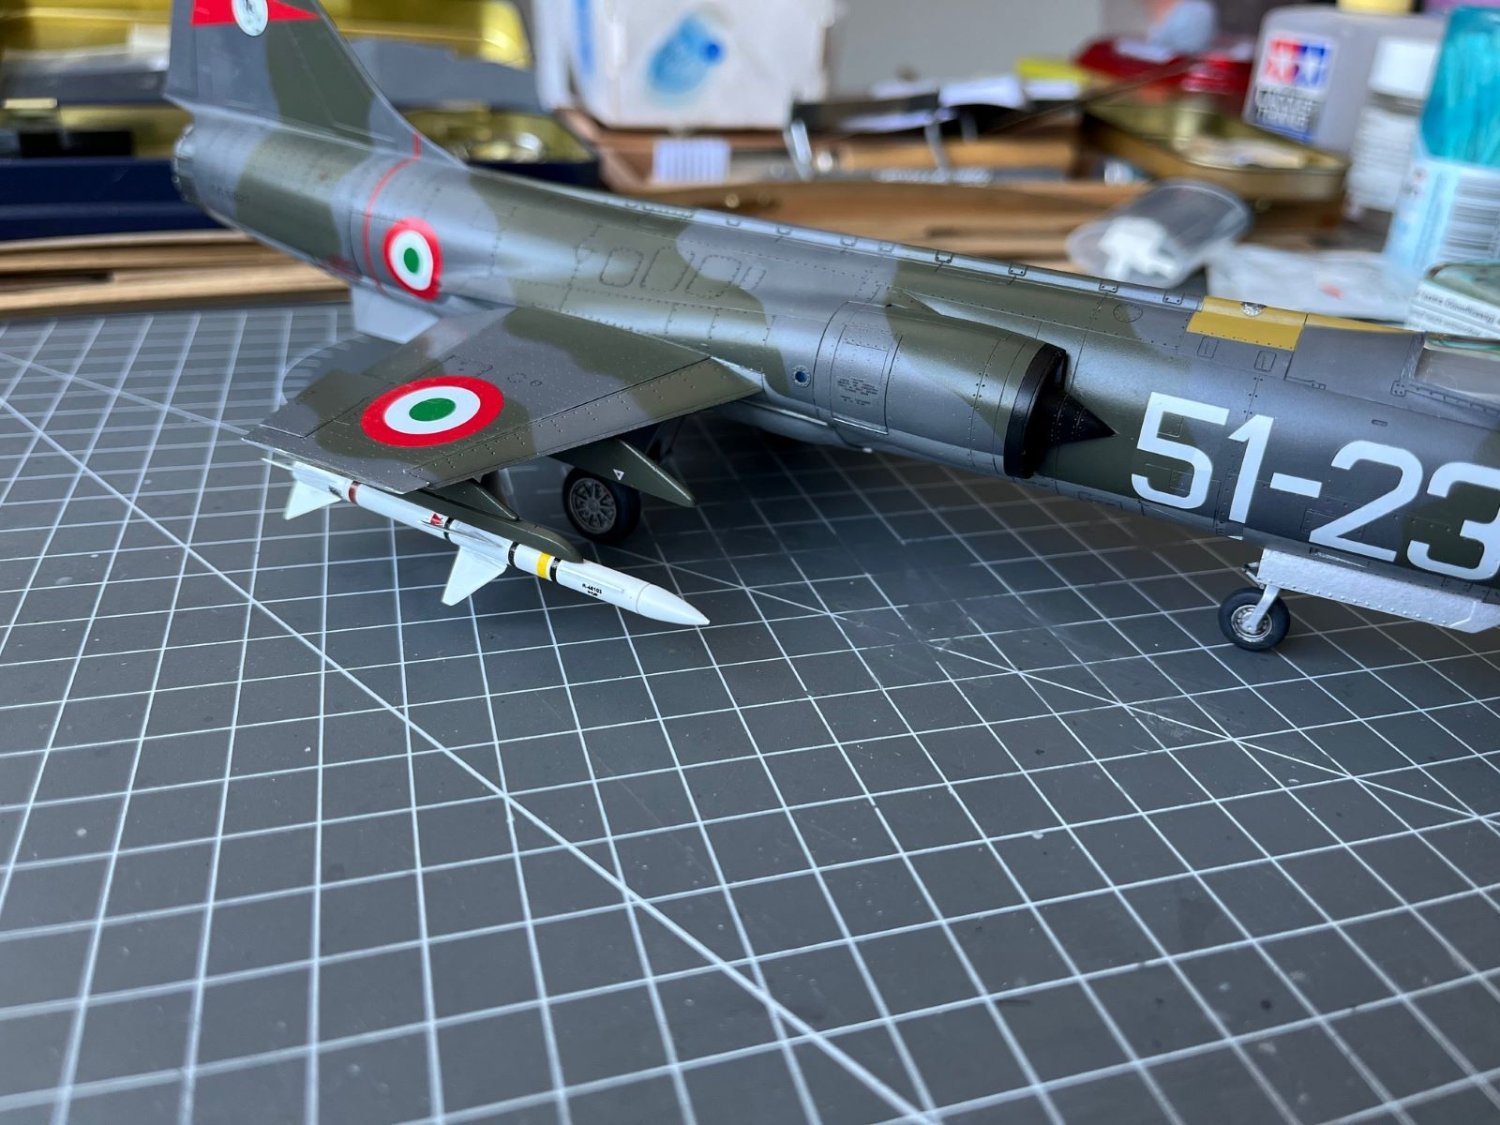
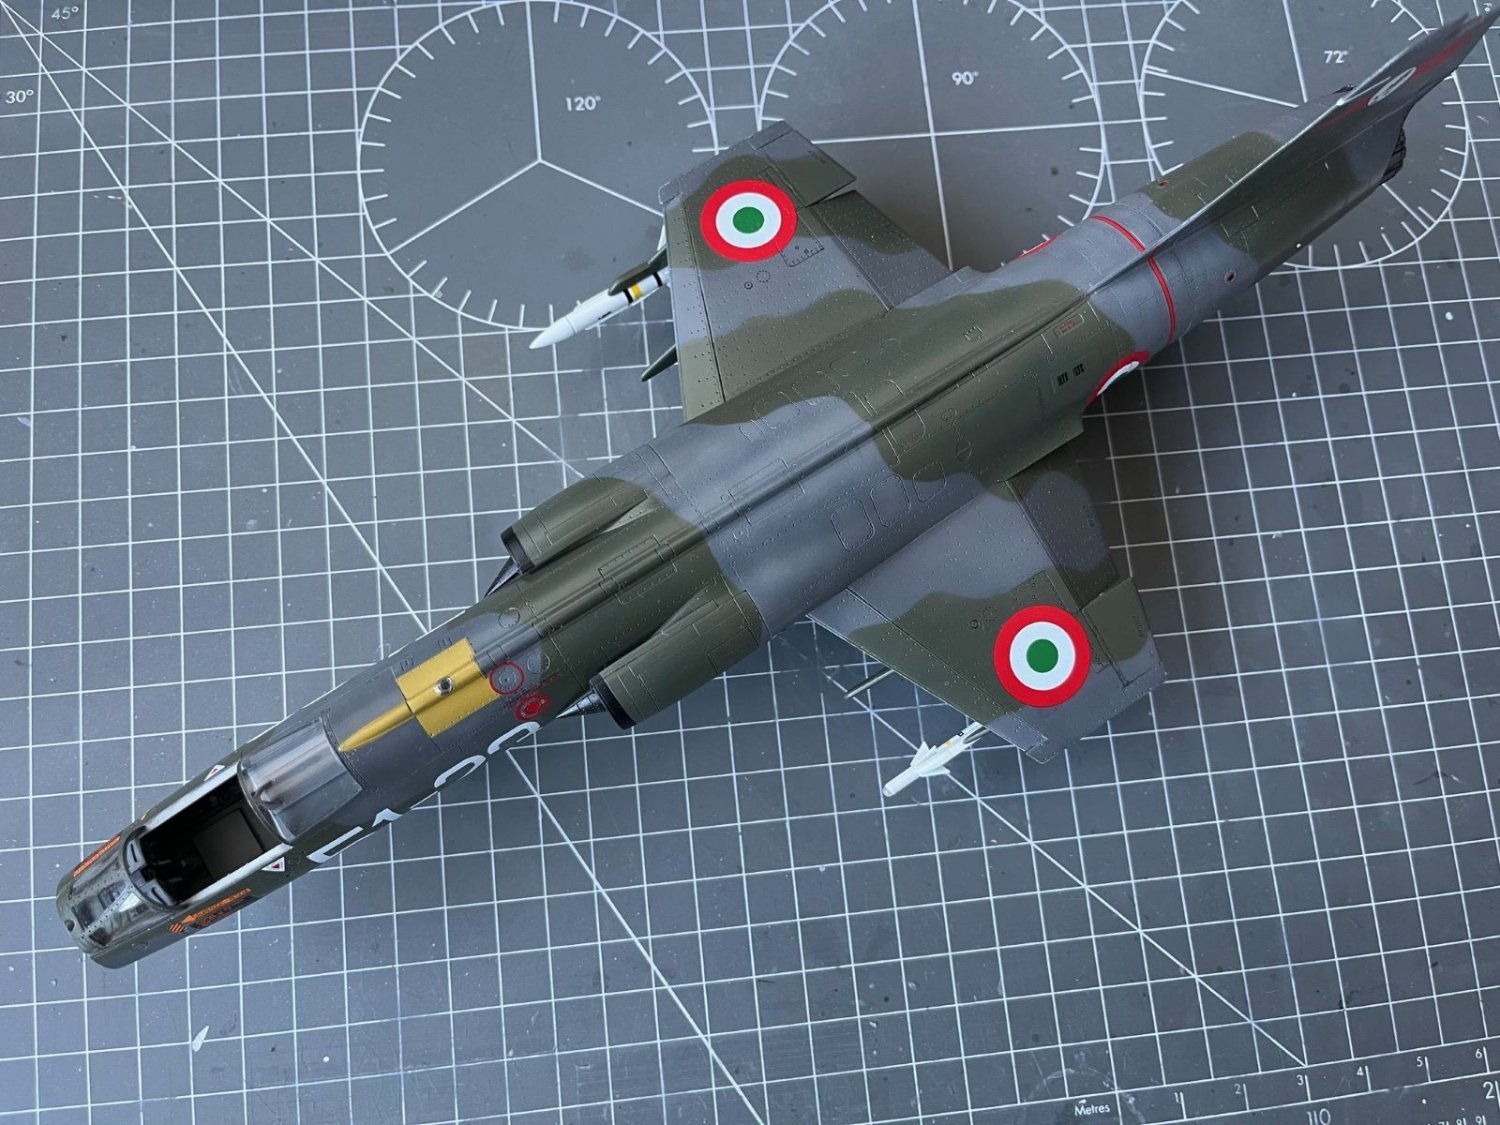
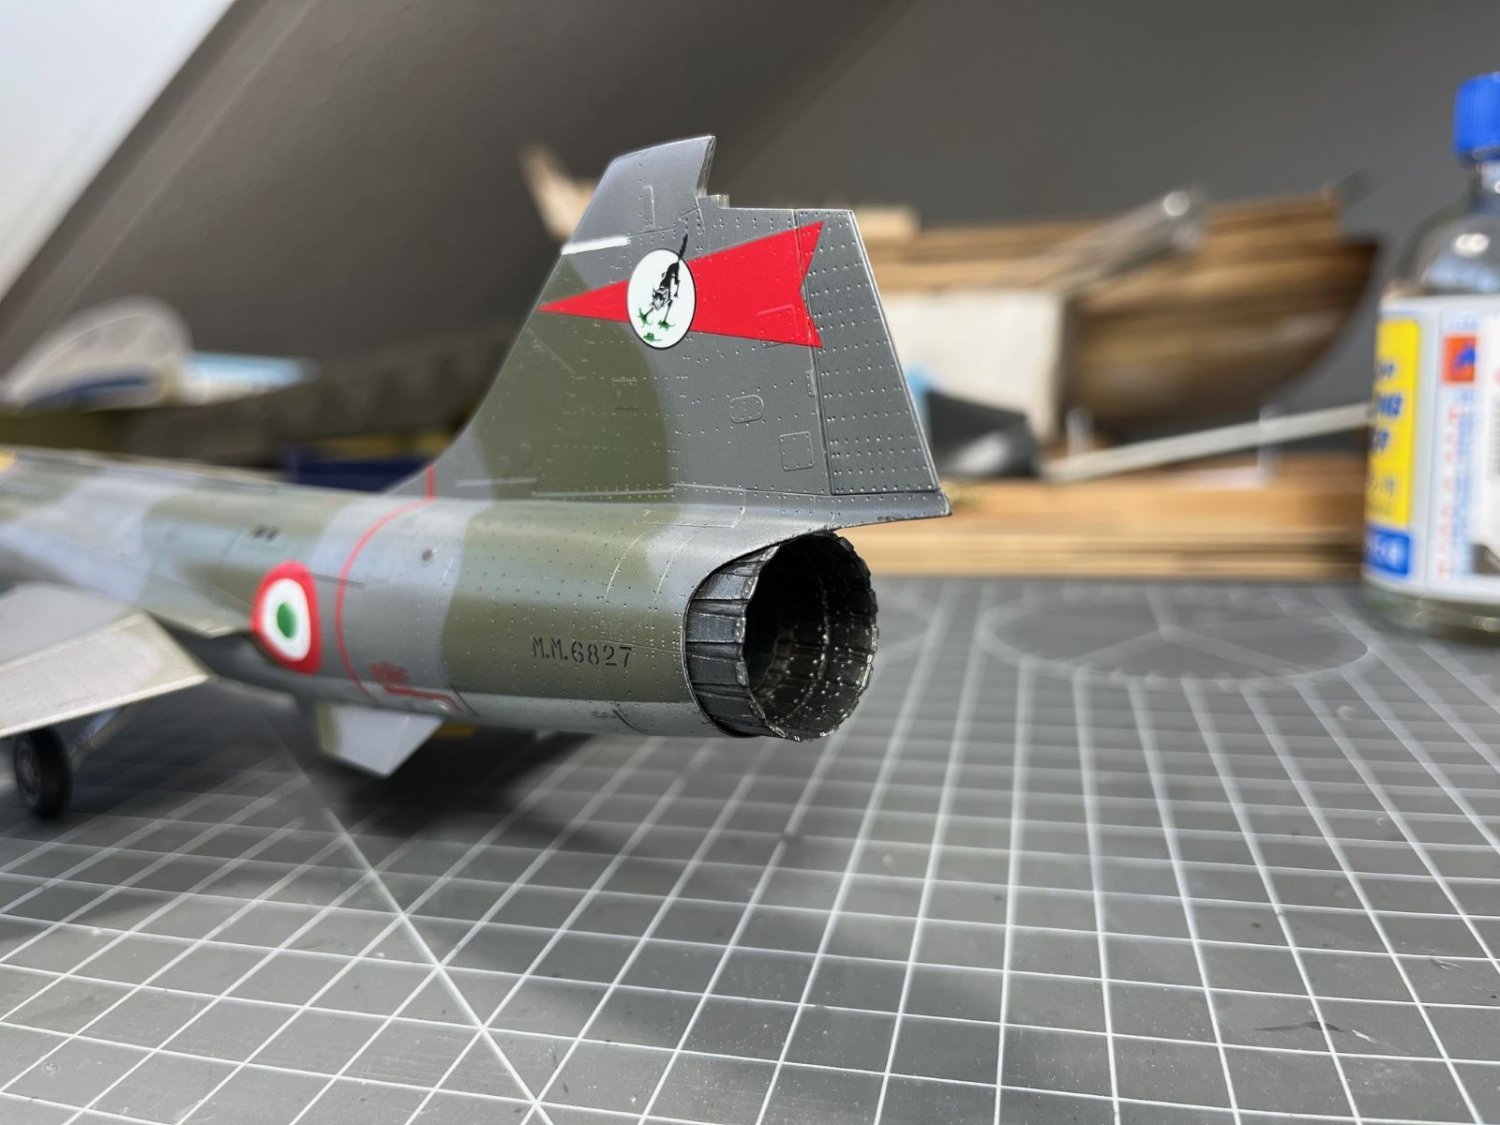
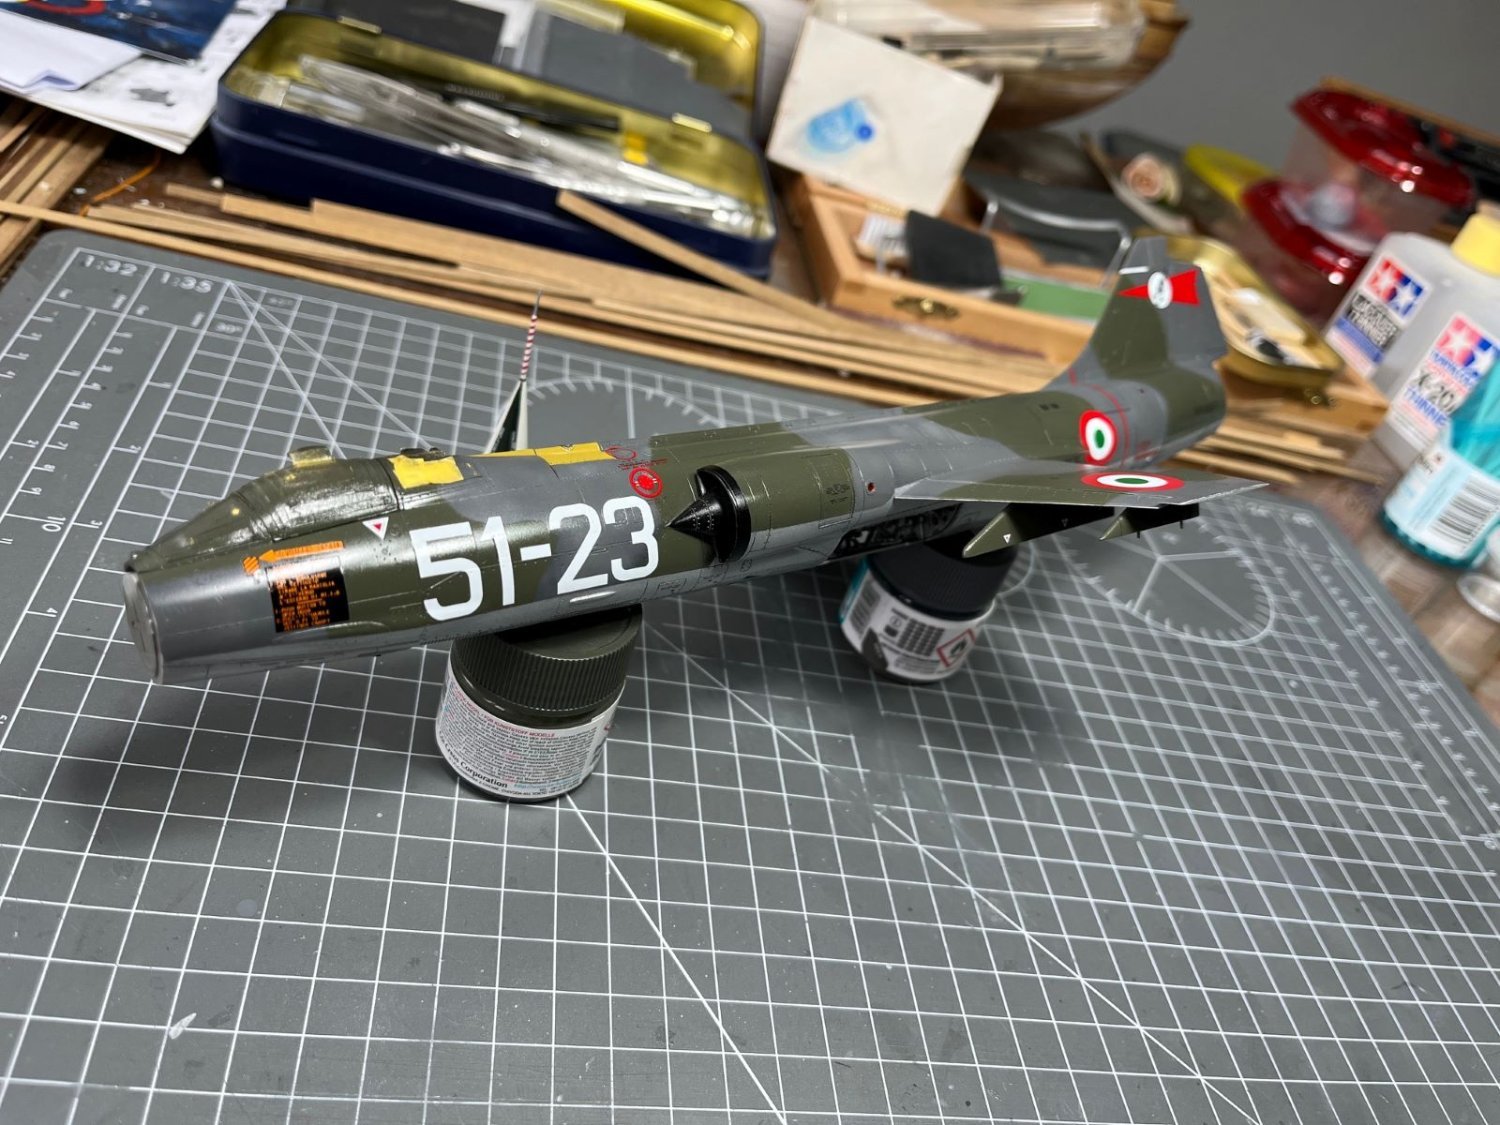
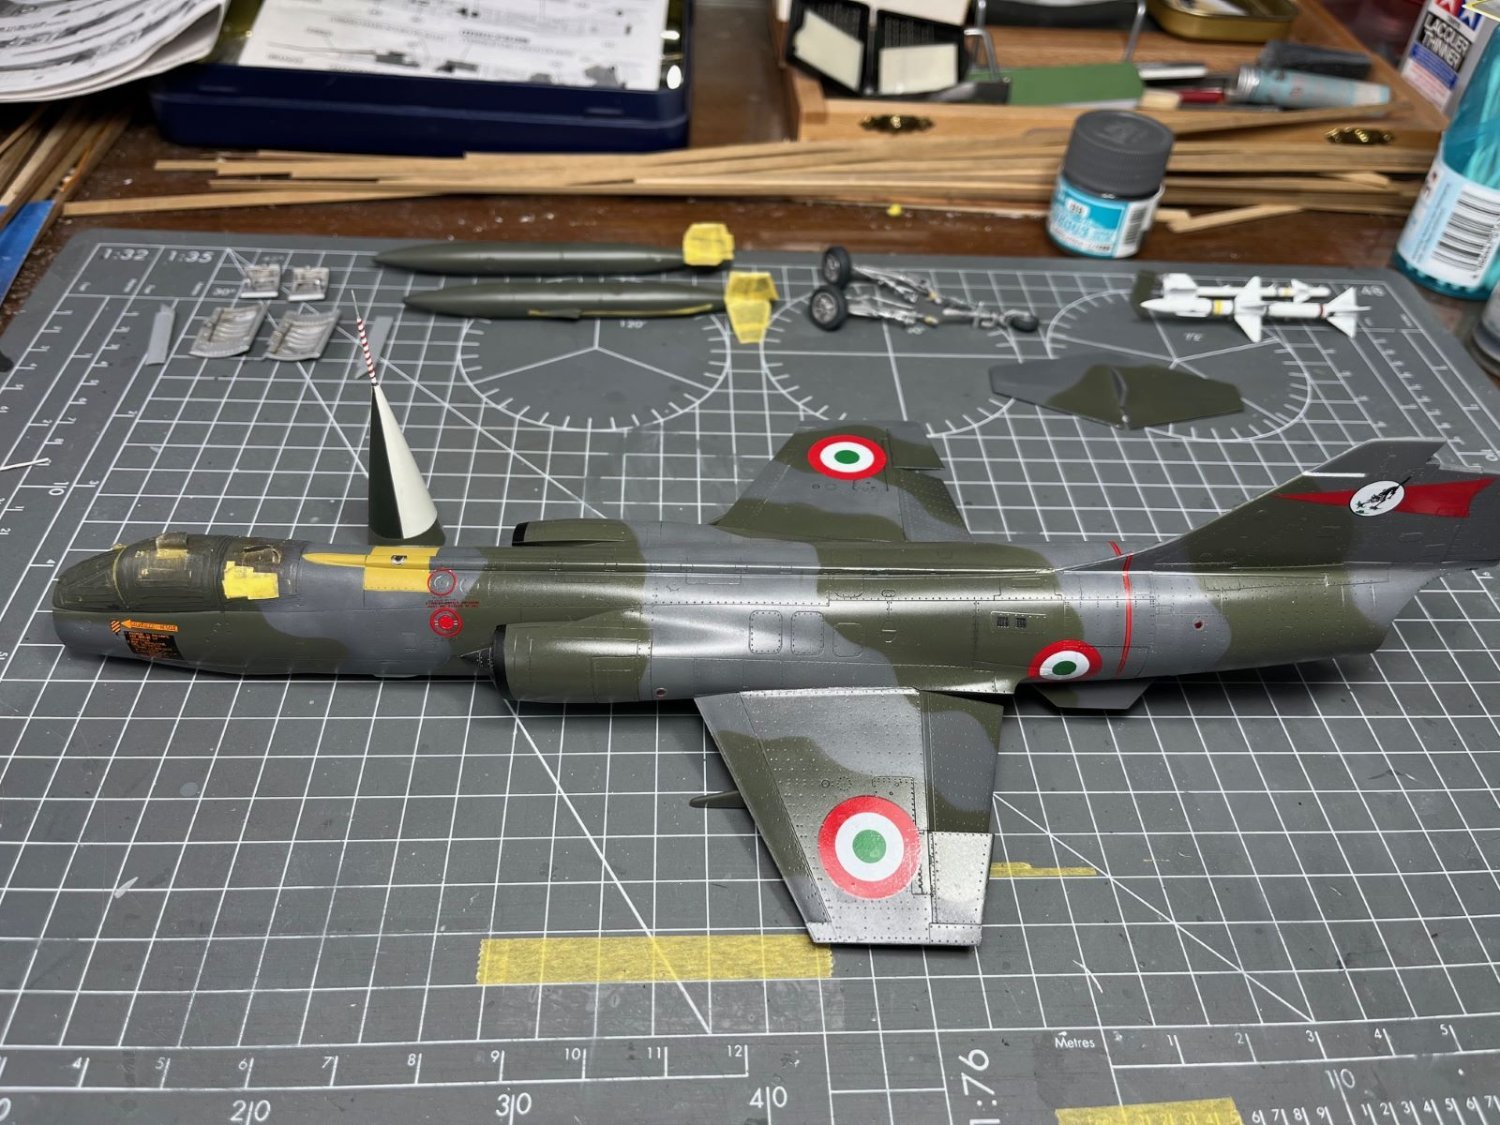
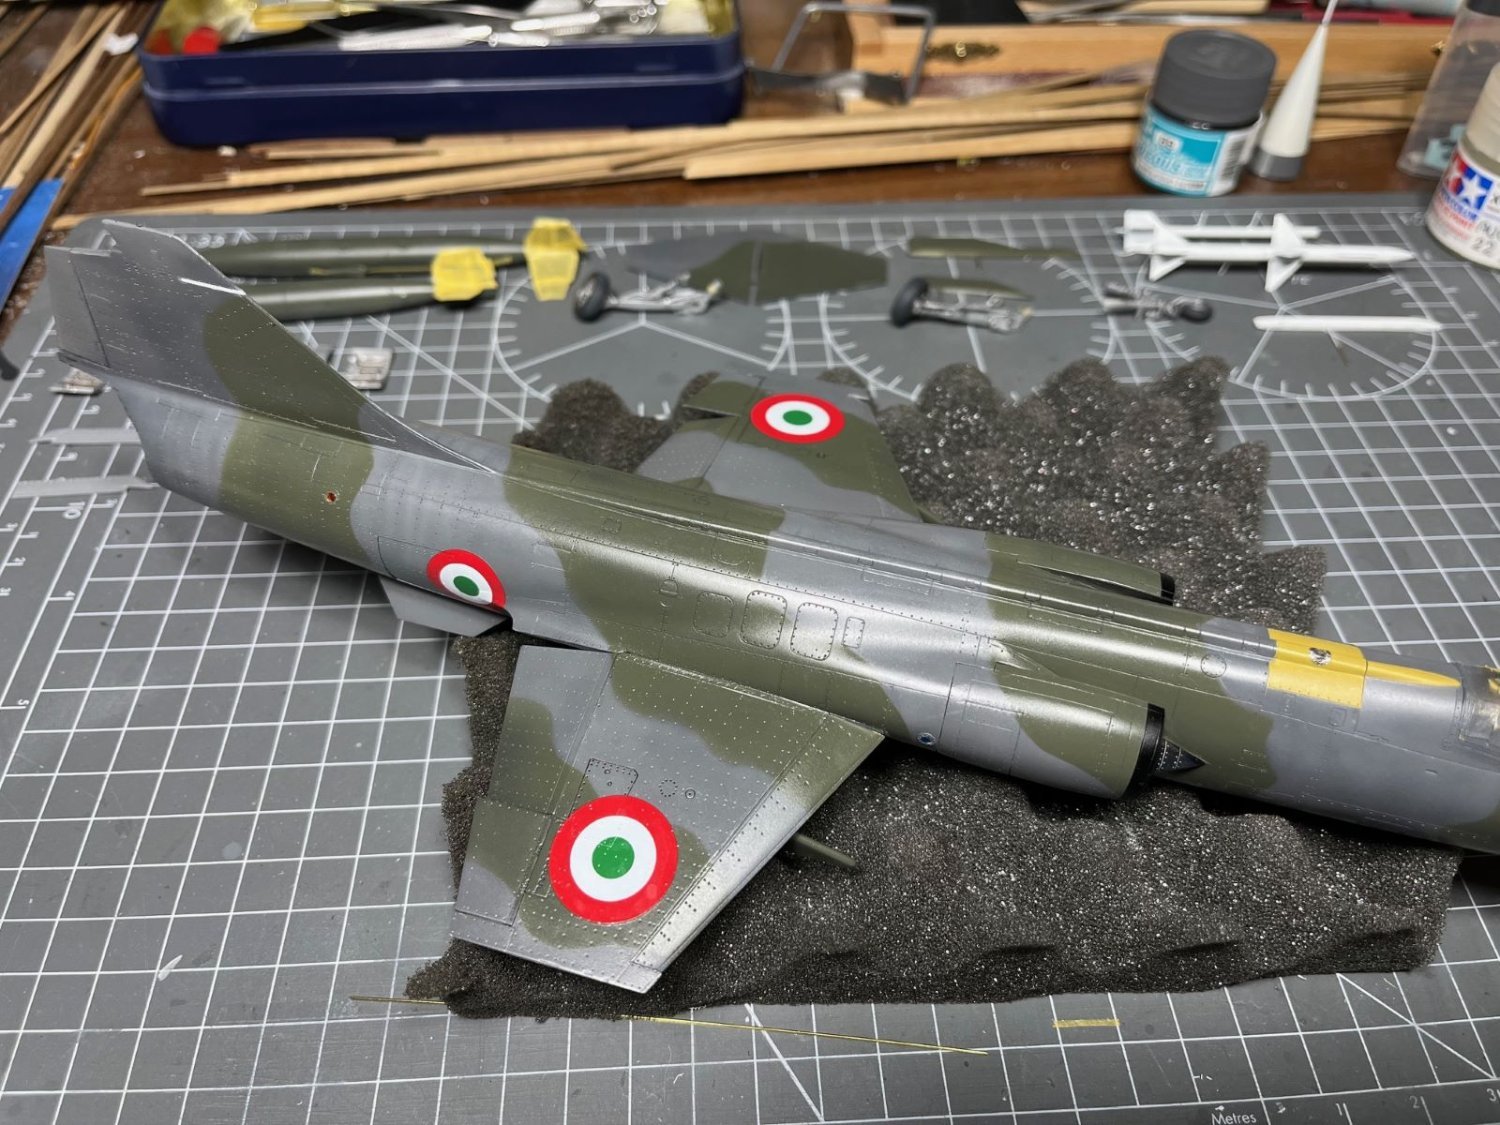
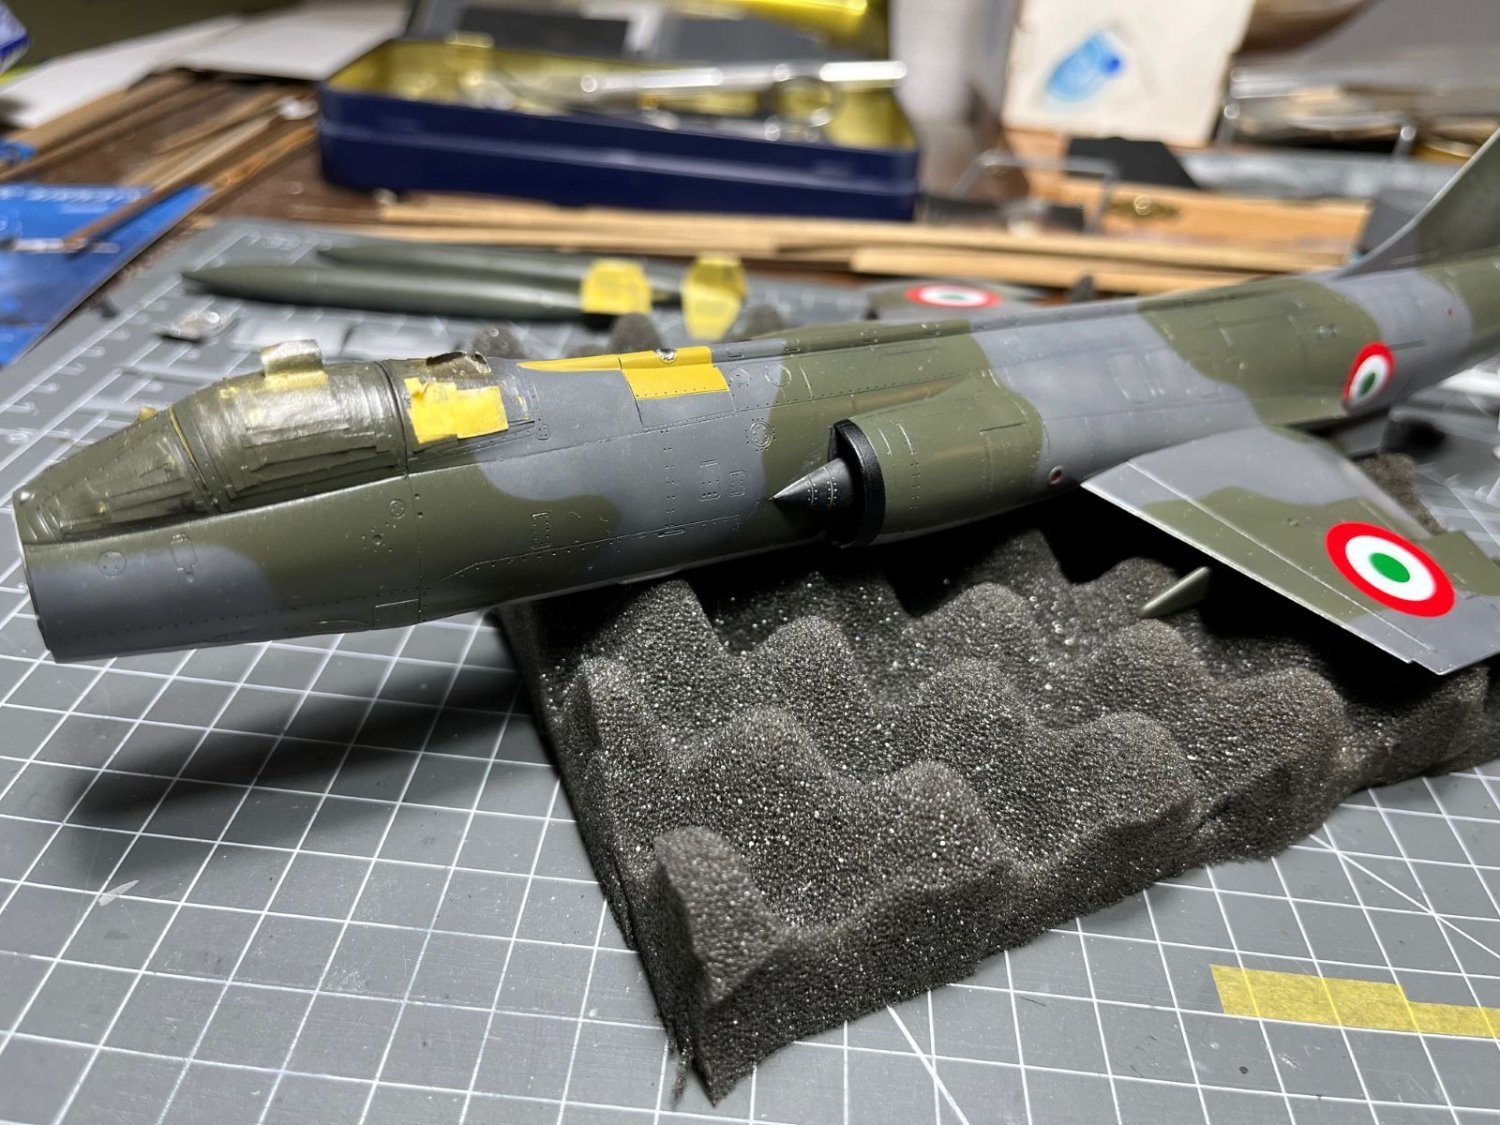
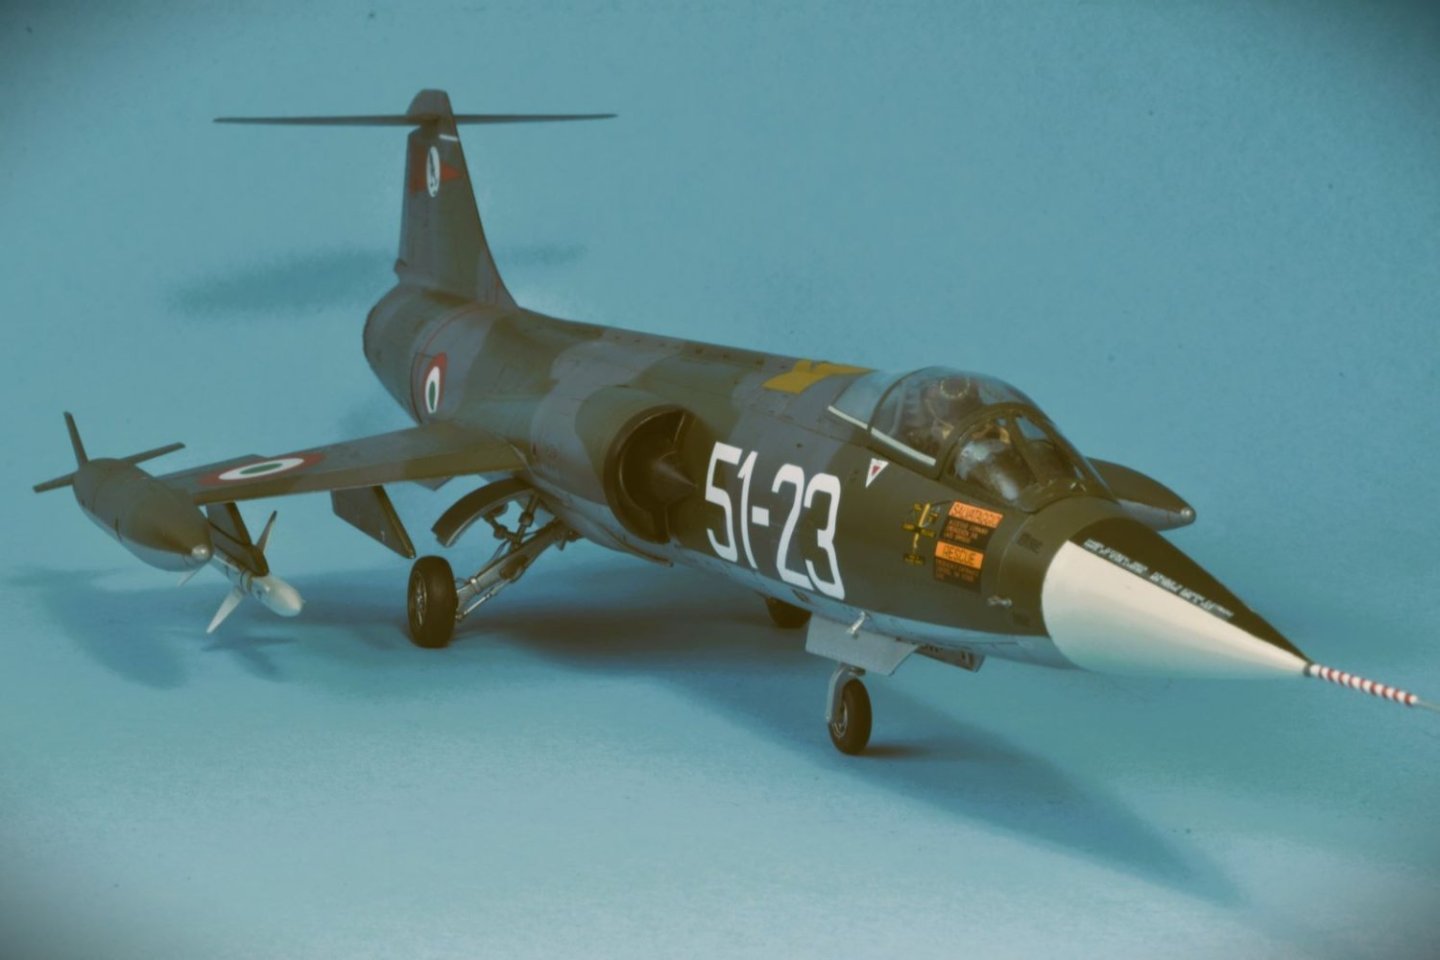
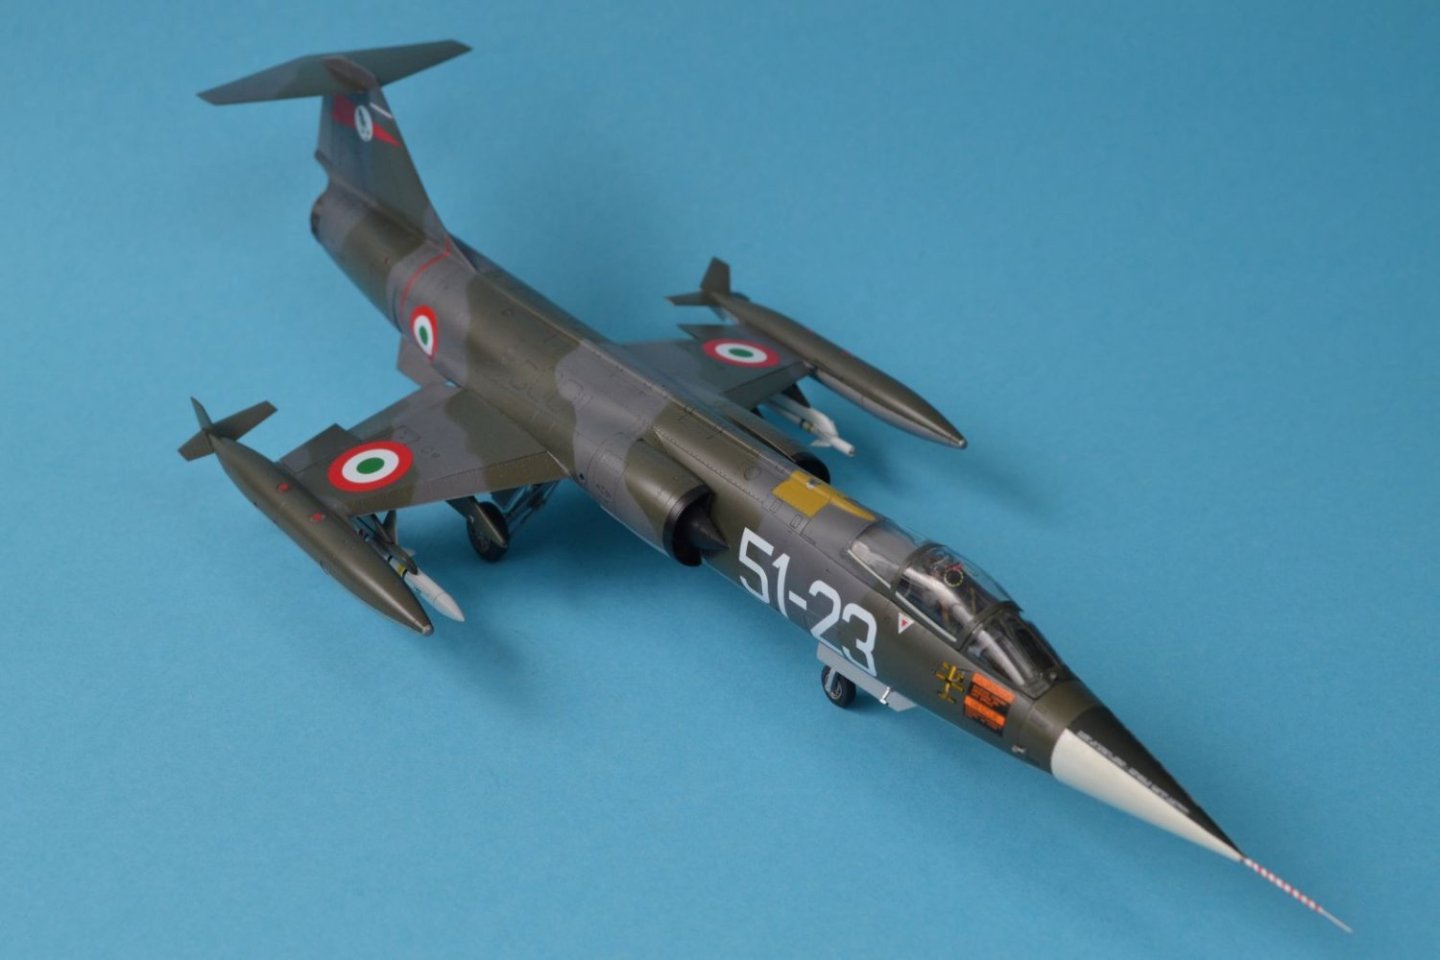
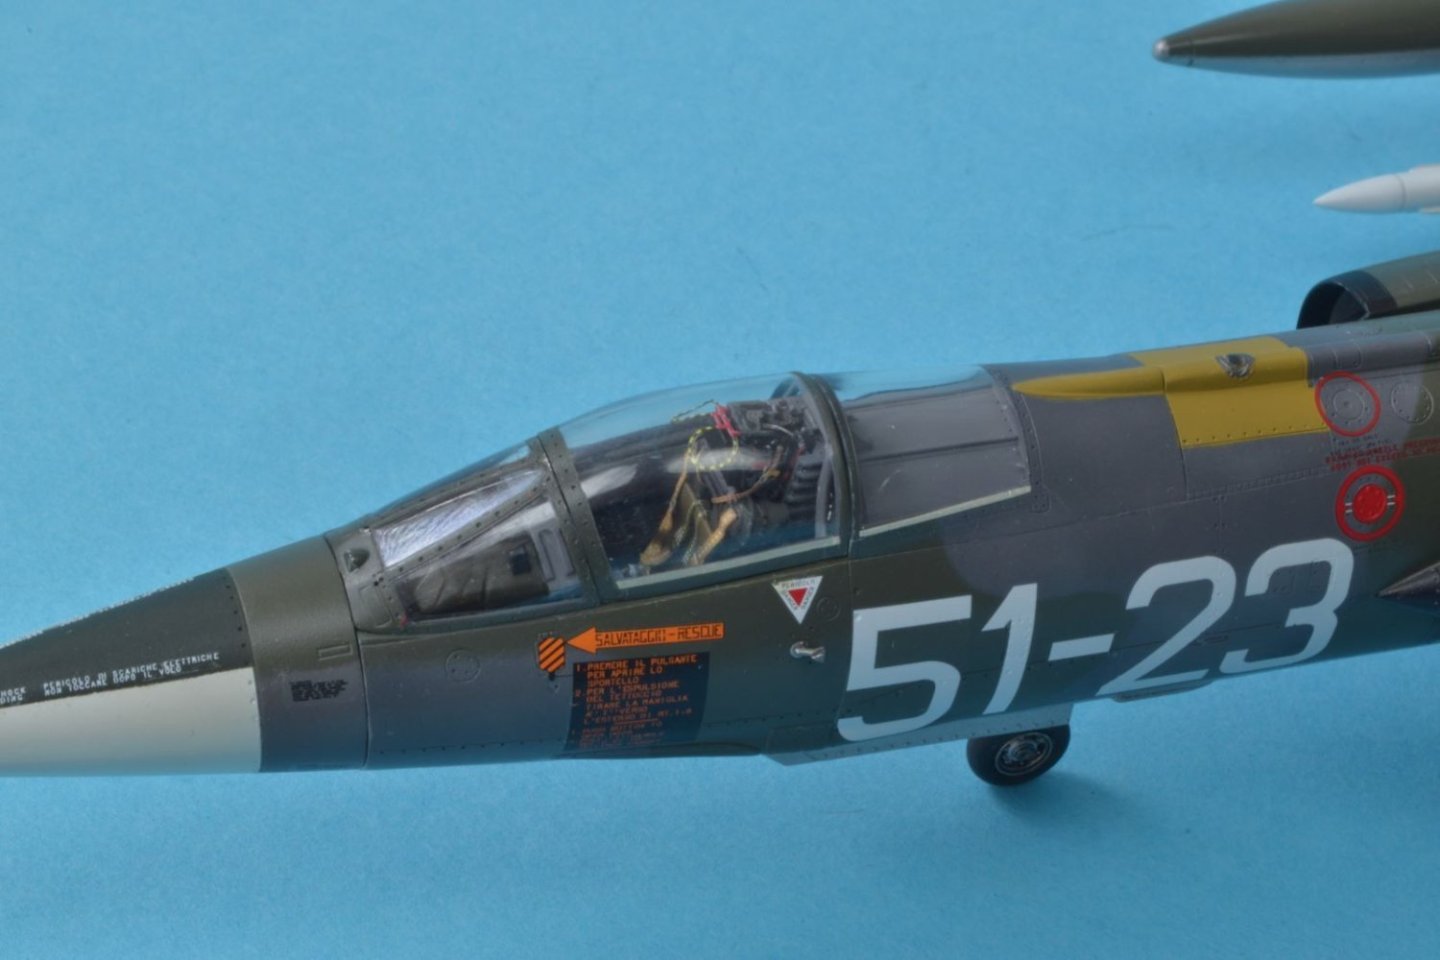
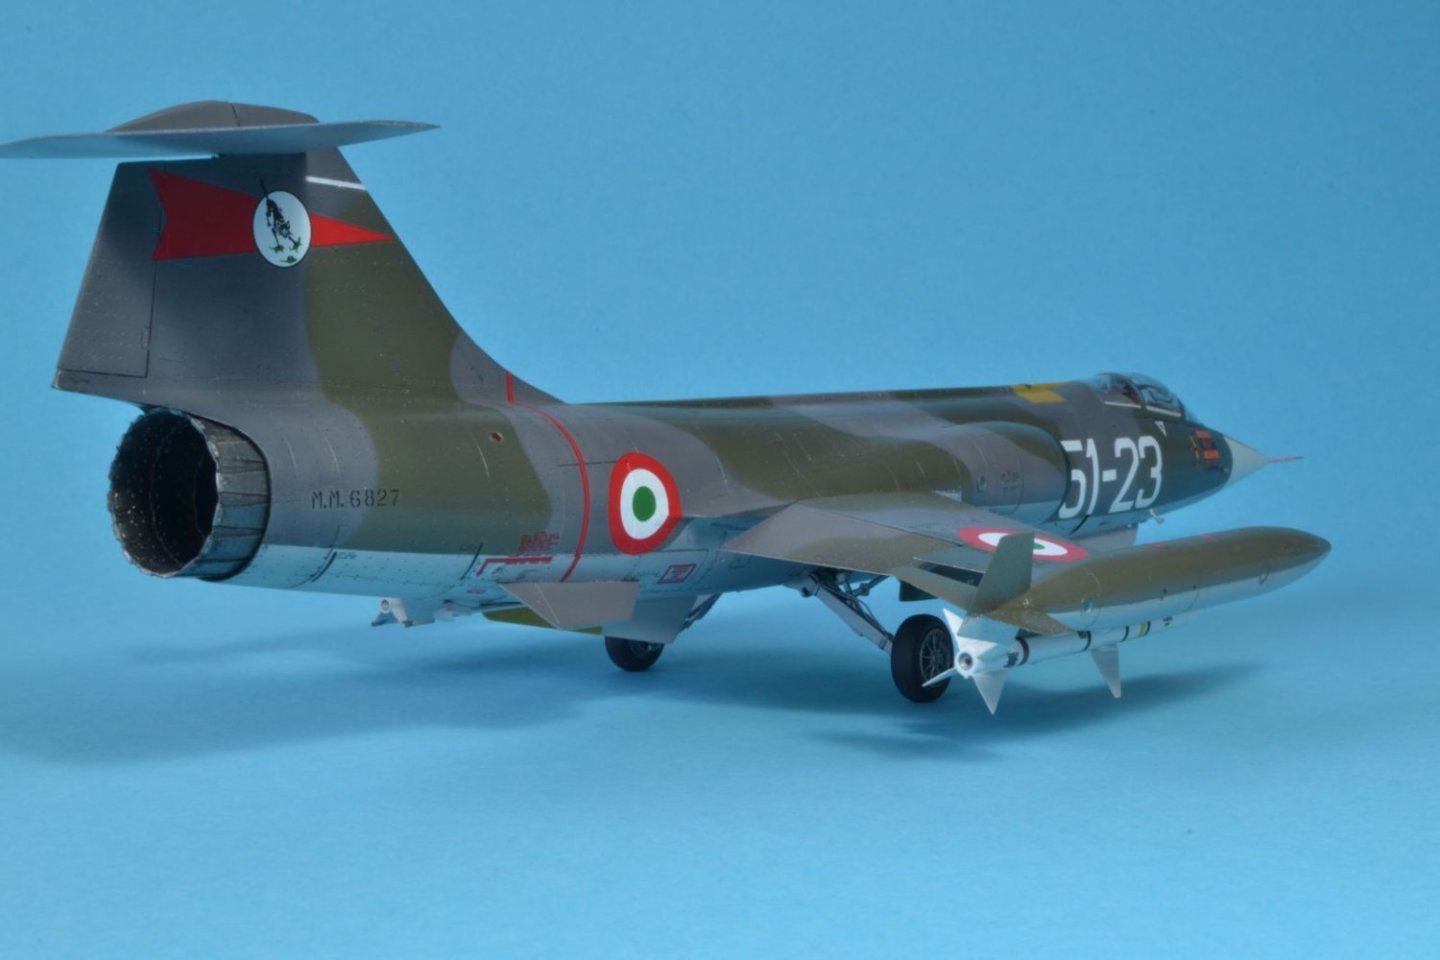
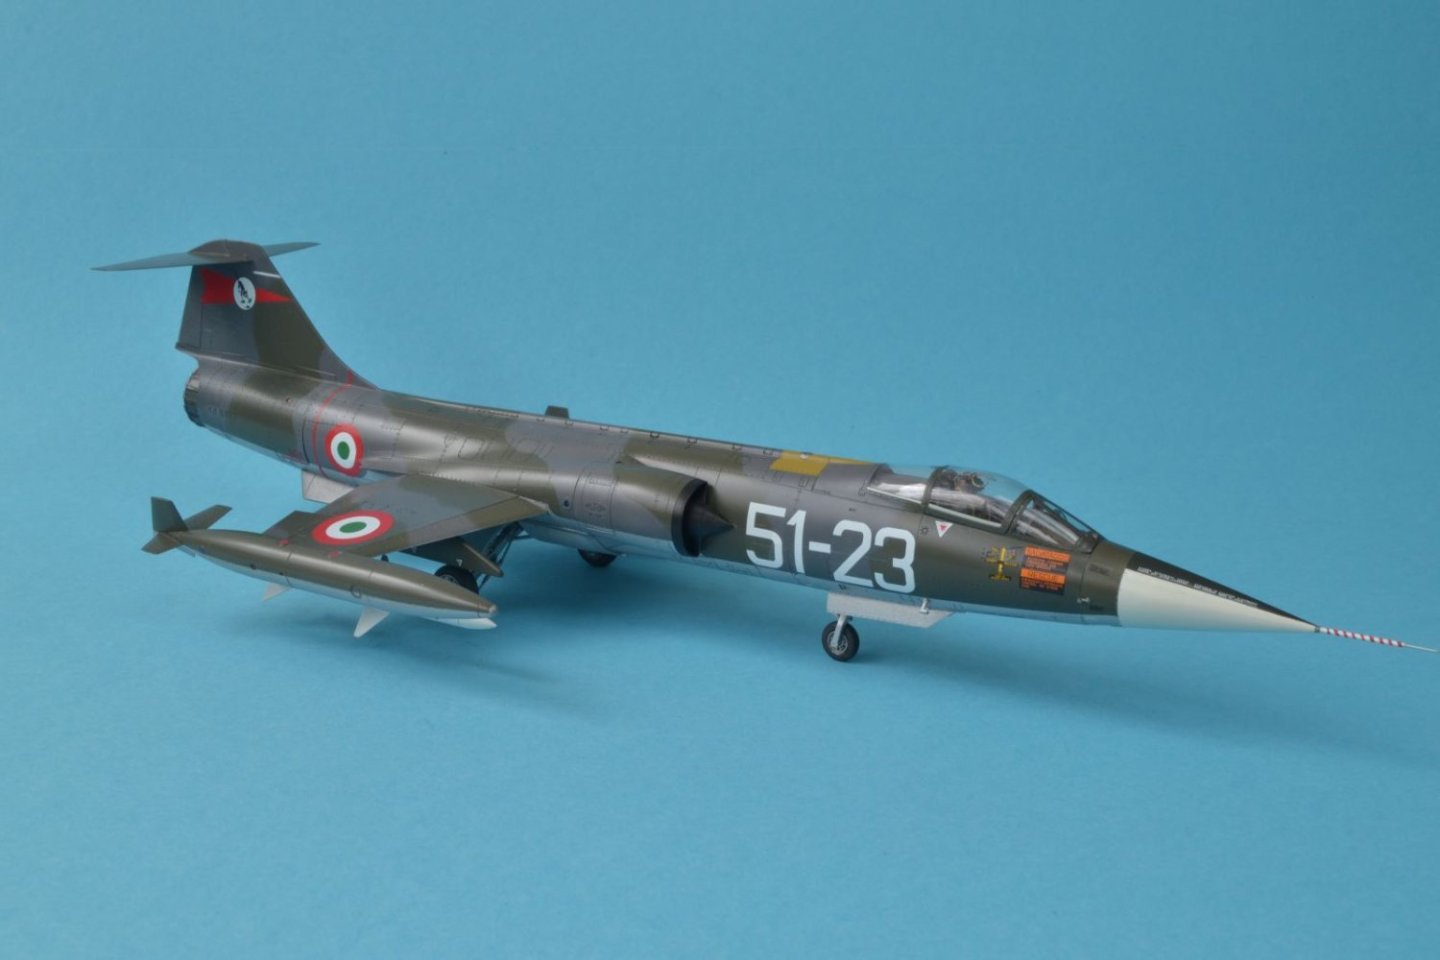
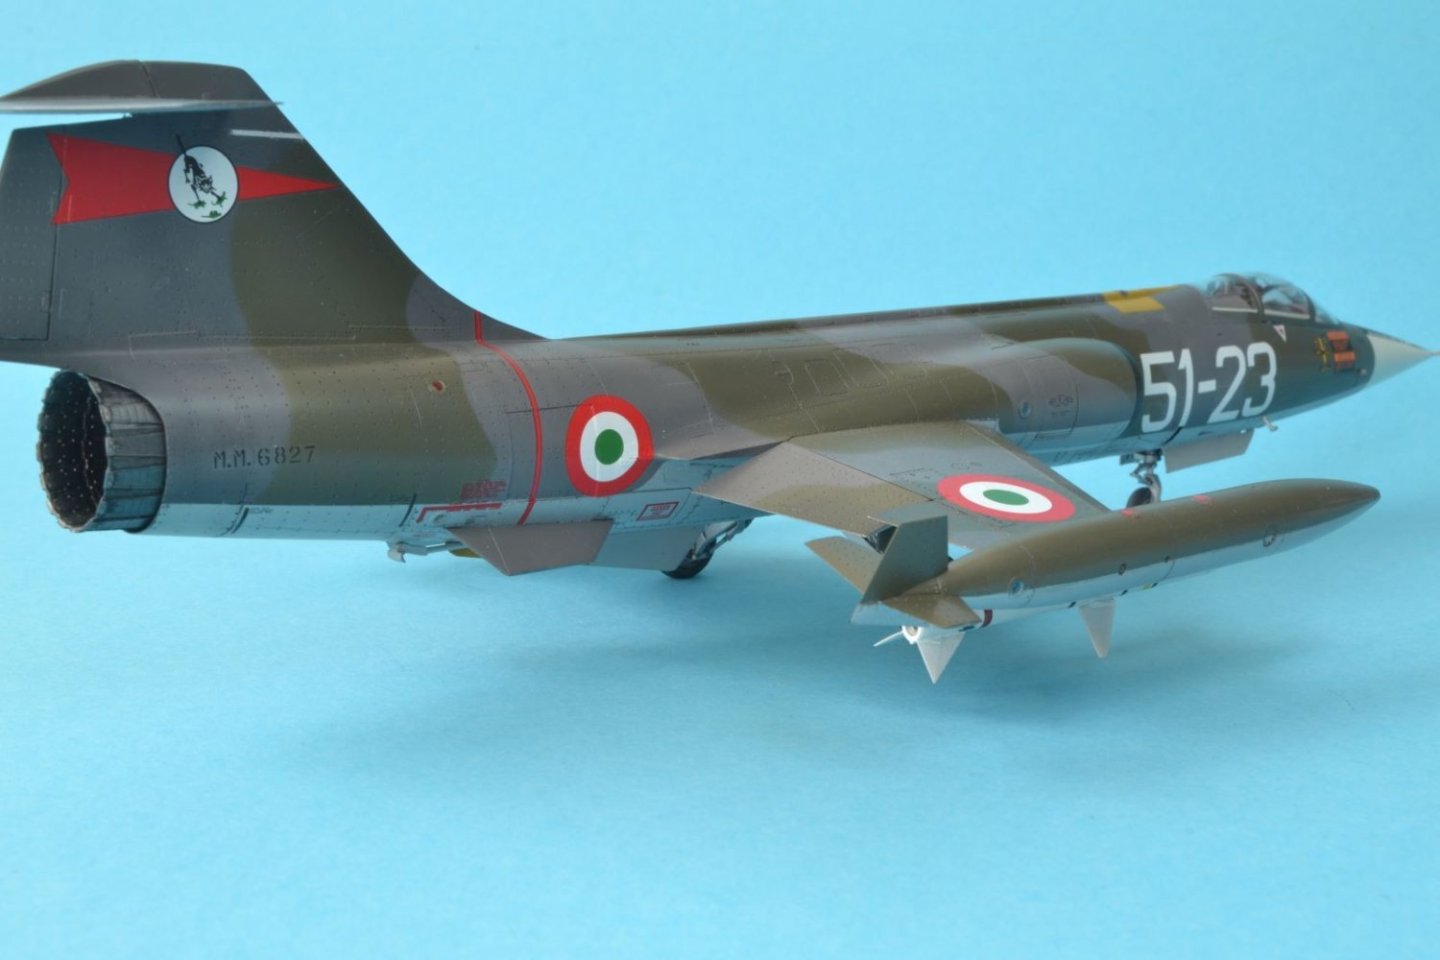
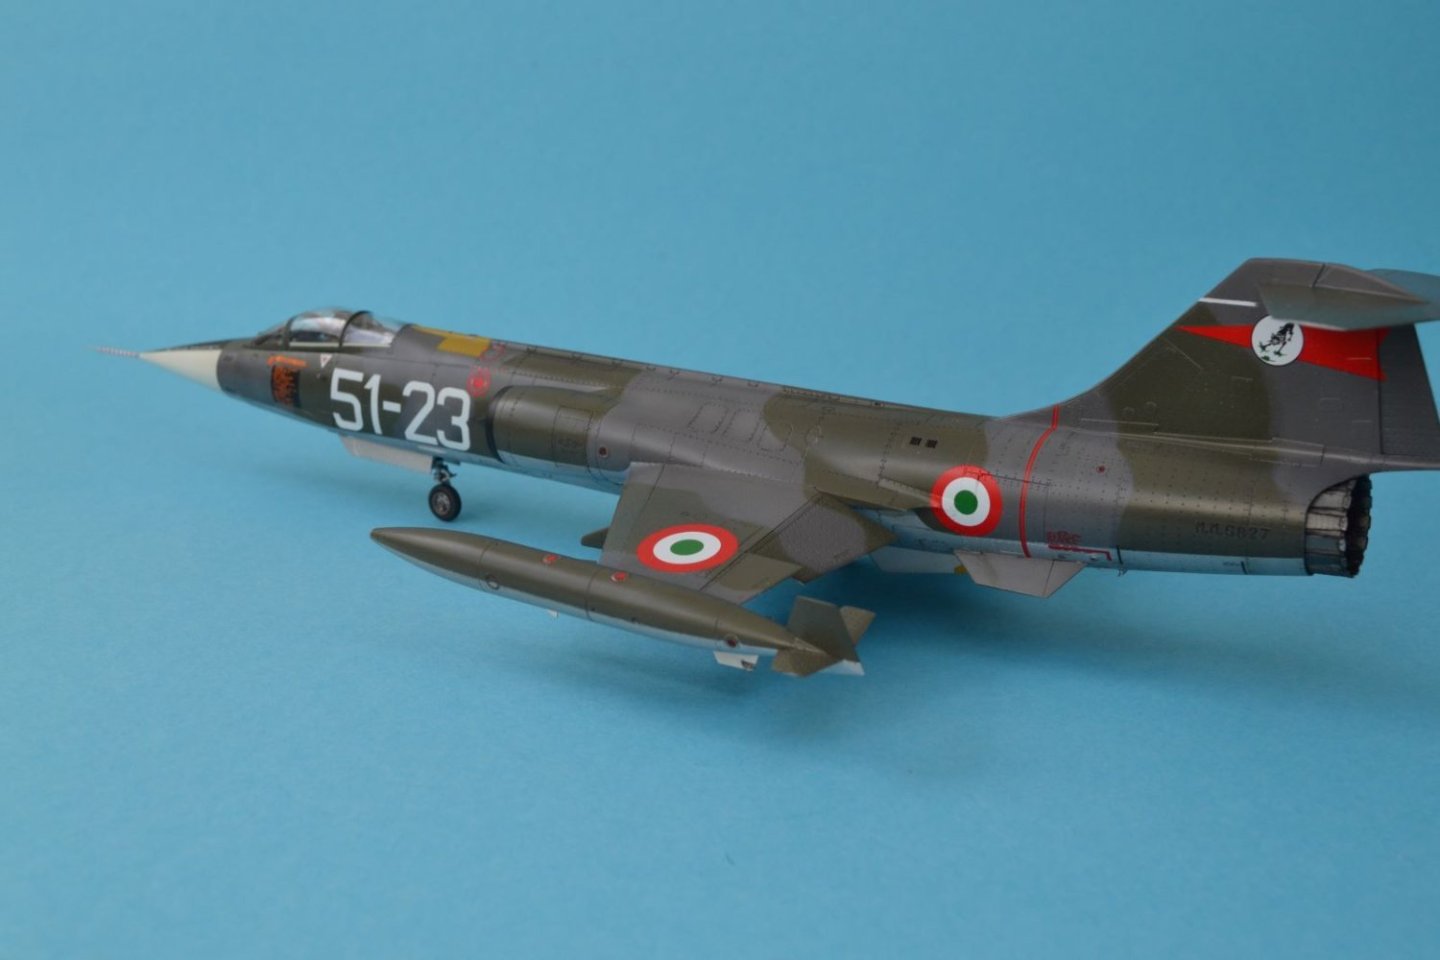
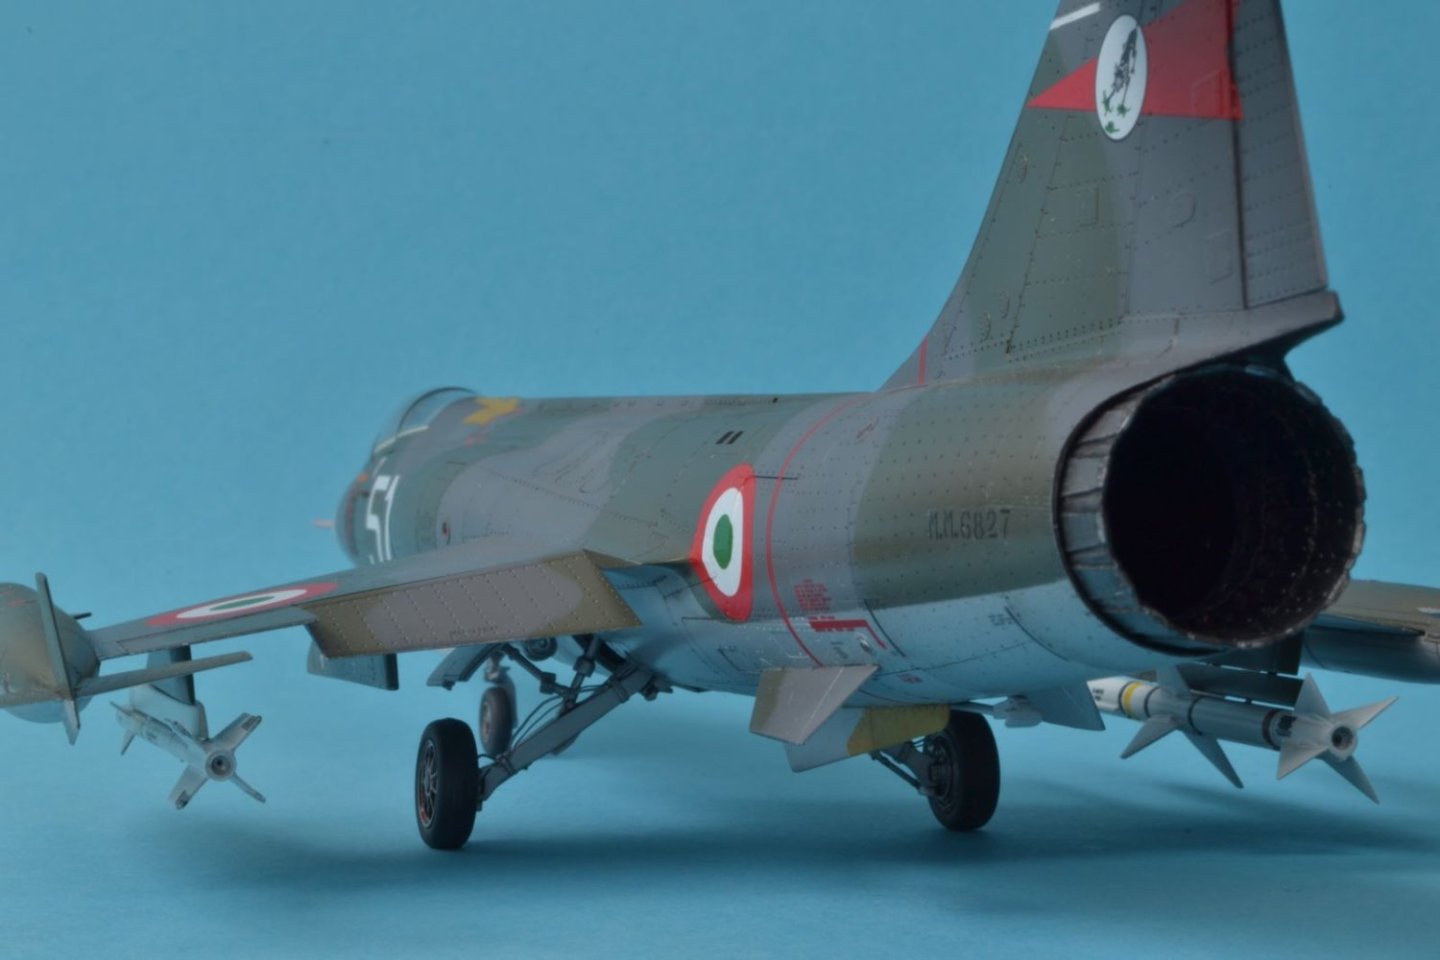
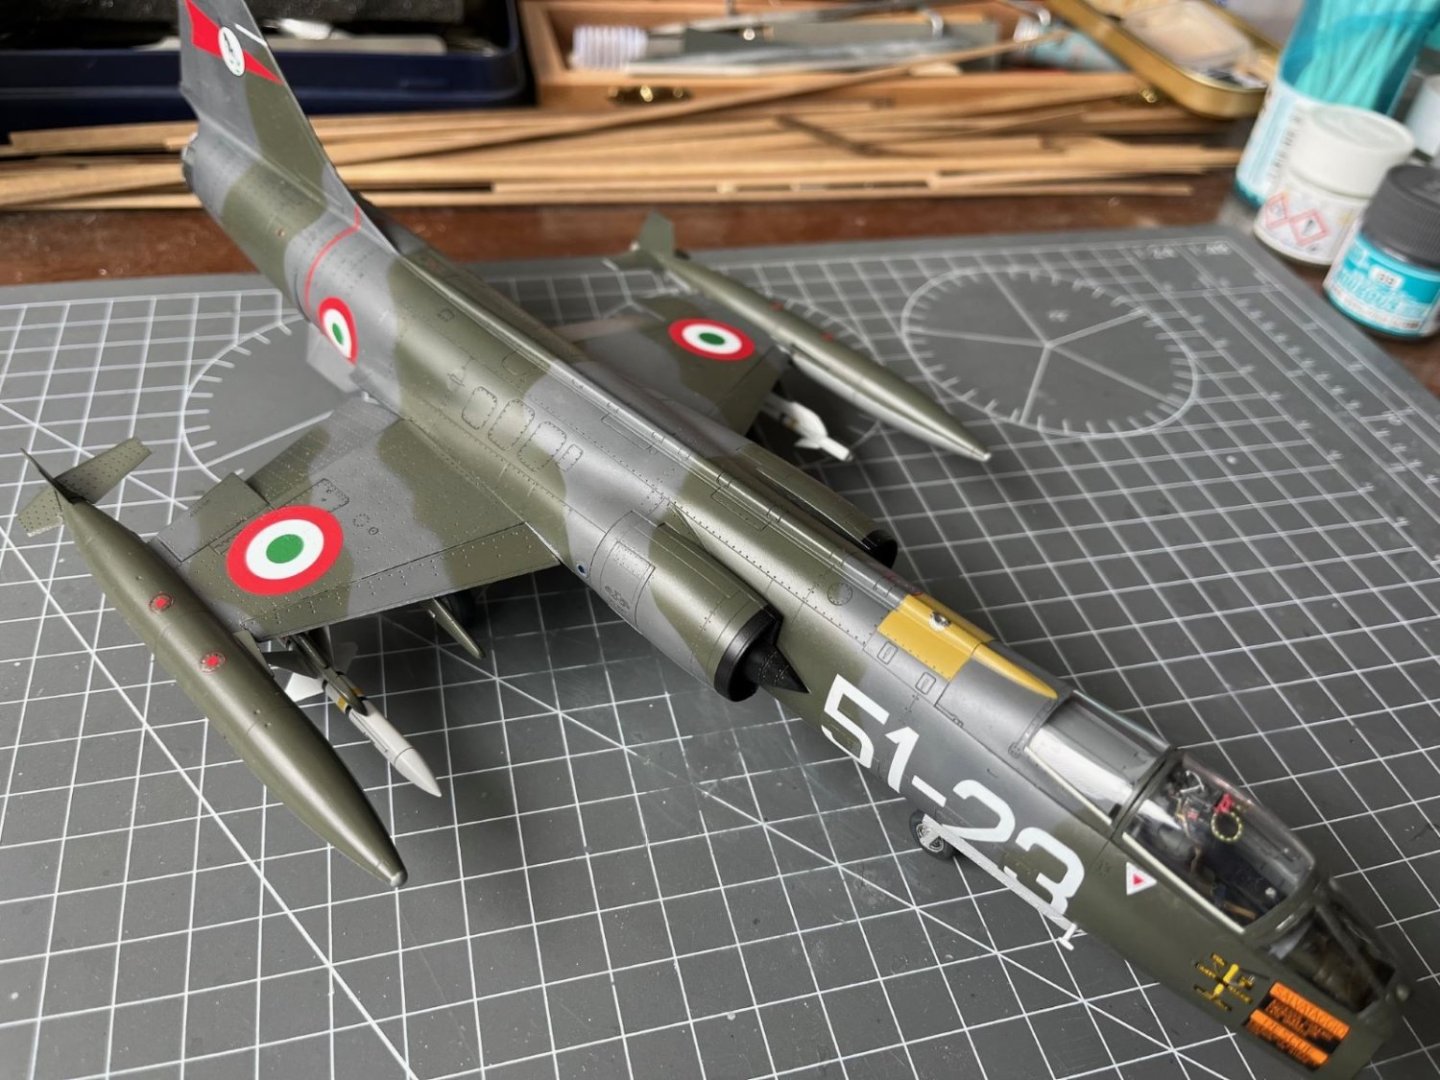
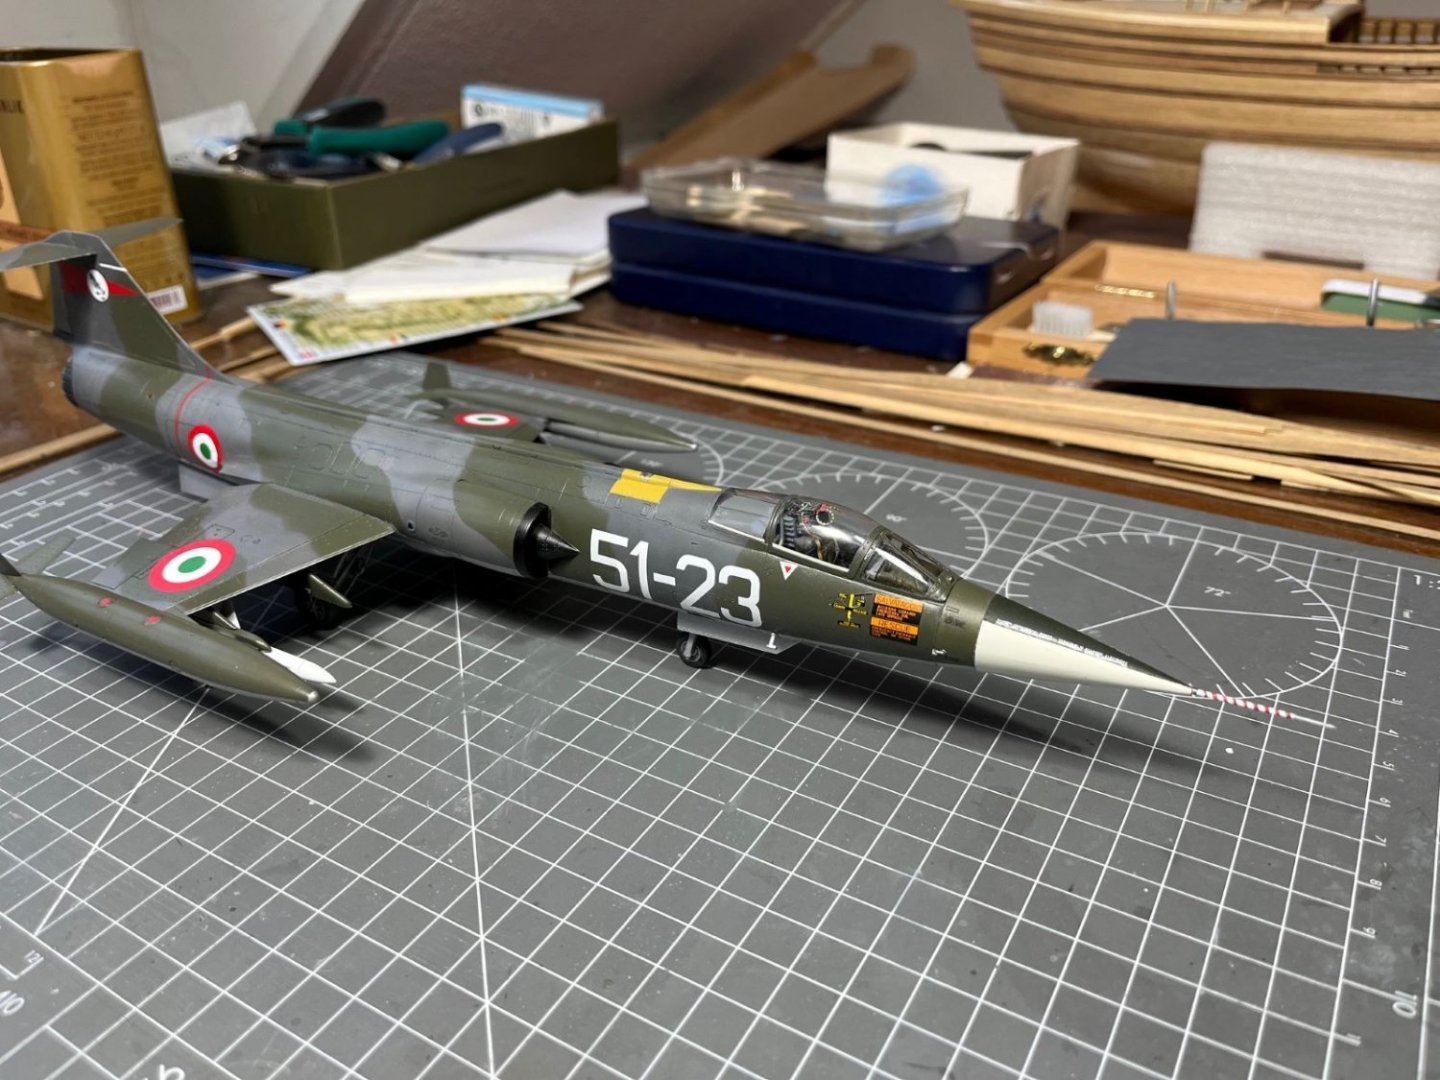
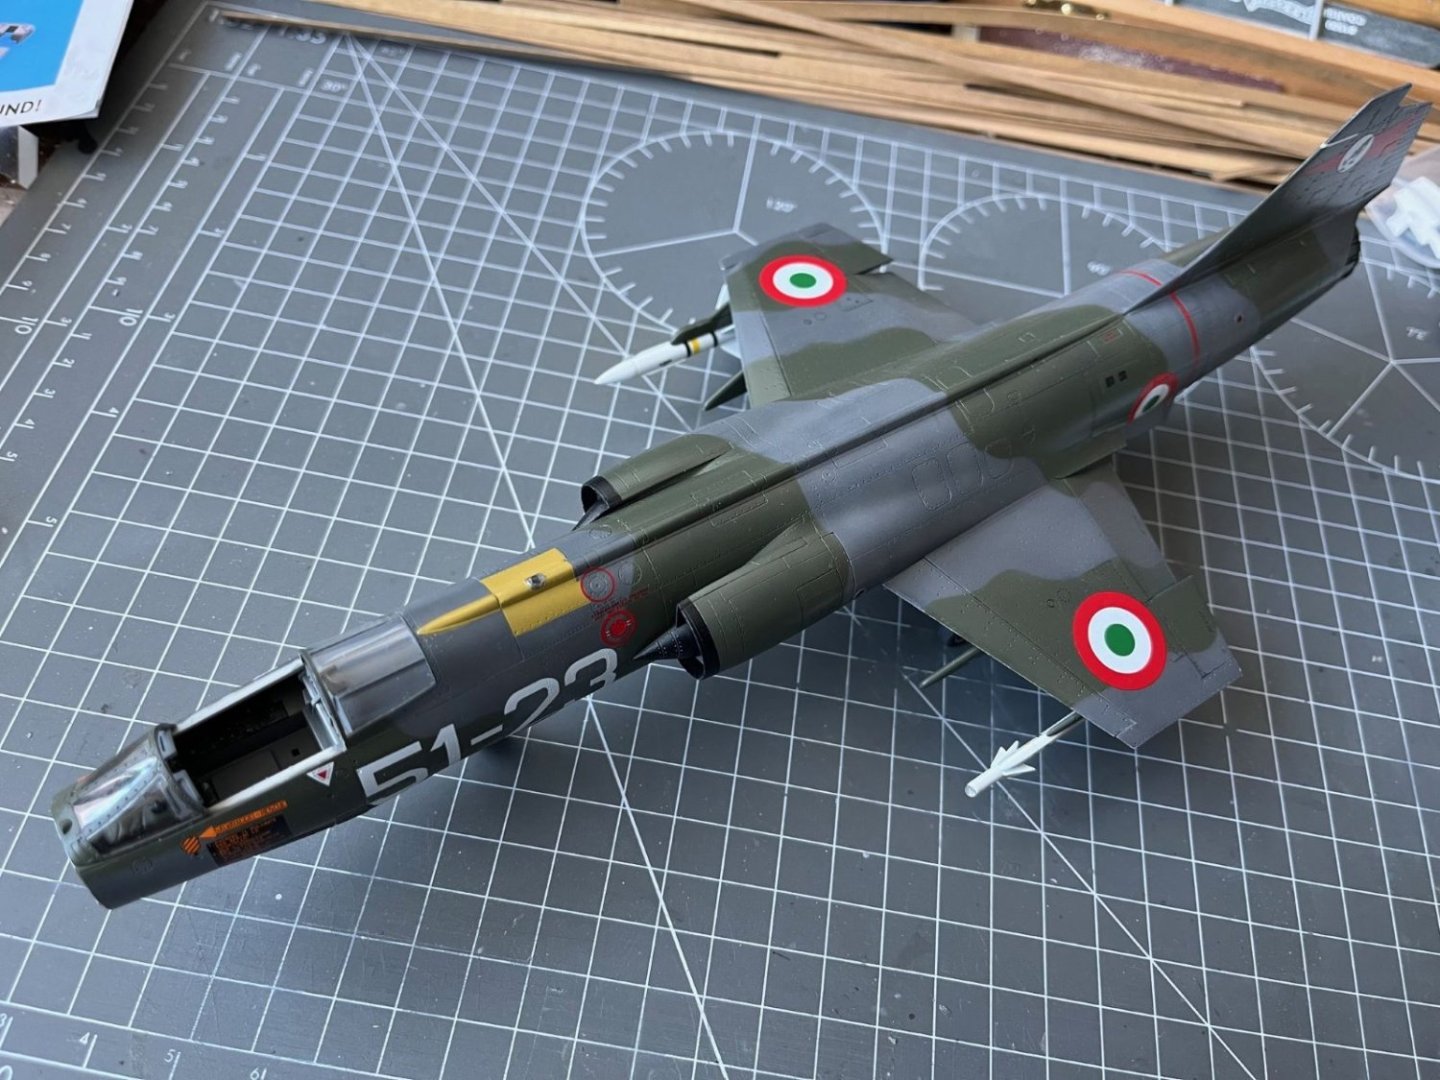
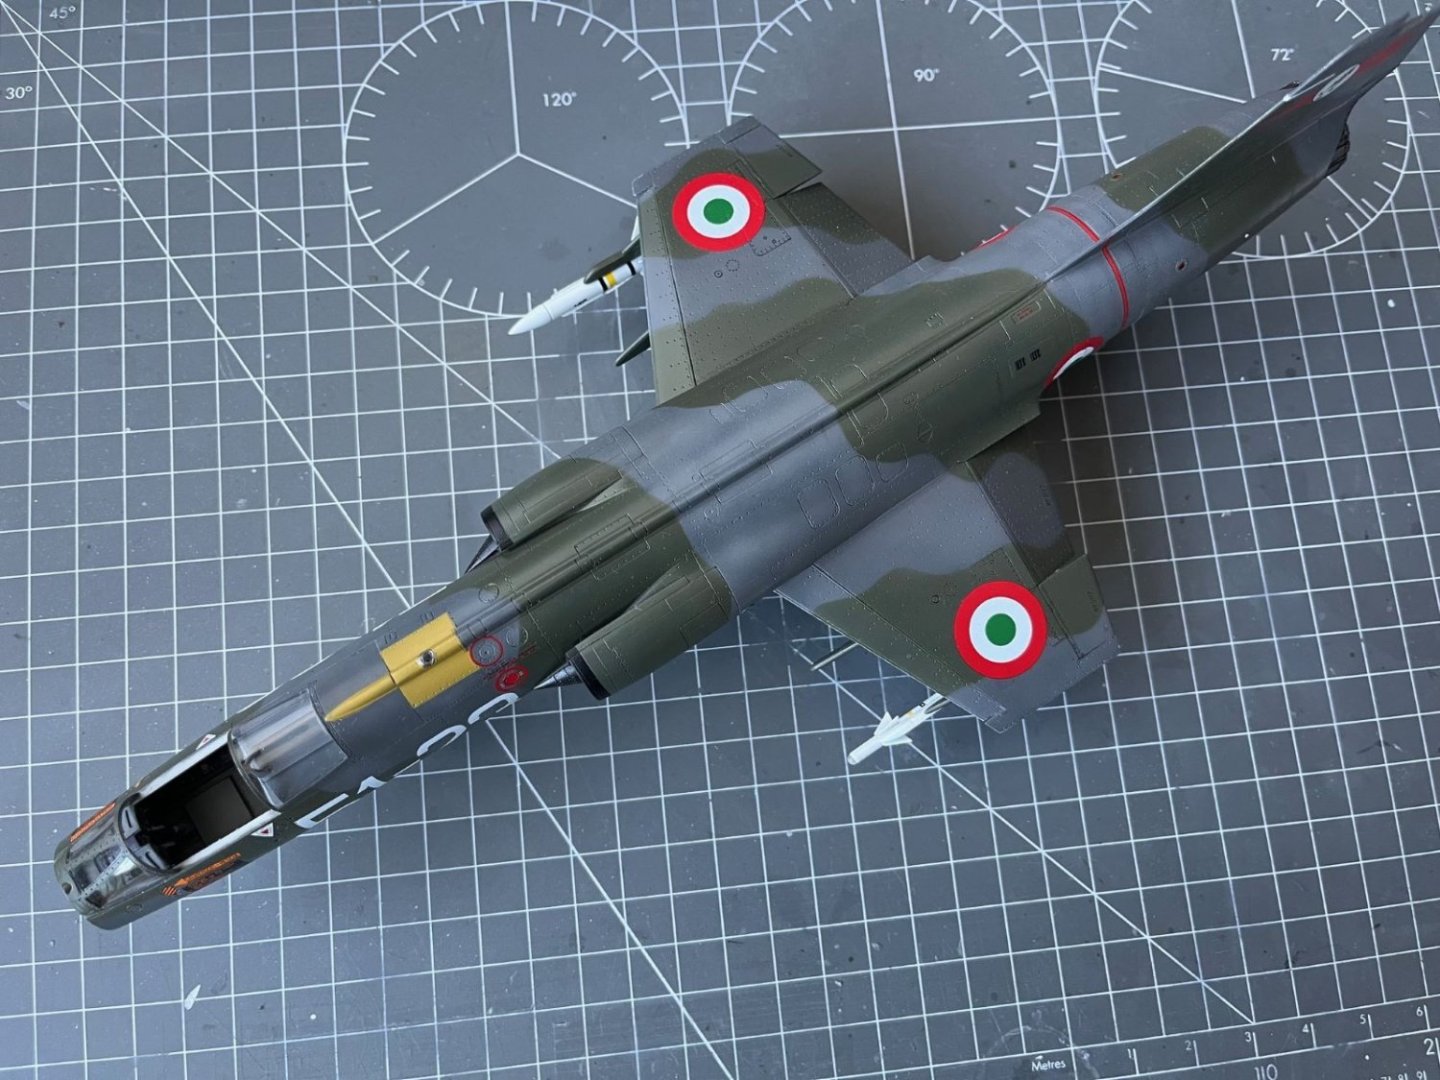
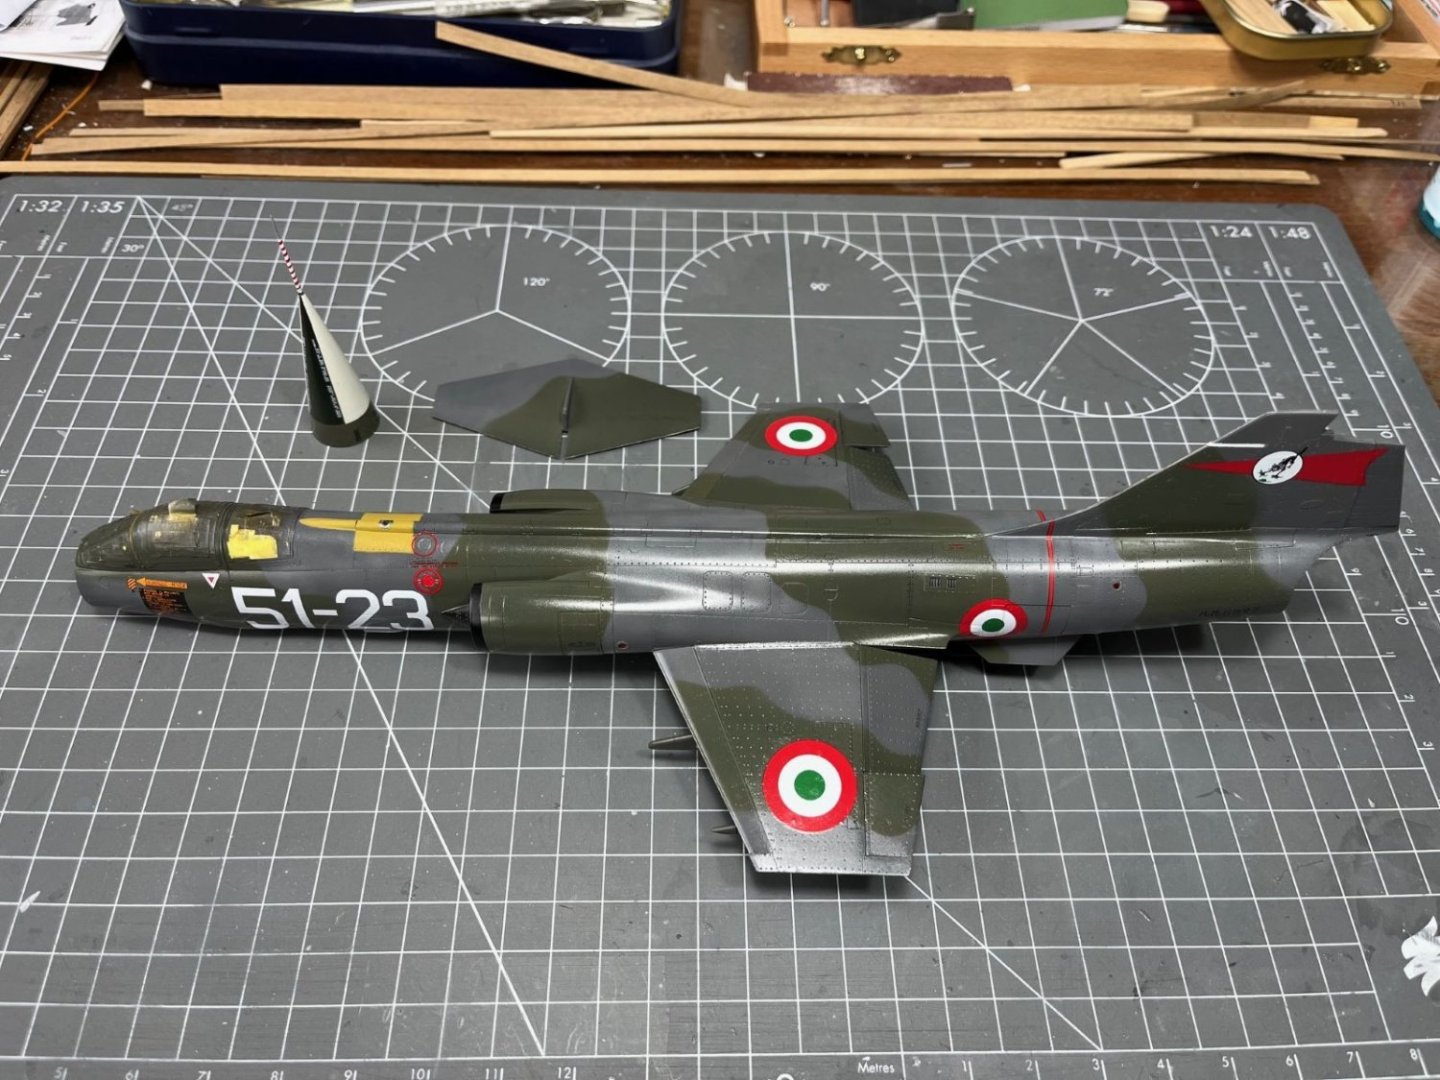
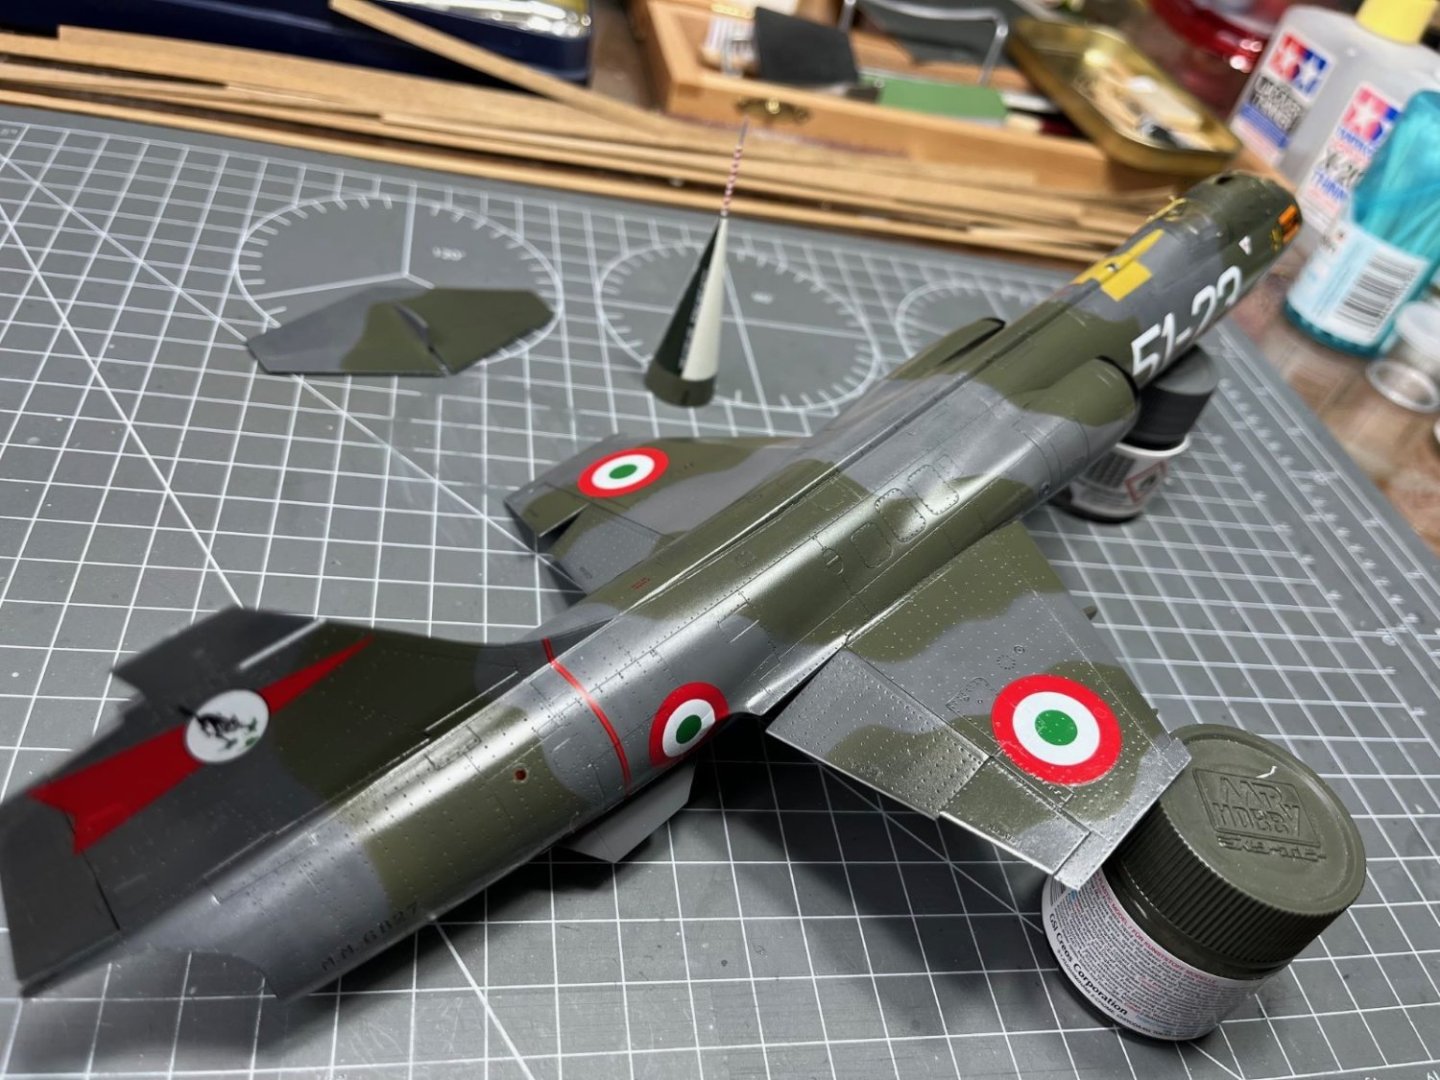
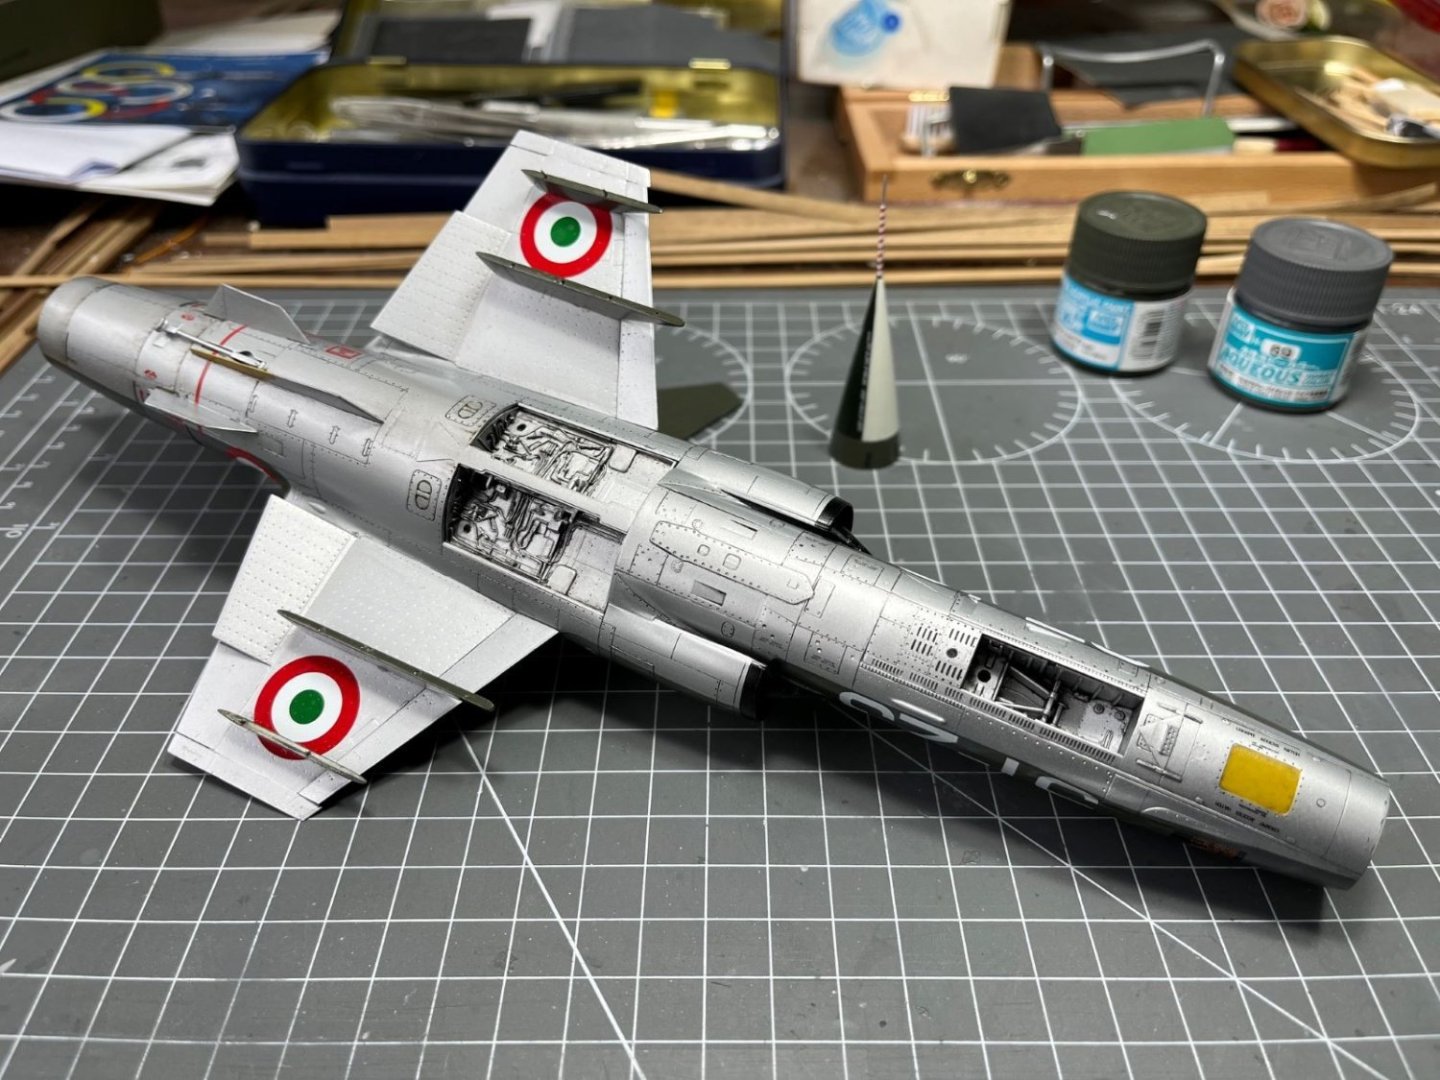
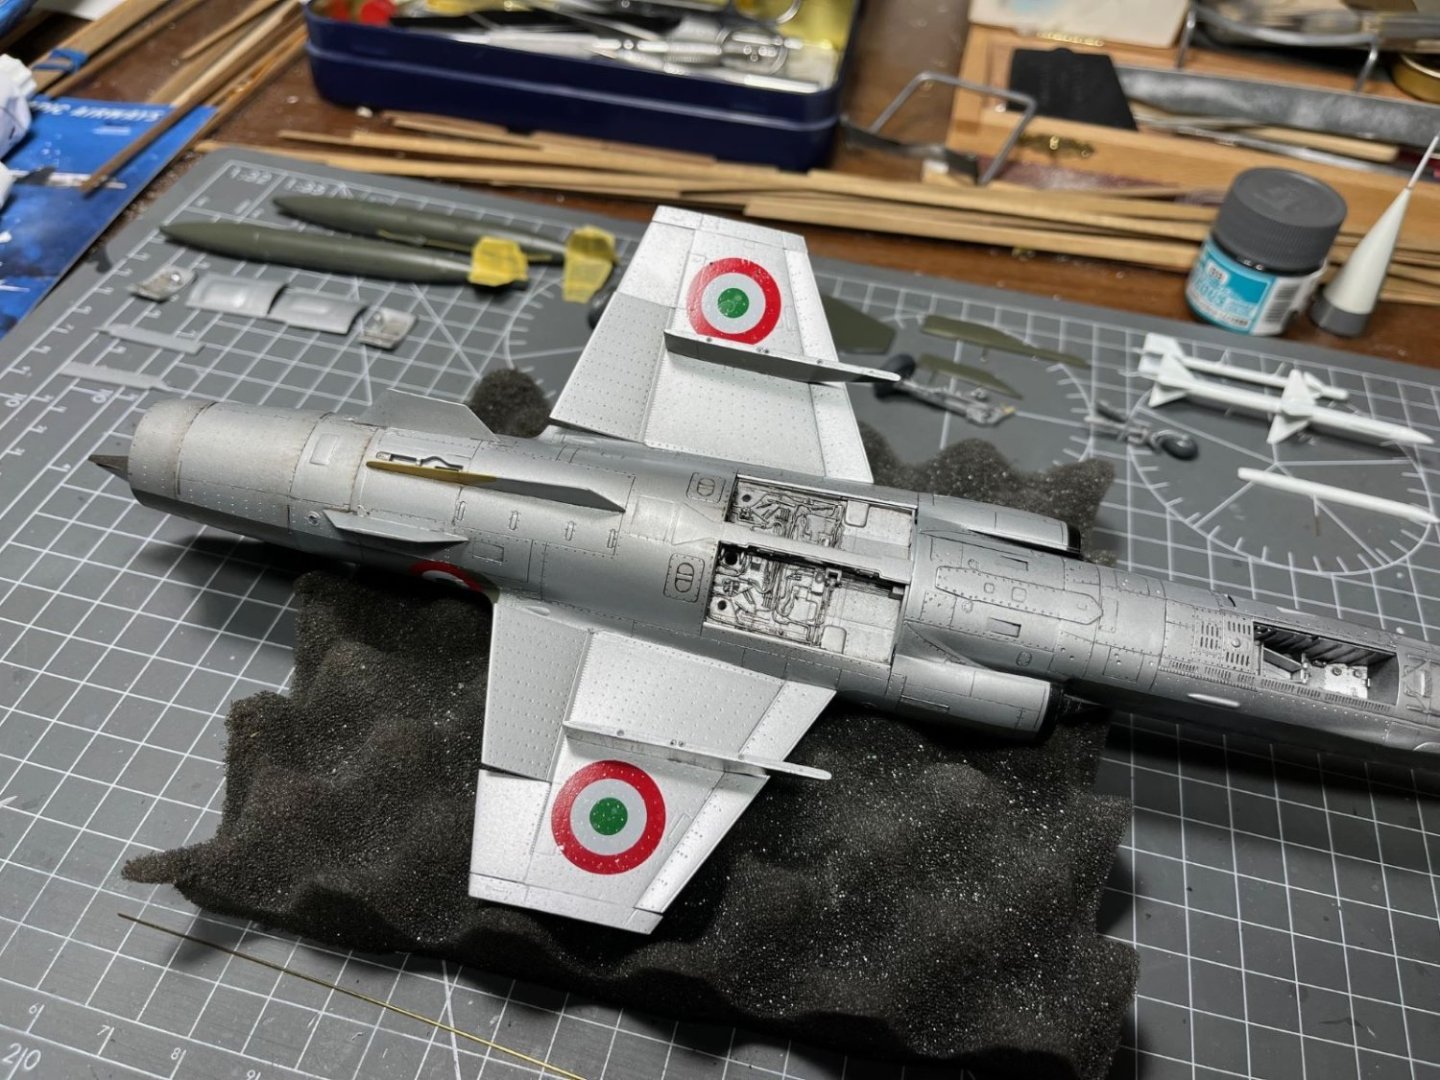
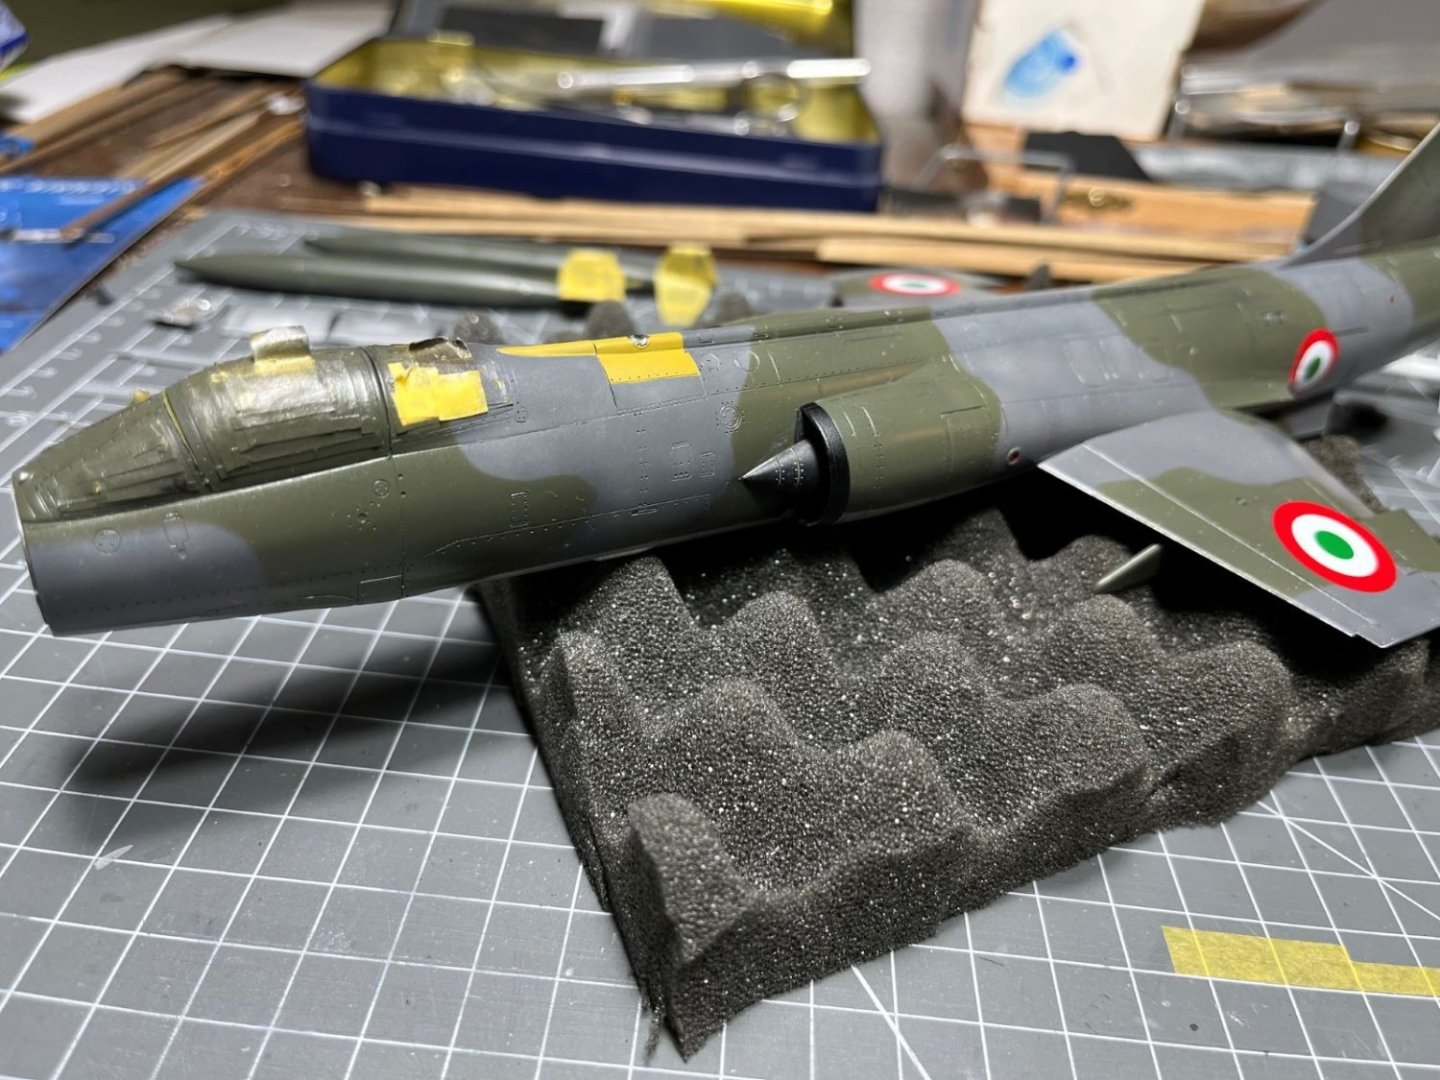
LOCKHEED F-104 S STARFIGHTER Kit Hasegawa 1:48 scale These are some of the final pictures of my finished model which depicts a Starfighter in Italian service. My F-104 carries the insignias of one of the interceptors of the 51st Stormo, based at Istrana, North of Italy as it appeared in 1981. This version started to be built by Aeritalia in Turin (former FIAT) in the late '60. It was powered by a more powerful J79-GE-19 and was armed with the version B or L of the Sidewinder missiles and with Sparrow missiles (from which the letter 'S' in the designation). The kit is the old 1:48 Hasegawa of the F-104 S which is by now outdated by the newer 'state-of-the-art' Kinetic one. Nevertheless, I found that the plastic is still very nice with crisp and finely engraved surface details, thin and clear transparent parts and it well reproduces the distinctive forms of this aircraft. The build log can be found in the previous pages. To improve the model, I sourced the following after market items: - Aires resin jet exhaust; - Master brass pitot probe; - Eduard resin ejection seat MB Mk7 and harness; - Eduard resin Sidewinder; - Aires resin Sparrow; - Skymodels decals. The colors that I used for the Italian NATO camouflage were Gunze H-69 (dark sea grey), Gunze H-309 (dark green) and Vallejo Metallic 'white aluminum' for the underside. Beside the positive points, I am also listing what are, in my view, its few negative points: - Overstated rivets on the wings which shouldn't be there; - Incomplete range of details for the 'S' version; - Absence of external loads and pylons; - Decals with yellow/cream color in place of white for codes. I replaced them with after market decals. The grey paint of the camouflage was slightly post-shaded to reproduce the typical discoloration of this paint. The final finish was obtained by a coat of Tamiya flat clear XF-86 with some clear added to obtain a satin finish. Little rivet trails and discolorations on the undersurface were obtained by oil colors. I hope you like my model, thanks for the provided feedback and comments and suggestions are as always welcome. Best regards, Dan


- 79 replies
-
- 20
-

-

-
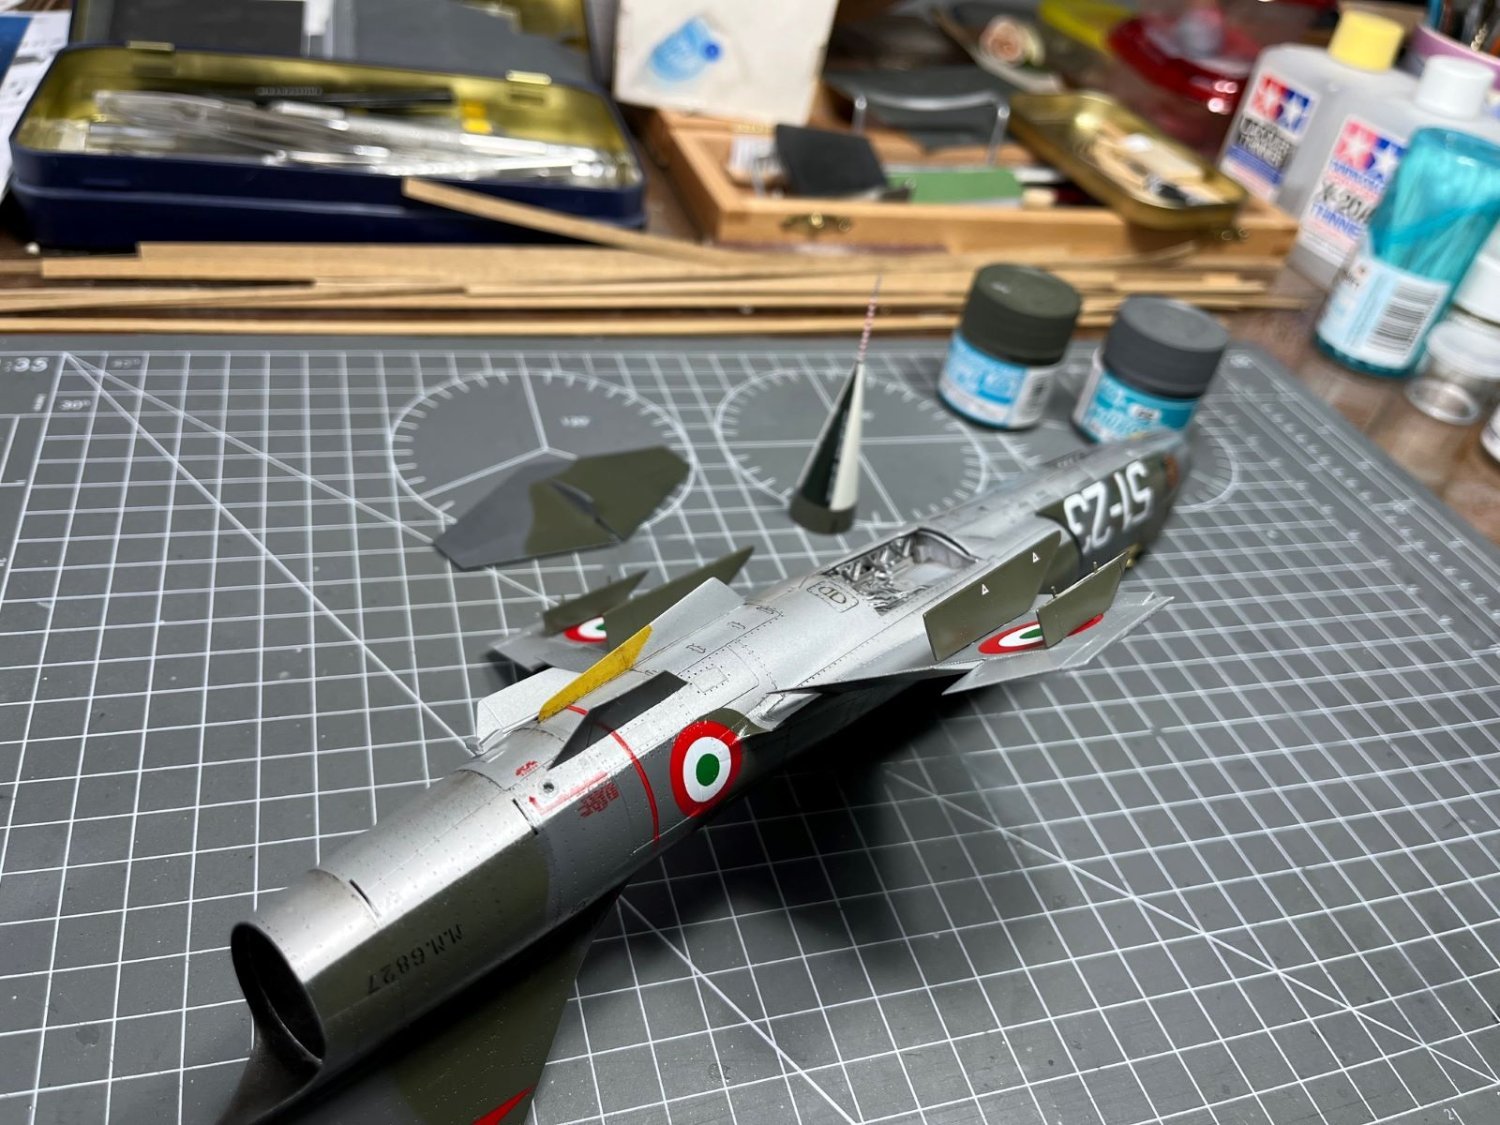
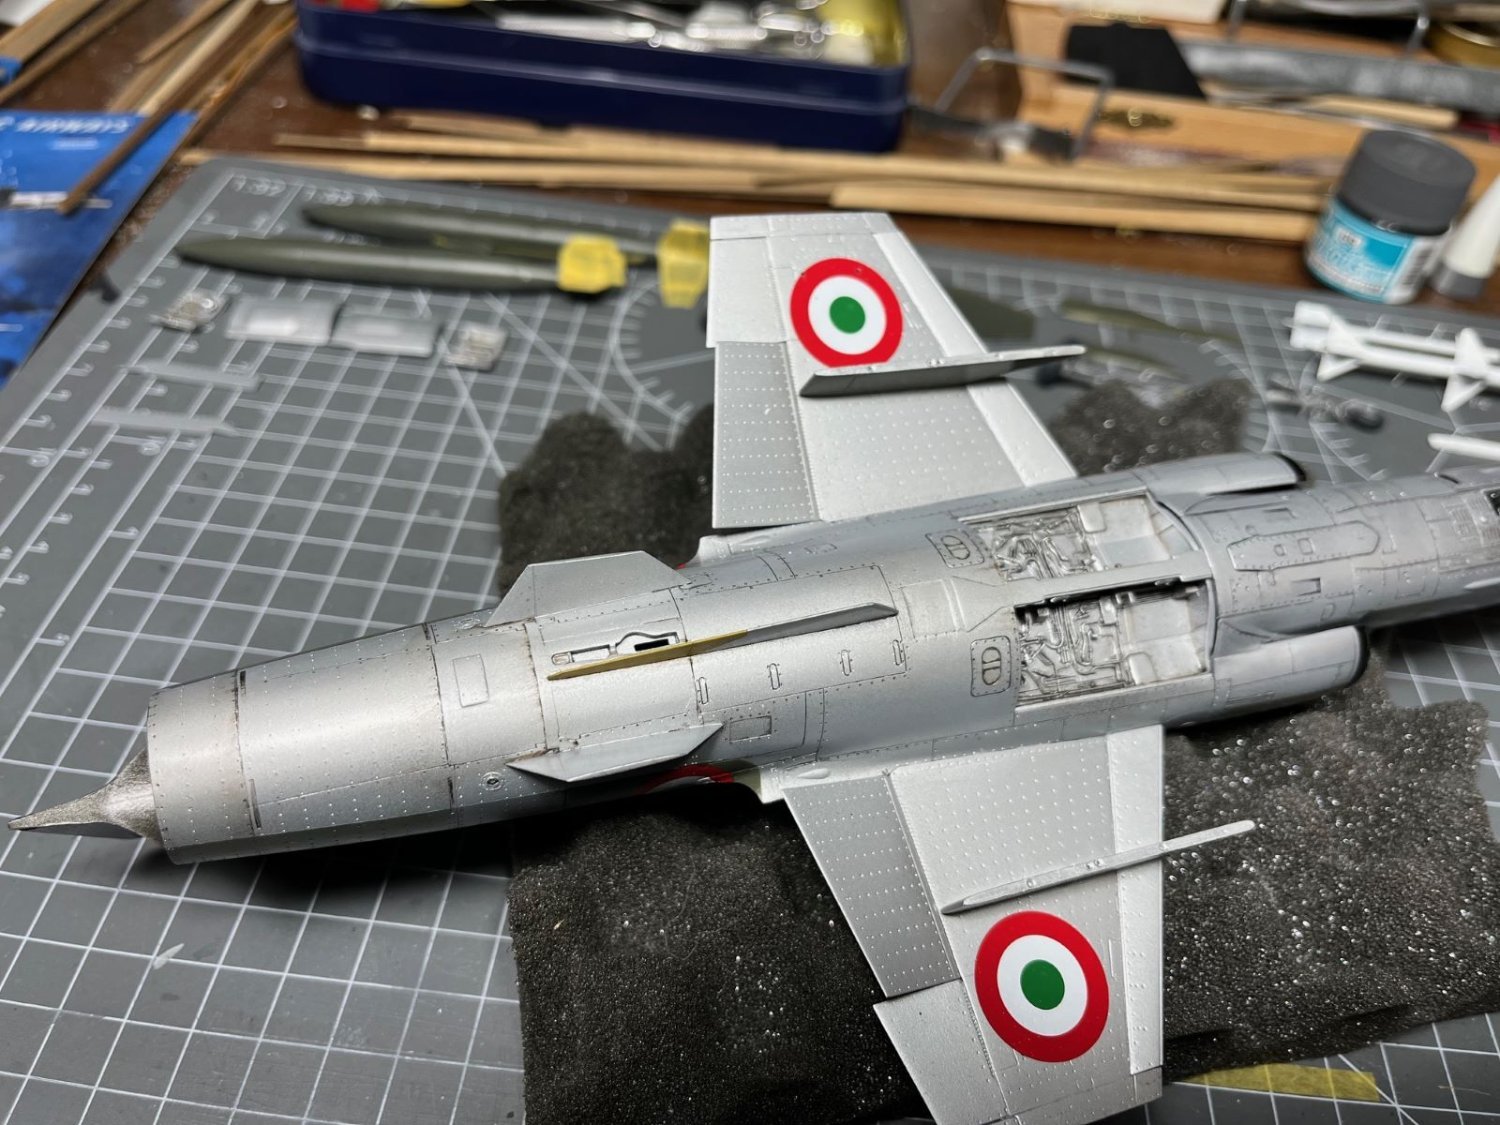
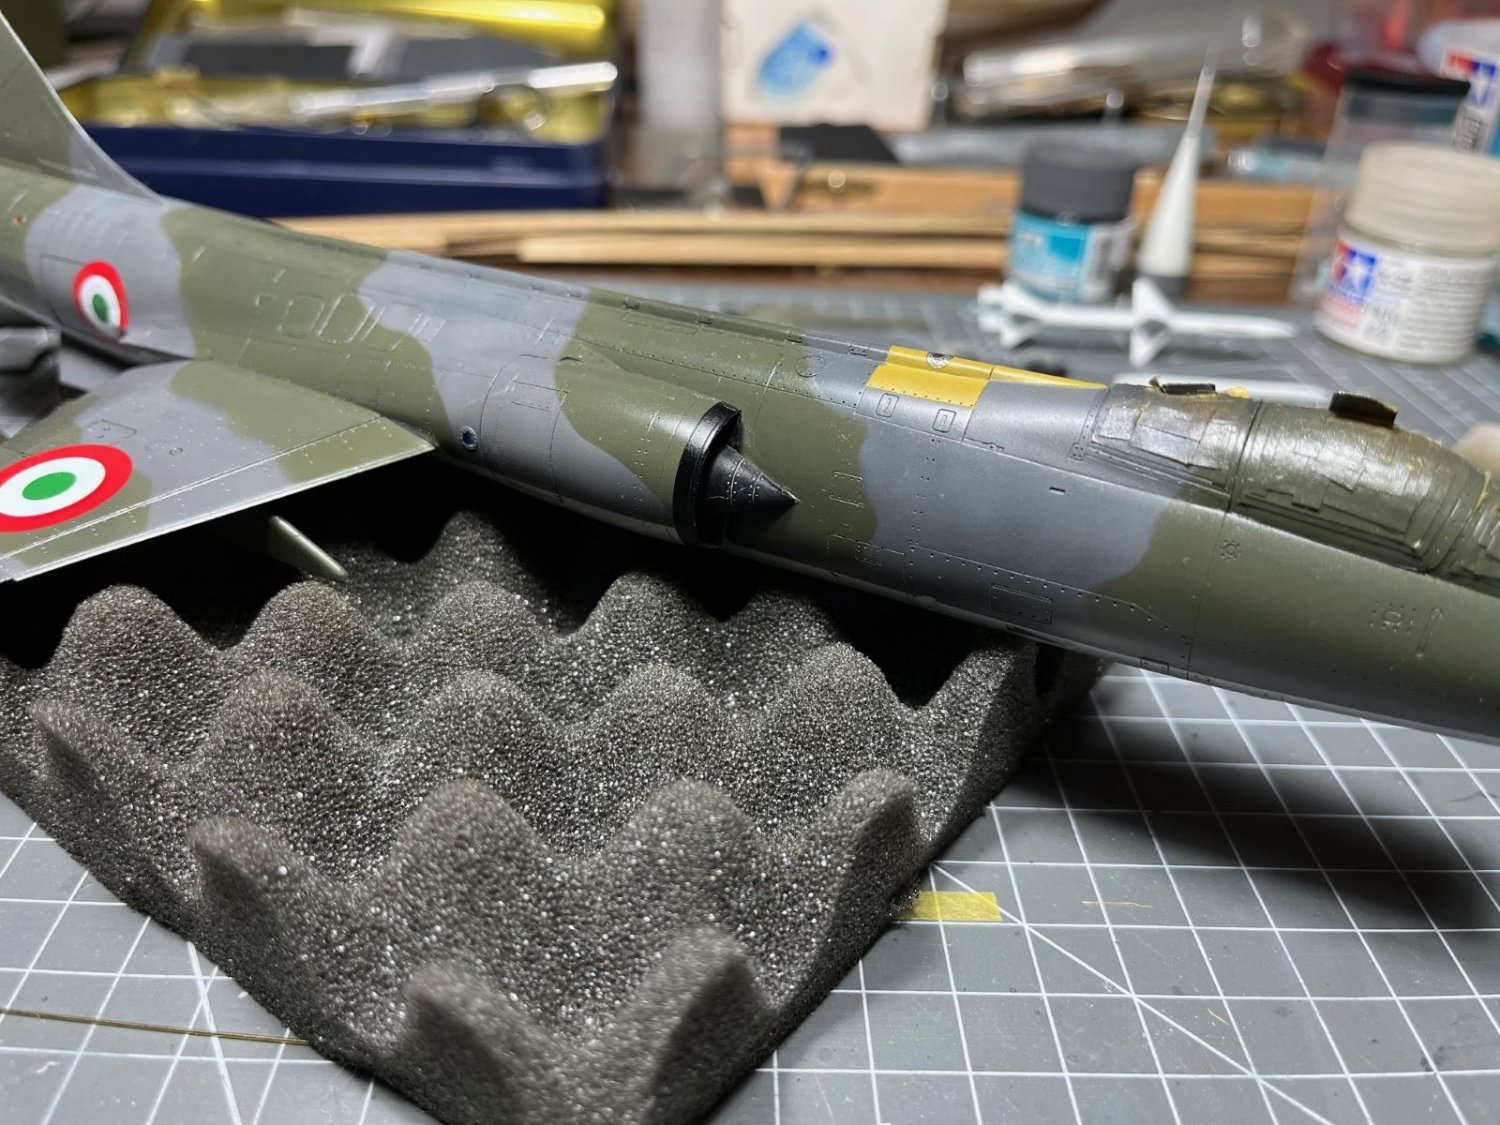
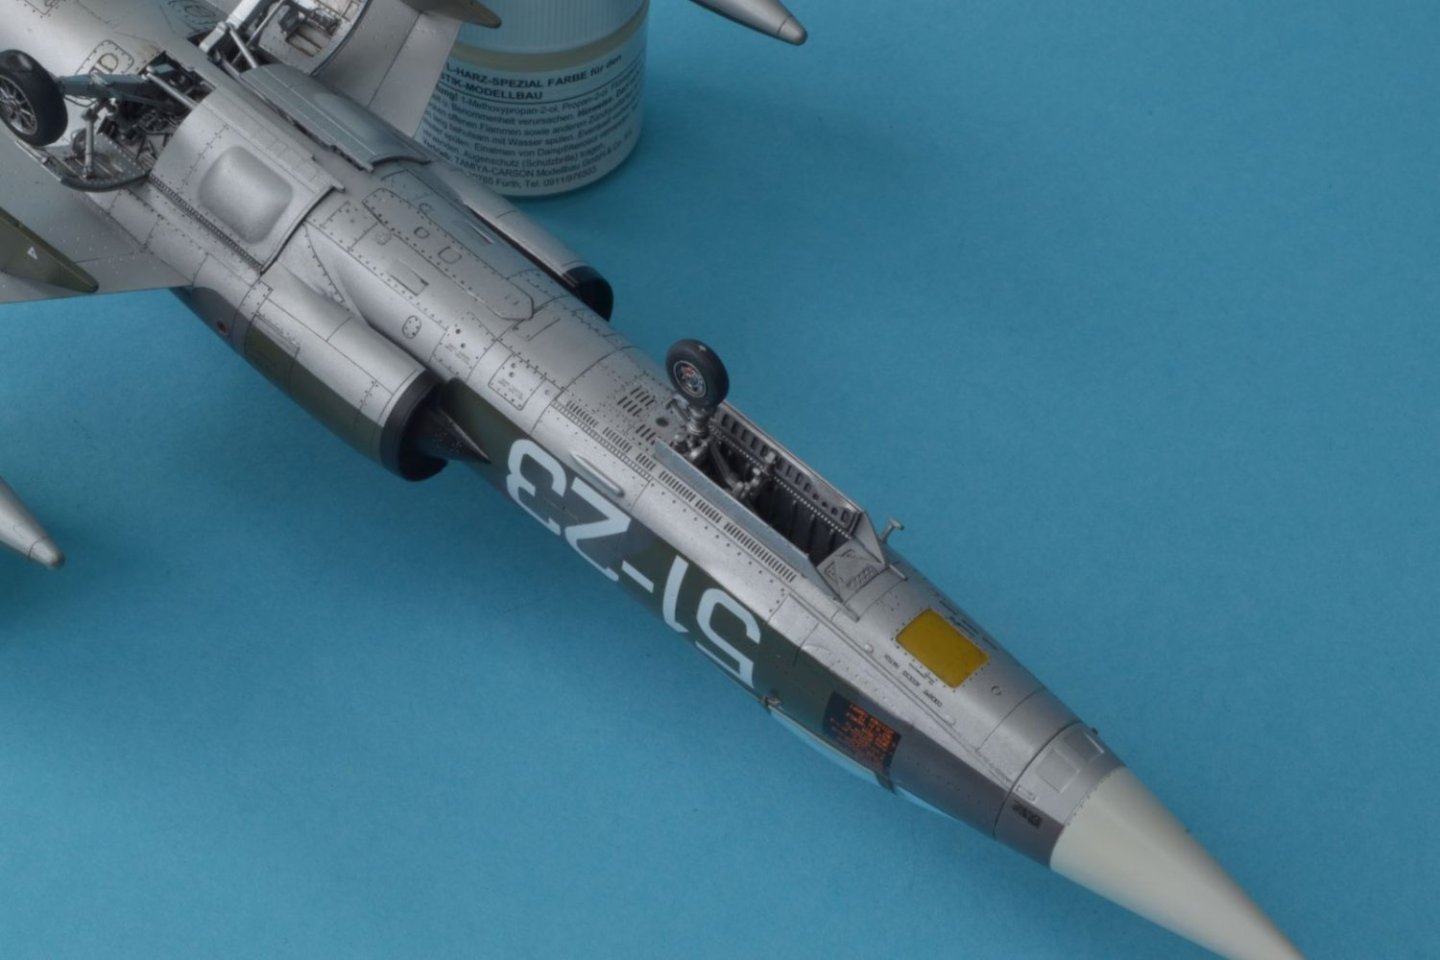
Hi there, the last bits being assembled. The angle of attack sensor vanes glued in place with white glue; The huge tip tanks that ruin the sleek shape of the plane: The stabilizer/elevator surface of the 'T' tail: And finally the nose cone with the long pitot which I managed to knock off only a couple of times: Next installment will be the last one and will contain the final pictures. Being the plane very long, it won't be trivial to take good pictures with all of it in focus. Best regards, Dan

- 79 replies
-
- 12
-
-
-
Thanks Andrew 😃! The Eduard kit was of top quality. Beside the photoetched things that are always a bit tedious to me, it was enjoyable to finish it. Cheers, Dan
-
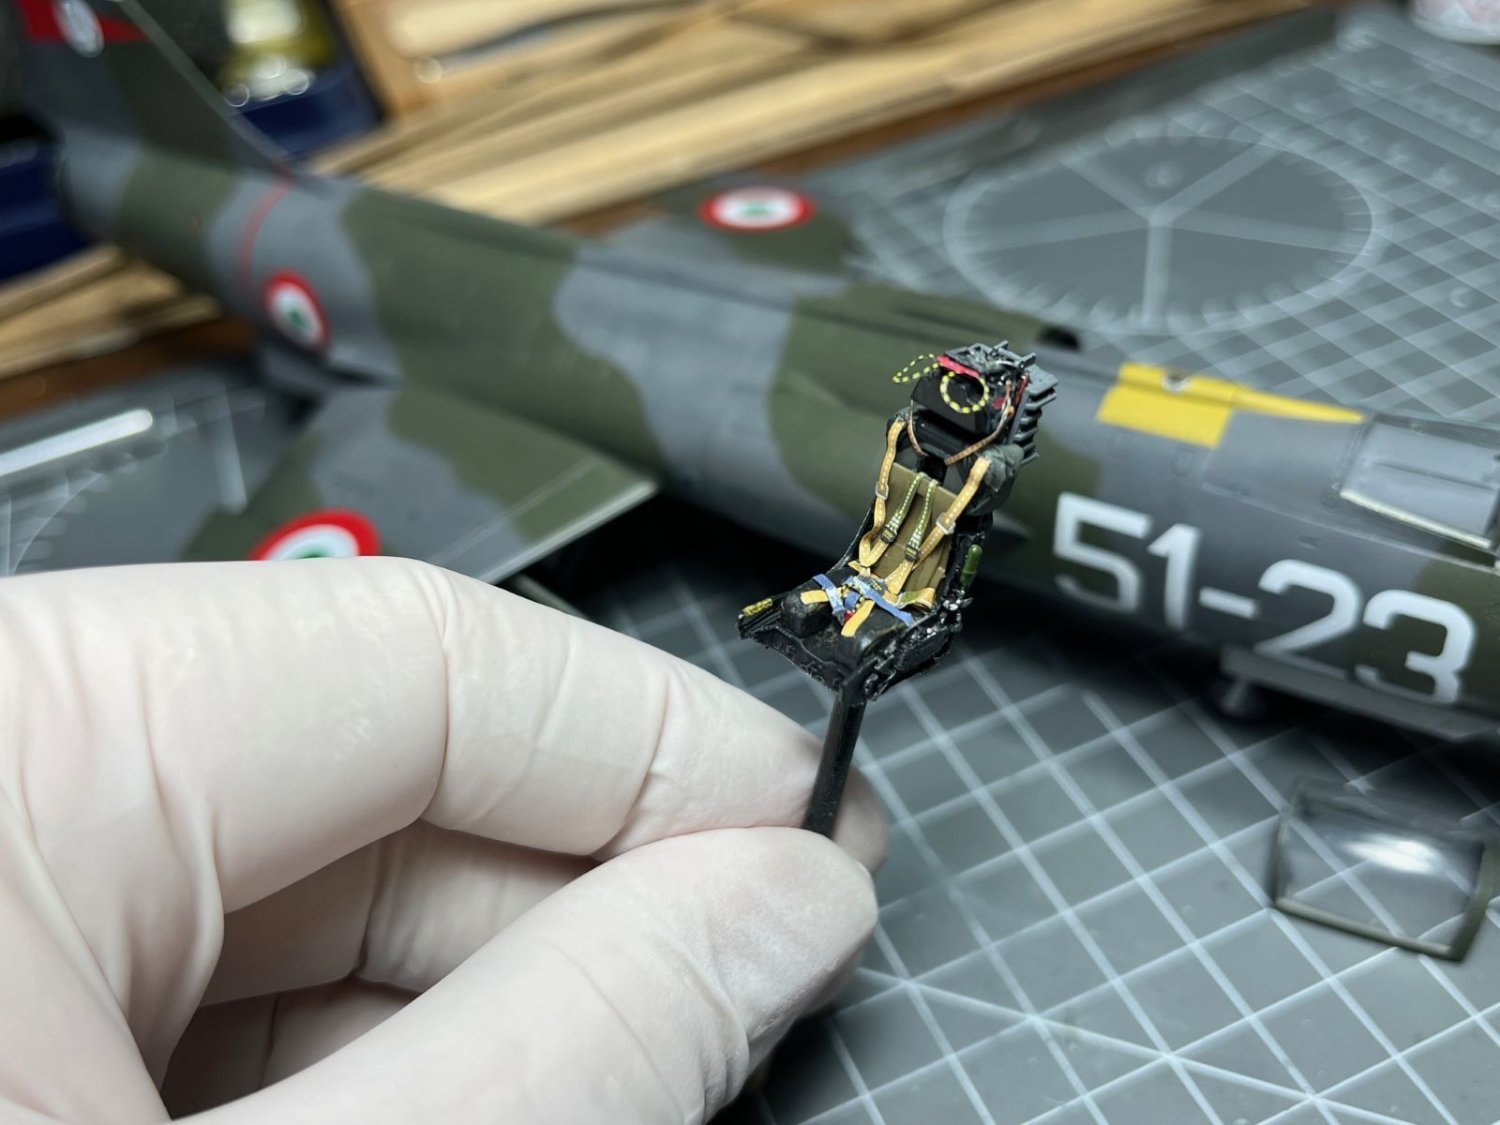
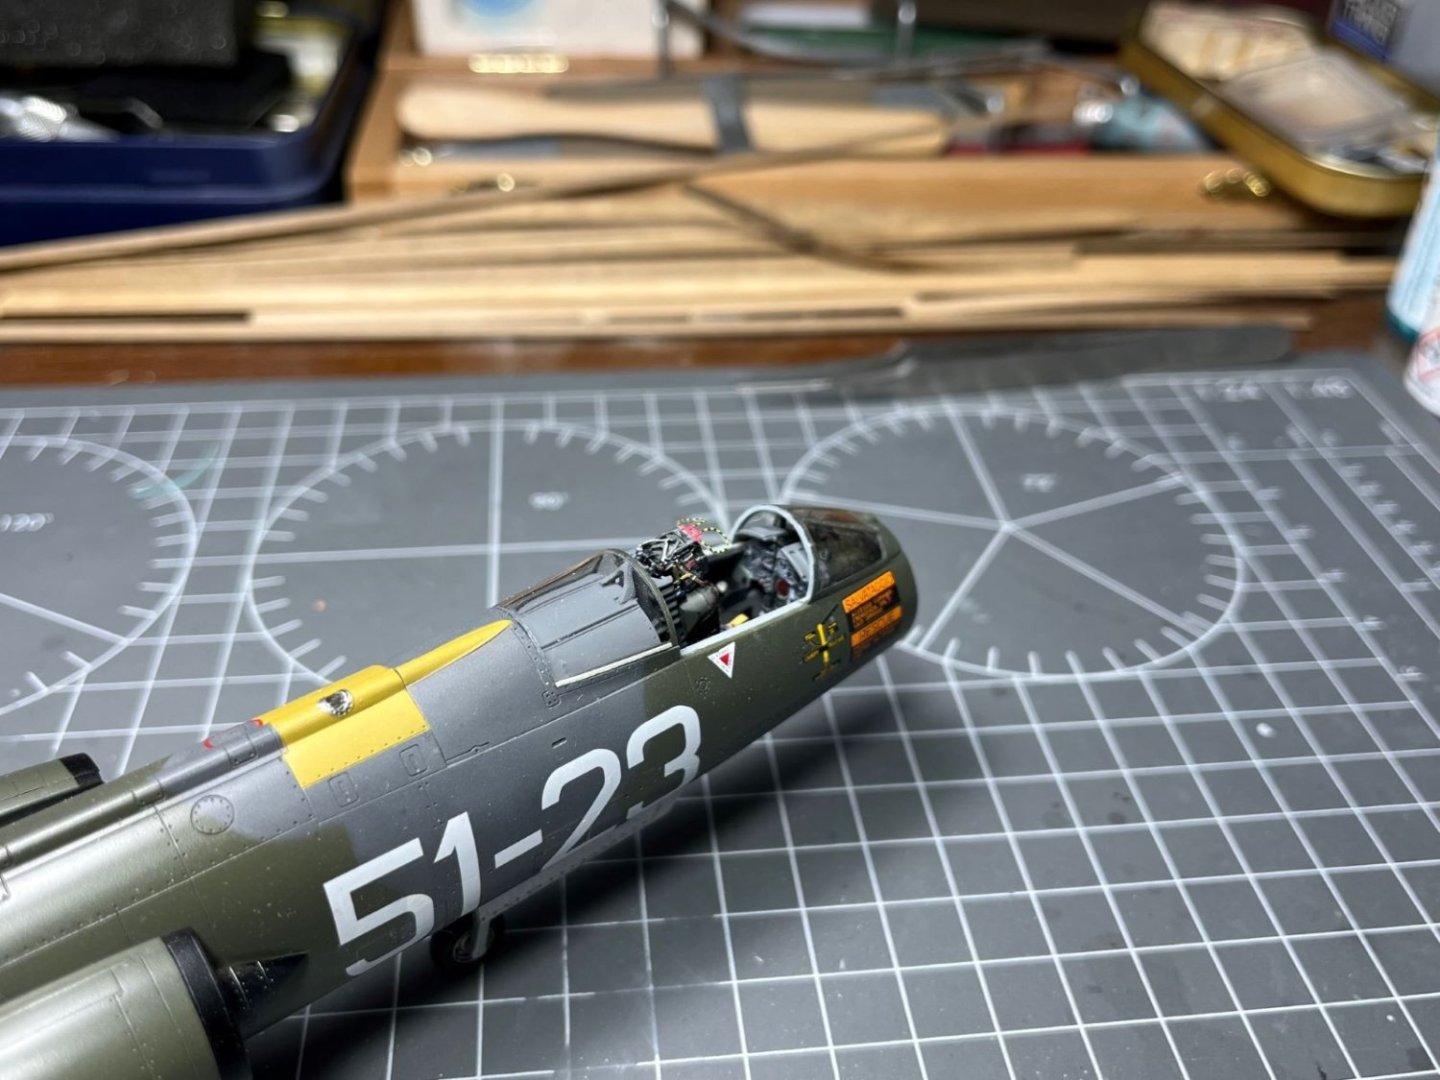
Hi there, this time I concentrated on finishing the cockpit. I sourced the Eduard ejection seat M.B. mk7 to replace the one of the kit, which was overall correct, but very simplified. The Eduard resin is very nice (I wonder how they produce these things) and broken down in few pieces. As usual, to drape the photoetched harness made of steel was a serious test of my mental sanity. The finished product, painted and coated with a flat clear was nevertheless quite nice: This is the seat tested inside the cockpit: Finally, this is how it appears under the finished canopy: That is all for today, best regards, Dan

- 79 replies
-
- 16
-
-
-
P-51D Mustang by CDW - FINISHED - Dragon - 1:32 Scale
Danstream replied to CDW's topic in Non-ship/categorised builds
Thanks for your explanations. Probably the kit design is flawed and the best action was what you did, i.e. lowering the LG bay. My comment about the position of the wing was aimed at trying to gain some fraction of mm by shifting the lower wing piece aft where the cut out of the fuselage offer more space (I had the impression from the pictures that this was possible). I am not assuming that the wing sits obviously too forward. Good luck again, Dan -
P-51D Mustang by CDW - FINISHED - Dragon - 1:32 Scale
Danstream replied to CDW's topic in Non-ship/categorised builds
Following, also for me, the P-51 is one of the coolest of WWII. It seems that the LG bay is too high, isn't the wing a tad too forward? Good luck, Dan -
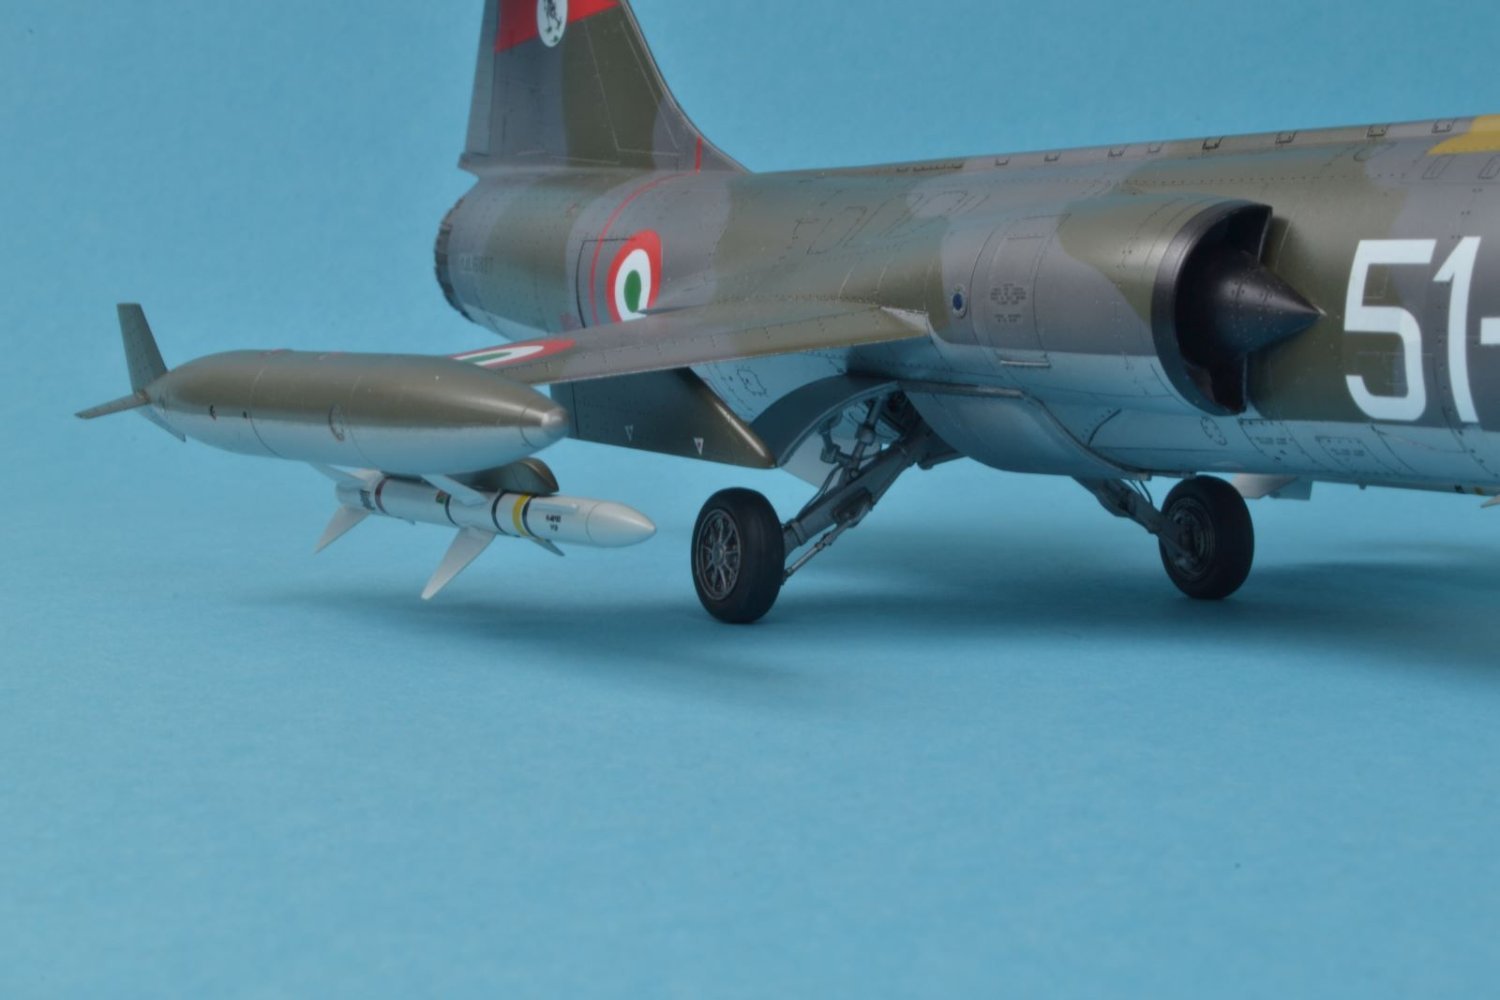
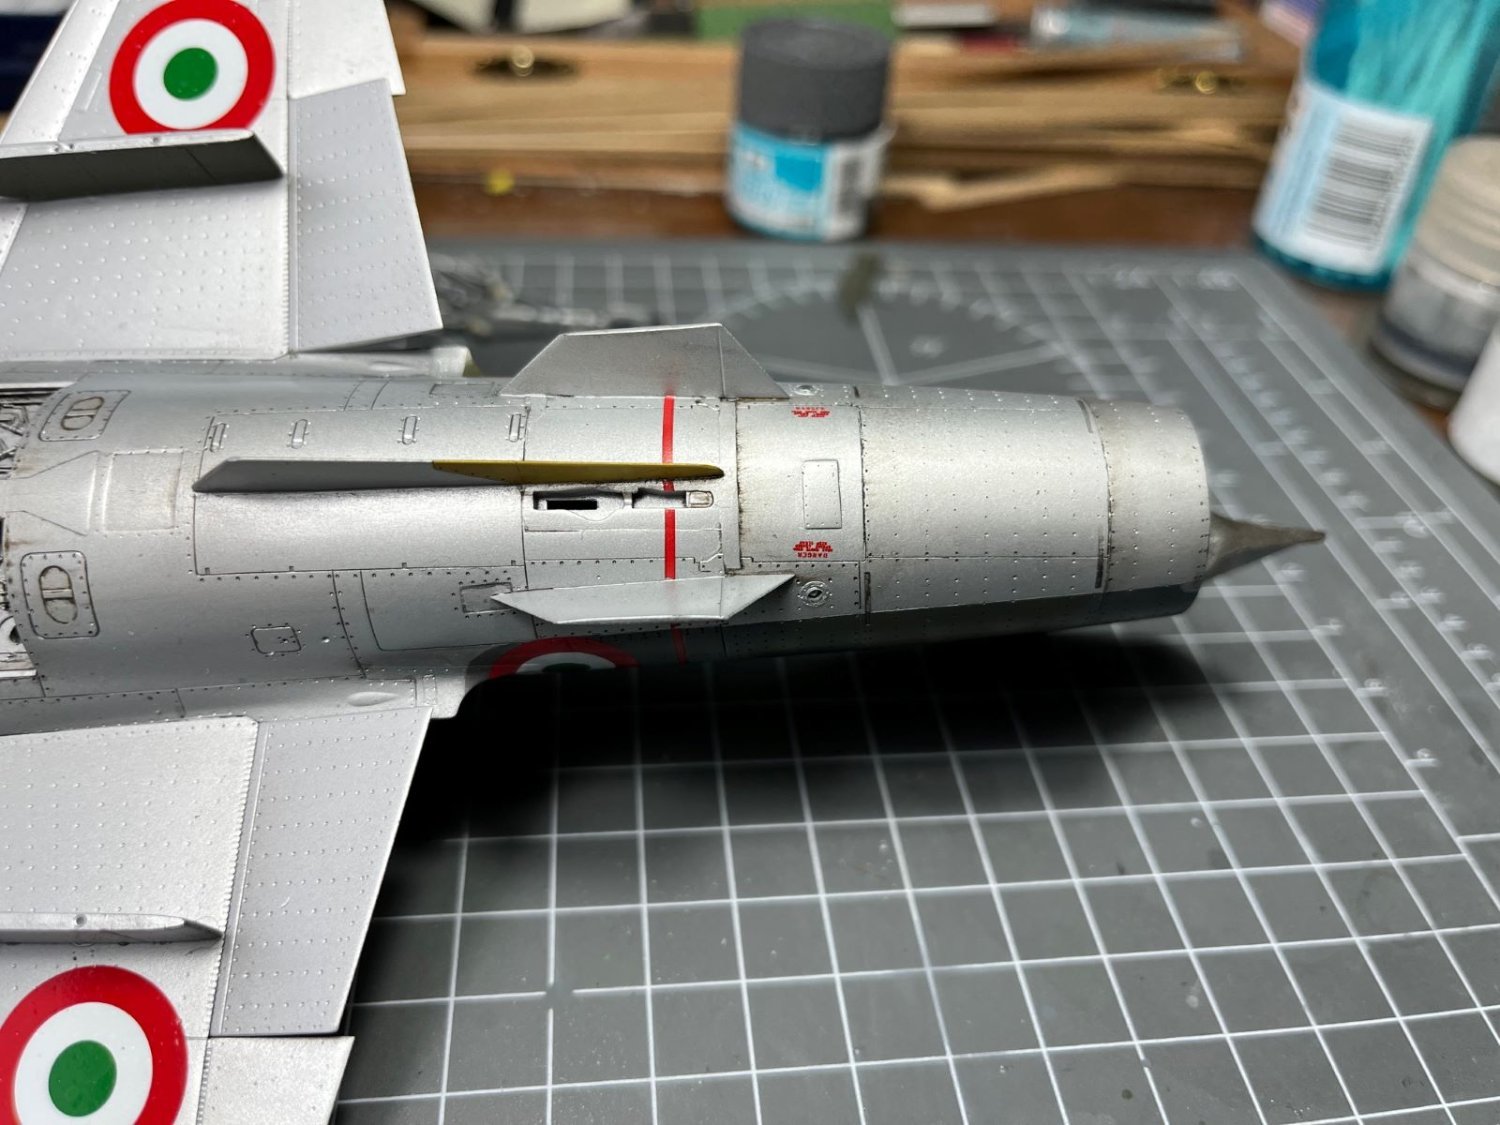
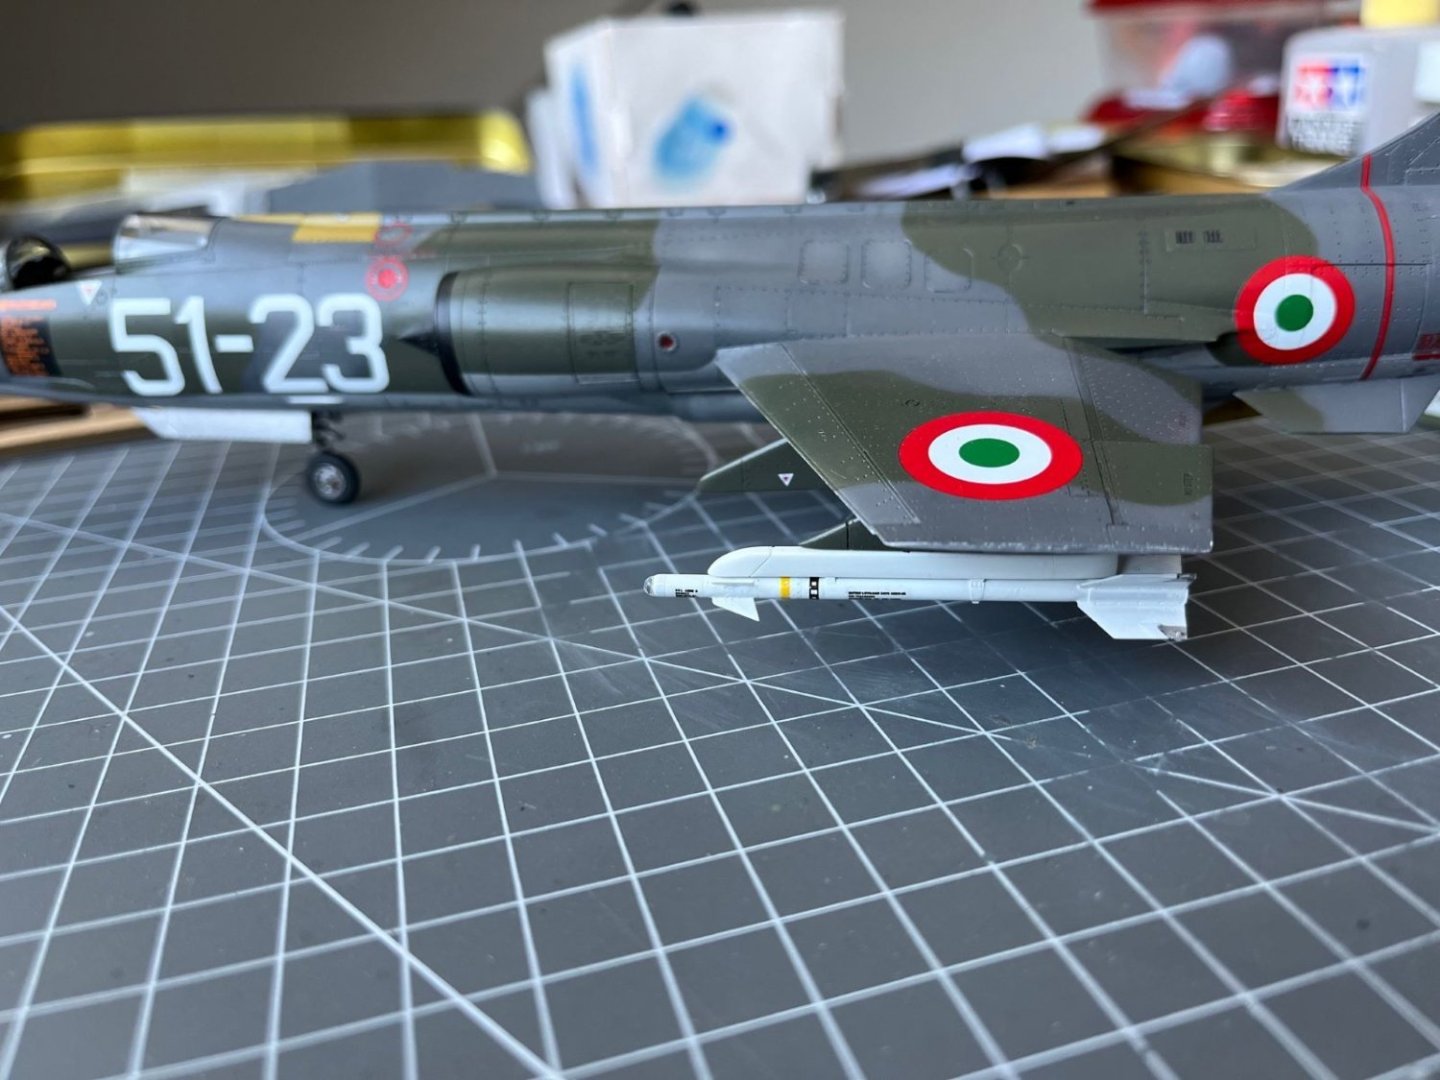
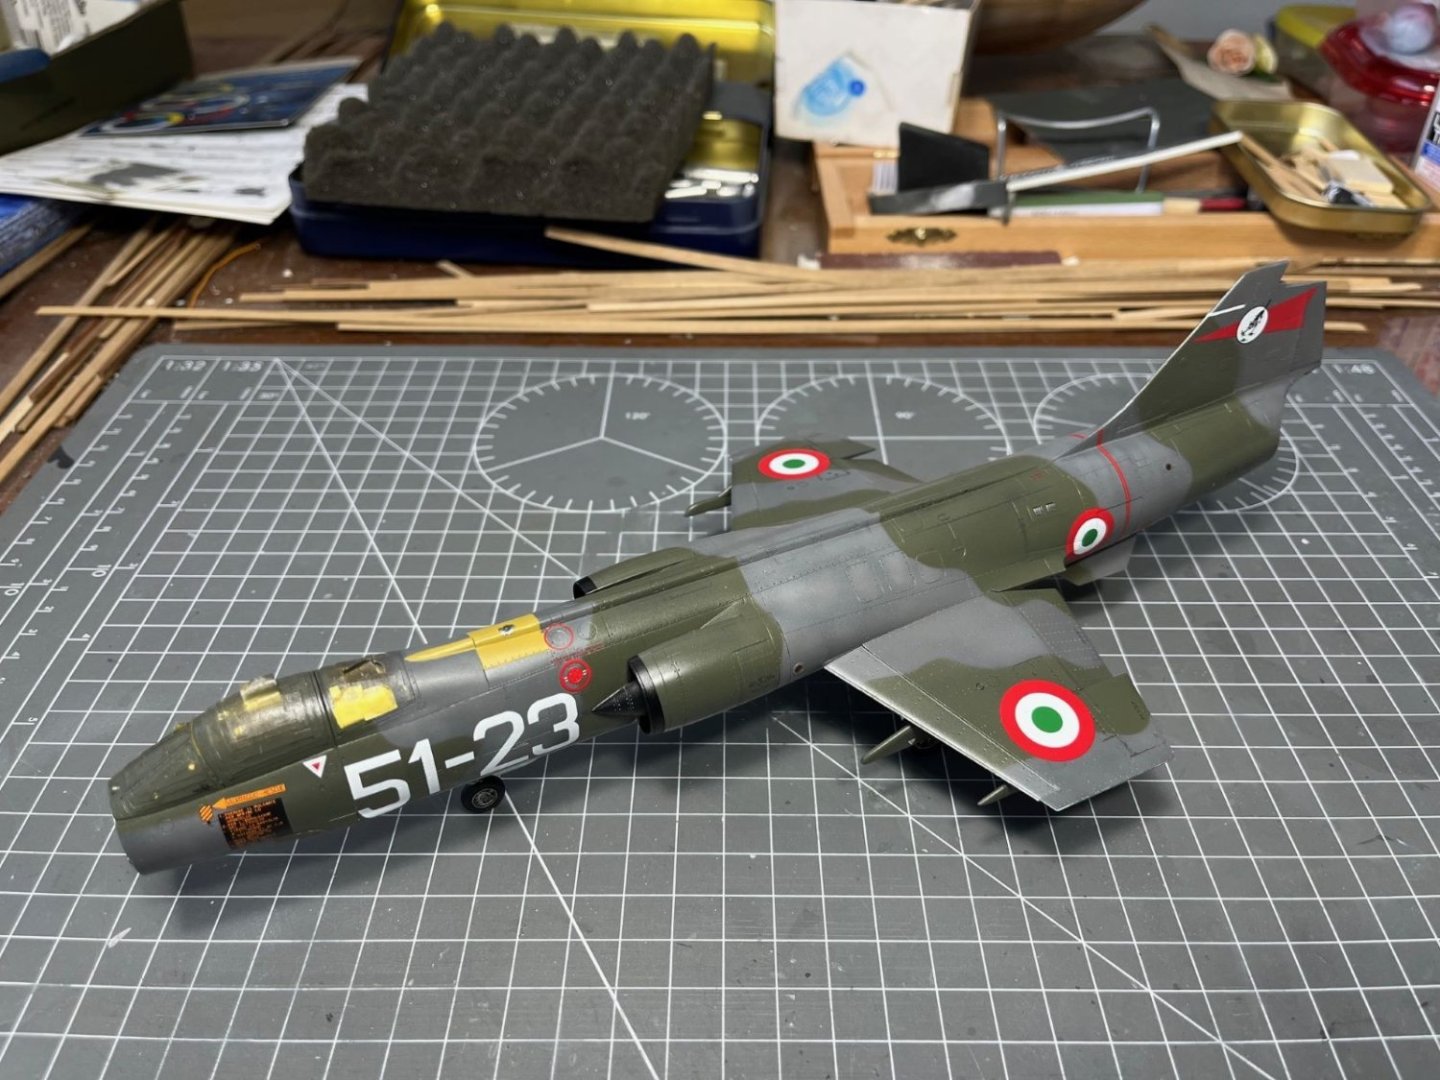
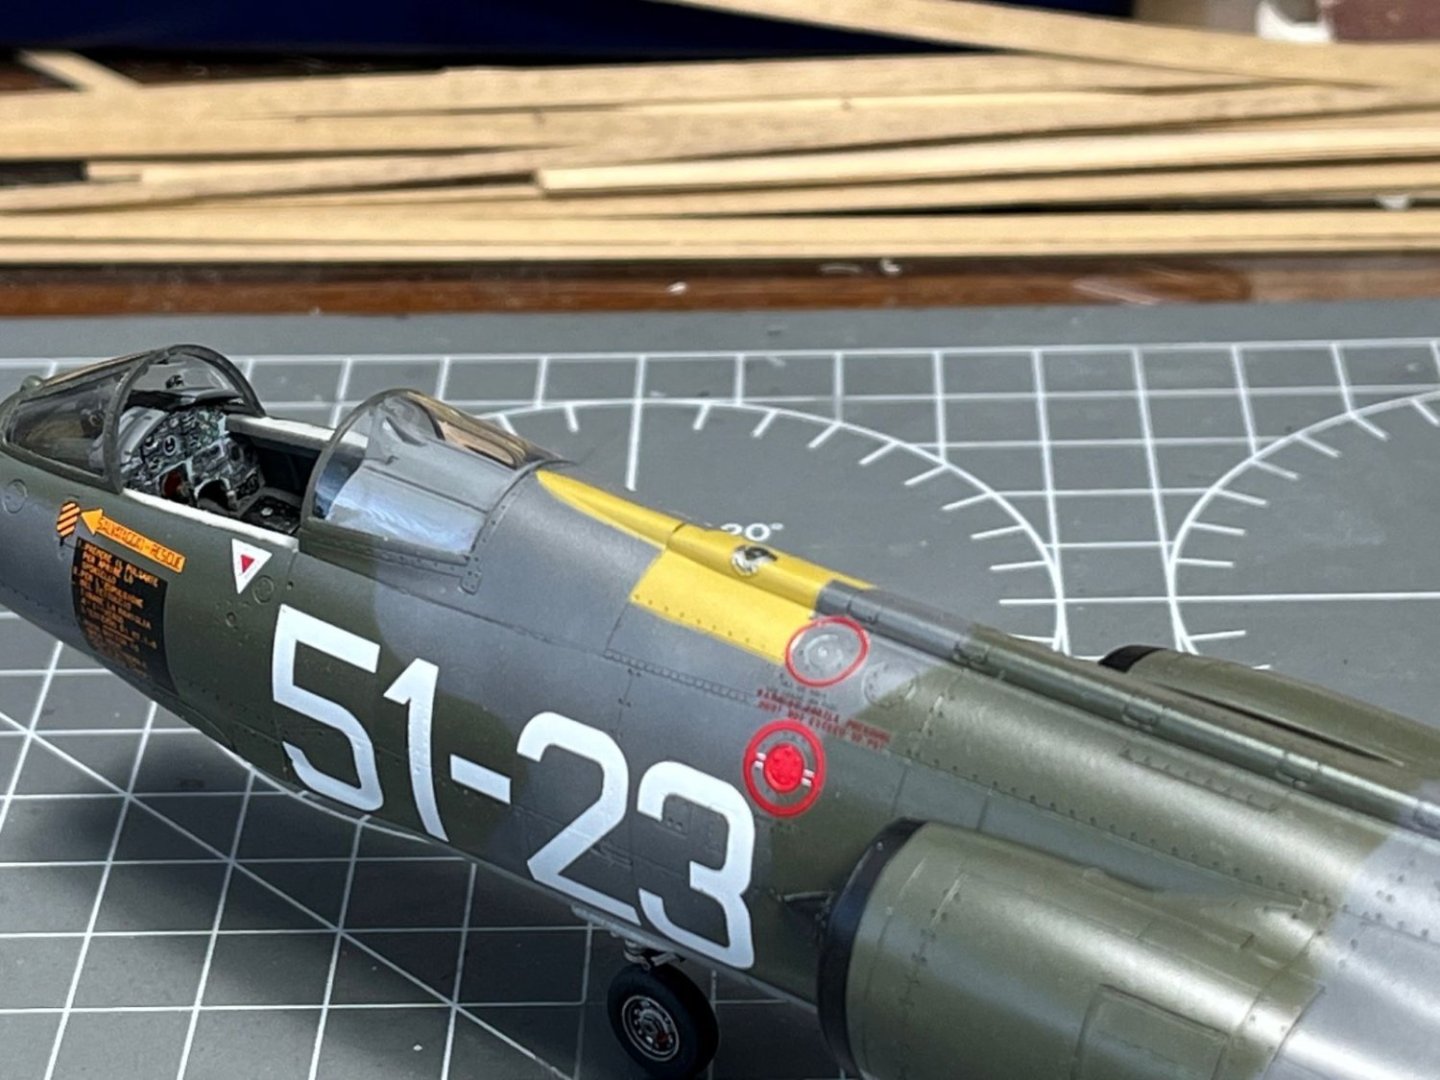
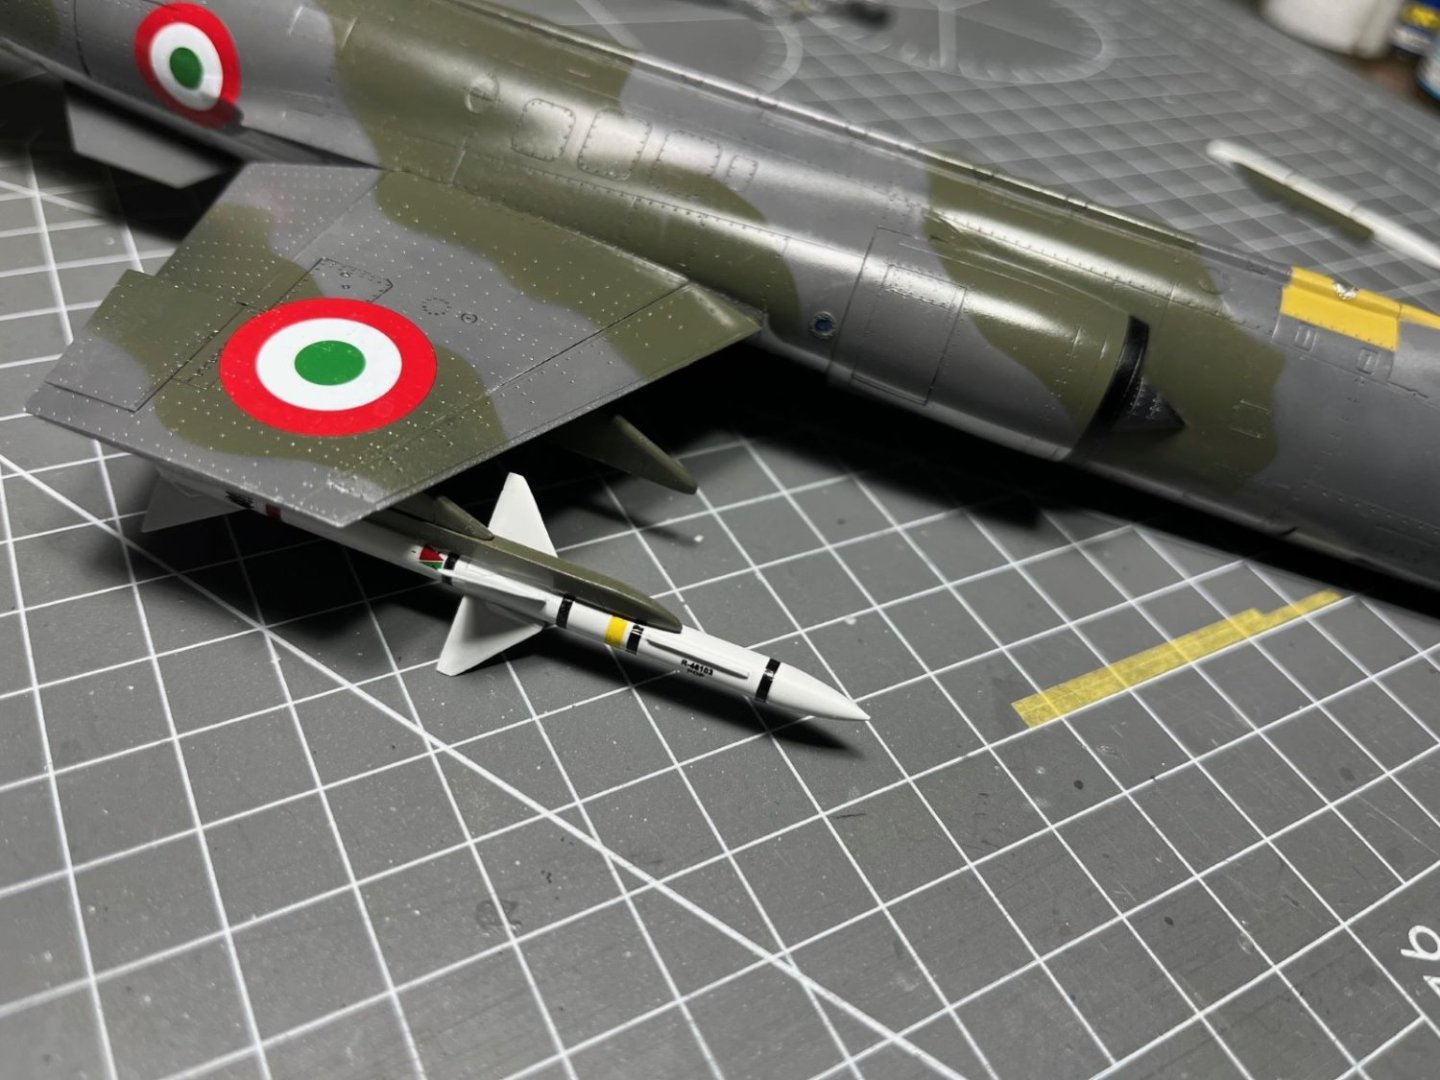
Hi there, few progress and a small problem. The problem first: some of the chemicals of the coatings seeped below the masking tapes and crazed the transparent plastic. There is also a mysterious whitish halo close to the yellow spine which probably was caused by the flat agent of the clear coating. I addressed the transparent by wet sanding with fine grits followed by polishing with Tamiya polishing compound. The halo was cured by spraying over it another bit of clear paint. The underside was completed with the landing gear doors. Finally, the Starfighter got its stings, the Sidewinder on the port side: And a Sparrow on the starboard side: This asymmetric configuration was commonly used by the Italian interceptors. Finally, two overall views taken under natural light to show how the real colors of the camouflage turned out: Here the blemishes reported before were already cured: That is all for now, best regards, Dan


- 79 replies
-
- 15
-
-
-
Yes, they were from Cartograf.
-
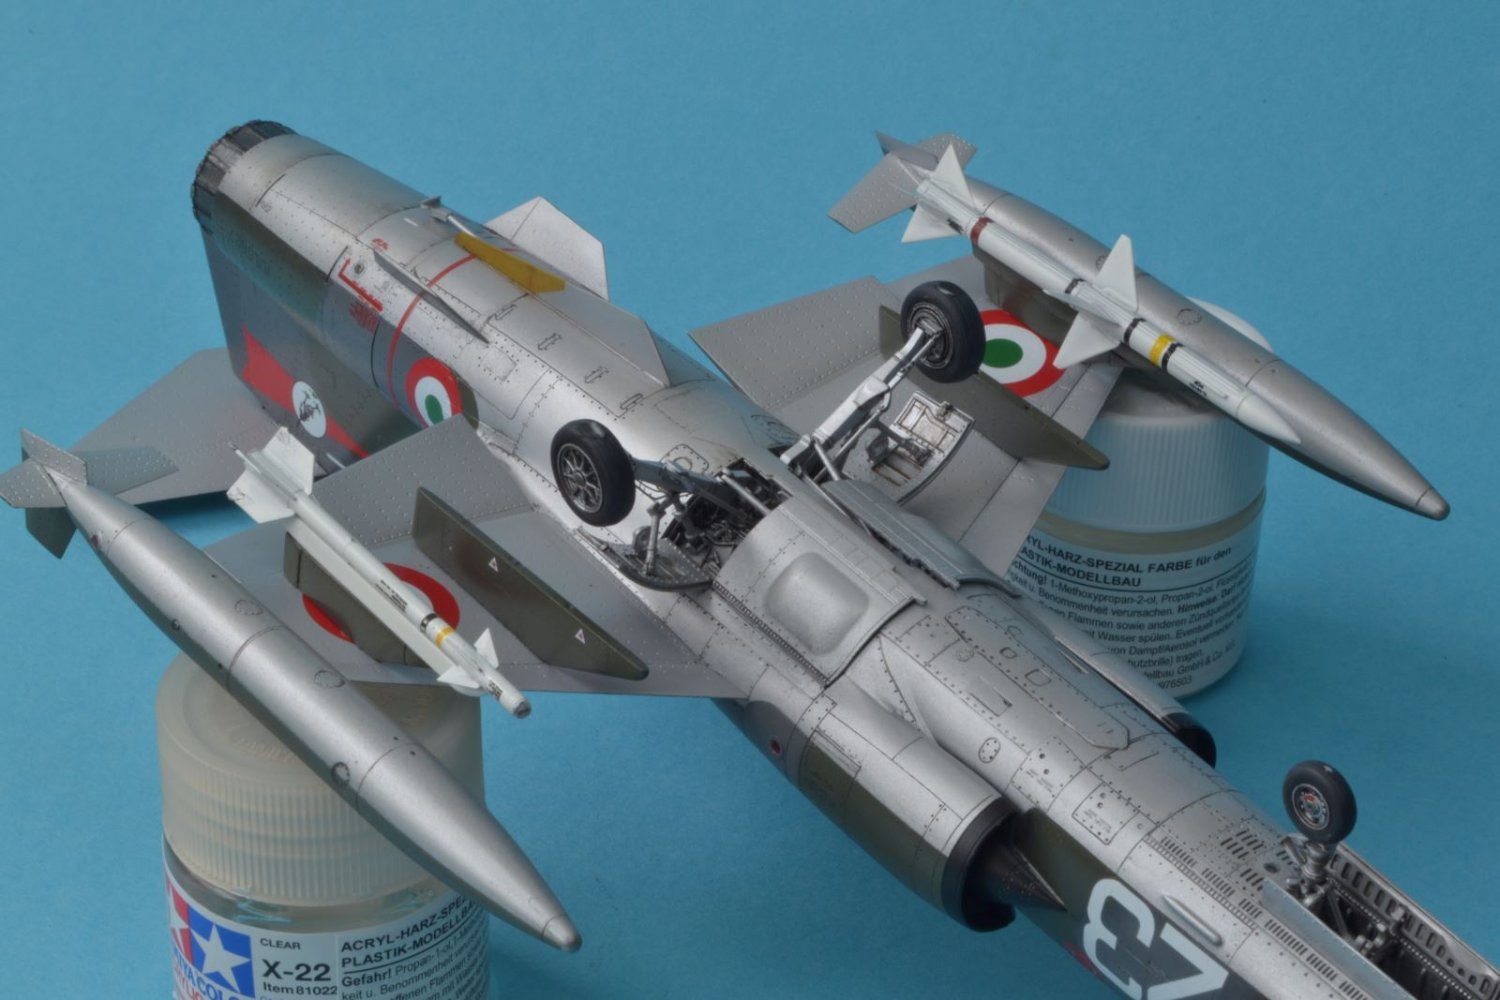
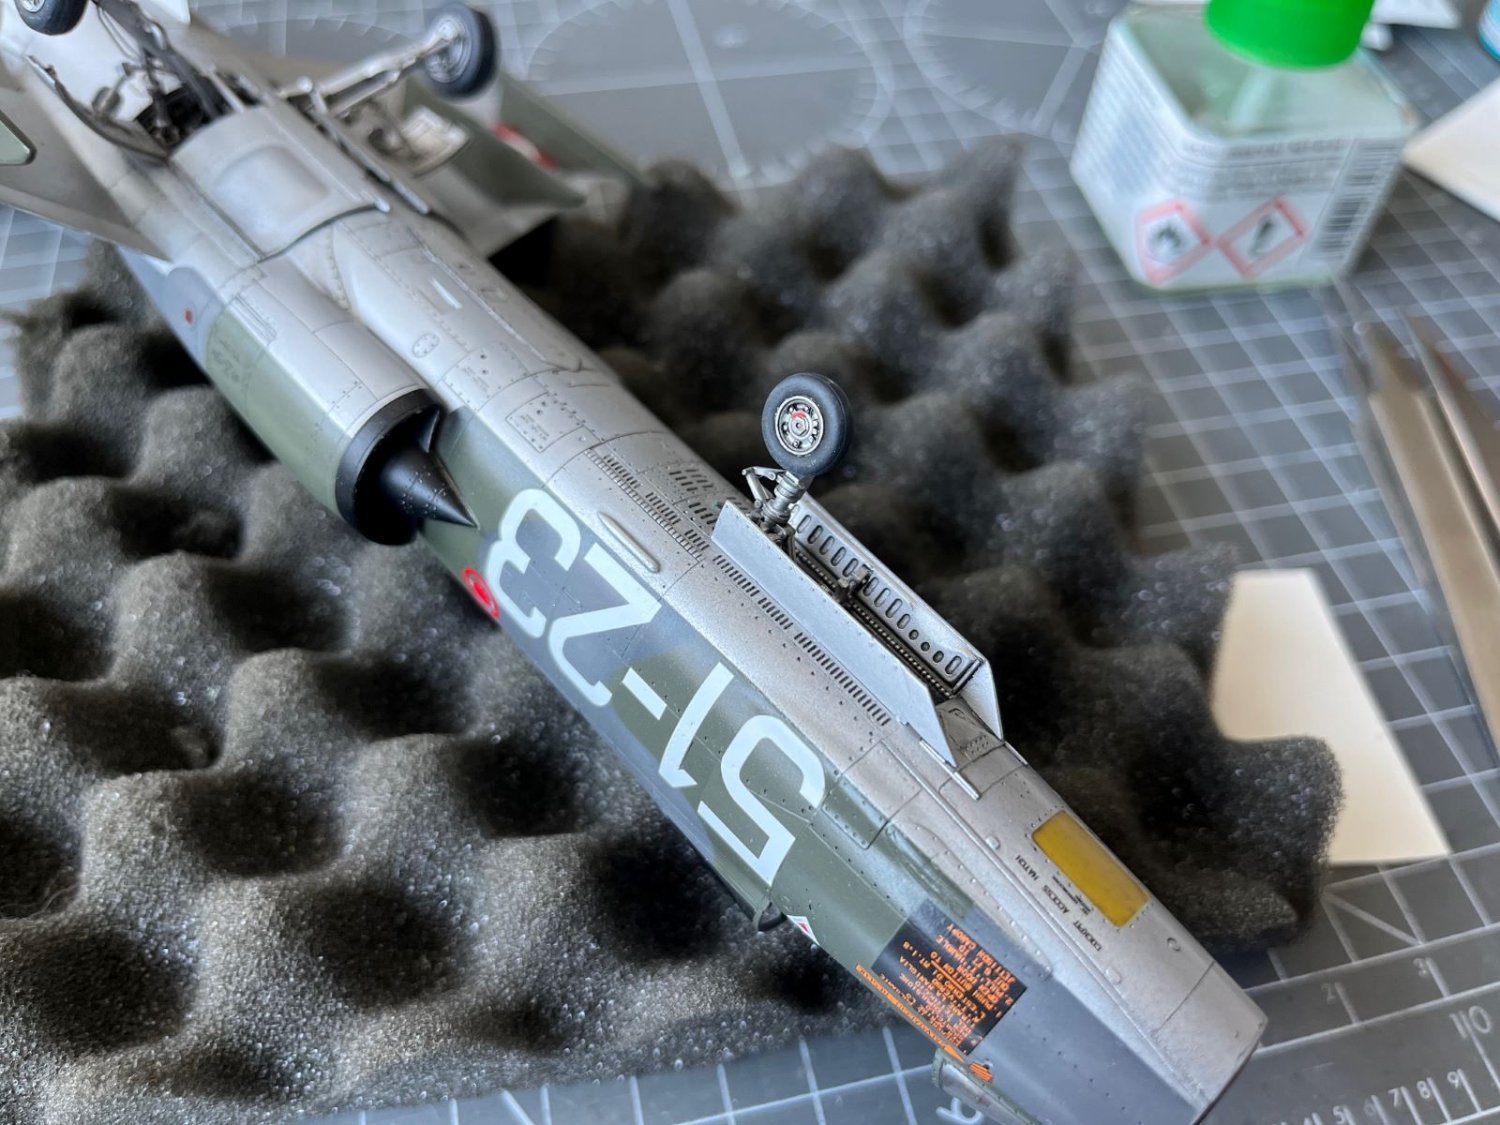
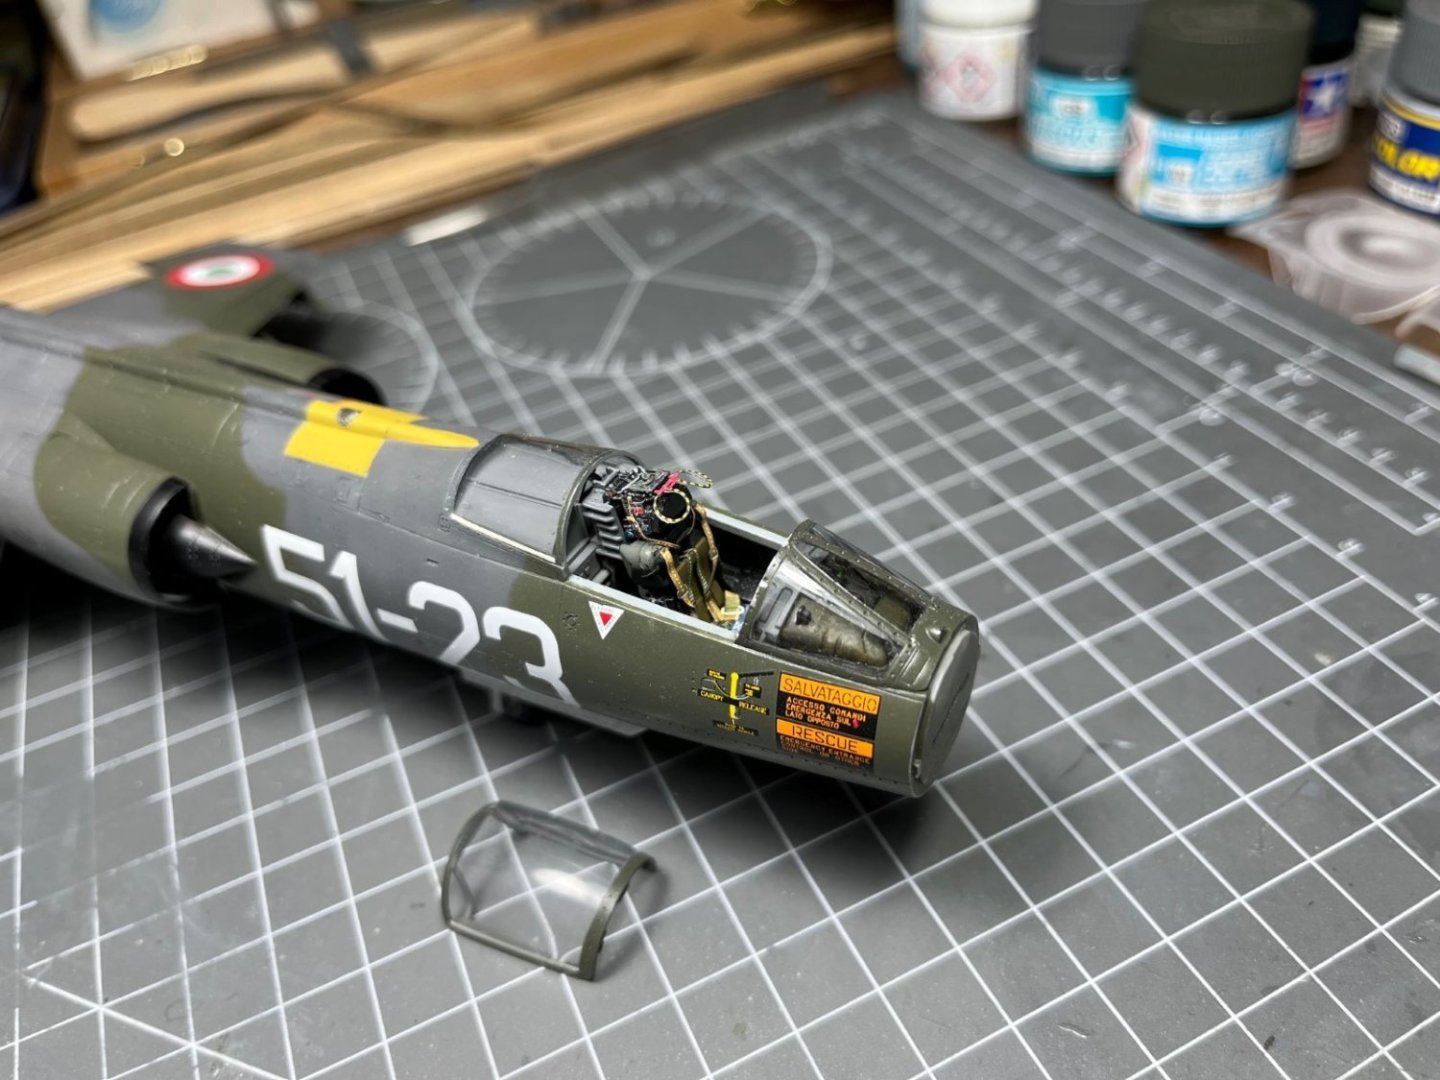
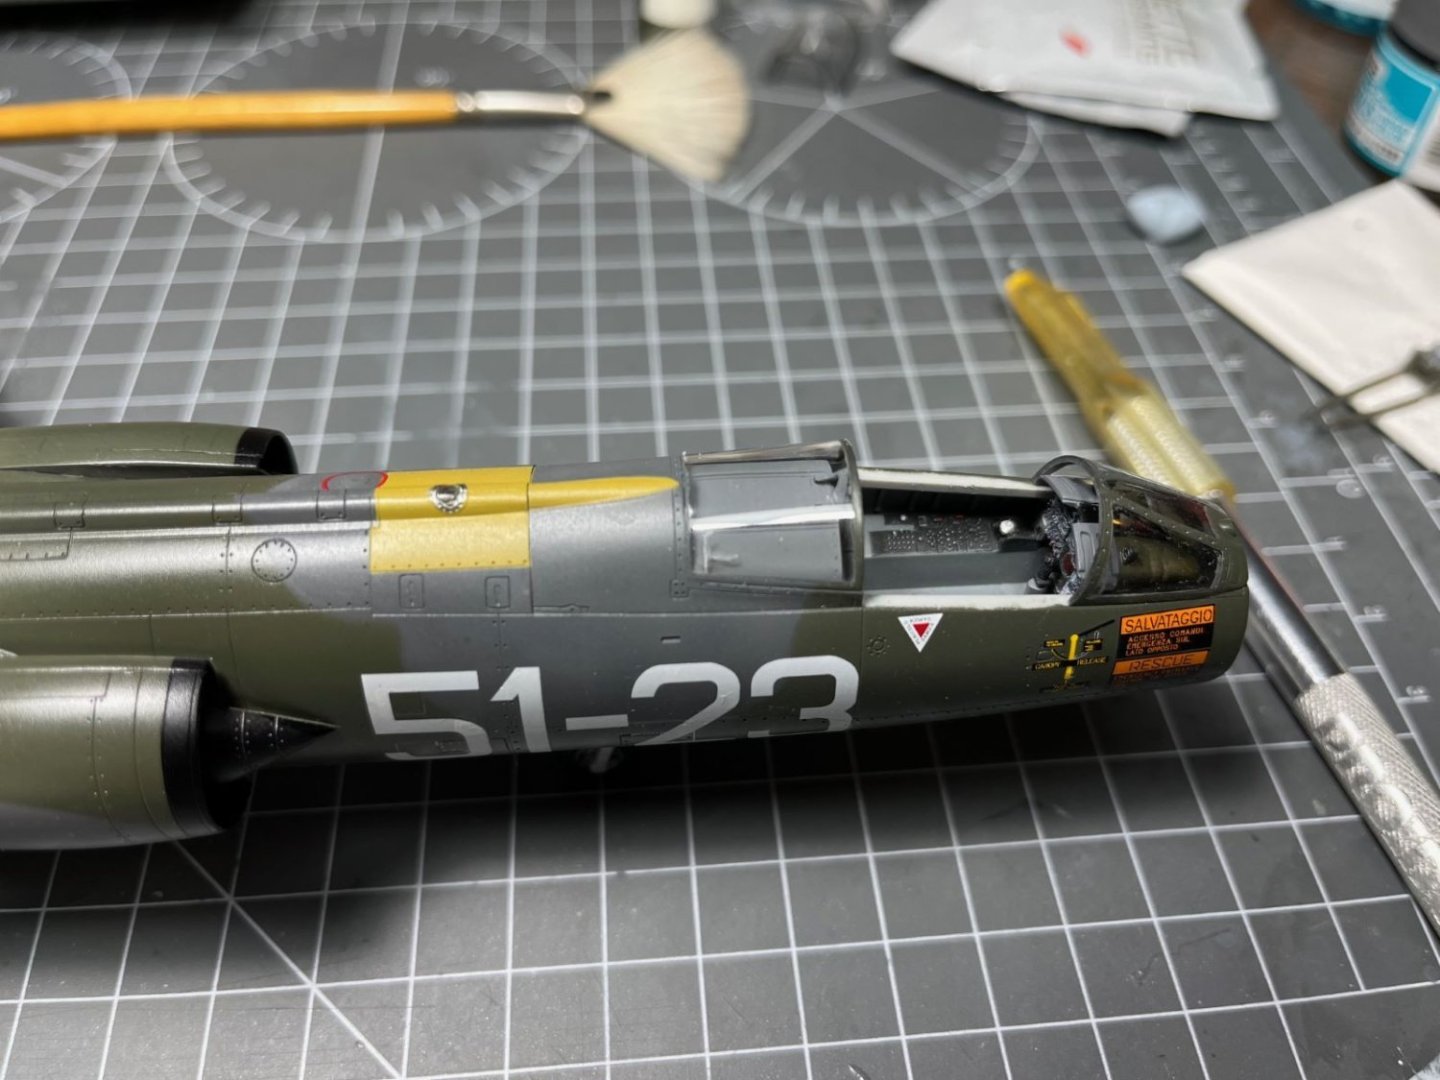
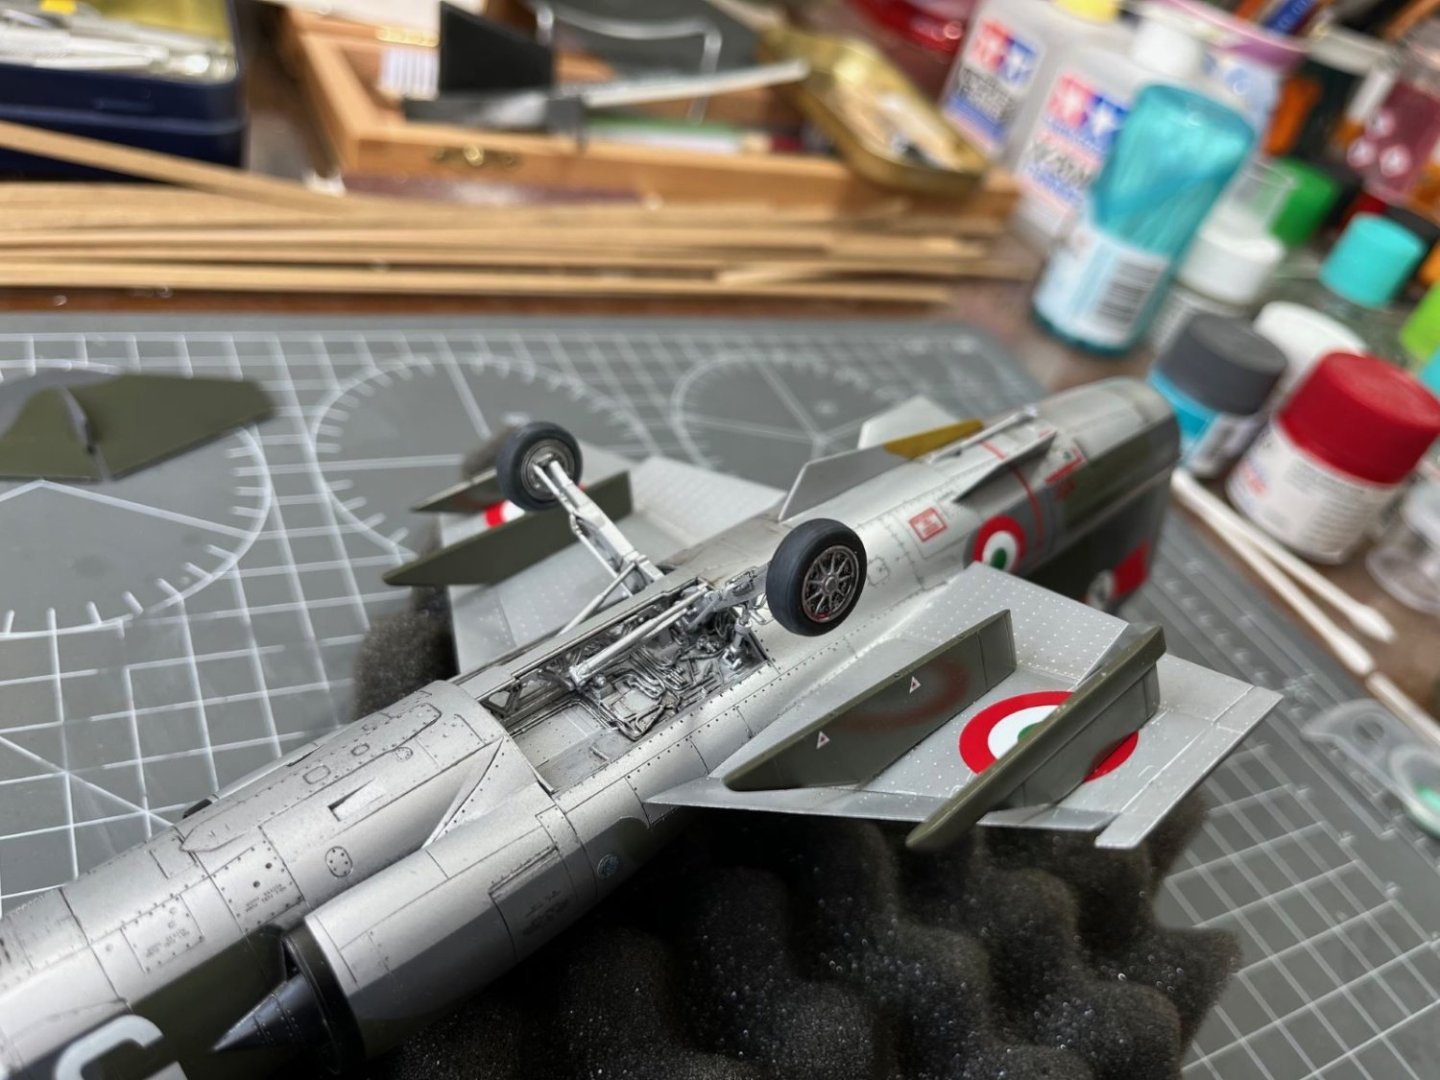
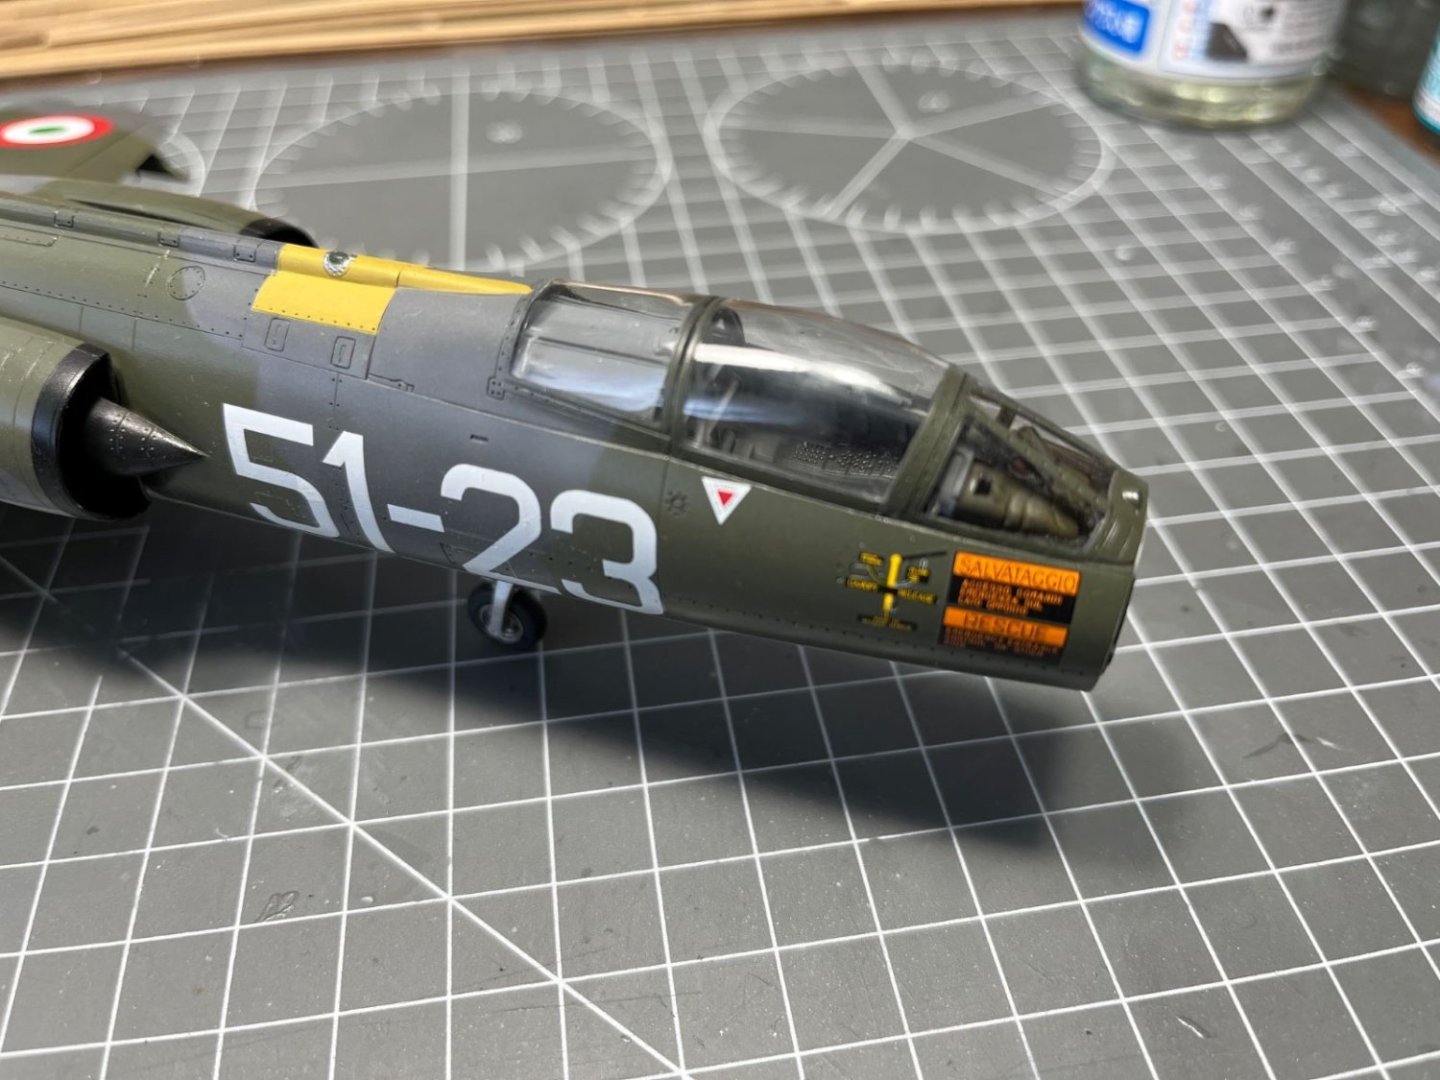
Dear all, I went on and put in place the landing gears previously prepared. I committed the final finish coat opting, as anticipated, for a satin finish obtained by Tamiya clear XF-86 plus some X-22, everything heavily thinned with Gunze levelling thinner, obtaining this result: I am quite happy with the smoothness and reflectivity of this that should resemble an almost new aircraft. Finally, after many months, I can remove the masking from the clear parts: Here, I removed the canopy hood to check the interior. Clearly, the cockpit sills need still to be painted. Only two small blemishes on the transparent parts need to be addressed. The jet nozzle can now go into its place: Next, the seat needs to be done, best regards, Dan

- 79 replies
-
- 12
-
-
-
Hi @Egilman, the paints of the Italian NATO camouflage aged along their lifetime, but one problem is that the grey aged much more than the green becoming matt and clearer. I didn't plan for that, and now it would be quite inconvenient to mask everything for depicting a grey finish which is much faded than the green one. At the beginning, I just post shaded the grey to show a slight discoloration in few areas. Therefore I will keep the aircraft as it was almost new, and I am going to finish everything with a satin clear coat. Saluti, Dan
-
I built a wingnut kit in the past and I also found its decals of extremely good quality and fit. At that time, strangely, I found that the blue Micro set was slow, but more effective than the red in setting down the large decal foils when left acting overnight. Great build Rob, Dan
-
Thanks Mike. The decals went down very nicely and reacted well to setting liquids, the only negative bit, as I wrote, was that they look a tad too large. This is something that I noticed more than once with decals. The aircraft completely glossy has its appeal and when these aircraft were new they had a kind of glossy finish. Best regards, Dan
-
Hi, just finished to apply the decals. I omitted a number of service stencils because they seem a tad too large and disrupt the appearance of the aircraft. In pictures, they are not that noticeable. In addition, they vary according to the epoch of the picture. In general, the quality of the decals is very good, but I have the impression that they are all slightly oversized. At any rate, this is where I am now, after a coat of diluted clear gloss on the airframe and main parts which should seal the decals and uniform the finish. The gloss coat was the Tamiya X-22 (20%) diluted with the good Gunze levelling thinner. The underside too got the same treatment. With the sealed decals, the model is ready for the last oil color paneling. It is really a pity that I didn't putty the rivets/divots of the wings. Afterwards, a matt/satin coat will follow. Best regards, Dan


- 79 replies
-
- 16
-
-
Very good progress with the fuselage. Looking forward to seeing this plane building up. I like the interior too. I suspect that the luggage compartment in the front has to do with keeping the C.G. in the right place. Best regards, Dan
-
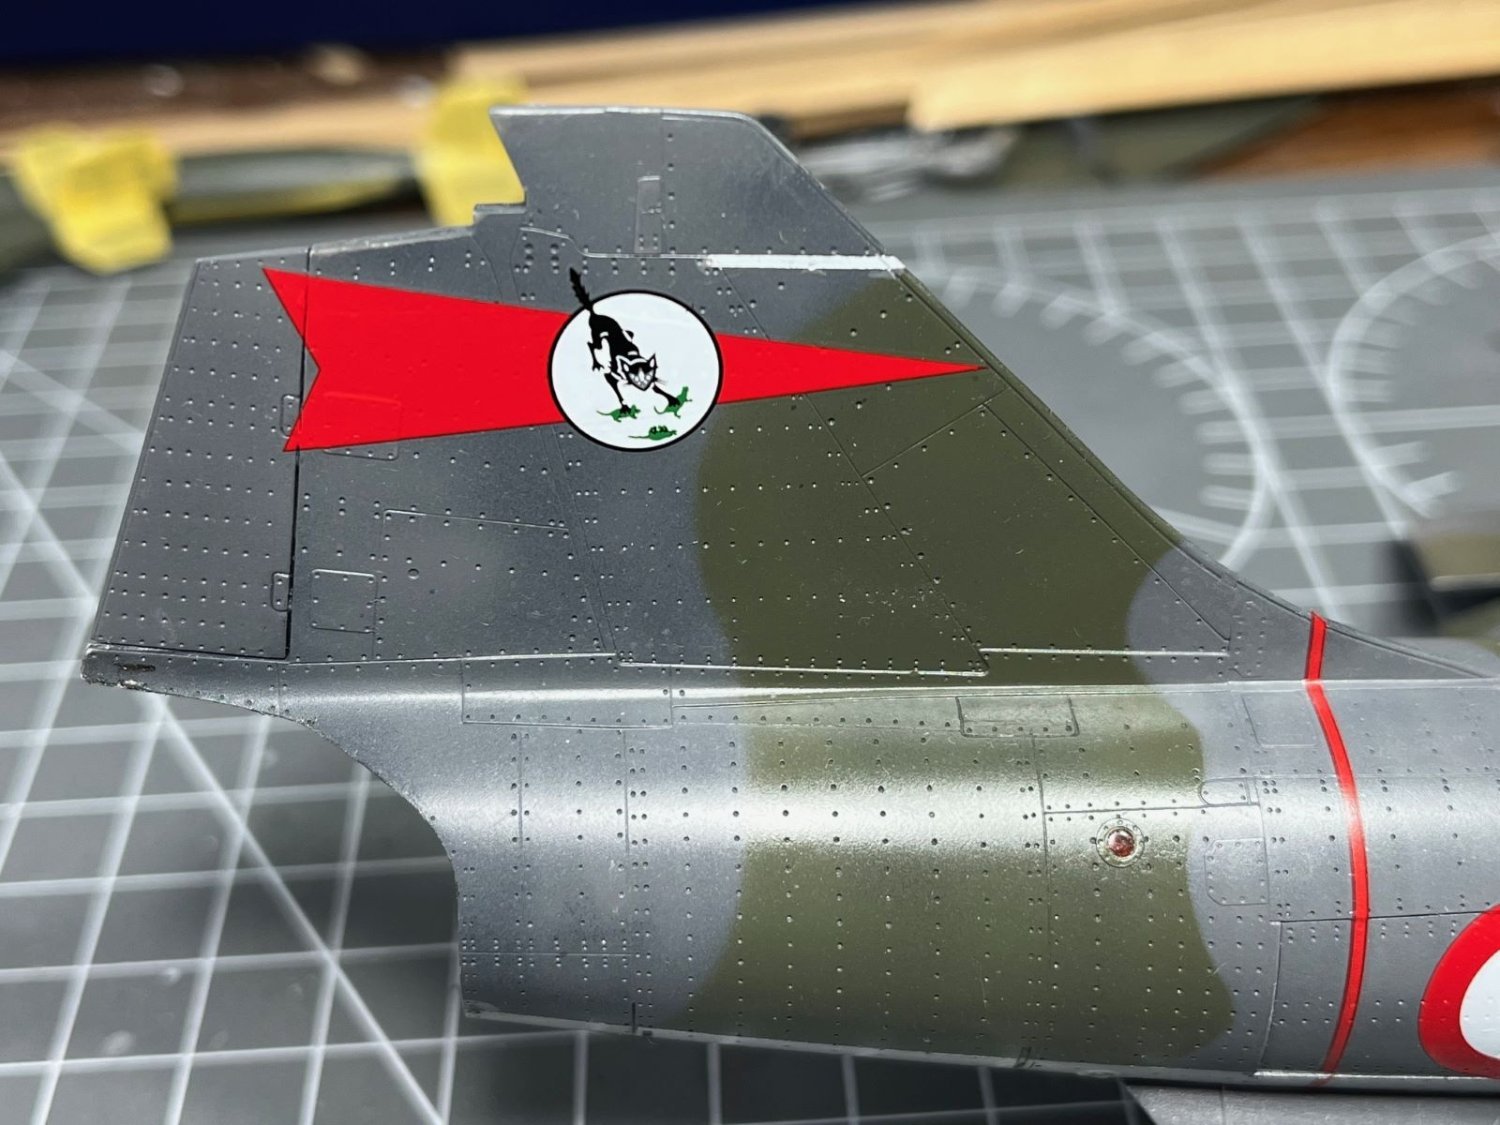
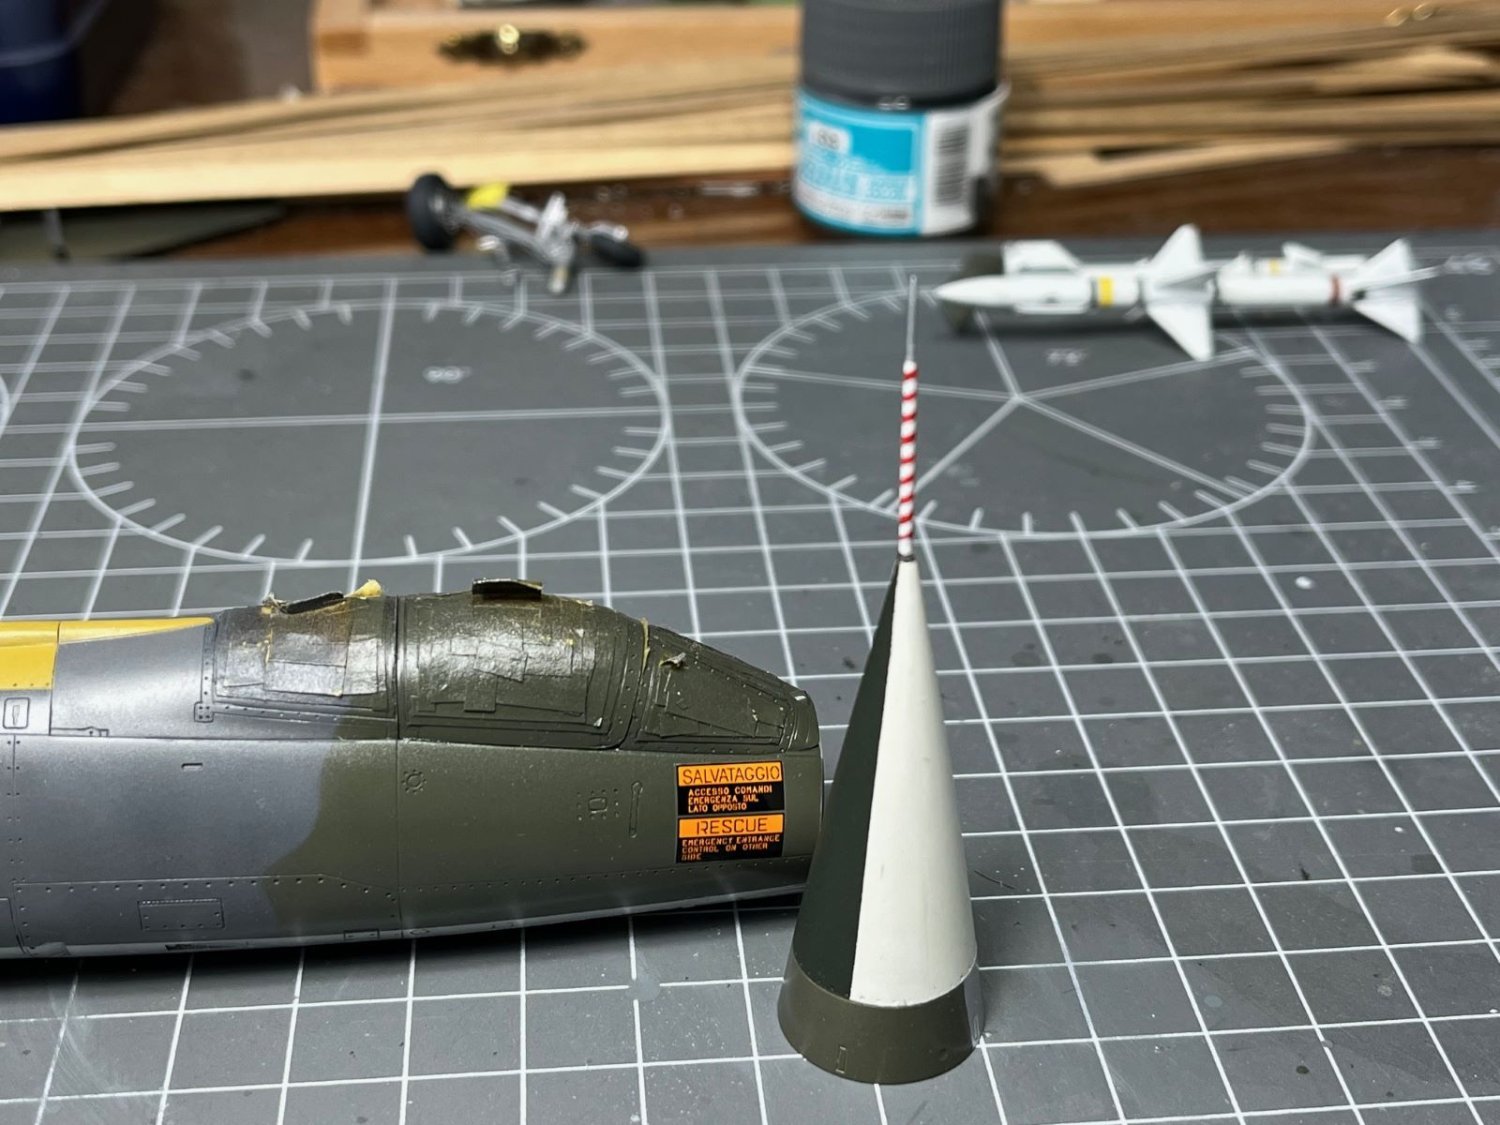
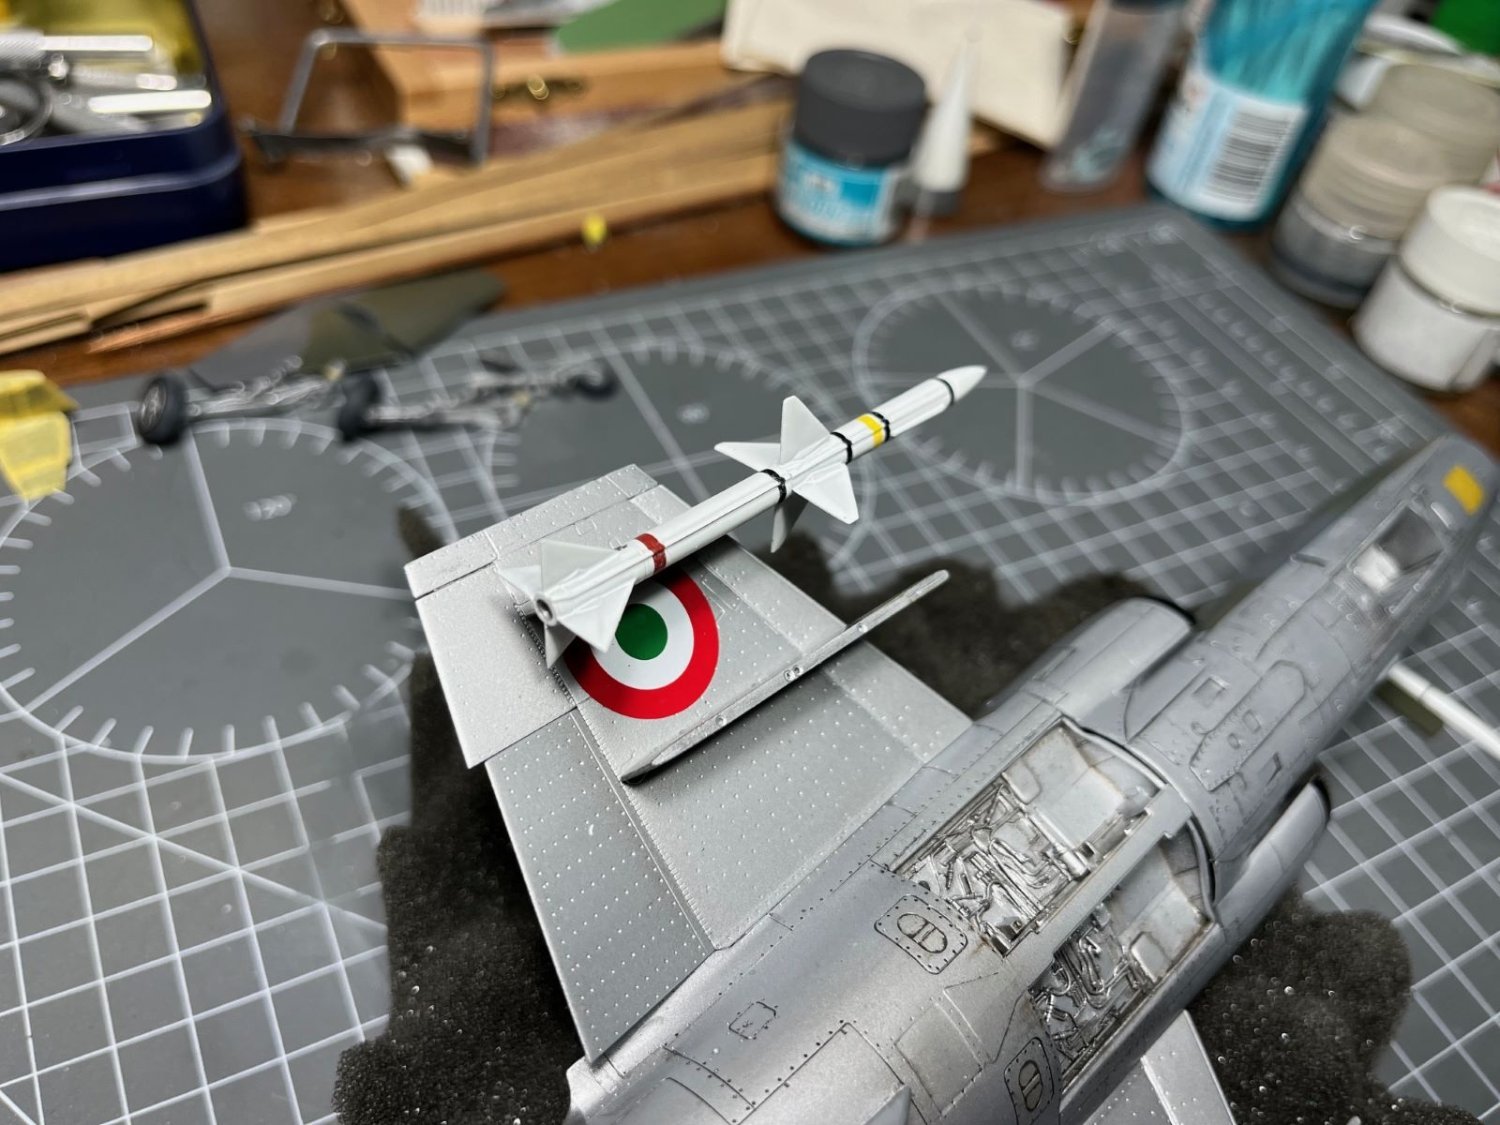
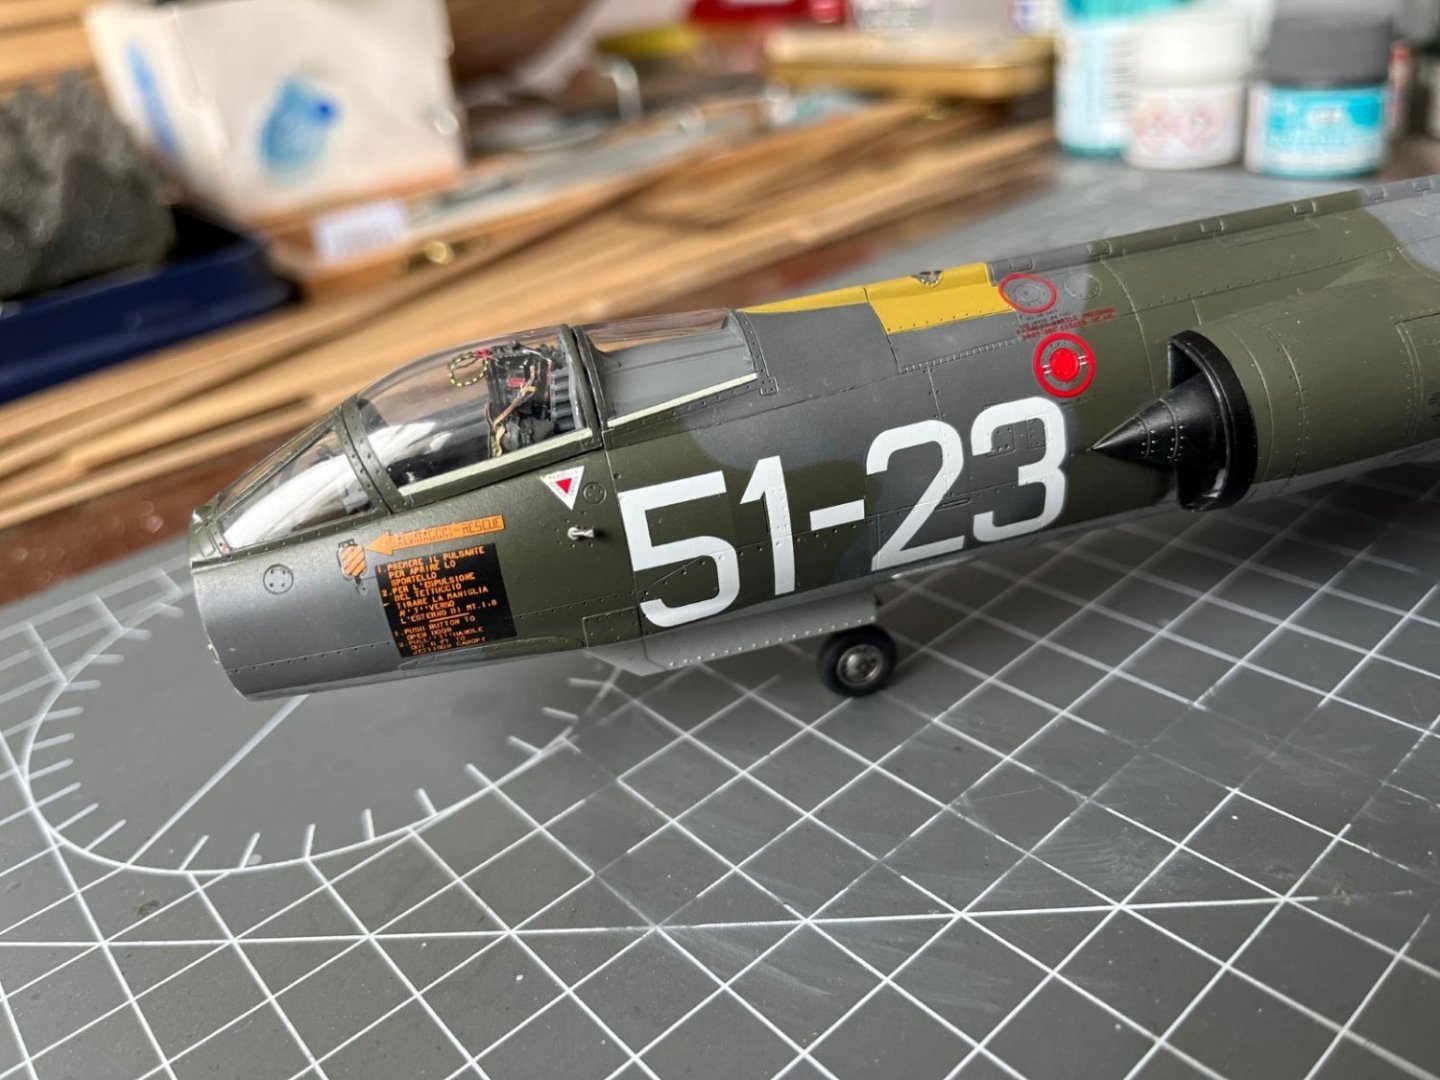
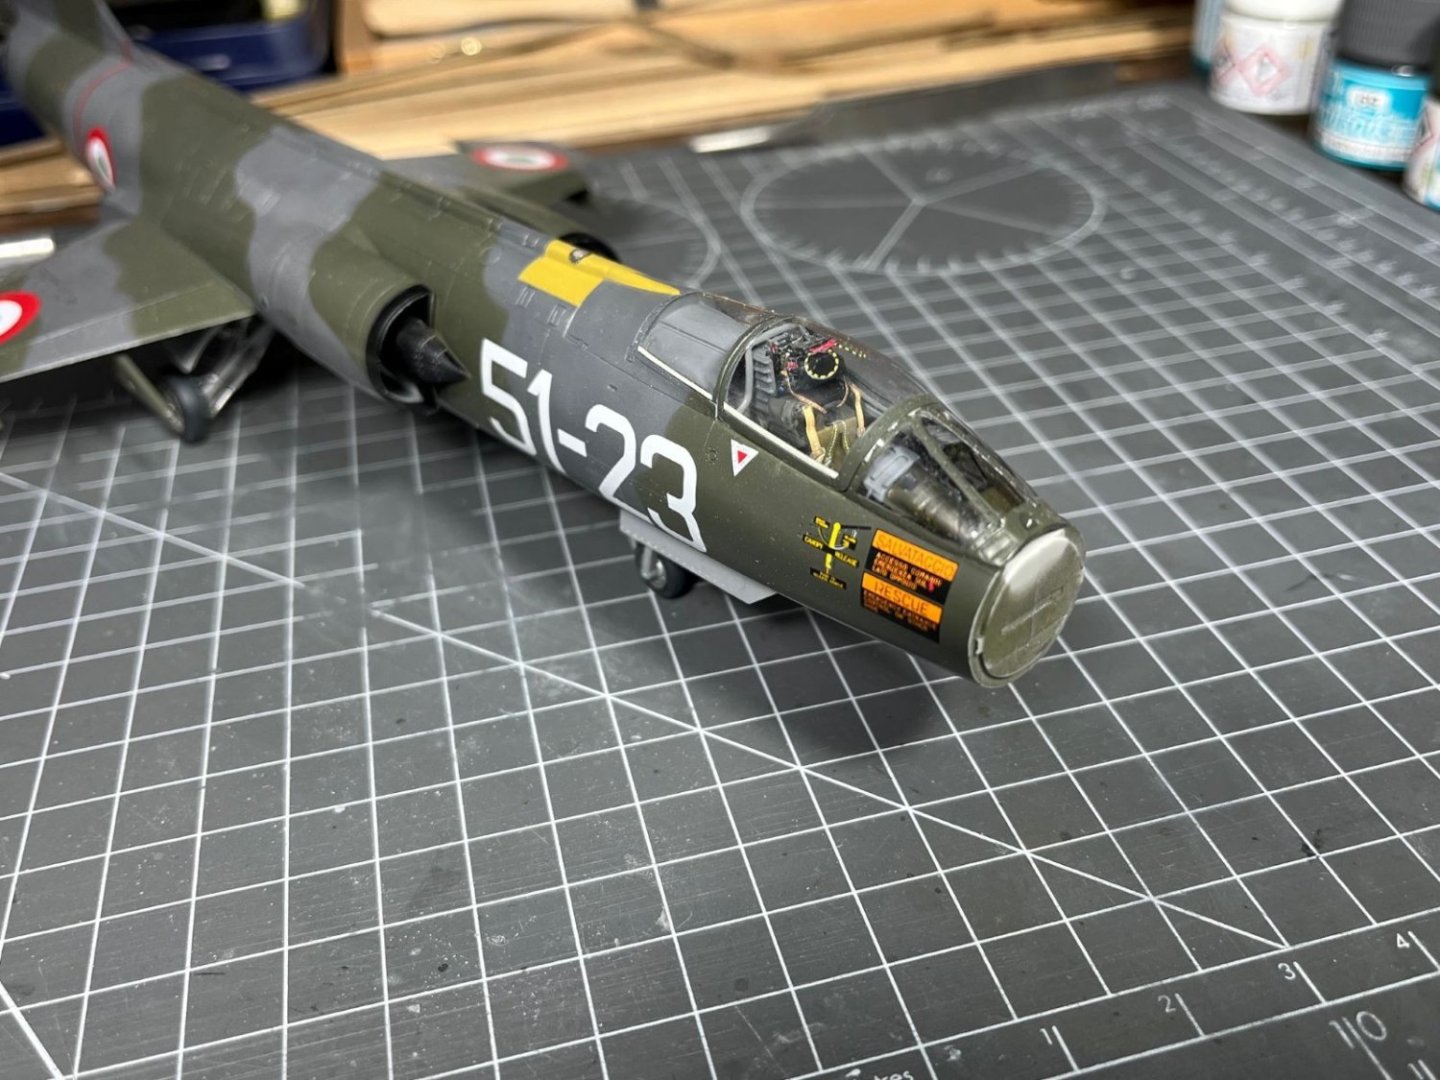
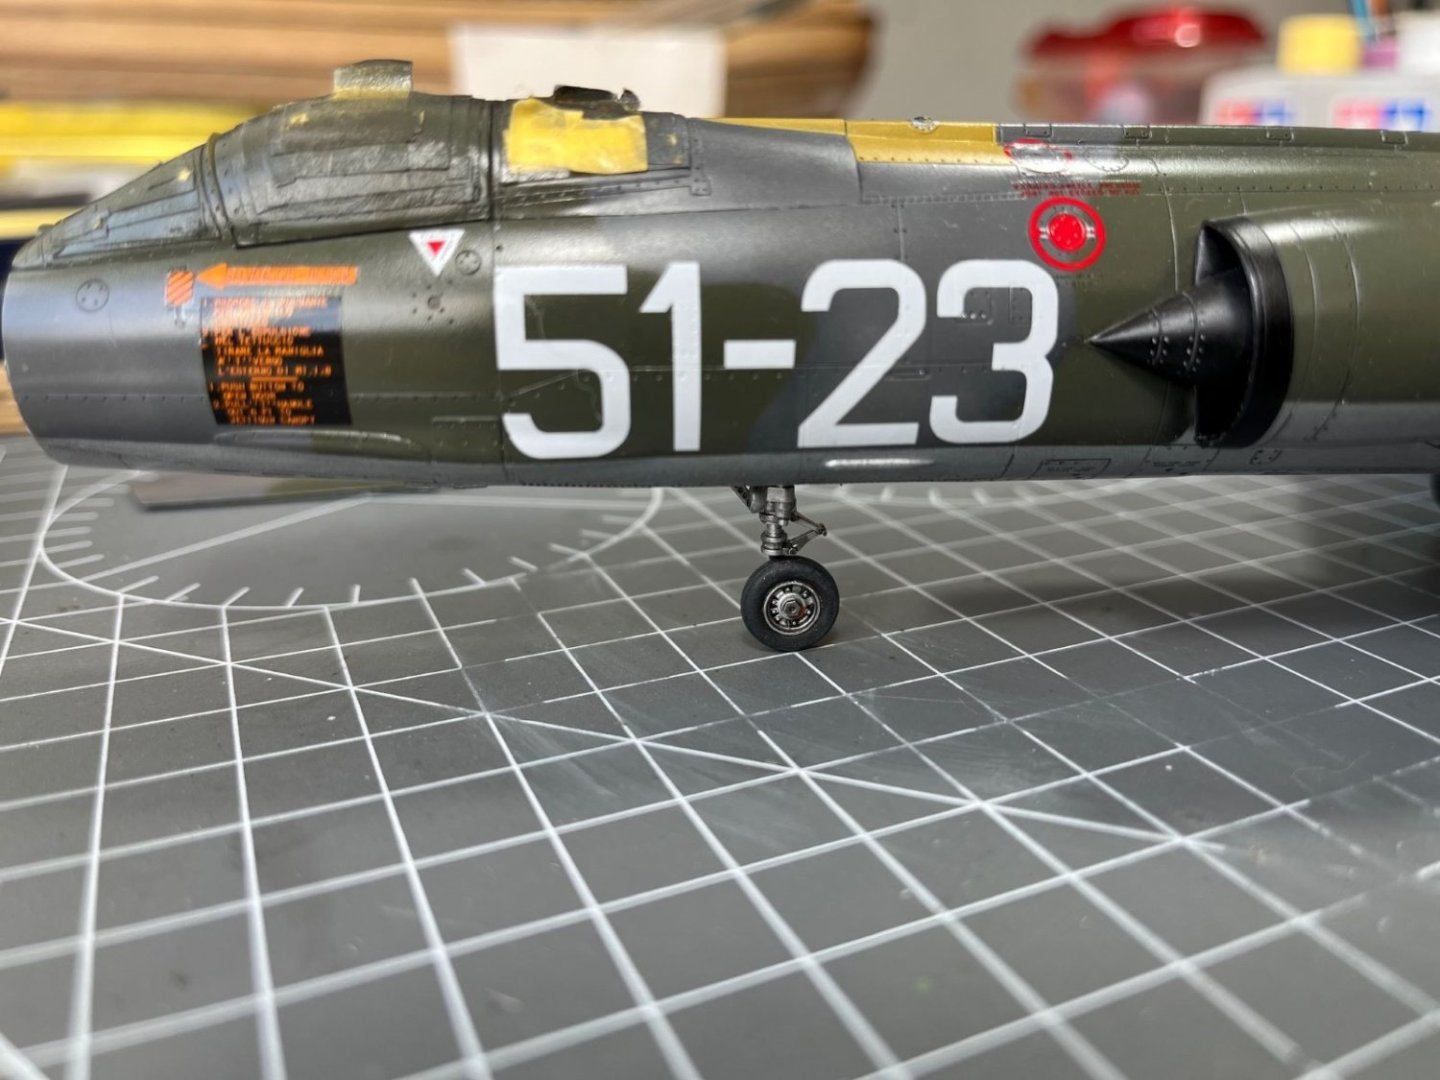
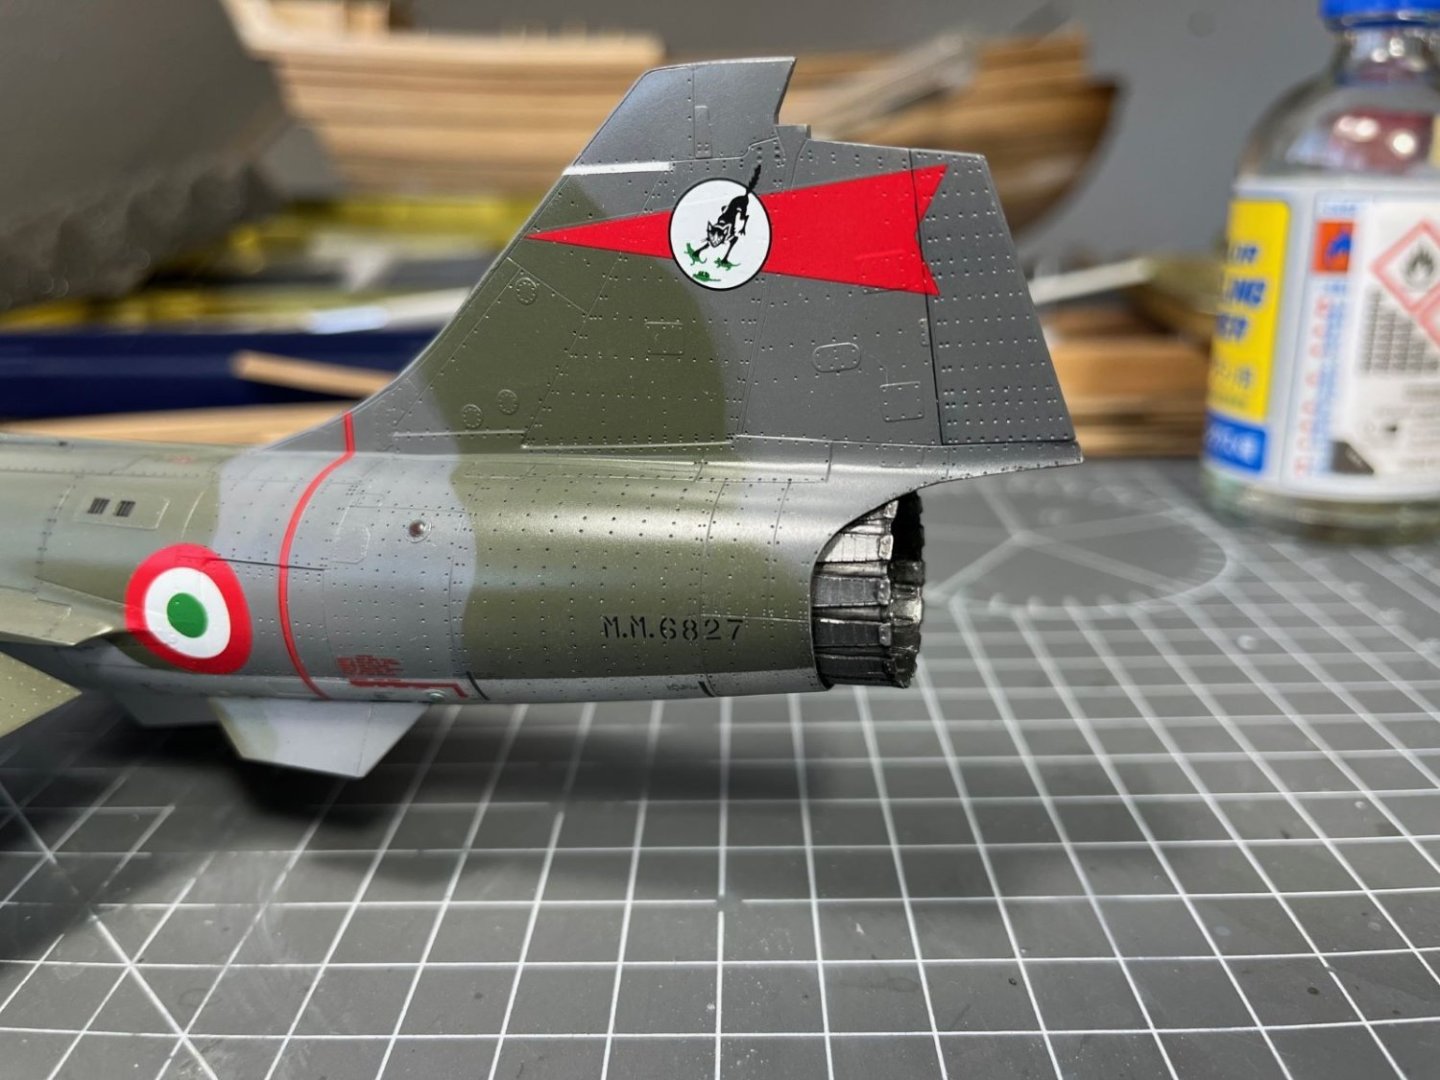
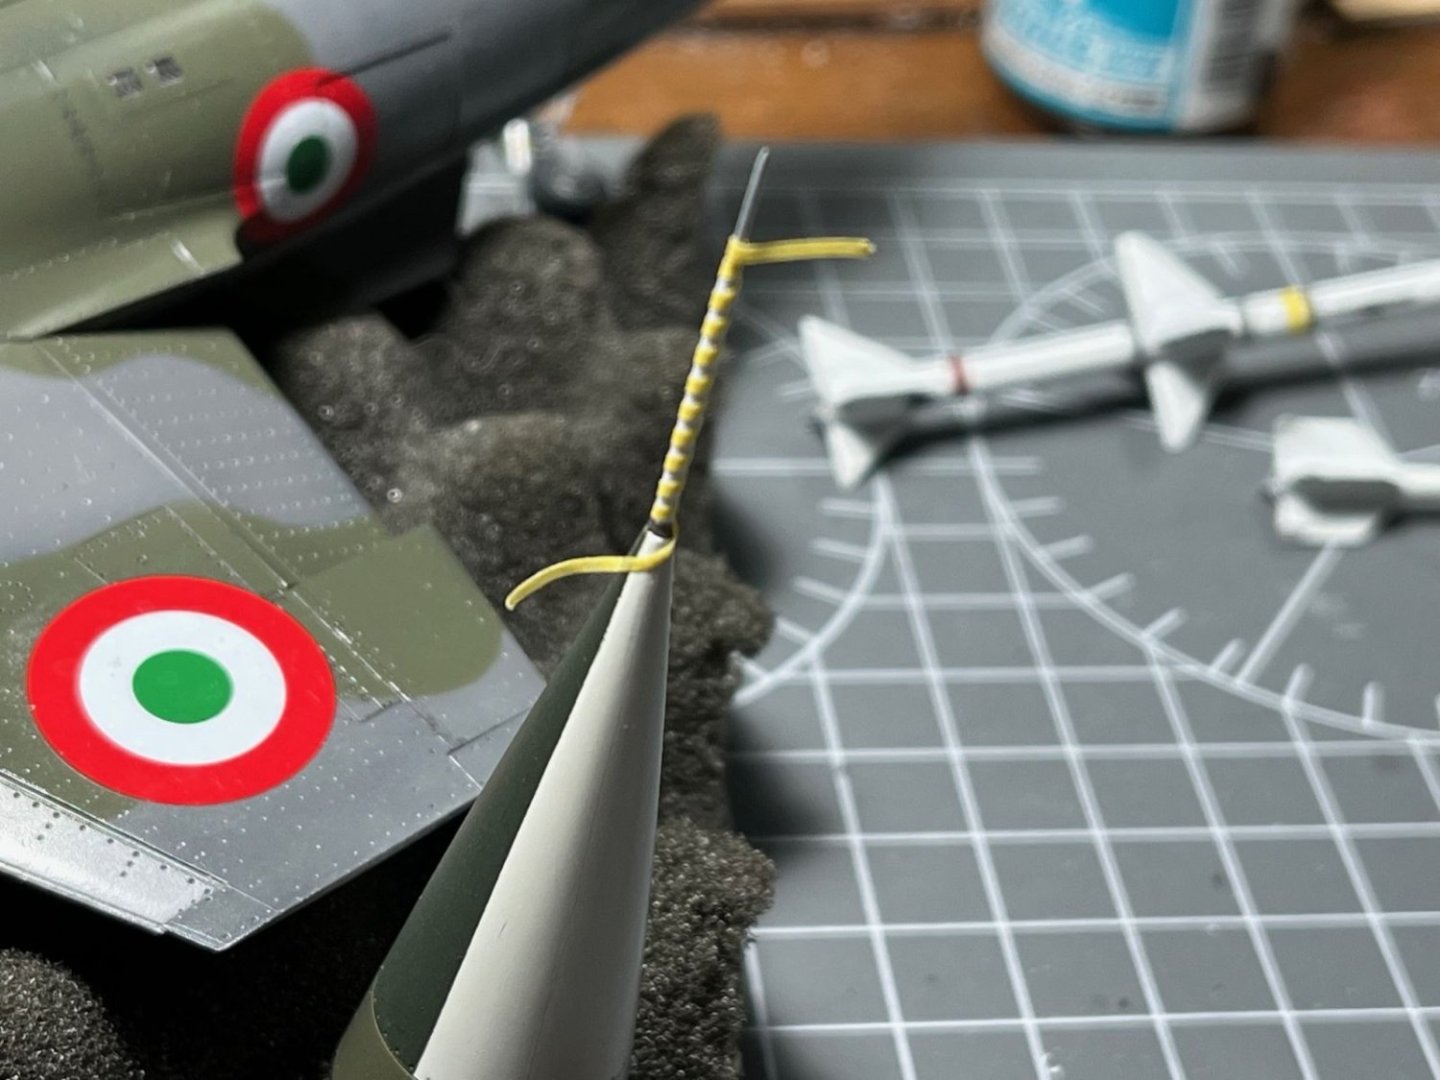
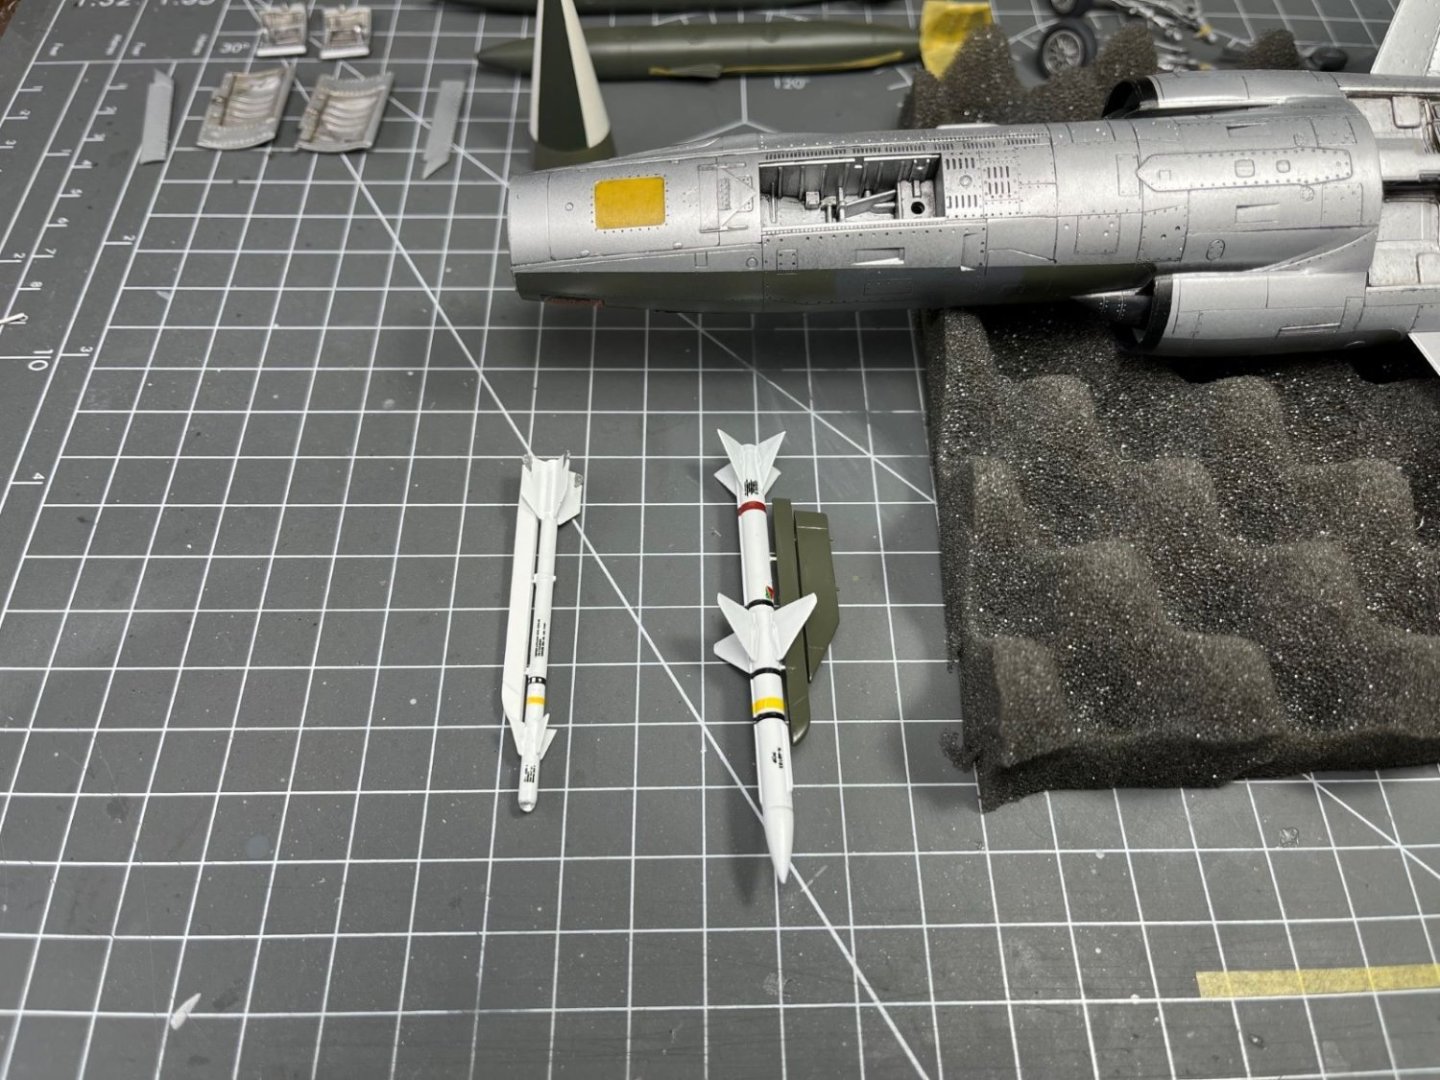
Hi there, I went on with decaling and I opted for the 51^ group of the Italian Air Force based in the North of Italy the badge of which depicts a black cat chasing three green mice. The three green mice were the emblem of the S.M.79s winners of several competitions at the end of the years '30. Because of rivalry between groups of the Air Force, the 51^ adopted the bad cat chasing the green mice for their badge. I was amused by this story and found the cartoon style of the badge really nice. I managed to resolve also a problem with the pitot tube that had a thin red spiraling stripe around it. It was impossible to apply a thin decal stripe because the radius of the tube was too small and the decal refused to coil and stay attached around it. My last resort was to mask it with tape: To be sure of not having paint seeping below the tape, I sealed the tape with clear varnish and for added safety I brushed it with a thick red enamel. The result was not too bad: In the picture, you can see also some service stencils that I started to apply (there are zillions of them) and the quality of the decals can be appreciated. It is possible to read all the texts and they are all correct without typos (also the Italian text is correct, differently from what often happens with Chinese decals). Finally, I modified for the last time the pylons of the missiles and completed also the Sidewinder. This should be the last version: That's all for now, thanks for following, Dan


- 79 replies
-
- 13
-
-
Hi Denis, sorry to hear about what happened to your house. I hope you will manage to repair it and go back to normality in short time. Good luck with your Fokker, Dan
-
Hi guys, thank you very much for your kind messages for my retirement 🙏. I have still to get used to my new status and I am spending a lot of time in front of the PC, responding mails, doing administration and paying bills. I see from your messages that all that is to be expected. I need also to do some works in the house which remained a bit behind all these years. I will be missing my work, the business trips in most of the significant places in Europe, the launch campaign in French Guiana and the last recent one at Cape Canaveral, however, I will not be missing the Monday morning project report meetings. Back to modelling, thanks for commenting positively my work. I am still working on the ordnance pylons, every second day I find new pictures that show different arrangements. Most probably, configurations changed along the years and I have to draw a line and stop modifying. My intention is also to resume naval modelling which languished for long time. Indeed, the sheet is very packed and I already spoiled one of the items. I am now much more careful and I am using a sharp knife instead of the scissors. Best regards, Dan
- 79 replies
-
- 10
-
-
Hi there, I am slowly progressing with this build, but not at the pace that I expected, though. Actually, I retired from work two weeks ago, but it seems that my hobby time has not increased, being a lot of time required in administrative and domestic affairs. At any rate, here I am. I started decorating the F-104 with the Italian roundels, but I have not yet committed which squadron badge will be sported by it. On the underside, I started to brush dirt trails in the area of the tail with oil colors: I also used oil colors on the cones of the air intakes to highlight details I worked to finish the scratch built pylons and the resin missiles. This is a dry fit of the Sparrow: Comparing with pictures of the plane, I realized that the missile sits a bit too forward and I need to shift it back. These resin missiles are another level of detailing when compared with the rough ones that I used on my F-15 few builds ago. I hope @Canute , who is a guru on the matter, is watching and will approve what I am doing. I am now working on the Sidewinder and soon I will show also that. That is it for now, best regards, Dan


- 79 replies
-
- 12
-
-

-
AMC DH9 by davec - FINISHED - Wingnut Wings - 1/32
Danstream replied to davec's topic in Non-ship/categorised builds
Very nice assembly of the interior. Following your progress, Dan -
Nice choice with the Hurricane. Dan
-
Triumph 3HW by Tim Moore - Italeri - 1/9
Danstream replied to Tim Moore's topic in Non-ship/categorised builds
Great modelling, the spoked wheel looks like the real thing. Following your build with interest, Dan