HOLIDAY DONATION DRIVE - SUPPORT MSW - DO YOUR PART TO KEEP THIS GREAT FORUM GOING! (Only 75 donations so far out of 49,000 members - C'mon guys!)
×

.jpg.2c2c29e54623bd7b752bc2cdab599665.jpg)
Danstream
-
Posts
747 -
Joined
-
Last visited
Content Type
Profiles
Forums
Gallery
Events
Everything posted by Danstream
-
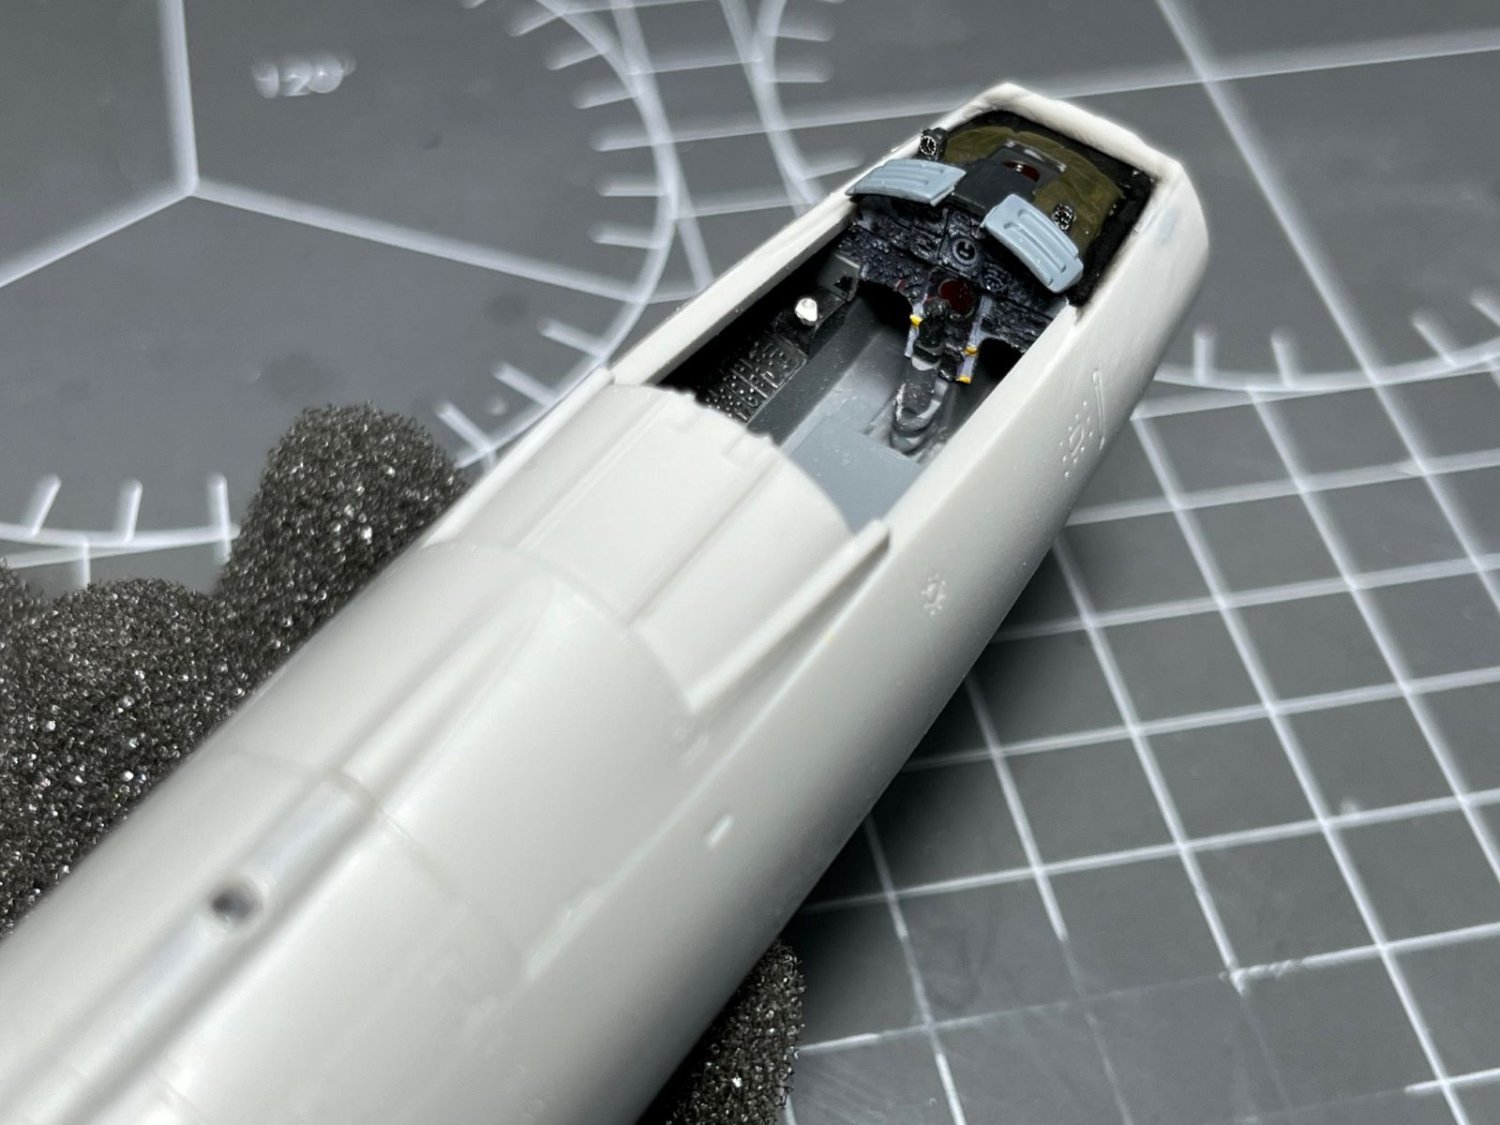
.thumb.jpg.c459ce4140b54c12eddb8eedfd446df3.jpg) A little step forward, I adapted the instrument panel, which was an Eduard a.m. for the Kinetic kit, and put on and finished the coaming. Perhaps, the canvas needs a coat of matt varnish. The cockpit is quite basic, hence I will opt for a closed hood. Next I will tackle the wing, best regards, Dan
A little step forward, I adapted the instrument panel, which was an Eduard a.m. for the Kinetic kit, and put on and finished the coaming. Perhaps, the canvas needs a coat of matt varnish. The cockpit is quite basic, hence I will opt for a closed hood. Next I will tackle the wing, best regards, Dan
- 79 replies
-
- 11
-

-
Shelby 427 S/C Cobra by CDW - FINISHED - Fujimi - 1:24 Scale
Danstream replied to CDW's topic in Non-ship/categorised builds
Beautiful model with a fantastic paint finish. Congratulations, Dan -
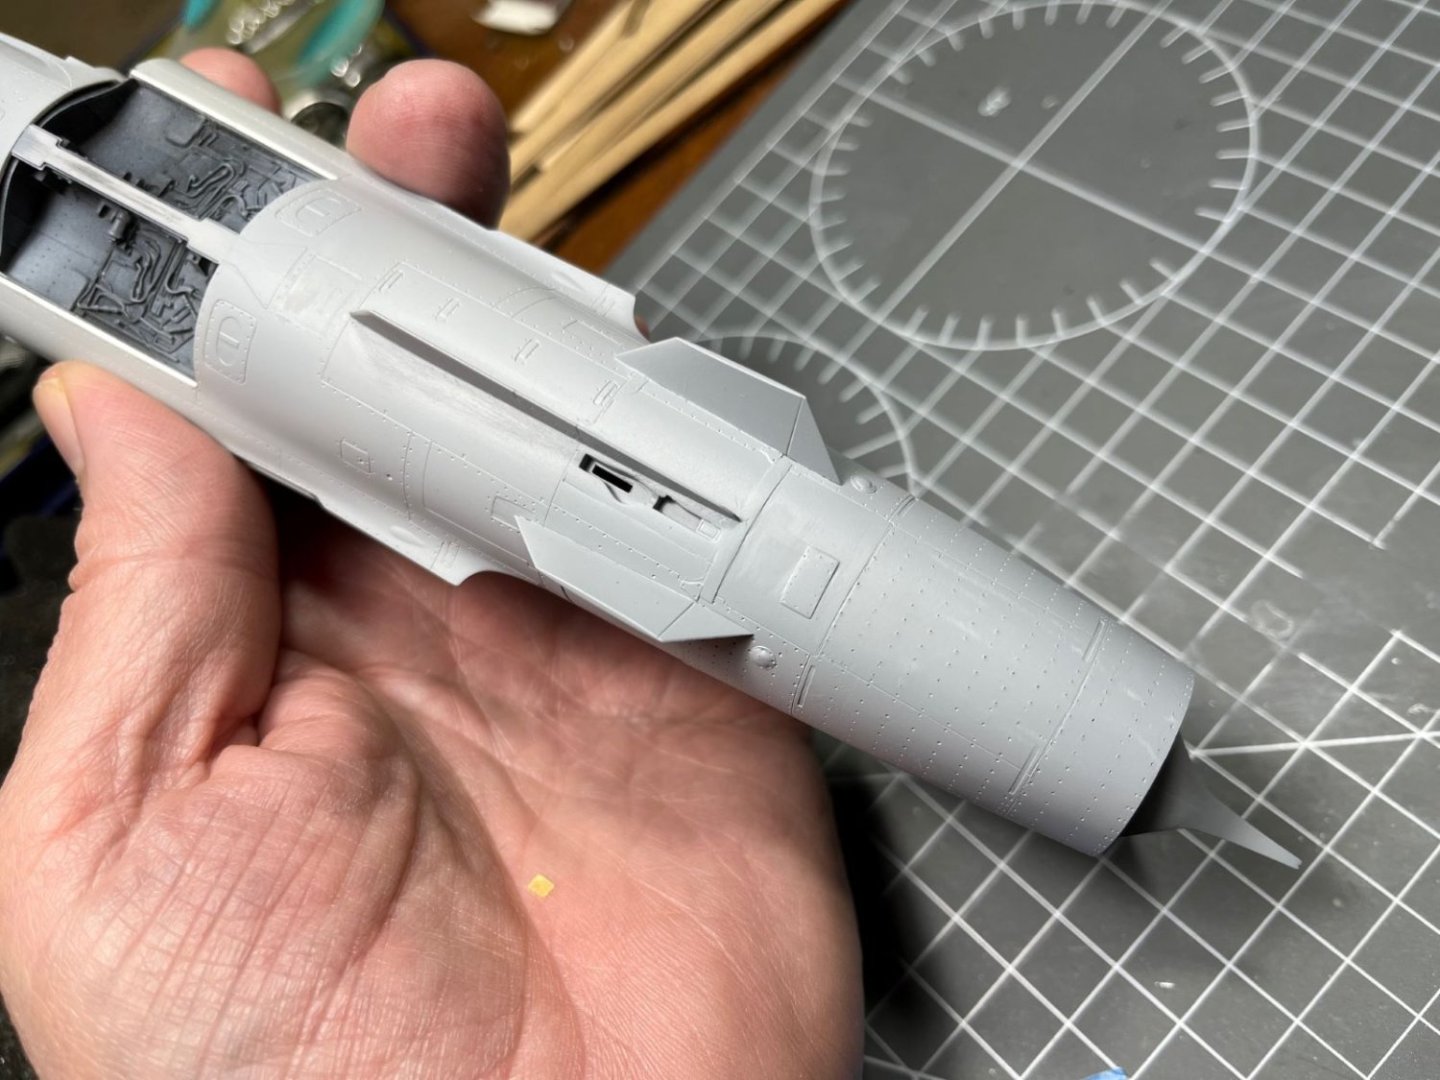
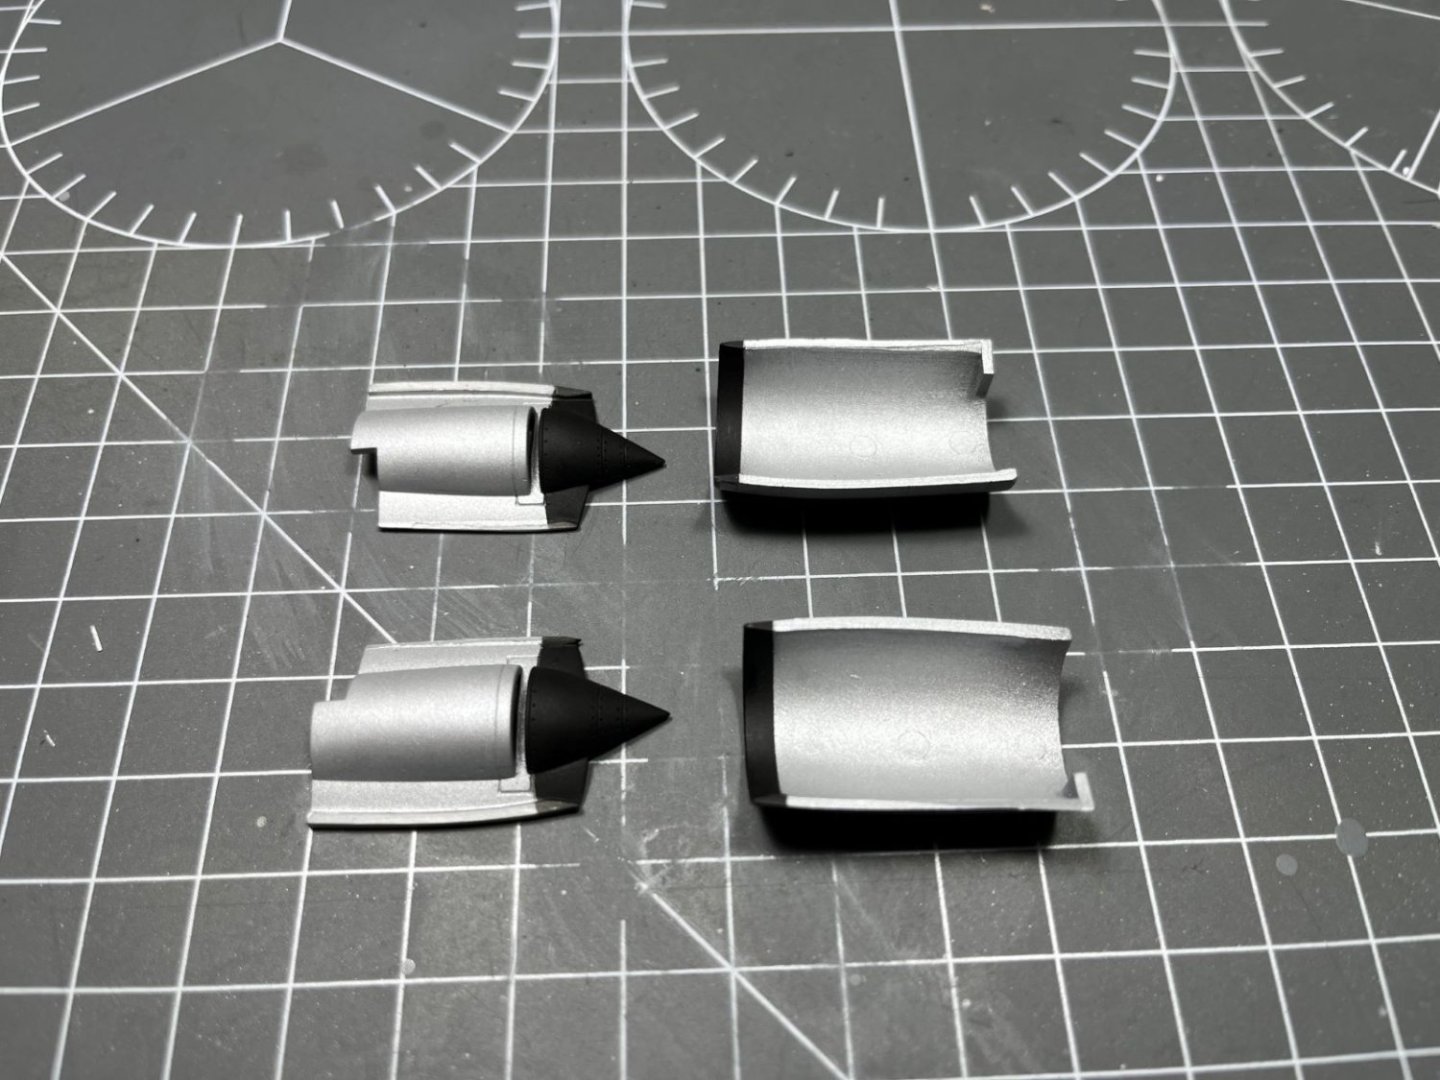
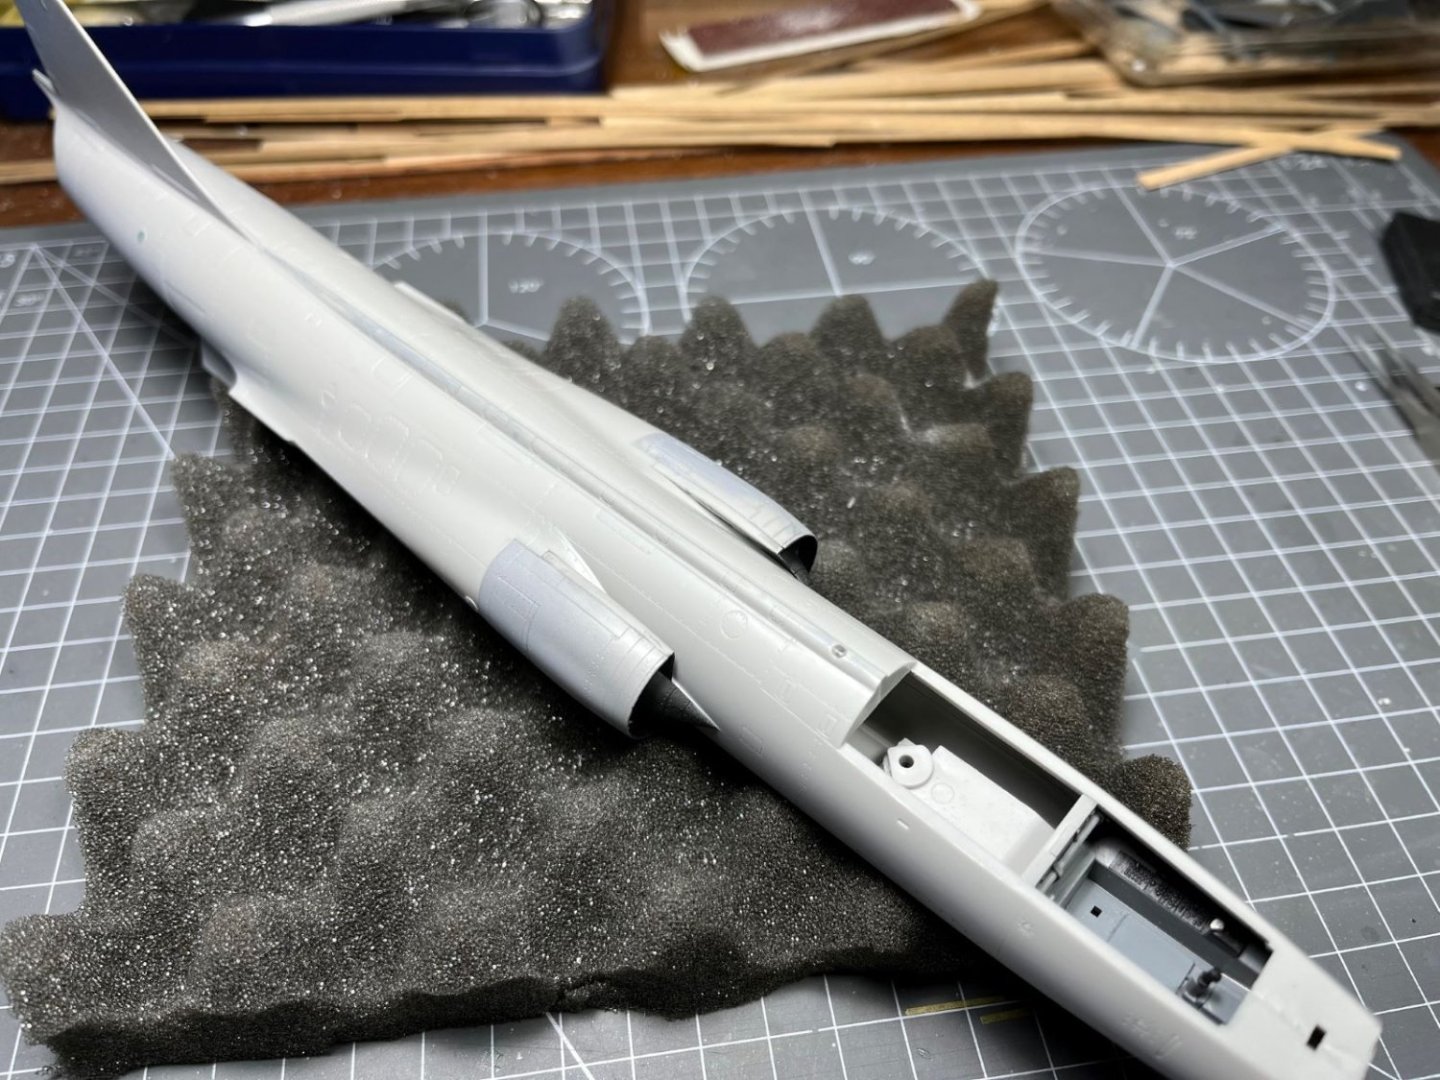
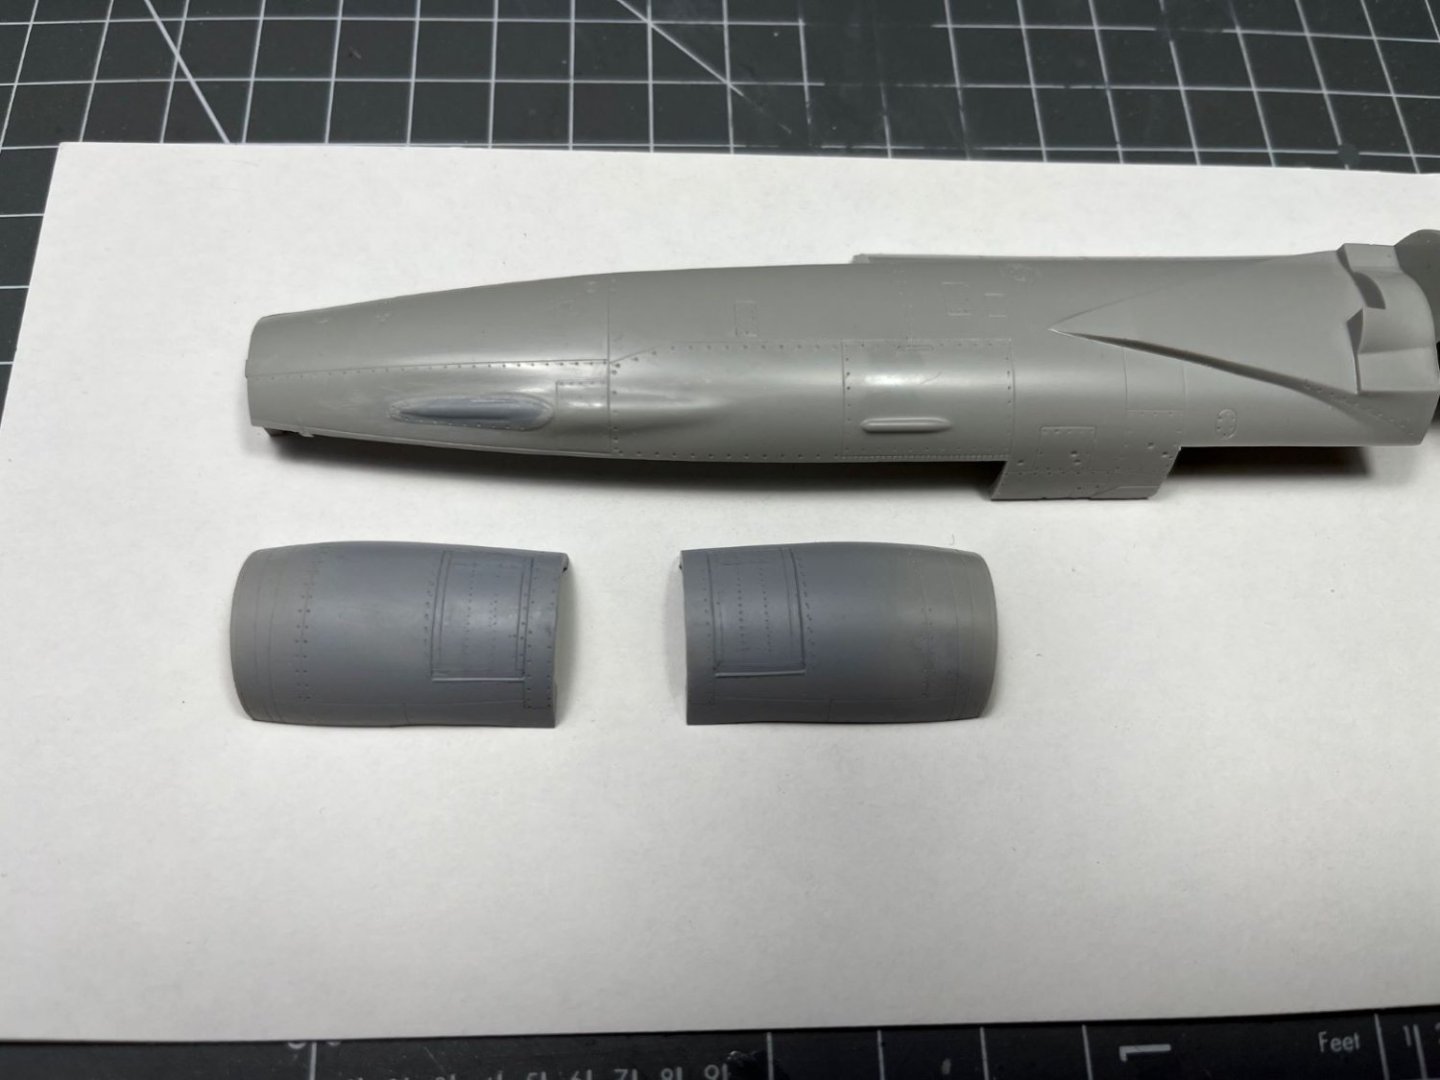
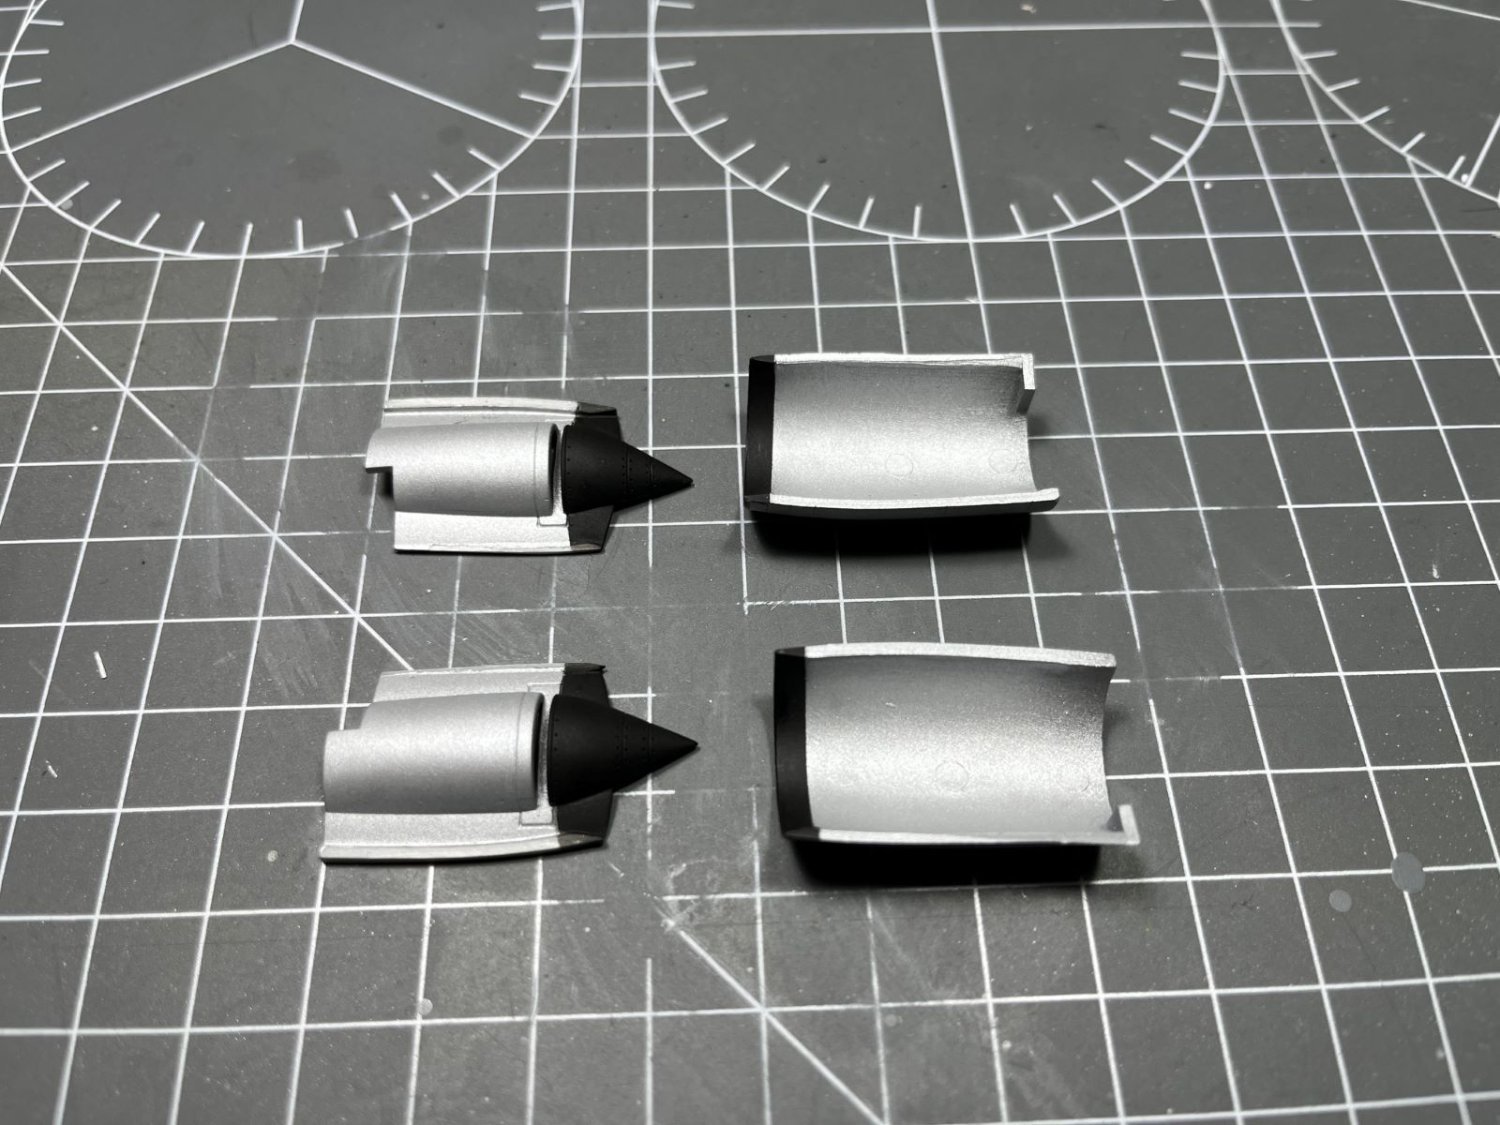
Hi, after long time, I am able to come back to my model. The addressing of the seam of the fuselage junction took longer than expected. After numerous filling and sanding sessions I eliminated all the ghost seams (I hope) and glued the belly fins which needed a quick reshaping and filling of the gaps at their bases. All the sanding marred the very nice details of the surface that had to be restored. This is the section of the tail which had its details re-built. Then, I painted and prepared the air inlet system which sport an anti-icing black coating on their entrance lips and cone. After mating them, I glued the inlets onto the airframe. It can be seen that the distinctive shape of the Starfighter starts to emerge and this nice kit capture it very well. The lower surface is completed by now, only some finishing of the air inlet assembly is needed. The underside of the fuselage is full of details, engraved or in relief, and attention must be paid not to obliterate them. The complexity of the details reminds to me the surfaces of the space ships seen in the Star Wars movies. That's all for now, best regards, Dan


- 79 replies
-
- 10
-
-
Shelby 427 S/C Cobra by CDW - FINISHED - Fujimi - 1:24 Scale
Danstream replied to CDW's topic in Non-ship/categorised builds
Good start, waiting for another great model. My curiosity and interest for historic cars is increasing after your builds. I am thinking that after all for me this would be the only affordable way to own such fascinating cars. Cheers, Dan -
Very nice Beaufighter, Andy. Clean and sharp work. I see that the landing gear was rightly assembled and it looks straight and solid. In my build, it didn't look equally solid. Love the pictures with the rotating propellers. Cheers, Dan
-
Bugatti Type 35B by CDW - FINISHED - Italeri - 1:12 Scale
Danstream replied to CDW's topic in Non-ship/categorised builds
What a spectacular model you have done, Craig! And, in addition, it has has a story behind. The finish of the body work gives really the illusion of being made of bent metallic sheets. I went through the picture several times because every time there was something new to look at. I never built models of cars, but your built is making me thinking of getting one. Are you going to build a show case for it? I think it would be a beautiful piece for any bookshelf or the like. Congrats, Dan -
That is the air intake, the oil was cooled by the air flowing over the tiny tube meanders that made up the lip of the cowling. A legacy that Macchi had from the Schneider cup time. Great progress, all the cowling with the blisters is an amazing work of love. Cheers, Dan
- 80 replies
-
- 10
-
-
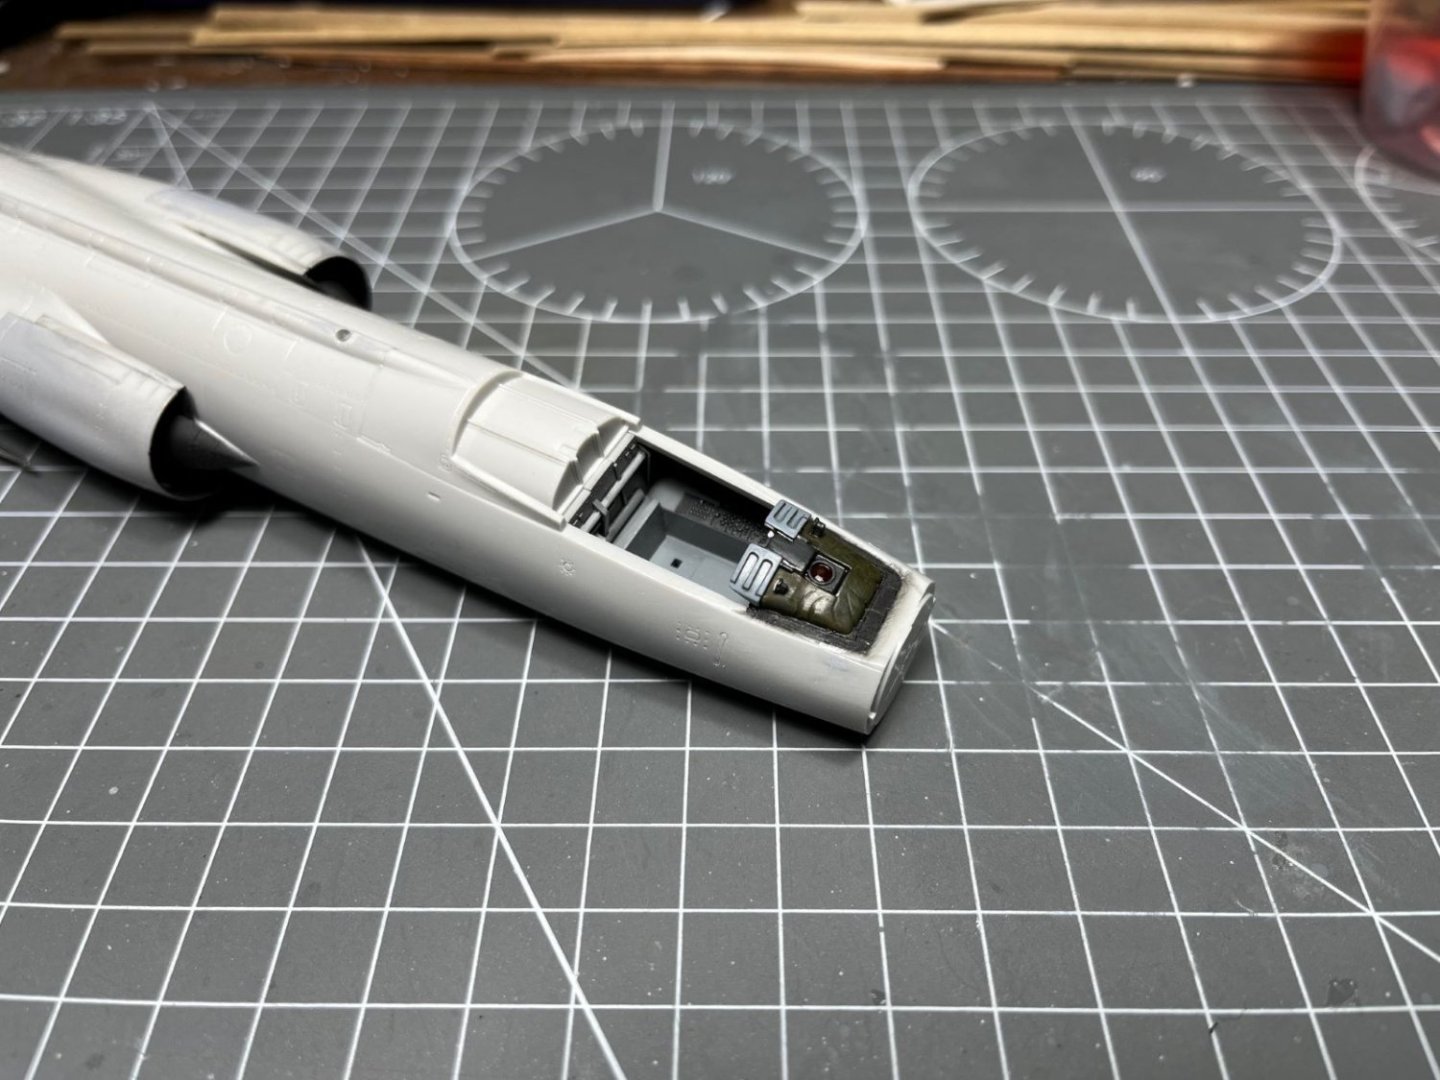
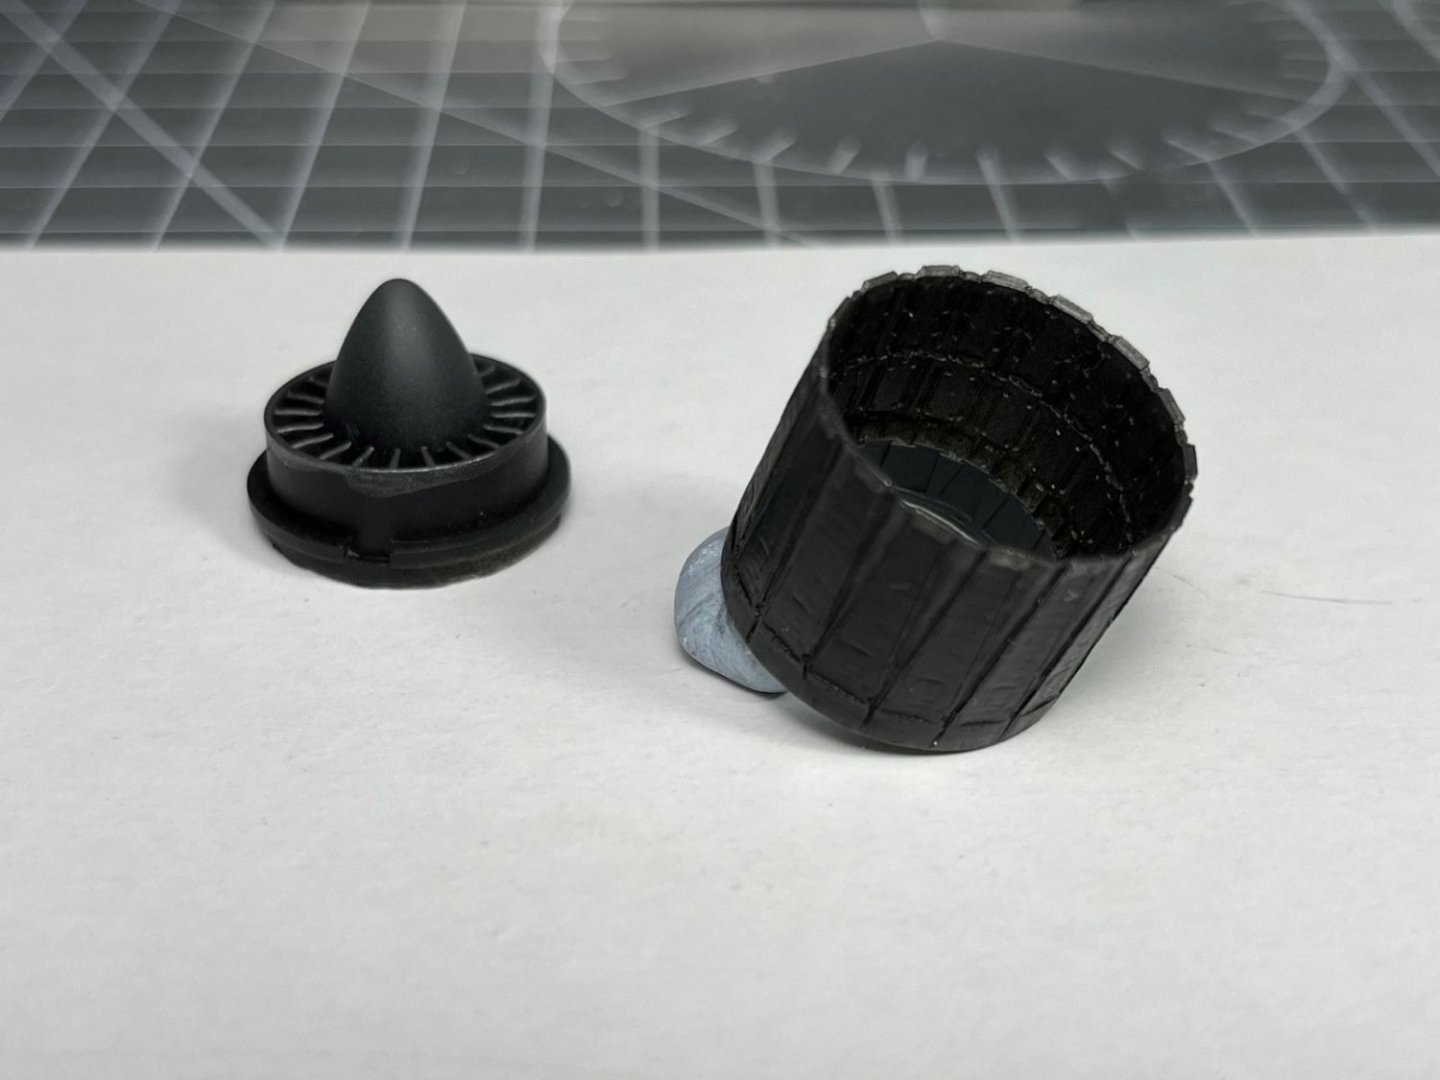
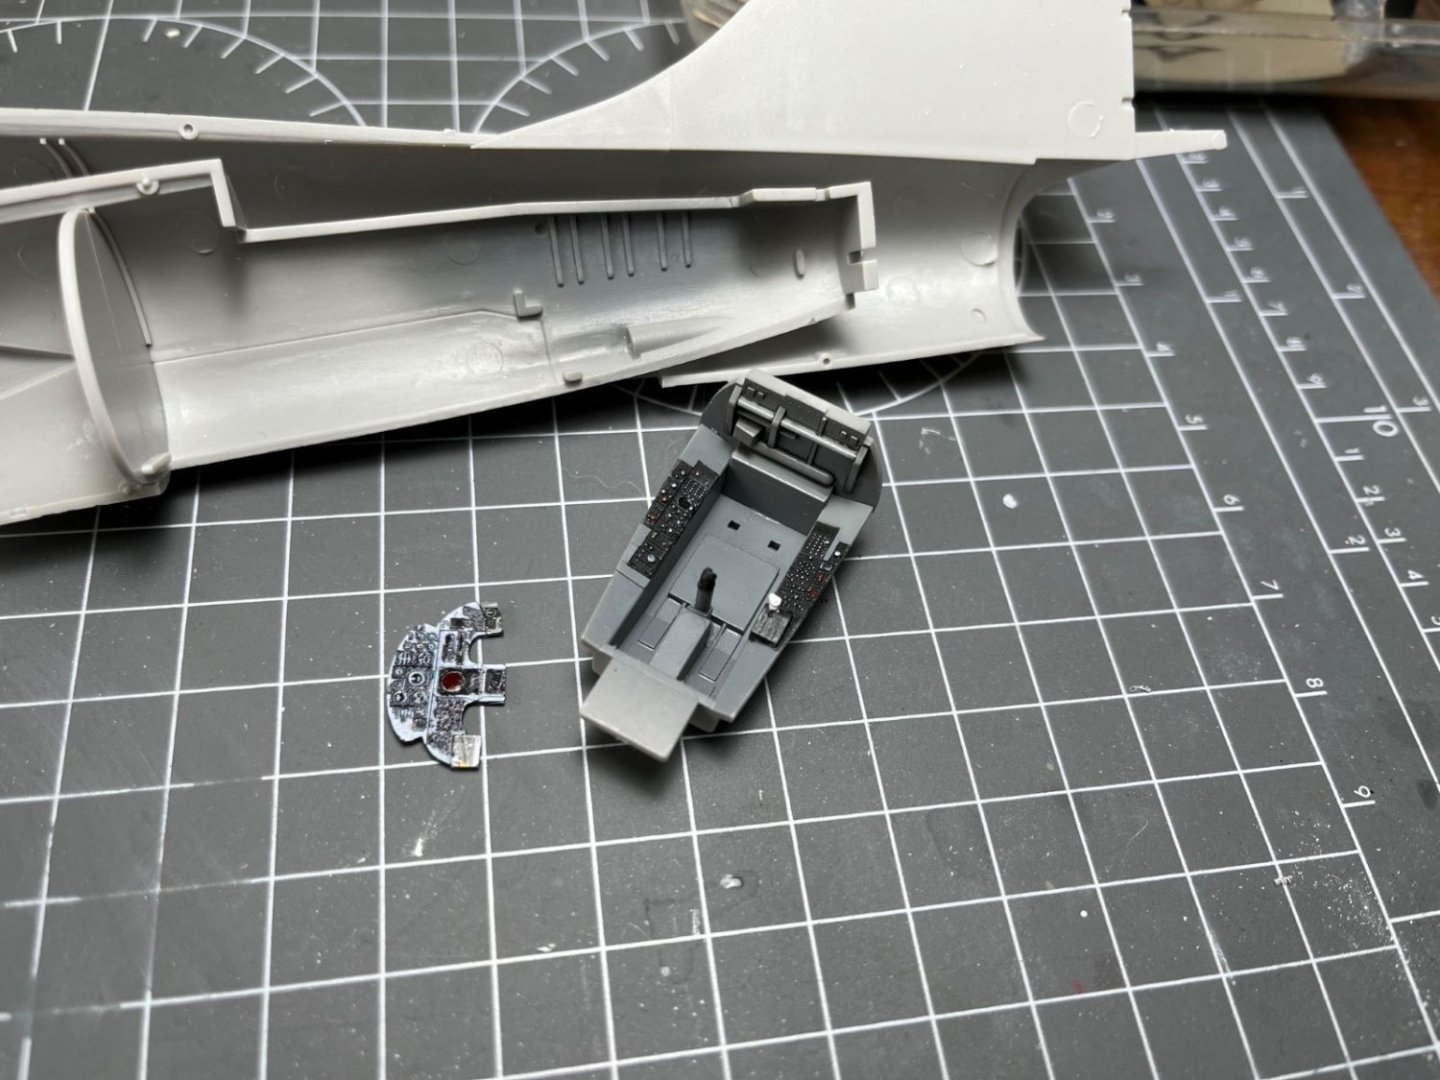
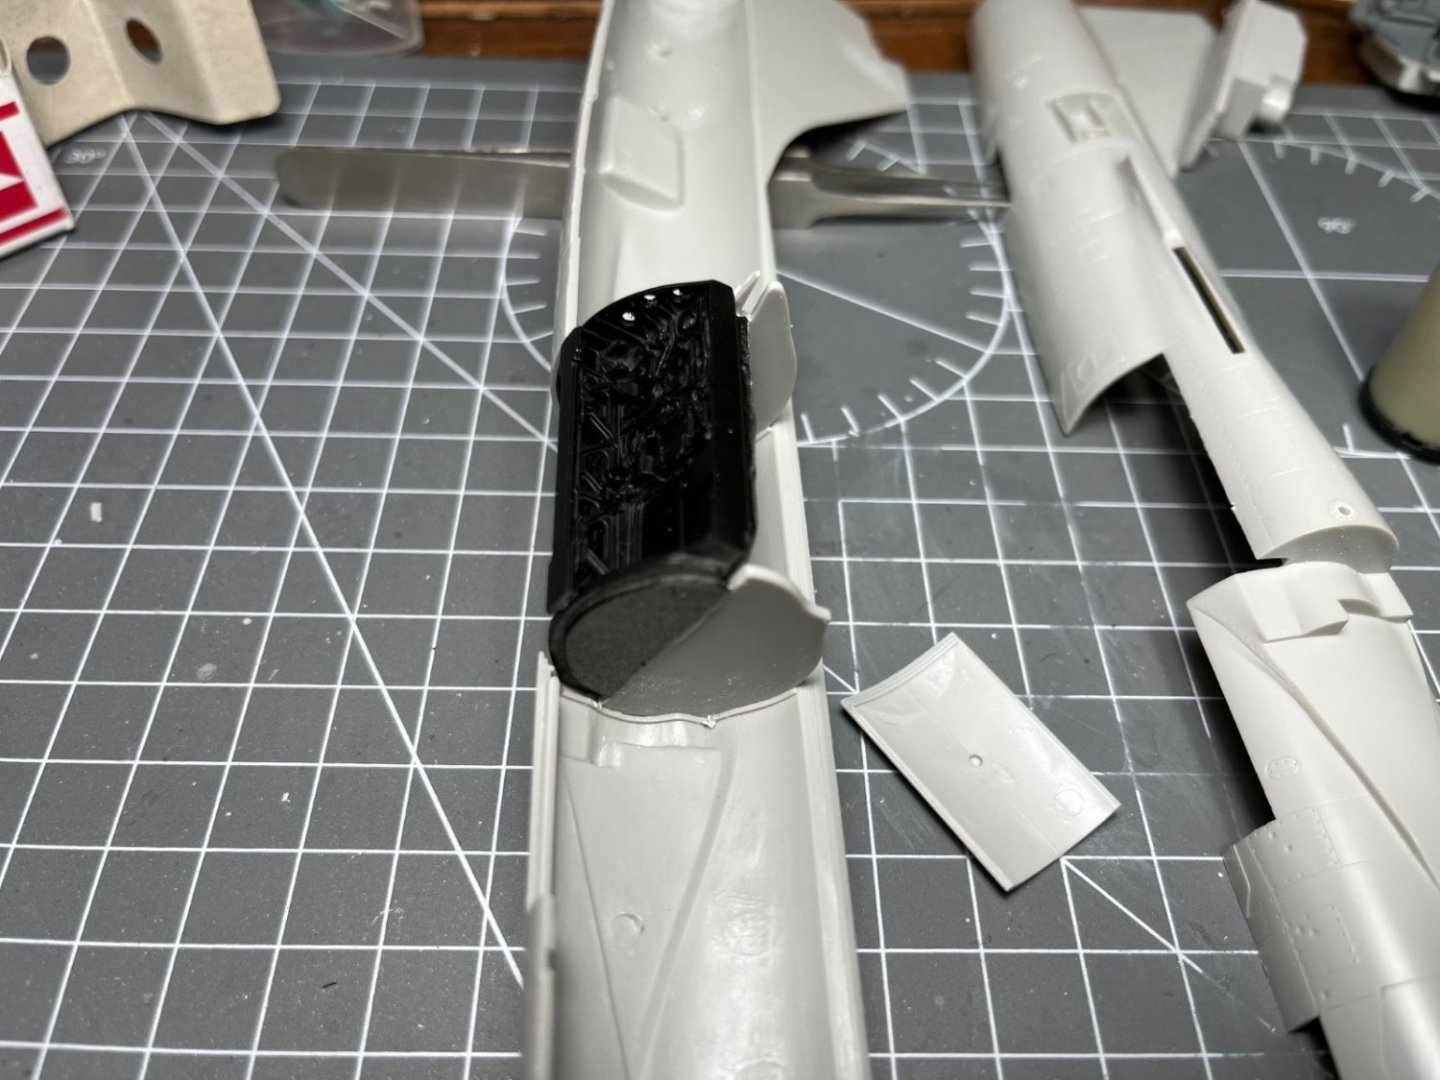
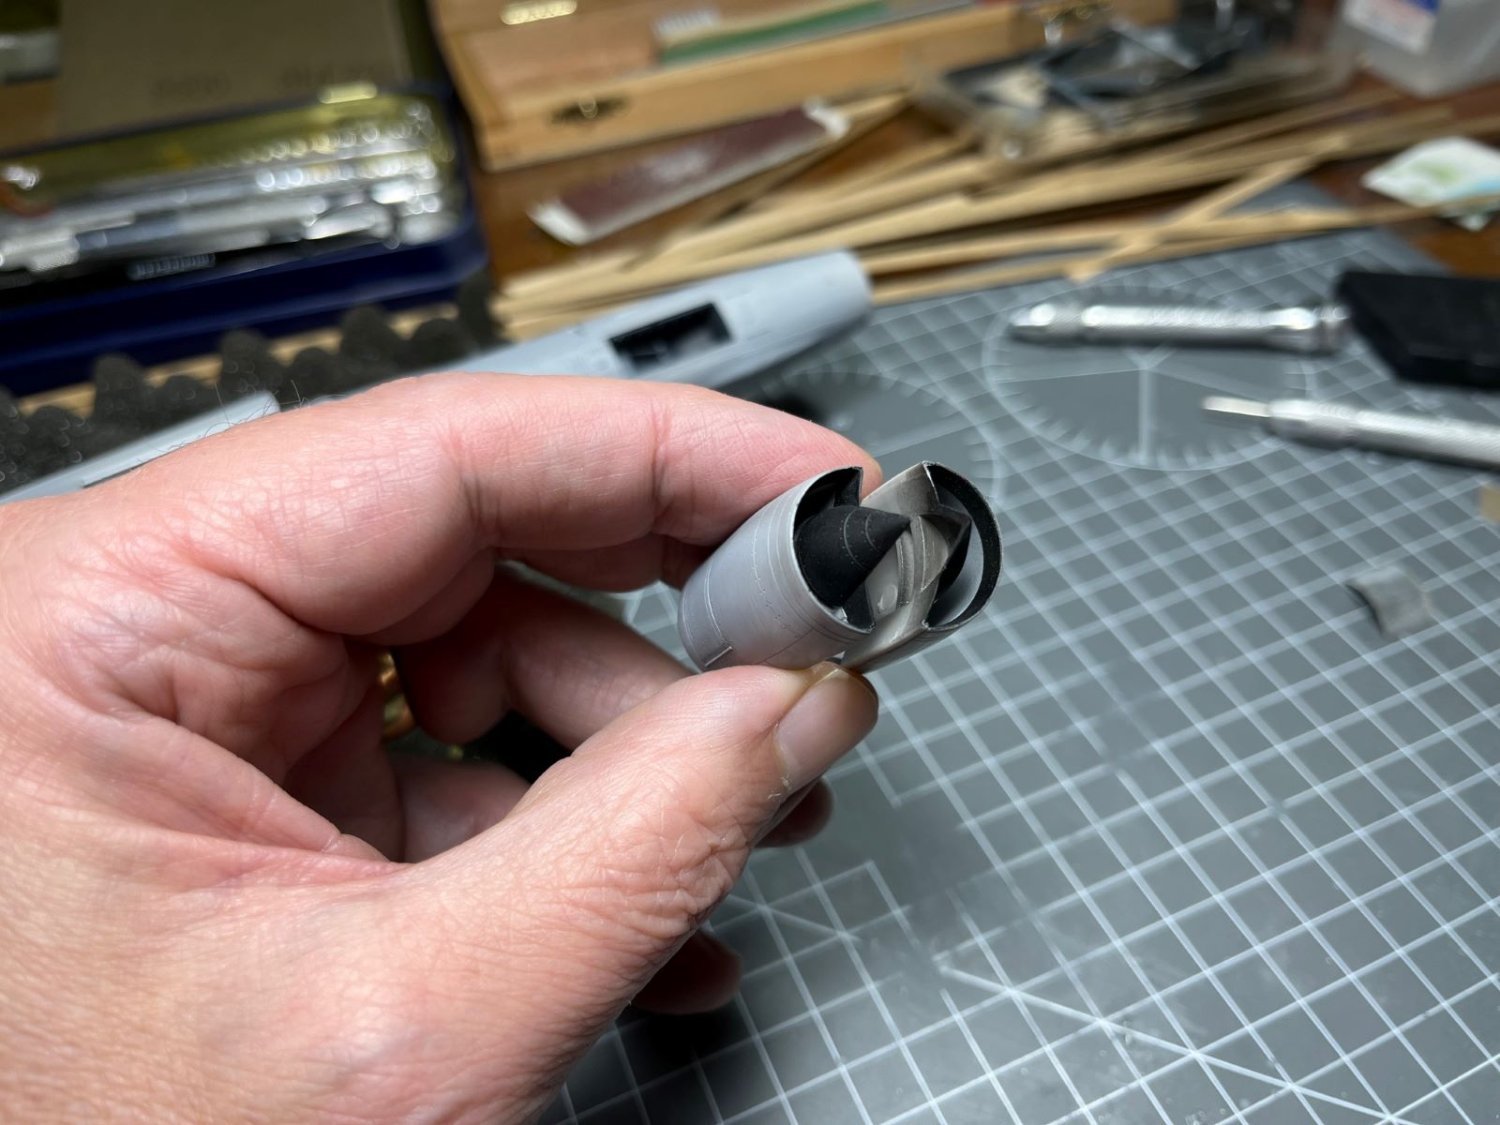
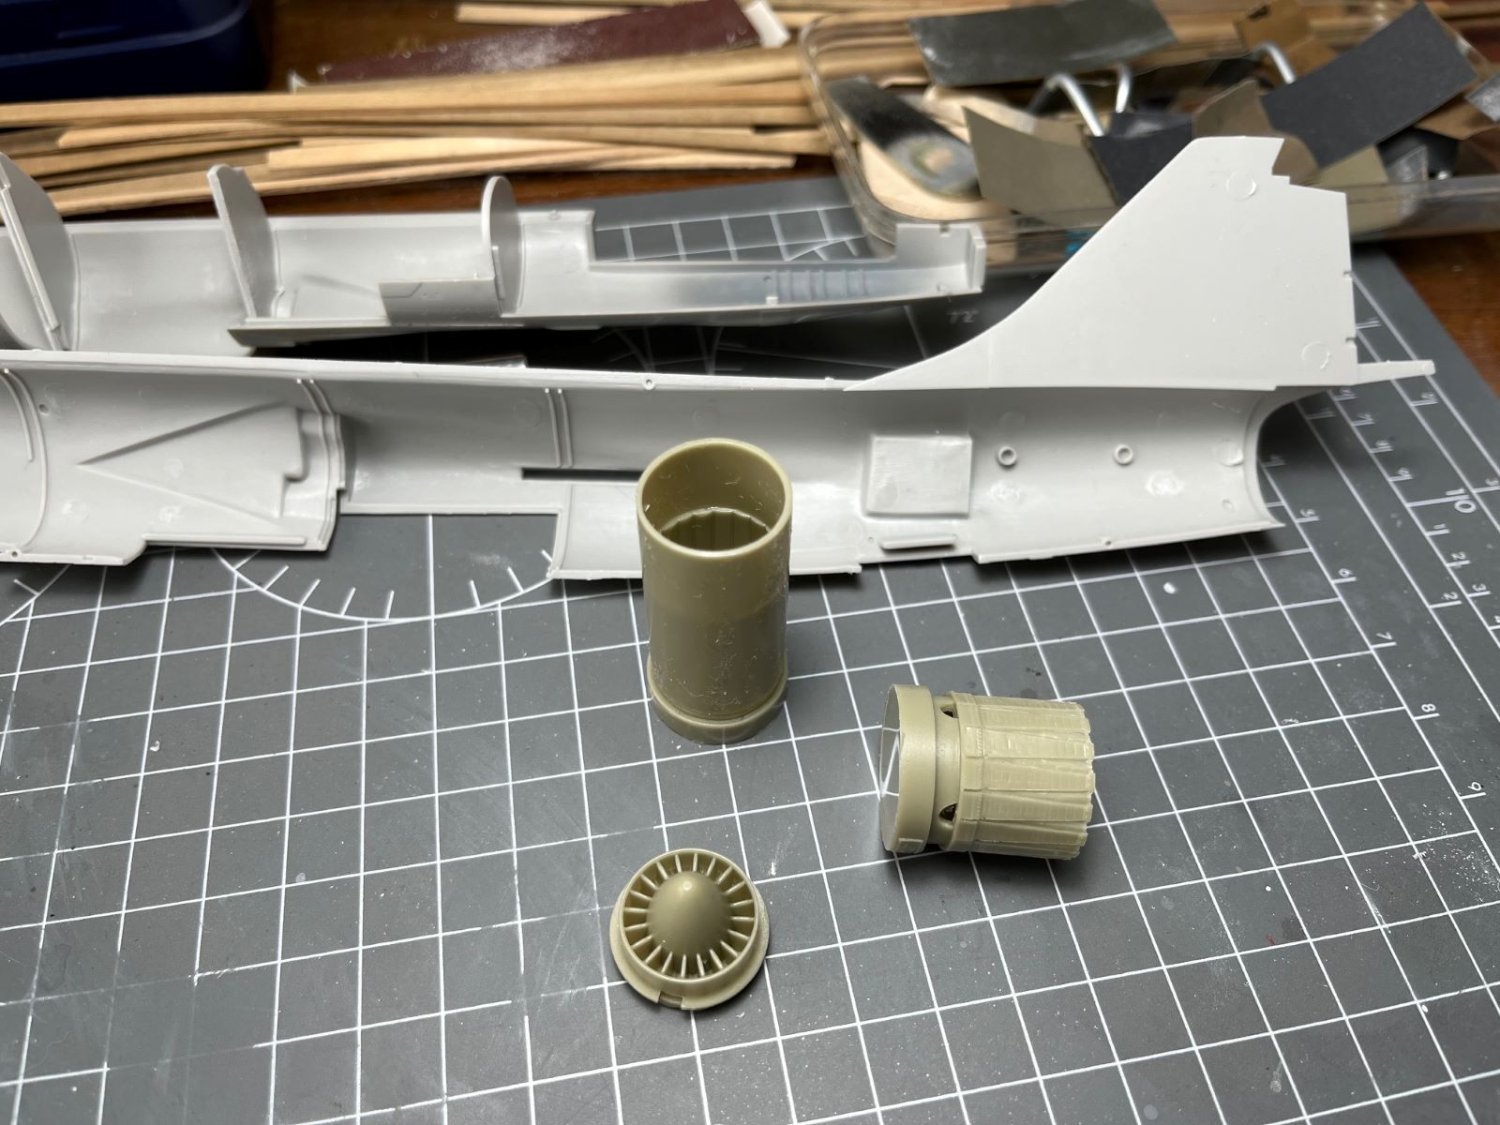
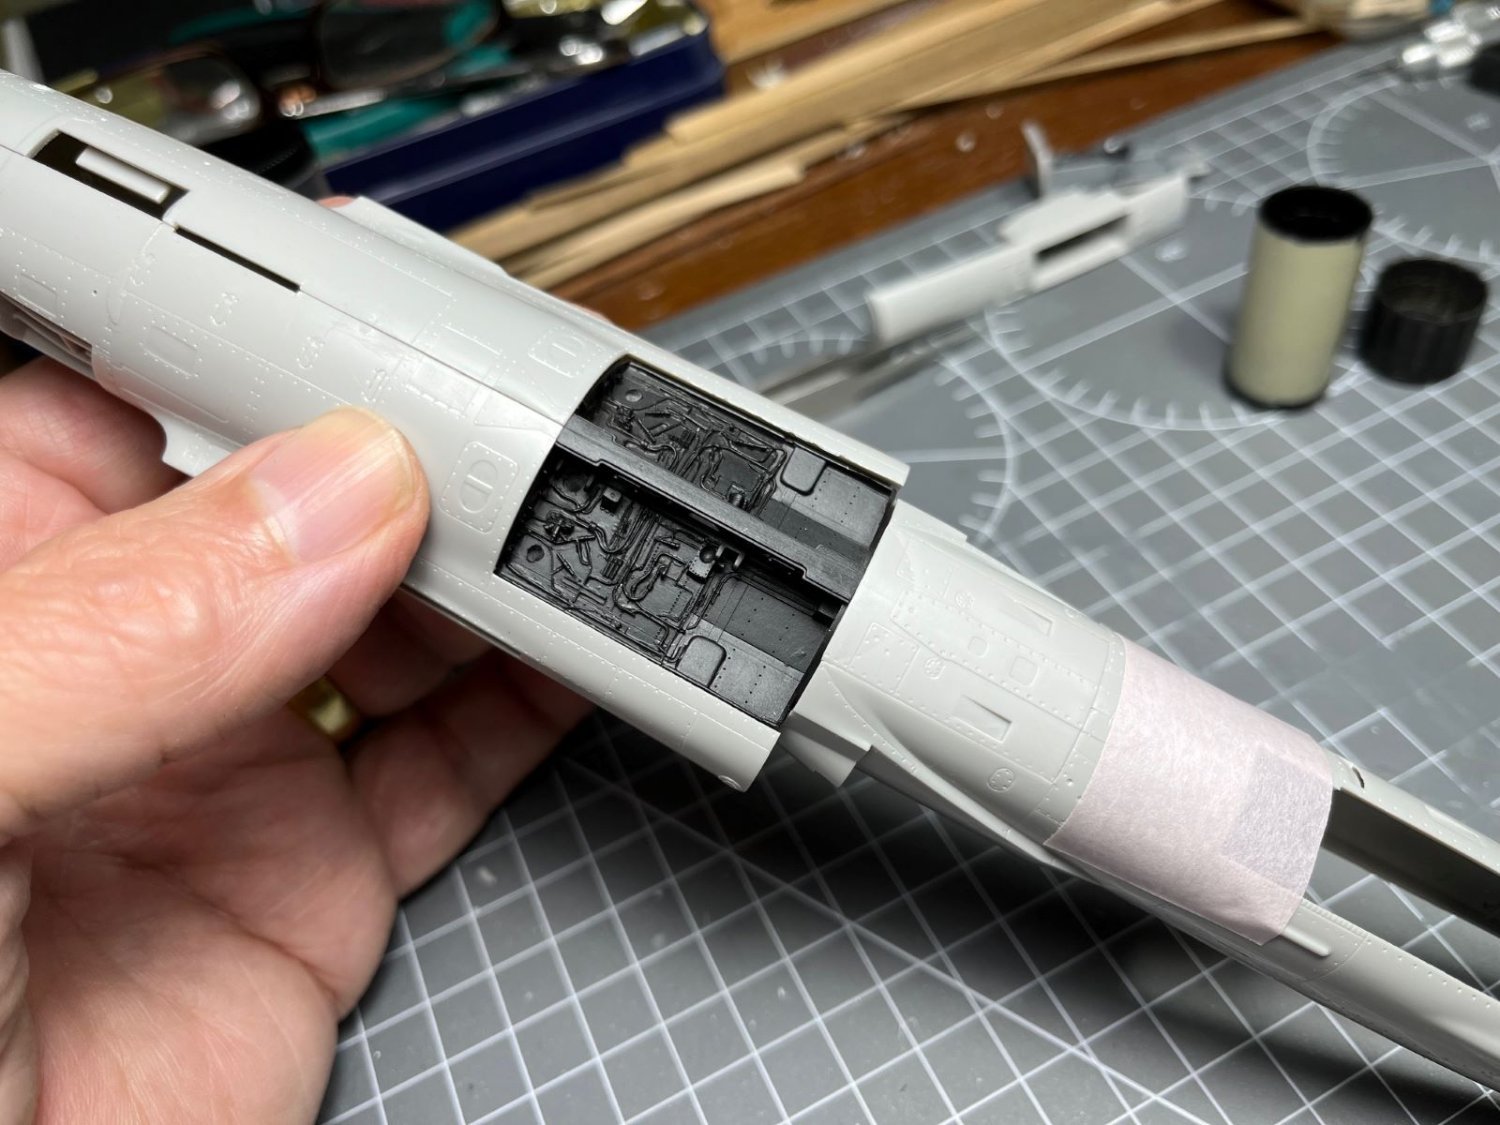
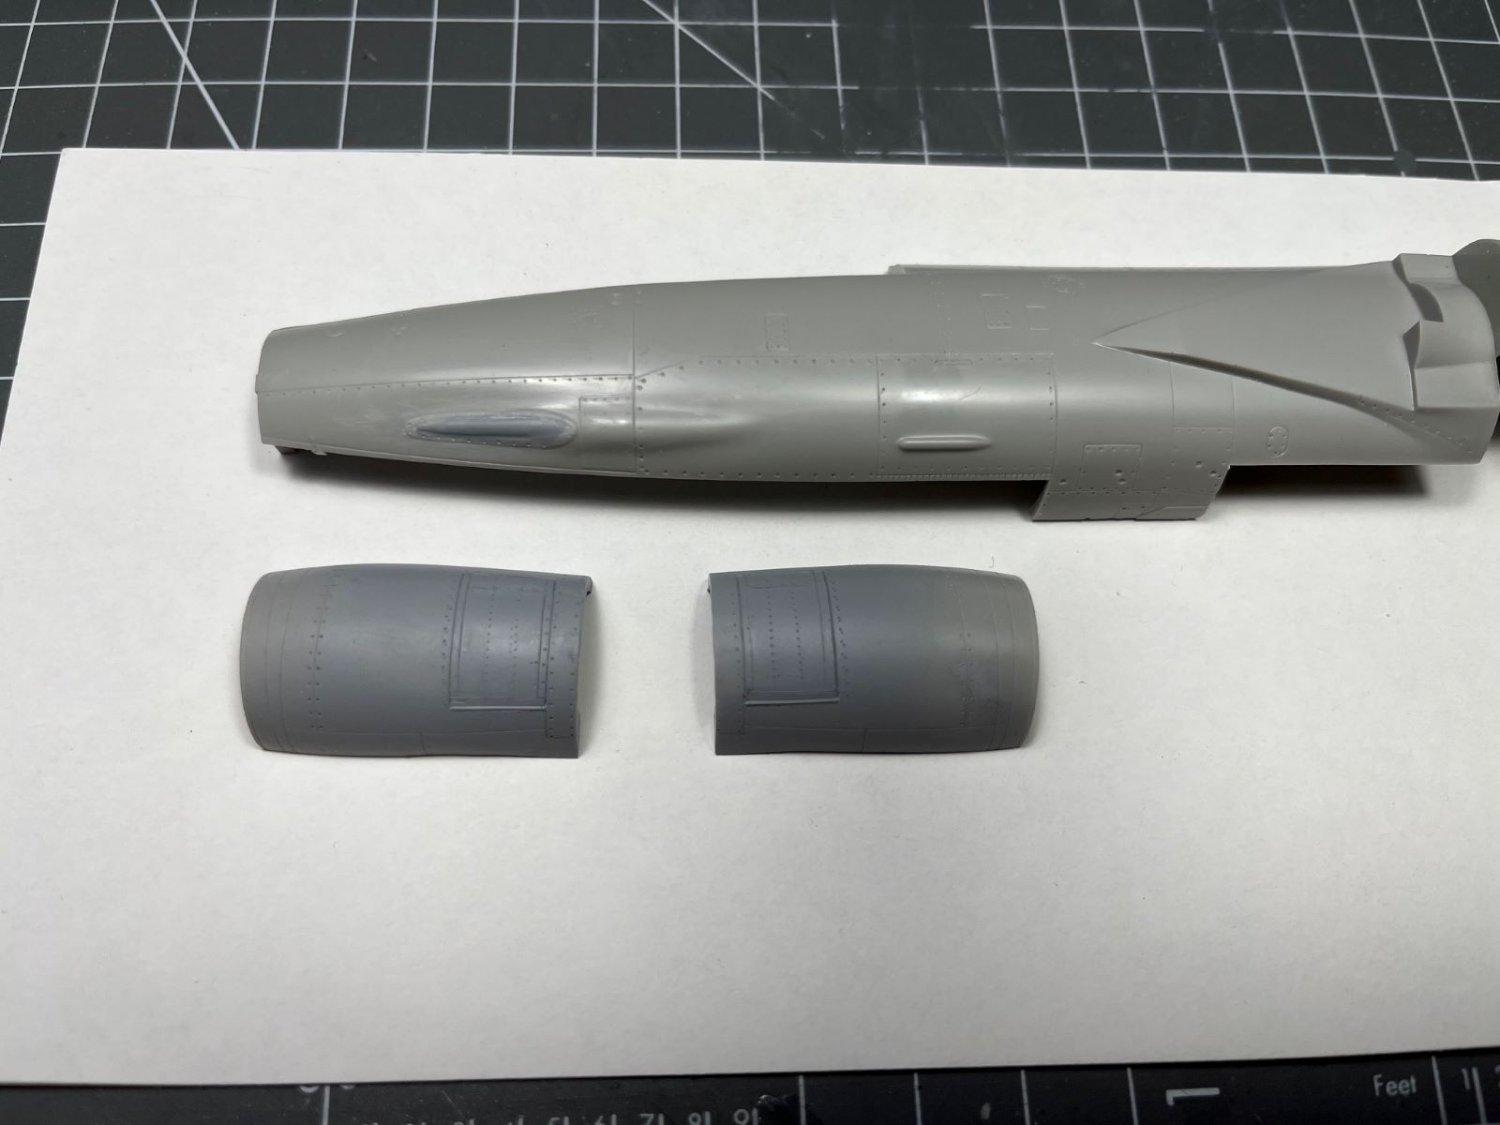
Hi, I am working on the details that need to go inside the fuselage. I bought the Aires resin replacement for the jet pipe of the J79-GE-19 engine. The kit provides the specific nozzle for this engine, but the resin parts were available at the LHS and they look better. I sprayed the parts with black surfacer primer and dry-brushed them with metallic steel paint. From pictures of the real plane, the nozzle appear quite black, hence, after an application of a Tamiya brown liner, I painted the petals matt black. Then, I picked up few details again with steel paint. Being everything almost black, it is difficult to take a picture of it, but this is the result. The cockpit is very basic and the instrumentation is provided by decals. However, these are very old and not usable any more, hence I picked up the details of the consolles by drybrushing while the IP is a replacement from Eduard, which being designed for the Kinetic kit, required some adaptations. I bought also a resin for the wheel bay which, although not strictly necessary, is a nice improvement. To install it, I cut and removed a part of the fuselage frames provided by the kit and glued the resin bay to the remaining frames obtaining a solid support for this large piece. This is how the bay will appear once inside the closed fuselage. There are still several other issues to fix before being able to close the fuselage. In addition, another problem to be solved is the replacement of the kit decals with a better and newer set. I found on the web a nice sheet produced by Skymodels, but I will tell you more next time. Kind regards, Dan


- 79 replies
-
- 13
-
-
I agree with what you write about the phenomenon. However, I think that the absolute demarcation between old and new style sci-fi films was, in my opinion, represented by '2001 a Space Odyssey' which is still remarkably rather believable in our days. @madtatt, your Millenium Falcon looks spectacular. Best regards, Dan
-
Nice build and sharp painting. As written in another post, I built this kit too and made the same version (but with a torpedo) and found it rather nice. Waiting to see more. Kind regards, Dan
-
Hi, the transparent looks good from here. It happens that often I need to use formal or semi-formal shirts for my work and often they come with a good quality optically smooth transparent cases which I keep aside when I found one. Also the transparent part that they typically insert below the collar to keep it in shape is generally optically good and a bit thicker than their transparent box. Just to say. Nice work Chris. Your build makes the C.200 look graceful to my eyes, contrary to my previous opinions. I don't know which kind of canopy lids are you going to make, I am sure you already know it came with different styles that protected the pilot's to different degrees. All types were hinged along the cockpit sills and I don't think there were types that were sliding. Kind regards, Dan
-
You have a fine model which is not commonly seen around. Clean and accurately finished, I definitely like it. Congrats, Dan
-
@Landlubber Mike, Hi Mike, thank you for following and providing always your feedback. It is only a pleasure for me to share. See you on the next build, Daniele
-
Your castle looks fine. I hope it is going fine with your eye, I went through that myself few years ago and all went fine. Of course, I need to wear glasses when I work at close distance, but I don't consider that a big problem, at my age (66) I would have needed reading glasses anyway. Get better, Dan
-
I am sorry to hear that. I hope you are fine.
-
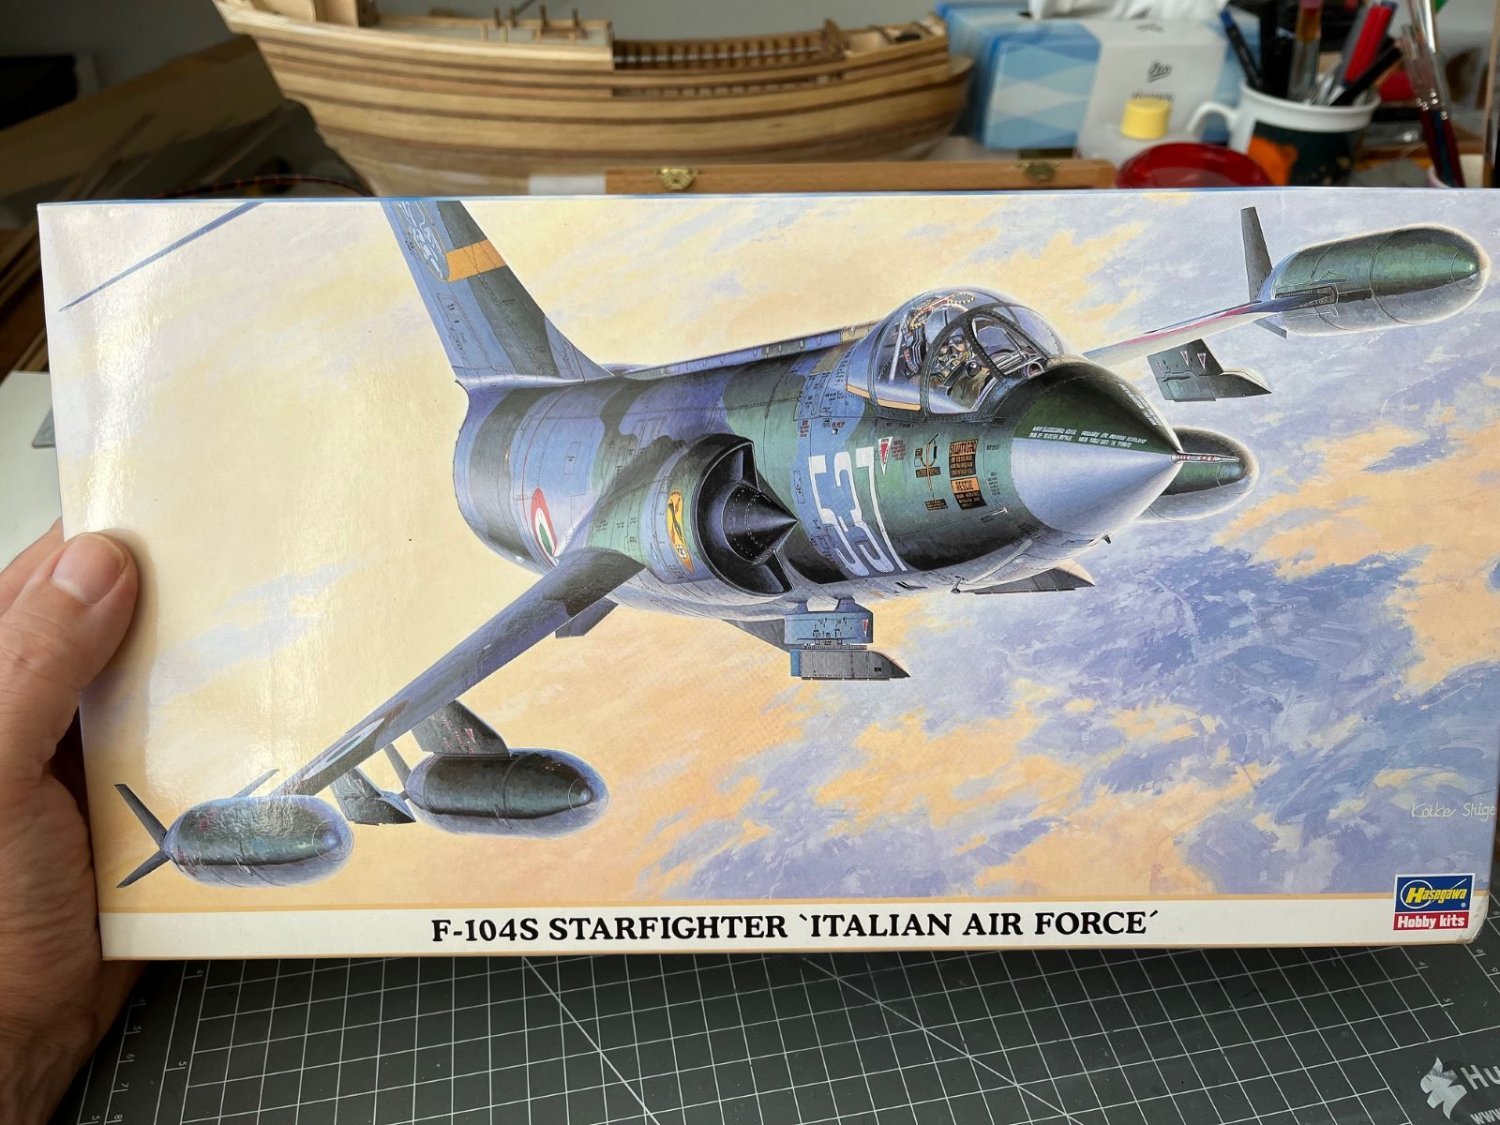
Yesss, me too. The box art is from the great artist of aeronautical subjects Koike Shigeo, although this one is not among his bests. I like a lot his depiction of luminous cloudy skies. Kind regards, Dan
-
Lotus 72D by gsdpic - FINISHED - Tamiya - 1/12 - PLASTIC
Danstream replied to gsdpic's topic in Non-ship/categorised builds
Outstanding build. I have a suggestion, if I may. The transparent part is somehow spoiled by internal reflections of light on the plastic edge. It is possible to suppress them by painting with matt black the thickness of the edge of the transparent part in contact with the car body. Best regards, Dan -
Your speed is amazing, before I could realize it, you have practically almost finished it. Nice and clean job, Dan
-
You might be not required to paint these models, but your margin for not marring the finish is absolutely nil. Great work on the 'curvy' lines of this model (pun intended). Cheers, Dan
- 80 replies
-
- 10
-
-
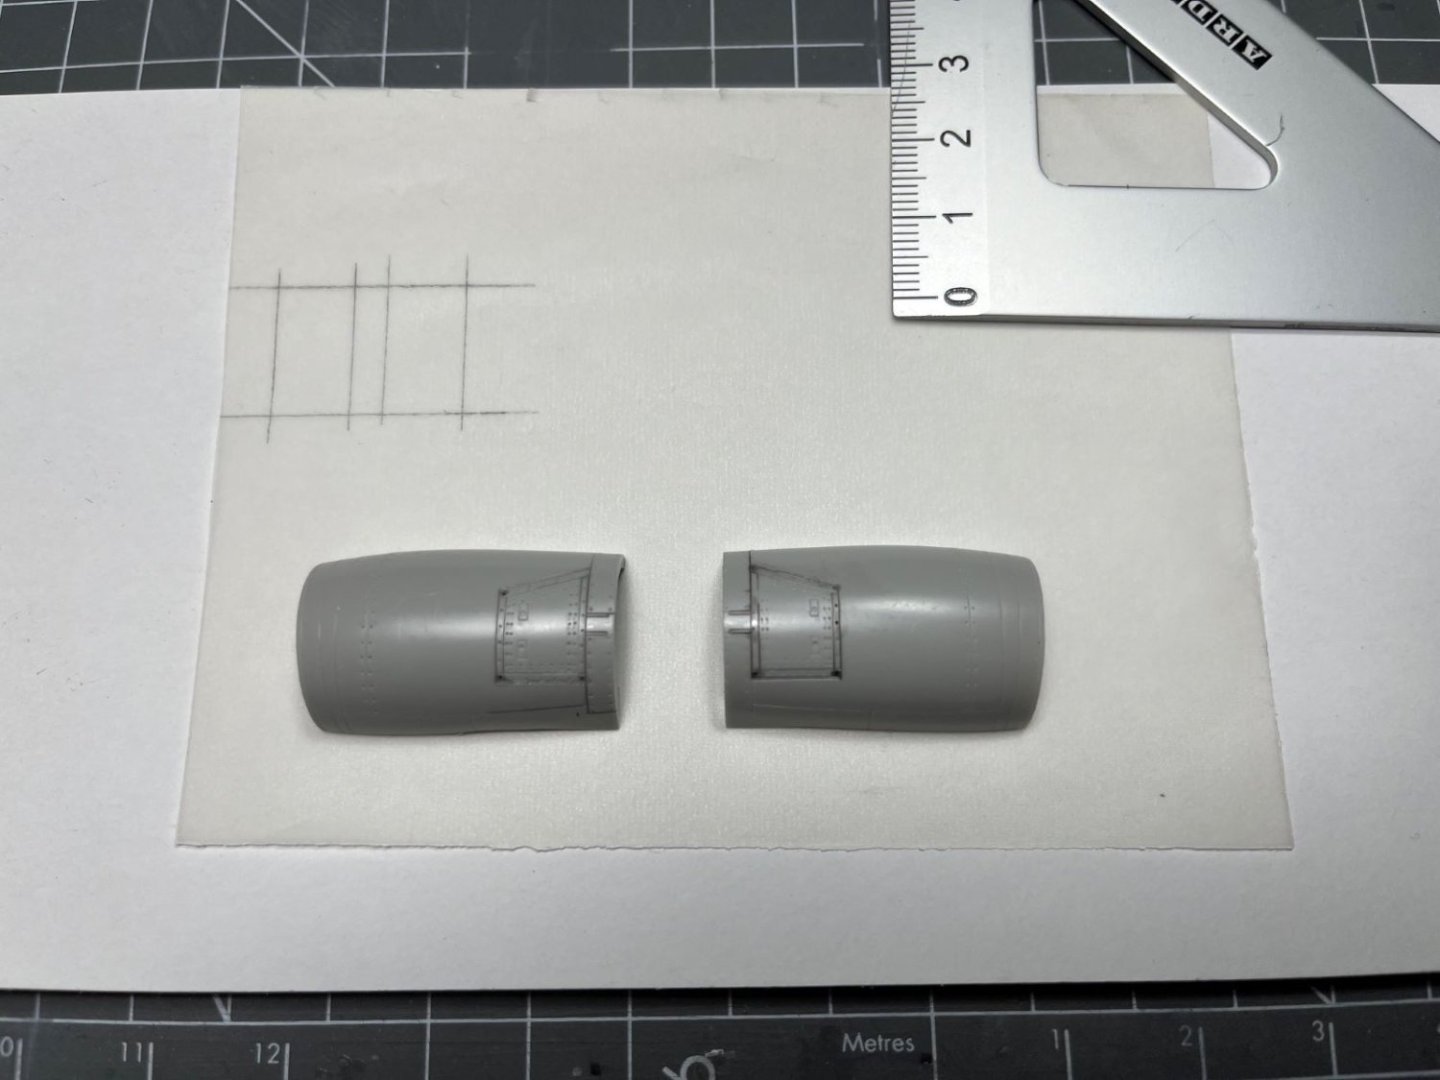
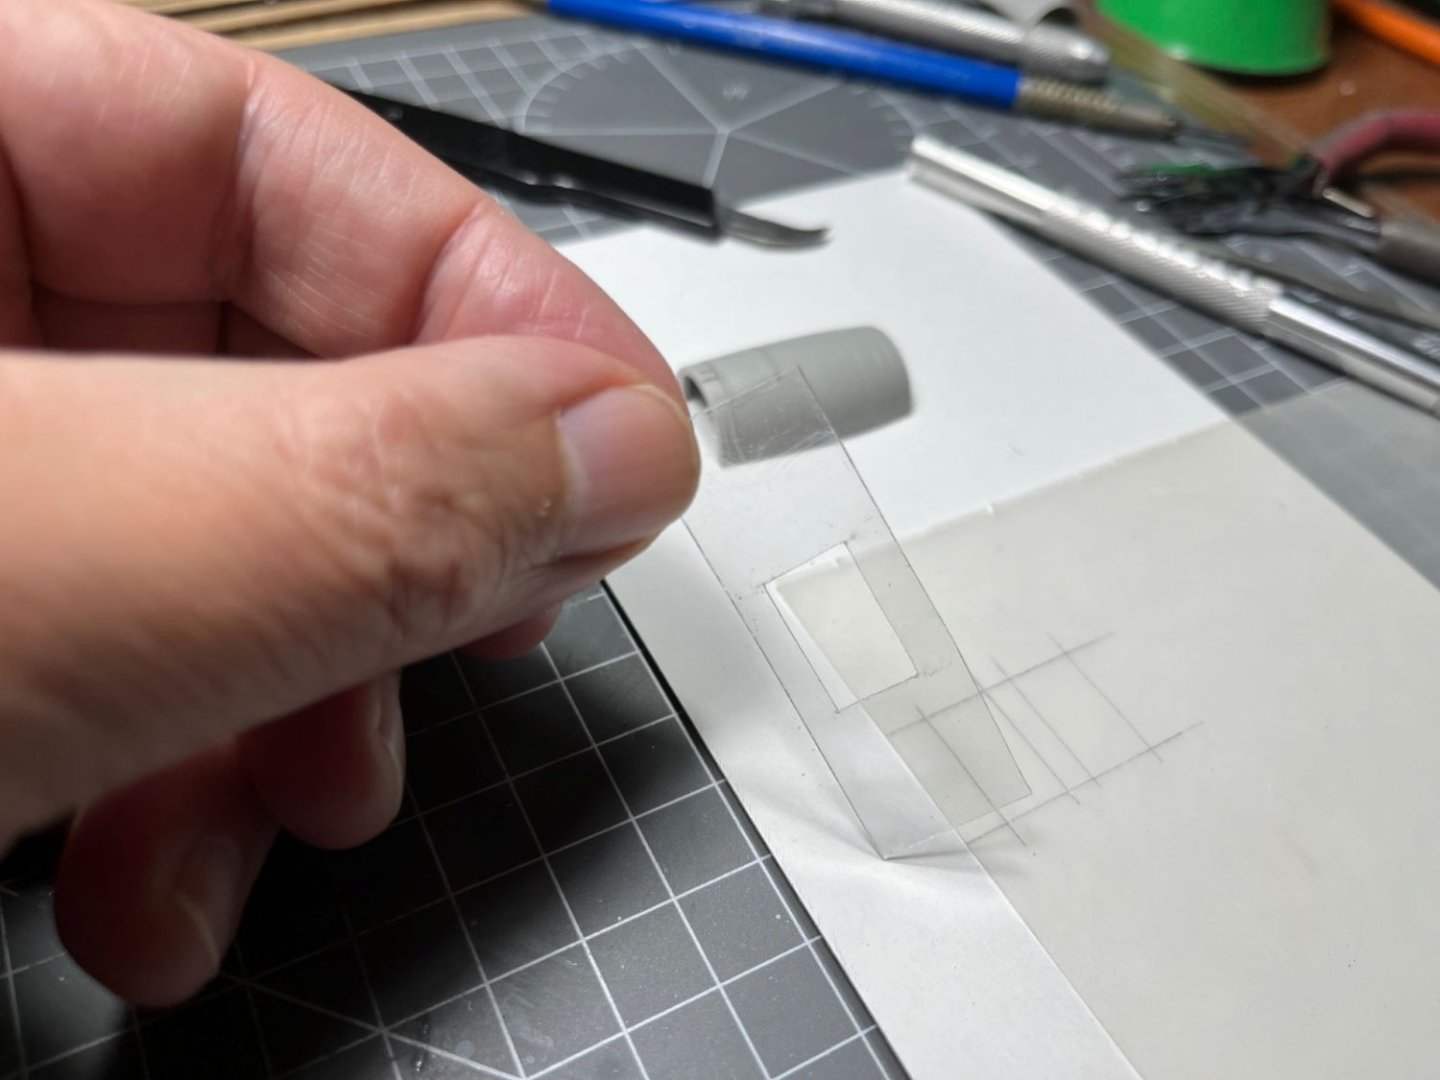
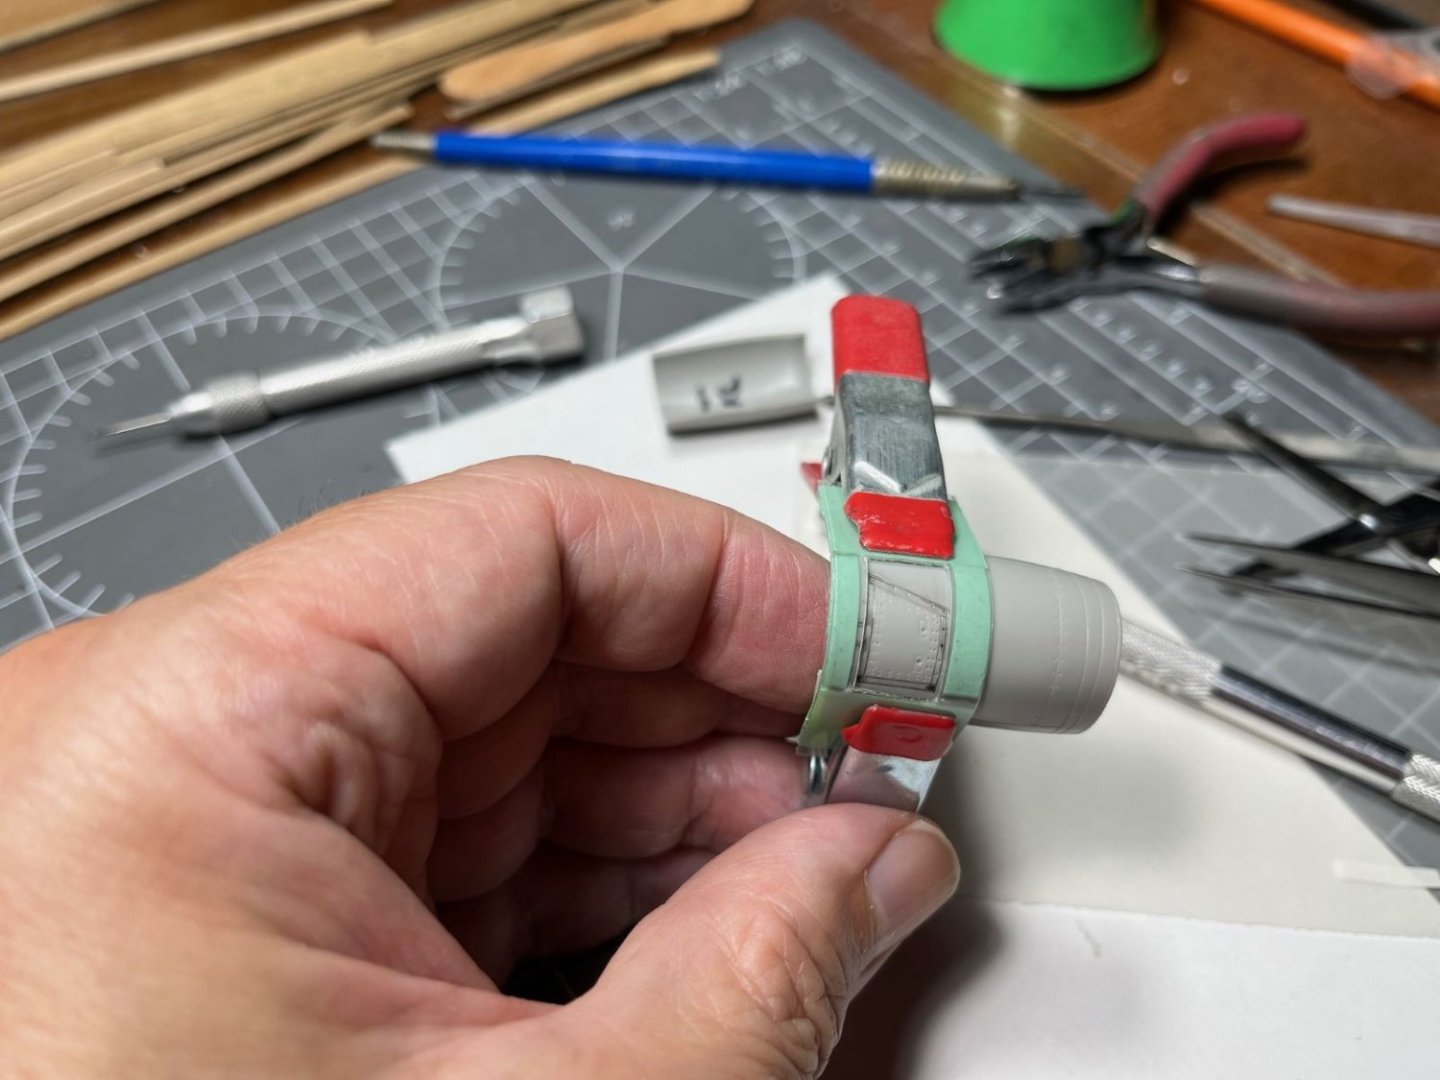
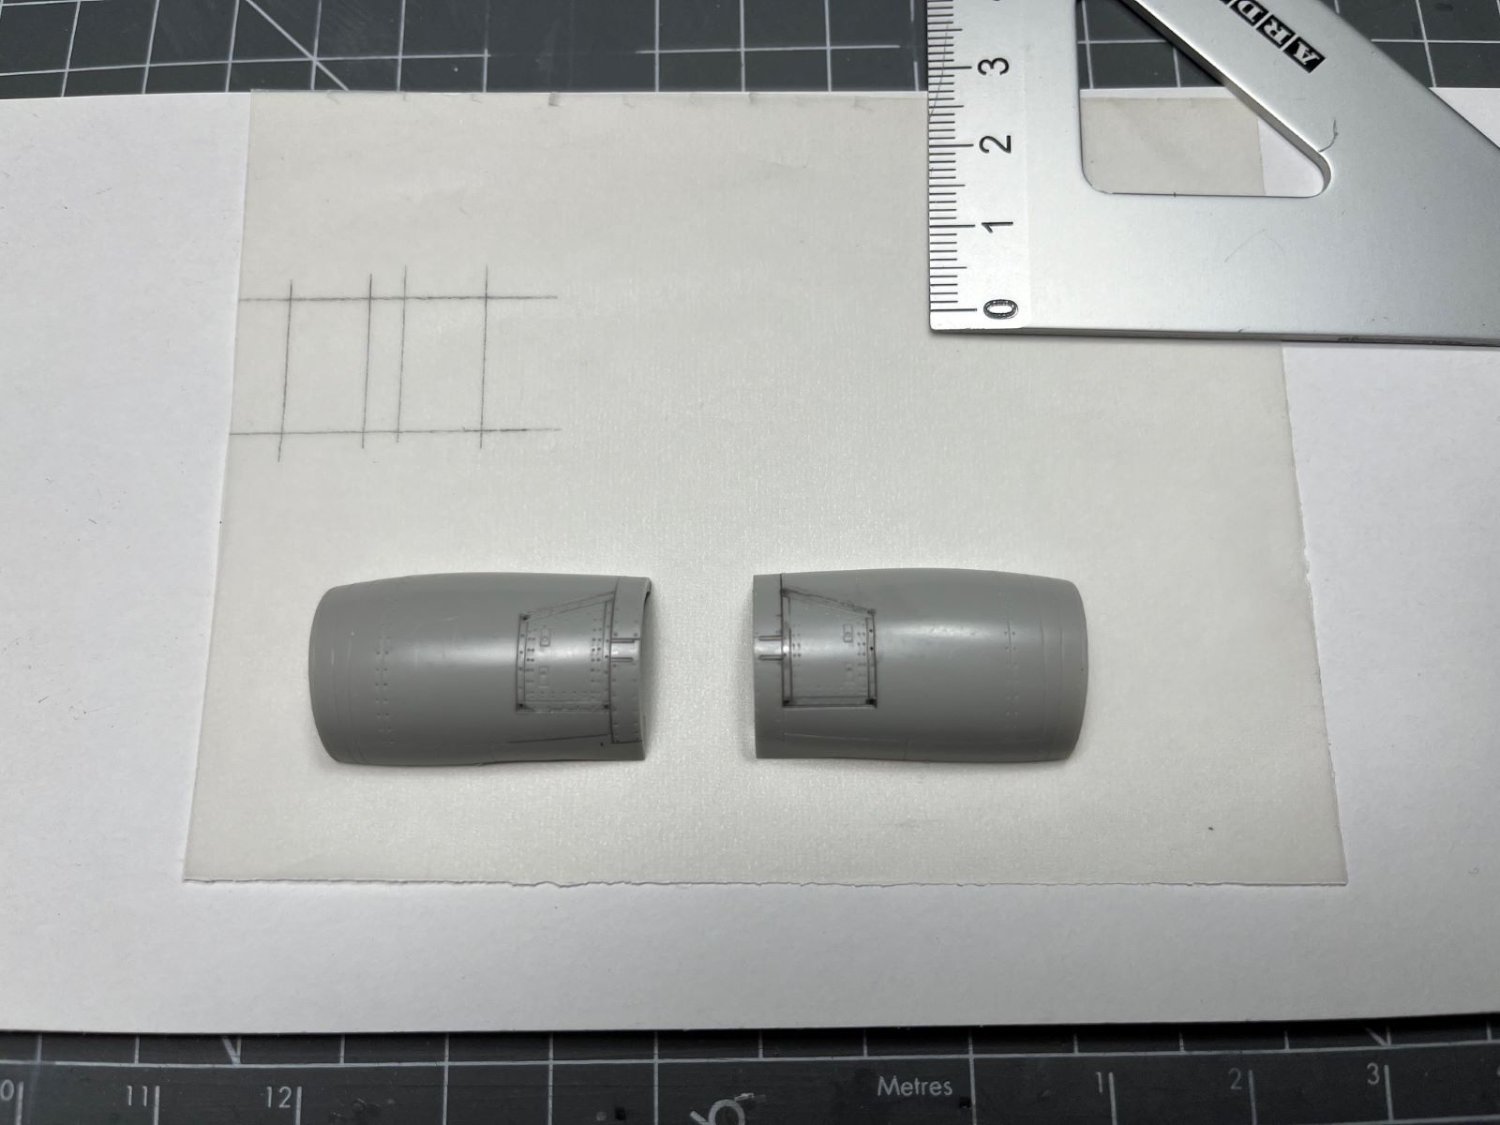
Dear all, I would like to share with you my next build of the latest version of the iconic Starfighter. I will make its version 'S', which Loockheed designed in answer to a specification from Italy for a more powerful, faster and better armed replacement of the standard NATO version 'G'. The aircraft was built by Aeritalia (former FIAT aeronautica) in the late '60 and was equipped with the version L of the Sidewinder missiles, replacing the old version B, and with Sparrow missiles ( from which the letter 'S' in the designation). Although the Starfighter had a bad reputation for its extensive record of accidents, especially in Germany and Italy (about one third of them was lost in accidents killing hundreds of its pilots in course of the years), it remained exceptionally long in service with European air forces, with the last ones being dismissed by the Italian Air Force in 2004. The kit is the old Hasegawa which I bought in 2002 and which is by now outdated by the newer 'state-of-the-art' Kinetic one. The plastic is not bad, on the contrary it is finely engraved with negative paneling and I believe it reproduces well the distinctive lines of this fighter. However, lazy Hasegawa didn't include the full range of modifications that were required for an 'S' version, hence, before diving into the kit build, I had to correct at least the two that required a bit of effort. At take-off, the more powerful J79-GE-19 of the 'S' required a larger input of mass flow rate of air, consequently, the air intakes were complemented by rectangular openings which were not present in previous versions. In the picture below, I am showing the kit parts with trapezoidal inspection ports of the 'G' version highlighted with black liner that I had to replace with the rectangular panels sketched by pencil on the upper left of the picture. Based on the drawing, I cut a template out of a transparent plastic sheet for guiding the engraving of the new panels After having filled the old panel lines with CA glue, I used the template for scribing the new lines Finally, after the addition of some rivet lines and piano hinges, the parts are ready in a reasonable shape. The second modification shown above consisted in blanking off the cannon opening being the cannon bay used to accommodate the guidance electronics for the Sparrow missiles. Now I can start the proper build and other few minor modifications will be shown during the course of the building. Also this time, I hope to have you watching over my shoulders, best regards, Dan

- 79 replies
-
- 14
-
-
I like a lot both the EE Lightning and the Hawker Hunter and they are surely on my list. However they are not yet in my stash. Seen that the cold war got 100% of consensus, I will stay within that period, but with something from my pile. I think I will pull out a F-104 Starfighter, which is the oldest kit I presently have. It will wear an old NATO camouflage. Hope you will not be disappointed, cheers, Dan
-
Thank you, Andrew! I am glad for your comment. Cheers, Dan
-
@ccoyle, @king derelict, @Canute, @FriedClams, thank you for your kind comments to my work 🙏. Thanks also to those who left a number of like's and even wow's. Alan, Gary, I am glad if you find some ideas reading my WIP, the idea behind these blogs is also that, to exchange mutual knowledge and experience. Should you need some more detailed clarifications, please don't hesitate to ask. Thanks to all, Dan PS - thinking of the next model, a modern type (according to the standard of my age, i.e. cold war) or WWII?
-
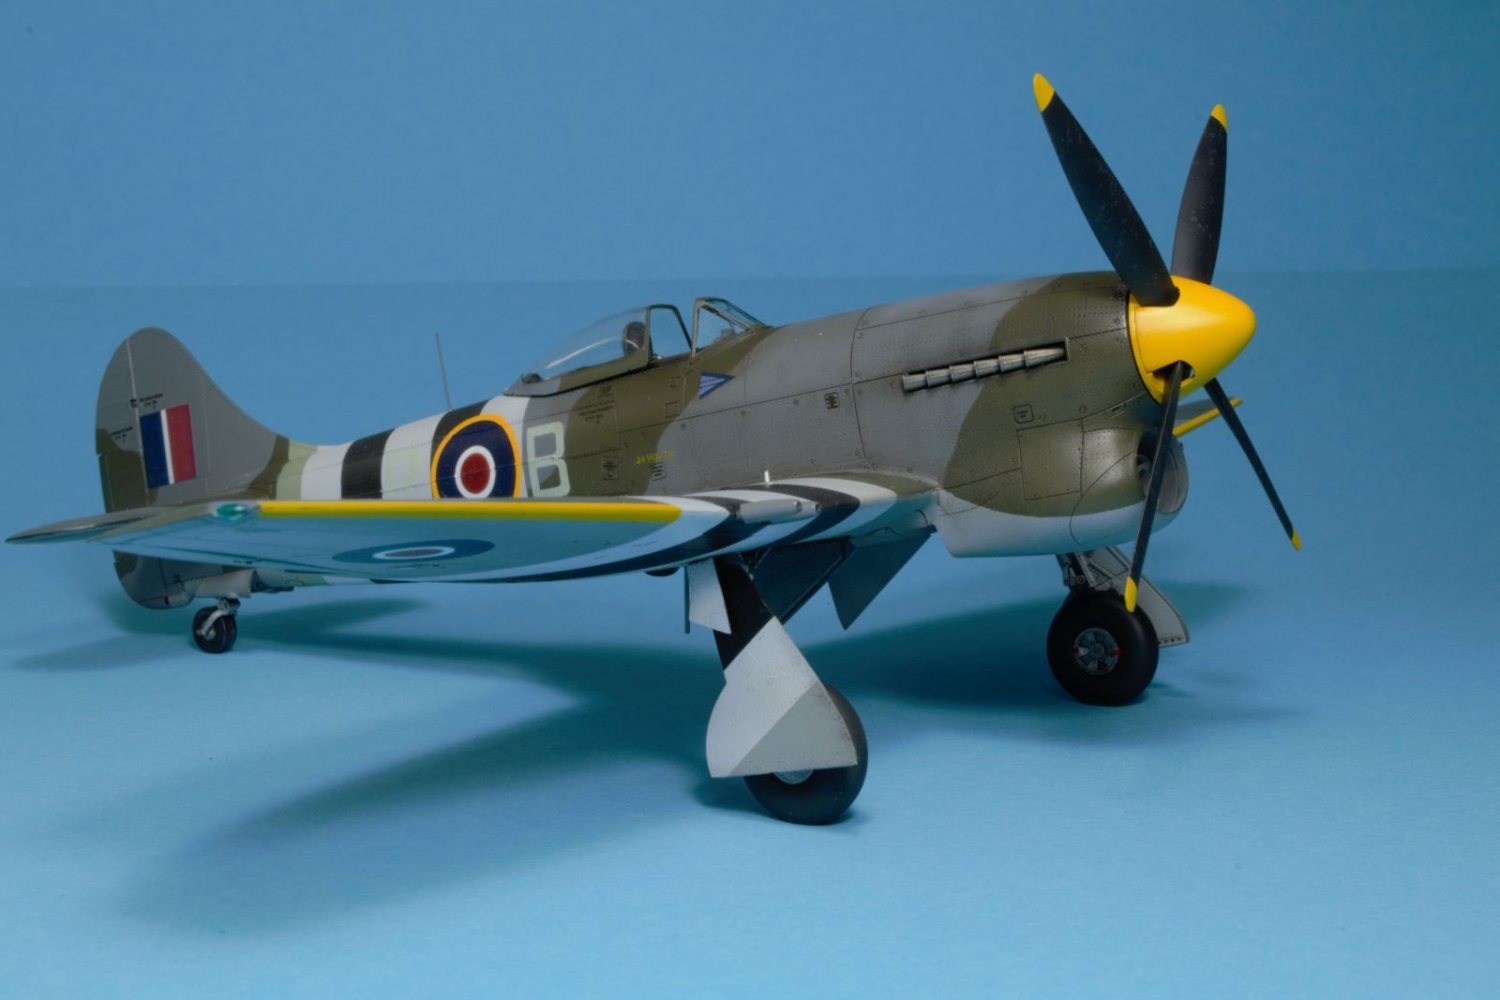
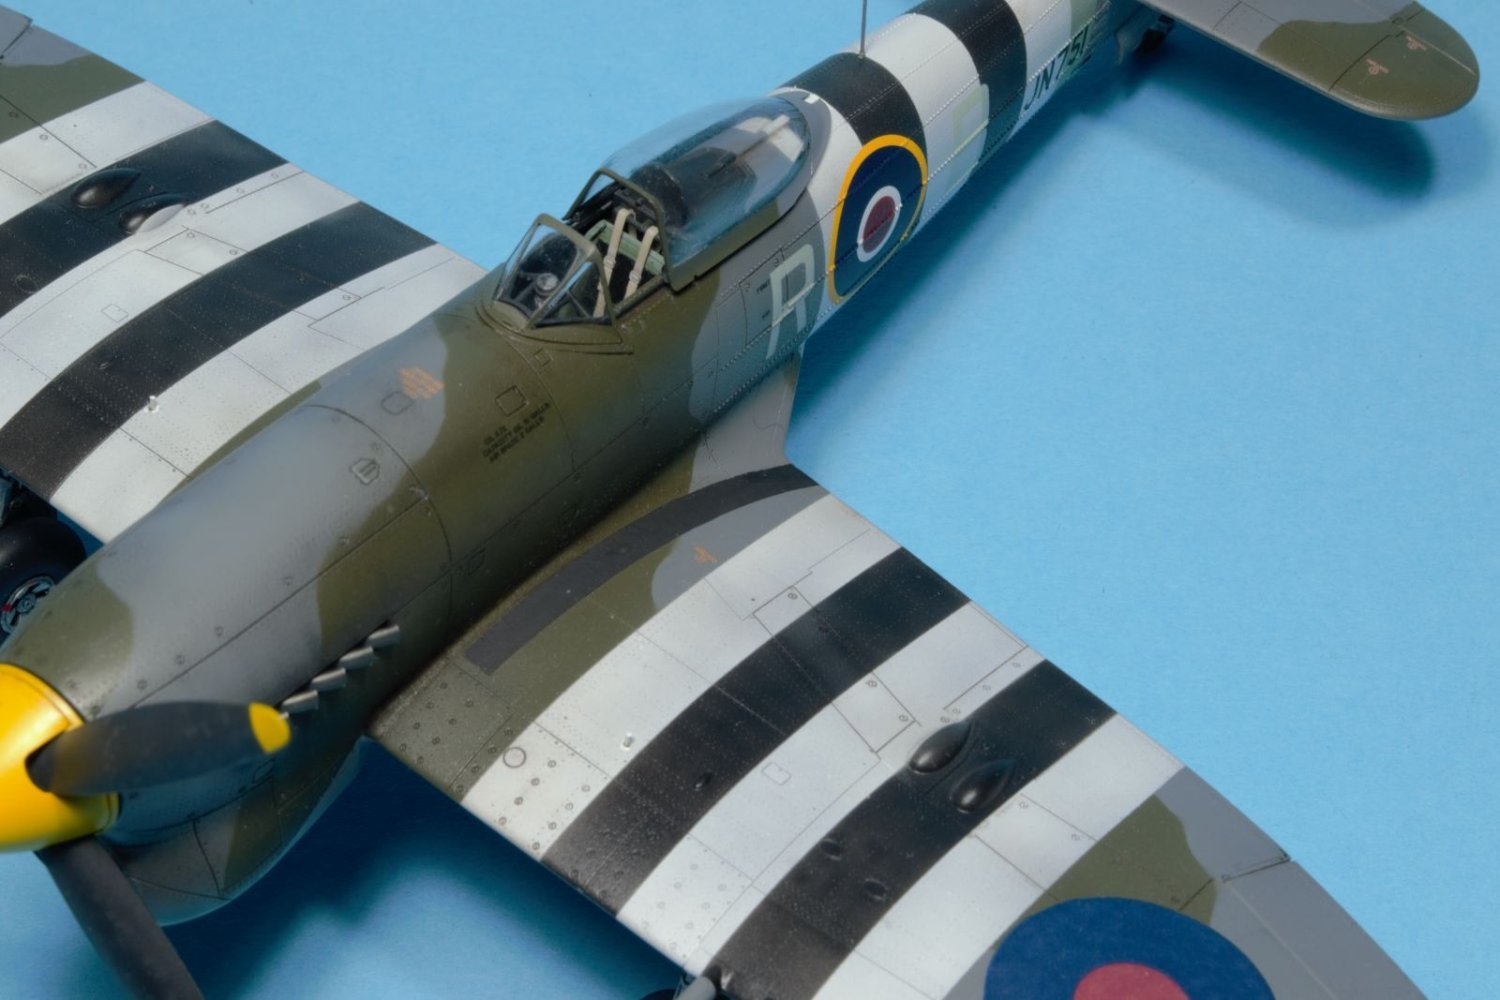
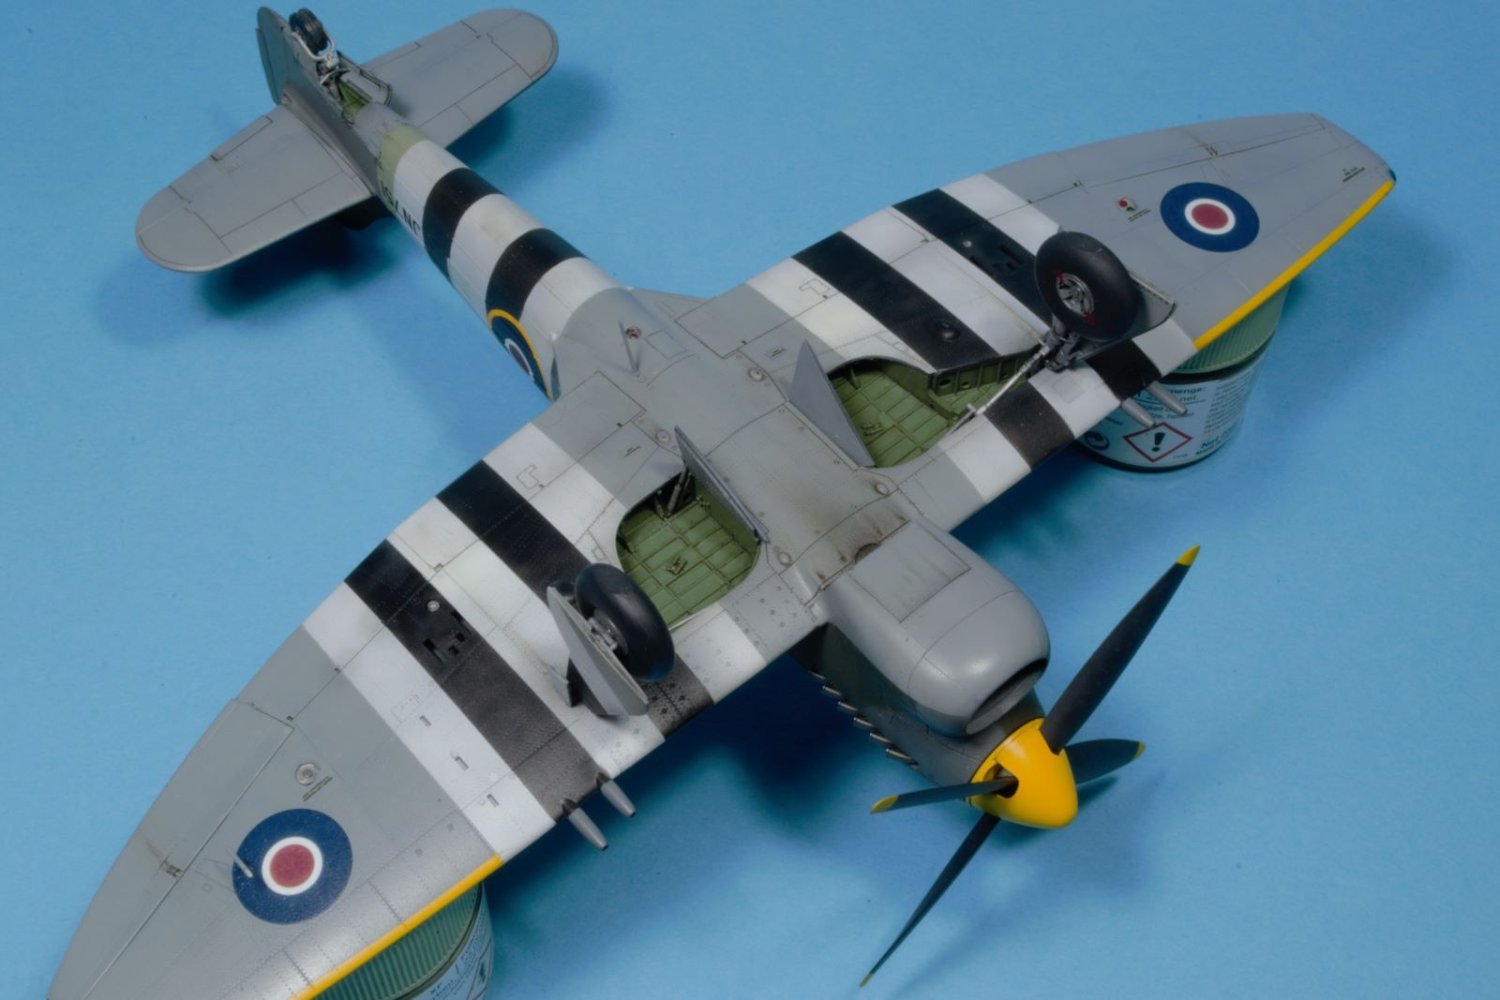
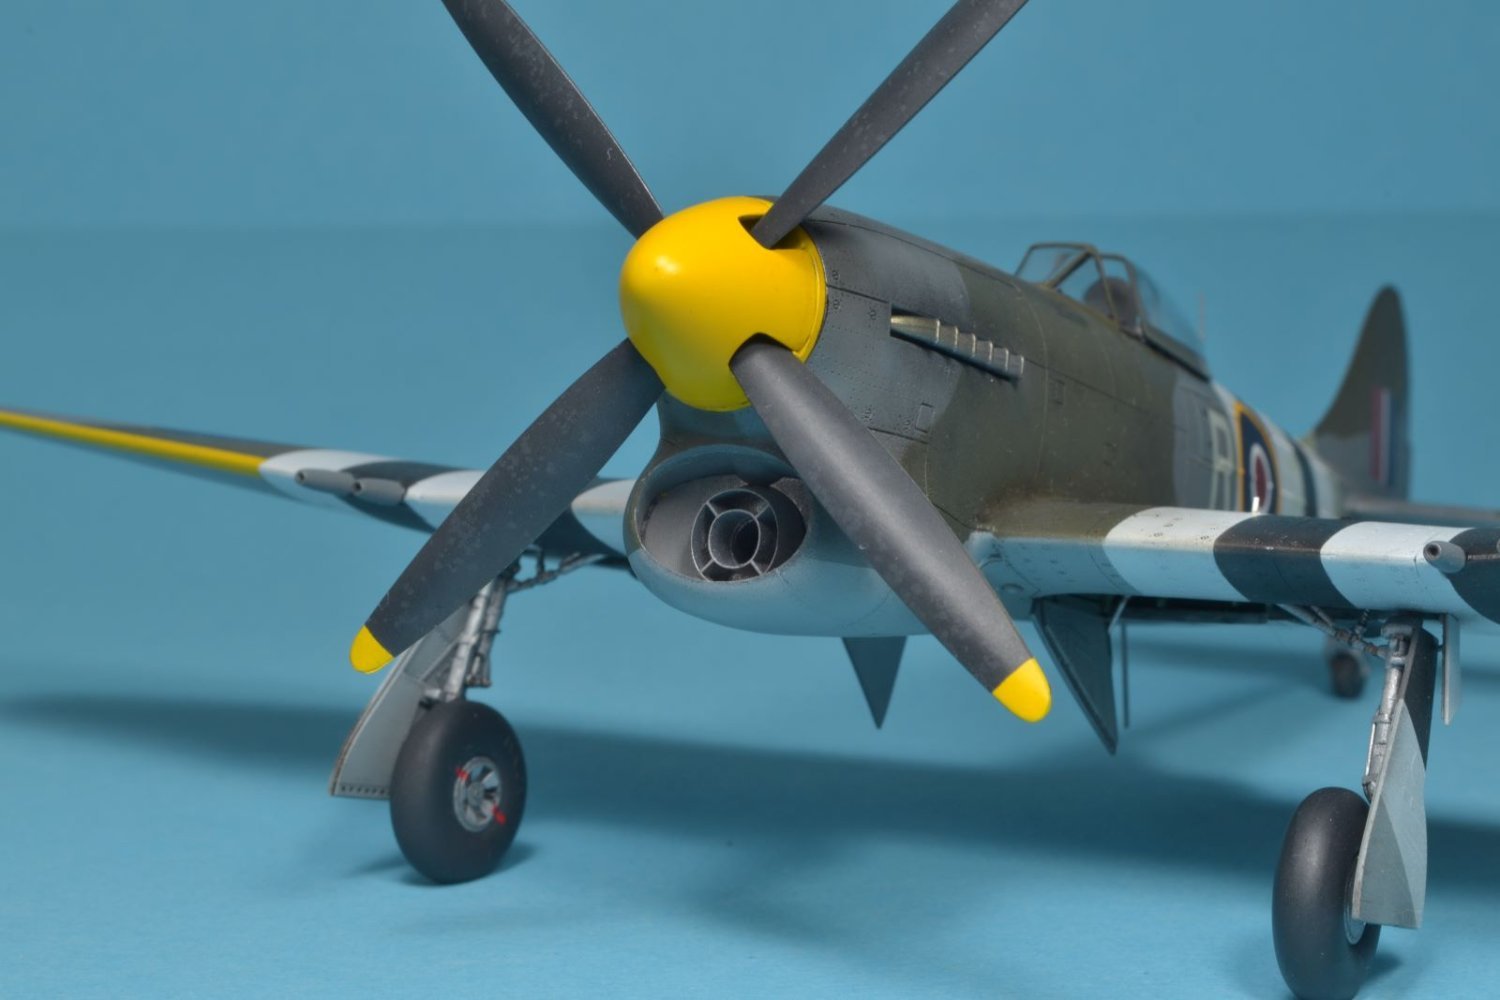
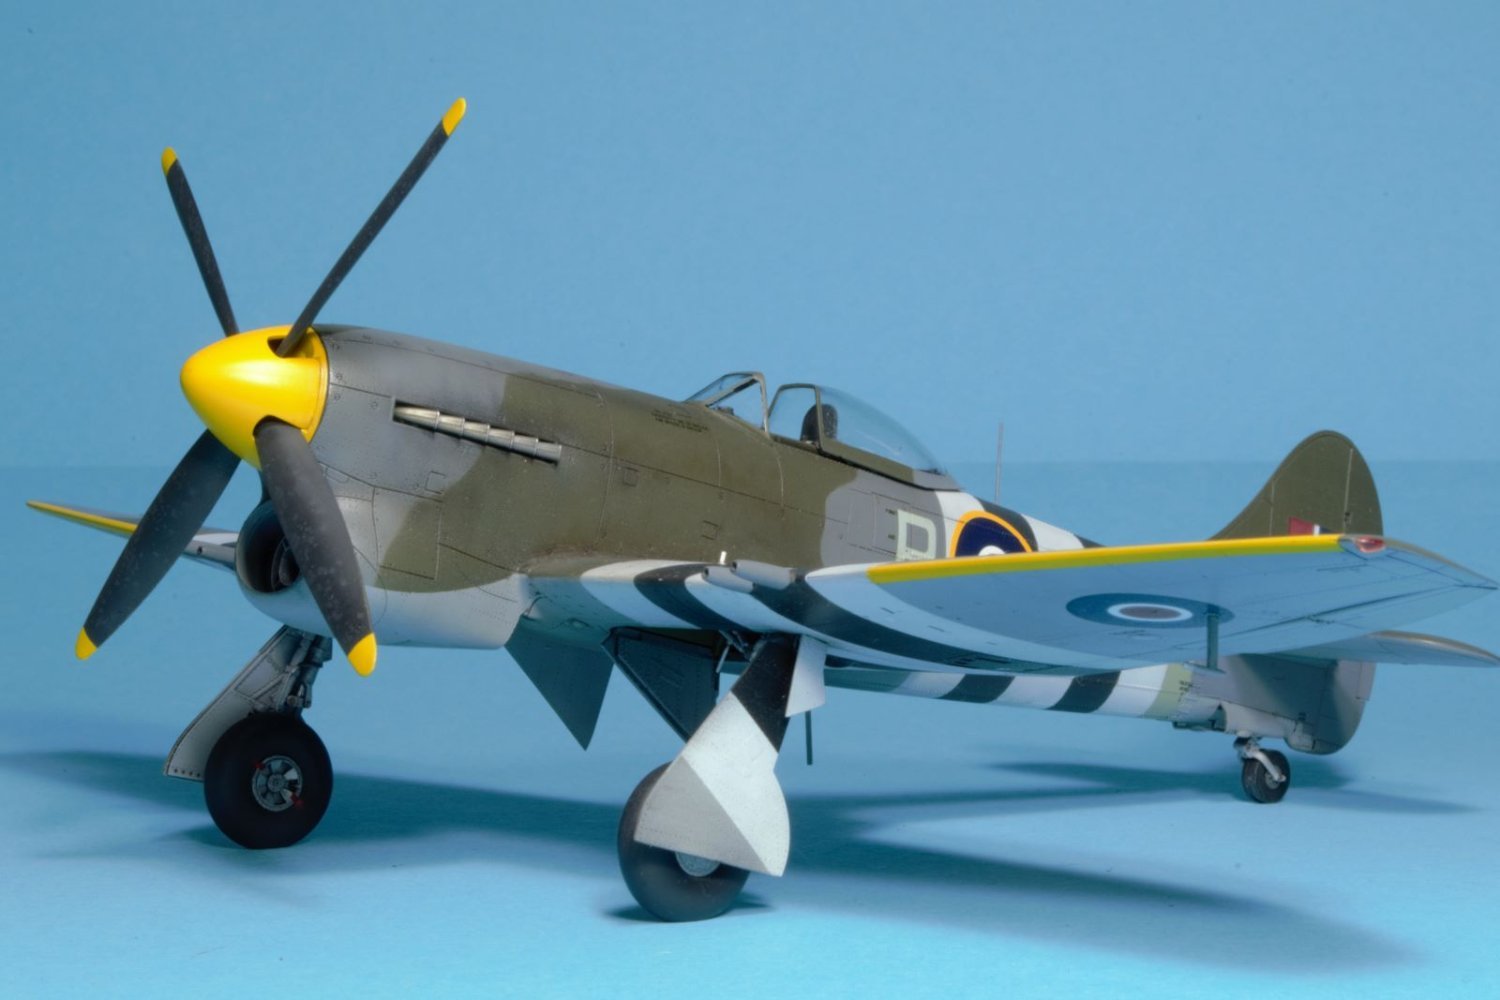
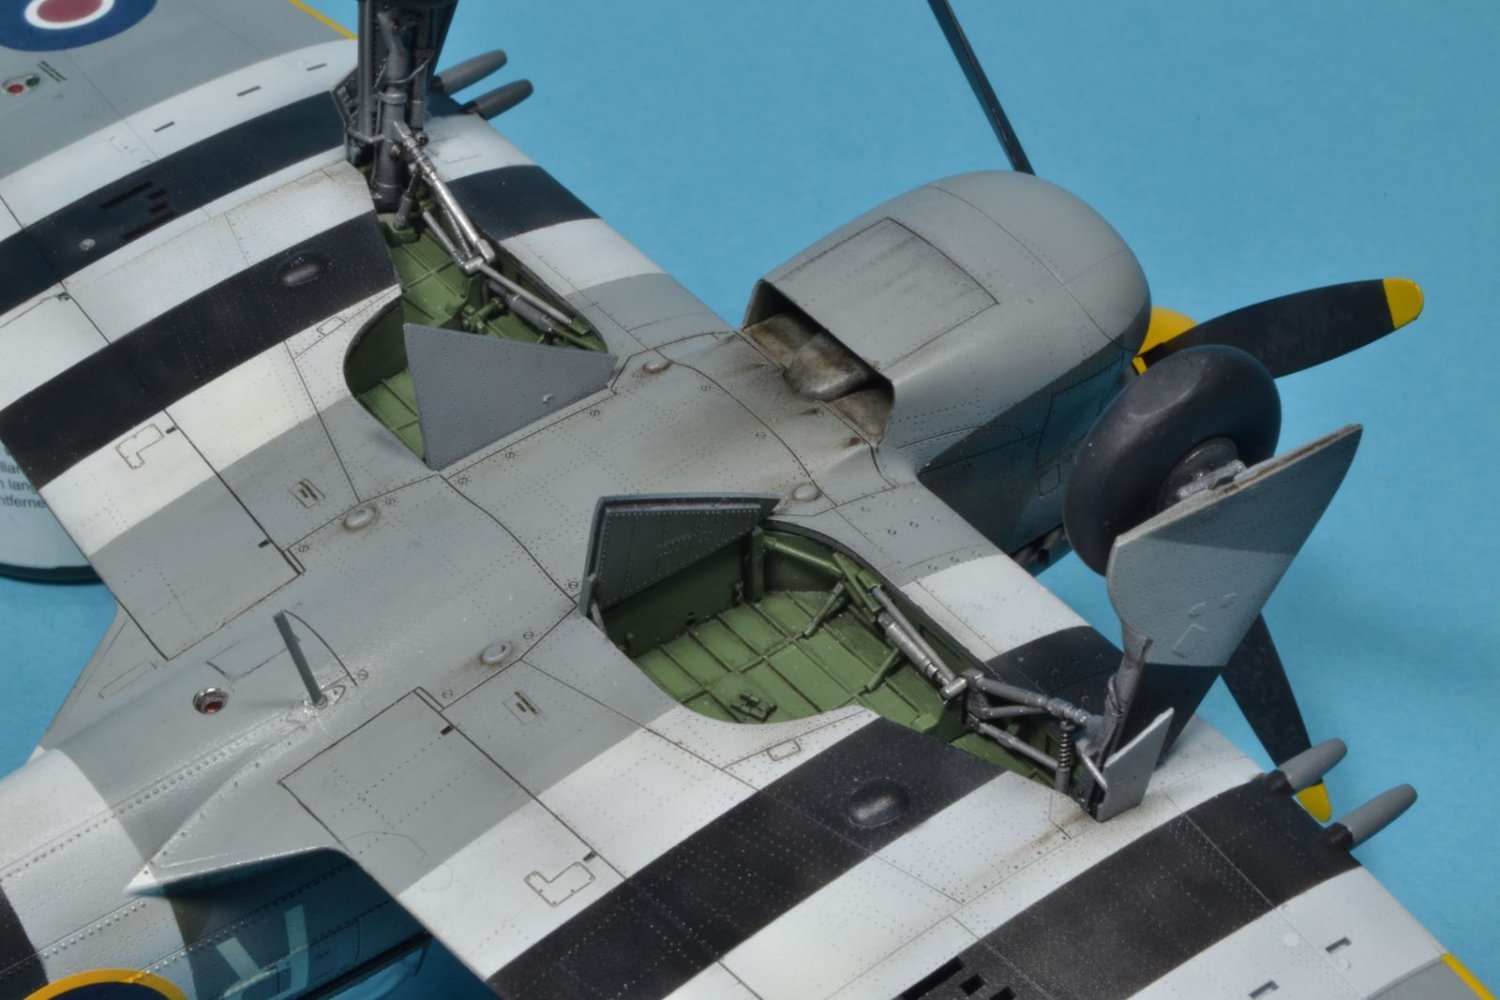
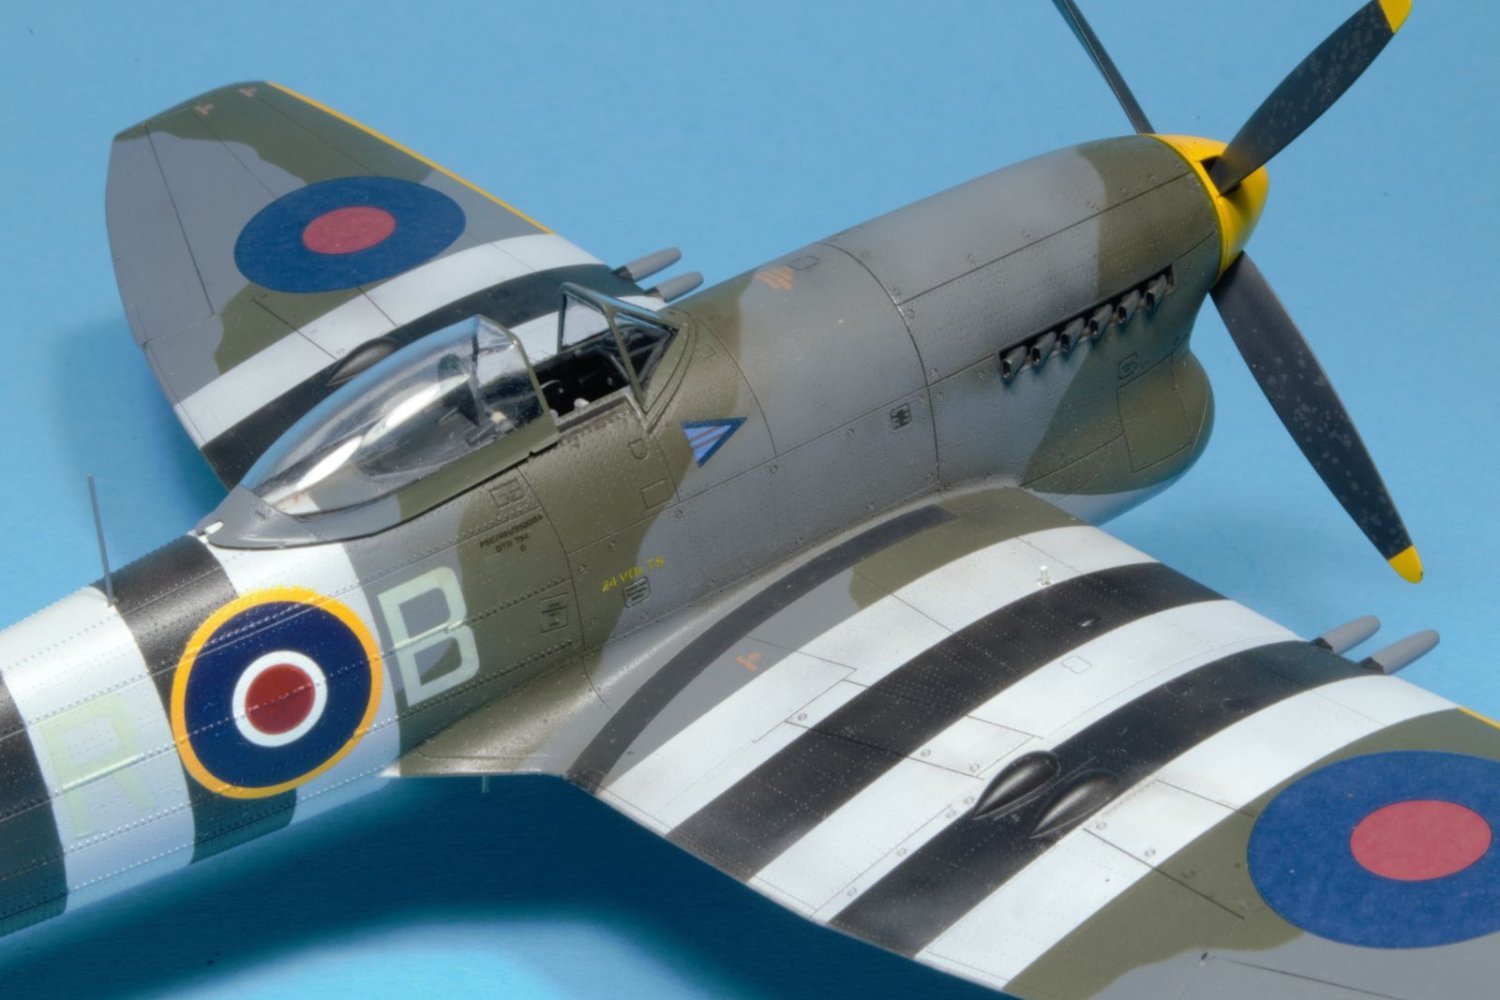
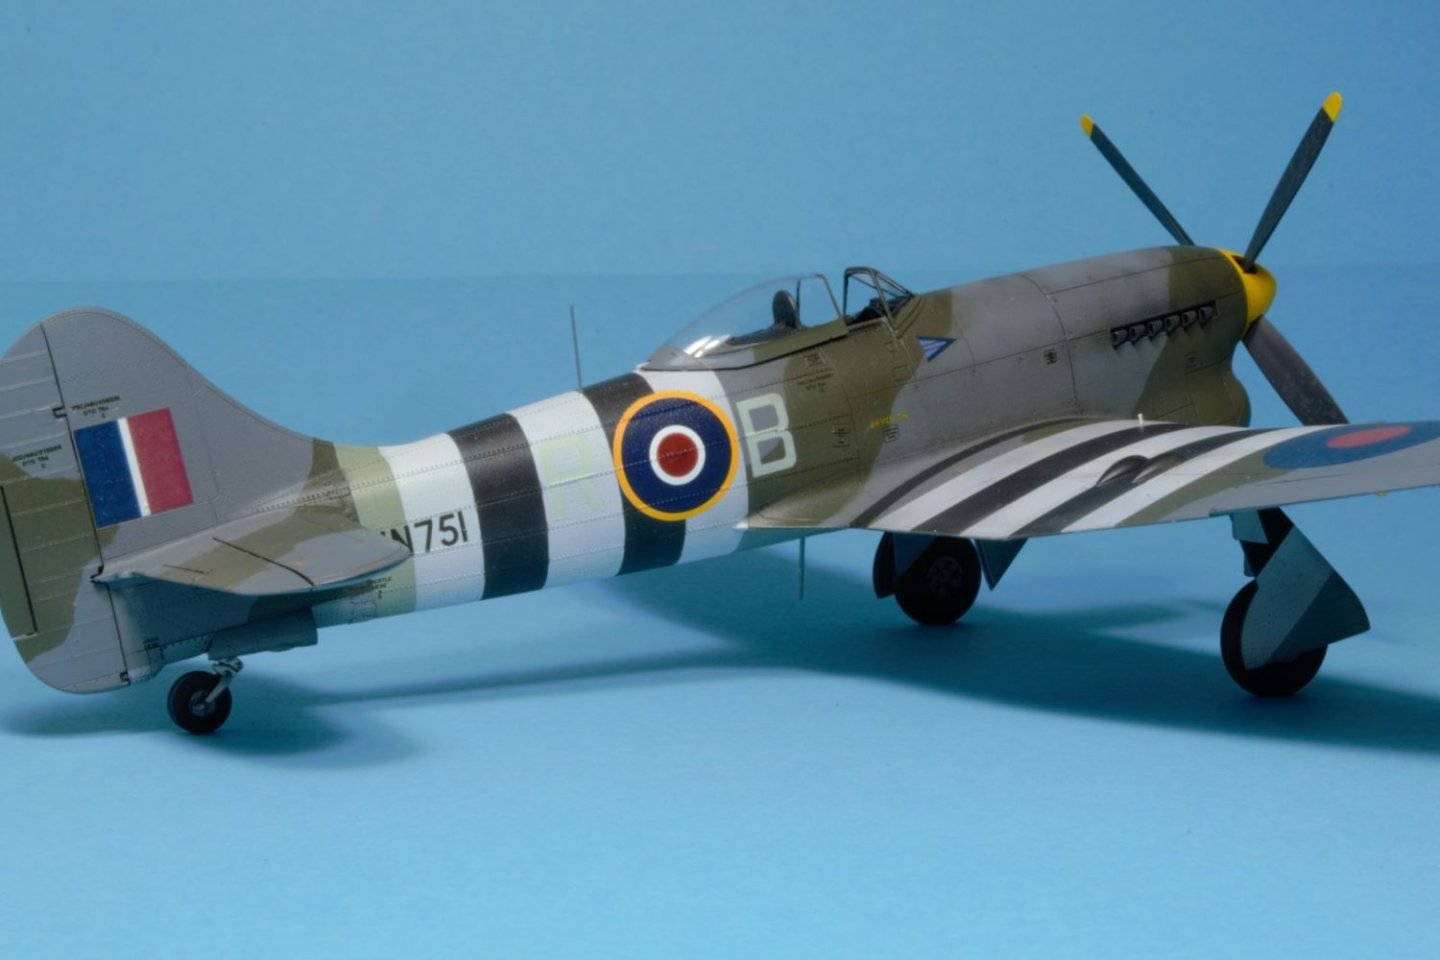
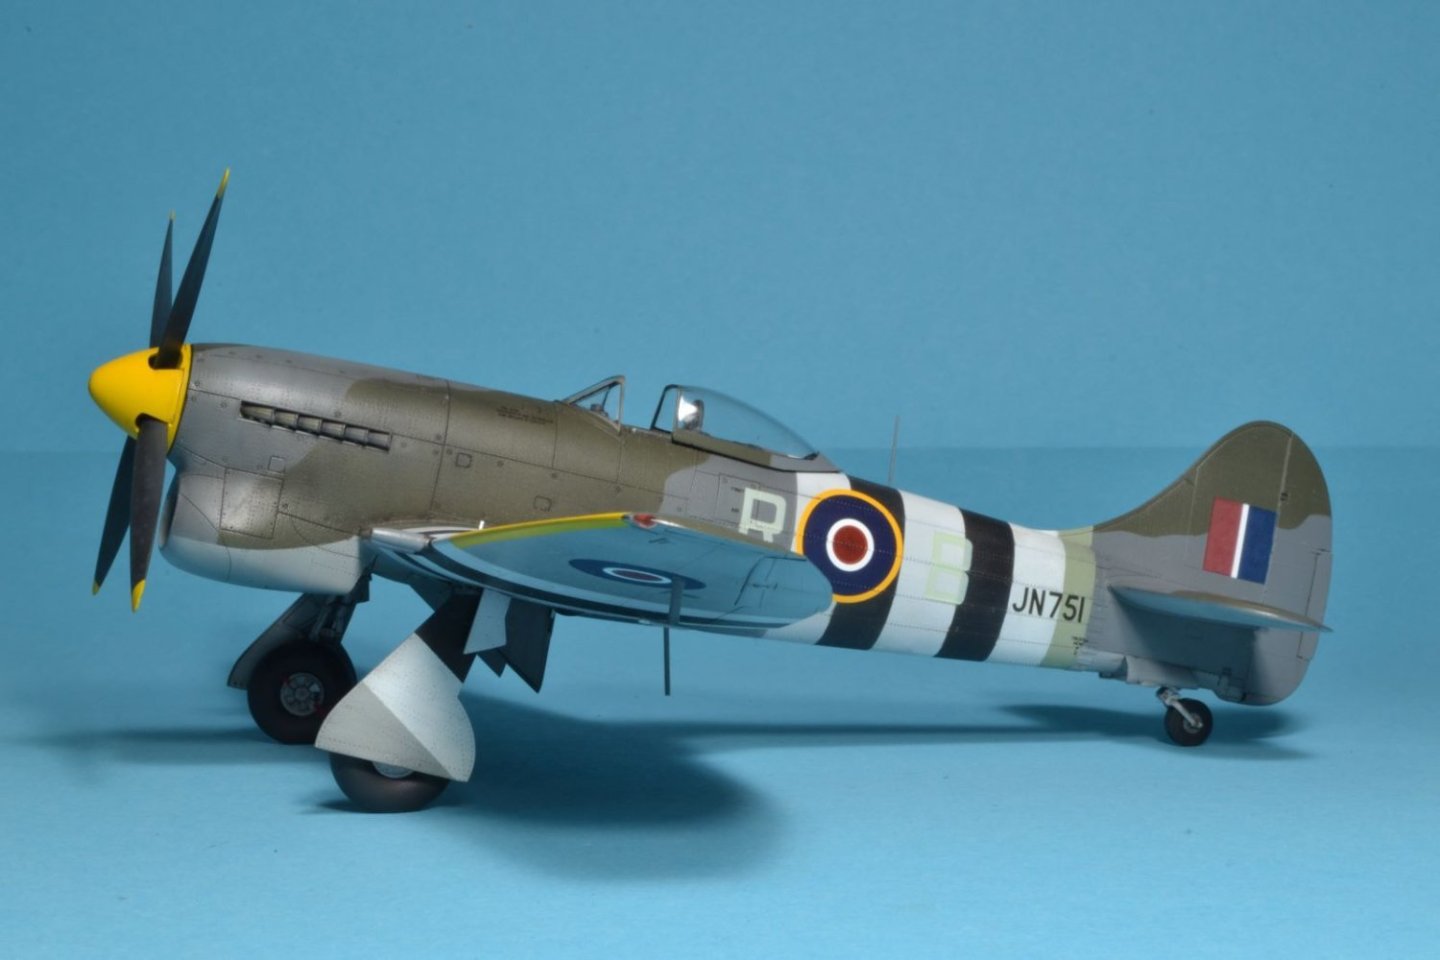
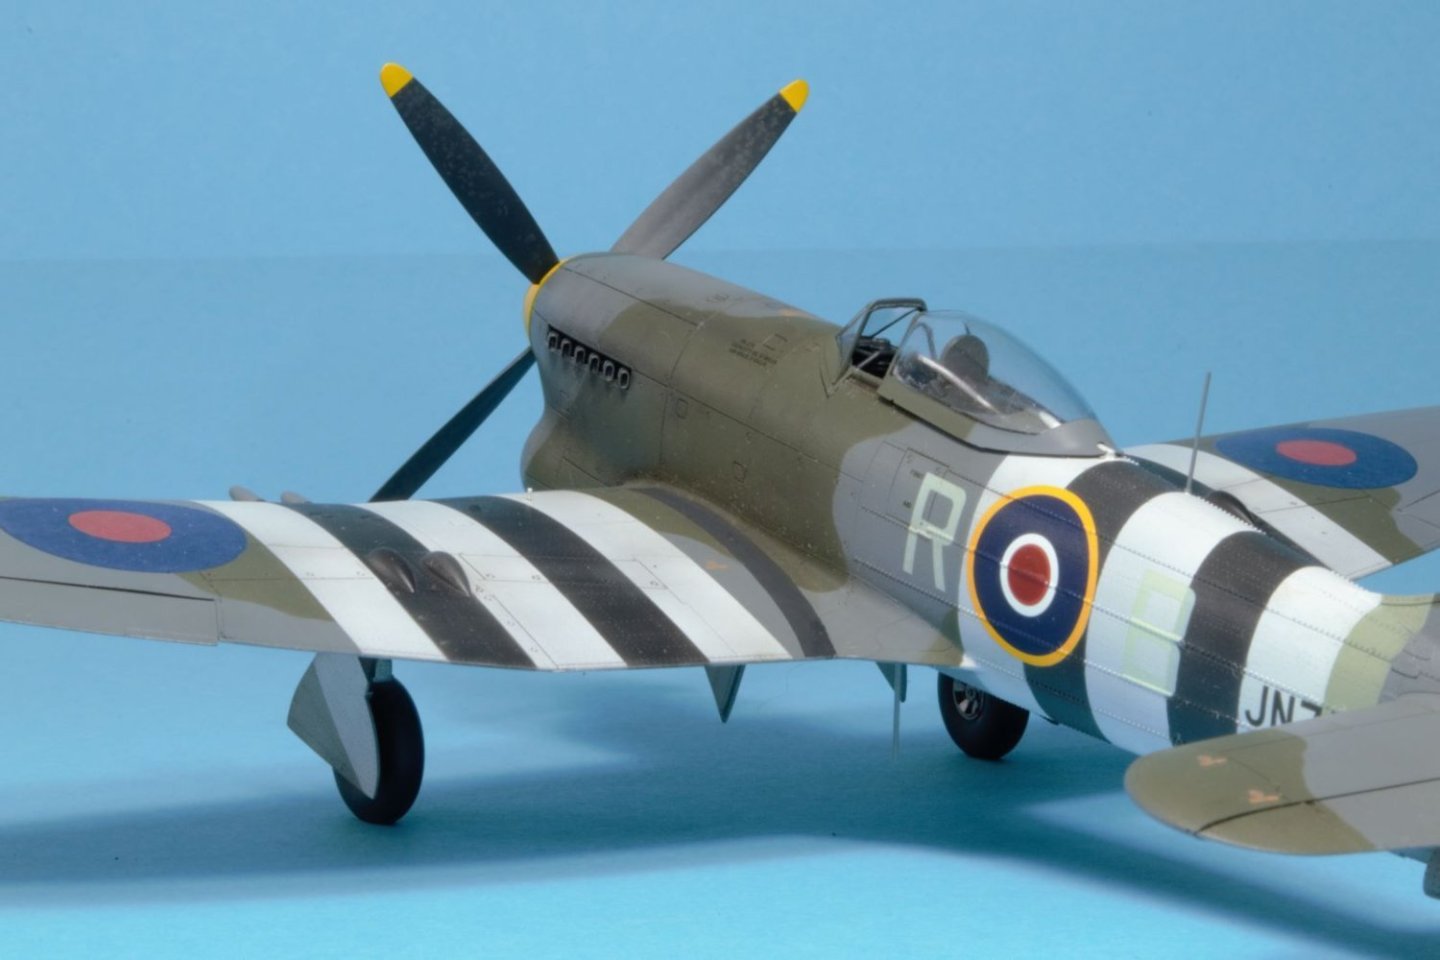
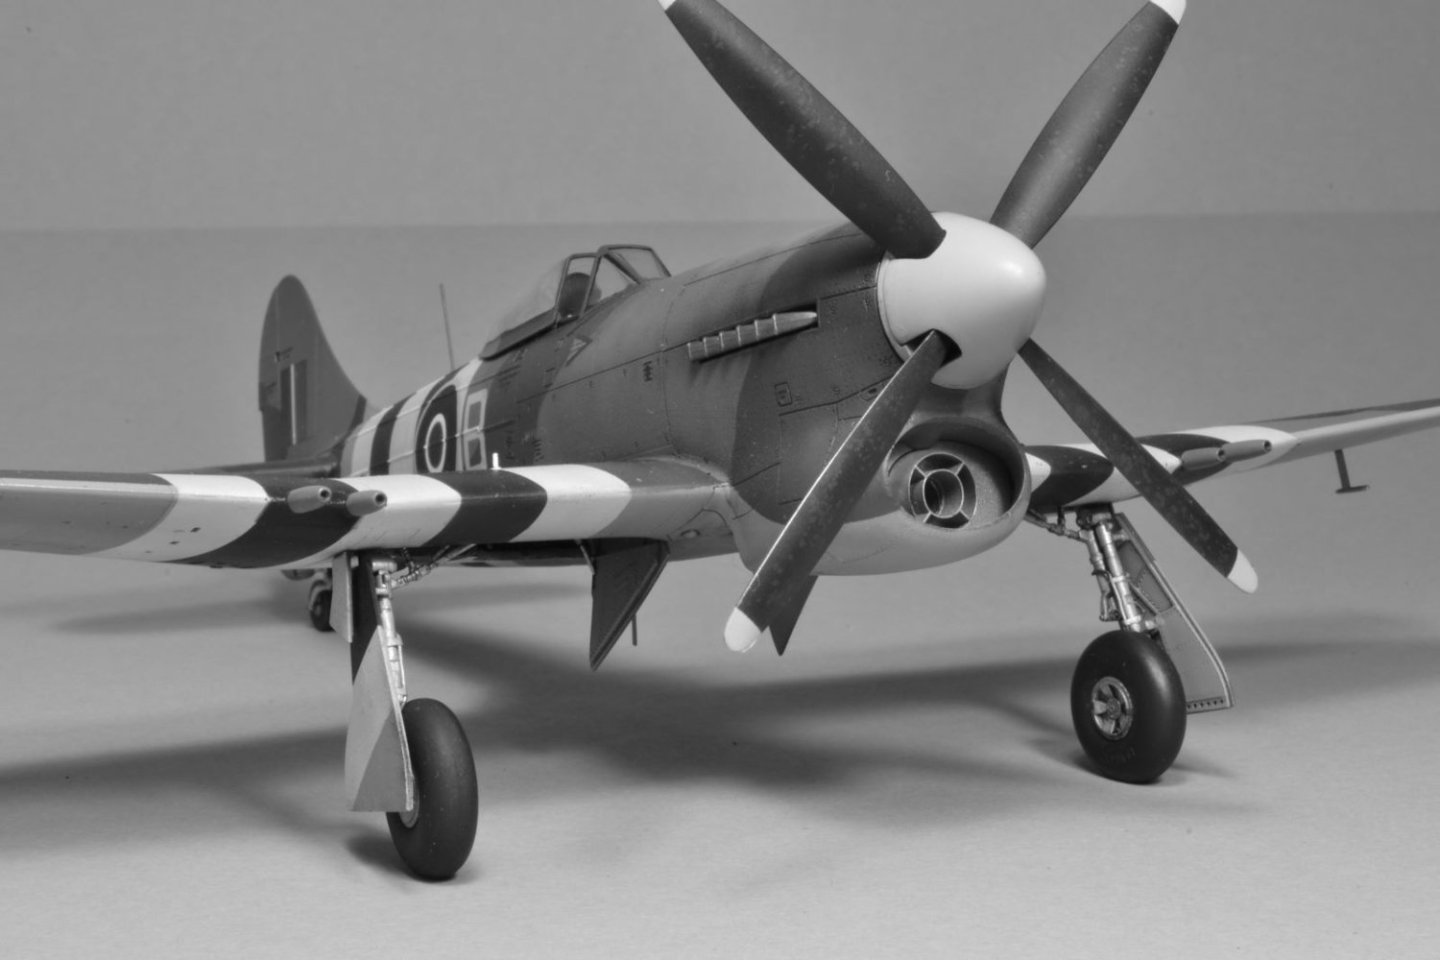
Hawker Tempest Mk.V Eduard 1:48 Mount of Roland P. Beamont, CO of No. 150 Wing, Newchurch, Great Britain, June 1944 The kit was a Eduard Profi-Pack Edition and my WIP is in the pages above. I sourced the following after marked: - Eduard resin central barrel radiator - Eduard resin exhaust stacks I used the following colors for the RAF camouflage: Gunze Mr. Color 361 (RAF Dark Green); 362 (Ocean Grey); 363 (Medium Sea Grey). I found this kit excellent, with a level of details (cockpit, landing gears, landing gear bays) and an overall fit both extremely good. The surface details are crisp and very nice, the transparent parts are thin and clear. I think that it is not a kit for beginners with many small parts and assembly needed particular care in few places. Personally, I enjoyed a lot this kit. In my opinion, these are its negative points (although they do not detract much from the high rating of this kit): - Overstated rivets on the fuselage. - Sink markings on control surfaces which are molded in one thick piece. - Yellow contour of the RAF roundels on the fuselage is too light and cold yellow hue (it tends to lemon). I replaced them with my spare decals. In one of my seniority moments, I applied incorrectly the decals for the letters on the fuselage! (they are not symmetrically posed with respect to the roundel). After assembly the airframe and filling the gaps, I sprayed the plastic with Mr. Surfacer black primer. After painting the strips and the camouflage, I applied black oil color on selected areas. A light weathering followed consisting mainly of post-shading of Tamiya smoke around movable panels and radiator and dark stains made with sprayed diluted black paint. Oil and leak trails were made by brushing oil colors. I thank all of you who patiently followed my long build and have given suggestions and support. Kindest regards, Dan P.S. - Following the suggestion of @Egilman, I still have to take few shots in sunlight!
.thumb.jpg.4ef7e68227df43b75a63cab22fe22994.jpg)


- 115 replies
-
- 17
-

-
-
My ... this is difficult. What would intimidate me most is the fact that the assembly and gluing doesn't allow for mistakes. The first time you commit to glue needs to be the good one with the final finish. Clearly, you are mastering these models by now, still I wish you best luck. Kind regards, Dan


.jpg.775667f2dd19ecfdbad9bef7e03ed883.jpg)