


jct
-
Posts
1,519 -
Joined
-
Last visited
Content Type
Profiles
Forums
Gallery
Events
Everything posted by jct
-
Pinta by jct - Shipyard - 1/96 scale - CARD
jct replied to jct's topic in - Kit subjects built Up to and including 1500 AD
thx for the likes...one last update for today...the keel, stem and peak are mounted...the kit supplied forepeak, stem, stern and keel are made up of 3 pieces each. laminated to .25mm thickness, you are to edge glue each of the pieces of the assemblies together to form a U shape...then affix them to the hull and each other...ya right. I got the stern post and forepeak together ok but the stem and the keel fought back big time. After about 45 min of try to get all the edges to align and stay at the right angle they went in the can!! I had a bunch of 3mm manila strips left over from planking so I laminated them one at a time to the hull till they were built up to the right thickness for the keel and stem, once the glue dried the whole assembly was hardened with ca, treated to a light sanding then the forepeak and stern post were attached and the whole thing painted out Sorry I got no assembly pics but finished shots follow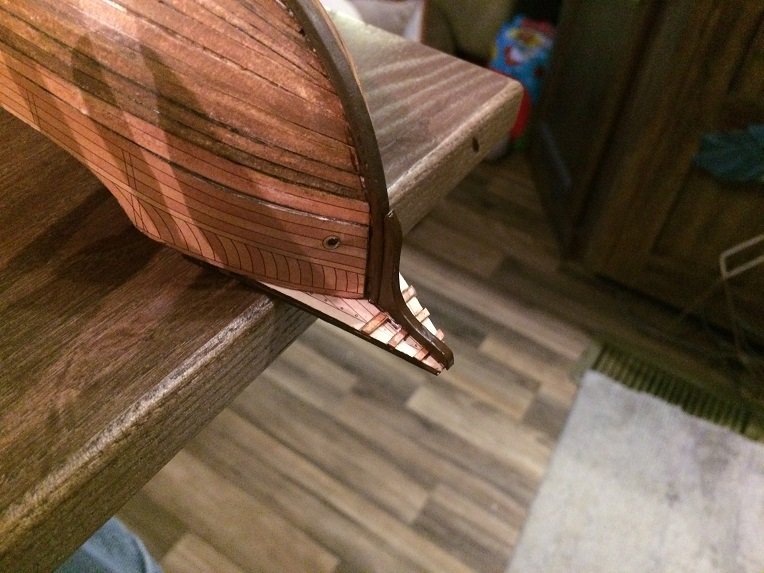


-
Pinta by jct - Shipyard - 1/96 scale - CARD
jct replied to jct's topic in - Kit subjects built Up to and including 1500 AD
just a quick update...the hull planking is complete, not at all perfect, in fact not even close, got some gaps and pointed planks, but overall it's better than it was...Pics follow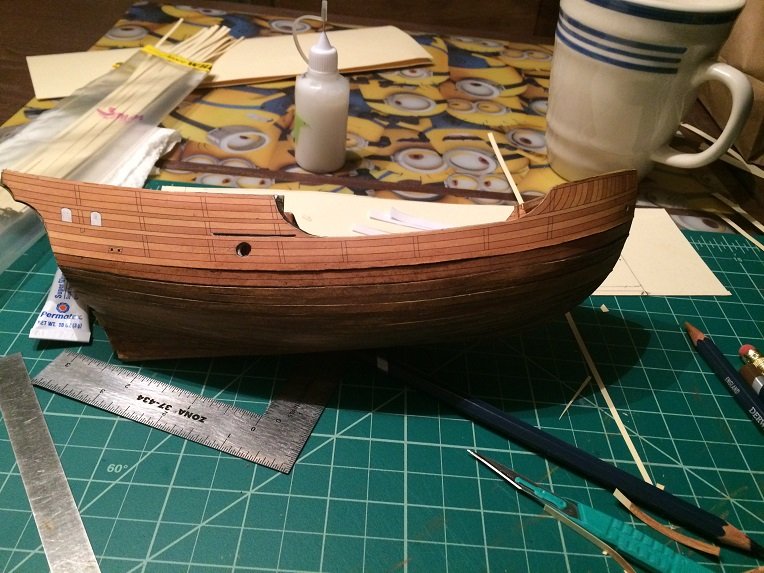
-
Pinta by jct - Shipyard - 1/96 scale - CARD
jct replied to jct's topic in - Kit subjects built Up to and including 1500 AD
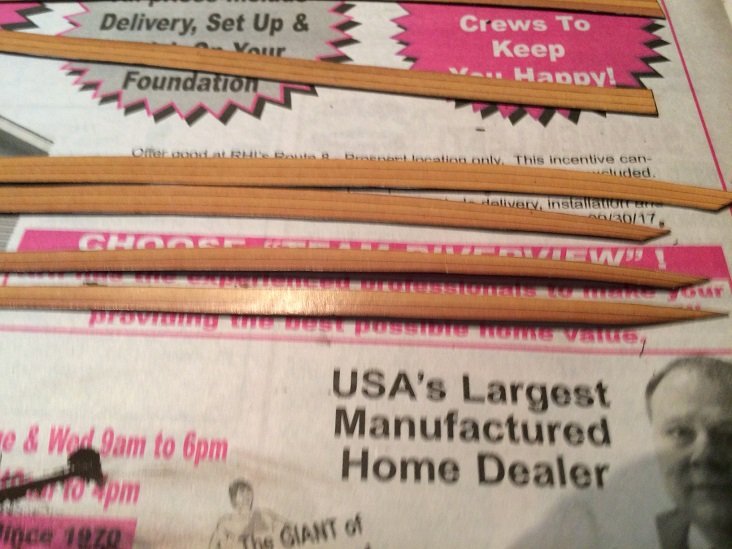
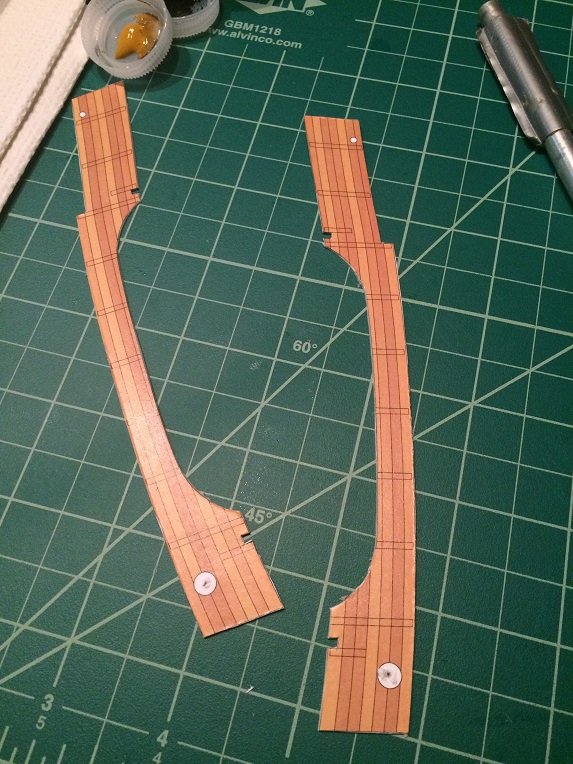
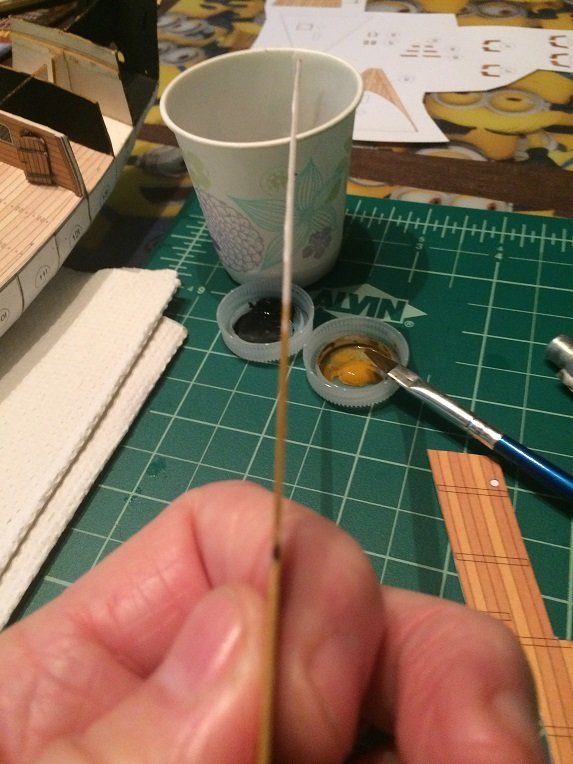
Latest update...I decided to fully sand and fill the lower hull, then layoff planking zones and belts...sticking with the paper theme I made planks from manila folder cut into 1/8 inch strakes, which matches the majority of the printed kit planks The hull was sectioned into 2 belts (red marks) and 5 zones tick marks for the zones, used the same techniques used on a wooden hull...planking fan, tic strips etc Manila strips were colored with watercolor pencils and treated to a lite brushing to even the tone test strip planking progress...the printed kit had steeler planks at the stern so I've included them too... hoping to get more done tomorrow Thanks for your time and attention and for all the likes and comments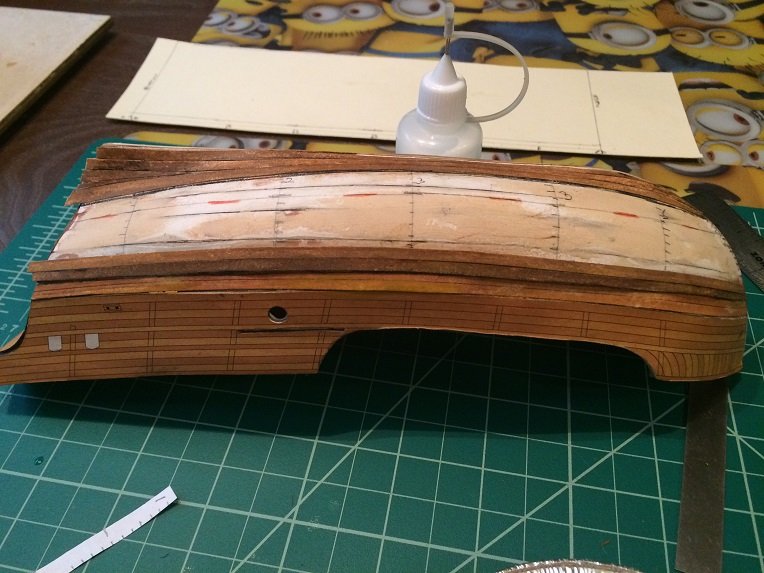
-
Pinta by jct - Shipyard - 1/96 scale - CARD
jct replied to jct's topic in - Kit subjects built Up to and including 1500 AD
Thanks to all for the likes and suggestions, that is what I like about this site everyone is always willing to step up and assist when and where they can...kudos to all...Thanks for the info Clare, I appreciate what you're saying about cardboard, i've already had a few pieces delaminate on me, I've resorted to using manila folder material laminated together...seems ok so far. I've got some acrylics on hand I'm going to experiment with...I'll keep you posted no news on the build as yet...tomorrow for sure, managed to escape from work for a super long week end...talk to ya all later, thanks again J -
Pinta by jct - Shipyard - 1/96 scale - CARD
jct replied to jct's topic in - Kit subjects built Up to and including 1500 AD
Hi all...thx for the likes and comments, I've found dc-fix vinyl on Amazon ...but I don't think that is what Doris uses -
Pinta by jct - Shipyard - 1/96 scale - CARD
jct replied to jct's topic in - Kit subjects built Up to and including 1500 AD
Thanks Jan and Danny, That is the brand that Doris uses, e-bay may be the best source for those of us in the US as they don't appear to ship to the USA...below are the links Doris provided, Thank you again Doris https://www.tapety-folie.cz/d-c-fix/m-1765/?gclid=EAIaIQobChMI-orYtbTR1gIV7LXtCh0URASMEAAYASAAEgLkyfD_BwE http://www.hcsdeco.cz/samolepici-folie/?vzor=Dřevo and thanks everyone for the likes -
Pinta by jct - Shipyard - 1/96 scale - CARD
jct replied to jct's topic in - Kit subjects built Up to and including 1500 AD
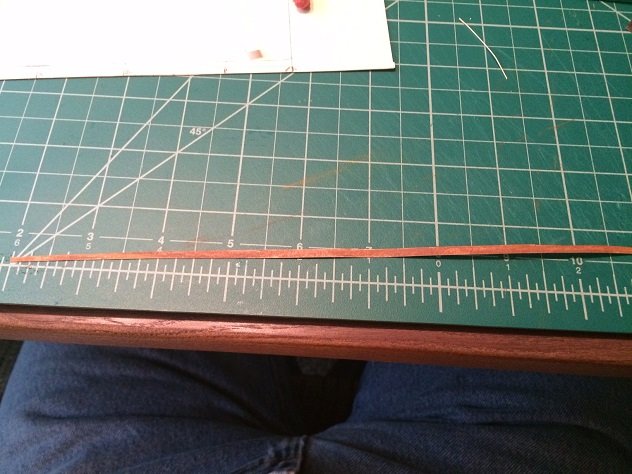
Hi Danny, I've considered your first selection and went as far as laying a heavy coat on it initially but did not care for the look, I'm considering re-planking ad you suggested but could not find a source for the material Doris uses...thx for the link I'll double check to see if she list a source there...if i cannot find suitable material I will probably just cut some 1 mm wide strips and color with varies shades and plank with them -
Pinta by jct - Shipyard - 1/96 scale - CARD
jct replied to jct's topic in - Kit subjects built Up to and including 1500 AD
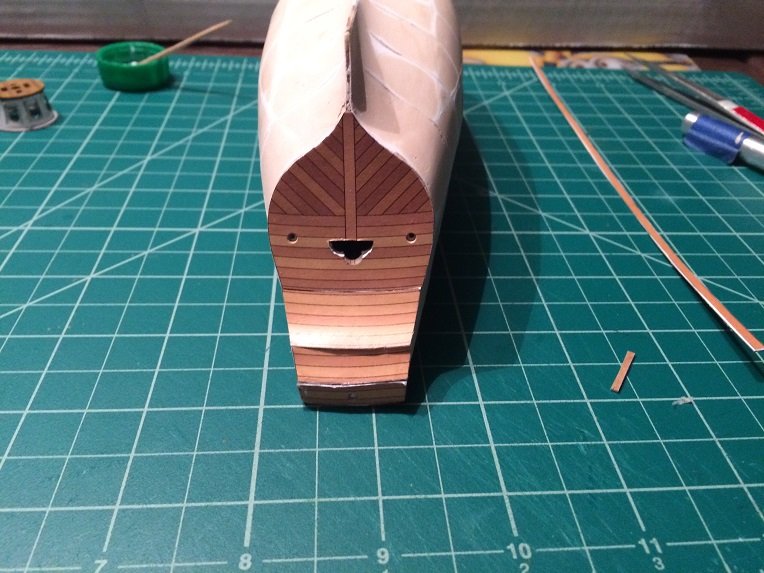
Thanks to all for the likes Thanks for the tip Clare...what type of paint are you using? The water color I've tried pust beads up on the surface and drys blotchy, was planning to try some acrylic to see if it made a difference... I was thinking of stripping the bottom hull and re-planking one plank at a time, but i need to find some appropriate paper, as I don't want this to be a hybrid , more to think about... in the meantime I put some work into the pEak and fore deck...nothing fancy here just glue-up and edge paint Pics follow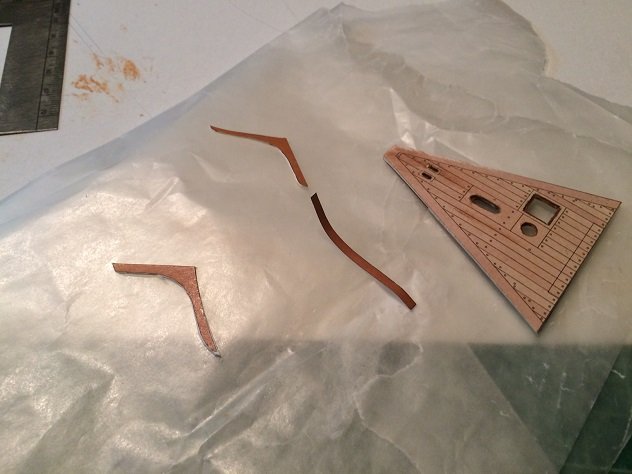
-
Pinta by jct - Shipyard - 1/96 scale - CARD
jct replied to jct's topic in - Kit subjects built Up to and including 1500 AD
Hi Clare, You might try using thinner stock the the kit instructions call for, I think it would have laid down better if it wasn't .5mm thick, just not pliable enough, I'm still not super happy with the results...still noodling on alternatives -
Pinta by jct - Shipyard - 1/96 scale - CARD
jct replied to jct's topic in - Kit subjects built Up to and including 1500 AD
Thx Scott, I appreciate your comments, the kit is very high quality, any thing preventing it form being 100% is definitely the builder -
Pinta by jct - Shipyard - 1/96 scale - CARD
jct replied to jct's topic in - Kit subjects built Up to and including 1500 AD
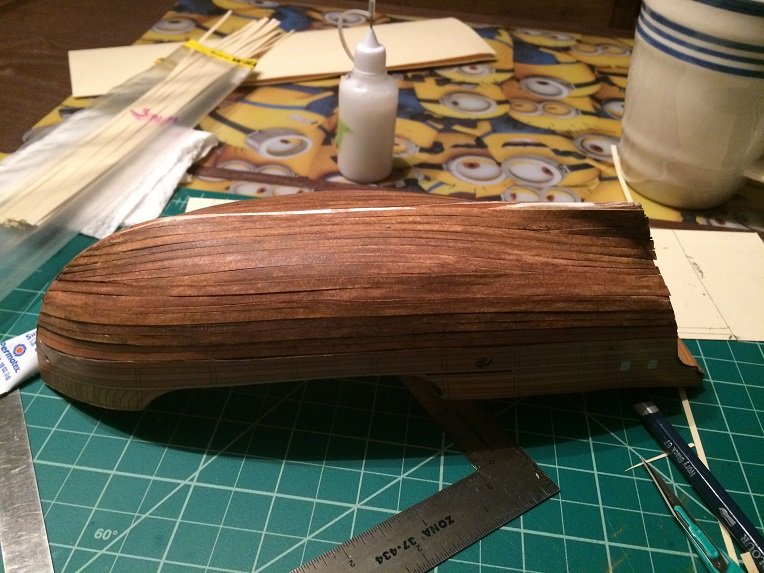
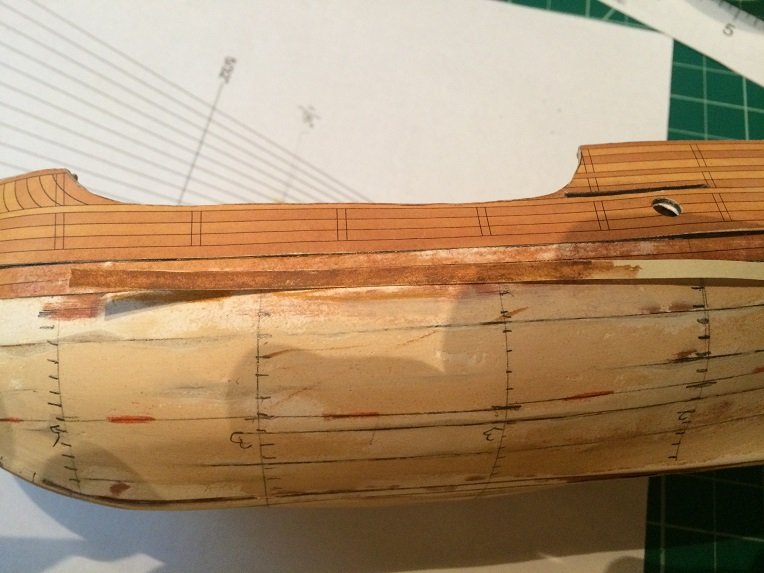
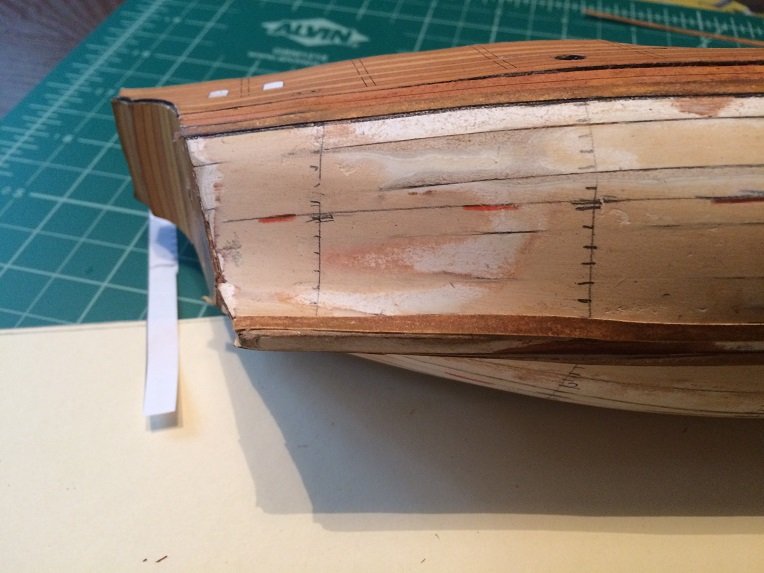
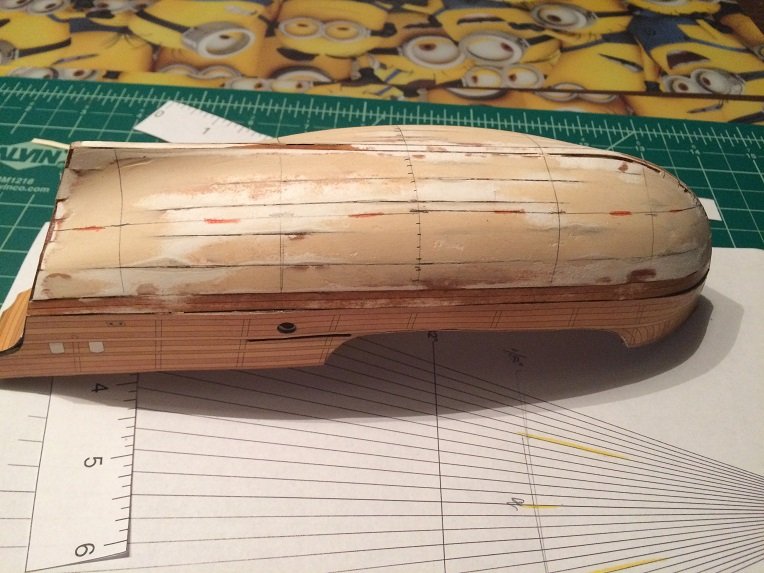
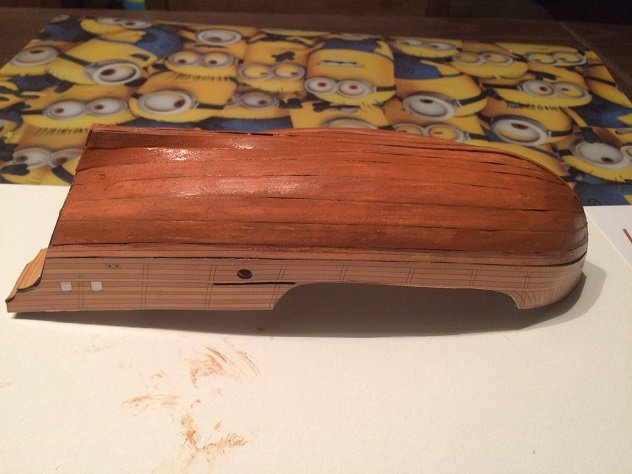
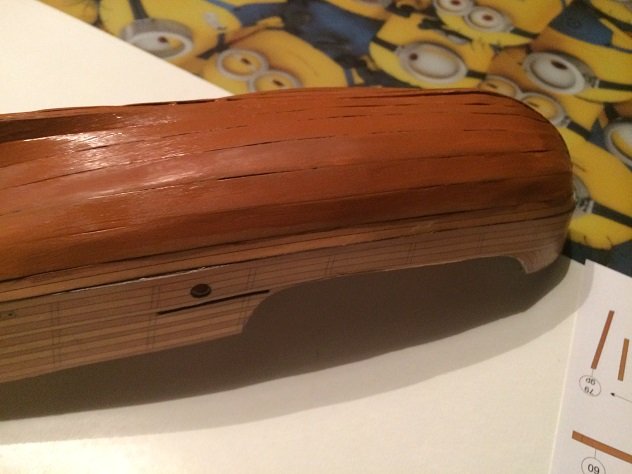
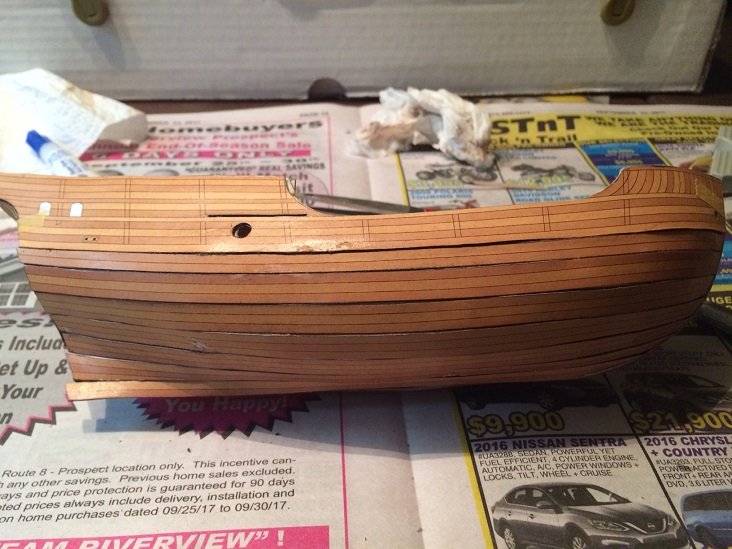
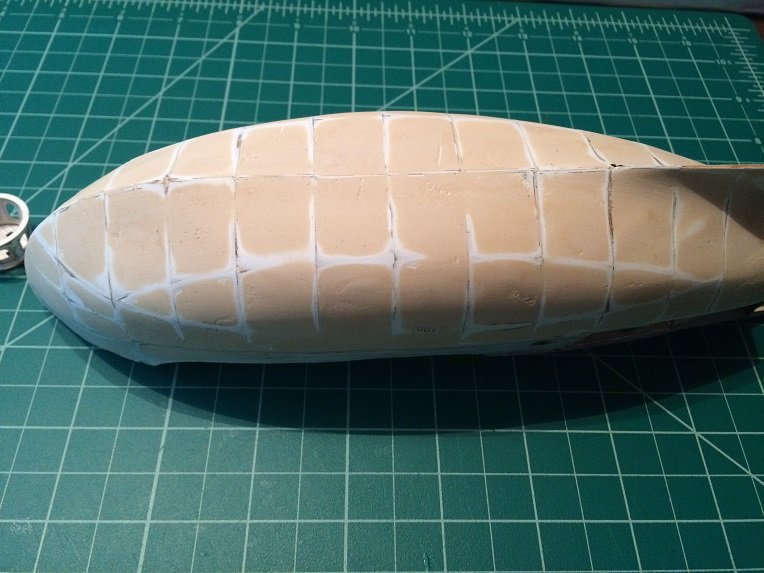
OK this next move may prove fatal to the Pinta build...I really hated the look of the lower hull with the clinker effect, so I figured since I was gonna tone the lower hull anyway to closer match the finished pics of the kit cover sheet I'd attempt a fix...so each step was filled with ca to harden the edge, allowed to dry, and attacked 180 grit!! Once I got the hull fairly smooth, fairly being the operative word, I mixed some paint to closely match the keel and rudder tones and slapped it on...I didn't want to totally cover the bottom just cover the bare spots and tone the rest so a lot of wiping the excess and applying thin washes ensued. Is it 100%...not even close but my hope is to distract the eye enough to make the clinker effect not as noticeable, hoping once the rest of the ship's details go up the hull won't be such an eye catcher. Thx for your time and attention...Pics follow Sanded hull (some of you are thinking 'Is he nuts' well, ya, kinda) Color ready to mix...burnt sienna, raw umber, and yellow ochre the test (close enough) Done ( I know still looks kinda crappy) Well that's it for now, I may get more done this afternoon, the Admiral has a bingo game to attend so I'll be left to my own devices
-
I think you're good to go Steve, planking looks fine from here
- 190 replies
-
- 1
-

-
- pinnace
- model shipways
- (and 1 more)
-
Pinta by jct - Shipyard - 1/96 scale - CARD
jct replied to jct's topic in - Kit subjects built Up to and including 1500 AD
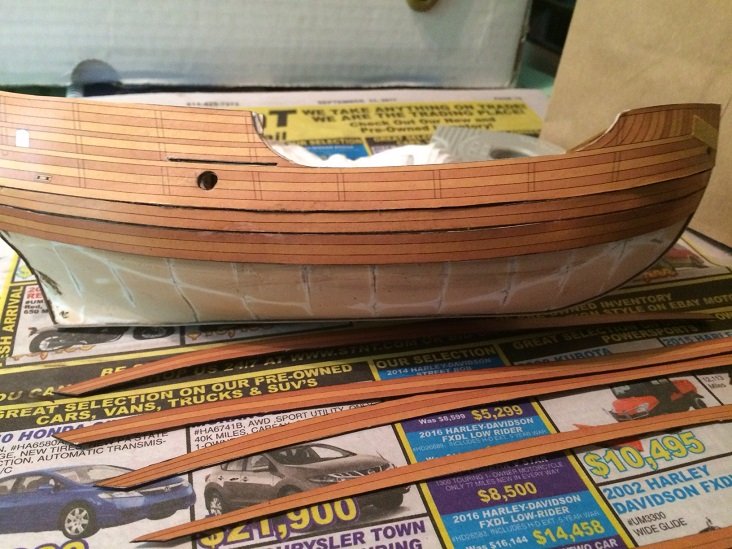
another addition to the log...got the hull "planked" , though I'm not to pleased with the results has a bit of a clinker look between the rows. The instructions call for the planks to be laminated to .5mm which they are but I think they would have laid better if they were half that thickness...on a wood build this could be sanded out but here it is what it is... Stern planks cut and laminated, edges painted planking started and finished As you can see not a very smooth application, just hoping the rest goes smoother...one thing I have finally figured out though is that the piece numbers are also the installation sequence numbers , pretty smart way to do things actually' Thx for looking in and for the likes and supportive comments, much appreciated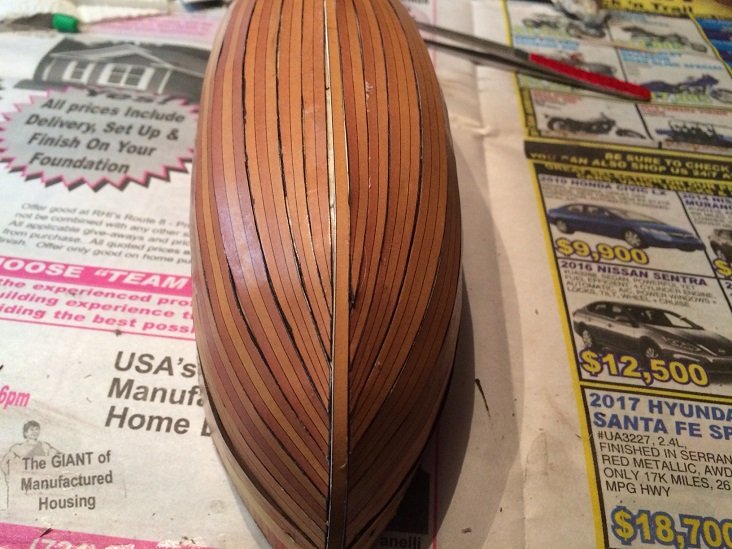
-
Pinta by jct - Shipyard - 1/96 scale - CARD
jct replied to jct's topic in - Kit subjects built Up to and including 1500 AD
thx for the likes and comments...good to have you aboard Clare, you are more than welcome...it is a nice kit very good quality at a very low price Yep very close Popeye...more than likely tomorrow as the weather dude is calling for rain, now sure if it will be done in one sitting but it will be started -
Pinta by jct - Shipyard - 1/96 scale - CARD
jct replied to jct's topic in - Kit subjects built Up to and including 1500 AD
thx for the likes and comments, another update...really just some pics not included in the last the completed crows nest still needs paint the and sanded hull finished interior bulwarks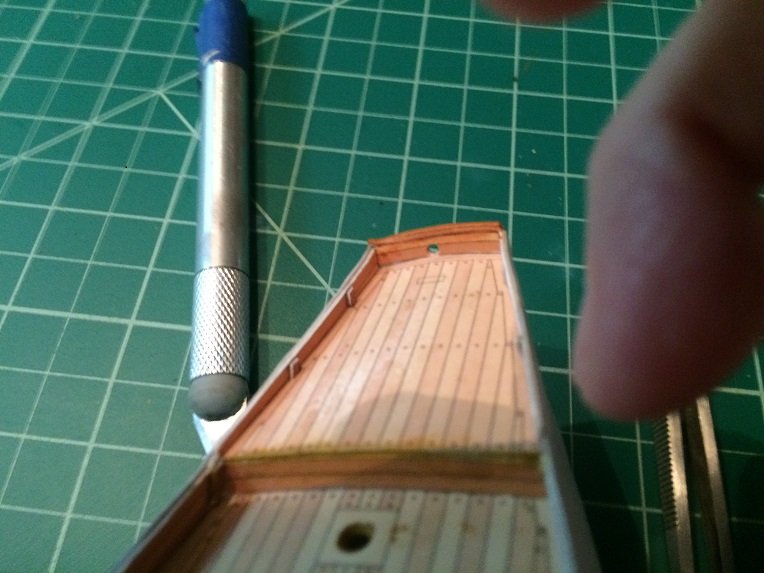
-
Pinta by jct - Shipyard - 1/96 scale - CARD
jct replied to jct's topic in - Kit subjects built Up to and including 1500 AD
interesting thought, that of a printer...the punch comes with six tips 4mm, 3.5, 3, 2.5, 2 and 1.5...used it again today works nice and comes in real handy, fast becoming a favorite -
THX much Denis...I think the tricky parts is still ahead though
- 258 replies
-
- 2
-
-
- harriet lane
- model shipways
- (and 1 more)
-
Pinta by jct - Shipyard - 1/96 scale - CARD
jct replied to jct's topic in - Kit subjects built Up to and including 1500 AD
More than welcome Ken, thanks for all the likes... it is that, but a new experience for me so I'm kinda feeling my way through...feel free to jump in with any comments or criticisms -
Thx much for the kind comment and the likes Scott, gals to have you along for the ride, be sure to start a build log on your Sea Witch...she should be a good one being a ship of legend
- 258 replies
-
- 2
-
-
- harriet lane
- model shipways
- (and 1 more)
-
THX for all the likes and comments...back to plating, the hull bottom is almost complete so I jumped up to the beltline to start laying in the upper rows, gonna try to fit in 4 rows lateral to the waterline, that should come close to completing the hull sides, then the plates that transition to the bottom...I thinking those rows are gonna be wonky This process has been a lot more complex and time consuming then I ever expected...kudos to those who have gone before...hoping the end result is worth the effort! Pics follow
- 258 replies
-
- 6
-
-
- harriet lane
- model shipways
- (and 1 more)
-
Pinta by jct - Shipyard - 1/96 scale - CARD
jct replied to jct's topic in - Kit subjects built Up to and including 1500 AD
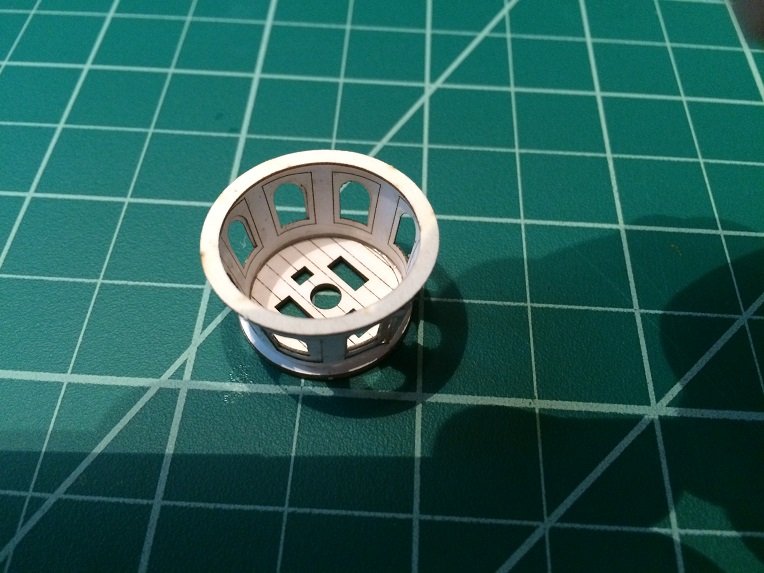
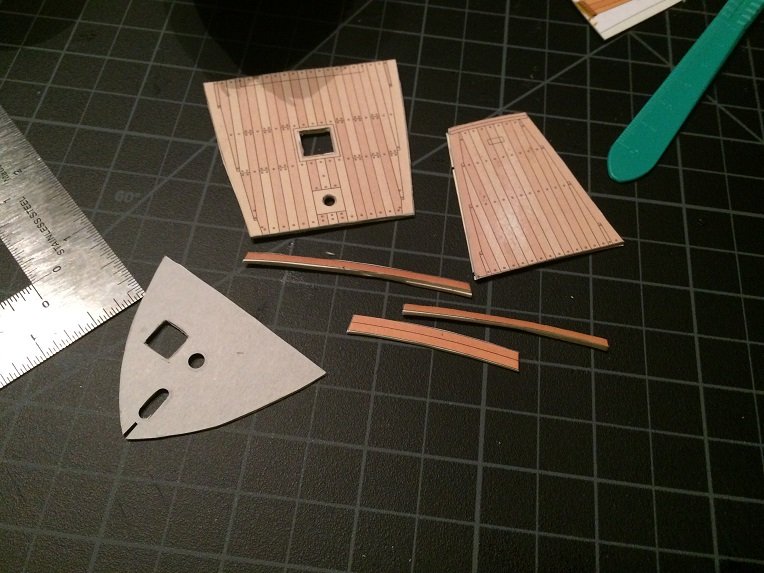
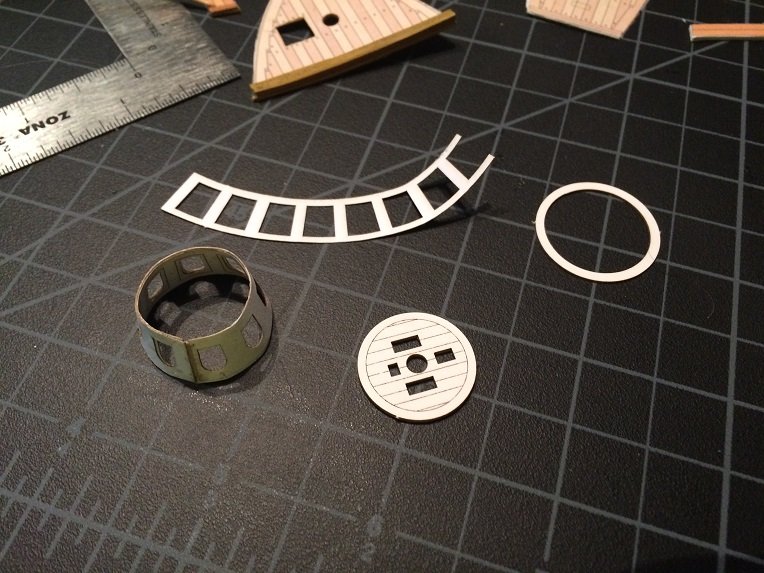
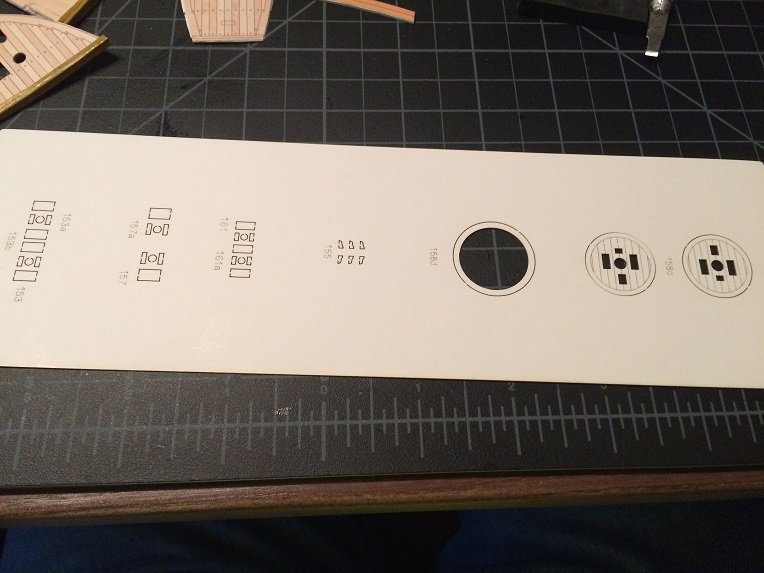
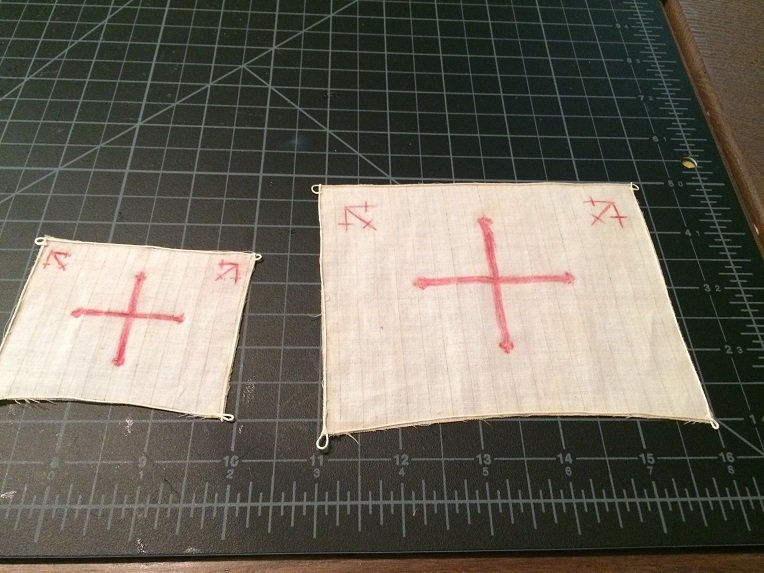
a small update...I decided to fill the main hull so while that was drying I turned my attention to a few small items. I picked up a new tool called a screw punch, on Amazon for 9 bucks, worked real well. results below The sails needed to have their markings filled in, I taped them to the kit drawings and filled in the crosses with water color pencil also started the laser cut crows nest that was included in the accessory pack i'll get the hull squared away next week and include pics, but thats it for now...thx for the likes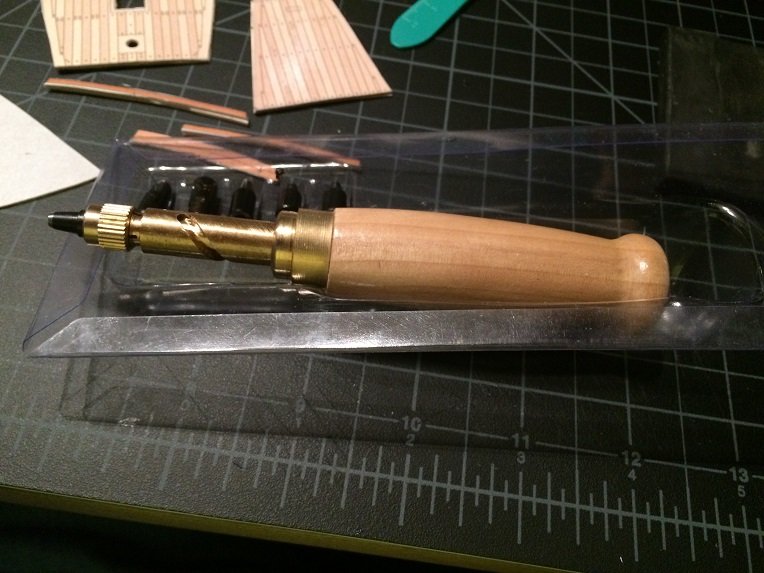
-
Hi Denis...nice job on your Jolly Roger, the glowy one should be cool when done, you have to shot some night shots for us!
- 140 replies
-
- 3
-
-
- jolly roger
- lindberg
- (and 1 more)
-
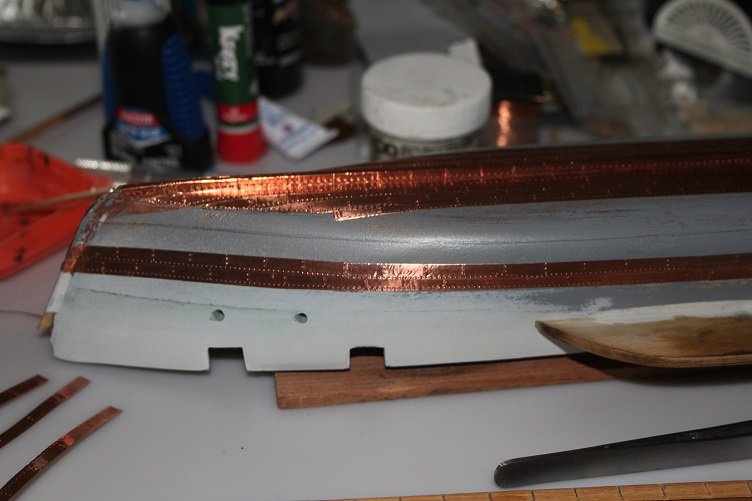
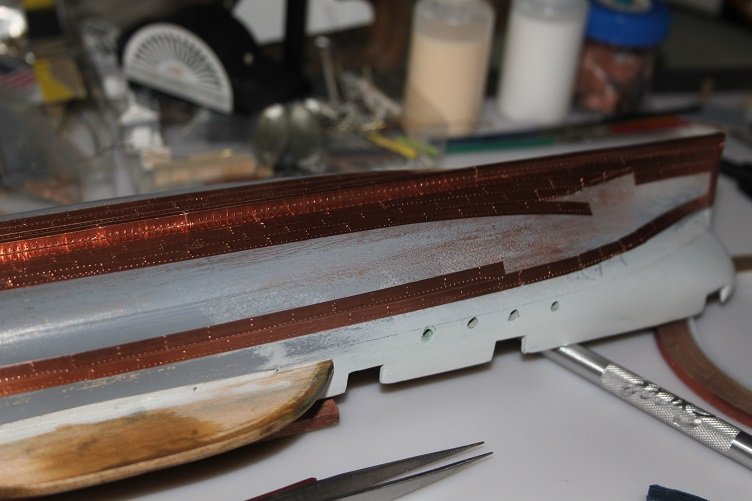
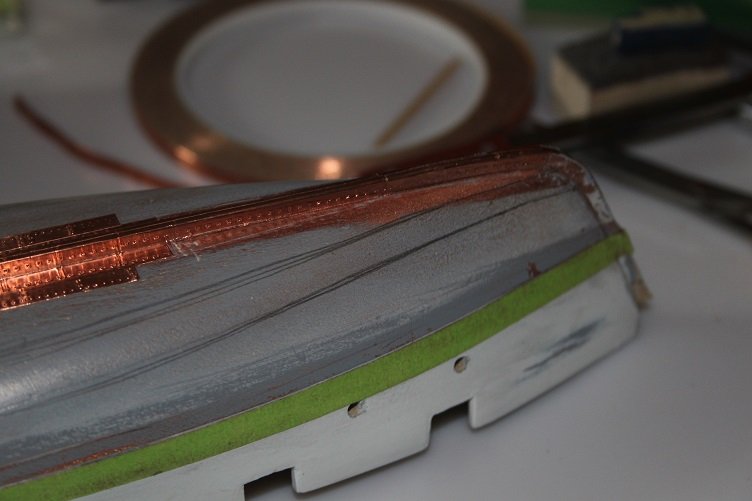
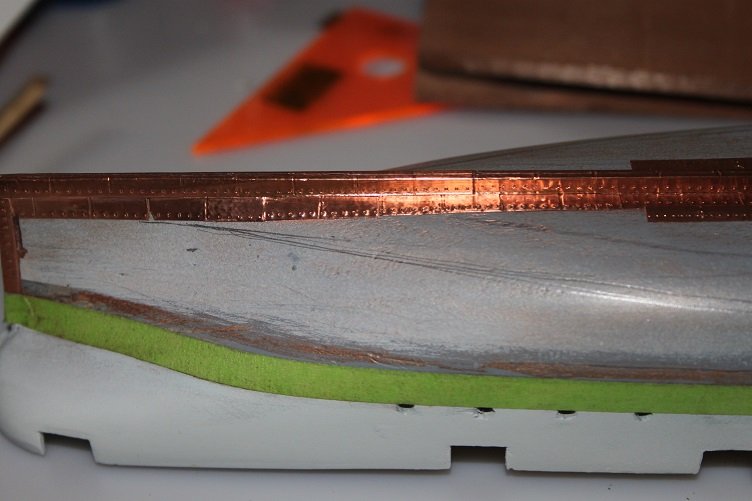
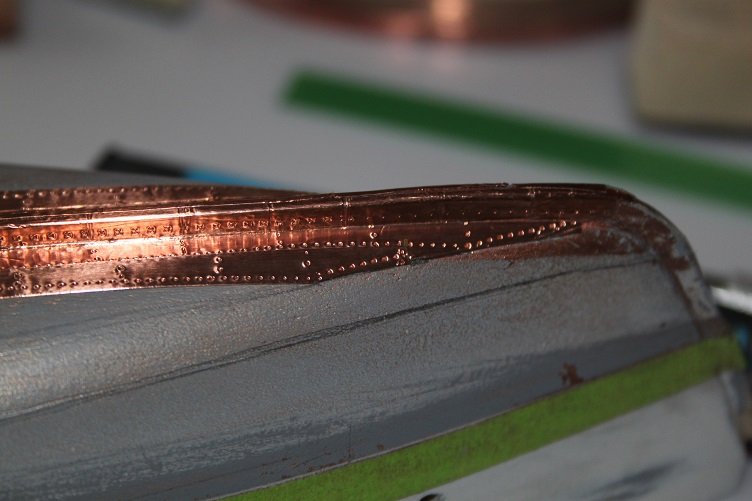
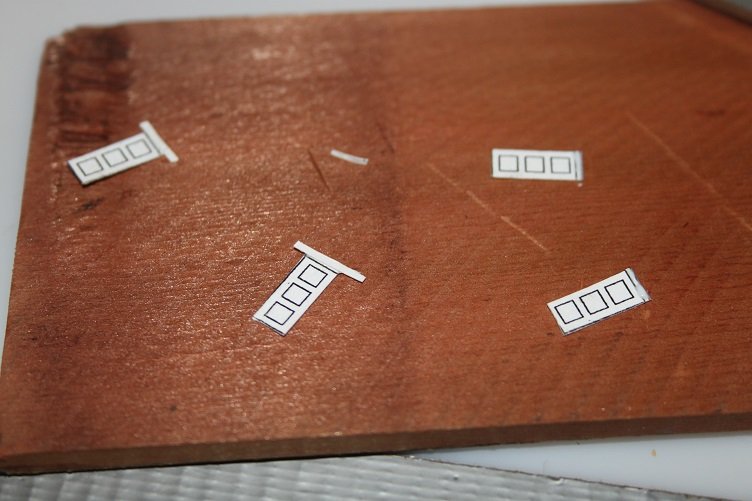
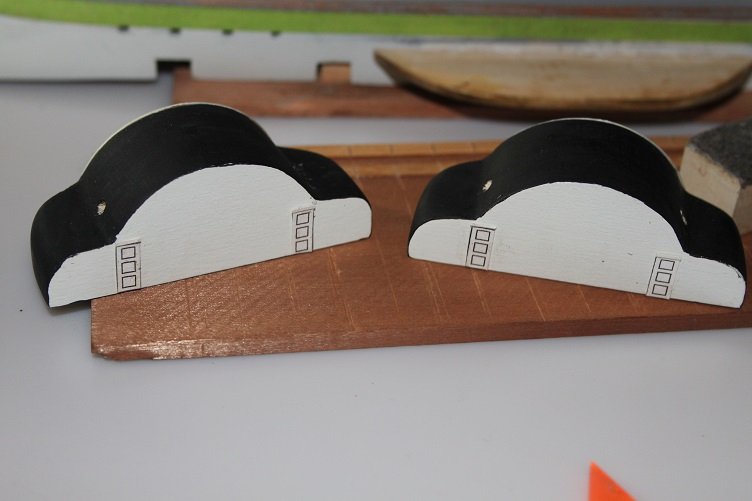
Hello to all, Thanks for the likes and comments...another update to the HL build. After doing some research on coppering a ship's hull I came to the conclusion that I was doing everything pretty much the wrong way!! So since everything was stripped down anyway wasn't a big deal to start with a new layout. First thing was to try to establish the plains where the plates would ly. This hull is basically slab sided and flat bottomed with a very sharp curve transitioning between the two amidships, when trying to lay bands this created havoc. So I layed off a couple gore lines (before you ask I have no idea why they are called that) each one on the edge of each transition, and started plating to the lines and trimming any excess. So far this is working well. I do believe there will be a few runs that fight back though gore lines at the bow... and stern... once the excess is trimmed at the gore line new rivets are run along the cut edge Another small detail...doors for the Wheel houses, these are copies of the kit supplied paper ones for the pilot house, glued to stiff card stock to add thickness...same applies to the headers added to each. Each wheel house has two, as the real vessel has a large shaft enclosure blocking the fore-aft path. Still have to add some trim to these guys but they are almost complete... That's it for now, thanks much for your time and attention
- 258 replies
-
- 6
-
-
- harriet lane
- model shipways
- (and 1 more)
-
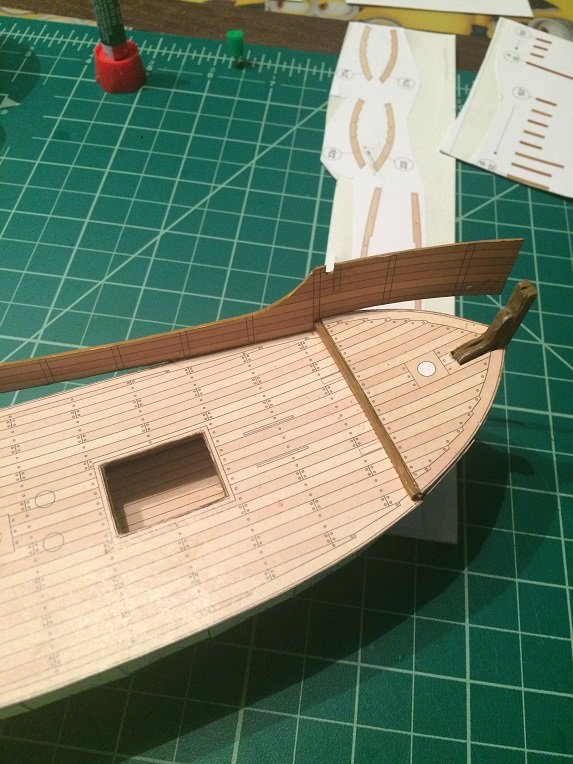
Pinta by jct - Shipyard - 1/96 scale - CARD
jct replied to jct's topic in - Kit subjects built Up to and including 1500 AD
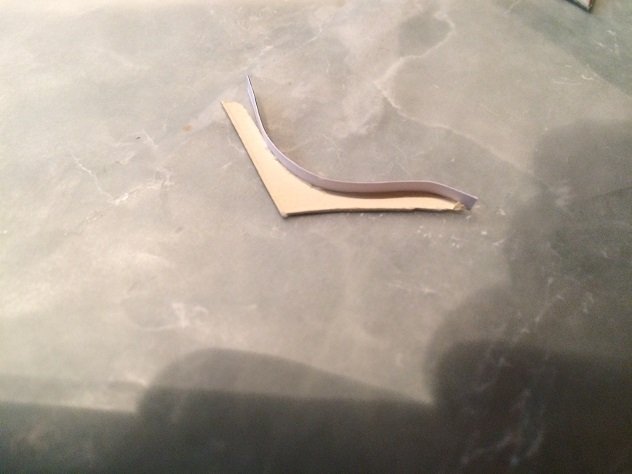
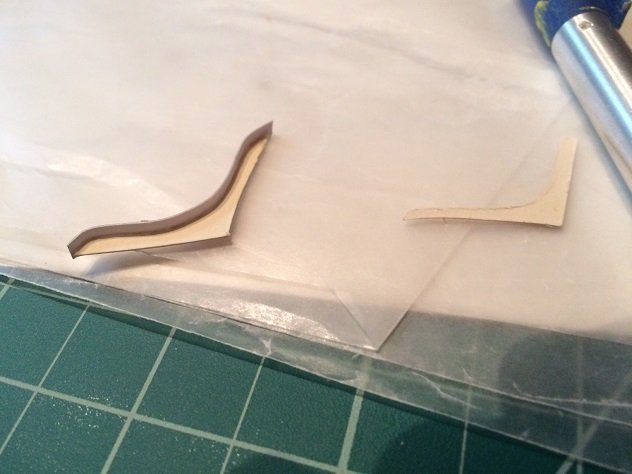
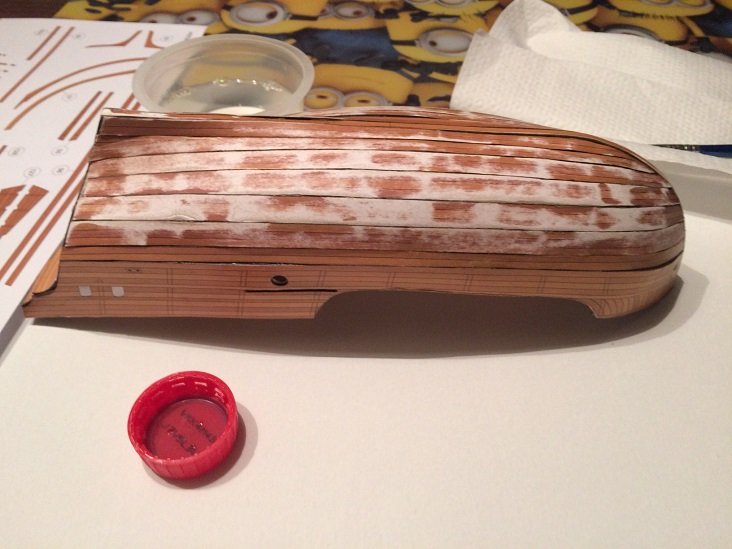
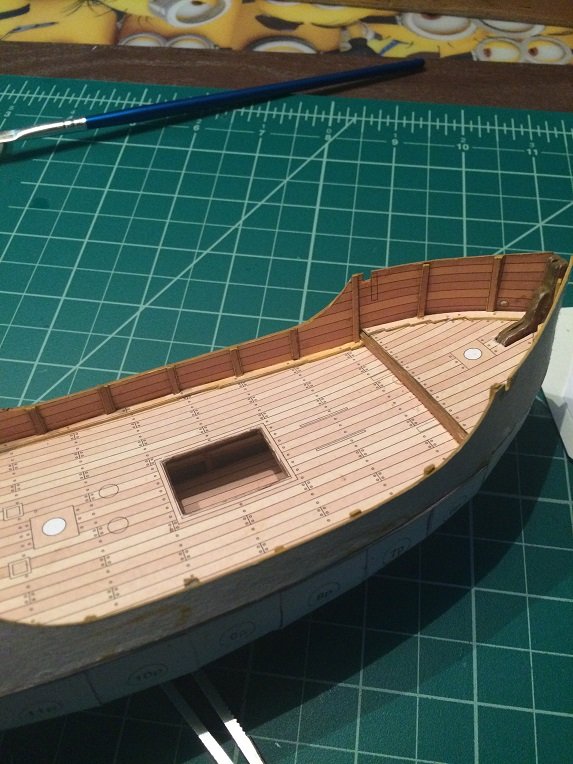
Hi everyone, another update to the Pinta, the side boards were cut out and build up to their proper thickness, I really like the way the kit instructions give you the finished thickness of each piece which allows you to get it correct right off. I'm using water colors to finish the exposed edges, just mixing colors to get close to the match... side boards were then mounted to the main hul by tacking and waiting for the glue to set bending to shape and gluing again, until the whole side was attached then the tiberheads were added and the waterways added that's all for now...more next week THX J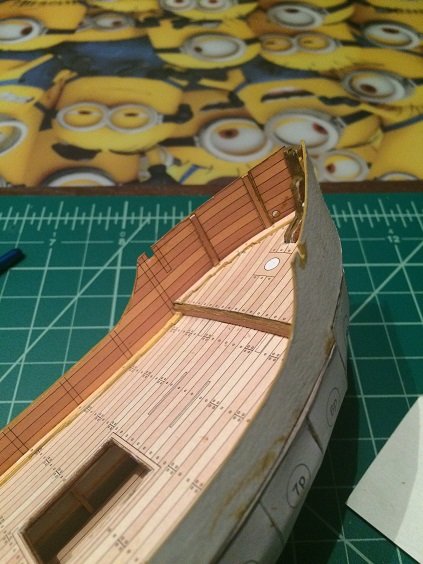
-
THX much Pop...yep I agree...debated with myself long and hard (drew some strange looks) about not adding them but decided to, but they do need to be subtle, besides no build of mine would be complete with out a least one tear down! This is old Testers enamel, this is the first issue I've had laying it over a primer coat, I'll defiantly keep the sealer trick in mind, not too many solvent enamels left though, switched to acrylics a few years back (the lungs have been grateful )
- 258 replies
-
- 3
-
-
- harriet lane
- model shipways
- (and 1 more)