DONATION DRIVE - SUPPORT MSW - DO YOUR PART TO KEEP THIS GREAT FORUM GOING! (91 donations so far out of 49,000 members - C'mon guys!)
×


Gabek
-
Posts
310 -
Joined
-
Last visited
Content Type
Profiles
Forums
Gallery
Events
Everything posted by Gabek
-
 Welcome aboard the HMS Triton, Jorge! Some excellent builds here that will inspire you! Clear skies, Gabe
 -
Beautiful work! And I completely agree with your decision about treenails. Excellent work that a caulker would be hard-pressed to find any gaps! - Clear skies! Gabe
-
As of July 1 (Canada Day) I am officially a retired teacher!

Looking forward to hours and hours of model building...once I have completed my orders!
-
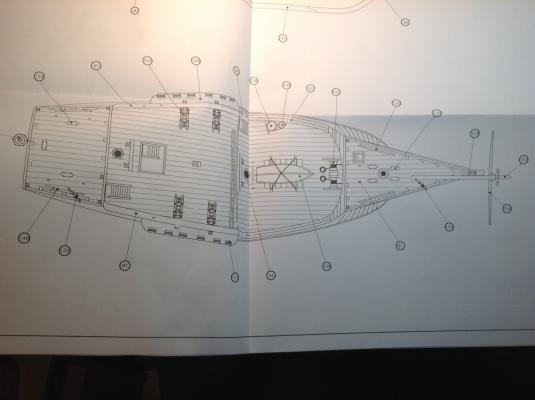
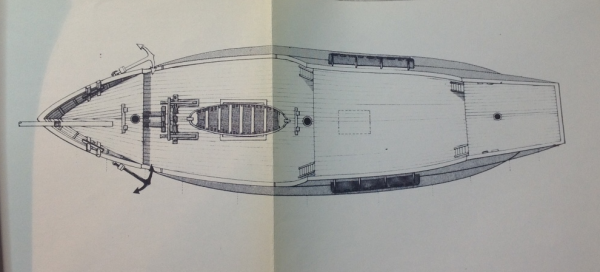
Although I am still in the early stages of my Triton cross-section, I am going to have to make some decisions soon. My overall plan is to paint one half of the model and show off the wood plus cutaways on the other half. My big question is about painting the hold... Photos of the HMS Trincomalee's hold show that everything: planks, pillars, beams, etc, were painted white. However, photos of the Victory's hold show unpainted sides and pillars. Any advice? Regards, Gabe
-
Great topic...and one I am going to address on my Triton cross-section. At 1/96 scale I am not even going to attempt a nail pattern! I am using a book and photos of HMS Trincomalee a lot as reference. Here's a decent shot of the copper showing different colours and the visibility of the nails. Clear skies, Gabe
-
I agree with Christian that there wouldn't be caulk between the frame timbers. Caulk was to prevent water from entering the hull - so it would only be on the deck and hull planking. (I read somewhere that when a new ship was launched, the head caulker would have to drink all the water that came into the hull! ) I wouldn't worry about remaking your frames - they look excellent. The paper is showing off your excellent construction of the frames! Clear skies, Gabe
-
Hello there Anguirel, I decided to put in chocks on frames 5 and C, which would be visible in the final model: http://modelshipworld.com/index.php/topic/5761-hms-triton-cross-section-by-gabe-k-196/?p=218064 http://modelshipworld.com/index.php/topic/5761-hms-triton-cross-section-by-gabe-k-196/?p=221134 I also had the problem of not finding a formula and ended up just picking between two reference sources I had and scaling down. Good luck in your build! Looking forward to reading more. Clear skies, Gabe
-
I hear you, Tony! What I find ironic is that I'm deep in the heart of North America https://clubrunner.blob.core.windows.net/00000050077/Images/Winnipeg.gif and I'm a nut about Nelson-era ships! Having said that - I've been able to touch the Atlantic, Pacific and Arctic Oceans. I have also found this Triton build has really honed my understanding of ship-building and increased my respect for ship-builders before the industrial revolution. Clear skies! Gabe
- 132 replies
-
- 3
-

-
- triton cross-section
- cross-section
- (and 1 more)
-
Beautiful work, Tony! In the back of my mind I was contemplating a cutaway on my Triton, and seeing yours has convinced me! Looking forward to seeing more on your build... Clear skies, Gabe
- 132 replies
-
- 3
-
-
- triton cross-section
- cross-section
- (and 1 more)
-
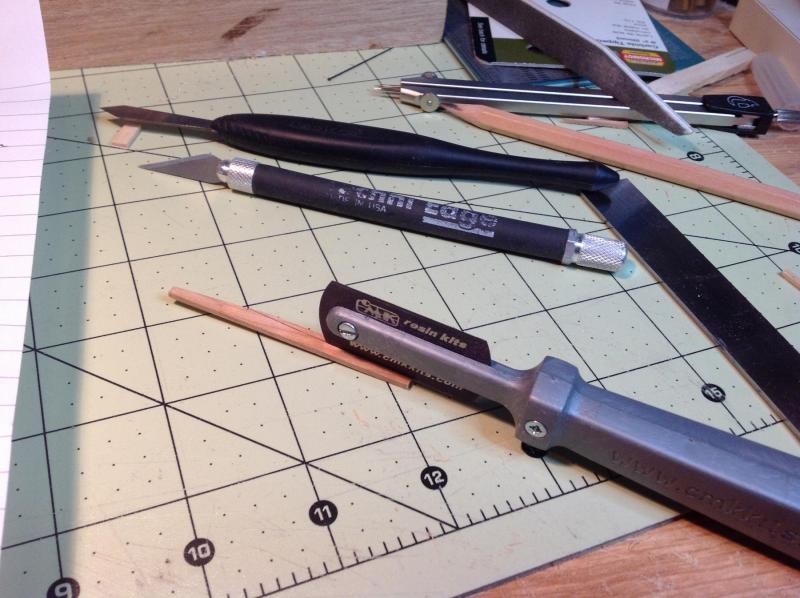
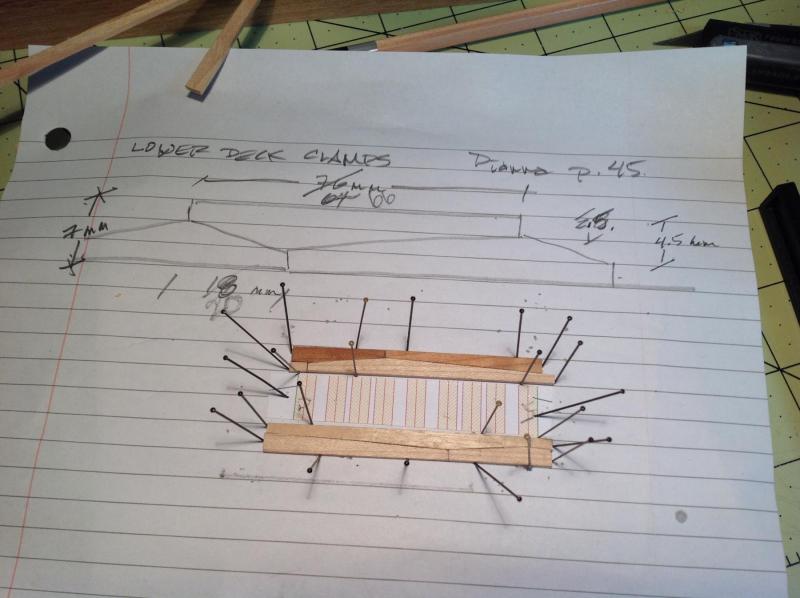
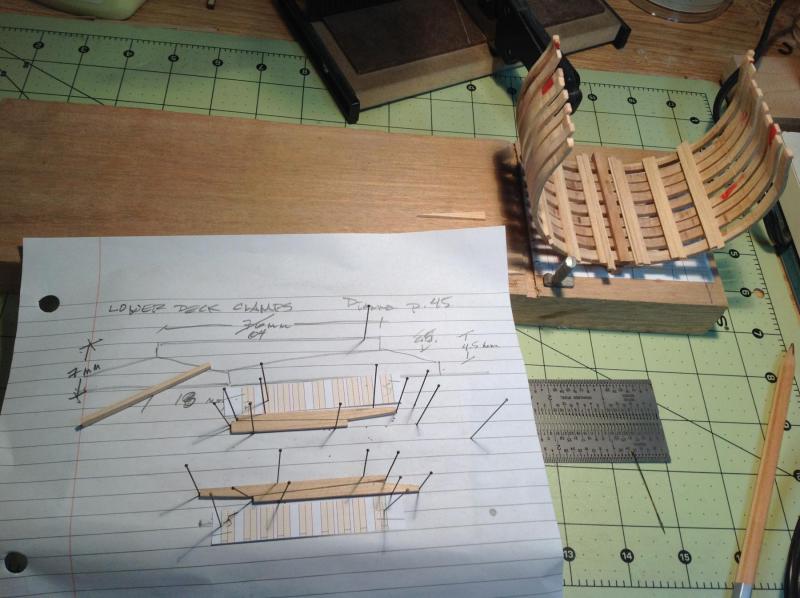
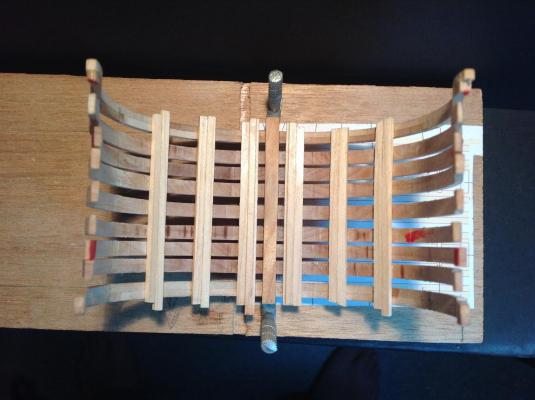
Thanks for the reply, Christian, and everyone for the likes. Good to be back at the dry dock! I found a small error in my layout of the deck clamps. While I was carefully reproducing what was in my main reference, AOTS: HMS Diana, I forgot that I was building the HMS Triton! When I was dry-fitting the planks it soon became obvious that there was a problem: the butt ends were hanging between frames! So, I had to rework the measurements and cut several new planks that now go from centre-to-centre on the frames. Good news was that I could still use parts of the first planks. Cutting the planks accurately was 'interesting'. After carefully marking out the shape I used a CMK resin blade. I glued up the pieces and clamped them into place. After a few hours I checked them out. I had to fix up a small mistake on one end...a small gap that still doesn't look perfect but I will try to fill it once the glue dries thoroughly. I don't normally say this, but it is something that will not likely be seen by anyone! (Shhhh...it will be our secret!
-
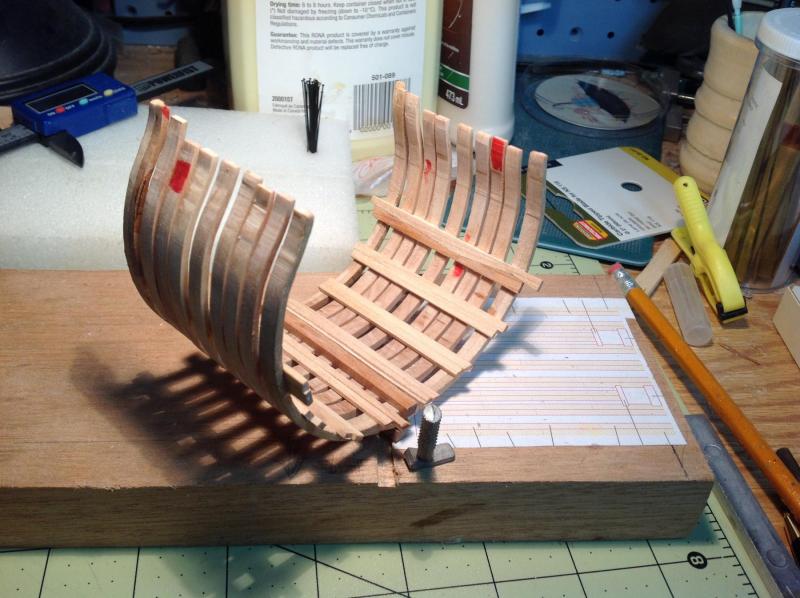
Back at it? Well, my poor Triton has been sitting idle for almost a year and collecting sawdust from my other addictive hobby - pen-turning. (A dark abyss, but rewarding for the fast results). A victim of this new passtime and the bathroom renovation from hell at my cottage, the deck clamps that I started laying out last January have not been touched in months. I did get a new Proxxon saw blade which I hope will fix my frustrations ripping planks. So, here is the status on the deck clamps: Using The Anatomy of a Ship: HMS Diana I planned out the anchor stock design and realized that, because of the angled cuts, it would be easy to make these run crooked. The lines on this paper are exactly the width I need for the clamps so I am able to lay out the planks nice and parallel, keeping them in place with pins as I go.
-
Welcome aboard! Great project...excellent learning experience. Looking forward to following your build. Clear skies! Gabe
-
Welcome aboard, Dupree! This is a great project that really pushes your skill and knowledge. The people here are a fantastic resource, super encouraging and a good shoulder to cry on when the time comes! Looking forward to watching your build. (And, I think you just kick-started me to get back on track with mine!). Regards, Gabe
-
Hey there, Jan. Power tools, yes. Precision, not so much. I wreck a lot of wood before I get it right! Getting these planks to the correct size has been an exercise in frustration! Sand paper has been my most valuable tool! Have you thought of a ship in a bottle? That's all hand tools. I tried one and I'm sure that I will be building more of them! Regards, Gabe
-
Thanks, Jan! As to your question...this model is 10.5 cm across the beam, 8.5 cm from keel to the top of the rail and just over 6 cm fore and aft. (That's 4.5" x 3.25" x 2.5" for the metric-challenged!) This is one concentrated headache generator! LOL, Gabe
-
Thanks, Ken and rschissler! Great advice, folks! I had checked out Moonbug's blog (say that five times real quick!) and I really like some of the mods he made...he's gone with the highrise fo'c's'le. So I am putting that down as a +1 vote. I checked out that book on amazon.ca...cheapest was $107, up to $505! I checked out our libraries and no luck...besides, if I do get that book I won't finish this model for at least 5 years! But, if Pastor leans toward the big fo'c's'le then that will be another +1 vote for. I am going to head down to my cave and build me a high fo'c's'le caravel! Stay tuned for the next decision... Regards and thanks again, Gabe
- 59 replies
-
- 2
-
-
- Santa Maria
- Artesania Latina
- (and 1 more)
-
Happy to oblige you, Crackers! I modified the poll. FYI - I saw the little line in the editor about making a poll so I'm giving it a try. I'm still a little shaky on how to use the poll...it looks it always shows up first in your topic. Editing it is a little strange. We'll see how this works. Clear skies! Gabe
- 59 replies
-
- 3
-
-
- Santa Maria
- Artesania Latina
- (and 1 more)
-
Here's a test of the polling feature in this content editor. Checking to see if I can get your votes on how to build my Santa Maria. Thanks for you input!
- 59 replies
-
- 1
-
-
- Santa Maria
- Artesania Latina
- (and 1 more)
-
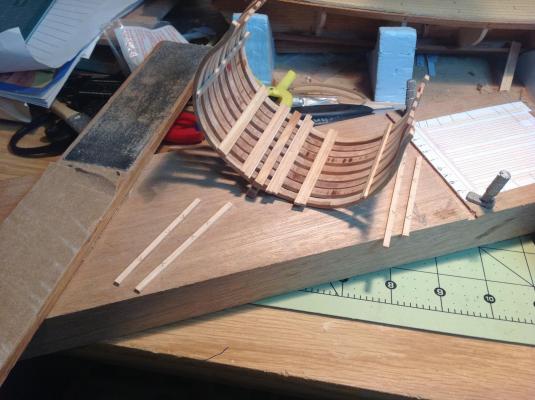
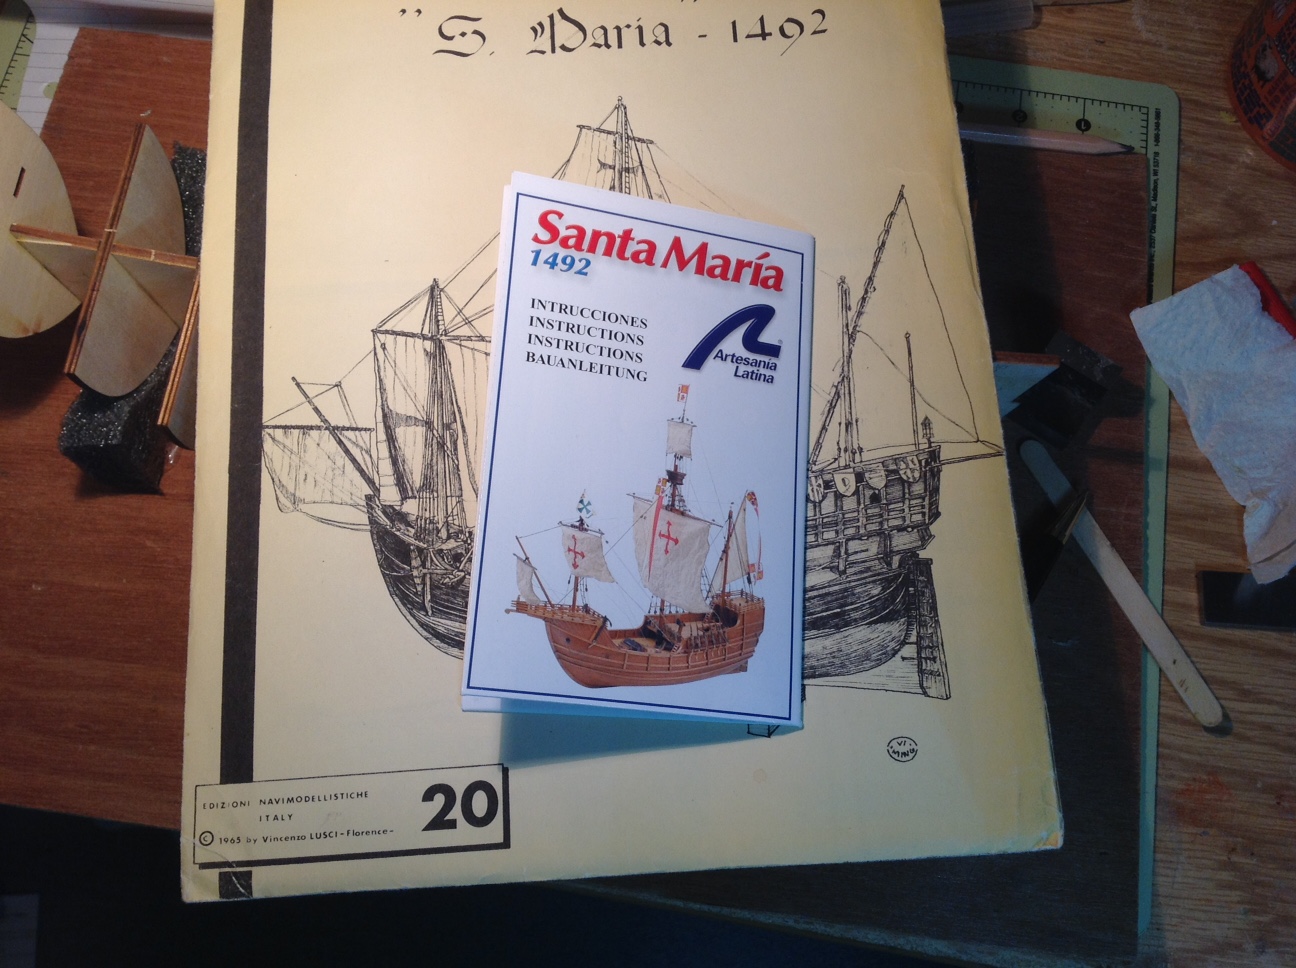
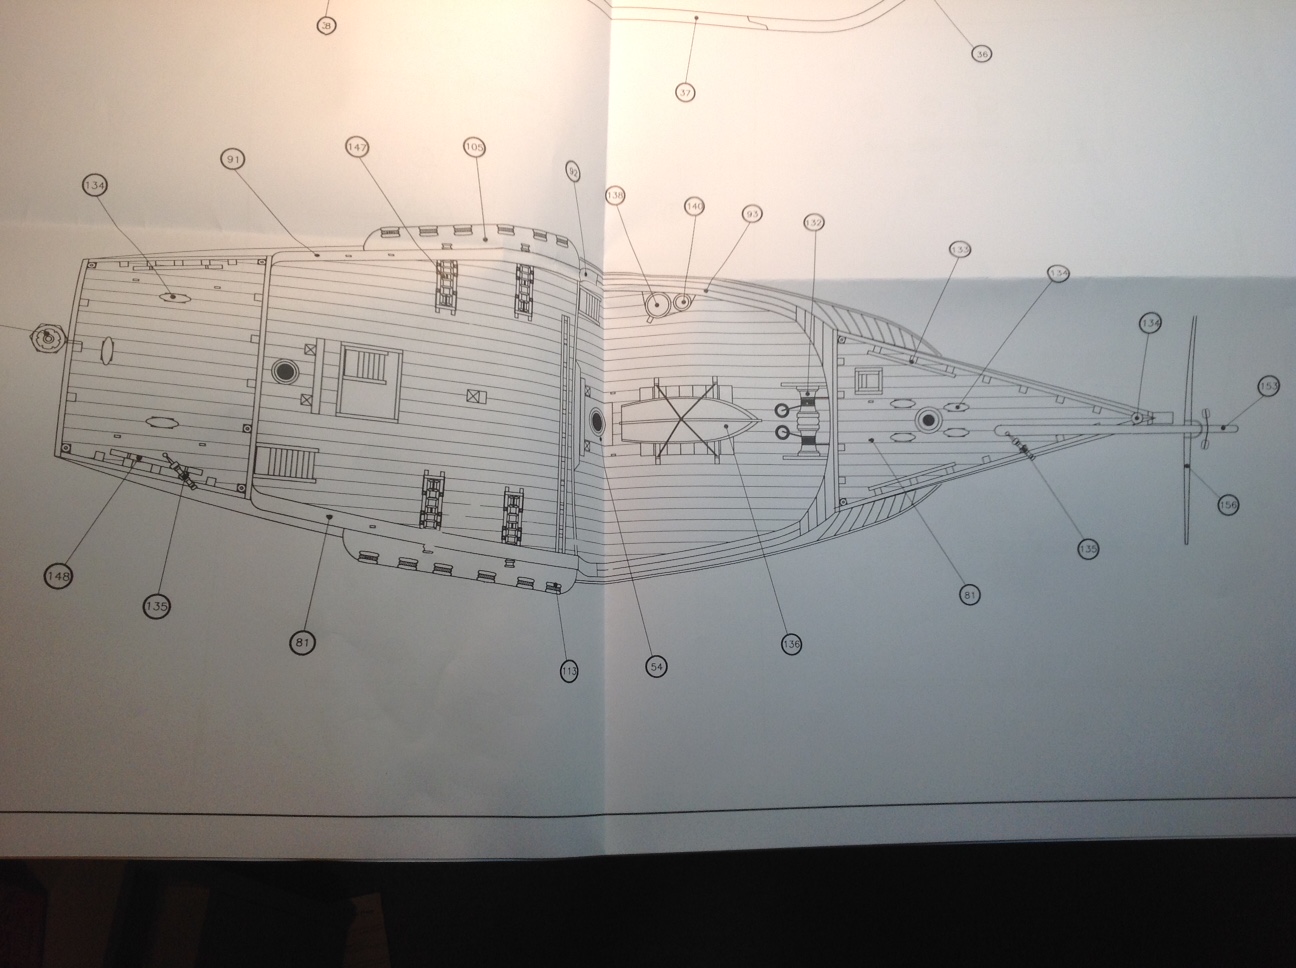
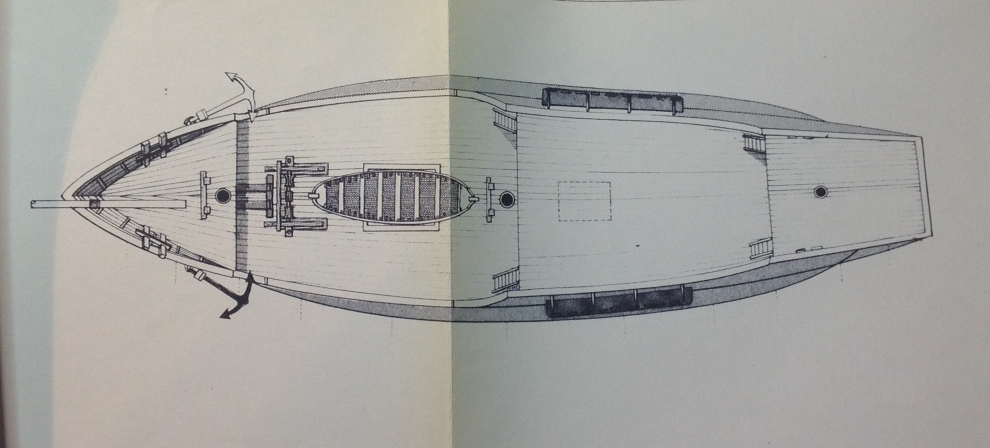
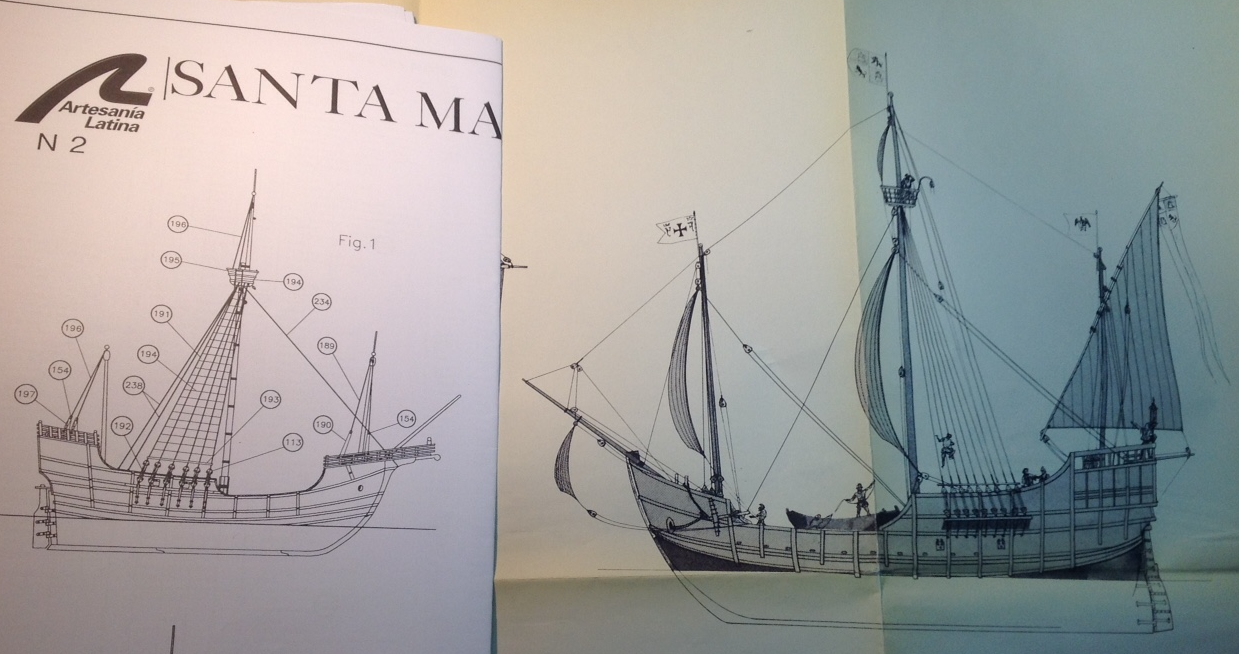
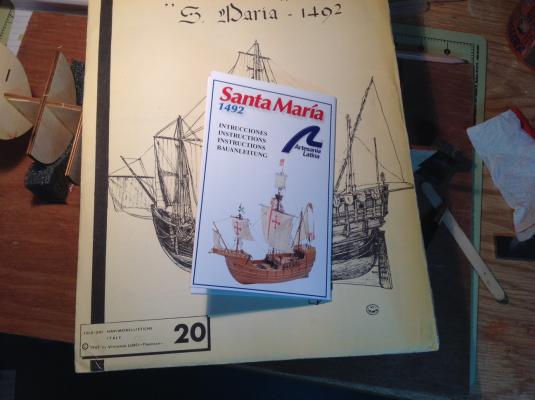
In the, "I can't believe I'm doing this" category... Ok...on so many levels I have really put my foot in it this time. For a few years now I had it in mind to build models for my sons when they graduate from university. For my oldest, Christopher, I want to give him the Santa Maria. For my youngest, I intend to build the Matthew. (His name is William...no, just kidding. His name is Matthew.) I also thought I would scratch build them at a standard scale or, at the very least, I would make nice ships in bottles. I've got a book on the Matthew and found some online plans. I bought some plans for the S. Maria on eBay - fairly old, Italian plans (funny - I just saw someone post a picture of the boat from this plan for someone who wanted to bash his AL Santa Maria!) However, about a year ago I spotted a good deal and picked up this kit. I'm not very knowledgeable about the ships in this period and I'm not terribly interested in them, so I was going to just follow the instructions on this model when the time comes. Well, I came to a big realization this week: My son is just a few months away from graduating! [gulp] Trouble! Where had all the time gone?! I pulled the box out from my pile (I haven't bothered to list my "on the shelf" models - it would take too long!), took a good look at it and said, "I think I can do this...but I will DEFINITELY NOT BASH THIS KIT!" [sigh] So, I decided to start this kit. I put away my Harvey (haven't started the log on this one, yet...I began building it before I found MSW), stopped the work I was doing on my HMS Titan and opened up the Maria. I've been looking at the model and the instructions...checked out a couple of logs here...Ok...I can do this...but I will DEFINITELY NOT BASH THIS KIT!" [sigh] What am I doing!? Well, my son is celebrating his 22 birthday today so I thought, "Today's the perfect day to start the Santa Maria" This is the first laser-cut kit I have encountered and I am impressed with how easy it was to cut away the parts from the sheets. Nice tight fits for the bulkheads. I only had to work on two slots to get the bulkheads to fit flush with the top of the false keel. It took me a very short time to glue up the bulkheads. All except one were square when I pushed them into their slots on the keel. Ok...good start. Except...I was studying the photos and the plans in this kit some more and I just didn't like the look of the ship. The forecastle looks odd to me...there doesn't seem to be enough ladders to get up and down the decks...some of the rigging looks wonky. I kept thinking of the modeler who was looking for authentic boat plans...so...I pulled out those old plans I had bought. [Grrr!] Big mistake. I like the look of the Santa Maria in the older plans! I don't know which is more accurate - but accuracy is not bothering me. Well, not too much. So,...I...might...bash...this...kit. [sigh] But, I have an idea... I'm going to ask the wonderful people here at MSW to help me decide. I'm going to put some of the changes I'd like to make and you let me know what you think. [Oh...I think this model will now be a house warming gift for my son ] [big breath] Here goes: Biggest decision right now... High, Railed Forecastle - keep it or drop it? Looking forward to your input. Several more decisions to come as needed. Kind regards, Gabe

- 59 replies
-
- 3
-
-
- Santa Maria
- Artesania Latina
- (and 1 more)
-
Thanks, Ray! Good to hear from you. It's been a bit of a busy term for me...and I was fighting with my little lumber mill to produce planks that were consistent. Still not happy with the amount of time and effort I need to invest in this...but I'll muddle through. All the best to you and yours! Gabe
-
Thanks for the kind words...and all the best of the season to you and yours. And thank you to all the likes and comments from everyone...makes me want to work on the model more! Kindest regards, Gabe
-
Thanks for all the advice Mark, Ken and Pete... And I have Titebond! Didn't think to use it on something this small. Roughing up the surfaces is a standard operating procedure for me, but this model is so small that I have only been using fine sanding and filing. I'll give it a try, though. In this case it was lucky that I didn't do a good job on gluing up! I checked out the site you gave me, Mark, and I'm definitely interested. Any idea what kind of costs we are talking about on the 2" slitting blades? Much appreciated, folks. Clear skies, Gabe
-
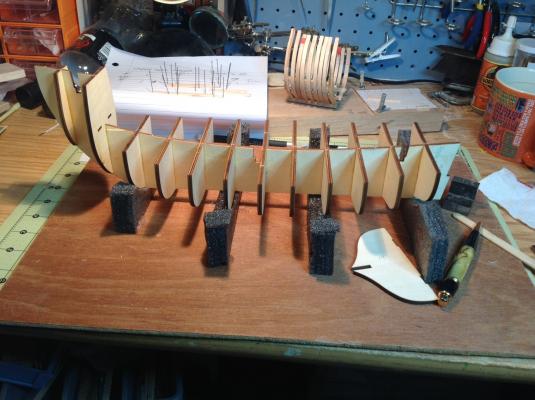
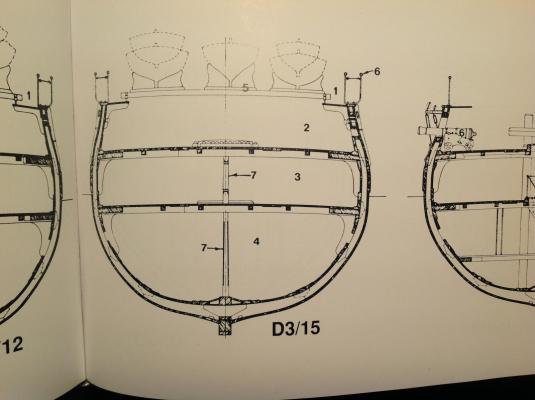
Thanks for the comments, Mark. I'm using a Microlux saw...the one with fixed blade height. The ripping blade is actually thicker than the cross cut, but I can see that it tips away ever so slightly from the fence as I feed the stock through. Just half a mm is too much. I've played with feed rate, types of fences, etc, but I end up ruining a lot of wood. Any suggestions would be greatly appreciated! I'm wasn't even aware of slitting blades, but I checked them out and I'm on the hunt for one! Thanks, Mark! It really jumps out at you when you see the Anatomy of the Ship drawings. The deck clamps, beams and spirketting all line up on joints as well. I also wondered why between decks would be so low...it seems like the builders were more concerned with the hull's integrity than sailor comfort! Here's a pic from AotS Pandora
-
Finishing the thick stuff in the hold and a sticky conumdrum I mentioned in an earlier post that I was going to remove the deck clamps in order to replace them with anchor stock styled ones. I had actually decided to leave them as is. I was worried that I would just make a total mess of it and possibly damage things if I tried to remove these pieces. Besides, at this scale I doubt that anyone would even notice the clamps under the mess deck. ( I was mentally composing my excuses and apologies to you folks for changing my mind
-
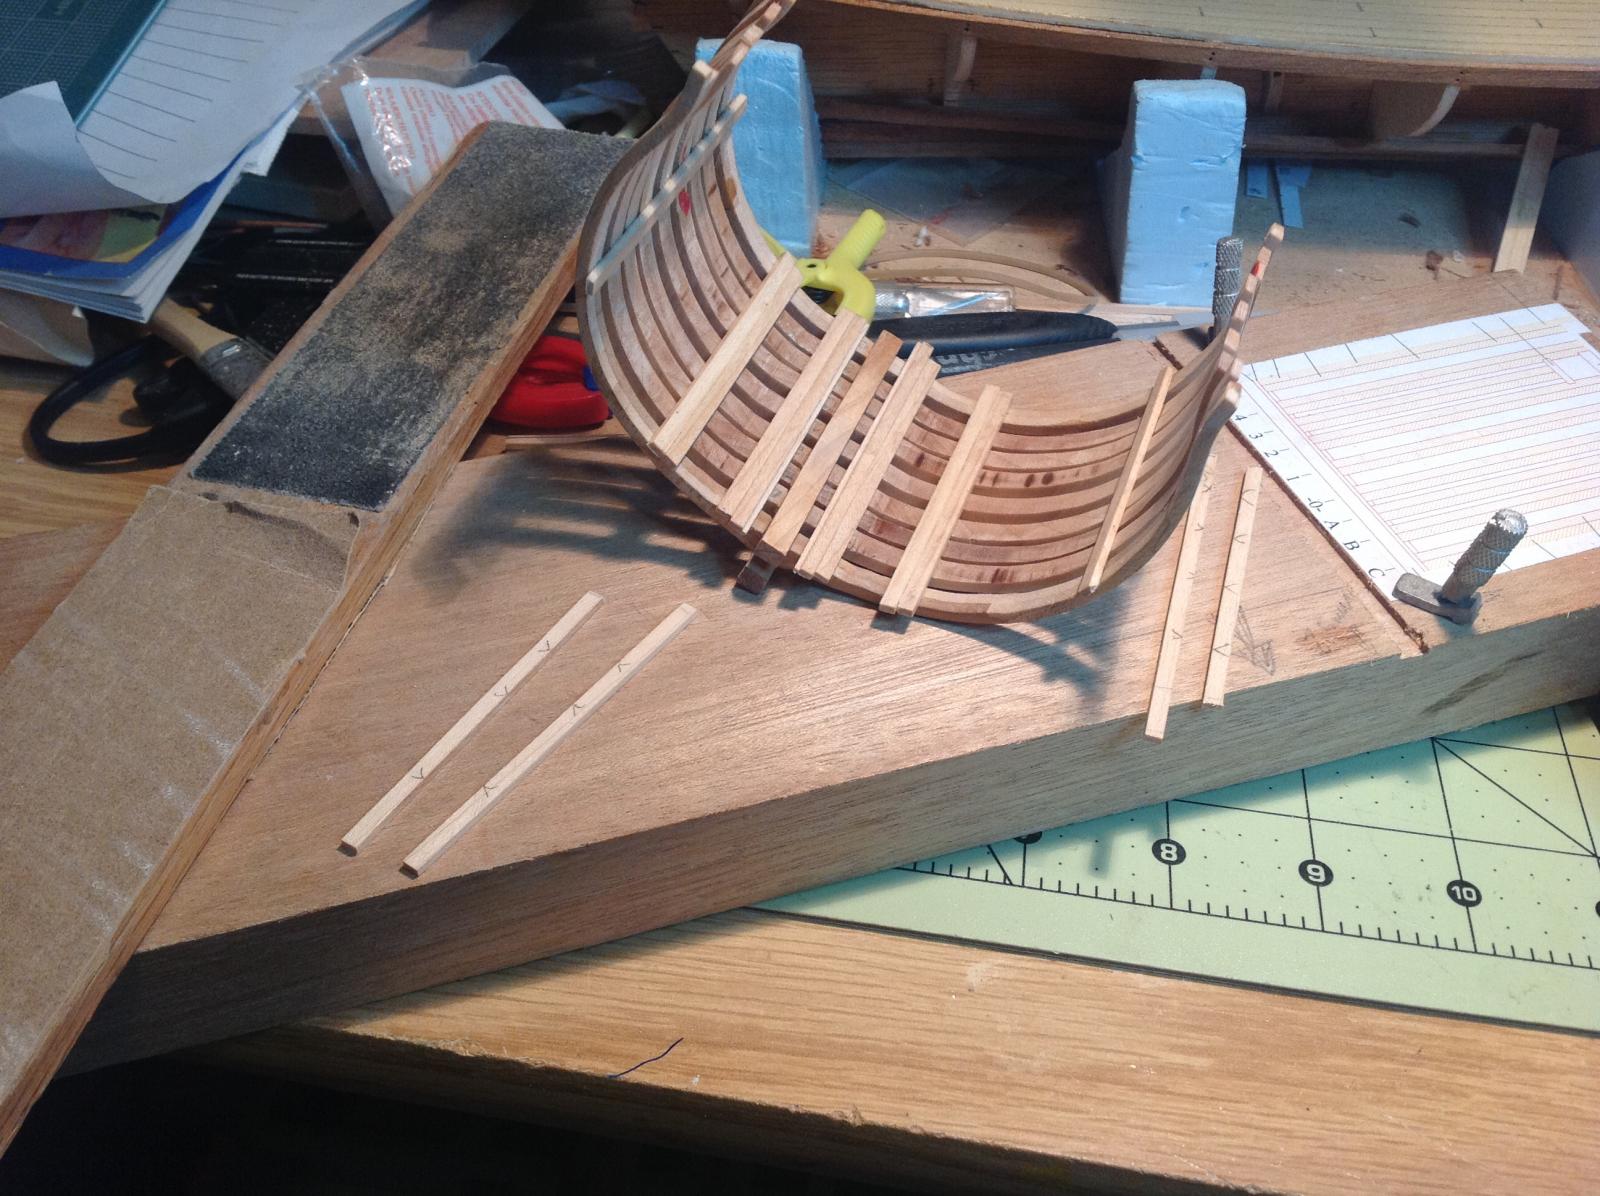
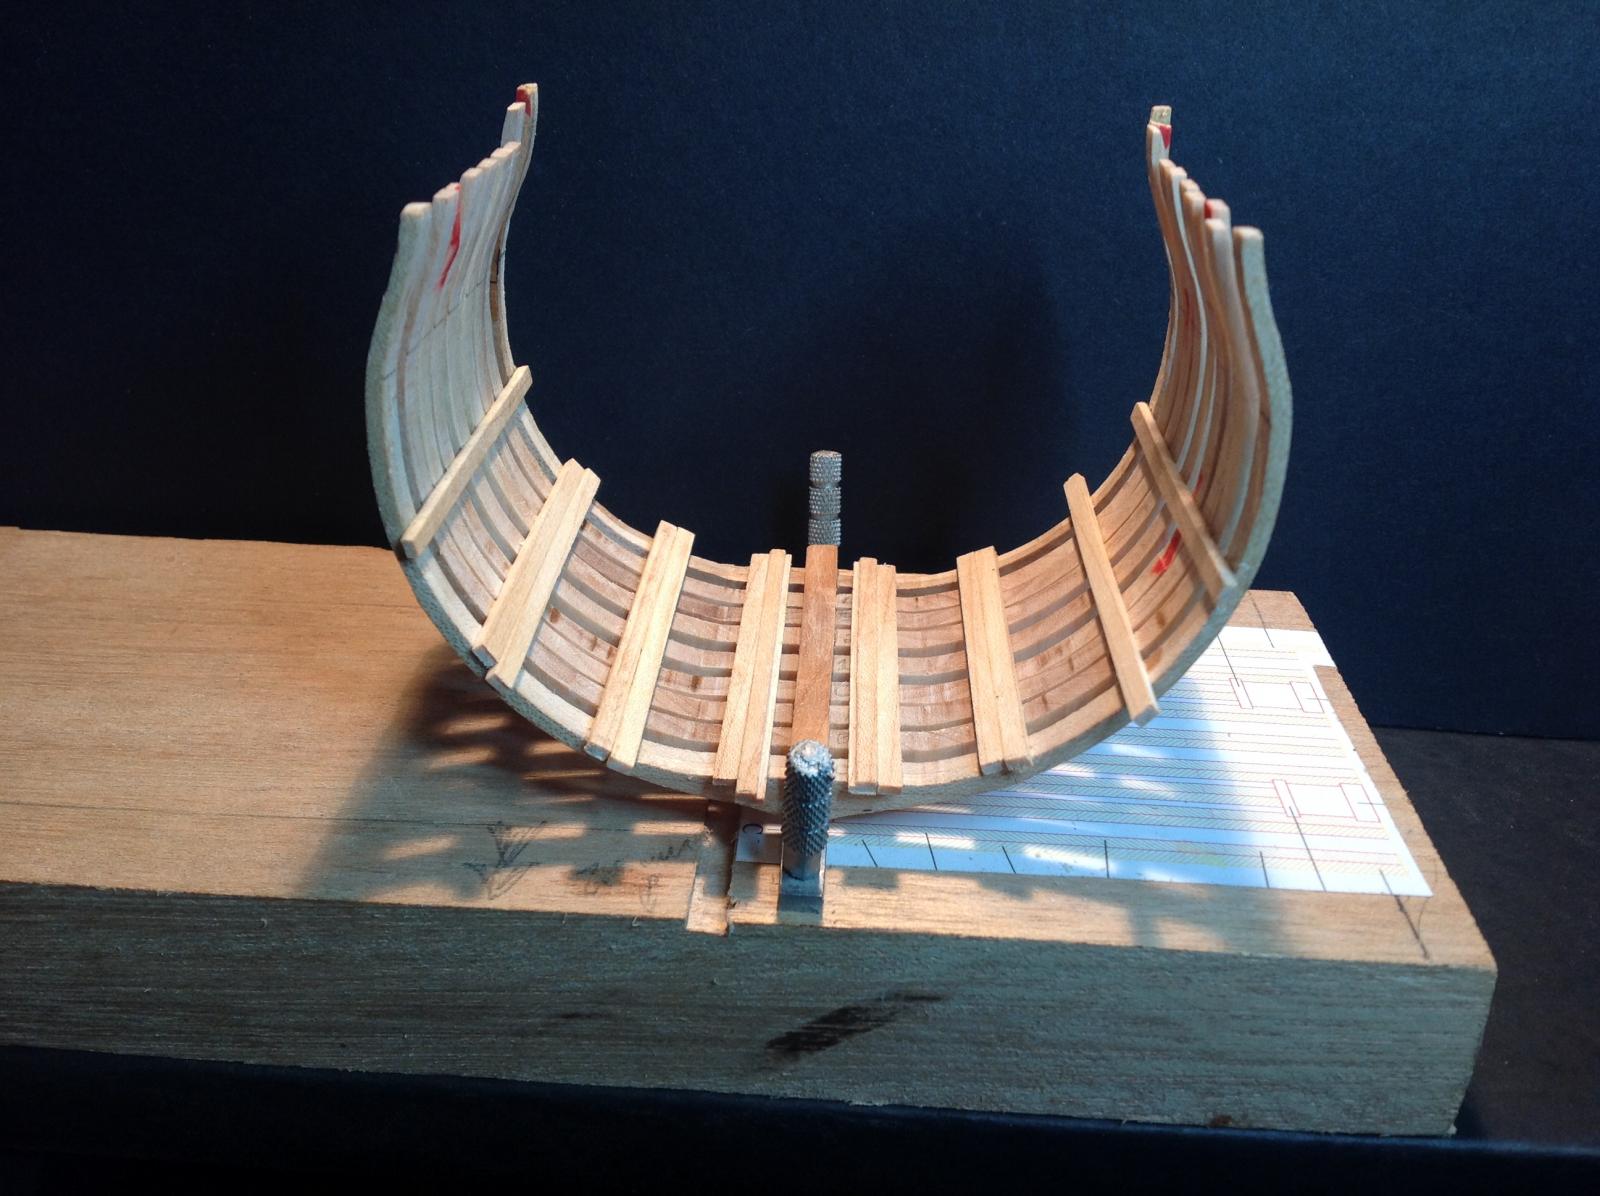
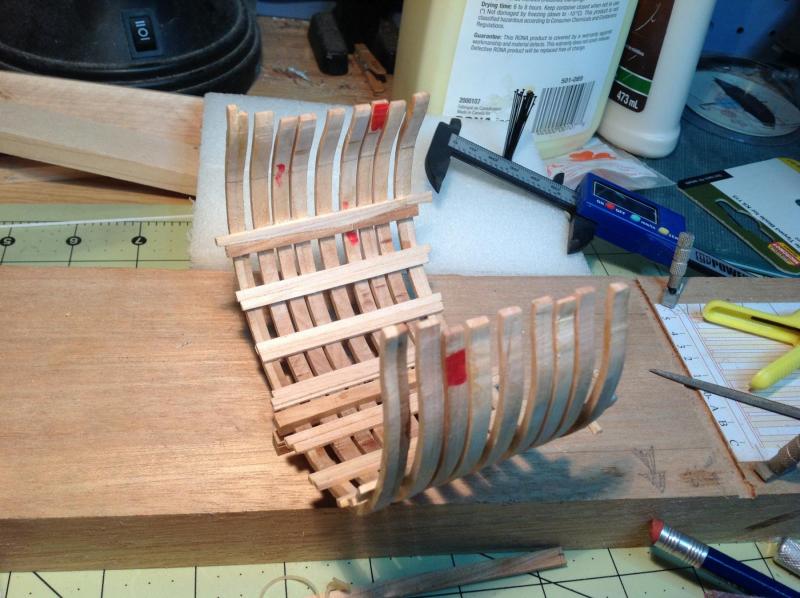
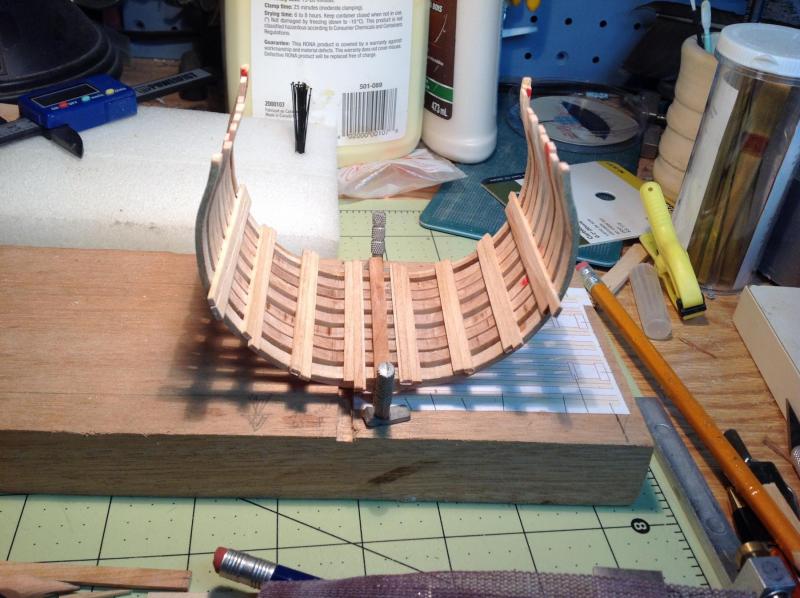
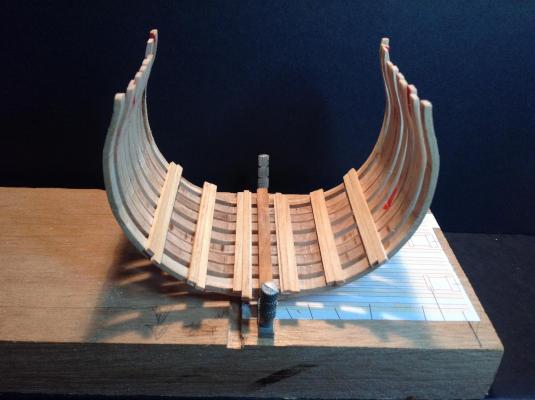
Thick stuff Just about fed up with my little table saw...particularly the ripping blade. I just can't get consistent results. I switched over to the cross cut blade and I now have less trouble setting it up and ripping strips, but this blade leaves much rougher edges that need sanding. Well, a little bit of elbow grease is worth keeping my blood pressure in check by reducing my frustrations! Moving along with 1.80 mm thick pieces for the thick stuff. I sanded the edges to get matched pairs of planks and marked them to make sure I butt up the right pieces and sides. Although I knew there was a reason, I could never figure out why the planks on the inside of the hull were different thicknesses. I figured it had something to do with stability of the hull, but why were they placed where they were? Now that I have built up some frames and I'm at this stage of my build I understand exactly why. The thick stuff planks line up perfectly with the joints in the futtocks, supporting them. Thick stuff lining up with a futtock joint - as seen from outside the hull: Why didn't I realize this before? I think there must have been thick stuff between my ears!