Gabek
-
Posts
310 -
Joined
-
Last visited
Content Type
Profiles
Forums
Gallery
Events
Everything posted by Gabek
-
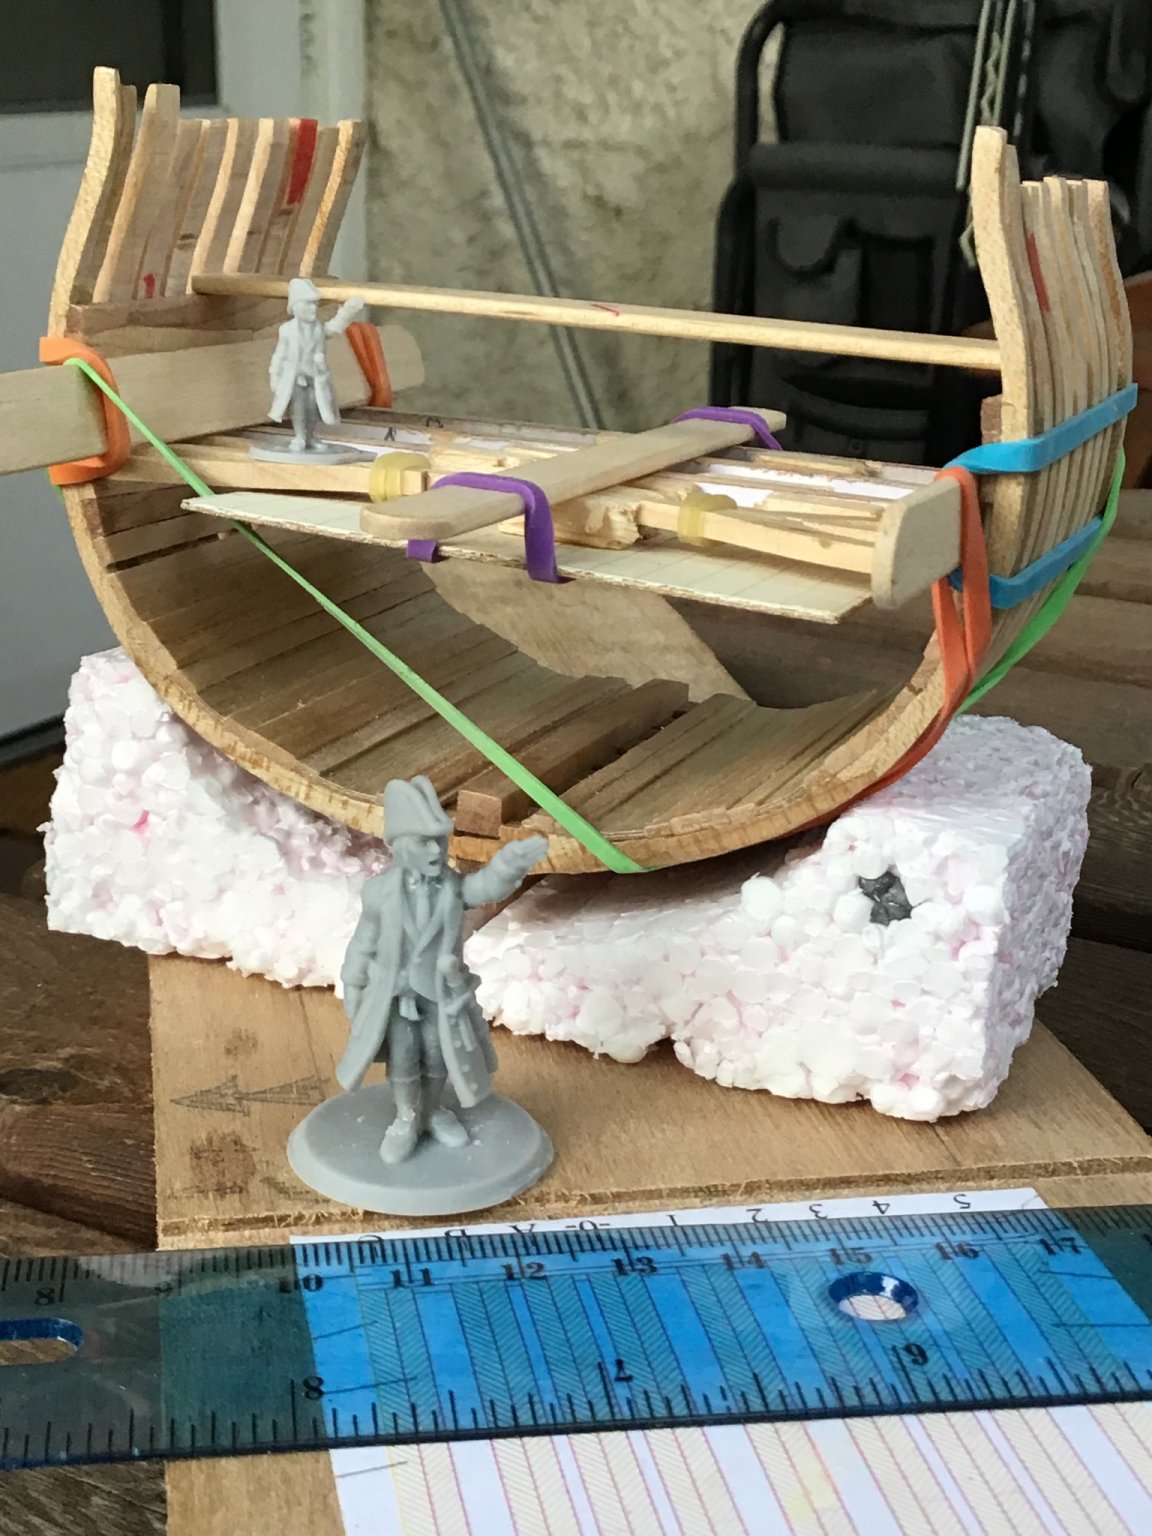
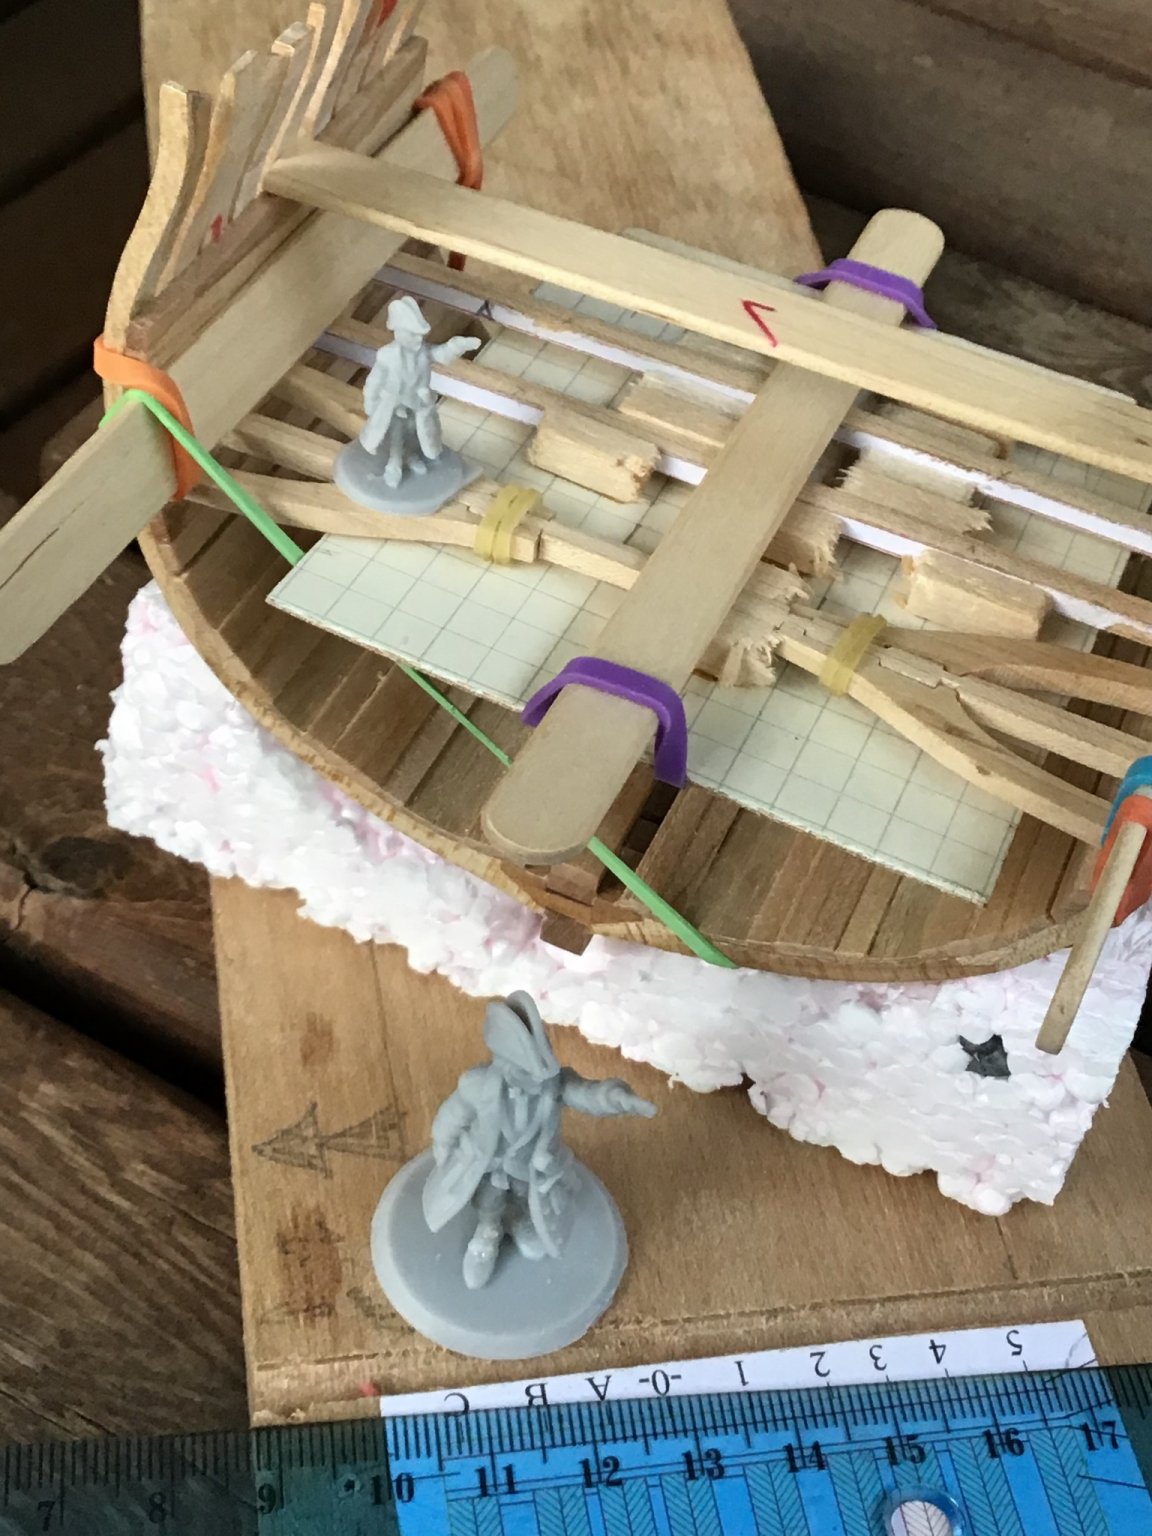
 Wow, another couple of years has passed! I’m still waiting for all that free time that retirement was supposed to give me… So, after two years I first had to figure out where I left off and get my brain back in the game of solving the riddle of my "micro Titan" (thanks Ray a.k.a ziled68 for the name!). After a day of reading all my past logs and advice from you folks I came to a couple decisions: I will need to finish the hold first: all building, painting and add-ons before building the deck. build the deck in place and not as a single unit off the model. One decision I still can’t seem to make yet is to build the well like Ainars Apalais' incredible example. The shot locker is the sticky point…it would impinge on the space under the main hatch. (Funny thing: I've been thinking about this for two years and one of the things that occurred to me was to build a cutaway main mast…and I see that Ainars did exactly that! 👏🏼) So, I set aside building the mess deck and started on pillars: I cut some 3.3mm square stock from birch and, after cutting to length, I used a knife to chamfer the middle 80% of the corners. I based this on Anatomy of the Ship: The Frigate Diana and a photo of the hold of HMS Trincomalee. Pillars in these ships were put in place with square tenons but I opted to use registration pins. So, I marked the centres on the ends of the pillars and drilled holes for brass wire. I the marked out where on the keelson the pillars were centred and drilled a corresponding hole. It didn’t take long to cut short lengths of brass wire and dry fit the pillars. I need to do some more preparations in the hold before I glue these in place. And may I introduce “Number One” - a figurine I designed on Heroforge.com and printed at 1/96 scale on my Elegoo Mars resin printer. (Another reason I haven’t been building the Triton. I'll be posting about this in another topic shortly.) Good to be back in the shipyard!
-
3d printing crew figures
Gabek replied to highlanderburial's topic in 3D-Printing and Laser-Cutting.
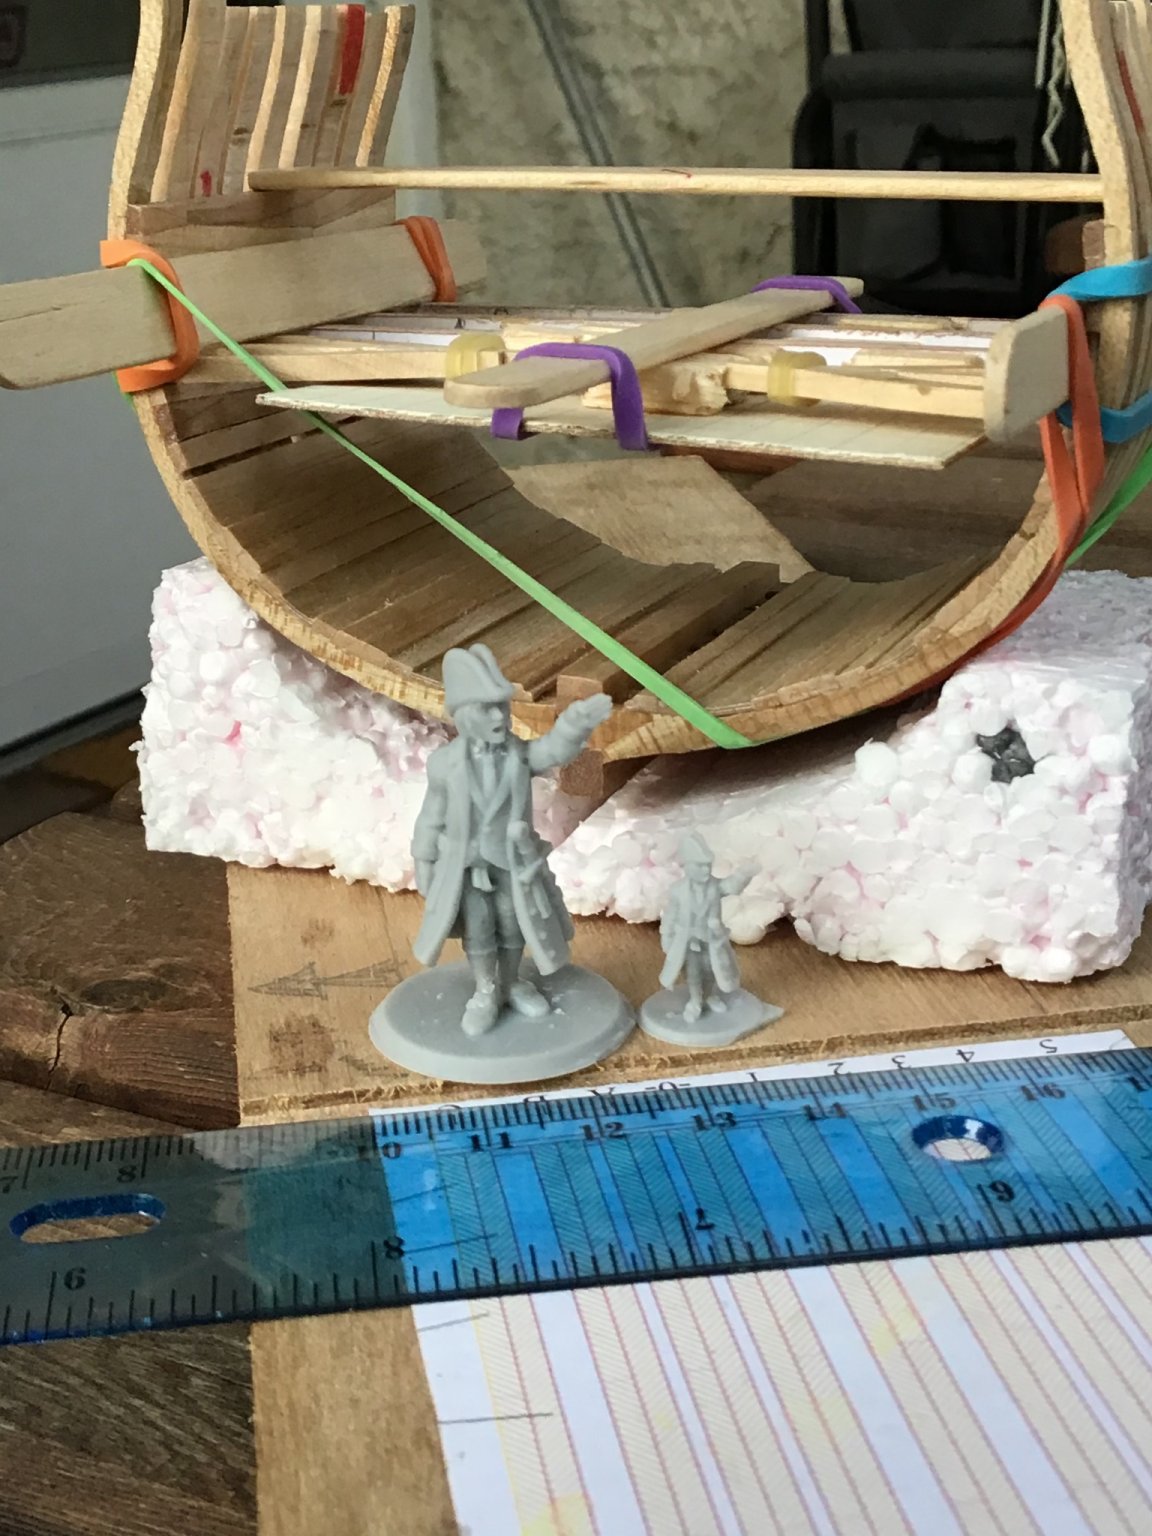
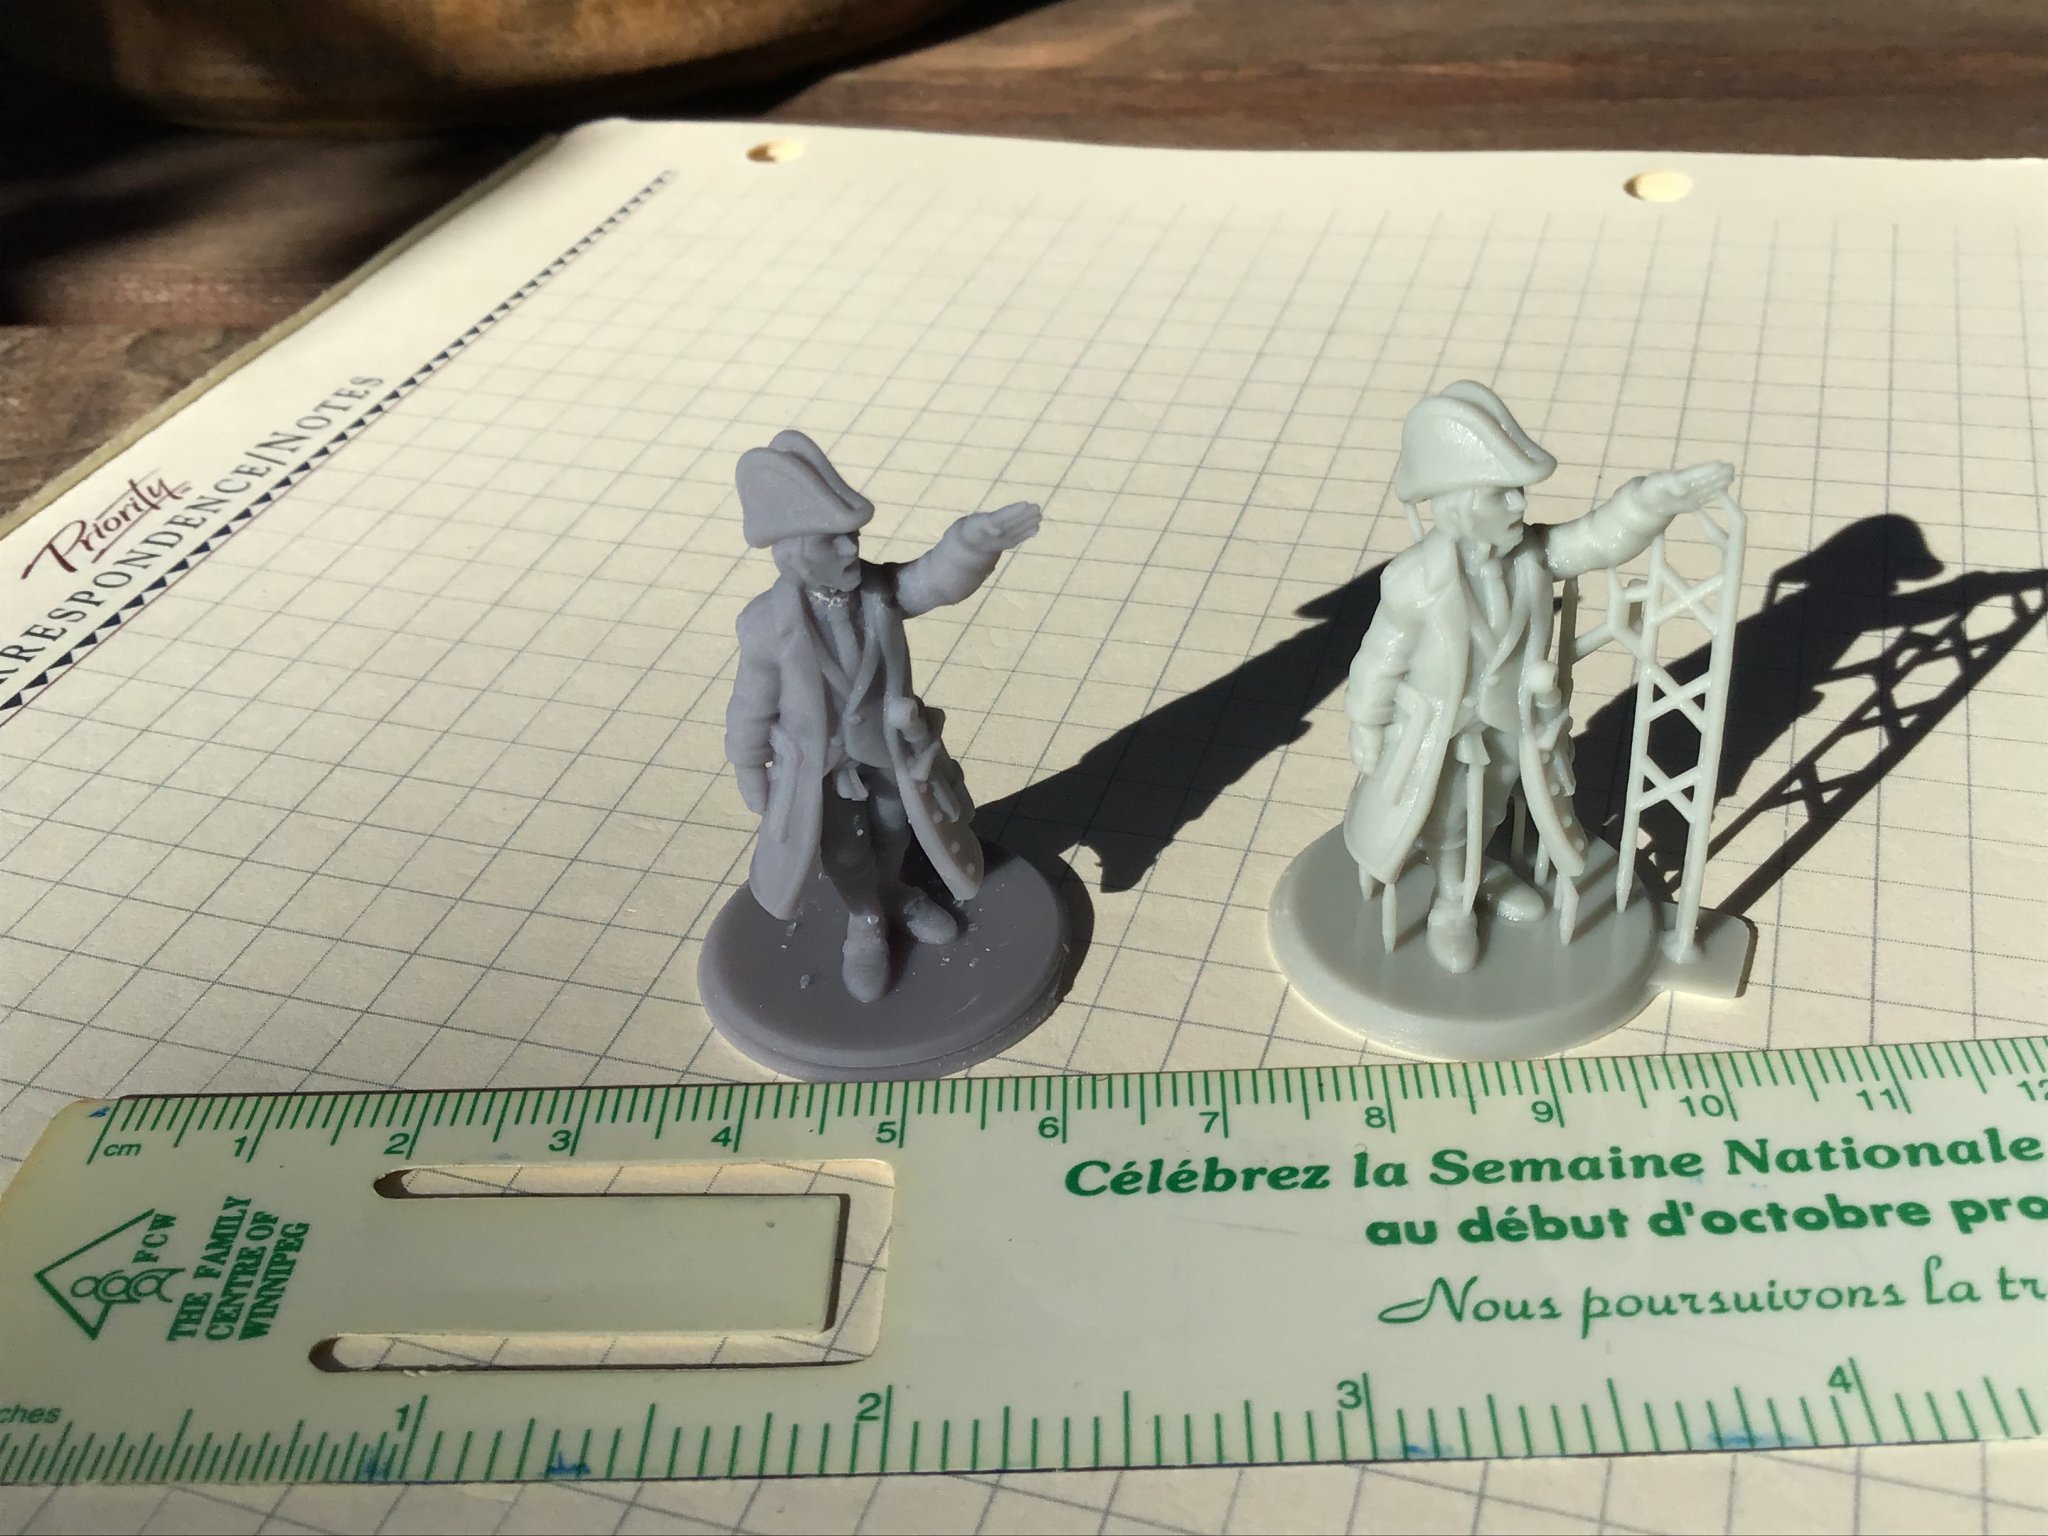
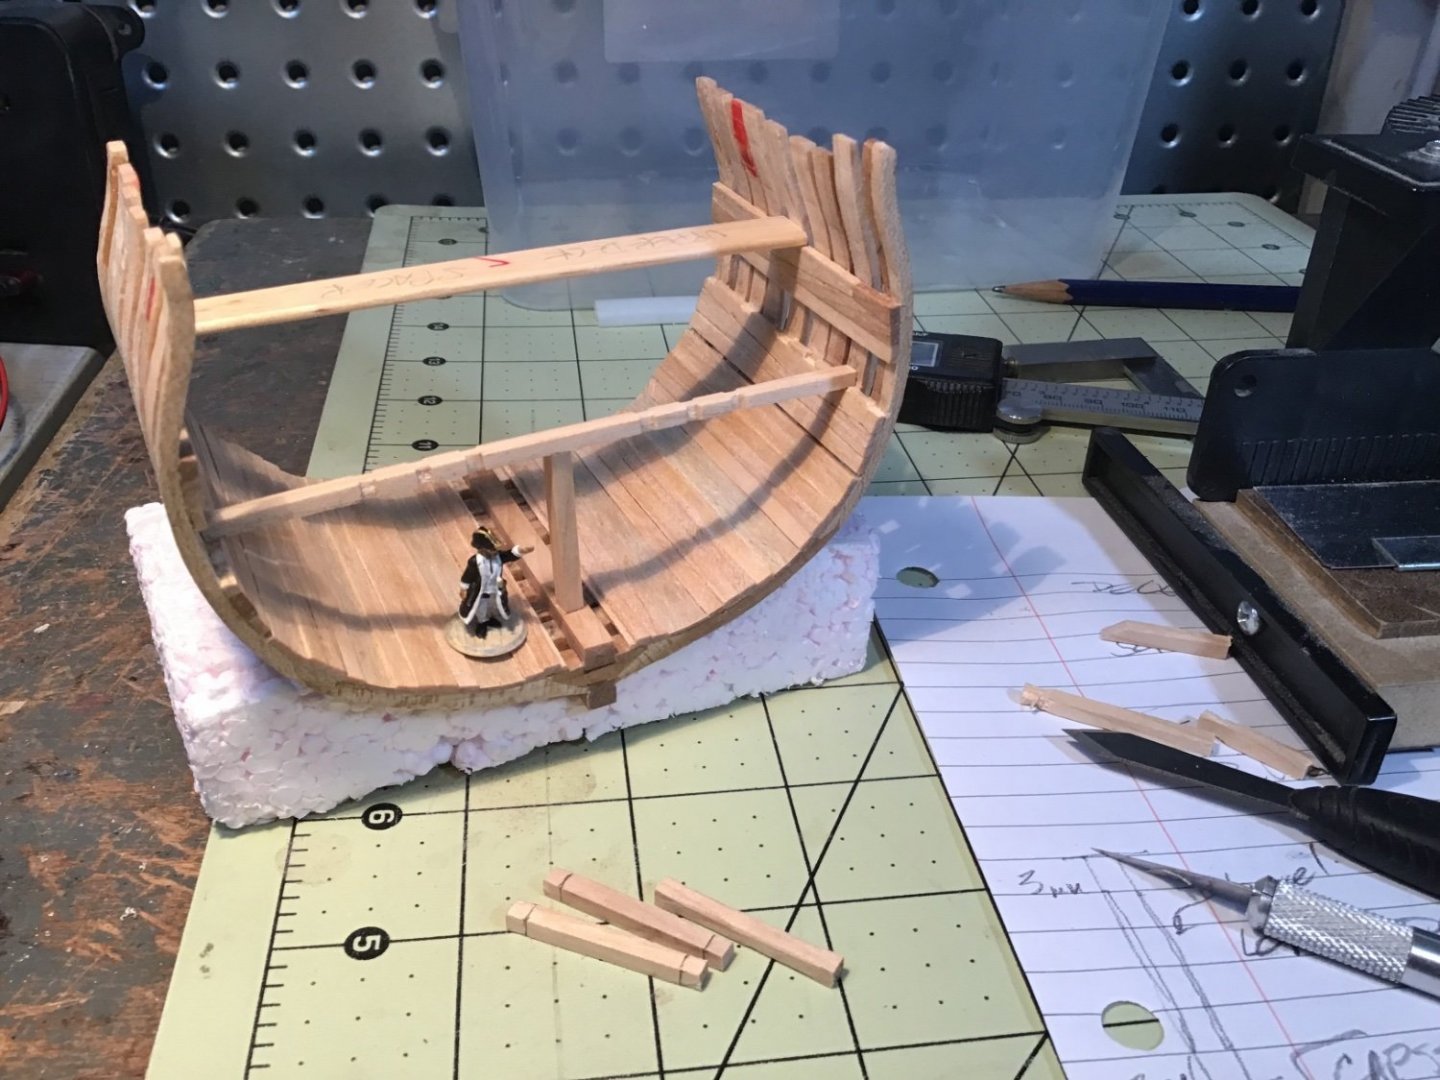
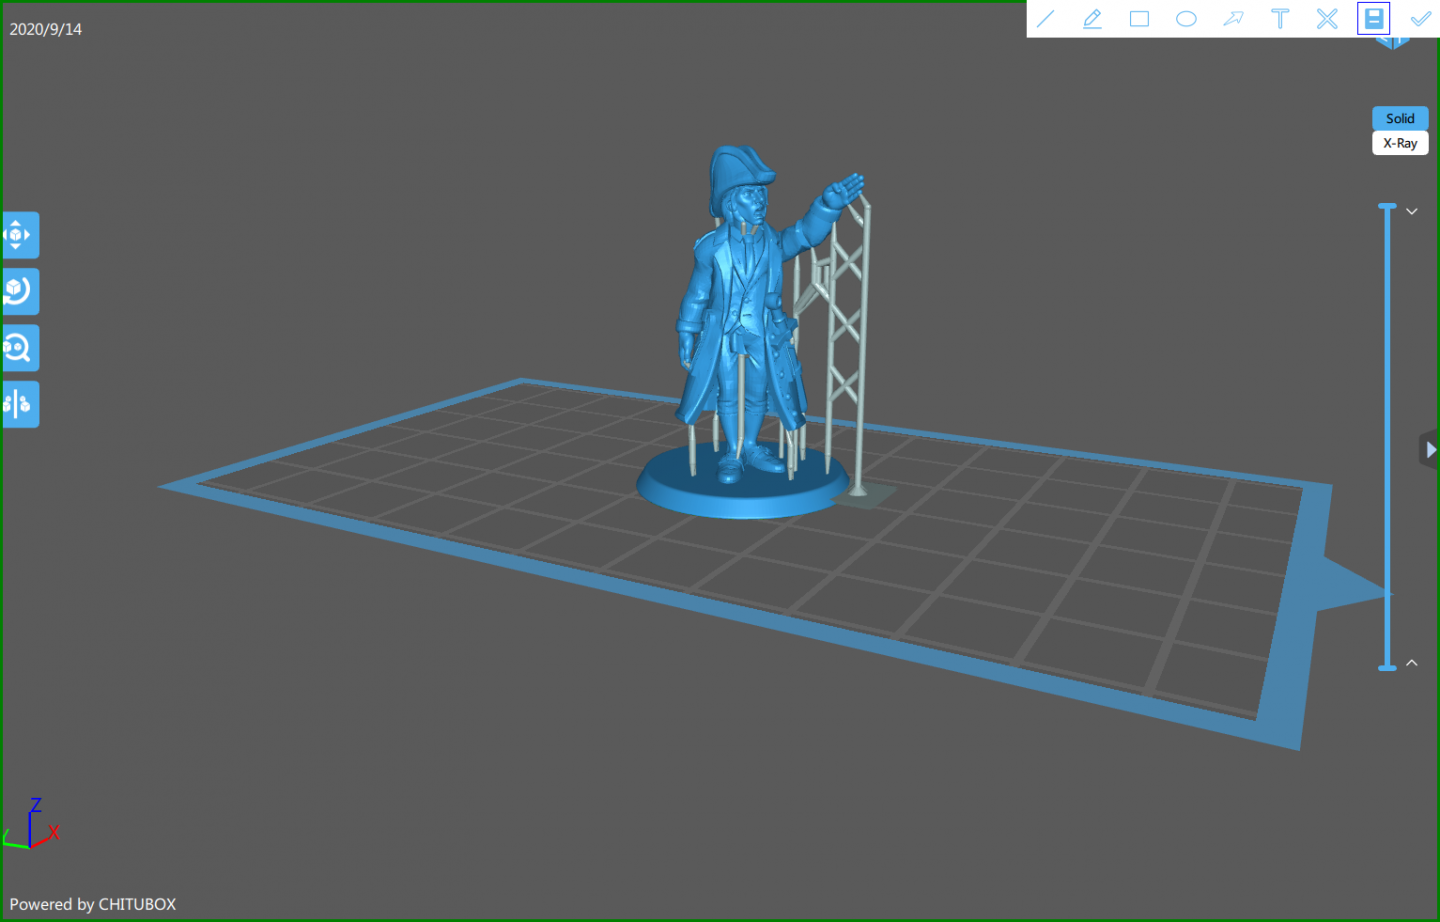
Back from the cottage and I printed off a 1/96 version of my Hero Forge figure. It took only a few minutes to rescale the original in the Chitubox software that the Elegoo printer uses. I did increase the resolution as well. Now it’s more in line with my "micro" HMS Triton cross-section in progress (please pardon the jig I have currently attached). Also, when I created the figure I didn’t pay attention to my options for the base, some of which would have been much easier to cut off when the time comes. I've got a few more software tools I'm going to explore to create more poses and ratings and get back to you folks. Clear skies! - Gabe


- 51 replies
-
- 10
-

-
3d printing crew figures
Gabek replied to highlanderburial's topic in 3D-Printing and Laser-Cutting.
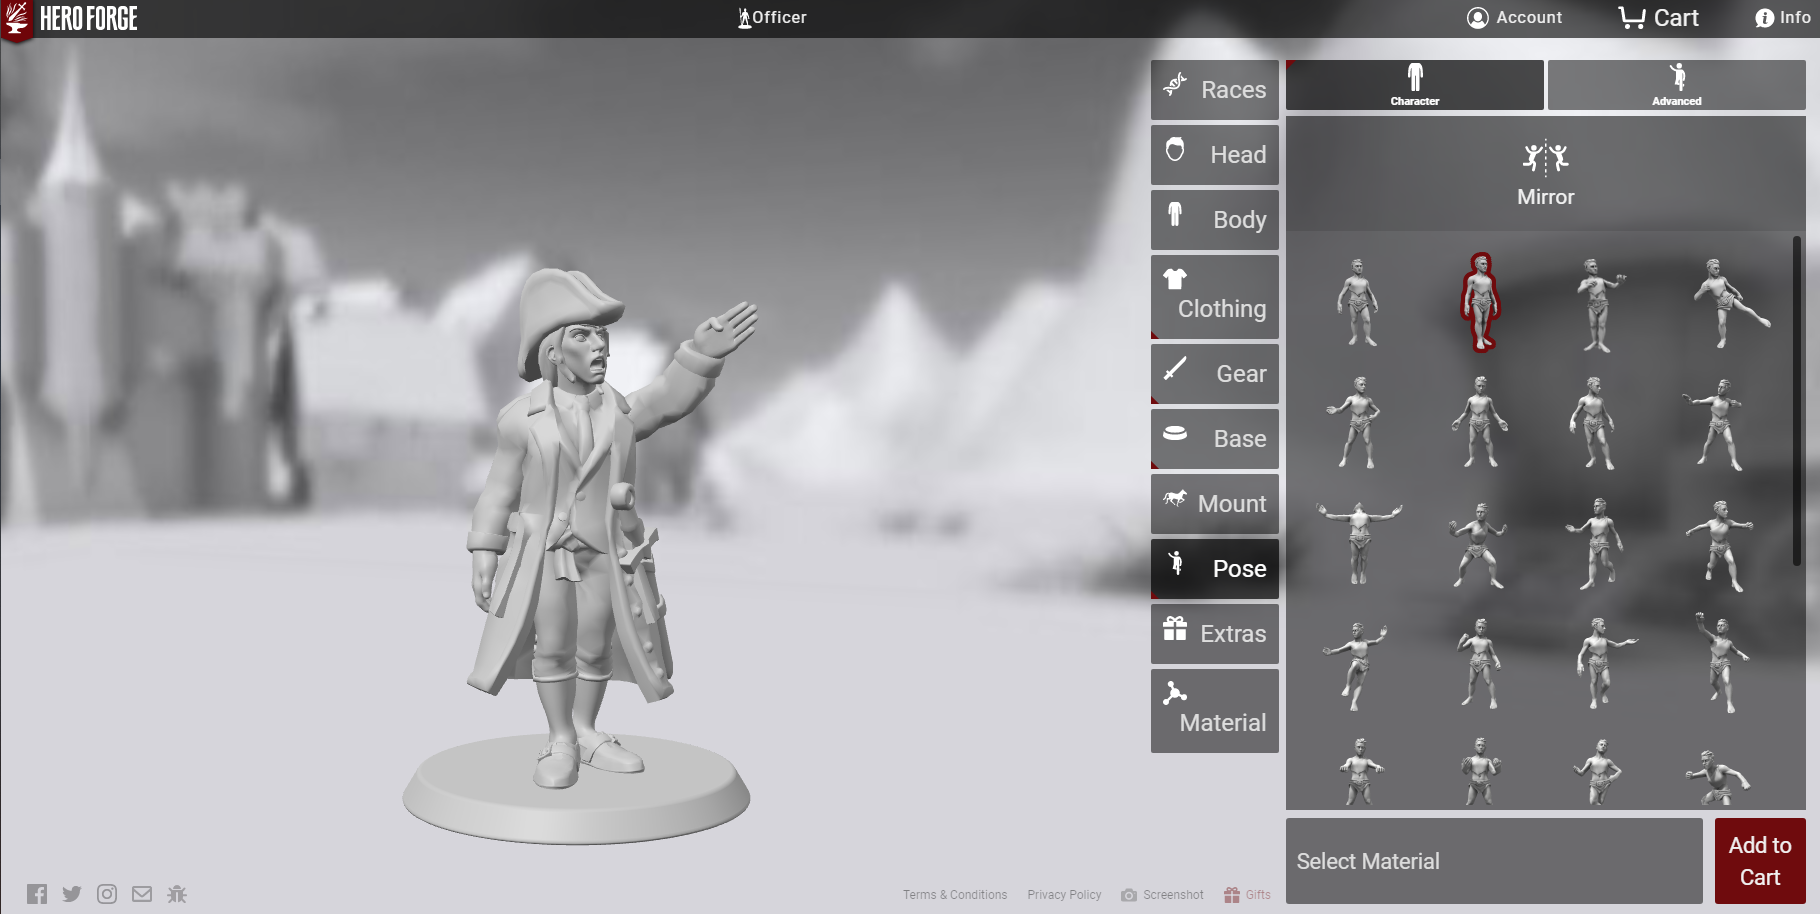
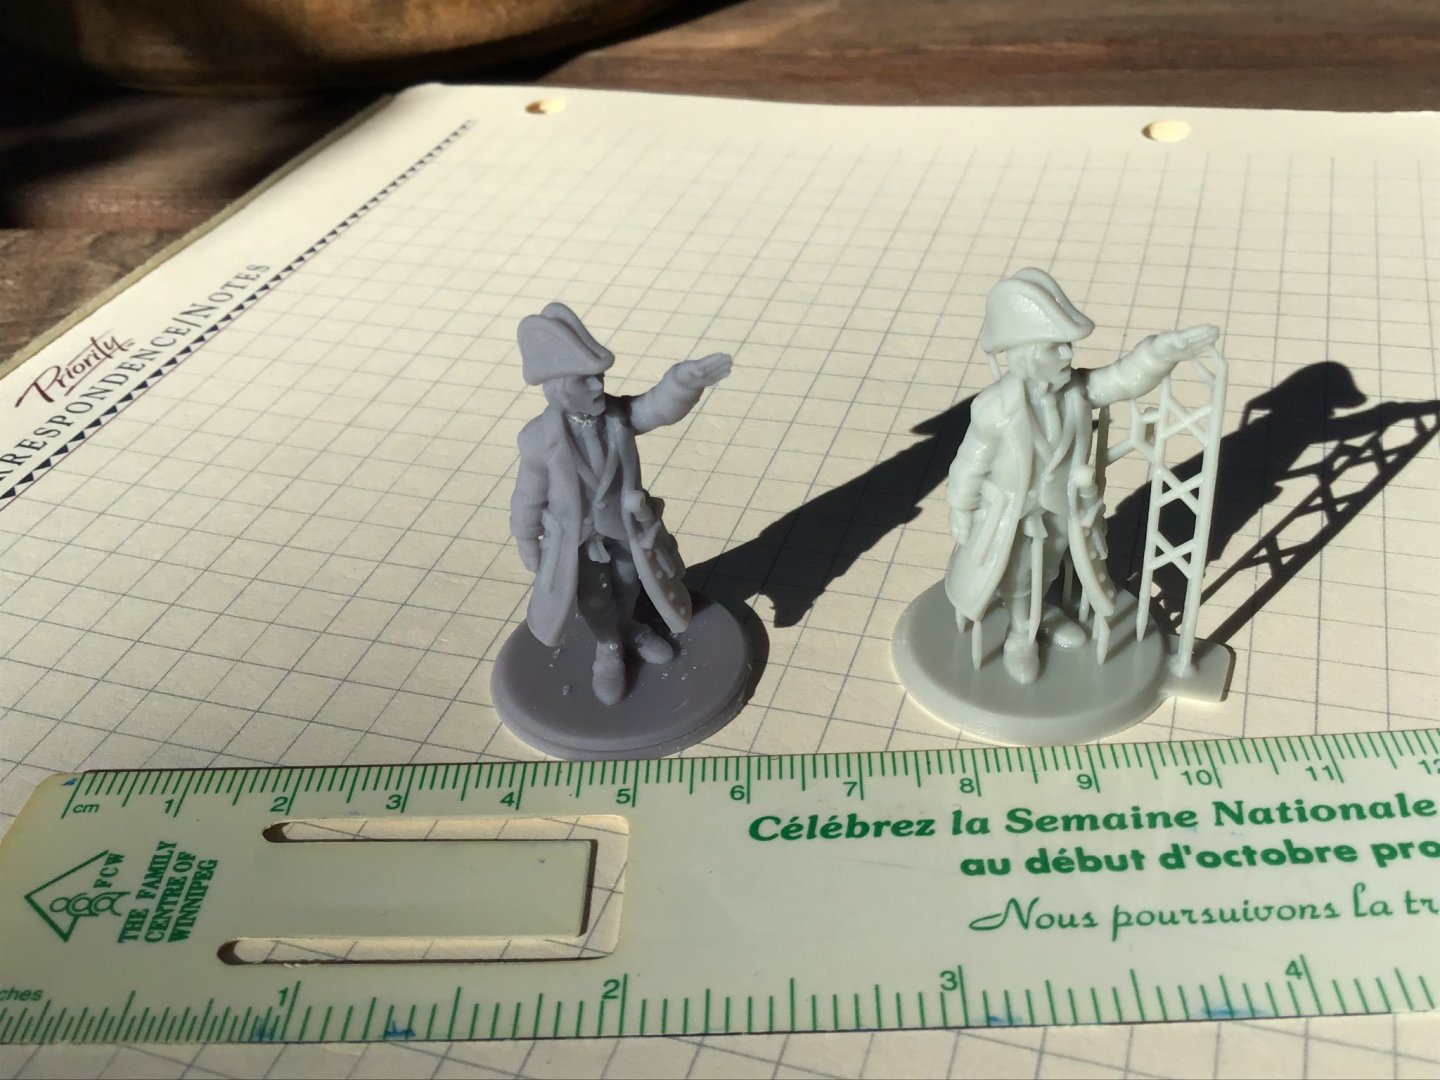
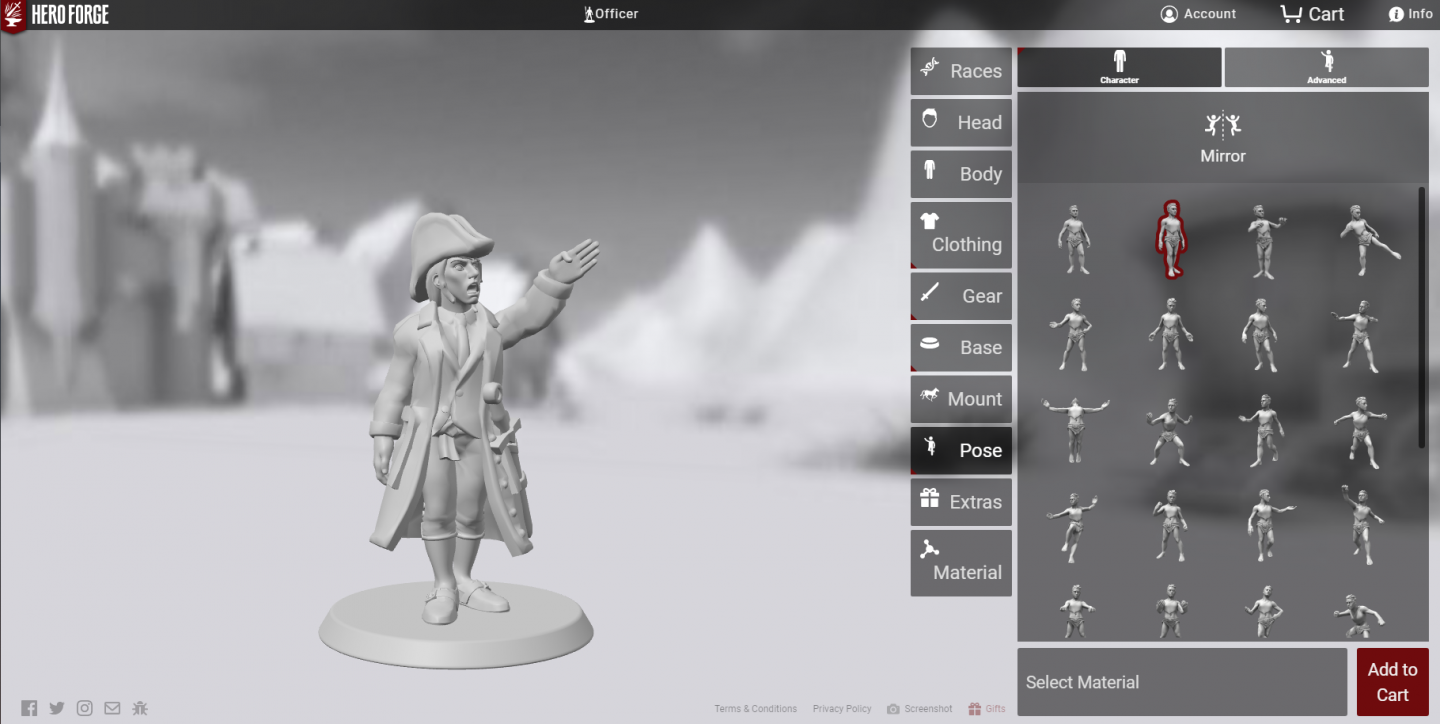
Thanks for the replies. With respect to figures - I have been investigating several online figure creators that allow you to download an .stl file for 3D printing. Most of these are geared toward fantasy and model railroad figures and kind of miss out on 18th and early 19th century maritime figures that I'm interested in. I managed to make a "navy-like" officer in Hero Forge (heroforge.com). The process is fairly straight forward - you pick and choose pre-made bodies, parts, clothes, poses to assemble a figure. You can customise the pose and, when you're ready, you pay $7.99 (US) to download the .stl file. You can actually have them print the figure for you for $19.99. They state it is roughly 1:48 scale. (25mm or 30mm). I bought the download (emailed to me in maybe 30 minutes) and opened it in ChituBox software (free) in order to create a file for my Elegoo Mars resin printer. i added supports (easy) to make sure that the model prints correctly. There are many types and colours of resins you can use for the printing. I purchased a standard grey UV-sensitive resin which must be cleaned in 100% ethanol/isopropanol and, since my workshop is next to my furnace, I quickly purchased a water-washable resin. (Winter is coming and I don't want to wash parts in 100% alcohol outdoors when it's -25C!) Here are the results using the two resins: Back to the ChituBox software to scale that figure to 1/92. I'll print that size shortly and get back to you folks. Clear skies! Gabe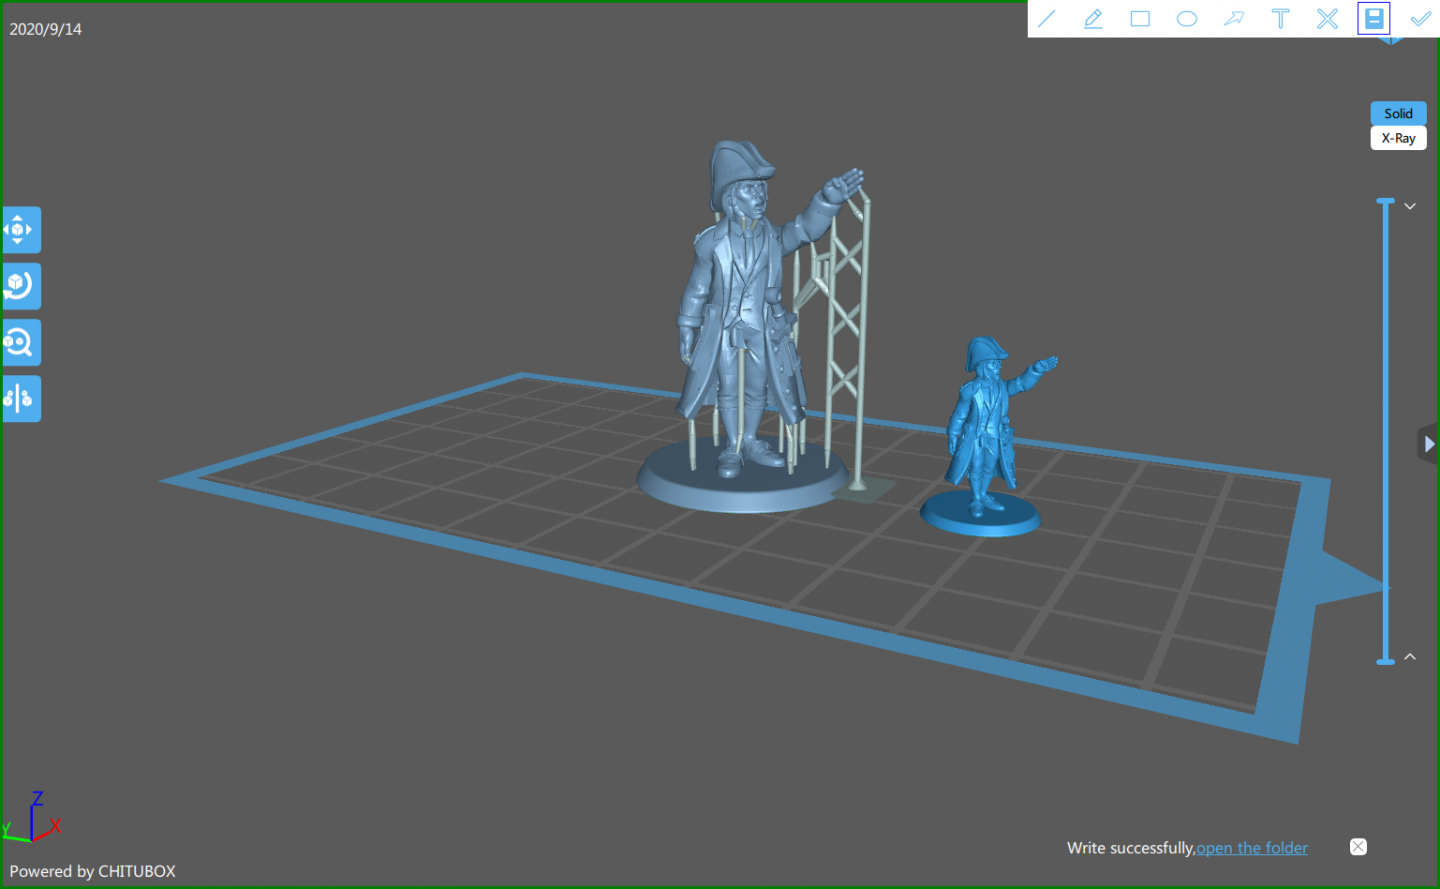
- 51 replies
-
- 10
-
-
3d printing crew figures
Gabek replied to highlanderburial's topic in 3D-Printing and Laser-Cutting.
Oh wow! I just purchased an Elegoo Mars resin printer to do exactly what you are doing! So glad that I found your post. I'm having a blast testing out my printer and can't wait to create some crew, fabricate parts and make ornamentation for my models. Great job! - Gabe -
Excellent work, Rob! I can pretty much guarantee that I'll be copying your method! Clear skies, Gabe
-
Wonderful work, Graham! The belfry looks awesome - nice touch and clever how you pulled it off. Clear skies! Gabe
-
Just wonderful, Nils! Admirable work as usual. And a truly remarkable body of work. Clear skies, Gabe
- 38 replies
-
- 2
-
-
- billing boats
- hjejlen
- (and 2 more)
-
Thanks, Edward! The nice thing about small pieces is that you have very little material to remove. The bad thing is you have very little material left behind! 😆 NOT looking forward to the hanging knees. Too much shaping, too little space. Any advice would be welcome! Regards, Gabe
-
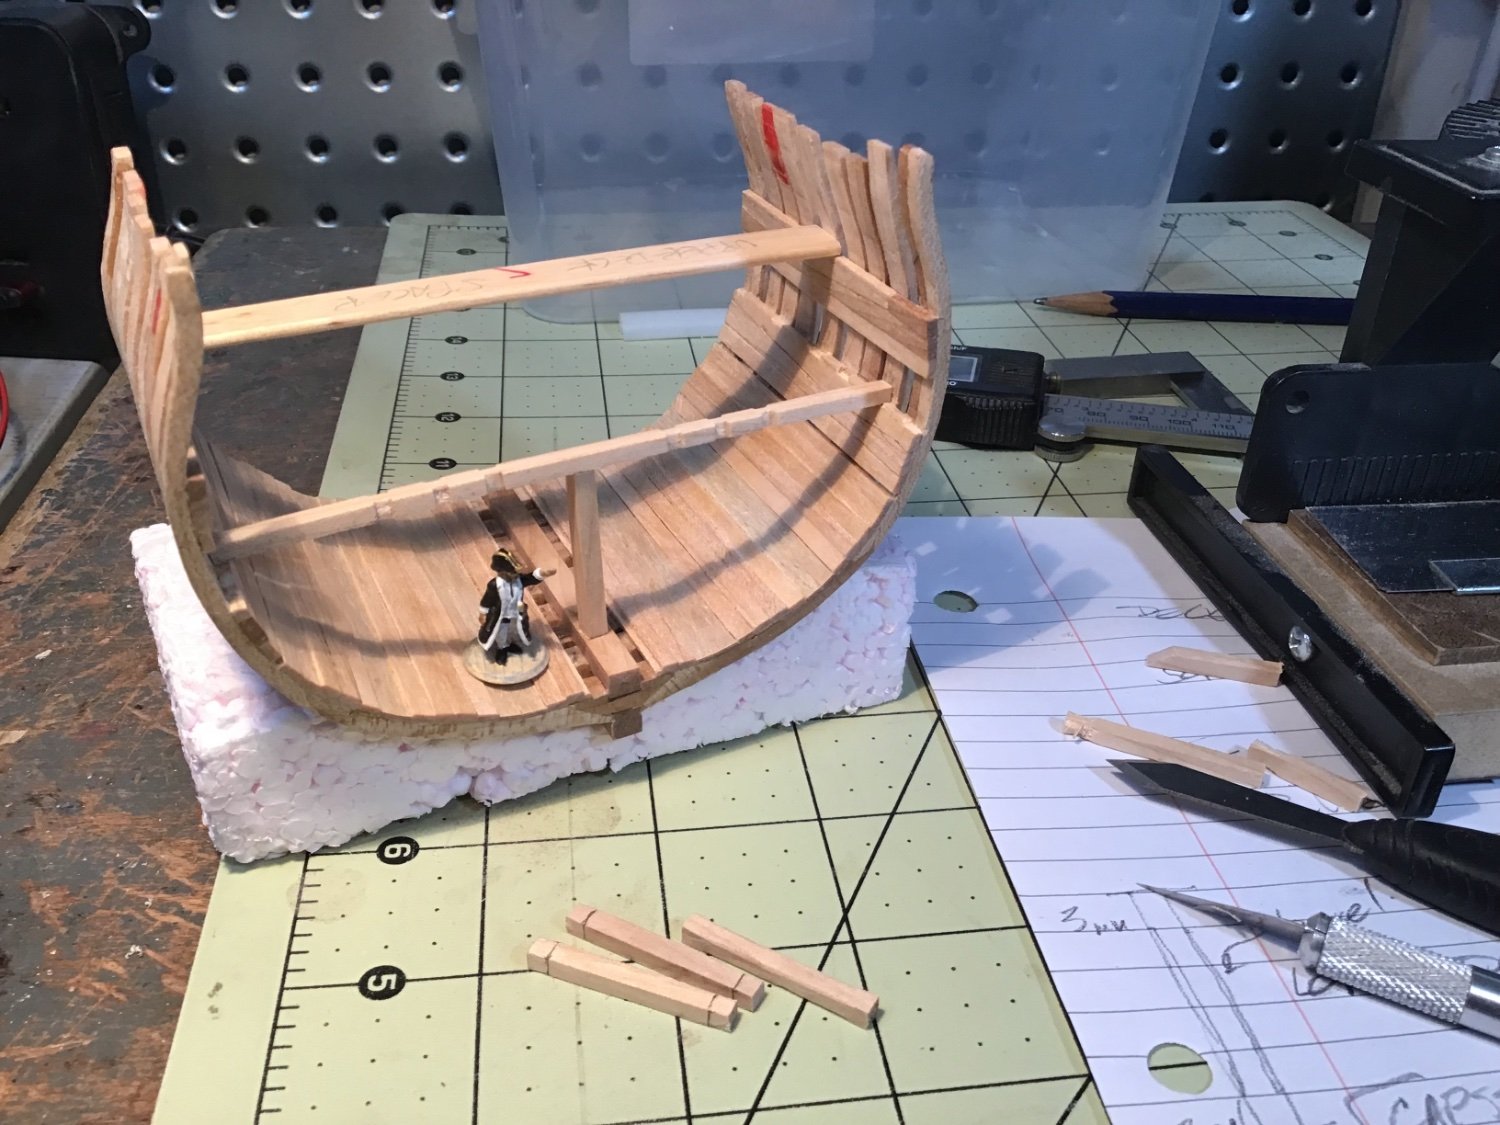
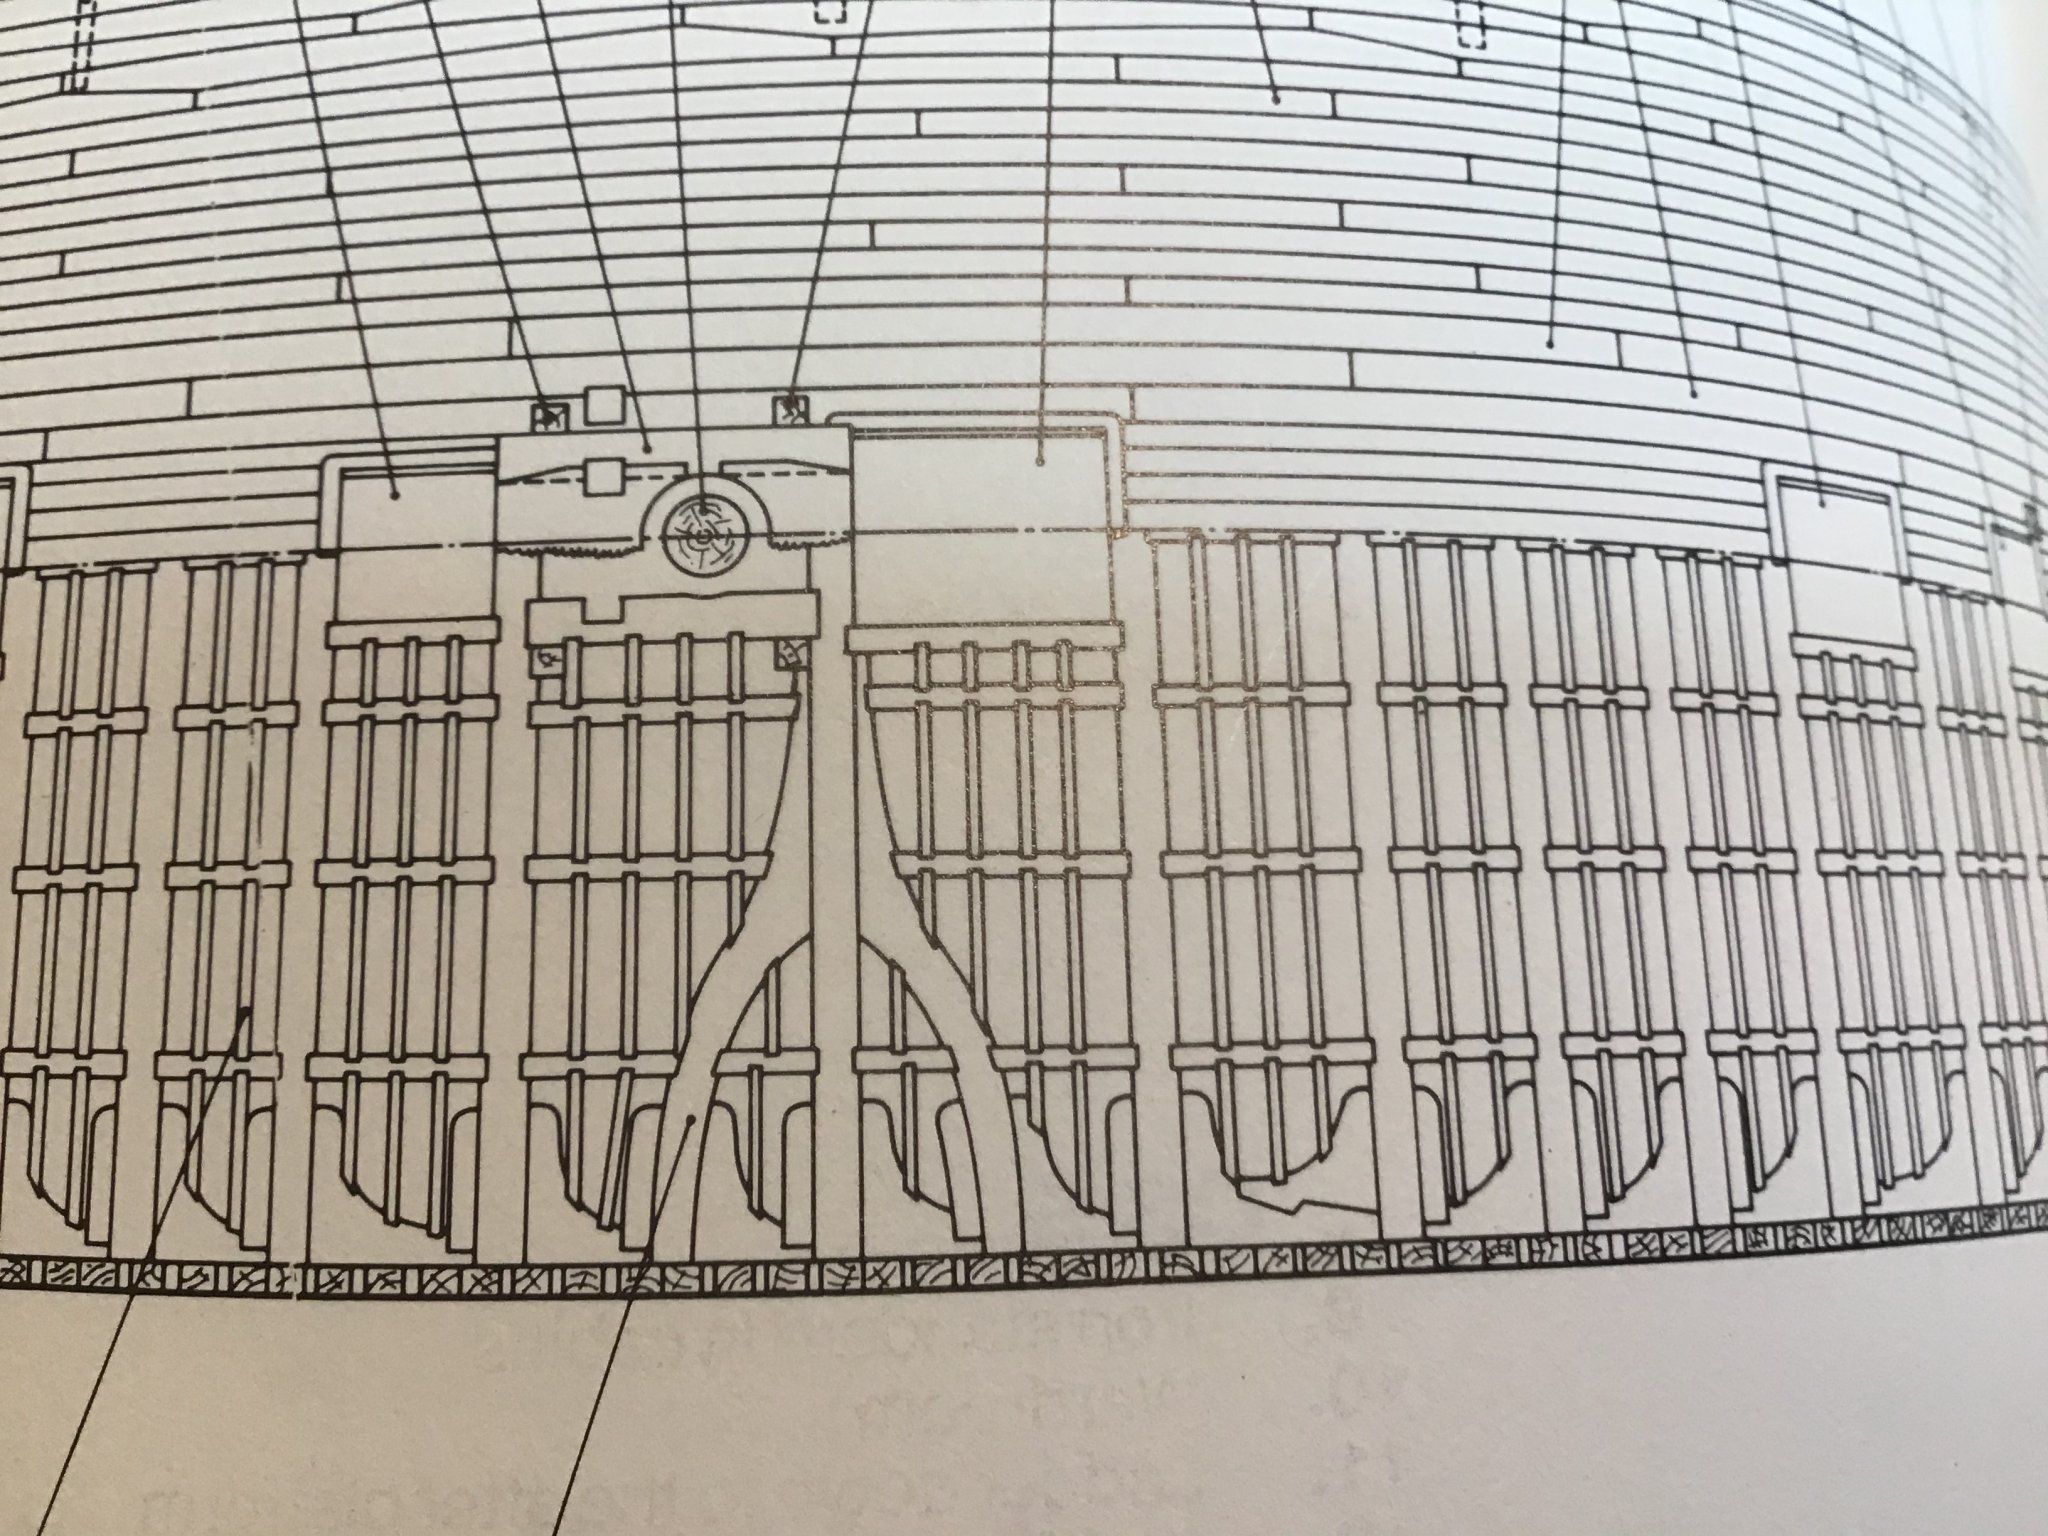
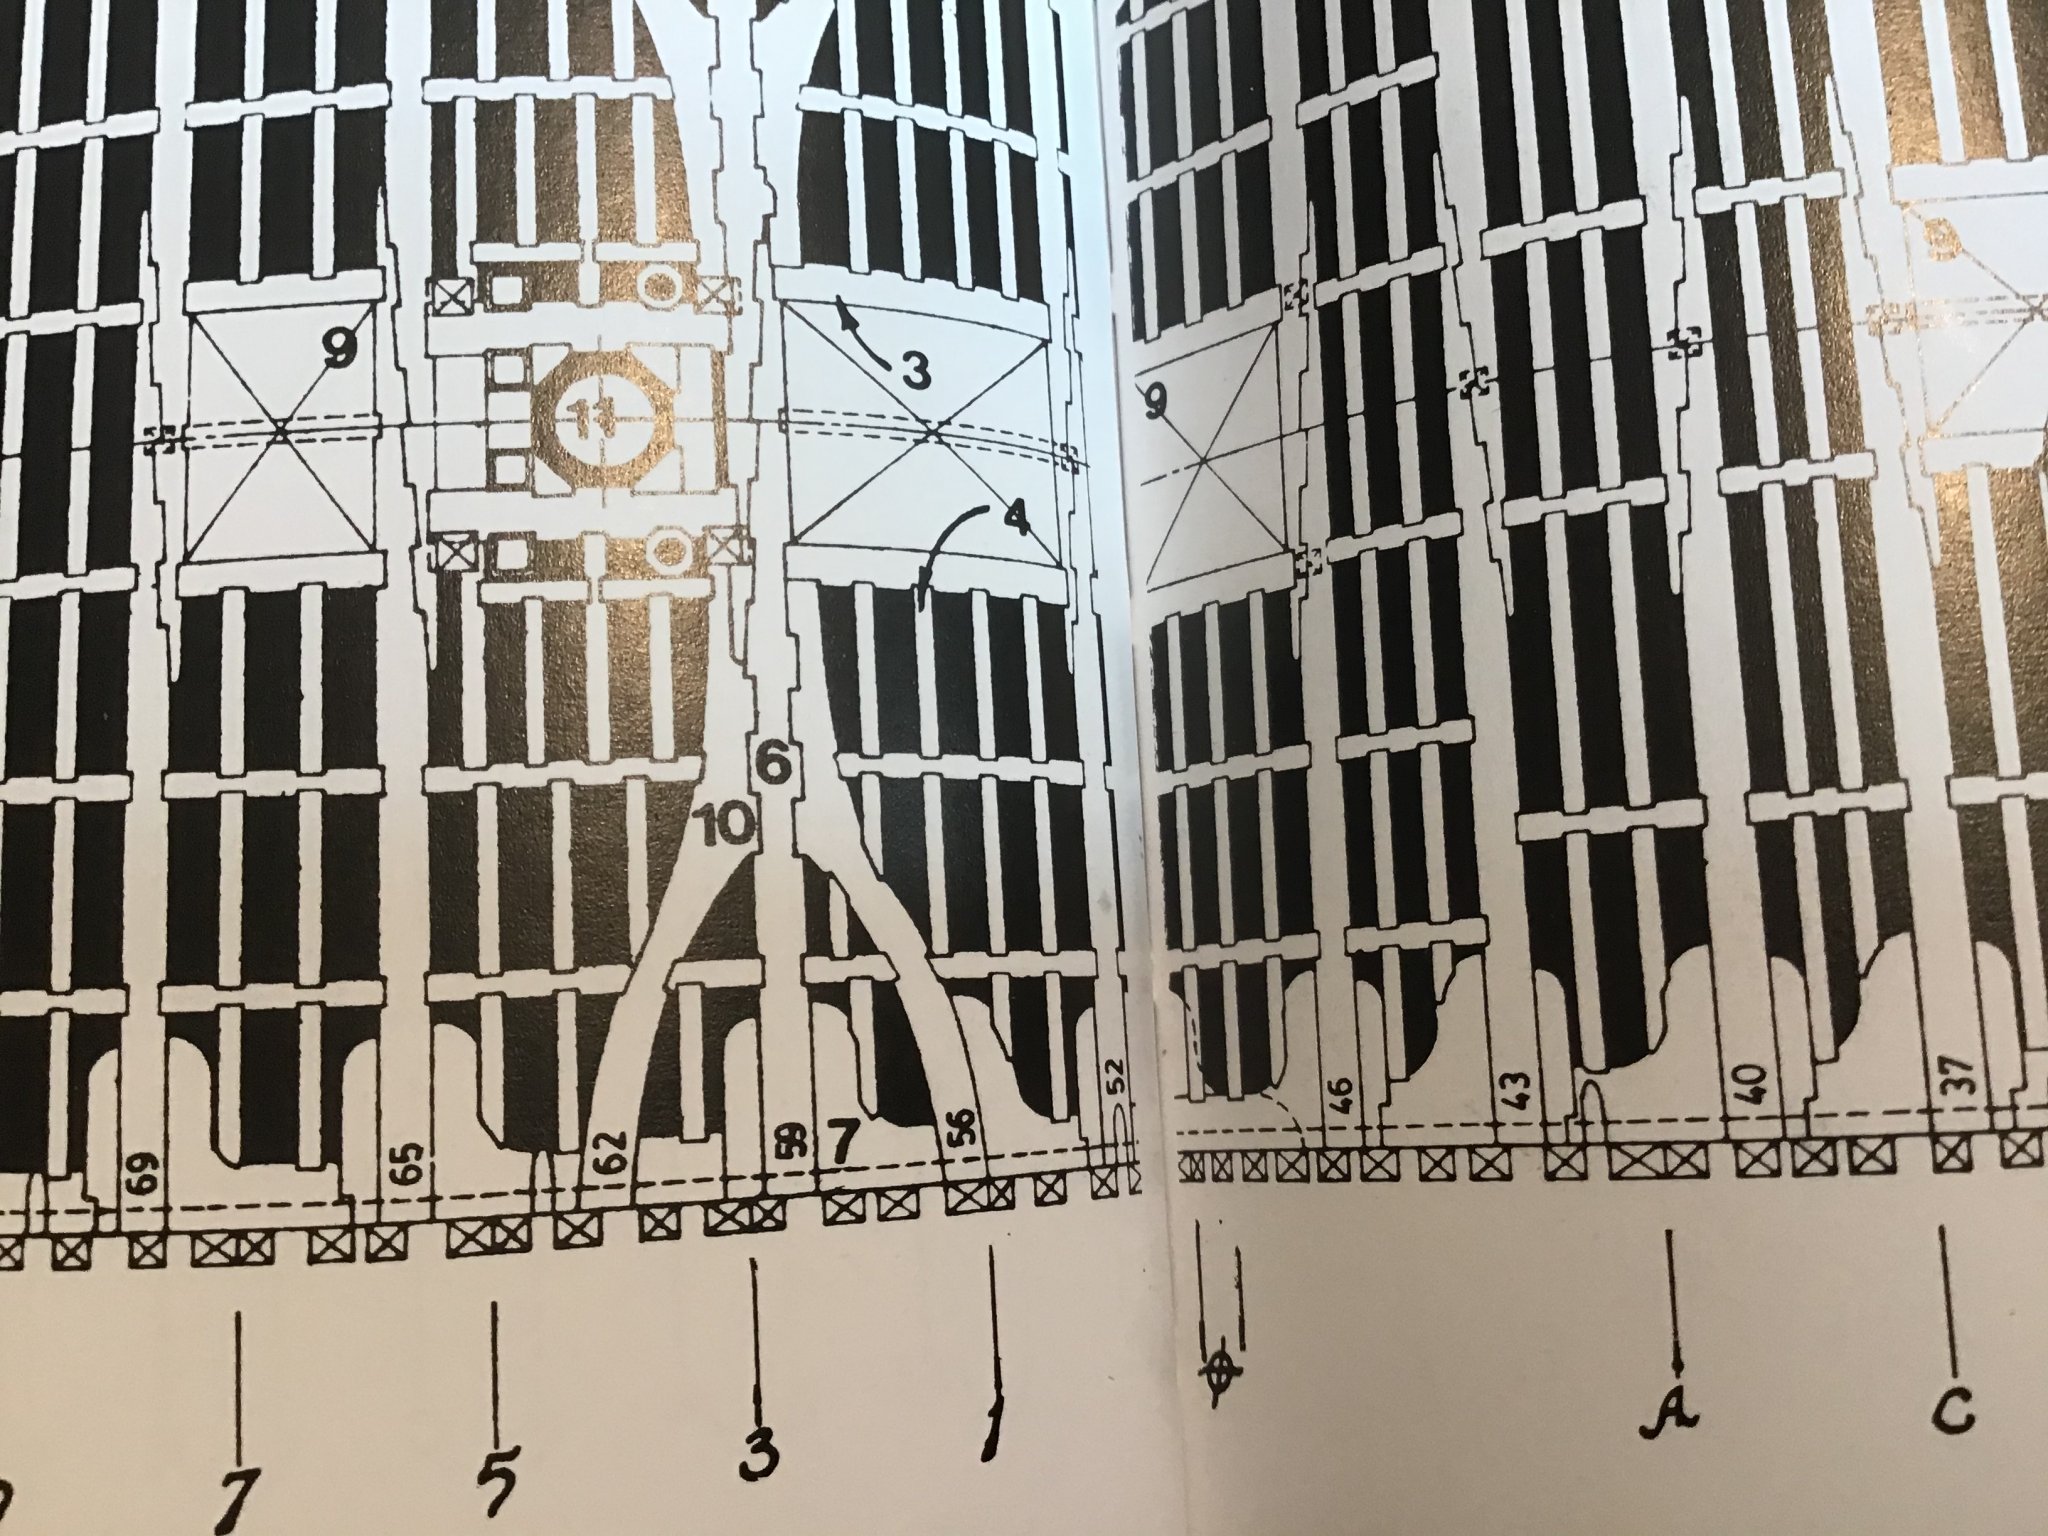
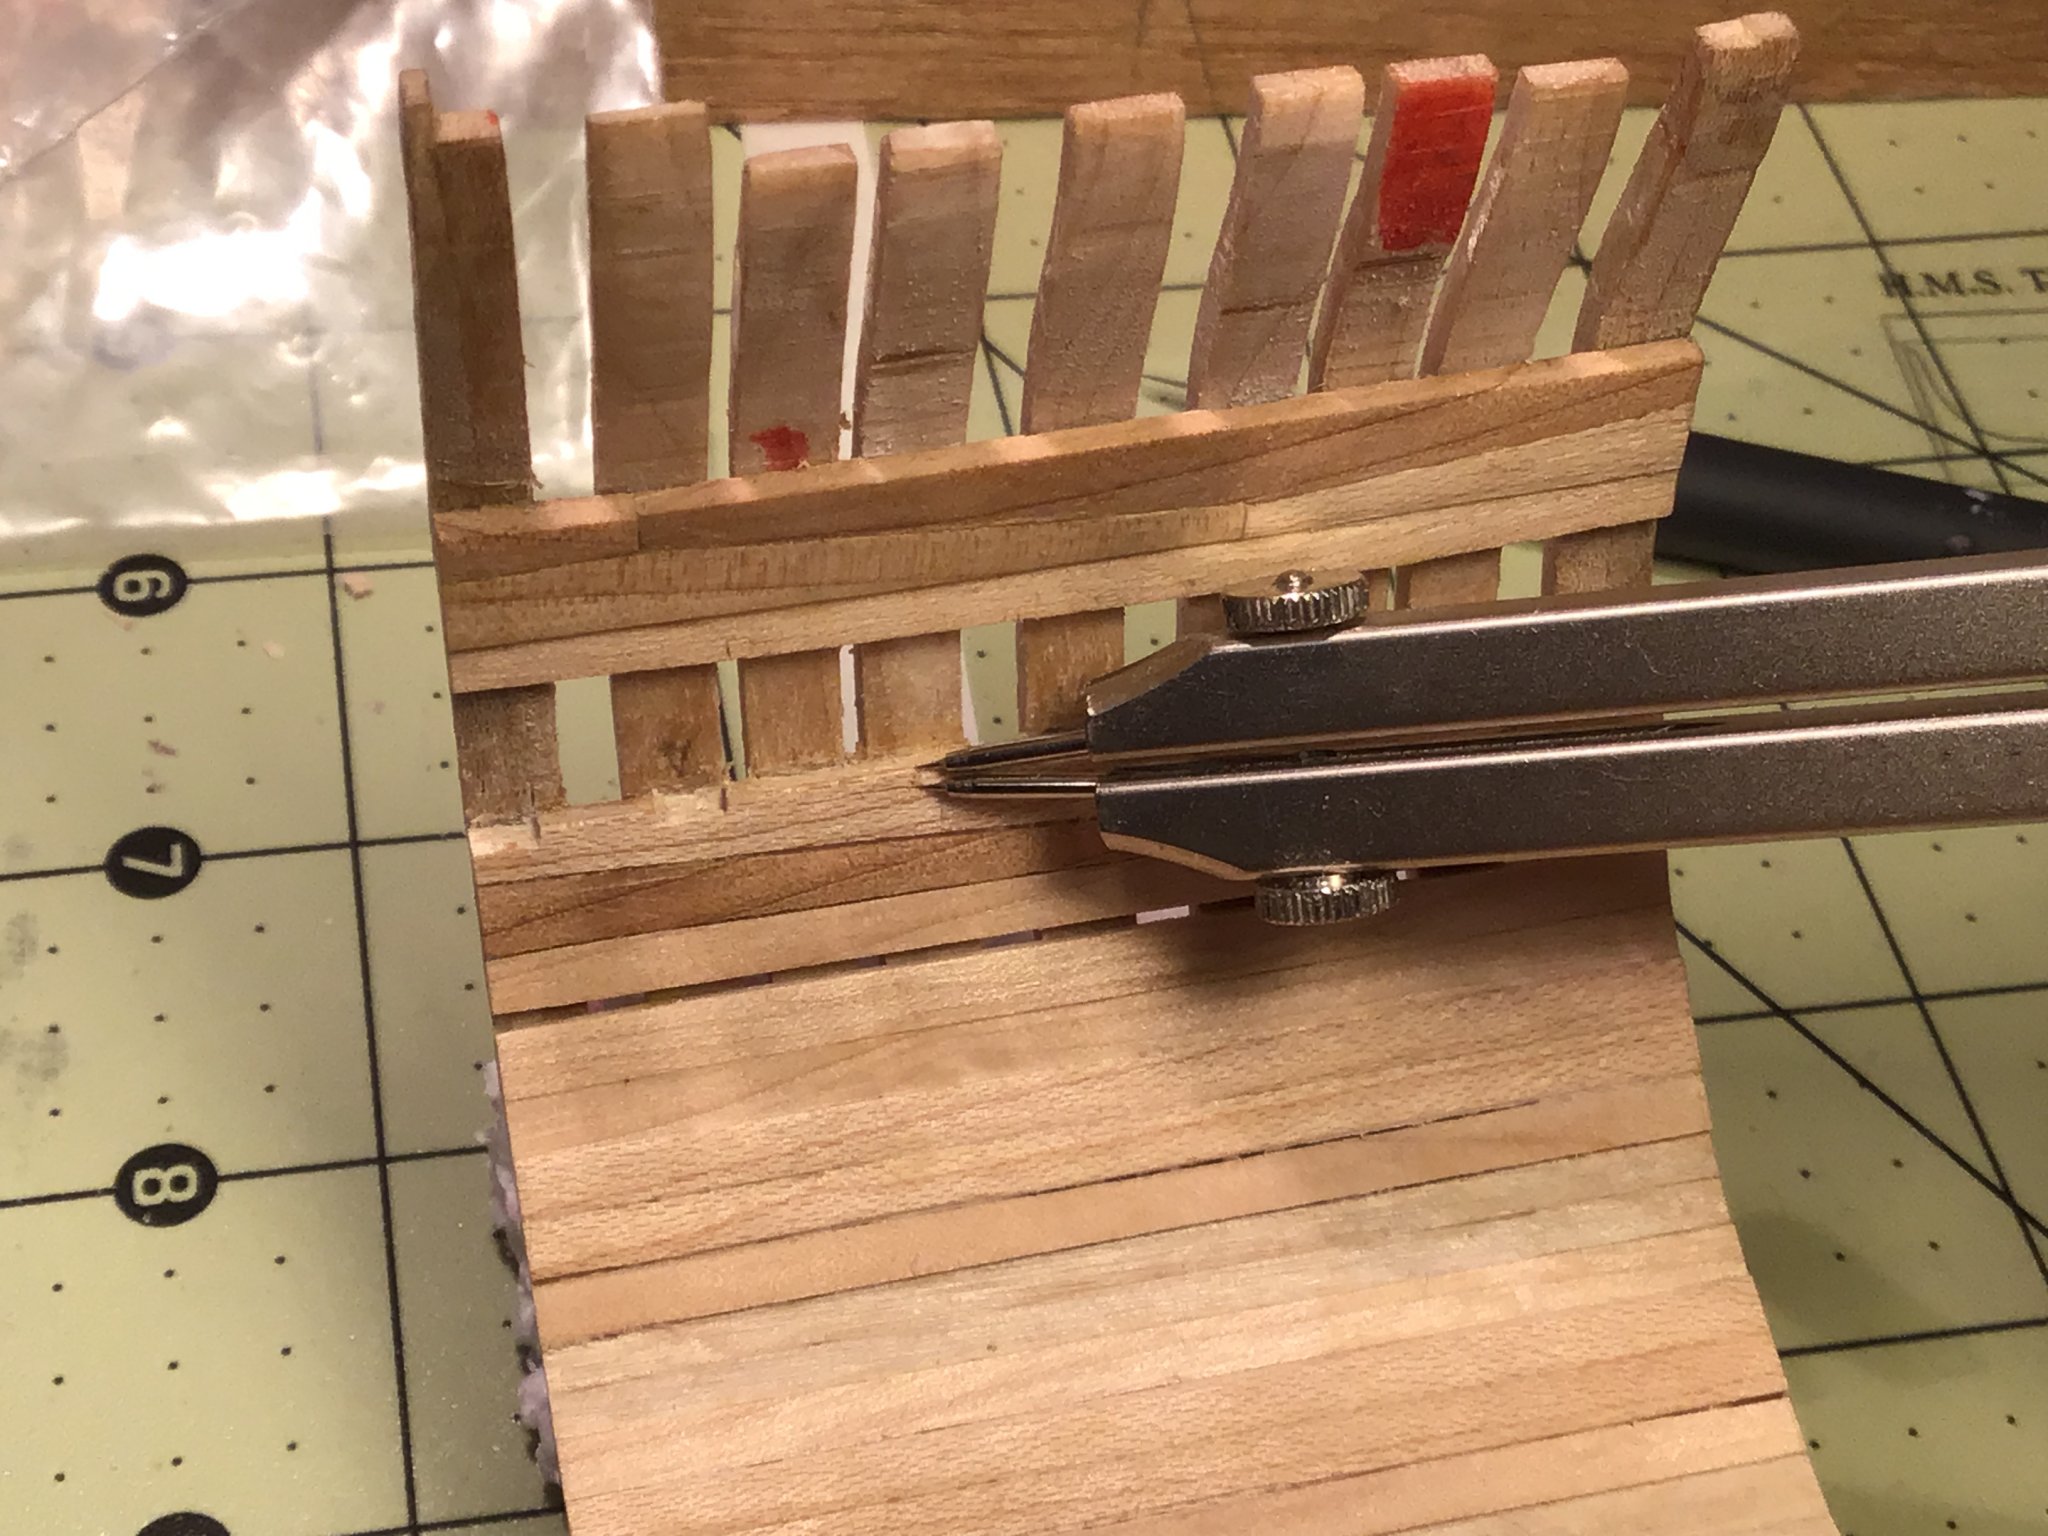
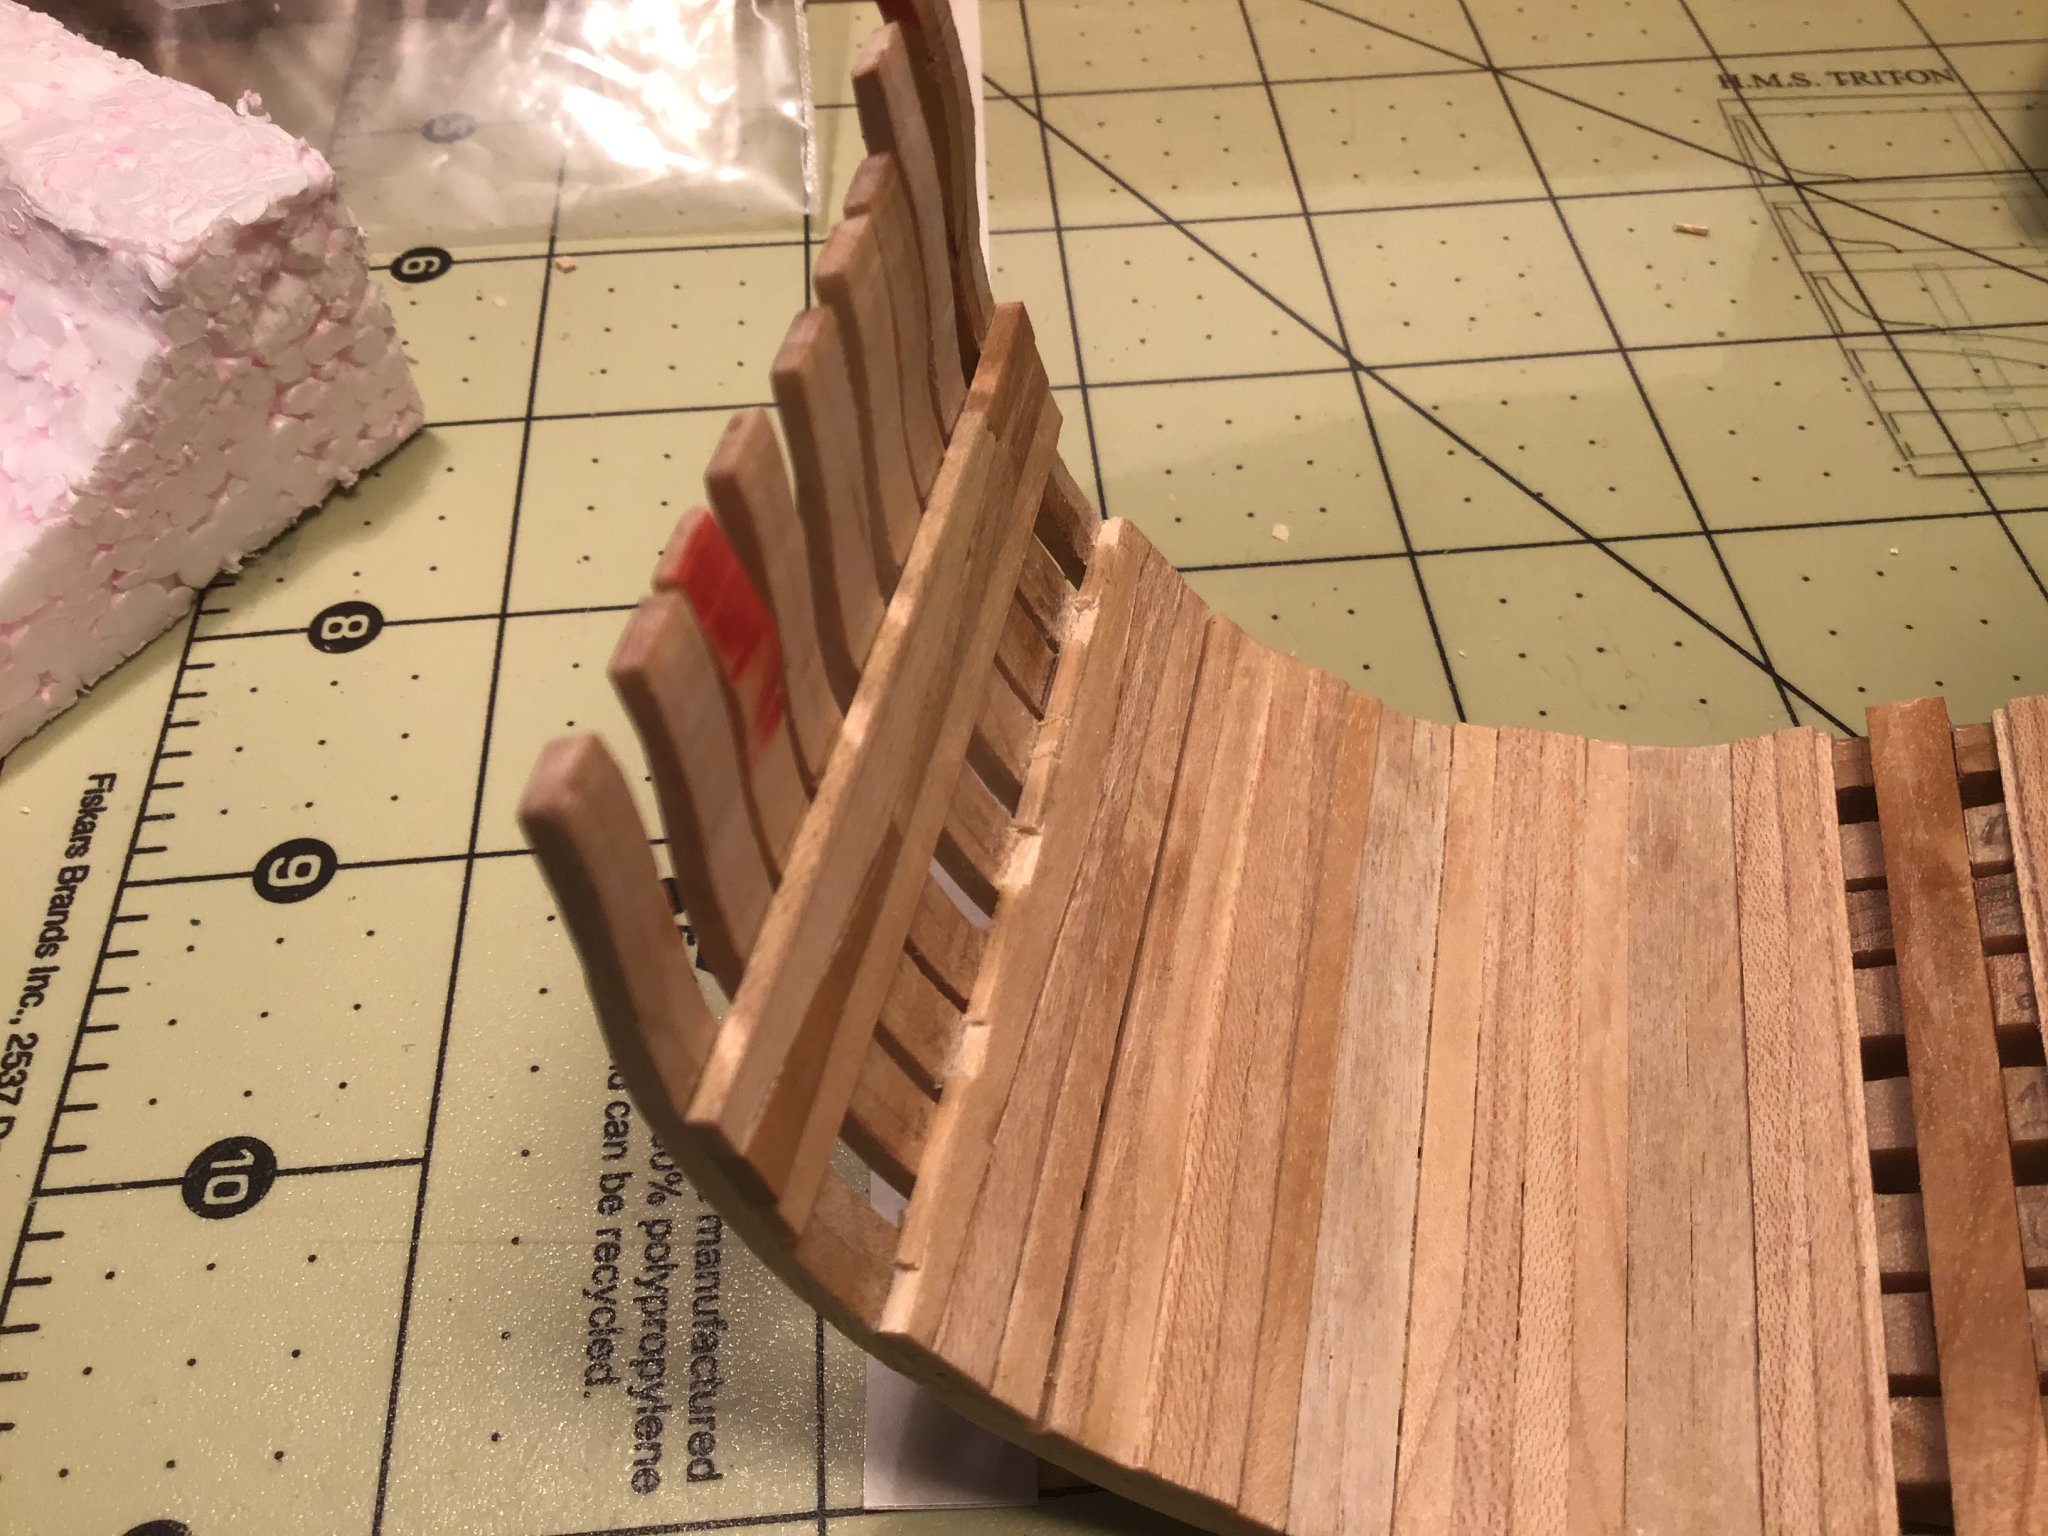
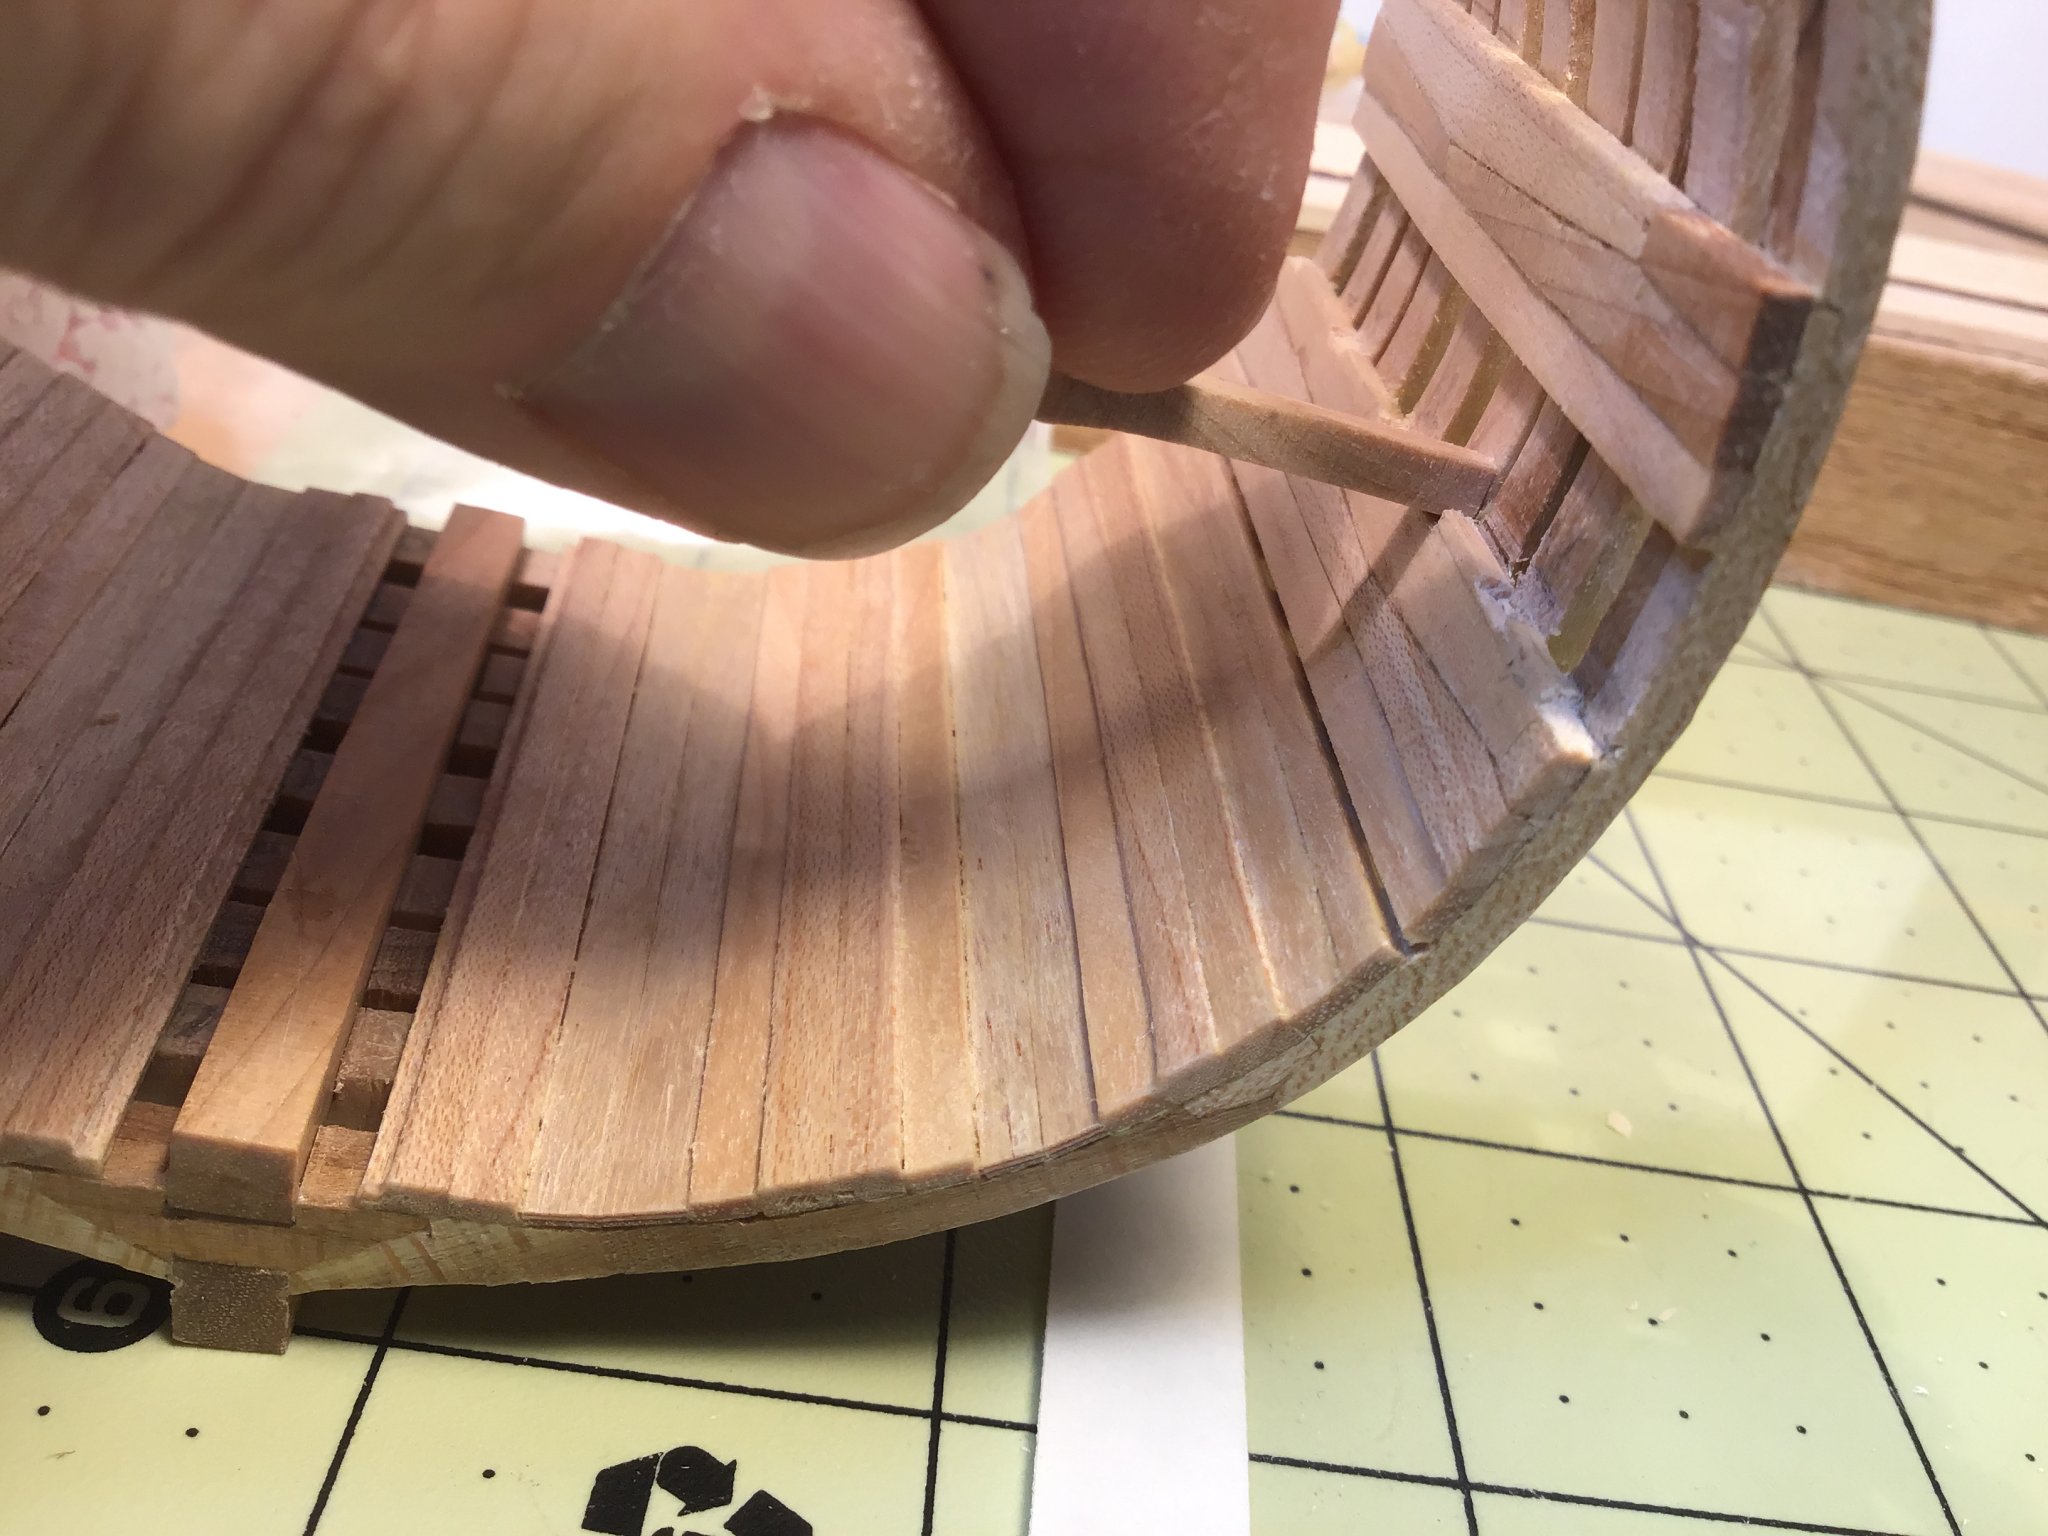
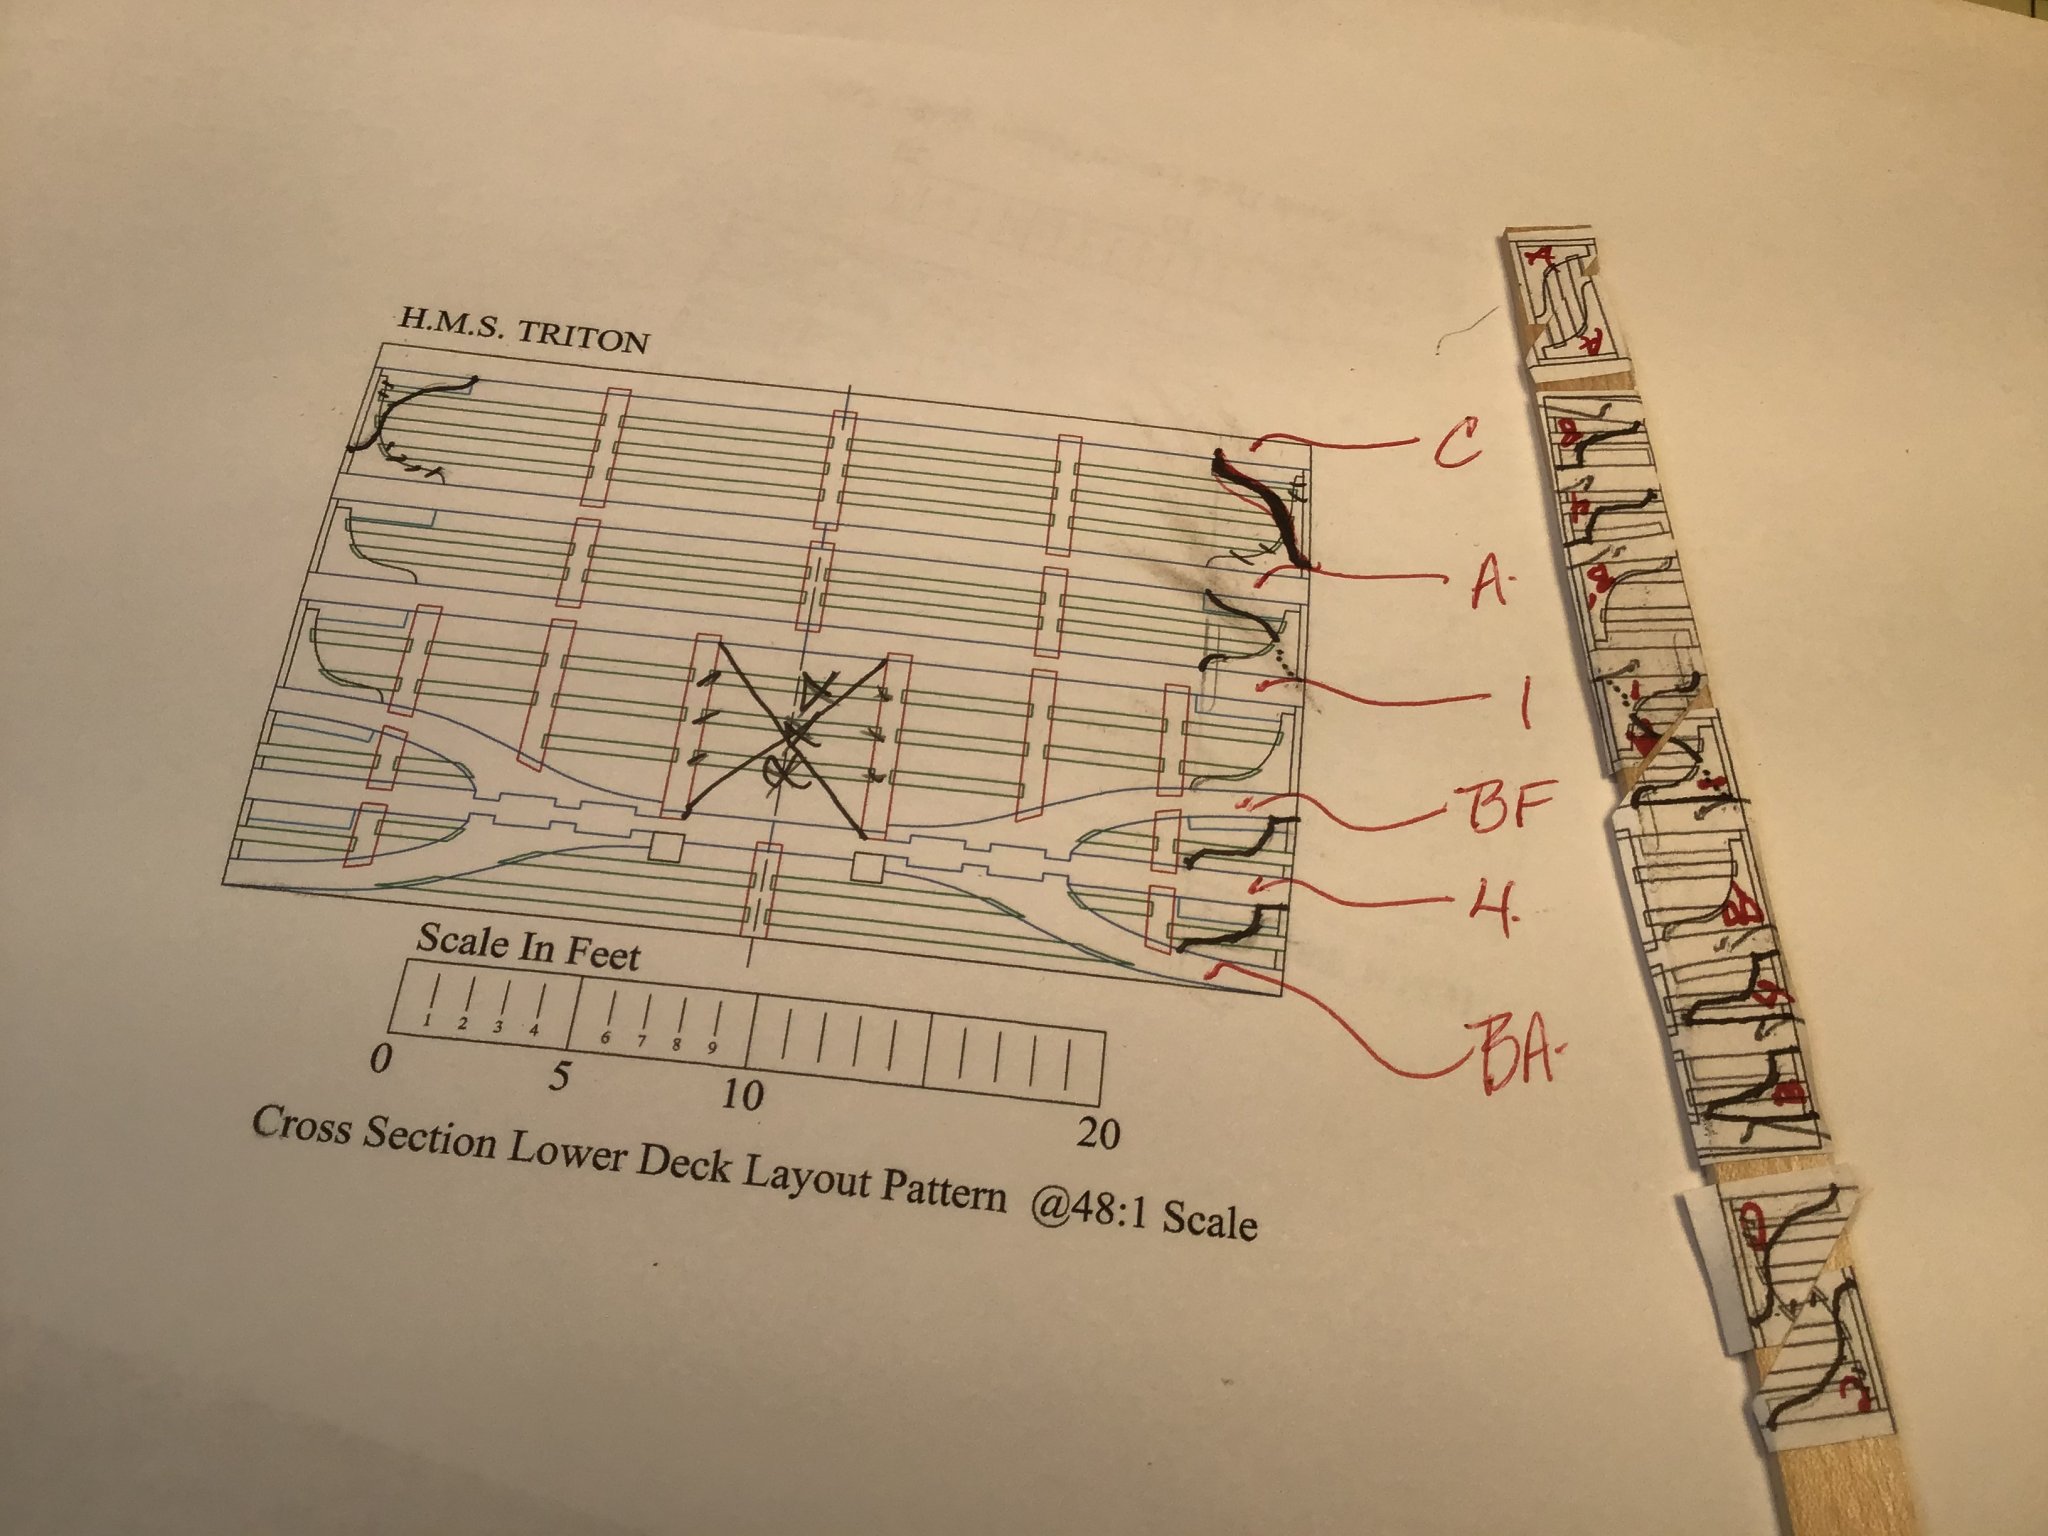
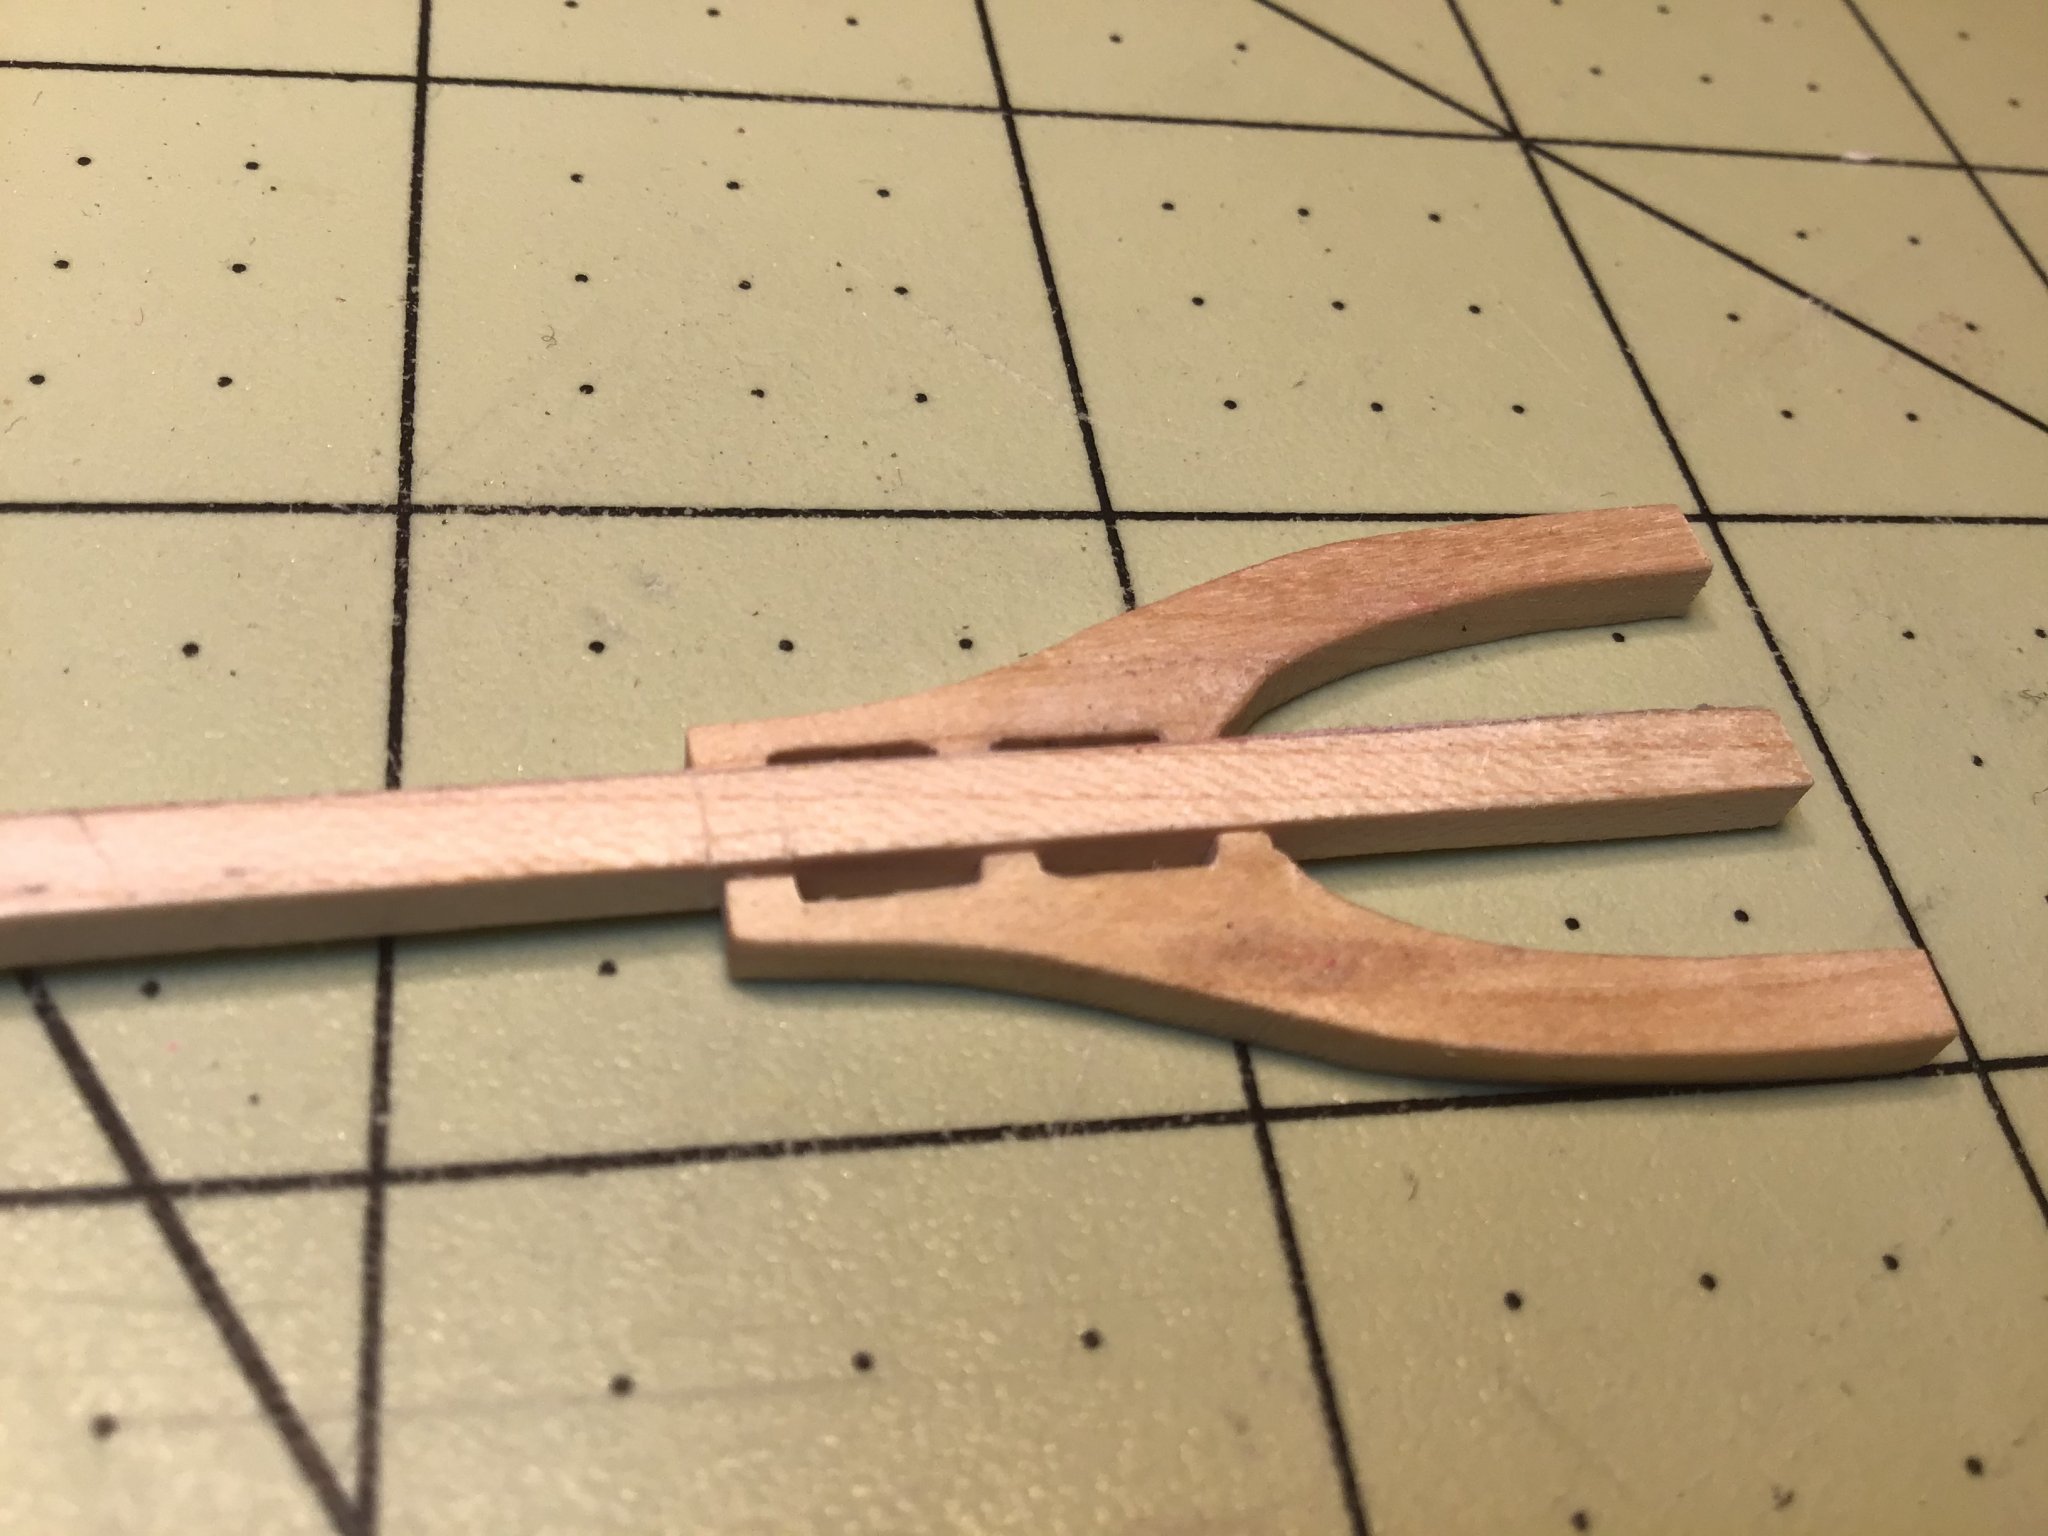
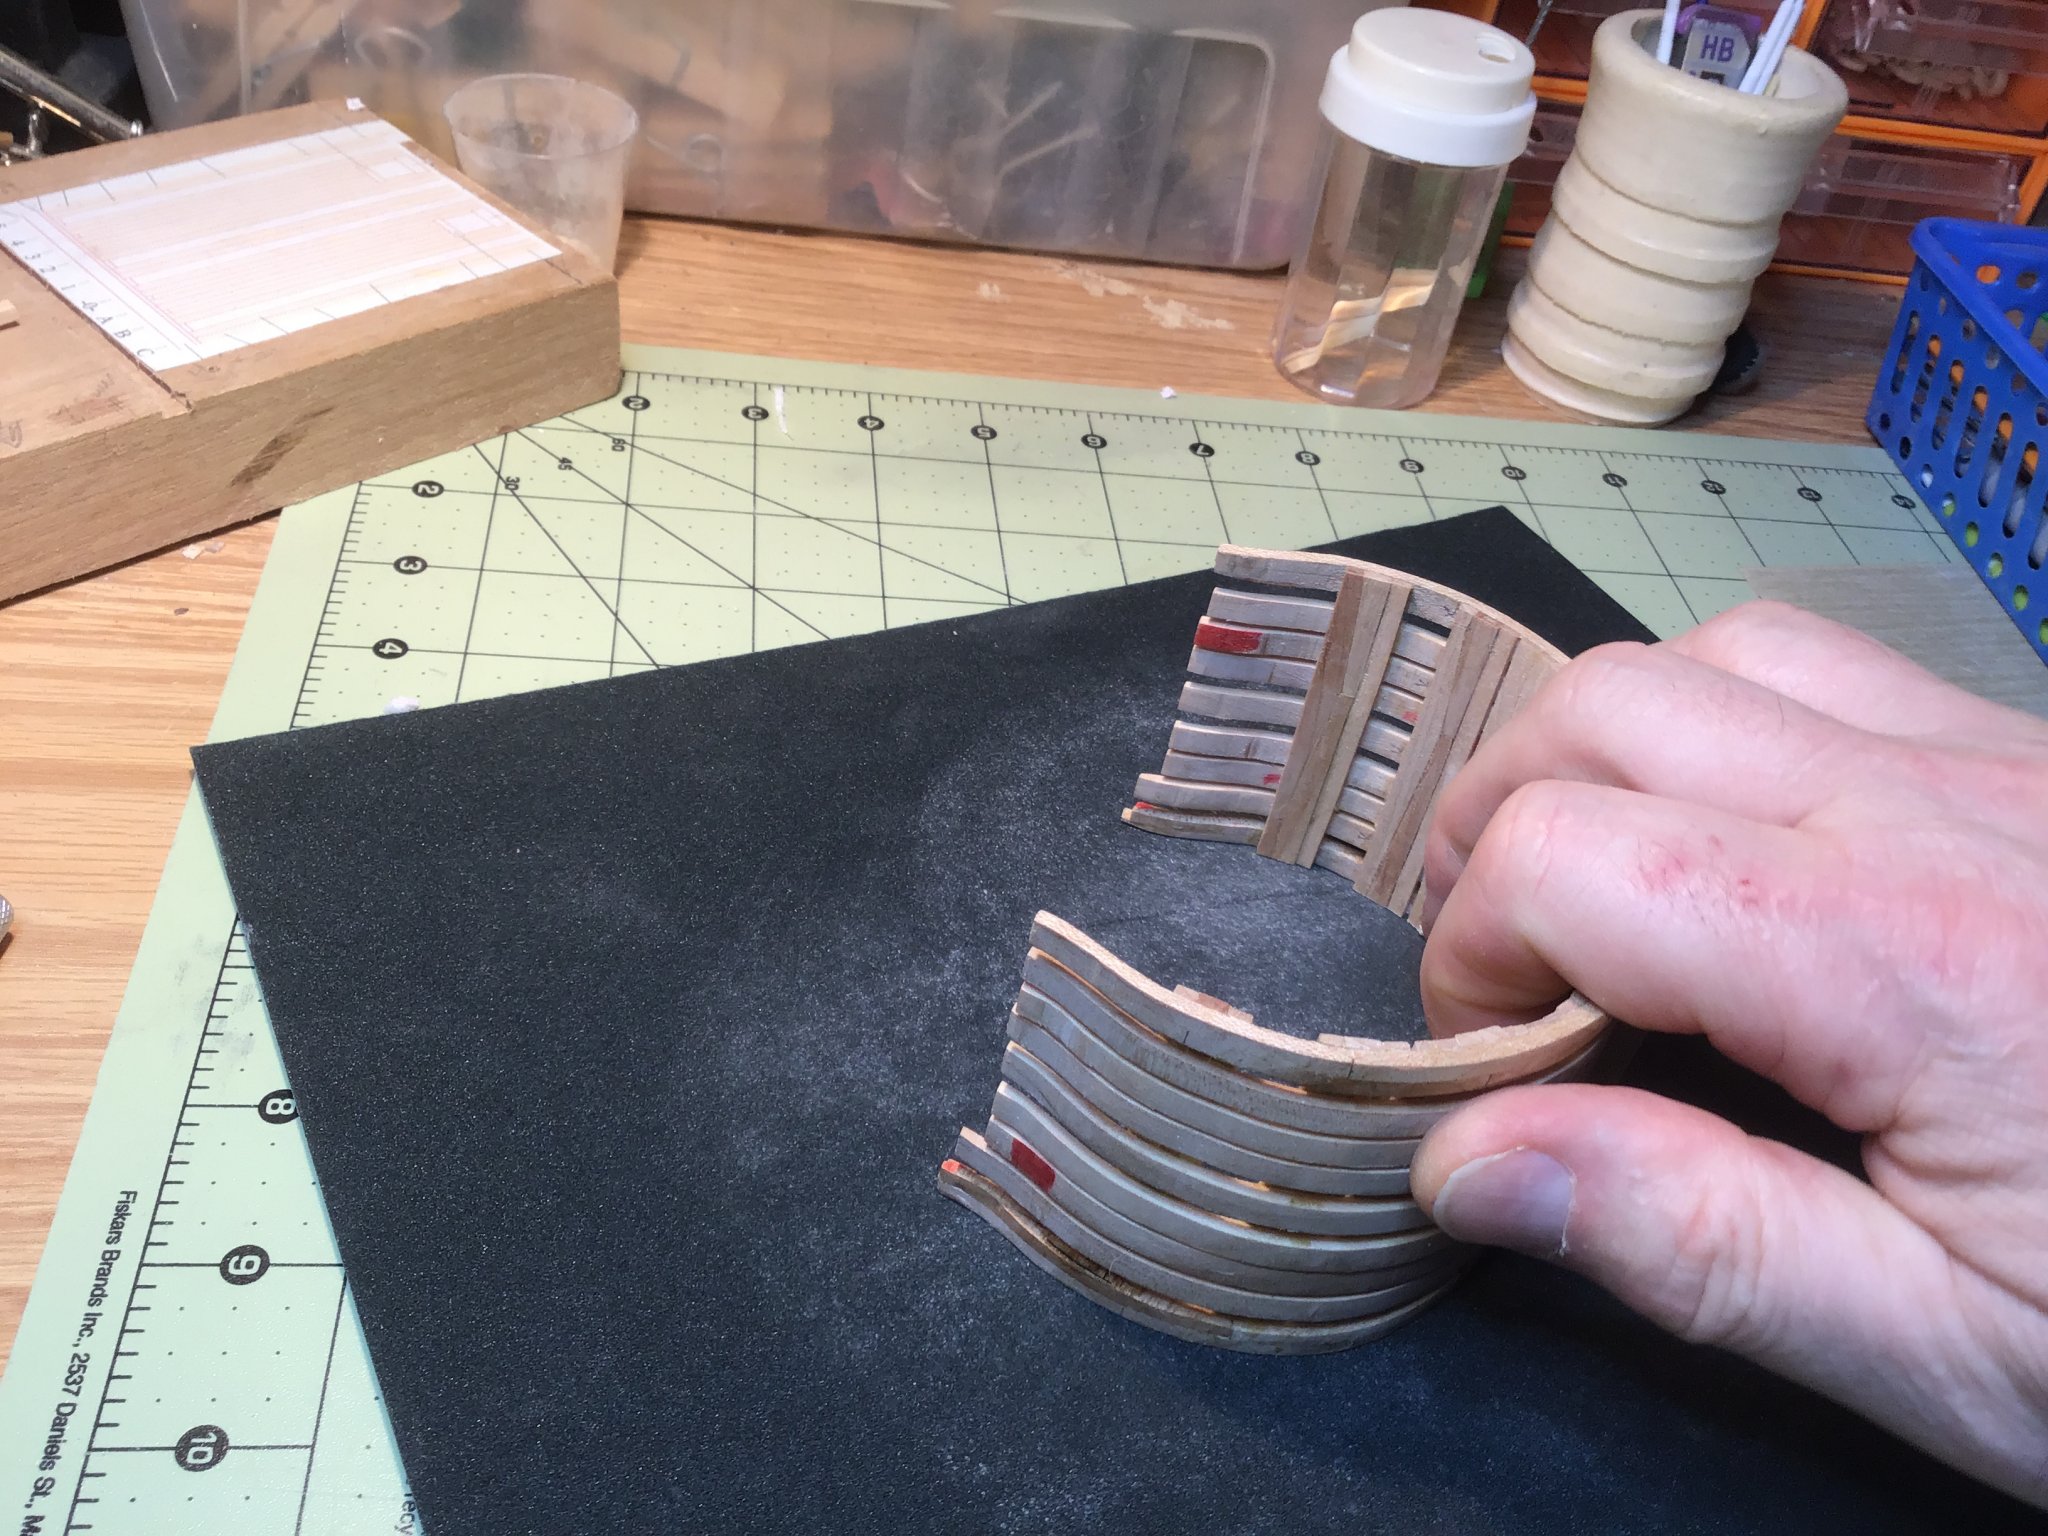
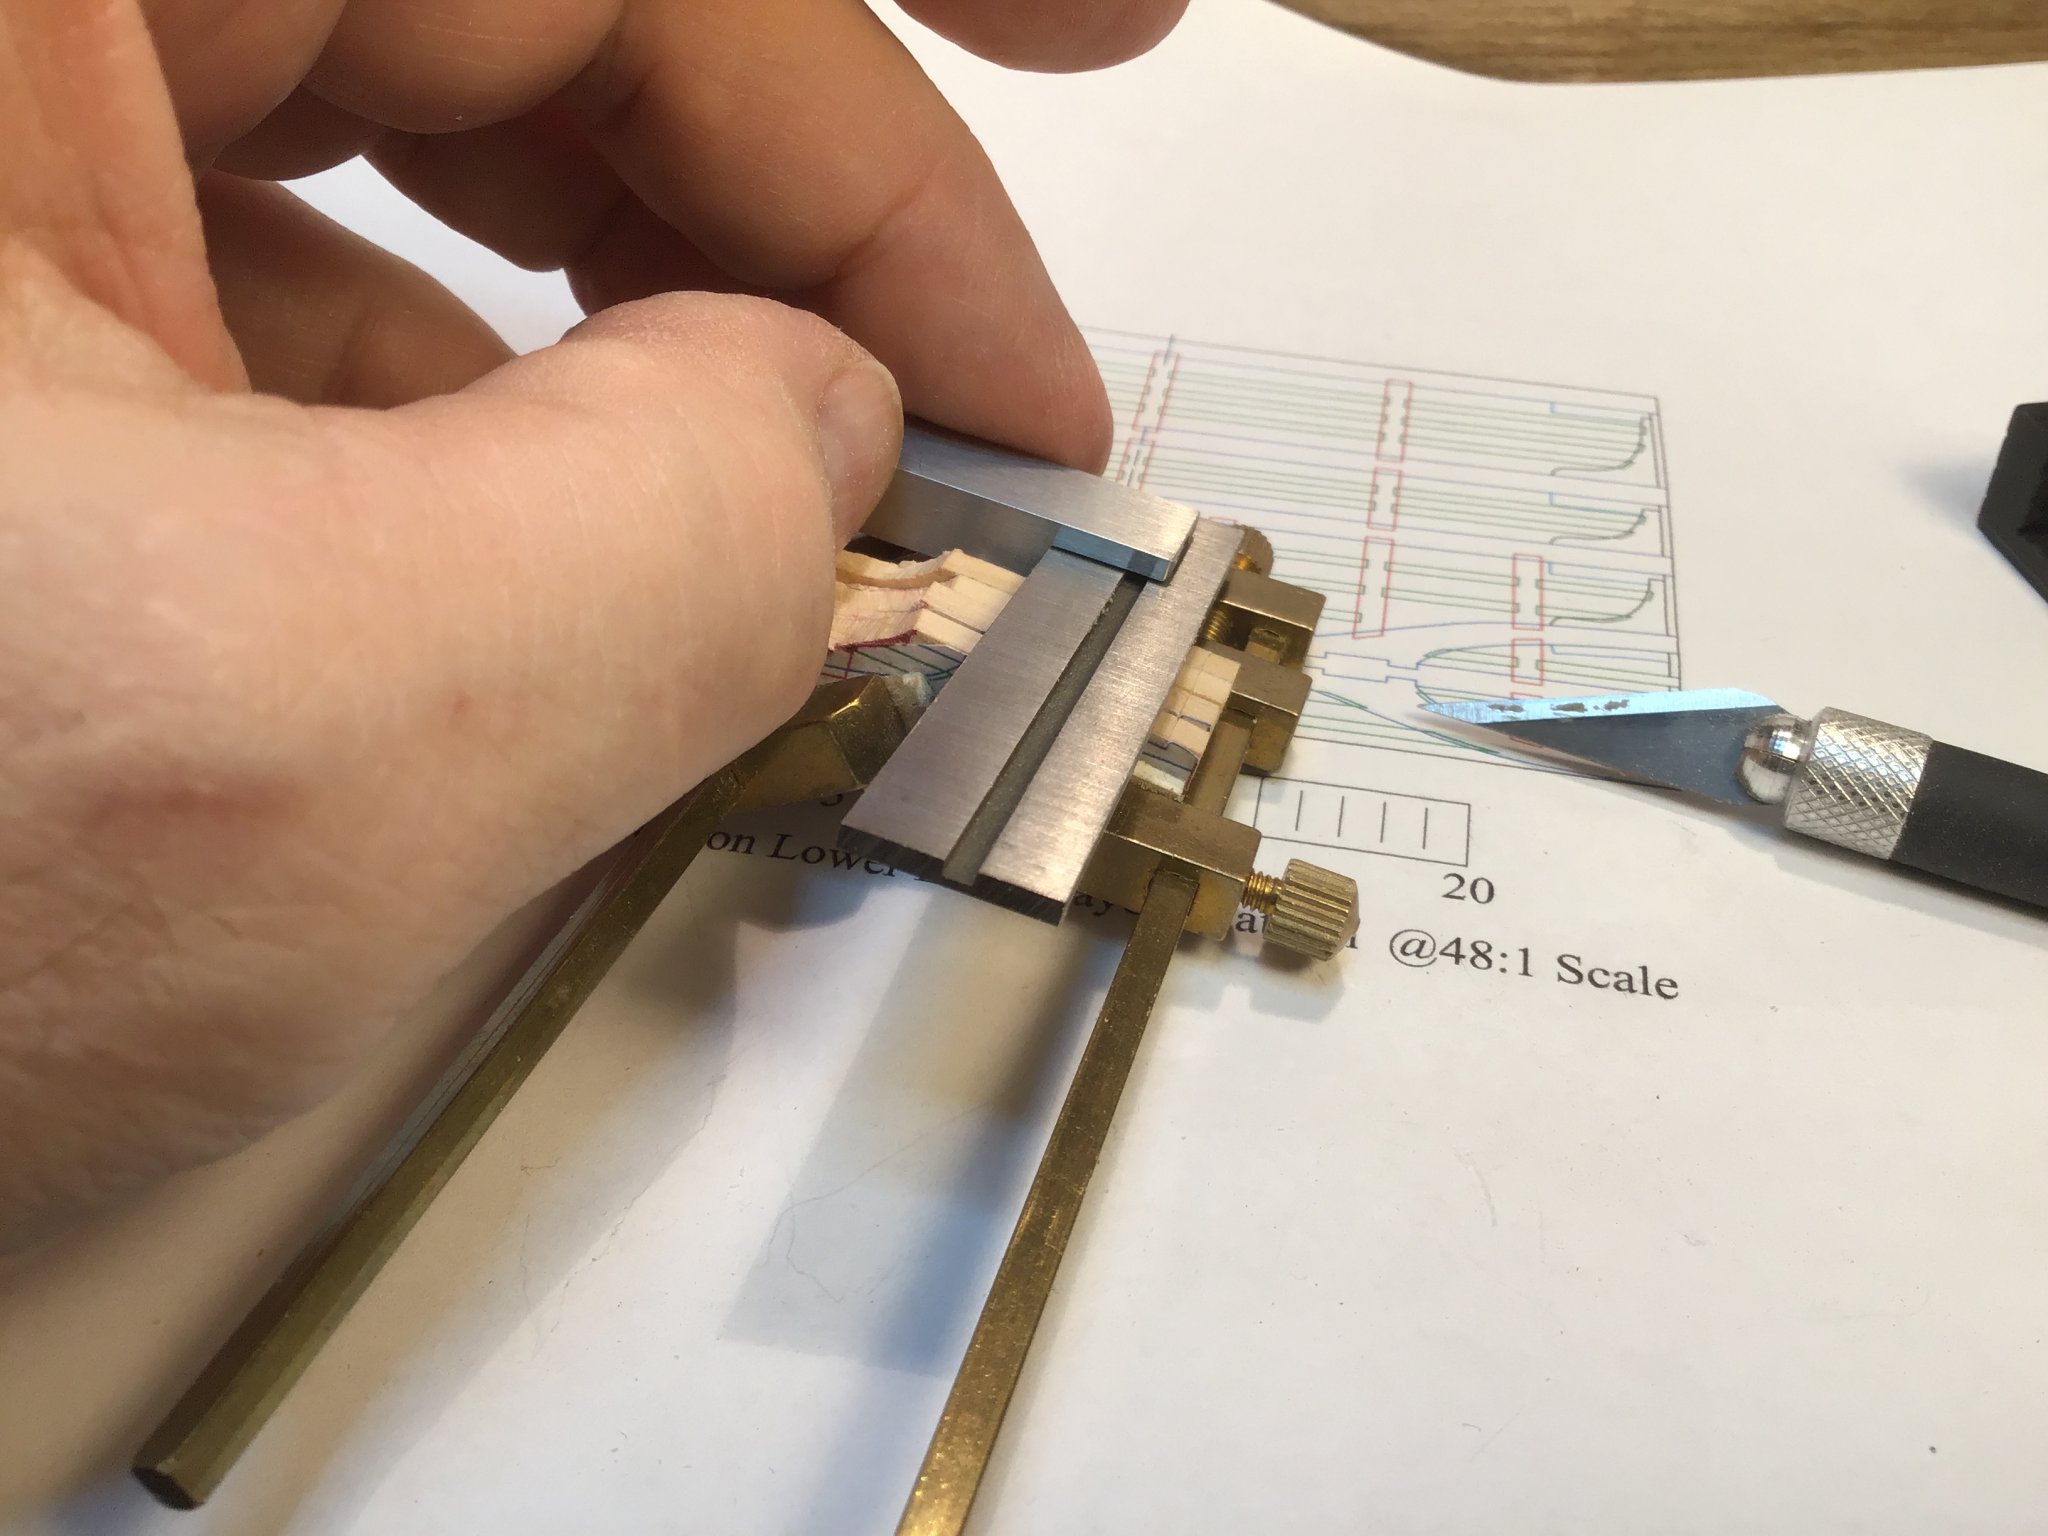
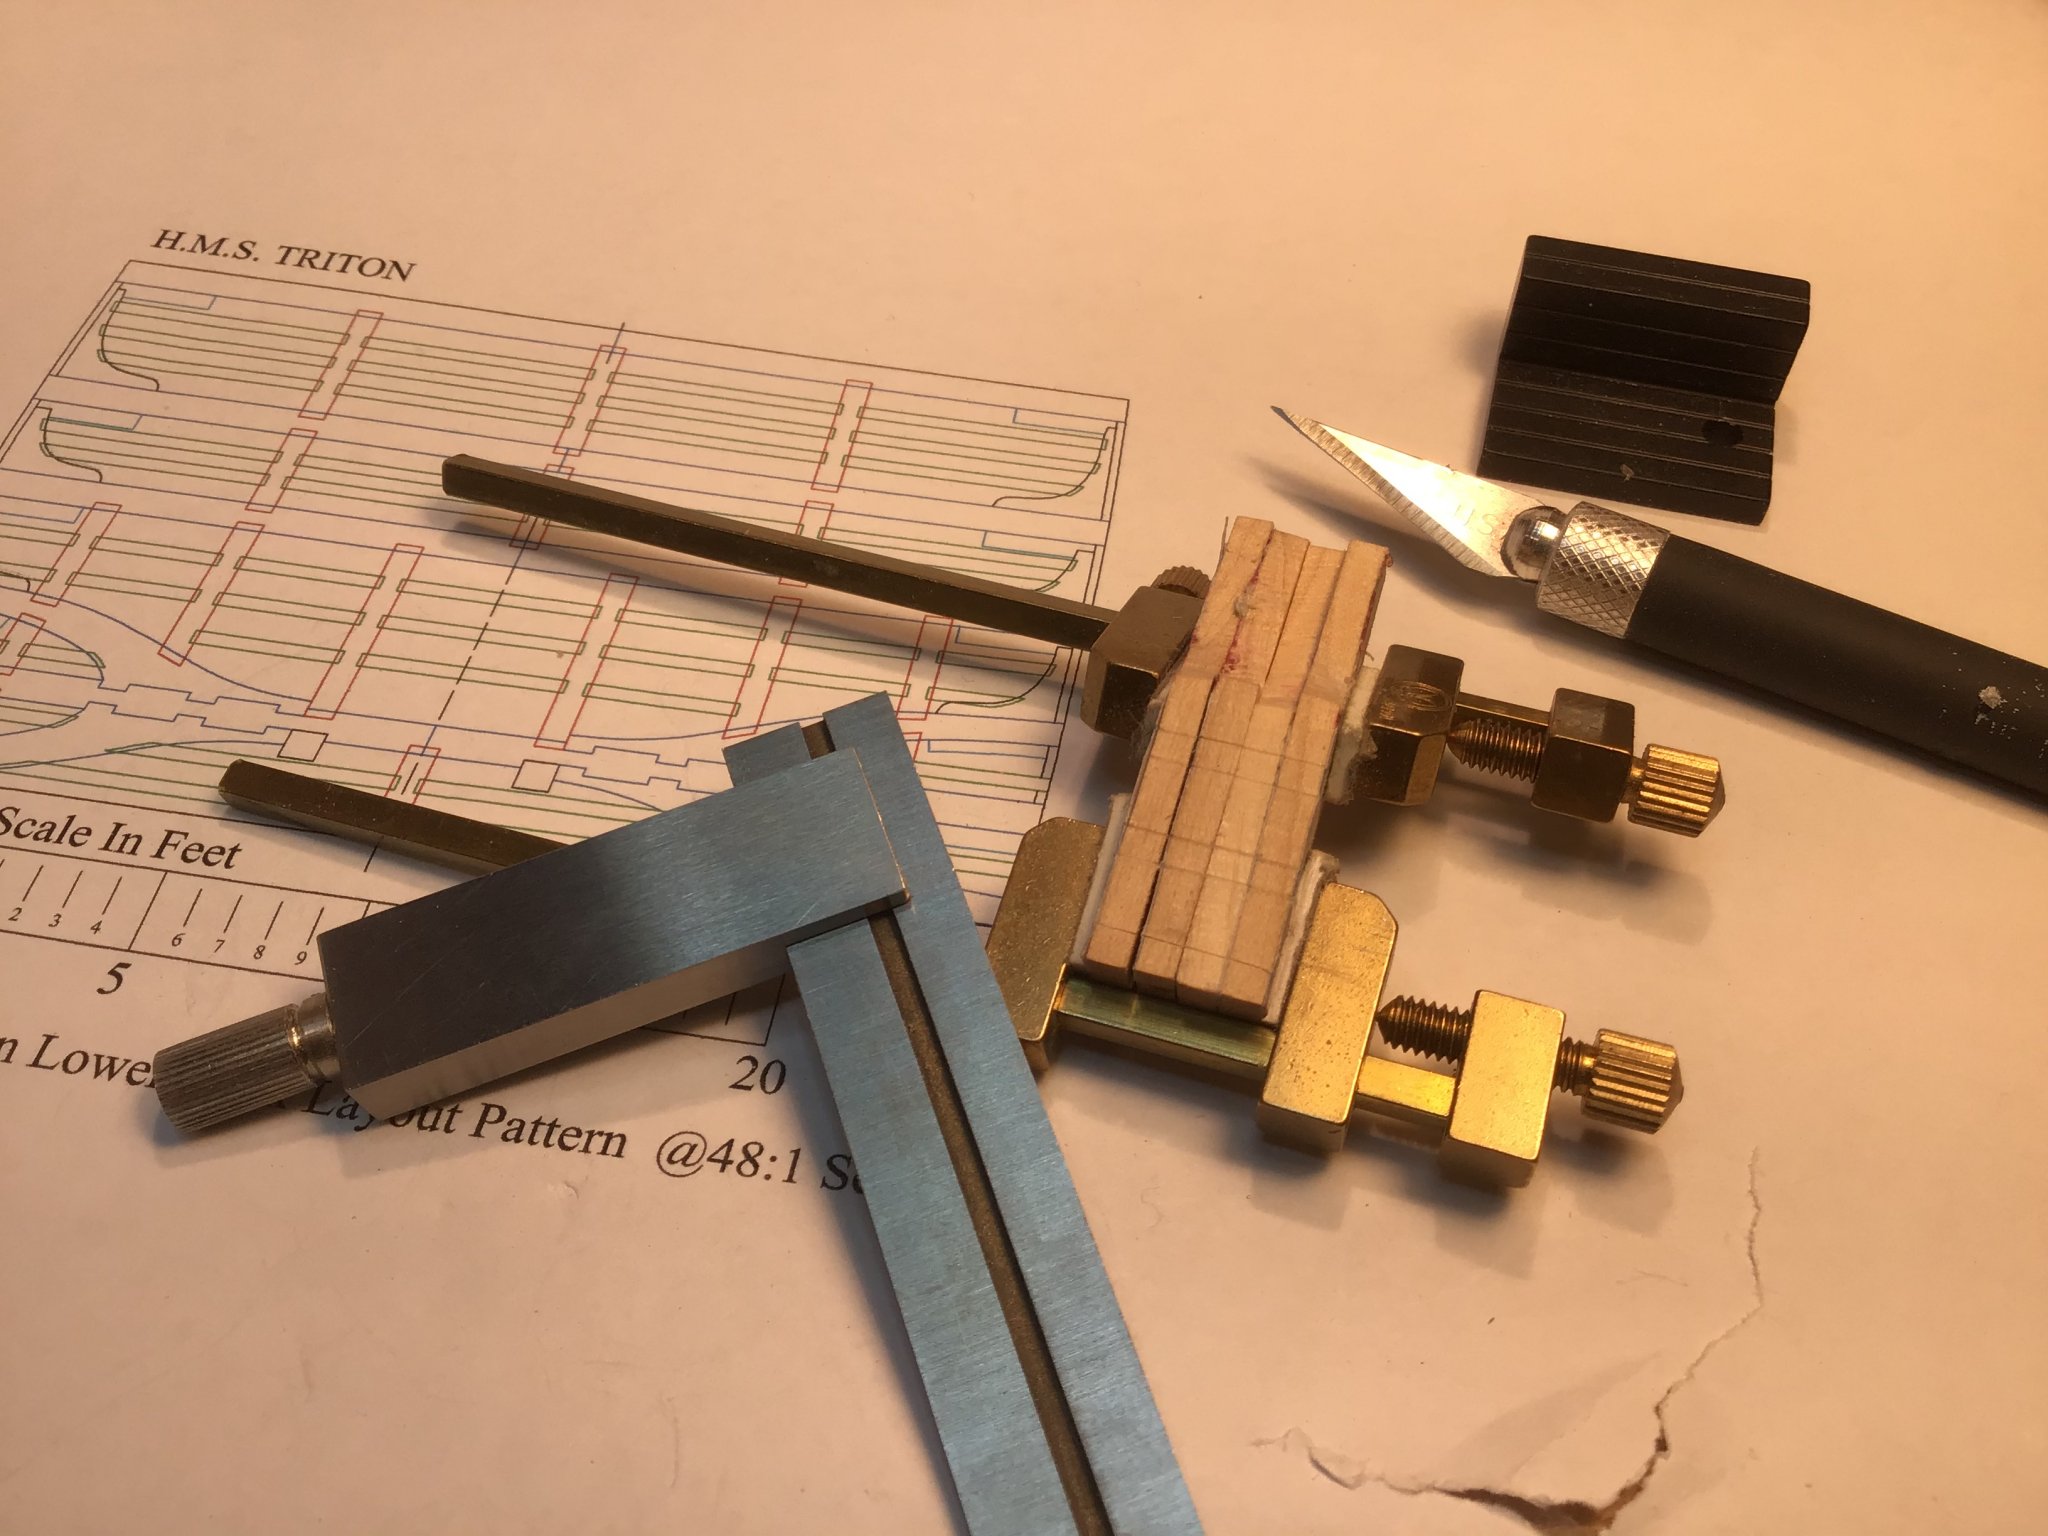
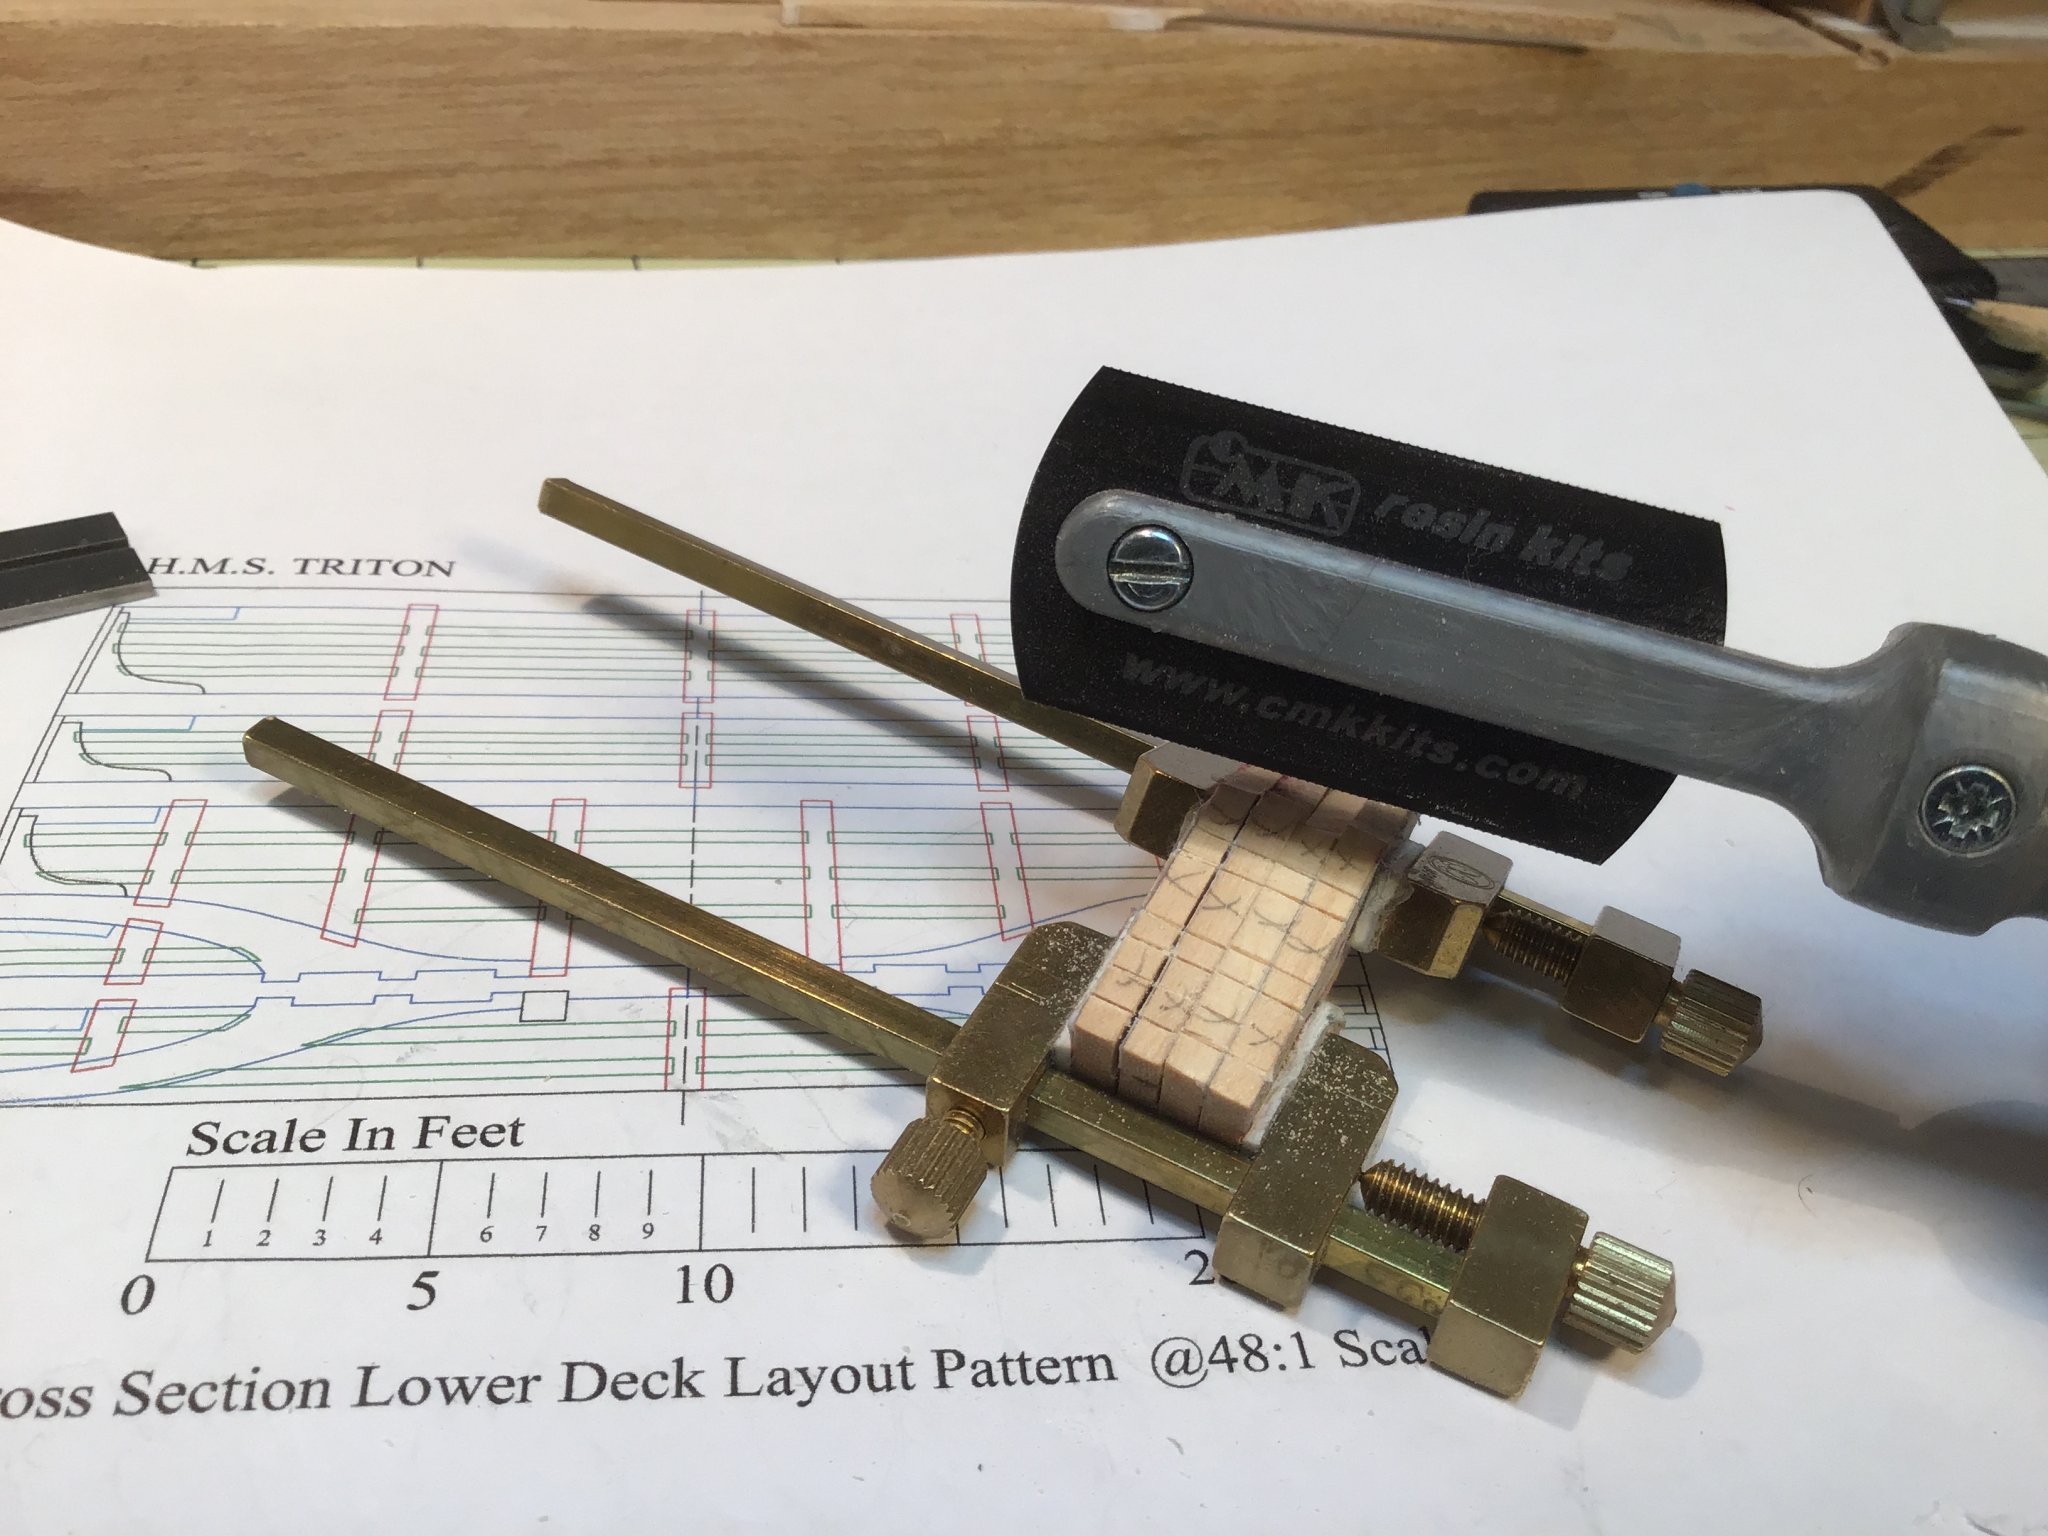
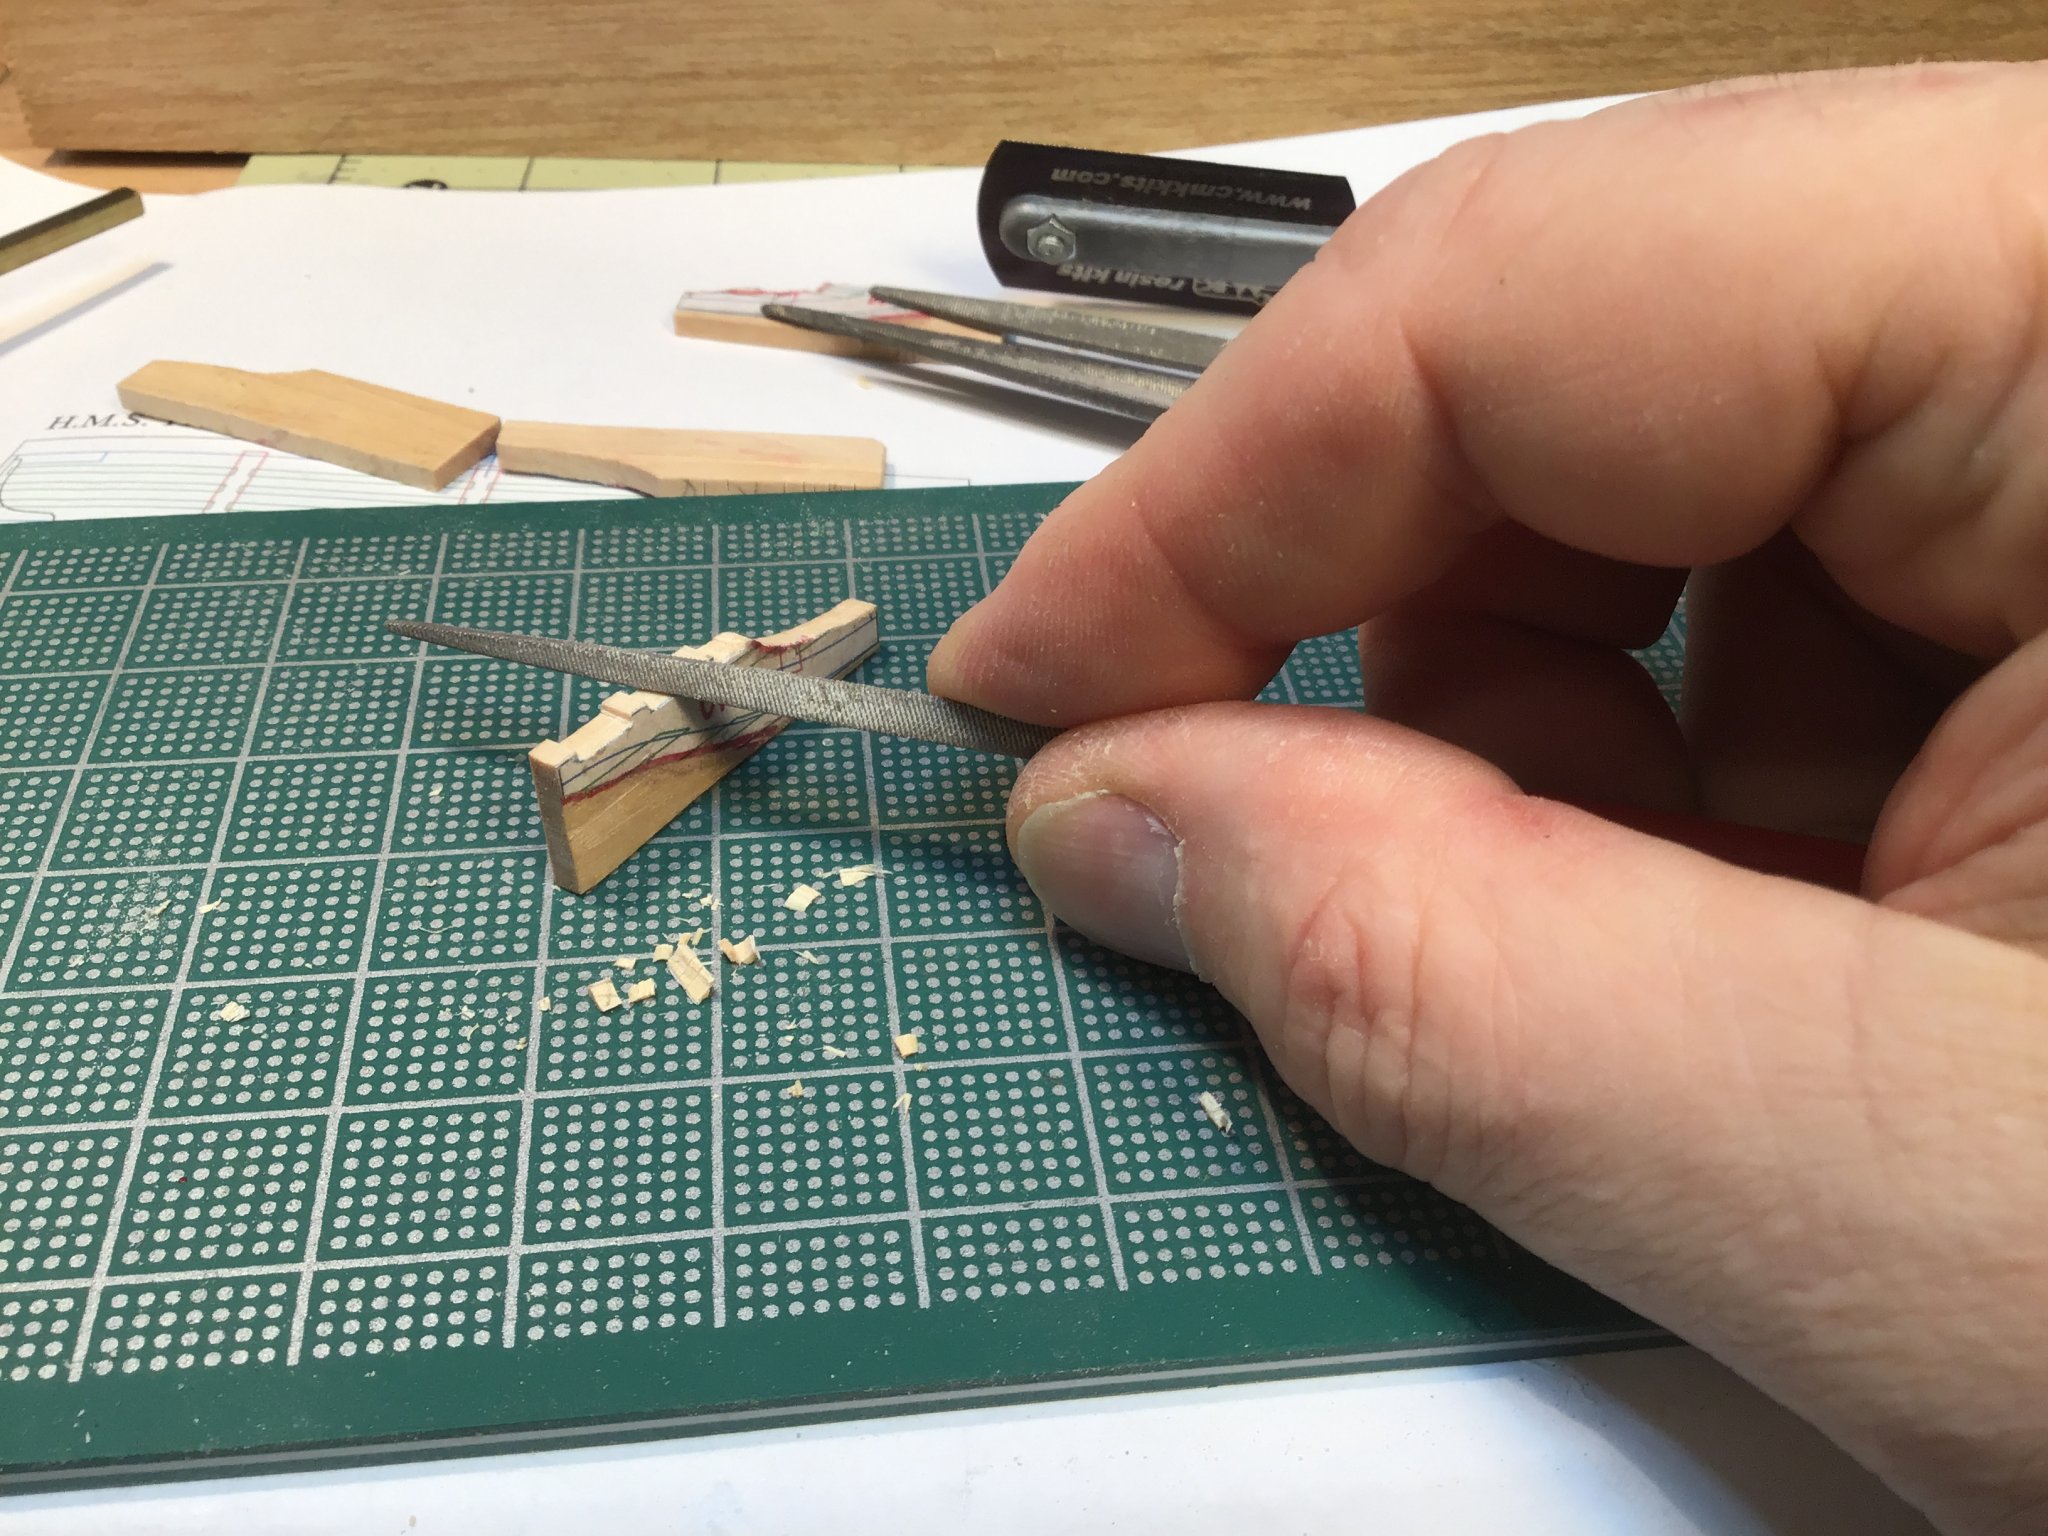
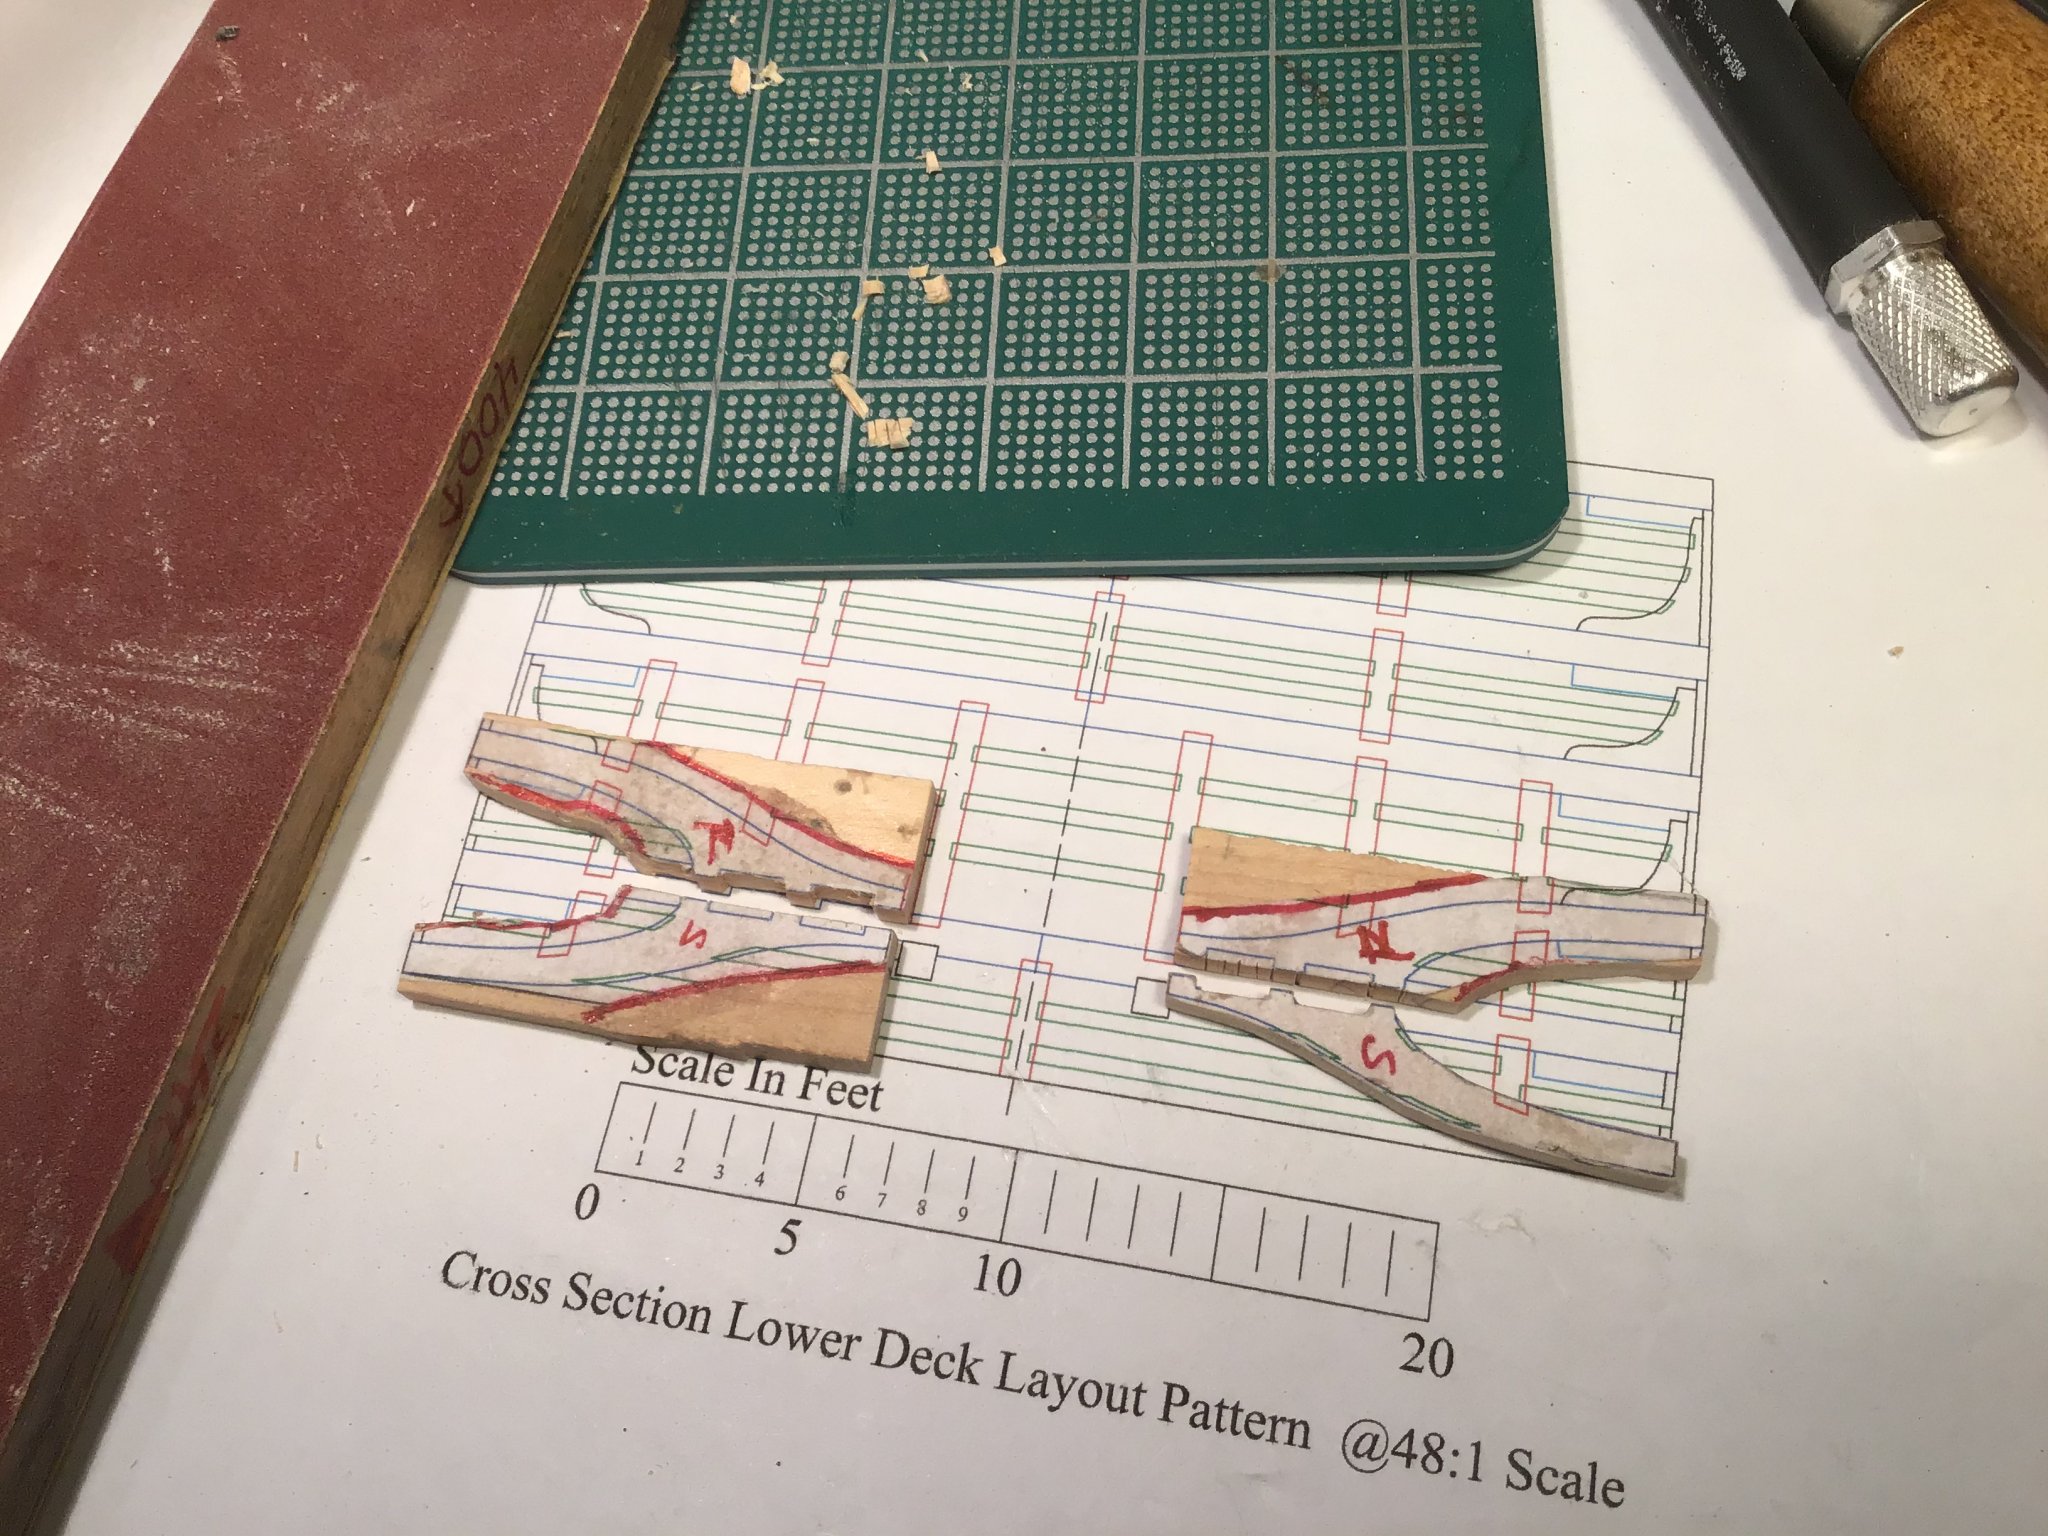
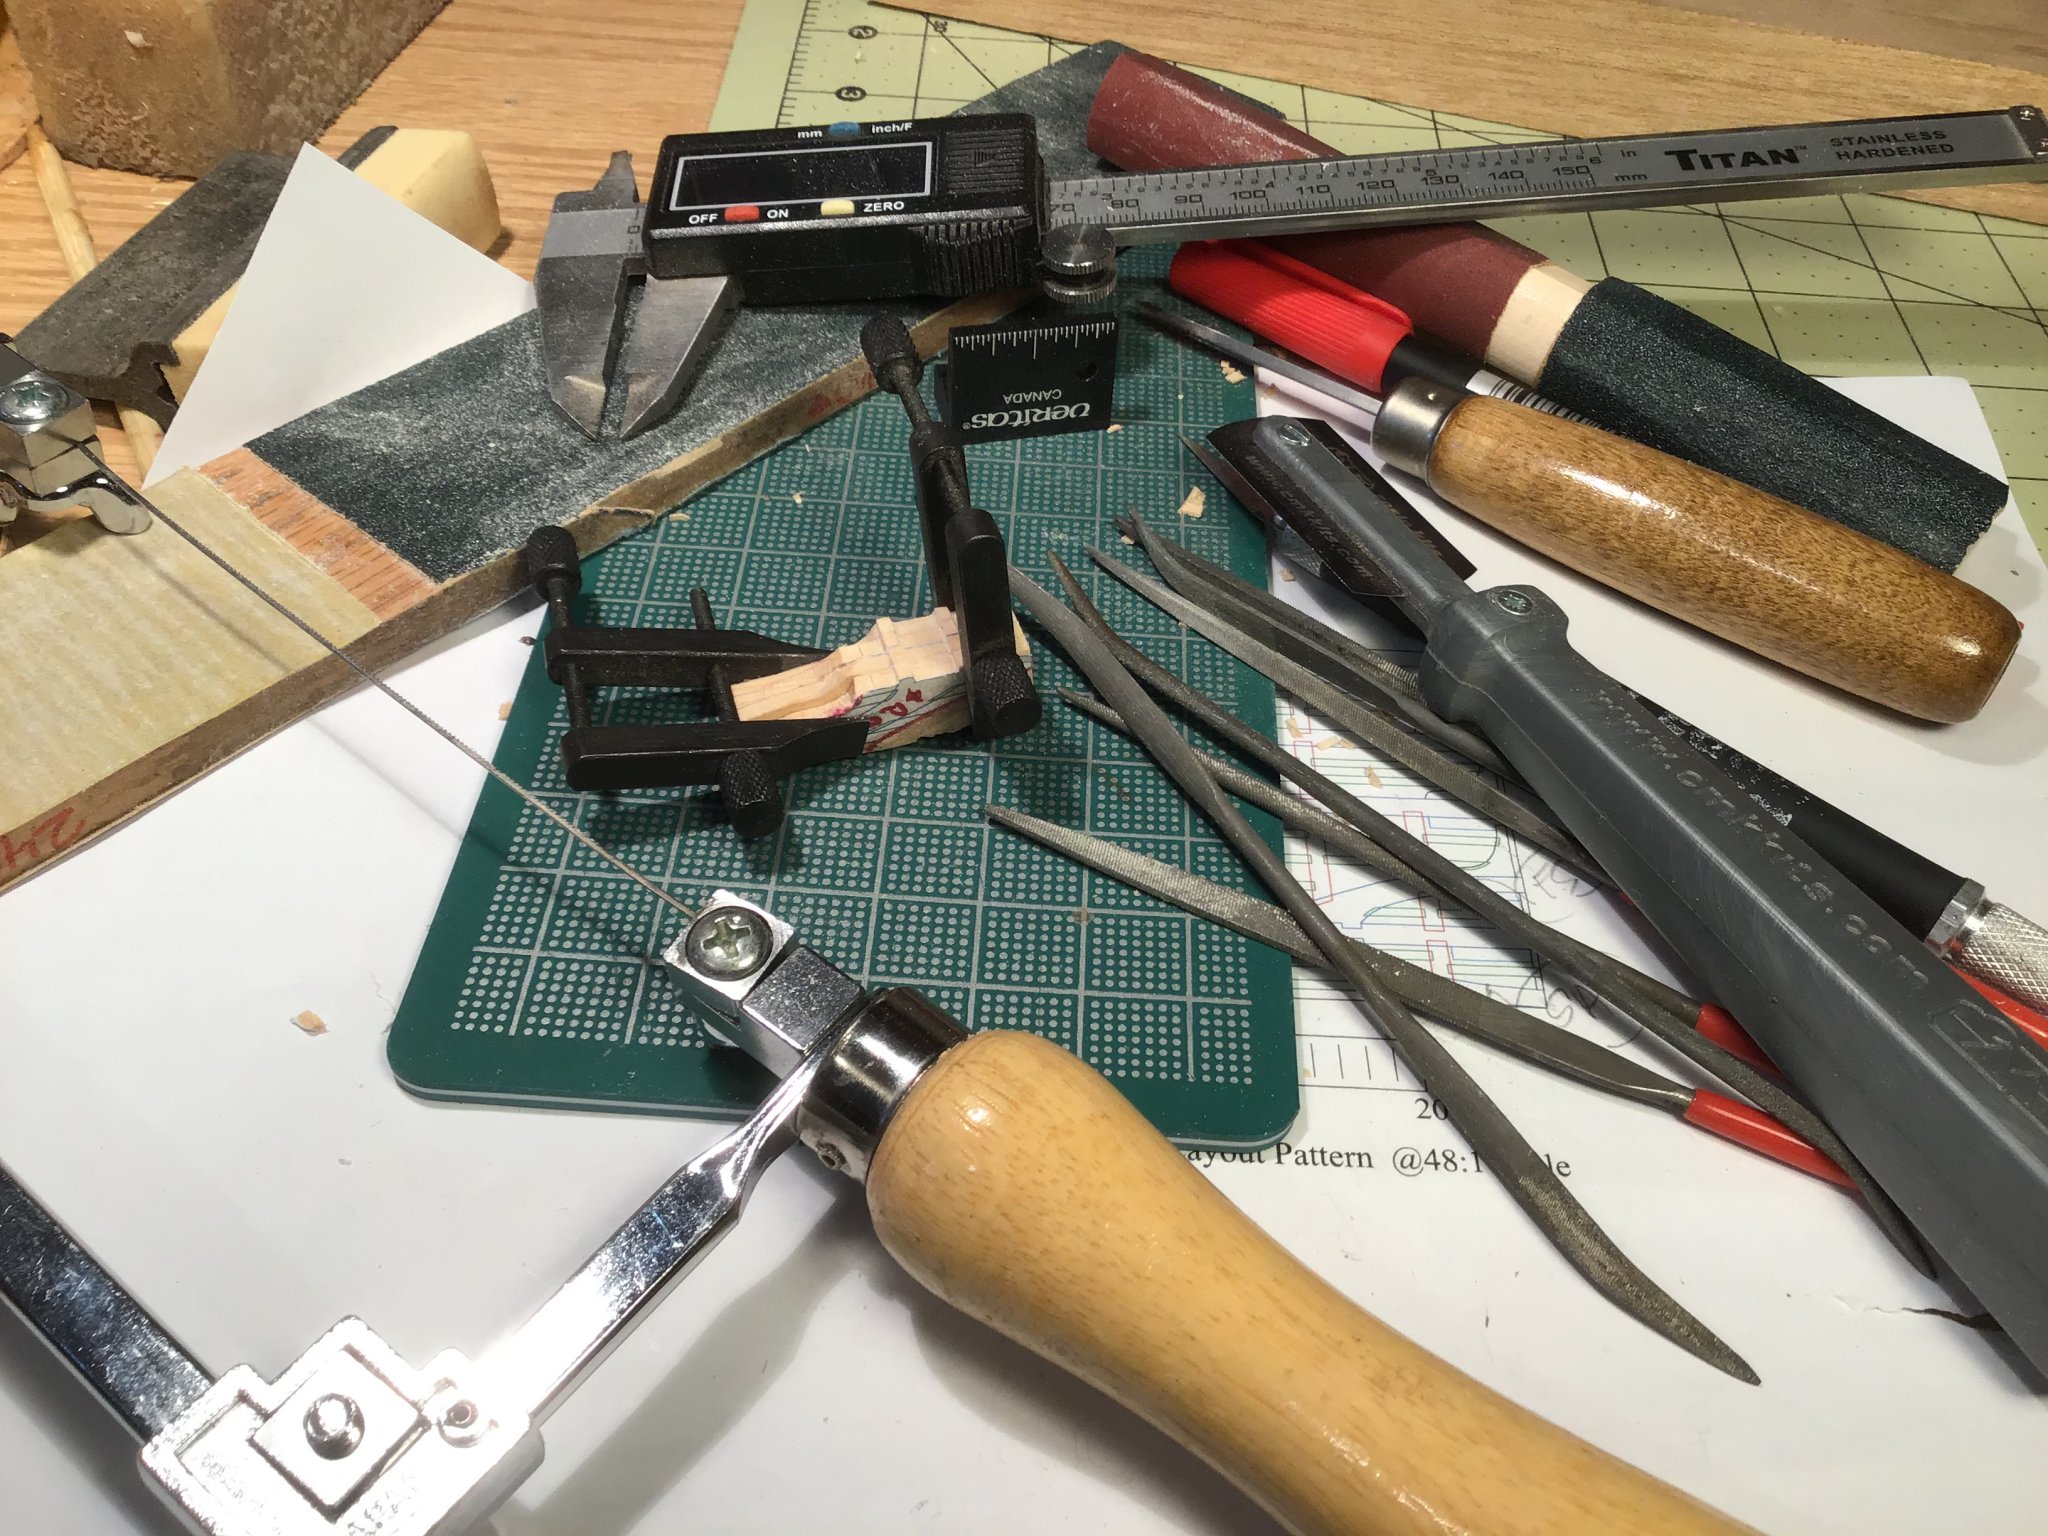
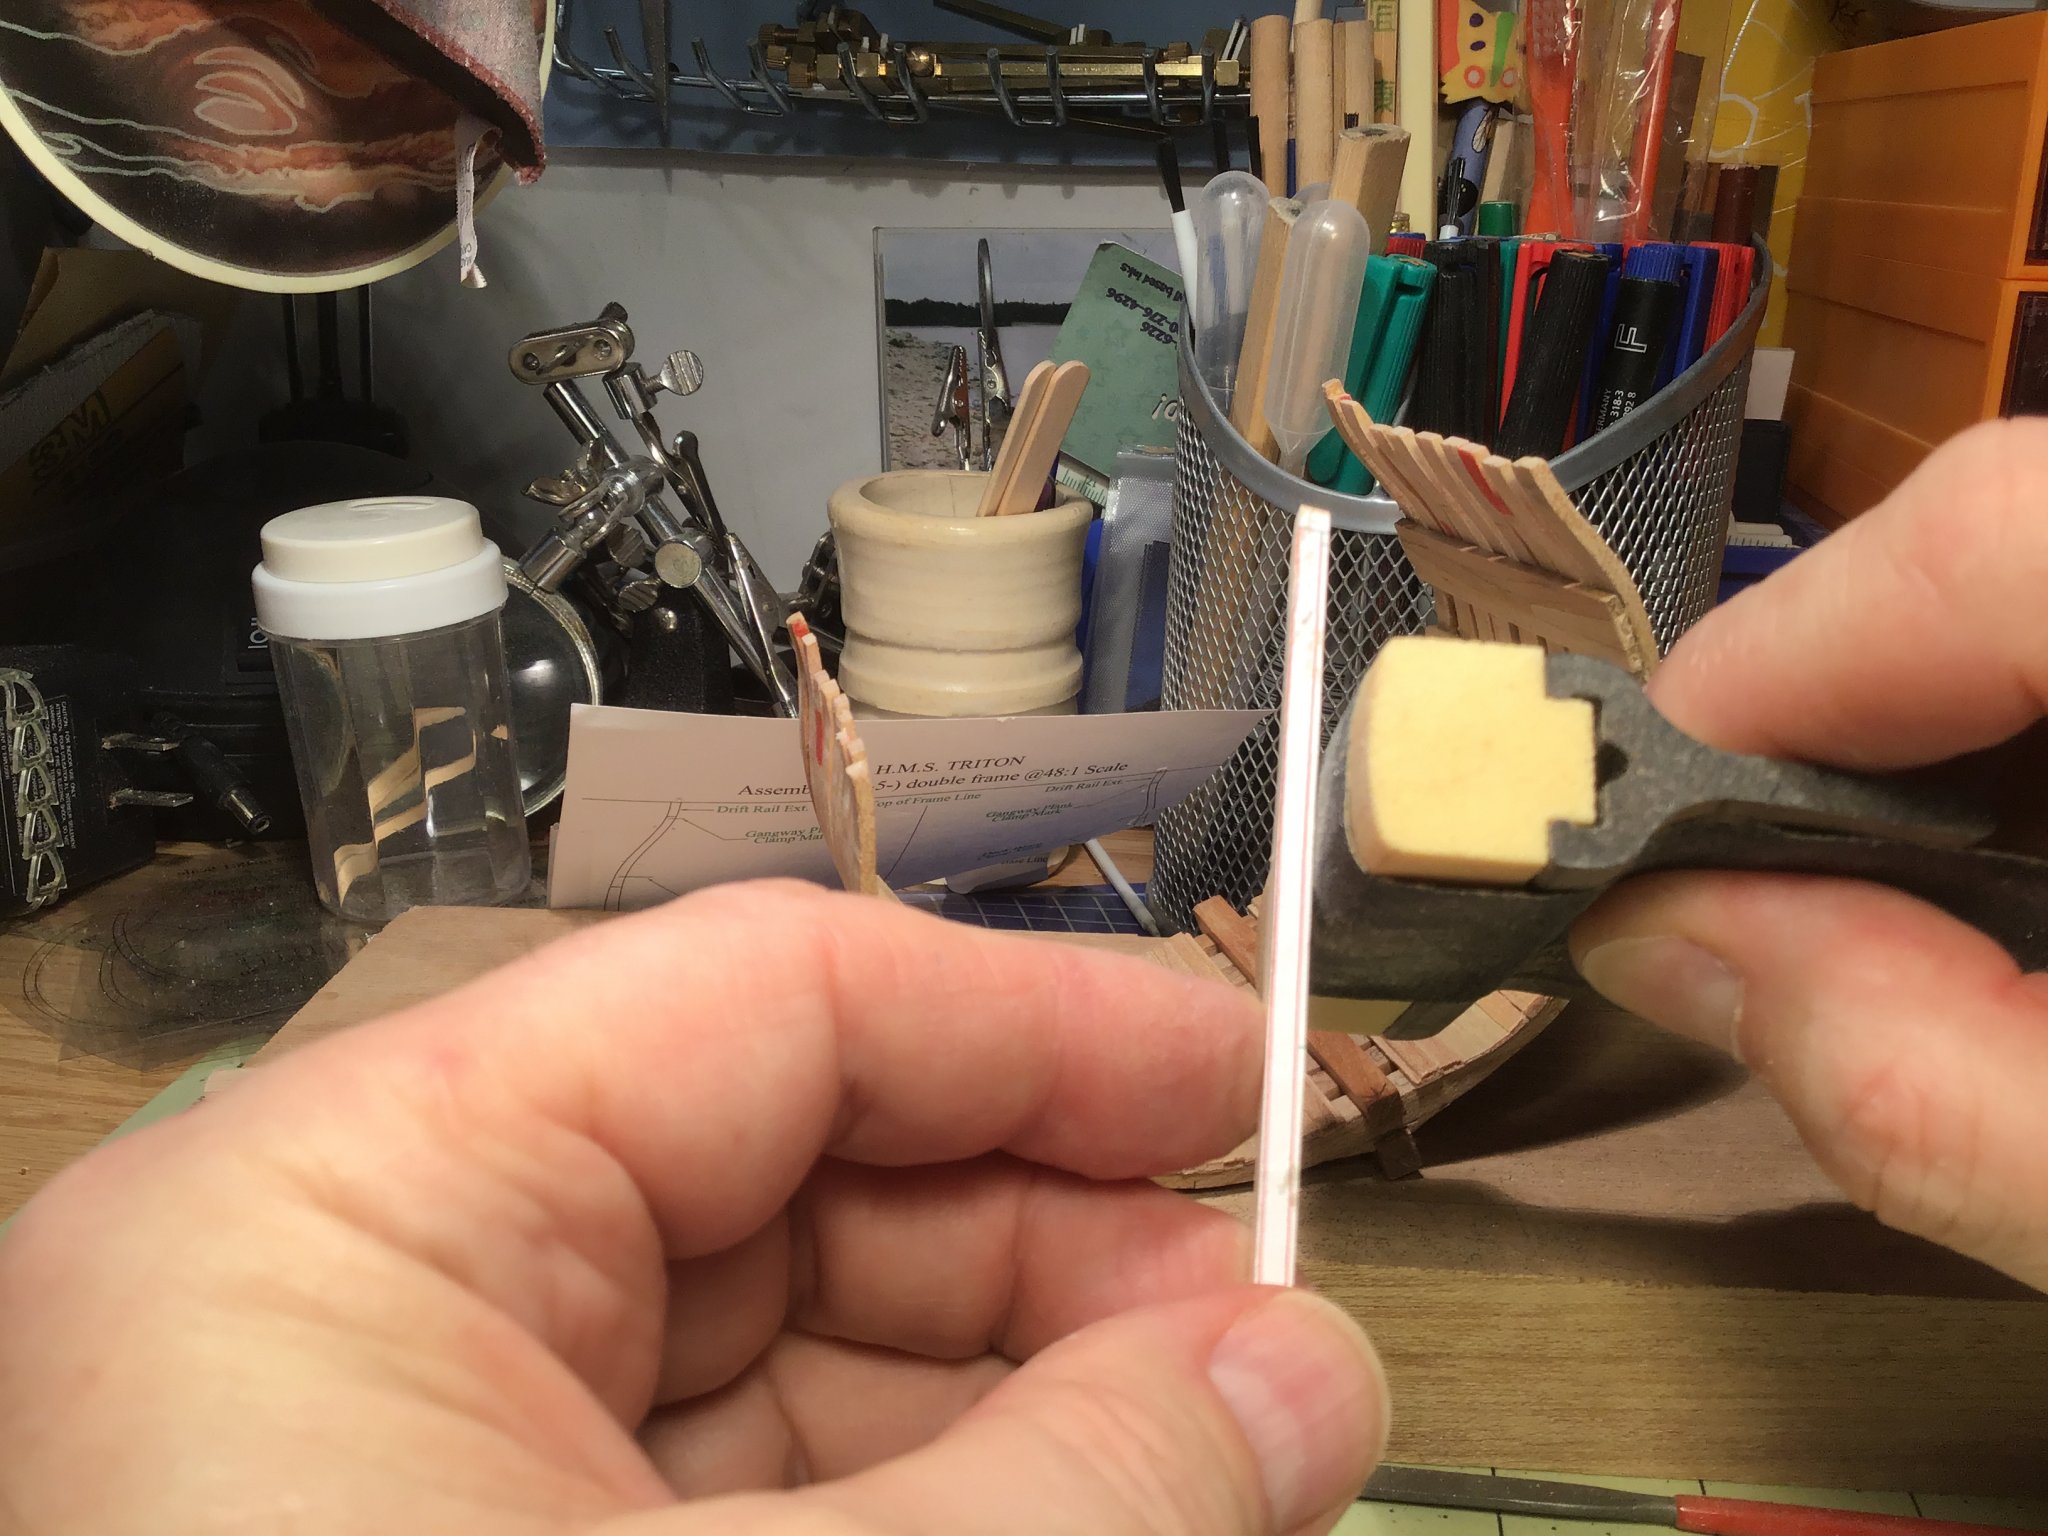
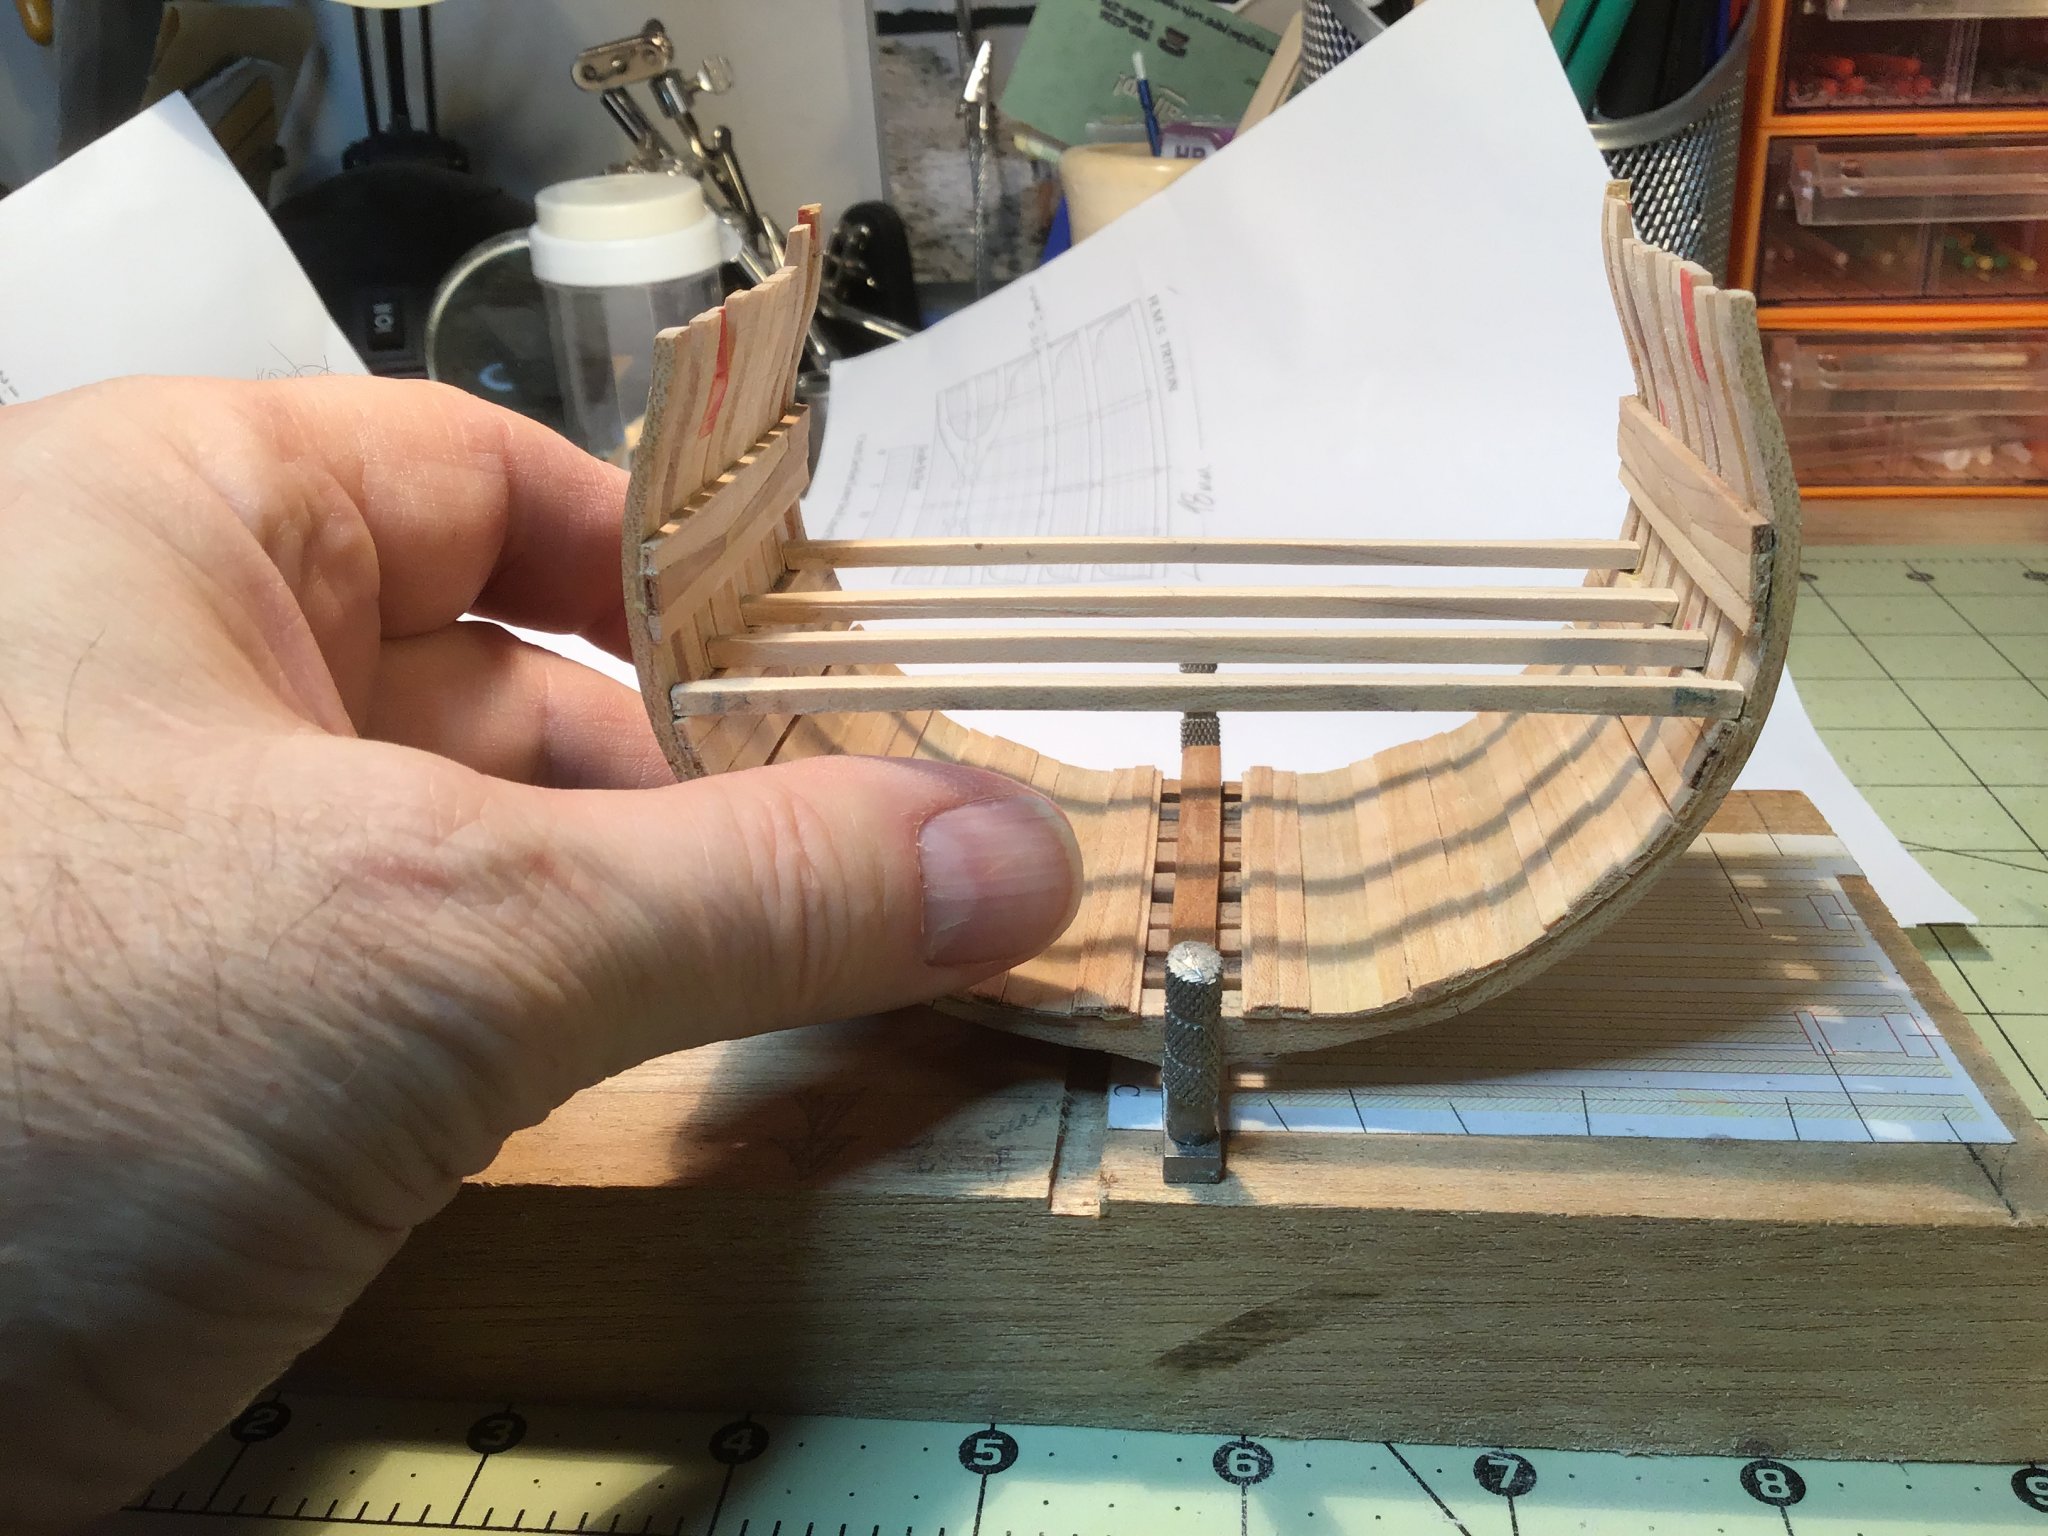
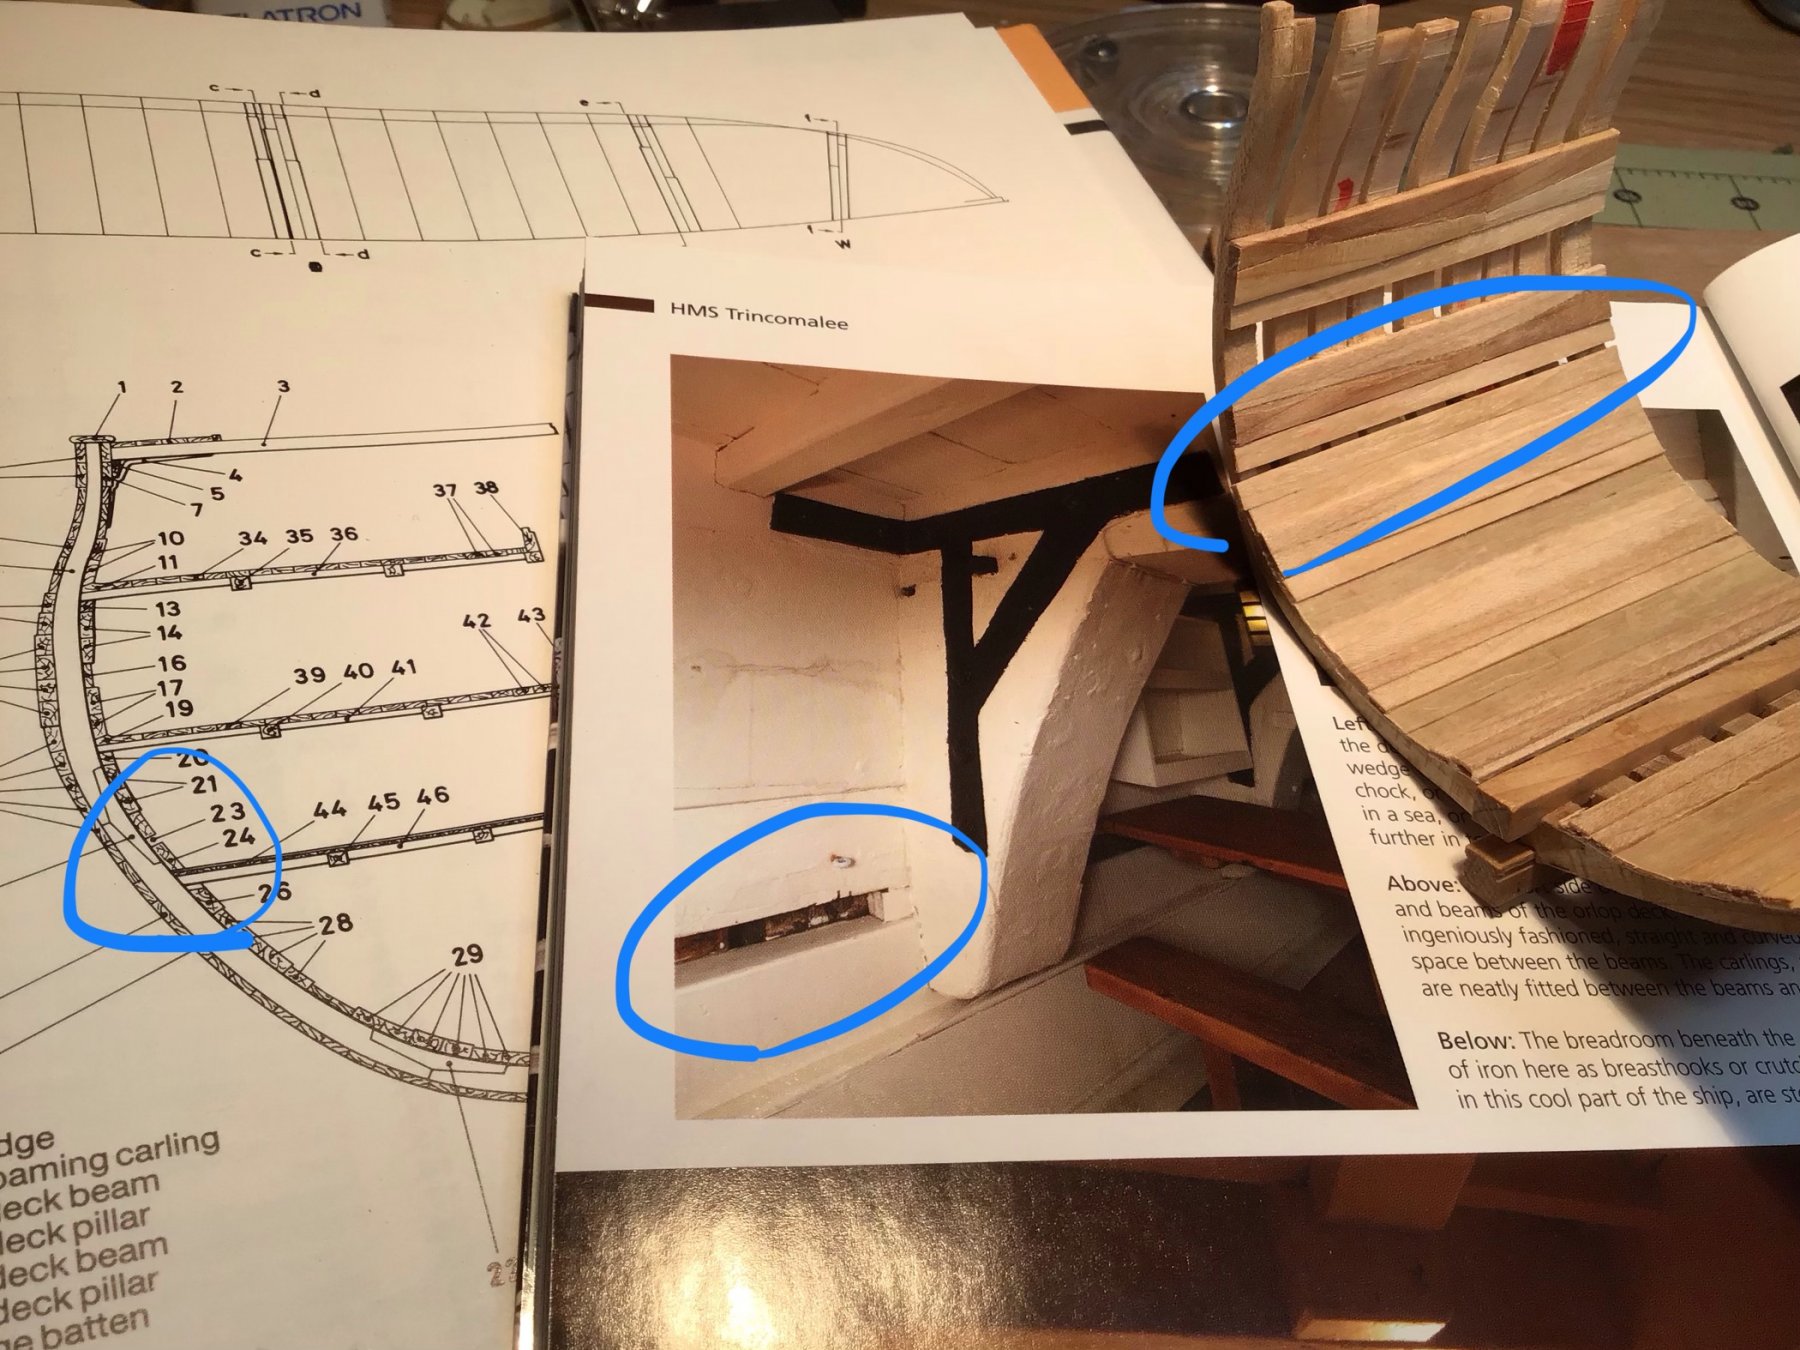
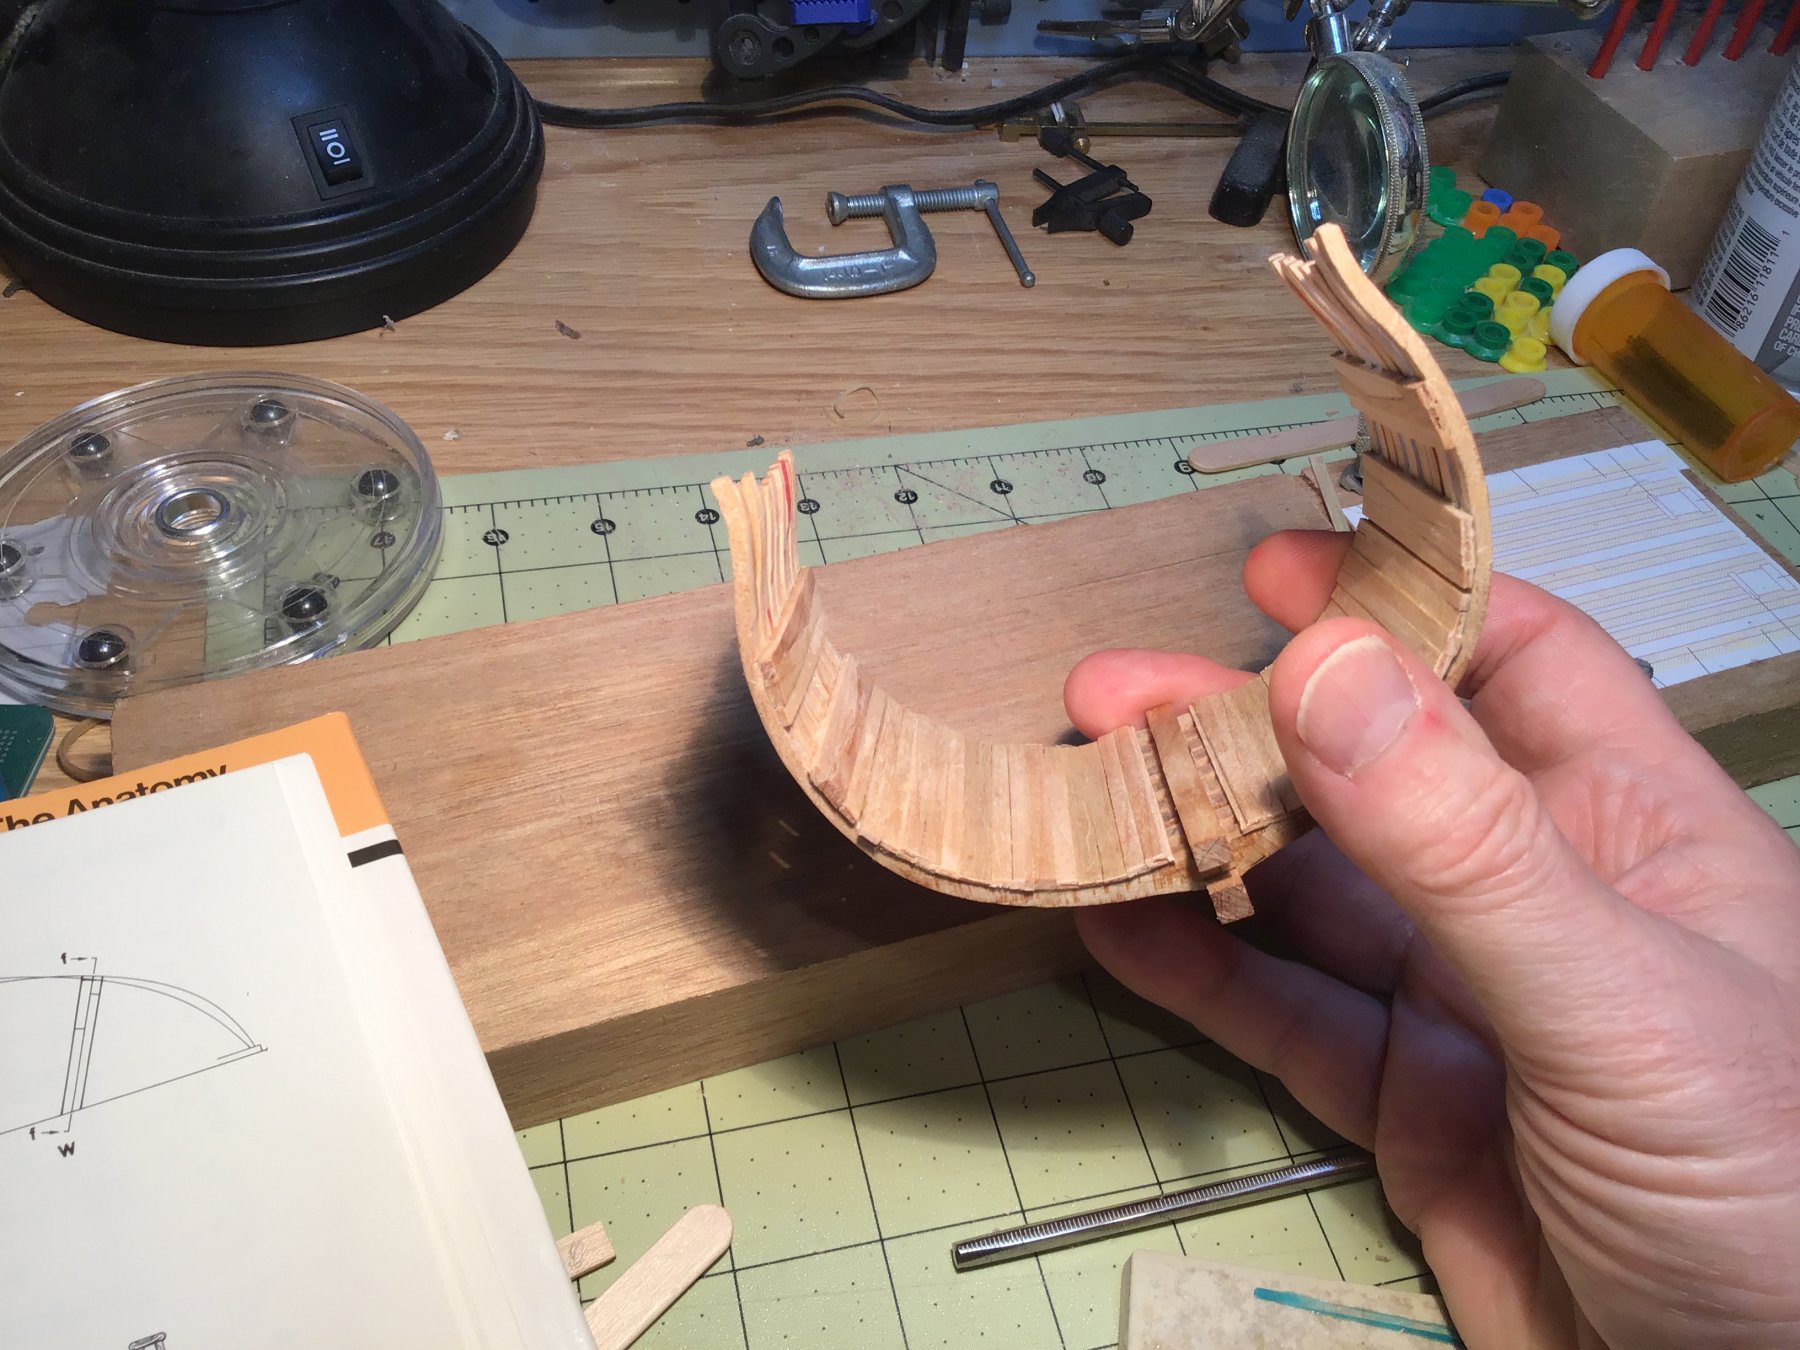
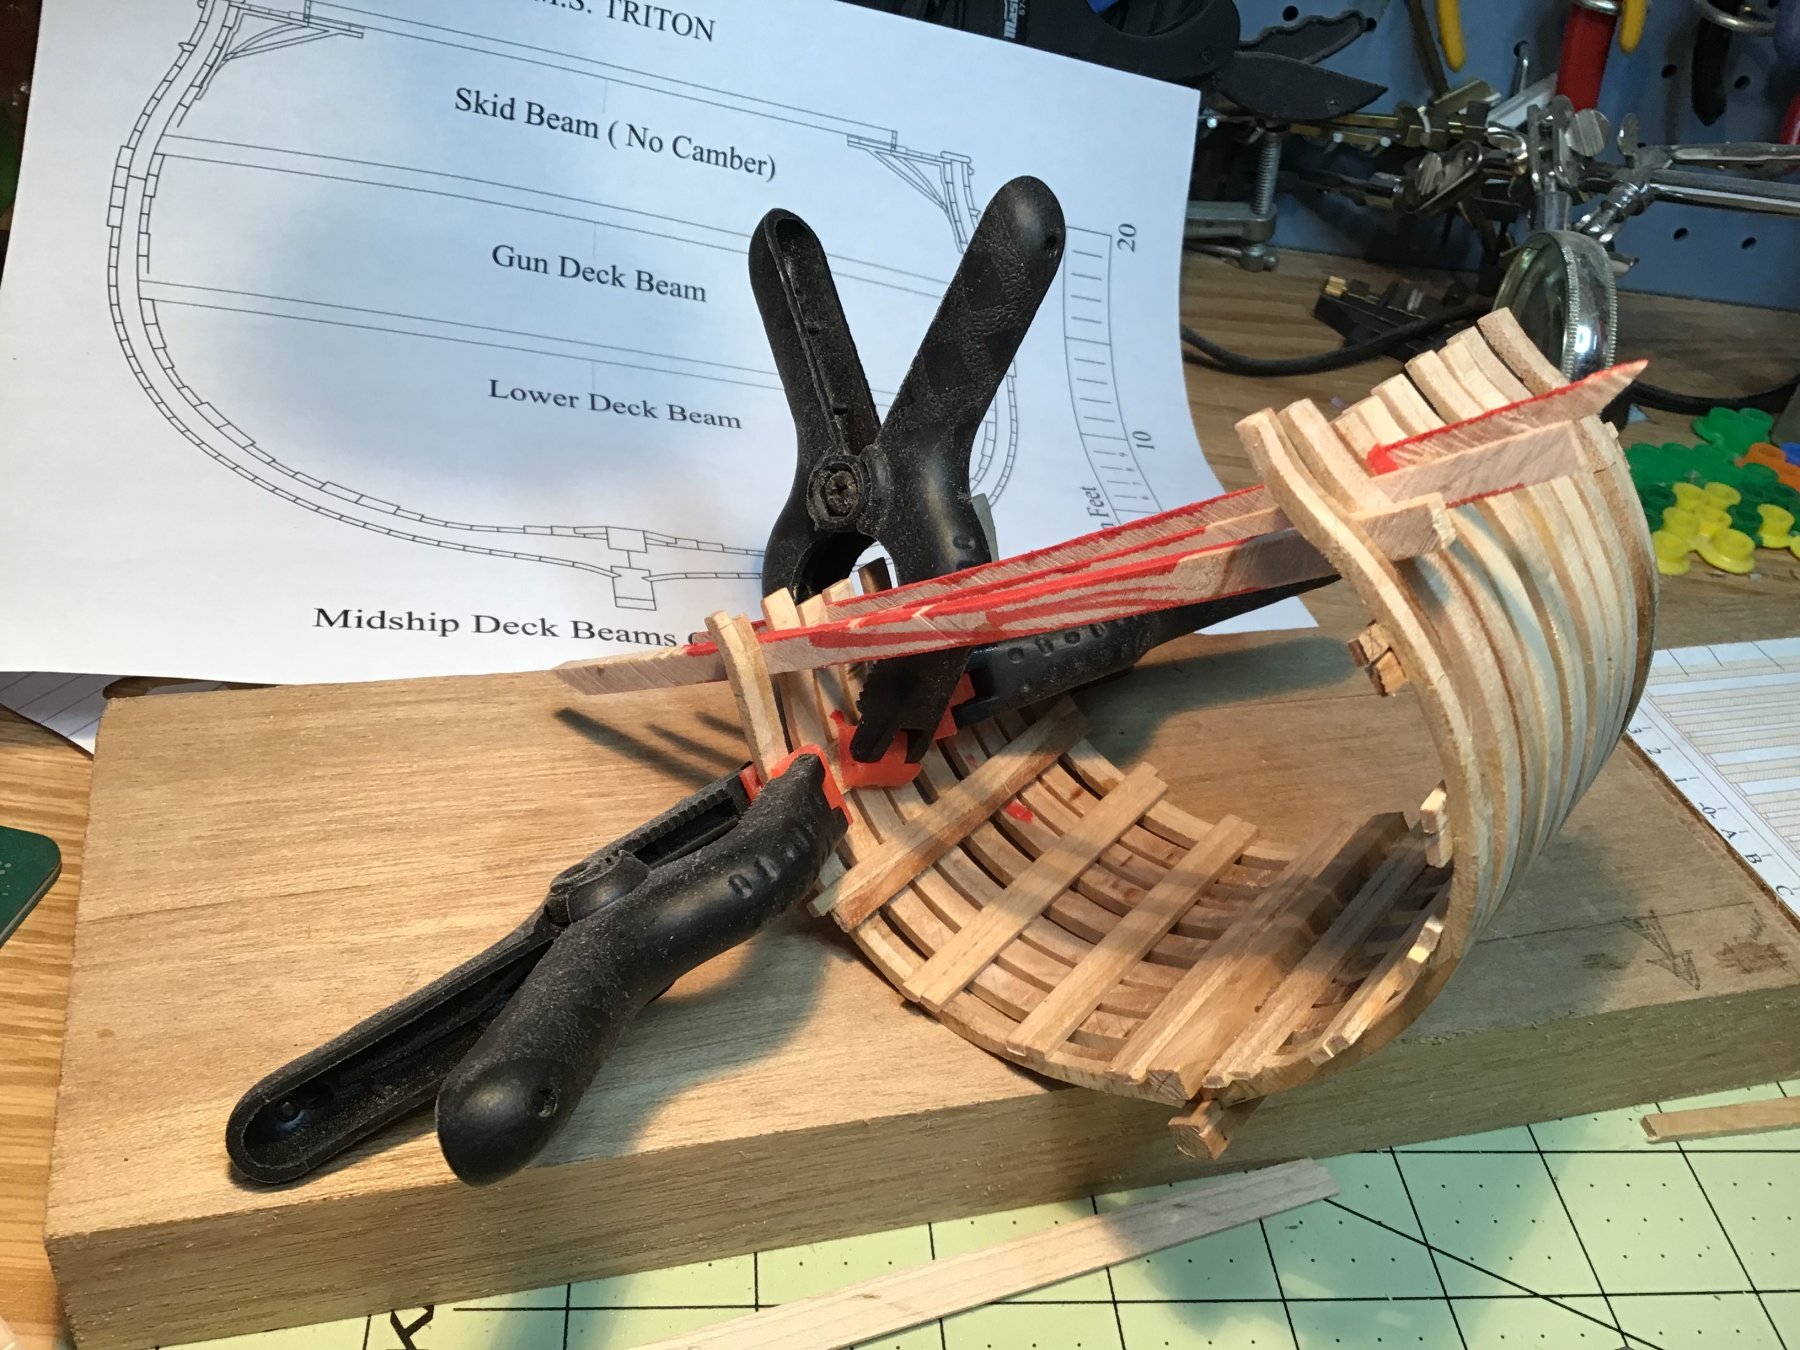
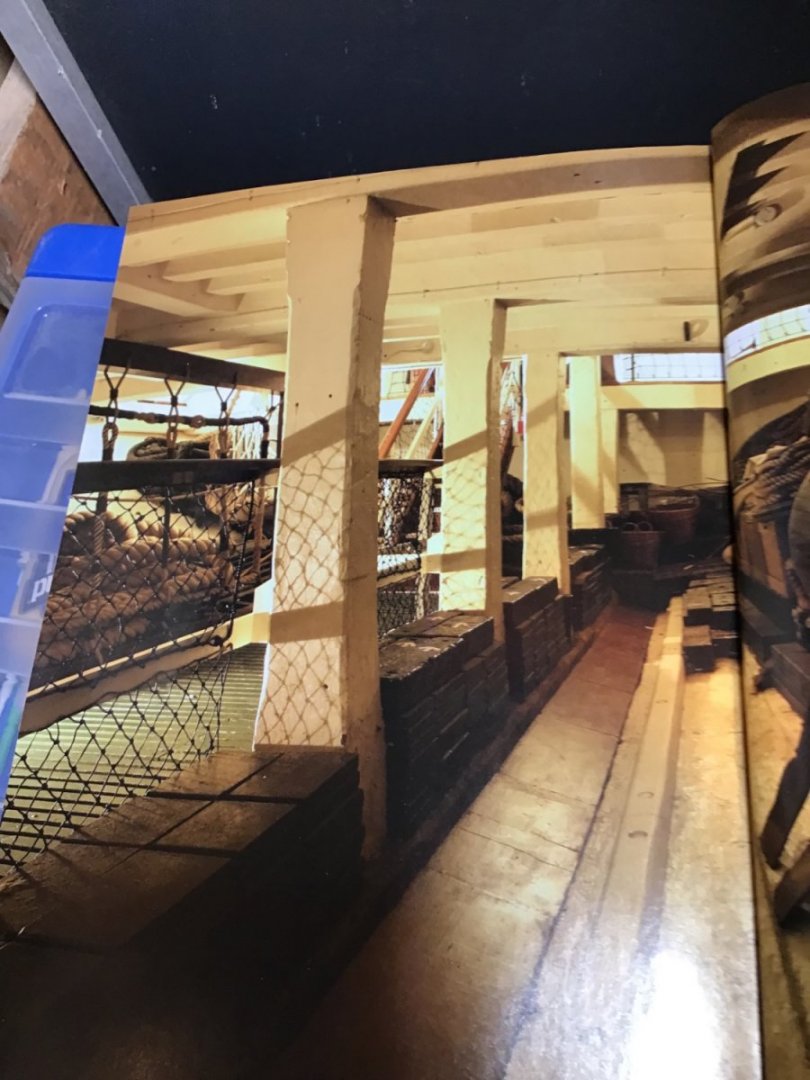
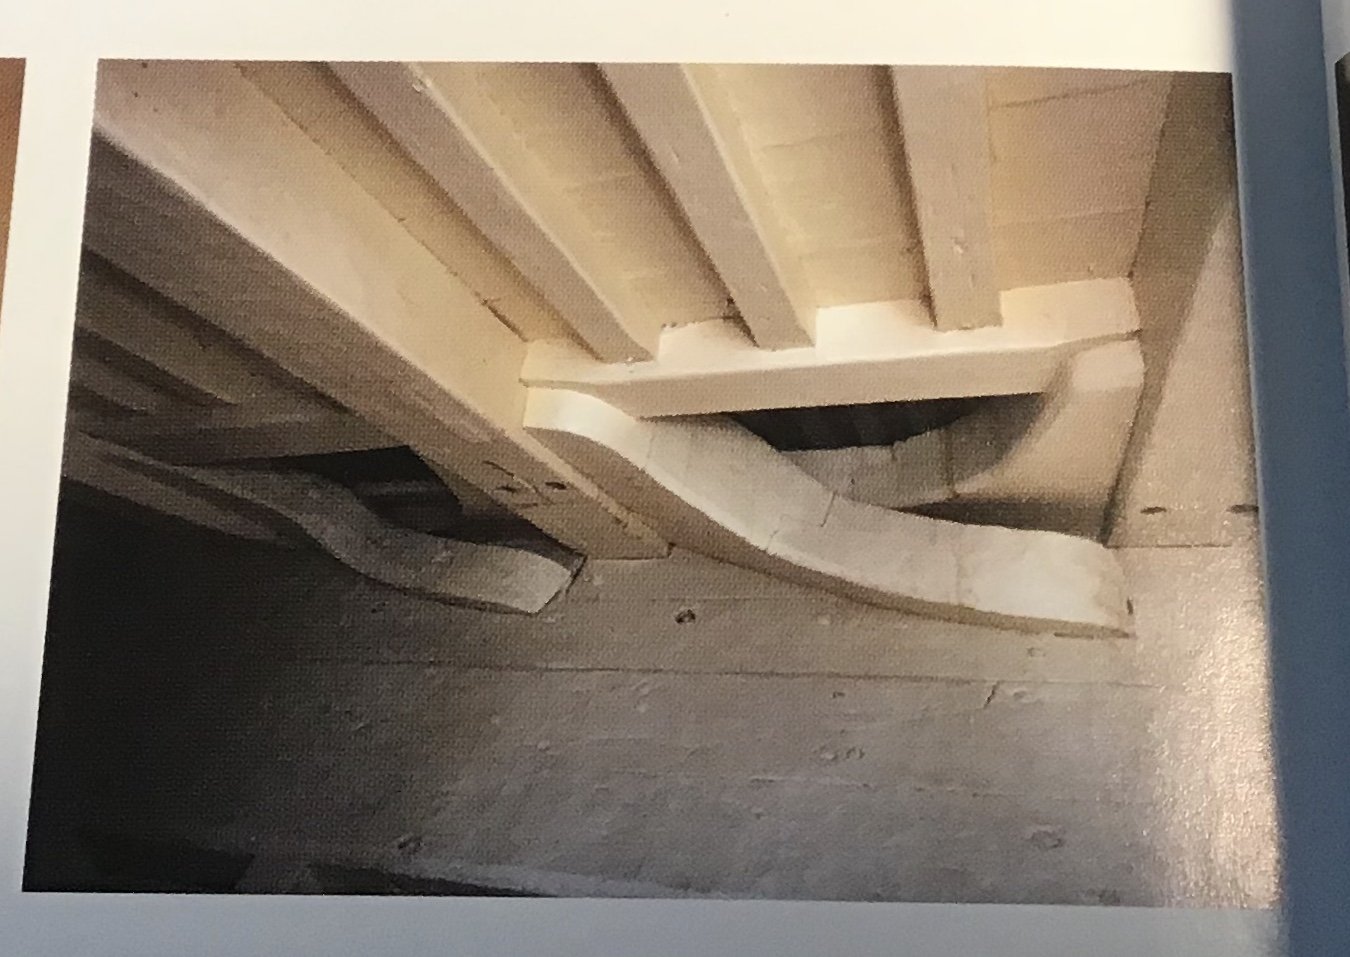
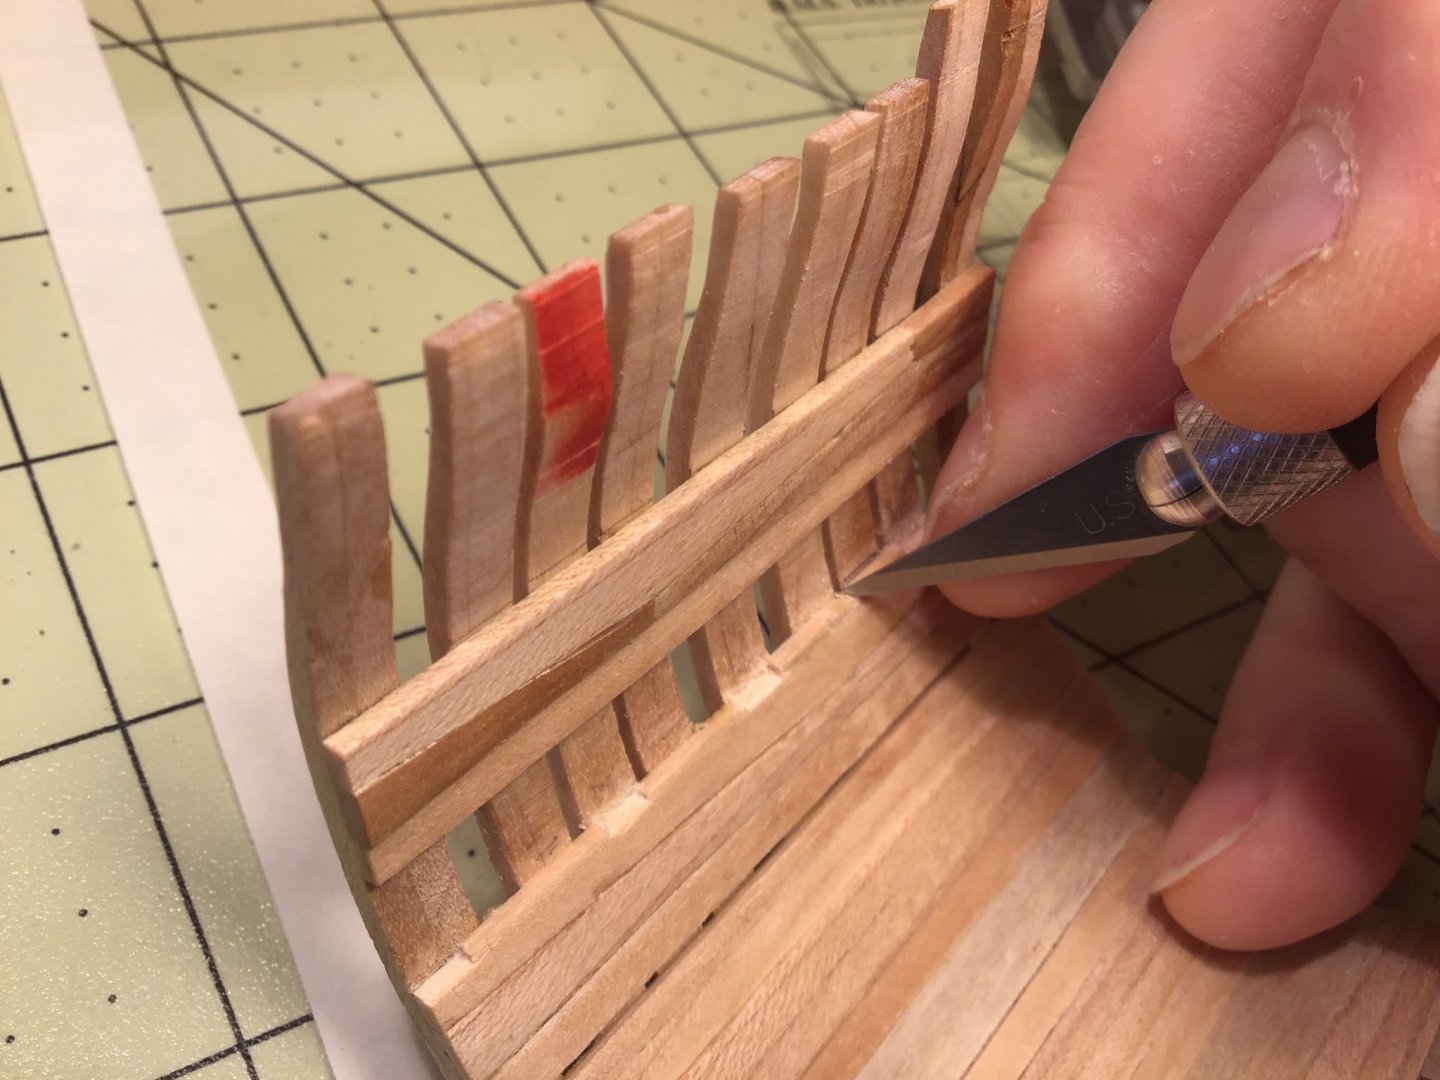
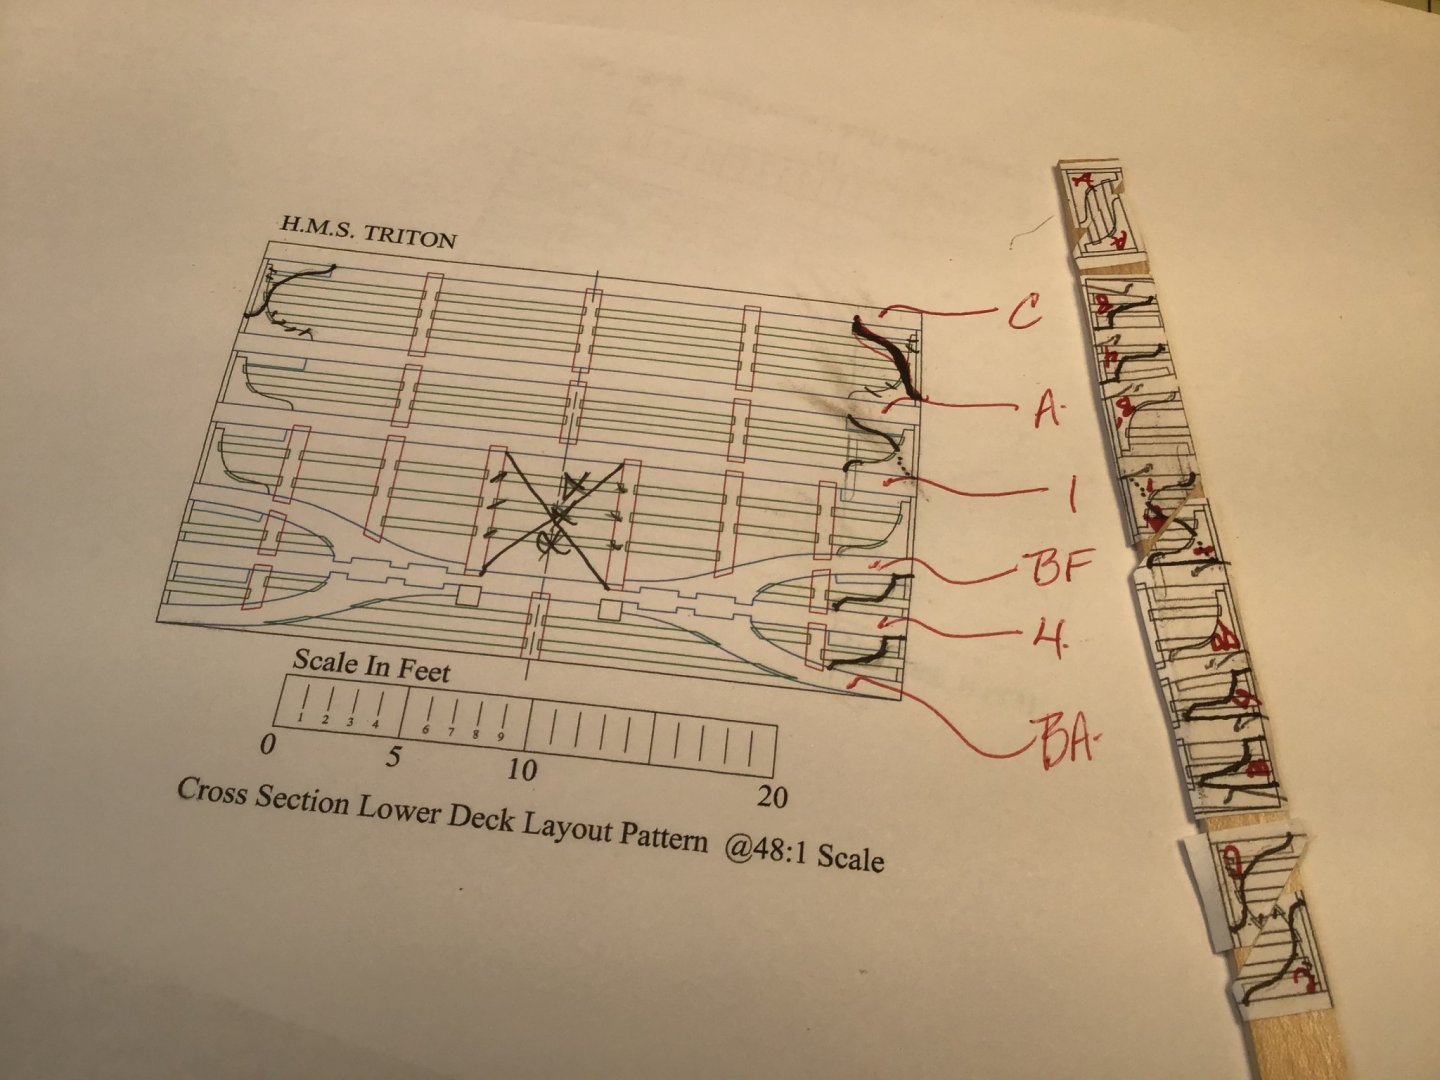
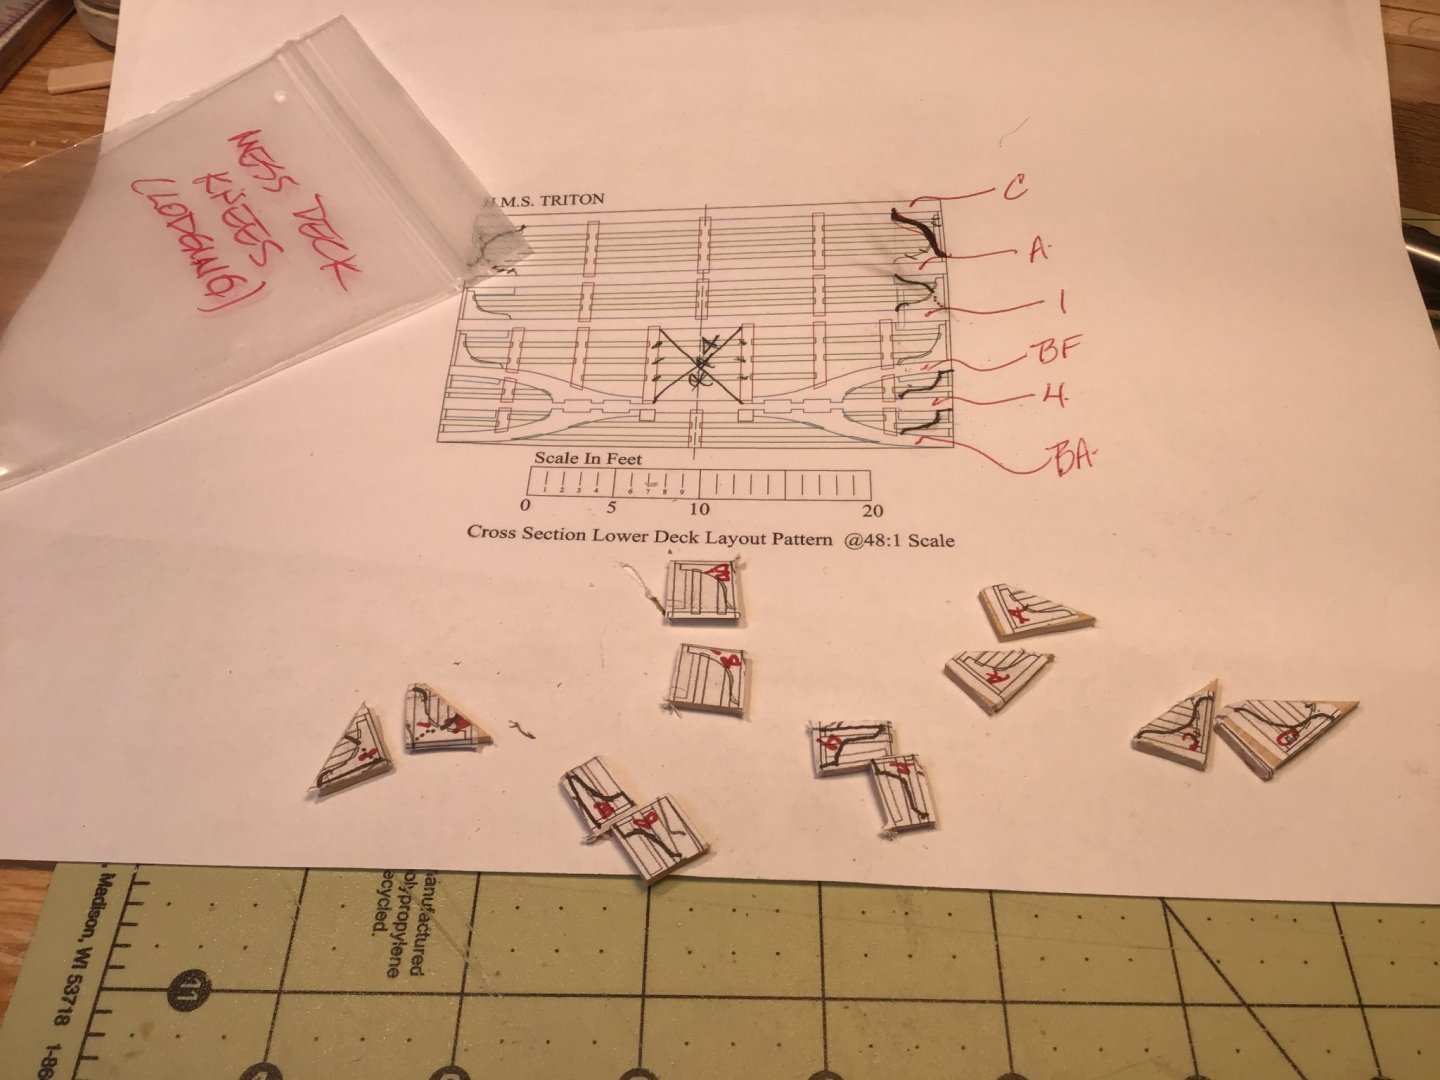
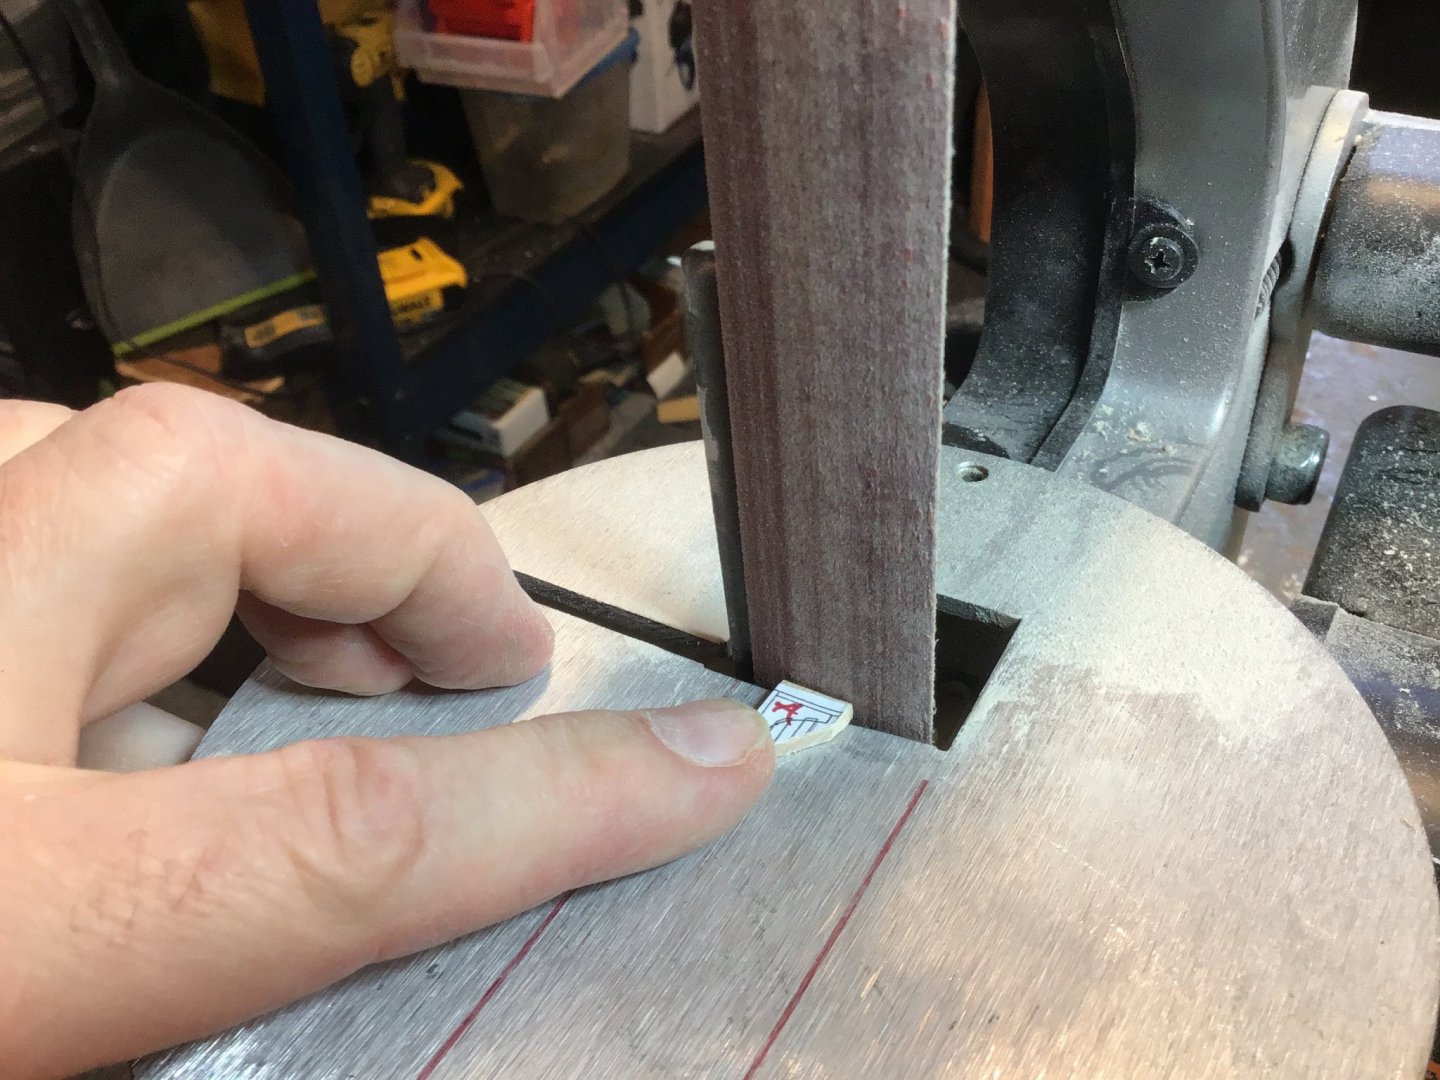
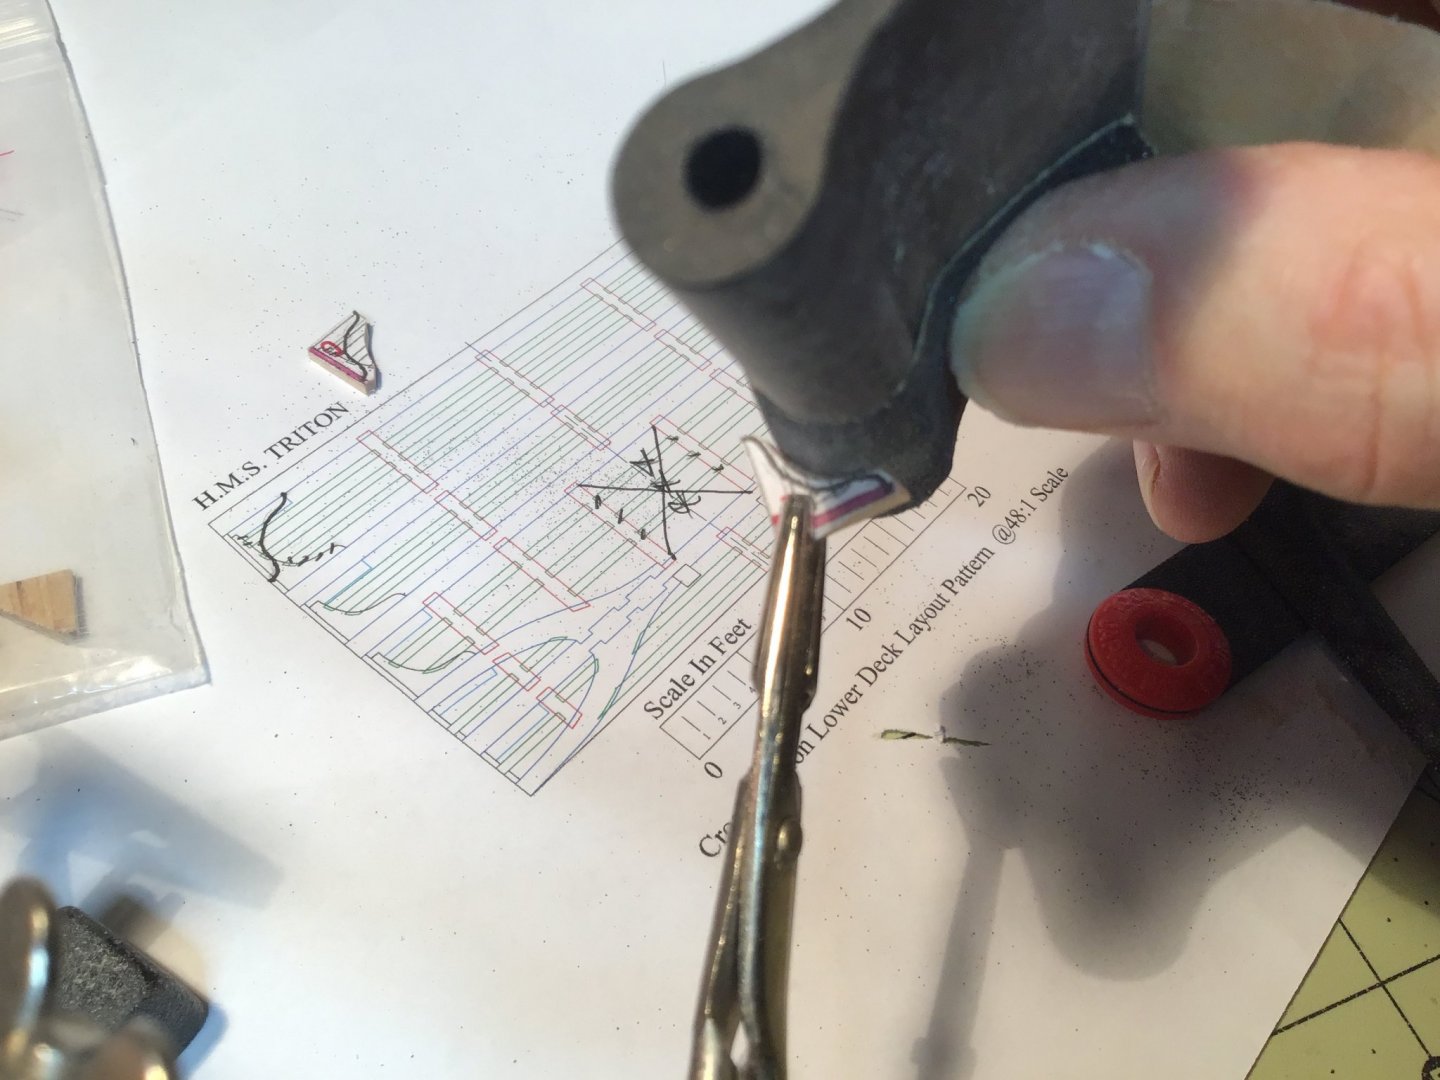
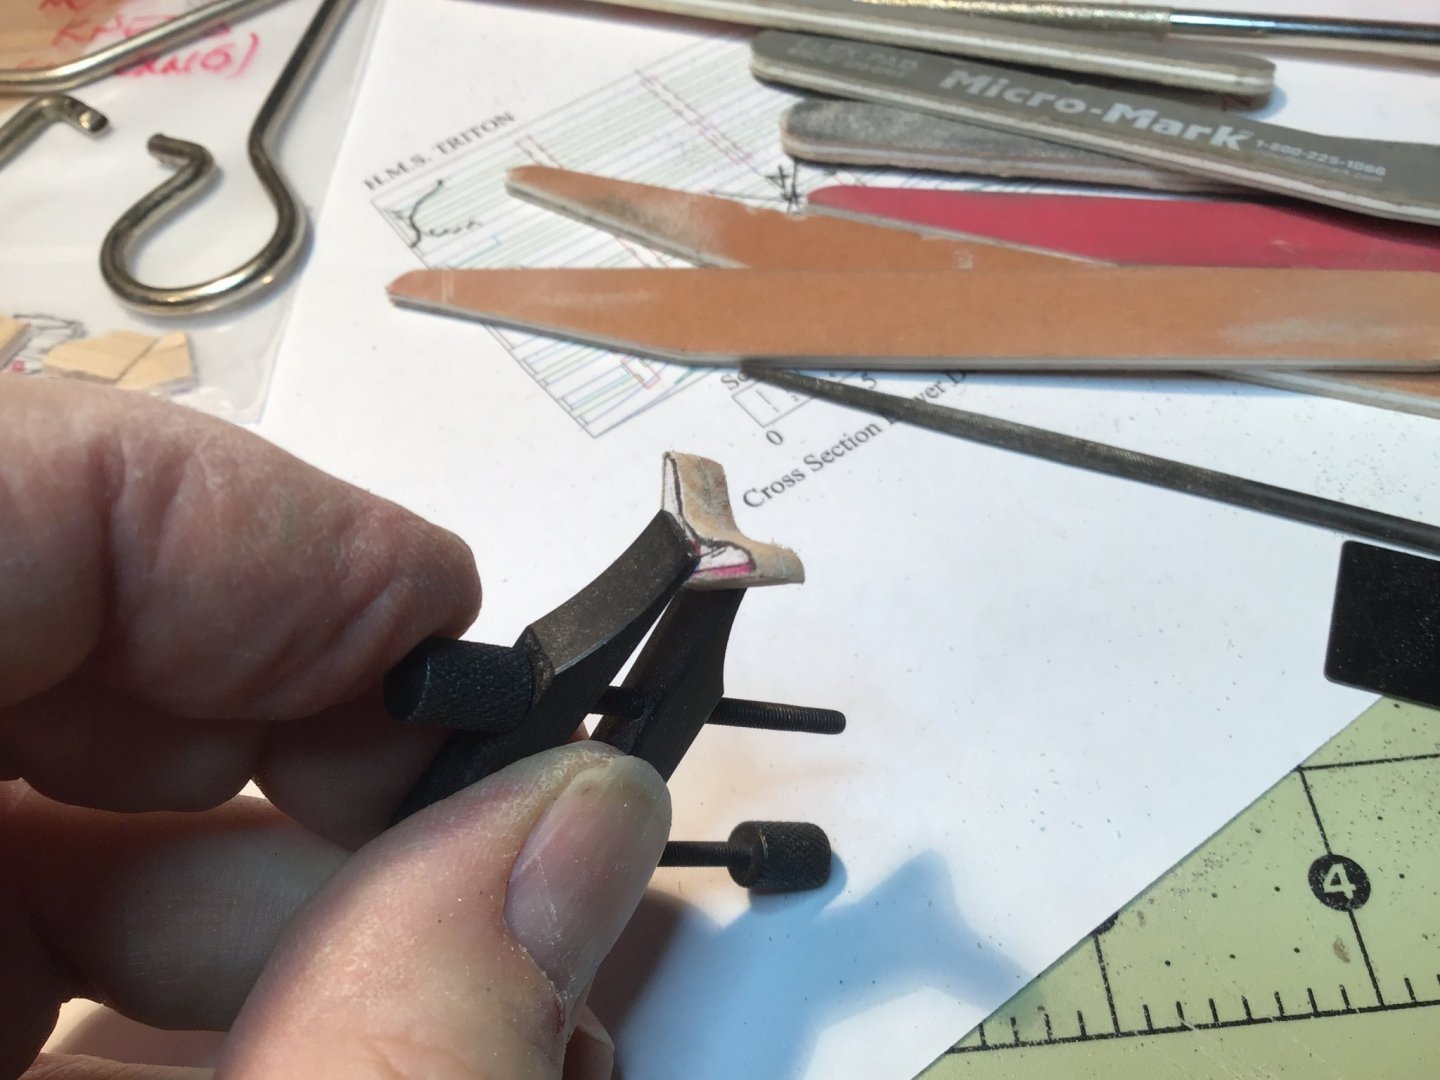
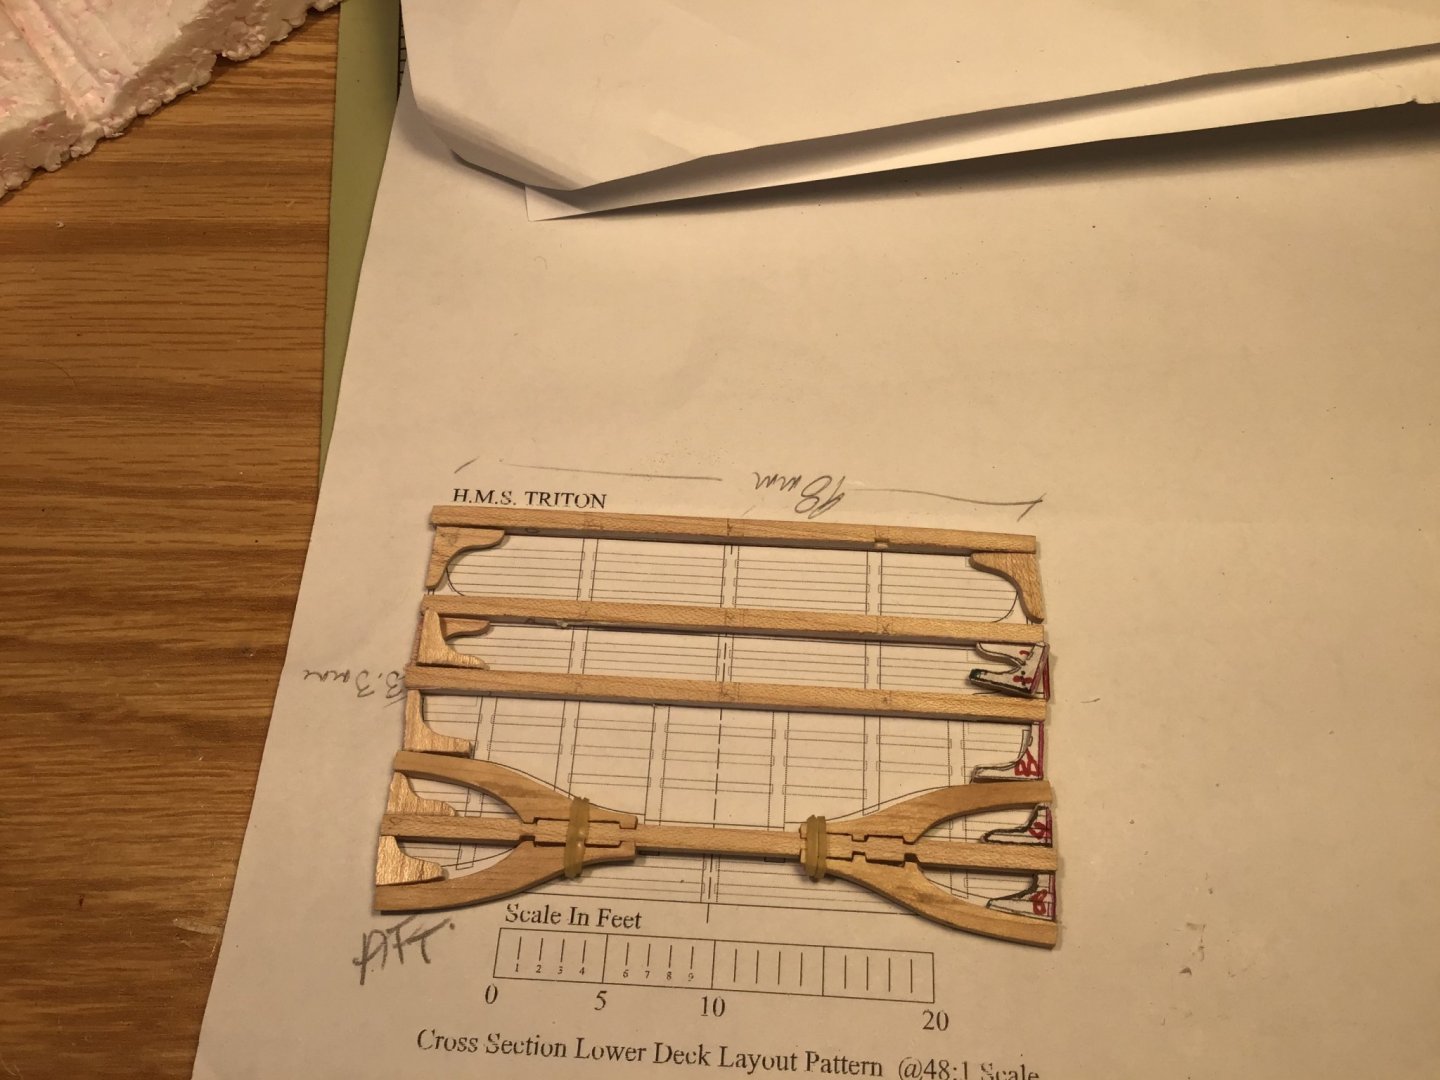
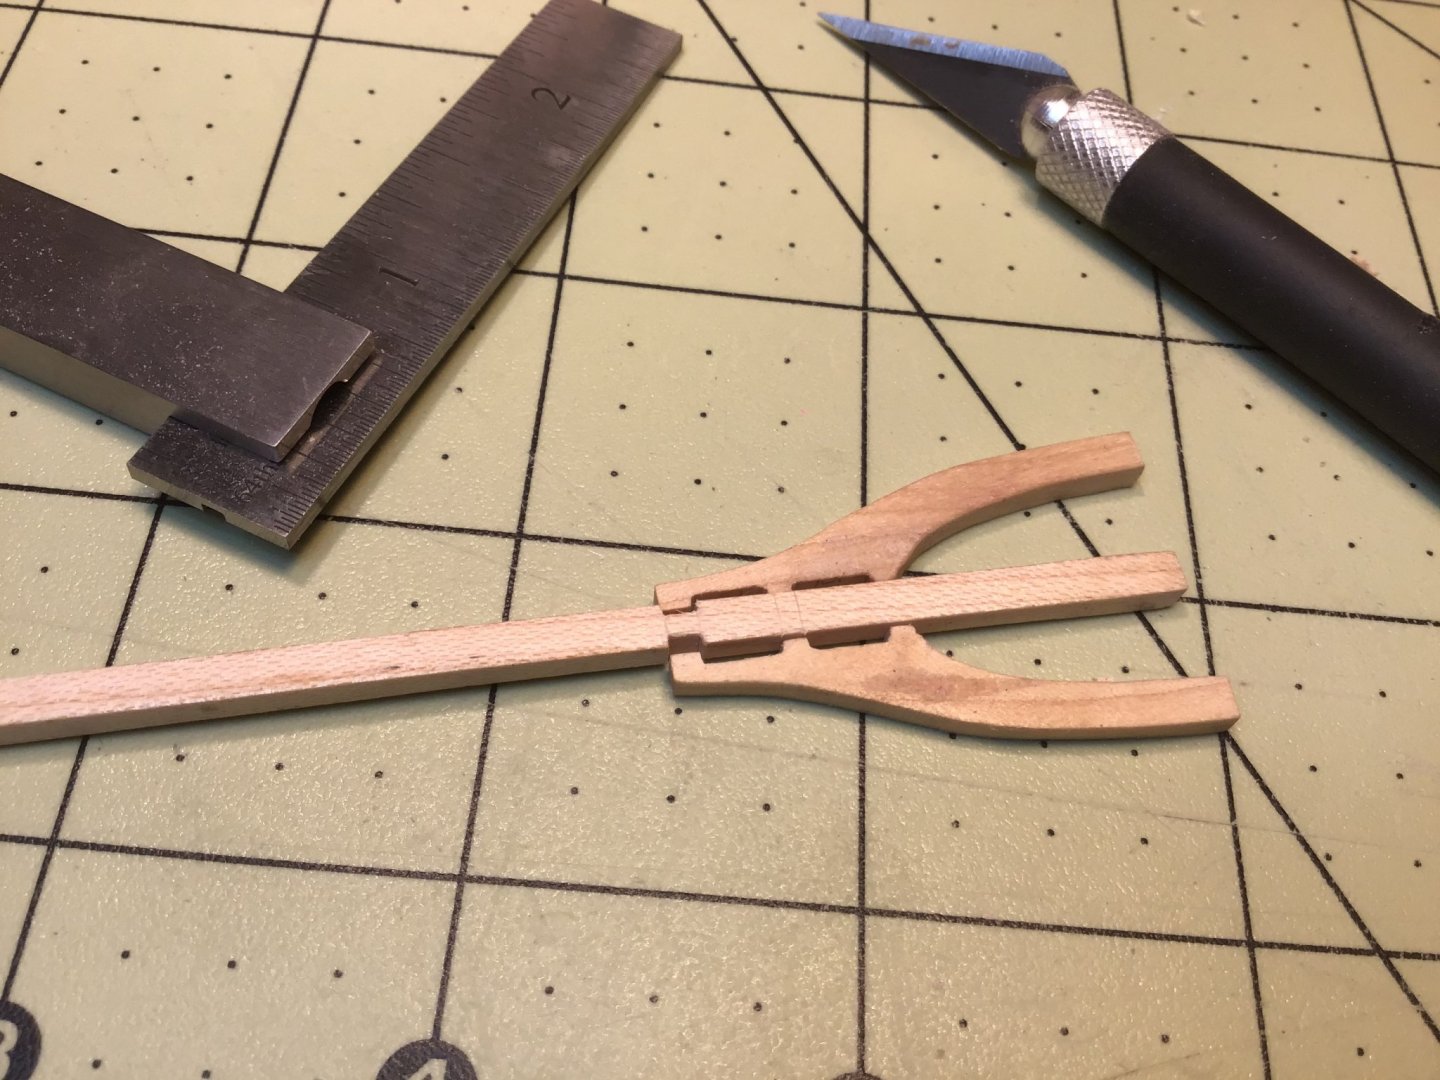
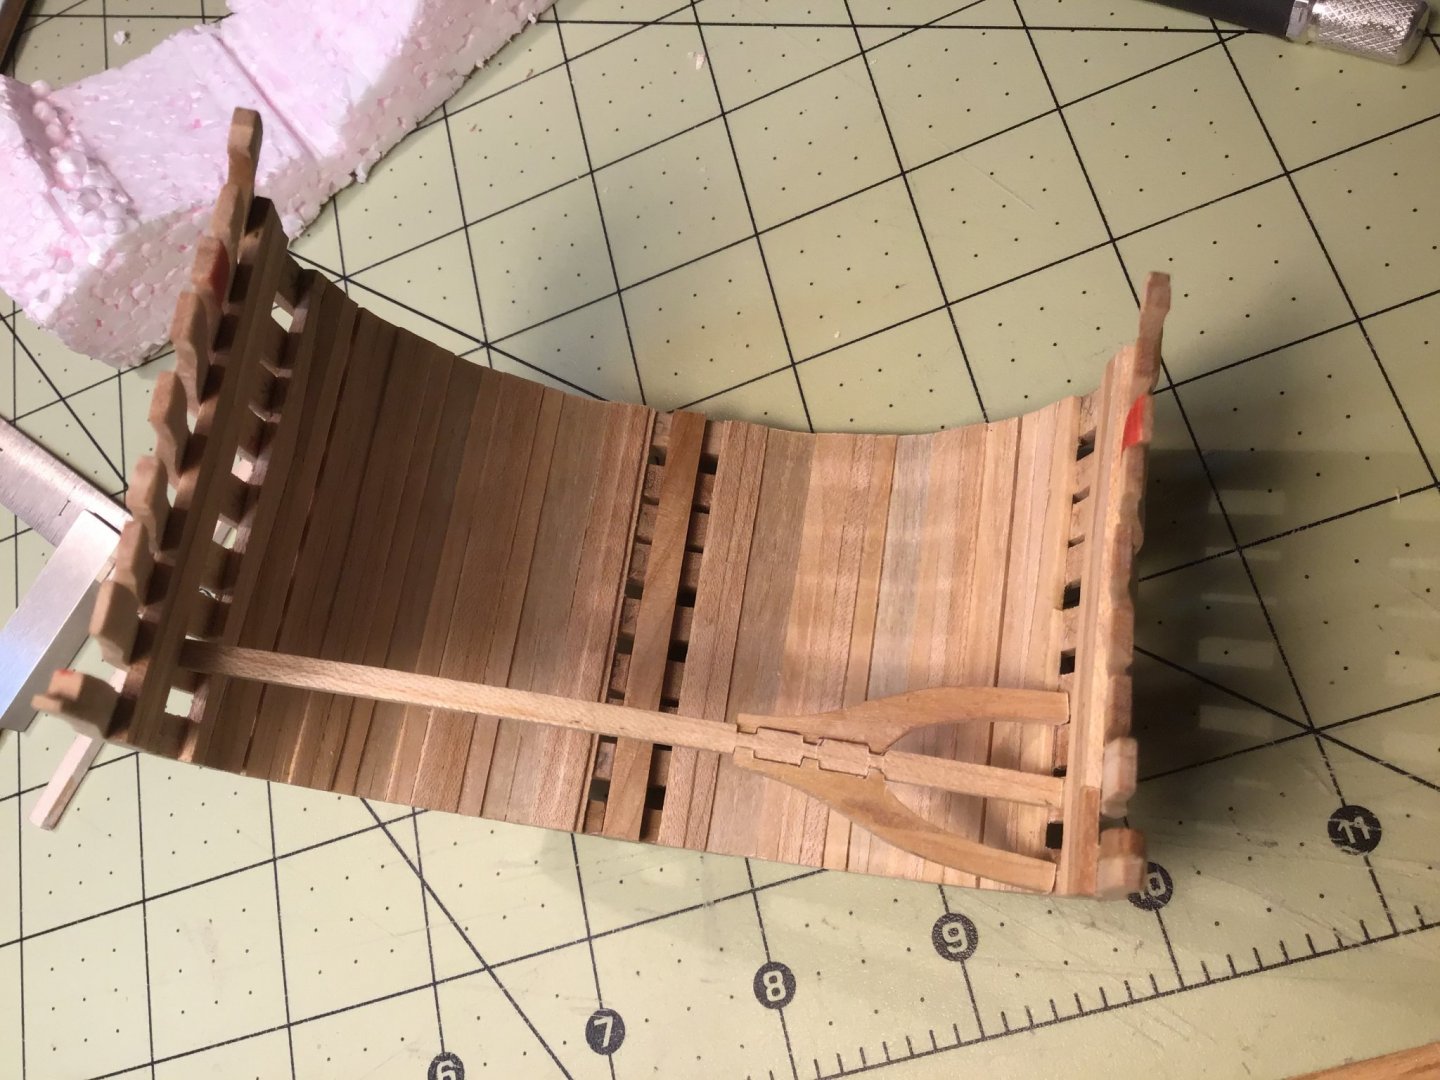
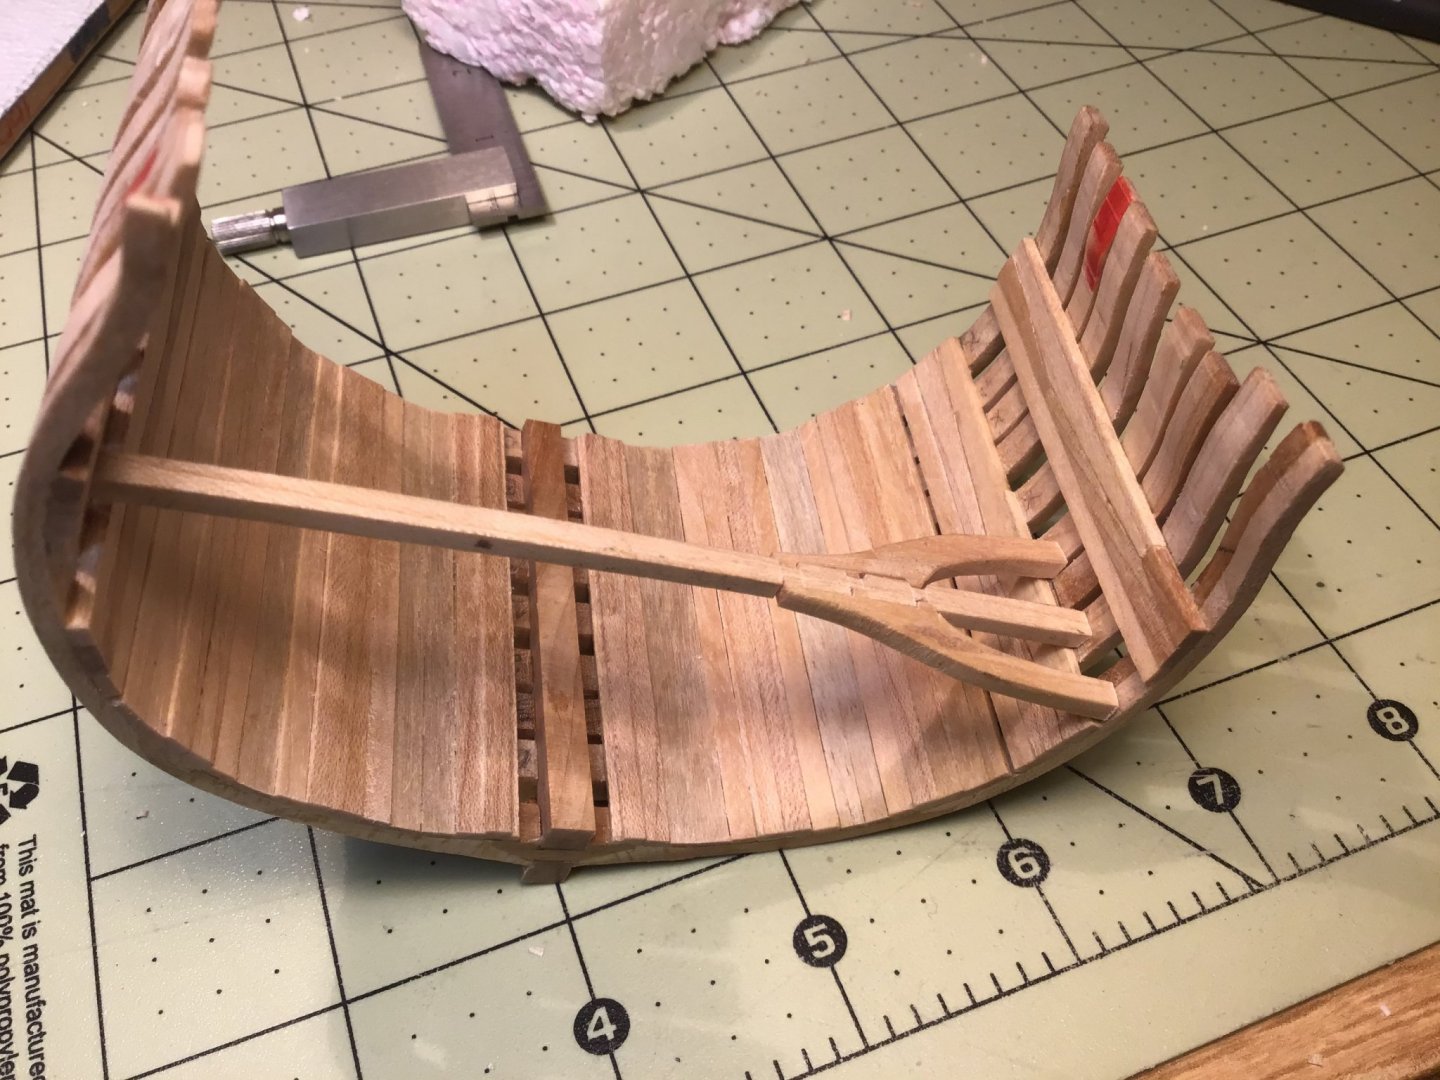
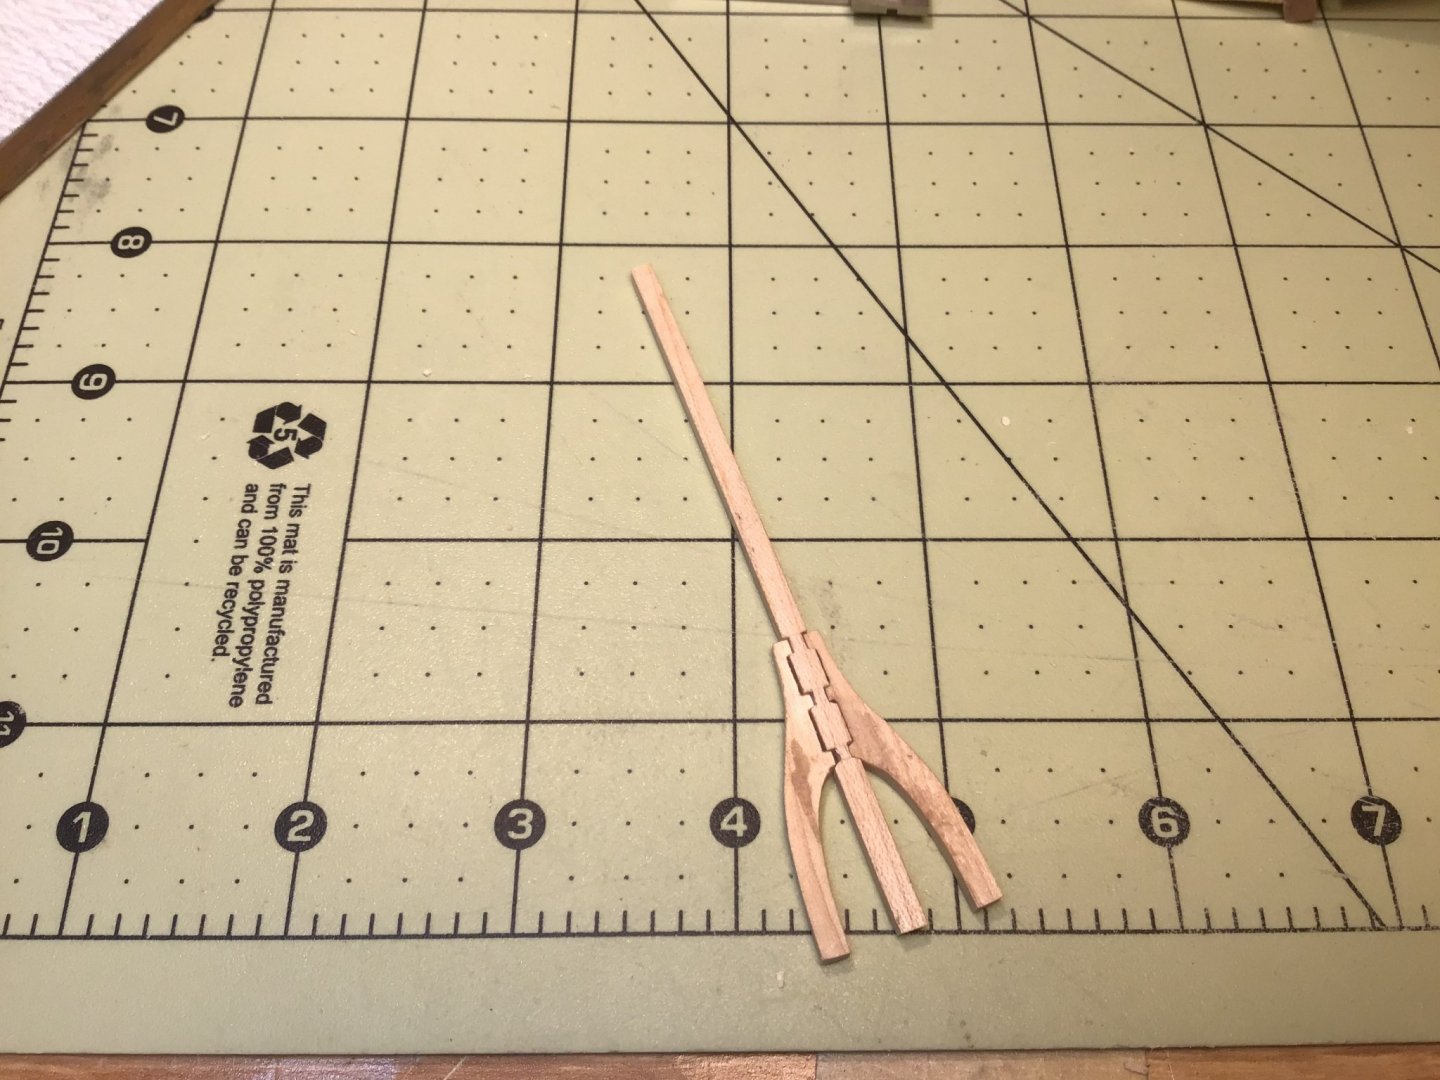
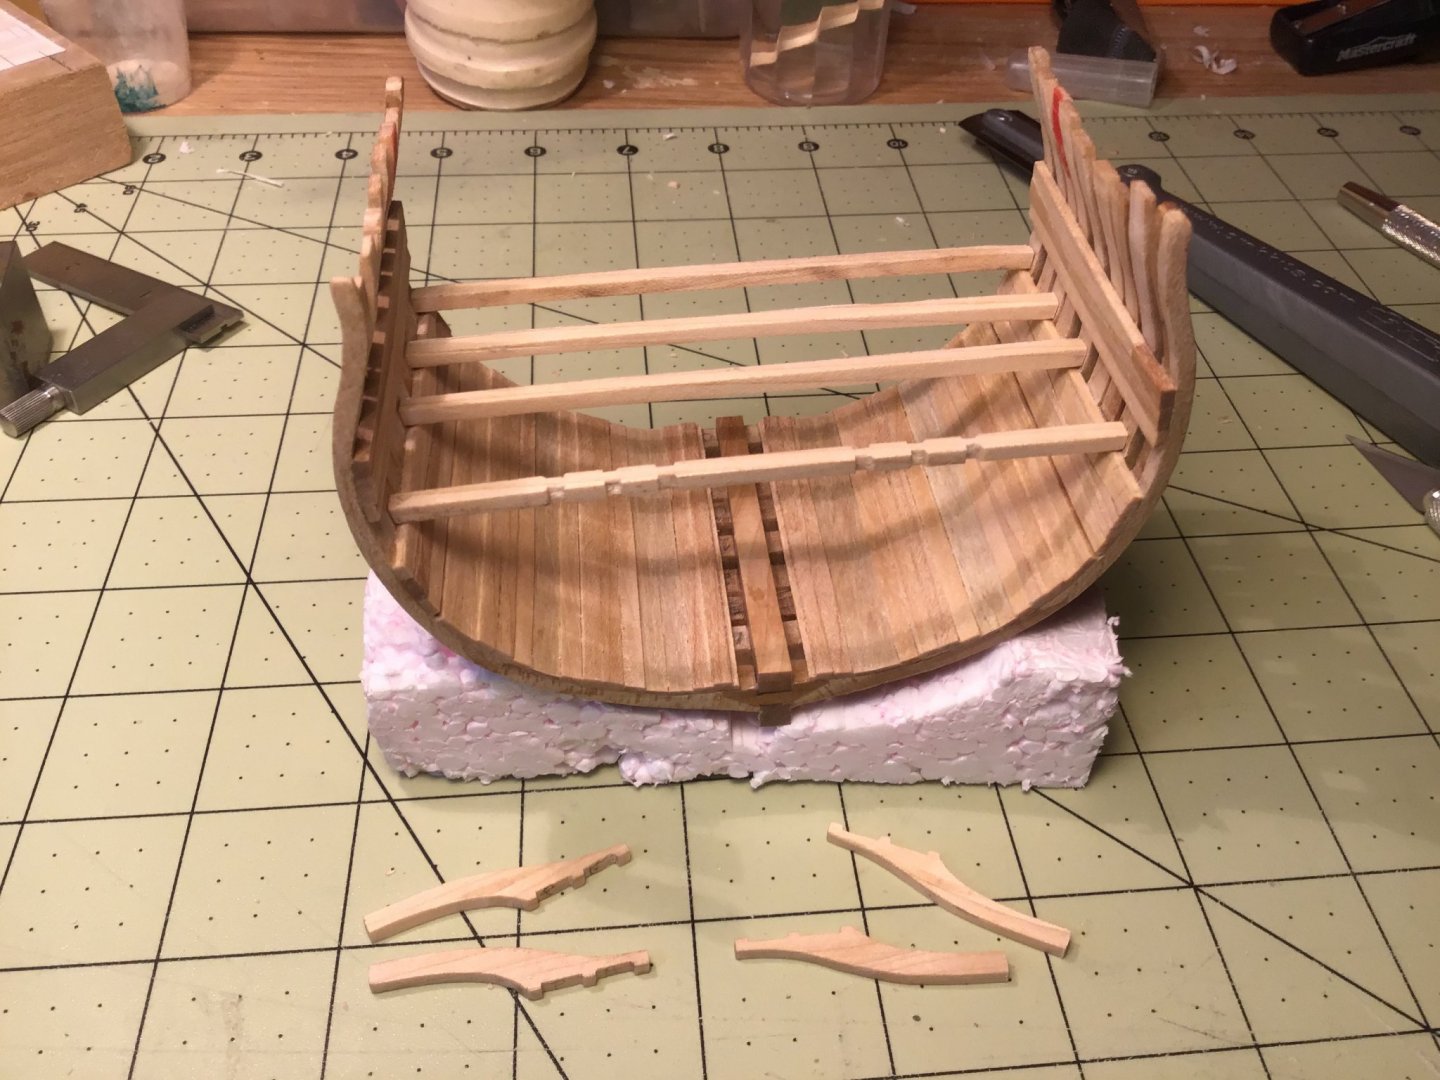
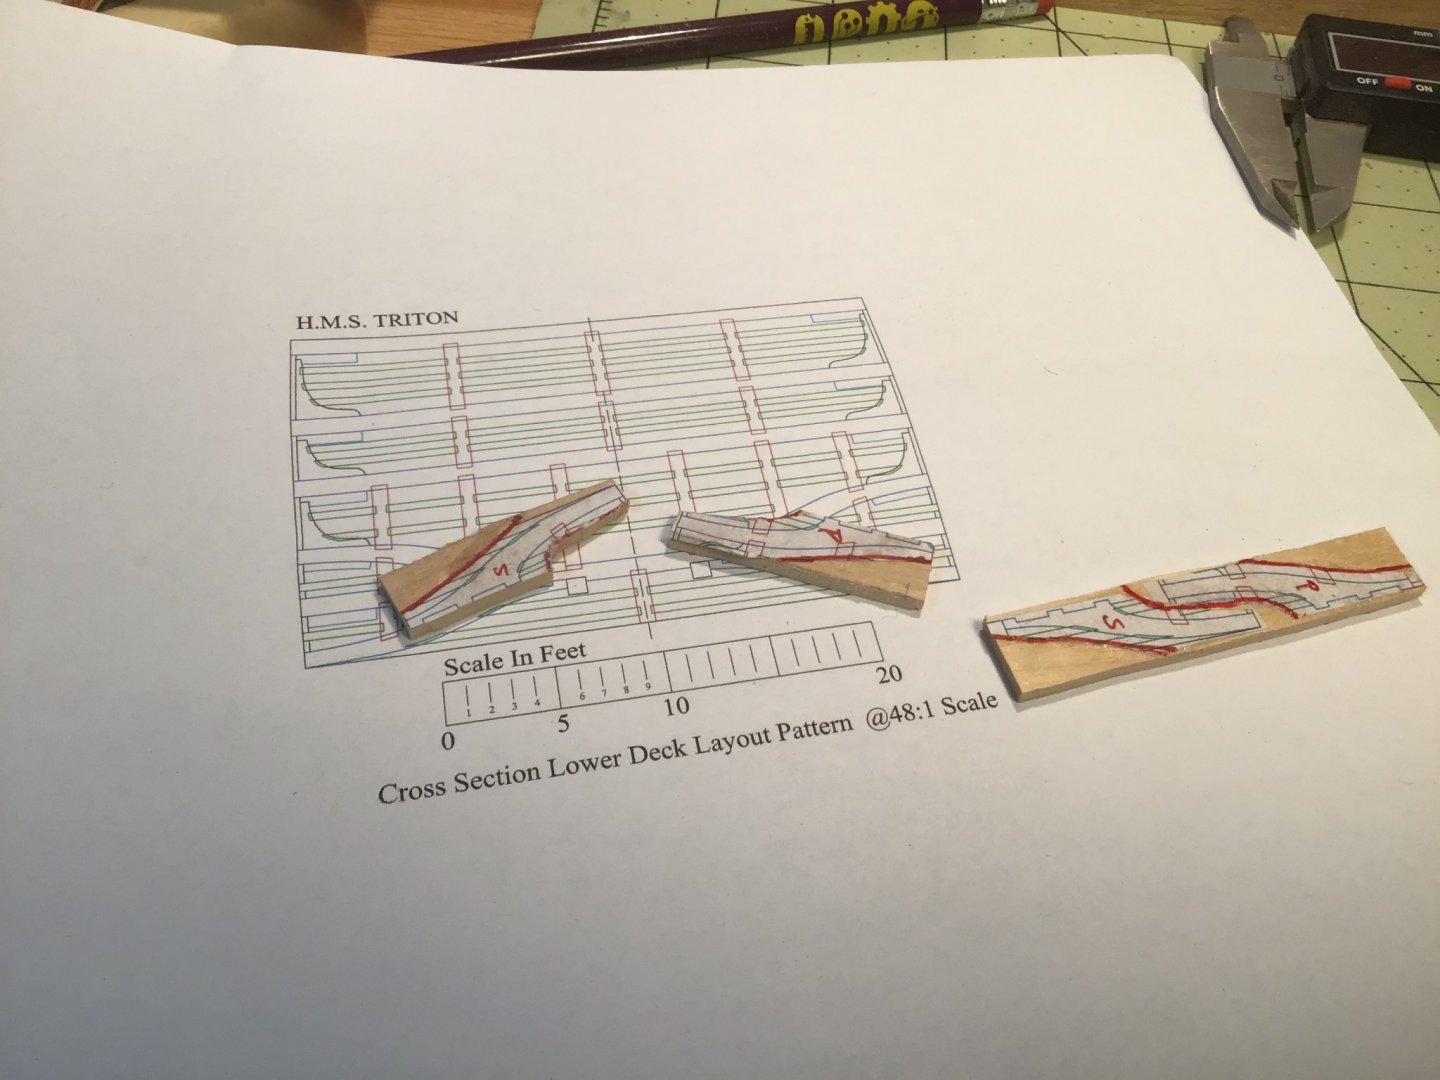
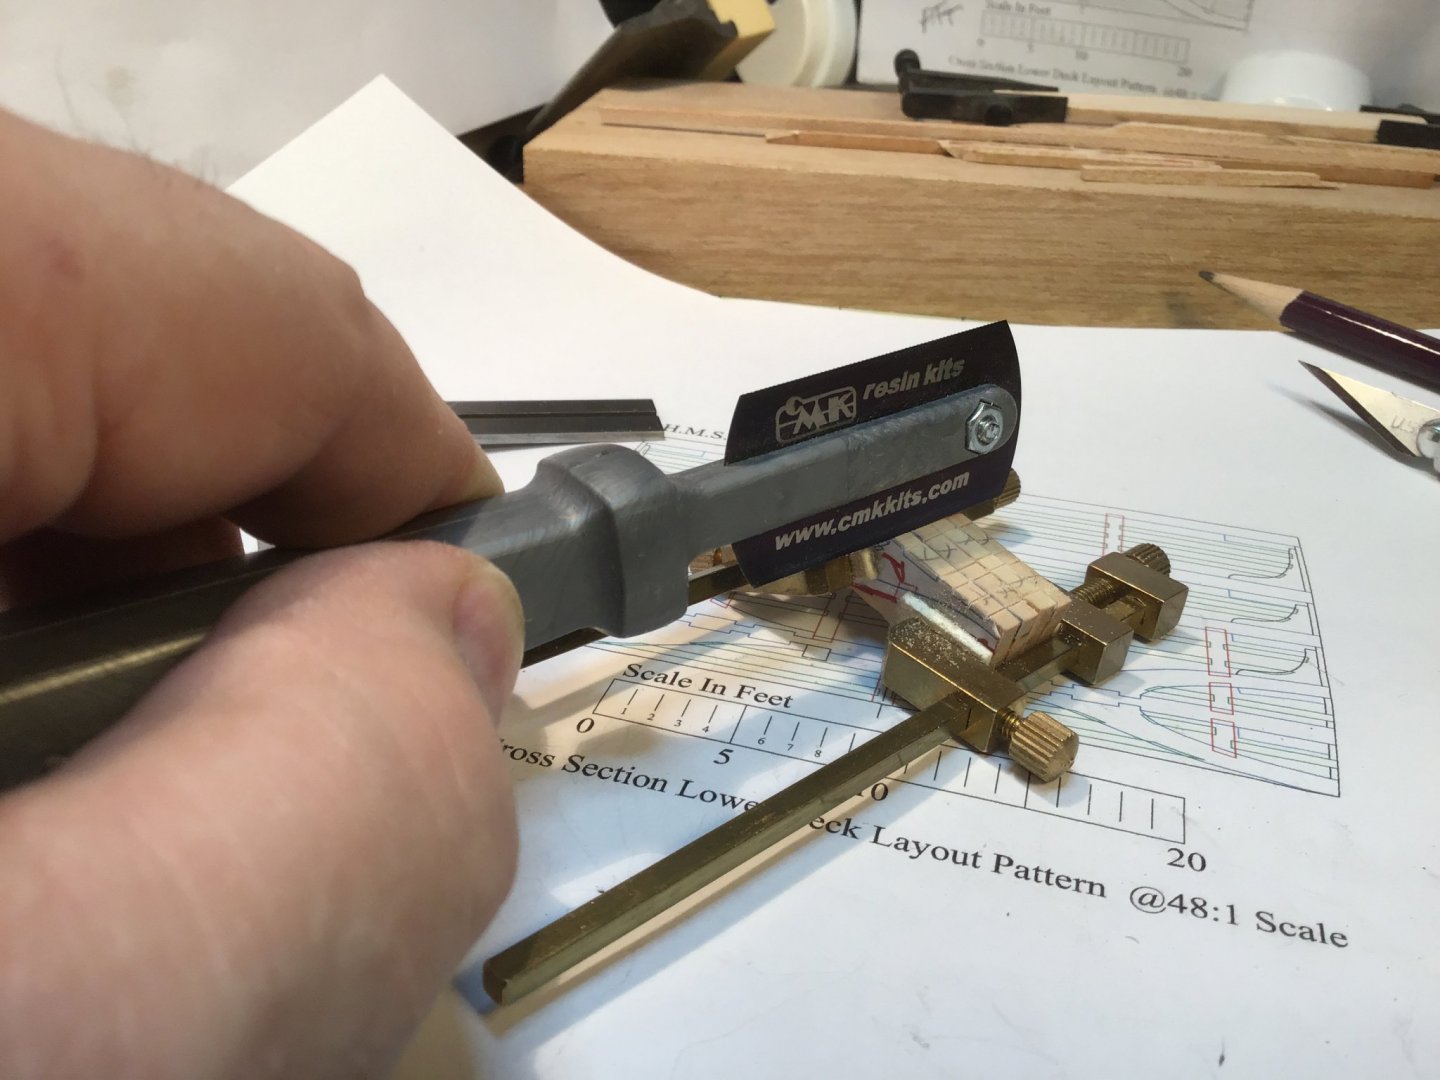
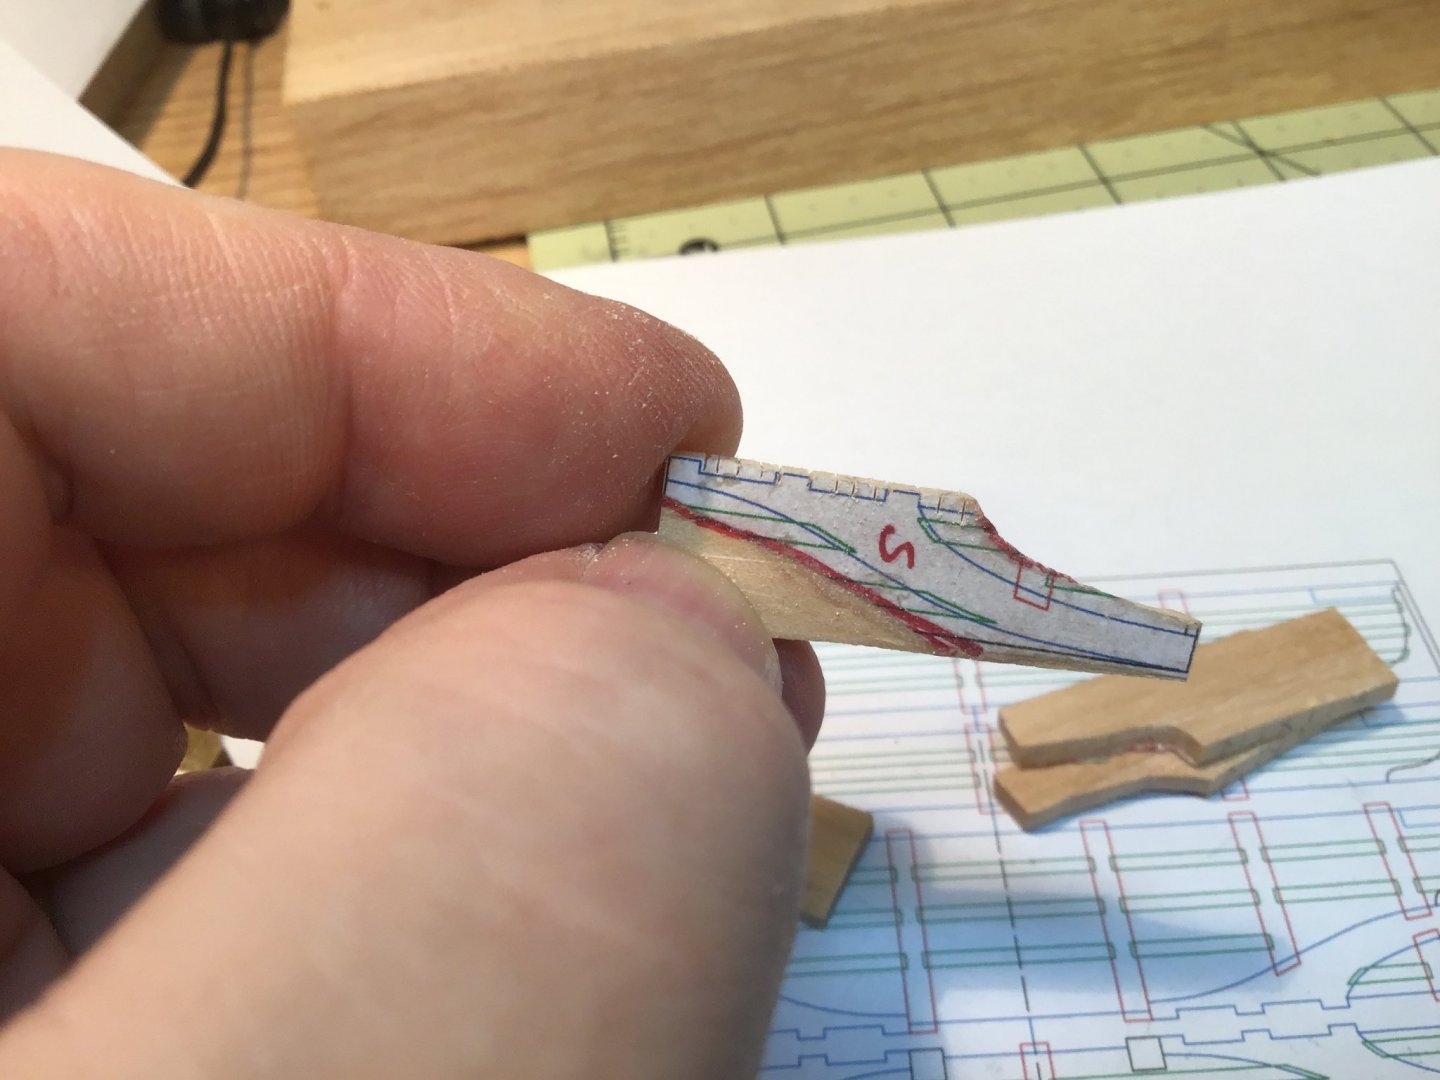
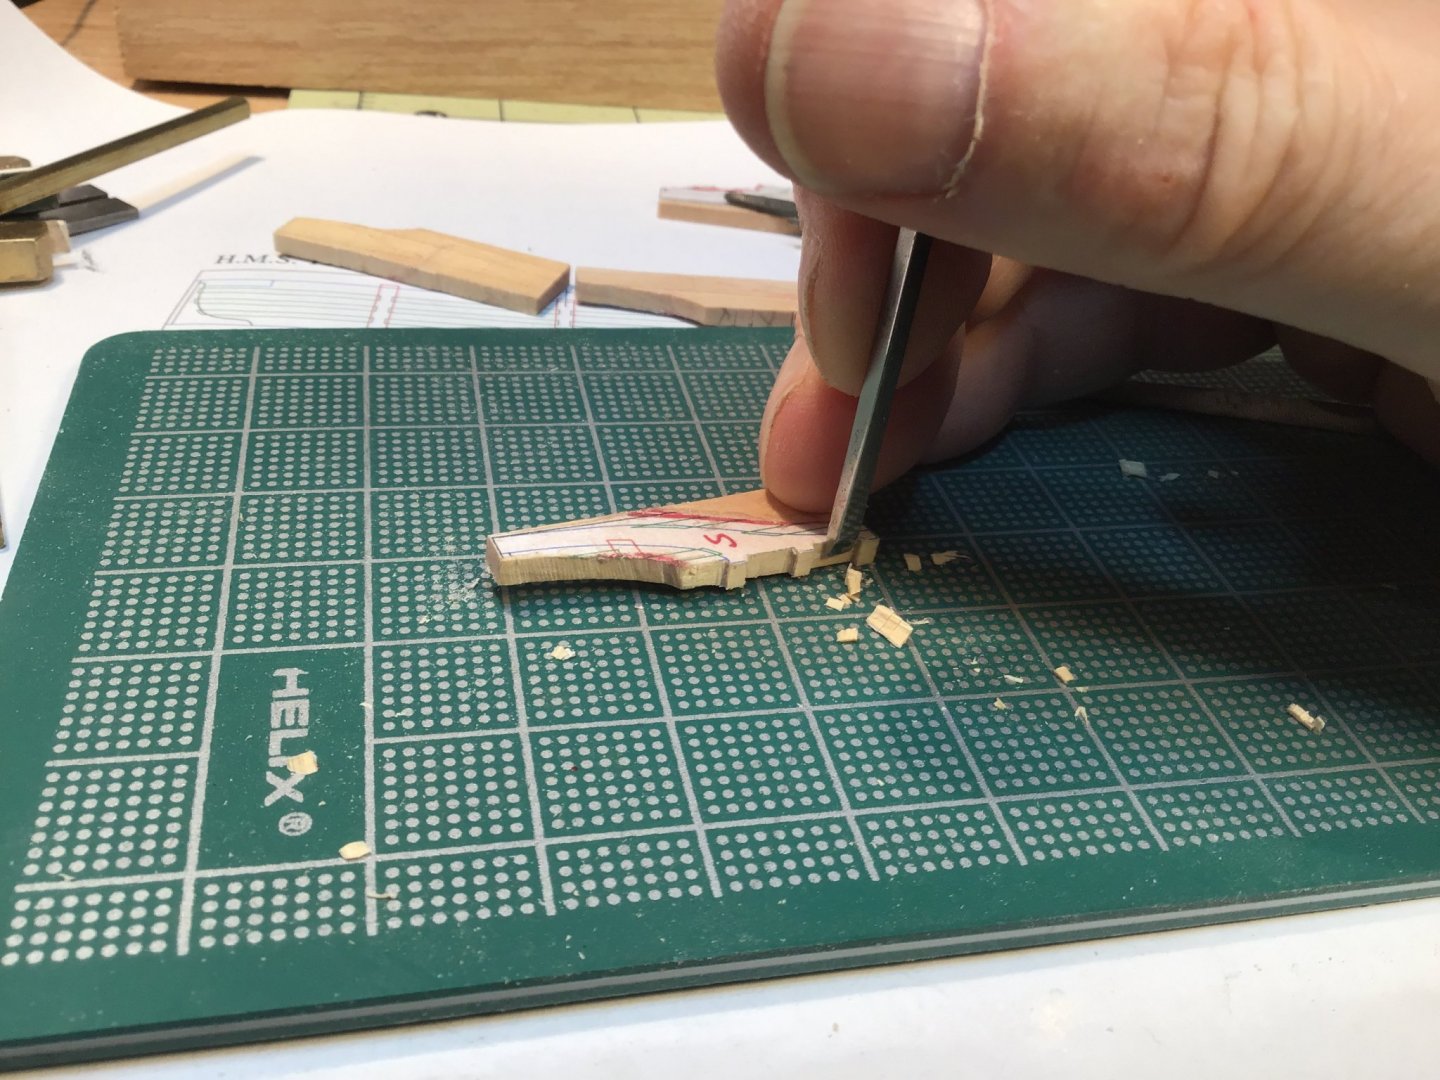
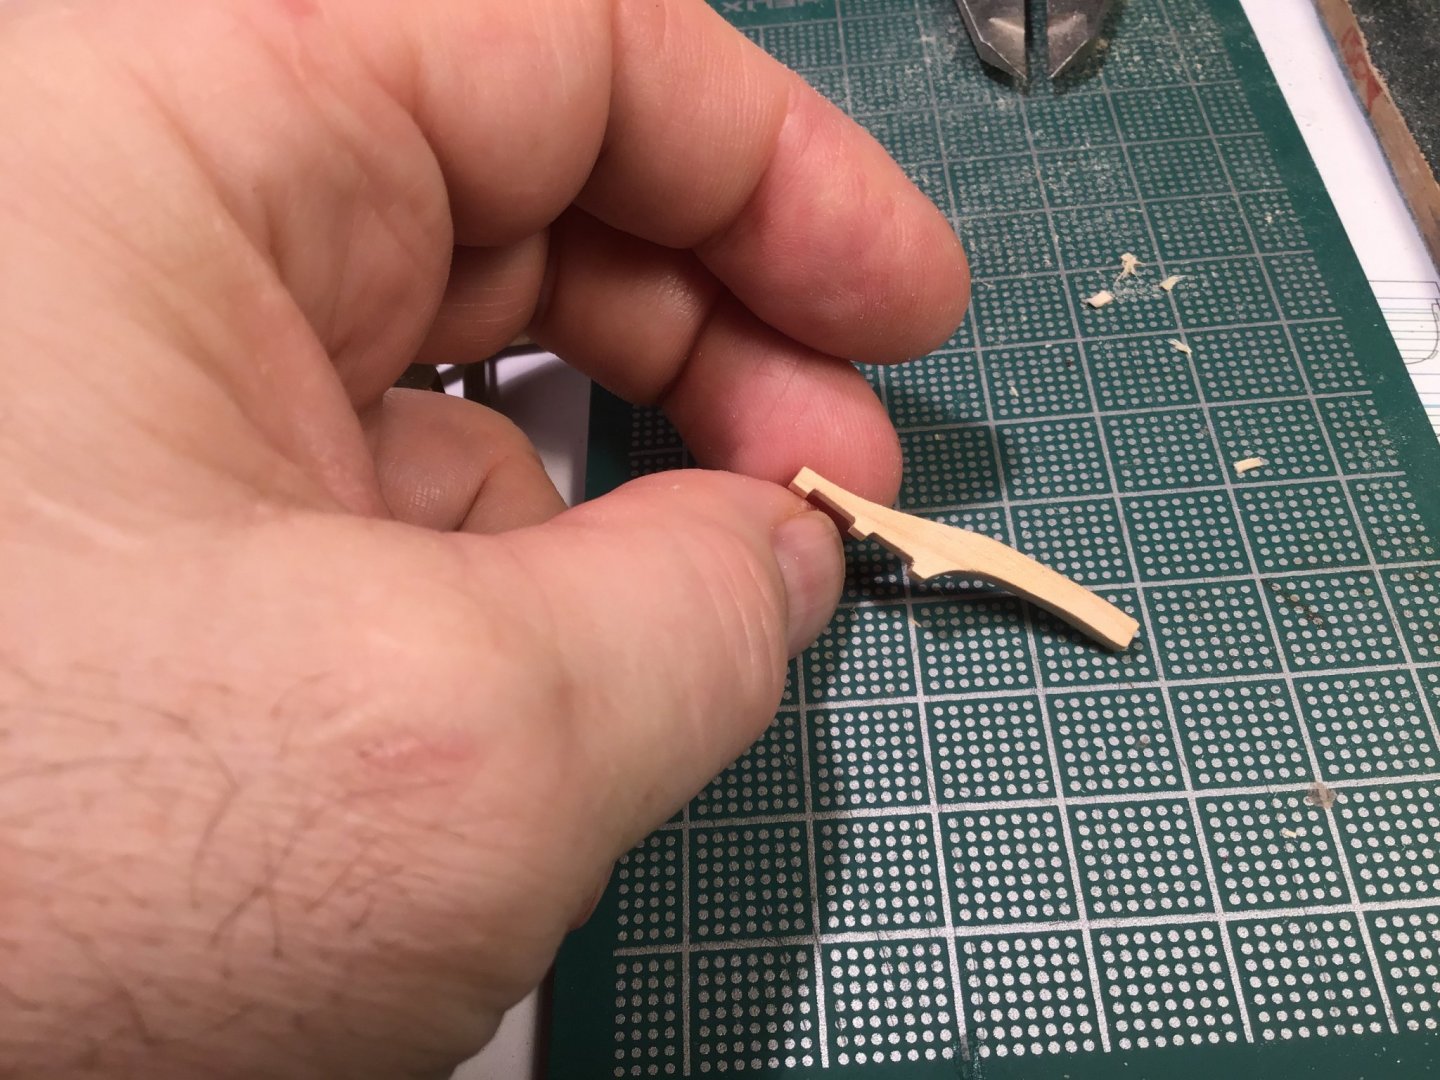
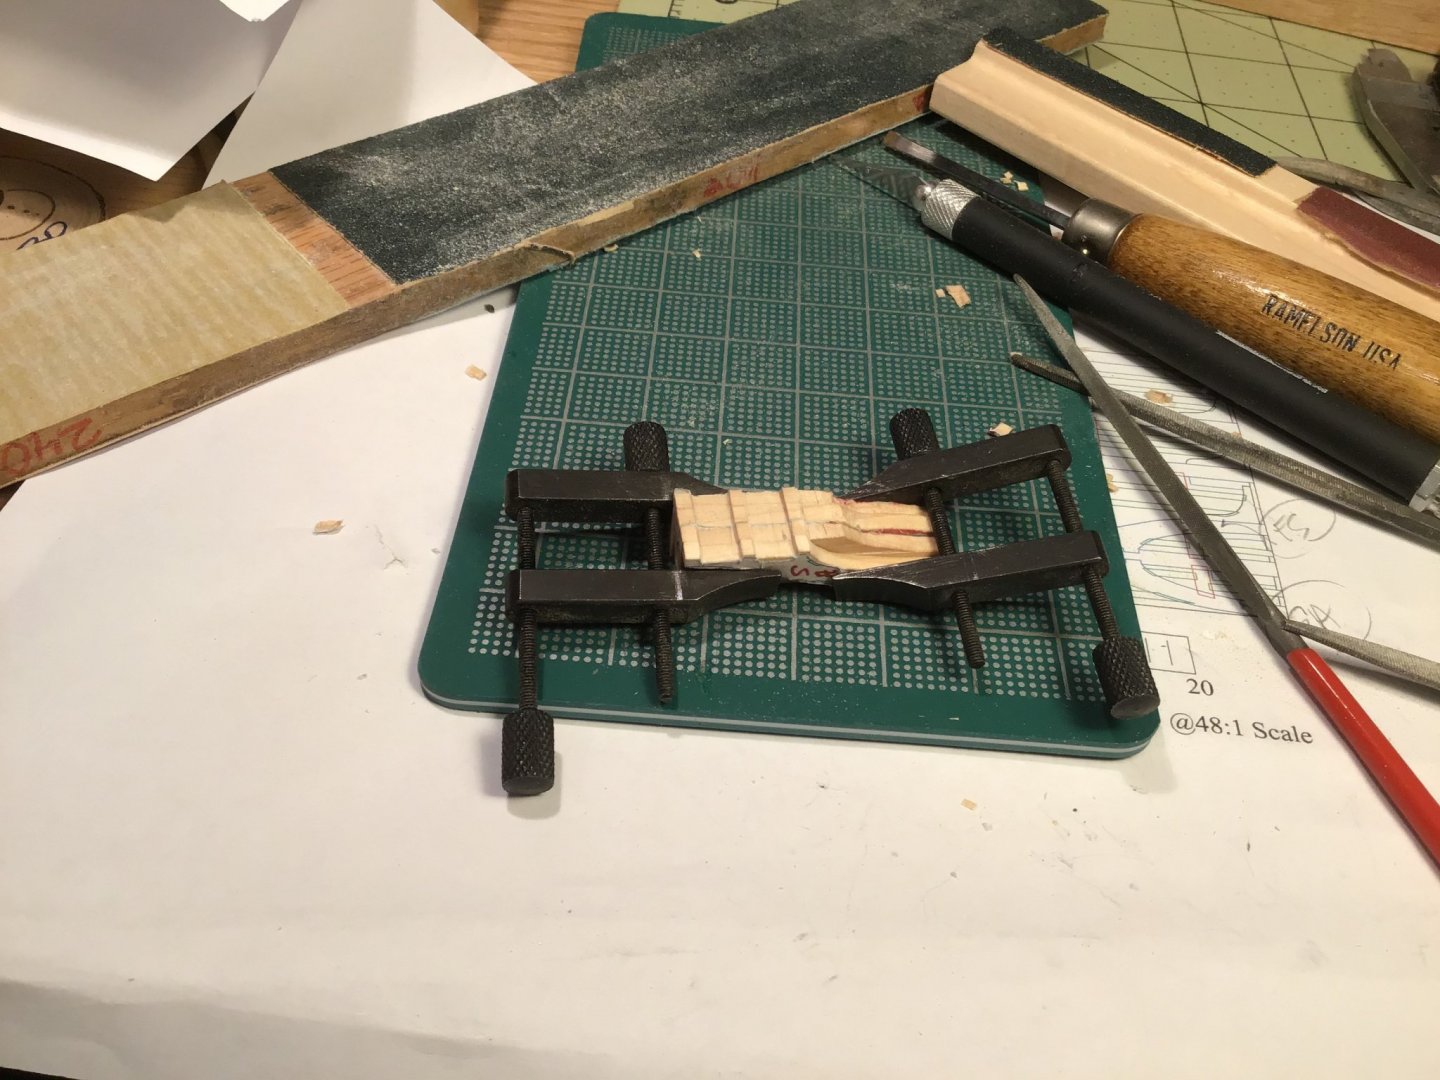
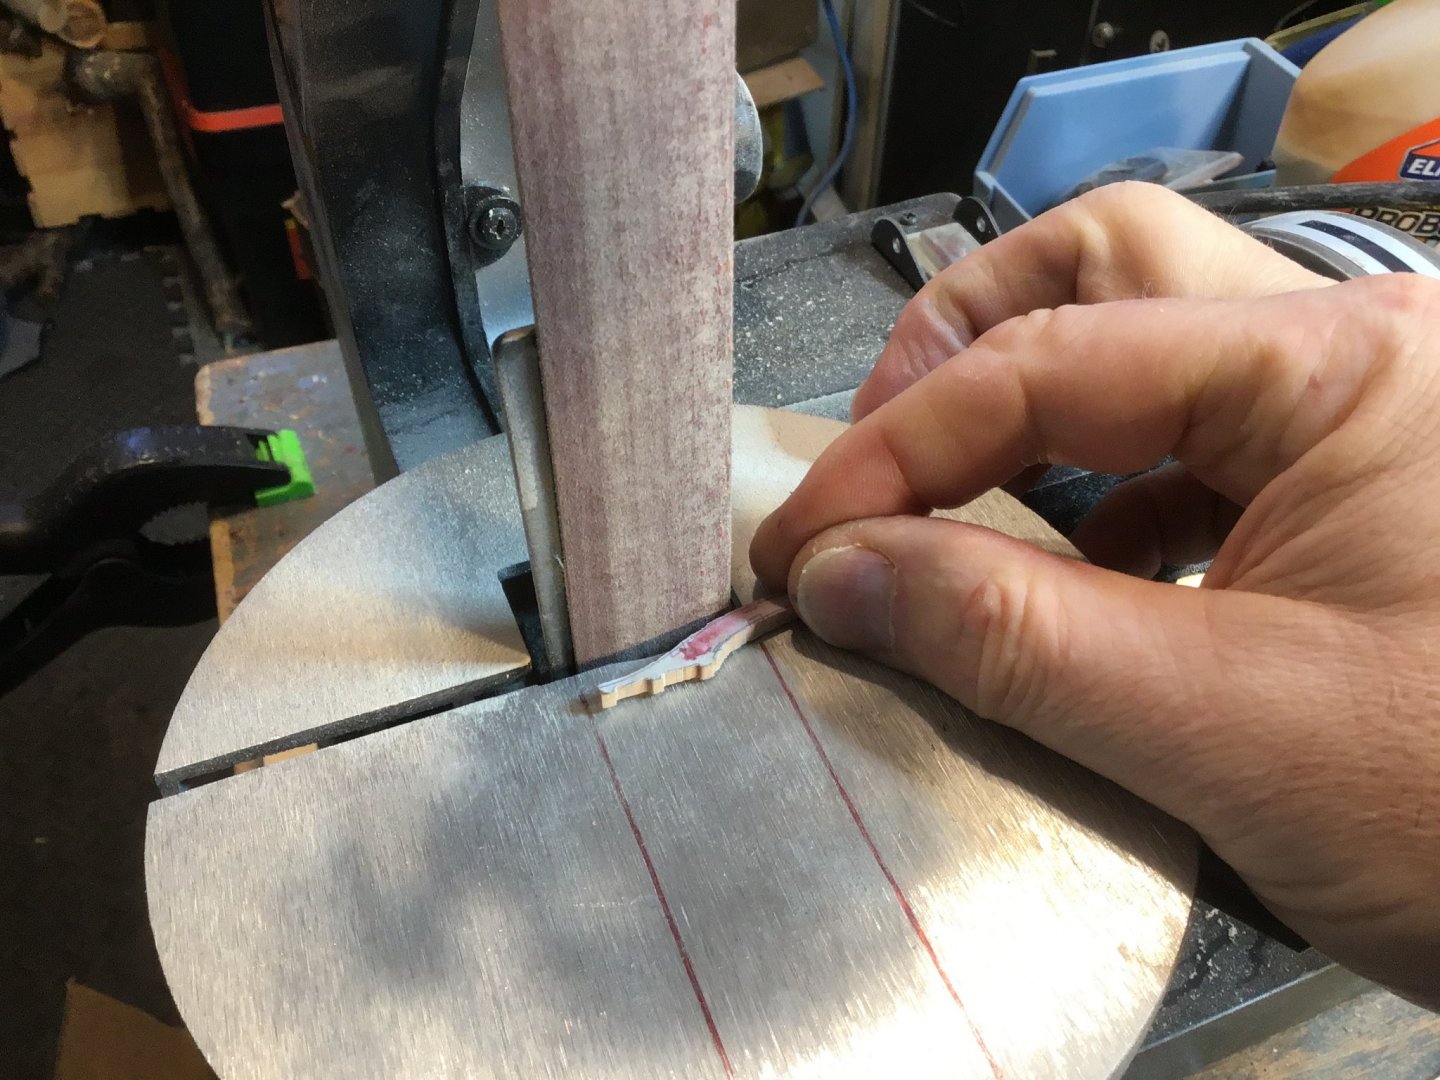
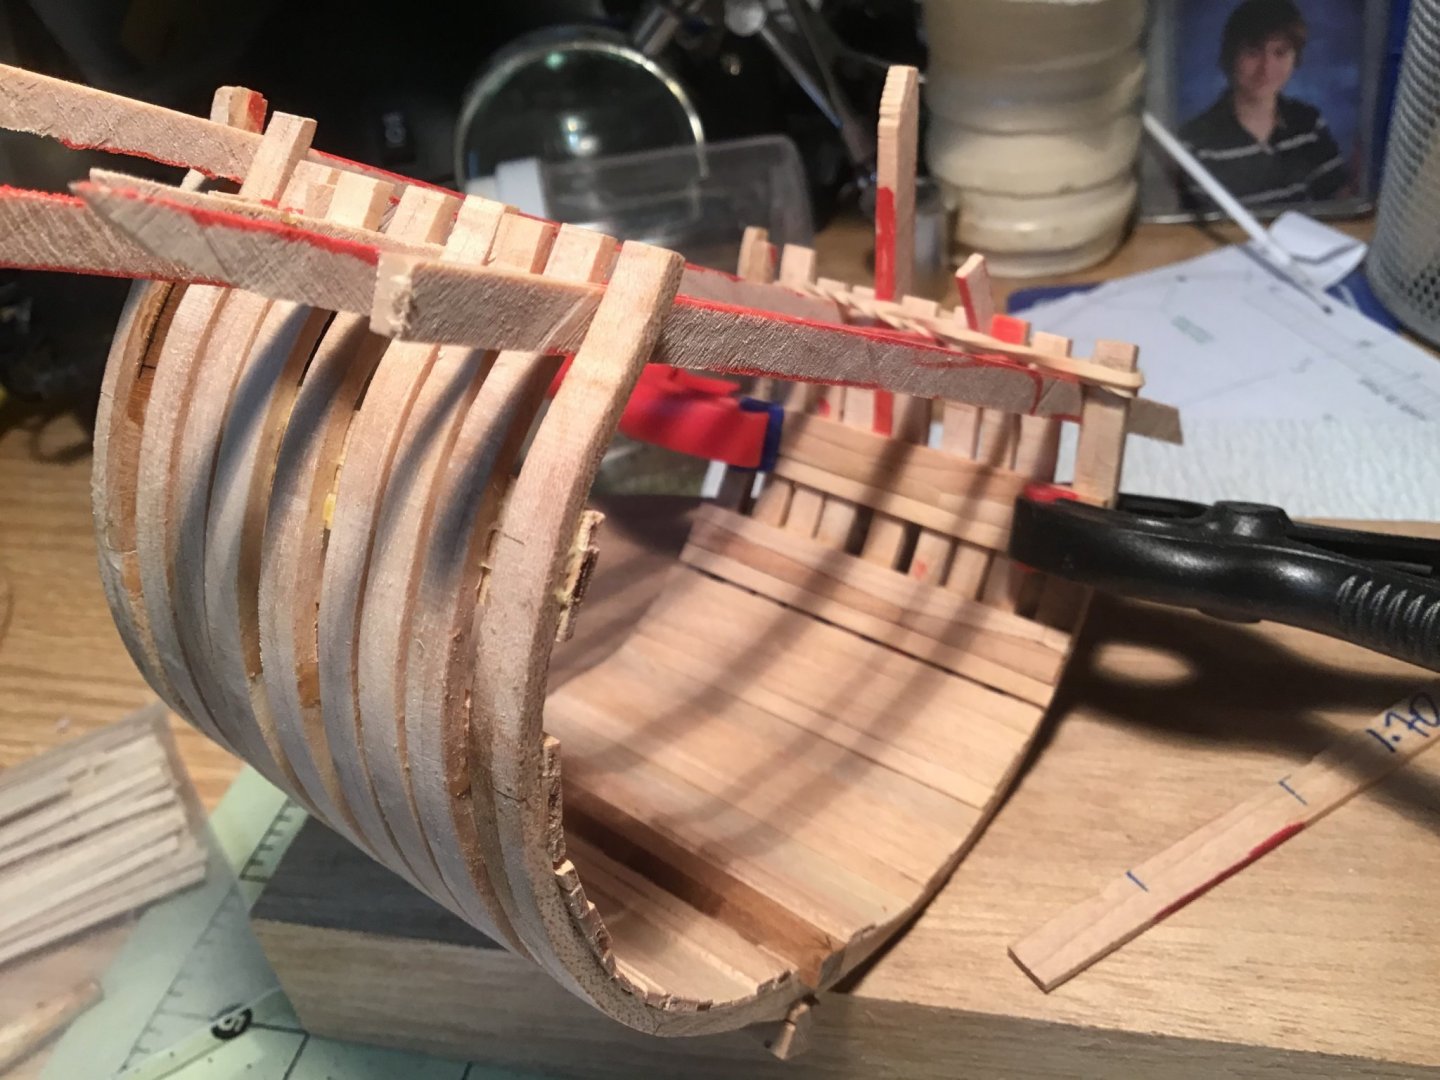
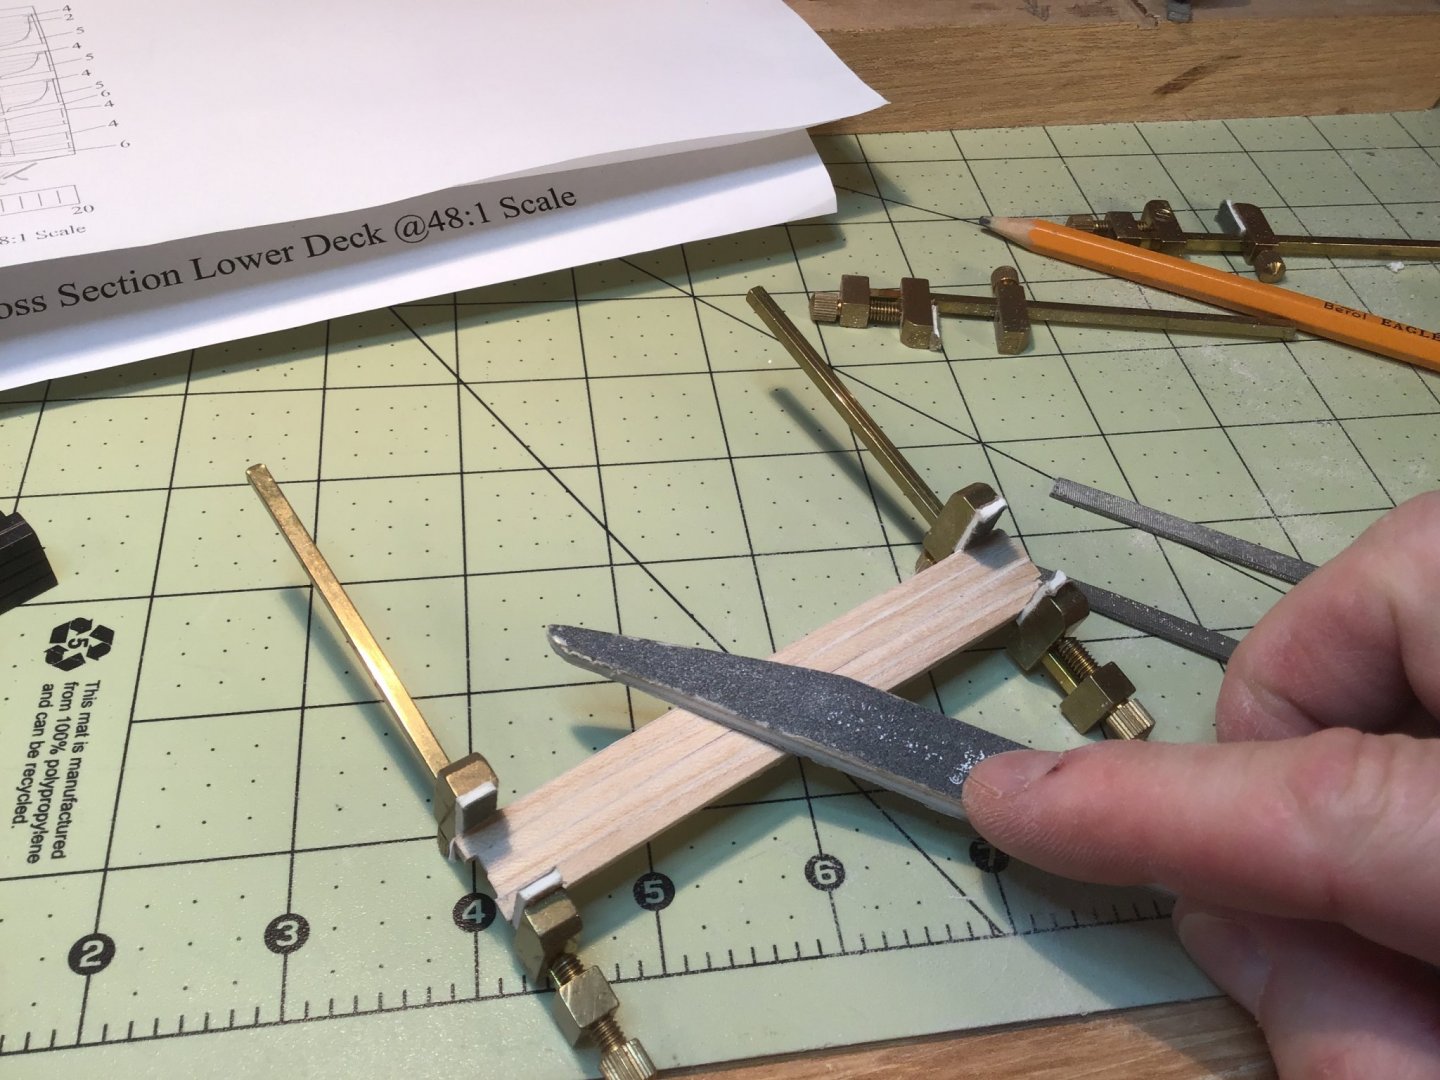
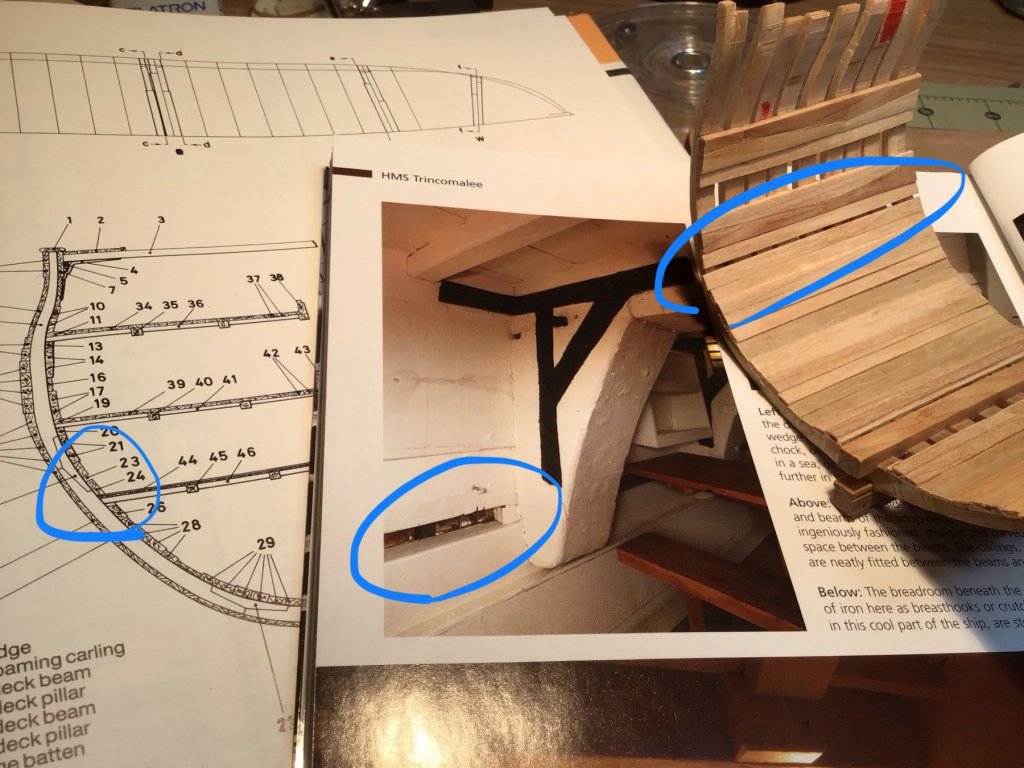
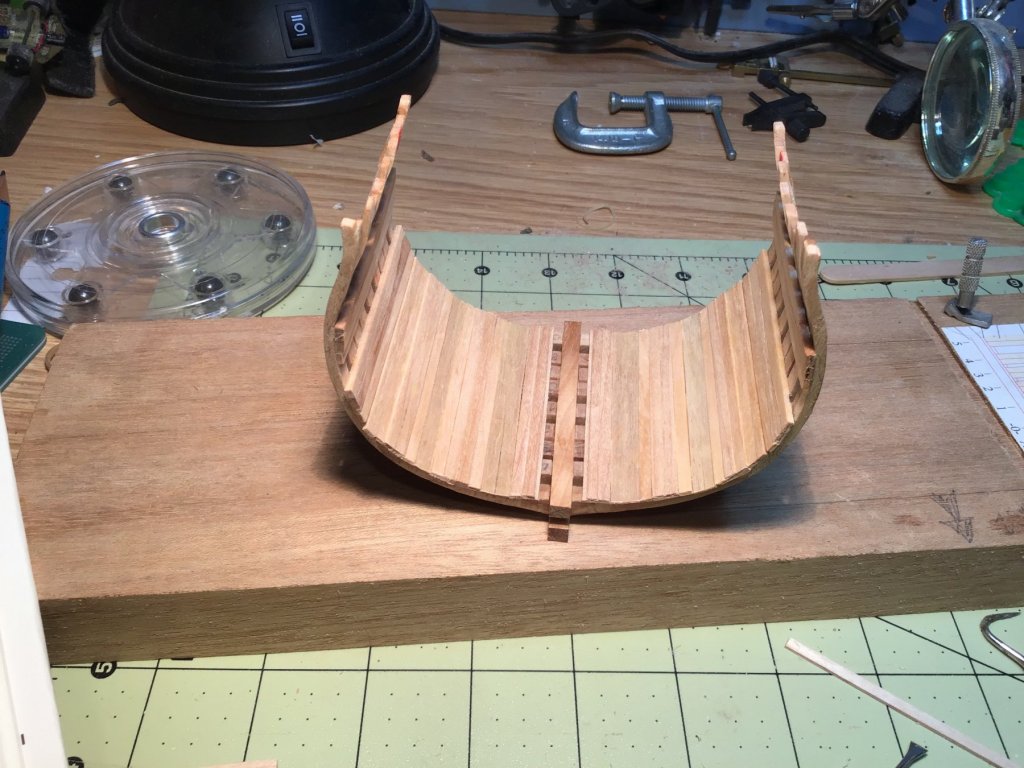
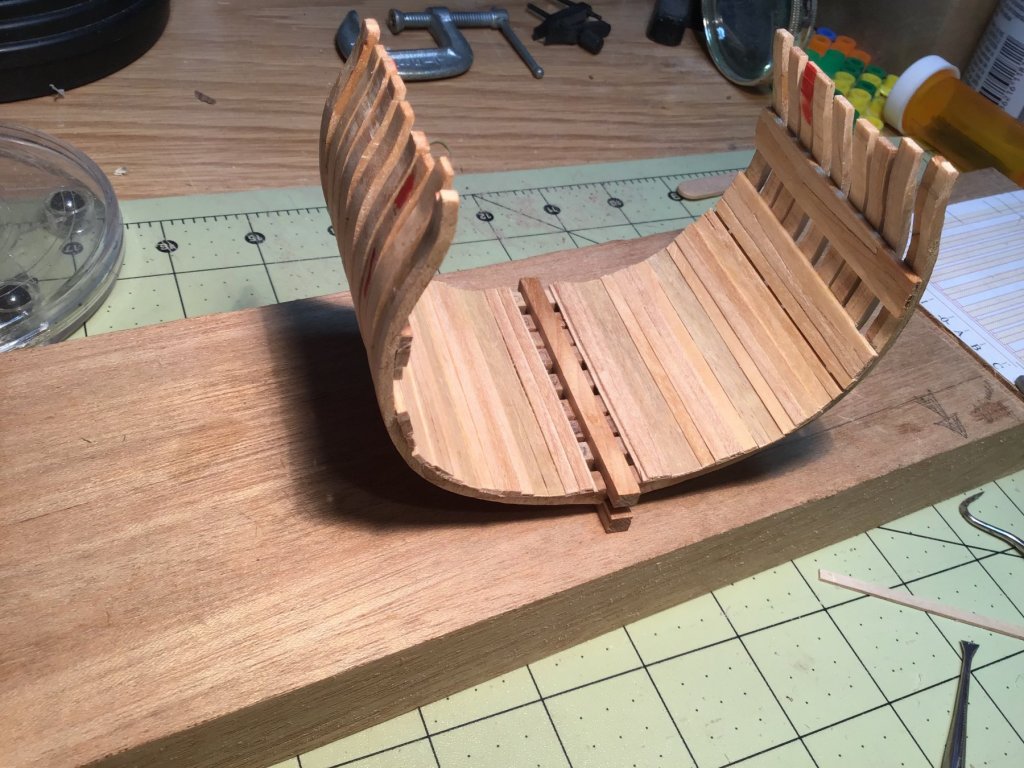
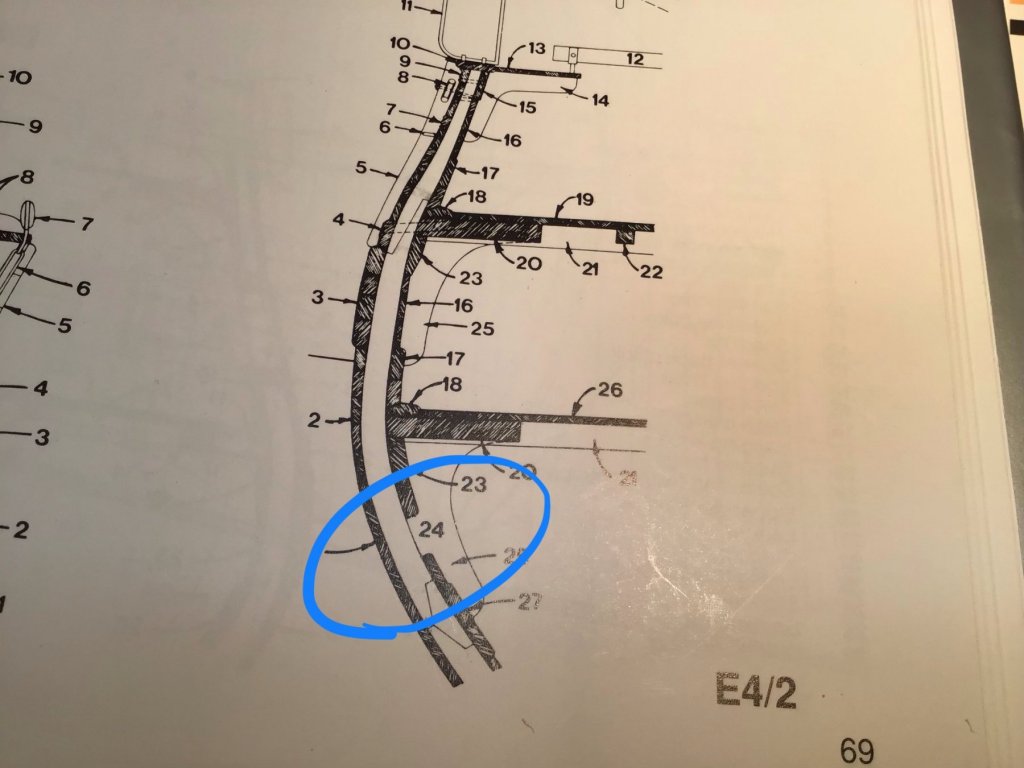
Weak/Week in the Knees After too much research (I'm cursed by this habit/addiction! 😩) and a week of dithering I decided to alter the arrangement of knees from the simpler, yet elegant, plans. In the AoTS books Diana and Pandora, the lodging knees forward of frame 0 abut to the aft side of the beams, there are knees between the beam arms and there is a transition where there are two overlapping lodging knees or a scarphed pair. Mess deck of HMS Pandora (Anatomy of the Ship, McKay) Mess deck of HMS Diana (AoTS, White) [aside: this content editor is giving me grief on my iPad 😡] I couldn’t visualize the "transition" knees but, lo' and behold, there was a picture in HMS Trincomalee by Davies: I took ideas from all of these plans. First, I notched the deck clamp for the beams. In an attempt to be consistent I resorted to scribing the depth of these notches by using dividers from a drafting set my father gave me when I was 12! Dry-fitting the beams Now on to the lodging knees. I drew up the additional knees and my rearrangement. At this time I decided to incorporate a hatchway to the hold and...(gulp)...I'm debating about putting in the well and shot locker 😫😭. I decided a while ago not to do this because it will obstruct the view into this tiny model, but after recently looking at Ainar's wonderful work I may just have to add these. (Sigh) I cut some birch stock and glued on templates. Shaping these pieces challenged me and it took me a while to work out exactly how I could do this and maintain consistency. Just holding them was troublesome! I was most worried that the knees needed to look identical from port to starboard. So, I roughly shaped each knee and then clamped together opposites and fine-shaped them as one piece. I had to use several tools to accomplish this but needle files, diamond files and small rifflers did not work well and I ended up attaching sandpaper to chopsticks for the final shaping. Once I had the work flow figured out I could shape a pair in about 10-15 minutes. Now my headaches will be what do I do next?! Once this deck is in place I won’t have easy access to the hold...so I'm going to sit down with a bottle if aspirin and do some more careful planning! Clear skies! Gabe


-
Beautiful work, Ainars!
-
Oh! I thought it was the PLANS that were out, Mark! 😂🤣 Attesting to the nature of wood, I noticed a significant difference in the width between the frames after I varethaned the outside faces. The beams fit very well beforehand but are now too long for the space. The "spring" in the frames is also much reduced, making me wince when I try to dry fit the beams. I'll be following your and Edward's advice and move ahead with building the deck in place. I’m going to have to carefully plan the painting and realistic touches I intend to add. Warm regards (it was -34C in Winnipeg today, btw, so I really mean it!🥶) - Gabe
-
Thanks Mark! The beam arms were a real test and I think I'll grade this effort at a “C”. Decent enough job but some mistakes. Hopefully I’ll bring that up to at least a “B" on the gun deck! On another note... Reading other logs I'm torn between several paths. I would like to assemble the deck right on the plans and install the entire assembly. I plan to make one end of my model realistic which means painting. Assembling the entire deck off this small model would help in that regard. But, I have already discovered: 1) that the beam templates I used from the frame planes are larger than on the deck plan! 2) the frames on my model aren’t EXACTLY spaced like the plans. My worry is that I will build a deck off the model that will not fit well when I go to install it. Again, fractions of a millimetre are noticeable and troublesome. The other choice is to build the deck in place like the shipbuilders would have. I can correct and shape as I go. I also think that installing the lodging knees next would also help keep the deck all square. But, this is a small model and fitting pieces would be difficult. A third option would be to follow some kind of combination of the above. Any and all advice is welcome and appreciated! Clear skies, Gabe
-
Welcome aboard! This is a great place to learn this hobby. In particular, read over the logs of the same model as yours. Great insights to be had. From Canada 🇨🇦 Clear skies! -Gabe
-
Thanks for the compliment, Edward! And please join in! Great work on your Triton(s) 😃by the way. I'm really enjoying your log(s)! Clear skies, Gabe
-
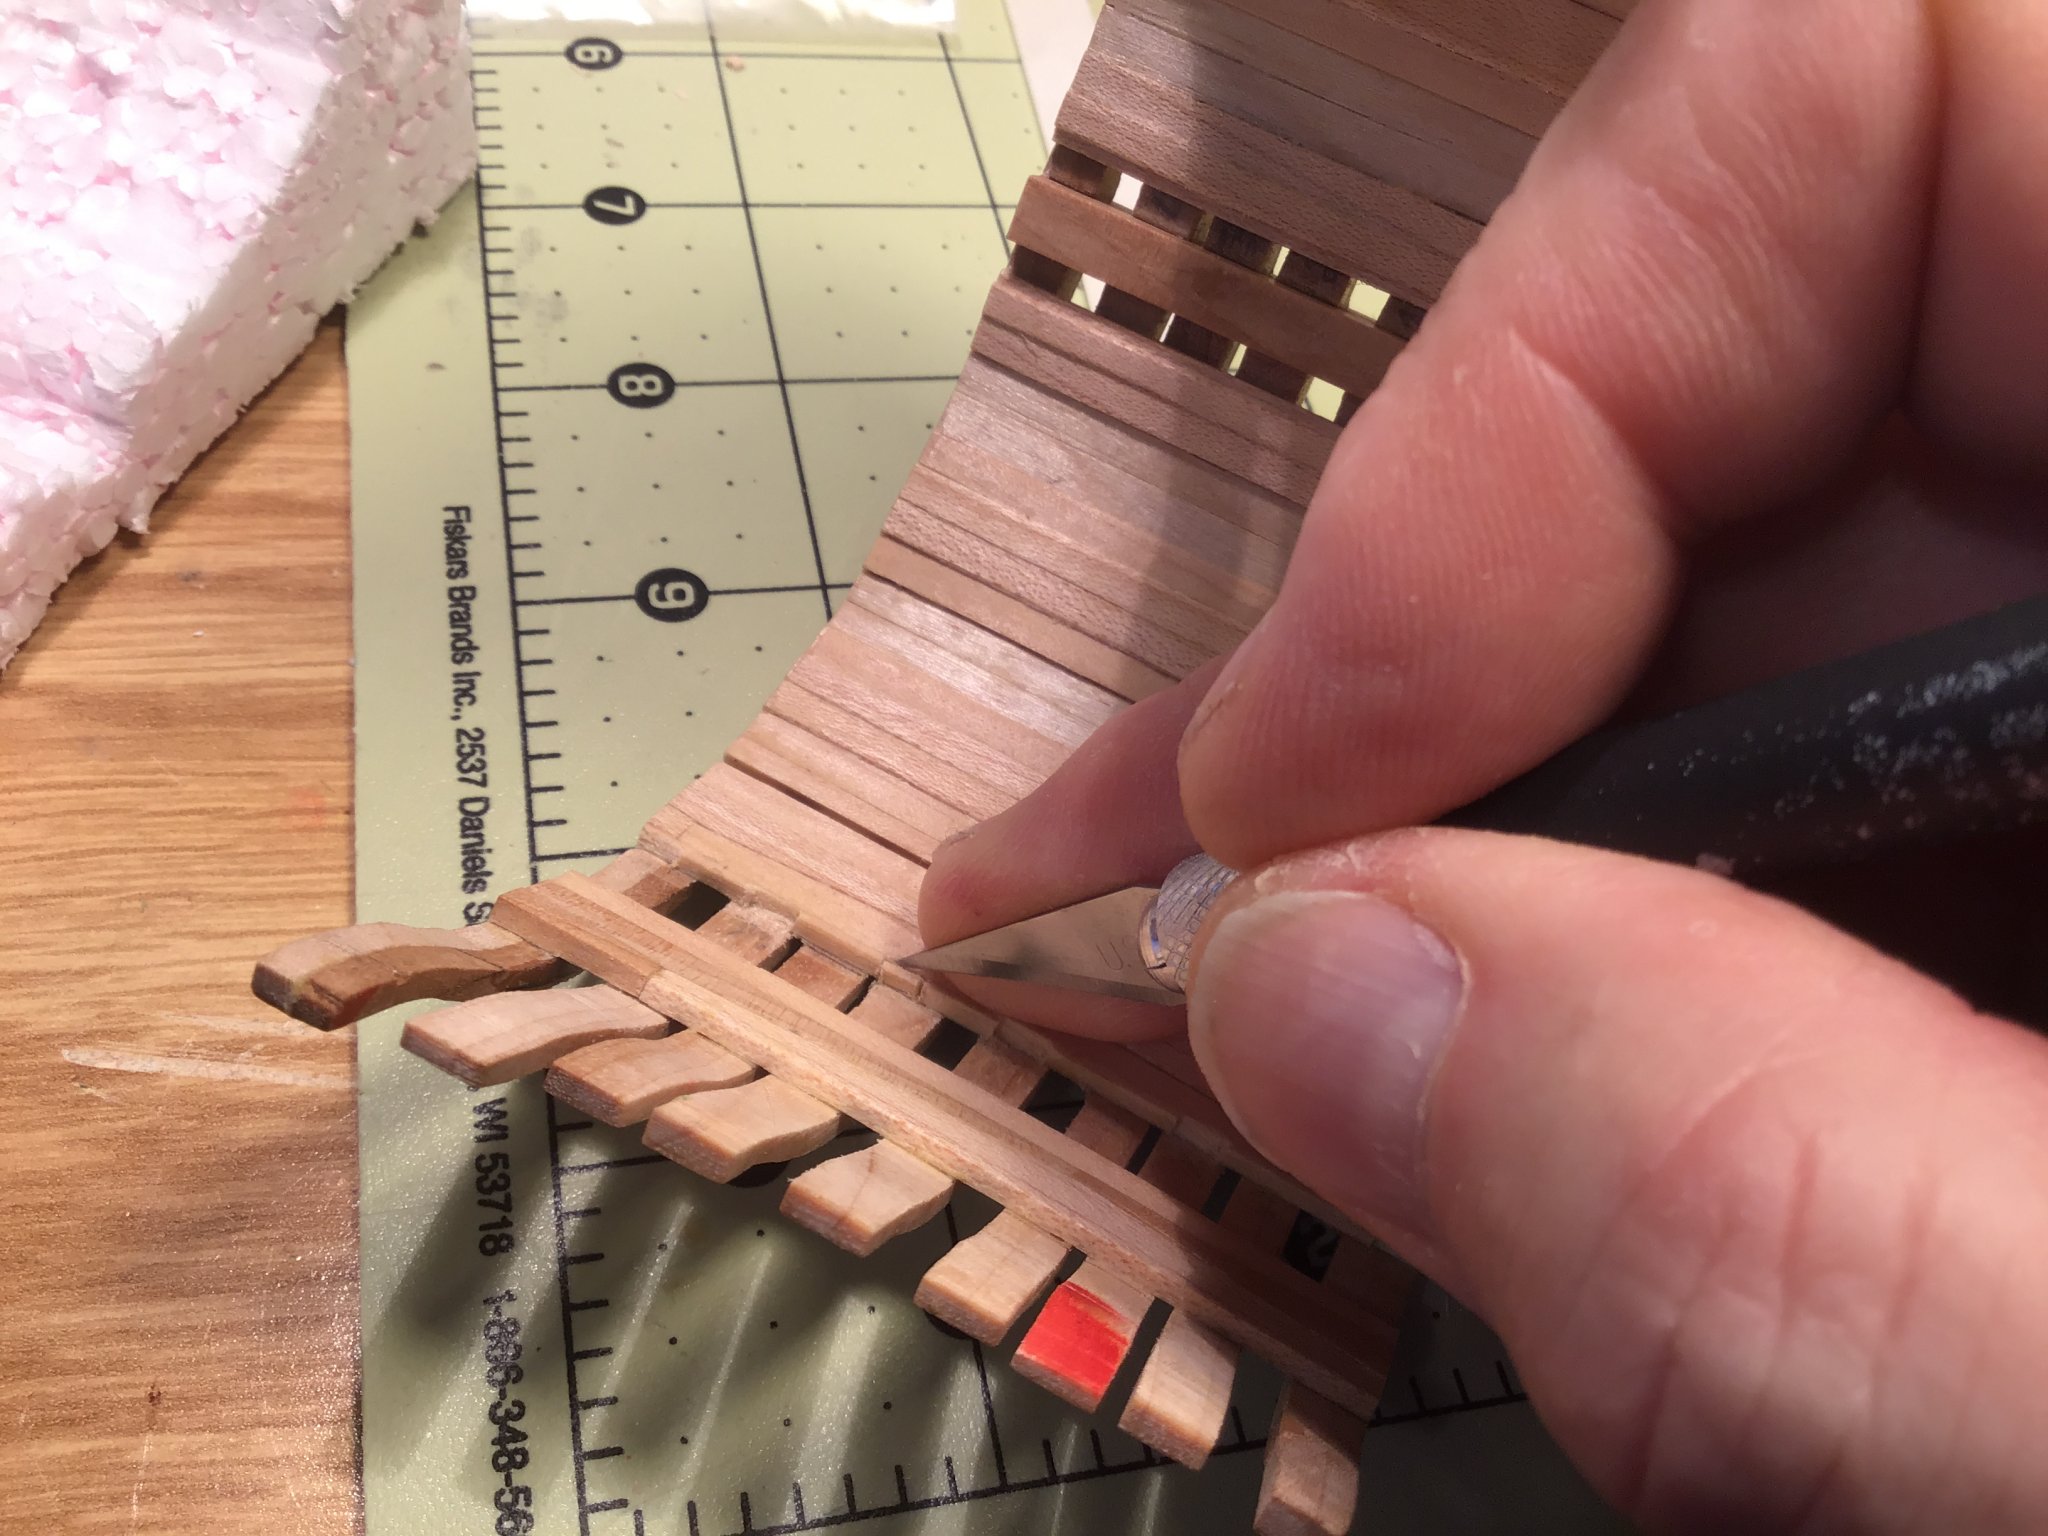
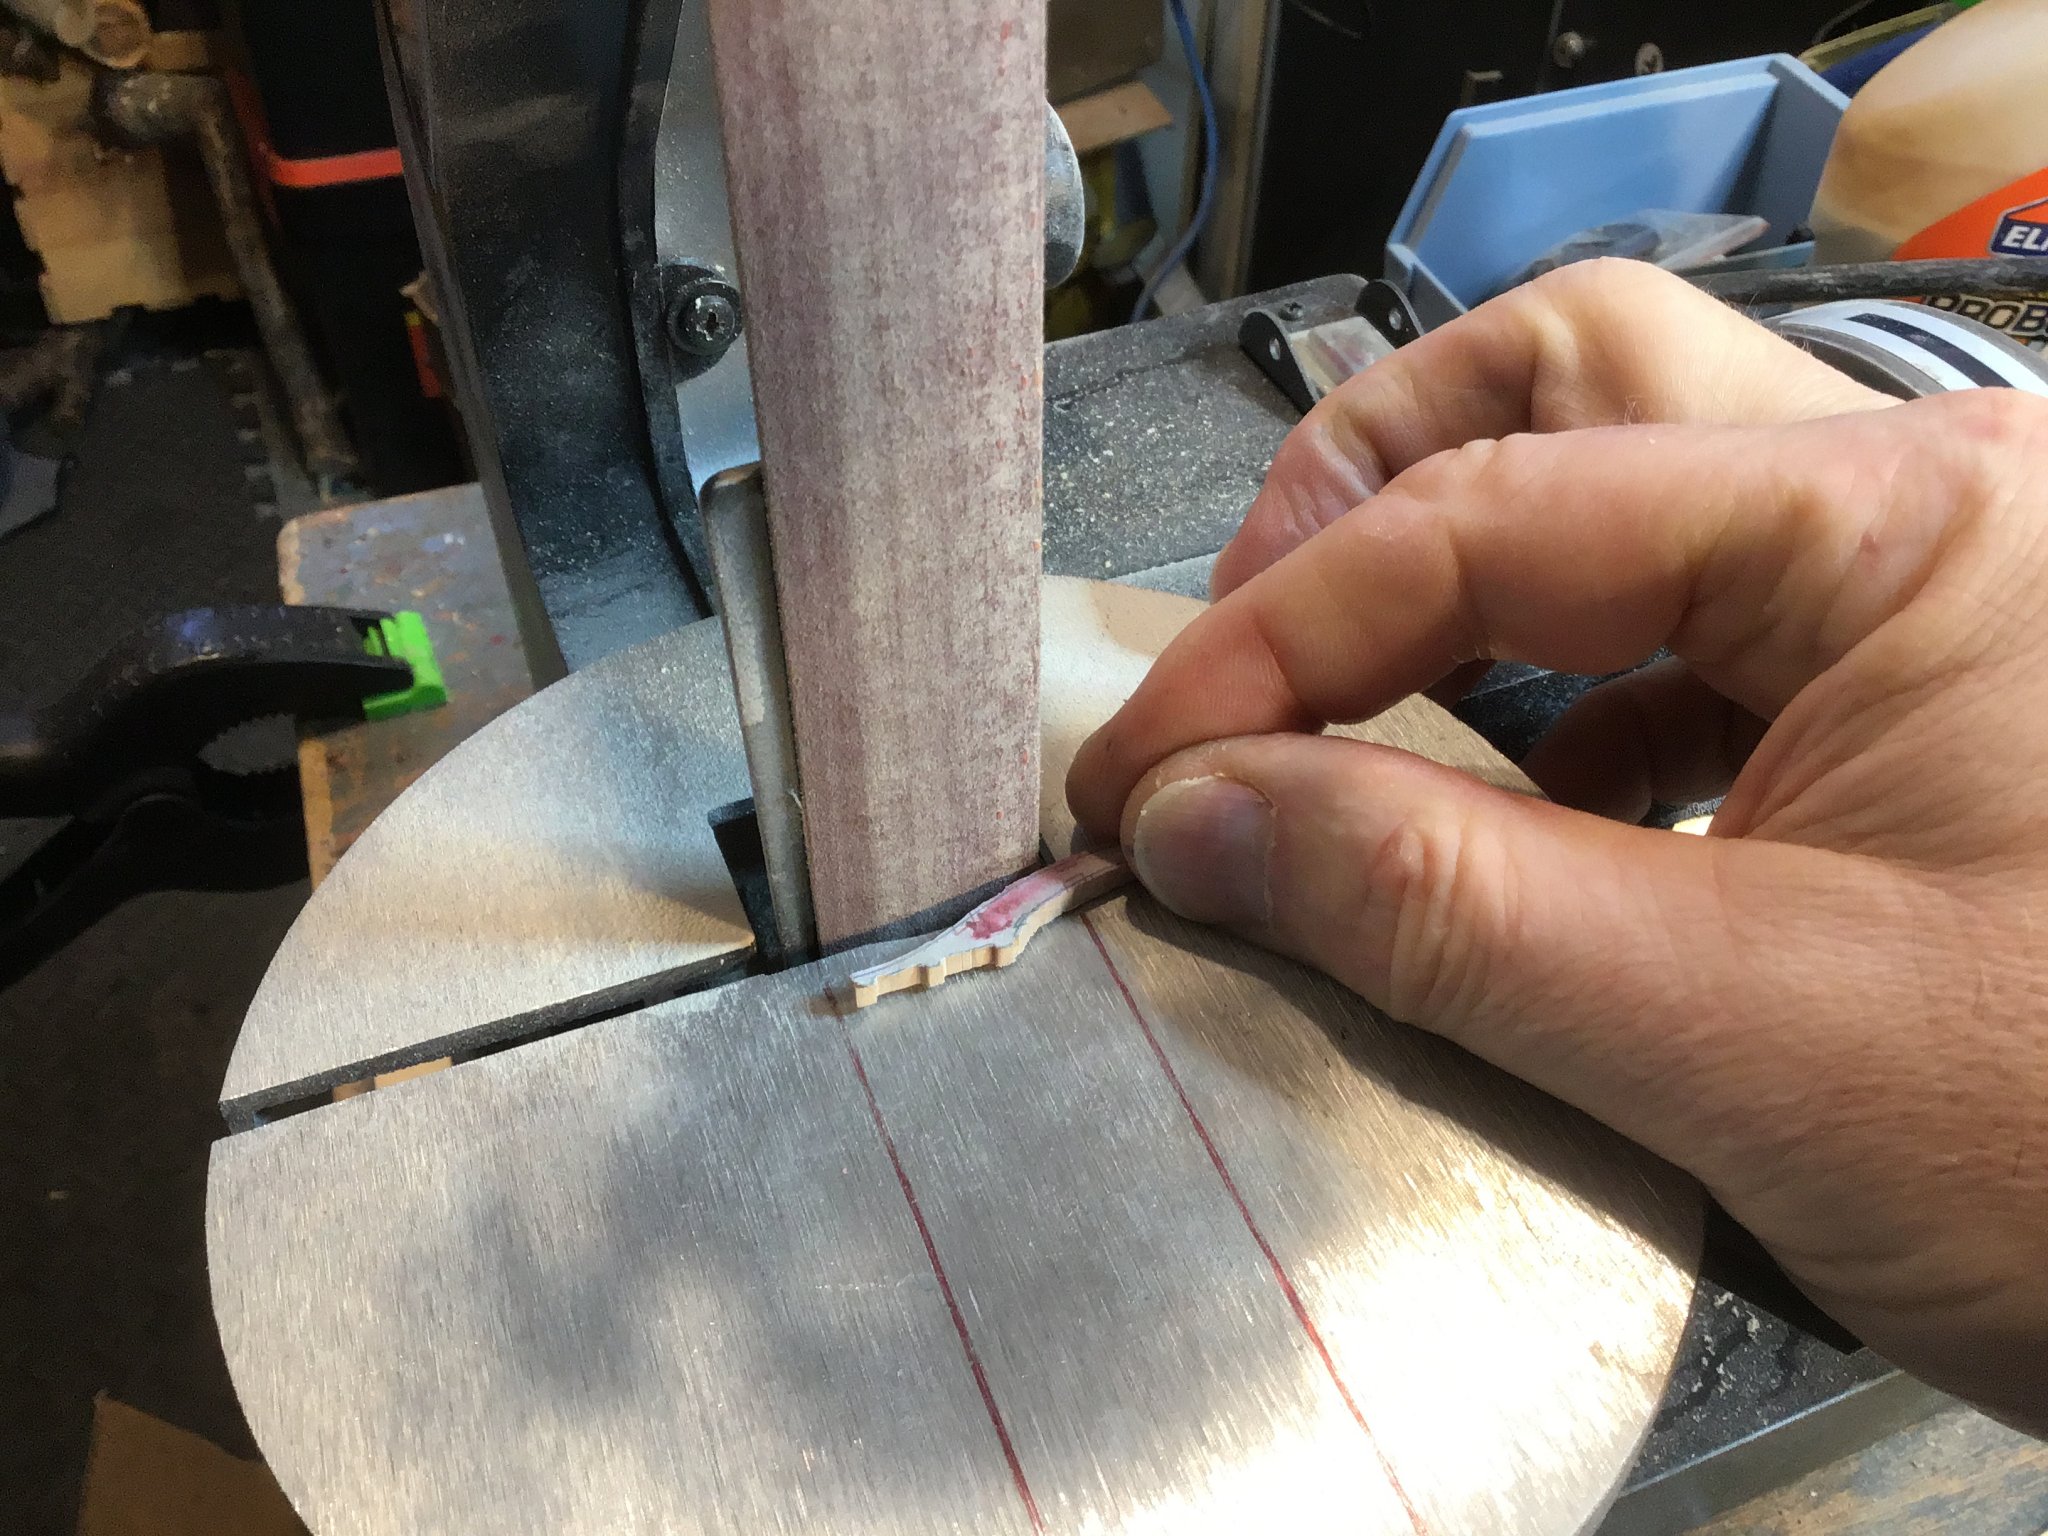
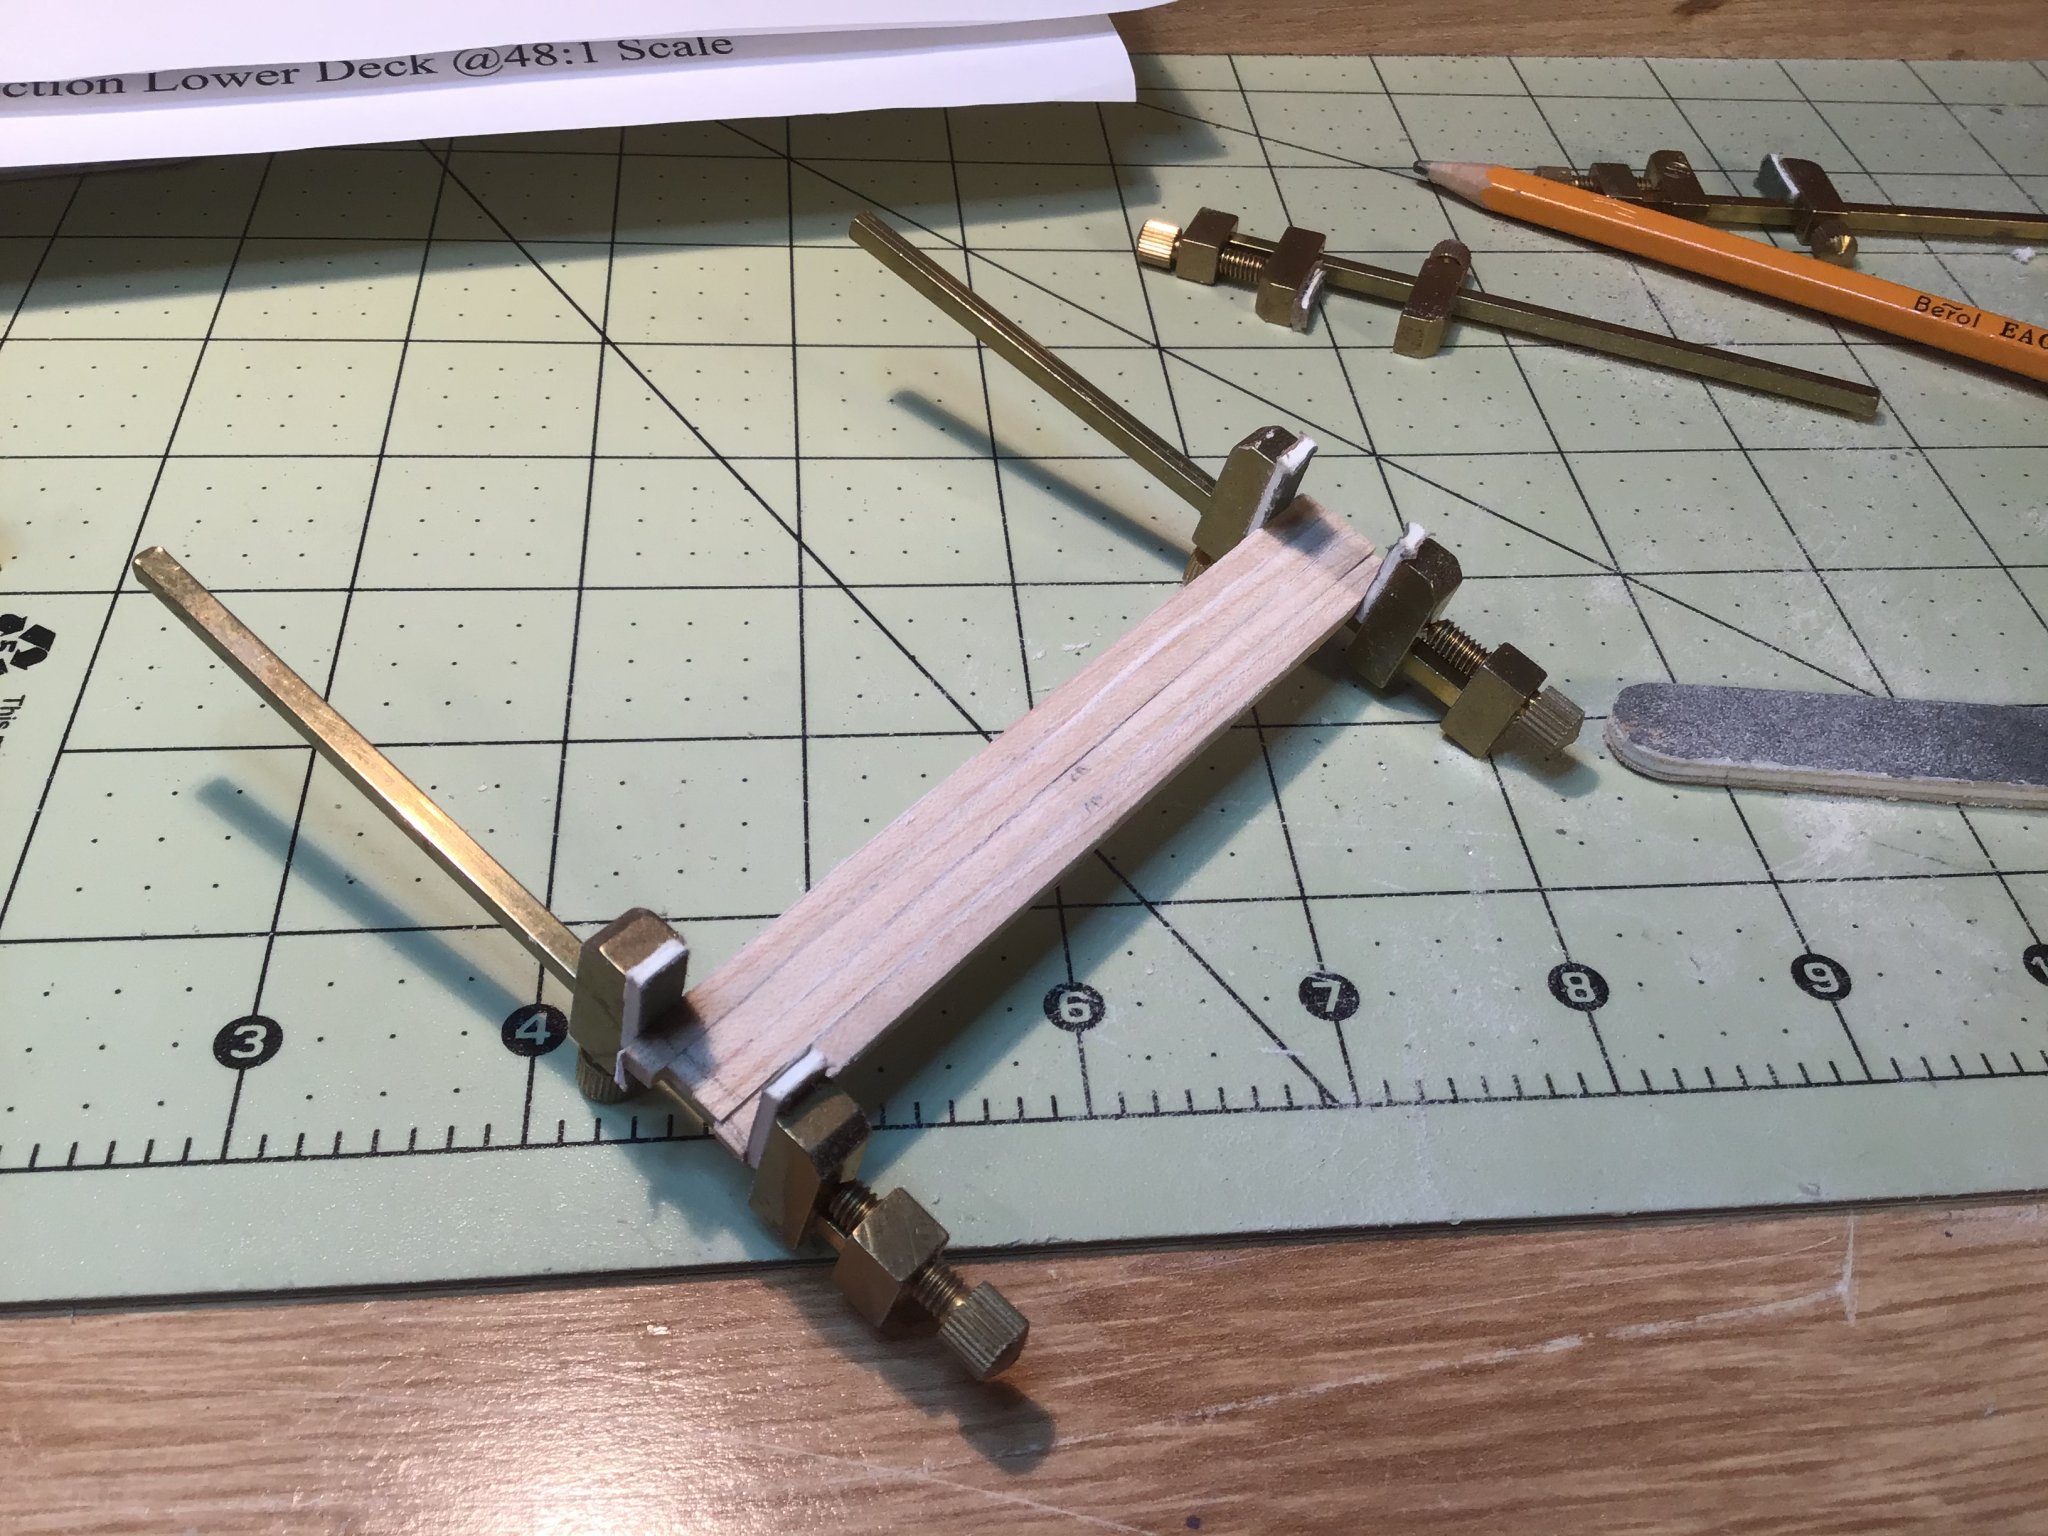
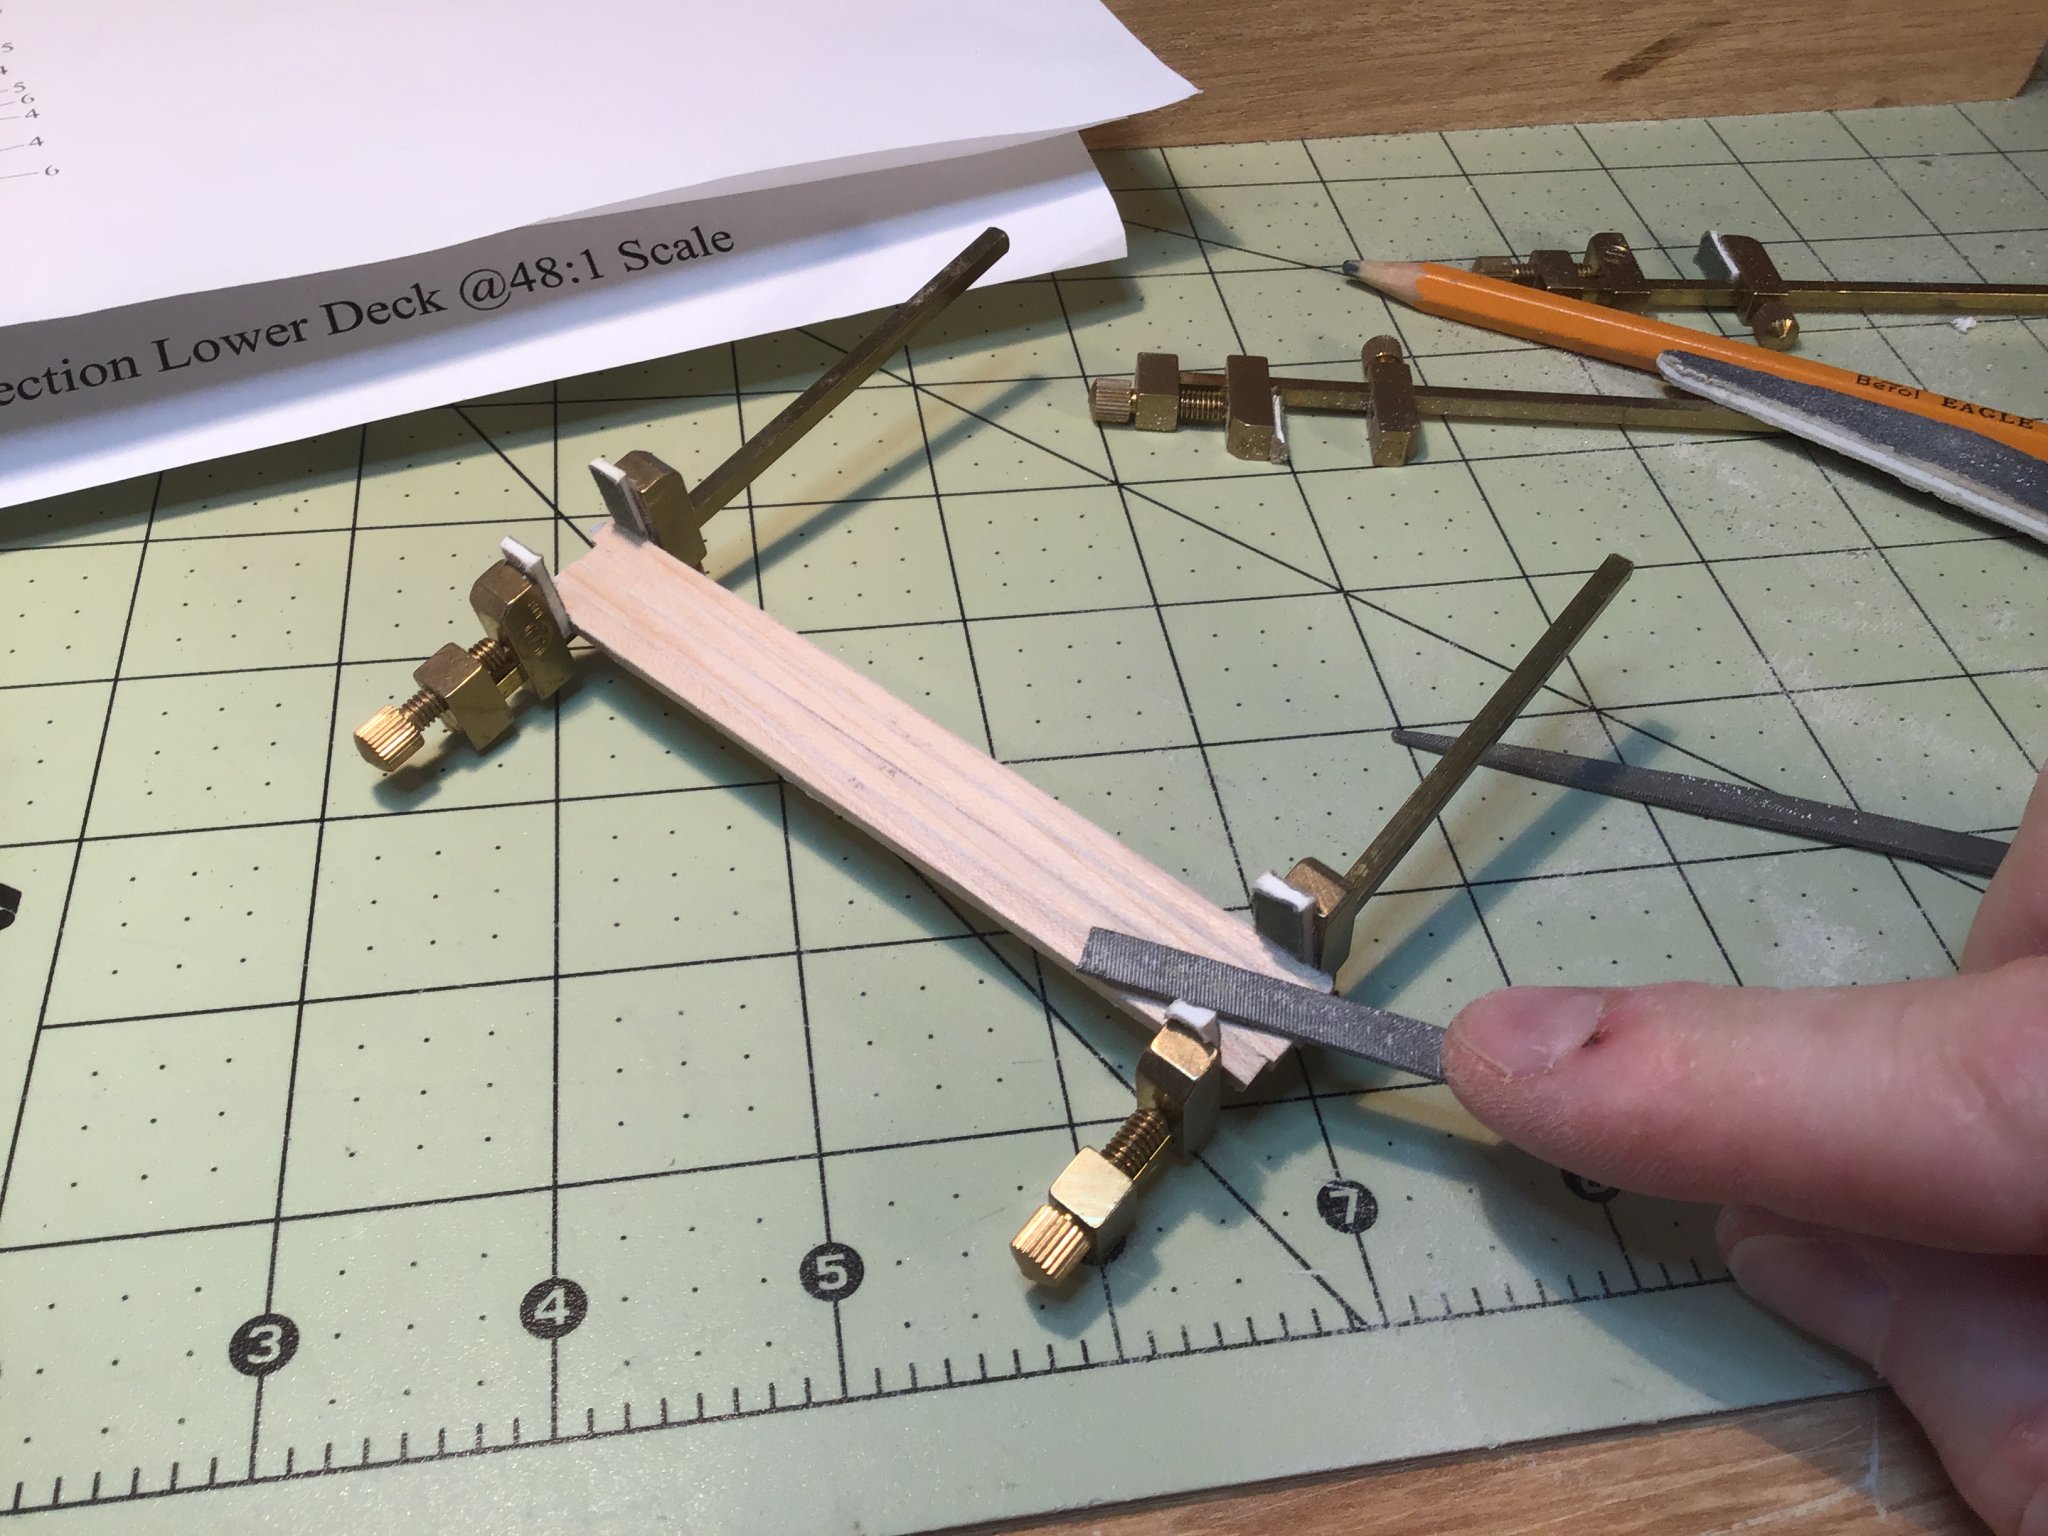
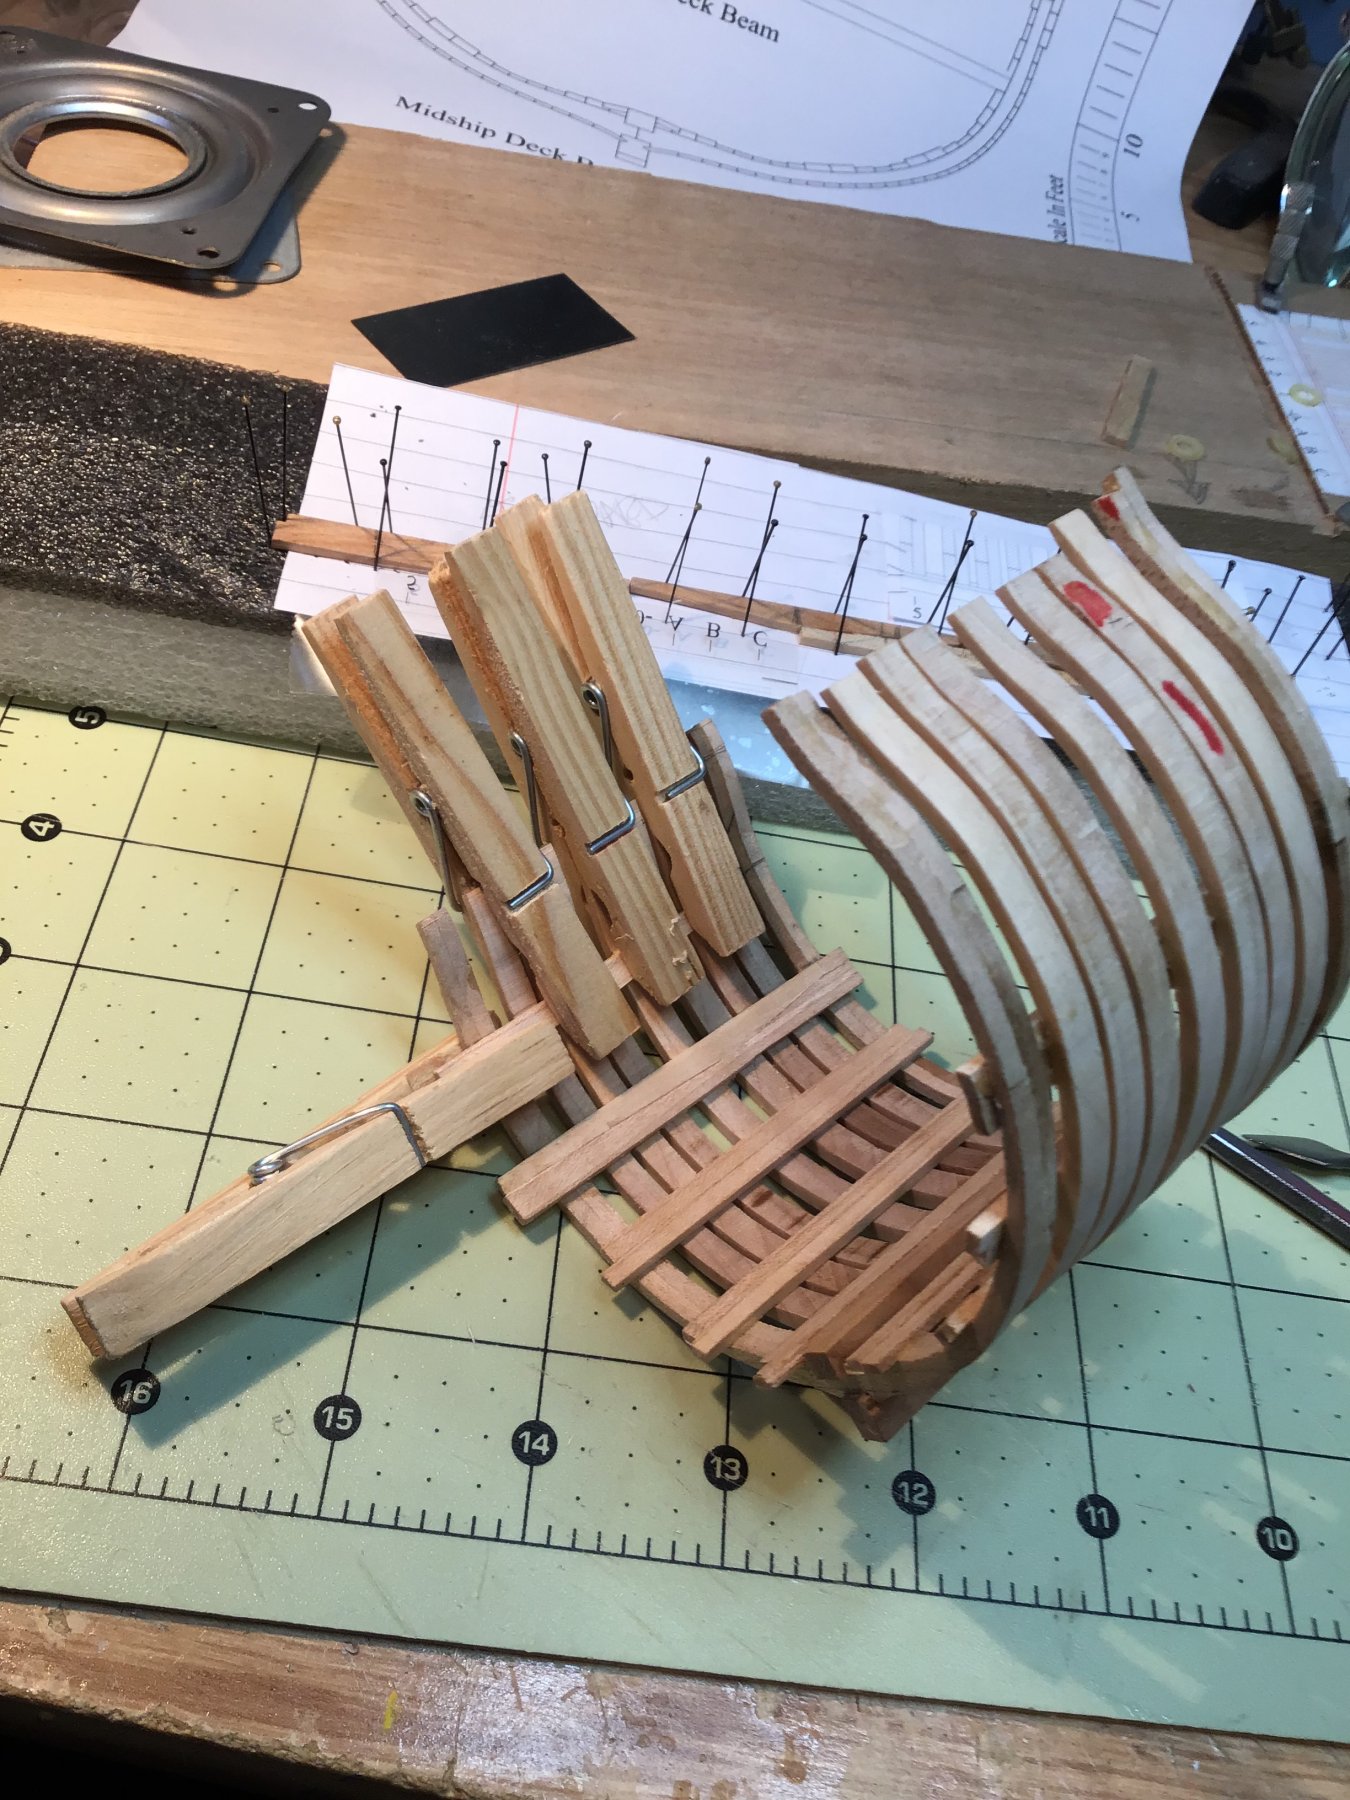
To arms! I had a clear idea of how I was going to fit the beam arms to the beam. I would need to concentrate on creating notches that lined up, were square and had tight junctions. Well, easier said than done! I first trimmed all the planking and sanded the ends on a flat surface. A single coat of varethane was applied to the outer frames to keep dirt off and minimize damage. I dry fit the beam to determine the proper placement of the beam arms. Once laid out I used an exacto knife to mark where the notches would need to be made, maintaining a correct alignment of opposite beams arms. The microsaw allowed me to create the stop cuts. I needed to use the very tip of the xacto blade to carefully chisel out the notches. A slip here and I might have knocked out a giant chip, wrecking all the work...but what’s new?! All of us are in this boat (🤪) together! It took a lot of trimming, scraping and cursing to fit the beam arms and, in the end, I had a few unsightly gaps and mistakes. I then reminded myself that this work will likely never be seen. Besides, I collected dust from sanding the frames and will be adding it to the glue when the time comes to fill in the voids!😳🤣 Clear skies! Gabe


-
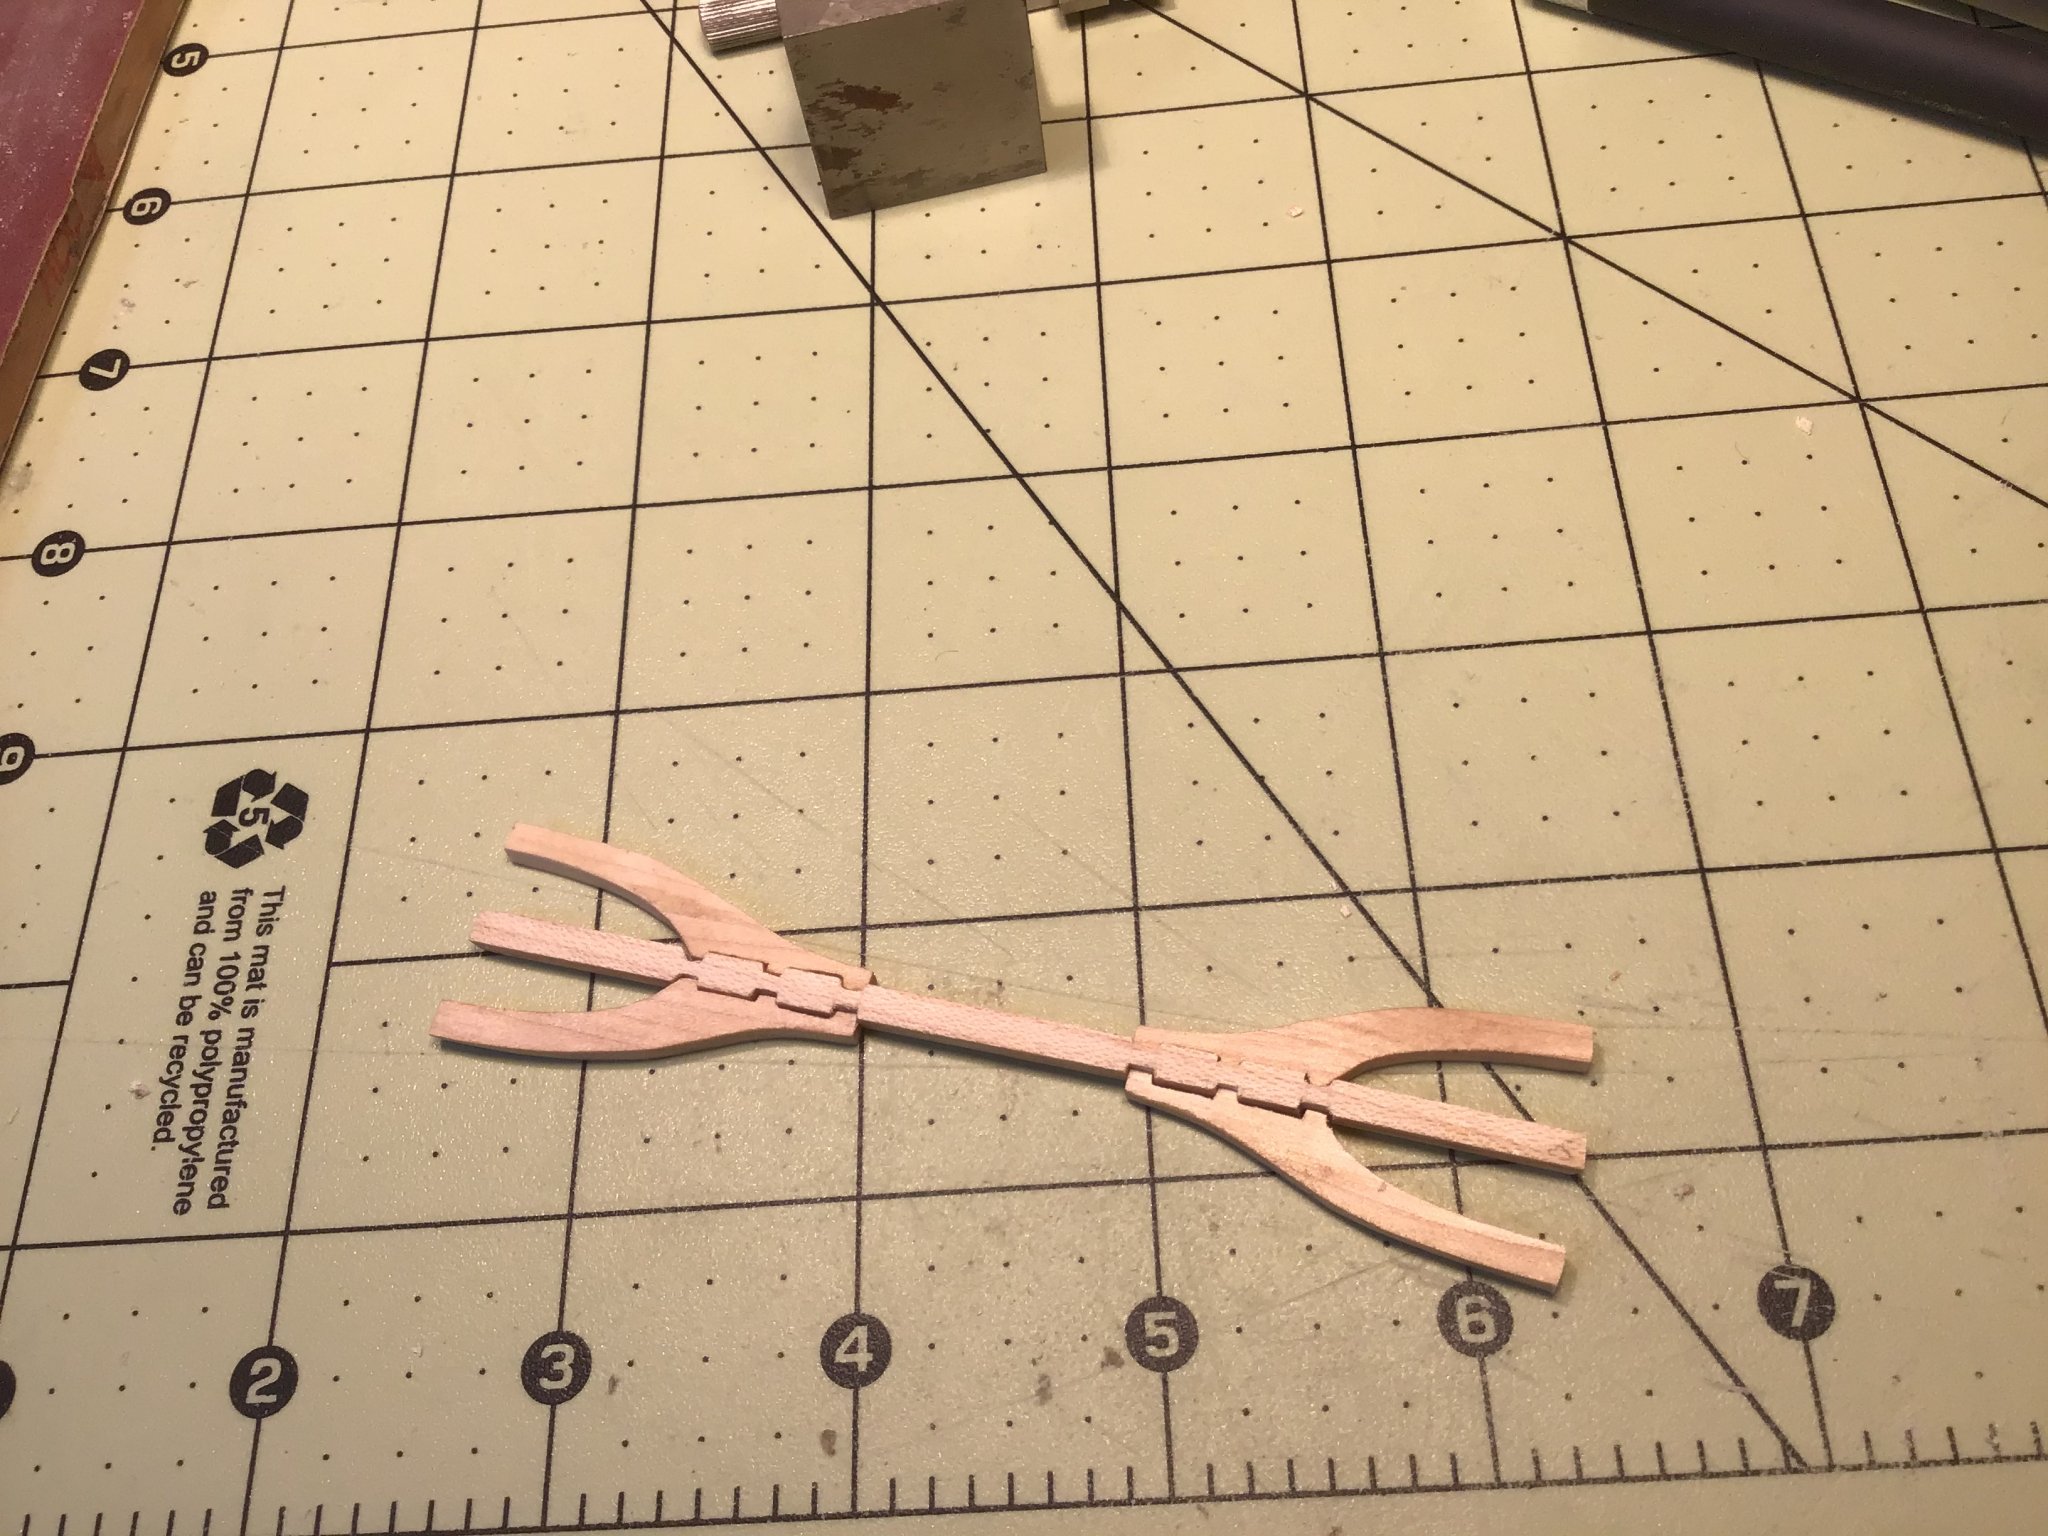
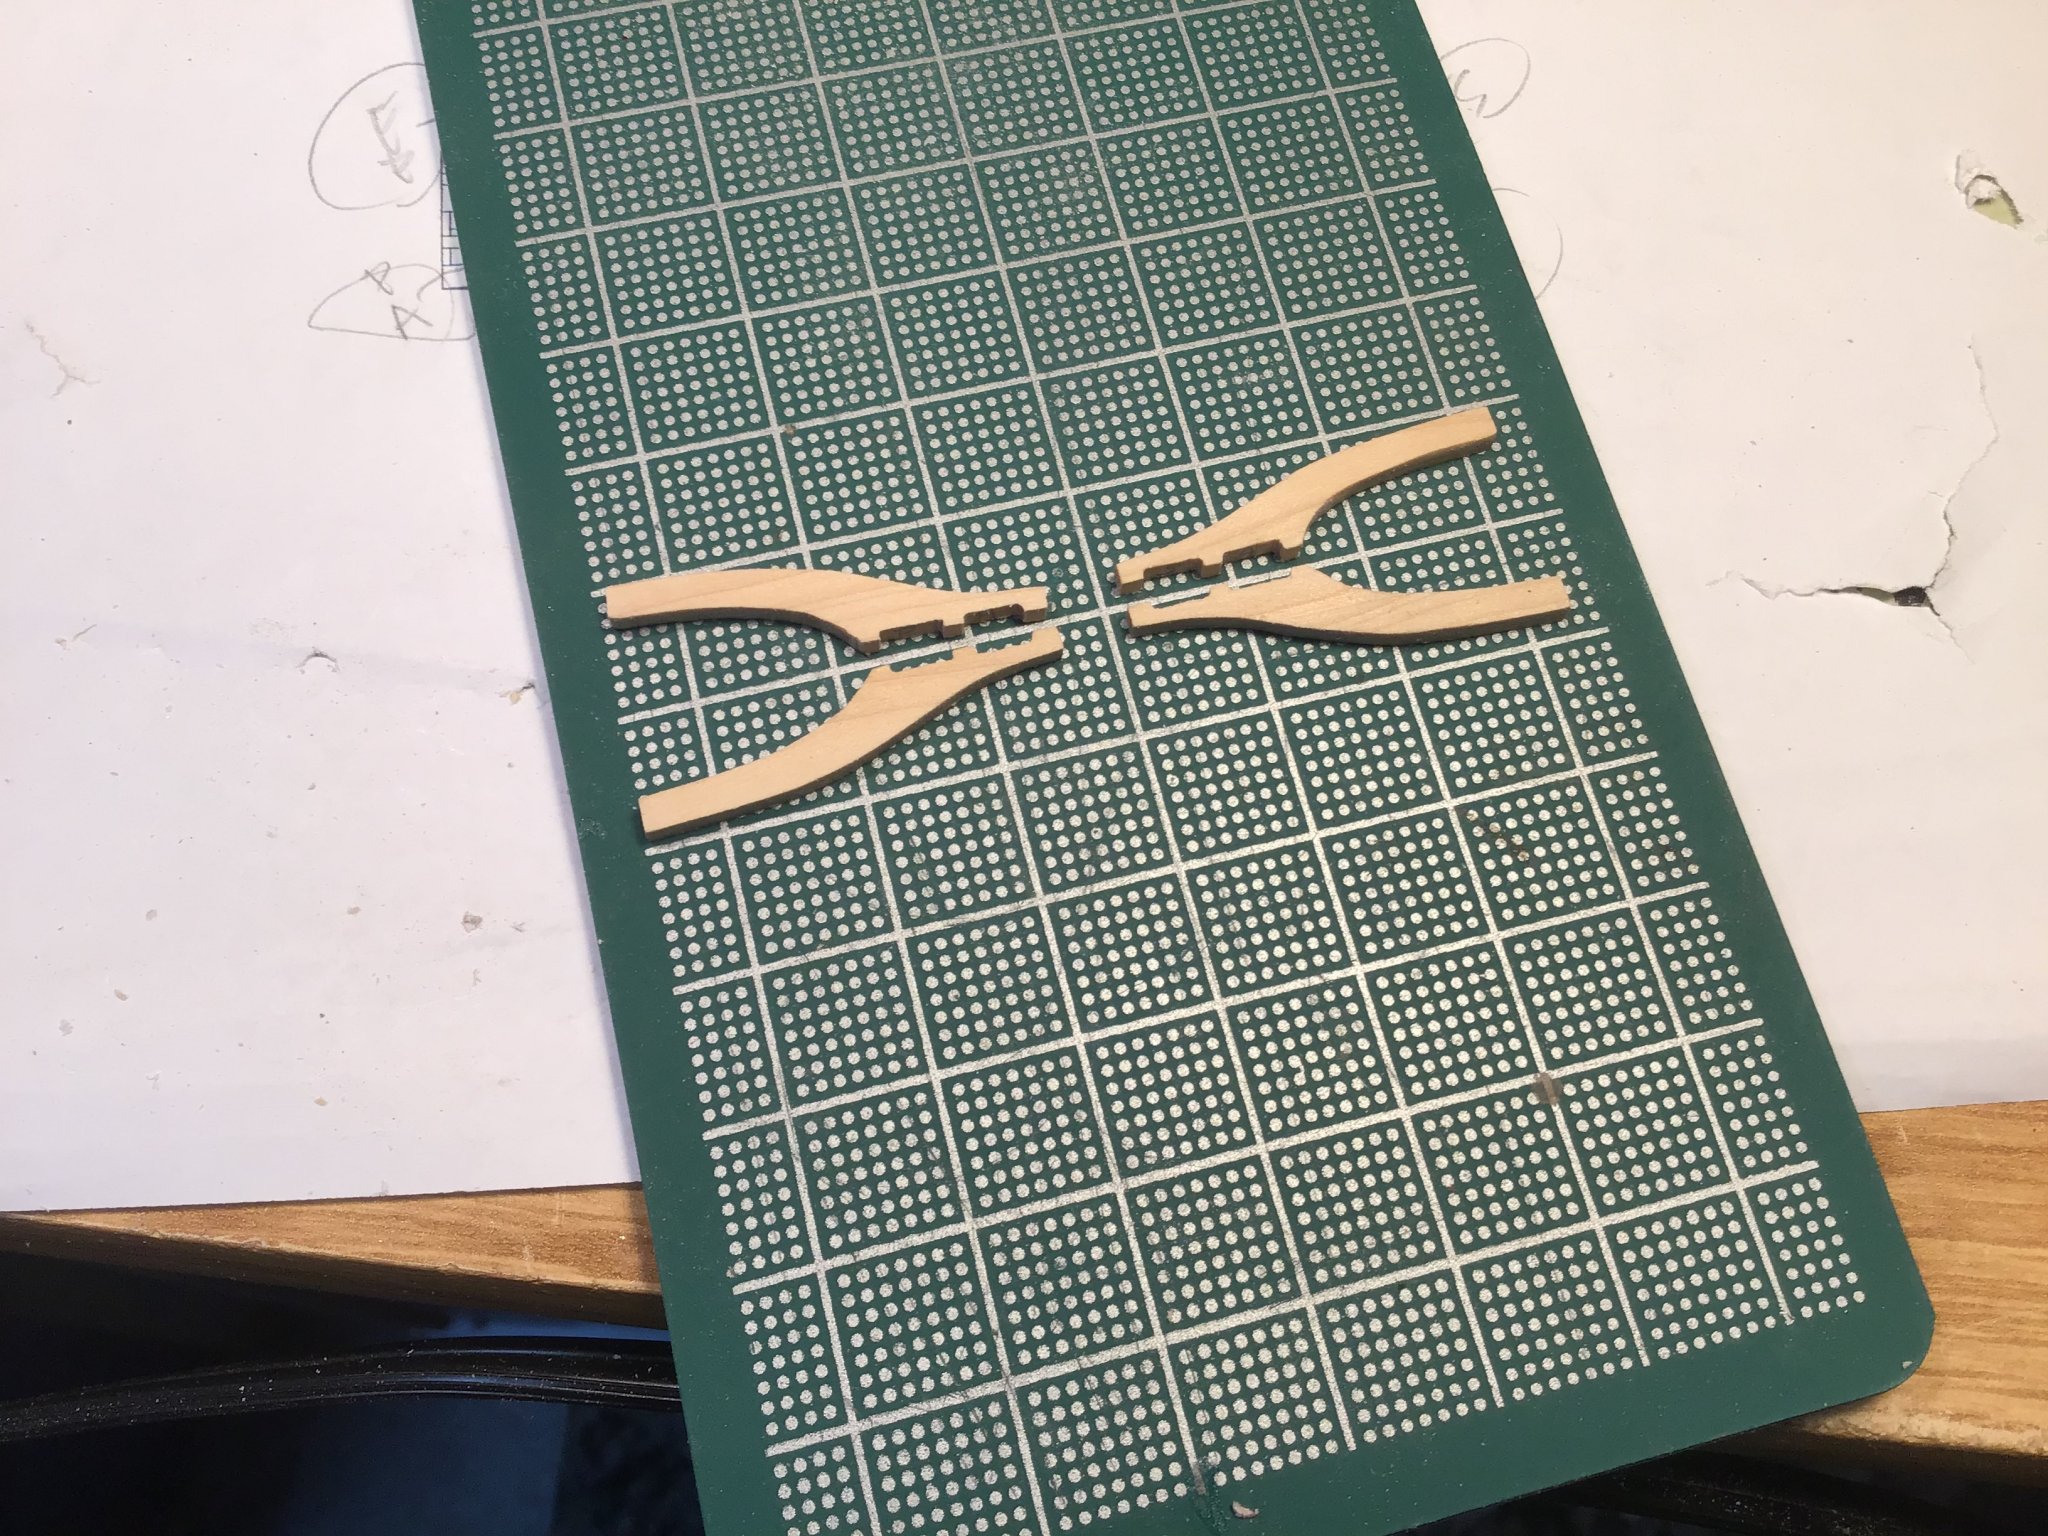
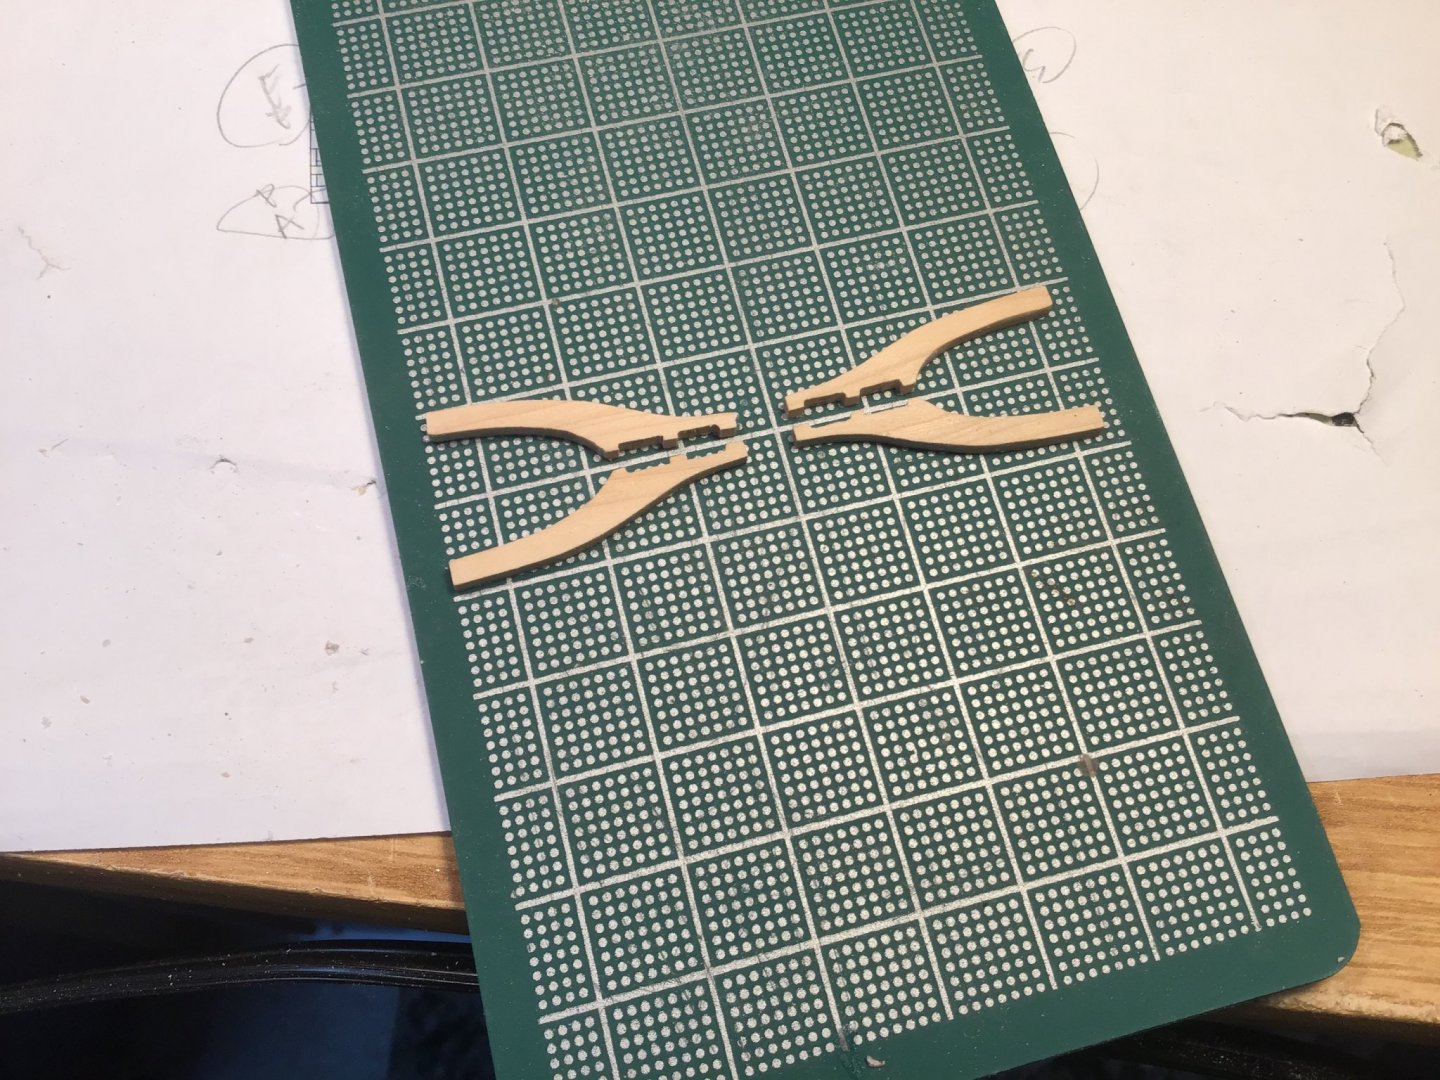
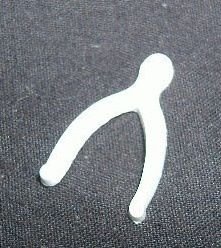
I set up my little table saw to make carlings. I’m astounded that I had to make over a metre of 2.6mm x 2.6mm stock for this tiny model! (And there will be way more needed for the ledges!) As I was cutting all the carlings I was mulling over the next steps and realized that I need to deal with the beam arms before anything else. The stock material was made by resawing some birch left over from the frames. (Kind of messy job with the spray glue!) My biggest concern in making these beam arms was to make sure I had the spacing and sizes all consistent. At thIs scale, just a fraction of a millimetre would be noticeable. So I devised a plan to mark and shape the pieces so that they all matched. After I glued on templates I sanded each raw blank carefully to where the beam arms needed to be notched. This allowed me to line up those notches when I clamped all four beam arms together. I then made the stop cuts for the notches by cutting across all four beam arms at once. Using a square and knife to mark the notches. Marking all done. Using this microsaw to make the stop cuts I separated the pieces, made several depth cuts in the notched out areas, and used a small chisel to rough cut the material. I concentrated on getting one beam arm completed by filing, sanding, scraping and praying. This first beam arm would become the template for the remaining ones, which were first rough-shaped on the belt sander and then clamped altogether for final shaping. Although not perfect, I'm pleased with the end products. It was good practice for when I will do the same for the gun deck. Depth cuts to assist in making the notches Taking out material using a small chisel. Filing to the lines. First beam arm done. Three more to go! Getting ready for final shaping. Here are all the tools I used to make these! One wrong move and...🤬😢😫 The whole time I worked on these I chuckled at how much anxiety they were able to create and how much they reminded me of the wishbone from the Operation game! And about as big! Clear skies! Gabe


-
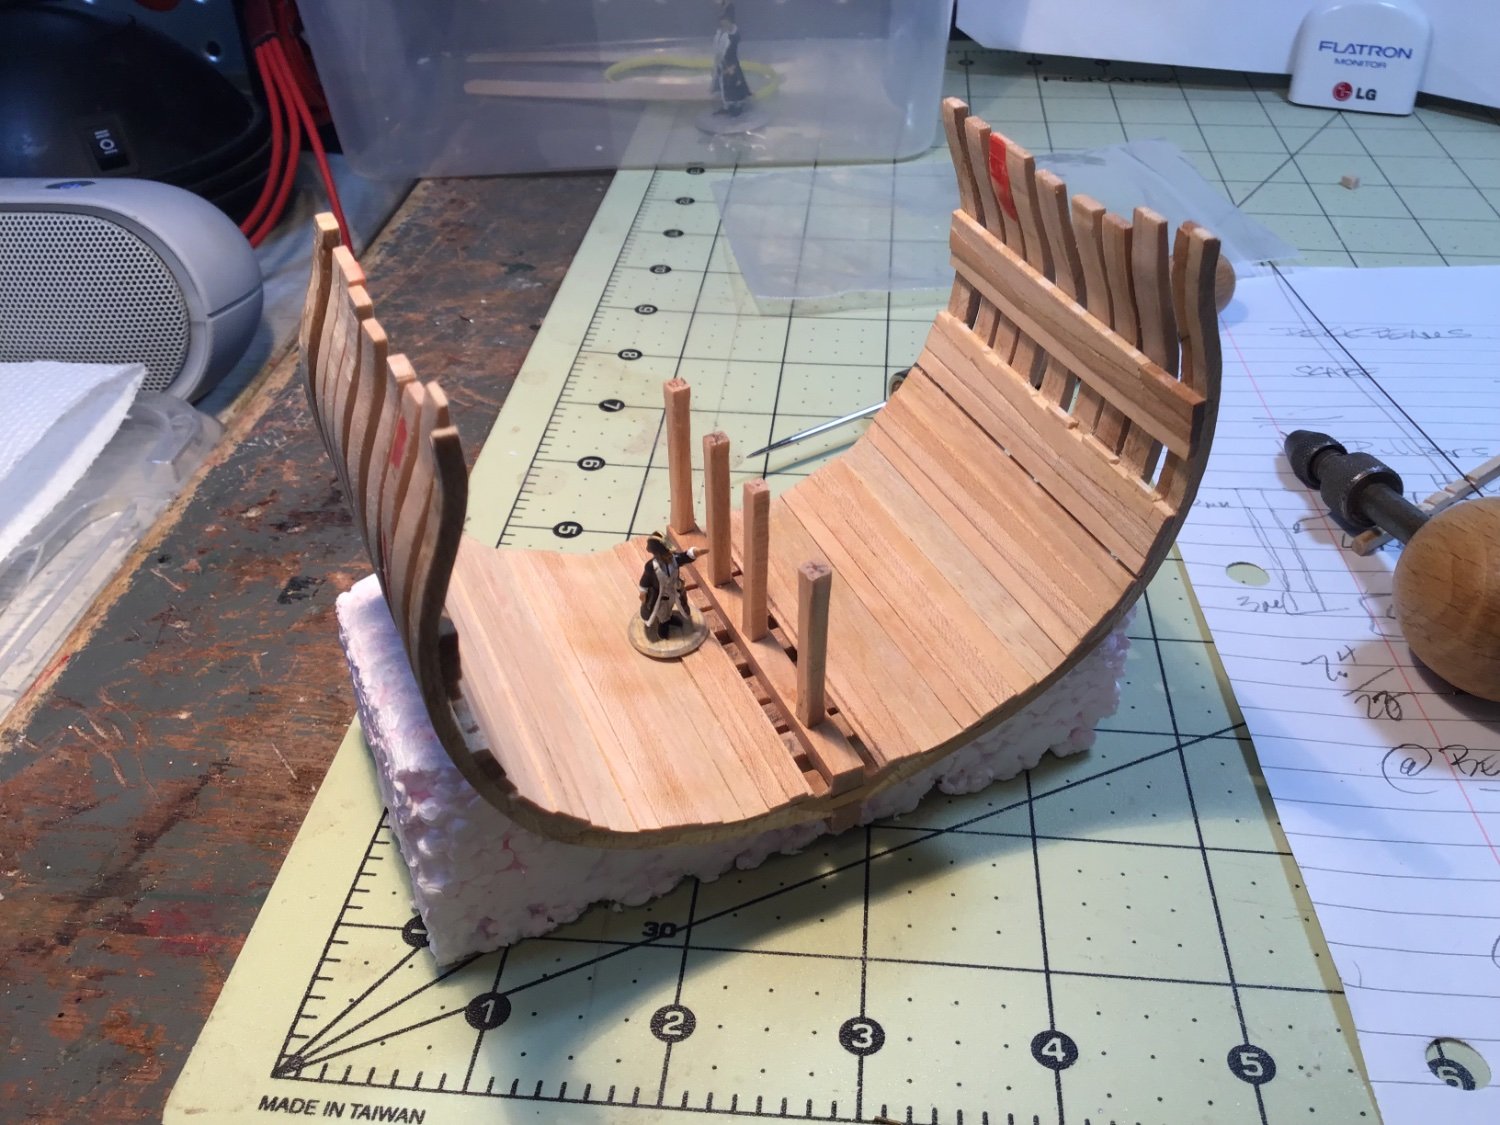
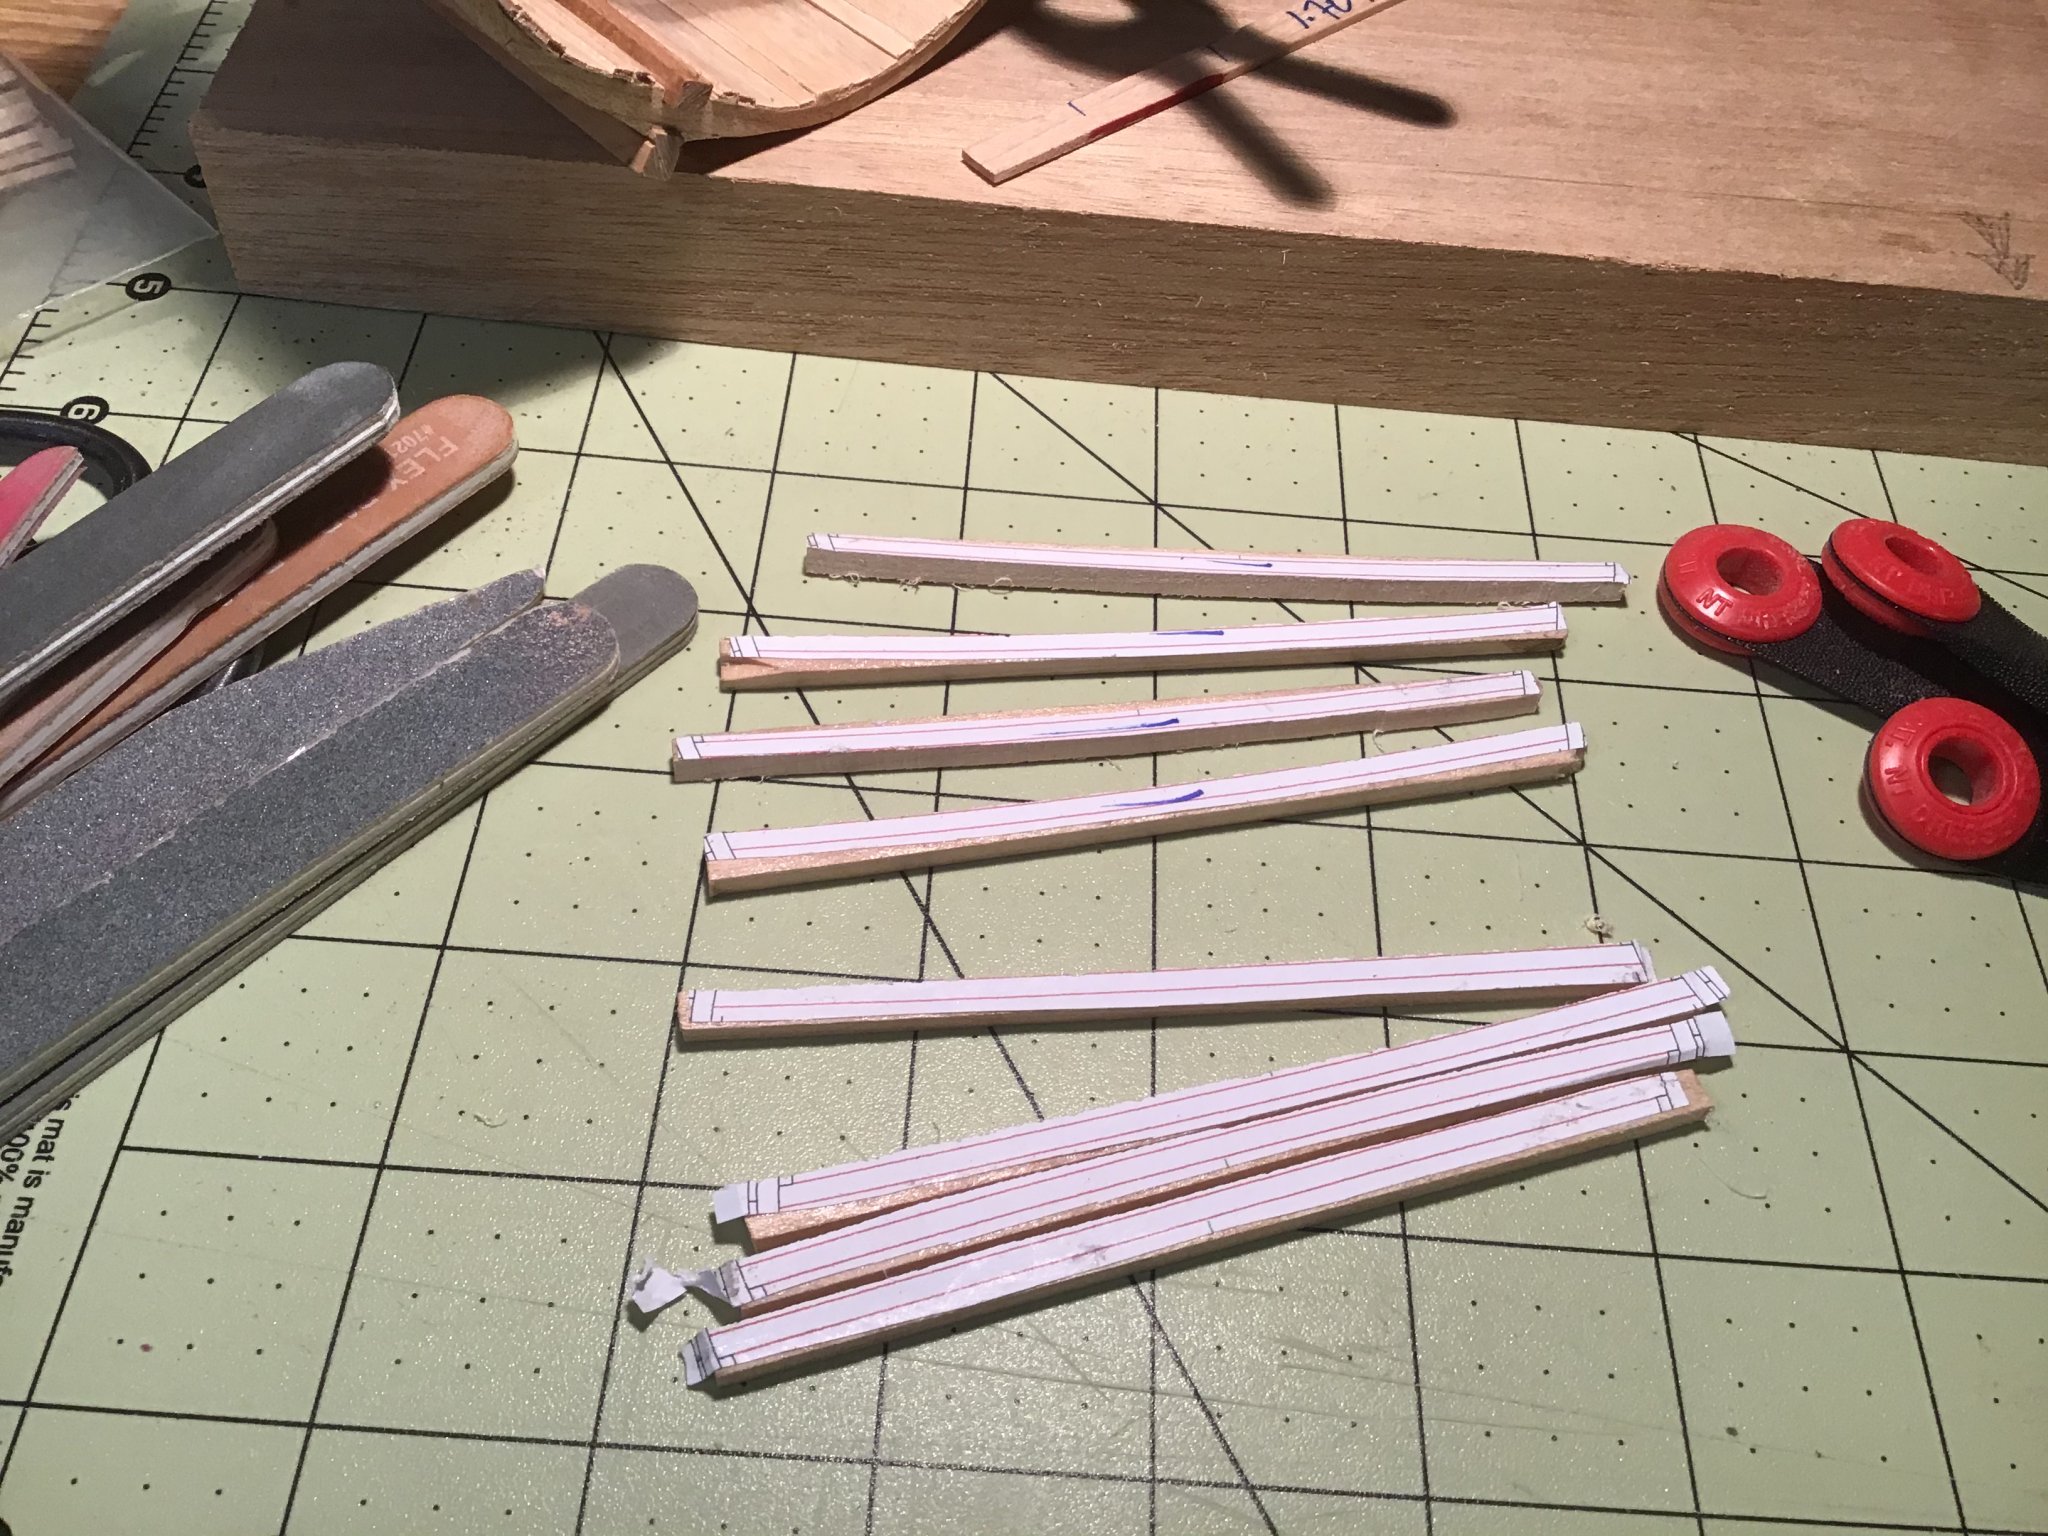
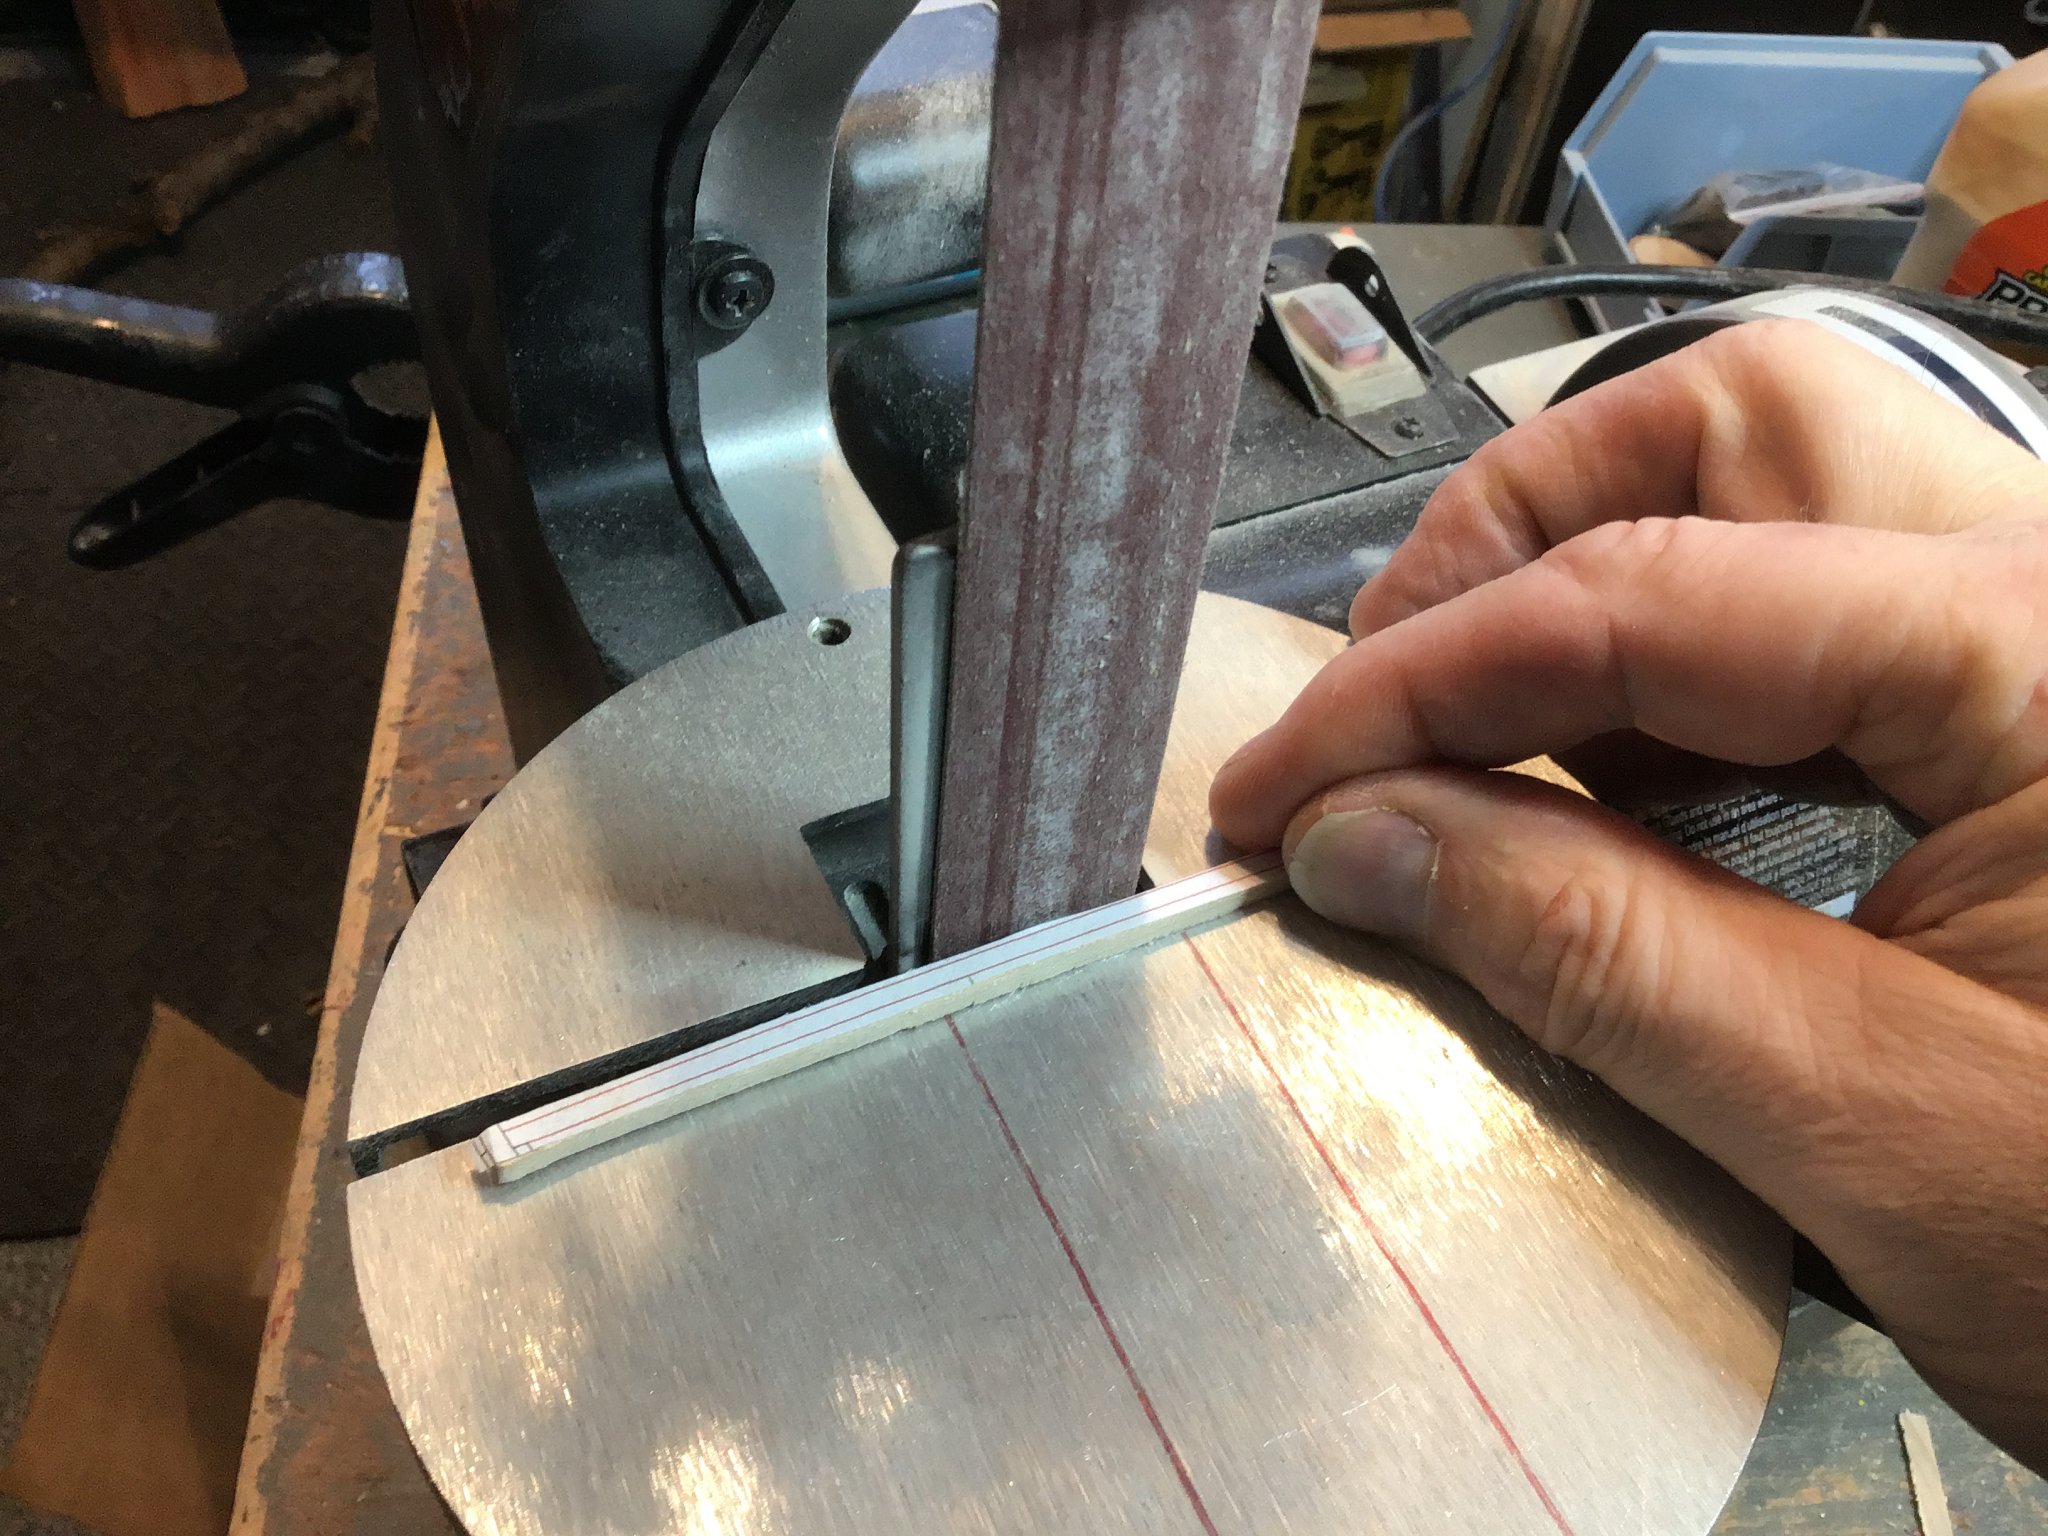
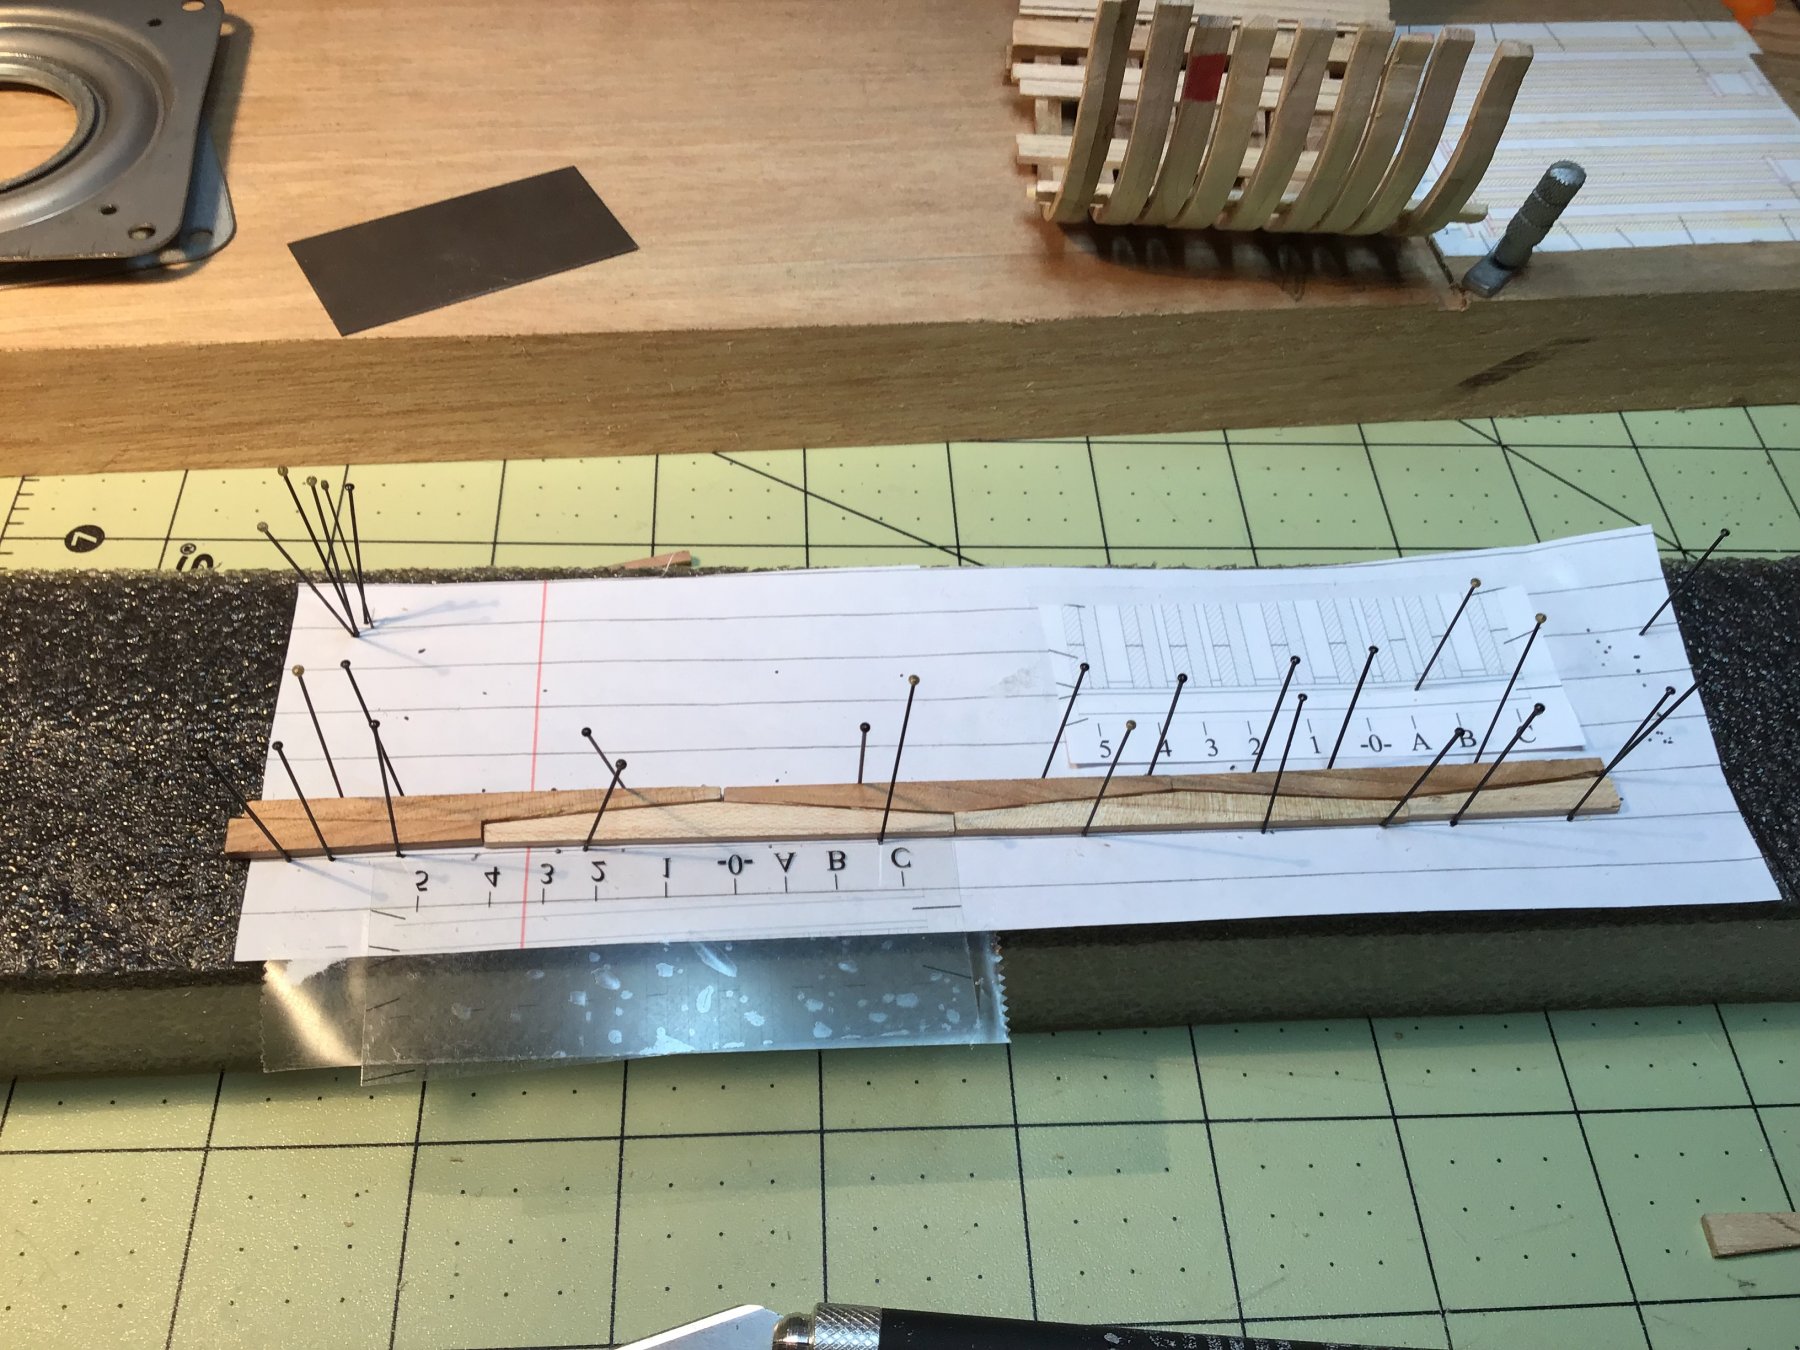
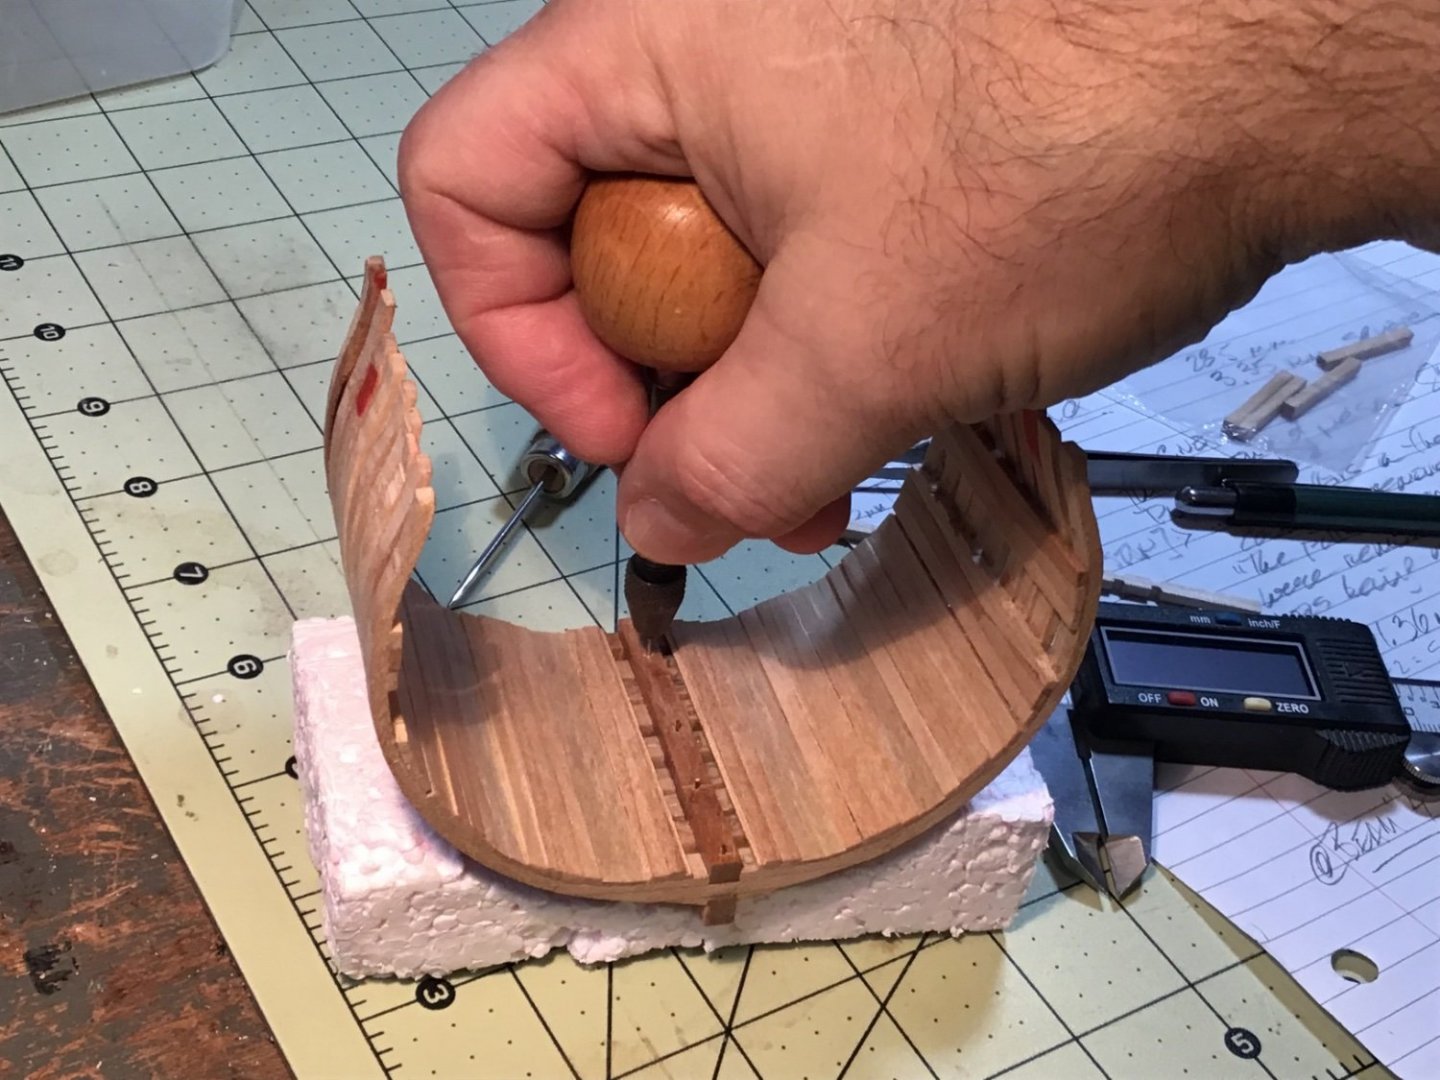
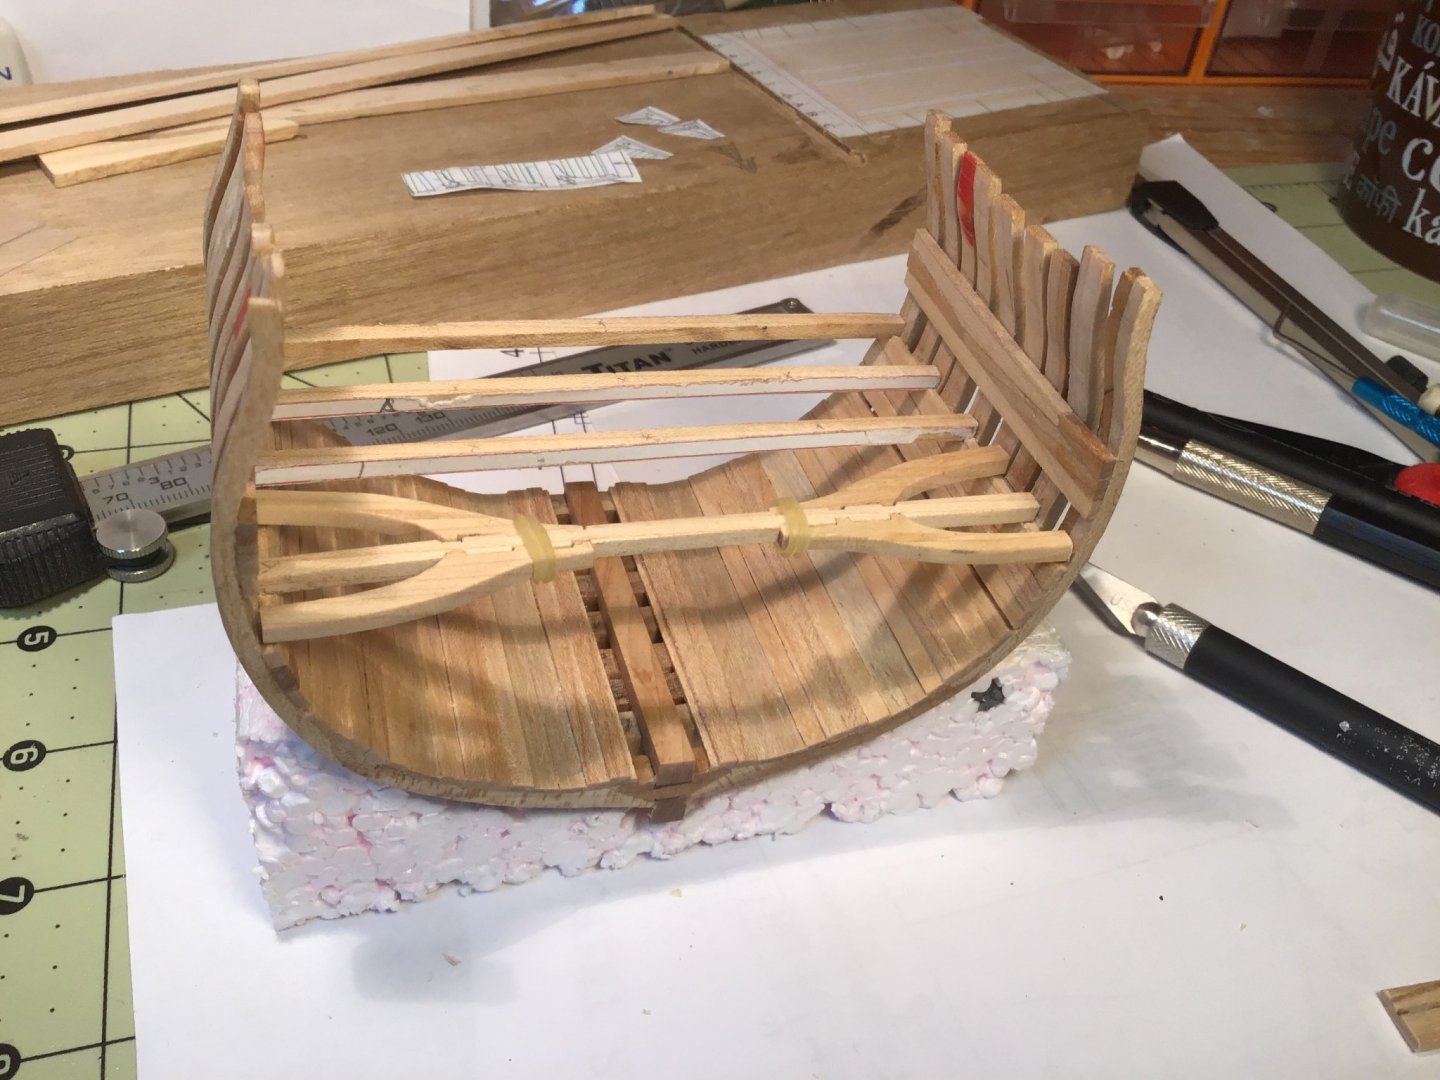
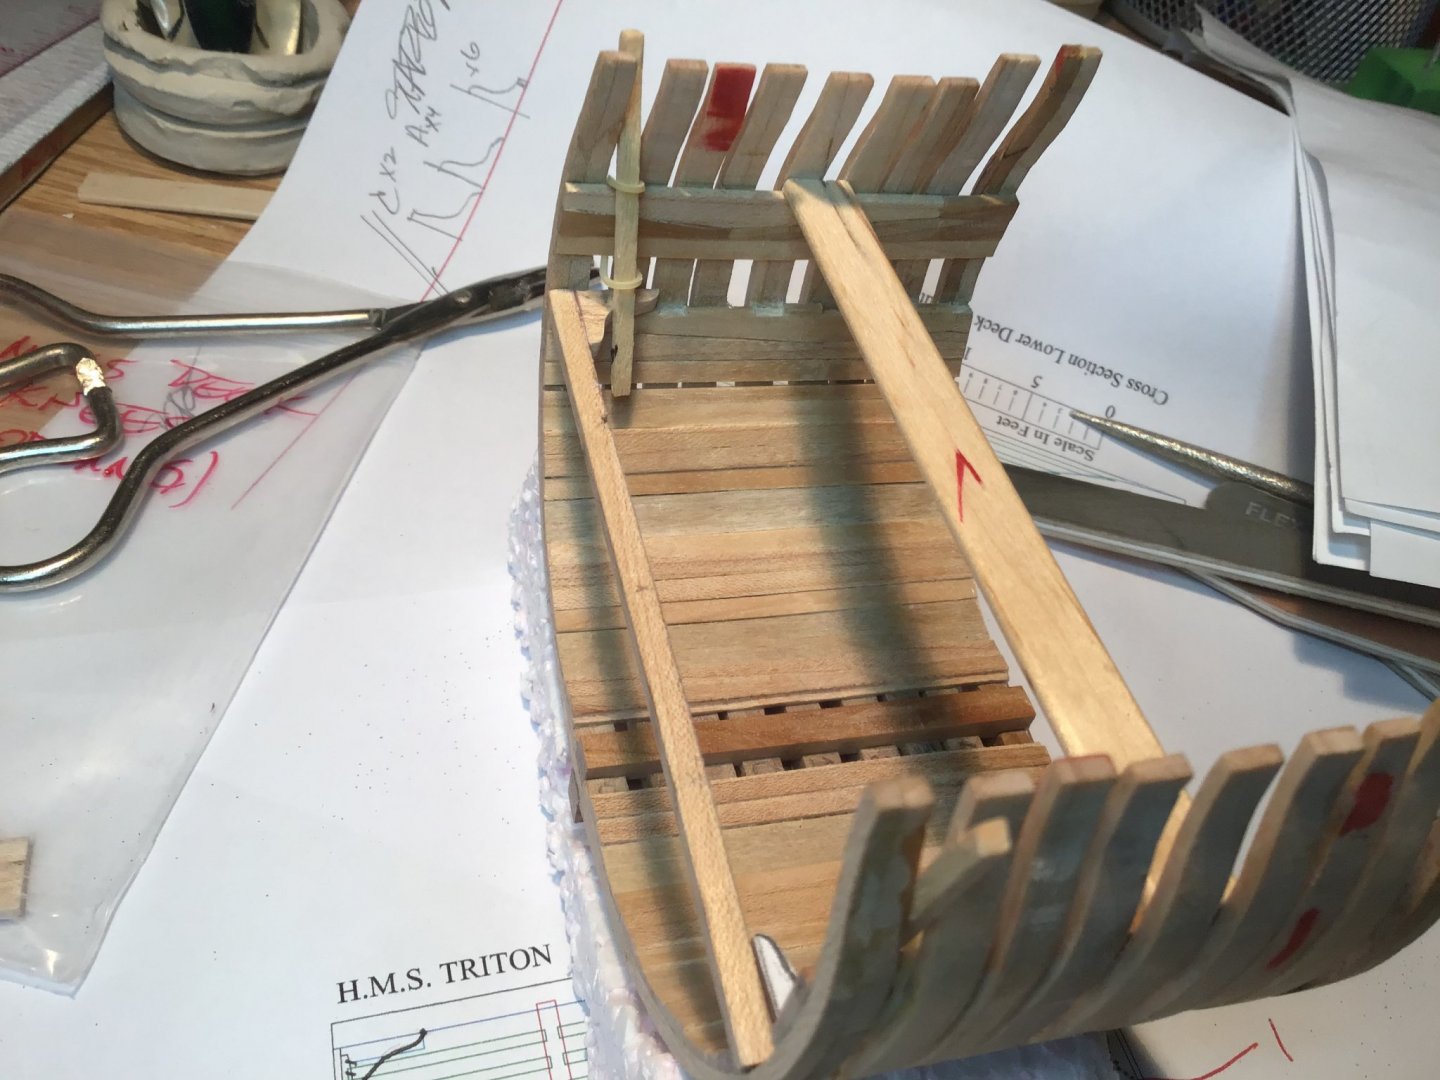
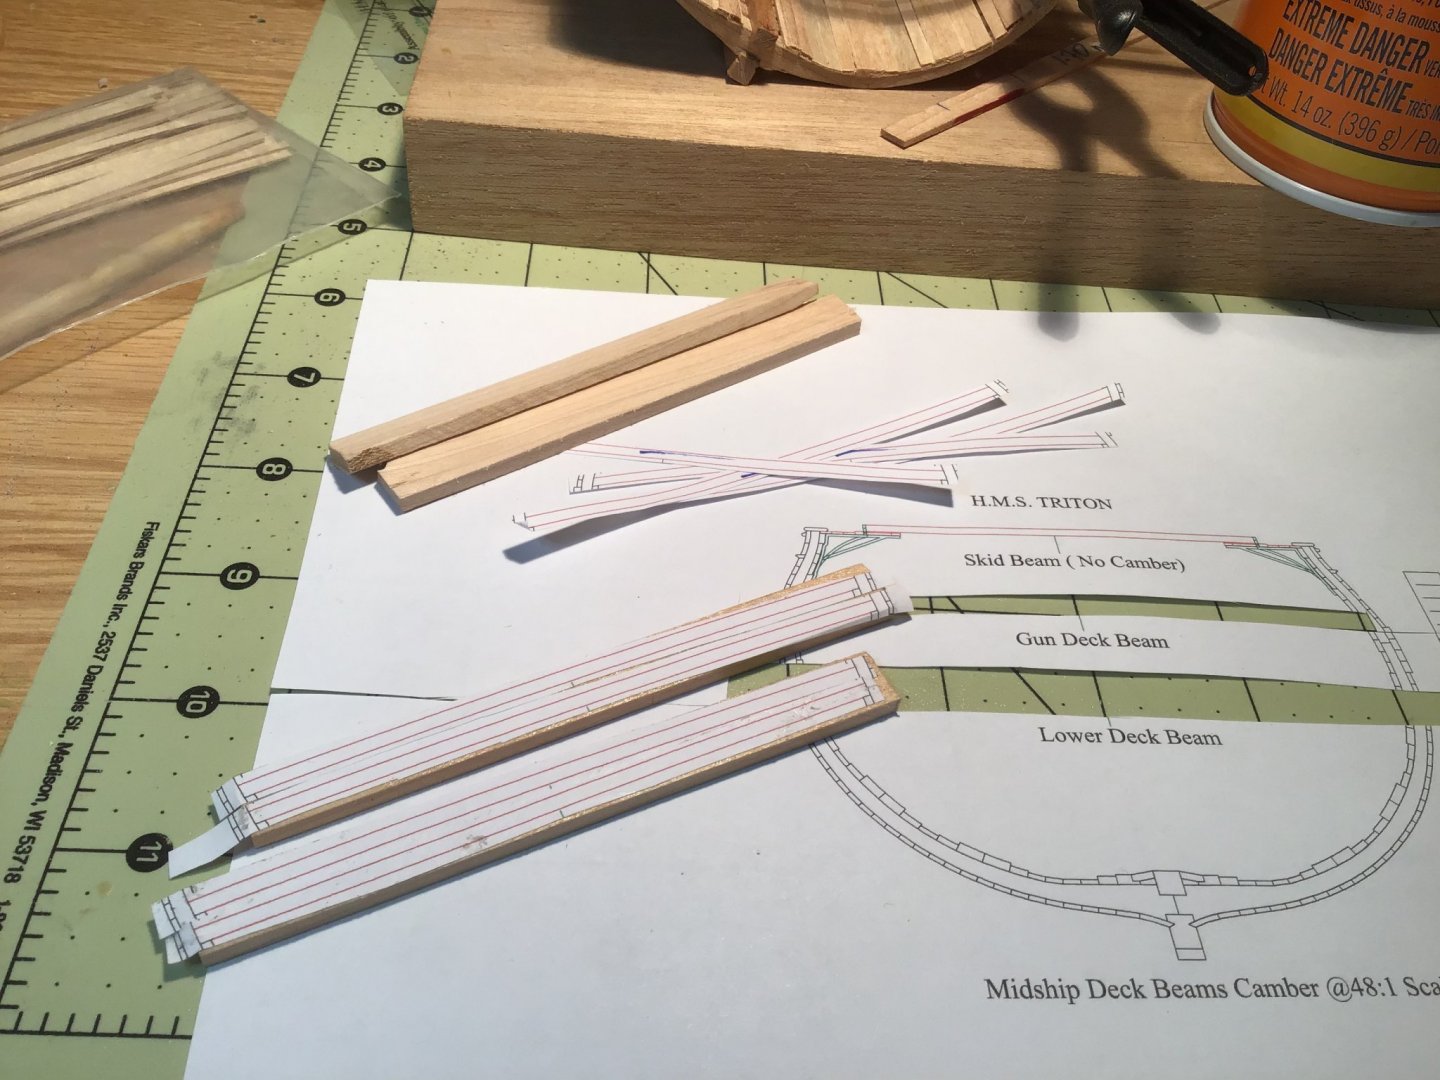
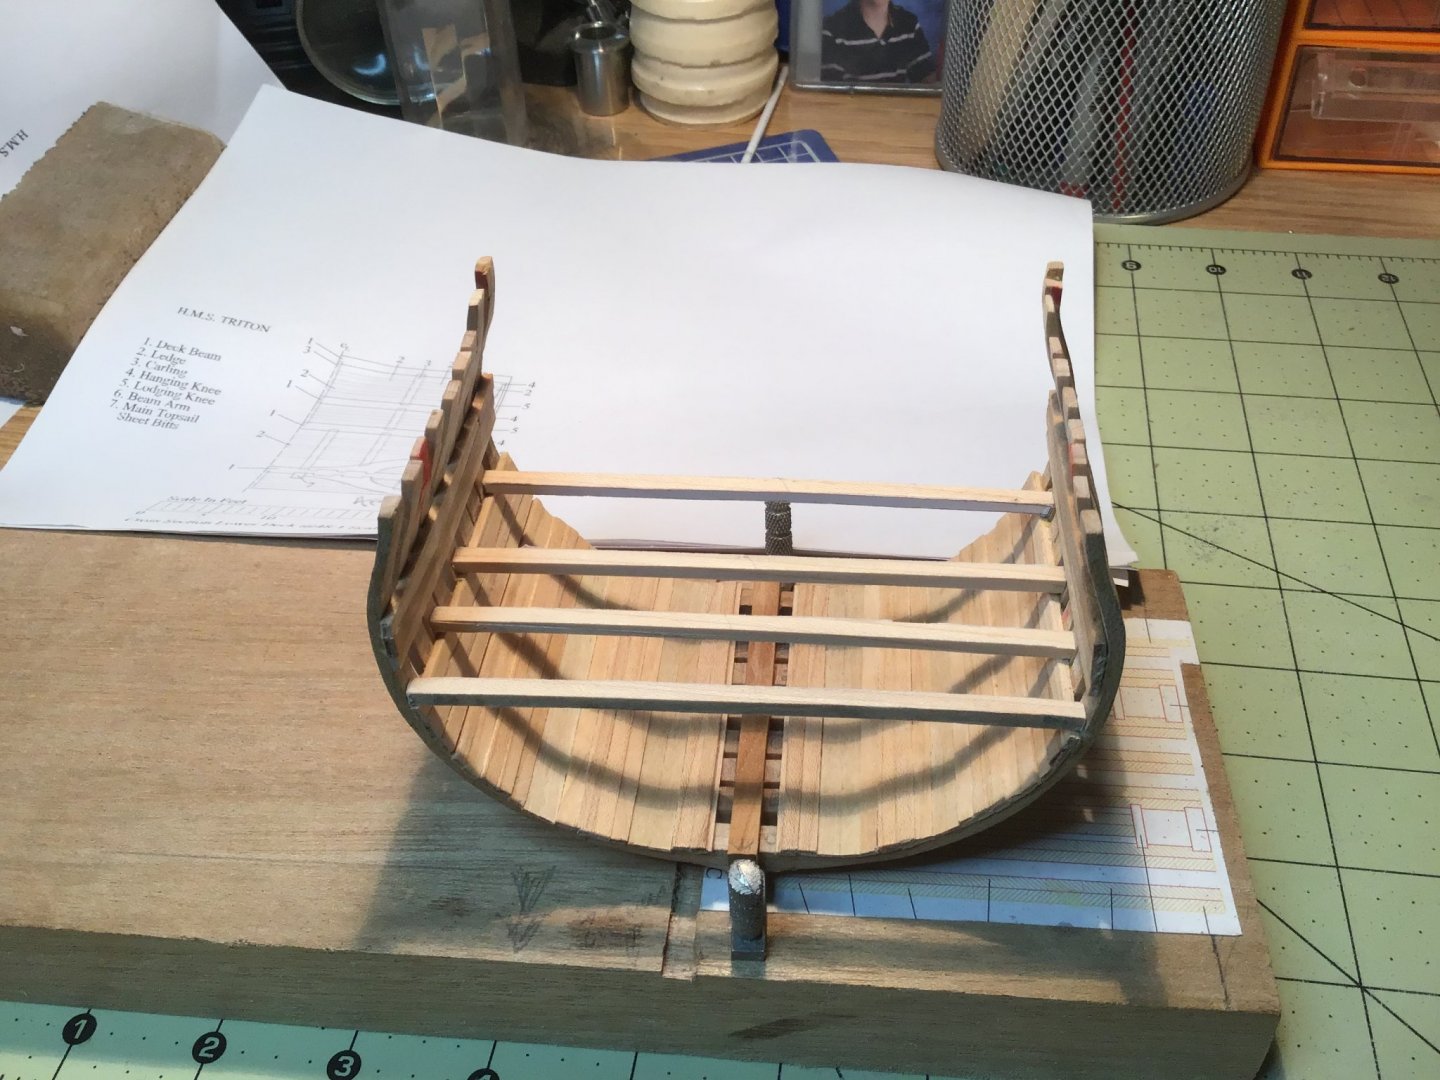
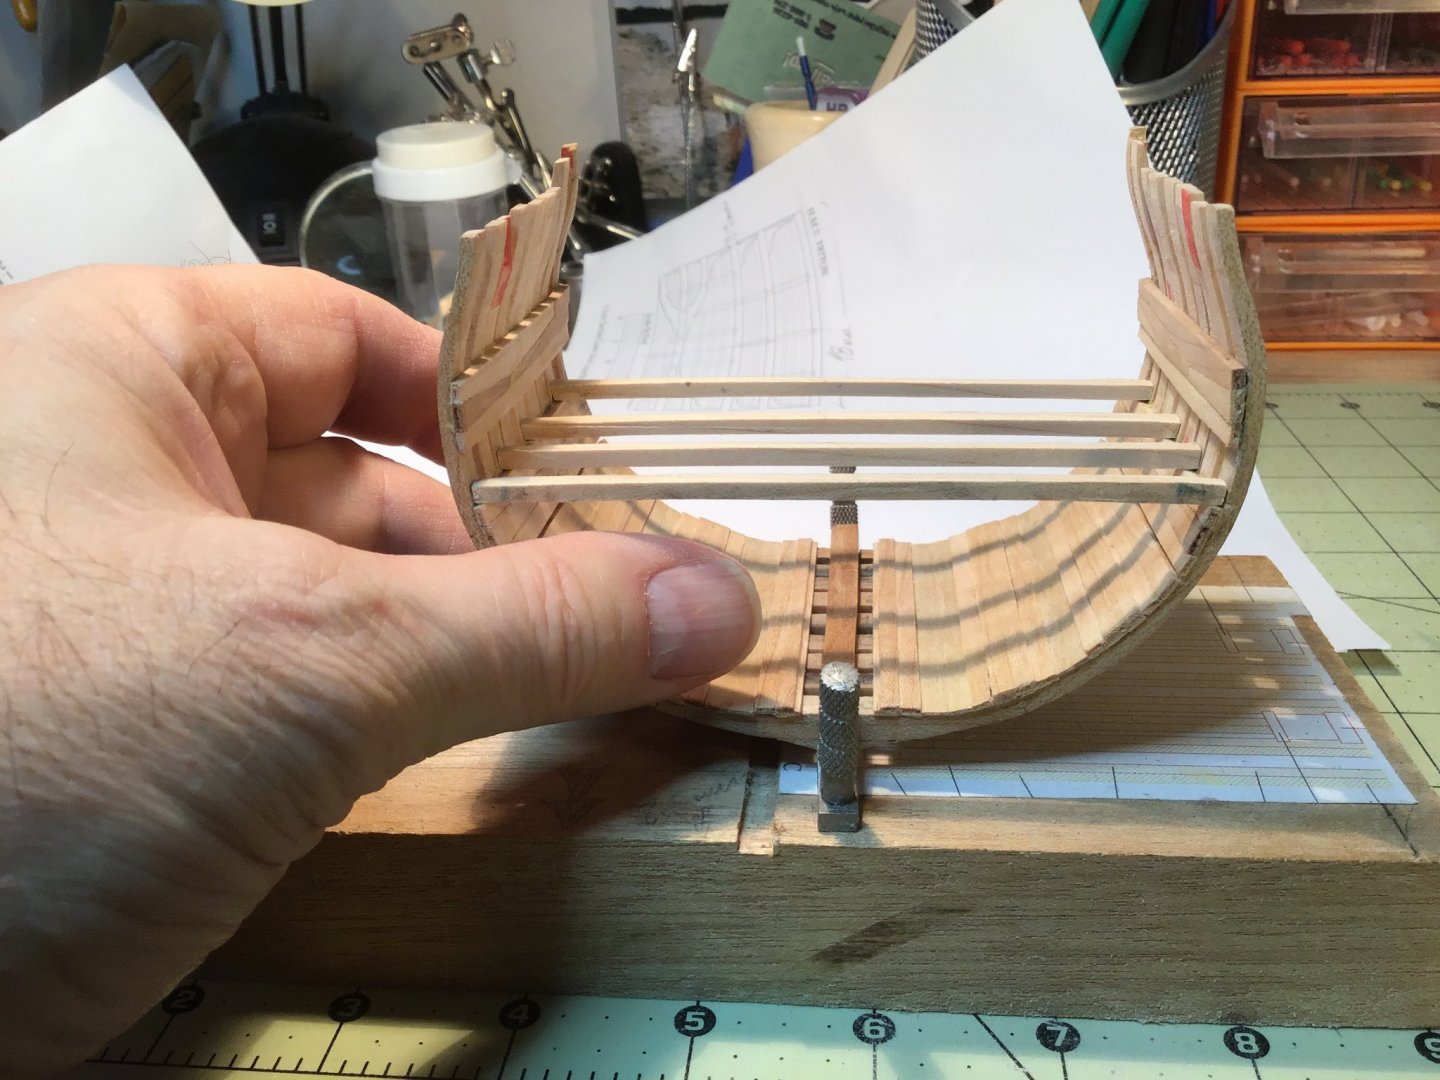
A year! It’s been almost a year since I last worked on this model! Sheesh. One step backwards... I have some advice for other procrastinators: go back and read your build logs before you pick up that forgotten model. It would have saved me half a day of work if I had! When I took my Triton out I was perplexed to find that I had only finished one of the upper deck clamps. So, I began preparing stock and planning to shape pieces when I came across the fully assembled clamp in the bottom of the storage container! Wha'?! Then it all came back to me. I discovered that the frames on one side were not spaced properly and had to painstakingly remove the clamp. I was so disheartened by this backward step that I just boxed up the model in disgust and put it on the shelf! Good news: I didn’t have to fabricate a new deck clamp and, in no time, I had it glued in place with the frames properly spaced. New/used upper deck clamp back in place. Deck Beams After mulling over my options I decided that I should build the decks. This would determine the spacing of spirketting, waterways and interior planking. I was able to prepare some 3.30 mm birch stock, glue on templates for the beams and rough cut them out: As usual, sanding these small pieces to the correct lines presented some headaches. I tried to do it all by hand, but it was taking so long that I resorted to gingerly taking the "bulk" waste off with my 1” belt sander. I forgot how nerve-wracking this is! One tiny misstep and I would have to start over again! A study in concentration. I first tried to do the final sanding with a sanding block but it was taking forever and I was getting frustrated. Birch is beautiful wood to work with but its hardness was working against me. I needed something larger and faster to remove the material before I exploded. Are we there, yet?! In preparation for working on the model I rejuvenated my sanding stick with new 100, 150, 240 and 400 grit sanding paper. With a scrap piece I tried out if I could drag and/or push these small pieces across the wider sanding surfaces. And now birch was my friend! These pieces handled the sanding very nicely and in no time at all I had all 8 deck beams to where I wanted them. Easy-peazy sanding! To eliminate minor differences I clamped the four lower deck beams together and did my final sanding to shape. I’m too excited to get to the rest of the lower deck that I'll finish shaping the gun deck beams later. I dry-fit the lower deck beams and I’m happy!😃 (And now I see how little room I have to work with!😳) Going to have to do some careful planning from here on. Particularly because I intend to show the hold with ballast and stores. Any advice would be welcome and appreciated. Next step: this Canadian goes carling!🇨🇦🥌🤣


-
Welcome aboard, Marshall! You have picked a great website to learn this hobby. It helped me finish my first model and, coincidentally, I’m Canadian, too!🇨🇦 (Winnipeg) Clear skies! Gabe
-
Early Swift, Virginia Pilot Boat ,1805 model
Gabek replied to Keith Black's topic in Wood ship model kits
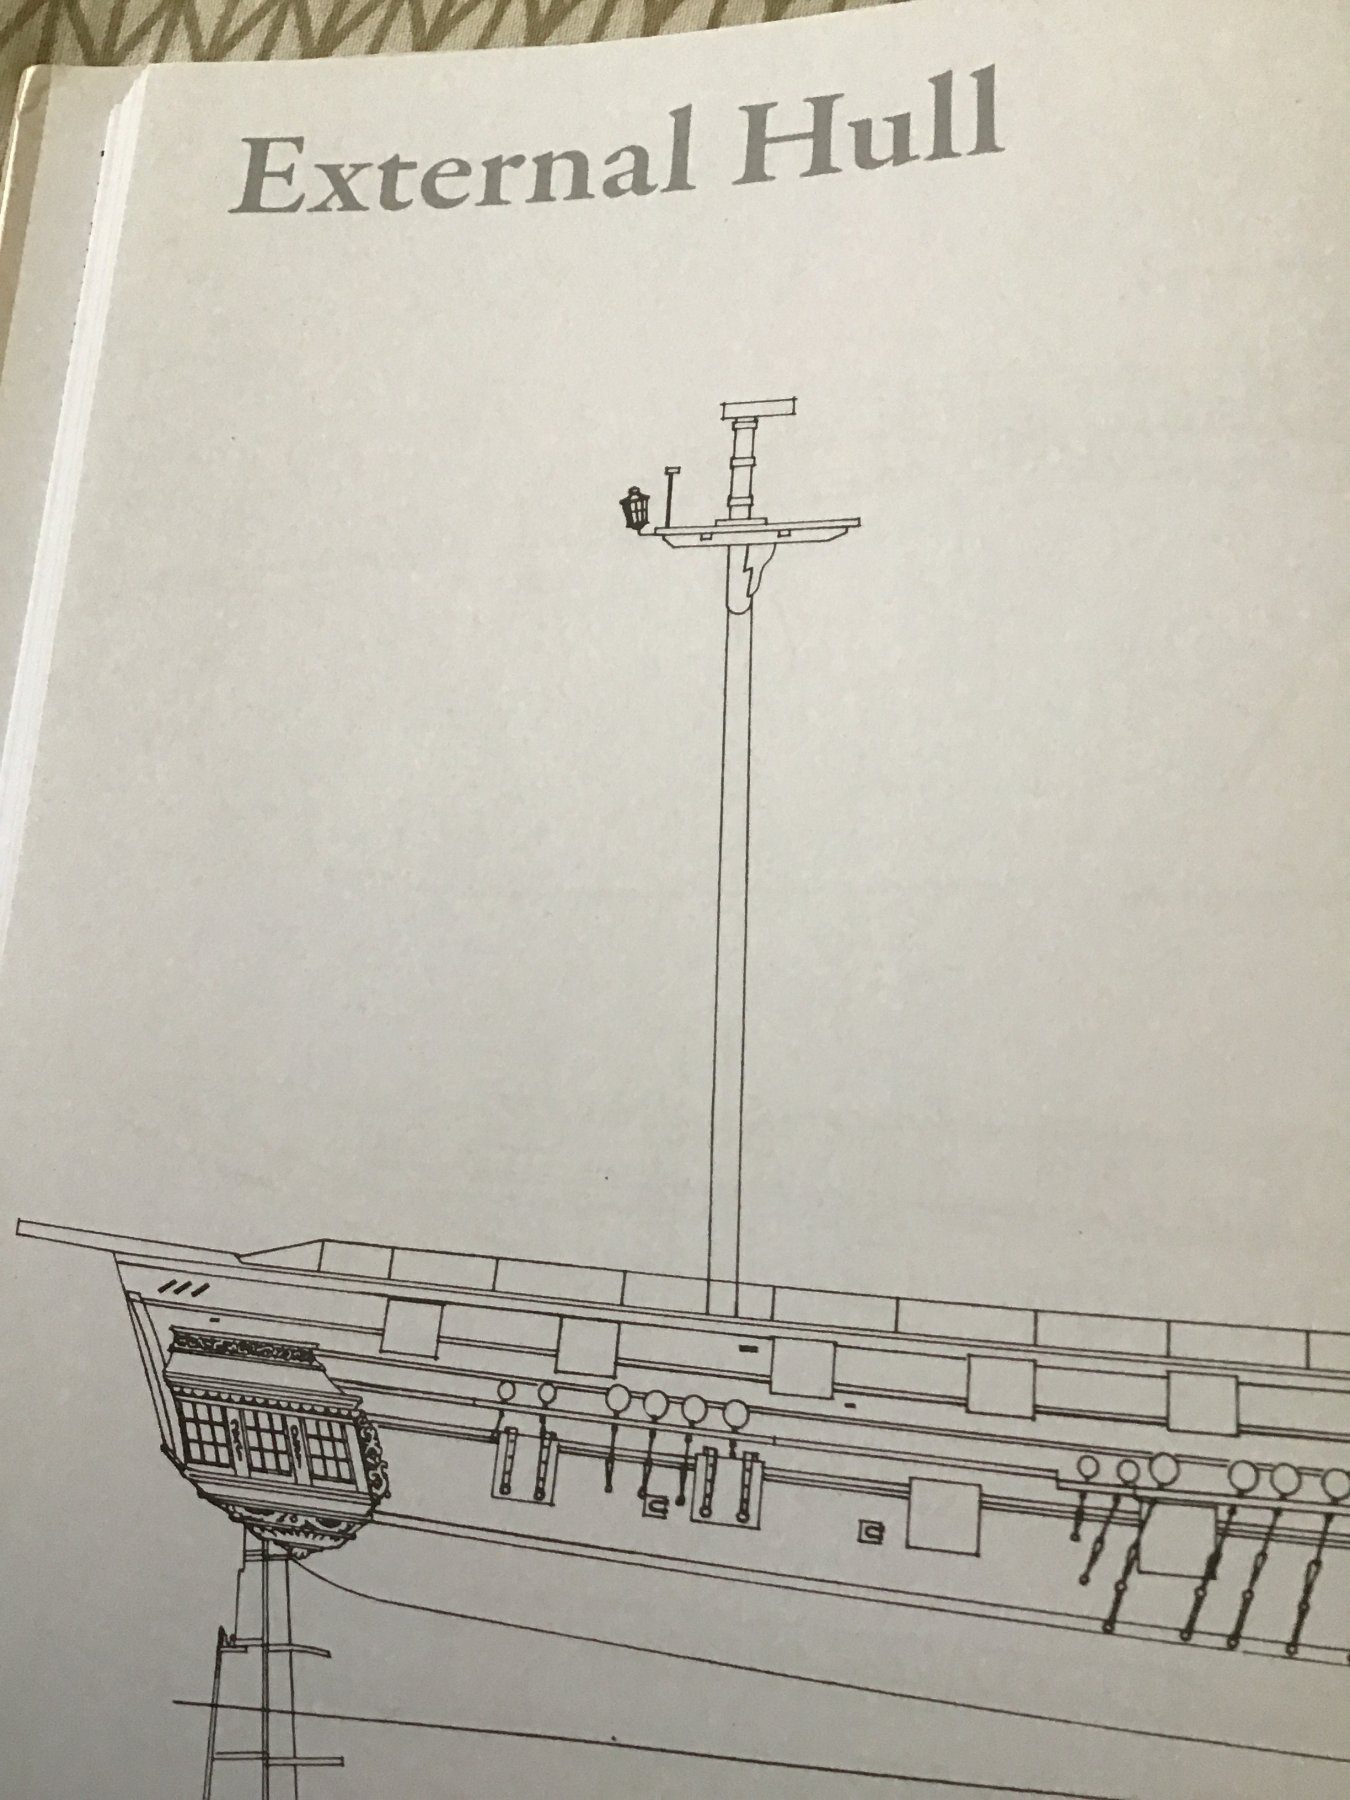
Wow...and I mean WOW. This rehabilitation is coming along beautifully. Painting is doing its job...that hull planking was the result of frustration trying to bend veneers to a complex 3d shape, which can't be done. All your colour choices are fine. Black and white are covering up the "booboo's" nicely! The lantern is exquisite! Please tell us how you made it. I never thought of rigging one on the mast. So, I started pouring through all my books and so far I could only find how they rigged a stern lantern on the mizzen top of a British frigate in Petersson's Rigging Period Ships. I think you could try installing yours on the flag mast somehow if you wanted. Keep on trucking! - Gabe
-
Early Swift, Virginia Pilot Boat ,1805 model
Gabek replied to Keith Black's topic in Wood ship model kits
Anytime you need the plans, Keith, just let me know. And thanks for the kind words about my build! 😳 Kind regards, Gabe -
Early Swift, Virginia Pilot Boat ,1805 model
Gabek replied to Keith Black's topic in Wood ship model kits
Hello Keith, There are a whole lot of Swift logs on this site that can help you. This was my first model and first build log, too. I still have the plans and ‘instructions'(you'll understand why I put the scare quotes when you read the logs 🤣). I could mail them to you if you’re interested. Clear skies and sharp tools! - Gabe -
Quick Work! Before I started the last planking I noticed something off. I dreaded picking up my calipers to measure the space between the thick stuff and prayed it was an optical illusion. The thick stuff on the port first futtock was 1 mm out, but parallel to the other pieces. At this scale that millimetre is huge! The mistake was done well back when I centred the the first pieces of thick stuff on the chocks. Somehow I messed up that placement and it now came up and bit me! Highlighting the discrepancy in the port and starboard quickwork. What's coming So, my planking on the interior hull is not symmetrical.😢BUT, it will almost be unnoticeable once I finish the model in the way I envision. Of which I think I will now sneak out a few details: I plan to put the model on a turntable so people can view all sides. I hope to paint the interior from frame C through frame 1 so someone looking from the bow will see a more realistic view of what the Triton may have looked like. When viewed from aft, frames 2 through 5 will remain natural wood with perhaps some cuttaway. I think I will paint one side of the outer hull and leave the other natural (and maybe cuttaway). Air Space One thing that perplexed me for a long time was how did they handle moisture between the interior and exterior planking? It wasn’t until I got the Anatomy of the Ship books that I spotted how...there was an air space built into the planking! The size of this airspace seemed to vary considerably. In HMS Diana it was close to the thickness of the deck planking, in HMS Pandora it was a complete strake, and in the HMS Trincomalee it was perhaps 7-8 inches midship according the photo in the book I have. So, I incorporated a 0.8 mm air space in my model that I guage is somewhere between Diana and Trincomalee in scale. And on the HMS Pandora... What next? I have a couple of small gaps between my planking that I will address next and I will likely cut back the excess keel and sand the ends of all the planking back to the outside frames. And I could use some advice from you folks! I face a couple of conundrums: a) should I paint and apply a finish to the current planking before I close off the (small) area with the lower deck? b) Should I work on the gunports and stabilizing the frame tops before the main deck? Not a lot of space in this model! Thanks for any advice you can offer. Clear skies and sharp tools! - Gabe


-
I hear you, Graham! I have a house and a cottage...so, basically TWO places going to pieces! My wife said to me last summer as I was nailing up some interior pine boards, "Gabe, you're making this cottage so cosy." My reply: "Dear, you realize that I'm actually building my coffin. When I kick the bucket, place me in the middle of the floor, light up the place, and build the new one on top of the ashes!"😃😁😂🤣😮😲😵💀👻 Thanks for the comments! Kind regards, Gabe
-
Thanks, Mark! I think you’re right about the retired persons' time-space continuum being shifted...the naps don't help! 🤣😜😌 - Gabe
-
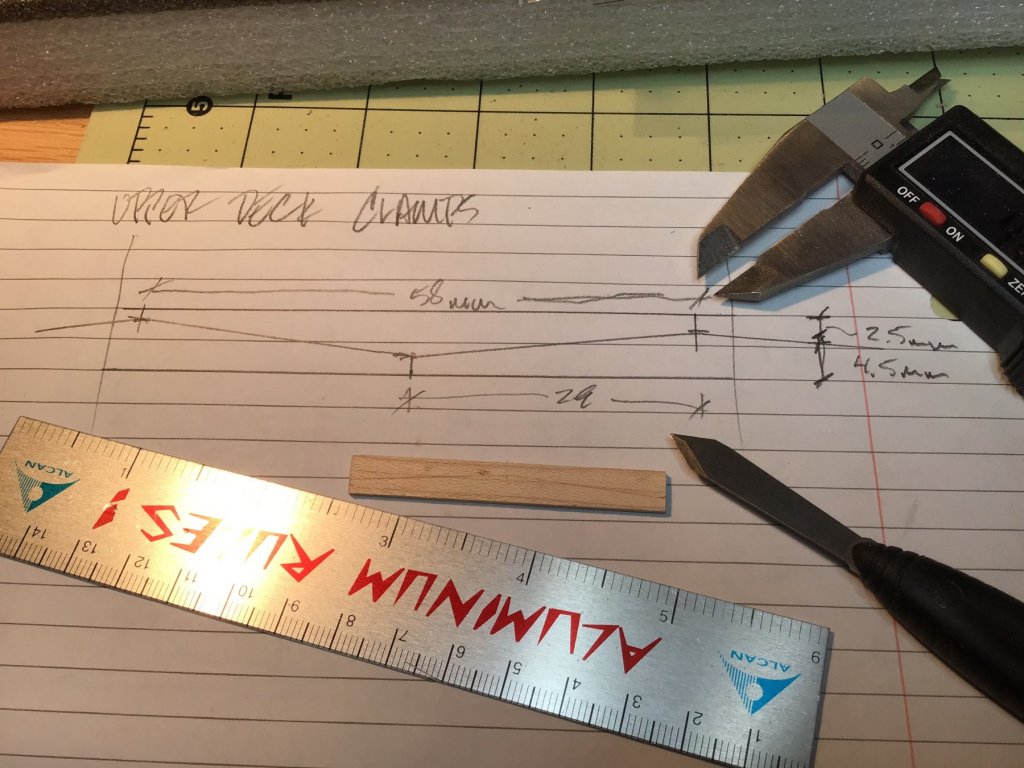
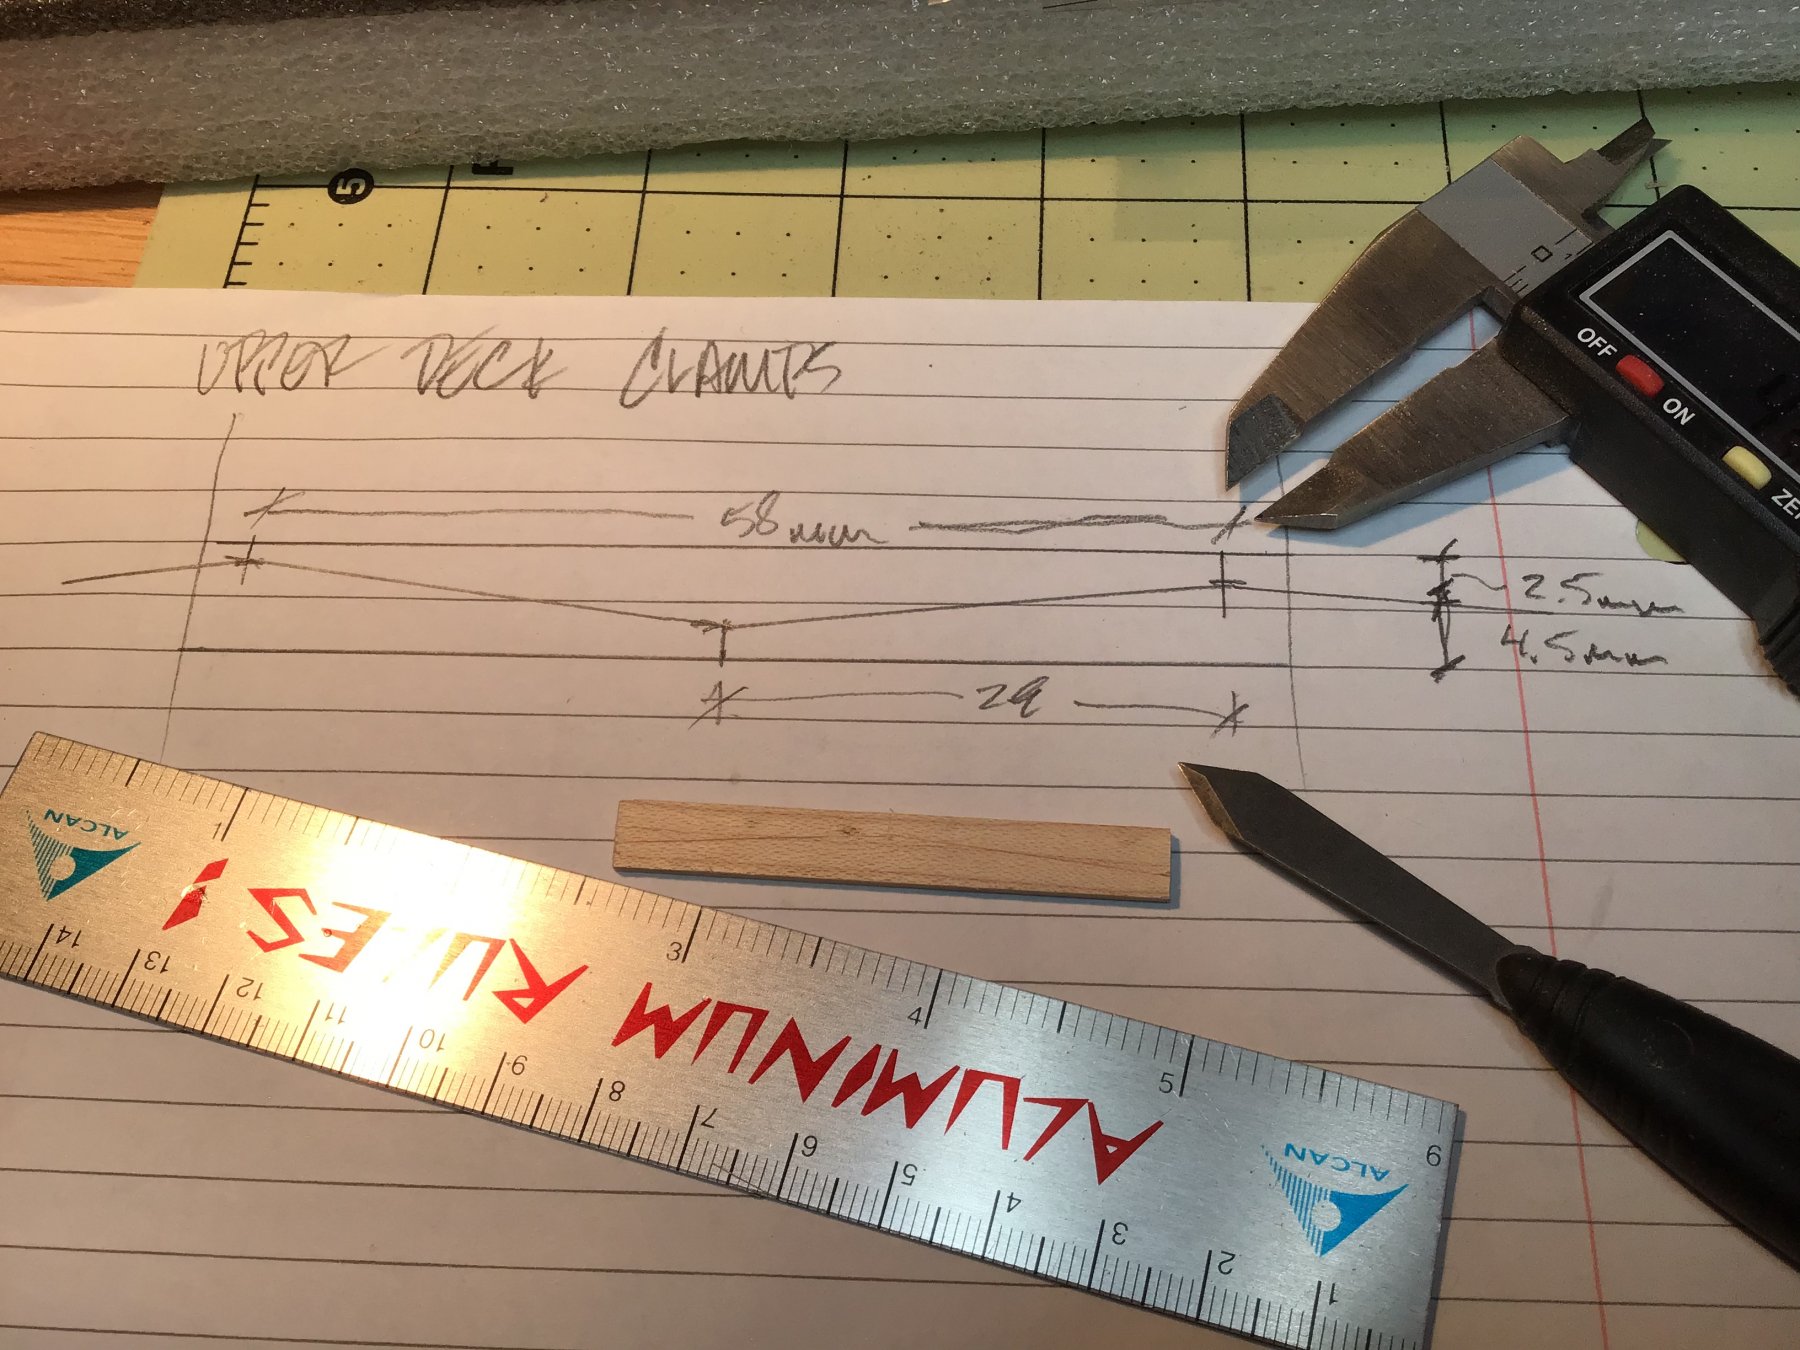
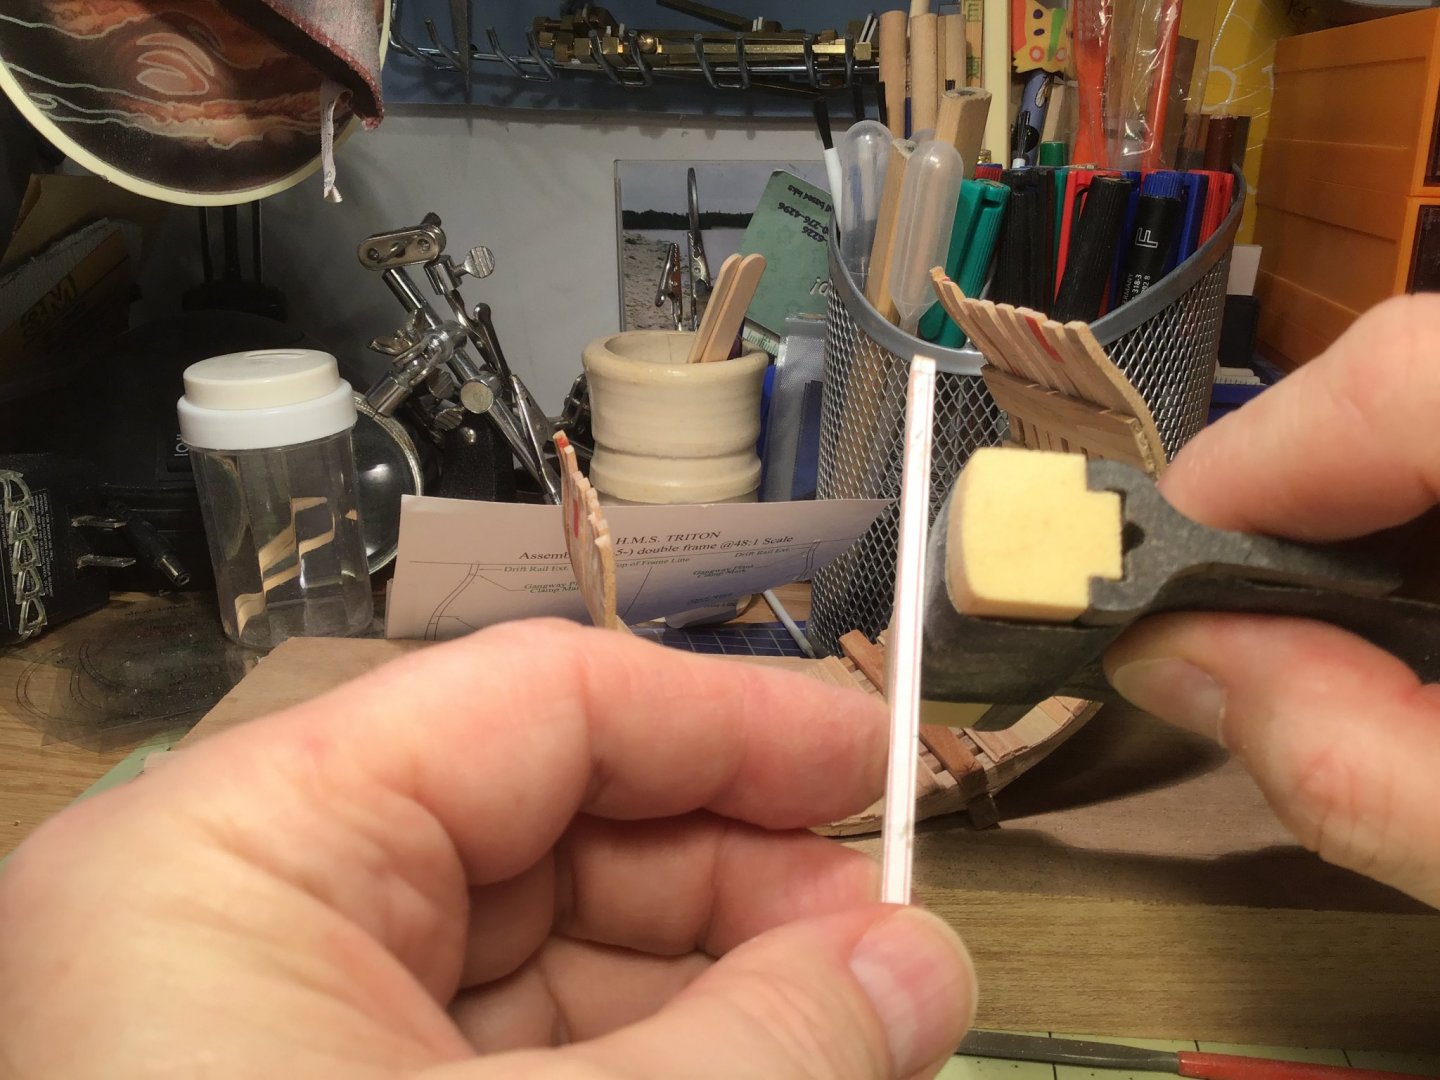
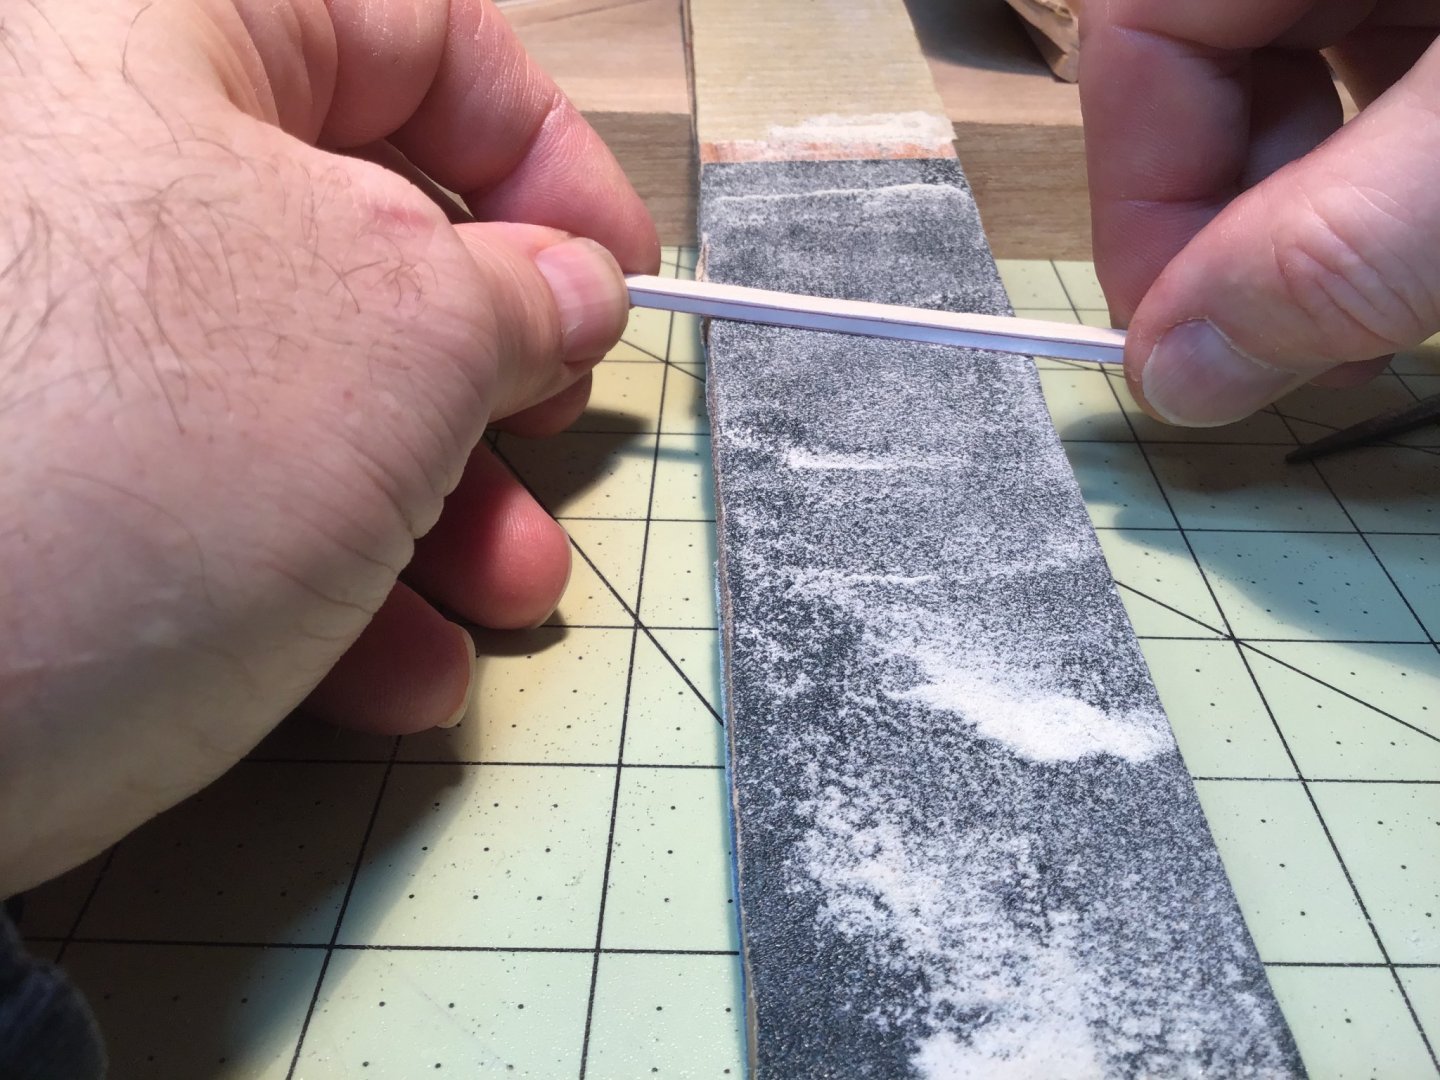
OMG! TWO YEARS HAVE PASSED since I last worked on my Triton!😳 When I was still teaching I remember meeting retired colleagues who said that they were too busy! I would tell them they were idiots...I was not going to be too busy when I retire! So, now I’m the idiot! 🤬🤯 UPPER DECK CLAMPS However, I finally dusted off the Triton and good thing I took good notes! I had made a measured diagram (over two years ago!) of the upper deck clamps which were symmetrical anchor stock unlike the lower deck clamps. This was a nice surprise that allowed me to get right to building! Rather than cutting partial planks I decided to make a run of full deck clamps that would span over twice the length of the keel. I thought this would make it easier to keep the planks running true. I realized that to mirror the two sides of the ship I had to flip the beam diagram for the starbooard side. I measured and laid out the cuts the same as before. [grrrr! Messed up some how and prematurely posted this!] [Man, I keep messing up and losing my edits!] When time came to start gluing I noticed that a couple frames had warped a bit. 😡I moistened them a little, inserted spacers and glued the planks one at a time, allowing a long cure time between pieces (8-10 hours). While waiting I began preparing 1.35 mm stock for the “thick" stuff that would be next. Thanks to Bilge Rat's advice to get a slitting blade, I had a lot more success than before. The planks on my model need to be 0.80 mm! I was having trouble getting such narrow stock on my saw...but I then remembered right under my bench I had a pizza box full of random veneers! I began rifling through, finding all kinds of goodies but not quite what I needed. 😢Just about to give up, I spotted a piece of 2’x2’ Finnish birch plywood in my wood stores that is...0.8 mm!😳😃 My plank woes are solved! (I hope!) Clear skies and sharp tools!