DONATION DRIVE - SUPPORT MSW - DO YOUR PART TO KEEP THIS GREAT FORUM GOING! (91 donations so far out of 49,000 members - C'mon guys!)
×


Gabek
-
Posts
310 -
Joined
-
Last visited
Content Type
Profiles
Forums
Gallery
Events
Everything posted by Gabek
-

New mini-mill... CNC and impressive
Gabek replied to mtaylor's topic in Modeling tools and Workshop Equipment
Hmmm...time to invest in lotto tickets, I think. (On top of the floggings, etc, my admiral would probably cut off my grog as well!) -
Sorry, Pete! On the positive side, the people around you now have another gift option for you! Start filling that wish list on the Lee Valley site. Regards, Gabe
-
Thanks for the likes and the comments, Mark and Per! The black machinst's clamps are also from Lee Valley: http://www.leevalley.com/en/wood/page.aspx?p=68938&cat=1,43314 Oh...the Canadian dollar is so low now that it might be cheaper than the US if you do the conversions. Ahhhh..Lee Valley...we have a store in my city
-
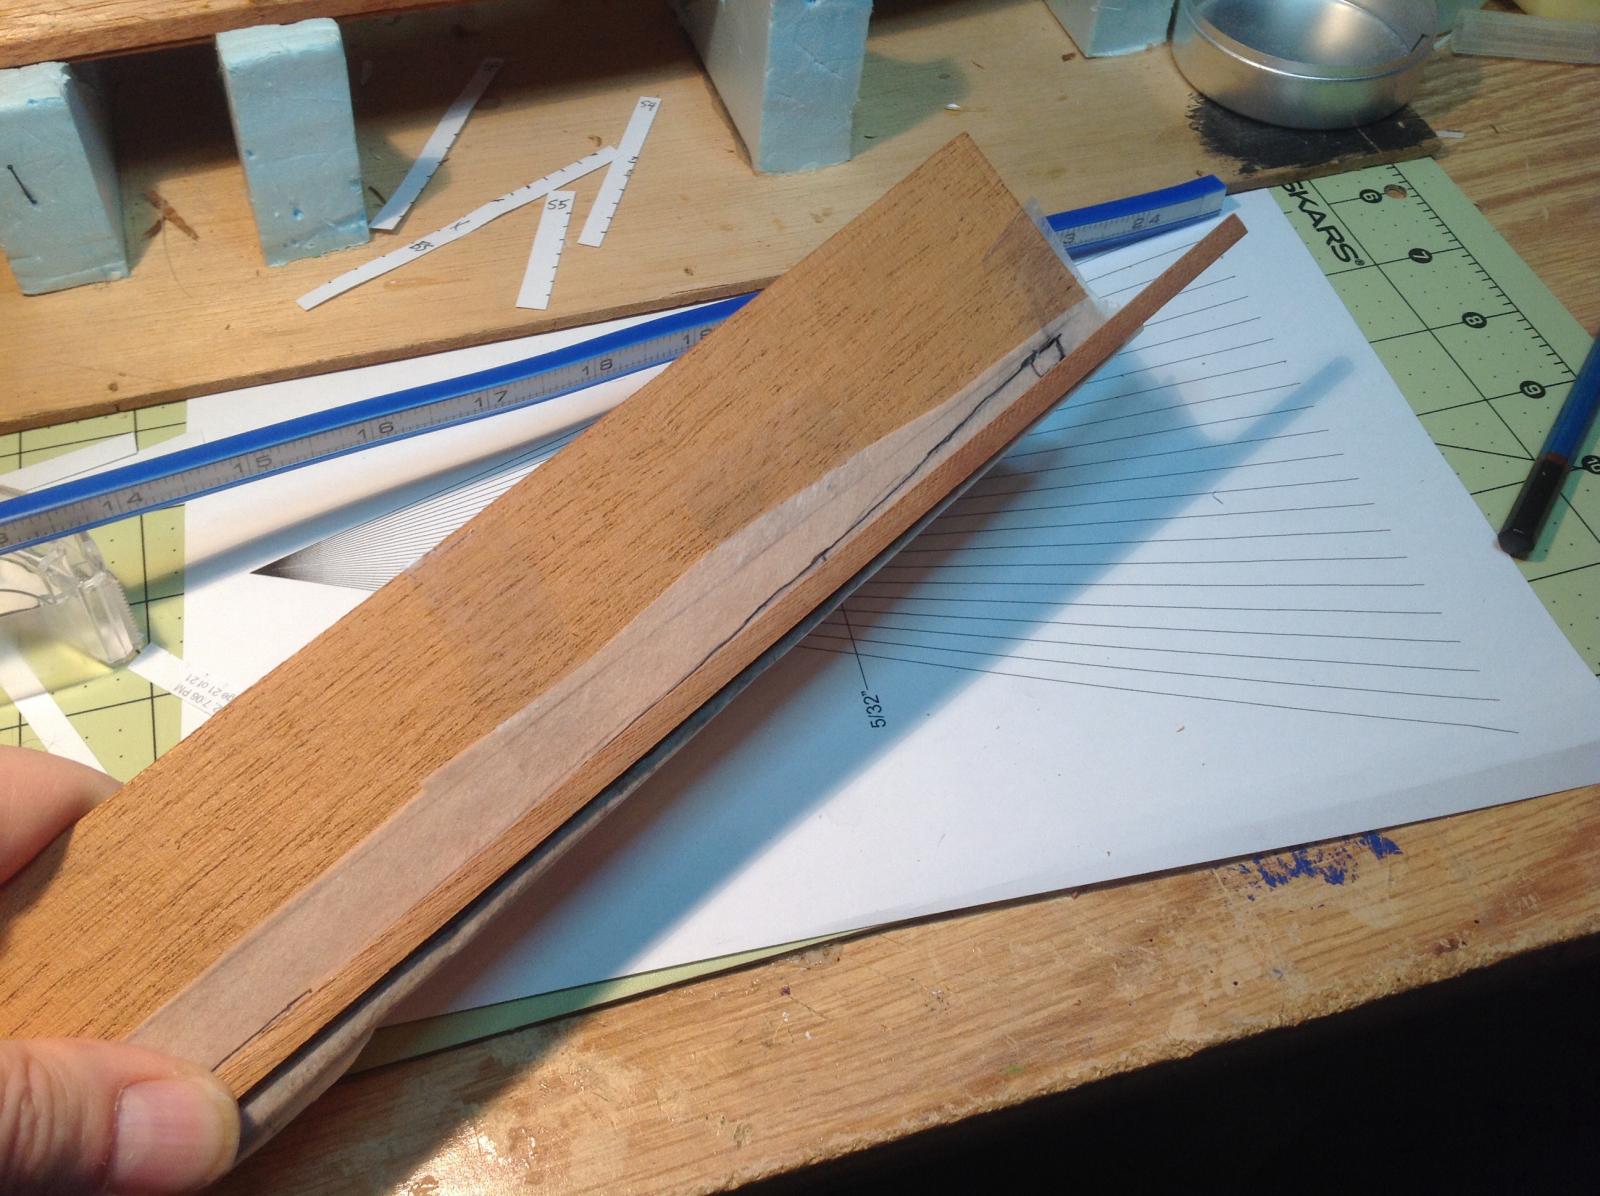
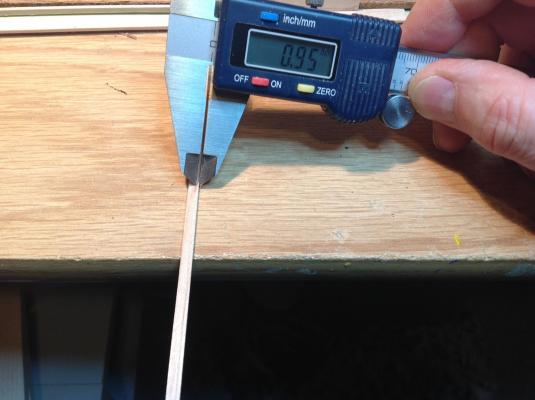
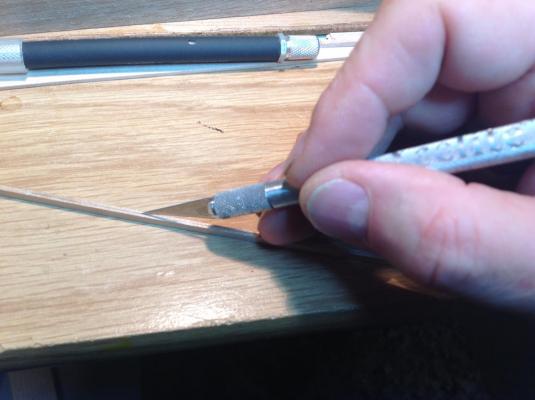
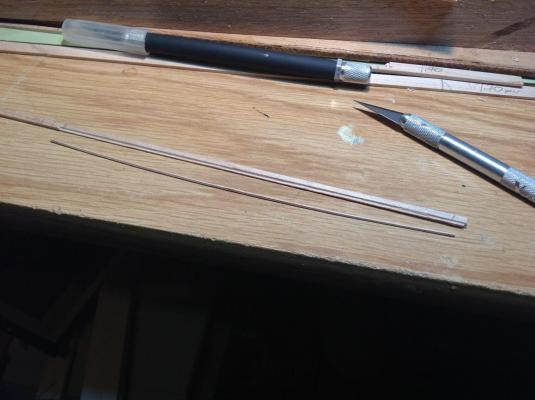
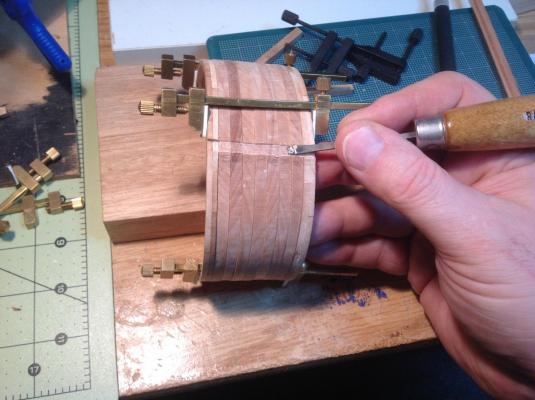
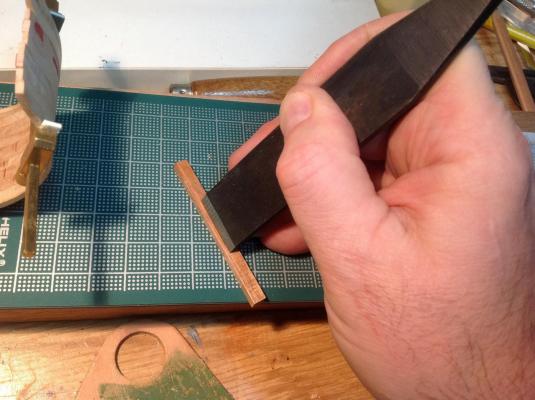
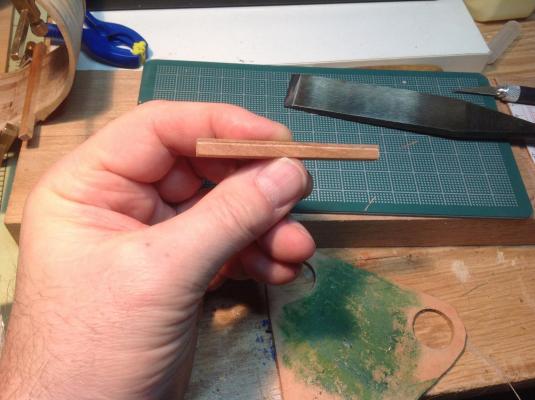
Limber Strakes After cutting some 1.70 mm thick planks and ripping one to 3.50 wide, it was time to cut the rabbet for the limber boards. I really wanted a marking gauge that could scribe 0.95 mm and 0.75 mm widths. I contemplated building one but thought accurate measure might be tough. I then looked at my digital calipers and those nice sharp edges on the jaws and realized I had my marking gauge. I ran the caliper along the edges until I had nice, clear lines scribed. To keep the two strakes consistent, I laid out the rabbet on one long strip which I would cut to length afterwards. These scribed lines were deep enough to run the xacto along them carefully without a straight edge. After about a dozen passes down each line a very clean rabbet was formed. After rough cutting this piece to length, I glued the larboard strakes into place. A 2.50 mm spacer strip helped line them up parallel to the keelson.
-
Thanks for the comments and likes, folks, but... NOT SO FAST! Seriously...I shouldn't have been so fast! I was so excited to get moving again on my miniTriton that I made a couple of BIG mistakes: 1) When I took the gluing clamps off I noticed something strange. I then realized that I had grabbed the wrong piece of wood for one side!
-
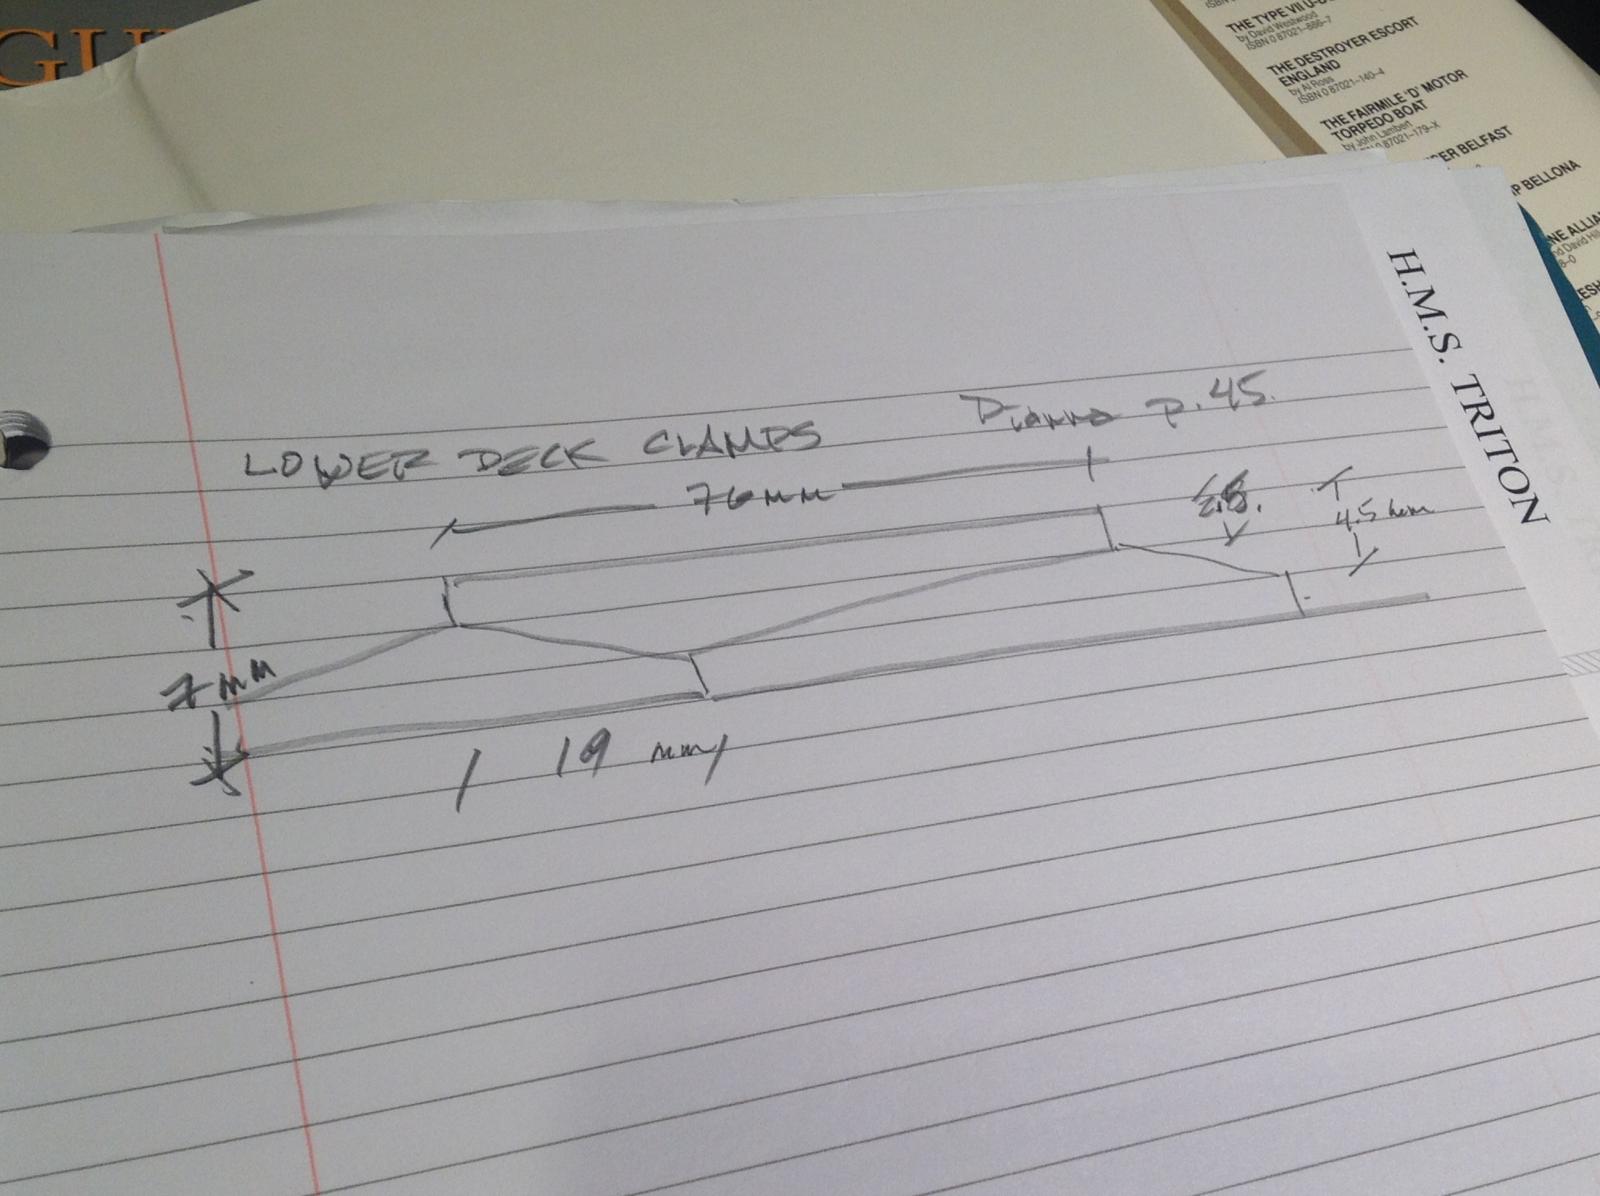
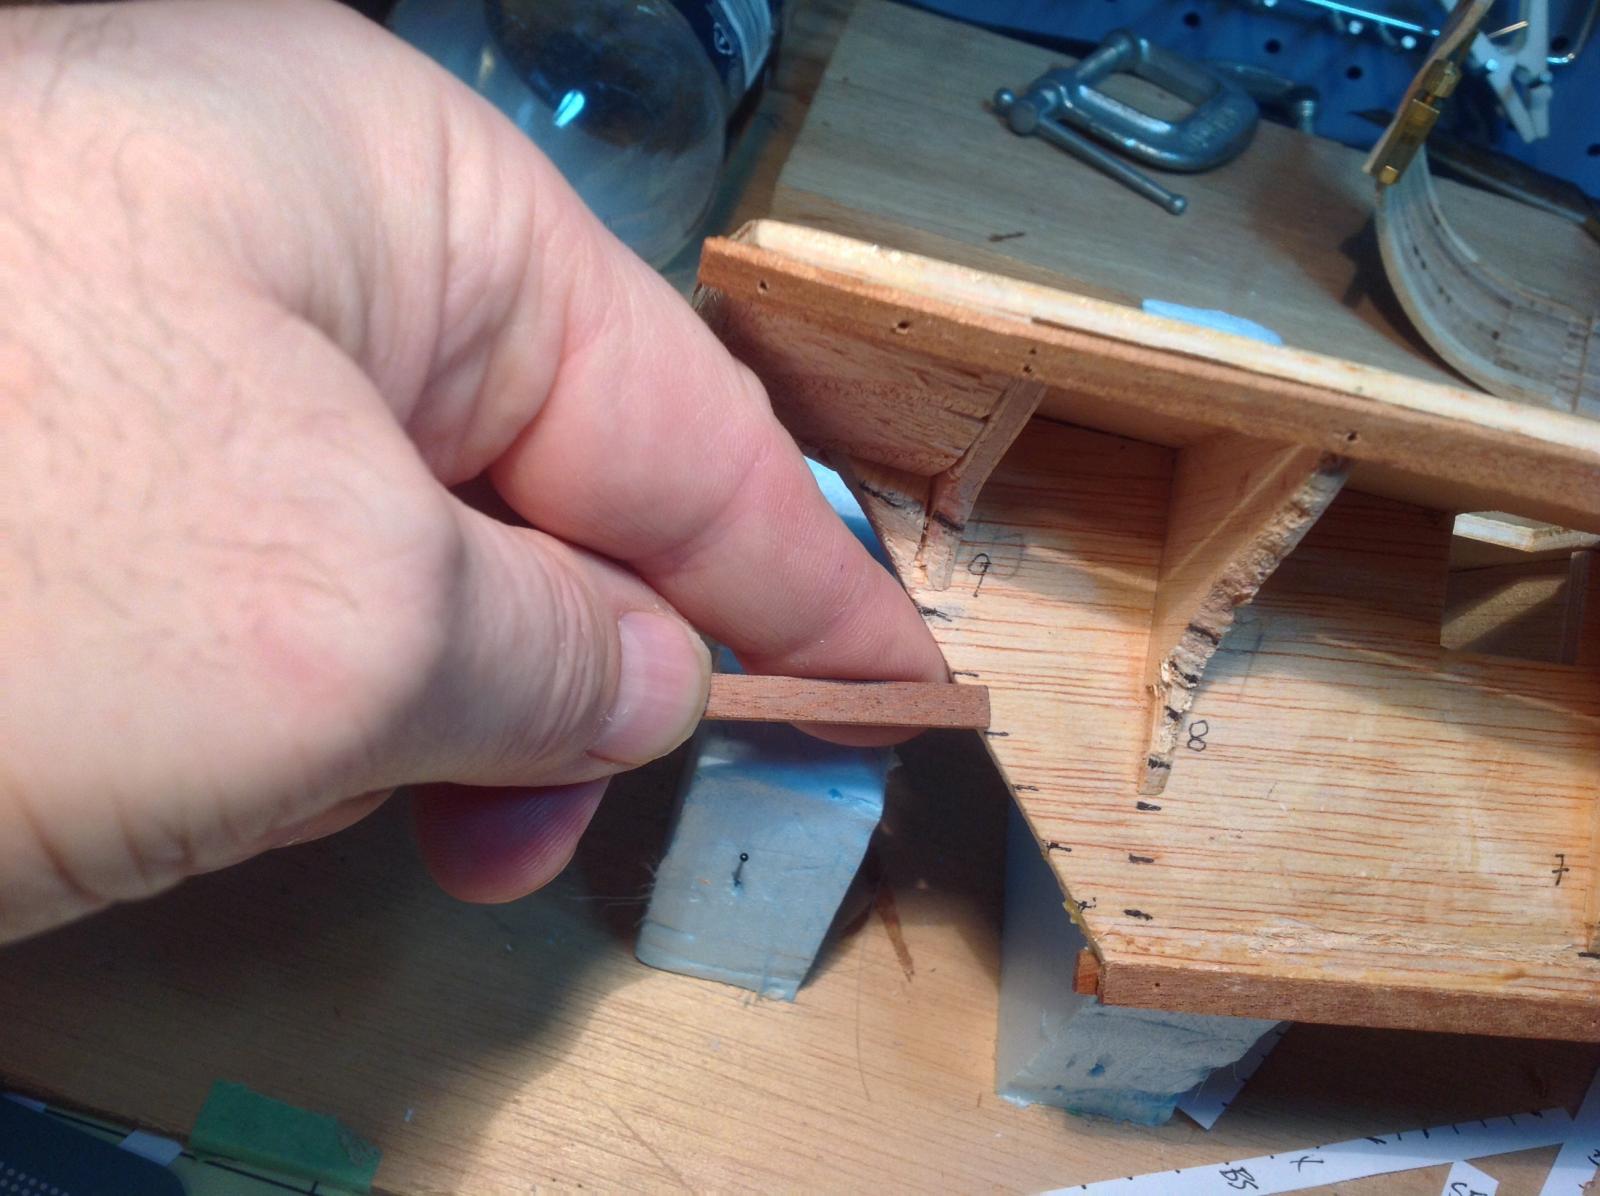
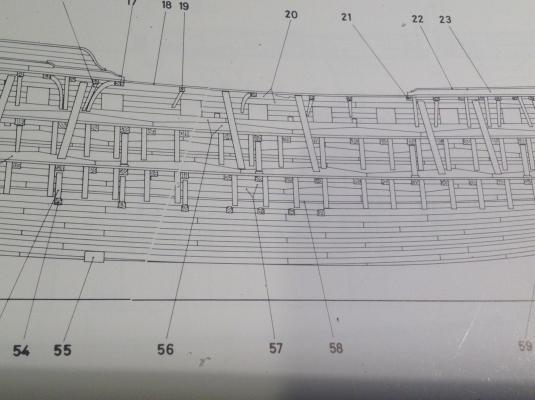
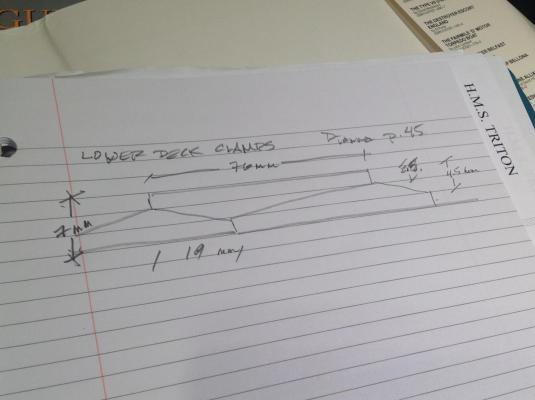
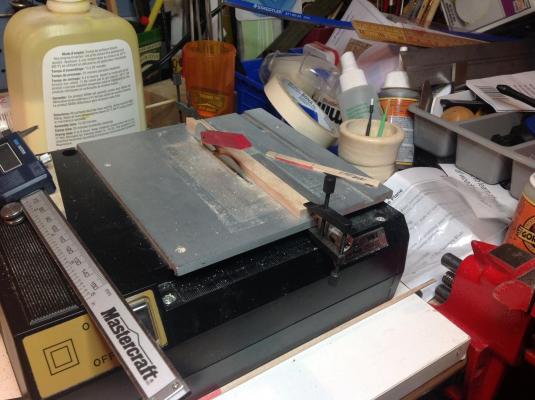
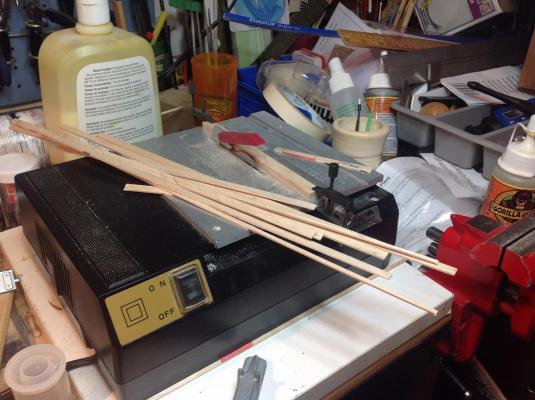
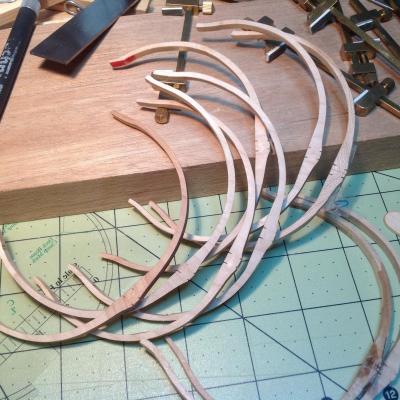
Well, it's been a while since my last entry...but I haven't been entirely inactive. My progress has been slow primarily because I was working out some problems with making dimension lumber on my little Microlux saw. Try as I might, I just couldn't rip some maple into 1.5 thick strips. At first, the strip would start off fine but after a few centimetres it would wander out and get wider. I played with the fence and stopped the wandering, but then the pieces were coming out tapered from top to bottom. I guessed that the blade was slewing out so I opened the saw and tightened things up. No luck. I finally realized that the fence was still the culprit and ended up clamping a chunk of wood to the table as a more reliable fence and I was off to the races. After ripping a bunch of 1.5 mm thick pieces, I marked the frames for the deck clamps. This is where having a framing jig would have been nice. Even though the frames were clamped together while I wasn't working on the model, the spaces between them were not even when set up to install the lower deck clamps. So, I used spacers. Looked like a mess...but it worked. I tapered the top edge of the deck clamps for a better fit for the deck beams when that time comes and glued them in.


-
STRAPPING USING HEAT SHRINK TUBING: Great idea on the heat-shrink tubing! I just checked Digi-Key.ca and they stock 1.0 mm inner diameter and up (260mm was the largest!) but you can special order 0.5 mm. I found 1.2 mm black tubing in stock: 4 feet (~1.2 m) costs $1.73 (Canadian). Regarding durability: looking at some of the specifications on this plastic...when your model has aged into a pile of dust and rusted metal bits they could probably sift the mess and find the tubing intact! Clear skies! Gabe
- 396 replies
-
- 10
-

-
- Idea
- Bright Idea
- (and 1 more)
-
For some reason this log isn't showing up on my content list.
-
Thanks for the comments, Ray and bigcreekdad. I won't be giving up on this any time soon even though it may drive me nuts. Which is what most of us ship modellers probably are, come to think of it! Clear skies and sharp tools! Gabe
-
I think Bligh and the loyal crew would have been overjoyed to have as many provisions! Excellent work, Steve
- 625 replies
-
- 3
-
-
- bounty launch
- model shipways
- (and 1 more)
-
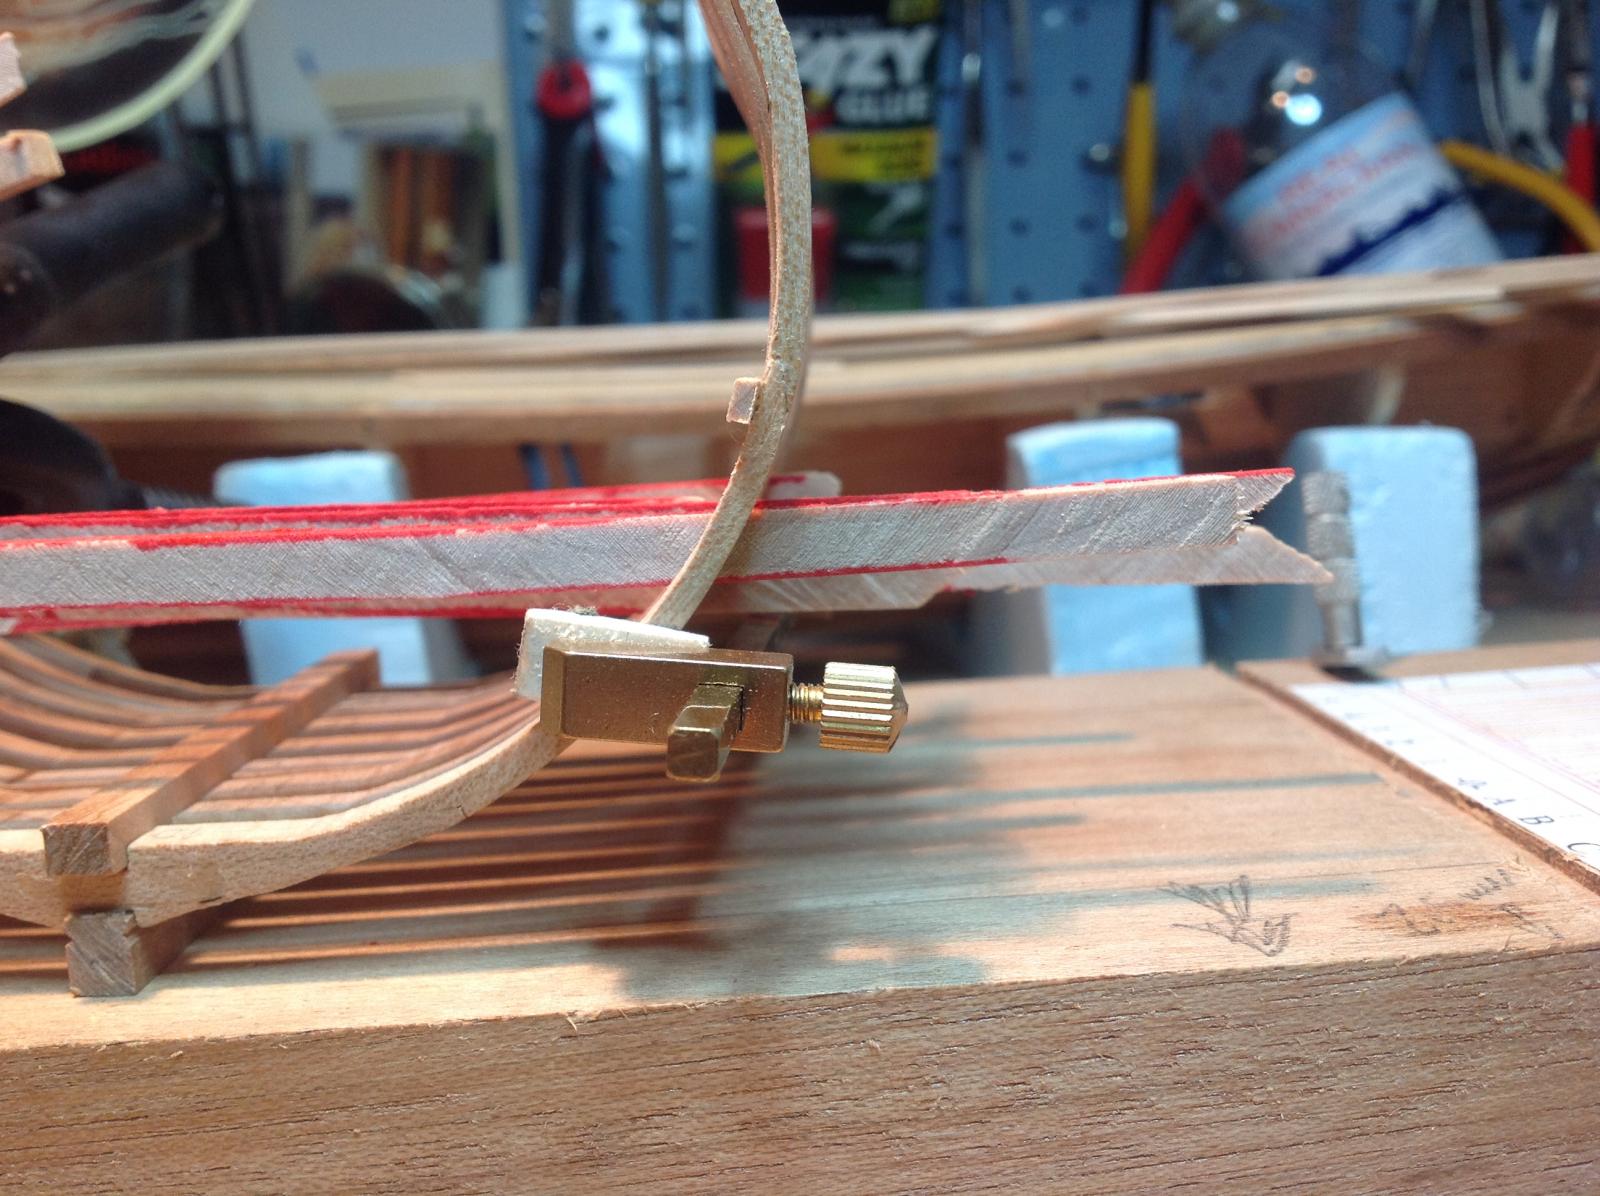
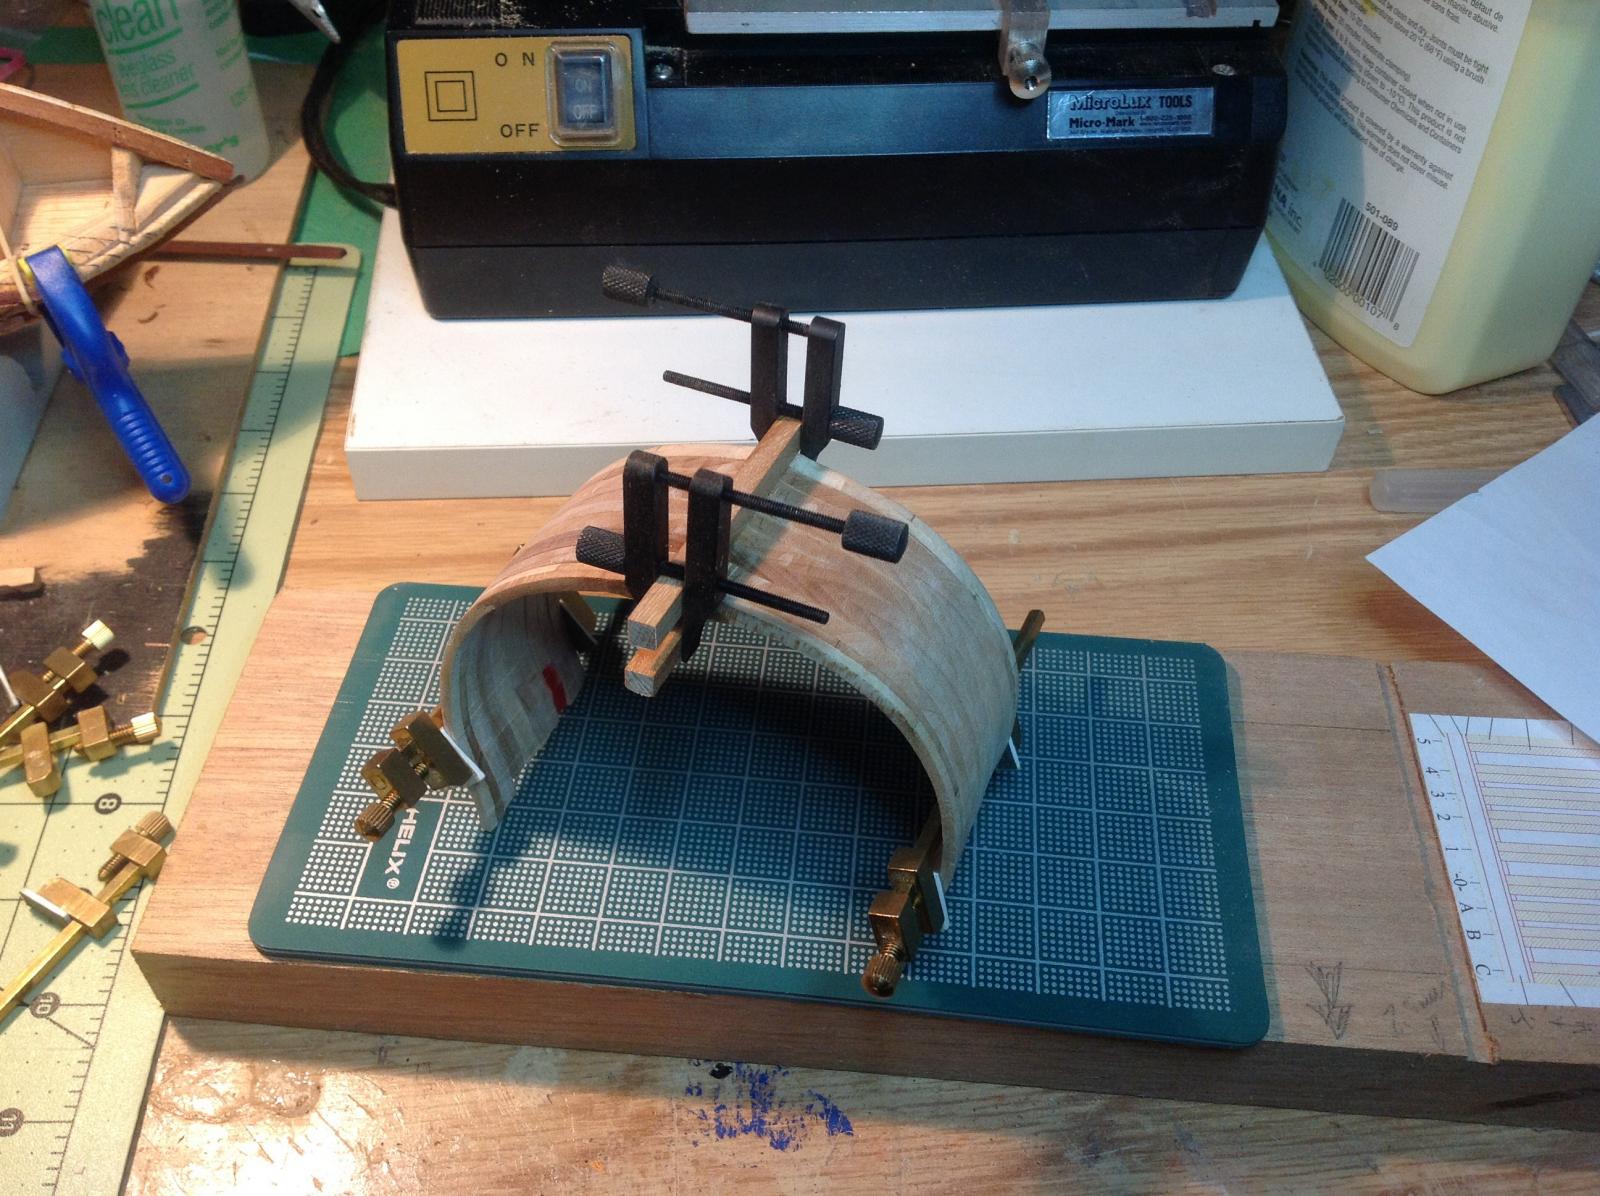
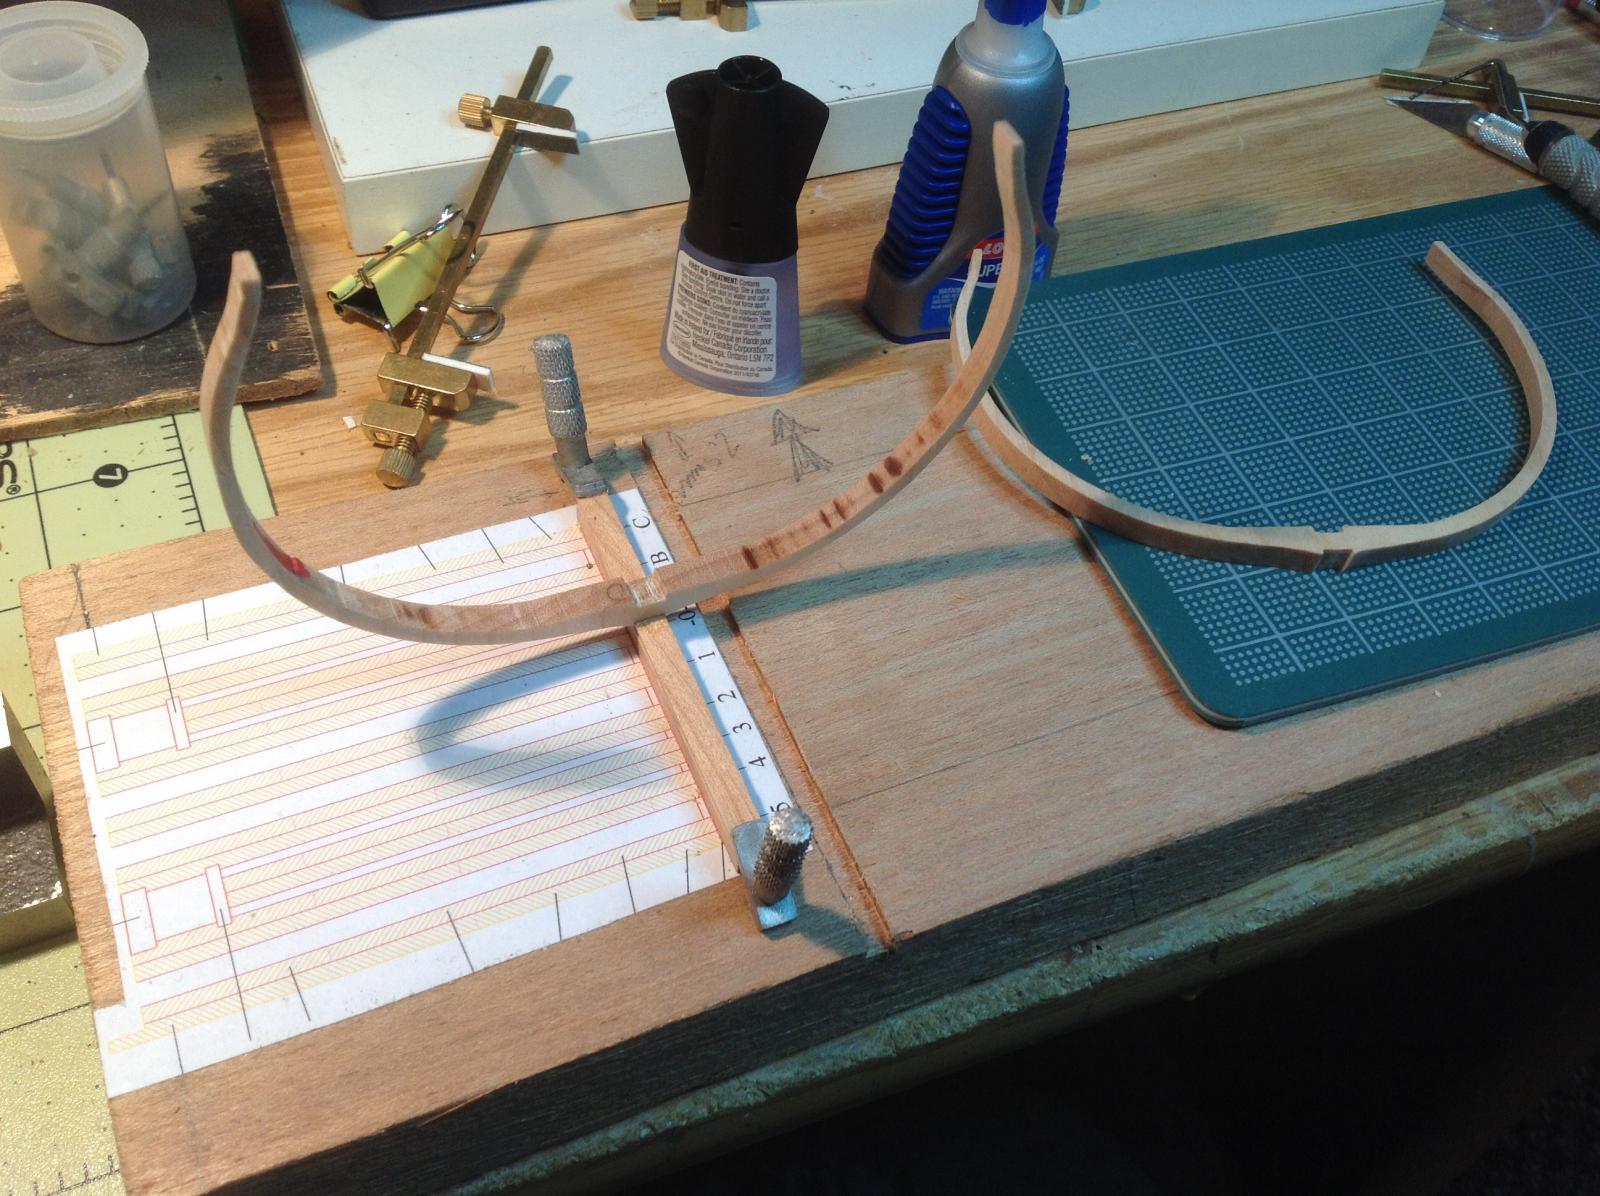
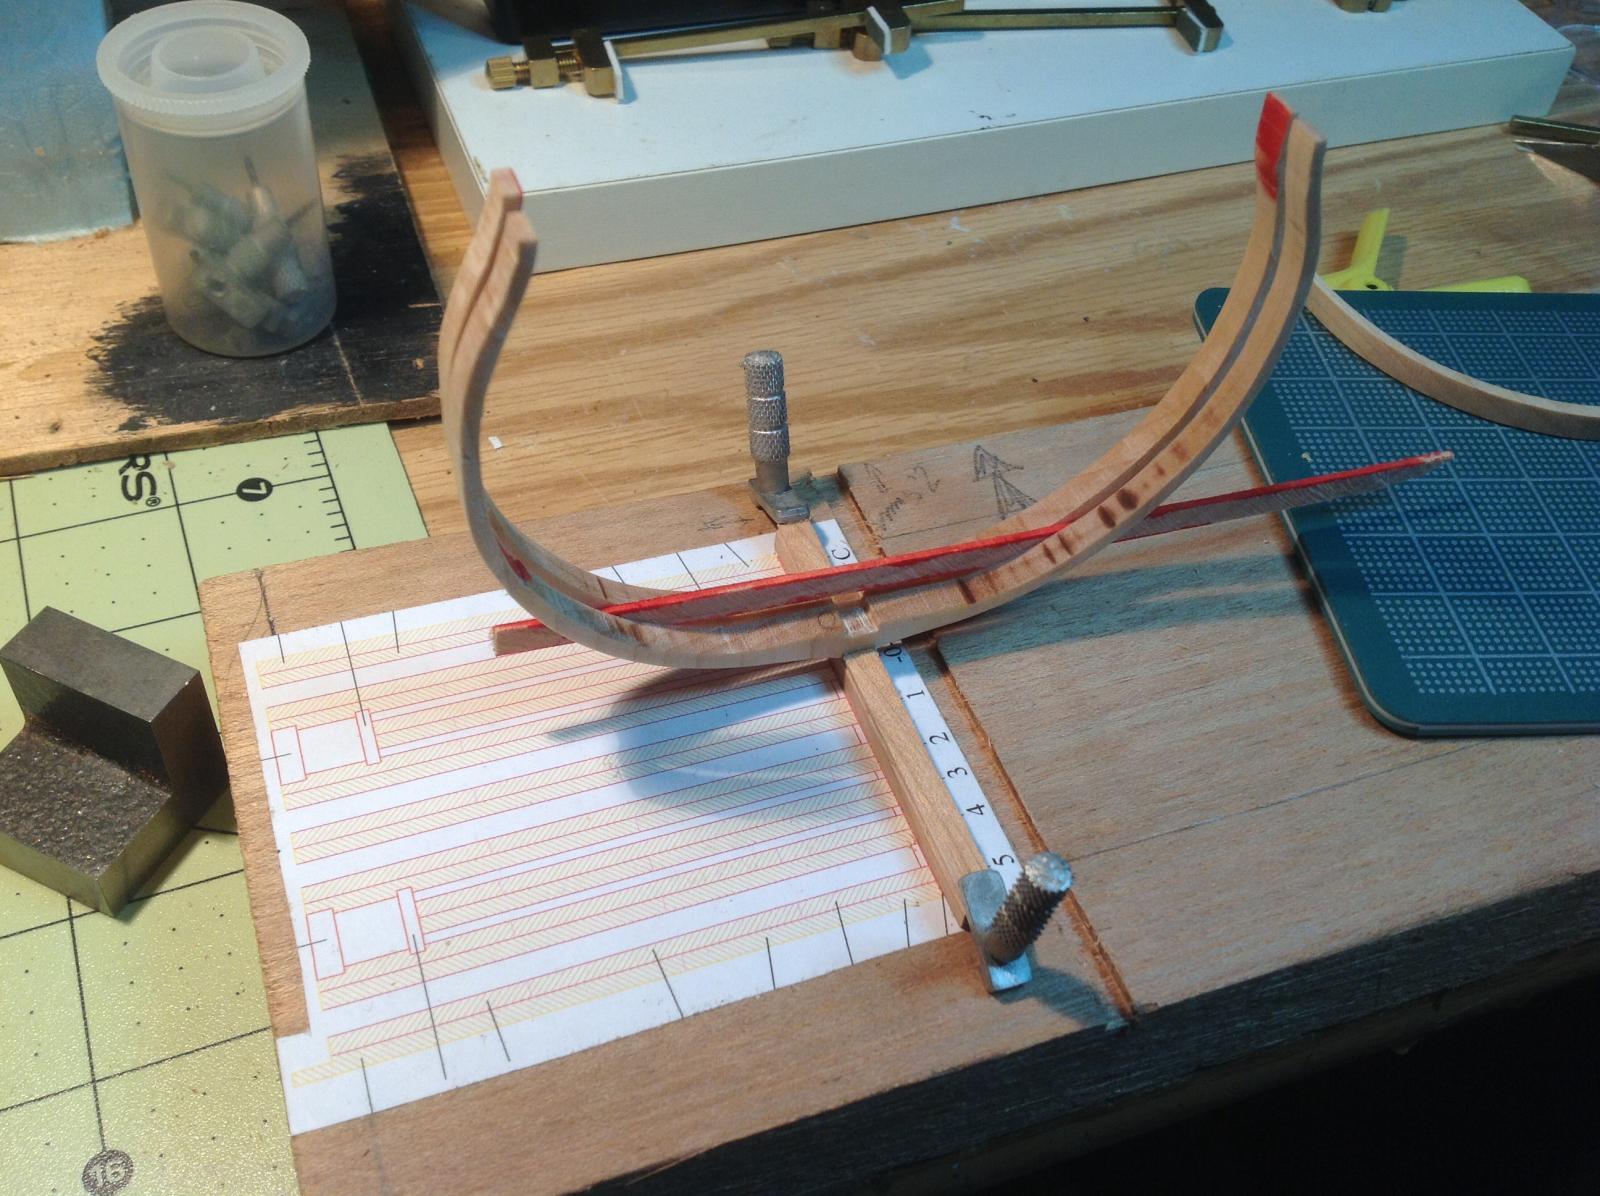
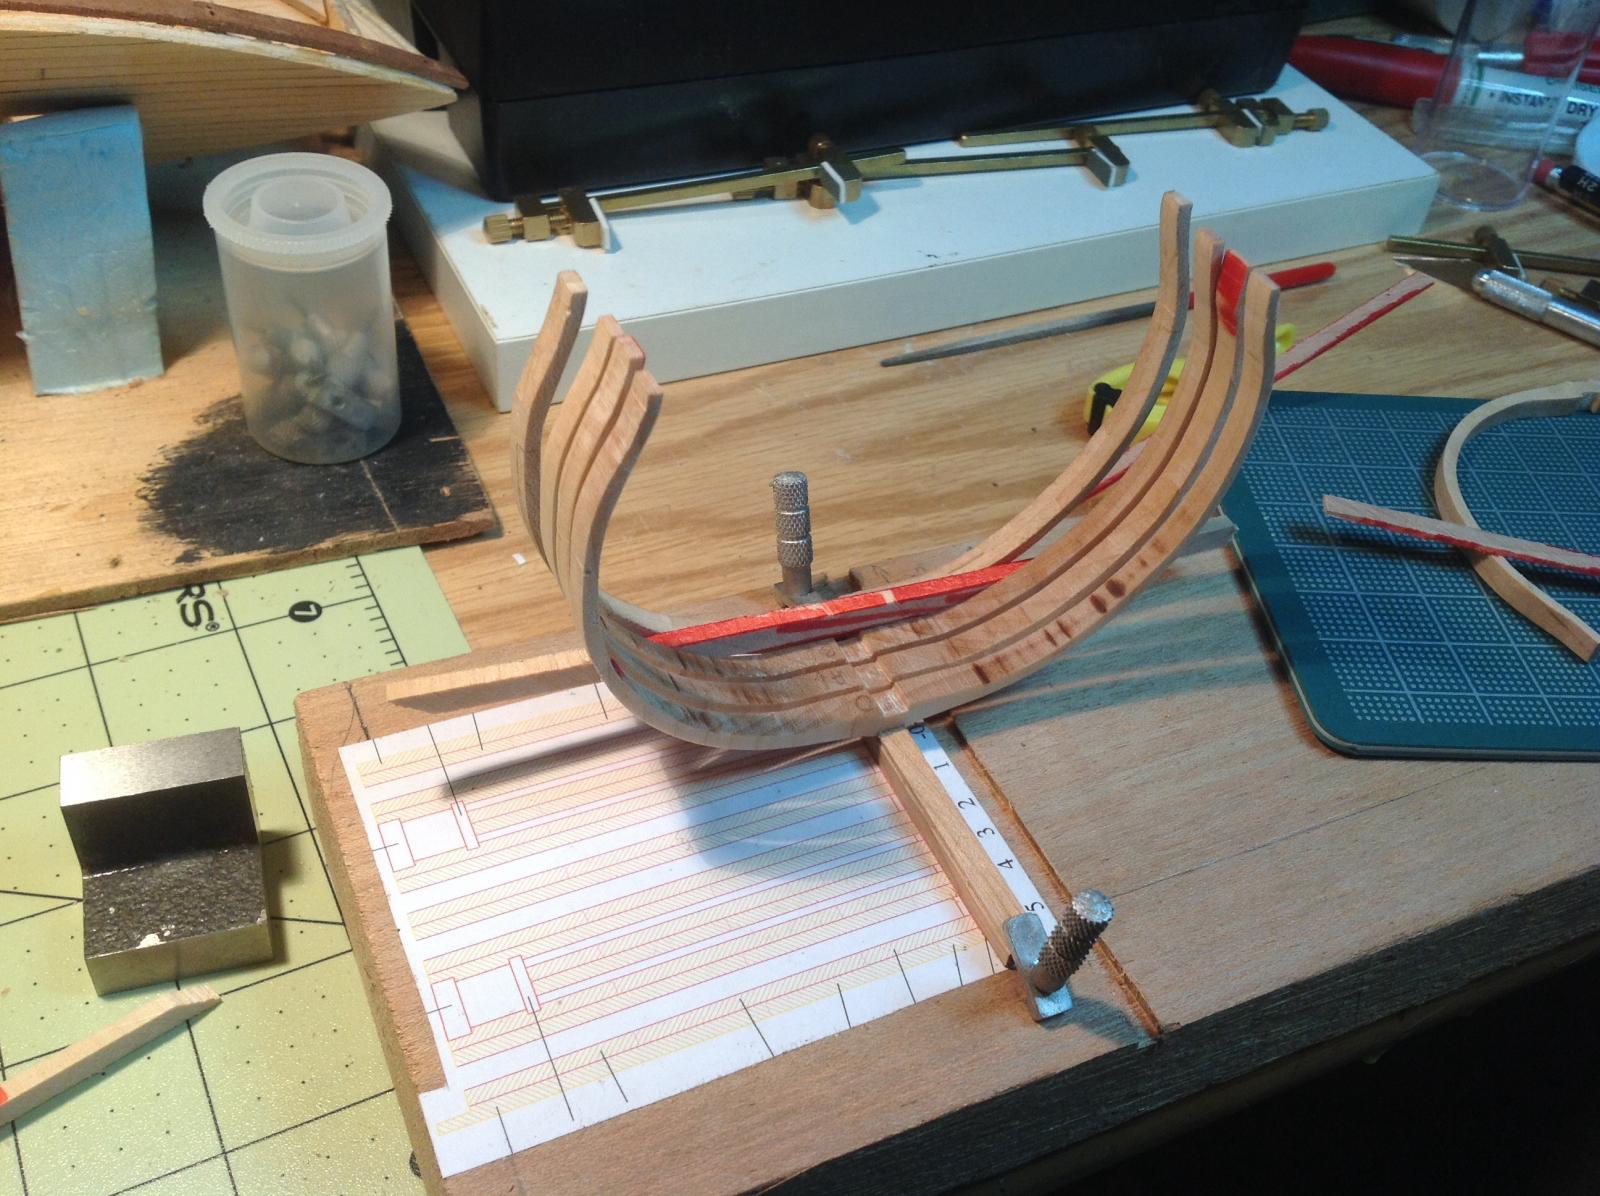
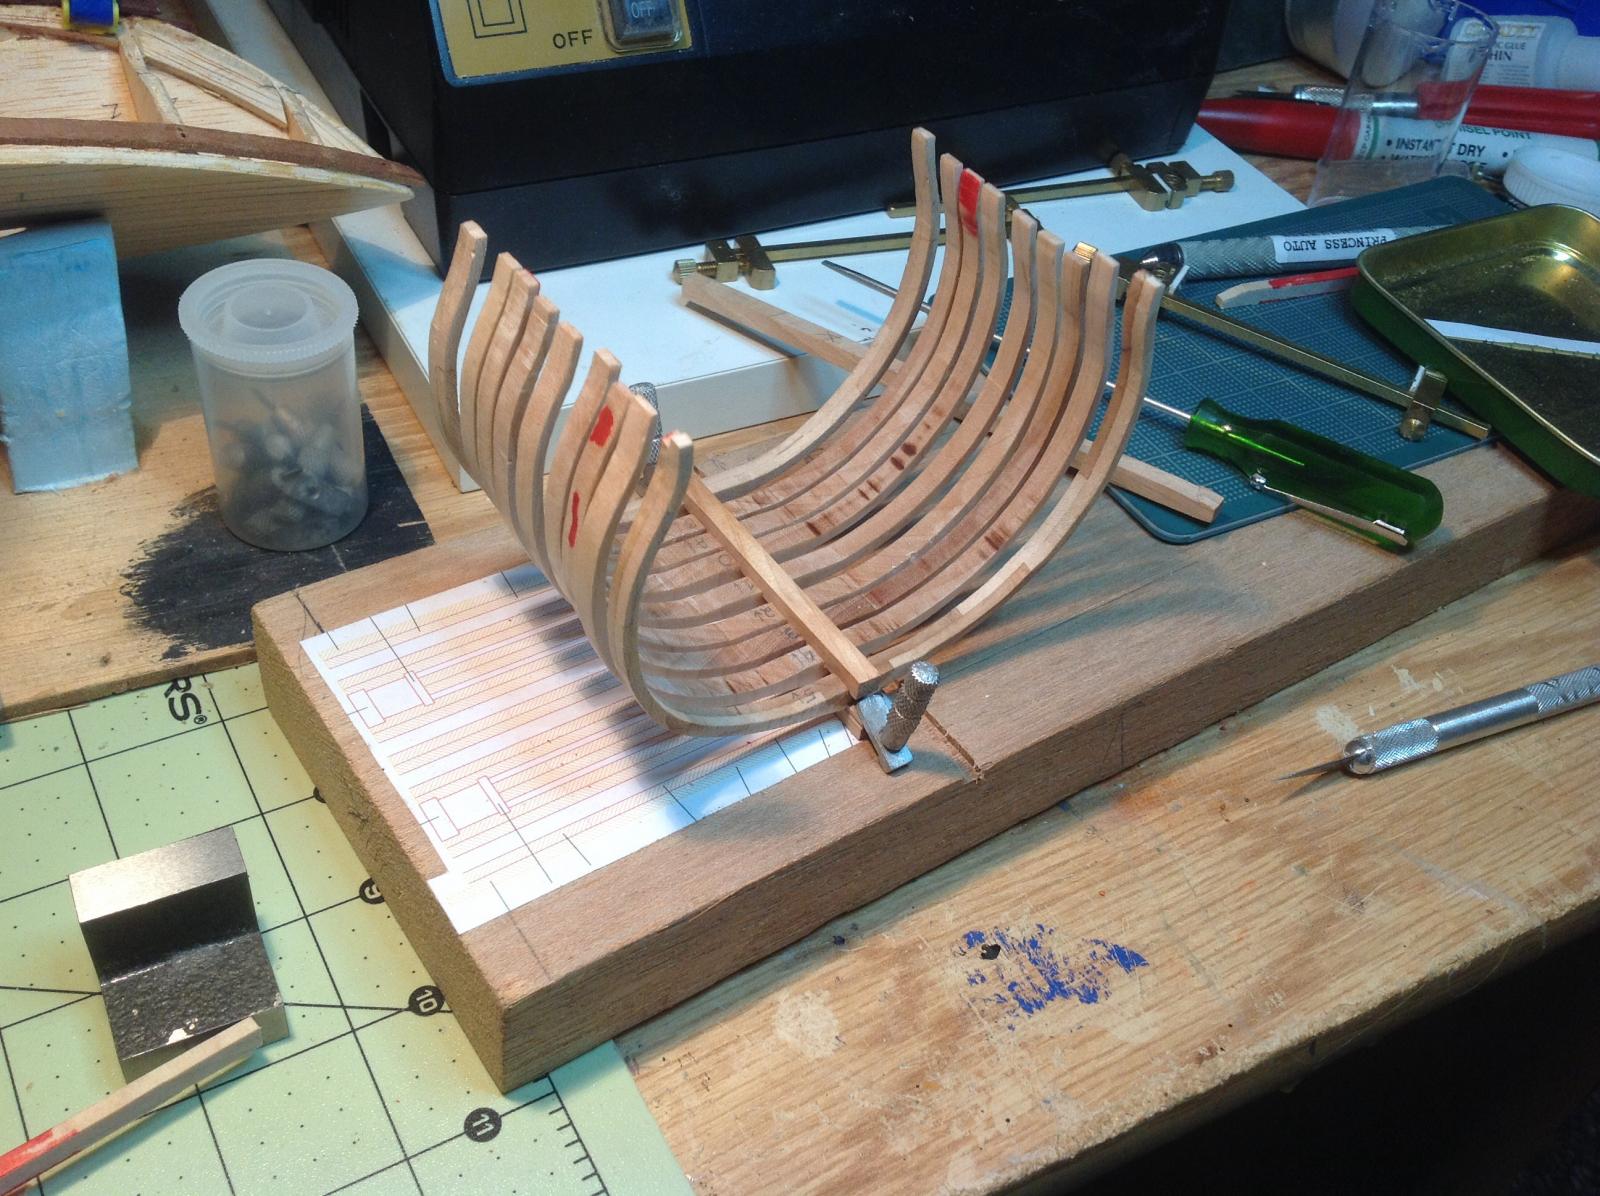
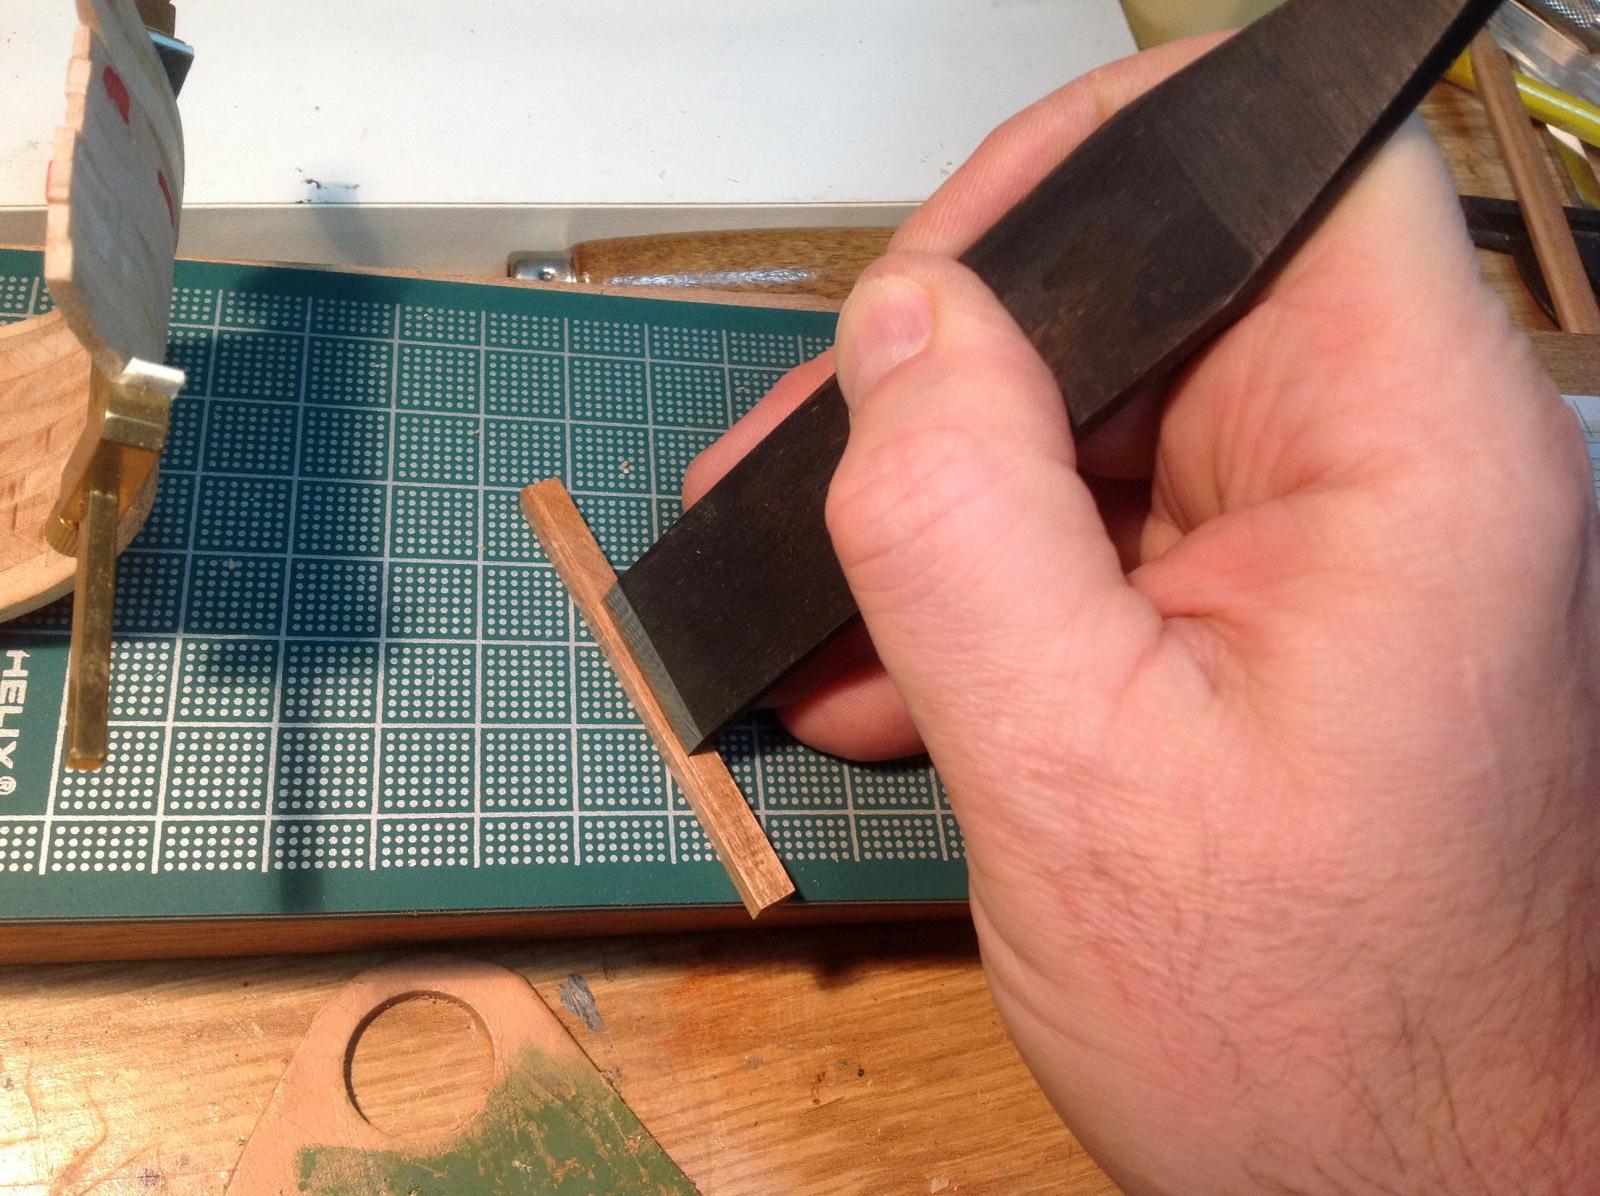
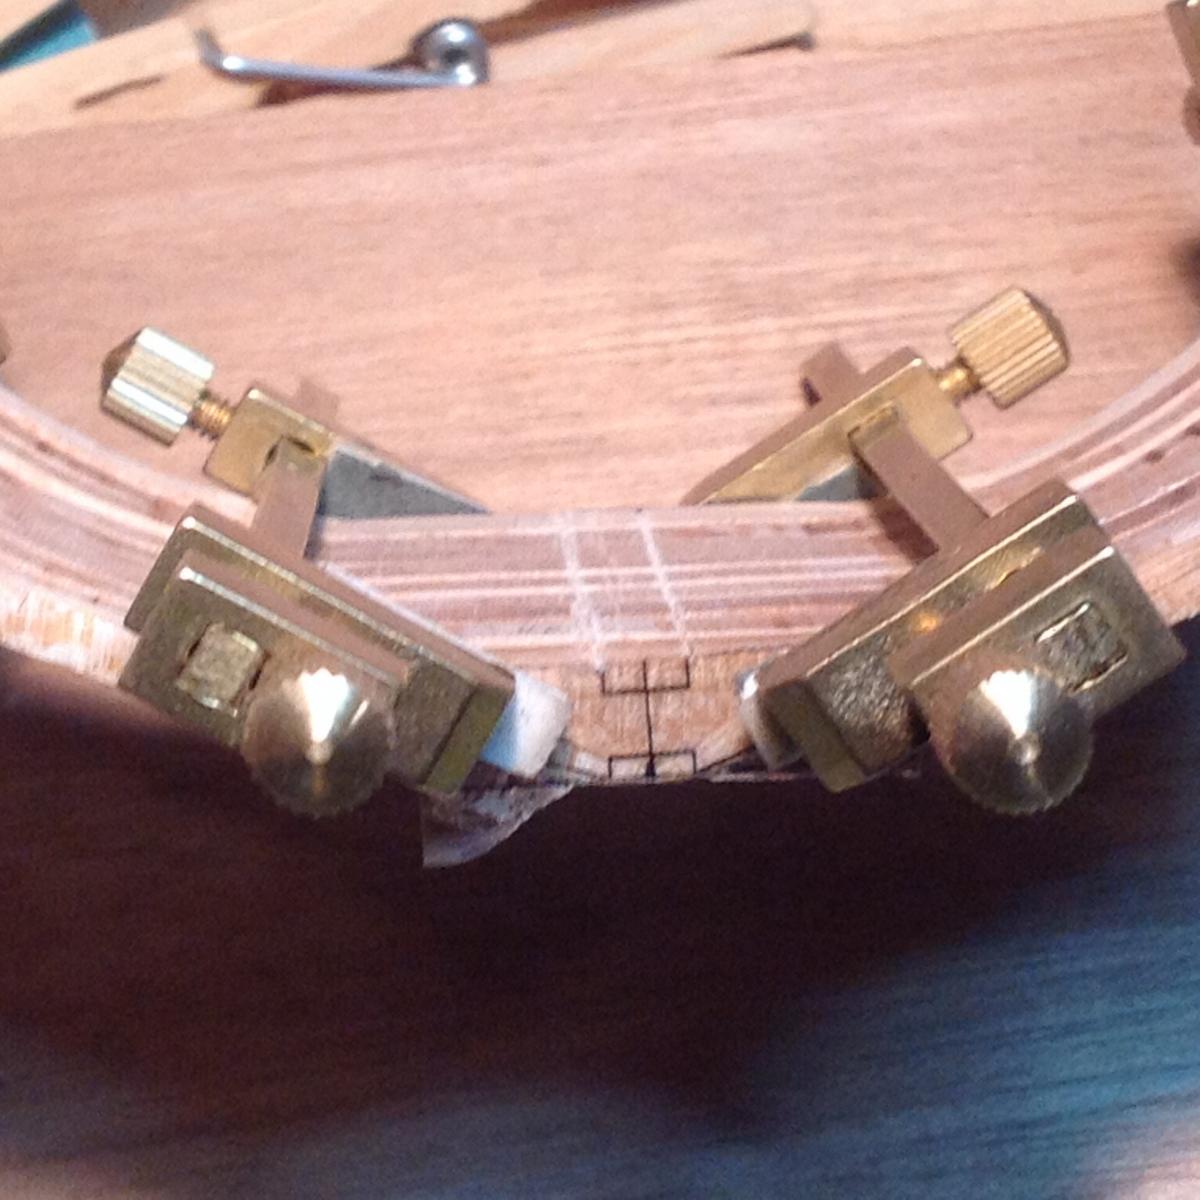
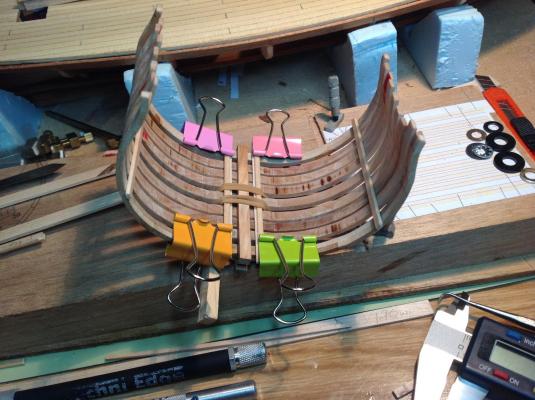
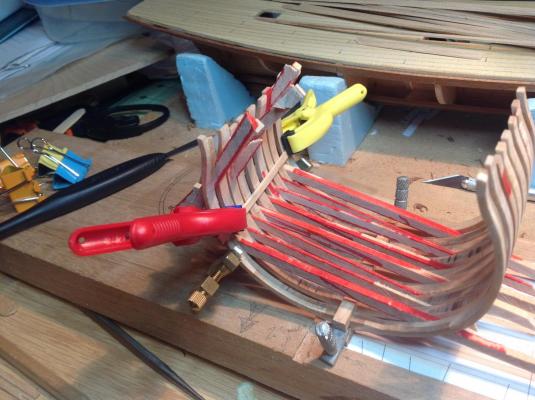
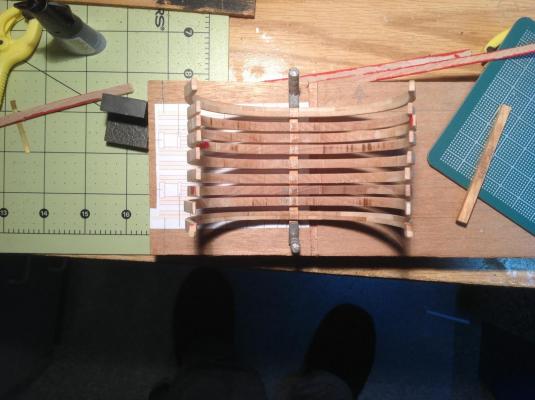
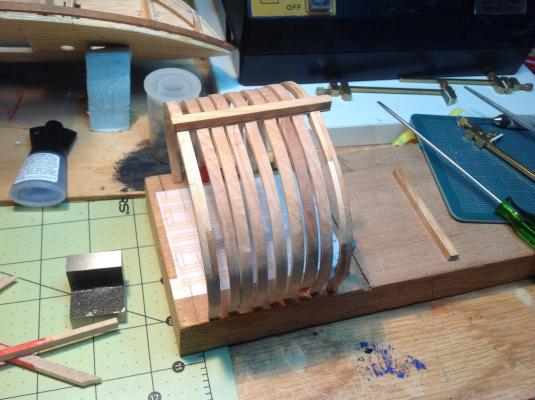
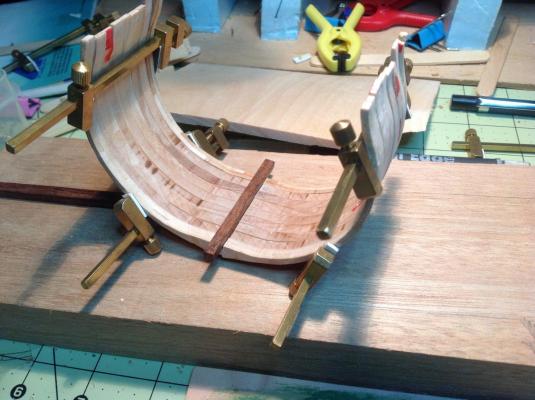
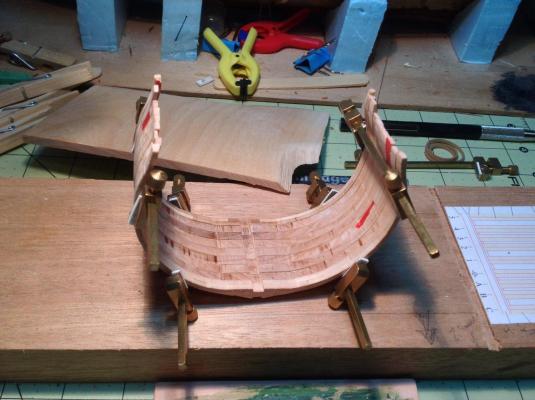
Well, I finally got some time to work on the Triton. Even though its been a while I have been thinking non-stop about this little model and I have been making some wild plans for her. One thing that I felt I needed to change were the keel, keelson and false keel. The dark contrast between the birch frames and the chechen was not what I wanted...not terribly realistic. So, I fabricated new pieces from birch. With the keel piece in place I used an exacto knife to mark the top of the rabet, and used an even larger straight gouge, finely honed, to cut the notch out. I cut the keel, etc., longer than needed so I could clamp the ends down. I saw this on another Triton build where the builder had screwed down the ends and thought it was an excellent method. However, I should have realized that I don't have screws small enough to do this at my scale. I ended up clamping them down with some planking screw clamps. I glued down a print of the frame plan to a work board to help with lining up the frames when the time came. I spent quite a bit of time shaping the notches for the keelson and keel to get a tight fit. I kept the frames clamped together to help line things up and to help support the wood to prevent breaking another frame. After I had the keelson fitted I made use of a couple of miniature machinist clamps to make sure the keel and keelson lined up properly. When time finally came to glue the frames in place I oringinally wanted to use carpenter's glue so I could adjust and fiddle. However, when I was dry-fitting and rehearsing the work I realized that it was going to be a nightmare to clamp and hold these small frames in place. So, I decided to go with cyano gel...should give me a few seconds to play but only need to be held in place for a short time. I thought that starting at the middle would be best so I picked frame 1 and, wouldn't you know it, as I was working out how to align the frame I forgot how delicate these were and I snapped it right in the middle. Let's just say that I dug deep into my lexicon of swear words. Clamped together, these frames had been sturdy and a few months away from this model made me careless. I grabbed some brush-on CA and managed to fit the parts back together rather easily. I put it aside and decided to push on with frame O first. When the time finally came to glue down the frame things went fairly smoothly. A small machinists square helped. The first frame glued in...and the wounded Frame 1 lying off to the side I continued to frame C in fairly quick succession. I had cut many spacers of the correct width to help me with this and future stages and they proved invaluable. By the time I got to this point Frame 1 had had enough curing time so I just kept on going. I think the entire gluing stage may have taken 20 minutes. Thank you CA! I had to do a bit more filing to fit the keelson to my liking, but eventually it was glued up as well.


-
Household Ammonia
Gabek replied to Q A's Revenge's topic in Building, Framing, Planking and plating a ships hull and deck
i was about to experiment with using ammonia to make a pretty severe twist in a mahogany hull plank and came upon this thread. The question was asked how does the ammonia work. It basically dissolves lignin - the compound that glues cellulose fibres together, making them stronger and rigid. From what I have read it also causes the cells in the wood to swell up, pushing apart cellulose fibres as well. Once dry it does rebound, but the hydrogen bonds between cellulose have been affected. That's why ammonia causes wood to be more brittle afterward - it took out the glue and wedged apart the strands. Like many things, there are conflicting views on how good this will be - so I think I'll give a test. I'm not concerned about any bleaching - I intend to paint and copper the hull. For some reading: http://www.biotechnologyforbiofuels.com/content/4/1/41 Regards, Gabe -
Ok, seeing that Chuck has responded while I was typing my post...I'd listen to him! Bowing deeply, Gabe
-
Hey there, I started planking AL's Harvey following their instructions and a couple weeks ago I got fed up with their layout. So, l peeled off what I had done except the garboard strake and the deckline plank and just started lining off for the new planks yesterday. This will be my first attempt at spiling planks. Seeing your post I ran down and just traced what the first plank would look like. I took a few pics to show how much curve there is especially at the bow and stern. I held a plank from the kit at the midship bulkhead positions and you can see how far out the piece is. And here I'm holding a kit plank to the stern so you can see it compared to the widths I have marked. You're right, the curved shape of the spiled planks means that the kit ones need to be put aside. I had a 1"x 3" piece of mahagony that I resawed into 1/8" thick x 3" wide planks (it's what I taped the trace to). I'm going to cut the new planks off of these. I suppose you could try gluing them edge-to-edge to make wider material, but I think you might have trouble when you bend them to the curve of the hull.


-
Hello Grimber, Just found your Swift log and have really enjoyed reading it over. Nice paint scheme. I've started a Baltimore clipper and plan on painting it and this log has gven me lots of ideas. Thanks! I also had lots of chuckles throughout this log (Bugs and Elmer included!) mostly through the same issues you and almost every other Swift builder has faced with this kit. Excellent work! Regards, Gabe
- 114 replies
-
- 1
-
-
- swift
- artesania latina
- (and 1 more)
-
Well done, Simon! Your Bluenose is a little masterpiece. Just beautiful work on the sails. Regards, Gabe
-
Well, I know that I'm ready for retirement. Work is getting in the way of all the things that I really want to do!


-
I spotted your gallery and just have to tell you how much I love your little craft! I'm drawn to miniature scales, too, and started on my first scratch build of an HMS Beagle that will be about 4" long. You have already given me several ideas on how to proceed. I'm really looking forward to going through all your other logs. Great work and thanks for sharing with us. Regards, Gabeu
- 120 replies
-
- 1
-
-
- mystic
- motor yacht
- (and 2 more)
-
...or not enough! Get well soon, mate. - Gabe
- 625 replies
-
- 1
-
-
- bounty launch
- model shipways
- (and 1 more)
-
I knew your incredible research and dedication to detail would play a role in this discovery! Congratulations! Time to start a book, mate. Regards, Gabe
- 346 replies
-
- 1
-
-
- terror
- polar exploration
- (and 2 more)
-
She's apparently in only 11 metres (35') of water and standing around 6 metres upright. The high arctic conditions and short working season would make this a very expensive raising. However, they interviewed a decendent of Capt. Crozier who thought that the construction of these ships was so sturdy and because they were further reinforced for arctic exploration that raising might be feasible. And we should mention that our Prime Minister is tickled pink over this...maybe he'll spring some money this way! This is really big news for us Canadians. I think that you and your model might end up playing a part in all this if you want, E&T! Regards, Gabe
- 346 replies
-
- 5
-
-
- terror
- polar exploration
- (and 2 more)
-
http://www.cbc.ca/news/politics/lost-franklin-expedition-ship-found-in-the-arctic-1.2760311 For anyone else interested in the discovery of one of Franklin's ships. Regards, Gabe
- 346 replies
-
- 2
-
-
- terror
- polar exploration
- (and 2 more)
-
Nice work, divedog. I found out much later about deck planking practices but had already made a perfect stagger of butt joints which looked great...for a house carpenter laying down flooring! I believe that ship builders tried to use as long a piece as possible up to 8 or 10 feet (I can't give you the exact number right now, I'm on a road trip and don't have access to my references.) Like Russ said, the span between the hatches would not have any joints. I planked my second plank-on-frame like this (no build log yet) and like the look. It makes a lot of sense. Your idea to wait on indicating the butts and nails is pretty good. I would ignore the bulkheads for now. Later you will install stanchions for the bulwarks and they would represent the tops of the frames. At that time you can add the butt joints if you wish and align them with the stanchions. I did it the reverse way and later didn't like how the stanchions lined up to the butt joints. So, at the bow, my butt joints and stanchions don't line up well. With respect to nails...deck planks were drilled with counter sinks to recess the heads, filled with wood plugs and caulked. They would also line up the grain of the plugs with tgat of the planks. So, sometimes it's hard to even see the nails. The choice then is to either put dots or circles or nothing. I didn't bother, liking the look of clean lines. I have seen museum models use every combination. As Keith said, this is your baby. I can commiserate about all the decisions. I think I researched for two weeks about what knot to use in one part of my rigging. I actually enjoy that part of the hobby a lot. Welcome to wooden model ship building! Regards, Gabe
-
Hello there, adivedog. Welcome aboard and greetings from Canada! As a fellow 'Swiftie', I look forward to following your build log. And...you've got an excellent mentor in Keith! Like he said, this model is a great one to start with and it was my first as well - I completed it February of this year. However, it took me so long to complete (27 years!) that I can't remember a lot of the details of the early steps other than I decided to add the keel and stem before the second planking, whereas the instructions said to add them after the second layer. (I'm assuming that your hull is double planked - I built the old version of the kit). My method allowed me to cut in a rabbet to hide the edges of the second planks, particularly at the bow. I will say that you should watch the thickness of your hull at the stern - I left mine too thick and it created problems when I was installing the stern post and rudder. You will have a chance to fix up some imperfections after you complete the first layer by adding wood filler and sanding...and sanding...and sanding some more. One thing that I learned from my first build and that Keith absolutely embraces is that you should feel free to change/modify/question/deviate from the instructions as you see fit. Reading the logs on this site is an inspiration and great education - you'll pick up lots of ideas on what to do and, if you read my log, what NOT to do! Have fun... Regards, Gabe
- 159 replies
-
- 1
-
-
- swift
- artesania latina
- (and 1 more)
-
Just discovered your build log and I empathize with the curves this kit throws at you (no pun really intended