


Freebird
-
Posts
253 -
Joined
-
Last visited
Content Type
Profiles
Forums
Gallery
Events
Posts posted by Freebird
-
-
1 minute ago, Ian B said:
The builds coming along great, I enjoyed Chucks design a lot.
Ian, I totally agree and thank you!
Best Regards …. Rick
-
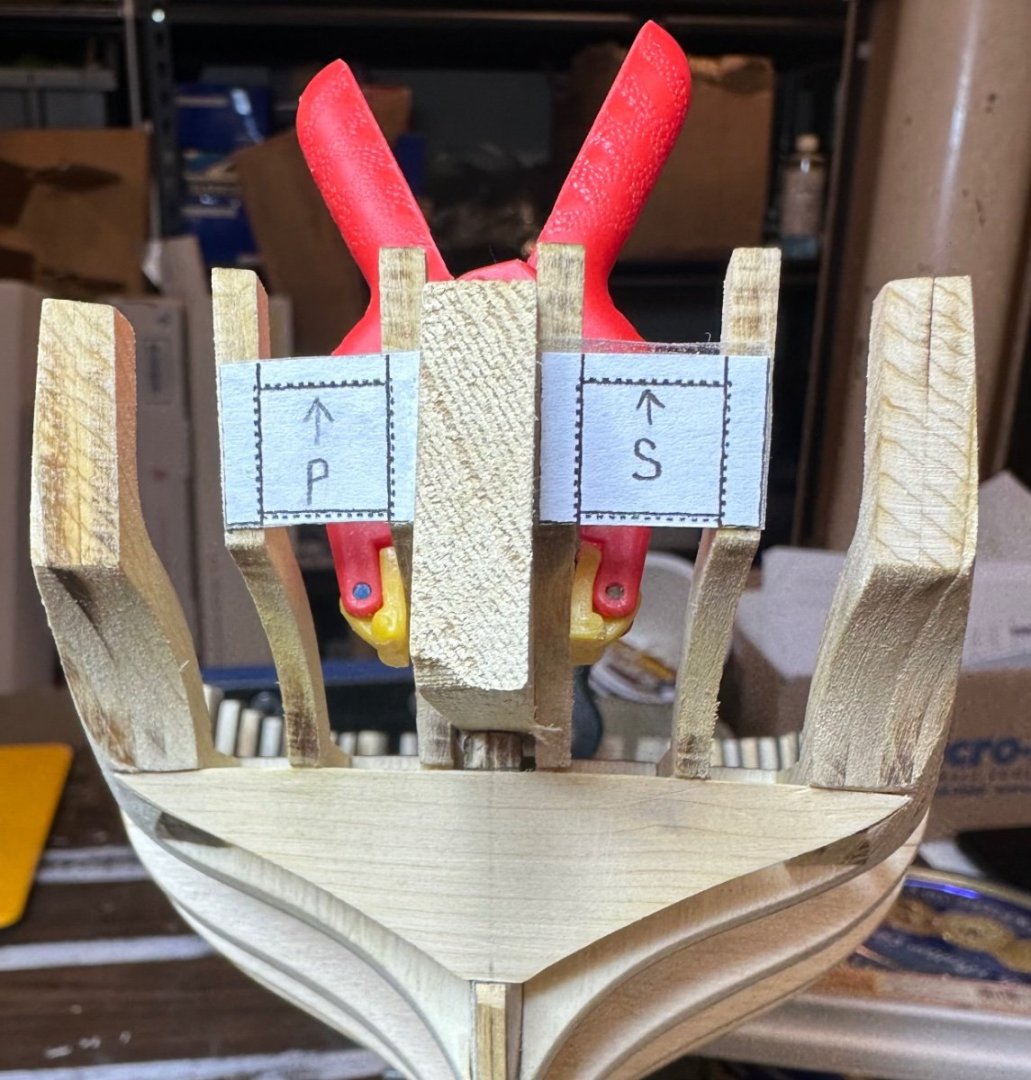
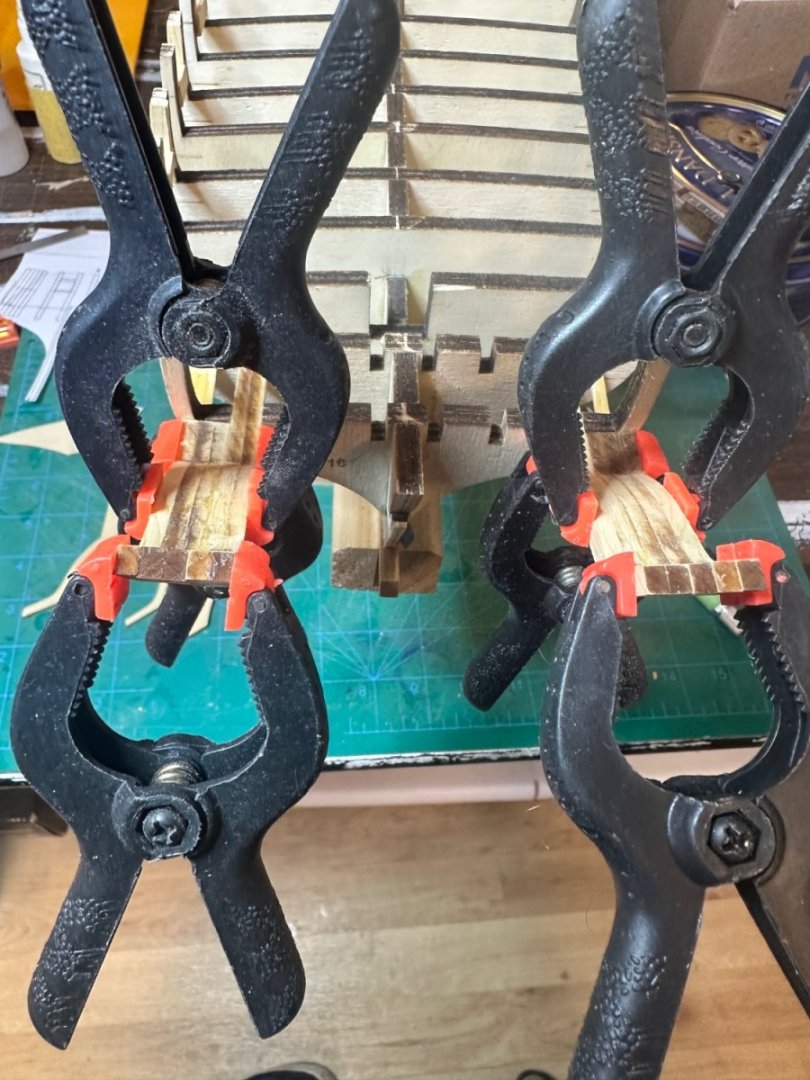
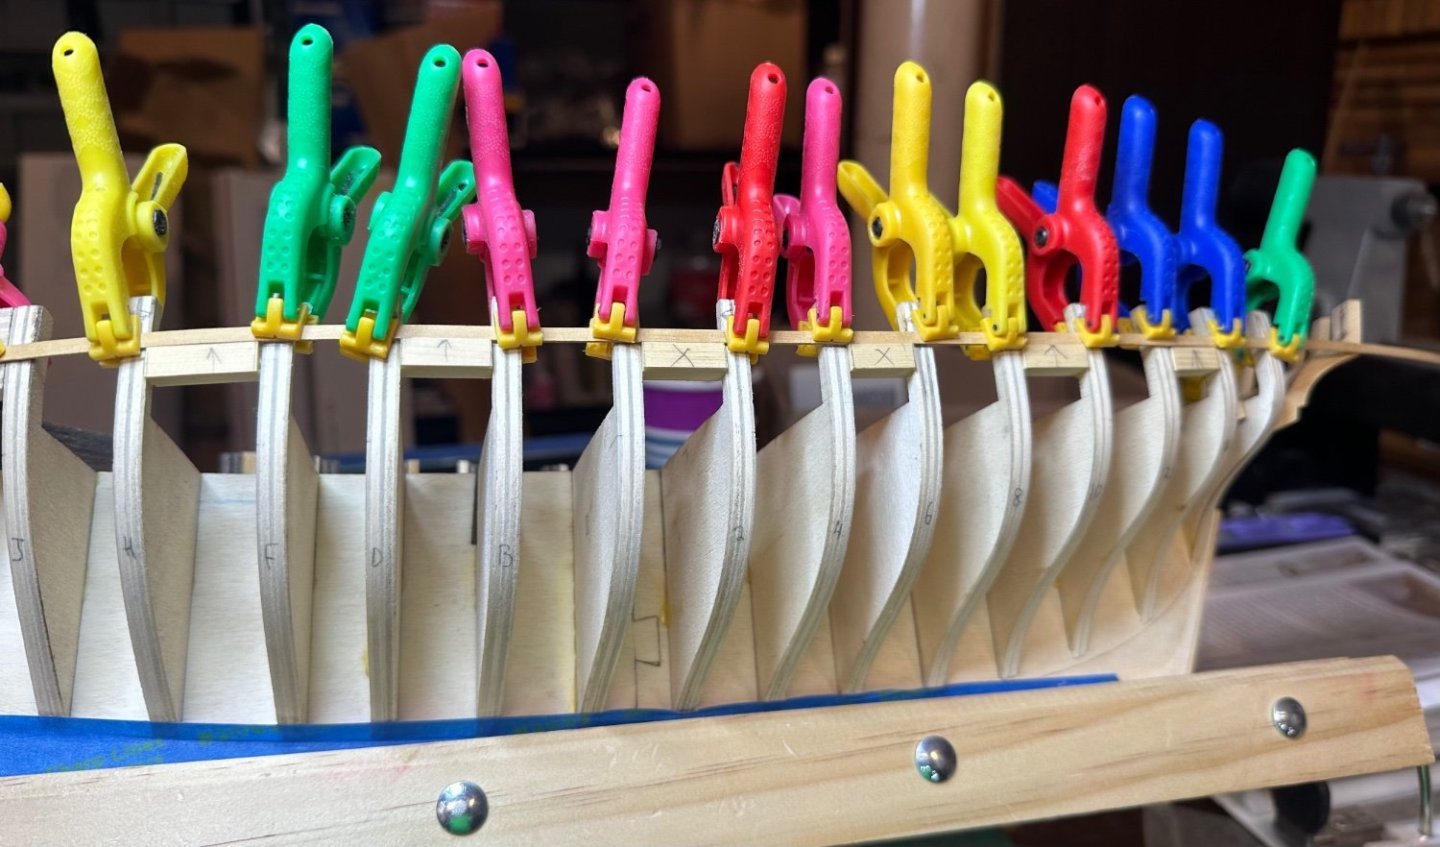
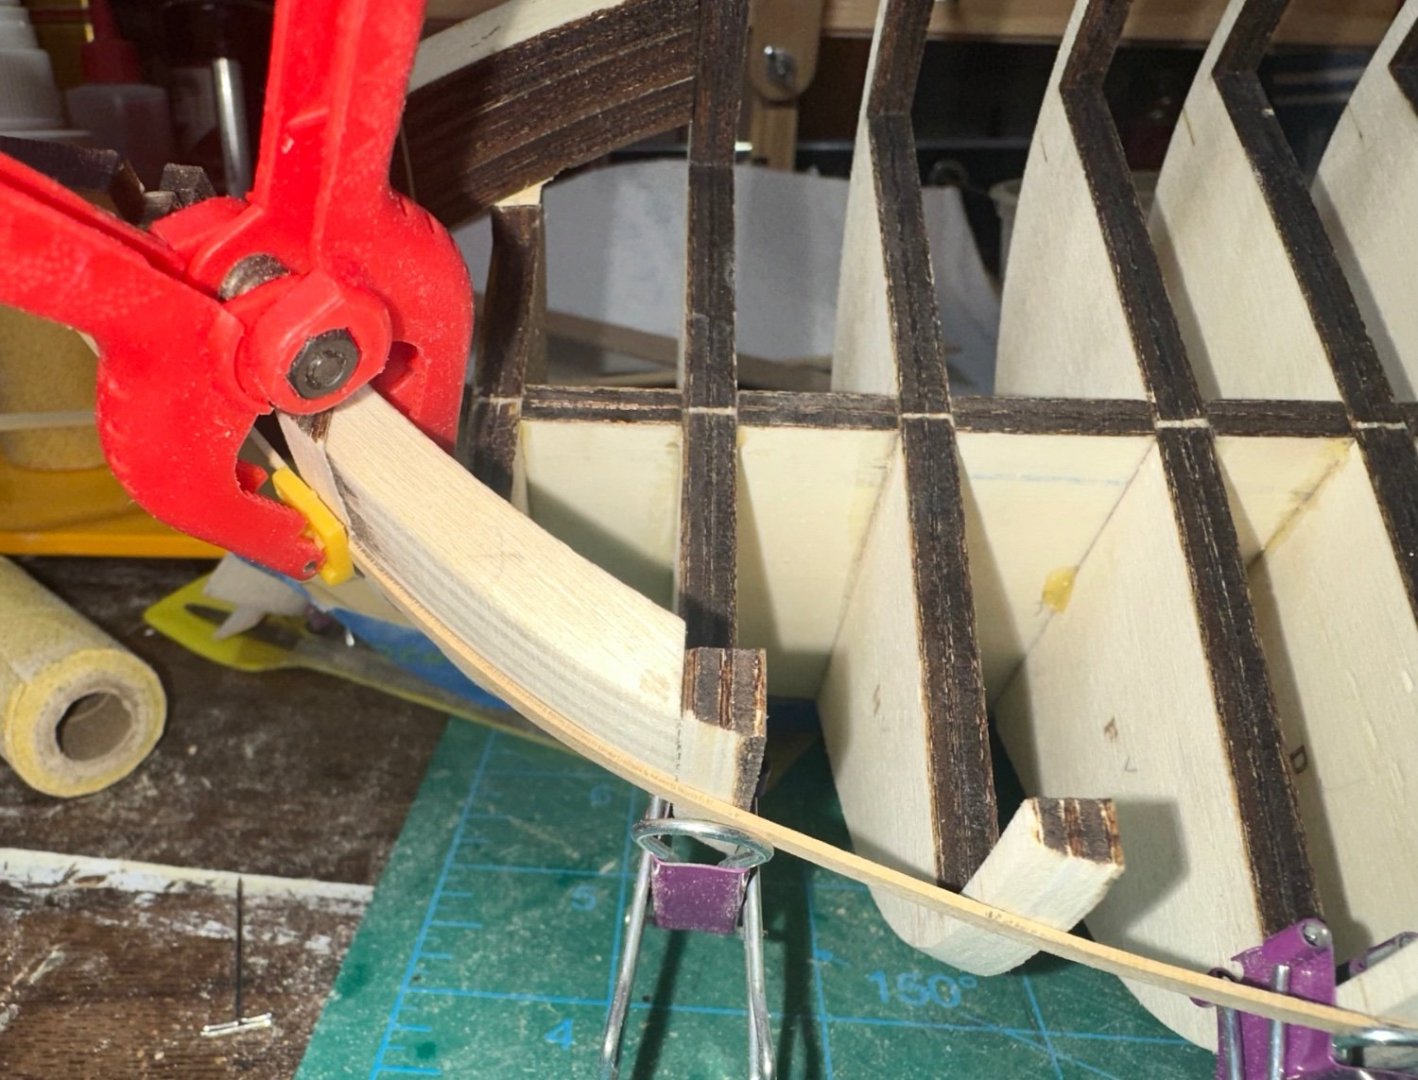
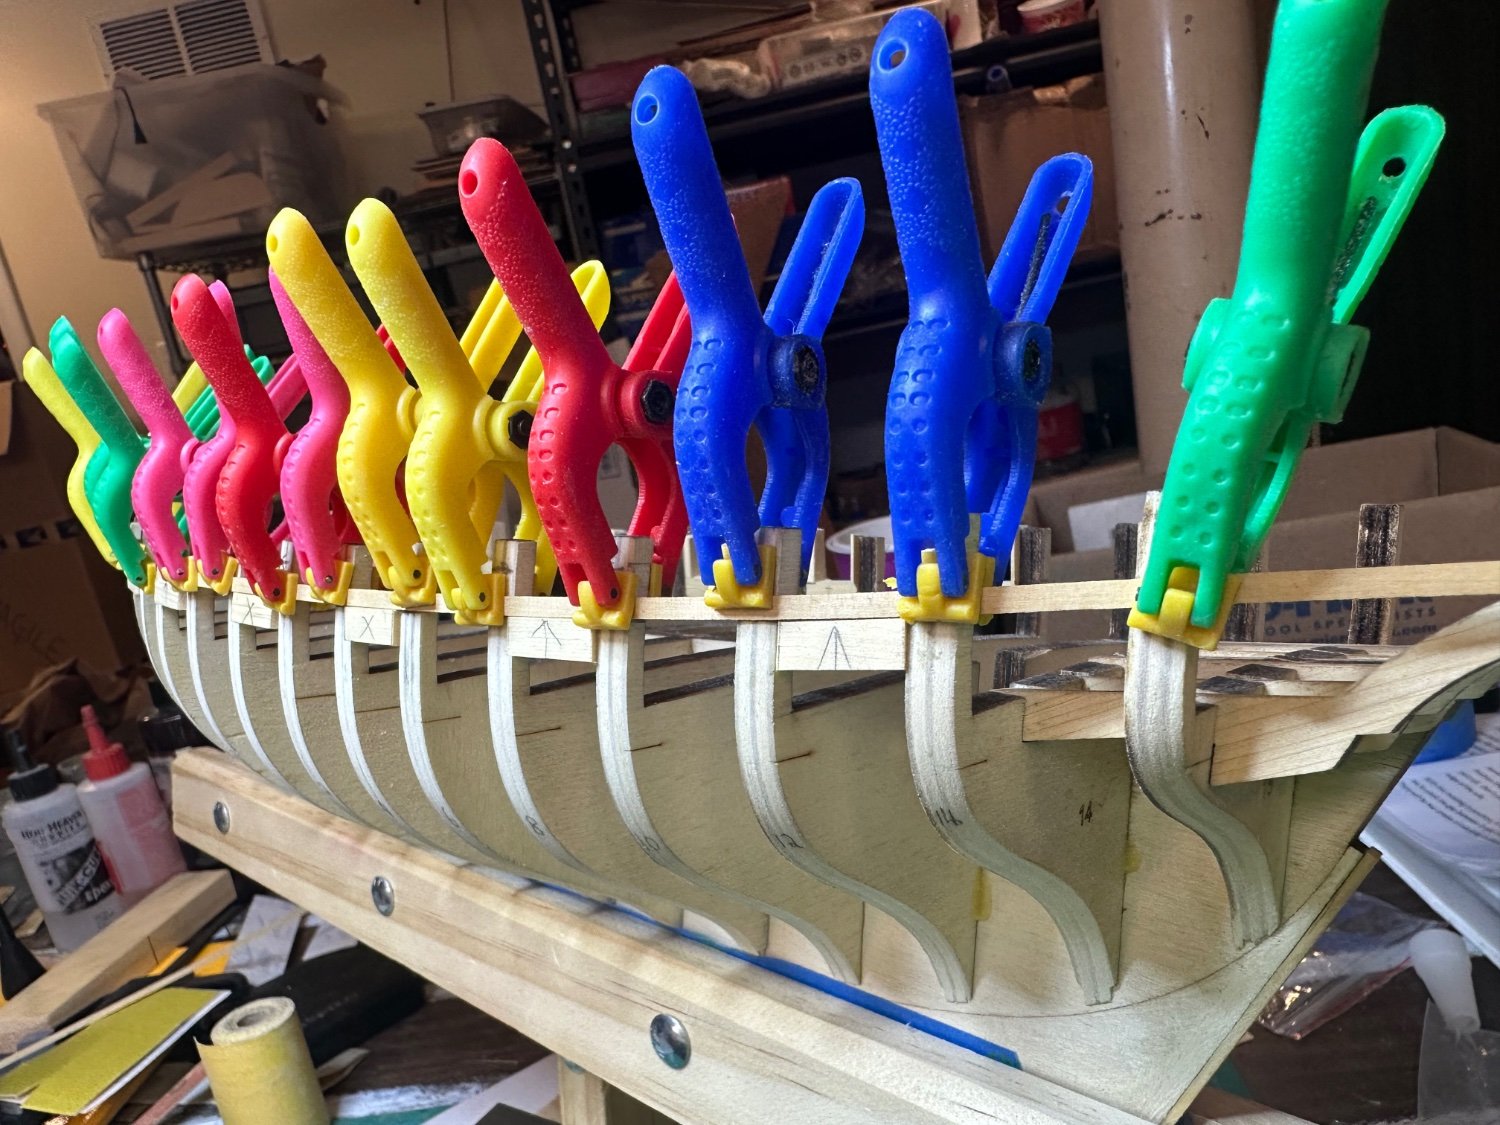
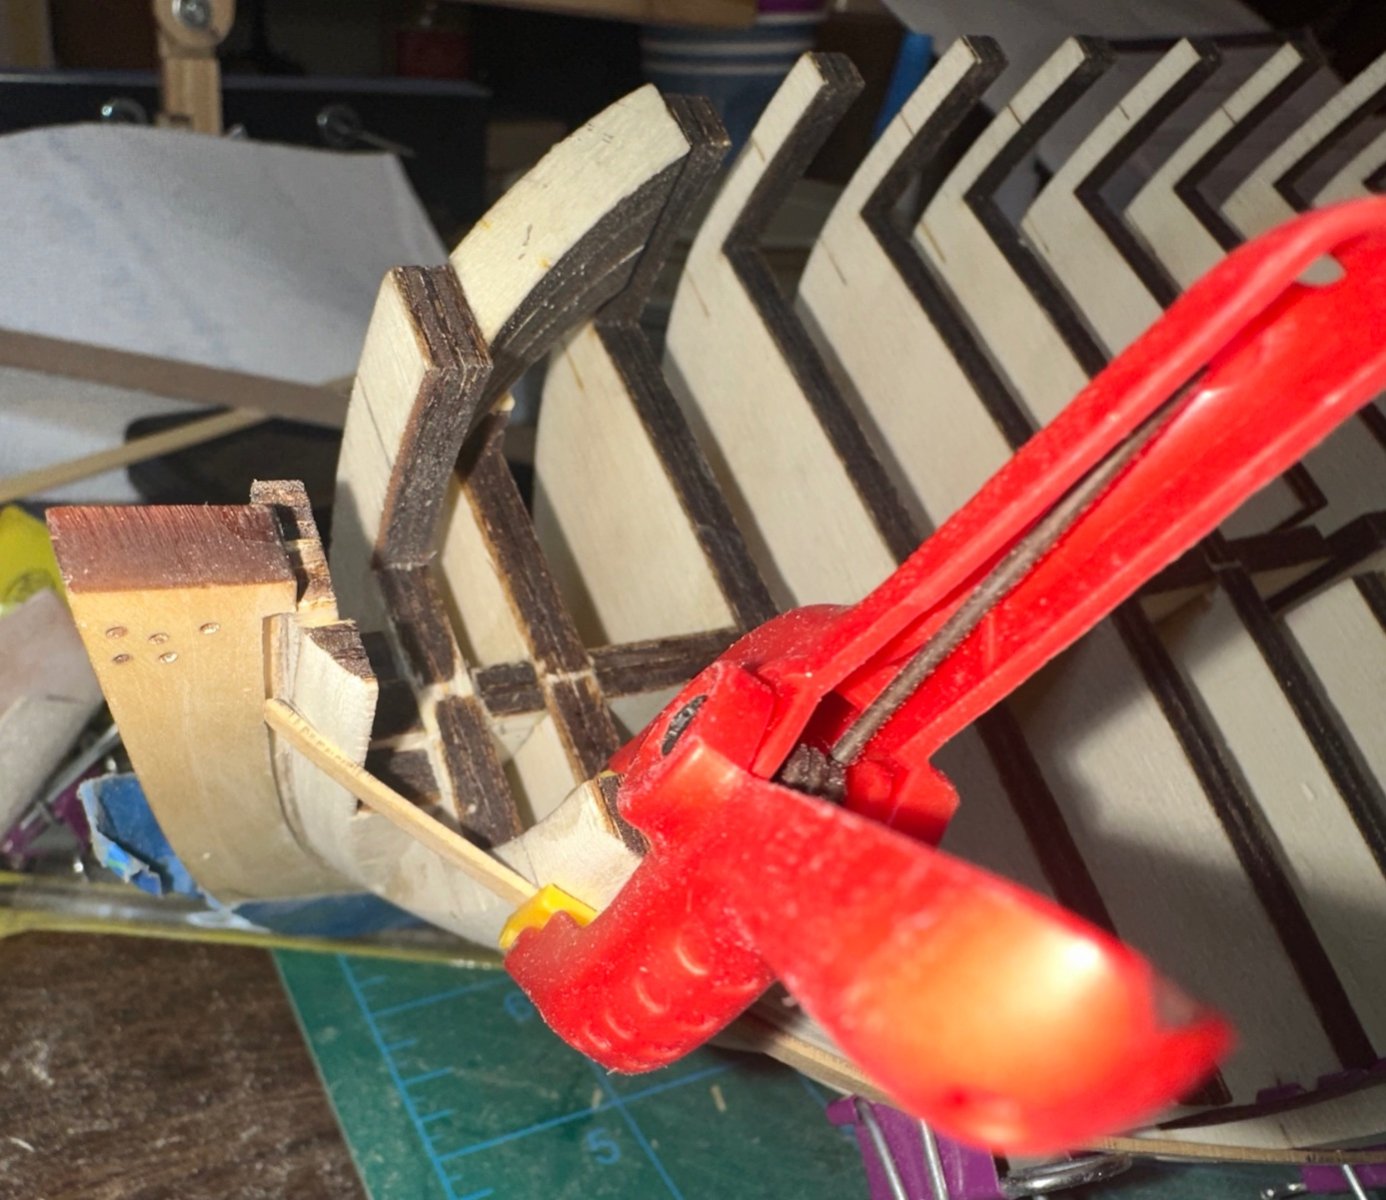
First, let me say that I’m enjoying this build immensely! Next, I thought the gun ports were a pain, they ain’t got anything on the 2 ports in the transom, but I got’er done. I cut the ports from the stern template and used double-sided tape to position them on the frames. I also clamped a 5/16” board in between the 2 X frames to stabilize them. Four hours later, the ports are framed, lots of measurements taken to ensure they were equally positioned in relation to each other. The Byrnes disc sander is a huge asset for this type of work. This is my first time building a stern like this and I’m really pleased at the results. I’m really enjoying this build! Wait, I think I already said that, but it bears repeating.
Best Regards …. Rick
-
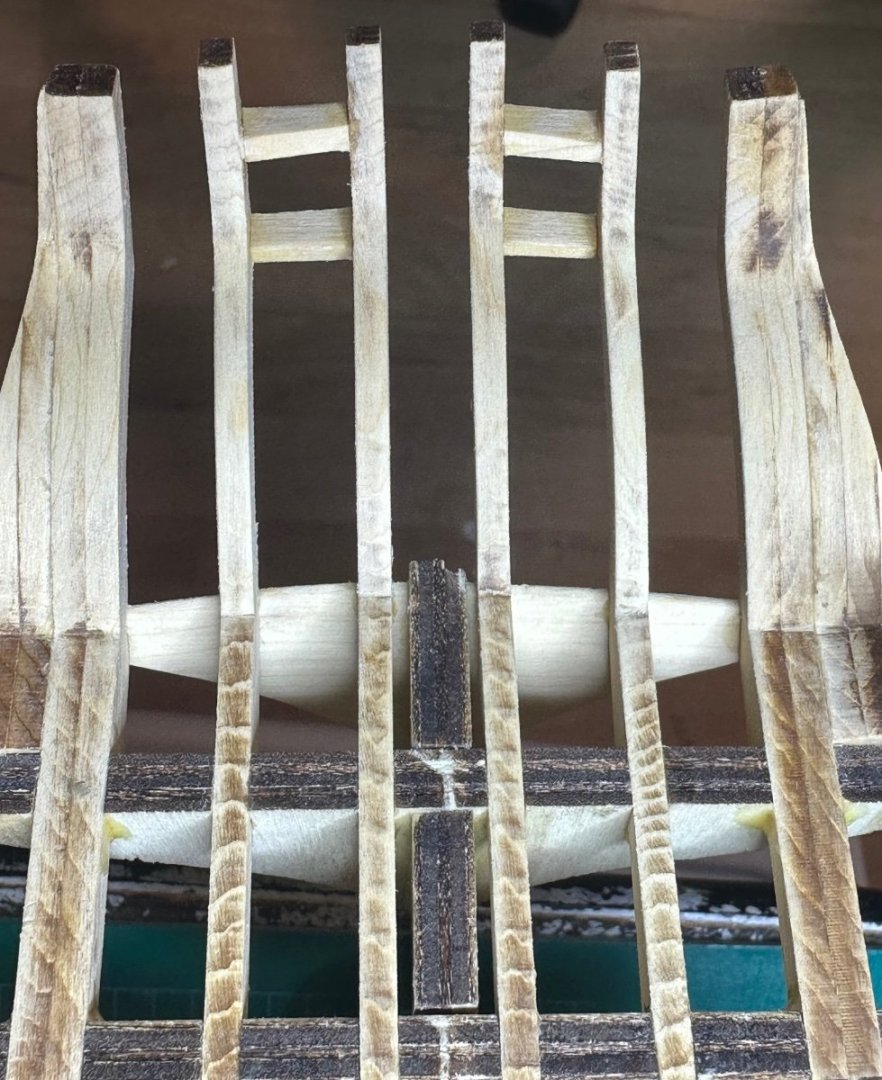
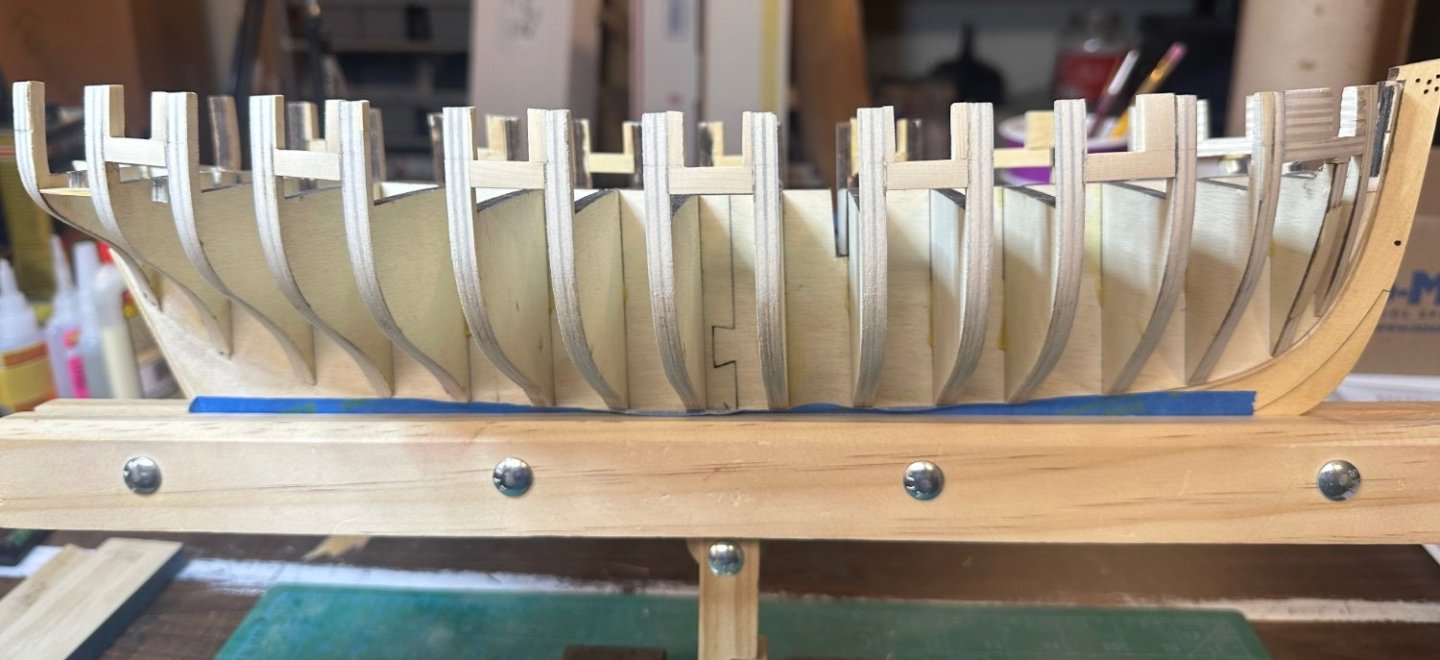
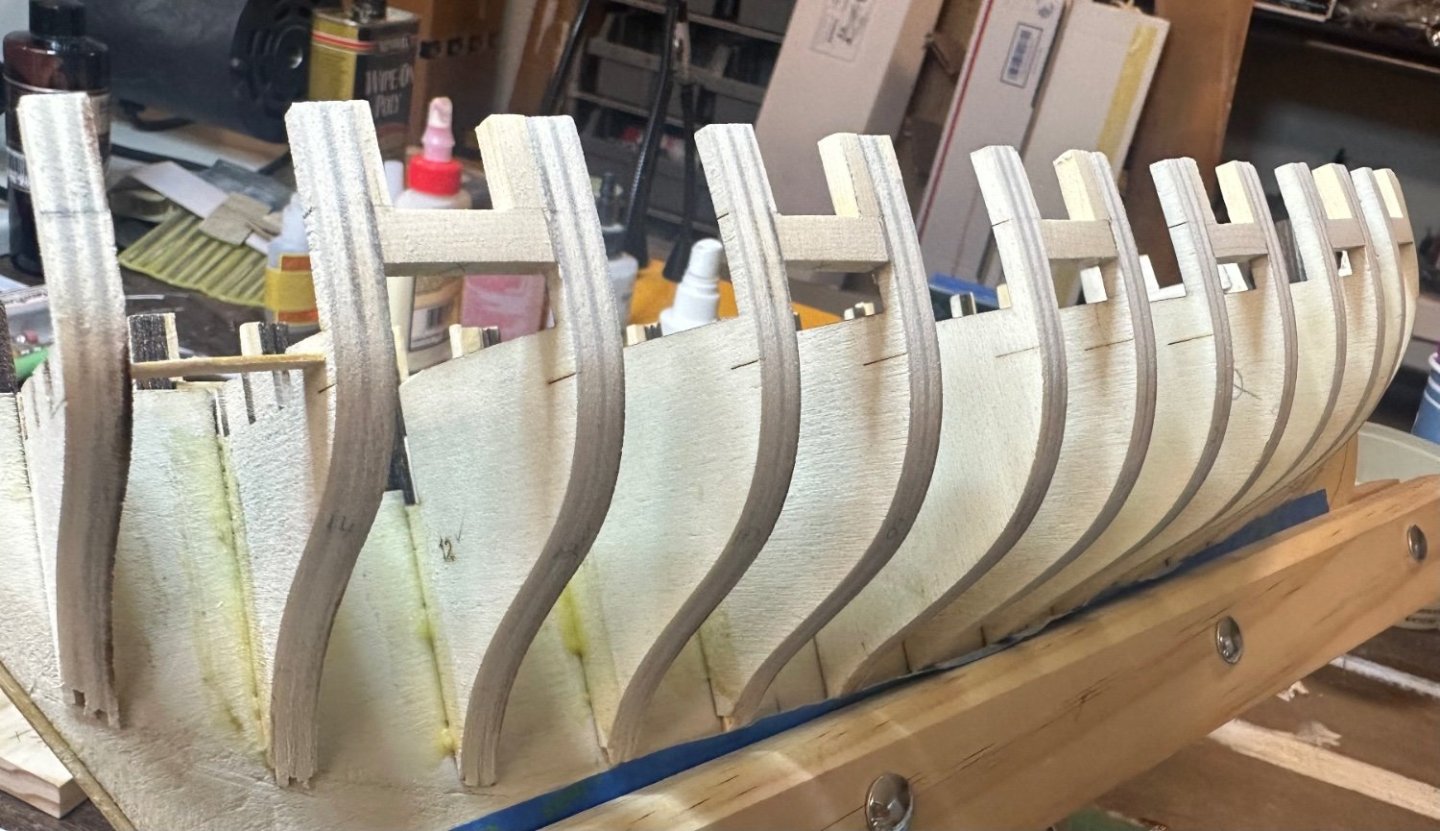
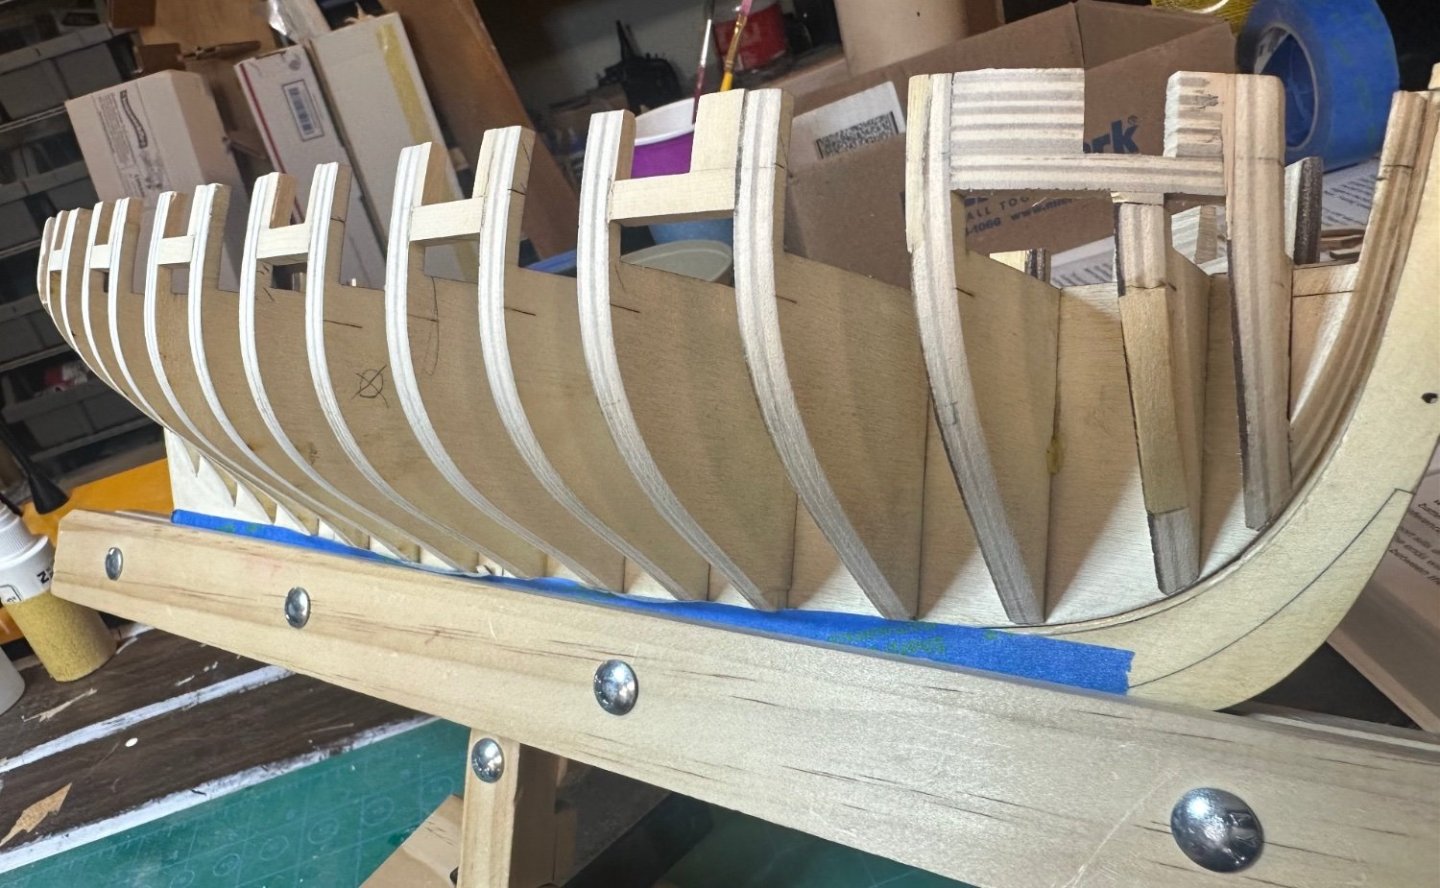
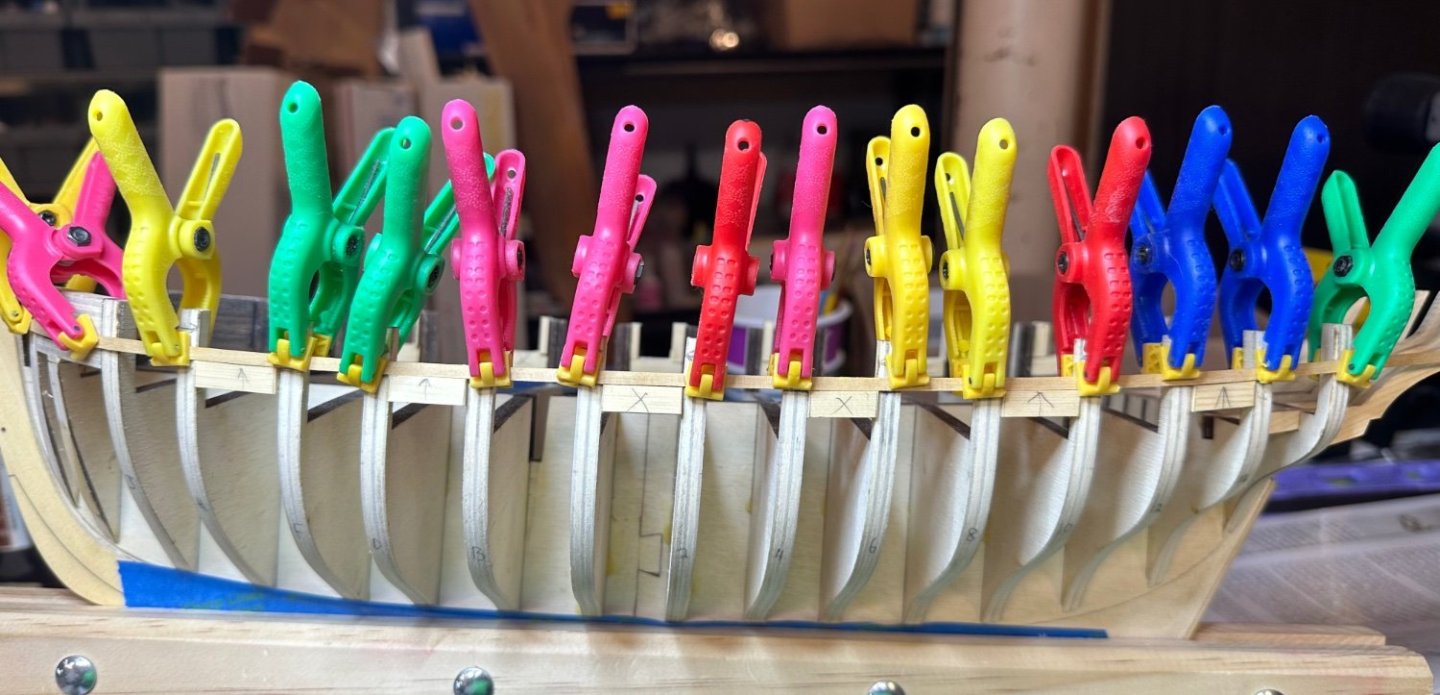
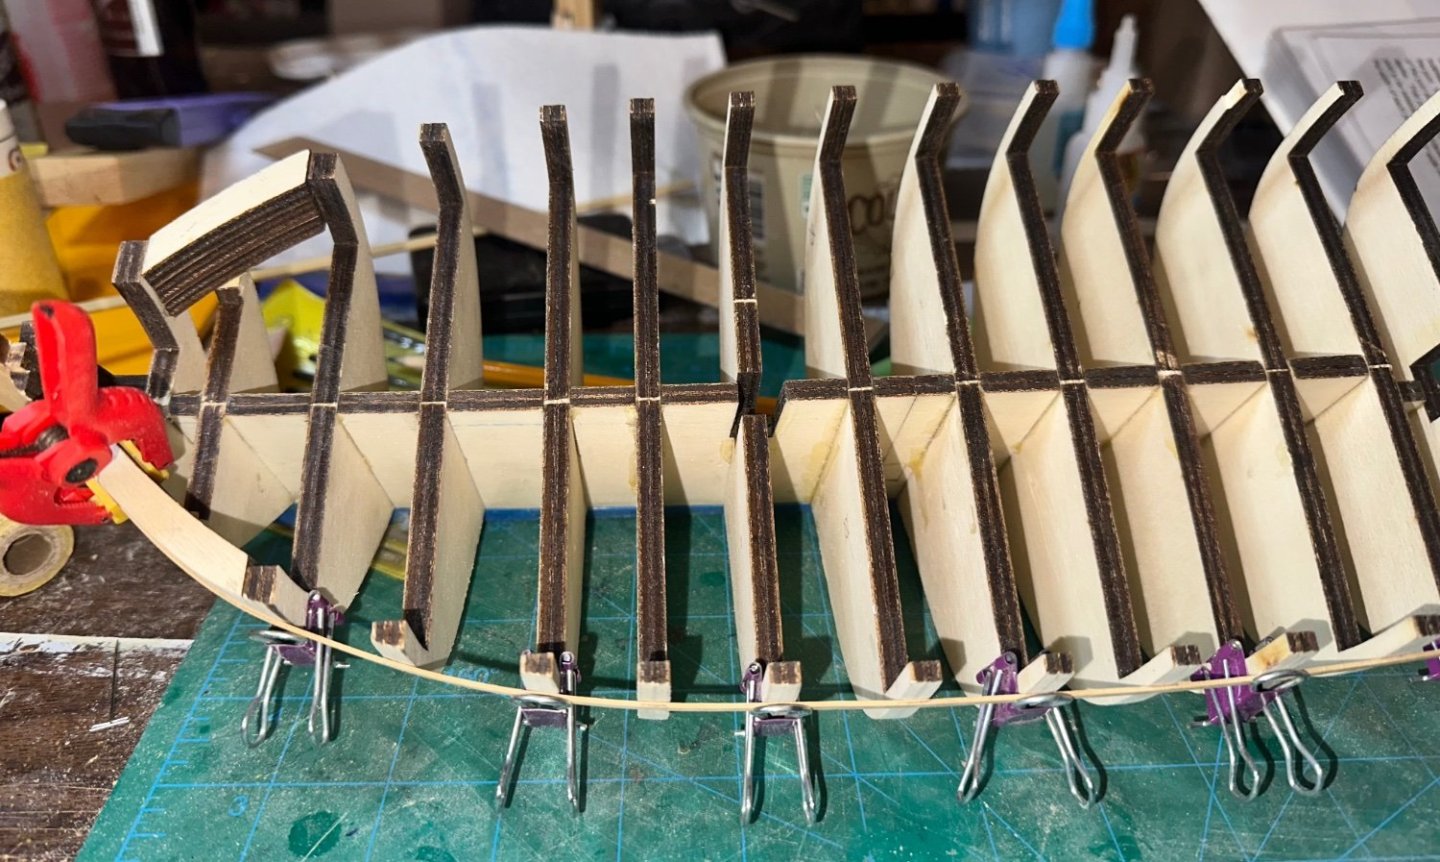
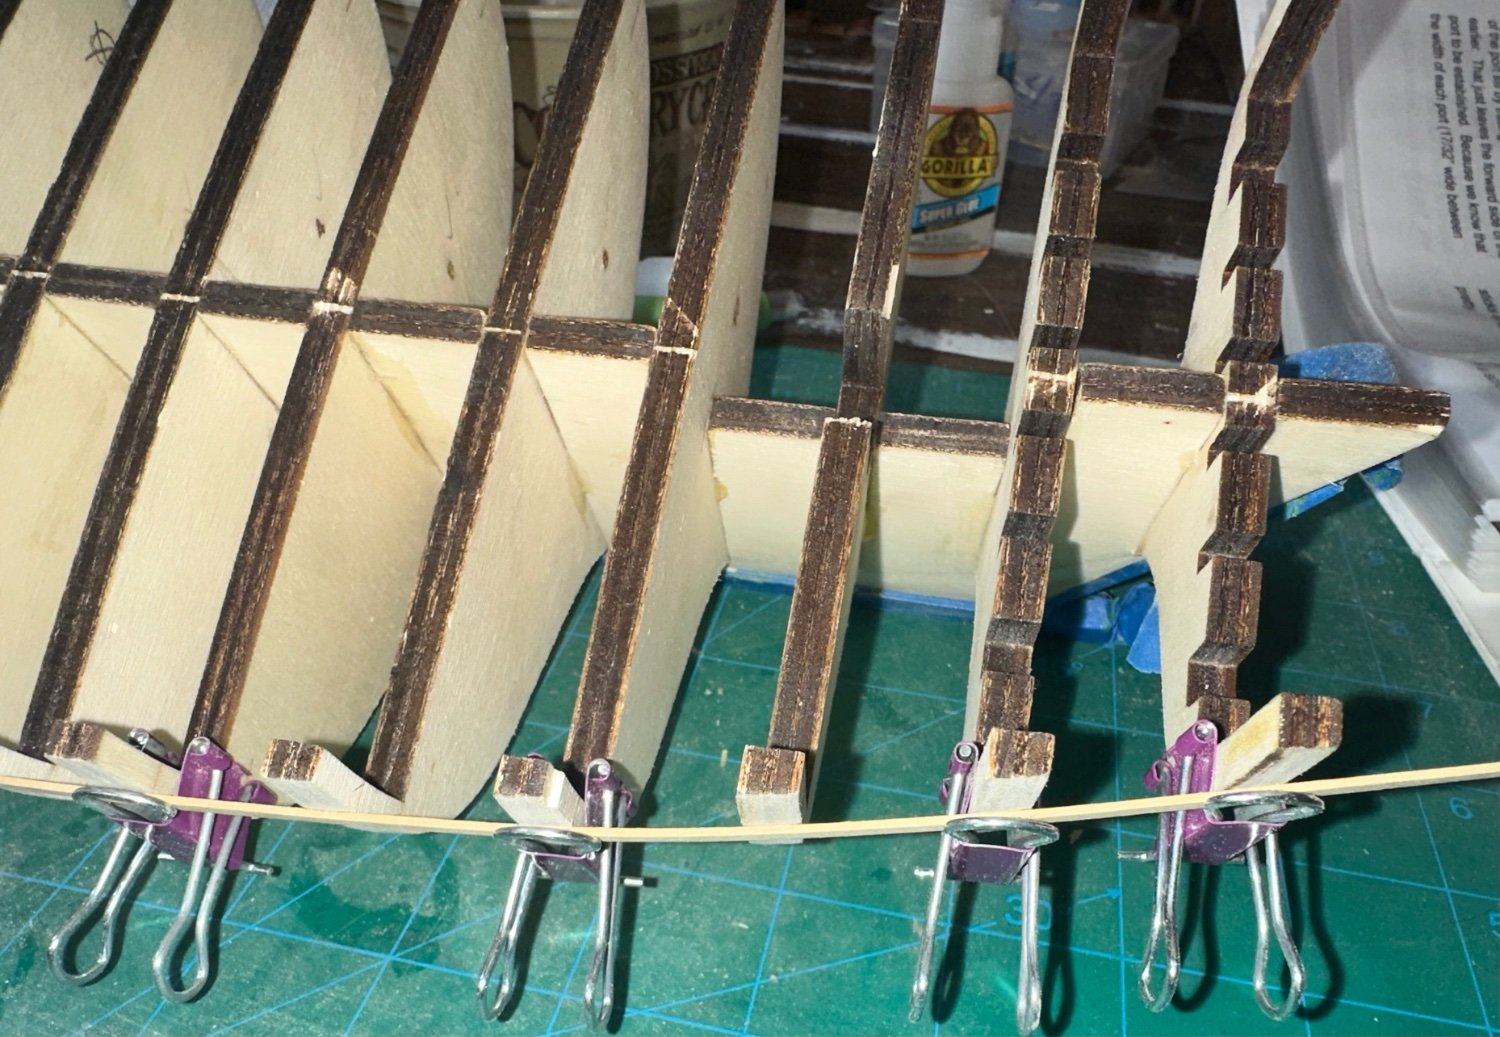
Remaining stern frames glued in place as is the counter. On to the sills and lintels.
Best Regards …. Rick

- Ryland Craze, Diver, BobG and 1 other
-
 4
4
-
Thanks Chuck!
Best Regards …. Rick
-
-
Thanks Chuck, that means a lot to me!
Best Regards …. Rick
-
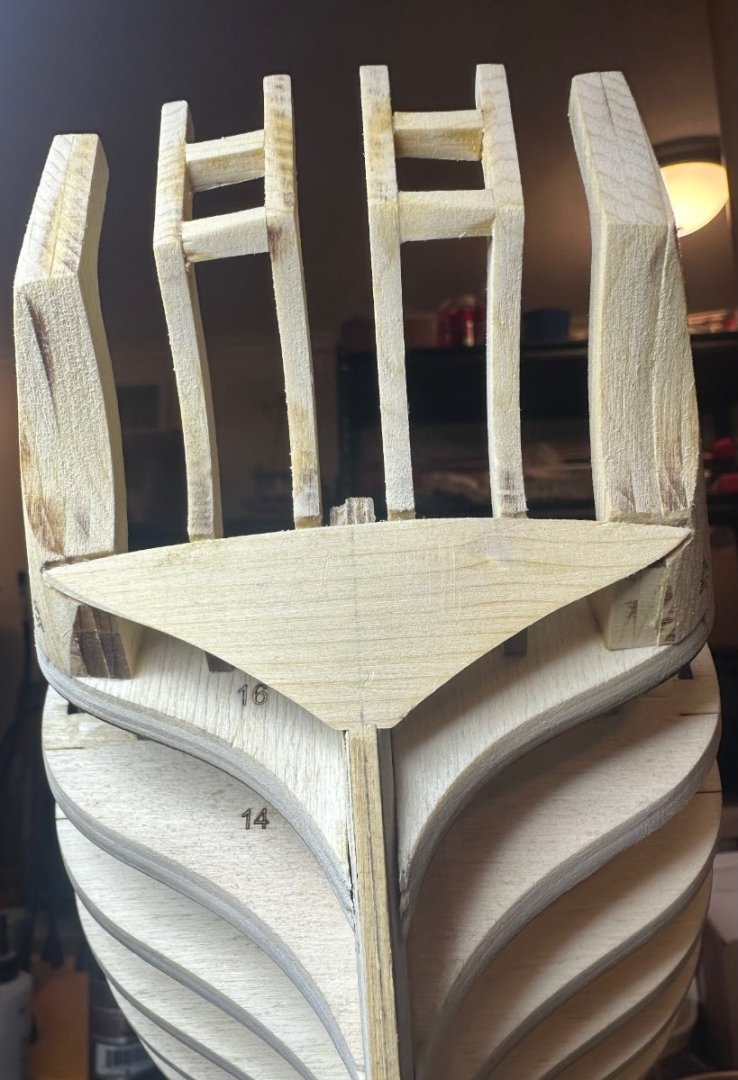
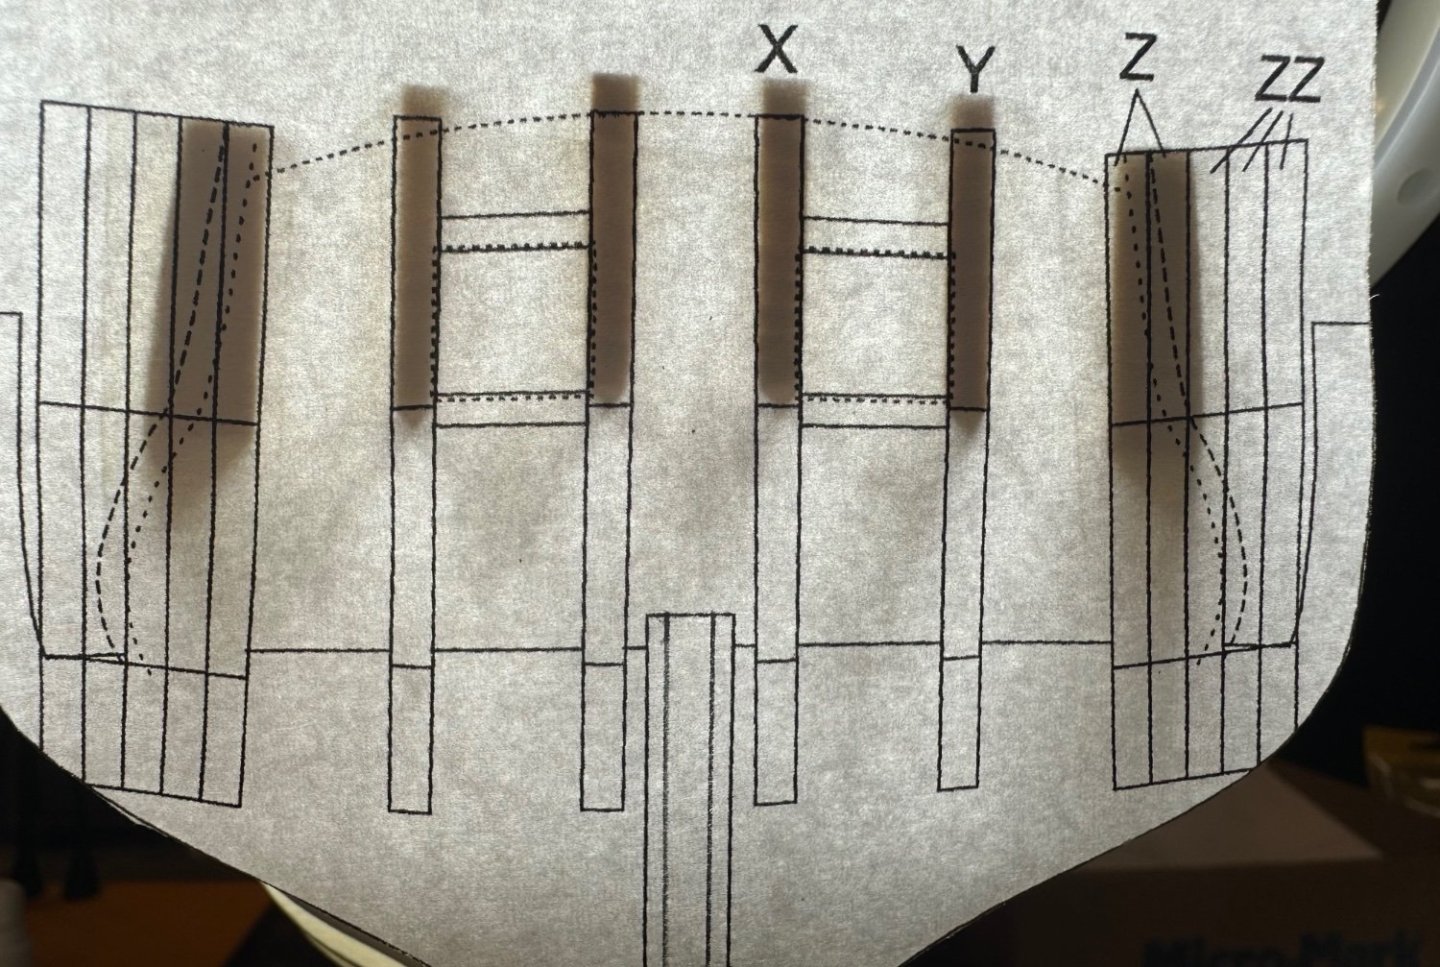
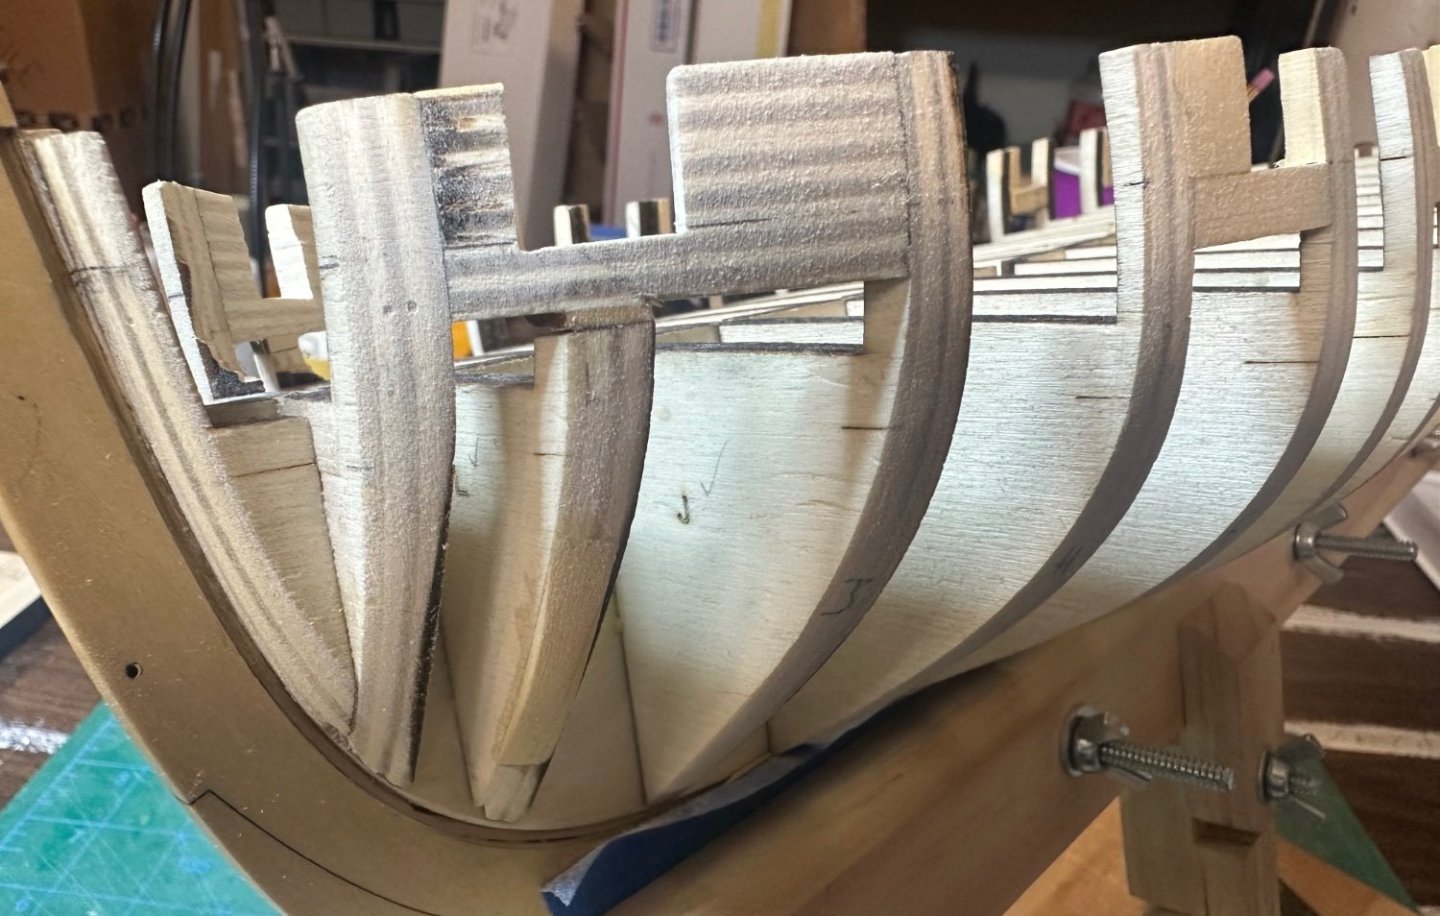
Holy accuracy! The X/Y frames are just sitting in place and I decided to tape the stern template in place. Dang! Can’t ask for better alignment. I know I’m not this good, a great testament to Chuck’s design and laser skills. I’m loving this build! Thanks Chuck!
Best Regards …. Rick
- Chuck, Knocklouder, Ryland Craze and 5 others
-
8
-
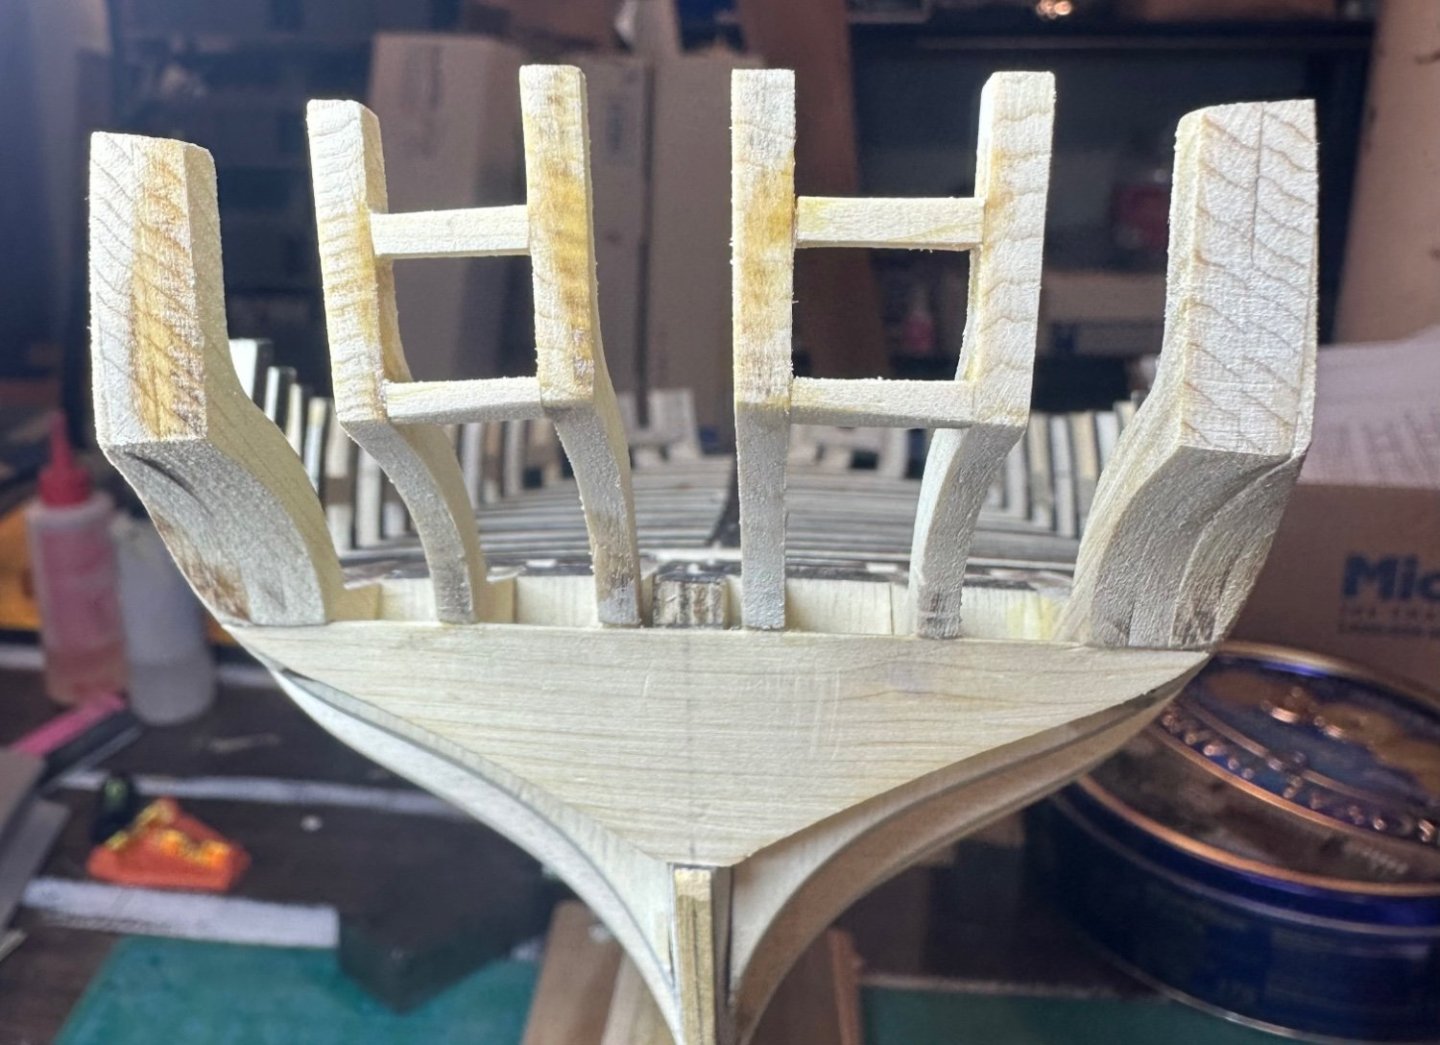
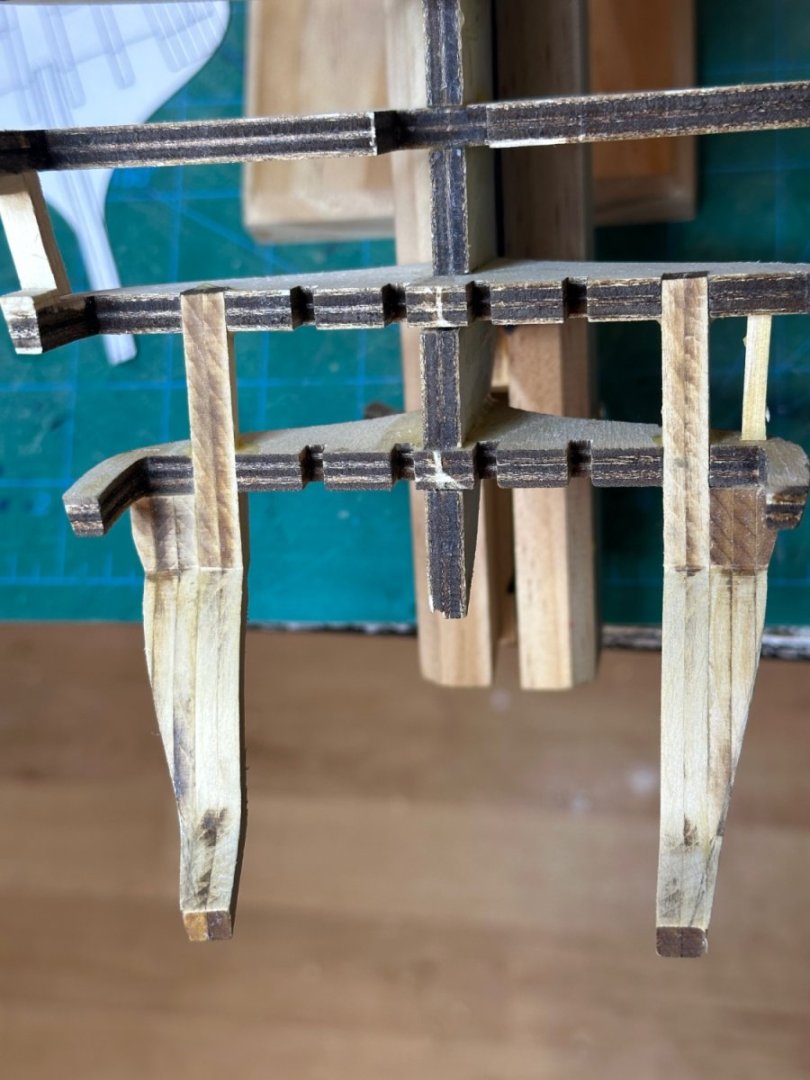
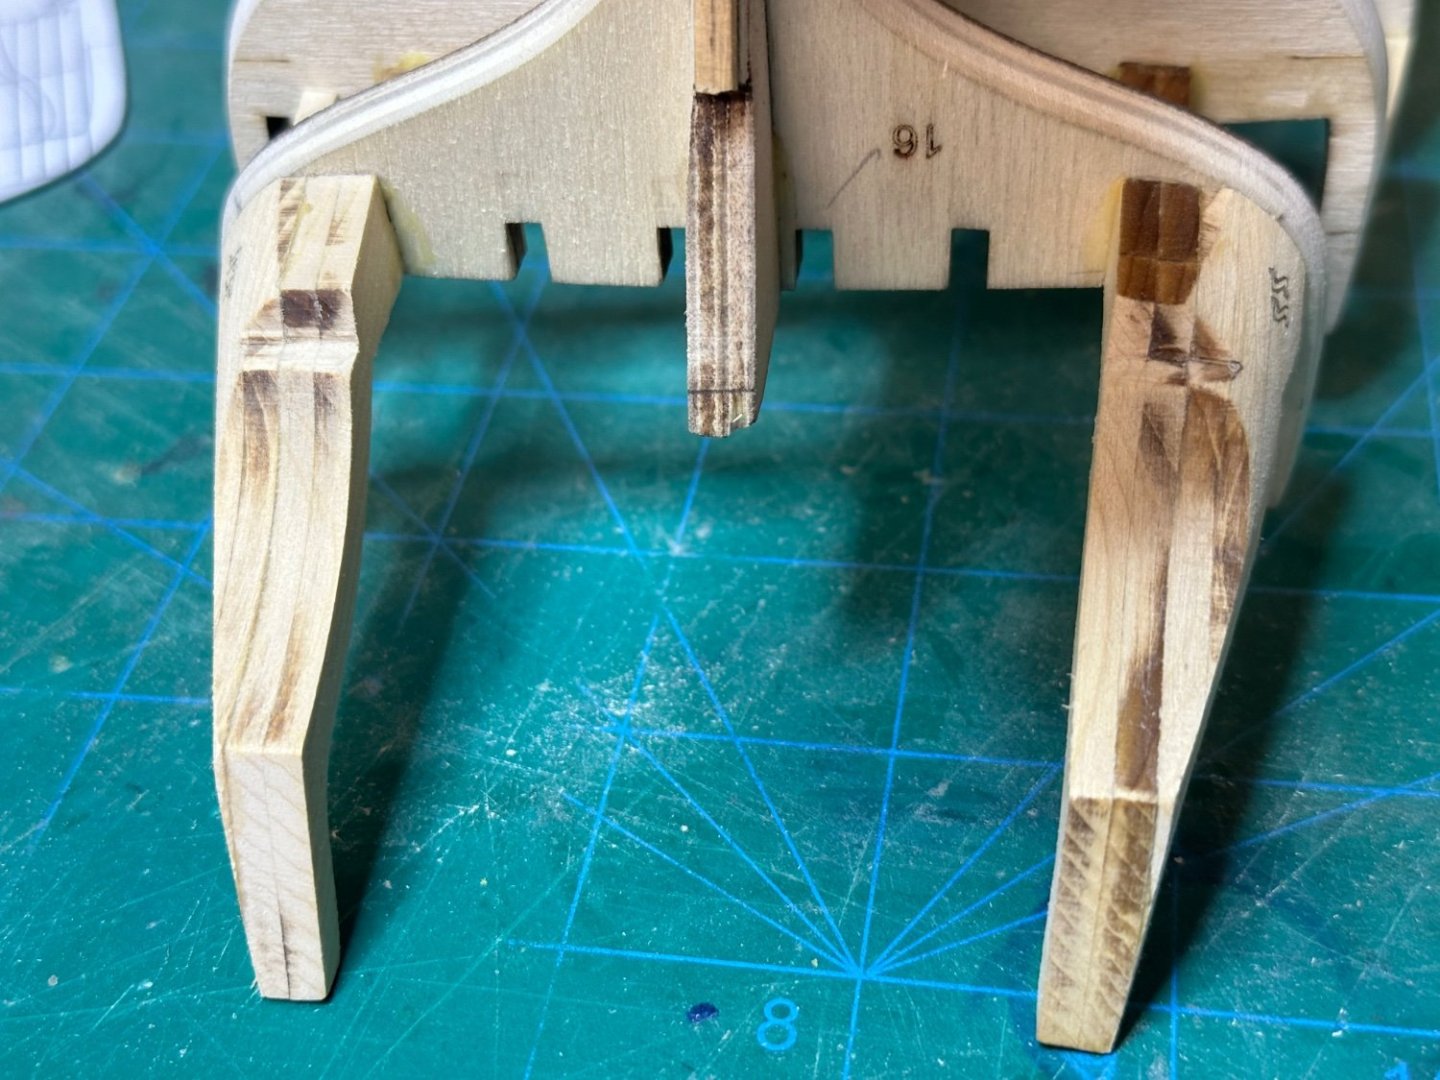
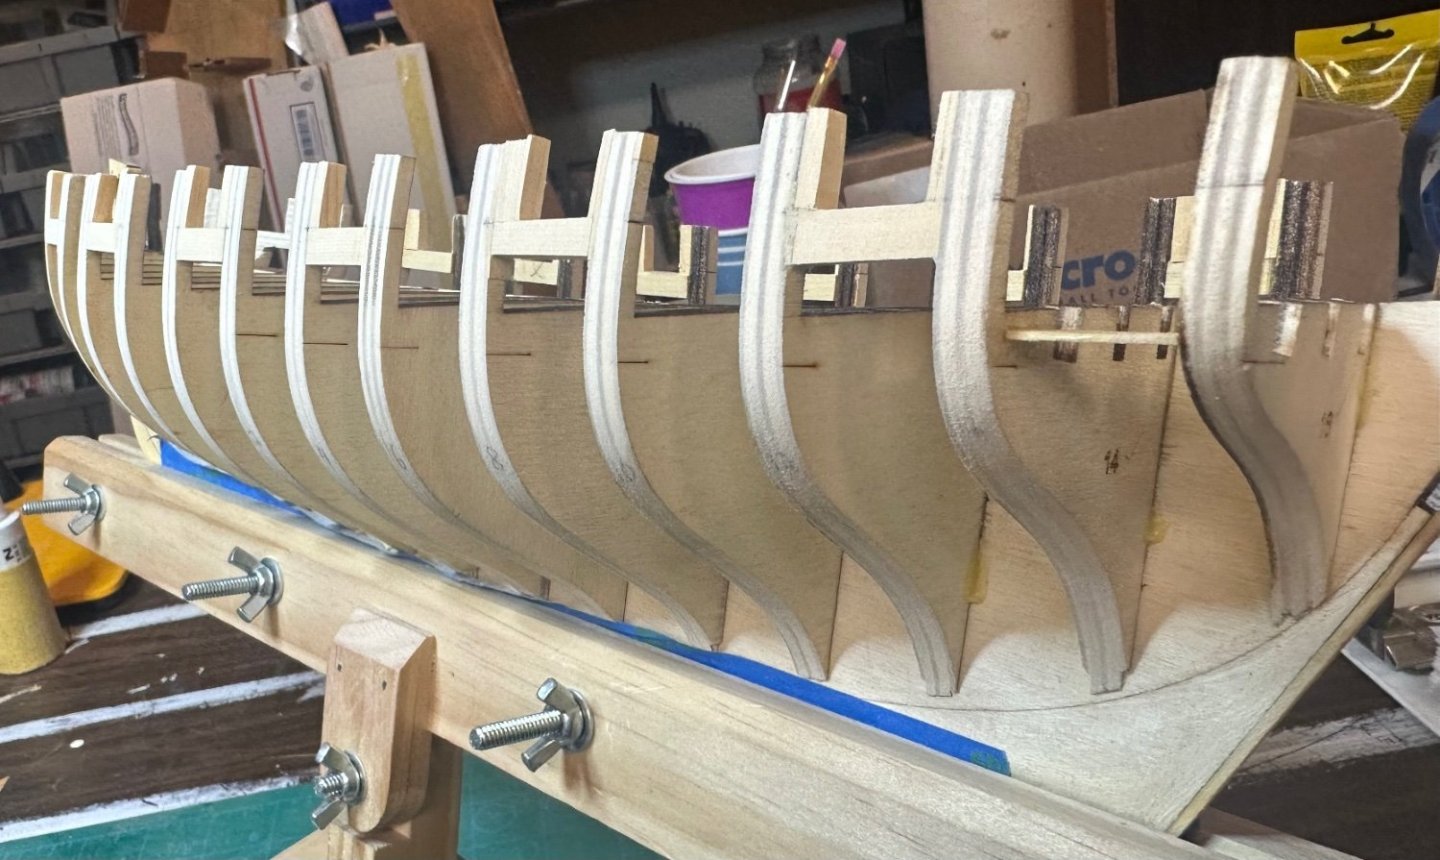
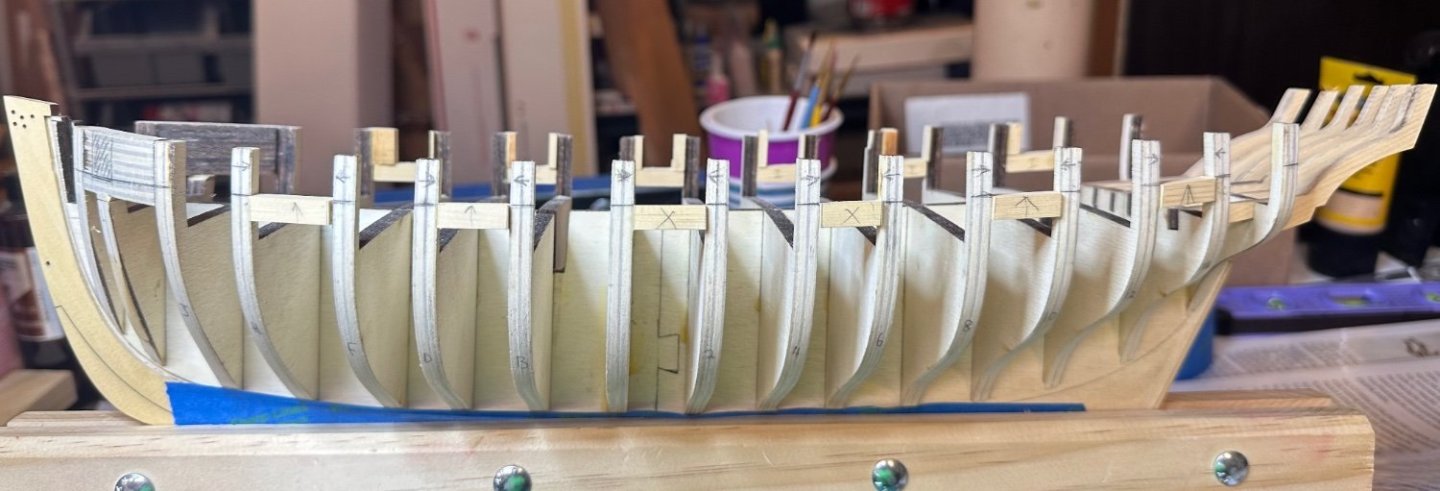
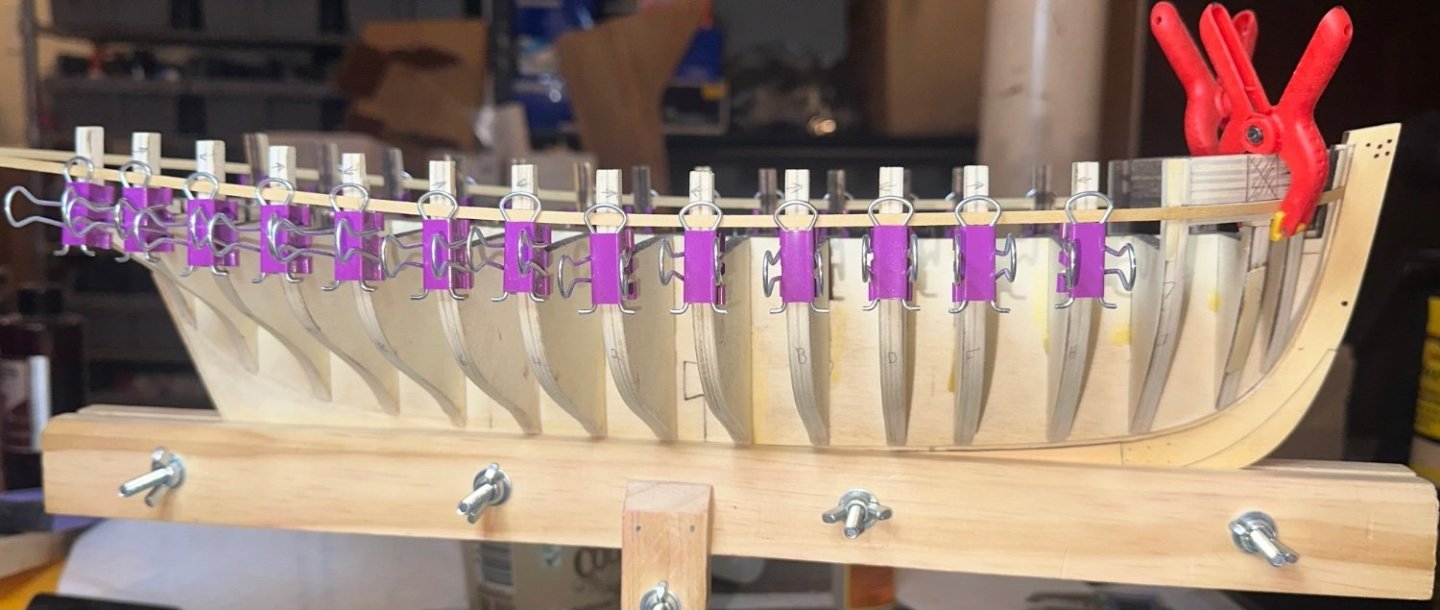
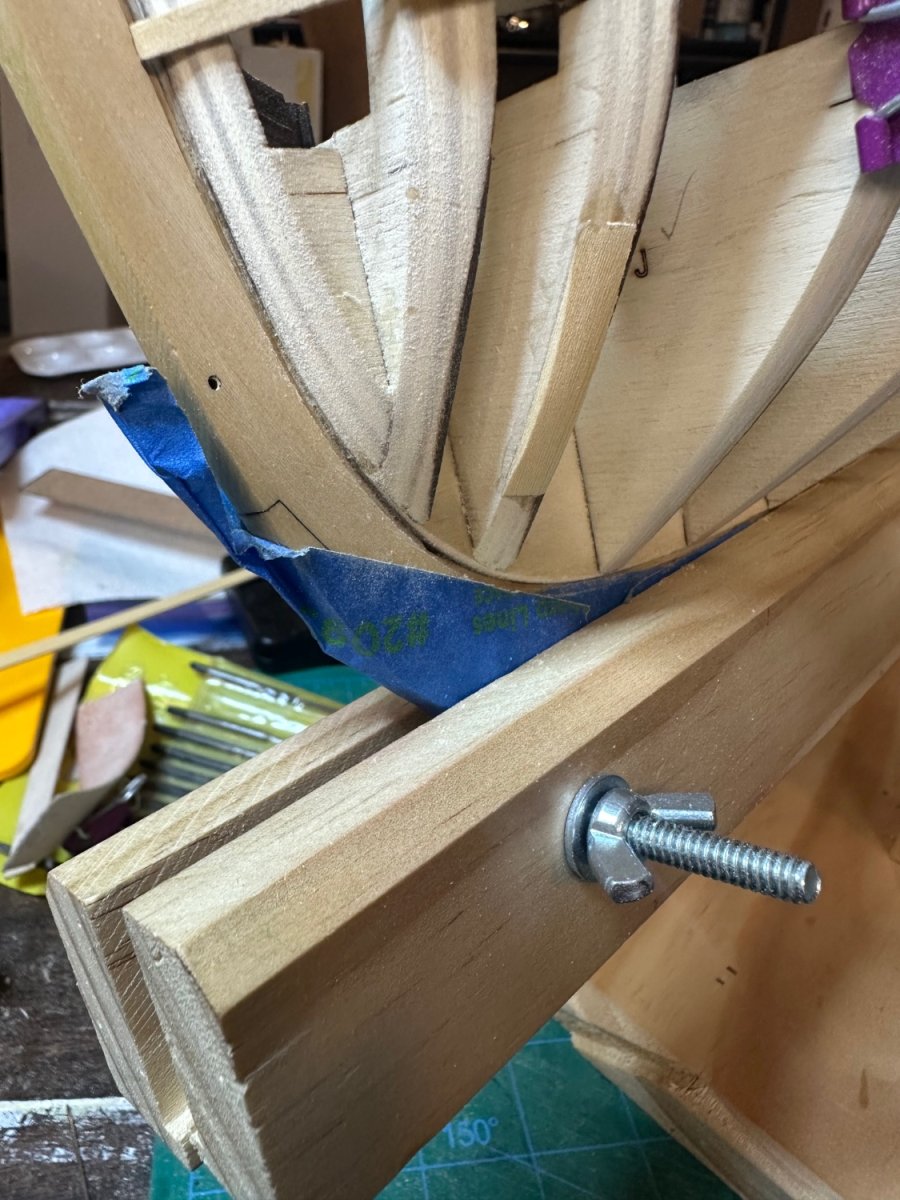
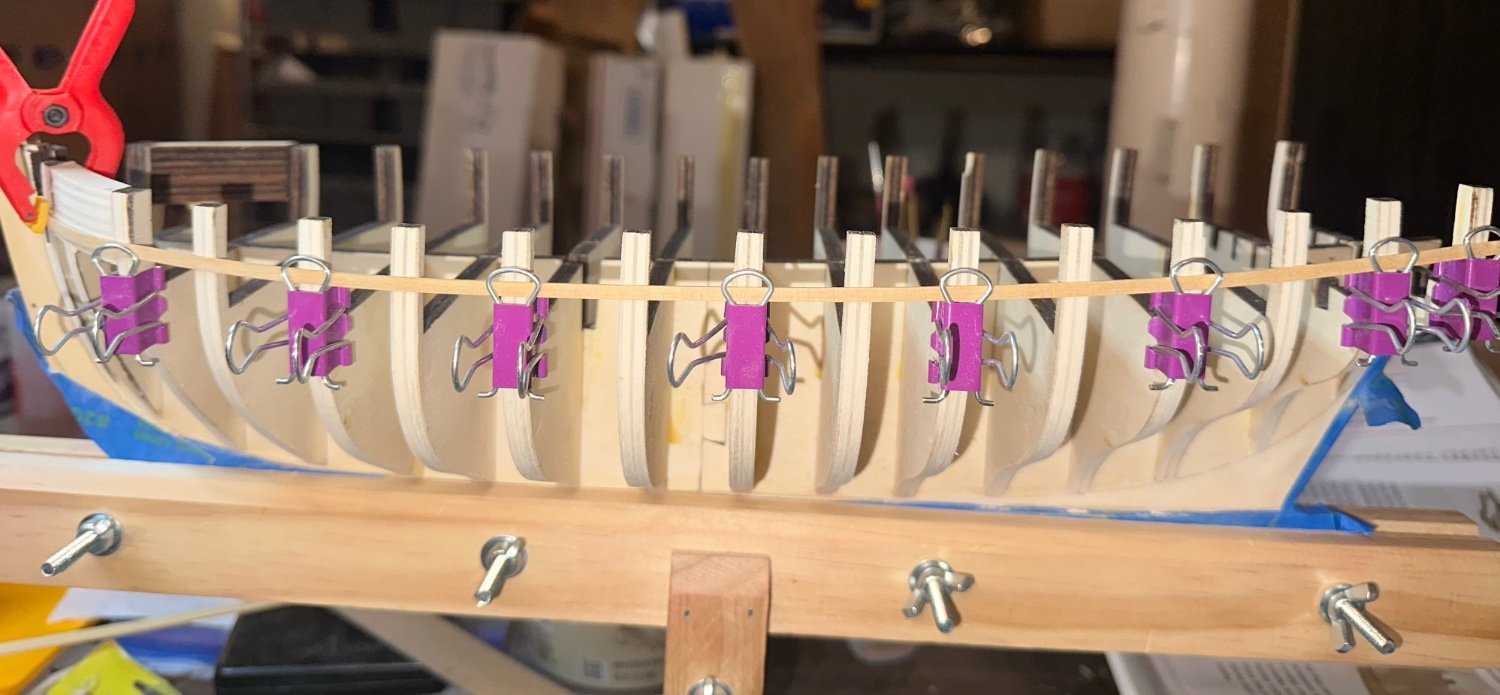
Outer frames are faired and a batten confirms the shape is good.
Best Regards …. Rick
- GrandpaPhil, JpR62, Saburo and 1 other
-
4
-
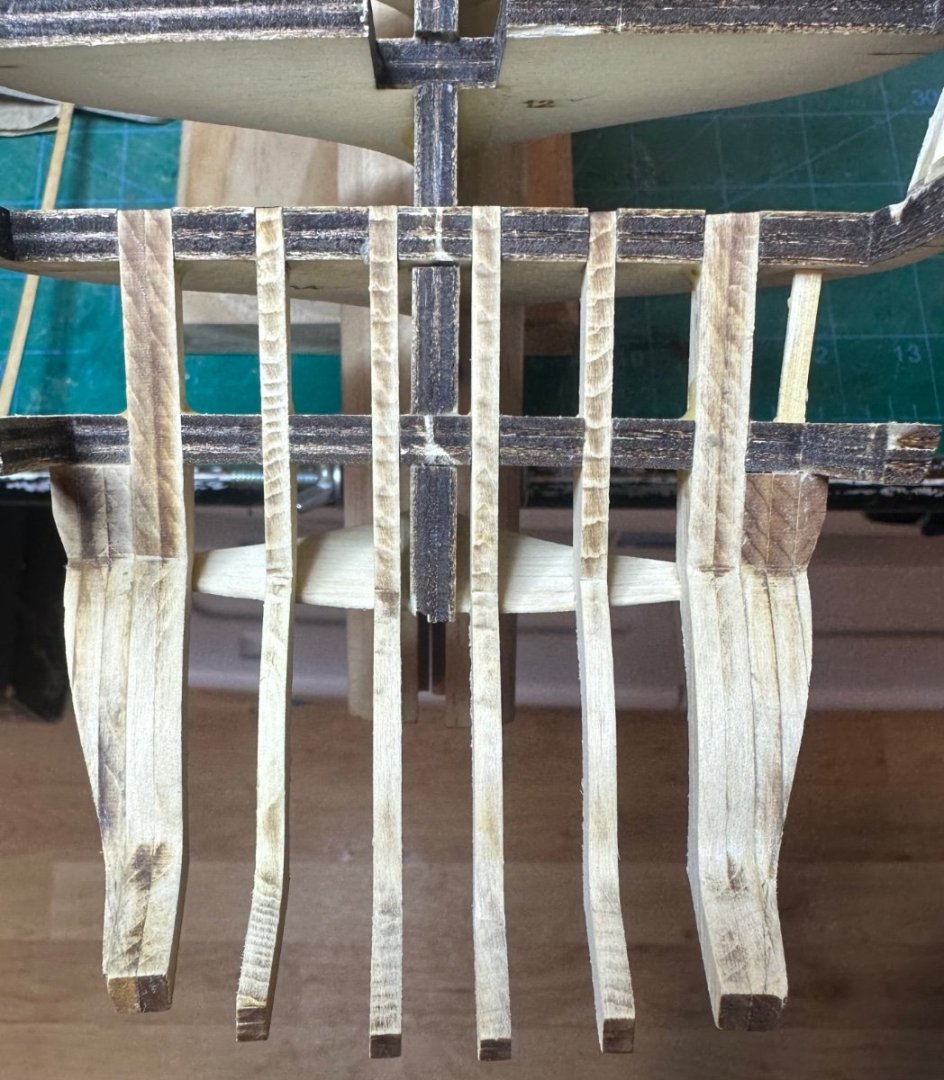
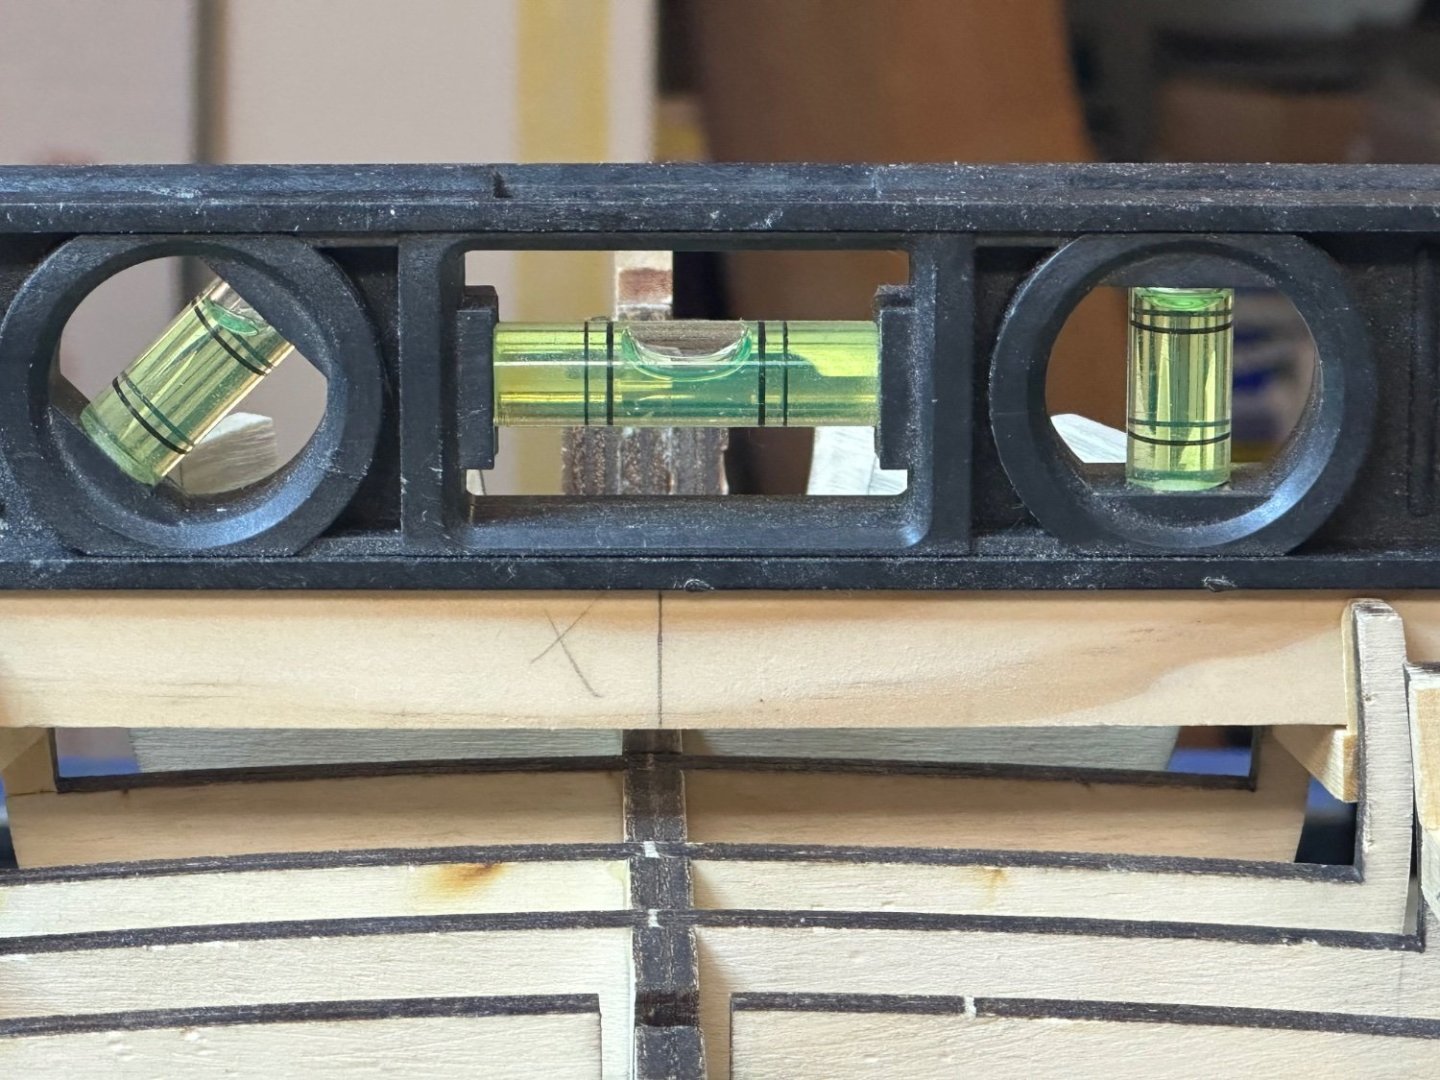
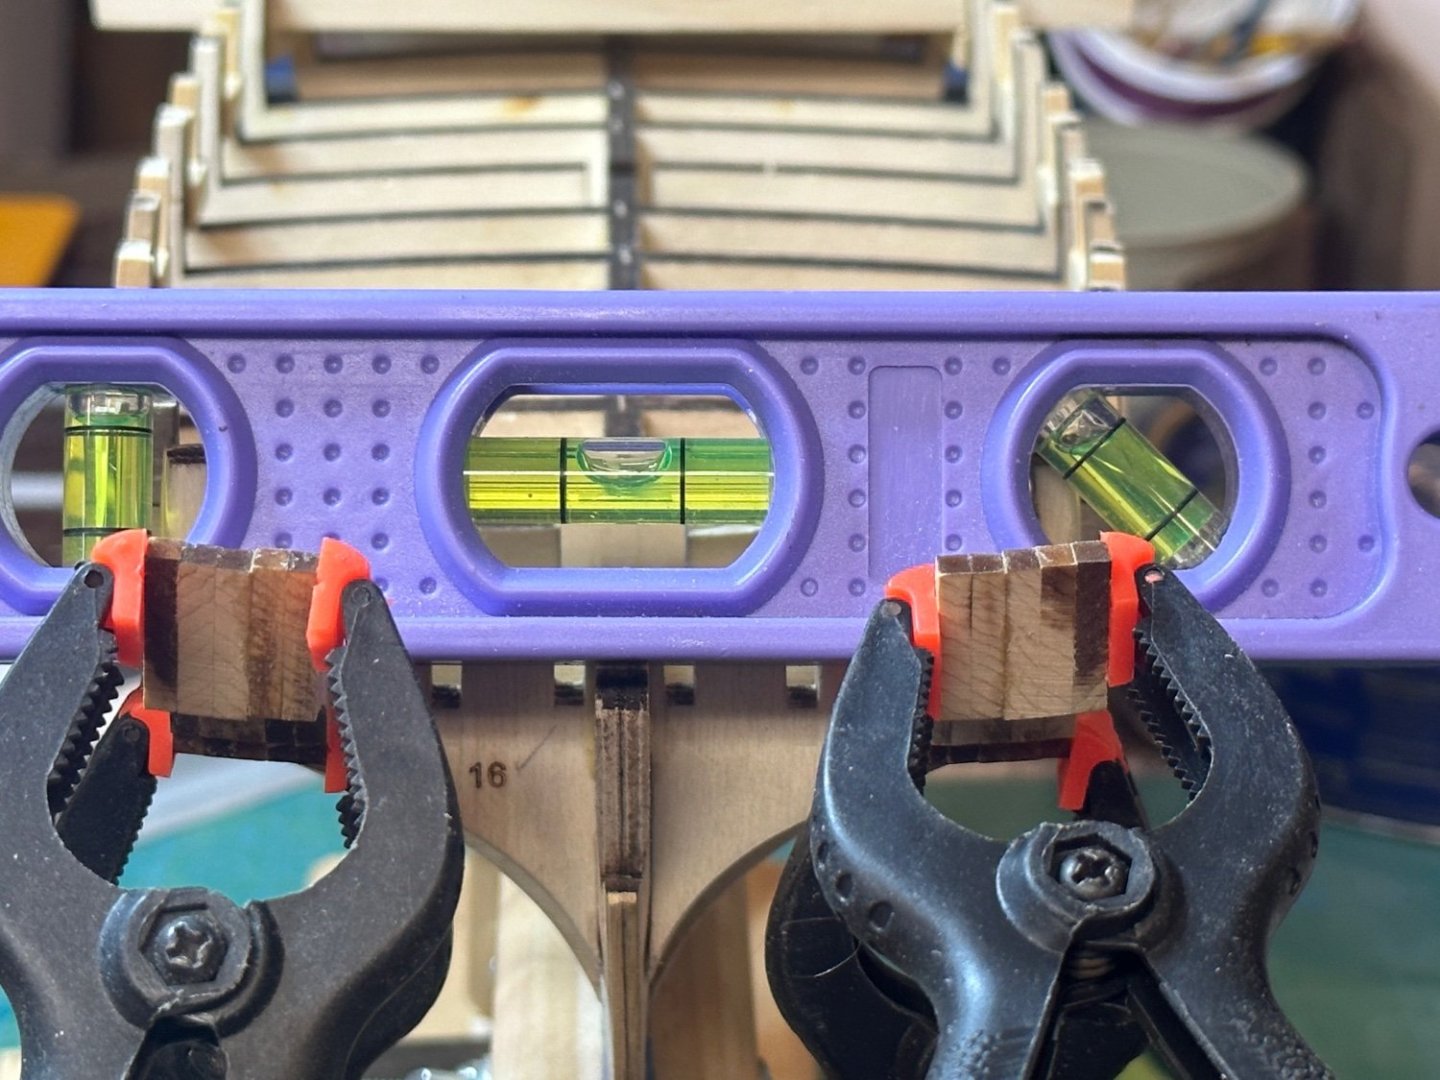
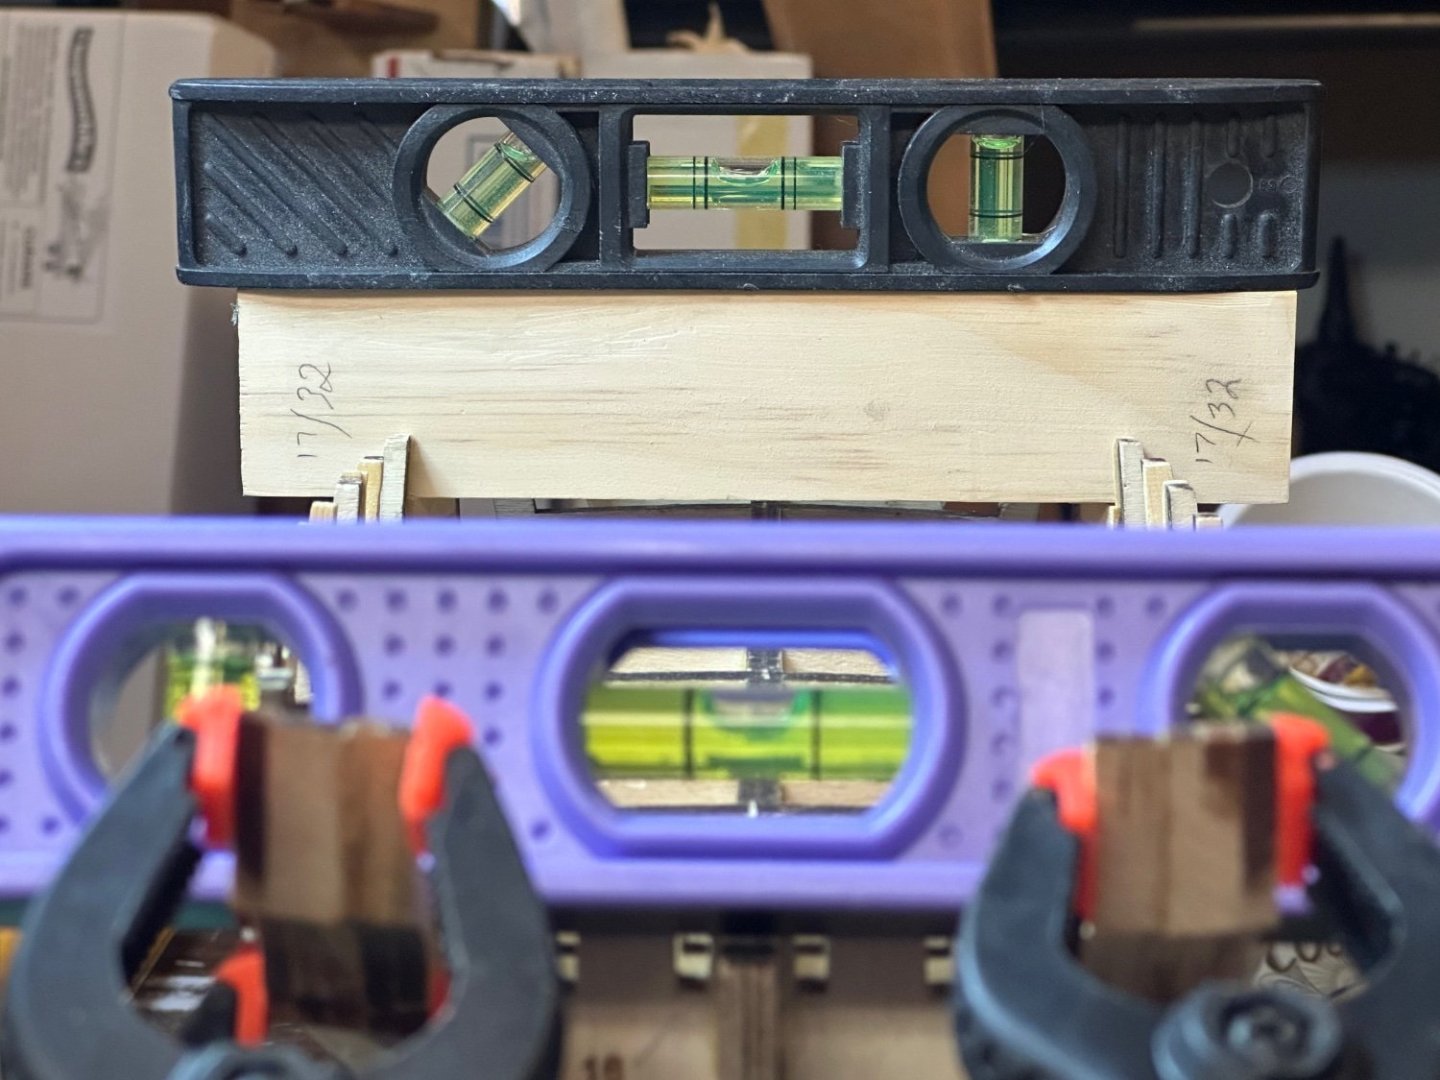
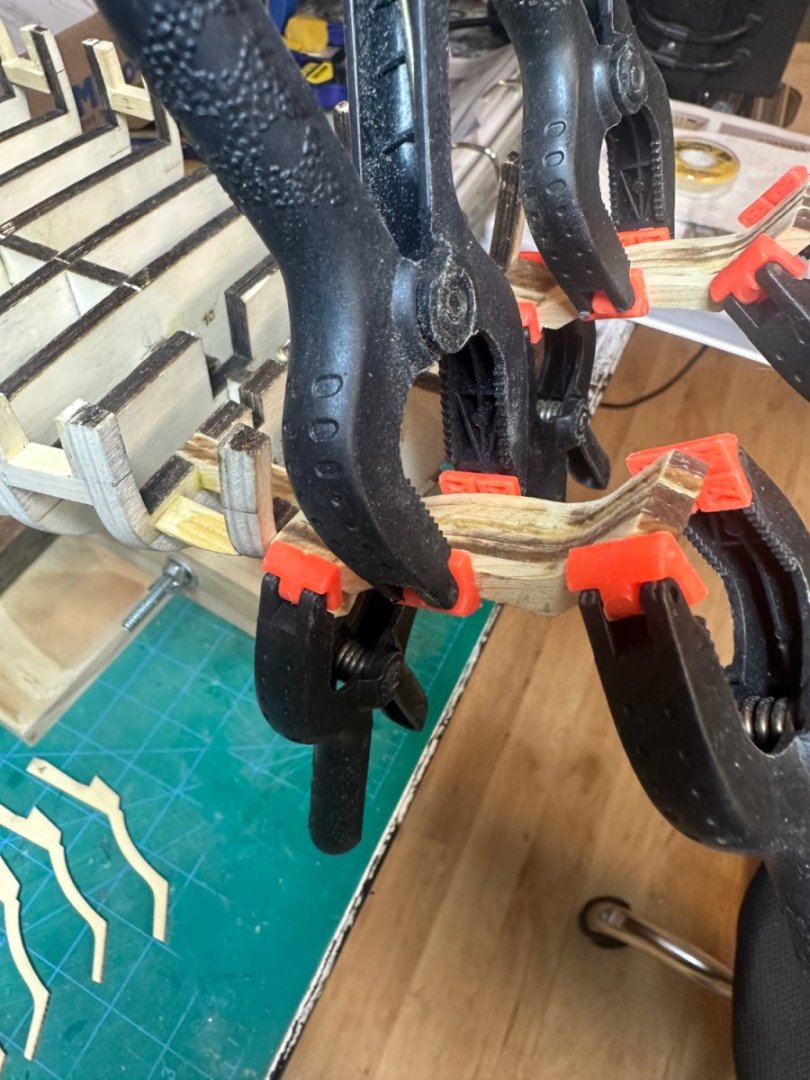
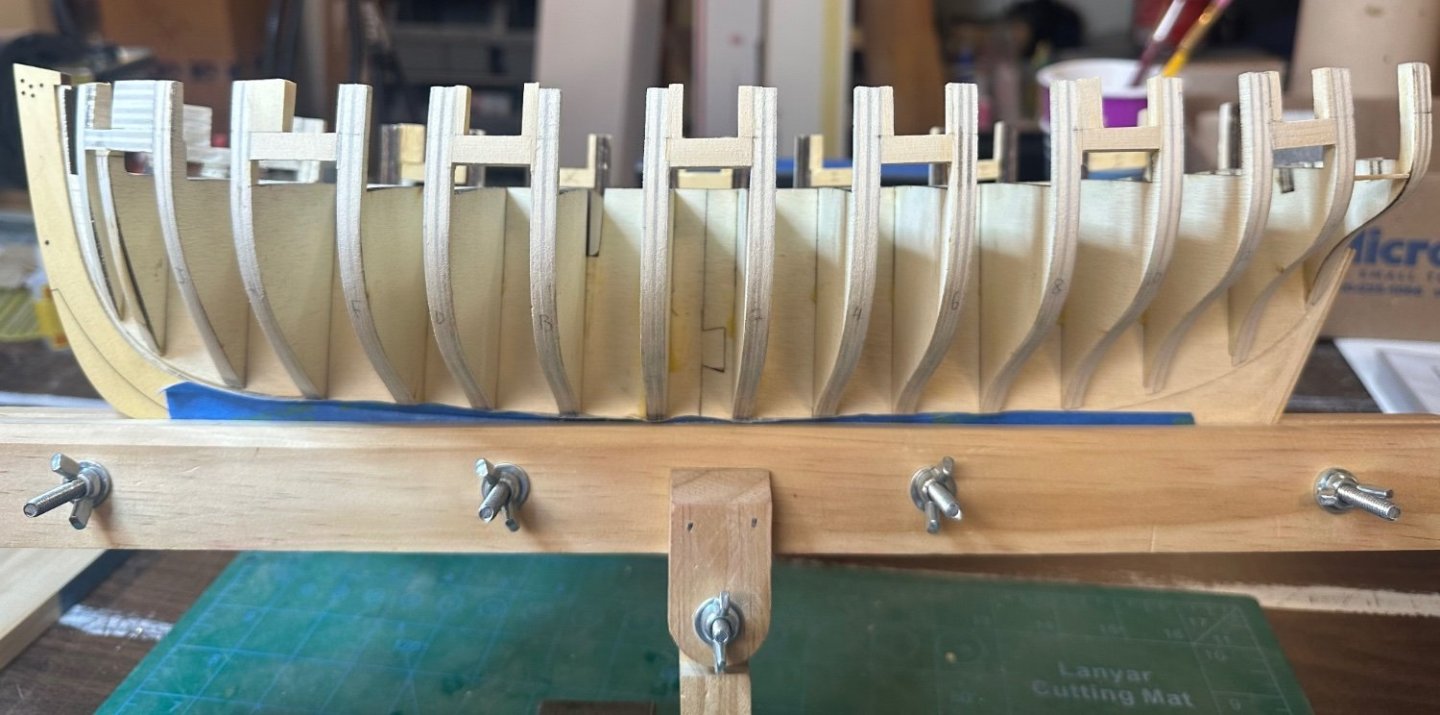
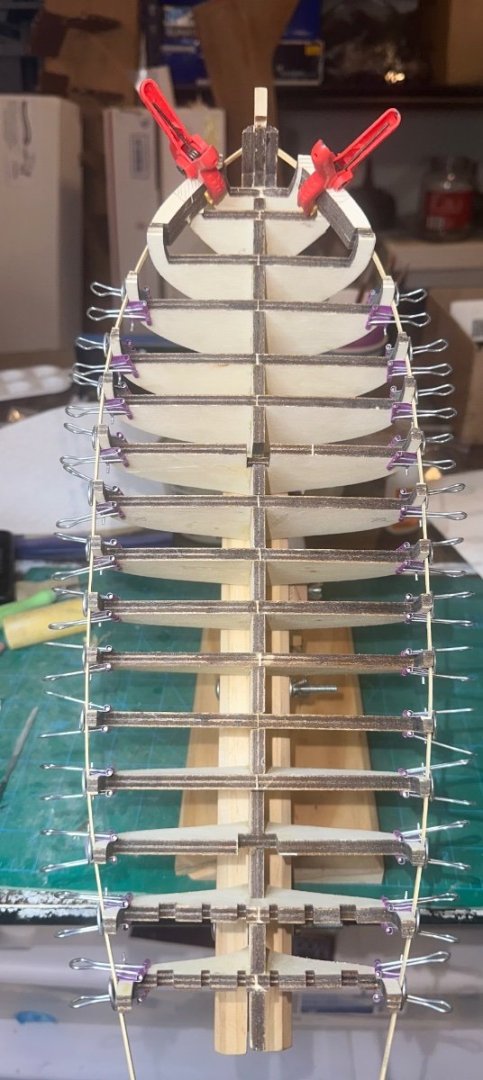
Started framing the stern. Z frames are laminated and glued into place. I used some bubble levels to make sure the frames were level with the bow and no adjustments were needed. Hard to see in the pictures, but all is level. I’ve also made the square tuck piece. Just need to fair the outer frames first and then glue the X & Y frames in place.
Best Regards …. Rick
-
44 minutes ago, Diver said:44 minutes ago, Diver said:
Very impressive. I hope my skill levels will get to this level some day.
Thanks Diver, I think you’re more advanced than I am. This is my second build, first was Chuck’s Medway longboat, this is far more advanced than I thought.
20 minutes ago, CaptnBirdseye said:I have just got mine, but this is going to be a steep learning curve for me, so i hope you don't mind if i follow along? 😬
Oh and i freely admit that if i see any good ideas i will probably steal them
Thanks Captain, you’re more than welcomed to pull up a chair and follow along, I enjoy the company! There’s a lot of Cheerful logs with lots of great ideas to steal, err…..I mean to use. You’re going to love this build, such a pretty vessel with nice lines.
Best Regards …. Rick
- CaptnBirdseye and Ryland Craze
-
1
-
 1
1
-
This marks the completion of chapter 1. Lots of rework required and a lot of measurements taken. Gun ports are a lot more complicated than anticipated. A few I messed up by over sanding (a bad habit of mine), and some were improperly installed. What ever didn’t measure up was removed and replaced. The sills have a nice flow and the battens sit snug on the bulkheads from stem to stern, no humps or bumps. I thinned the bulwarks to 1/8” before cutting the forward chase posts. All of this work is a new frontier for me and I’ve really enjoyed it! It took 30 days to complete this chapter, just some time here and there, no hurry needed here!
Thanks to everyone for the likes and to those that have offered advise, much appreciated!
Now onto another first, the stern.
Best Regards …. Rick

- Ryland Craze, Knocklouder, Saburo and 6 others
-
9
-
Very nice! Hope mine is half as good as yours!
Best Regards …. Rick
- Ryland Craze and JpR62
-
2
-
Chuck, Thanks for checking in and looking over my shoulder, much appreciated! I did find myself picking up the pace, so I’ve backed off. Thank you for the reminder. Having lots of fun, it’s so very different than the longboat.
Best Regards …. Rick
- Saburo and Ryland Craze
-
2
-
Thanks Glenn for the sage advice. Gun ports is something I’ve never done before, and it’s quite a challenge. I’ve been looking at build logs, including yours, for ways to get them ship shape. I’m having a lot of fun with this build and it’s teaching me a lot for when I get to my Winnie. One thing I really like about Cheerful, is the amount of bulkheads, I think it made fairing easier to get a nice flow.
Also, just for giggles I put the stern parts on the hull to see what’s it going to entail. I can already see that there’s a lot of room to mess things up. Again, this is a first for me.
Best Regards …. Rick
- Saburo, BobG and Ryland Craze
-
3
-
-
Ok, who ever thought that gun ports on model ships was a good idea should be hanged from a yardarm! I’m a pretty good modeler, but gun ports have brought me to my knees. They’re a whole lot more work than I anticipated. I had to tear out some sills (only 2) and several port uprights. Lots of lessons learned! Stay tuned!
Best Regards …. Rick
-
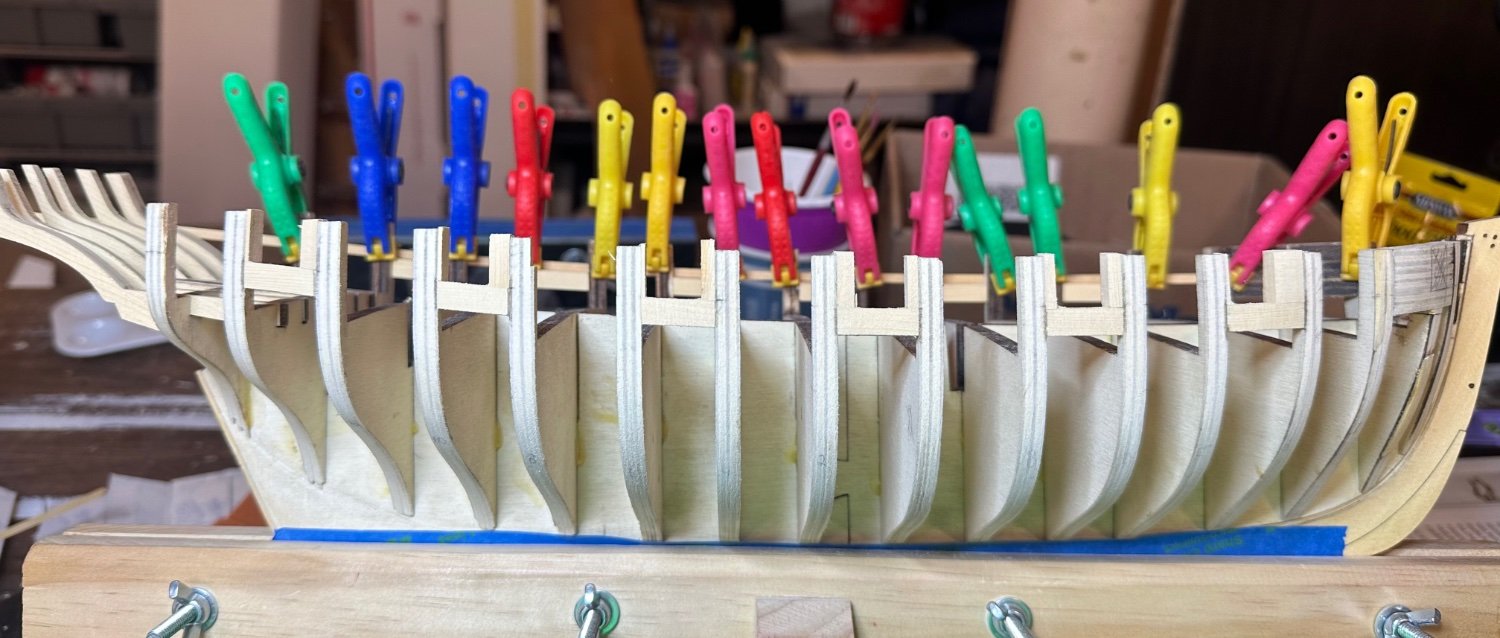
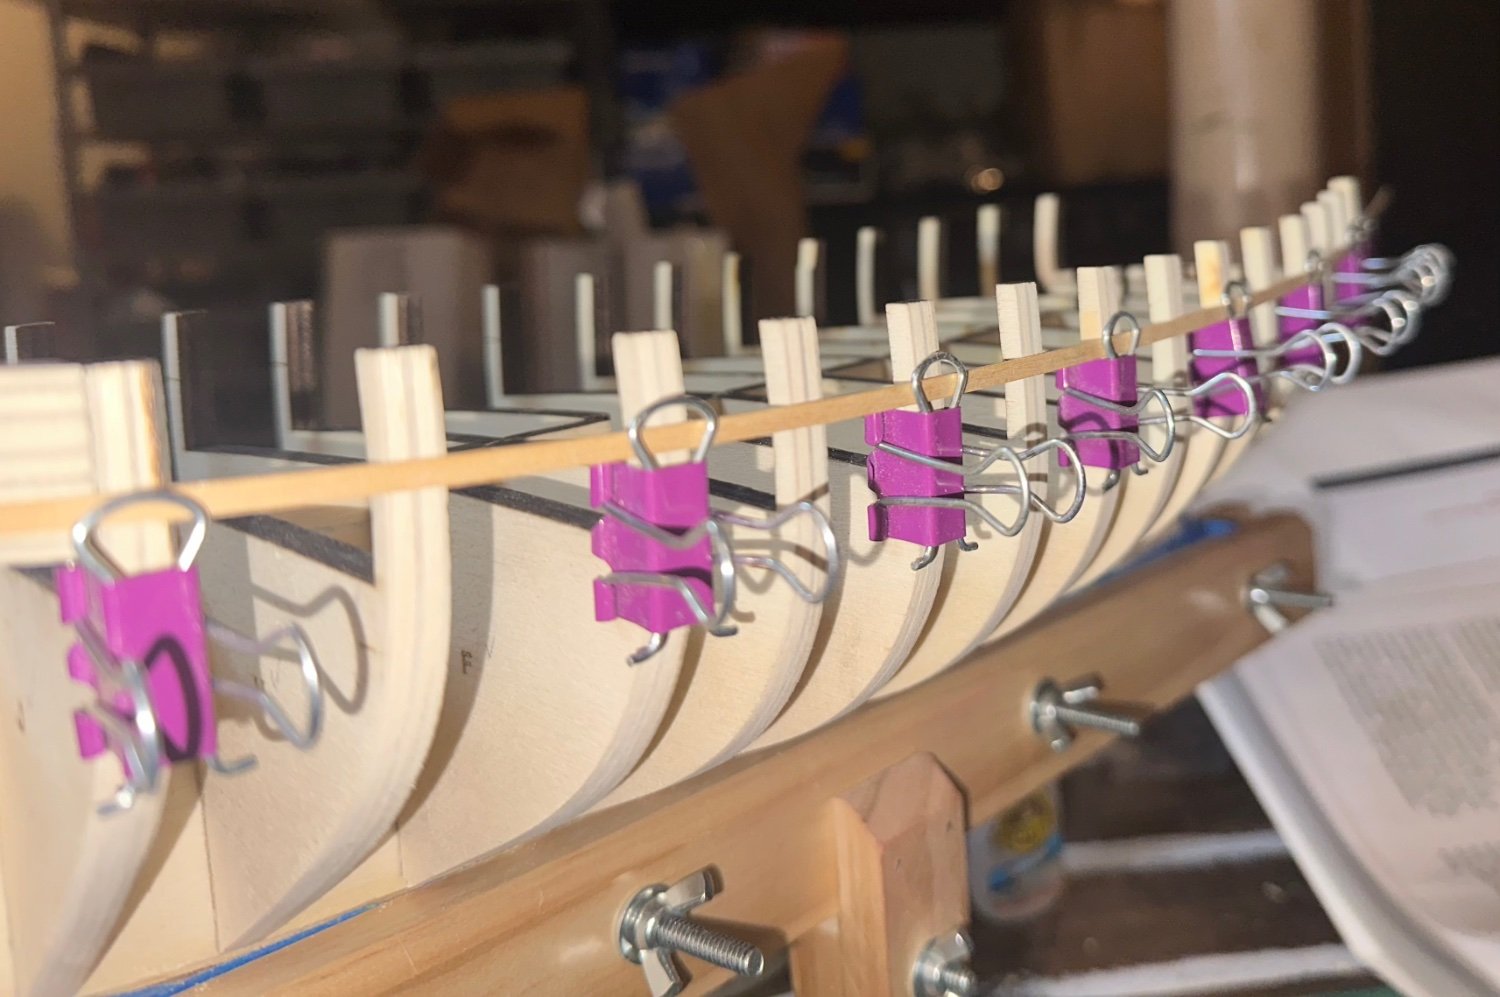
Slow progress, I completed the starboard ports and then checked the alignment with a batten, all looked good. Then I thought for the port side why not use the batten to align the sills. So I placed the batten just touching marks. I made the sills and alignment was quick and easy. Now to add the port uprights.
Best Regards …. Rick


- JpR62, Saburo, Prowler901 and 6 others
-
9
-
It’s the cat’s meow!
Best Regards …. Rick
-
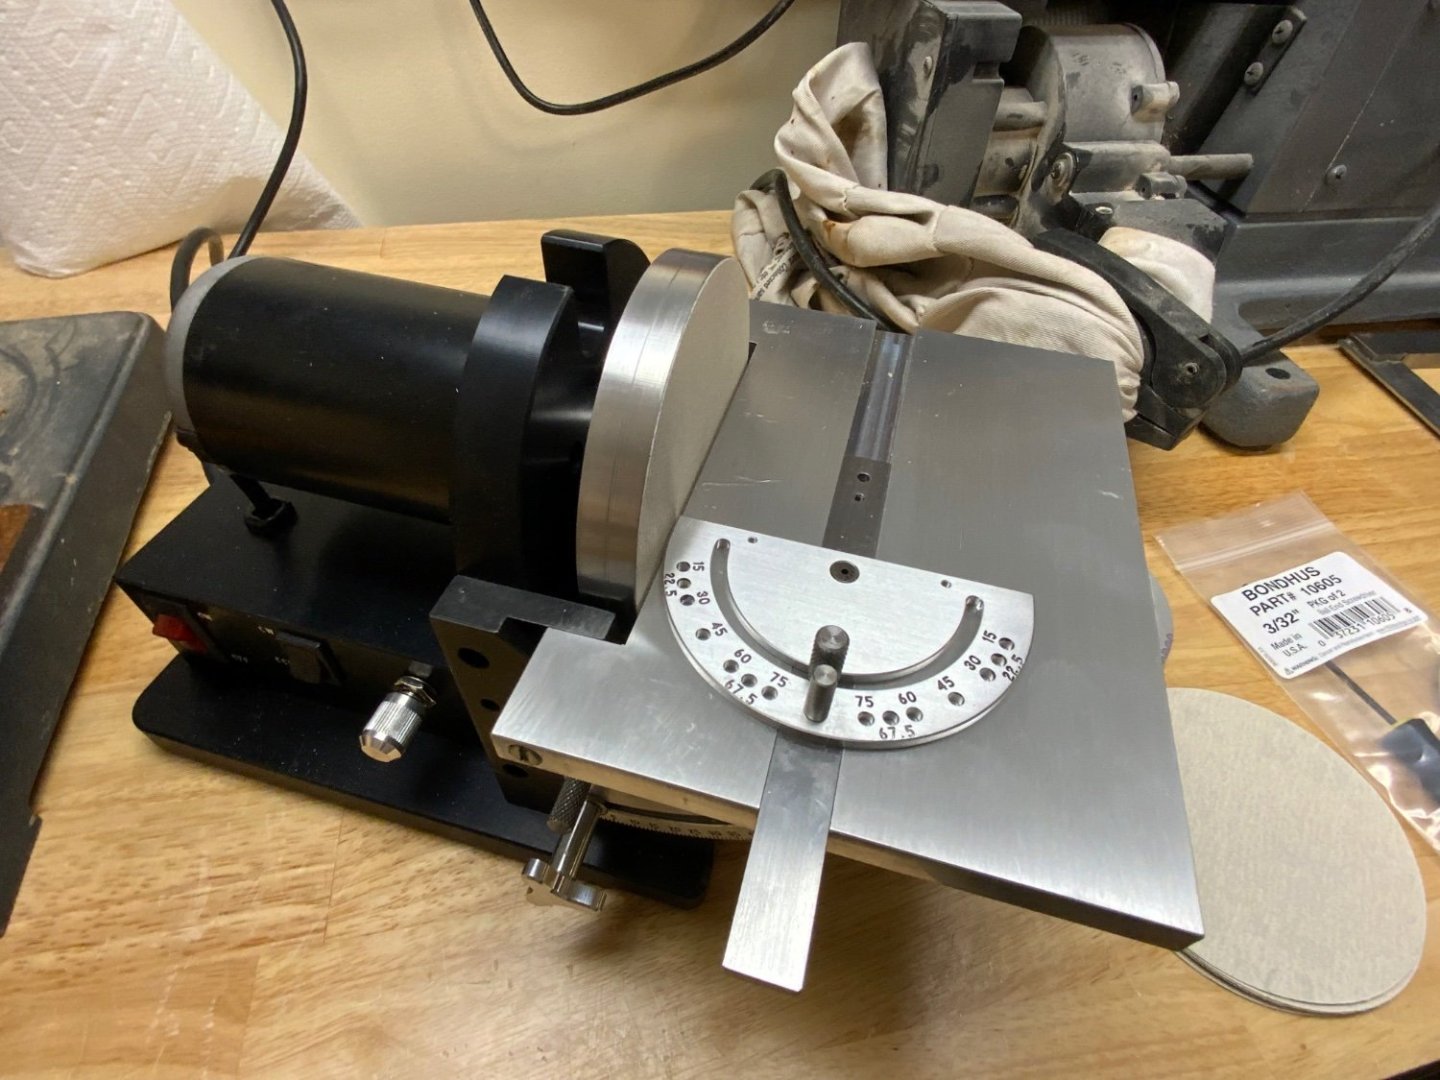
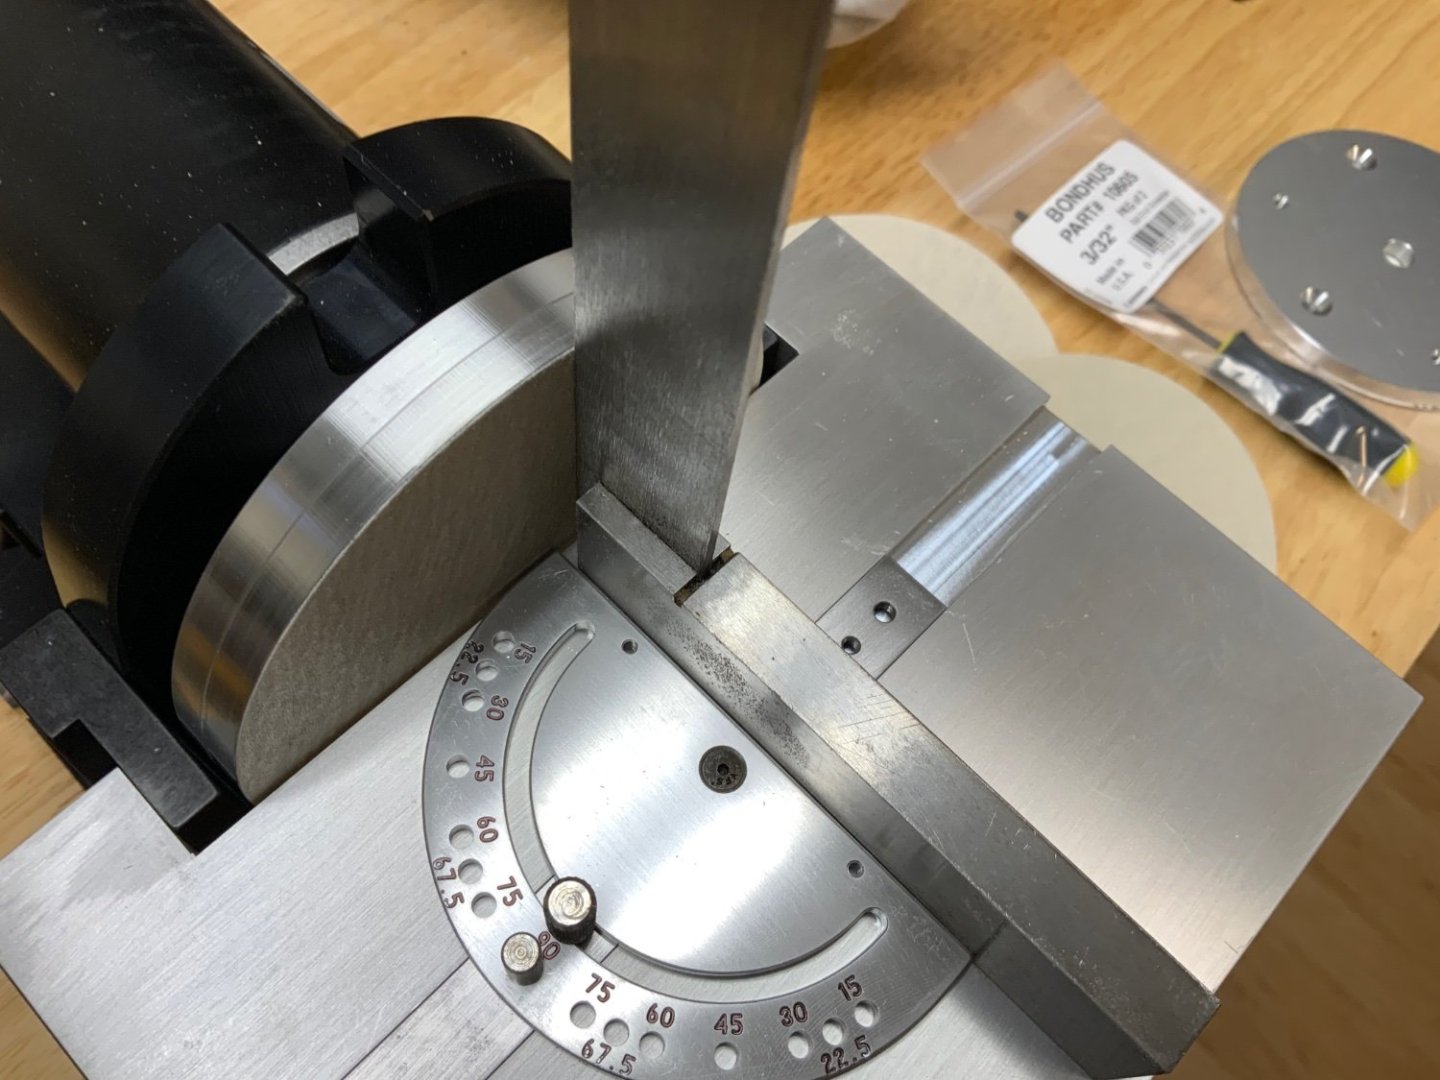
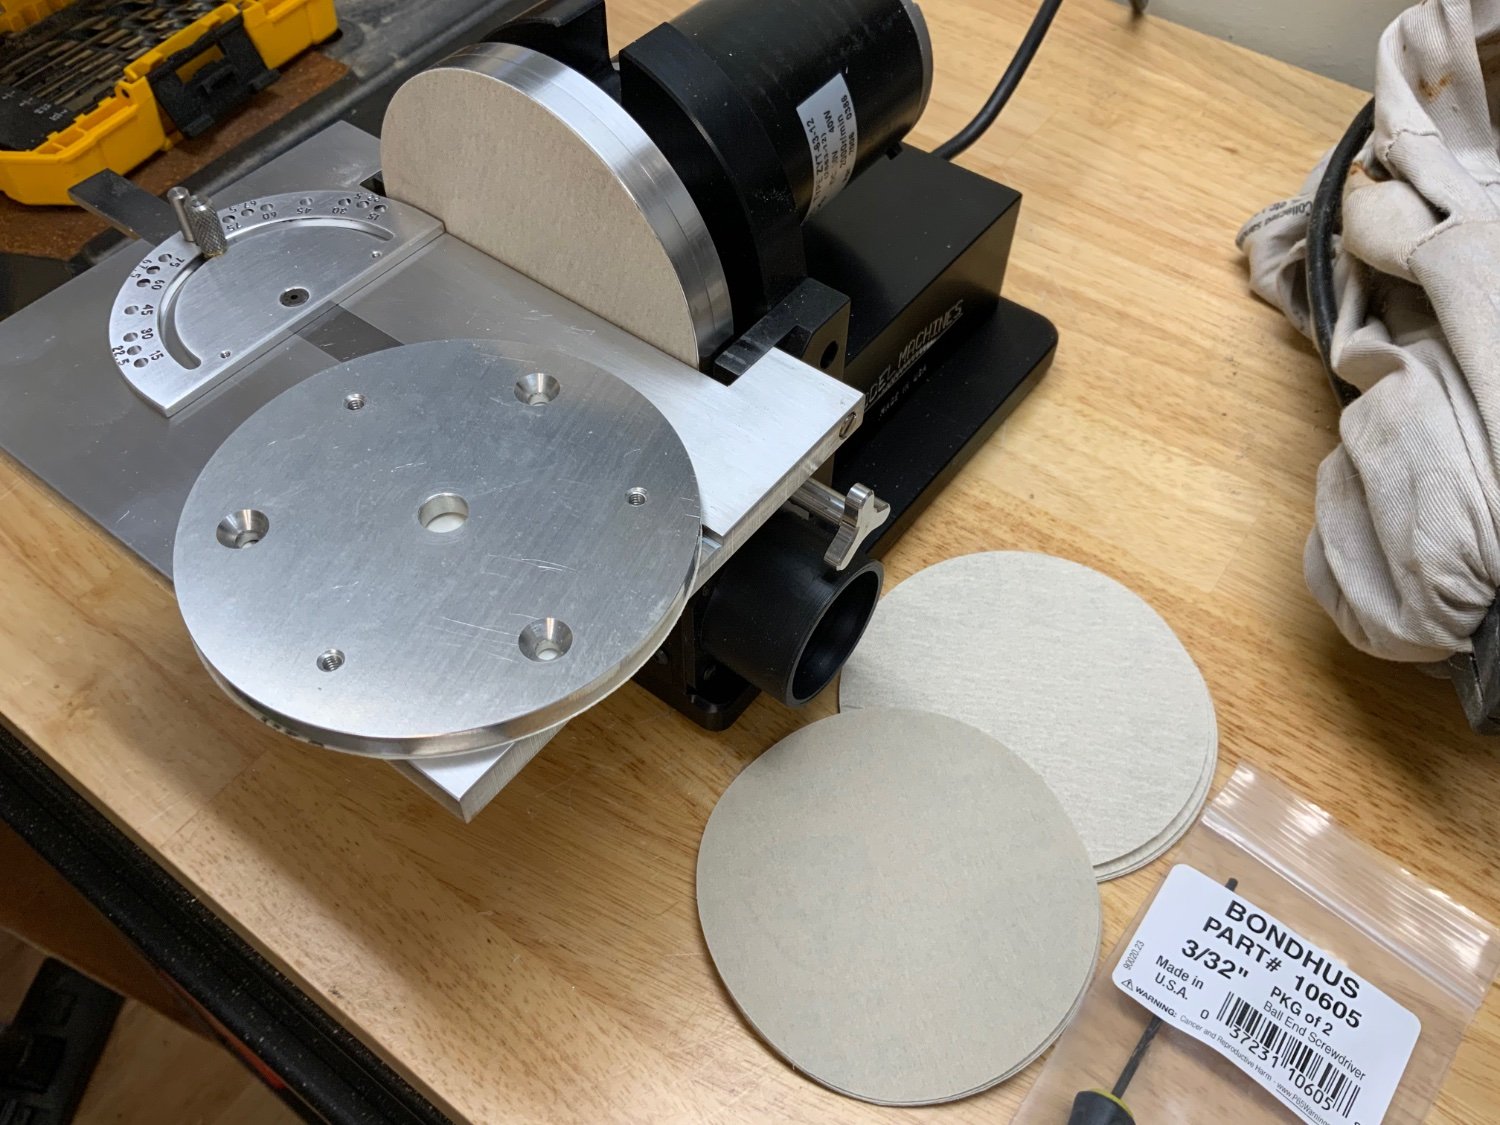
New toy arrived today, Byrnes 4” disc sander with an extra disc. This will make life a whole lot easier! No more using the monster disc sander that’ll sand a finger to the bone in less than a second. The accuracy is amazing! Now on the the sills!
Best Regards …. Rick

- GrandpaPhil, CiscoH, Ryland Craze and 7 others
-
9
-
 1
1
-
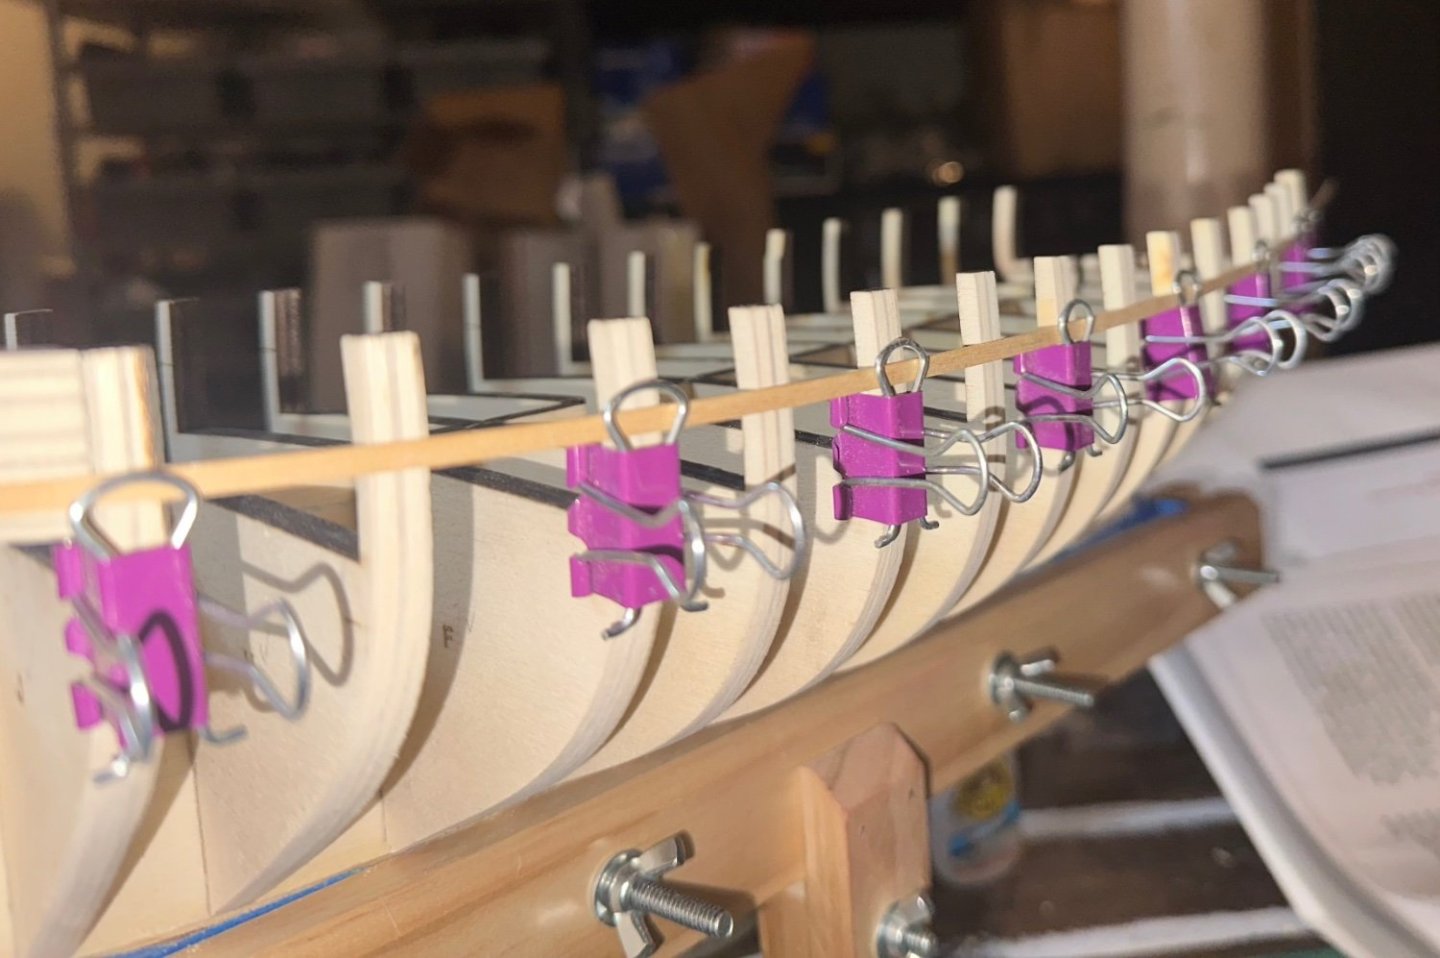
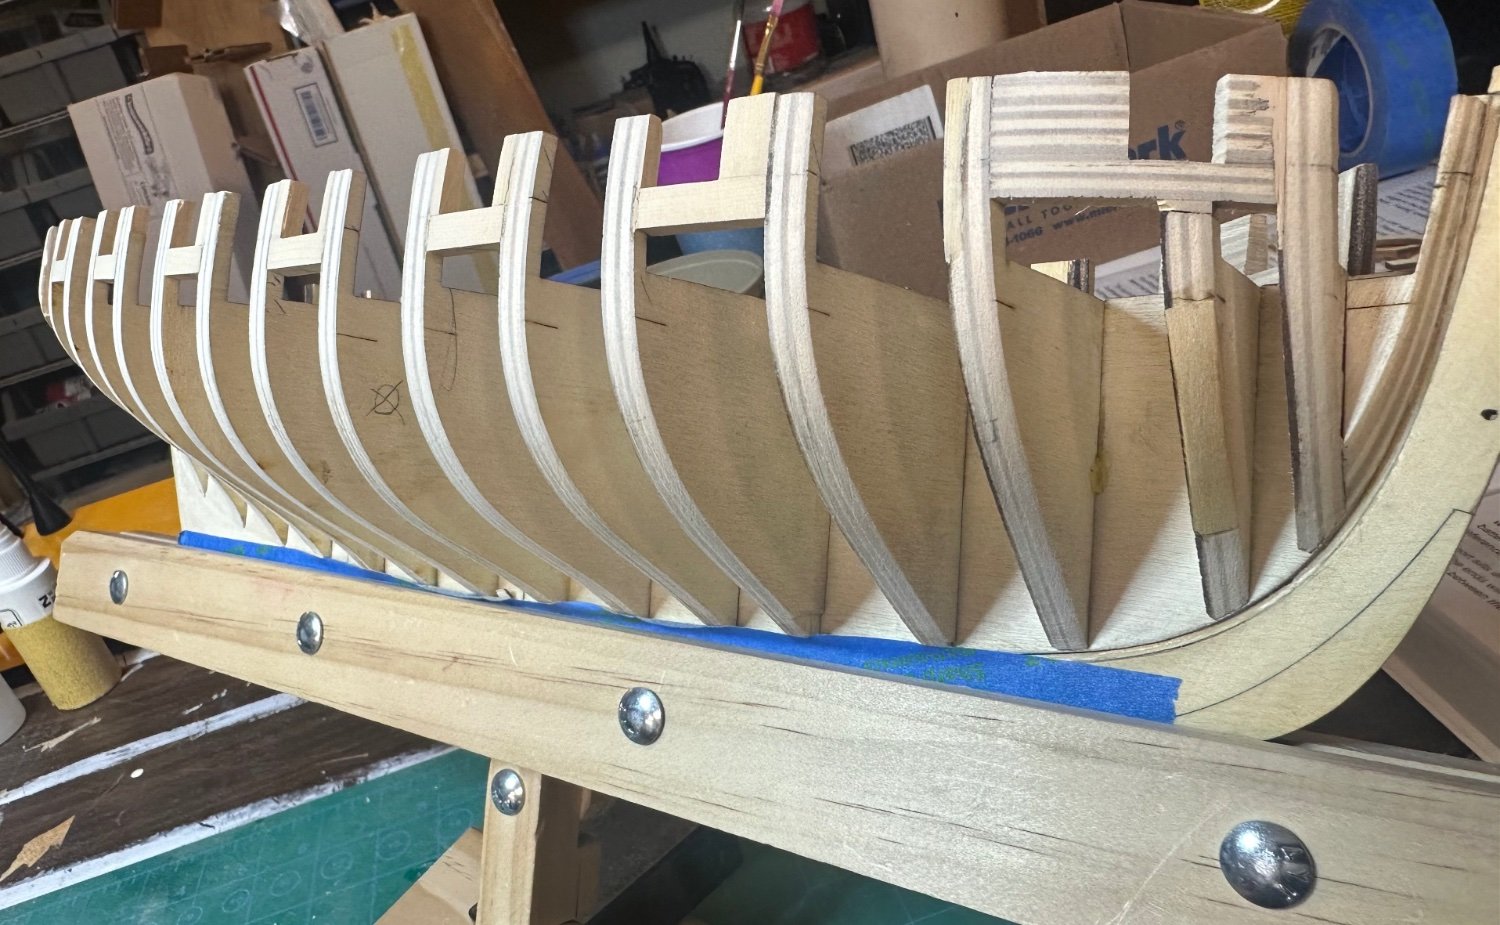
Looking good and I think I’m ready to start the sills. The batten has a nice flow from stem to stern. What I found remarkable was that each laser mark was .470” from the top of each bulkhead extension. Also, when fairing the starboard side, I made the exact same mistake on bulkhead L and it too needed a shim. At least I’m consistent.
I have a Byrnes 4” disk sander on order that should be here in a day or so. I’m going to wait on doing the sills until the sander arrives so I can give it a test drive. Here’s a few pictures.
Best Regards …. Rick


- Paul Le Wol, CiscoH, Diver and 11 others
-
14
-
2 hours ago, glbarlow said:
Don’t just pin the batten, slide it up and down, top to bottom with your fingers at multiple sections, you can feel the imperfections if there are any, it should feel smooth and flow evenly.
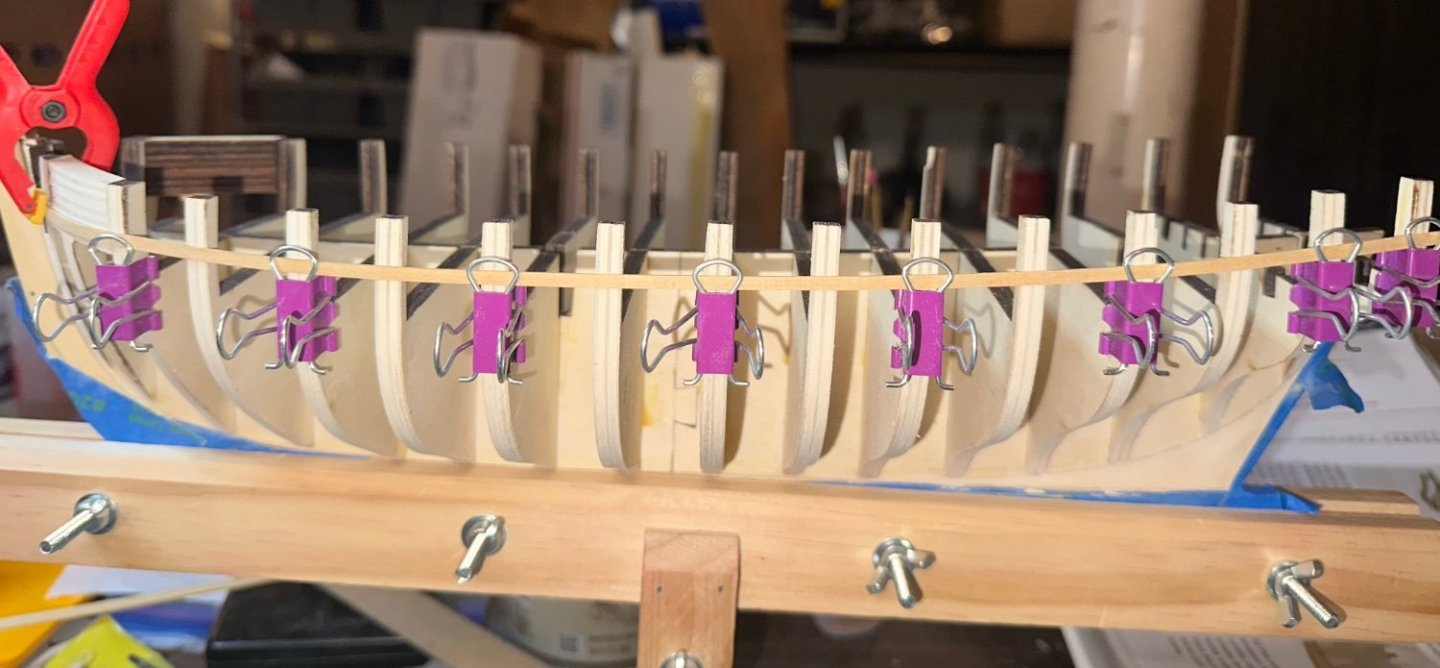
Glenn, that’s exactly what I’m doing. The batten runs very nicely across all bulkheads the length of the hull. I’m actually very impressed that I don’t have any bumps or dips. I’m sure that some tweaking will be needed when I start planking.
Thanks for checking in and having my back!
Best Regards …. Rick
- glbarlow, CaptnBirdseye, BobG and 1 other
-
4
-
Here’s the batten on the lower marks, looks pretty good. Please ignore what looks like to be a flat spot on bulkhead L, it’s the clamp pushing on the batten behind the bulkhead.
Best Regards …. Rick
-
1 hour ago, Paul Le Wol said:
Hi Rick, in the first photo where you are using the t-pin, the batten seems to cut straight across the space between the bow filler and bulkhead M. Maybe you can try putting some bend in the end of the batten so that it will enter the rabbet at the stem at a better angle. Then see how it sits moving aft. Looking good!
Paul, thank you for the look! As you can see from the pictures above, a lot has changed. Thoughts?
Best Regards …. Rick
-
On 3/18/2023 at 11:15 PM, glbarlow said:
Sometimes, even often shims are a better fix than more sanding, the battens don’t lie. Keep in mind the bow is the first three to four bulkheads, do them as a unit. Your bulkhead B problem could be created two bulkheads away. Fair slowly, be one with the wood. It will show you the way.
Glenn, thank you for the Zen! I added a shim to bulkhead “L” as there was a flat spot. Good call!
On 3/19/2023 at 12:55 AM, BobG said:I've done the same thing in same areas that you are showing in your photos. I find the forward 3 or so bulkheads to be the most difficult to get right even when I'm checking often with a batten. I seem to always end up with a gap as well and I'm not sure what I'm doing wrong.
Bob, being this is my first effort at this type of hull I have a lot of angst. More sanding at the bow was needed (which I knew), more light sanding was needed along the entire hull was needed and that went a long way.
The batten flow looks good but not perfect. Any suggestions!
Best Regards …. Rick


- Prowler901, BobG, Ryland Craze and 5 others
-
8


Cutter Cheerful 1806 by Freebird - Syren Ship Model Company - 1/48
in - Build logs for subjects built 1801 - 1850
Posted · Edited by Freebird
Well, UPS just dropped off a fairly large and heavy box. I forgot that my birthday is a week away and my Admiral surprised me with a fantastic and unexpected gift, a Byrnes table saw and some accessories! Holy sawdust Batman! She knows that I’ve really gotten into ship modeling and how much I’m enjoying building. She also knows the value of quality tools. She’s a keeper!
Best Regards …. Rick