


Freebird
-
Posts
275 -
Joined
-
Last visited
Content Type
Profiles
Forums
Gallery
Events
Posts posted by Freebird
-
-
Grant, thank you for the kind comment.
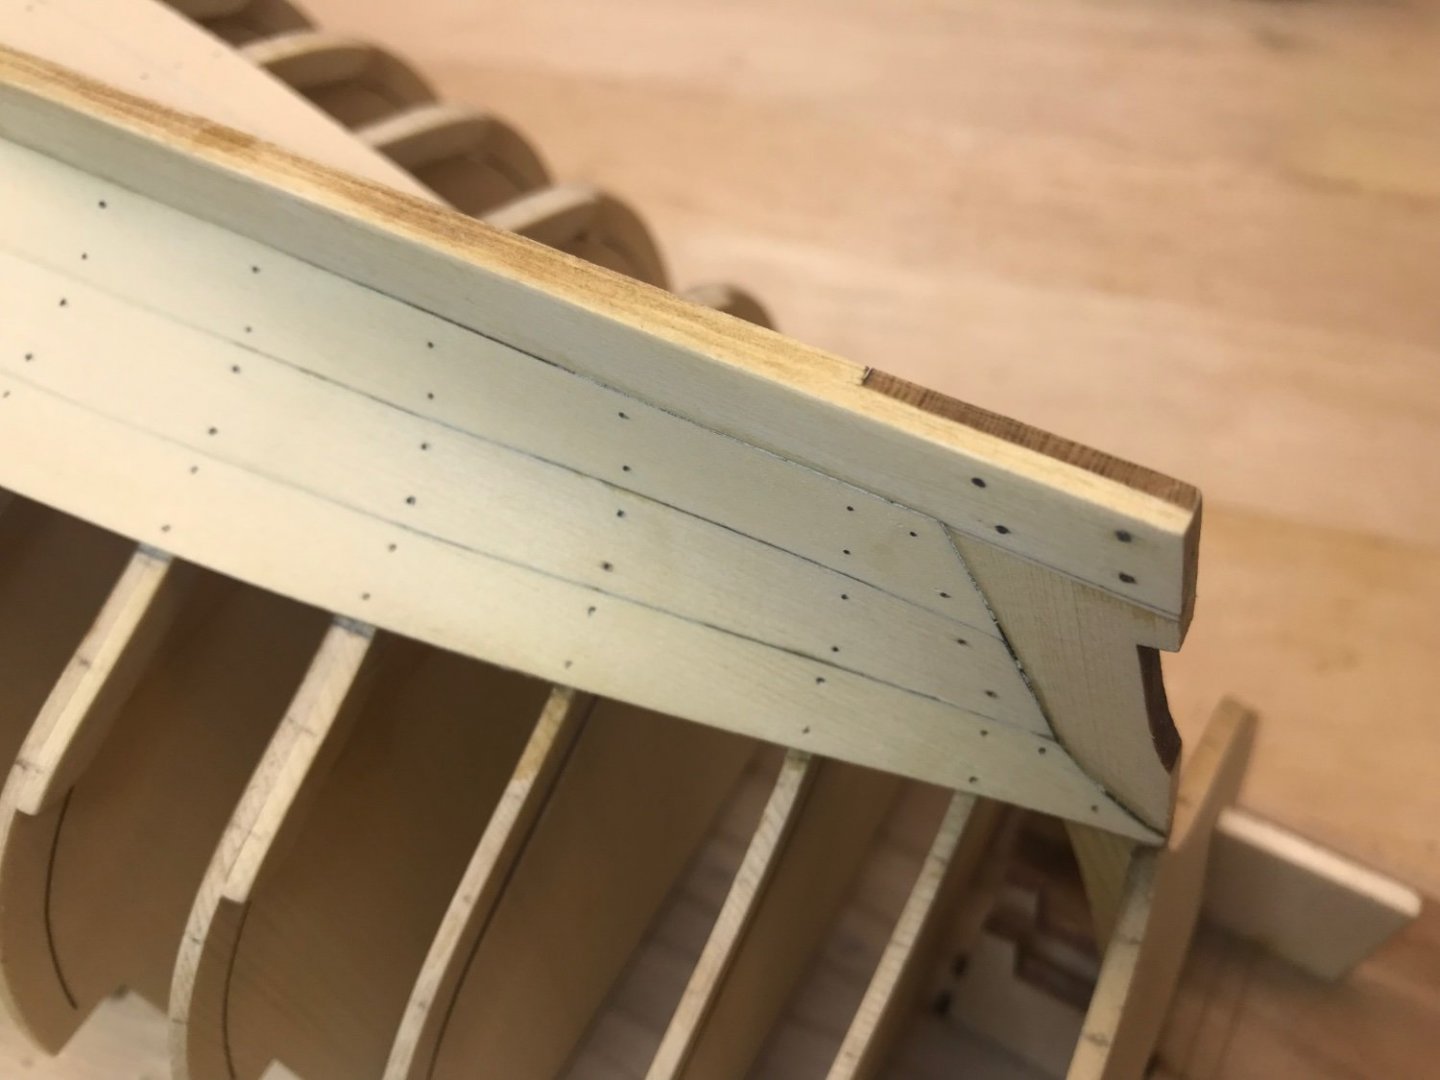
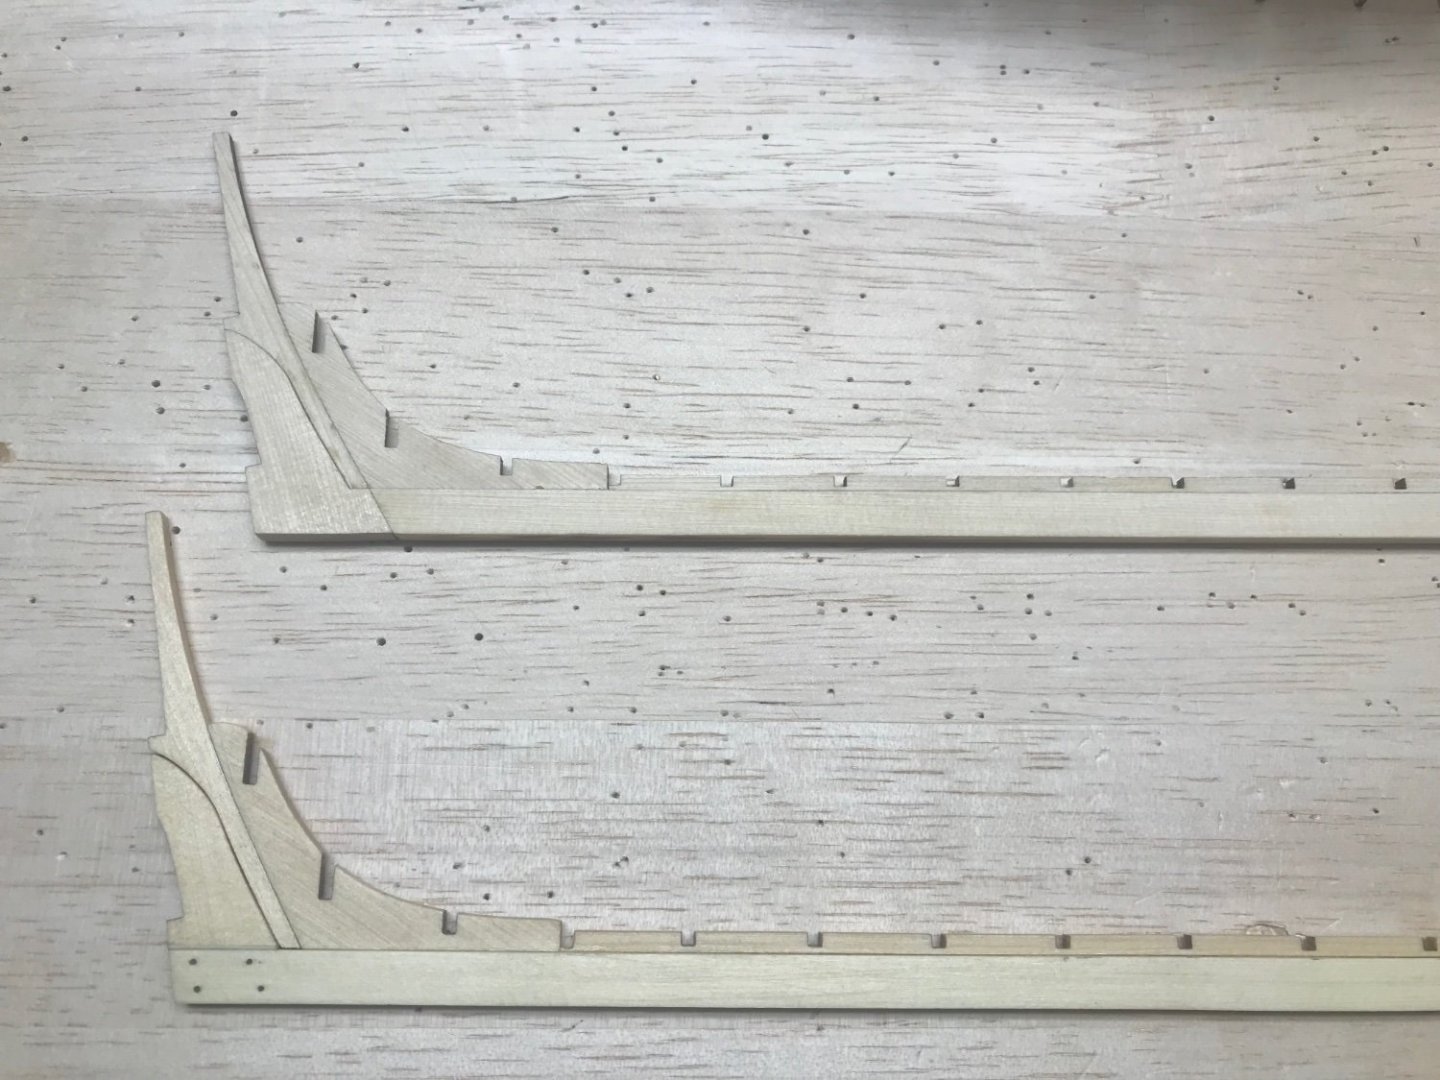
Thats exactly what I did. However, when I made the replacement, I placed it in the open blank and not knowing it, the blank expanded (I didn’t notice this), and my replacement part was a perfect fit, or so I thought. So I went about fitting the replacement plank on the hull and it fit very well. Next I fit the aft plank to finish the strake, and when I fit it, at the butt joint there was quite a mismatch in the width of the planks. I really didn’t give it much thought, so I finished fitting it and glued it in place to finish the strake. After I finish putting a strake down, I always check the symmetry from the bow and stern. Looking at the stern all was well. The bow was a different story. The port strake was about 1/16 higher (wider) and I’m thinking what the heck happened as all the previous strakes were even on both sides. I noticed my tick mark was covered, hmmmm….. So a grabbed a compass and made some measurements and found the replacement plank to be about 1/16 too wide it’s entire length. DOH! That’s when I figured out the pattern expanded when I check fit the replaced plank. Thinking back, I do remember that the plank kinda “snapped” into the blank. Not wanting to rip the plank off unless absolutely necessary, I slept on the problem. The. Next morning looking at the problem with a cup of coffee, I decided to trim off the excess width. I didn’t have anything to lose, right? If I messed it up the plank would come off. Anywho, I used some transparent tape and traced the plank from the starboard side and transferred the pattern to the port fat plank. Using a new #11 blade and very light, smooth strokes is was able trim the excess off. A light sanding and I had the plank trimmed to the starboard pattern. Job done. Symmetry between port and starboard looked good and measured perfectly. Sorry, but I didn’t take any pictures of the repair process, but I’ll post some pictures of the end results.
Best Regards …. Rick
- Ryland Craze, gjdale and Diver
-
 3
3
-
Thank you Chuck!
I’ve been really enjoying this build. Never thought I’d be able to actually build something like this, as I’ve always admired from afar and thought no way. The design of the kit is just amazing and is going to be a great stepping stone to my Cheerful build. Thanks Chuck!
I will be posting some progress pictures shortly and asking for some advise as I’ve discovered a problem.
Best Regards …. Rick
- Ryland Craze and Diver
-
2
-
I’m back! Cancer surgery went very well and I’m able to return to the ship yard.
Before I stopped, I broke the tip off of plank 9 at the bow. I’ve read somewhere that Chuck had posted a pdf of the spiled planks. I’ve looked around and can’t find it. Anybody have a link. TIA!
Best Regards …. Rick
-
Thank you Grant.
Best Regards …. Rick
-
Ryland, thank you for the compliment and to all the likes!
Floyd, yup, one at a time!
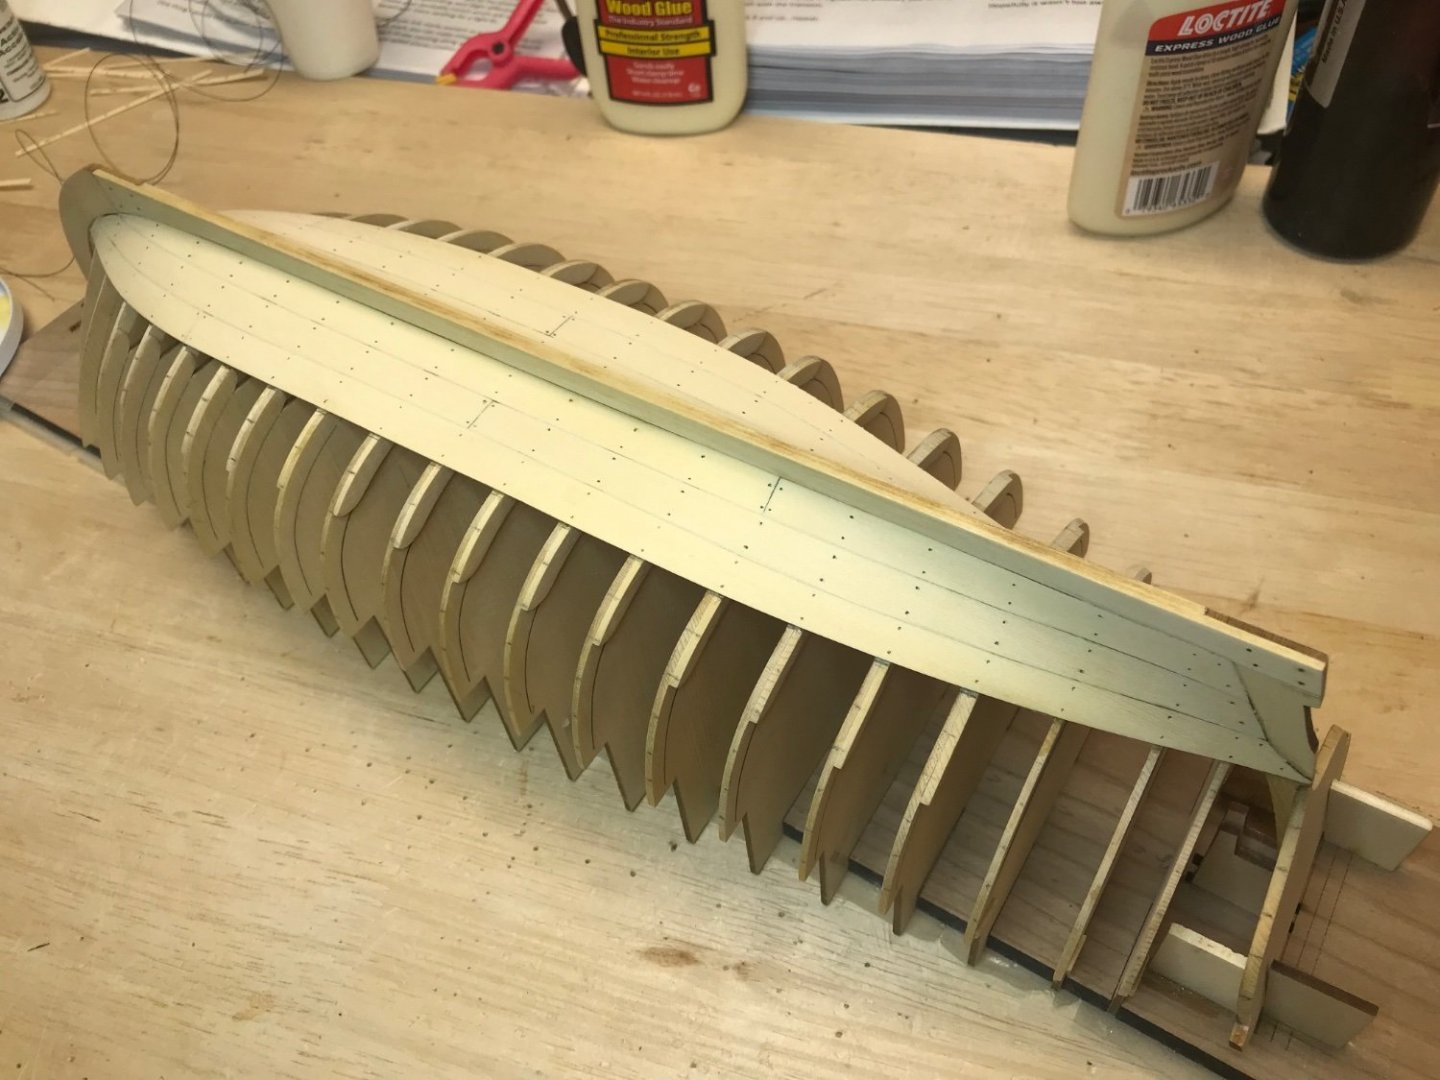
Making progress, have completed 3 strakes on each side and they’ve been given a light sanding. Heavier sanding is still needed at the stem and stern. I’m finding these areas the most difficult so far. I’ve been taking a long time to fit each strake lining them up to minimize sanding. Chuck’s design is superior to anything I’ve ever built. Lots of work and fitting and refitting, but like most say, it’s not a race. To be honest, I’m surprising myself with this build.
Don’t know if I’ll get anything done tomorrow, have to prep for cancer surgery on Friday. Probably will be at least a couple of weeks before returning to the shipyard. Gives me something to look forward to when I’m released.
Best Regards …. Rick


-
How cool! Another Medway on the blocks! Will be watching closely!
Best Regards …. Rick
-
-
Thank you Chuck! This project has been a pleasure! Thanks to All for the likes!
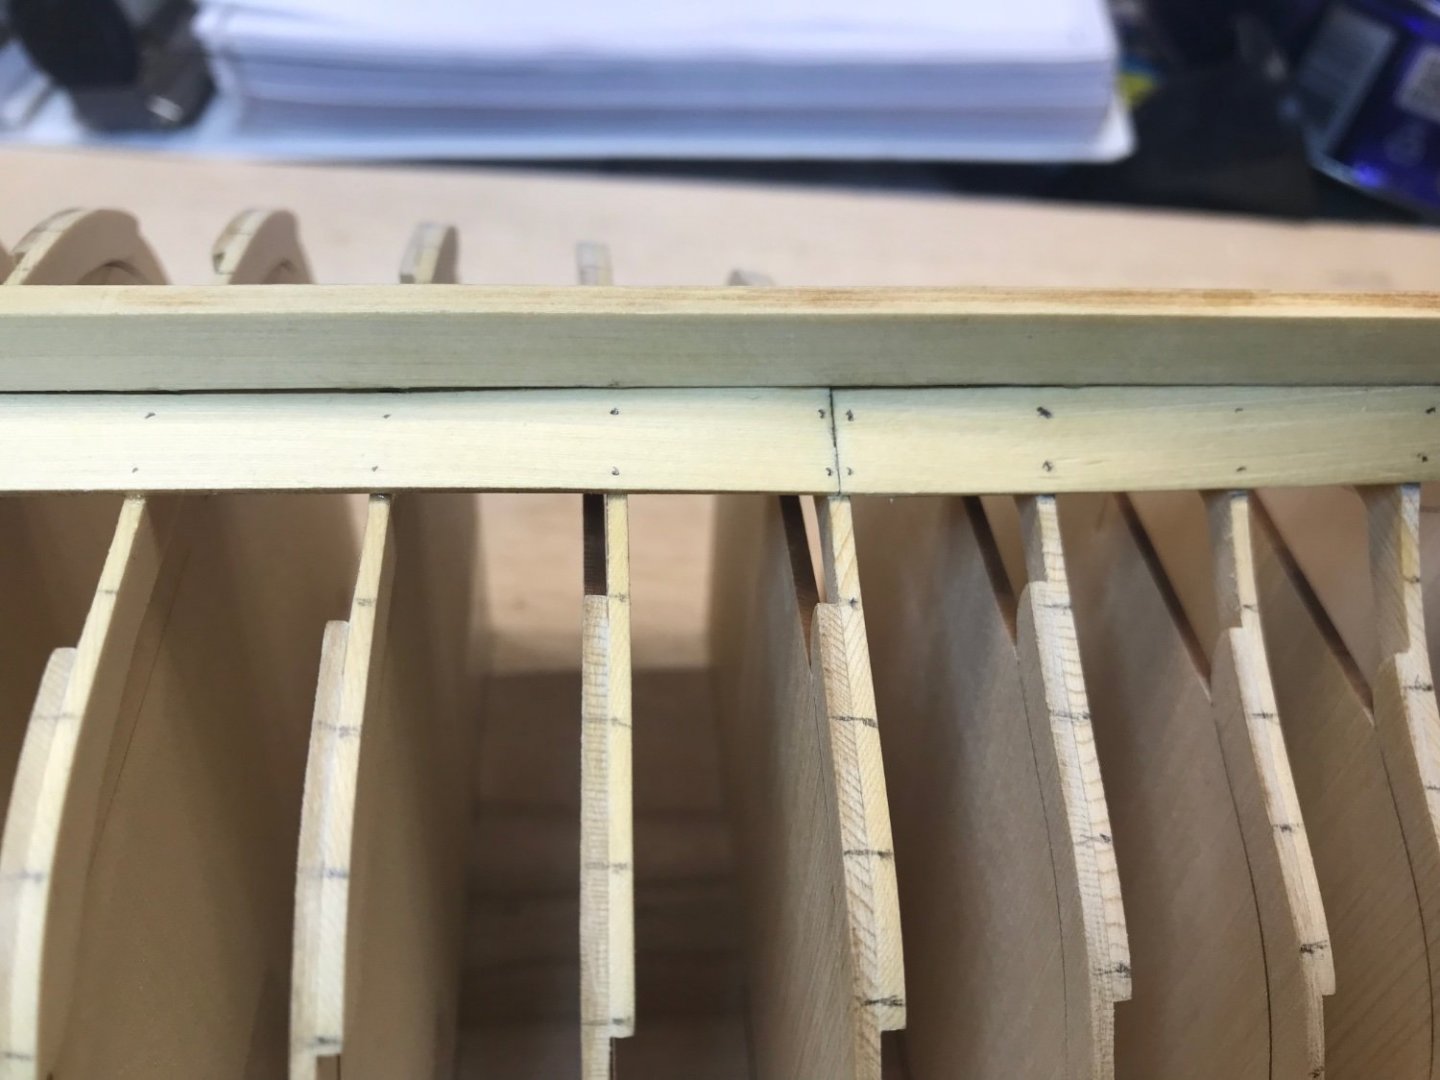
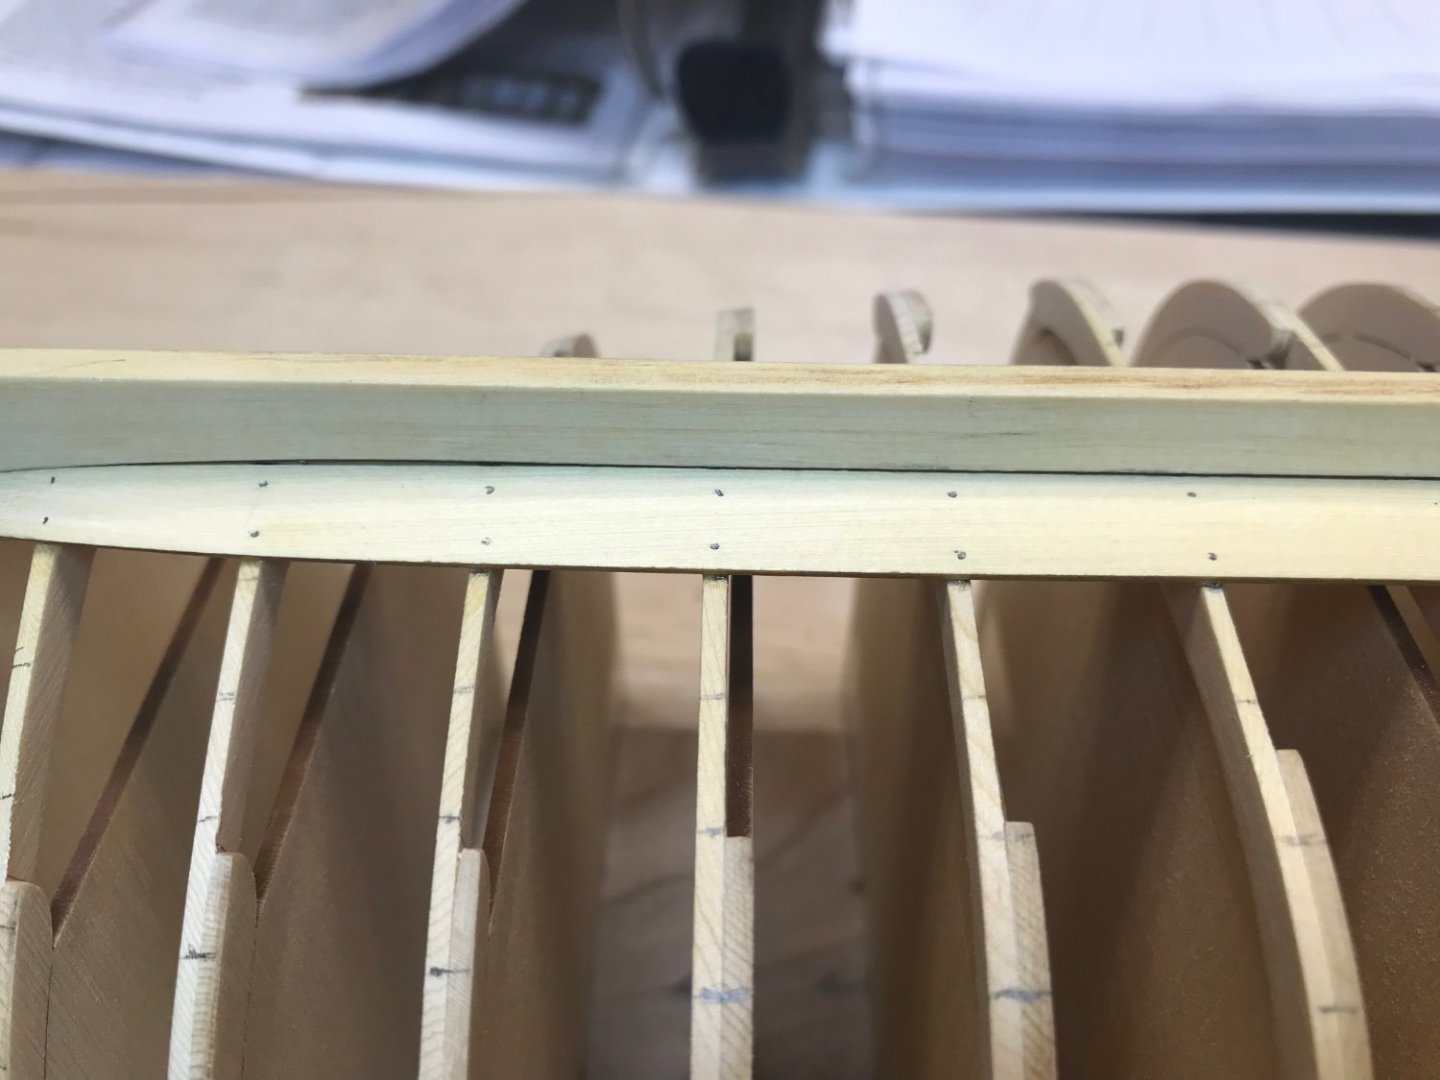
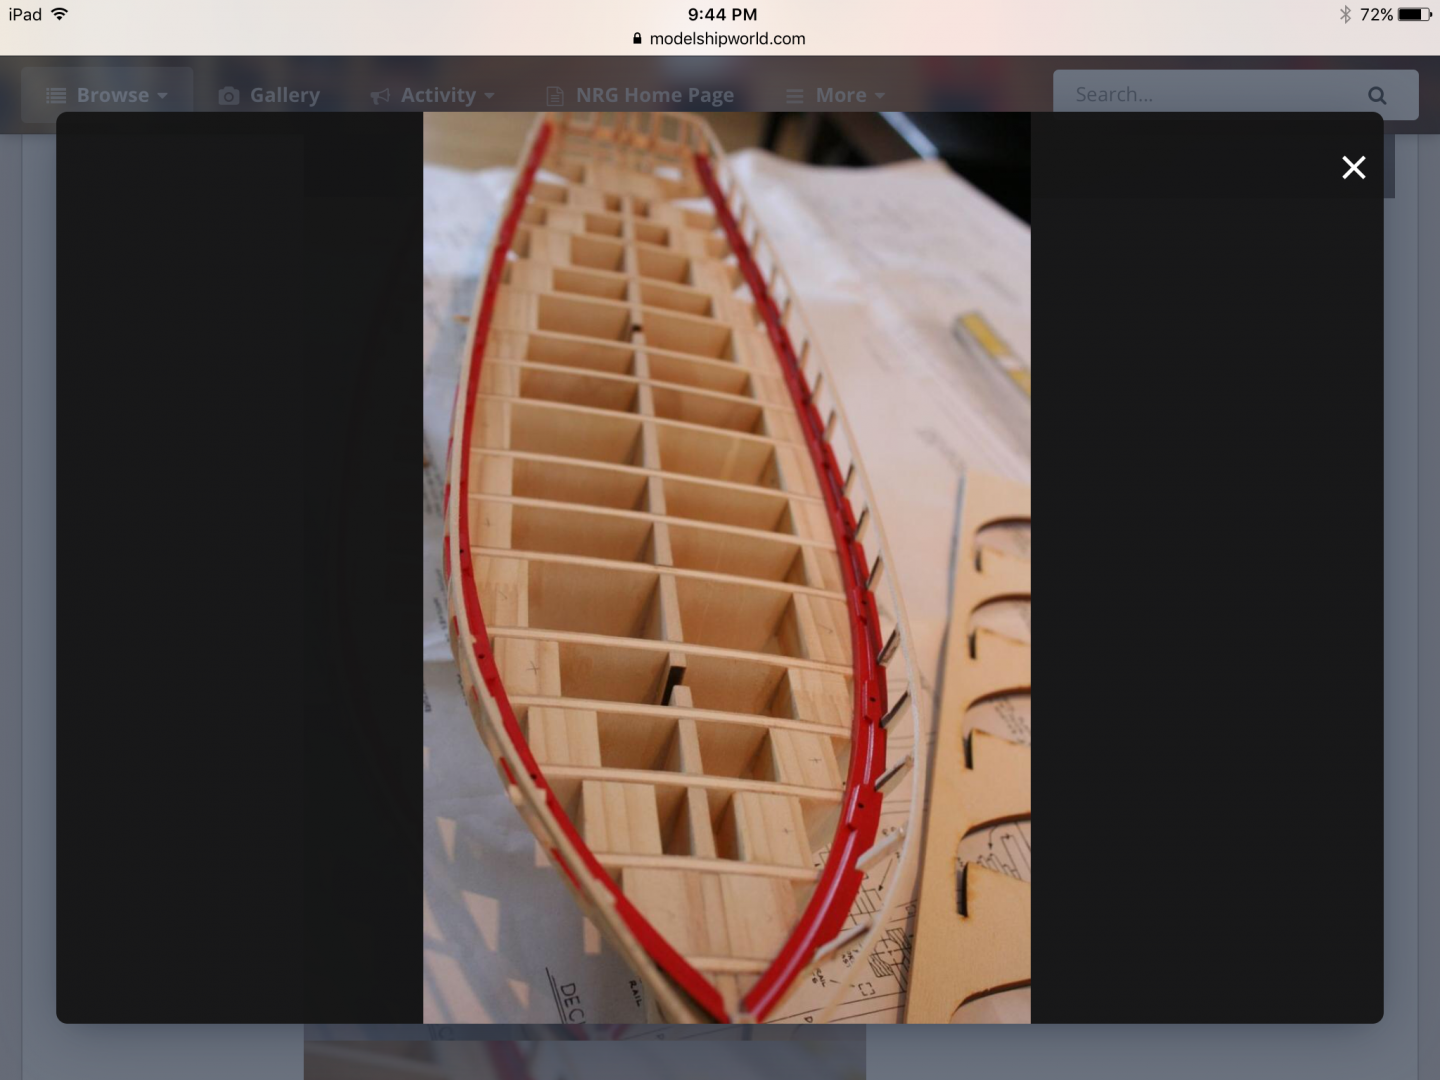
Got the the first 2 strakes down. Came out pretty good, only a couple of areas next to the keel that have some gaps that I’m not fond of. Maybe some type of filler? Looking for ideas. Also going to add the nails as I complete a strake, much easier as the frames are visible. I have the hole locations marked in the starboard side. Need to experiment on some scrap first to get my process down. More to come….
‘’Really enjoying this build, learning a lot!
Best Regards …. Rick


-
Ryland, Grant, thank you for the kudos!
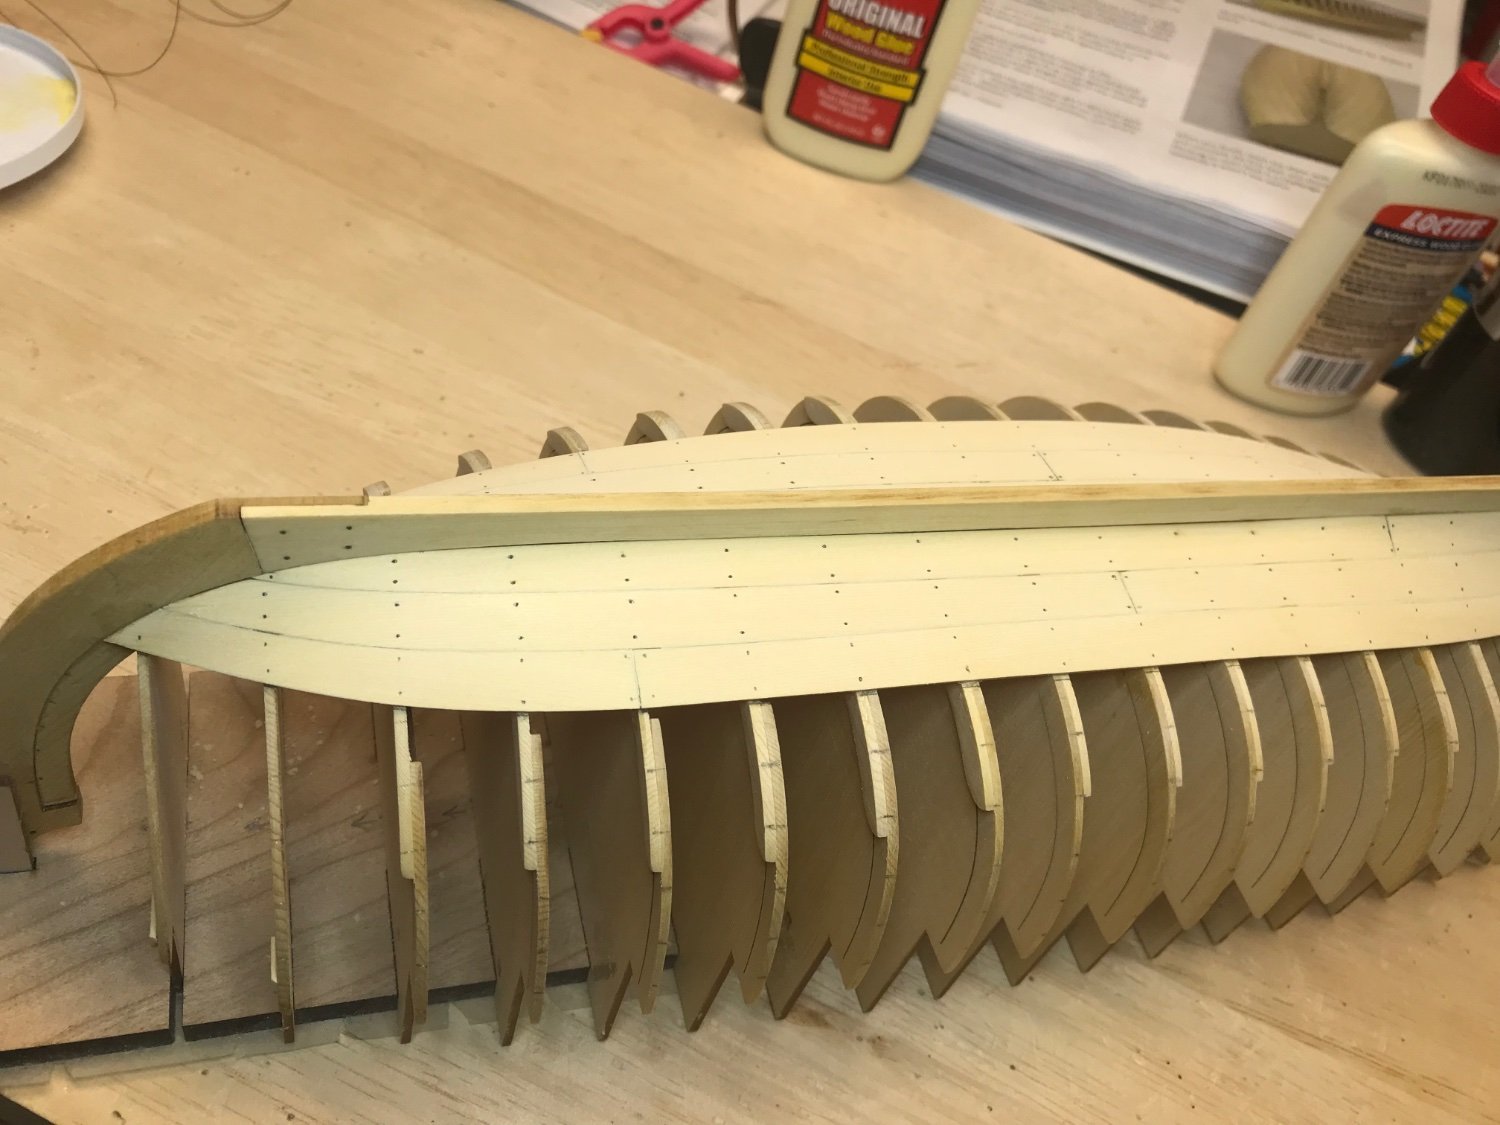
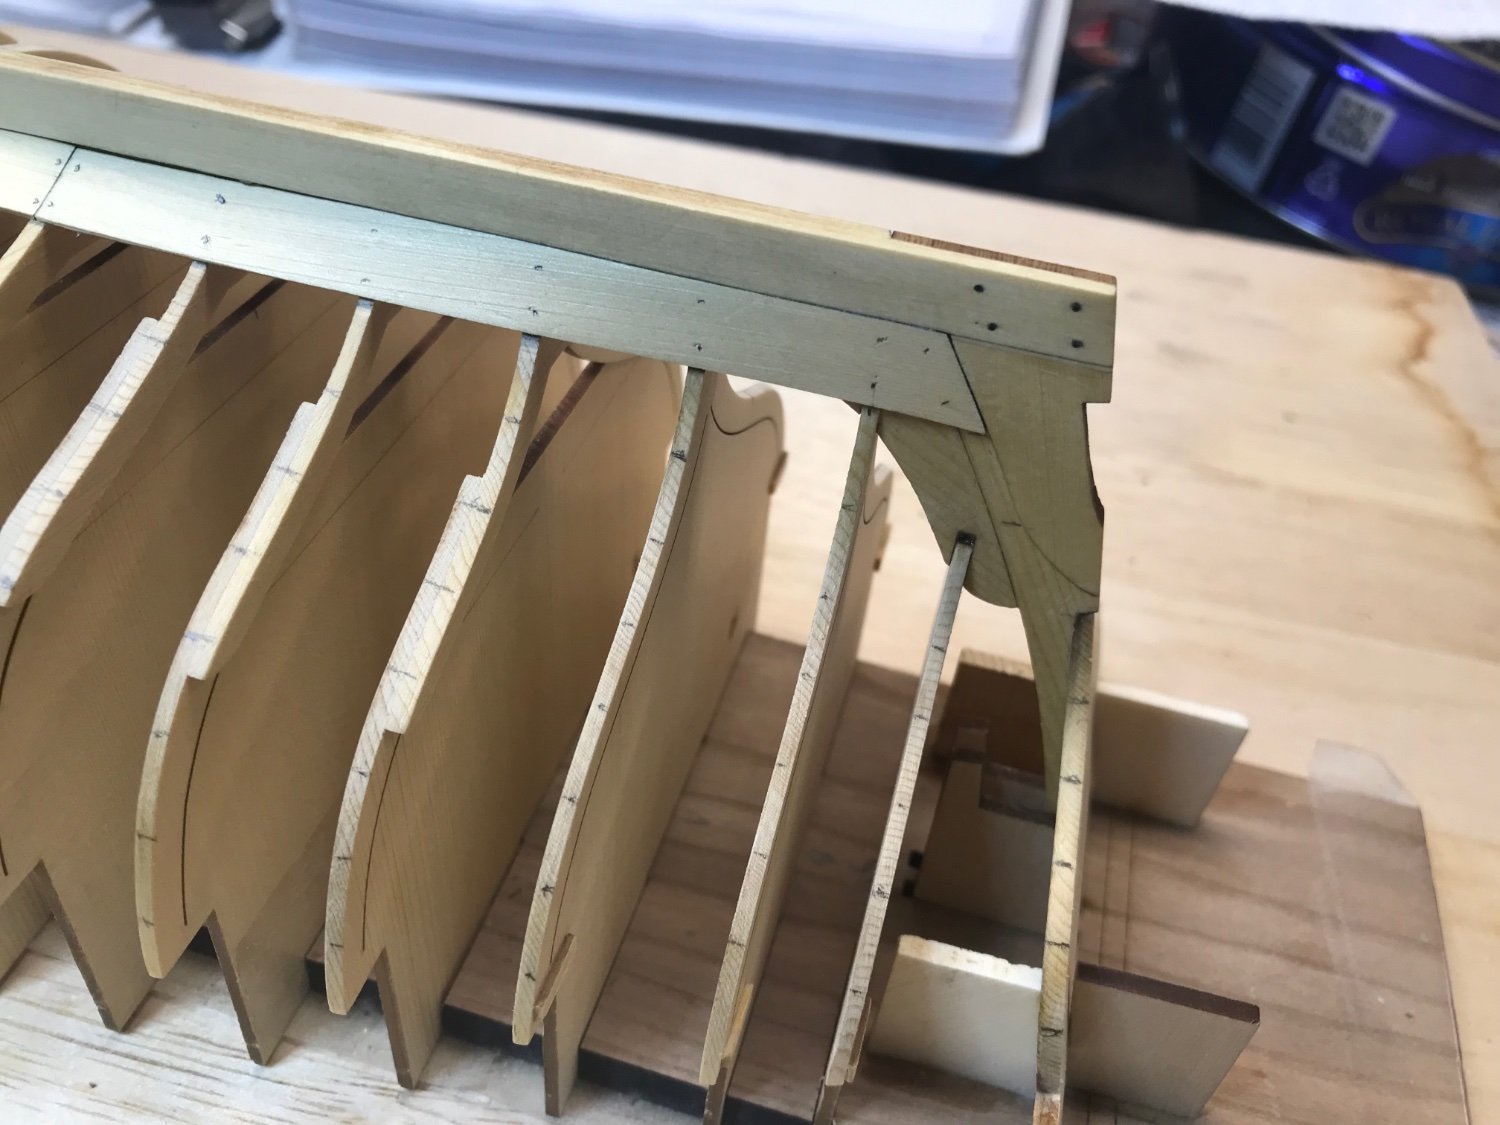
Ryland, I wanted to line off the bow without using the template to see how well I’d get to where the planks would lie. Failed miserably! LOL! I used the template and saw where adjusting was needed. I needed to adjust each line toward the keel. The stern was much more obvious and was very close to the template. This was a very interesting step as I’ve never planked or lined off a hull. I have a much better understanding now.
Best Regards …. Rick


- CiscoH, gjdale and Ryland Craze
-
3
-
Thank you Floyd and for the likes.
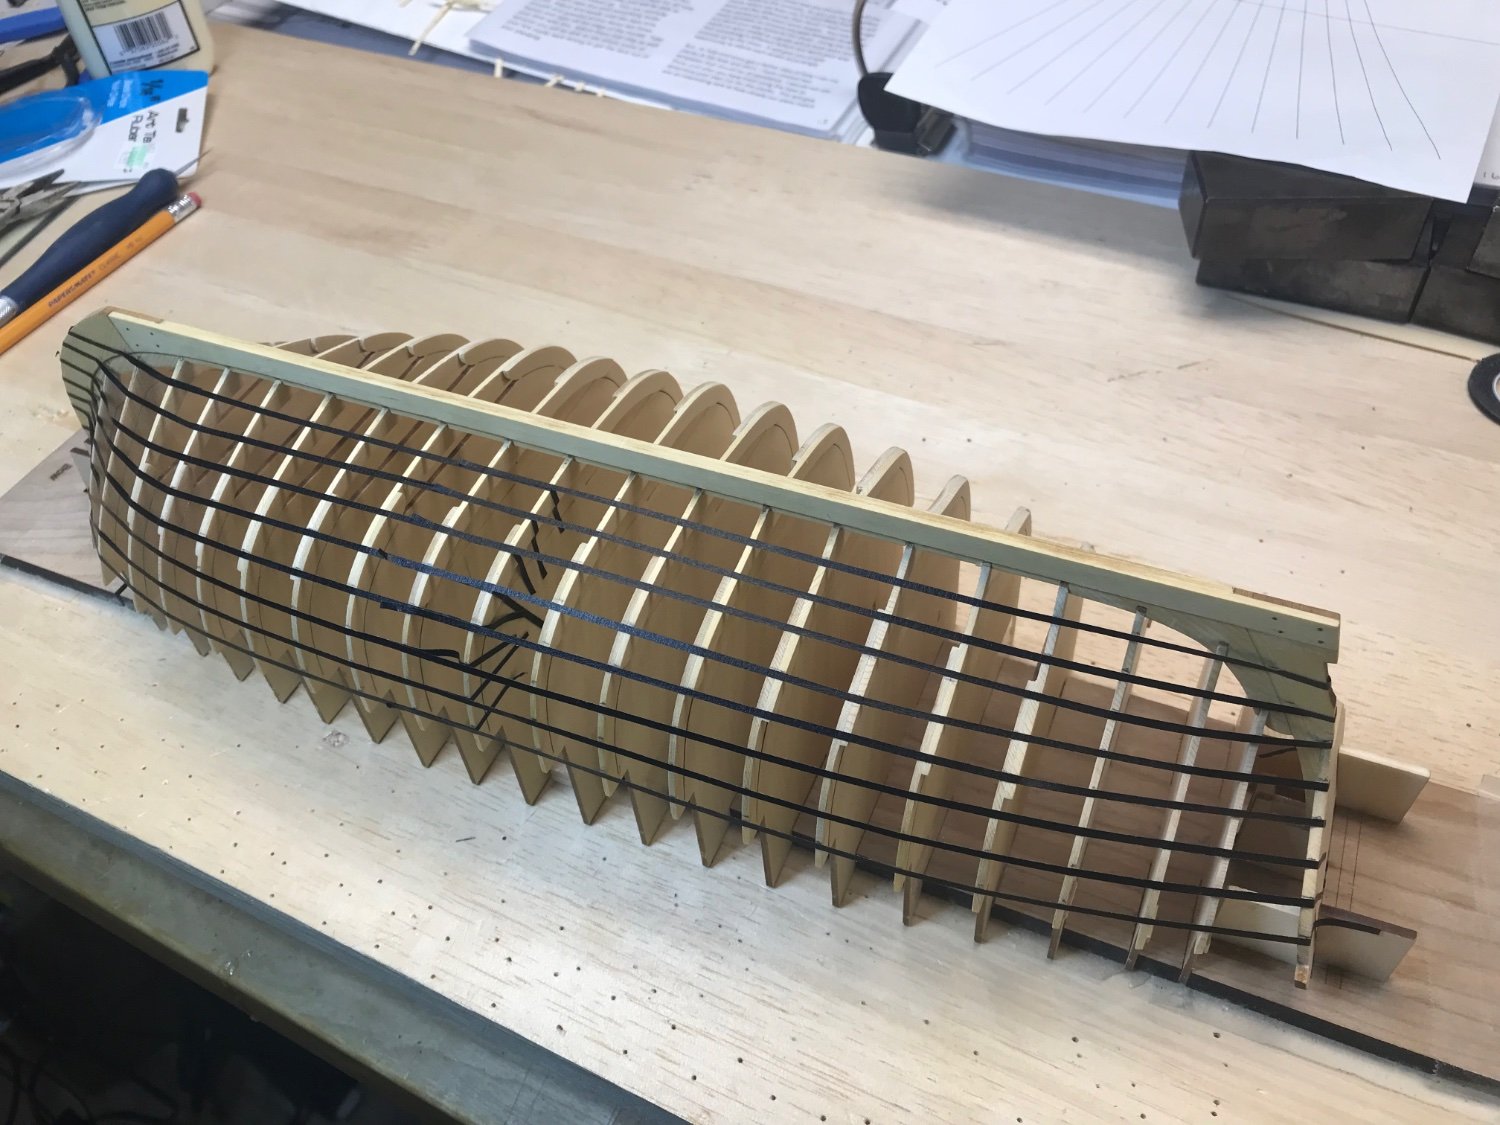
I’ve made my tick marks on the port side of the hull and lined off front half. I still need to figure out how to line the bow. More to come….
Best Regards …. Rick

- gjdale, Ryland Craze and JpR62
-
3
-
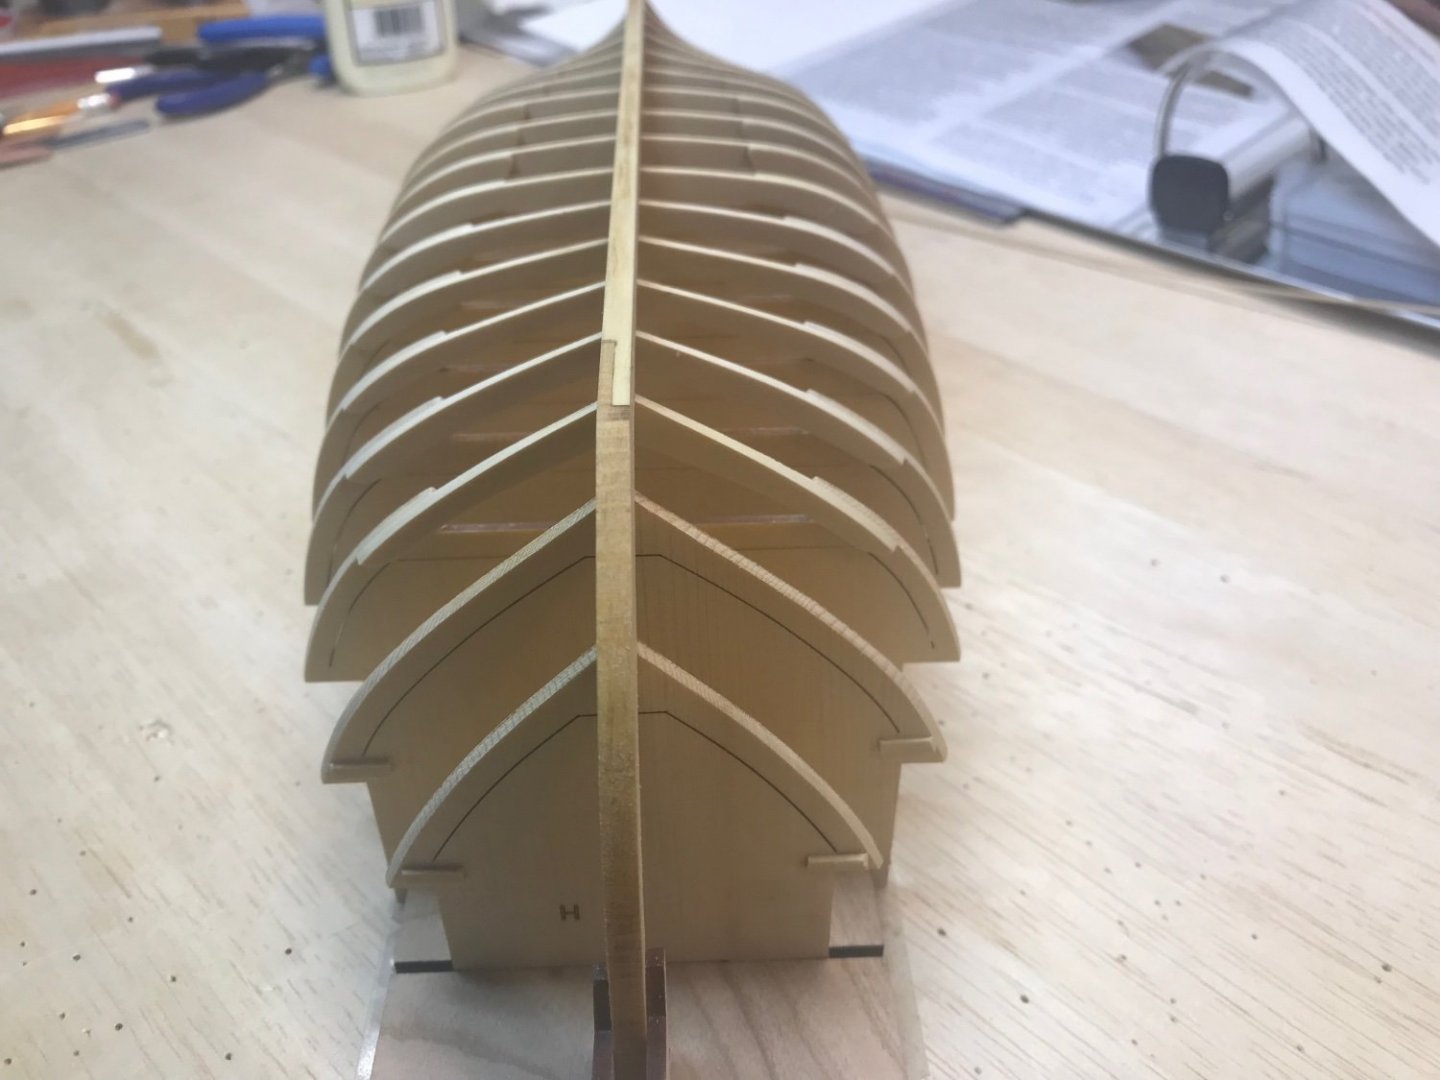
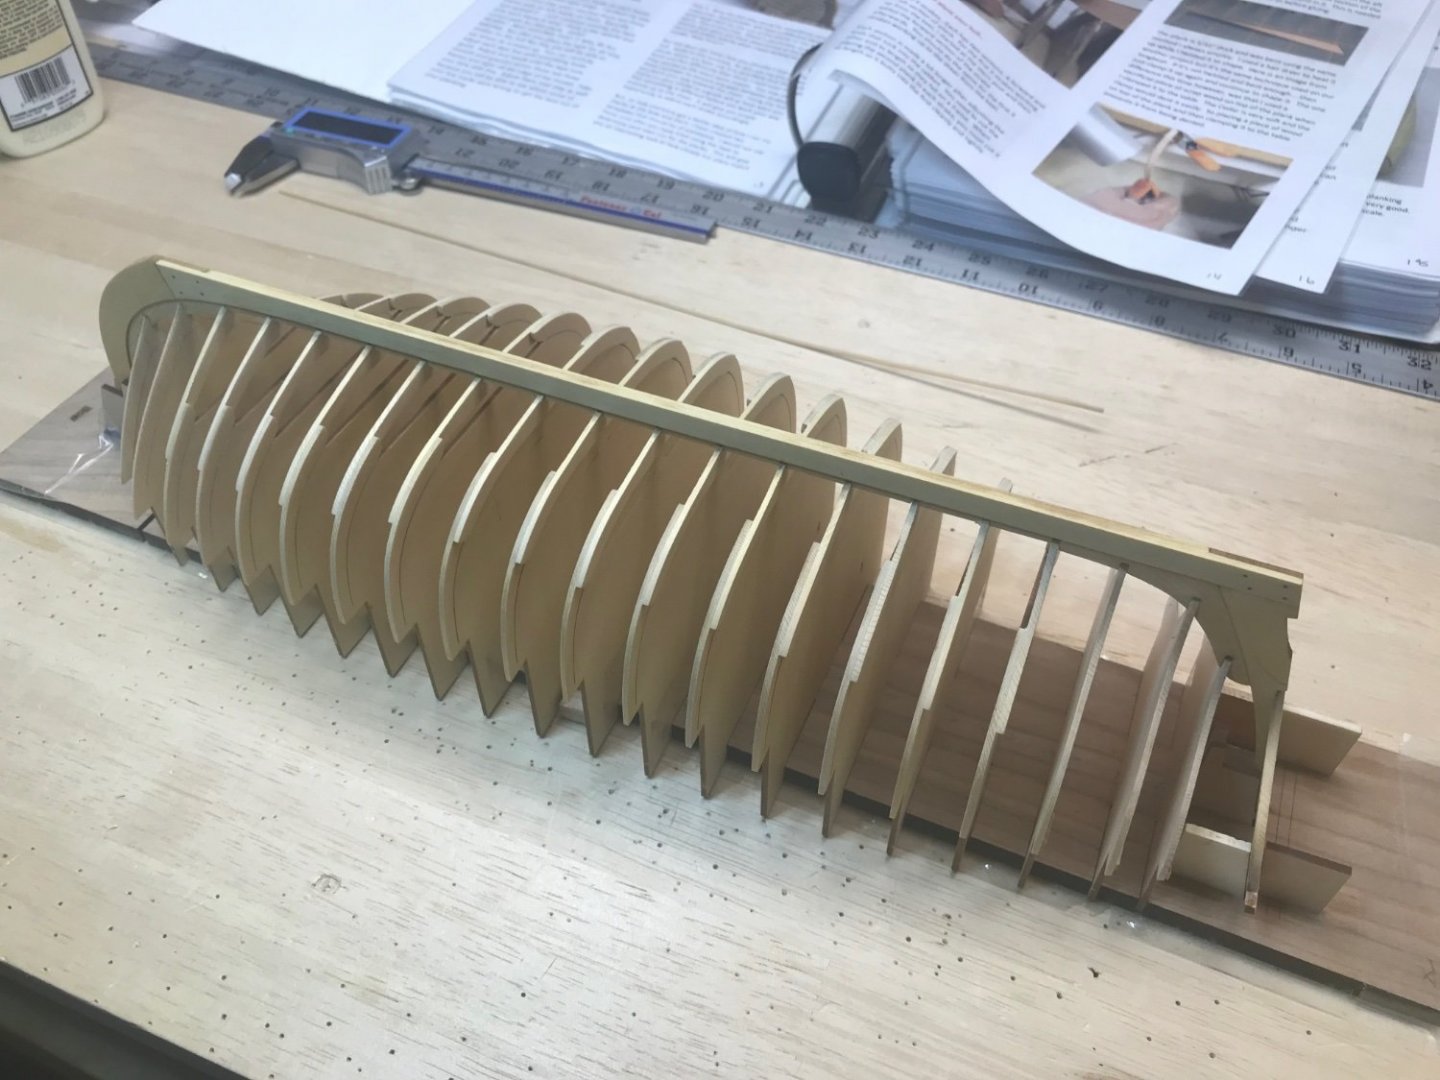
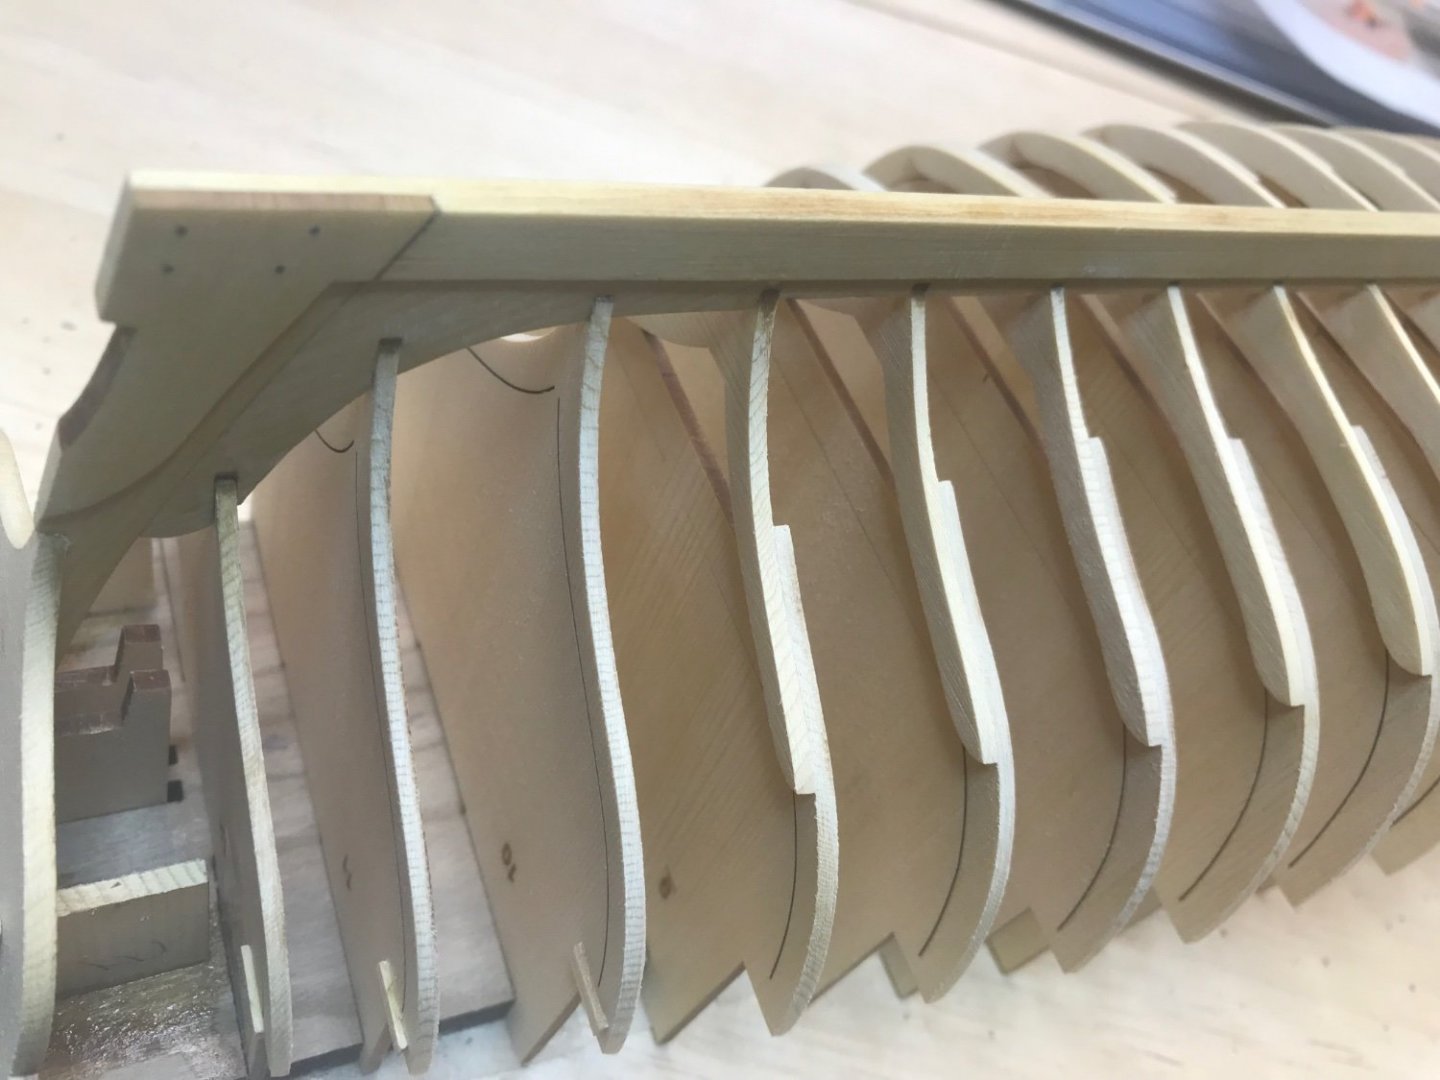
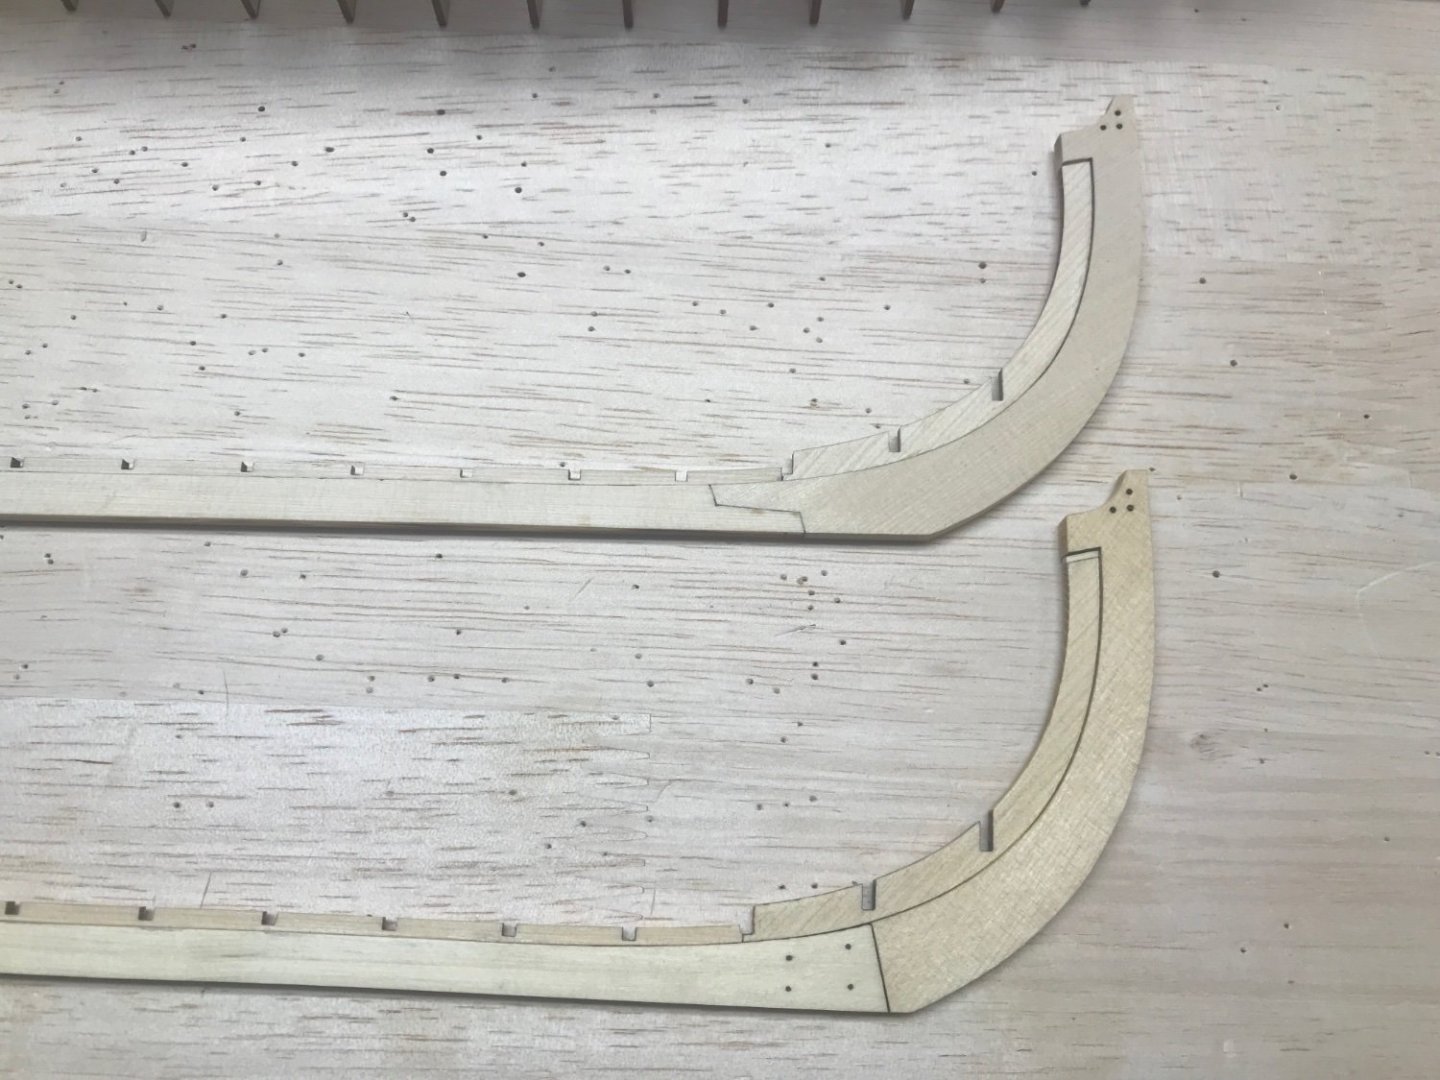
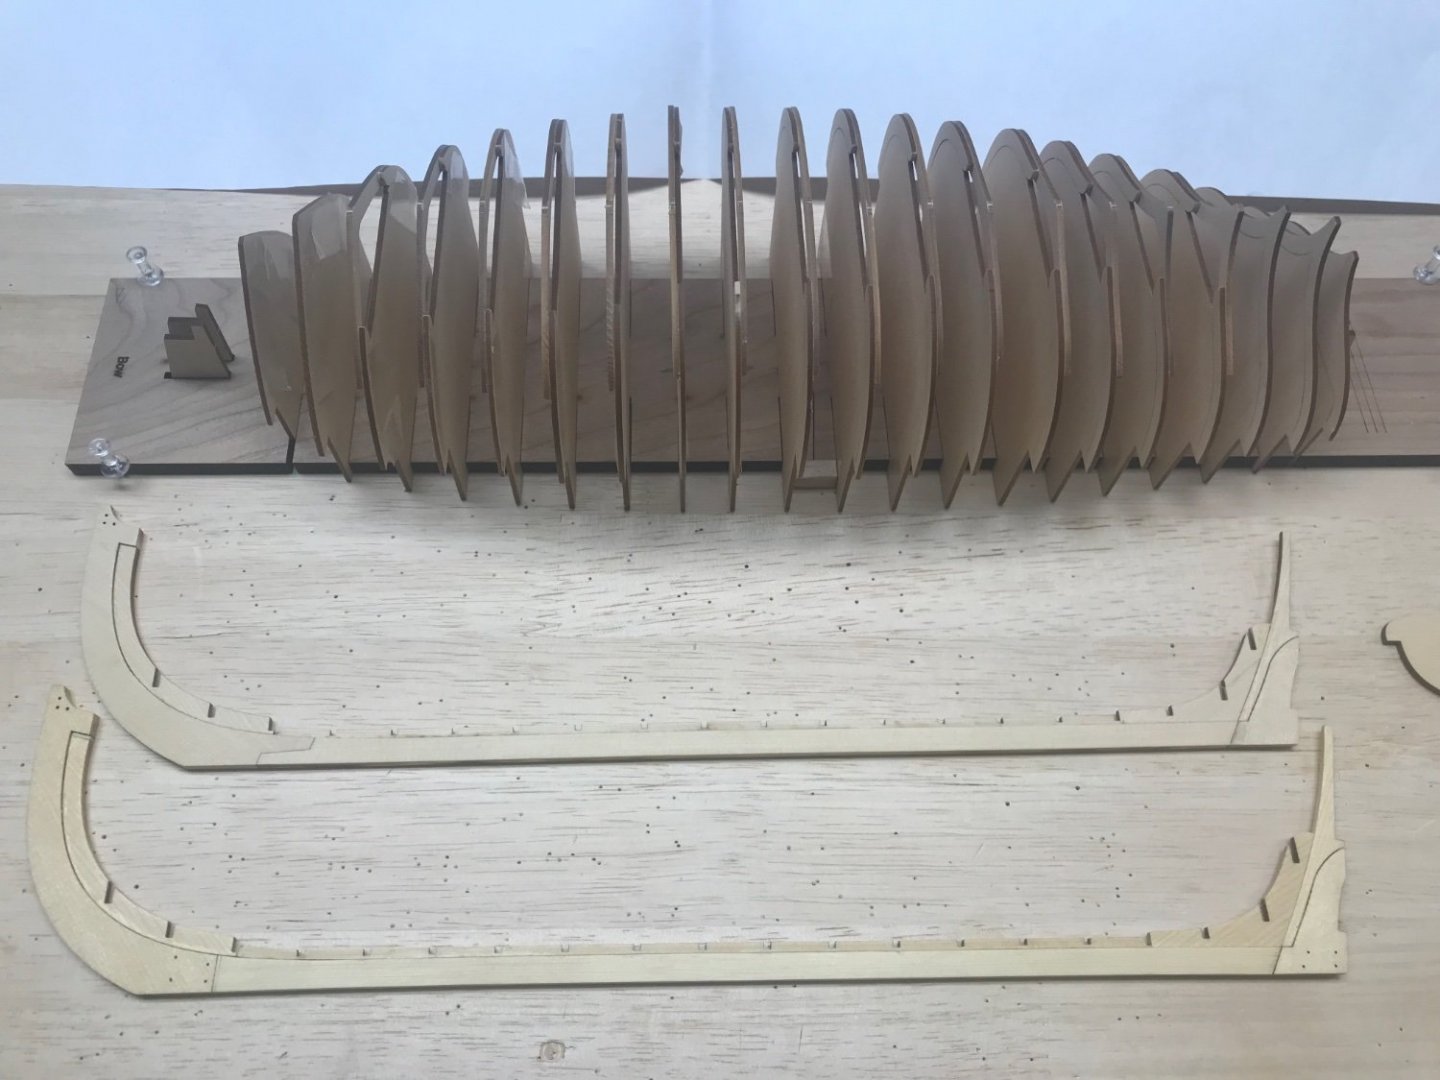
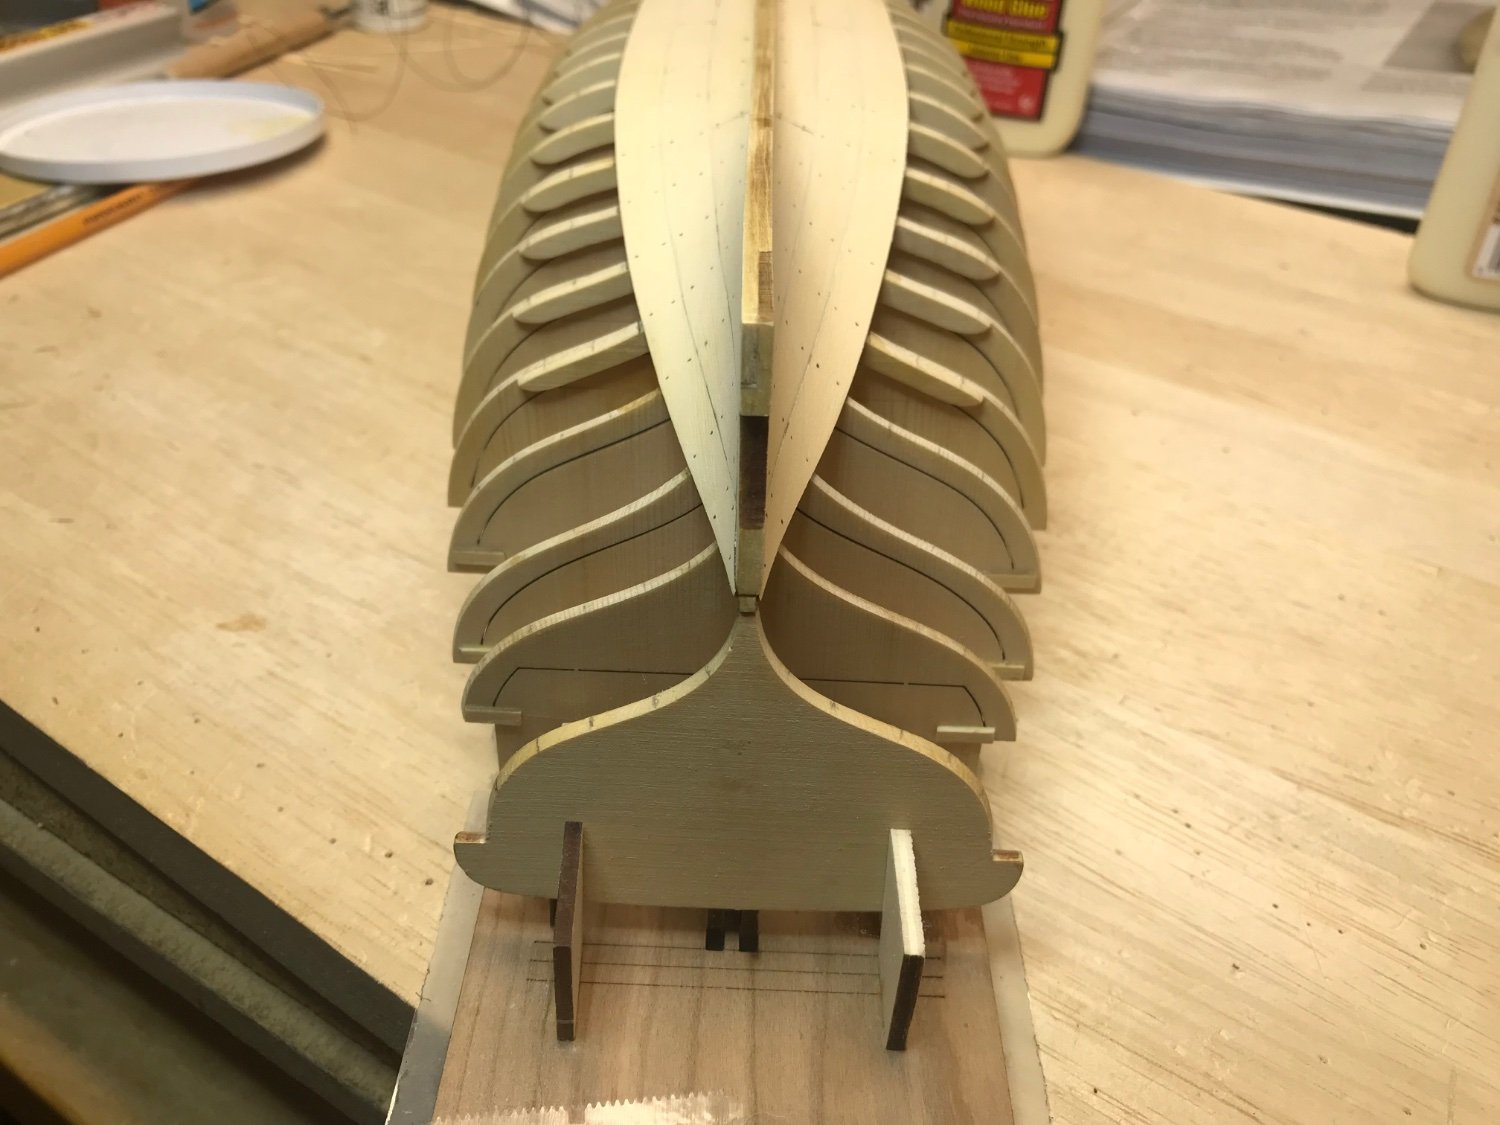
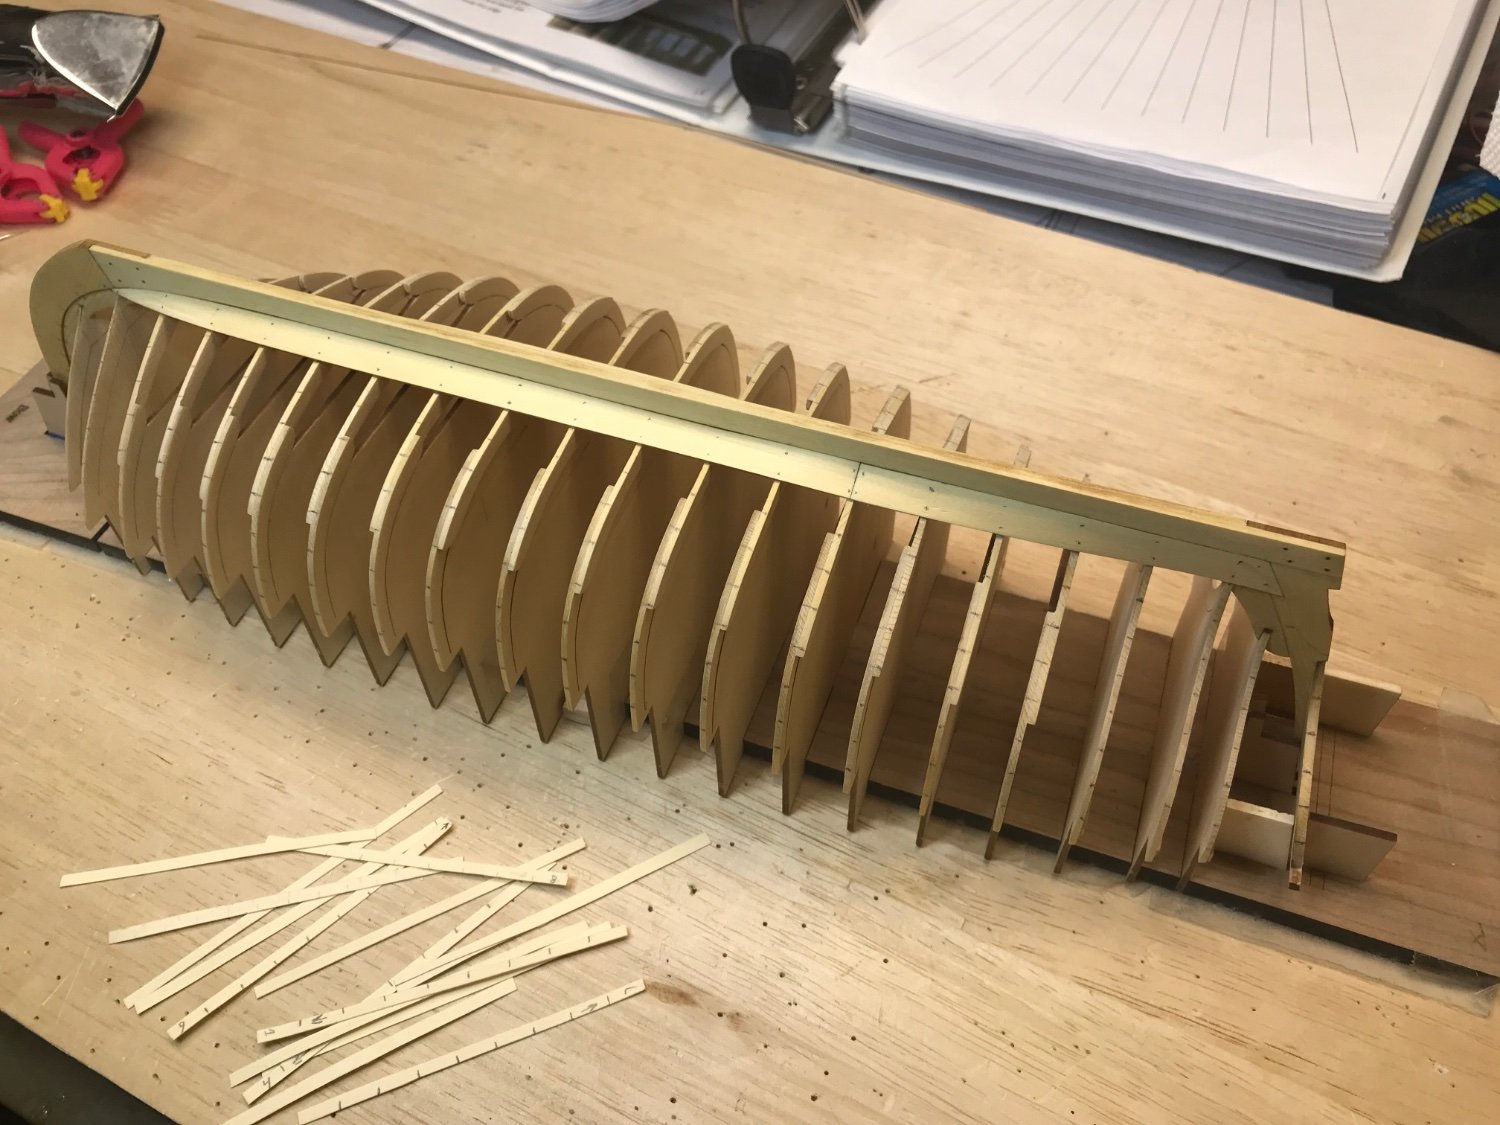
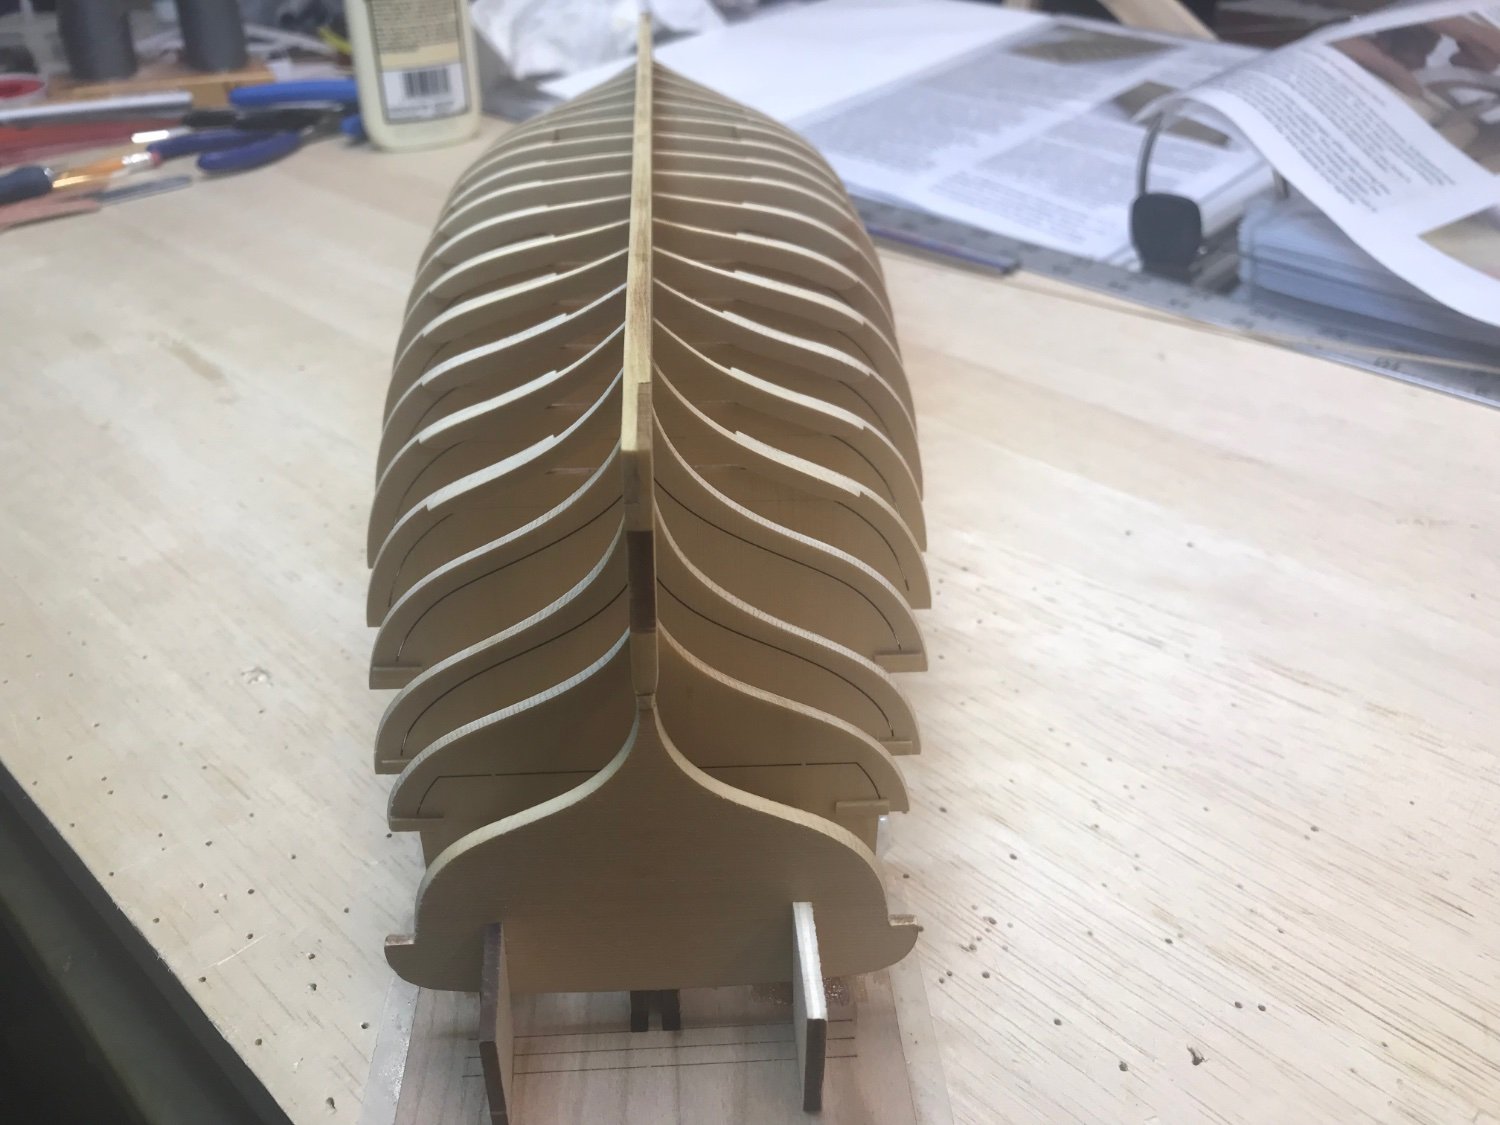
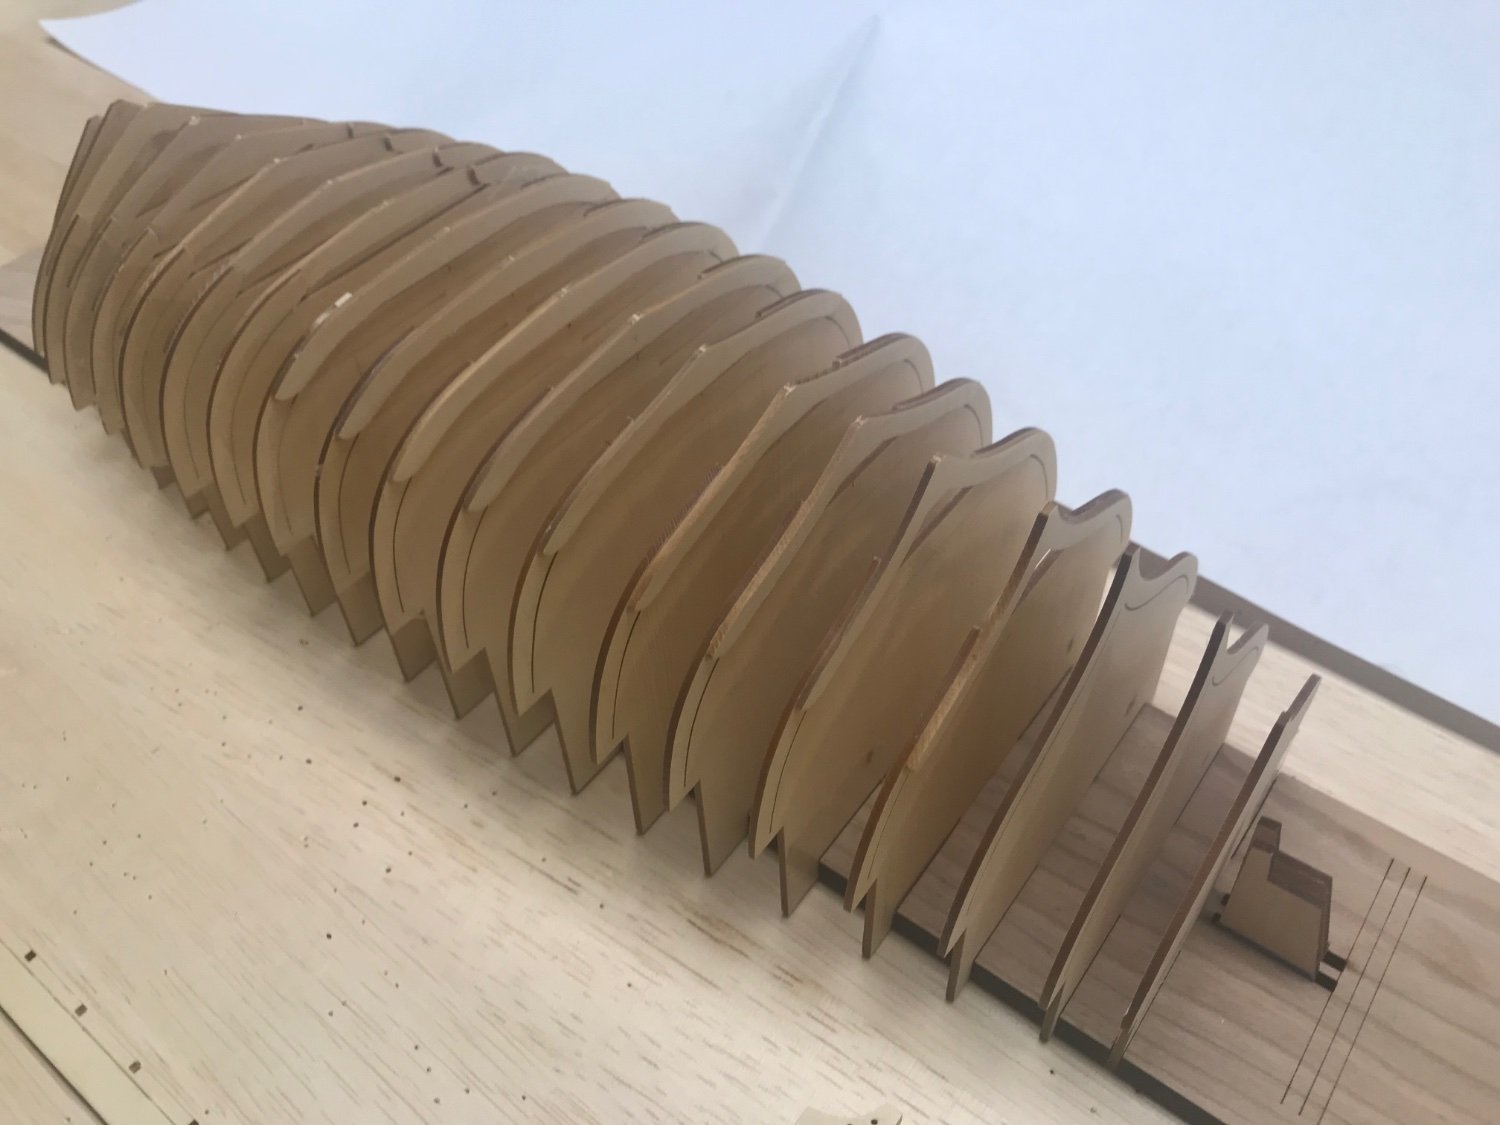
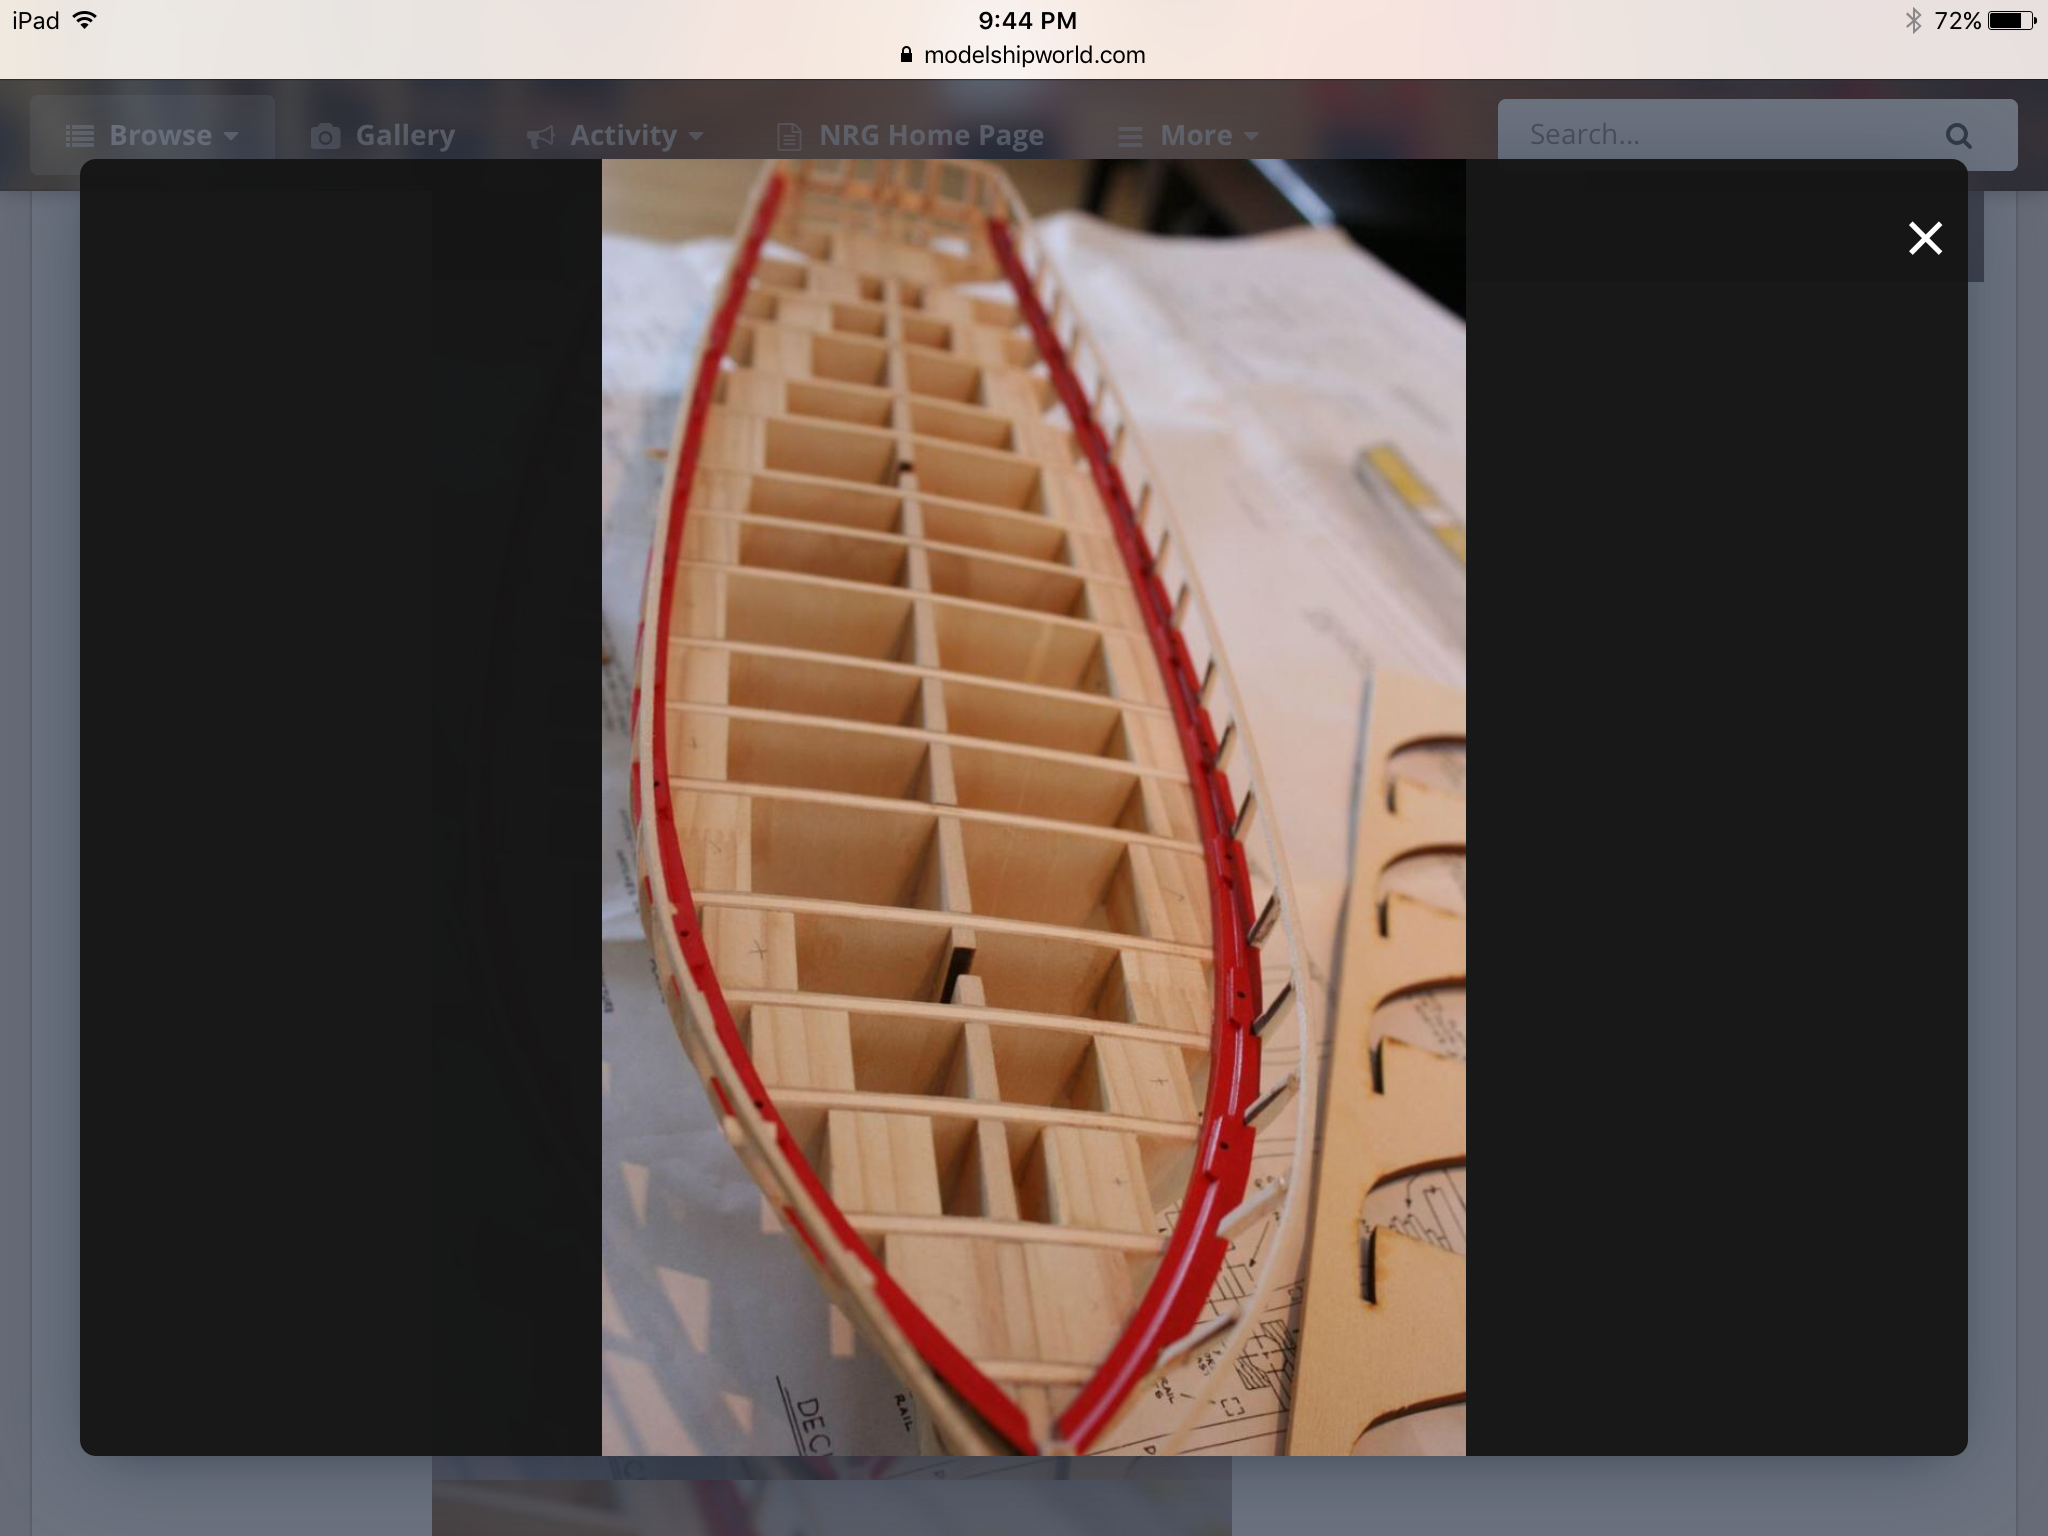
Finished fairing the hull this morning. First time doing this and I think it came out pretty good, lots of gentle and detailed sanding. It was an enjoyable task. Also glad that there are many excellent build logs to gaze upon! Now to line off the hull following Chuck’s lead.
Best Regards … Rick

- gjdale, Ryland Craze, ccoyle and 1 other
-
4
-
Thanks! Agree, Chuck’s designs are awesome. Already have the Cheerful waiting in the wings.
Best Regards … Rick
-
New year and my first wood build! A little about me, I’m a lifetime modeler, mostly R/C planes and scale helicopters. Back in the 80’s I also got into R/C subs and had a lot of fun/success. I won a lot of National awards with my scale helicopters and just love to build. I retired a year ago after over 40 years of building jet engines, so I have the time now to enjoy my building. About 40 years ago, I tried to build a Billings Cutty Sark and as can be imagined, I failed miserably. Now, after reading the way awesome builds on this site, I decided that now was the time to get started.
For my first build, I decided on Chuck’s Medway Longboat, it’s such a beautiful project and it’ll help me develop skills I need for my next project, Chuck’s Cheerful. I like to start new projects on January 1, as it makes it easy to see how long it takes to build. Actually, I started this build about a week ago and it has been a wonderful change of pace. Chuck’s efforts in designing and implementing his designs are of epic proportions! I’ve never seen such detailed laser cutting and his practicums are fabulous, as is all of the fantastic builds on MSW. So without further ado, here we go.
I'm going to pass on showing the kit parts, as there are many already posted in the group build.
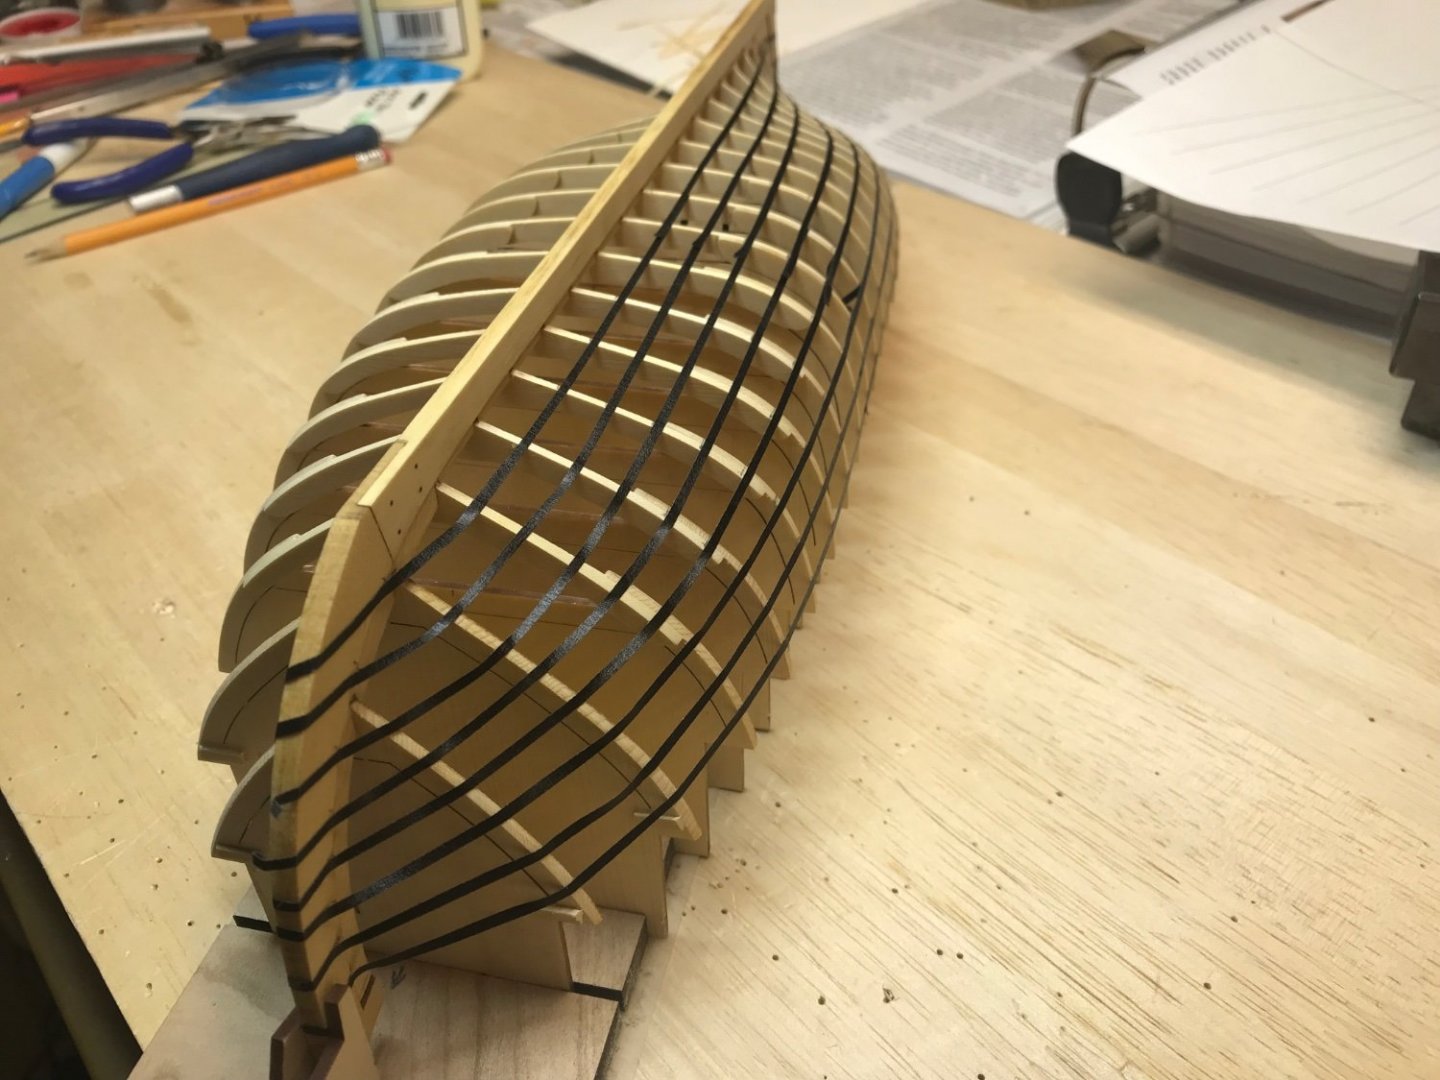
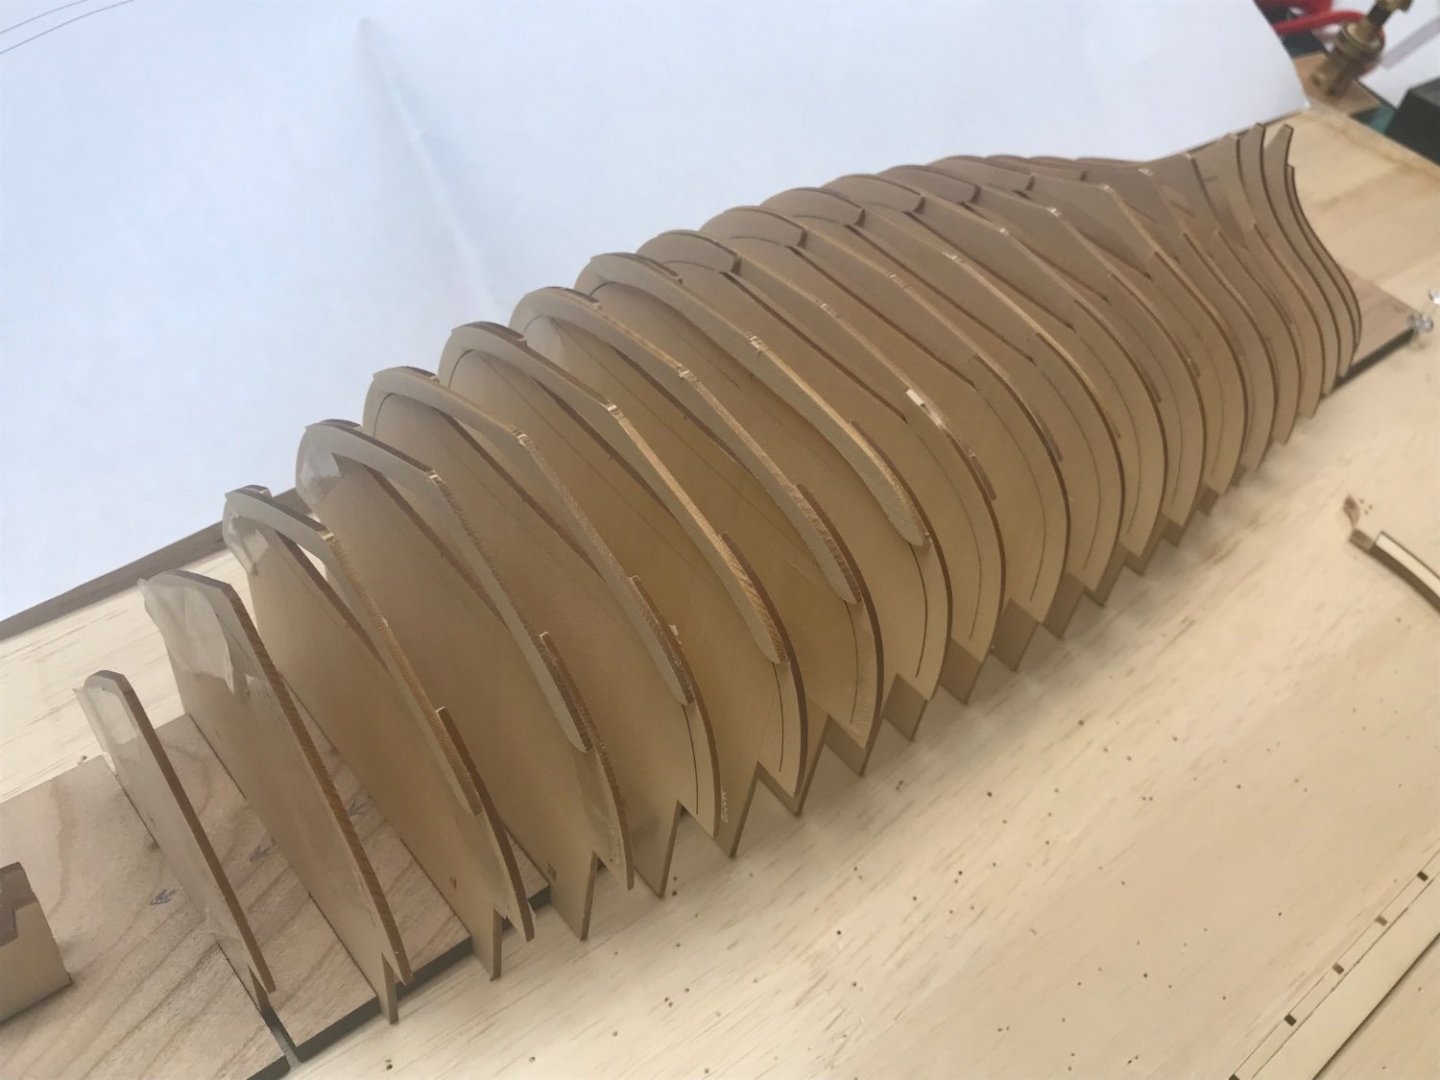
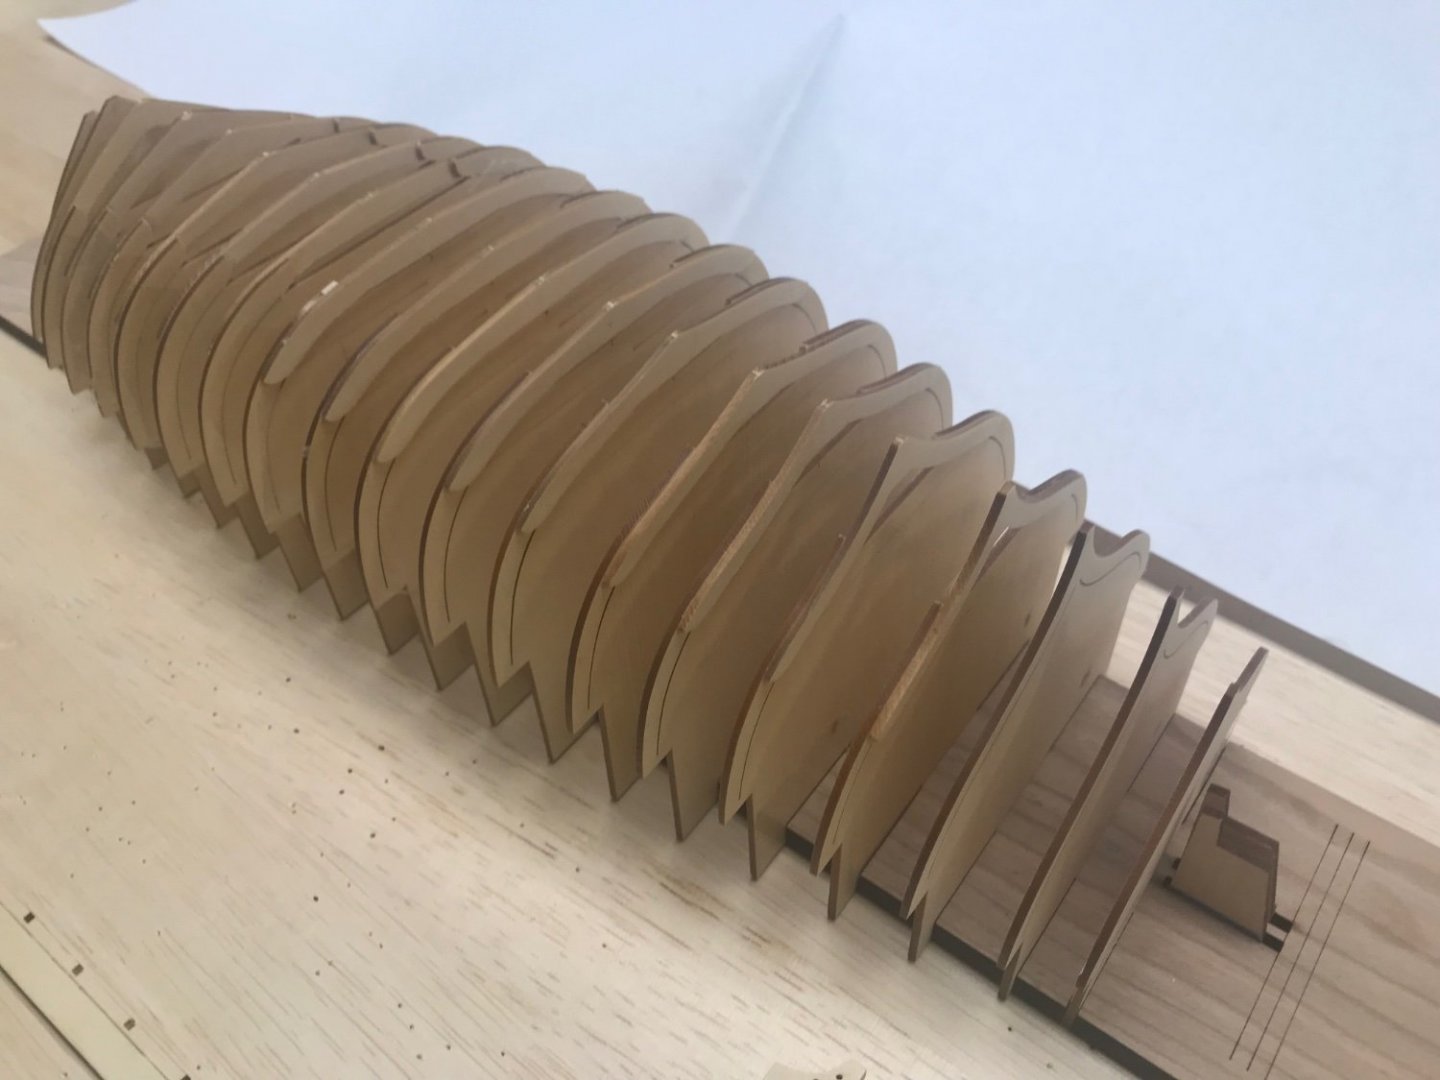
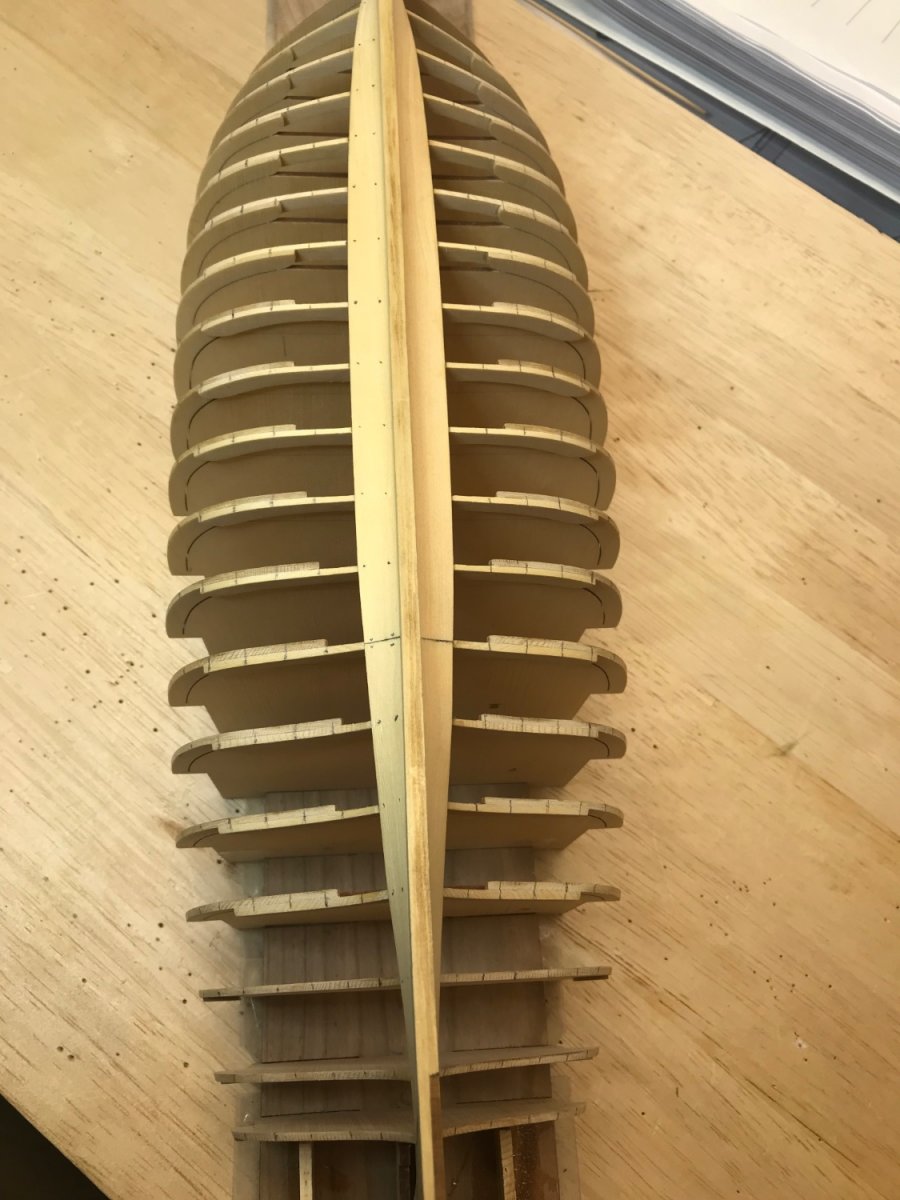
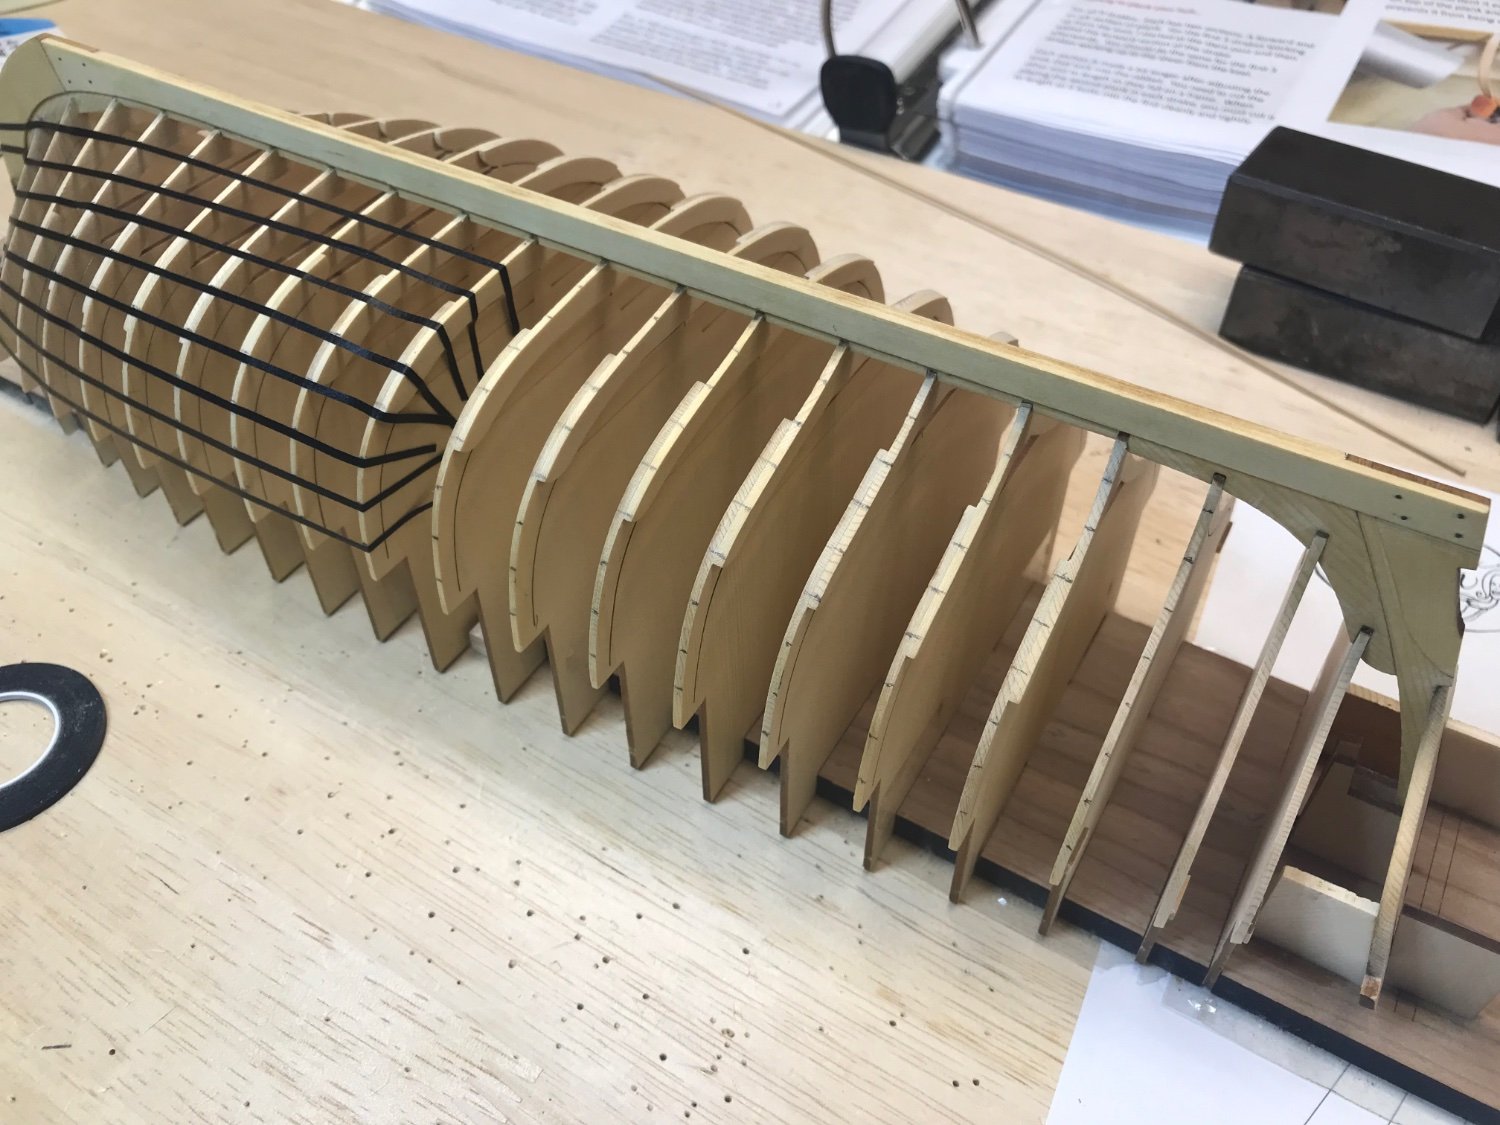
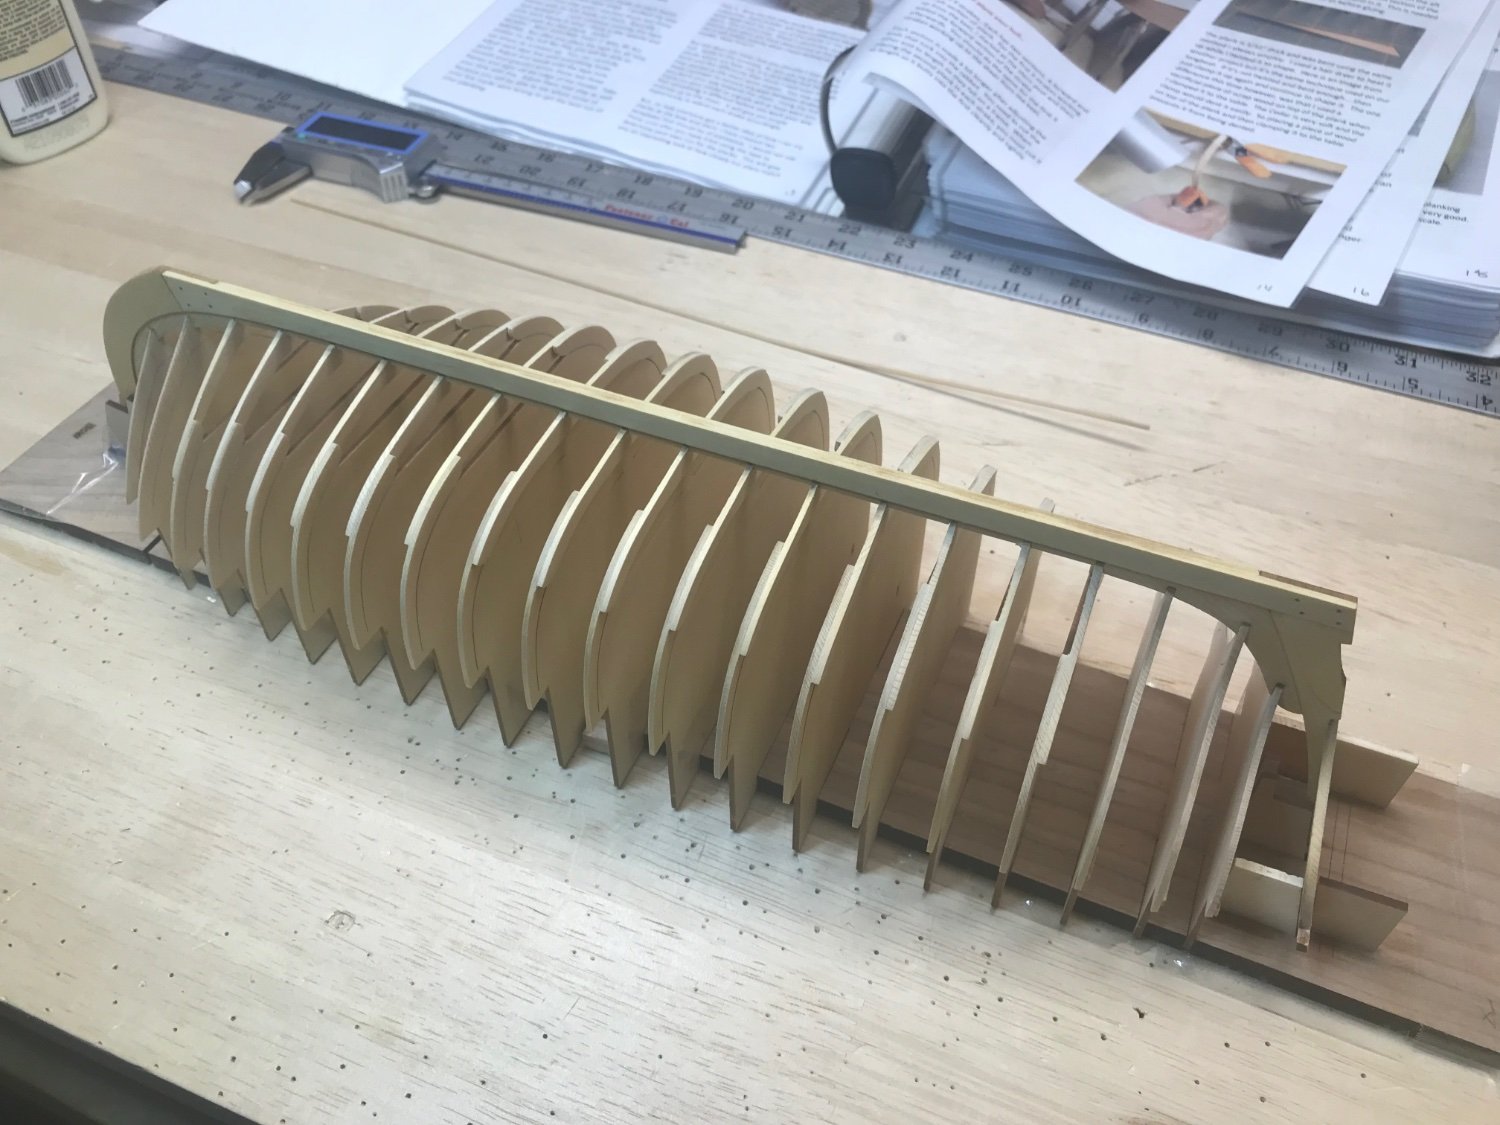
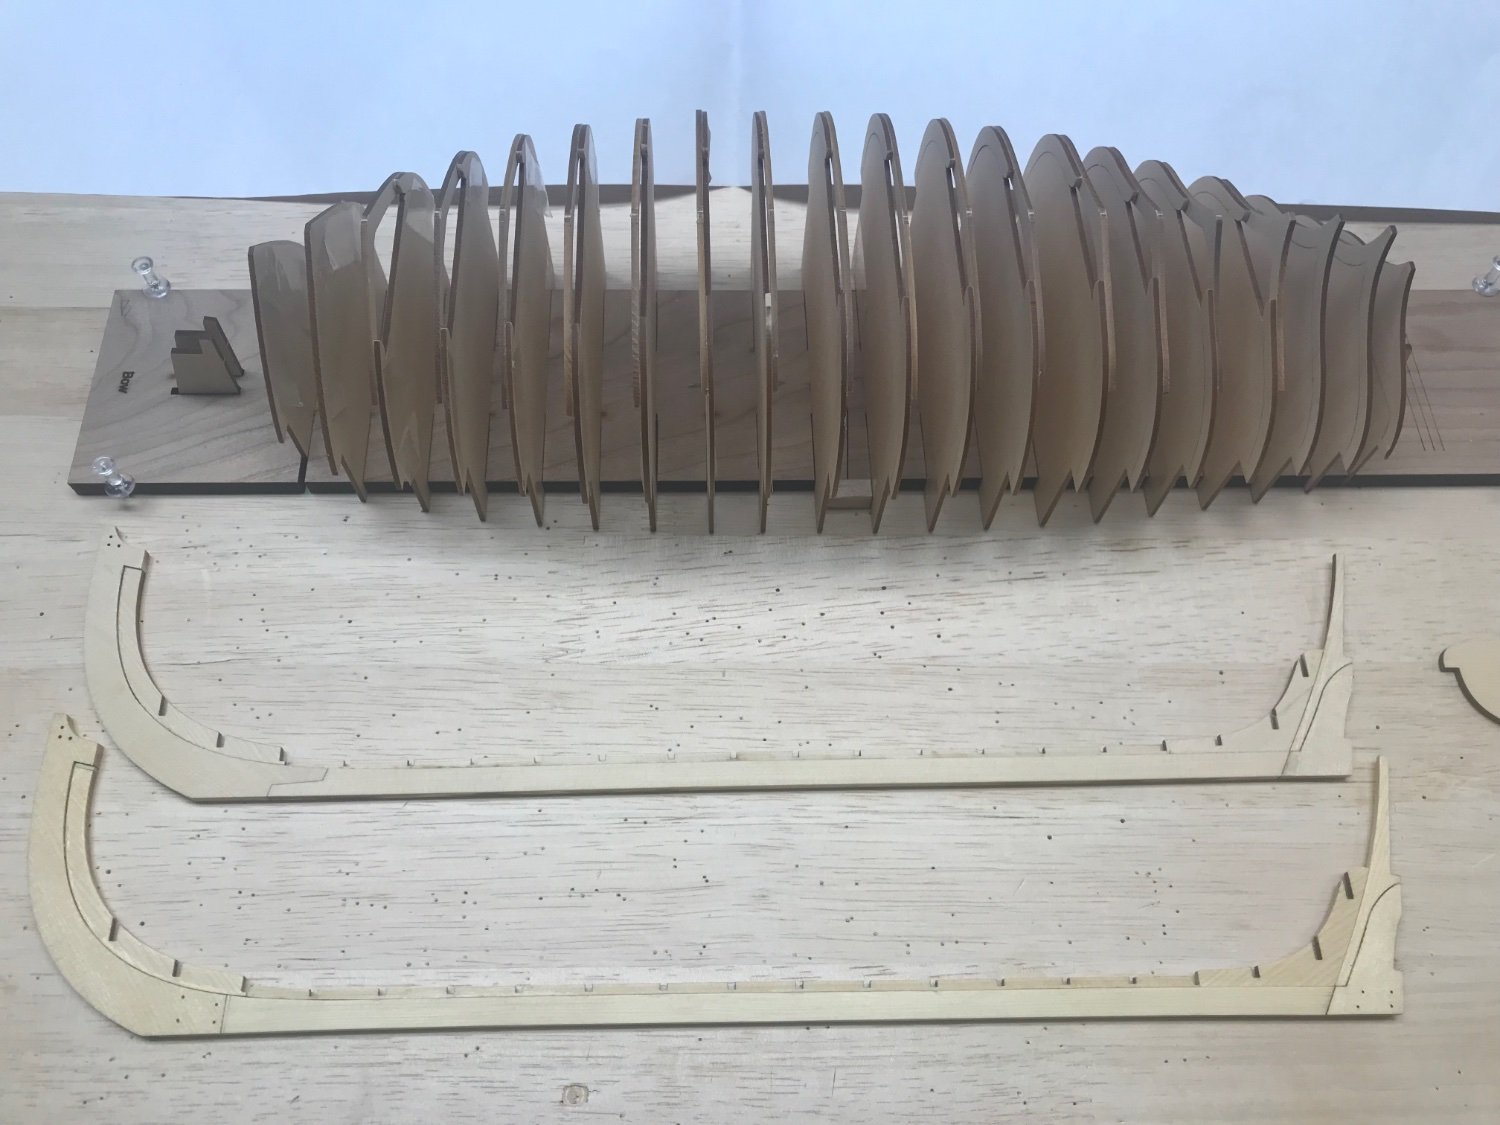
I started with the easy keel to ease into the build and then built the lap-joint keel. Frames have been assembled and fitted to the building board. Keel has been glued in place and is drying. I expect to start fairing the frames later tonight. A task I’ve never done. Enjoy!
Regards … Rick

-
-
-
-
1 hour ago, Keith Black said:
You're welcome, Rick.
Unfortunately that log was abandoned and we're left not knowing the reason why. From reading the log, he and his wife had just bought a house and that's where the log stops. Abandoned logs and unfinished builds seems to happen far too often. It's sad and I wish that somehow there could be 'build medics' that were able to rush in and save a modeler and their build before a model is abandoned.
Brain's Niagara build held a lot of promise but we'll never know how good it could have been and we're all left the worse for not knowing.
Keith,
Totally agree with what you’ve voiced. I was very impressed with his framing and how precise it looked. I was very disappointed last night when I read his unfinished log.
Rick
- mtaylor and Keith Black
-
2
-
Keith,
Thank you! I’ve been looking at Niagara logs, but haven’t gotten to this one yet. Thanks again!
Rick
-
4 minutes ago, Roger Pellett said:
Rick,
I thought that you knew the answer and were testing our expertise! I was expecting to win a valuable prize. How disappointing! 😁
That’s a good one, Roger!
Rick
-
4 hours ago, mtaylor said:
Where did you find it?
It was a build log that I found last year here on MSW. I saved a few pictures but not the log. Stupid me.
Rick
-
Quote
Brig Niagara?I have no idea, was hoping someone would chime in that does know.
Rick
-
Yup, a hopefully 2 for one post!
Rick
- Old Collingwood and mtaylor
-
2
-
OK, let's give this a shot. Does anyone recognize this build?
-
All,
Thank you for the warm welcomes and the advice. I’m planning on a build log and hopefully I won’t hit too many snags. One of the reasons I got the Medway Longboat is the subject, but mostly because of the outstanding instructions that Chuck provides and the many informative build logs. To that end, I’ve got the Cheerful waiting in the wings. I’m very excited to get going and have been messing around with some “stuff” to scratch that itch for the moment. Yesterday I bought some paint and I’m going to try Chuck’s method of many watered down coats on some scrap.
Is there a thread on how to post pictures? Thanks!
Rick


Medway Longboat 1742 by Freebird - FINISHED - Syren Ship Model Company - 1/2” Scale
in Medway Long Boat - 1742 - Public group project.
Posted · Edited by Freebird
Thanks Diver! My first build also. Great fun! I’ve been following your log and you’re doing a fine job.
Best Regards …. Rick