


Freebird
-
Posts
275 -
Joined
-
Last visited
Content Type
Profiles
Forums
Gallery
Events
Posts posted by Freebird
-
-
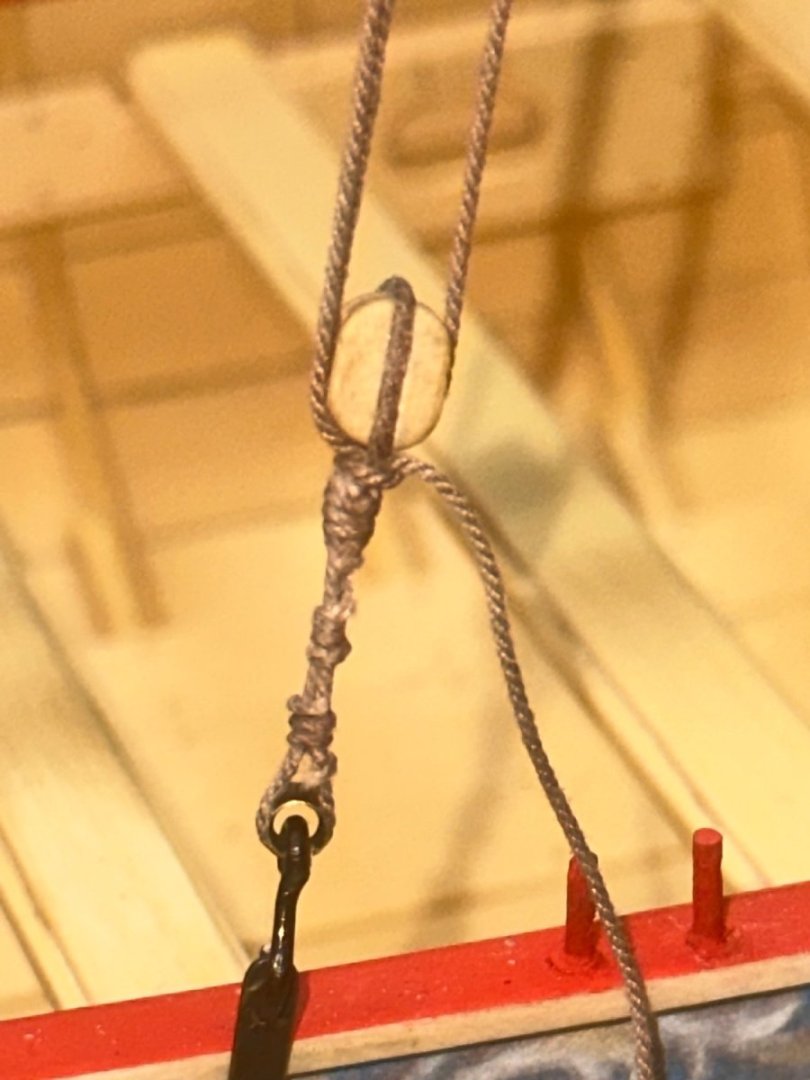
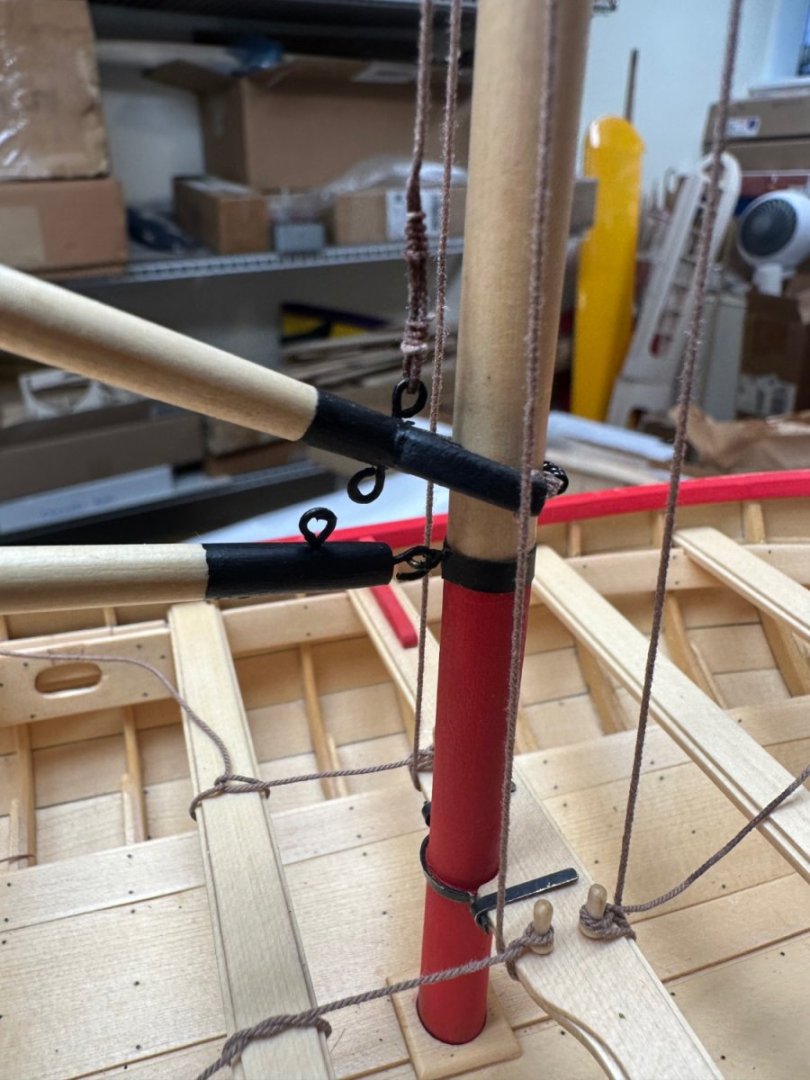
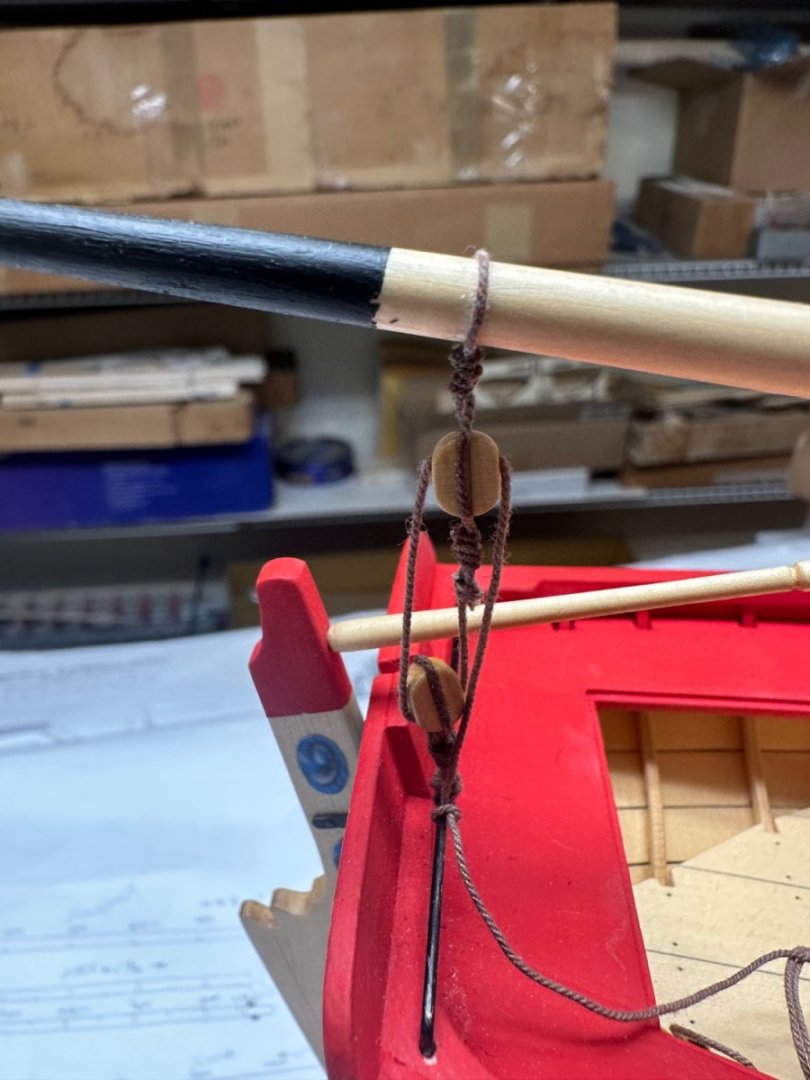
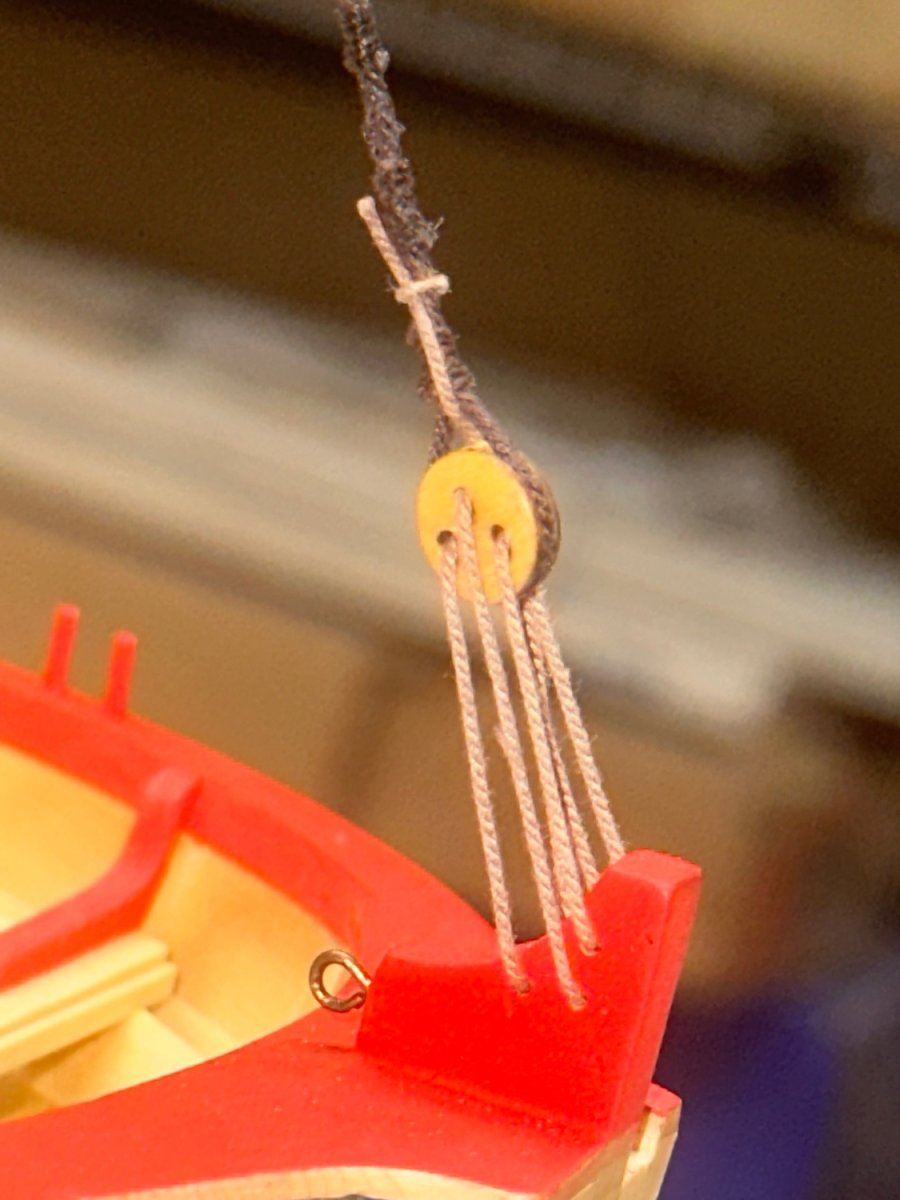
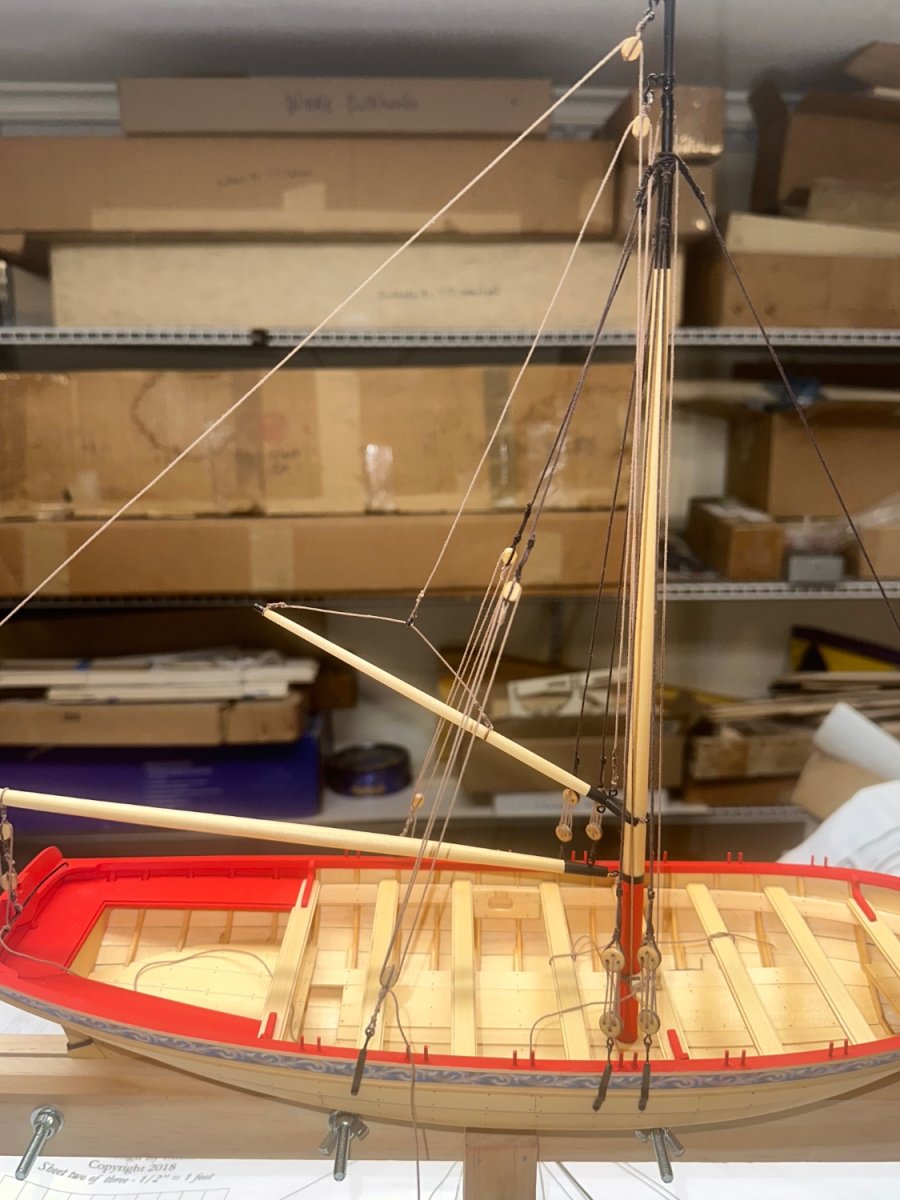
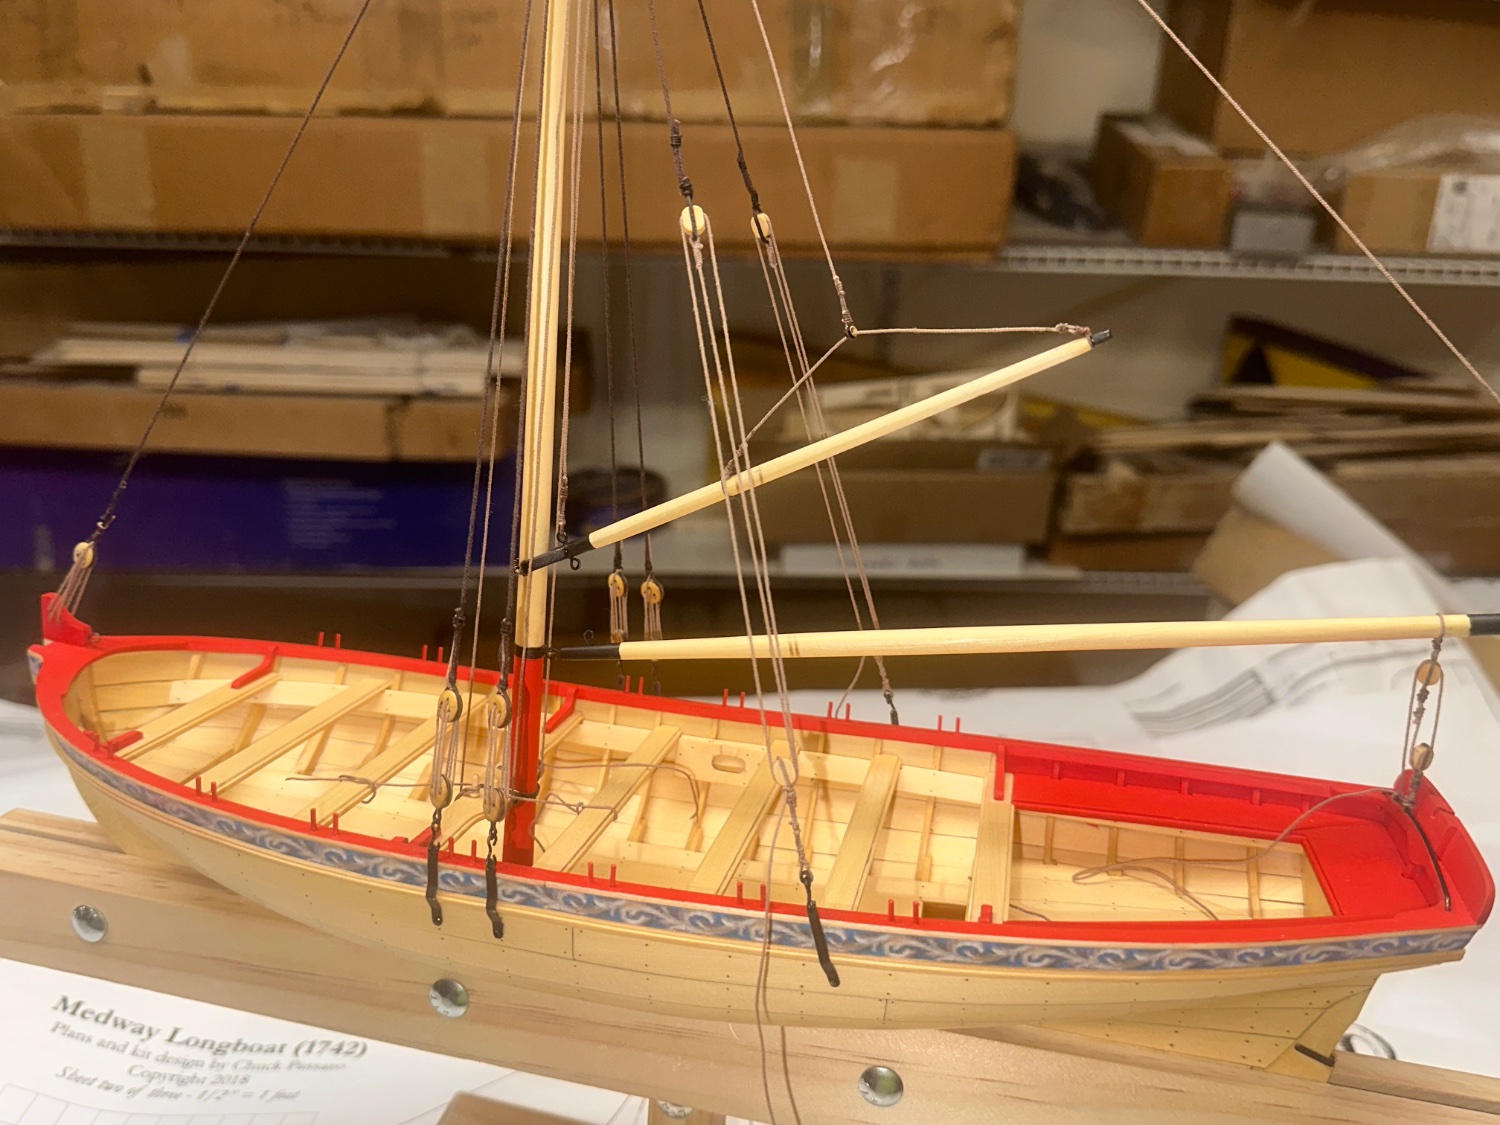
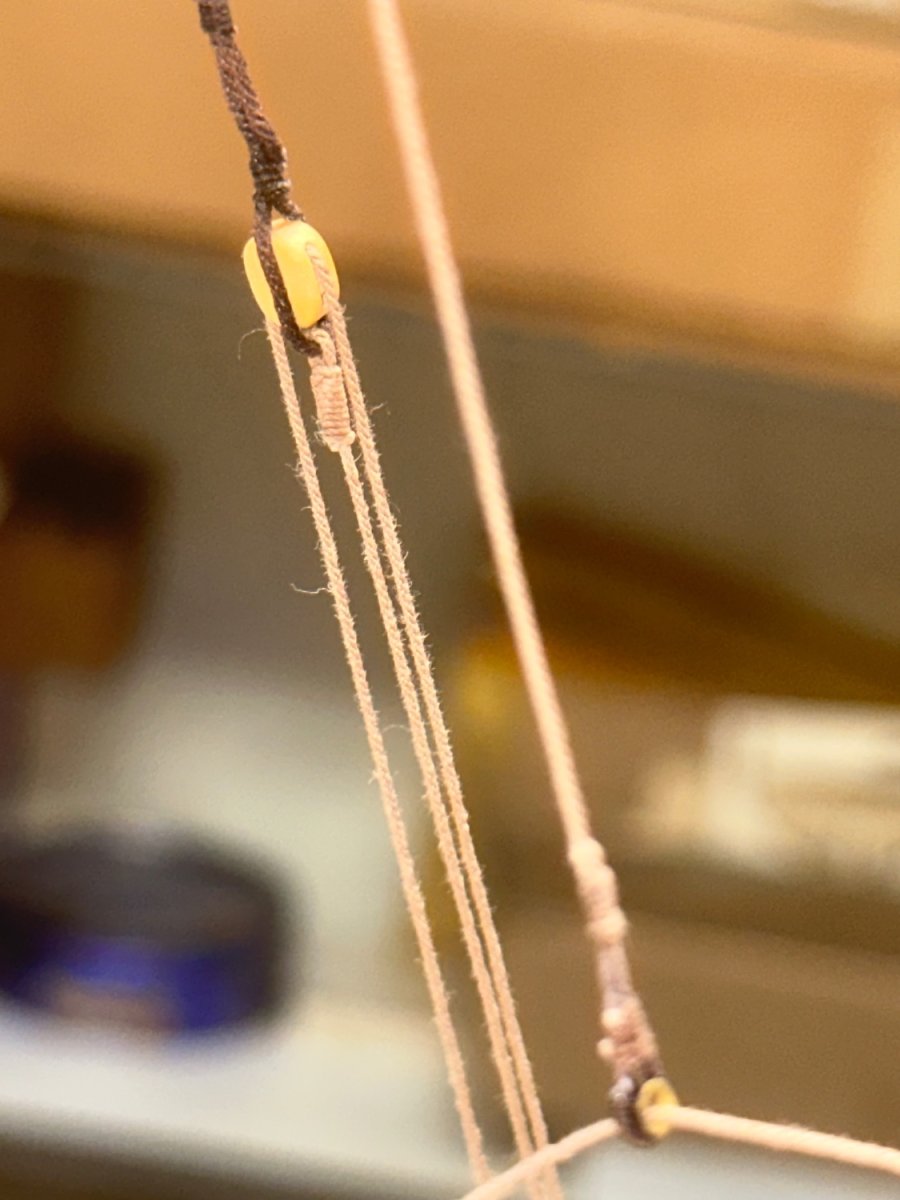
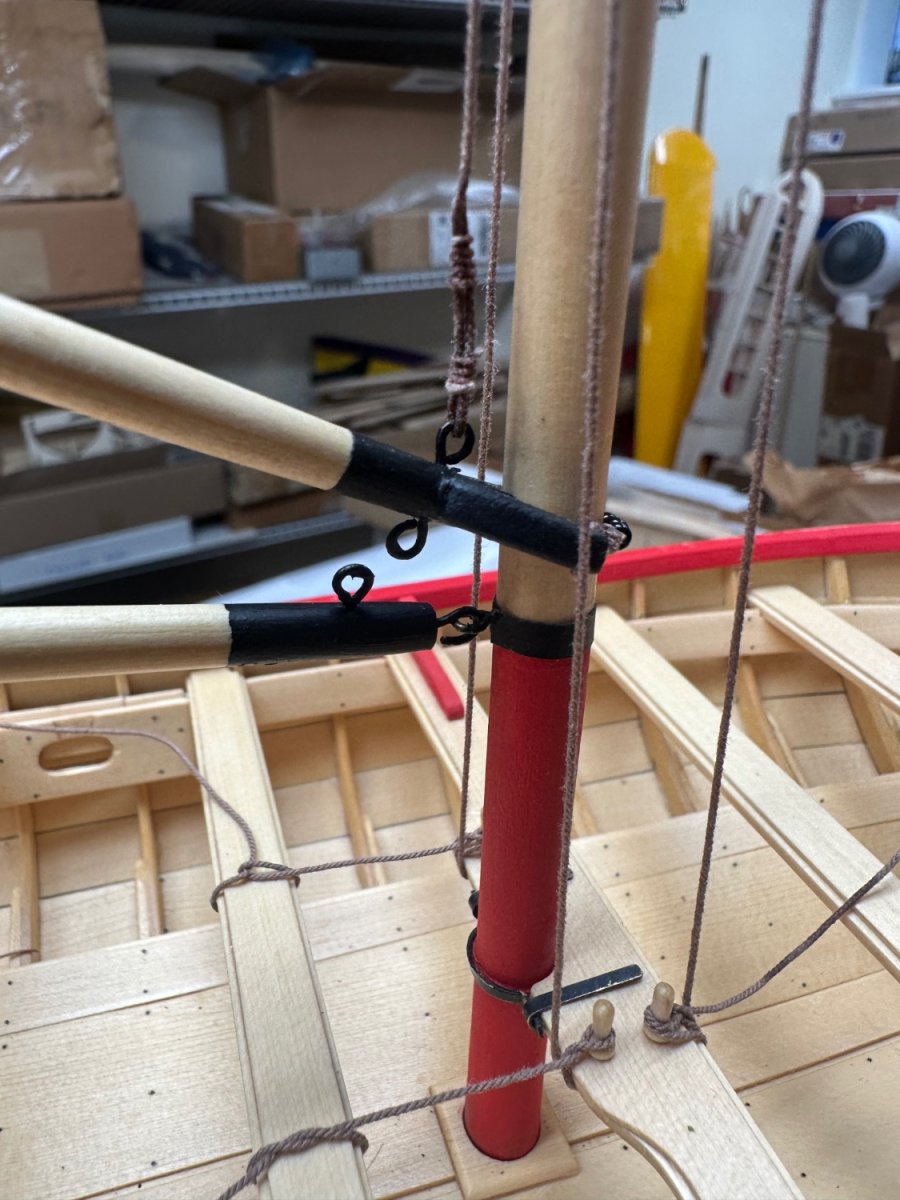
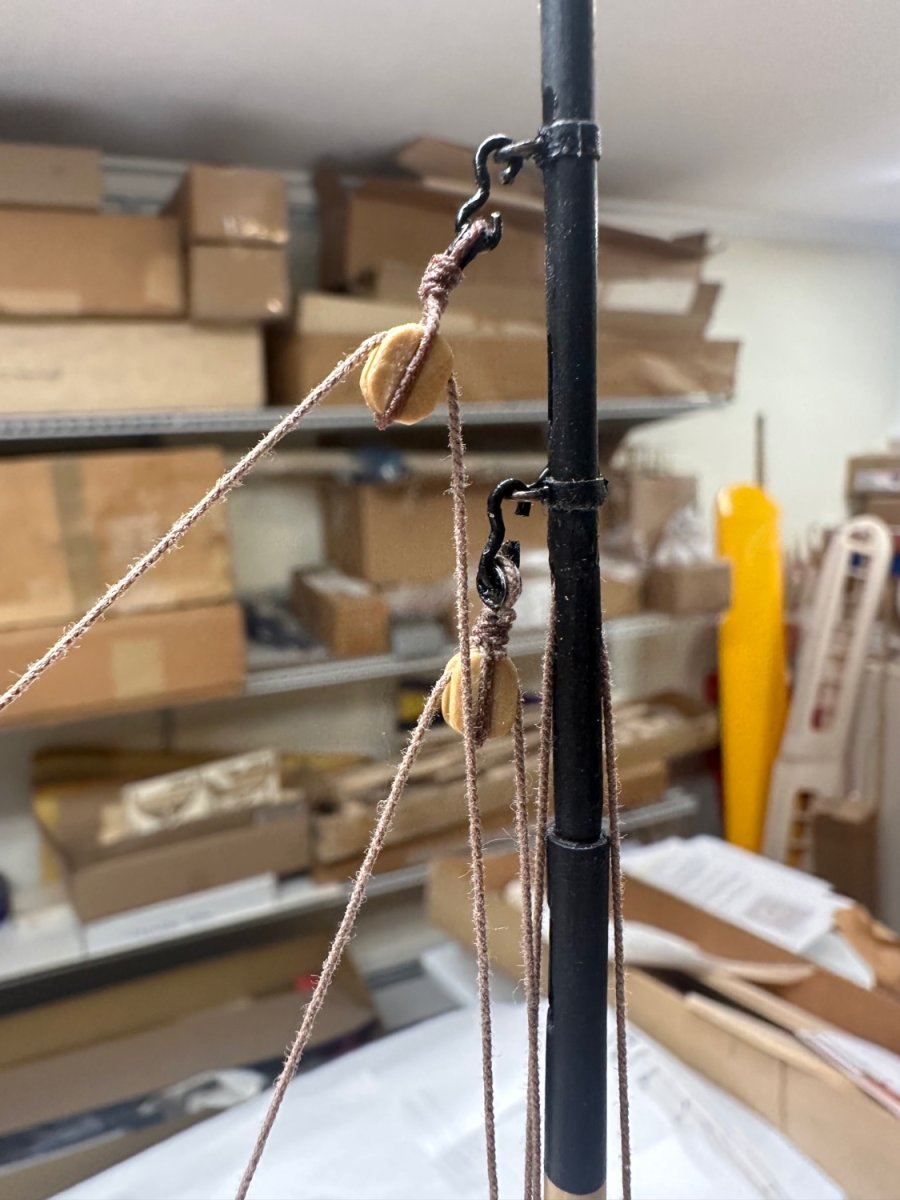
With the exception of the bowsprit and its rigging and rope coils, the rigging is complete. Again, first time attempting rigging. Lots of lessons learned, I even made thimbles and served the lines as appropriate. All skills that I will need for Cheerful. Hardest part for me was seizing, I have a long way to go. With that said, any and all comments are welcome!
Best Regards …. Rick


-
-
-
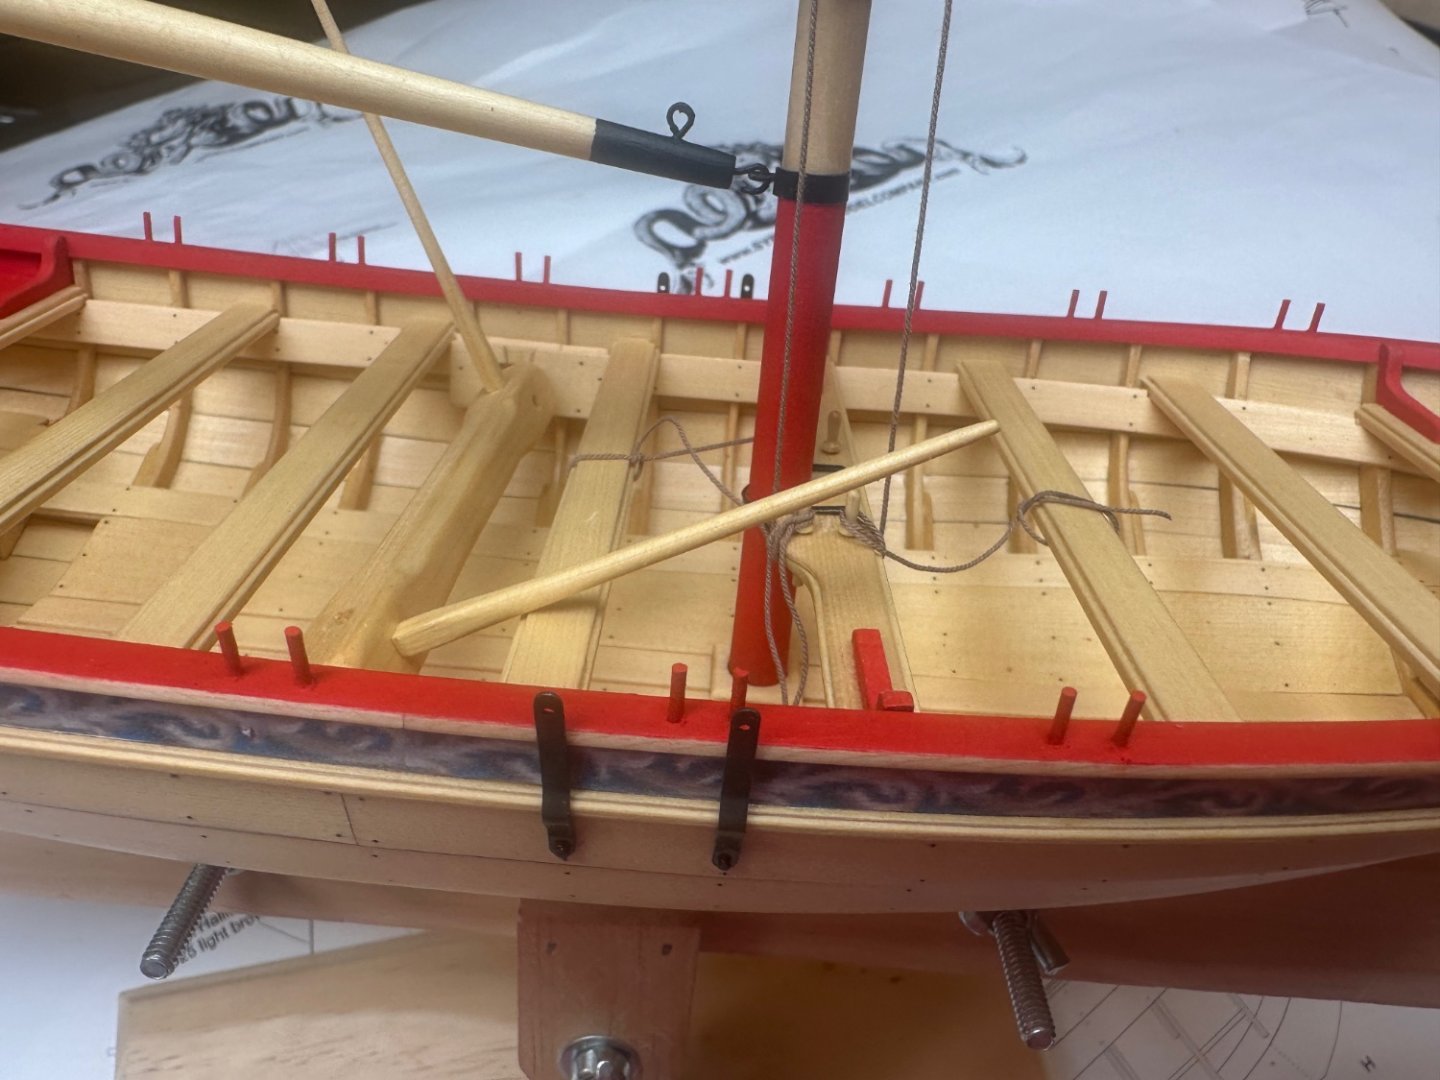
Repair completed….
Best Regards …. Rick
- Diver, CiscoH and Ryland Craze
-
 3
3
-
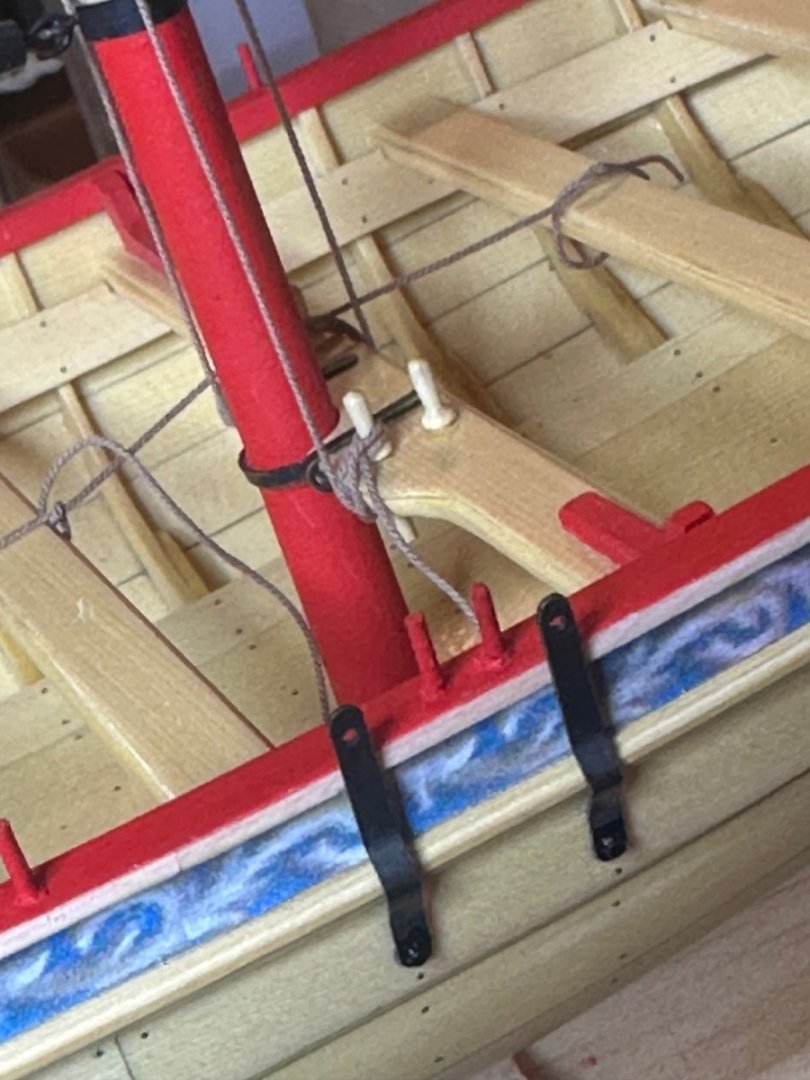
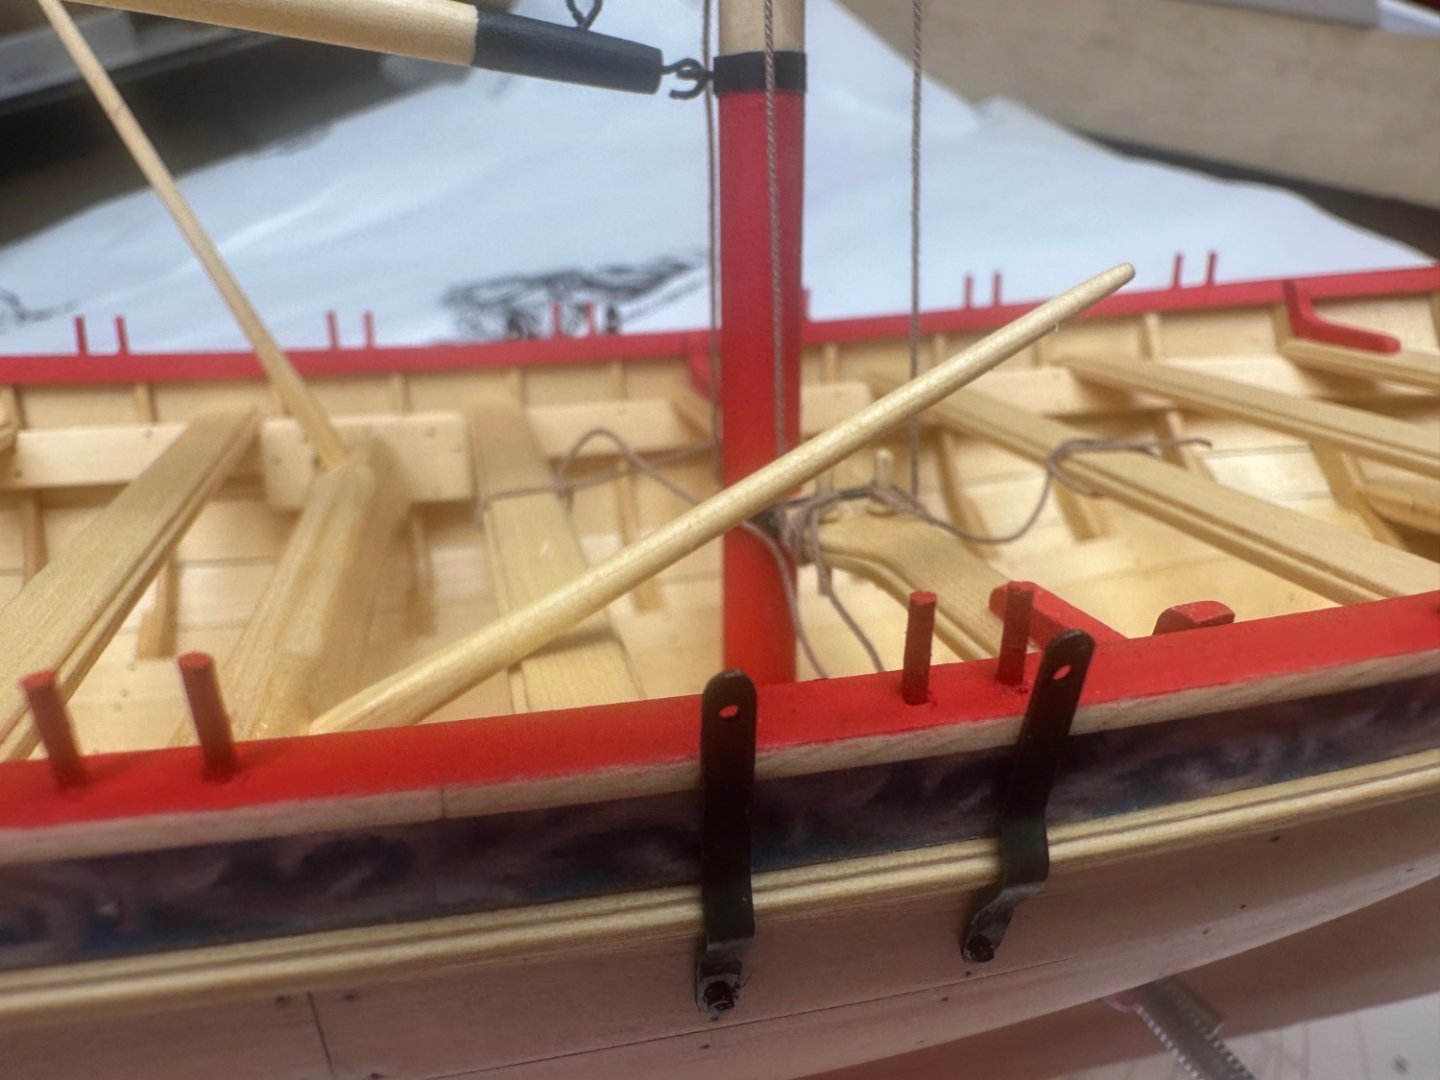
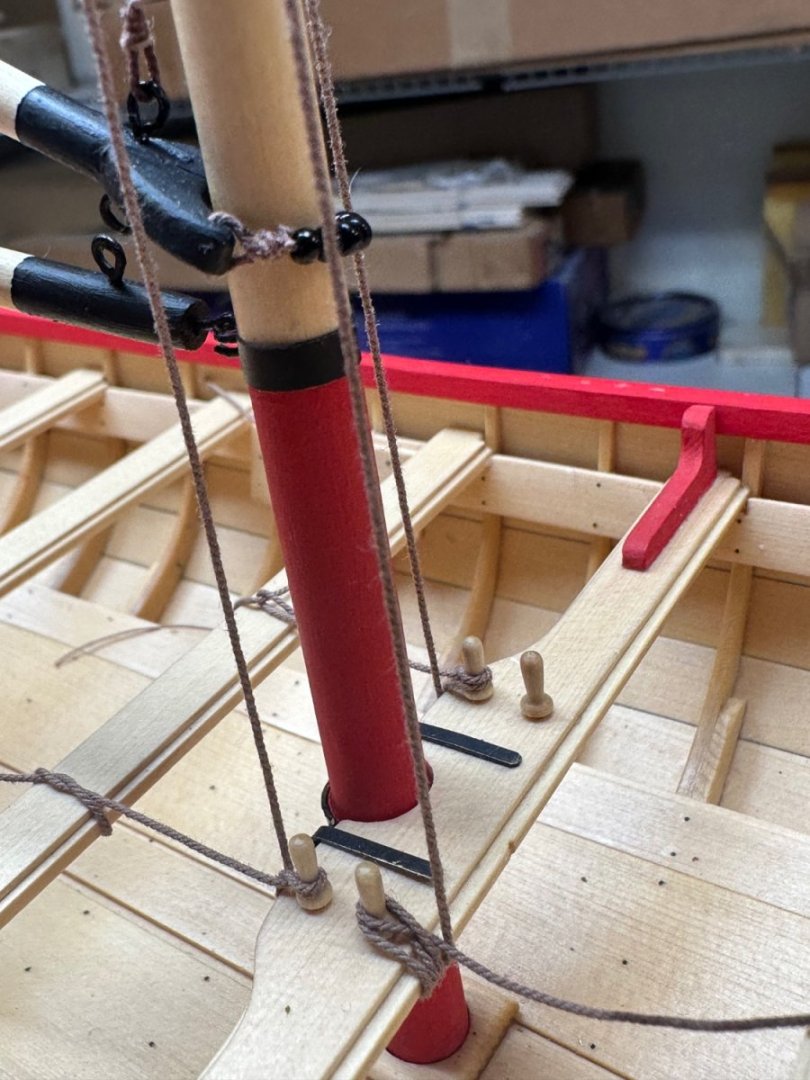
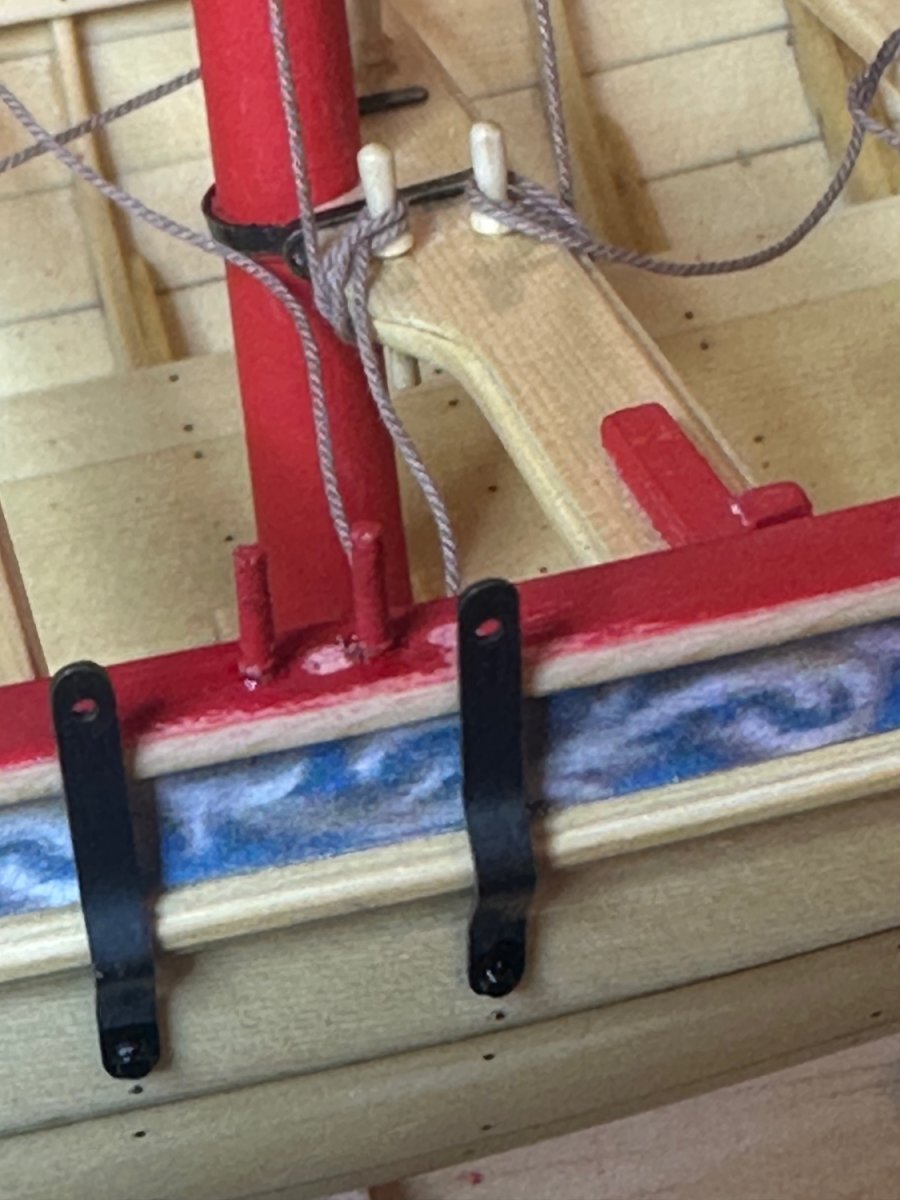
Here’s a picture after relocating the thole pins. Just need to touch up the paint.
Best Regards …. Rick
- Chuck, Ryland Craze and Tossedman
-
3
-
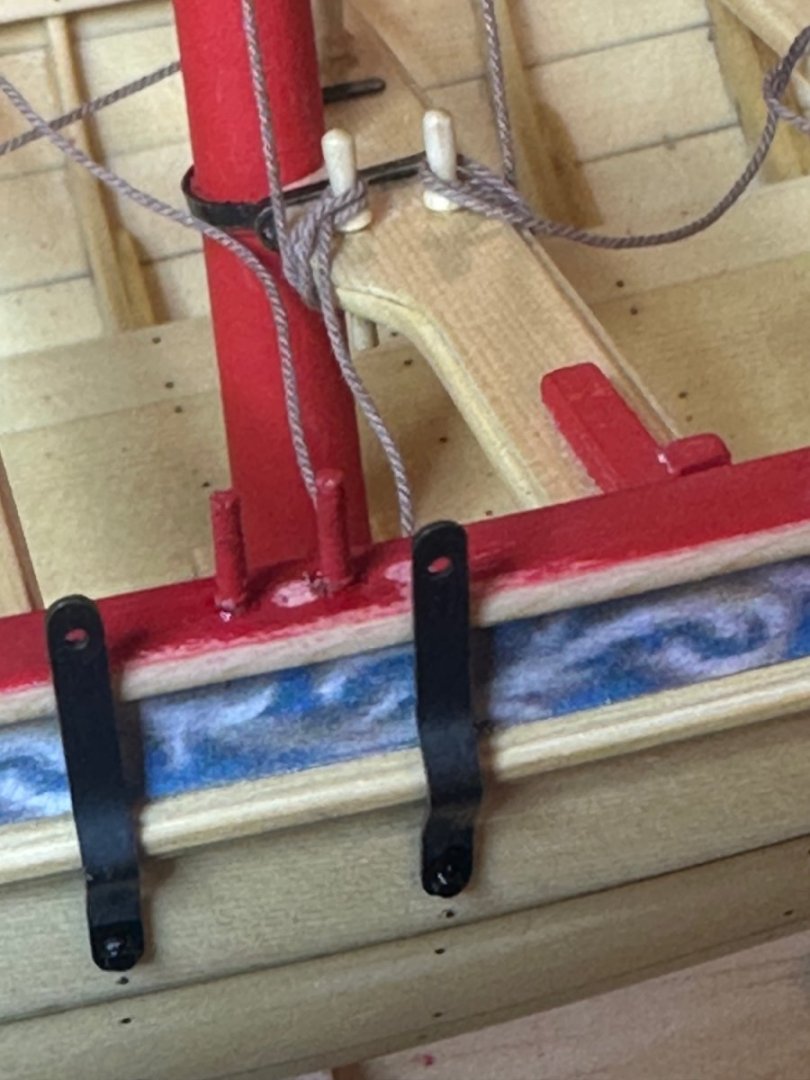
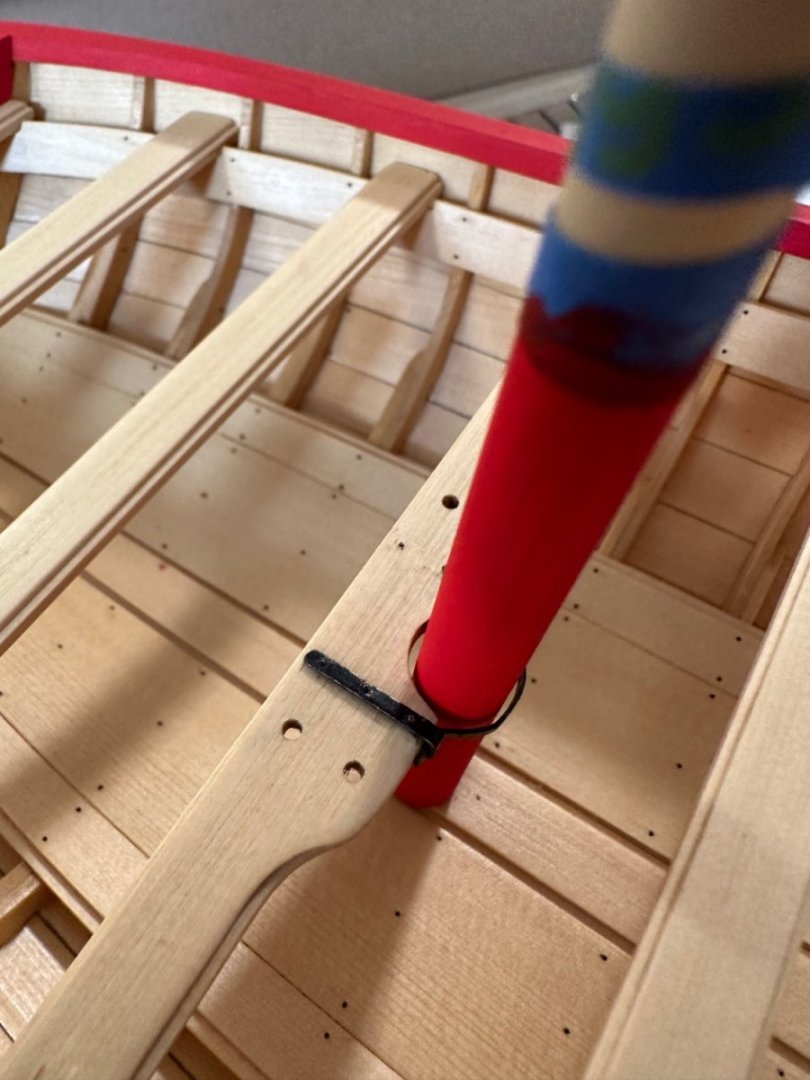
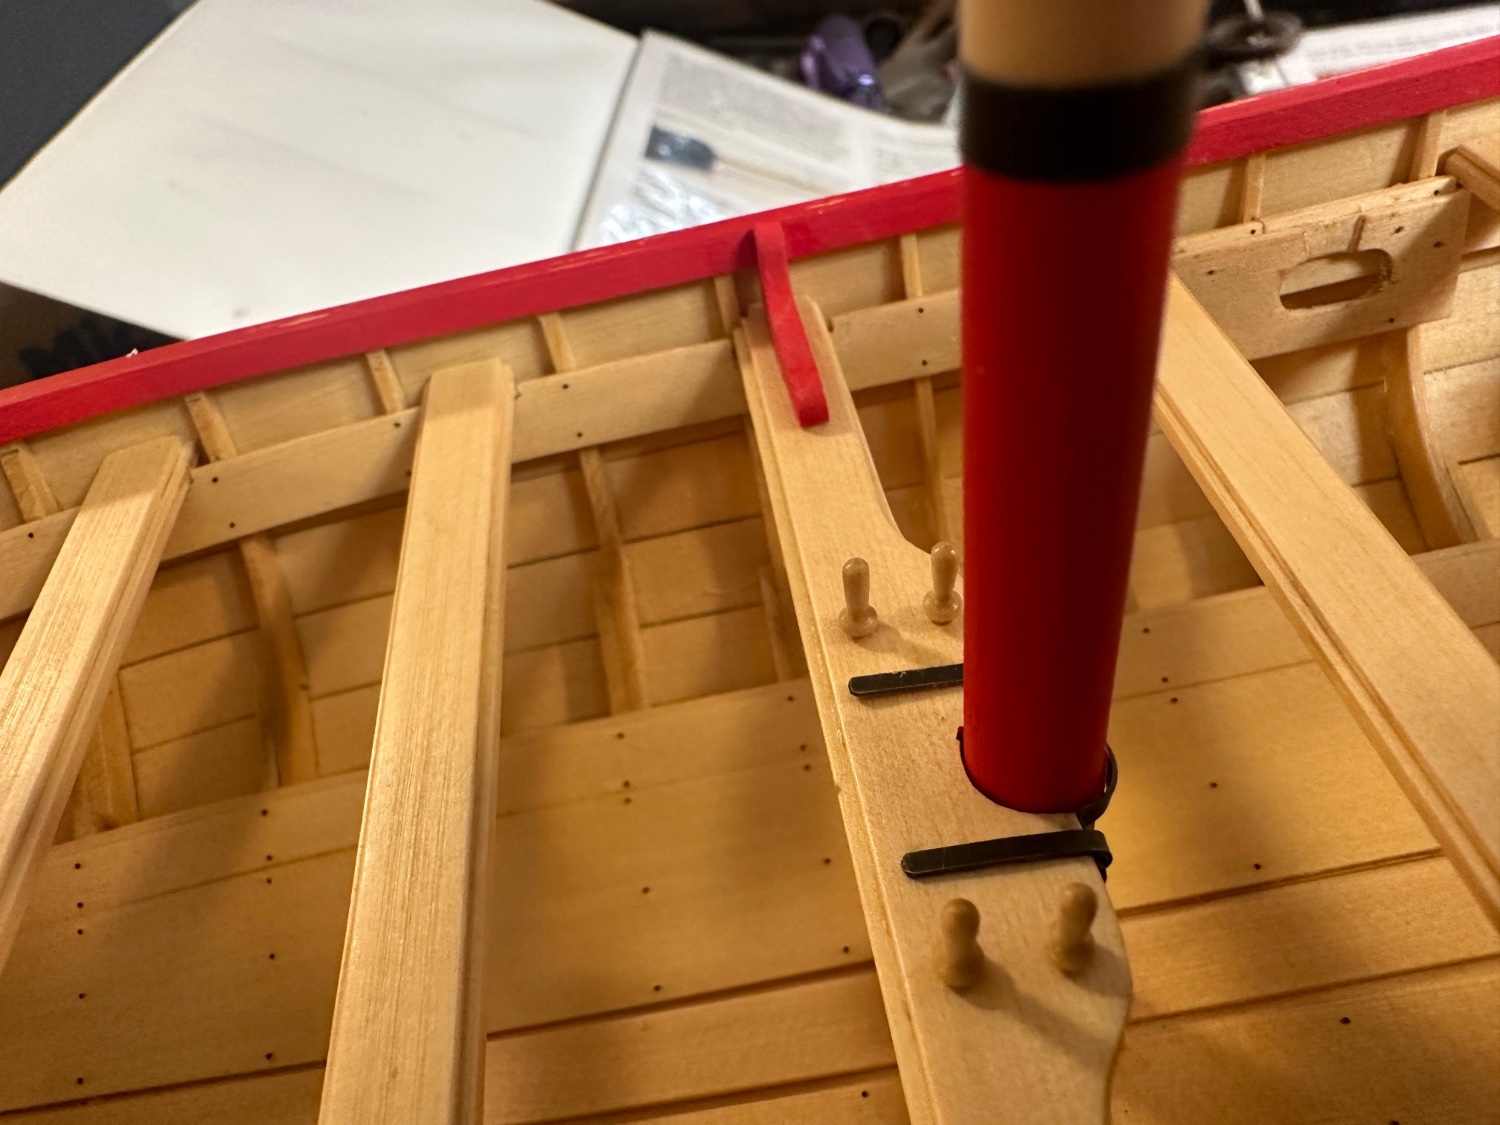
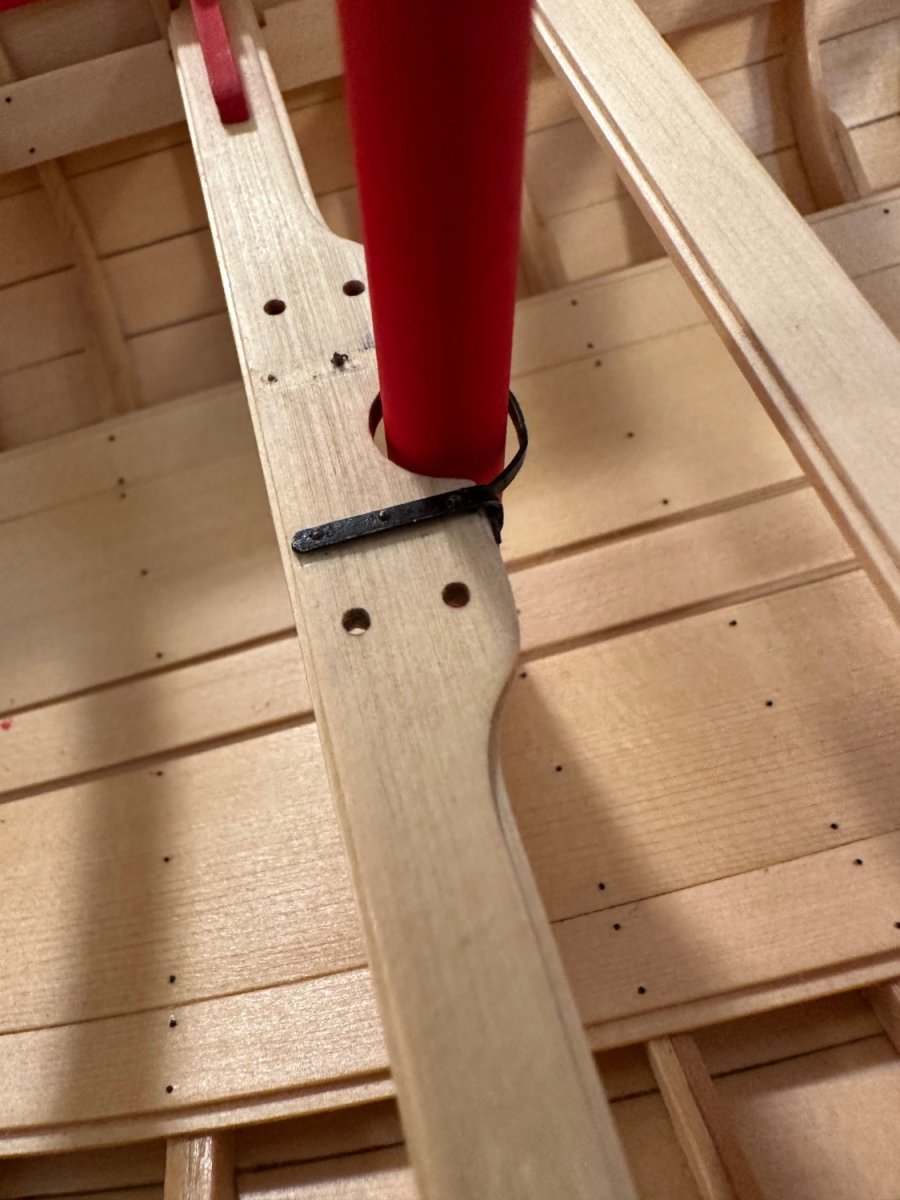
Here’s another oops that I need to fix. One set of thole pins on the starboard side are out of position. The strap covers the forward pin, an oar wouldn’t be able to be used. So the front pin will need to be removed and placed behind the rear pin.
Best Regards …. Rick
- Ryland Craze, ccoyle and Chuck
-
3
-
Diver,
You can use isopropyl alcohol. Just dab alcohol around the joint and let it soak in for a few minutes. It’ll soften the glue. It may take several tries.
Best Regards …. Rick
-
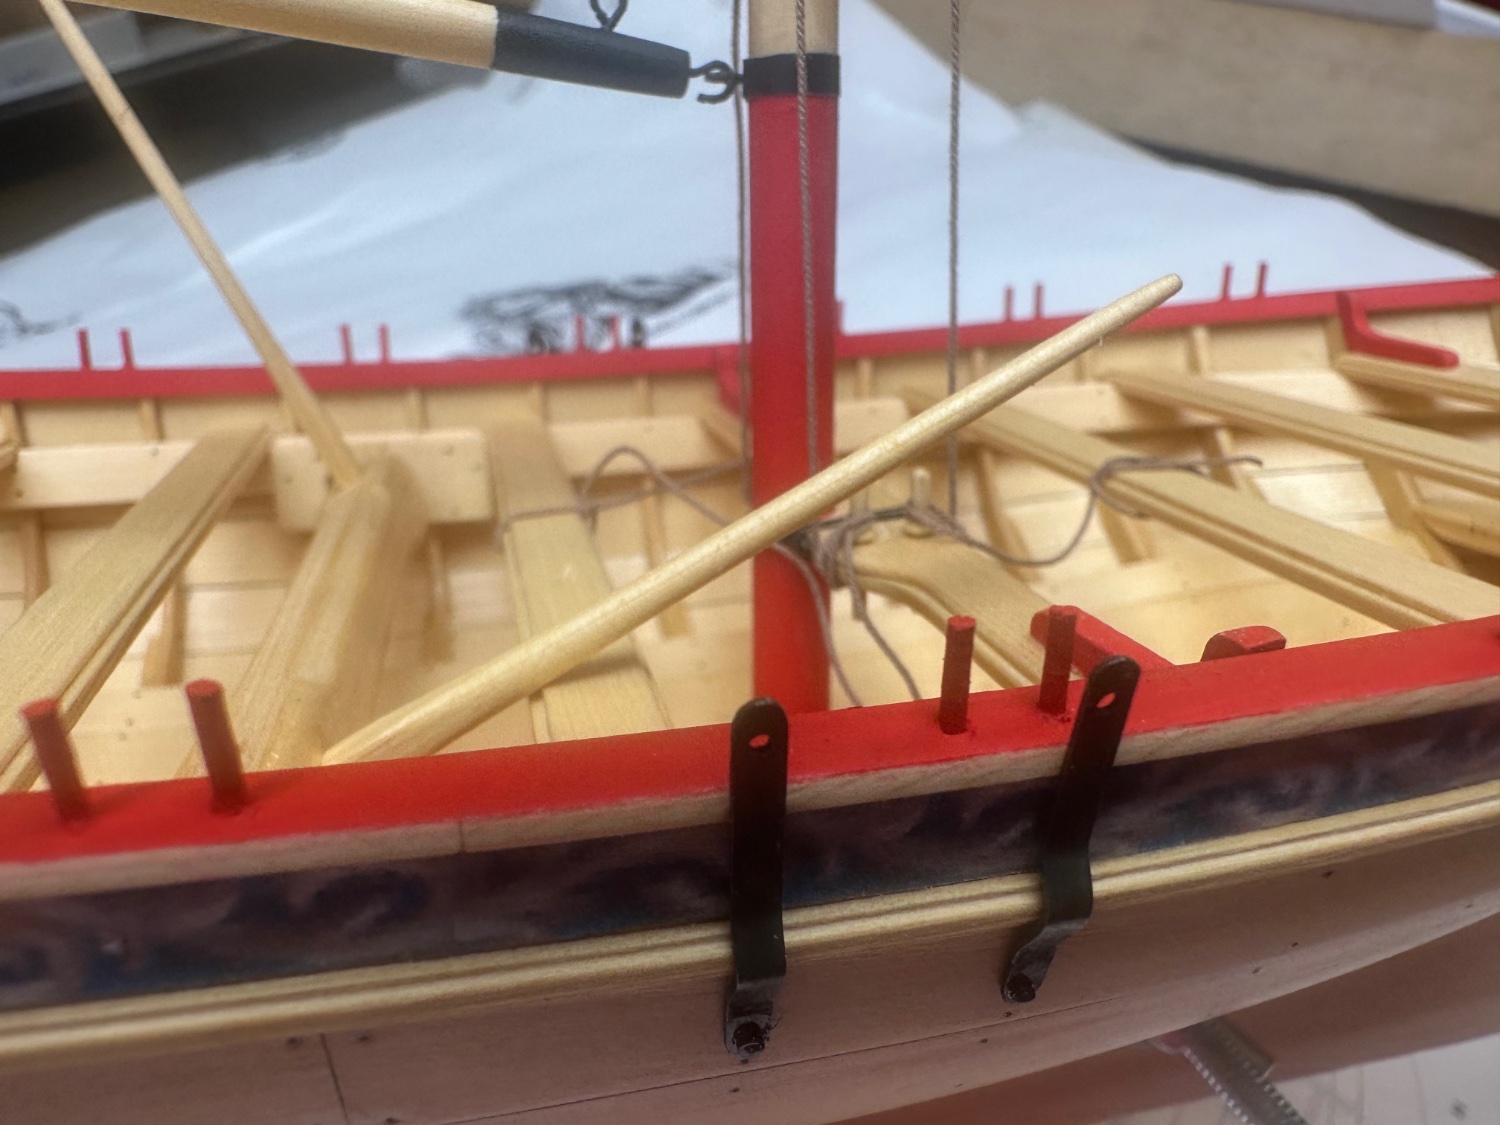
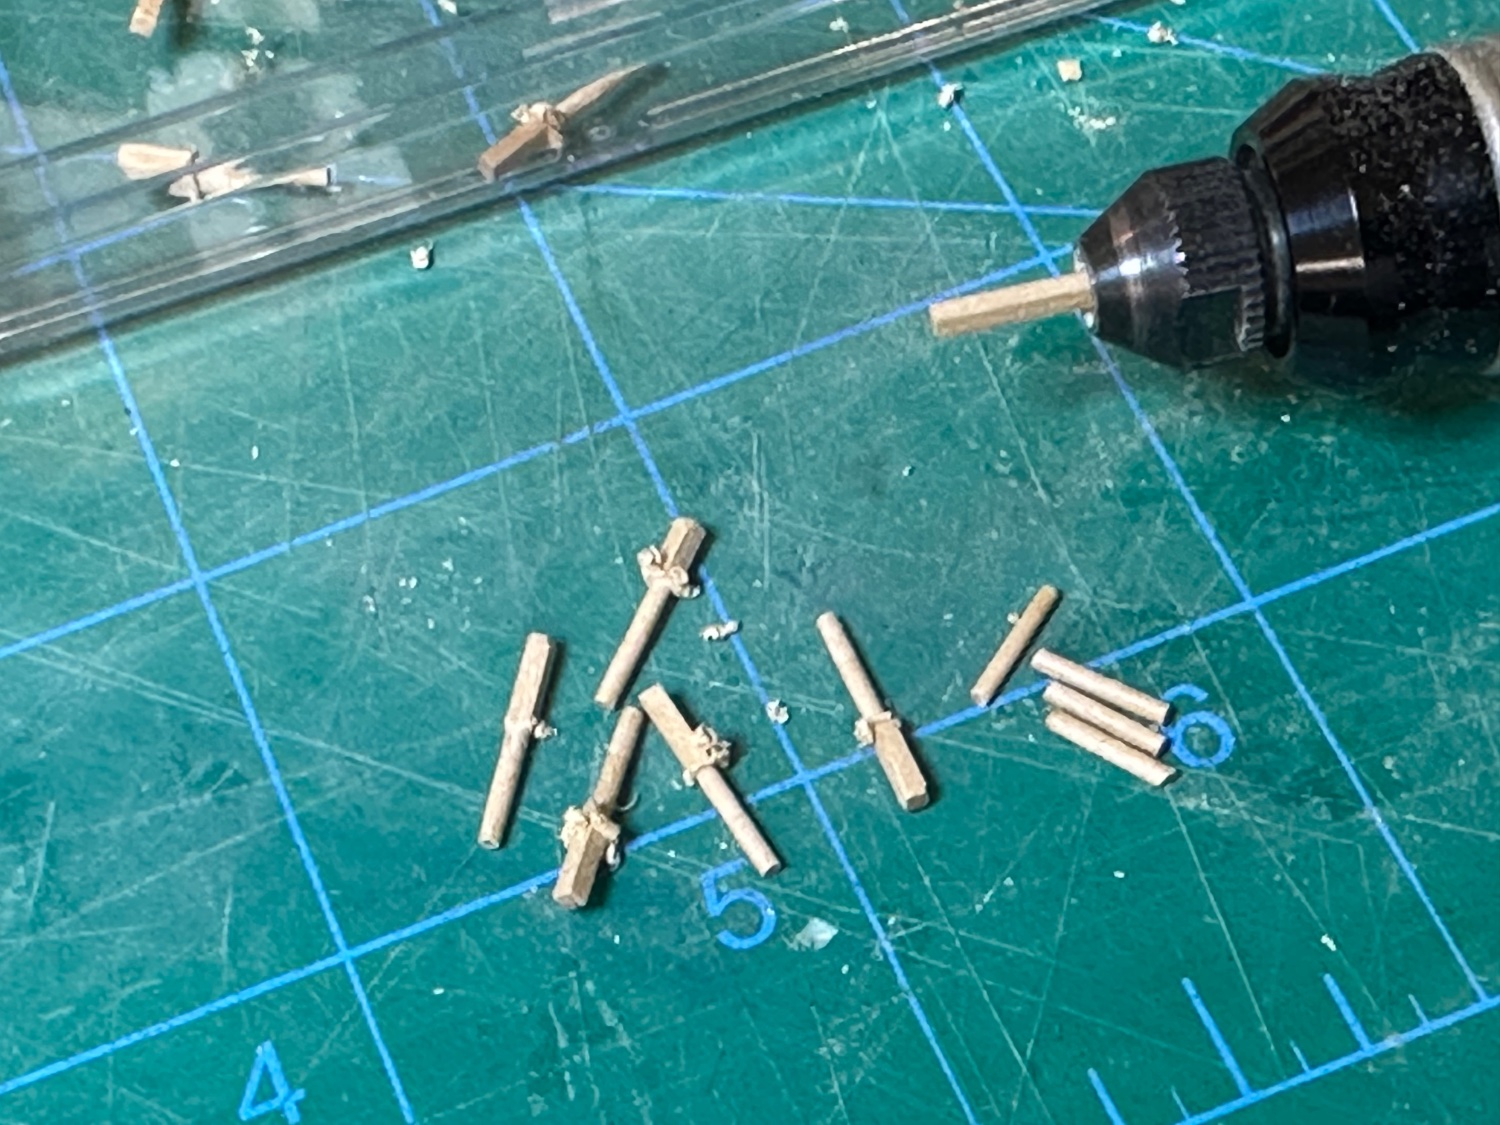
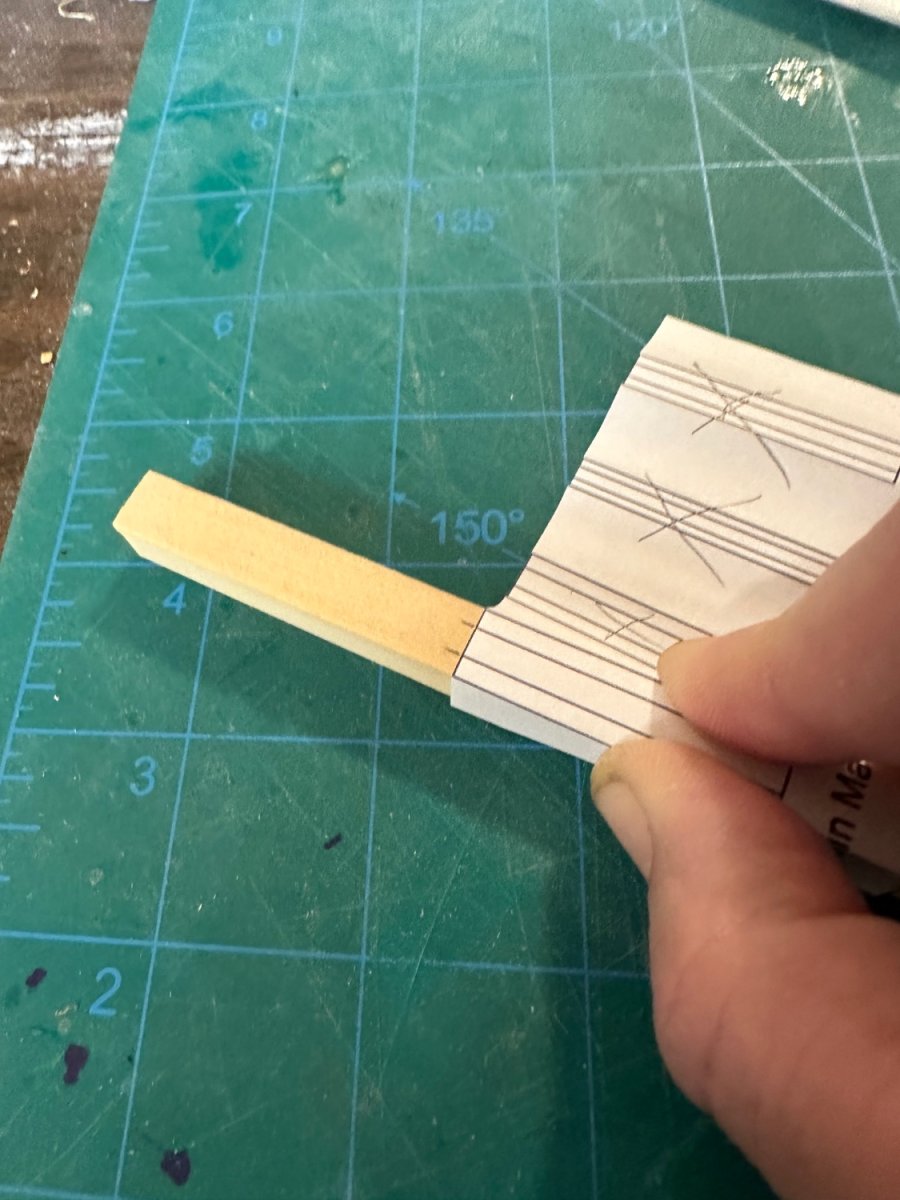
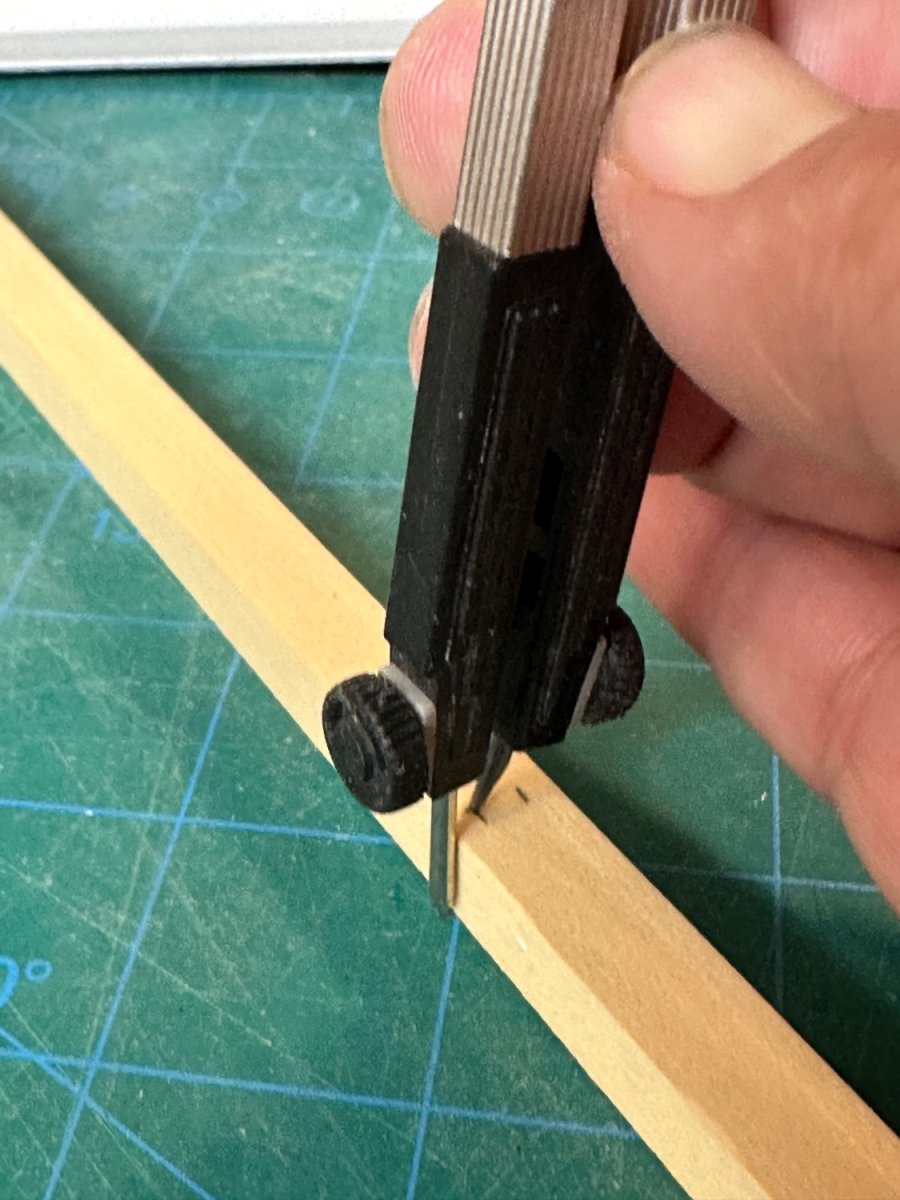
This morning I wanted to start on the shrouds, however I realized that installing the Thole pins would become problematic with the shrouds installed. So this morning became thole pin morning. I turned more than I needed and used the best from the batch. I remember in Ryland’s log that he made a little guide for consistent spacing for drilling the holes in the cap rail. It is a great idea and made for an easier task. Thanks Ryland! I also made a small guide to go over the pins to get a consistent height. It is no more than a piece of 3/16” thick ply with the pin spacing. I left the pins a little on the long side so I could clip them and then sand them flush with the top of the guide. It worked really well.
Thanks to All for stopping by and all the likes, I really appreciate it!
Best Regards …. Rick


- gjdale, Diver, Ryland Craze and 3 others
-
6
-
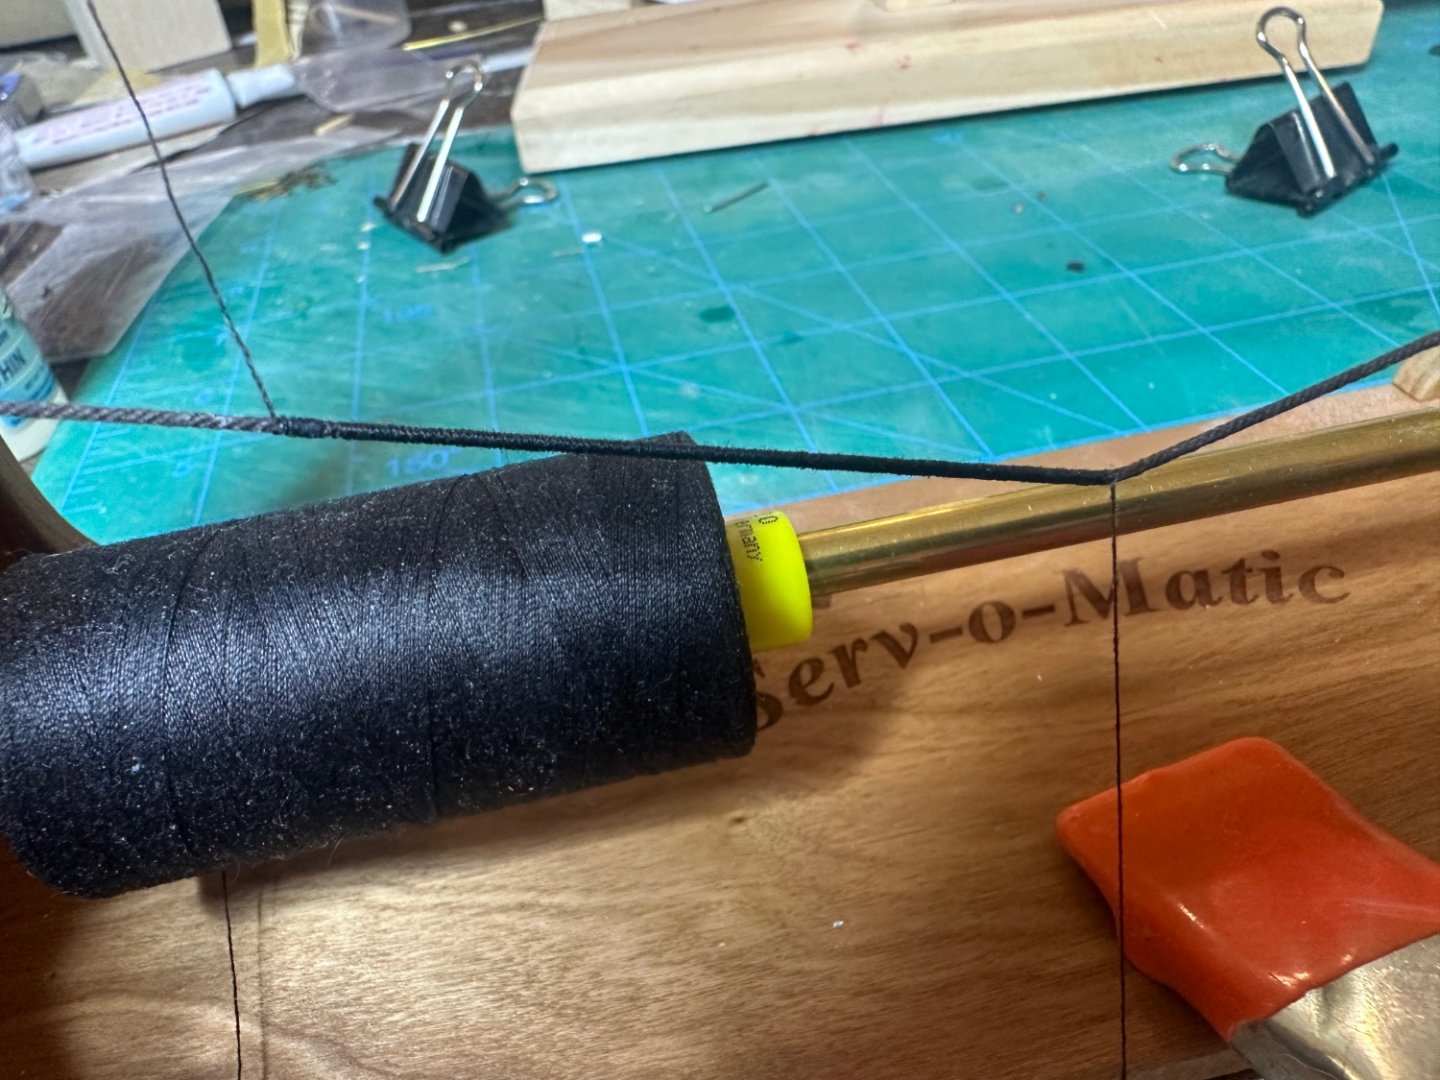
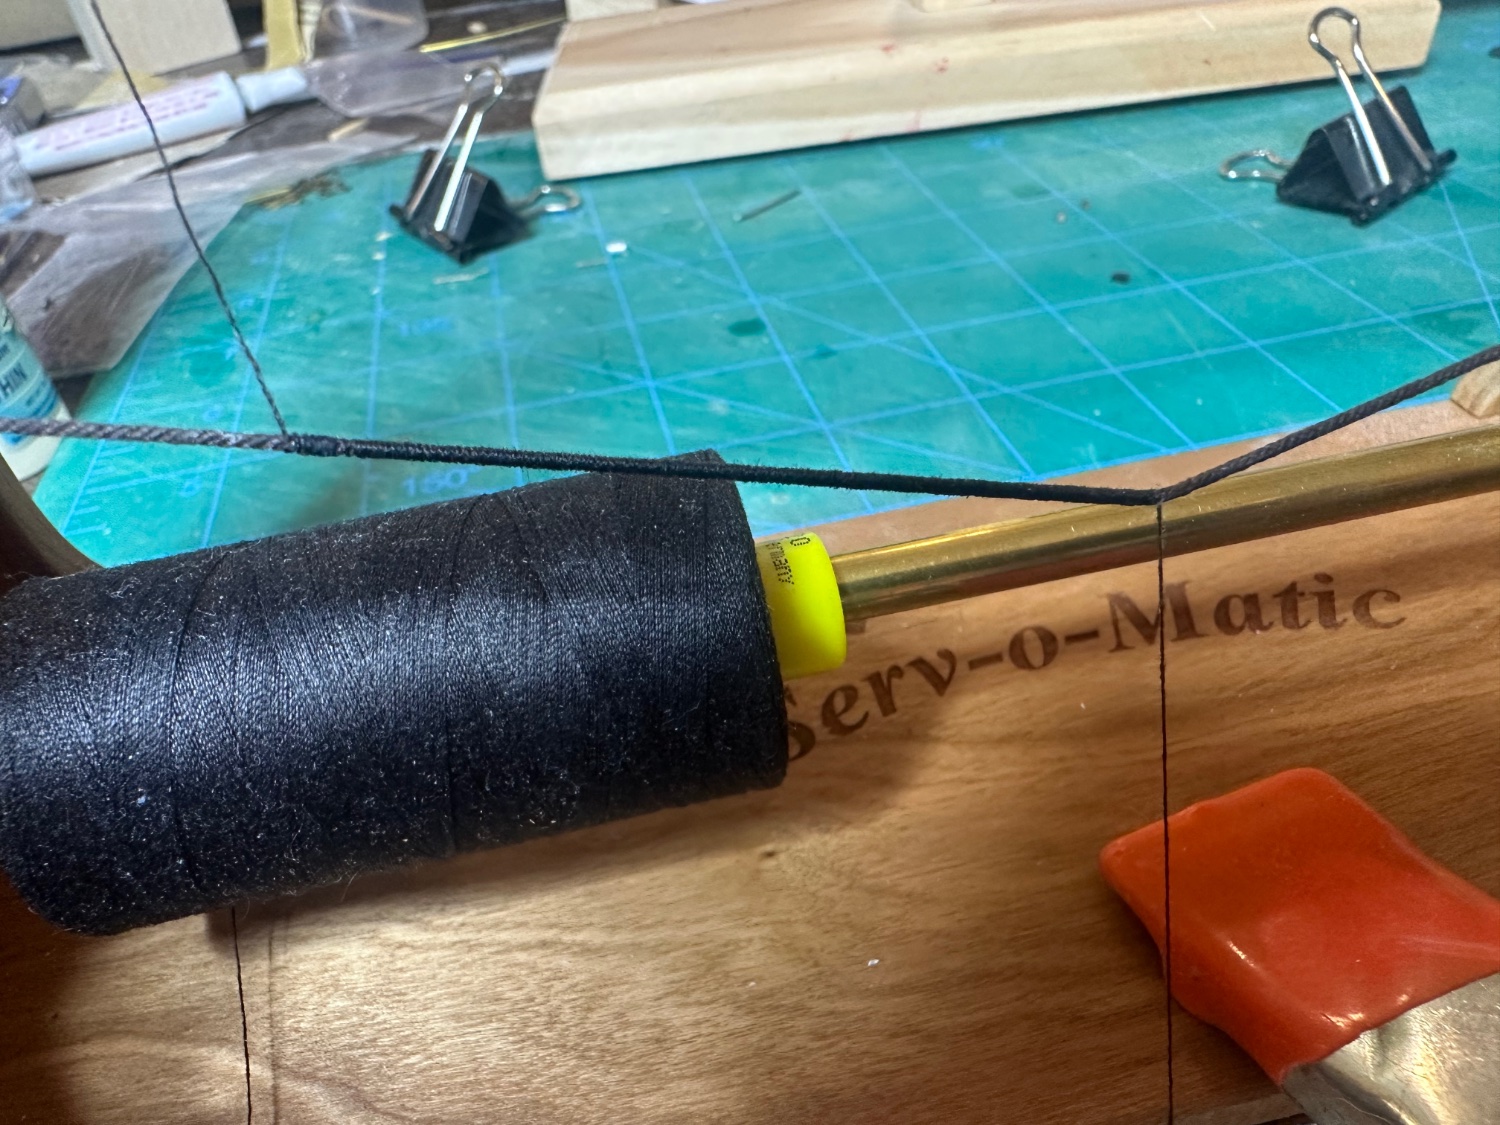
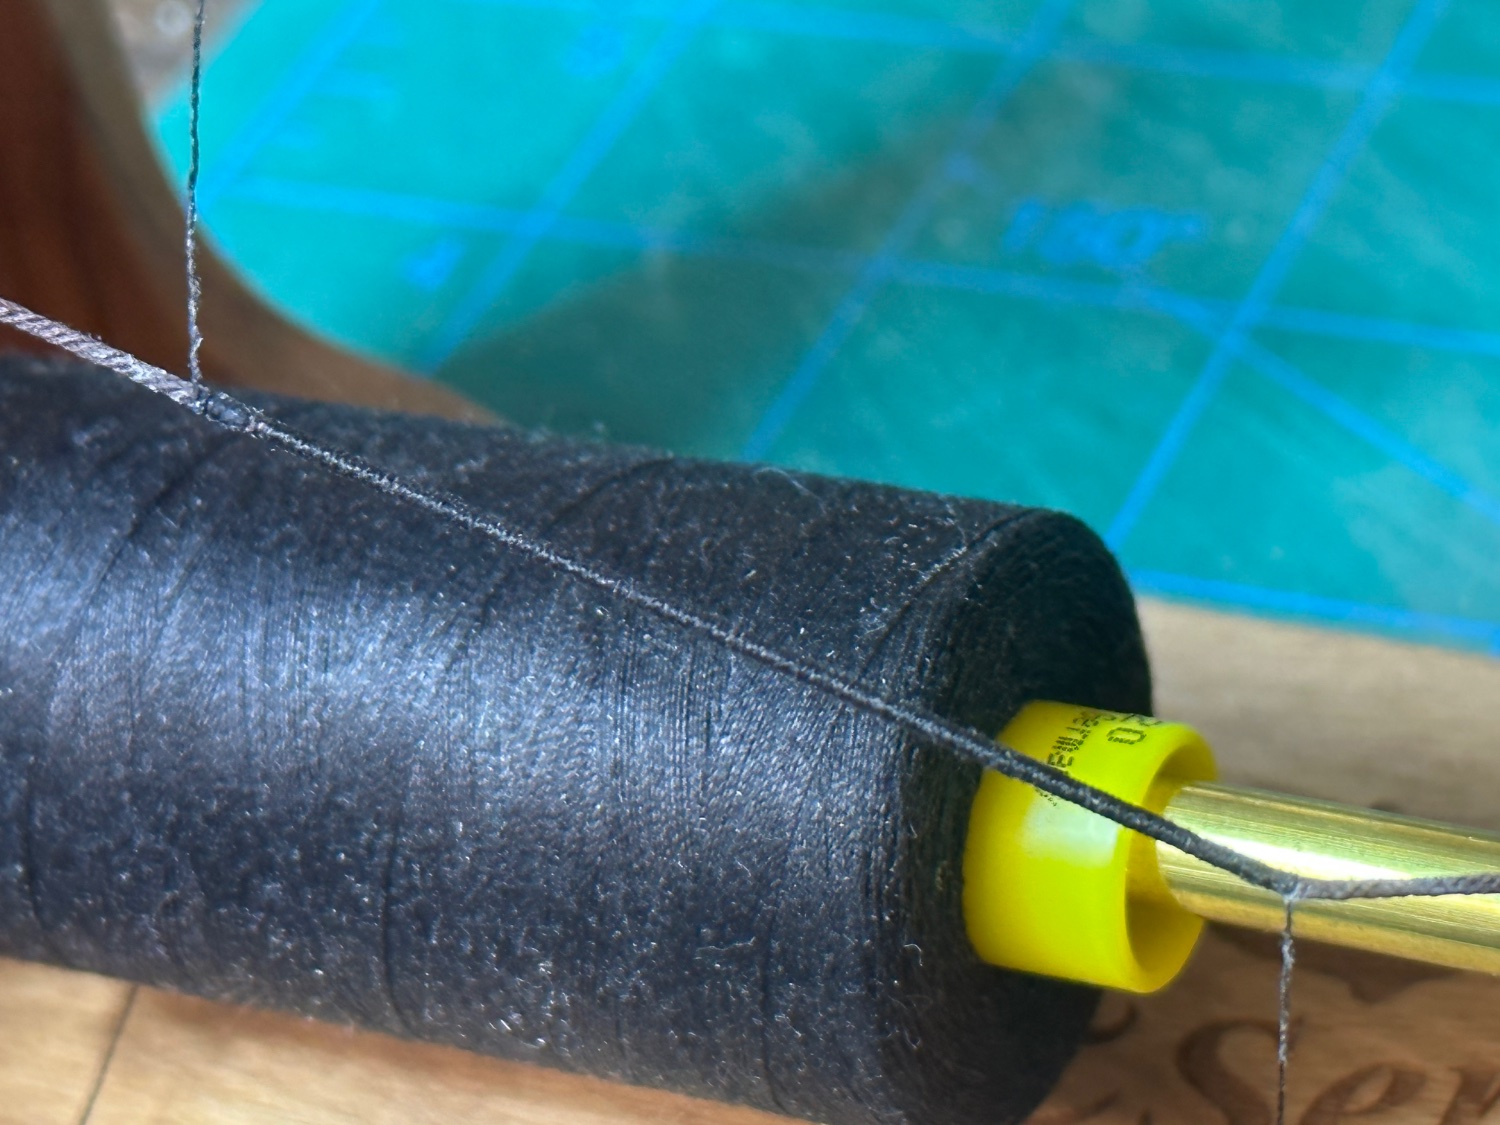
Been jumping around a little and this morning I tried my Servo-o-Matic. I served one of the shrouds and I was surprised how easy it was. One problem was that the excess line got very tangled. How do you get around this issue? Sorry, no pictures of the mess.
Best Regards …. Rick

-
Thank you Chuck, means a lot to me!
Best Regards …. Rick
-
Chuck, thank you for the info! I’ll give that a try. Does the rigging look correct so far?
Winnie, yup! But first I’ll build (and start a log), Cheerful. I need to build more skills before tackling her, I have to do her justice!Best Regards …. Rick
-
Finished up the boom and gaff rigging. Overall, not too bad, l’m pleased. Question though, what glue do you guys use to secure knots and seizings? I’m not happy with using CA as it darkens the tan and how it makes the rigging so hard. Any and all comments and suggestions are welcome!
Best Regards …. Rick


-
Thanks guys, much appreciate the encouragement!
Glenn, Cheerful is next on deck and I have studied your build extensively, lots of great info in your log. And as you know, there’s a lot of other great Cheerful build logs, I can’t wait to get started! Like you, my Cheerful build is a stepping stone to to my Winnie patiently waiting.
Best Regards …. Rick
-
-
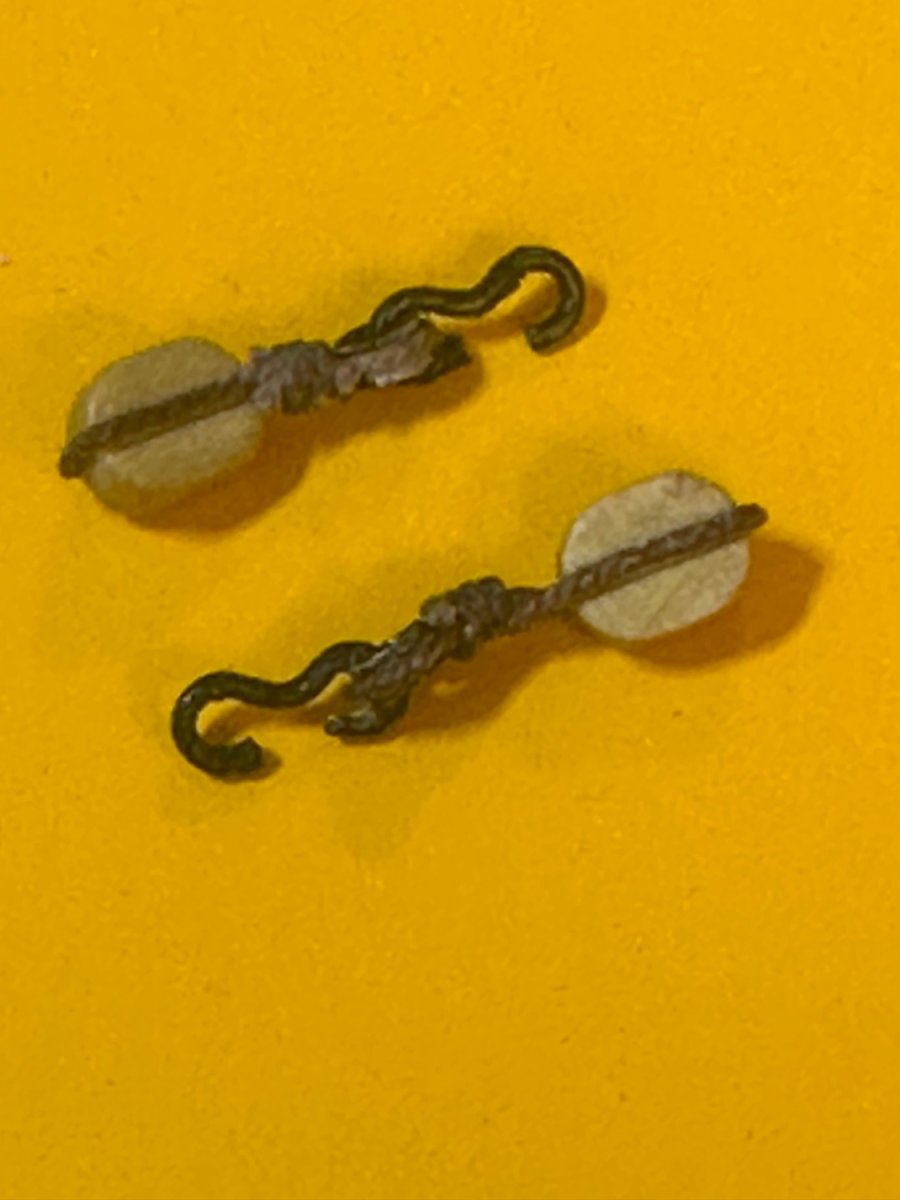
This build for me has been a journey of many firsts, and I’ve enjoyed every step of the way. I’m almost ready to start with the rigging, another path I’ve never been down. I’d like to start with stropping the blocks, and I’ve made some acceptable hooks and a couple of thimbles. Can anybody point me to a good tutorial on how to strop these blocks? As always, thanks for the likes and help!
Best Regards …. Rick
-
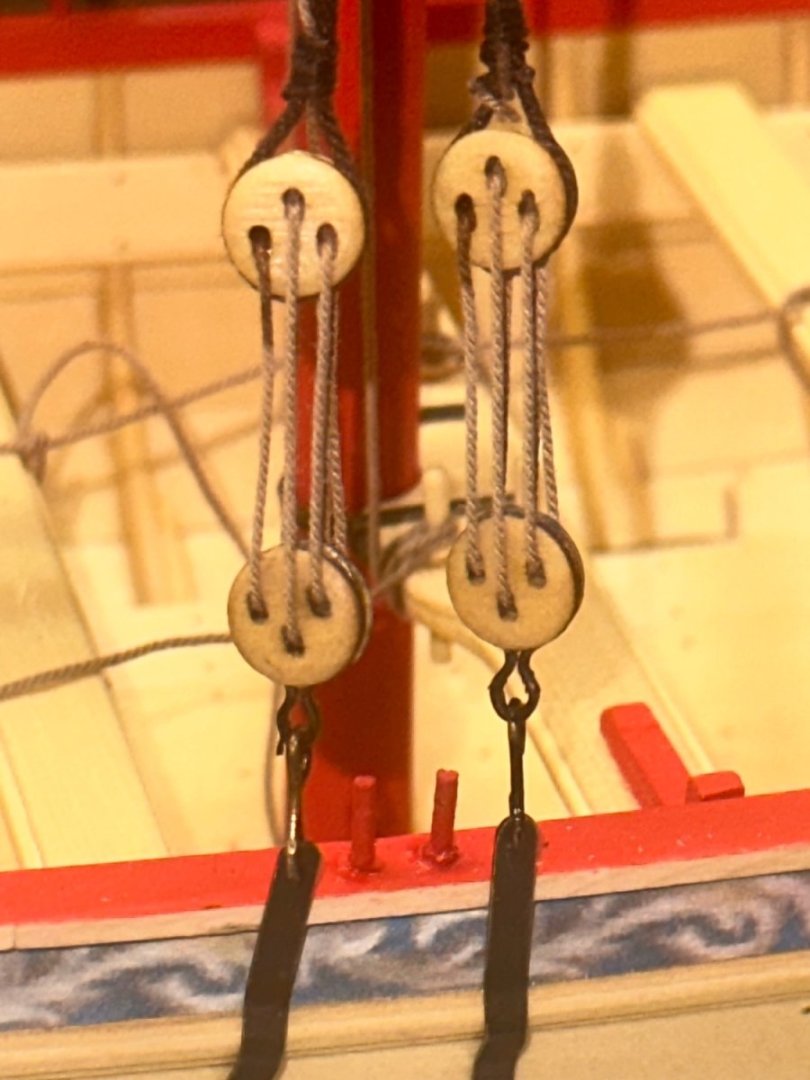
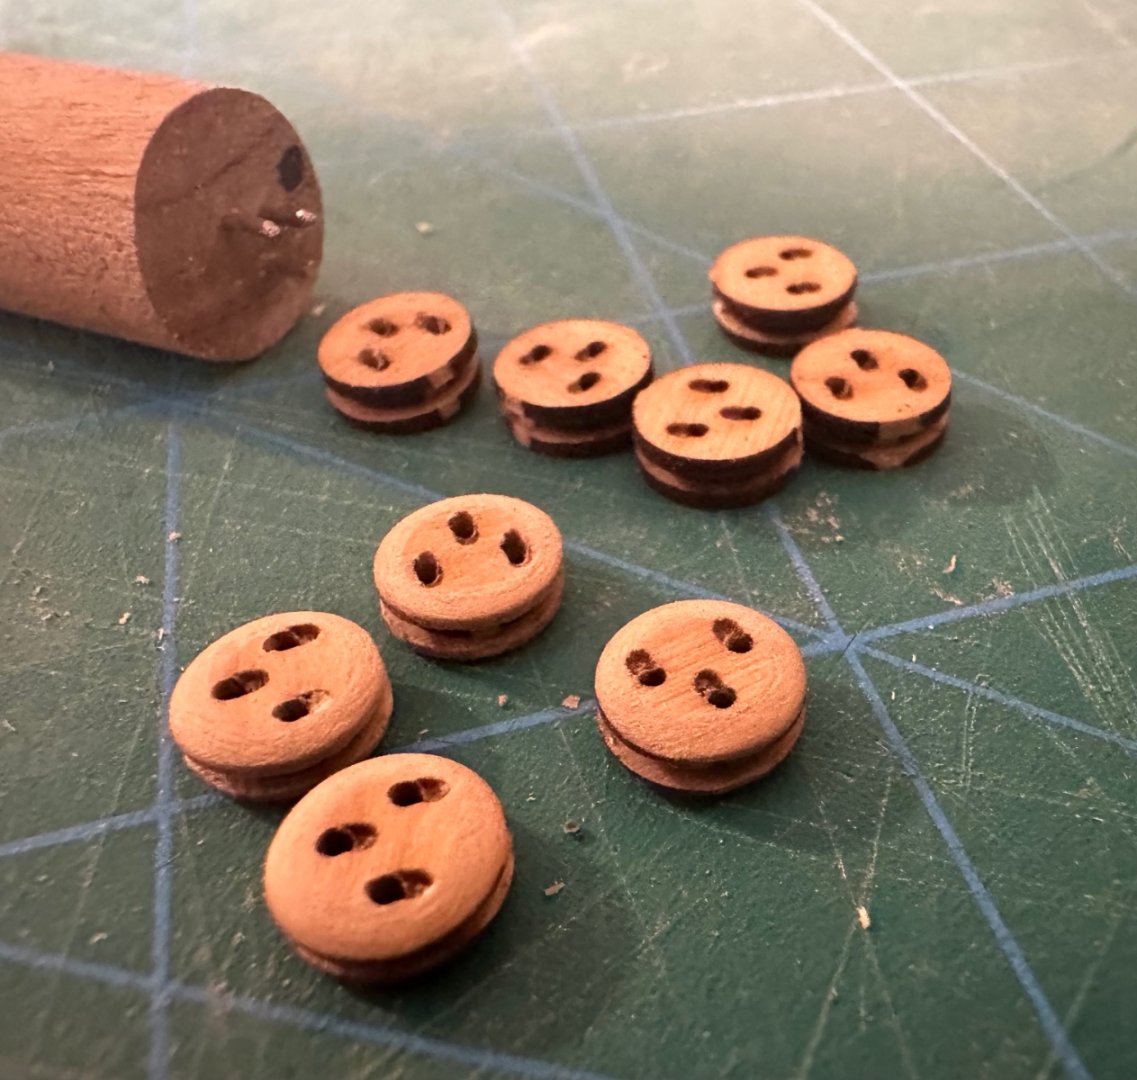
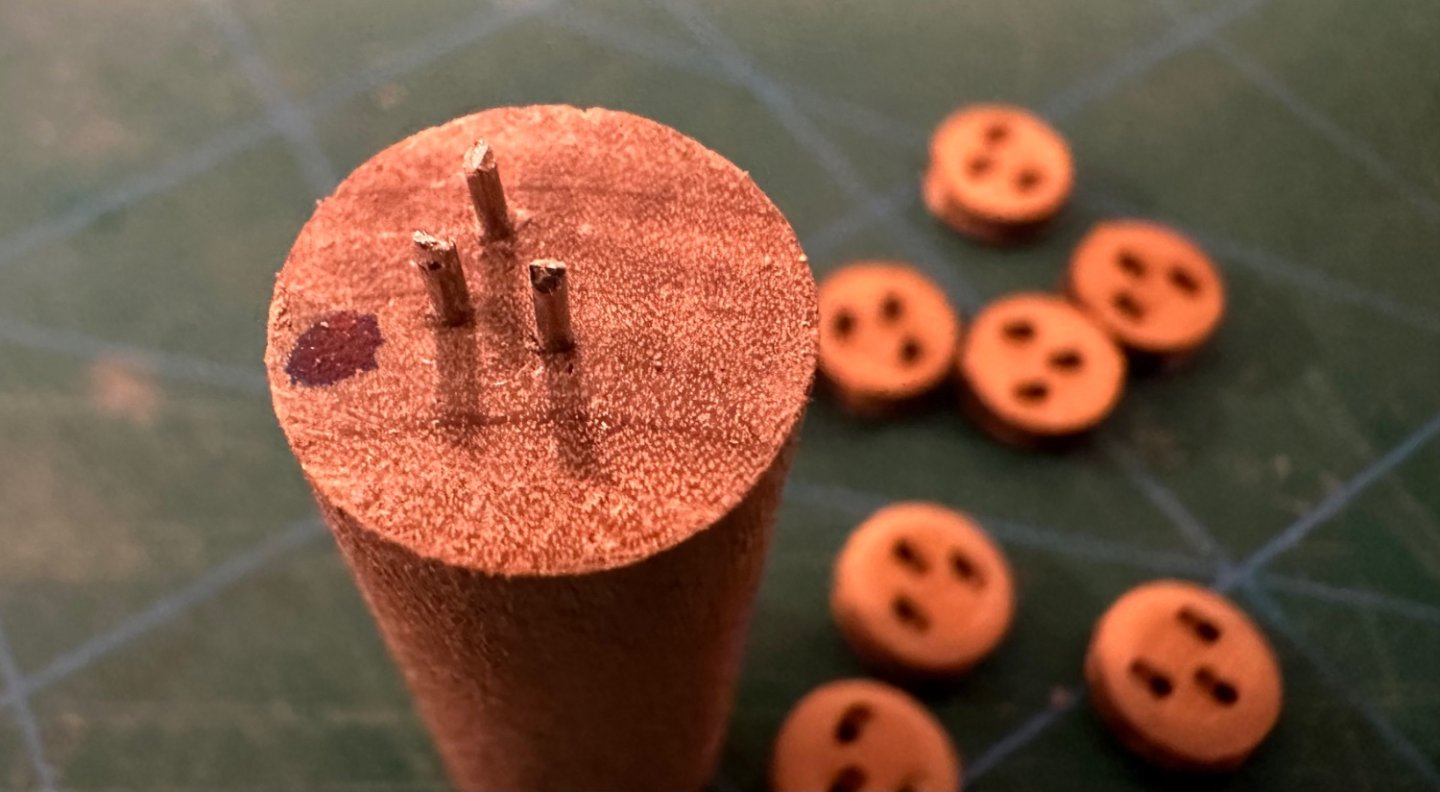
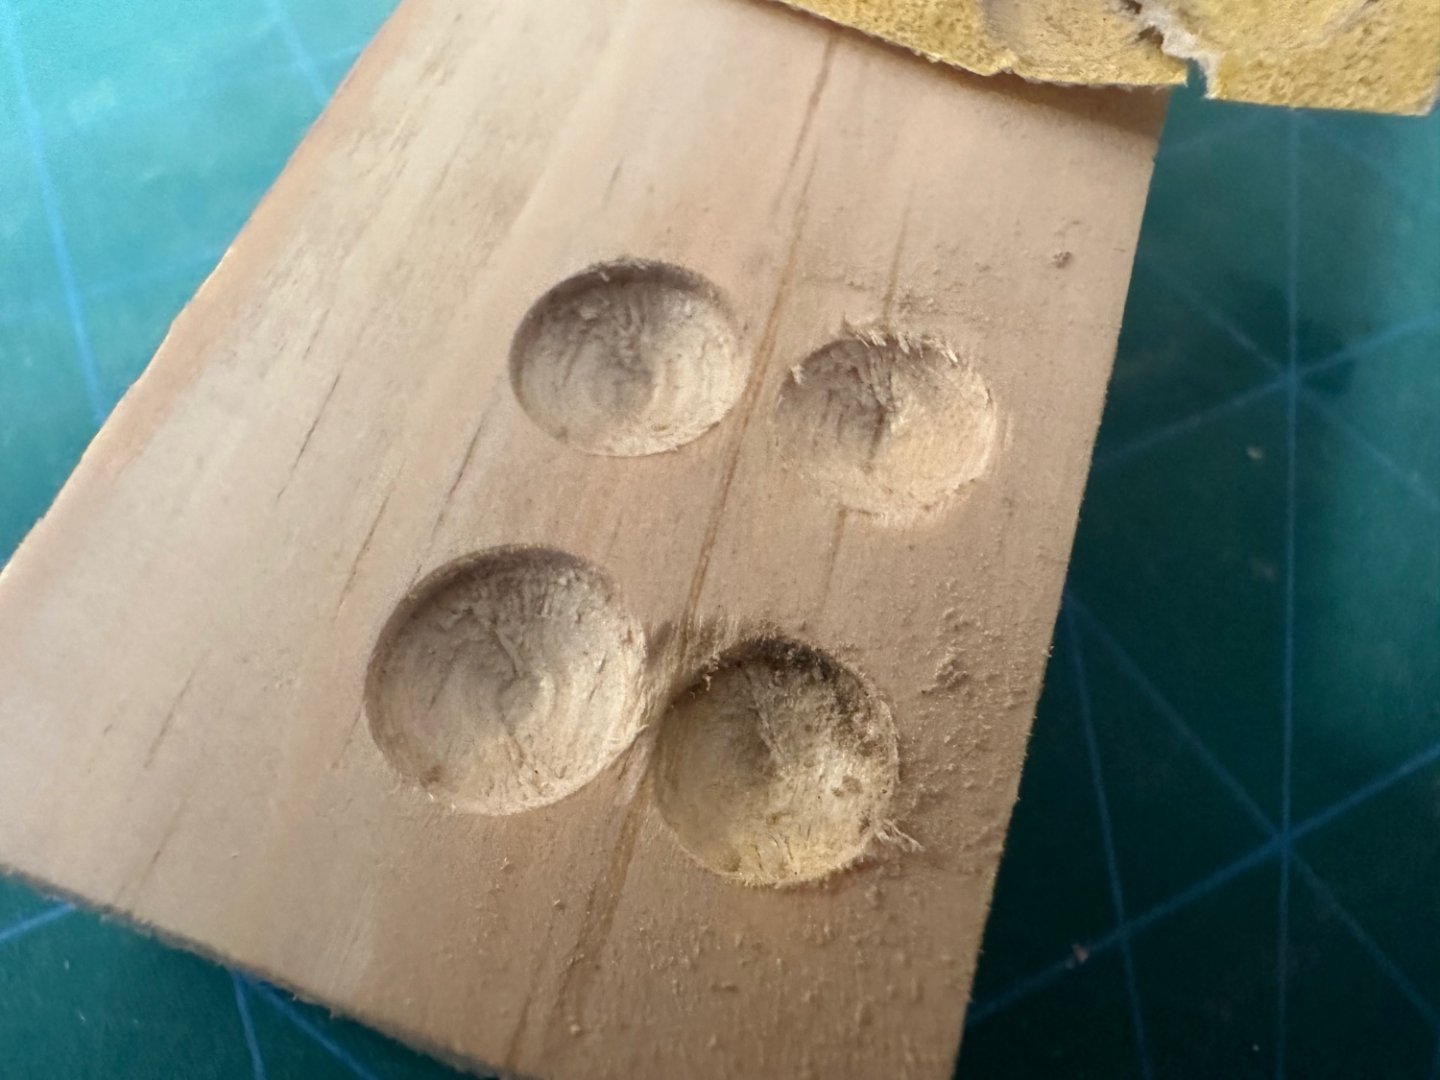
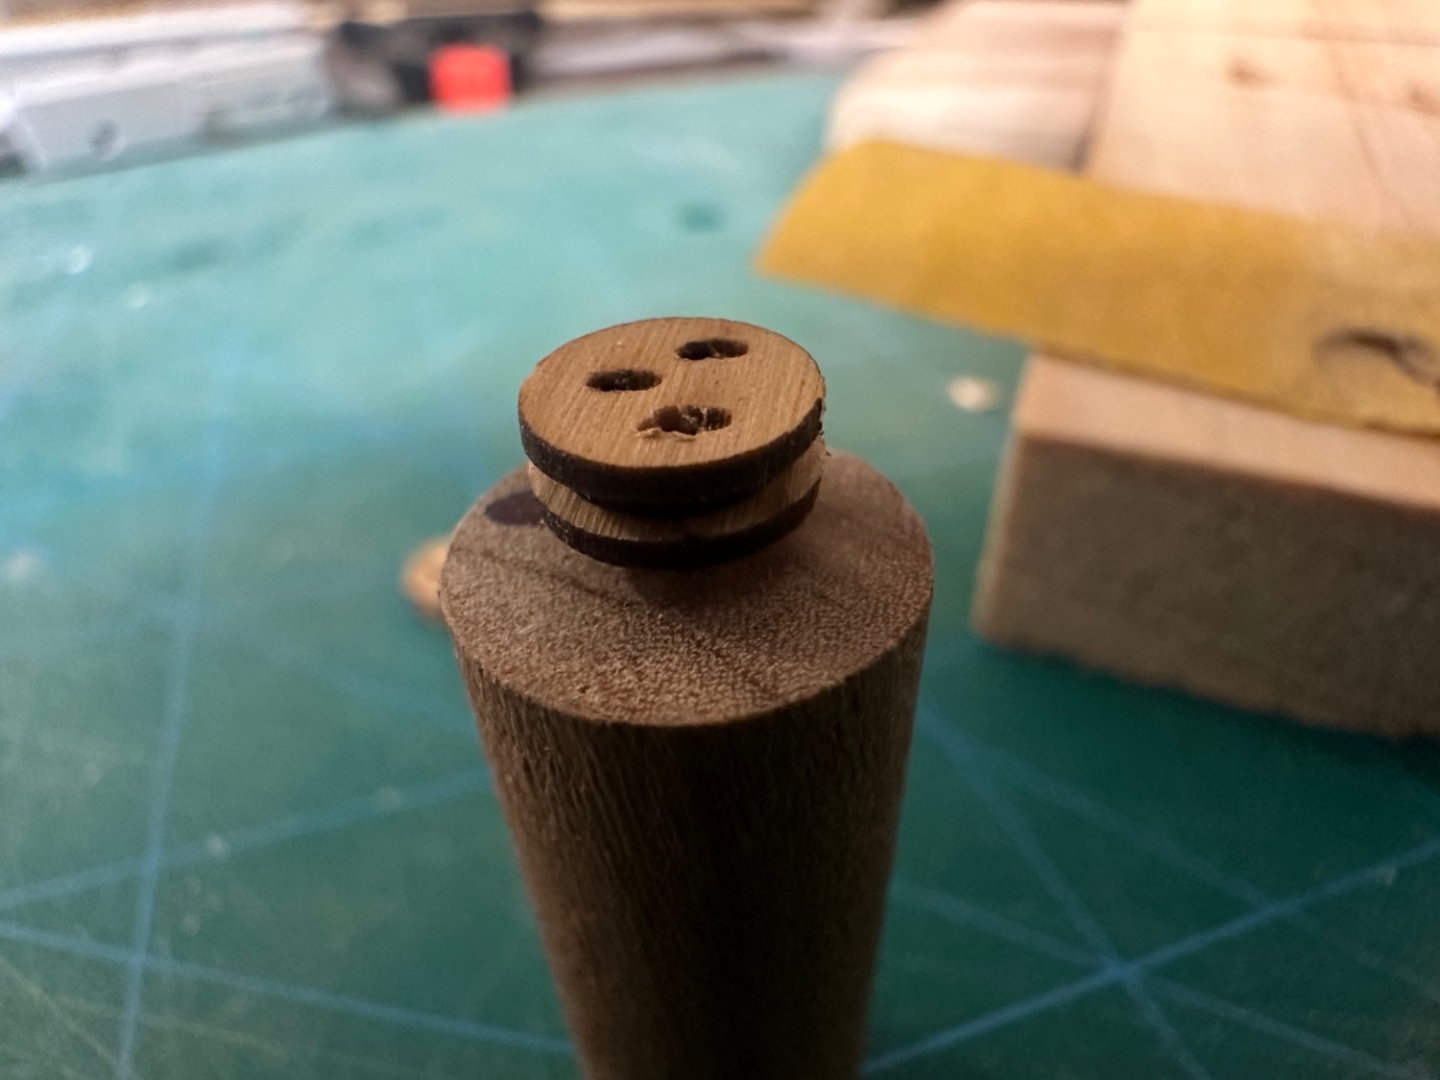
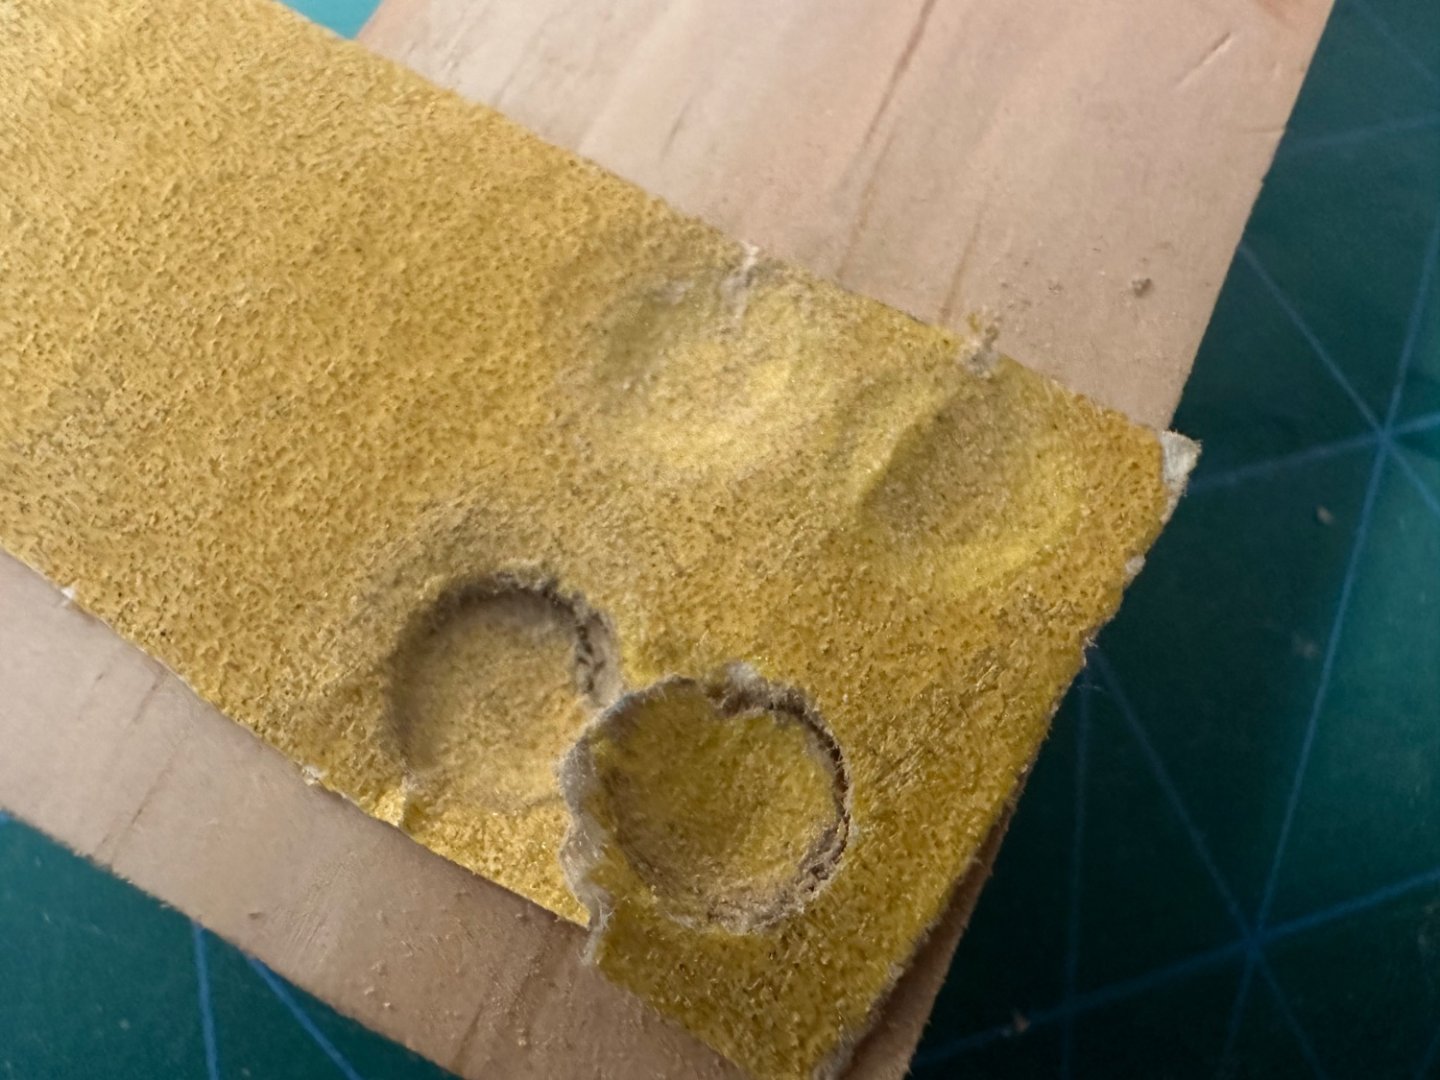
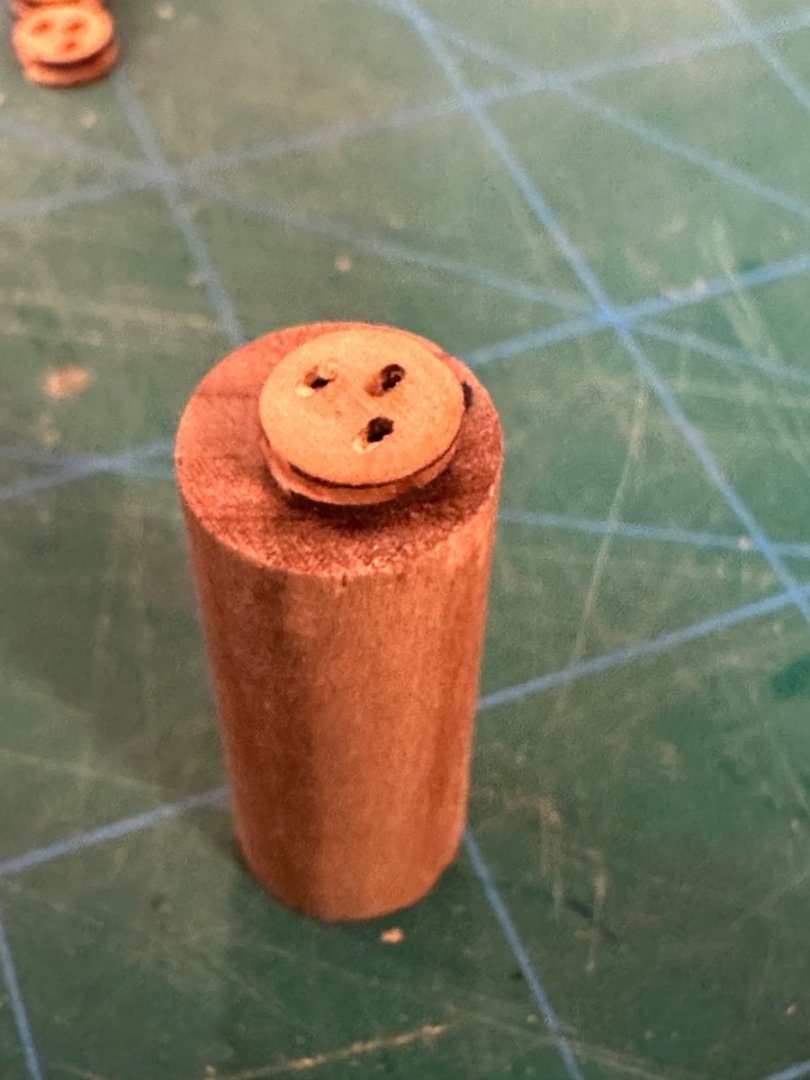
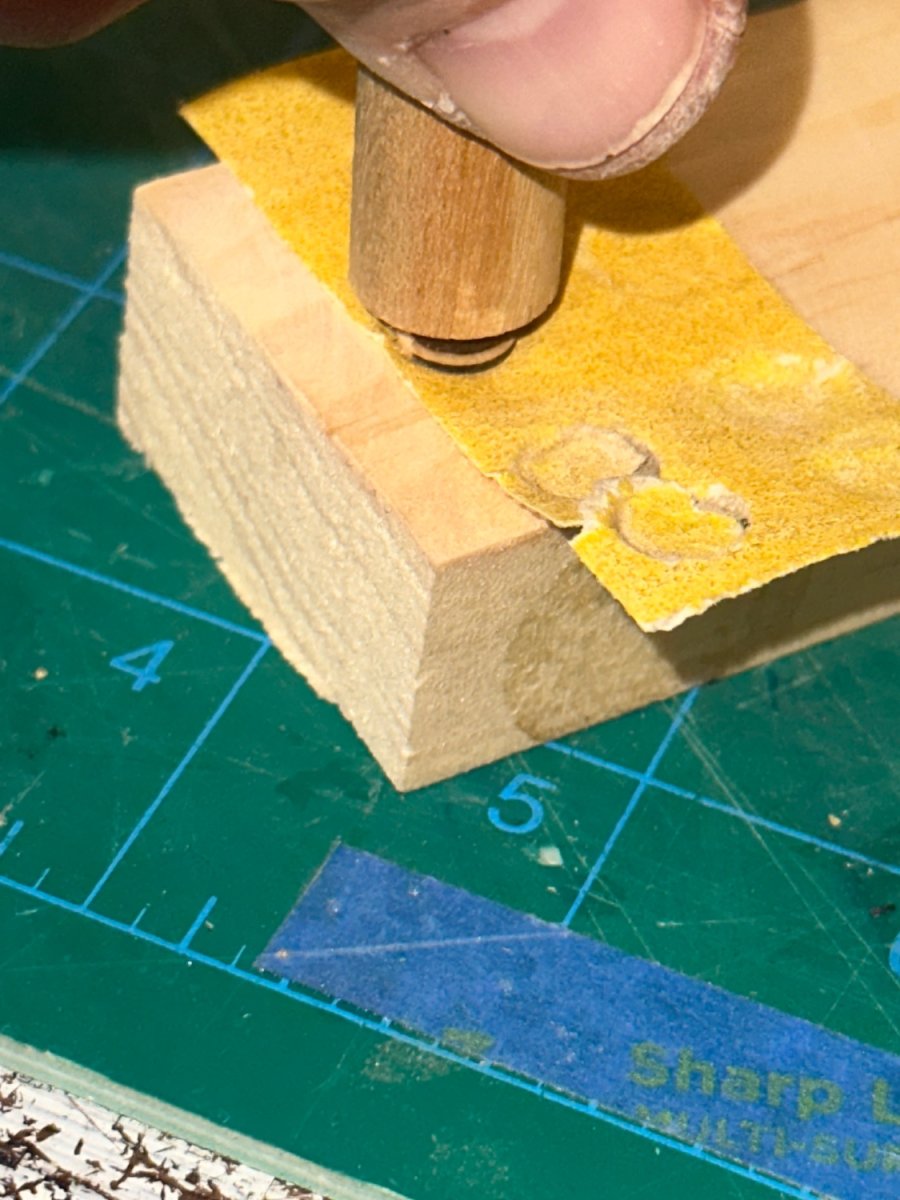
When working on a project, I like to have everything possible ready to go. So today, I made the deadeyes using Chuck’s kit. They were easy to glue together and to shape. I remember seeing a post from a MSW build log (sorry I don’t remember who’s idea it was), on how to shape the deadeyes. It worked pretty well. You need a dowel, self adhesive sandpaper, a scrap block of wood and some T-pins. I drilled some shallow indents in the wood that were a little larger in diameter than the deadeye. The deadeye is secured to the dowel using 3 pins that are pushed into the end of the dowel. The pins reside just below the surface of the deadeye. I marked one pin for the bottom hole in the deadeye so the deadeye is always positioned the same. Now place the self-adhesive sandpaper over the indent and push it into the indent. With the deadeye secured on the dowel, twist the dowel and being the sandpaper has a radius from the indent, you get a pretty good rounded deadeye. See pictures.
Best Regards …. Rick

- CiscoH, Ryland Craze, Gregory and 4 others
-
7
-
-
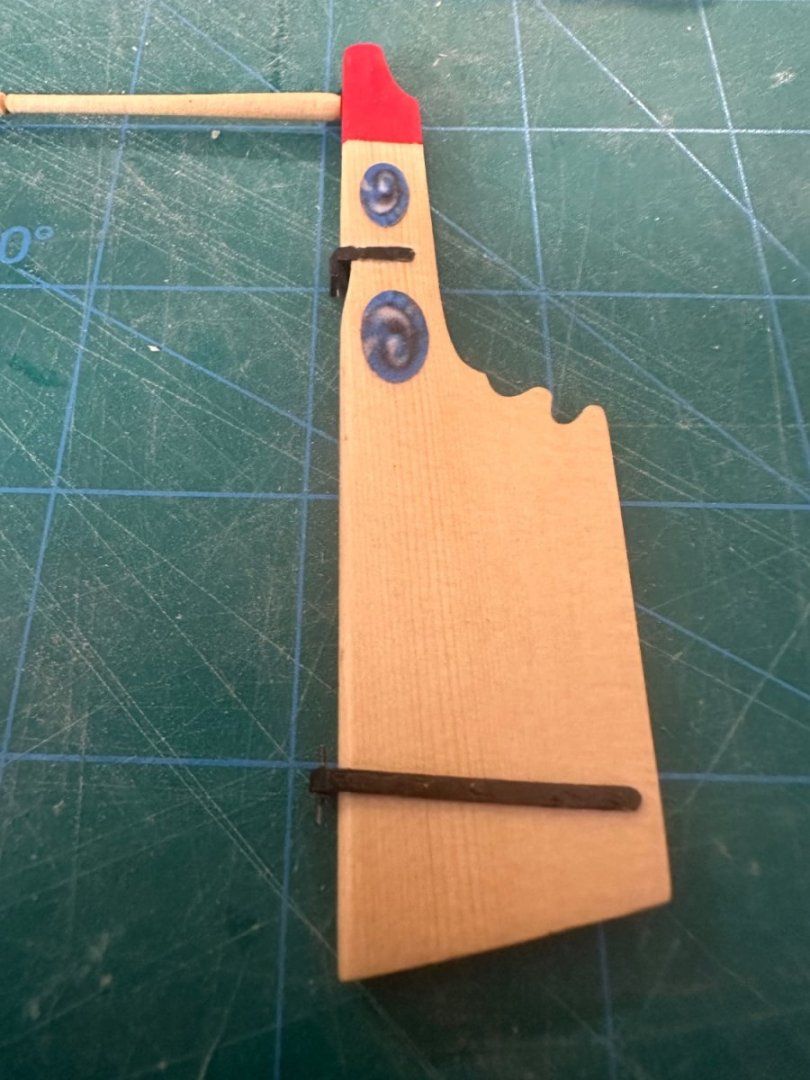
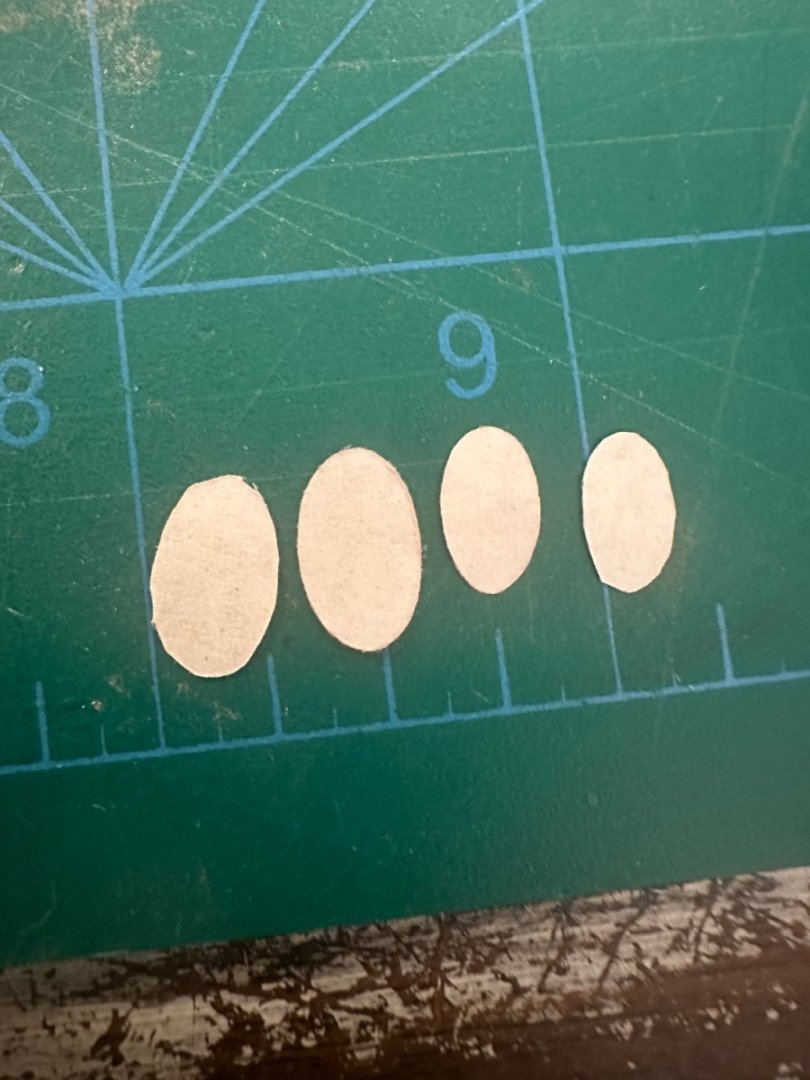
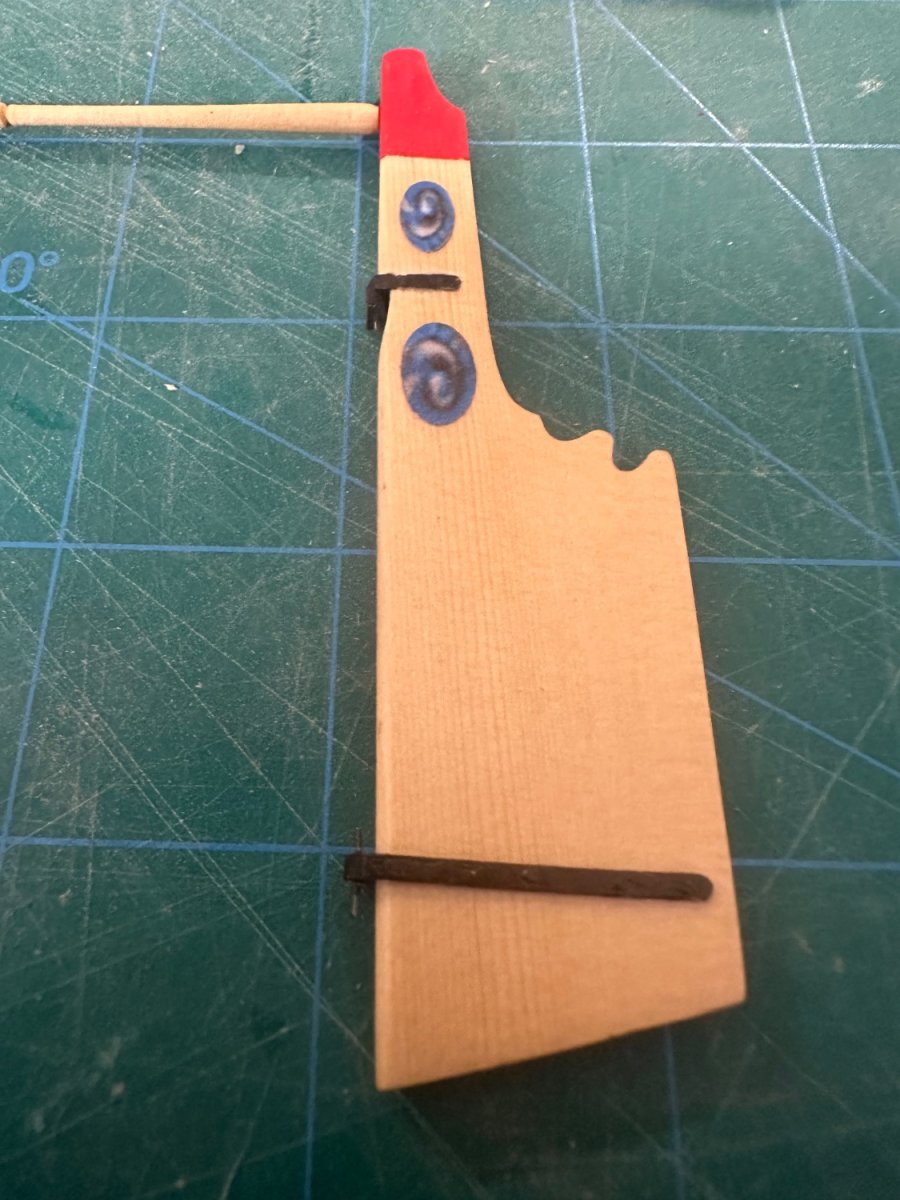
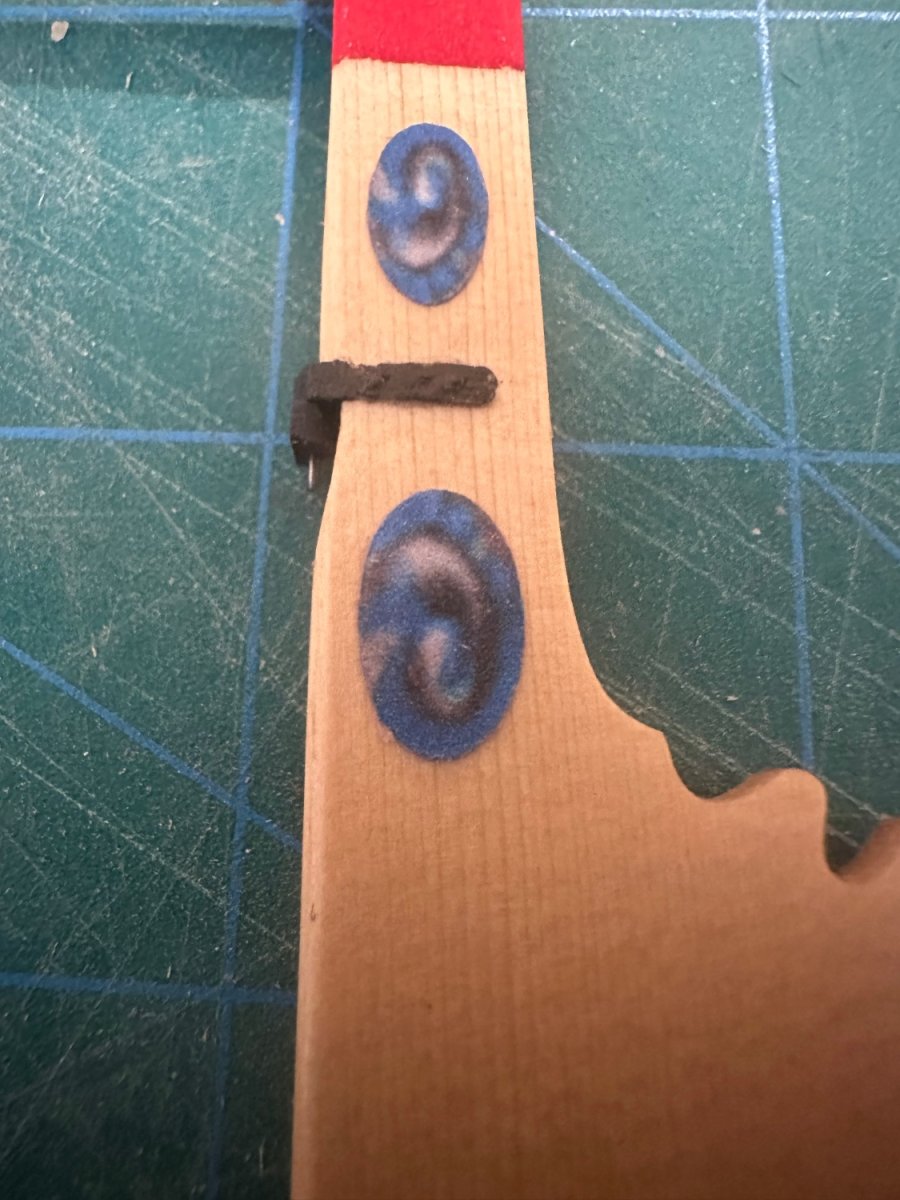
I also decided today to finish the rudder. I painted the red and added the friezes. One thing I know about my skills is that I can’t cut something as small as these designs without having some rough lines. While I managed to cut out some that were satisfactory, I wasn’t entirely happy with them. As I sat and looked at them, I wondered if I could gently sand the edges smooth with some new 400 wet/dry sandpaper. I found it’s possible and the result was totally worth the effort. I held the frieze right near the edge and used a very light touch so the edge wouldn’t roll over. In the pictures below, the 2 middle ones are edge sanded. When done, I used a blue pencil that matched the base color and gently ran it on the exposed white edge. Results were excellent. Amazing what a little effort can accomplish.
Best Regards …. Rick

- Chuck, Ryland Craze, Tossedman and 5 others
-
8
-
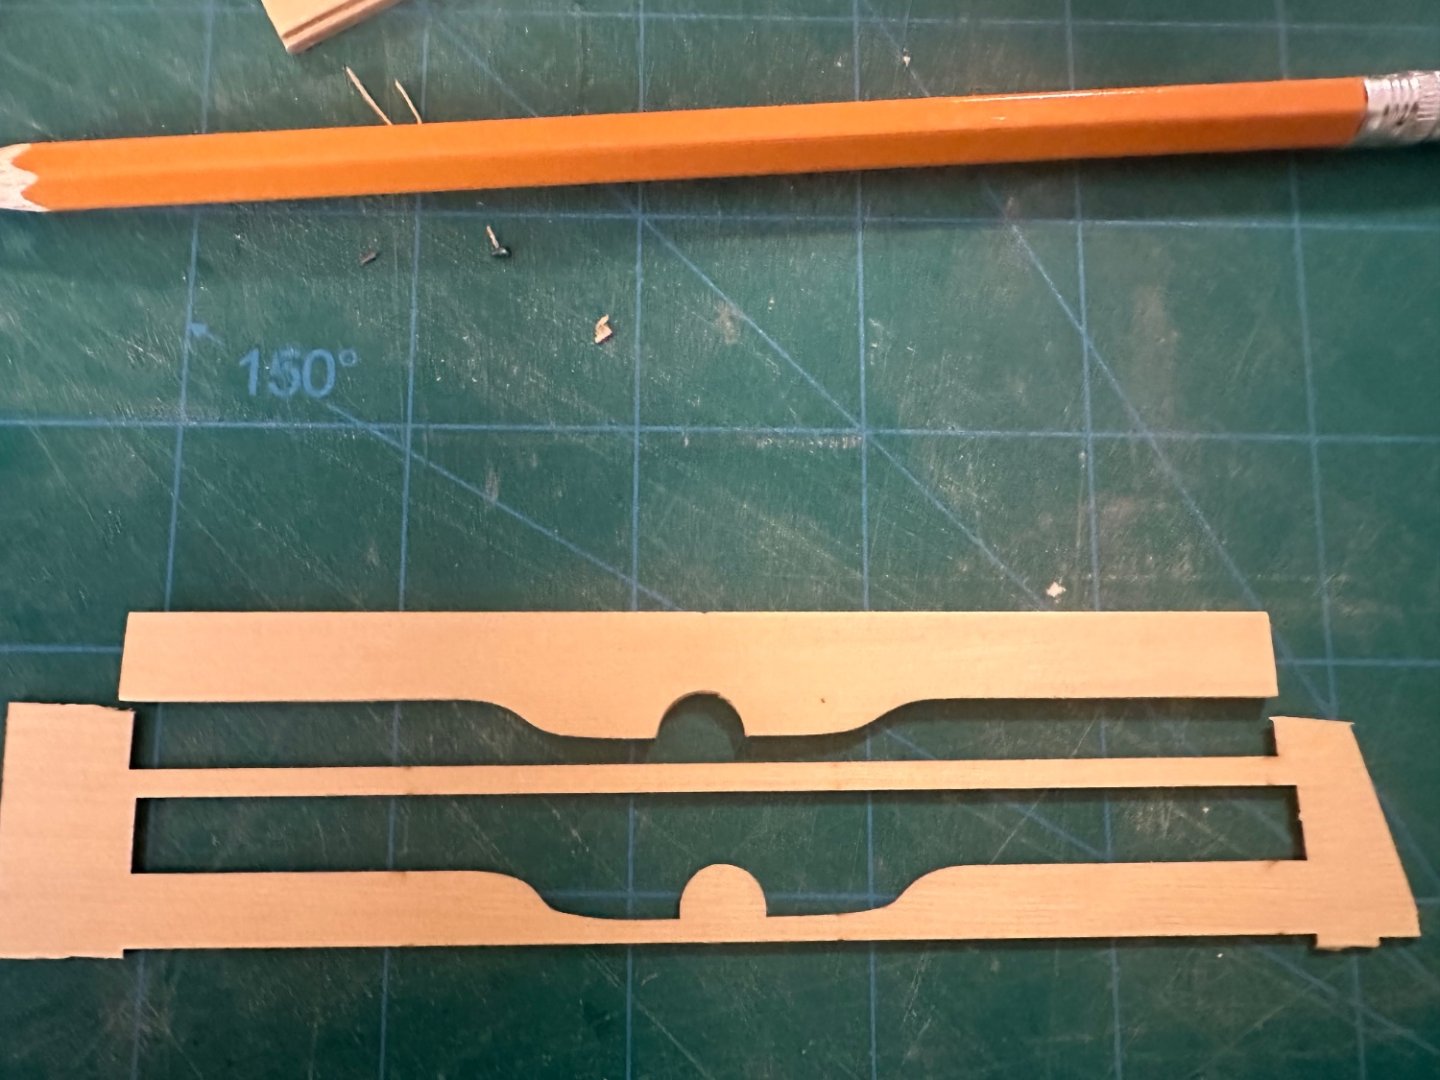
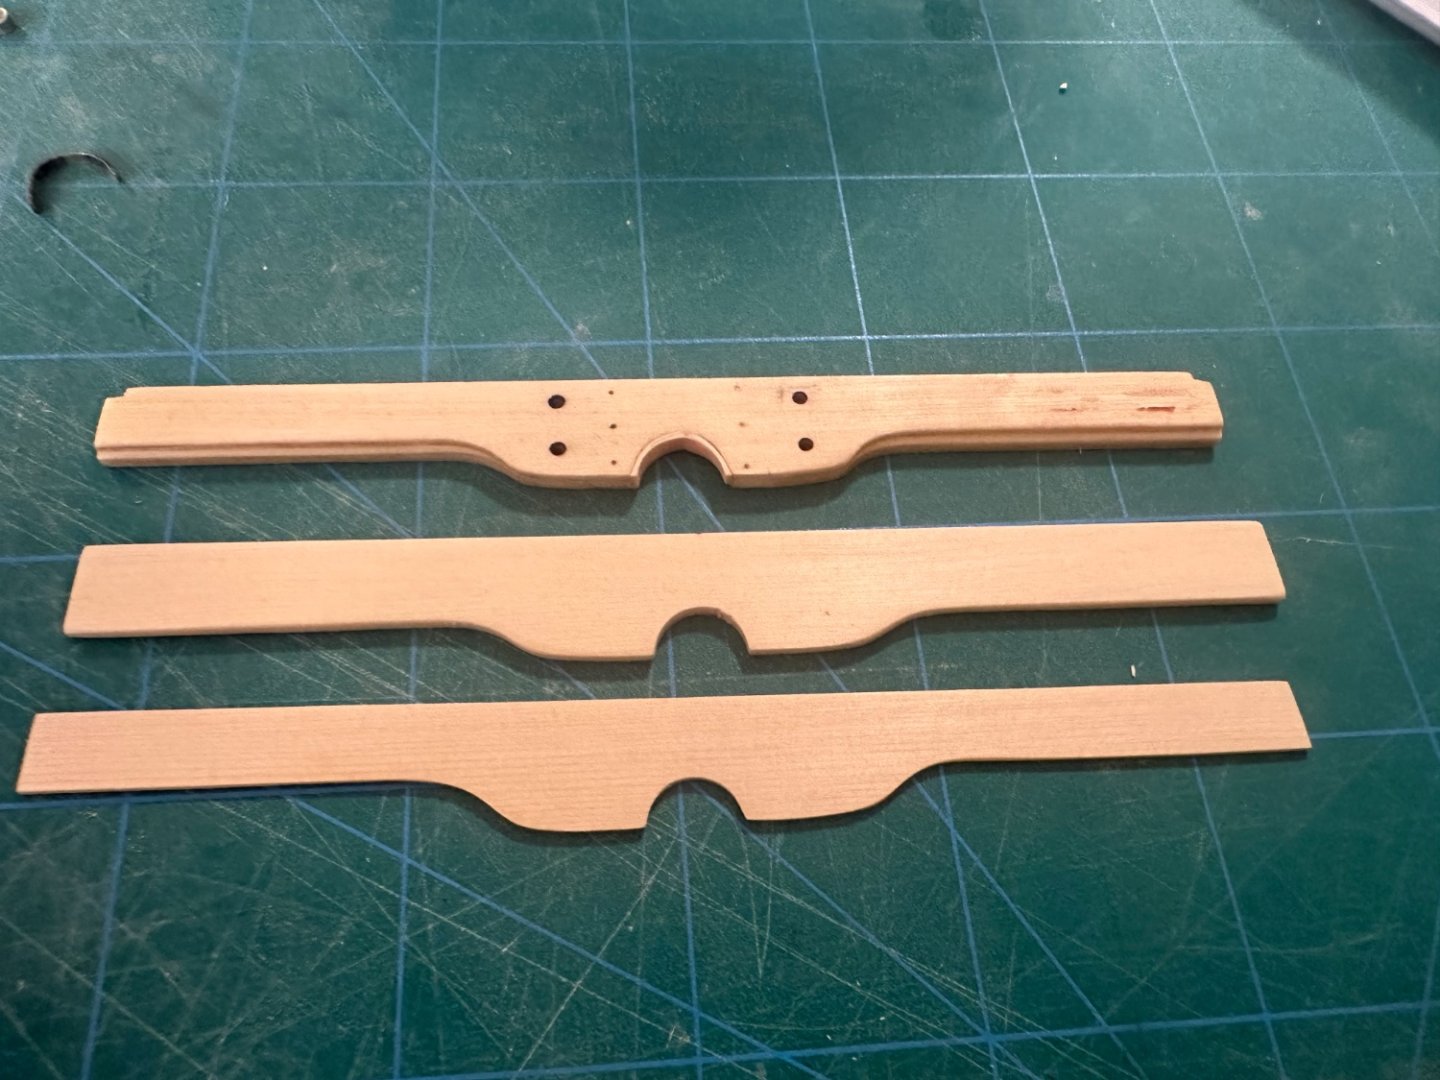
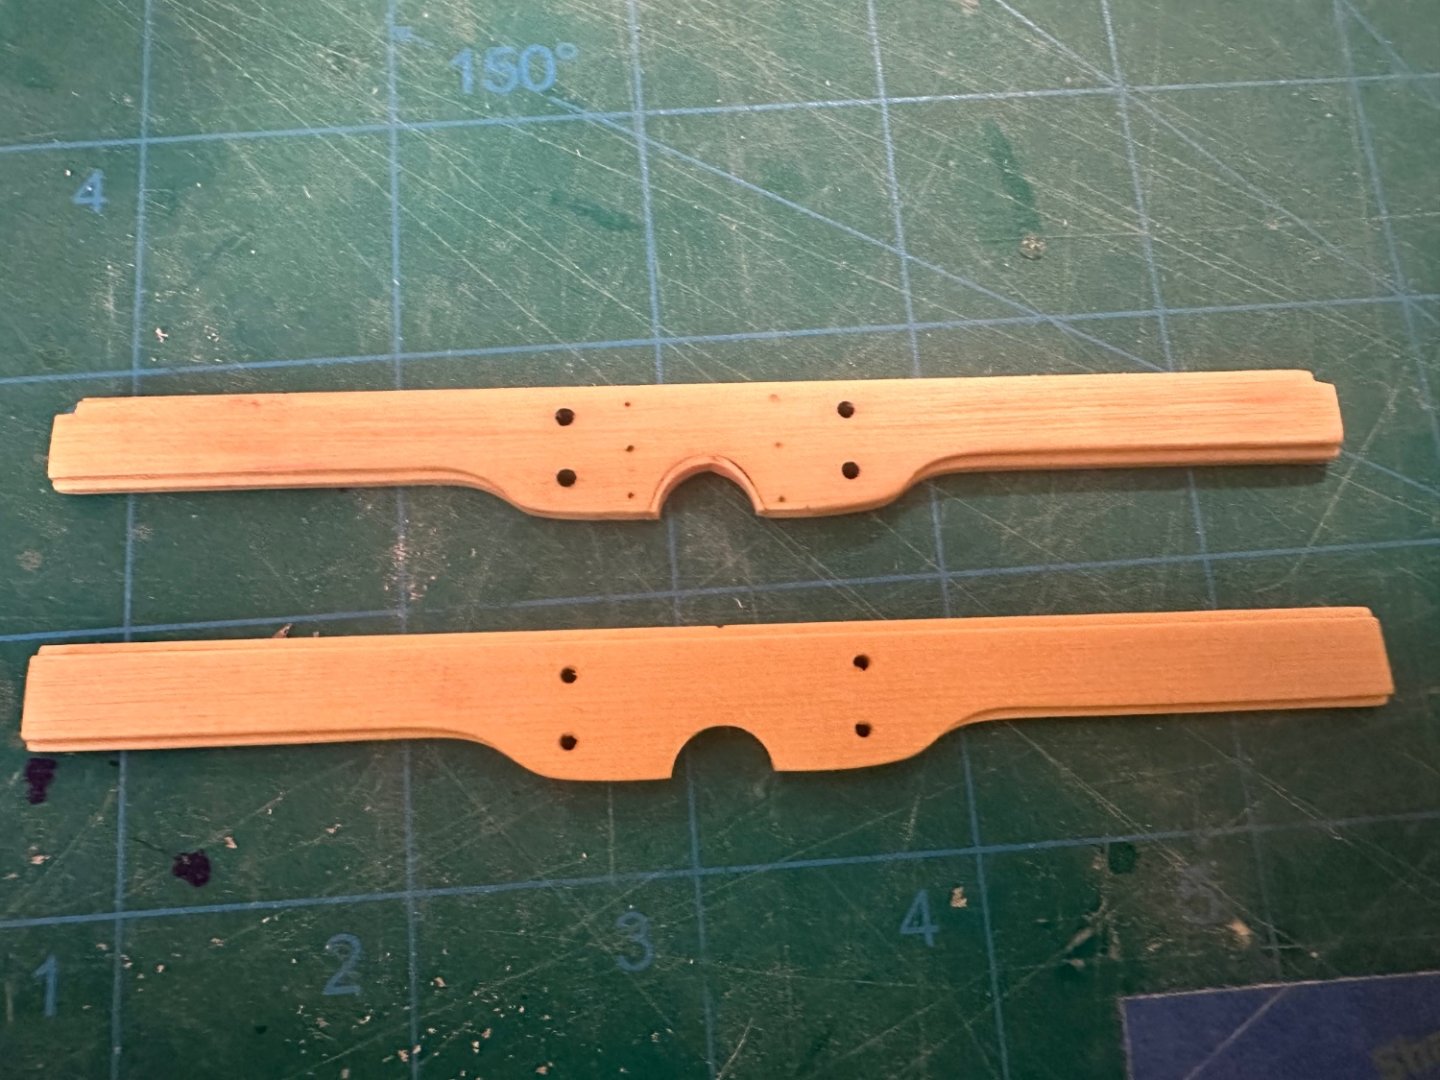
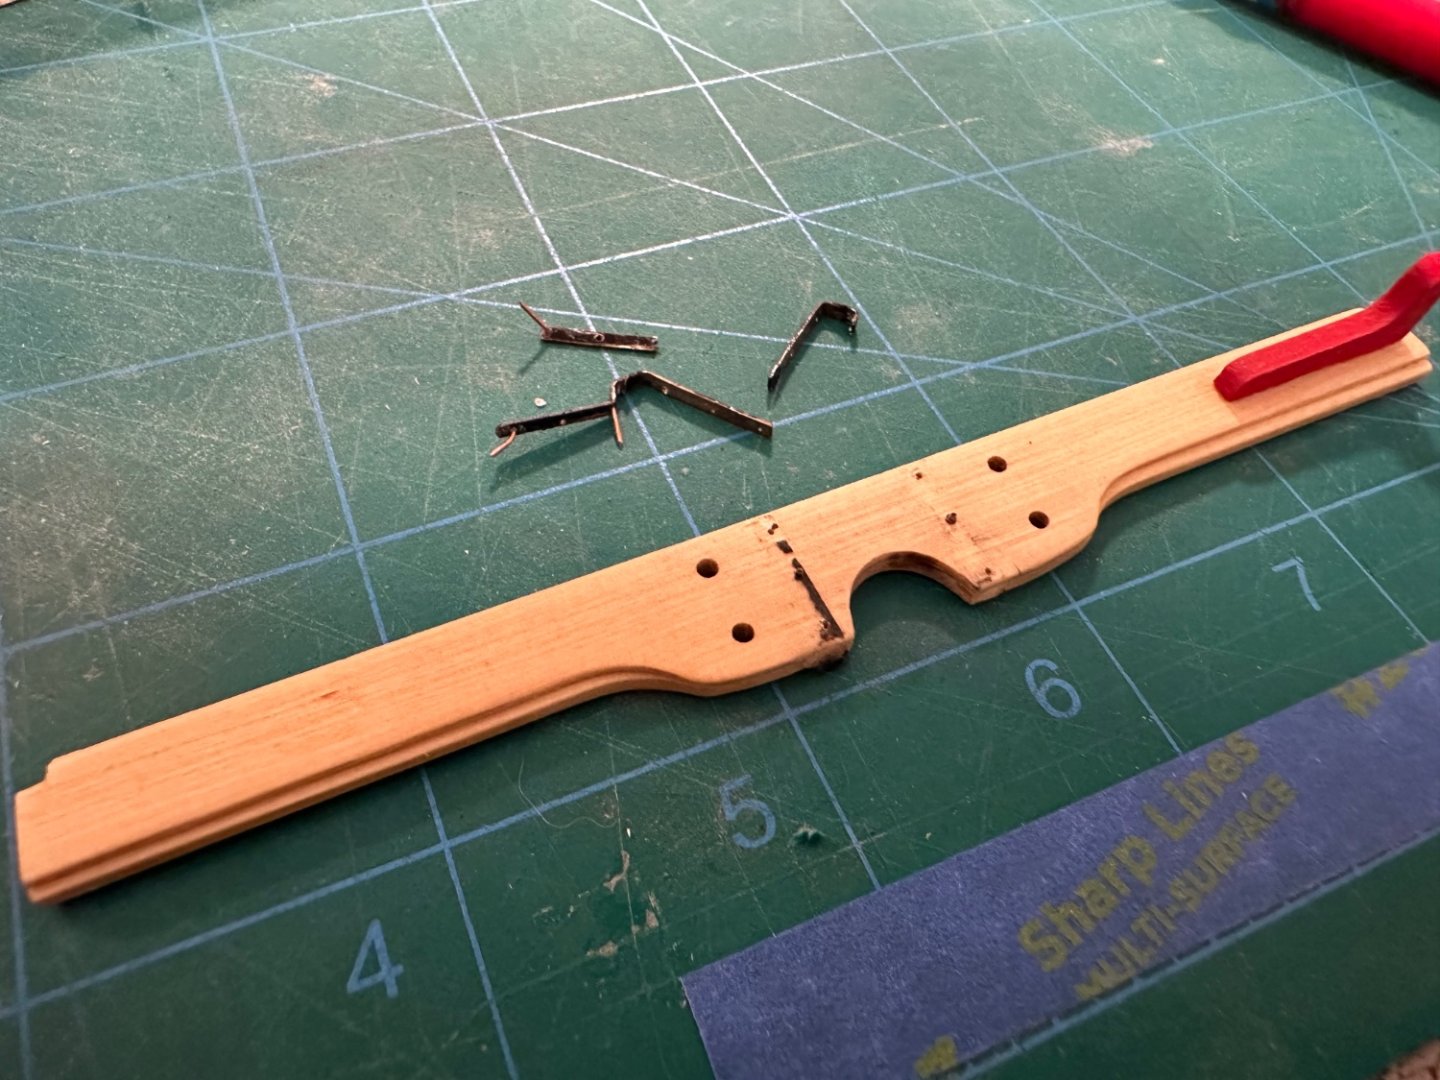
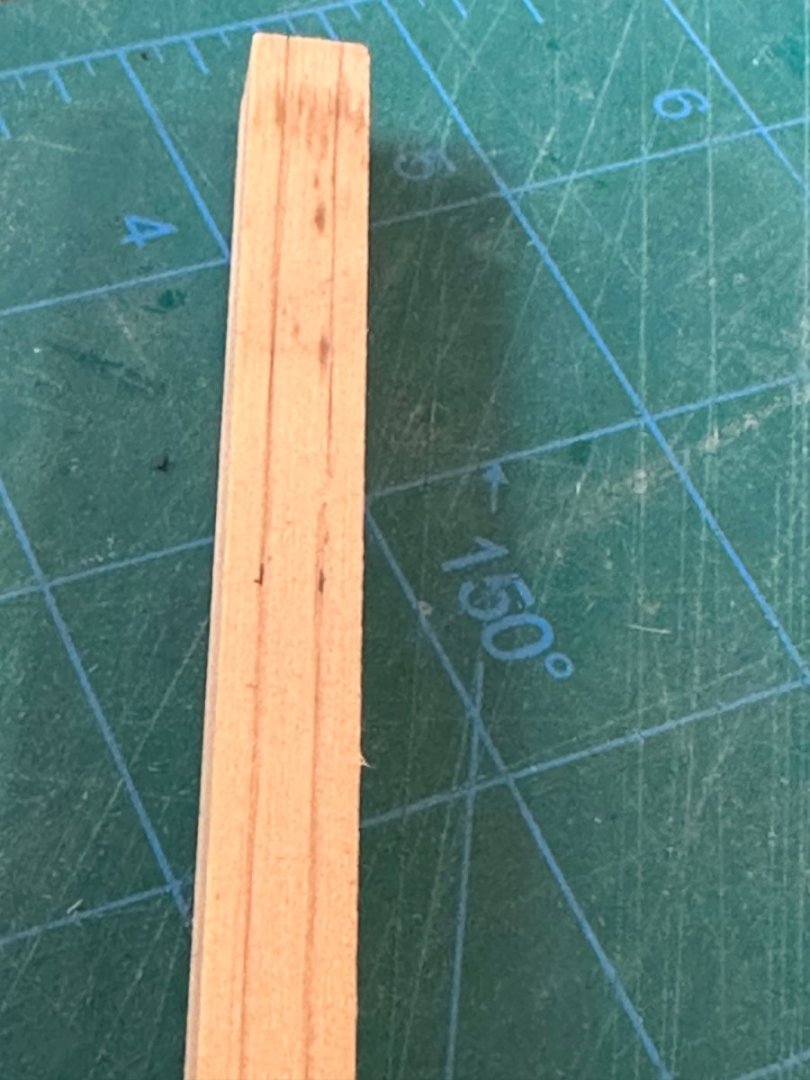
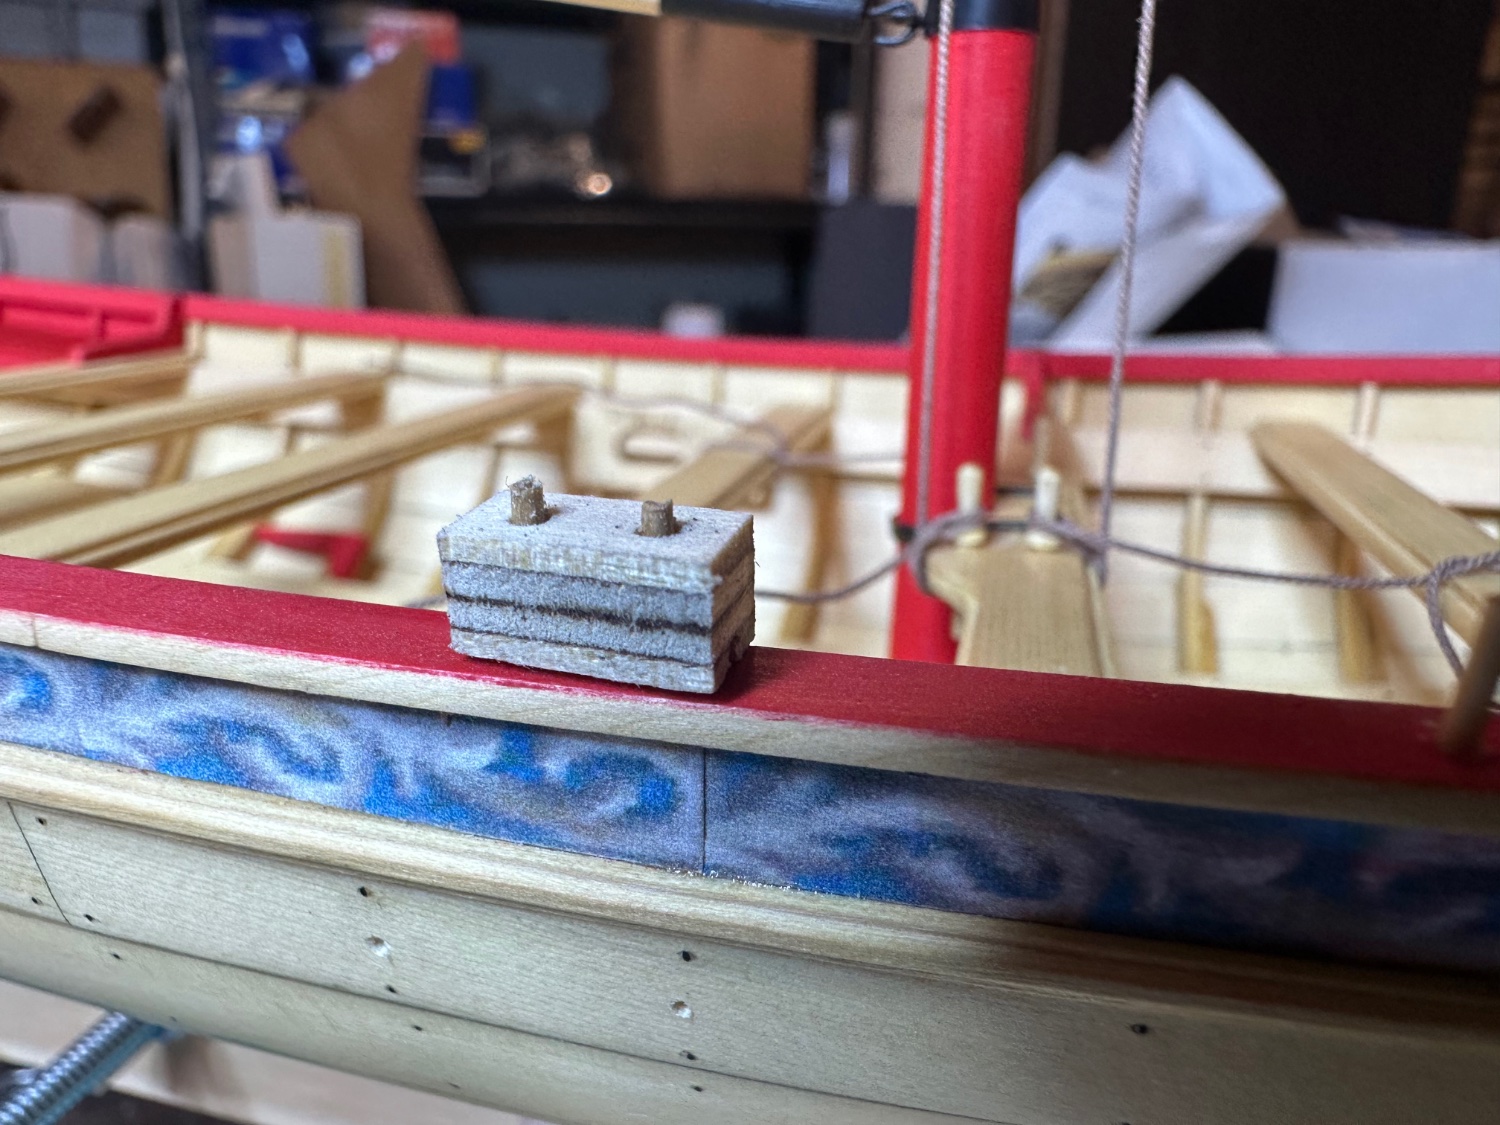
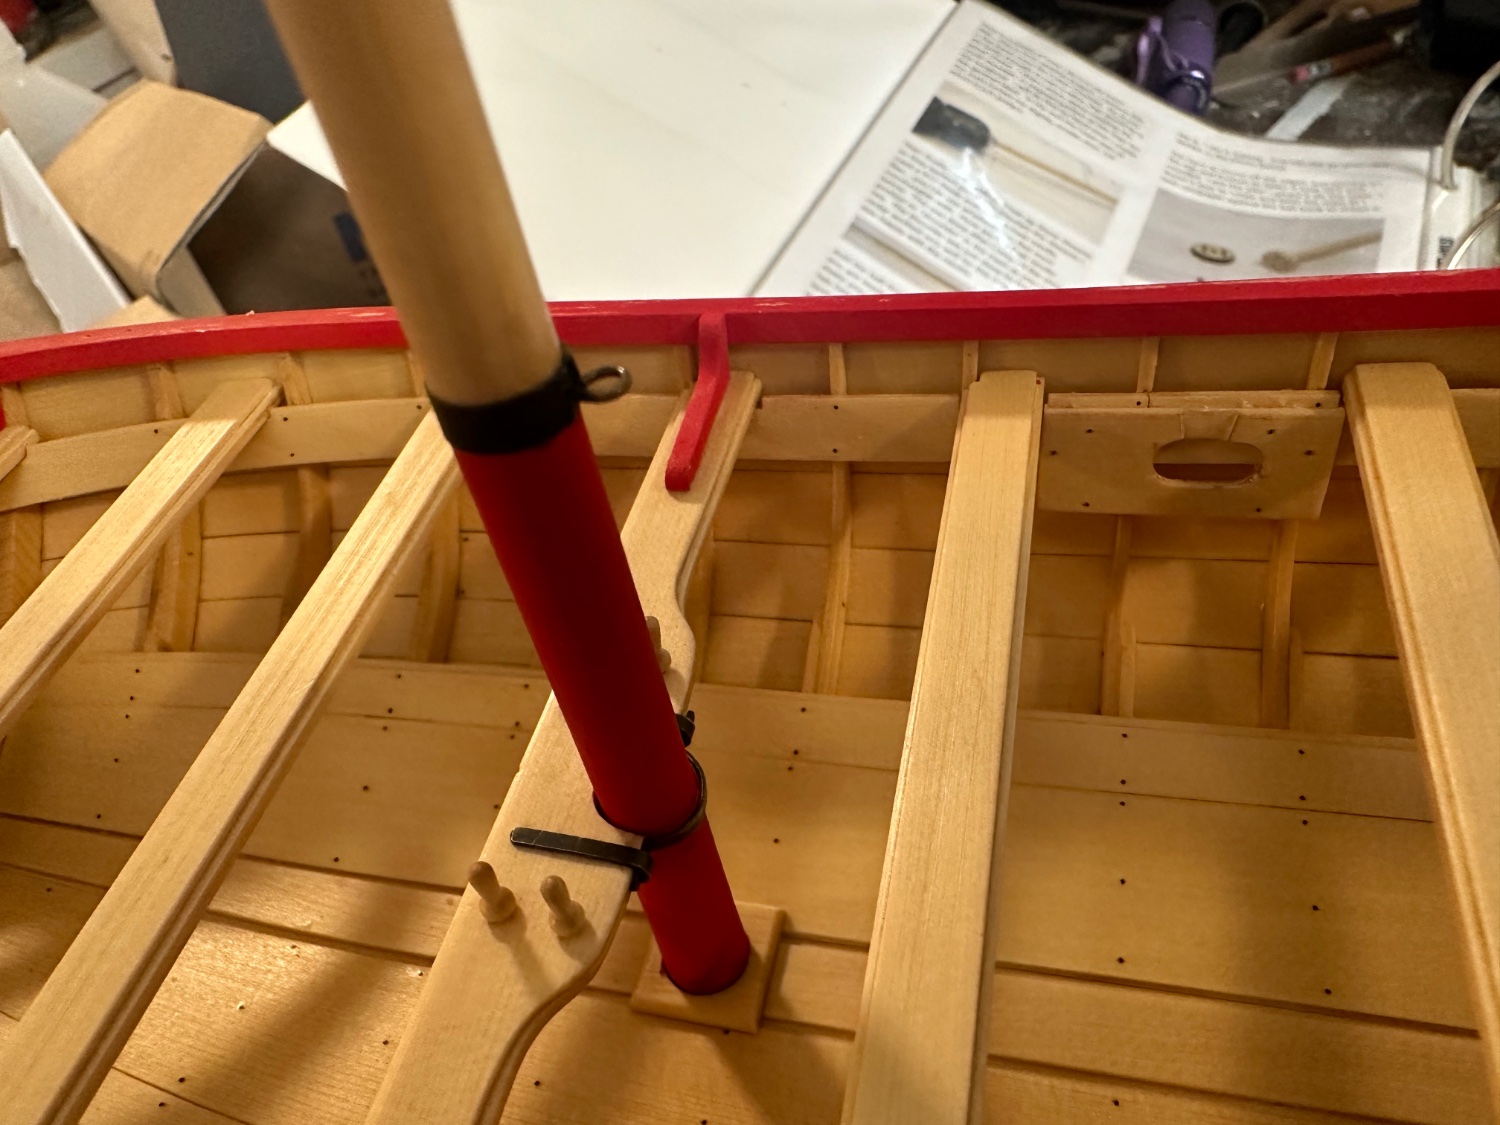
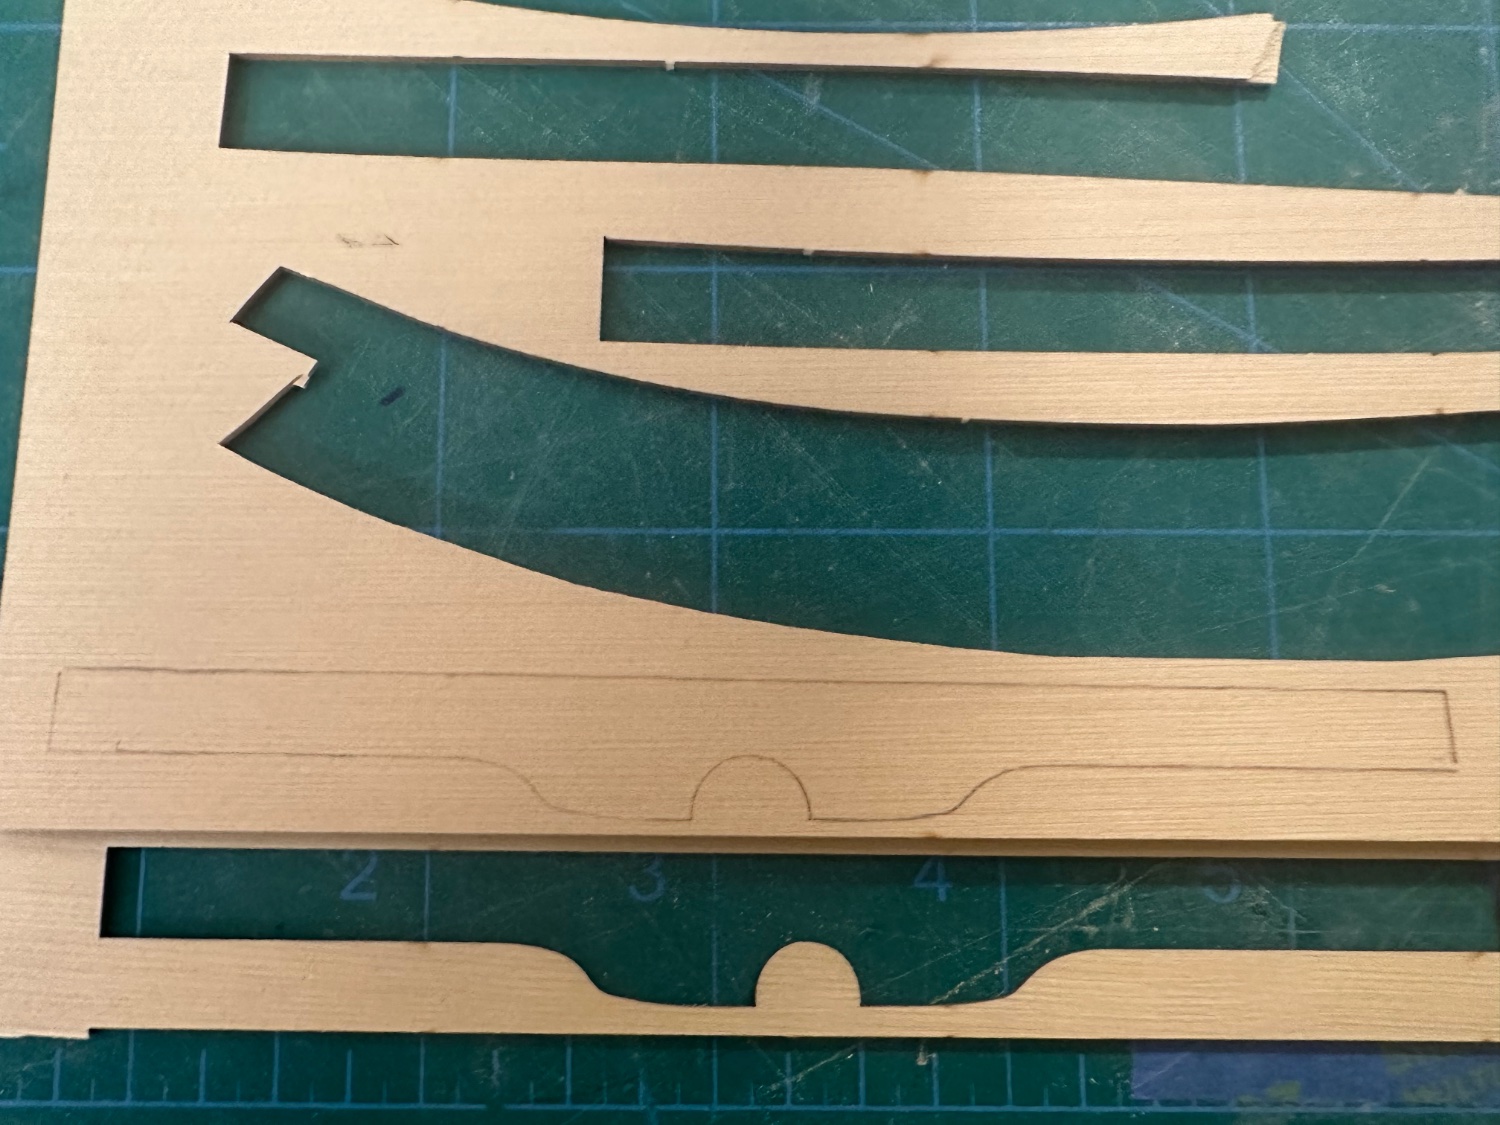
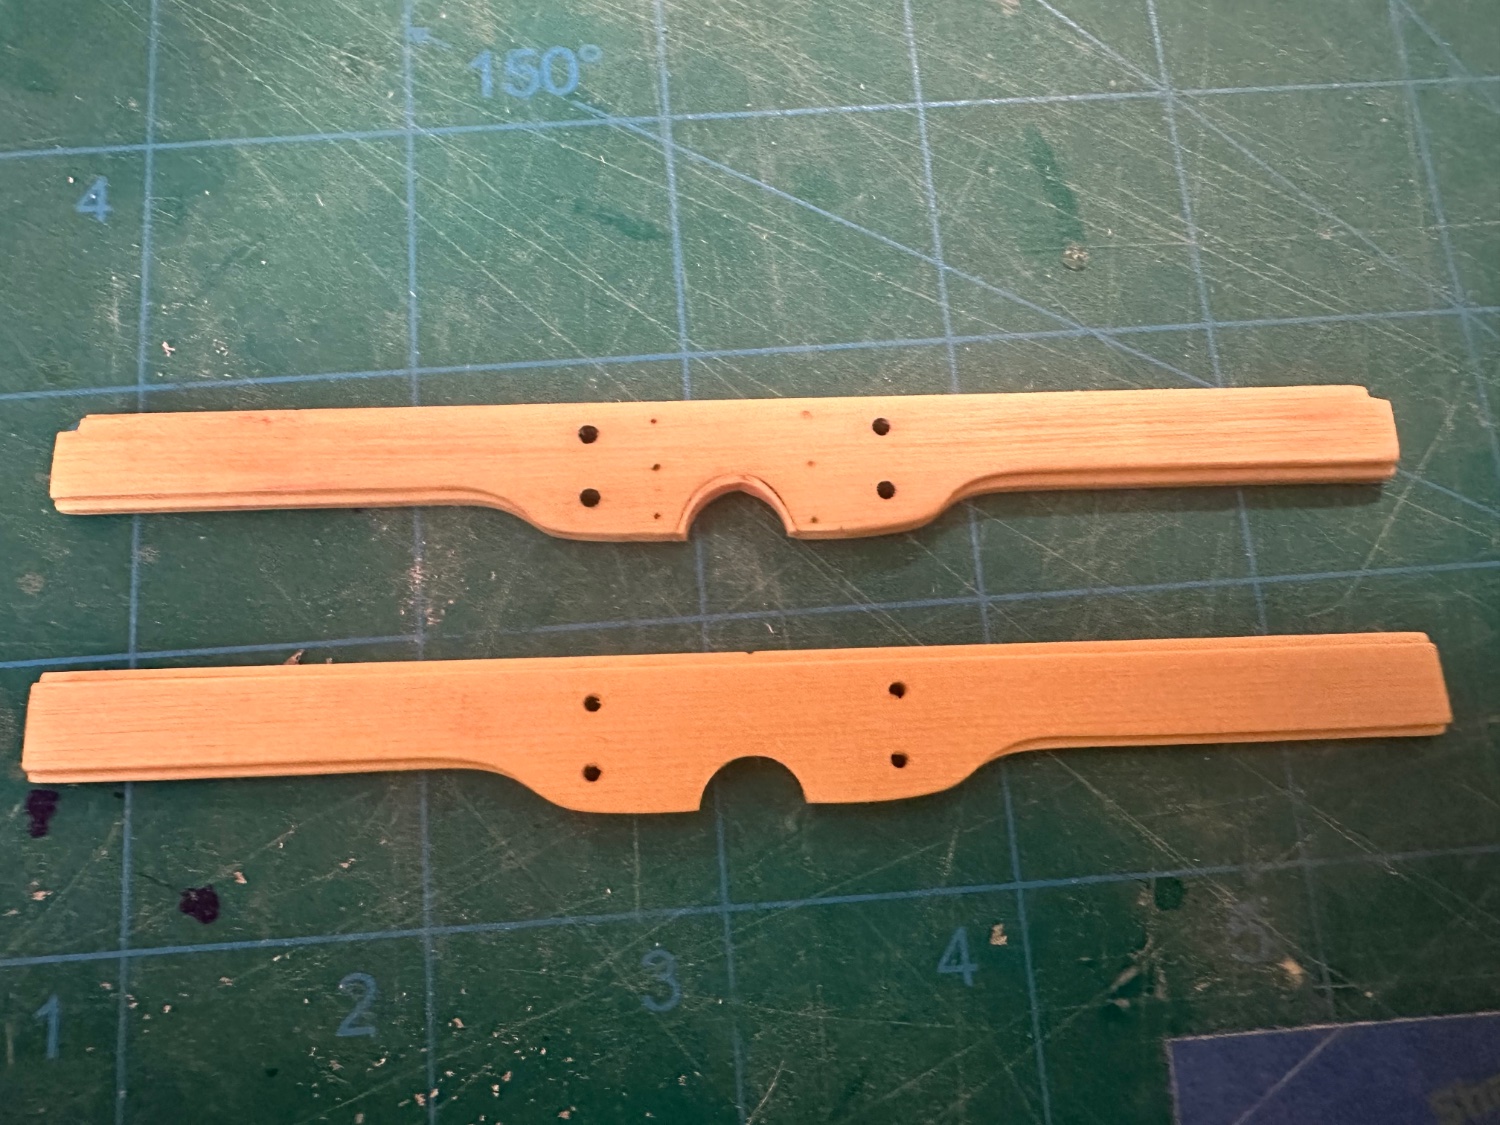
Spent some time seeing what my options were for making the mast cutout smaller in the thwart smaller in diameter so the mast would fit better. I managed to bend some yellow cedar to fit the mast cutout but I didn’t like the way it looked. So I decided to make a new thwart with a smaller cutout. One thing I learned many years ago was to never toss out the die cut sheets the same parts came in just in case you need to make replacement parts. That sage advice served me well today. All I needed was 1/16” and 1/32” sheet to make the parts. Fortunately, Chuck provides some spare wood on his laser-cut sheets. It was a simple exercise to trace the shapes and cut out and sand to shape. Now I just need to remake the iron work again.
Best Regards …. Rick


- gjdale, Ryland Craze, Tossedman and 3 others
-
6
-
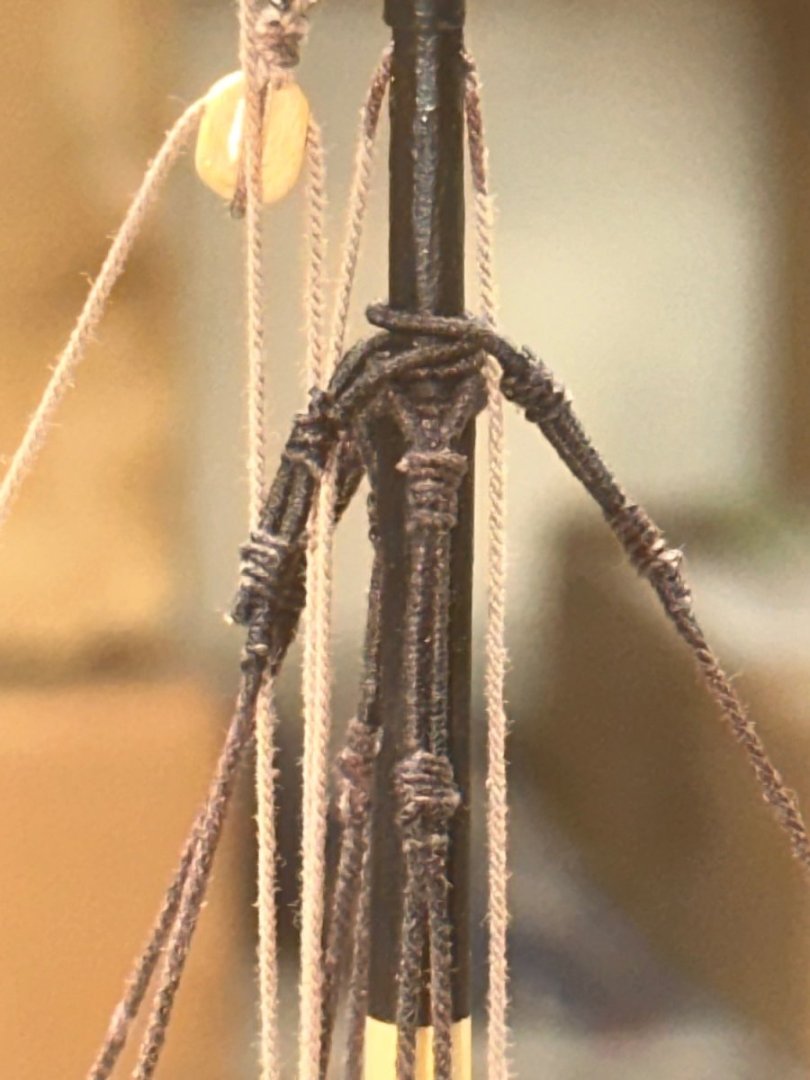
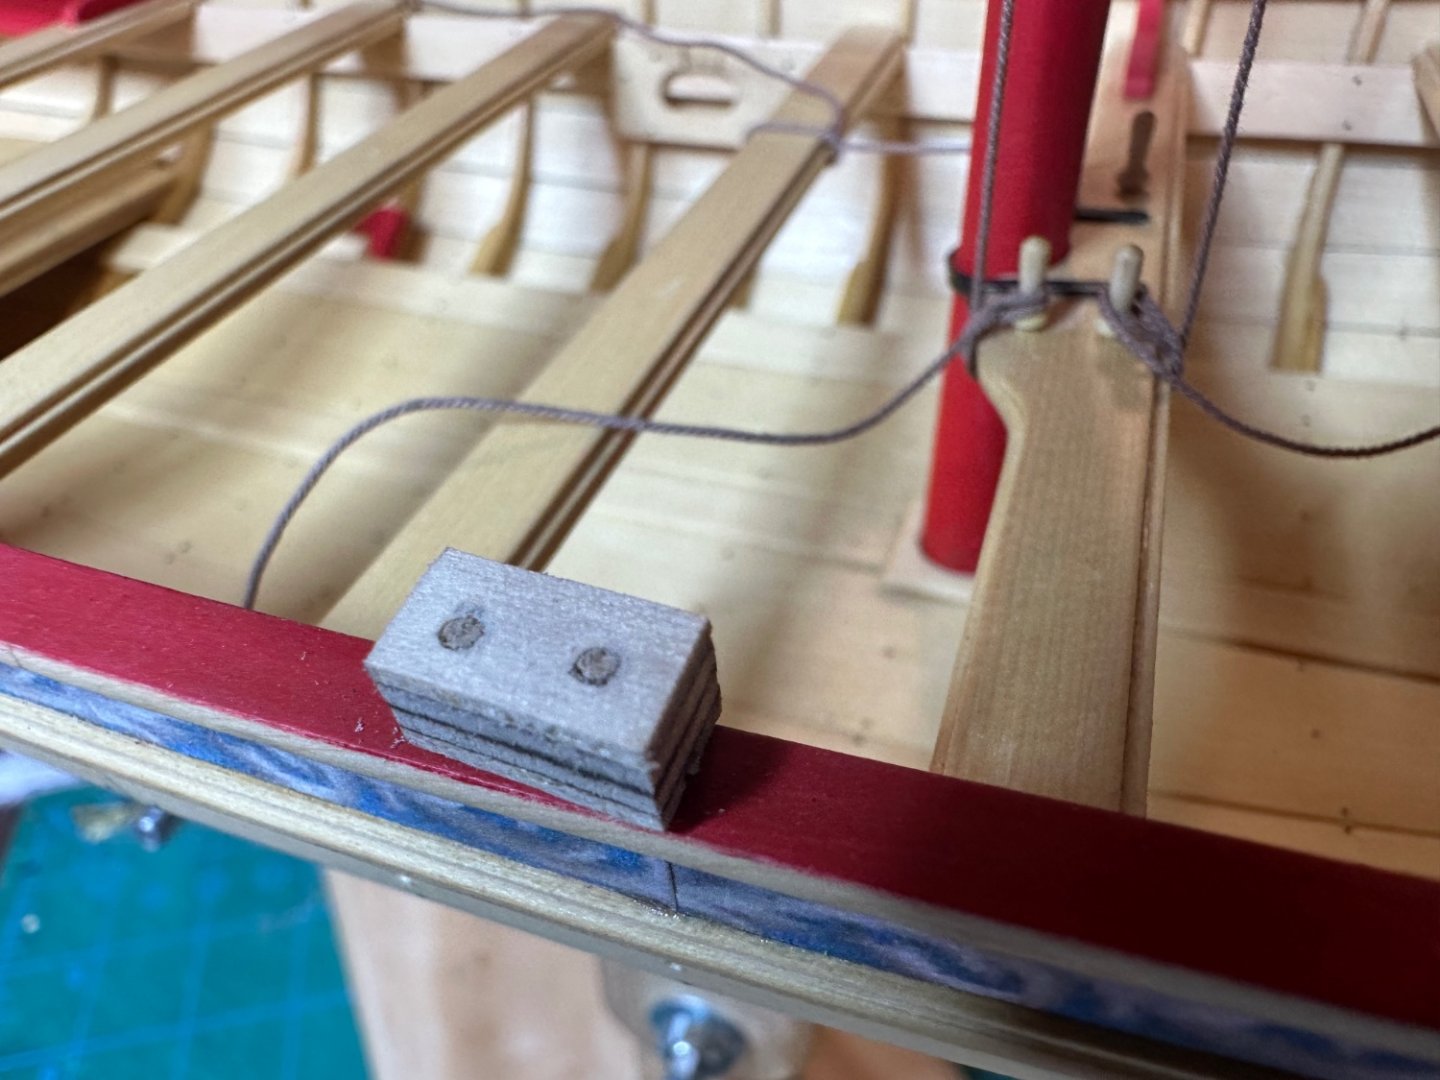
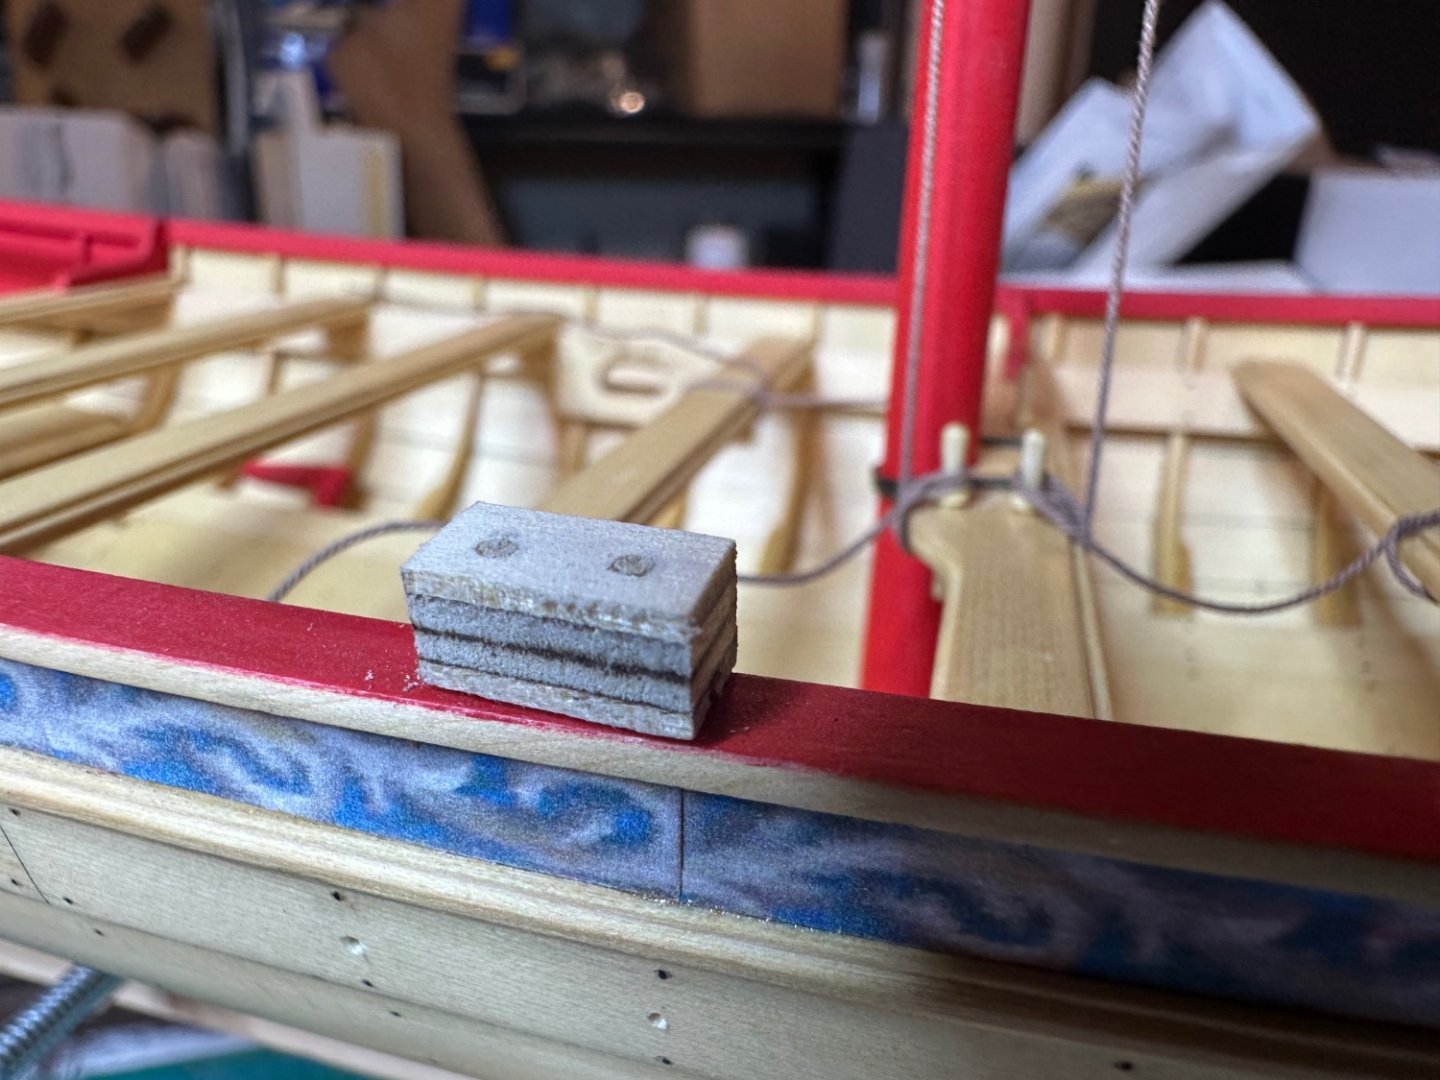
 My first deconstruction, I took too much wood off the mast and its diameter is far smaller than the mast strap. After going through options, I decided to remove the thwart and all of the straps and start over. My project for the day.
Best Regards …. Rick
- bruce d, Ryland Craze, Chuck and 1 other
-
4
-
Ryland, thank you for the accolades! I refer to your Medway log often, lots of great info for this newbie. Rigging is again, something I’ve never attempted, but looking forward to learning the ropes (pun intended). I’ve throughly enjoyed this build, Chuck has done an outstanding job designing and explaining how to create a beautiful model. Cheerful is on deck and then Winnie. I think I have a problem….
Best Regards …. Rick
- Chuck, bruce d and Ryland Craze
-
3
-
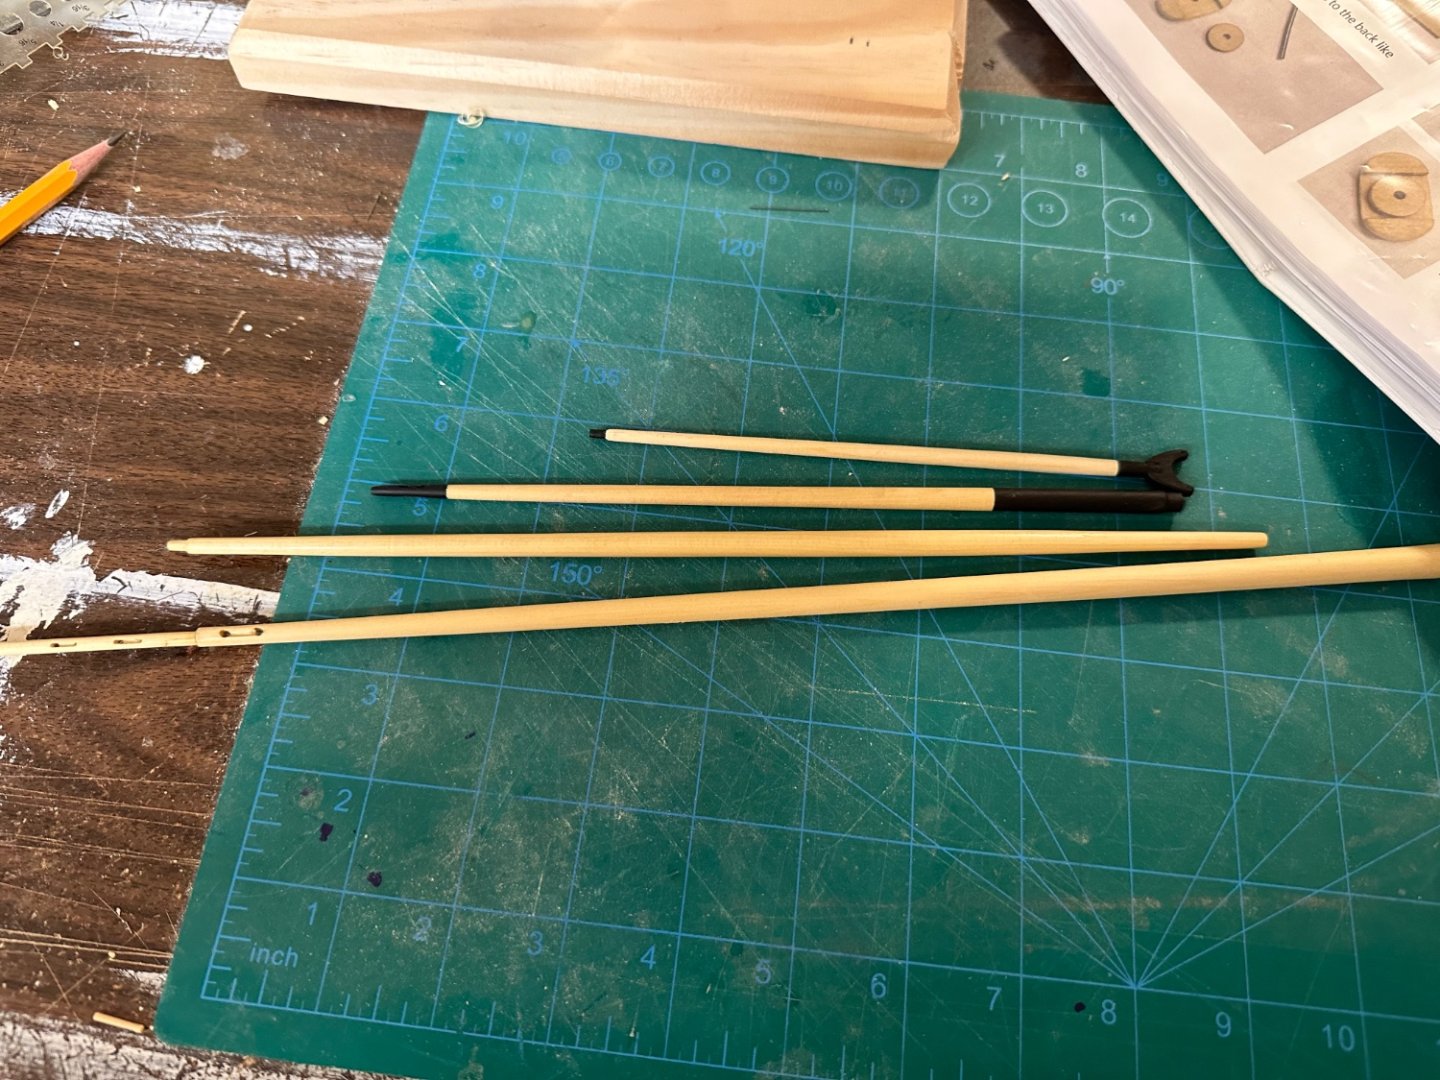
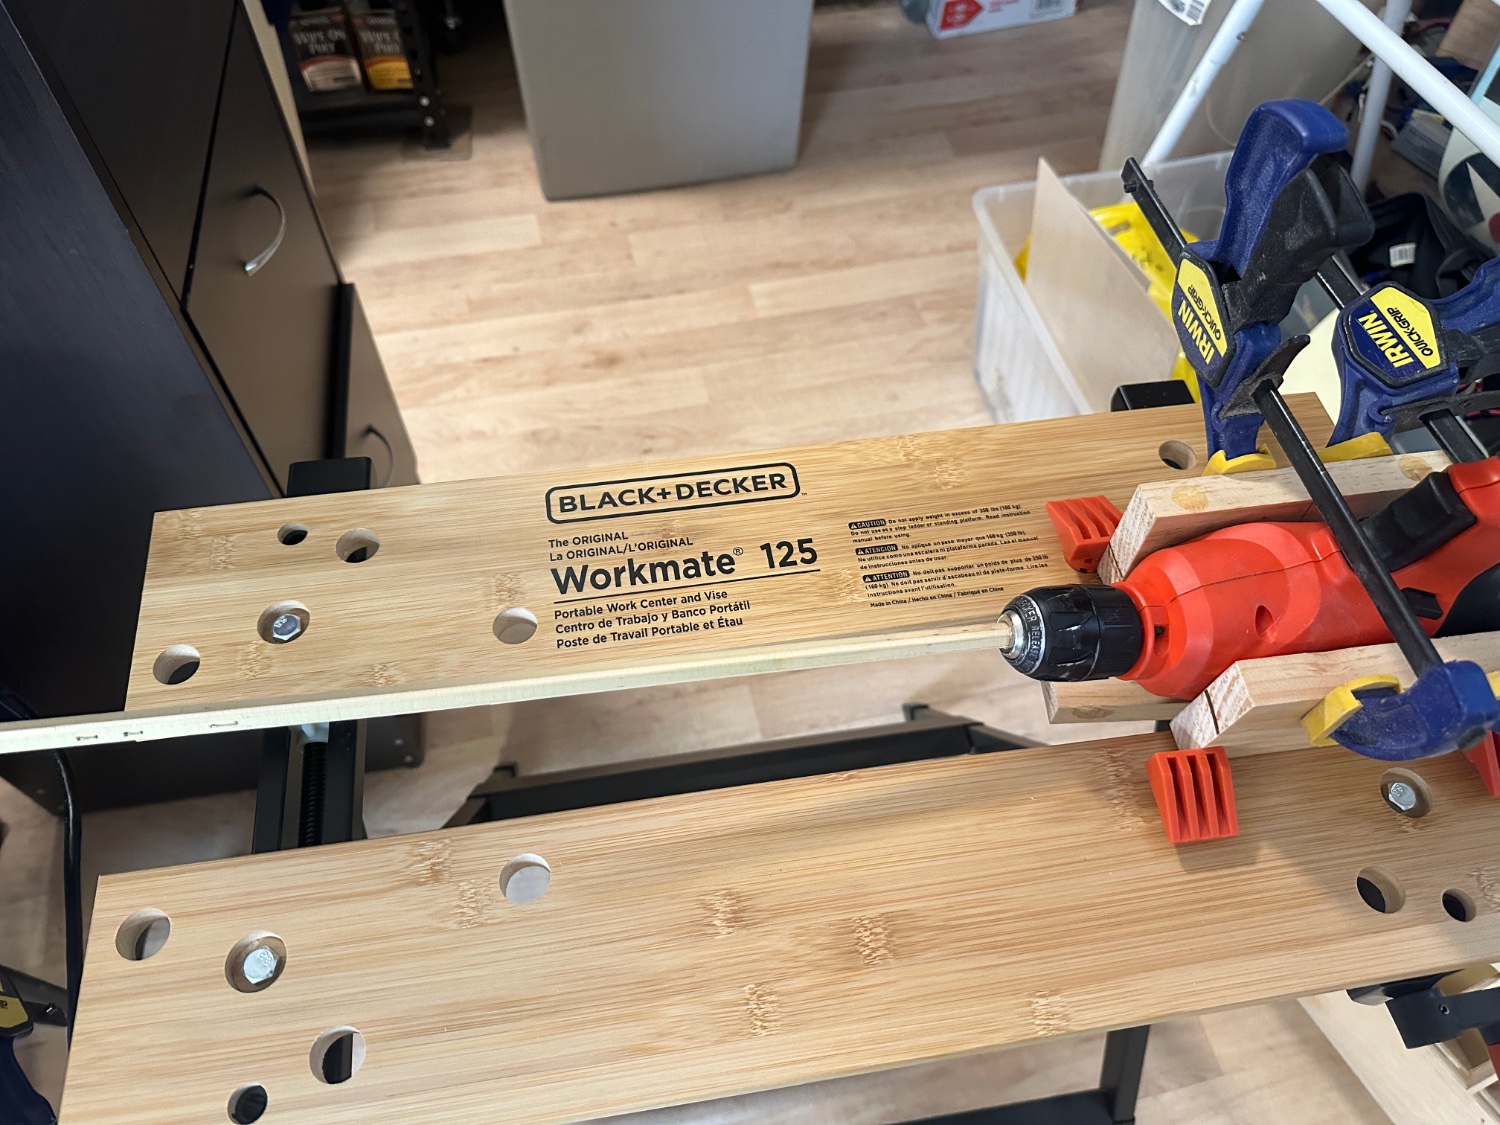
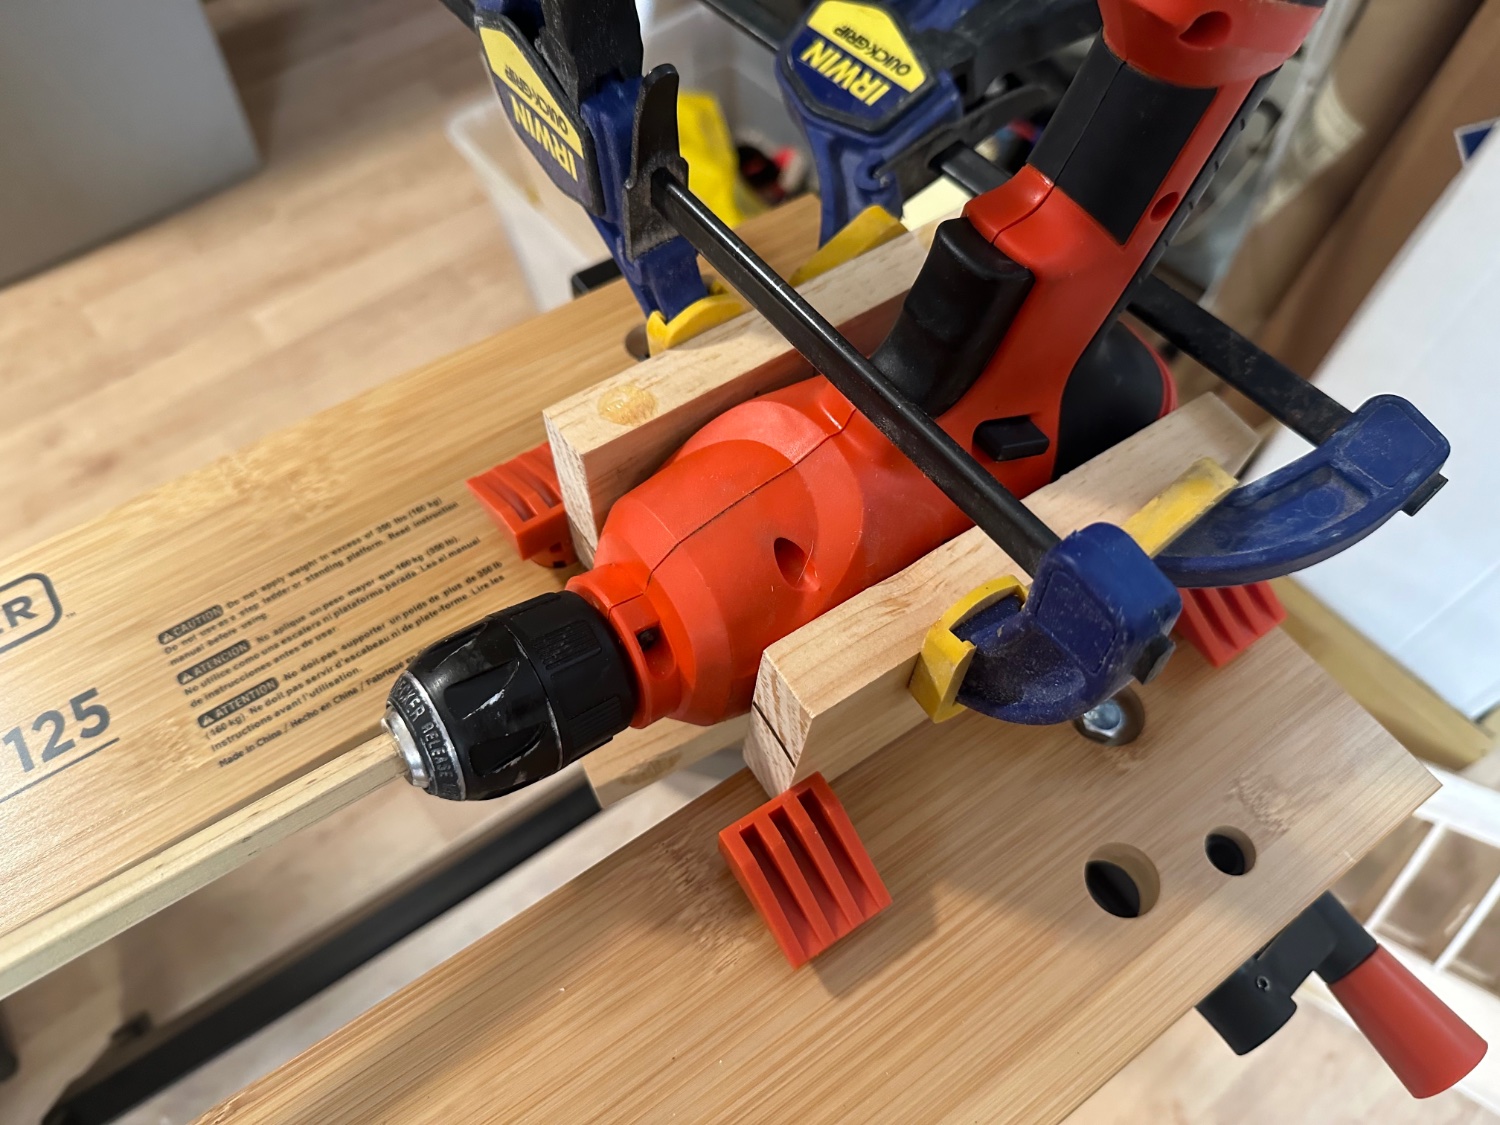
Finally got to spend some quality time in the shipyard today and I again did something I’ve never done before. I made the main mast, bowsprit, the boom and the gaff. I had a lot of apprehension getting started, I followed Chuck’s instructions after some very slow and thoughtful carving and turning on a small lathe, I had 3 of the 4 parts made. They actually came out pretty good. The mast was a different story as the lathe couldn’t accommodate the mast’s length. So it was time look at other logs for ideas and I found a couple that used a clamped hand drill. I have a B&D Workmate to secure the drill with the help of a few blocks of wood I had. To secure the the opposite end of the mast, I removed the tail stock from the lathe and clamped it at an angle to the end of my workbench to match the angle of the drill. The jig setup worked very well. All have a coat of WOP and need to be painted and need to make the various fittings. This model has been a lot of fun and has really built up my skills.
Best Regards …. Rick


- Gregory, Nunnehi (Don), bruce d and 5 others
-
8
-
Walrusguy,
I’ve been closely following your fantastic log and applaud your talents and efforts! Quick question for ya (perhaps Chuck can chime in also). I’m a big fan of Alaskan Yellow Cedar (AYC), because of its wonderful color and workability. The question is, do you think that using thinner 1/32 thick planks instead of 1/16 thick planks is doable? Thanks for your thoughts!
Best Regards …. Rick
-


Medway Longboat 1742 by Freebird - FINISHED - Syren Ship Model Company - 1/2” Scale
in Medway Long Boat - 1742 - Public group project.
Posted
Thank you Chuck!
And thank you All for all the likes!
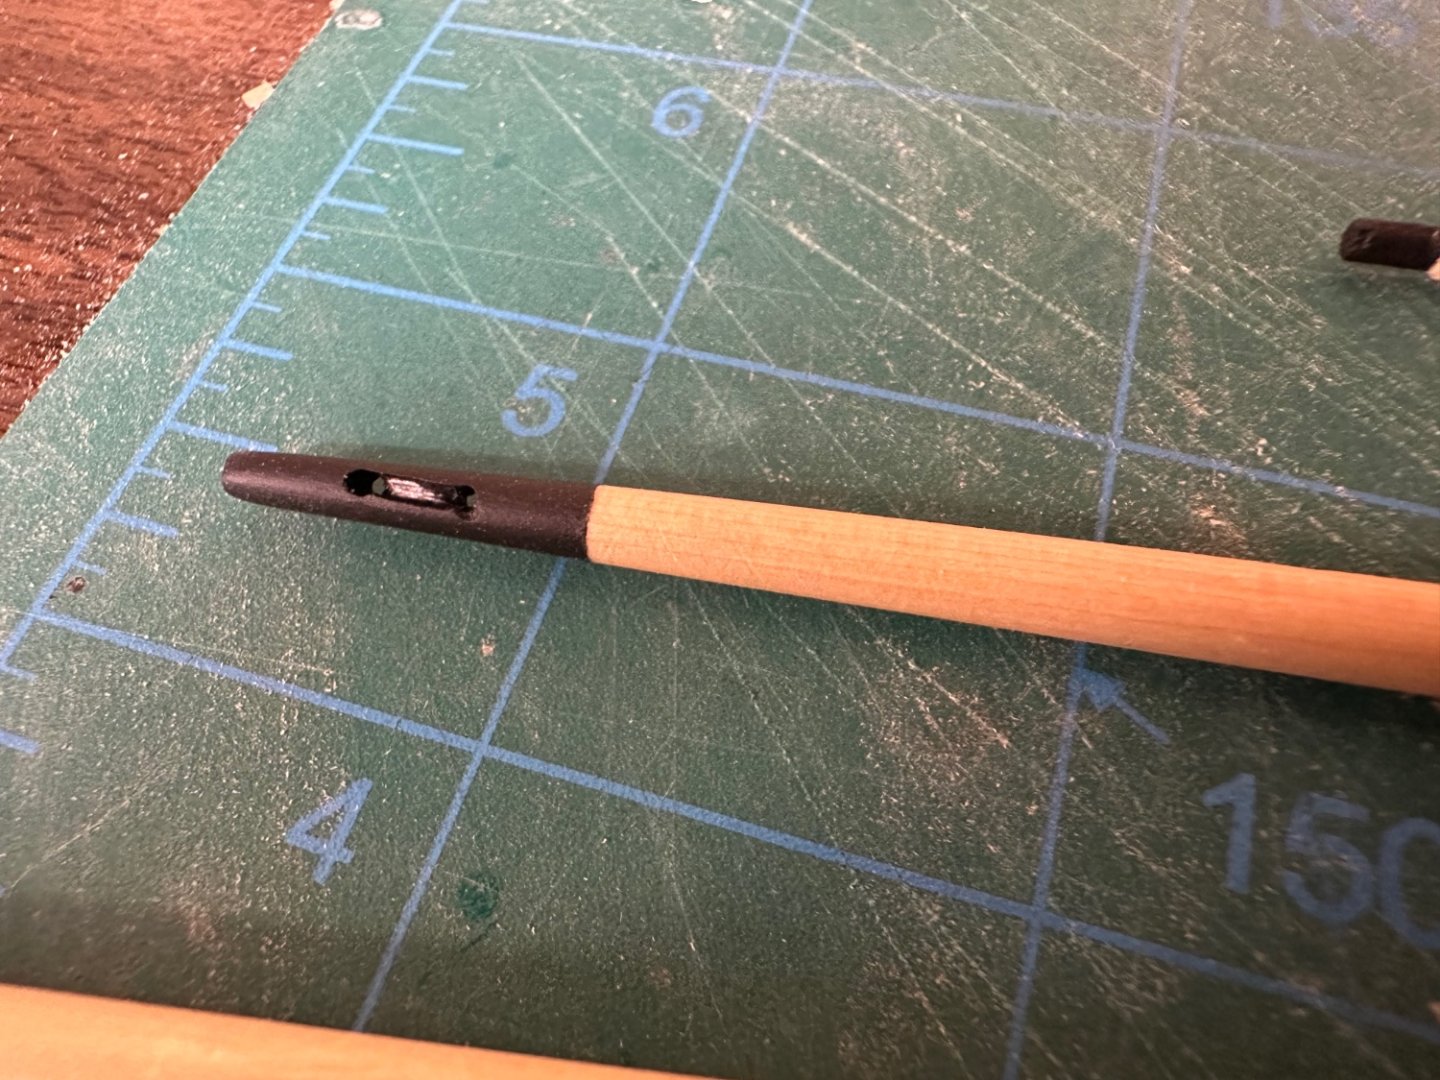
Today is install the bowsprit day. The brass has been cut to size and the pins filed to shape.
Best Regards …. Rick