

GGibson
-
Posts
940 -
Joined
-
Last visited
Content Type
Profiles
Forums
Gallery
Events
Posts posted by GGibson
-
-
Very nice job, Joe! This NSP was my first build. You did awesome work! What's next?!?
")
- Ryland Craze and JoeMacD
-
 2
2
-
Richard (RetiredGuy) did an awesome job on his Bluenose build. Definitely one that I keep referring back to for guidance!
I recognized the text font of the drawings almost immediately! I was given the book by a local hobbyist who knew I was starting a Bluenose build. The book's title is Bluenose II - Saga of the Great Fishing Schooners - Measured Drawings by L. B. Jenson, Nimbus Publishing, Copyright 1994.
-
Great work, John! Love the meticulous detail. Anxious to (eventually) get to all of the deck details that you have enjoyed building.
-
Nice work, John! I had seen this photo before that had the two lovely ladies sitting atop the wheel box, but hadn't noticed the grate to the side of the wheel box. Nice looking out! Not that it makes a lot of difference, just placing the grate on the deck looks great (no pun intended), but while the ship is out on the water, would it have made more sense to have the grate positioned directly in front of the wheel? Where would the steersman be standing while under sail? To the side where the grate is in the picture, or between the wheel box and the cabin? Not questioning, just curious as a non-sailor. Continued awesome job on your Bluenose, sir! 👍😁
-
-
Hey Tim! Your fore and aft decks look awesome! Great work! I am getting close to finished on my Bluenose decking, as well, but have not done any of the fake stanchions or other bulwark work yet. Those are next on my list. Hope mine comes out as well as your Bluenose is looking! Keep doing well!
-
Great detail work on all the "deck parts", John! I've be referring to your work a lot when I get to various points on my Bluenose! 👍
-
Great work, John! Looks really nice! So, I take it you are not going to replicate the two "companions" sitting on top of the companionway in the photo on the right? 😁 I'm quite aways behind you in my build but following yours with great interest.
-
Great job on the foredeck, Tim! I recall struggling on my first nibbing strakes I made for my Ballahoo build, but made it through it. Mixed emotions about getting to that point again with my Bluenose build. Appreciate the inspiration!
-
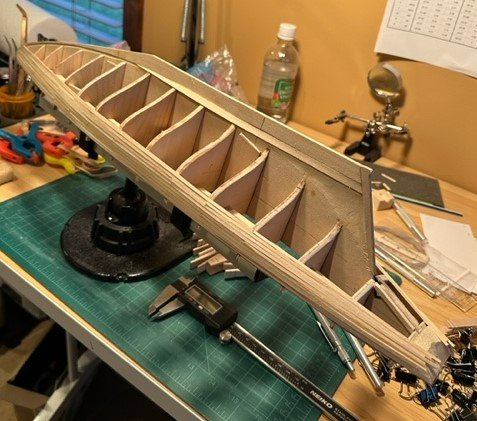
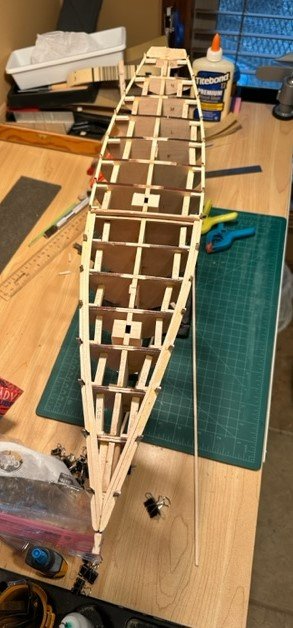
A quick update on my Bluenose progress... I have completed the hull planking! There are certainly some gaps and undulations in the planking, but all-in-all I seem fairly pleased with how it came out. Will now work diligently on sanding, filling, sanding, filling... starting at 80 grit sandpaper and working my way up in grits to where the hull is as smooth as I can get it.
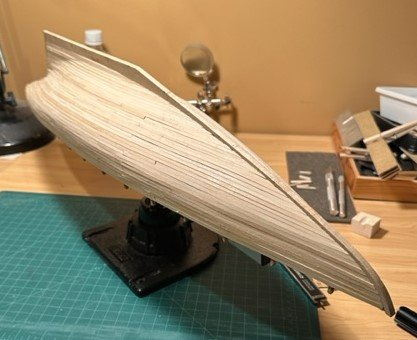
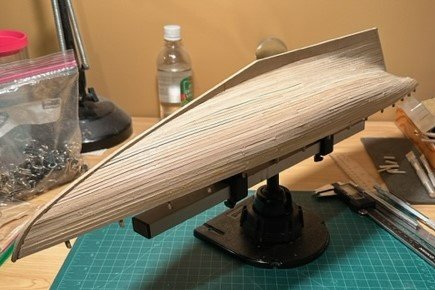
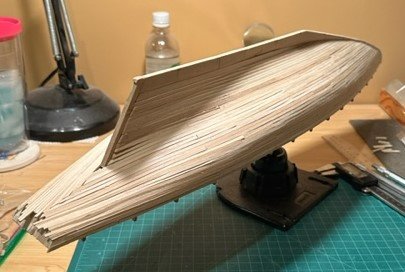
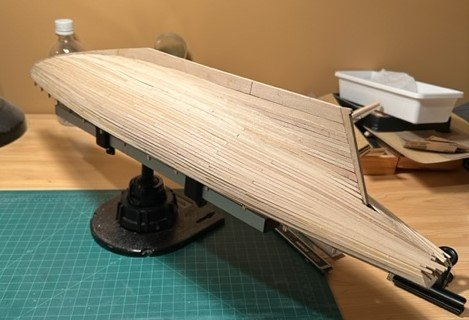
As you can see from the pictures, I still need to trim and clean up the planking at the stern/transom area. And then, after I'm done sanding the hull, I'll go "topside" and finish the transom framing, knightheads, hawse timbers, fake stanchions, etc, etc, etc.
Appreciate the follows, likes, comments and critiques!
-
Continuing to move "slowly but Shirley" on the Bluenose hull planking. Have finished with the "Belt B" sections and they didn't seem to require quite as much tapering as the previous ones. Will now start on the "Belt D" section, which is the part of the hull planking closest to the garboard strake. Looks like a few of those might require a bit of twisting as the strakes transition from the bulkheads back to the sternpost. We shall see how it goes! But, seems like it's coming together decently. I'll then work in the "Belt C" strakes.
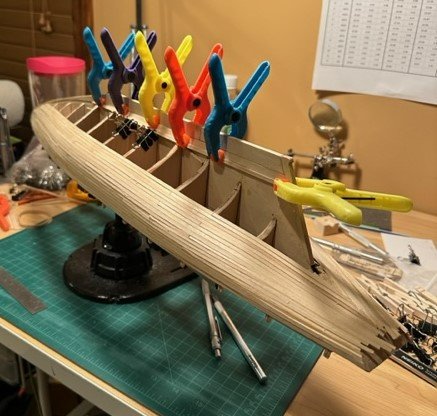
Thanks for your peeks and critiques...
- Prowler901, bhermann and bobandlucy
-
3
-
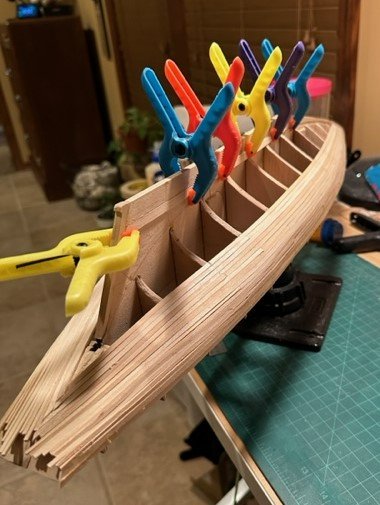
Due to the holidays, travel, and other real-life distractions, I have been absent from the shipyard for periods of time the past couple of months and haven't kept pace. I have, however, just finished the first "Belt A" section of the Bluenose (along with the garboard strake) on both the port and starboard sides of the ship.
Seems like the planking is going well, albeit slowly. Was already planning on needing to do a bit of sanding/filling/sanding, so I'm satisfied with how the planks are looking so far. I thought I had read in some other Bluenose build logs that the planks needed little to no tapering, but (if I've done my calculations correctly) I needed to taper especially the aft ends of the eight "Belt A" planks (from Bulkheads M, N, O & past the stern blocks) a decent amount. Hope I've done them right!
On to more planking! Oh, joy!
- Fubarelf, bhermann, bobandlucy and 2 others
-
5
-
Nice chest, Bob! (Maybe the first time in your life you've heard that, huh?) 😄
- bobandlucy, druxey and Ryland Craze
-
2
-
 1
1
-
Great work, David! She looks fantastic!
- Steve Anderson and Dave_E
-
2
-
Hi Bob! Not sure I'll ever get to the quality build of the Syren... but going to follow you with great interest on this build log. Thanks for sharing your work and time! Best wishes on a great, yet challenging ship build!
-
Looks really sharp, Tim! Great job! I am still on my "Belt A" planking (doing more tapering than I thought I was going to do), and have been stalled due to Christmas preps, getting ready to travel over holidays, etc. So, will hit the shipyard hard again when I get back. Enjoy your holidays with family!
-
Nonsuch is looking great, Bob! Congrats on what you have accomplished!
I have purchased rope from both Syren and Ropes of Scale, and have had awesome customer service and delivery speed from both. Yes, much better than the Model Expo-supplied rope in my amateur opinion.
-
Loving the detail, Bob, and the chrome fittings look awesome with the white and the natural wood grain appearance. Curious if the steering wheel was all one piece or did you have to assemble it from parts? Are you planning to do as much rigging and sail work as you can on the mast "off ship" before stepping? Was just reading about the coin ceremony believed to have started in ancient Rome. Not sure the smallest of coins will fit through that mast hole, though!
Continued great job, Bob!
-
I definitely agree with Roger on the "lost to the Floor Gods" comment! My workspace is on a tile floor, so when I drop a block or a deadeye, it bounces to... who knows where?!?! So, I have employed the same technique as Roger, securing whatever I am trying to thread/rig in my helping hands workstation with rubber alligator clips. Keeps things quite steady!
And, I also use the CA technique both James and Greg mentioned to stiffen the line being threaded. Although I do use a needle threader for some applications, i.e. pulling line in order to serve shrouds, I would think that it might be difficult to use a needle threader to pull through block or deadeye holes, as you'd be doubling the thickness being pulled?
- thibaultron, mtaylor and Ryland Craze
-
3
-
The door looks like wood grain to me! Great work!
-
Looks like nice work, Tim! I am still working on my "Belt A" section planking.
-
Looking really sharp, Bob! Love how that topside looks in all white right now. Nice clean look! Great job.
Saw that the Nonsuch is featured in the latest NRG issue, but haven't looked at it yet.
- thibaultron and bobandlucy
-
2
-
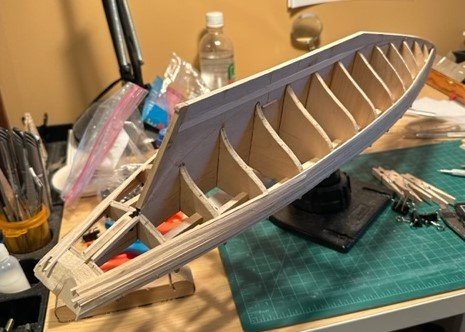
Appreciate the call out, Tim, on the waterway extension at the bow. I knew I had to finish it, but was looking at the combination of the waterway piece and the knighthead and hawse timbers and their relation to one another, and took a picture before I finished. I do like, though, that you noticed it. Good looking out! I also added some scrap wood for the mast slots.
I still need to complete the knighthead and hawse timber construction at the bow, as well as the transom framing at the stern. I have another newbie question, though. Should I complete those items, as well as working on the additional bulwark stanchions, main rail, buffalo rail and monkey rail before the hull planking, or do the planking first? I know that the instructions call for those to be completed prior to the planking, but was wondering if anyone had concerns with any of those breaking or getting snagged during the planking process. Is there a particular sequential reason why those should be done first?
-
Bluenose by JohnU - Model Shipways - 1:64
in - Kit build logs for subjects built from 1901 - Present Day
Posted
Looks really sharp, John! Well done, sir!