

GGibson
-
Posts
940 -
Joined
-
Last visited
Content Type
Profiles
Forums
Gallery
Events
Posts posted by GGibson
-
-
Nice start to planking, Tim, and appreciate the meticulous "start over" attitude! Keep pushing forward! I'm still going to school on you!
And please tell me you clean off your worktable before your photo ops. Mine is way too cluttered with... stuff!
")
-
Thanks, Tim! I am obviously following your Bluenose progress, as well, and hope to learn lots from your build.
-
Pretty straightforward beginning... Assembled the center keel with Titebond. Used some scrap wood to reinforce the two joints on both sides. Then worked on cutting the rabbet into each side of the center keel. Someone else had mentioned in their build log, as well, after doing three previous ship builds, this is the first build that has instructed me to cut into the keel like this. This operation may have been what scared me away from this project 16-17 years ago, fearful of messing it up right from the start. Anyways, it worked out pretty well by using a couple different Xacto blades.
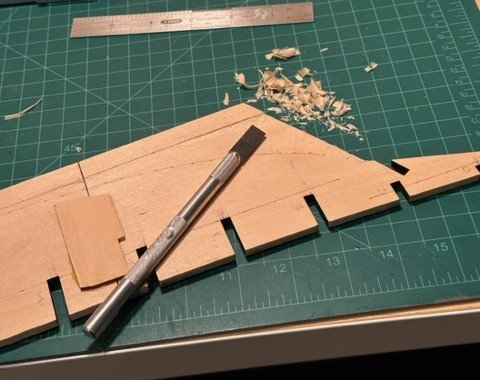
I prefer the curved #10 blade rather than the standard #1 or #11 "pointy" blade to cut the rabbet. Then, used a #18 flat knife (almost like a chisel) to clean out the area between the bearding line and the rabbet. Thought I might have an issue when I attached the scrap wood for the joint supports before I cut the rabbet with the keel being wobbly as I was attempting to cut, but I think it worked out pretty well. I also have not yet installed the sternpost. Thought I would be able to taper the hull to its proper depth on each side without the sternpost attached. We'll see if that was a good decision.
Now on to the bulkheads. I have "dry-fitted" each and they all fit pretty well. One or two are a bit looser than they probably should be, but once they are set and glued, they should be ok. Have not yet cleaned up any of the char on the bulkheads, as I figured I'd do that as a part of the fairing process. Reading ahead a bit, I'm still a bit unclear on the bulwark stanchion extensions, stern blocks, horn timbers, etc., but will address those as I get to them. Much more to learn!
-
Great start on your Bluenose, Tim! I saw your "like" on my initial Bluenose build log post and had to acknowledge. Your build log here is one that I flagged to follow in order to lean on hints and advice. Look forward to watching your progress!
-
Well, no rest for the weary, as they say... Finished the Ballahoo and have three more ships waiting for shipyard clearance. As I had indicated in my signature section previously, my son gave me the Bluenose as a gift some 16-17 years ago, when I had never thought about doing shipbuilding as a hobby, and had way too busy of a working life to devote time to this hobby. I opened the box, read some of the instructions, and pretty much thought "Nope, looks too complicated. I'll put it away for another day."
So, here we are 16-17 years later and I have found model shipbuilding as a fun and rewarding hobby after all. After three completed ships, it is now time to work on the Bluenose. I think I have learned enough skills in my three previous builds to make my Bluenose looking good. Time will tell. There are plenty of really good build logs for the Bluenose that should help guide me on my way. I look forward to digging into them and doing as much research and observations as I can.
Since there have already been plenty of prior build logs, I won't post the obligatory "open the box and look at the contents" picture and post. But, I will point out the difference in the box covers from what it looked like 16-17 years ago (shown in my pic below) and how Model Shipways box cover looks like today. Thought that was interesting.
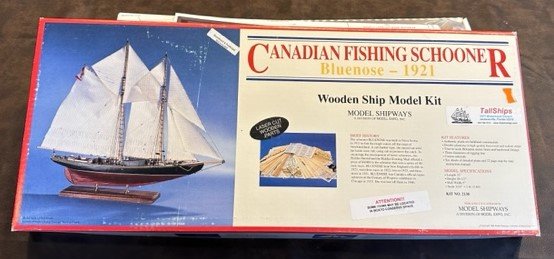
In doing a quick comparison of the instructions included in my Bluenose box to the online pdf instructions available on Model Shipways' website, they look the same, so it doesn't appear the build process has changed much, if at all. So... here we go with another build log! Appreciate all the follows, likes, comments and criticisms that this build log will generate. Thanks!
- Knocklouder, Jeff preisler, Fubarelf and 1 other
-
 4
4
-
-
As I usually start out my queries, I'll say "This is a silly question, but...". Going to start working on the Bluenose 1921 and noticed that the parts list includes deadeyes and blocks that are supplied and measured in inches. The parts in three previous builds I have worked on have all been measured in millimeters. And, in all due respect, I have found that the Model Shipways-supplied blocks and deadeyes are not as good as others available.
With that said, in doing the conversions from inches to millimeters, for example, a 3/16" block converts to 4.76MM. Will a 5MM block look too big? Conversely, a 1/8" block converts to 3.175MM. Will the appropriate size line still fit thru a 3MM block? Do the holes significantly change that much?
Finally, appreciate everyone's recommendations on what they use for alternative blocks and deadeyes. I have purchased the "Beautiful Blocks" from Model Expo, but have also looked at the "Realistic Blocks" from Ages of Sail, and the deadeye kits and specialty blocks from Syren Shipmodel.
Thanks...
-
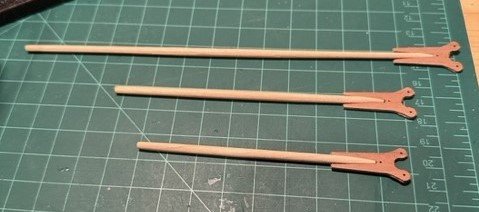
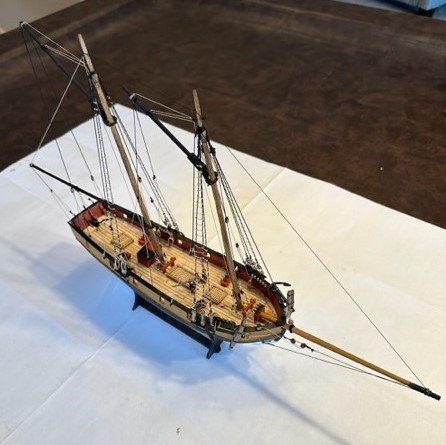
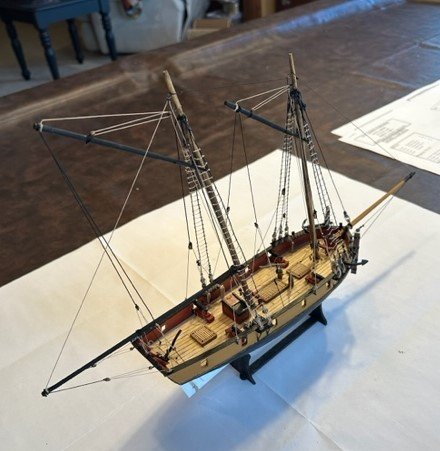
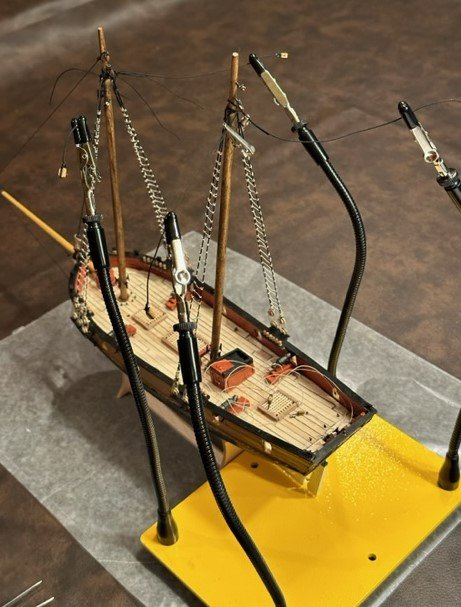
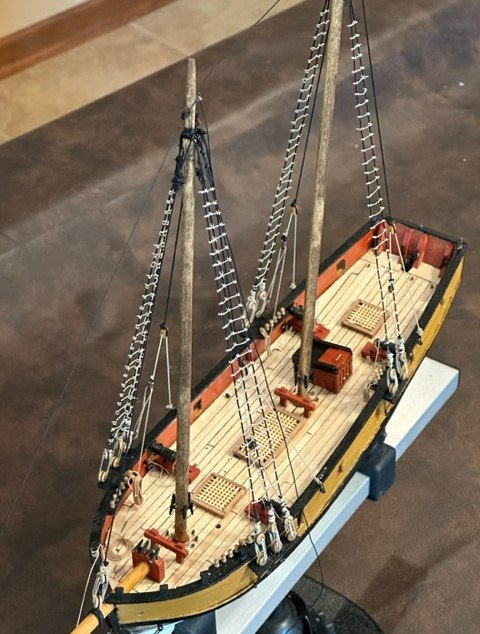
Well, it's been a busy few weeks working on the boom, gaffs, running rigging, etc. Cut the dowels to be used for the boom and gaffs to the appropriate lengths and shaped them in order to fit snugly in the jaws. They shaped pretty well and looked nice when painted. Attached most of the blocks for the throat halyards and peak halyards on both gaffs (but did not attach the blocks to the masts until the rigging had been threaded through the blocks to make it easier).
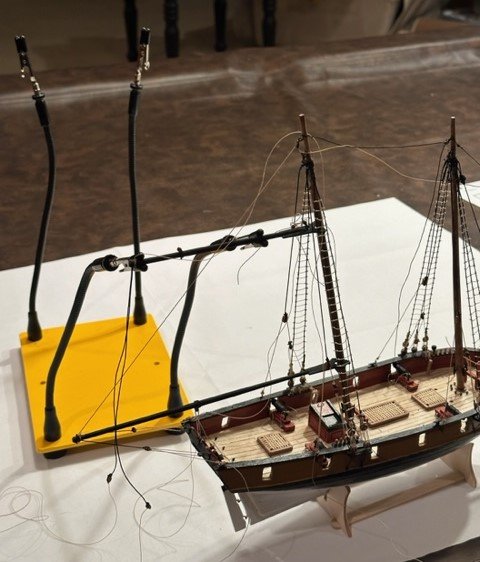
As several other builders mentioned in their build logs, I placed a small wooden saddle/tack on the mast at the base of the boom to help support it. That helped a lot in holding it in place better. The two gaffs didn't seem to need a saddle, as the throat halyards kept them in place. Pulled out the 4-Hands again to help me hold the gaffs in their general location as I completed tying down the mast blocks and tightening all of the running rigging. Was even surprised how well the parrel beads went around the masts. Thought I'd have them all over the floor before I was done.
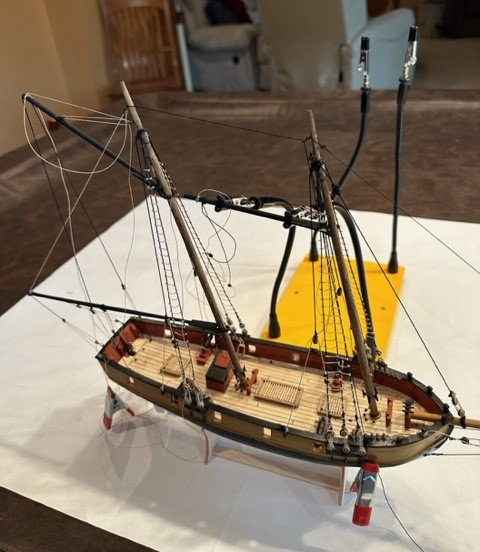
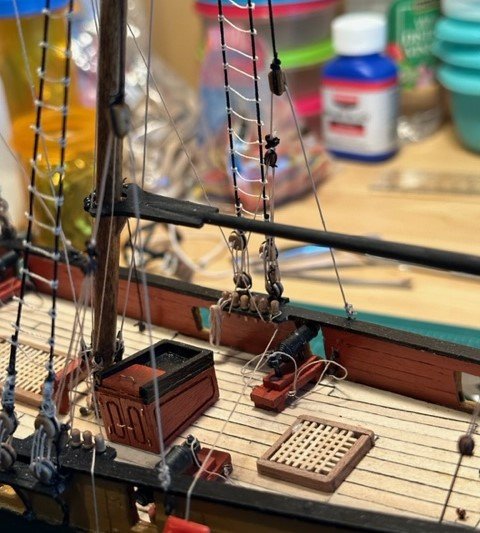
Once that was done, I made a couple more rope coils to hang on the belaying pins that the backstays came down to. Still need to learn how to do a better job at those hanging rope coils. Also, placed the two hand pumps in place, as well as the tiller arm, which I had left off during construction to avoid snagging any of them and breaking. Also place the anchors on port and starboard sides and ran anchor cables to their deck holes. (What are those holes actually called?)
So..... my version of the Ballahoo is now complete! Lots of things I wish I had done better, and many techniques I need to get a lot better at, but all-in-all still proud of what I accomplished.
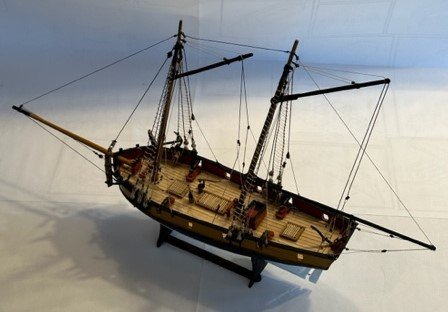
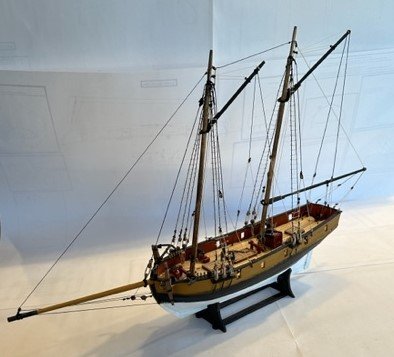
This is my 3rd ship I have now completed in my brief model shipbuilding post-retirement hobby, and am so grateful for the comments, likes and feedback I received in this build log, as well as a million kudos to those who had previous Ballahoo build logs that I was able to constantly refer back to. Special thanks to both @jim_smits and @egkb, whose logs were most helpful and both provided me with private feedback on questions I had. This MSW community is awesome. Thanks to all.
-
-
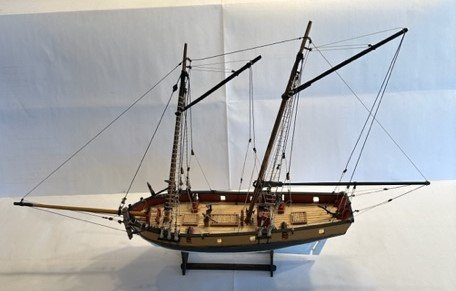
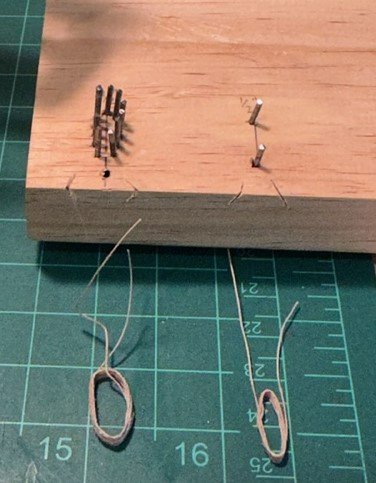
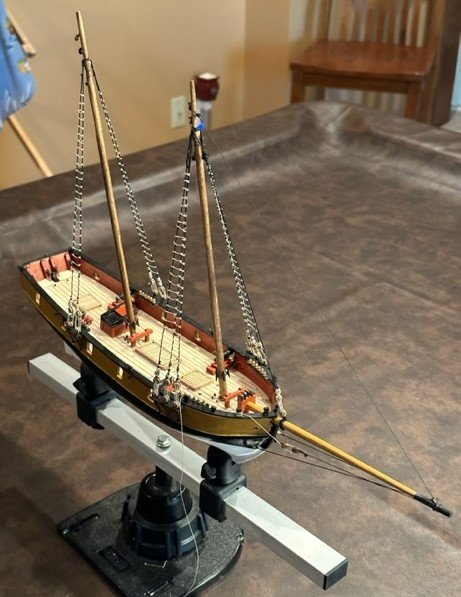
Got a few more tasks accomplished... Firstly, I completed the two sets of backstays on each mast. Hadn't found a tremendously good purpose yet for the "four-hands helper" I acquired a few months back, but for holding the four backstay lines simultaneously while I secured each to their respective positions on the masts proved quite helpful!
Have watched quite a few YouTube videos on how to make the rope hanks, and several previous Ballyhoo build logs had really good advice on their preparation. Tried making them using both the "bunch of nails in an oval shape" technique and the simple two-nail approach, and not sure if either of them were perfect for me. I just need some more practice. Also prepared a flat rope coil for the line coming from the front of the bowspirit, similar to the technique used in a video I watched by Olha Batchvarov (who is awesome in all of her shipbuilding videos).
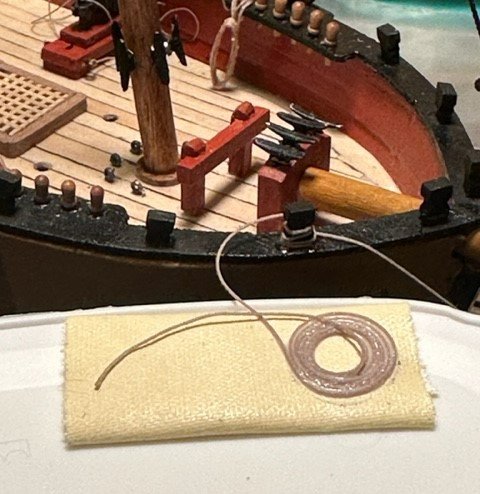
Finally, ran the line from the top of the aft mast to the top of the fore mast, through a block and down to a cleat. I have not belayed it to a cleat yet, though, as I want to confirm what other running rigging lines will be coming down the same fore mast so they don't all cross.
It's now on to the booms and the running rigging. Getting closer to the end!
-
Nice work, David! And excellent tutorial! Coincidentally, I have been working on rope hanks for my Ballahoo, using both the 2-nail method and the "bunch of nails in an oval" method, and honestly was not really happy with either, but I settled. Have one more to make and I may give your method a shot, as well. Appreciate the info.
-
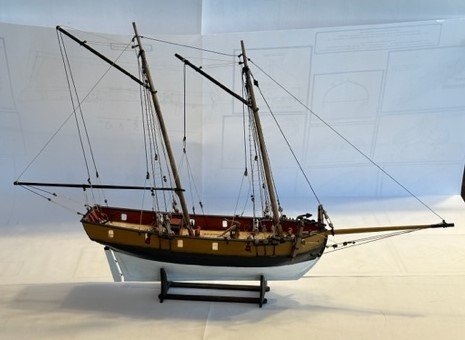
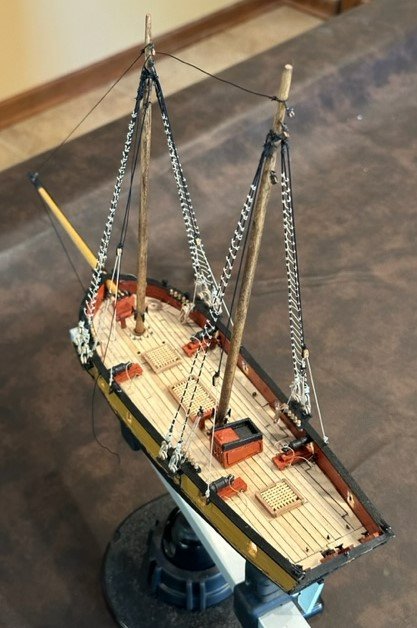
Completed the ratlines on all four sets of shrouds... not as bad as I thought it was going to be, but definitely monotonous. Got into a decent rhythm/routine. A couple came out a bit "slacky", but all-in-all I'm ok. Also completed the jib stay from the foremast to the end of the bowspirit and back to the boat. Will finish the rope coil and hang on one of the timberheads in a few days.
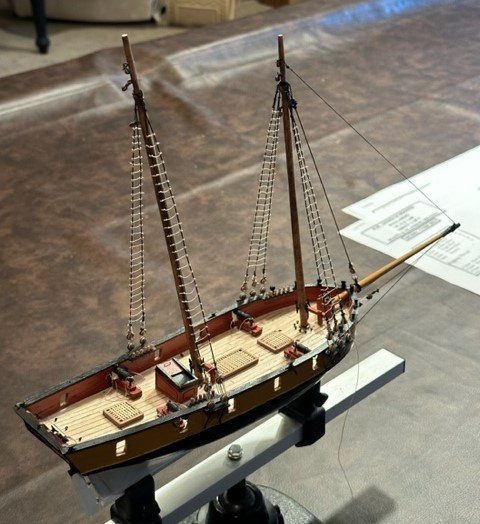
Now on to the two sets of backstays.
-
Hi Tim - Saw this build log in the list of "Recent Replies" on the MSW home page, and obviously caught my eye! Hope you don't mind the follow and the encouragement. As indicated in my signature section below, the Bluenose was a gift from my son some 16 years ago when I knew nothing about ship modeling. Started it, but got frustrated and put it in the closet, where it became buried. It's in my shipyard waiting for the next build, so I'm anxious to see how you do, and learn from all that you do. Great start!
-
Appreciate the input, George. Yes, I am hitting each of the ratline knots with diluted PVA as I am progressing. One of the other recently completed Ballahoo builds used the natural thread for ratlines as a bit of a contrast, and I thought it looked nice, so doing that here, as well. I'll do the ratlines for both masts. Like you said, you get into a bit of a rhythm. Thanks for the feedback!
-
-
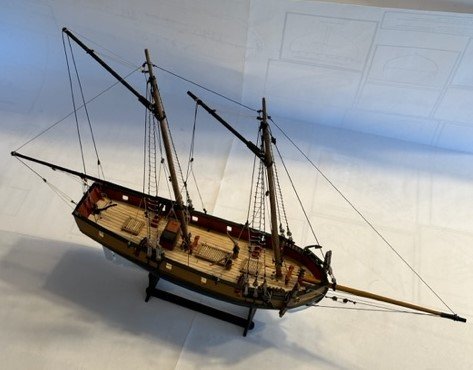
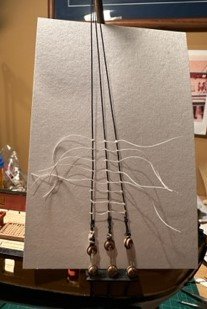
Haven't been working in the shipyard too much this summer. Had a couple medical things I had to address, as well as three weeks of grandkids visiting, so work on the Ballahoo has been minimal. Back at it a bit, though, now, and am to the point of working on the shrouds and ratlines.


Not all my deadeyes came out perfectly even when I tied the lanyards on them. But, for a first attempt, I'll take how they came out. Now on to securing the ratlines on the shrouds.

As I have seen on some other build logs, I am using a note card to assist with the spacing and alignment for the ratlines. Simulating an approximate 14" spacing between ratlines and adjusting to scale, I drew lines at 6mm distances, and will use this as a guide. Guess this is about the best way to do it. Will take a while to do all of them, though!
-
Looks good so far, Bob! Meant to ask this on your earlier post... are those bulkheads thicker than "normal"? How were they for your fairing? Think they will be better to do the planking with?
-
This looks REALLY good! Love how you have put some additional touches on it, making it "your own". And I agree with Bob, the rigging on this one is fun. I think as the instructions suggest, though, I did most of it with the mast off the boat, laying on a flat surface.
Hope the knee replacement went well! I had both knees replaced at the same time back in 2012, and they are doing great. Just stick with whatever rehab you have left, it pays off. And, finally... I love Olha Batchvarov's YouTube videos. They are inspiring!
-
This answers my question I just posted on your Harriet Lane build log! Ha! I received the Model Shipways email notification about this pre-sale, as well, and am intrigued by the look of this boat. But, with three ships already in the shipyard holding pattern, I probably need to pass. As you begin working on it, though, you may still convince me! Good vibes heading your way!
- druxey and thibaultron
-
2
-
I purchased the set of Microbox drill bits that BenD showed in his post (mine are in a blue plastic box with a clear sliding case), but I also purchased a nice set of Gyros drill bits that have worked well for me. Gyros® Carbon Steel Wire Gauge Mini Twist Drill Bit Set |Includes 20 Micro Carbon Steel Bit Sizes #60 to #80 | with Convenient Clear Dome Storage Case (45-12010) (gyrostools.com)
- Canute, mtaylor and thibaultron
-
3
-
Awesome job, Bob! Although I started following later in your build, it has been fun (and educational for me!) to watch your progress, your struggles, and your successes. Your Harriet Lane is finished! Are you going to encase it, as druxey suggests?
And, of course, we have to ask... WHAT NEXT?!?
Gregg
- druxey and bobandlucy
-
2
-
-
Hi Bob - Will watch for replies from experienced modelers on this topic, as well, since rope sizes for the various riggings have always interested/concerned me. I, too, have purchased rope from Syren, as well as Ropes of Scale, as I find both their qualities to be much better and more "authentic", if you will, than kit-supplied. I have a stash of multiple millimeters and colors to hopefully last me through my current build and those waiting in the shipyard. If not, I know how to get more! Ha!
Your Harriet Lane looks awesome!
Gregg
-
Looking good, Bob! I am jealous of your seizing abilities now, as I have a bunch of deadeyes and blocks to do on my Ballahoo (after the grandkids leave and I have some medical stuff attended to). But... back on topic, everything looks great! Doing well!

Bluenose 1921 by GGibson - FINISHED - Model Shipways - 1:64
in - Kit build logs for subjects built from 1901 - Present Day
Posted
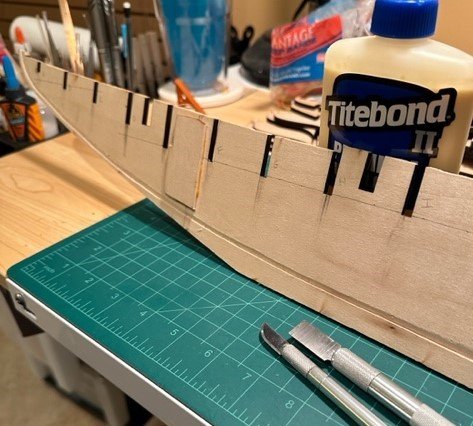
Well, I have made some progress in beginning this Bluenose ship build. After getting the keel assembled, I checked the fit on all of the bulkheads. They all, remarkably, seemed to fit pretty well without too much sanding. Made sure, of course, they were all aligned at 90 degrees to the keel before securing with Titebond. I also took the time now to trim/form the bulwark stanchions to their 1/8" width. There was a natural seam in each of the bulkhead stanchions, and I used that seam to trim, which "seamed" to work out ok. I will find out later if I'll have any issues with the widths, but it looks like that will work alright.
After reading all of the other Bluenose build logs regarding reinforcing keels (especially the stern end) and bulkheads due to breaks, I thought it would be good on mine to add some reinforcements between each of the bulkheads. Using some scrap 1/8" square wood strips, I added the strut pieces between the bulkheads.
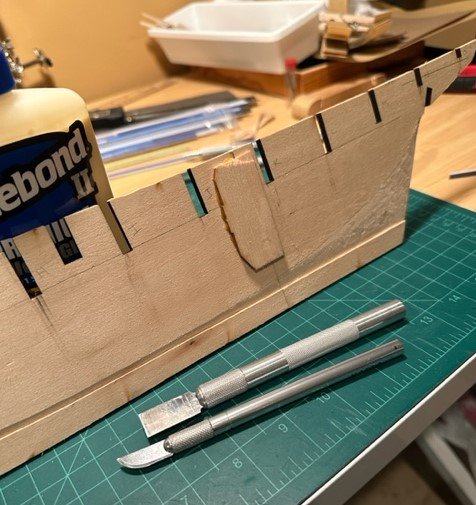
At this time, I also added the sternpost. Can't pass up a chance to use some rubber bands for holding!
I was a little apprehensive about how to trim out the stern block. But, it gave me the opportunity to... buy a new tool! Never have used a scroll saw before, but it seemed to make the cut pretty easy. I then used the Dremel to shape it a bit more. We'll see if there are any issues when I get to planking the stern area, but it may need some more shaping. Tried to do as much cutting and shaping before attaching to the ship to avoid unnecessary vibrations and potential breakage.
Next on the agenda was to add the waterway planks to the fore deck. The instructions indicated to first fit the plank that goes between each of the bulwark stanchion extensions, but it seemed to me easier and more precise to place that first inboard plank first. I also added some scrap wood on the bulkheads to act as a ledge for easier placement of those outside planks.
In another build log, someone else had noted, as I recall, that the placement of the great beam is mentioned late in this first stage of hull construction. Seems like the great beam and deck beam should have been added perhaps prior to the waterway planks. I have added them now, as well, and hope that it does not affect any of the other plank placements to come.
Still plenty to work on before the hull planking begins, it appears. I need to work on the transom framing and the knighthead & hawse timbers, as well as the aft deck waterway planks. Also need to add the needed support pieces for where the two masts will set.
It all still feels a bit confusing, but will settle down once I get to the hull planking, I hope. Appreciate the advice, criticisms and even the "what the **** were you thinking" comments.