


Larry Cowden
-
Posts
137 -
Joined
-
Last visited
Content Type
Profiles
Forums
Gallery
Events
Posts posted by Larry Cowden
-
-
-
9 hours ago, Roger Pellett said:
Art,
I hesitate to post this since you’ve already spent $100, BUT, here goes.
A number of years ago, I got involved rebuilding wood canvas (Old Town) canoes. These involve a lot of steam bending. After jury rigs outdoors I finally set up a system that would be safe to use indoors.
Your steam generator will work well. I used a Wagner PowerSteamer wallpaper steamer that is the same thing that you have, just a different color scheme.
After trying PVC pipe as a steam box I found that it would not withstand the heat from the steam. It sagged badly. I replaced it with a wooden box made from 4 1”x4” boards nailed together. With a hinged lid on one end and a block of wood capping the other. A galvanized threaded flange was fastened to the bottom and a threaded nipple was screwed into the flange that mated with the hose from the steam generator. A small hole was drilled into the bottom as a drain.
The hinged door allowed me to quickly open the box to pull out wood. The steam can burn you quickly so you will need some sort of tongs. Another advantage of the wooden box is that it leaks! This allows circulation of hot steam within the box and ensures no buildup of pressure within the system.
If you have adequate circulation in and out of the box, I don’t see a need for either pressure or temperature gages. Water at atmospheric pressure boils at 212F, and you don’t want a closed system.
Roger
Thanks for the info!
- Canute and thibaultron
-
 2
2
-
On 3/24/2014 at 3:20 PM, fifthace said:
But to be honest, I've used mine twice since I bought it. Since then it gathers dust on a hook on the wall.
You will need to have a shaver adaptor as well though, or cut the plug off and fit a UK one.
I don't understand what you mean by the sideways spread?
EI believe he's referring to the displacement of wood fibers laterally as the plank is compressed around the form. The minor distortion can lead to gaps as progressive planks are laid next to each other. It can be corrected by light sanding to true up the plank to actual dimensions.
-
On 3/24/2014 at 2:59 PM, Mike Dowling said:
I have got a manual plank bender. The problem with this, which I did mention earlier in my log, is that it does spread the wood sideways a little bit. It is effective but the spread progressively becomes a problem.
That said, were can I get an electric plank bender?
Try EBay. I bought two on there based on recommendations from other builders. https://www.ebay.com/itm/Vintage-Aeropiccola-Ralt-RA-5-Plank-Bender-for-Model-Ship-Building/174601642404?ssPageName=STRK%3AMEBIDX%3AIT&_trksid=p2057872.m2749.l2649 This one was highly recommended.
-
On 3/24/2014 at 1:13 PM, Mike Dowling said:
Sorry mate, lost me again there! Soak, bend, apply while wet but don't glue? I tried that with a small test piece but, whilst drying it has sort of unbent itself which is not helpful.
I have seen some builds where they repeated this 2 or 3 times to get the plank right.
-
On 3/21/2014 at 1:20 PM, Captain Al said:
Dom, I looked carefully at the pictures and here's what I can make of them (re the hawse pipes)....the anchor rode (be it all chain or chain and rope) runs through the hawse pipes in the bulwarks to the windlass. The excess then runs down through the main and lower decks and is coiled in the bilge between the forward and aft holding platforms. Two things seem curious to me in this. One, I can't see the hawse pipes for the main deck (not the bulwark pipes, but the pipes for the excess to run through) and I can't locate a part for them in the parts list. Two, I would find it strange to stow anchor rode in the bilge. Yet this is what the picture on the box shows pretty clearly. More on this I guess when I get there. Right now I'm just going to stick parts 93 ("anchor hawse pipes") in their designated holes in the lower deck.
Just my two cents. But ships store anchor ropes and chains in line lockers below deck and not in direct contact with the bilges. Bilges are usually wet and contaminated with chemicals that would rot and destroy anchor ropes and chains stored in direct contact for long periods of time. I suggest a detail missing is such an open locker on the lowest deck for containing the ropes and chains dry and protected from the bilges.
-
On 3/21/2014 at 7:03 AM, Mike Dowling said:
Thanks for that Dom, oh and by the way, thanks also for the tip about using map pins. Brilliant! Just need to get some now. What I will do when I get there is put on just one plank - which might be a control strake at the top. Take a pic and see what you say after that. OK?
My hawse pipe/s (thanks again) are not metal on mine. Oh no, I have to carve them and drill them all by myself! And eventually feed the rope through the insy little holes I made in the decks to the bottom of the boat where I suppose I am expected to curl them up to look neat and if someone on board put them there!
Just a little rant, I am enjoying it really!
Thanks for the heads up on the hawse pipes! You will have to post pictures.
-
On 3/12/2014 at 2:26 PM, Captain Al said:
I like your sense of humor. It will serve you well I think in the days and weeks to come. My wife and I were just poring over the pictures and plans that come with the kit and its very weird. The pictures on the huge box that it all comes it has something down there, whether or not its a deck or not is hard to tell. But the instructional photos show nothing more than a fwd/aft running beam that is fixed to the inner side of frames 8 and 9 (just forward of the holding well box. The picture shows a lot of barrels and bales heaped inside, resting only on the hull planking. I suppose this beam is to hold these barrels in (but they'll be glued). And in reality, I don't think these heavy barrels would have been allowed to sit just on the planking. But the plans show nothing; neither a deck or a beam. So just like you said, why make things more complicated than they already are. I'm going to move on with the work that I have in front of me and follow the plans/instructions as they've been written. Maybe someone with more naval history can provide an answer re the ballast cause I am still curious about that. And if they actually used something like stones (which they did), it would be easy enough to throw some pebbles in there.
Hi Captain Al, I have followed marine archeology for a number of years. And in at least 80% of the underwater wrecks where the hull was still reasonably presented, the ballast was stones. Research NG wreckage stories.
-
On 3/10/2014 at 2:07 PM, Mike Dowling said:
HI there and many thanks for the post. Being a bit of a peasant I'm afraid I don't understand some of your nautical terms as yet! However I know on my build I have had to remove any sections of beam below cutouts. Seems like a shame when one has been so careful doing them in the first place!! I suppose it makes sense in the end. Believe me, I too am having sleepless nights worrying about the planking!! Maybe I should have chosen an easier ship for a beginner!
Anyway, thanks for the comments and I will keep watching yours.
All the best,
Mike.
Hi Mike, As I have this kit too. Can you list the sections where you had to beams and post some pictures? I am saving these build logs for future when I can actually get to it.
-
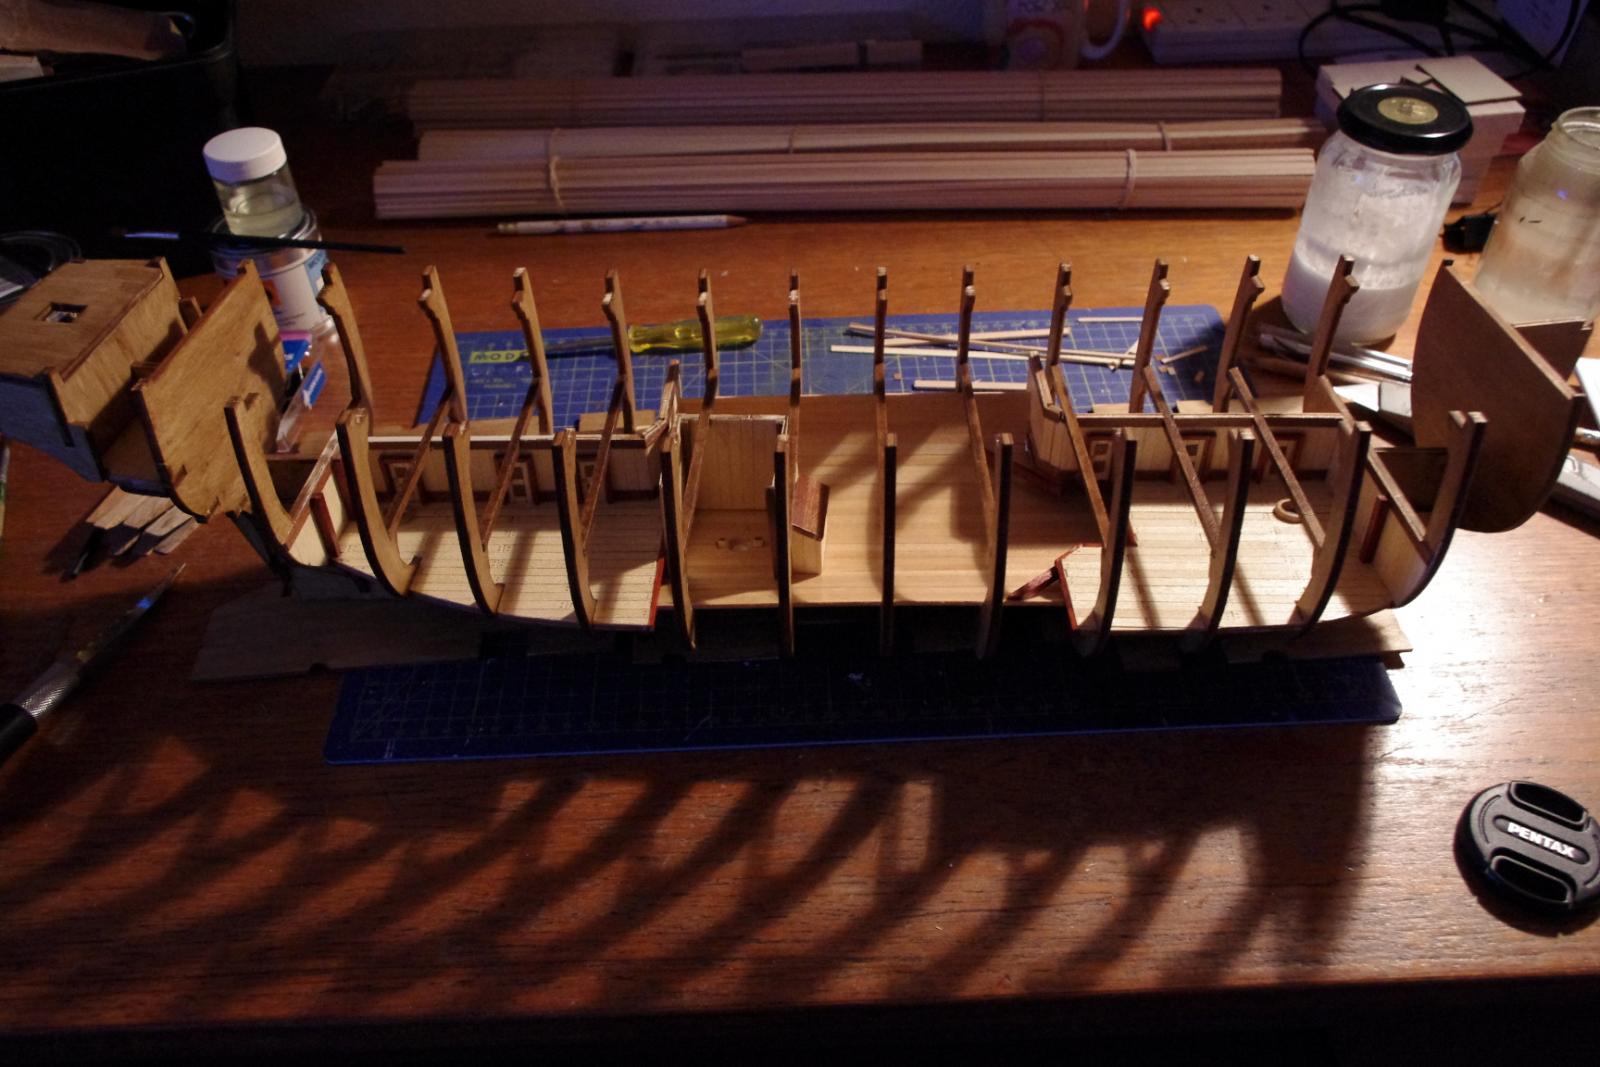
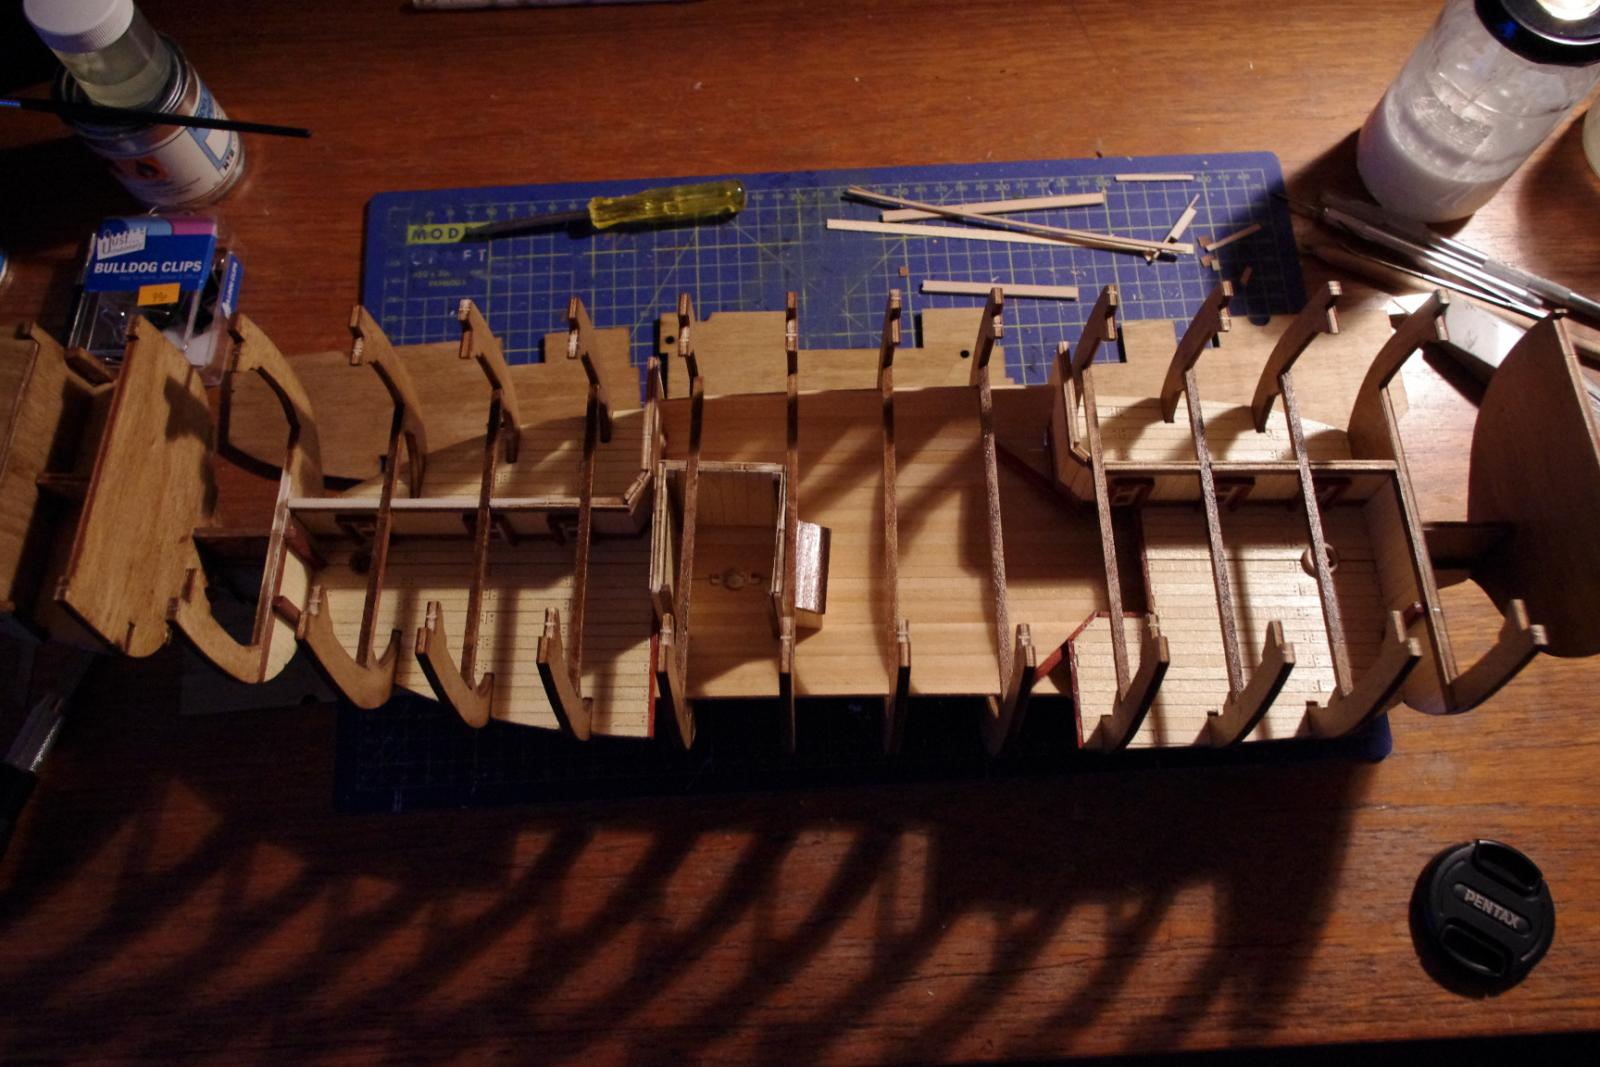
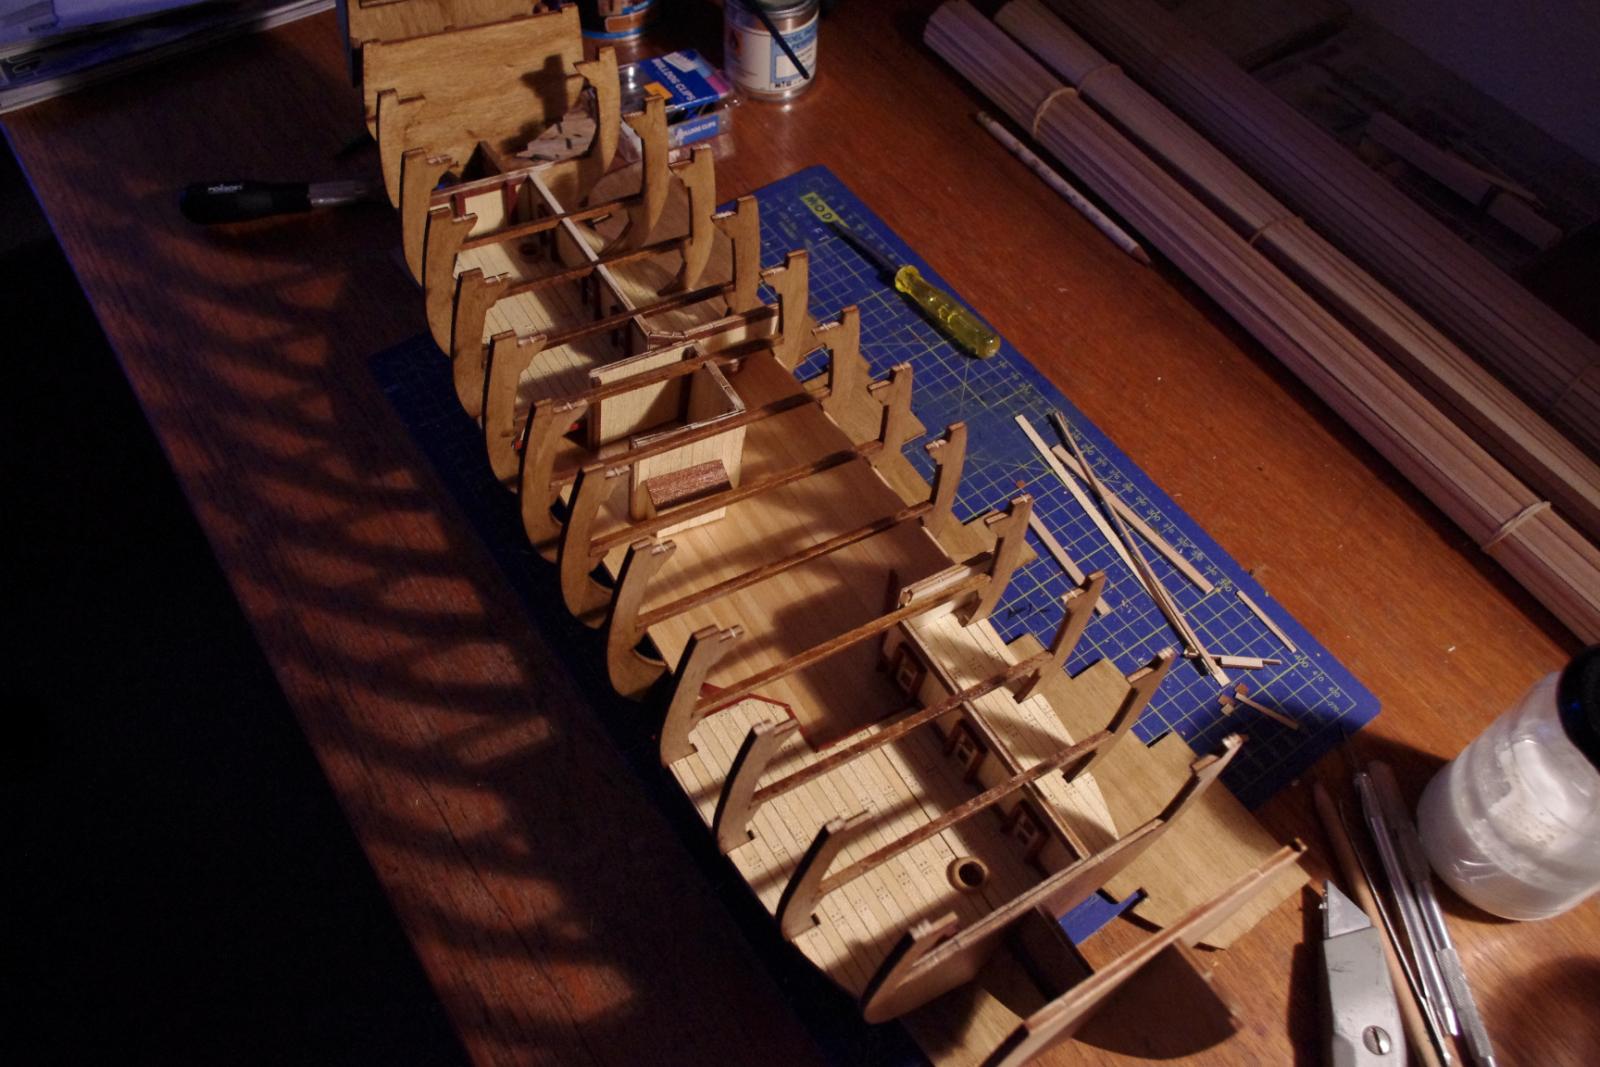
On 2/20/2014 at 5:30 AM, Mike Dowling said:
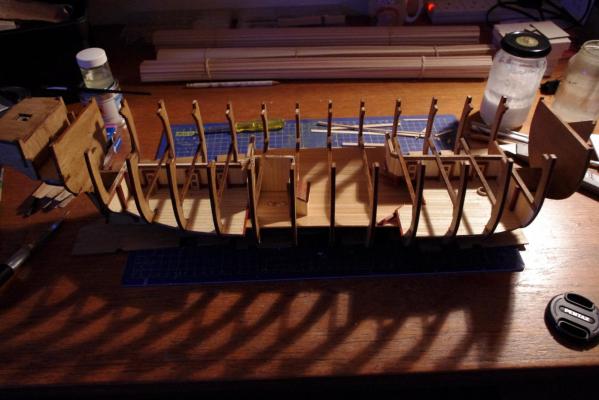
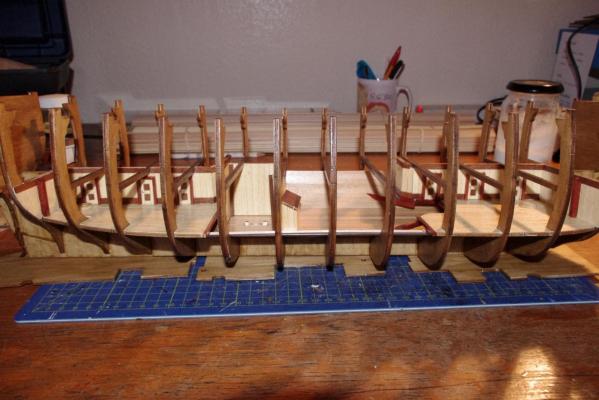


 Hi everyone, at last some more pictures for you. As you can see, the whole framework has now been stained and the bottom deck cut, planked glued and varnished, cabins and bilge on top and beams ready for the next deck.
A couple of thoughts. Firstly despite what some would have us believe plywood does warp, badly!! Also CA glue does not like varnish at all. I must remember not to varnish the bits I have to glue afterwards!!
I find it hard to believe I have put in so many hours with not a lot to show for it all. Still it doesn't matter, it is a challenge and good fun.
Is 'kit bashing' when you get really fed up and smash it all to bits or is it altering the bits that should fit and do not or will not? If it is the latter than a good bash has been had already!.
I keep finding a lot of ship builders keep referring to coating parts with varnish. But that's not compatible with CVA glues. Would shellac work?
-
On 2/15/2014 at 1:15 PM, Mike Dowling said:
Hi all, many thanks for all the comments, I look forward to having a look at your log Captain Al and maggsl_01 I hope I can do the model justice! I have to say it is turning out to be a tricky beast, maybe OcCre are a bit over the top with their detail!! I am hoping to get the lower deck finished and fitted soon so watch this space!!
Because it is early days I am not sure if there is enough wood supplied to finish the kit in the end, I rather suspect not. It is amazing to me how much wood you get through just with finishes and linings. I am sure the stagecoach I built was easier than this. Never mind I am having fun, just can't believe the time I'm putting in!!!
I will try and post some more pics soon!
I will hitch a ride on this build. I just received my OCCRE Bounty kit from Latvia of all places. Therefore I am especially interested in any kit problems you run into!
-
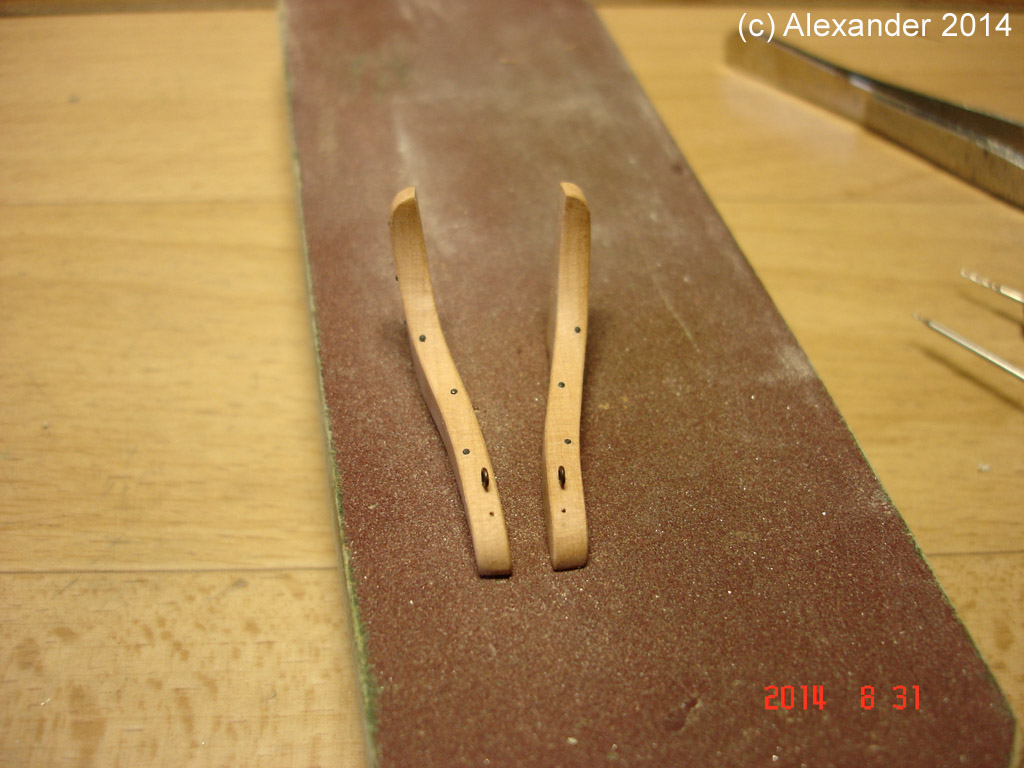
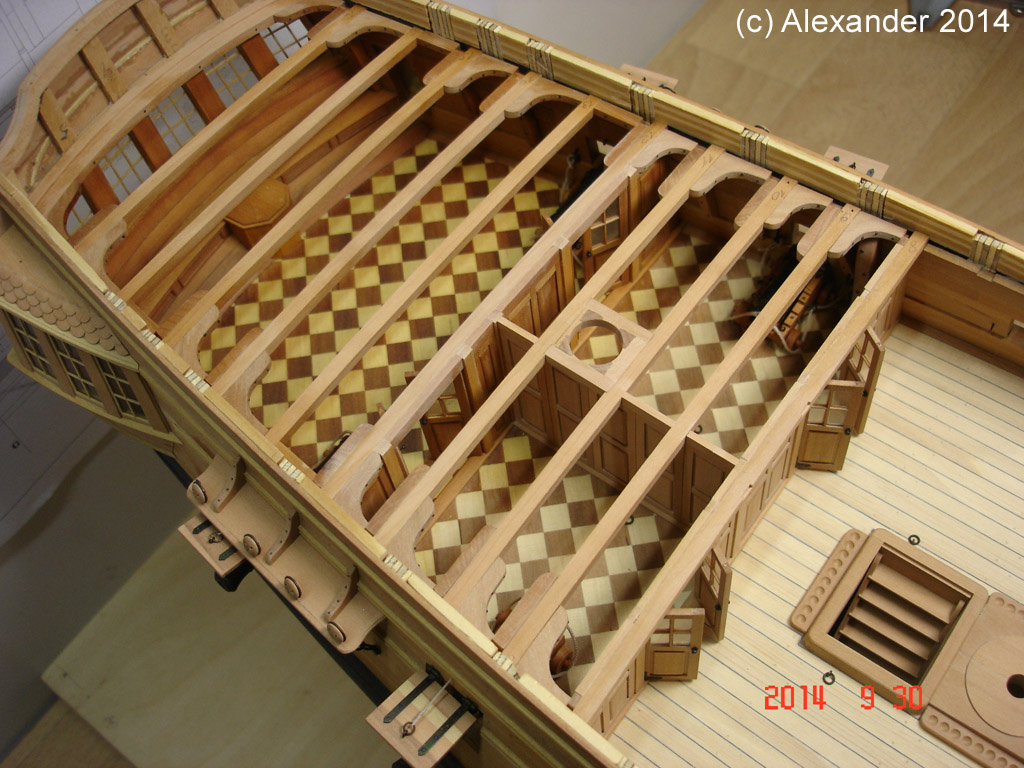
On 10/1/2014 at 6:39 AM, Alex M said:
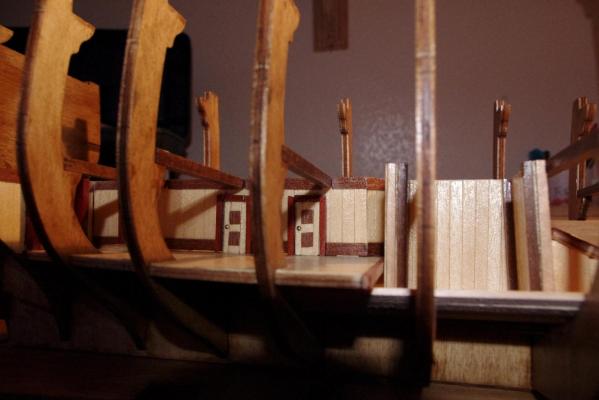
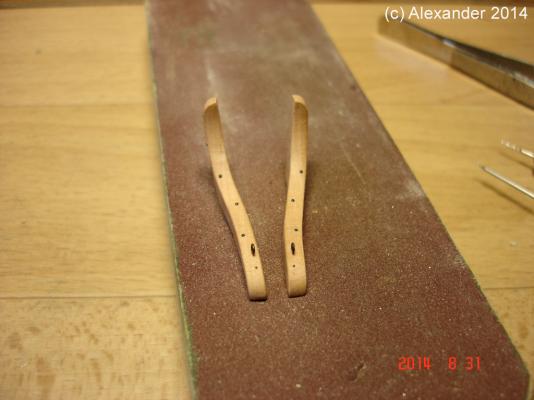
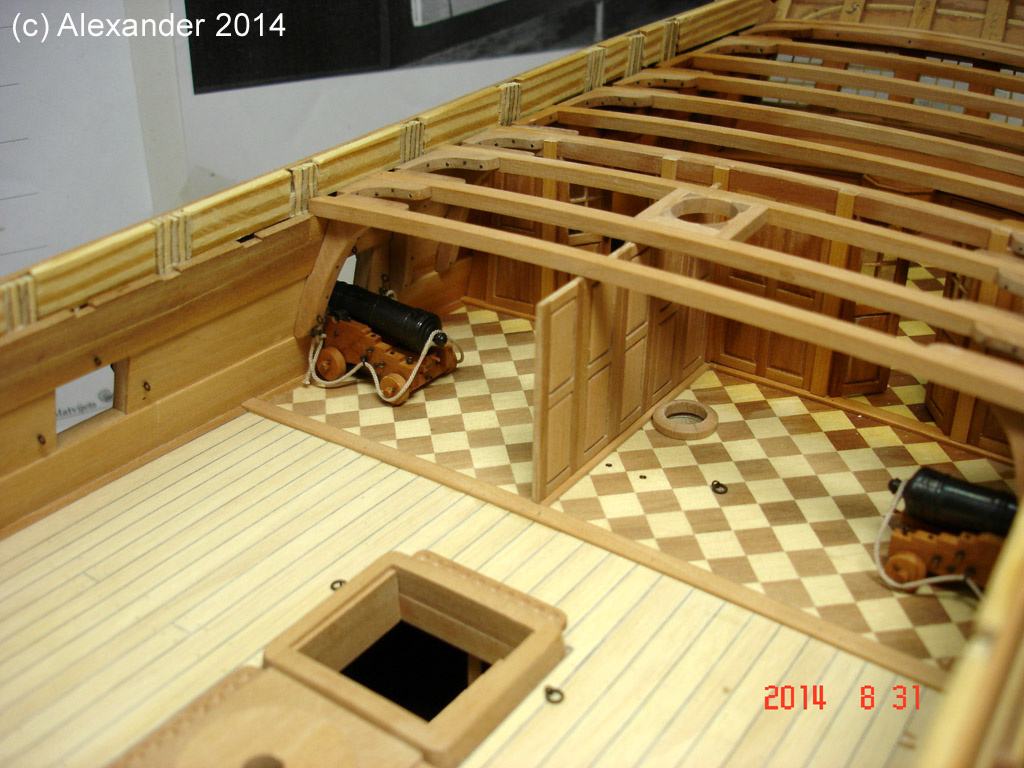
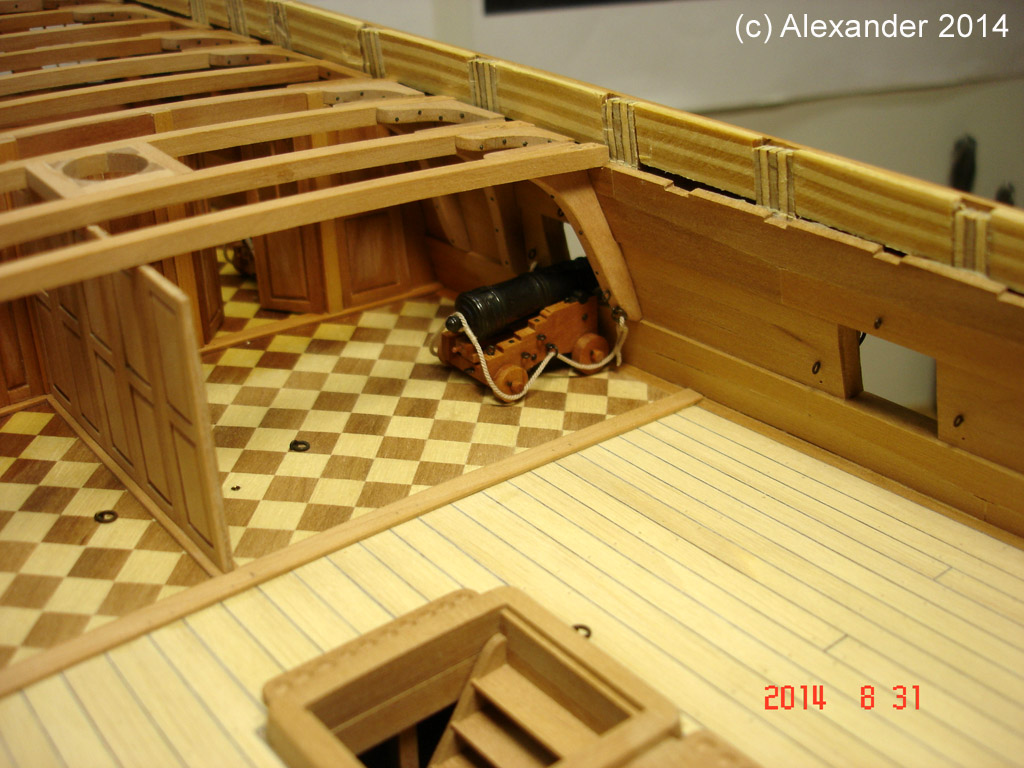
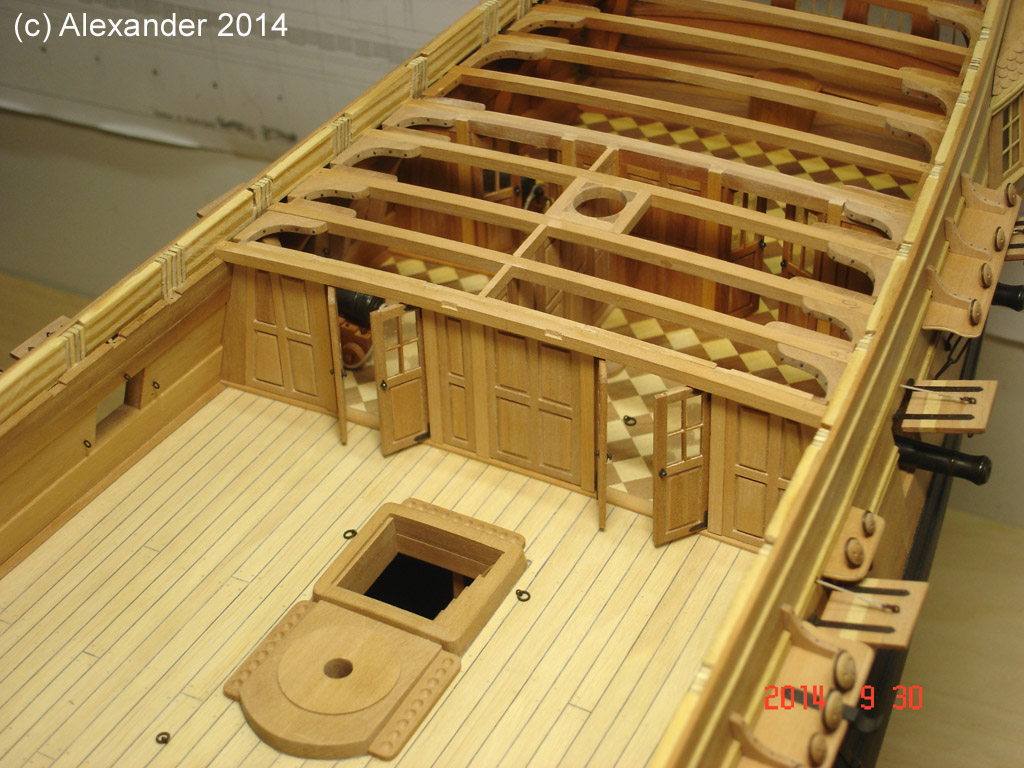
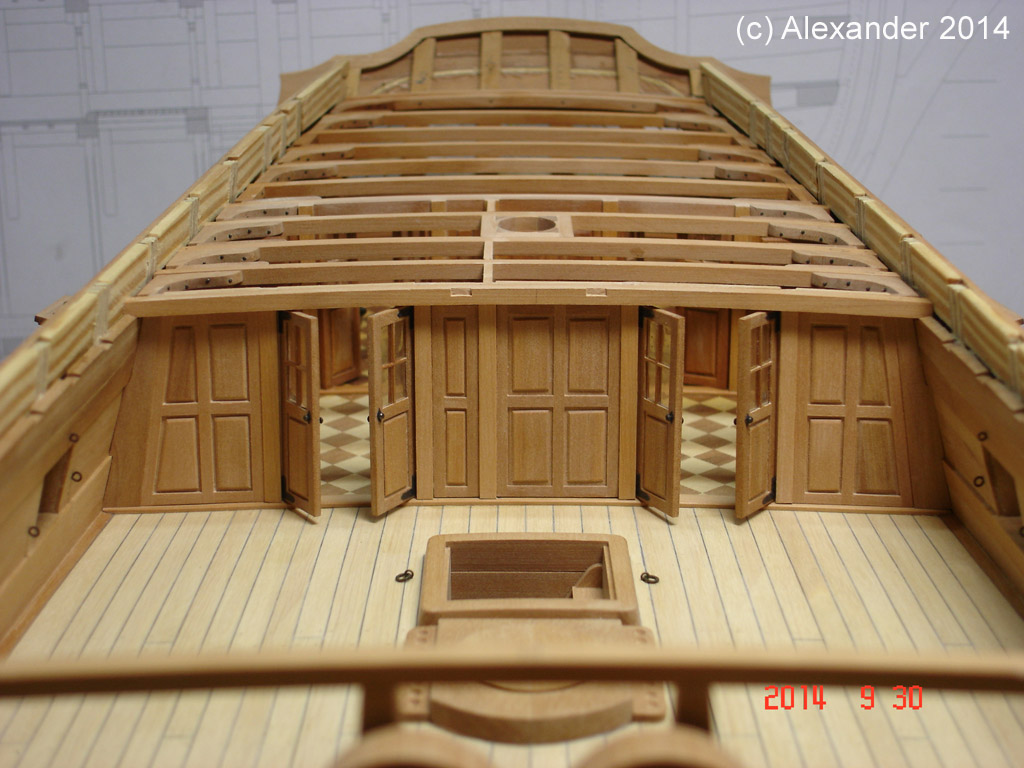
Hello and many thanks for warm words! Now it's time for litte update. Firs the last hanging knees in the cabin, I have decided to make them a little compass:
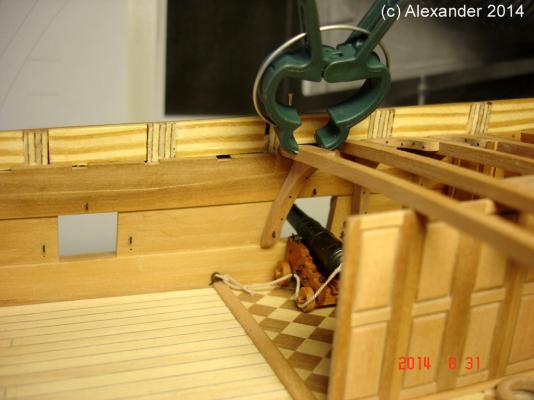


Then completted fore bulkhead of captains cabin, I leave the doors half open as in the rear bulkhead:


I hope I will have more time for modeling now...
Alex
Hi Alex, Somewhere in this log I haven't found your section on how you built the Captain's cabin floor. How did you do that amazing work?
- mtaylor, Jeronimo and Captain Poison
-
3
-
-
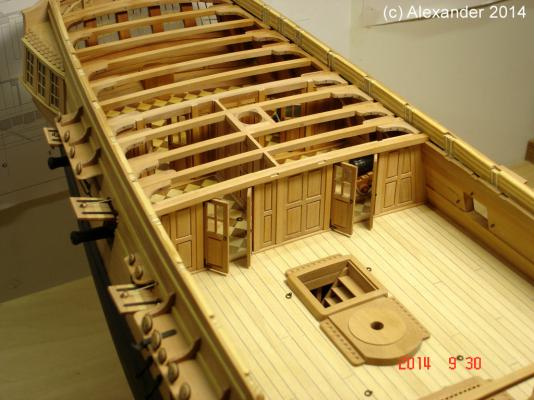
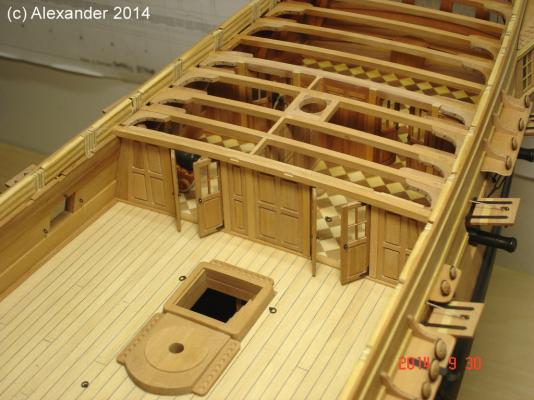
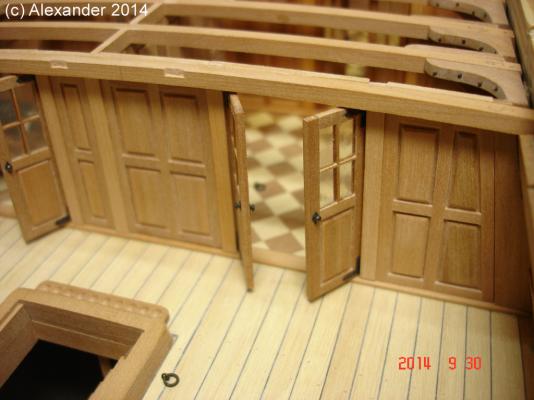
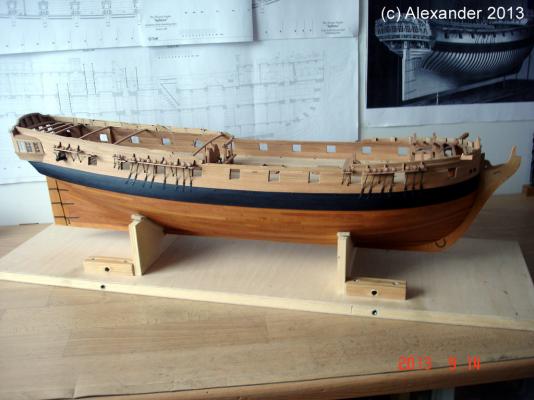
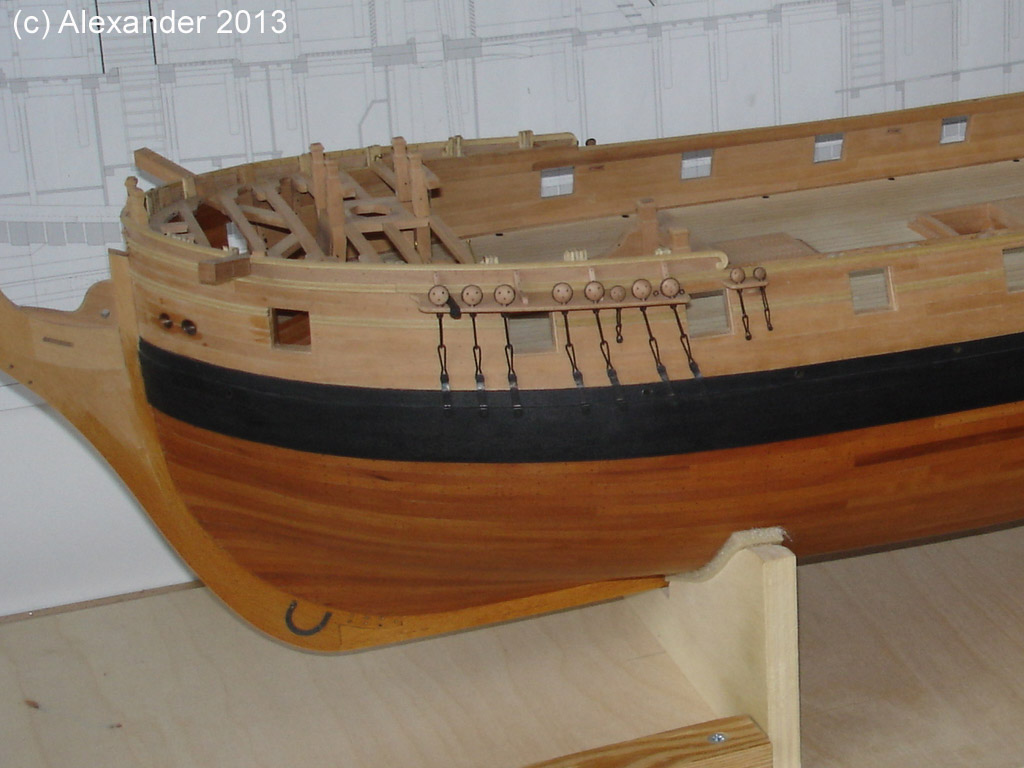
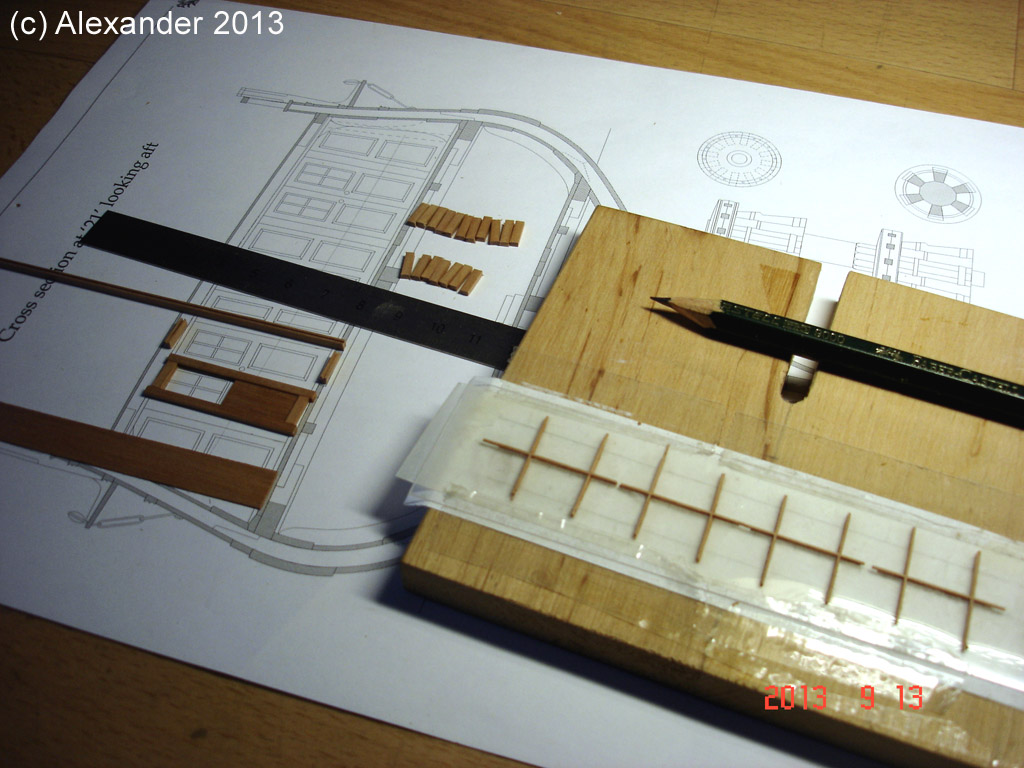
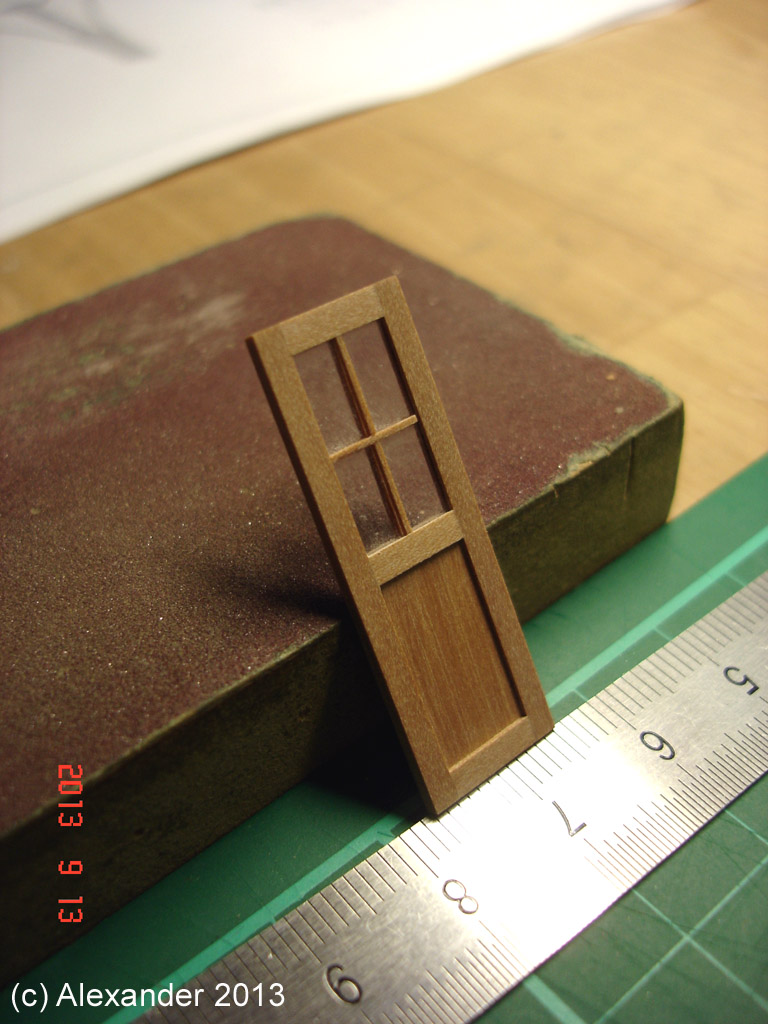
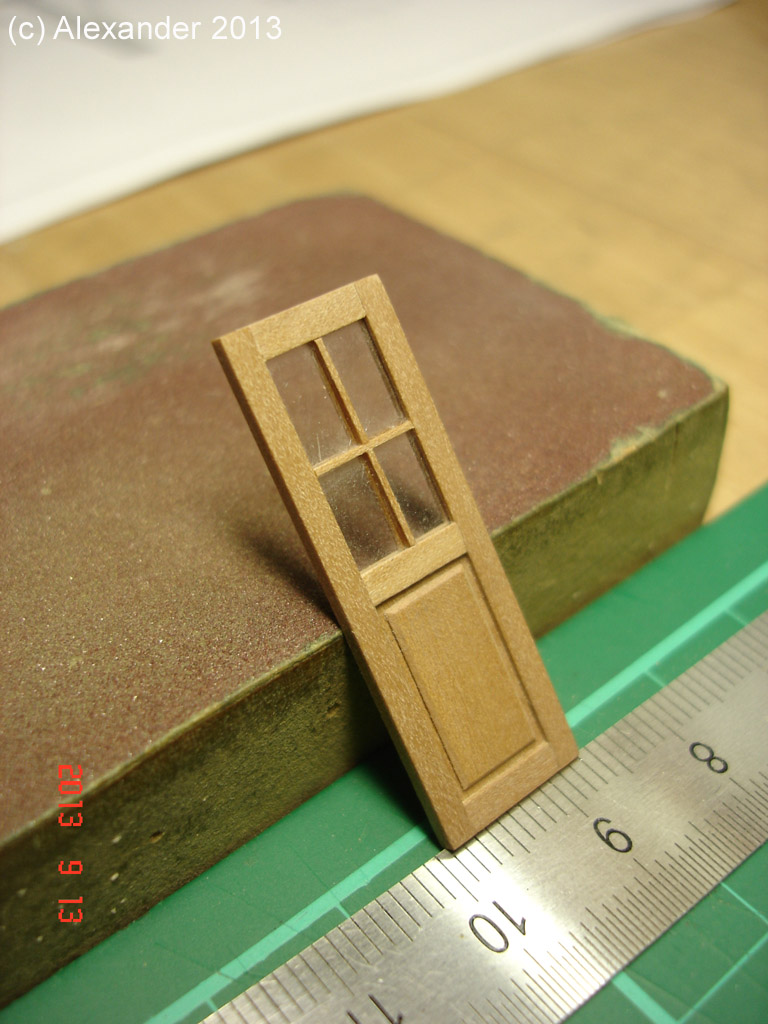
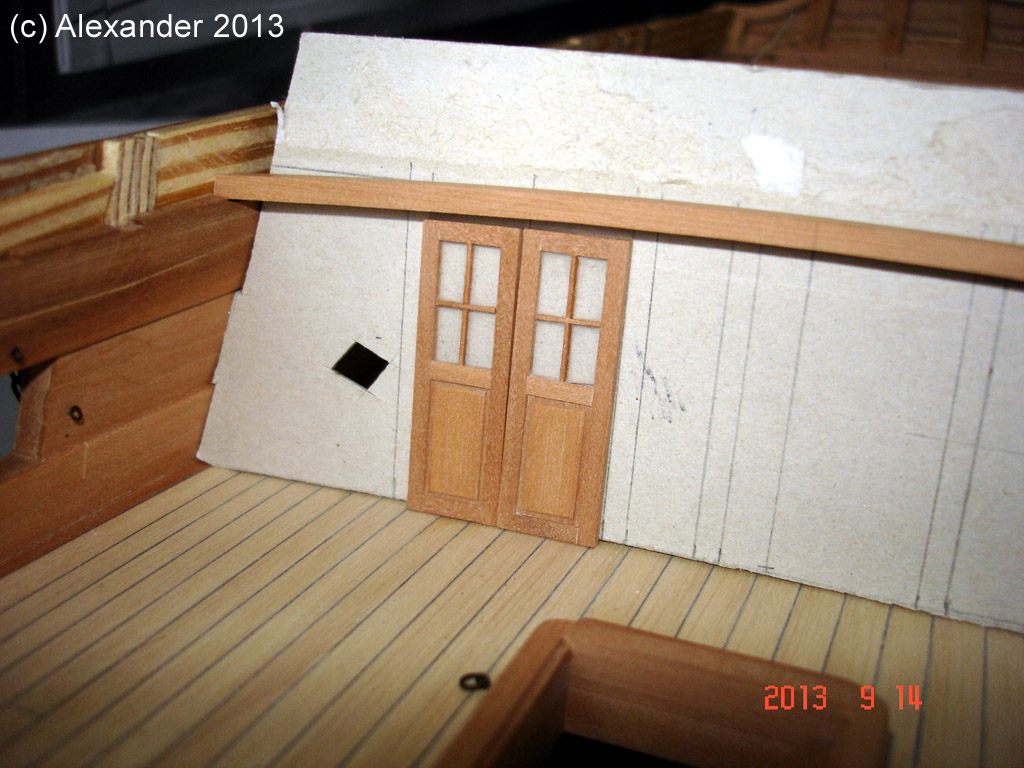
On 9/16/2013 at 5:27 AM, Alex M said:
Hi guys, thanks you all for warm words!
Nearly nothing time to work at the model, so only a small update. The chains are now completted.


The next task is the bulkheads of cabins, so here the doors under construction. The door windows are done the same way as at the stern, but here I have glued wood strips at both sides of plastic sheet. The images show the making step by step.
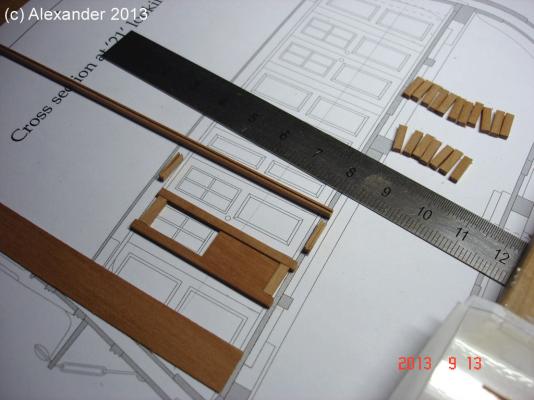
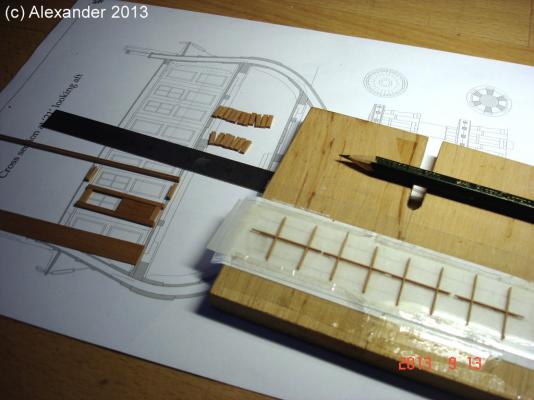
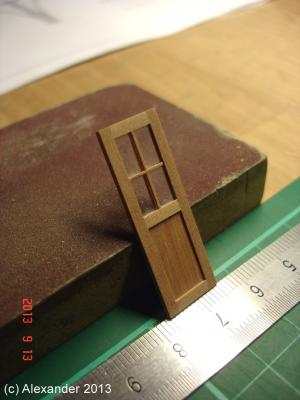
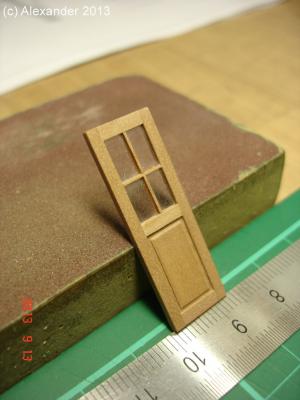
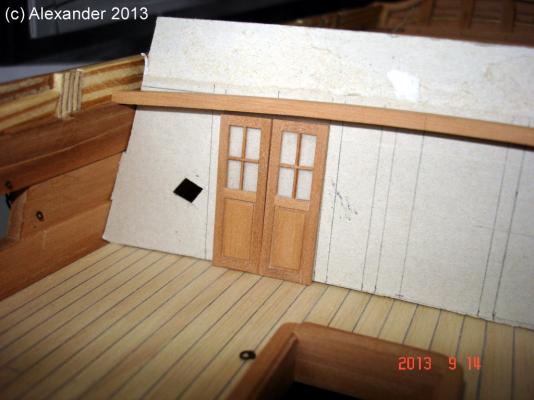
Alex
Dthose look Ike frame and panel doors with the panel free floating. Are they?
-
On 3/9/2015 at 12:55 PM, jbshan said:
To blow these up, open in a new tab or window. I then see a magnifying glass with a '+' inside, or use the prompt under 'view' for zoom + or -.

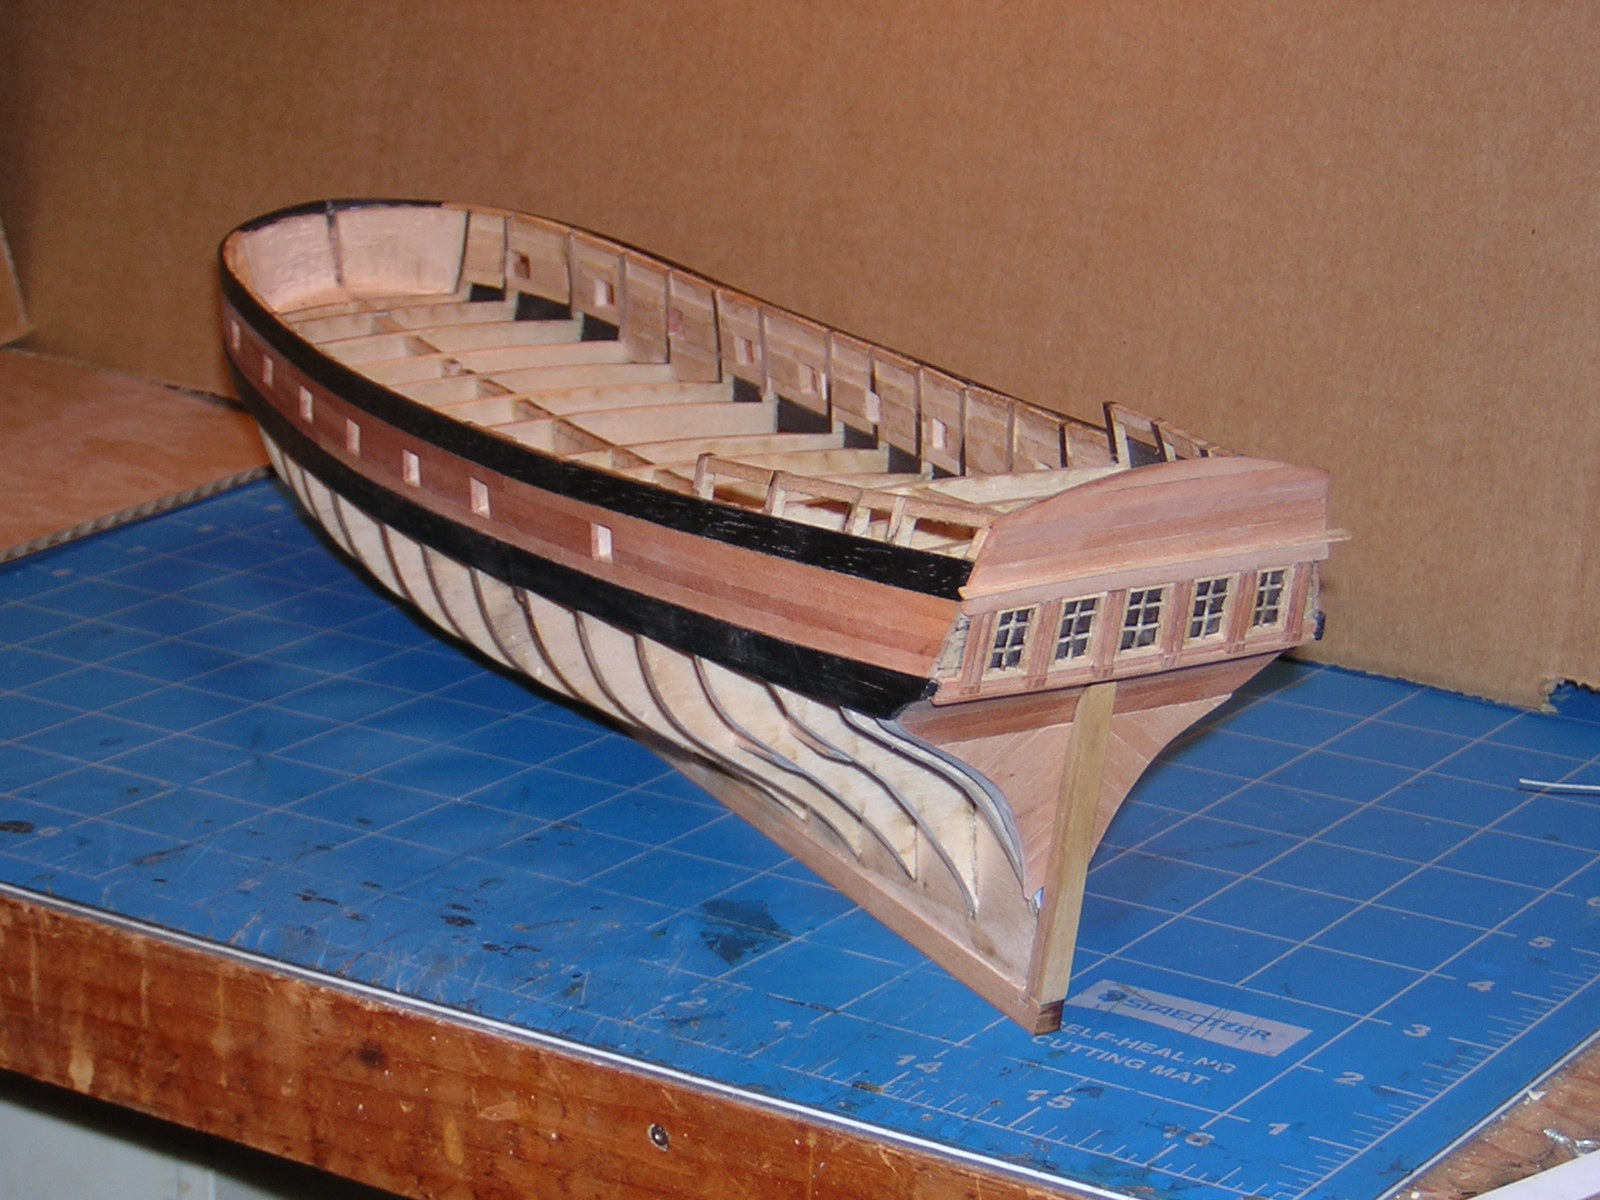
Here's about the next one in sequence. I took it to show the transom and stern lights but it will serve to show the planking process.
First, having faired the blocking on the exterior, I put one strake of swiss pear along the bottom of the port openings. Using a batten to line this up makes this strake go in nicely. Next were the two strakes between the ports, again of swiss pear, then one more full strake. I held the strakes between the ports just to the edge of the openings in the blocking.
The black strakes of plank are ebony. It is evil stuff. Next time I would use walnut or some other dark wood if I wanted the contrast in color.

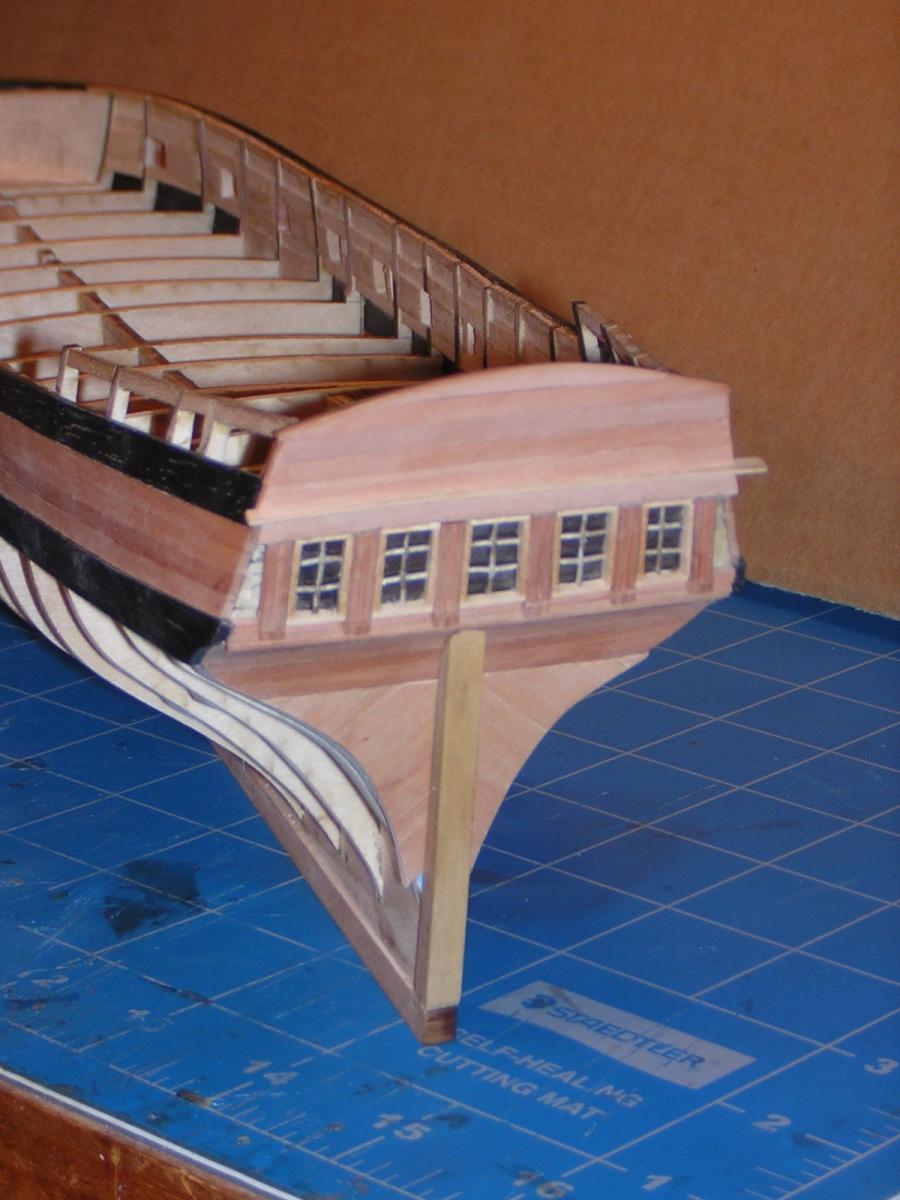
Here is a closer view of the square tuck stern. The planking is fairly straightforward here, though the photo is kind of blurry. The tafferail area is backed with some scrap 1/32" plywood and planked horizontally with swiss pear. The stern lights I will deal with in their own section. Below that is the counter, curved inward and set by a block that I think shows in one of the earlier pics. Below that is the tuck area that I planked diagonally, lower outboard rising to the center line. [edit: The stern post is applied on top of the plank.]
I think you can see that I have left the top molding for the stern lights and the ends of the tuck long, later to be brought down flush, either to the side plank or to allow the bottom plank to run by and be in turn sanded back flush. There will be short horizontal pieces of plank outboard of the stern lights added before that area is brought back flush with the side.
Why is ebony evil stuff? It's a hard wood and looks great on your model. Is it machining the planks?
-
-
6 hours ago, Emmet said:
We moved from NW Jersey to NH about 1985. We had an opportunity to build a house there. We enjoyed the winters there until we got to be 70 years old. Since then we go south during the winter. We have a house in Jersey in a senior community and see doctors there. After that we head south about mid January. We rent a house there north of Tampa. We also visit friends.
Victory was quite a bit cheaper including shipping and I also bought some balsawood that was cheaper. It was about a hundred bucks different. It may be that the price will not be different when it comes to Columbus ships. Amazon does not sell serious models of Victory ships. This stuff gets expensive depending on the ships.
Many years ago I had relatives in Littleton, NH we would visit. My wife's in-laws from her first marriage lived here down the road and would go to FL. for winters also. I kind of like that idea too. They had a trailer home in a gated senior citizens park. I have only picked up my kits on eBay. And a couple at antique and years sales. Often the sellers don't know the real value of them. I bought the Beagle for $25 basically NIB. I was surprised at how expensive some models are! Serious money!
-
On 12/22/2020 at 11:38 AM, Emmet said:
How do you do the snowbird routine?
-
6 hours ago, Emmet said:
It is obvious that you have acquired excellent skills over the years. I enjoy looking at your work.
I bought Amati because I did not know any better. I built La Pinta last year and I was not overly happy with the supplies but the instructions were pretty good.
This year I bought Santa Maria and the materials are much better but the instructions are not good. The scale is not accurate and it is a good thing I did one last year when I was new. Without prior knowledge I would have had a bad time. I am estimating all the time. I bought both from Amazon.
I Plan to build La Nina next year and I was reading that Columbus' original La Nina had lateen sails and then changed them to square sails in the Canary Islands because the squares were better heading west across the open ocean. They put one lateen sail on the stern to make it easier to sail along coasts. Apparently the Portuguese had used lateen sails along the coast of Africa because you could steer better. So I am wondering about building it. I see Amazon has Artesania Latina's La Nina with lateen sails. Then again I think I will buy La Nina from Cornwall next year.
I am also doing HMS Victory and I bought that from Cornwall in England-the price was right (even with fast shipping) and the materials and specs are good. Cornwall was recommended by Clearway on this site. He is a guy with a lot of experience and you should look at his models of Victory as well as HMS Terror.
I hope I have been some help. I am still on the road to our winter place.
Thanks for your reply. I looked at the Cornwall site and was very impressed. The Caldercraft models look to be the Cadillac of ship models. Maybe when I hit the lottery for some of those! So if Amazon has the same model here available, why go to Cornwall? You like the snowbird routine? We moved to the Catskills from L.I. because we like the seasons. I actually hate NY and never imagined living here. That was before I met my wife online and she was born and raised on Long Island and still living there. Oh well.
-
Hi Emmet,
I am revisiting your build on this one because it's made by Amati. This ship, the Pinta, and La Niña are on my list to build. But Latina also produces the same three. You are also building another one I would like to do. Can you give me a good comparison of these two companies in their kits? Why did you select Amati for this vs Latina? You mentioned one problem already. Is this a consistent problem? I have options to purchase this model from either company. And I will want to keep all three Ship builds from the same company for consistentcy. I have fair to some advanced skills in model building and woodworking. I haven't done wooden ships. But I have done plastic and other detailed work. And with a full wood shop and other hobby tools I don't worry about having to build parts if necessary. But I would like a true heads up evaluation before committing. Thanks.
-
-
7 hours ago, KrisWood said:
Hi @bigpetr,
While trying to figure out how to print the plans on paper in the first place, a year ago or more now I think, I had changed a number of print settings in both Rhino and Acrobat Reader. I changed them all back to the defaults except for two things:
Print scale in Rhino (1:25 instead of the default 1:1)
Print in Greyscale in Acrobat Reader
Once I had everything except those two set back to the defaults, it printed correctly the first try.
")
Because I do not own a large format printer I had to print it tiled as a poster in Acrobat Reader. I'll try taping together my tiled pages and building from that. If that still doesn't work (mostly due to inevitable errors in the angle at which I tape them together) I'll take my plans to the local printshop and have them print it at blueprint scale (they go up to ARCH-E 36"x48") and buy a lot of carbon paper to transfer it to the wood.
I hope to have updates for you all in the near future!
I used Staples for my architectural prints. Just took them a flash stick with the plans and they printed them directly for me.
-
13 hours ago, Danstream said:
Indeed Larry, I am going on without following the A.L. instructions improvising what I am doing at each step. This is also one of the reason why I am proceeding so slowly. Fortunately, I found and downloaded the instruction manual written by Chuck Passaro for the prototype of the Model Shipways Mayflower which is based on the existing replica and which I am using broadly as a reference guide.
Best regards,
Dan.
Is there a link available for that? I would like to download it as this ship is on my build list.
-
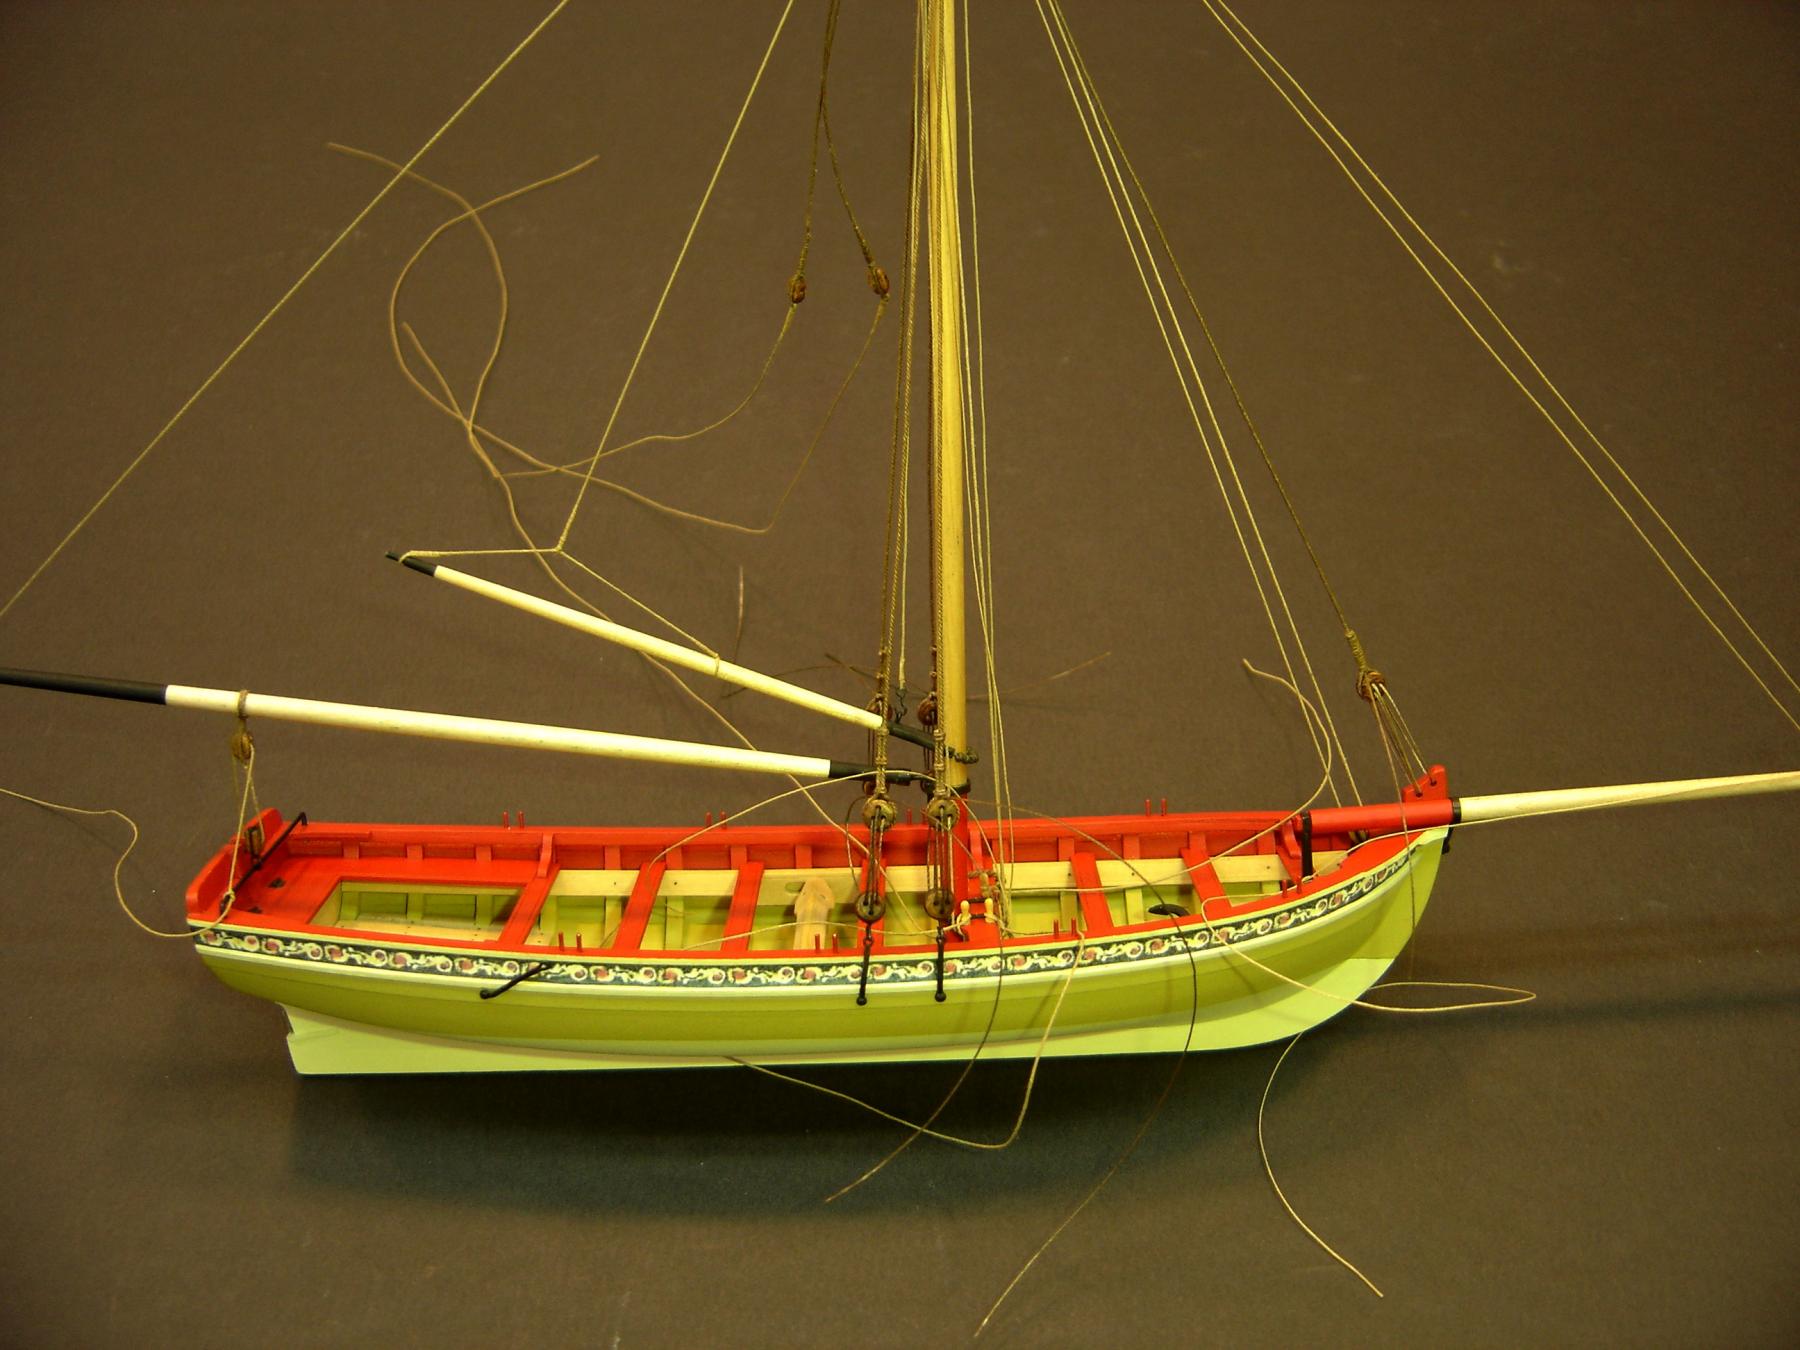
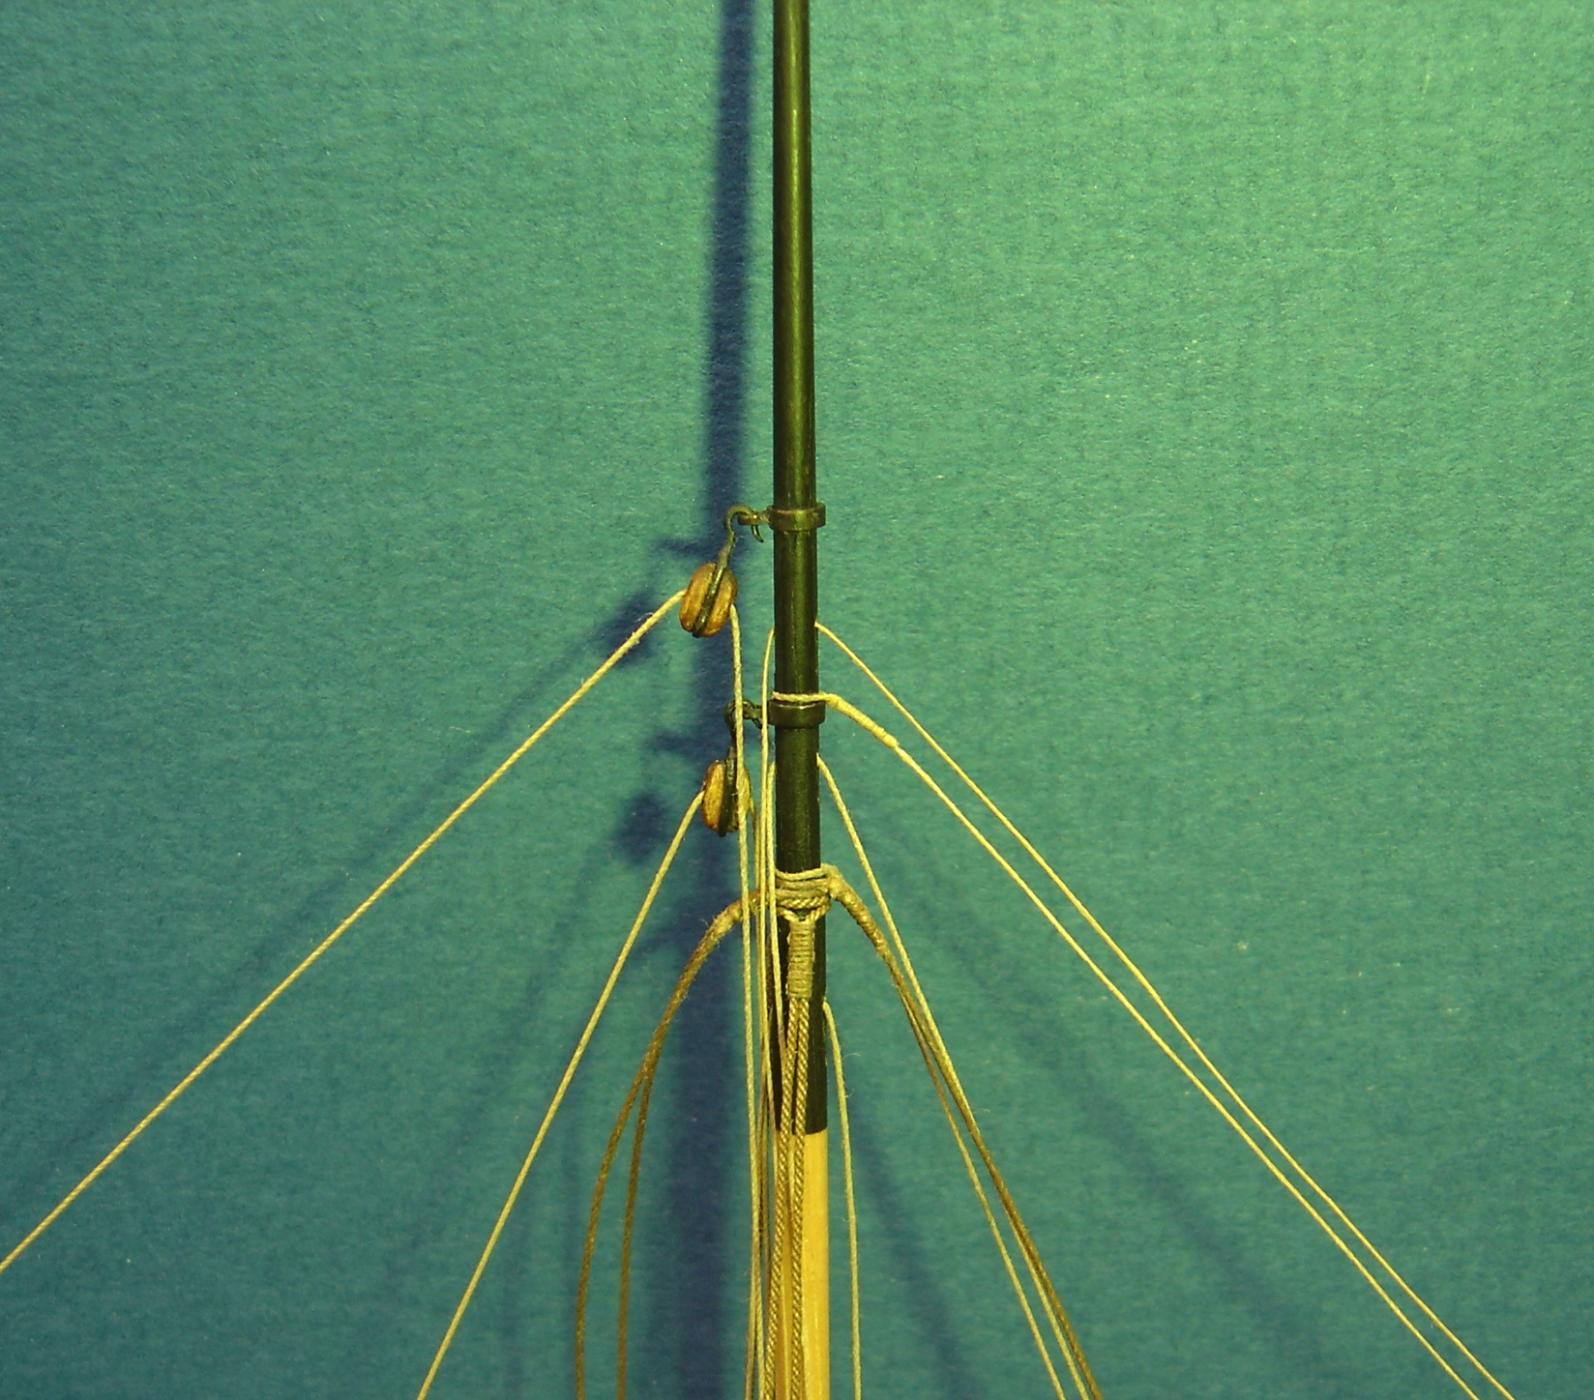
On 1/14/2017 at 10:40 AM, BobF said:
Steve:
Here are a few photos of where I currently am with the model. Nothing, at this point, is permanently tied down. I decided to leave the backstay pendents until last since they would interfere with belaying other lines. Quite a mess, huh?

It looks like the deadeye claw method is working out well. The deadeyes appear to be pretty even.

Per your request, here is a closeup of the upper part of the mast. I hope you find it useful.
BobF
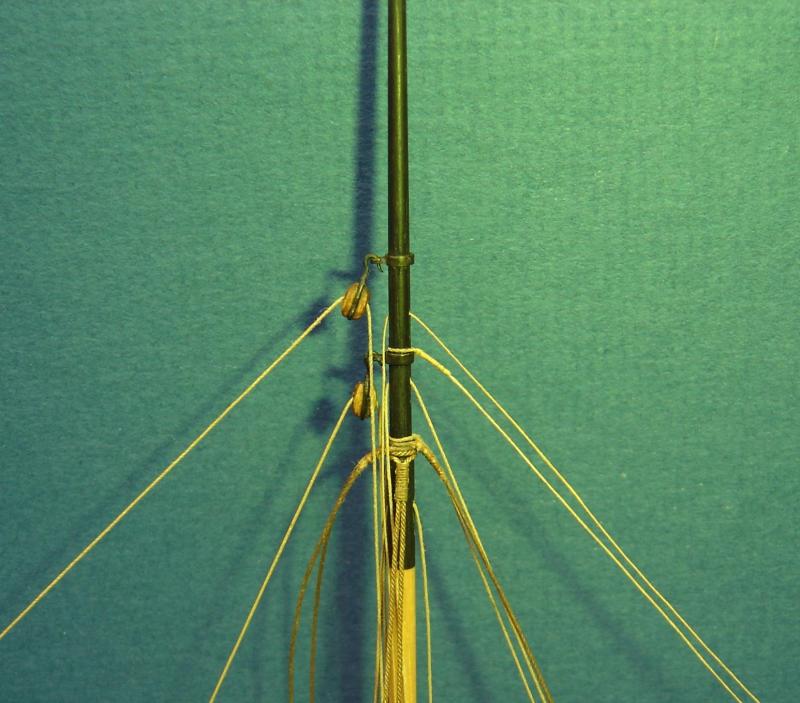
Okay Bob, you have me confused. After the work you put in with using the claw technique, now your dead eyes are rigged with rope. What's the story?


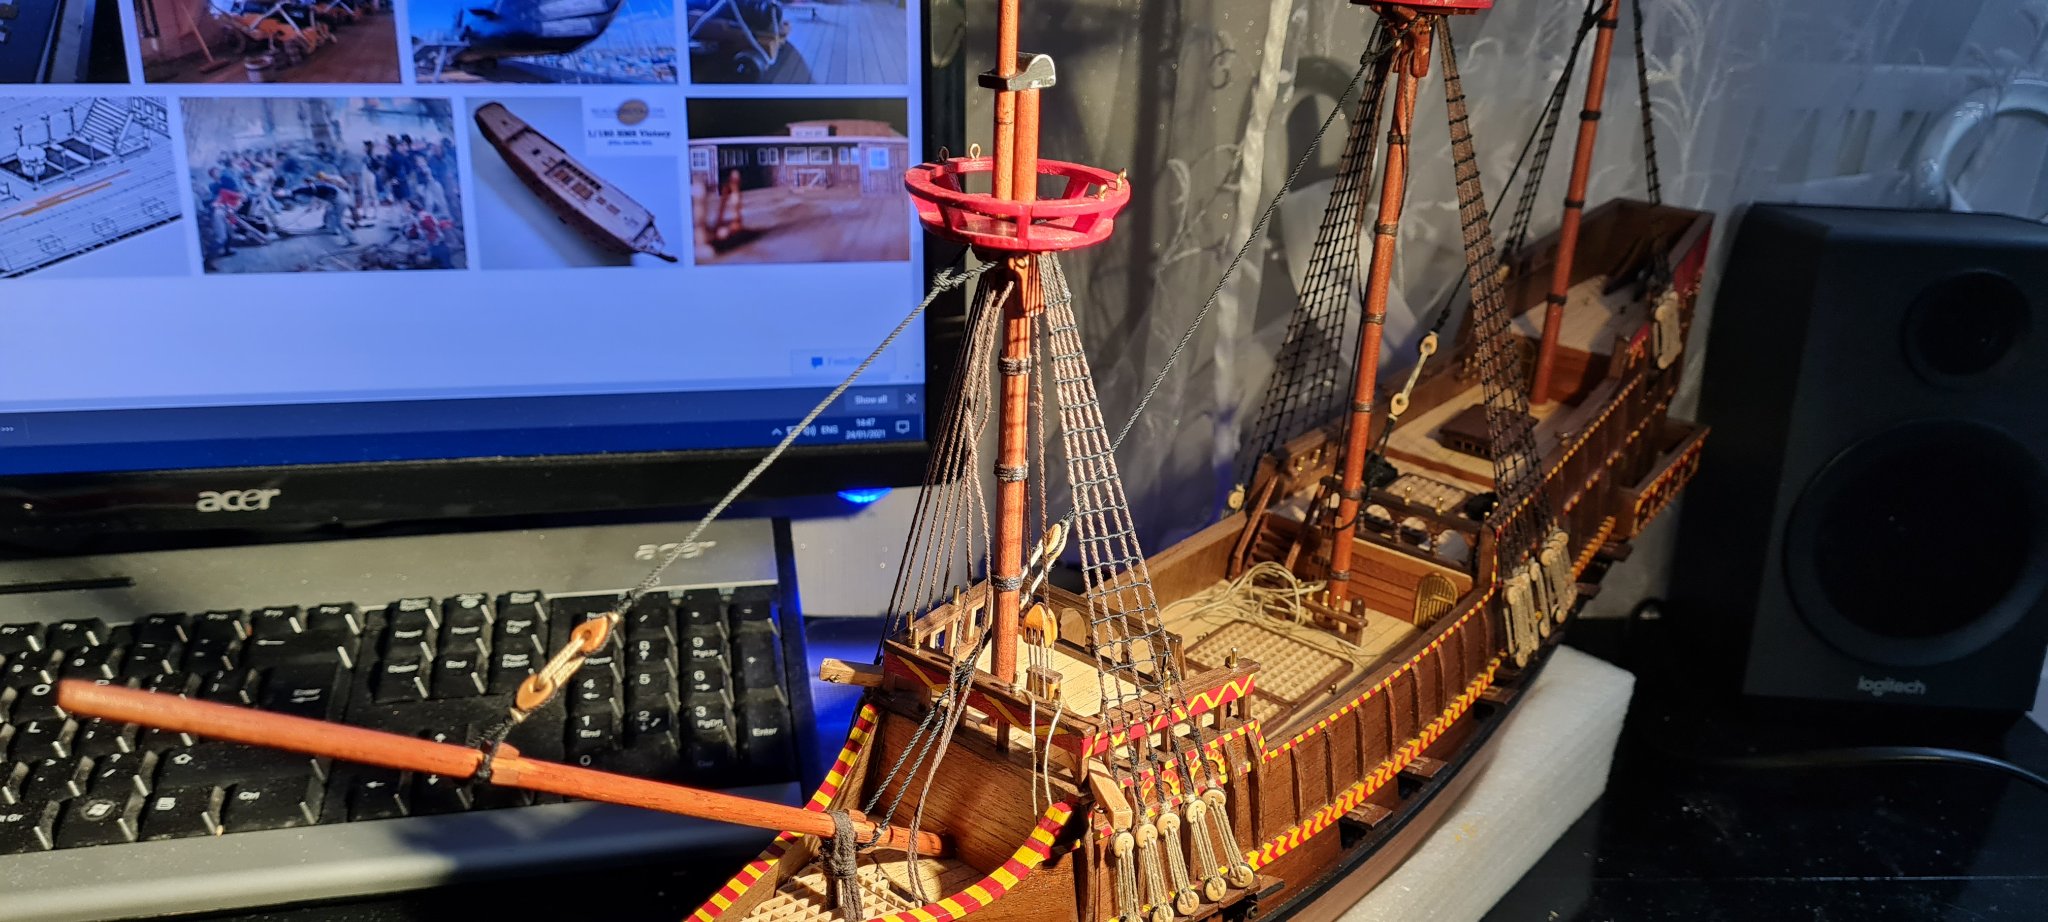
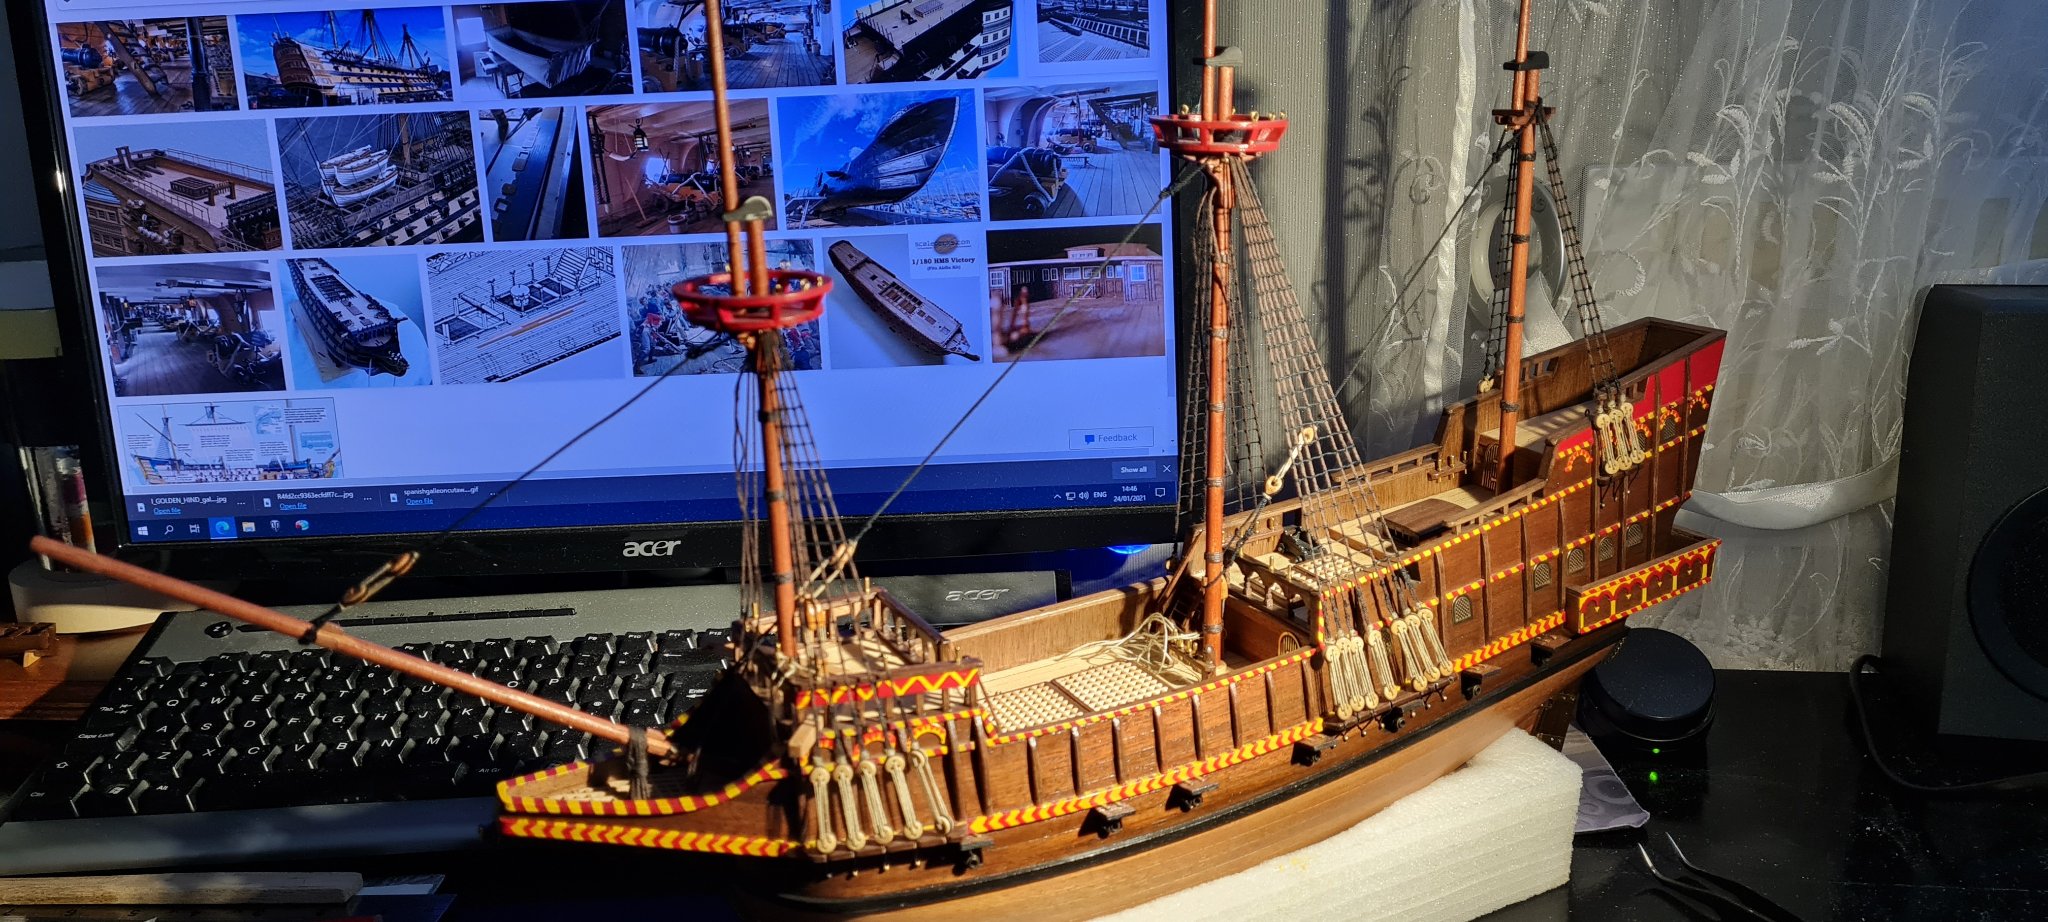
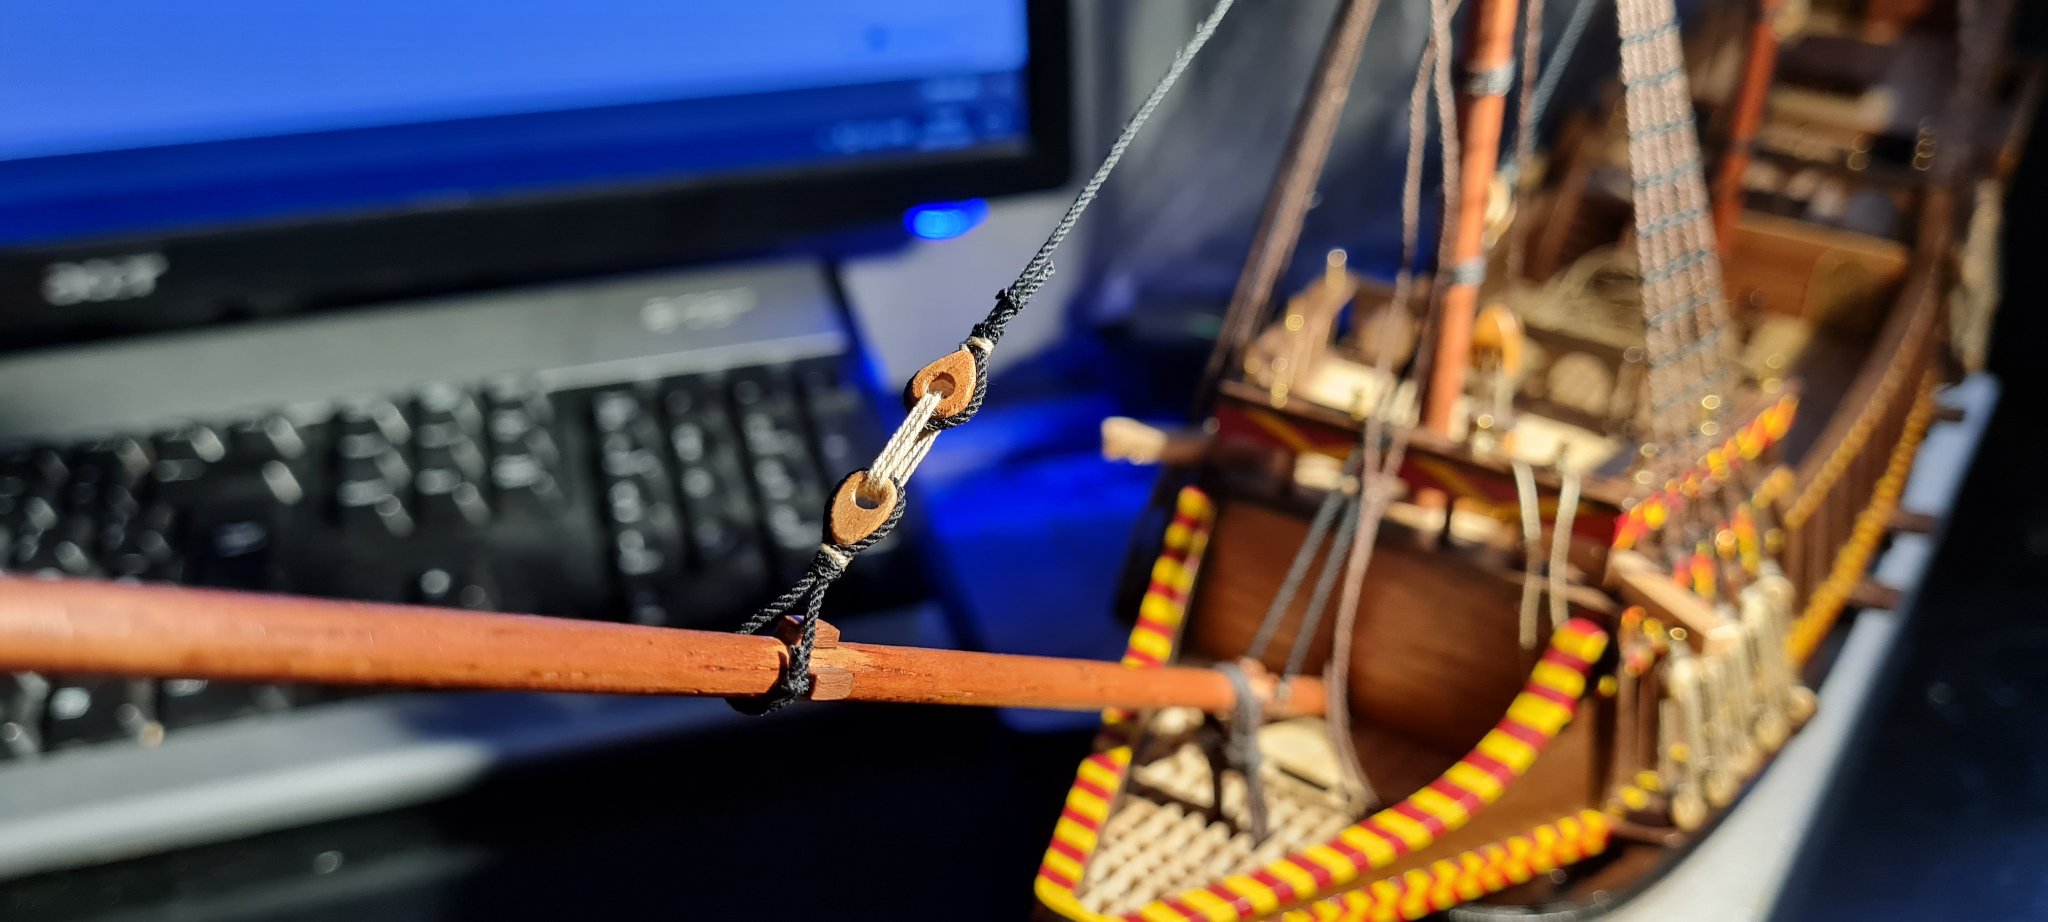
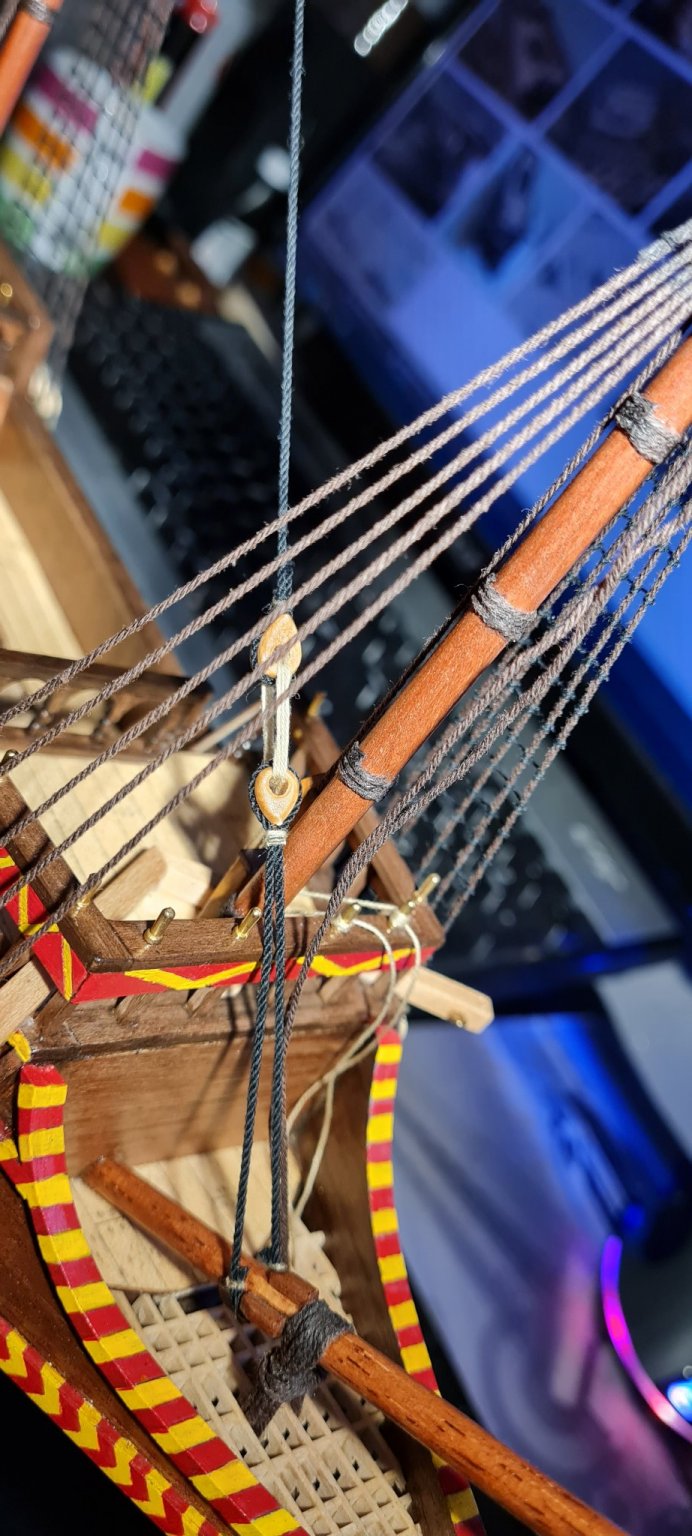
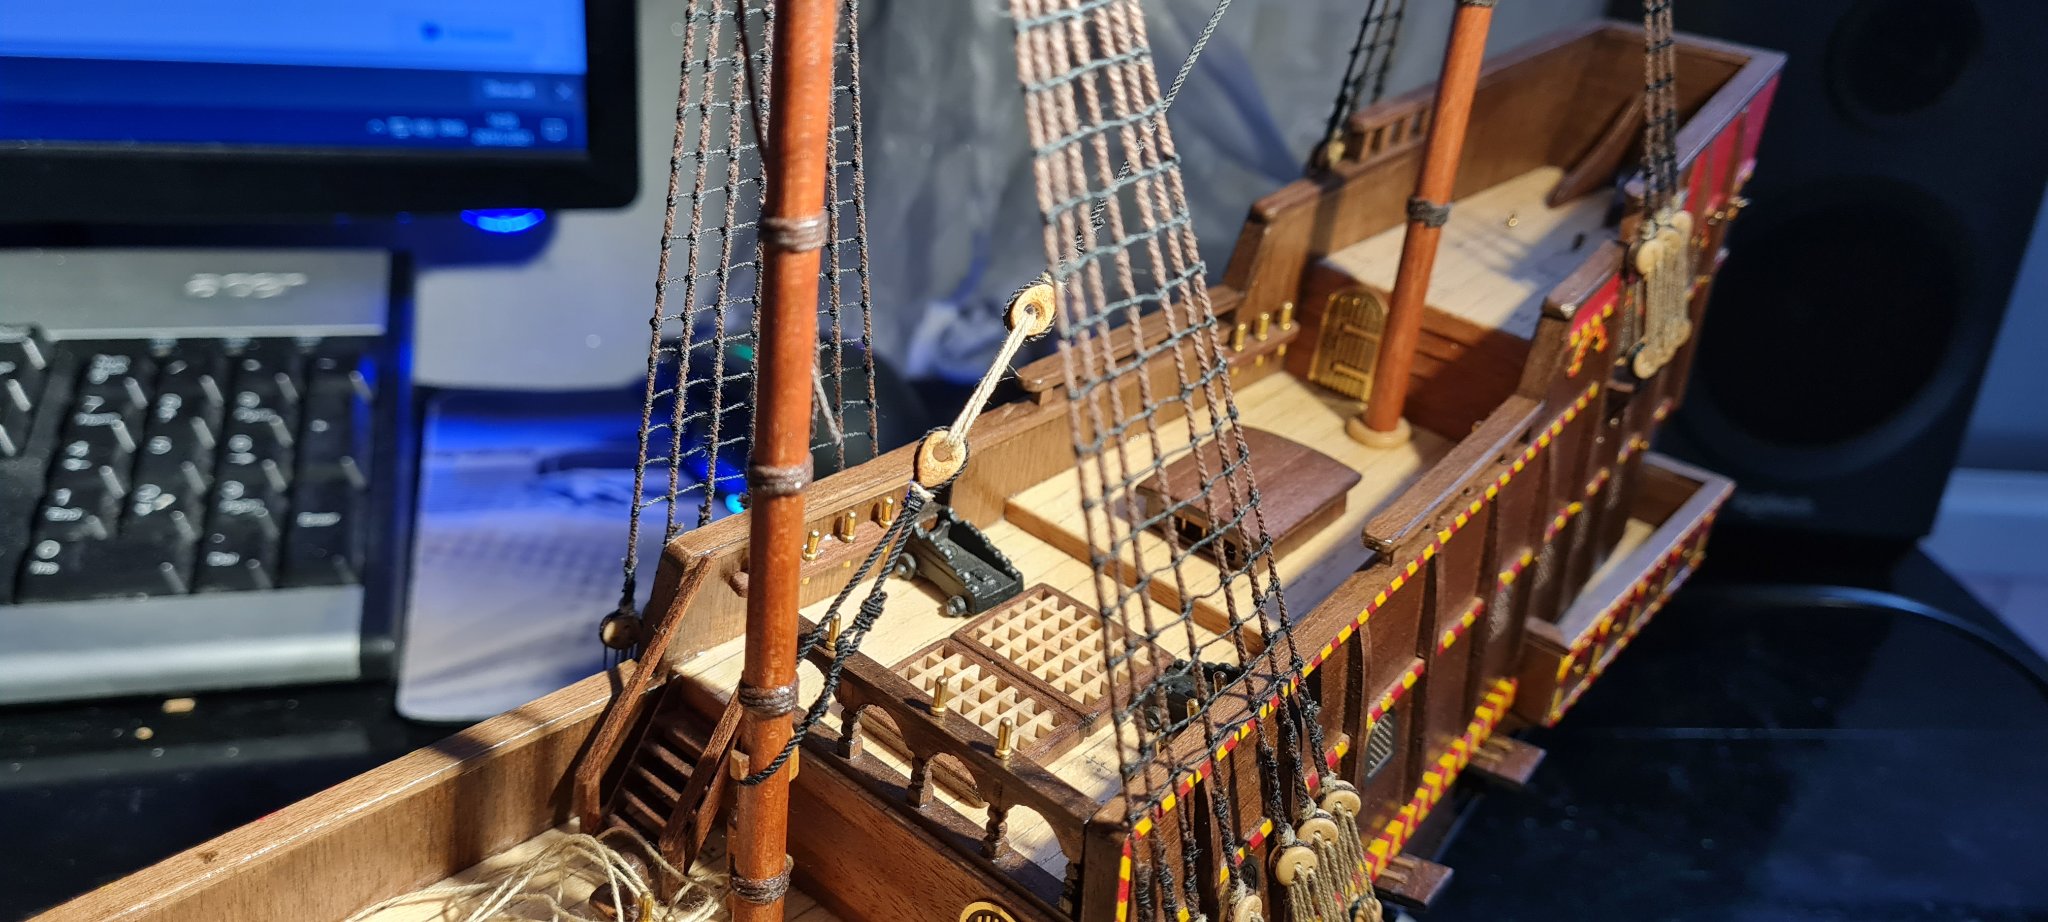


Golden Hind by Tomasz B - OcCre - 1/85
in - Kit build logs for subjects built from 1501 - 1750
Posted
If I may offer my two cents so to speak, in the end, you're the builder, the Captain, the quality control officer, and it becomes a matter of what is acceptable to you. Those viewing your model will never know what mistakes you made, what you corrected, what is historically correct. What you will take away is what you learned and what you will apply to the next one. That "Holy Grail" of perfection will always be there to seek. I know! I have followed it many years on so many things I have built!