bobandlucy
-
Posts
512 -
Joined
-
Last visited
Content Type
Profiles
Forums
Gallery
Events
Everything posted by bobandlucy
-
 Thanks, G.L.! I've definitely improved my skills. The author is a good teacher of techniques. Bob
- 45 replies
-
- 1
-

-
- norwegian sailing pram
- Model Shipways
- (and 1 more)
-
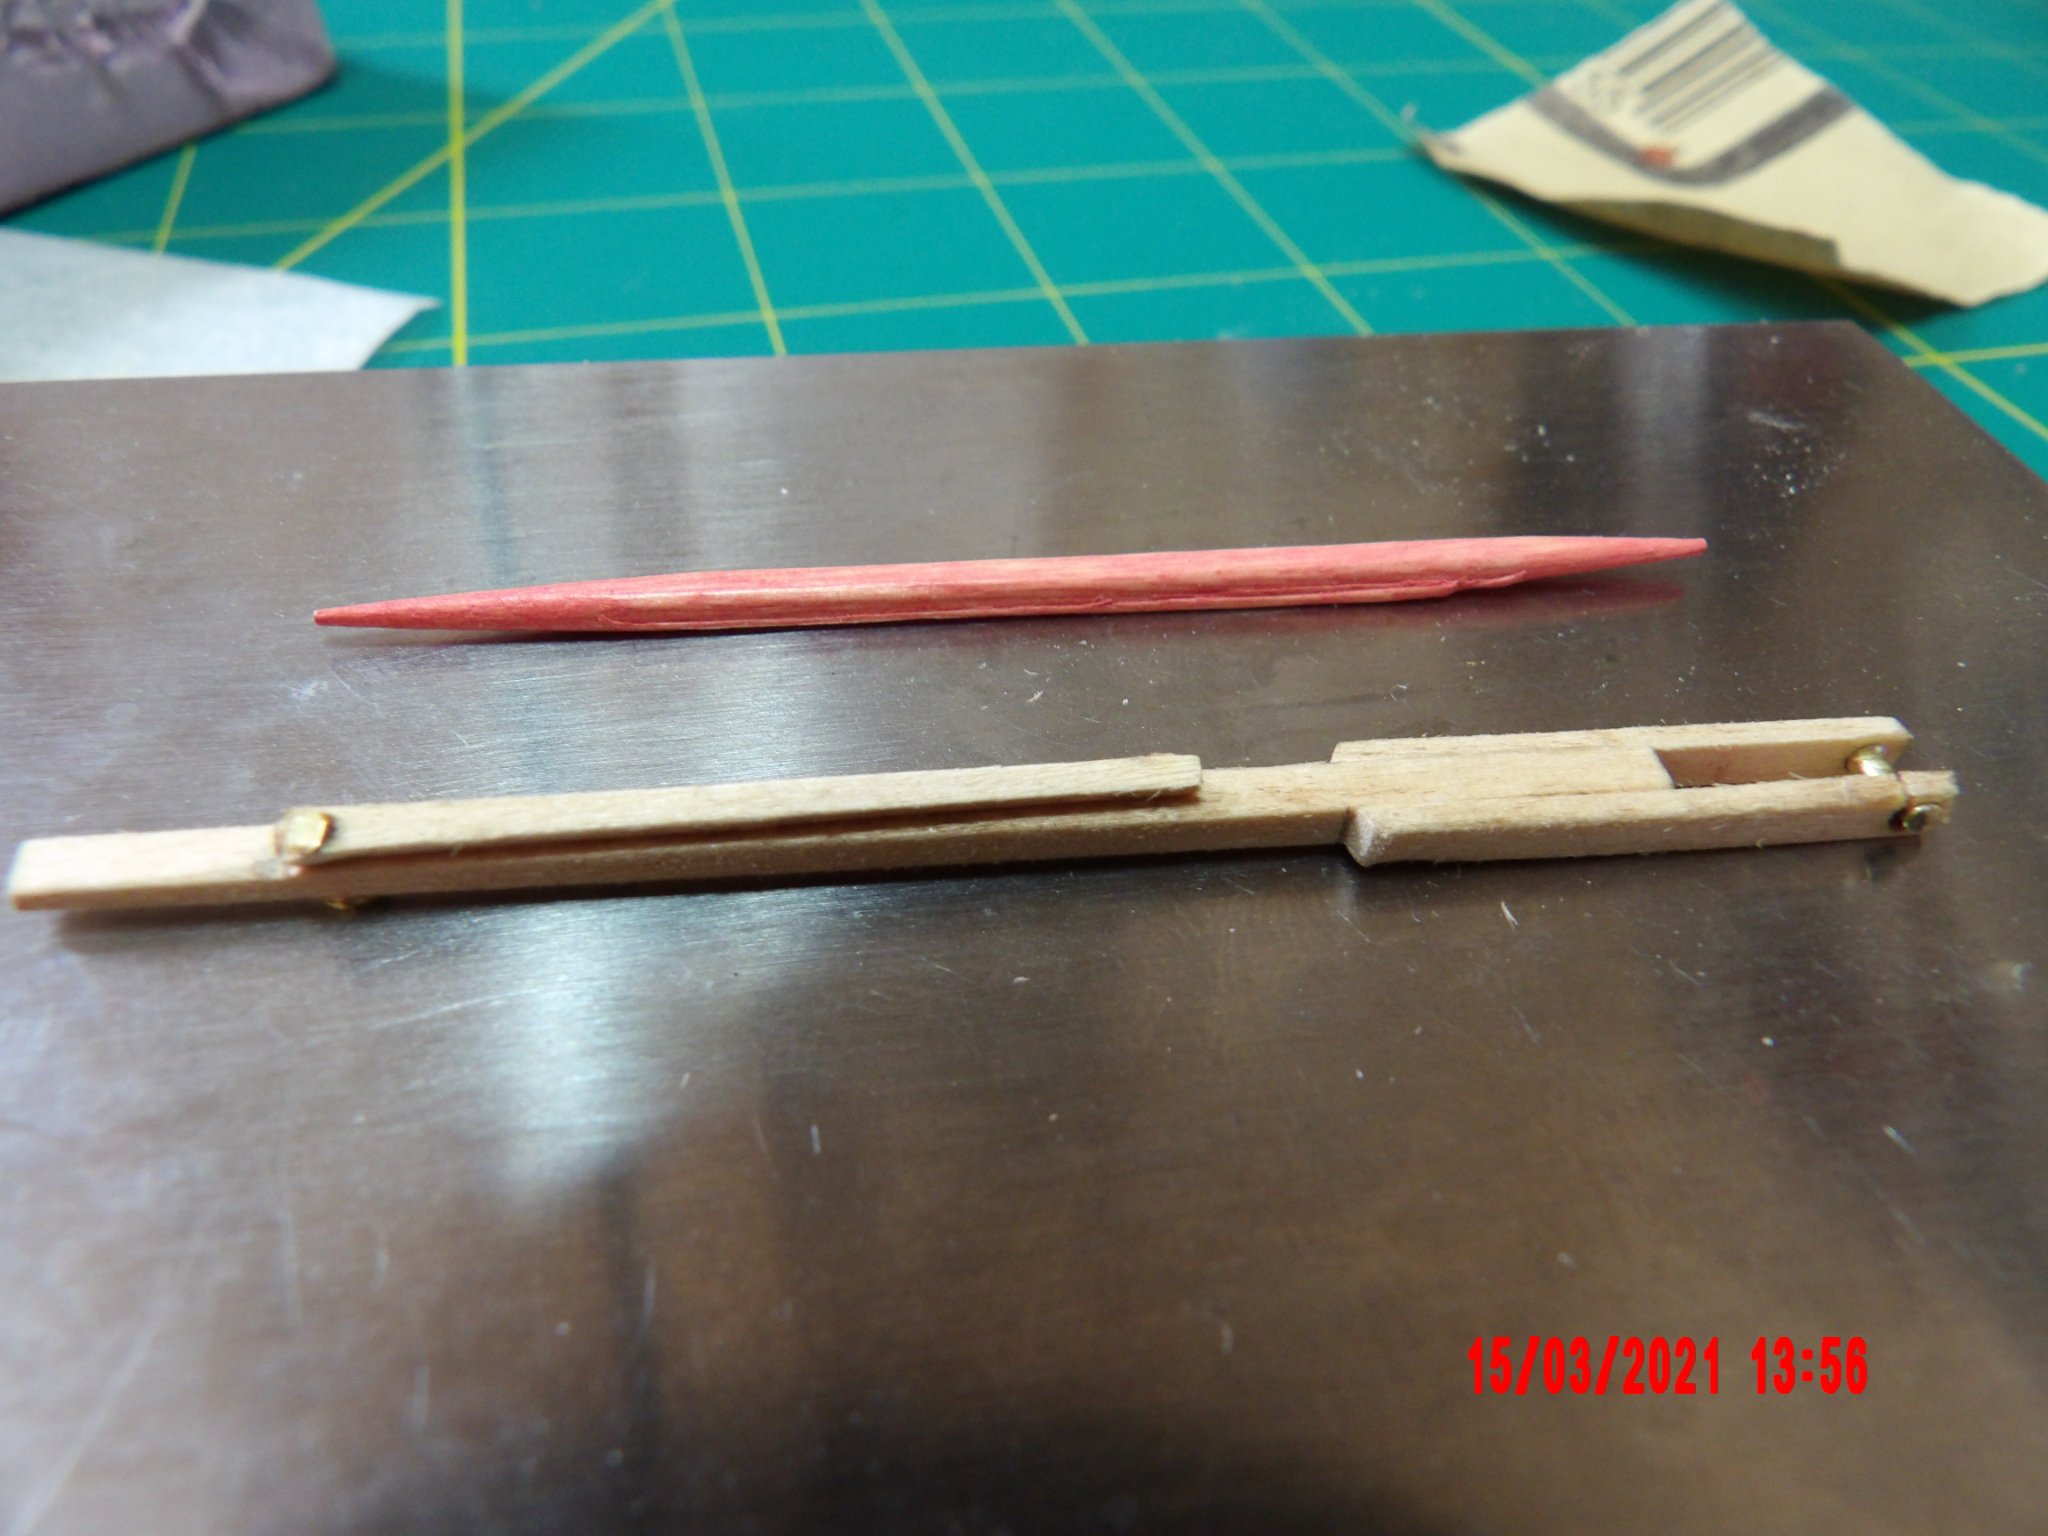
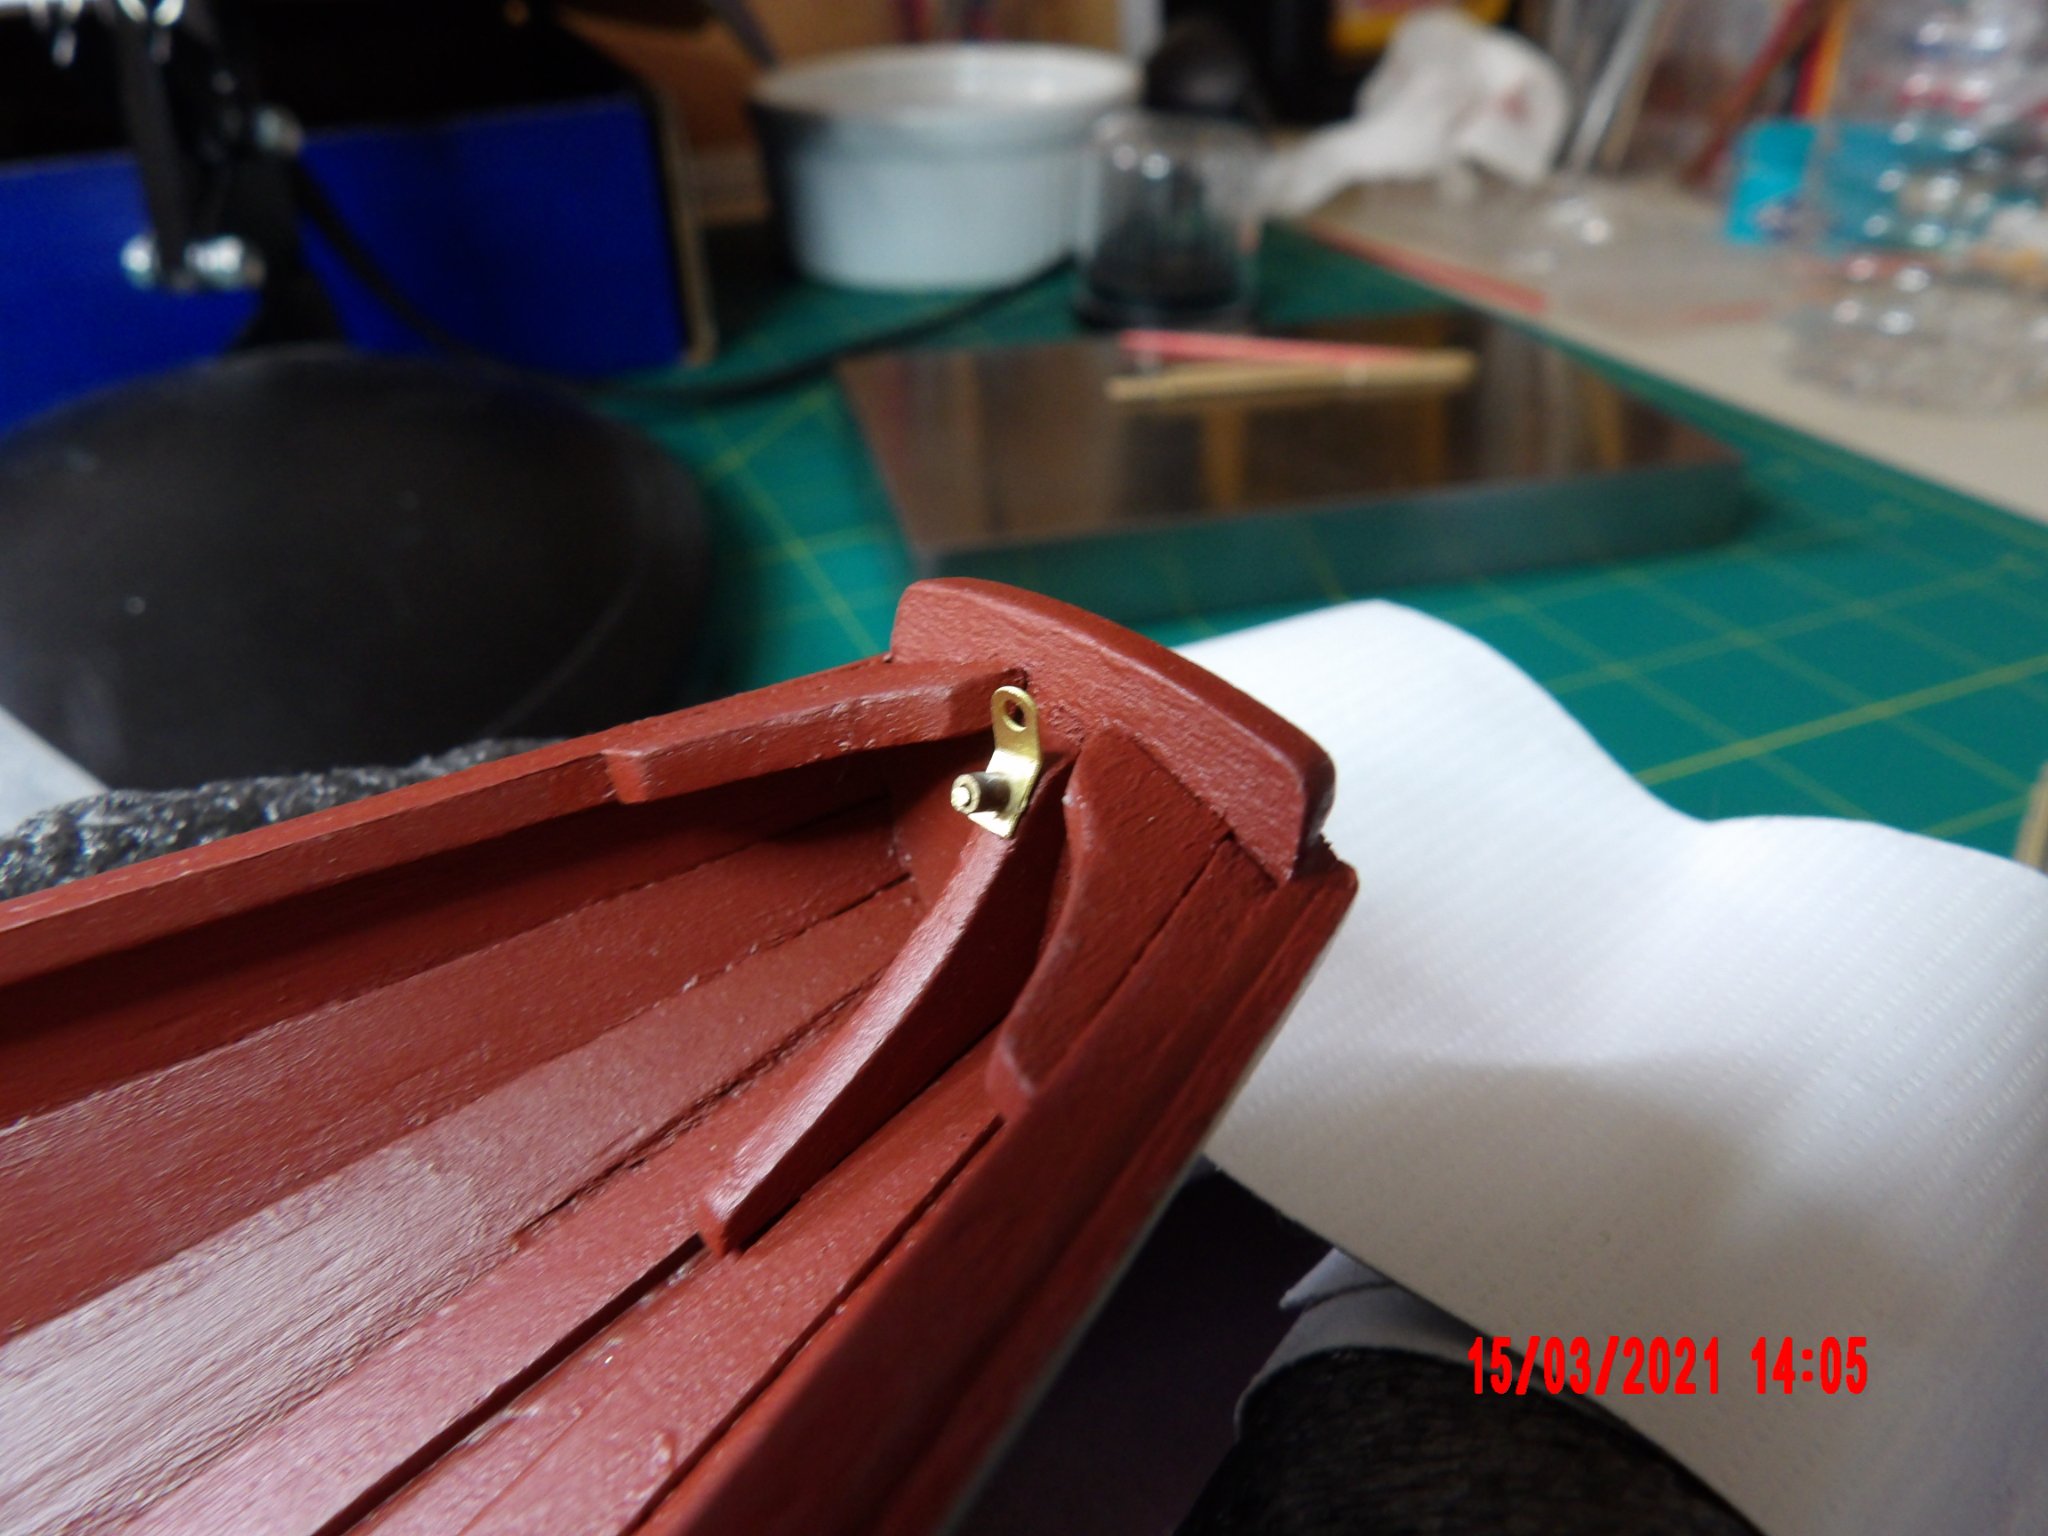
It was a tough day in the hobby room (Sleepless night), but it started well. I put the recommended clear satin coat on the exterior. I am happy with the result: Then I assembled the tiller. Tough going there. I broke one of the pre-drilled holes in the tiller side pieces while trying to perform the riveting. I could not get the 1/16" hard brass rod to mushroom as described, the rod bent and caused the break. I think that I should have paid more attention to squaring the clipped ends of the rods, and it's also possible that my hammer was too light. I did a repair with CA glue. Then I forgot to drill the hole in the tiller extension piece, and had attempted to rivet it to the tiller arm, where I broke this hole as well. I saw pretty quick that I would not be able to drill the hole, and decided against doing so. During my CA repair, I accidentally glued the extension to the tiller. What a mess. I'm thinking of filing a groove and attaching the rod to the extension that way. I know the preferred method of display would be to show the extension slightly to one side of the tiller, but of course, can't do that now. . . BTW, the instructions call for the grooved slot in the transom to be filed with a 3/8" round file, which I purchased, but the laser lines show a much narrower slot. Next I did the eyebolt and bow stay, no problems there, but gosh the piece of tubing to simulate a hex nut is tiny, and I kept losing it once cut. Heads up, the instructions to anneal the tubing come after this installation and seem to apply to subsequent steps, but you will need to soften the tube before cutting. I do understand that I should have filled the gap towards the rear of the sheer plank, I think I thought that the paint would fill them. Lesson learned, Fortunately, this won't be real visible in the finished, stand-mounted model.


- 45 replies
-
- 4
-
-
- norwegian sailing pram
- Model Shipways
- (and 1 more)
-
Thanks, Gregg I thinned the paint a bit with water. It took 8 coats before becoming opaque all over. A little tiresome, but I do like it when each coat is progressively smoother and easier to apply. I used Minwax pre-stain conditioner and Red Oak stain, followed by Wipe-On Poly.
-
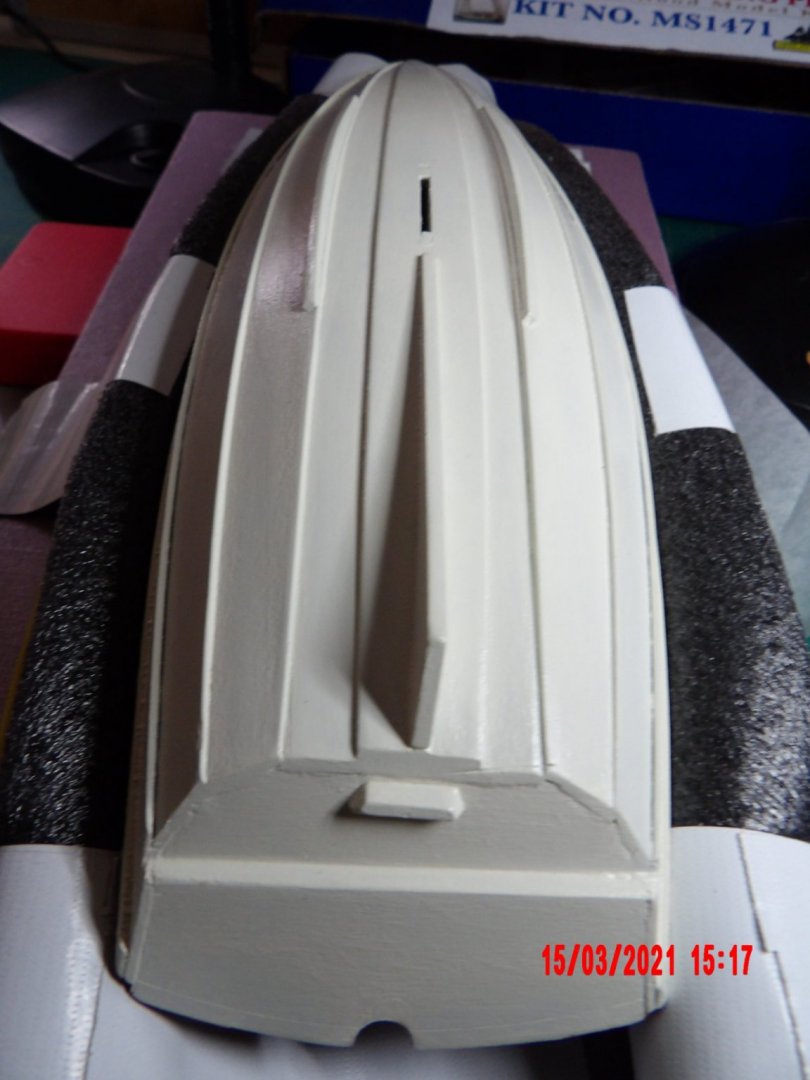
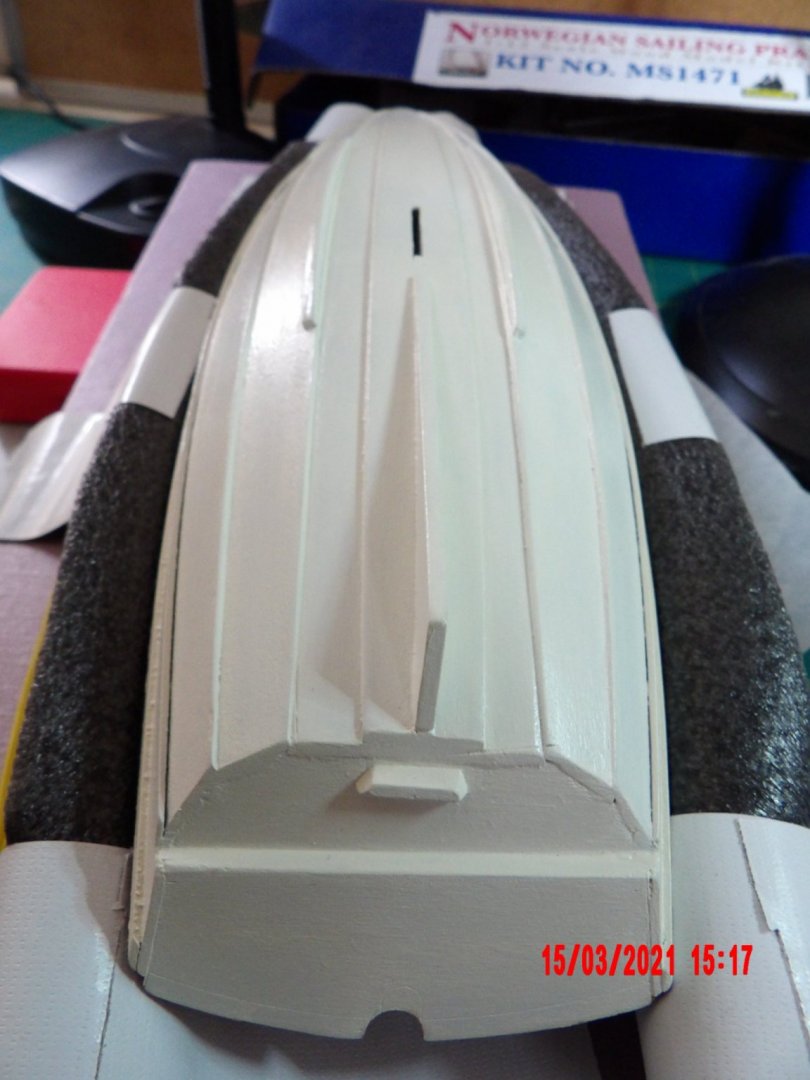
Painted the outside of the hull. 8 coats! The line where the two colors meet is not as crisp as I would have liked, but is not bad enough to obsess over. After obsessing over this for an hour (haha), I went back in to see if I could make this neater. BTW, I caused this problem by masking before painting the hull exterior, instead of taking the author's advice and simply dragging a flat brush at 90 degrees to the edge. I did improve it using this method, but think further work would be detrimental.
.jpg.b2101998e96a31b59446eff07a1ed379.jpg)
- 45 replies
-
- 6
-
-
- norwegian sailing pram
- Model Shipways
- (and 1 more)
-
Thanks, Gregg. Yeah, it's funny how a photo will reveal flaws unseen with the eye. . .
- 45 replies
-
- 3
-
-
- norwegian sailing pram
- Model Shipways
- (and 1 more)
-
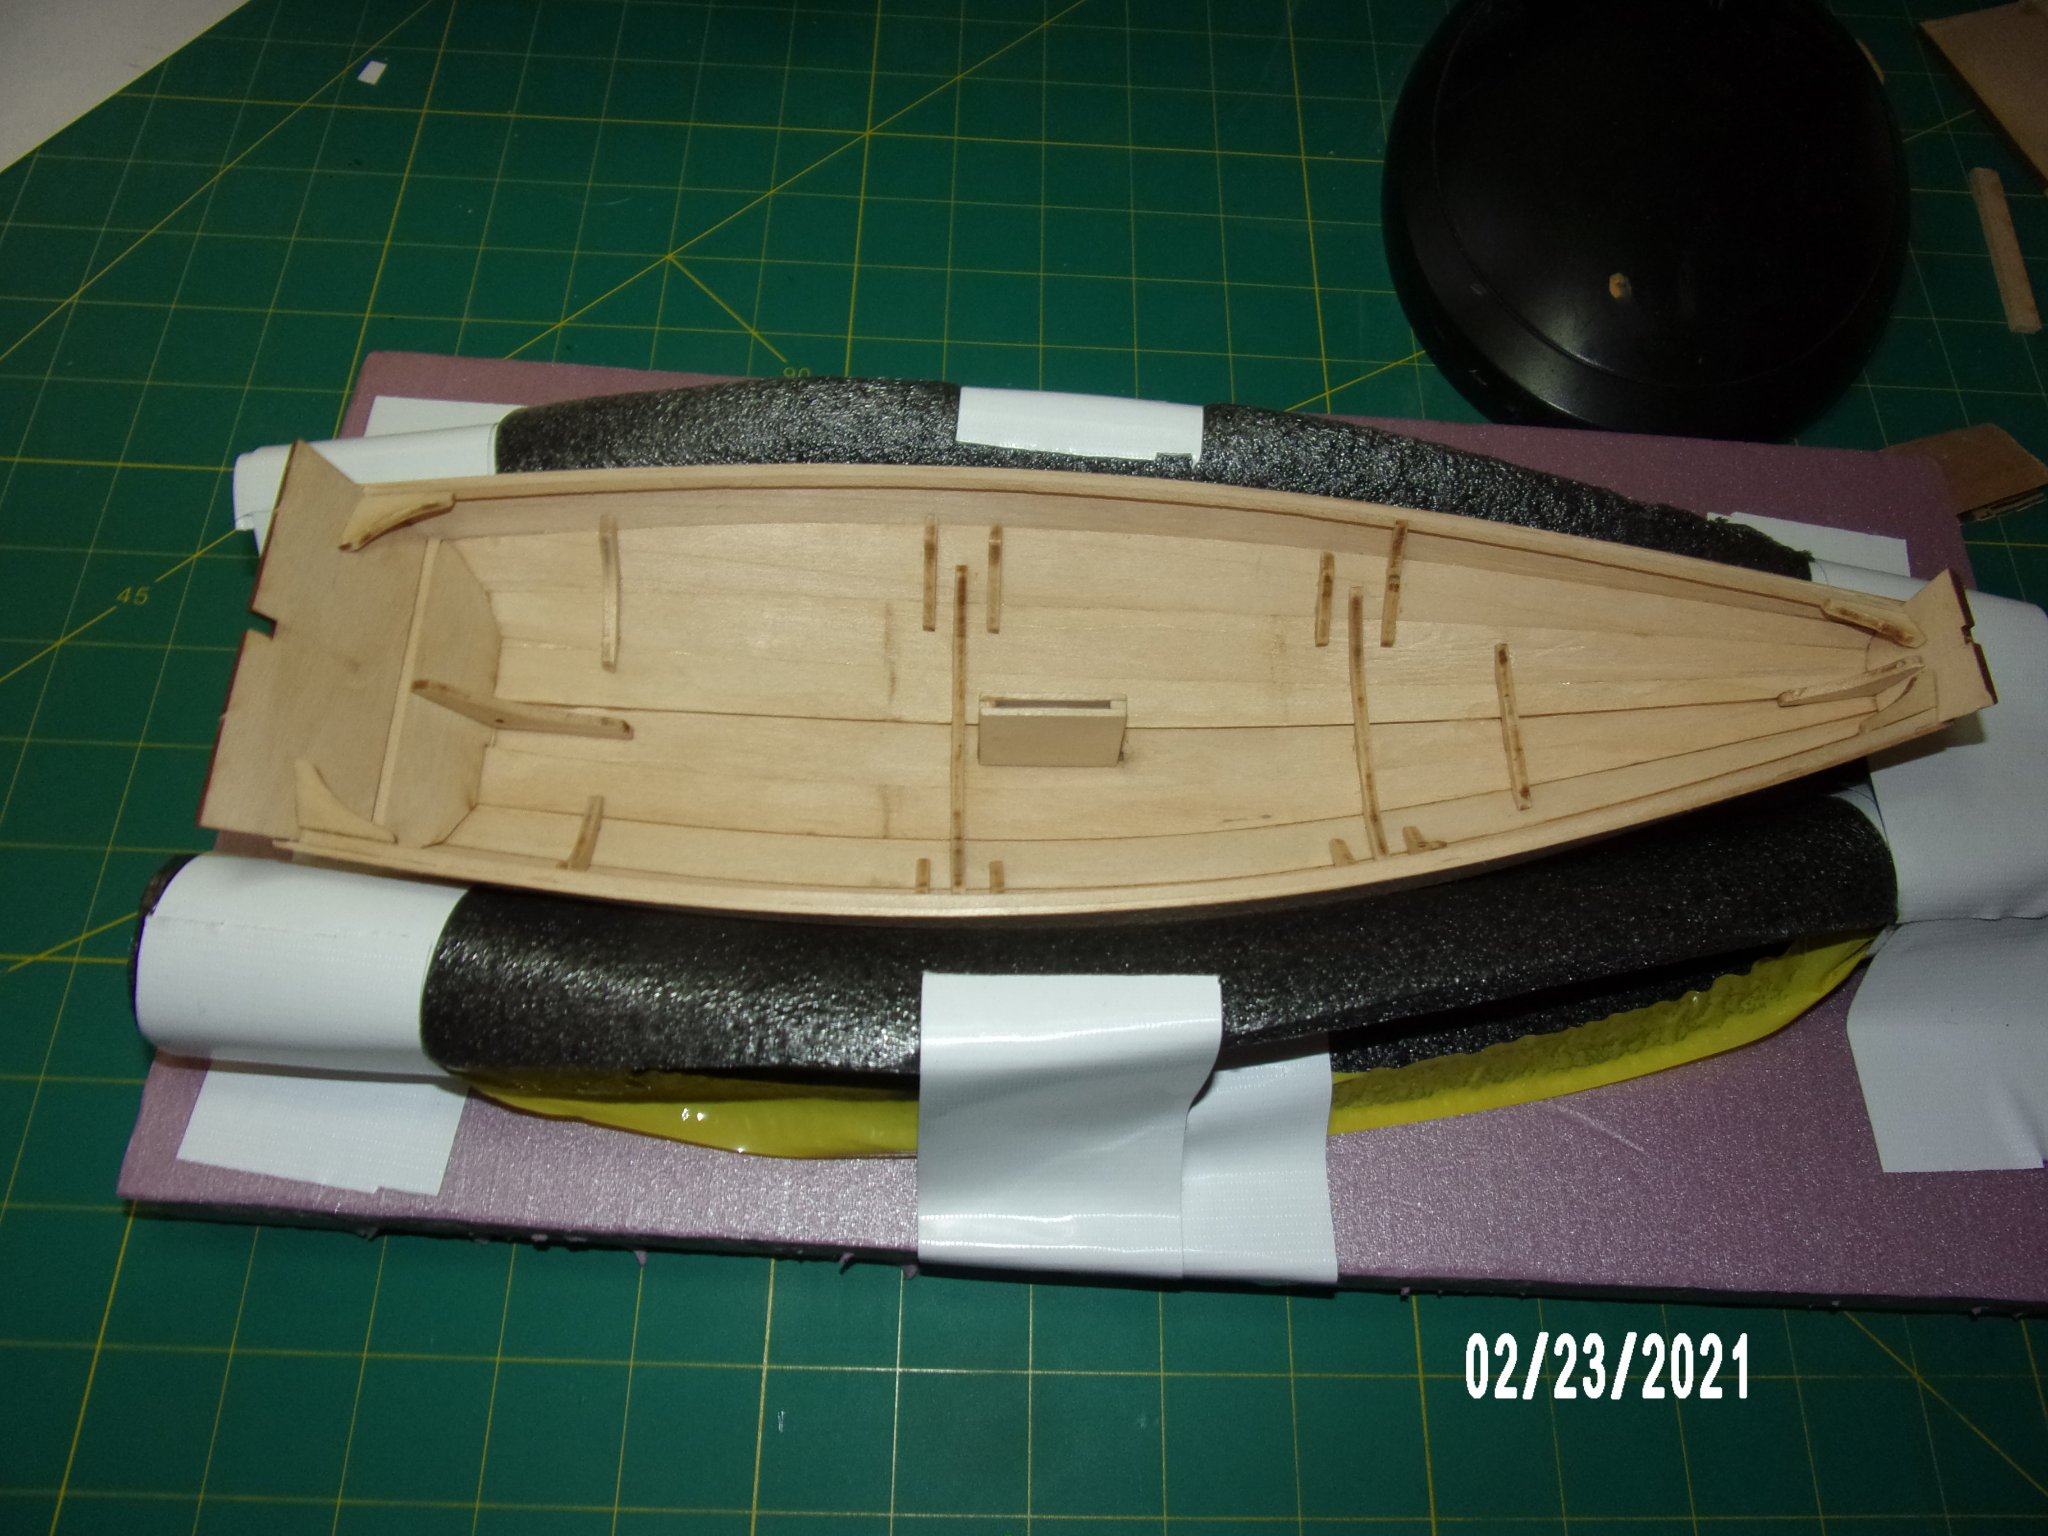
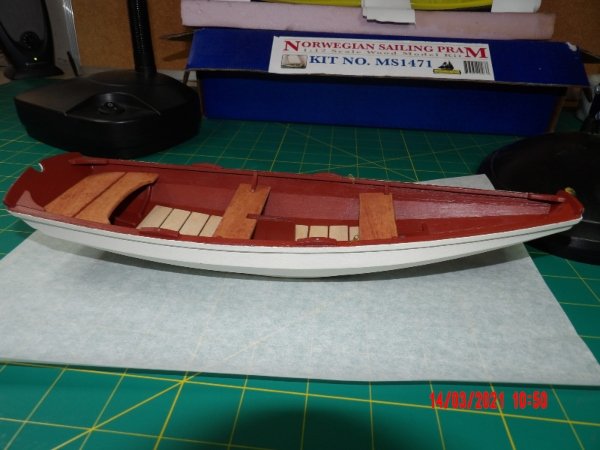
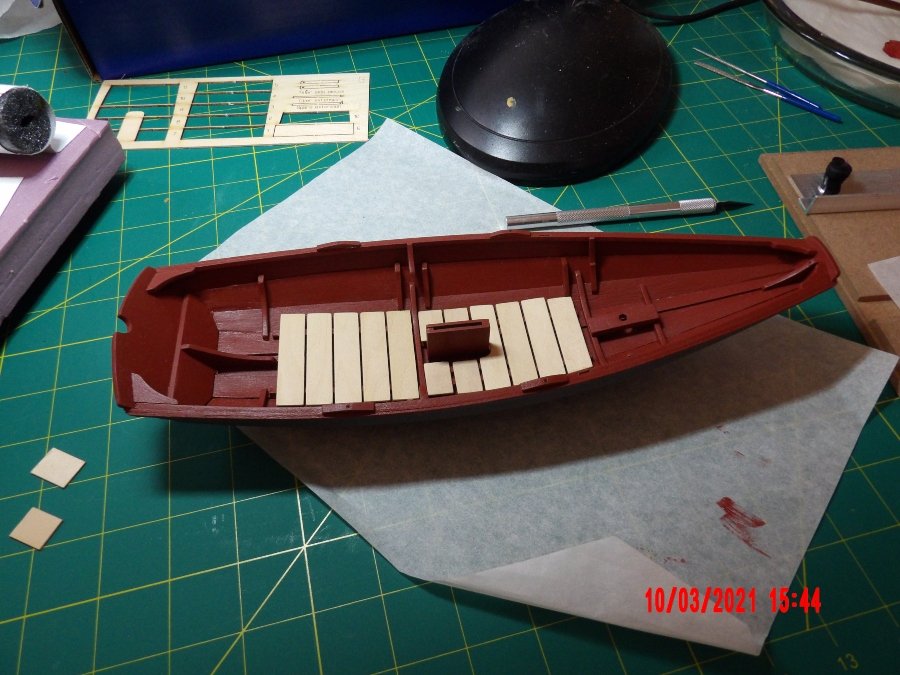
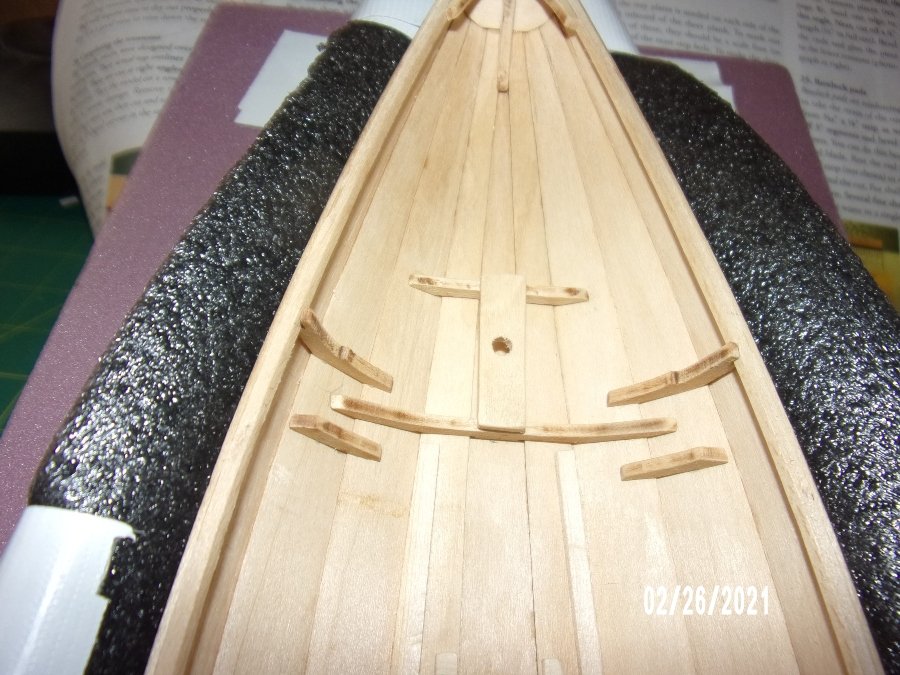
I have painted the interior. I put a lot of effort into painting the area that is essentially hidden by the floorboards, but could not help but try and make it perfect. The instructions are to do the exterior next, but I needed a break from painting, and decided that there was no reason I couldn't install the floorboards. I left them unfinished per the instructions. I should have centered each array between the thwart frames, but did not, and am left with exposed cleats at each end of each run of boards. I feel that this will be less noticeable when the thwarts and stern sheet are in place. I am thinking I'd like a third color element in the interior on the thwarts and stern sheet and may just use a light red oak stain as I did on the Dory.
- 45 replies
-
- 6
-
-
- norwegian sailing pram
- Model Shipways
- (and 1 more)
-
Looks good, Gregg! You just clued me in on a mistake which I also made. I only have two rowlock pads also. The instructions do not call out 4 pads, just that they be installed at 1'-6" aft of the forward thwart frames and does not mention doing the same at the amidship frames. But the pictures of the completed boat do show them. I have already applied primer, I suppose I could sand it off and glue in another set, or maybe just stick them on with CA glue, or not add them at all. Decisions. . . Congratulations!
- 26 replies
-
- 1
-
-
- Model Shipways
- Norwegian sailing pram
- (and 2 more)
-
Thanks, Gregg, I am painting now. It's difficult to do by hand inside the boat. I look forward to the challenge of the metal work. Bob
-
Ready to paint the hull after trimming the rub rail . I am very pleased and have learned much. I think this model is going to turn out better than I expected.
- 45 replies
-
- 4
-
-
- norwegian sailing pram
- Model Shipways
- (and 1 more)
-
Kit Review 1:24 Muscongus Bay Lobster Smack - Model Shipways
bobandlucy replied to kurtvd19's topic in REVIEWS: Model kits
Thanks very much, Kurt -
Kit Review 1:24 Muscongus Bay Lobster Smack - Model Shipways
bobandlucy replied to kurtvd19's topic in REVIEWS: Model kits
Kurt, what is the reason one might want to replace the rigging lines? Thanks, bob -
I glued in a replacement mast step after breaking the supplied 2 piece stacked assembly. The bottom piece was described as having no hole, to serve as a stop for the mast, but both of the kit's pieces had holes. Since the wood grain ran in the short dimension (oddly), the assembled part was very weak in the area of the holes. I made a single-piece step from scrap, with the grain running in the long dimension. I blew it and put the hole through, but I can deal with that later. Update 3-19: Don't deal with this later. Put in your stop before gluing the step down!! I had to remind myself to breathe as I made the chain plate slots in the inwales. Using the recommended drill size, I could not get the sawblade through the inwale. I drilled a line of holes along the length of the slot and began cutting and chiseling with an Exacto blade. When I had broken through, I then used the sawblade to neaten and square the slots. So glad I did not create a mess. Shoot, I blame myself as I have the parts on hand- just read on another log for this model that the 2" scale lengths for the chain plate slot per the printed instructions is wrong as the plates are 1" wide. And so they are. Now I have to decide whether to add filler on the top of my pristine inwales, or just live with it.
- 45 replies
-
- 4
-
-
- norwegian sailing pram
- Model Shipways
- (and 1 more)
-
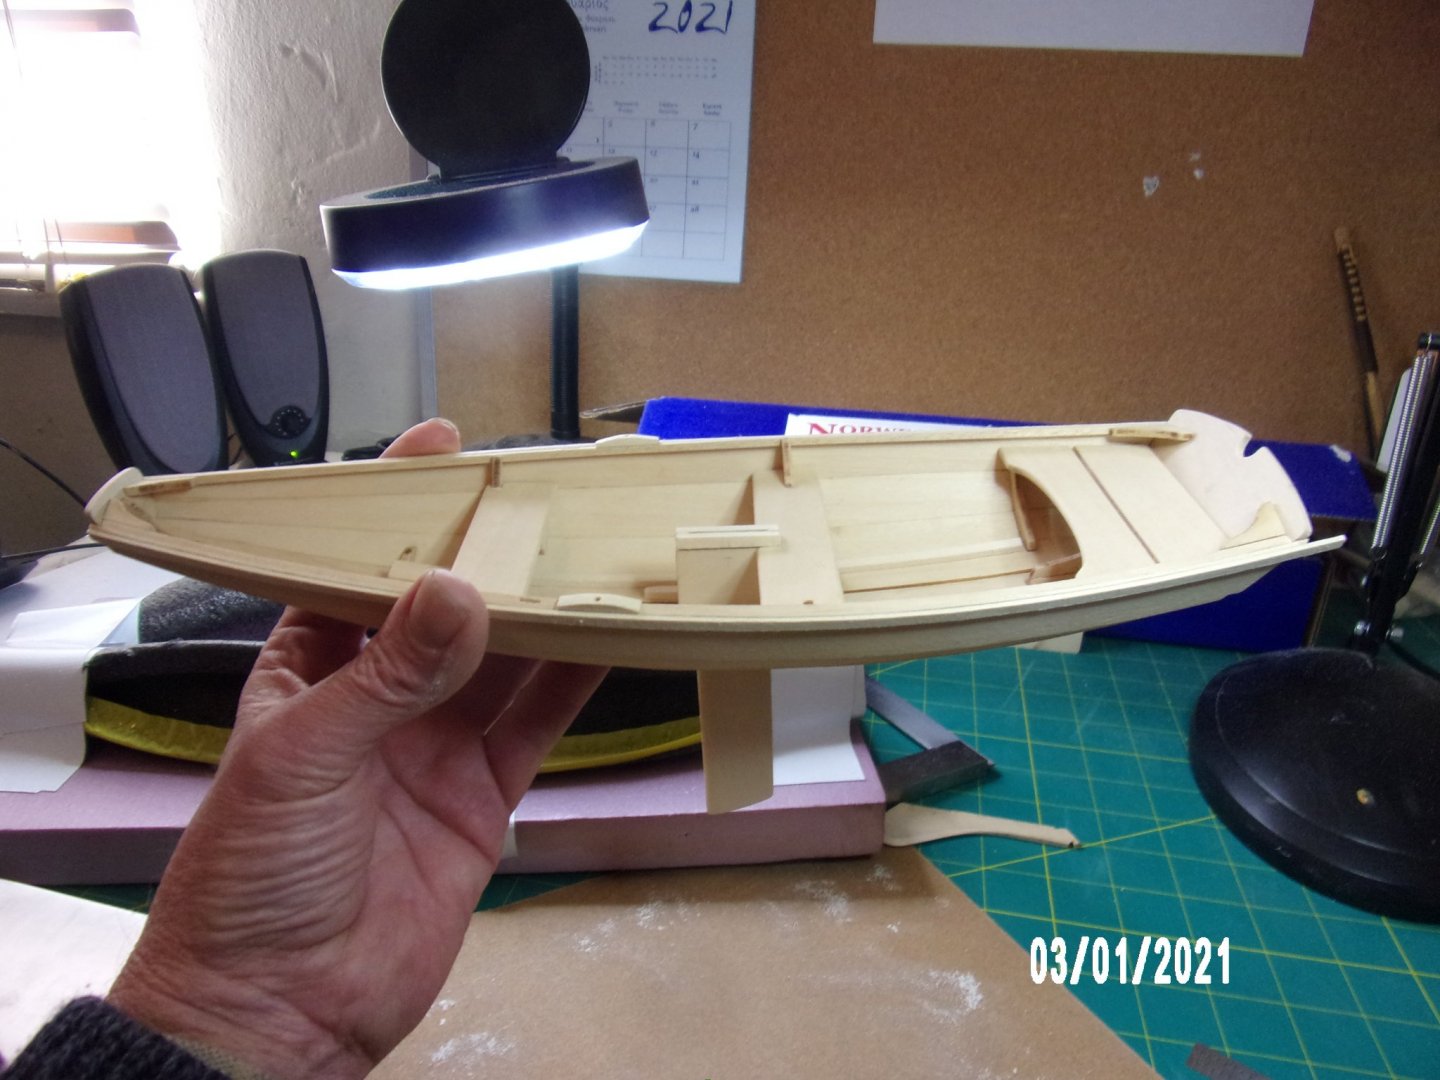
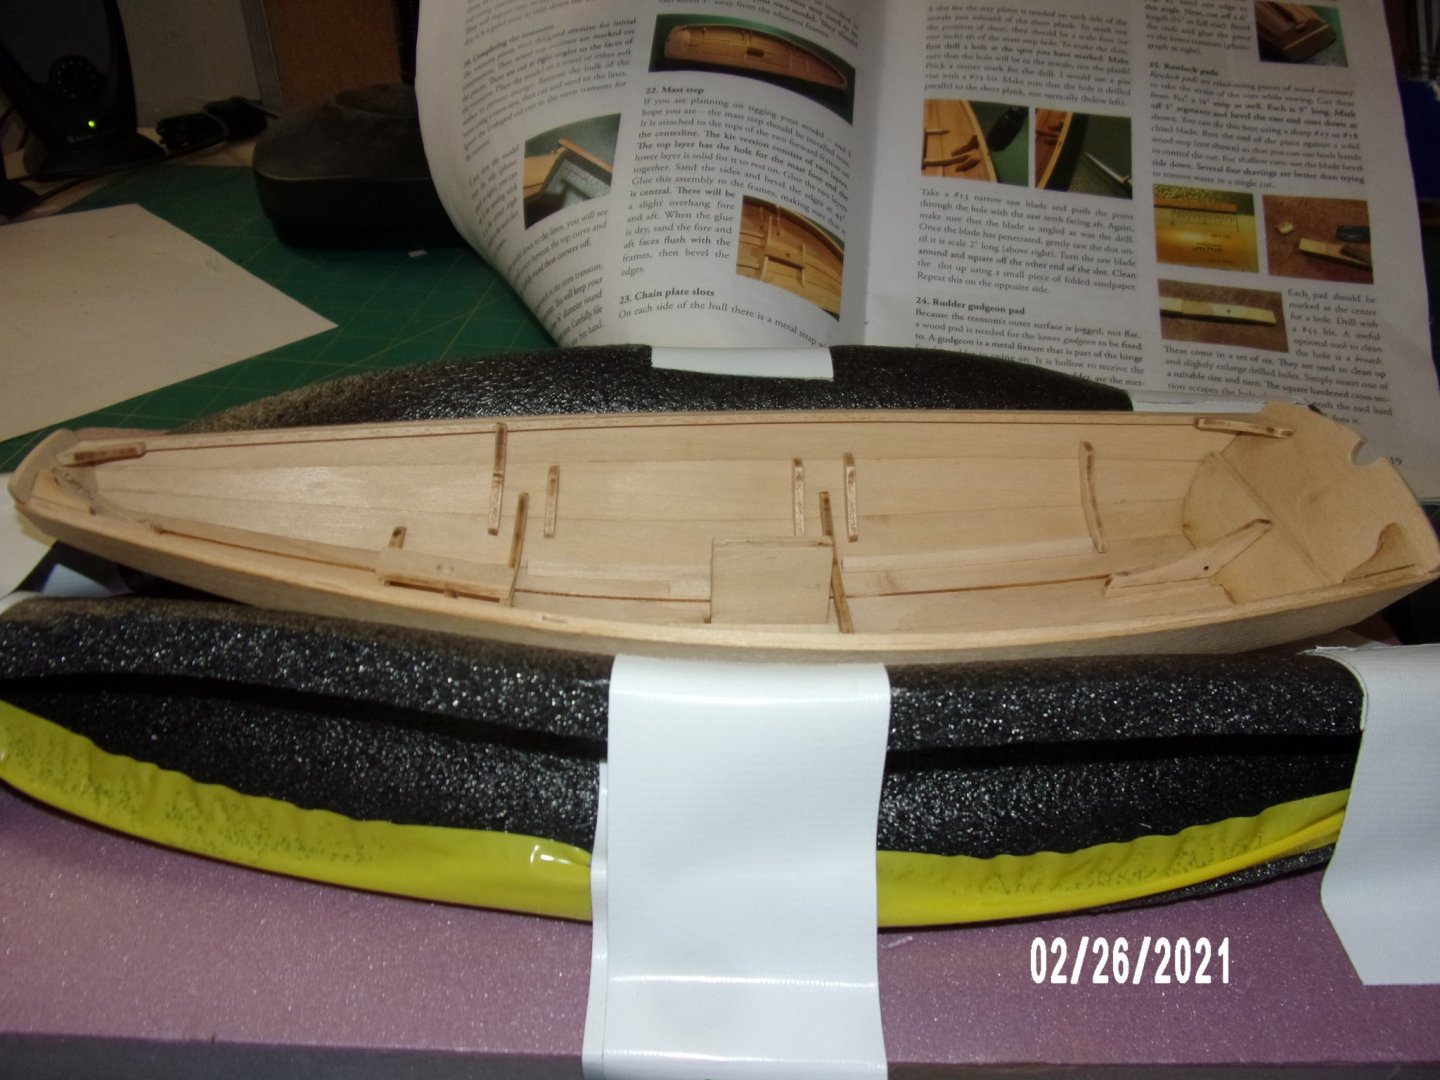
She is free of the building board! Glued in the quarter knees, dagger case, and internal frames. I found these parts difficult. Will have some gaps to fill, and I can see that material might have to be subtracted at some support points for the thwarts and stern sheet in order for these to sit nicely. I have done a better job controlling/removing glue squeeze out this time. Getting close to painting of the hull, which will take me a while, going by my experience with the dory.

- 45 replies
-
- 2
-
-
- norwegian sailing pram
- Model Shipways
- (and 1 more)
-
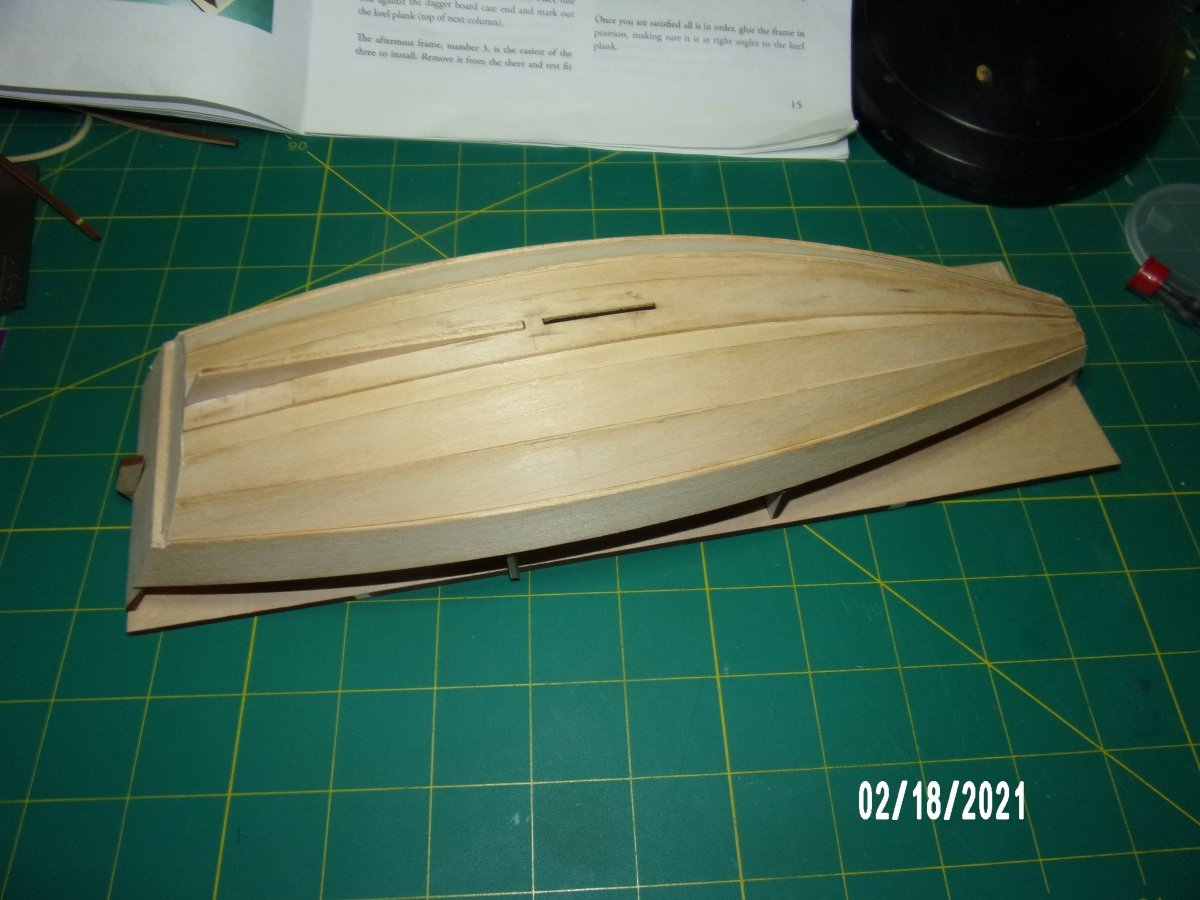
Finished planking. Naturally, the side planks were more difficult to fit. Ended up beyond the intended line at the rear transom and will have to increase rear transom vertical dimension to compensate. I was very careful, but failed to hit the mark in all respects. This is the best I could do at this time.
- 45 replies
-
- 5
-
-
- norwegian sailing pram
- Model Shipways
- (and 1 more)
-
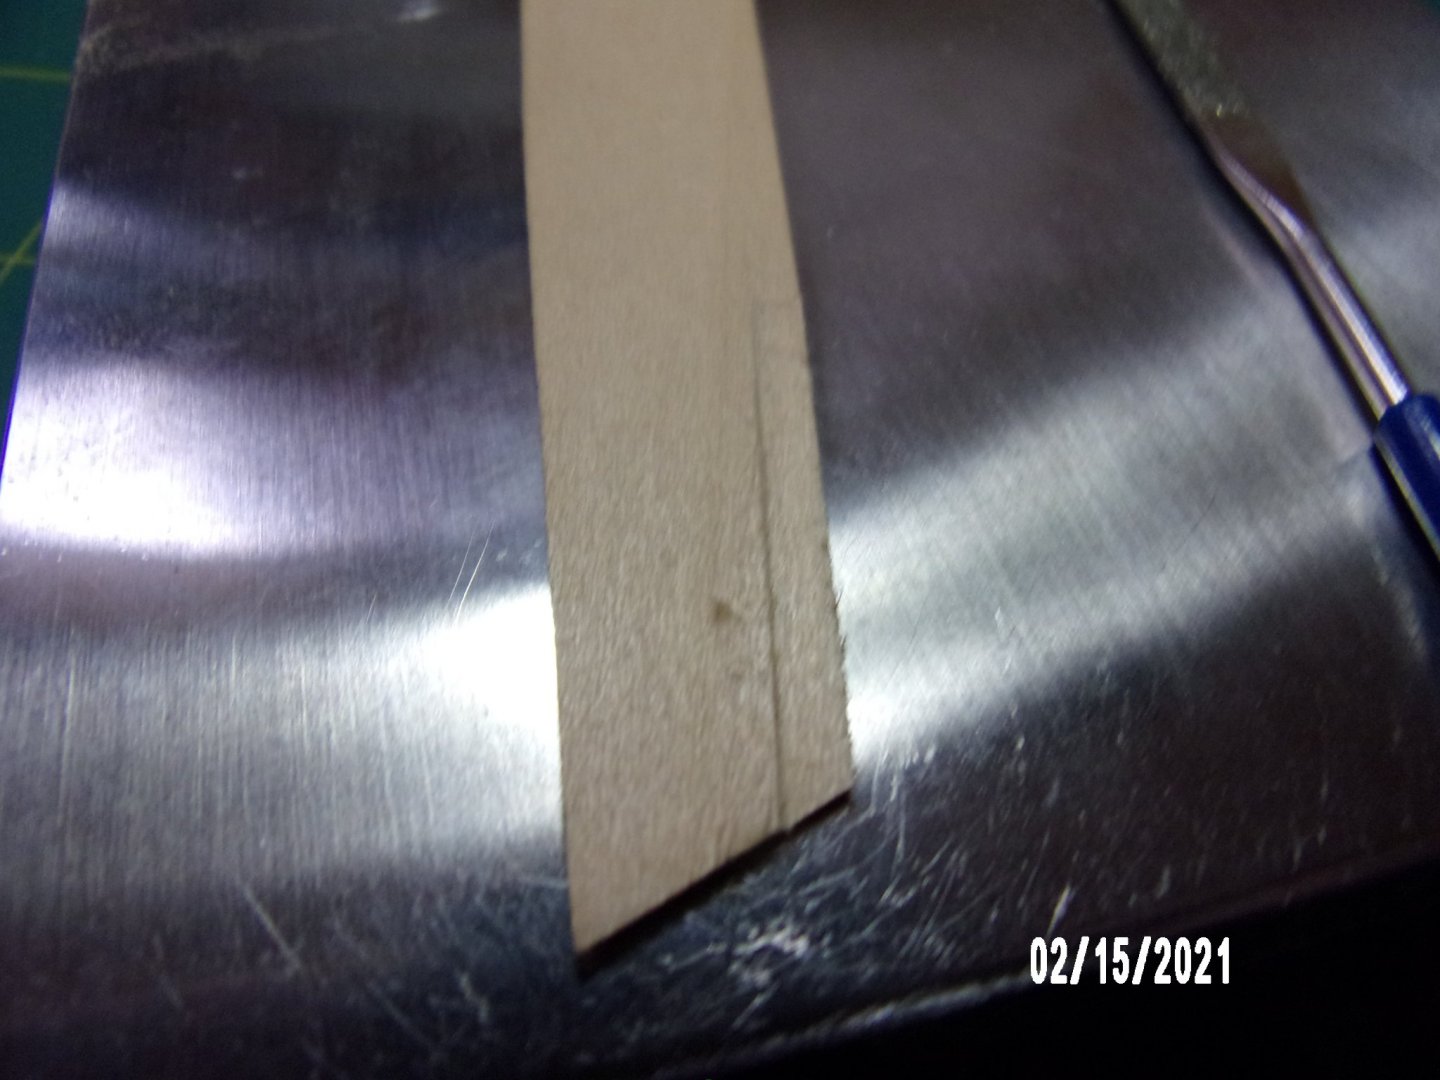
The best rabbet on the first garboard plank. I don't wish to post every little action, but I'm really happy with this result. I chiseled 60% or so and finished with a jeweler's file, checking the dimensions with calipers as I went along:
- 45 replies
-
- 3
-
-
- norwegian sailing pram
- Model Shipways
- (and 1 more)
-
Glued the three bottom planks on today and had a lot of problems. I'm not going to relate all the details, but the major problem was warping of the building board and inaccuracies in the molding frames as supplied. The building board and molds are inadequate in thickness as noted elsewhere, and there was a sizable error in centerline for molds-to-building board. I did a pretty good job in plank bending and don't think that stress from the planks contributed to the problem. I made some adjustments. I decided that additional attempts to correct might be more destructive than helpful. This is a learning kit, and I am learning. So, onward!
- 45 replies
-
- 2
-
-
- norwegian sailing pram
- Model Shipways
- (and 1 more)
-
Thanks, Gregg!
-
Not corrected on my set. . .
-
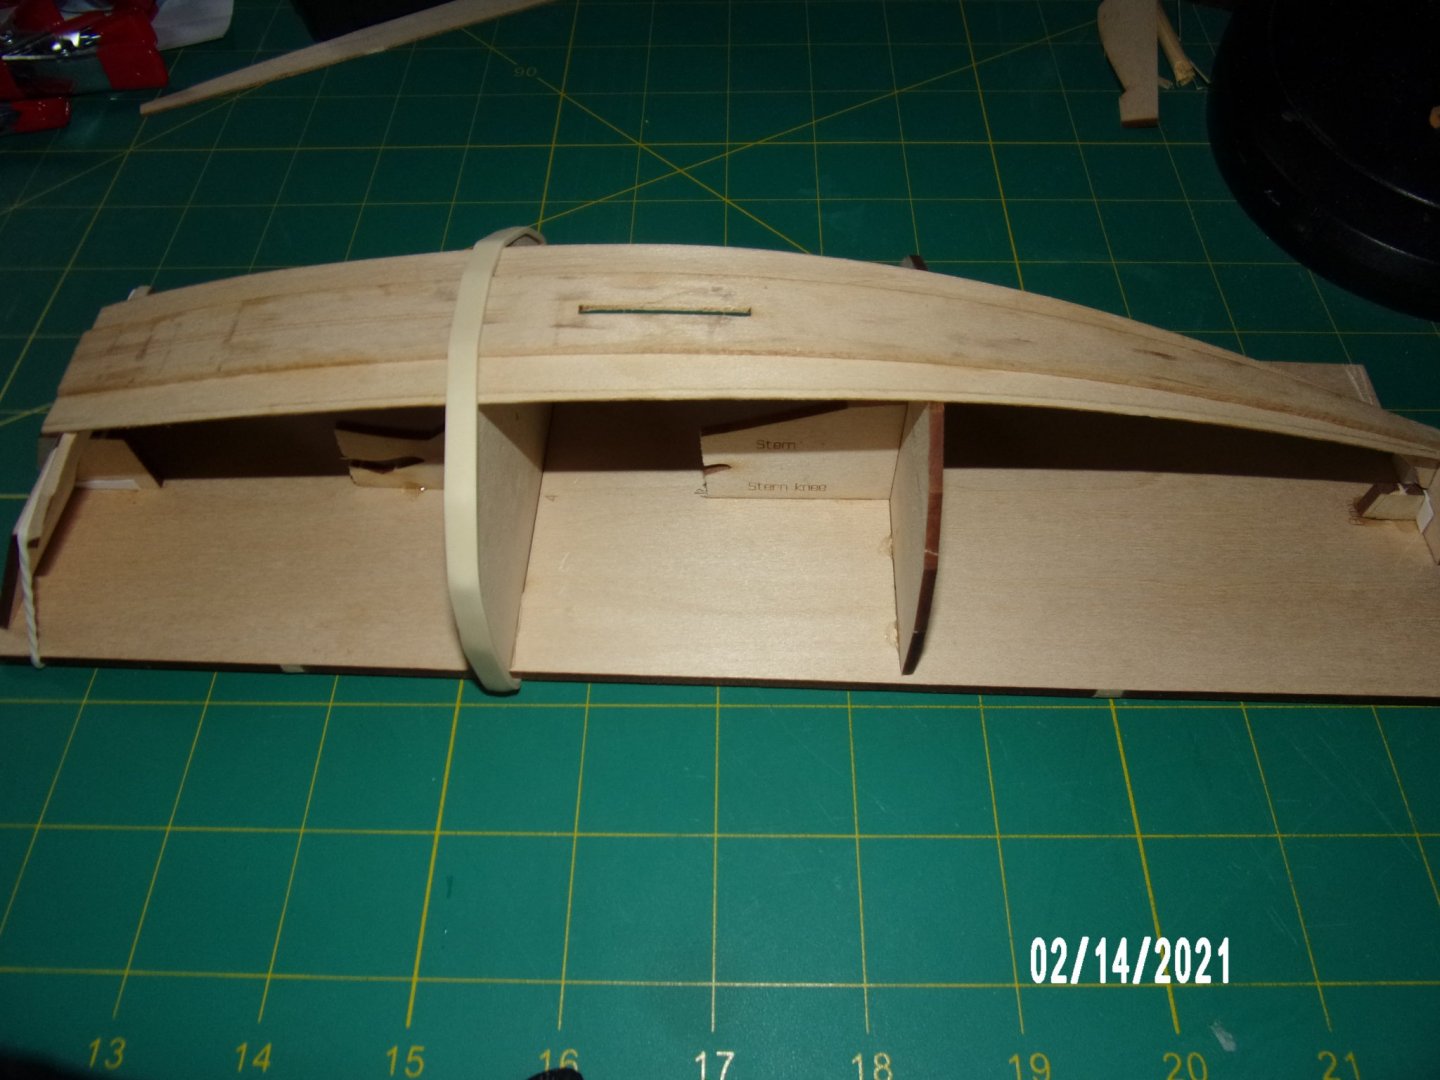
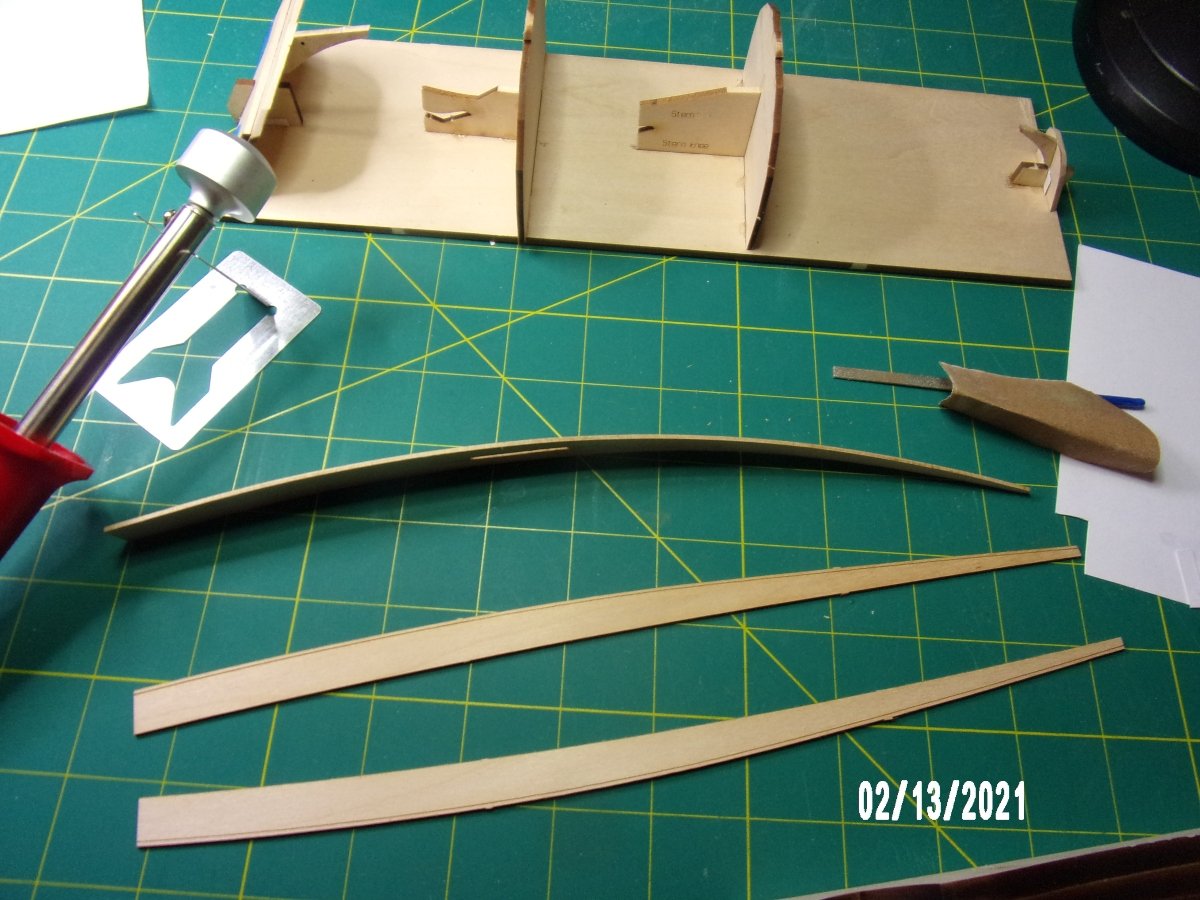
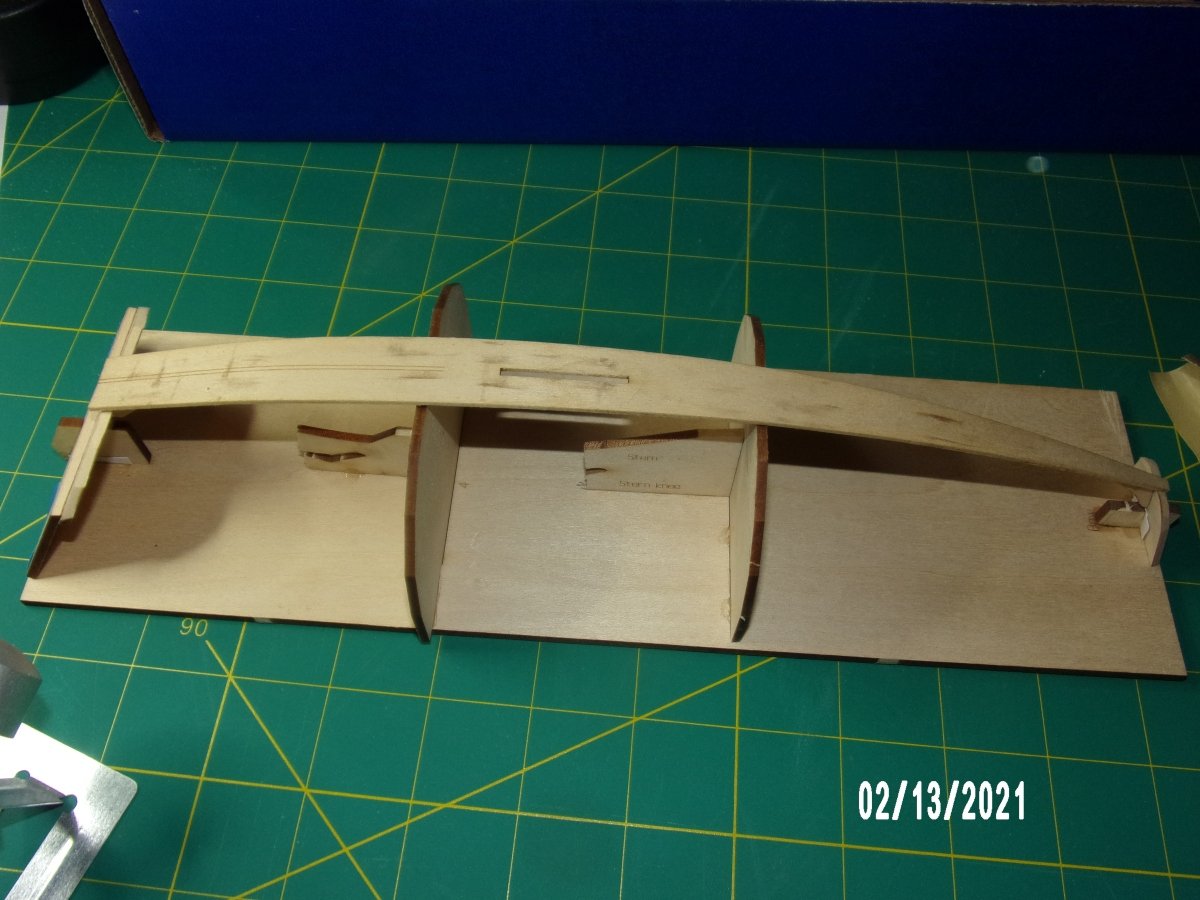
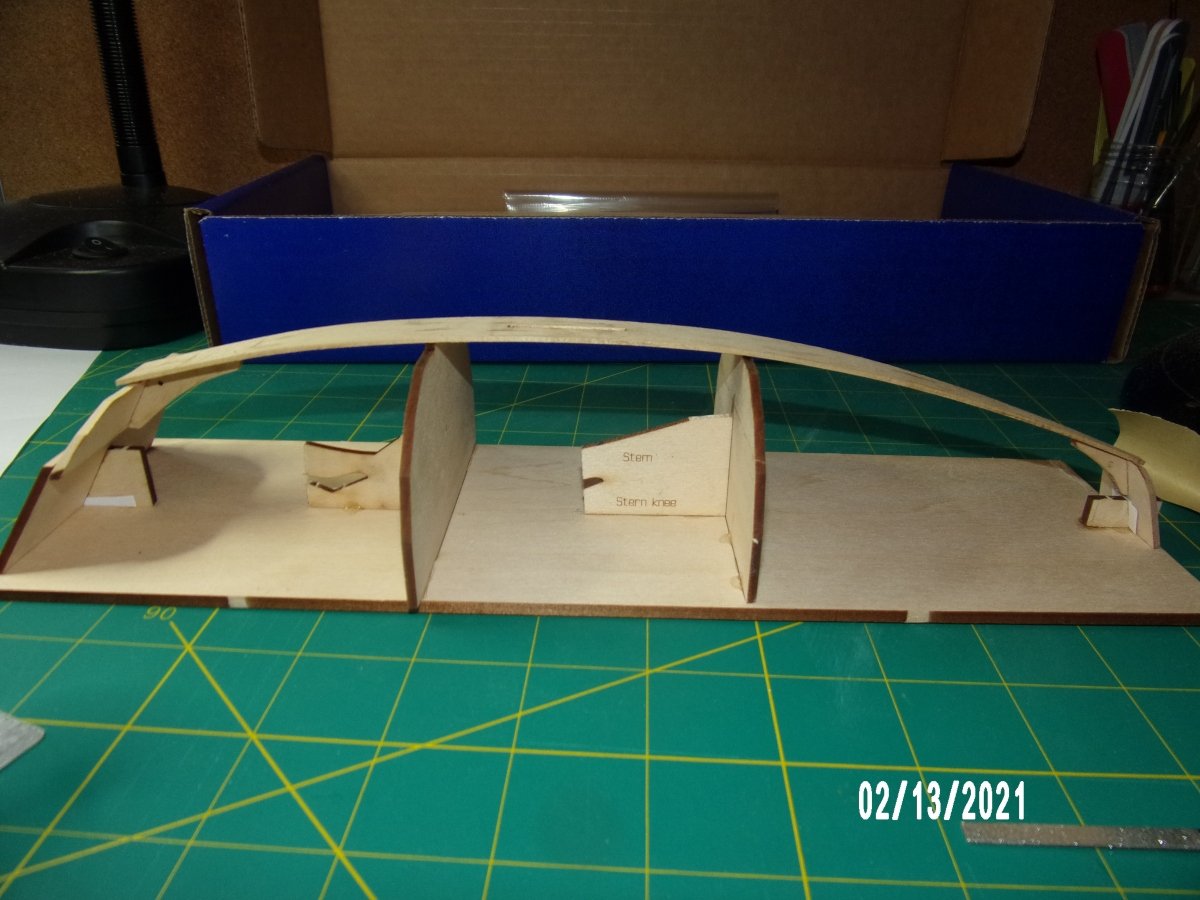
I assembled the building board. It took quite a bit of modification to get the forms to seat, and the transom holders had to be modified with the razor saw, they were way off dimensionally. Since the kit came with an extra keel plank, I decided to try out my electric planking tool. I am very pleased with this method. The grain remains flat and I got a really good fit. It took me a while, but I imagine I'll get faster at it. The plank lies in contact at all 4 points without the need for clamping! The marks visible on the plank are from the char on the form supplied with the planking tool. I'll have to clean that up before I use it again. The marks do sand off easily.
- 45 replies
-
- 4
-
-
- norwegian sailing pram
- Model Shipways
- (and 1 more)
-
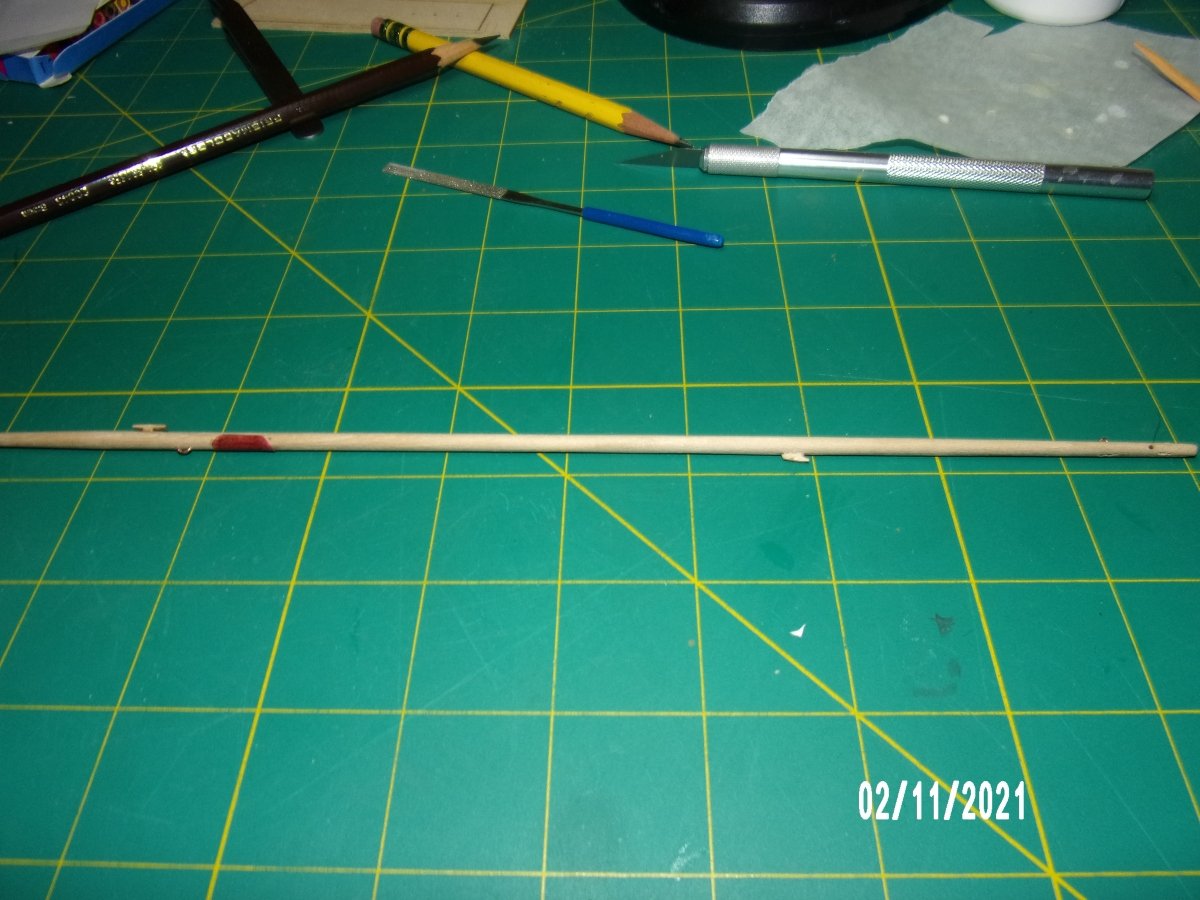
Shaped the mast and added the mast attachments. This assembly will need more work, but I received the part I needed from Model Expo (took less than a week!) and want to get back to the hull assembly and back to doing things in the correct order:
- 45 replies
-
- 2
-
-
- norwegian sailing pram
- Model Shipways
- (and 1 more)
-
I'm not sure at all about the purpose of the sheave, except maybe to help prevent abrasion of the rope when raising the sail? Is so, why does it not appear on both sides of the mast? The rope appears to pass through the sheave once only, so it seems to me that the lower hole did not have to be all the way through the mast. I put mine on the wrong side of the mast, and am debating whether to try and correct with filler. I also ended up with the "alternative" eye just below the back stay straps, which appears only on the Page 5 plan. I don't think it will have a use. If the eye is indeed an alternative to the sheave, why would it not be shown in the same place as the sheave?