MORE HANDBOOKS ARE ON THEIR WAY! We will let you know when they get here.
×

bobandlucy
-
Posts
511 -
Joined
-
Last visited
Content Type
Profiles
Forums
Gallery
Events
Everything posted by bobandlucy
-
 Railings look good, Bob!
 -
"I decided to try a rope coil for the bow mooring and see I need to improve my technique." Rope coil is perfect, what are you talking about? Bob
- 22 replies
-
- 1
-

-
- Lowell Grand Banks Dory
- Finished
- (and 1 more)
-
Good work! Nicer than mine, and I admire the lobster trap. You have a talent for this work, and I'm happy you have decided to continue with this series of instructional models. Bob
- 22 replies
-
- 1
-
-
- Lowell Grand Banks Dory
- Finished
- (and 1 more)
-
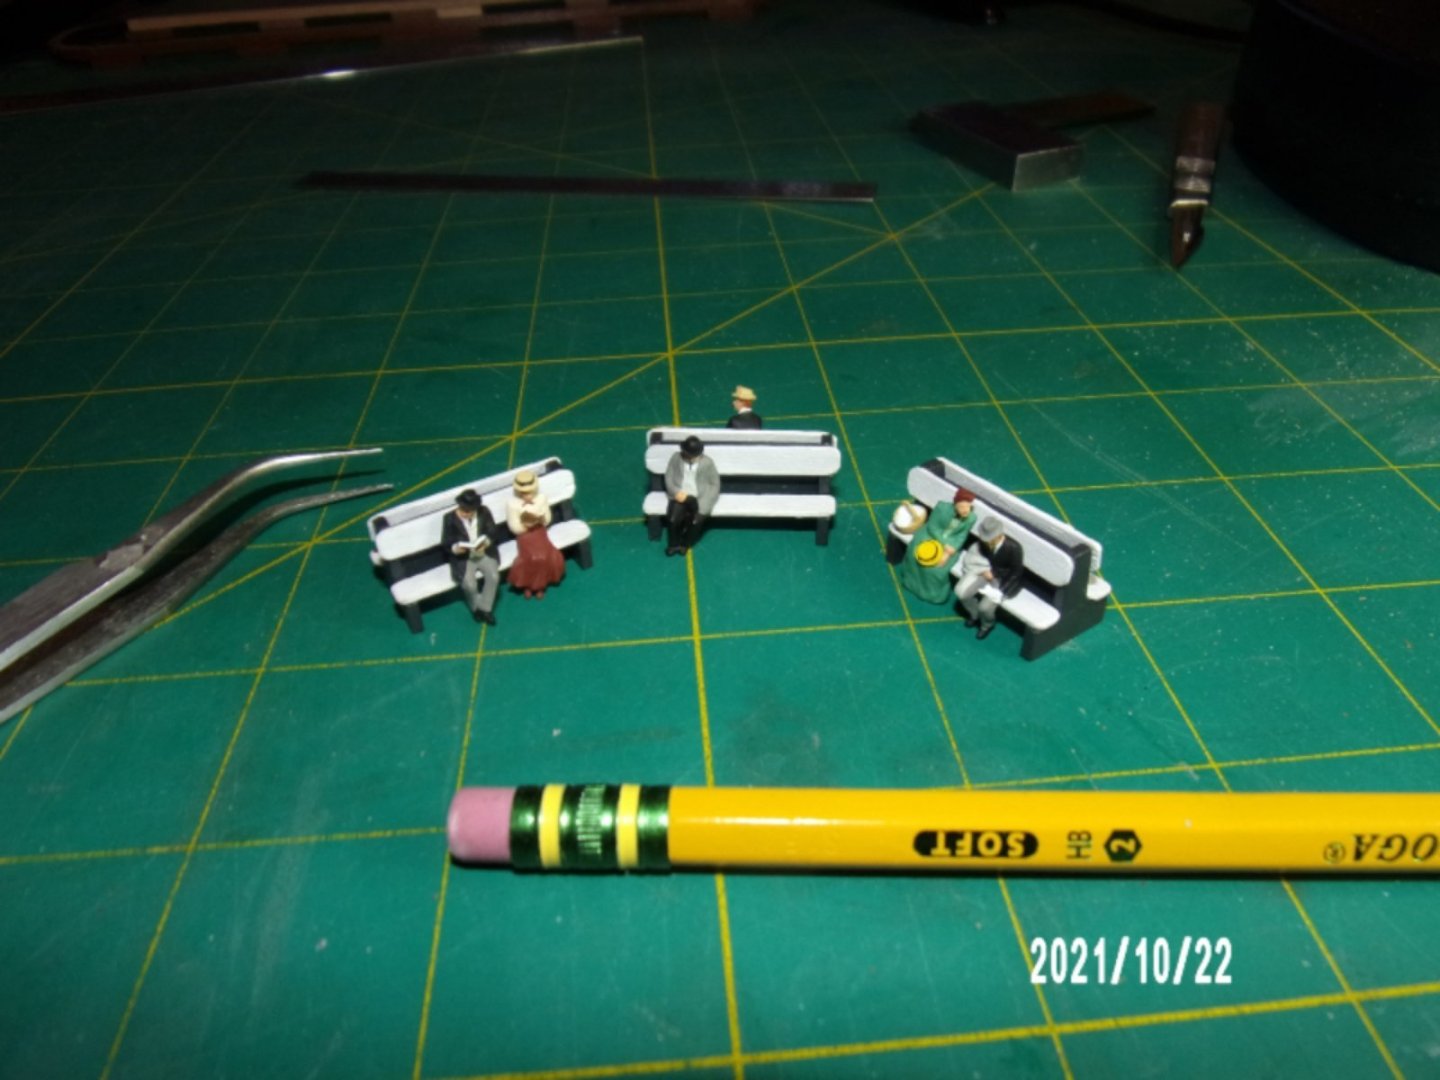
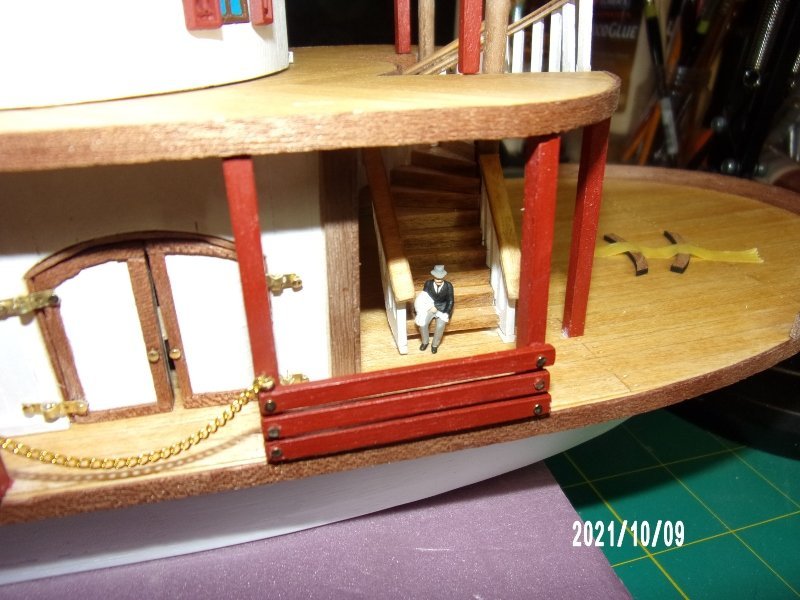
Decided to take a break from larger issues and built the bench seats. This was more difficult than I anticipated, and required a jig to keep square. I couldn't resist adding the Preiser seated figures I had purchased. Gosh they are delicate, and I did break two of them but was able to fix, My favorite are the couple reading, which in my experience is a rare coupling. Additionally, there is a guy half in the bag, and opposite a man intent upon his destination. Finally a couple, the wife is nagging him and he is in despair.
- 109 replies
-
- 3
-
-
- Finished
- Artesania Latina
- (and 1 more)
-
The hull looks really nice, Skibee!
-
I'm sure you will enjoy the building of this model. I learned a lot from this series of kits. Bob
- 8 replies
-
- 2
-
-
- Lowell Grand Banks Dory
- Model Shipways
- (and 1 more)
-
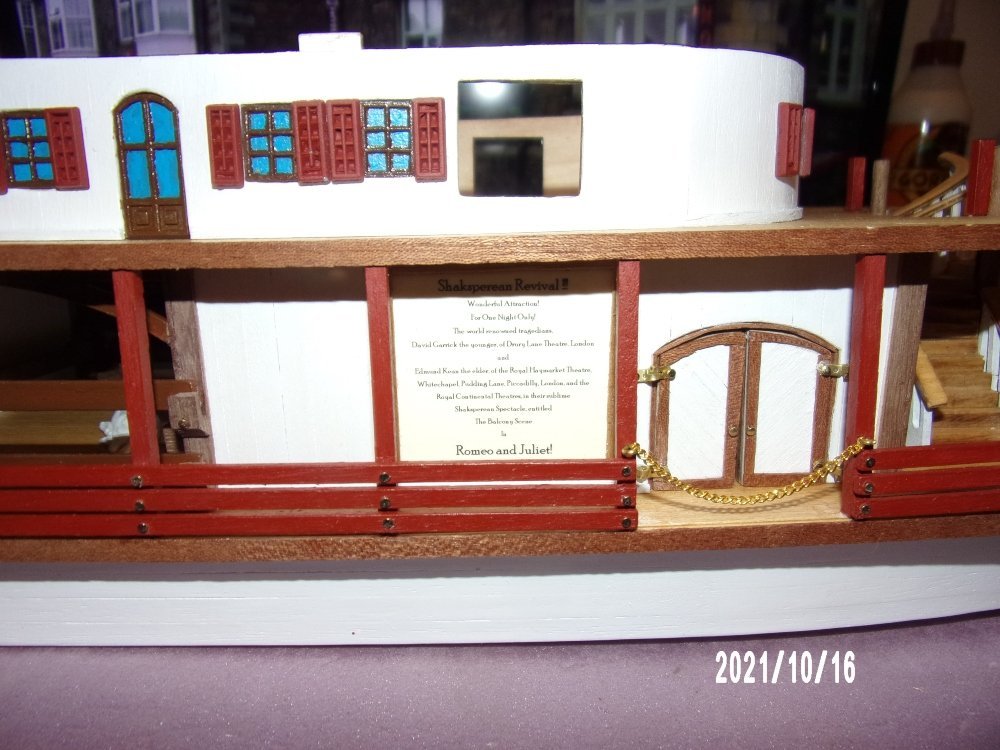
I don't know if these boats would have featured any advertising, but I thought a playbill from The Adventures of Huckleberry Finn, in which the rapscallions The Duke and The Dauphin deceive the citizens of a small Arkansas town by selling tickets to a "production" of Shakespeare's Romeo and Juliet, might provide a nice tie-in to the book. It's a little large, but heck, so is everything else on this boat! I've taken the text from the novel, including misspellings:
- 109 replies
-
- 2
-

-
-
- Finished
- Artesania Latina
- (and 1 more)
-
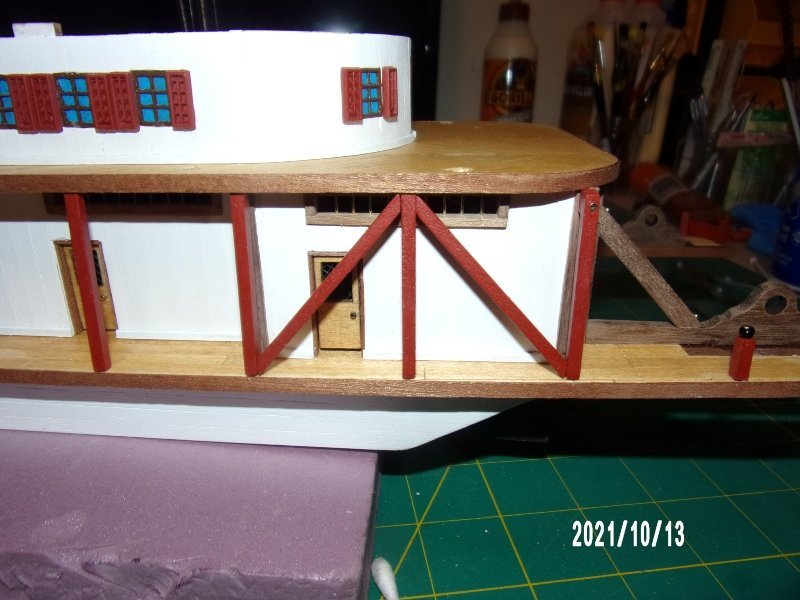
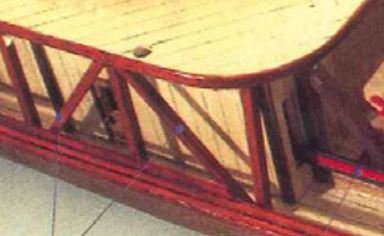
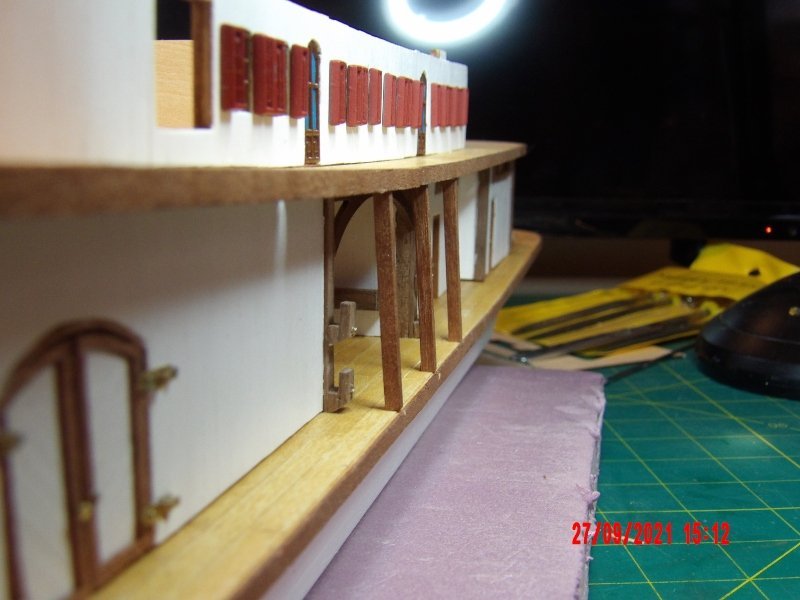
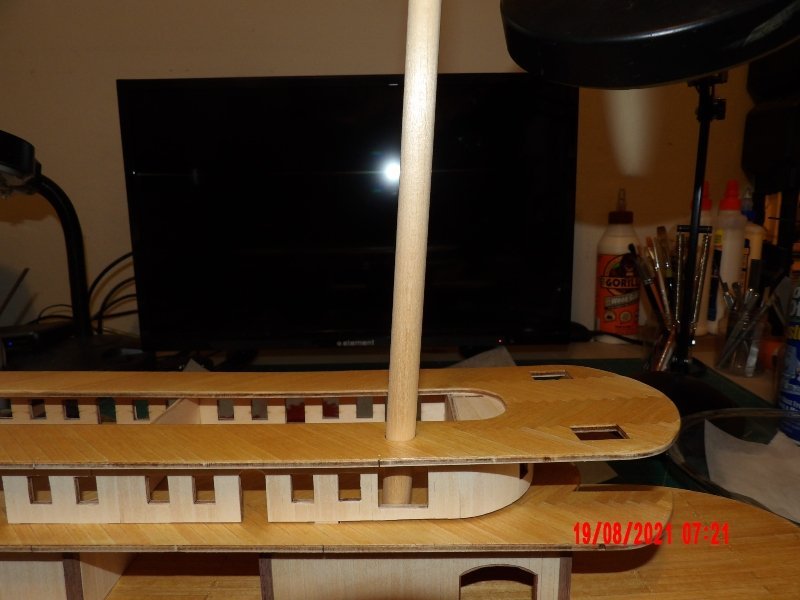
I installed the final full height columns towards the stern. I puzzled over this for a while (days), as the manual shows the column tucked under the rounded portion of the second deck, against the building corner trim. On my model, as for most I have seen, the as-built condition does not allow this, and I did not like the appearance of the column slant being more severe than the rest of the run. Some people installed the column in this location and allowed the top of the column to protrude, some moved the column forward- which also would affect the length of one of the diagonal braces. I preferred to maintain the column spacing and also the slant, and so added a stand-off piece between the column and the building trim. This will also prevent possible distortion of the railings when they are added. From the manual: As installed: I also placed the short posts out on the wheel area. Topped one of them with the supplied bead and pin, but realized it would be wise to wait until the railings are installed, as they will provide added rigidity for the posts. Would have been easier to add the beads off the model. . .
- 109 replies
-
- 2
-
-
- Finished
- Artesania Latina
- (and 1 more)
-
David, yes, I feel I'm heading in that direction. I'd also like to incorporate dioramas. . .
- 109 replies
-
- 2
-
-
- Finished
- Artesania Latina
- (and 1 more)
-
David, as you have said- I'm learning with each model. If I had a full shop and the extra material, I would certainly change quite a bit on the KOM. I'm not so much concerned with historical accuracy at this point, but many features of this model are so wildly out of scale that they hurt my brain. However, I will finish it, and it will make an attractive display regardless, I'm sure.
- 109 replies
-
- 2
-
-
- Finished
- Artesania Latina
- (and 1 more)
-
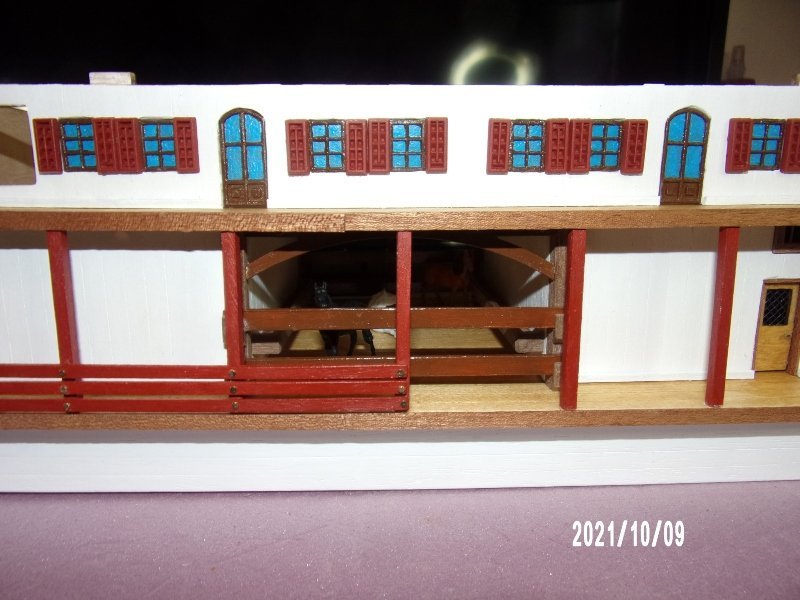
I received my order of wood and have been adding baseboards on the exterior walls in order to hide the gaps. This would have been easier if done prior to placing the support columns, but I did not want to wait. However, this was not impossible, and was even fun trying to figure the angles and avoid getting glue where it doesn't belong. I'm happy with the results so far, and with the dimensions of the baseboards (1x2 mm). Similarly, placing the horses in the stable area would have been easier at an earlier stage, but was also fun. Using tweezers to manipulate them into position reminded me of the old child's game "Operation." Kept expecting to hear the buzzer. . . I have not glued any human figures in as it's too early, but seeing them and the horses on the model really makes clear some of the dimensional shortcomings of the model. These are HO scale figures, a little off but really the difference should be barely perceptible, if at all (model 1:80, figures 1:87 scales). For instance, the rails at the stable are huge- how many men would it take to lift them off for loading/unloading? And the treads on the spiral staircase. . . probably not impossible to climb but it would be a heck of a workout!

- 109 replies
-
- 3
-
-
- Finished
- Artesania Latina
- (and 1 more)
-
Mike, I just PM'd you with the instructions
-
Thanks, Bob. I see the slanted end columns on the plans, but was not sure if the ones in between them were also slanted, as there is no section view provided. The pictures in the booklet are not taken at angles that give a good view of them. I decided that having a mix of vertical and slanted columns would look odd. I went with the slanted support columns. Since I did not mark the column locations by overlaying the plan prior to placing the 2nd deck buildings, I started by centering a column between the stable opening. I took the distance between the columns from the plans. The opening in the railing in front of the boiler room double doors did not come out centered, as it should have. I guess the spacing should have been increased slightly. I will learn to accept that this model will be less than perfect!
- 109 replies
-
- 4
-
-
- Finished
- Artesania Latina
- (and 1 more)
-
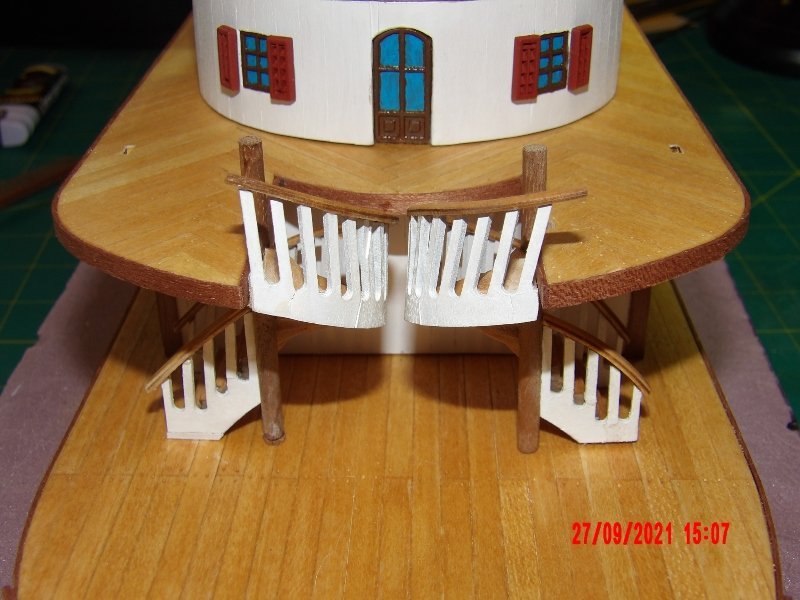
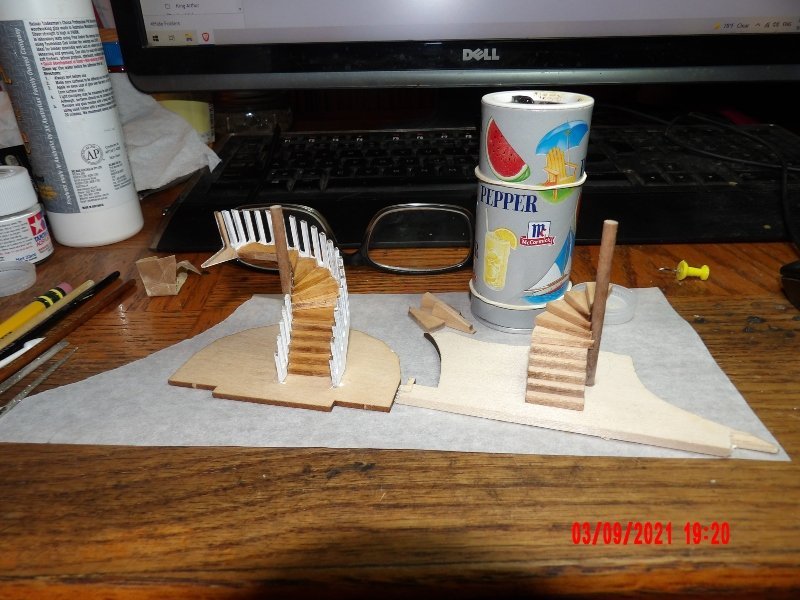
Installed the spiral staircases. Of all the parts of this model done so far, I am least happy with these, but at the same time glad to be more or less done with them. The underdeck closure parts came out at a bad angle, and I had cut them off. I will have to figure out some detail to hide the messy intersection of the stairs and the 2nd. deck at the front edge of the deck. Maybe some bunting? I lost track of how many times I broke the posts, and they are not vertical at the top of the stairs. Had to add some shim to one to make it match (almost) the height of the other. Altogether a humbling experience. Started cutting some deck overhang support columns. This has been driving me crazy. I can't tell from the plans if they are supposed to be vertical or slanted inboard from bottom to top. The 2nd deck is slightly smaller then the 1st. Mounting is shown to be on the inside edge of the rub rails. The ones at the ends of the run where the deck above is rounded are slanted, according to the plans. The columns above, 2nd to 3rd deck, are clearly slanted. I have seen build logs showing both approaches. Leaning towards slanting in order to maximize space for passage, and to minimize twist in the railings at the curved deck areas. This approach will result in a slightly rounded profile when viewing from the boat ends, which may be a nice contrast to the building structures. Am I nuts?

- 109 replies
-
- 2
-
-
- Finished
- Artesania Latina
- (and 1 more)
-
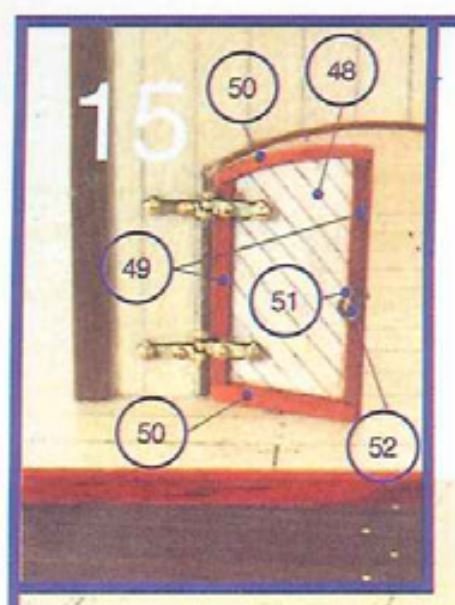
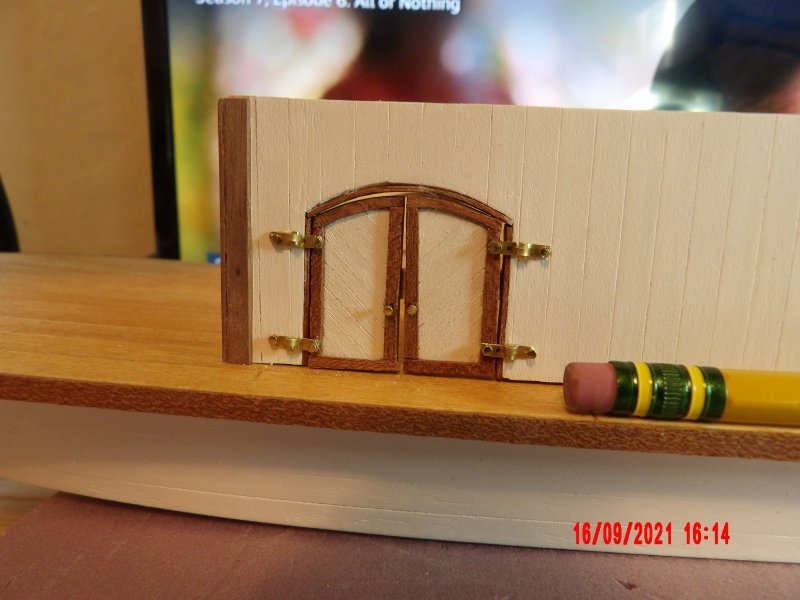
Thanks, David. I have the patience, but could use better eyesight! Or a stronger magnifier. . . I see now that I had the hinges for the double doors wrong, they were supposed to be operable. Bob Fraser got it right. The written instructions confounded me, and it was not apparent from the parts themselves that they needed to be cut, and part of the hinge discarded. When I enlarged the picture (after the fact), I could see how they are supposed to be formed. Oh well, I'm not going to do over. . . I made the supports for the stable area out of the 4x5 mm material called out. They seem to be way large, and would allow only a very small passage along the side of the boat once the columns are installed. I think I will make replacements out of smaller material.

- 109 replies
-
- 4
-
-
- Finished
- Artesania Latina
- (and 1 more)
-
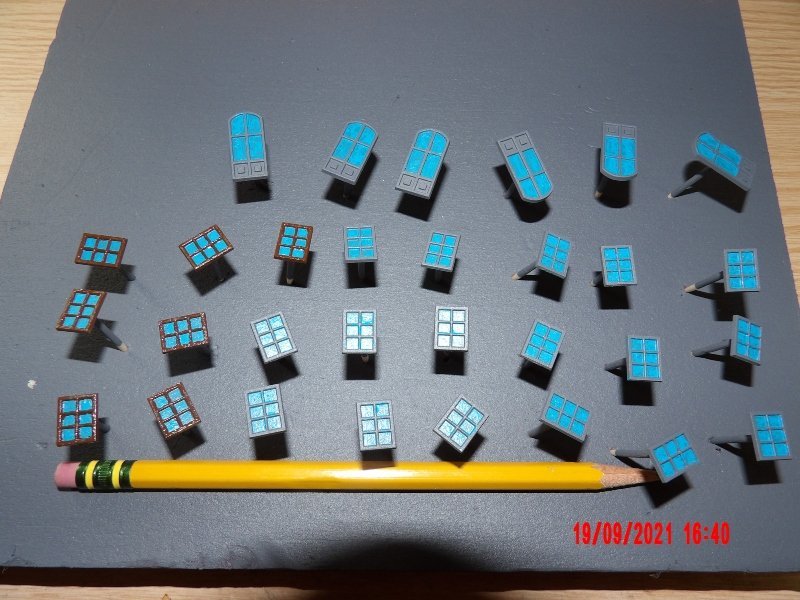
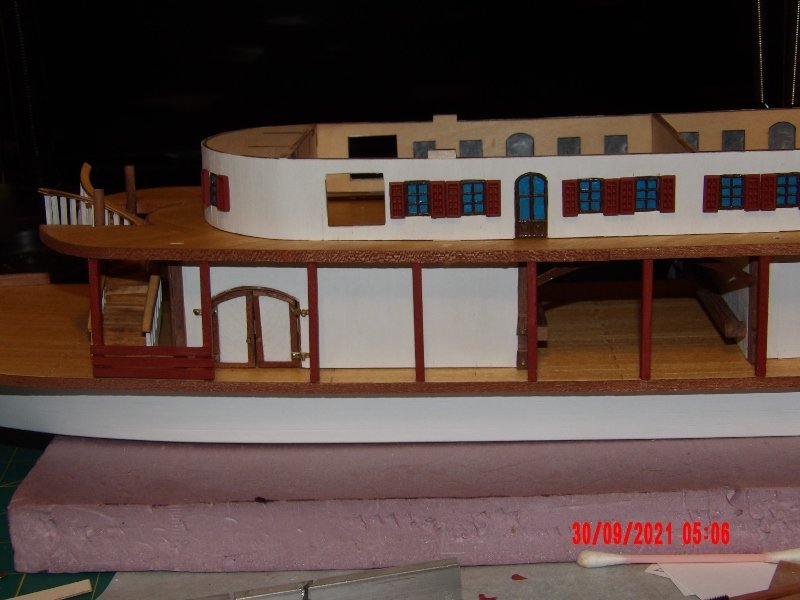
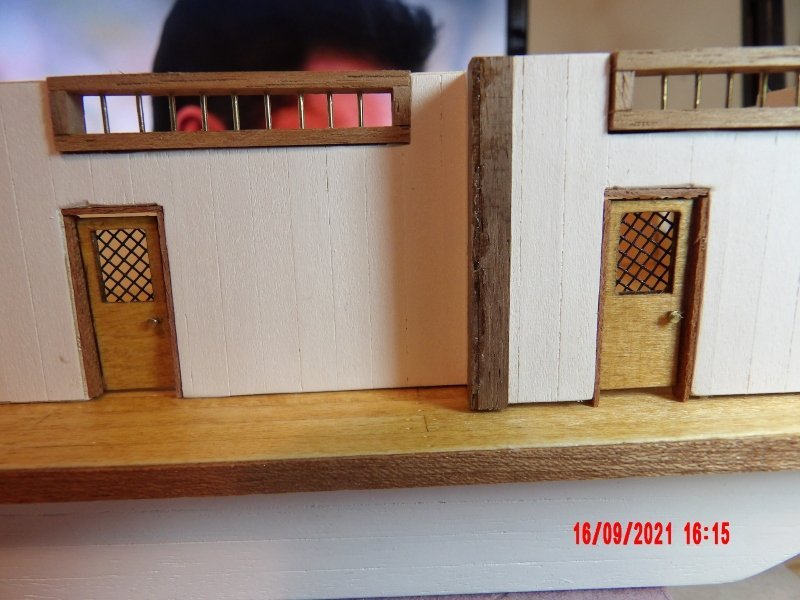
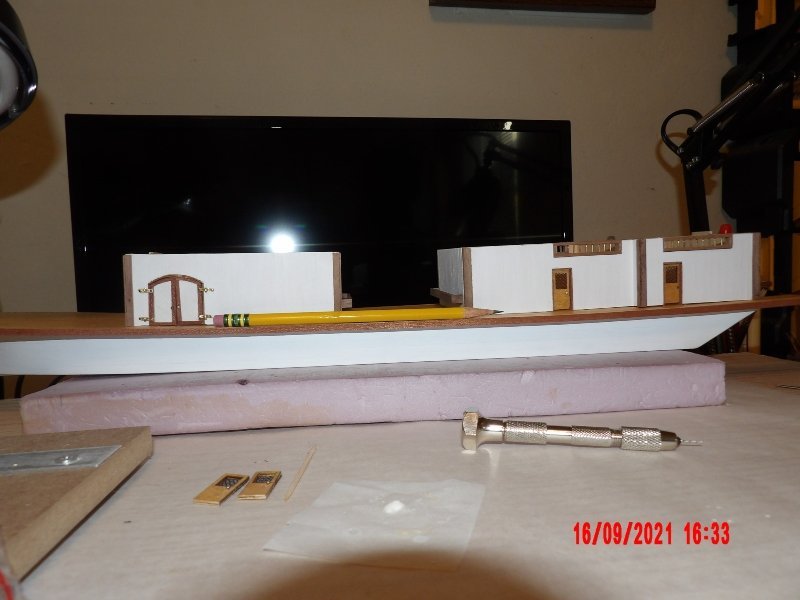
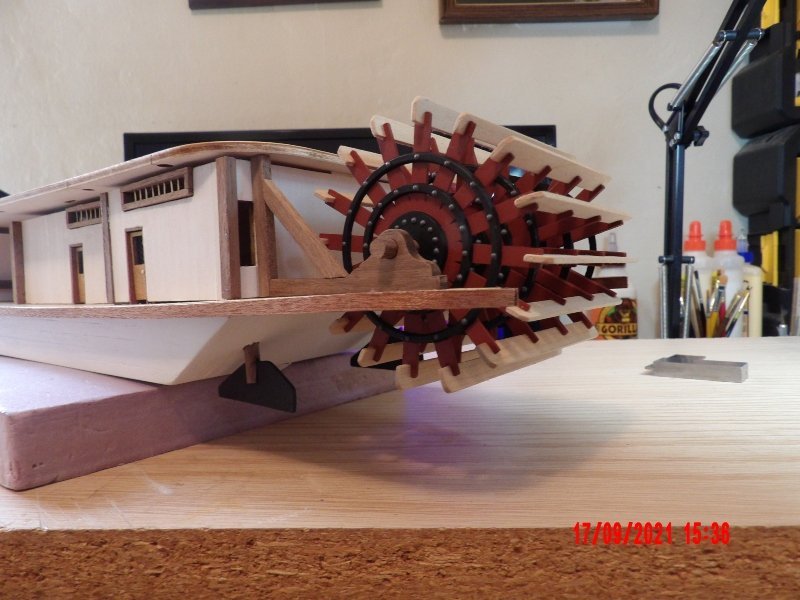
Doing some things a bit out of order with consideration (I hope), to suit my mood. . . Added the first deck buildings and then the doors. The fit of all doors was loose, so I added a backer board, which is visible through the cracks. If I were to do over (which I'm not) I would completely fill the openings with a backer painted black. I used plastic door screen material instead of the acetate sheeting for the wire-glass door windows. For the double doors, I altered the provided hinges by first bending them around a brass rod, then glued a piece of the rod to the hinge. I drilled new holes in the hinges, and cut off the excess hinge material, thus reducing the size of the hinges. Admittedly, they look a little rough, but are not as huge as the hinges as supplied. I made up the paddlewheel supports and fitted the wheel, not gluing it in, in case I need to remove it temporarily for reasons I can't foresee as yet. Installed the rudders. Getting close to installing the spiral staircases, which ought to be interesting because they did not turn out to have equal heights. . . I may have to accept a less than perfect install. Due to the curvature of the lower deck (which appears to be an intentional feature), I will need to add some closure strips at the base of the buildings and where the buildings meet the second deck (not glued on yet), but am wary of using kit-suppled material for that, as I may run out- so I am looking to order some walnut or sapelli somewhere on-line. So far, I have only found a good source from Modeler's Central- I have ordered stuff from them before, but shipping takes so long from Australia. . .
- 109 replies
-
- 4
-
-
- Finished
- Artesania Latina
- (and 1 more)
-
Looks very clean! Congrats
-
Working on the spiral staircases. My first is not perfect, and I have yet to fit the hand rails. The posts are not perfectly vertical near the top. . . The disposable pepper shaker happened to be the exact size needed for wet-bending.
- 109 replies
-
- 4
-
-
- Finished
- Artesania Latina
- (and 1 more)
-
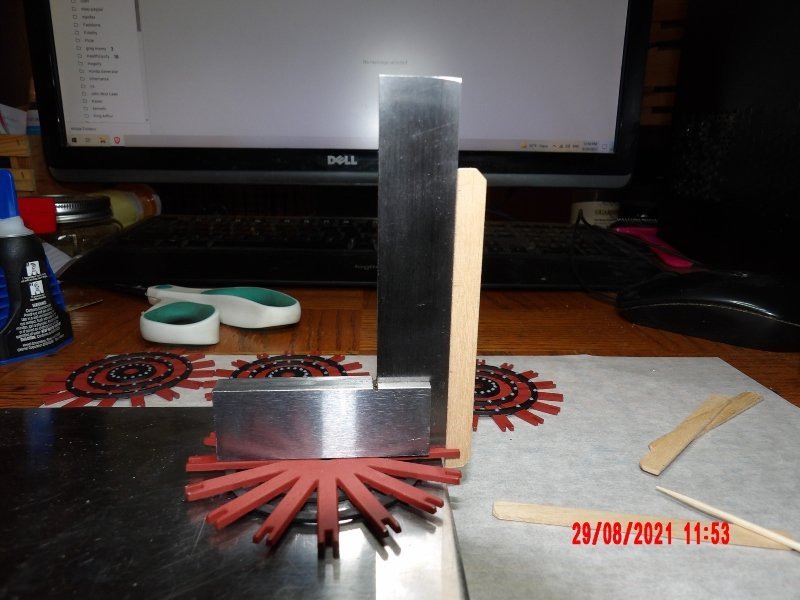
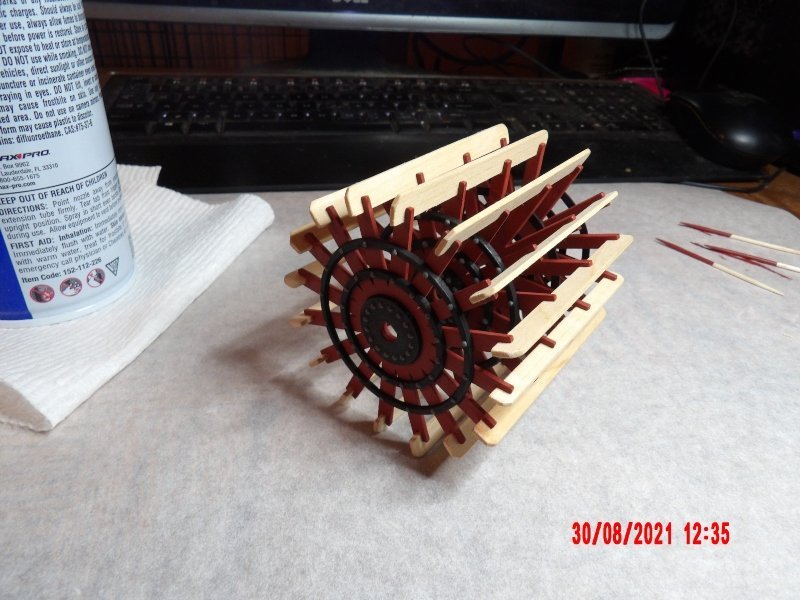
I have a new puppy in the house, as Lucy has passed- so things are going very slowly. The hobby room is not suitable, so I am restricted to things I can do on the coffee table in living room, during nap times. I finished the paddlewheels! Endless paint touchup but I called it done today. Unfortunately, one of the boards supplied for the wheels was 1mm narrower than the other two, and I had no appropriate scrap, so I used it in four places- spaced out evenly. I don't think most would notice.
- 109 replies
-
- 5
-
-
- Finished
- Artesania Latina
- (and 1 more)
-
Bob, no apologies necessary. Hey, I just put Merseyside together with Jerry and the Pacemaker's "Ferry Cross the Mersey" song. I love that one. Bob
-
Bob, I know that the lower set of holes for the chimney are covered from the bottom as the manual shows, to create a recess for mounting. The holes are still misaligned, though. Looking through your log again was time well spent. Looks really good!
-
My cat is not allowed in the hobby room! I like that drill press you've got. It looks like it can be used for milling operations as well. bob
-
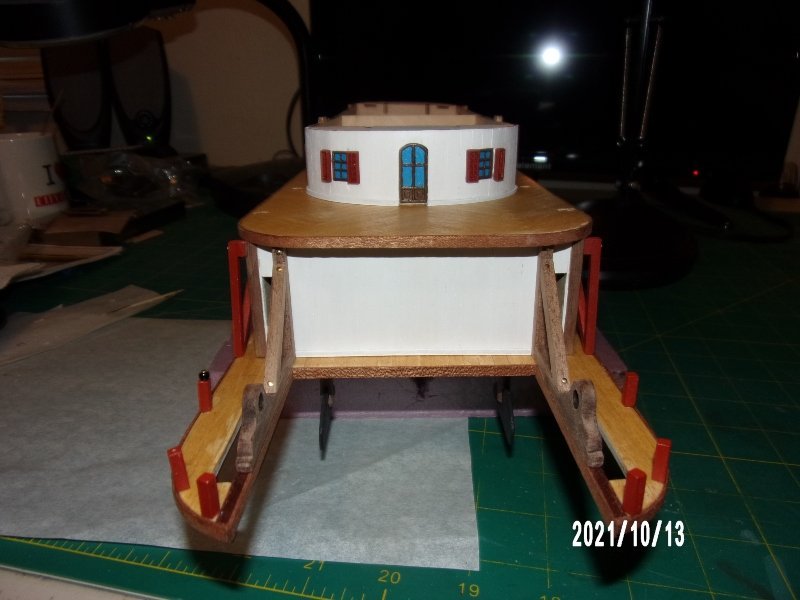
Thanks again, Bob. I reviewed your log, and I see that you do have the top staterooms oriented correctly. I will have to ignore the notches/tabs from the third deck upwards, and go by the plans. . . Below you can see the forward slant of the smoke stacks. I looks to me that the alignment of the second and third decks is correct, so I will correct the second deck holes to allow a vertical installation of the stacks. For today, though, I am going to continue with the paddlewheel painting. It is just mindless enough work for right now. I'll get back to the dimensional problems a bit later.
- 109 replies
-
- 1
-
-
- Finished
- Artesania Latina
- (and 1 more)