rfolsom
-
Posts
881 -
Joined
-
Last visited
Content Type
Profiles
Forums
Gallery
Events
Everything posted by rfolsom
-

Cutty Sark by NenadM
rfolsom replied to NenadM's topic in - Build logs for subjects built 1851 - 1900
Looking on the bright side, you discovered this before the chicken coops and stairways were installed... I really like the looks of your bulwarks; I would give some thought at where you'll be anchoring your deadeyes before you install the pinrails; I pre-drilled all holes for the deadeye posts and boat davits/ skid rail posts, as they are right up against my bulwarks. Great progress my friend, reading your logs helps kick start me into action! Cheers; ~Bob -
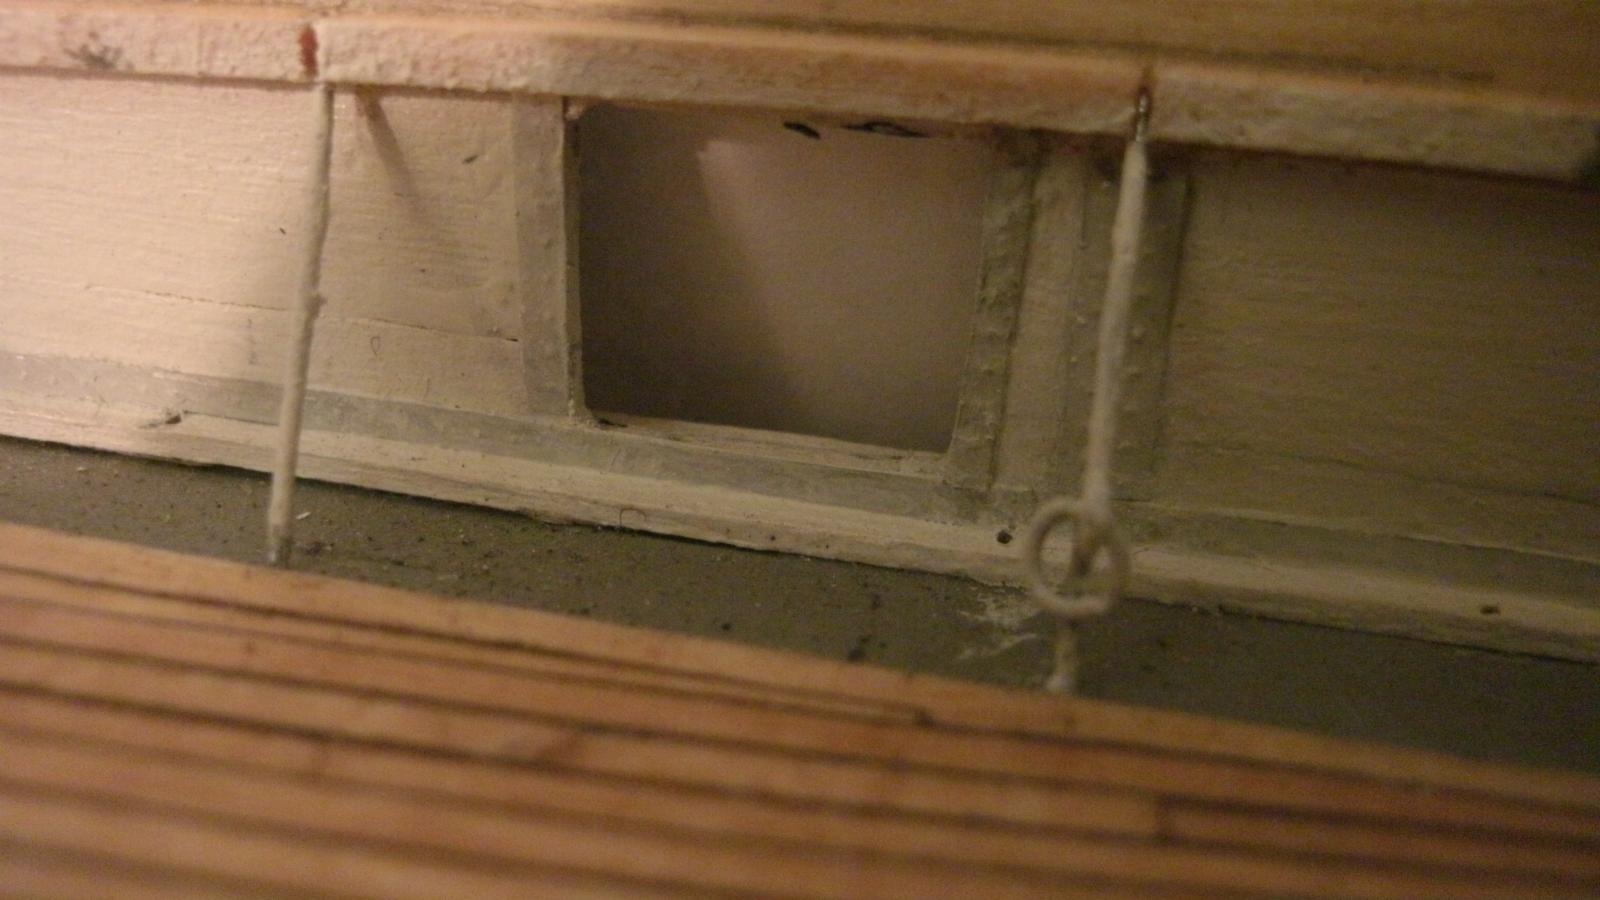
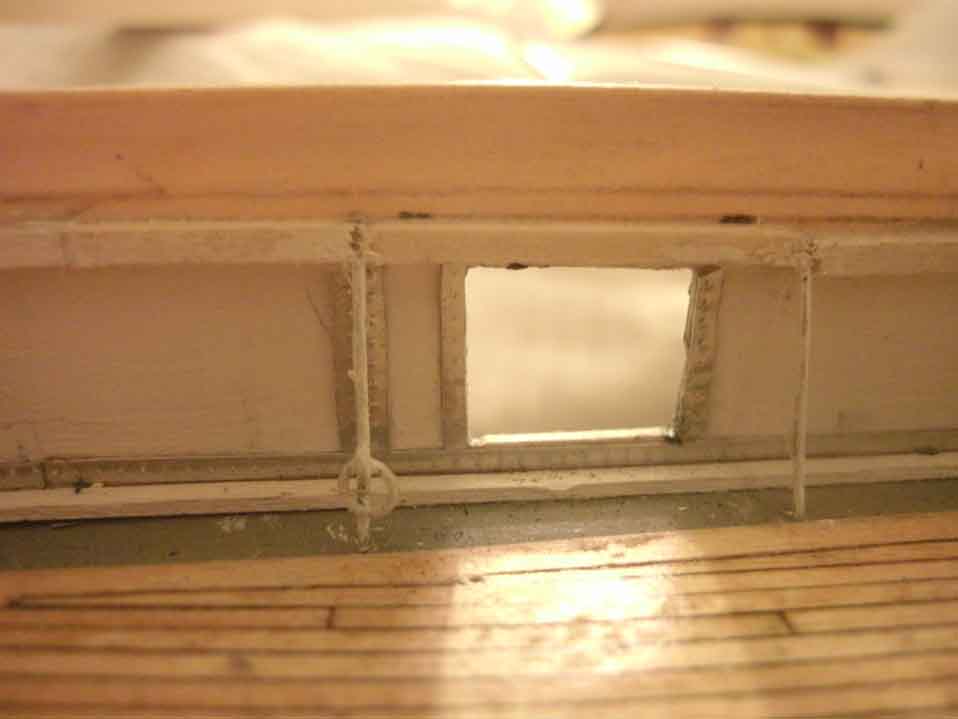
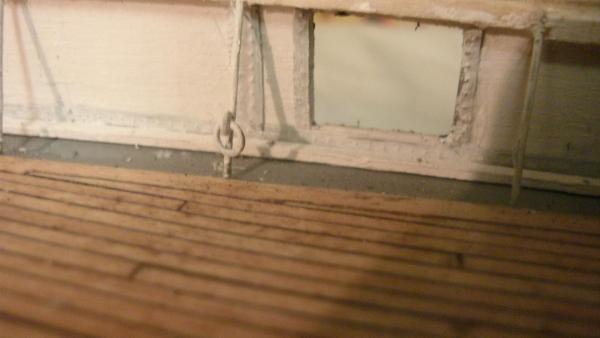
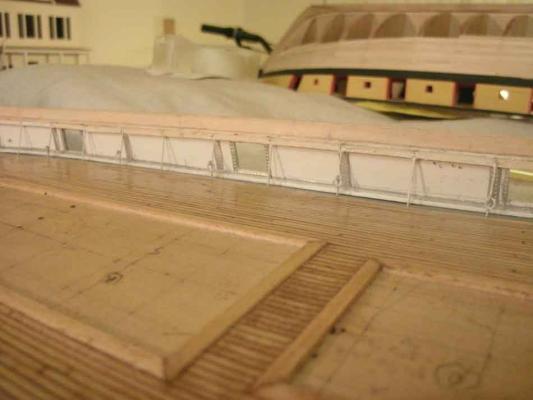
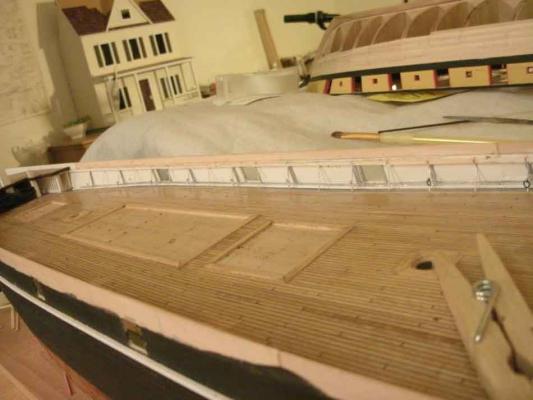
Testor's paint bring me back to my plastic modeling days... (last plastic model I made was around 1984-85). I might have to do a test with wood, my new preferred modeling medium. Speaking of paint, and acrylic, I did a paint test on my first port and starboard freeing port riveting details, and to my (slight) dismay, the first thin coats pretty much obliterate the rivets with my naked eyes. The next two pictures, however, seem to show them better than my eyes do, along with a lot of debris on the waterway and around the ports, especially seen on the second picture. Most of this debris is due to re-sanding the inside of the freeing ports and bringing black paint dust onto the deck from the exterior. I used a wide brush to clear it away, but much still remains. I must take time to swab the deck... First picture is of the first port freeing port, second is of the first starboard freeing port. Starboard inner bulwark riveting details are finished (except for painting) and port side is 75% done. Even if most of the rivets are obliterated in the painting process, I won't sweat, I can live with it. Also notice the holes drilled in the waterway trim against the bulwarks; these will receive the deadeye stays and were my compromise to actually mounting them directly to my thin, 1/32" basswood bulwarks, as on the real ship. ~Bob

-
Cutty Sark by NenadM
rfolsom replied to NenadM's topic in - Build logs for subjects built 1851 - 1900
Gotta tell you about the brick. ... You know, the one you bang yourself on the head?... Always there's a build where there's many repetitive parts, and you don't want to go any further. So sometimes you need to use the "brick" to get started again. A brick for me was the stancions I had a brick with the coppering. I need a small brick right now for the inner bulwark detailing. I am obviously speaking metaforcally; Kids, don't use bricks to kickstart the thinking processs..... Stancions look excellent! Nenad's bricks should be safe- 4,152 replies
-
- 3
-

-
- cutty sark
- tehnodidakta
- (and 1 more)
-
Beautiful planking; Please think twice before coppering! ~Bob
-
Nenad; I have been using Model Expo's acrylics, but I have been less than satisfied.... I may need to water them down and apply many thin coats... This is something I'll have to face very soon. As I told my friends at my other build: ("It looks like dried mud on a tree trunk")
-
Thanks for the positive input, my friends; I am hoping things look ok when painted... ~Bob
-
Cutty Sark by NenadM
rfolsom replied to NenadM's topic in - Build logs for subjects built 1851 - 1900
Yes, and always melt the solder with the wire being soldered, not the tip itself. If the solder is not melting upon contact with the wire, the wire is not hot enough. ~Bob- 4,152 replies
-
- 1
-
-
- cutty sark
- tehnodidakta
- (and 1 more)
-
I especially like the outside bulwark plating details, and how their effect is still seen after painting. What is the thickness dimension of your bulwarks, and what do you use to plate the outsides, if you don't mind me asking... Also, your ship's scale? Awesome job!! ~Bob
-
Cutty Sark by NenadM
rfolsom replied to NenadM's topic in - Build logs for subjects built 1851 - 1900
Sleep is the best remedy for a tired body; when the body needs it, it will take it. I like to start dinner and then put a movie on while it's cooking; then we watch the movie and eat dinner; The Admiral will then unfailingly go to bed, and I can go Hmmm.... with the build. only problem, (Then I get tired and go to bed.....)- 4,152 replies
-
- 1
-
-
- cutty sark
- tehnodidakta
- (and 1 more)
-
Cutty Sark by NenadM
rfolsom replied to NenadM's topic in - Build logs for subjects built 1851 - 1900
Nenad; In my experience I planked the deck first, (actually before the hull and bulwarks) and the only problem I've had (so far) was some marring of the deck when squaring the bulwarks (easily fixed). I think either way will be fine. I love the look of your rivets, and am looking forward to seeing the stanchions in place with the decking! ~Bob- 4,152 replies
-
- 1
-
-
- cutty sark
- tehnodidakta
- (and 1 more)
-
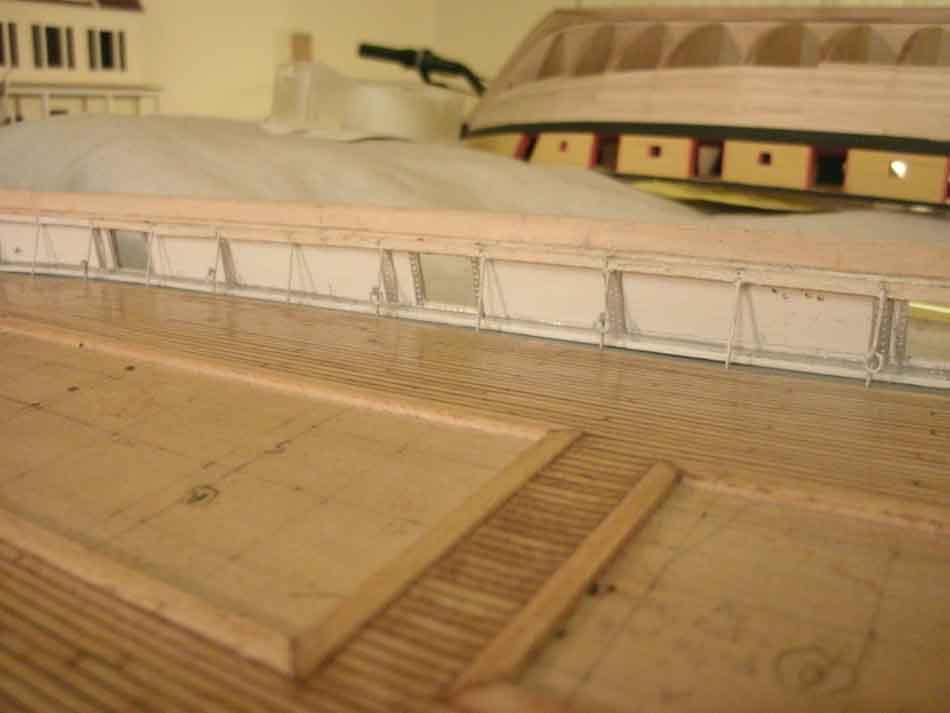
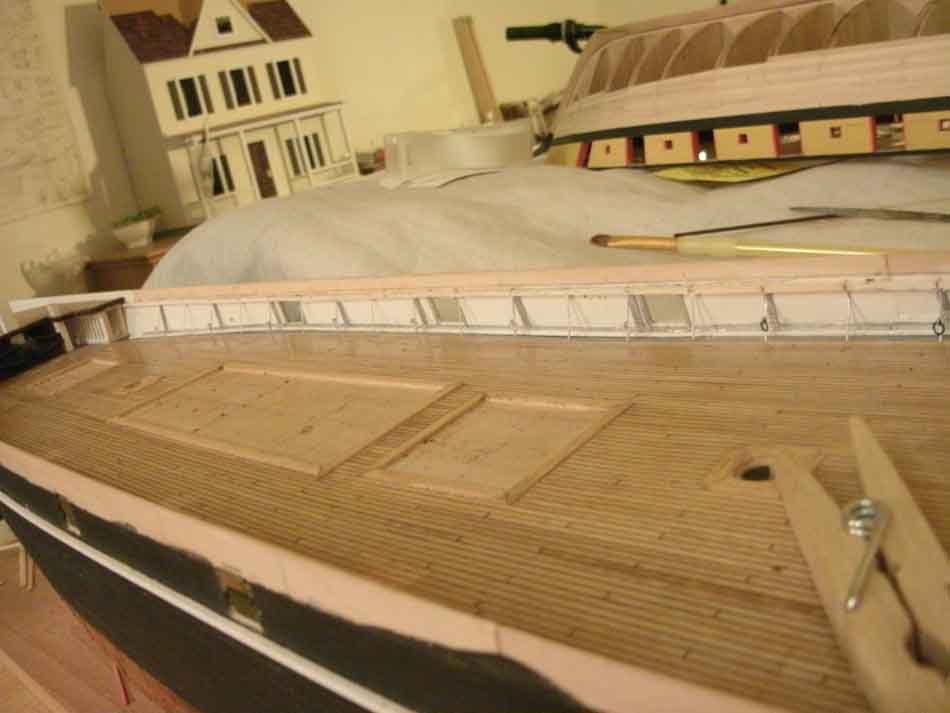
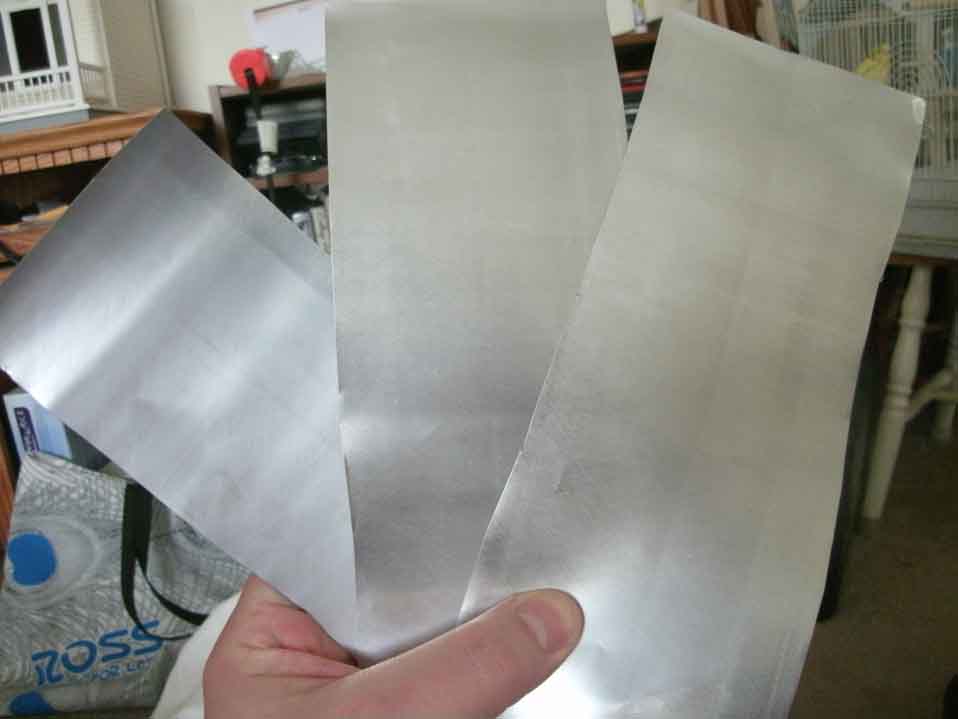
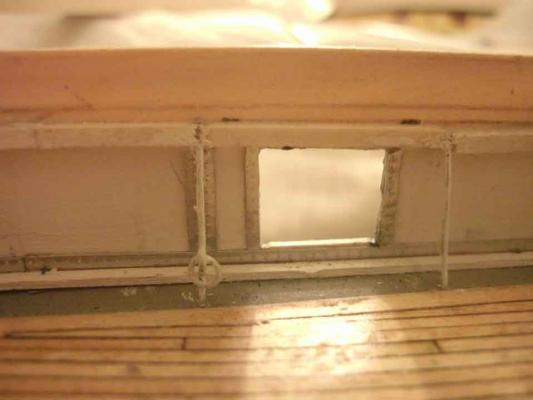
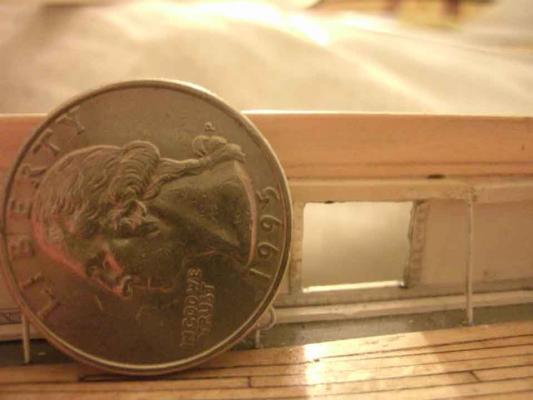
Thanks for the positive input, gentlemen; Thanks again to Nenad for helping my laziness in adding details. I'm not putting as much time as I'd like into the build right now, but I am making slow (SLOOOW....) progress. (Slow progress is still progress, right?) What I found surprisingly cool is that adding these aluminum rivet strips around the freeing ports is making my thin 1/32" basswood bulwarks noticeably stronger, as when I added the stanchions. Starboard side rivet strake is laid, and verticals along the outside of the first three freeing ports are done, as well as some of the rivet panels behind the stanchions.
-
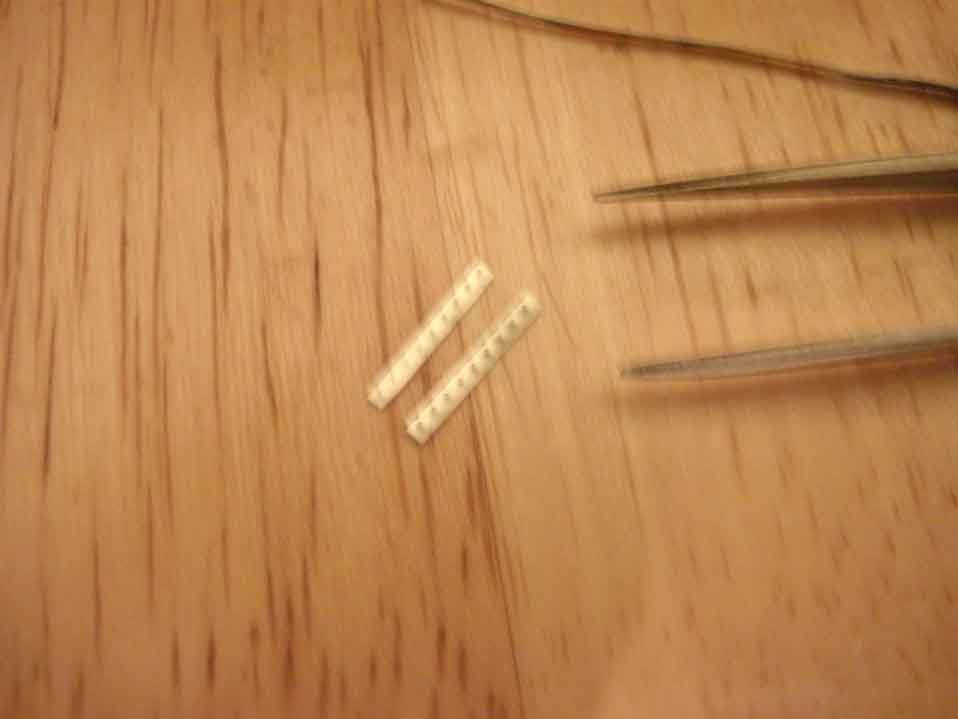
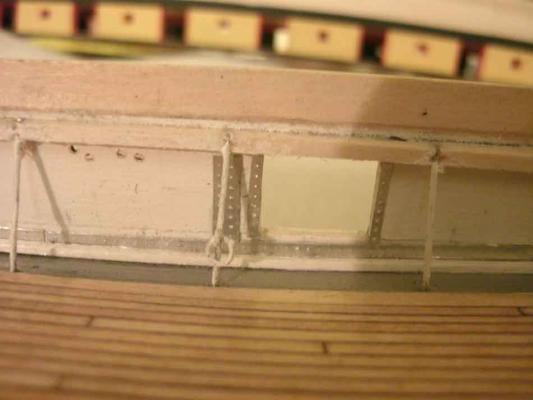
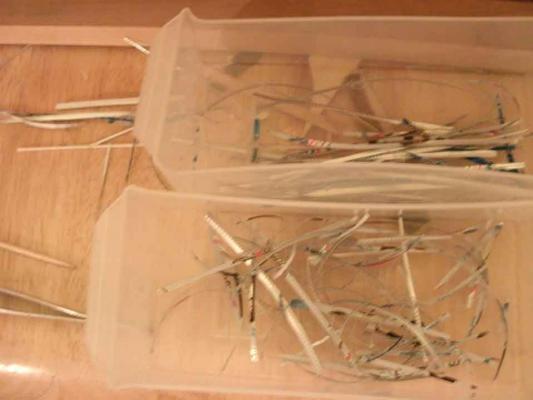
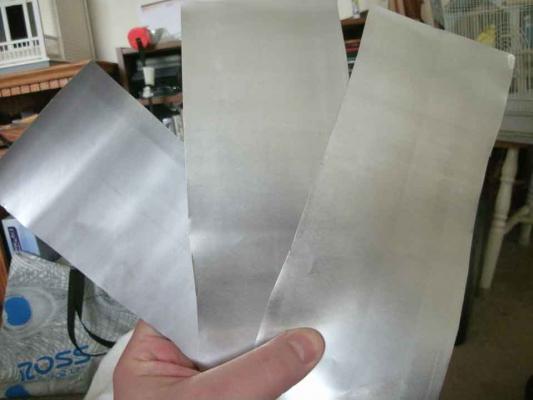
I've finally made some (small) progress on the build. Progress meaning actually affixing parts to the ship, and not just playing around with aluminum cans. After several days of cutting thin (0.5 - 3.0 mm) strips of aluminum, and embossing these with a ponce wheel, I finally decided to actually start fitting some of the better looking ones to the ship, starting with the inboard sheer strake to bulkhead riveting, and then the vertical reinforcements around the freeing ports. One inboard port is done.

-
Cutty Sark by NenadM
rfolsom replied to NenadM's topic in - Build logs for subjects built 1851 - 1900
Nenad; How are you forming your stanchion rings? I twisted mine around a drill bit and pulled taut with two pairs of pliers. This seemed to form a consistent ring. Looking good so far; eager to see more.... Bob -
Cutty Sark by NenadM
rfolsom replied to NenadM's topic in - Build logs for subjects built 1851 - 1900
Nenad, I experimented with the transverse member (position 1) and found out it was not worth the time and effort for me. If you could find a "lattice" of the correct wire diameter, such as a screen, you might be able to cut T -shaped pieces out of it.. -
Nenad; going over Lou's construction details for the CS, His references say the ports are actually 32.5" x 26.5", which is 10.75mm x 8.75mm at my scale, and at your scale (1:96) it would be 8.6 mm x 7 mm, which seems pretty close....
-
Nenad; From centerline of mizzen mast to centerline of main mast on my actual build, it is 21.3 cm. On campbells plans it is 12.7 cm. Campells scale is 3/32" = 1 foot. Mine is 5/32" = 1 foot. I multiply all distances (on plans) by 1.66667 to get my actual build plans. I did not have a scale on my kit, and spent several days measuring pre-cut parts and comparing them to my campell's plans to find my actual scale, before I commenced building. At 1:96 scale, your build would be 0.8 times my build, and the mizzen to main centerline distance should be right at 17 cm. Hope this helps.. Bob PS, What is your actual centerline distance between mizzen and main masts?
-
Nenad; I just re-read your post (#229) and actually my scale is 1:76.8, so I have to scale up Campbell's plans by 166.67% which makes my freeing ports 10mm. Daniel; I'm just going to have to buy some epoxy and start the experimentation process..
-
Cutty Sark by NenadM
rfolsom replied to NenadM's topic in - Build logs for subjects built 1851 - 1900
Stanchion tests are looking good, Nenad; I'm still playing with my Al rivet strips and experimenting with cutting freeing port lids. Hope to have some progress shortly... Looking forward to seeing how your stanchions look with all your inner bulwark detail! Bob -
Nenad; I am not familiar with soldering! I can solder through-hole electrical devices on a PCB, but not structural components... Working with metal is an entirely new learning curve for me in this hobby. Marc; I had success in my initial tries with CA on aluminum. However, I believe the Al (from cans) is coated with some sort of polymer that might help the bonding of the CA. I'm sure epoxy is a better way to go, especially with pristine metal surfaces. I have never used epoxy (yet) but my father used it all the time before the days of CA. His hobby was O-gauge steam locomotives, so more metal work..
-
Cutty Sark by NenadM
rfolsom replied to NenadM's topic in - Build logs for subjects built 1851 - 1900
Ordered tweezers from Ebay...- 4,152 replies
-
- 1
-
-
- cutty sark
- tehnodidakta
- (and 1 more)
-
Cutty Sark by NenadM
rfolsom replied to NenadM's topic in - Build logs for subjects built 1851 - 1900
Yes, Nenad; Popeye says it all... Even though my stanchions are in place, I now want to emulate the inner bulwark riveting, as you have... I'll have to work on this... Excellent progress, my Friend! ~Bob- 4,152 replies
-
- 1
-
-
- cutty sark
- tehnodidakta
- (and 1 more)
-
I'll be fabricating the freeing port covers out of sheet aluminum, (aluminum cans) with ca affixed hinges made out of the same. If this is the wrong way to go, please let me know! Cheers, ~Bob
-
I agree totally, Nenad. I am surprised that I made it through the coppering process without giving up.... Many days of coming home and sitting at the bench, cutting 30-40 tiles, then putting rivets on them, peeling the backing, affixing, etc. etc. But it was relaxing, and my mind could wander, and I could put on some music or an old movie and just lose myself... I would never be able to do this in a factory, for weekly wages; I would probably jump off the roof....
-
It's great progress you're making, Nenad; It seems like everyone stopped (in my other build, too) but you keep going on.... Don't worry, I'll join you soon; I have many rivet strips to affix.....
-
Thank you; Daniel, for the nice words; I'm working on getting things up and running again.. ~Bob