HOLIDAY DONATION DRIVE - SUPPORT MSW - DO YOUR PART TO KEEP THIS GREAT FORUM GOING! (Only 36 donations so far out of 49,000 members - C'mon guys!)
×


rfolsom
-
Posts
881 -
Joined
-
Last visited
Content Type
Profiles
Forums
Gallery
Events
Everything posted by rfolsom
-
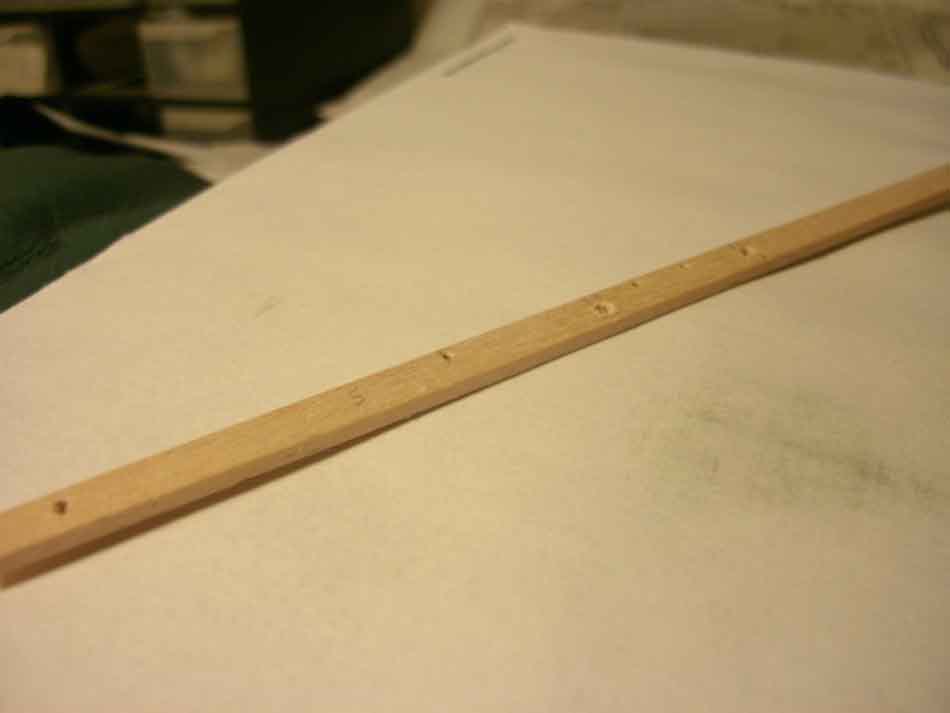
 Belaying pin holes are drilled very close to the inboard edge, The larger deadeye holes are approximately centered (Even larger Davit holes being more outboard). I fabricated a small concave sanding block by cutting a 1 cm length of plastic tube from a writing pencil in half lengthwise, and affixing a small piece of 400 grit sandpaper to the inside surface. This works well for rounding the rail edges without disturbing the belaying pin holes. ~Bob
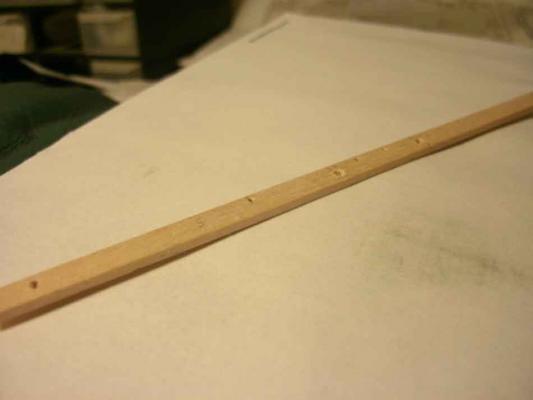
-
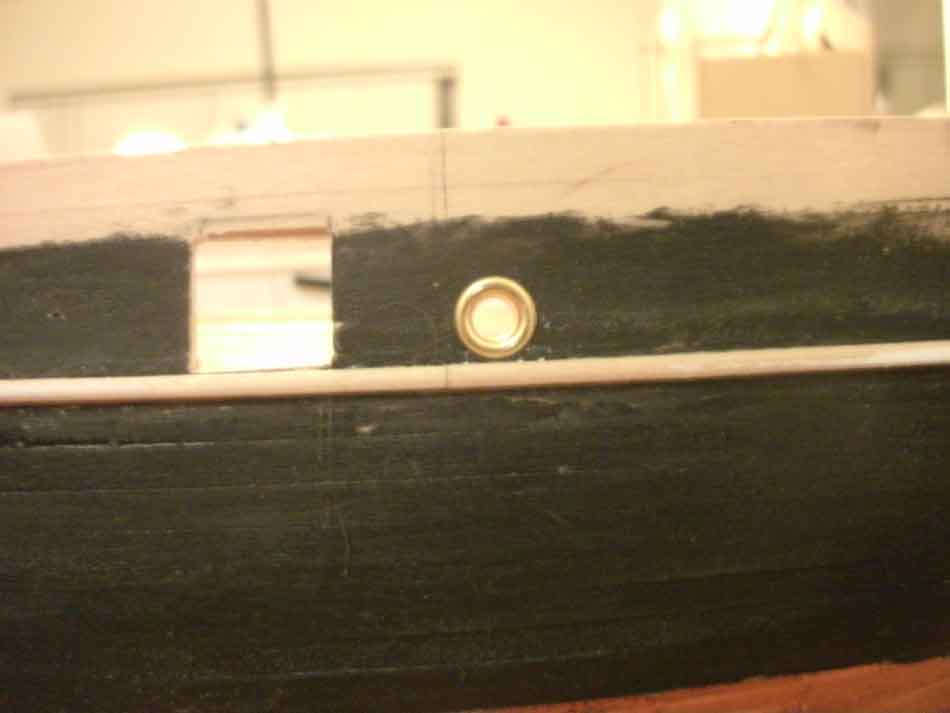
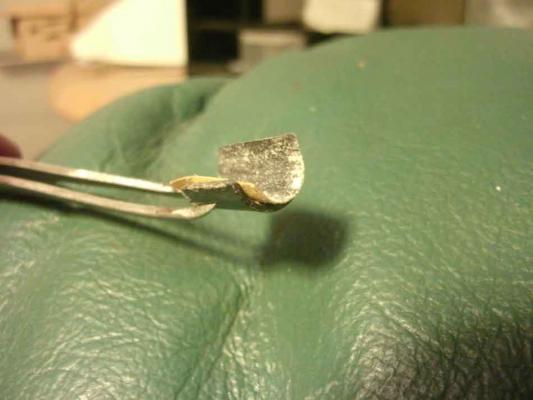
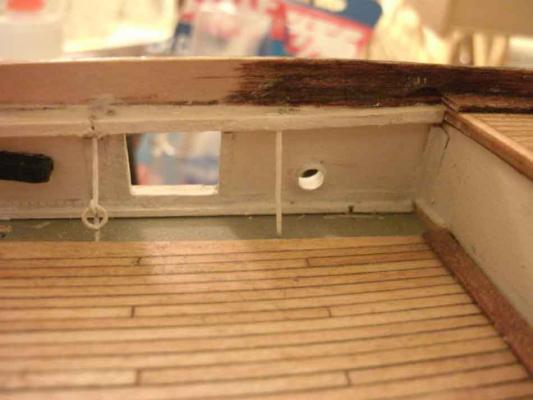
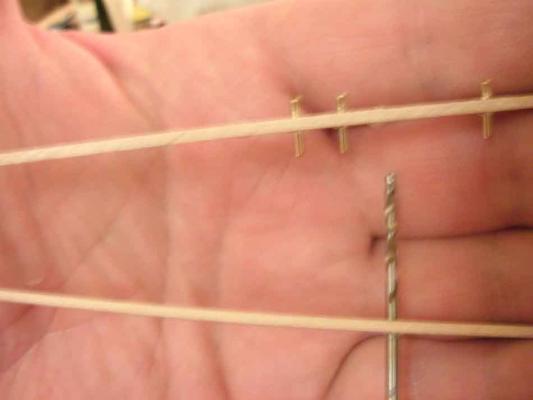
Ok. Stanchions have been done. All holes for deadeye strops and davits are drilled. Most of my pinrails have been drilled and roughed out, so I'll start installing pinrails on the main deck moving from aft forward, adding inner bulwark details as I progress. First (low quality, sorry..) photo shows the pinrail section from the poop front bulkhead moving forward. I've built these in sections, and these were the easiest to rough out. (One deadeye hole, three belaying pin holes, and two davit holes apiece). plus two perpindicular eylet holes... One side shows belaying pins in place for scale, the other shows the drill bit I will use to align the pieces with the pre-drilled davit hole in the waterway. Second and third photos show my latest, small, pathetic, progress. The aft mooring pipes. As I mentioned before, I am using round brass pieces as opposed to oval ports, which I cannot find. (Or fabricate!) I can live with this... (I hope) Outside rims will be painted black, inside rims painted white. (one inside already painted)

-
Cutty Sark by NenadM
rfolsom replied to NenadM's topic in - Build logs for subjects built 1851 - 1900
...And don't forget the tassles, bell, and Hello Kitty basket!- 4,152 replies
-
- 2
-

-
- cutty sark
- tehnodidakta
- (and 1 more)
-
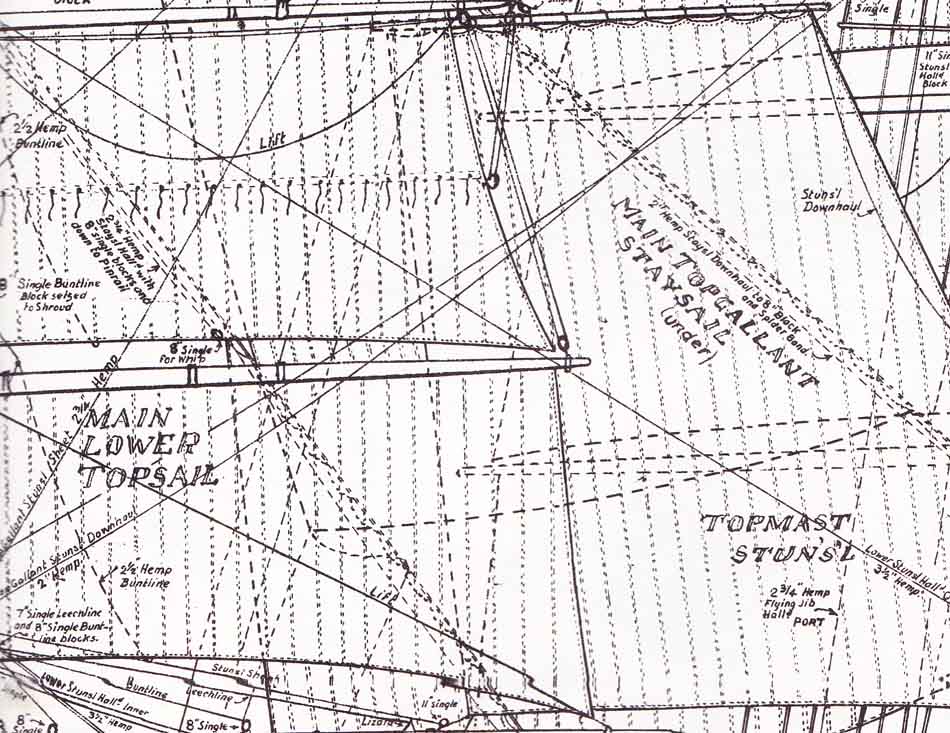
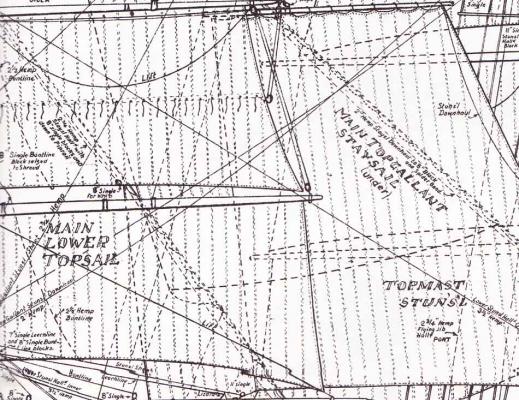
Nenad; my plans are in paper version, and I was lucky enough to receive two copies each in my 30-40 year old incomplete kit purchased off of ebay. I can read the small print ok on all sheets. One set of plans is mounted to my wall for quick reference; the other set I keep safe and copy sections for enlargement and printing in photoshop as needed. Here is a sample from sheet three for your reference; hope this helps... ~Bob
-
Patrick; Congratulations, fine work indeed! The Niagara is my prerequisite for building the Conny; In my teens I did Revell's Constitution and Cutty Sark. My current Cutty is an old Billing's Boat kit that is being around 90% scratch built. I plan to finish the "big three"... Cutty, Conny, and Victory. I'll also purchase the MS Constitution kit, but when it comes time for the Victory, I plan on 100% scratch build. Looking forward to seeing your Conny posts; (maybe my Niagara will be done when your Conny is...) ~Bob
-
Bravo! When it comes to the figurehead and scrollwork, I have no idea whatsoever how to proceed... I am not a sculptor, or an artist, and I think I would fail at this task... ~Bob
-
David; Thanks for the nice words; I do not have Longridge's book; I rely on a set of G. Campbell's plans, along with his book "China Tea Clippers". Since most of my hull and decking are already finished, do you think it would still be worth investing in Longridge's book for the spars and rigging? BTW, both Nenad and myself would really enjoy seeing some pictures.. ~Bob
-
Bob- To which details were you referring? Nice progress, btw... ~(the other) Bob
-
Cutty Sark by NenadM
rfolsom replied to NenadM's topic in - Build logs for subjects built 1851 - 1900
Well, Nenad, I hope your hand is ok. i -
Cutty Sark by NenadM
rfolsom replied to NenadM's topic in - Build logs for subjects built 1851 - 1900
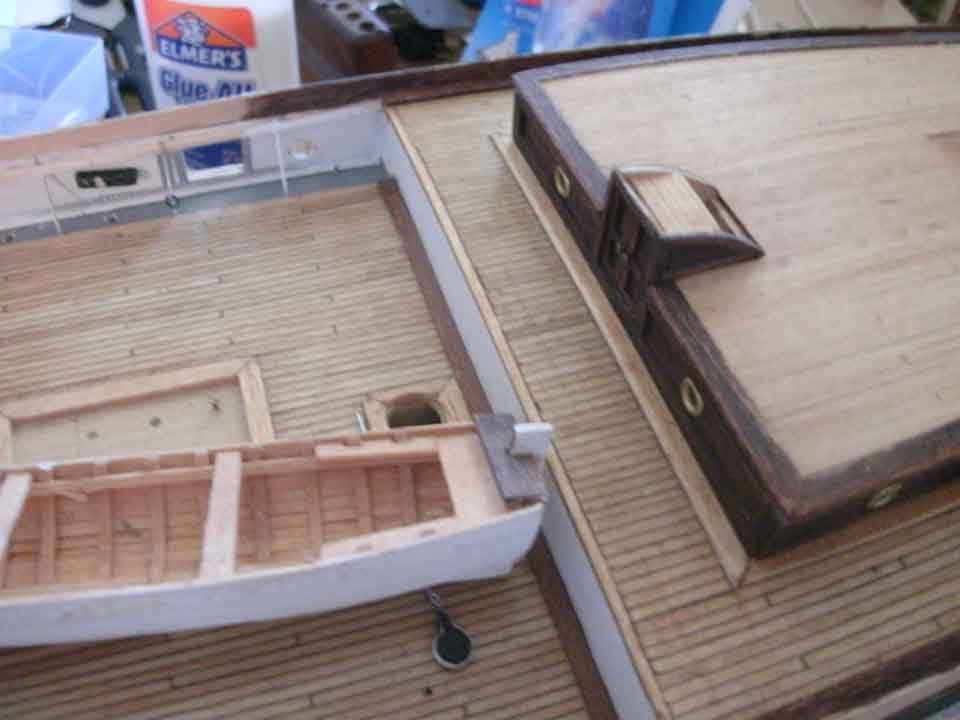
Nenad: I know these colors are somewhat off-base to your solution, but I'll show you the colors I chose. (The ship's boat is not for the Cutty, it's just an experiment). My stains are all from Minwax: The ship's boat interior is Golden Pecan, which has a slight pinkish hue that you may be looking for. It is not overcoated. My deck is Ipswitch Pine, coated with polyurethane. The top of the deckhouse is also Ipswitch Pine, but appears (disturbingly) different from the main deck, even though the stain is from the same can. It has not been overcoated yet. The trim and deckhouse sides are all red mahogany, which in retrospect is a little too dark for my taste, but I won't be reworking the finished hatches and deckhouse already made. (I can live with this..) I know how you feel when your mind gets "saturated" with all the choices, and starts to go numb... Hope this helps a little... ~Bob
- 4,152 replies
-
- 1
-
-
- cutty sark
- tehnodidakta
- (and 1 more)
-
Cutty Sark by NenadM
rfolsom replied to NenadM's topic in - Build logs for subjects built 1851 - 1900
I think I'd go with no. 3. It looks close to many of the pre-restoration photos out there. I chose a lighter color for my deck more for my personal preference than historical accuracy. Everything looks great, by the way. Looking forward to your next steps... ~Bob -
Cutty Sark by NenadM
rfolsom replied to NenadM's topic in - Build logs for subjects built 1851 - 1900
Nenad; I like the tests you're doing; Mahogany is a great wood; my kit came with enough strips to plank the entire ship, but I found the mahogany grain to be too out-of-scale. On another note can you tell me what this means from your last post? ( also to the North Pole to be settled by grasshoppers, and to have 25 years again, and to ... ) ~Bob- 4,152 replies
-
- 1
-
-
- cutty sark
- tehnodidakta
- (and 1 more)
-
Very nice work, Patrick! Are the ship's boats the kit "bread and butter" or did you scratch build?
-
Cutty Sark by NenadM
rfolsom replied to NenadM's topic in - Build logs for subjects built 1851 - 1900
Stanchions look great! Are you doing the pinrails next? Once I'm done painting the lower bulwarks, I'm going for the pinrails.. ~Bob -
Niagara's motto; "Don't Give Up The Ship" extrapolate to the build...
-
Nenad; It is worse in my other build. Some people I talked to every day I haven't heard from in months. The exception is Patrick, who is about to finish the US Brig Niagara
-
So, their's just four of us left?
-
Yep, this is why I'm asking opinions; Thank you, Nenad; I'd like to hear from Lou and Dognut.... and what happened to Spencer??
-
Great work on the stanchions, I opted not to put in the horizontal crossmember; Yours look great! ~Bob
- 121 replies
-
- 1
-
-
- cutty sark
- artesania latina
- (and 1 more)
-
I wish you a speedy recovery; It's always a bad thing when life and limits of the human body prevent us from doing what we love doing. All the Best; ~Bob
- 237 replies
-
- 2
-
-
- cutty sark
- revell
- (and 2 more)
-
Nenad; if you read Lou's post on Luca's log, he mentioned that the deadeye posts were probably anchored to the sheer strake originally, which would coincide with my choice of not mounting them onto the bulwarks (I don't have that choice, either way). And yes, we have a h*** of a lot of work ahead! But I look at each step as a milestone. Tonight (actually about 15 minutes ago) I finished the inner bulwark riveting details. I have pieces of shredded aluminum cans all over the place. (One, complete with simulated rivets, was stuck to the bottom of my bare foot as I walked to the bathroom, but the job is now done). It would be really cool if we all stay in touch for the years it takes us to finish our builds....(or years to the power of years..) Maybe at that time we could all meet somewhere and drink a toast to our accomplishments!!
-
A survey for the CS fleet (and everybody else); please put in your votes: Should the waterway be grey, or reddish-brown (rust?) color? Mine is already grey, but I like the looks of those who chose the red. In this, I'm not looking for historical accuracy, per Se, just everyone's opinion on the color. Please give your honest opinion (I trust the wisdom of the masses) as it's not a big deal for me to repaint right now. A month from now it will be... Thank you for any and all input. ~Bob
-
Whoops! I guess I rowed over to an enemy merchant vessel! Luckily my time machine transported me some 56 years into the future...
-
Thanks for the kind words, everyone! Niagara is on hold for now as I am working on my Cutty Sark. I'll soon run into a tight spot with her, and return once again to the Niagara, with posts, of course... "Don't Give Up The Ship" (but it's ok to row over to another for a small break....) ~Bob
-
Awesome build, Patrick! I'll be consulting the flag ideas when I reach that point (hopefully before 2020). I've put my Niagara build on hold for awhile to focus on my Cutty Sark. If you don't mind me asking, did you print directly to the foil, or use a printed decal/transfer or paper? Keep up the great work! (not like there's much left) ~Bob (rfolsom)