rfolsom
-
Posts
881 -
Joined
-
Last visited
Content Type
Profiles
Forums
Gallery
Events
Everything posted by rfolsom
-
 I like your idea, Nenad, and I would like to find a torch like that..as an electrical engineer, I have no problem soldering wiring and components, etc... But structural soldering is a learning curve for me.....
 -
Cutty Sark by NenadM
rfolsom replied to NenadM's topic in - Build logs for subjects built 1851 - 1900
Nenad; I too was concerned about stanchion 7. However, I was able to find a picture on the internet of the exact area, and found that the stanchion is indeed present. I'll try to find the picture I referenced and send you a copy of the link. Thank you, Lou and Sailor for the measurement details. ~Bob- 4,152 replies
-
- 1
-

-
- cutty sark
- tehnodidakta
- (and 1 more)
-
Cutty Sark by NenadM
rfolsom replied to NenadM's topic in - Build logs for subjects built 1851 - 1900
Nenad, I really like the effect that you've produced with the riveted lines surrounding the freeing ports. This is where I will be be at the moment...- 4,152 replies
-
- 1
-
-
- cutty sark
- tehnodidakta
- (and 1 more)
-
Cutty Sark by NenadM
rfolsom replied to NenadM's topic in - Build logs for subjects built 1851 - 1900
Ok, Nenad; no more whining for me. Now I need to ask you a question, (and Lou). The bulwarks were made of sheet iron that were riveted together. Does anyone know the dimensions of the sheets? Also, any dimensions on the rivets and the spacing between them? None of this is apparent in Campell's plans (my bible). Thanks, guys, ~Bob -
Cutty Sark by NenadM
rfolsom replied to NenadM's topic in - Build logs for subjects built 1851 - 1900
Good progress, Nenad. Your second picture looks like me in the mirror... I think the winter doldrums is affecting everyone; nobody has posted for awhile on my other build log (including me) and I have to push myself to do any work. Colorado weather is very weird; four days ago it was almost 70 F, and the next day we had a foot of snow. A day later it was 65 F and all the snow melted, and today it's 19 F and has been snowing all day long.... -
Nenad; I was very (pleasantly) surprised at how strong these thin bulwarks became after the addition of the stanchions and "stanchion rail". Indeed, I cracked them several times during the coppering process when the hull was inverted. I would advise coppering your hull before doing the inner bulwark details such as the stanchions. ~Bob
-
Luca; A. Latina makes some fabulous kits, but they are not meant to be exact scale models of the real ship. The Latina kits are made with many exotic woods that would never be used on the real ship, and it would be a shame to cover up the wood with paint and copper. However, if you want to make an accurate representation of the C.S., that's exactly what you'll have to do. My 40+ year old billings kit came with many strips of mahagony for planking, but I opted to purchase basswood, as the texture scales better, the wood is more flexible, and it's much cheaper. If I owned the A.L. Cutty, I would probably just build her right out of the box, following A.L.'s directions to the letter. I would have a fine, beautiful model of Her, but it wouldn't be exactly accurate. This is where you should decide either kit, or scale, or a compromise. If you choose A.L, I wouldn't worry about copper or paint. If you choose an exact replica, purchase one good set of plans (Campbell's) and take all of your serious measurements from them, and shape any inaccuracies from your kit accordingly. Above all, remember this is a hobby, it's fun, a stress reliever, (not a stress causer), and your build is YOUR build, and you can do what you want, just as long as it makes you happy! Progress looks excellent, BTW... ~Bob
- 121 replies
-
- 1
-
-
- cutty sark
- artesania latina
- (and 1 more)
-
Luca; Thank you for the kind comments; as far as the poop decking goes, I am satisfied how I planked around the curved deckhouse and the outer planking following of the curvature of the hull: however, my planking immediately aft of the deckhouse is an inaccurate compromise using plank "wedges" (for lack of a better term). I hope to hide this with the steering box. These planks should have been individually tapered in this area. The deck is made of individual 1/16" x 1/32" basswood planks edged with a black fabric marker (tested many methods, this one is the best, in my opinion, no bleeding, and well defined lines that remain after sanding) stained with Minwax golden oak, and sealed with Minwax spray polyurethane clear gloss. And yes, I did use gloss, as I am not sure if I will be casing the model upon completion, so the dust will hide any excess sheen. (Plus, it's what I had on hand from my miniature furniture building, and I'm too cheap to spend another 8 bucks on satin....) ~Bob
-
Hello, Nenad. I plan on affixing these with CA glue. I'll have to test this on my test piece first, along with the paint, but I think it should be OK. Nails would have to be very small indeed, and I don't like drilling through aluminum, and my bulwarks are only 1/32 inch thick basswood. I have to do a little testing and research using Lou's photos (Thank you Lou) before I get underway with this detail step. I probably won't do the riveting details on the inside of the bulwarks, as all my stanchions are in place already, and the detail will probably be lost after the main rail, with belaying pins, ropes, etc. are in place. ~Bob
-
A.L. Swift.. Great looking model of Her. Welcome to the CS fleet! I believe you are doing the only AL Cutty on the forum; it'll be watching! BTW, copper plate dimensions were either 14 or 20 inches in height, by 48 inches in length. 20 inches in height on side and bottom of keel. 14 inches elsewhere.. Bob
-
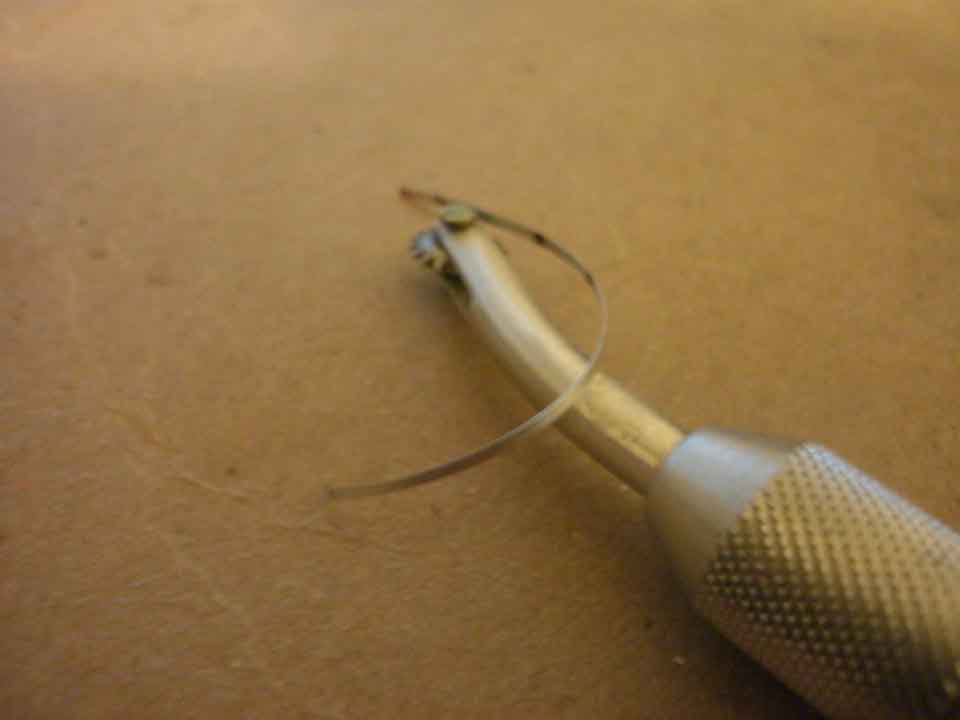
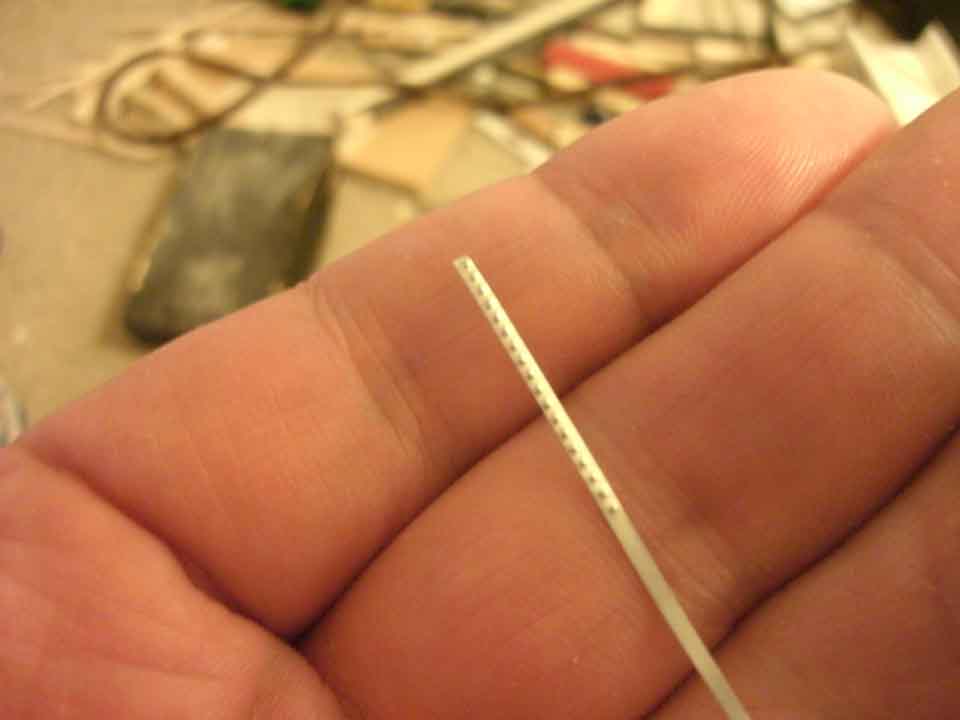
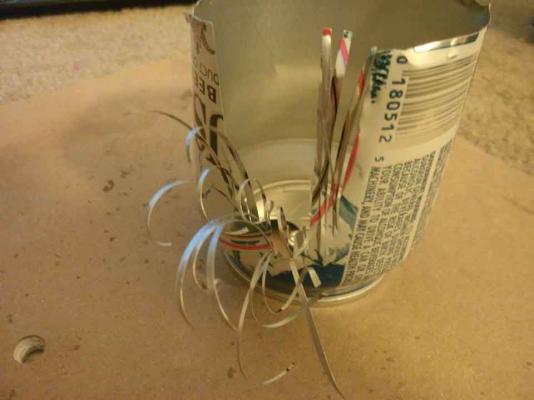
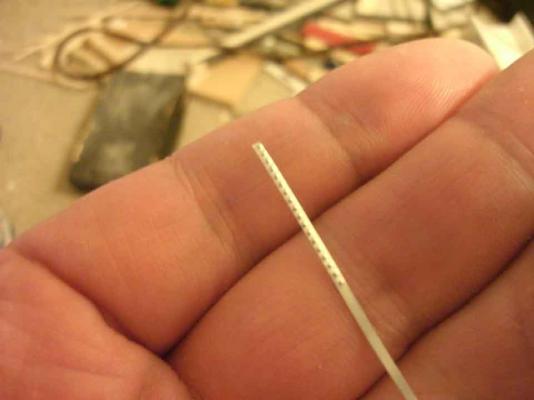
Ok. Haven't posted in awhile, (haven't worked on the builds for awhile) but did a little experimenting with Al cans tonight. I like the effect that Nenad has around his freeing ports, but I had no success with copper foil or wood veneer. With my previous experimentation making deadeye strops out of Al, It was too tedious to measure and cut, so I just cut a can in half, and made random small cuts all along the perimeter. I then easily found strips that matched my dimensions; all without pulling out calipers or a ruler...(kinda like picking lumber from a lumberyard). The ponce wheel I used for dimpling my copper tiles proved effective in making simulated rivets in 2.5mm strips, so I am now enthusiastic about my build once again. Bob

-
Cutty Sark by NenadM
rfolsom replied to NenadM's topic in - Build logs for subjects built 1851 - 1900
Impressive work on the detail around the freeing ports; I must experiment with that for my build... ~Bob -
Cutty Sark by NenadM
rfolsom replied to NenadM's topic in - Build logs for subjects built 1851 - 1900
Looks Very Good; On my other build, it seems like everyone is in a race; This is a hobby, not a job, right? The Dune reference brought back old memories......- 4,152 replies
-
- 2
-
-
- cutty sark
- tehnodidakta
- (and 1 more)
-
anybody build the billingboats cutty sark?
rfolsom replied to dgsmooth's topic in Wood ship model kits
Hello, and welcome! I am currently building the older version of the Billings CS. Model no. 459. No fittings, die cut bulkheads. This model came with two sets of G. Campbells plans. These are indispensable. The kit's versions are very vague. Please get a set of these plans, and then you're off and running! I believe you can order them off of the Cutty Sark website. Stick with the Campbell plans and you will not go wrong. (And watch Nenad, Dognut, Spencer, and the rest of us in the forum!) Happy modeling! ~Bob -
Cutty Sark by NenadM
rfolsom replied to NenadM's topic in - Build logs for subjects built 1851 - 1900
Nenad; Do you have access to eBay or Amazon? Model Shipways is a great company for parts, as well. 1/4" Self-adhesive copper tape works great for the hull coppering... -
Cutty Sark by NenadM
rfolsom replied to NenadM's topic in - Build logs for subjects built 1851 - 1900
Nenad; I'm not seeing anything wrong with the shape of your stern, unless it's being too fat. Just Dremel out the lower areas shown, and you'll be fine... Correction: STEM -
Happy New Year Lawrence; My good friend from Belgrade was asking a couple of questions. I was born and raised in Nebraska, English is my language. Thank you for your compliment and Best Wishes to you and yours in 2014. ~Bob
-
Hey Rich; good to see you're settling down once again, and sorry about your Kitty... (Cats have always been my favorite pets, but the apartment won't allow them). What ship are you planning on boarding? You're now a lot closer to Erie PA, ... Any thoughts?
-
Cutty Sark by NenadM
rfolsom replied to NenadM's topic in - Build logs for subjects built 1851 - 1900
Nenad, I definitely agree with Lou on the plank lengths; I don't think, in my Humble Opinion, that the planking butt locations on the hull are a big deal. I try for an average of 30 scale feet in plank length, and adjust the staggering to fit the bulkheads (3 strakes between) If I were building a true plank-on-frame hull, I'd be a little more particular, including treenails, etc. (and butts on actual frames, not kit bulkheads). However, I'm satisfied with my plank dimensions, even though I could have spent a little more time with tapering and fitting. Hmm.. definitely would like more information on your Admiral's recipe, but I suppose this is the wrong forum; many questions on this..(Fresh spinach? Poach egg in water? Stock? Cook toast in milk? Seasoning?) Objection, irrelevant. (for MSW). Objection, leading the witness. (for Bob's hunger)- 4,152 replies
-
- 1
-
-
- cutty sark
- tehnodidakta
- (and 1 more)
-
Cutty Sark by NenadM
rfolsom replied to NenadM's topic in - Build logs for subjects built 1851 - 1900
Nenad: I must apologize to you; I was going over my build log and found a question you asked that I did not see. I'm sure you found the answer but I'm embarrassed that I did not see the post. Sometimes I just skim over my own log and go to my friends' logs that are making more progress. Anyway, scaling in photoshop is easy, and known reference points are the way to go. (Distance between masts is probably the best indicator.) Scale up, or down, to Campell's plans, and stick with it. I was lucky that my kit was incredibly accurate with the bulwarks and keel, but the details were very vague... Very nice progress; almost time to copper! Happy New Year to You and your Family; ~Bob -
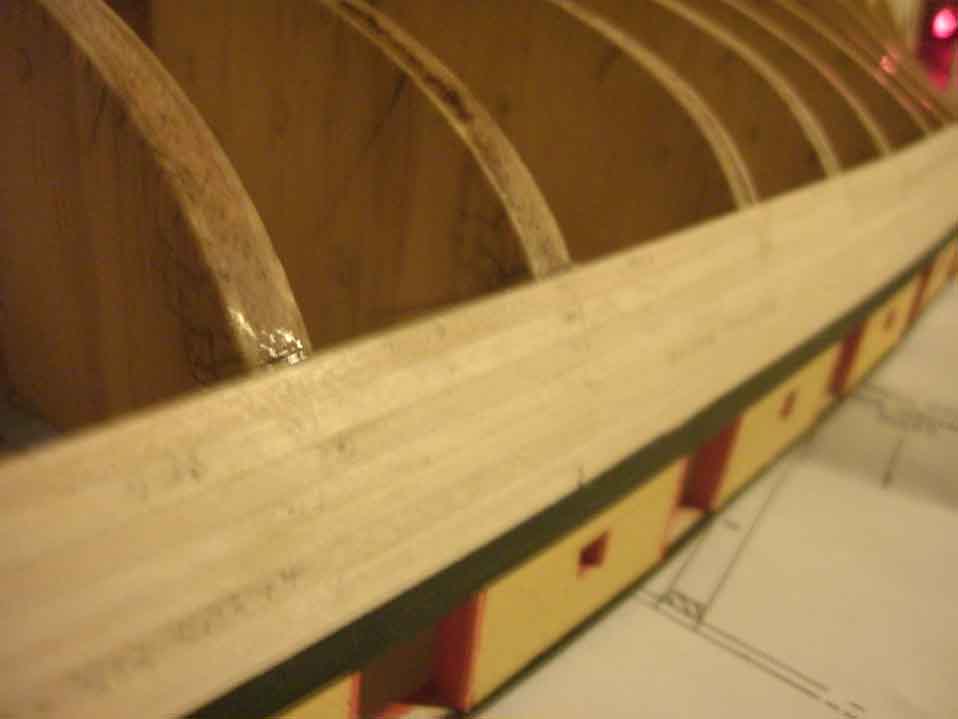
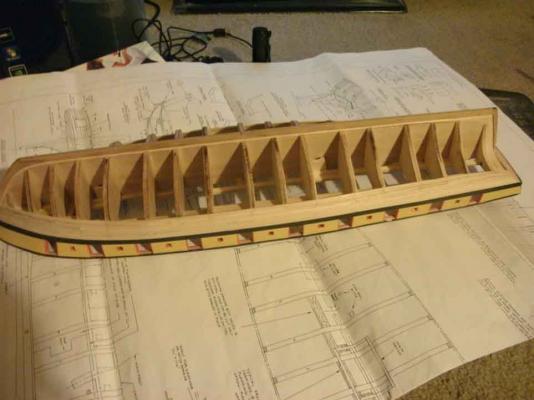
Finally finished Belt "A"; Sorry for the photo quality, the macro function on my camera is kinda whacky, and then the batteries died... :mellow: Happy New Year to Everyone! ~Bob

-
Very nice work. I might be at that stage by next Christmas; and by that time you might have returned Santa's Elves back to him... (Yes, I know your secret! ) Happy Holidays! ~Bob
-
Welcome, Tongaman! Happy Holidays to you. Your build is looking good so far; I too opted to individually paint the bulwark planking. I believe you and greatgallions must have kidnapped Santa's Elves to help with your progress. (hmmm.. that's why I received gift cards this year...) Keep up the good work! ~Bob
-
Looking for help finishing rigging on Cutty Sark
rfolsom replied to Toshimoriguchi's topic in Masting, rigging and sails
Hello Toshi; If I lived nearby you I'd love to help you out. Denver is a little ways away however.. I'd like to see pictures of your build. Good luck with your search; maybe try a local model shipbuilder's club? Joe; it looks like you have the Billings kit; I have the older version.. Hope to see a build log from you soon. I too am on the 3 to 5 year plan. Bob -
Cutty Sark by NenadM
rfolsom replied to NenadM's topic in - Build logs for subjects built 1851 - 1900
Looks great, Nenad... I'm going to have to have a go with the riveted outlines.. Merry Christmas and Happy Holiday Season! Bob- 4,152 replies
-
- 1
-
-
- cutty sark
- tehnodidakta
- (and 1 more)