HOLIDAY DONATION DRIVE - SUPPORT MSW - DO YOUR PART TO KEEP THIS GREAT FORUM GOING! (Only 36 donations so far out of 49,000 members - C'mon guys!)
×


rfolsom
-
Posts
881 -
Joined
-
Last visited
Content Type
Profiles
Forums
Gallery
Events
Everything posted by rfolsom
-
 Popeye: 1 mm thick strip would be too thick for my application here; my bulwarks are much too thick as it is; that's why I chose 0.3mm walnut veneer in 5 mm x 16 inch strips. I will definitely consult plastruct in the future... My late father was an avid model railroader, and I'd heard of the product; but not sure if dad used it at all. (he hated everything plastic, but maybe he ordered wood or brass from there?) Bob
 -
Nenad; I am definitely aware of the cumulative errors due to repeat usage of this wooden jig... indeed, I did not want to fashion a jig for this initially (unless it was metal, which I don't have the tools for.) This is why I'm making a test piece; when this is finished I will look at it at all angles and try to determine the best course of action. If I have to fashion two or three more jigs, it won't be a problem...
-
Marc; I used your idea to make a jig; mine will fit over the uprights and establish end points for the panels; which in my build will be of varying lengths.
-
Thank you, Marc; I will probably use a version of your jig when it comes time for the real thing. Still in the testing process, though... Bob
-
Larry; I agree with you totally... I also know that I had a good heads- up from all you guys further along in your builds about the gap problem between the planksheer and the outer planks at the gunport sills, and was able to sand and shim them into place with the info you provided; so I tried to point out some of my goofs to the newcomers to the Niagara. As I posted in my other log: Mistakes? You can: Fix them. Hide them. Ignore them. :mellow: Pretend they're supposed to be there. Blame it on someone else. Whatever works, enjoy your builds!! Bob
-
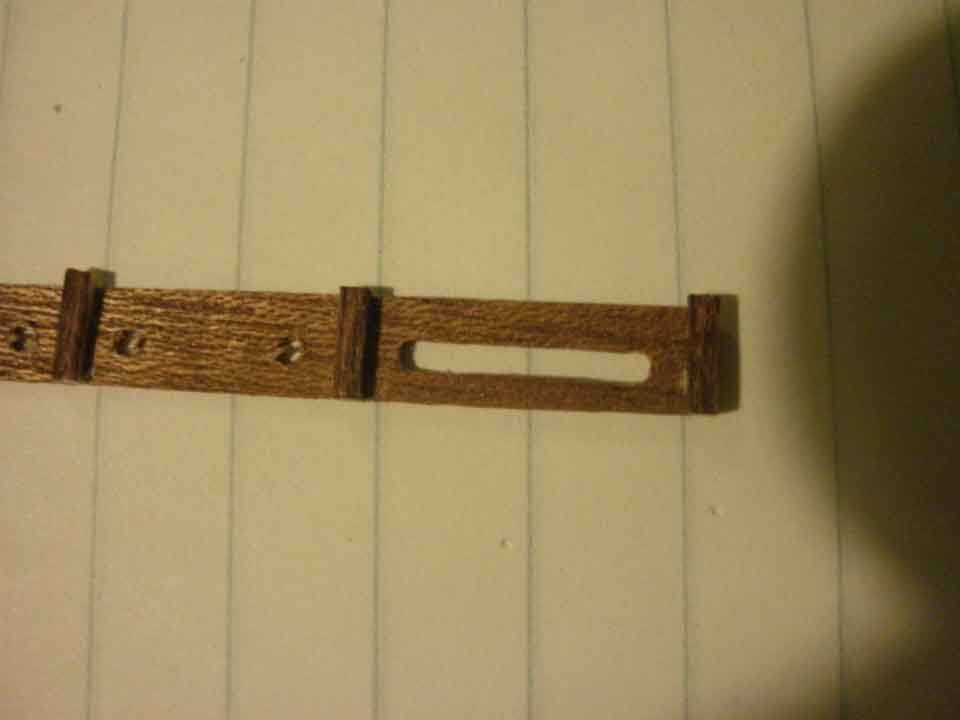
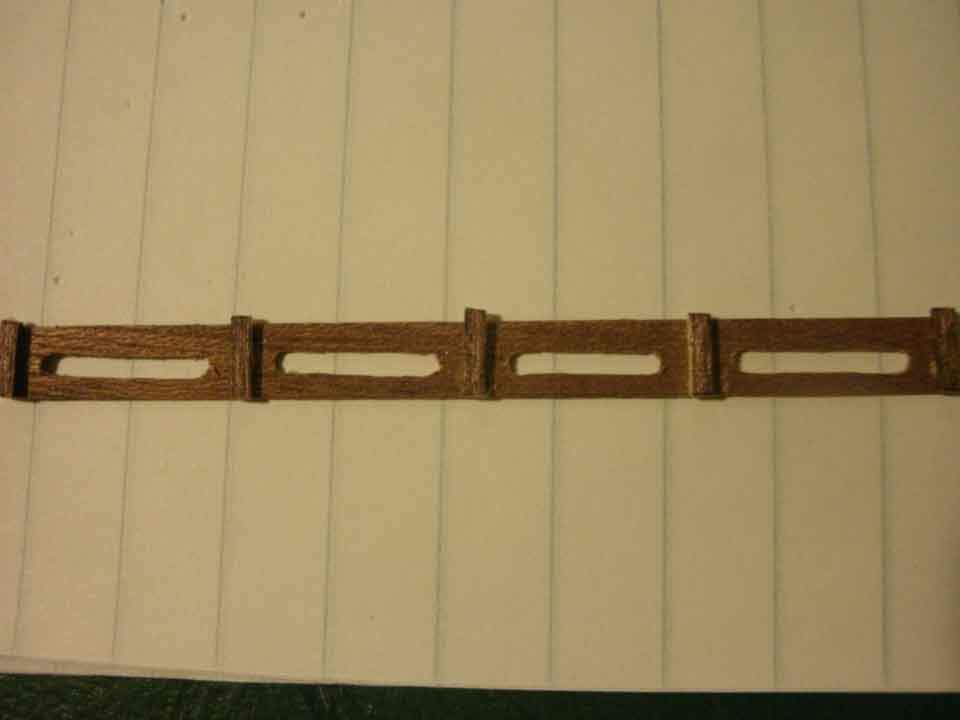
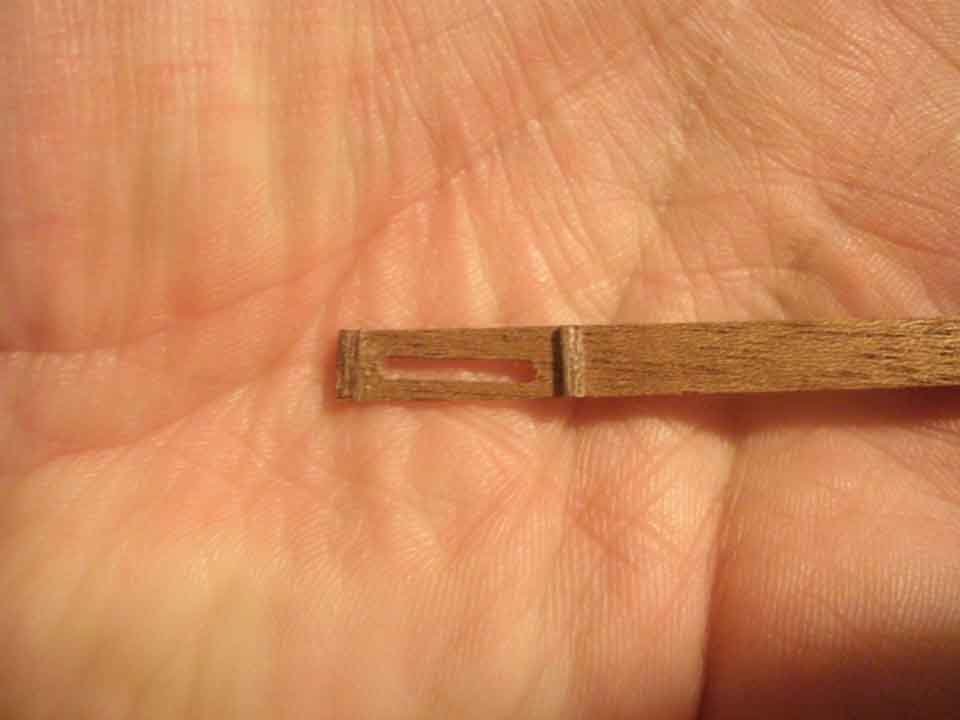
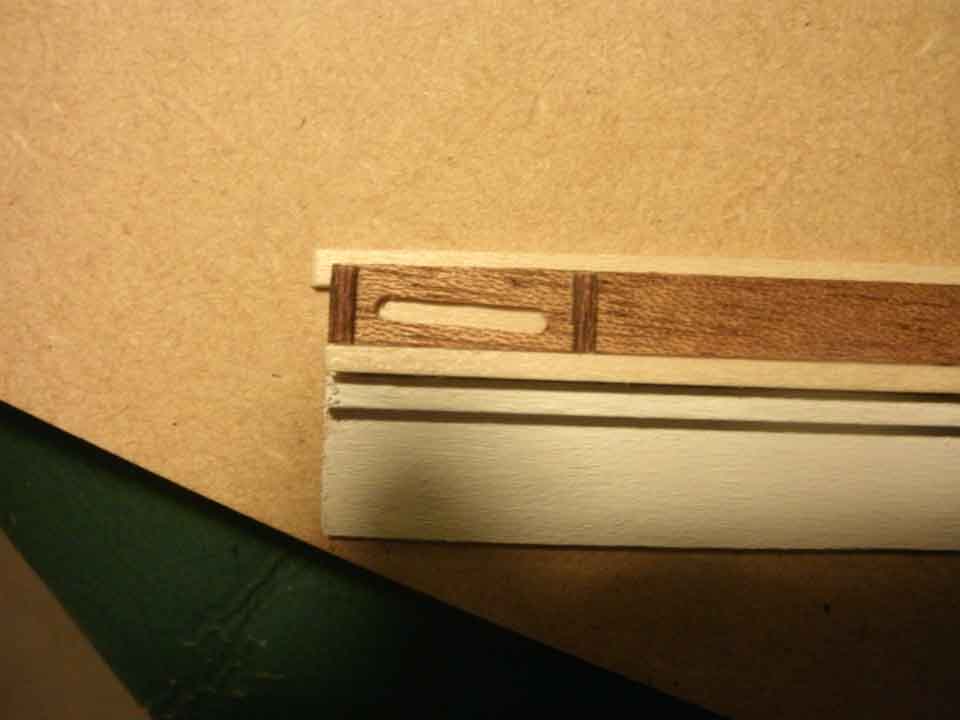
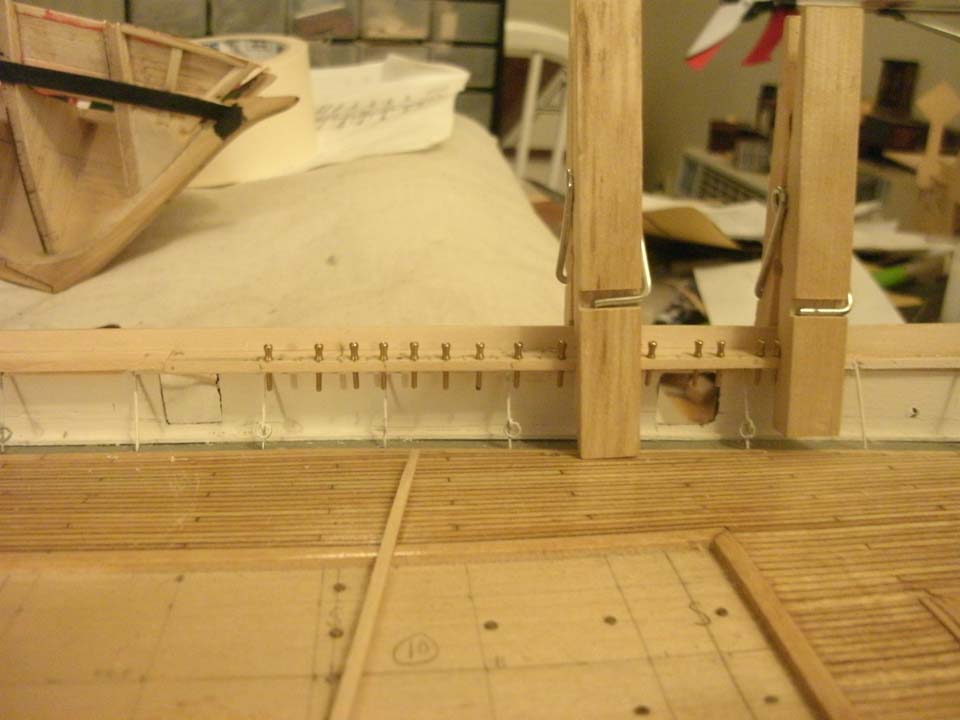
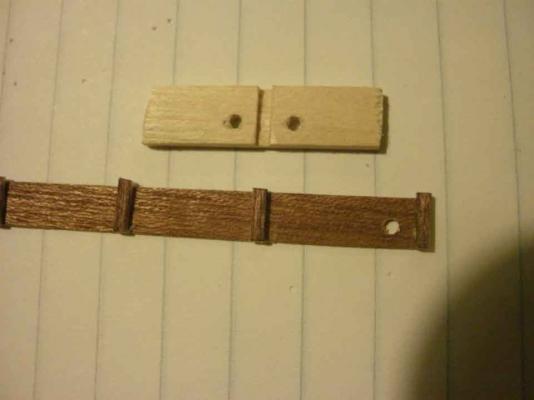
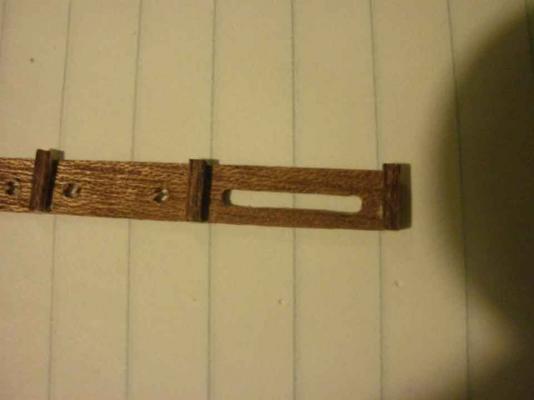
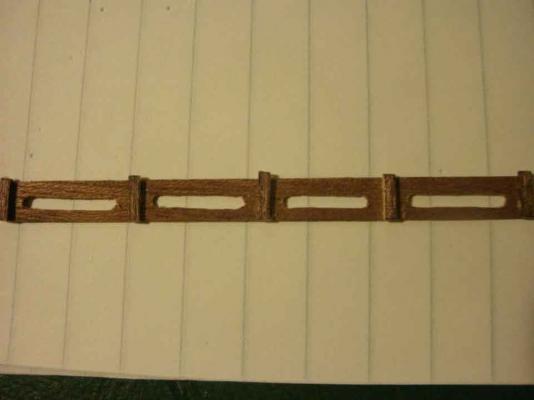
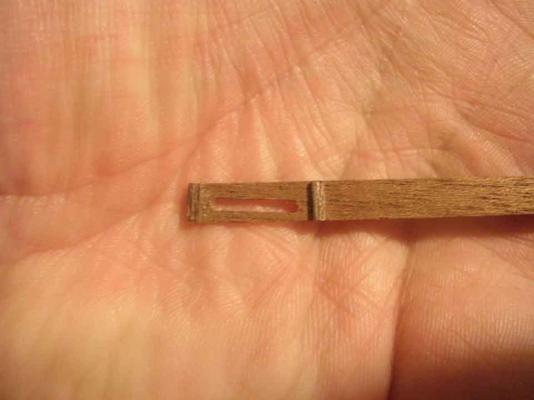
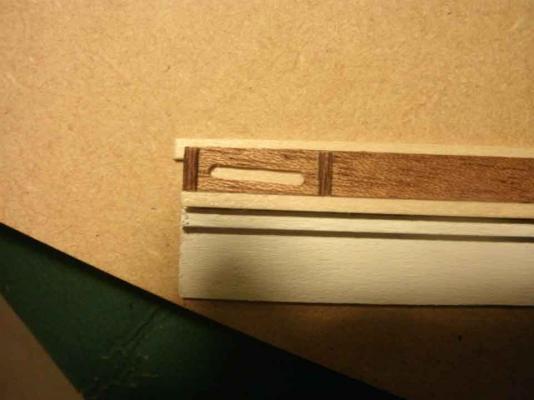
Alright; First photo shows my test bulwarks as it would appear on the ship, with the stanchion support rail in place (minus the stanchions). Second photo shows first trial run of a panel section using the 5 x 0.3 mm walnut veneer with the 1/32" x 1/16" stained basswood uprights glued into position. I drilled two holes (Marc's idea) and cut between them with an xacto blade. As this was a trial run, (a trial run before my test run ) , I just wanted to see how the wood reacted with the drill bit. Hence, the lopsided panel. But I am encouraged by the result, and hope to fine-tune things by the time this test build is done. My plan is to do a long stretch of paneling with uprights installed (Nenad's idea).
-
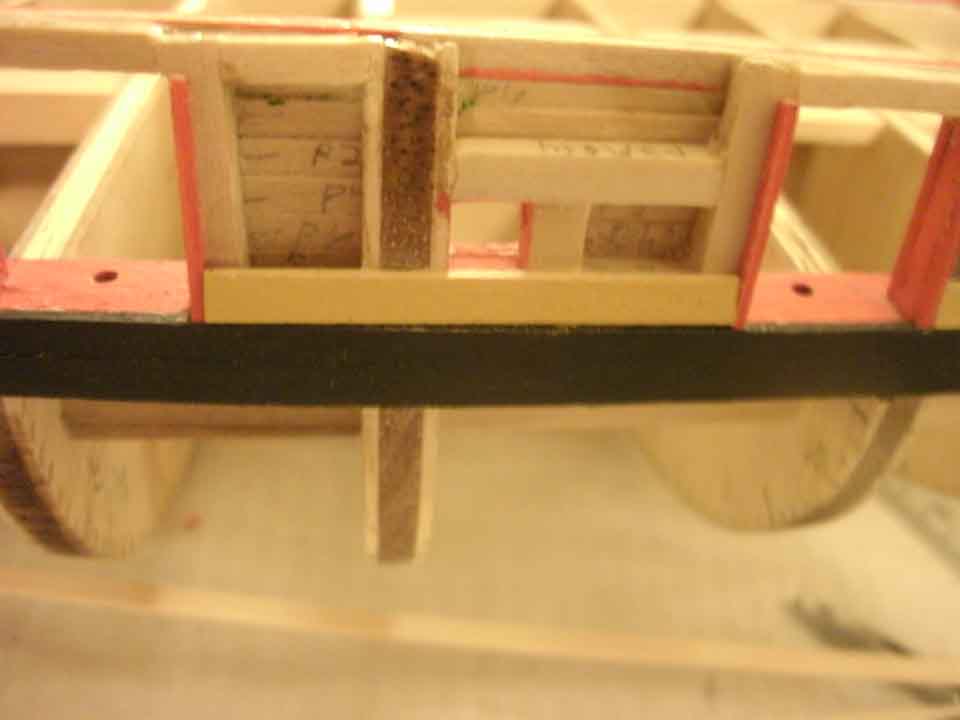
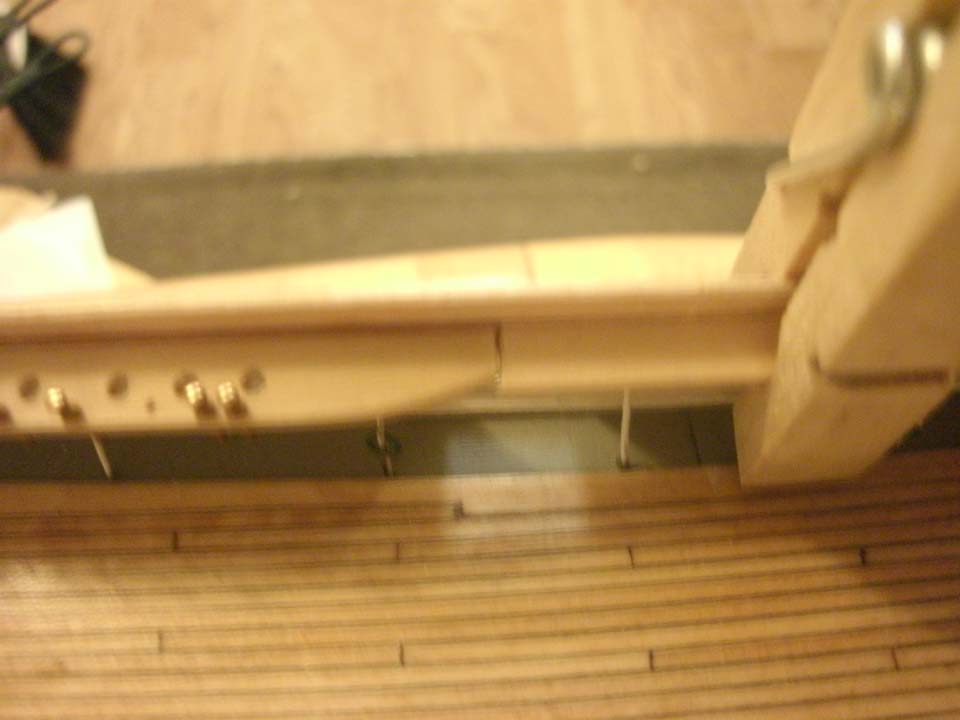
Ok, here's some pics of what happens when you're not watching every last detail, from every angle, plus looking into the future... Top picture shows a yellow plank in position; looks ok from the outside, but... Second picture shows the same plank from the inside, 1 mm higher than the bottom of the sweep port (middle arrow). This is due to my first hull strake, supposedly even with all the gunport sills (laid as one long plank) rising up in that one particular area. (outside arrows). I had thought I had laid this plank accurately, but in this one area, I overlooked the rise, and the problem will compound itself; I will try to strike a happy medium by sanding this outside plank slightly before adding the sweep port trim, and maybe slightly sanding the two planks above so the planks will evenly frame the ports. I do not want to sand into the even run of a plank, because this is not the effect I am looking for, as it was not necessary on the real ship. After final painting and touching up, hopefully this mistake will go unnoticed.. Bob

-
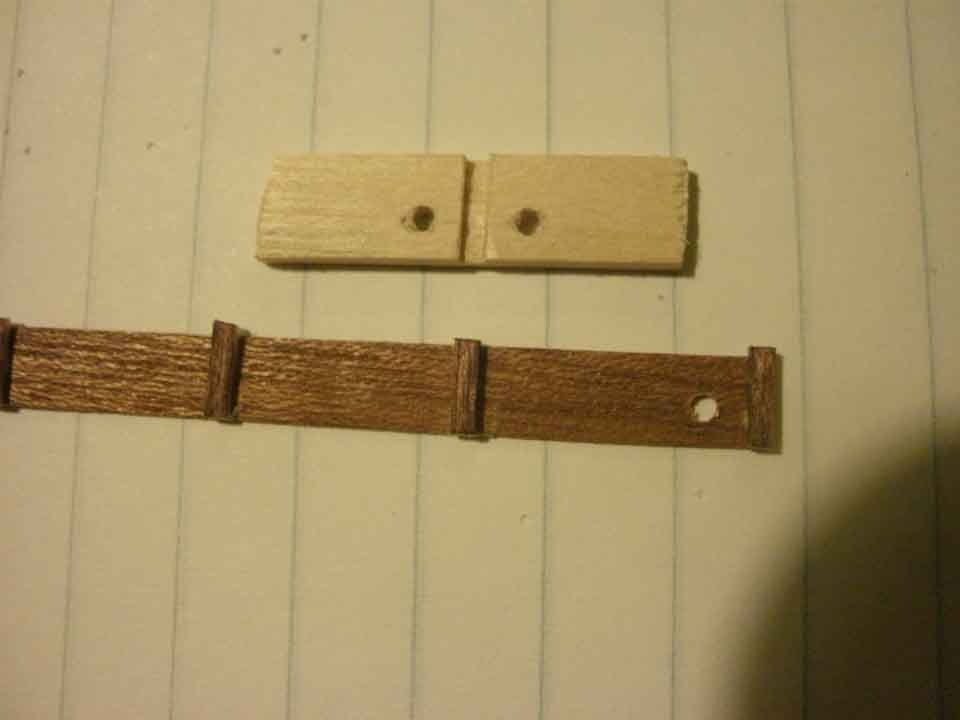
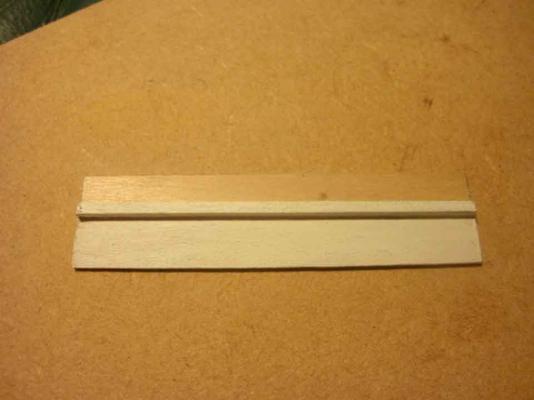
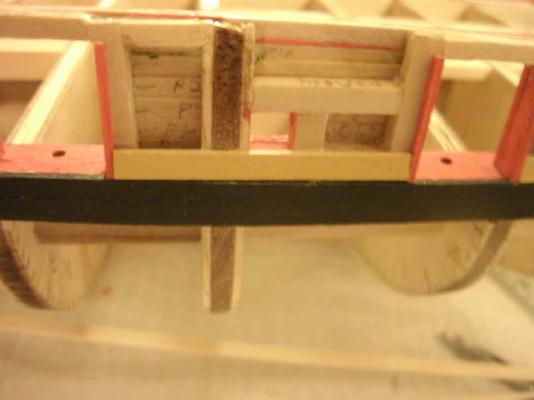
Top photo shows existing buwarks on the ship (yes, very messy after drilling holes for the deadeye shrouds, and discoloration where the pin vise rubbed against the "support" rail that holds the stanchions.) This is NOT the final coat of paint, nor the finished freeing port, btw. Second photo shows the pieces I will use to replicate a 65 mm section of bulwarks. From top to bottom, 1) 1/8 " x 1/16" caprail. 2) Lenght of 1/16" x 1/32" basswood, mahogany stained, that will be cut into the 4 to 5 mm uprights. 3) 5mm by 0.3 mm walnut veneer, that will be drilled out for ovals, and hopefully save me from making raised panels. 4) 1/32" sheet, same as installed bulwarks on ship. 5) 1/16" square strip, used as stanchion "support" rail. (also installed on ship) 6) 1/8" x 1/16" inch scrap of discarded main rail, complete with holes for 1 deadeye and two belaying pins. I will be testing the painting, layout, staining (the mahogany stain on basswood is darker than the natural walnut) and shaping of these various pieces, and hopefully come to an acceptable conclusion before implementing on the actual build. Bob
-
In my post #62, I show some tests of the white bulwark paneling in a raised format. I have never been pleased with this inaccurate representation, and Marc and Nenad's techniques have prompted me to try to find another solution. The thinnest stock I had on hand was 1/32" thick, so combined with the 1/32" bulwarks, and 1/32" uprights, would have made the whole assembly too thich for the 1/8" caprail, which needs to be shaped. Card was not an option due to staining, sanding etc; carving the ovals into the 1/32" bulwarks (especially in situ on the ship) was beyond my ablility; but I found some 5mm by 0.3mm strip walnut left over from another build; so time for testing...
-
Thank you, Marc, for your kind words, and it's great to see you're back. Nenad: Yes, I have followed Marc's progress, and I'm happy to see his new postings; I have thought about the pump, but now you've sparked me (once again) to address the white paneling on the bulwarks... Bob
-
Marc; I'm so glad to see you getting up and running on your build and build log; hope you found closure on the home front, that's the most important thing... The saltwater pump, bowsprit, and irons looks great, I've thought about them, but need to stay focused on matters at hand, or I'll wind up with 20-30 tiny builds in various stages of construction all over the place! All the best, Bob
-
Cutty Sark by NenadM
rfolsom replied to NenadM's topic in - Build logs for subjects built 1851 - 1900
Nenad; Sorry to hear about your sickness, wishing you best in recovering... Be careful working on the ship if you have a fever, like you said it makes thinking and working very difficult. On a positive note, after looking at your method, and much thought, I decided to look in my Artesenia Latina Swift box for some ideas. (The Swift was my first wooden ship build, started about 5 or 6 years ago. The hull is done with just some deckhouse details to do before stepping the masts and starting the rigging). To my surprise, I found 12 strips of walnut veneer (left over from the second planking layer) 5mm wide, and only about 0.3 mm thick. This is thin enough to cut ovals into and glue onto the existing bulwarks without destroying the scale of my rails. So, in the next few days I will be experimenting with this method and posting the results on my log. (Giving credit to you, of course!) Thanks for all your helpful ideas, and your persistent encouragement... Bob- 4,152 replies
-
- 1
-

-
- cutty sark
- tehnodidakta
- (and 1 more)
-
Cutty Sark by NenadM
rfolsom replied to NenadM's topic in - Build logs for subjects built 1851 - 1900
Nenad: I really like the way your white panels and bulwarks are coming along; I also like your choice of color for the stained areas. Right now, I'm mentally struggling with that area, but I won't be physically experimenting with it until the main rail is finished and installed. For me, (at the moment), I see no other alternative but to install raised white panels in order to keep the scale of my rails in check. (Not sure if I can live with that, yet...) and as for the color, I wish I had chosen one less dark than I had chosen. (I already had 80% finished my poop deckhouse, hatches, and heads last year using a dark mahogony stain, and I will not be remaking them, so I will have to live with it...) :mellow: Looking forward to your progress in this area... Bob- 4,152 replies
-
- 1
-
-
- cutty sark
- tehnodidakta
- (and 1 more)
-
Larry: Your planking is looking great! I can't wait to get to that stage; I'm about halfway finished with planking the outside bulkheads, and with cutting and painting each plank individually, it's gotten quite tedious... I'll be happy to plank the remainder of the hull, sand, and then paint. Have a great weekend! Bob
-
Michael; Thanks for the nice comments! Brian; Do you have a build log started for your CS? I'd like to see some pictures... Bob
-
Hi, Brian; Is your kit the old 459? Mine is (bought off of ebay) and did not include the fittings kit or kit instructions, but included two copies of G. Campbell's plans (3 sheets each) that I refer to almost exclusively. If you can get ahold of a copy of these plans, all rigging information can be found there, including the rope diameters. I had also downloaded the Billing's plans for the current CS model, but shelved them in favor of Campbell's. The only kit pieces I wound up using were the bulkheads and keel pieces, and their supporting structural components. I ordered basswood planking to scale in bulk for both the decking and hull, copper tape, deadeyes, belaying pins, rigging line and blocks from Model Expo. I will also be using the original kit's spars for the most part, since they seem to be in scale, and many are pre-tapered (Yay!). I probably would have built this kit right out of the box, but the sheet with the main deck was missing, so after framing I started scratch-building that part, and things just progressed from there....
-
Cutty Sark by NenadM
rfolsom replied to NenadM's topic in - Build logs for subjects built 1851 - 1900
Hello Nenad; I face the same dilemma, and had thought previously about Tony's solution; however, it's very hard to stain card to match wood, so I gave up on that idea. I'm still planning to make white panels that stand out, instead of being inlaid, but I'm unsatisfied with that method. Even my thinnest wood prohibits me from doing the inlaid panels without throwing the rails and other details out of scale, but we'll see what happens... I've got a ways before I get to that step, and I'm looking forward to your solution. Glad you're finding at least a little peace on the home front; Classical music plus ship modeling makes for great relaxation. (and of course, a couple of beers...)- 4,152 replies
-
- 1
-
-
- cutty sark
- tehnodidakta
- (and 1 more)
-
Thanks for the great feedback, guys, I really appreciate the positive comments. Popeye; as far at the cap rails are concerned, the actual dimensions on the real ship are 6.5 by 3.5 inches, which translates very closely to 3/32 x 3/64 inches. I do have some of this stock in my other build, but not enough to fit the CS. I will be opting for the much easier to obtain 1/8 x 1/16 inch strips, and sand into an approximately oval form in cross-section. 1/8 inch is 9.5 scale inches, but after sanding and taking into account my thicker than scale bulwarks, I hope to strike a happy medium. They will definitely not overshadow the pinrails, as the maximum width over scale would be 1 mm. (3 scale inches). Bob
-
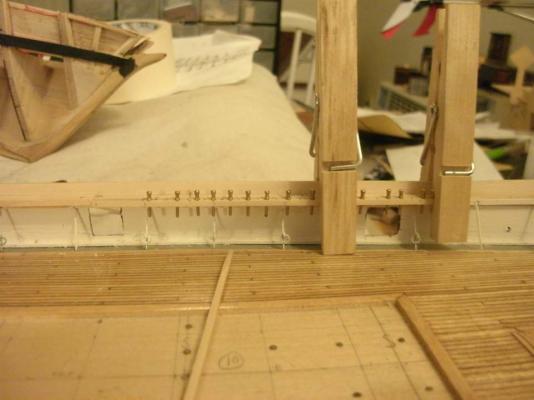
These rail pieces are just clamped into position temporarily; bulwarks need to be final painted, stanchions also need to be final painted, remaining deadeye stay mounting holes need to be drilled, paint needs touched up.... You get the idea. Always look 3 to 5 steps ahead in order to complete the step you are on today. This process should always leave several steps between 3 and 5 that are "under construction"; but leaves a good heads up for your finalized step. Mistakes? You can: Fix them. Hide them. Ignore them. :mellow: Pretend they're supposed to be there. Blame it on someone else. Whatever works, enjoy your builds!! Bob


-
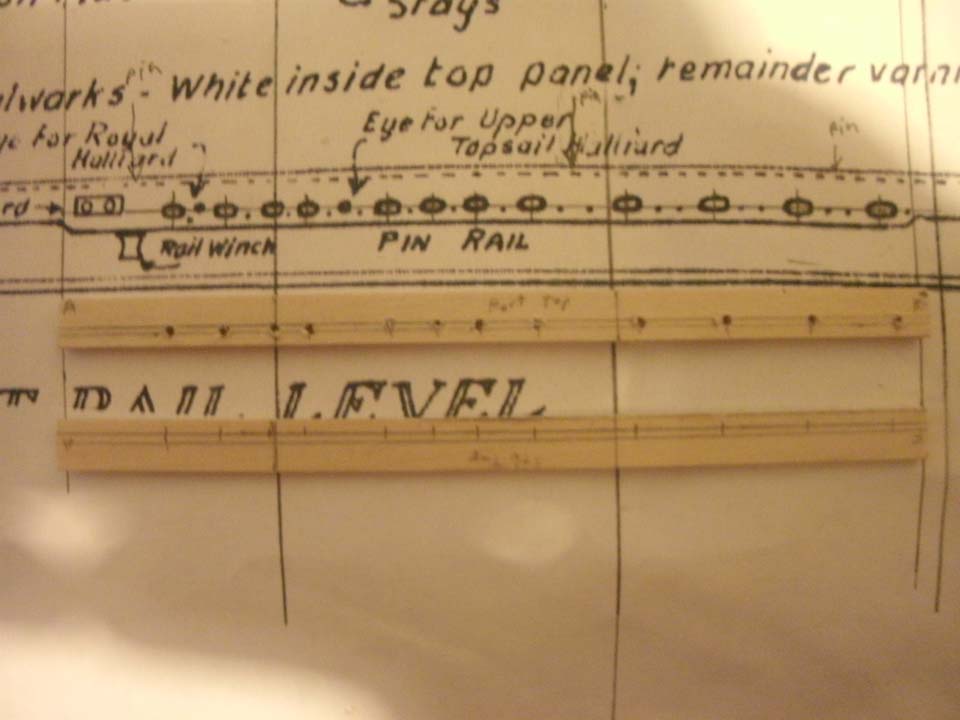
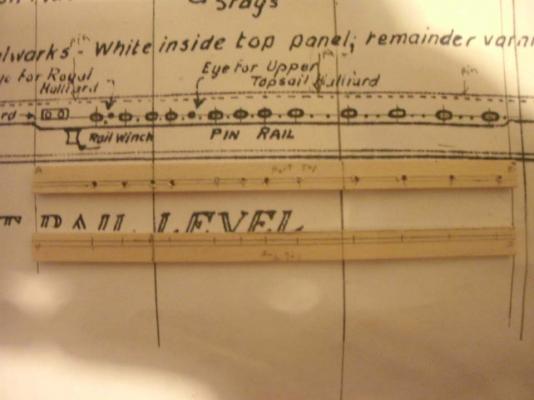
Here is the layout of the foremast main rail pinrail; 12 holes at 1.25 mm for deadeye stays; 17 holes at 0.85 mm for belaying pins; and 2 holes at 0.5 mm for eyebolts... Belaying pins were installed to check scale, relationship to existing structures, etc, etc...
-
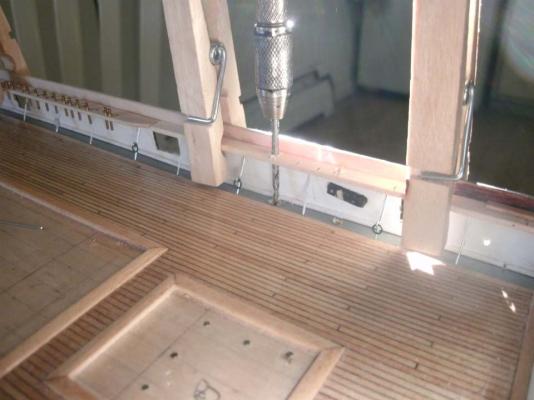
I then used some new rail pieces, drilled for deadeye stays, belaying pins, eyebolts, and boat davits to locate the davit holes in the waterway, and drilled...
-
Allright... the main rail is almost roughed out; some sections were made around a year ago, and some can stay, and most will go... Firstly, I had to discard the 1/8" parts made a year ago, in favor of 3/16"; a little large but better in scale after sanding and shaping. The roughed-out port mainmast section of the pinrail is ok, but the starboard side will probably need to be remade, since I shaped it before fitting on the actual ship. (live and learn)...

-
Thanks for the comments, everyone. I have to do some tweaking before I install the main rail, so it might be a bit before I post some pics. Dognut; at 1:115 scale, Model expo's 2.5 mm deadeyes would look just about right, I believe....
-
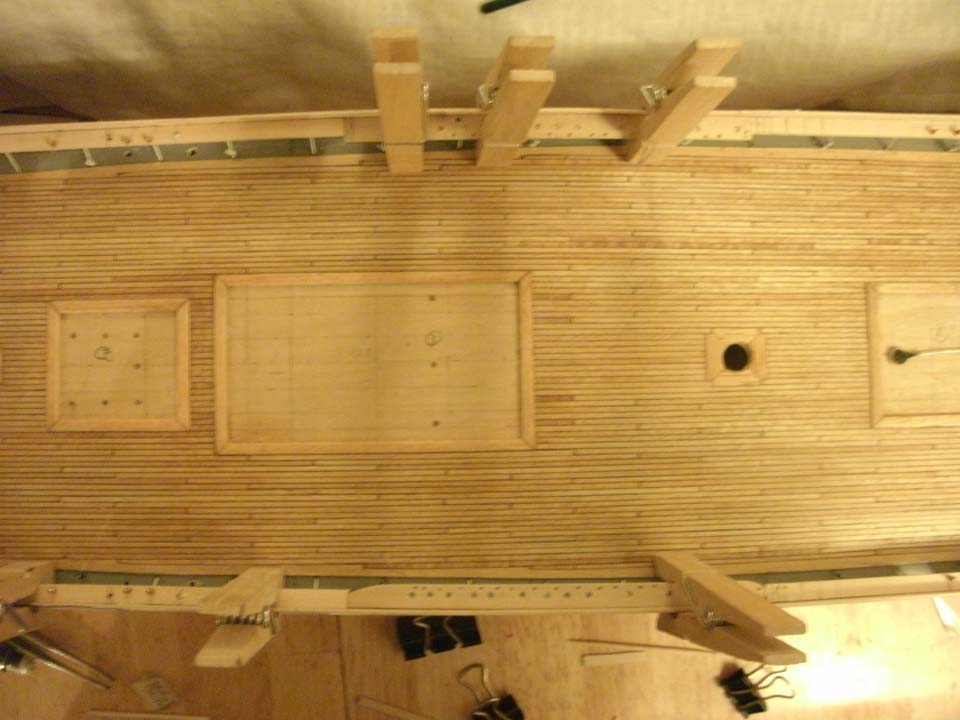
I always measure from as many known reference points as possible when I build; and the center pawl and carrick bits make excellent reference points, as they extend squarely through the main and forecastle decks.
-
Spencer; as far as the nibbing on the forecastle, I rely on G. Campell's plans almost exclusively for my build, which shows an extension of the main rail covering the forcastle nibbing, as well as the poop (or stern quarterdeck). However, upon researching modern photos of the CS, you can indeed see the nibbing, so I believe it would be a matter of taste, in this case. If you already have the forecastle deck permanently fixed in place, I wouldn't worry about the bowsprit placement. I decided to shape the end of mine, and provide structural support, (as I did with the mast blocks) so I would have the exact angles right without, (hopefully) any tedious adjustments in the blind spots below the permantly installed decks.