HOLIDAY DONATION DRIVE - SUPPORT MSW - DO YOUR PART TO KEEP THIS GREAT FORUM GOING! (Only 36 donations so far out of 49,000 members - C'mon guys!)
×


rfolsom
-
Posts
881 -
Joined
-
Last visited
Content Type
Profiles
Forums
Gallery
Events
Everything posted by rfolsom
-
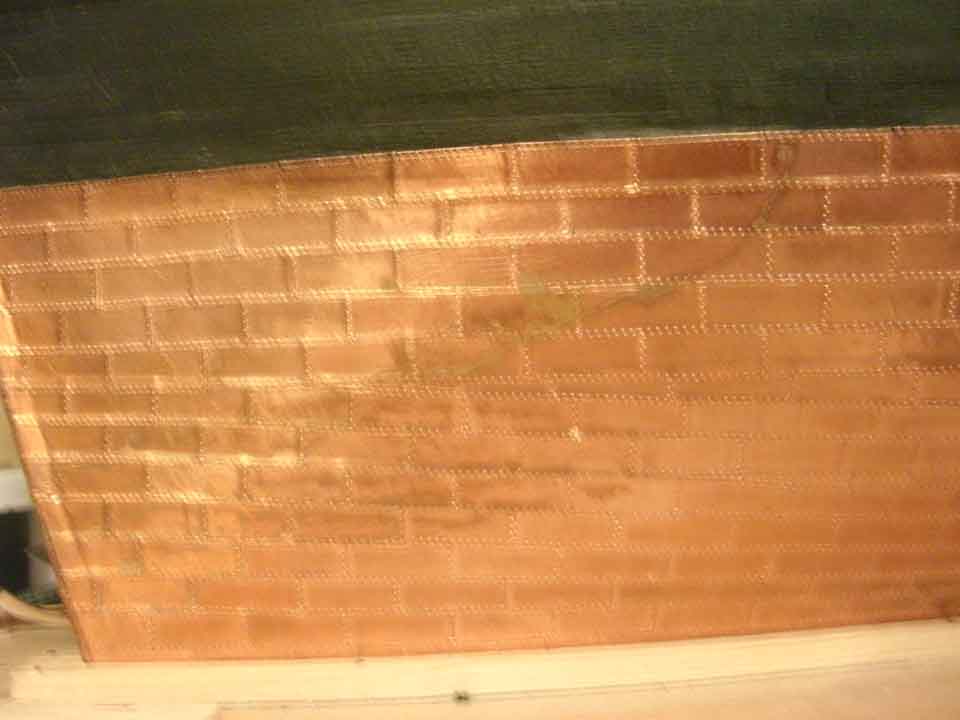
 Great progress, A.J. After closely examining the picture above, I do not believe that the current ship is coppered, because you can see the individual planks where the copper color is. Also, the original ship was not coppered, as these ships (Niagara and her sister Lawrence) were built rather hastily and were designed for very short lifespans (I believe just the one battle of Lake Erie.) As they were not ocean-going vessels, and had only a 9 ft. draft, copper would be an unnecessary and very expensive addition. She would look good with a coppered hull, though, and it's your build... ~Bob
 -
Nenad; Great quote, and I believe in it wholeheartedly. Duff: Thanks for the nice words, and as far as ongoing maintenance goes, I will do some touch ups on the copper before the masting and rigging, but once it's mounted to the pedestals, there will be no more fiddling... The "drips" just look a little weird . Lawrence: Thanks also for the kind words; you probably constructed the newer model; mine was the old 459 purchased off of ebay about two years ago... This kit, in my estimation, was about 40 years old, and did not come with the fittings kit. It also was missing the instructions and the printed sheet that included the main deck. The printed forecastle deck also came straight across, so I scratch-built all decking. The windlass is also scratch built. The kit came with mahogany planking, while very pretty, was out of scale and too coarse grained, and since I opted to paint and copper the hull, I simply ordered enough basswood in scale to plank the hull. Indeed, except for the bulkheads and keel, the entire ship is scratch built. I will probably use the kit supplied dowels for all spars, as they seem in scale and in good condition; some are even pre-tapered. Any thoughts on the figurehead or pumps? I will probably purchase these, as I think scratch-building them will probably be beyond my skills.. Thanks for the input, gentlemen! ~Bob
-
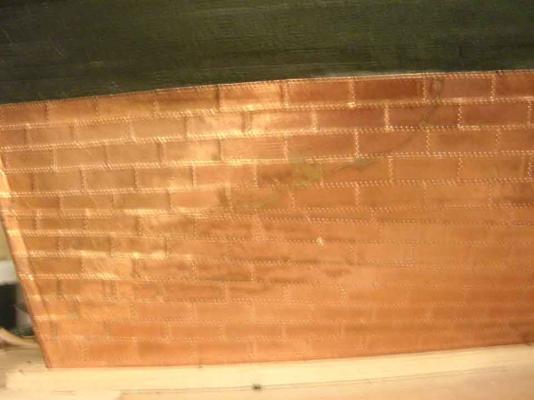
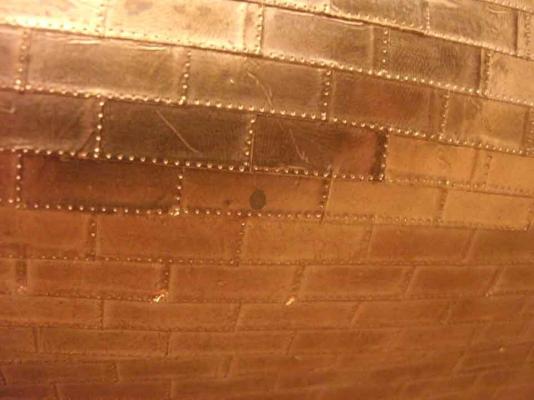
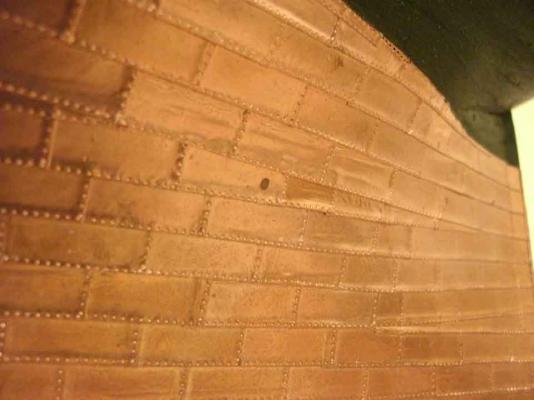
Nenad; First picture shows large discoloration across many copper tiles; this will not be replaced, probably will use some solvent and see what happens. Second and third pictures show a "drop" or drip, of something on a tile, which I'll replace... You can also see where the corners of the tiles are lifting; not usually a problem, just smooth them back.. Small scratches, dents, etc. are just fine with me; not only can I live with them, they show the character of the sheathing... Bob
-
Kevin; I've been watching your log for awhile now, and also your incredible work with your Victory; So now I have to ask your opinion... Do you think the Bismark could be scratch built effectively in mostly wood at 1:76.8 scale? I've never scratch-built anything in plastic... I am currently working on the Cutty Sark in that scale, and plan to buy Model Shipway's Constitution in that scale, and am planning on scratchbuilding the Victory, also in the same scale. You Bismarck guys have now made me add that build to my list, and at 44 years of age, I just might be able to finish all these... Great work! Bob
-
Nenad; In my build, I do not plan on applying anything over the copper, as the natural patina from the copper aging is actually pleasing to me. Some people would probably like to preserve the shiny appearance, and spraying it with a clear coat of some sort would also definitely help with the plates lifting, as mine do from time to time. My plan is to finish the bulwarks, main and topgallant rails, install the deadeyes, and exterior railing, then flip the ship over and go over the hull, replacing any damaged copper, and install the rudder. I will then permanently mount the hull to a baseboard with pedestals. This will have the effect of differently aged copper plates; but to quote from G. Campbell's book, China Tea Clippers : "A ship could expect to get two Far East voyages before needing recoppering." "...the deterioration of the plates was piecemeal, a condition which was aggravated progressively as the plates were renewed piecemeal also."
-
Very nice! And all in six days? It took me 10 weeks to get from start to where you are... Well done! Bob
-
Cutty Sark by NenadM
rfolsom replied to NenadM's topic in - Build logs for subjects built 1851 - 1900
Wow, Nenad; looks great! I'm still trying to touch up my stanchions, and get the rest of the holes drilled for the deadeye stays; Maybe then I can finally make some progress... Keep up the good work; I'm looking forward to your second planking ! ~Bob -
Cutty Sark by NenadM
rfolsom replied to NenadM's topic in - Build logs for subjects built 1851 - 1900
Ah yes, the freeing ports... On my build, they will need to be squared up and painted before resuming the rail work... as far as the hatch cover material, I am not sure... wood would probably be too thick; aluminum from cans too thin and warping; brass? ... I did see a site where the builder used sheet styrene with good results... I did not want to use plastic in my build, but, we'll see....Tell me what you think. Also, when I cut out the freeing ports, the bulwarks straightened themselves even more, due to the structural strain being reduced.- 4,152 replies
-
- 1
-

-
- cutty sark
- tehnodidakta
- (and 1 more)
-
Cutty Sark by NenadM
rfolsom replied to NenadM's topic in - Build logs for subjects built 1851 - 1900
Nenad; Bulwarks look great! I thank you for your inspiration... When I mounted my bulwarks (1/32" sheet basswood) it was before i finished planking or coppering the hull; needless to say, they cracked and broke, and were repaired many times... some of my pictures look like an eel swimming, they wereho warped.. But, I actually sawed them where the curves were, and re glued them, relieving some of the stress, and they straightened out a bit... Adding the stanchion rail also helped, as did the stanchions themselves. What was once a very delicate structure, now has some strength, which is very cool... Yours will probably do the same as you add the detail. (railings, pinrails, etc..) -
Brian; in my application, the two rail technique, as I understand it, would be more cumbersome than the approach I'm testing. My slots are cut in 0.3 mm veneer; anything more would throw everything off.. Thank you for your input, and I hope my final product will produce adequate results.. Cheers, Bob
-
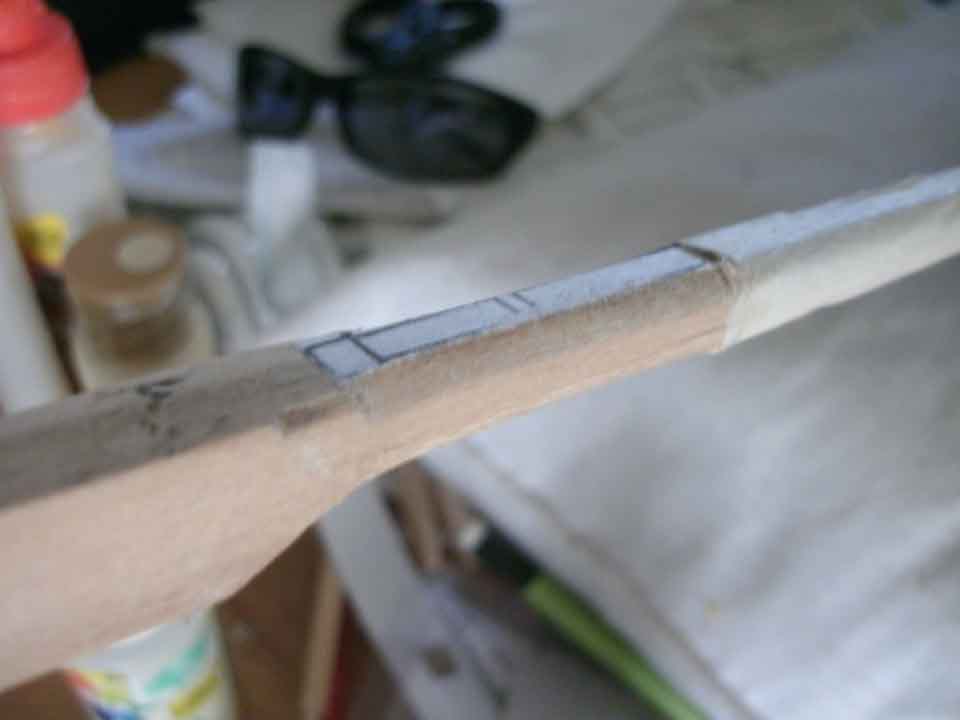
Thank you, Rich and Larry (aka class clown ). Larry: I squared the 3/8" stock to 21/64"; added the top sheet on my flattest surface, and glued both side sheets on (one flipped horizontally in Photoshop to make a mirror image). As the top of the bowsprit is completely flat, i then used the scroll saw to rough out the bottom angles, and then did the side tapering. The side tapering is much less than the bottom, so angle errors are not too great- also, most of my shaping at this time is concentrated on the proximal end of the bowsprit. I used a glue stick for ease of pattern removal later on.. Bob
-
Holes for the cleats and chocks were also drilled while the patterns are still in place...
-
Here's a picture of the distal octaganal portion; tough to get the octagon without turning it completely round; we'll see how it looks once the "bandages" are removed. The oversized block at left will be cut off once I'm satisfied with shaping.. The excess made a convenient handle to hold on to. The tape wrapped around the bowprit at right was used to protect the rounded portion while shaping the octagonal portion.

-
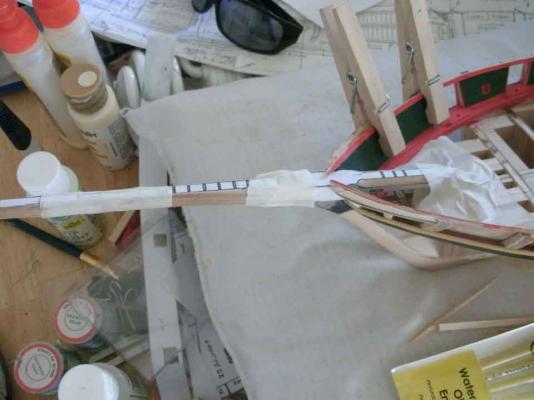
Larry: Thanks for the nice words! Nenad: I will return to the CS build in the next couple of days (don't worry)! Today I test fitted my roughed out bowsprit to the hull. (I wanted to take pictures of the bowsprit alone after the carving I did last night, but my camera batteries needed charging.) With the bowsprit taped into place, I will complete the outside bulwark planking.
-
I intended finishing the planking of the outside bulwarks with the placeholder bowsprit installed, but I believe I will try my hand at fabricating the bowsprit itself; this is the piece with the plan's pattens affixed to the block..

-
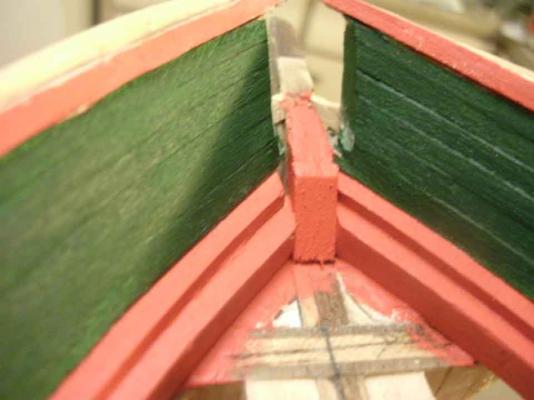
Here's the bowsprit hole after cleaning up...
-
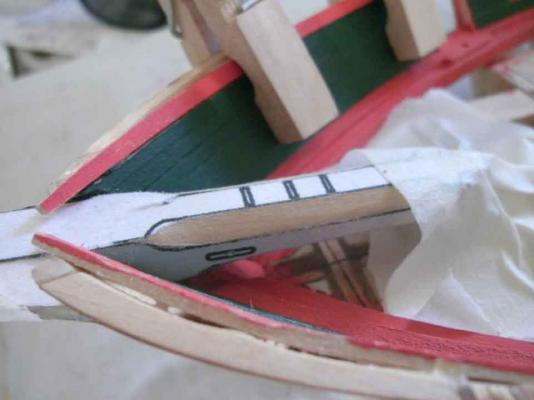
Ok.. Most of the bulwarks are now planked, inside and out. I need to finish planking the outside between the stem and the first gunport, so I decided to take a piece of 3/8" square stock and sand it to the 21/64" square bowsprit dimension and cut the bowsprit hole...


-
Joe: Your paint job is looking great! Can't wait to get to the stage you're at.. I'll be watching closely! -Bob
-
Dognut; Good luck with the cabinets; particle board is very inferior especially in the kitchen, when things can get wet, spilled upon, steamed by cooking etc... Definitely time well worth investing... And it pleases the Admiralty Hope to see new posts after the interim project... Bob
-
Hello, A.J. and welcome! If you choose to use the Model Expo paints, this is what they are: Green: Dark Green MS4801 Red: Gun Red MS4802 Rails and Deckhouse color: Light Buff MS4821 Looking forward to your build log... Bob
-
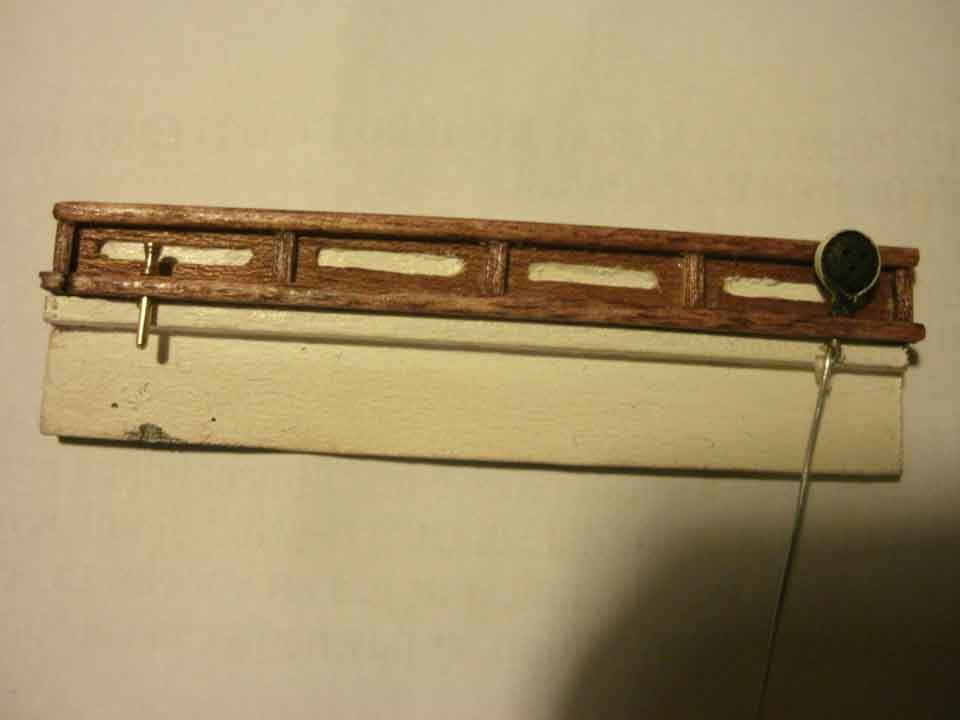
Here's the finished test piece. Second picture is shown with belaying pin and prototype deadeye/stay assembly. Third picture is cross section of bulkhead. This is not perfect by any means, I need to watch glue leakage into the cutouts, and make cutouts more precise, but I think I can live with it. Bob

-
Nenad: My little jig has a groove cut into it that fits snugly over each upright (I will glue all pre-stained uprights onto the strip of walnut first). It fits snugly enough so that there is no lateral play whatsoever, and very little rotational and up-and-down play. I assume that the groove will wear down along with the holes, so a replacement jig or two will be necessary. I believe I will alternate between port and starboard sides, so when the jig is worn out, and a new one is made, the opposite sides will still appear identical. Test piece is finished, and a coat of minwax polyurethane is drying on the stained areas... Photo to follow Bob
-
Oh, yes, and Thank You for your bulwark diagrams; I tend to jump around within our logs so I hope I don't confuse any of our new friends!
-
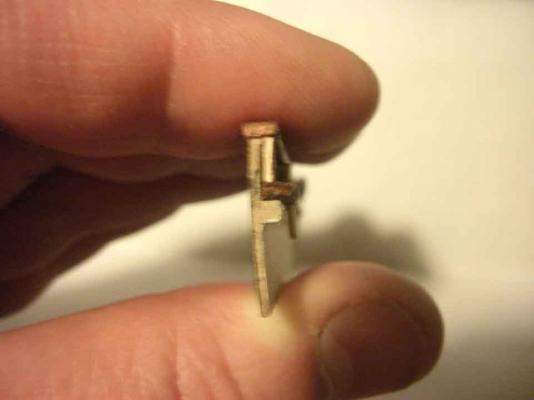
Marc; Do you have any tips on soldering? My skills are poor, at least for structural soldering, (I can do wires, PCB component soldering etc.) Would you recommend a small torch? and if so, what brand? I'm definitely a ways away, but I like to try to plan ahead... Many thanks, Your build is very inspirational! :) Bob
-
Cutty Sark by NenadM
rfolsom replied to NenadM's topic in - Build logs for subjects built 1851 - 1900
Nenad; I like all the movies you listed above, but I'd be willing to airmail you a bag of popcorn for some more pictures and posts... ~Bob- 4,152 replies
-
- 1
-
-
- cutty sark
- tehnodidakta
- (and 1 more)