HOLIDAY DONATION DRIVE - SUPPORT MSW - DO YOUR PART TO KEEP THIS GREAT FORUM GOING! (Only 36 donations so far out of 49,000 members - C'mon guys!)
×


rfolsom
-
Posts
881 -
Joined
-
Last visited
Content Type
Profiles
Forums
Gallery
Events
Everything posted by rfolsom
-

Cutty Sark by NenadM
rfolsom replied to NenadM's topic in - Build logs for subjects built 1851 - 1900
Best of luck to you on hard times; I'm sure everything will come to a resolution soon, and you can relax and go on with the build. Just focus on the important things for now... Our ships are very patient with their creators! -
Good luck on the moving process, Rich; remember, a year from now this will all be history, and full steam ahead! (No, wait; sail, not steam...)
-
Satisfied with the yellow paint, I started the outside bulwark planking, in a similar manner to the inside; I pre-paint the fiddly little 1/32" square port trim and install; and individually fit and pre-paint the planks. This is to avoid the tedious masking, (which I hate, and am not good at). I'll be really glad when the port trim is complete; I enjoy the planking, but these trim pieces are a pain. I found out that the planking from the stern to the aft edge of the last gunport requires tapering; narrowly avoided having to tear out planks in that area- just tapered the topmost three- I think it will be presentable. Bob

-
Cutty Sark by NenadM
rfolsom replied to NenadM's topic in - Build logs for subjects built 1851 - 1900
I like the bularks; good job! -
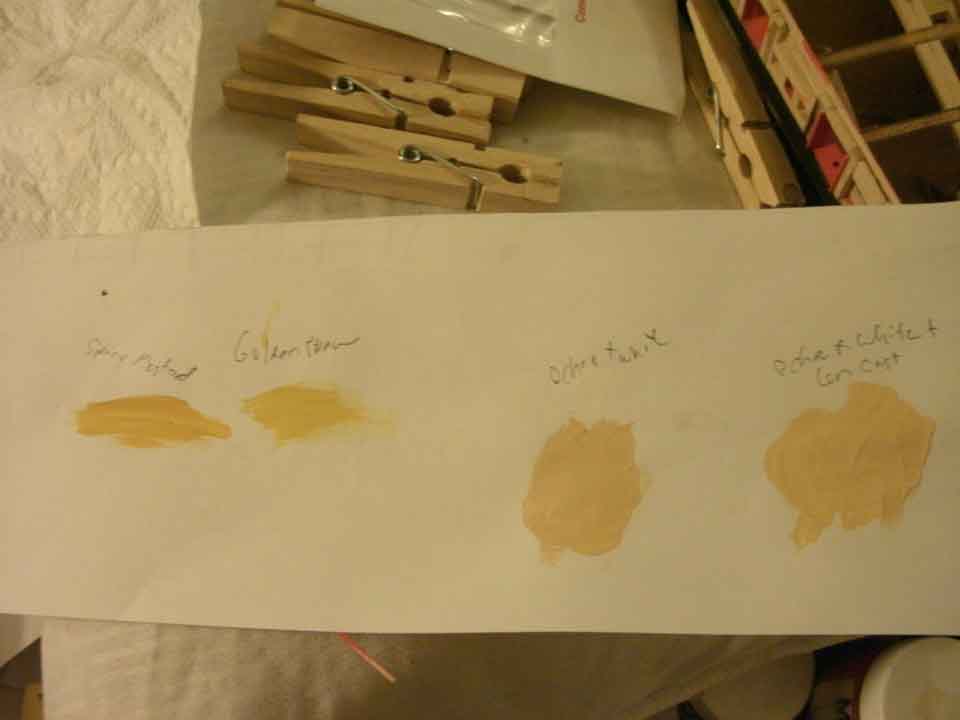
First two strakes immediately beneath the gunport sills, port and starboard are laid. Been whacking my head against a post trying to find the right (right in MY mind, too!) shade of yellow. The yellow ochre from the MS. paint kit is too dark, in my opinion, and I hate mixing my own colors..; I finally found (with the help of my Admiral) a yellow, second from left, called "Golden Straw". This will be my yellow for the Niagara... Bob


-
Spencer; Deck is looking great! When I installed my forecastle deck, I also installed the center pawl bit and carrick bits just to make sure everything lined up. I wouldn't worry about nibbing strakes on the forecastle and poop, they only existed on the main deck in the real ship. However, nibbing is cool, and makes a nice effect nonetheless... Keep an eye on the camber of the forecastle, another good reason to install the center pawl bit. Also make sure you have a good solid landing for the bowsprit before permanently placing the forecastle; I actually shaped my bowsprit before any planking began, and built up a solid area beneath the forecastle deck that I could insert the bowsprit at the proper angle without worries later on. Keep up the good work! Bob
-
Cutty Sark by NenadM
rfolsom replied to NenadM's topic in - Build logs for subjects built 1851 - 1900
Nenad; are these the bulwarks from the forecastle to the poop deck, or the bulwarks that surround the poop deck.? (they will have to be bent, one way or another) Bob -
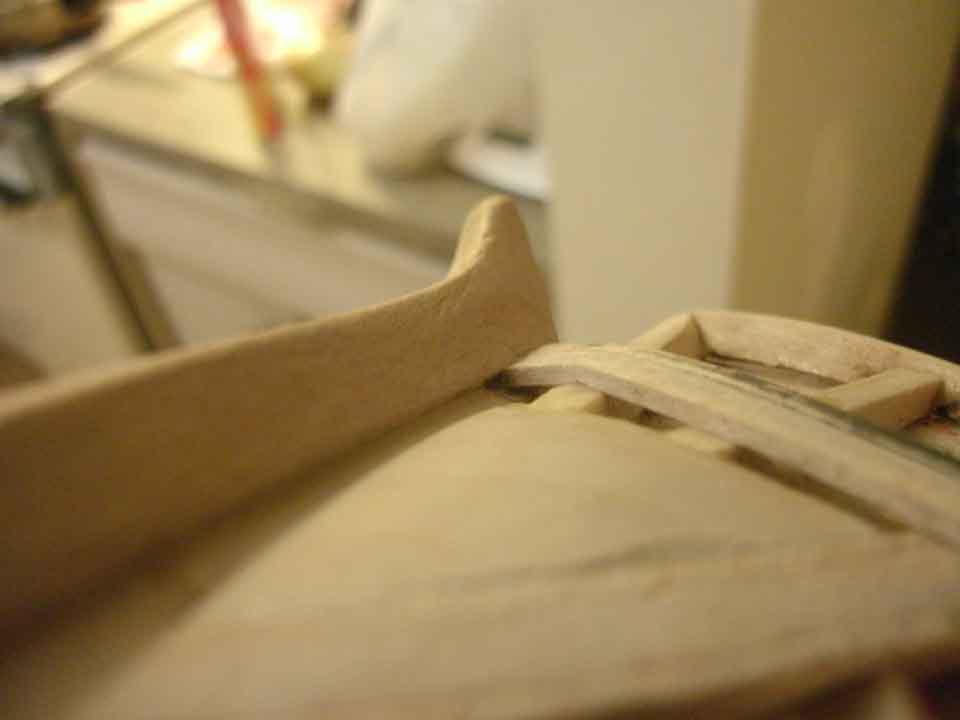
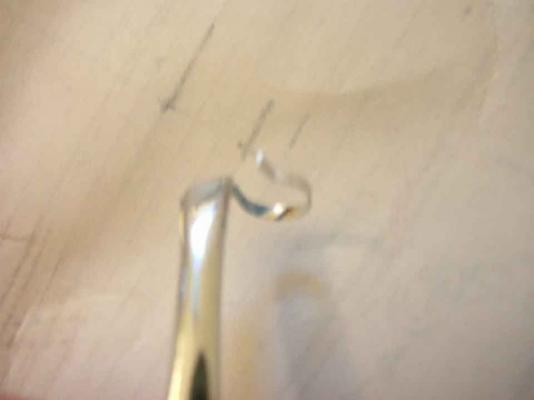
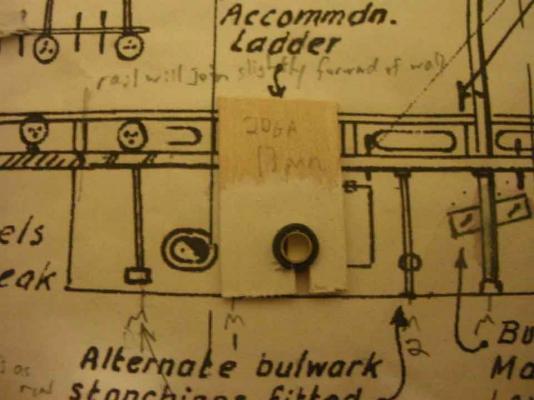
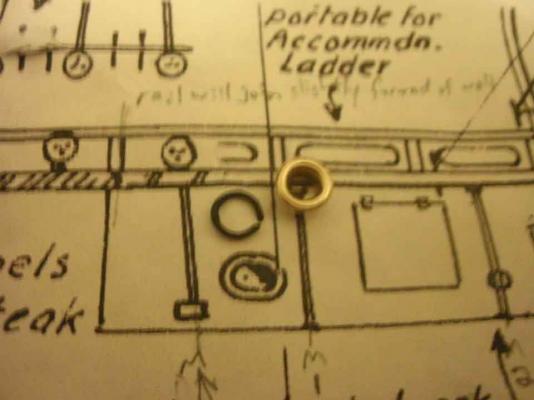
Ok; This afternoon's progress, for Nenad Nenad; your sketch would prove to be structurally impossible at this scale, however, I did use an aluminum can to fabricate the ring. Pics show various stages of prototype construction, with last pic showing the prototype assembly in place on the ship, with the temporary setup of the main rail section. This part of the build will actually be a few weeks away; main rail needs to be installed and finished, plus all the bulwark decorations.

-
Close enough for me to be satisfied, I believe...

-
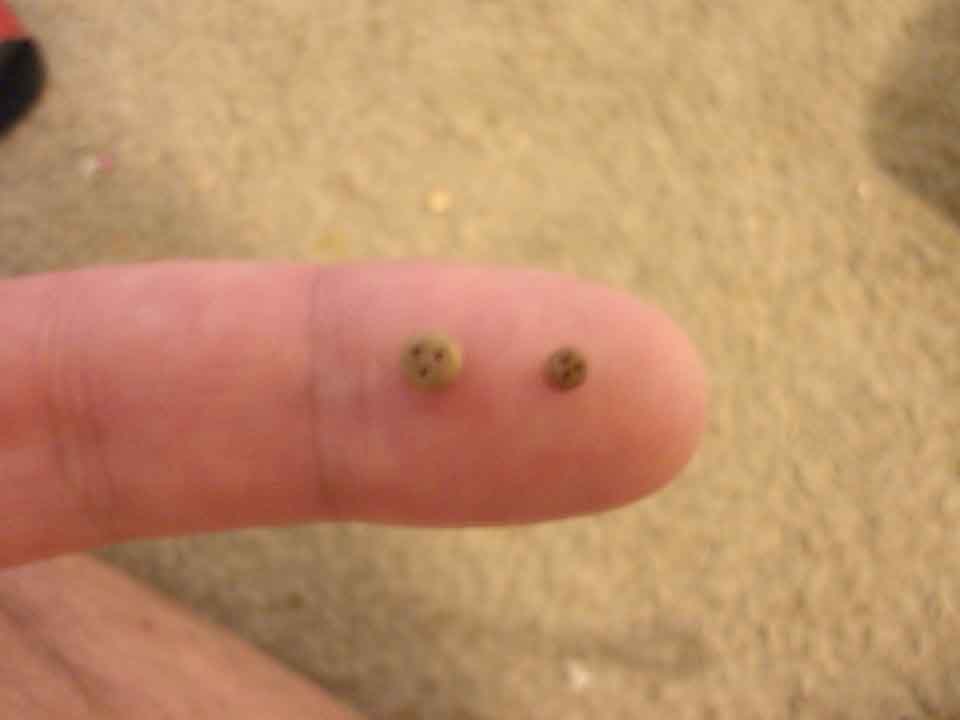
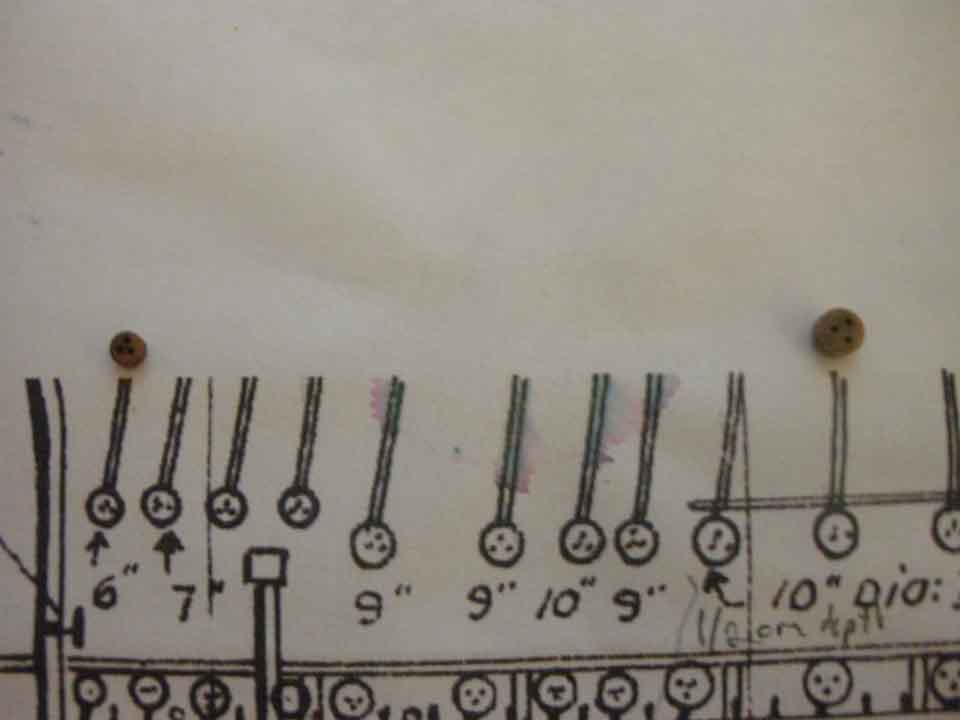
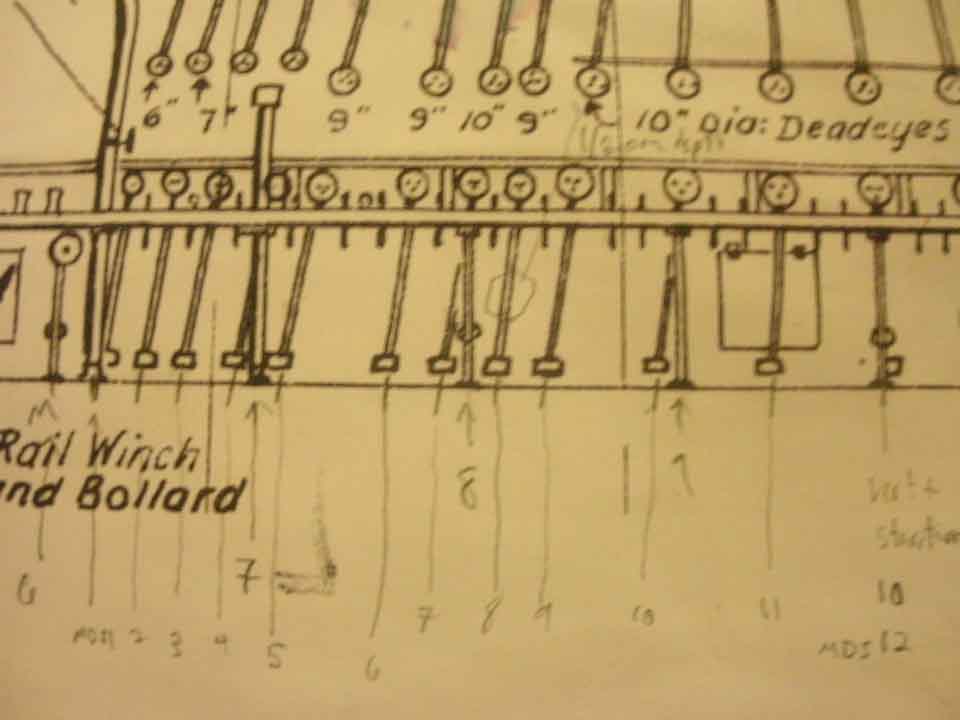
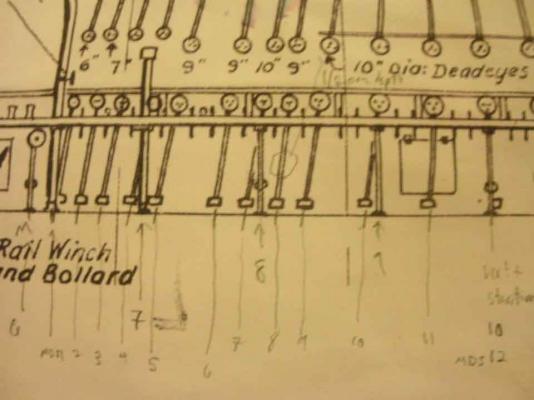
Nenad; The CS has deadeyes in diameters of 6,7,9 and 10 inches. At my scale, 1:76.8, this translates to 2, 2.3, 3, and 3.3 mm. Model Expo sells 2.5 and 3.5 mm deadeyes (their smallest), which I ordered some in May 2012. I am planning on using the 2.5mm for the 6 and 7 inch deadeyes, and the 3.5 mm for the 9 and 10 inch.
-
Cutty Sark by NenadM
rfolsom replied to NenadM's topic in - Build logs for subjects built 1851 - 1900
And yes; I'm not fond of (most) sitcoms and soap operas. I was a nerd growing up, which means I like science and math, Remember to keep everything in scale, Make compromises when compromises fit, and work. And above all.... Hmmmmmm- 4,152 replies
-
- 1
-

-
- cutty sark
- tehnodidakta
- (and 1 more)
-
Cutty Sark by NenadM
rfolsom replied to NenadM's topic in - Build logs for subjects built 1851 - 1900
Nenad; You may not have to wet your panels; try a dry fit first; The Cutty has such gradual lines, I didn't have to bend the bulwarks until the last 25% of the hull. -
Oh yes, Nenad! You strike again, my Serbian friend!! I was waiting for this... I am thinking about surrounding the deadeyes with brass strips; I'll have to see how it goes when I get the deadeyes actually installed... but I will test the aluminum can theory; it will most likely be more in scale... Grrrrr... Jury finds the defendant... Guilty As Charged. Sentence: More pictures....
-
Cutty Sark by NenadM
rfolsom replied to NenadM's topic in - Build logs for subjects built 1851 - 1900
Nenad; The movie was "R.I.P.D." It had really bad reviews, but the Admiral and I both enjoyed it- 4,152 replies
-
- 1
-
-
- cutty sark
- tehnodidakta
- (and 1 more)
-
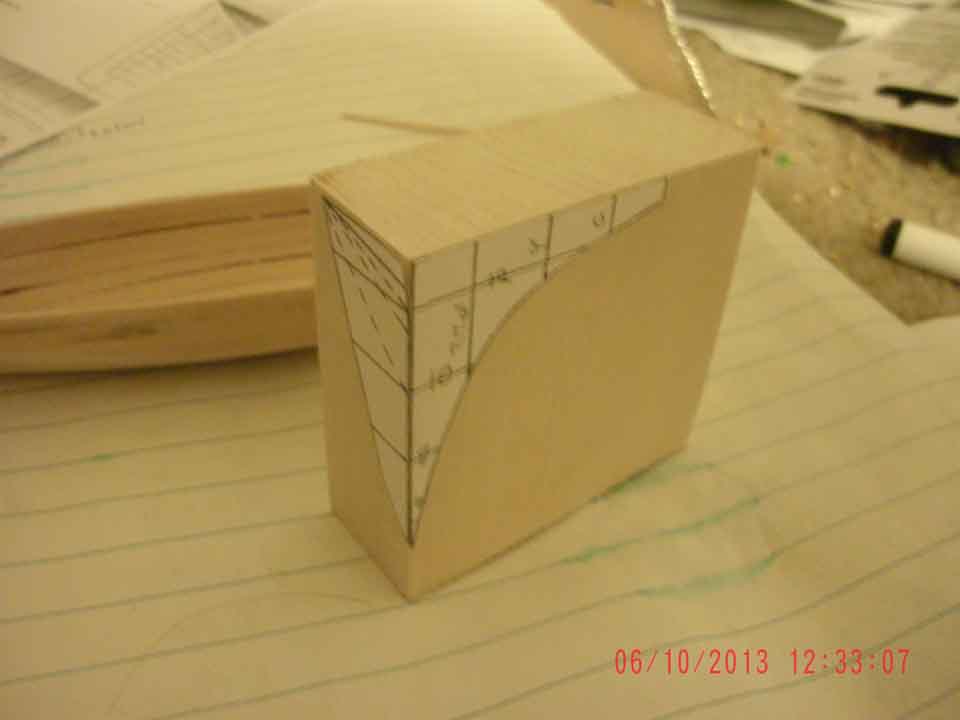
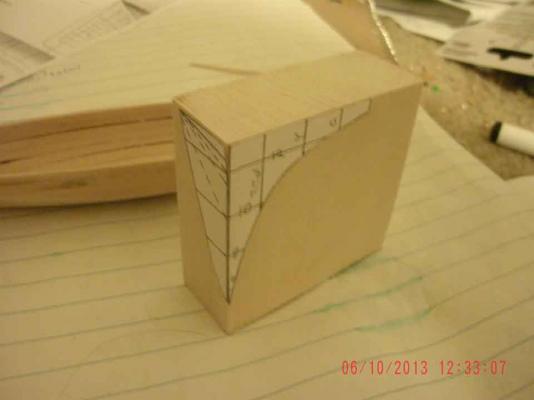
Tony: Slow is the way to go. No race here amongst our crowd! I have found with wooden model ship building, (for me, at least) it takes about 50 minutes of going over plans, researching, testing the fitting, painting, sanding, sizing of parts, going over plans again, looking over the build; etc. etc... Before spending 10 comfortable and confident minutes of actually working on the ship itself. So, look at everone's build logs and their pictures of the stern; make some copies and cut out the sections and actually affix them to your blocks. (I've found glue sticks for elementary school works well for this, as you can usually just peel off the paper after shaping the part.)
-
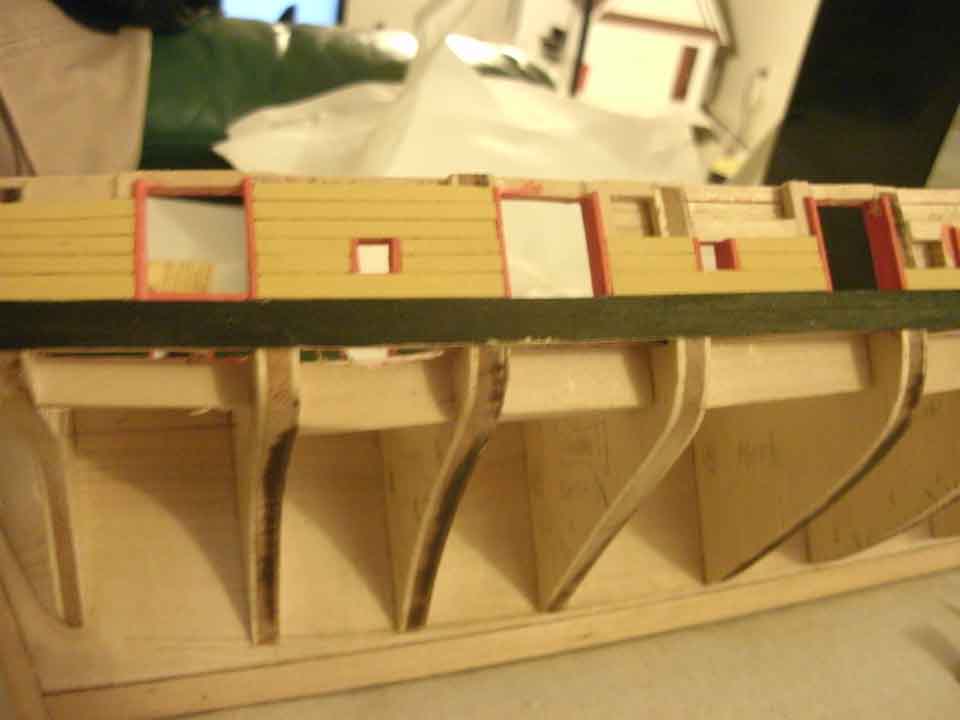
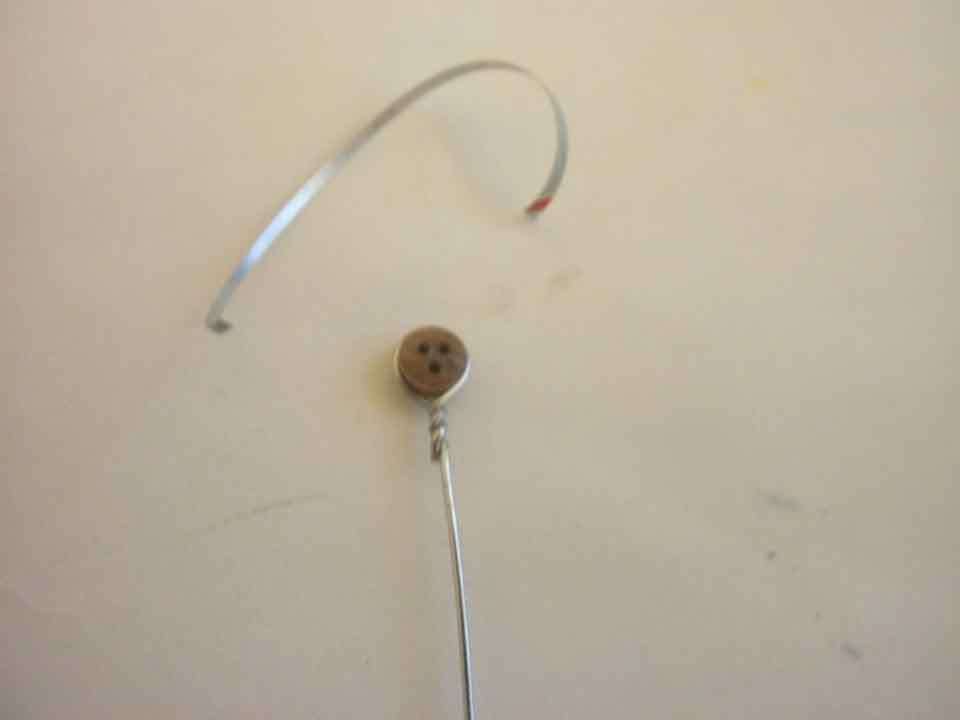
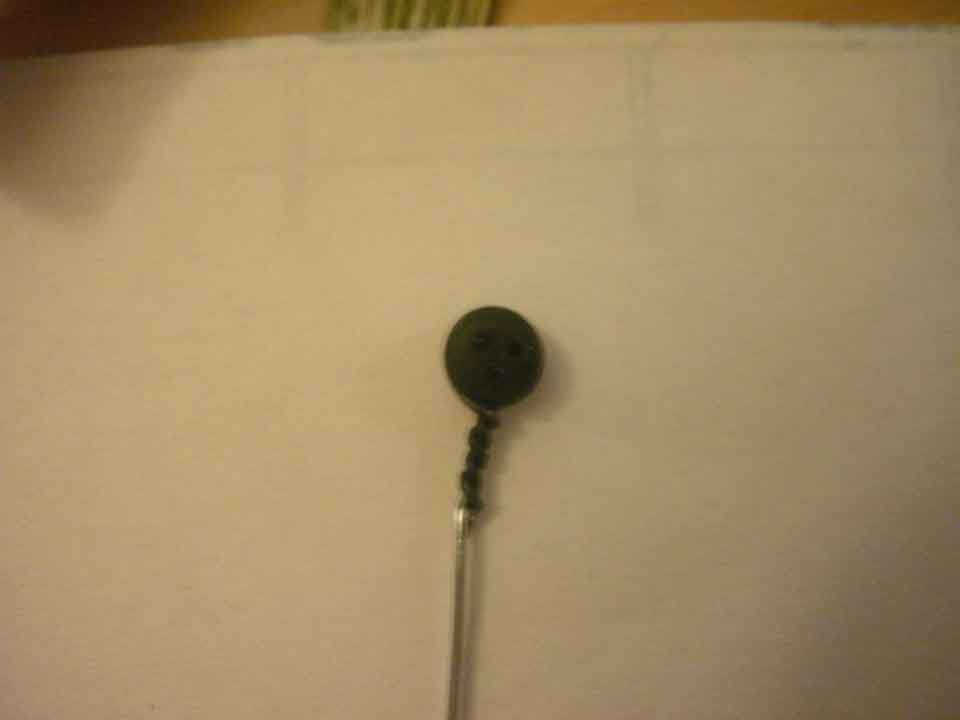
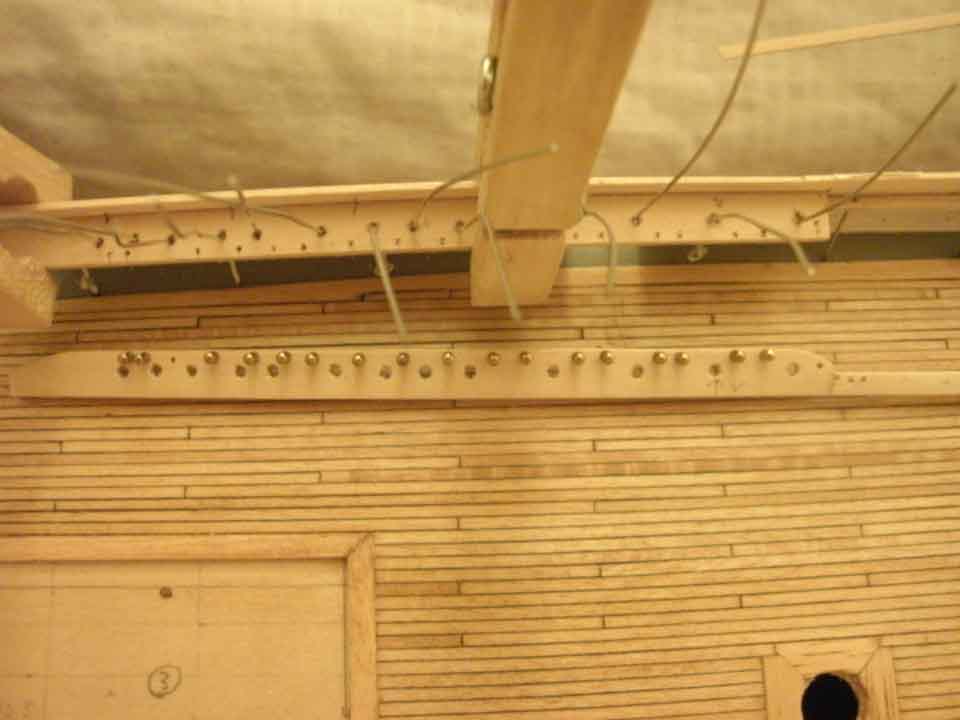
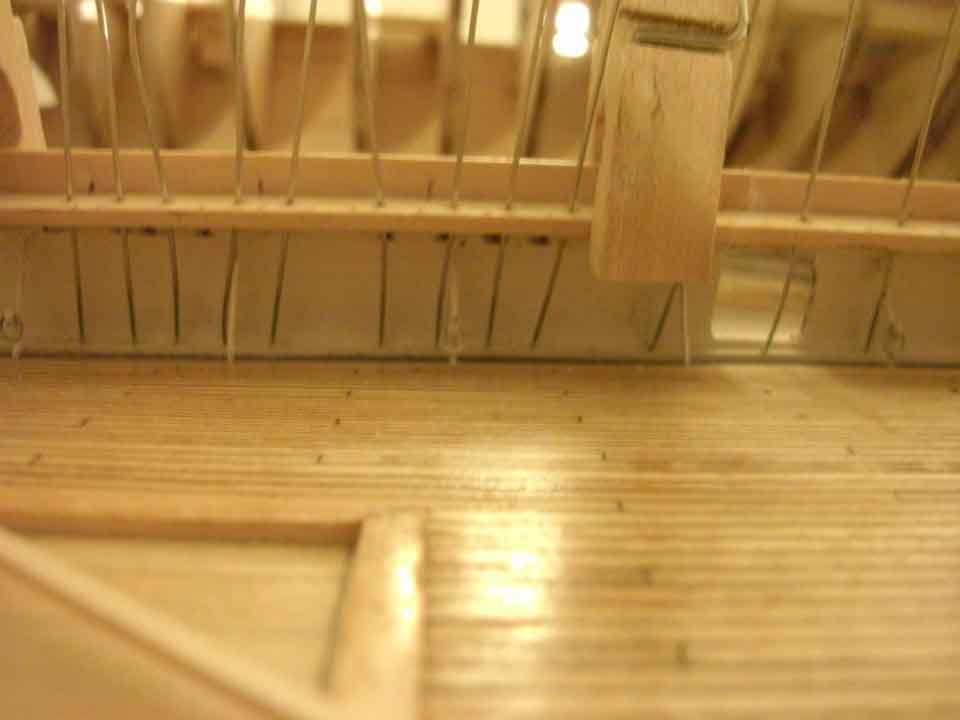
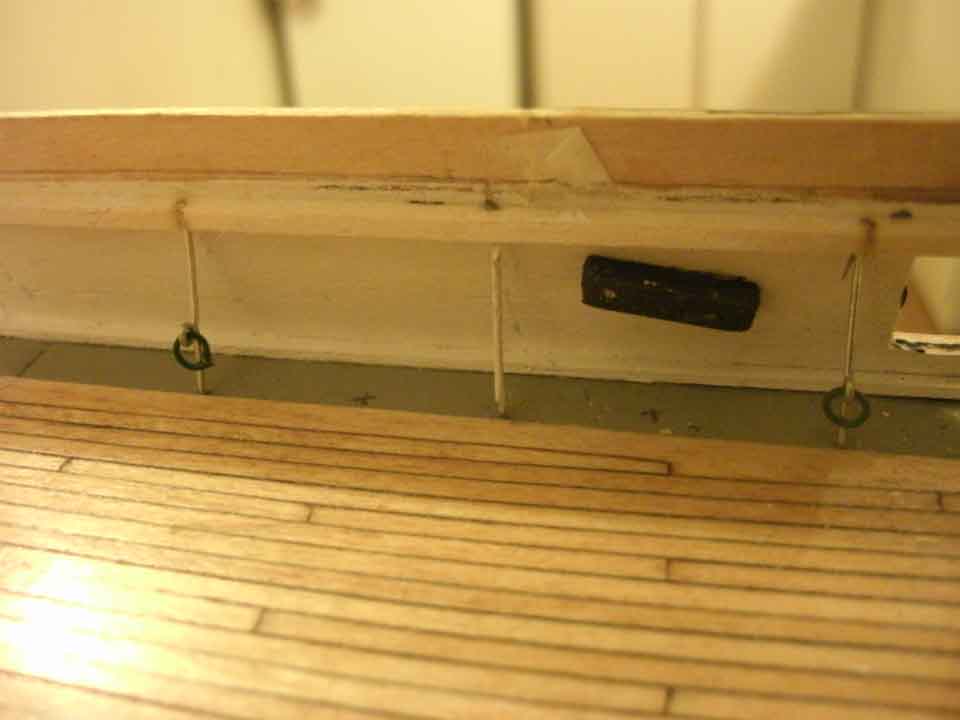
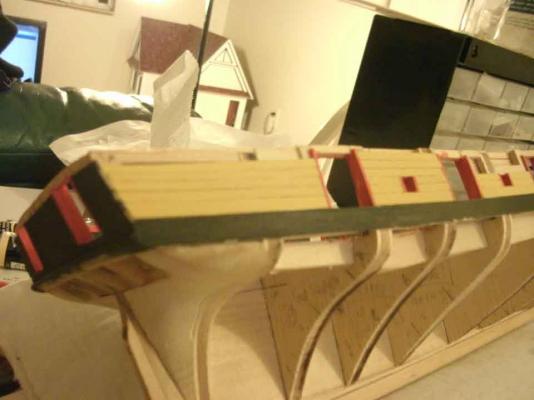
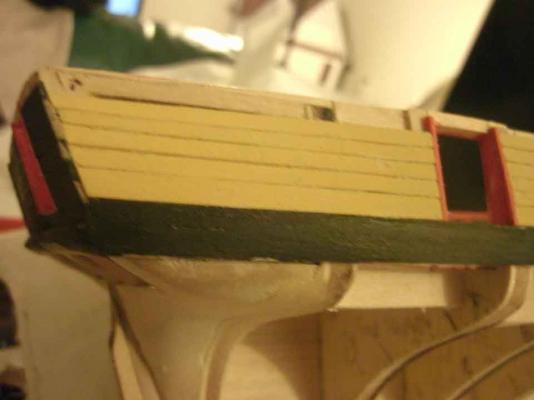
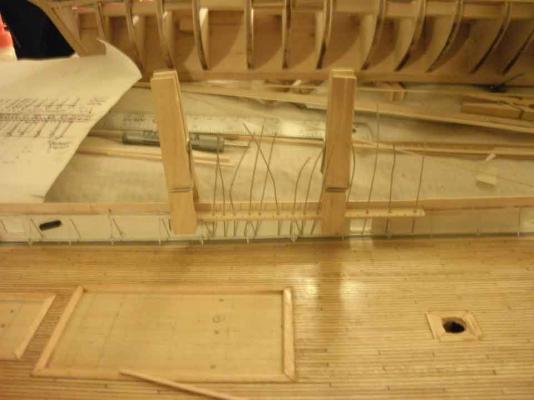
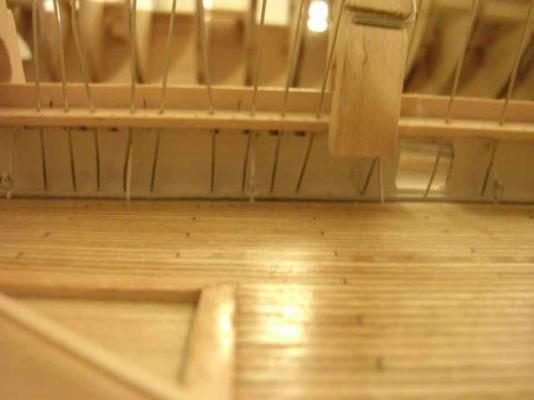
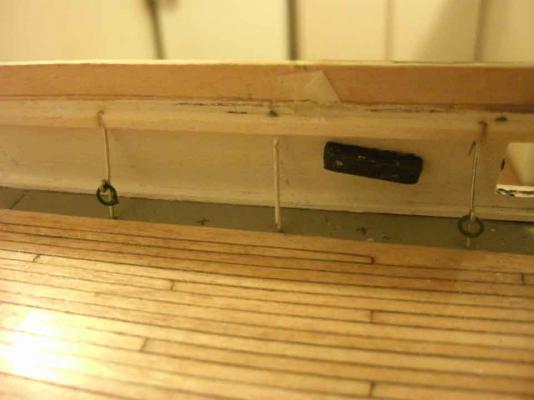
Thank you for the kind words, Popeye and Dognut. I'm still plugging along with priming and painting the stanchions, touching up the bulwarks, and drilling holes for the deadeye stays. After drilling all 13 holes for the main port deadeye stays, I clamped my port pre-drilled main pinrail section into place, and then rammed a needle one cm down into the holes at the angle the stays will enter the deck. (Yes, I know they are affixed to the iron bulwarks in the real ship, but as my bulwarks are made of 1/32" sheet basswood, they are going into the deck!). I then set up this hairy contraption with lenghts of 24 gauge wire (25 gauge is more accurate for these, but why buy more wire when the notice is imperceptible?) to test the angles of the stays, as compared to the angle of Campbell's plans. These stays are all at different angles, as the loads of the shrouds were distributed across this linear area at the deckline. Everything is temporarily posistioned, and the stays will be straightened and attached to deadeyes at a later time, but all the holes, and their angles, need to be established before the main rail is attached. Second photo shows the starboard twin partially shaped with belaying pins test fitted.

-
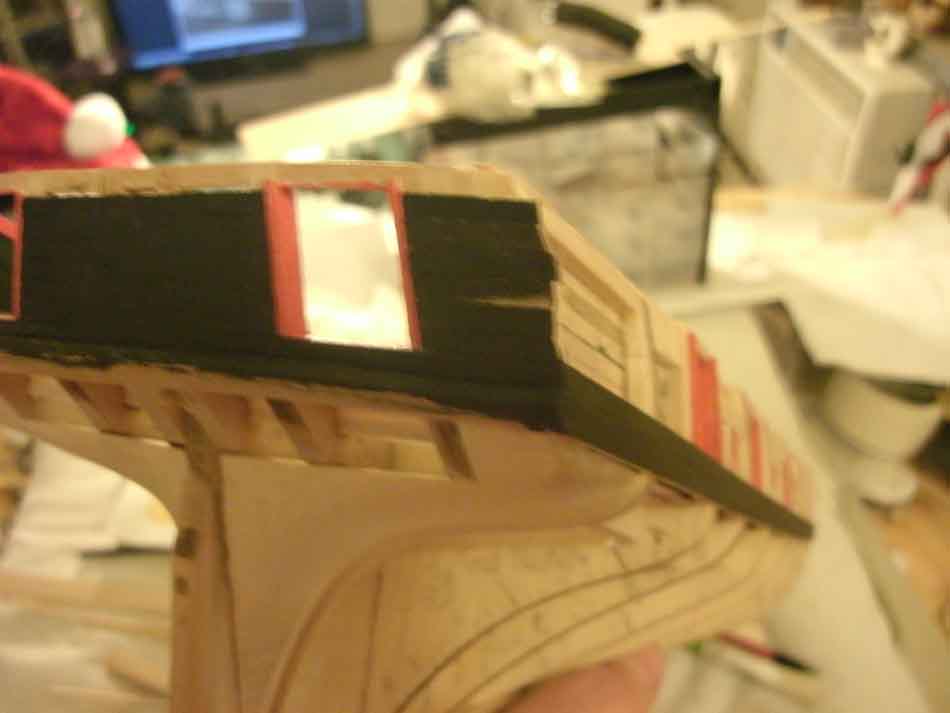
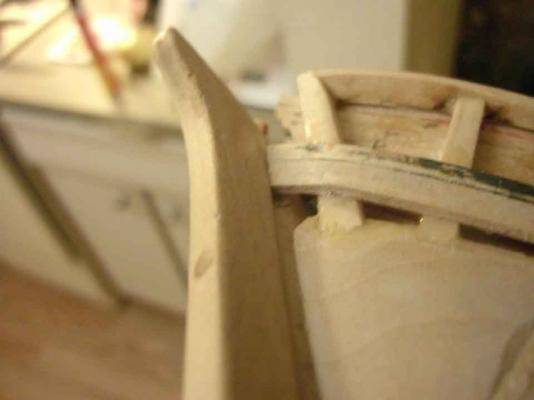
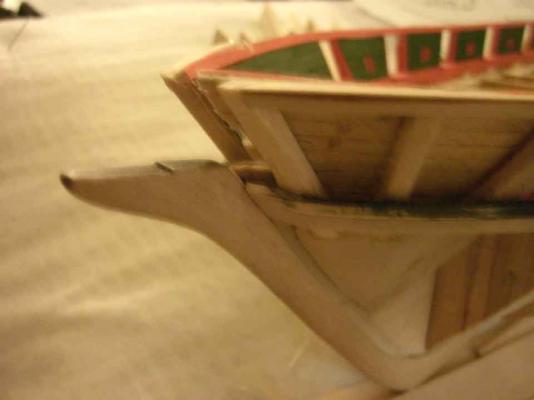
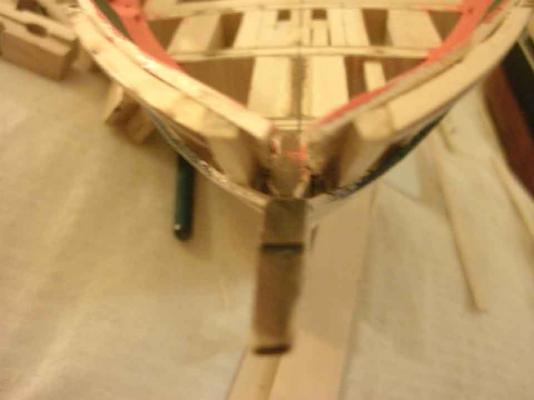
Correction; in my post before last I said; .."deep as your planks are wide." I meant "deep as your planks are thick.." Also, if you look carefully at my Cutty's bow, you can see the lighter wood which was gradually shaved and feathered into the rabbet which allows the planks to come to a sharp bow characteristic of clippers, as opposed to the more blunt bow of the Niagara. Good luck, and keep moving forward!
-
Here are some additional pictures I just took of the Niagara's bow as it is right now with only the first two outside strakes laid, at different angles to try to show how the planks lay into the rabbet. Notice the top view where you can see the "V" cut into the false keel (this is the rabbet, and follows the keel all the way around) The false keel and the stem, keel, and sternpost pieces are all the same thickness, and the rabbet is cut into the false keel only. Hope this helps some. I can take additional pics if needed. Bob

-
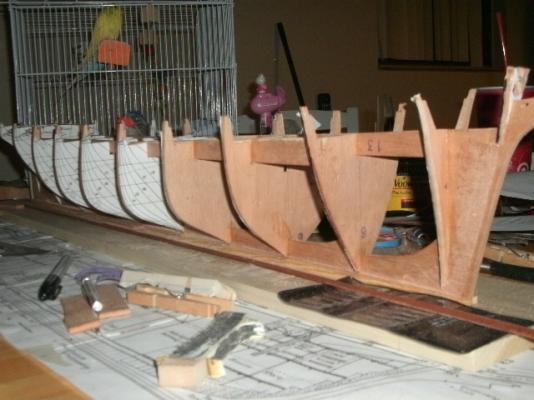
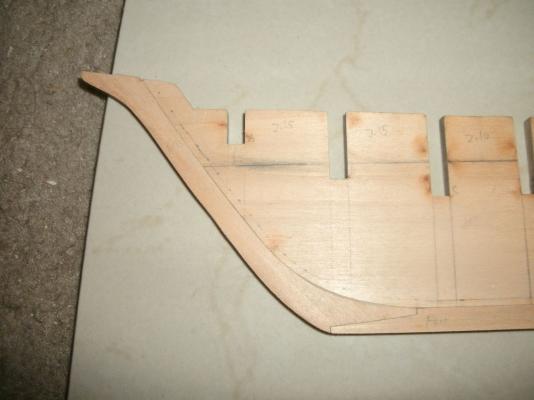
Dognut; it seems to me you needed to cut a rabbet in the false keel. This is a notch running all the way around the ship, as deep as your planks are wide, that allows the ends of the planks to set into. Here's an early picture of my Cutty Sark showing this, but it's hard to see. At top is a picture of my rabbet in my other build, the US brig Niagara; which is a little easier to see.
-
Duff- I thought about purchasing the Longridge book(s), however, I've found about 98% of what I need from G. Campbell's plans, plus his book on "China Tea Clippers". Undoubtedly, the Longridge book would help my build, but I'm at the point where it would only be marginally so, and I need to use my resources to find/fabricate/carve/ things like the pumps, winches, nameboards, scrollwork, etc. etc.
-
Dognut: Indeed, this is not a race; it is a hobby, and it is alot of fun and relaxation. Imagine if we were all employees in a factory somewhere, building Cutty Sark Models, from 8 am to 6pm, five days a week, and had to make a certain amount of progress each day; or face penalties, maybe possible termination... Don't sweat it! Enjoy the hobby, look the challenges square in the eye, cuss a bit, and keep going; and like I tell Nenad, sit back, admire your build, and say: "hmmmmmmmm"
-
Cutty Sark by NenadM
rfolsom replied to NenadM's topic in - Build logs for subjects built 1851 - 1900
Nenad; I understand completely! We all need a break from our builds, It helps in the long run. Our Admirals love our work but they are the ones to say; "Ok, time for a break, let's do something else!" It gives a time for us to clear our heads and start with a new approach. Sometimes we (or at least me) find ourselves hitting our heads against a brick wall (or a marble slab) and the one's in charge say; "Hey, back up, look at it tomorrow". I picked up the ship tonight to look down the deck, and The Admiral said; "No, not until we watch a movie.." Out-gunned once again...- 4,152 replies
-
- 1
-
-
- cutty sark
- tehnodidakta
- (and 1 more)
-
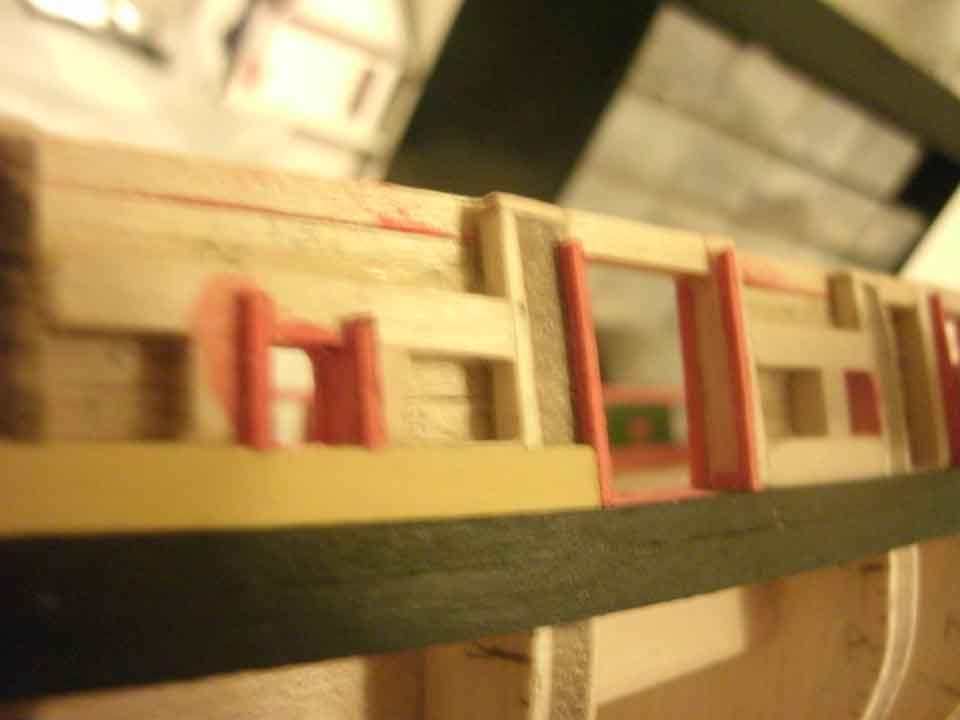
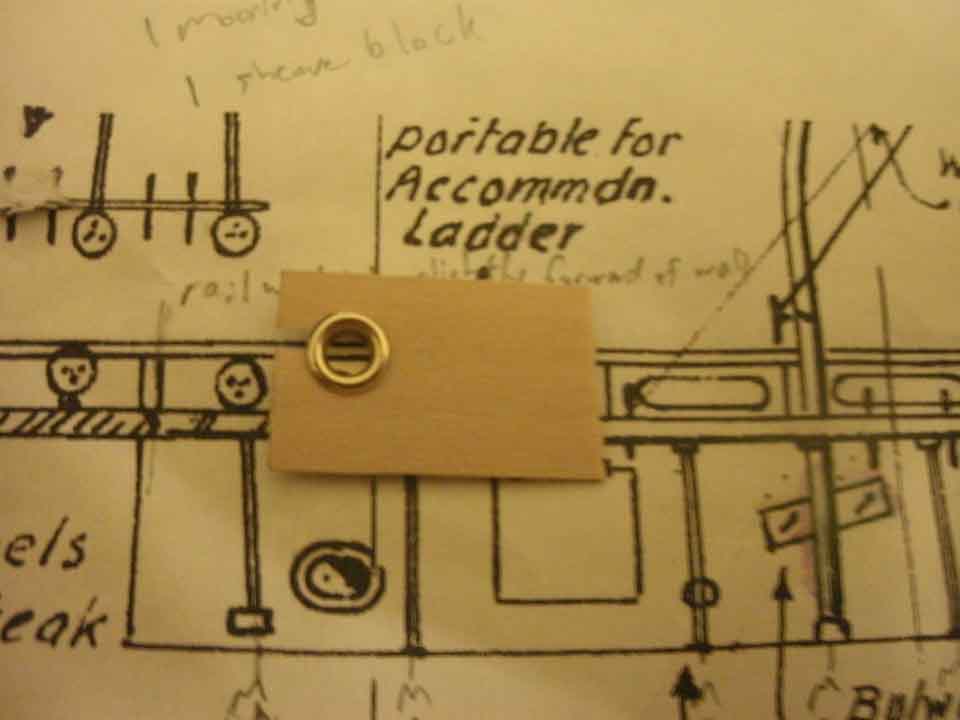
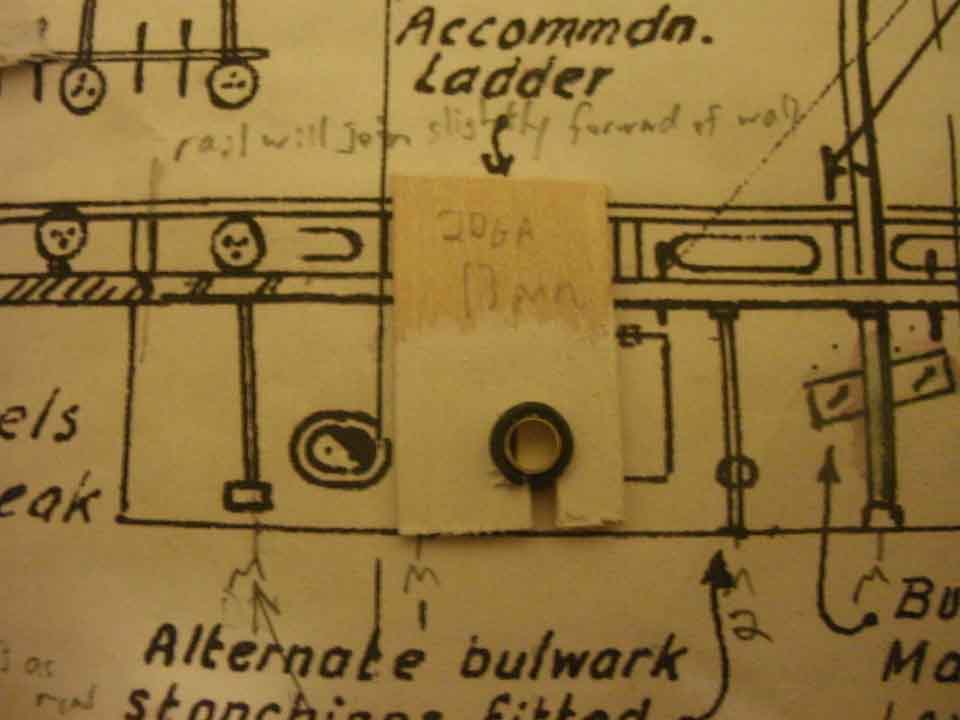
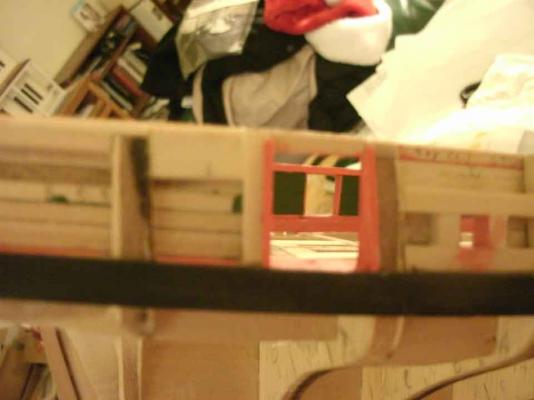
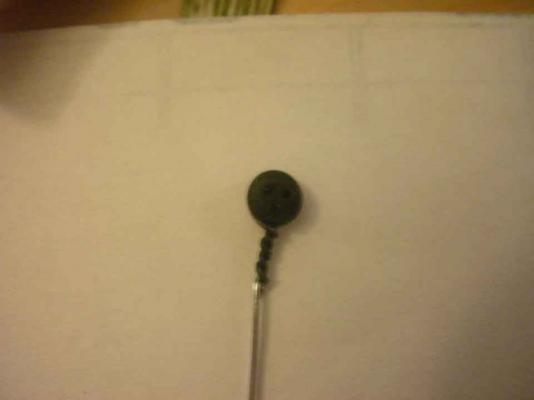
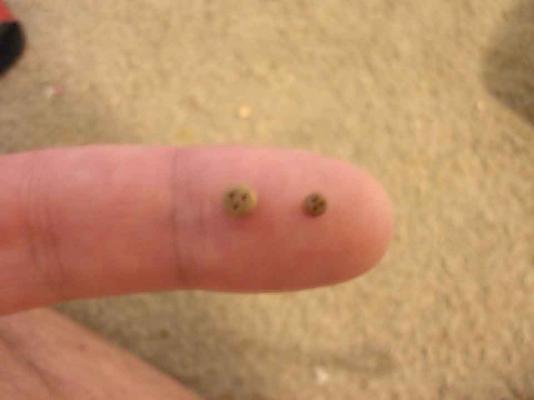
A bit of a dilemma with the mooring pipes... How to fabricate the ovals? After much thought, (I initially pondered this problem over a year ago, and ordered 4mm airports from Model Expo to test) I decided to abandon the ovals and just go with the round ports. After no success with grinding or sawing the 1/16" flange to fit my 1/32" bulwarks, I decided to make rings from 20 gauge wire to even the overhang inside, and paint them black. Here's pics of my tests on a scrap of 1/32" material. Nenad, I can live with this. (Unless, of course, you propose a better solution...)

-
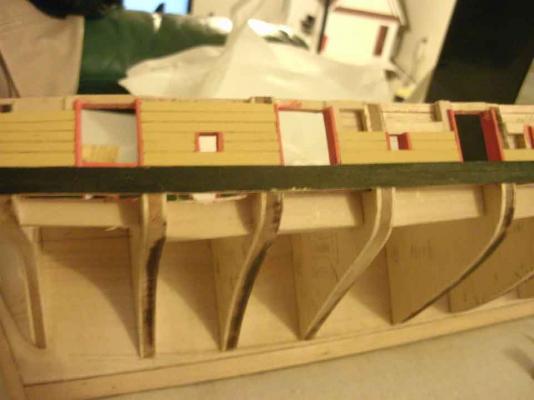
Added rings to all the ringed stanchions; also added two of the four sheave blocks mounted to the bulwarks. (Yes, they are supposed to be at that angle)
-
Kevin; Just stumbled upon your build, and it's looking great! I must say, however, if you are creating a great and accurate model from history, as we all are, why omit the swastika? The symbol itself has been around much longer than the third reich... It's all a part of history. If I were recreating a confederate warship from the 1800's I would include the confederate flag, for realism; history should not be offensive, we should all educate ourselves and our children in order to prevent the terrible mistakes we've made in the past, and as model ship builders we should embrace the wonderful engineering and design that went into these magnificent vessels; they all were created by great minds that, In My Humble Opinion, were horrified at how the war mongers ultimately used them to satisfy their own selfish agendas. That being said, I look forward to your build; I haven't done plastic since I was a kid, but this looks like a great kit, and It's tempting...