
HOLIDAY DONATION DRIVE - SUPPORT MSW - DO YOUR PART TO KEEP THIS GREAT FORUM GOING! (Only 36 donations so far out of 49,000 members - C'mon guys!)
×

Gregory
-
Posts
3,141 -
Joined
-
Last visited
Content Type
Profiles
Forums
Gallery
Events
Everything posted by Gregory
-
 It just means do not post modeling content in this forum.. It is for help with forum use and features. Brain farts are ok in this forum..
 -
What would you have me do to determine if this machine is adequate for the work I plan to do?
-
I have not detected any play in the head at all. The chuck is as finally made as any I have seen. I am not interested in investing anymore to make this a "better " machine. I could have paid a lot more and got a lot less.
-
USS Constitution by mtbediz - 1:76
Gregory replied to mtbediz's topic in - Build logs for subjects built 1751 - 1800
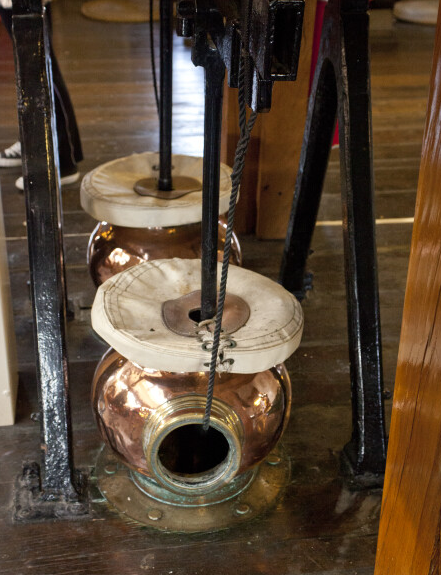
You may have this picture but it shows a little more detail. It looks like some copper vessels that allowed for a larger volume of liquid to be discharged as opposed to just the diameter of the main pump body. Another view. This appears to be a different set of pumps consisting of two pumps.
-
One option would be to sand as much as you need to, to Smoot things out and not worry about breaking through that layer, then go with another layer. I wouldn't hesitate to abandon a project if I felt I wasn't meeting my goals.
-
Another quick little job. I didn't set this up as tight as I could have. I wasn't concerned with small deviations, but maybe should have been. These pieces are the tentative quoins for my tentative Rattlesnake cannon. I needed a hole to insert the quoin handle. With hind sight, a little jig to do them securely one at a time, would give me more precision.. Next time. Still in prototyping phase. Experimenting with mahogany for some contrast on the gun deck, as I have chose not to paint. I will probably go back and do a better job of centering the quoin handles, because it's one of those things I would lose sleep over. Anyway, just another sea trial for the drill press. It is really up to the task, but I need to prep better.

-
The wood is cherry.. There are a lot of good ring ideas in the forum. I've been trying to learn something from Chuck Passaro. He designed and made Cheerful, Winchelsea and other models. Here is some of the latest info on ring and eyebolt making that he posted.
-
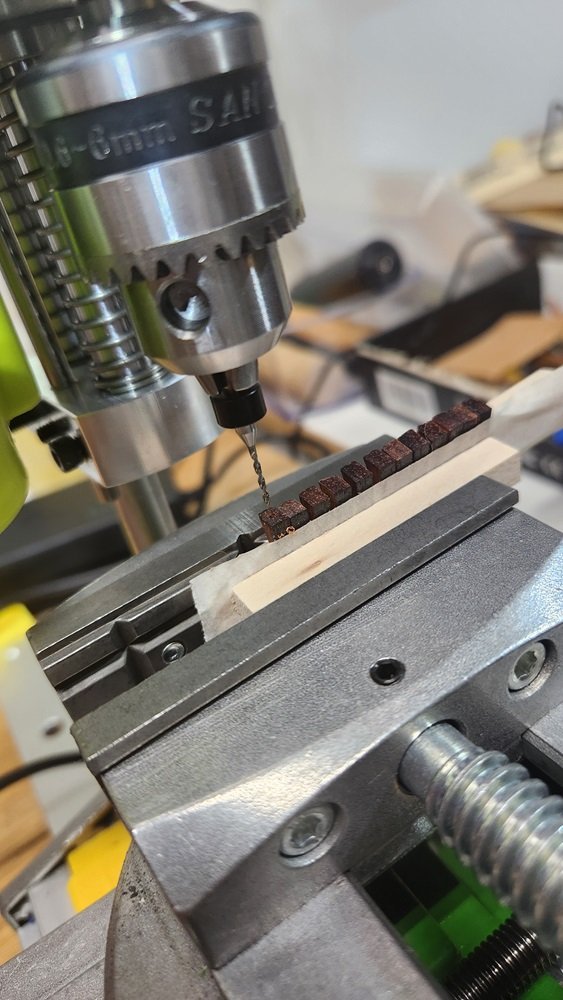
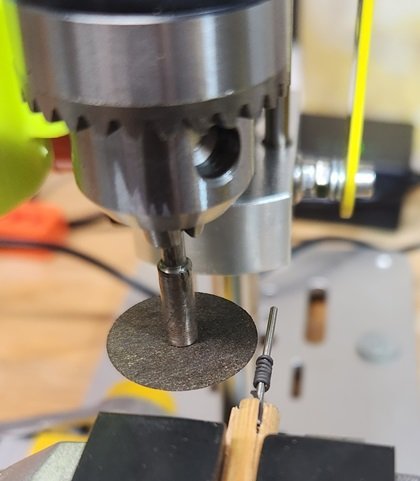
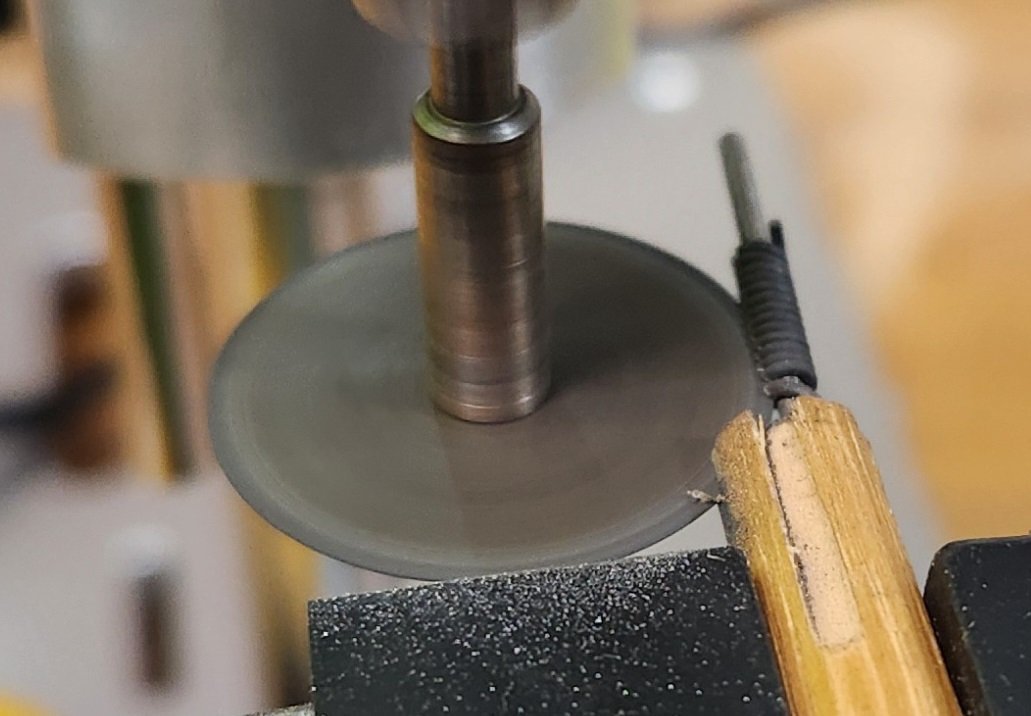
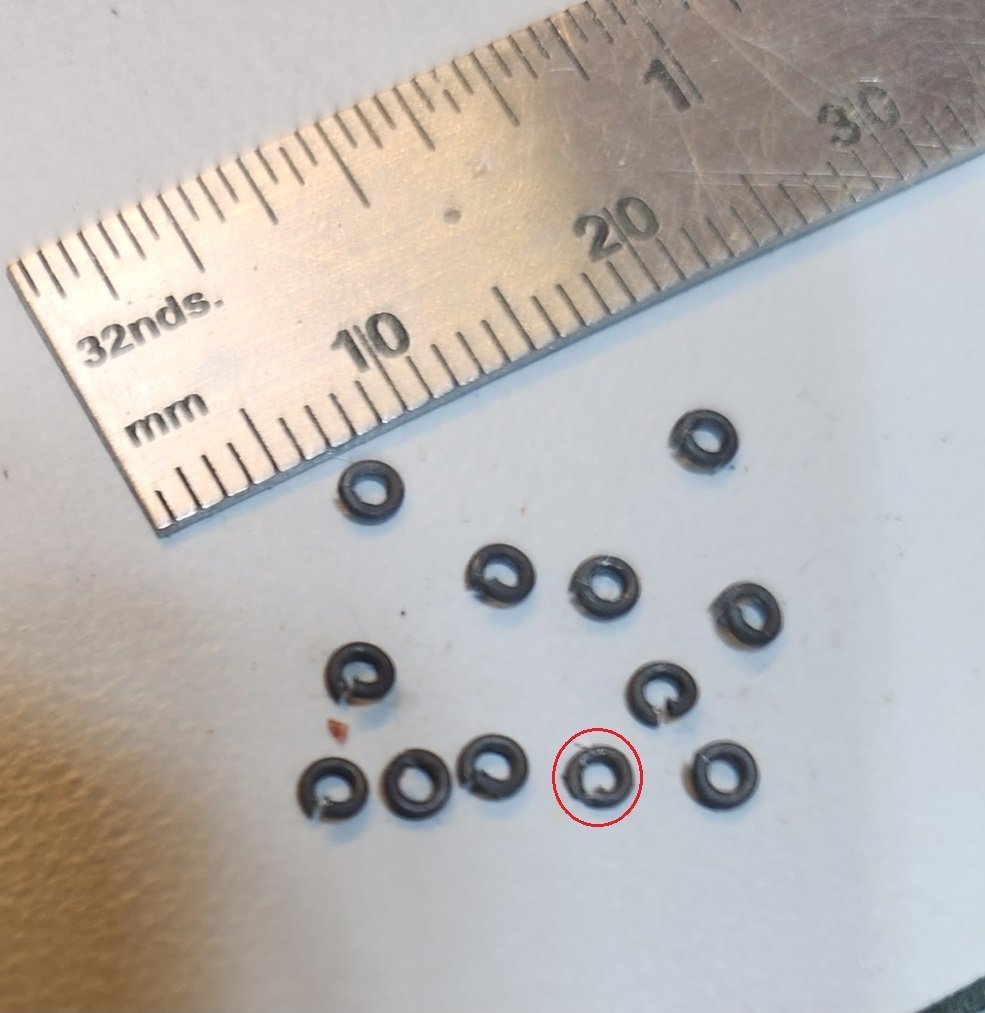
I did a little milling operation today. I'm working on some cannon for my Rattlesnake, and they require a lot of split rings and eyebolts. This method has been gleaned from a lot of discussion about making these things. I would have to say Chuck Passaro is my primary instructor on this. I have wrapped some 24 gauge annealed steel wire around a #56 drill bit fixed in a dowel. All the X, Y and Z adjustments took a little doing and there were a few oopsies before I got it where I wanted it. The tool is a .009 separation disk. Chuck P. says he has a saw he uses, but I have decided to go with this. Anyone who uses these discs can attest to how fragile they are. It's not unusual for me to break one just setting it up in the mandrel. If this set-up were not tight, the disc would not make it through the job. I can actually hear/feel a little click when one of the rings is cut through. This picture is toward the end of the operation. Here is the result. The one with a circle around it snuck in from an earlier effort with a different method. The open rings close up almost flush with very little pressure.
-
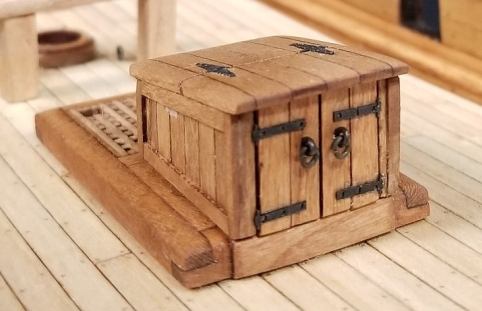
Since you are exploring ideas.. I did a little mix and match on my companion for Resolution. I make my hinges out of black paper.
-
Thanks for the info. I guess I've never done the type of work that calls for that type of precision. I 'll just have to see if this set up does what I need to do.
-
What do you mean by " preciseness " in a vise ?
-
Yes. See upthread. This is just one possible configuration. I won’t be depending on it for any serious milling. I have a Proxxon for that. The table as is just gives me a lot of flexibility at this station.
-
You could, but it limits the Y axis by an inch or so more than the way I have it. An inch is a lot at this scale. A small vise would do really well.
-
I just finish with 320 to 400 sandpaper. I also use a wipe on poly that’s been thinned with about 25% mineral spirits. Several coats, that are wiped with soft cloth and left to dry over night between coats. You can look at later pics of my Resolution to see the effect I get.
-
You may have already been there, but in the Gallery under “Contemporary Models “, page 2, there are several cutter models. You might get some different ideas about companion ways.
-
Help with understanding the rigging diagram
Gregory replied to Linda DOBLE's topic in Masting, rigging and sails
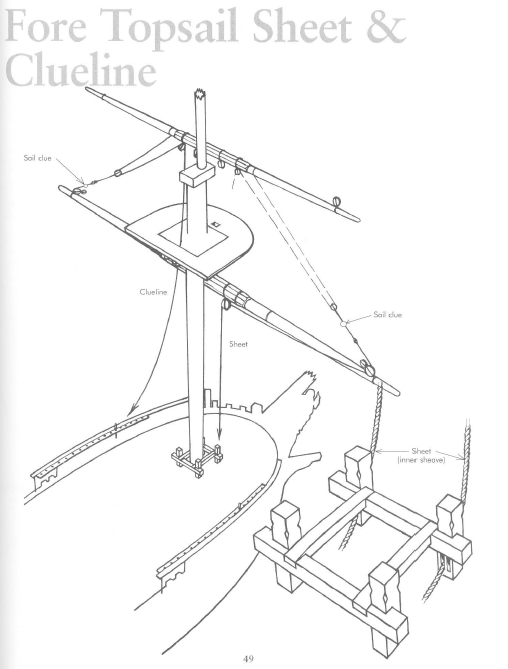
There is not a simple answer to your question, and that is a very simplified rigging diagram. It is difficult for me to tell which line/s are represented by your green highlights. They might be the sheet lines that would be attached to the lower corner of the sail ( not the middle of the yard ) and go through a series of blocks to be tied off/belayed on the deck or higher up in the rigging. There are lines to control the yards and lines to control the sails. Some do a little of each. The best starting advise you could get would come from a book such as Historic Ship Models by by Wolfram zu Mondfeld. It has some very good rigging details, such as: There will be help from many here, but the best help you will get is pointing you to the resources where this information can be found. Another good rigging resource for beginners is Rigging Period Ship Models by Lennarth Petersson. It provides a point to point guide for every line on the ship.. Petersson diagrams every line on the model like this. Hope this helps.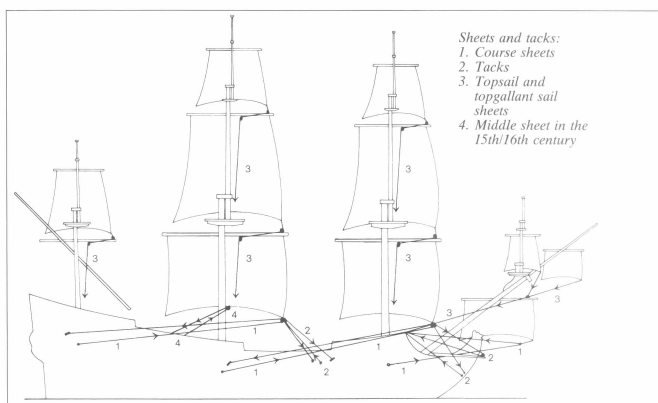
-
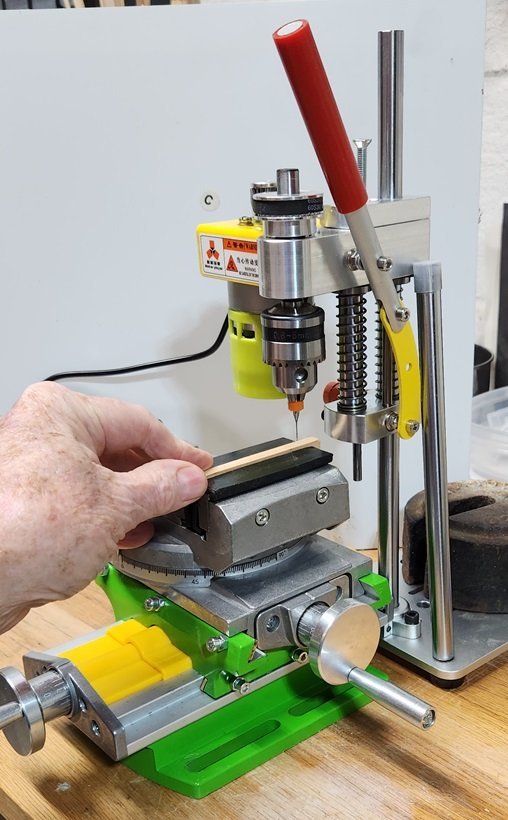
Here's with the new 12.2" ( 310mm ) rod installed. I set the old one there for compare. The rod from Amazon is very good quality and a perfect 12mm fit. I set the height for the micro bit, but there is plenty of room for longer tools. I don't have anything screwed down yet, but it will be a nice fit for my limited workspace. Here is a rundown of basic cost. Drill Press $69.99 X-Y Vise Table $57.59 Steel Rod $9.99 Time will tell if it is good for the work to be done. I look forward to working with it.
-
Because that was where he found it?
-
Take a look at the dimensions early in the thread. It has a really small footprint.. Here's a repost since we are on page 3 now..

-
I think it's going to be better for me. Time will tell.
-
I believe I understood what you were saying, and that certainly clarifies it. That is certainly a good solution if the circumstances call for it. For me, replacing the rod is a more streamlined solution. I wish I had thought of it before Chuck brought it up.
-
I think the quality is really good considering the price. The clearance under the head was my only concern.
-
Mostly drilling, but I want to experiment with light milling with wood. The bits will be the weak link. I don't forsee taxing it very much. Someone besides me will have to push it to it's limits..
-
How would that solve the problem of the bearings made for a 12mm post?
-
Solid.
