Gregory
-
Posts
3,168 -
Joined
-
Last visited
Content Type
Profiles
Forums
Gallery
Events
Everything posted by Gregory
-
 That looks pretty good to me! One small quibble. Those pintle pins should not stand proud of the leading edge of the rudder . .
 -
I suppose you can, but you are moving out of my area of expertise when you start drawing your own plans. Perhaps someone else can help. It sounds like you may need some good drafting software to do this.
-
I am not sure what you are calling ' bridges '...
-
The colors from the AL kit should work as well as any..
- 1 reply
-
- 1
-

-
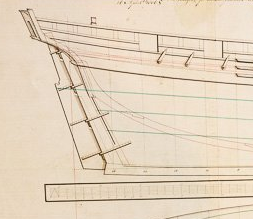
Here is the rudder from G Barlow's Cheerful. I think the cutouts for the " pintles " can be interpolated fairly easy. Some lines from the NMM.

-
There are some good references in the Cheerful logs. I can't get to them right now, but will dig up something later if you don't beat me to it...
-
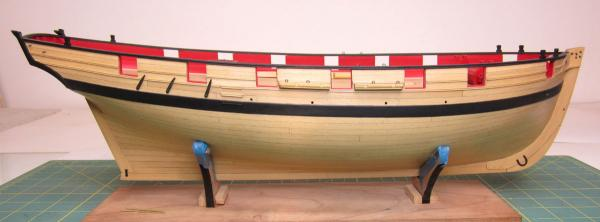
FWIW Chuck did include scuppers on Cheerful; Aft, as shown in the painting above ( if those are scuppers ) wouldn't make much sense. If I remember correctly, from some of the Cheerful logs, some builders chose not to model them. I have seen several contemporary models that did not show them either. I think it was one of those things that didn't show up on contemporary line drawings because they were taken for granted.
-
I would start off by Googling English Galleon Plans and looking at the images. You will have to sort out what kind of costs, if any, you might incur. You will see many options including images where you might be able to infer the run of the decks. If you are not that concerned about historical or architectural accuracy, then what you can infer from these drawings, along with the lines you have, you should be able to come up with the basis for a nice model.
-
The decks are not shown in those drawings, so you would need another source to provide that information. When you say " false keel " are you referring to the center longitudinal piece of a plank on bulkhead model? To establish the slots, you will first have to establish the deck/s ...
-
While this may be true, I think it makes for a more interesting model.
-
Did you see Kurt's answer above? I really don't have any idea.. I was just trying to find the kerf you were looking for.
-
I think Chuck was asking about your other parameters- diameter, arbor, etc. However, I suspect you have that covered and are just trying to zero in on the kerf. Malco has some 1/32 blades called Plain Metal Slitting saws.
-
What OS are you using? Windows ?
-
I get my blades from Malco Saw . The .03 is .762 mm They have a 1/2" arbor, so you have to make an adapter or get the one from Micromark. I have not had any problem with the .03 blade over heating and warping, with stock 6mm or less. The .02 can be a problem except with very thin stuff. It's good for very shallow grooves.
-
Well, that single screw, holding the fence to the sliding block might be a problem. 😉
-
Thanks for the explanation.. I really wasn't understanding from an earlier post what a zero clearance insert had to do with tear out.
-
The Dado effect for the Proxxon saw is a separate issue from the discussion of the sled. as well as a separate issue of Byrnes vs Proxxon. You would manage your insert just as you would for different width blades.. The warping washers are just another option to get a wider cut vs stacking blades or using wider blades. I can't even say it is something I would use, but I don't know why it wouldn't serve it's purpose if it is what you want to accomplish with one of these doll house saws..

-
Right. "Wobble" makes it sound like the blade is loose, which is not the case. The washers are thicker in one area, causing the cut of the blade to wobble laterally.. I don't know why it wouldn't be square. Maybe you could explain.
-
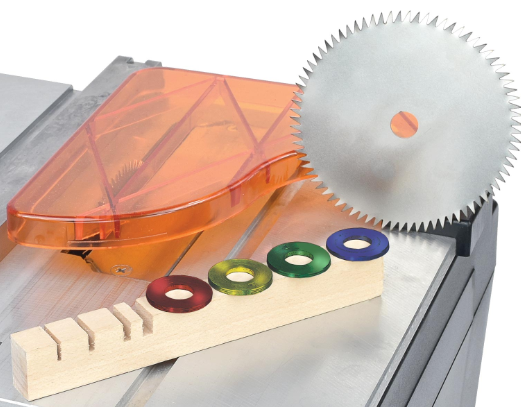
Have you seen what MicroMark calls a Dado Cutting System for their tilt arbor saw? Just some "Specially-designed" washers that make the blade wobble. Seems it would be pretty easy to make your own. Could be useful for gratings or other projects.
-
I have to admit my lack of expertise and ask for an example of when the sliding table is the best way to use the saw?
-
Great low cost option. It reminded me I bought a sled for my old Microlux, that I need to see if I can find.
-
Video not working for me. Anyone else?
-
The 1/8 shank ones are carbide. The carbide ones break very easily, but work well if one is careful.
-
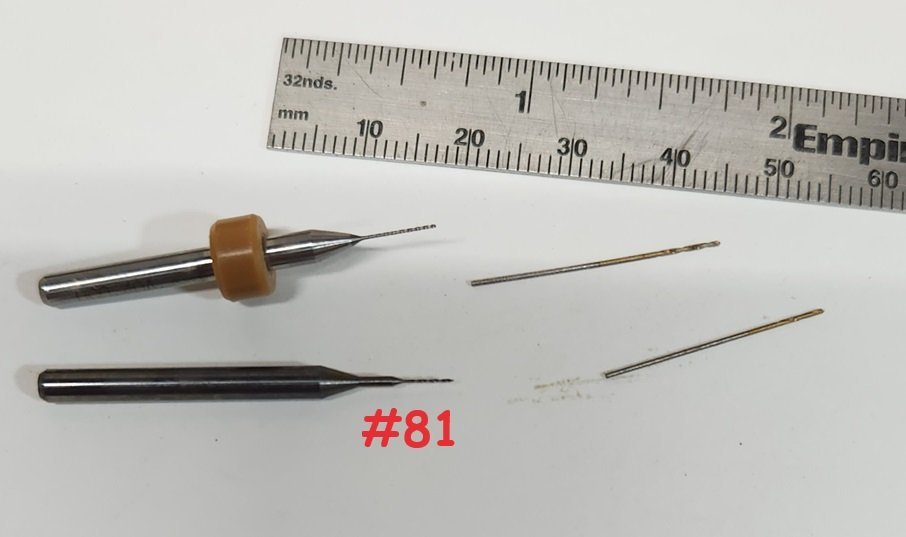
I don't anticipate doing any work that can't be done with the 1/8 shank micro drills, and I have them at least as small as #81.
-
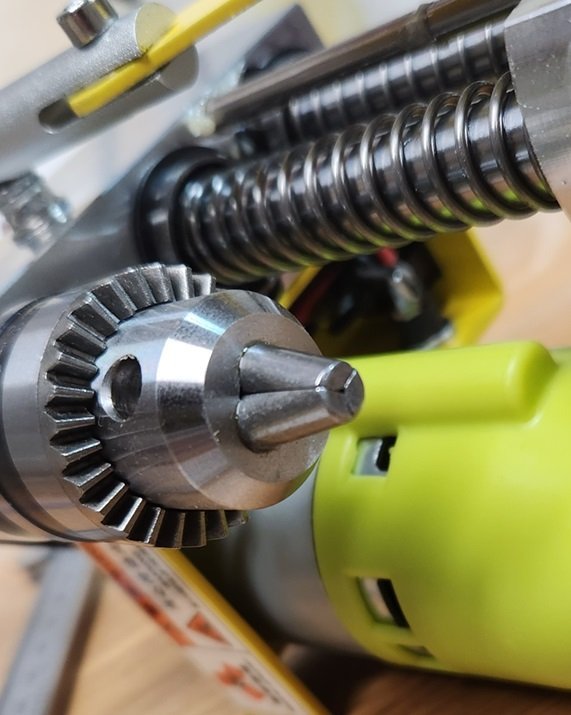
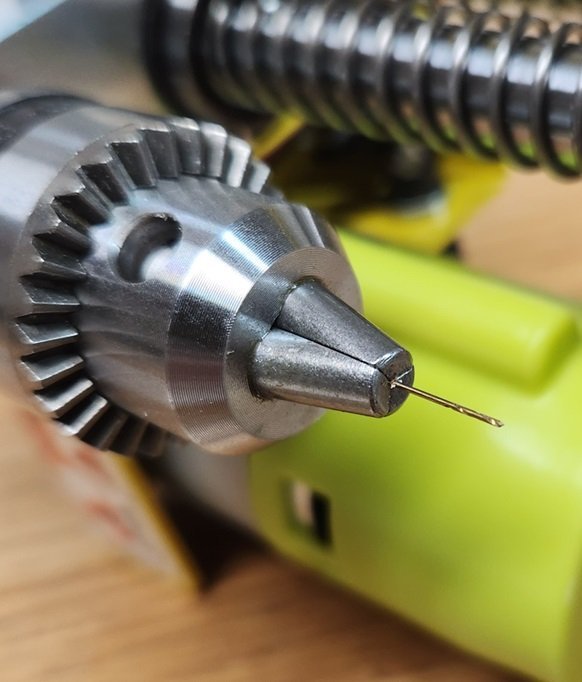
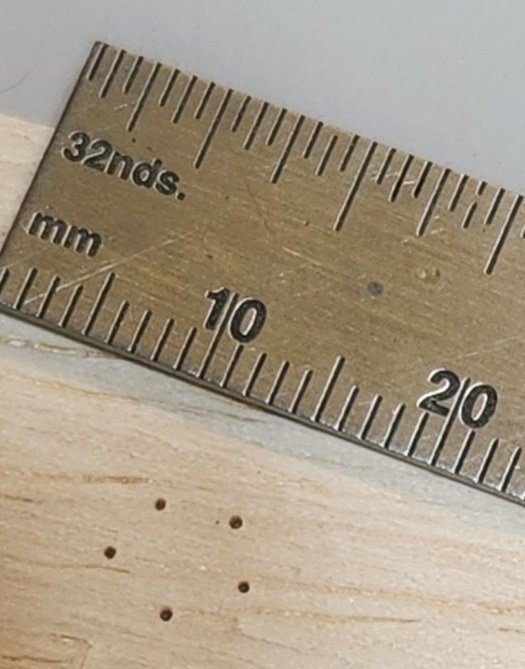
I have found the listed specs for all kinds of Chinese stuff to be unreliable. Generally, they are not catering to a market that cares about that kind of accuracy. Here is a close up of my chuck. I think the appearance of that opening is deceptive. It's certainly smaller than 1/32. Here are the smallest bits I have. Of course, the 2 with the 1/8 shank are not an issue. I don't have any decent calipers right now, but the bit on the bottom right is a little smaller than 24 gauge wire. ( .028" ) Here it is chucked up. Here are a few holes in some plywood with the bit above. The piece wasn't clamped , so there may have been some micro-movement. I'm looking froward to using this on a project.