

Gregory
-
Posts
3,170 -
Joined
-
Last visited
Content Type
Profiles
Forums
Gallery
Events
Everything posted by Gregory
-

Help with tapering
Gregory replied to N1ckel's topic in Building, Framing, Planking and plating a ships hull and deck
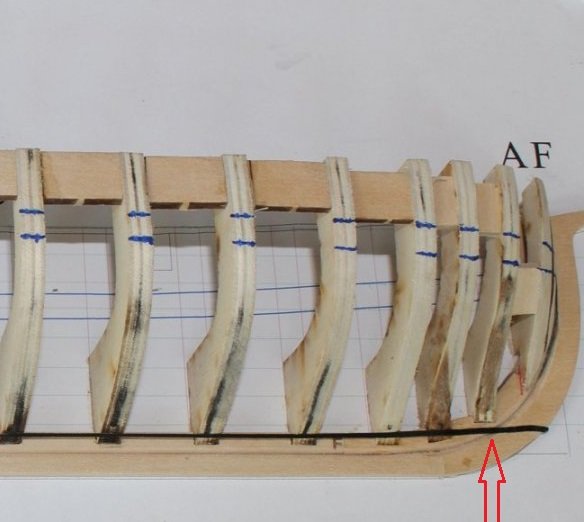
A good start might be to read about setting up the garboard. The half hull planking project is a good reference for establishing the garboard and planking in general. I borrowed this image from the Half Hull Project. The blue area is the garboard. The red tick marks show the width and number of planks at a mid-ship bulkhead. In this case there are ten. Which may or may not be the actual number of planks. I am just trying to illustrate. You then have to measure the distance indicated by the green line. This is the space available for the same ten planks at the bow/stem. Lets say that the planks are 4mm wide, so the area at the red tick marks would be 40mm. Lets say the green line measures 30mm. Divide 30 by 10 and you have 3mm. So, your planks need to taper from 4mm at mid ship to 3mm at the bow. Chances are you won't have the same easy measurements, but I hope the illustration helps.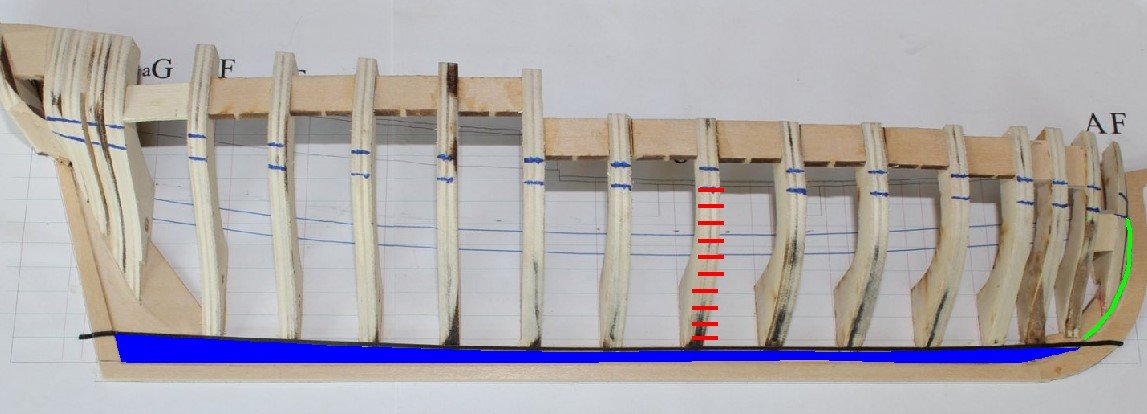
-
The iridescence is probably due to the oil content, which is common in tropical hardwoods. You might try rubbing with mineral spirits to help reduce the shine.
-
On a manufacturing level , something like weight per foot might be a standard. I really don't think they are counting twists. Just a guess..
-
It would vary with the size of the rope and the size of the yarns. When laying up rope the idea is for the yarns to be twisted as tight as possible without crinkling the rope. This is true for full size or scale rope. The number of twists per foot will be what you have when the rope looks good.
-
Those cannon are superb! The frieze painting really sets your model apart.
-
I think a pennant would be a nice touch.. The signal flags might be a distraction IMO.
- 562 replies
-
- 3
-

-
- vanguard models
- alert
- (and 2 more)
-
Jeff, Putting oil based poly over acrylic is what Woodartist asked about. So it sounds like you think it should be OK.
-
I beg your pardon, I'm afraid you have the advantage of me...
Gregory replied to JohnSGG's topic in New member Introductions
Looking at some of the fittings, particularly the deadeyes and belaying pins, it was not totally out of the box.. -
Cured CA is essentially plastic. It will not deteriorate any faster than other plastics. That said, if you roughen up the brass and use tight holes, PVA should work as well.
-
Cast Metal and Brass
Gregory replied to Flyfisher's topic in Metal Work, Soldering and Metal Fittings
A little more context might help. Is this a kit? Which one? Which parts? I've never seen a typical kit that suggested any soldering at all. -
That is what I was looking for.
-
Quick question for the Constitution guys who have researched this so well. Looking at the plans you posted, are the deck planks that end in a point actual practice, now and in the past? I had always been led to believe the points were to be avoided and were eliminated with nibbling(?).
-
Not much of a gap. If it were me, I would sand away until everything fits.
- 83 replies
-
- 6
-
-

-
- Lady Nelson
- Amati
- (and 2 more)
-
Your build should be the Poster Child for that kit!
- 562 replies
-
- 7
-
-
-
- vanguard models
- alert
- (and 2 more)
-
Proxxon cross cut sled + other accessories
Gregory replied to OT1138's topic in Modeling tools and Workshop Equipment
The one from MicroMark for the tilt arbor saw should work. However, something you could make yourself would work as well if not better. Sliding Table Microlux -
I also said: " I don't know if that's close to your final look..."
-
British Pathe film: Model Boat Building, 1956.
Gregory replied to uss frolick's topic in Nautical/Naval History
Ever watched NCIS? Main character Gibbs, builds boats ( not models ) in his basement.
-
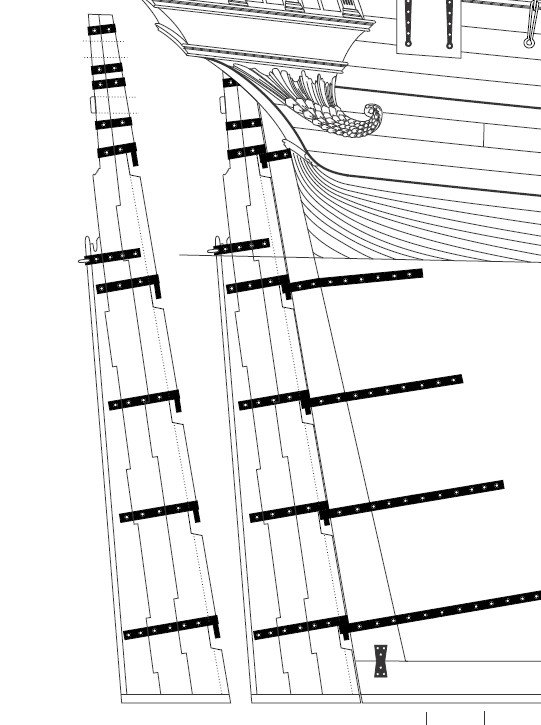
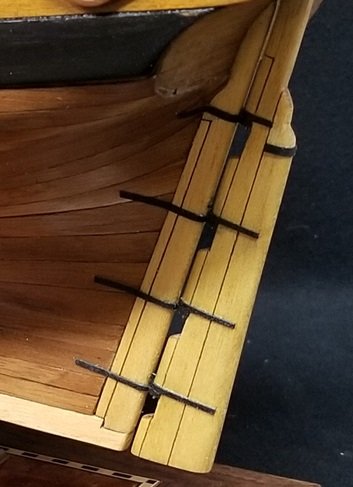
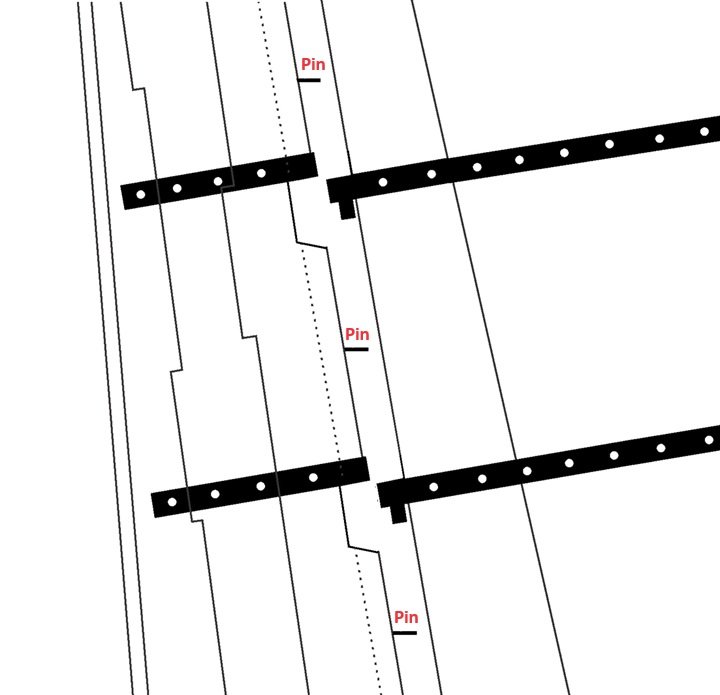
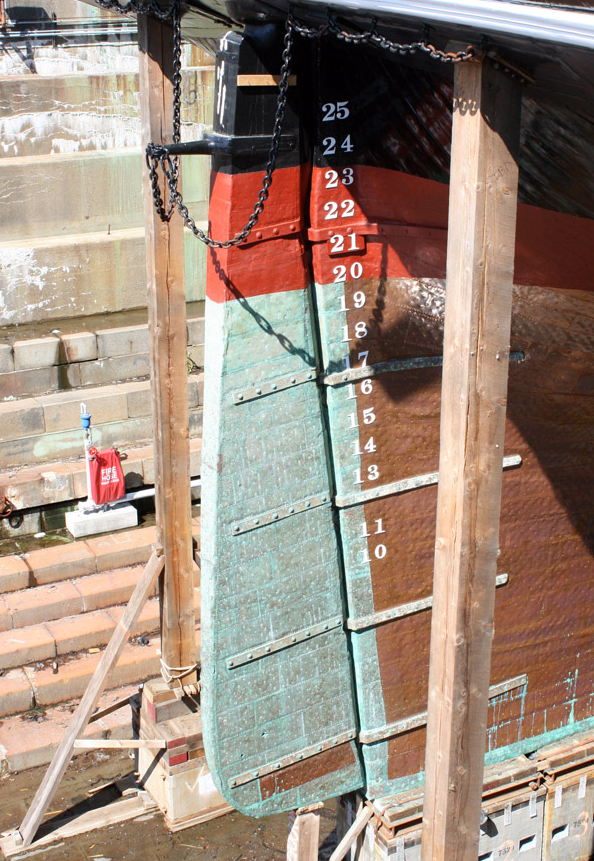
Here is the rudder attachment from Chuck's Winchelsea. It is typical. The pintles are countersunk into the rudder and the gudgeons are no bigger than the slot where the pins are. I'm surprised the Bluejacket plans don't show this more clearly. The kit supplied parts may have to be modified somewhat, or you might consider making your own. I made the gudgeons and pintles on my Resolution from cardstock. Your rudder would also require some modification to fit correctly. Keep in mind that it doesn't have to go together like the real thing to look good. For my Resolution, I put the Pintle pin in the gudgeon, rather than hang the rudder as in actual practice. Then I used small pins to fix the rudder to the stern post. You might find a different way that suits you better.
-
I don't know if that's close to your final look, but the rudder would be almost flush with the stern post. Your arrangement looks rather incongruous. Sorry to sound critical, but I wouldn't want that to detract from an otherwise excellent build. The kit supplied gudgeons and pintles may leave something to be desired, or require a lot of work to get a good fit.
-
Those look really good.. If I were going to shoot for any improvement, it would be a more uniform size.
-
I think your best bet for understanding the Garboard will be to look at the Half Hull Planking Project.. Talk about the garboard starts here: I agree the garboard has caused a lot of grief, but I think the main mistake people make is how far forward it should run. The black strip shows the placement of the garboard. Toni says " The garboard is the only strake with a straight edge. " The image is misleading due to perspective. As it runs forward you have to account for the space it covers on the curved bulkheads. As I mentioned, where the garboard meets the stem is critical, but if you just lay a straight line , accounting for your plank width, from the stern to the stem, it will be perfect. The mistake most often made is letting the garboard fall to far aft , which result in planks that curve upward too much as the planking moves up the bow. Practice making your planks with paper or card before committing your wood stock.
-
We have this information from a recent discussion. https://modelshipworld.com/topic/36354-gun-positions-and-their-associated-tackle/?do=findComment&comment=1042700
-
I hope my comments were not taken as being critical of your work. To the contrary, your planking and now, the mitered joints are an inspiration, and I think it great that you are adding a detail that sets your model apart from the crowd.
-
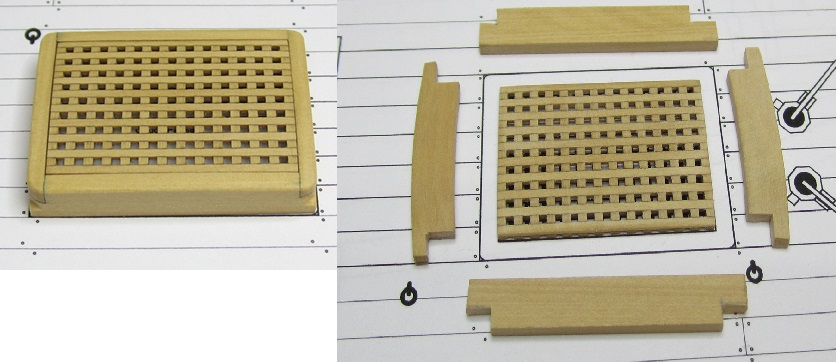
Your work looks very good, but who is George Stockwell? I seem to recall seeing the mitered joints on a contemporary model or two, but for the most part they were the lap joints we see on a lot of models here and elsewhere. I borrowed these from Chucks Cheerful. Of course, the builders of the Virginia Sloops may have followed a different practice, of which I have no expertise.
-
Considering earlier discussion it should easily fall within 1501-1750.