(1)(1)(1)(2).jpg.a128ea4d7b02ebfc5d5eb6547e92106f.jpg)
PRS
-
Posts
372 -
Joined
-
Last visited
Content Type
Profiles
Forums
Gallery
Events
Everything posted by PRS
-
Thanks. Good information to have.
-
(1)(1)(1)(2).thumb.jpg.792ad774561d3d4f35888704cde27a8e.jpg) Really nice!
Really nice! -
Spent the day yesterday getting practice on my Proxxon FET table saw and made this stand. Not sure if I like it or not though.
- 274 replies
-
- 11
-

-
- Cheerful
- Syren Ship Model Company
- (and 1 more)
-
So I ordered the saw Monday night and received it Friday from Home Depot. I also ordered the other two different blades for it. The Super Cut and the Fine Cut blade. This saw works pretty good and using the fine tooth blade is will be able to cut planks. The super cut is a weird blade and not sure what to use it for. Now I did use the fine toothed blade to cut some MDF and completely ruined the blade. Lesson learned on my part. I did make a crosscut sled and it works well. Having a table saw will be a game changer for me now as I can cut what I need and also cut many pieces to the exact same length when I need it.
-
Ontario checking in. Welcome!
-
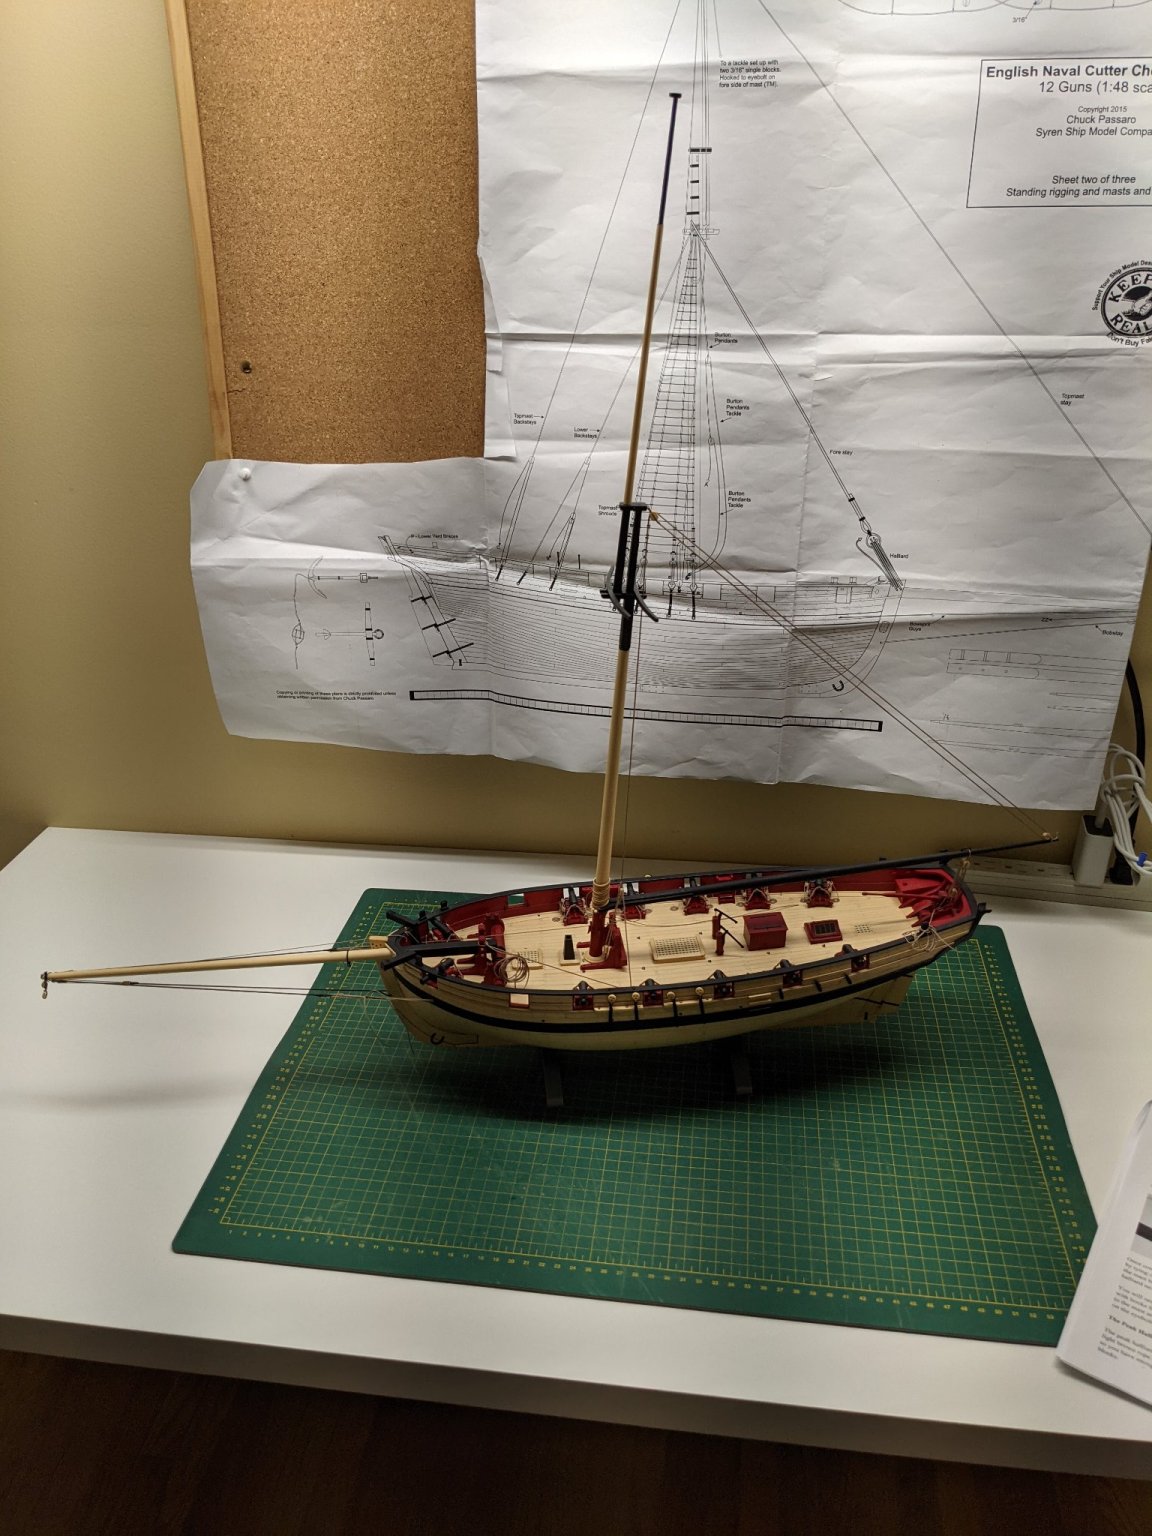
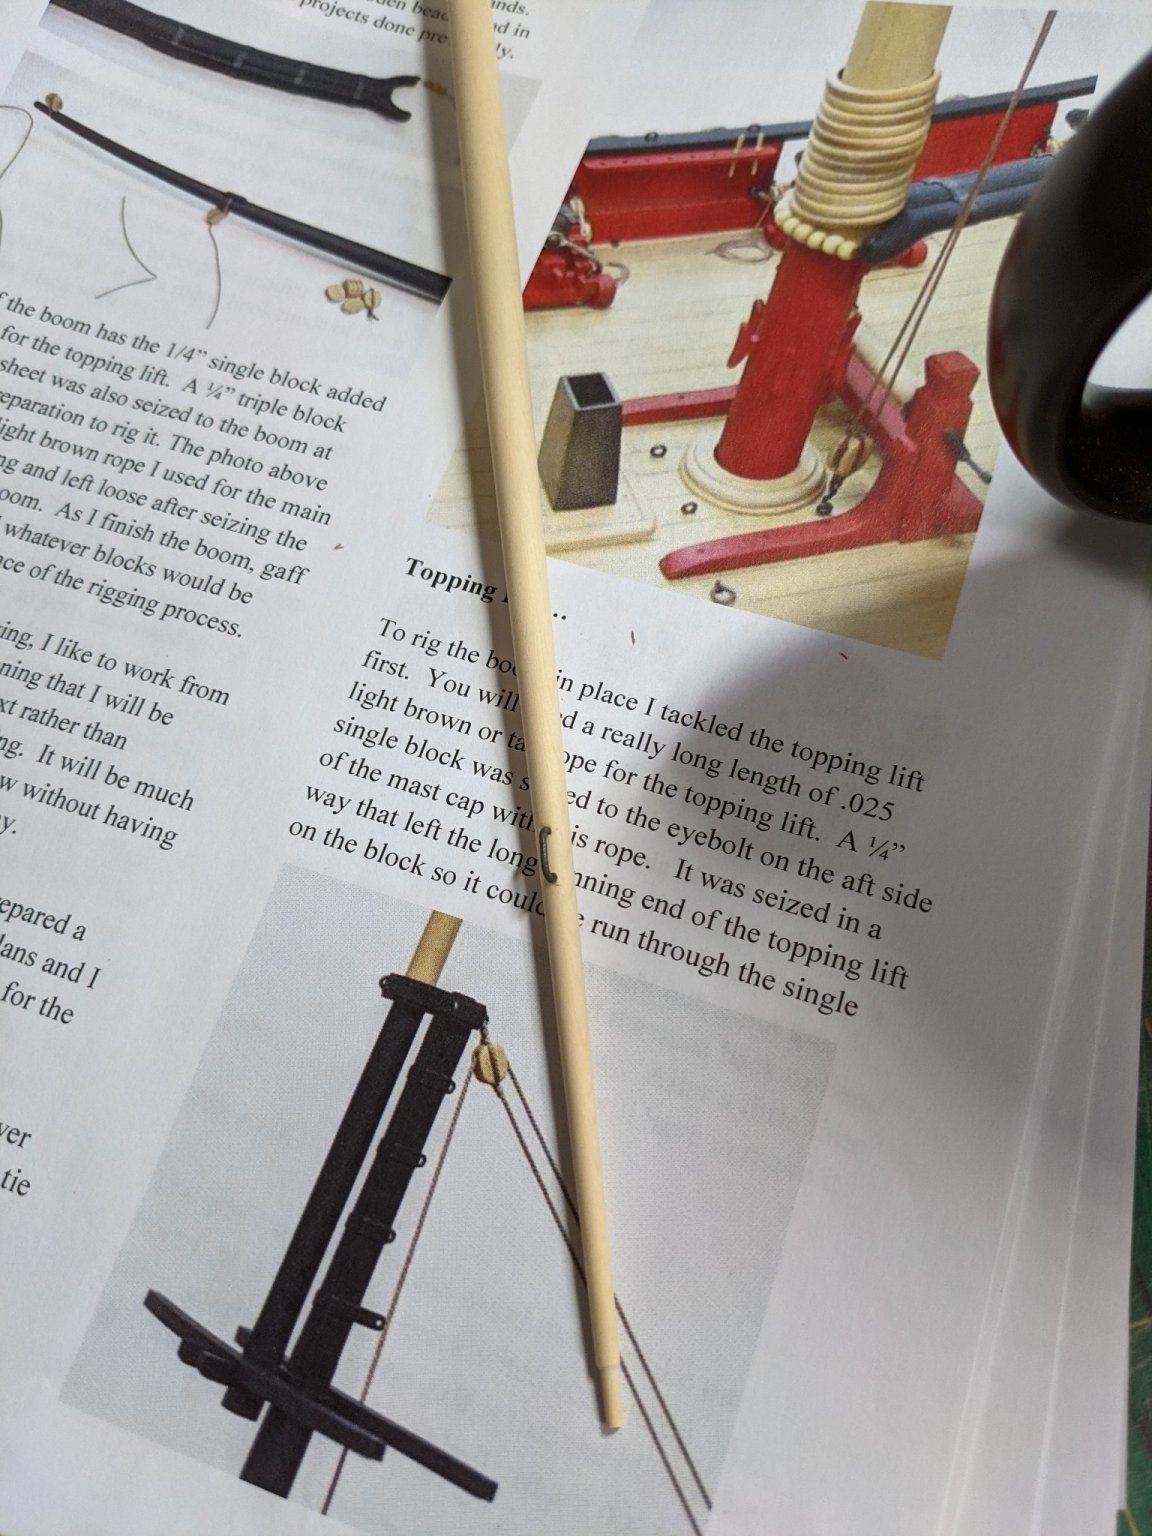
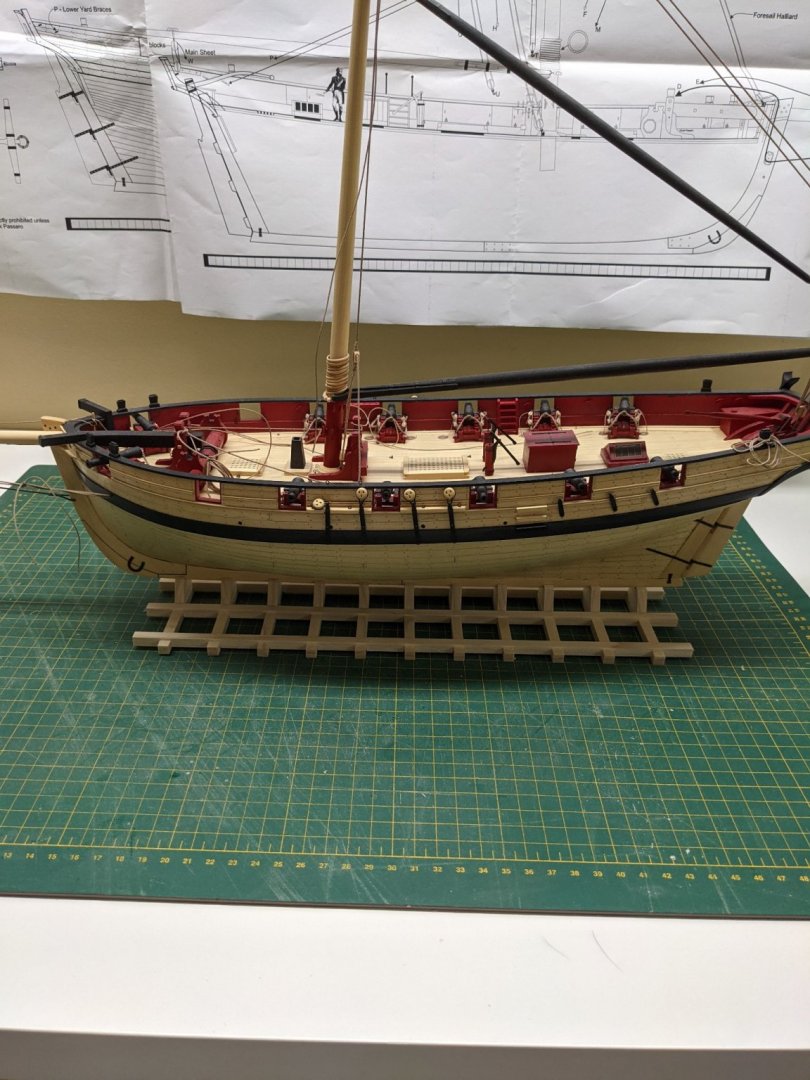
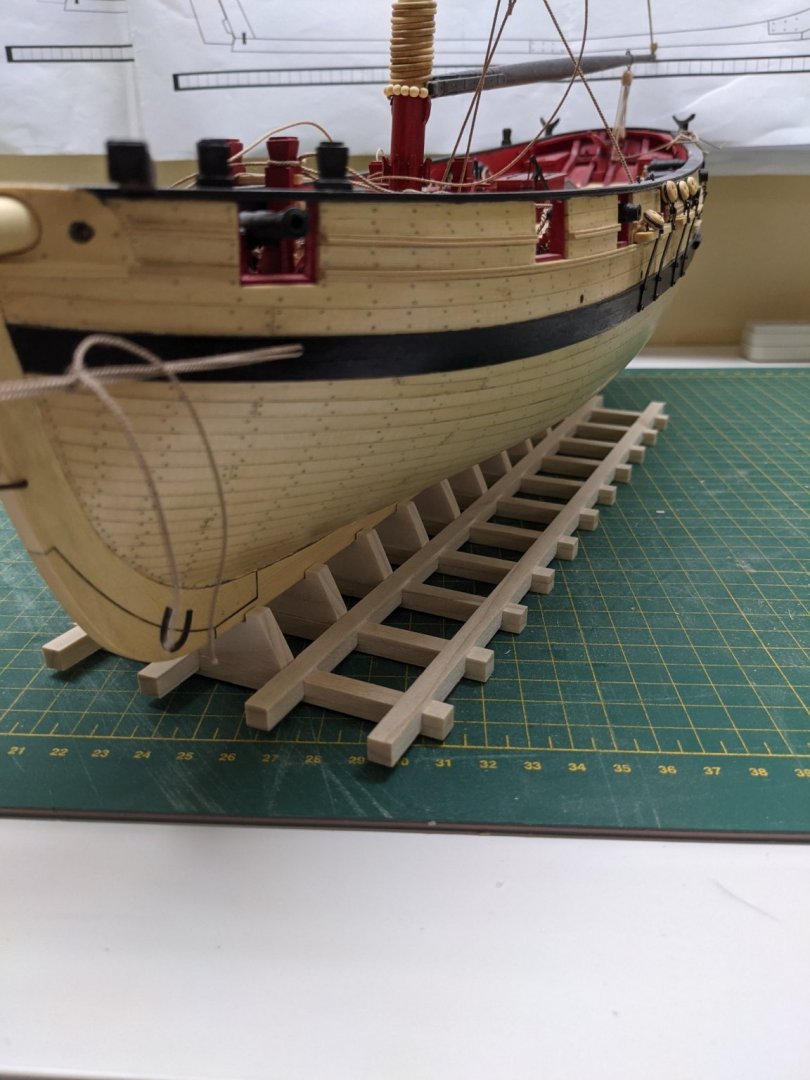
Rearranged my room and have the boom rigged. Mast is in and not glued so it may be off a bit. Whole bunch of extra rope hanging wherever I can put it.


- 274 replies
-
- 9
-
-
- Cheerful
- Syren Ship Model Company
- (and 1 more)
-
HM Cutter Cheerful 1806 by JpR62 - 1:48 scale
PRS replied to JpR62's topic in - Build logs for subjects built 1801 - 1850
I like this. How is working with the cherry wood for planking? Hard to cut and bend or easy? -
Wow that looks like a really nice and easy to use CAD program.
-
Thanks for the opinions everyone. Yes I would get the more expensive Brynes saw but look at it this way. $450 plus 30% exchange and then 15% duty and then shipping puts it out of my price range. Sorry I didn't specify that at the start of the question. I really appreciate that and you helped me make up my mind. Wanted to make sure it was decent and not a pile of junk. Everyone here has been really helpful.
-
Before everyone tells me to buy a Brynes saw it is far too much for me to spend in Canada. Home Depot sells the FET for $398 and would like input from people that have one and how it works out for them. Since this has 4 inch blades it will work for what I want to do which is ripping planks and such. I did look at the cheaper Proxxon and also the Micromark saws but then cheap Proxxon has a 2 inch blade and doesn't have a full fence.
-
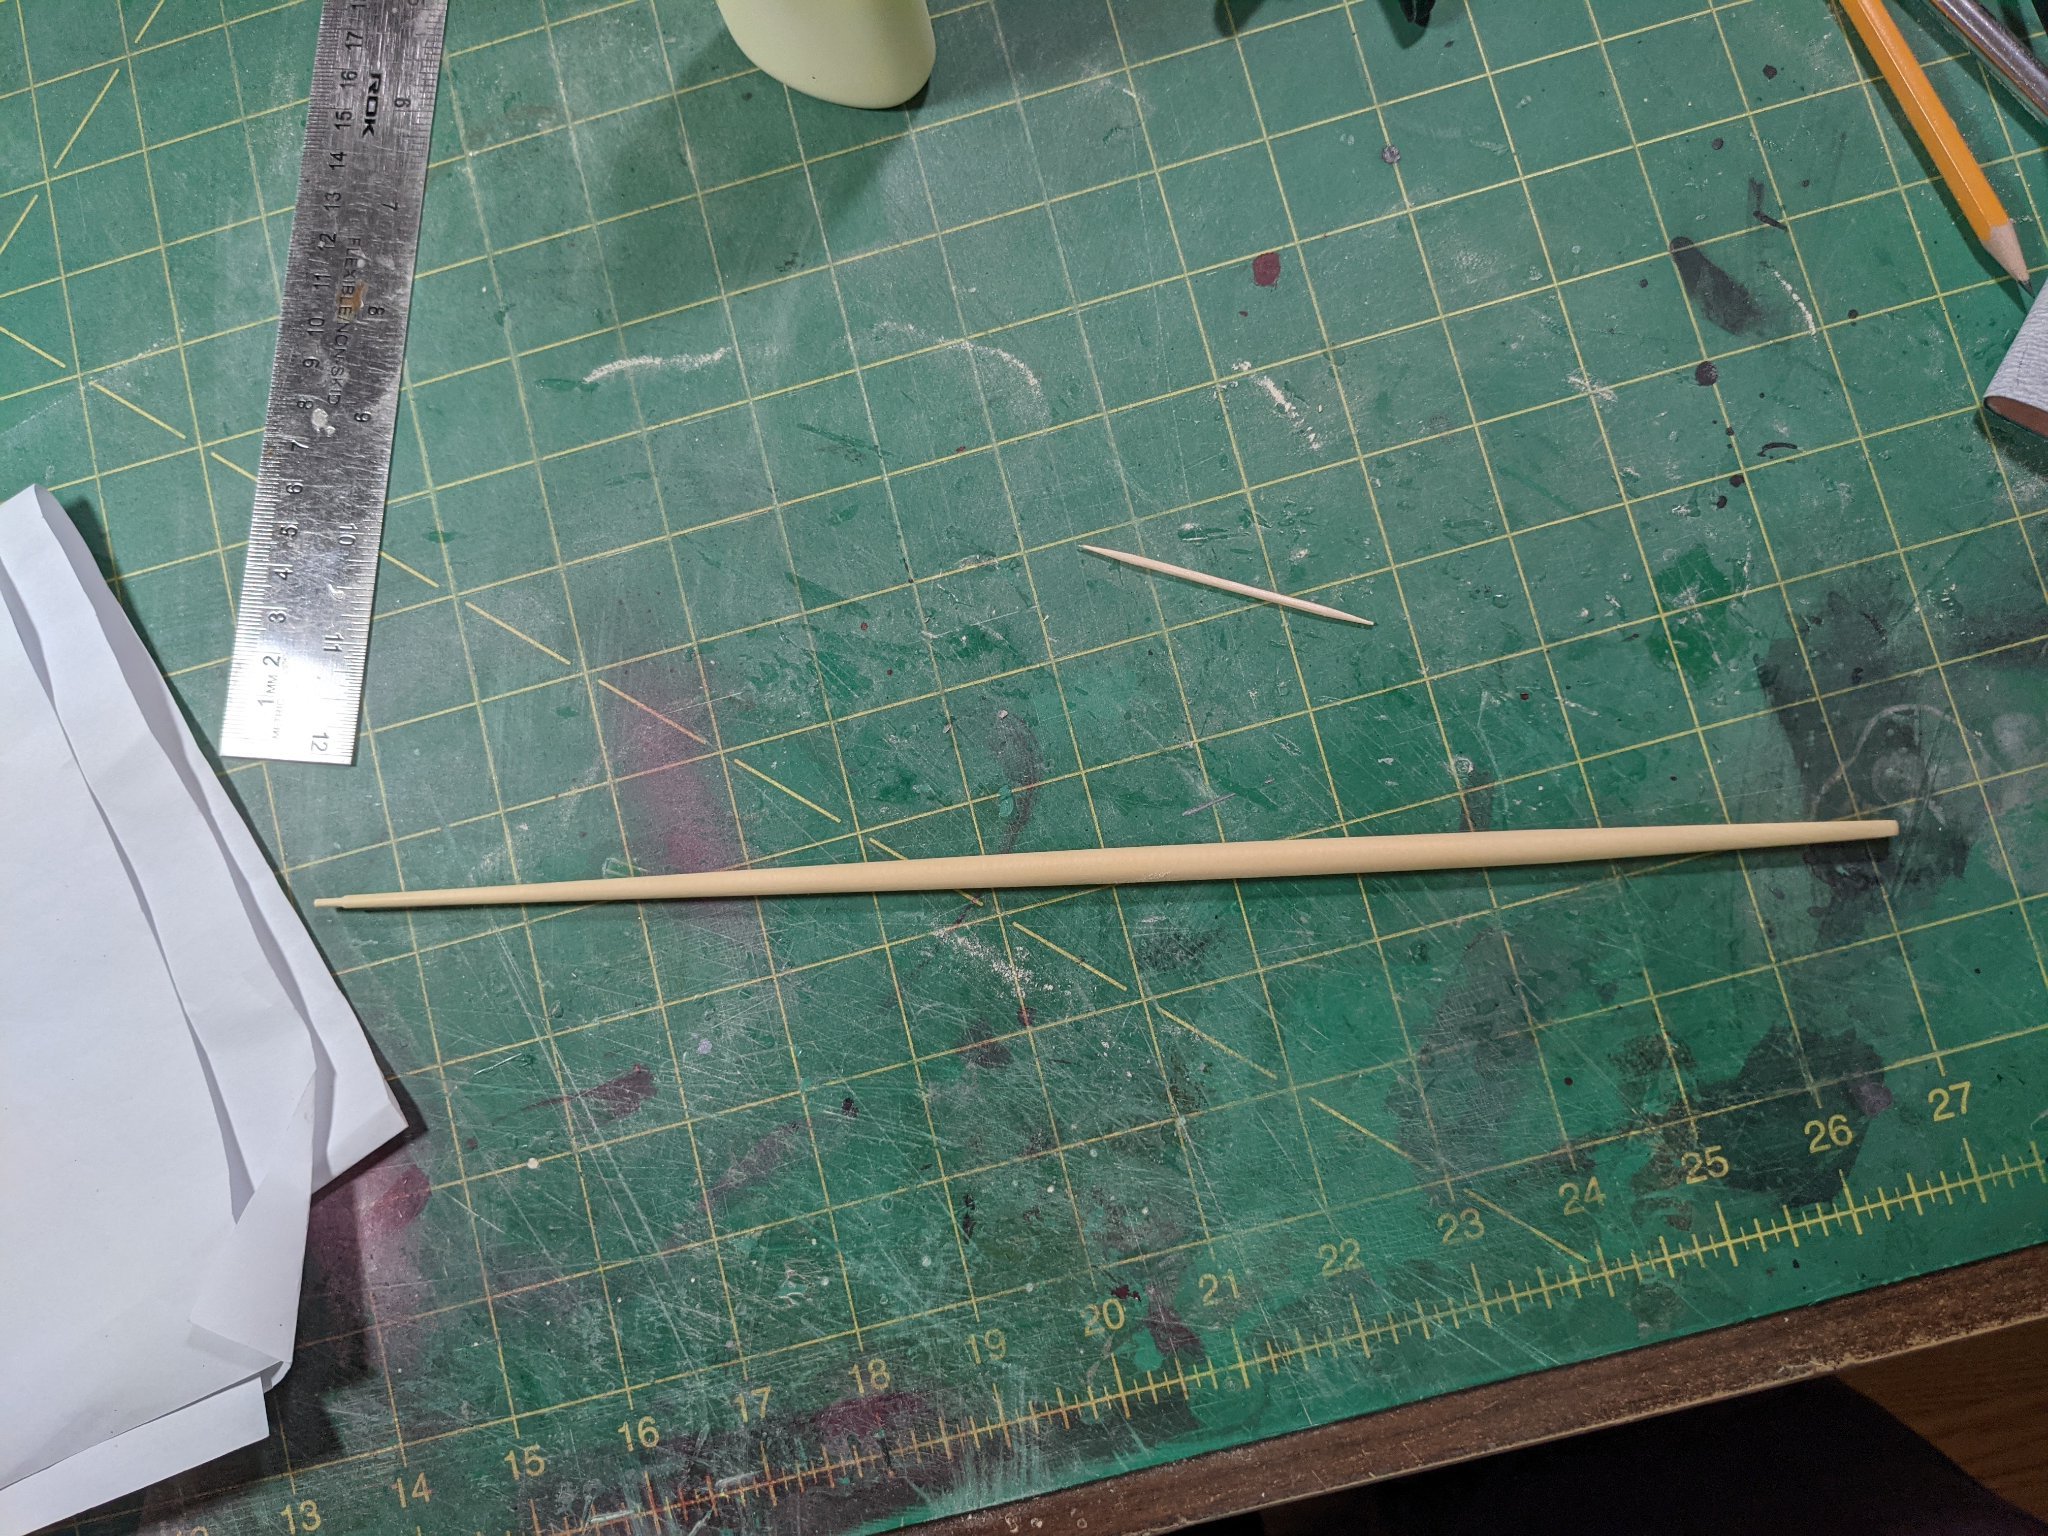
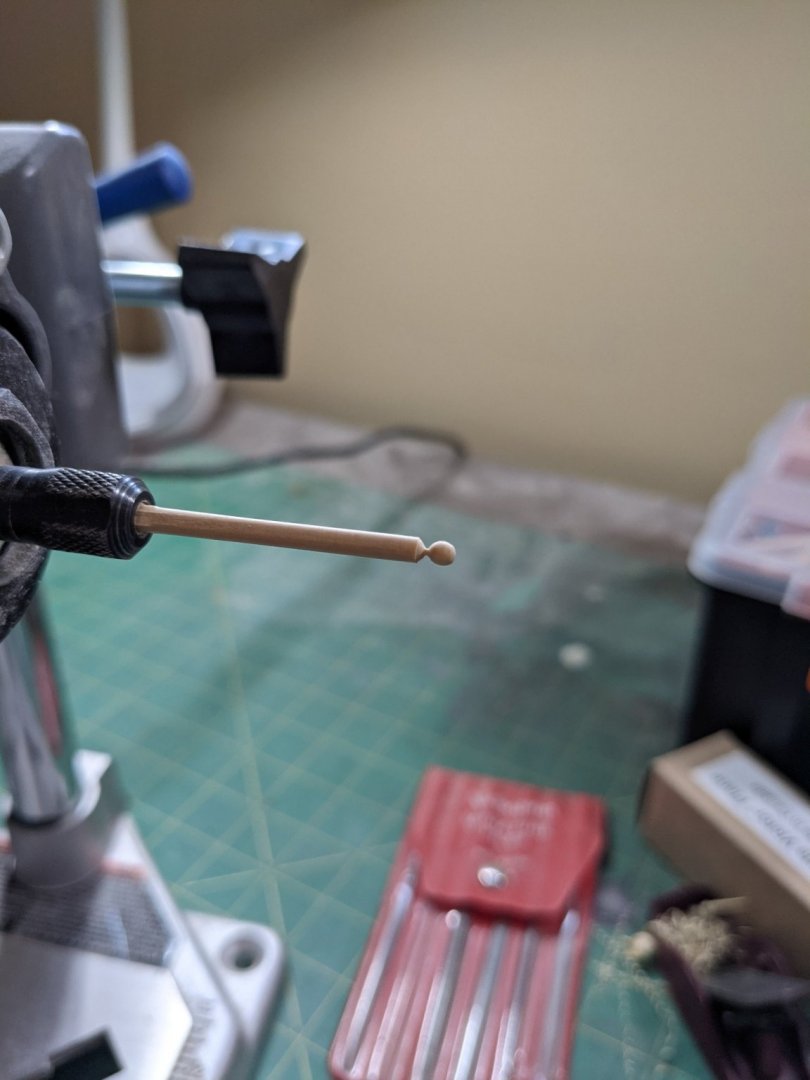
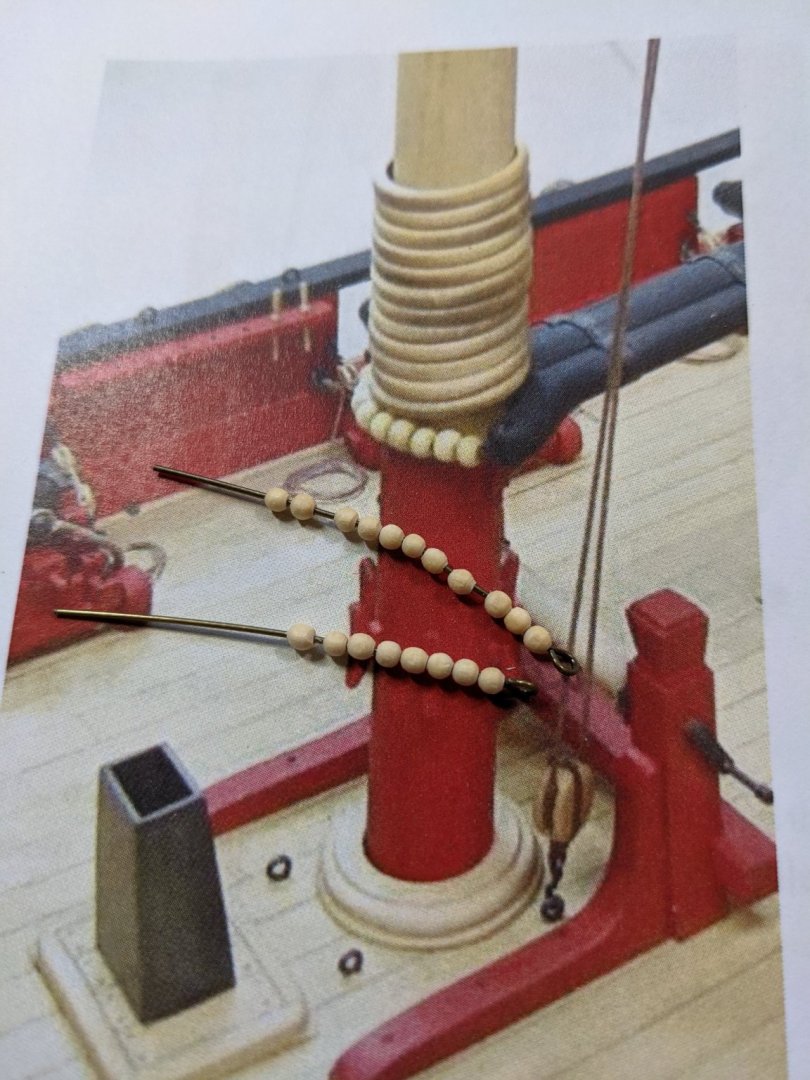
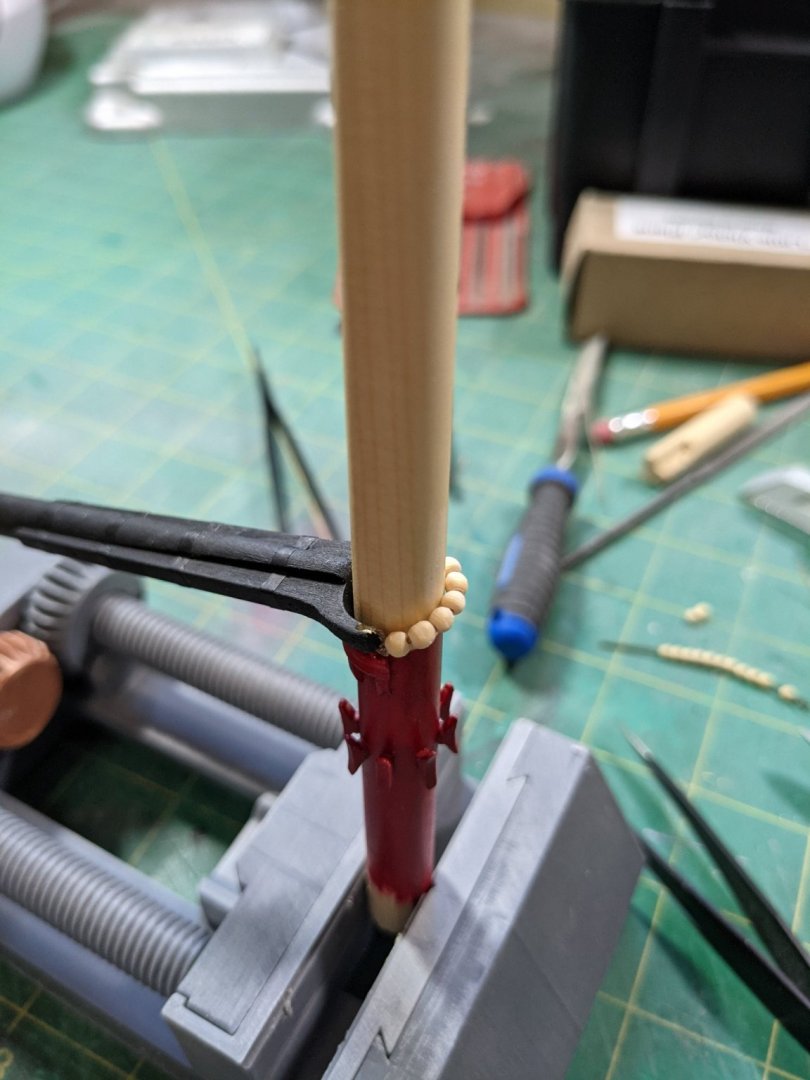
I didn't have the beads for the boom so I made some. Mounted the boom and then working on the blocks for it. Should have done the blocks first

- 274 replies
-
- 11
-
-

-
- Cheerful
- Syren Ship Model Company
- (and 1 more)
-
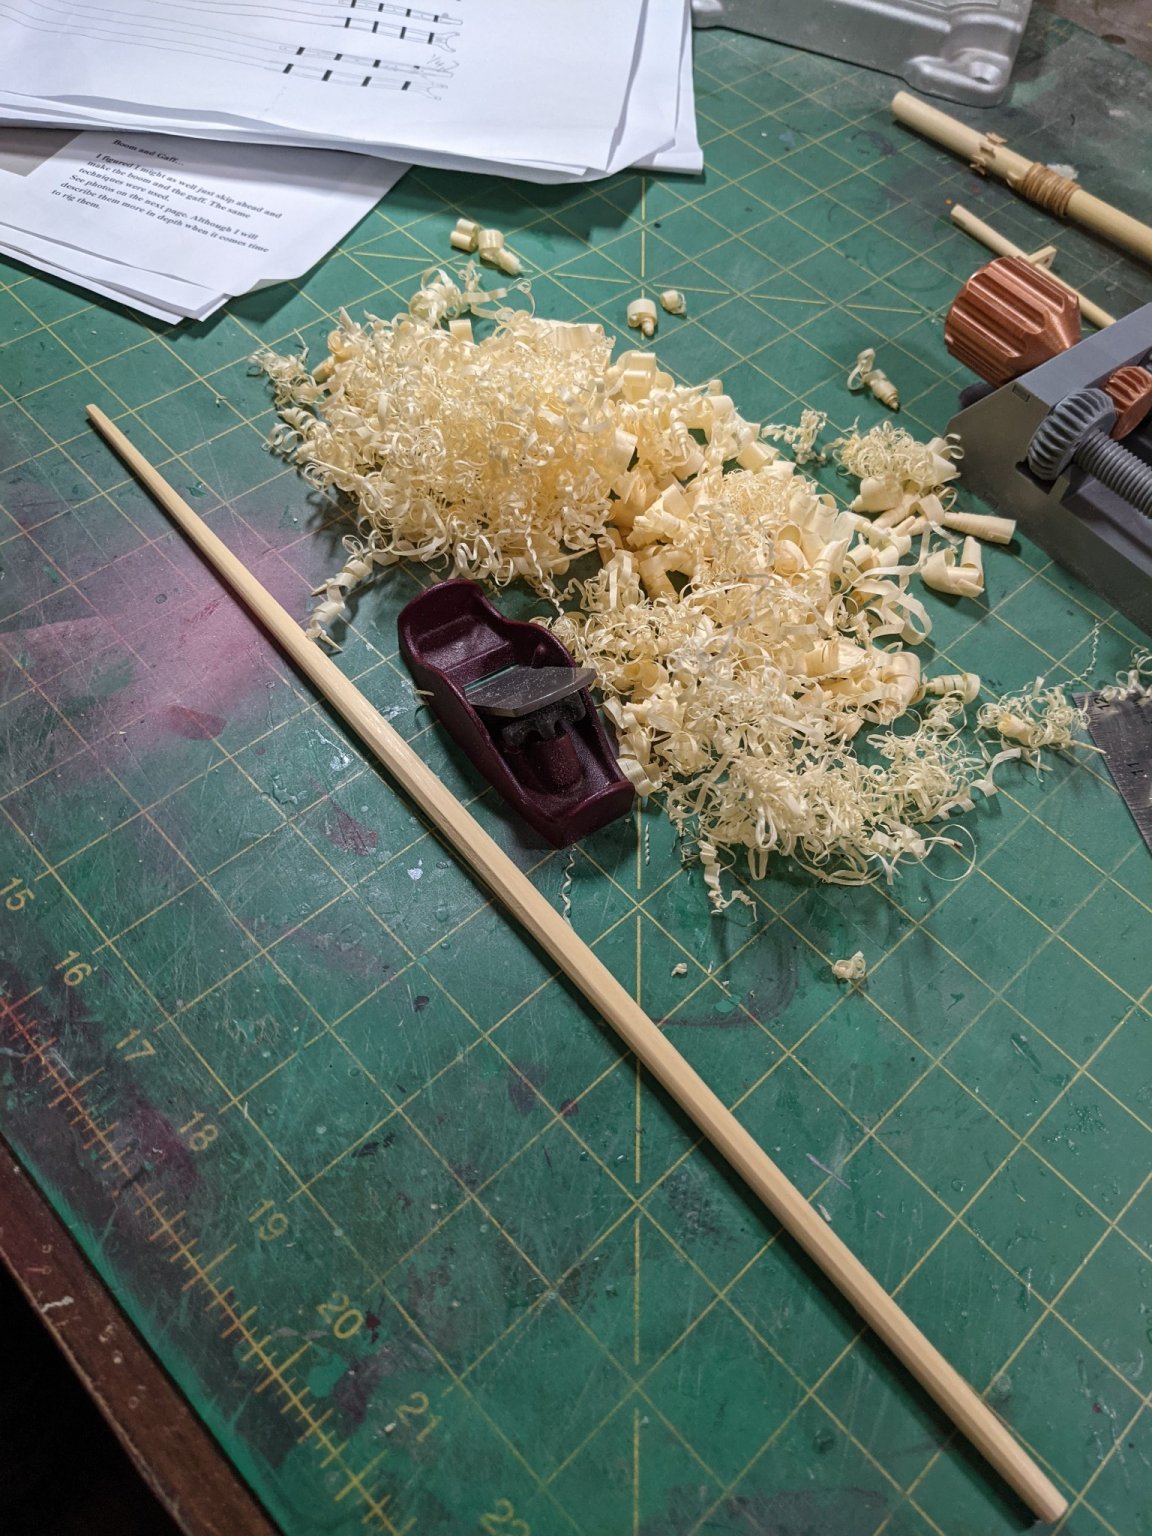
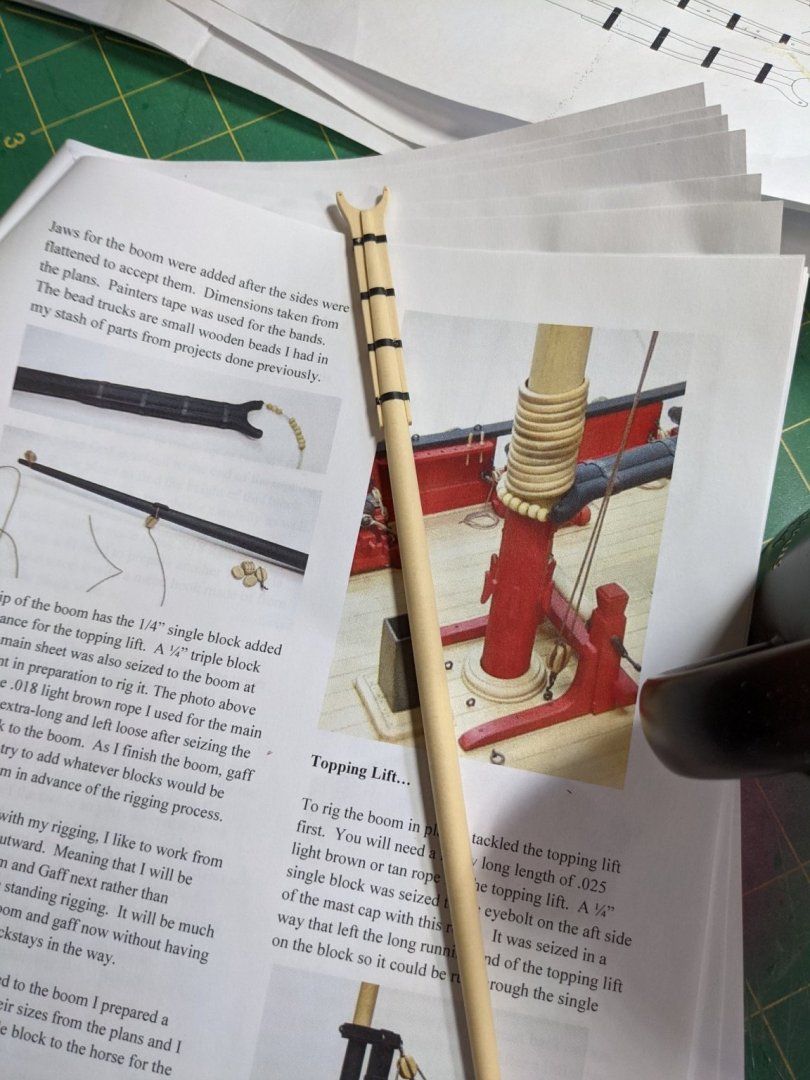
Thank you very much Don. Yes it was easier using the tic strip though and using the wires. Than you Chuck. Making the boom. I love the smell of cedar shavings.


- 274 replies
-
- 5
-
-
- Cheerful
- Syren Ship Model Company
- (and 1 more)
-
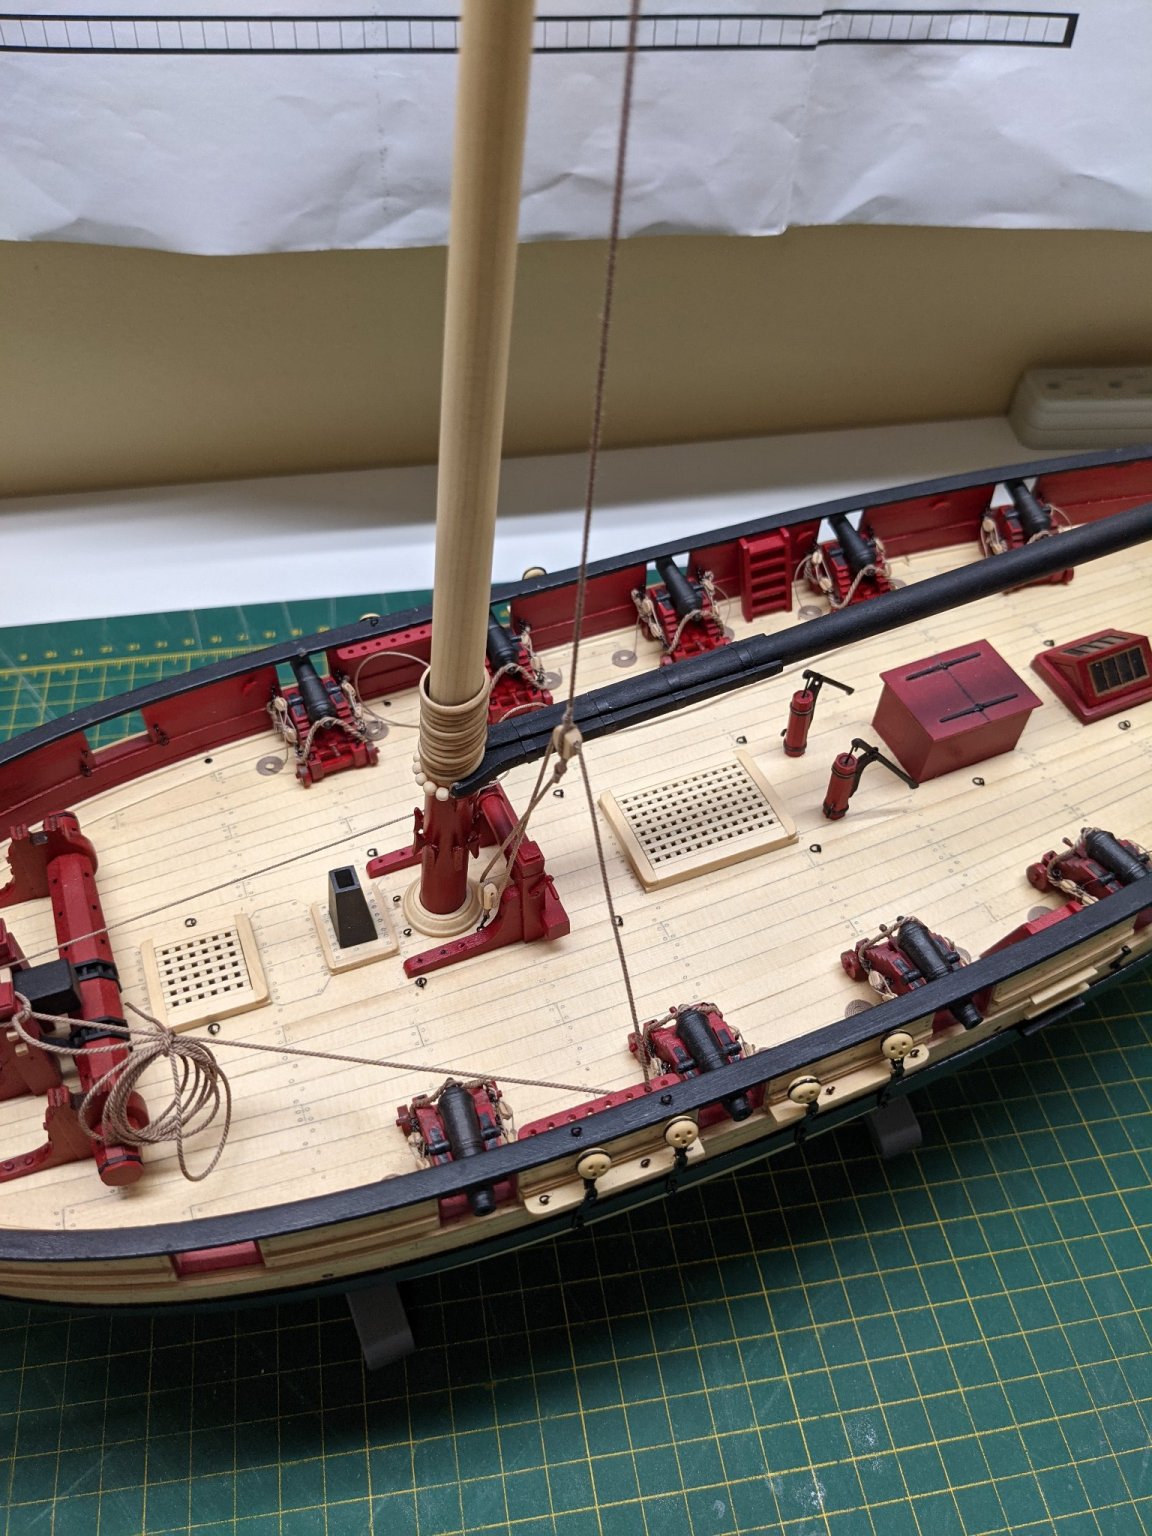
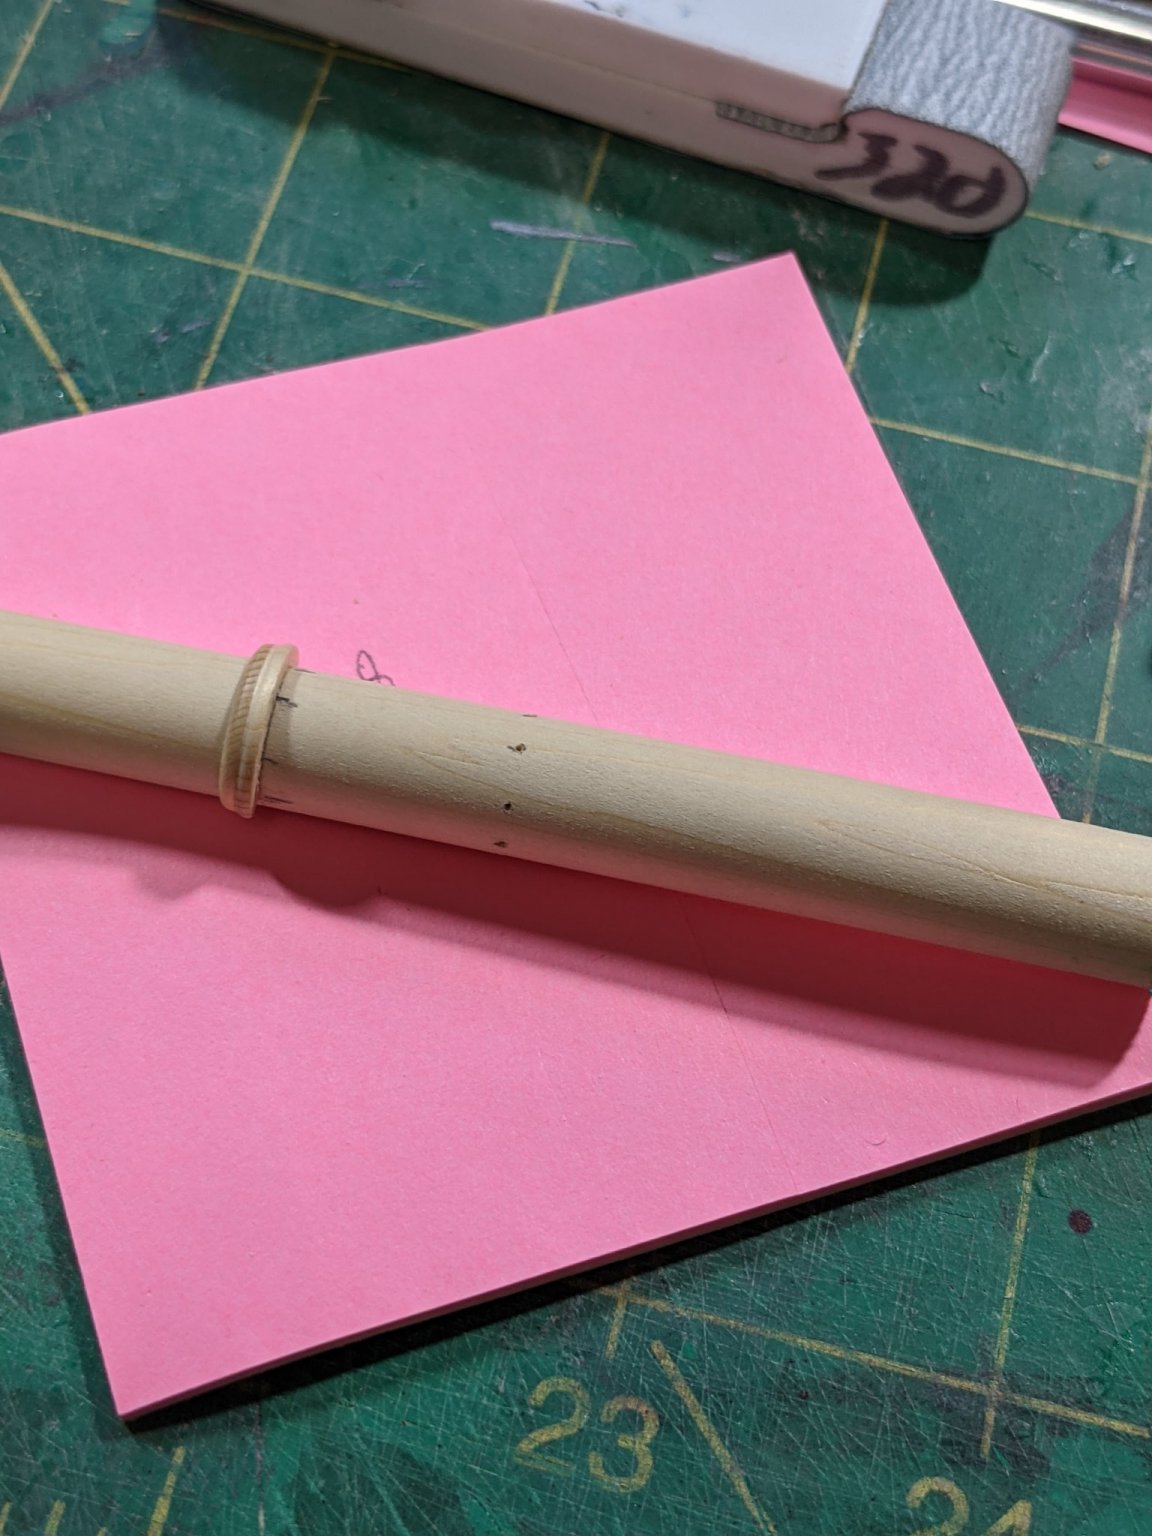
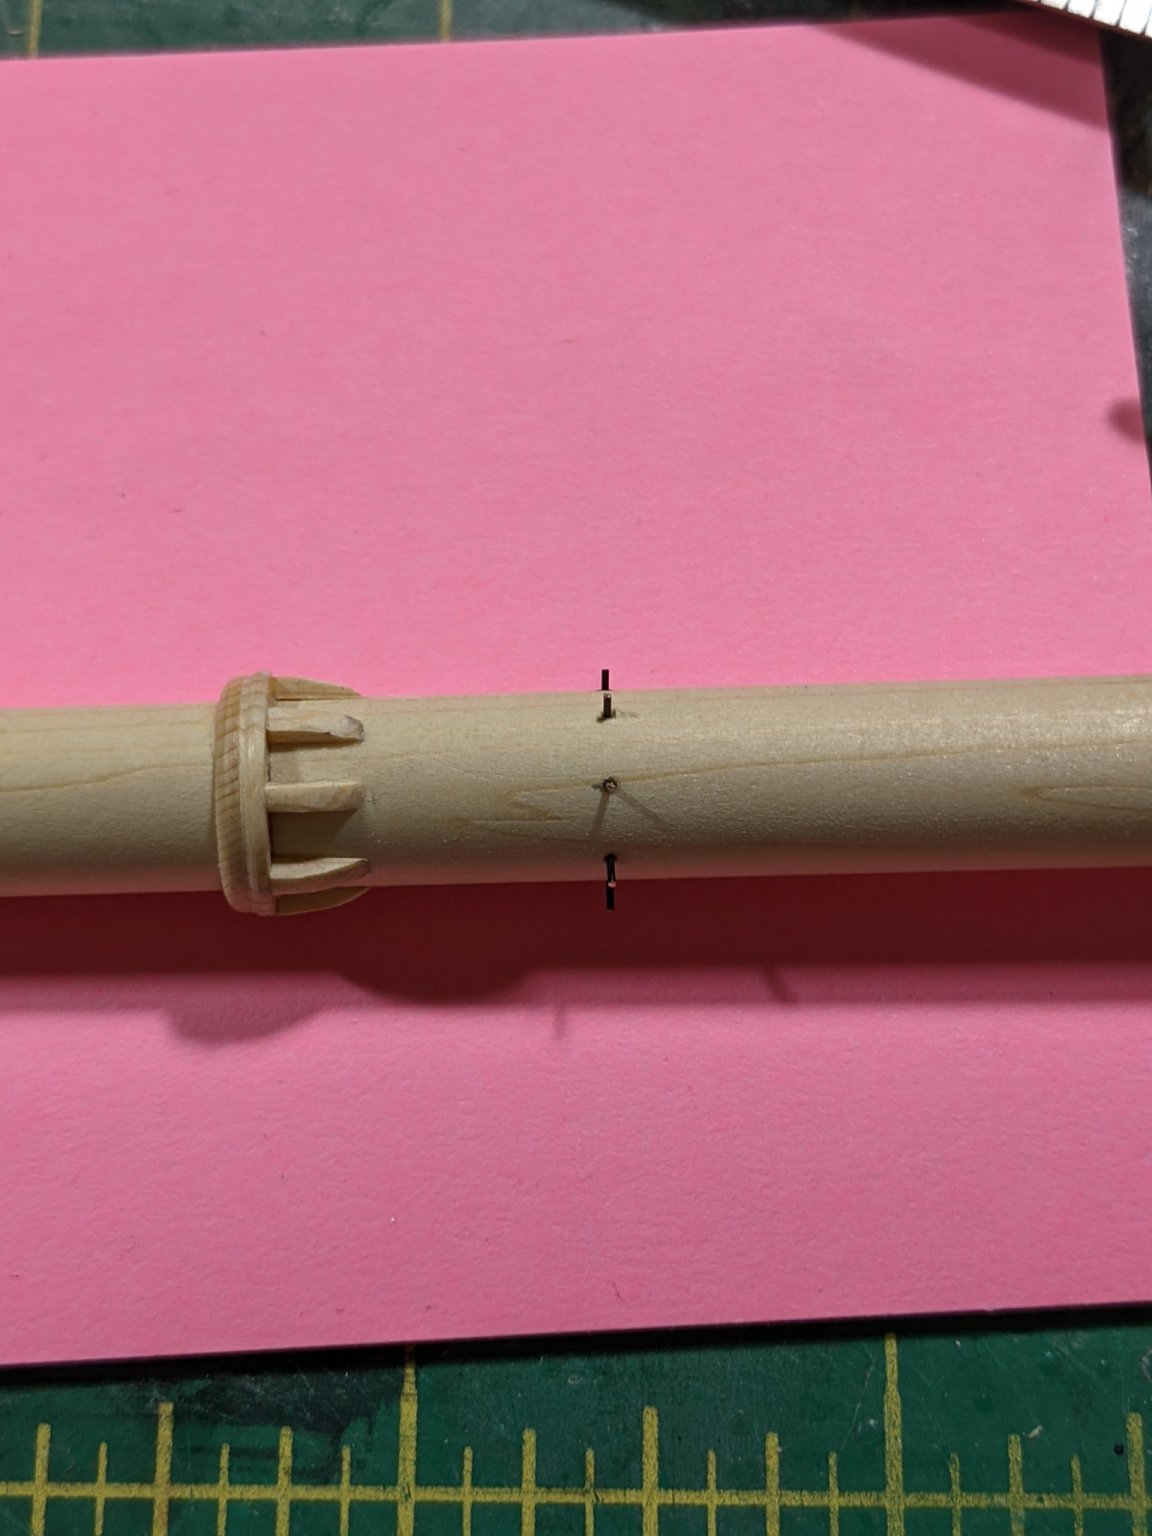
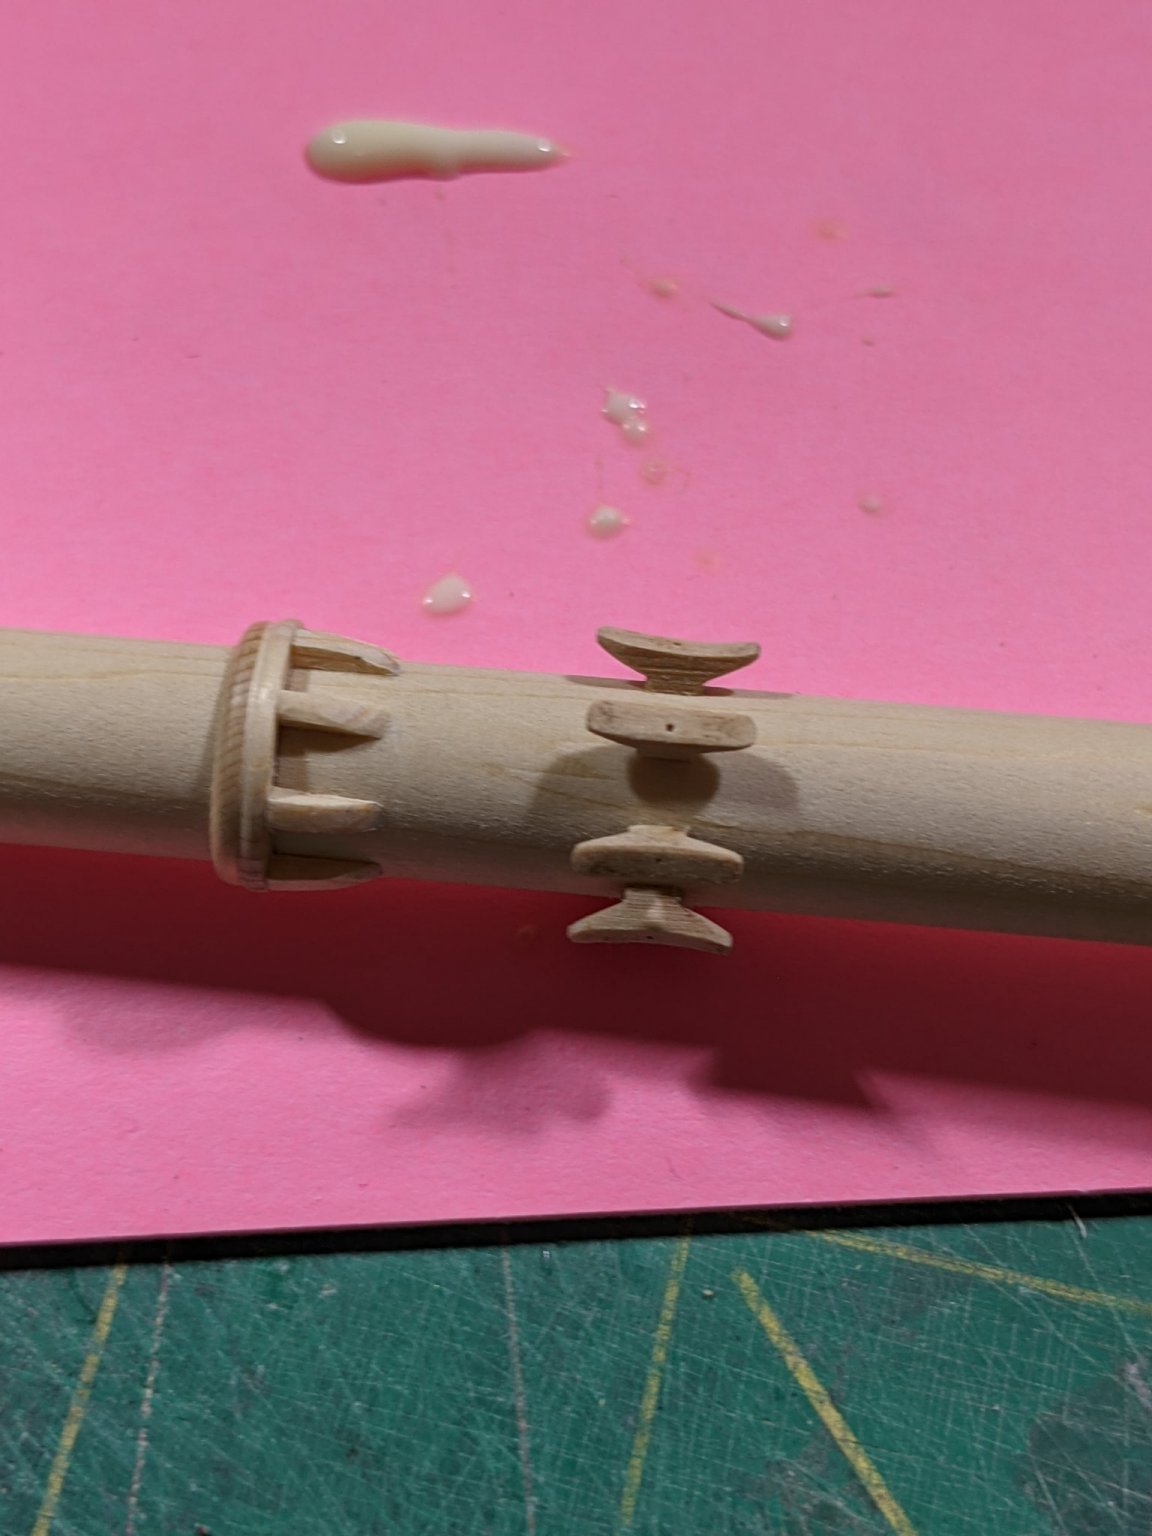
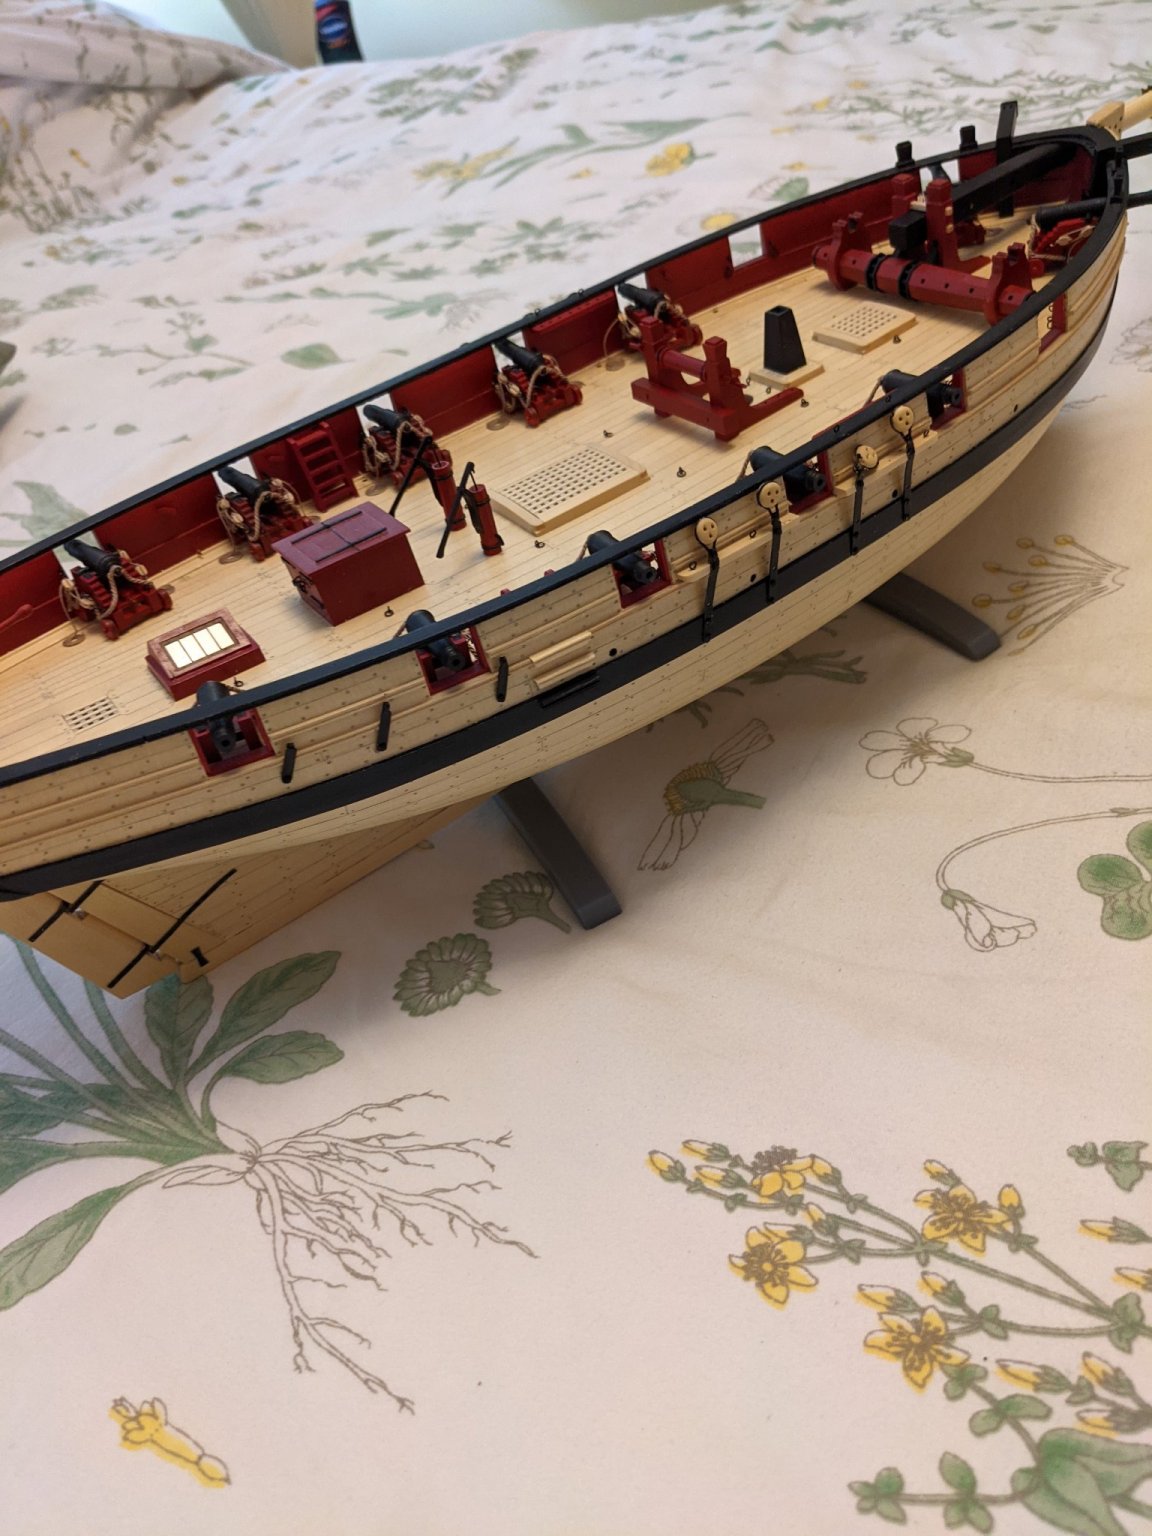
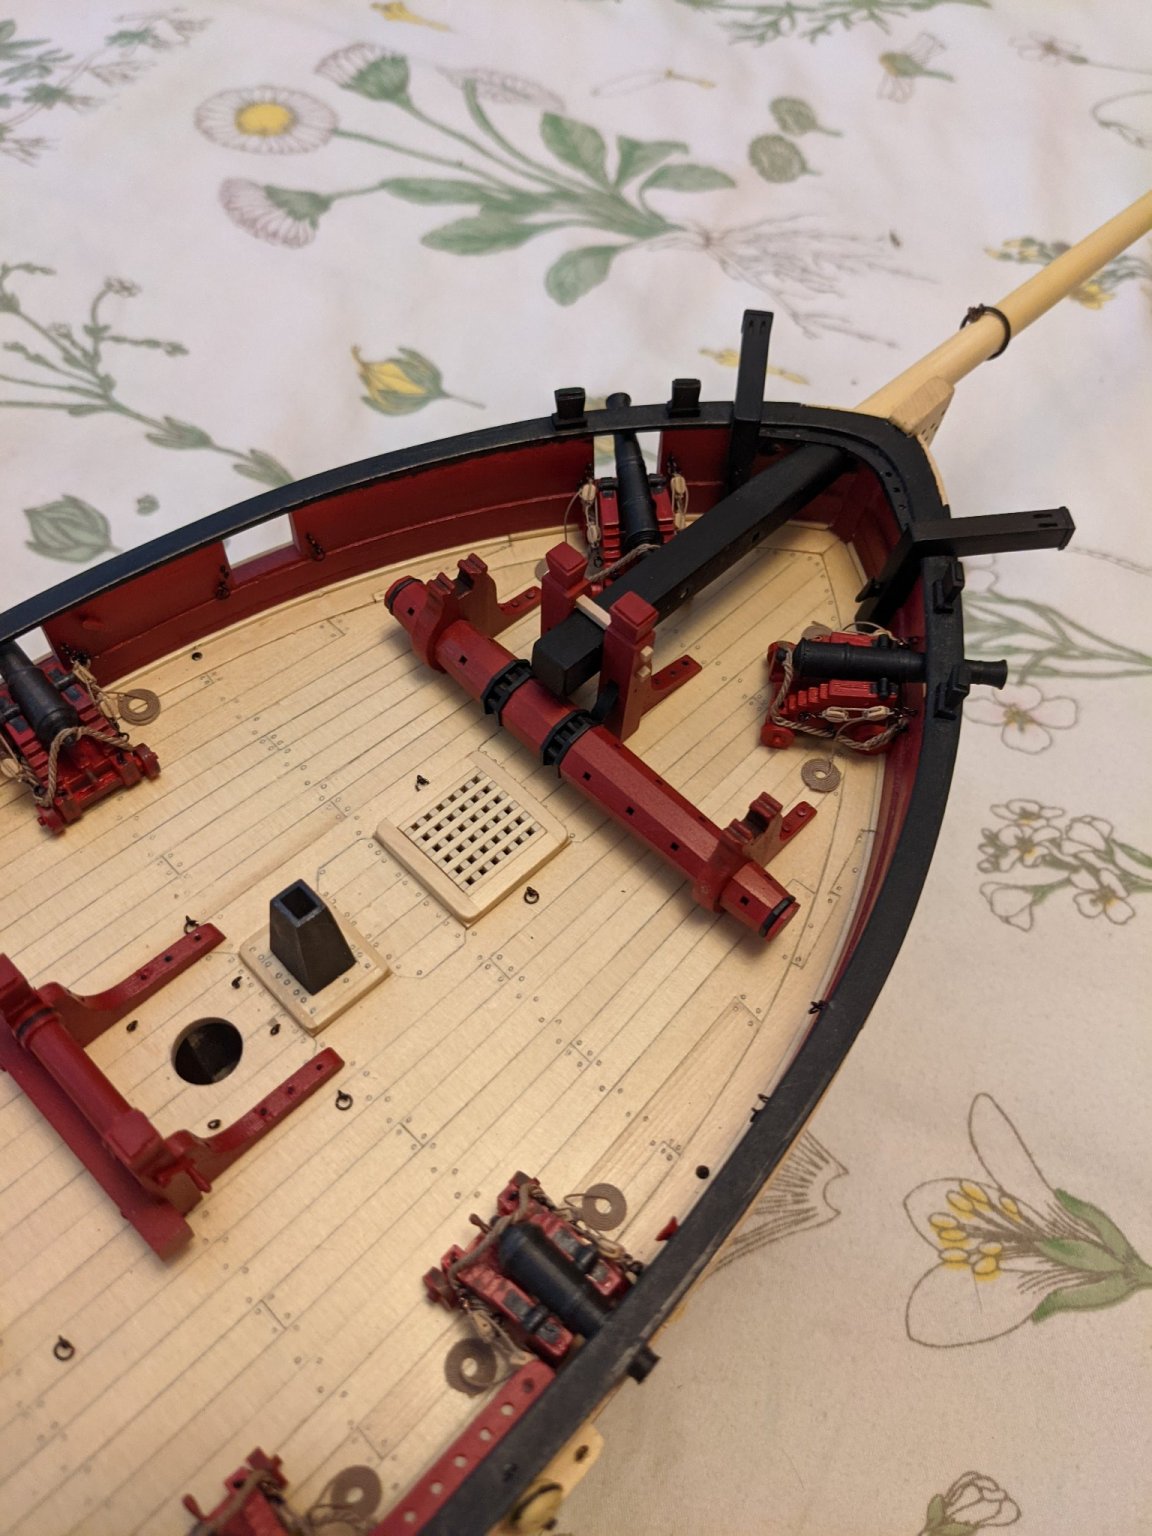
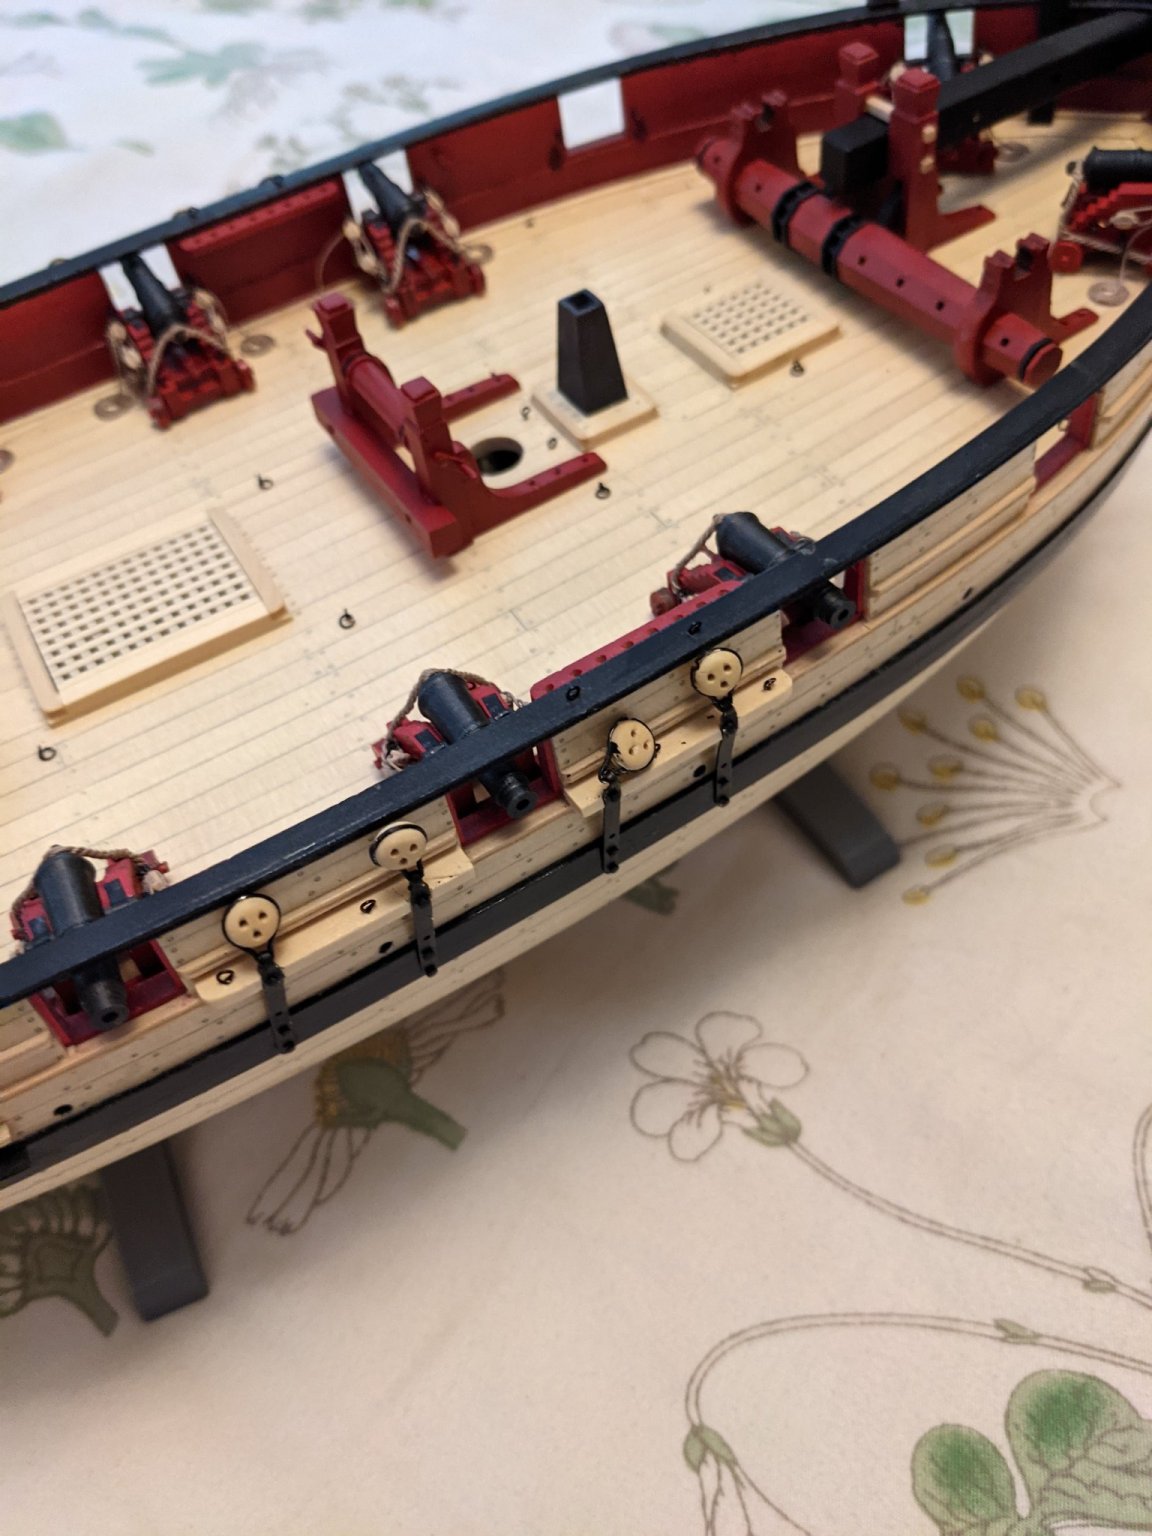
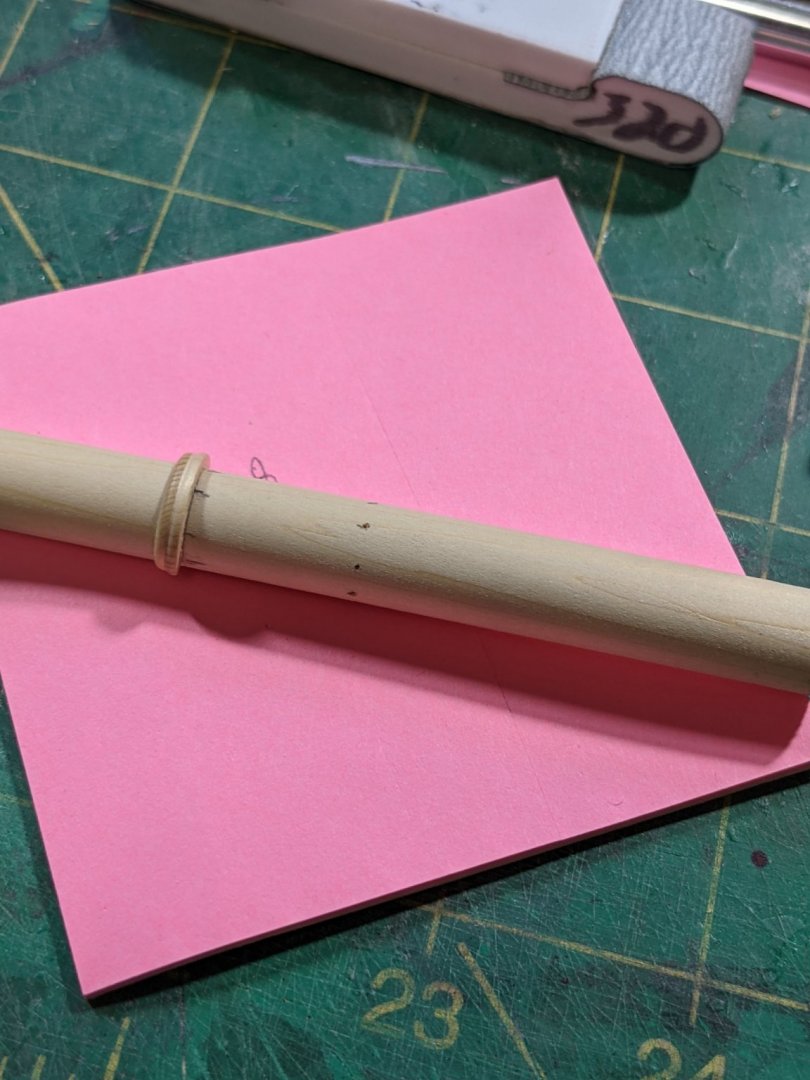
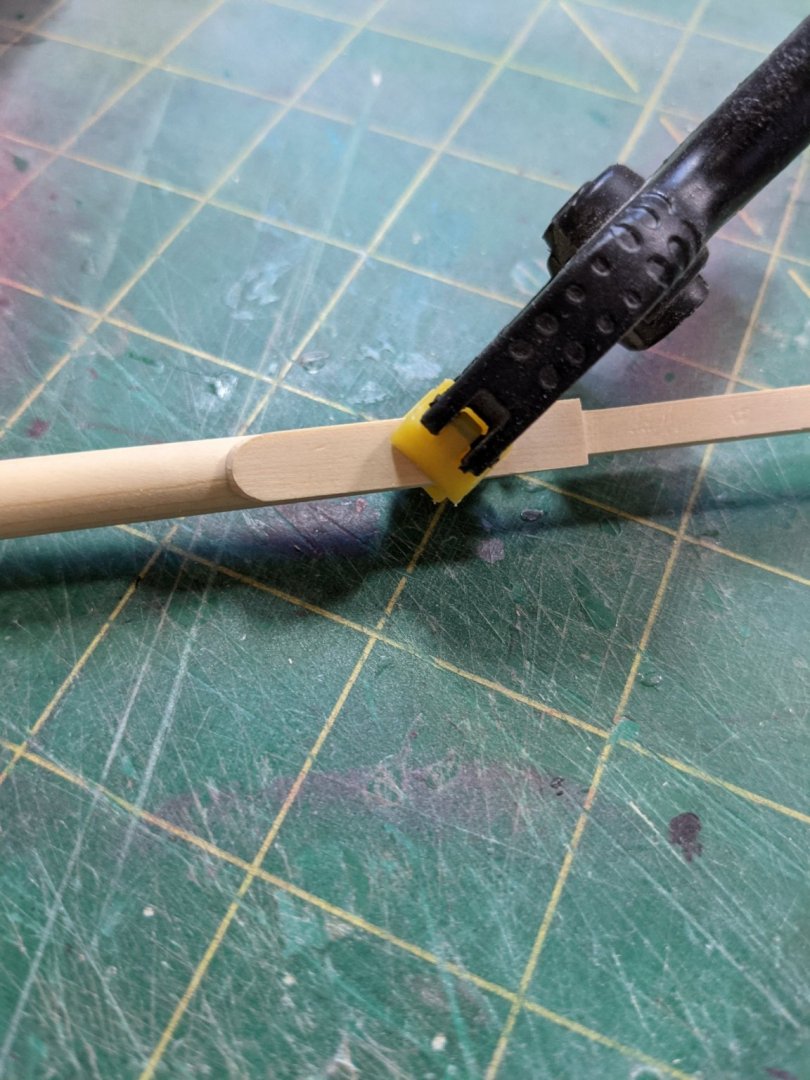
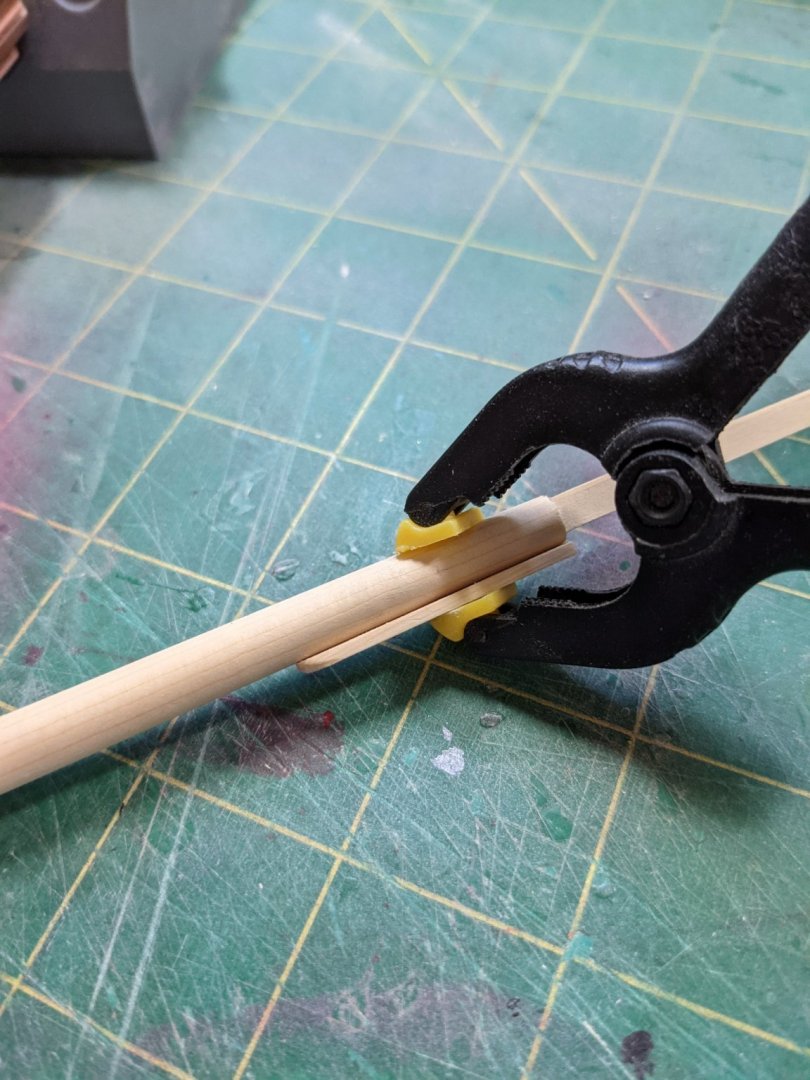
Working on the mast I made the stop for the rings. This is the second one I made as the first one broke too easy. This time I made a boxwood sandwich with the grain 90 degrees and it held up better. Also used a tick strip to mark the locating holes for the cleats. In these hole I glued a small piece of wire and also drilled locating holes in each cleat in the center. Once the cleats were shaped a bit they were glued on trying to get them square. \ Getting back to my question I had I decided that the pieces at the top of the mast should be beveled to form with the mast. I think this looks better. So the lower mast is done except for painting and some finish sanding and yes the rings still slide down over the top pieces.


- 274 replies
-
- 9
-
-
- Cheerful
- Syren Ship Model Company
- (and 1 more)
-
Airbrush “controls”
PRS replied to glbarlow's topic in Painting, finishing and weathering products and techniques
One thing to keep in mind when airbrushing is the quality of the paint has a lot to do with how small the pigments are ground. I have found that Vallejo has finer pigments than Tamiya paints but they are harder to clean out of the airbrush. Tamiya Acrylics are very forgiving when airbrushing as they lay down nice and smooth and you can just about use anything as a thinner for them where the Vallejo cover real well and you have to use their thinner or the Tamiya Acrylic thinner. (don't skimp on thinner by trying to use water or windshield washer fluid as some suggest). If you decide to up your airbrush game get a compressor with a tank. There are a lot of them on Amazon or since you are in the states TCP Global is a good source. A dual action airbrush will be up to you what you want to spend but stay away from chinese brands. (I am looking at you Iwata NEO with your expensive replacement parts). The rest of the Iwata line are good airbrushes but pricy. Currently I am using a Badger Patriot and it is a great quality airbrush that comes standard with a .5 tip but they also have a fine needle kit for it also. -
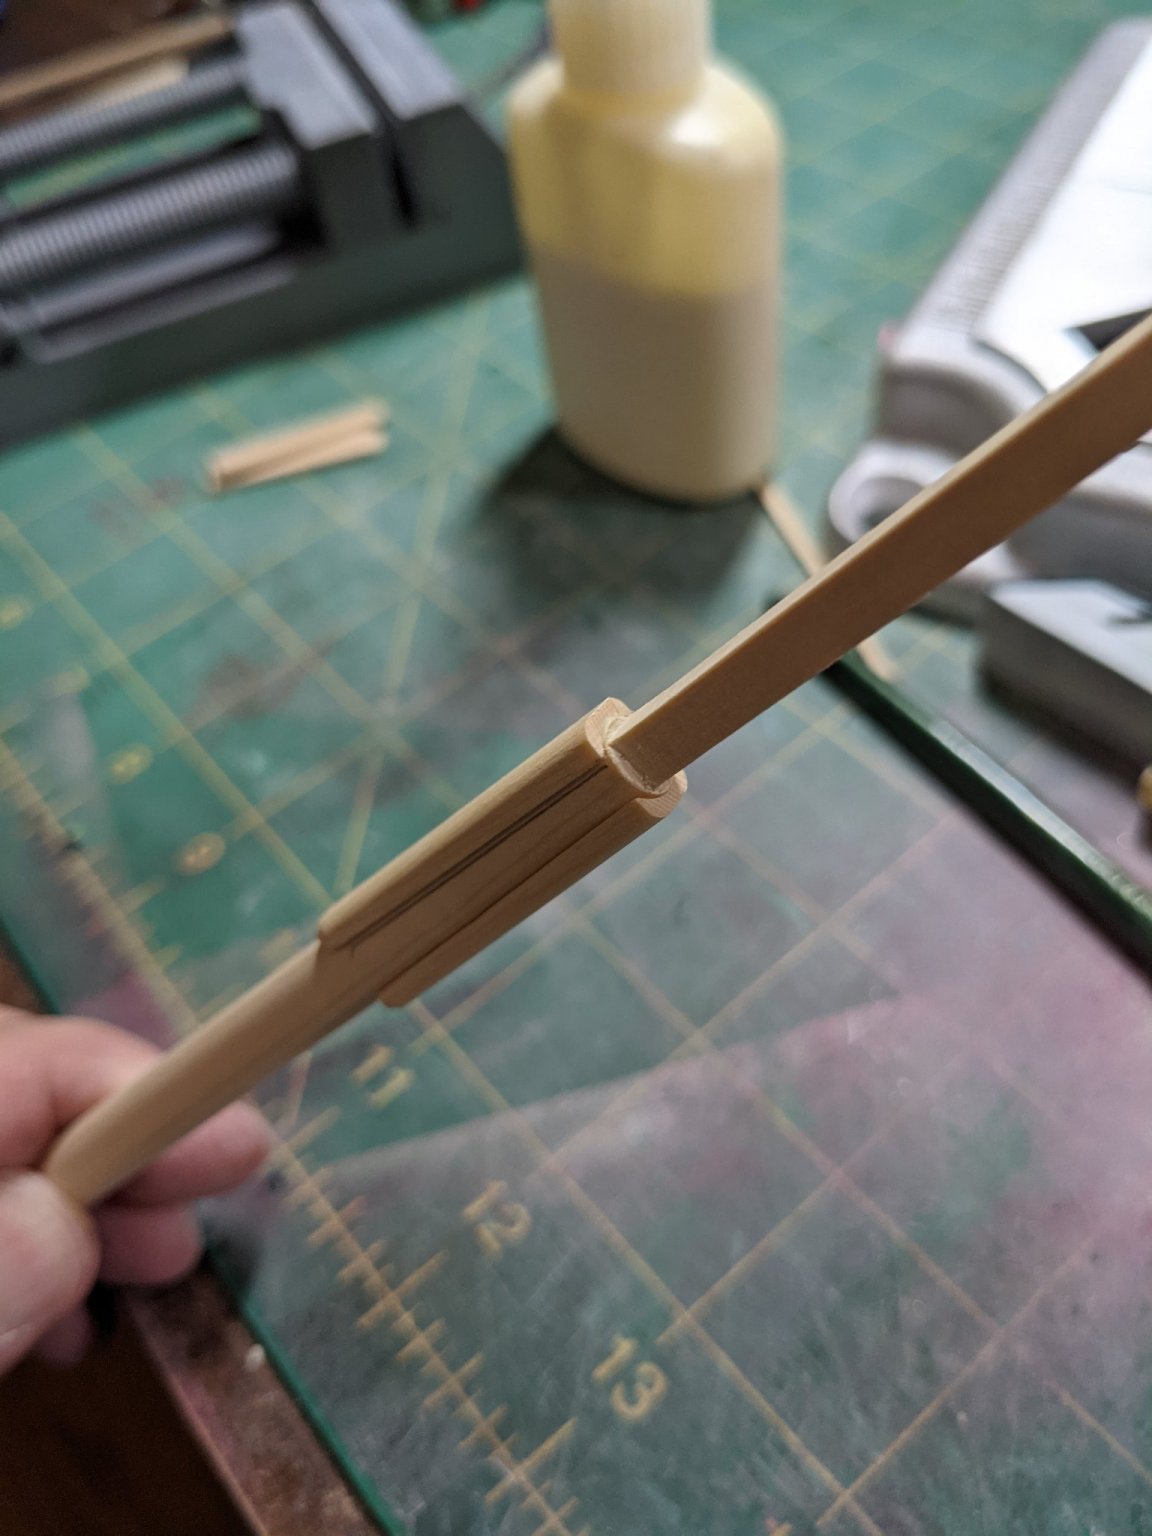
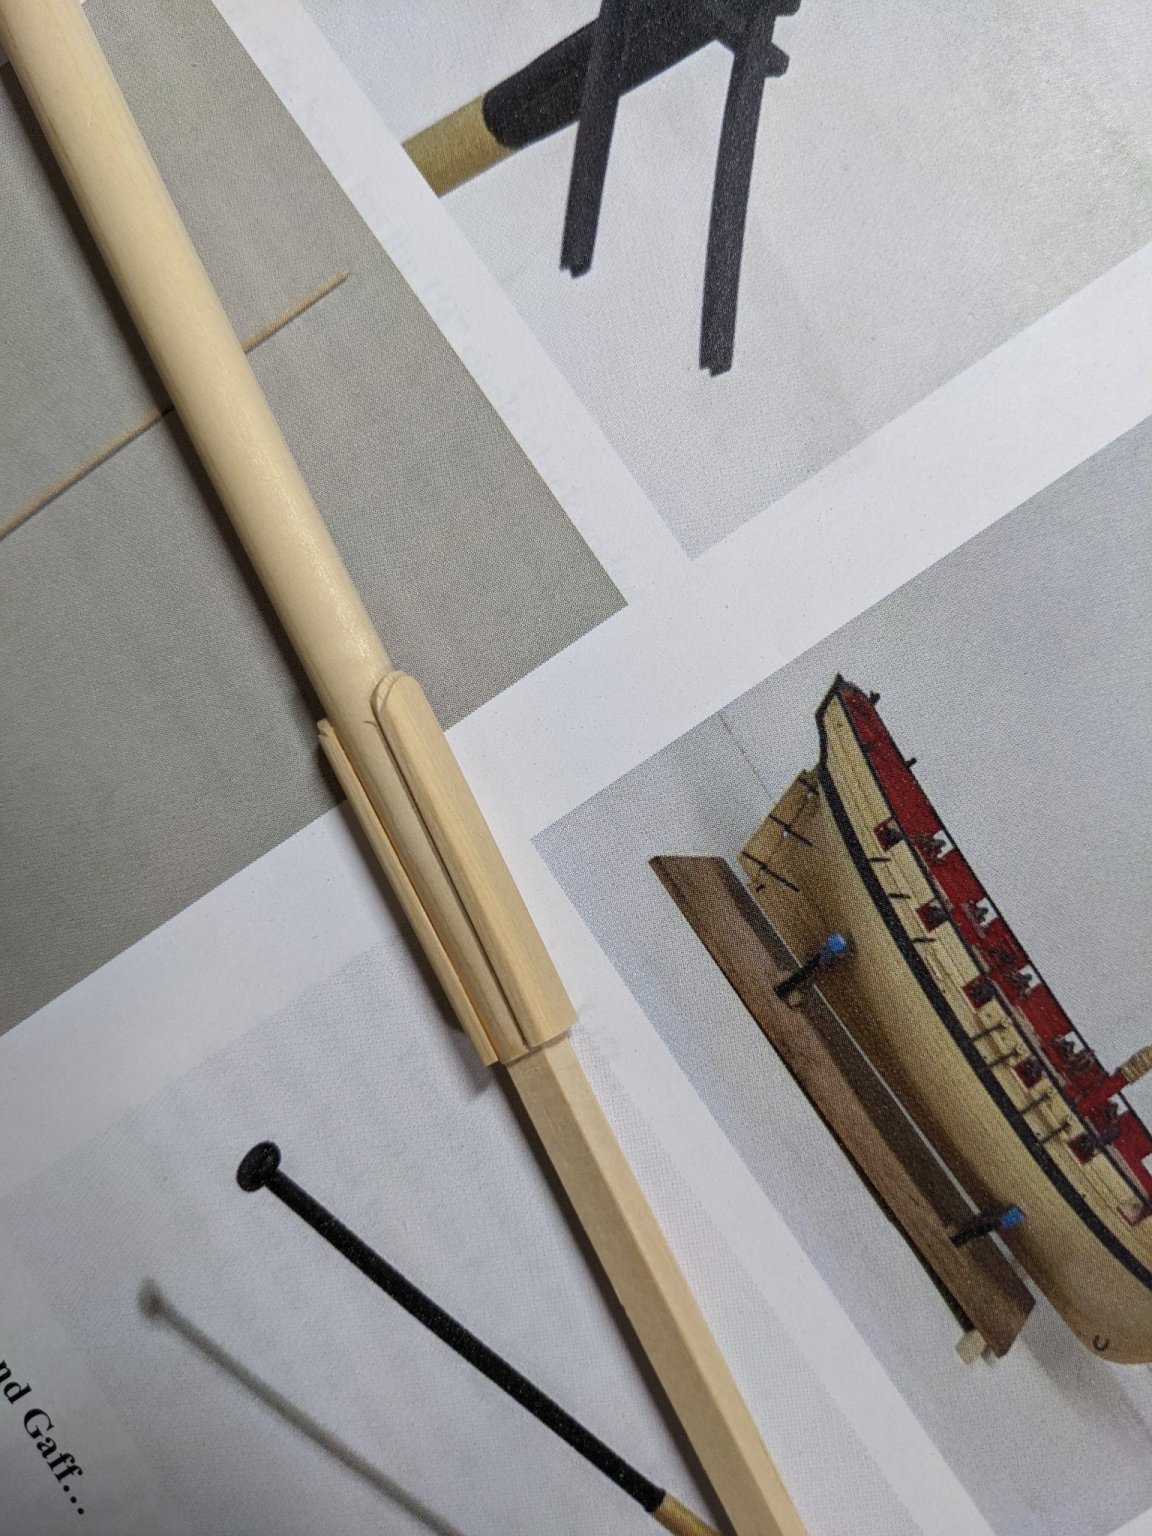
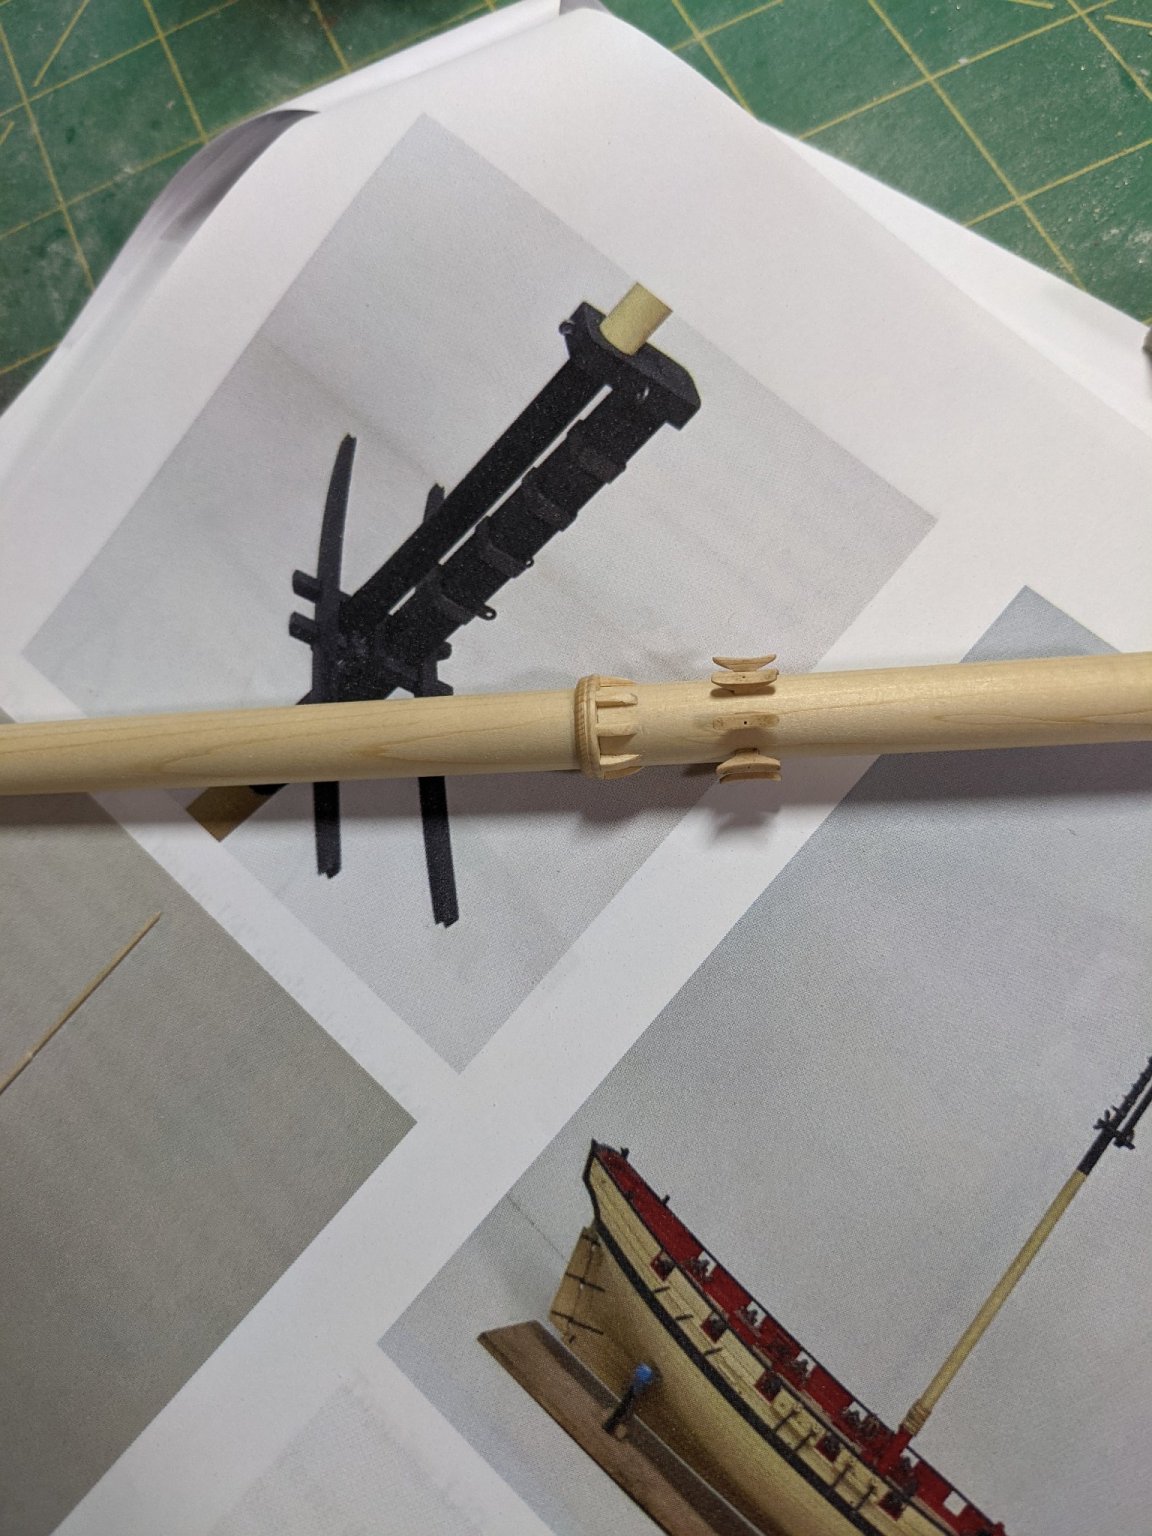
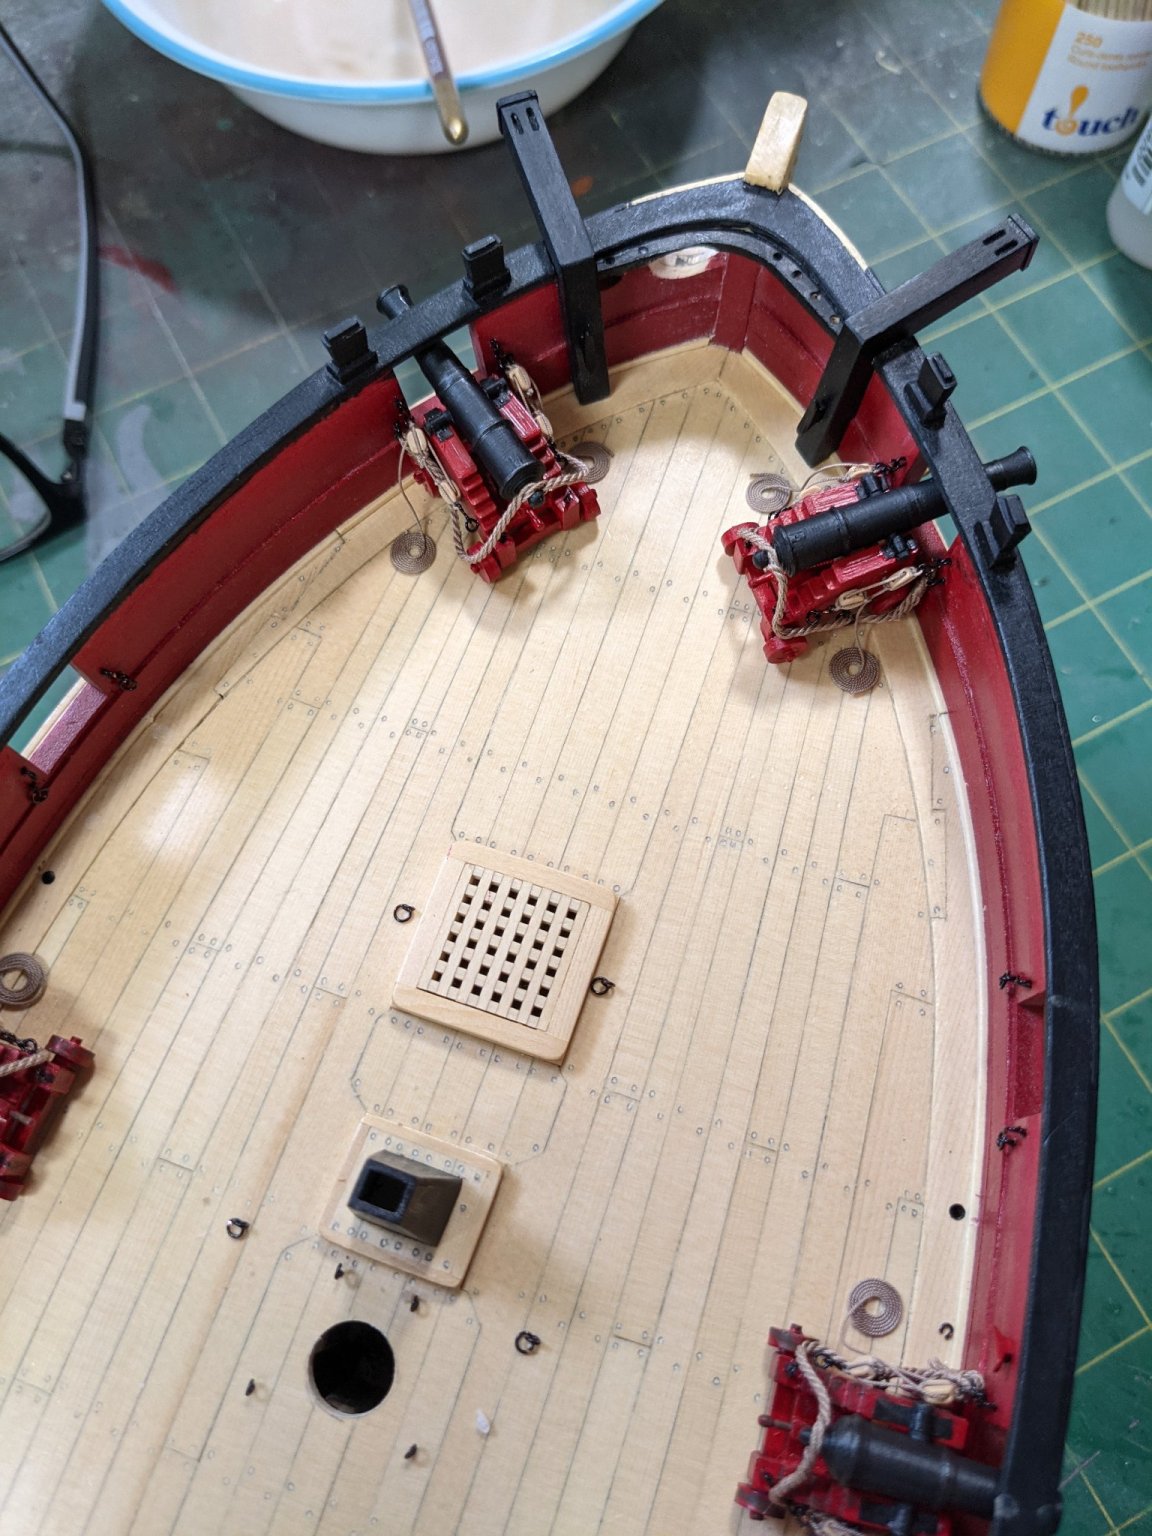
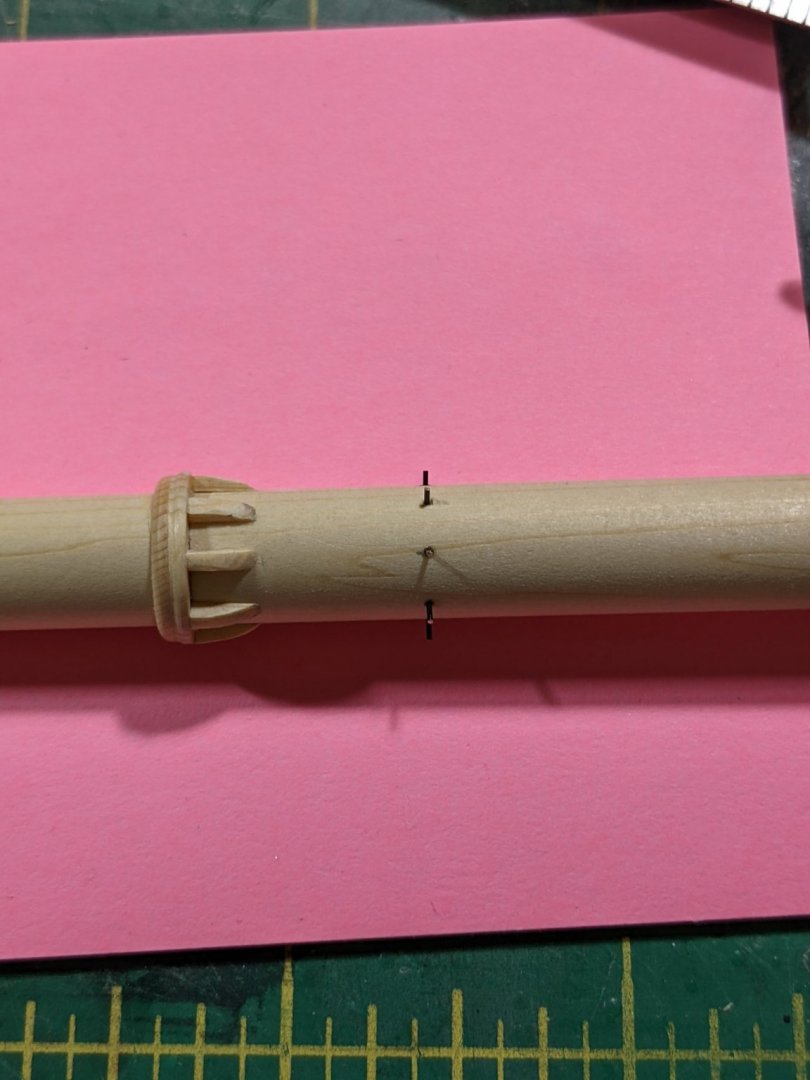
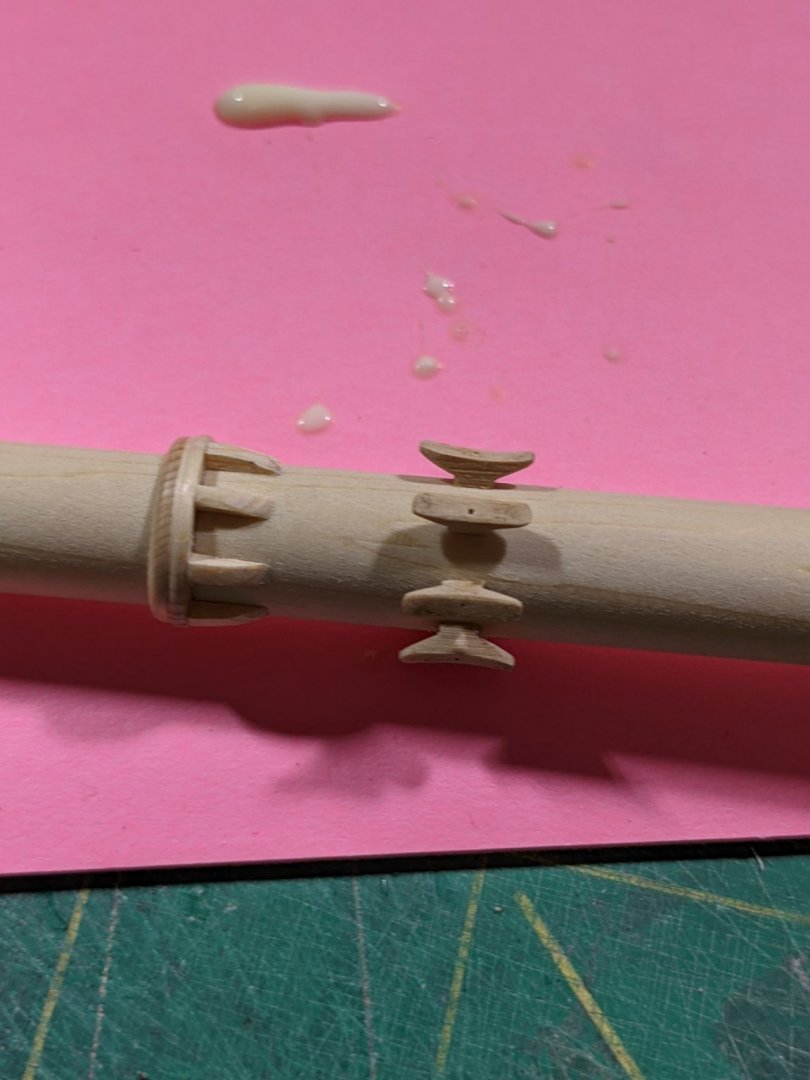
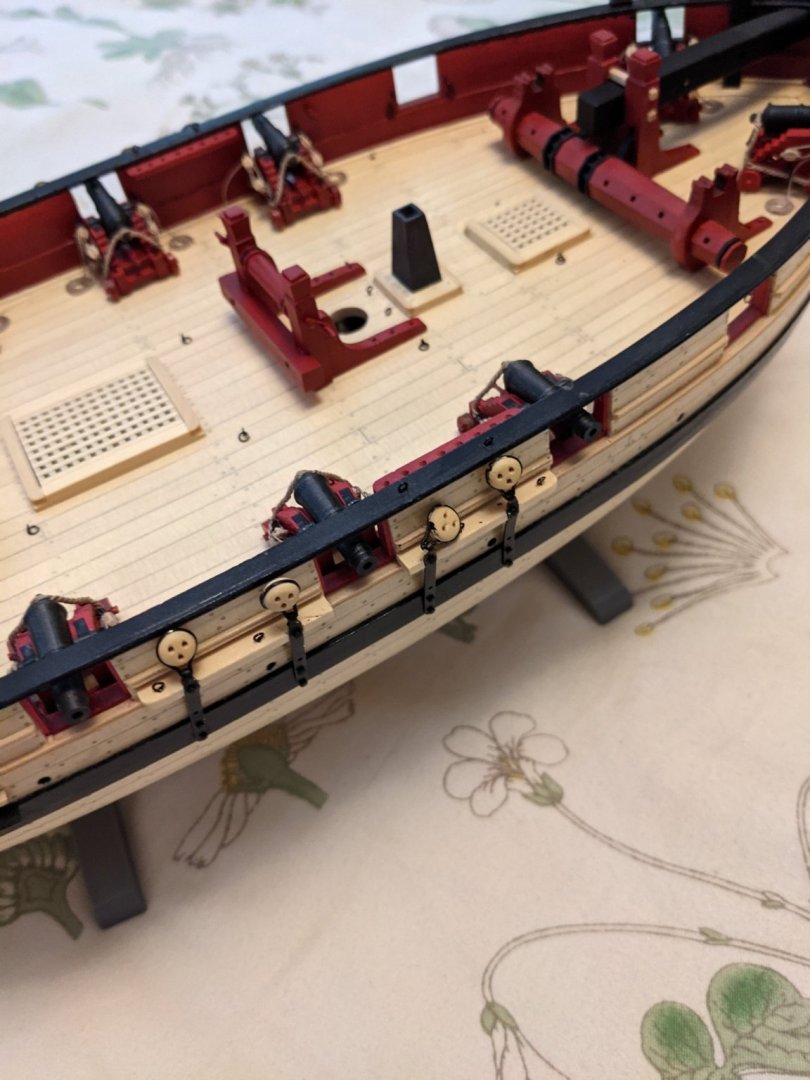
Working on the mast and I have a question. Are these plates attached the way I show it here or should there be a flat spot on the mast at this area?
- 274 replies
-
- 3
-
-
- Cheerful
- Syren Ship Model Company
- (and 1 more)
-
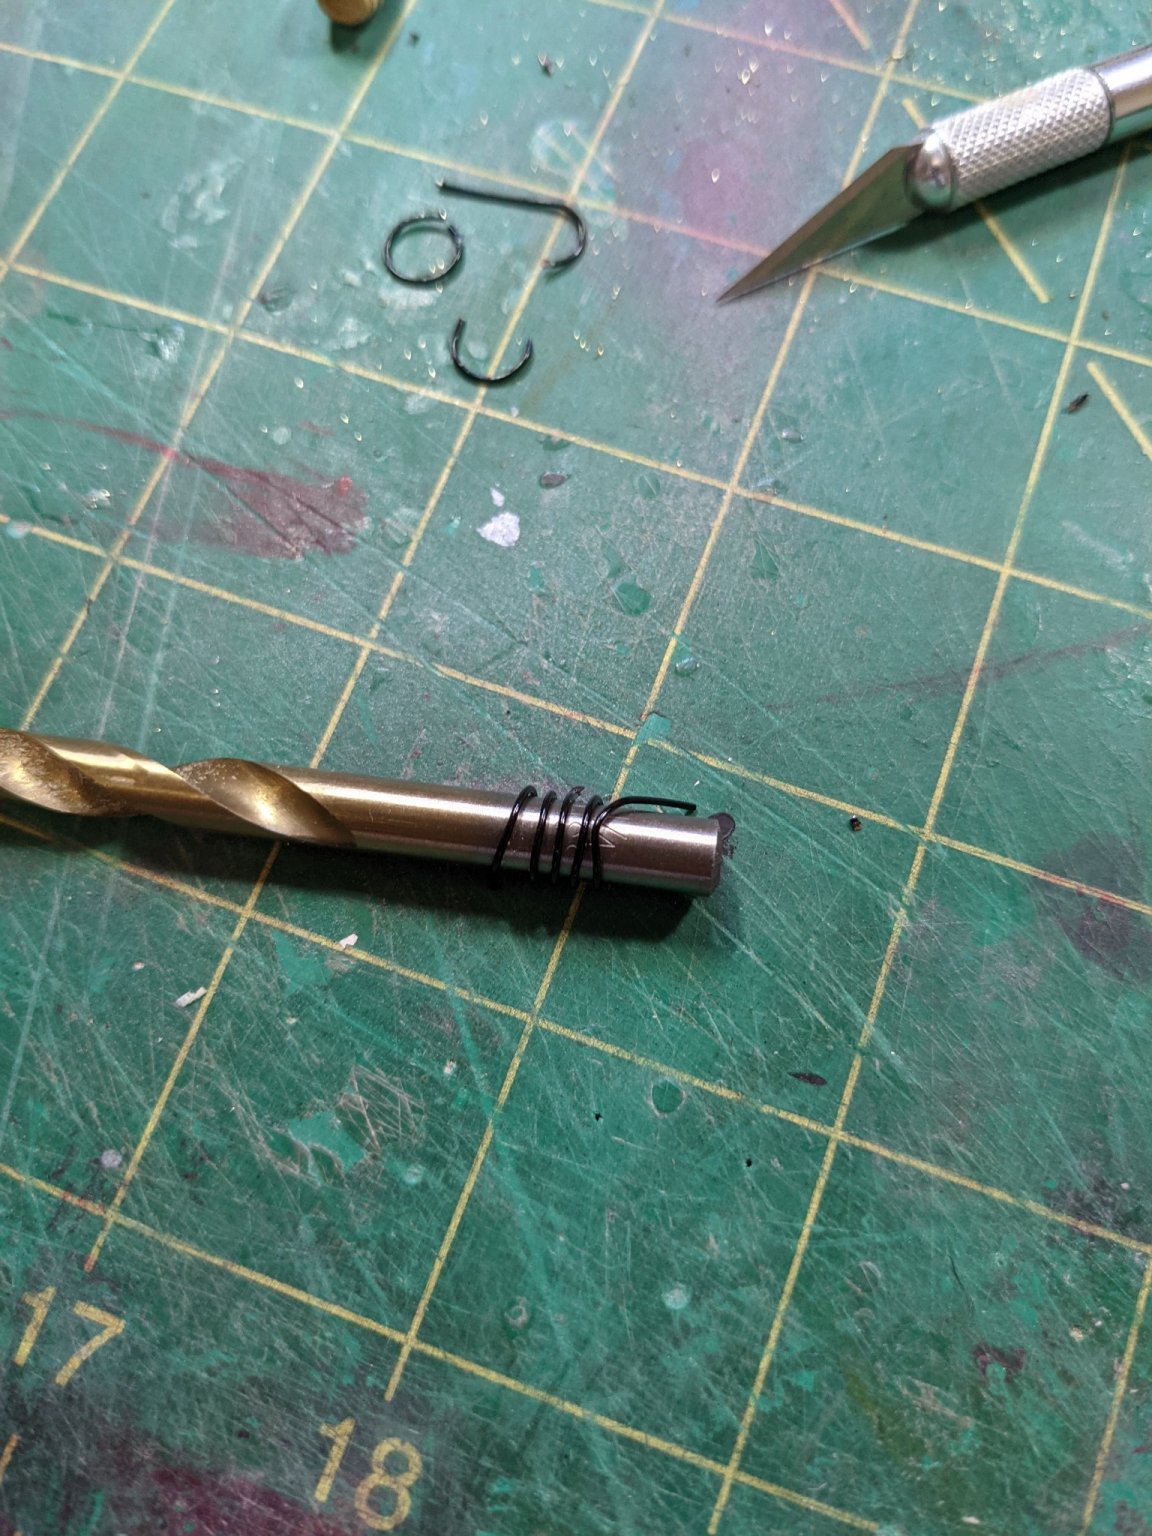
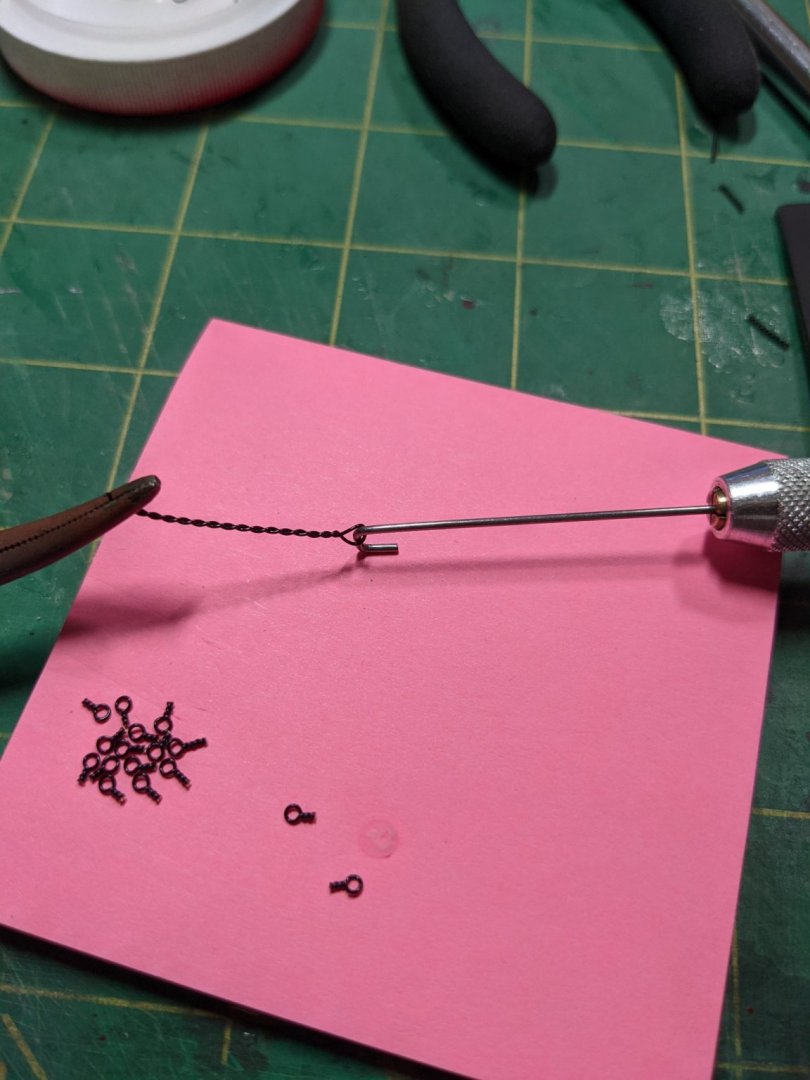
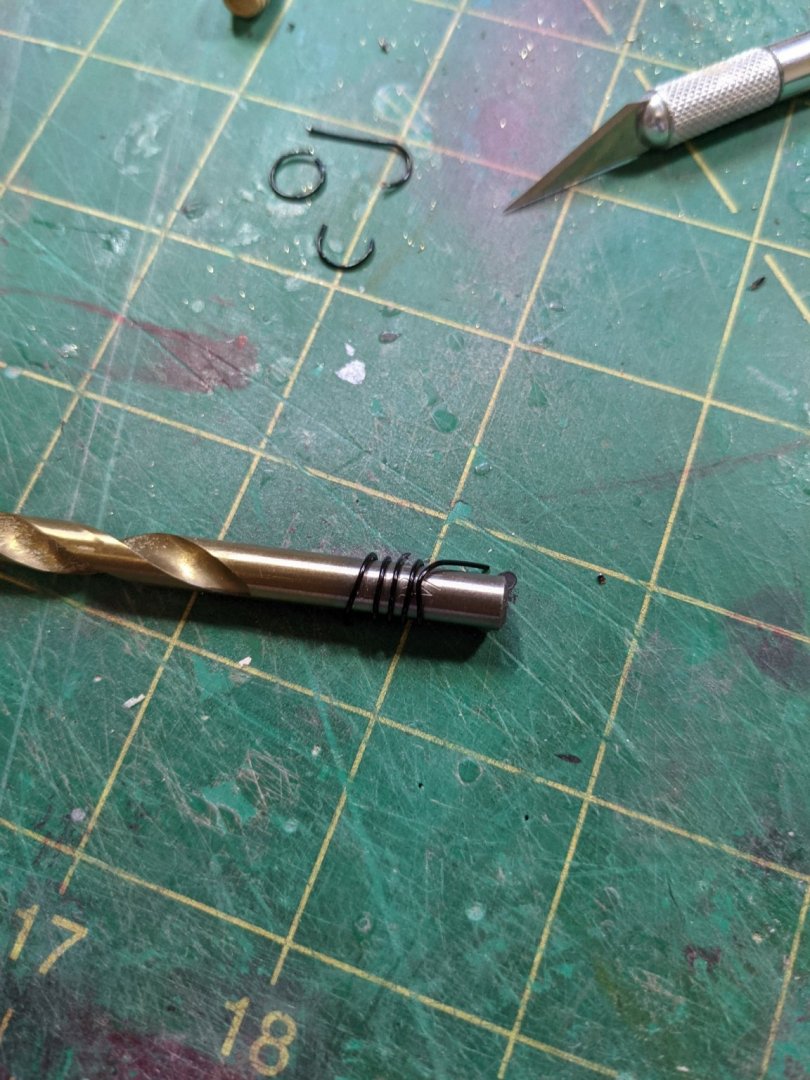
These are easy to make: Take a piece if small wire and fold it over. Make yourself a small hook our of piano wire and chuck it in a pin vise. Then just twist it.

-
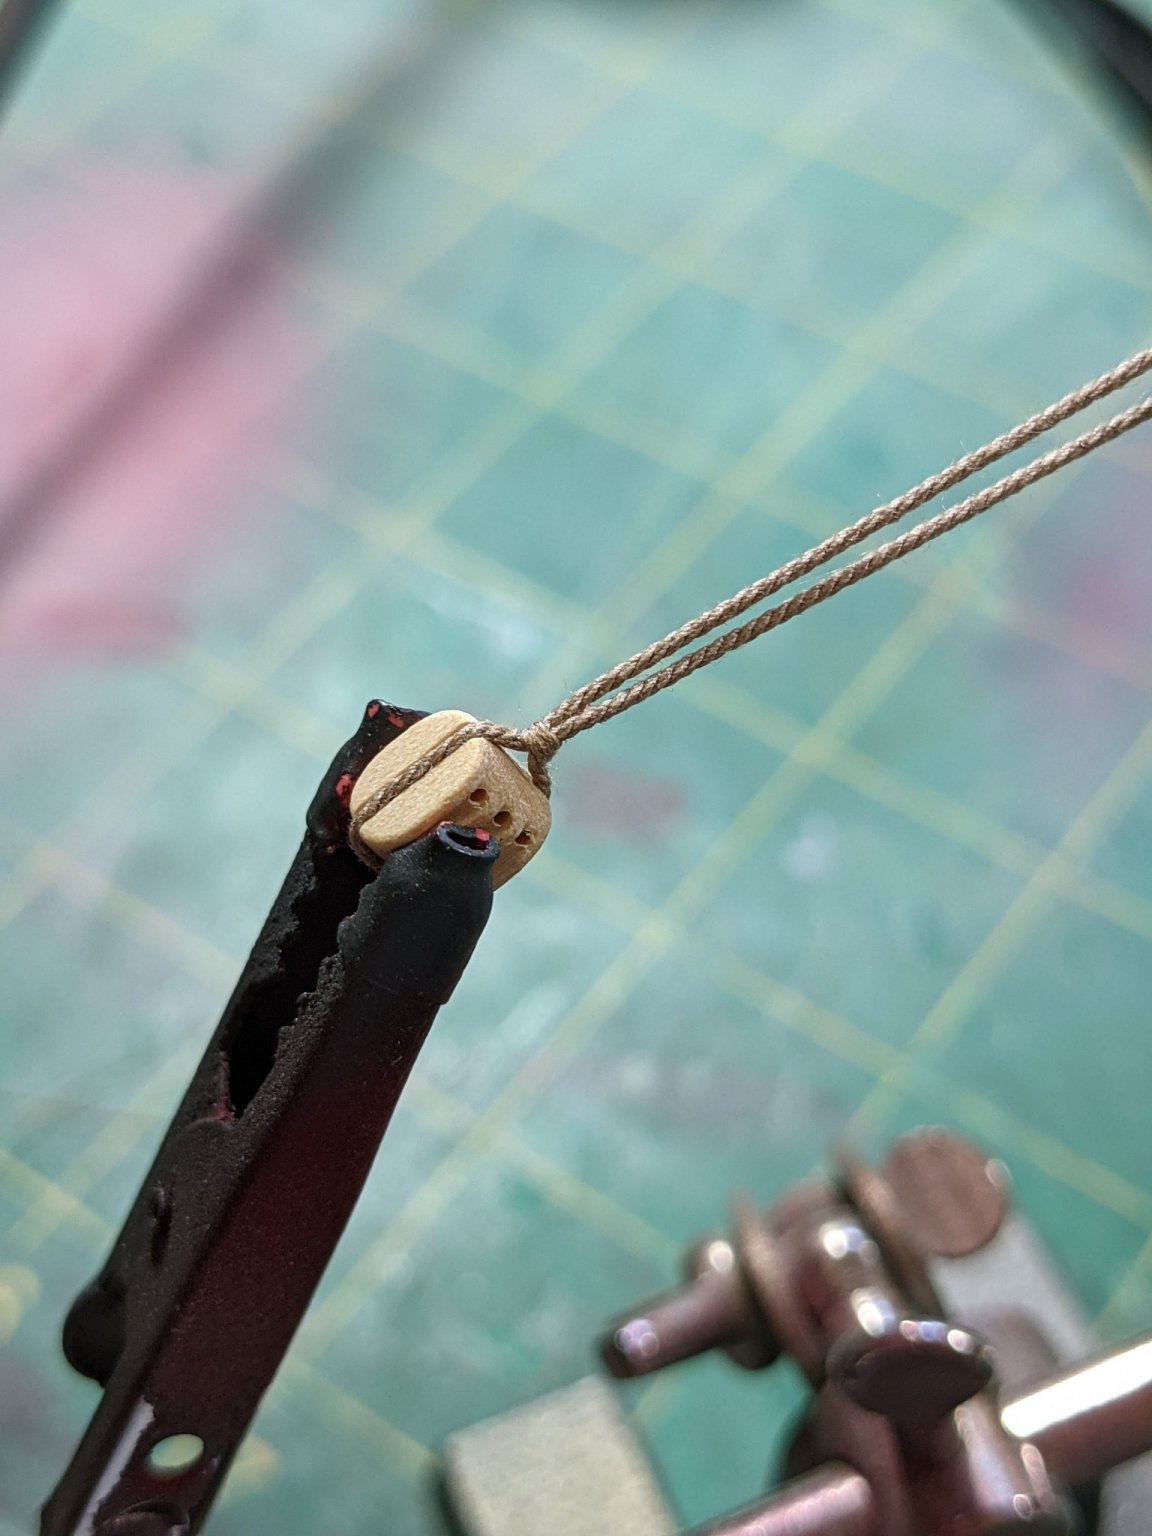
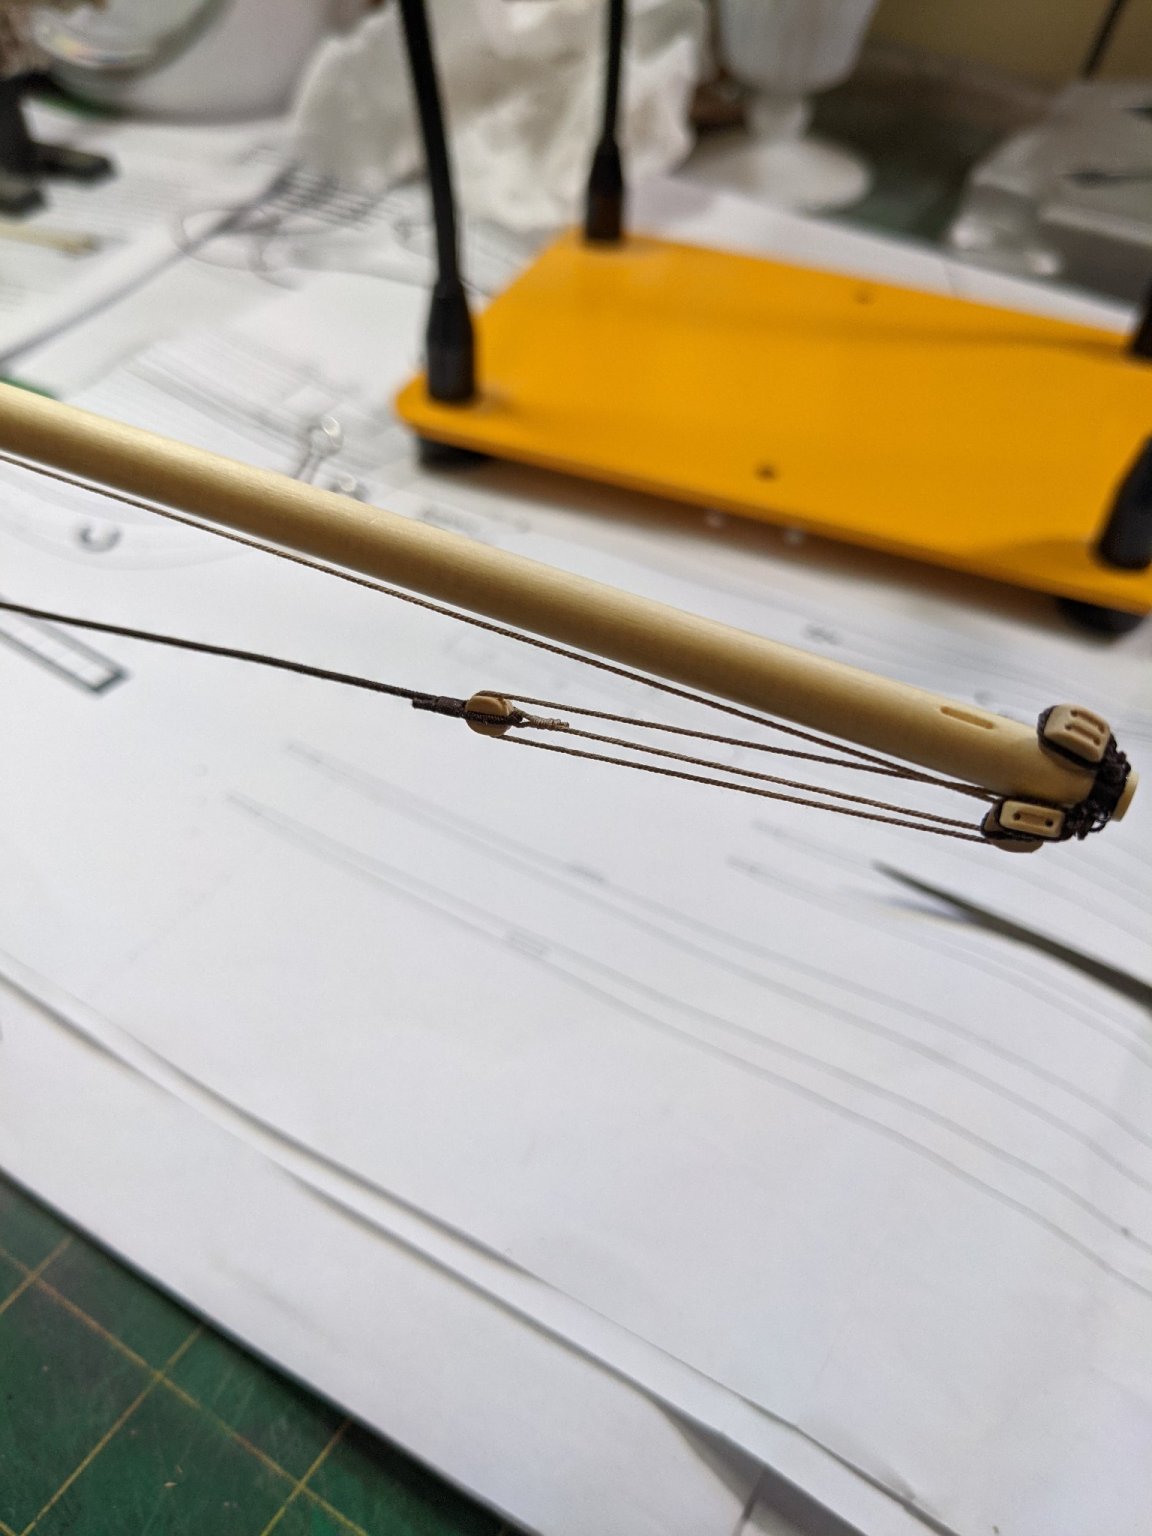
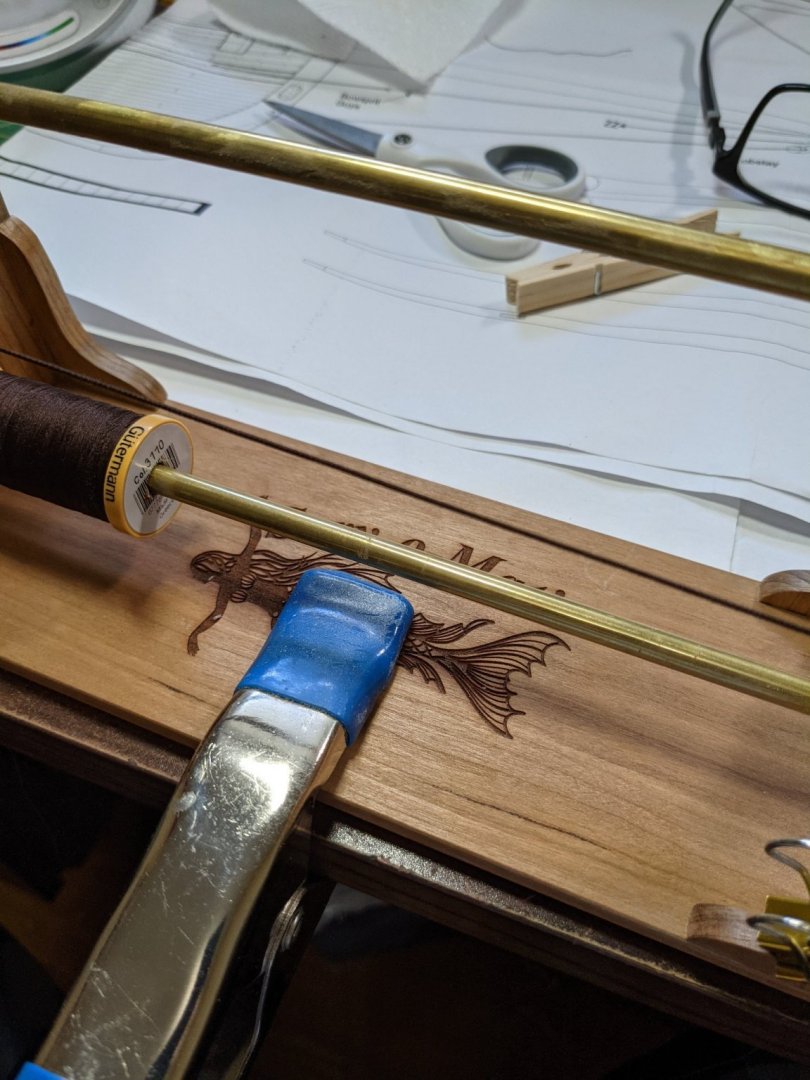
Wrapped a length of .025 rope with the Syren Serve-O-Matic for the Bobstay. I am using Gutterman cotton thread for my rope. Bobstay is rigged. One question: does the wrapping around the rope extend past the cut end as it is in the bow end or does it leave rope showing as I did at the block?

- 274 replies
-
- 11
-
-
- Cheerful
- Syren Ship Model Company
- (and 1 more)
-
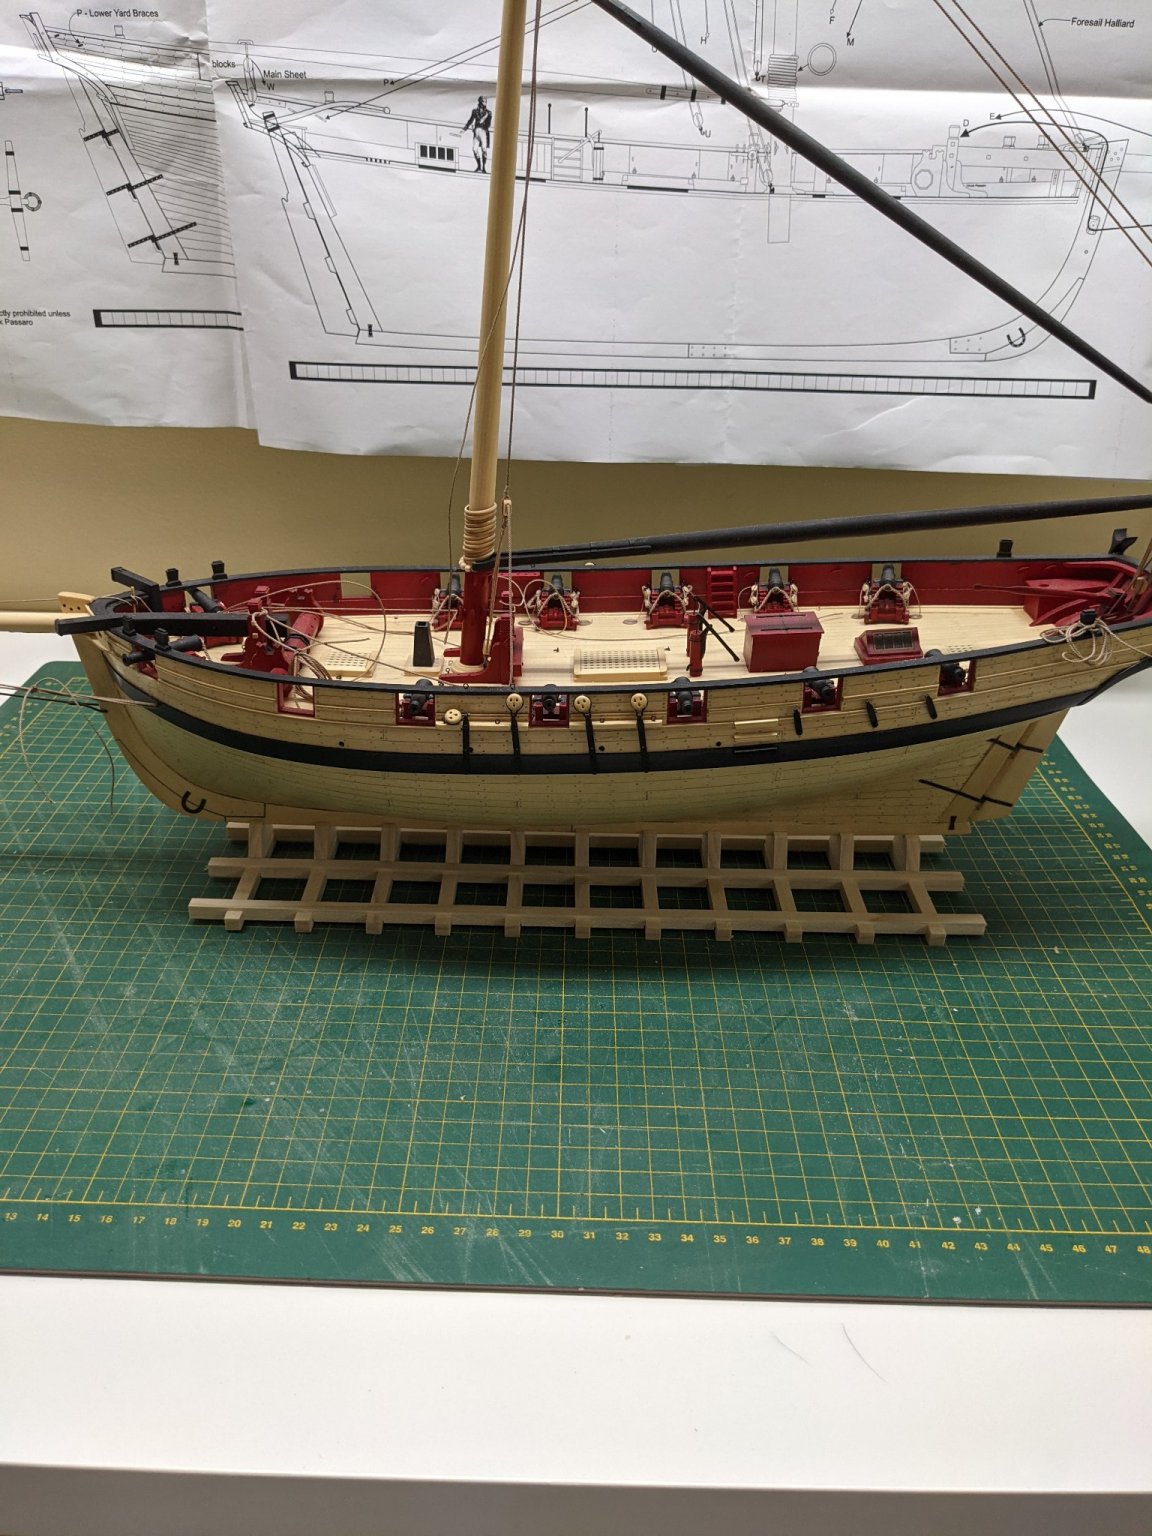
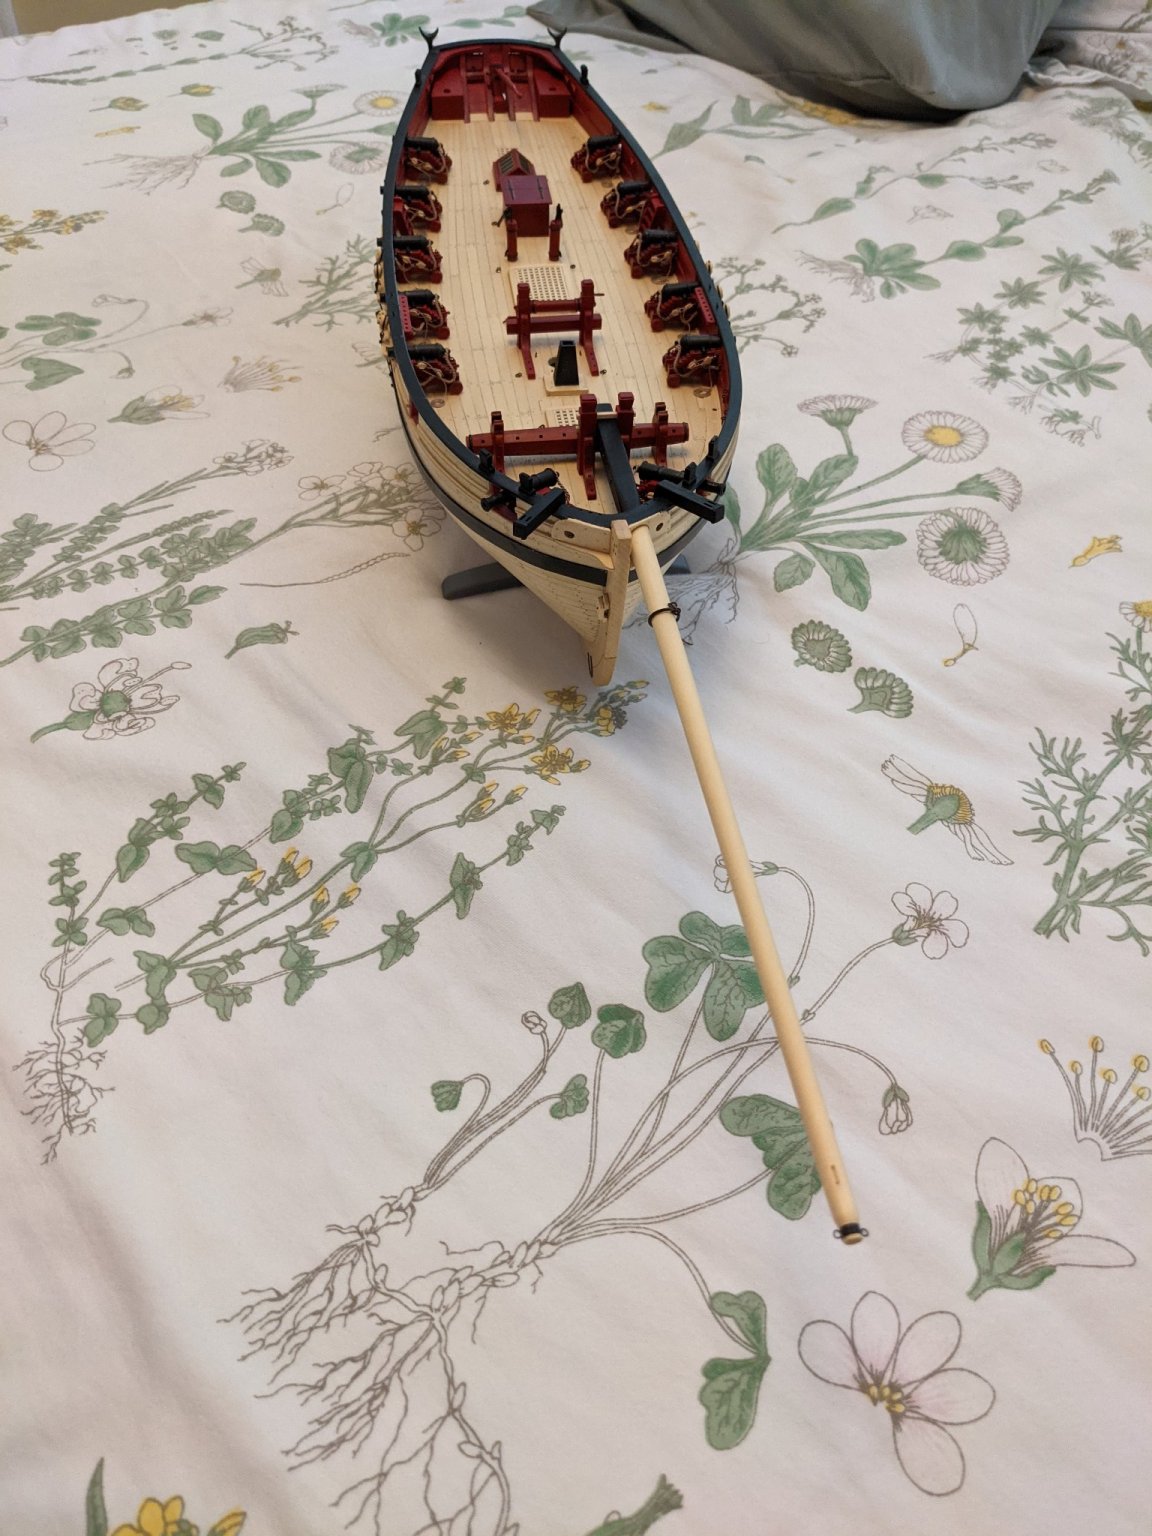
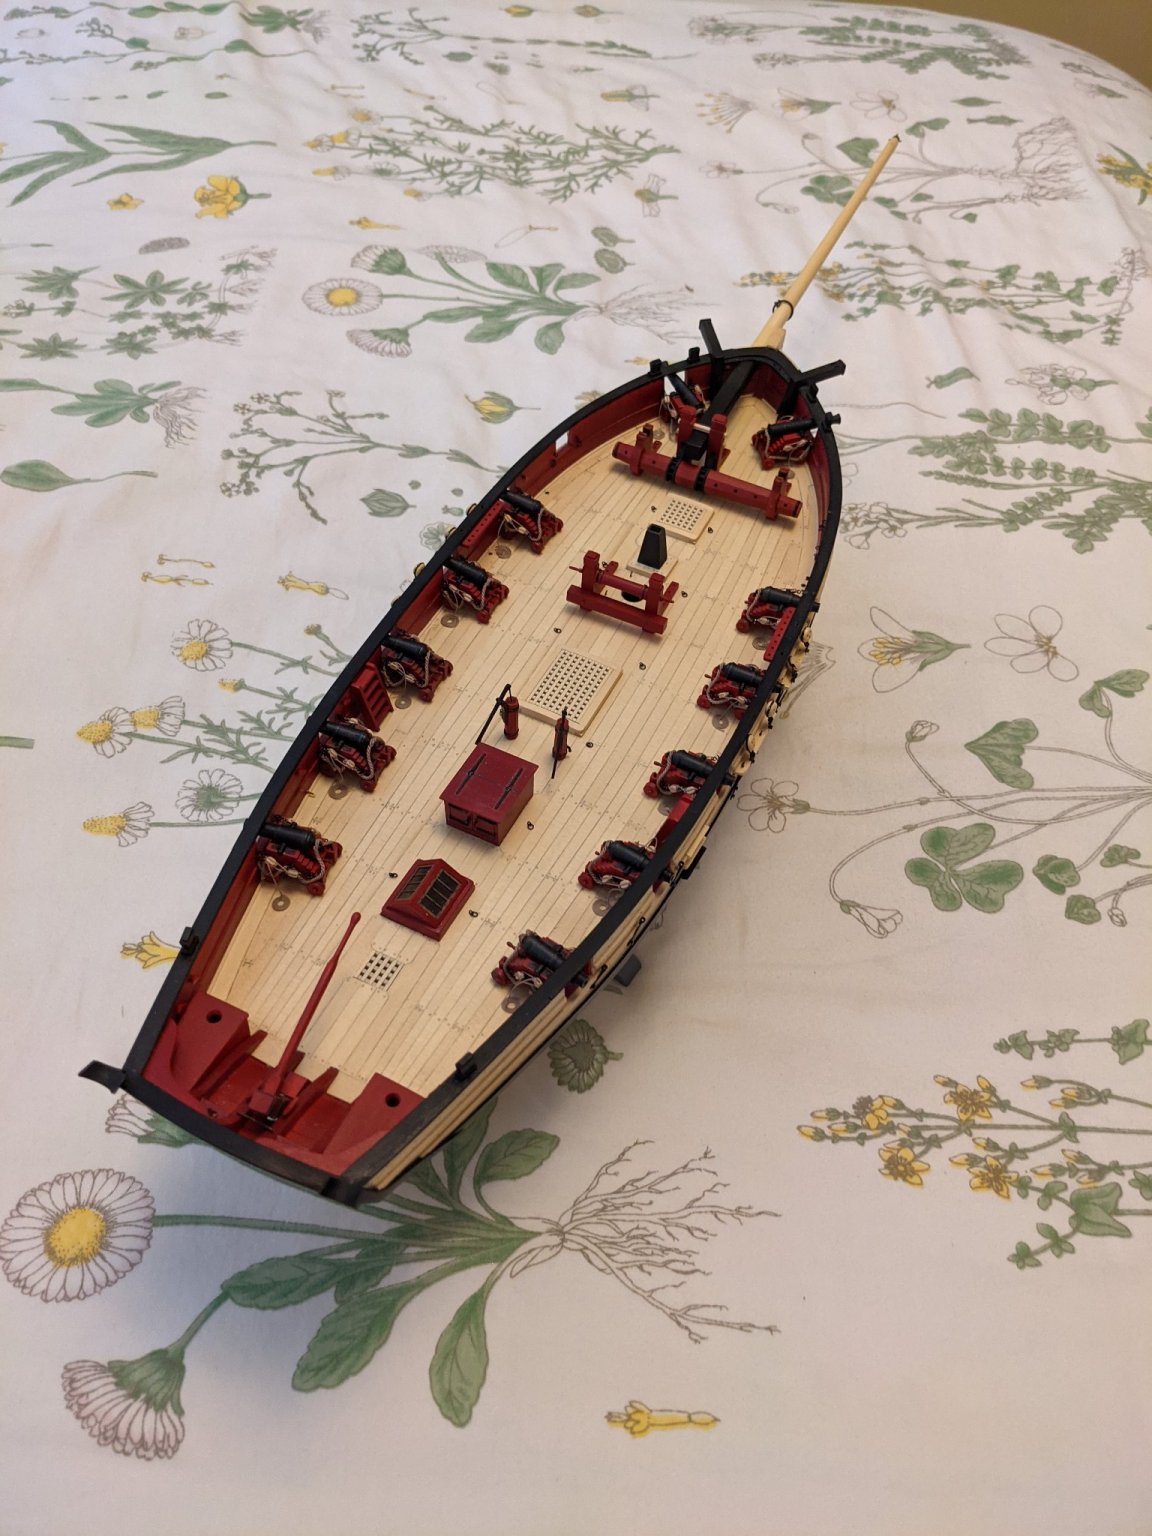
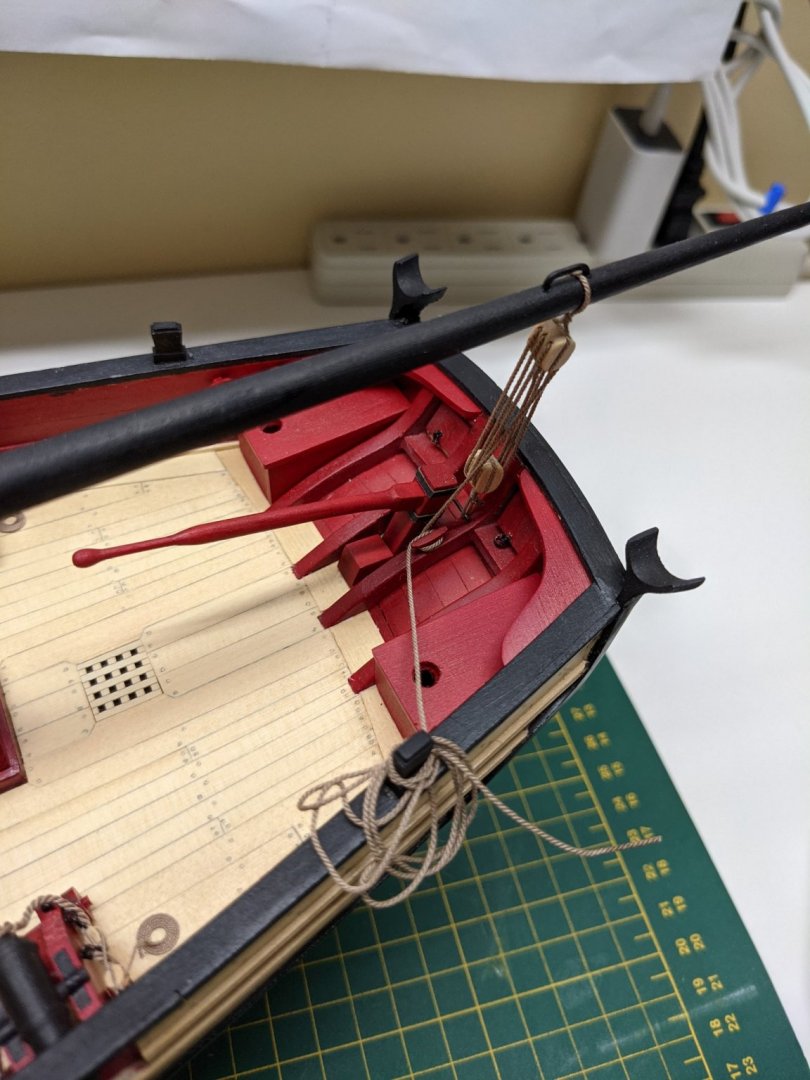
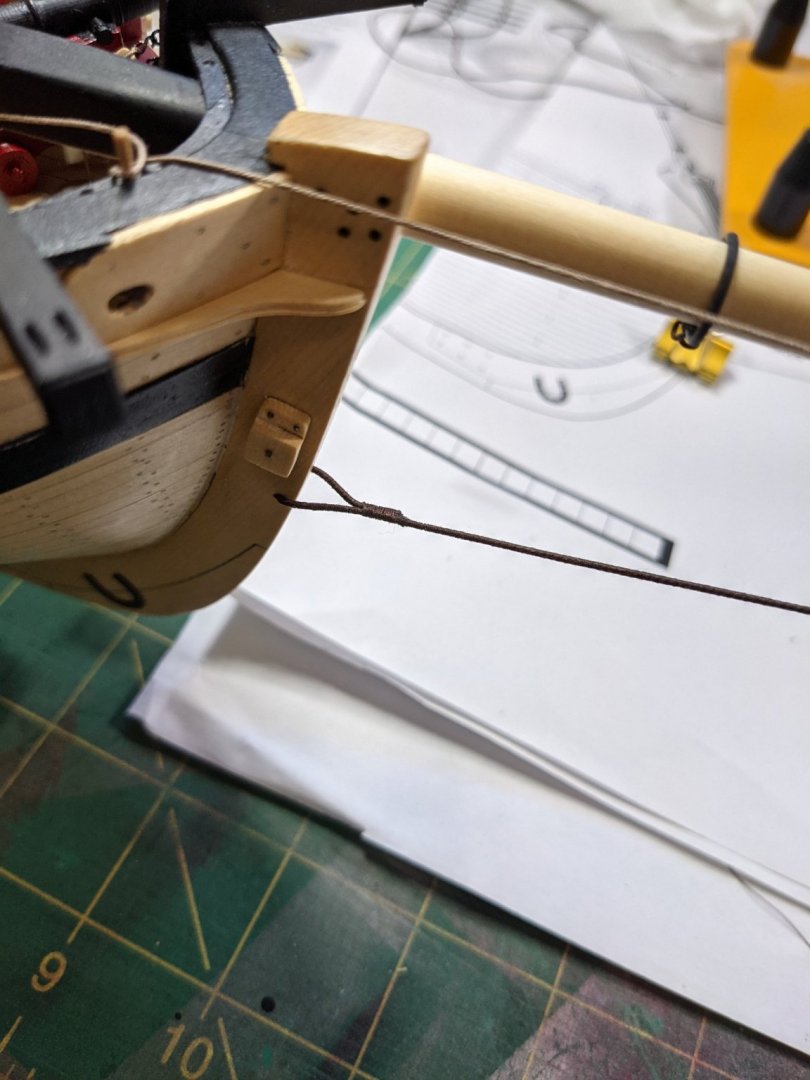
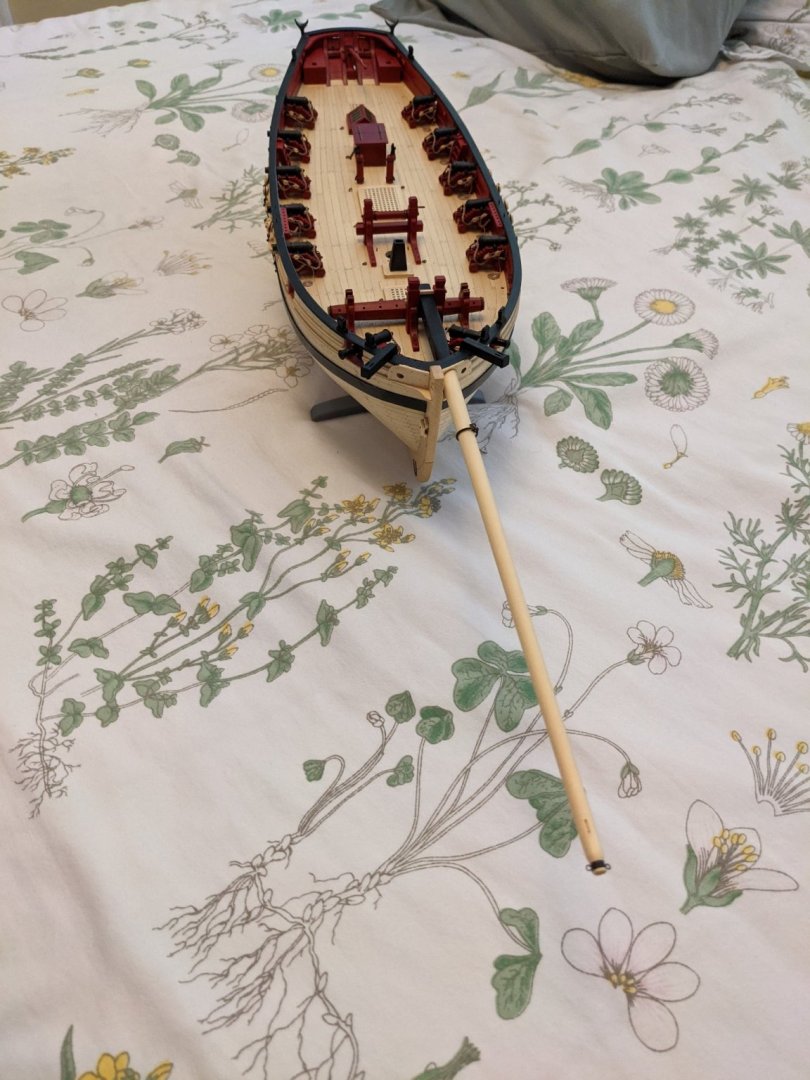
I already had shaped the bowsprit earlier while I was waiting for paint/glue to dry so I was ready to mount it and complete the chapter. I am now ready to move to chapter 12 where we start some of the rigging. This has been a very fun build and I am learning new skills as I go along.


- 274 replies
-
- 7
-
-
- Cheerful
- Syren Ship Model Company
- (and 1 more)
-
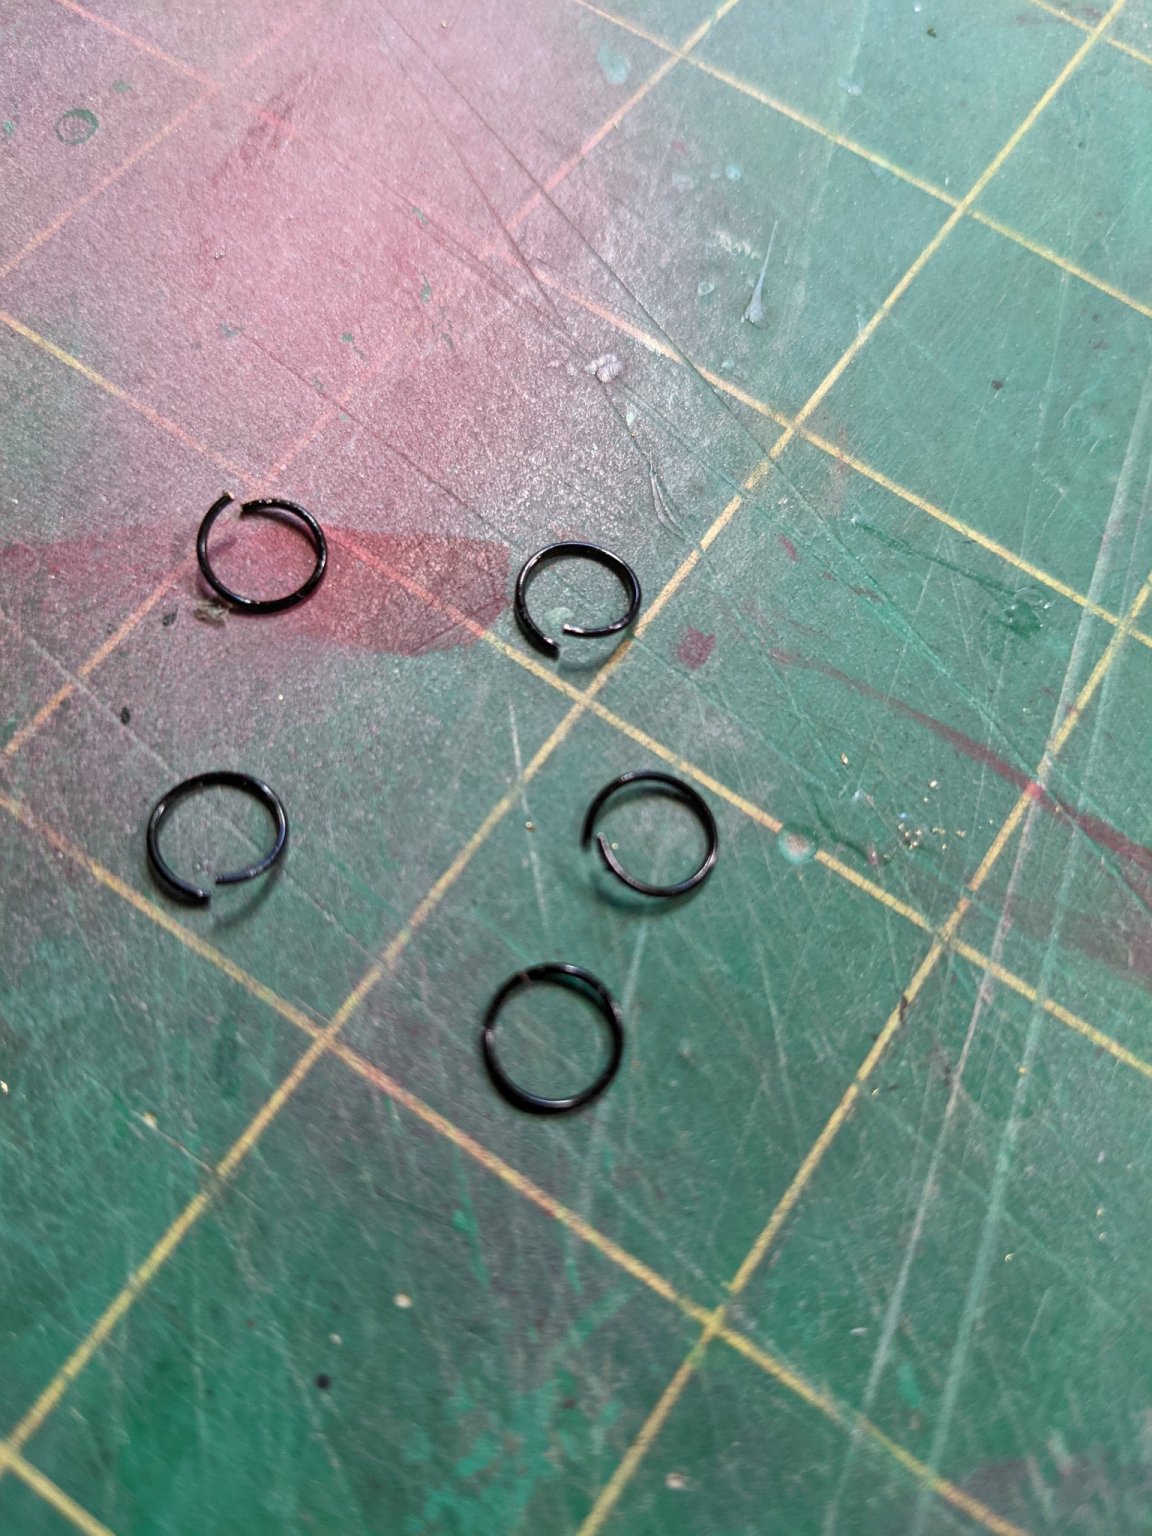
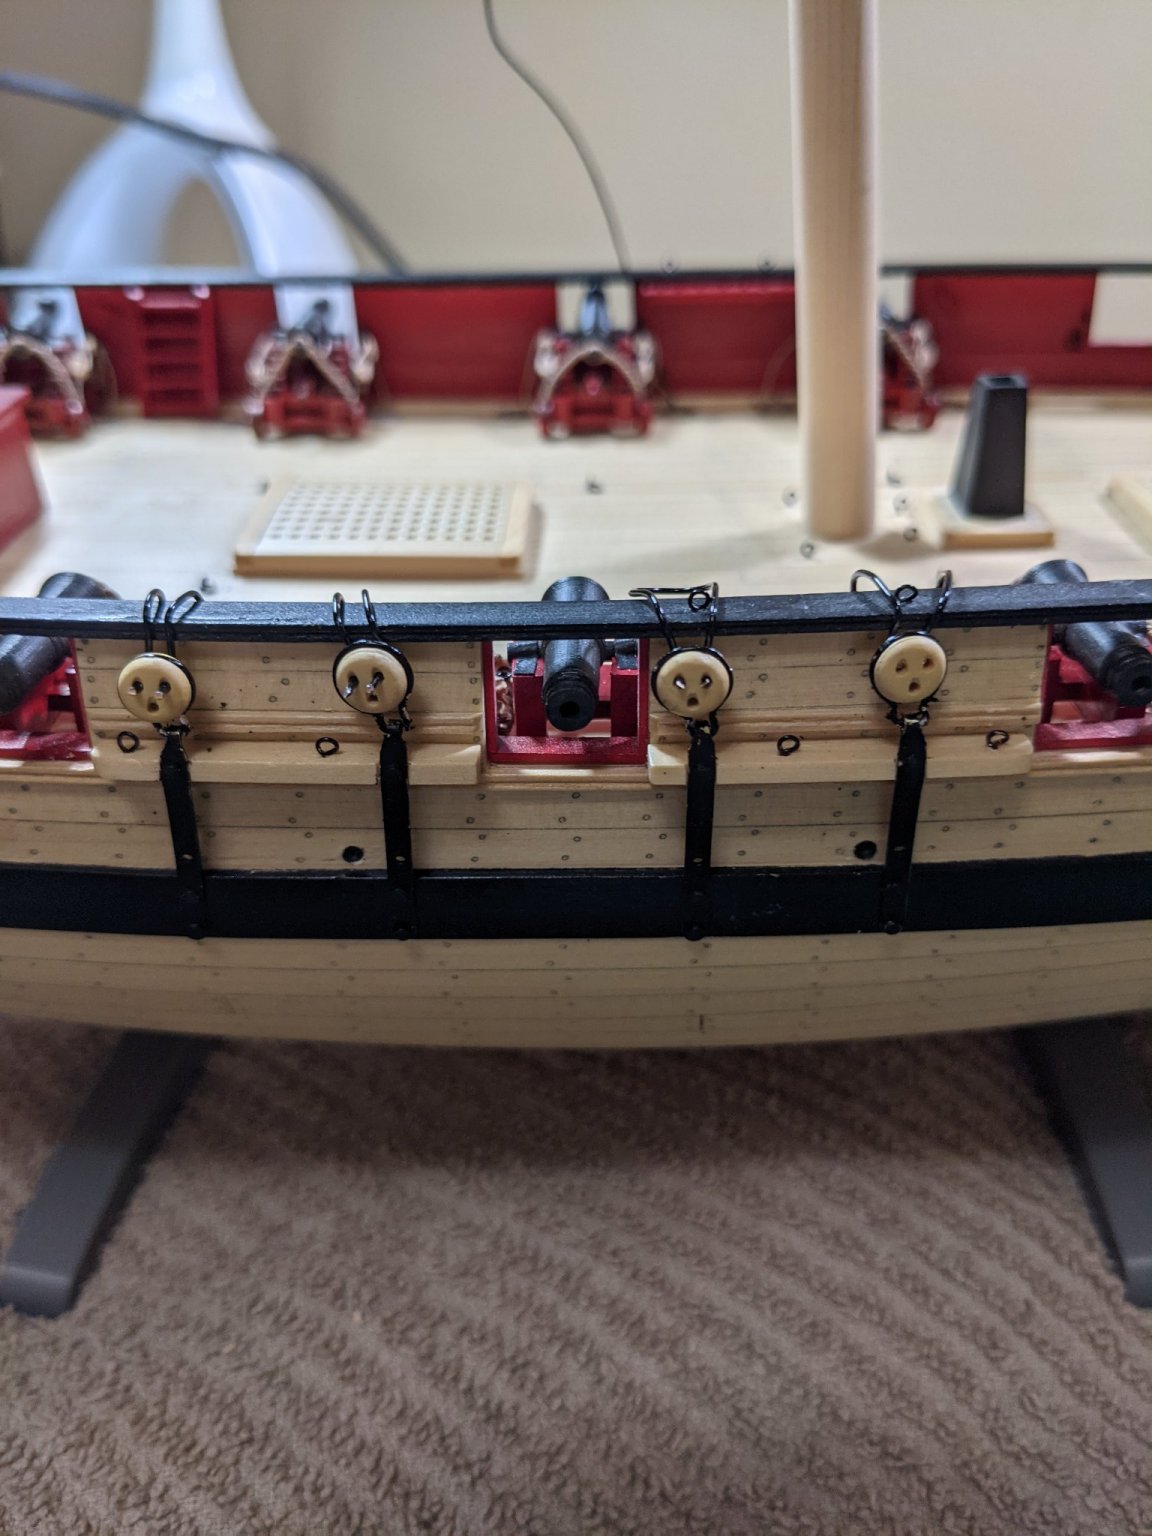
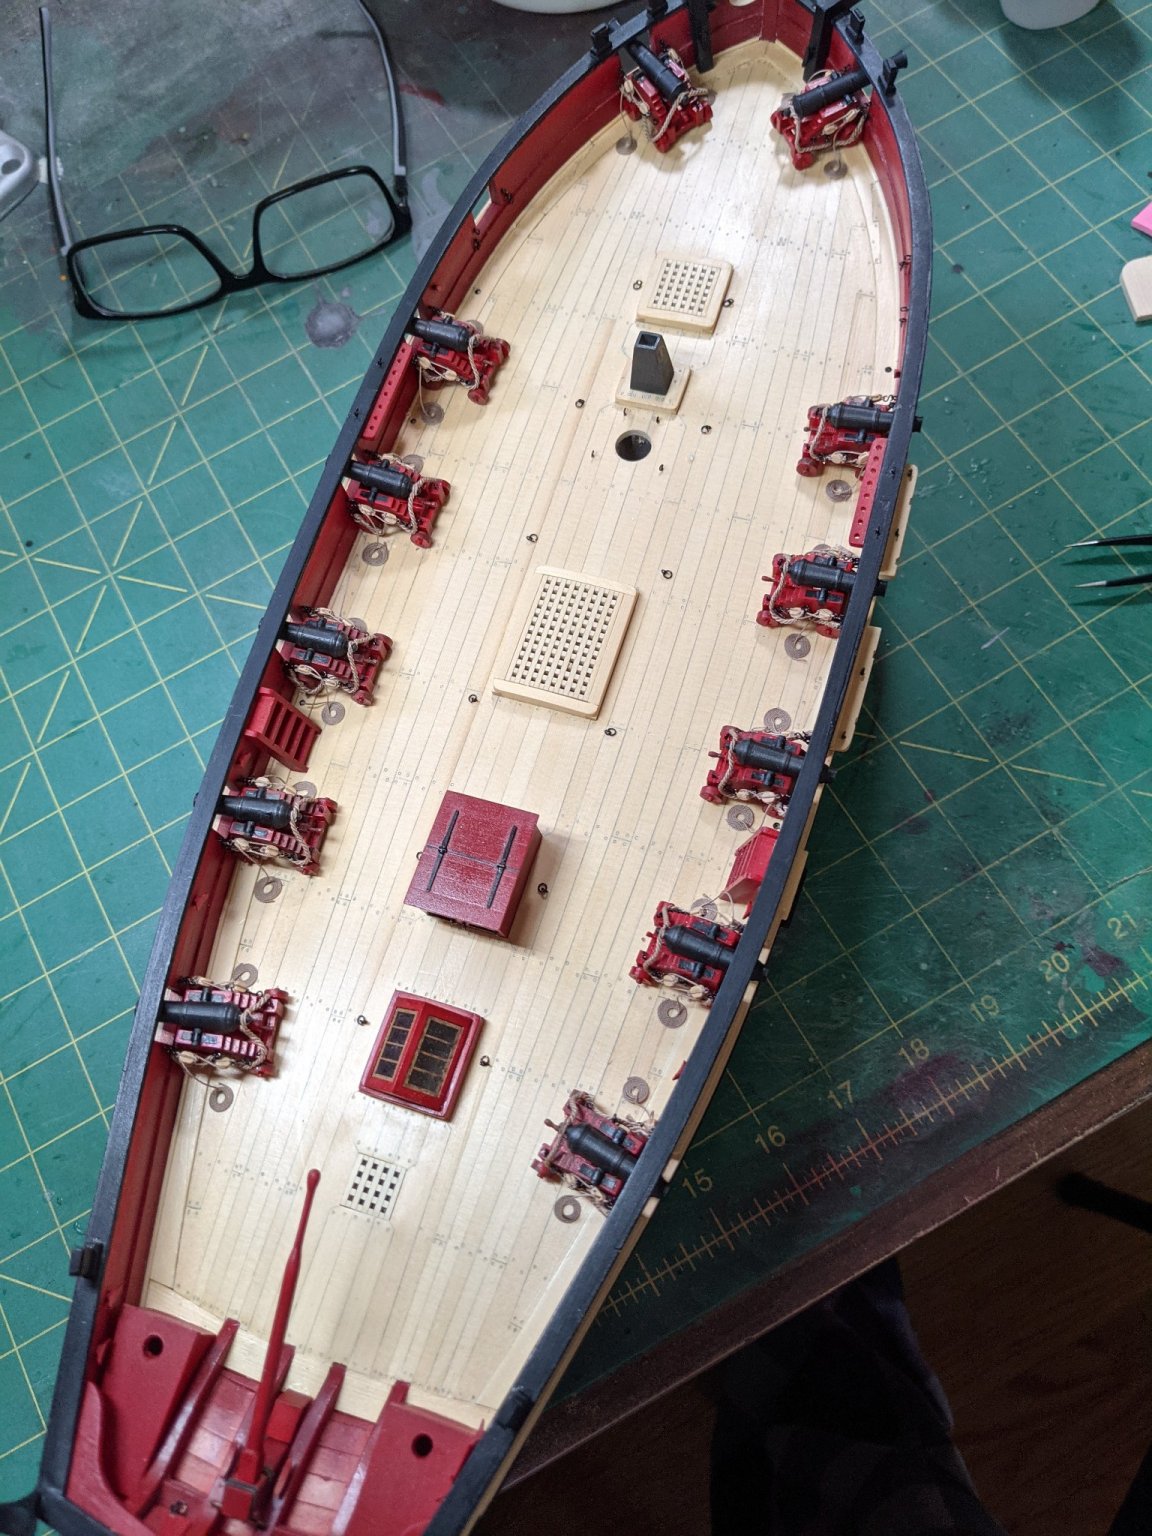
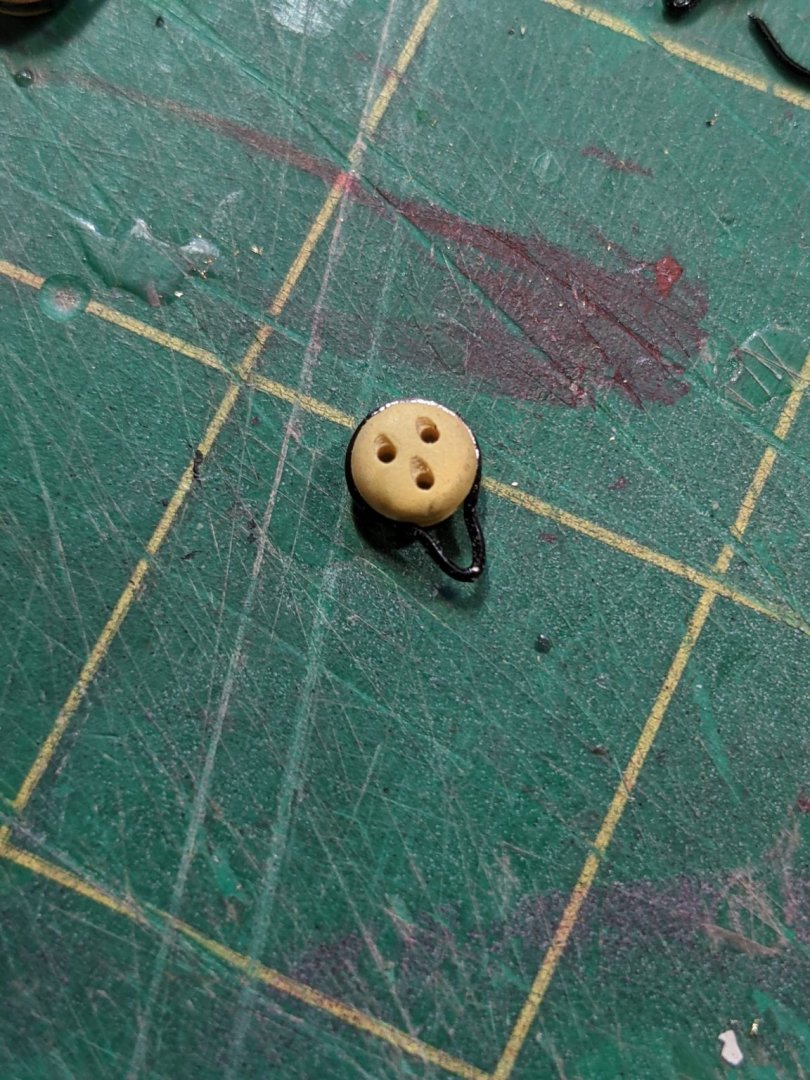
So I redid the deadeye stropping as I didn't like the way it was. First used a 1/4 inch drill bit and wound some coils with 22 gauge wire. The cut out the coils with flush cutters. The soldered the ends together and with pliers made up the hook on the bottom. You will need a lot of these as they do pop with pressure. Here are the eight I redid. It took about 3 times as many coils until I got the eight done. Once they were installed I touched up the black paint.


- 274 replies
-
- 5
-
-
- Cheerful
- Syren Ship Model Company
- (and 1 more)
-
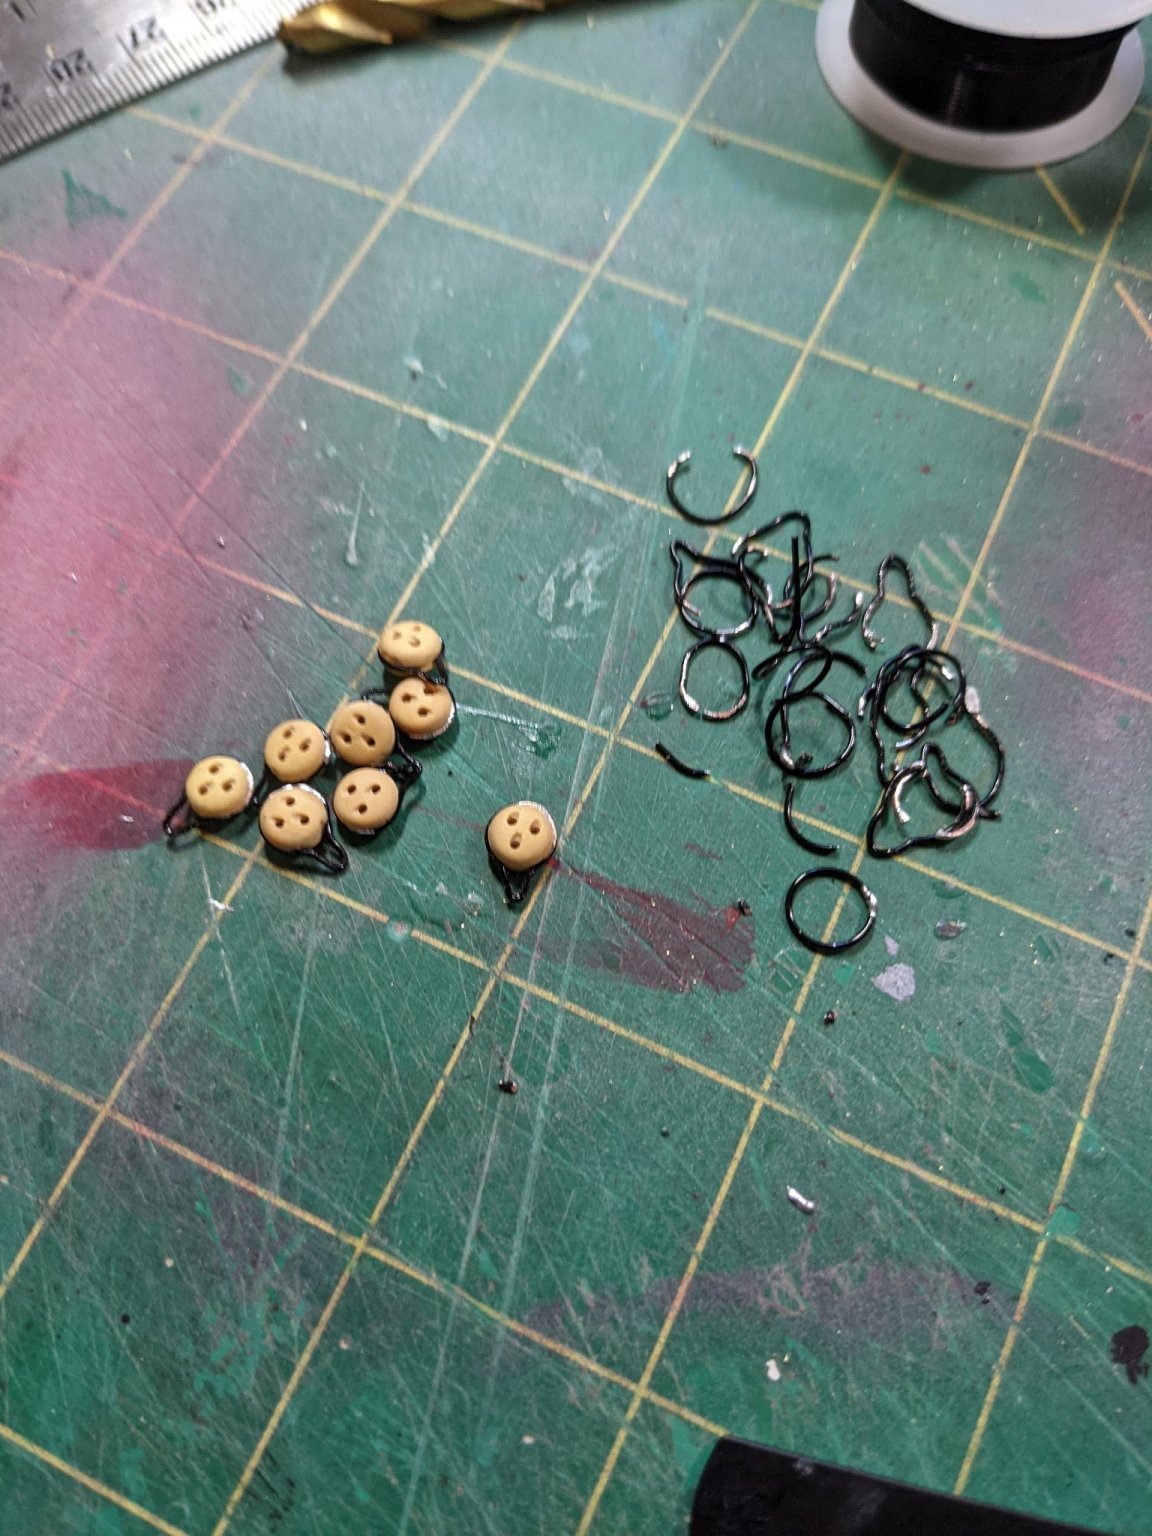
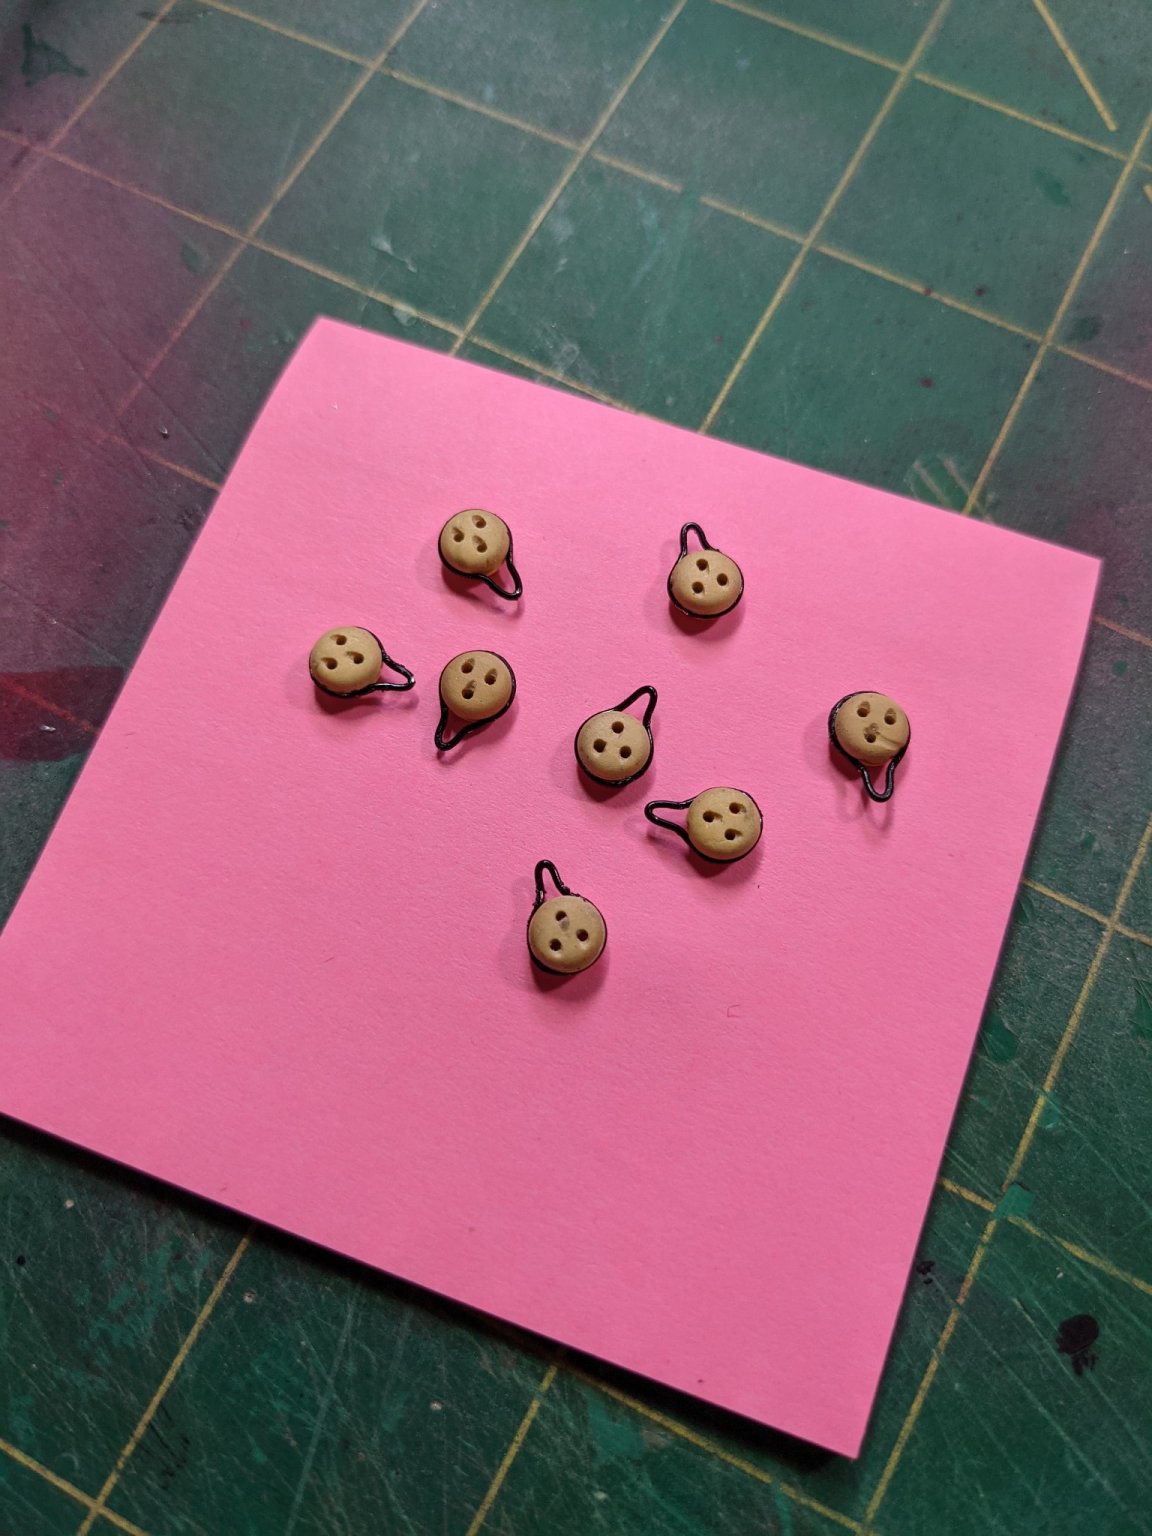
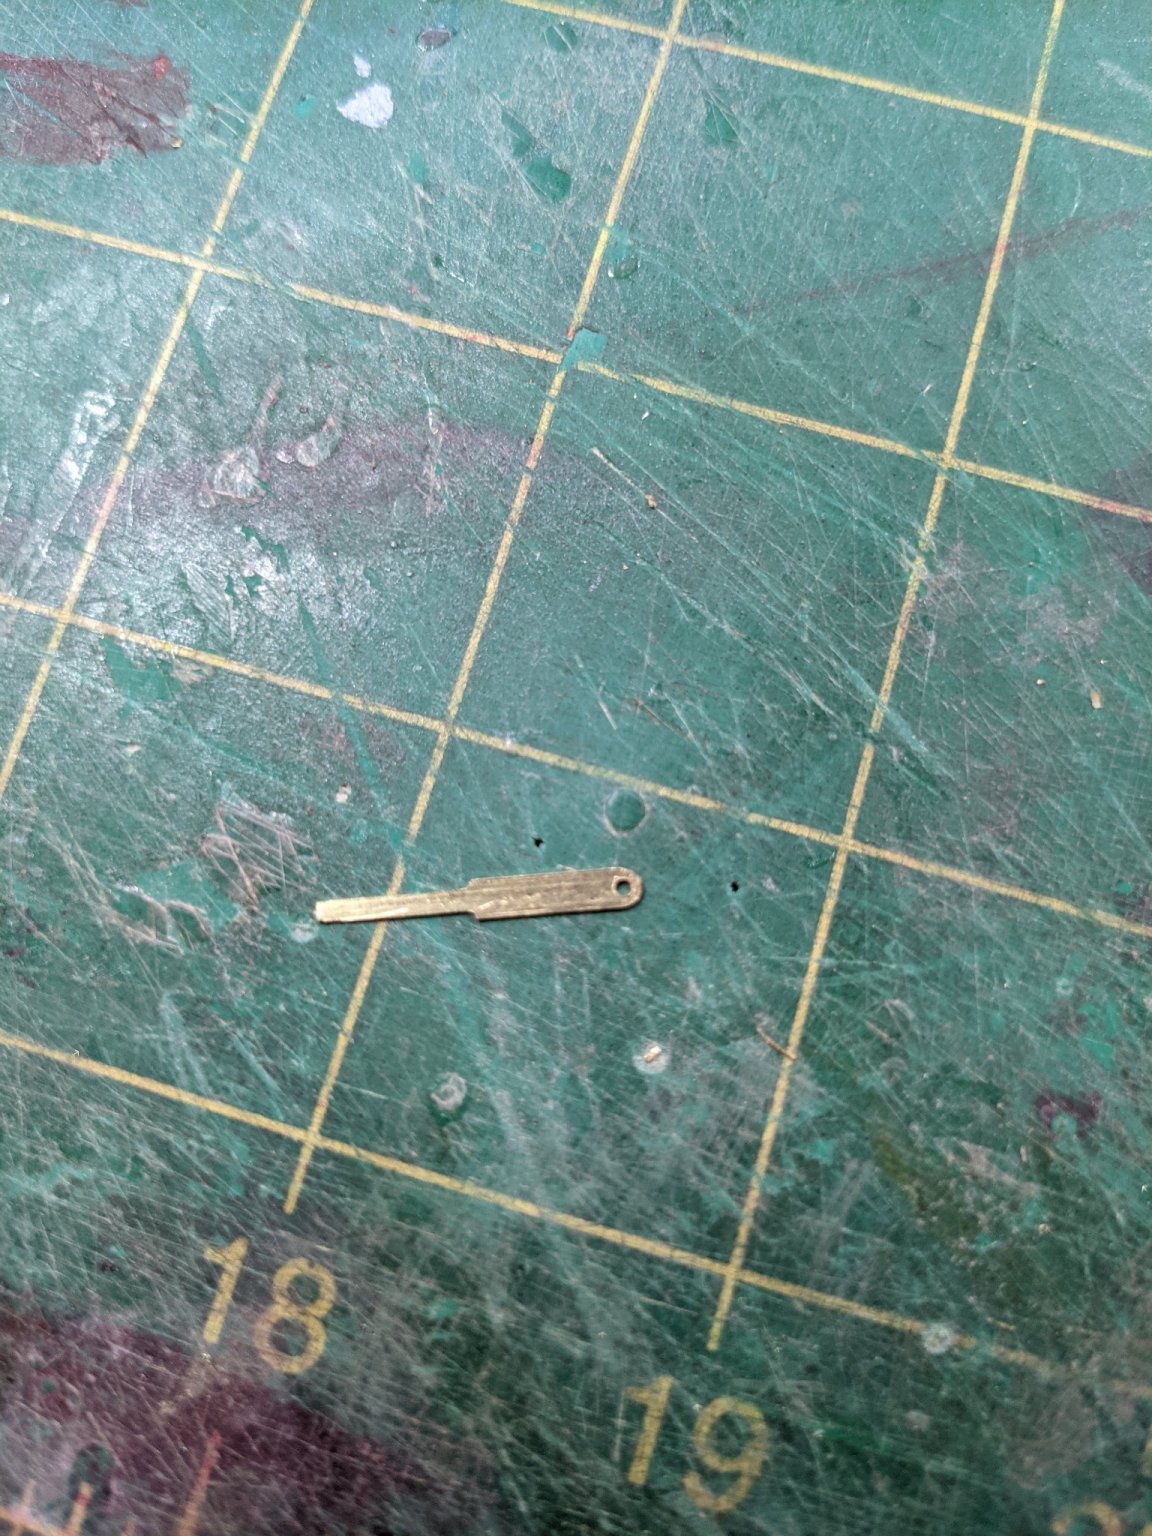
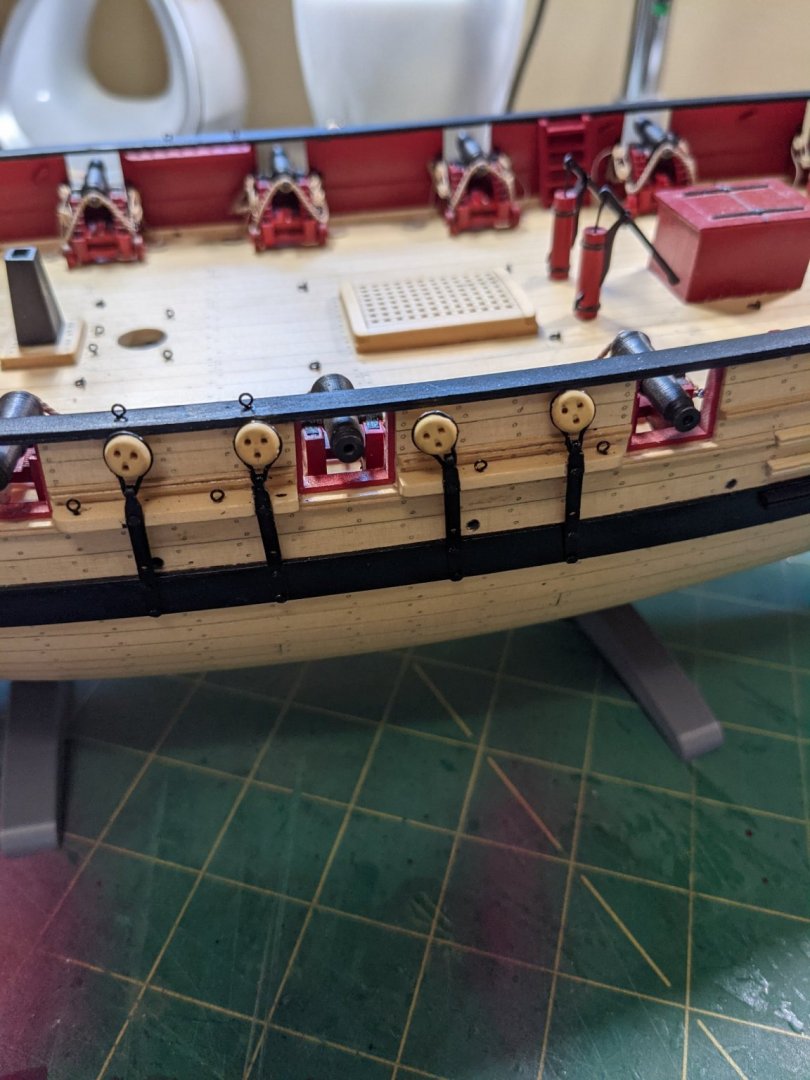
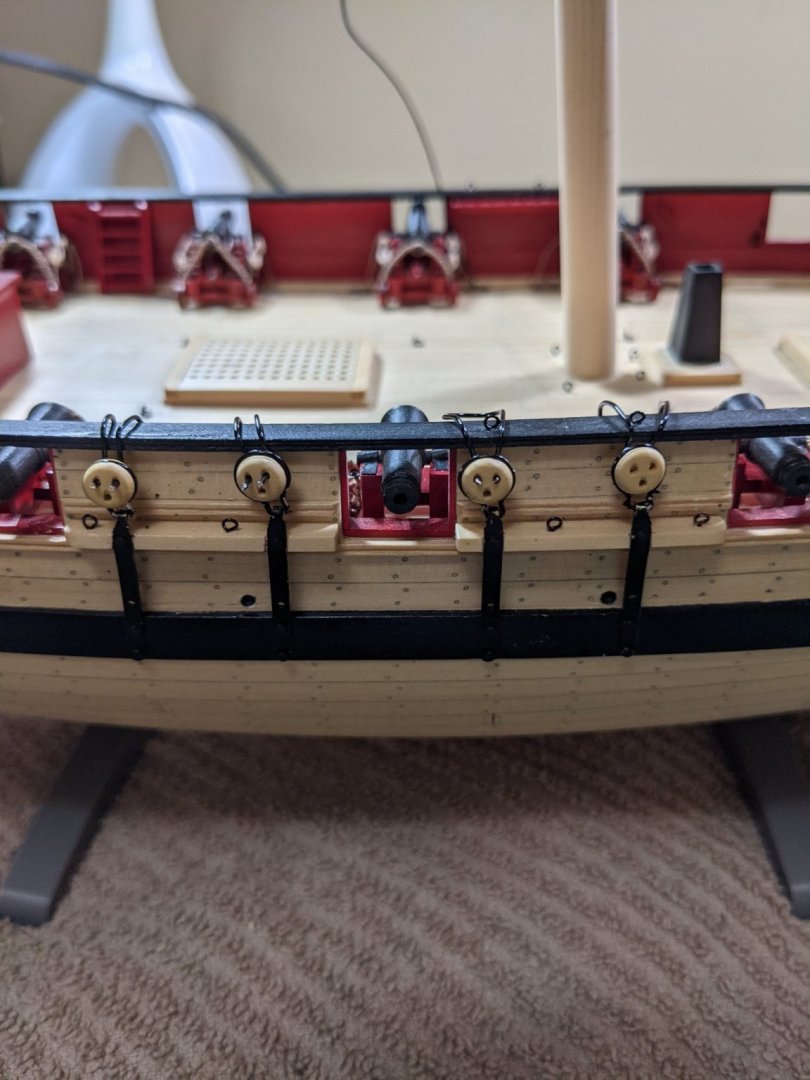
Thanks everyone for the comments and likes. I have the chainplates done and the deadeyes stropped. One issue I am having is the end of the 22 guage wire for the stropping is inside the chainplates and it is springing back and doesn't want to stay tight and the deadeyes come out easy. Not sure how to remedy this or have the "seam" at a different spot instead of the bottom. These deadeyes are Chuck's new ones that you don't have to make and they really look good though.
- 274 replies
-
- 3
-
-
- Cheerful
- Syren Ship Model Company
- (and 1 more)
-
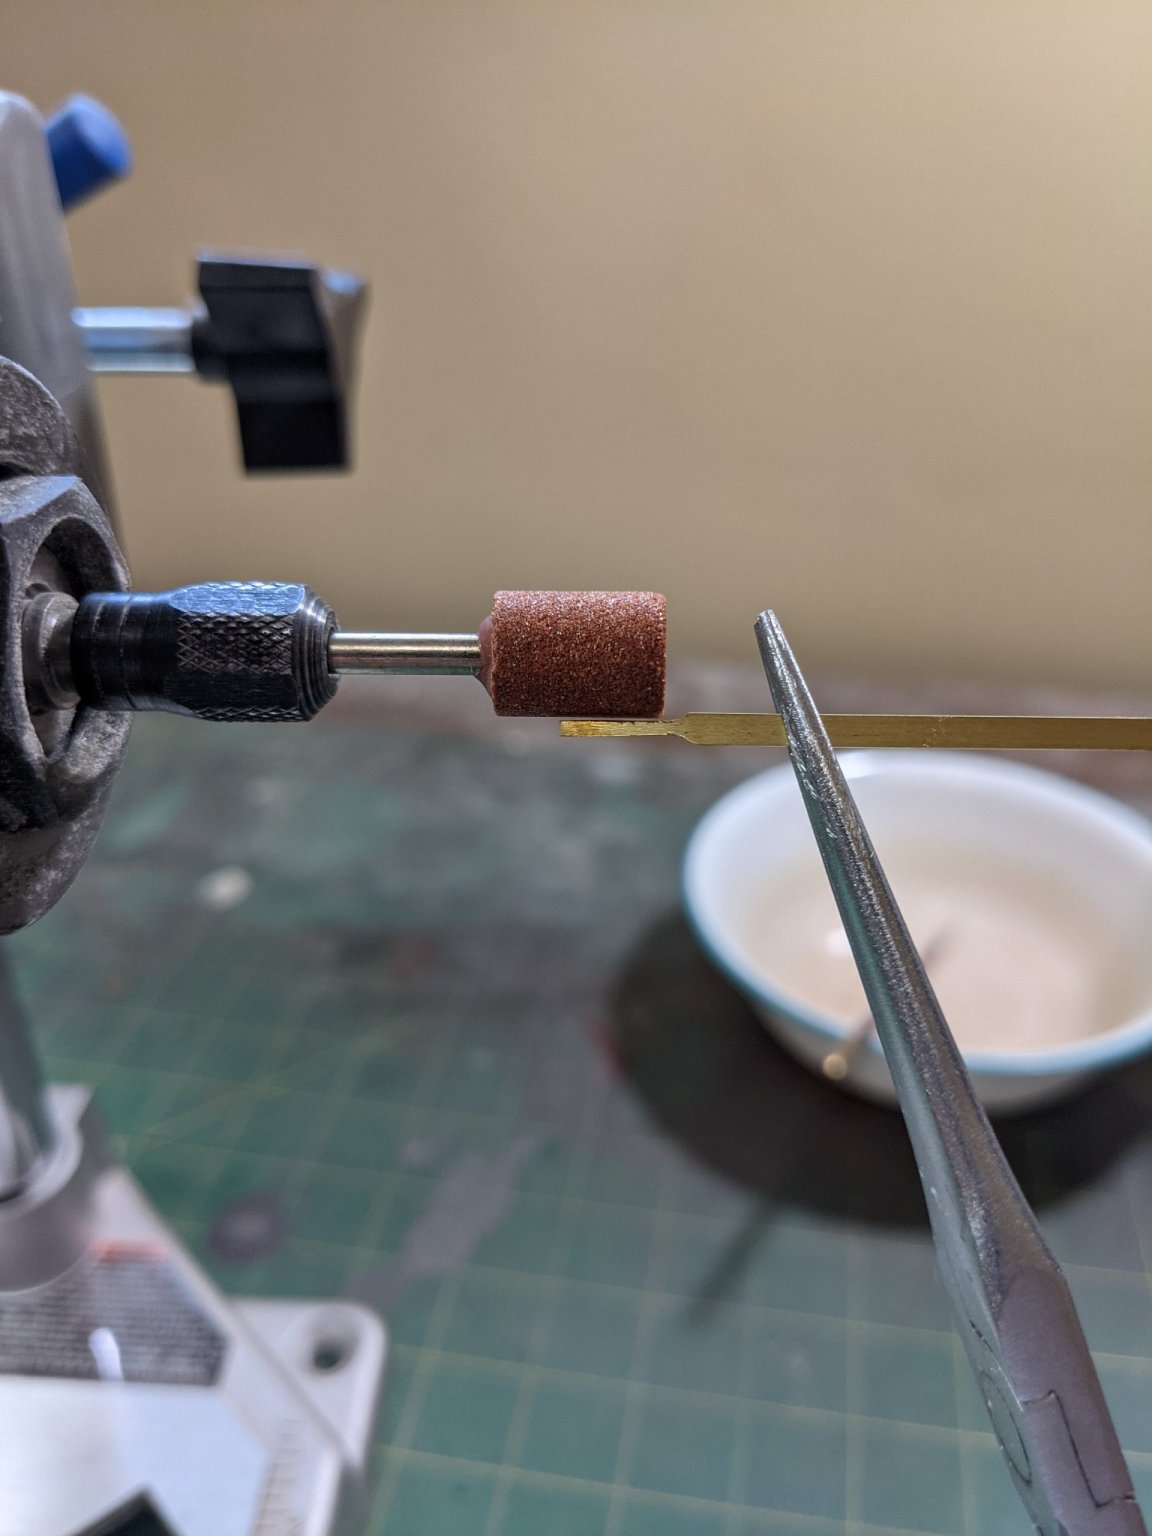
I agree with soldering. I will paint them black after using automotive grey primer. Just not sure how to hold them for painting yet.
- 274 replies
-
- 3
-
-
- Cheerful
- Syren Ship Model Company
- (and 1 more)
-
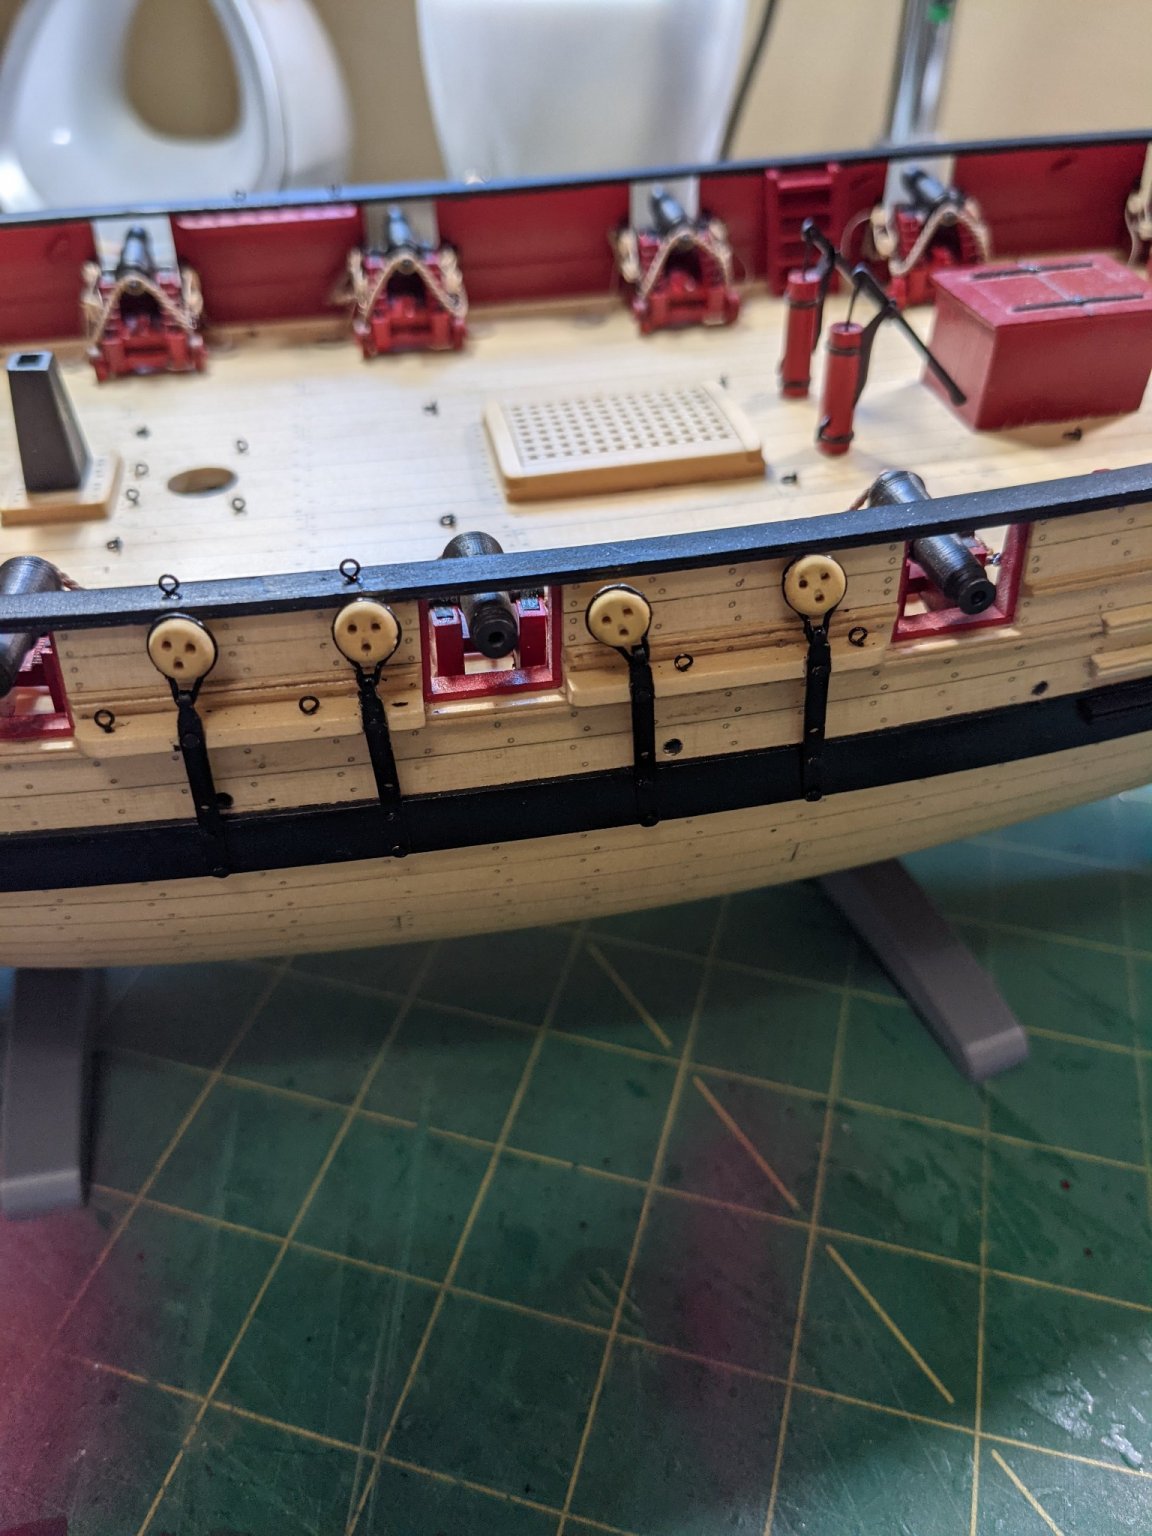
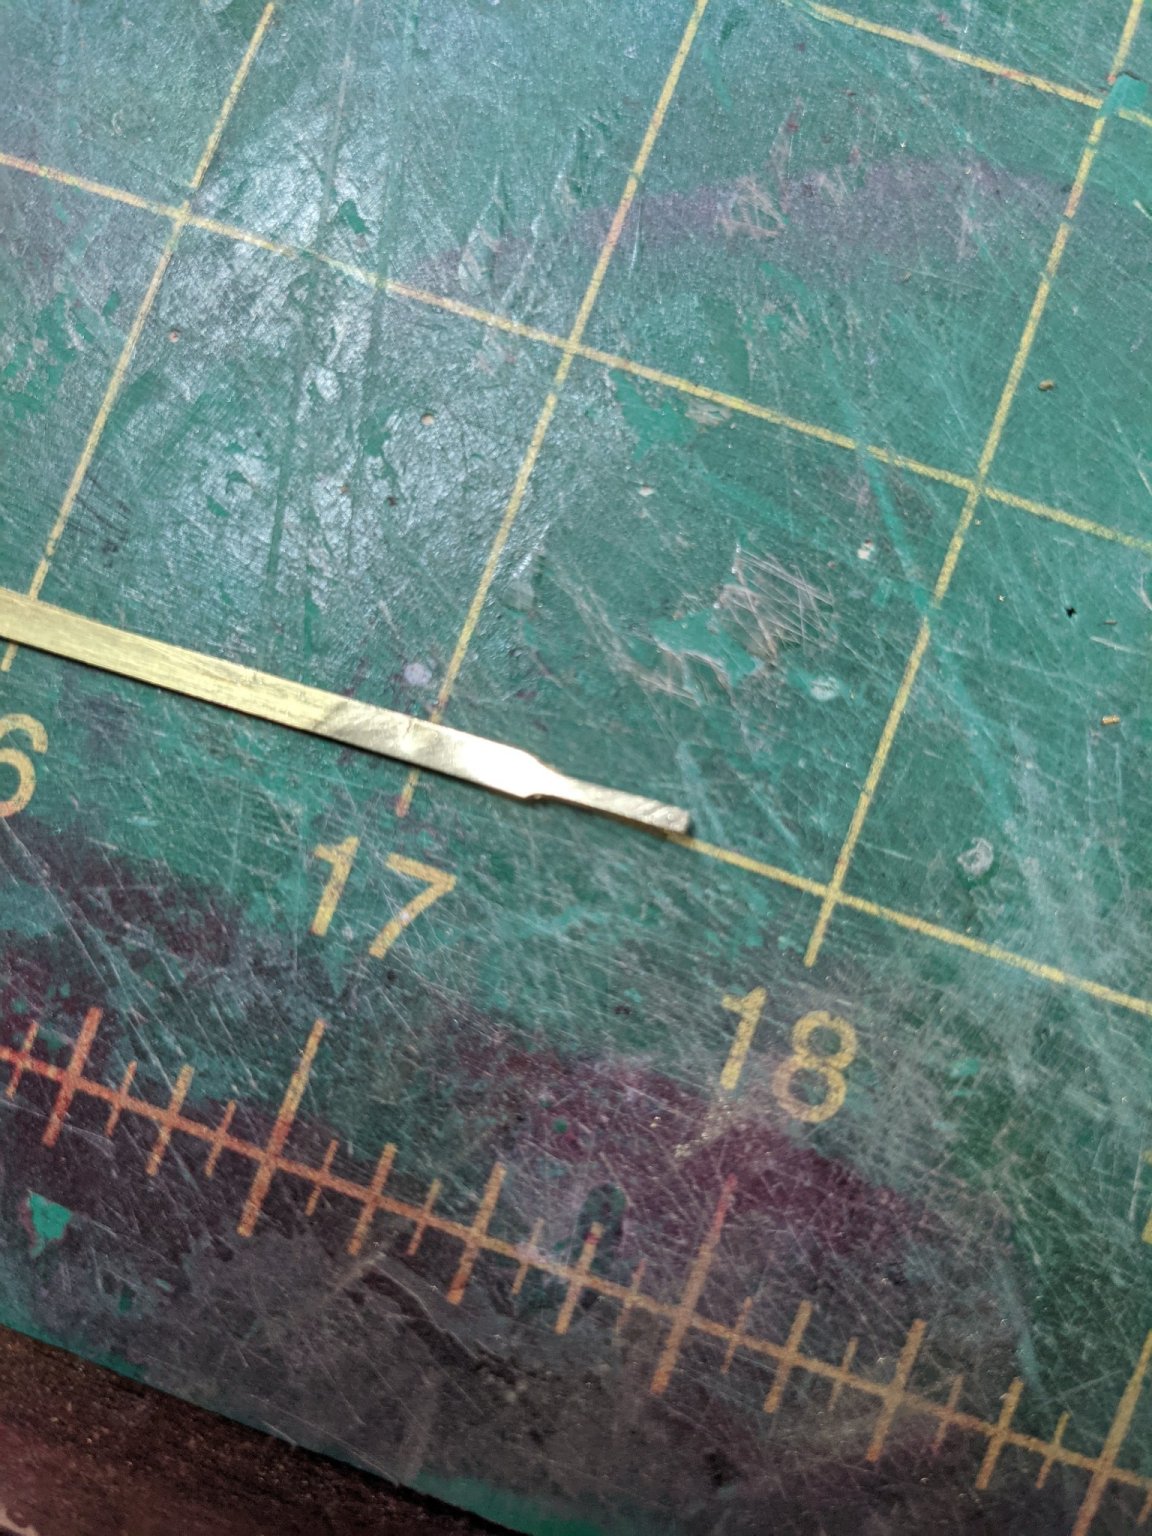
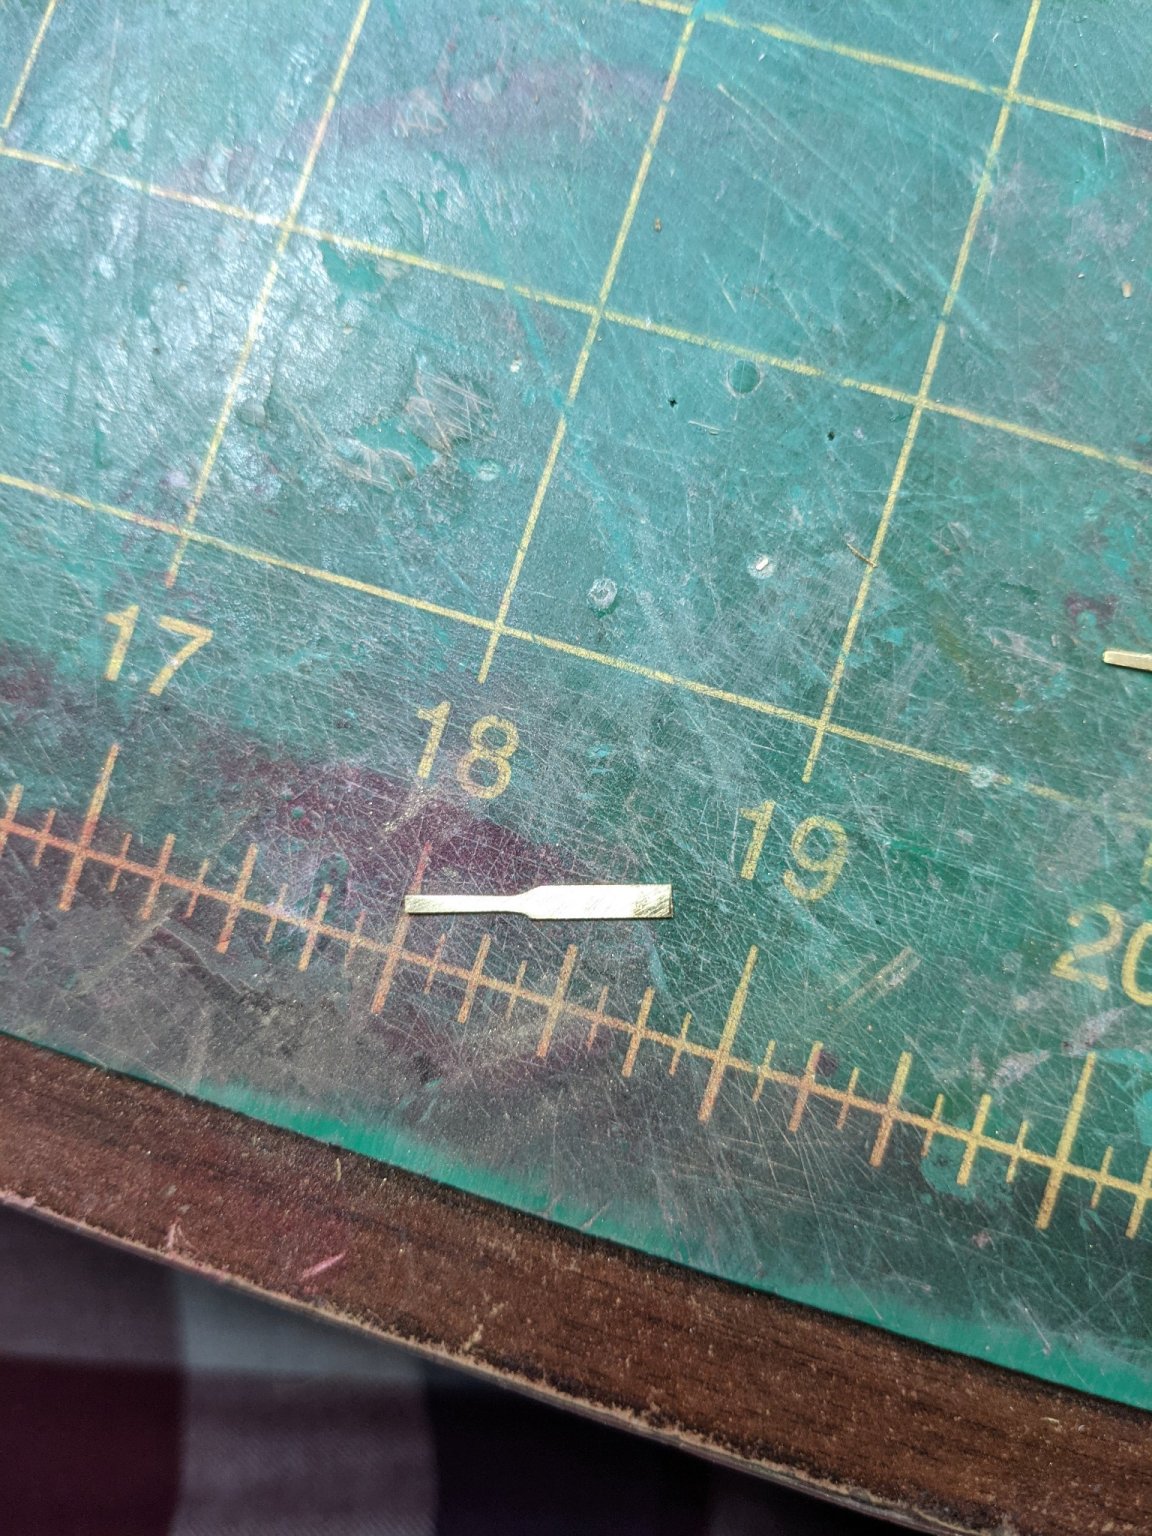
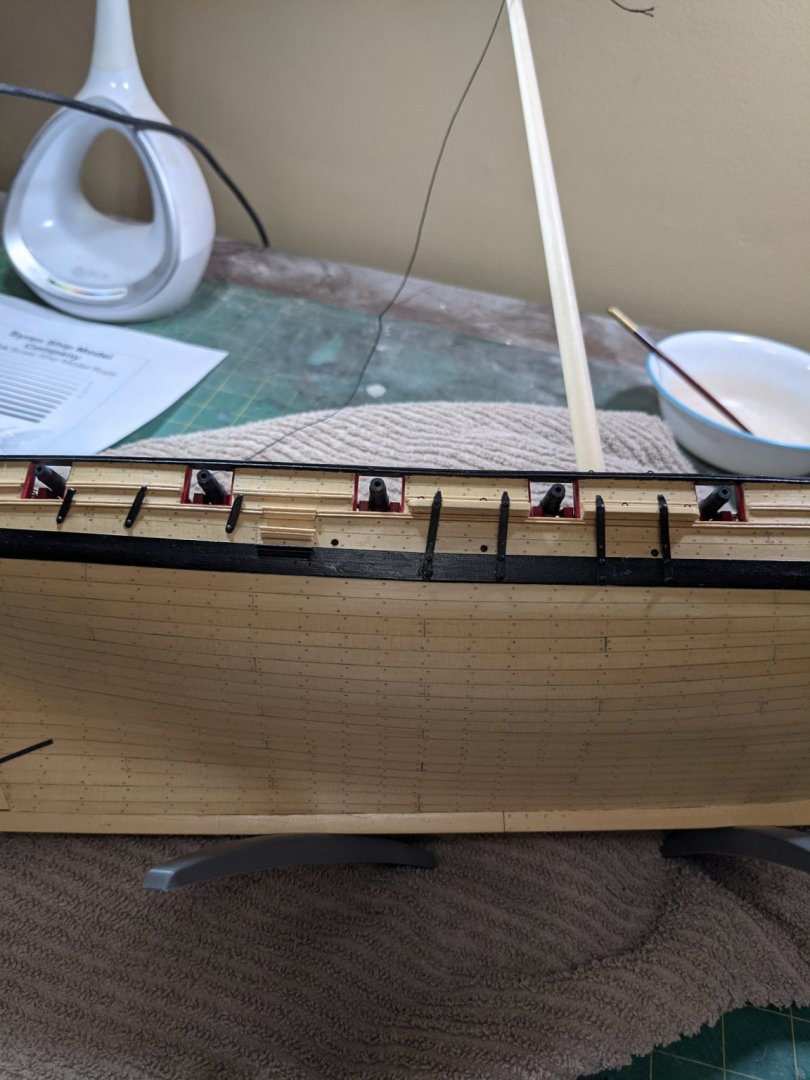
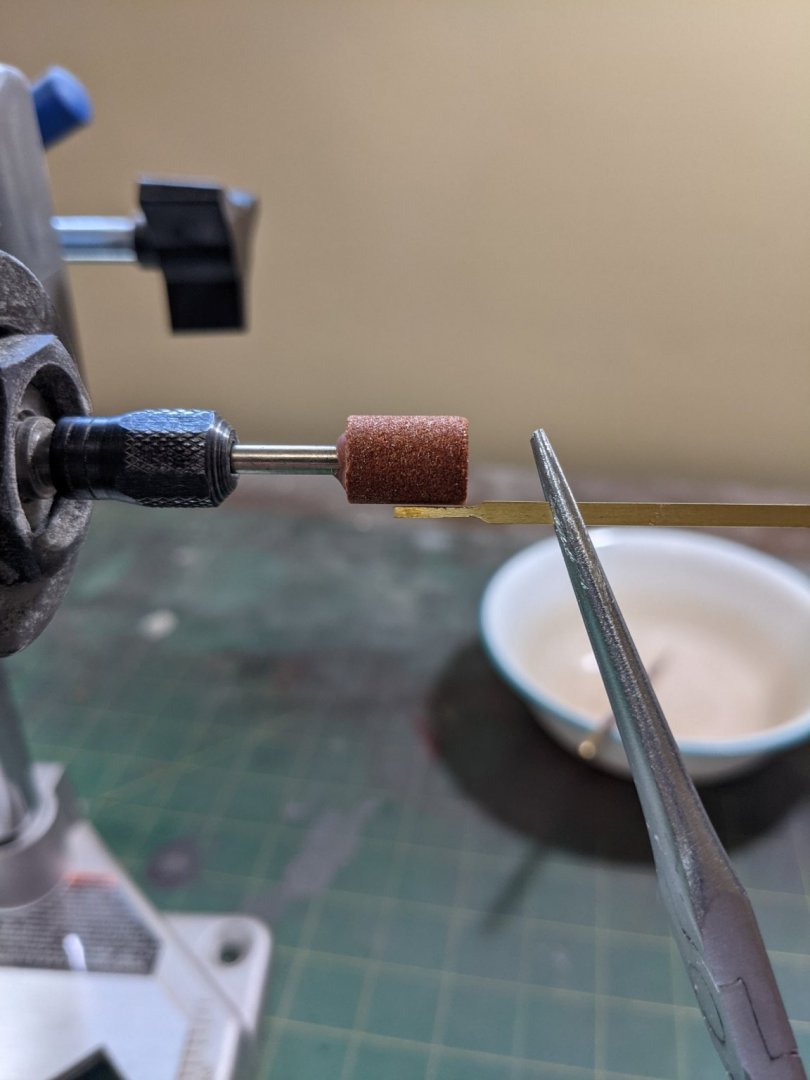
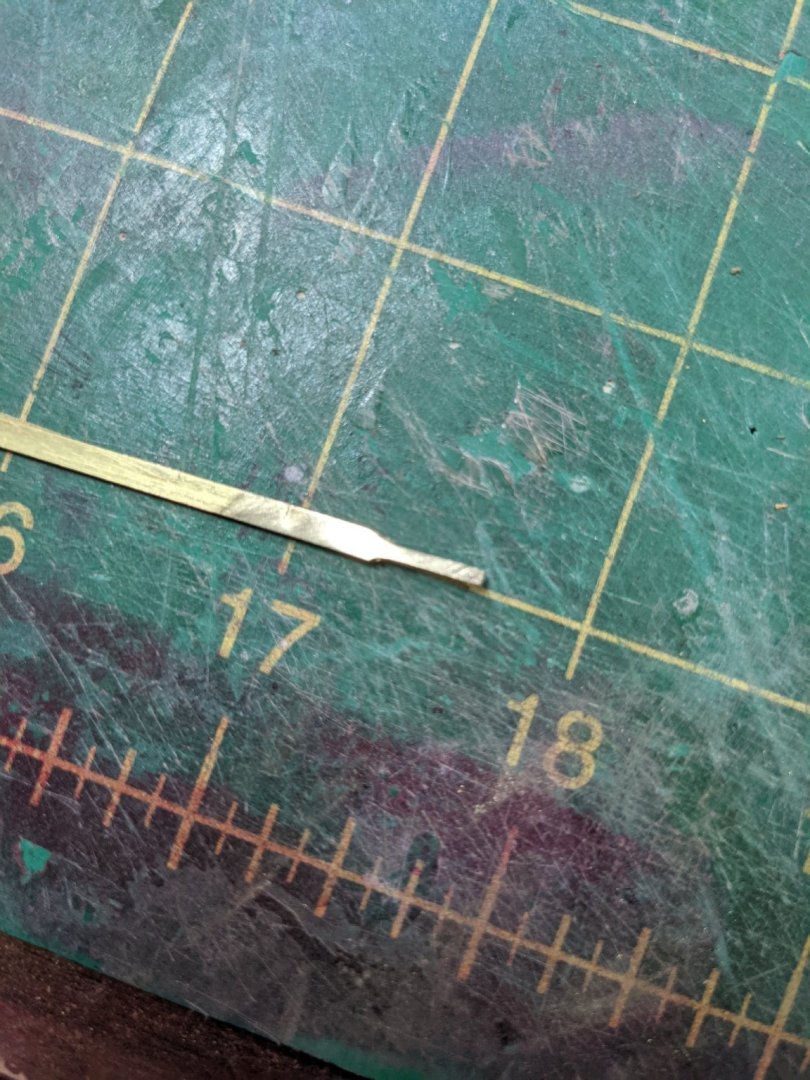
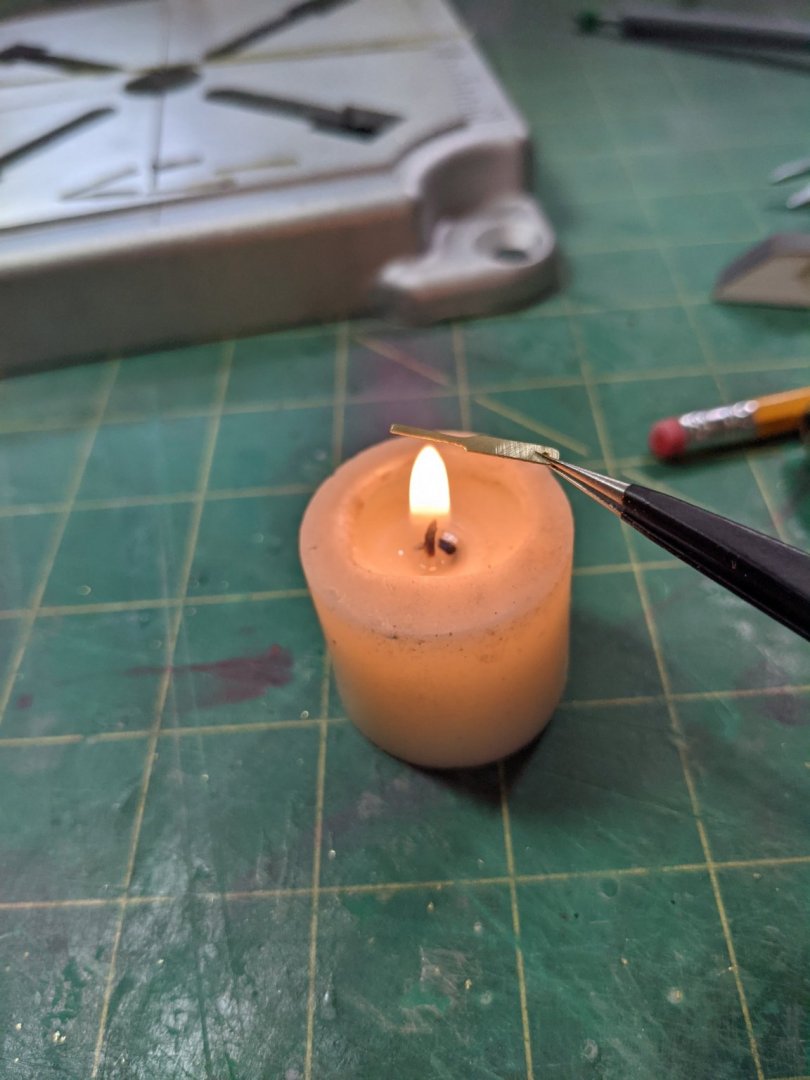
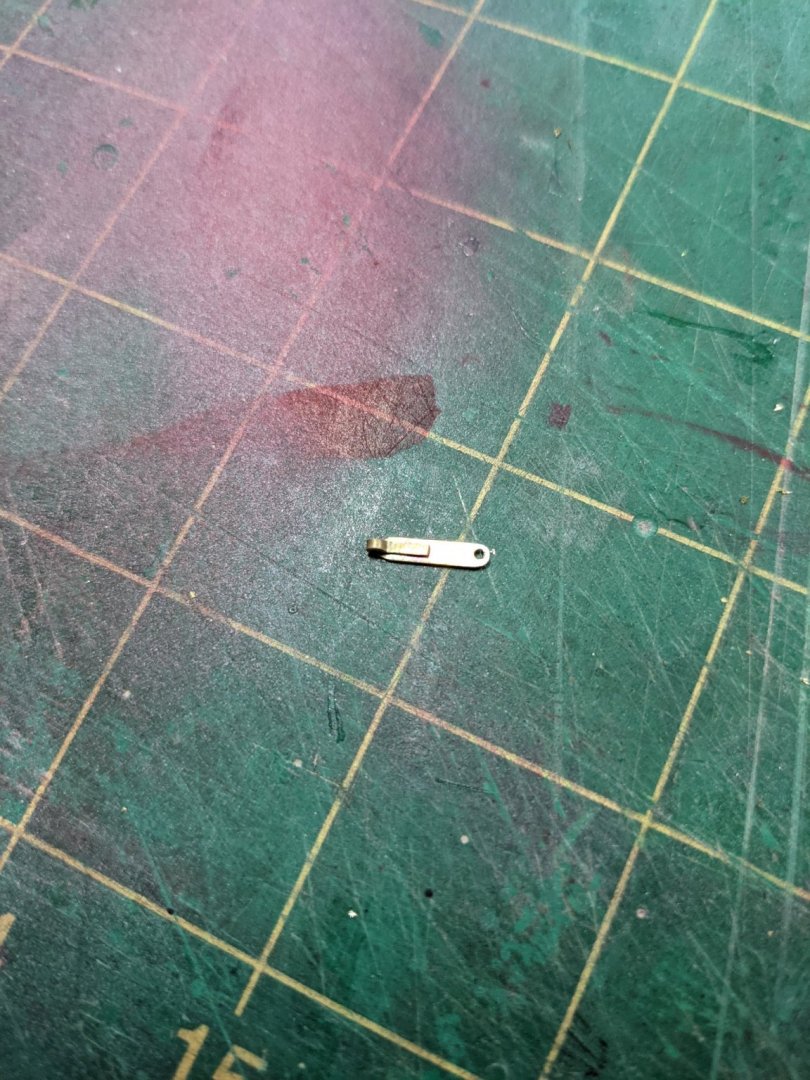
Started making the chainplates. How I did it is a little backwards that what Chuck says to do but I found it easier. First I ground down the part that will be bent with the dremel holding the piece with pliers as they will get hot. Then finish filing the end to make it even and mark the length. Then cut to length. Round off the bottom and drill the holes. And before bending the end I want to heat it up until it changes color. This way it softens the metal so it bends easier. Then bend it around a round wire. You can see the color difference from the heat treating. I haven't decided if I am going to solder the end or glue it. Once I finish all of them I will probably solder them.


- 274 replies
-
- 6
-
-
- Cheerful
- Syren Ship Model Company
- (and 1 more)
-
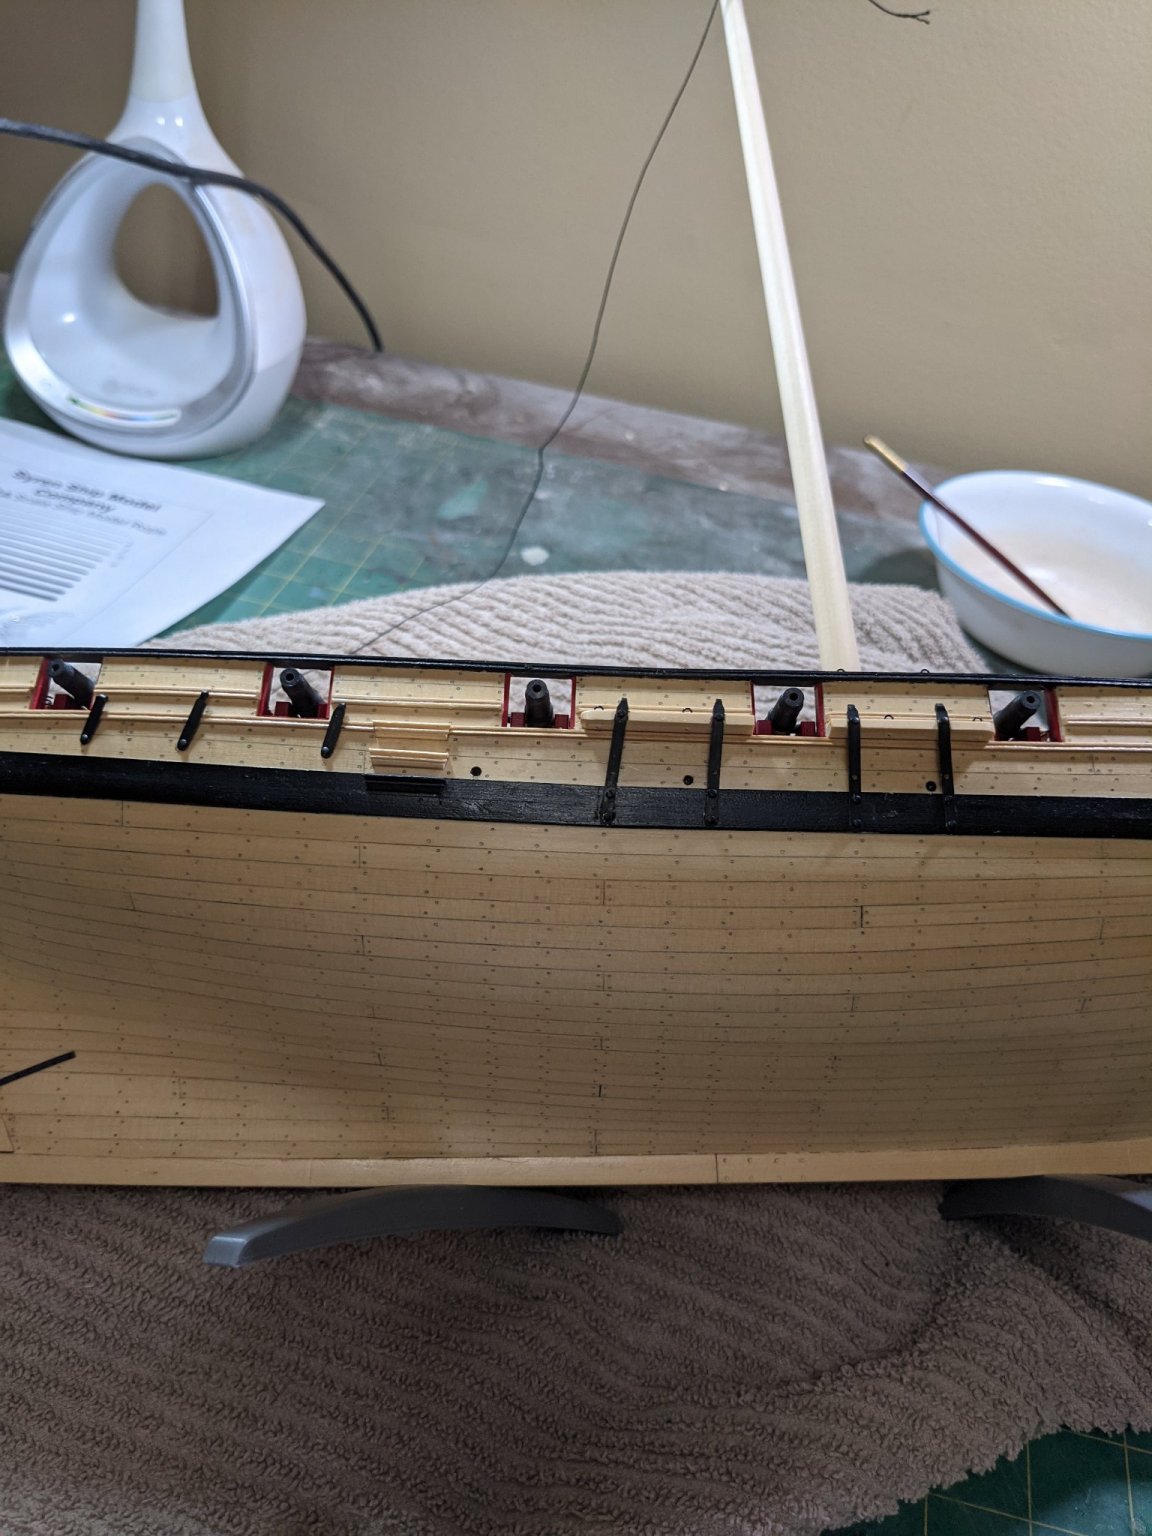
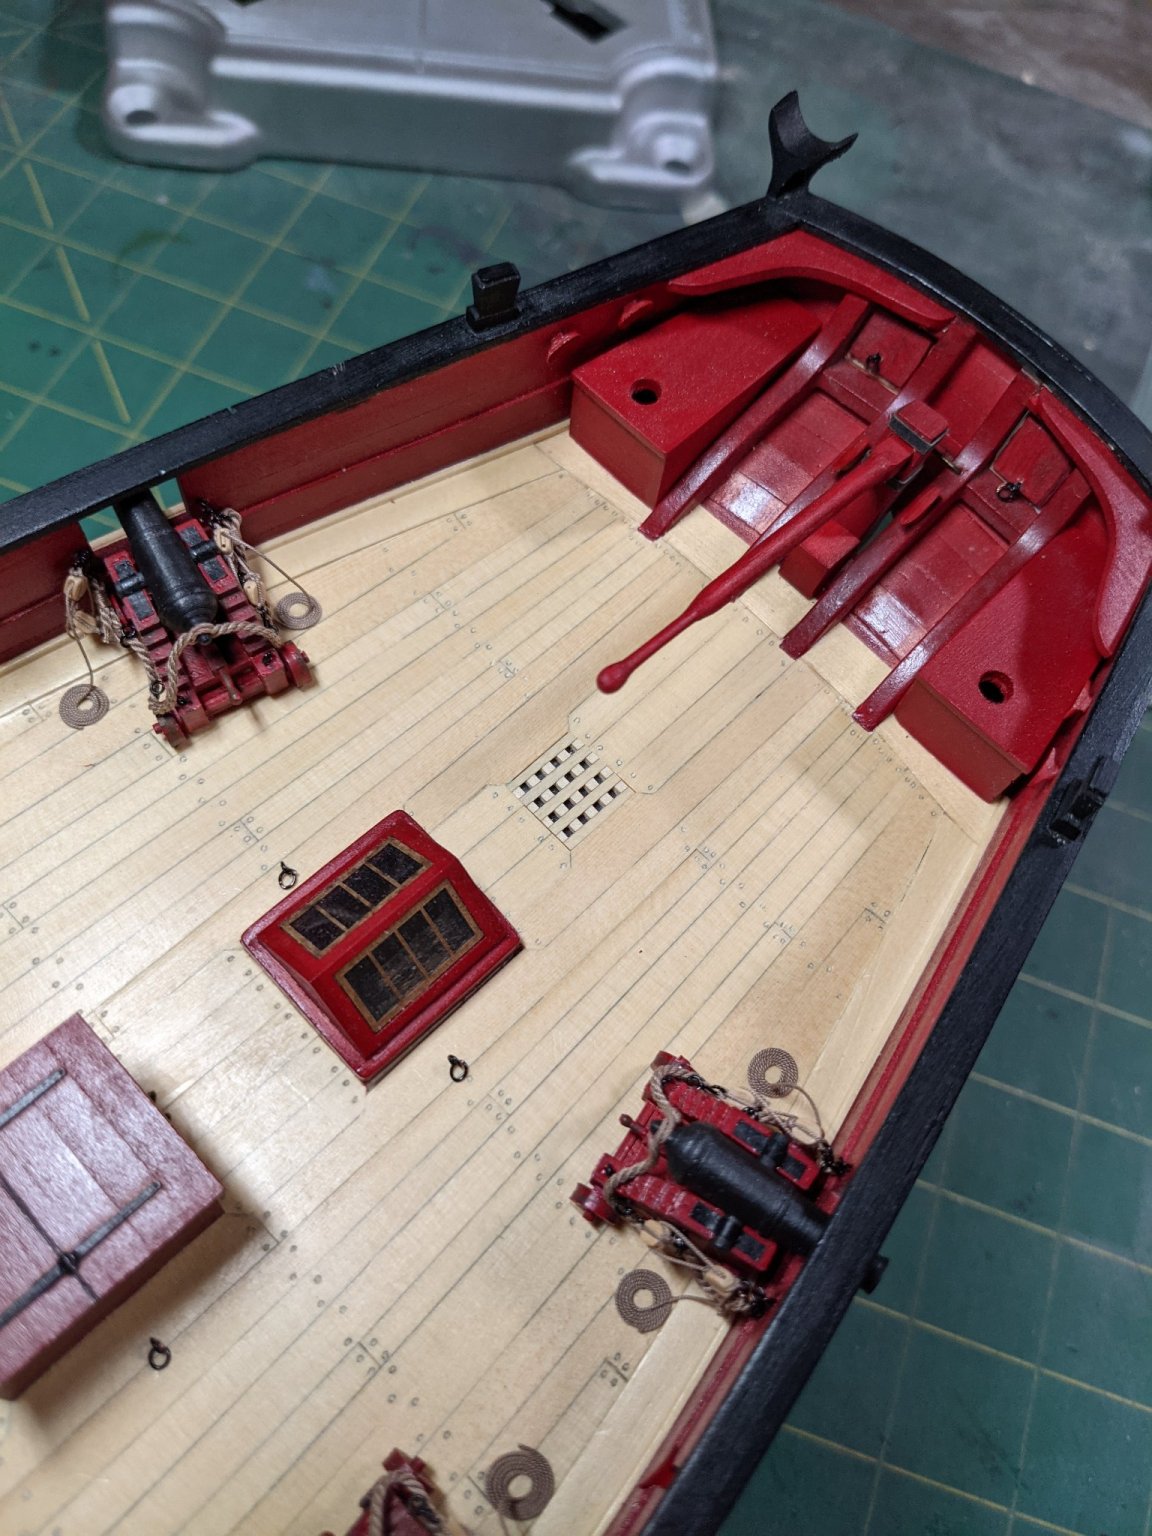
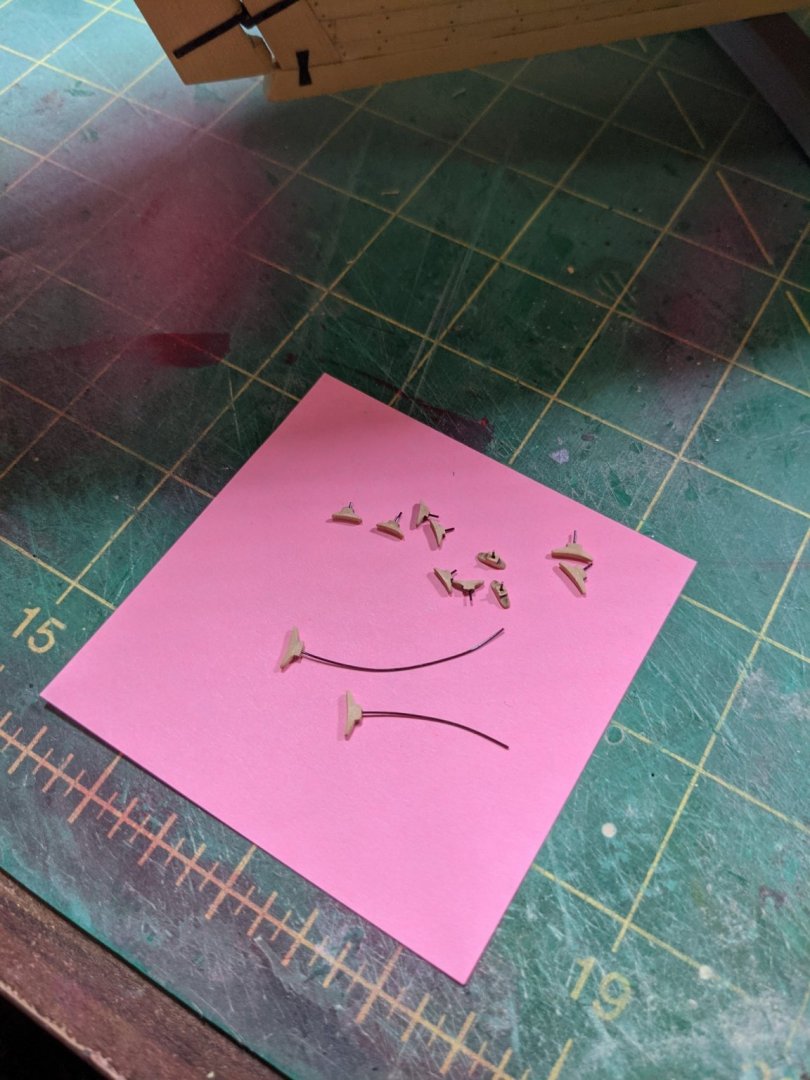
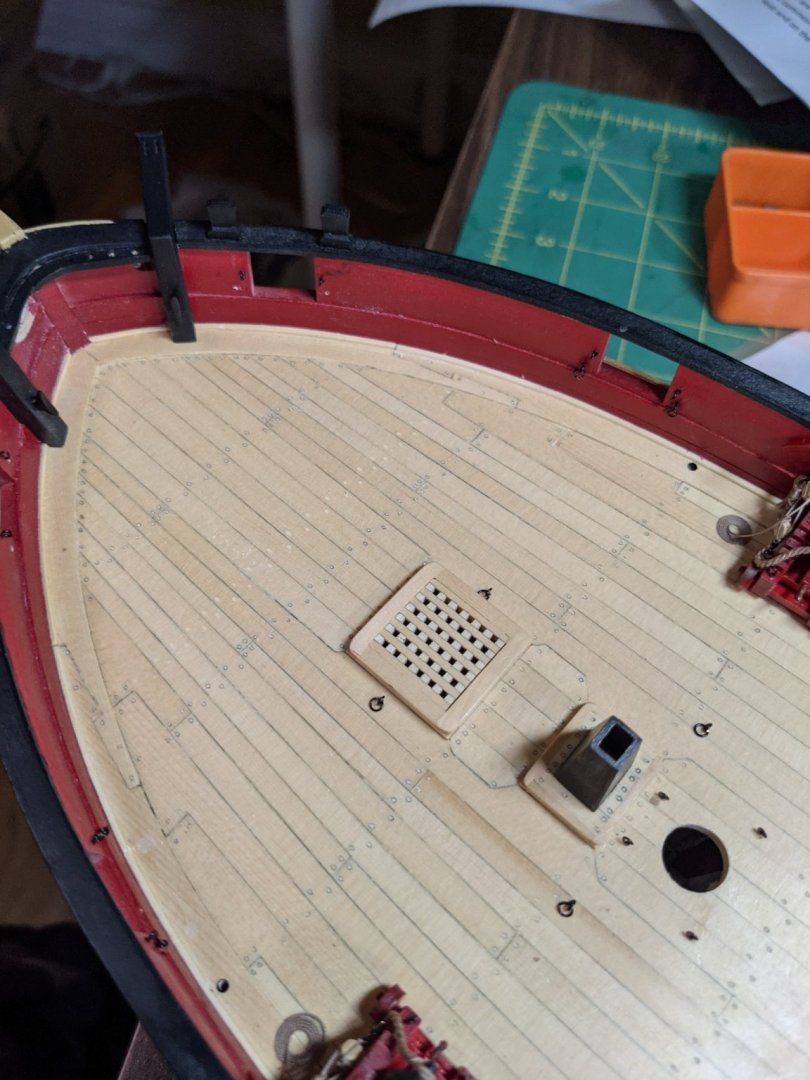
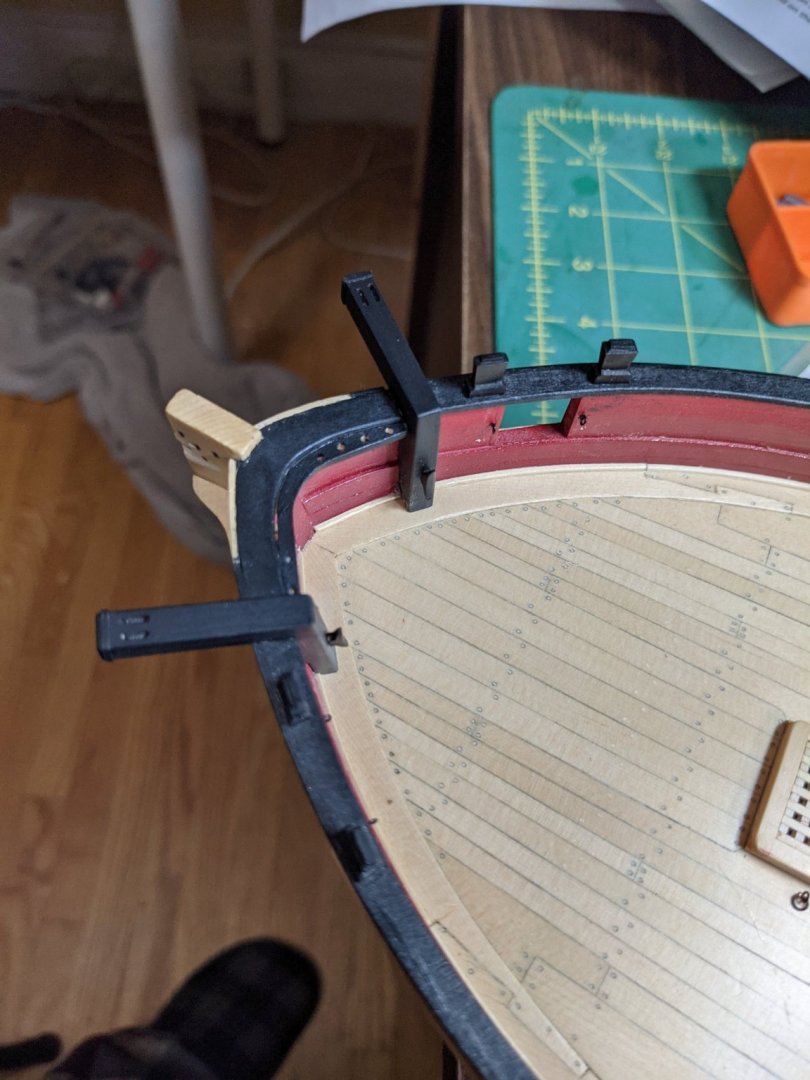
Cleats! My fingers hurt from sanding these down and there are a few extra somewhere as they either dropped into no mans land or flew away somewhere. I have them mounted and painted though and will celebrate with a chocolate bar.

- 274 replies
-
- 9
-
-
- Cheerful
- Syren Ship Model Company
- (and 1 more)
-
That looks gorgeous! In fact I didn't see the differences in the colors of the boxwood until you pointed it out but it still looks great.