(1)(1)(1)(2).jpg.a128ea4d7b02ebfc5d5eb6547e92106f.jpg)
PRS
-
Posts
372 -
Joined
-
Last visited
Content Type
Profiles
Forums
Gallery
Events
Everything posted by PRS
-
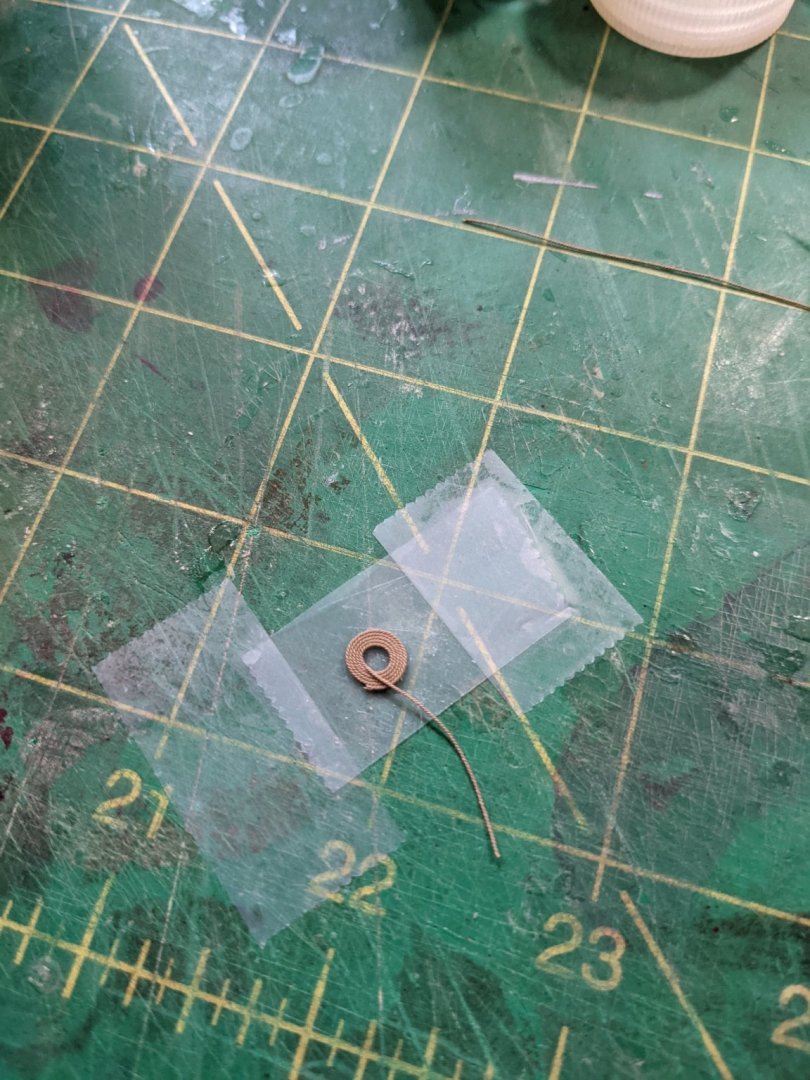
(1)(1)(1)(2).thumb.jpg.792ad774561d3d4f35888704cde27a8e.jpg) So all of the rope coils are finished for the ten smaller cannons. Not hard to do once you get a rhythm going.
So all of the rope coils are finished for the ten smaller cannons. Not hard to do once you get a rhythm going.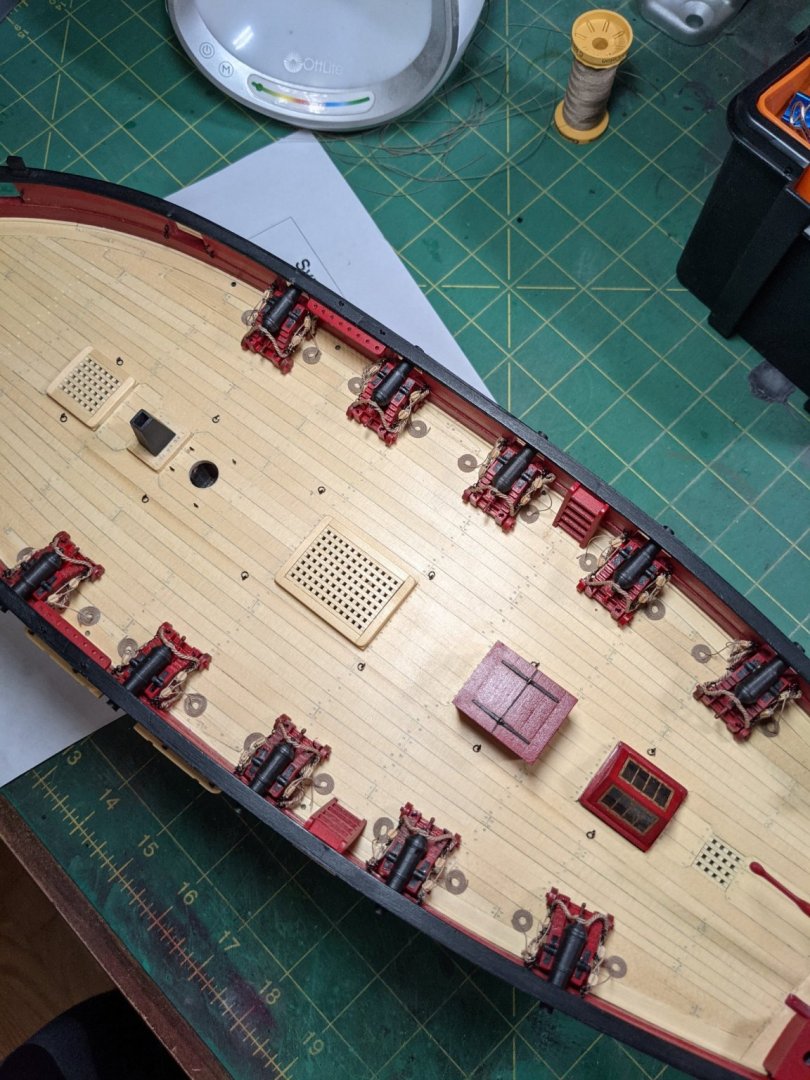
- 274 replies
-
- 8
-

-
- Cheerful
- Syren Ship Model Company
- (and 1 more)
-
Beautiful!
-
Wow the copper looks so good I didn't think it was paint at first.
-
Yes I found the walnut was pretty hard to make the bends and it broke easier. If it was thinner it might have been easier to do. But since it is so thick it leaves a lot of material to sand
-
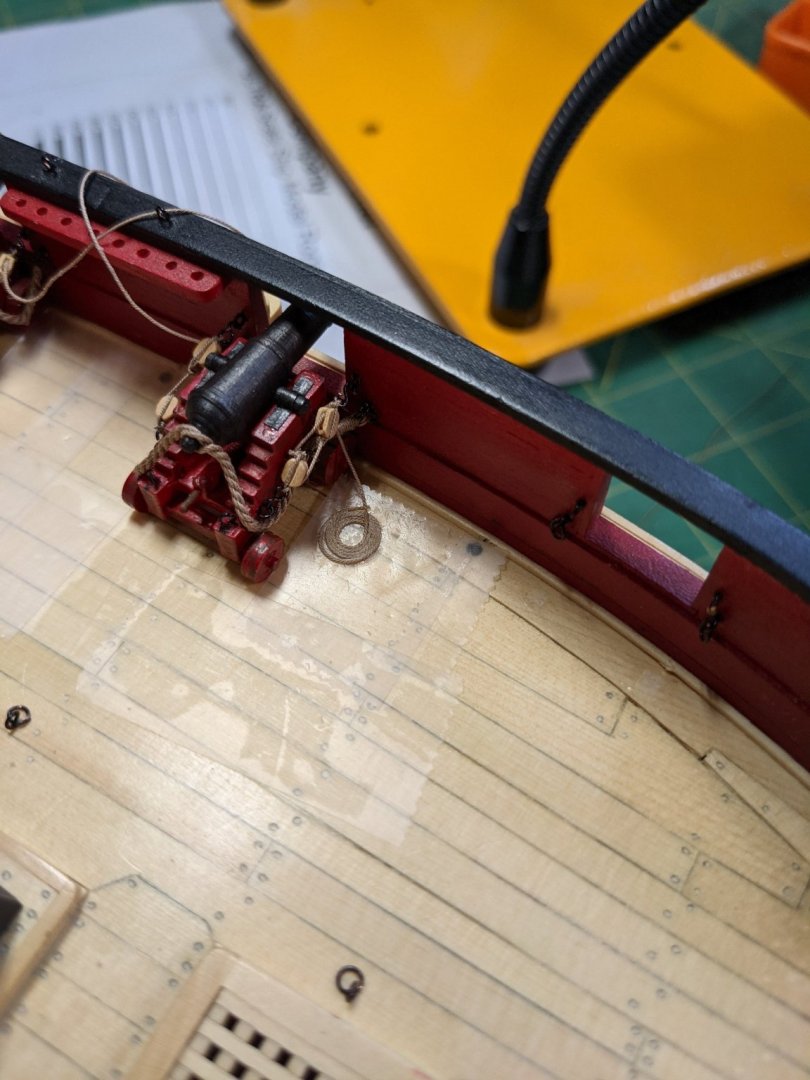
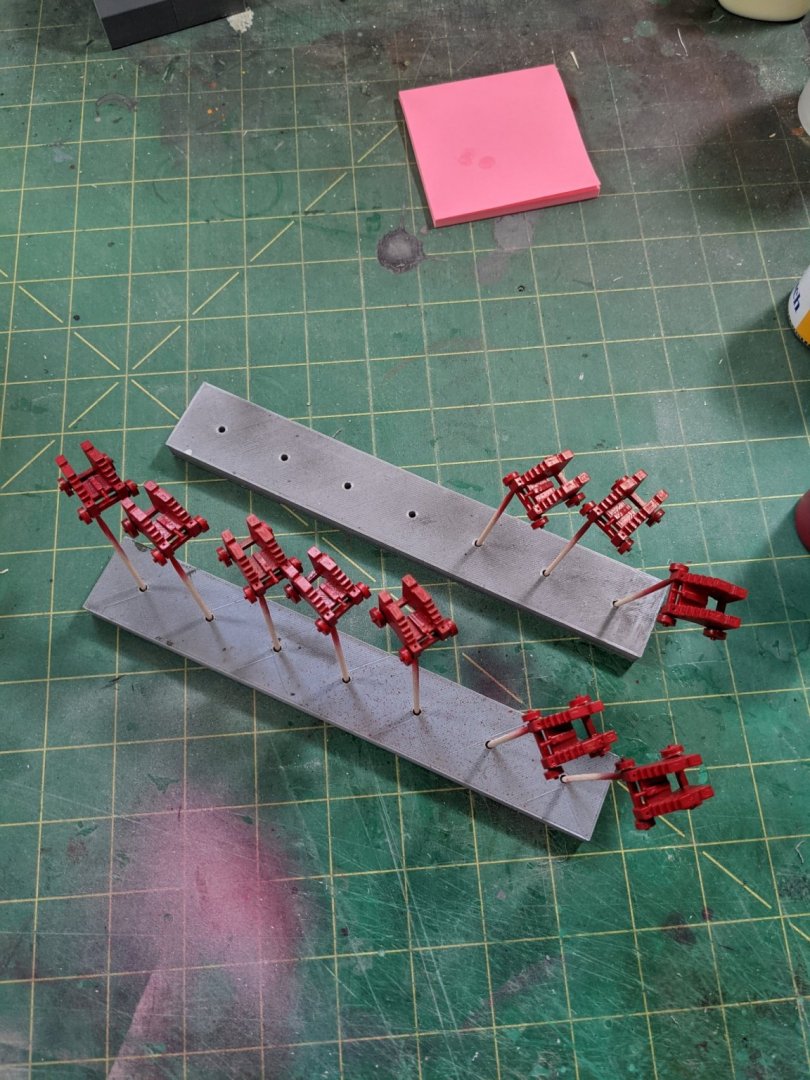
Fun with rope coils. I decided to see if I could make the rope coils better and tried the way that was posted by someone here by making the coil on some tape and then using watered down white glue to set it. Since the test looked good I used some alcohol to remove the coils I had made and redid them with the cannonades I had already rigged. I like the looks of these better and even though they take some time to do it is worth it in my mind. I am using scotch tape for this and wonder if there is a low tack double sided tape that would make this easier.

- 274 replies
-
- 7
-
-
- Cheerful
- Syren Ship Model Company
- (and 1 more)
-
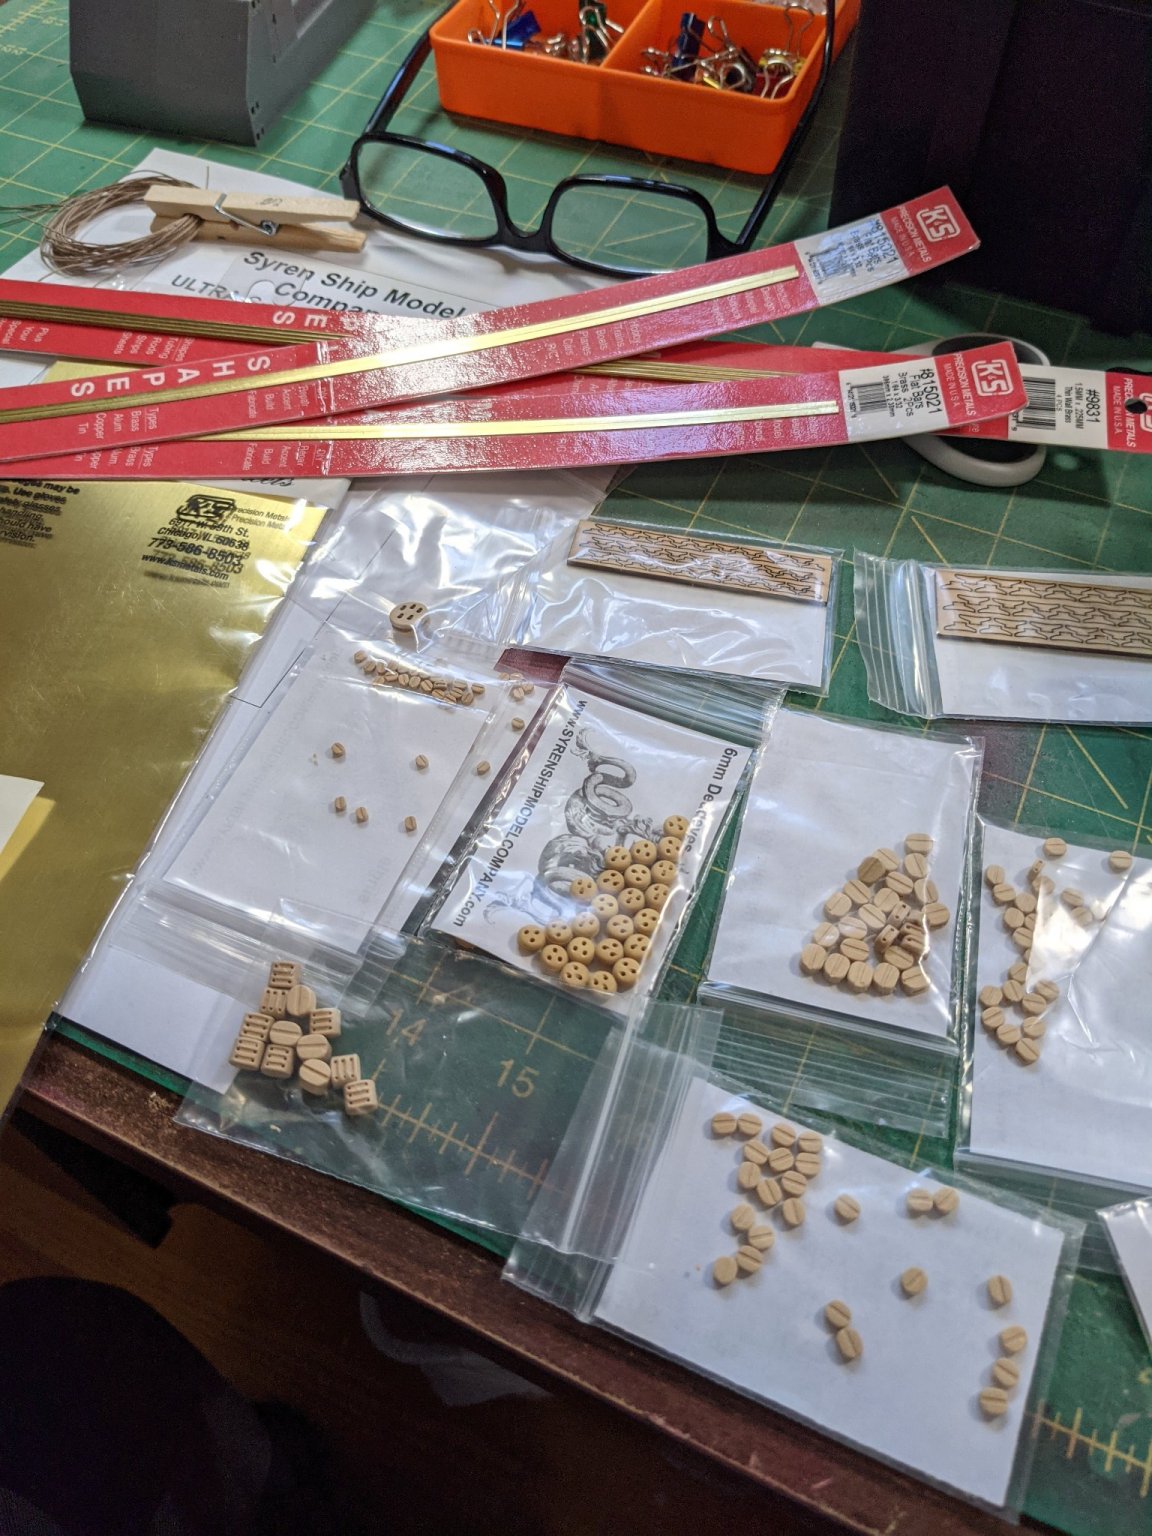
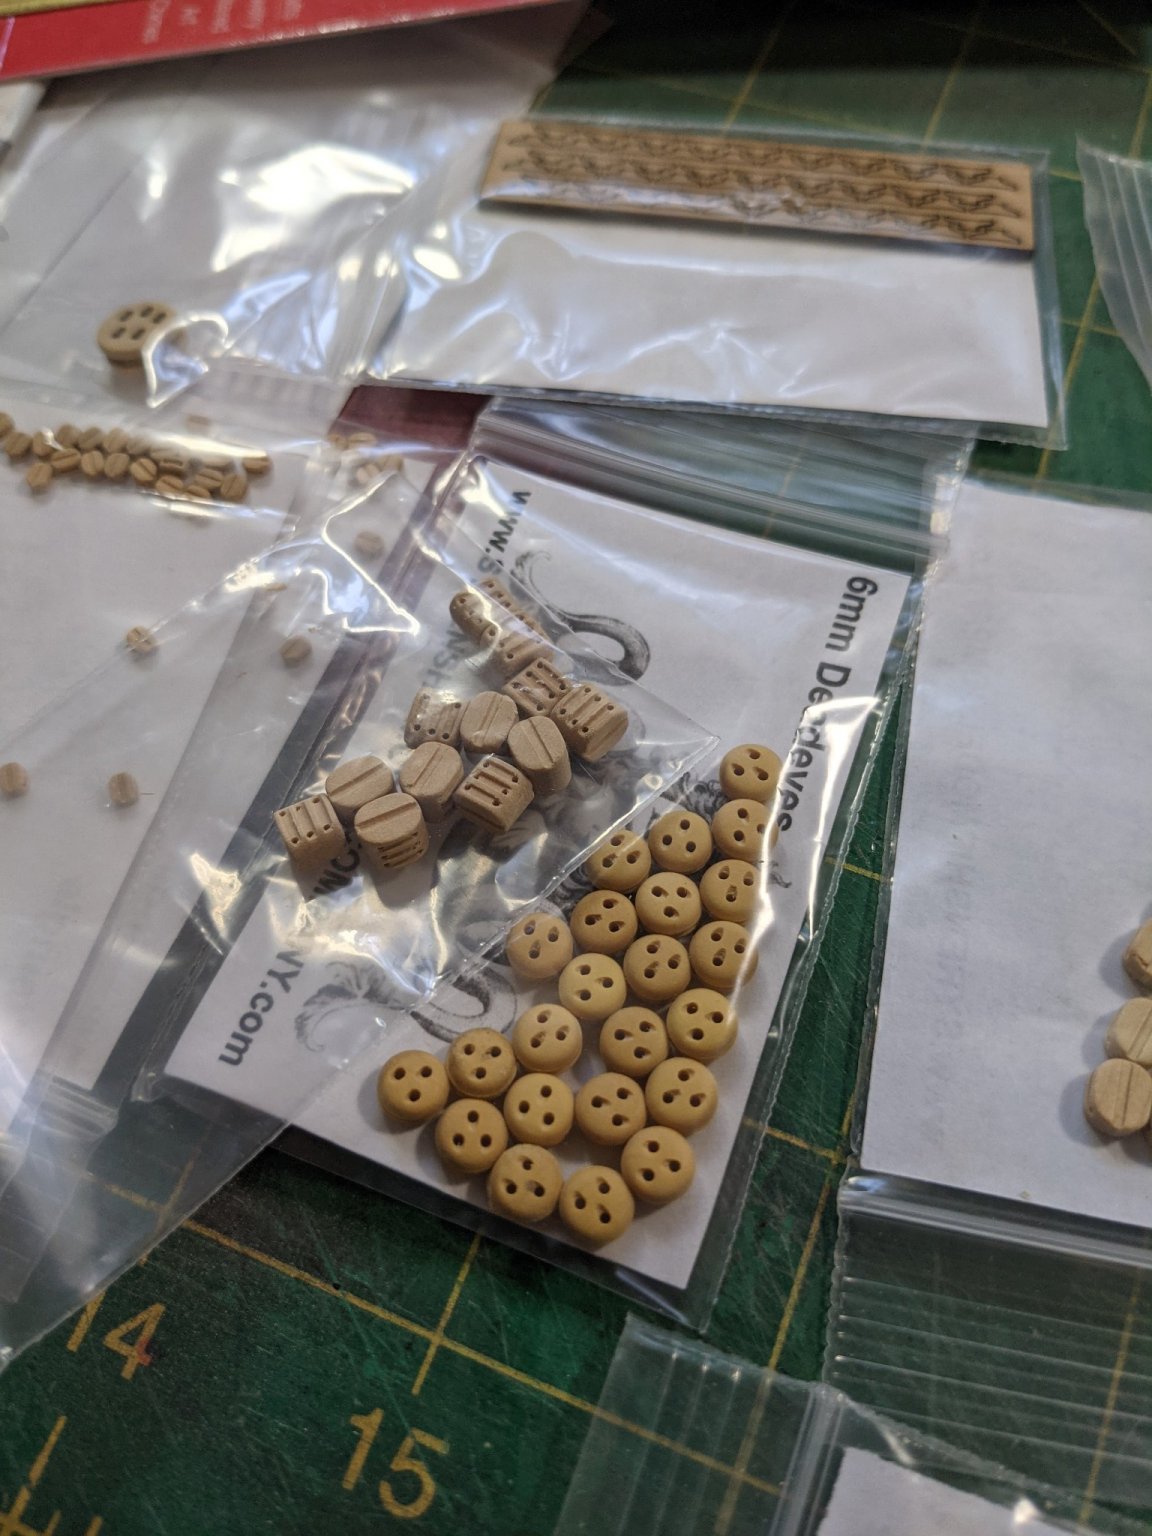
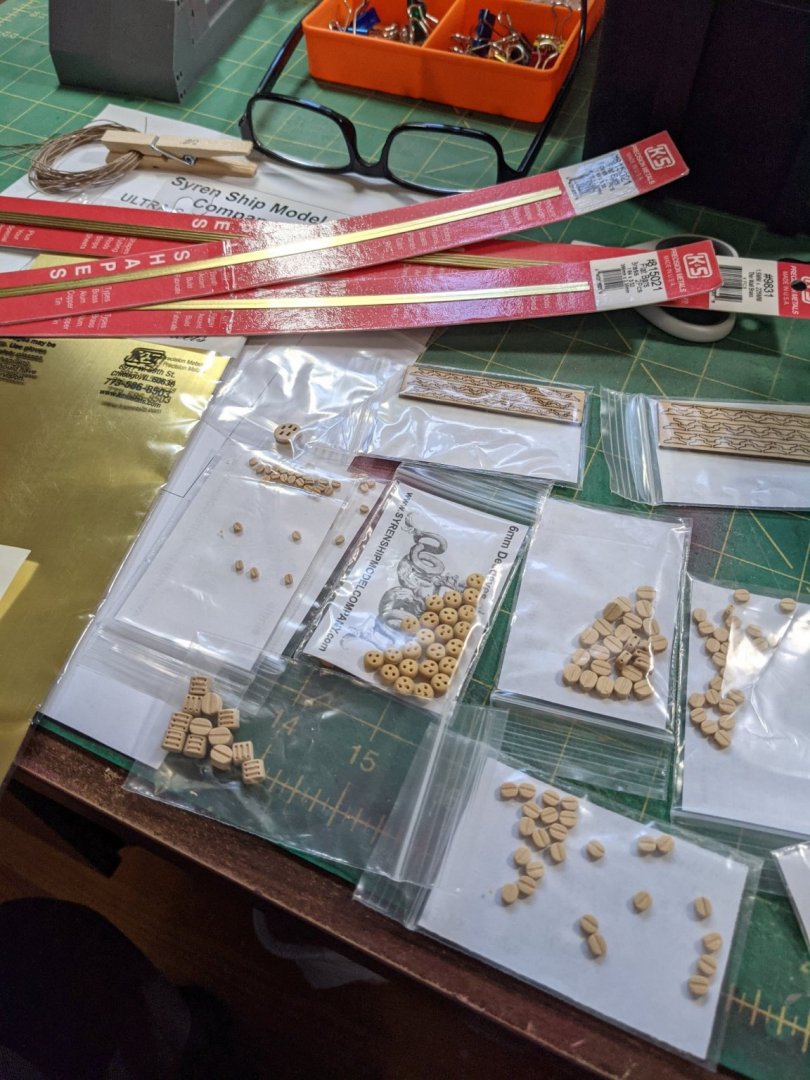
My blocks, deadeyes and cleats came in from Syren. Also purchased the brass from Great Hobbies here in the great white north. Man these look good. I started to do the cannon rigging with the 1/8 blocks. Wow these are tiny. Will have to go back and redo what I had planned as the length of the hooks are way too long so I have to remake them as they need to be shorter. This is going to take some time and thinking.

- 274 replies
-
- 6
-
-
- Cheerful
- Syren Ship Model Company
- (and 1 more)
-
I am speechless looking at this fine build. I will reference your build log when I go to do mine as seeing what you have done has made up my mind what my next build will be.
- 263 replies
-
- 2
-
-

-
- Medway Longboat
- Syren Ship Model Company
- (and 1 more)
-
Fokker Dr.I by hornet - Artesania Latina - 1/16 scale
PRS replied to hornet's topic in Completed non-ship models
Sweet! A few years back I tried to do a sopwith from model airways but the cast pieces were really a turn off and it is all sitting in a box in the closet. -
I like the idea of a carpet piece. I need to go find a small rug for my bench now. Looking good!
-
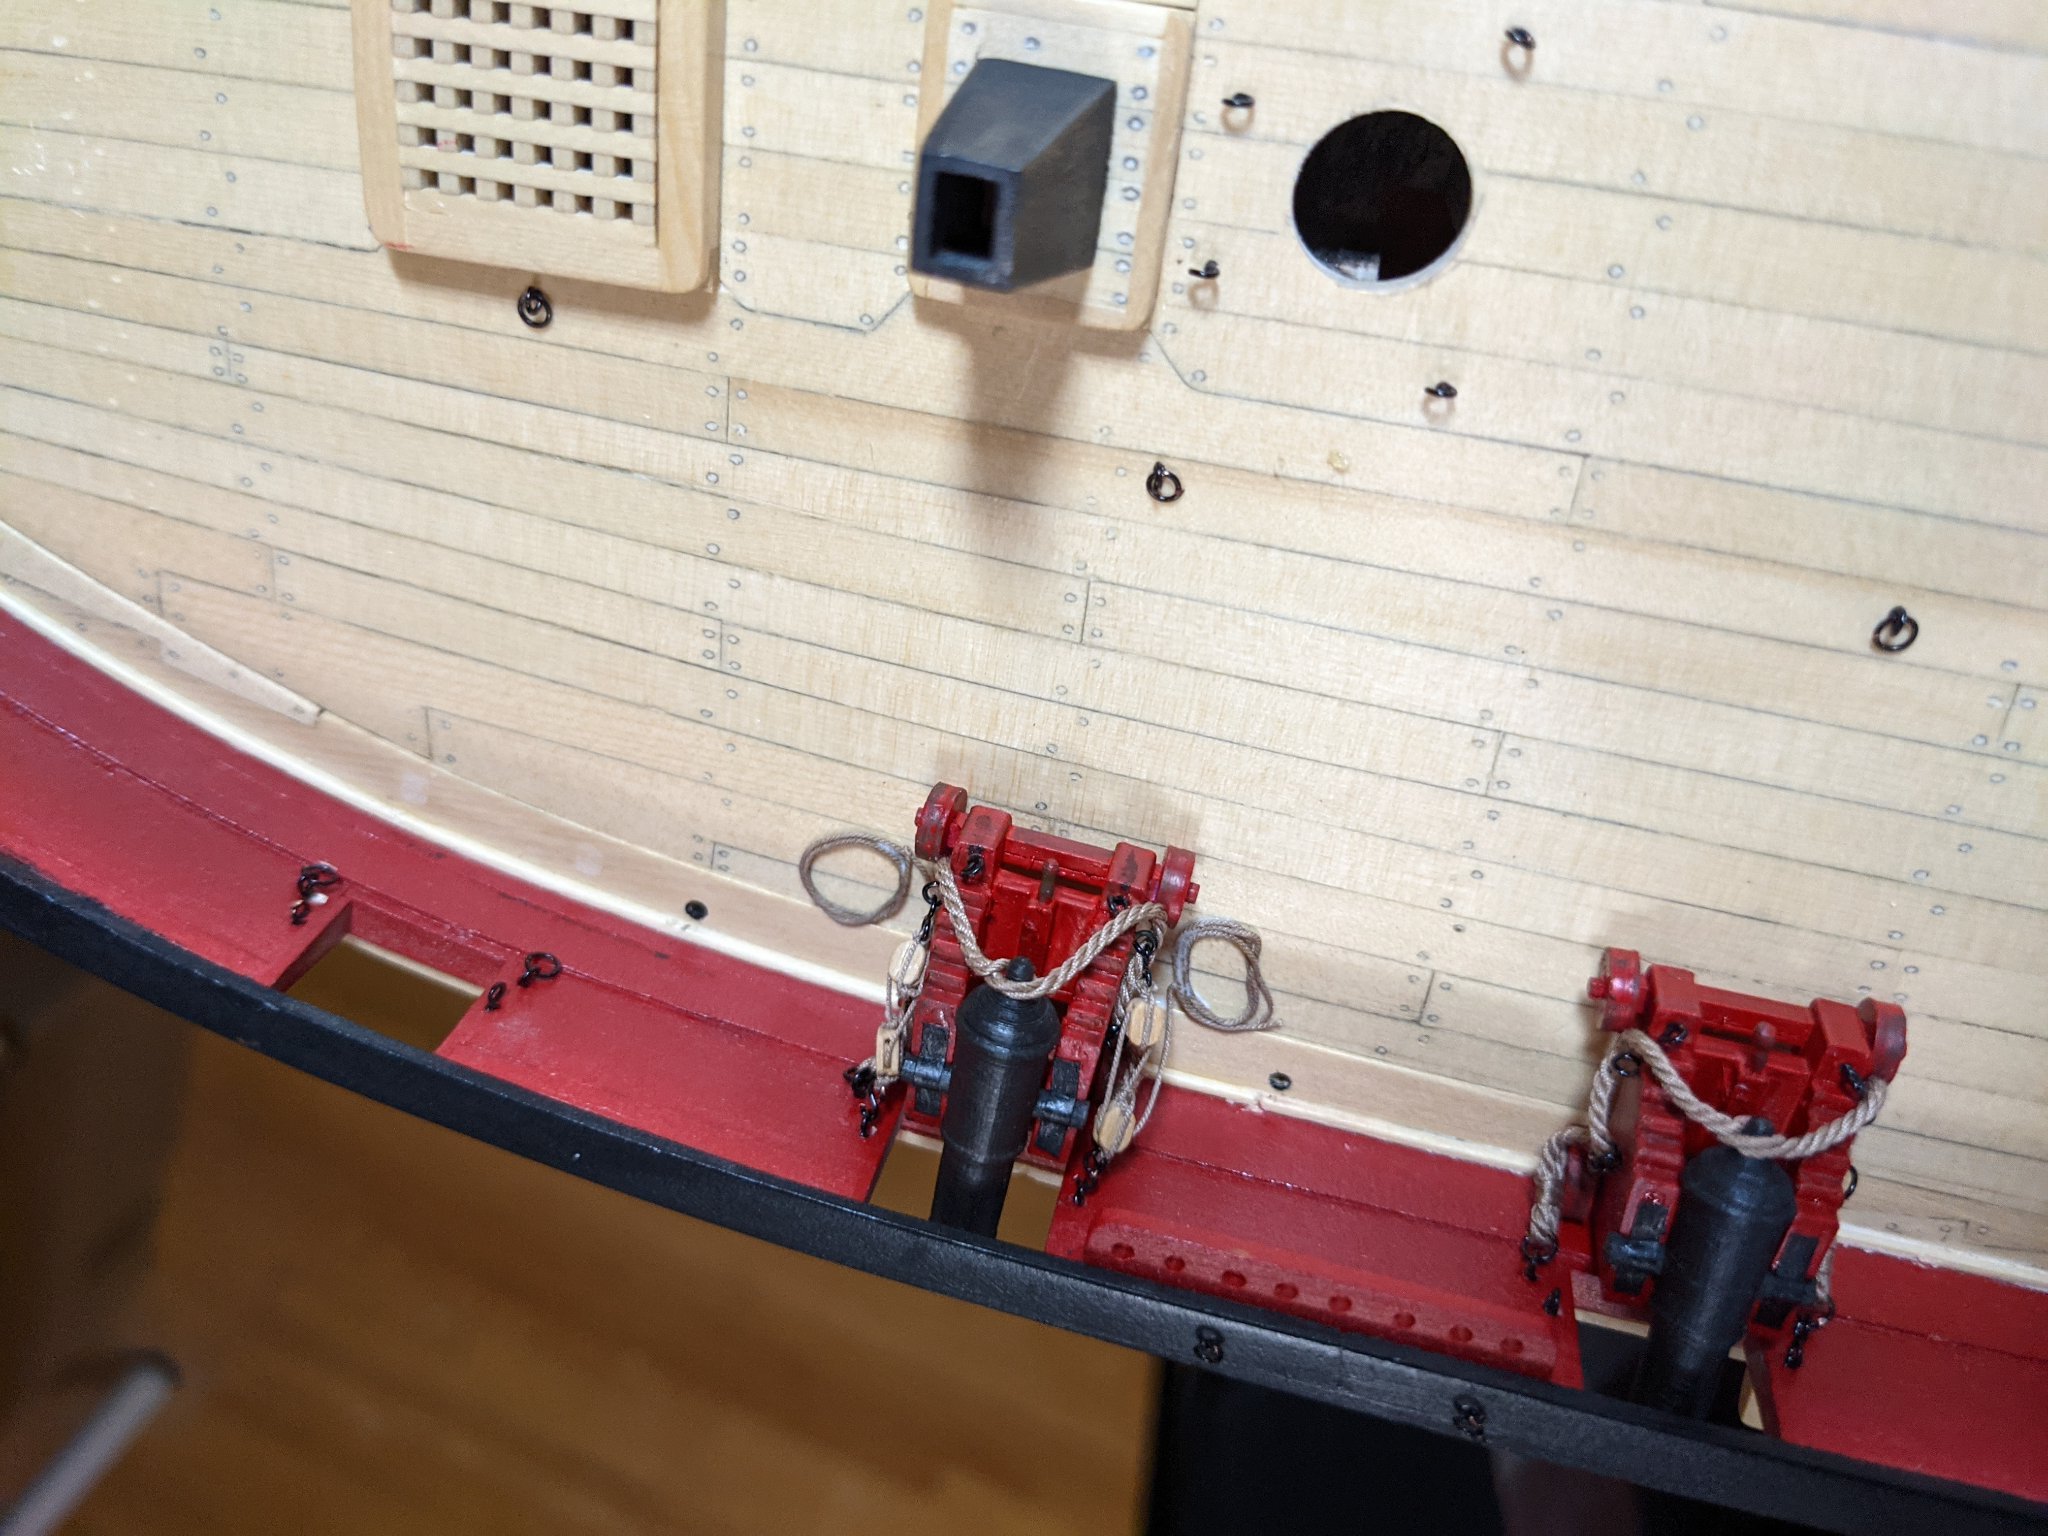
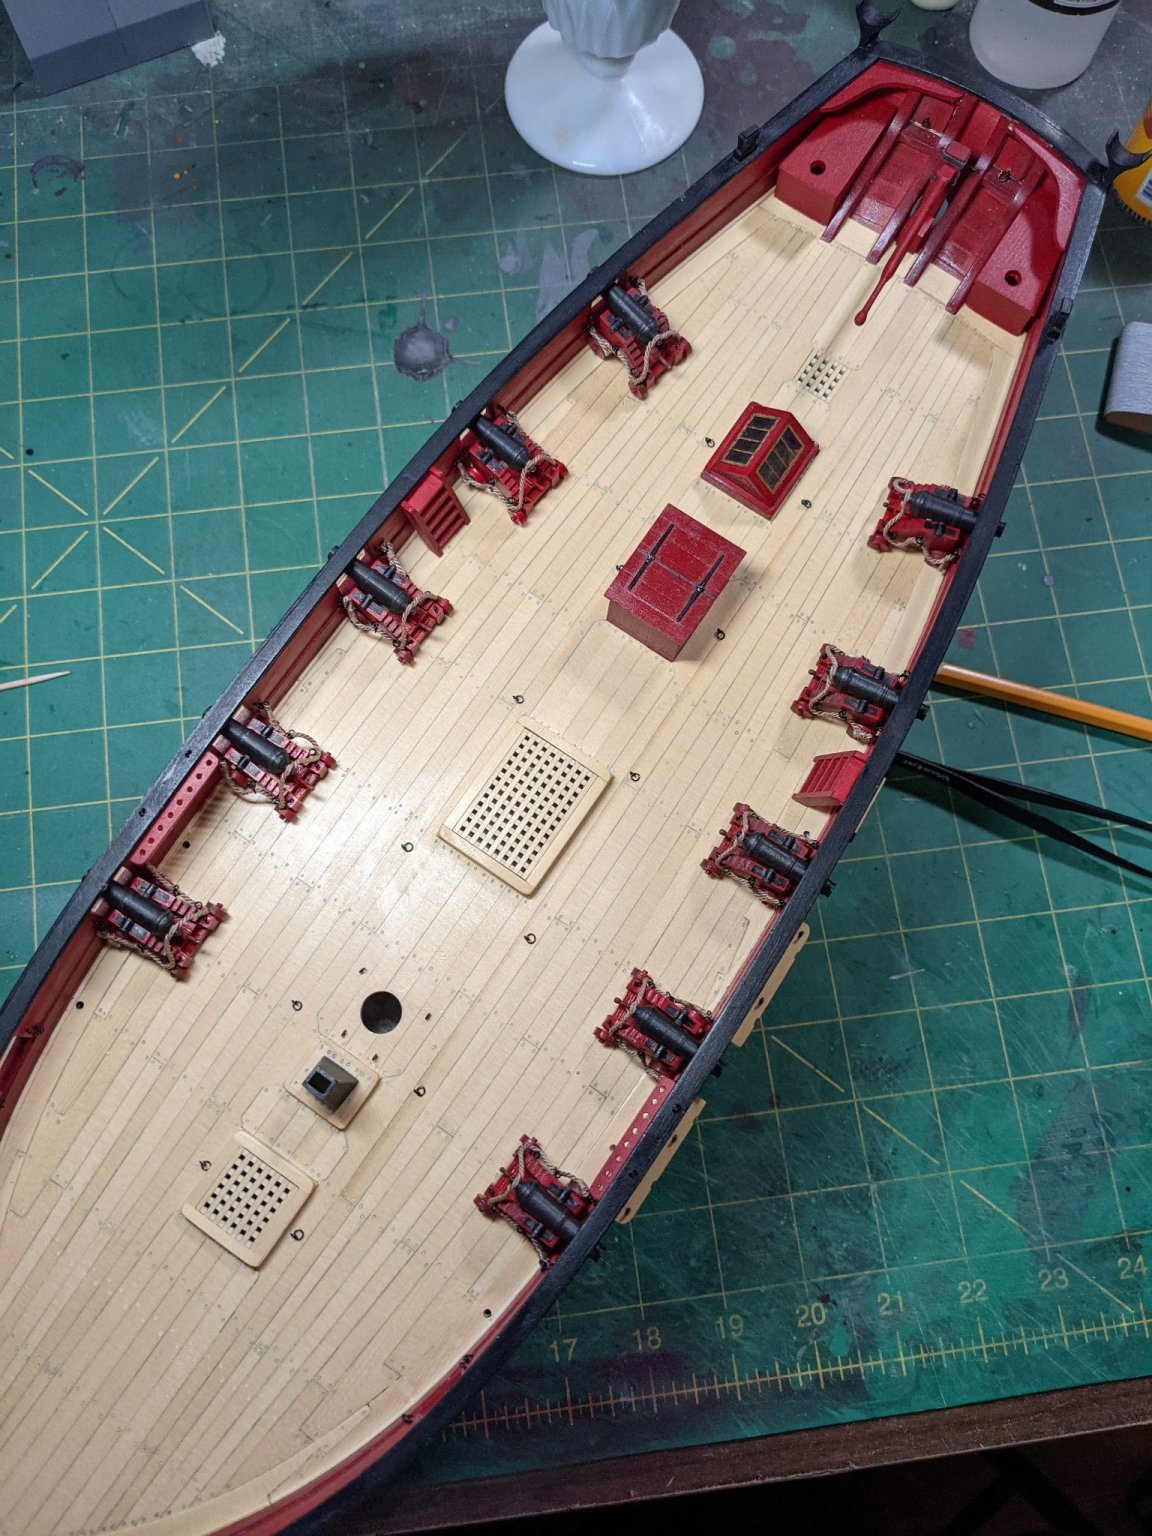
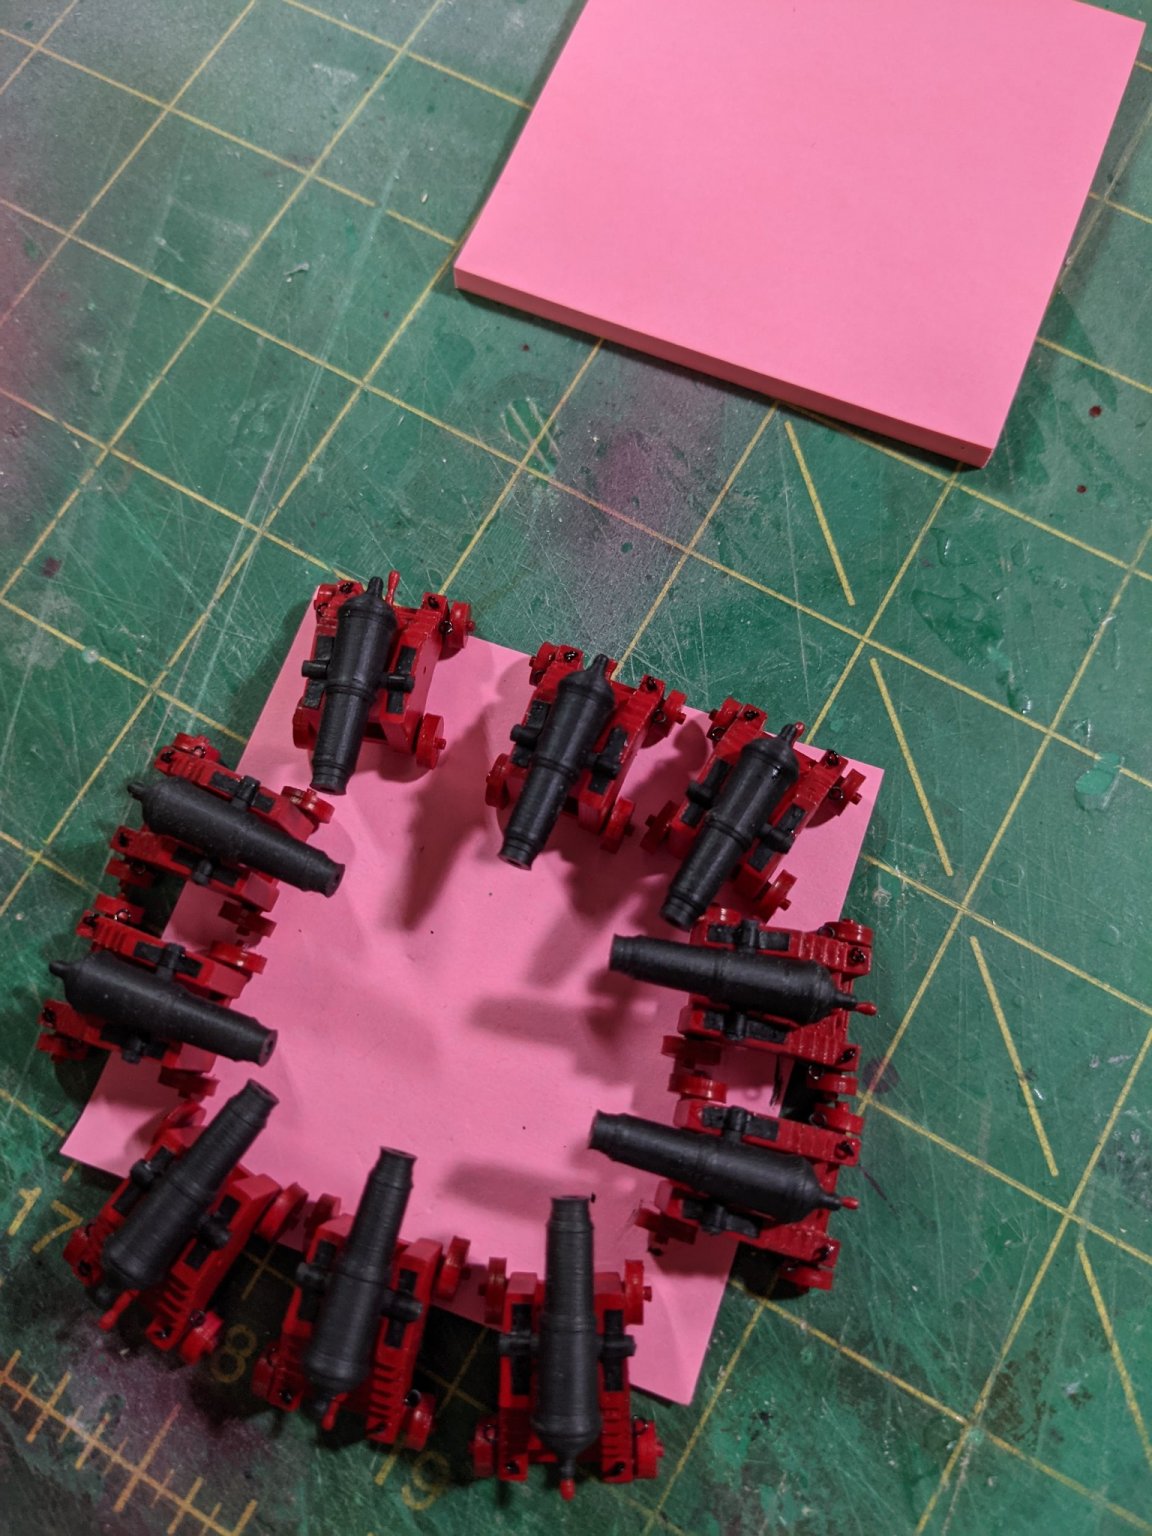
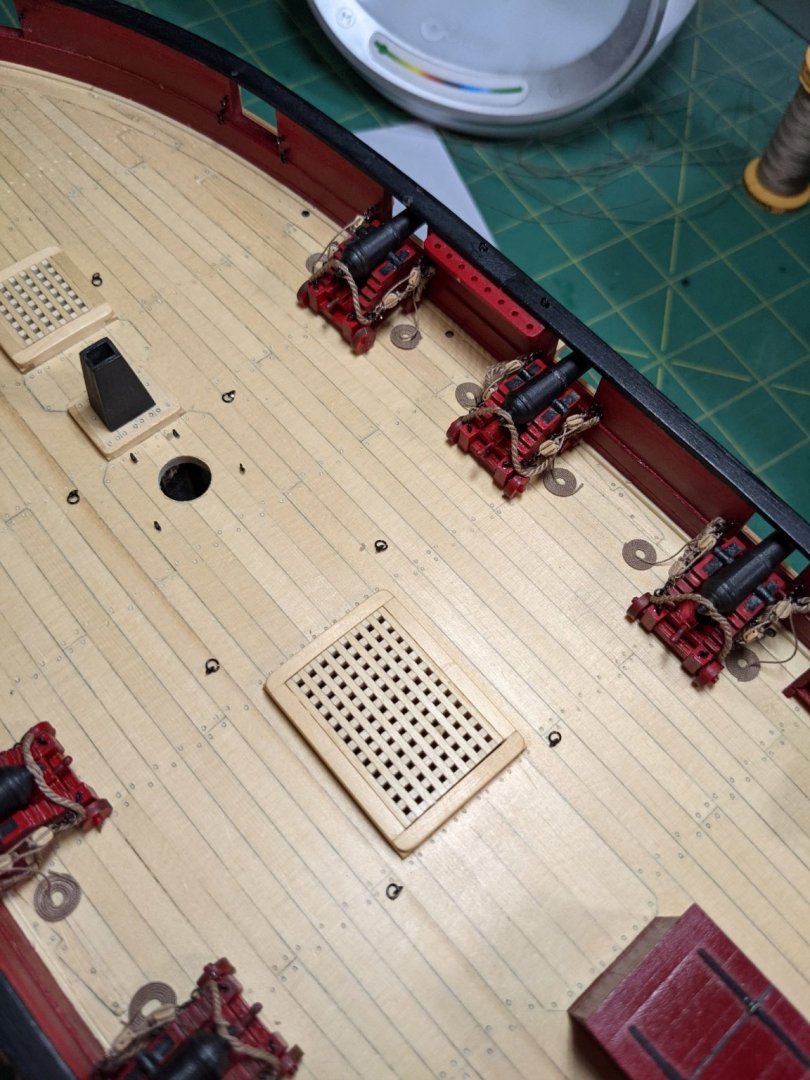
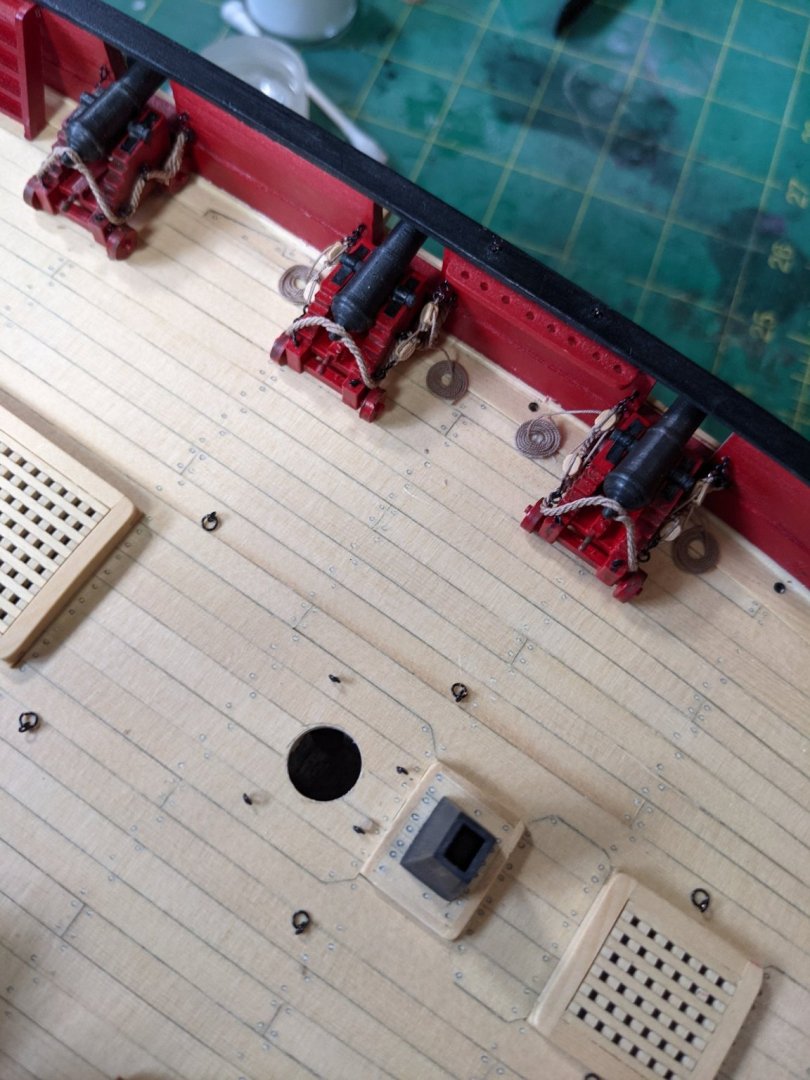
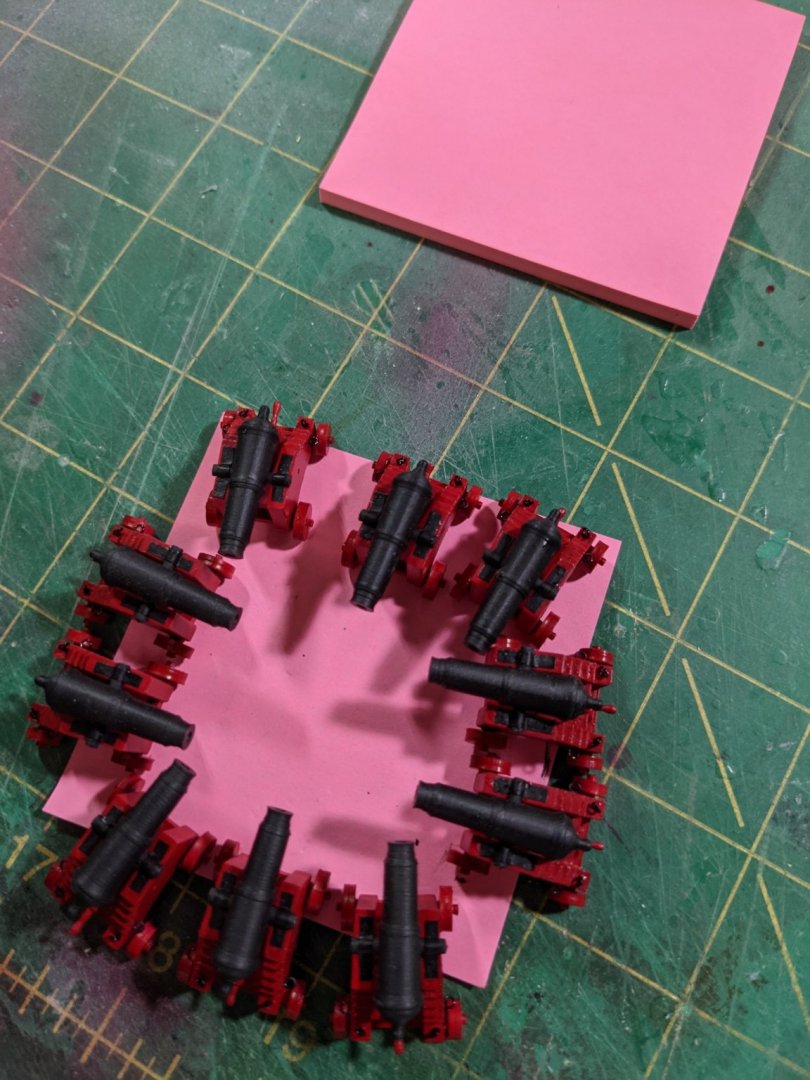
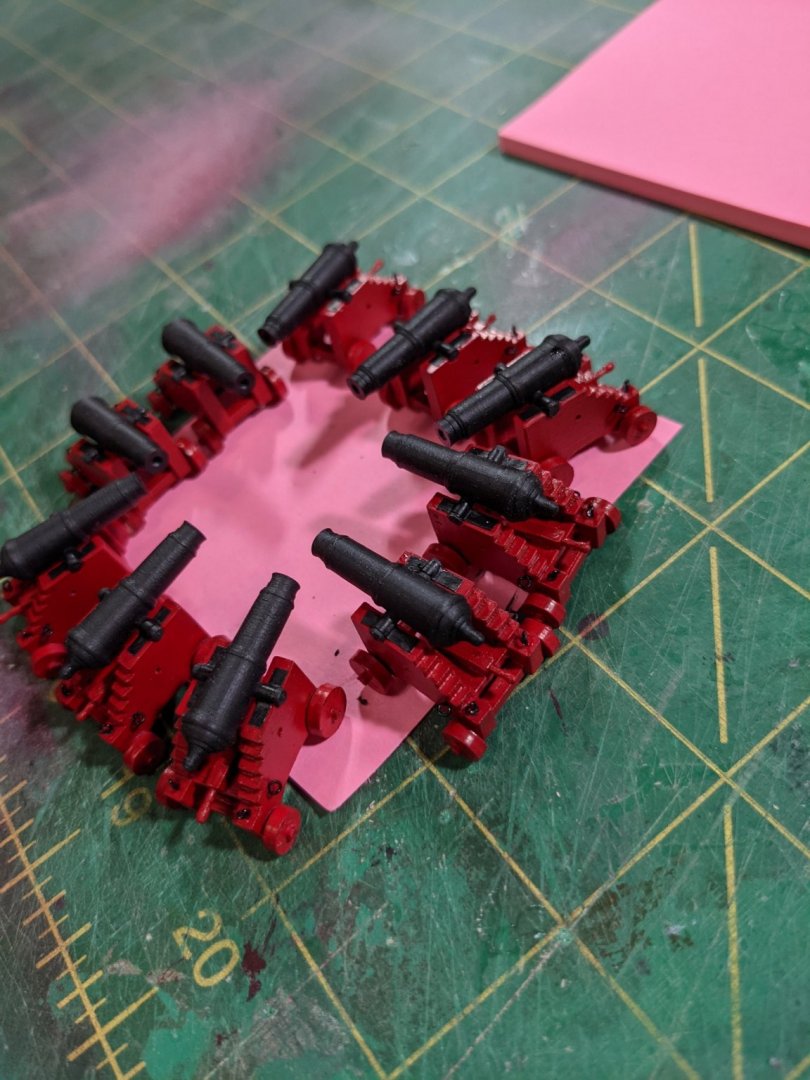
I have ten cannons mounted. the deck is looking more complete.

- 274 replies
-
- 7
-
-

-
- Cheerful
- Syren Ship Model Company
- (and 1 more)
-
OK it just struck me as odd they didn't use all the ports. Must have been a reason for this. Maybe not enough crew to man them? Just being curious...
-
Yes but that makes 12 guns for 14 gun ports.
-
So I am installing the cannonades on the deck and have a stupid question: There are 6 gun ports on each side for them (7 if you count the ones at the bow) but only 5 are installed on each side. Did they not want to put a cannon at each gun port?
-
Some of the skills transfer. One of the best skills is Chuck's advice of working slow and making each step it's own task and enjoying the build process.
-
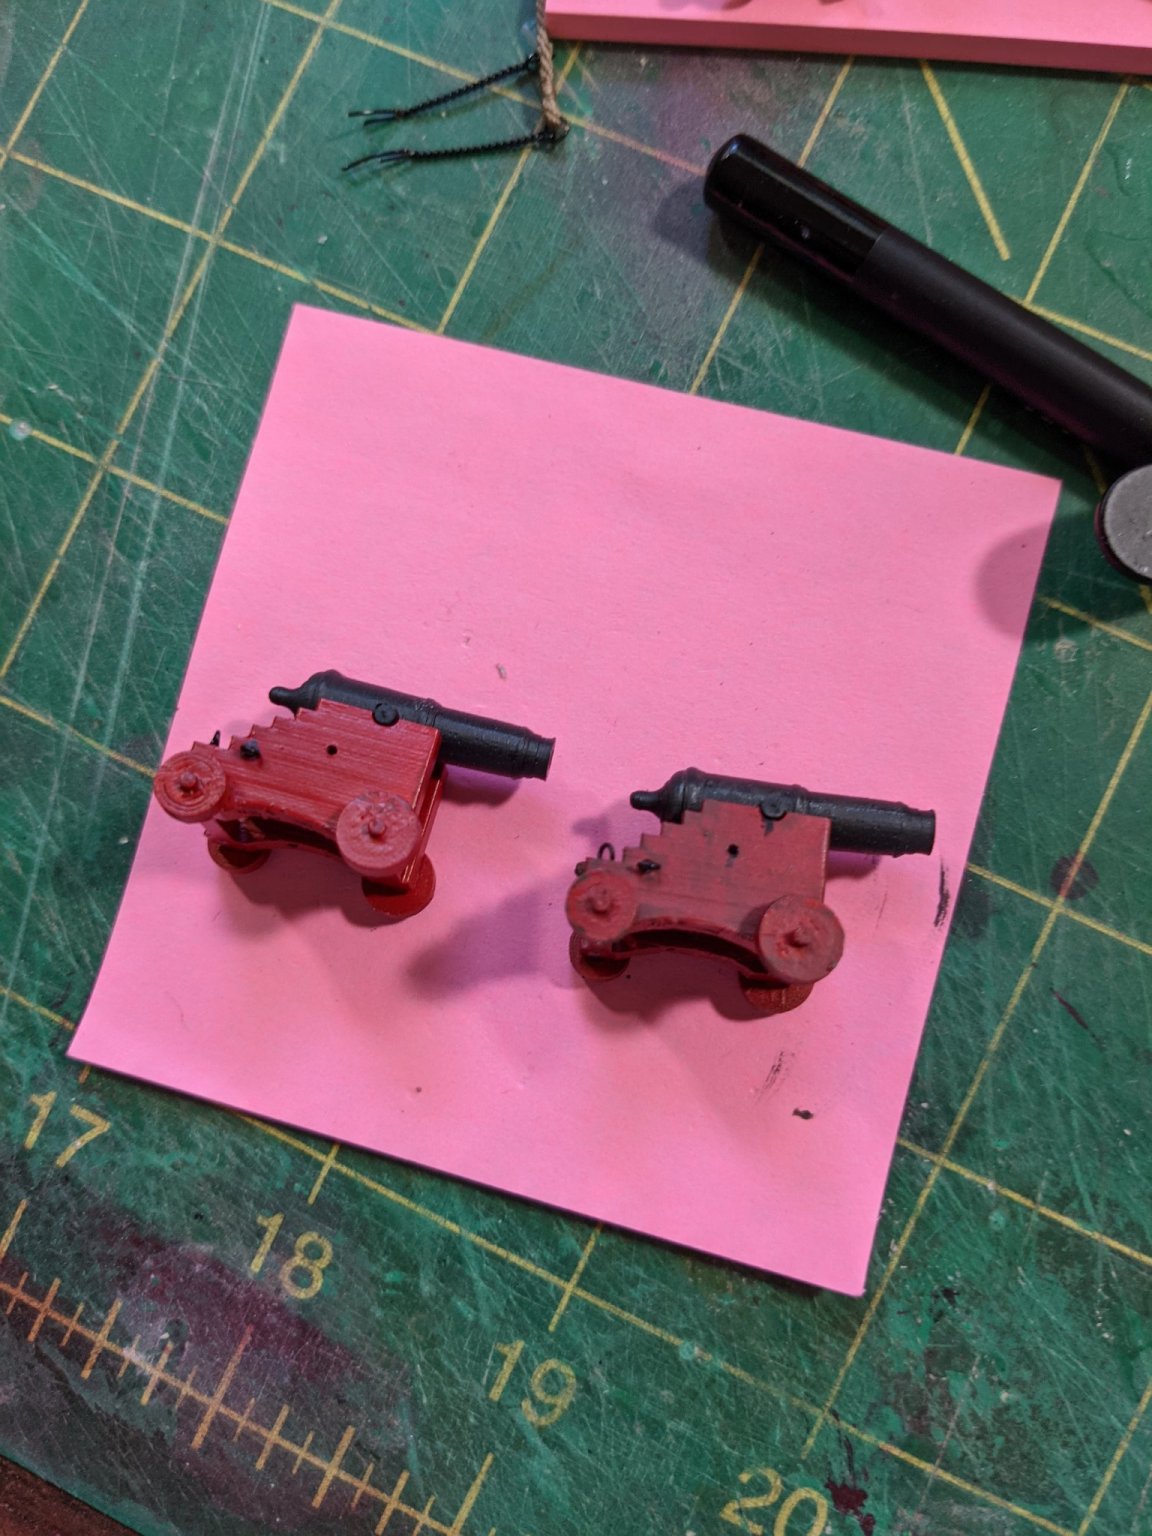
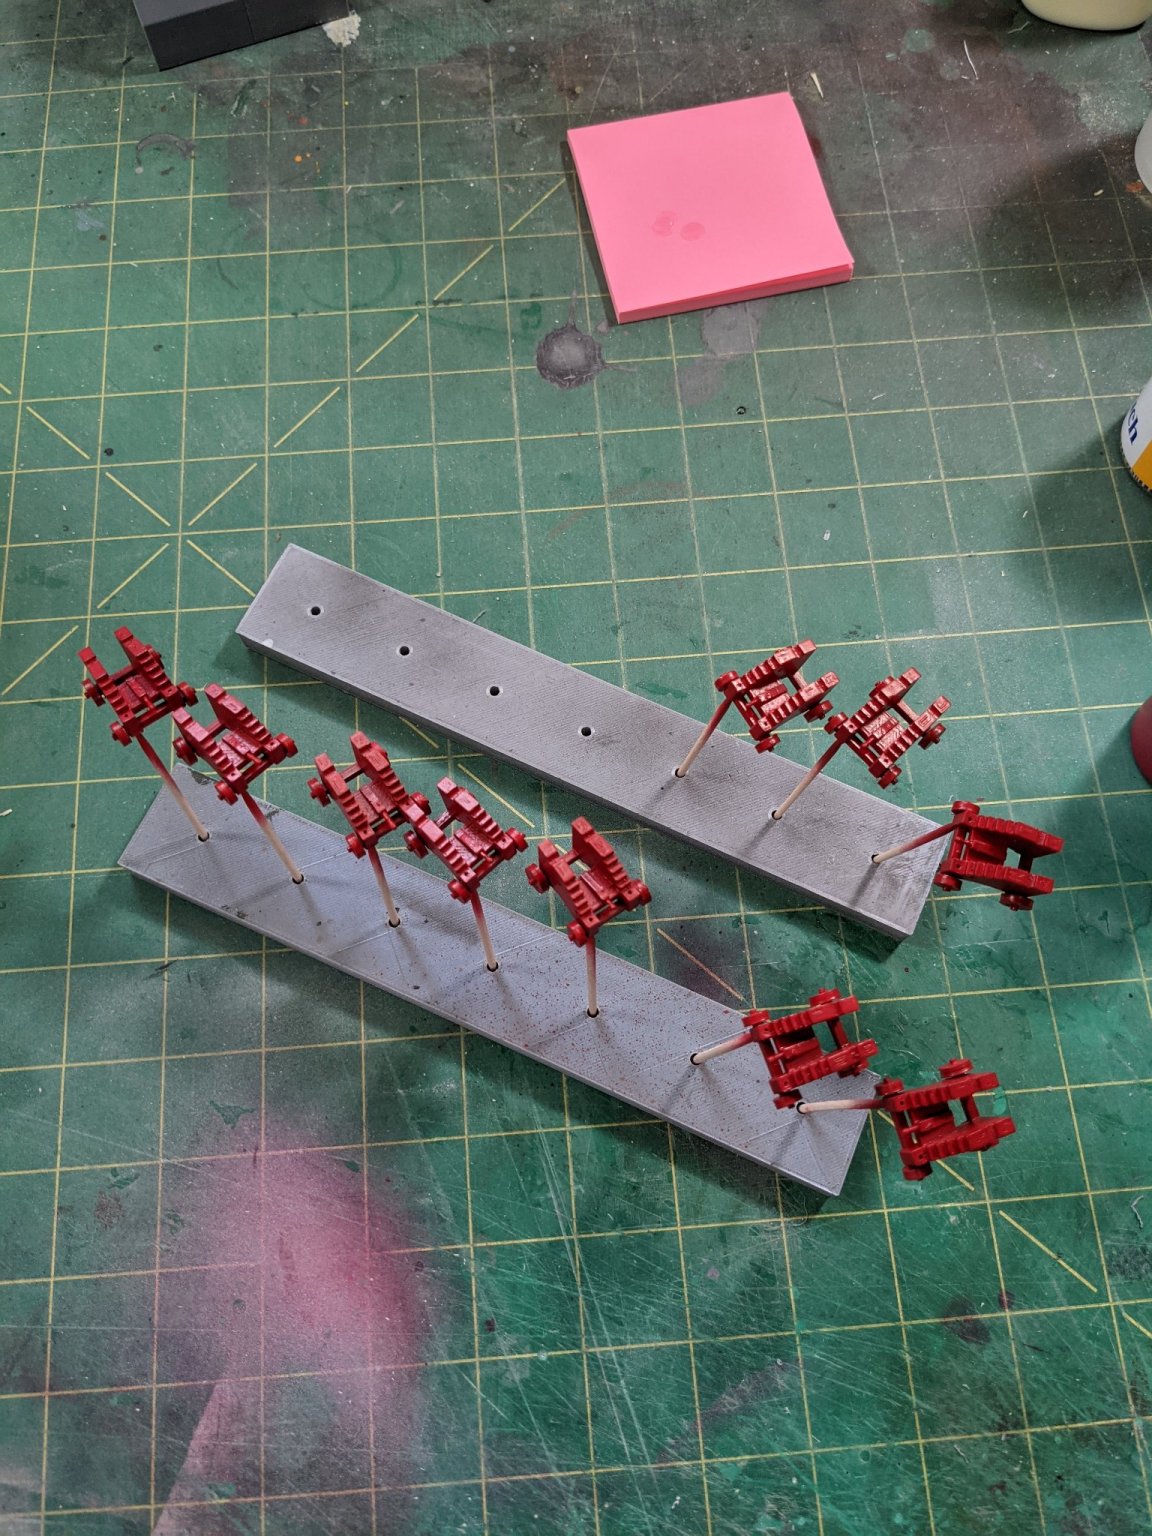
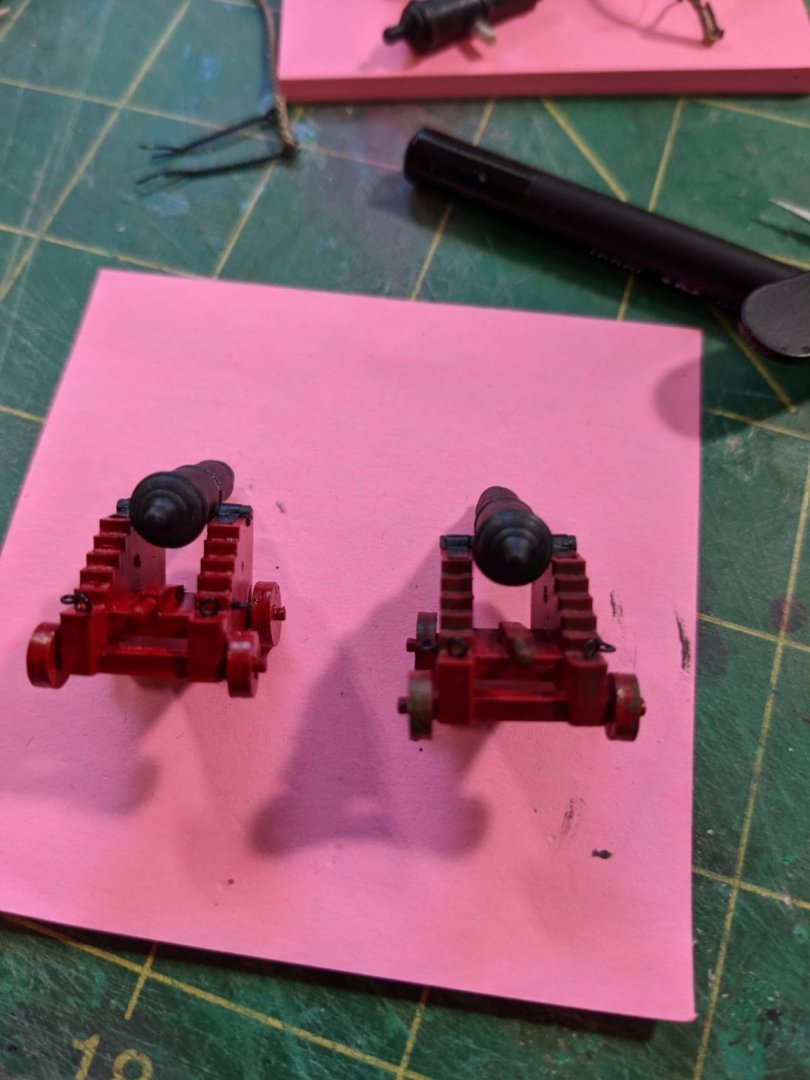
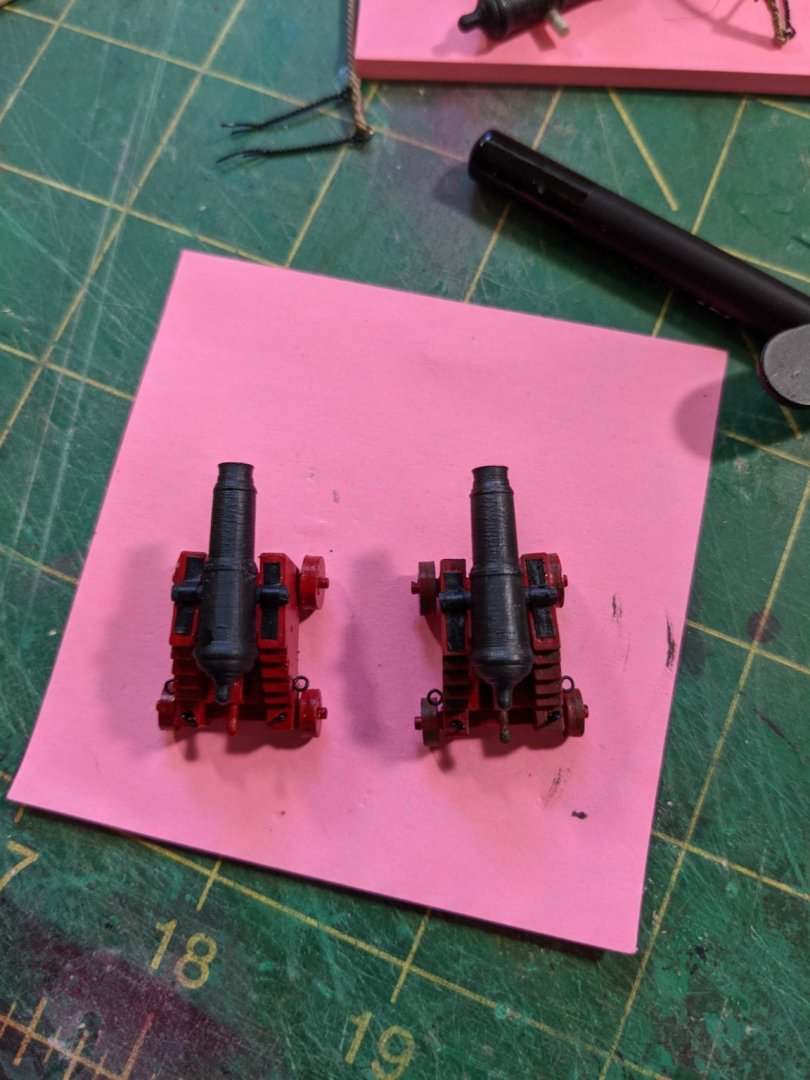
Did some weathering with my AK Interactive weathering pencils. I may tone it down a bit on the carriages. Left side is before and right is weathered.


- 274 replies
-
- 7
-
-
- Cheerful
- Syren Ship Model Company
- (and 1 more)
-
I can see that the weathering powder does a fine job on making that look realistic.
- 1,784 replies
-
- 1
-
-
- winchelsea
- Syren Ship Model Company
- (and 1 more)
-
Wow that looks fantastic! Did you have to turn it over after each cut pass? How do you keep things aligned if you do?
-
The red is in the paint. I do my own printing and have a Prusa MK3. If you follow the first tutorial through and design your own you will get a good handle on using Fusion 360. It took me three walk throughs before I got some of it down.
-
Good ideas. I will apply some weathering to the cannons and see what I can do about the glossy finish. let me see if I have some dullcoat around. Here is the link to Fusion 360 for personal use. https://www.autodesk.ca/en/products/fusion-360/personal And this guy has the best tutorials.
- 274 replies
-
- 2
-
-
- Cheerful
- Syren Ship Model Company
- (and 1 more)
-
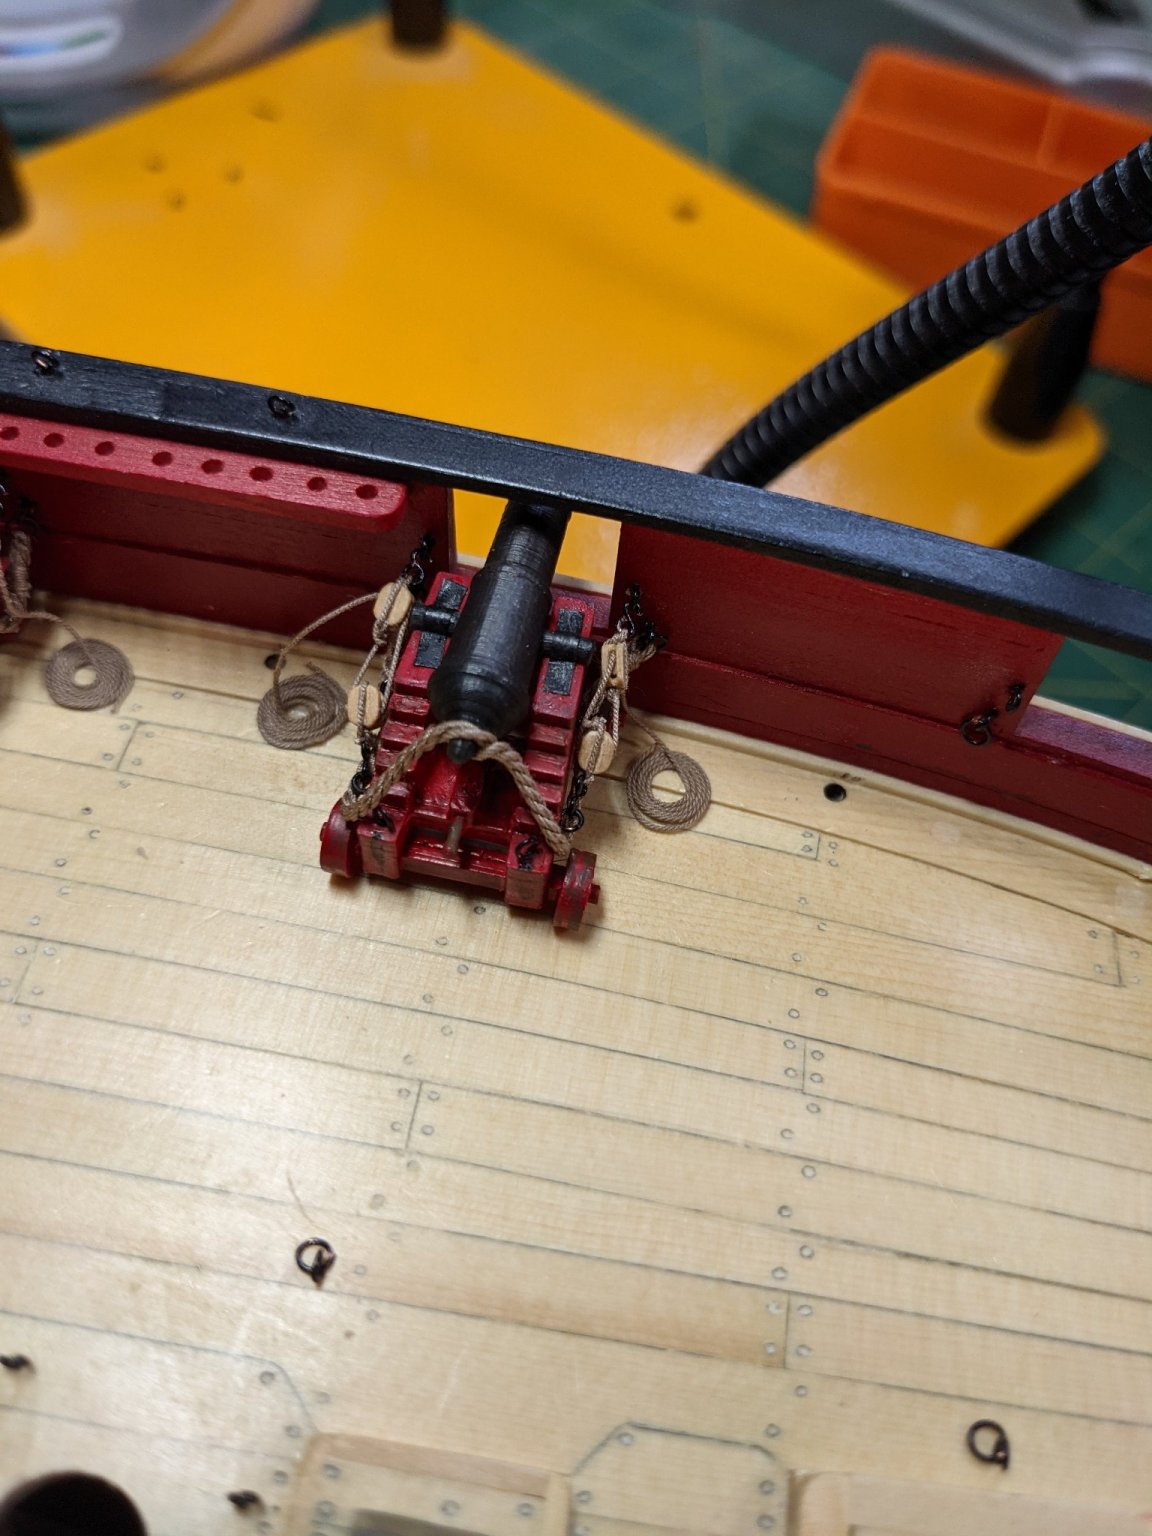
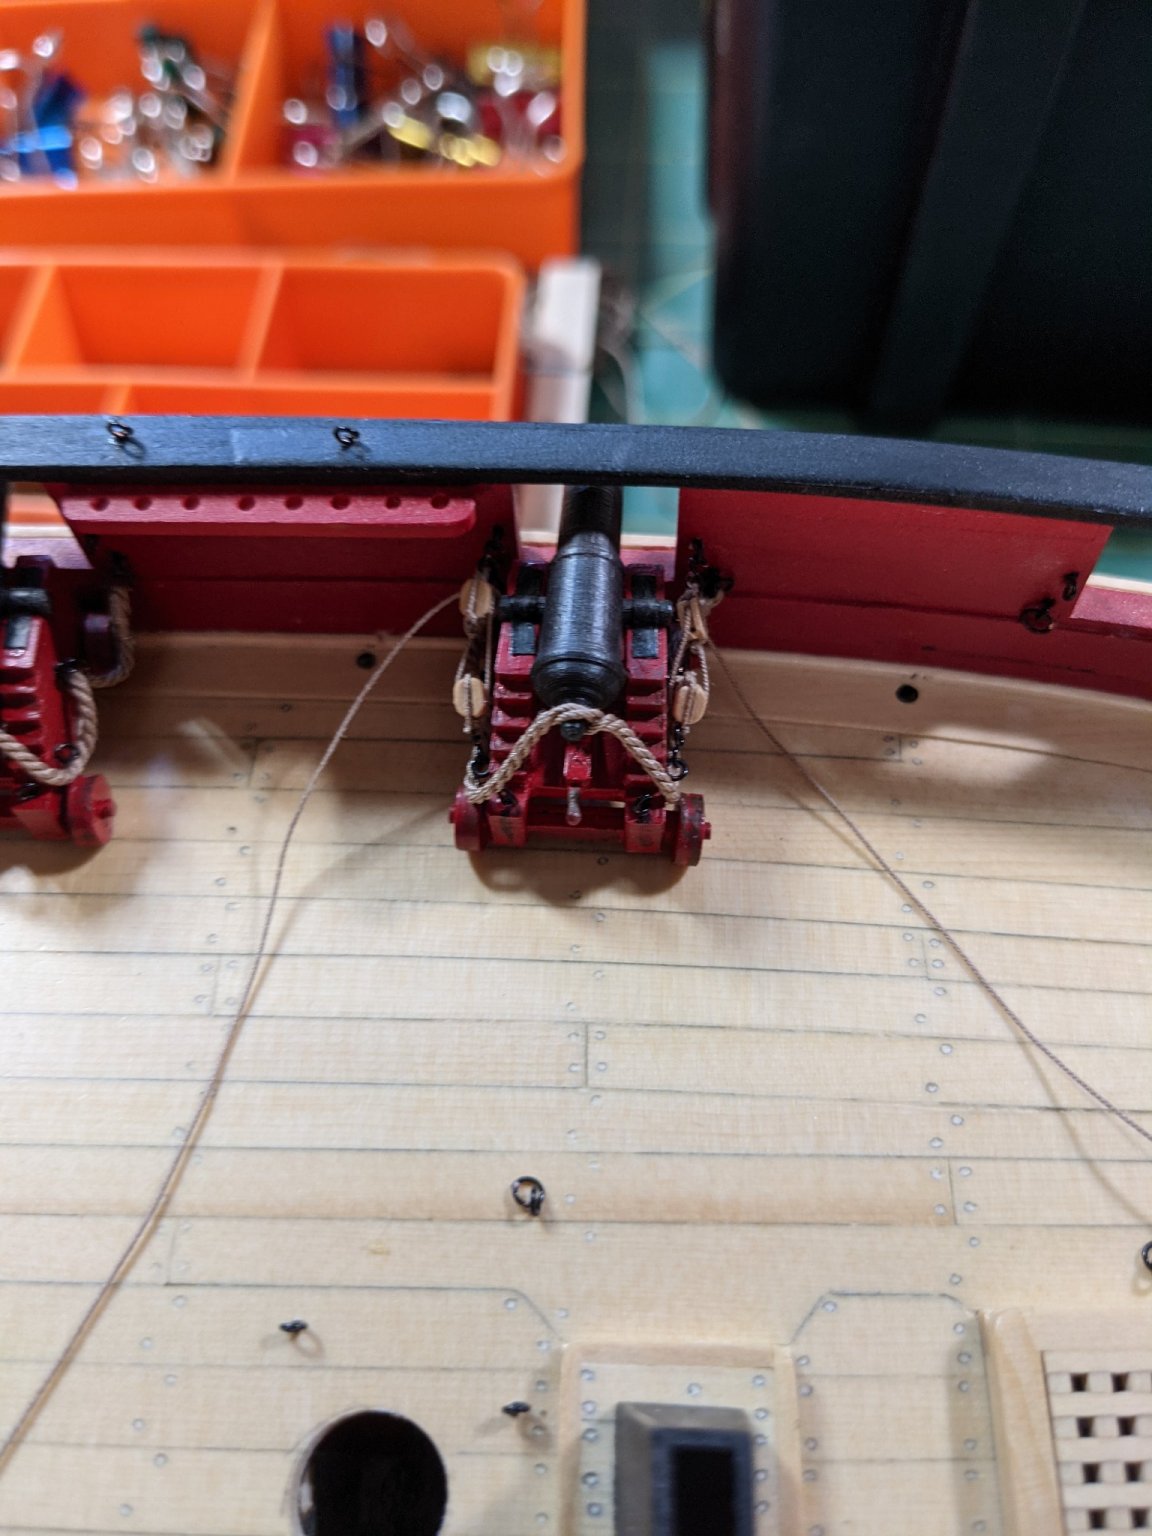
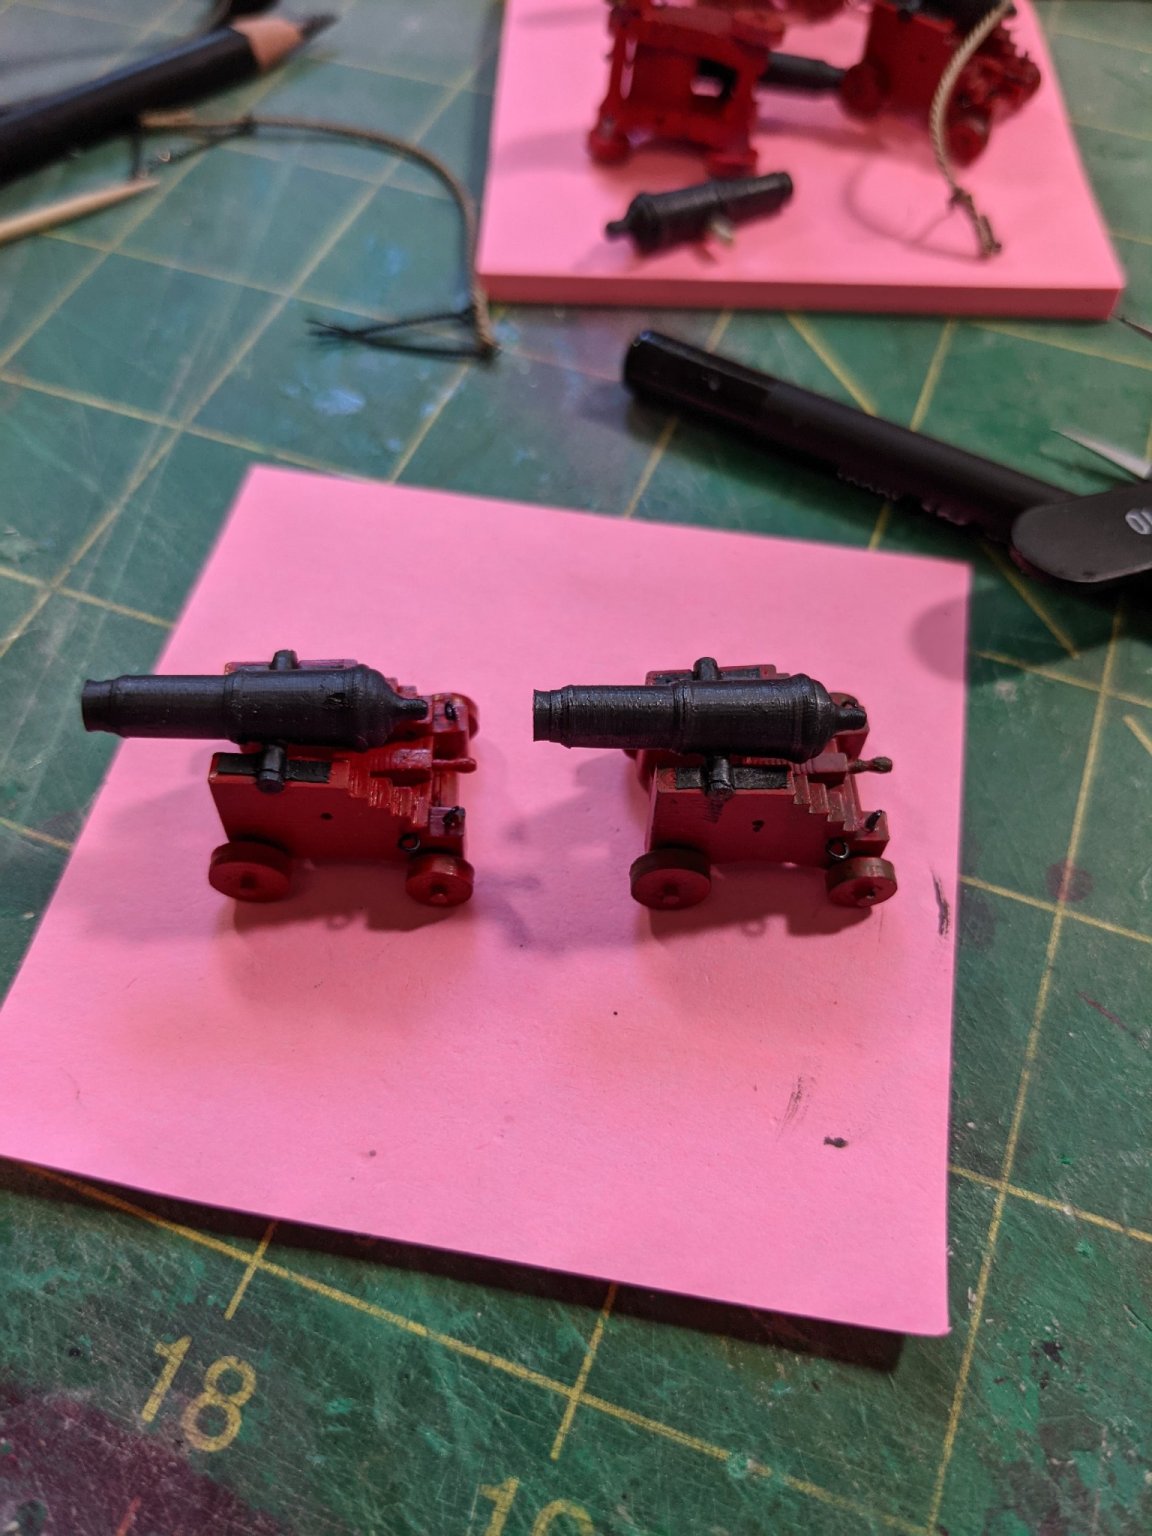
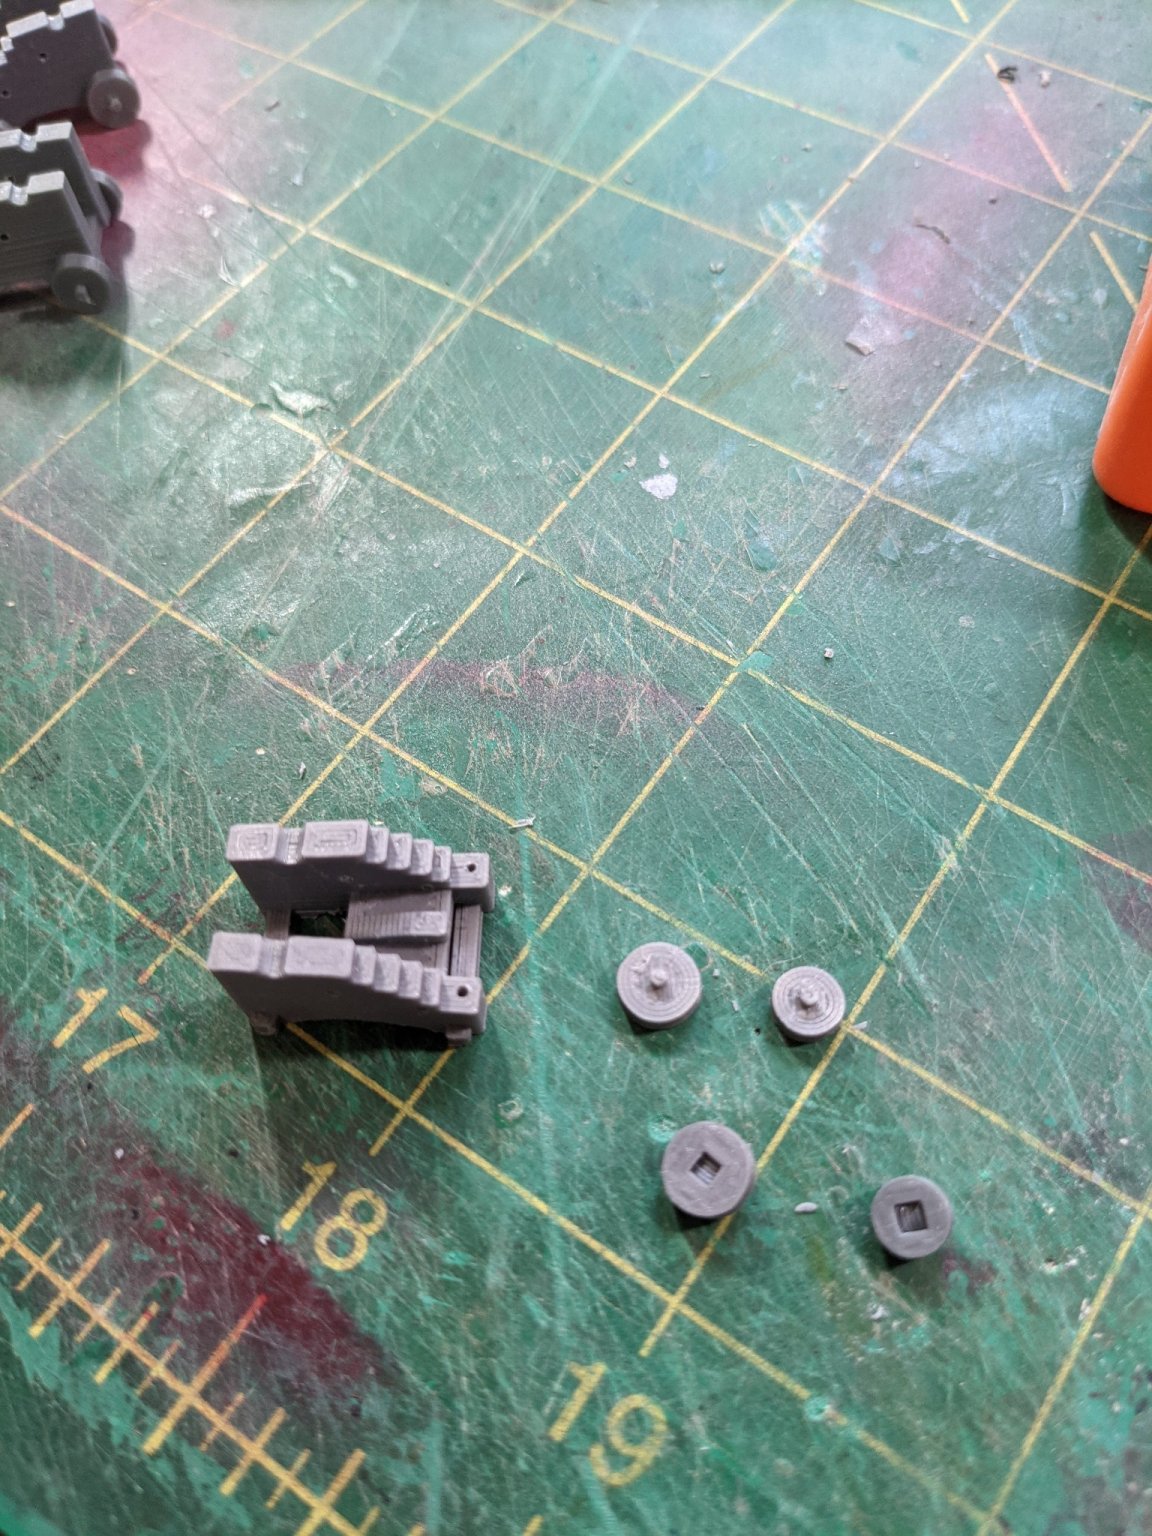
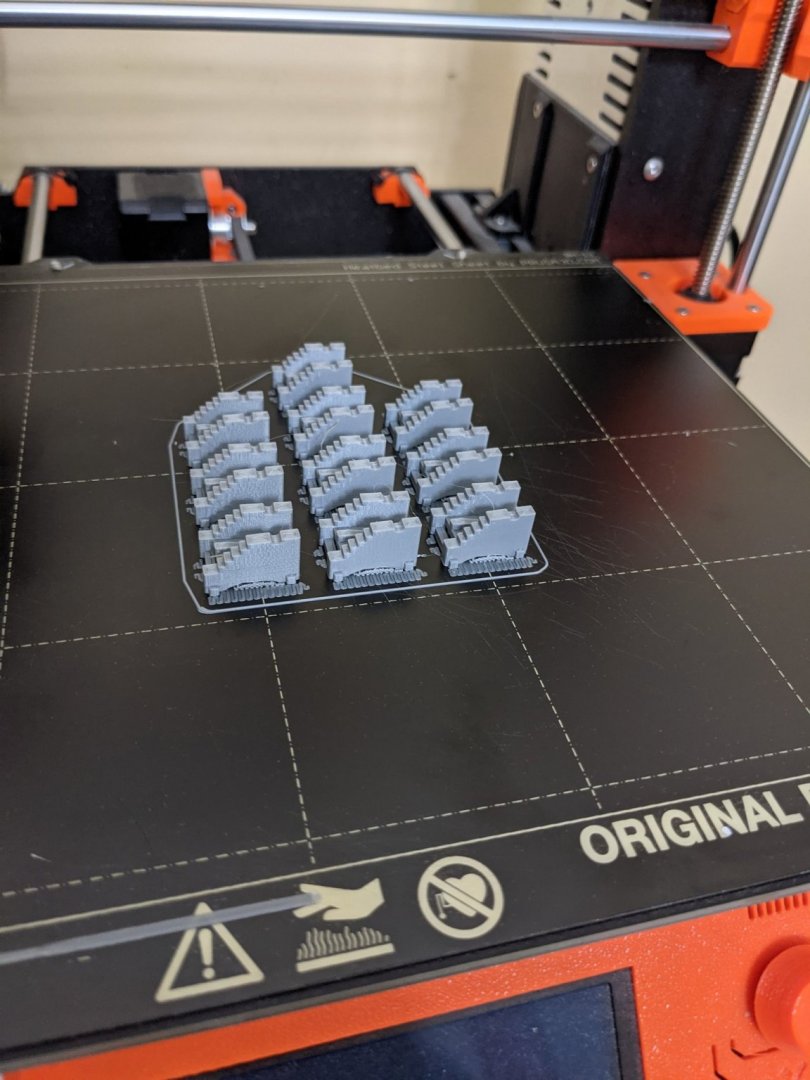
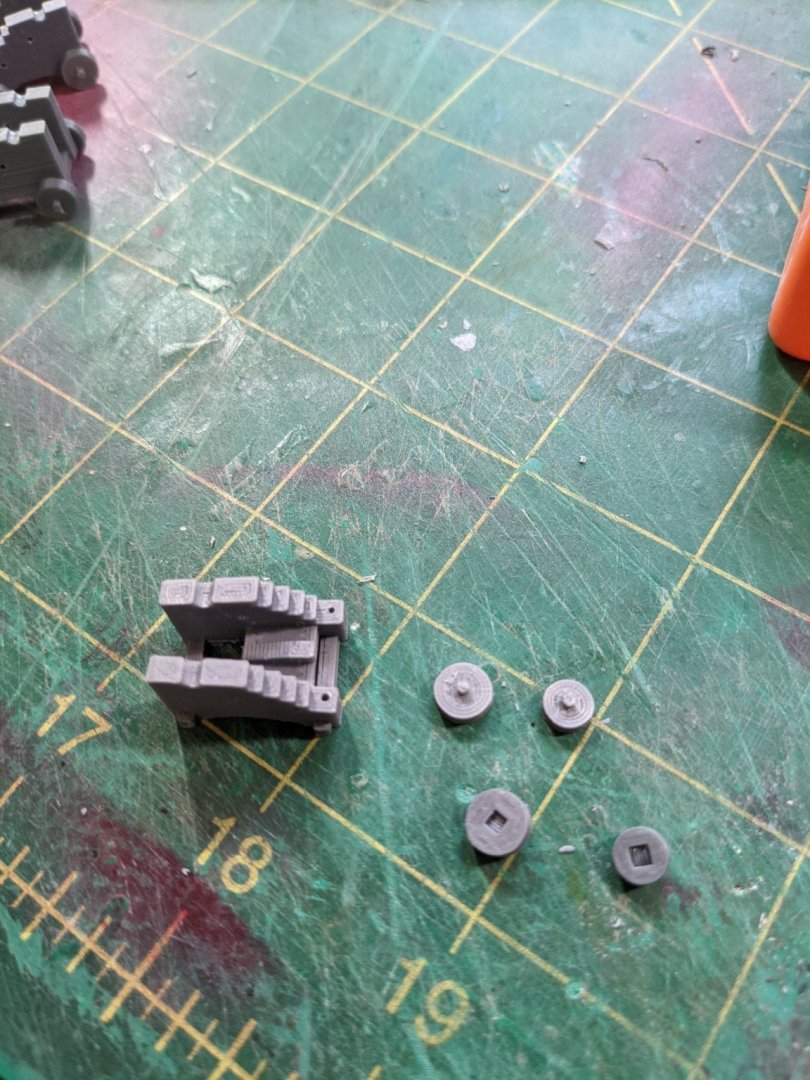
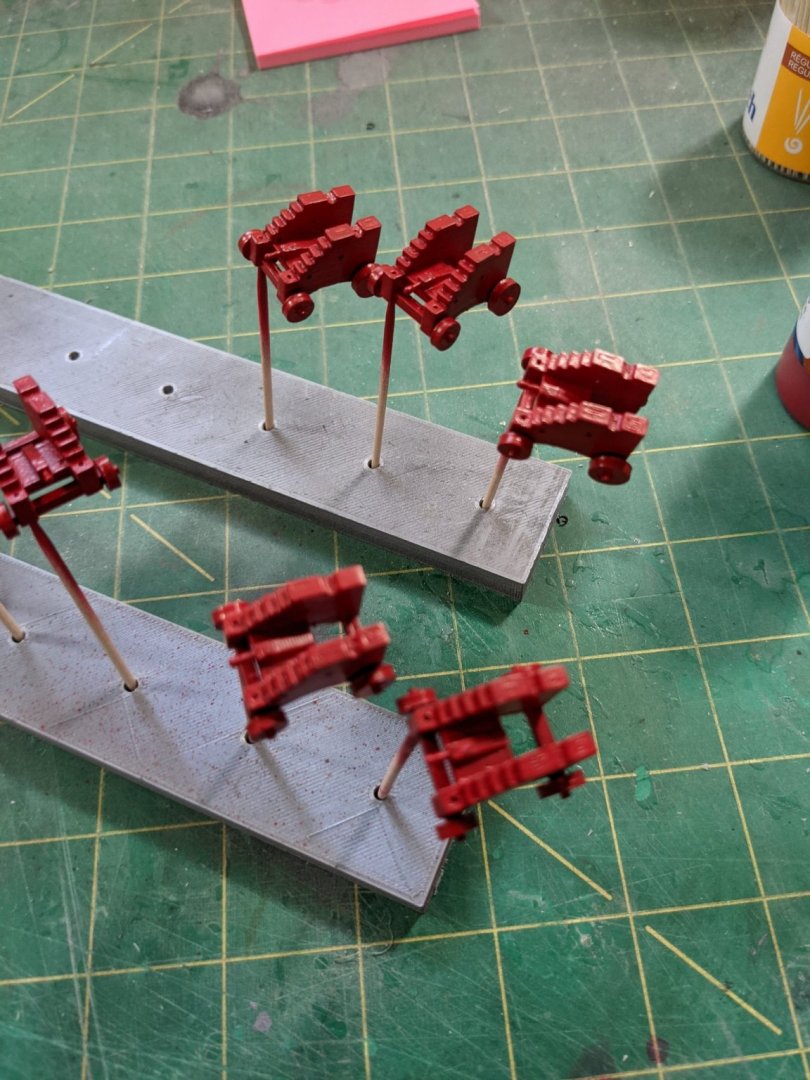
So now for the cannons and gun carriages... I did something different and drew the cannons and carriages up in Fusion 360 and 3d printed them. It wasn't as easy as it sounds as it took a few tries to get it right. I know some of you will scoff at this and that's perfectly ok. I wanted to see if I could do it and have the software and printer. Here are the 10 carriages printed on the build plate. This was a 5 hour print at .1 mm resolution. After some minor prep I glued the wheels on with cya. Then used badger white primer and then sprayed the red with 3 coats. The handles are wood and turned with the dremel. I drilled all the holes for the eyelets and mounted the cannons which were sprayed with the badger black primer. I used some fine masking tape painted for the cannon hold down parts. Thoughts?
- 274 replies
-
- 6
-
-
-
- Cheerful
- Syren Ship Model Company
- (and 1 more)
-
Going to follow this one. You sure are organized.
-
Looking good. Might want to tape up the keel to protect it. I didn't and made all kinds of marks in it.
-
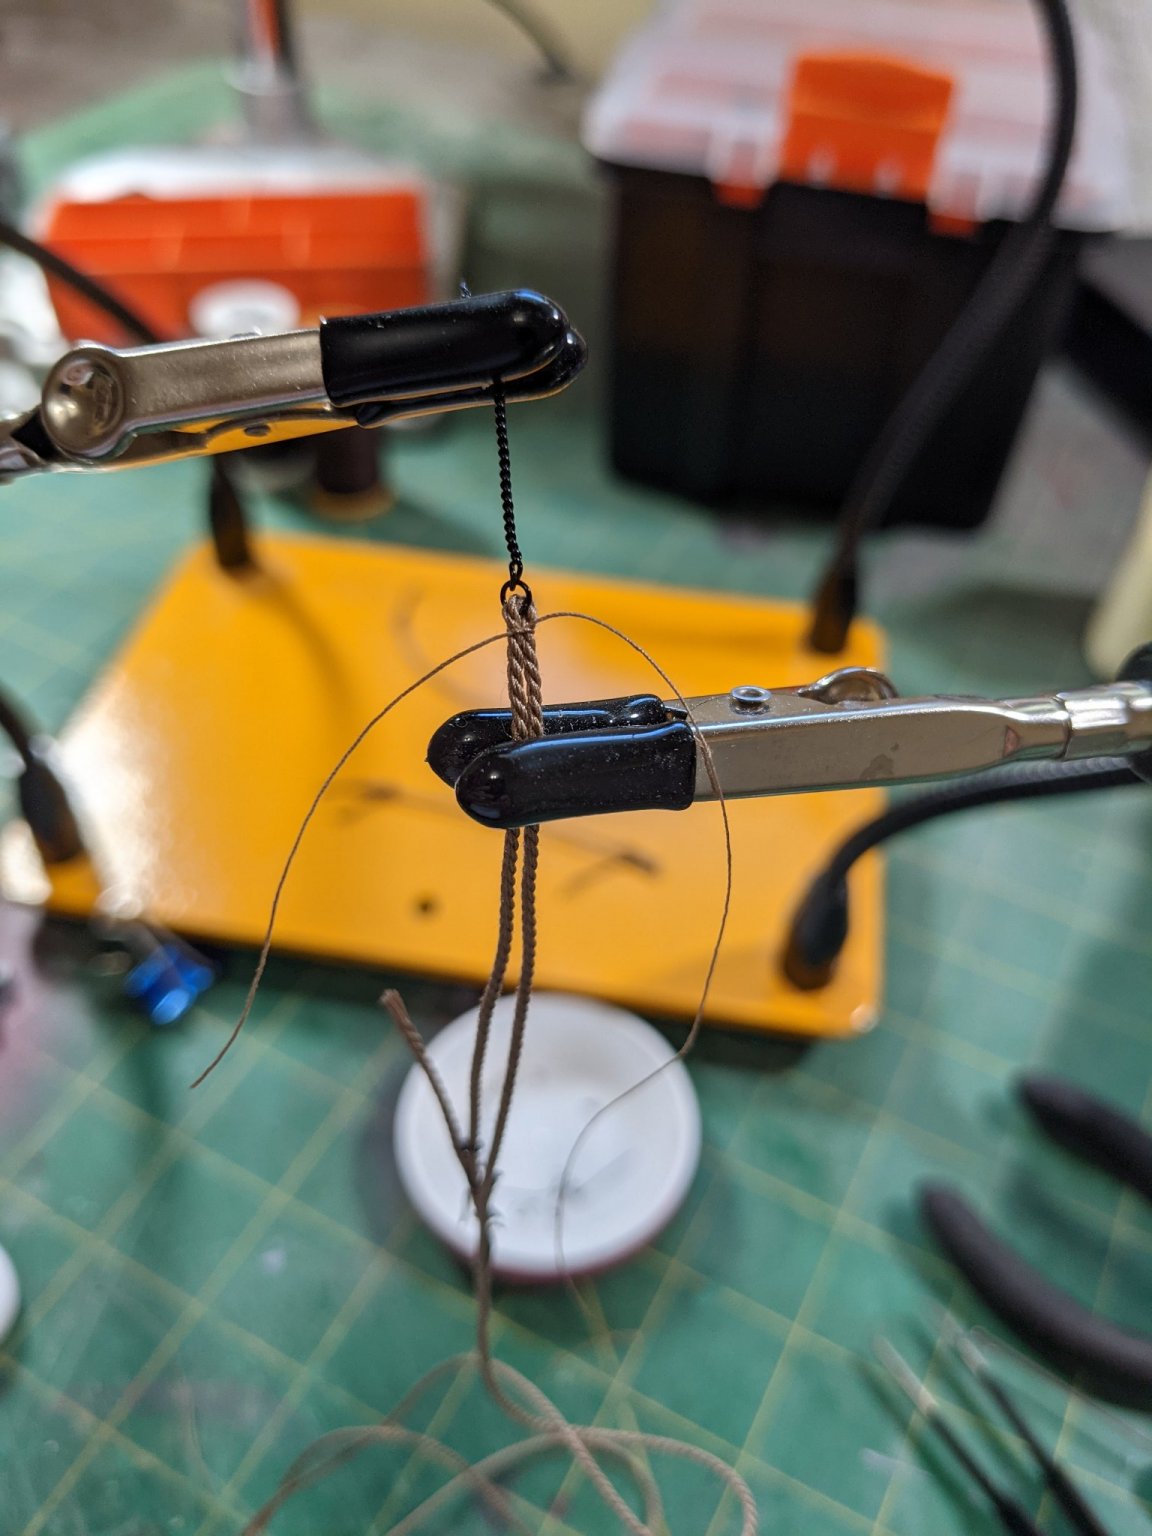
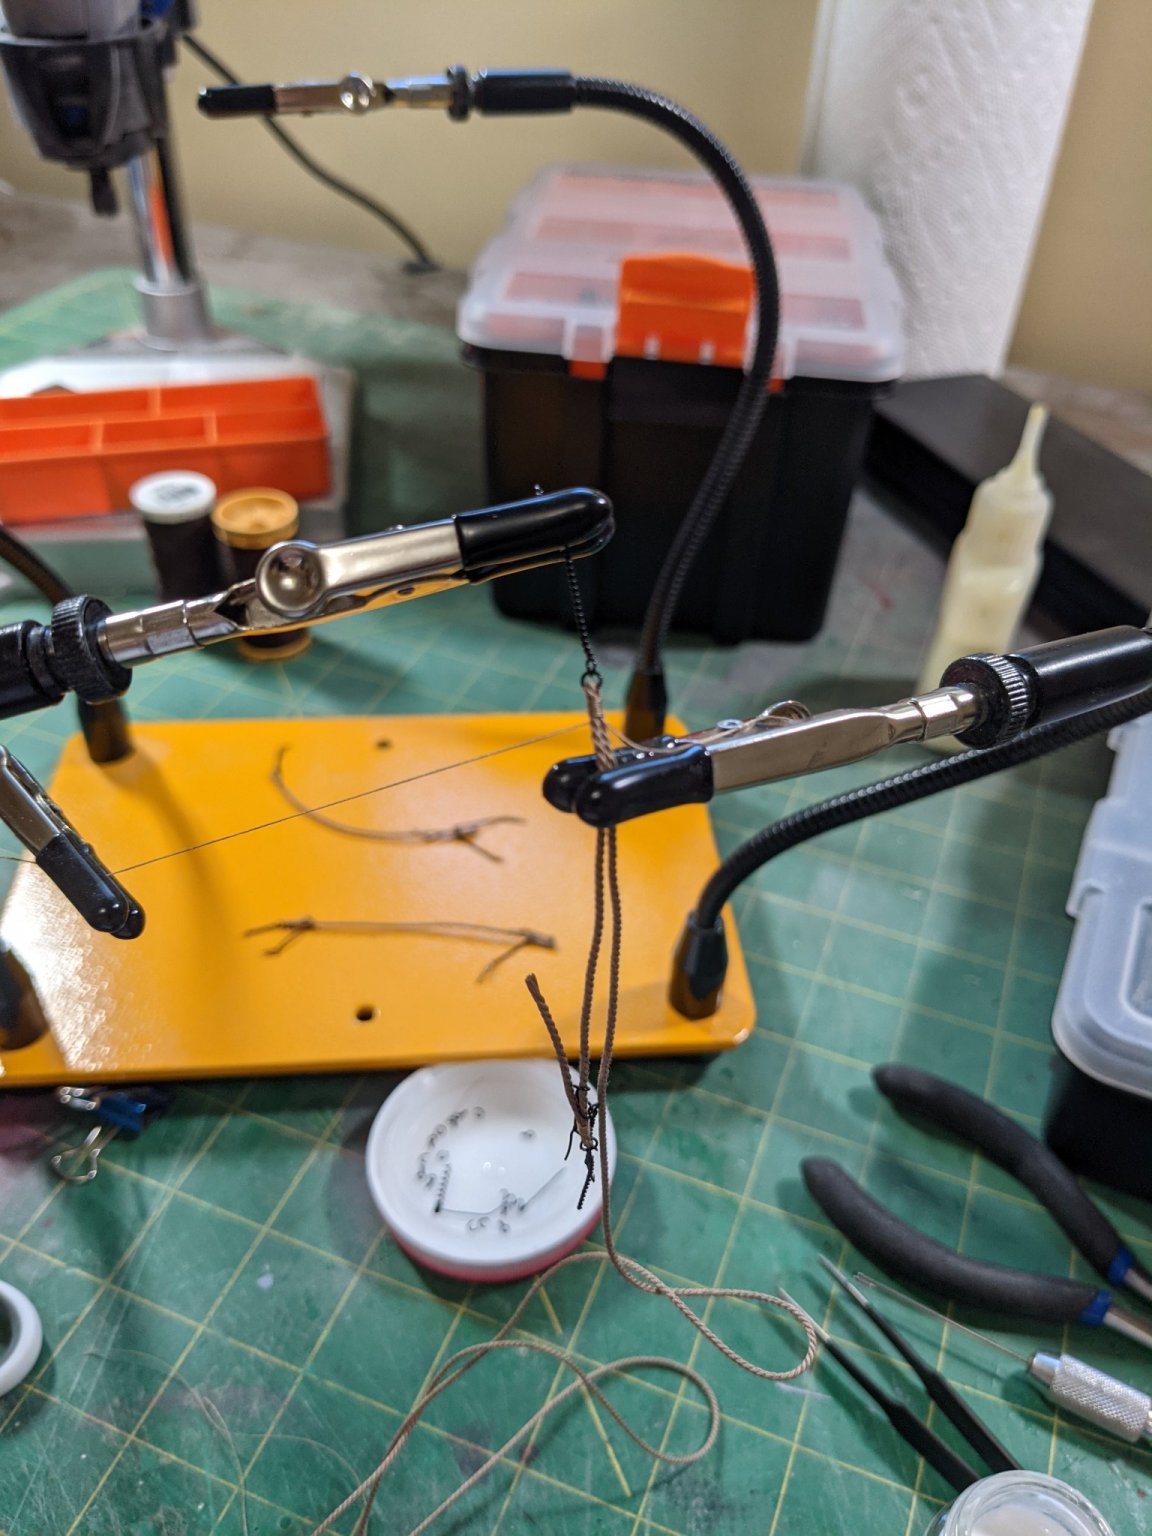
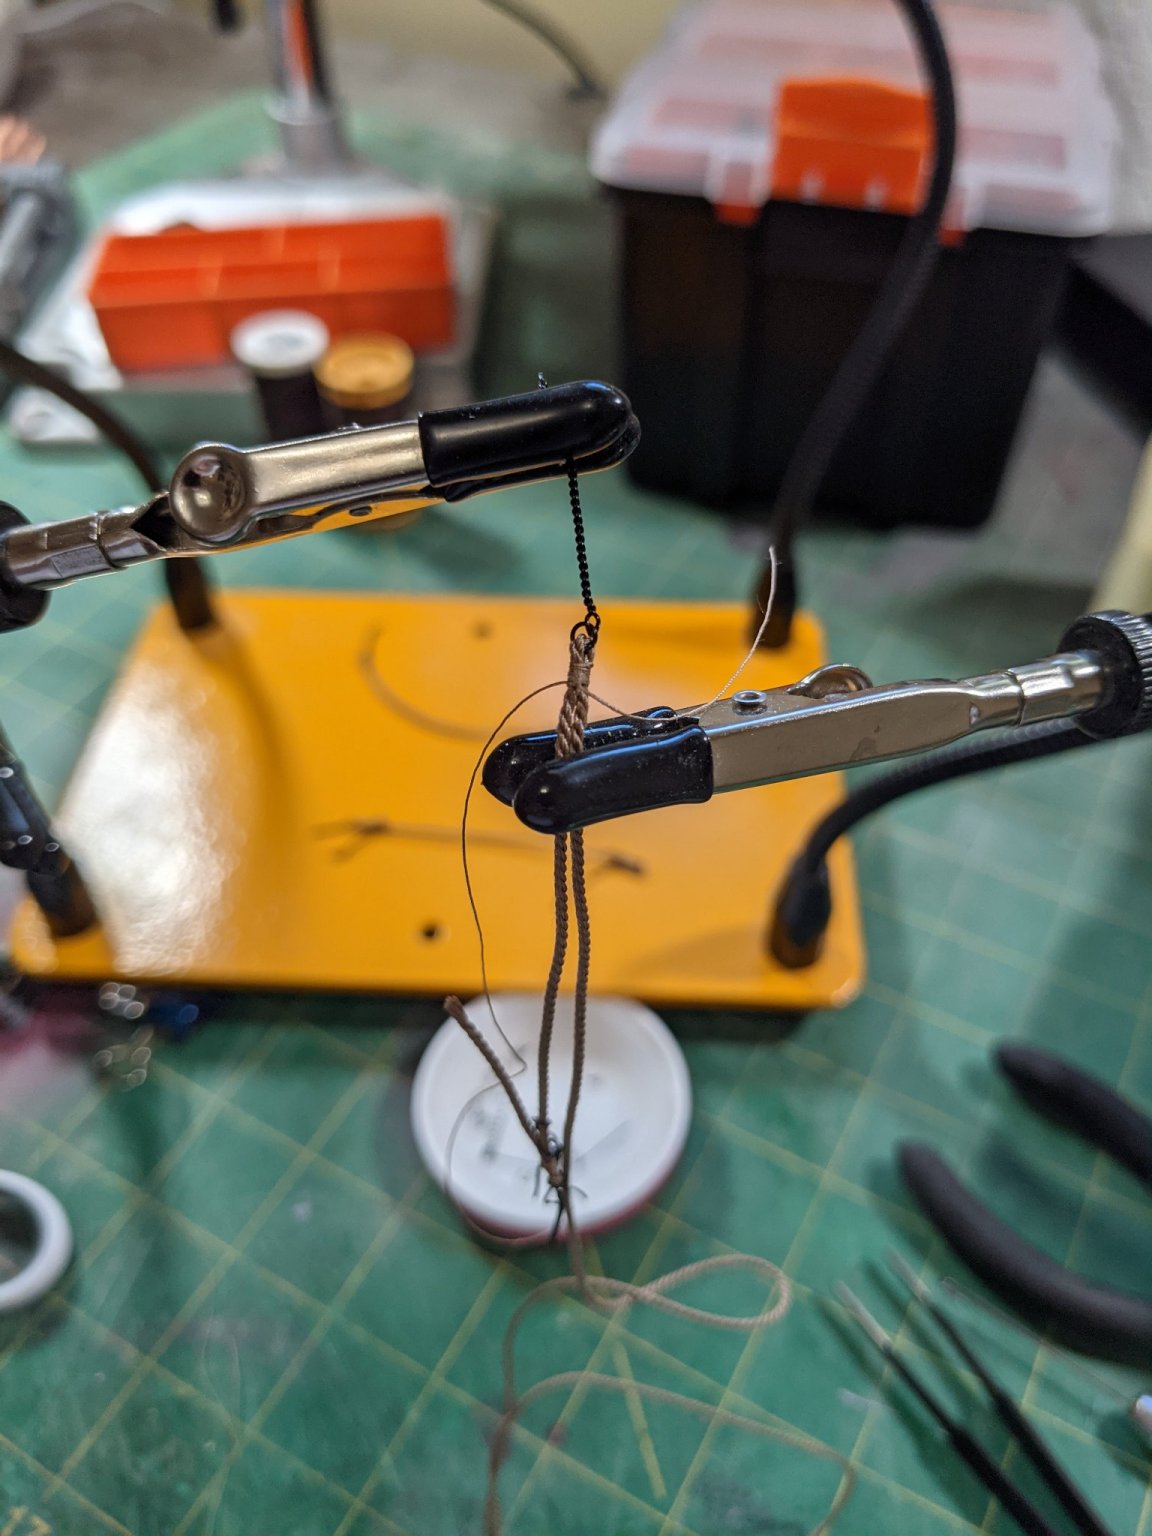
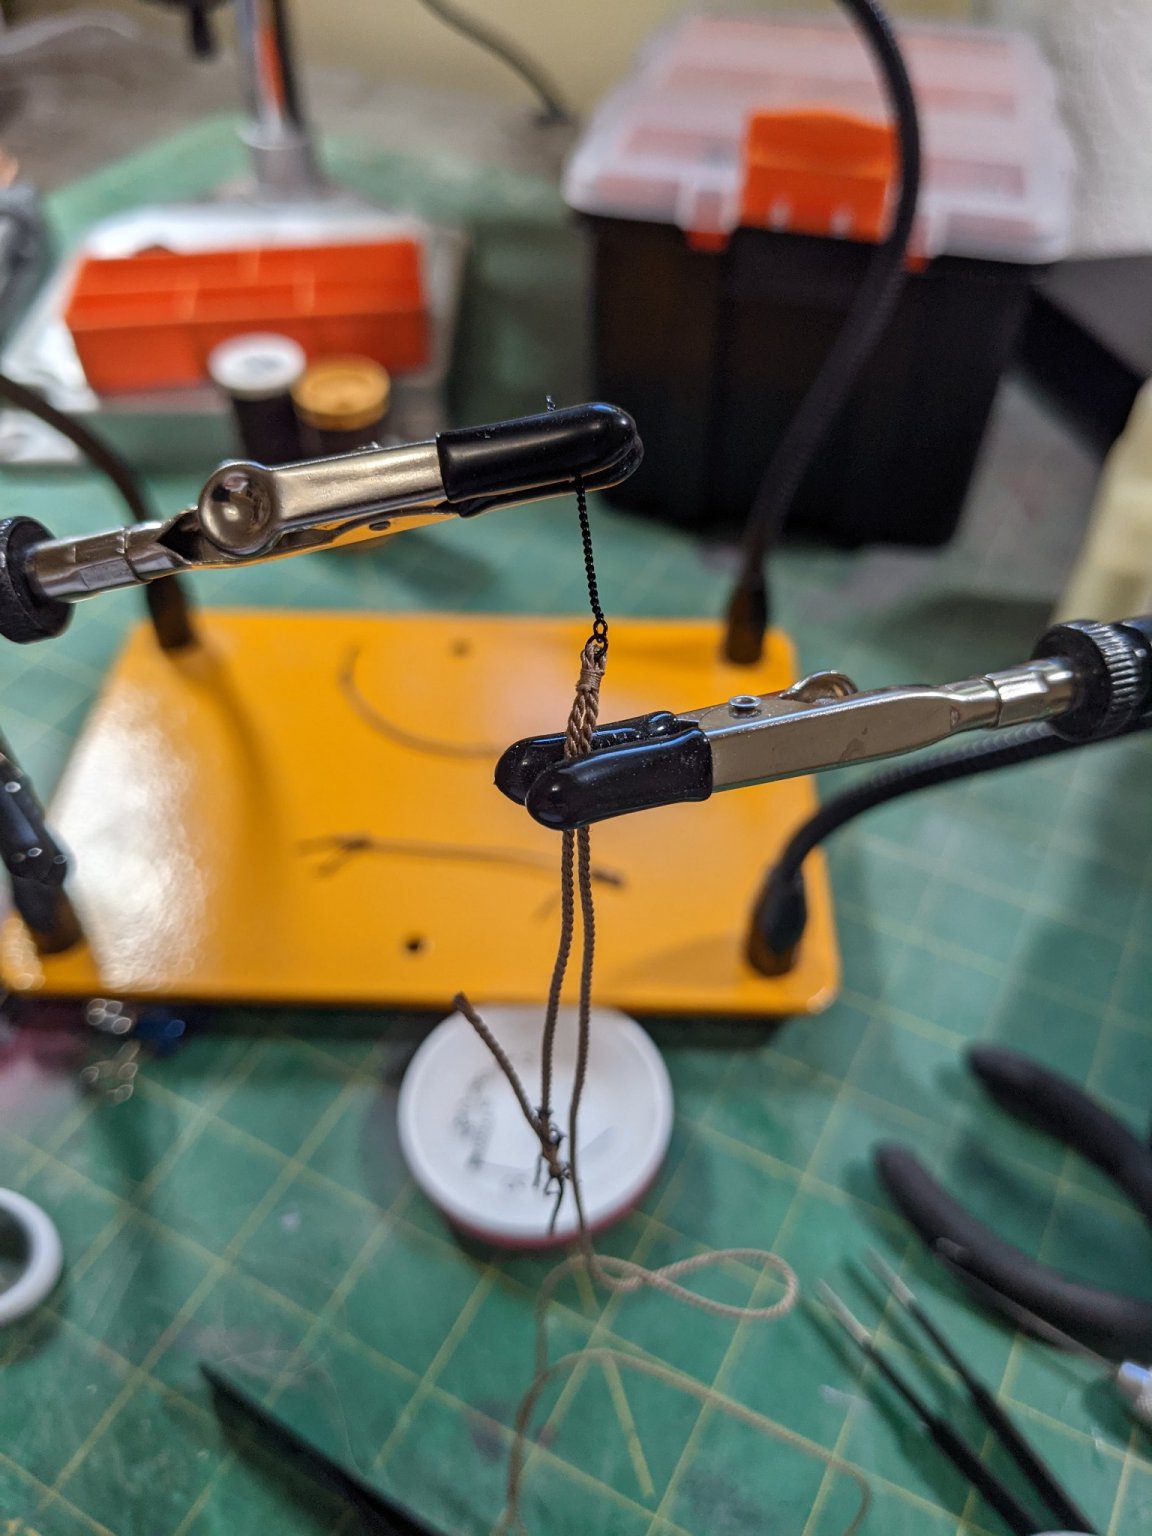
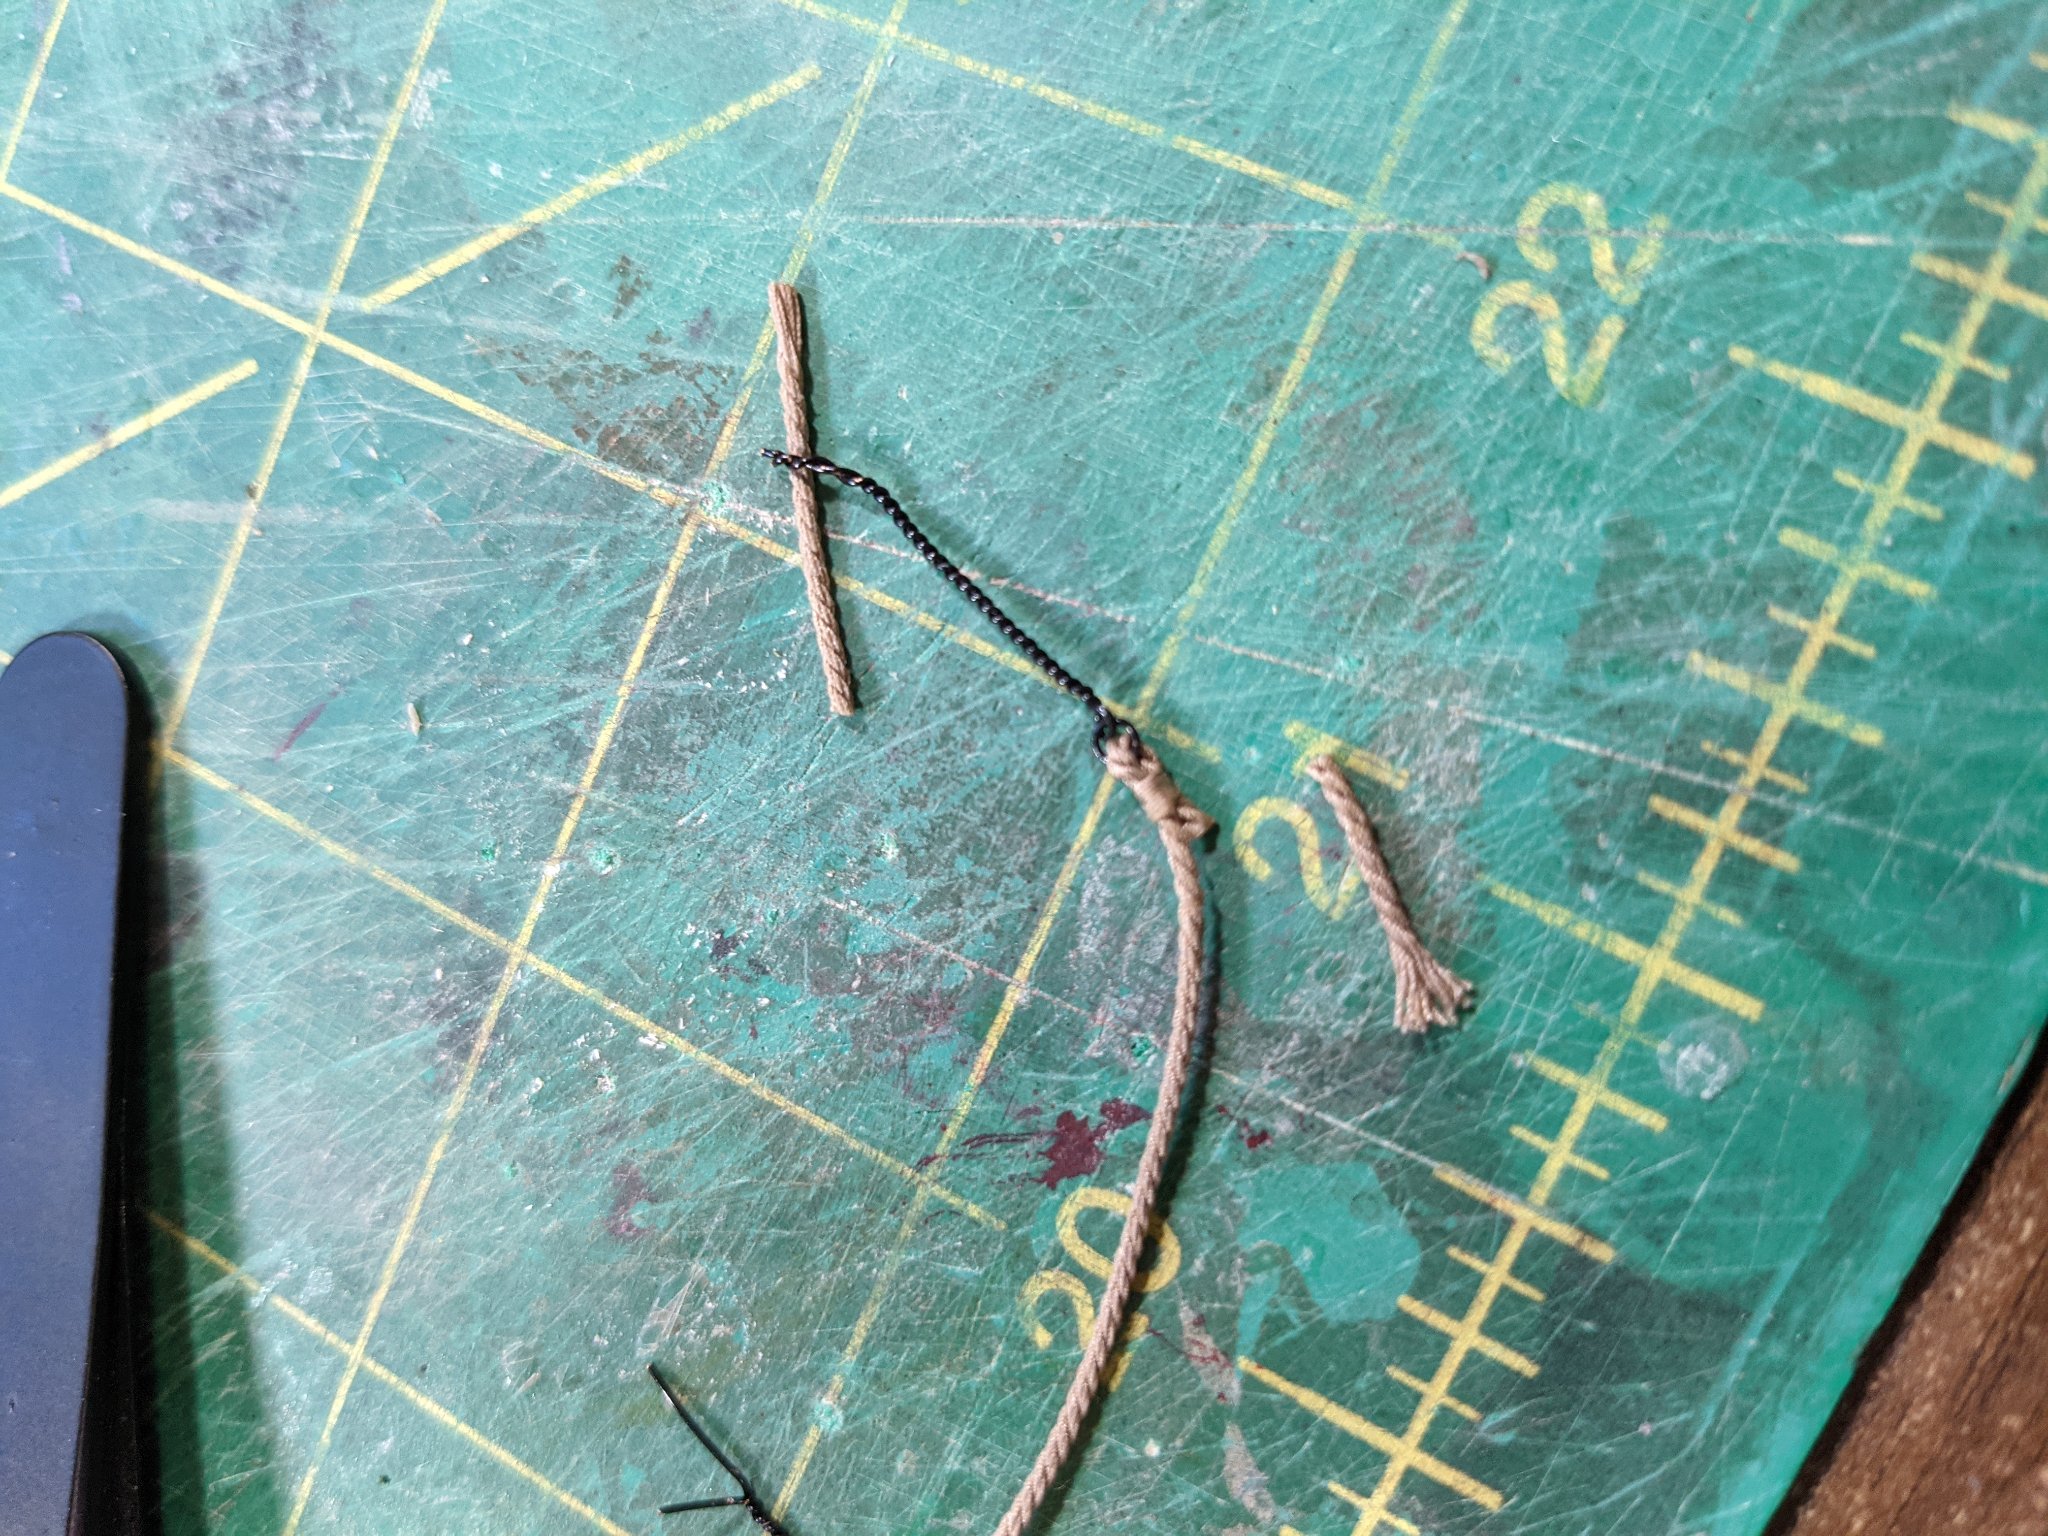
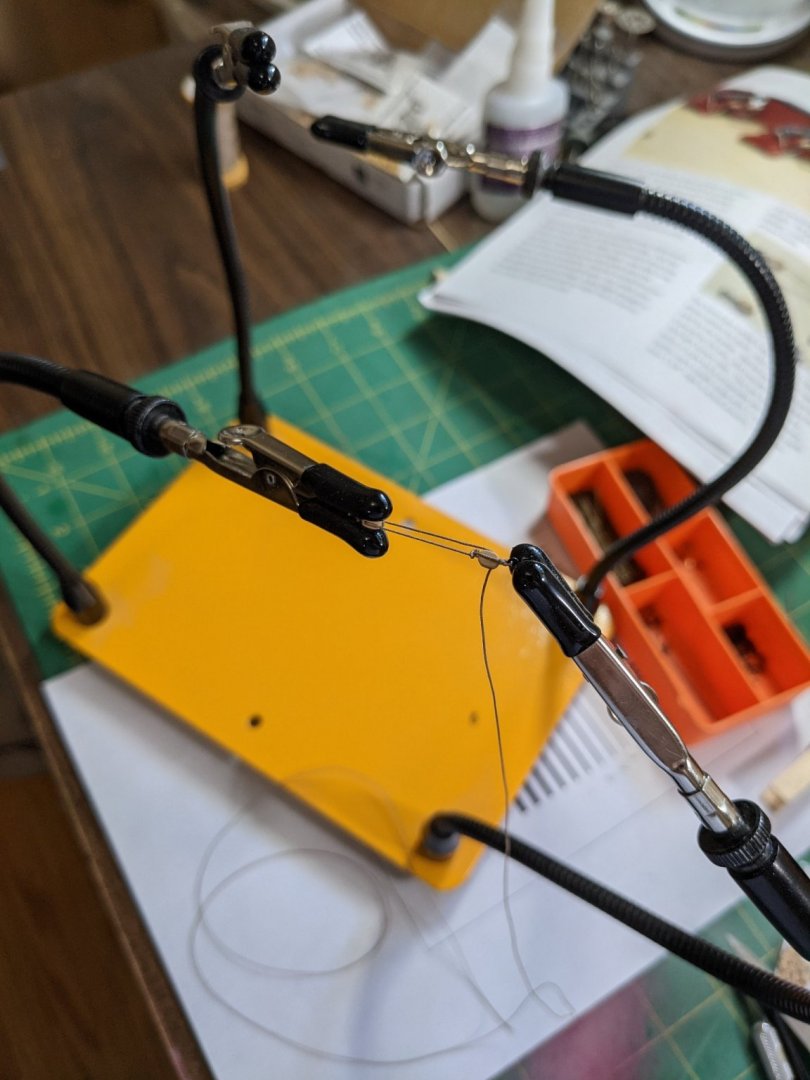
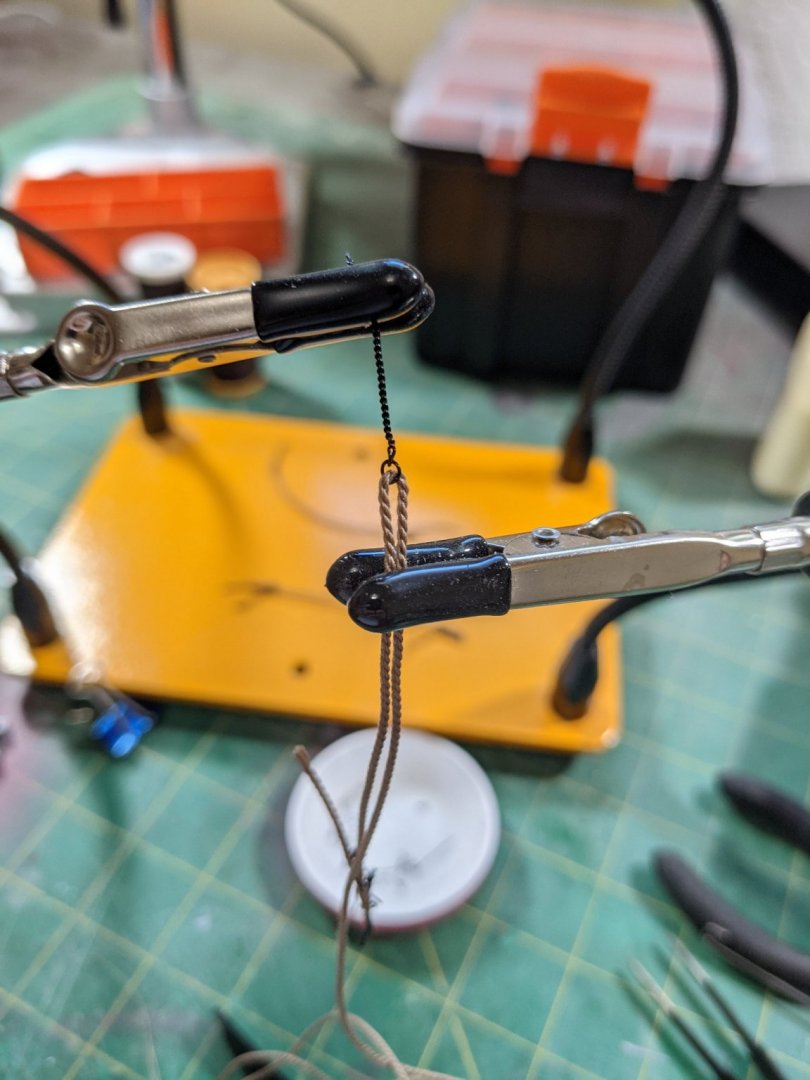
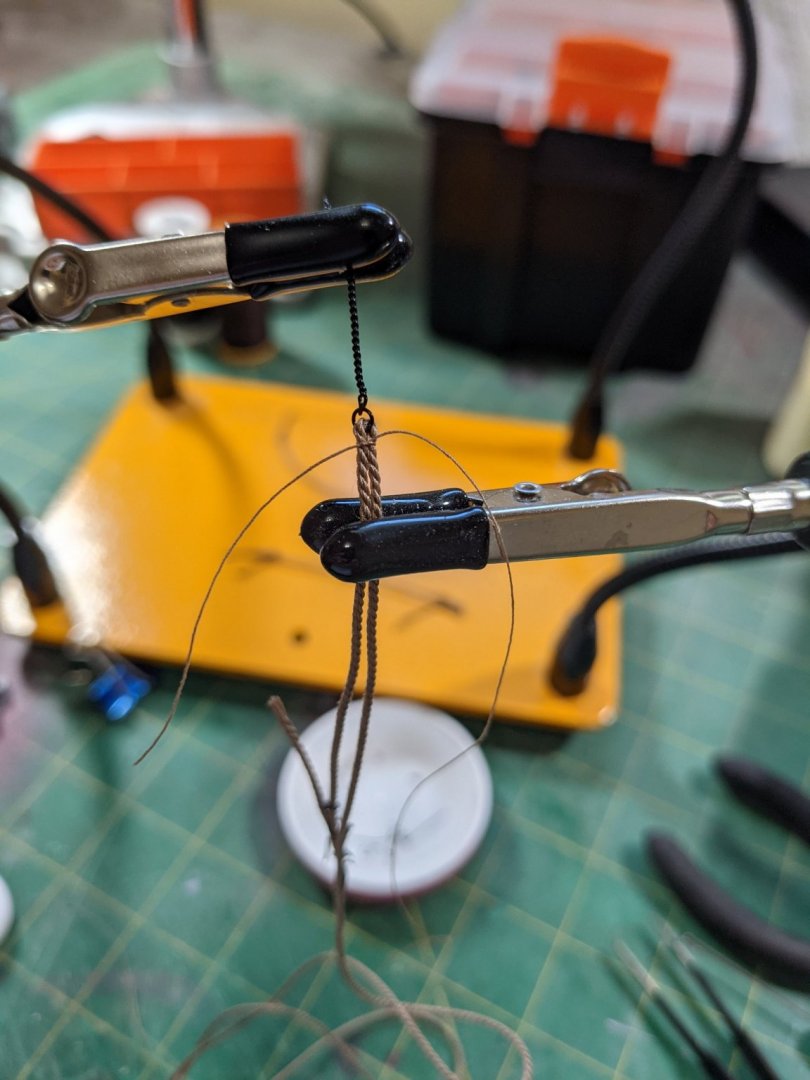
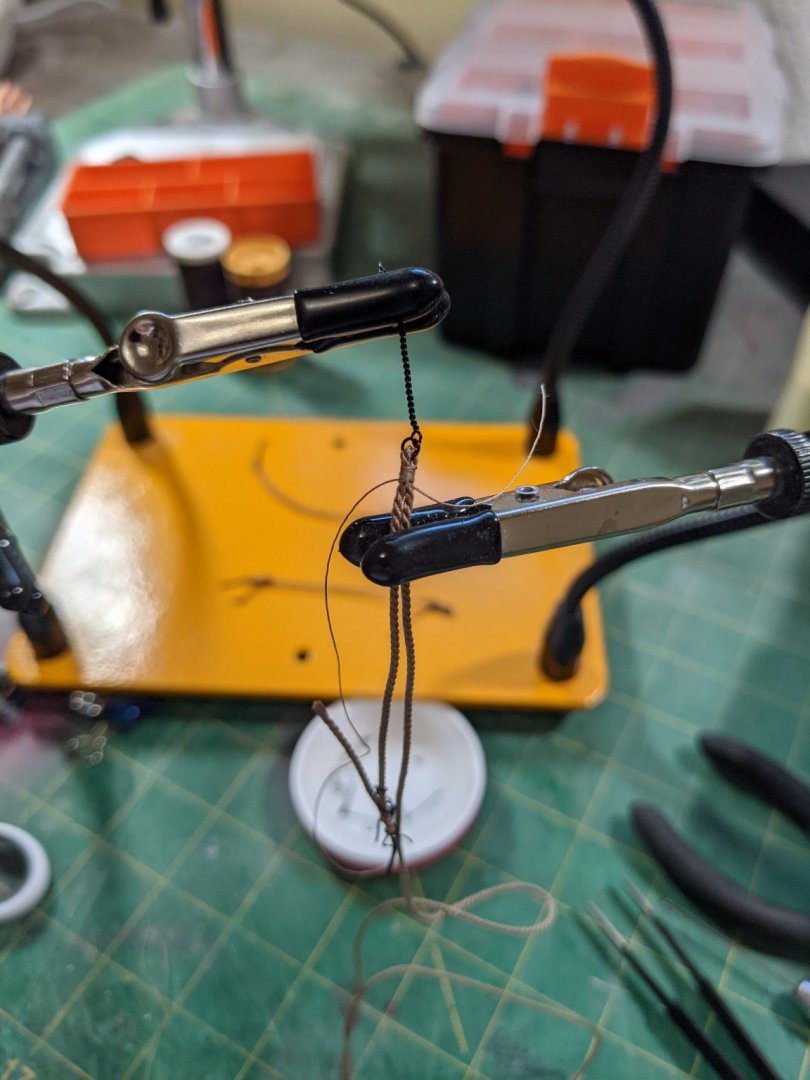
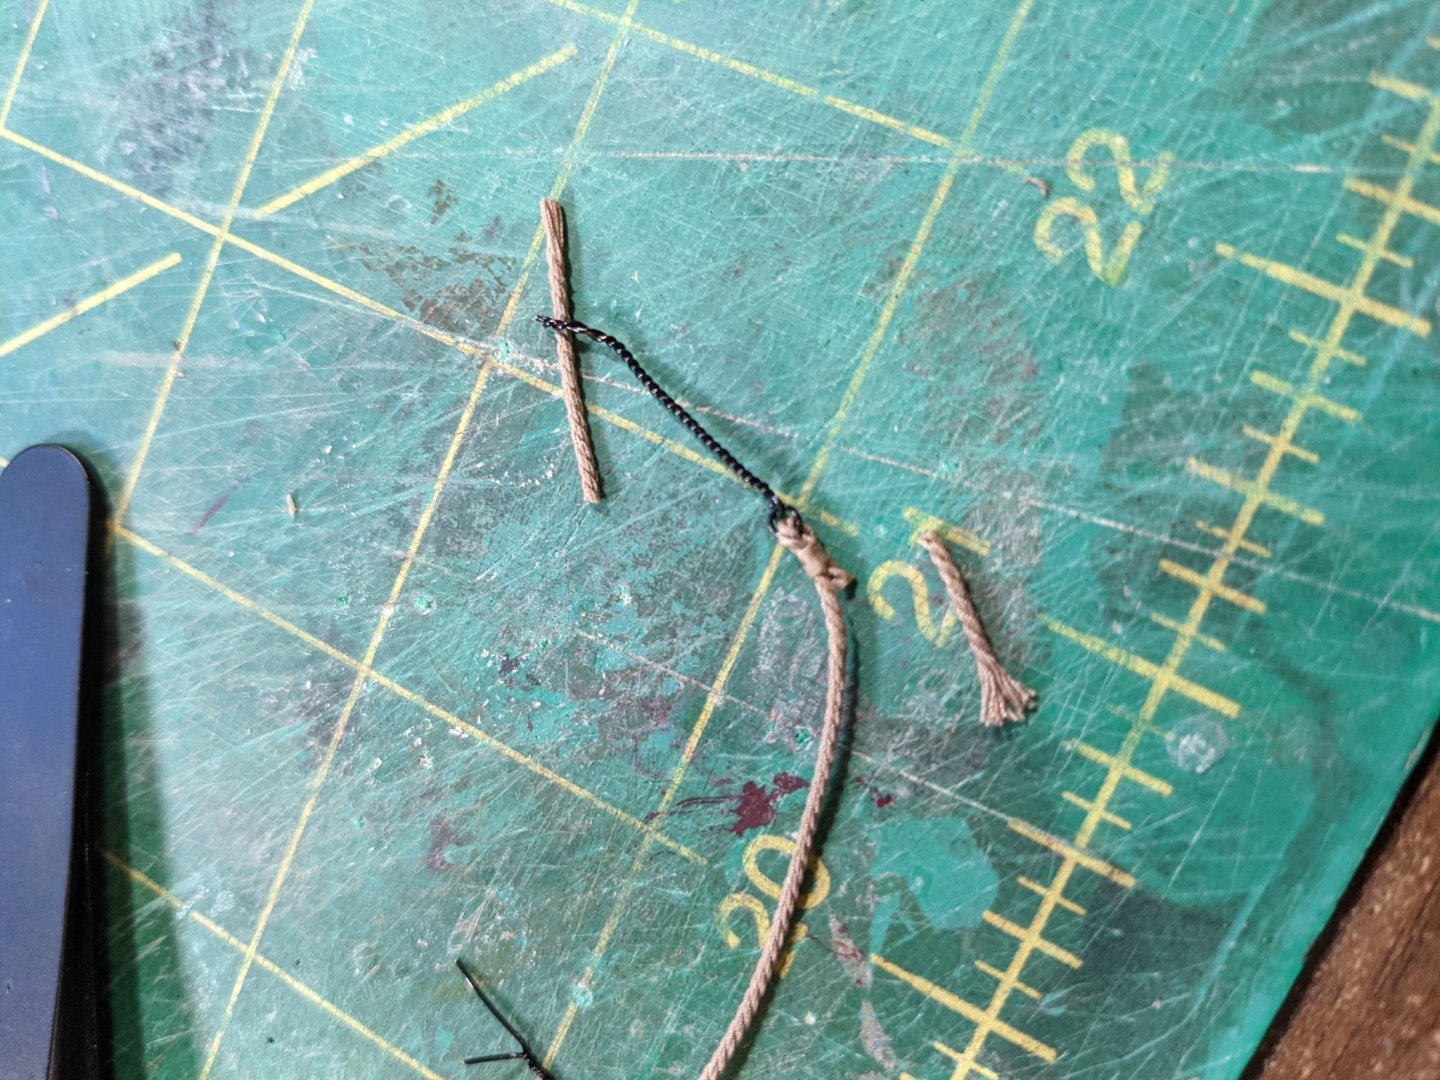
Here is how I am doing the breach ropes. First I clamp the rope in the quad hands. Then tie a knot with the same color thread and apply thinned glue to make the knot tight. Then do 7 wraps and clamp the free end down. I captured the other end under the wraps so it sticks out the bottom of the wraps. Then knot these ends together and apply more thinned glue to make them tight. With a fresh #11 blade trim the ends as close as I dare. Here is one of the 12 completed ropes.


- 274 replies
-
- 6
-
-
- Cheerful
- Syren Ship Model Company
- (and 1 more)
-
Thinning Paint
PRS replied to Ed Gibbons's topic in Painting, finishing and weathering products and techniques
I use acrylics all the time and Vallejo are great for brush painting and ready available. They are good for airbrushing but you are limited to what thinner you can use. The acrylic thinner by Tamiya and Vallejo's own thinner are the only two I find work good. Now cleaning the airbrush of just brushes is harder with Vallejo as it seems the pigment is so fine it gets everywhere. To clean my airbrush I have to use lacquer thinner and always remove the needle as it gets all over. For strictly airbrush painting the Tamiya acrylics work better but they do not brush paint as well. Tamiya acrylics have an advantage they they will take just about anything as a thinner and you can use lacquer thinner for them if you want to but the smell is pretty intense. They do clean up easier in the airbrush though.