(1)(1)(1)(2).jpg.a128ea4d7b02ebfc5d5eb6547e92106f.jpg)
PRS
-
Posts
372 -
Joined
-
Last visited
Content Type
Profiles
Forums
Gallery
Events
Everything posted by PRS
-
(1)(1)(1)(2).thumb.jpg.792ad774561d3d4f35888704cde27a8e.jpg) It is Gutterman cotton thread. I guess the number is the color.
It is Gutterman cotton thread. I guess the number is the color. -
Nice looking rope!
-
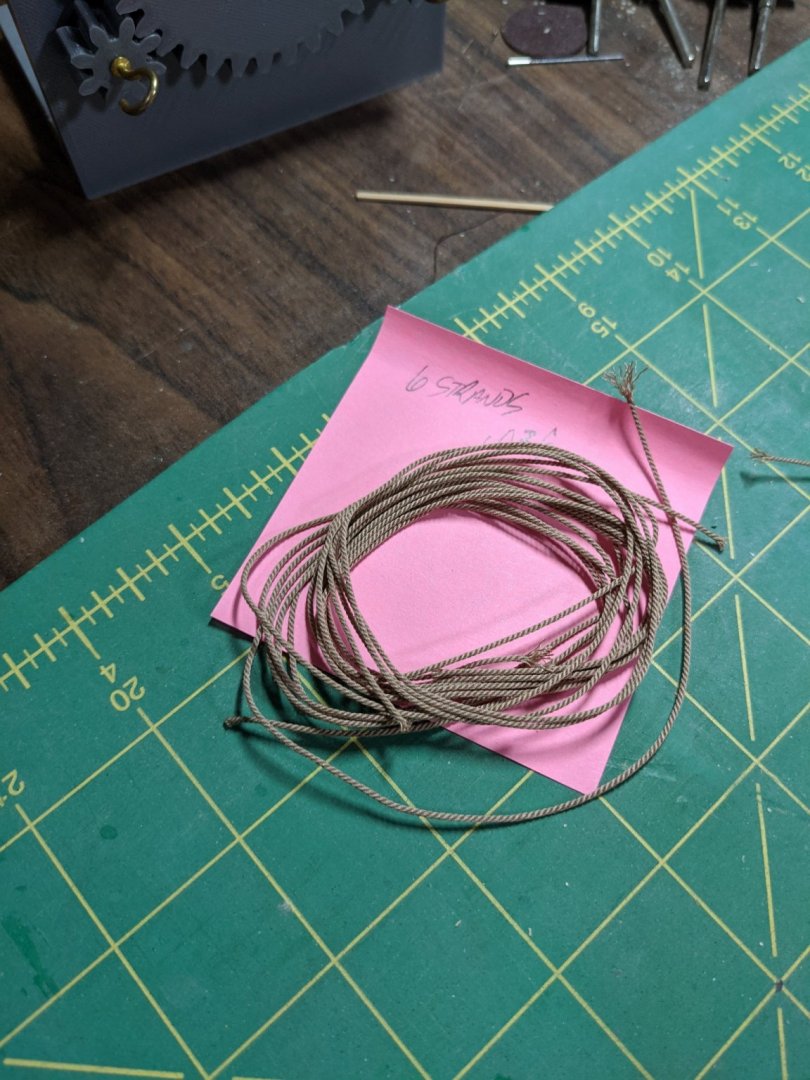
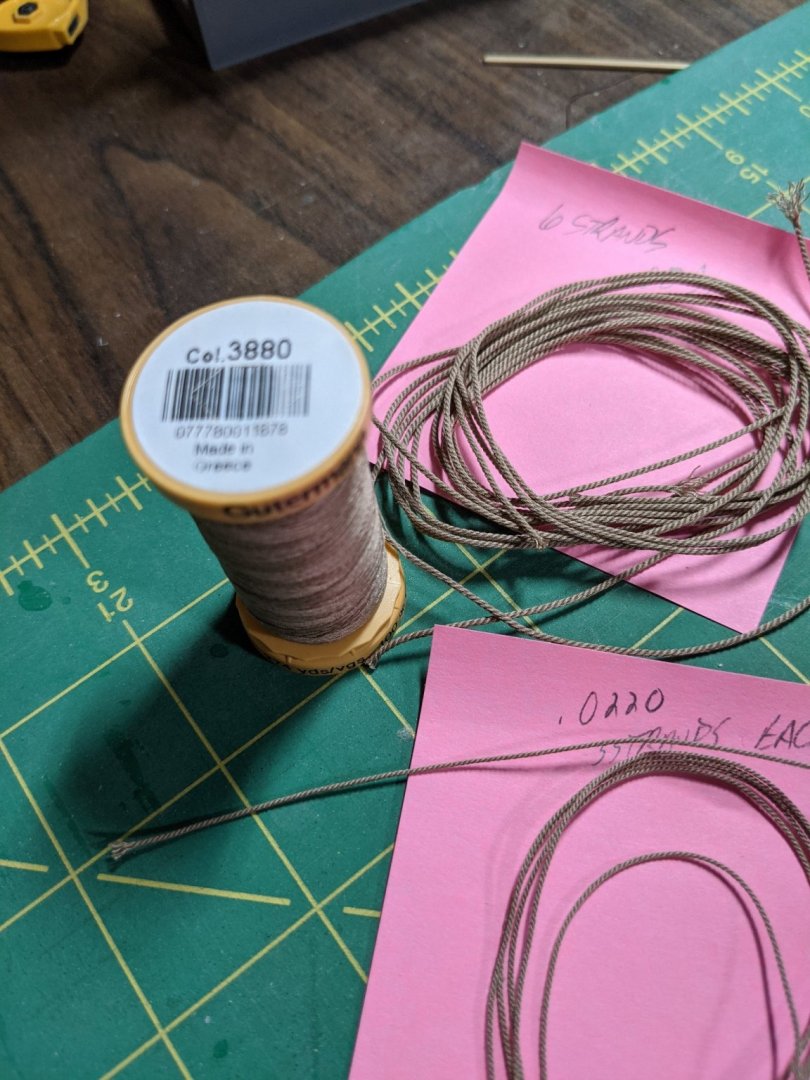
Going to start rigging cannons. Made up some rope tests and have the size pretty good. This is the cotton thread I am using for this.
- 274 replies
-
- 7
-

-
- Cheerful
- Syren Ship Model Company
- (and 1 more)
-
Beautiful picture thanks. W#onder how many watches or coins were dropped out those holes?
- 274 replies
-
- 1
-
-
- Cheerful
- Syren Ship Model Company
- (and 1 more)
-
I don't know how you get such precision in your work. It is excellent.
- 607 replies
-
- 2
-
-
- winchelsea
- Syren Ship Model Company
- (and 1 more)
-
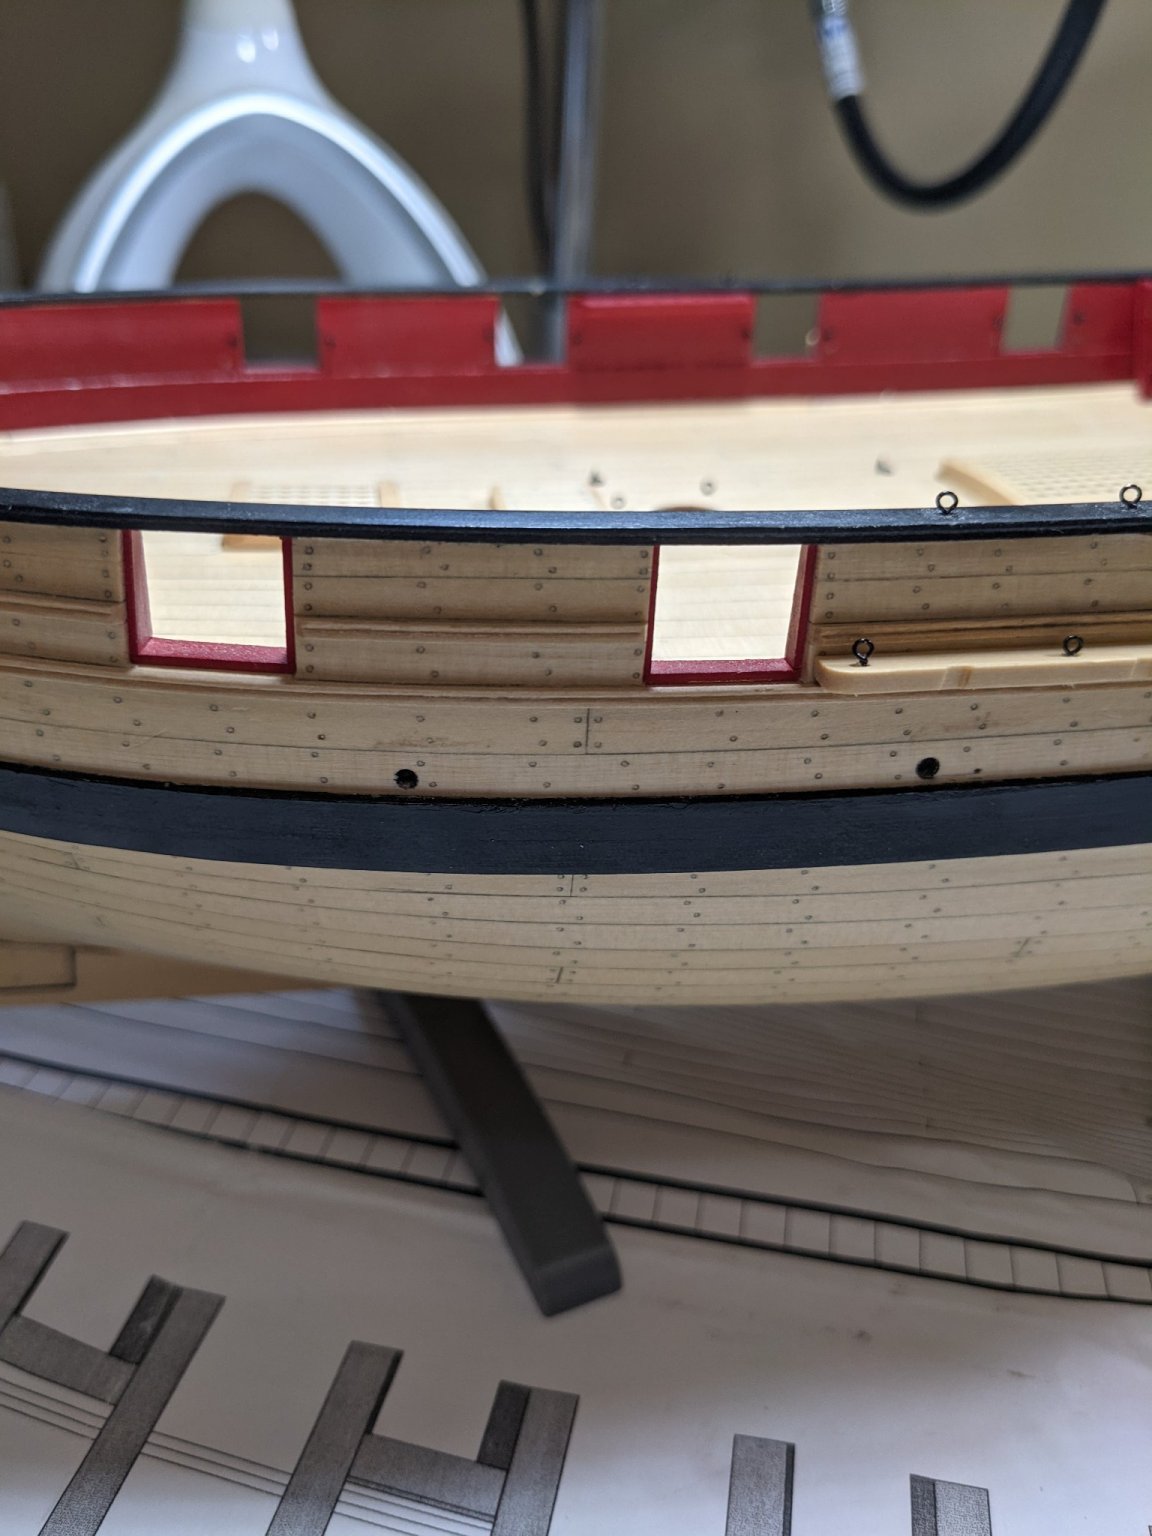
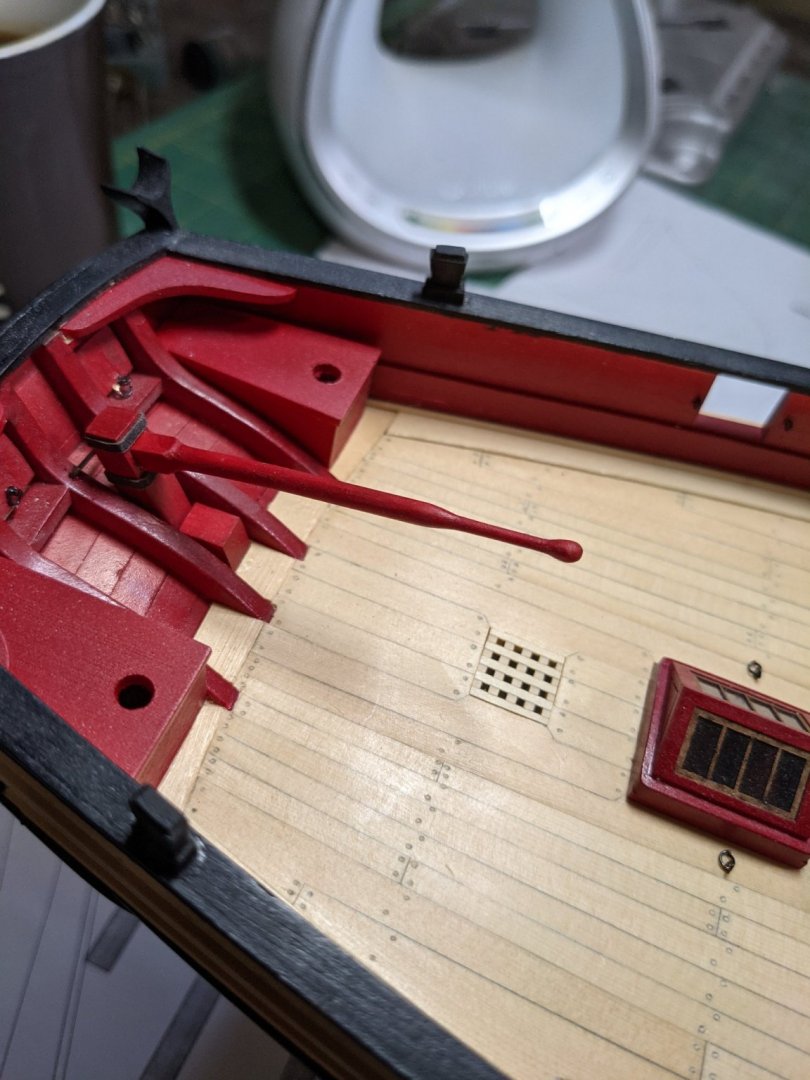
Shaped the scuppers on the outside but have not done them yet from the inside. Not sure how they are supposed to look on the inner part of the hull as to whether they are even with the deck or cut into the deck a bit. Also finished the tiller and mounted the rudder. The tiller is press fit so I can remove the rudder if necessary later.


- 274 replies
-
- 8
-
-
- Cheerful
- Syren Ship Model Company
- (and 1 more)
-
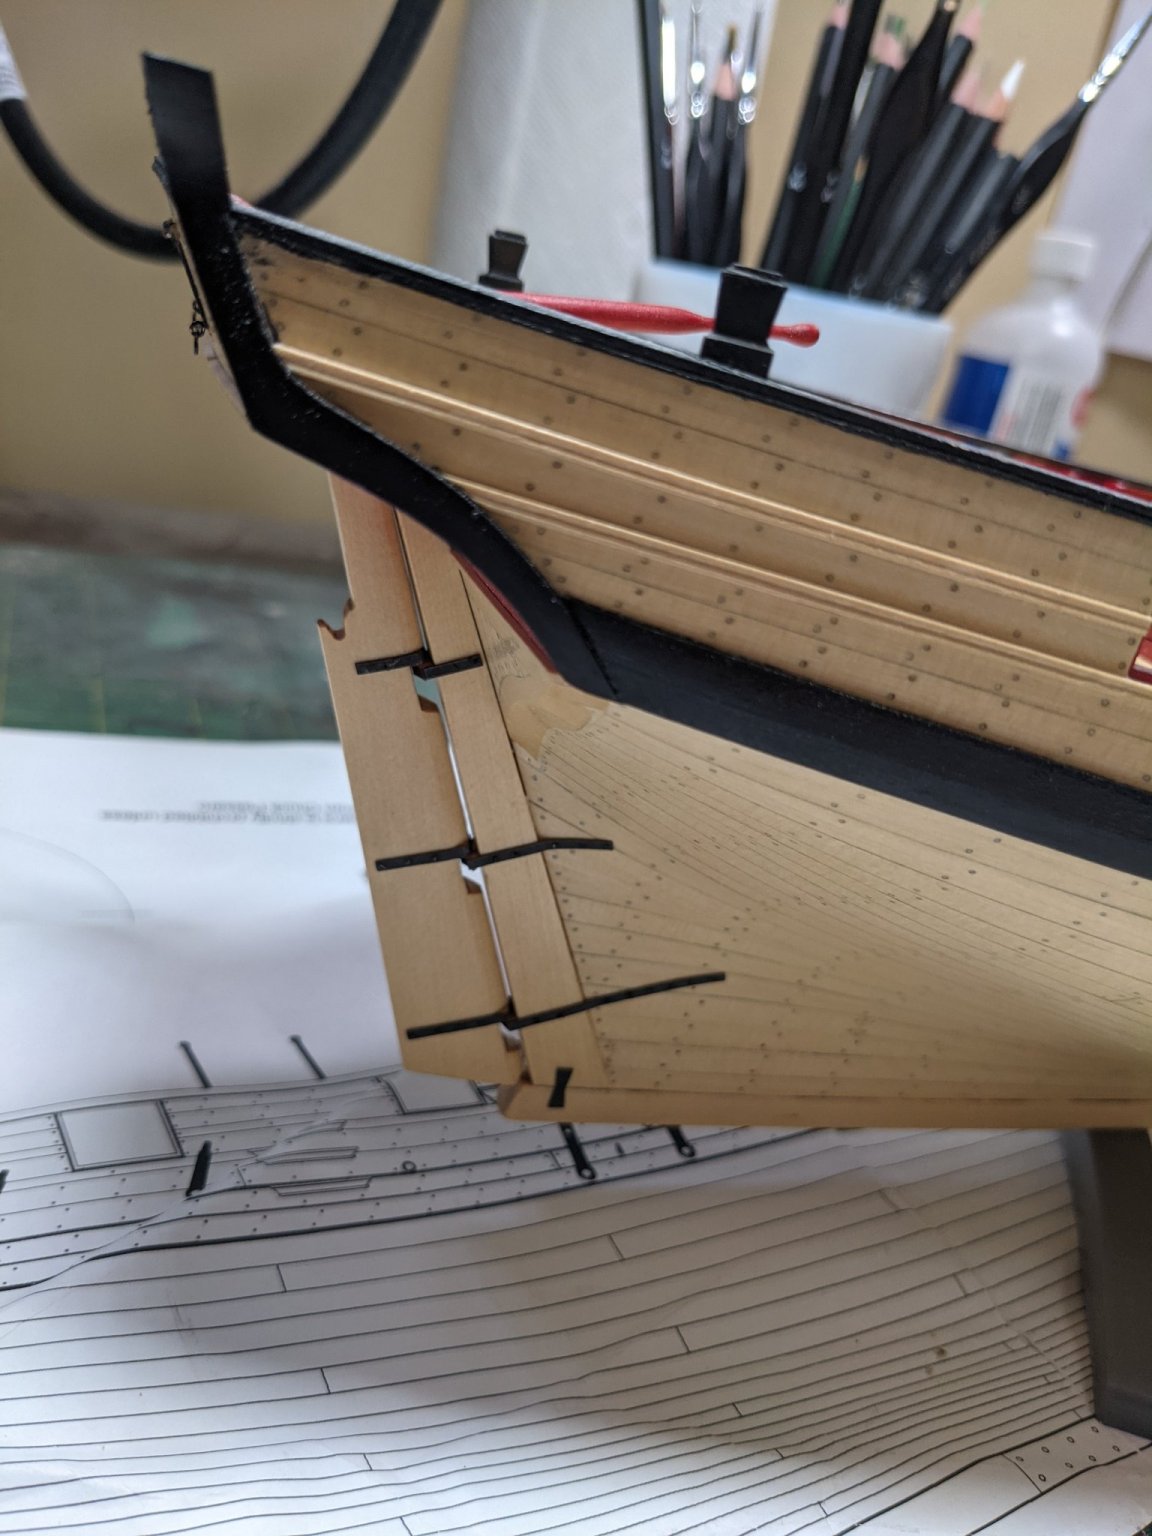
Thanks John. Yes the gap has to be there according to the instructions. The air gap is to keep the wood from rotting in the real world.
-
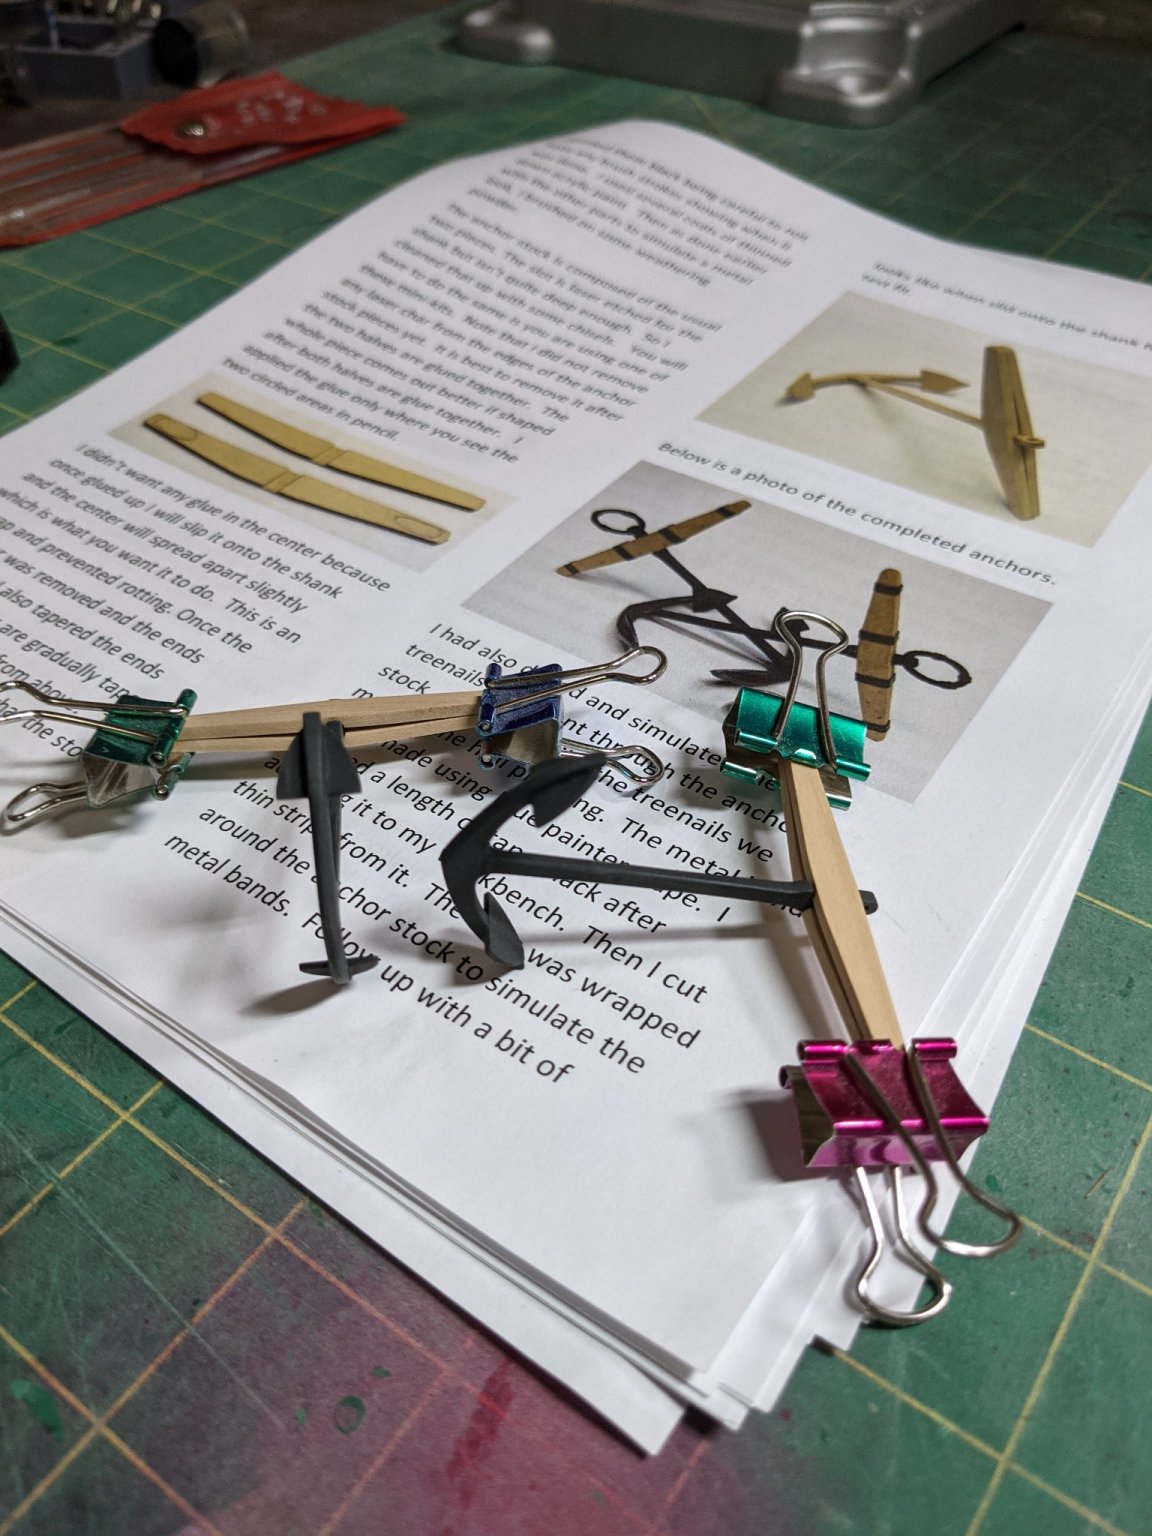
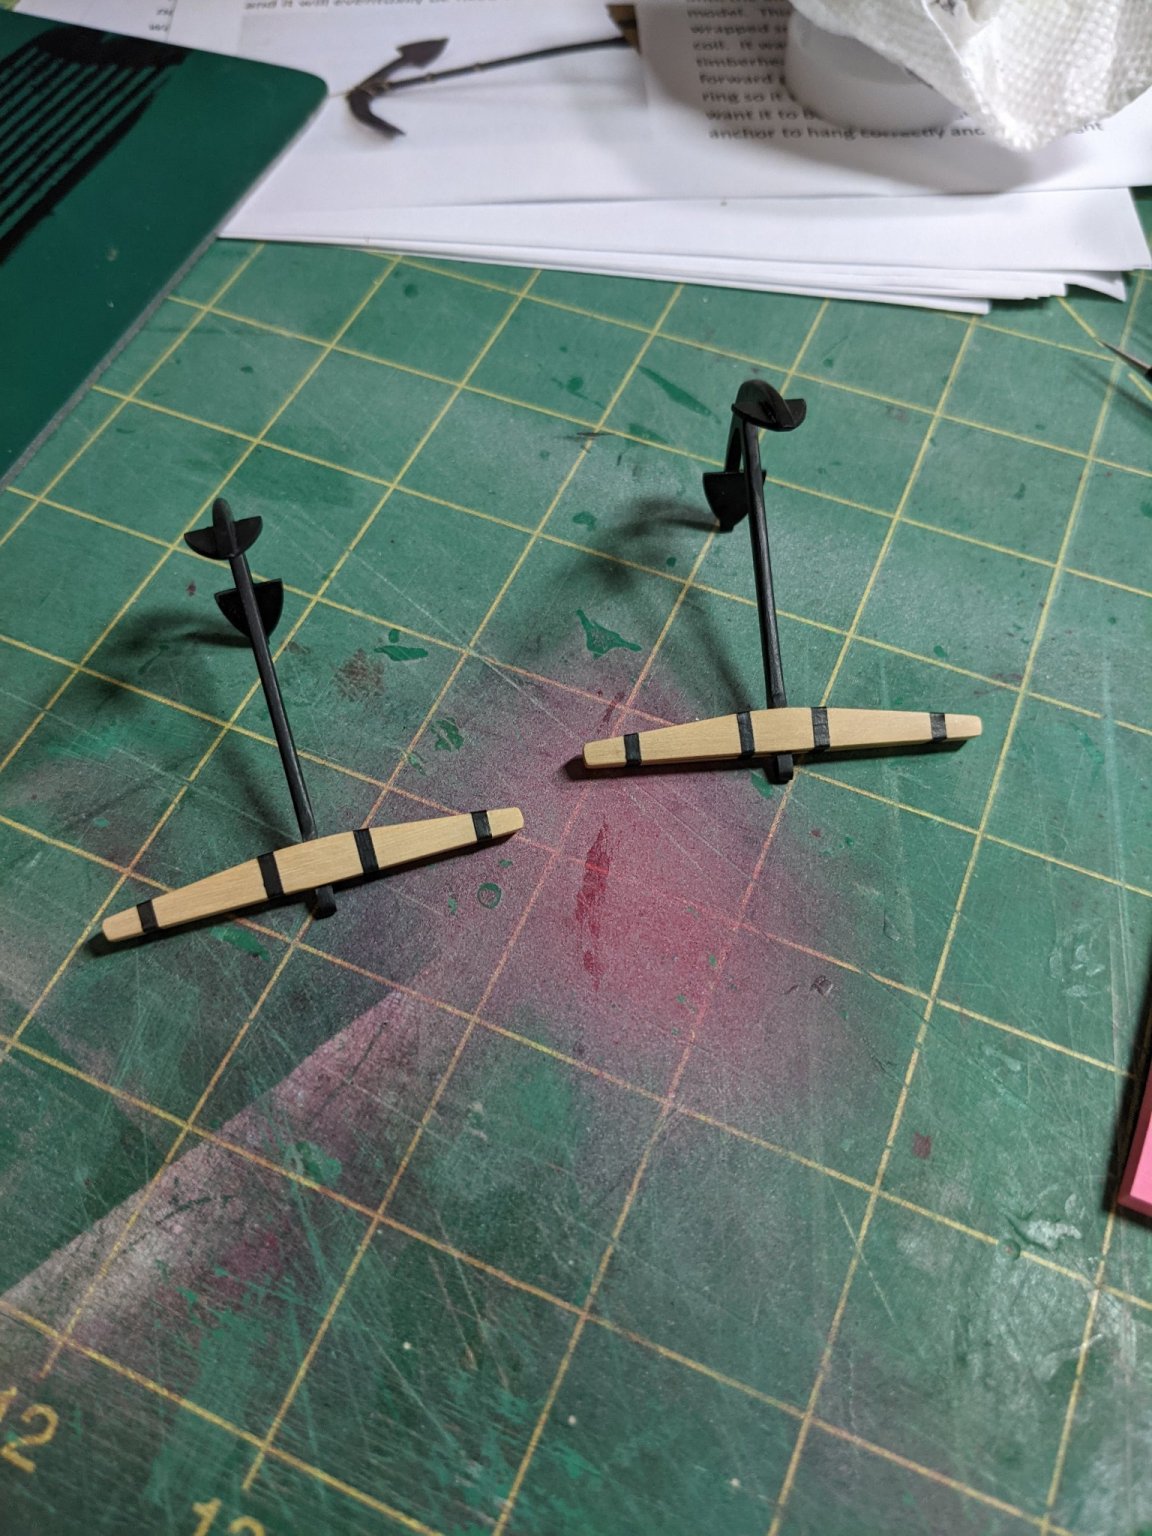
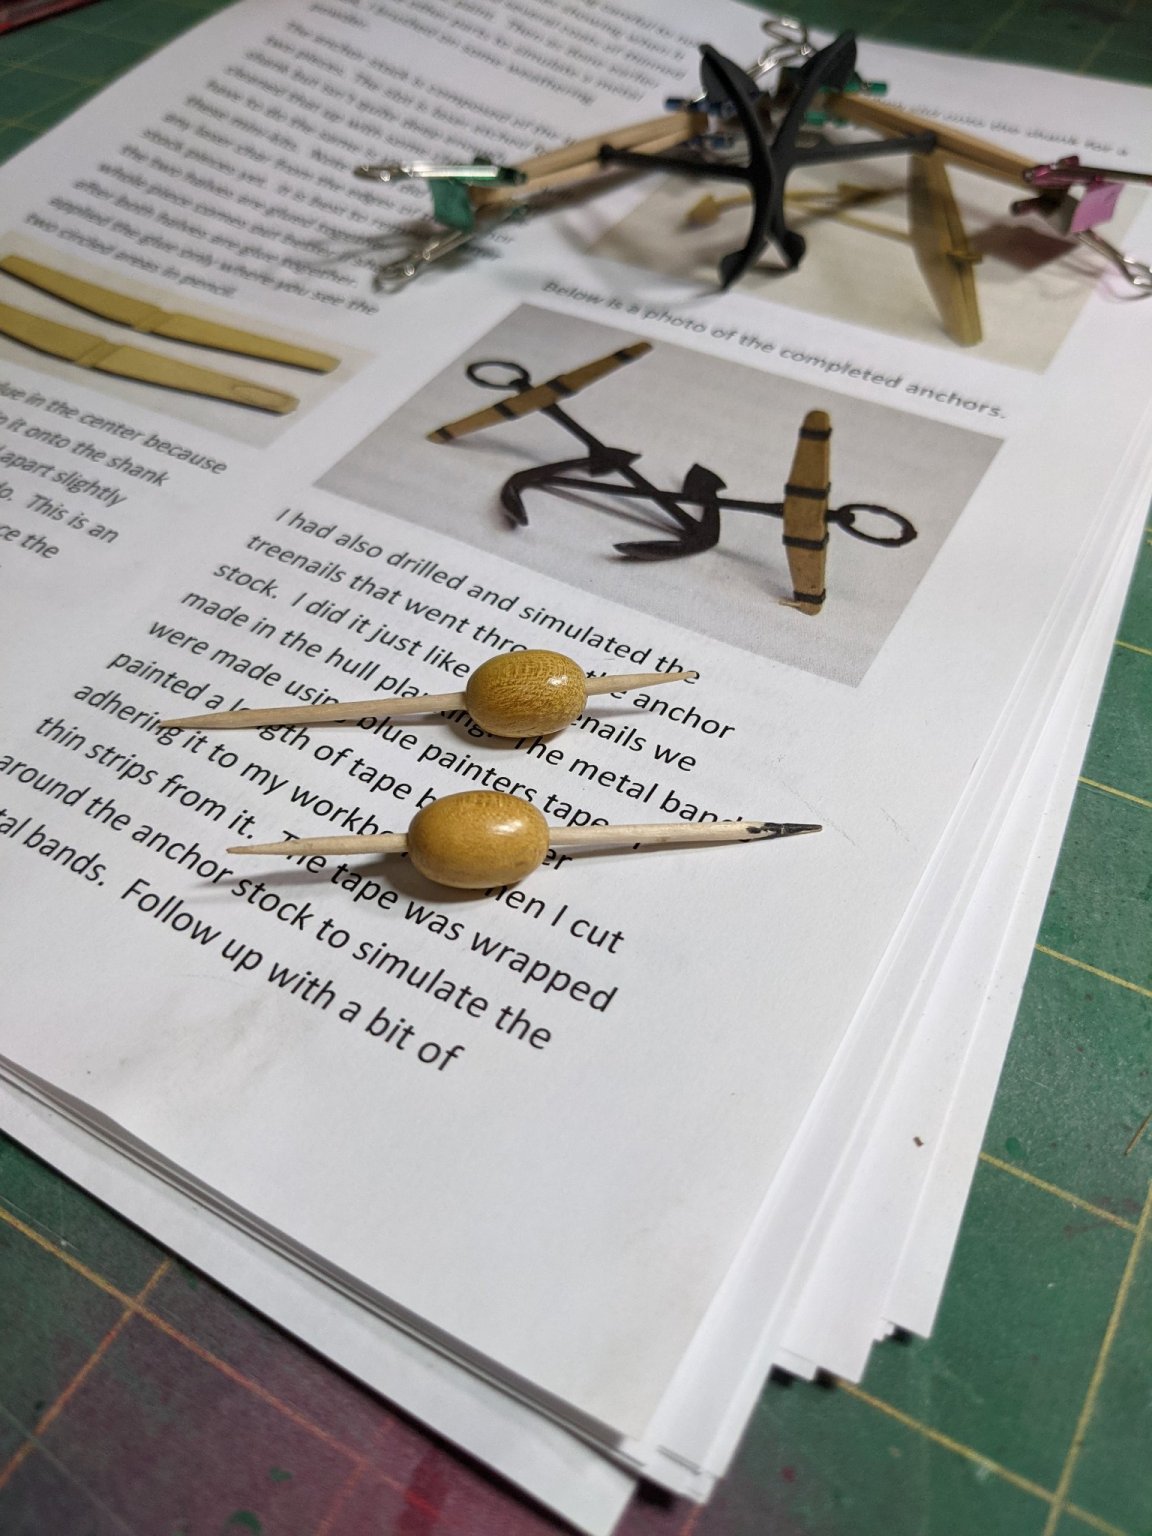
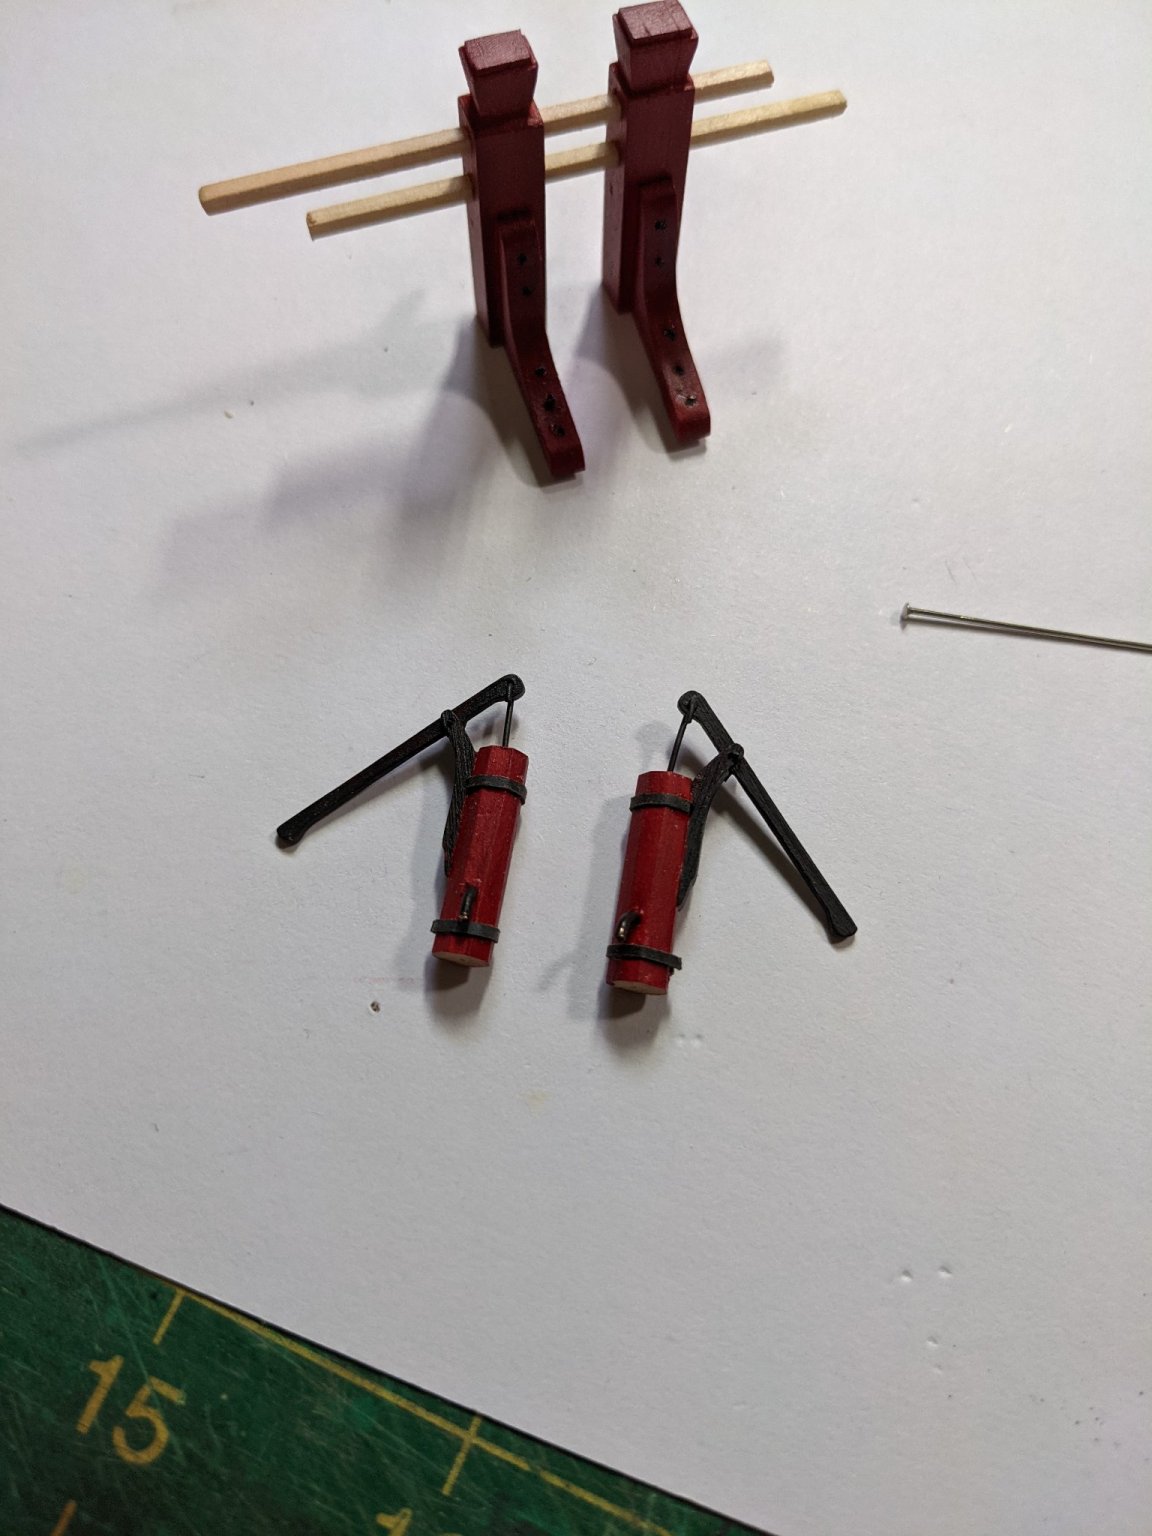
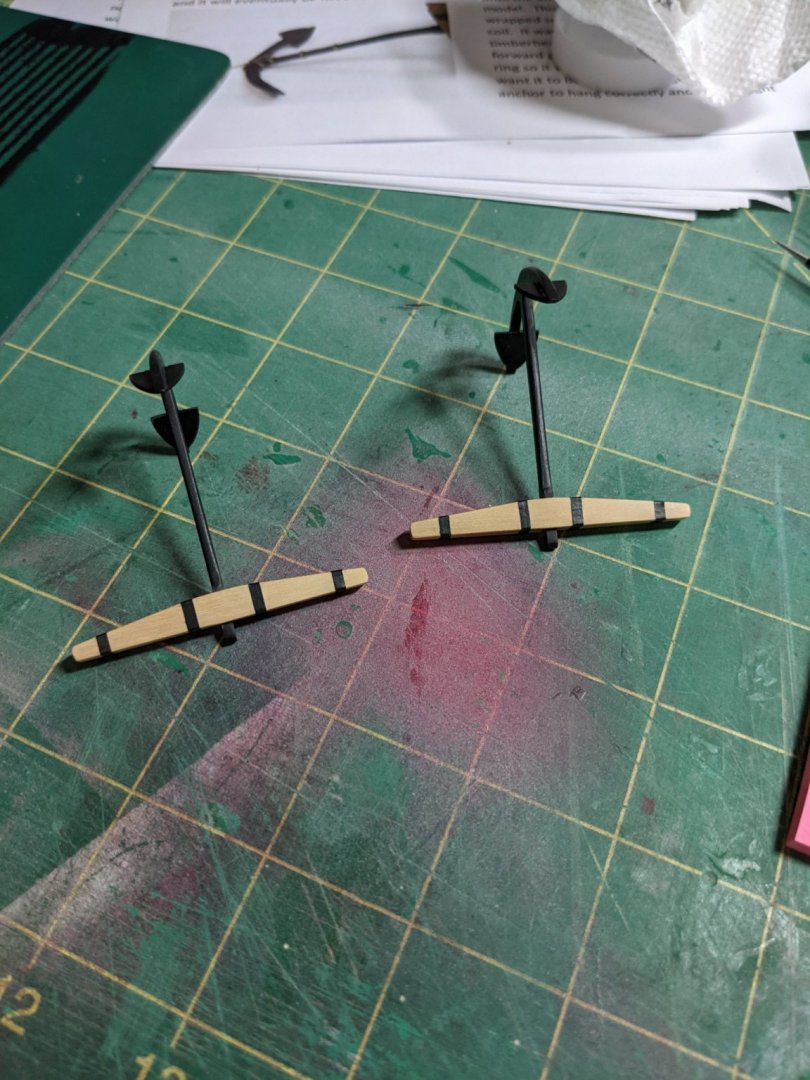
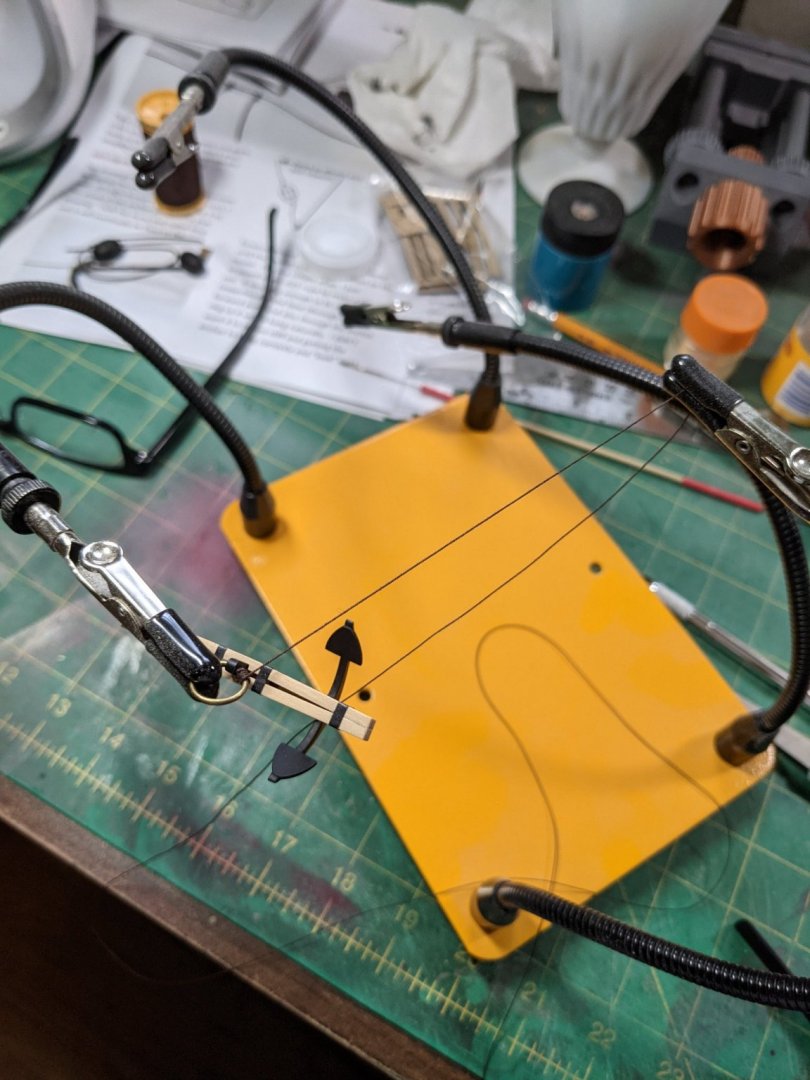
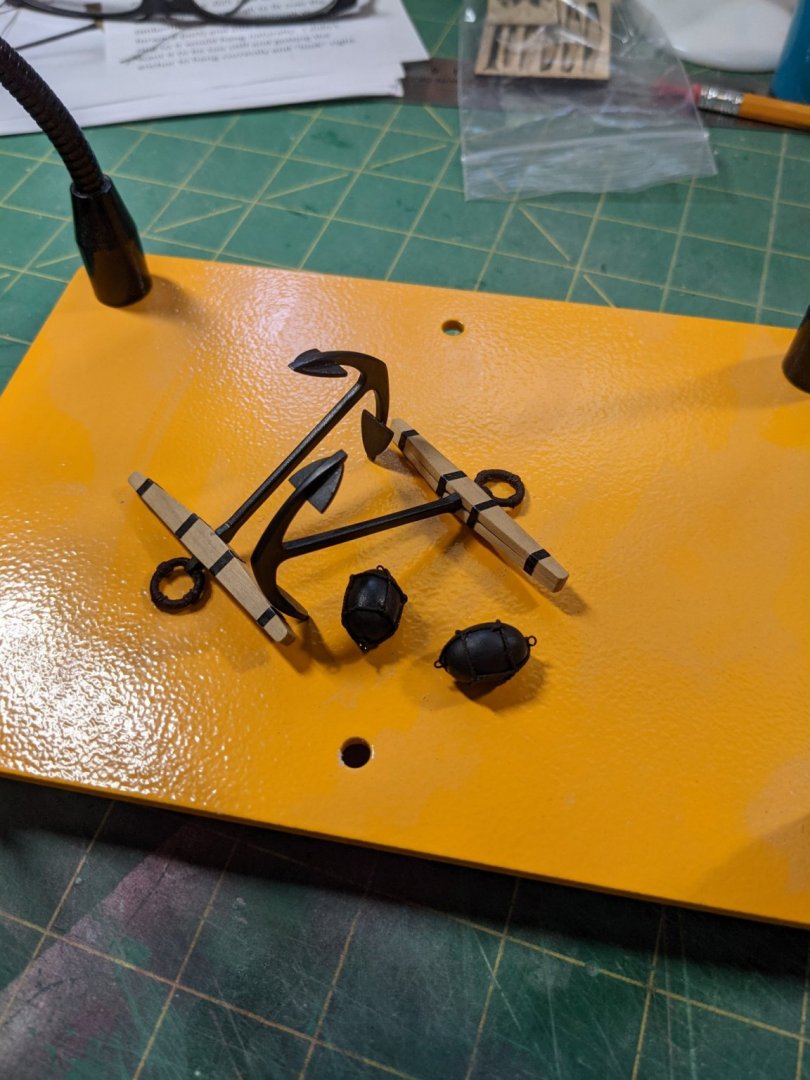
Decided to mix it up and tackle the anchor mini kit. The parts fit was good and I left this part to dry overnight. Then cleaned them up and sanded ready for the straps. To make the straps I used the pink 3m painters tape and cut 2mm strips and removed every other one so the paint will go to the edge. I tried regular masking tape and the blue tape but the pink was the smoothest. Wrapped and glued the straps on with the tiniest dab of super glue. Then made up some dark brown rope and spent some time wrapping the rings. Wasn't hard to do just time consuming. Then once they were wrapped I roughed up the buoys and painted them black after filling the holes with toothpicks Then did the rigging on them and that was fun trying to get it all to look right but it was worth it in the end. I used a bit of my weathering pencils on the anchors and like the way it looks.


- 274 replies
-
- 10
-
-
- Cheerful
- Syren Ship Model Company
- (and 1 more)
-
Thant looks beautiful!
-
Thanks. I can see that making rope coils is going to be a skill I need to improve. Sorry for the one word post above. I was super tired and just wanted to go to bed. Been one of those weeks.
-
I can vouch for Joe as I purchased the complete cut wood kit for the Cheerful and it is all great quality wood.
-
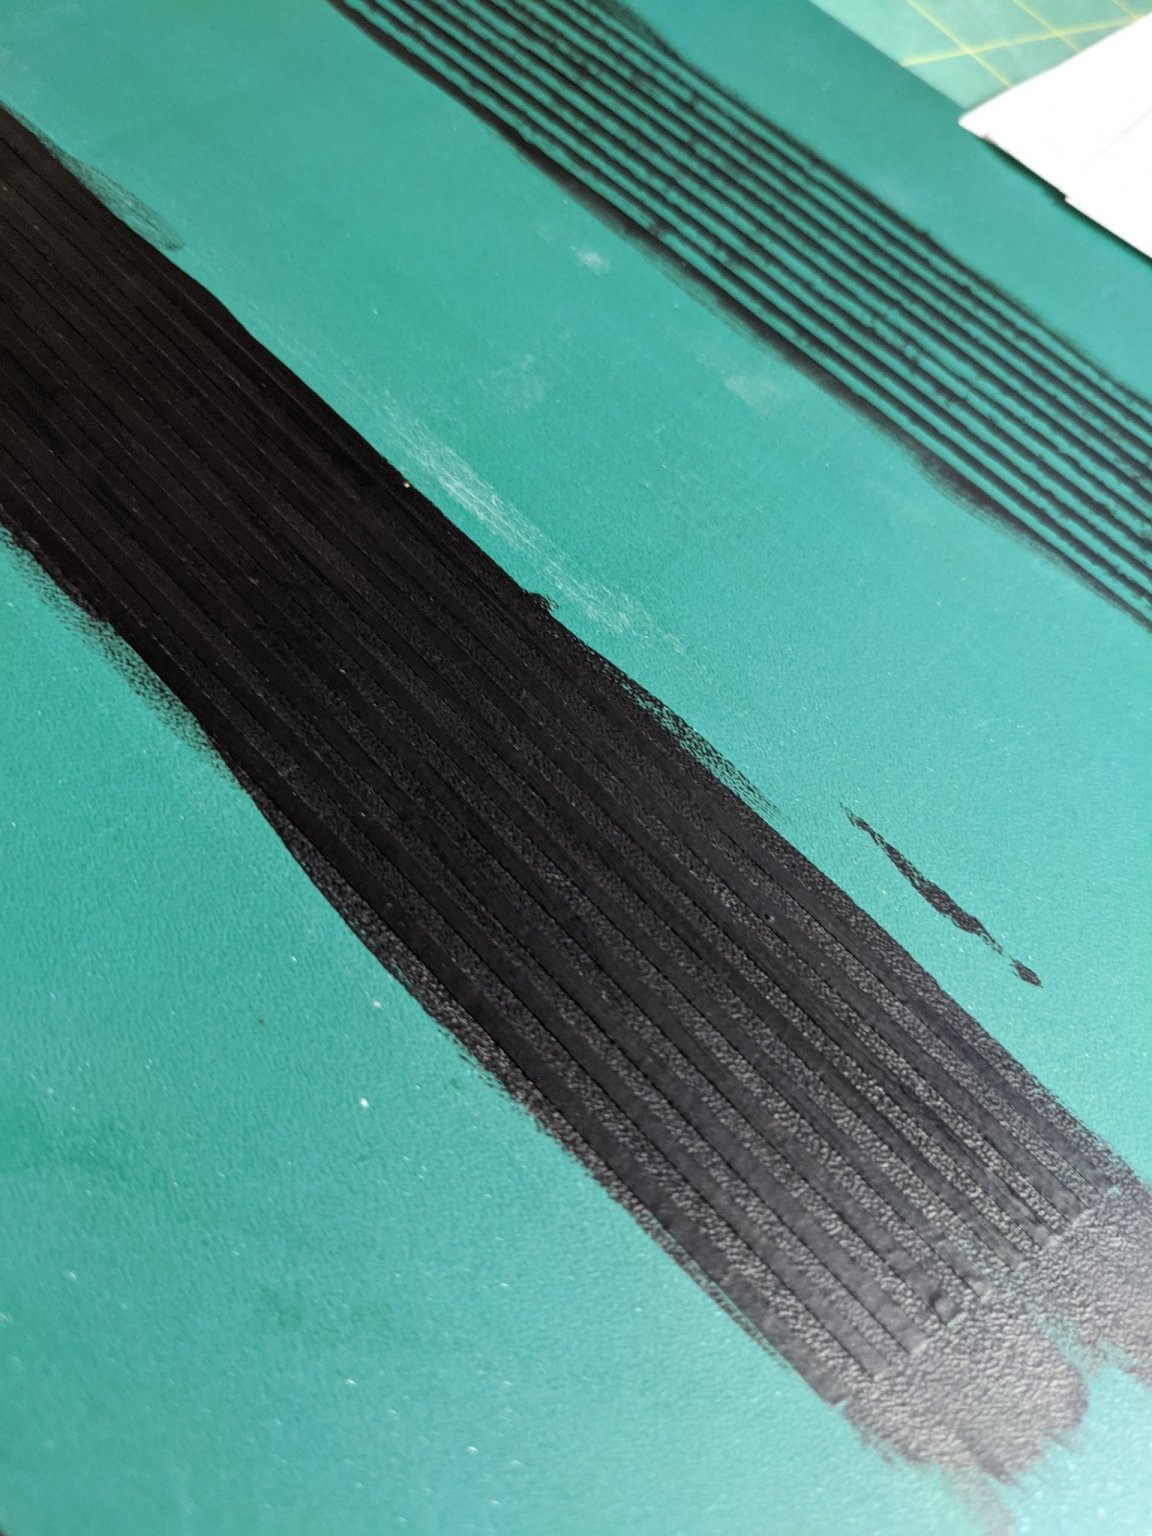
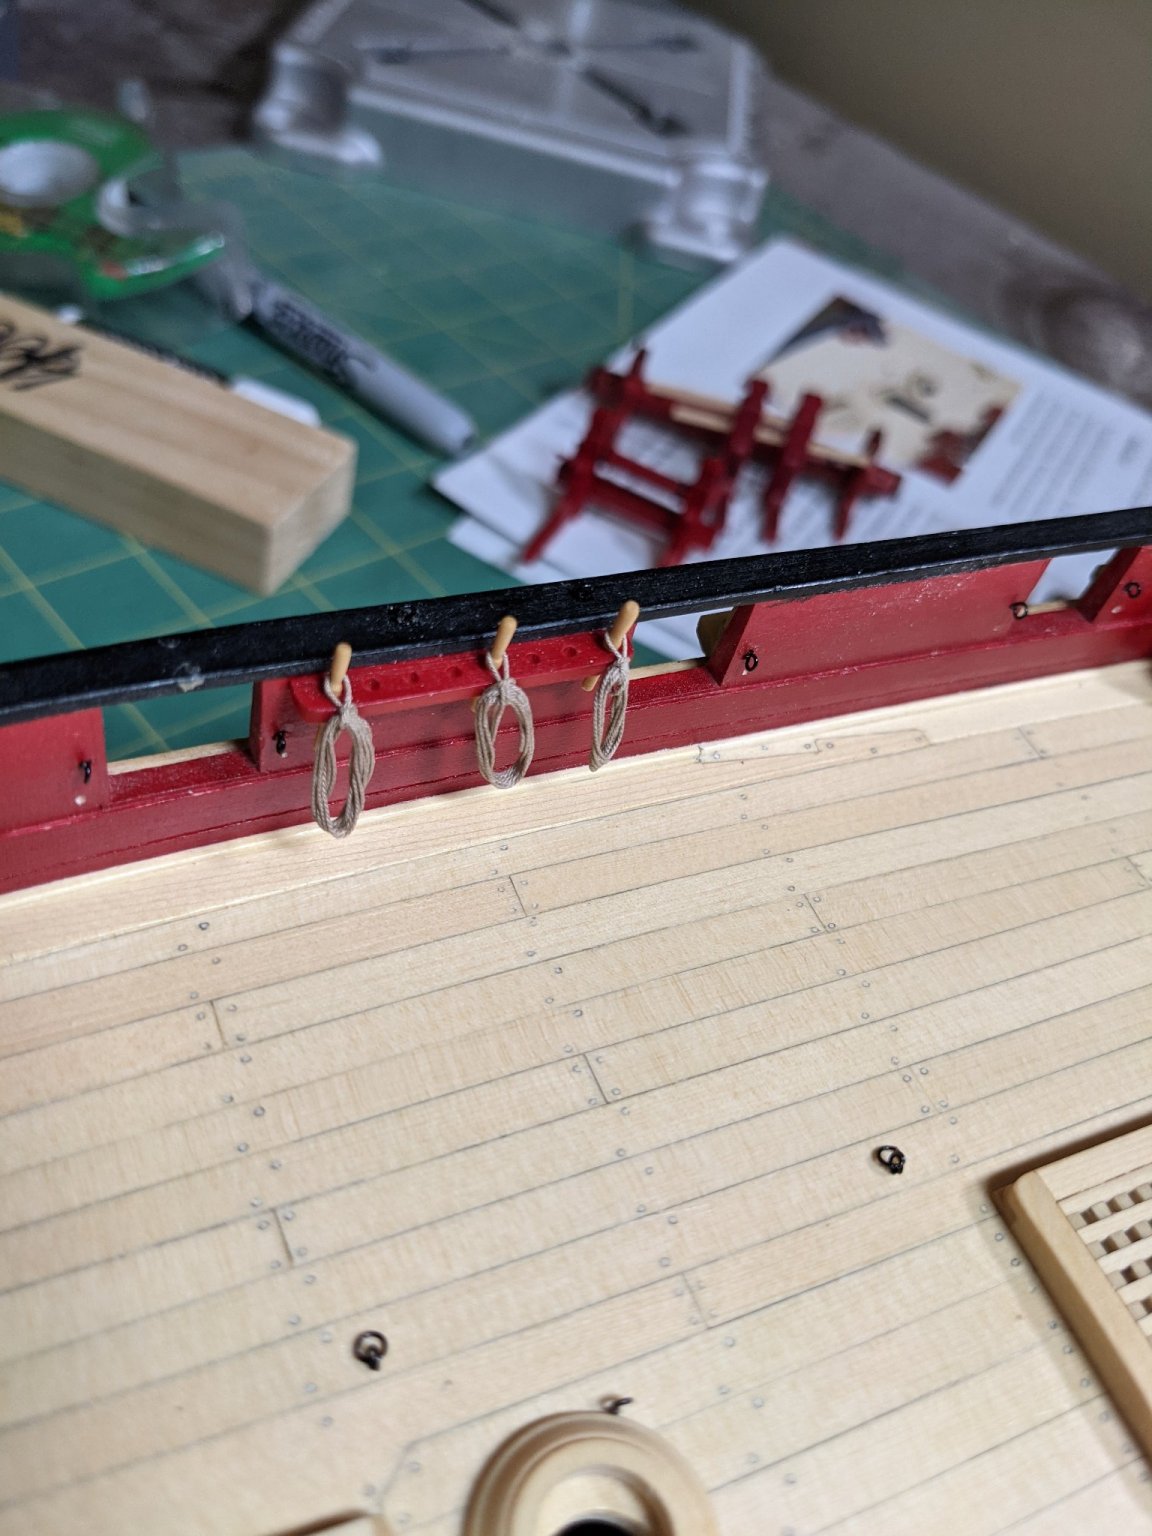
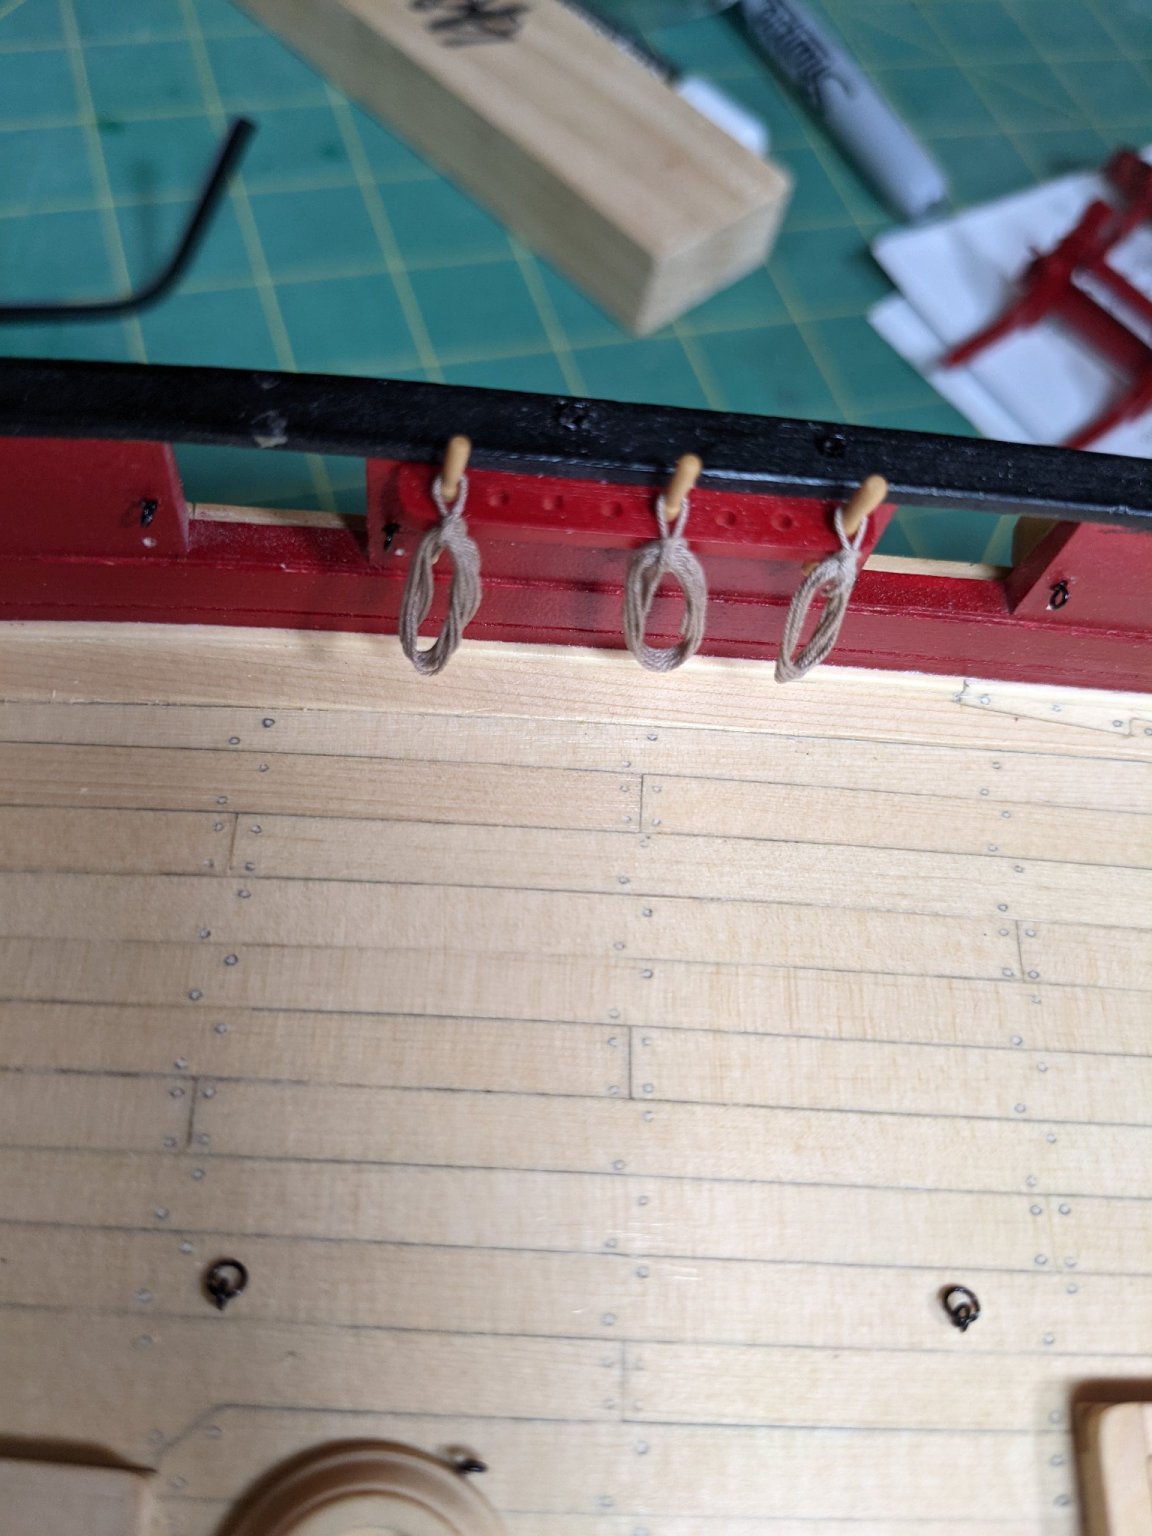
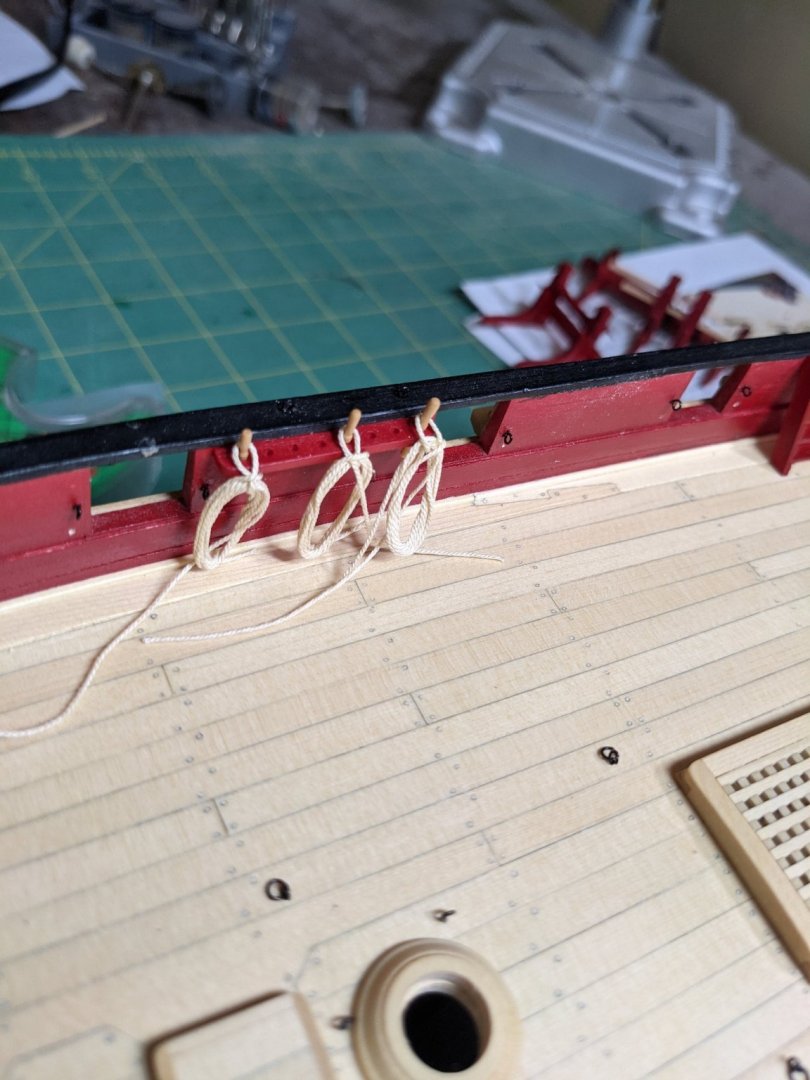
Was playing with some rope coils. Not sure about the size yet but what does this color rope look like?
- 274 replies
-
- 1
-
-
- Cheerful
- Syren Ship Model Company
- (and 1 more)
-
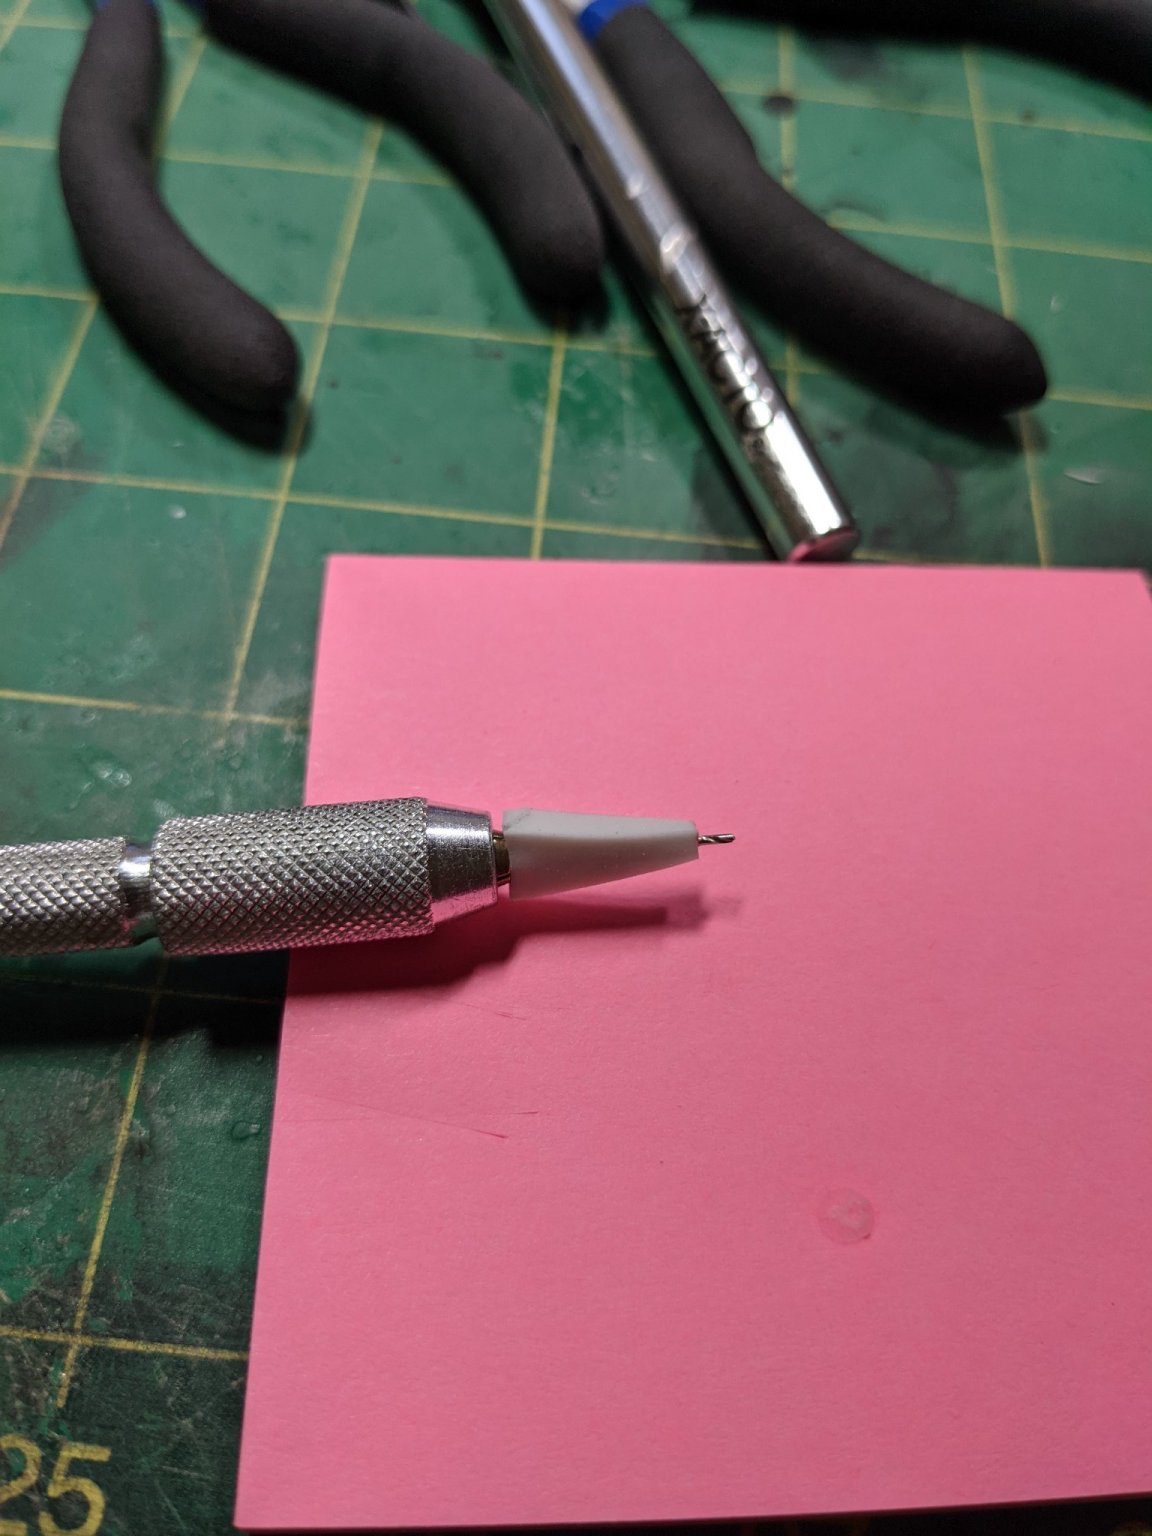
Hey thanks Glen. I needed to drill the holes for the eyebolts for the guns and tried a few different ideas so the drill wouldn't go all the way through and then I came up with a simple solution. Drill through an eraser and then trim it off after it is stuck through and then you have a drill depth gauge that won't mark up the paint.

- 274 replies
-
- 4
-

-
-
- Cheerful
- Syren Ship Model Company
- (and 1 more)
-
Hey Glen. I am going to follow along on this build log also. Where's the beer?
-
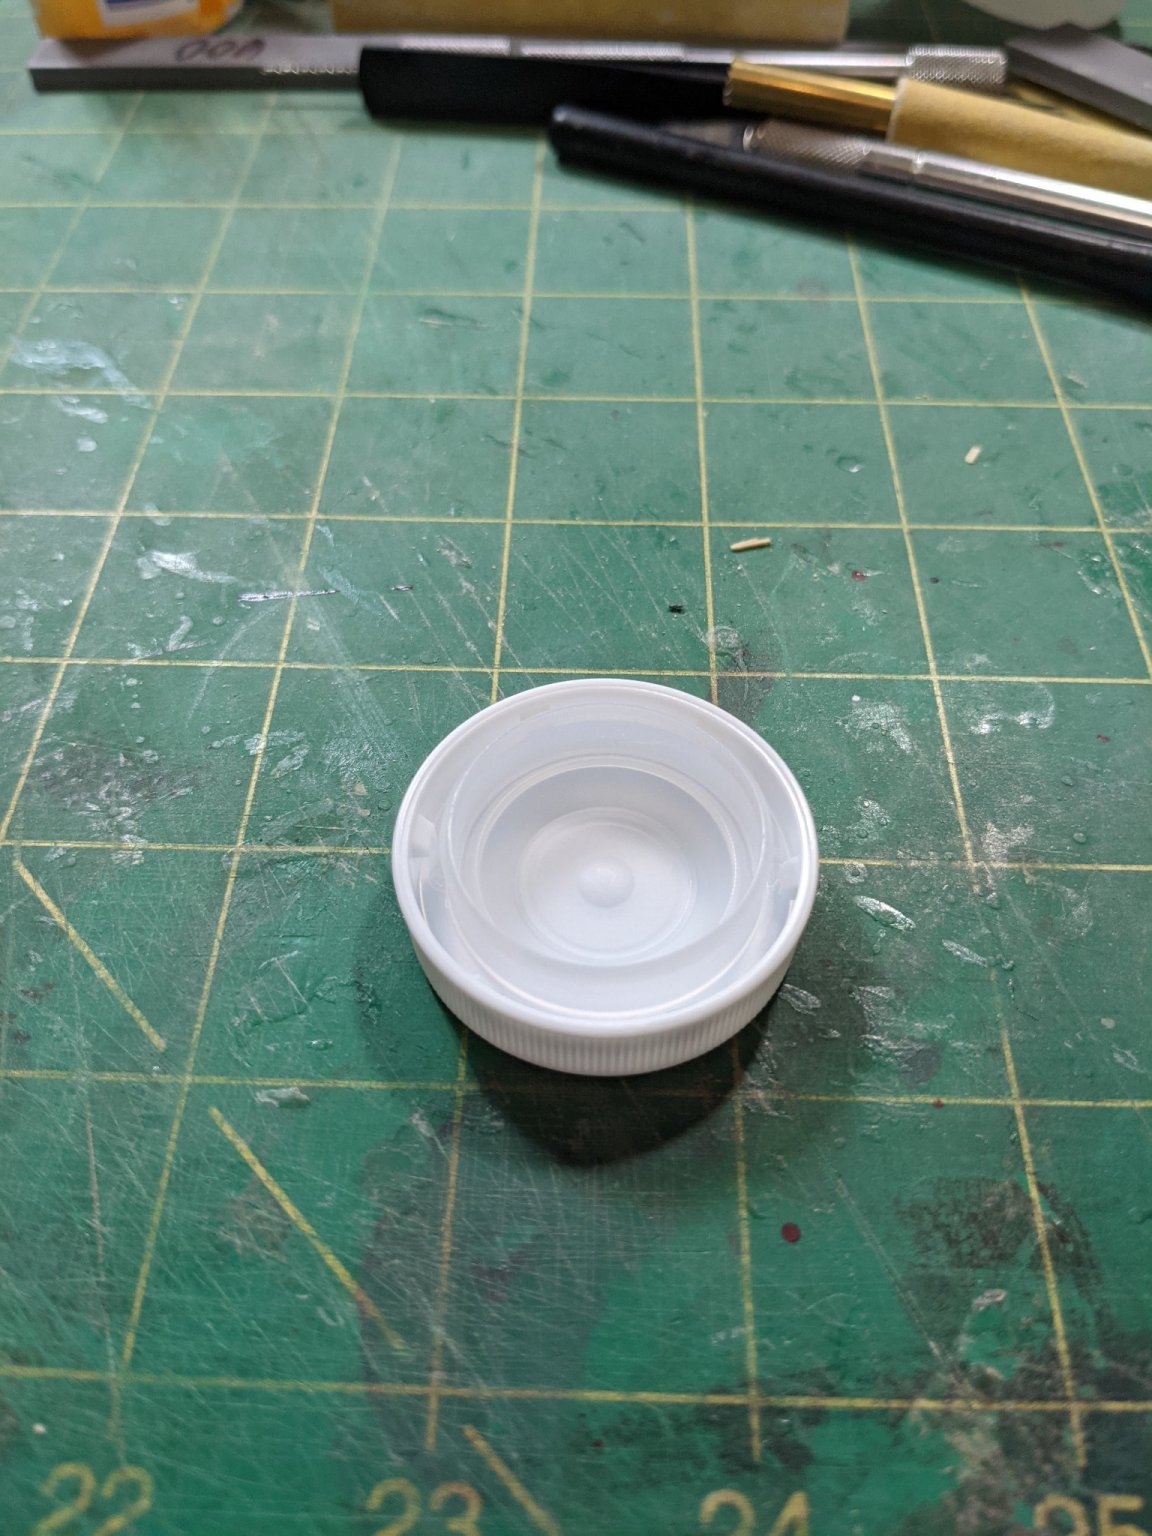
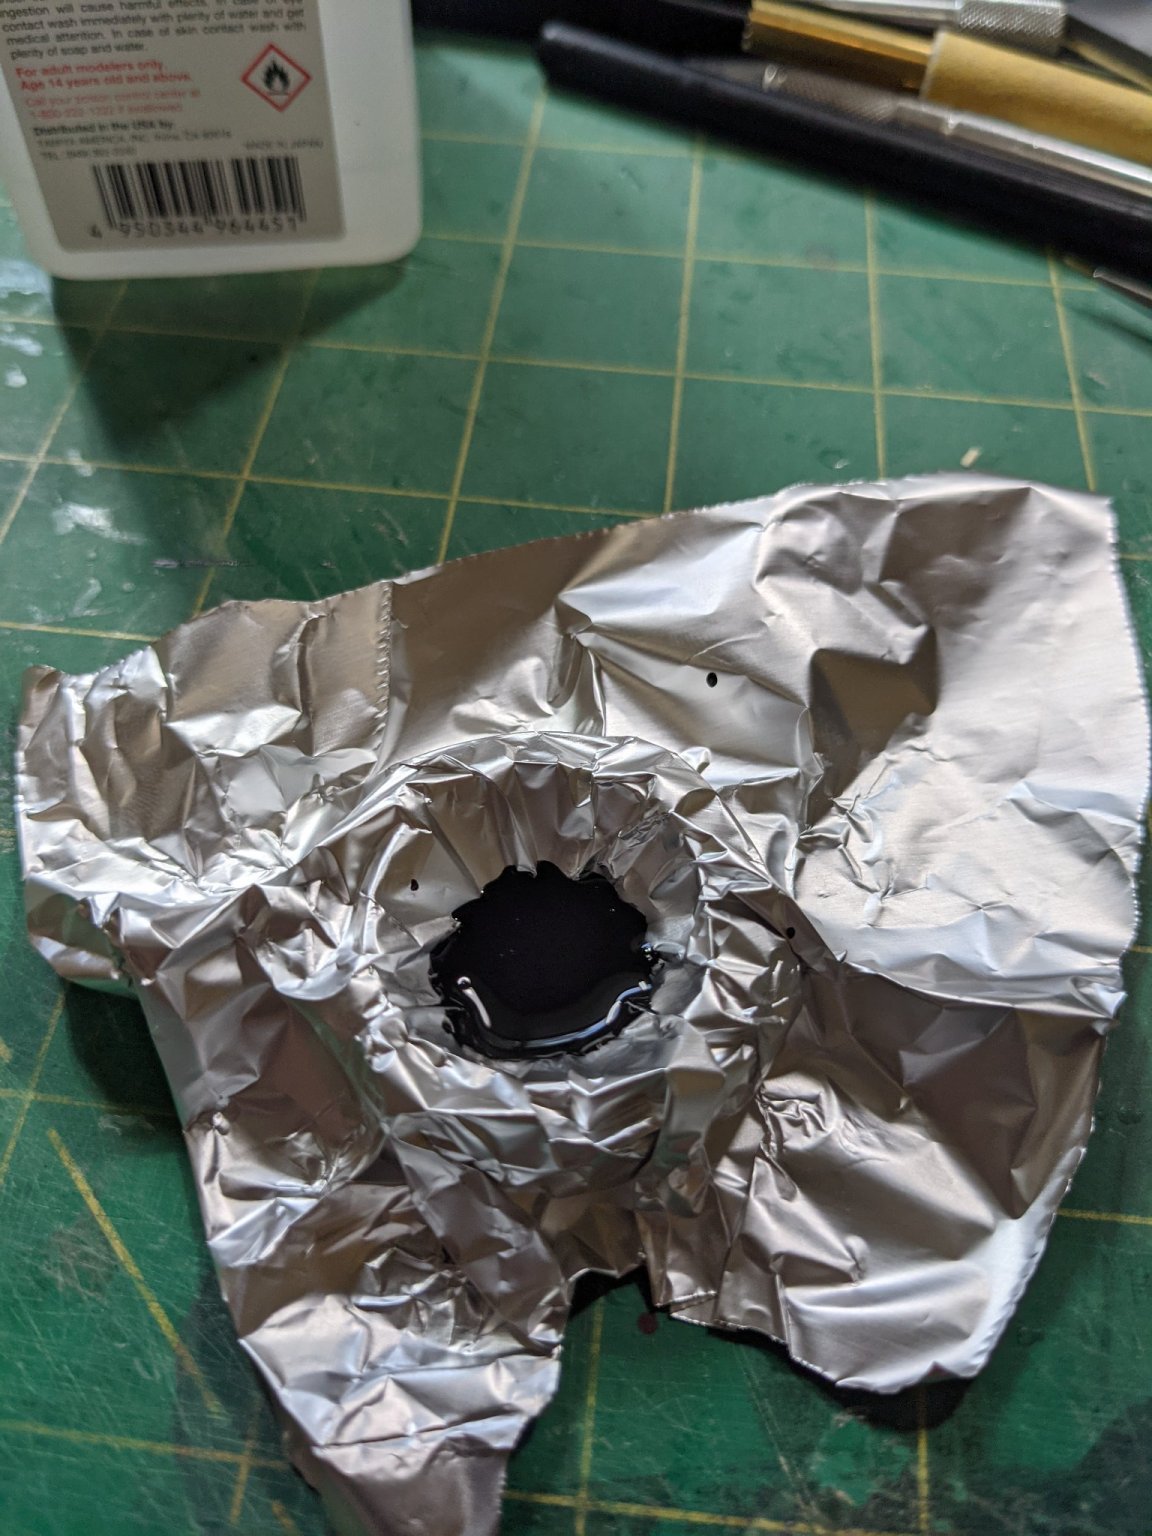
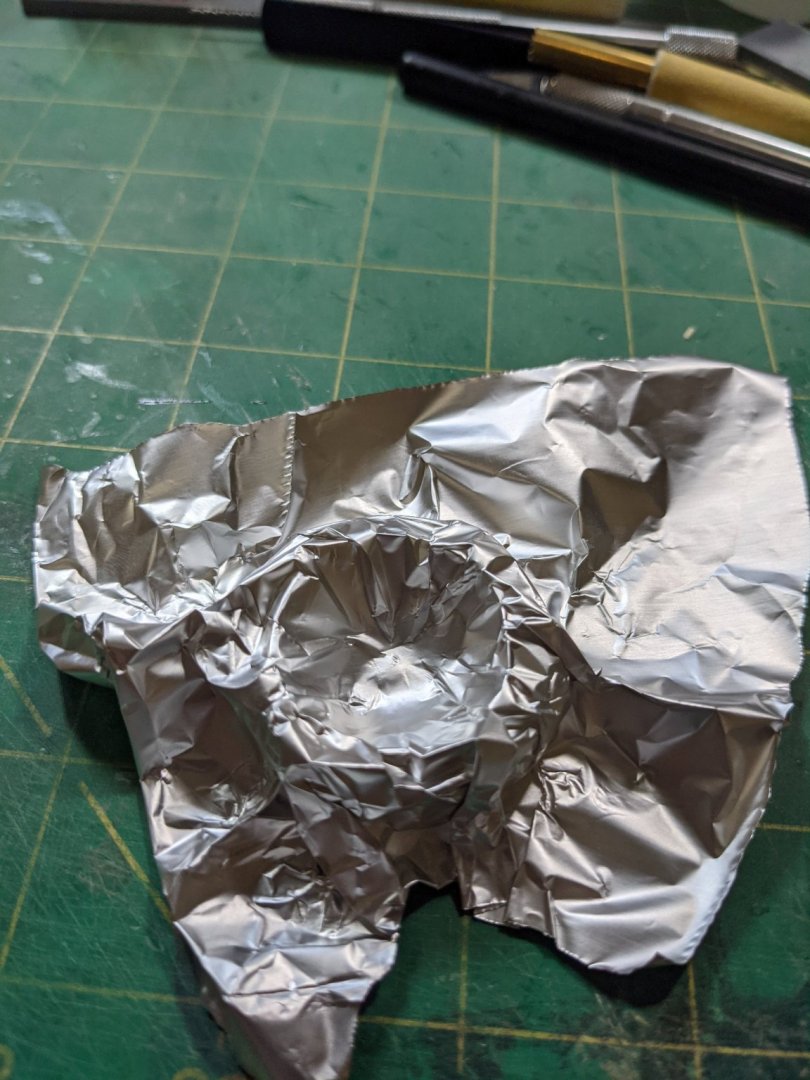
Thanks everyone. This is actually a fun build and wish I didn't have to work. Anyway here is a free tip for painting small parts. Use the top of a pill bottle and the squash some tinfoil into it to make a small reservoir for mixing the paint and thinner. When you are done just remove and discard the tinfoil and you are ready to go and cleaned up.


- 274 replies
-
- 8
-
-
- Cheerful
- Syren Ship Model Company
- (and 1 more)
-
Looking great!
-
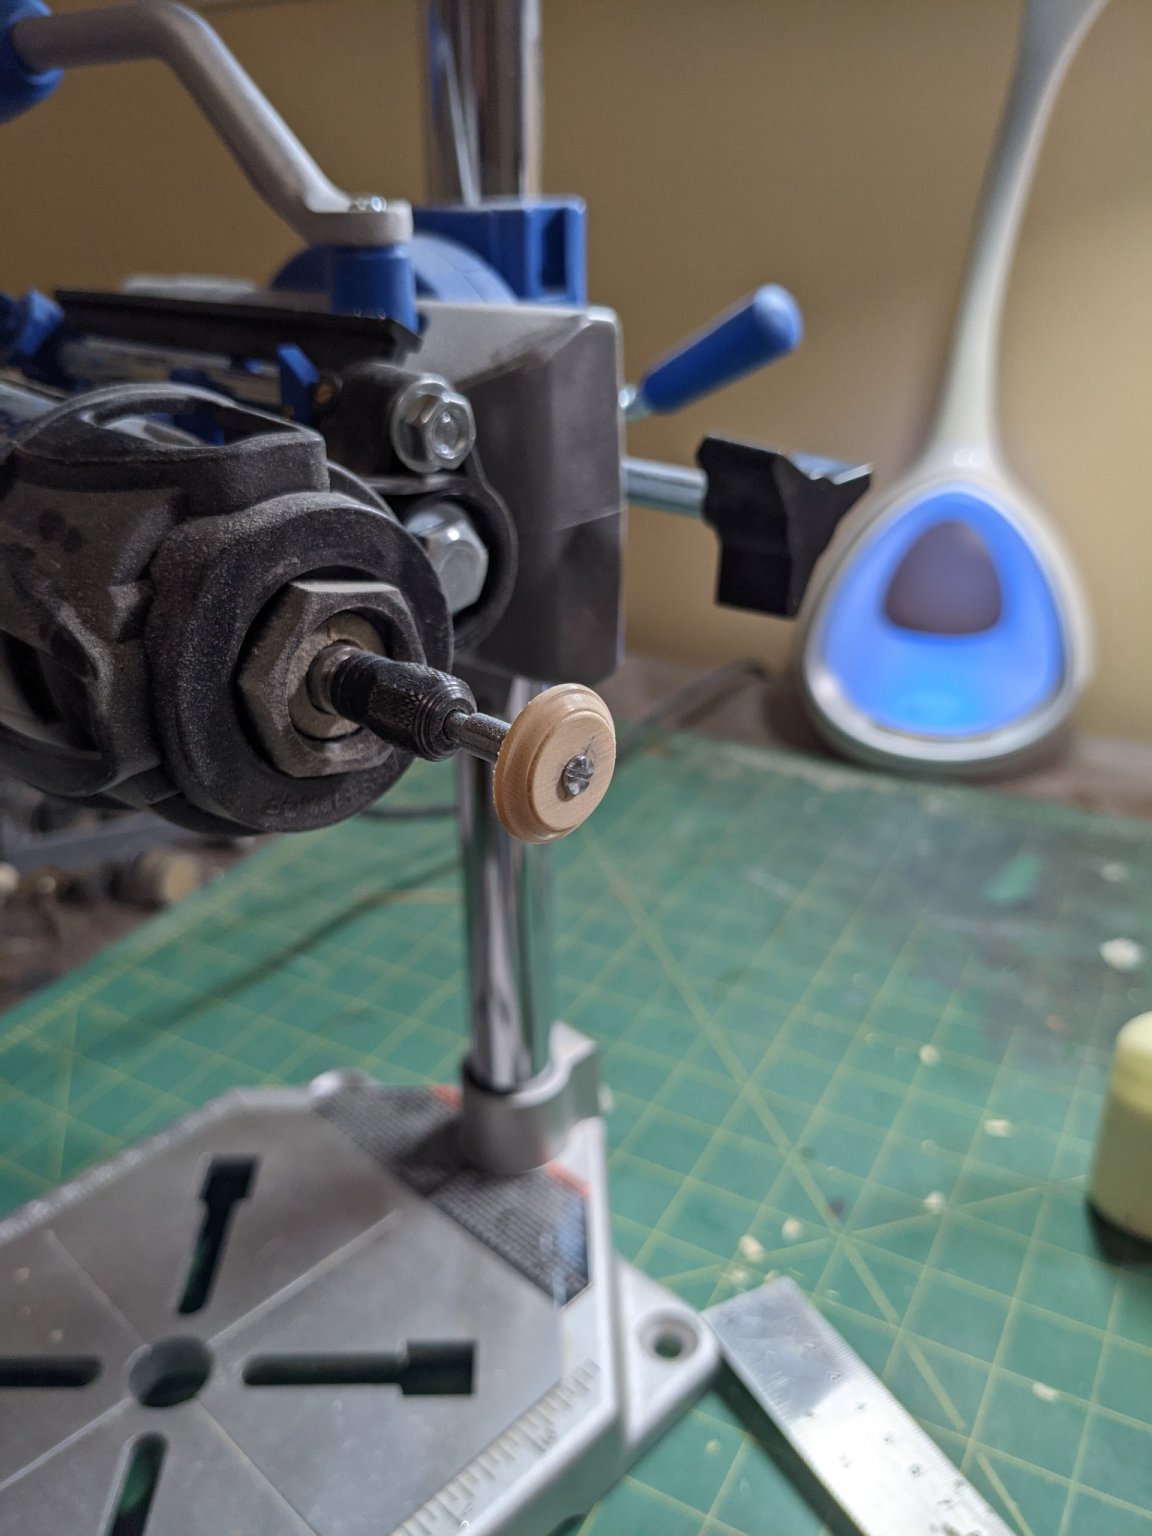
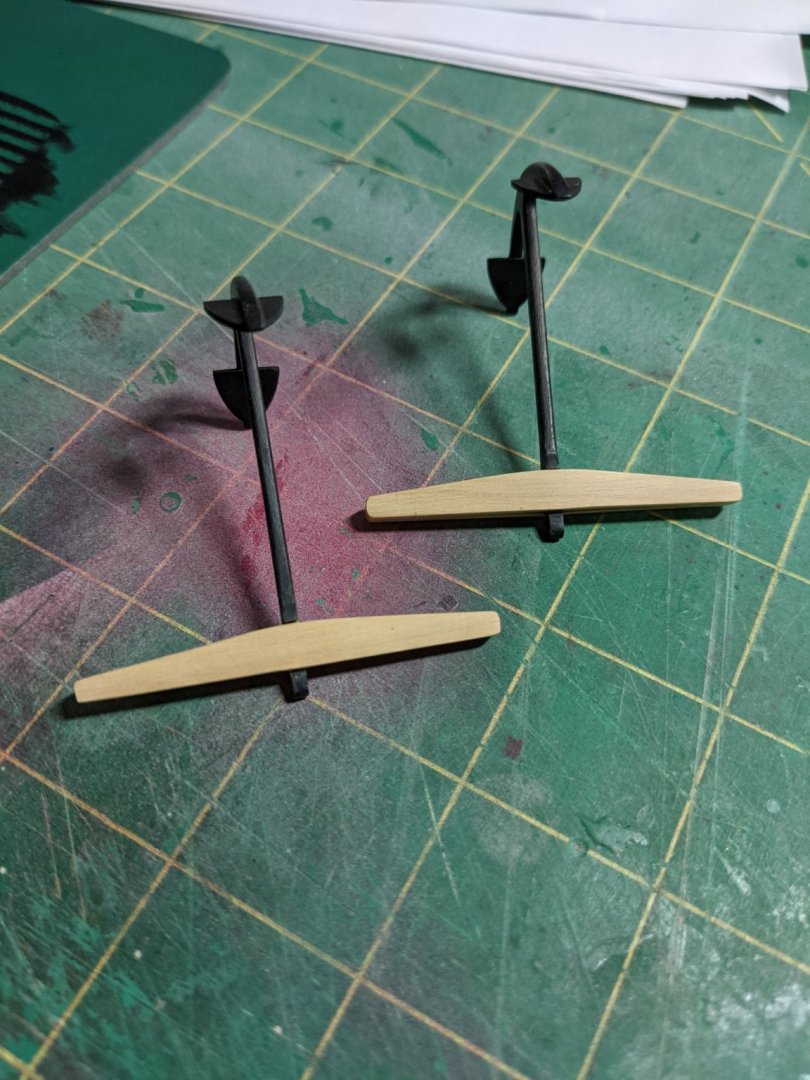
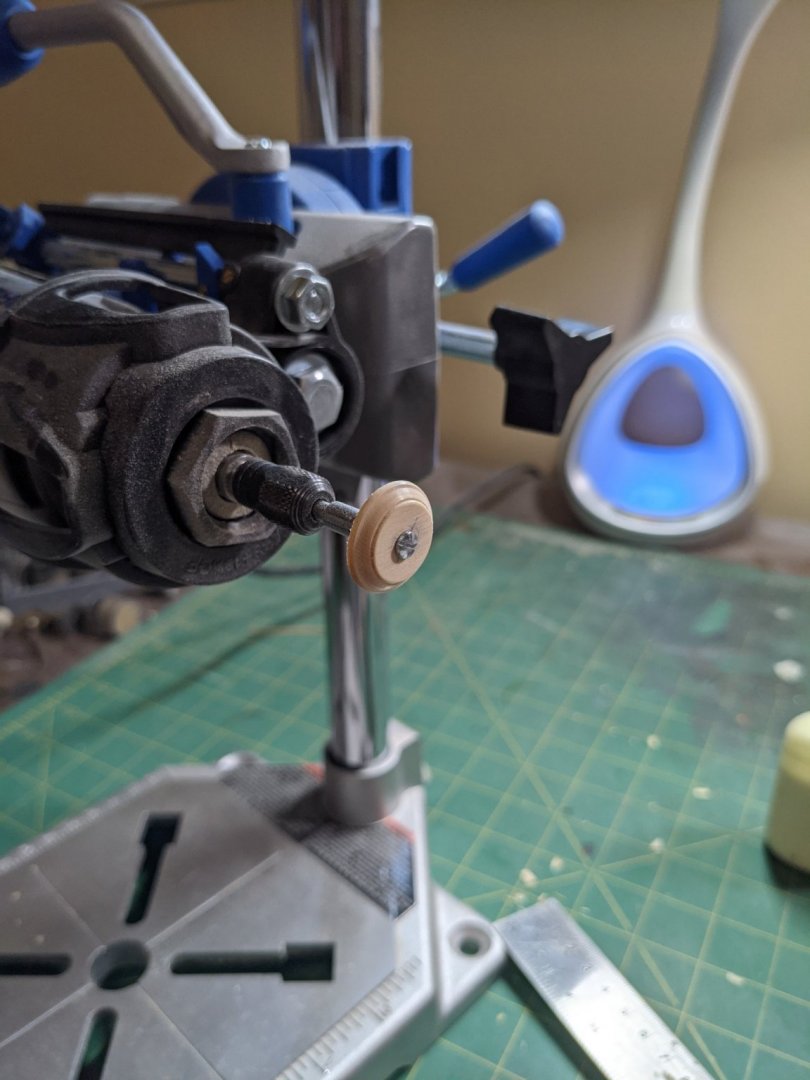
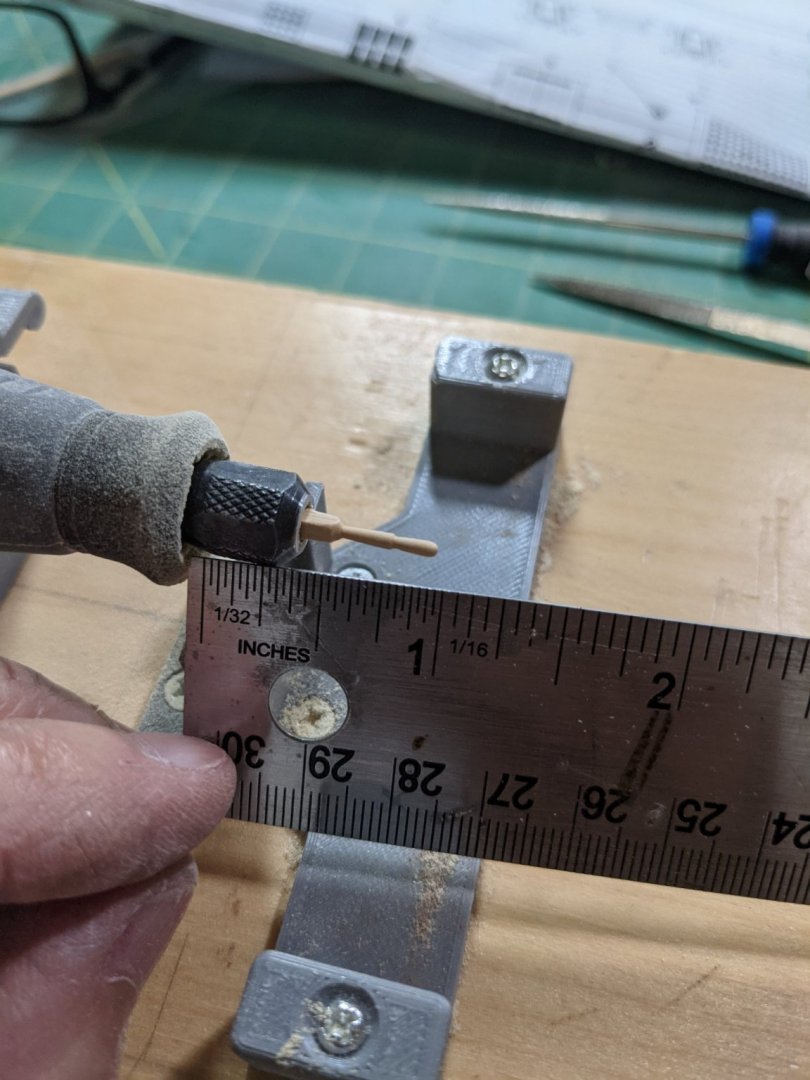
So who needs a lathe when you have a dremel and sort of steady hand Once I have the mast made I will finish the hole sizing.

- 274 replies
-
- 6
-
-
- Cheerful
- Syren Ship Model Company
- (and 1 more)
-
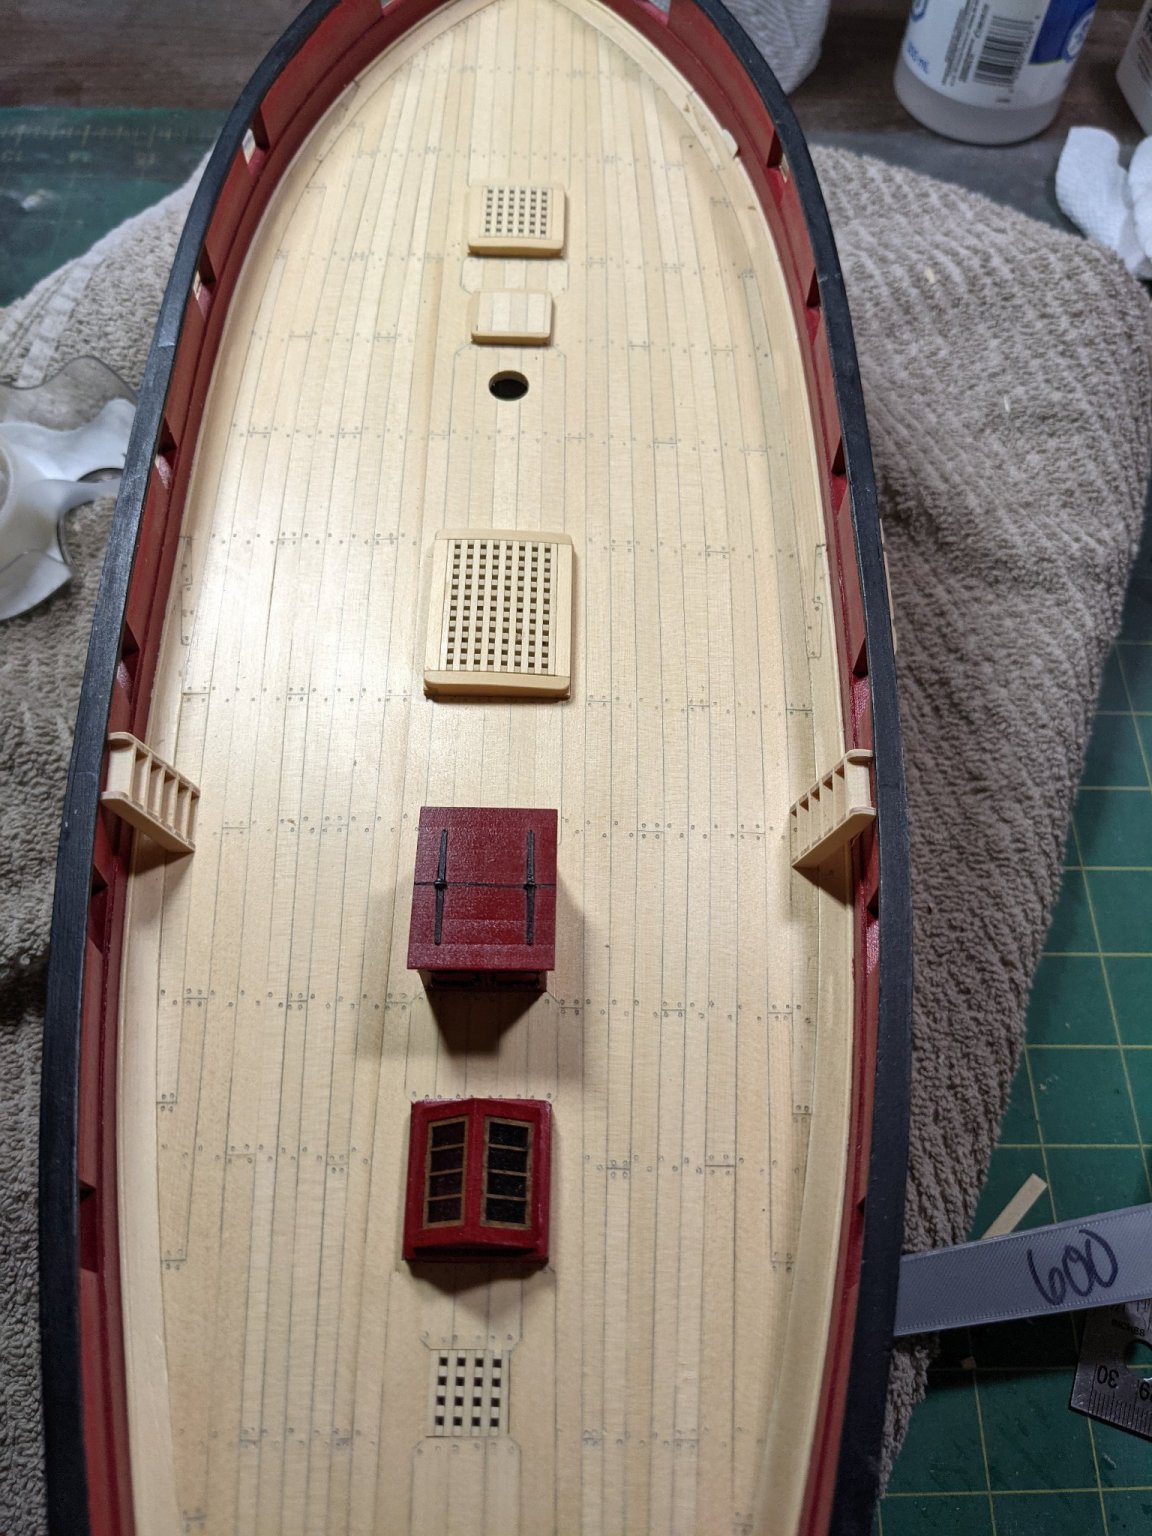
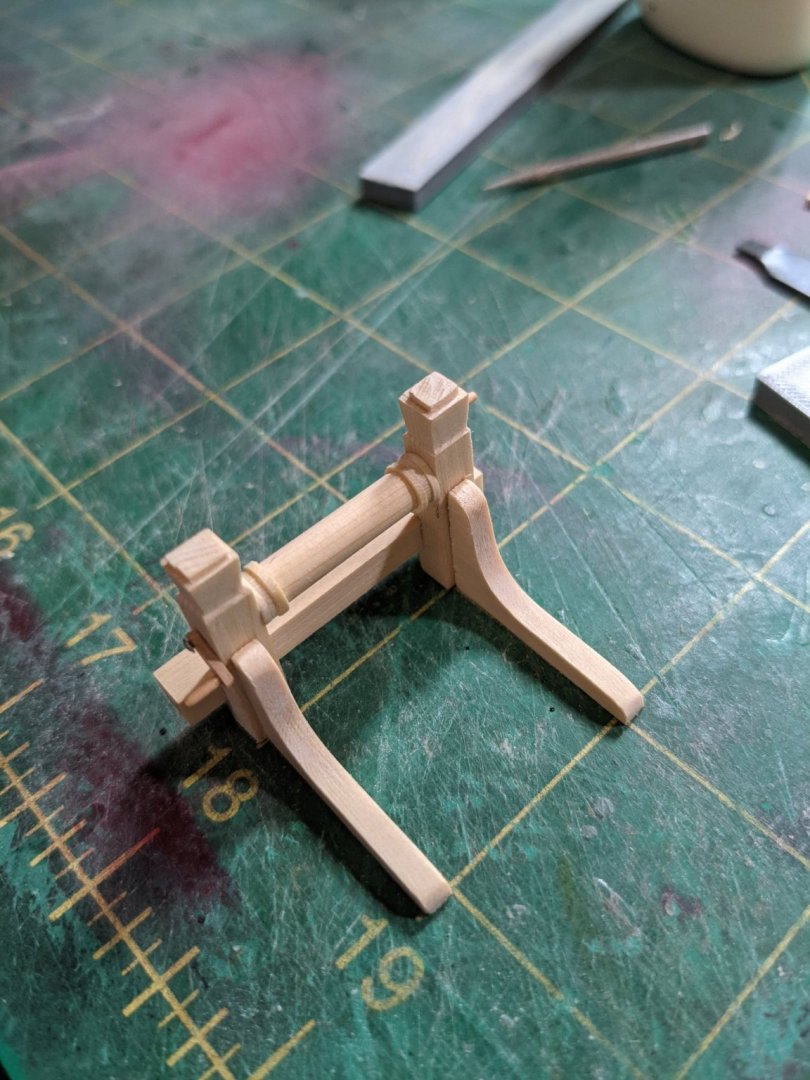
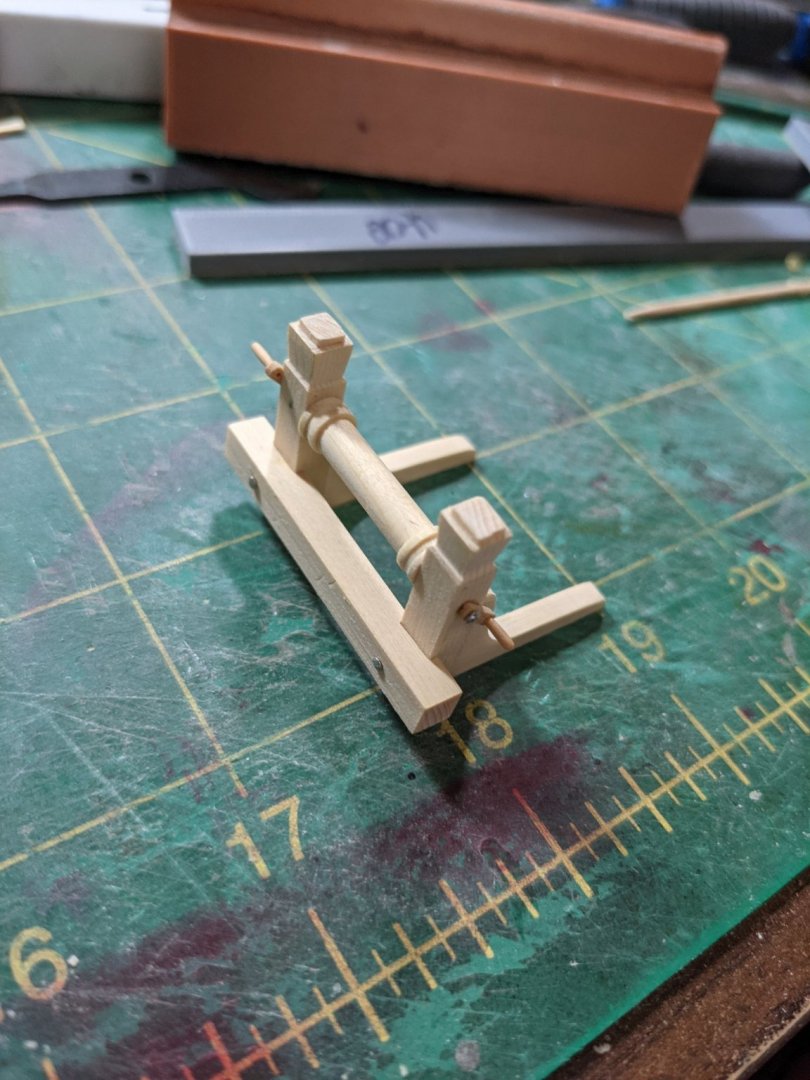
Working my way slowly through some of the deck fittings. I have the pumps ready for mounting. Also spent a few hours making the winch and it is ready for painting. I didn't make a gear for the winch but will paint the part where it would be black. This was pretty fun to figure out how to make it and build. Once I paint this and the seats of ease I will let them set up for a while before handling them. Guess my next step will be the catheads.

- 274 replies
-
- 13
-
-
- Cheerful
- Syren Ship Model Company
- (and 1 more)
-
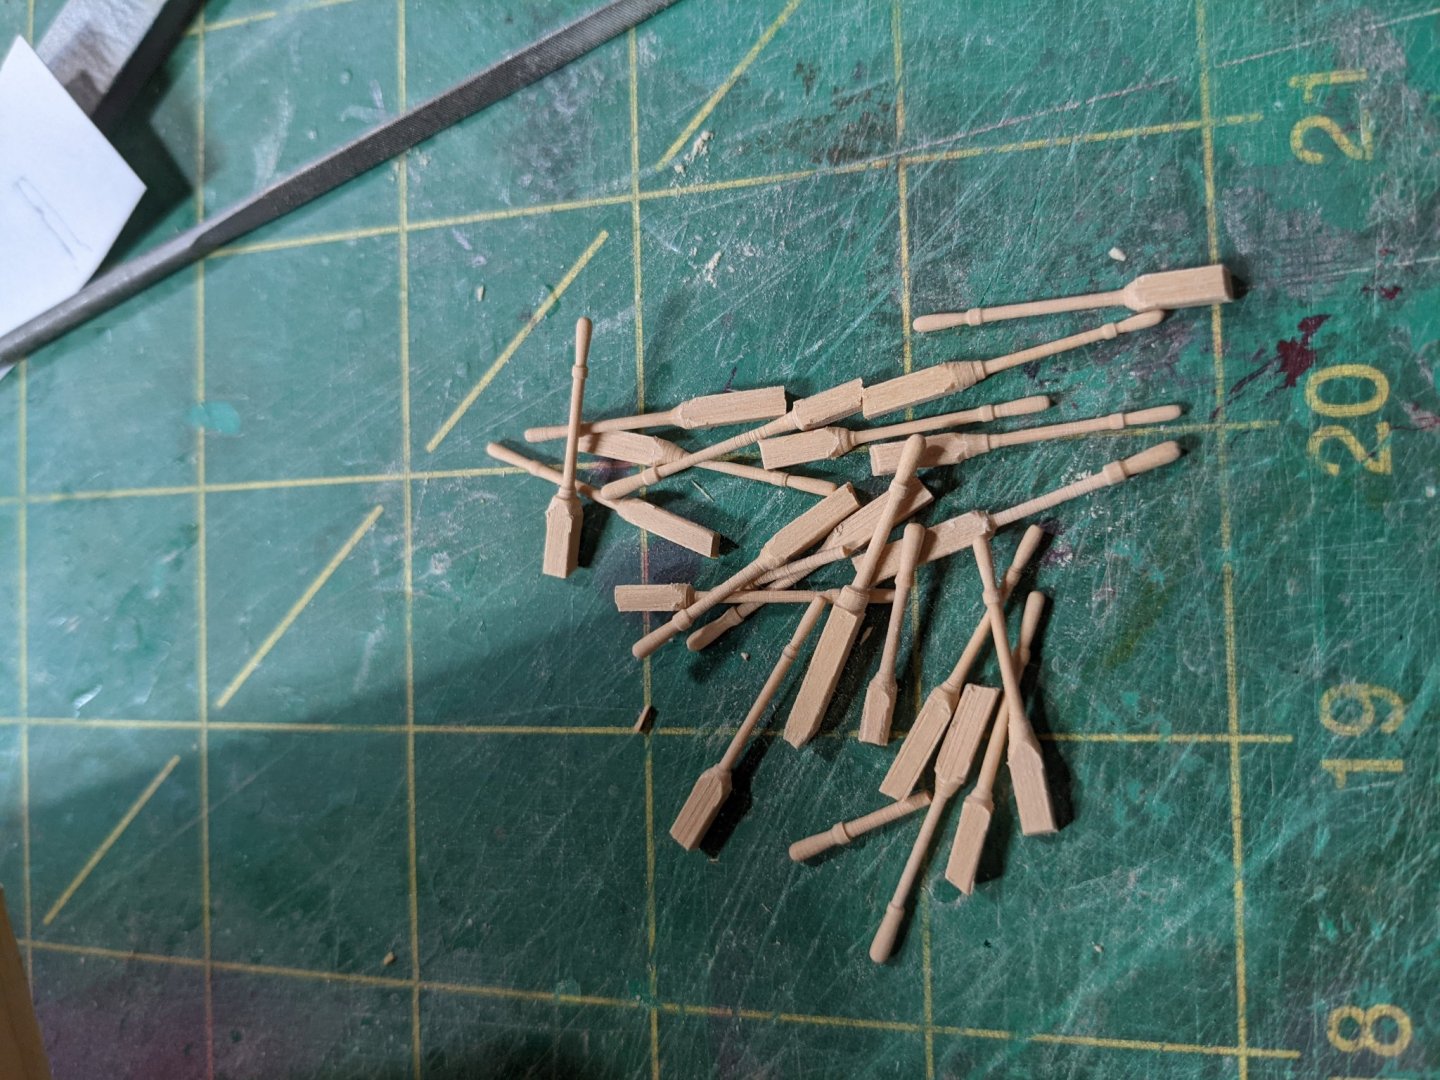
Wow thanks Allan. Comments and like keep me motivated. I looked it up and also took a look at a lot of photos so redid the shape so it looks more realistic. I have 22 made and not sure if I need more but wanted to make sure I hade the hole size correct for the pin rails before I made them.
- 274 replies
-
- 10
-
-
- Cheerful
- Syren Ship Model Company
- (and 1 more)
-
I buy xacto blades on packages of 100 from amazon and just throw them out when they get dull o=r I am doing something that needs a perfectly sharp blade. I consider them expandable and they are not expansive buying them in bulk.
-
Before I start on the bow pieces and pin rails I decided to try making some belaying pins. I have never done this before but is fun to do. before I go further does this look like the right size and shape?
- 274 replies
-
- 2
-
-
- Cheerful
- Syren Ship Model Company
- (and 1 more)
-
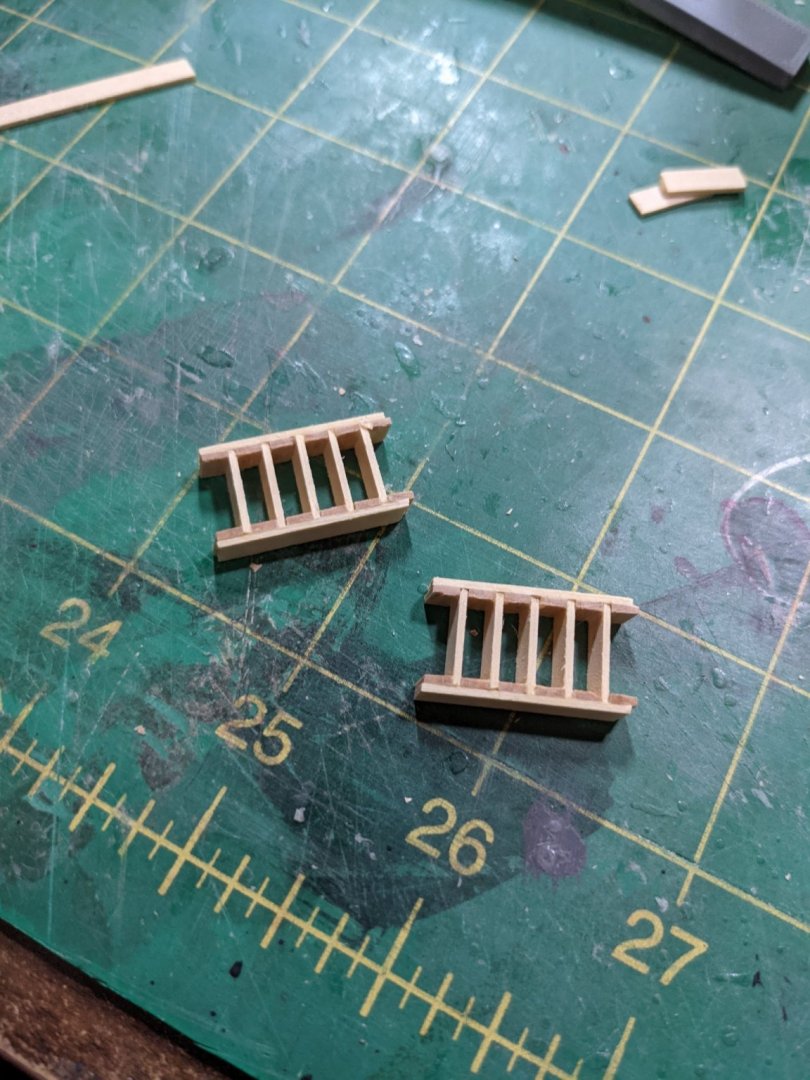
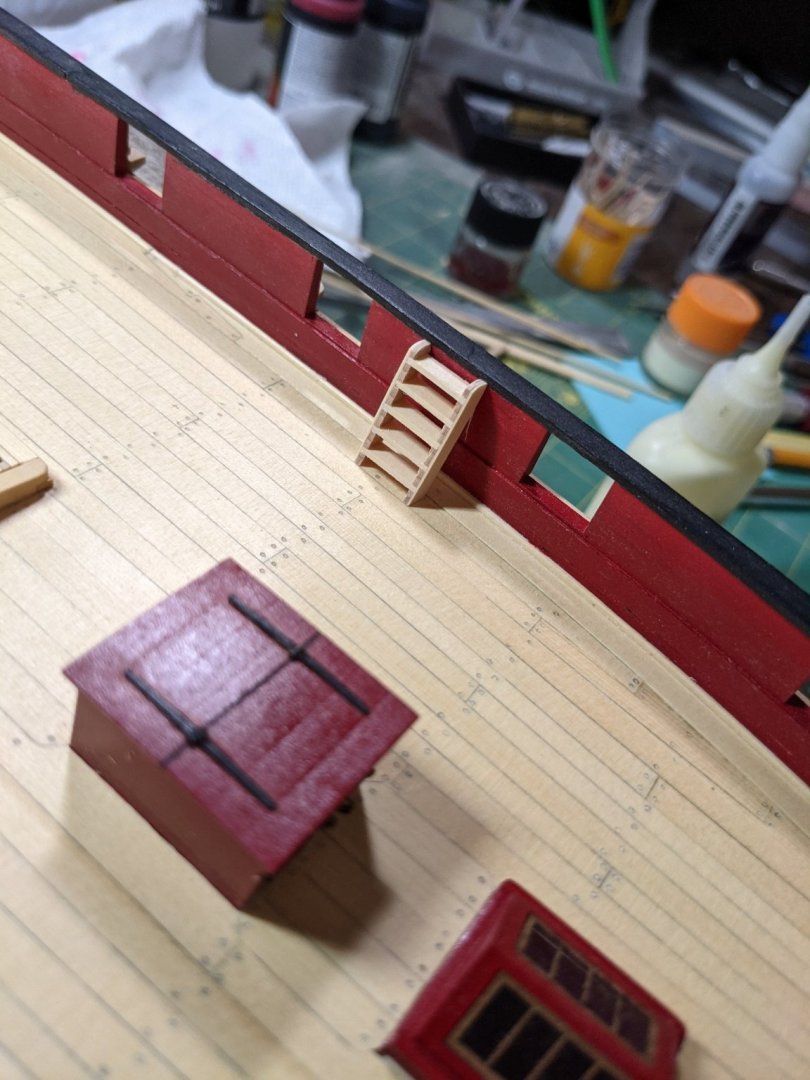
Second attempt at making the ladders as the first didn't work out. Used 1/32 strip and then glued 1/8 spacers for the rungs. Once they dried I glued in all the rungs and sanded the outside down almost to nothing. Sill have to paint them red.


- 274 replies
-
- 4
-
-
- Cheerful
- Syren Ship Model Company
- (and 1 more)
-
Thanks. I cut the moulding away and inserted the step. Was pretty easy to do. The treenailing does take some time but goes pretty quickly once you get a rhythm down. I listen to podcasts while I am working so the time goes by nice.