(1)(1)(1)(2).jpg.a128ea4d7b02ebfc5d5eb6547e92106f.jpg)
PRS
-
Posts
372 -
Joined
-
Last visited
Content Type
Profiles
Forums
Gallery
Events
Everything posted by PRS
-
(1)(1)(1)(2).thumb.jpg.792ad774561d3d4f35888704cde27a8e.jpg) This is the canopy glue you need. Pacer RC 560 dries clear and sticks great. https://www.greathobbies.com/productinfo/?prod_id=PACPT56
This is the canopy glue you need. Pacer RC 560 dries clear and sticks great. https://www.greathobbies.com/productinfo/?prod_id=PACPT56 -
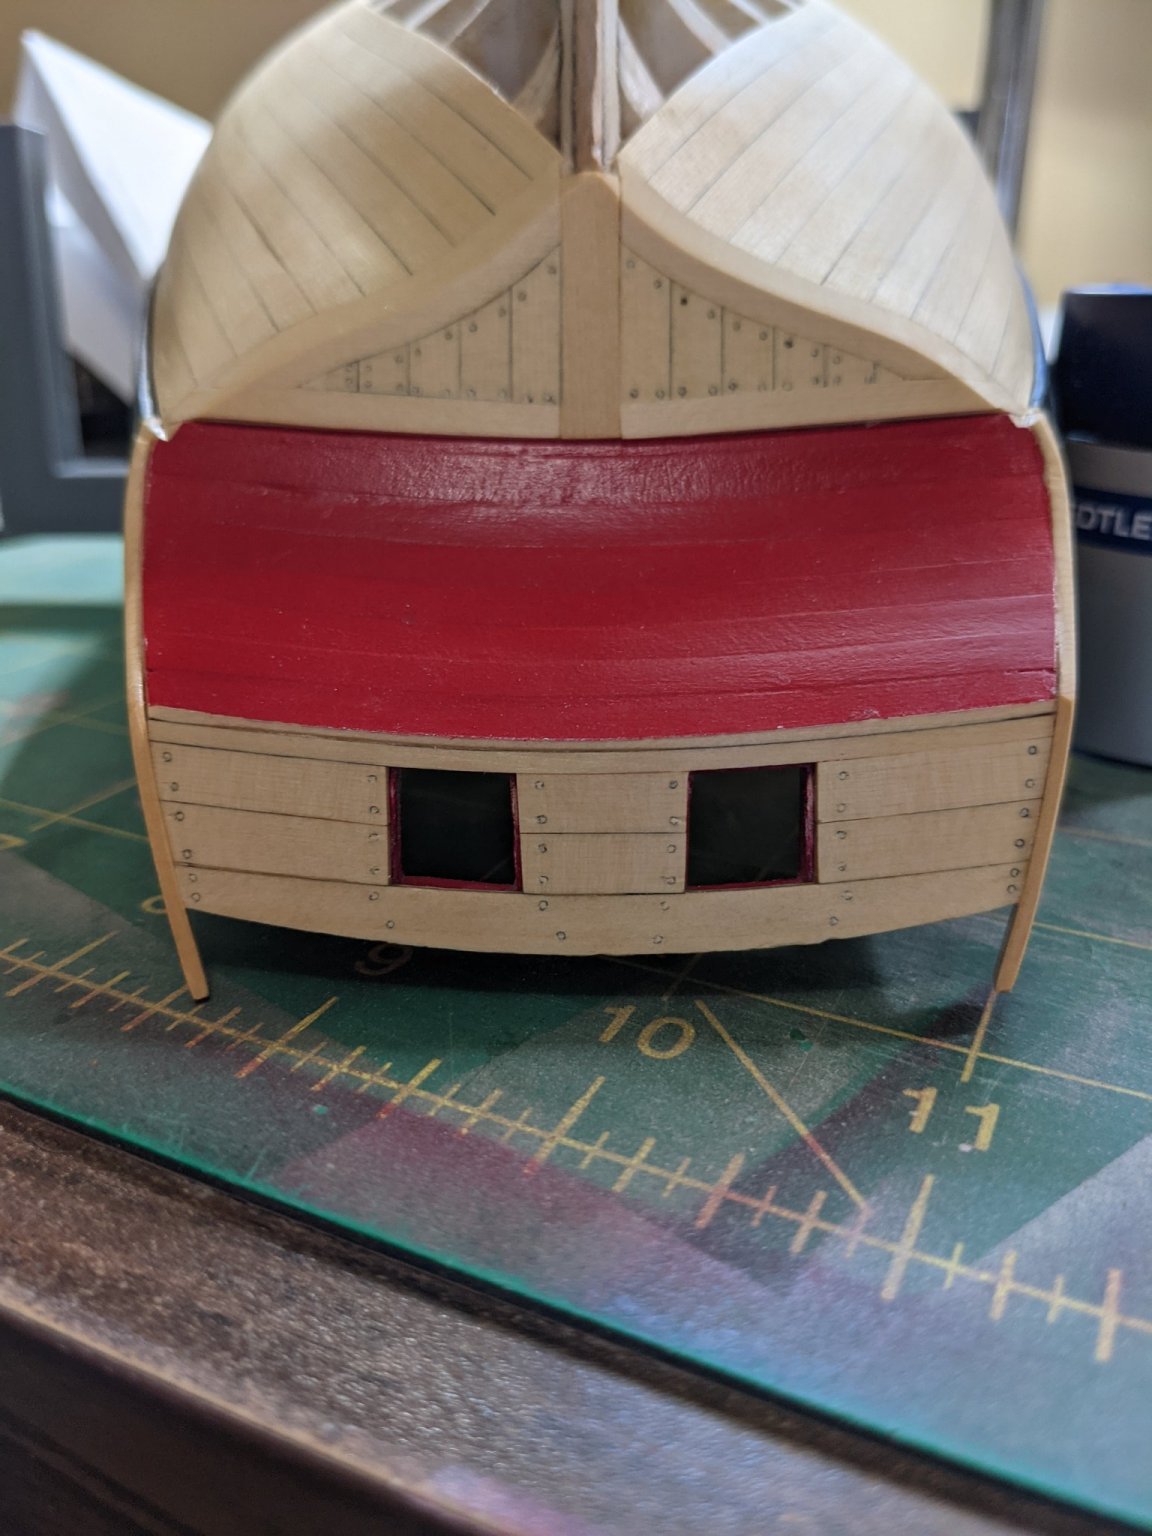
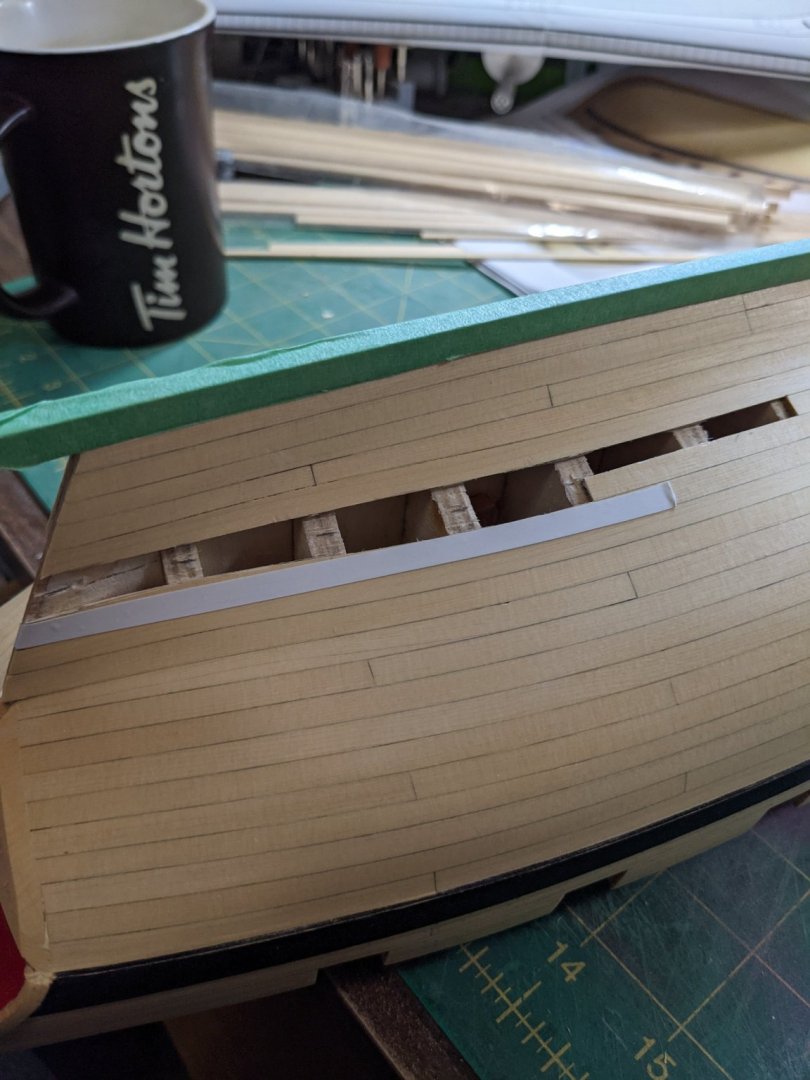
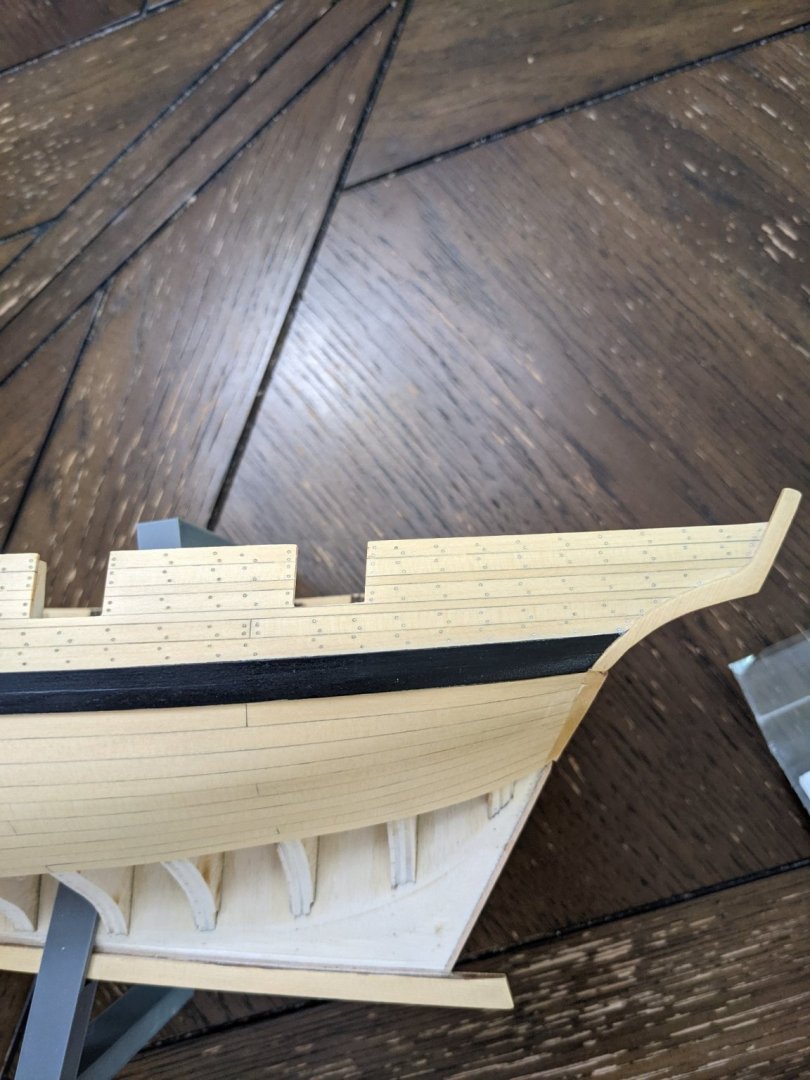
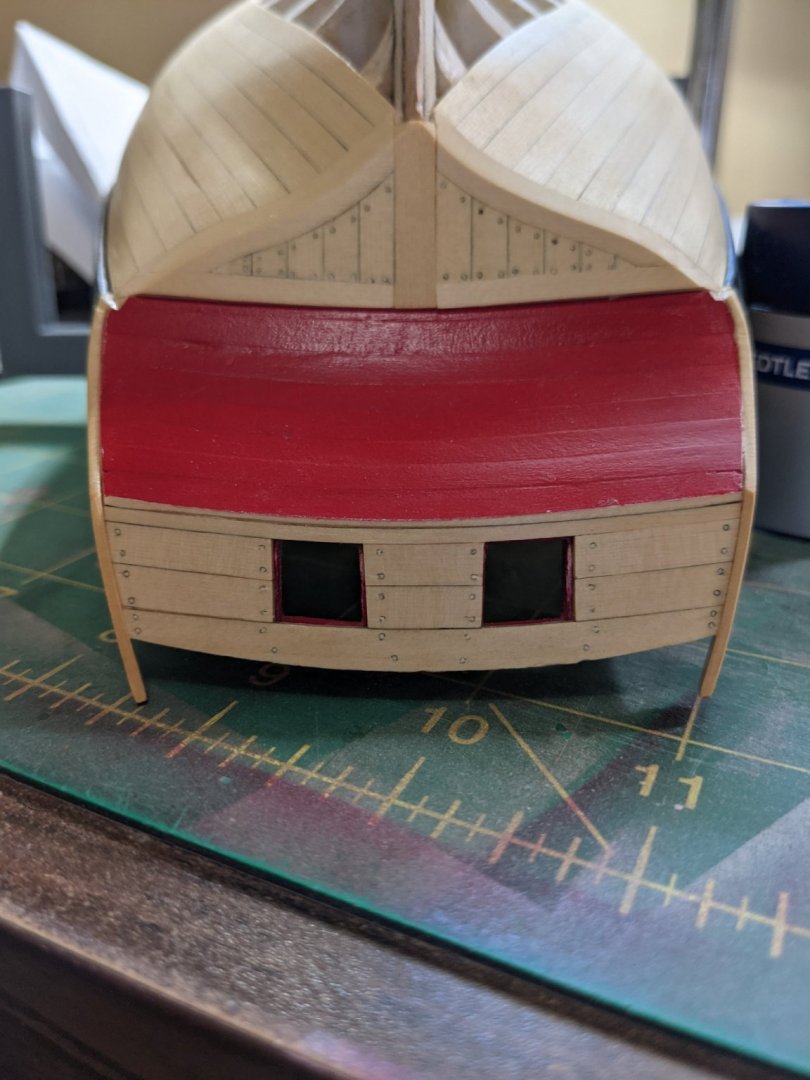
I wanted to get the molding trim pieces on before sanding the hull. I sanded the area where the poly finish was to help the PVA stick and did have some issues as the glue I am using (Lepage wood glue) sets up really fast when you use a minimal amount so it was almost dry when I placed the pieces. I used my small jar of 50/50 mix of PVA and water and with a small brush used that to seep glue between the molding and the trim. Then wiped the excess off with a qtip dipped in water.
- 274 replies
-
- 9
-

-
- Cheerful
- Syren Ship Model Company
- (and 1 more)
-
HMS Euryalus 1803 by rlb - 1:48 scale
PRS replied to rlb's topic in - Build logs for subjects built 1801 - 1850
I like those little wooden clamps. Did you make them?- 122 replies
-
- 3
-
-
- Euryalus
- Plank-on-frame
- (and 4 more)
-
Thanks for the advice. I will do that. I like the poly finish and need to sand the whole hull again and will start with some 320 grit and then go up to 800 grit for a nice smooth finish.
- 274 replies
-
- 2
-
-
- Cheerful
- Syren Ship Model Company
- (and 1 more)
-
The deck planking looks spot on!
-
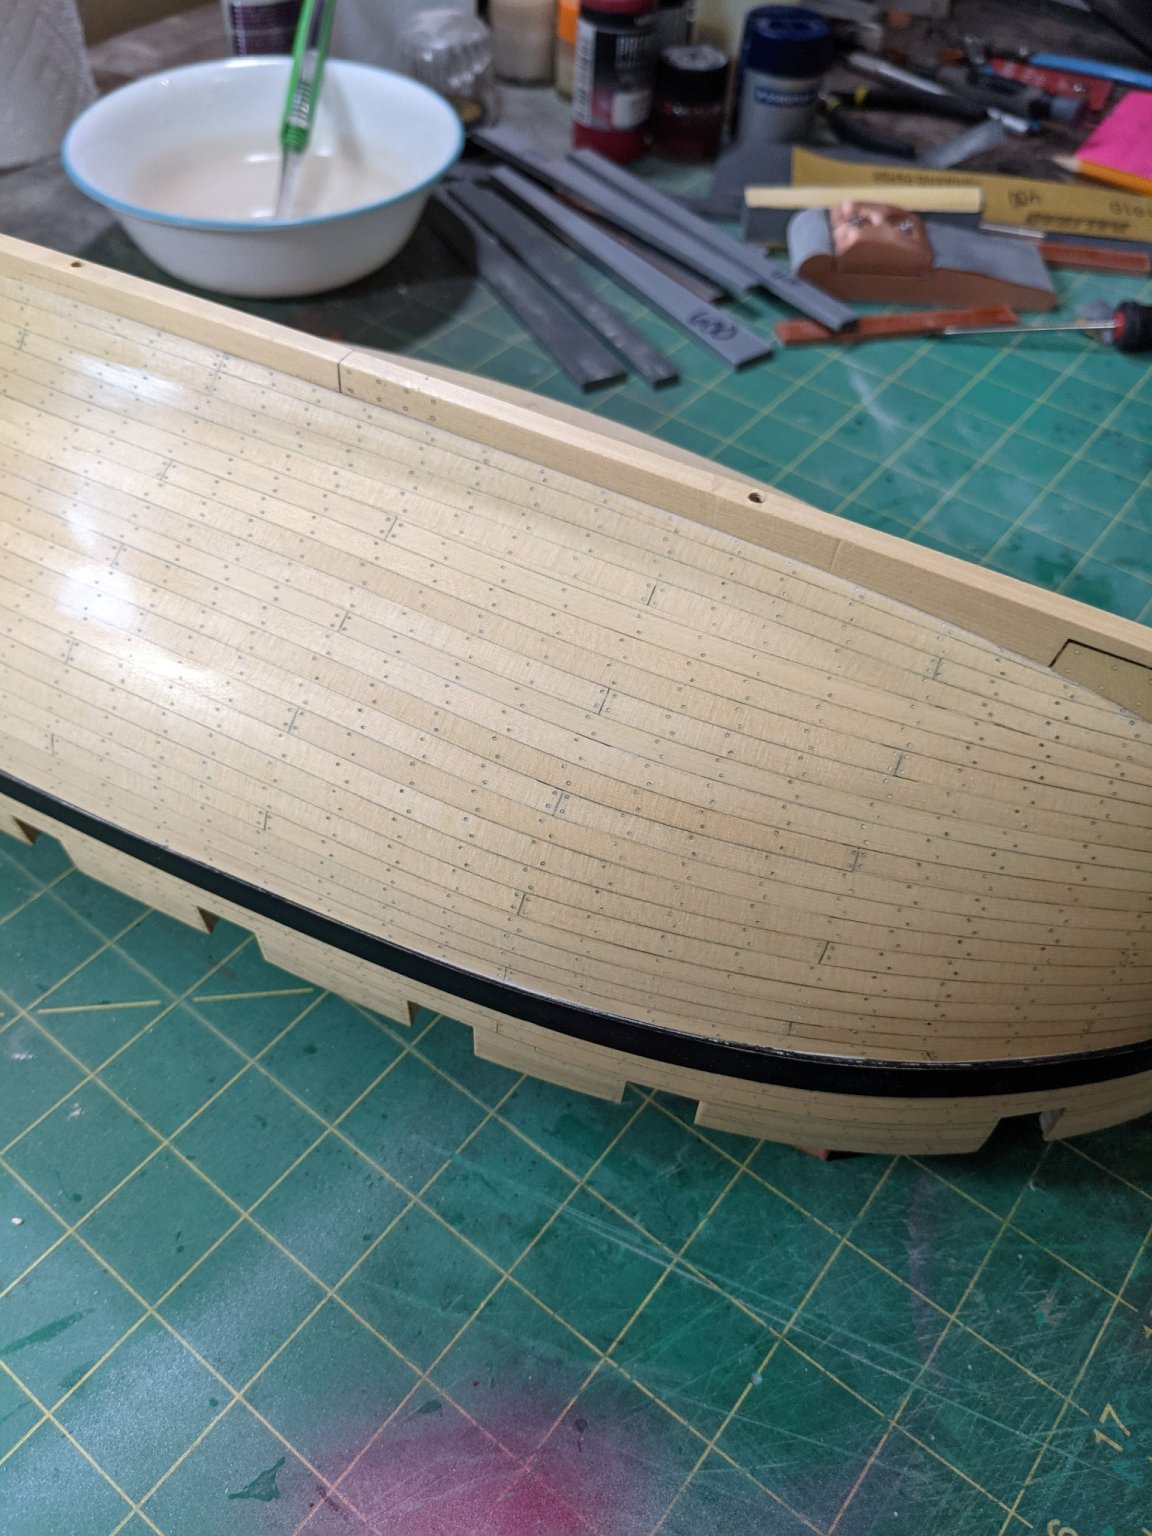
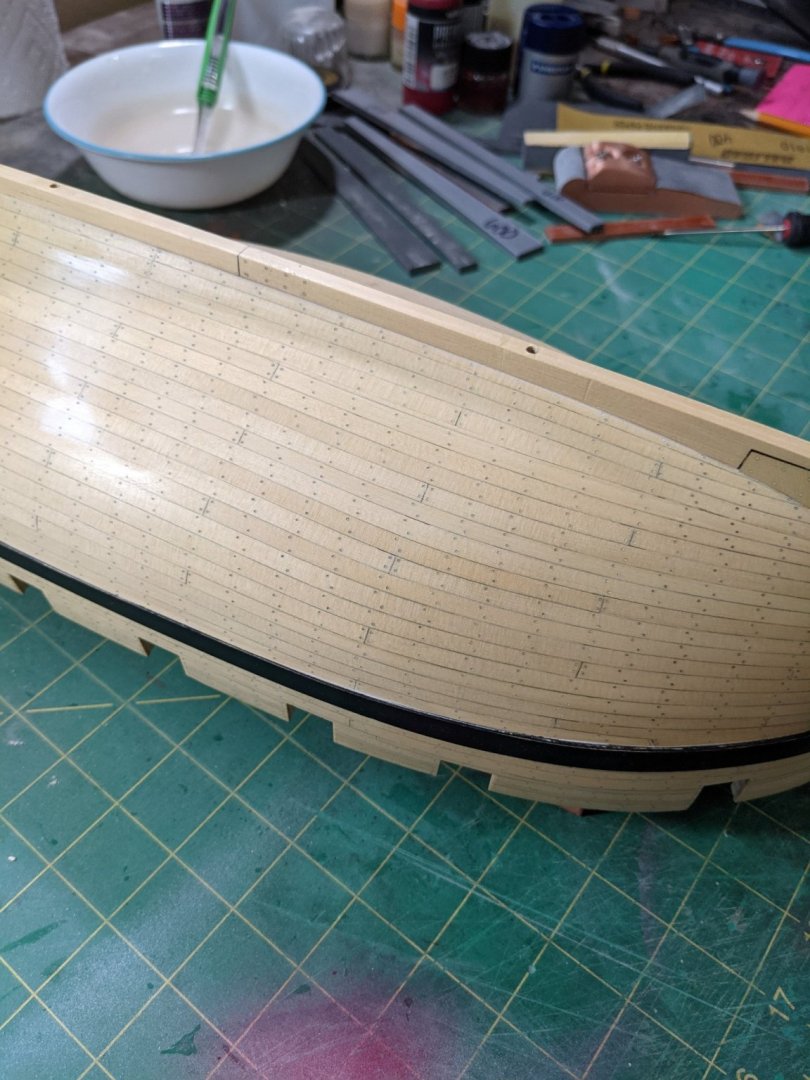
After 3000 plus tree nails I am finished the hull and moving on to the trim pieces. I think it was worth all the drilling and I do need to put a couple more coats of poly on the hull and see a couple spots that need some sanding. I find that sanding the poly surface really clogs up the sandpaper.


- 274 replies
-
- 11
-
-
- Cheerful
- Syren Ship Model Company
- (and 1 more)
-
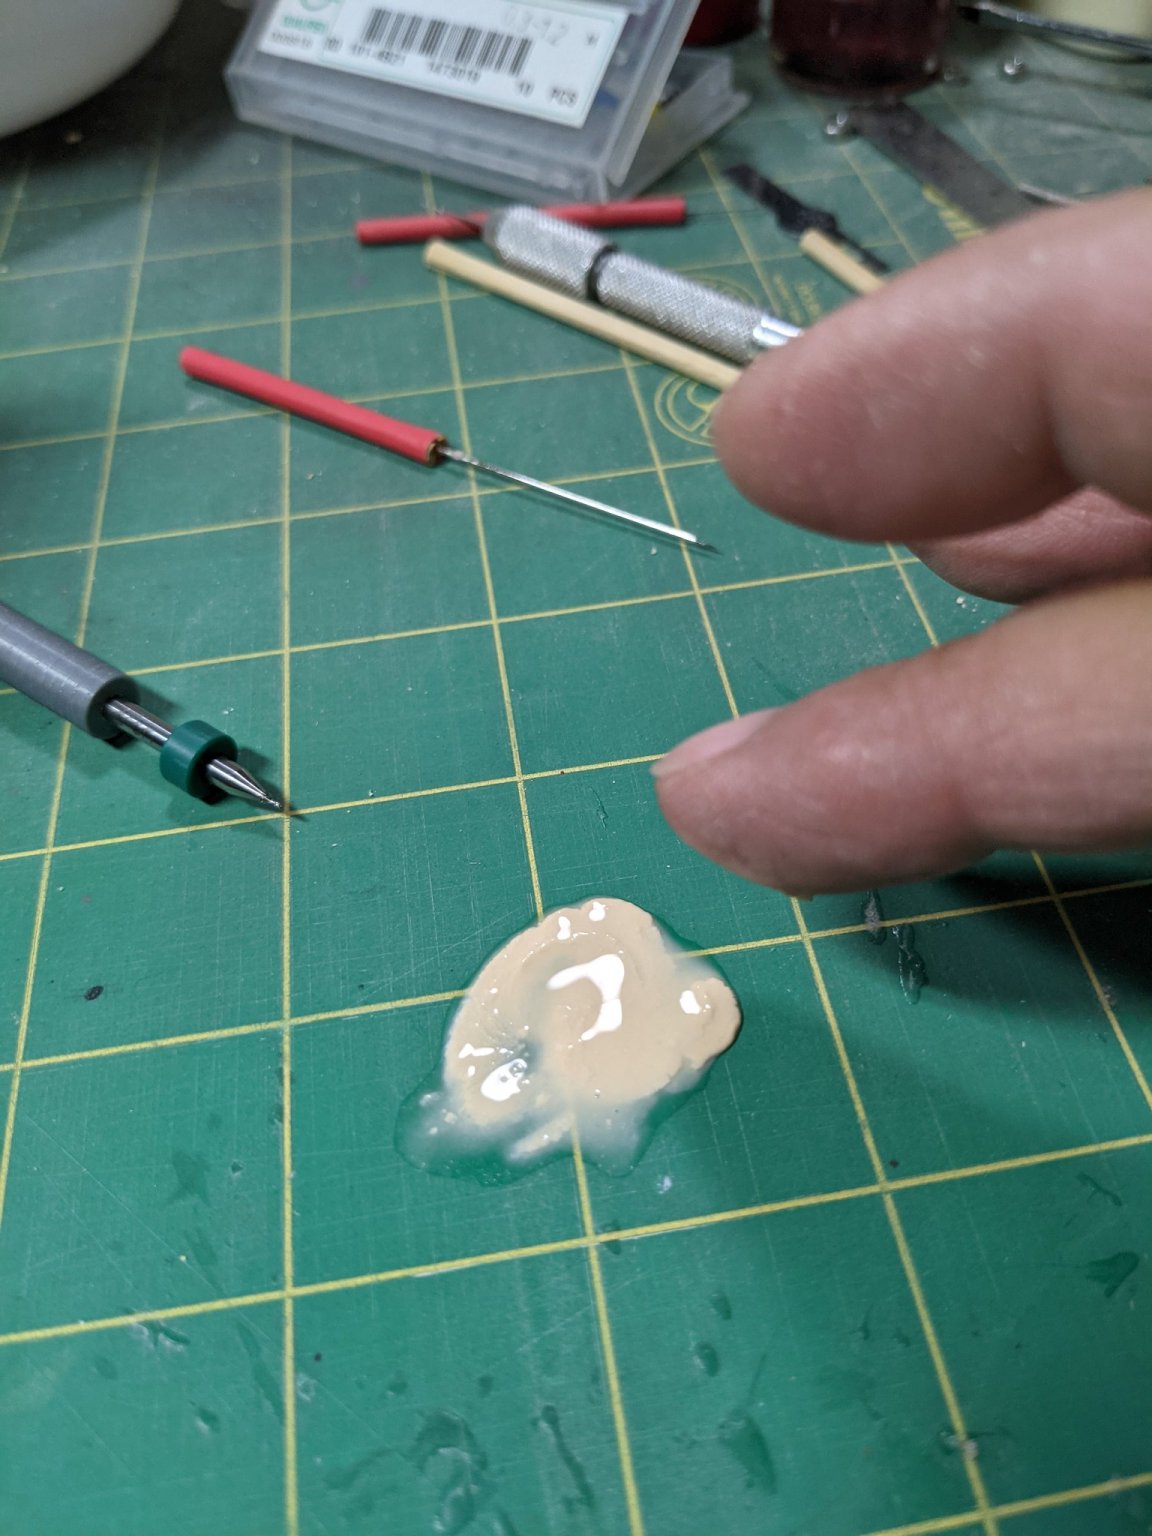
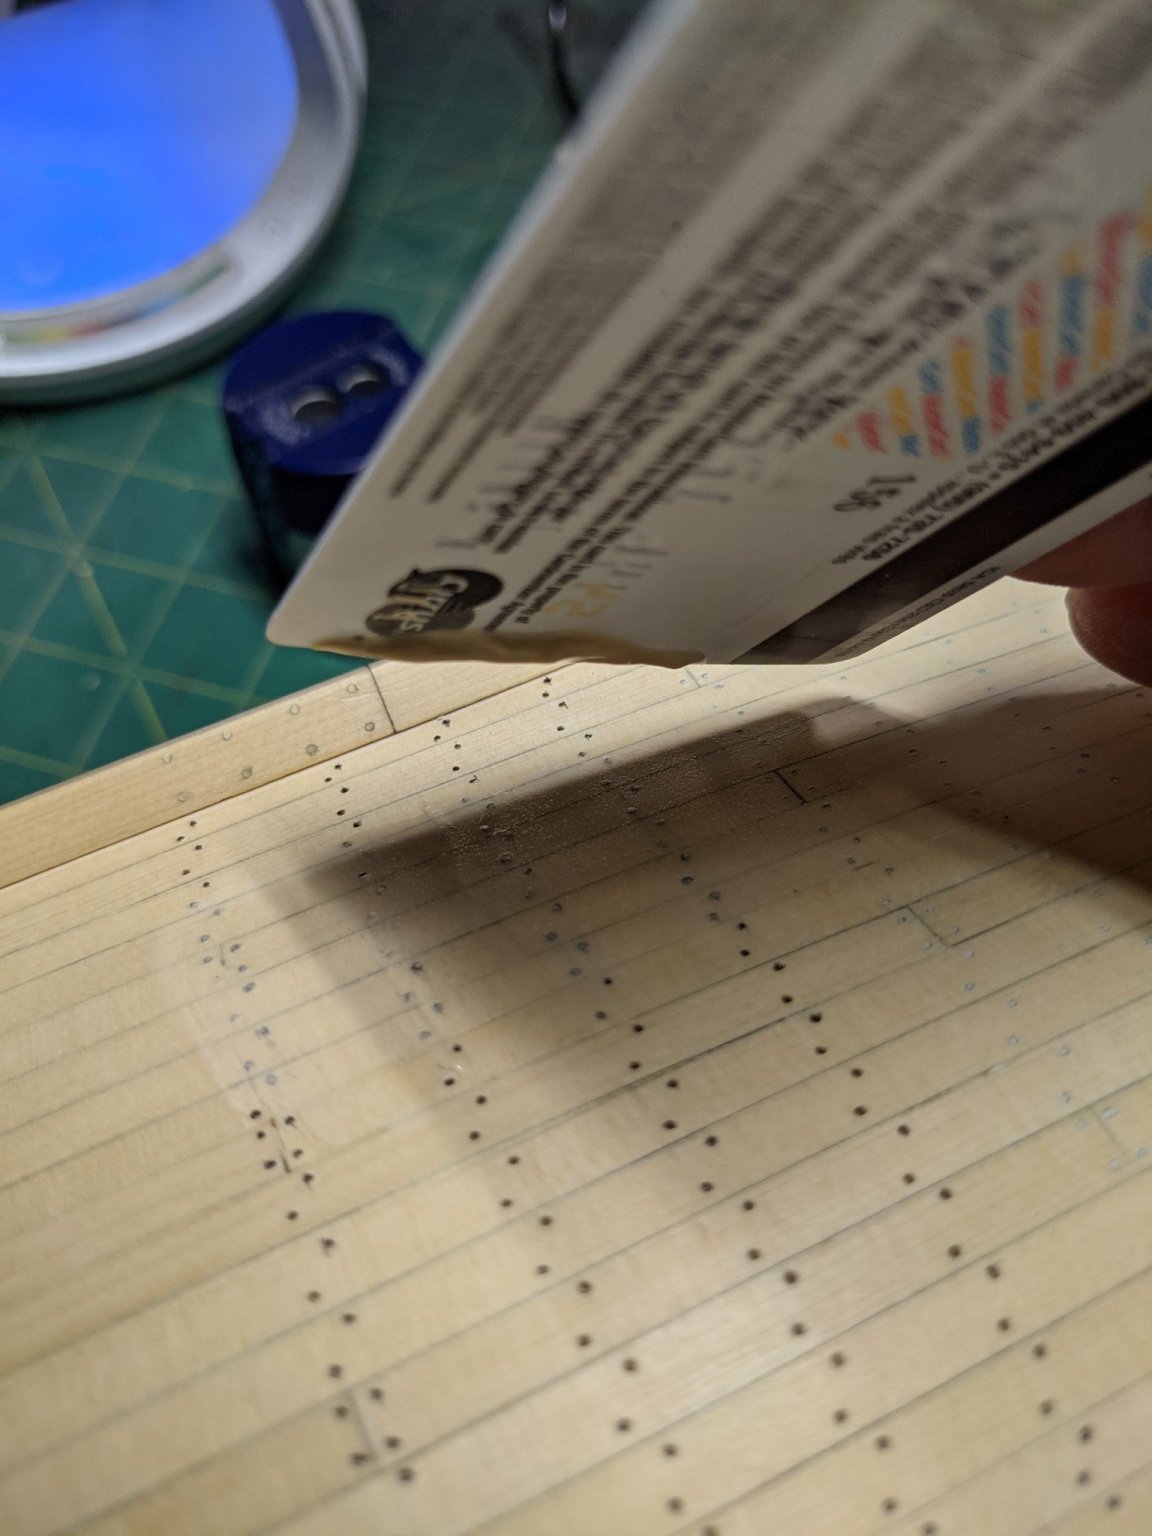
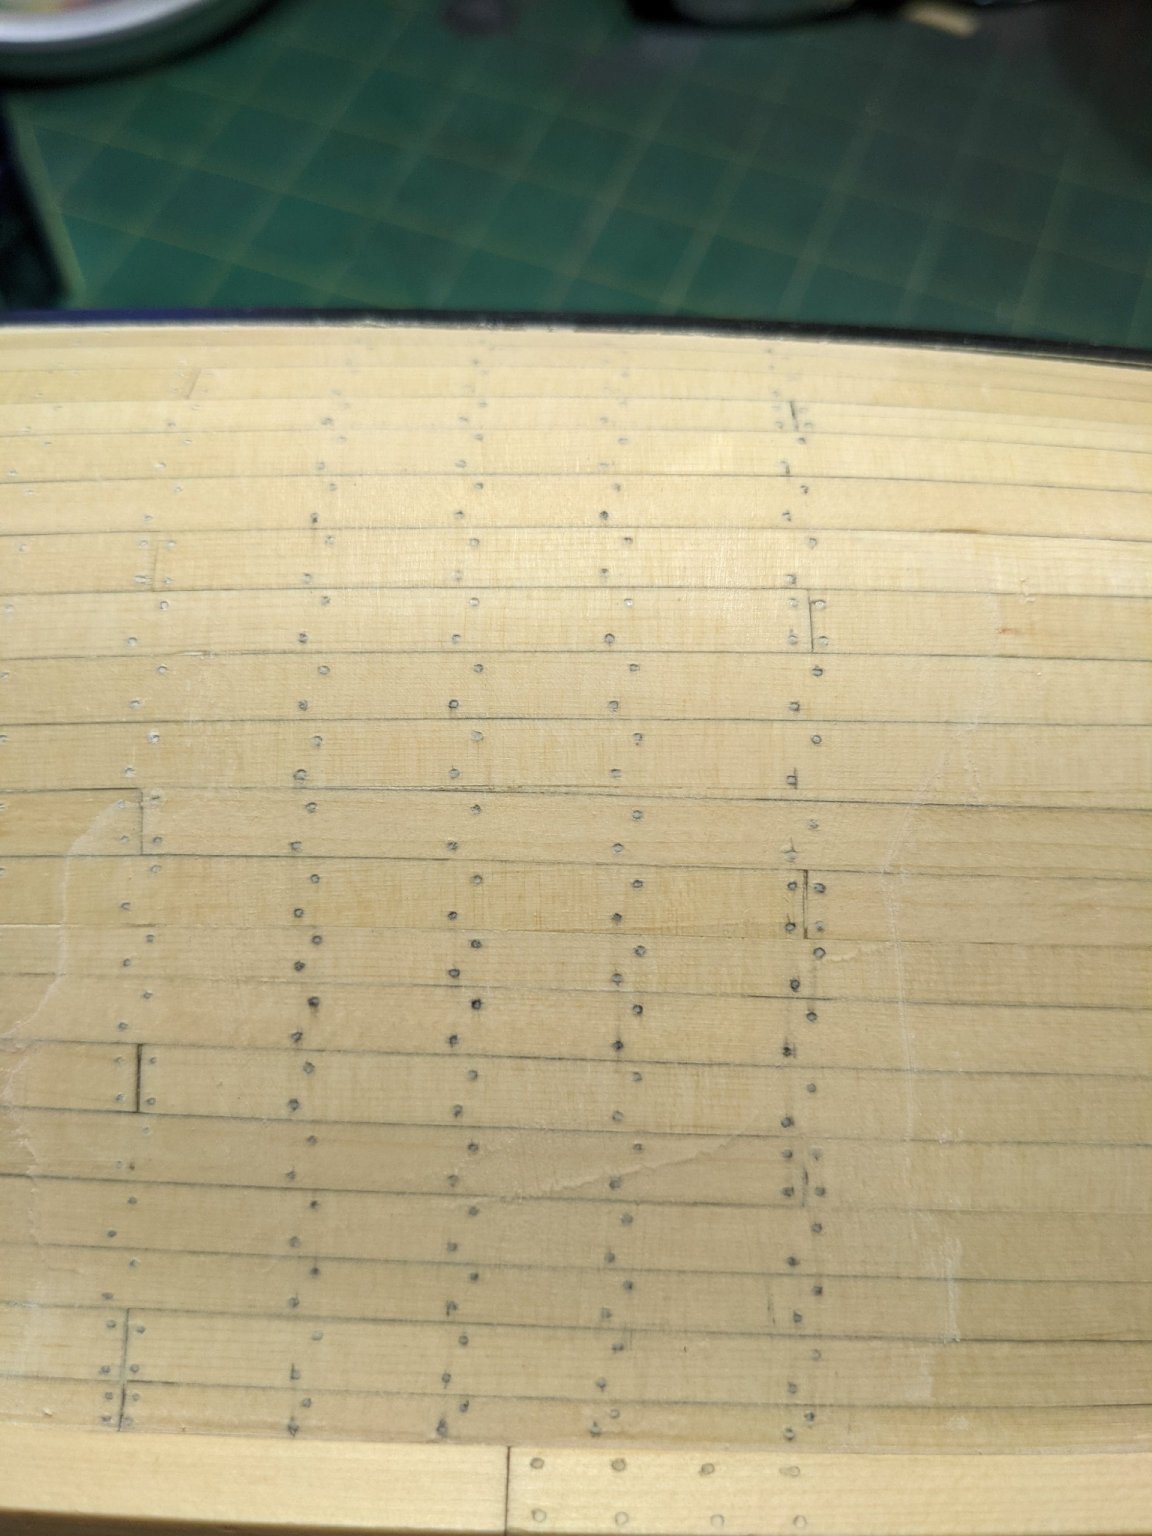
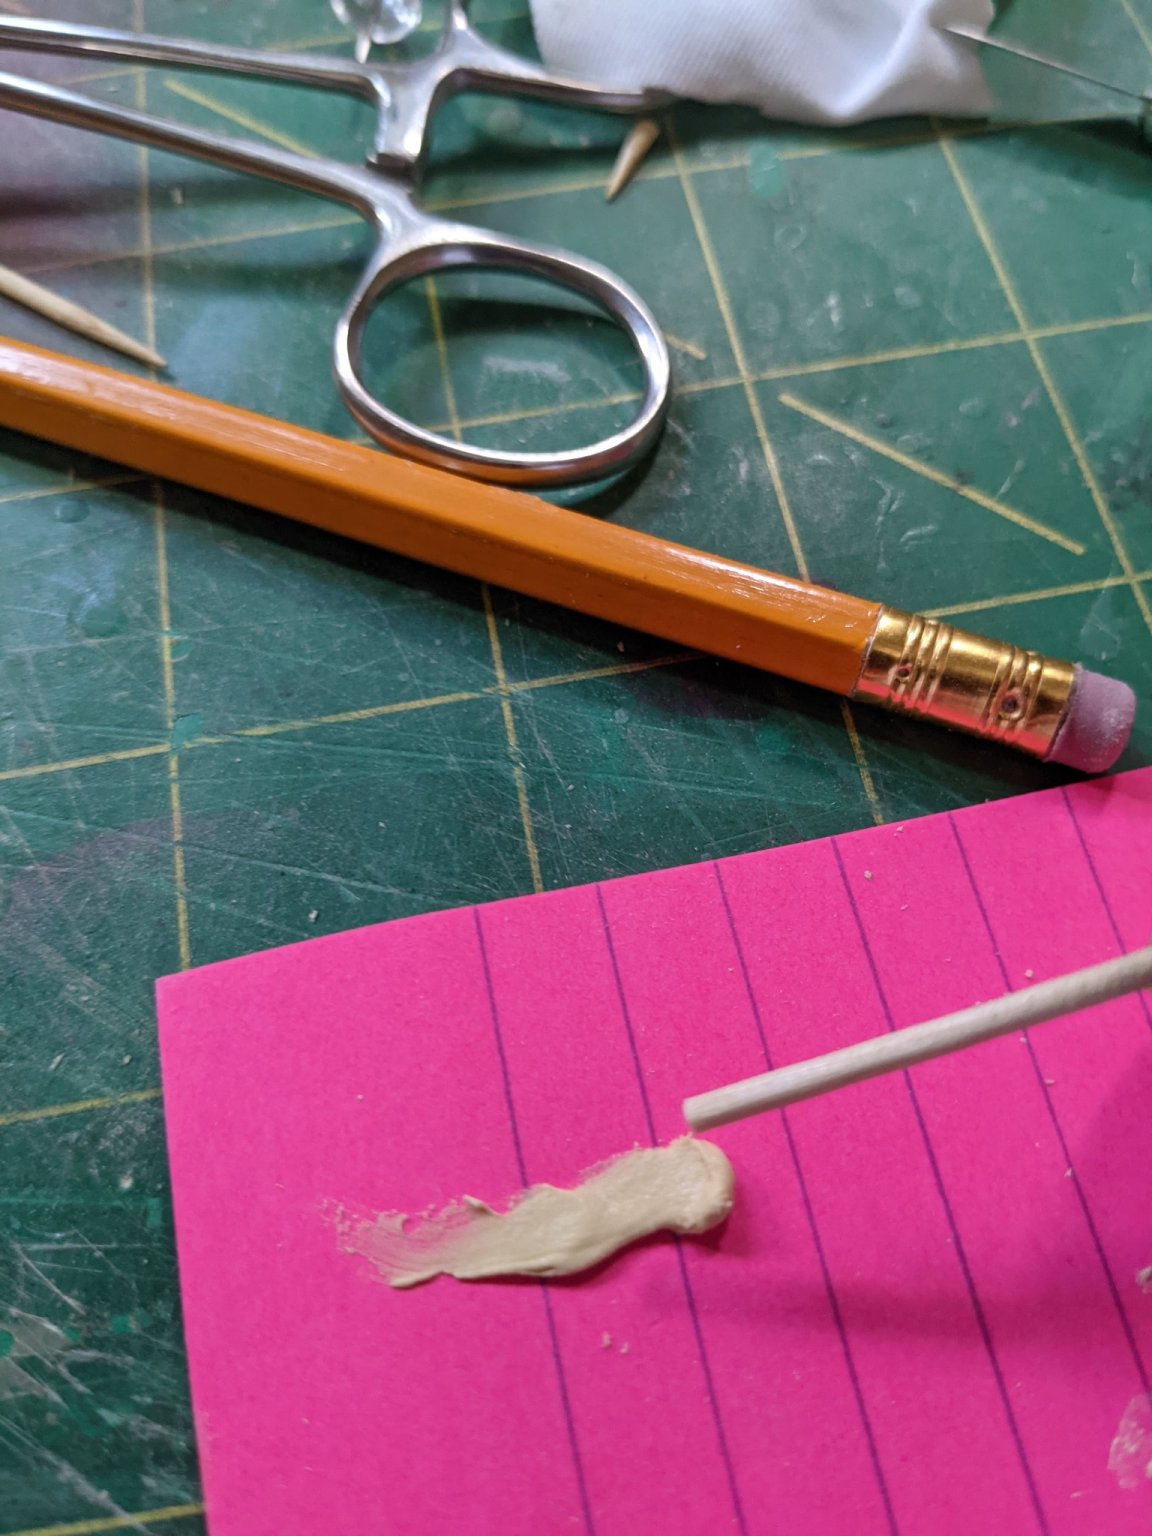
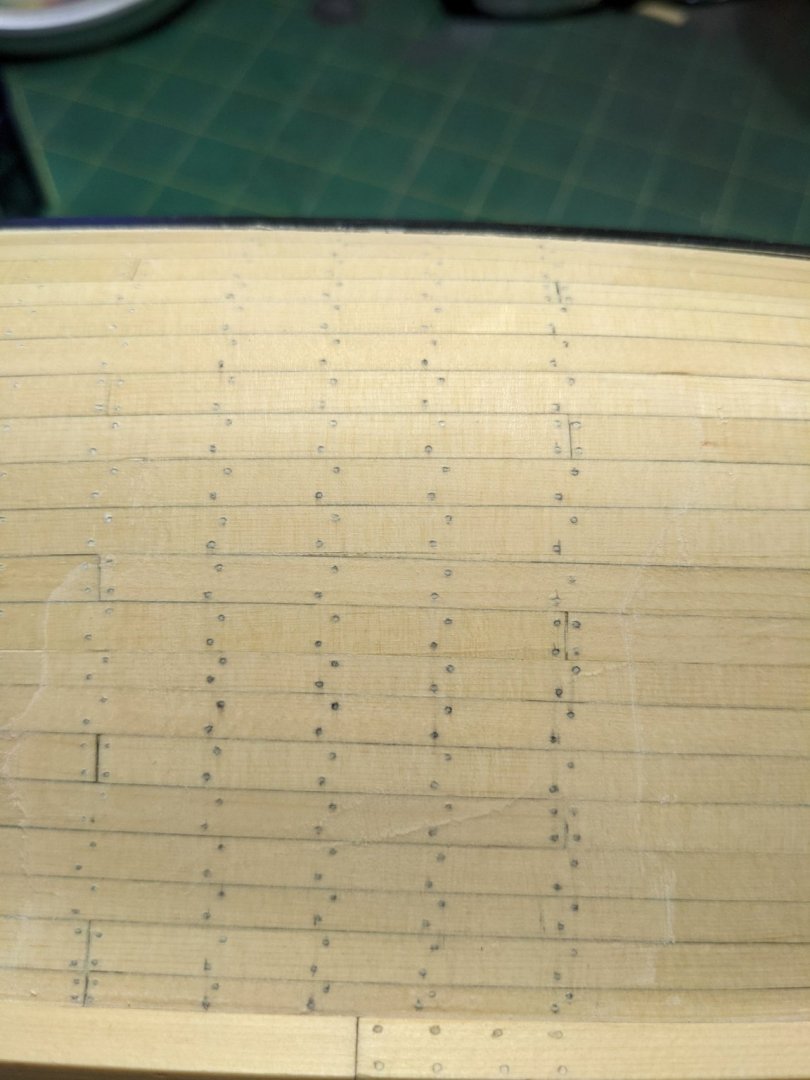
I have been doing the tree nailing and found a good way to fill them. When I first started I was using a piece of wood to fill each hole and then scraping with an xacto blade. This was putting dents in the wood as well as taking a long time to fill the holes. I am using a water based wood filler and this is the easy way to do it. Put a glob of the filler on your cutting mat. You are using a cutting mat aren't you? The put a couple drops of water on the filler and use your grubby finger to mix it up. The take your wife's credit card and scoop up all the filler and use that as a spatula to work the thinned filler into the holes. The take a piece of paper towel and wet that and wipe off the filler from the planks. This works real good since the filler doesn't stick to the poly finish very well. Since you are not scraping the filler off there are no blade marks left behind. Here is what it looks like after wiping it down and before the final sanding.

- 274 replies
-
- 9
-
-
- Cheerful
- Syren Ship Model Company
- (and 1 more)
-
Thanks Bob. Just read through your Medway build and it looks awesome! I like the rigging you did on it for sure. Yes I do spend a lot of time on my hobby. Usually a couple hours or so a night and then weekends. I need an outlet as my job is pretty stressful and I am not one to just sit and watch TV after work. This week I am on a much needed vacation so I am sleeping in and relaxing while I build. One thing I like to do is listen to podcasts while I build and have found a lot of interesting stuff out there. I might try some audible books but I do read for an hour every night so this might spoil my reading time.
- 274 replies
-
- 3
-
-
- Cheerful
- Syren Ship Model Company
- (and 1 more)
-
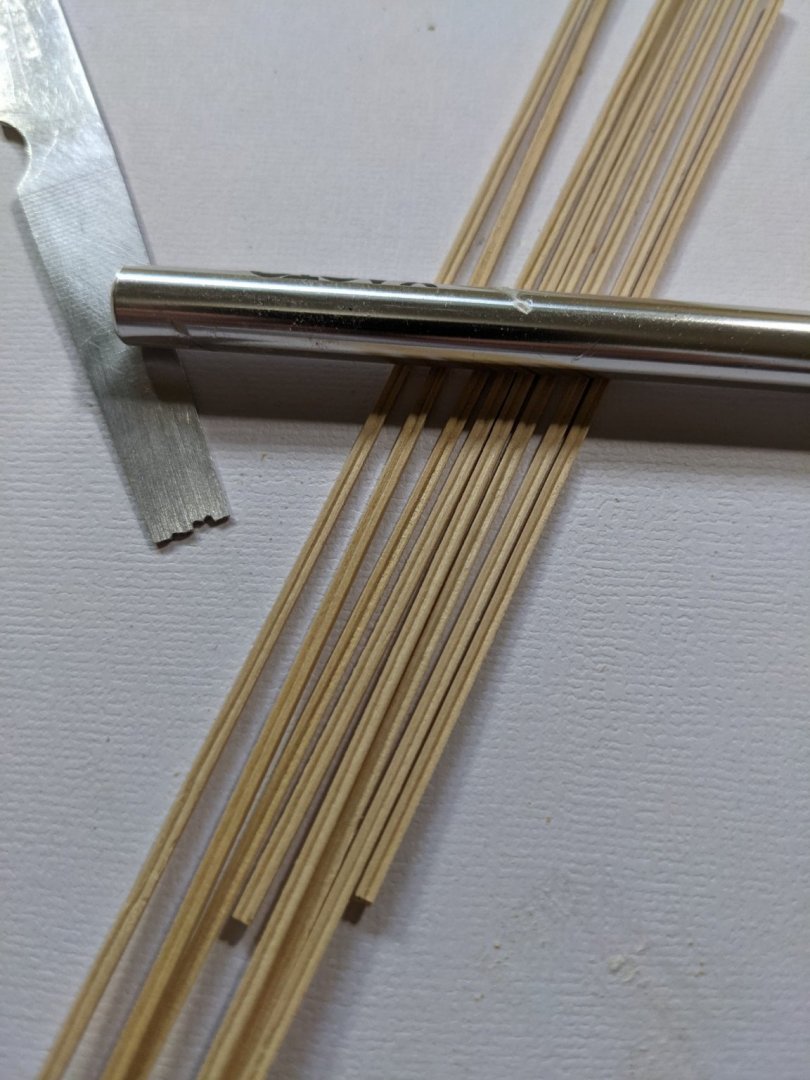
Thanks both of you for the kind words. The likes and comments keep me going. While waiting for a coat of poly to dry I made a scraper from an aluminum nail file and made some mouldings.
- 274 replies
-
- 5
-
-
- Cheerful
- Syren Ship Model Company
- (and 1 more)
-
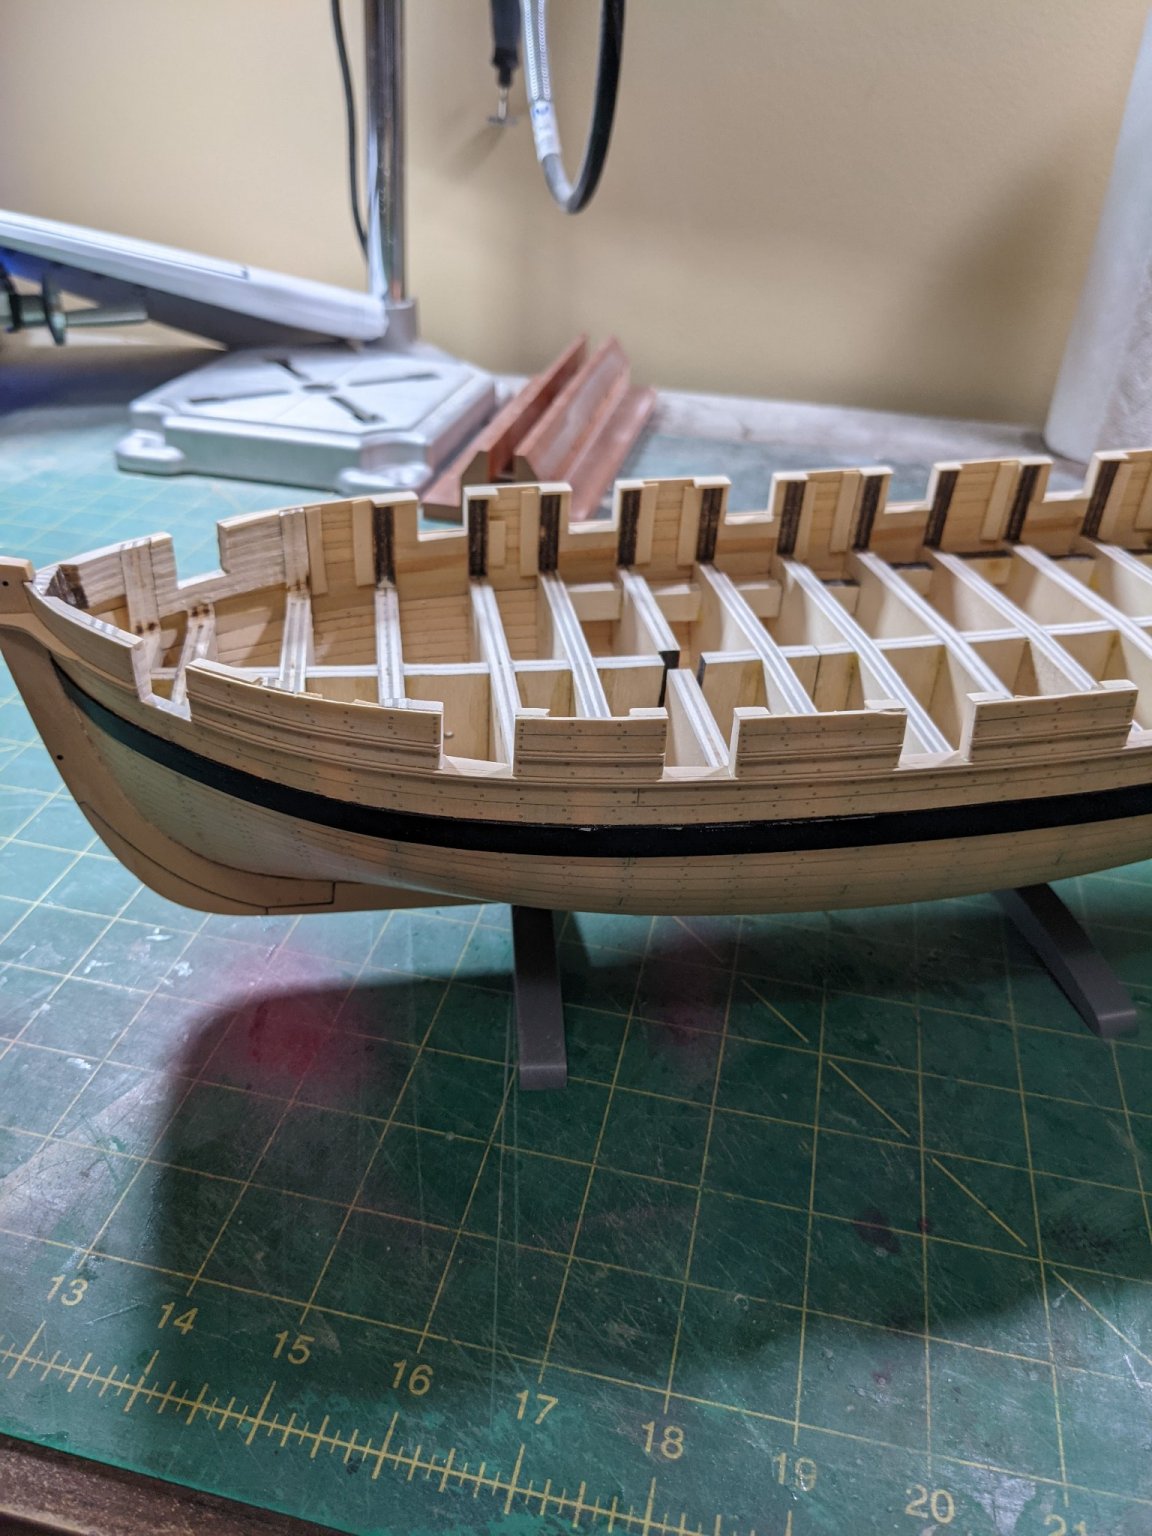
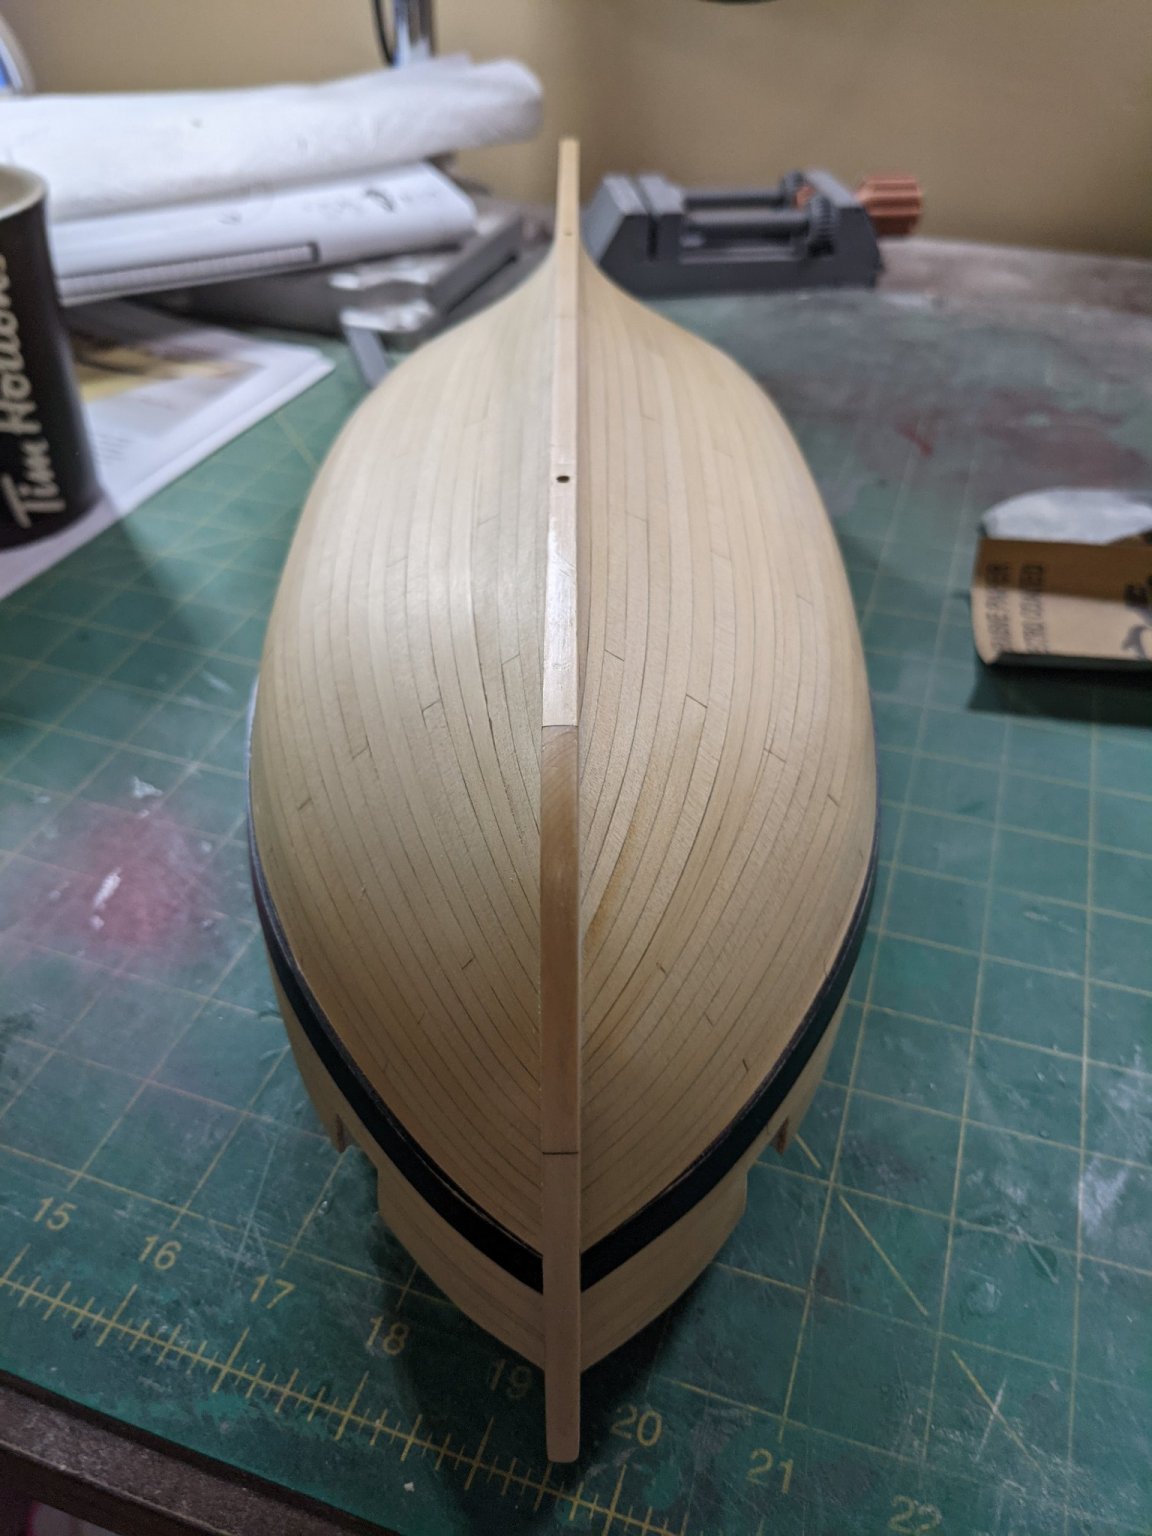
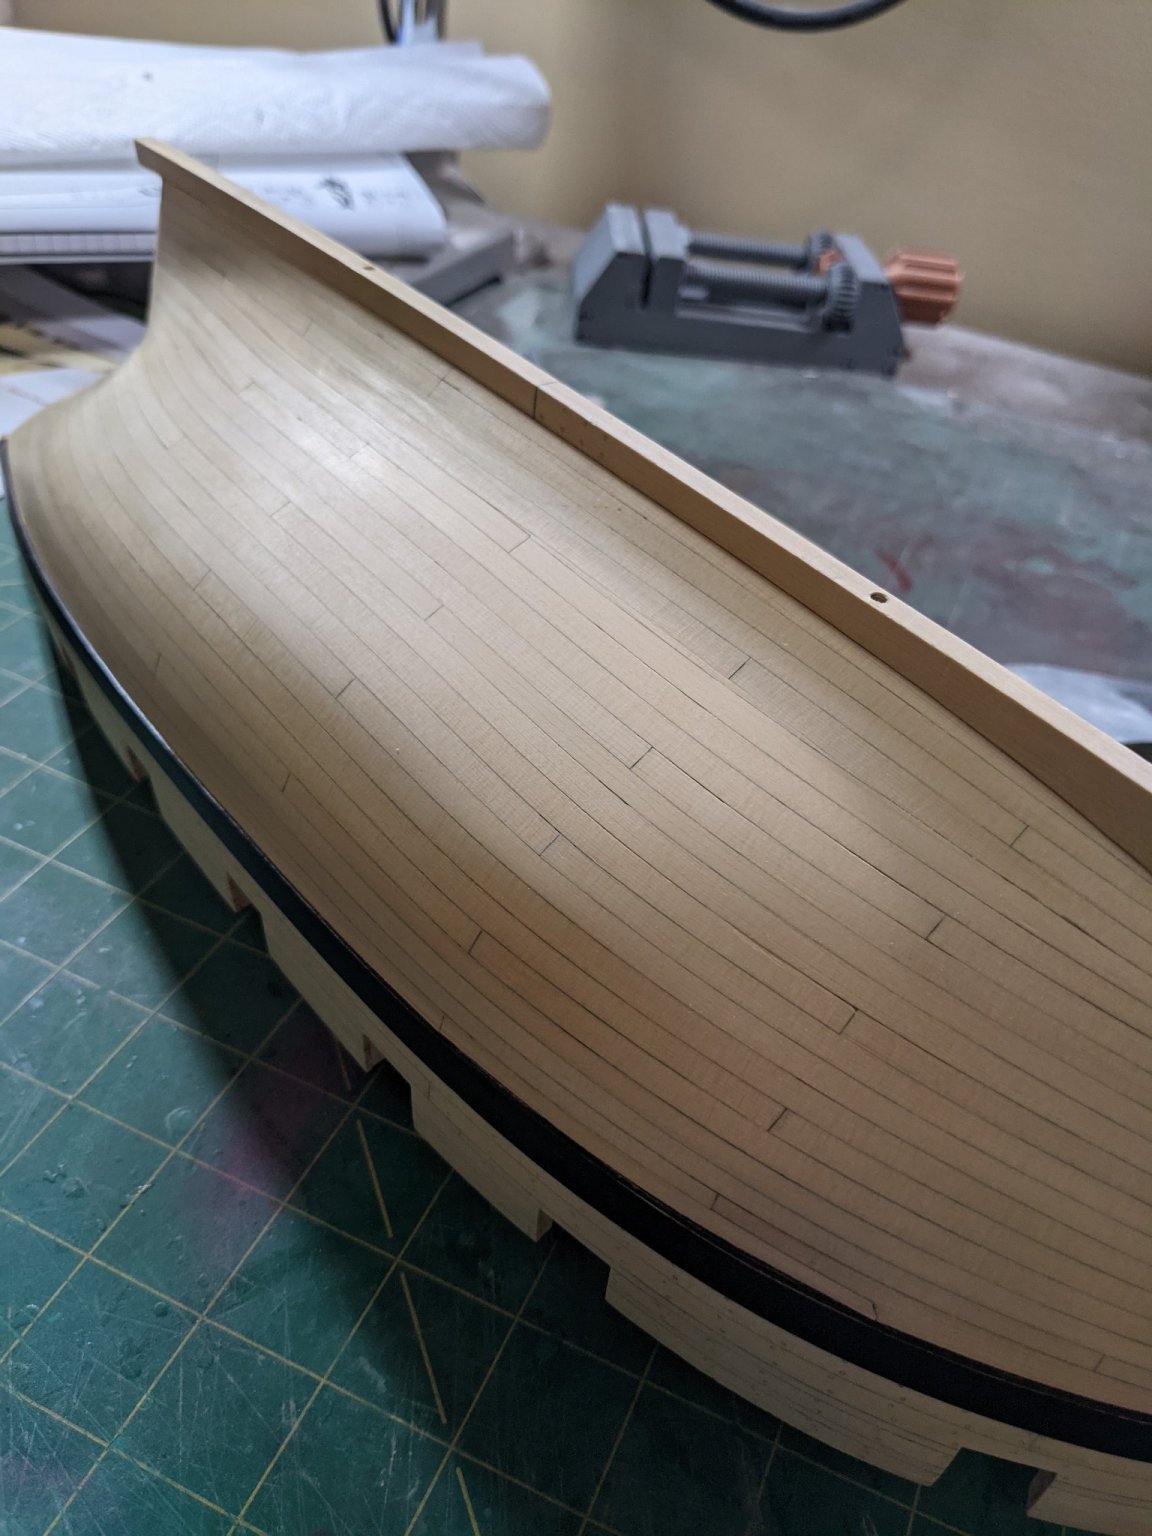
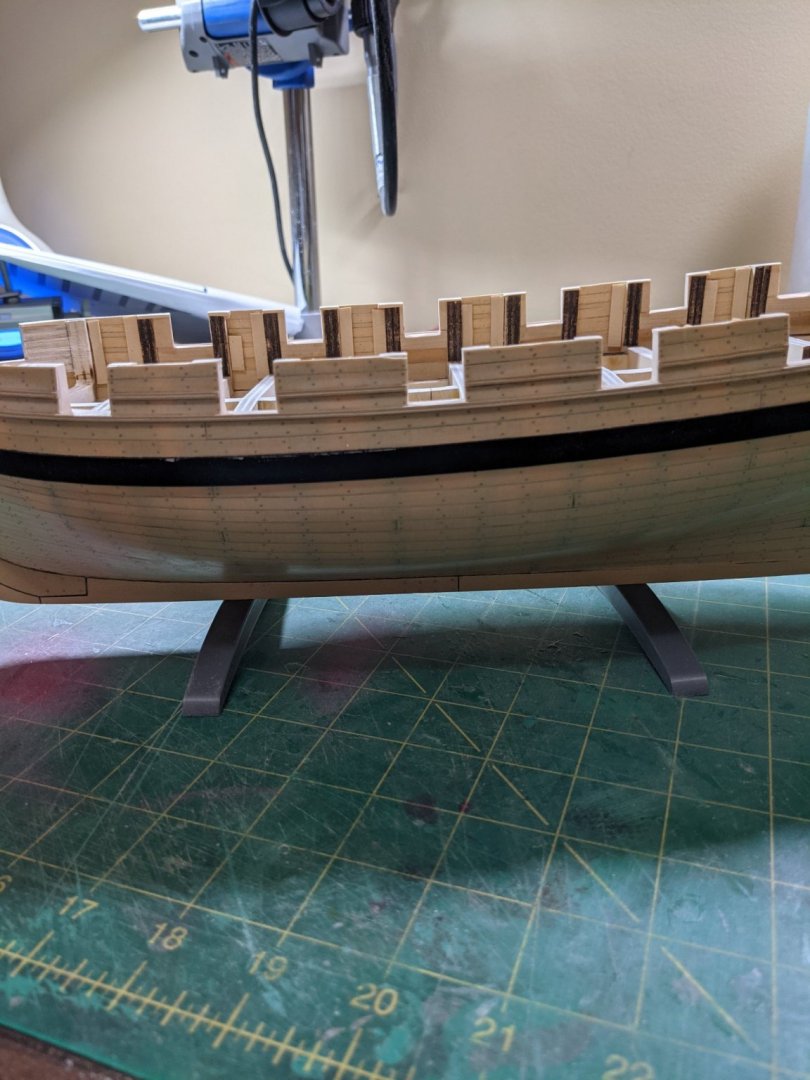
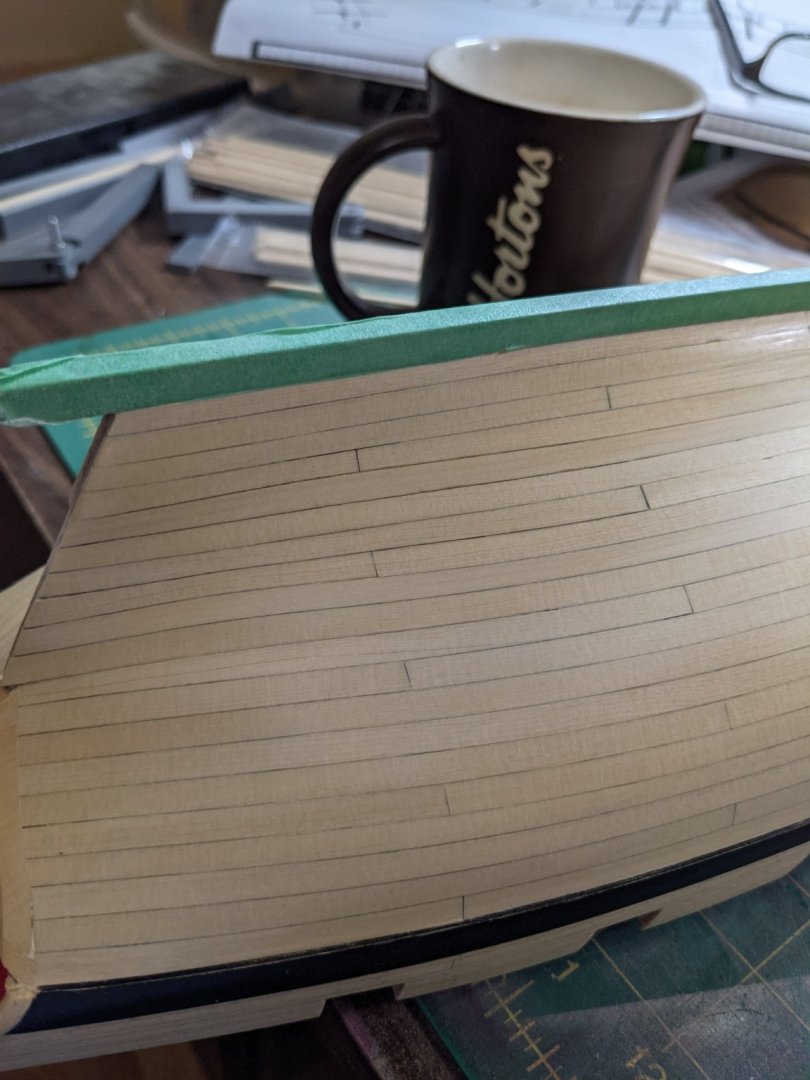
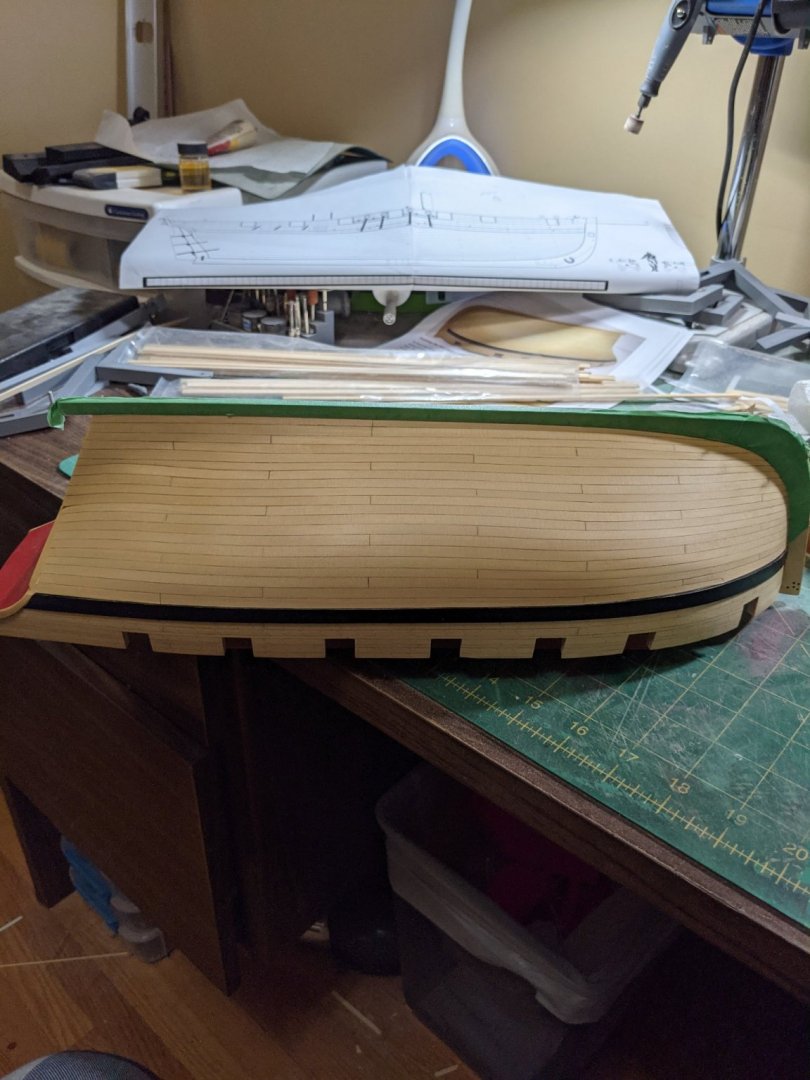
Reached a milestone today as I have the hull planked. Turned out not too bad and I learned a LOT about making sure you carefully mark out the runs of the planks. Have to do some paint touch ups and then put on the stern post and then it is on to tree nailing the hull.


- 274 replies
-
- 12
-
-
- Cheerful
- Syren Ship Model Company
- (and 1 more)
-
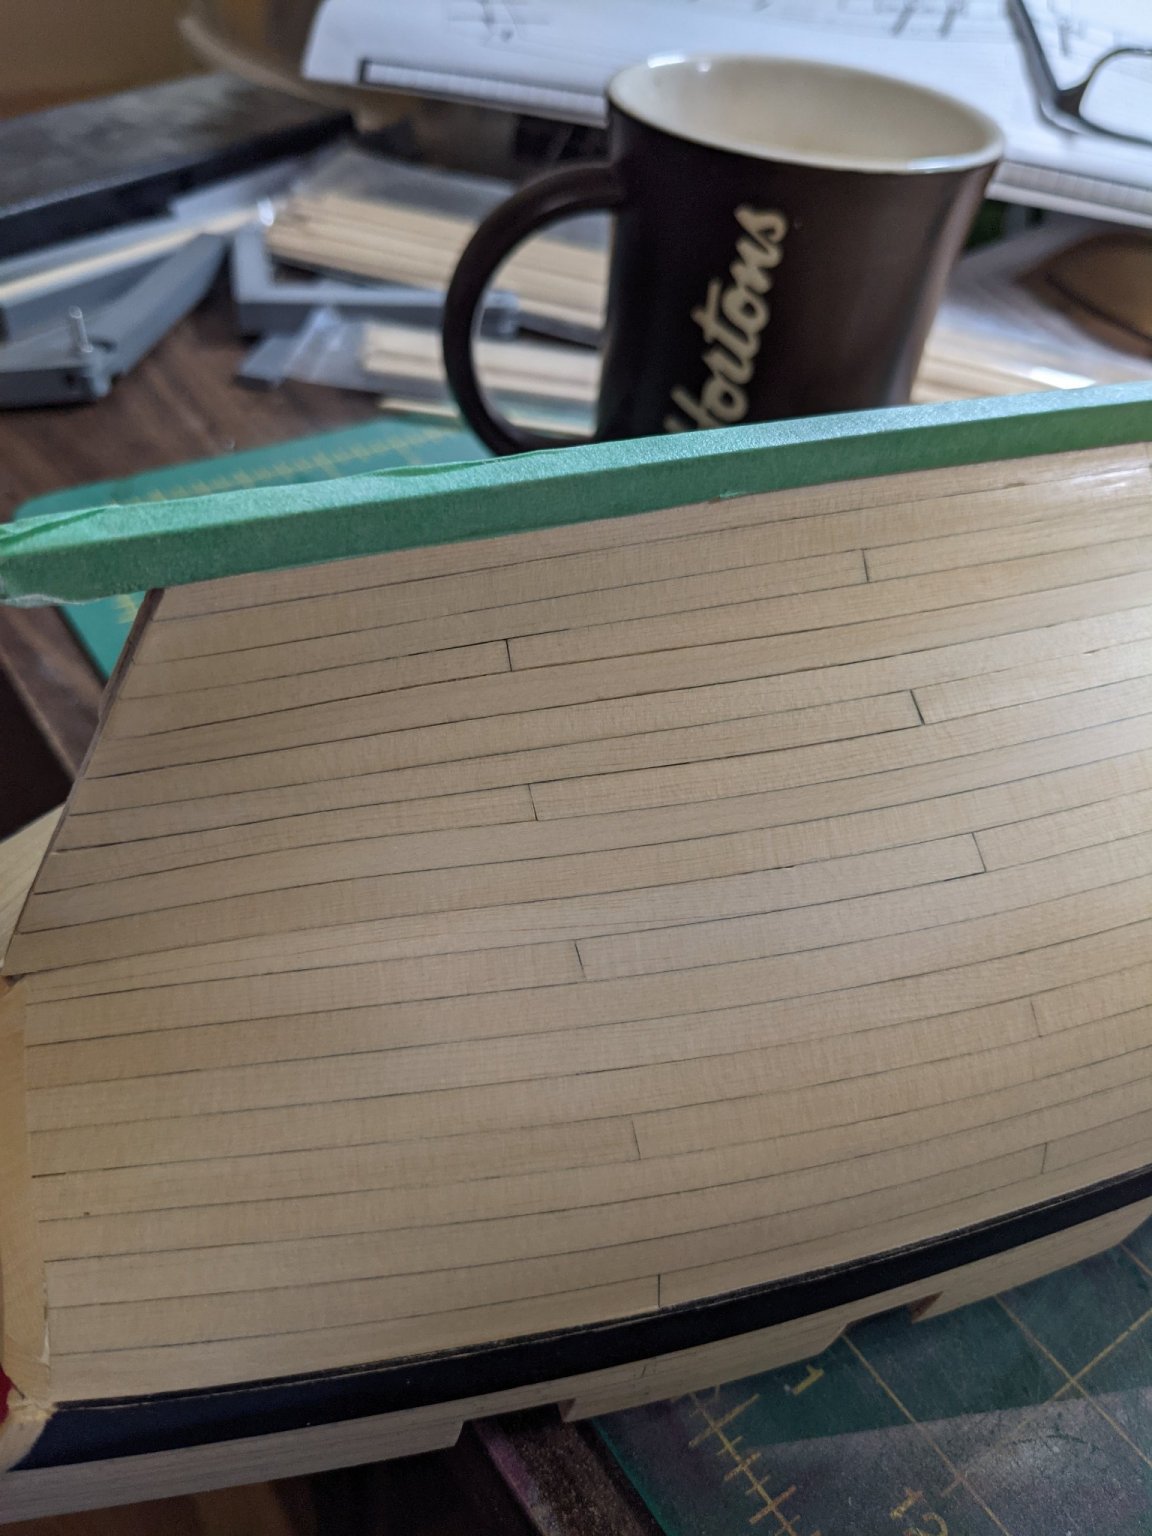
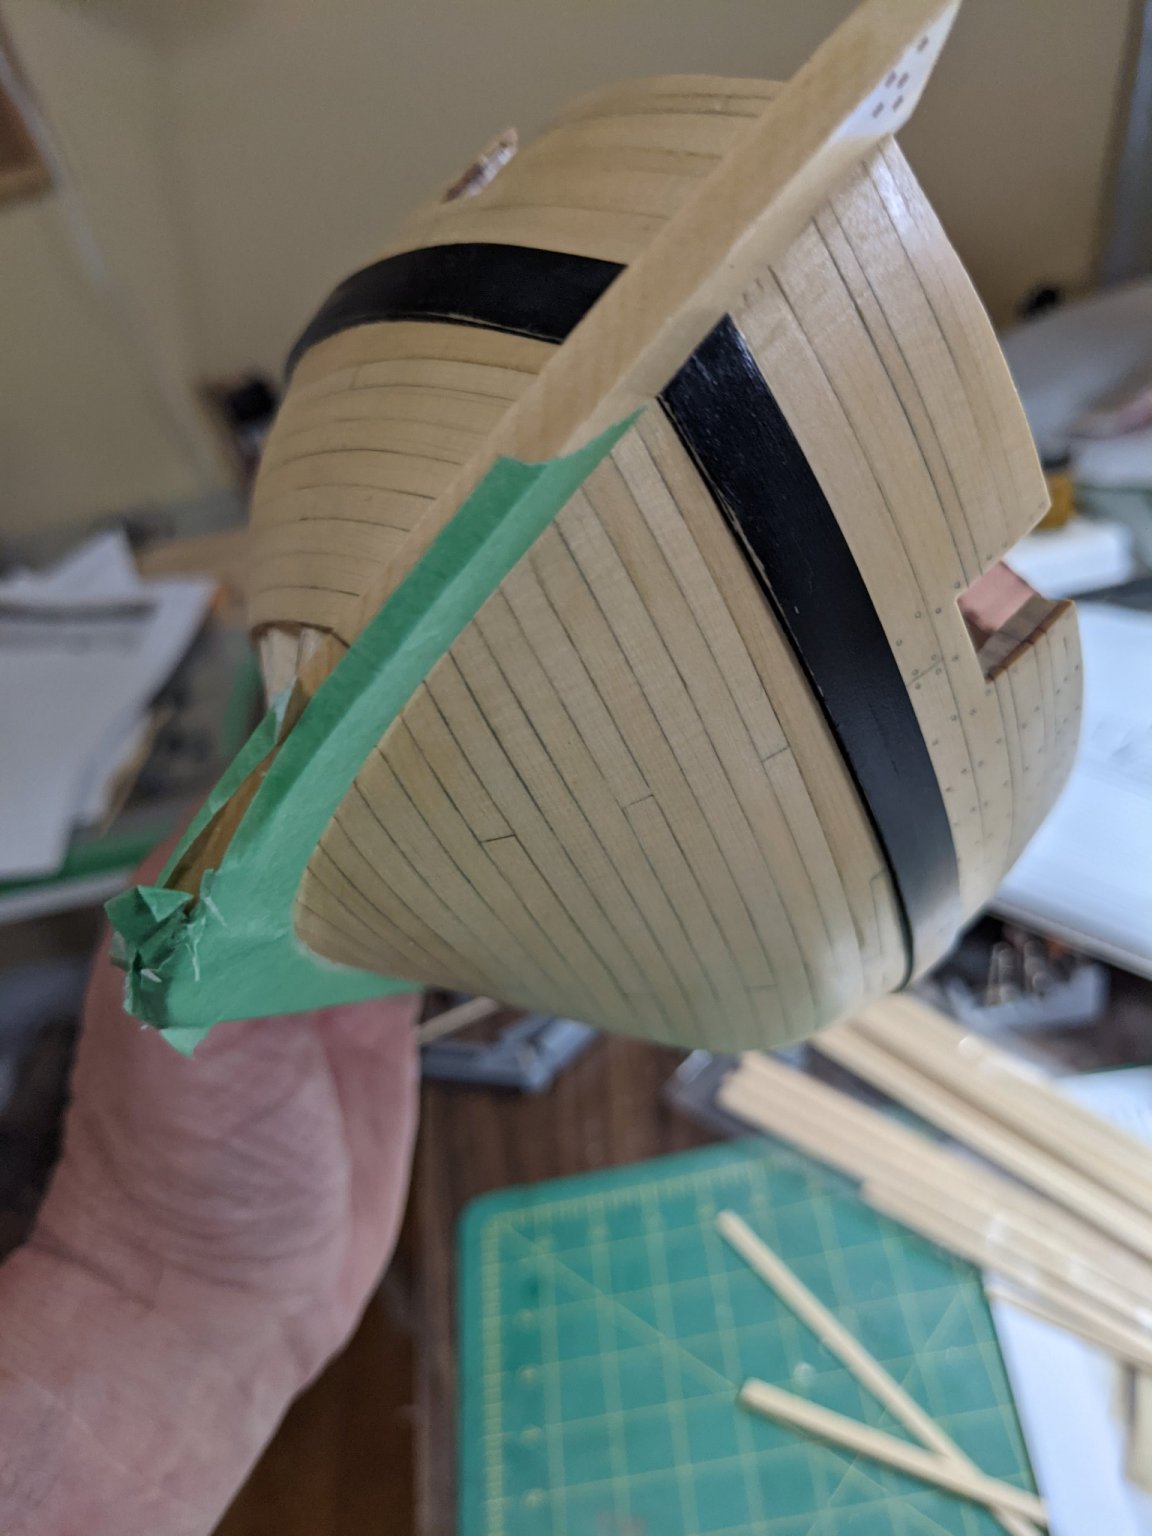
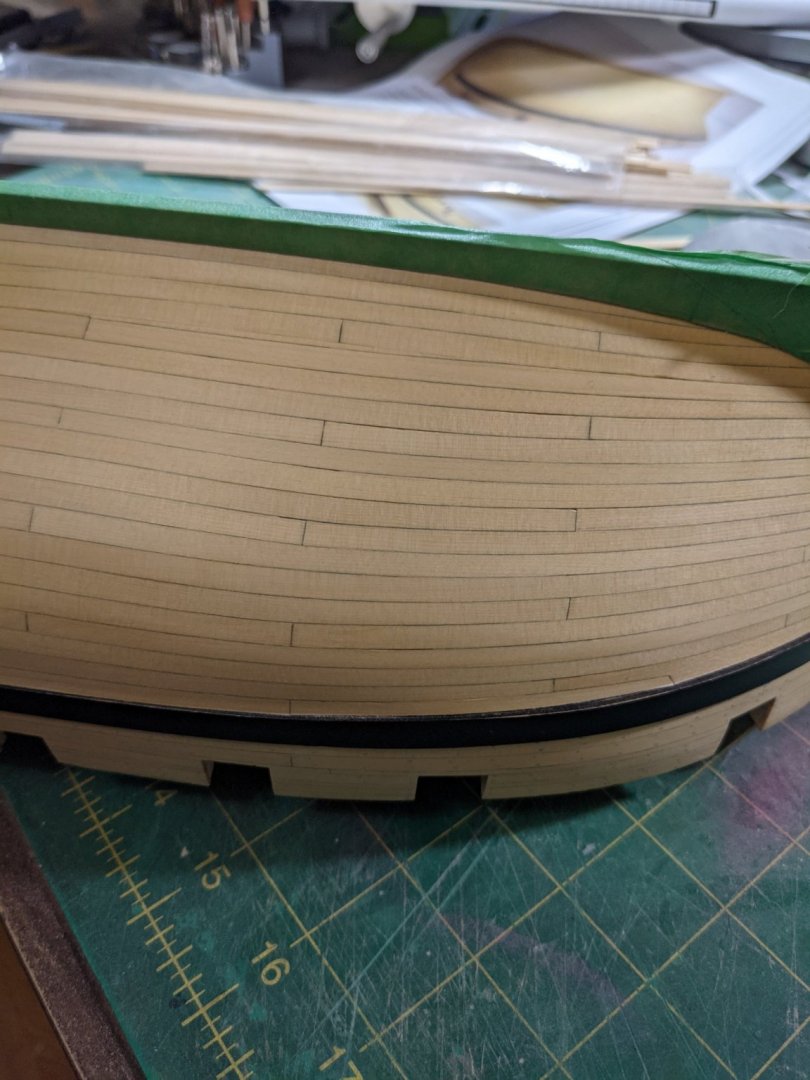
So I pulled out the two bad planks and marked where the third one will be cut with some tape. Carefully fitted some replacements. Once sanded and a coat of poly I can see it was worth doing over again. Not perfect but I like it better. On to the other side to finish planking. phew!

- 274 replies
-
- 10
-
-
- Cheerful
- Syren Ship Model Company
- (and 1 more)
-
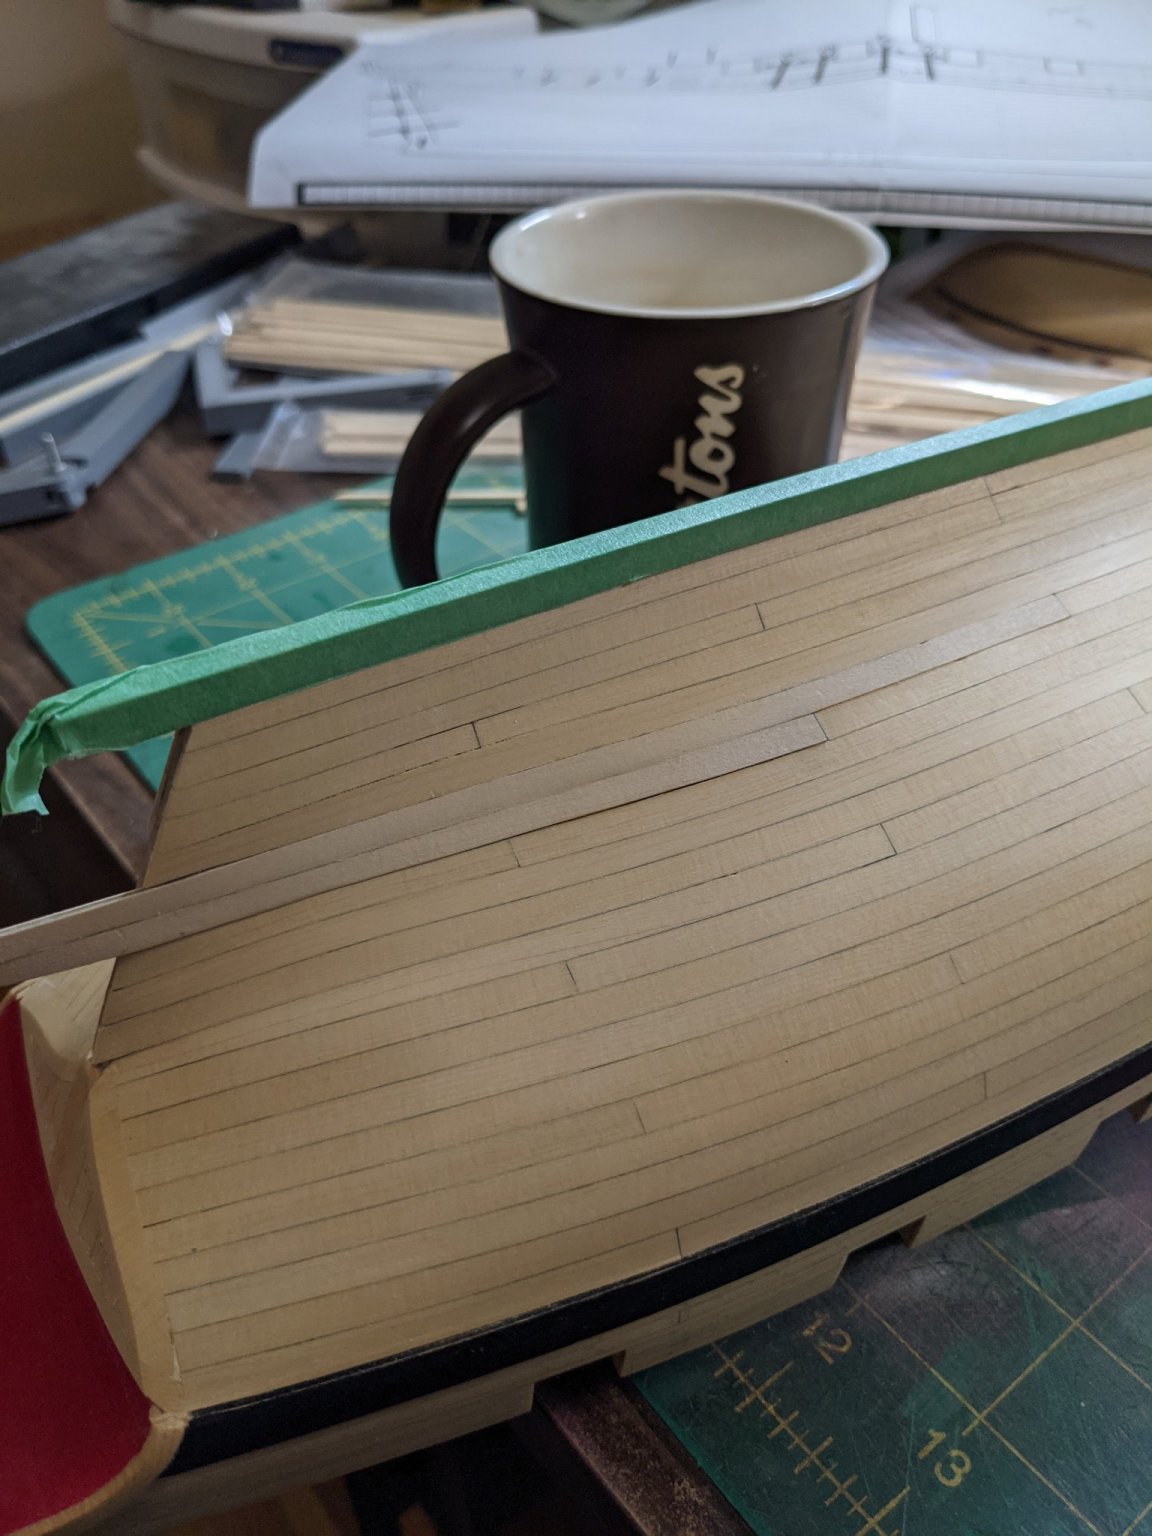
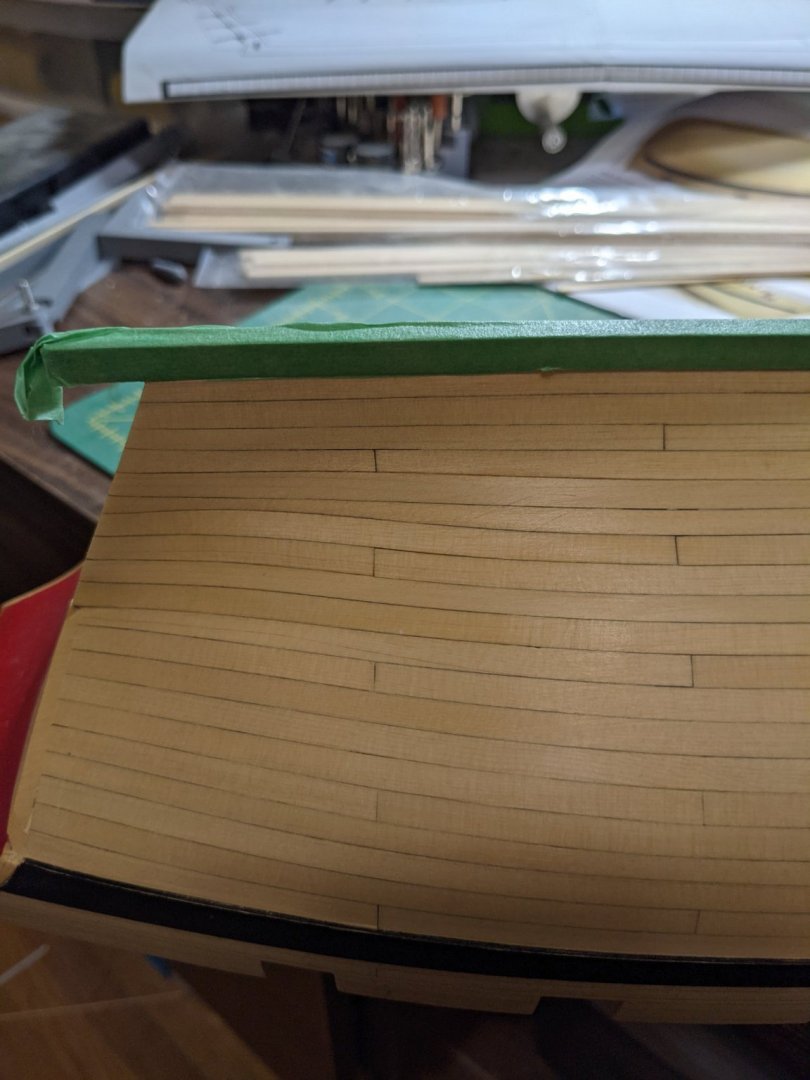
So I finished the planking on one side and did have to make some adjustments. This fix near the bow is ok and it is not too noticeable. But at the stern there is a huge problem. I will remove #5,6 and 7 planks counting from the keel and redo those. Just my not paying attention and painted myself into a corner. This shouldn't be too bad to do as I will remove them up to the ends and mark them out and do it over. My issue I had was thinking that I needed to make full width planks at the back and was worried I would need to add a wedge if I didn't and went off my lines and just got it wrong. This won't be too bad of a fix and it just shows you how it is important to follow the tick lines to the letter. In my defense it did look ok until I put a coat of poly on it.

- 274 replies
-
- 8
-
-
- Cheerful
- Syren Ship Model Company
- (and 1 more)
-
Fiberglass a boat Hull
PRS replied to Riotvan88's topic in Building, Framing, Planking and plating a ships hull and deck
For fiber glassing this is how they do it for R/C airplanes. https://www.modelairplanenews.com/workshop-tips-working-with-fiberglass-and-resin/#visitor_pref_pop -
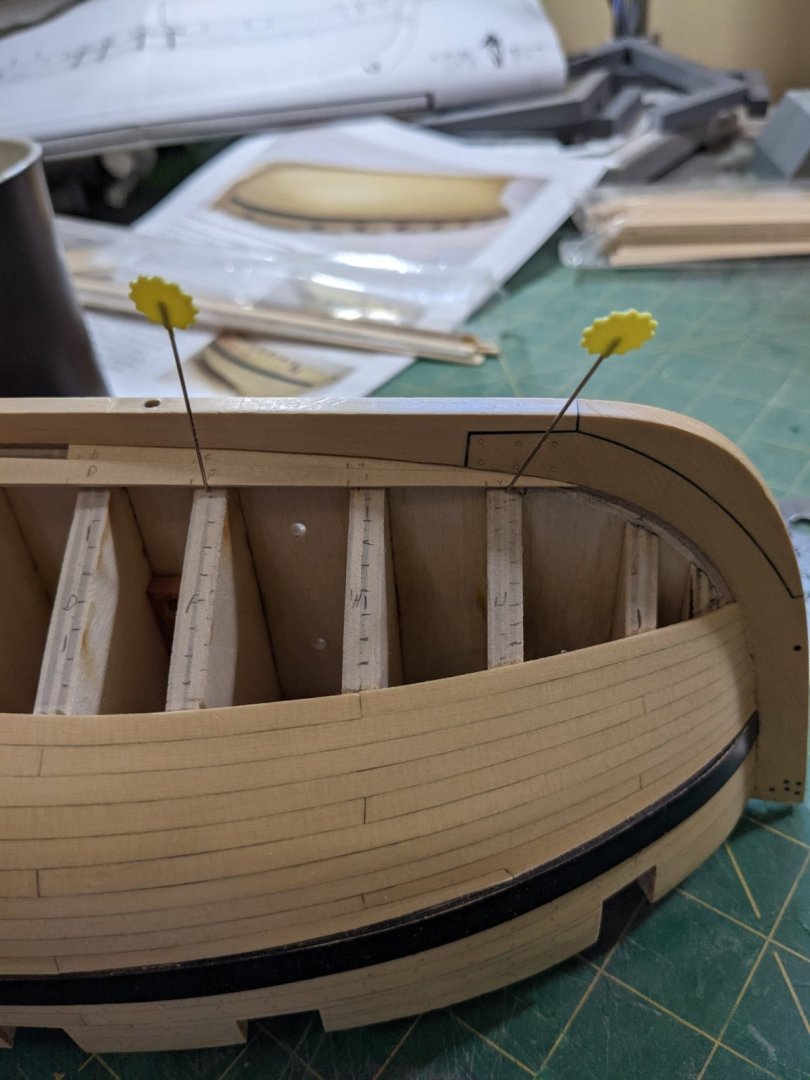
Nice mug I have a question about the keel clamp. Are you not afraid of breaking off the keel if you use too much force on it? I haven't used one but see a lot of people using them.
-
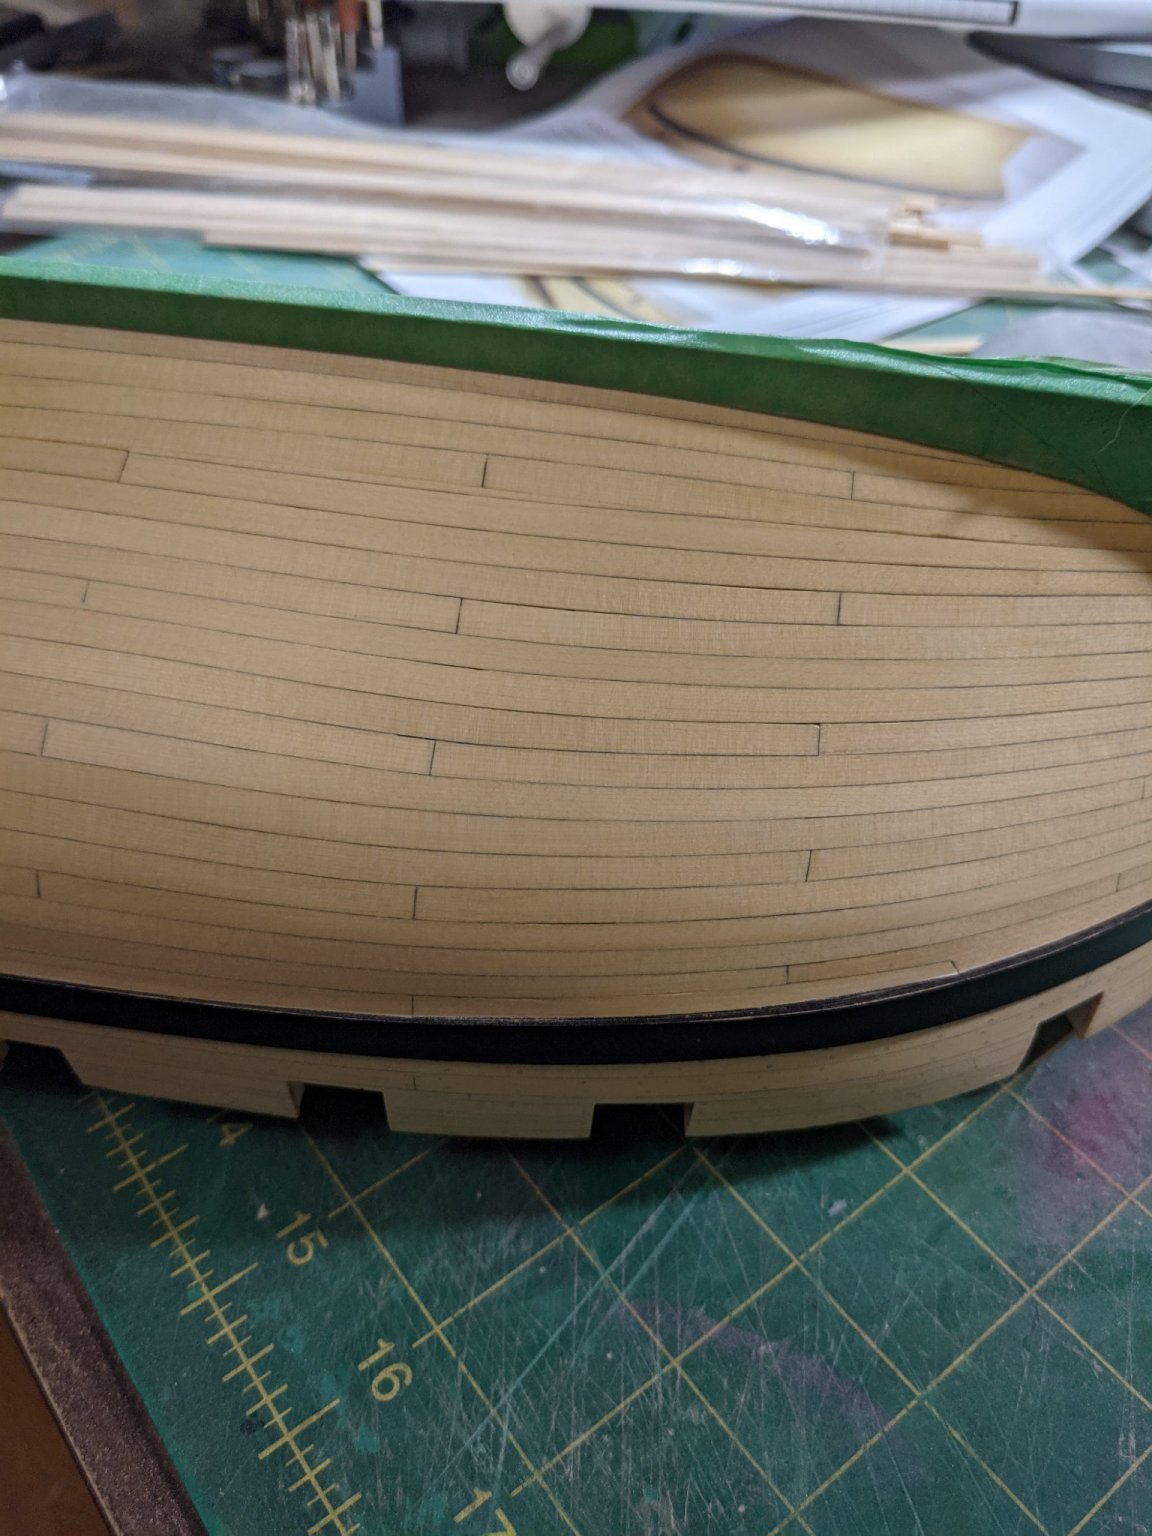
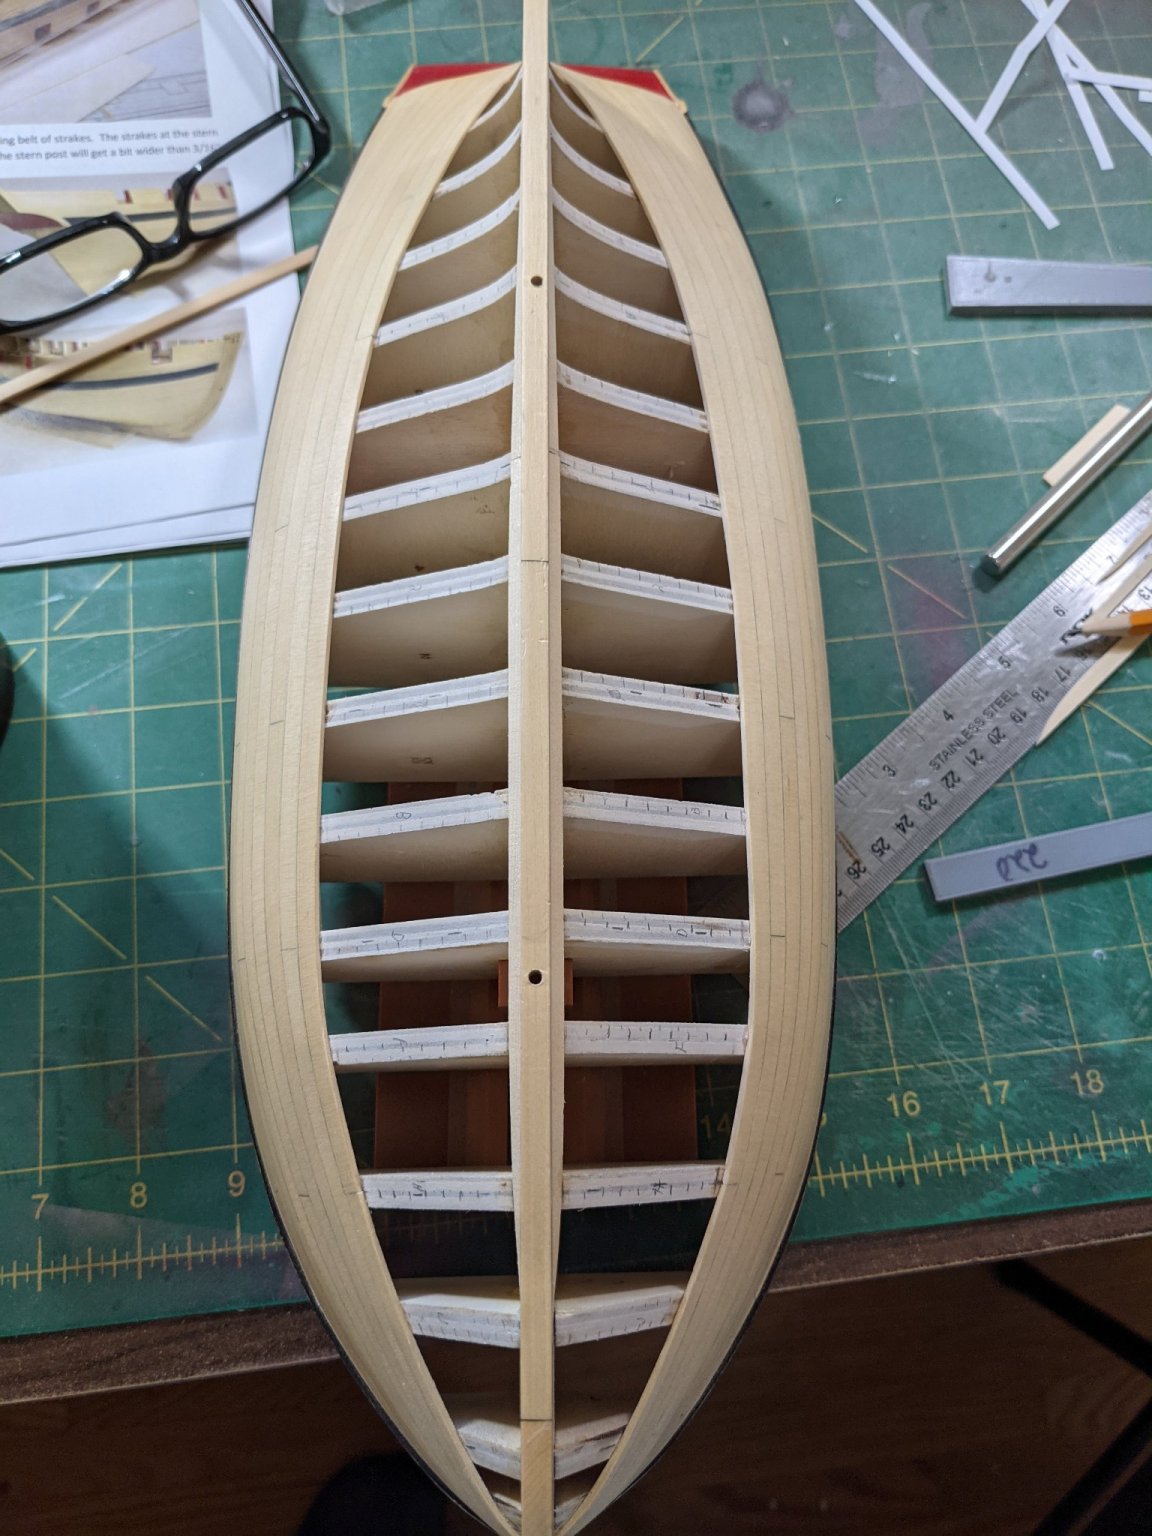
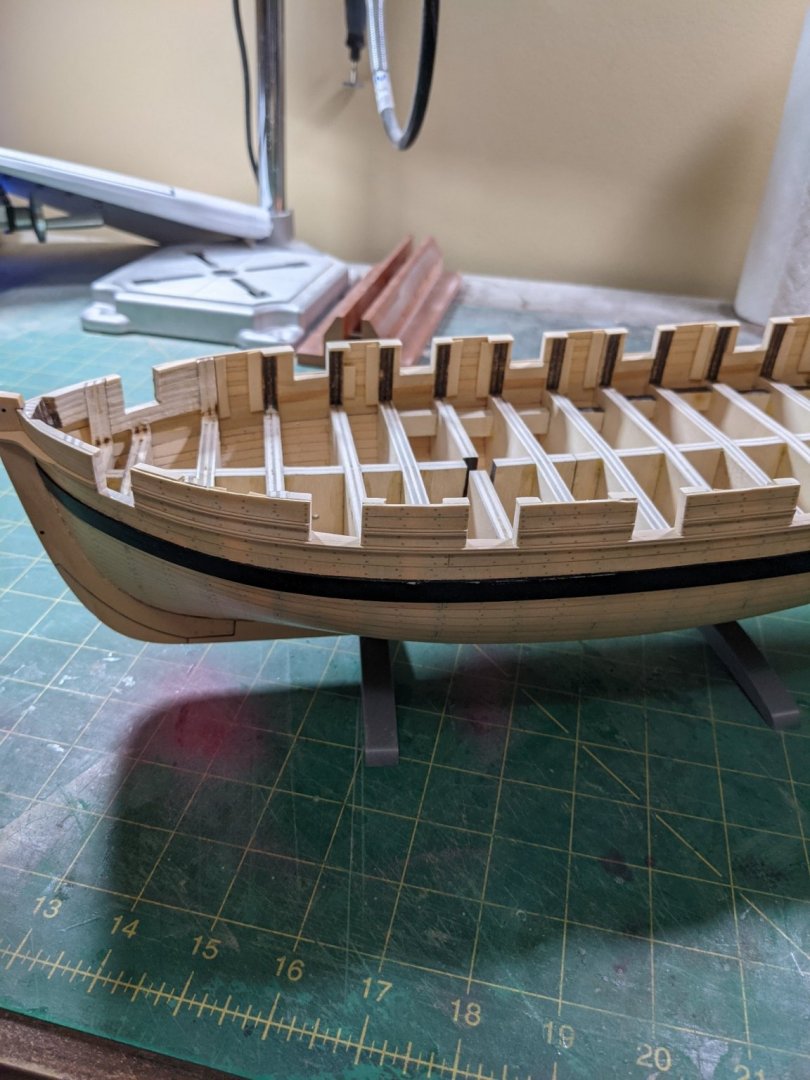
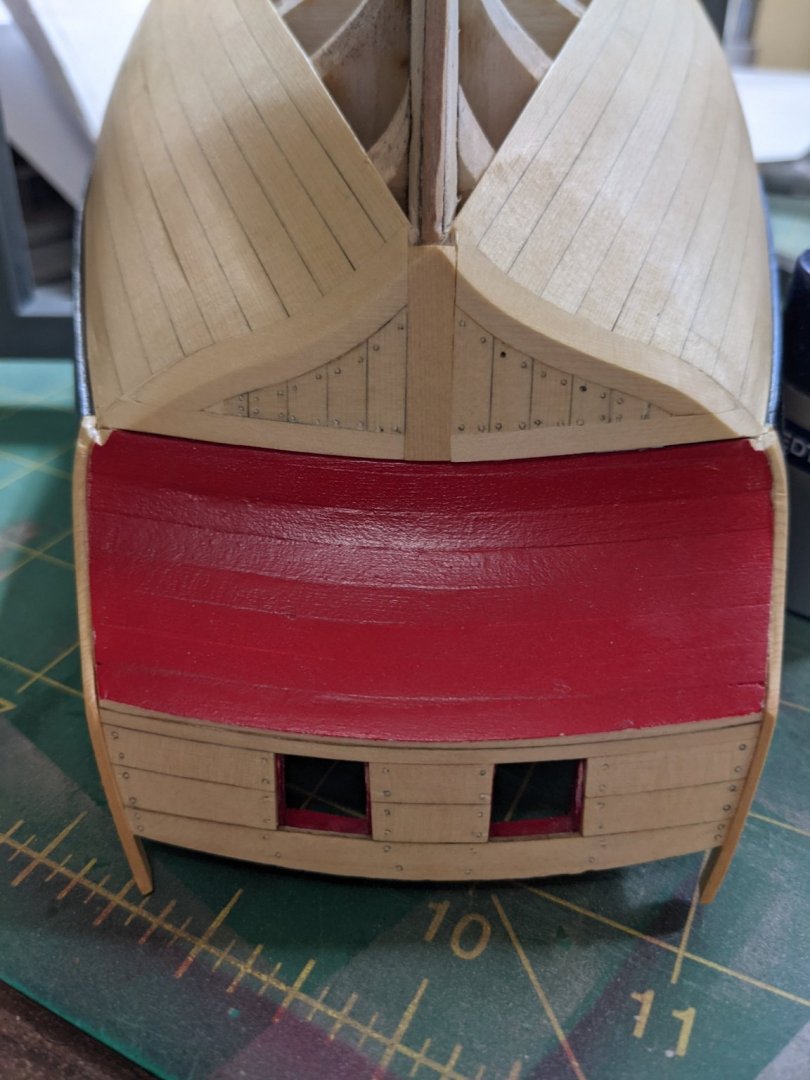
Made a couple test pieces for the garboard strake to try to get a tight a fit as possible. After these were done it was just a matter to transfer them to the strakes themselves. All in all this took about 4 hours to get two of the strakes in place. I may have them a little thin and will need to see if this is going to cause an issue going forward.

- 274 replies
-
- 9
-
-
- Cheerful
- Syren Ship Model Company
- (and 1 more)
-
The larger ones are #2 blades and I am not sure why but they are pricy and I have not found a source for 50 or 100 packs like I can the #11 blades.
-
Thats going to look nice with the ebony. Can't wait to see it. Good choice.
-
The clamps are Ryobi small bar clamps you can get at most home improvement stores. The sanding blocks are all 3d printed with sandpaper superglued to them. They cost pennies to make.
-
I like the Olson blades. They give a great cut. https://www.amazon.ca/gp/product/B000GARGYW/ref=ppx_yo_dt_b_search_asin_title?ie=UTF8&psc=1
-
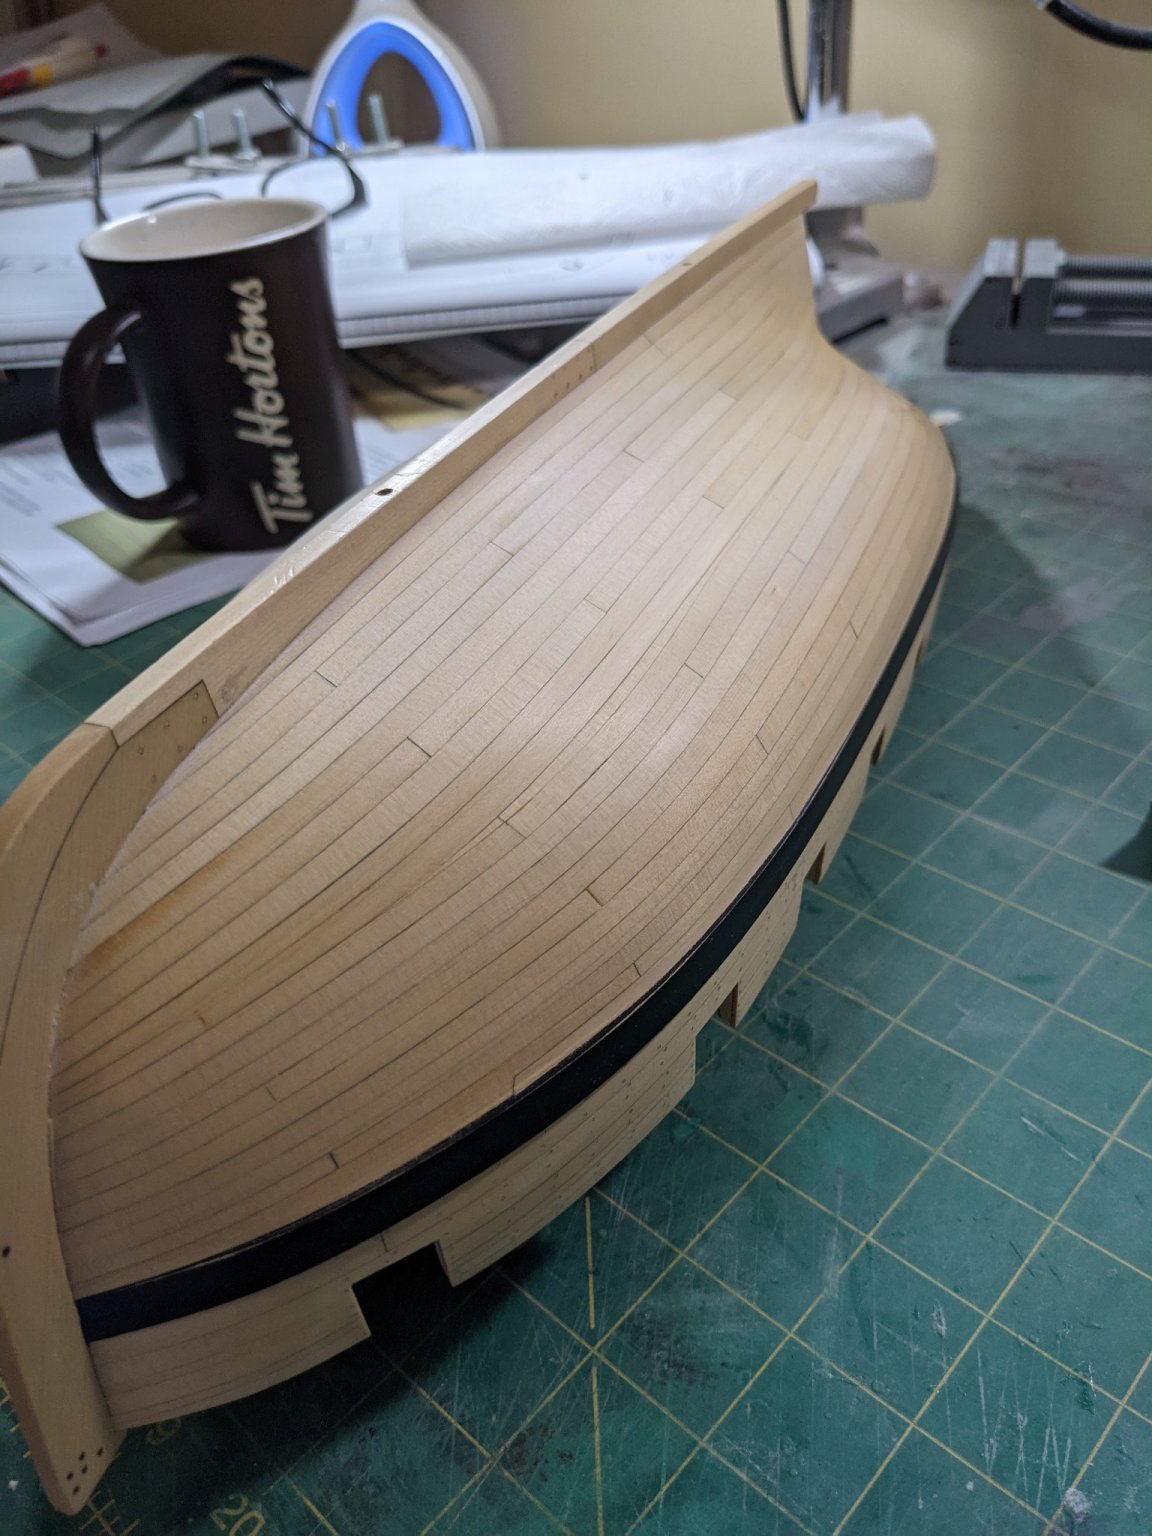
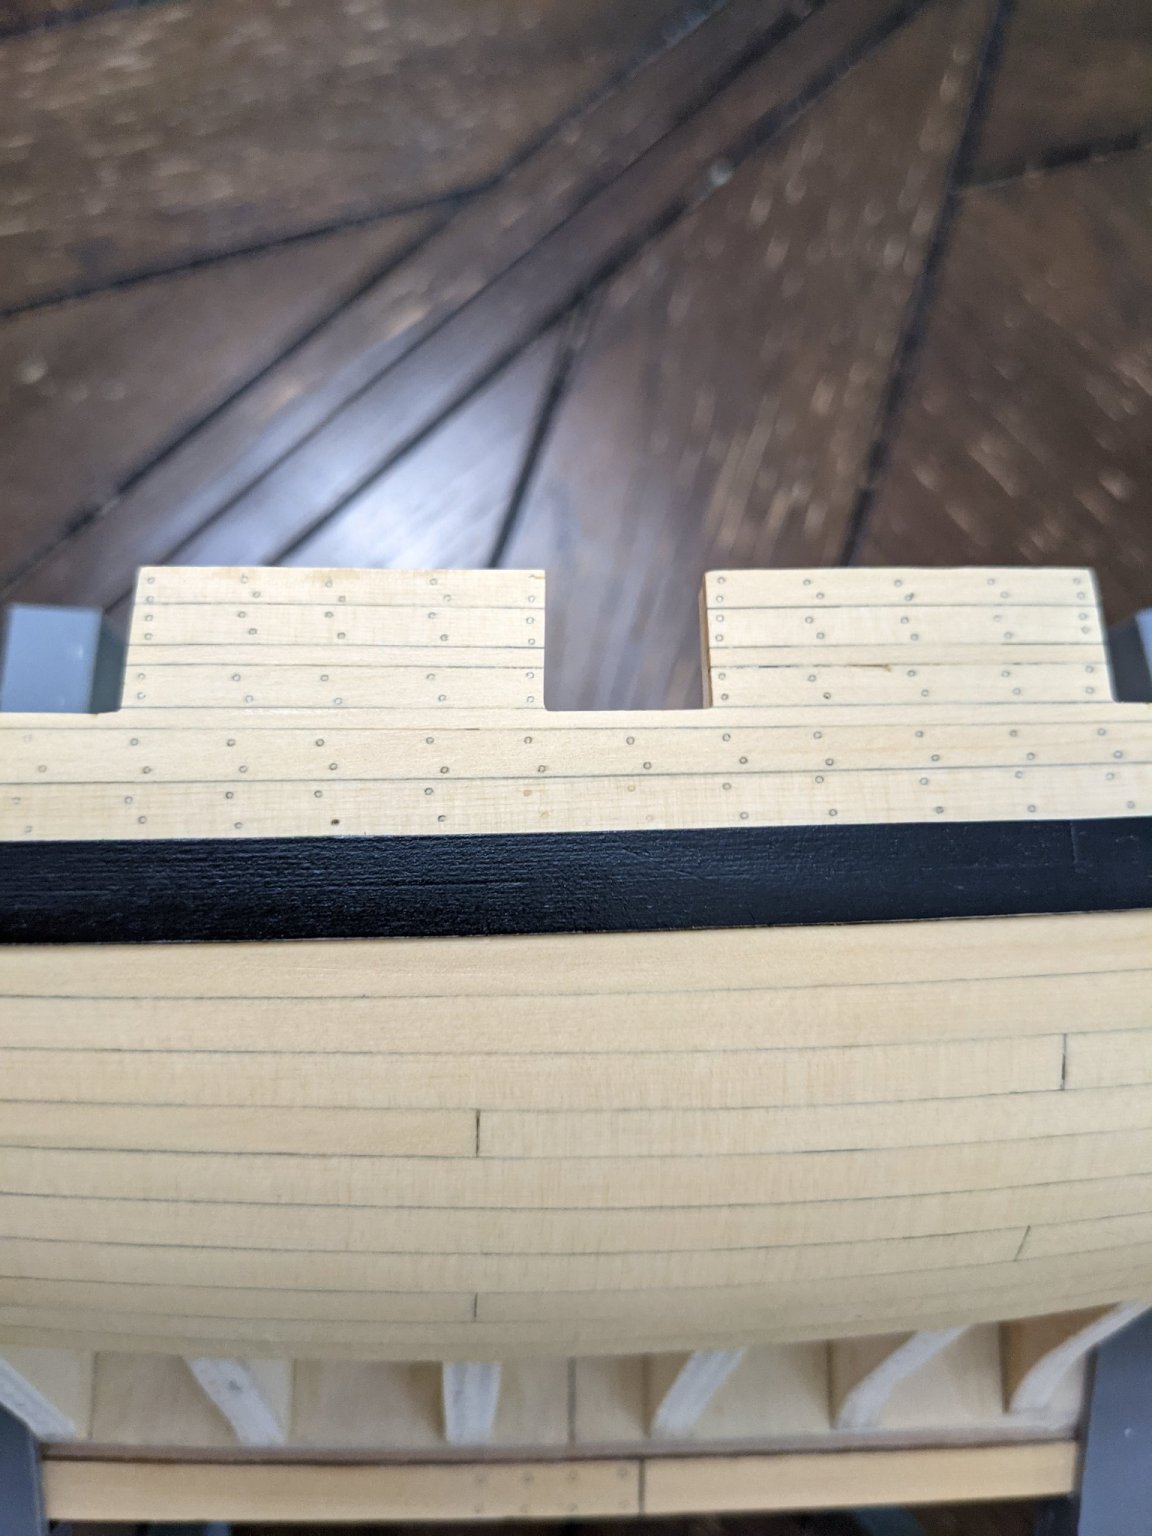
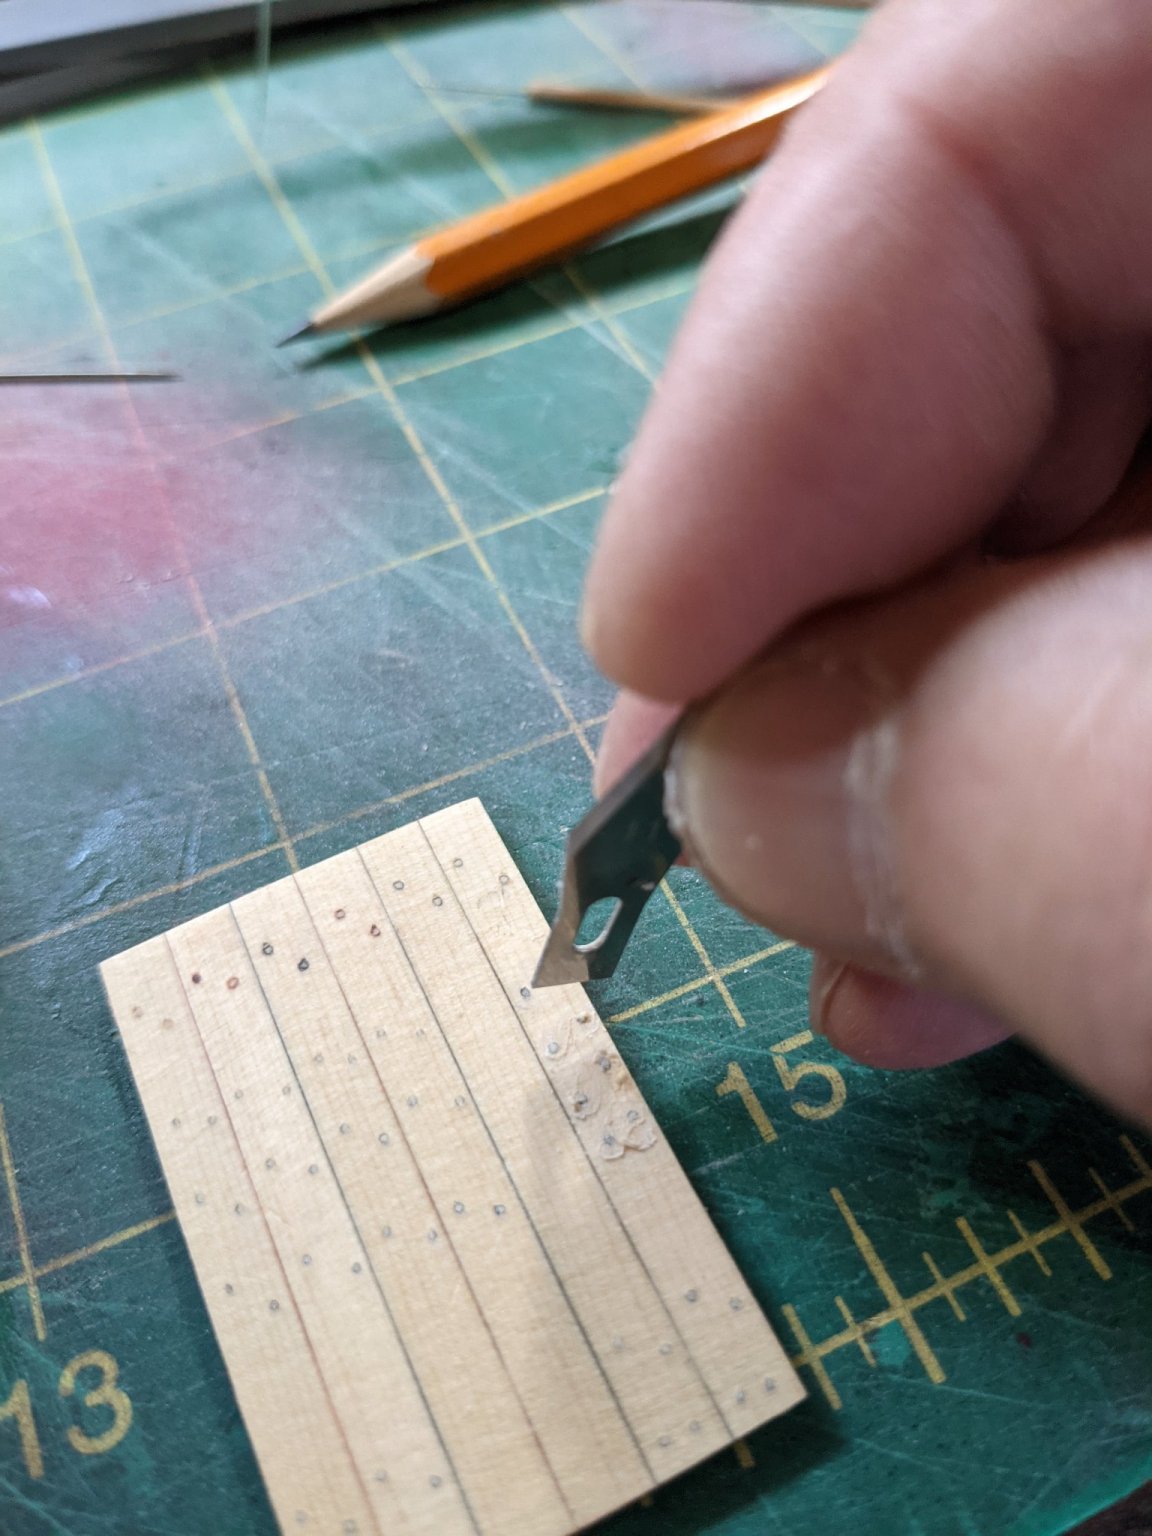
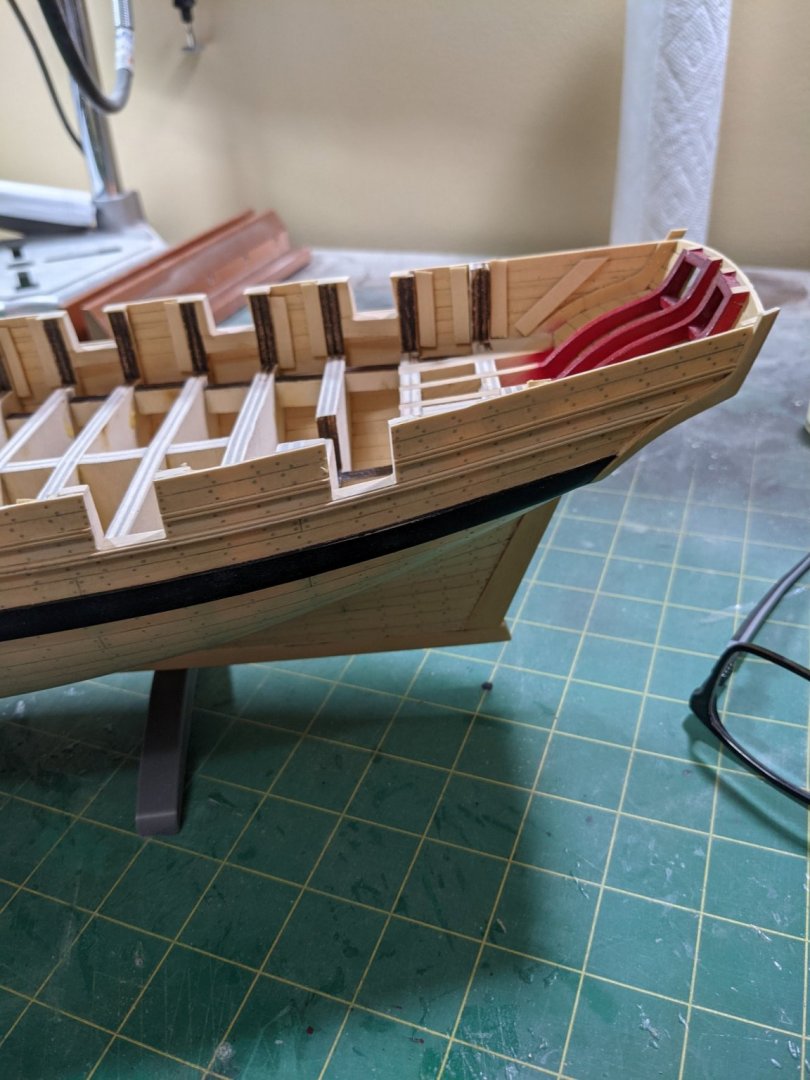
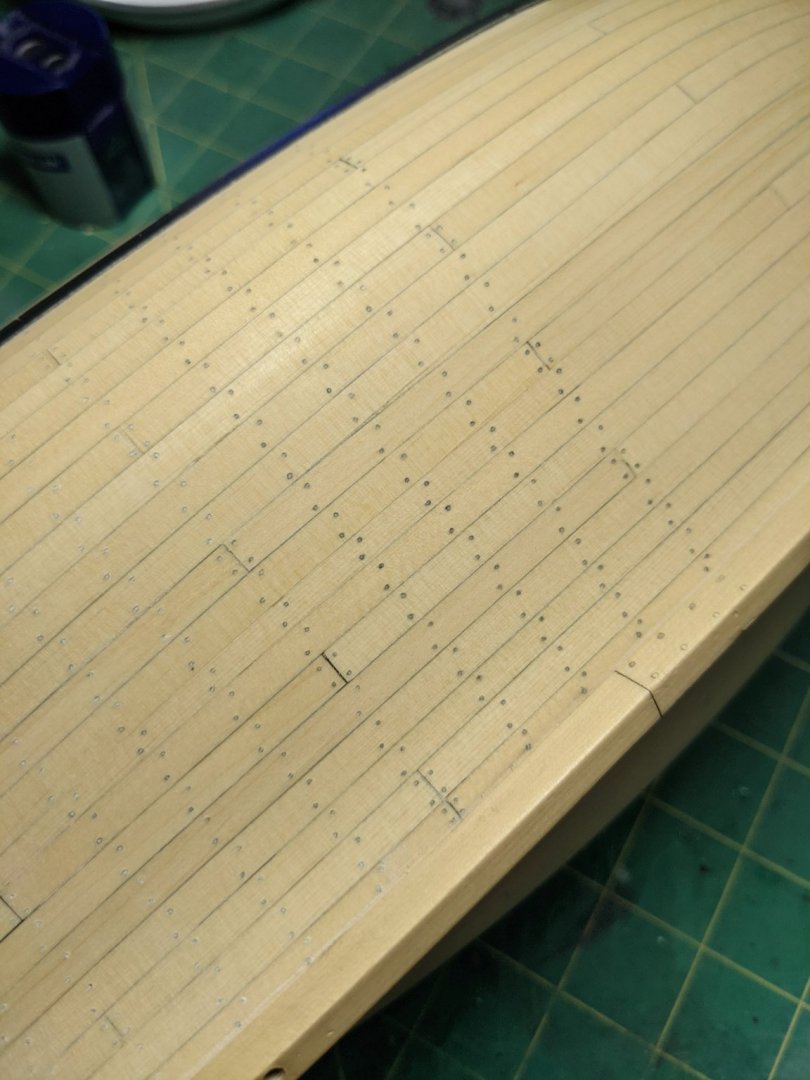
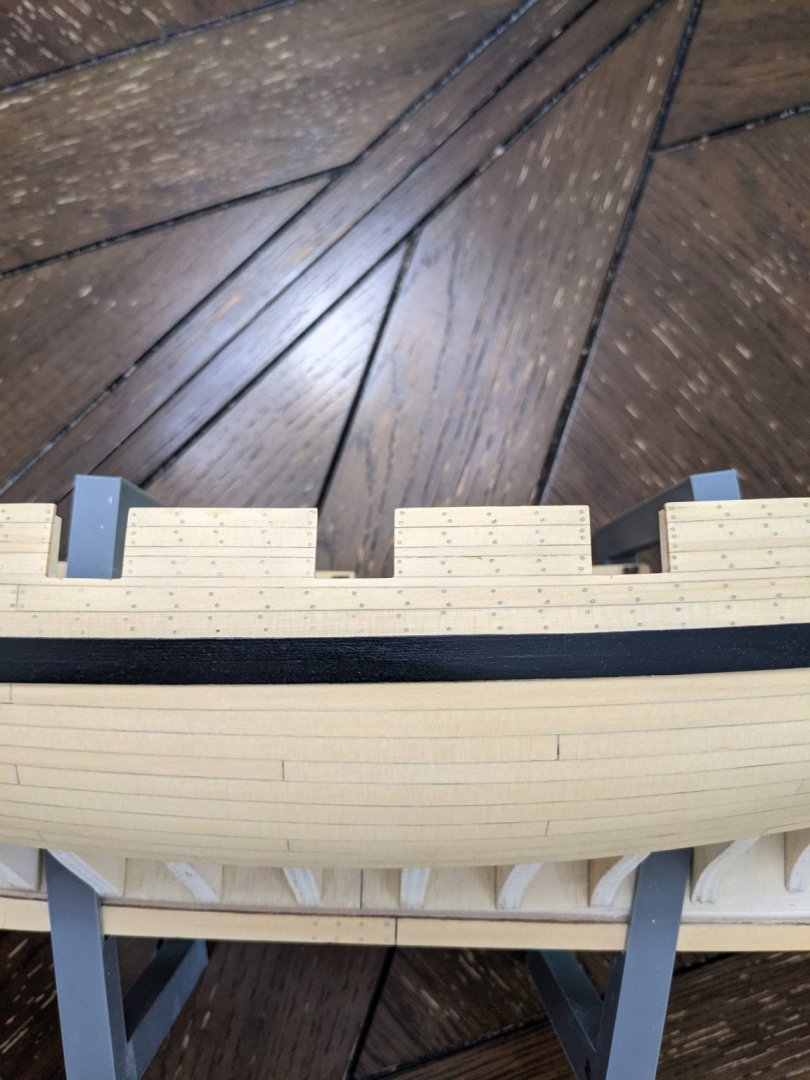
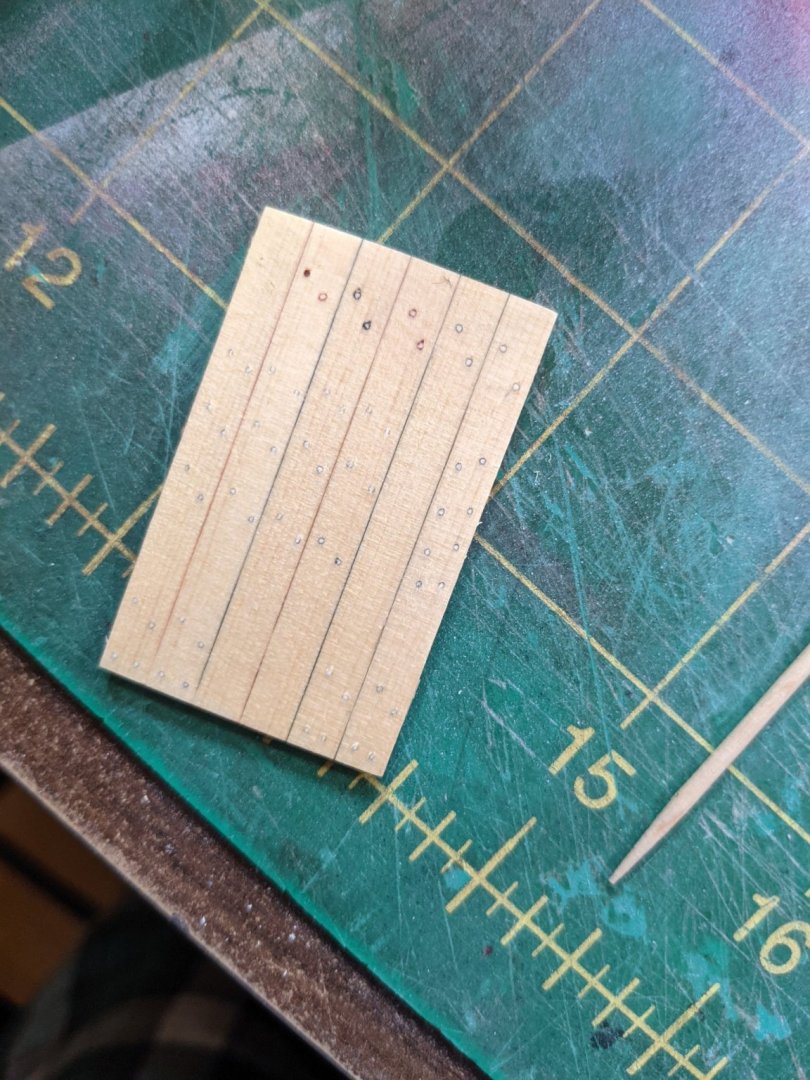
So I made a change in the way I am doing tree nailing. Instead of a toothpick I am using a piece of plank to apply the filler as it works like a little spatula. Also I am using the sharp part of a #11 blade to scrape away the excess. Have one side done above the wales and will do the forward part once the other pieces are in. I like the looks of it even though it takes a lot of time to do. Here is wat it looks like with a first coat of poly on it.


- 274 replies
-
- 8
-
-

-
- Cheerful
- Syren Ship Model Company
- (and 1 more)
-
Just remember that resin printers are smelly and messy. Otherwise they print fantastic with no layer lines. When purchasing a 3d printer stay away from the cheap chinese stuff. I had made that mistake myself before purchasing my Prusa MK3. It is a filament printer but I can use it right beside my computer and it does print very well. Prusa does make a resin printer and although pricy they are great quality and the company has excellent customer service.
-
Here is a Fusion file for the small cannon I drew up. You can load this and see all the steps I took to make it. My way of doing things might be different but it is what I know. I tried to make one by doing an outline and then doing the rotate around the center but it was hollow and would not slice right for printing and I couldn't figure out how to make it solid inside. cannon4.f3d
-
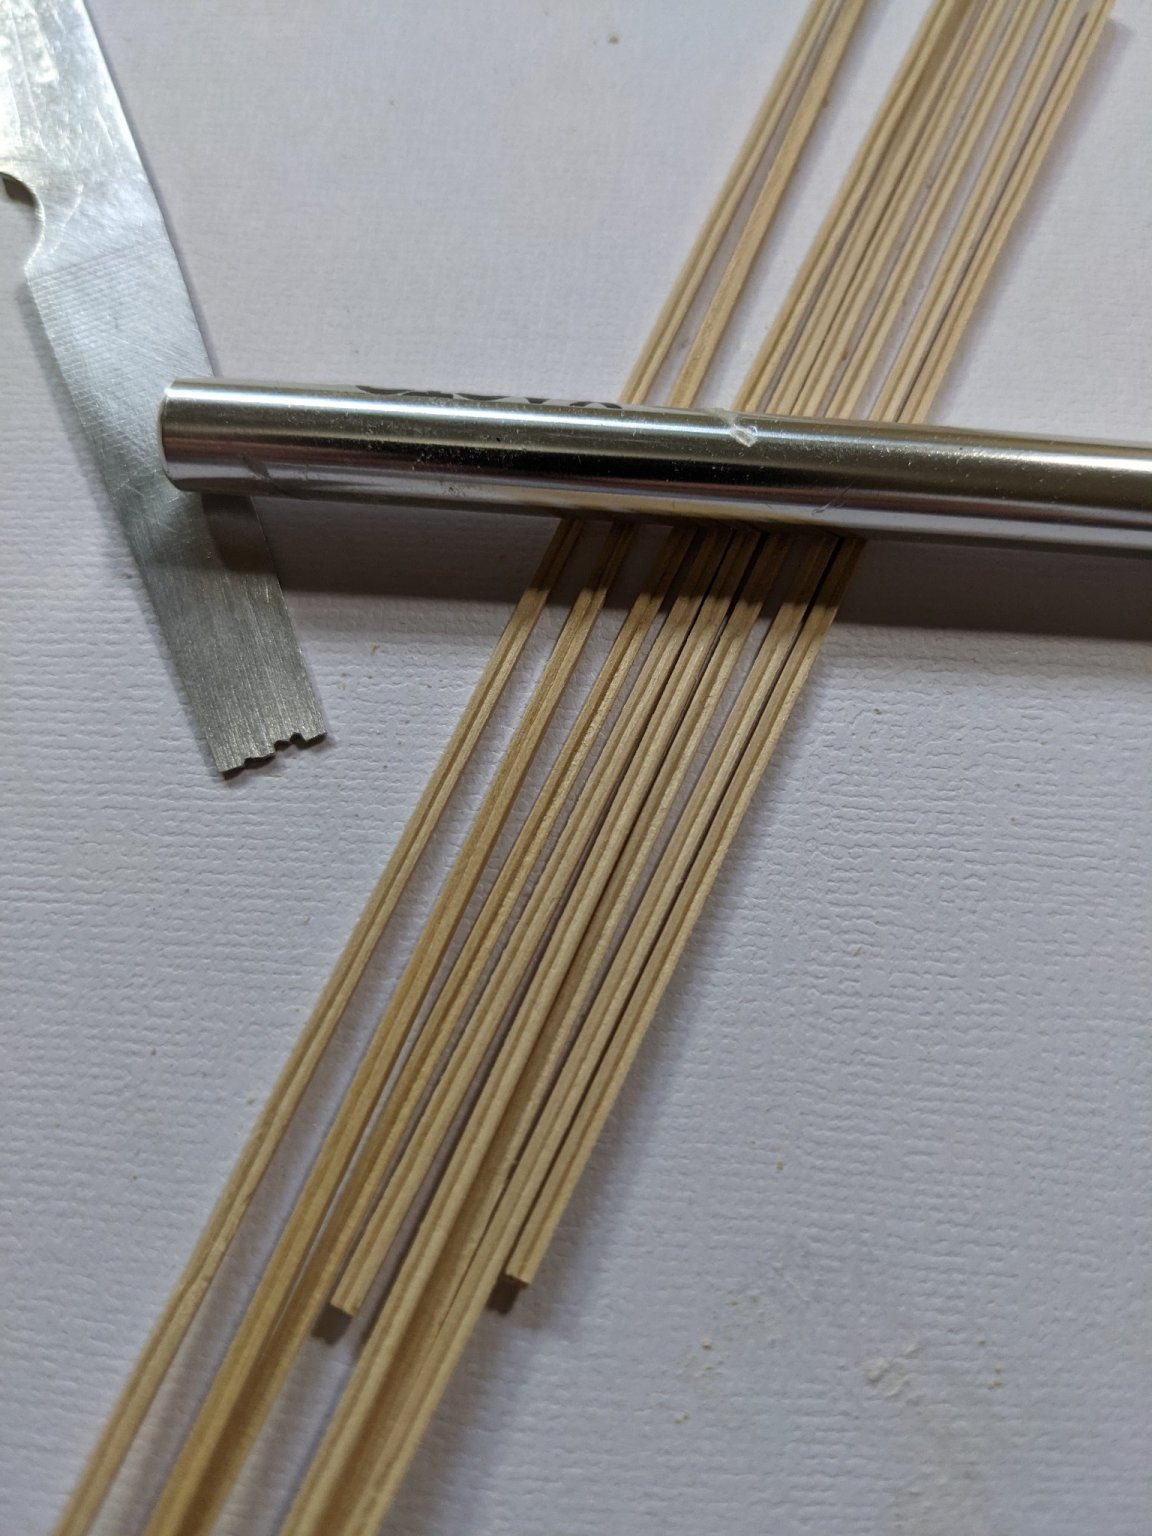
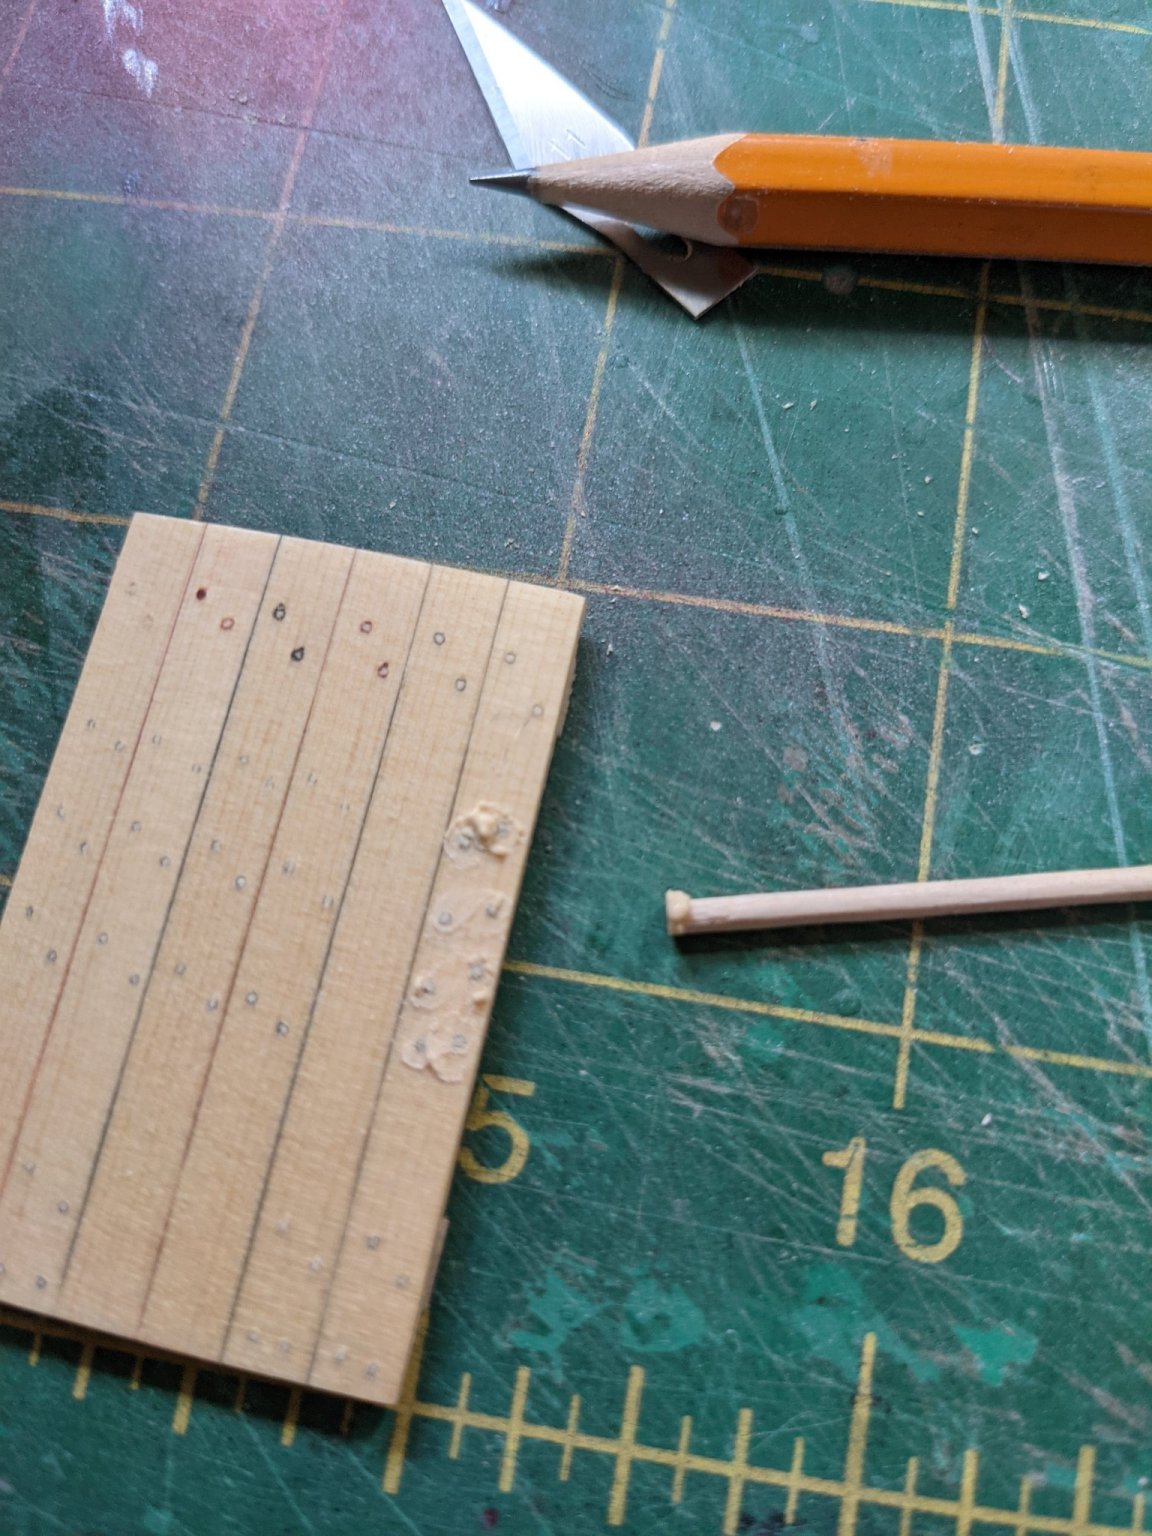
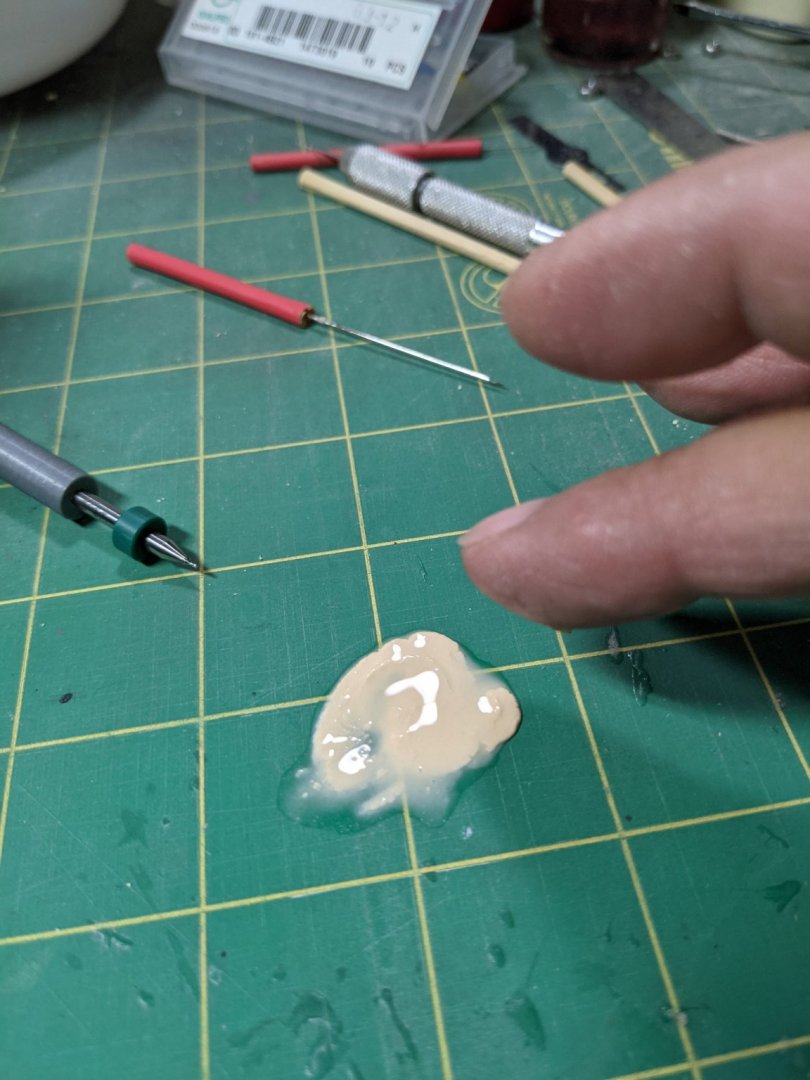
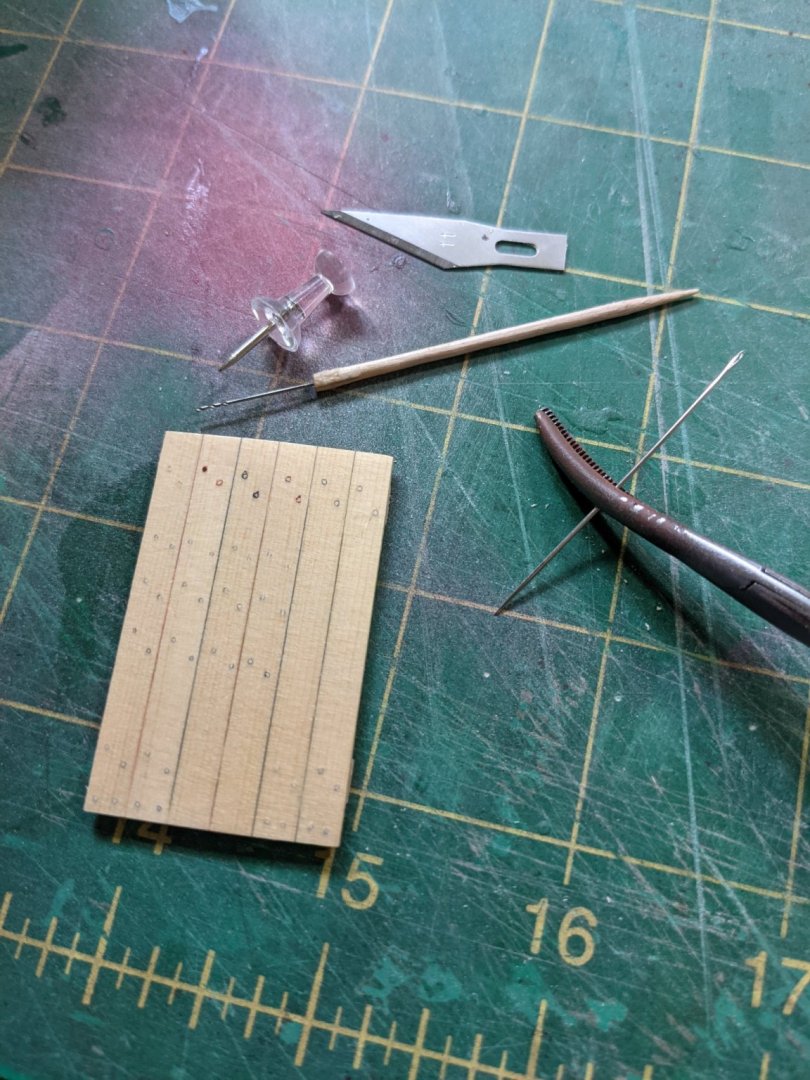
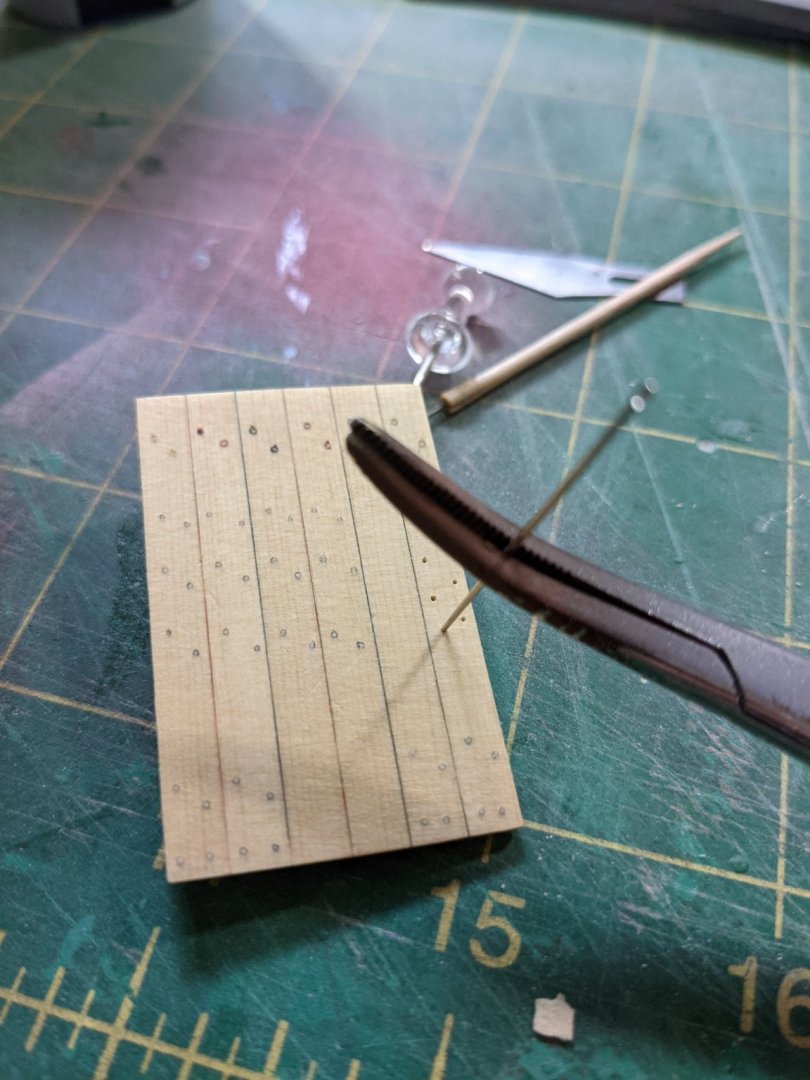
Here is what I have come up with that works surprisingly well and is easier for me to do. Here are the tools I will be using: A small needle held in forcepts, A tiny drill bit from my Micromark set superglued to a toothpick, A spare #11 blade, A push pin for the awl but I swapped it out for a larger needle. The small needle pushes through the planking real easy to make the first hole and it does not wander. Then I go over the hole with the small drill bit to clean and round the hole. And then using a larger needle to round out the hole a bit. The go over each hole with a #2 pencil. Then take a cut off toothpick and fill the hole with natural wood filler. Then scrape the excess with the end of a #11 blade. Give it a few minutes to dry then sand with 600 grit sandpaper and a coat of poly. I think this will work out for me to be a better way as I won't be breaking drill bits and will be able to get the hole right where I want without it wandering.


- 274 replies
-
- 9
-
-
-
- Cheerful
- Syren Ship Model Company
- (and 1 more)
-
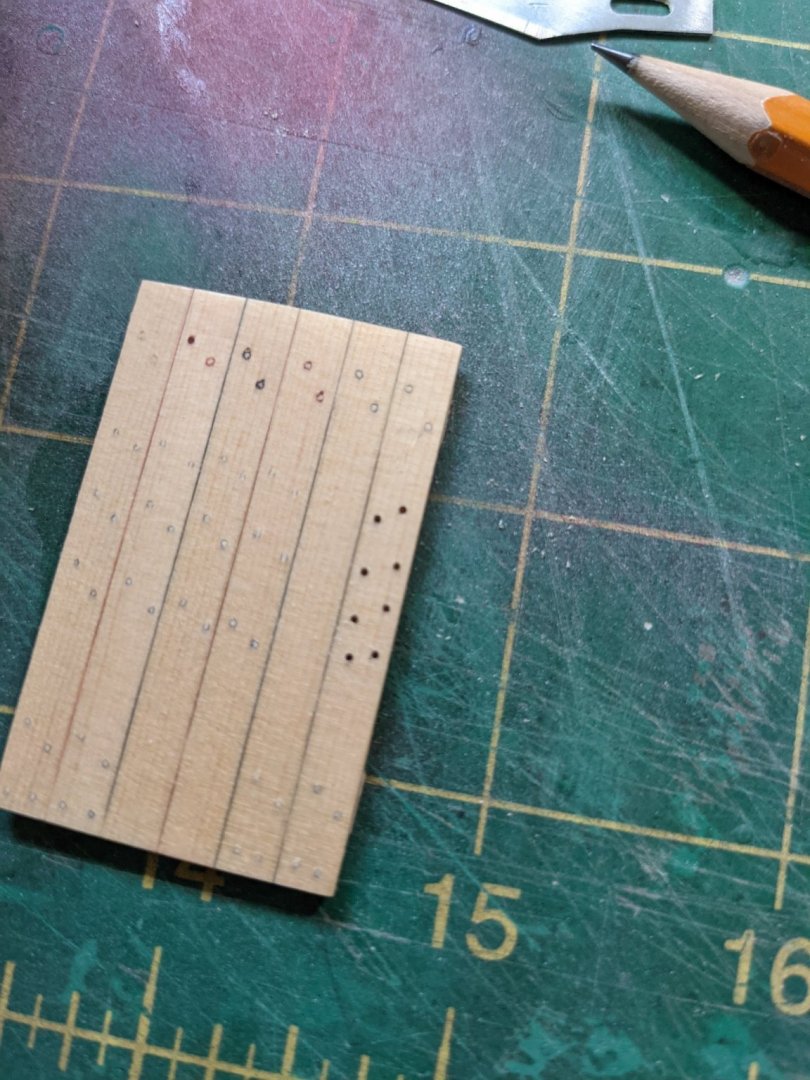
So I did some tree nailing on the back and had a hard time with drill bit breaking and also not staying in the spot even though I was using my fingers. There has to be a better way for me.
- 274 replies
-
- 4
-
-
- Cheerful
- Syren Ship Model Company
- (and 1 more)
-
Beautiful ship and awesome work area. It looks like the workshop is nice to work in as you can turn around and do cutting as such and then turn around to build. What keeps you from tree nailing the floor?