
HOLIDAY DONATION DRIVE - SUPPORT MSW - DO YOUR PART TO KEEP THIS GREAT FORUM GOING! (Only 13 donations so far - C'mon guys!)
×


Dan Vadas
-
Posts
3,261 -
Joined
-
Last visited
Content Type
Profiles
Forums
Gallery
Events
Everything posted by Dan Vadas
-
It looks like the horizontal frames could have benefited from some extra card lamination on their flat parts (without doing the tabs). Even just doubling the thickness of the card makes an enormous difference to the amount of weight it can hold. I hope you can sort out the hull skinning. I'd be inclined to cut in the hawses AFTER it's skinned. Use VERY sharp scalpel blades for that and it should cut OK. Perhaps some extra support frames either side of the hawses may help. Danny
-
CA glued Henry. The wire is only 0.1mm thick, a bit too thin to try and silver solder with a pen torch. Danny
-
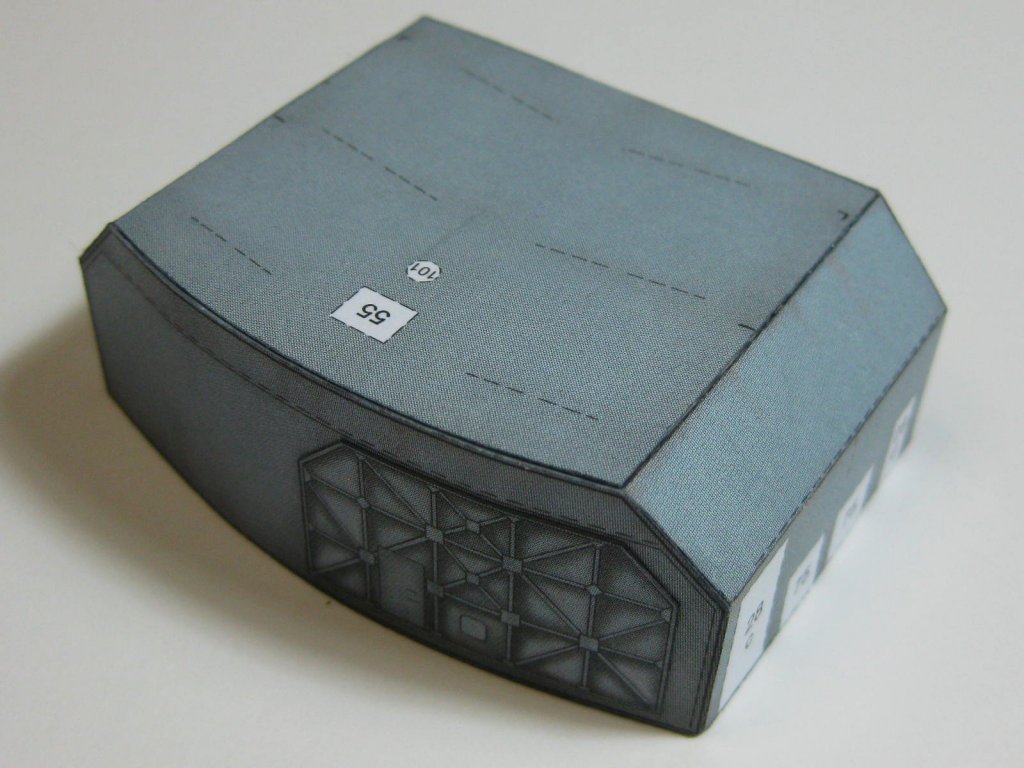
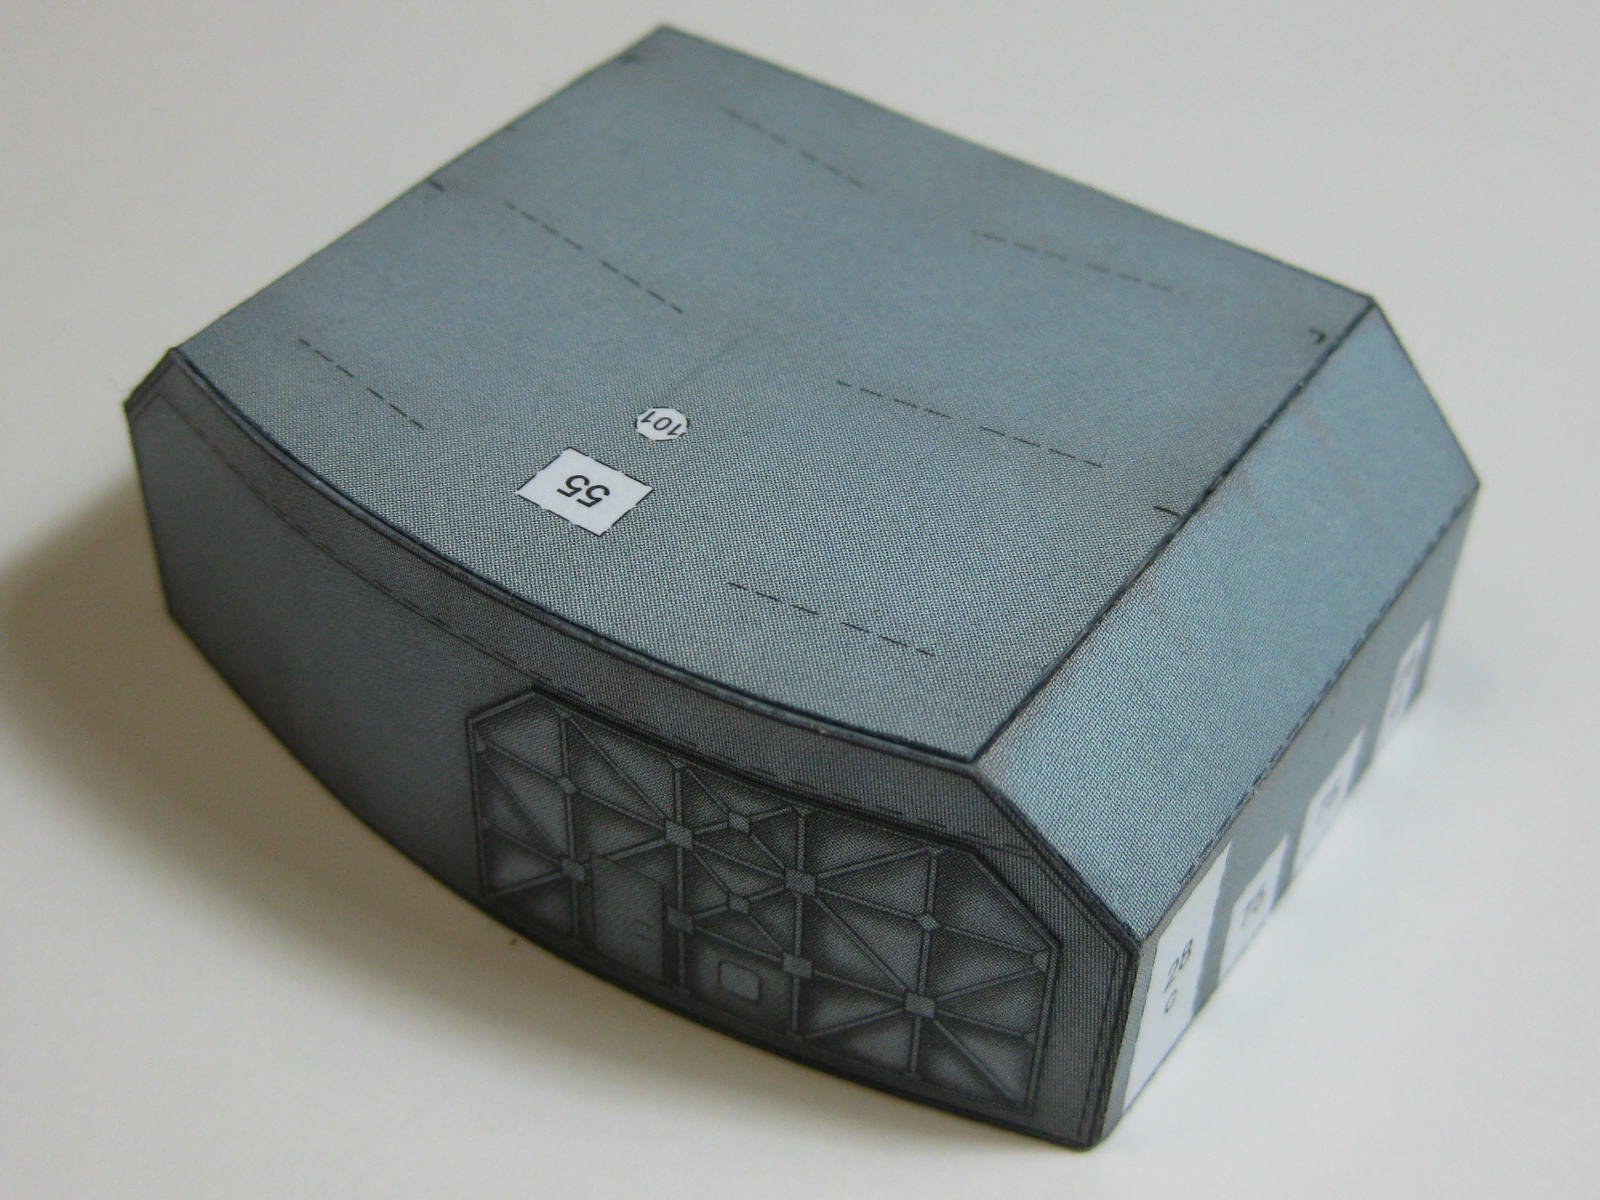
The next sub-assembly to make was the Large Hangar. I added a LOT of extra framing - the kit framing would have been virtually useless on it's own : The whole design of the hangar was awful. Why they designed it to have two joins right at the top is beyond me, a much better alternative would have been to have the two side walls and roof in one piece with the front and back walls as separate pieces. Corner joins are relatively easy. Despite that it still came out well : Attached to each side wall are two louvred boxes and two plain ones. First thing was to fold up the boxes. Some of the pics below are of the four plain ones, but the louvred boxes were made using the same method. First I used my PE pliers to fold the sides and top of the box. I overbent each one, this prevents a lot of "spring-back" when gluing : Next I cut a backing piece for each box from 0.5mm card the exact size of the inside of the back of the box. These were stuck to my MDF block with double-sided tape. One side was glued to the base and allowed to dry before the other side was glued : Then the top was glued down : The louvres take a while to fit. First they were all cut and edge-coloured. Next I applied a thin bead of PVA using my squeeze bottle : The bead of glue is till too large, so I "shaped" it using a small paintbrush until I had the right amount (less is better than too much) : Each louvre was placed in position using tweezers : Most of them fell into place without further adjustment, but some needed re-aligning using a toothpick : The two larger boxes finished. The smaller ones weren't much harder too make, but I had to use the toothpick on most of them : Danny
.thumb.JPG.fa7d84ea73222d29fbe382570ed1de92.JPG)
.thumb.JPG.ad24ff5e688be40c521f94129e8c3358.JPG)
.thumb.JPG.89e0934b1bc0c6f948dbed94636f2a17.JPG)
.thumb.JPG.108d00df194b26447c0f571ff8191b18.JPG)
.thumb.JPG.c31c066a76121cc52ec85cab90cdc862.JPG)
.thumb.JPG.6549fd3ae8f1828302ede7baf6e15b48.JPG)
.thumb.JPG.730469c9a7051a964d7f592d71477f45.JPG)
.thumb.JPG.67b974383373e959852363eeec73bc8c.JPG)
.thumb.JPG.ca6e1815dce0c6e82511fdb18887536d.JPG)
.thumb.JPG.aff4787720e2de6a92fc2518878f22e6.JPG)
- 524 replies
-
- 19
-

-
Yay, another Card model . Interesting subject too. Tabs .... yuck! I don't like tabs . I'd be redesigning the construction to eliminate them wherever possible. Hopefully the twist will come out later on when the deck is on and the hull is skinned. If you can untwist it by hand now it should be OK later, even though the twist comes back in when you let it go. The triangulation of the hull skinning acts like a brace, but you'll have to be careful to firmly support it straight before you start the skinning. Danny
-
Very true Jan. That's about 2kg, I have no doubt it would have held more than twice that amount without a problem. Danny
-
Yep, just a line over which I CA glue the wire. Sometimes I find more conduits in the 3D book and add them as well. Danny
-
I've built the Aft 2nd Deck, there are only small details left to do later on. As usual I added a lot more framing, the only ones in the kit were the three central ones : Lots of weights held the deck piece to the framing while the glue dried : Next the walls were glued on, and the detailing added - shutters, life rings and a small conduit made from 0.2mm wire : There's also a conduit either side of the range finder column. I made this from 0.2mm soft brass wire and painted it : Last for now I fitted two bulwarks and the railing. Paint touchups to the railing will be done later on : Danny
.thumb.JPG.103055e7310f998821053aa345da8466.JPG)
.thumb.JPG.63345389416ff23d26b05ad03510bc37.JPG)
.thumb.JPG.cb6f878263b50f39e8f361cc2884fd84.JPG)
.thumb.JPG.046ed3ce09c60366a74ed65a4e58c3f3.JPG)
.thumb.JPG.b751161e44f439fbeaa0b7ace93eef7a.JPG)
.thumb.JPG.cd8850961c8b3c1a70994931dd85994c.JPG)
.thumb.JPG.8d10830580505d29579e4f393e840c18.JPG)
.thumb.JPG.6ea7c5995a95d250d6017fa720de41a9.JPG)
- 524 replies
-
- 15
-
-
Maybe you should only supply a link to the downloads to buyers of the ropewalk? At least the Chinese will have to actually buy one before they pirate it . It might slow them down a day or so . Danny
- 22 replies
-
- 9
-
-
- ropewalk
- rope rocket
- (and 1 more)
-
Thanks Henry . Hmm, I wonder where I got that from - probably confused it with Russian ships which are male. I'm a little embarrassed, as I was born in Germany but came to Australia when I was 4 years old and soon forgot most of the German language . EDIT - I discovered THIS DISCUSSION in a forum about Bismarck where the consensus seems to be that Bismarck (but certainly not every German warship) was referred to in the masculine gender. I must have read something similar earlier on. Back to the build, and I've finished and installed the first mast - the easier one of the two. The other one won't go on for quite a while yet, but I've made all the bits for it. I wish there was some way of tapering the mast and spars, there probably is but it would be very difficult due to the small diameters and it's beyond me at the moment. An alternative would have been to make them from wood (very easy ) but I want to use as much paper in the build as possible. Here are the pics of the mast fitted to the conning tower. There was no PE supplied for the footwalks on the spars so I made them from 0.2mm wire. The ladder is PE : Danny
.thumb.JPG.d509bfaf1d1a2704d9a3fc3115c652a9.JPG)
.thumb.JPG.a797c6a68f49288f95437ab86b9f6f20.JPG)
- 524 replies
-
- 14
-
-
Matt varnish won't change the size of the flake, actually it won't make much of a difference at all. Hah, no wonder there was a bit of confusion . Danny
-
Maybe use a paint that has a much finer flake? Or try mixing light grey into it? Danny
-
Lots of our place names over here were "borrowed" from the Old Dart . Merry Xmas to you too. Danny
-
Hmm ... I don't see much of a challenge in that. You're only doing about 3kph, whereas I was pulling 130kph on one of the worst roads in Australia at the time . Danny
-
Nice work John. I've Merged this topic into your old build log. You can add to it by Replying in the box at the bottom of the page rather than starting a new Topic for each update. Danny
-
Actually Pat, yes I have. When I was 19 and rode a motorbike from Gloucester to Newcastle every weekend to see my girlfriend I perfected the art of rolling a (TOBACCO ) smoke in the pocket of my leather jacket with my left hand and lighting it without stopping the bike . Danny
-
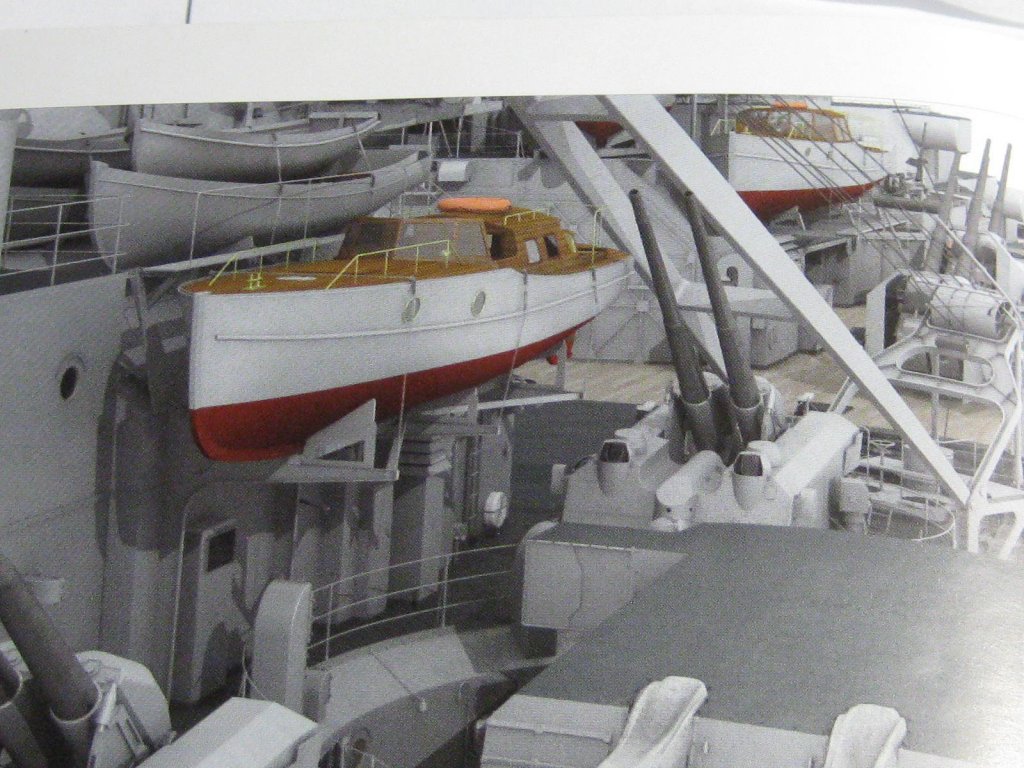
If it's any help - and don't take it as gospel as there are quite a few errors in the kit design - but my Bismarck has a catwalk on both sides. Your screenshot shows a catwalk, and that's on the starboard side - the bows of the boats were loaded forward. However, my 3D Bismarck book shows the port side one with NO catwalk : Danny
-
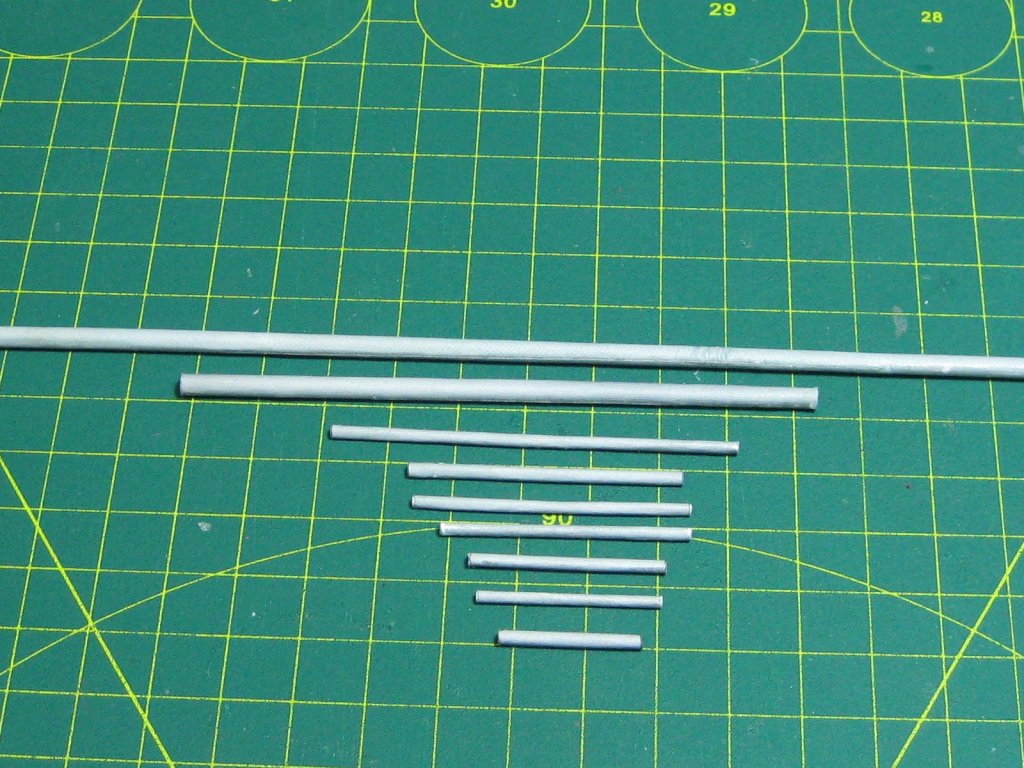
I spent the rest of today rolling all the Spars for the masts. These were actually harder to do than the masts, as they are only 2.0mm and 1.8mm in diameter and I had to roll them from 0.23mm card which gets pretty tight : Danny
- 524 replies
-
- 13
-
-
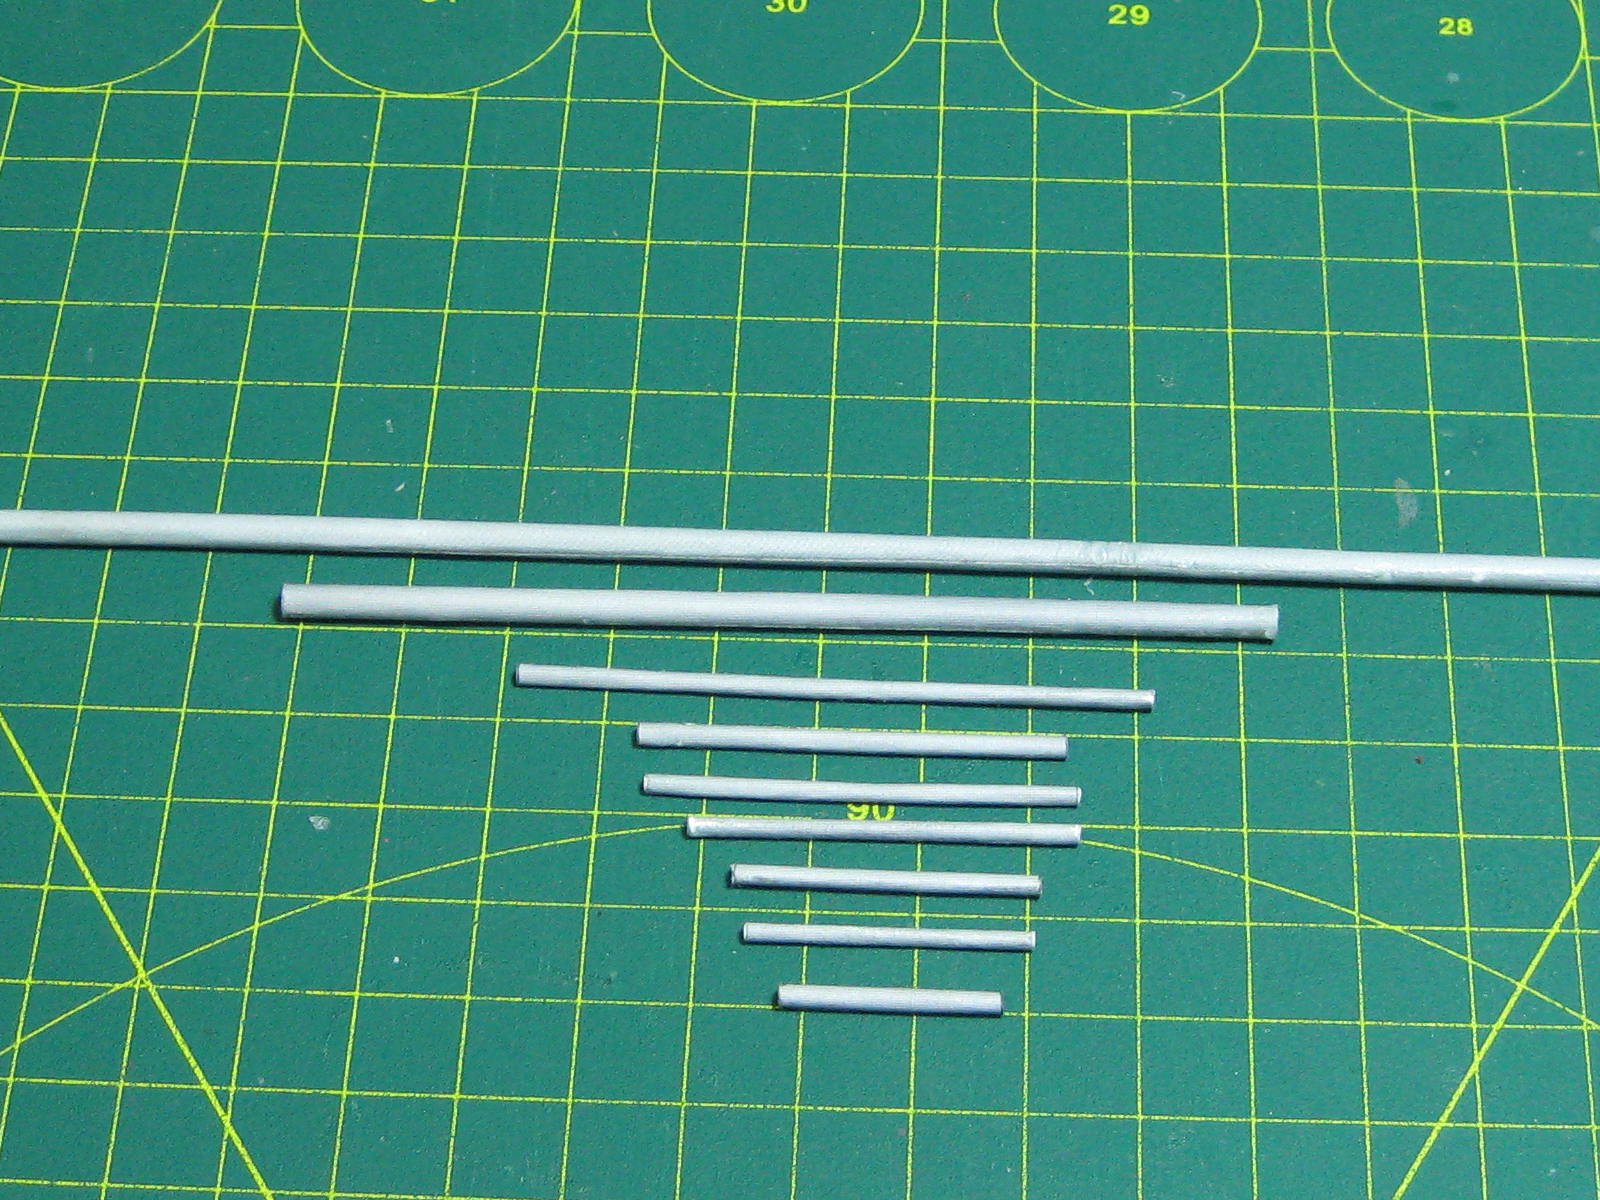
Thank you all, you're too kind (but keep it up ). There are four pipes that hang out at angles from the conning tower. These are made from 1.0mm brass rod, and the footwalks are supplied in the PE set : I realised I'd forgotten to fit the support girders underneath the top deck before I'd glued it on. This made the task a lot more difficult with all the fragile things I'd already added making it hard to get a good hold of the tower without damaging anything else. Most of it survived intact, but I had to re-glue a piece of railing : I was in two minds whether to roll the masts and spars from paper or use brass tubing, but I thought I may as well give it a go - I could always revert to tubing if they turned out rubbish. I surprised myself . Here are some pics of the Forward Mast in progress, showing my method of construction : The mast finished and the two tubes I used. The larger one has another plastic tube inside it with a slit cut lengthways to get the right diameter. The outer brass tube clamps the plastic tube tightly, and the thinner tube supports the inside of the paper : The seam cane out almost invisible : And I've also done the Main Mast. This one is 180mm long and 3.25mm in diameter, and it came out as straight as a gun barrel. I'm happy : Danny
.thumb.JPG.b0a97b0159ca44890919a3c5bbdd994a.JPG)
.thumb.JPG.503e32e80728ff106af1e8a7938742b6.JPG)
.thumb.JPG.96f5c7a44ca737decf8c98f7791daac5.JPG)
.thumb.JPG.8db0451885d5cce99a49b686579e1c2a.JPG)
.thumb.JPG.a1886f60dc2fac62c2544113be10dd17.JPG)
.thumb.JPG.d451287d8a78f7c2f869b18cb6cee6b3.JPG)
.thumb.JPG.4a859ffdfa8cf0506327ccf3eb649d0e.JPG)
.thumb.JPG.d3a94ee9210075ec97f93ae3662a93ac.JPG)
.thumb.JPG.b19fd6fcbf8bcebf8312c55c1a362caf.JPG)
.thumb.JPG.cc104d65d1956b39107c9f4dea05888e.JPG)
- 524 replies
-
- 16
-
-
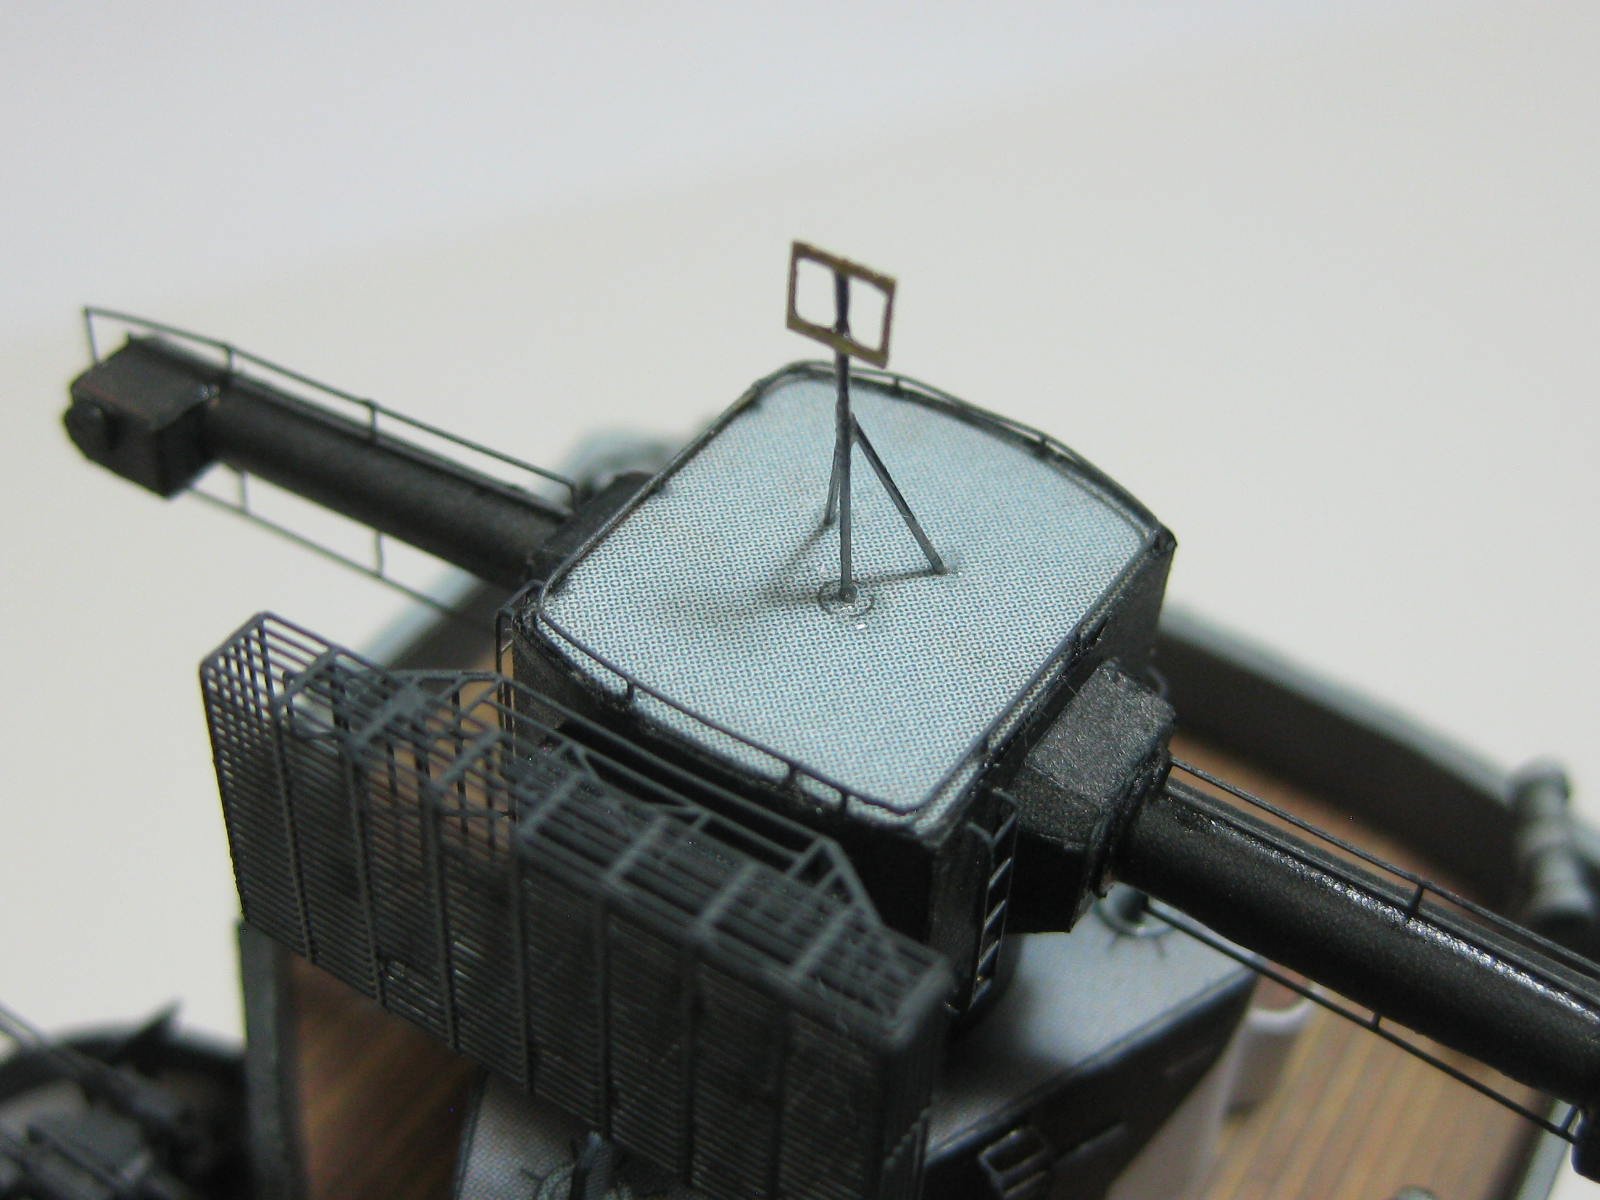
Thanks for that Pav . The top deck of the conning tower is completed. I didn't take any progress pics of it's construction. It has a rather tricky edging around it, which is double-thickness and very narrow so it took some rather careful cutting out : Another tricky part to cut out was a support for two shields (?) above the bridge. Same double-thickness stuff : I also forgot to take pics of the Radar Turret during construction. These pieces were a bit of a puzzle to work out, as the miniscule drawing of them in the instructions didn't give much of a clue : But I managed to work them out : The 2nd of the three Radars. There are 9 pieces that make them up. Something I realised when making this one is that I'd only put less than half the pieces in the one I built before, I'll correct that tomorrow : The radar turret completed. Those two pieces I mentioned earlier in this post are the inboard supports for the range finder arms : The antenna-like piece on top of the turret is a light tower. It's not shown at all in the kit, but I picked up on it in the 3D book. I made it from 3 pices of 0.3mm wire and a section of spare ladder : And some overall views of the conning tower to where I am at the moment : The light only looks like it's skewed, it's the macro lens distortion : Overall pics of the forward superstructure : Danny
.thumb.JPG.ef1a2eddd7ddf729f5b6404de31283a9.JPG)
.thumb.JPG.35d2a96a4f9c634f6204bfdc0a56042a.JPG)
.thumb.JPG.a3f251e0ca12e9deaca016b13abc2831.JPG)
.thumb.JPG.705f42840945b9c8b2b8937be18ffc6d.JPG)
.thumb.JPG.389797fb85dd9e53a4411ba43154e3a8.JPG)
.thumb.JPG.390543be549f11253e2d44513511527e.JPG)
.thumb.JPG.05a4a72ca2a940b2f4032545fc32976a.JPG)
.thumb.JPG.a91c42a7a9ac279c2ae19d9a6f457ed5.JPG)
.thumb.JPG.d6e84b2afd3db1ad58c90f8a37e3d5f7.JPG)
.thumb.JPG.d501aac104c9fe81660b84dd00b354d4.JPG)
.thumb.JPG.157c59b0bb30d9e80c04f98203211c10.JPG)
.thumb.JPG.2119cc559c6876a19782efd171f60ebb.JPG)

.thumb.JPG.d60a33f9b5511632ad3867dc8b905893.JPG)
.thumb.JPG.d90722ea0d4bebcabce9b82432fa4cba.JPG)
.thumb.JPG.632730ff13350f85cf7b00a90d41f952.JPG)
.thumb.JPG.6bf4494699a7e806fdb0a87bcd536233.JPG)
- 524 replies
-
- 29
-
-
That was the first place I looked, I've bought lots from them before (great service ). Unfortunately they don't have anything in 1/200 scale . Popeye, thanks for the link to Eduard's. After looking at what's available I think my next build will be HMS Hood, plenty of PE in 1/200 . Danny
-
Thanks Scott, Ponto's it will be. Now I've only got to work out where to buy them from. Any particular sites you know of? Danny
-
Gee I like the PE, much more detailed than what I've got . I only have the stuff from GPM - three small cards of detail specific to Bismarck, plus railings, portholes and two types of gun. Scott - after using both Ponto's and Mk1 PE sets, which do you think is the better for accurate fit and design? I'll be building either HMS Hood or Yamato (from Card) for my next model, and I'd like an opinion before I buy the PE. I know you've had a problem or two with some of the PE not fitting properly. What do you put that down to? Poor design, poor fitting instructions, wrong PE for your particular kit (I notice that there are different sets for brands of kit, Tamiya, Trumpeter etc), or "pilot error"? Danny
-
G'day Zuko, and another Aussie welcome . If you go to the main page in the Kit Build Logs forum you'll find a Pinned topic near the top of the page which opens a number of Indexes to all the Build Logs on the site. Follow the instructions on opening the Index for Wooden Ship Kits and you'll find 31 build logs for Swift, some have been completed, some abandoned for various reasons, but no doubt you'll find most of the info on building your kit amongst them. Have fun with your build. Danny
-
There are a pair of 4-Barrel 20mm Guns on the next deck, so I've made them both. There were none of these in the PE cards, but they were supplied as laser-cut. It was a full day's work to make them. Here are the parts for both guns, and the very sparse instructions : About half of one gun completed : And both of them finished and ready for paint. I used four of the spare handwheels from one of the PE sets to replace the plain round ones in the laser-cut : Danny
.thumb.JPG.c4b29613a75e39f81d2dd22824187cf6.JPG)
.thumb.JPG.6b3555856c6036c5721ccf9161eefabc.JPG)
.thumb.JPG.1e6d5189009f115bdae5cac0c41fbcf0.JPG)
.thumb.JPG.36fc8a64d8af8a90ed5ab0320d68eaed.JPG)
.thumb.JPG.7e816d7af9c9545824cb466bcb5bc1f3.JPG)
- 524 replies
-
- 22
-
-
The Bridge Deck and lower columns are finished. There were a few small details to make for either side. Small units like this take longer than some of the more substantial ones : With all the details above the deck installed I could now glue on the lower part of the column, and add the support girders : Danny
.thumb.JPG.6e4a561cfb9050941da9019fa80a1b67.JPG)
.thumb.JPG.4b5b77225a974c14a2c1e42e100b1880.JPG)
.thumb.JPG.6ba61c28e7aa9f63a082e1f8dbe0d72a.JPG)
.thumb.JPG.a058ca3bd21aad3c175078efceecd5c2.JPG)
- 524 replies
-
- 12
-
.JPG.8346495ad025eb1c569171fc73fd65d1.JPG)
.JPG.8d96ffca0a688fecabfa49935bfb1a3d.JPG)
.JPG.7487568bb7adce2e5da9b40731bc7d59.JPG)
.JPG.c29c64f969ebc812faefdf5cce3fc61d.JPG)
.JPG.6a46d4f85981a7c32c7feb41f7f021d4.JPG)
.JPG.49a3a1910832ecf5490b4725a306dafe.JPG)
.JPG.9c841d226ce2190e66a8e38e852f0eab.JPG)
.JPG.dd0ec46c22742ed696ede1903485b7e5.JPG)
.JPG.8c7f3e9a1e9aa67261d96de18b636327.JPG)
.JPG.d847d00af3e3a6f4c3f0c24511fb8879.JPG)
.JPG.f14d9f78603afe4747027bef1286b550.JPG)
.JPG.ab0f76830d350b761116209b8aec44c9.JPG)
.JPG.a1366f07f2d1deb601e079b27769308c.JPG)
.JPG.16f79bba987d1106d67c8e76fb4b6b84.JPG)
.JPG.14c2b73b7e76cf5cfc2dffee2780a2bb.JPG)
.JPG.469e3d1f288c7bcb5f00103485a2d8cf.JPG)
.JPG.0ca8dfe8004451d503b53257570147ec.JPG)
.JPG.2f4351c0c072f062de779de337600c88.JPG)
.JPG.aab765ea481a51b8dd1525465882d62b.JPG)
.JPG.4ca67442a1a7245ea7faca85cd44c633.JPG)

.JPG.bc353176aadcdc02cea12f22545827a7.JPG)
.JPG.73ab8188953b99b8ab75f7012763032e.JPG)
.JPG.4981863f9c65ccf0eaf46380e8aaa335.JPG)
.JPG.8407e2adafee1d665de3400f71889a09.JPG)
.JPG.bc2b92d29e84c321cfdc7d7a659dfc30.JPG)
.JPG.a1b2f7df4927cc2bffd79220d4cb2c92.JPG)
.JPG.3f849edf0c826336887fe6a35ac5935e.JPG)
.JPG.3ec76793afc6ef644749fd3a0beaca53.JPG)
.JPG.66279e6c7eb78dec43eb1c151c32b77e.JPG)
.JPG.3e860dba833fc1f0d46d45f940d4de17.JPG)
.JPG.1c3b59654c2b4aa8c4e6c1cb907e5199.JPG)
.JPG.8936506f47d8d99ef2f3f4d5253d02f9.JPG)
.JPG.2c11cafc89292340cb05096ba48043a5.JPG)
.JPG.b48562de65715e2e75ceca6067cc37d9.JPG)
.JPG.81496ef785bdcfd4c5733b099fcf9782.JPG)
.JPG.6dd4fb59af7a1c7226a4b80557c0a1d9.JPG)
.JPG.e8007338771afaf815ed25e40a11da1b.JPG)
.JPG.c6a0847215debbc8990c8da33969ed08.JPG)
.JPG.e18f43ad23183498ff4d7ec1c4a439ae.JPG)
.JPG.f42d11ec66dc225d260c229f573fa424.JPG)
.JPG.135587a749cc9b1f8e62cc31038b2739.JPG)
.JPG.180e191b8c80b4a343bfed6de0882eb7.JPG)
.JPG.eb9e9b03f580ffa74f414a83f9c135d7.JPG)
.JPG.4c75399854f5e20033ca7aca6c5e8d75.JPG)
.JPG.1d90812e8e882aa9d6ac93d9fe0b0ec2.JPG)
.JPG.0bd3c236763374255e333b06e46e033b.JPG)
.JPG.ad5e2effac674c1a54d4b62eb425c481.JPG)
.JPG.927c1fcc717e0b96e30c489b704263f5.JPG)
.JPG.15afd577edc76108b5998a61c983b5e6.JPG)
.JPG.7f8c64021f9c97a76d3b9e7f8cc747df.JPG)
.JPG.debaabe3a8e8ff4ccc91ad47dd2e947b.JPG)
.JPG.80004a7317acc38cf00af64d7738506b.JPG)
.JPG.c36682e3d8f7f610d17dae03309121b6.JPG)
.JPG.88c4e97f7c0a0bbc3c1074fa102c0b11.JPG)
.JPG.057000de953a4deb334d851a4cd7728c.JPG)