
Check out our new MSW Sponsor Innocraftsman
×


Dan Vadas
-
Posts
3,261 -
Joined
-
Last visited
Content Type
Profiles
Forums
Gallery
Events
Everything posted by Dan Vadas
-
Eddie, that would be the Conestoga Wagon from Model Trailways, same manufacturer as my stagecoach. http://www.modelexpo-online.com/page.asp?lp=1005 Danny
-
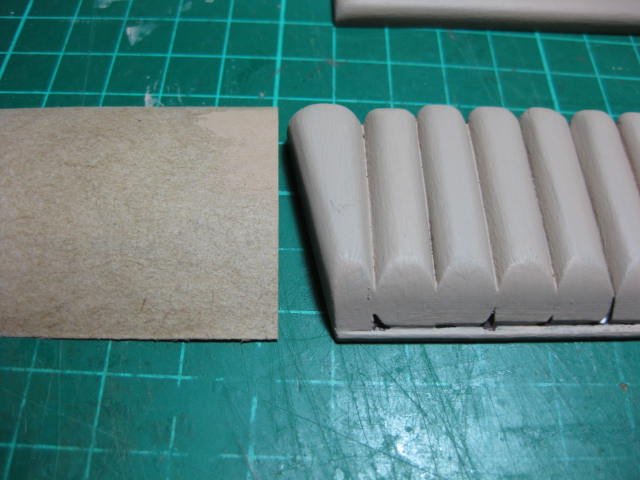
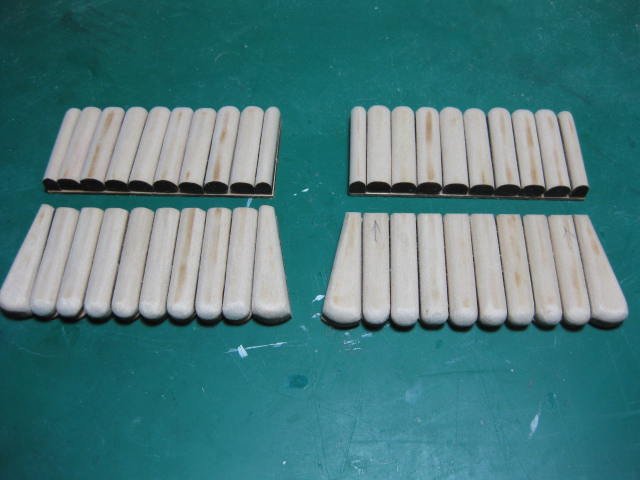
Hi all, After some thought (too much ) and a couple of changes of mind (Black and Burnt Umber - both got "lost" inside the cabin) I finally settled on a colour for the upholstery. If I'd have just used Clearcoat it would have turned out nearly the same . I was after the colour of the "leather" supplied with the kit, and I reckon I got it pretty close. A piece of the "leather" is on the left in the 1st pic. I used artist's Acrylics, brushed on. The formula is : 2 parts White, 1 part each of Burnt Umber, Burnt Sienna and Yellow Ochre, and 1/2 a part of Sap Green. The pieces are just freshly painted, they'll dry a bit darker. A tip : To save trying to exactly match the colour in case of a touch-up being needed, I put the remaining paint in the fridge - it'll stay useable for months . Danny
- 151 replies
-
- 15
-

-
True, but when you also replace the fuzzy rigging thread, the woeful sails, the ......... etc etc, you may as well start Scratchbuilding as there won't be much, if anything, left of the Kit. That's without mentioning the historical inaccuracies (assuming the ship was REAL in the first place). Rant over, Danny
-
This is the one I use Eddie : https://www.bunnings.com.au/feast-watson-250ml-sanding-sealer_p1564778
-
Mike, I used a spray can. Maroon Enamel. Danny
-
Hi Eddie, good to see the build log up . Off to a flying start. Yep, gotta agree. I bought a couple of these years ago, they went into the bin not long after . Are the tips steel or plastic? If they're steel you can unclog them by running them over a gas flame for a couple of seconds . One point for now - I got the tip when I saw Moonbug's coach - sand smooth and use a clear Sanding Sealer, couple of coats with a sand between, on the outside (and the inside if you feel it necessary) of the cabin sides BEFORE gluing on any Moldings. It's near impossible to get right into the corners later to clean them up properly. Also do the same to the Moldings before gluing them on, same reason. PVA glue will stick to the Sealer. After all is attached you should only have to topcoat it all. Will you be painting or leaving it in natural wood colour? Danny
-
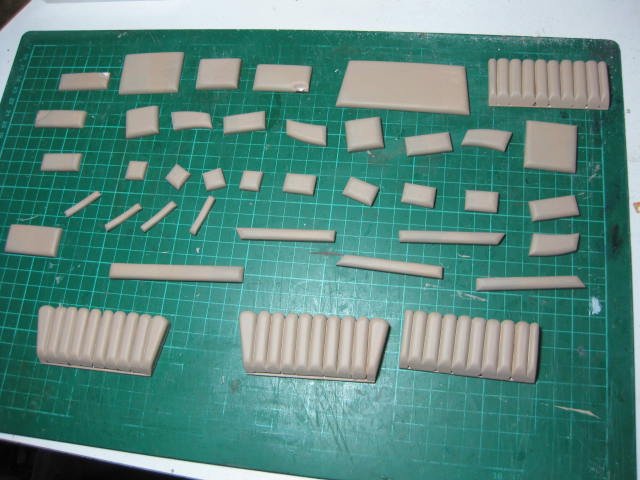
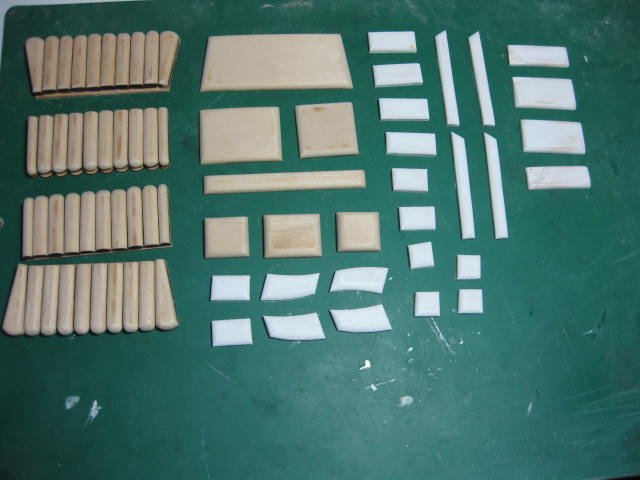
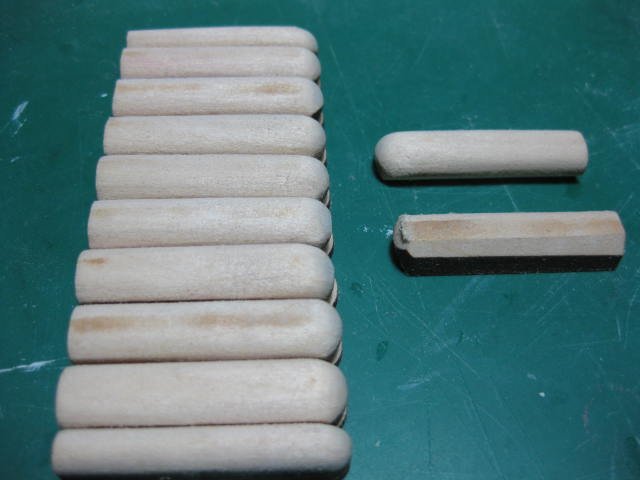
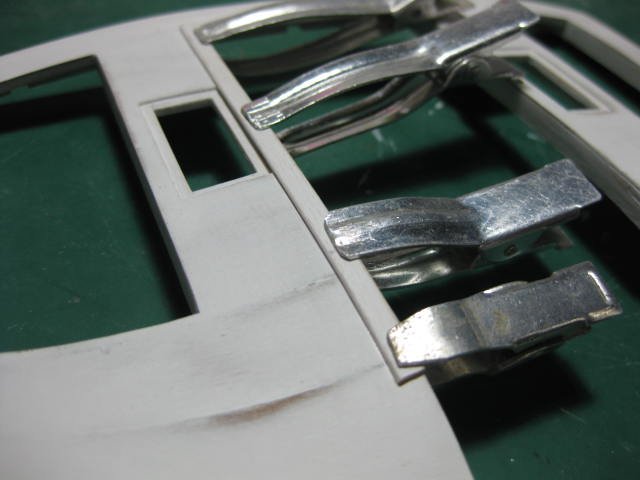
And now for one of the most tedious pieces of the model - the Upholstery. This is about as much fun as tying the Ratlines on a HMS Victory (well, maybe a Brig ). 48 parts in the seats, each one needs rounding off from flat stock. The individual pieces are then glued to a base : The seats assembled and ready for primer : There are 7 pieces of upholstery for the Jump Seats, Driver's Seat and rooftop Passenger Seat. There are also 24 panels for the sides and doors. All these pieces needed rounding off as well, and three of the door panels had to be recessed out for the internal escutcheon plates : Danny
- 151 replies
-
- 15
-
-
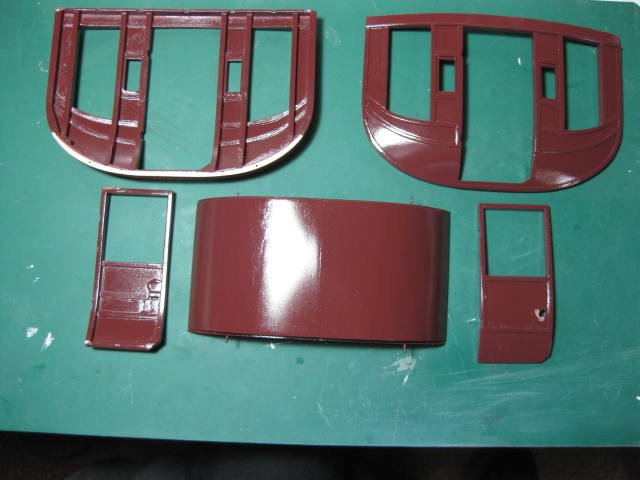
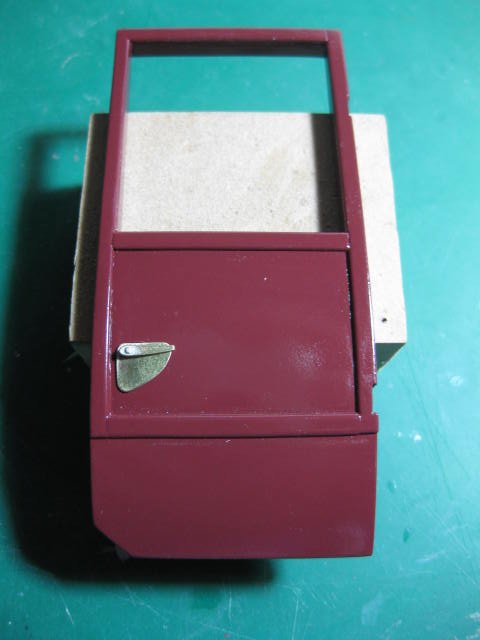
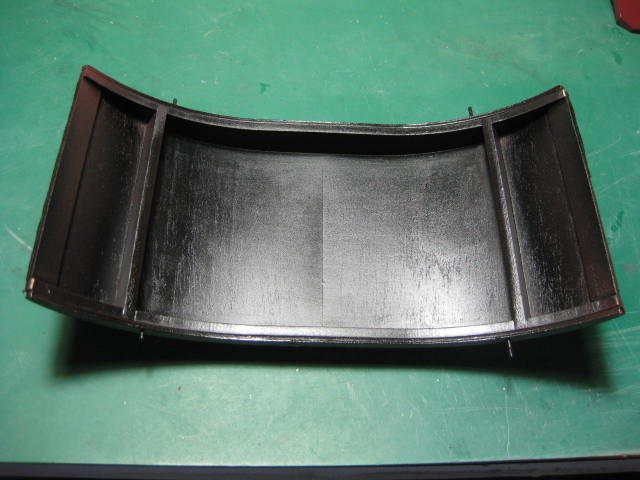
Hi all, A bit of progress in the last week. I've prepped and glued on all the Moldings to the sides and doors : Constructed and painted the Floor : And Painted the sides and doors. The lighting doesn't do the finish any justice - the colour is quite a bit darker in reality, and the reflections make it look a lot rougher than it really is. Very hard to get a high-gloss finish to come up well in the pics : The custom-made external door handle and escutcheon plate : Danny

- 151 replies
-
- 17
-
-
1. Yes - the San Francisco 2 is/was made in Vietnam, not Spain like the original version - it features very poor timber, crappy metal fittings, and even worse instructions. Not a patch on the older type AL kits. 2. No - see above. 3. I hope not - AL went way downhill about 10 or 12 years ago. Their "HMS Supply" was so bad that it started me on the road to severe Kit Bashing and eventually Scratchbuilding, for which I'll be eternally grateful to them . Sorry to deflate you, but I don't want to see you disappointed with a sub-standard kit when you have such fond memories of the first attempt at the San Fran. Danny
-
I recommend THESE. Made from aluminium, they can be very easily cut and/or bent into whatever size/shape you need - and they're cheap . I've been using them for years. Only drawback is that they are fairly small (about 1.5" maximum clamping), but they're mostly used for smaller work anyway. Danny
-
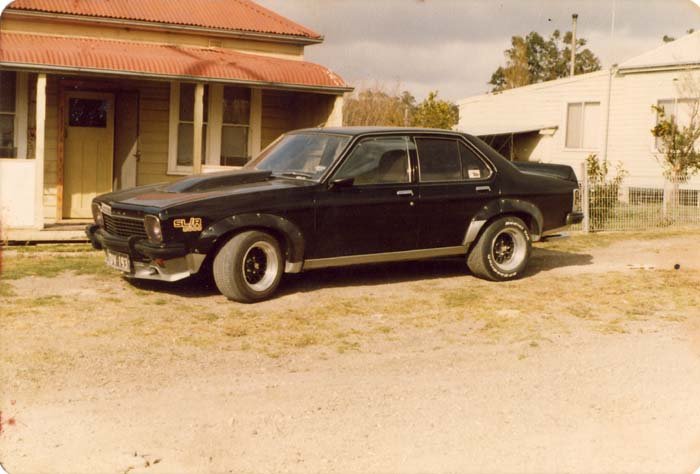
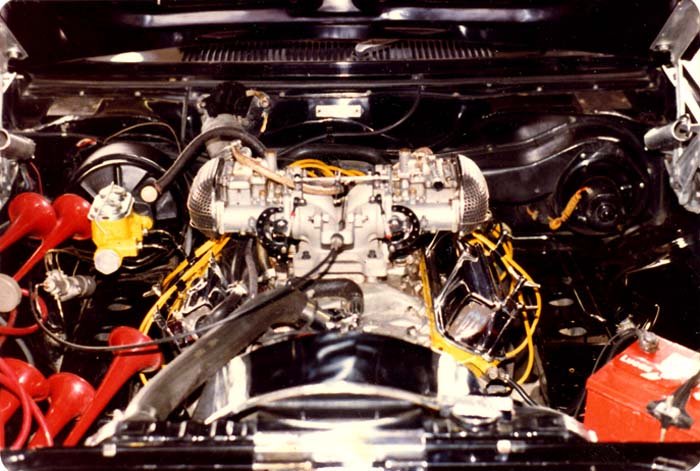
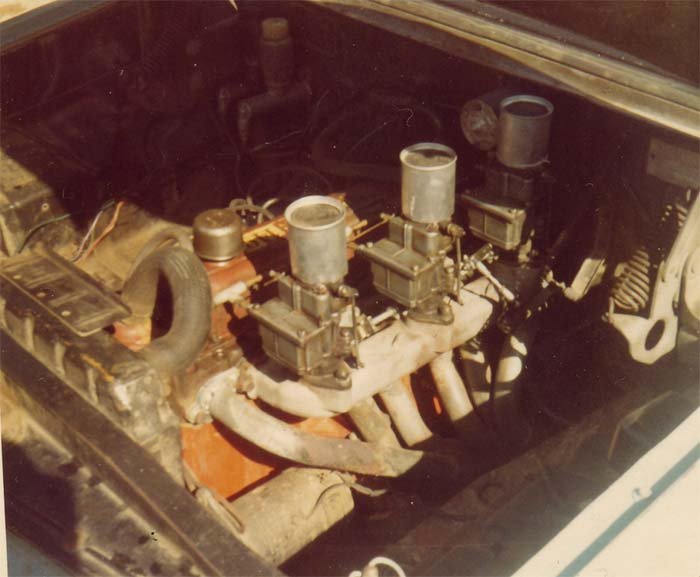
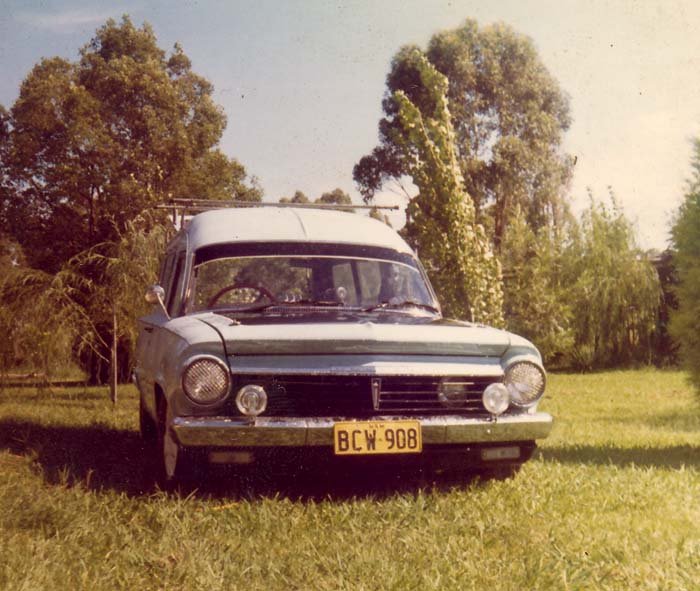
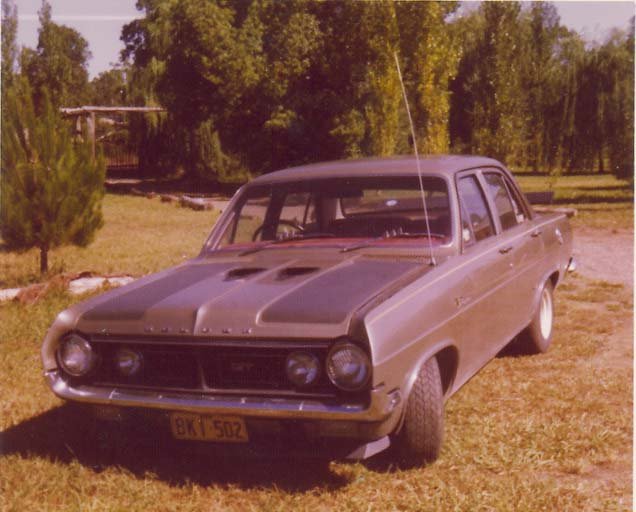
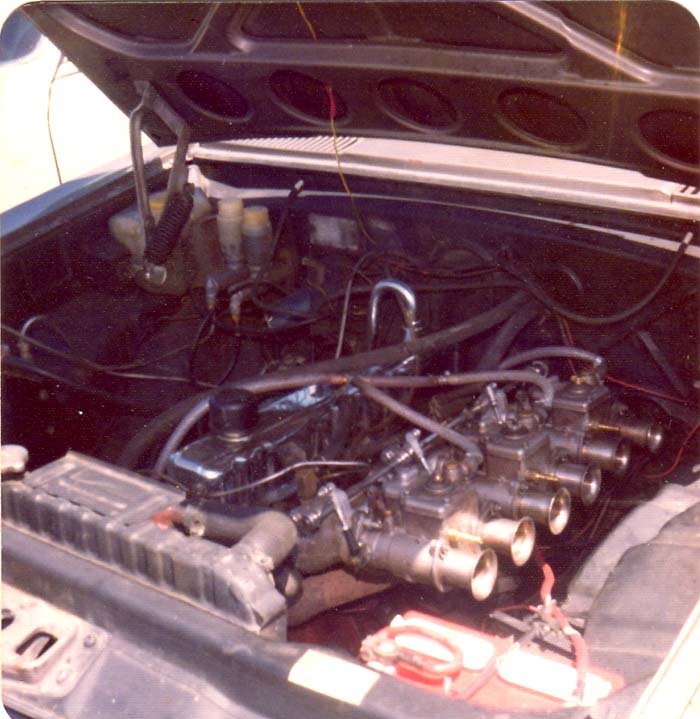
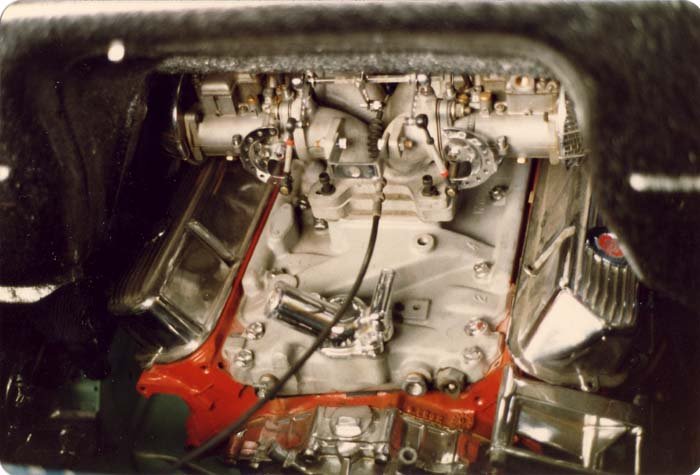
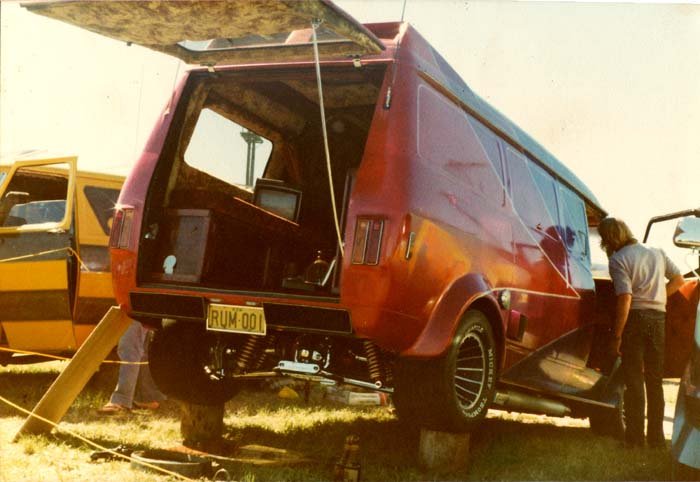
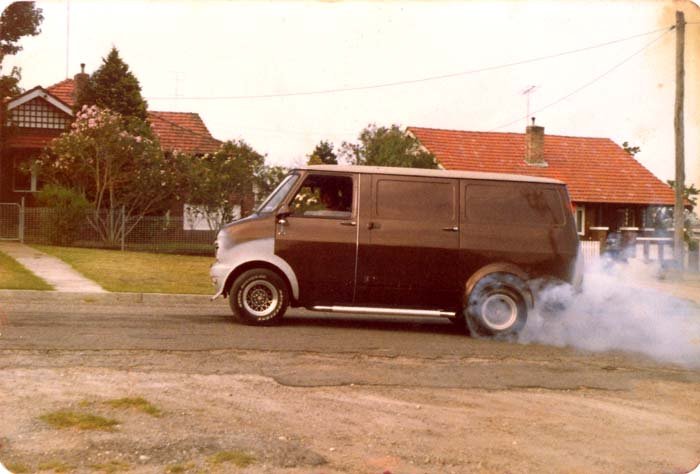
Hmm, let's see Mark ..... 1964 Holden panel van - 192 Cu In, Triple Stromberg carbs, 35/75 cam, worked head etc : 1965 Holden Premier, 214 cub in, triple dual-throat Weber carbs, 40/80 cam, 12-port head, tuned headers, 4-speed gearbox, etc 1977 A9X Holden Torana, 5 litre V8, dual Weber carbs, big cam, worked heads, tuned headers, etc. I had two more similar ones to this - the last one had a 340 cu in V8 and a 9" Ford rear axle, full-on suspension, 15" x 10" wheels and a heap of other goodies. It would have left Peter Brock's Bathurst 1000 winning car for dead - top speed of over 170mph. SWB Bedford van, with a thumping 454 cu in Chevy. Stock unit had a 1.2 litre 4 cylinder engine : LWB Bedford with a 5 litre Holden V8 - 400 + hp. Also had a fully chromed Jag rear end : You could say I was a bit of a racer in my youth . Eddie - stagecoach's back wheel diameter is 130mm. Danny
- 151 replies
-
- 11
-
-
Thanks John, just white PVA wood glue. The aluminium wheel hubs don't really do more than hold the spokes in place - the spokes are glued to each other. No problems with anything not sticking . Danny
-
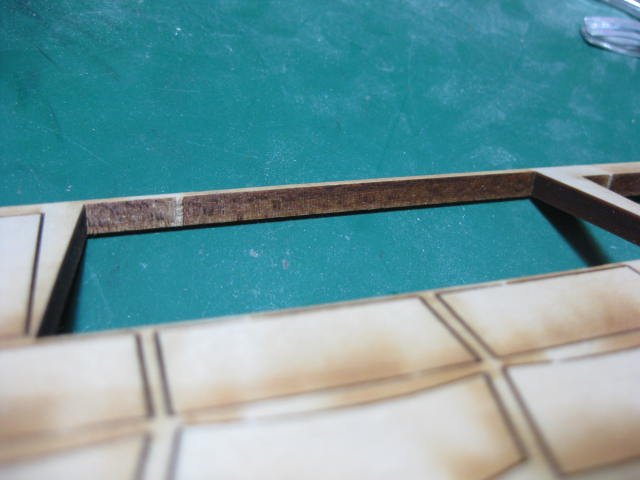
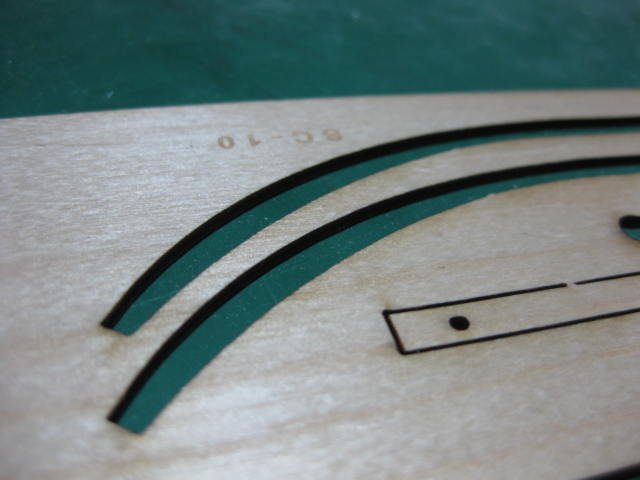
Thanks Mike, popeye, Elijah and Paul. Comments are always appreciated . I stained the pieces with "Feast Watson" brand Oak coloured stain. There is hardly any char to speak of, it's the best laser cutting I've come across in a kit. It just needs a quick wipe over with 150 grit to remove the tiny "tags" of which there are usually only two per piece, and also to roughen the gluing edge a touch : This is the only piece I regarded as just OK, with a small amount of char - a sheet of 1/16" ply that only contained 4 pieces. In another kit this one would have been regarded as one of the better ones : Yes, I chemically blackened the brass and Britannia Metal pieces. The Britannia didn't blacken a lot, just enough to take the "newness" out of the pieces. I can't recall the name of the chemical - it was given to me by gjdale. If you're reading this Grant, perhaps you could remind me . Paul, don't expect working door locks in the kit - they are my own doing . All in all though, an excellent kit . Danny
- 151 replies
-
- 10
-
-
Hi Martin, "Weekend Kit" - yeah, right. Bit of false advertising if ever I've seen it . So your aim is eventually to build a ship in a bottle? That's a whole different ball game. I was getting a bit bored with building full size ships a while ago, so I thought I'd give SIB a go. Check the link in my Signature below for some tips if you like. It was a ton of fun . Danny
-
G'day Adam, and welcome to MSW from Down Under. Good advice from Vince in that last post - if you like it you're more likely to keep going with it . Danny
-
Thanks Jan, Eddie and Matt. Interior is fully detailed anyway Jan. And the windows are merely rolled up canvas . Nope Eddie, I'm doing the Aussie version circa 1862. The main body colour is Maroon with cream wheels. Danny
-
Hi Eddie, I see you're back on-line again too . I bought the kit from Model Expo in the USA about 5 years ago. Model Trailways is one of their brands. I actually managed to get it while they had one of their 1/2 price sales. Here's a LINK to their Wagon line. From the look of the price on their page it'll work out to about $AUD230.00 with shipping and the exchange rate. Danny
-
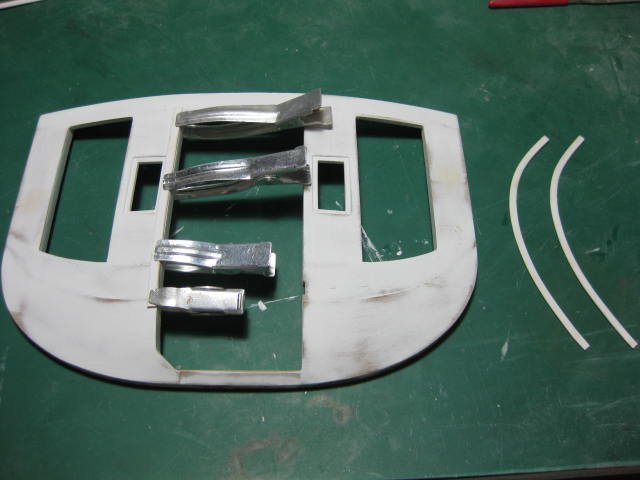
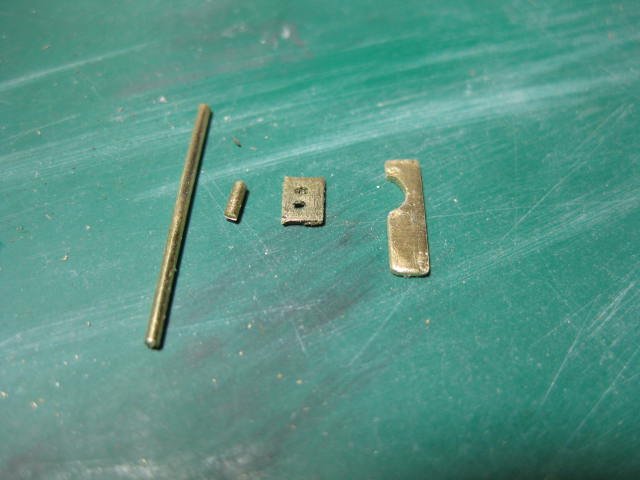
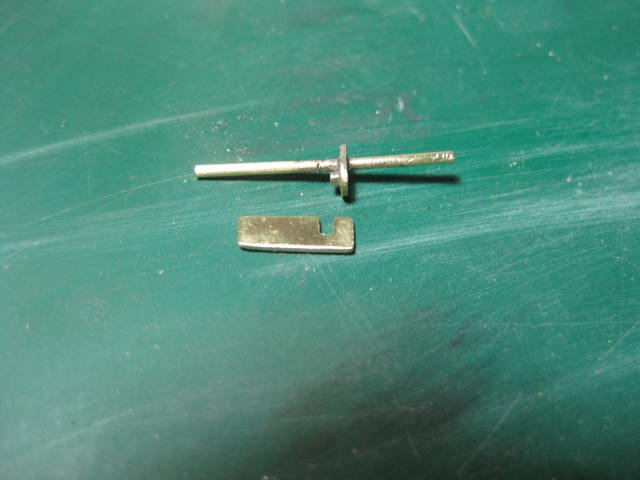
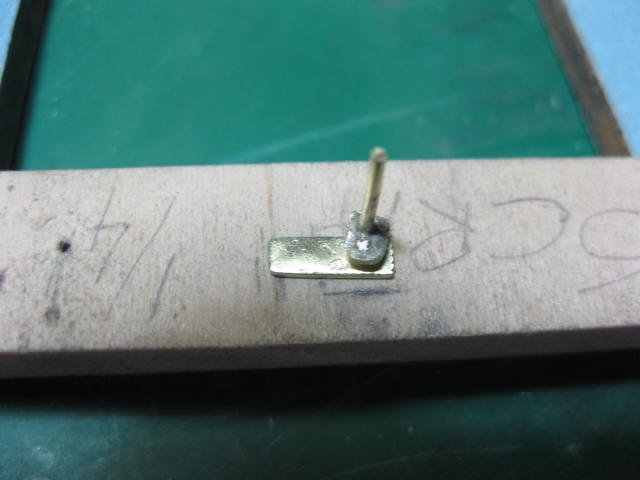
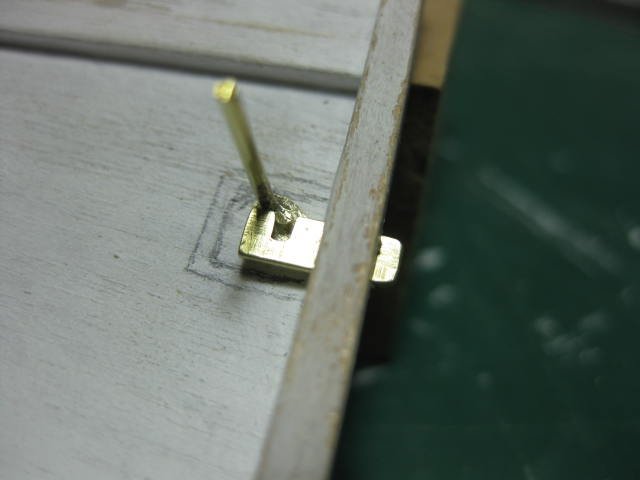
Some of you may have been wondering how long it would take for me to crack and start Kit Bashing - right about NOW . While visiting the Scale Model Horsedrawn Vehicle site I saw a build where the guy had made WORKING door locks. Not to be outdone I thought I'd give it a go . The other guy is building in a larger scale (1:8), so I've simplified my method. The design is entirely my own, a bit of "trial and error" included . Here's a pic of the working parts that I built initially. From the left - the main shaft, the cam pin, the cam, and the tongue : My first test was a failure - the tongue needed a slot instead of the semi-circular cutout. I'd actually thought of the slot as I was falling asleep last night, but by this morning I'd forgotten about it Here is the mk2 tongue, and the cam silver soldered to the shaft : My "test bench" where I checked that the assembly had enough "throw" - perfect : The assembly fitted into the door. I still need to make some "locators" to hold the tongue in line, as well as escutcheon plates to hold the shaft in position : More will follow tomorrow. Stay tuned . Danny
- 151 replies
-
- 20
-
-
Hi Pat, Regarding your cutter - in my opinion you are building it the hard way. I found the "plug" method much easier. Here's a LINK to where I'm (clinker) planking the hull. Hope this may be of some help to you. Danny
- 517 replies
-
- 3
-
-
- Endeavour
- Artesania Latina
- (and 1 more)
-
Or you could just buy one : DREMEL DRILL PRESS I bought one of those years ago before I got my Sherline Mill. They are OK I suppose, but not all that accurate. I haven't used it for years. Danny
-
Mark, read my last post again, I edited it - his Build Log is in the "Deleted Content" Forum. Maybe only Admins can access that??? Cheers, Danny
-
Mark, check out his Content in his Profile, that's how I found it . Or click HERE . EDIT - I just noticed it's in the "Deleted Content" section. Cheers, Danny
-
Hi ikkypaul, I've just checked your build log, and the title you have given it is about as good as you can do considering the circumstances of it's initial construction. Except that it looks a LOT like the Cutty Sark . If not, then leave things as they are. If you want to edit the title again, use the Edit Button in the FIRST post of your build log. It's the only one in which a title can be edited. Good luck with your project - it looks like your uncle did a good job on the model. It looks well worth restoring. Cheers, Danny
-
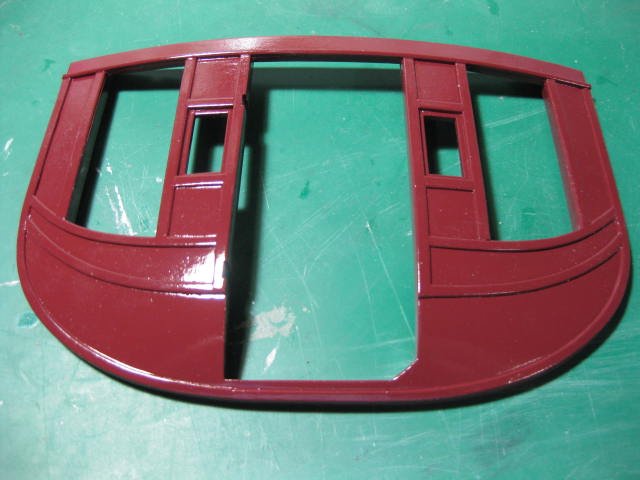
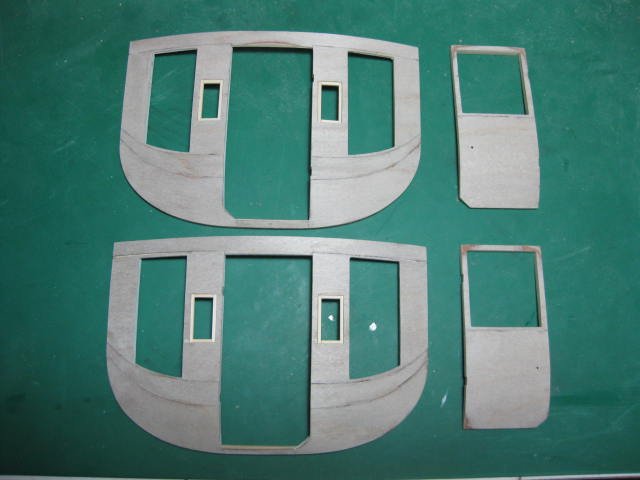
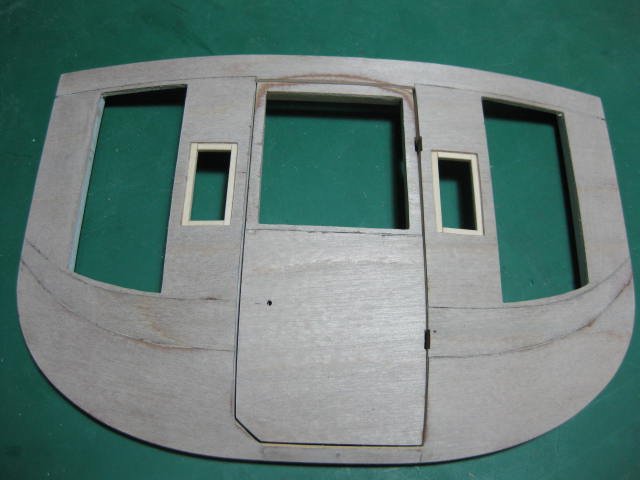
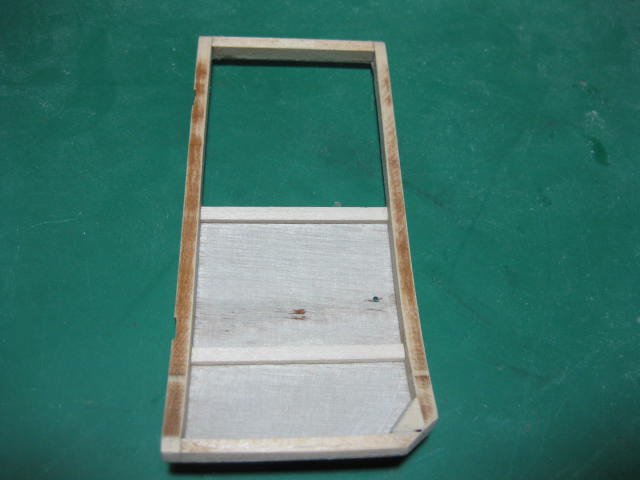
Very nice Mike . I've sheeted both sides and also made the two doors. Ready for paint : The door in place, the gaps are much neater than they look here as I've only roughly supported it for the pic. The hinges are fitted after painting :
- 151 replies
-
- 19
-
-
Thanks Bill. And thanks for the "heads up" Wayne and Mike, I'll make a note of that. Cheers, Danny