Dan Vadas
-
Posts
3,261 -
Joined
-
Last visited
Content Type
Profiles
Forums
Gallery
Events
Everything posted by Dan Vadas
-
Hidden - but very necessary. The intakes ensure that the pump tubes are correctly positioned in the cutouts. A slight miscalculation here can end in grief further up the track with a misalignment of the tubes. Well done. BTW - you've just reminded me that I need another PE card for my Cross-section of Vulture . Danny
- 1,215 replies
-
- 2
-

-
- sloop
- kingfisher
- (and 1 more)
-
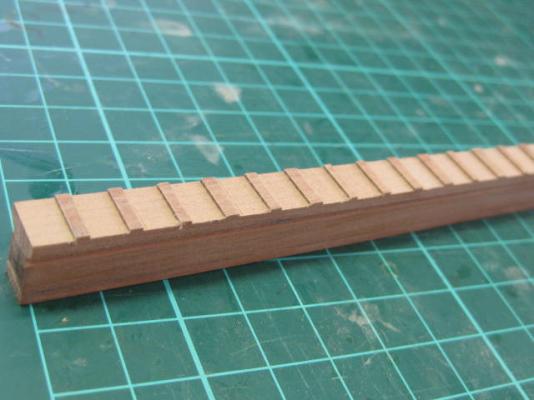
Last job for today, I cut the mortices into the keel for the frames. This wasn't totally necessary as they won't be seen later, but I figure it makes it easier to line up the frames at the correct spacing. Speaking of spacing, I've followed The Framing Disposition plan I got from the NMM. The spacings aren't even on the plan, some are 2 1/4" scale inches different to others, making them LOOK wrong even though they are correct. Danny
- 268 replies
-
- 25
-
-
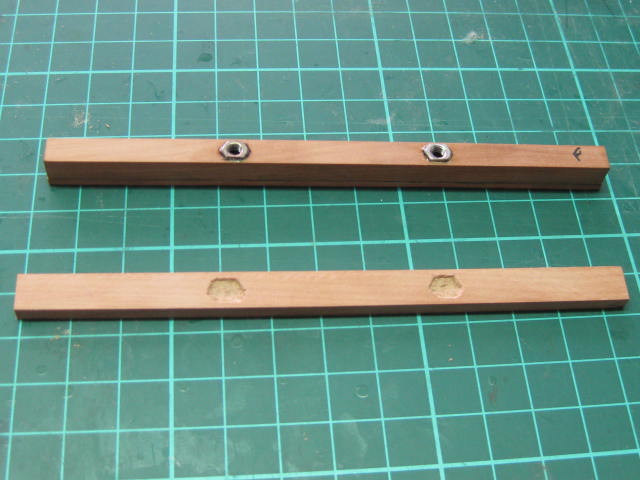
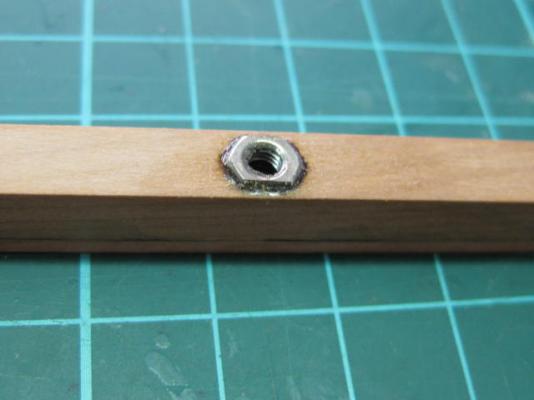
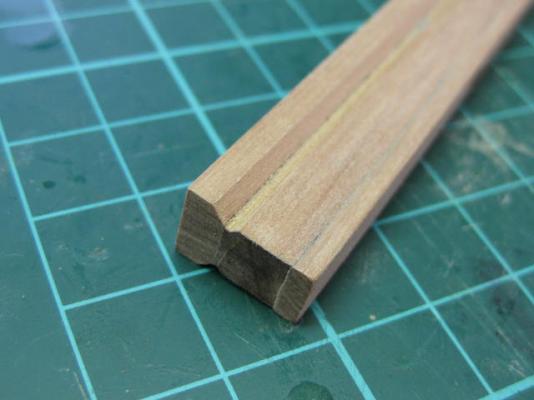
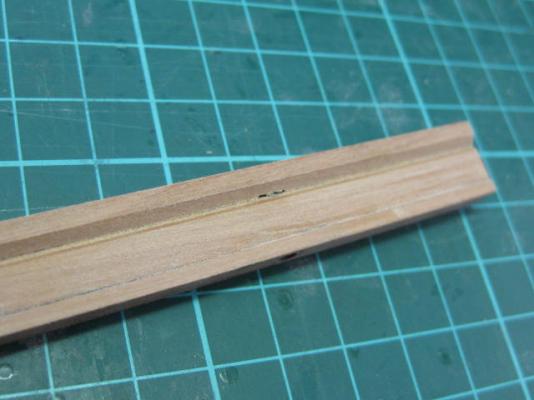
And another thank you to my new followers for looking in . No Pat. The ones on the full model are clear enough to see all those details. The cross-section will only get a stub mast to about half the height of the lower mast. I'll detail the section that I fit of course. Keel Work has started by making up the Keel. First I glued on the False Keel. Then I fitted two stainless steel mounting nuts into the keel itself - on the full model these went into the Rising Wood, but that created a few problems with exact placement under two frames to hide them. The rising wood needed a little bit of scalloping out to clear the tops of the nuts : I've also cut in the Rabbet. I used a 45° cutter in my Mill, as this section has a straight rabbet : I managed to JUST cut through to the mounting nut on the port side - lucky that it's the side that will be planked : Danny

- 268 replies
-
- 24
-
-
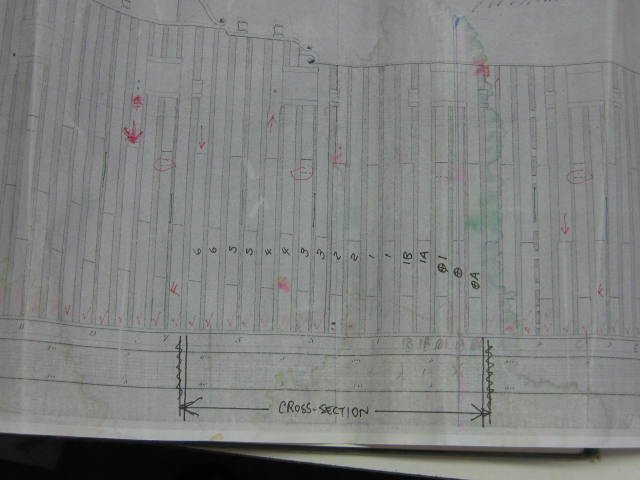
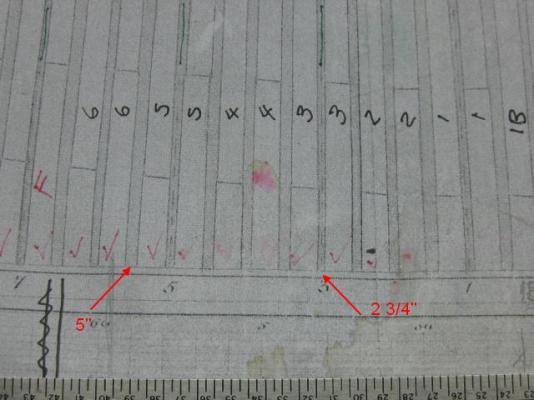
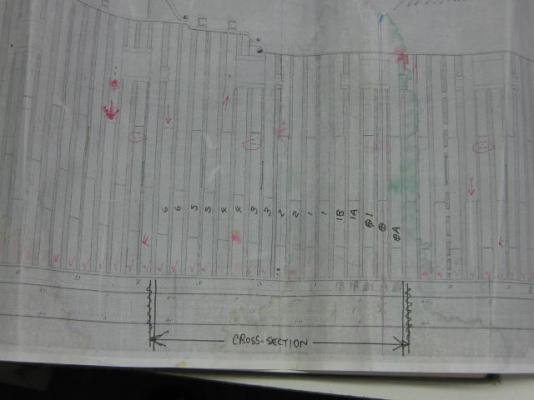
Are the frames of a Swan Class evenly spaced? According to TFFM they are 28.254" between the fore side of one frame and the fore side of the 2nd frame over, indicating that they are all even. My Framing Disposition plan for Vulture from the NMM shows them at all sorts of differing spacings, from about 2 3/4" to 5" between frames, a variation of 2 1/4" : On my Vulture I followed the Disposition plan, which resulted in some odd gaps that just looked wrong. I want to avoid that with the Cross-section I'm doing if at all possible, unless it's the correct way of doing it. I doubt that the original plans were drawn that way unless it was accurate. They show all the Shifted and Cast frames clearly. Danny
- 1 reply
-
- 4
-
-
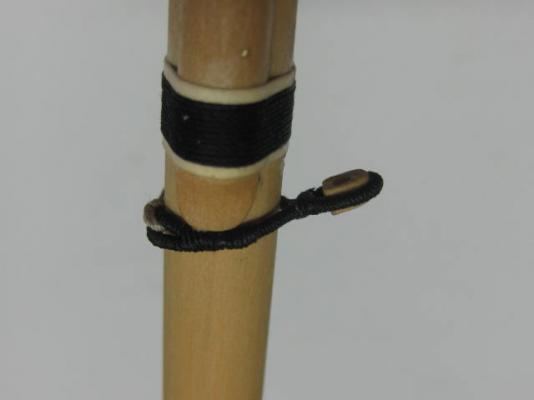
Hi Al, Take another look at one of those pics I sent you in the PM - they use a Collar similar to this one : Danny
- 265 replies
-
- 1
-
-
- finished
- artesania latina
- (and 1 more)
-
Janos ...... errr - it's in the Title . 1:48 scale, same as Vulture. Thank you John. Danny
-
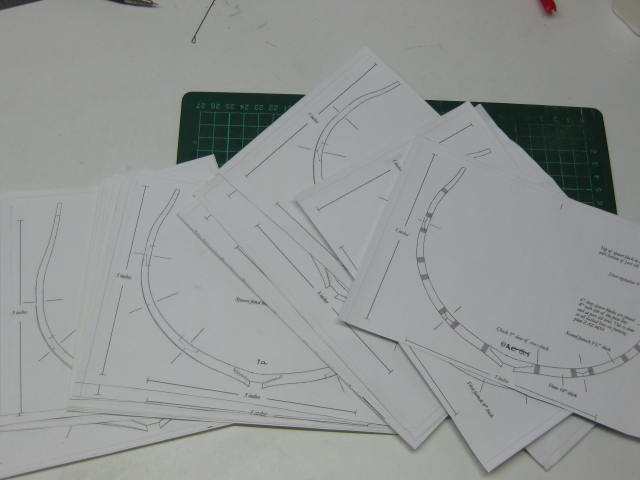
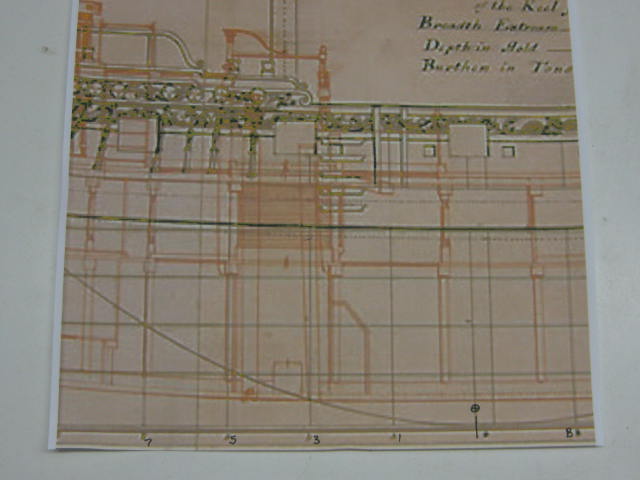
Thank you all for your interest in this build. Any comments are always welcome. And Russell, we're all still waiting for your Build Log of Euryalus . Preparations begin by first deciding how much of the section to build. I decided on roughly this area, which shows the Well and Shot Locker, as well as the lower part of the Main Mast and the Pumps. There will also be two fully-rigged Guns on the Upper Deck : Next I worked out which Frames will be needed from the Framing Plan : Then I printed out the frames from the CD supplied by Admiralty Models for the Swan Class Ships. I printed these on sticky-backed A4 size Label Paper (2 frames per sheet) : When I checked on how much timber I have left from building Vulture, there was a bit less Swiss Pear than I thought. I have enough to make a decent start, but I'll have to order a few more pieces from Crown Timberyard. These will probably take around 6 weeks to arrive (at least 4 of those clearing Customs) so there may be a short delay in sequential construction later on. I can pass the time by building other details . Cheers, Danny


- 268 replies
-
- 15
-
-
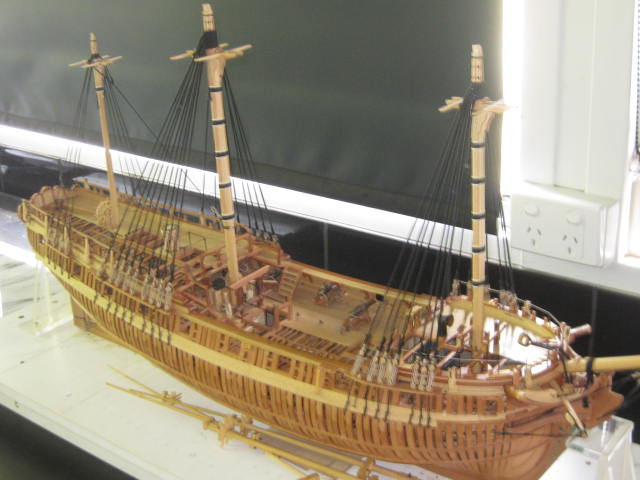
Hi all, Having completed HMS Vulture and donating her to the Port Macquarie Maritime Museum I decided to build a Cross-section of the ship to display alongside her. I will be building the section in exactly the same way I built the original model, using the same timbers etc. This will allow viewers to see some of the internal details which are now virtually invisible. Below is my now customary Index to Points of Interest. Clicking on a Link will take you to the relevant post where the construction of that area begins. The Index will be added to as work progresses. Index to Points of Interest Preparations Keel Floors Frames Fitting Frames Fairing Pump Recesses and Pump Inlets Internal Planking Treenailing and Mainmast Step Lower Deck Beams Stanchions for the Well Lower Well and Shot Locker Limber Boards and Lower Deck Knees Iron Knees Chain Pump Sprocket and Chain Pump Tubes Hatch Coamings Mast Lower Deck Planking Upper Well Mast Partner Carlings and Main Topsail Sheet Bitt Pins Hammock Battens Gratings Mast Partners and Pump Tubes Fitted Wales External Planking and Treenailing and Port Liners Bitts Fitted, Cisterns and Chain Pump Cranks Elm Tree Pumps Guns Quarterdeck Section, Entry Steps and External Moldings Guns Finished, Gangways and Ladder Gangway Railing and Newel Post, Channel, Chains and Deadeyes FINISHED MODEL .
- 268 replies
-
- 21
-
-
Thanks Crackers and Sam. For the bad news - I'm not going ahead with this project. On closer inspection there was far too much shoddy work done by the previous builder to make a half-decent job of restoring this model. By me anyway - I have better, more enjoyable things to do. I've given it back to the owner, who is going to have a go at fixing it himself. The good news - my next major project (apart from some fun "Object in a Bottle" gifts for my and my partner's various grandsons) will be a Cross-section of the midships of Vulture. Link can be found in my Signature. Danny
- 59 replies
-
- 13
-
-
- norske lowe
- billing boats
- (and 1 more)
-
Sorry Richard, I don't remember. I had it written down when I gave the measurements to the guy who made the case but I've thrown out the piece of paper. It'll take me a while to find out - I'll have to visit the museum to measure it, and I don't have any plans to do so in the near future as it's a fair drive from my home. Danny
-
Sitzbank aus Eisen (Bench made of iron)
Dan Vadas replied to merchen's topic in Metal Work, Soldering and Metal Fittings
I just checked out that site wefalck - all I can say is . Danny -
That's good to hear, and I look forward to seeing it Erik . Danny
- 222 replies
-
- 4
-
-
- 18th century longboat
- model shipways
- (and 2 more)
-
Can't wait to see what you can do with REAL wood then Erik, if you are turning out this excellent quality work with a softwood. Wait until you try using something like Castello or English Box - you'll think you're in heaven . Danny
- 222 replies
-
- 8
-
-
- 18th century longboat
- model shipways
- (and 2 more)
-
Well that was different Bob - well done . Watch out for paper cuts though . Danny
-
Not at all. I'm not sure if it's a wax as such, or more of a very thin plastic coating. Either way, it's good stuff to use . Danny
-
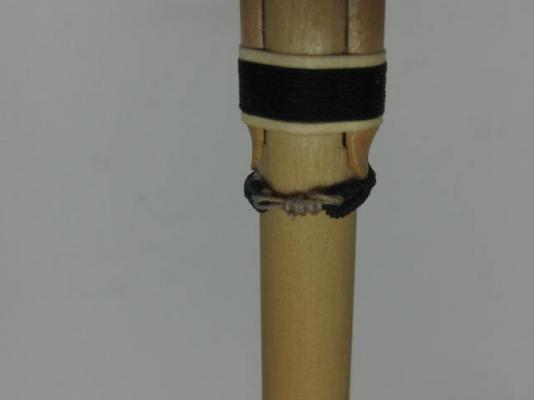
YES to pretty much every question/answer you asked. Seizing the loop after it goes around the mast is easier than it looks, especially if the deadeye lanyards haven't been fitted and the shrouds are still loose. Alternatively, I loop the shroud around the mast, use a bent wire through each deadeye to keep them the same length, tie a half-hitch with the seizing line around them, give it a dab of PVA to hold the knot, let the PVA dry for 10 minutes, remove the wires and slip the shroud off the mast, and finish the seizing on the bench. I use Carpet Thread for the seizings. It's a lot stronger than normal thread and has a thin wax coating which eliminates the "fuzzies". Danny
- 265 replies
-
- 1
-
-
- finished
- artesania latina
- (and 1 more)
-
Probably because the starboard ones go on first. Danny
-
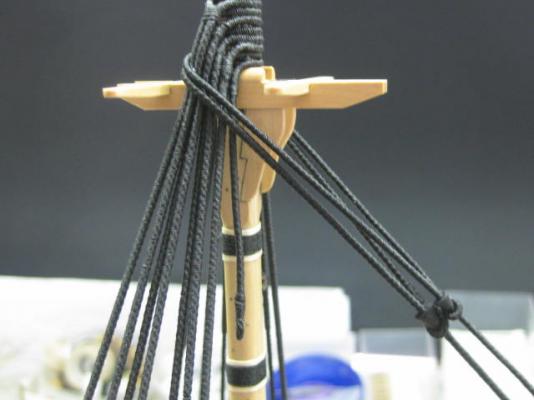
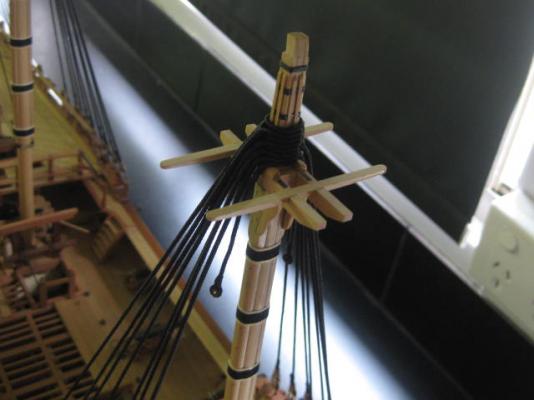
I sent Mike a PM about his question. Here it is for those of you who may get some benefit from it : Yep, it is impossible to get the 2nd deadeye through the gap between the lower mast and the topmast. That's why I don't fit the topmast until AFTER I've rigged all the shrouds and stays. The pics below will show my method : I do a similar thing with the topmast shrouds and stays - I leave the topgallant mast off until they are all rigged. I make all the pieces of the whole mast up on the bench before I start fitting anything permanently without gluing the three pieces of mast together. I even leave the Mast Tops off until that section has been rigged. Here's a LINK to the post in my build log of Vulture where I start fitting the shrouds. BTW - the shrouds don't go from starboard to port. They are rigged in pairs for each side. That is, the first two shrouds on the starboard side are looped around the mast, followed by the first two for the port side. Then the 3rd and 4th shroud for starboard, 3rd and 4th for port etc. If there is an uneven number of shrouds the aft one for each side goes from starboard to port using a "cut splice" around the mast. I hope my explanation is what you were looking for. Danny

- 265 replies
-
- 2
-
-
- finished
- artesania latina
- (and 1 more)
-
It most likely is. Try either Chrome or Firefox (both easy and free downloads) - I use both without any problems. BTW - I'm still on Windows XP. Danny
-
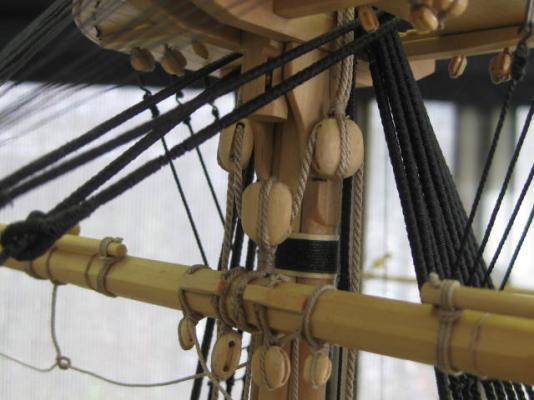
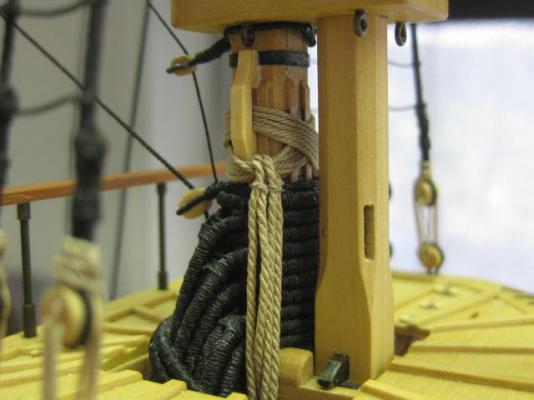
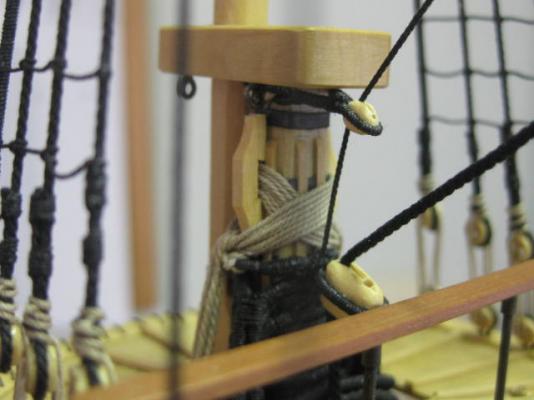
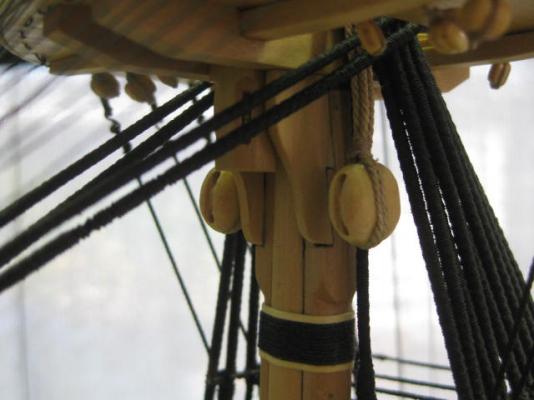
BTW - both Artesania and CP have it wrong for the Jeers. They go like through the Lubber Hole. Here are a series of pics of my Vulture showing the correct attachment : However, feel free to do it CP's way - no-one said that Artesania have it right all time, there will be more discrepancies with authenticity . Danny
- 265 replies
-
- 3
-
-
- finished
- artesania latina
- (and 1 more)
-
Al, it worked fine when I moved your last pic on the previous page into the text. What Browser are you using? I'm guessing that's the problem. The black squares only indicate that they are Attached Pics, not Embedded ones. Nothing happens if you click on them. Danny
-
Ulises took the words right out of my mouth - I can't add to or take anything away from what he's written except the bit about CA sticking everything except what you want it to . Norman, don't rely on the PVA to do more than stop the very last bit of knot from slipping through. If you are tying your knots PROPERLY there won't be any dramas with them coming undone. The beauty of using PVA is that it is easily undone WHEN YOU NEED TO. A brush-over with Isopropyl Alcohol or even just water will loosen the knot if you need to make any adjustments. That's virtually impossible with CA. Danny
-
Artesania Latina's "HMS Supply" falls into BOTH categories. It started as by far the worst kit I've ever bought, and finished as one of the best because it sent me down the road of Scratchbuilding. The hull itself was OK for the most part, but from there on I trashed EVERYTHING and scratchbuilt the rest. The supplied fittings were cheaply cast junk, the rigging plans were a joke .... the list goes on. The associated research needed was quite a lot of fun. My overall best was my 2nd last one - HMS Vulture, scratchbuilt from "TFFM" books. The Longboat in the Bottle was a lot of fun, but I regarded it as a bit of a diversion . Danny