Dan Vadas
-
Posts
3,261 -
Joined
-
Last visited
Content Type
Profiles
Forums
Gallery
Events
Everything posted by Dan Vadas
-
The Bodywork starts. There is a jig included in the kit that makes assembly quite simple. As with everything else that's laser cut in this kit it is very accurate. Here's a pic of the start of the assembly : The first frame completed and faired. I made both frames in an easy day : A frame off the jig : The two frames and one lot of external panels primed and ready to assemble : Cheers, Danny
- 151 replies
-
- 22
-

-
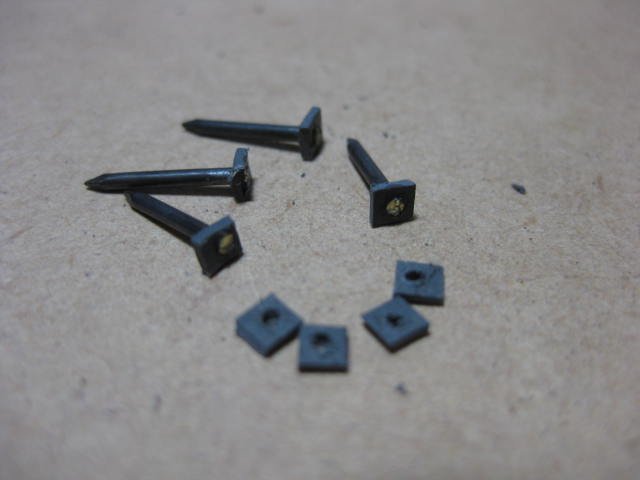
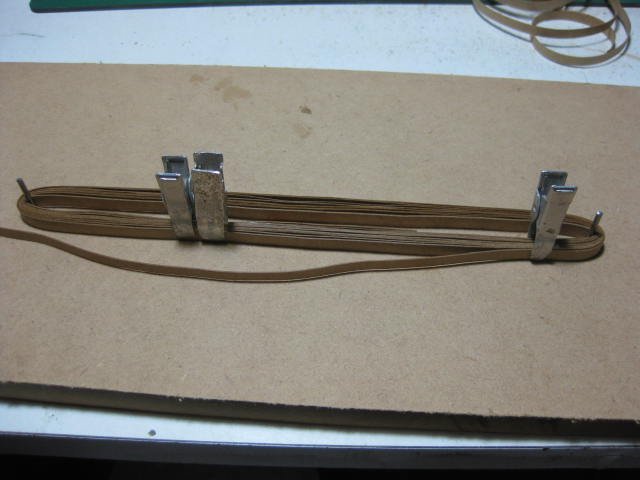
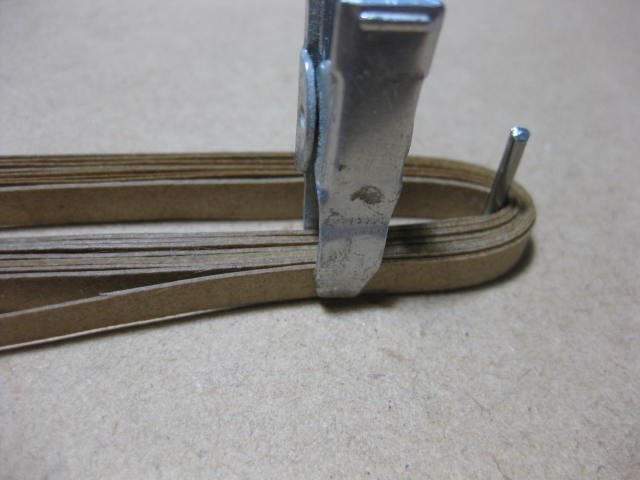
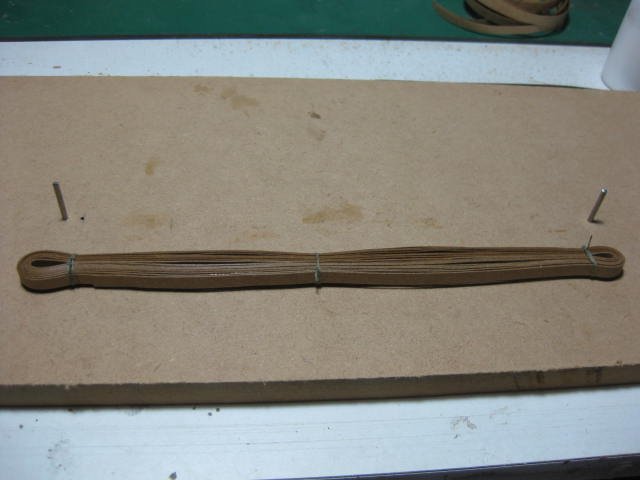
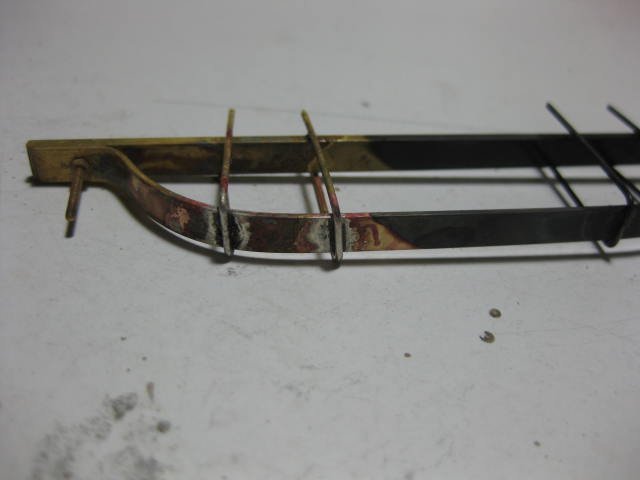
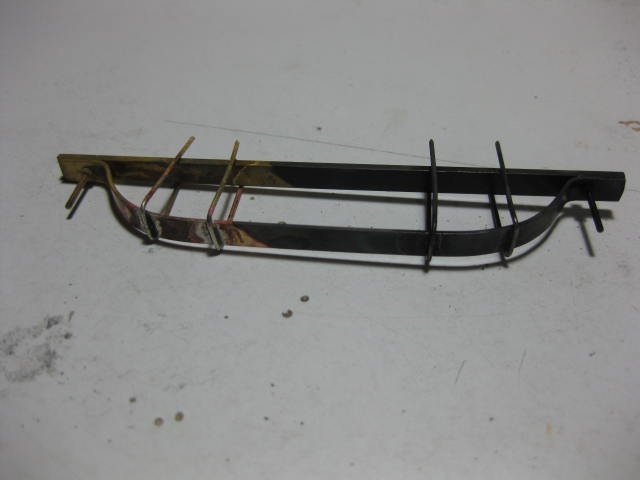
Thanks Mike, Bug and Jan. It's all relative Bug - there are details, such as the tiny 1mm nuts, which aren't all that easy at 1:48 . So I don't get in trouble with the Admins for posting "off-topic" . Makes no difference that I AM an Admin, rules is rules . Next step is to make the Thorough Braces, Concord's version of suspension. The kit supplies a type of thin gasket material which is a pretty good simulation of leather. It's also quite easy to work with. First bit was cutting ten 3/16" wide strips from the 3' x 8" sheet supplied. Then I made a simple jig to get the braces the correct length. Five lengths of the strip were then turned around the nails, gluing each end to the previous strip : A completed brace. String is used to stop the whole thing unravelling until it's fitted : I've had very few problems with this kit - it's one of the best I've ever done . However, there's no margin for error in the amount of material and fittings supplied. Indeed, they didn't supply enough 8 gauge brass pins or laser-cut nuts. So I made my own from offcuts of the pins, and some of the left-over "rubber" material : Cheers, Danny
- 151 replies
-
- 23
-
-
Hi Al, nice work so far. Regarding your question about placing the pics where you want to in the post - too easy . I usually upload all the pics for the post first, type in the first bit of the post, then when I want to add the 1st pic I click on the "+" button in the bottom-left of that pic. Type in the next paragraph or two until you want to add another pic and repeat the process for the next pic etc. Cheers, Danny
-
Thank you John. Here's a Progress picture. Wheels still need to be painted, I just HAD to see what it looked like up to now : Cheers, Danny
- 151 replies
-
- 25
-
-
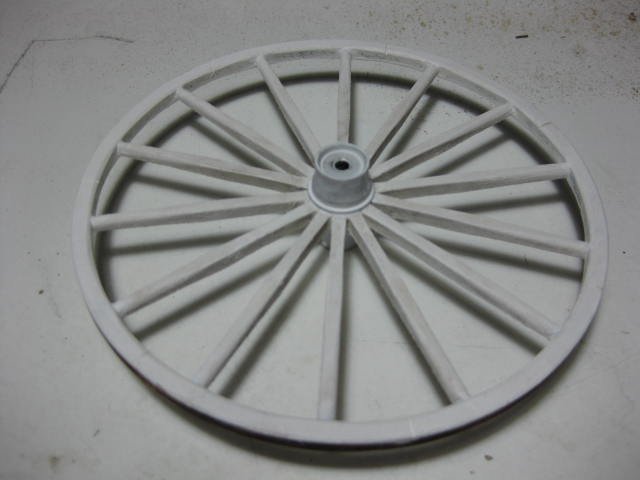
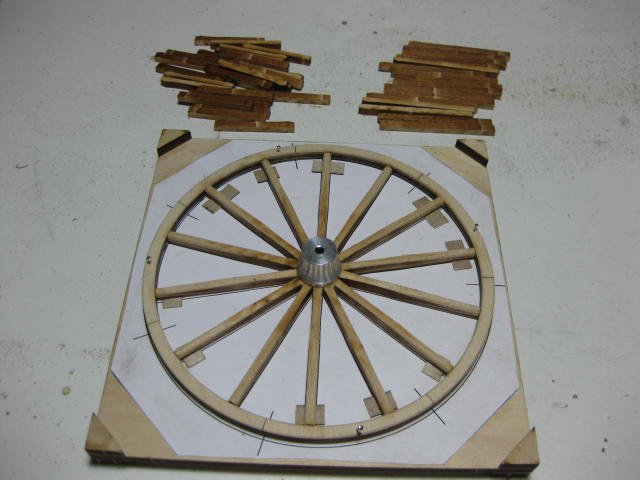
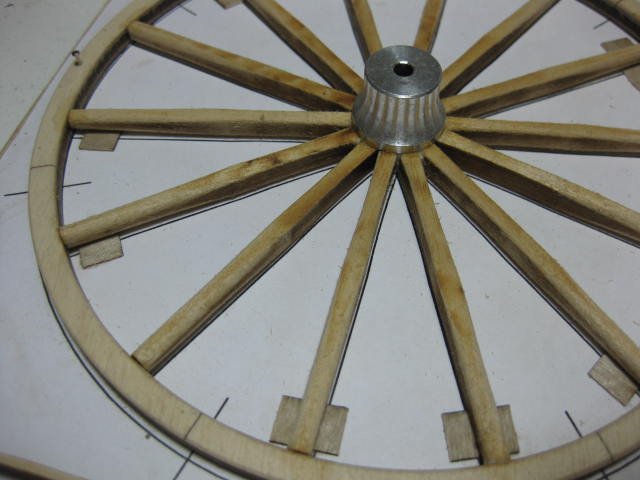
To construct the Wheels the kit supplies a jig and pattern. This needs to be constructed first, but it's all fairly simple. The hardest and most time-consuming task is to sand the rims and especially the spokes. There are 52 of these (14 for each rear wheel and 12 for each front), and each one needs to be sanded to an oval for 1/2 it's length - bit like making a couple of thousand treenails . The two piles above the jig haven't been done yet : Cheers, Danny
- 151 replies
-
- 17
-
-
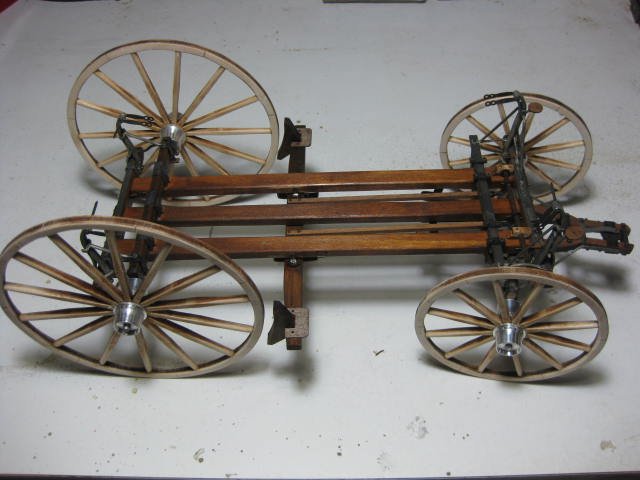
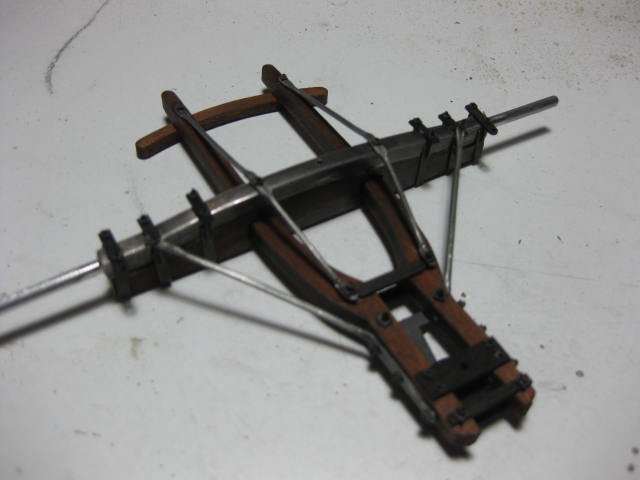
A pretty good day's work - I've completed all the Running Gear on which the front axle is attached : This is how the assembly will fit relative to the frame : Cheers, Danny
- 151 replies
-
- 22
-
-
Thanks for the pics Mike and Wayne, your models are turning out/have turned out very nicely indeed. I'm starting to think I have found a new hobby (just kidding ). Though I may build another wagon or two. Cheers, Danny
-
Thanks John and Mike. Mike - What type of coach is it? Chers, Danny
-
Hi Popeye, The nuts and bolts were kit-supplied. Cheers, Danny
-
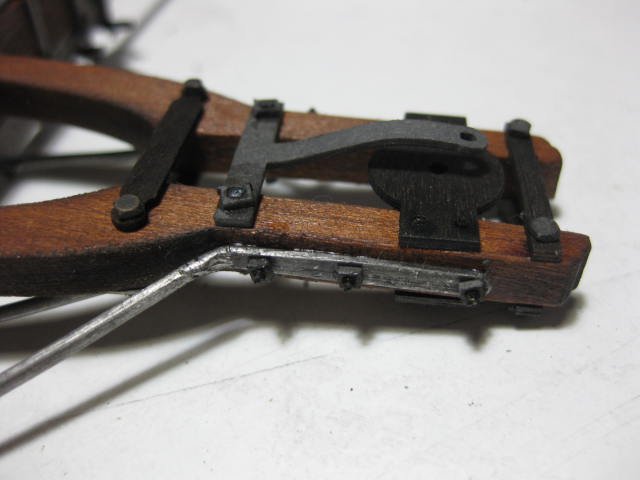
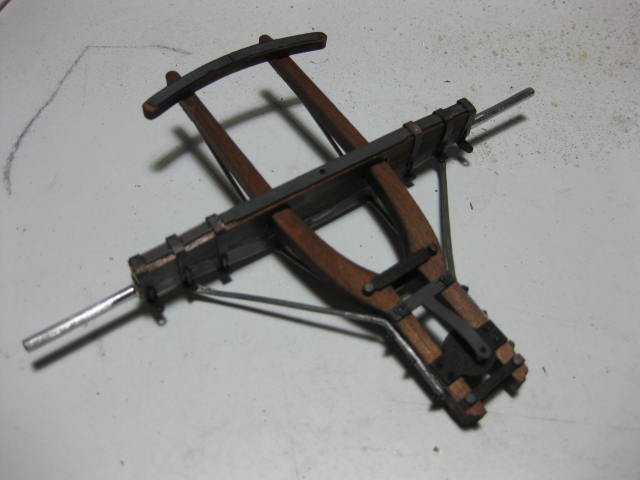
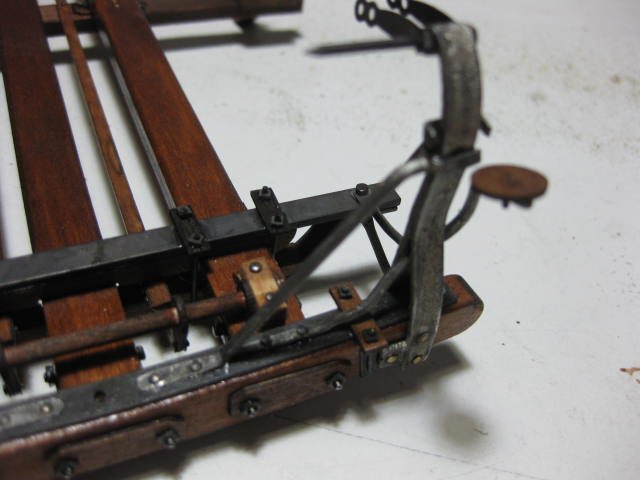
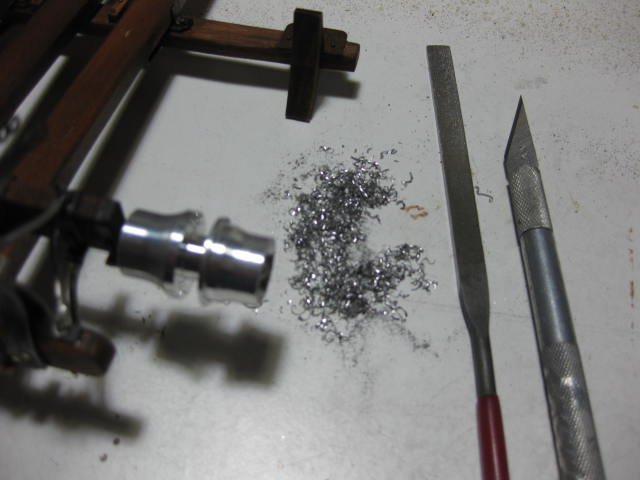
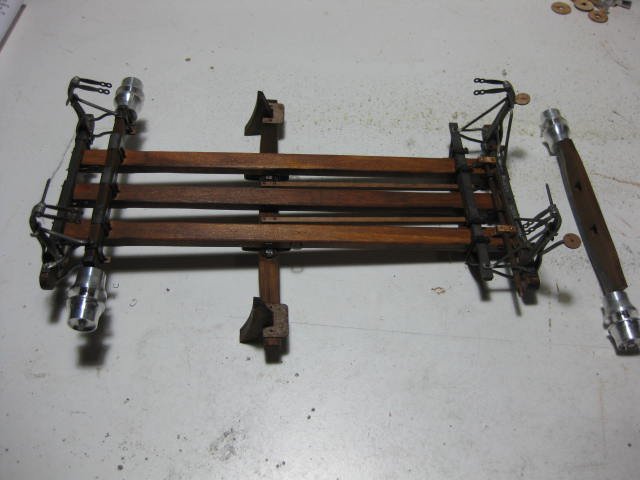
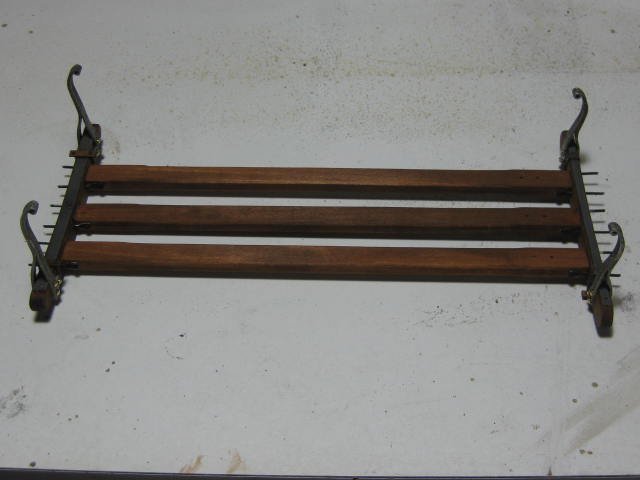
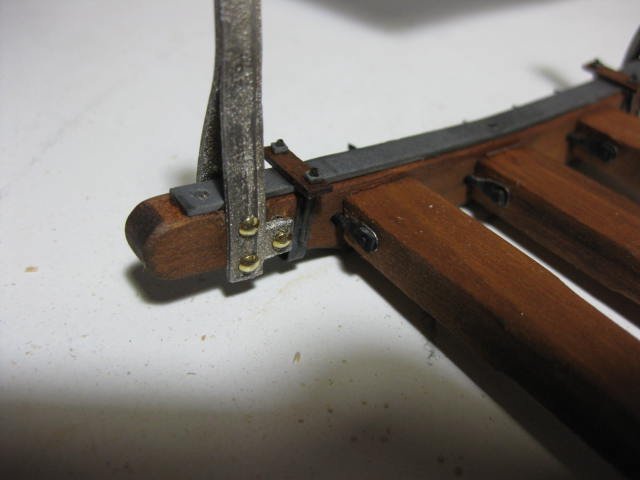
I've completed the Frame, or chassis. Here are two pics of the Brace Header "iron" work, made from brass, silver soldered and blackened : This is the assembly in place, complete with tiny square nuts and two 1.3mm threaded bolts and nuts : The front and rear Standards are supported by struts, cast from Brittania metal. I've found most of these castings to be adequate without being exceptional. The metal itself is in very good condition, easily bent without snapping (except for 1 piece which was easily fixed). The casting was only so-so, with a fair bit of flash cleaning needed : One step that the instructions omitted was to check the fit of the CNC lathe turned Wheel Hubs on the axles. This caused me considerable drama, as the axles were between 0.3mm and 0.7mm too large in diameter. Not too bad for the front axle, which was still unattached, but a lot harder to trim on the already-fitted rear axle. After using a flat needle file to correct the front axle I attempted the same on the rear. 10 minutes later I was still nowhere near doing one side, when I came up with the idea of shaving the axle with a #11 Xacto knife - brilliant . It took less than 5 minutes to complete BOTH sides. The shavings shown in the pic below are from ONE side of the axle : Here's where I am up to. BTW - the brake mechanism actually WORKS : Cheers, Danny

- 151 replies
-
- 22
-
-
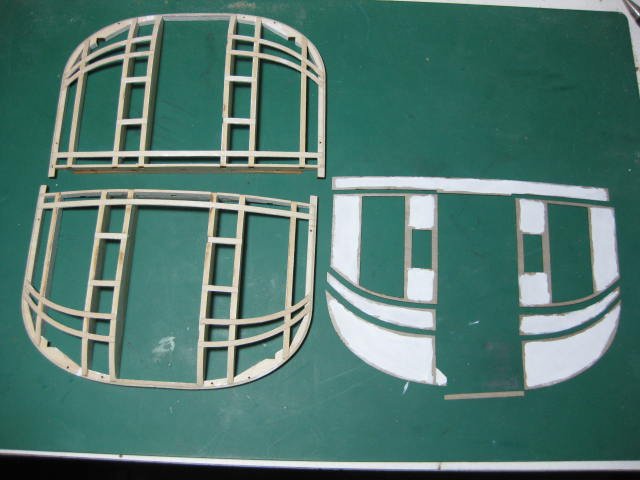
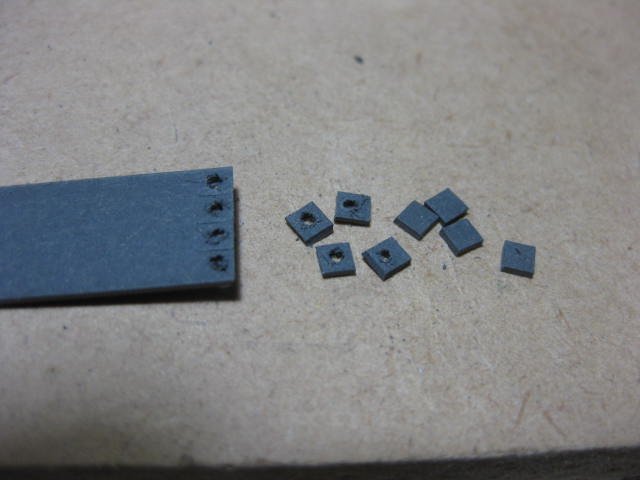
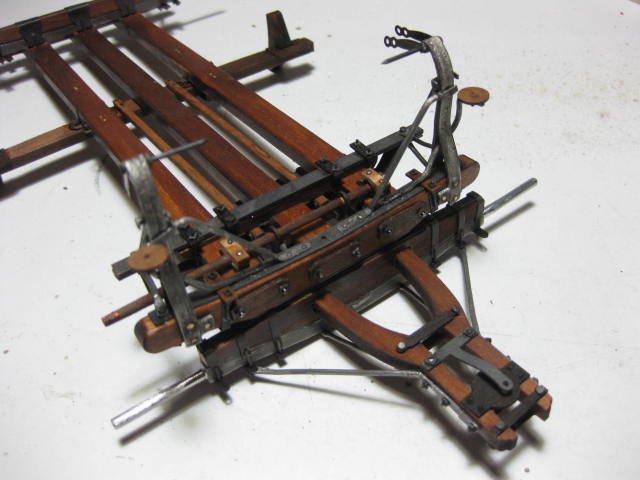
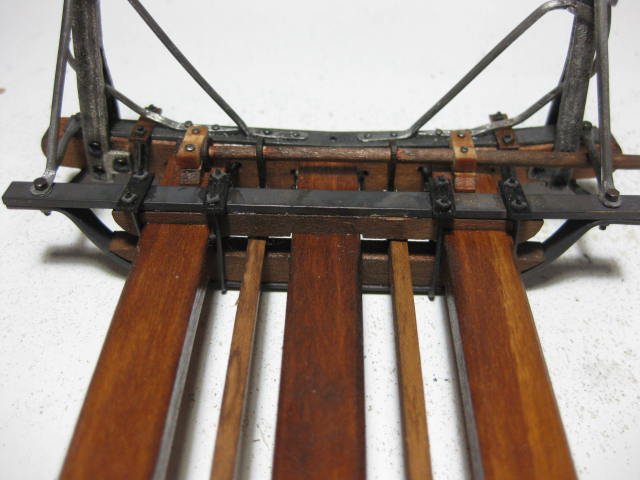
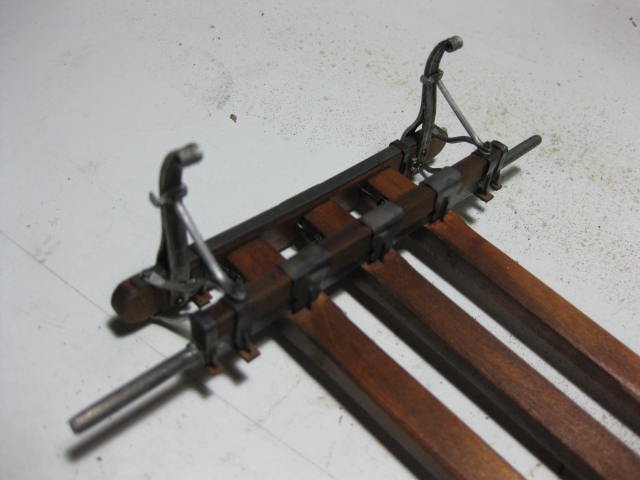
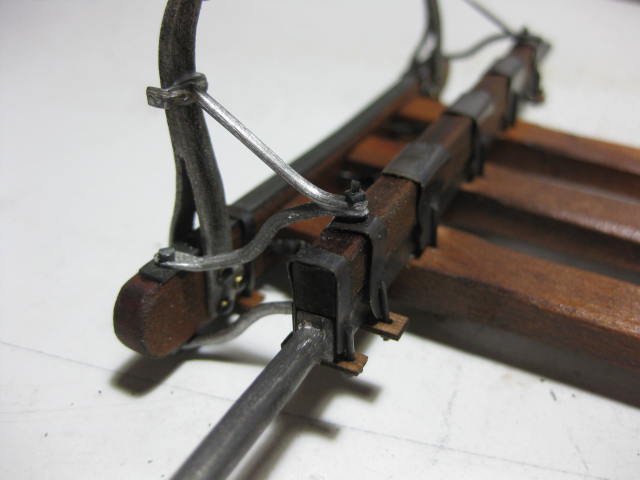
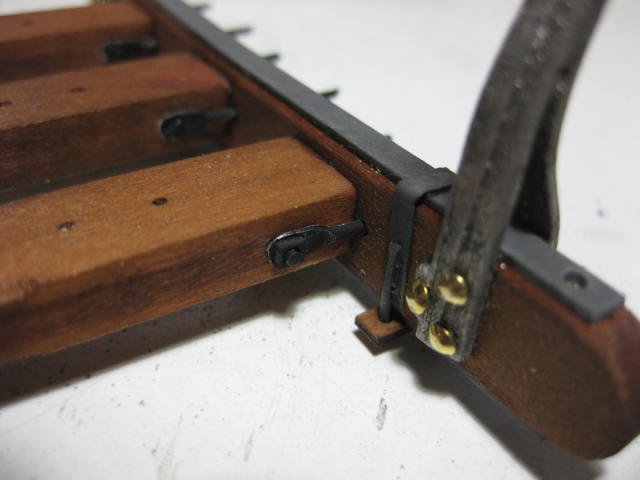
Thanks guys, A fair amount of progress in the last few days. Bear in mind that while I may know a bit about building ships I know NOTHING about building stagecoaches, so progress is a bit slower than usual as I'm actually following the kit instructions . Fortunately the basic techniques of construction are pretty much the same. Here's where I'm up to - the Frame assembled and waiting for glue to dry before installing the End Plates and nuts on the Draw Bolts : Some detail of the rivets holding the Standards. The brass looks out of place, I'll do something with them a bit later. Note the U-bolt Clips, made from brass strip and silver-solder "bolts" which have been blackened : The Draw Bolts which hold the whole thing together. I squared the heads of brass pins with a hammer and anvil. The nuts are kit supplied and laser cut from some kind of rubber/cardboard composite to simulate iron. As with the rest of the laser cut parts they are of excellent quality : Cheers, Danny

- 151 replies
-
- 22
-
-
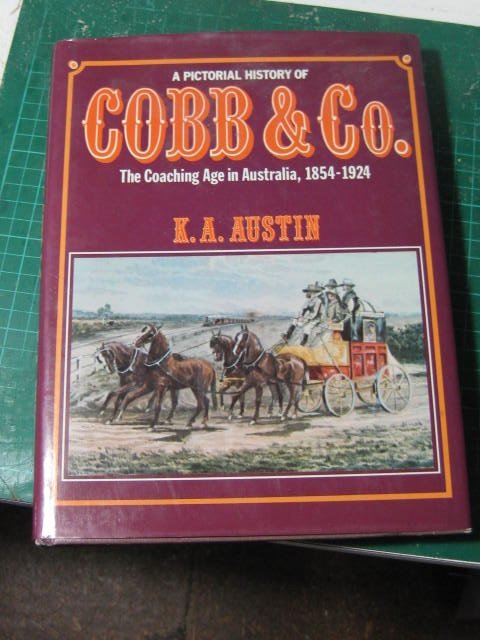
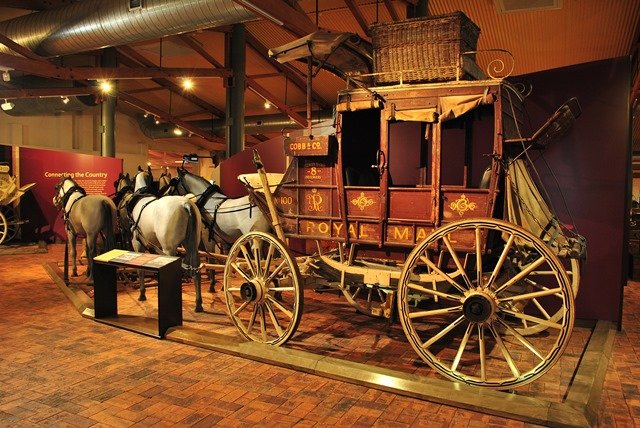
Thank you all for the kind "welcome backs" and messages of support. I hope I won't let you down with this model . It's OK as long as you put it in "Shore Leave", which is a Forum for non-ship related topics. This won't be a really detailed Build Log, more a progress report when I have done anything significant. Forgot to mention earlier, I'm doing the Australian version of the Concord used by Cobb & Co. To this end I bought a copy of the excellent book below to help in researching modifications and colour schemes : Here's a pic of a restored coach in the Cobb & Co Museum in Toowoomba, Queensland. I'll build mine similar to this : Cheers, Danny
- 151 replies
-
- 15
-
-
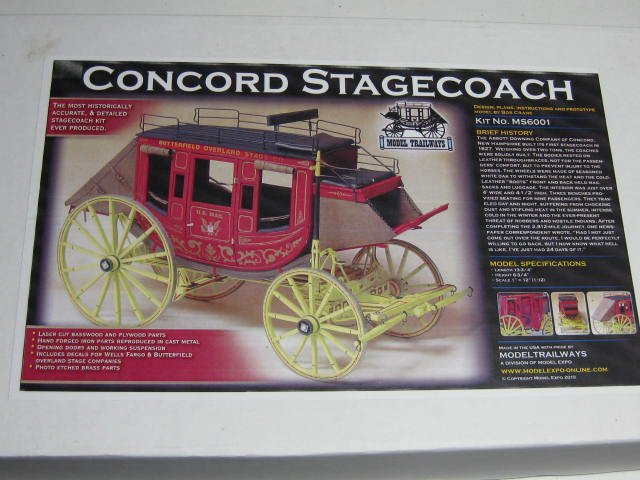
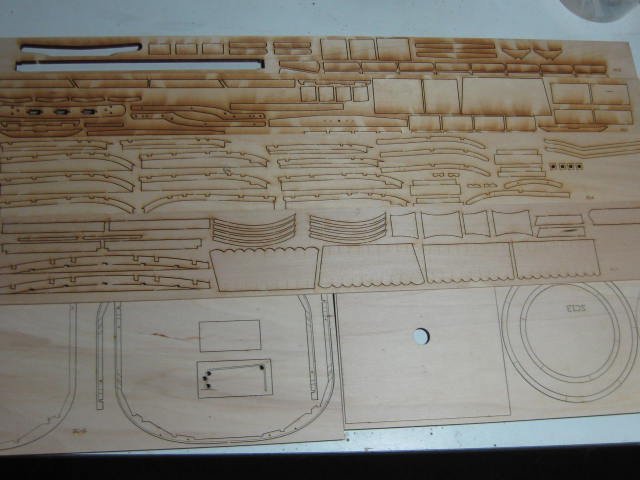
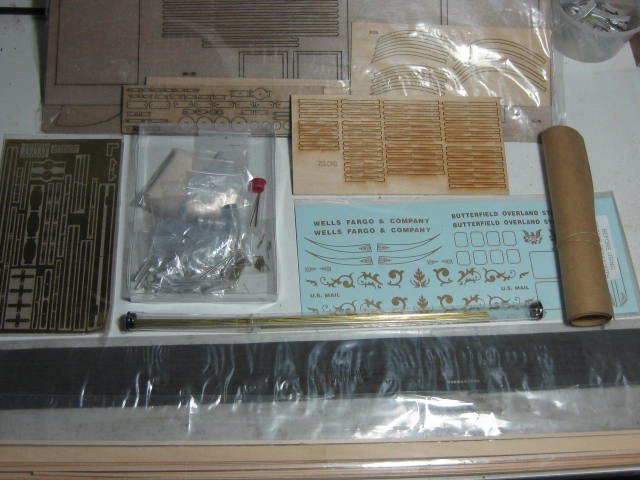
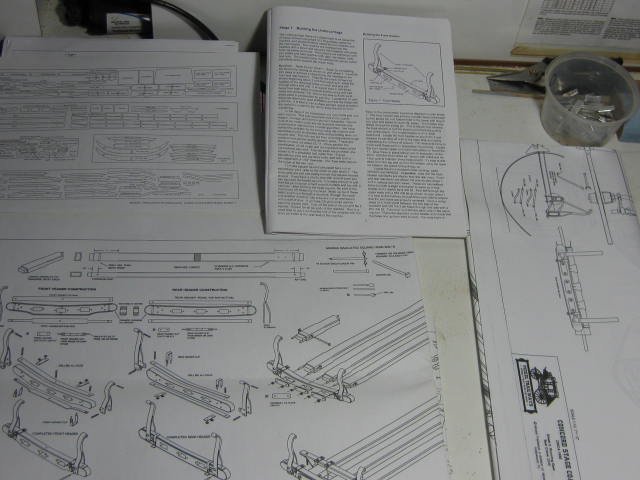
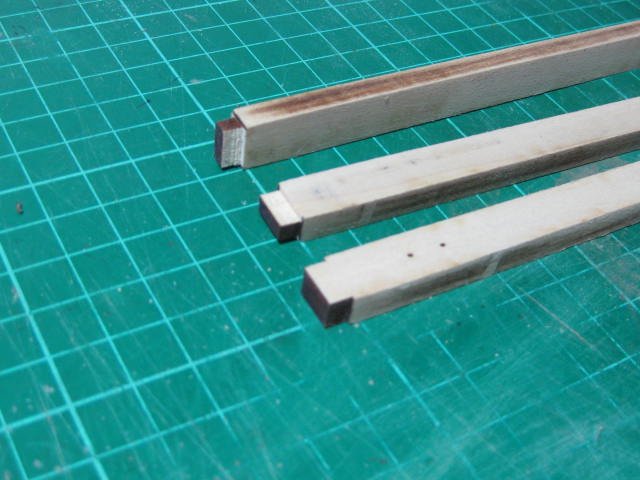
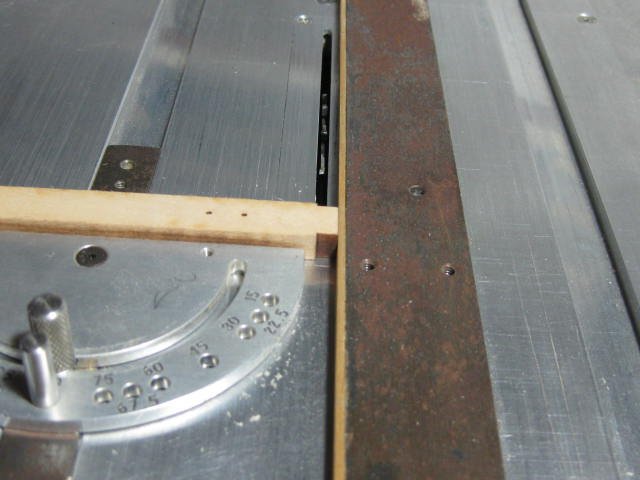
Hi all, I'm finally back after a long layoff due to Cancer treatment, not something I'd recommend but it beats passing away. All seems to be OK now . Those of you who remember me (those of you who don't - check my Signature for past Builds) may recall that I had a Model Shipways (Trailways) kit of a Concord Stagecoach which I'd intended to build for one of my grandsons. The time has finally arrived where I feel up to the task. Here are the "obligatory" pics of the box and it's contents : Quality of the parts and especially the instructions seems to be of a high standard. Here's a small start to the project, cutting the tenons for the Reaches - the longitudinal members of the chassis : More will follow soon. Cheers, Danny
- 151 replies
-
- 31
-
-
Thanks to all for the kind words. I haven't been feeling too well lately due to the Chemo I'm going through, but hopefully that will end soon - my results look very promising and with a bit of luck I'll be finished with the treatment. I'll find out my final results next week, and if all is well I should be back on deck in a couple of weeks when things "normalise". To those who asked "What's next?" I have an "off-topic" model to build for one of my grandsons (a Wells Fargo Coach) which will take me about six months or so, but I may run something Maritime concurrently - I'm not sure what yet. Danny
- 268 replies
-
- 11
-
-
Chrome works on my ancient Windows XP . Danny
-
Opinions on Sherline DRO for Lathe
Dan Vadas replied to rtropp's topic in Modeling tools and Workshop Equipment
David (and others), you can retro-fit the Sherline with DRO. Sherline sell the complete package as an accessory. Danny -
Bill, read the post just before yours - I didn't go ahead with this one. Danny
- 59 replies
-
- 2
-
-
- norske lowe
- billing boats
- (and 1 more)
-
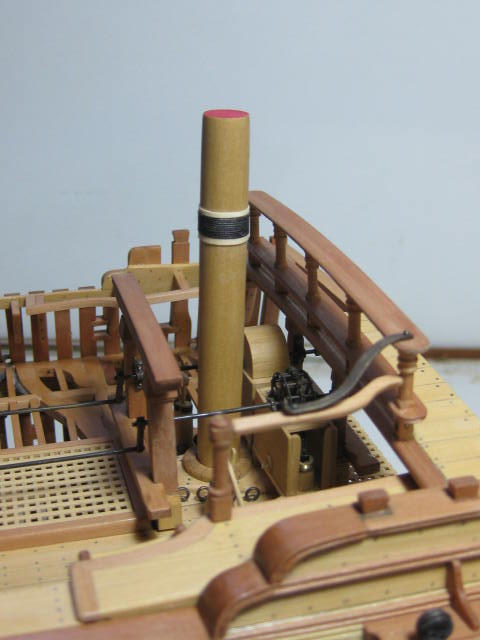
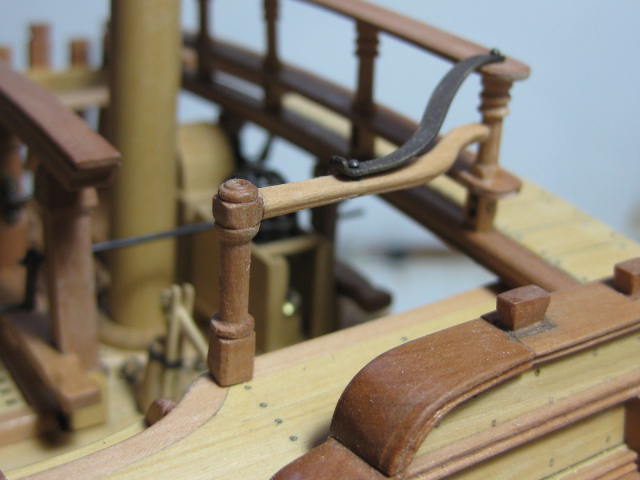
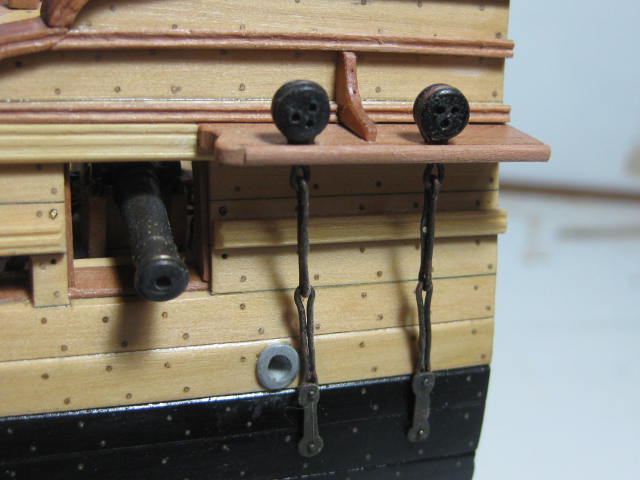
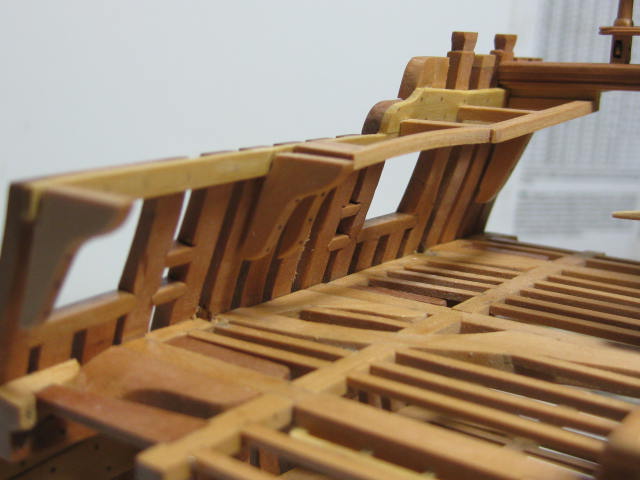
.... continued. The Railing for the gangway and it's Newell Post and Bracing : Finally, the port Channel, Deadeyes and Chains. All pieces were constructed in similar fashion to the full model : Pics of the finished model will be added shortly. Danny

- 268 replies
-
- 29
-
-
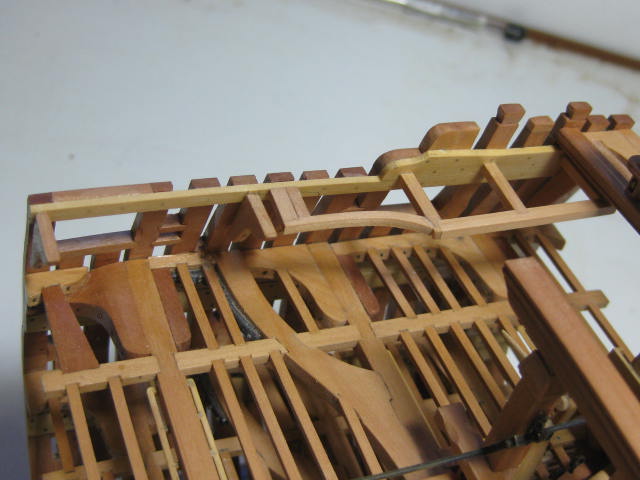
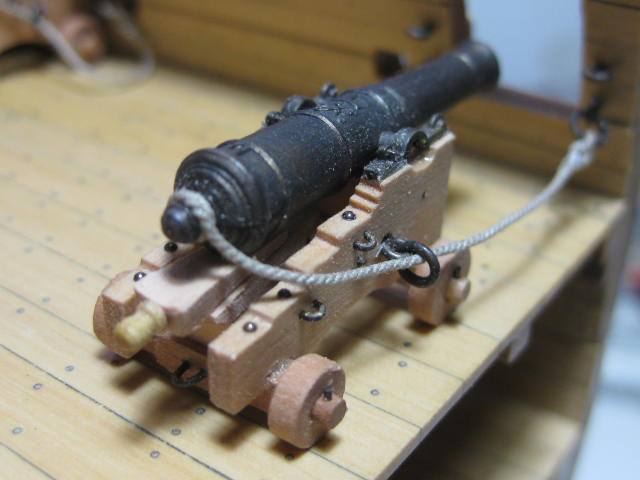
Thanks for all the comments and Likes . The last few pieces of work. Thanks again to Grant for the rigging line I needed to finish off the guns - they turned out pretty well I think : The Gangways and Ladder. Tricky getting the mortices for the angles on the stiles cut correctly, as there is a 5 degree difference between the two sides. I had to have two goes at it, as I cut them back-to-front the 1st time : Continued in next post .....

- 268 replies
-
- 33
-
-
Nicely done Pat, you're on the home stretch now . Danny
- 517 replies
-
- 3
-
-
- Endeavour
- Artesania Latina
- (and 1 more)
-
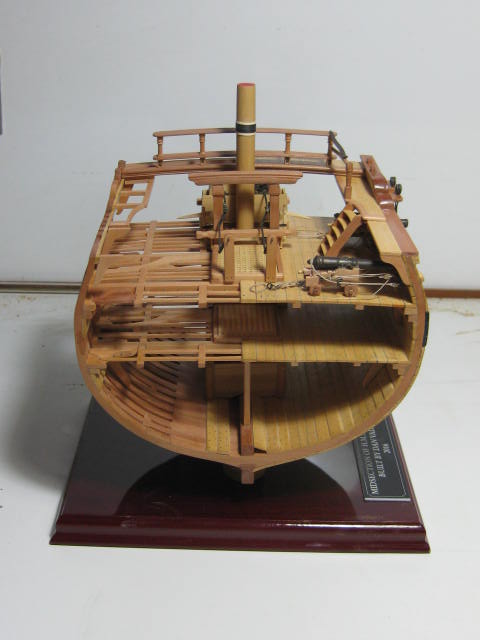
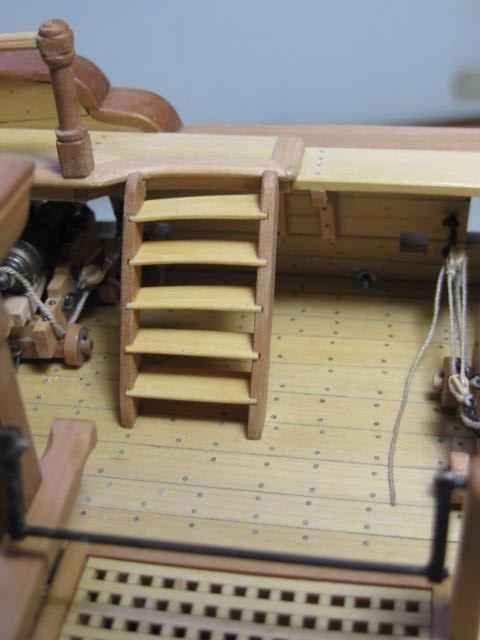
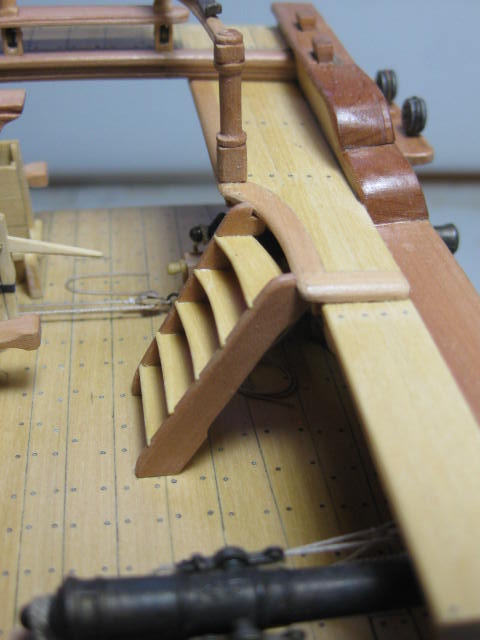
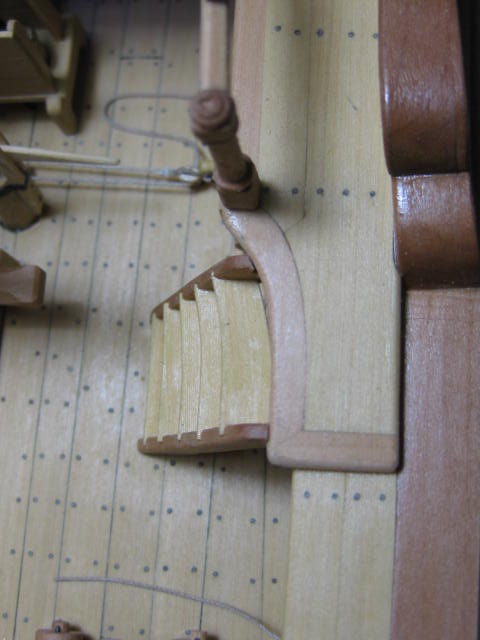
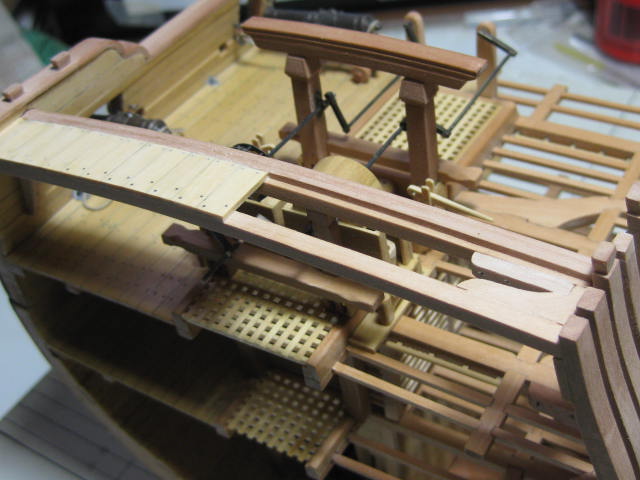
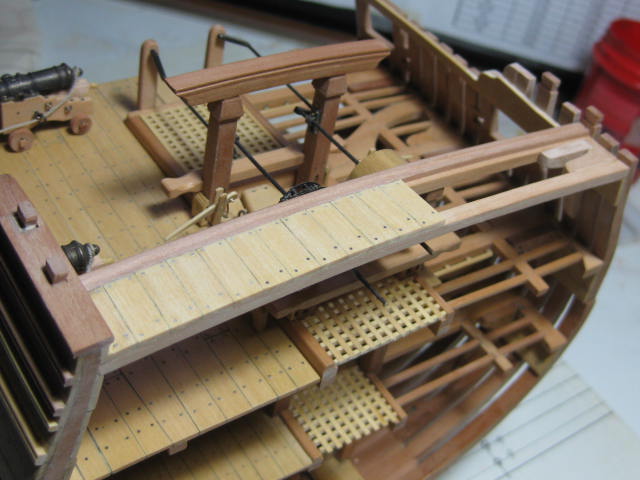
Two more steps complete this update. I've made and fitted the Quarterdeck section : And also shaped and fitted the Entry Steps and the various molded rails, Planksheers and Hances : Danny
- 268 replies
-
- 31
-
-
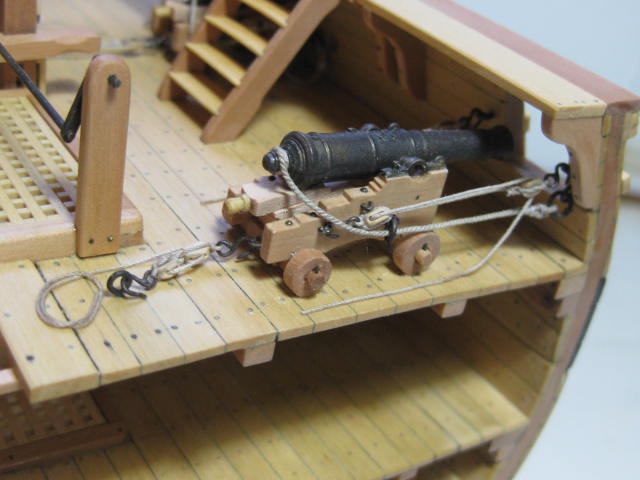
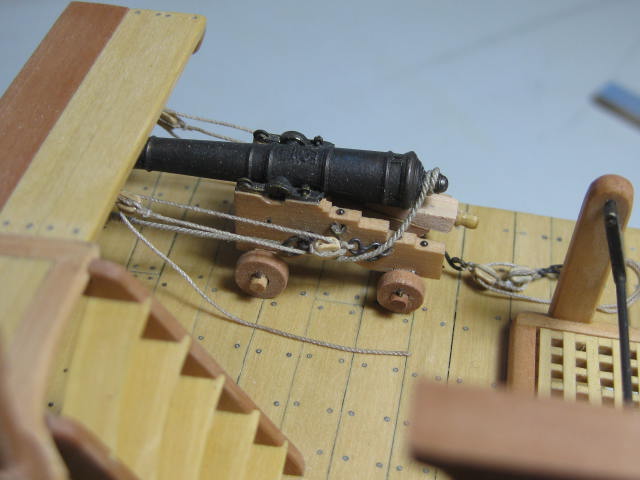
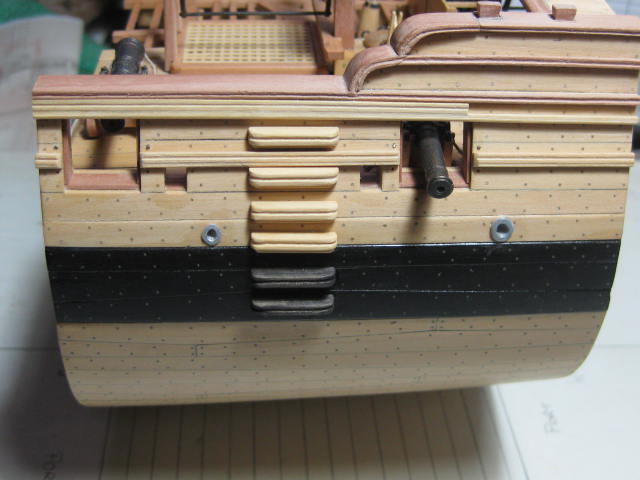
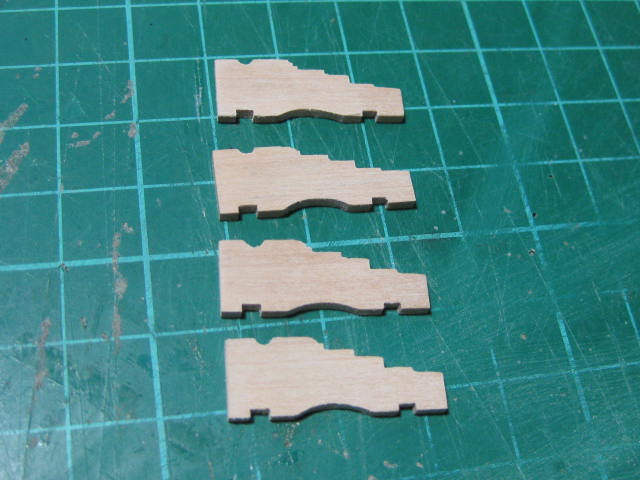
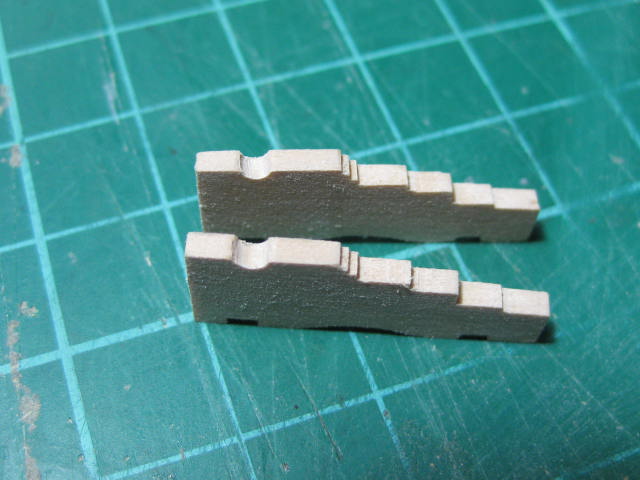
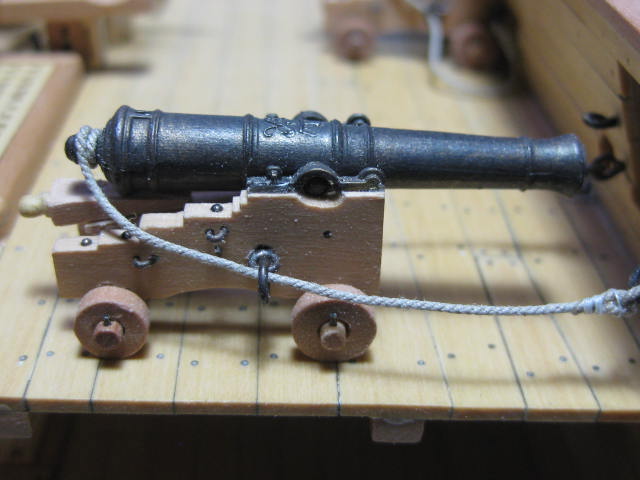
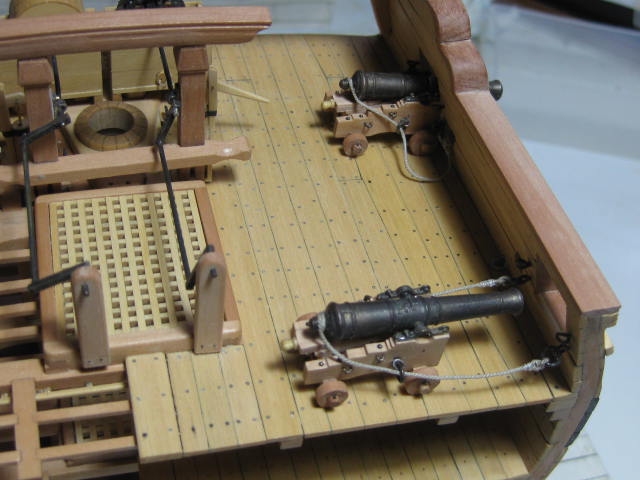
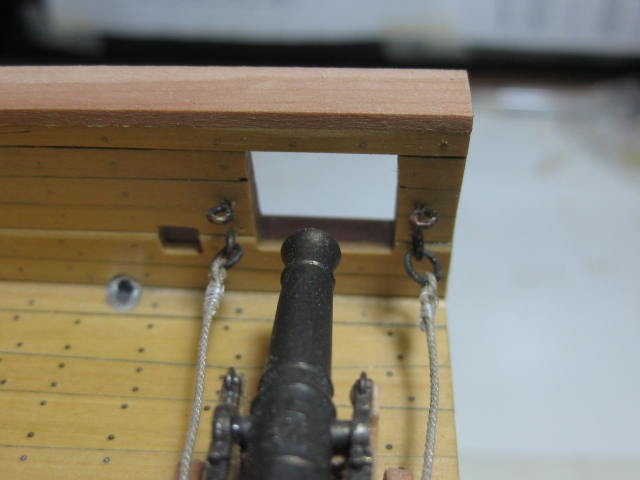
The two 9 pounder Guns were next. I cut the various steps in the carriages on the Byrnes saw Some (rather dusty ) details of the guns. Once again, more can be found in the full model log : The guns in place. Side Tackles are yet to be fitted - I'm waiting on some of Chuck's 0.3mm line which has kindly been given to me by Grant Dale (Thanks mate ): Danny
- 268 replies
-
- 27
-
-
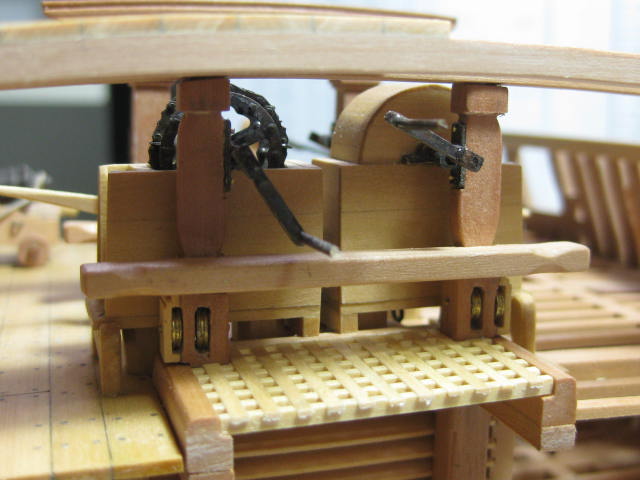
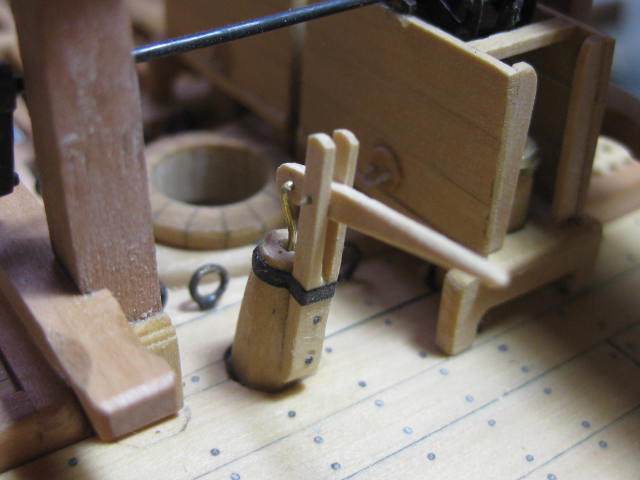
..... continued. I made and fitted the upper parts of the Elm Tree Pumps, complete with working handles : Danny

- 268 replies
-
- 17
-