Dan Vadas
-
Posts
3,261 -
Joined
-
Last visited
Content Type
Profiles
Forums
Gallery
Events
Everything posted by Dan Vadas
-
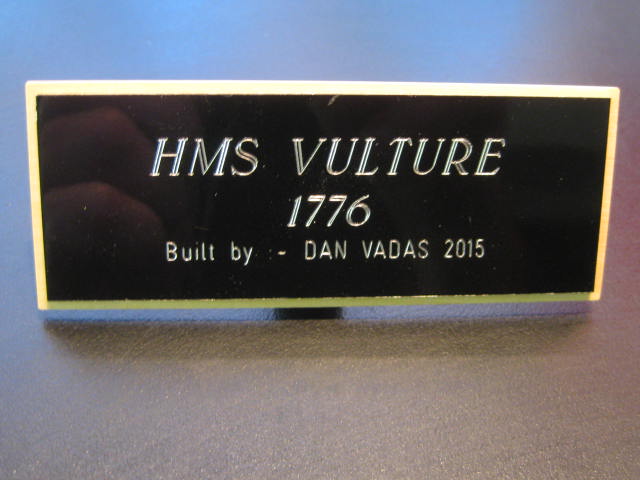
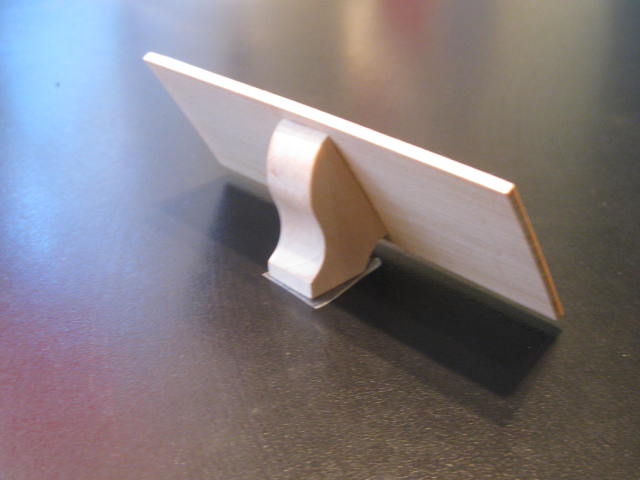
Goodoh George and Greg - thanks. A small update - I had a Nameplate engraved over the weekend, and made a stand for it : Danny


-
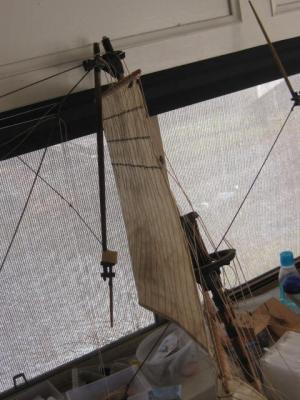
Thanks very much Peter, and a welcome to you too. Ain't that the truth . Well, I've made my first decision - all the rigging has come off, as well as some of the masts. I'll most likely remove the remaining ones, as it's a lot easier to detail them on the bench : Danny
- 59 replies
-
- 17
-

-
- norske lowe
- billing boats
- (and 1 more)
-
Welcome to the build Matt. Check out the two in my Signature . Danny
- 59 replies
-
- 5
-
-
- norske lowe
- billing boats
- (and 1 more)
-
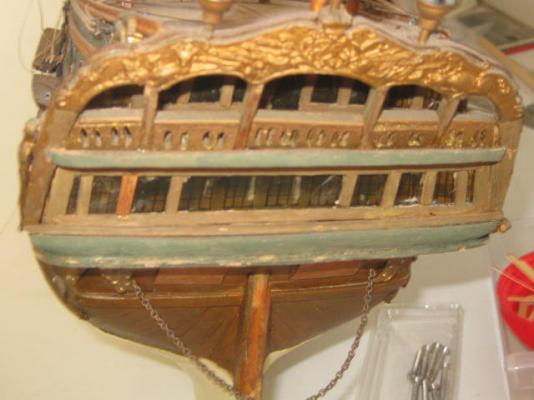
Thank you Brian and Steve. Yeah, I don't know what the story was there. I do know that it was the first Masted model he'd attempted, maybe he thought the ratlines were too hard to tie so he left the shrouds off as well? The Billings plans are about as good as any of theirs (not for the novice ) so they didn't help him much. It's already been stained, so I'll tidy those areas up a bit and give it a coat or two of semi-gloss. Below the waterline will need a re-paint with a color closer to "normal" . Danny
- 59 replies
-
- 5
-
-
- norske lowe
- billing boats
- (and 1 more)
-
Thank you wyzwyk and Jack. David, as with the other Restorations I've done I'll try and make it look like it was completed by the original builder - something that's more difficult than it sounds, but it also gives me a lot of latitude as far as details are concerned . The original plans were still in the kit, for what they're worth. I'll be going with them. Danny
- 59 replies
-
- 6
-
-
- norske lowe
- billing boats
- (and 1 more)
-
Me either George . Yeah, pretty yuck John . I guess he tried to match the color on the kit box - without much success . It's supposed to be "White Stuff" which was used as anti-fouling in some periods. I'll re-paint it. Danny
- 59 replies
-
- 5
-
-
- norske lowe
- billing boats
- (and 1 more)
-
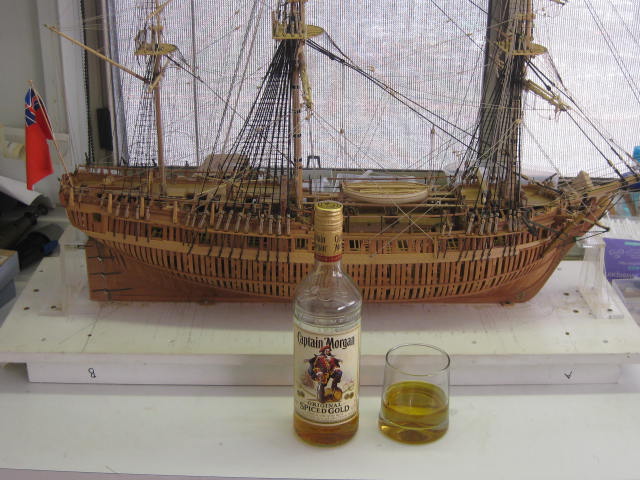
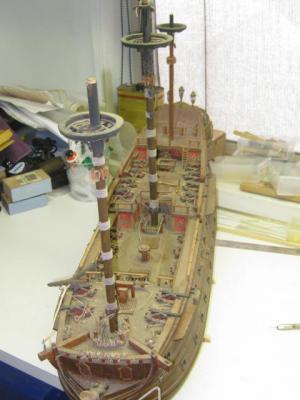
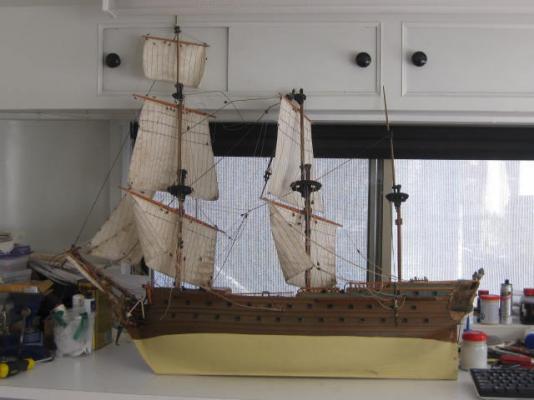
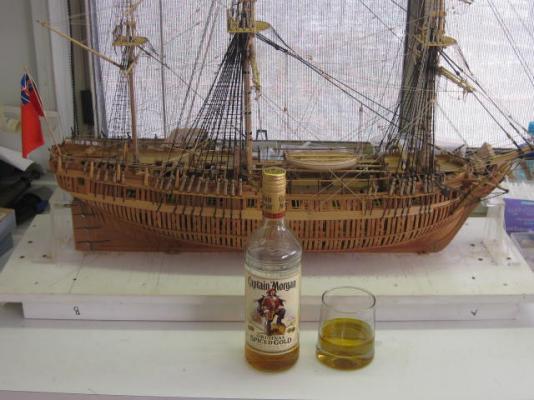
George - she's 1100mm long, 1000mm high and 200mm wide. No Greg - I live in a van, and most of my tools are here . Russell :) : Danny
- 59 replies
-
- 3
-
-
- norske lowe
- billing boats
- (and 1 more)
-
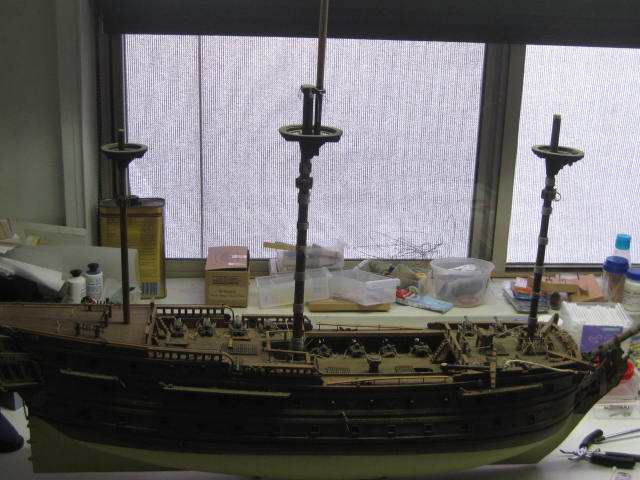
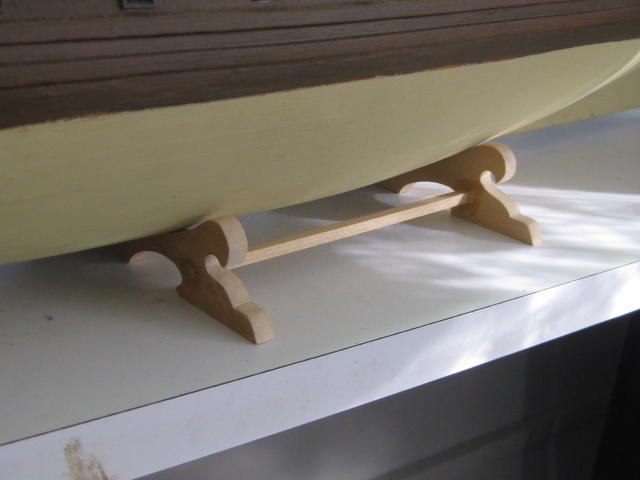
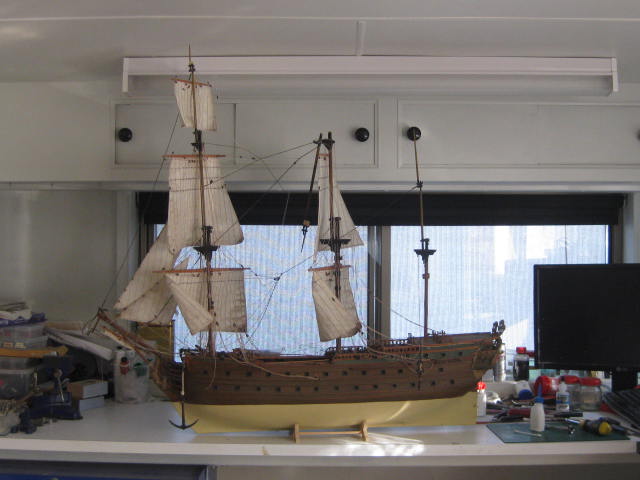
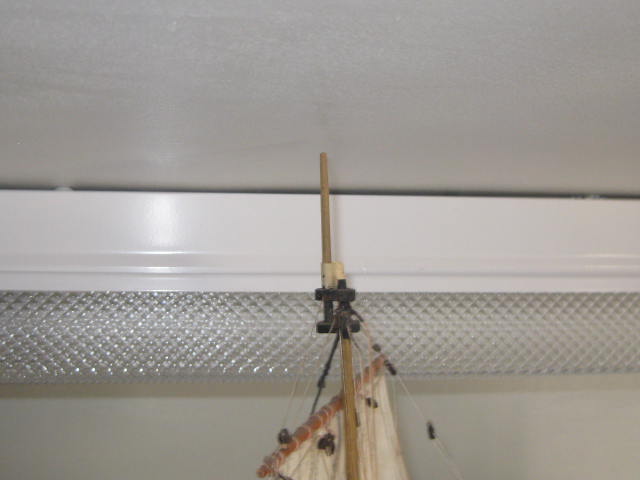
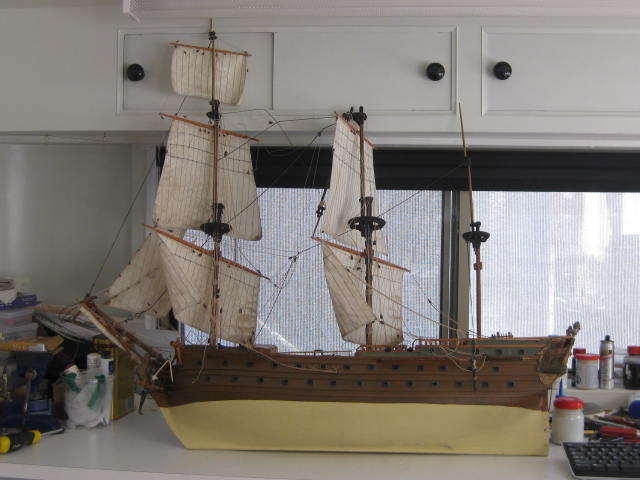
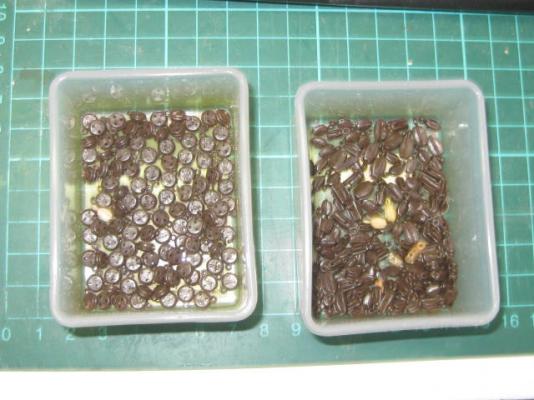
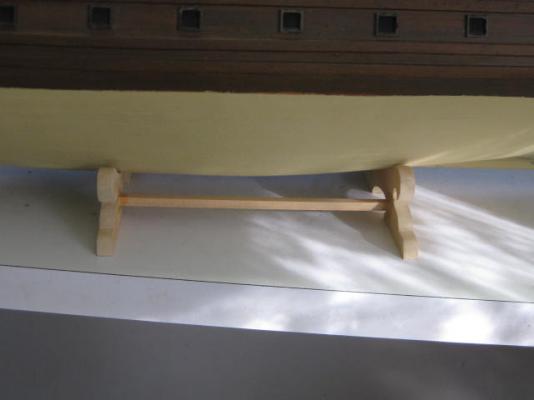
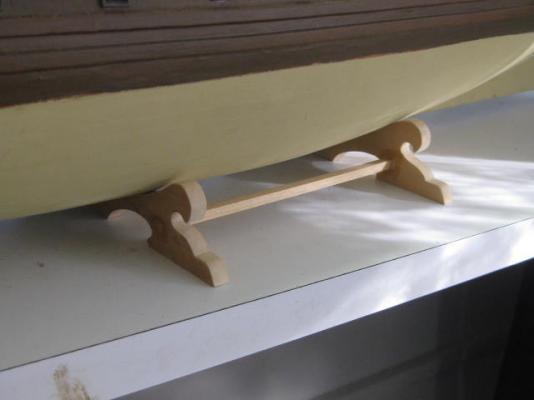
Welcome all . Good question Jan. I'll leave the plastic ones as long as I can find the rest of them - they weren't in the kit box, I hope I've put them in another container . I'm on a limited budget with this model, and I REALLY DON'T feel like making them all from scratch for this one . It'll probably be easier to rip it all off and start again Jeff. I'll use a better quality thread (but not Chuck's this time - I have quite a bit of leftover stuff from previous builds). The first thing I've made is the stand. I need some way of supporting the ship, and I need to keep a building board as low as possible so I can actually fit the model on my workbench (see pic below). I've used the kit-supplied stand, and screwed it to the keel : Here's what I meant about keeping things as low as possible. The Foremast only JUST clears the ceiling of my caravan. The Mainmast won't fit at all, so I'm thinking of shortening all the masts until it does : Danny


- 59 replies
-
- 12
-
-
- norske lowe
- billing boats
- (and 1 more)
-
Wow, I go away for a couple of days and there are several pages of Congratulations . My sincere thanks go out to : Ian, Nenad, Nils, Chris, Grant, Cabrapente, Goerge, Ioannis, Druxey, Chris, Brian, Tom, Carl, Nick, Nigel, Sherry, Russell, Mark, Christian, Robin, Pat, Brian, Ed, Mo, David, Greg, Eammon, Adam, Piet, Johann, Ian, Jan, Richard, Steve, Doris, Popeye, Remco, Marc, John and Toni. The ship itself is finished, but I still have to finish making the base and then screw her to it. That should happen in the next day or so, and then I'll take some good pics of her and post them in the Gallery. The reason I've been away was I had to pick up my next project. This will involve finishing the Norske Lowe pictured below for a guy who's father died before finishing her. This is the same guy who's Mississippi Riverboat I finished a while ago. Once again it's a rather rough model, but nothing I can't handle . I'll do a Build Log of this project. Those of you who wish to follow it can access it through the Link in my Signature. Danny
-
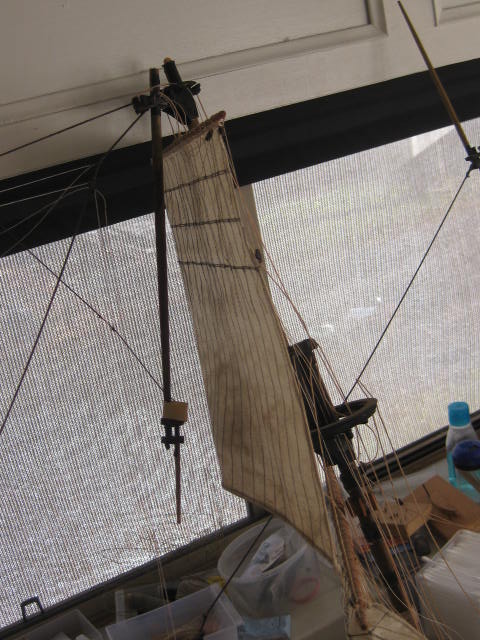
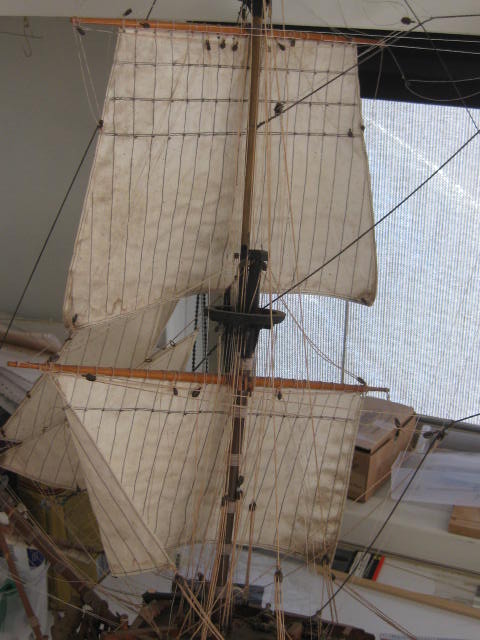
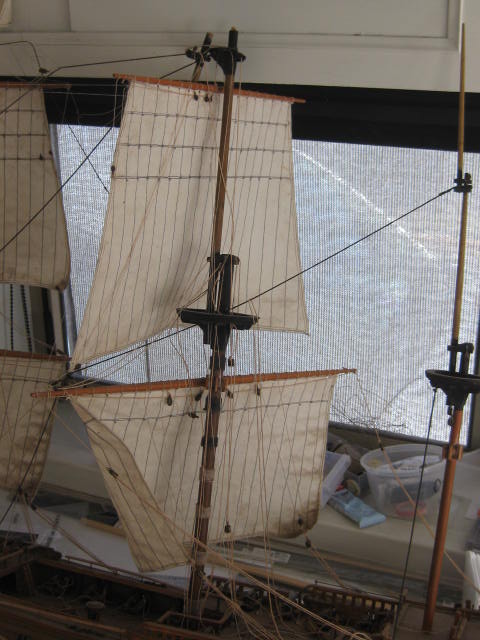
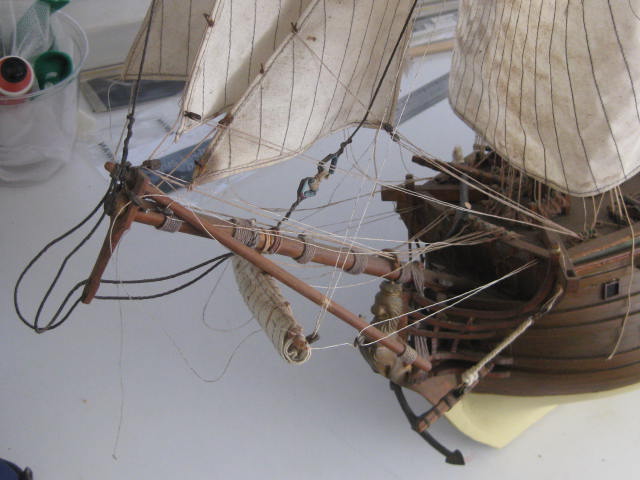
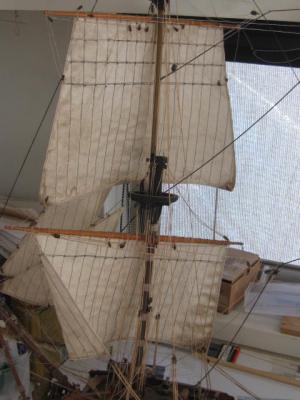
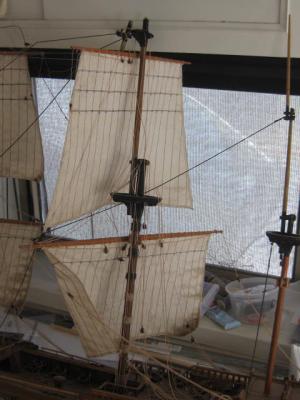
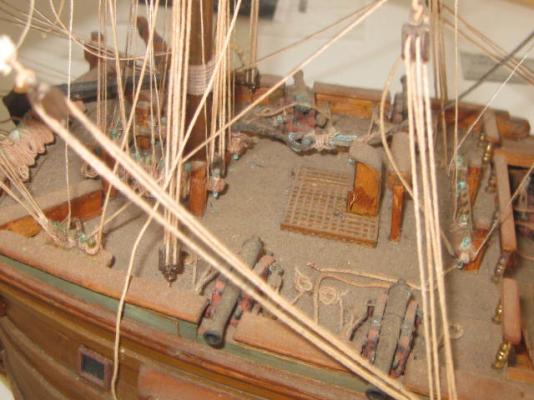
Hi all, I undertook a project three ( was it really?) years ago to finish off a model of Norske Lowe for the same guy who I finished off the Mississippi Riverboat a while ago. His father died before completing both models, so he asked if I could do it for his family as a keepsake. The old guy was a fair to middling modeller, so I don't have a real lot of "Re-do's" on it, but there are some areas I'll tidy up a bit. There are several broken pieces, mostly masts, which I'll re-make. Unfortunately, he had little idea of the sequence of rigging a model - the sharp (or even not-so sharp) eyed among you will relaize that there is virtually NO Standing Rigging, but most of the sails have already been fitted. This will be a bit of a nuisance. Here are the BEFORE pics : Danny


- 59 replies
-
- 18
-
-
- norske lowe
- billing boats
- (and 1 more)
-
Domanoff serving machine 2.0 or 2.5
Dan Vadas replied to CPT_D's topic in Modeling tools and Workshop Equipment
I've got the powered version, and totally agree with John above regarding having two hands to guide the serving thread. The Domanov machine has a reverse for "unseizing" when you inevitably screw up (or want to use it backwards if you find that easier), but I found it better to undo any stuff-ups by turning it by hand. It also has a variable speed control - most of the time I use a setting just above the slowest. The modification by Hornet for the spool holder is a good one - I WAS going to do the same to mine but still haven't got around to it . Danny -
Building boards
Dan Vadas replied to Sgthod's topic in Building, Framing, Planking and plating a ships hull and deck
Here's a LINK to the building board I made for HMS Vulture. The end supports can be made from ply if you can't work with acrylic. They are removable for when you need to work on either end of the hull - the other one will stop it from tipping, and there are also two screws that come up from under the board into the keel. These have nuts set into the keel, and are used for the permanent mounting pedestals later on. Note there are two longitudinual timbers underneath the flat board, set in about 25mm from the edge - they not only stop the MDF from bowing, but make the whole thing easier to lift as you can get your fingers under it. Danny -
Hi Bob, Check out THIS LINK in my build log where I'm making Parrels - lots of them! You can use the same technique for making your gratings. Danny
-
Cheers Greg . My next Build will be in my Signature. Here's the Celebration Pic : Danny
-
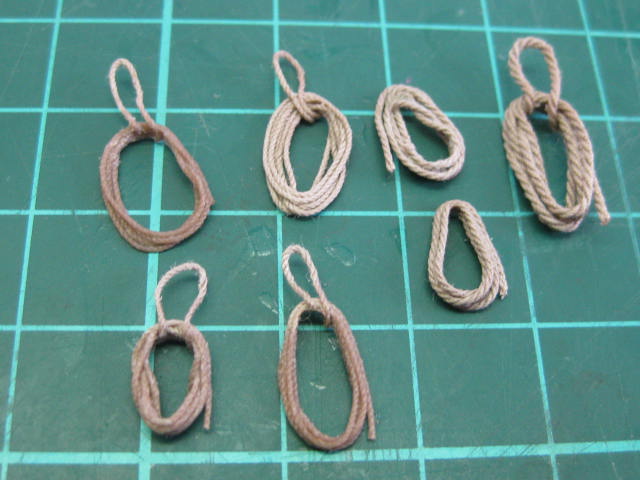
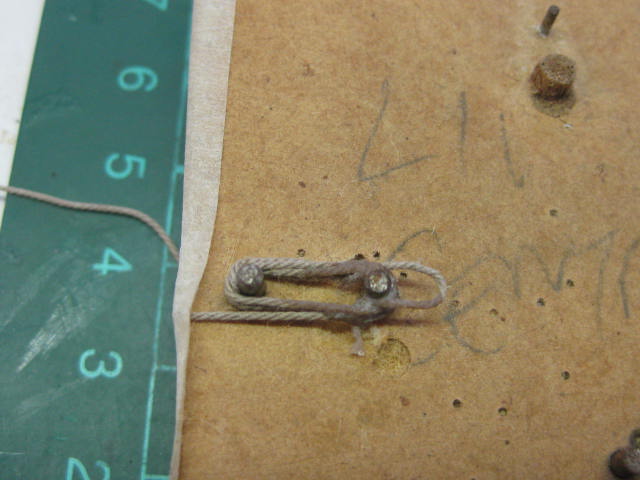
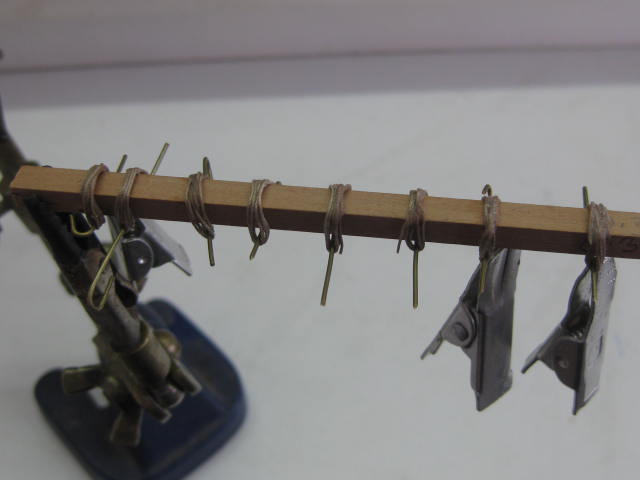
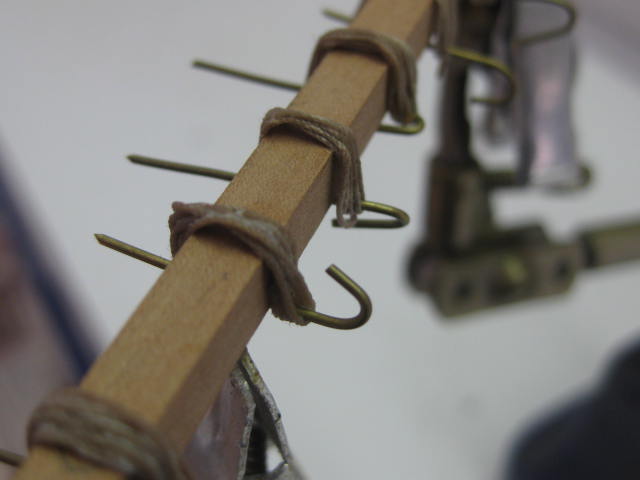
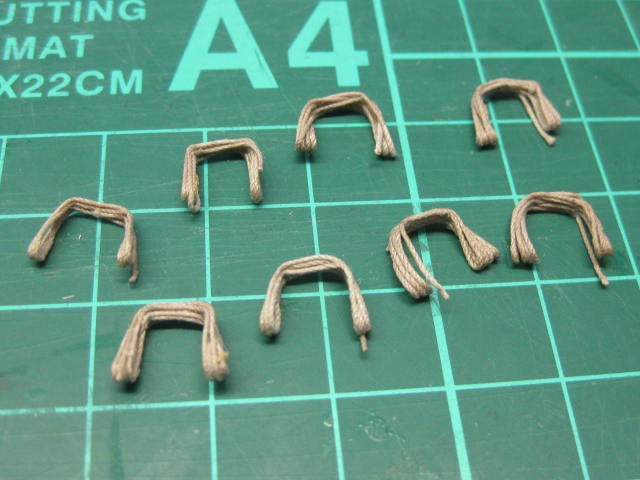
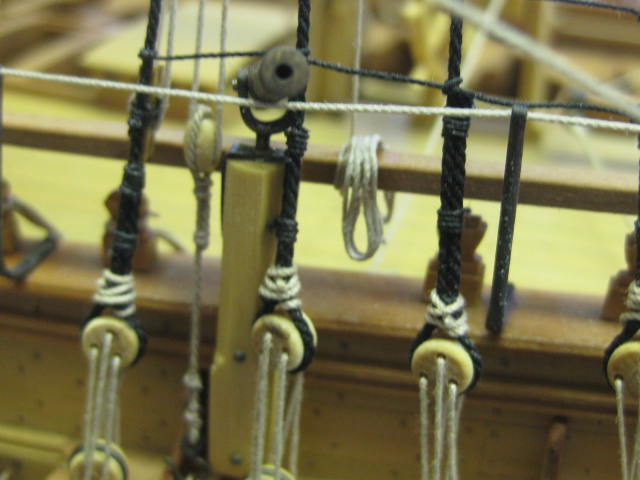
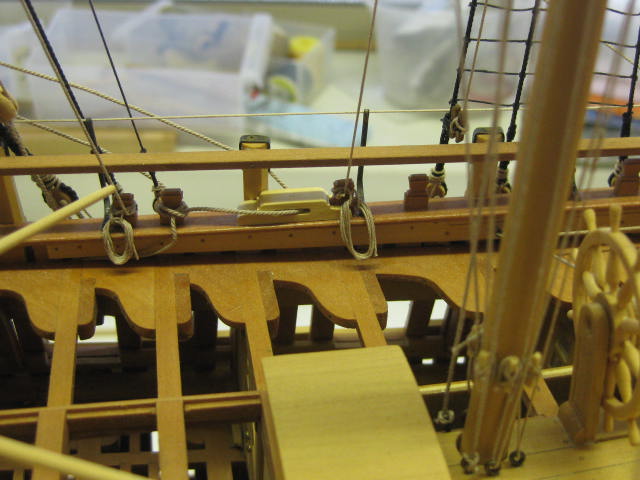
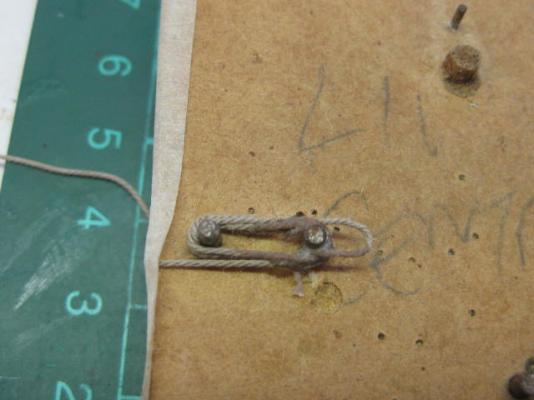
Rope Coils The last bit of work on the actual model is to place all the "dummy" Rope Coils in their various positions. I made several types, depending on how the line was belayed. I used a simple jig to coil the rope : For the coils that go over railings I used this method after first coiling them on the previous jig : Here's a small selection showing various types and sizes : And some of the coils fitted : Danny


-
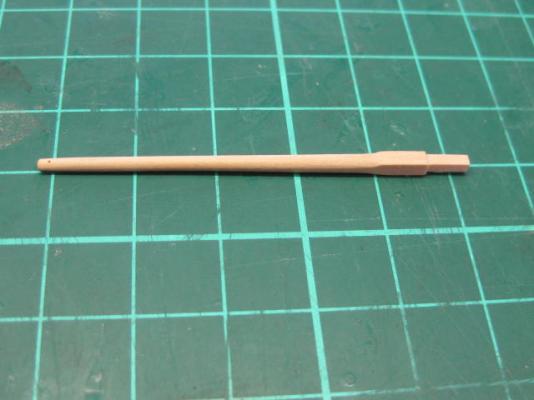
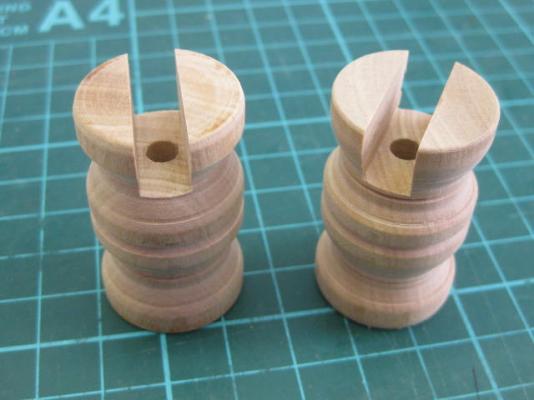
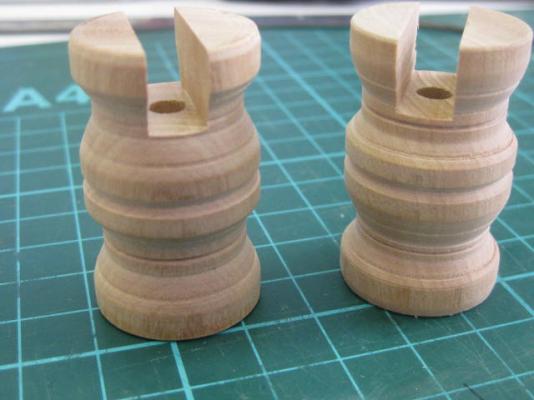
Pedestals Not a lot to say - I turned the Mounting Pedestals on the lathe and cut the slots with the mill. They'll need slight adjustments to the slots to fit the hull. No finish has been applied yet : Danny:
-
Thanks you Greg, David and John . Yes John, it'll stay right where it is now. There will also be some pics of the Finished model in the Gallery. Danny
-
Gluing 101
Dan Vadas replied to CPT_D's topic in Building, Framing, Planking and plating a ships hull and deck
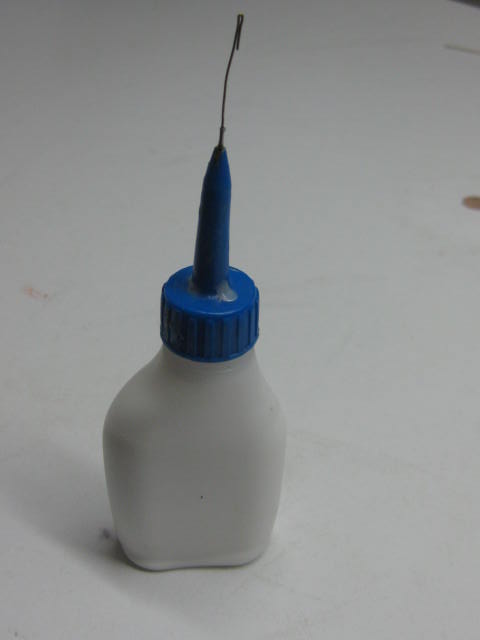
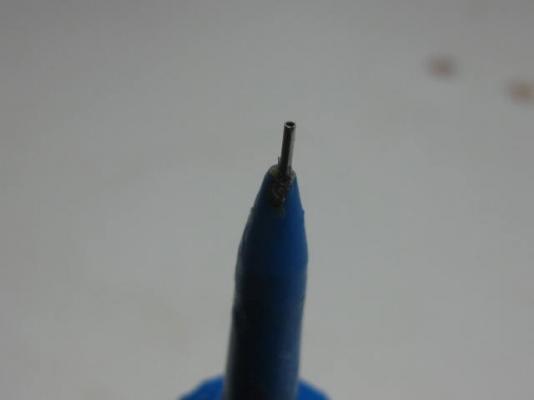
I'm with Druxey regarding the small paintbrush for most uses, but instead of using another brush for cleanup I use Q-tips, A pack of 100 costs about $4.00. For fine gluing where I want just a small drop or two I bought a small plastic glue bottle with a needle applicator. A piece of 0.5mm stainless steel wire seals it when not in use : Danny
-
Lovely stuff mate, can't wait to see it "in the flesh" next month . Danny
- 456 replies
-
- 4
-
-
- finished
- bomb ketch
- (and 2 more)
-
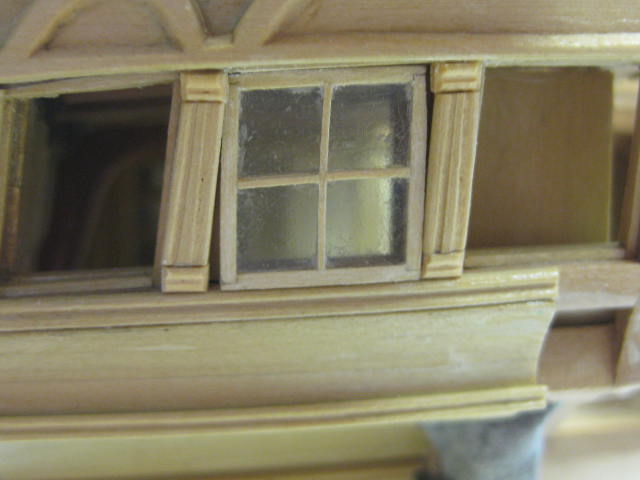
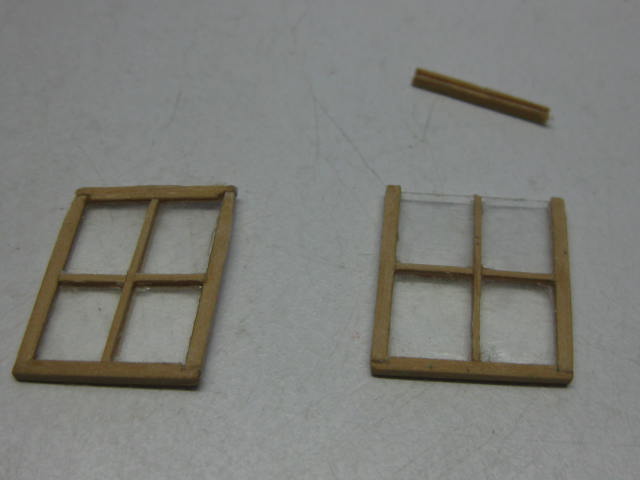
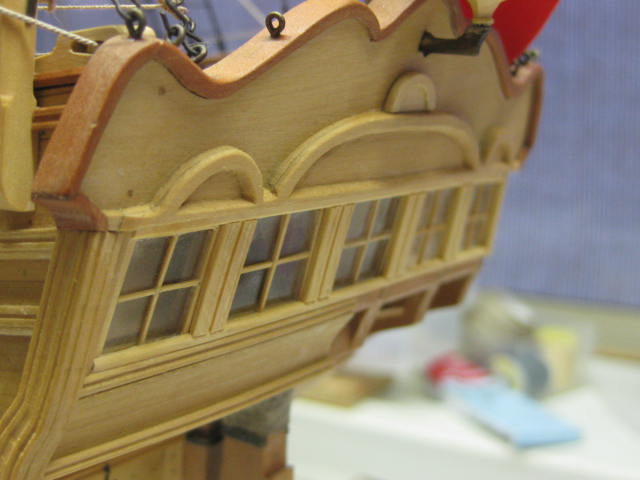
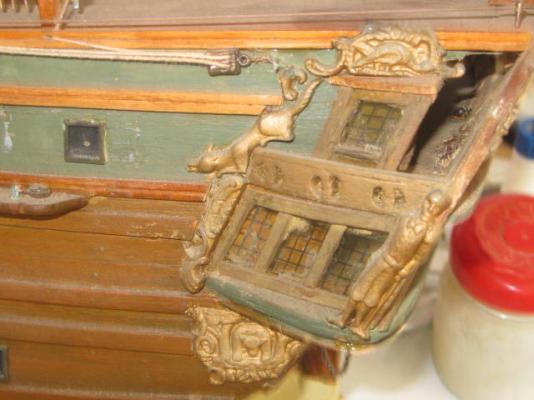
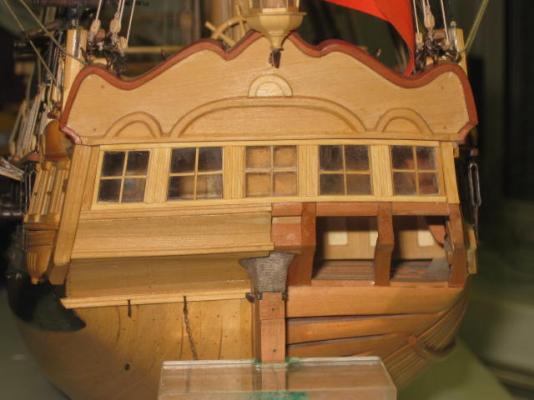
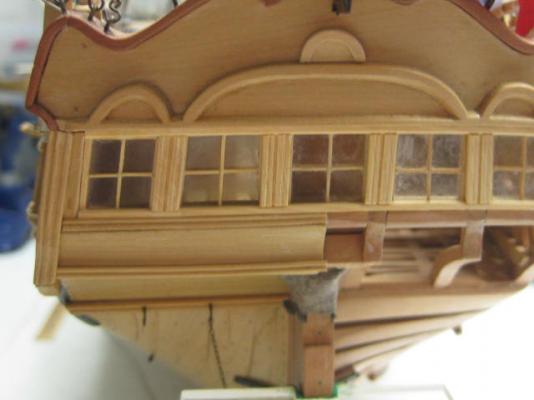
Redo of Stern Lights Following the comments about the way I'd swung the Stern Lights it didn't take me long to decide to redo them. I had to totally remake two of them, as you can see by the pic below they didn't fit correctly into the frames. As I'd decided in the first place to show them in the open position I didn't take a lot of care to get the angles exactly right : I added a top and bottom sill, and made new munions : I'm much happier with the final result - not perfect, but a lot better . Danny


-
Once again my thanks go out to Brian, Ed, Dave, Popeye, Jeff, Greg, John, Carl, Evan, Russell, Brian and Tom for all the comments . Brian - better late than never . Ed - thanks for the insight. I thought the same myself. Dave, Brian and Tom - I'll be finishing off the masting and rigging on a "Norske Lowe" for someone else. This shouldn't take me more than about a month. Following that will be my first attempt at a ship in a bottle to quieten all those who have asked me if I'd ever built one . Then I'm thinking about making a Cross-section of Vulture's Midsection which I'll also donate to the museum that Vulture's going to. How so? All the information I've found about it attributes it to Thomas Birch . Danny
-
Thanks for looking in again George, Tom, Brian, Robin and Druxey. George - I'm using THIS method. See below. I had it in the dim dark recesses of my mind that I'd made them, but they weren't in the tray of "Finished Pieces". For some reason they were in the one alongside it . Actual work on the model commenced on Wednesday August 17 2011. It's 4th Anniversary is next week . I spend an average of 6 hours per day on it, and I've had about 3 months in total not working on the ship in that time. That's about 1370 days at 6 hours per day - 8,220 hours . Let's see - at $25.00 per hour (labourer's rate) that makes it worth $205,500.00 plus parts. Make me an offer . Robin - I thought it a bit strange myself. I followed the directions in TFFM, so I guess they must be right. Druxey - I agree about the centre light. I left it open to show the Rudderhead a bit more clearly . Danny
-
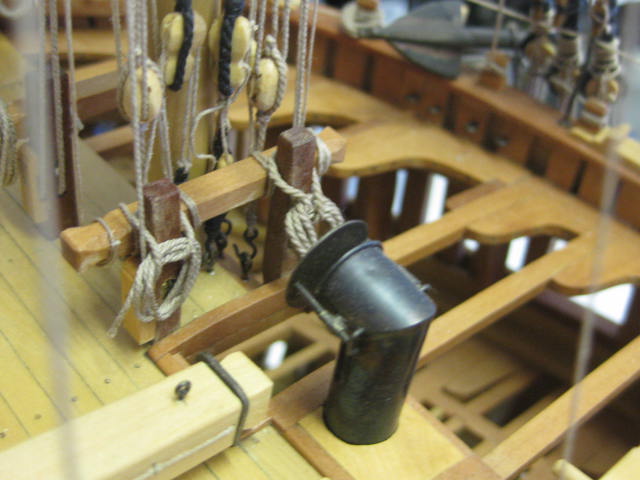
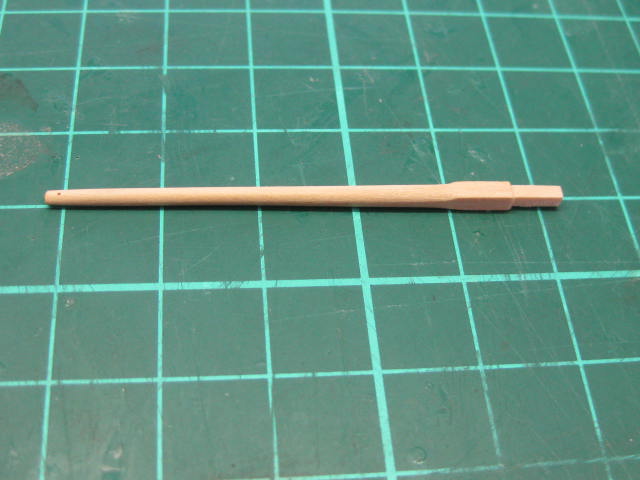
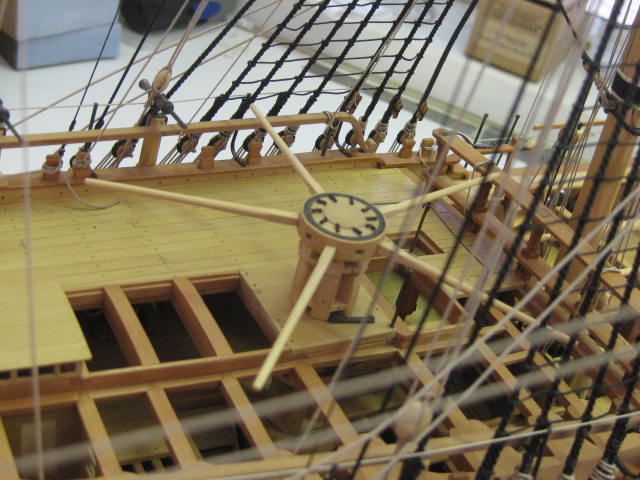
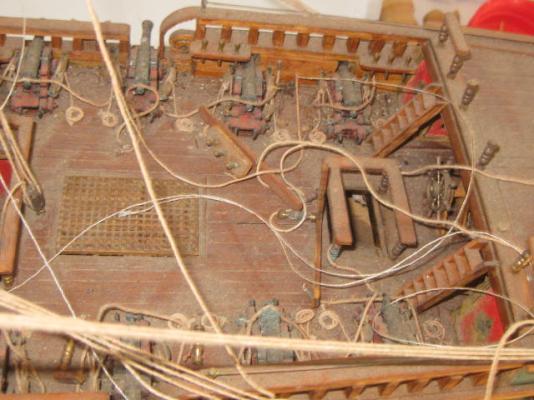
Don't cry Greg, there'll be another . Capstan Bars Fitted I made the capstan bars long ago when I made the capstan. I'd actually forgotten that I did, but luckily I found them before I wasted my time building another set . Not much else to say, here are the pics : Danny