Dan Vadas
-
Posts
3,261 -
Joined
-
Last visited
Content Type
Profiles
Forums
Gallery
Events
Everything posted by Dan Vadas
-
Rob, that's known as a Scarph (or Scarf) Joint. They are used in many places on a ship instead of butt joins (not in hull planking though). Danny
-
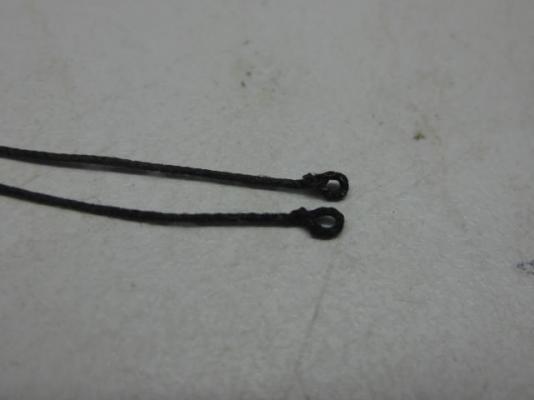
Hi Al, On my AL Supply I had the same issue. I bent the eyes into the bottom of the wires first (which means NOW at the stage you are) and then elongated the holes lengthways in the channel just large enough to slip the eyes through. The deadeye covers the slot, and the Chains will stop them from pulling upward. Don't fit the chains yet - you need to determine their proper angles by using a piece of thread from the tops of the lower masts. Don't rely on the positions indicated in the AL plans, they could be a long way out. Danny
-
Rob, you're welcome. The link I sent you went to the wrong post. Scroll up the page to the previous one and you'll get some better pics. I've changed the link in my last post to point to the right one. Danny
-
Hi Rob, It's made in at least two sections per side. Check out THIS LINK to my build log of HMS Vulture for the idea. You will need some wide stock to cut it from, probably not supplied in the kit. Danny
-
That was the LAST thing on my mind at the time John . Thanks JP. Wonderful?? I don't know about that - there are usually half a dozen rejects before I get one that looks half-good. Hand held Canon digital camera, with auto-focus and macro zoom (not SLR). Danny
-
My experience has been the same as Joel's above. The Swiss Pear is a bit easier to sand, but it's also a bit easier to accidentally mark later. Danny
-
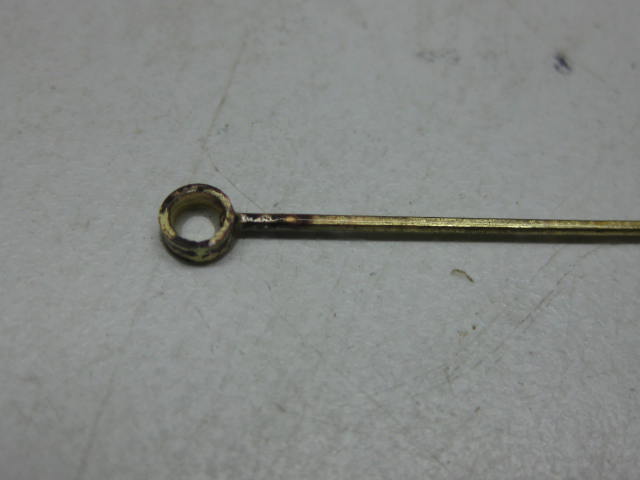
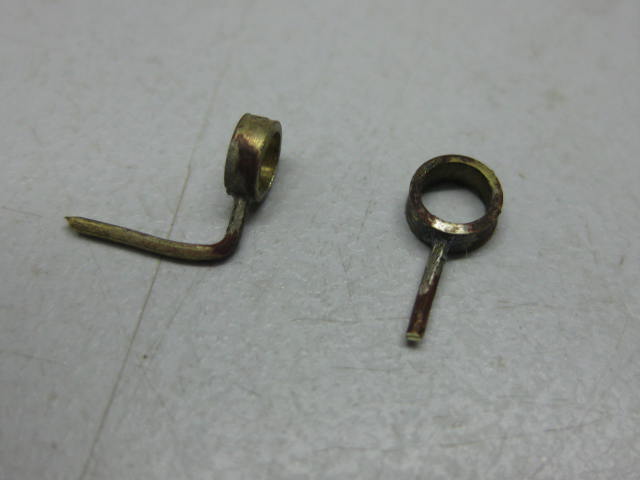
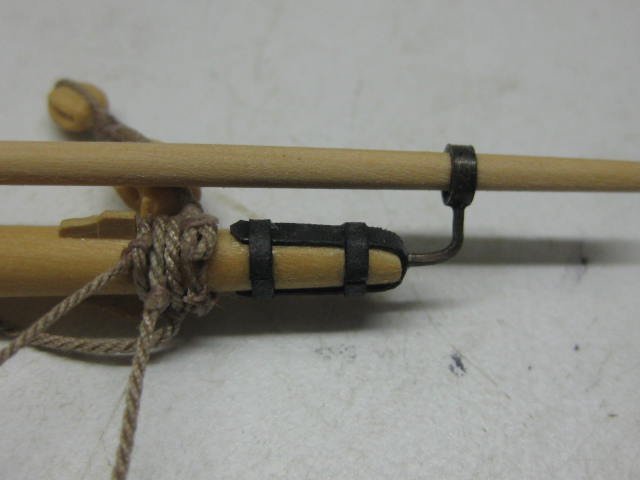
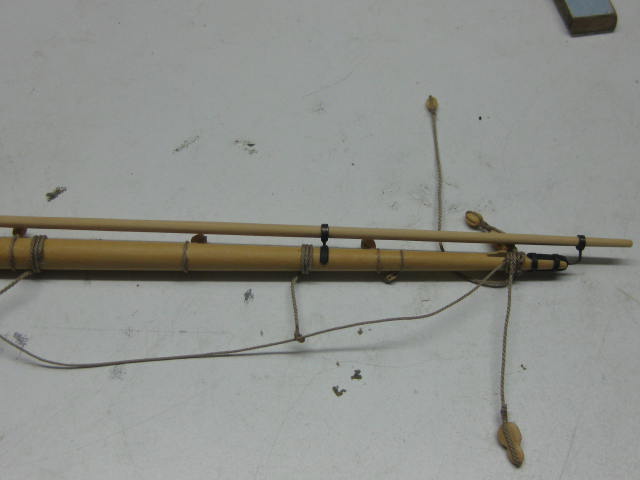
Thank you Janos, George, Maury and Greg. Greg - my next ship will be in a bottle (because I've always wanted to do one ). Janos's talents would be wasted in that environment . I thought I might mention a couple of recent "incidents" in the workshop. 1. About 4 weeks ago we bought a kitten (name of "Pud") to keep the pup company. We should have named him Houdini, because he gets into the most impossible places. My workbench is a long way off the floor - 900mm to be exact - but somehow this little devil managed to get up there. I was in the next room watching TV, and when I glanced through the open doorway I saw Pud INSIDE HMS Vulture . He had his back legs on the bench on the port side and his front paws on the starboard waist rail. I approached very slowly and carefully removed him from the deck - luckily no panic ensued and he came out without a fuss. No damage done at all . 2. Last week we had both of them de-sexed, so they were both a bit quiet and dopey the next day. Ziggy the pup likes to lie next to my feet while I'm working on the ship. I have a mobile swivelling office chair, and poor Ziggy was lying behind me without me knowing when I pushed the chair back and ran over one of his paws. Poor bugger, as if the visit to the vet wasn't enough ..... . 3. Last night I heard a noise in the workshop as if something had fallen. I was too tired to get up and investigate at the time. Next morning I found that the diffuser on the flouro light above the bench had somehow come loose and had fallen across the end of the Main Yard. This thing is a metre long and weighs about 300 grams at least, but the only damage to Vulture was a straightened out hook on the inner lift block (see pic 3 above). It took me all of 1 minute to re-bend the hook and slip it back into place, but the damage looked horrendous at first . Danny
-
Difference between a deadeye and a clump block
Dan Vadas replied to Captain Al's topic in Masting, rigging and sails
Al, what kit are you building? Some of these manufacturers use their OWN terminology for certain items (just to keep us all in confusion ). I'd say just go with "deadeyes" for both . Danny -
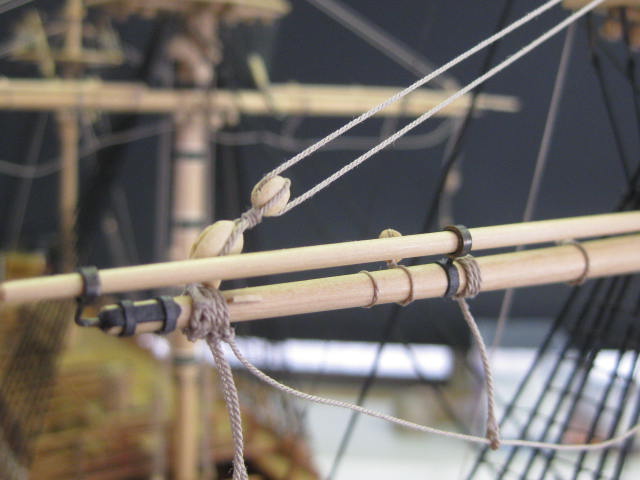
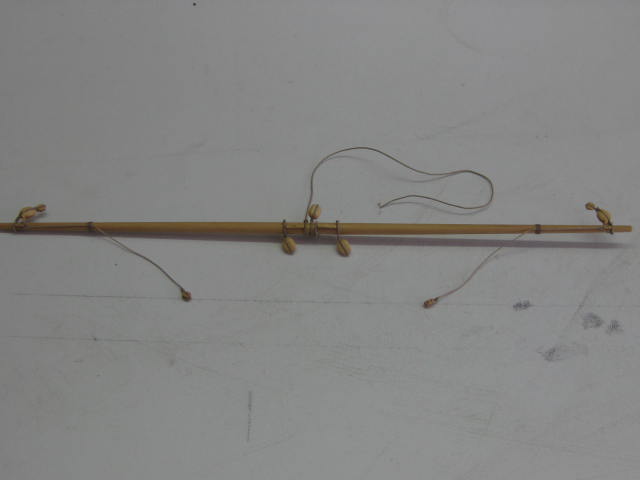
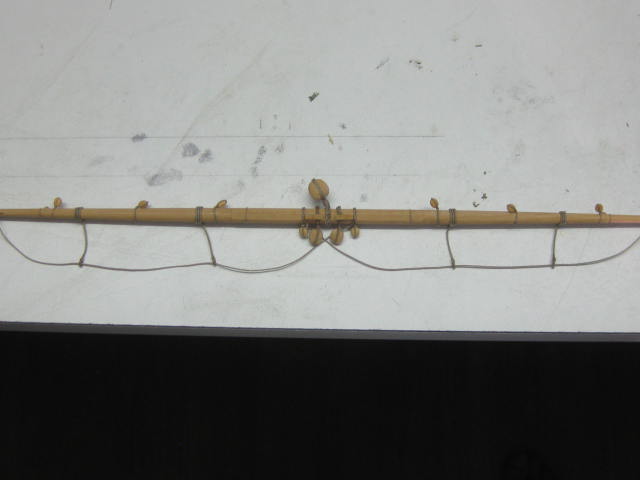
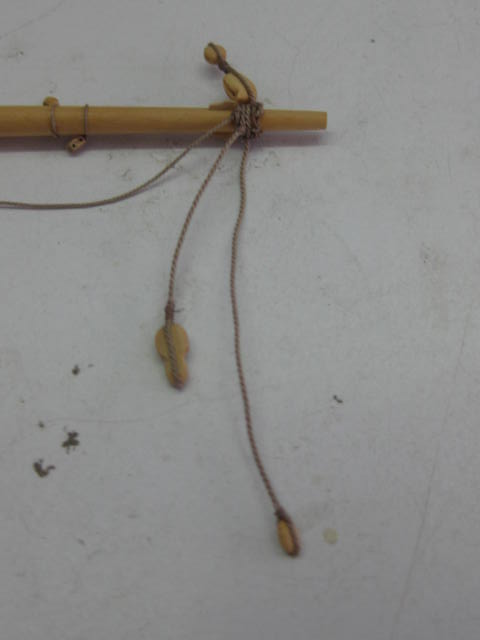
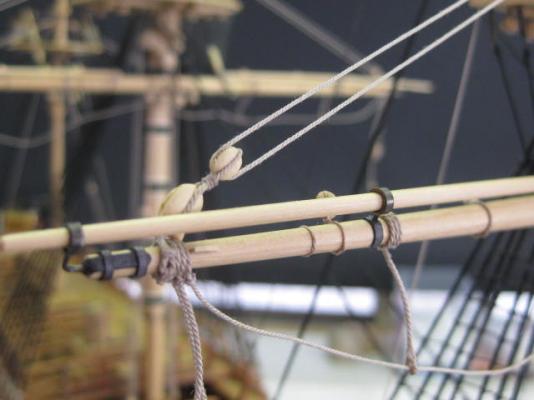
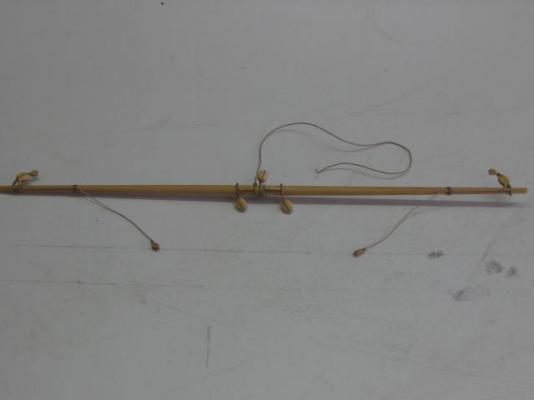
Yard Lifts The Yard Lifts are used to square the yard. They don't carry a lot of the weight, which is done by the Jeers, so they seem a little flimsy. The main and fore lifts are of 3" rope, and the mizzen are a mere 1.5" (diameter). The pics should tell the story of how they are rigged : Danny

-
Quite a few guys to thank for dropping in and commenting - George, John, Pat, Greg, Richard, Carl, Crackers, Nils, Popeye, Steve, Grant, Mark and Al. Thanks guys . Or you could follow along with my next build Greg . I don't know so much about the experience bit Popeye - until this build I'd been buying most of the blocks or using kit-supplied ones. It IS more a question of technique, which I'm still working on - my more recent blocks look a lot better than some of the early ones on Vulture . Danny
-
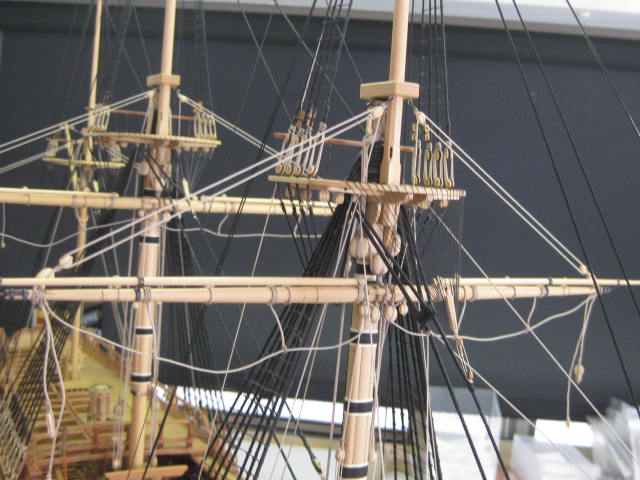
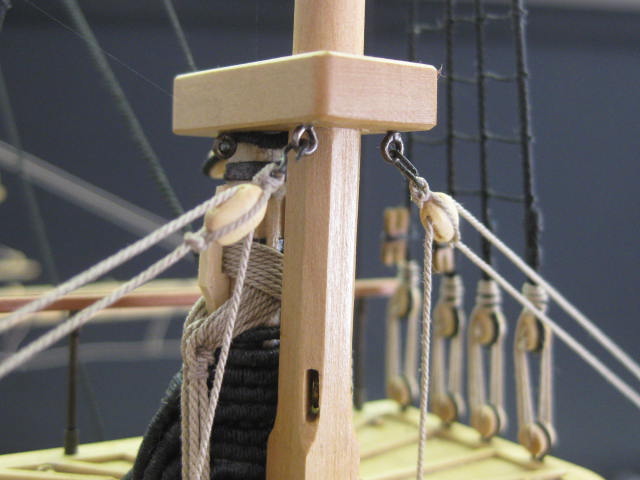
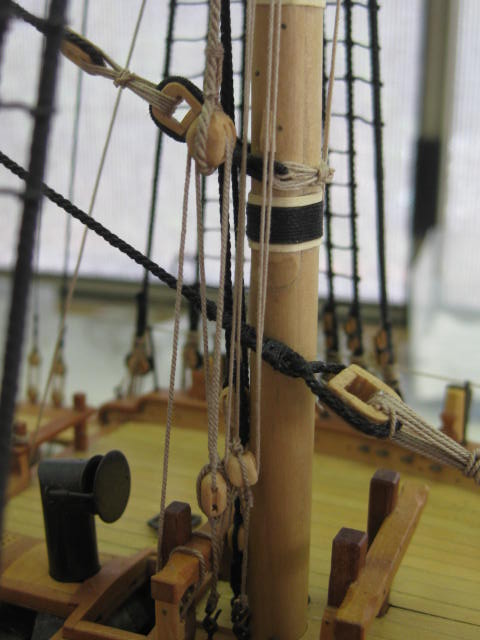
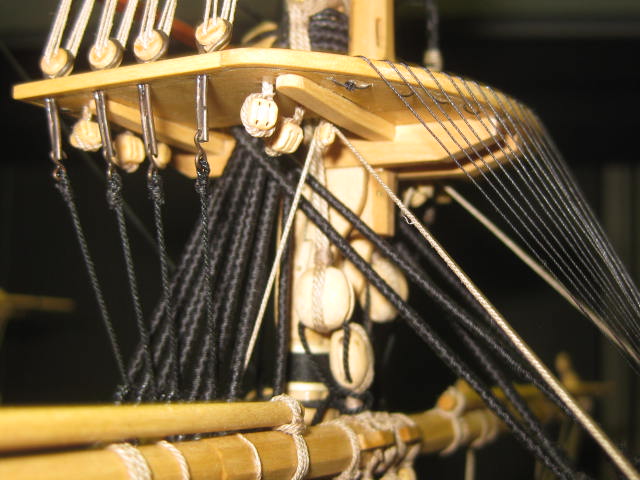
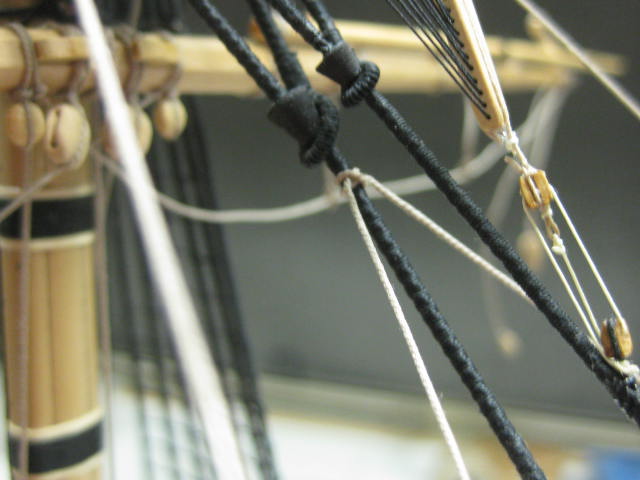
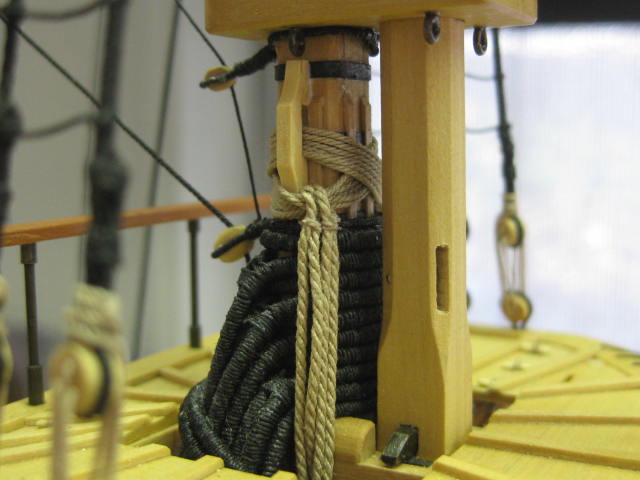
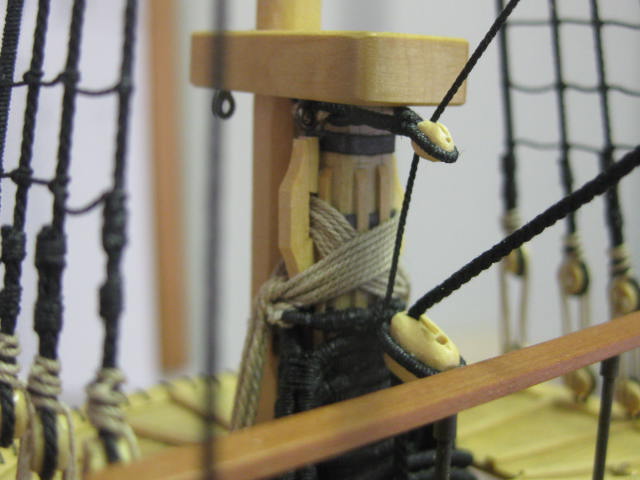
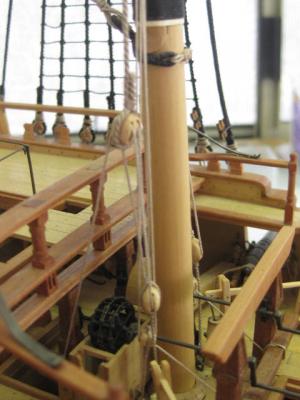
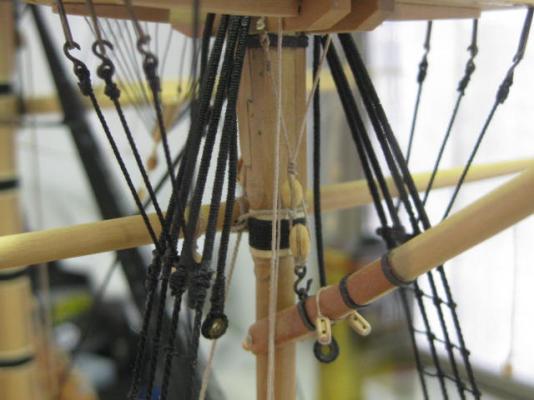
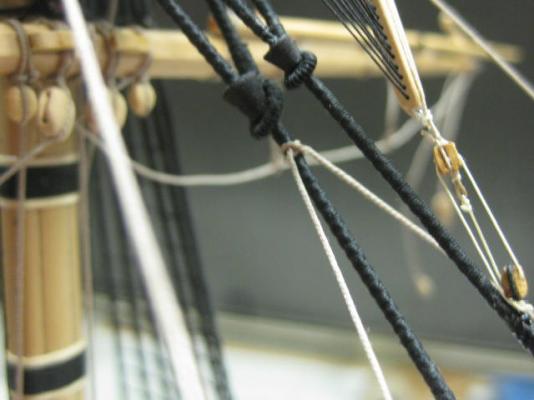
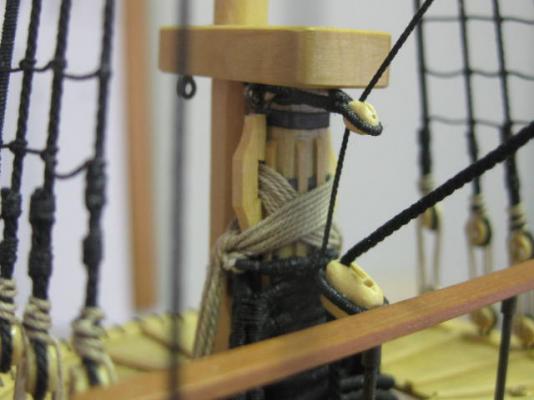
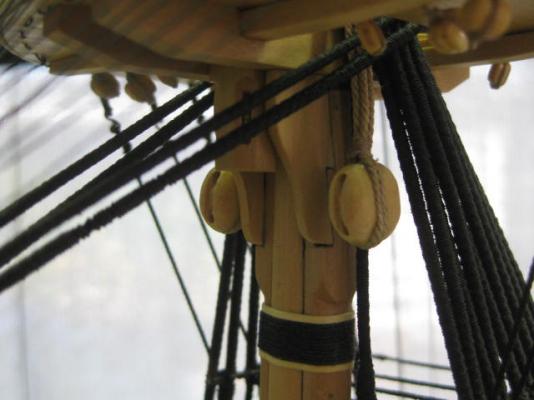
Jeers With the arrival of the rigging thread I was waiting on I could now finish off the Jeers on the fore and main masts. These start with a double block on one side. It reaves through the large jeer block under the Top on one side, through the block in the centre of the yard, back up through the other block under the top, and finishes with another double block : The tackle of the jeer falls. This is the main mast : And the fore mast : The falls of the tackles go through the sheaves in the Jeer Bitts and belay around the Bitt Rail : Danny


-
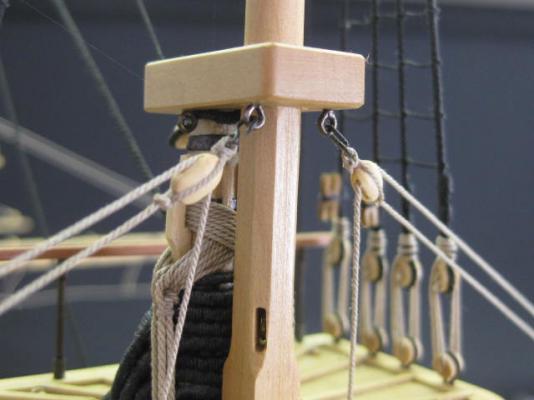
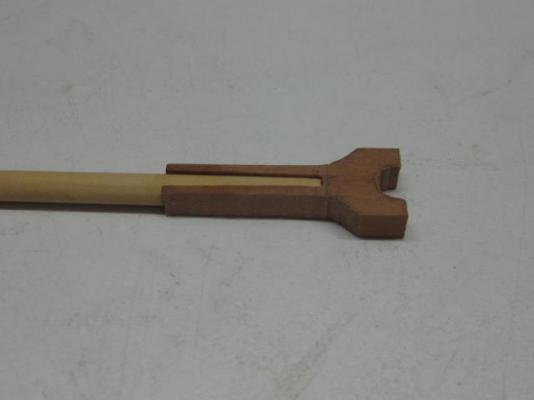
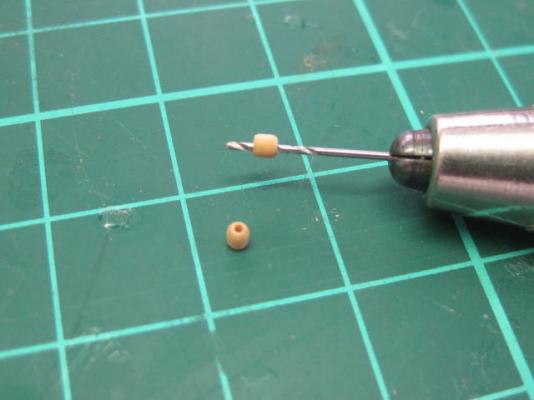
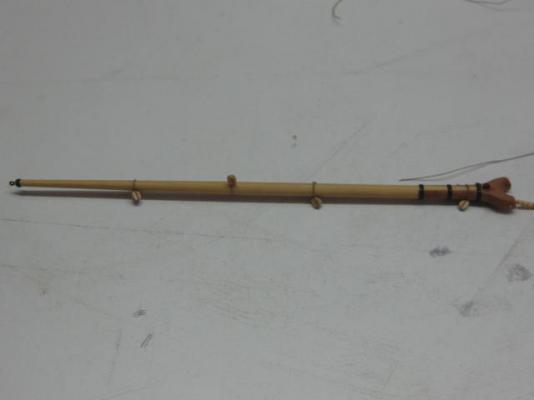
Gaff I made the Jaws for the Gaff from Swiss Pear for a bit of contrast. This pic shows the jaws after gluing to the spar and before rounding off : After shaping, and with card bands, eyebolt, blocks and parrel fitted : I turned and drilled the Parrel Trucks on the lathe. They are 1.5mm in diameter : The Throat Halyard block is supported in a sling which goes over the bolsters in the mizzen top : The Parrel is knotted on one side of the jaws, goes around the mast and back through the hole in the other side. A stopper knot finishes it off : The Peak Halyard rigging. A double block hooked to the mast cap is used to lead it downward : The falls of the two halyards belay to the cleats : Danny


-
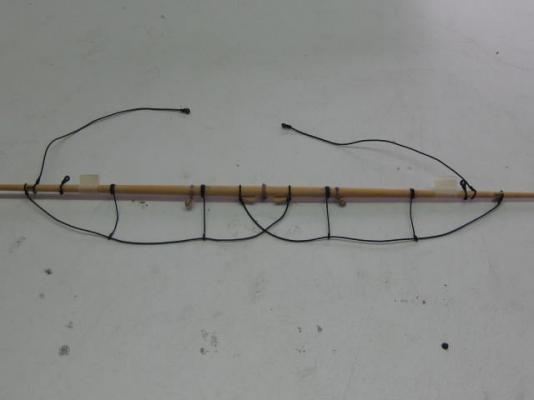
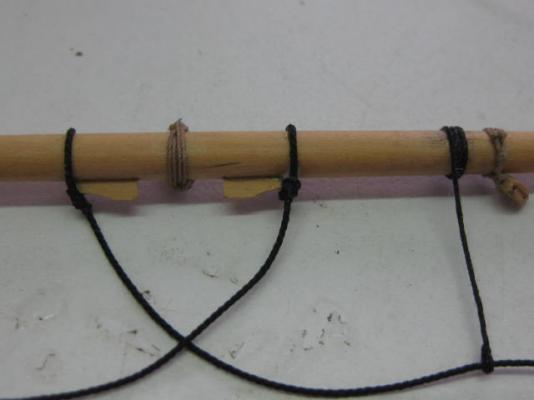
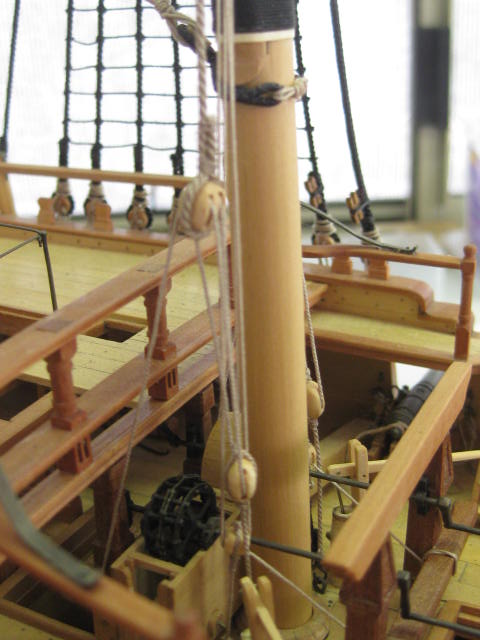
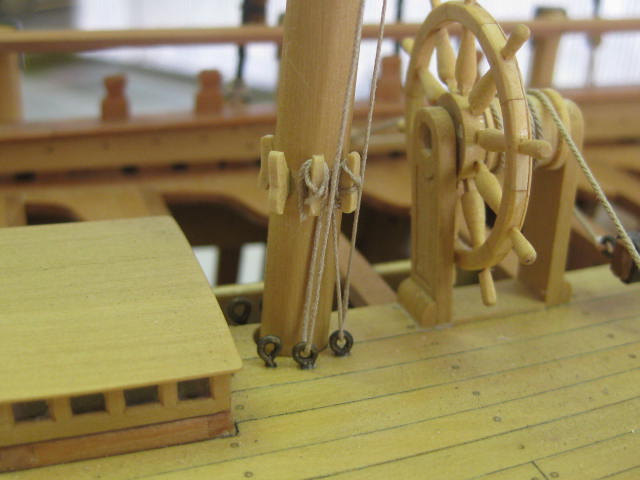
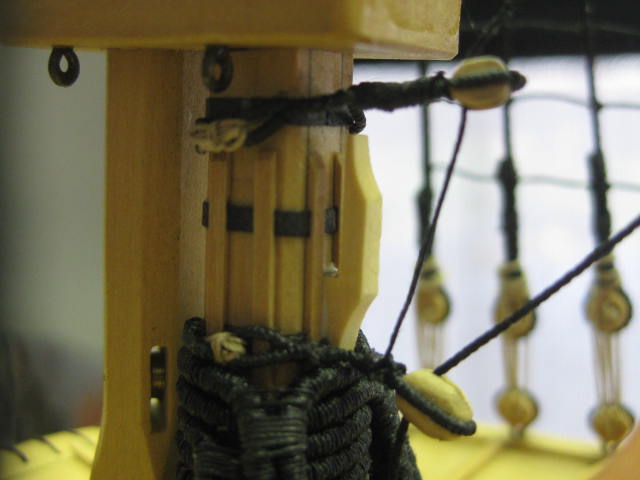
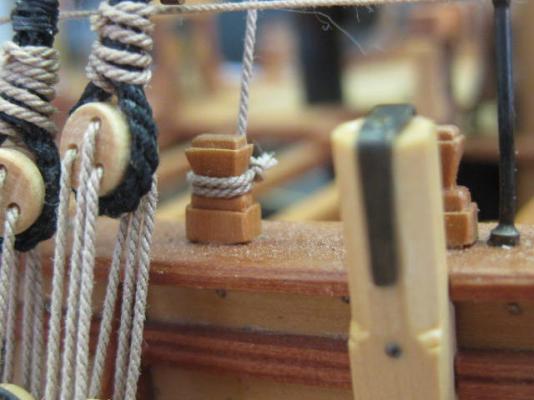
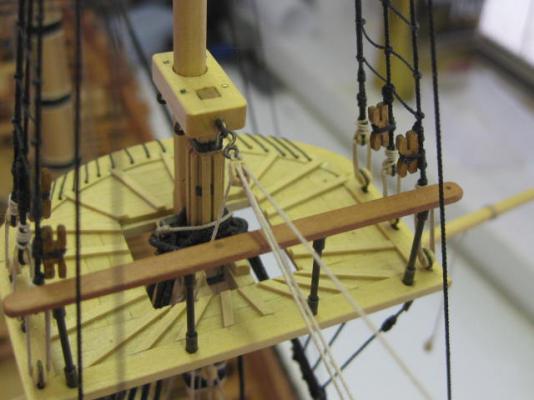
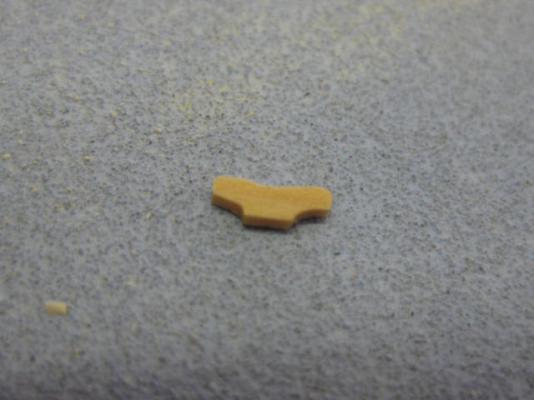
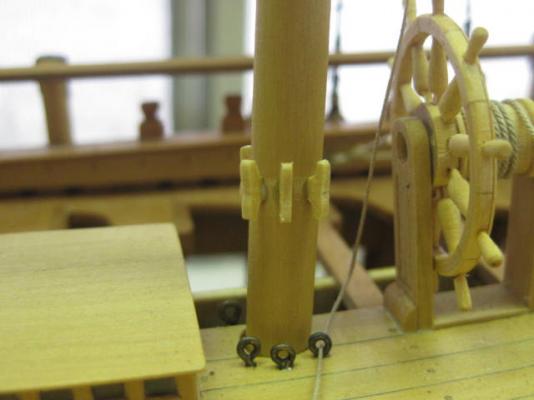
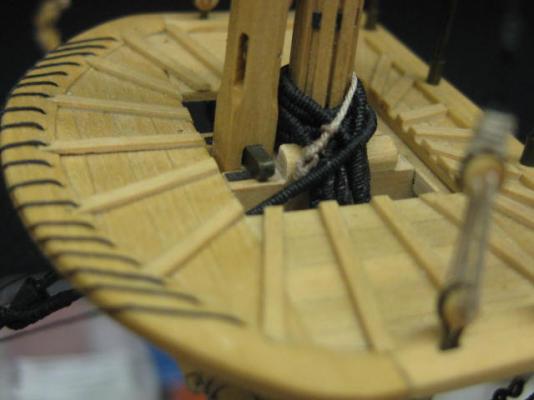
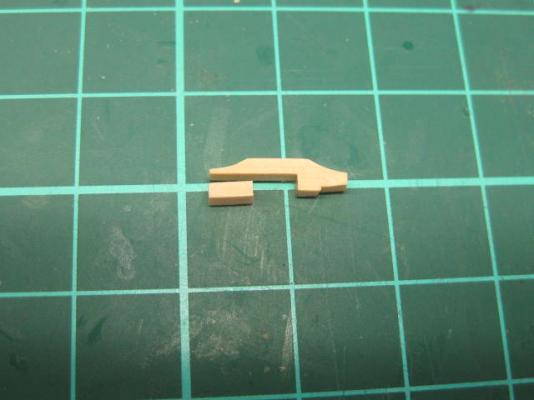
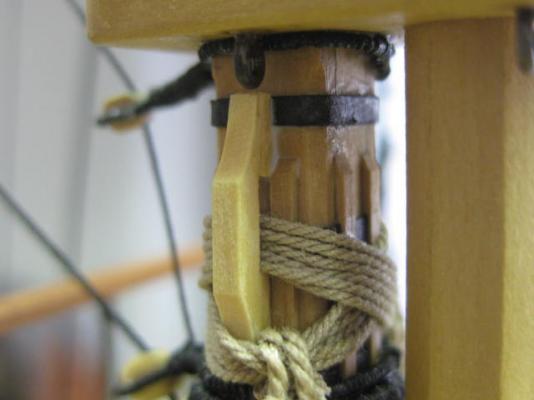
Once again thanks for the comments George, Greg, Skybolt, Michael, Ben and Kees . Mizzen Mast Cleats There are six cleats to be fitted near the foot of the Mizzen Mast. These would have been considerably easier to fit before the mast was stepped . To mass produce the cleats I tack glued about 10 (some spares) pieces of 5mm x 1.5mm x 0.8mm pieces of english box together. When dry I filed them to shape : Then I dropped the unit into Isopropyl for half an hour and seperated them : The hard part was gluing them to the mast with the shrouds getting in the way a bit : Danny


-
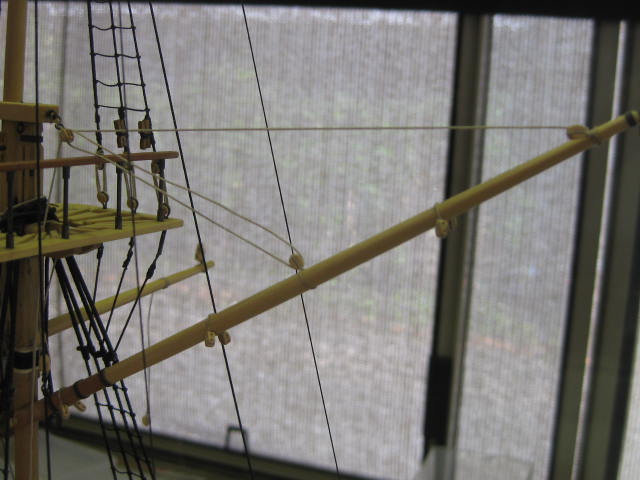
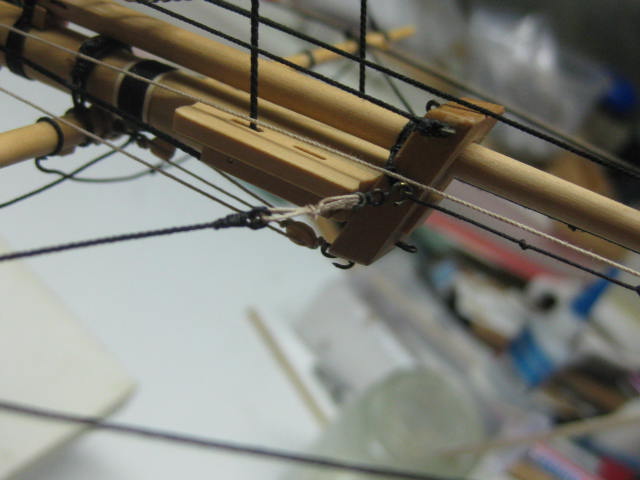
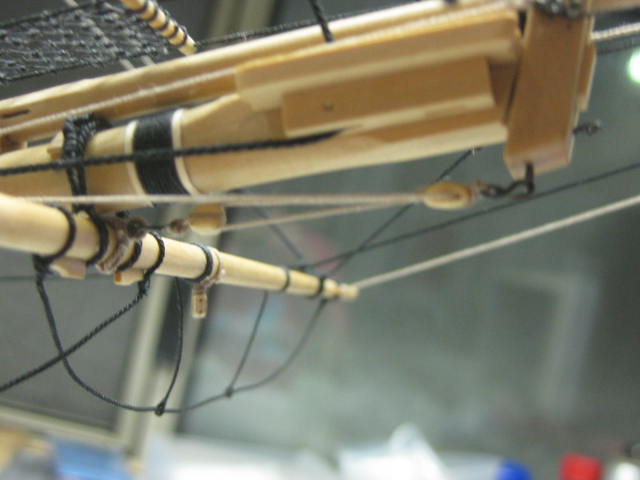
Once again a big thank you for your overly kind comments George, Dave, Greg, David John and Nils. Crossjack The Crossjack is much simpler to fit with blocks than the two previous yards, as this yard doesn't carry a sail. The only blocks are a 10" block for the Sling, two 10" Quarter Blocks, the usual two Lift/Topsail Sheet blocks at the outer ends, and two Brace Pendants : The brace pendants are lashed to the yard about 4 feet from the ends to improve their lead : Instead of Jeers like on the other two lower yards the Crossjack is supported by a Sling. This has a small eye spliced into one end, passes through the Sling Block, and goes around the mast above the shrouds. The end of the sling goes through the eye and is seized back to itself : A Truss is fitted in similar fashion to the other yards, except there is only one thimble and fall. The fall of the truss has a single block stropped to it. The standing part of the tackle goes through the eye of the strop, through another single block with a long strop and hook, back through the upper block, and belays to a timberhead : The lower truss tackle block hooks into an eyebolt in the port mizzen channel : Danny


-
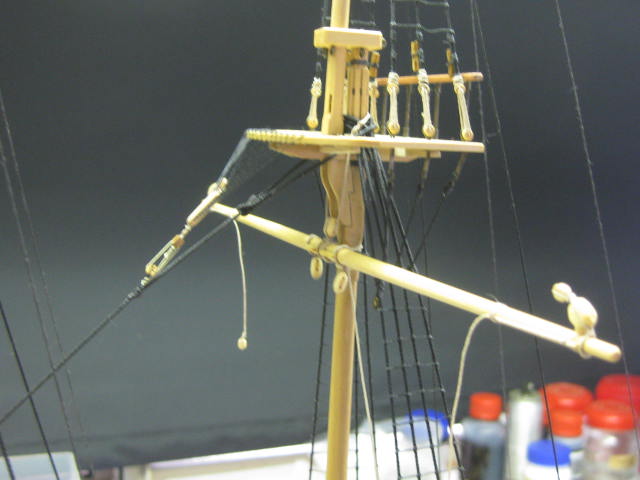
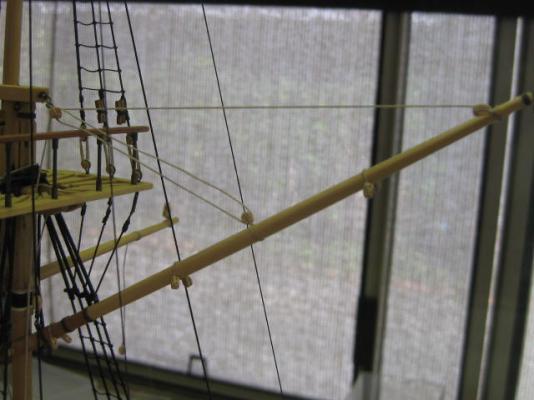
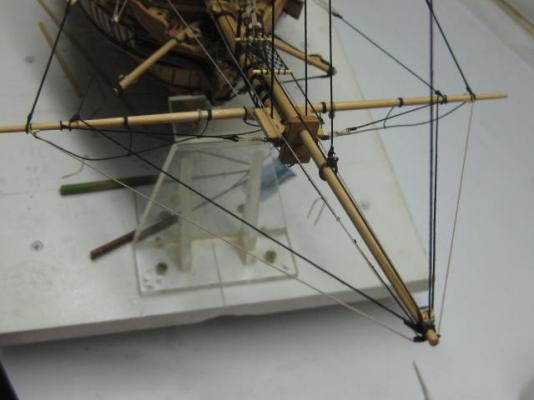
Thanks for looking in again David, George, Kees and Nils, and also to all those who hit the "like" button . Spritsail Running Rigging I've completed all the rigging on the Spritsail. This pic shows the Jib Guy Falls (dark inner lines) and the Yard Lifts (light outer lines). I'd rigged the forward parts of the Falls earlier, now they pass through the thimbles about 3/4 of the way in from the ends of the yard and end with a single block which has an eye stropped into it's ****. The tackle for the falls has a block and hook attached to the Cathead, and the fall passes through the block in the fall and ends at a timberhead. The Lifts start at the yard cleats, pass through the thimbles at the end of the jibboom and tie off to a cleat on each side of the bow : The Halyard has two single blocks, one with an eye and both with hooks. One hook is attached to the thimble in the centre of the yard, the other hooks to the eyebolt under the cap. The fall runs to a timberhead on the starboard side of the bow : The previously attached Standing Lifts lash to another hook and thimble which go into the eyebolts either side of the cap : The light colored lines in the shape of a "W" are the Braces. The standing parts of these are very long, as they start on the Forestay where the attach via a clove hitch in it's centre, through the blocks on each end of the brace pendants on the yard, up to the blocks under the mast top, down through the sheaves in the inner ends of the Bitts, and tie around the timberheads above them : At this stage I haven't done any "faking down" (coiling the lines around the belaying points) of any of the lines. That will come when I've finished all the rigging. Danny


-
Thanks once again Carl, George, Mark, Grant, Janos, Crackers, Christian, Nils, Greg and Mhegazi and also for all the "likes" . Truss Pendant Tackles The Truss Pendants prevent the yards from pulling away from the masts in a forward direction. There is one on each side of the mast. Work begins by stropping a thimble in each one. The line turns around the yard and is seized back to itself : Then each line is passed around the mast and through the thimble in it's opposite number. I've only temporarily tied the yard through the jeer blocks to prevent it from dropping - I'm awaiting some more suitable size rigging thread from Chuck : The falls for each tackle have a double block at their ends. The tackle passes through this block and through a single block with a hook stropped to it. The strop is long enough to clear the bitts. This hooks into an eyebolt at the foot of the mast. This is the fore tackle : And the main tackle : Danny


-
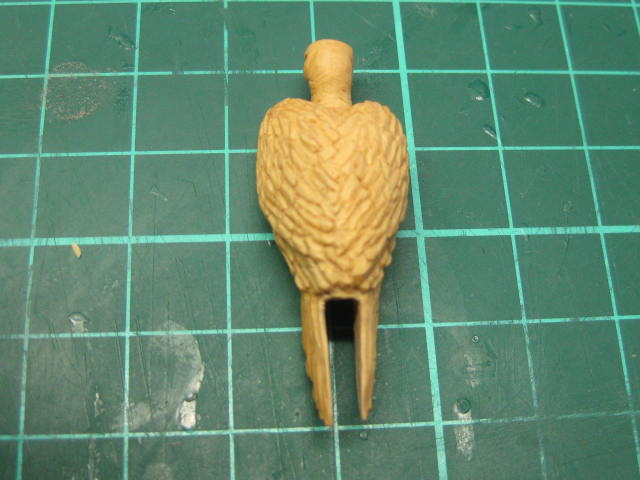
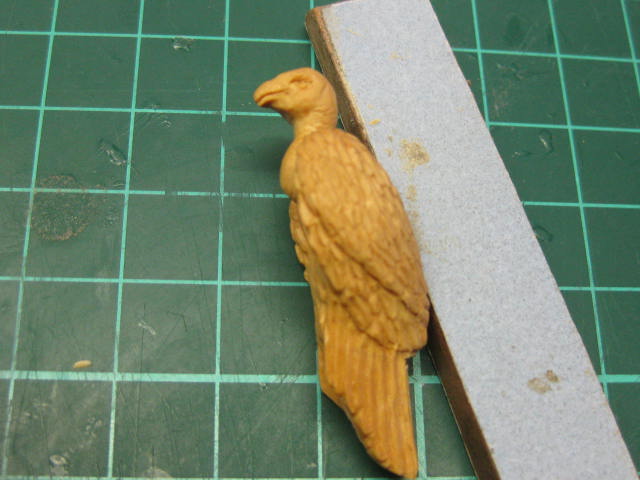
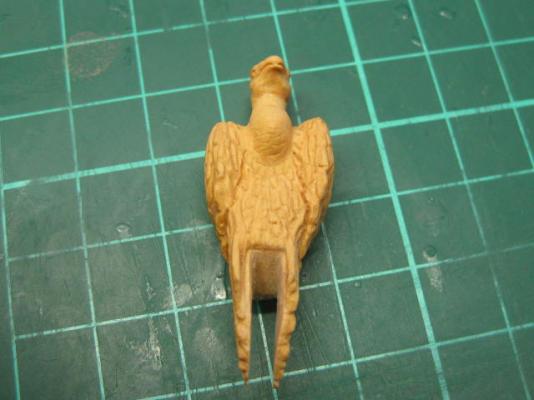
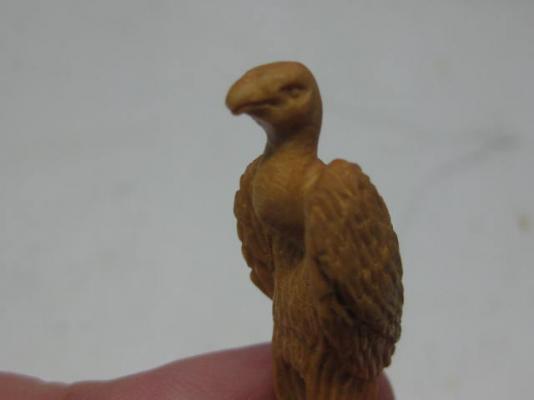
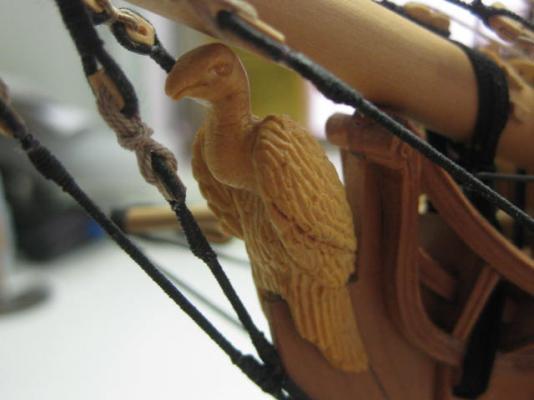
Thank you Carl, David and George. Figurehead My figurehead arrived the other day . This was carved by Janos - a brilliant job as usual, and something I don't have much talent at . The only thing I really had to do was fit it - this took the best part of 2 hours, as I had to CAREFULLY cut the slot between it's wings to fit around the stem : All done . Danny


-
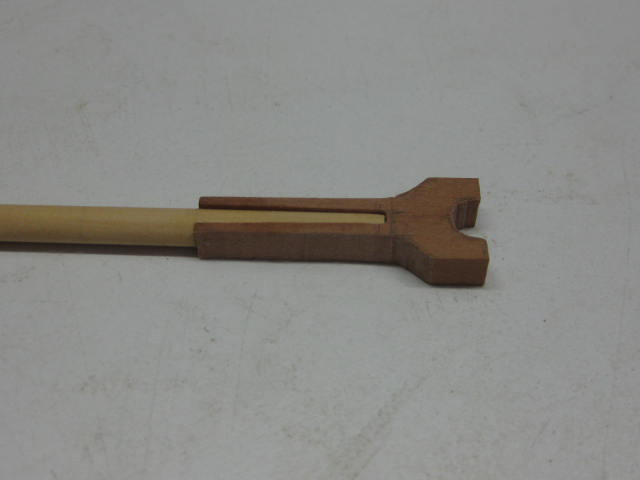
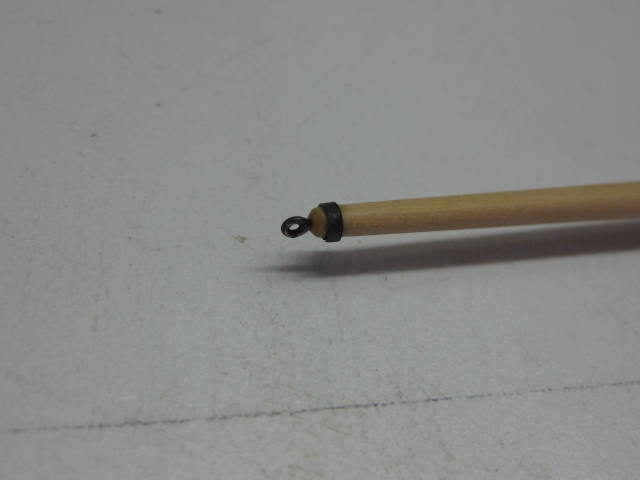
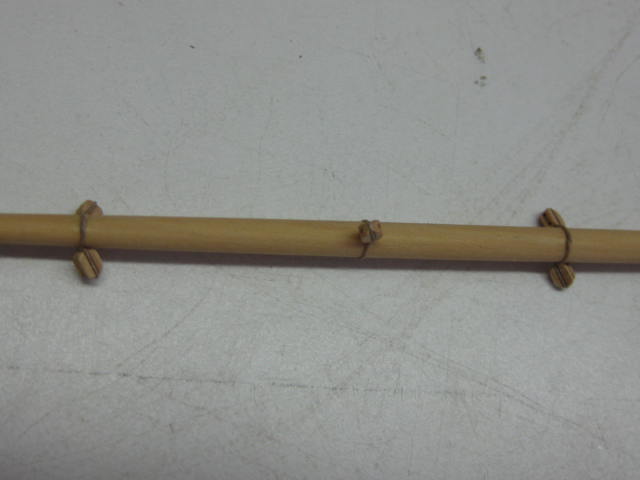
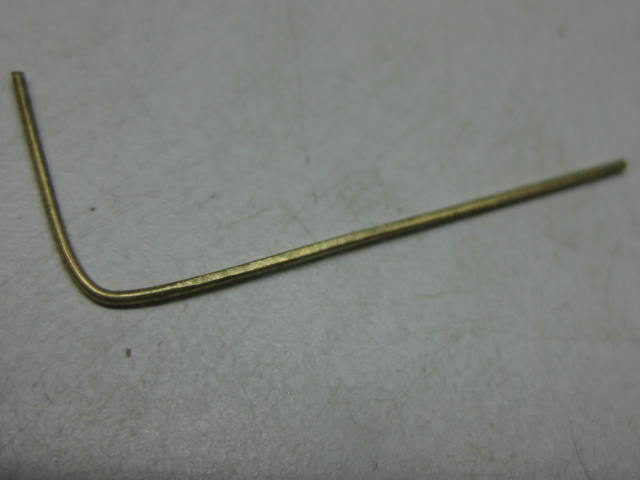
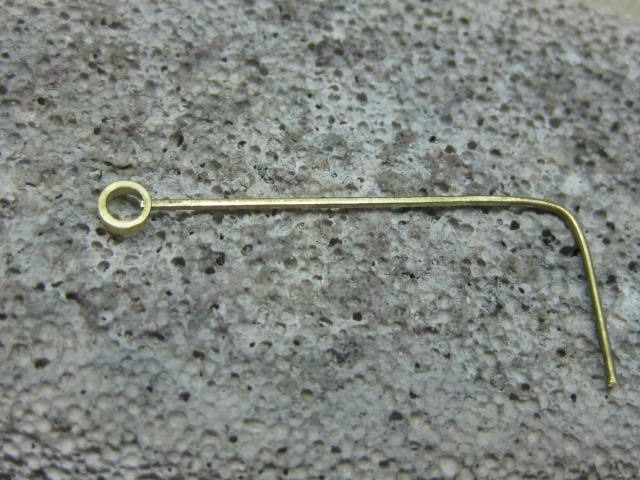
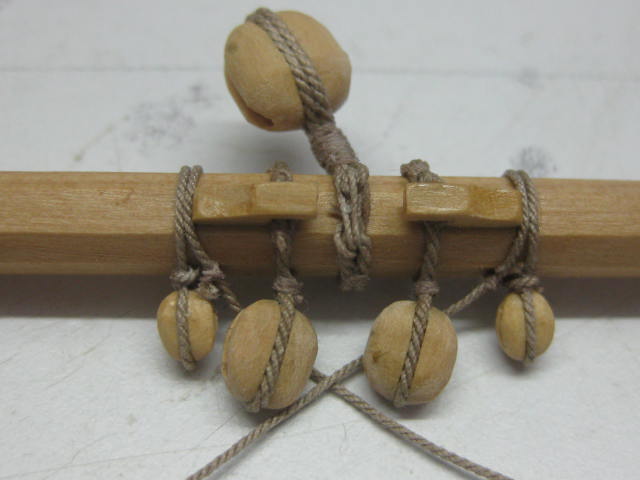
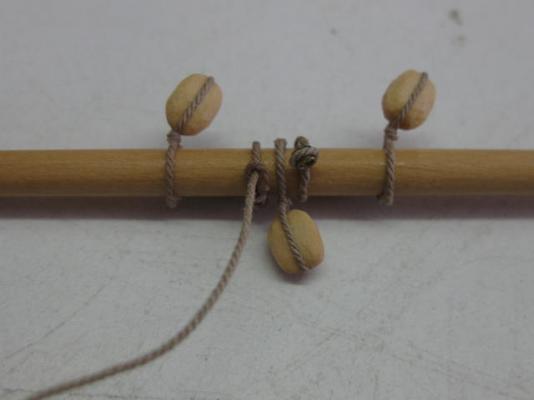
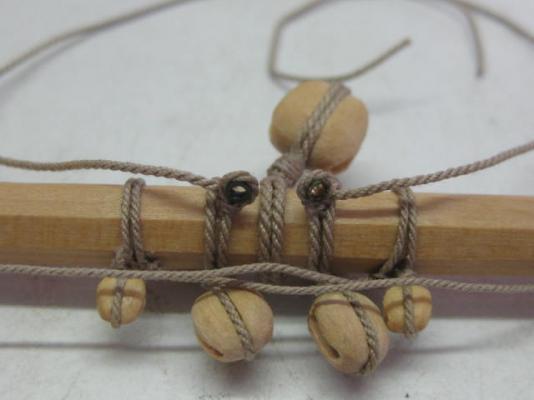
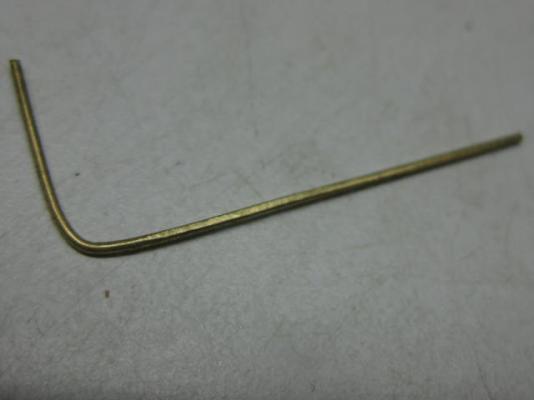
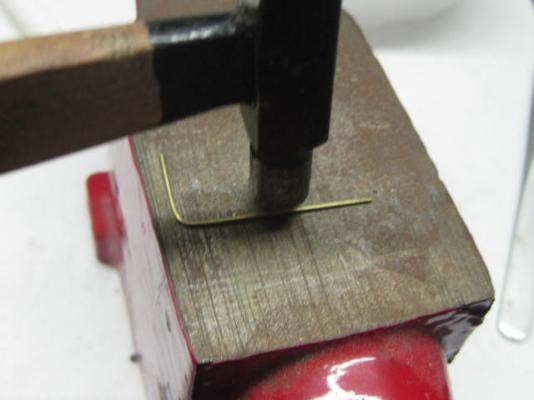
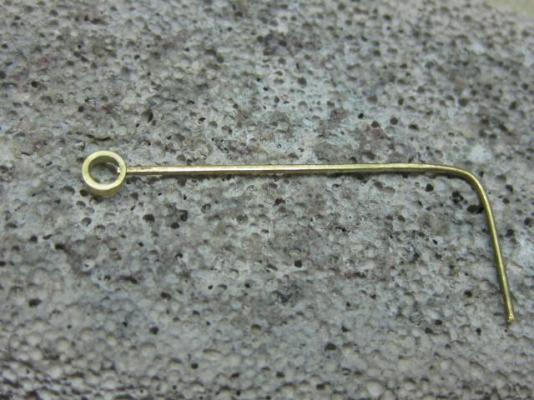
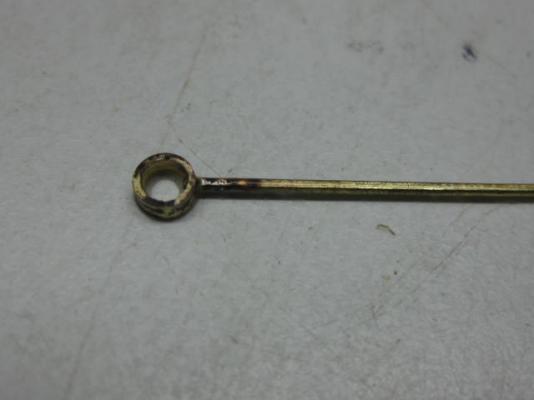
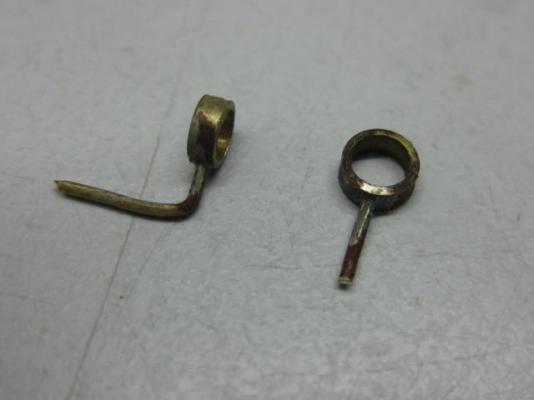
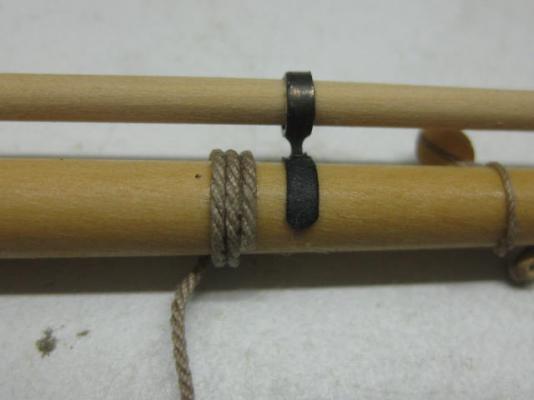
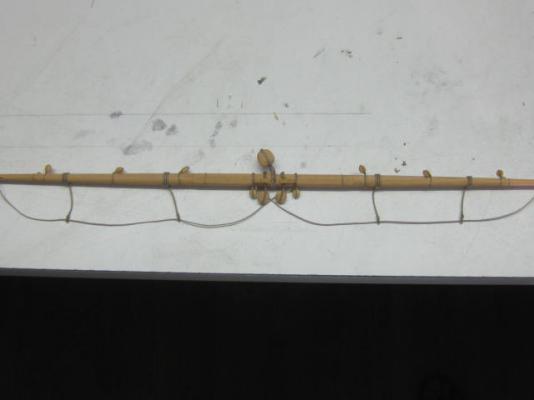
Stunsail Irons The stunsail irons support the Stunsail (or Studding Sail) Booms on the yards. The booms can be retracted inboard along the yard when not in use. The iron work for these turned out to be fairly easy to make. I started by cutting the larger inner rings from some tubing of the correct size (which I had in stock) using the parting tool in my lathe. The outer rings are smaller in diameter and width, and as I didn't have any tubing of that size I turned and bored some round stock to the correct size. Next I drilled a 0.7mm hole into each ring for the legs. Not having any 0.6mm square bar for the legs I made my own from 0.7mm wire. I bent one end of the wire so I could control which face I had on top, and then simply hammered the wire flat on all four sides. Again, this is a lot easier than it seems at first : I pushed the end of the squared wire into the rings and silver soldered them together. Note that I left the square stock at full length whilst soldering so that I could control the direction of the squared section. I trimmed these to length after soldering : I made the straps and reinforcing rings from thin card which I dyed with black wood stain. These are glued on with PVA : The irons fit to the fore upper section of the yard at a 45 degree angle from the vertical : Danny


-
Thank you for the comments John, Dave, John, Kees and Greg. Much appreciated . I sure did Nils. I use a LOT of diluted PVA when I'm doing strops and siezings. It's very easy to clean up while still wet with a Q-tip. The PVA helps to keep the line in shape while I'm tying it. No I didn't George. At this scale, and with Chuck's rigging line, it wasn't necessary. The Quilting Cotton I used for the serving was sufficiently stiff to "smooth out the bumps" in the line. Danny
-
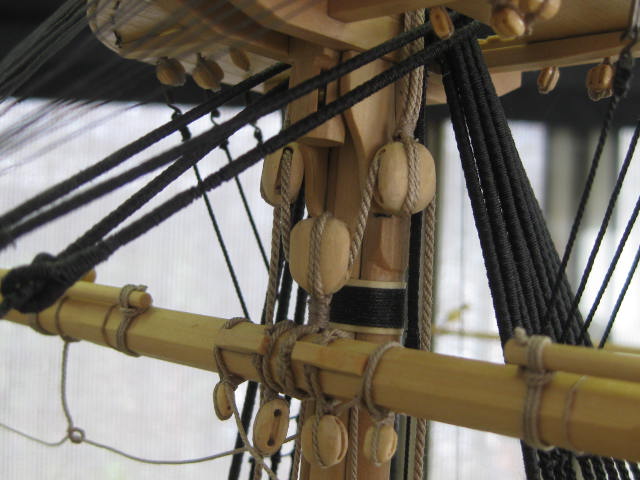
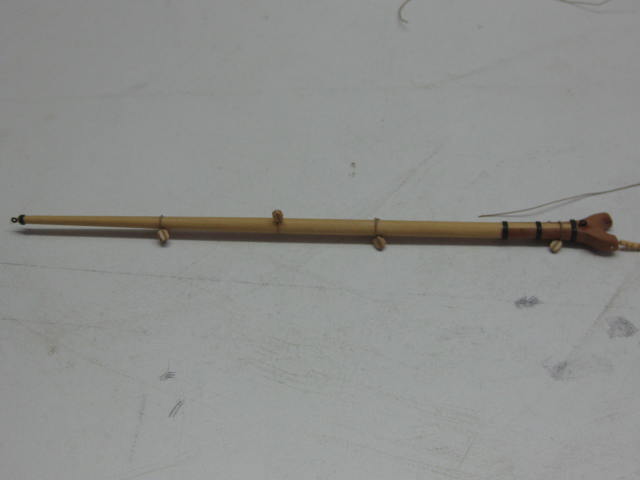
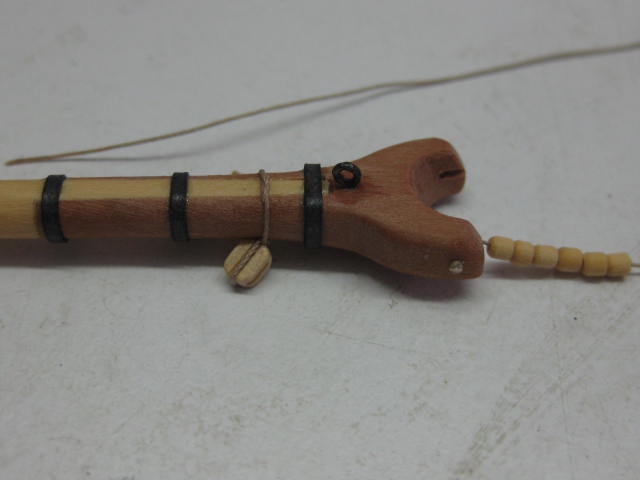
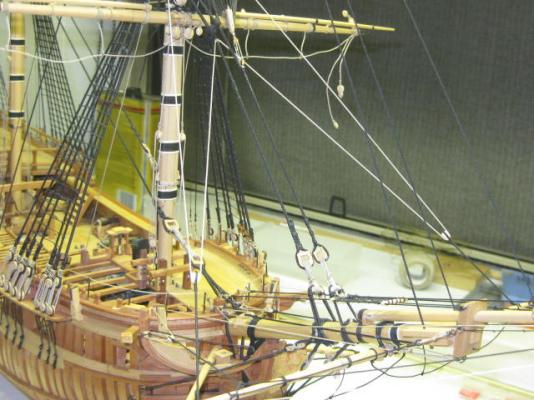
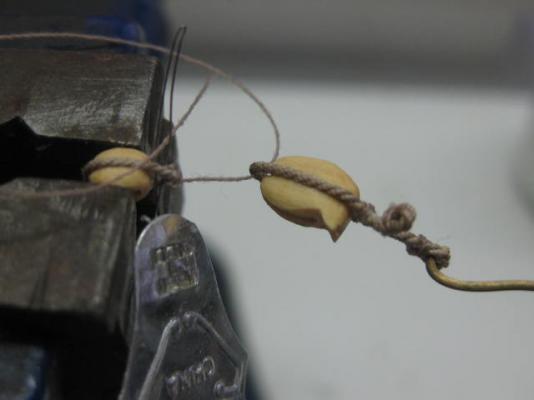
Blocks fitted to the Lower Yards An overview of most of the main yard. There are 23 blocks in total. The Fore yard is virtually identical except for it's length and diameter : The central portion showing the Jeer Block (top), the Quarter Blocks (lower inner) and the Clueline blocks (lower outer) : One of the four Stirrups (not yet adjusted and stiffened). Note the three turns around the yard : The Leechline block (inner) and one of the four small Tricing Line blocks. The Yard Cleats have also been fitted : The Topsail Sheet/Lift blocks fitted : And the Yard Tackle block (inner violin block) and the Brace block : Here is a list of all the blocks for the main yard (the fore yard is the same) : Jeer Blocks - 1 x 20" single plus 2 x 20" single Jeer Tye Blocks fitted to the mast. These blocks are double stropped. Quarter Blocks - 2 x 14" single Topsail Sheet Blocks - 2 x 12" Shoulder Yard Tackle Blocks - 2 x 15" Violin Clueline Blocks - 2 x 9" single Lift Blocks - 2 x 9" single Buntline Blocks - 4 x 8" single Brace Blocks - 2 x 8" single Leechline Blocks - 2 x 7" single Tricing Line Blocks - 4 x 6" single Danny


-
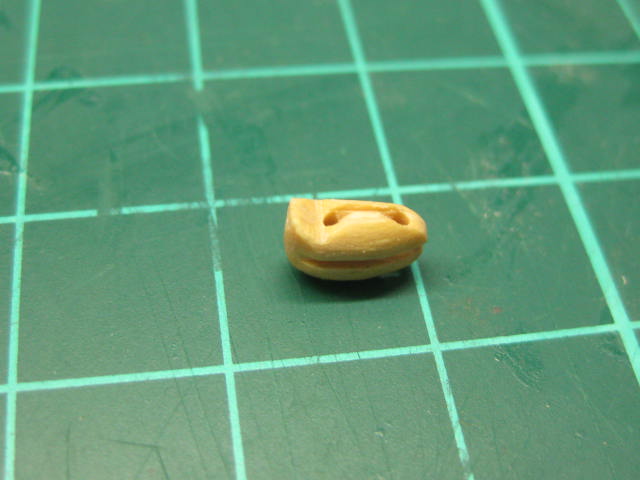
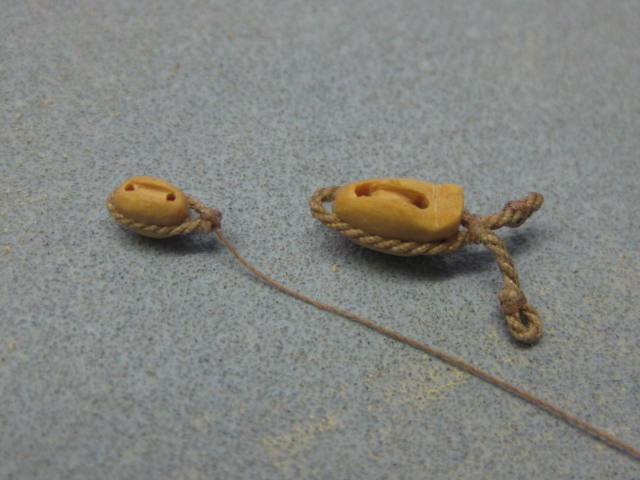
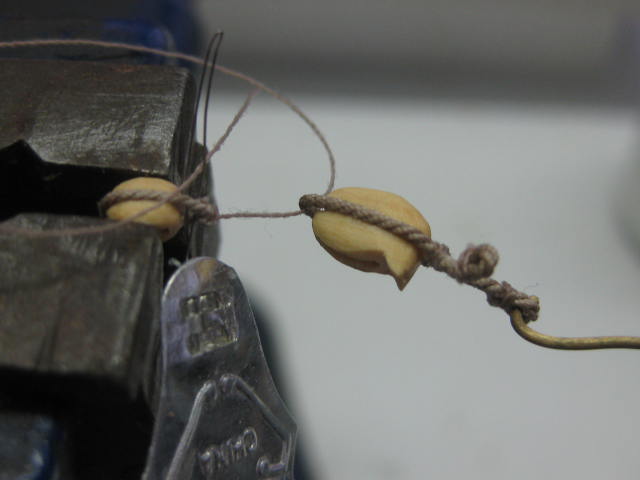
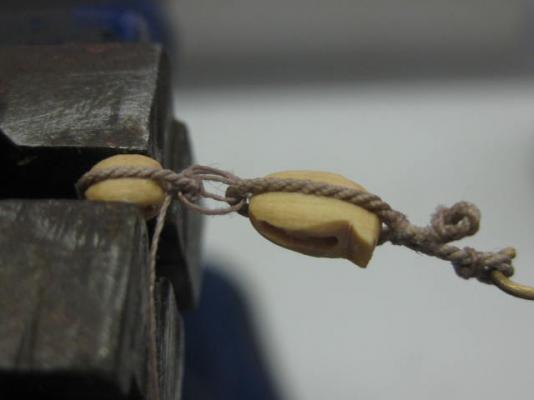
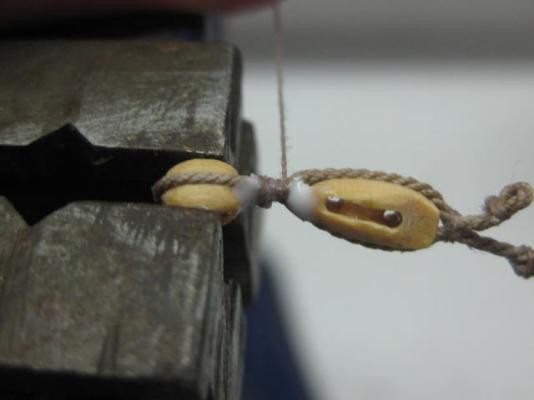
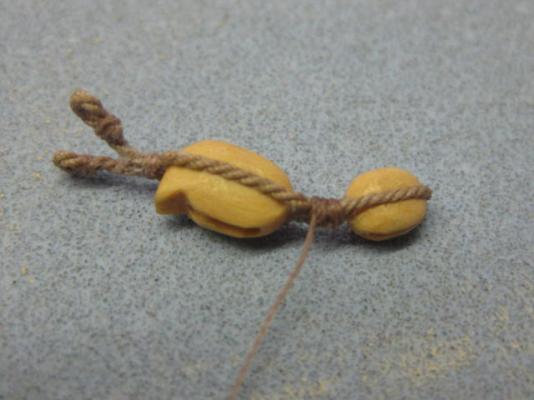
Thank you too Nils, Frank, George and Pat. Topsail Sheet Blocks These are a Shoulder Block. The Lift blocks are seized to them as well. Here are a few pics of a carved sheet block : My method of seizing the two blocks together. Note the gap in the strops to allow the lashing to pass through : Danny


-
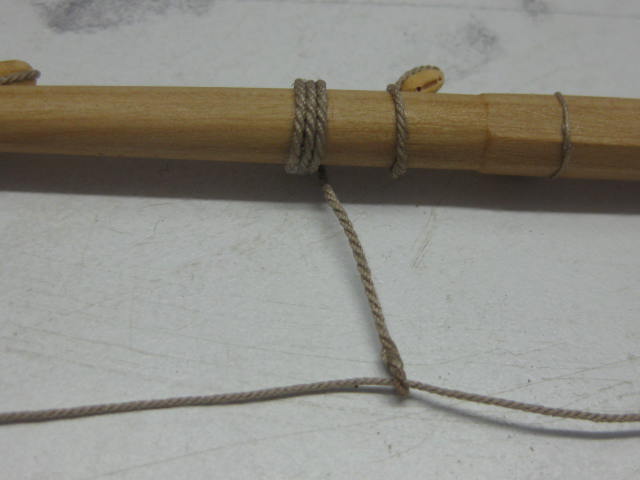
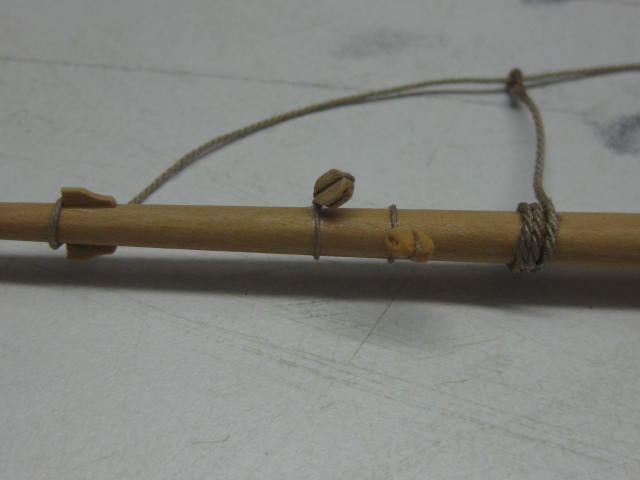
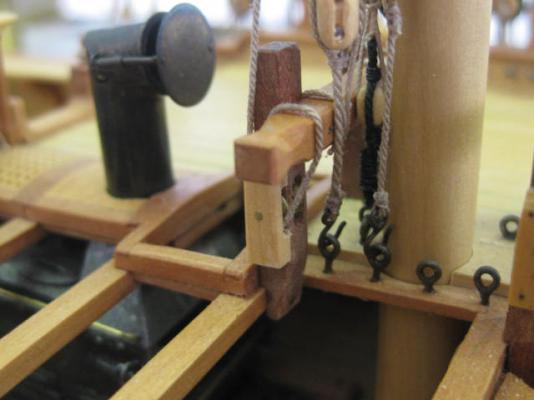
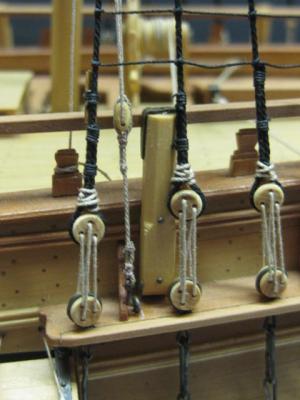
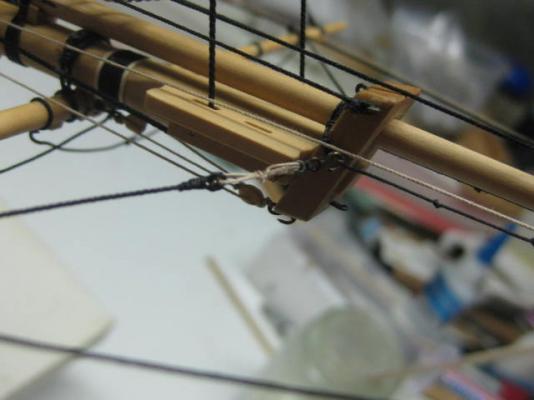
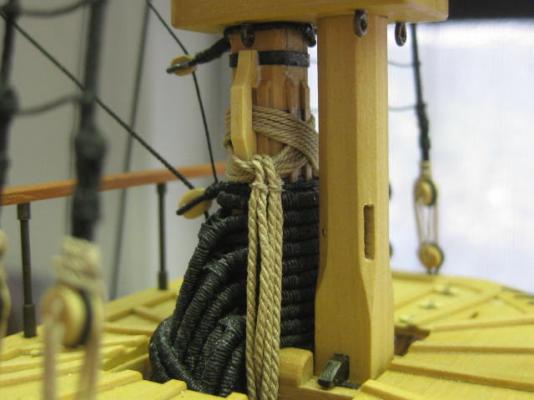
Thanks muchly Christian, Greg, John, Carl and David . Jeer Tyes The jeer tyes support the lower yards. These would have been a fair bit easier to fit before raising the Topmasts . Two 20" single blocks, one each side, are double stropped with very long strops : A cleat each side of the mast supports the strops. TFFM suggested the following method of making the cleats to allow the lashings for the strops to be fitted more easily, but after I'd done them this way I think it would have been easier to make them in one piece. The small "feet" at the top were a real pain to fit afterward, and a needle treader can be used to pass the line through one-piece cleats with a minimum of fuss : The lashings take a little while to fit, as there are six turns around the mast for each (there are supposed to be seven, but I made the lashing line a bit too short ). The strops should be long enough for the blocks to sit beneath the tops by about half their length. The yard will sit at the level of the futtock shrouds when they are rigged : Danny

-
Hi Al, Definitely . Rather than try to explain all the gun rigging, take a look at my build log of Vulture from HERE . I've fully detailed all the rigging over several pages. Danny
-
Add the acid, ANY ACID including HCl, to the water - NOT the other way around. Some acids can explode if water is added to them! Grant - stand corrected. Keith is right . Danny
-
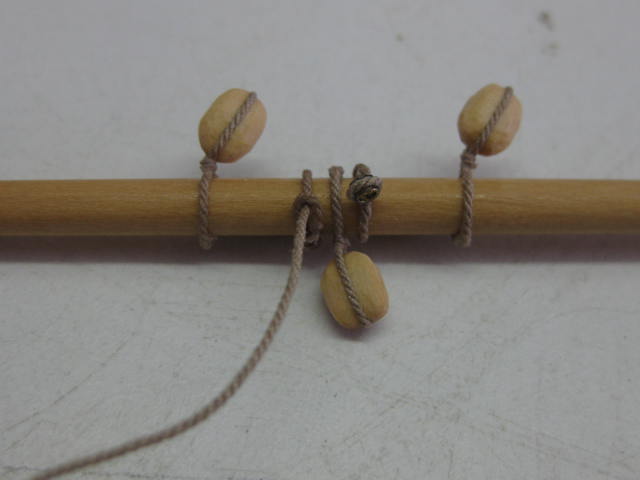
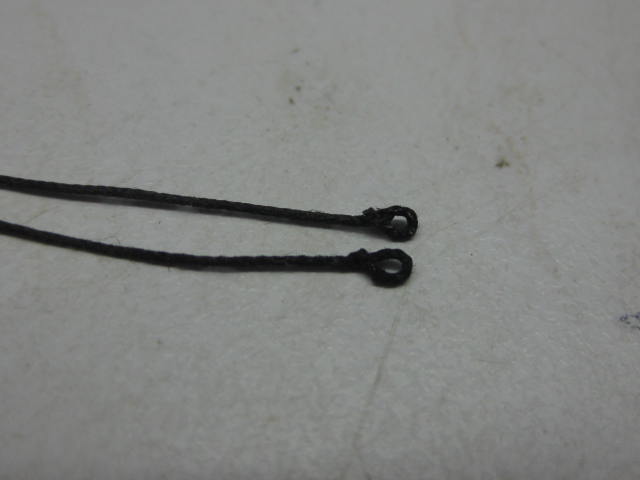
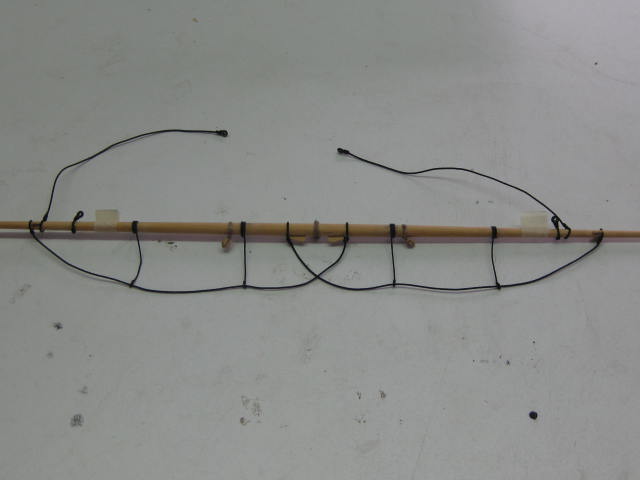
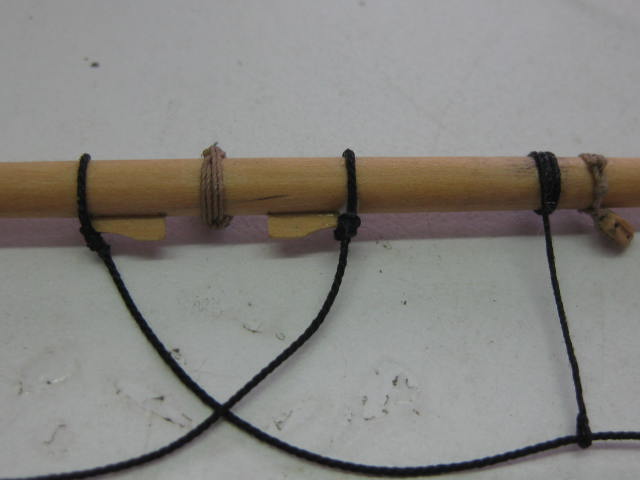
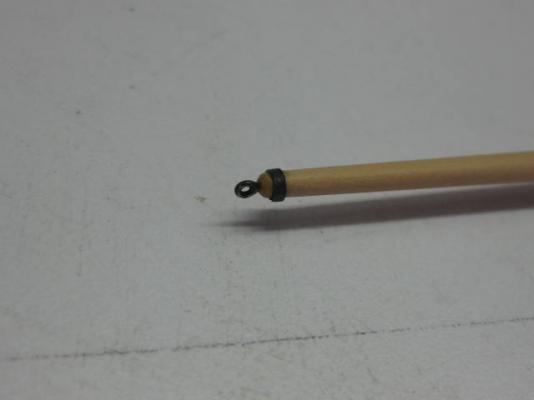
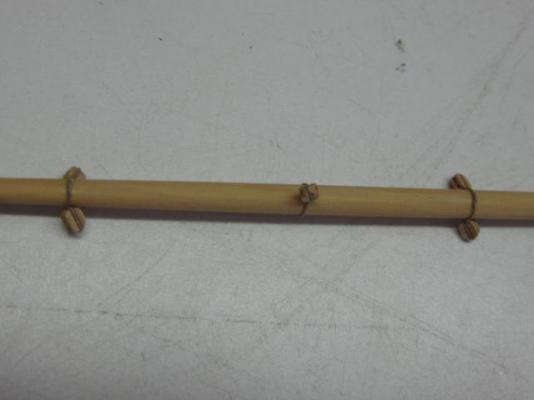
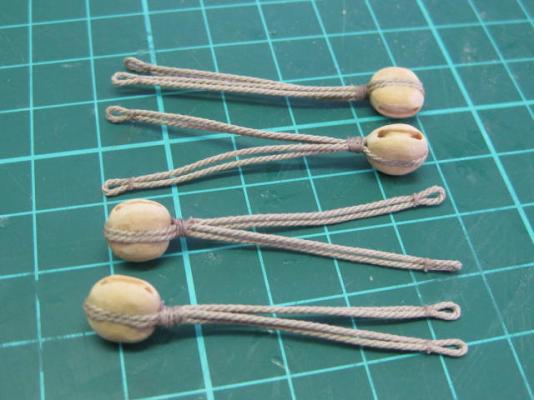
Next pieces are the Stirrups and Horses. I've made these from "tarred" line as they get a lot wetter than the horses on the other yards. The Stirrups have an eye in their lower ends. I made the eyes by passing the line back through itself using a needle threader : The upper ends of the stirrups turn three times around the yard. On the real ship they were nailed to the yard, but PVA does the job on the model : Finally the Standing Lifts are fitted. These also have a thimble seized into their outer ends : I haven't glued the stirrups to the horses yet - I'll do that after the yard has been slung to get them to "hang" neatly. Danny