HOLIDAY DONATION DRIVE - SUPPORT MSW - DO YOUR PART TO KEEP THIS GREAT FORUM GOING! (Only 53 donations so far out of 49,000 members - C'mon guys!)
×


Dan Vadas
-
Posts
3,261 -
Joined
-
Last visited
Content Type
Profiles
Forums
Gallery
Events
Everything posted by Dan Vadas
-
That's the same page I found too Jan . Danny
-
:D
-
That would be the Lily, rebuilt as HMS Bounty. Danny
-
Take that as a "Yes you got it" David - Anja has finished for today, and we both know you are right. Play again? I'm sure she won't mind. Danny
-
Bugger - David beat me to it while I was putting on the "bells and whistles" :D . Danny
-
No problem at all Anja. It's this one Kalmar Nyckel . You needed to remove more than the flags to stump "Google Image" . Danny
-
Yay - you got her Anja . Every 2nd Norwegian Fishing Boat looks very similar . How did you like my "background removal"? Danny
-
Keep looking Anja . Danny
-
Righto - I can't make it any easier than THIS . Now all you have to do is find the actual PAGE she's on (there are only 16) . Danny
-
Michael, read the last two sentences before the pic again - I put the lines there to make it easier (not harder ) to understand where I went wrong, and how it should have looked (and looks now ). Danny
-
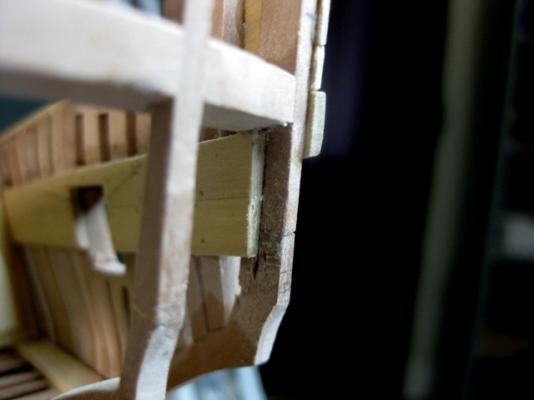
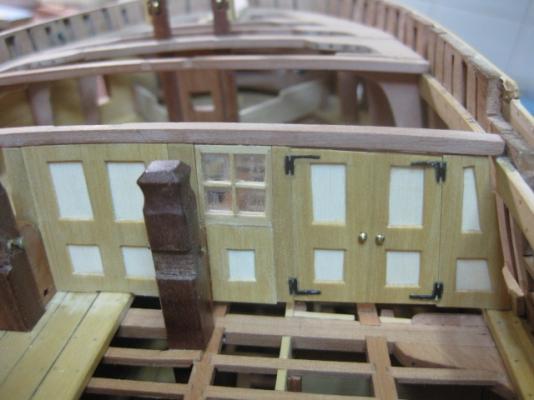
A "Heads Up" to those who are following me in building a Swan Class : TFFM is not very clear in some aspects of the Stern Light Framing, and I've found one bit that would have been much easier to do BEFORE the Counter Timbers are fitted. Section 9.15 mentions that the first step to doing the framing is to fit the Lower Sills and then rebate the ends of the Inner Planking to match the (not yet fitted) 1" thick Counter Timber Linings. This would be extremely difficult to do after the lower sills are fitted, in fact it was VERY HARD to do with the Inner Counter Timbers already in place (it took me nearly an hour ). Luckily I'd already removed the upper counter planking (see previous post) or it would have taken a lot longer on the Port side. I suggest you cut the Inner Planking back the required distance WHEN YOU FIT THE PLANKING. TFFM is also unclear about HOW MUCH to cut the rebate in - I cut it back to the inner face of the counter timbers, which is wrong. No big deal, I'll just glue in two extra pieces the same as the ones that line the counter timbers to fill the gaps. The rebates should be the same width as the thickness of the Light Frames. You'll get the idea when I actually do these pieces shortly - I still need to replace the upper counter timbers first. Danny
-
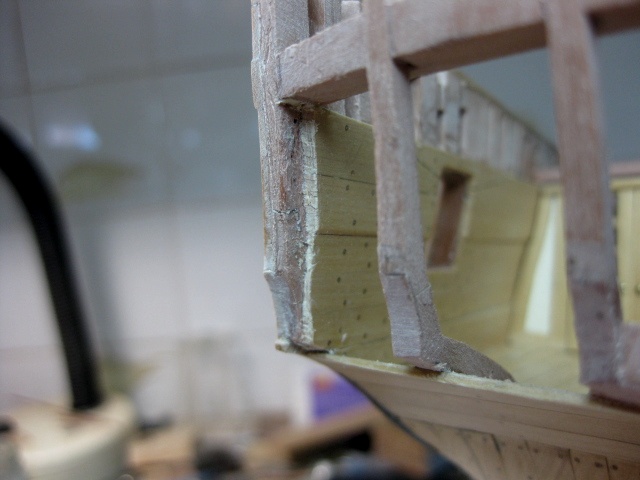
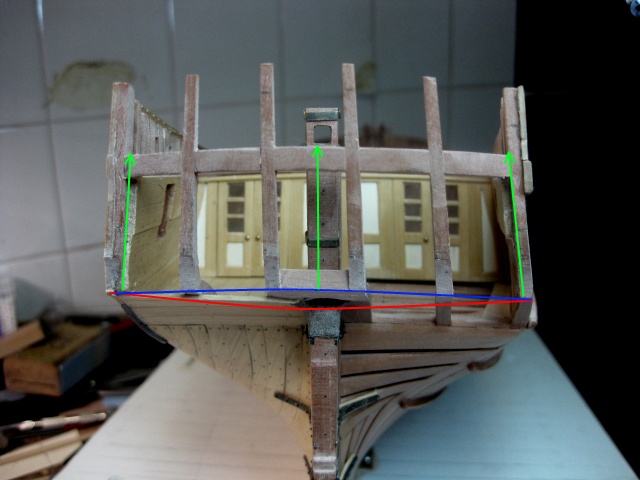
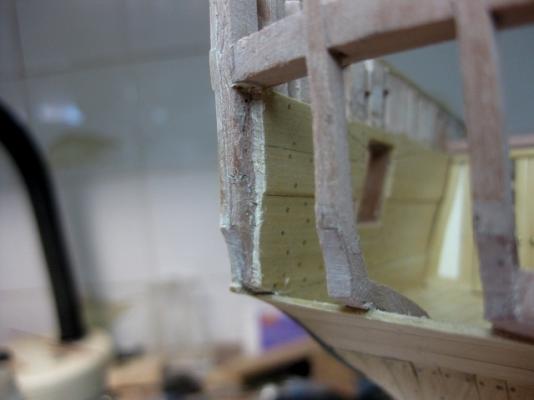
Why thank you John . Now that the forecastle bulkhead is completed, and I've worked out my method for making the Lights, I turn my attention back to the Stern Lights. The first thing I had to do when I lifted my ship from the Tilting Table and had a good look at my previous work was to remove the Upper Counter Planking and the uppermost Lower Counter plank and re-align them properly. That is one disadvantage of using the tilt table - I can't get a good view athwartships because of the way I have it all set up (workbenches get in the way). The Counter Timbers needed some trimming to get the curvature of the counter to match that of the Transom. My first attempt had the curvature upside-down . The blue line is correct, the red line is where the original counter planking finished. The upper counter planking should be parallel with the transom (green arrows) : After some careful marking out I used a small diameter drum sander in the Dremel to cut off the bulk of the excess and finished off with a round sanding stick. What looks like a "dip" to the left of the rudder is actually the 2nd lower counter plank - it cuts off at an angle over the last section before the rudder and creates an optical illusion. See HERE Danny

-
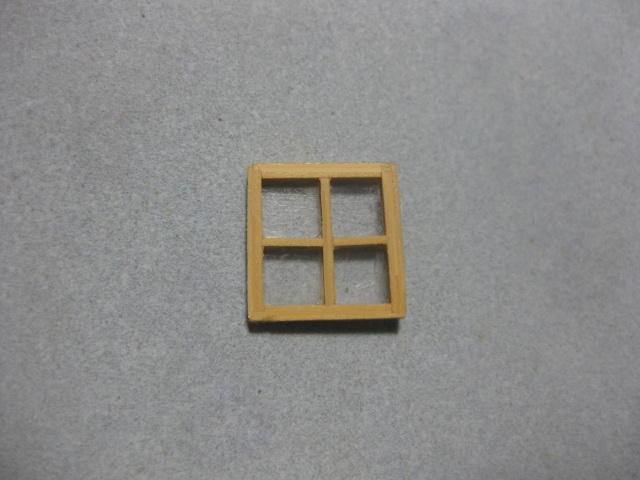
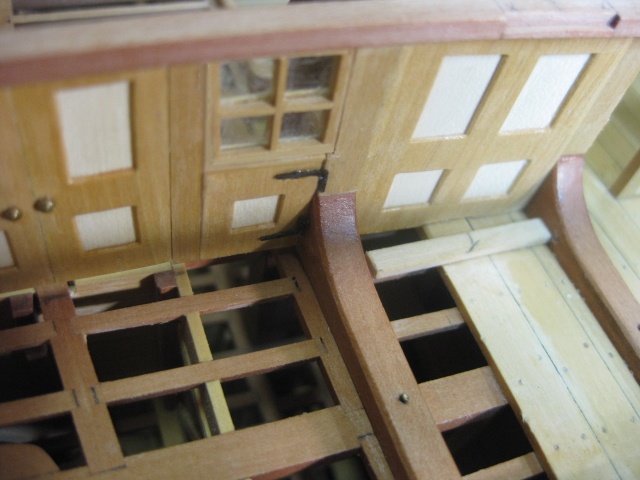
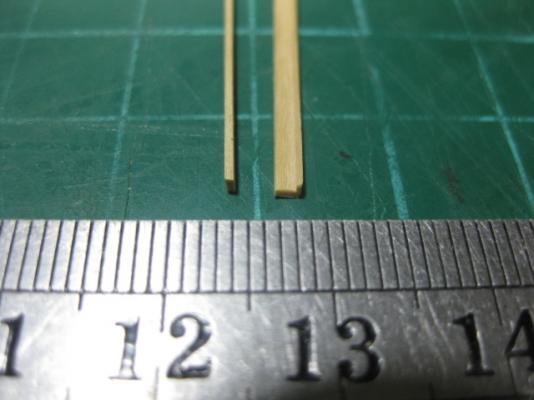
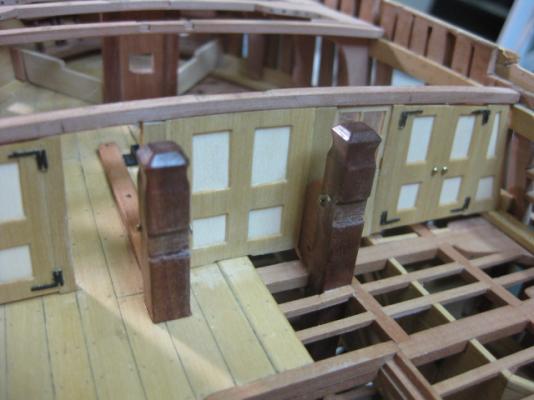
Forecastle Bulkhead Lights I've just about finished all the Forecastle Bulkhead, just a bit of cleaning up and Minwaxing to go. I've made the two Lights, as well as the two hinged panels under them. They are hinged for the anchor cables to pass through as I previously mentioned. There is no real documentation that supports the design of these - I fitted them the only logical way I could guess at. The Lights are made from 1.2mm x 2mm Boxwood rebated to accept the acrylic "glass". The filler and munion strip is only 0.4mm x 0.8mm - this was glued in and then sanded flush with the framing : The bulkhead with the Starboard side Light and Cable Panel fitted. I'll fit the Port side ones when I have completed the forecastle deck framing as these will both be fitted in the open position : Viewed from Aft : Viewed from Forward : Danny


-
OK, I seem to have stumped you all - another clue : Replace "vintage" from my last post with "ancient" .... I know she actually isn't, but that's where to look. Oh yeah, and the background of the original picture doesn't look anything like mine either - lots of re-touching done . Danny
-
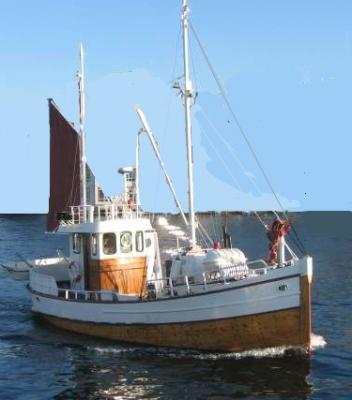
Sorry Anja, that's not it (you were very close though ). Two clues : She's another (vintage?) Fishing Trawler from Norway. Danny
-
It might be the camera angle Jeff, but that mast looks closer to a 15 degree rake . Danny
-
I found out she was a visitor to my own home port of Newcastle . Danny
-
Adrieke, that's the same pic I eventually found after a rather merry chase around the Internet. First I had to find out who Duncan McLean was, then ..... . Here's my next. Good luck on this one : Danny
-
Earlscourt? Danny
-
Glenesslin ? Danny
-
Thanks Janos, John and Sherry. John, the lights are too high for the cable to pass through - the cable would damage the lower panel. Yes there is, also at the sides. Danny
-
Got her that time Barehook - your turn. Danny
-
Not the "Mighty Mo" Barehook. Danny
-
OK, next : Danny

-
That's TOO easy Anja - the floating off-shore platform Sevan Voyageur. Danny