HOLIDAY DONATION DRIVE - SUPPORT MSW - DO YOUR PART TO KEEP THIS GREAT FORUM GOING!
×


Dan Vadas
-
Posts
3,261 -
Joined
-
Last visited
Content Type
Profiles
Forums
Gallery
Events
Everything posted by Dan Vadas
-
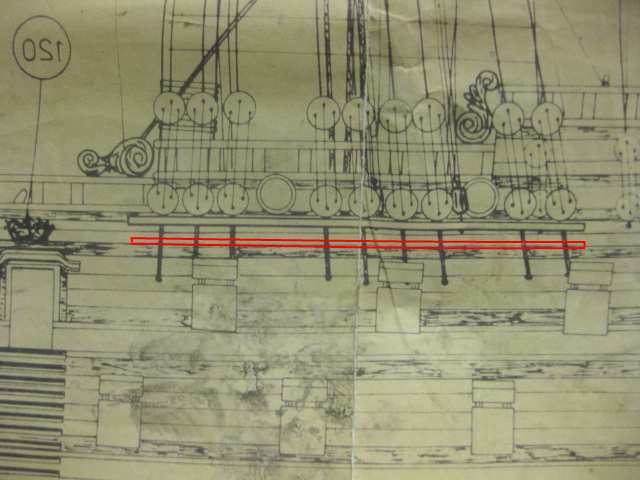
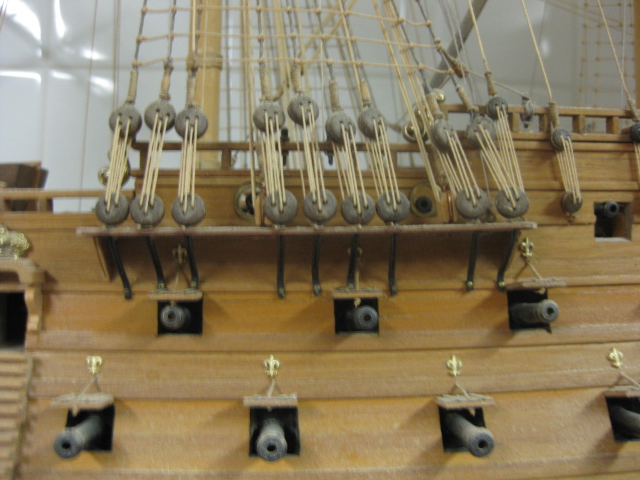
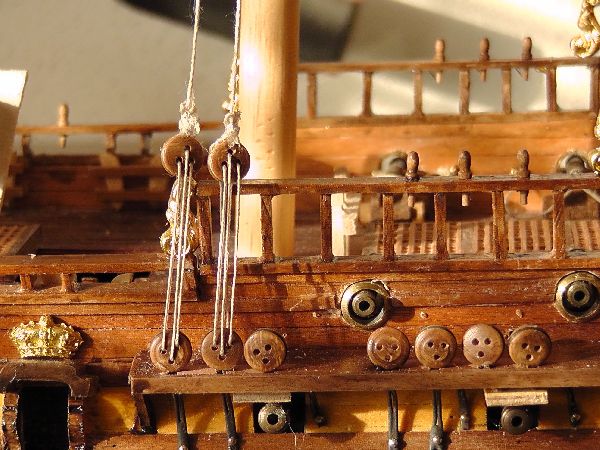
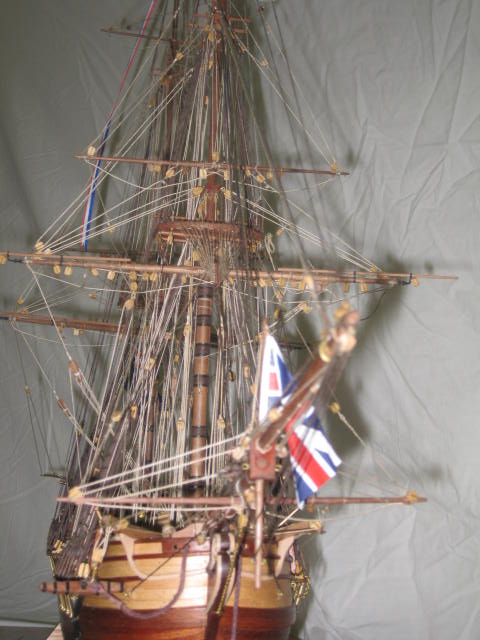
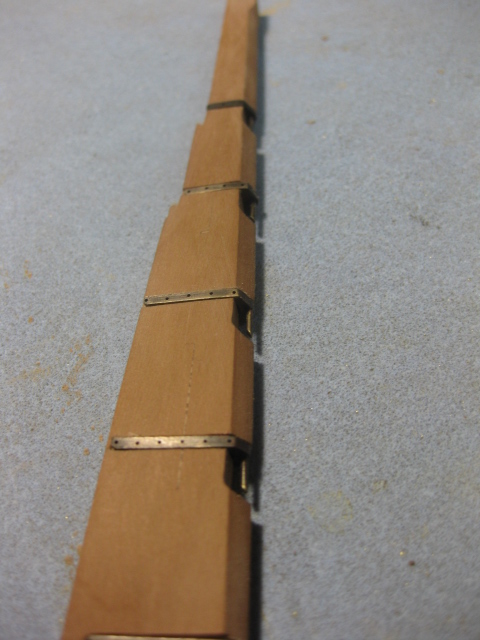
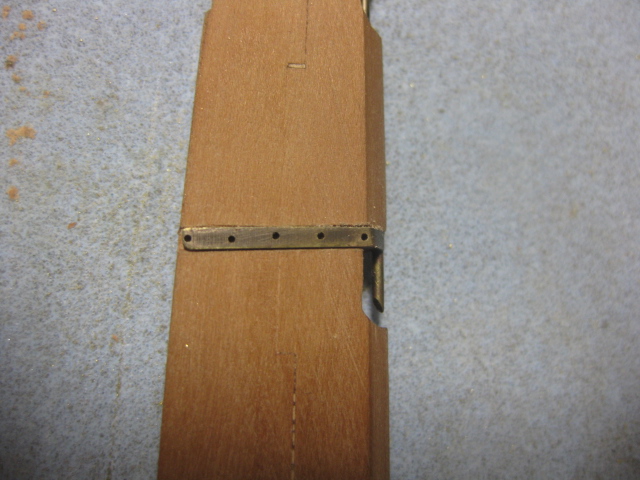
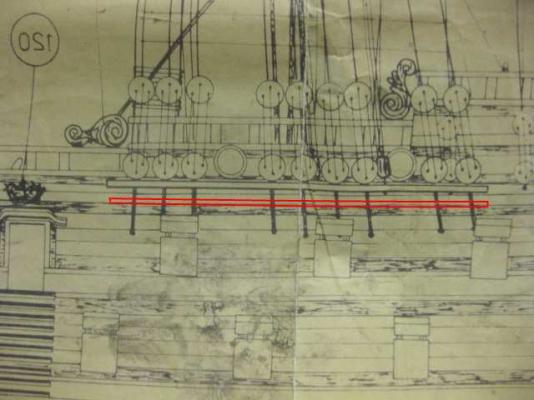
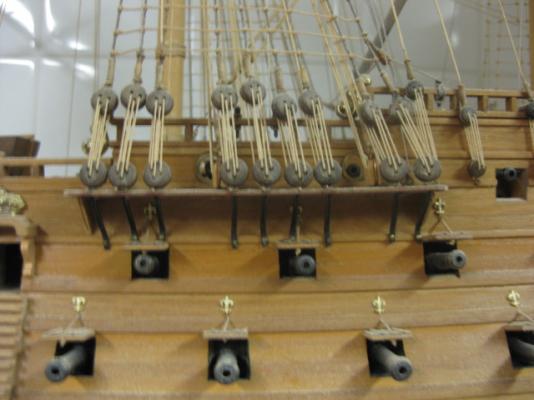
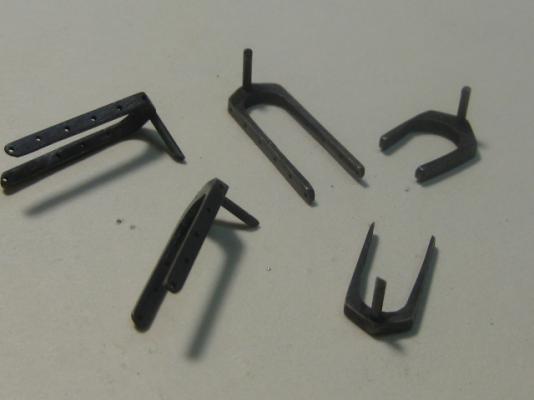
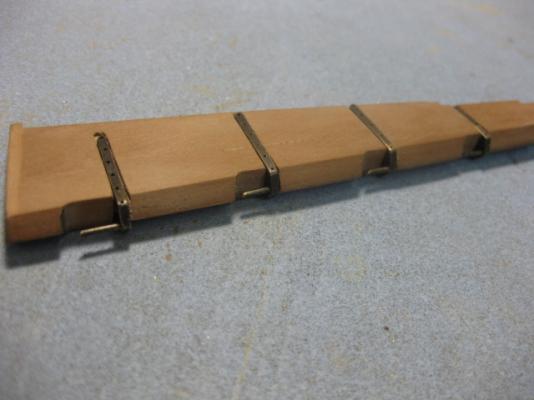
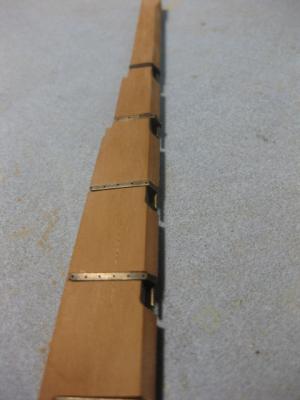
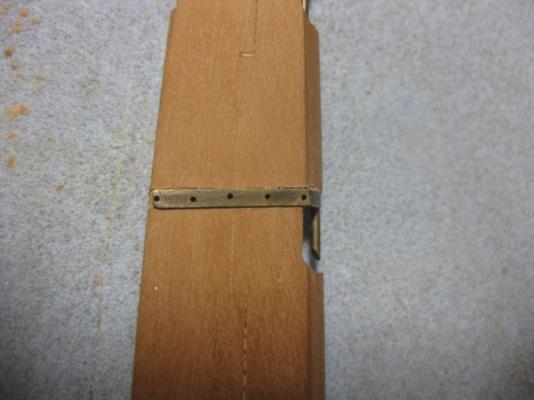
Hi Sjors, I've found why you are having a problem with lining the Chains up with the Shrouds. Take a look at the three pics below and see the difference in the height of your Chainplates - you have yours much too low (where the red line is in the first picture). The last picture is of my own Mirage. That's why your Chains are hitting the gunports at funny angles - they don't have enough room to go above them. No easy fix for this I'm afraid - the Chainplates would have to come off and be raised. I understand if you don't want to do this . Danny

-
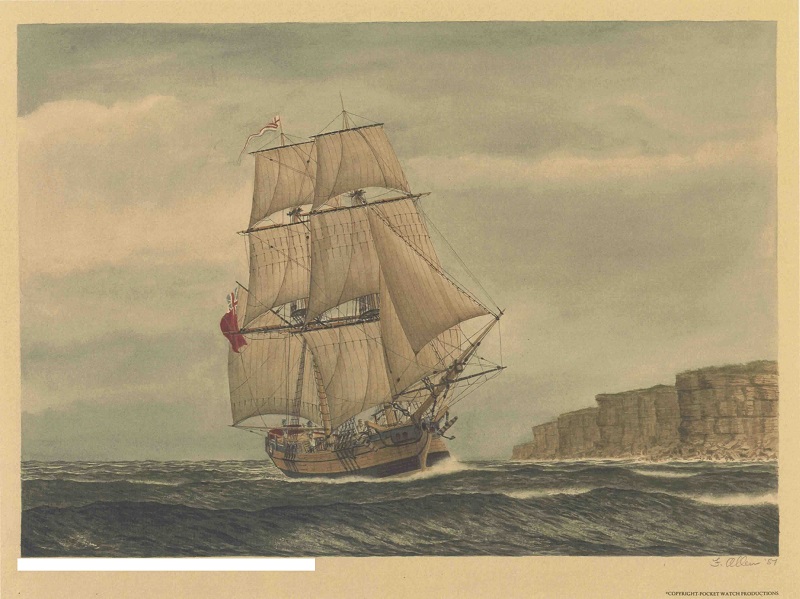
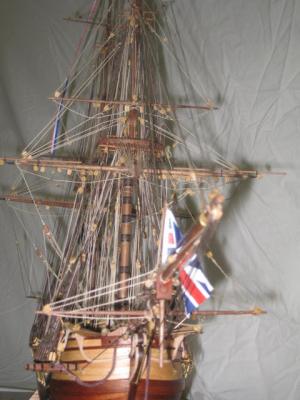
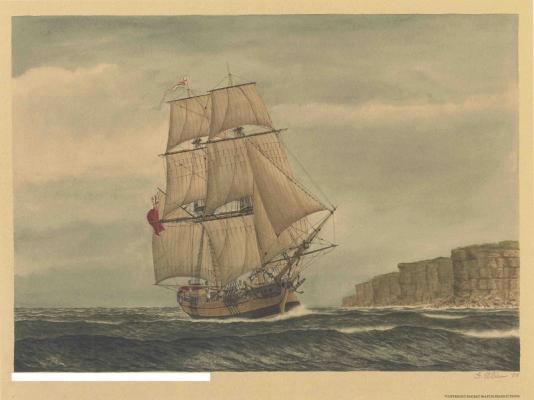
Supply it is David (sorry Adrieke - he beat you to it ). Wish I'd seen that painting when I was building her - I just found it by accident this morning. Not to worry - the model came out almost exactly the same . Danny
-
Thank you very much David, Wayne and Greg. Actually Greg, I came up with the idea when I looked at what sizes of brass stock I had (and I didn't have the opportunity to get anything else yesterday). Everything was too small apart from a big chunk of 20mm x 4mm that I'd scrounged up somewhere. So I decided to mill it to the right size and it escalated from there . Danny
-
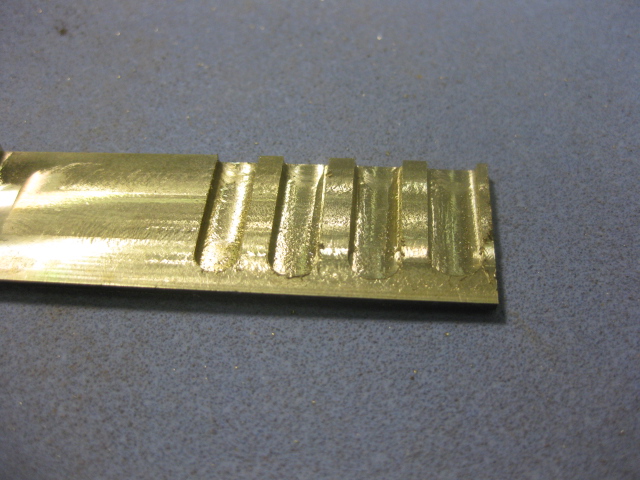
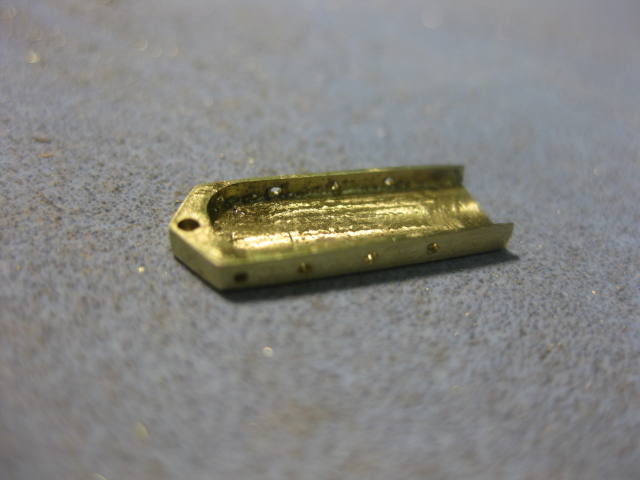
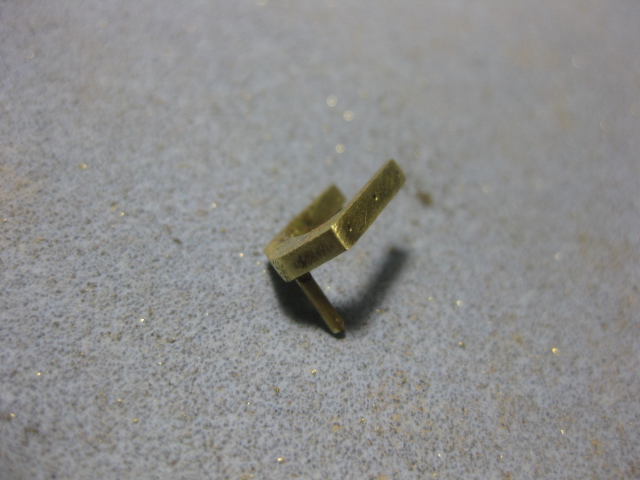
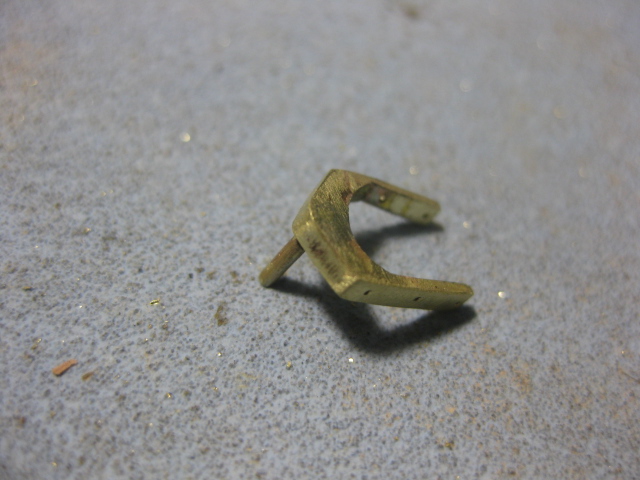
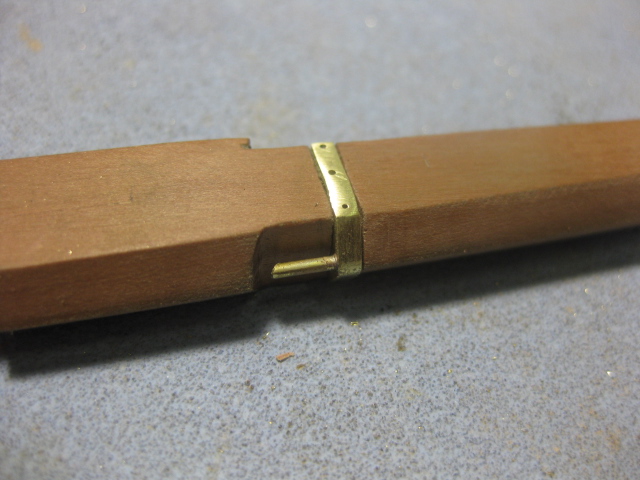
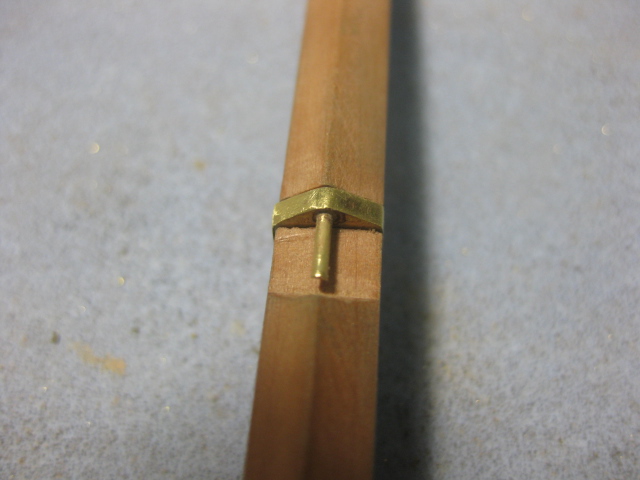
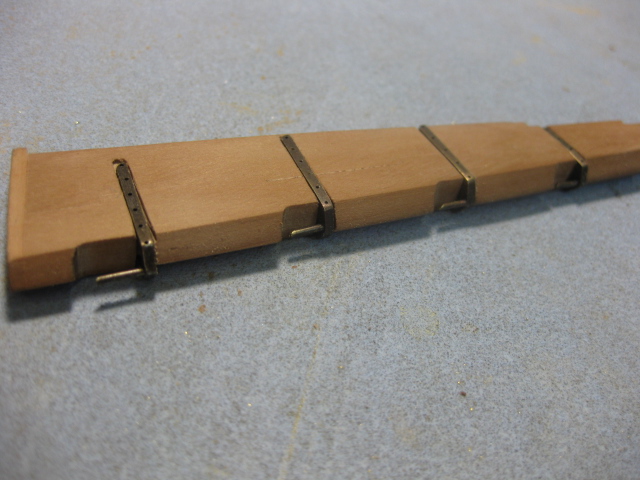
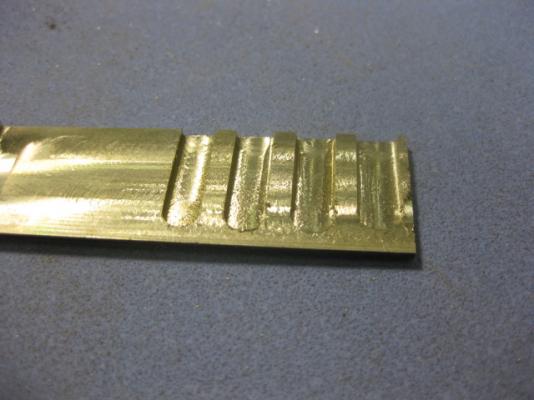
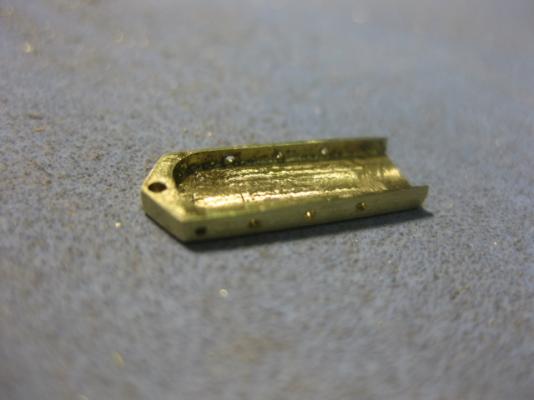
Pintles I made the rudder Pintles from 1.6mm thick brass sheet. First I milled most of the inside, leaving a thin piece at the bottom for strength while the rest of the work was carried out : Then I cut each piece from the main sheet, sanded the angle at the fore end on the disc sander and drilled the holes for the Pins and bolts : I filed out the thin centre and silver-soldered in the Pins : Next job was to mill the rebates for the straps and recess the fore ends. For a Mill Cutter I ground the point of a 1.6mm drill flat - perfect tiny cutter (note - I only left a very short piece protruding from the chuck so it wouldn't snap off). The last two pics are of a dry-fitted pintle : Then I lightly blackened them to simulate bronze : And finally another dry-fit : Danny

-
Thanks for dropping in Pat and Adrieke. Hmm, maybe I'd better send them down to you Pat - I won't be needing them for quite a while, and they're getting out of practice : I could do a better job on shrouds and ratlines than them now :D Danny
-
Hi Andy, Were you trying to put a square peg in a round hole (or triangular to be more exact)? That's why us guys with lathes have a four-jaw chuck . Nope Augie - still the same deal, though to a slightly lesser extent. The three jaws of the chuck still won't seat properly. Danny
-
Hi Sjors, Don't panic just yet - I still have the plans for Mirage, and the model . I'll take a look when I get home later today. I'm pretty sure my plans are different to yours, maybe an older Corel kit, but they WORKED . Danny
-
Hi Jeff, Good to see your build log coming back together again - I'll be following it with interest, so if you have any questions I'll try to remember what I did way back then . At least I still have all the pics from my old build log . Danny
-
Wait for it Garward - mir0n has "bookmarked" the pages so all his posts are in order without other's comments. He'll edit them when he's ready, but they won't show as "new" posts so you will have to keep looking for an update. I did the same with my "reconstructed" Build Log of Vulture - I just added posts with titles and added pictures and text when I had the time to do so. Danny
-
83 in fact . This one should be pretty easy : Danny
-
Steam Tug President? Danny
-
Thanks Brian and Grant. Better send it again Grant - it's not in my Inbox . Danny
-
Thanks once again John . The rudder is "Bearded" on it's inner edge to allow it to turn without binding. I marked out the limits of the bearding and sanded the angles in with a cork block and sanding stick : Danny
-
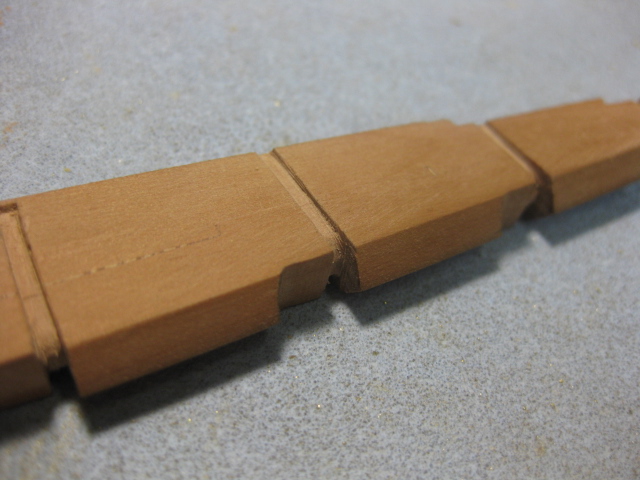
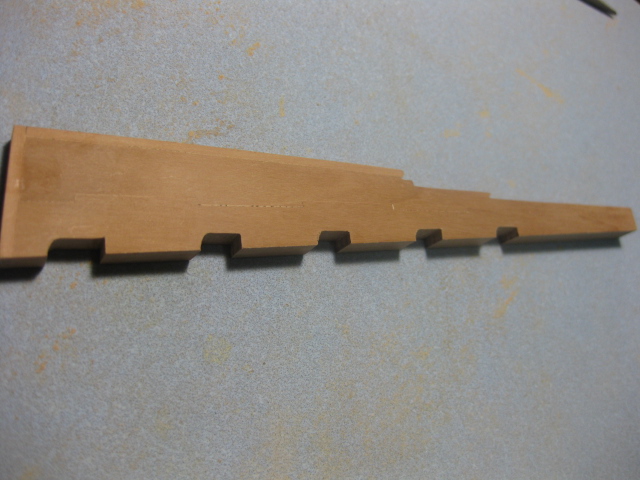
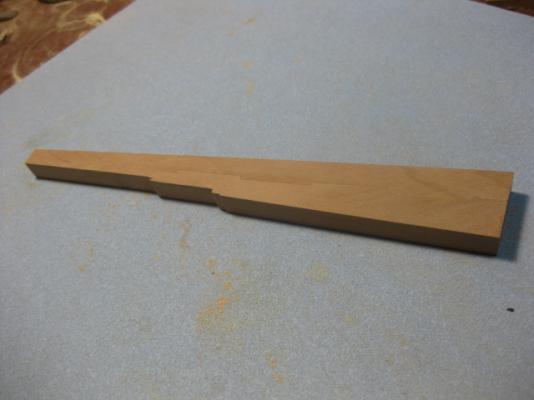
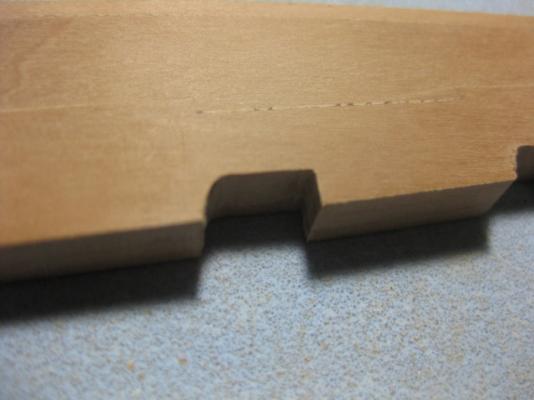
Hi all, Work continues on the Rudder. I've cut the tabled and glued-together Main Piece and Blade to the required angle and shape. I've also glued on the Backing Piece and Sole Piece, tapered the assembly from top (14") to bottom (10") and cut in the recesses for the Pintles : Danny
-
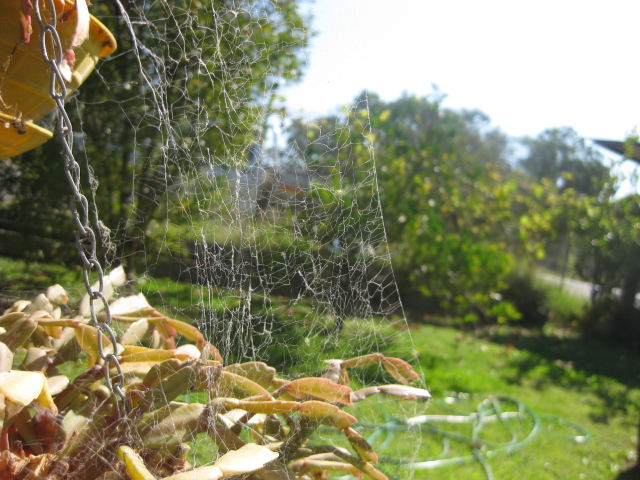
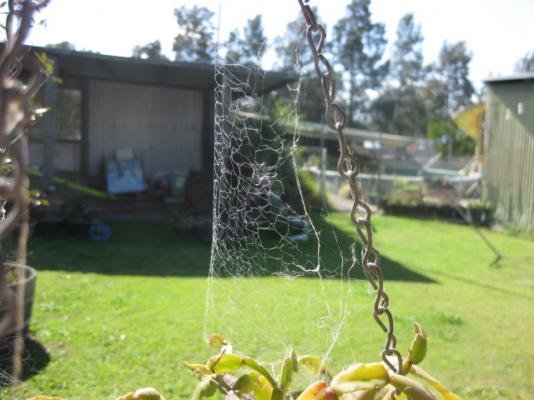
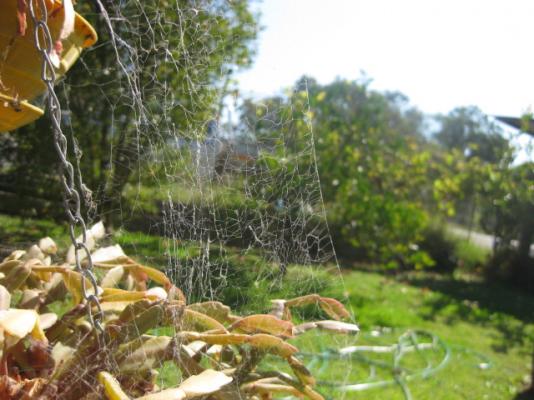
Thanks for dropping in, and the nice comments Robbyn, Michael, John, mhegazi, Grant and Aldo - much appreciated. Not the first, and not the last I guess John . Not to mention my trained Spiders when it comes to Rigging :D . It just takes practice Aldo - not to mention a few thousand $$$ worth of tools . Danny
-
Hi Erik, Looking good so far . Are you cutting your treenails into small lengths and then inserting each one? That's how it looks to me anyway. I use the full length I've drawn and snip it off flush with small sharp side-cutters and then move on to the next one (brushing a tiny amount of PVA on before inserting the "nail"). No waste, and it works a LOT quicker . It also helps if you use a drill that's slightly larger than the treenail - the glue fills the gap and it's not noticeable at all. Danny
- 43 replies
-
- 3
-

-
- lauck street shipyard
- kingfisher
- (and 1 more)
-
Hi Grant, Nice Tumbler - it seems to do the job very well indeed. Post it in "Wooden Tips and Tricks" - that way it won't get "lost" in your Build Log. Danny
-
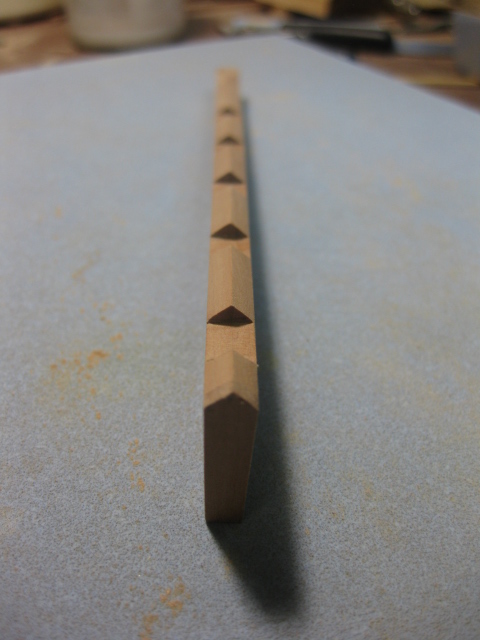
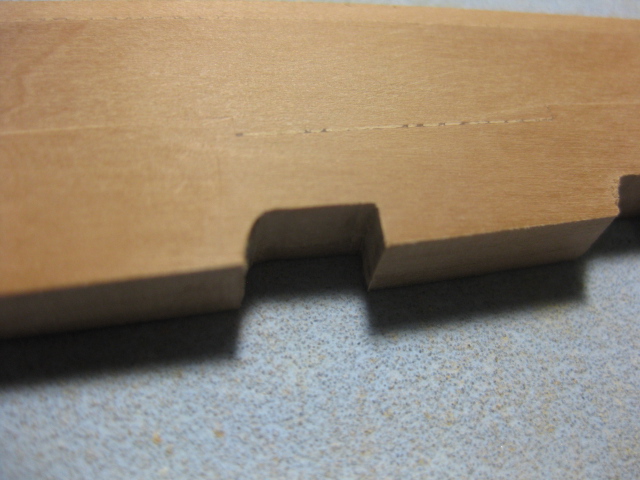
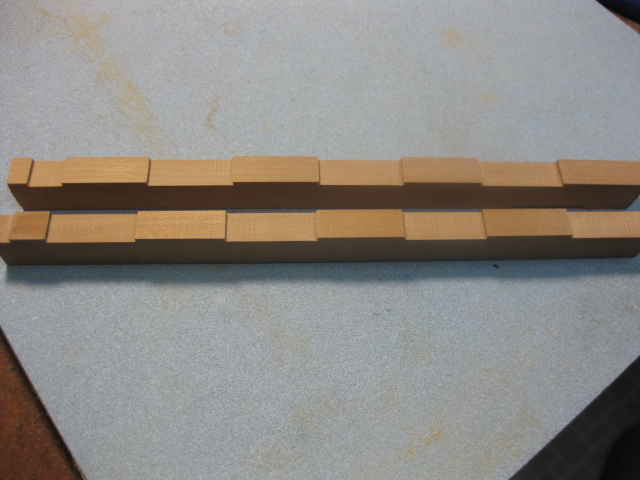
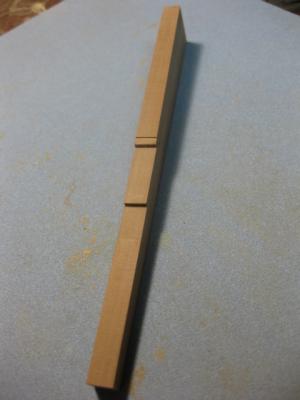
Thanks Joe, Druxey, Adeline, reckon54 and Geoff. I knew that Druxey . Correct . Yes Adeline - it's not very difficult to do, apart from the rigging to the ship's wheel. Rudder The rudder is made from two main pieces of timber which are "tabled" together. I've made a simplified joint, there should be alternating tables in each piece but as only one side is seen at a time the difference isn't noticeable : Danny

-
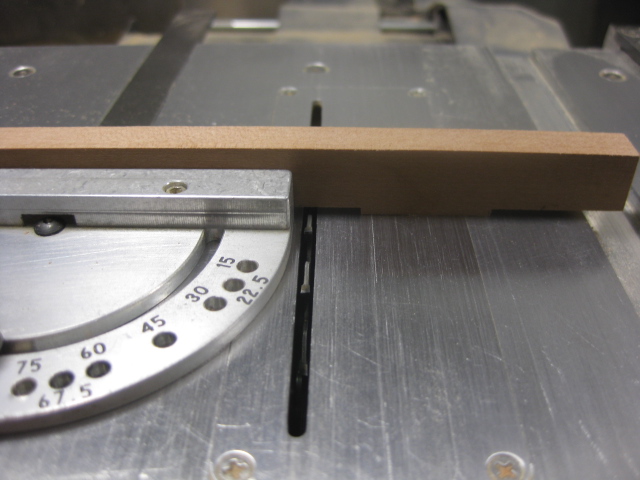
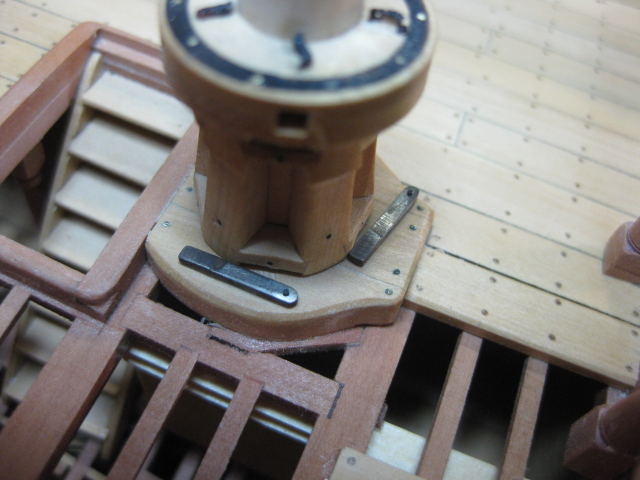
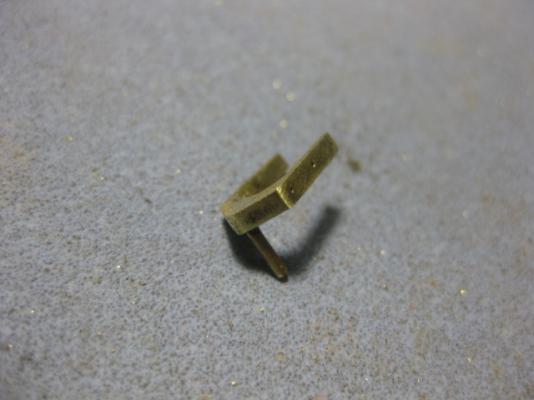
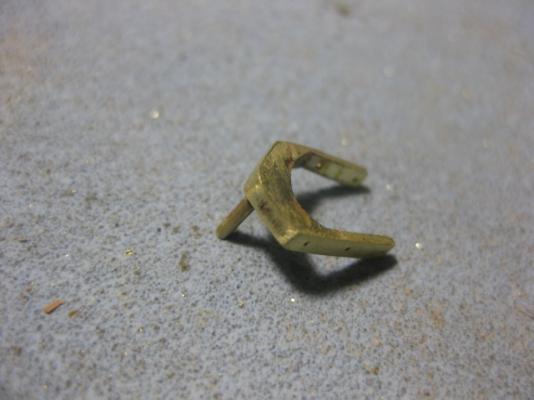
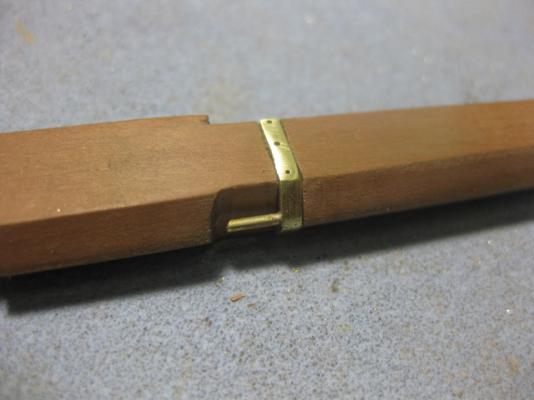
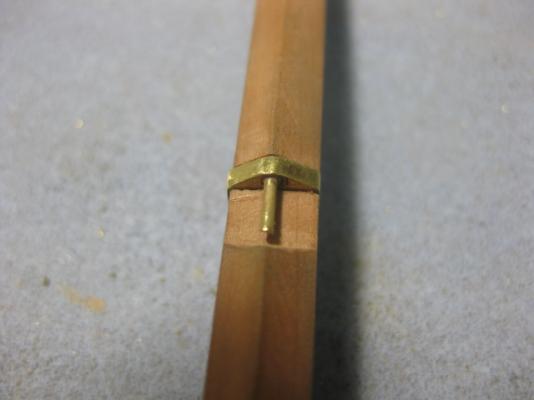
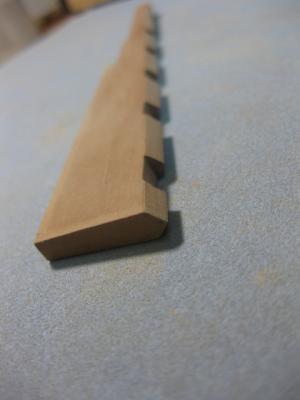
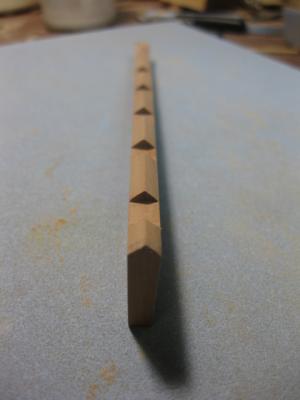
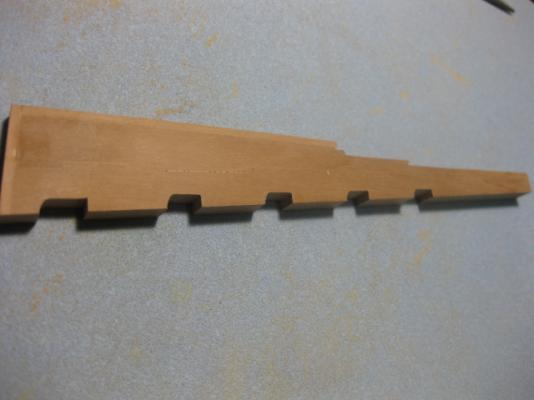
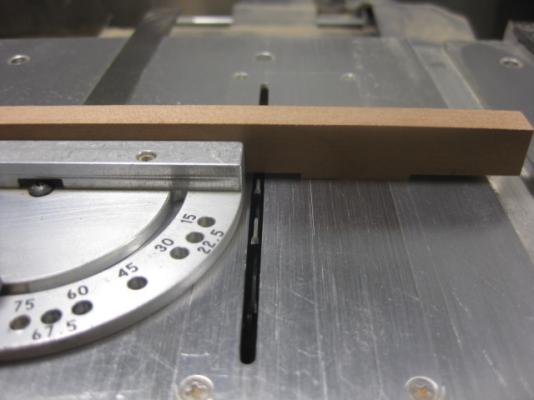
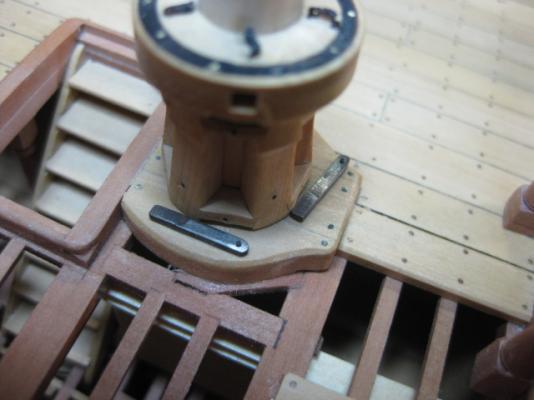
Thank you Pat, Mark and Crackers. Compared to the bar pins, quite an easy one - the Capstan Pawls. These prevent the capstan from turning back, they were very simple things that were pushed into place with the foot of the sailor nearest to them. Later ships had more complex arrangements. These were made from a piece of 1/16" square brass, filed down to 1/32" for most of their length - they step up to full height on the end that locks into the capstan whelps. They are held in place with a 3/4" bolt. Note how one pawl locks into place whilst the other is almost halfway across a whelp - this gave them two bites with a smaller rotation between. I've also made the two for the upper capstan with these. That concludes the work on the capstans for now - all that's left is to fit them, which I'll do after I've placed the Guns in this area (I'm still waiting on the barrels before I can start on them). Next job will be the Rudder and associated works. Danny

-
Thanks Mark, John, Joe, lamarvalley (you got a name? ), Grant and Remco. No need for a remake Remco, just drill a few more holes in the ones you've already made . Here's the final results - they look pretty realistic in real life. One tip - Birchwood Casey Brass Black doesn't work on copper (I should have remembered this). It turns black all right, but it flakes off straight away leaving a mess behind . I'll have to get some Liver of Sulphur for future work with copper : Danny

-
Dang, Kevin .... ya missed out again by a few minutes. St george already had it . Danny
-
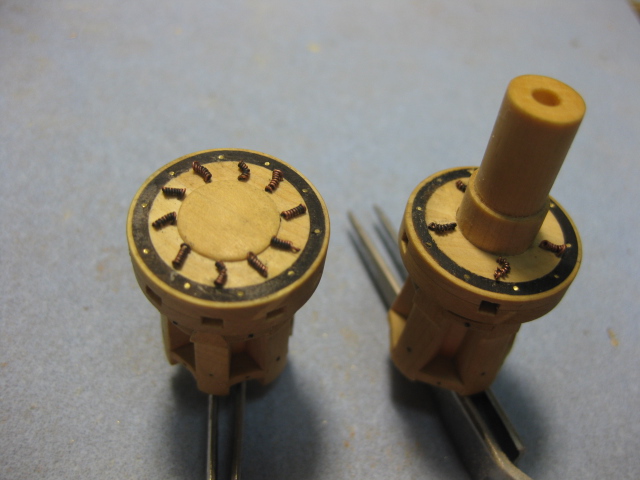
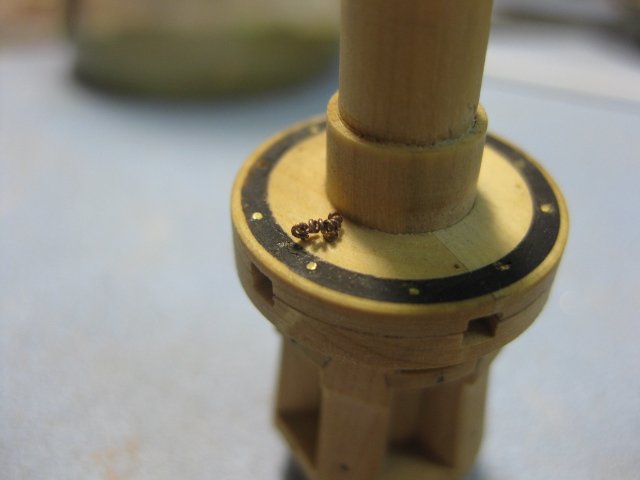
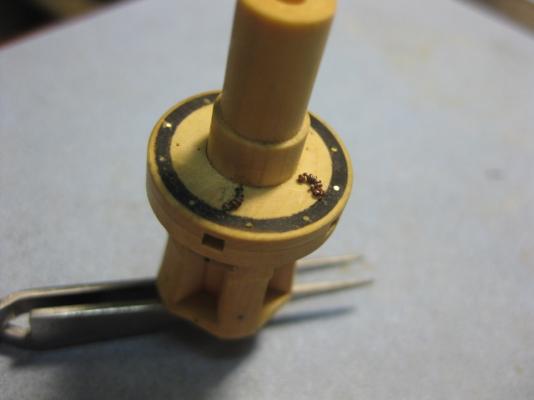
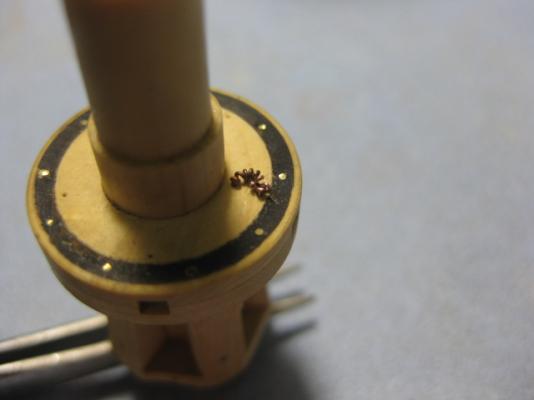
Thank you John and Brian. Here's #2 - about 10 minutes worth, including blackening. It's the one on the left in pic 4 and looks even better than #1, so I'm going ahead with all 15. Am I going crazy ??? :D : Danny

-
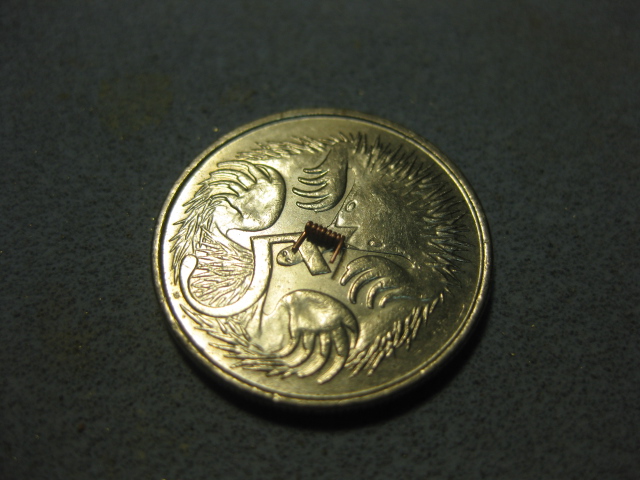
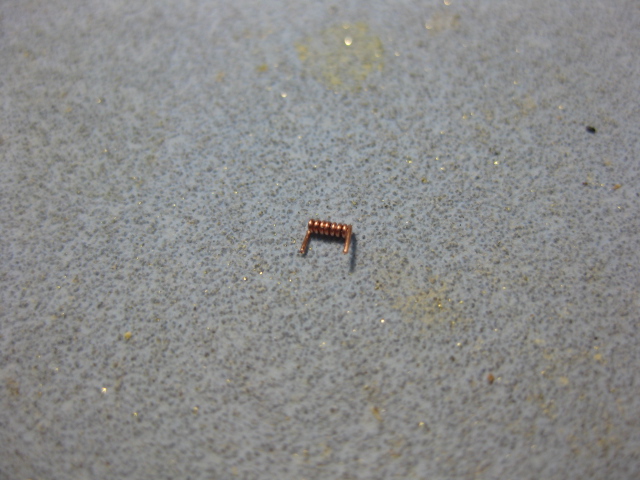
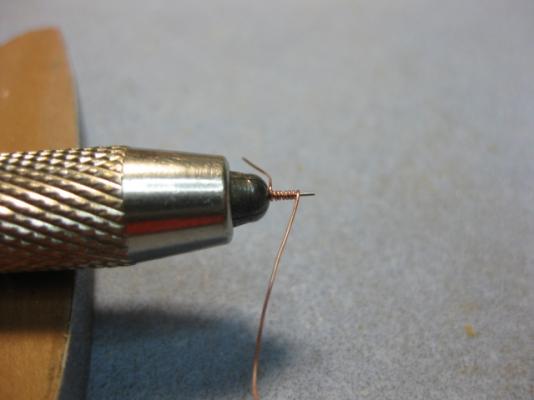
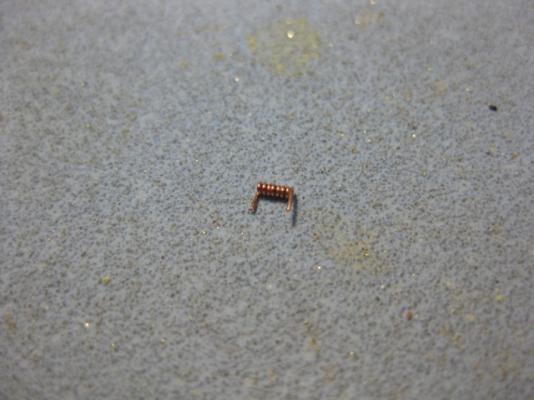
OK, I took Druxey's challenge after all - here's a prototype REPRESENTATION of a Bar Pin and "Chain" which took me about half an hour to make. I used 0.2mm (blackened) copper wire wrapped around a 0.25mm drill bit for the "chain", and made two "eyebolts" from the same wire : And here's an approximation of how it looks by the naked eye : I'm going to do another one using a simplified method (no actual Pin and Bolt, just one curled wire). If I can get it down to 5 minutes each and they look OK I'll do all 15. Stay tuned . Danny

-
Andy - that's ANOTHER of life's great simple pleasures, try it one day . I was actually referring to the malt you sprinkle on ice cream (or don't you do that in the States?) - also yummy, especially on chocolate ice cream. Danny
-
Hi Frank, Video and sound were fine for me, and I'm using Firefox 19.(something). Probably IE (slow as a wet week) or a LAN issue if it didn't download properly at the time. Danny