Dan Vadas
-
Posts
3,261 -
Joined
-
Last visited
Content Type
Profiles
Forums
Gallery
Events
Everything posted by Dan Vadas
-
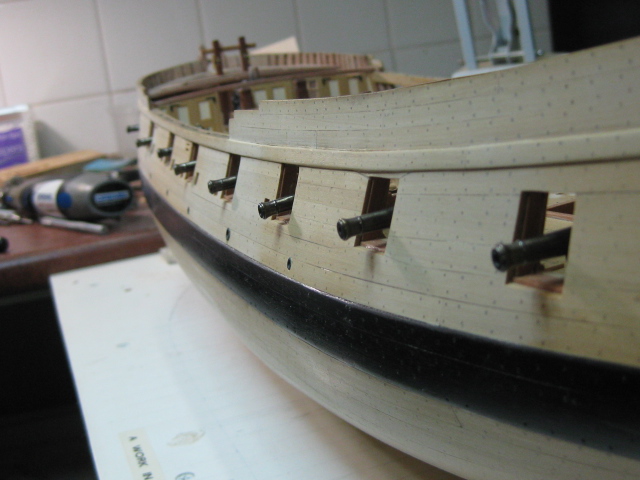
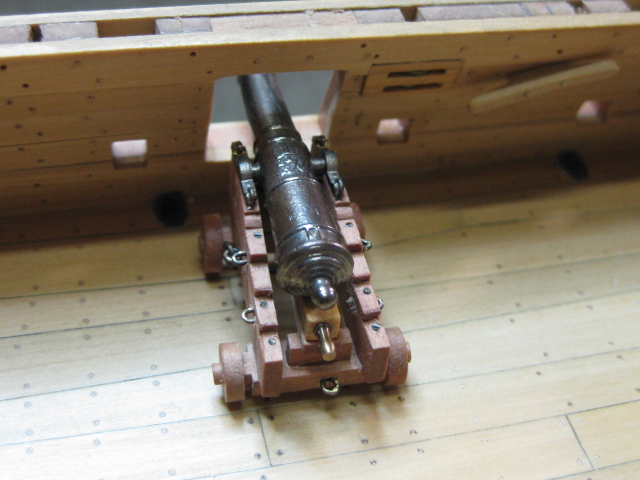
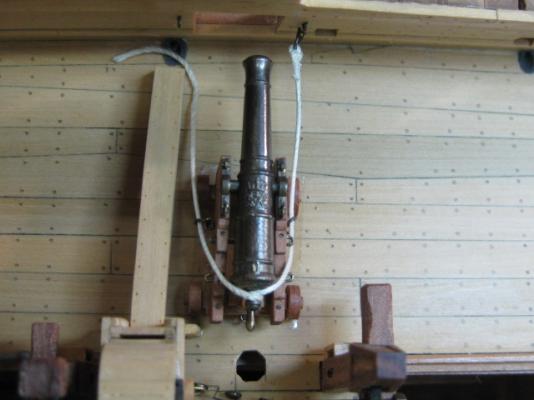
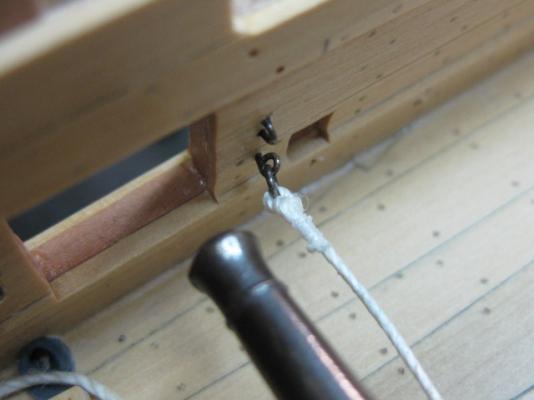
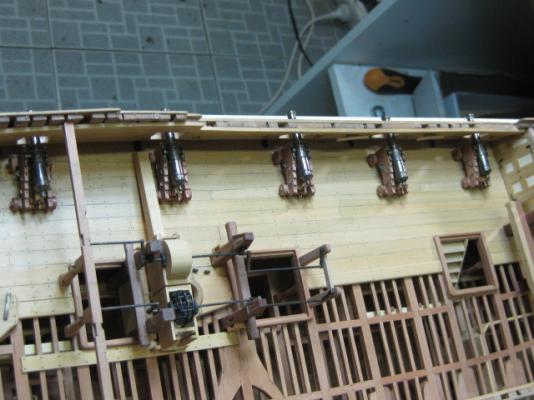
Breech Rigging The Breeching is a 4" rope on a 6-pounder. As with all ropes and lines it was measured by it's circumference. The diameter is about 1.25", which is 0.66mm in 1:48 scale. The line I'm using is 0.7mm - as close as I can get. The first thing I had to do was work out exactly how long the Breeching should be. TFFM specifies three times the length of the barrel, but I wasn't sure whether that was the whole rope including the half-hitches and seizing around the ring in the hull and the loop around the cascabel or the overall length without any twists and turns. I've made up an overlength piece which has already been tied and seized around one of the rings. I figured the best one to try out the length on was the port with the most obstructions behind it - any further back and the pumps would be in serious trouble . I used a piece of double-sided tape to temporarily fix the gun to the deck, fitted the eyebolt on the ring into it's hole and looped the rope around the cascabel. This now gives me the measurement I need - I'll undo all but the seizing and make all 8 breechings the same length : Danny
-
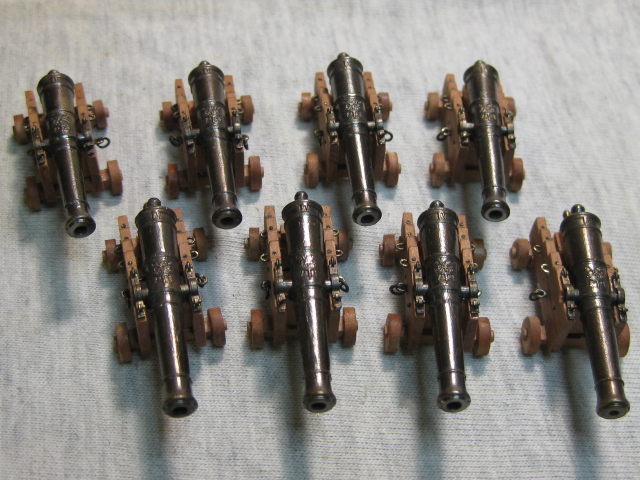
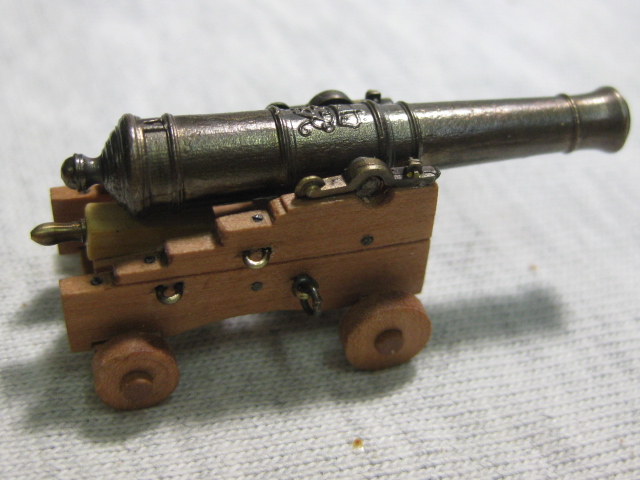
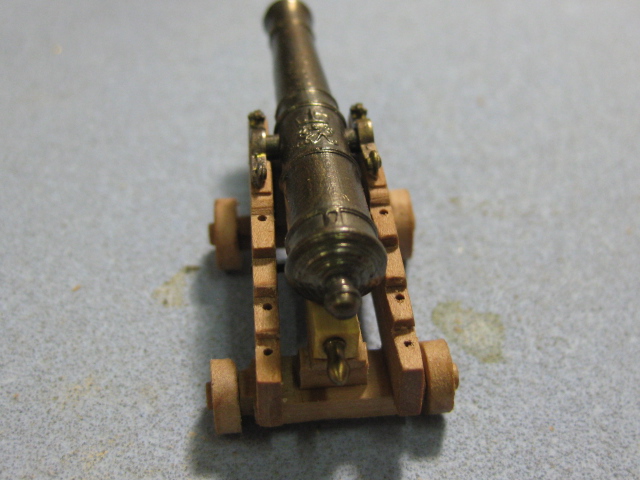
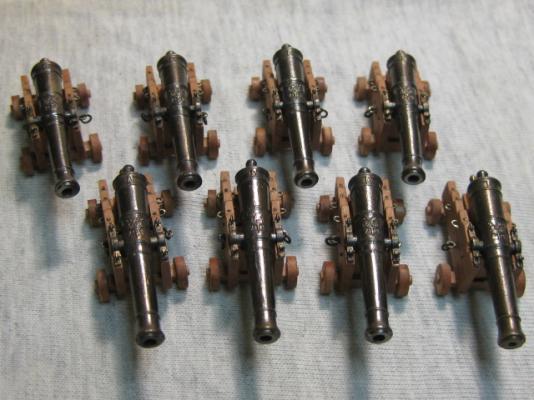
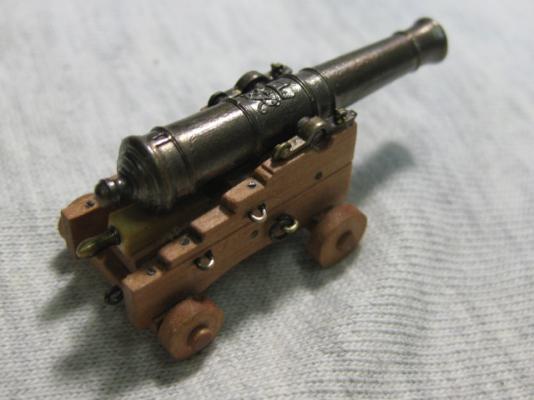
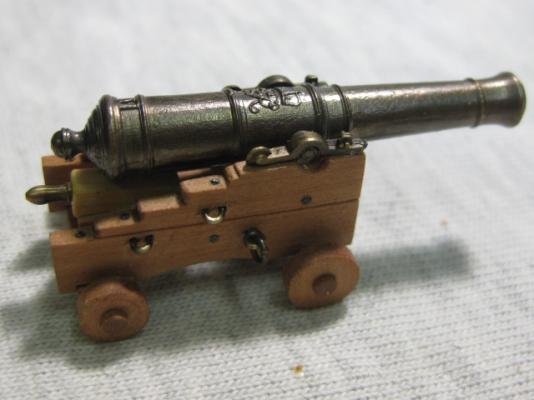
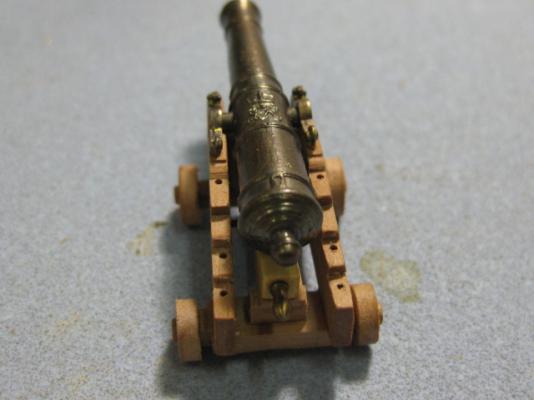
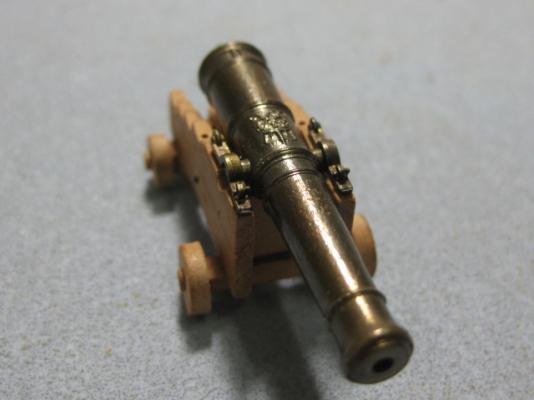
Thanks again to Kevin, Sjors, Mark, Janos and Aldo - I'm really pleased with the way the guns have turned out too. It was well worth the effort and expense of buying the barrels and capsquares, there was NO WAY that I could have made them as well as this , although it took quite a bit to "finish" them. Here are a few pics of all the completed carriages. Rigging them up will be the next job : Danny


-
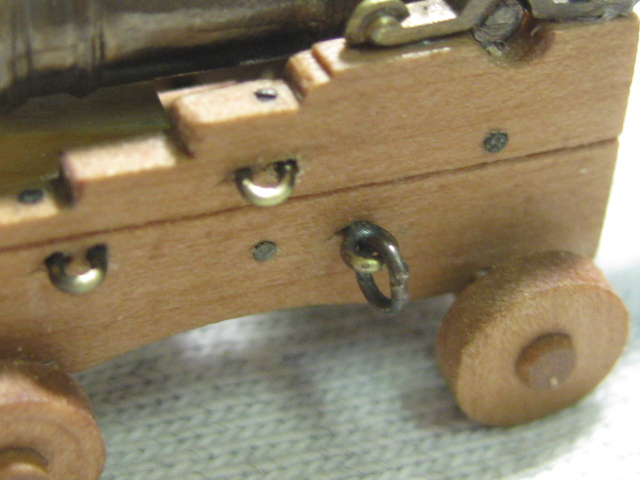
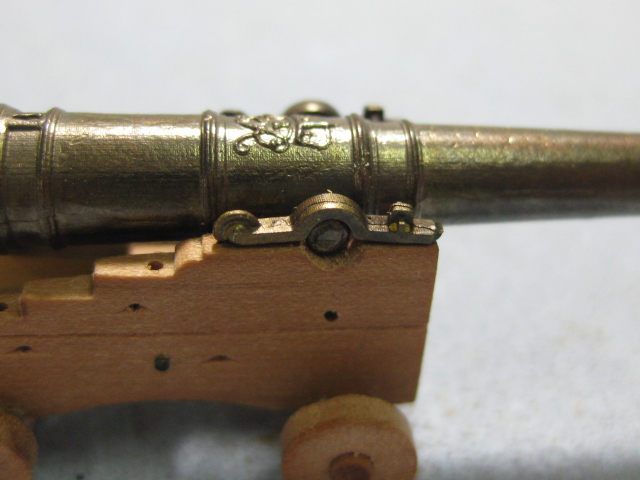
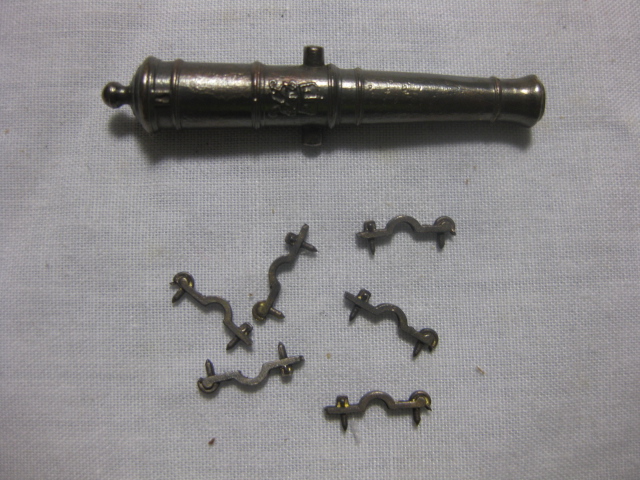
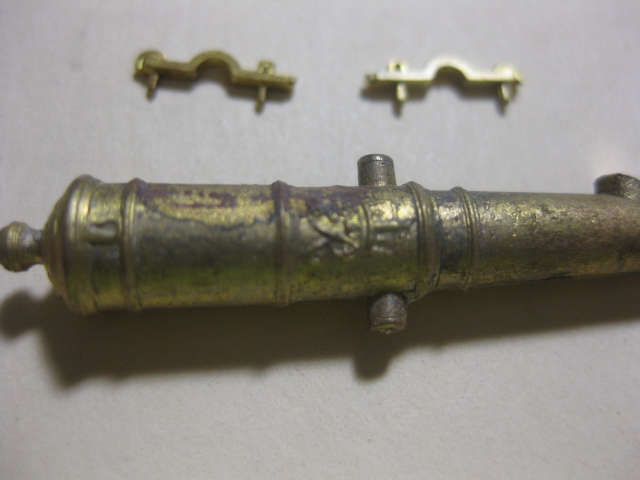
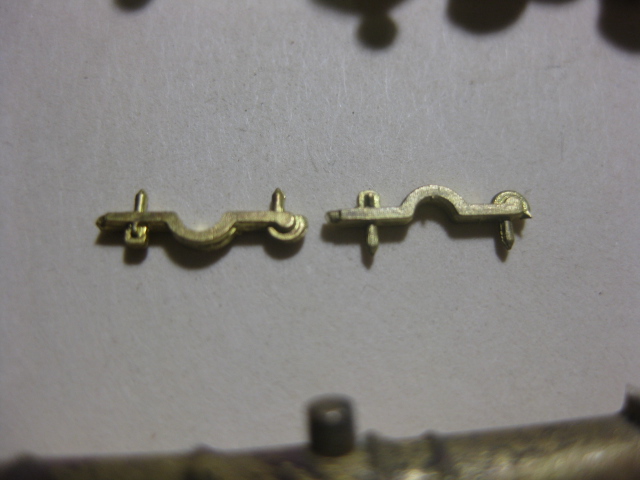
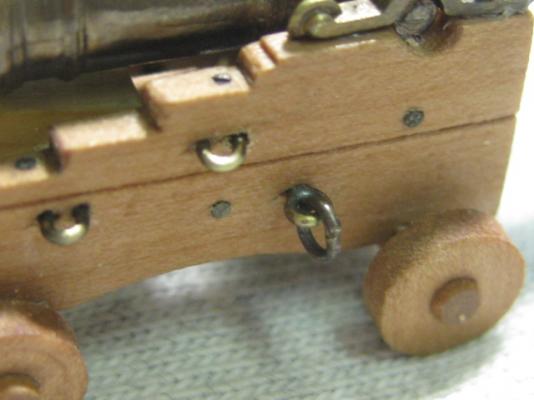
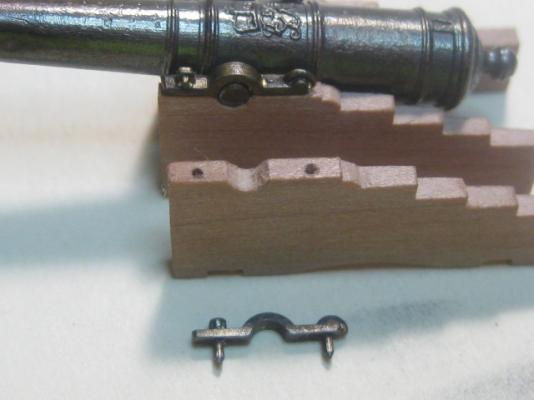
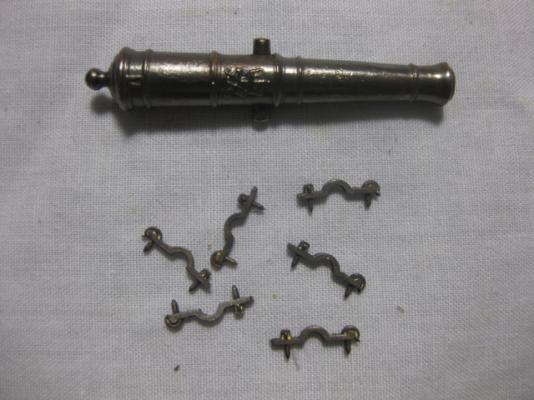
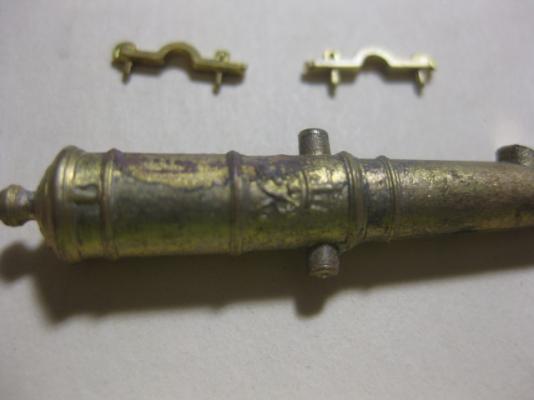
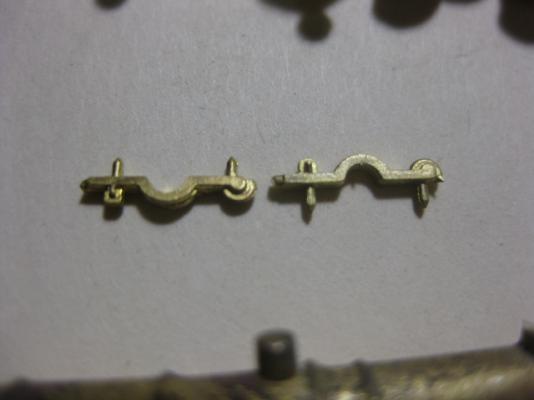
Thank you Robbyn and Mark. Hardware The final details of the guns are the various items of hardware - the five Loops for the Training Tackles, the eight Bracket and Transom Bolts, and the two Breeching Ring/eyebolt assemblies. The breeching rings and eyebolts were the most difficult parts to make, as they are joined together but silver-soldered independently so they actually work. : Danny

-
Finnish tanker "Ragny"? DOH - David posted that while I was still looking . Danny
-
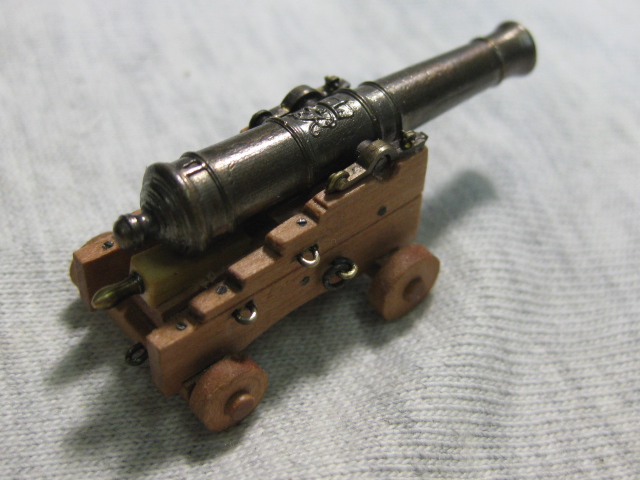
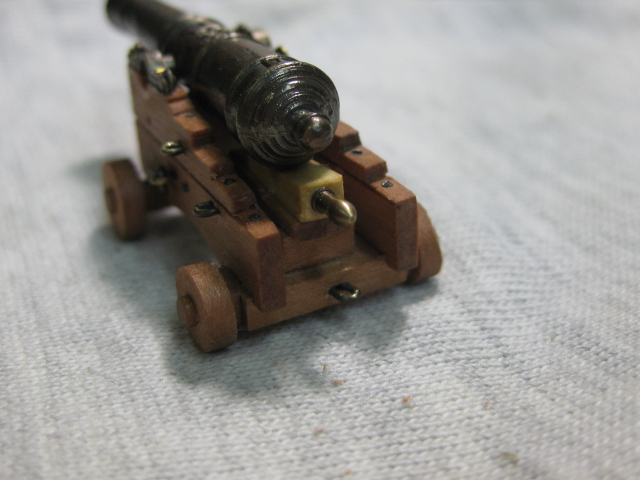
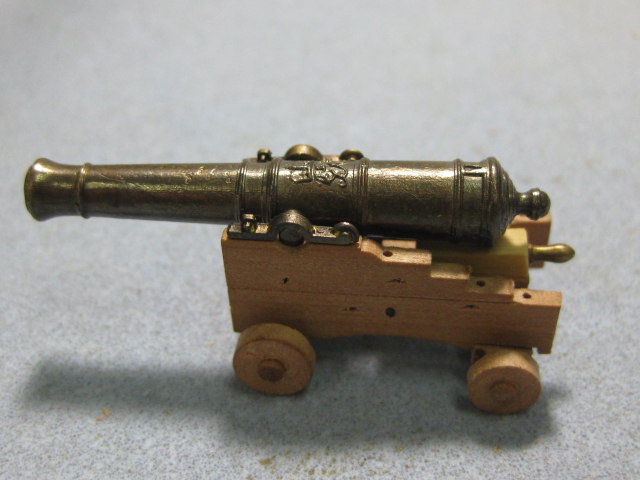
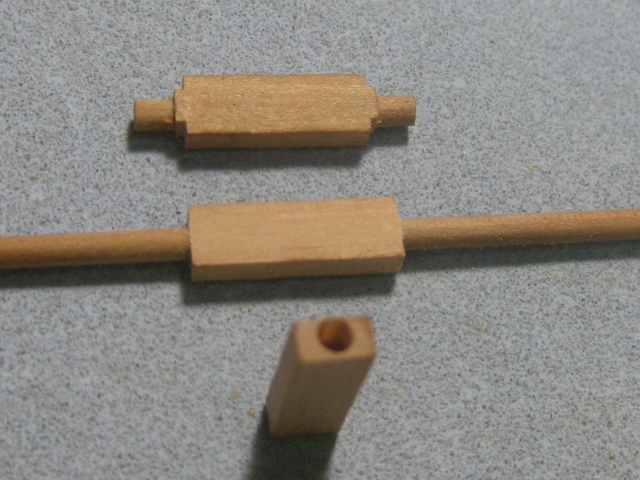
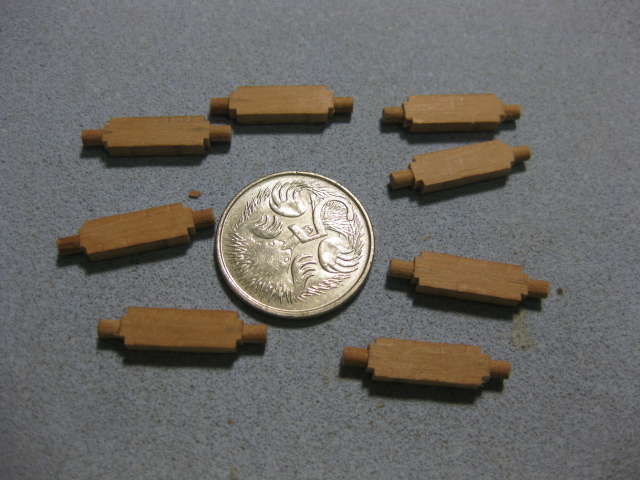
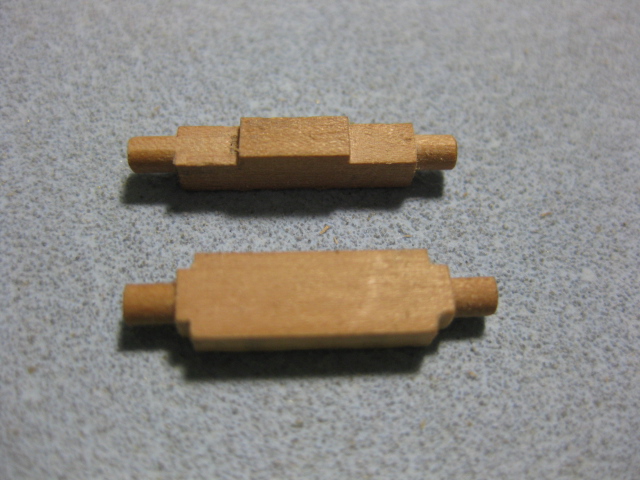
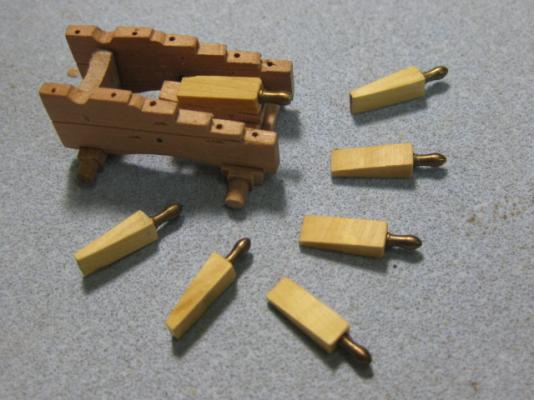
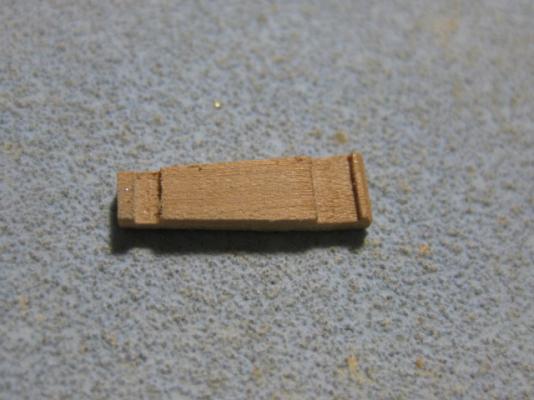
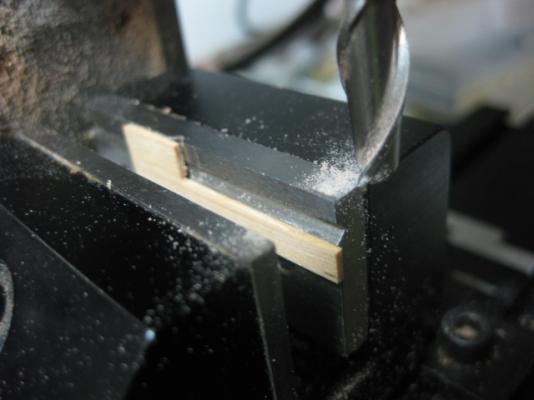
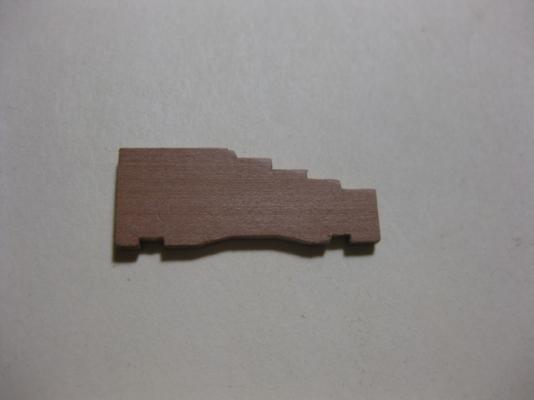
Quoin Between the Bed and Barrel is a wedge-shaped piece called the quoin. It's function is to change the elevation of the barrel. This was accomplished with the aid of crowbars, and the quoin was either pulled backward to elevate the barrel or pushed forward to depress it. I made the quoins from English Box for a bit of contrast. The handle at the aft end is a cut-off and lightly blackened brass belaying pin : Here are some progress pics of one of the guns so far. All that's left to do is make 56 eyebolts and 16 breeching rings, and fit another 64 bolts : Danny


-
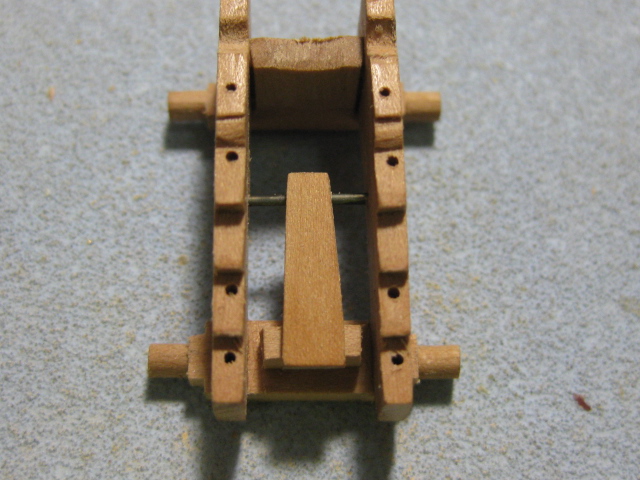
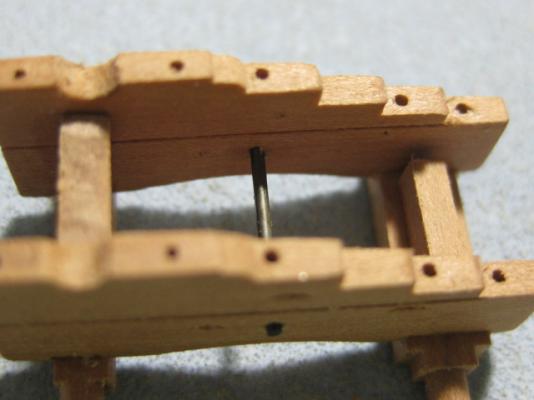
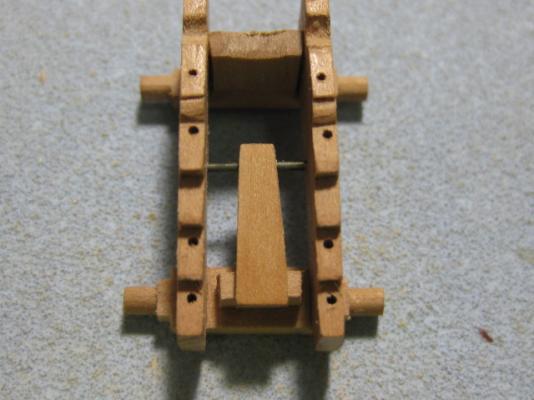
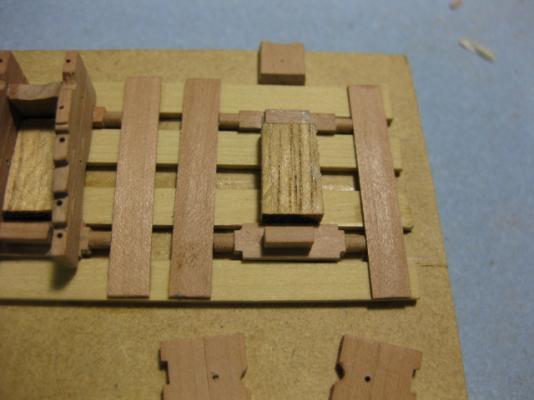
Bed The supports for the barrel at the aft end consist of the Bolster, Bed and Quion. The Bed is nailed to the top of the Bolster, and is supported at it's fore end by the Bed Bolt. There are rebates in the underside of the bed to accept both : The Bed Bolt has two functions : Supporting the Bed and preventing the upper parts of the carriage from spreading. The Transom at the fore end of the carriage has a similar bolt at it's upper end : Danny
-
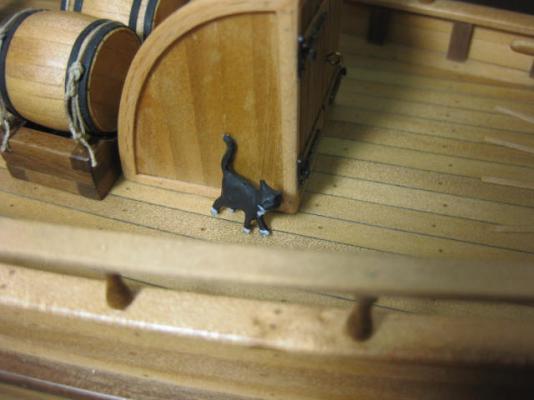
Grant, Sherry, David, Brian, Juergen and Charlie - thanks very much for the kind comments . Usually over a quiet smoke and a glass of Glenfiddich (of which I have one glass remaining ). I certainly don't envy you the task Sherry . Welcome to Model Ship World Charlie. From the poem in your Signature I'm guessing you may be building the "Norfolk Sloop"?? Here's your old mate Trim : Danny
-
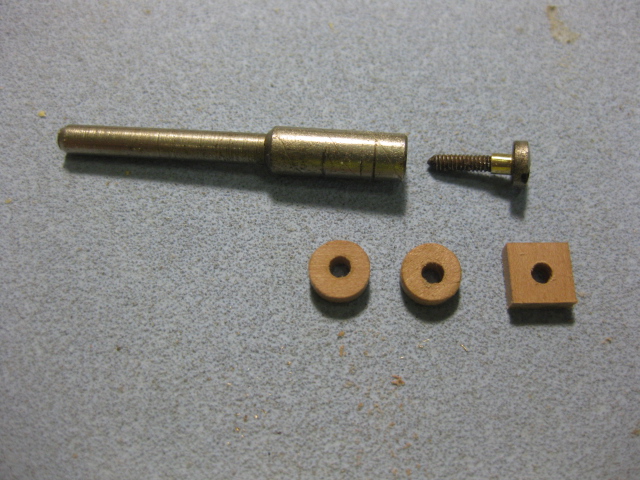
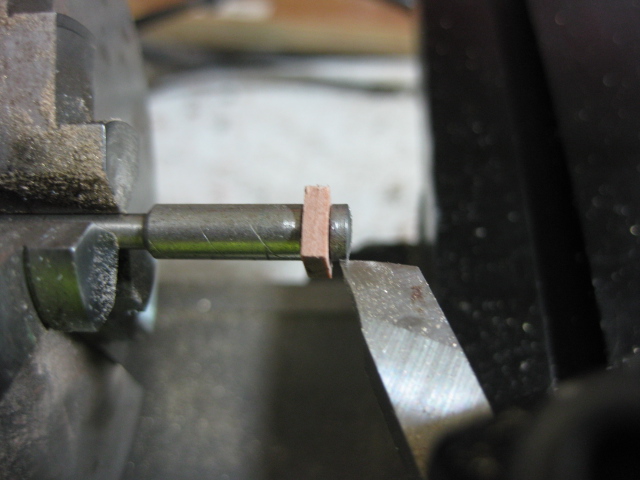
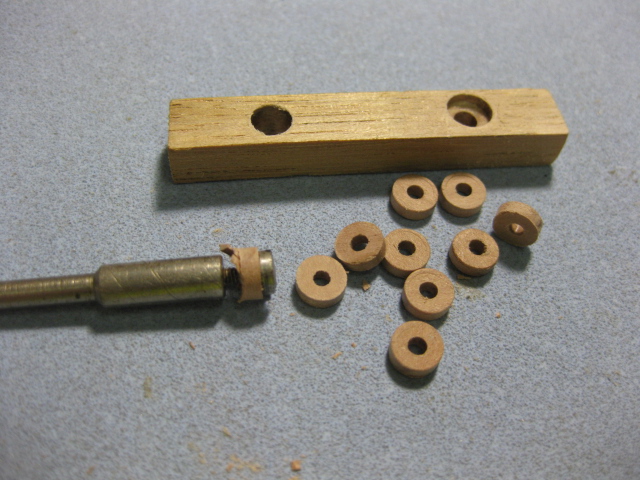
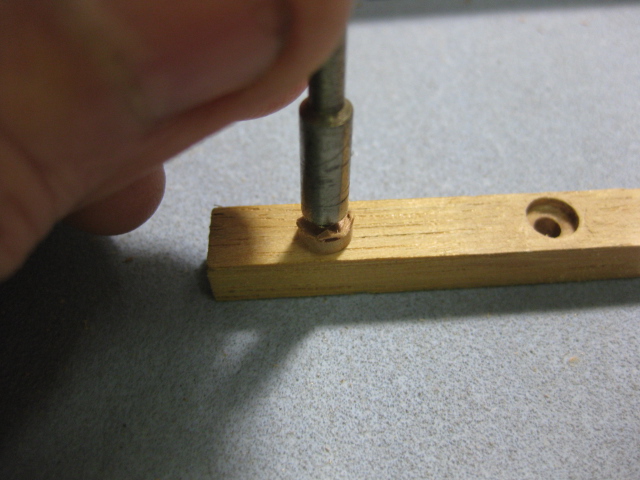
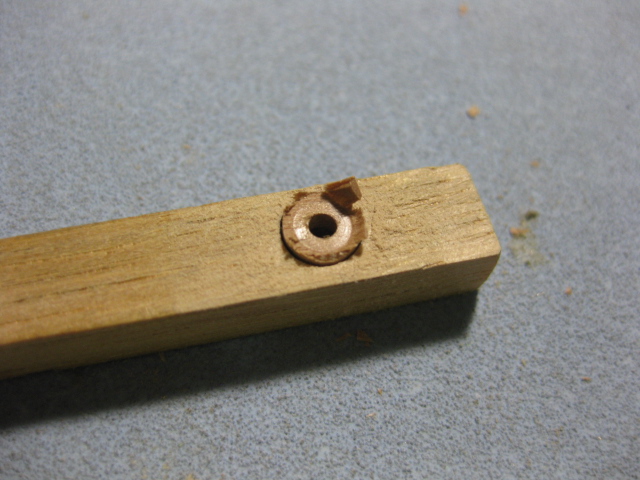
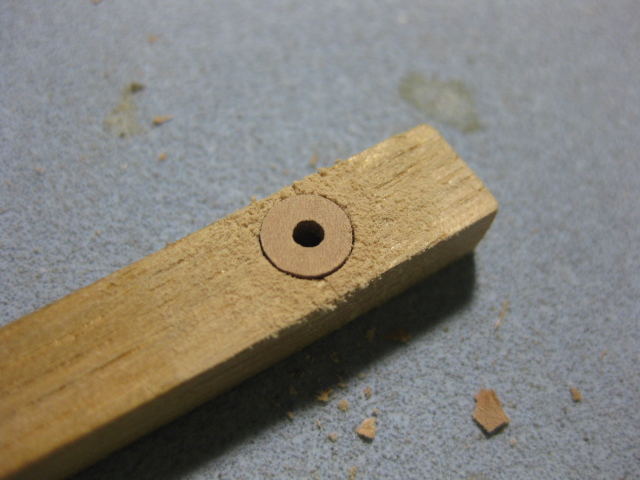
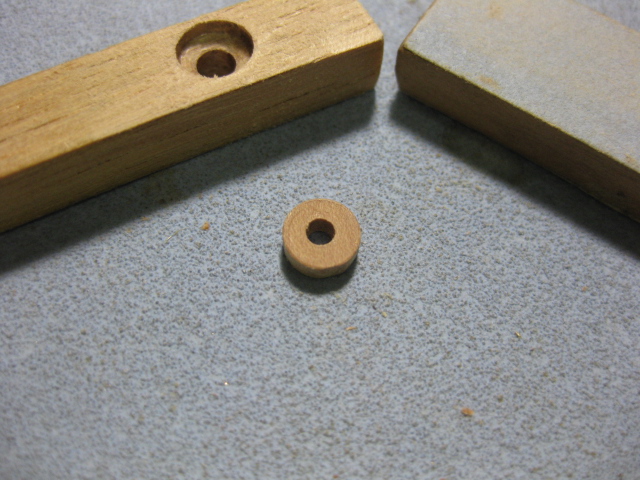
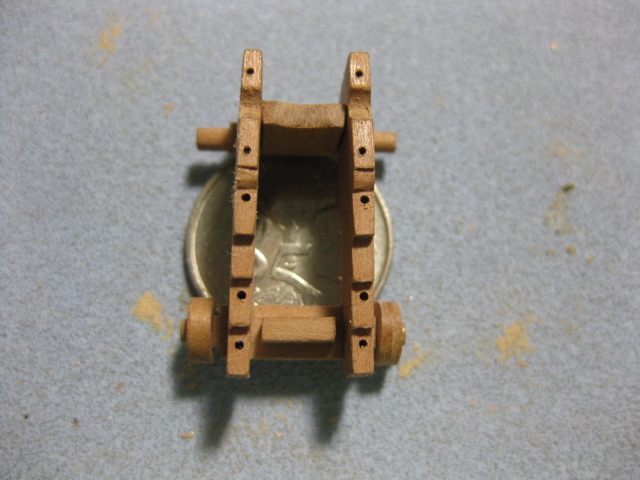
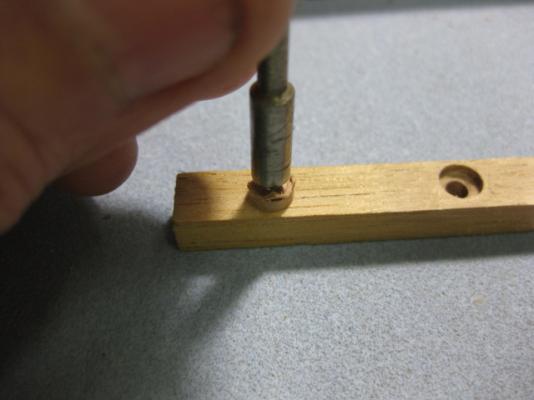
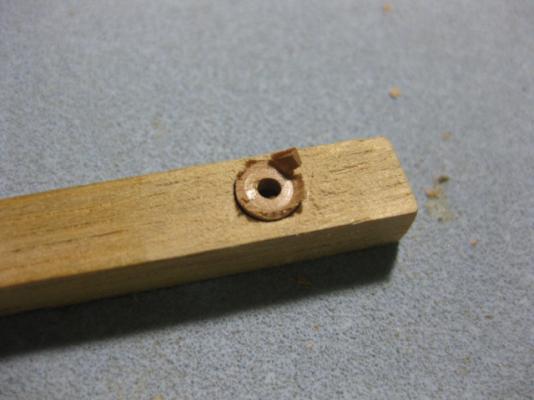
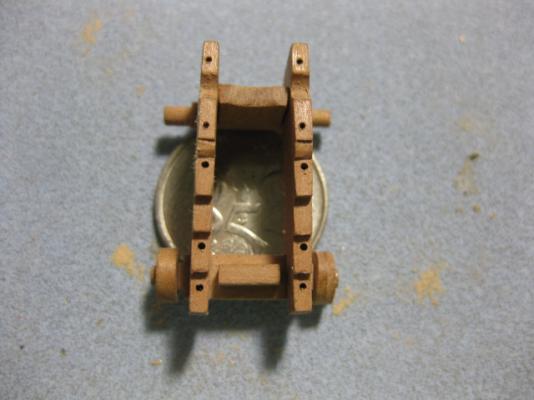
Trucks I gave a bit of thought on the easiest way to make the Trucks (wheels) without resorting to using dowel - the grain would run the wrong way, although at this scale it would be difficult to pick the difference. The Trucks are 4" thick, the Hind Trucks are 10.5" in diameter and the Fore Trucks are 12" diameter. On larger guns they were made from four pieces of timber with the grain running crosswise to each other and bolted together, but a 6-pounder's trucks were made from one solid piece. I started off by cutting a strip of timber a little wider than the required diameter. I set up a simple stopper jig on my mill vice by CA'ing a couple of pieces of scrap to the top and drilling the 2mm centre hole. Then I cut the piece off square on the table saw. To hold the piece into the lathe for turning the outside diameter I used a spare mandrel from my Dremel accessories. The screw was only 1.7mm, so I turned up a small brass sleeve to give a snug fit to the hole. When tightened it held the piece of timber beautifully. I found it difficult to remove the truck from the mandrel, so I drilled a slightly smaller hole than the truck in a piece of scrap. By placing the piece over the hole I could easily remove it by pushing it into the hole : There was a burr on one side of each piece after turning it, so to hold the rather awkward round piece without damaging it while sanding I drilled another hole in my piece of scrap which was slightly larger than the diameter of the truck and a bit less than it's thickness. The piece protrudes slightly from this hole, and a couple of wipes with a sanding stick soon removes the burr : A view of the progress so far. The carriage sits on top of a 5 cent piece : Danny


-
Thank you Greg, Adrieke, Mark, Randy and JP . Mark, I have absolutely no plans to build a 74 - 16 guns (well, half of them ) is more than enough . In fact, I doubt I'll be doing another 18th Century or earlier ship - I might get into a few "working ships/boats" like Tugs or Offshore Supply vessels, maybe a modern battleship .... we'll see. Danny
-
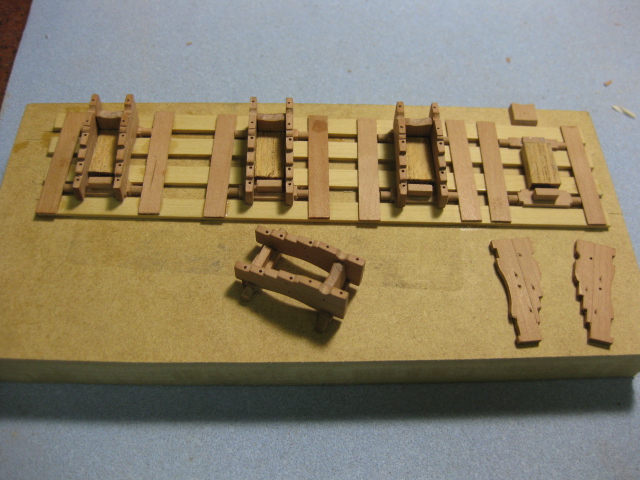
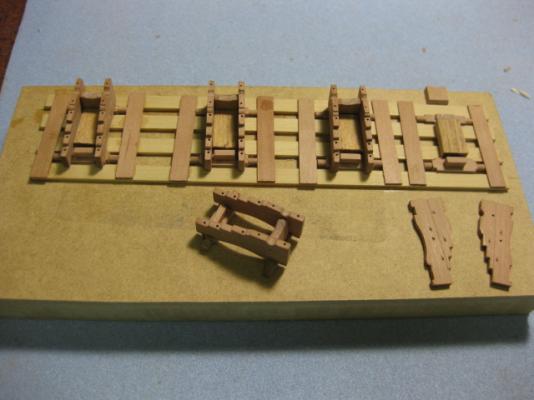
Thanks Mark, Kevin, Aldo and Druxey. Carriage Assembly Jig I've made up a jig to assemble the carriages, I can do four at a time. The one in the foreground is completed (for now), three are glued together in the jig, and one is being set up : Danny
-
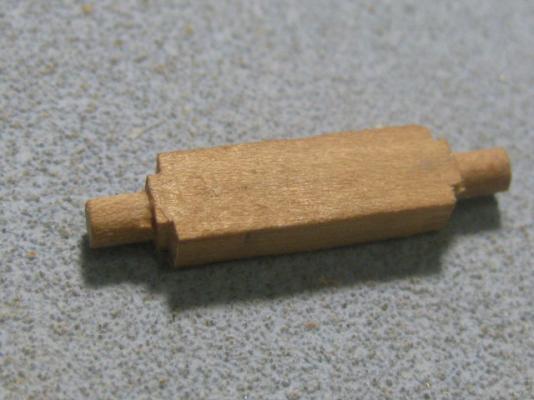
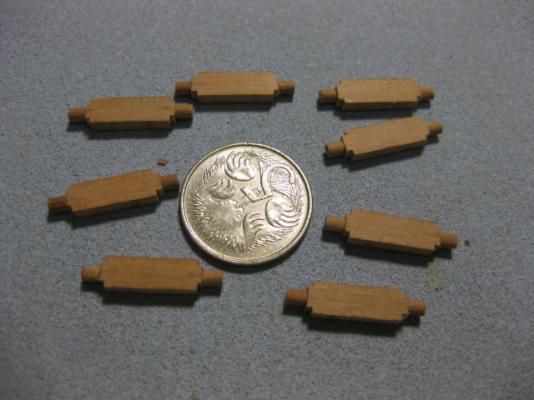
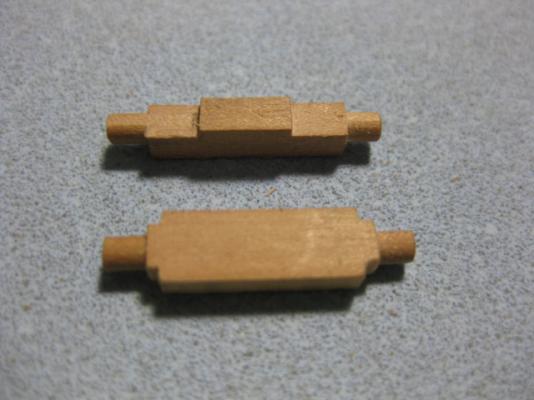
Axletrees The Hind Axletree should have had a pair of rebates where it fits up to the bracket, but I decided not to show that feature as it would look identical to the way I have rebated them anyway. It was much easier to simply enlarge the rebates in the brackets. I had a few attempts at turning the stub axles into the trees. As I had to use a 4-jaw chuck it wasn't all that successful, at least time-wise (it took to long to accurately set them up). I came up with the idea of drilling the ends of the trees with the mill and inserting two lengths of 2mm dowel (these were trimmed down off the longer lengths after gluing) - perfect results and it didn't take very long at all . There is a small step on the inboard end of each axle to prevent the Truck from fouling the bracket. I cut these on the Byrnes saw : The Fore Axletrees are a different size and shape to the hind ones. I made them in similar fashion, once again using the saw to cut the spacing rebate : Danny

-
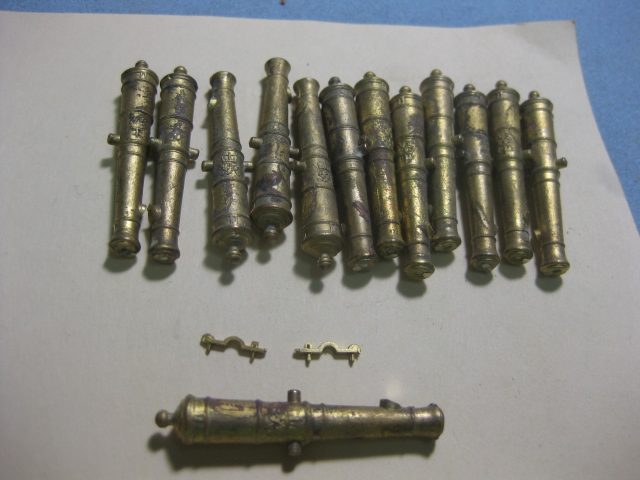
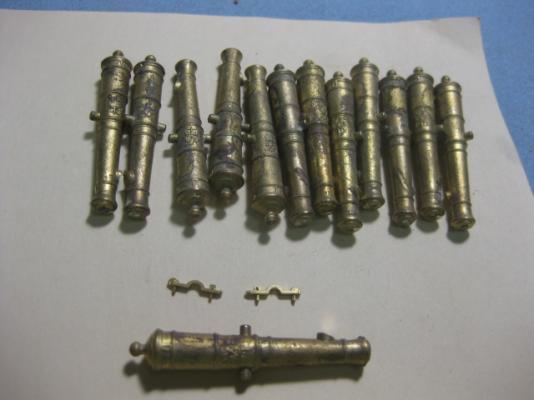
Thank you Adrieke and Pat. Pat, it looks like they are nearly all 1:48. They are made in various sizes from 35mm to 80 mm, at least for English cannons. It would depend on the calibre of the particular gun you need, but unless you want 32pndrs I think the smallest would be too big for your scales. I used 41mm barrels which are perfect for 1:48 scale 6pndrs. Here's the link to the "Artillery" page of the website : Artillery Click on "Cannon" to see them all. Danny
-
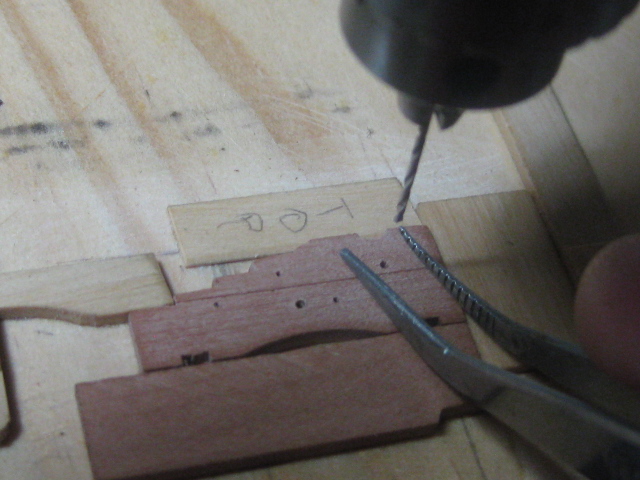
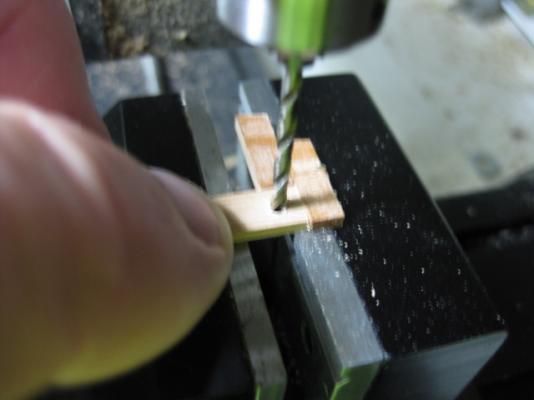
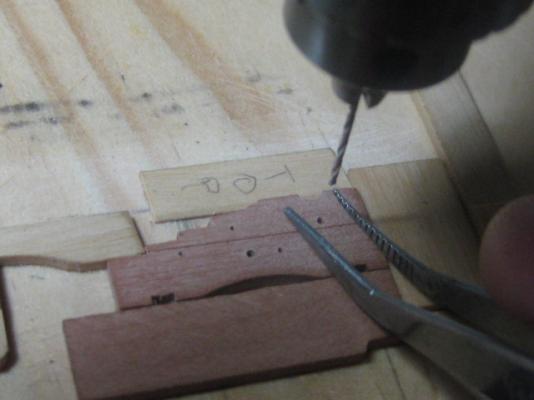
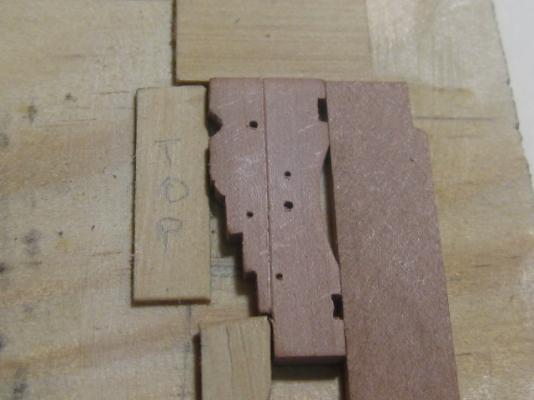
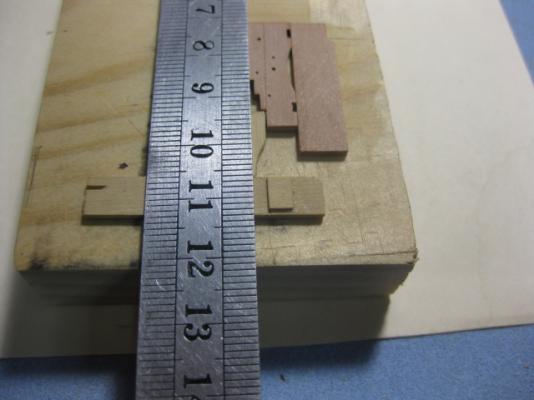
Thanks for looking in again Janos, Brian, Sjors, Grant, Mark and Ian. Janos, the guns are cast in brass, not bronze. I've never used pewter so far, so I don't know anything about blackening it. Drilling the Bolt Holes Apart from the already drilled capsquare holes there are another 8 holes to drill in each bracket for various bolts and eyebolts. To assure precision placement of each hole I made a jig to hold the bracket from some pine board and scrap planking. I set the mill to the first hole, drilled all 16 of them and then reset for the second hole etc. There are three 0.5mm holes for the Breeching and Training Tackle eyebolts, and two 0.7mm holes for the Bed Bolt and Transom Bolt : The jig was also used to accurately scribe the join between the upper and lower halves of the brackets using the back (blunt) edge of an Xacto. A pair of stops aligned the steel rule : I used the same setup as for the capsquare holes to drill the three 0.7mm holes for the bracket bolts : Danny


-
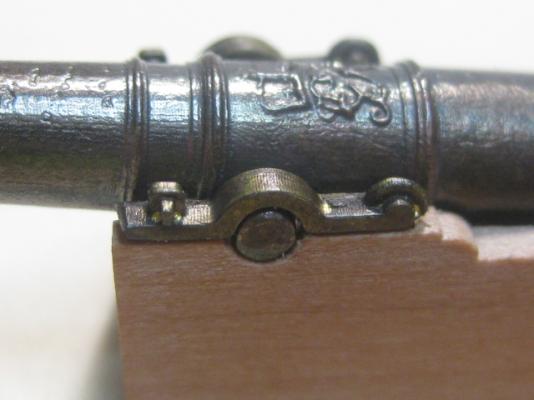
Fitting Capsquares Thanks Greg. They took a bit of careful work to get off, first with the edge of my disc sander and then with a needle file. They came to me "as cast" with no extra work done. Blackening was no problem at all once they had been pickled in vinegar and wirebrushed with the Dremel. I used the mill to drill the holes for the Capsquares - can't beat it for that kind of precision, every cap fits perfectly . Unfortunately, the caps are slightly overscale (1mm too long), but I can live with that : Danny
-
Thanks Janos. I bought them from shipmodels.com.ua in Ukraine. It took over three months for delivery, and they weren't cheap . Sjors, I'm making them SHINY BLACK : Danny
-
In the interest of "keeping the game moving" I have a suggestion for all those playing this game. I always have a couple of new ships saved on my computer for future use in case I don't have time to look one up in a hurry. If I'm successful in naming a ship it only takes a minute to Upload my next one. Danny
-
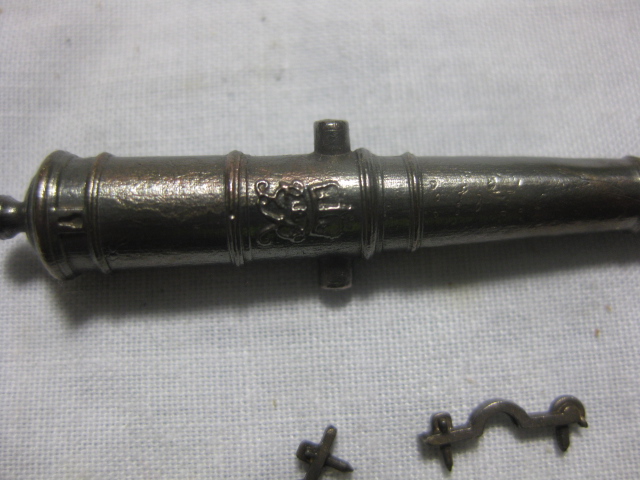
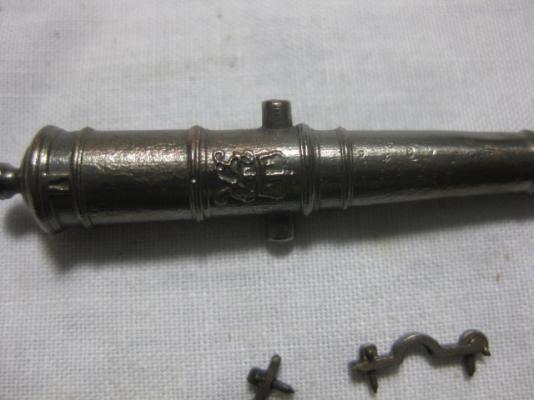
They should do Brian . Gun Barrels Ironic isn't it? I'd no sooner had a whinge earlier today about not receiving my Gun Barrels YET when .... they turn up . Worth the wait - the casting is superb. Every detail, including the George III Crest and the Touch-hole. They need a little bit of cleaning up, there's a very small amount of mold flash and the surface is in need of a good scrubbing - should look very realistic . I ordered (and paid for) 8 barrels - I received 13, along with a pack of Trunion Capsquares which are also very nicely detailed . Danny
-
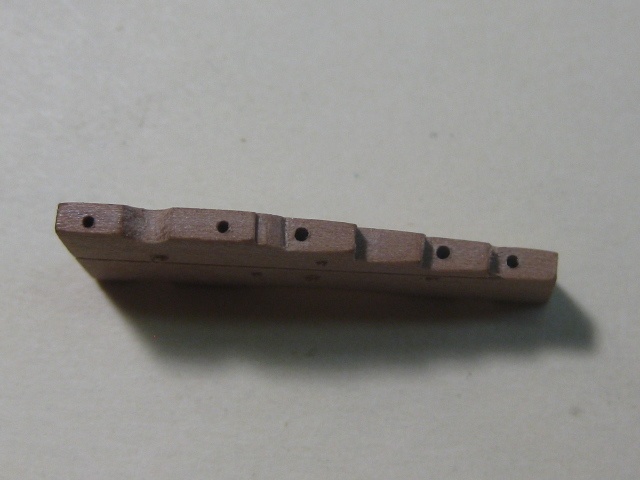
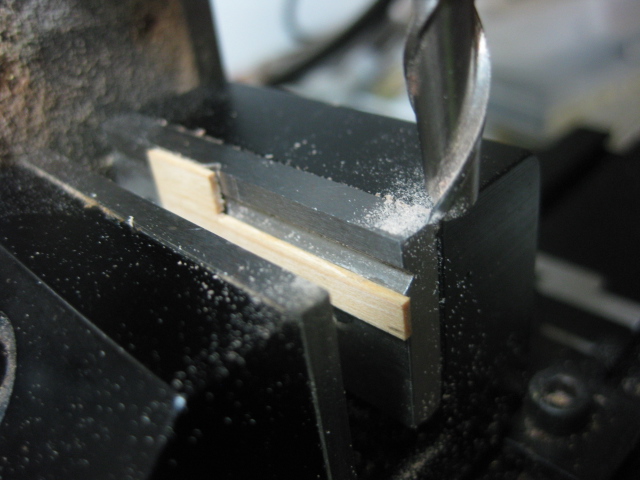
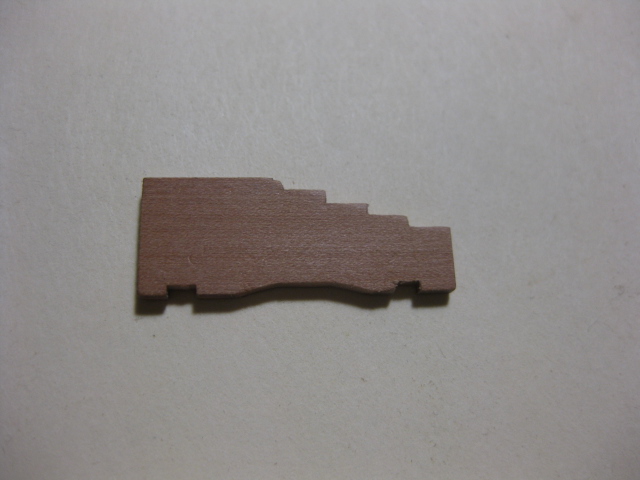
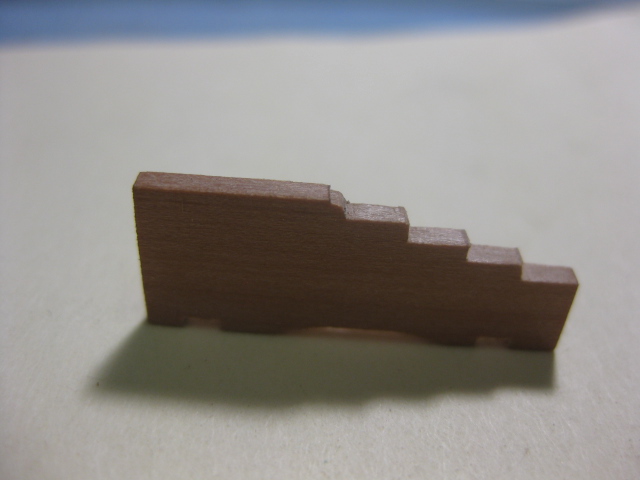
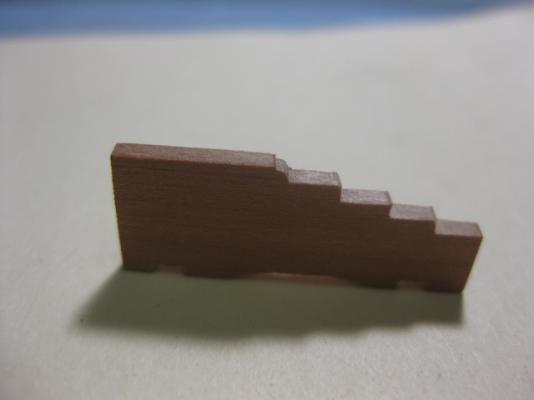
Once again a big thank you for all the kind comments Randy, Robbyn, Brian, Grant, Adrieke and Jeff . Gun Carriage Brackets Time now to move on to a very enjoyable part of this build - the Guns. I STILL haven't received my gun barrels yet, but at least I can make up the Carriages while I'm waiting. I'm only making half of the sixteen guns that Vulture carried, as there will be none fitted on the unplanked side. The first parts to be made are the Brackets, or side pieces. I cut the rebates for the Axletrees on the Byrnes saw using spacers to get them all exact. The hind axletree is a fair bit wider than the fore one, but it required a smaller rebate as it fits up differently. I used the mill to cut the steps into the top edge. I made up an "L" shaped piece of scrap timber slightly thinner than the pieces to be milled. This was CA glued to one edge of the vise to make setting up for each piece a breeze : One of the Brackets after milling. I cut the "ogee" shape into the topmost step with my Xacto knife. The rounded section on the bottom was milled in with a home-made cutter ground from an old 10mm drill bit : Danny

-
You're getting good at this game Adrieke . Your go. Danny
-
Thanks Adrieke, OK, this isn't quite a ship (yeah it's a boat - but it DOES have a name), and it's in a rather "unusual" setting : Danny

-
HMS Hogue? Danny
-
South Korean built tanker "Petion" ? Danny
-
Hi Toni, If you can see the treenails when you wet the timber, they will stand out better after you apply a finish later on. The scuttle rings look very nicely to scale to me . Danny
-
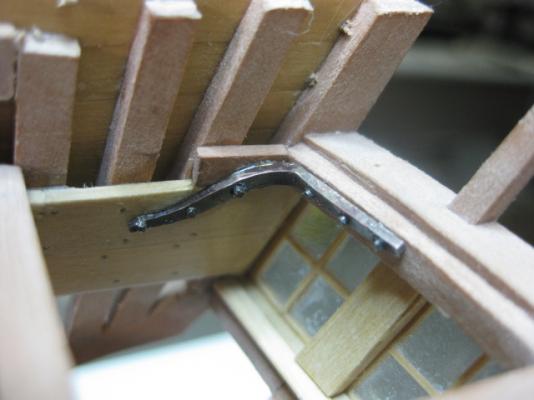
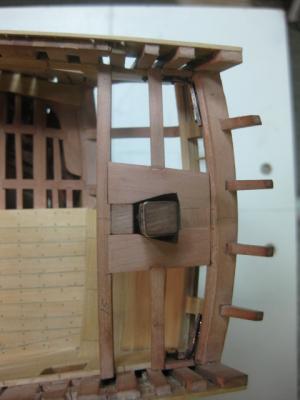
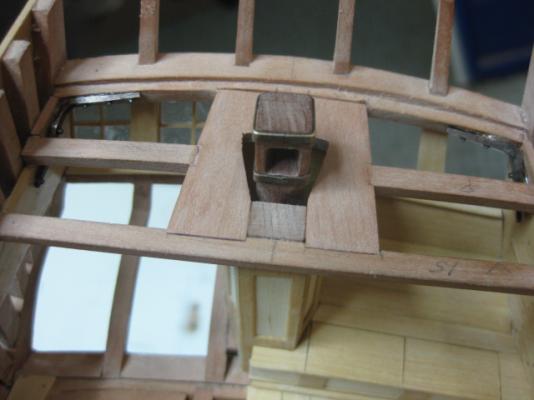
Thanks Robbyn, but I'm not really "thinking" of the actual details, just putting into practice what is in the TFFM books . Transom Iron Knees The corners of the transom are strengthened with Iron Knees. I made these in similar fashion to the other ones described earlier in my build log. They are "cast" (bent) to go under the half-beam. A Filler Piece has been fitted to take the place of a Lodging Knee : Here are the aforementioned "half-beams" : Danny
-
Well .... there's only one ship in Kelly's Boats with the next letter - Donaghmore. Danny