HOLIDAY DONATION DRIVE - SUPPORT MSW - DO YOUR PART TO KEEP THIS GREAT FORUM GOING!
×


Dan Vadas
-
Posts
3,261 -
Joined
-
Last visited
Content Type
Profiles
Forums
Gallery
Events
Everything posted by Dan Vadas
-
Jay, that's not quite right - it should be (((7x16)+13)/16)x25.4 = 198.4375. Your answer came out as 31.75. The above answer took me about 30 seconds to work out on a calculator - a quick glance at my home-made Conversion Chart (which hangs on the wall behind my bench) shows it as 198.44 - close enough tolerances - and took me 3.4 nanoseconds to find . Danny
-
what powertools to buy
Dan Vadas replied to Adrieke's topic in Modeling tools and Workshop Equipment
Leave that one alone Sherry - I have one and never bother using it. The bigger 5-speed Taiwanese Drill Press does all that work much more accurately. Shame you are in the US - I have a Sherline Lathe for sale, but freight charges would kill the value. :cheesr: Danny -
what powertools to buy
Dan Vadas replied to Adrieke's topic in Modeling tools and Workshop Equipment
The best tool to cut planking strips into equal lengths (without going to power) is (IMO) a Chopper II - a guilottine that uses single-edge razor blades and has adjustable "stops" for precise even-length cuts. When I started my second wooden ship (30+ years ago) I bought two power tools - a smaller and cheaper version of a Dremel, and a Dremel Scroll Saw. The first went to it's grave many years ago, the latter is still going strong and is one of the "most-used" power tools in my workshop (the Byrnes Table Saw and Disc Sander would just outrank it). With practice you can cut just about anything with the scroll saw. BTW - I have virtually every power tool you can think of . Danny -
There weren't enough links supplied in the PE set John . Danny
-
Jay, without looking for your Calculator (it's somewhere underneath those plans in the corner) what is 7 13/16" in Metric? Danny
-
Look on the bright side Bill - at least she didn't call YOU a "useless tool" :D . Danny
- 85 replies
-
- 13
-

-
Thanks Remco and Pat. No. I wasn't speechless, just running late for work - I'm writing the text for the post at the moment (at work ). Give me a couple of minutes. EDIT - Text is finished. Danny
-
Great work Remco - you shouldn't have the alignment problems I had with a few of the pieces like the Upper Well/Lower Well with the way you are going about it . Danny
-
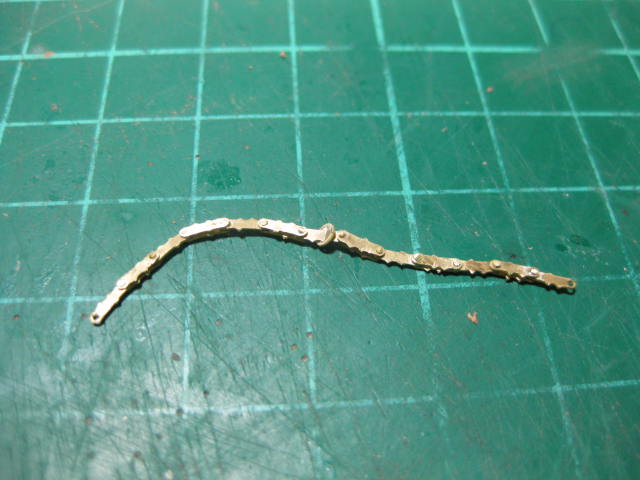
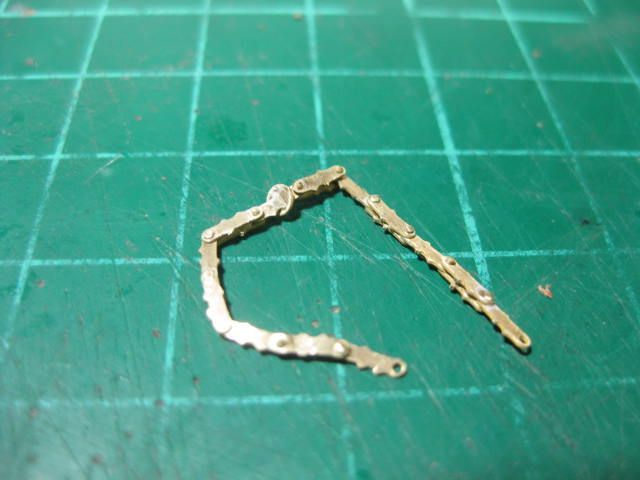
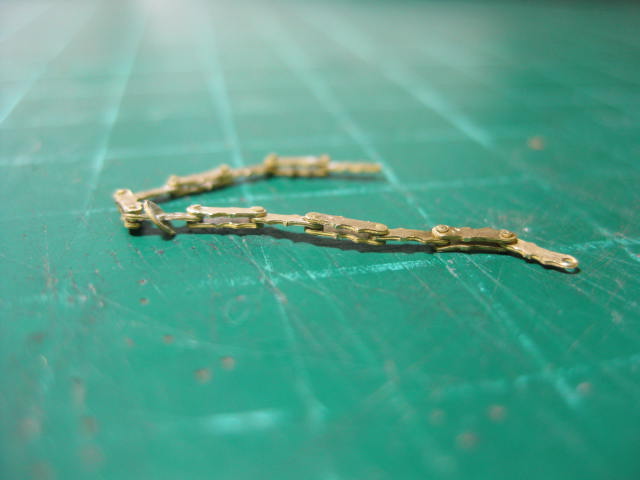
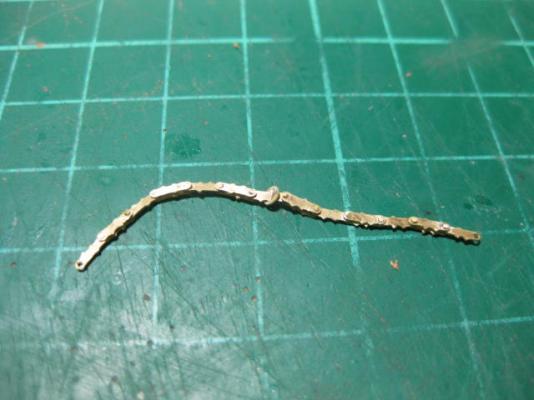
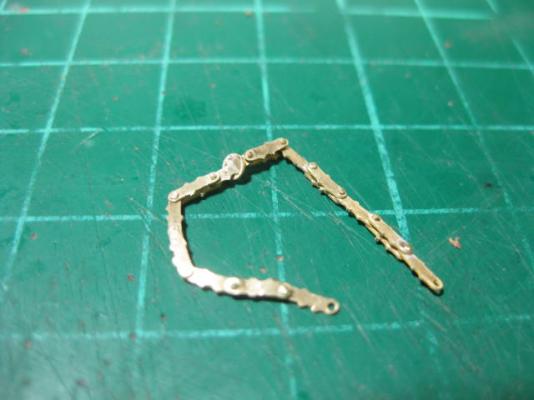
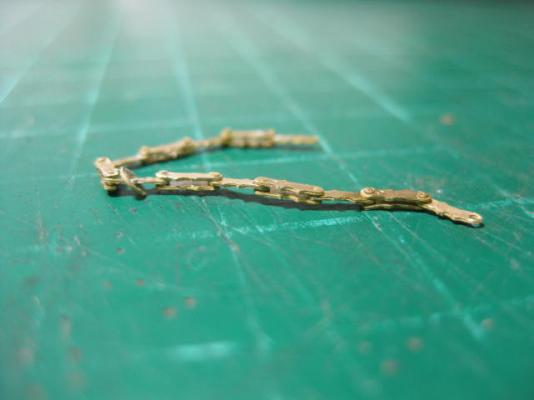
Pump Chain This is the Chain for the starboard Chain Pump - I'm only making one of these, as the port side will have a cover on the Cistern. The chain is made from the pieces supplied in the PE set from Admiralty Models. It's a little on the fiddly side to make, but I came up with a rather easy way to put it together. I should have taken a few step-by-step pics, but my explanation will have to suffice. After cutting all the required pieces from the sprue I started by fixing one link in my vise with half of it protruding. Then I picked up a second link with small pliers and pushed some 0.5mm brass wire through both pieces. The wire needed a good cleanup with 1000 grit wet and dry to slightly reduce it's diameter. Next I picked up a third link and threaded the wire through it alongside the second link, making three links joined at the same point. A drop of medium CA glue held the joint firmly. I then snipped off the wire on both sides a little longer than "flush". I continued in this manner for three single and four double links, then I slipped on the one (and only) "saucer" that will be visible - there is one every fourth single link, but I only need seven singles in the length around the Sprocket between the two Tubes. When I completed the whole length I placed each pin on my anvil and carefully peened each side of the wire to keep it all together. Then I gave the whole chain a bath in Acetone to remove the CA - the chain actually works, and doesn't come apart at all (OK, one joint did - not quite enough peening, but not hard to correct). I'll blacken the chain before fitting it. It took me about 1 1/2 hours to make 50mm of chain. Danny
-
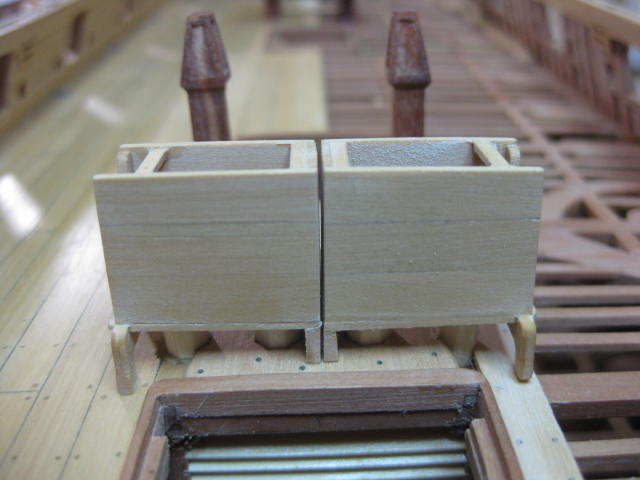
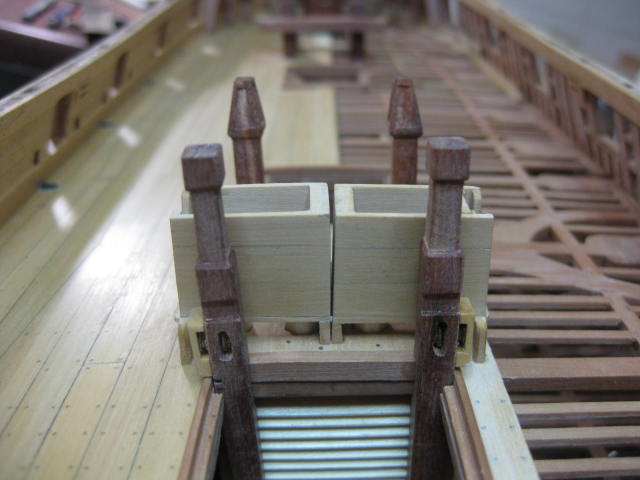
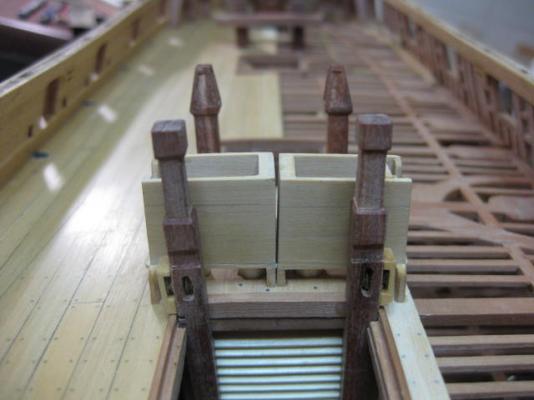
Hi all, I've tidied up the Cisterns a bit - the angle I had between them earlier wasn't right (I thought so too, and when I checked Greg's TFFM Volume III it was confirmed). It turns out that I'd forgotten to allow for the extra thickness of Vulture's unusual Main Mast Partners. No big job, just a little more trimming off the Inner Chocks soon put it right. I've spot-glued in both cisterns and also the Main Topsail Sheet Bitts and Jeer Bitts. Now that everything lines up I can mark where the Rhodings (bearings) for the Chain Pump Cranks will go : Danny

-
Thank you John, Sherry, Pat and Russell . Pat, the smell is still hanging around a bit - I have all the doors open and the fans roaring just to be able to work again (the things I have to do ... :D ). Russell - your praise is gratefully accepted, but it's a little over-the-top .... there are far better modellers on this site than myself. I'm still a comparative novice at this game compared to them (have a look at EdT's "Naiad" or some of Doris's incredible work, to name just two). Danny
-
Jim, if you're painting it I suggest the Limewood - a lot easier to get a lateral bend into than either of the others. I'll also suggest you either make a simple jig in which to clamp the soaked timber whilst it dries, or else clamp it in place on the hull (whichever works better for your application). Make sure you leave it to dry overnight at least, depending on ambient temperature. The timber MUST BE COMPLETELY DRY before you attempt to glue it in place. BTW - even though you are painting the timber I STILL wouldn't use Balsa. Danny
-
Hi Jeff, Great article . I've posted a link to it in a Pinned Topic in the "Wooden Tips and Tricks" forum in case this topic goes down a few pages in the future. Danny
-
Yep, and I don't have to tell you how much of them will be visible after another deck goes on, do I ? Sort of like someone who made a Cast Iron Galley Stove from Boxwood and painted it black? Danny
-
Hi Toni, Your deck work is coming along beautifully. I didn't get quite as good a fit with my lower deck Lodging Knees, especially on the planked side. The way you have started here will put you in very good shape by the time you get up to the more visible decks (where I took a lot more time over them, and also modified my techniques a bit ). Danny
-
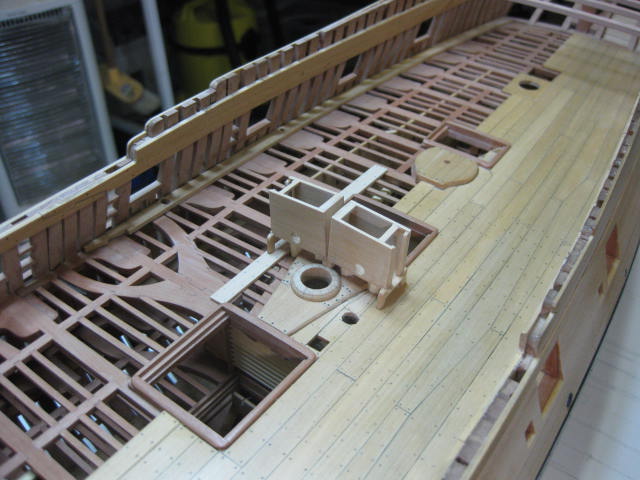
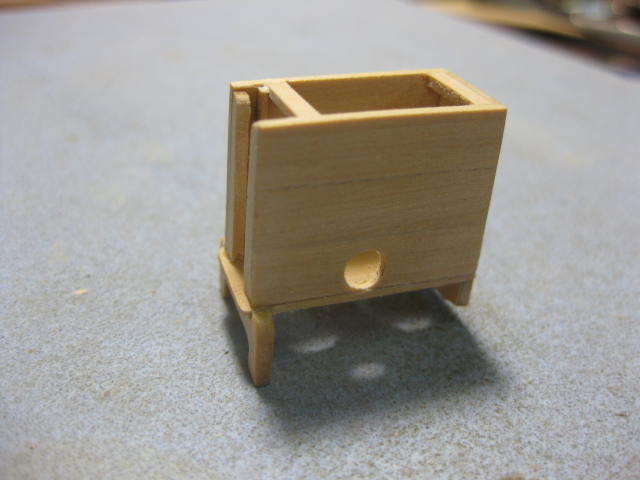
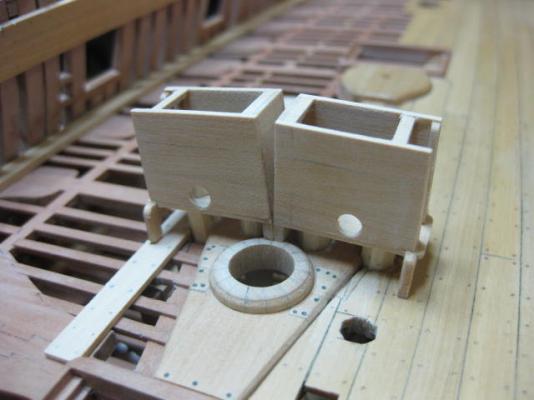
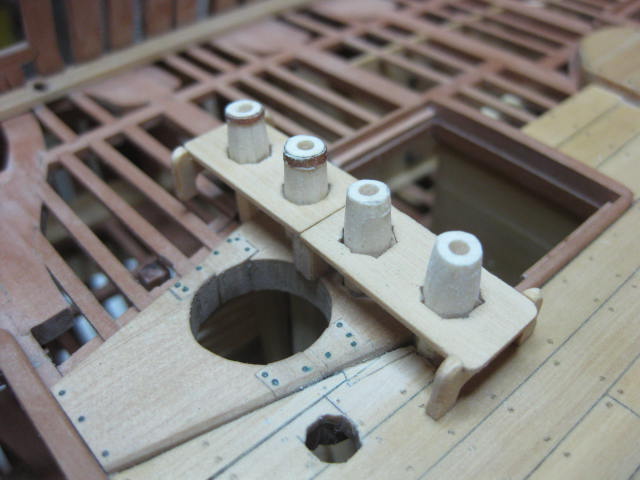
Thanks Carl and Mark - it's good to be back at work on my ship at last . Yeah Mark, there's not a lot of room between the forward part of the Cistern and the Mast - about 2 1/2". Here's an update for you Sjors - I'm about half finished with the Cisterns. They look out of alignment in the first two pics, but that is the way they fit : The Pump Dales (drains) will fit into the slots in the outboard end. I'll only be fitting the port side one : The hole in the side is for a drain bung : Danny


-
Hi Sjors, They are the bases for the Chain Pump Cisterns. The four tubes go to the bottom of the hold and contain the chains and "buckets" that pump water out of the bilge. You'll get the idea of how they work as I make the whole thing . Danny
-
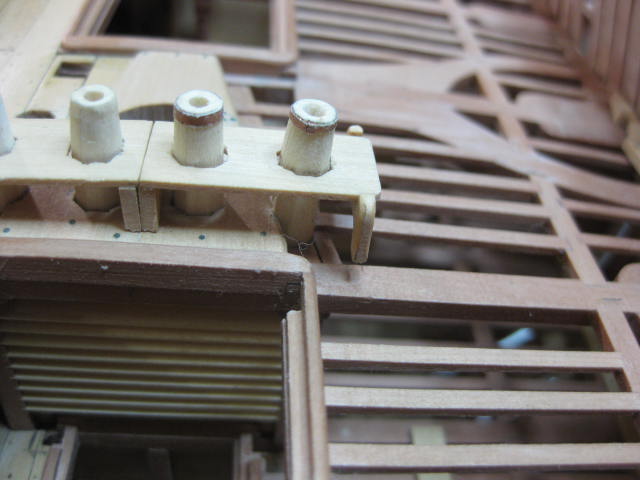
The plank has been fitted and the Chocks have been trimmed. The entire inner forward leg needed cutting off, plus a bit more : Note to any other Swan builders - your Inner Chocks may be a little different to mine ... this could be just a peculiarity of Vulture's Main Mast Partners and placement. Danny
-
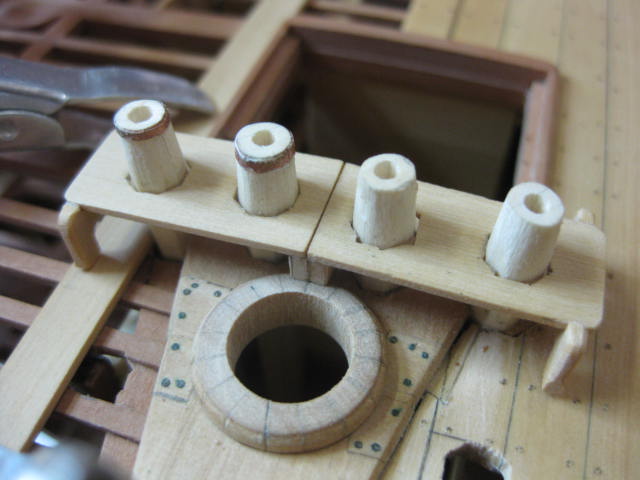
Thank you Janos . Here are the Cistern bases in place (dry fit only). I need to trim a fair bit off the forward inner chock legs to accommodate the Mast Wedges, and also fit a short piece of deck planking under the starboard side outer chock : Danny
-
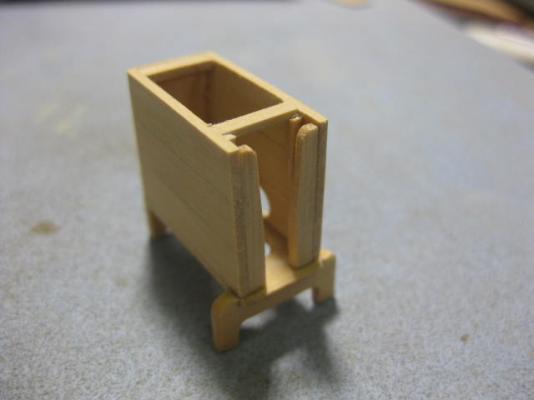
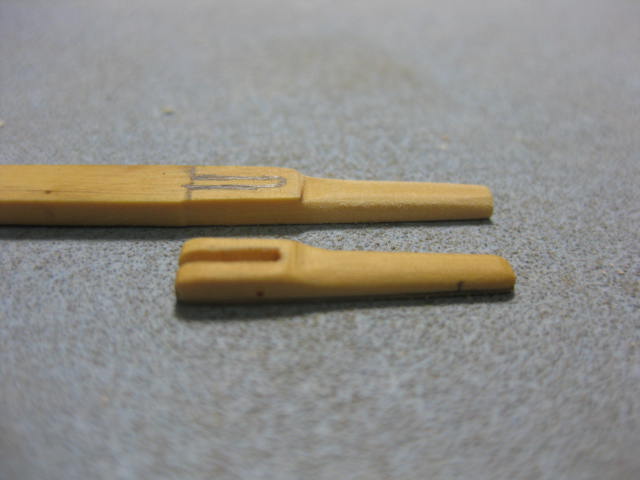
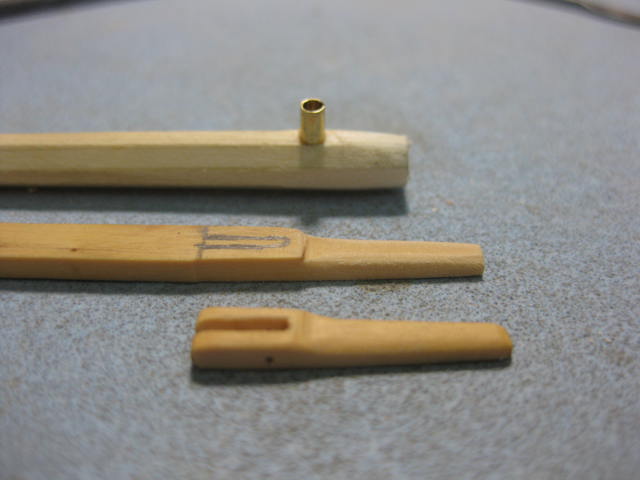
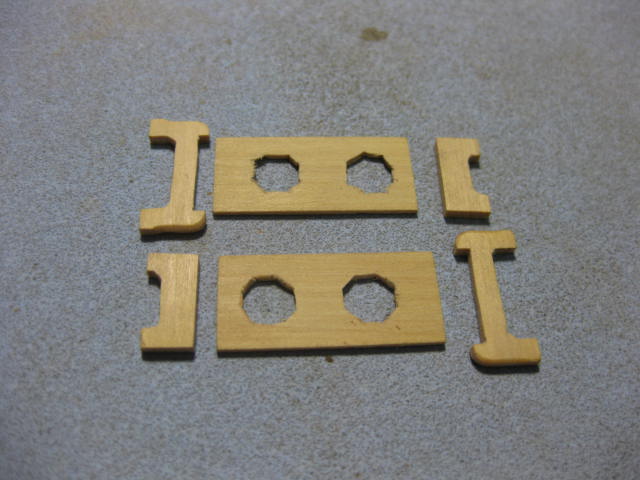
Hi all, Work has recommenced on Vulture at last . I've started on the Headwork for the Pumps. I've made the handles for the Brake Pumps and fitted the outlet tubes. These will be put in storage until a later date, as they get in the way of quite a few things at this stage: I've also started on the Cisterns for the Chain Pumps. I've made the Bases and the Chocks they sit on. The Outboard and Inboard ones are different to each other : The holes through the bases have a putty around the Pump Tubes on the real ship, so the slight imperfections of my octagonal cutting of them will be filled . The Port side will be fully covered in any case, so I selected the best one of the two for the open Starboard side. Danny

-
Thanks very much for your words of encouragement Druxey - always good to hear from you . BTW - it turned out not to be a rodent after all .... my elderly mother-in-law had accidentally left a piece of meat out of the freezer (which is in my workshop) and placed a box over it. I didn't discover it until my return on Monday after it had been out for 6 days .... I was faced with 10,000 Blowflies and a stench that made the trenches on the Western Front of WWI pale into insignificance :huh: . A full can of Mortein and two of Air Freshener, with the ceiling fan going full-blast for a day has now made the place liveable again . Thank you too Dave - it was your help with the Saved Build Log that made my work of restoring it a LOT easier . Danny
-
Oi Jeff - what about the rest of us that want to know too ??? Maybe a Post in the "Modelling Tools and Workshop Equipment" forum? EDIT - Oops, just read that . Some really useful information here - thanks for starting the Topic Dave. Danny
-
Hi Jim, I'm with John (Jim Lad) and Jeff - Balsa is great for a lot of things (quick and easy Pincushions or Knife Blade Holders), but really has no place in ship modelling other than what they mentioned. A few years ago I used it for Filler Blocks but now prefer a timber like Pine or Basswood - a bit harder to sand, but they takes planking screws etc a lot better and are also much better to glue planks to. You said it yourself . Danny
-
Thanks for looking in again Christian, Brian, Sjors, Maury and Pat. Maury, I have a couple of those ultrasonic devices too - but not in the workshop (YET) . Pat, Toni apparently still has quite a bit to add to her Log recovery .... what she has done already (which is even better than the original IMO) came mostly from a fortunately Saved copy. She has to do the rest the same way I did - from memory. I'm going away for the weekend starting today - by the time I get back the mouse stench should be gone (I hope). Danny
-
madchemist, that was Vulcanbomber's (Caroline) model. Nice work Sarah . If I can make one suggestion - when making things like the companionways (ladders) it's a lot easier to make the whole unit OFF the ship first before adding the details (like the steps). Do a lot of "dry" fitting before gluing the piece in to make sure you have all the angles right, or if it needs a bit of trimming to make it fit. Danny