HOLIDAY DONATION DRIVE - SUPPORT MSW - DO YOUR PART TO KEEP THIS GREAT FORUM GOING! (Only 51 donations so far out of 49,000 members - C'mon guys!)
×


ECK
-
Posts
637 -
Joined
-
Last visited
Content Type
Profiles
Forums
Gallery
Events
Everything posted by ECK
-
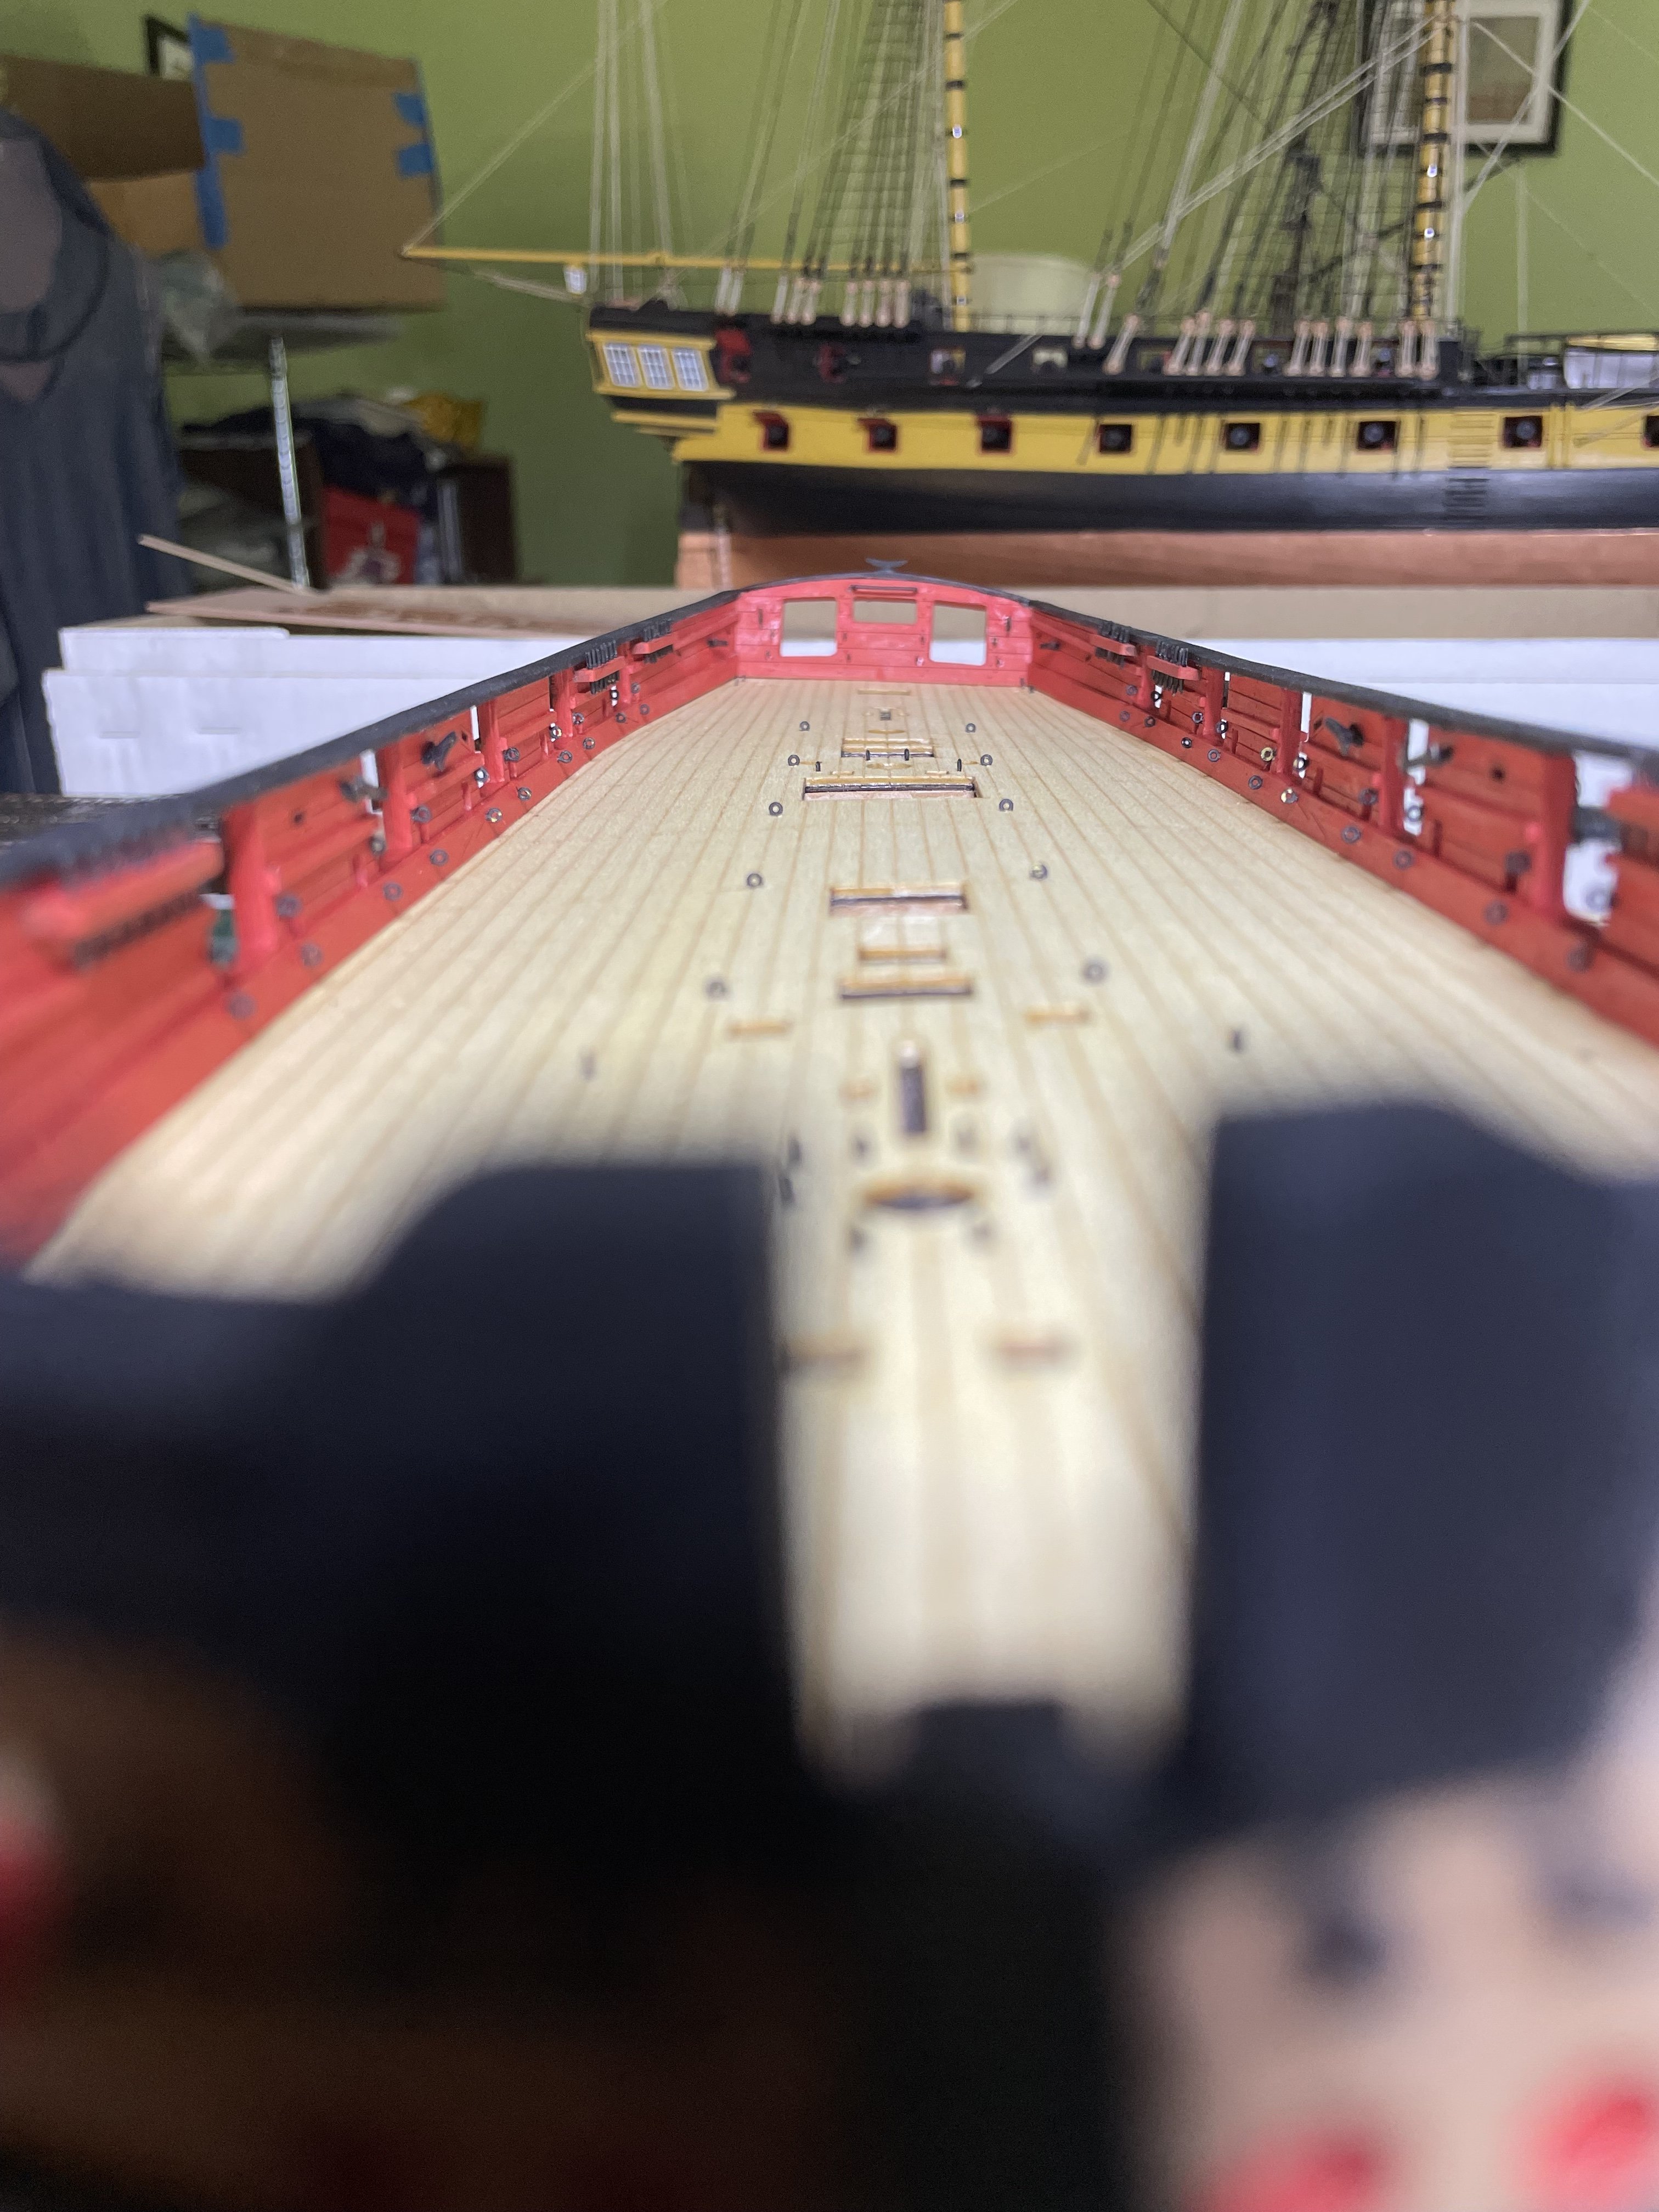
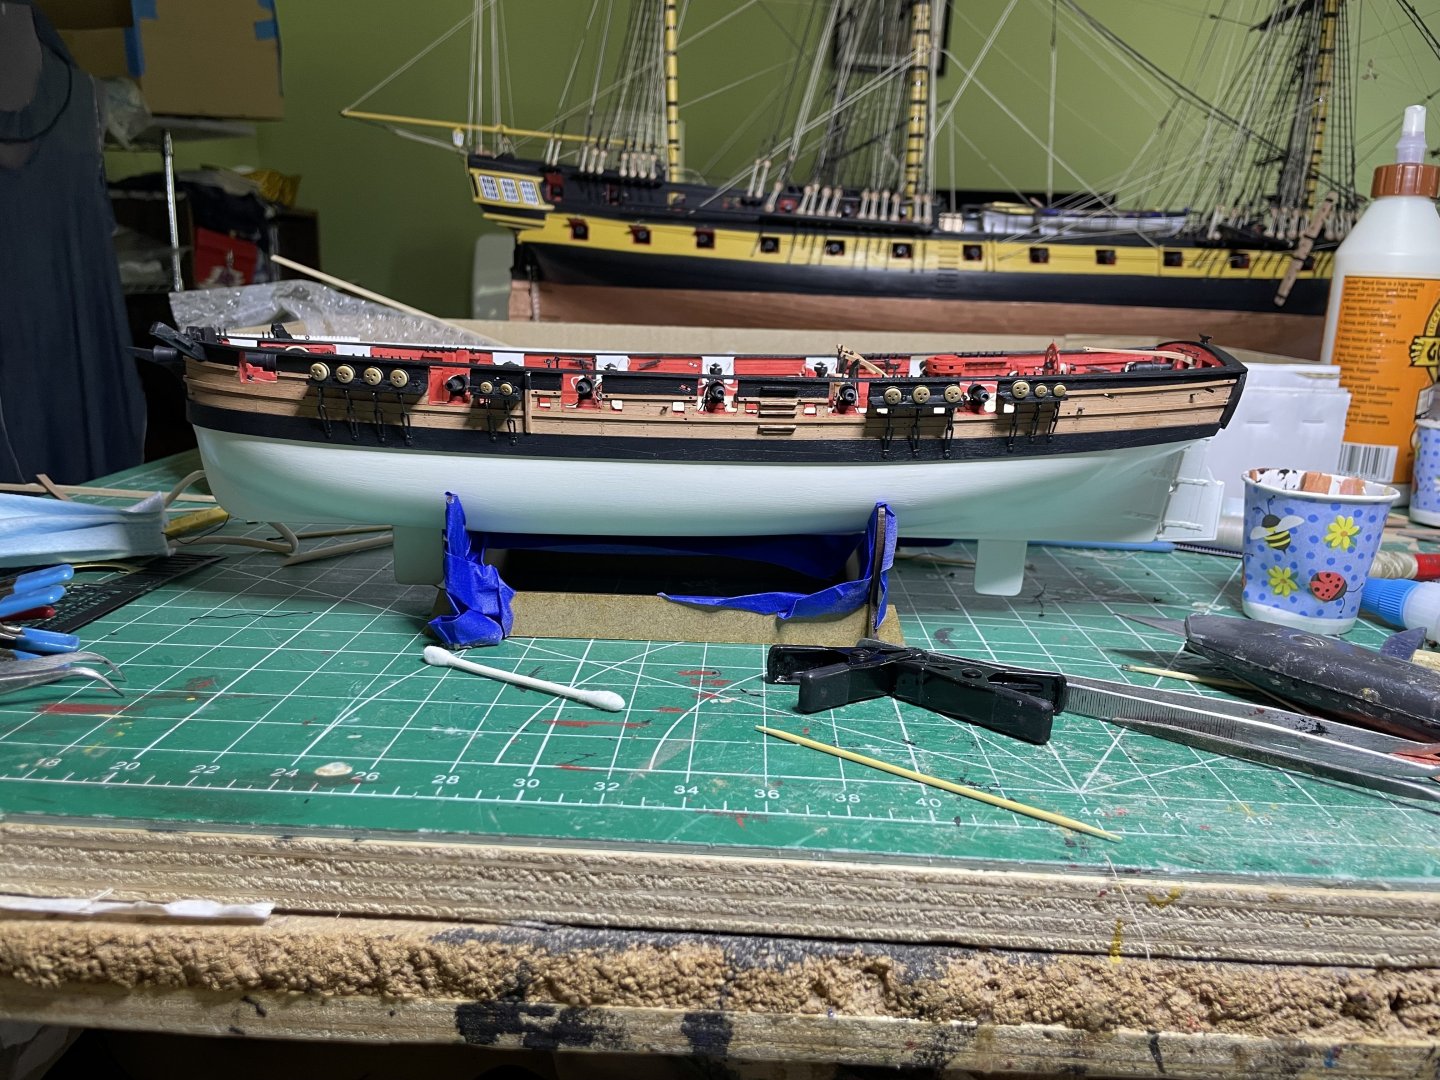
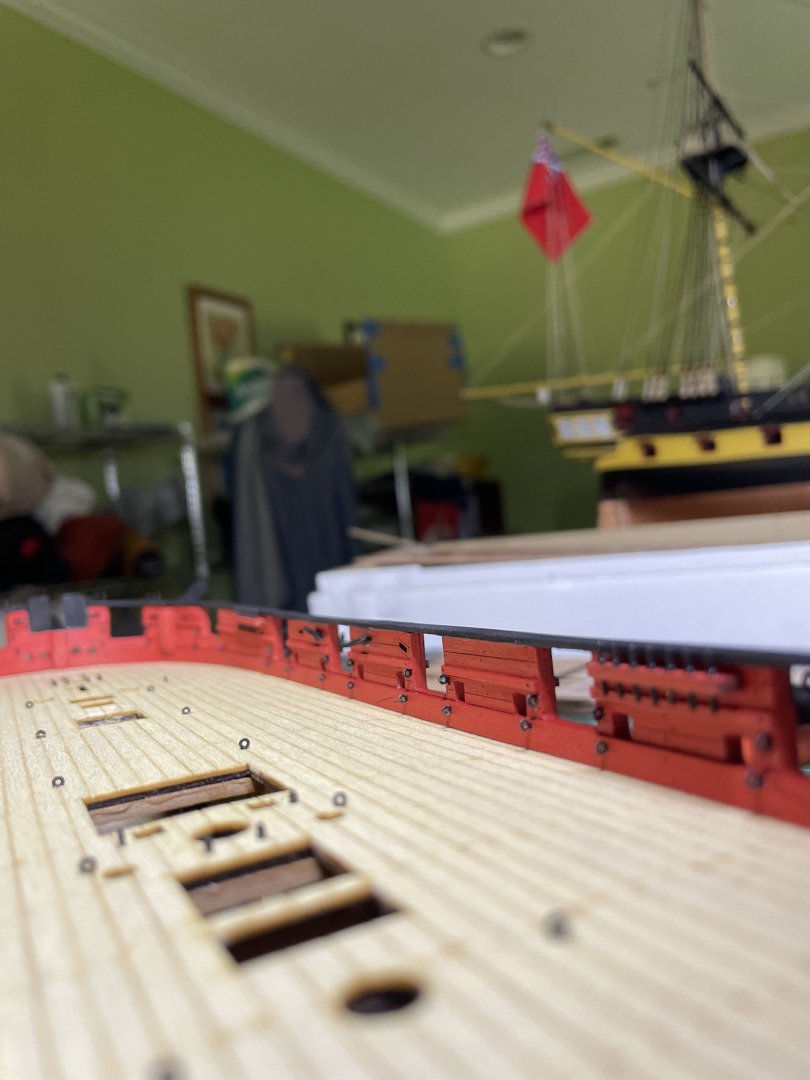
For me, I would not want to trip or stub my toes on the cannon balls so I did it as on sheet 6
-
Interestingly, on the forward hatch on Plan 6 the shot holders are parallel to the bow/stern but in the instruction book they are parallel to the sides.
-
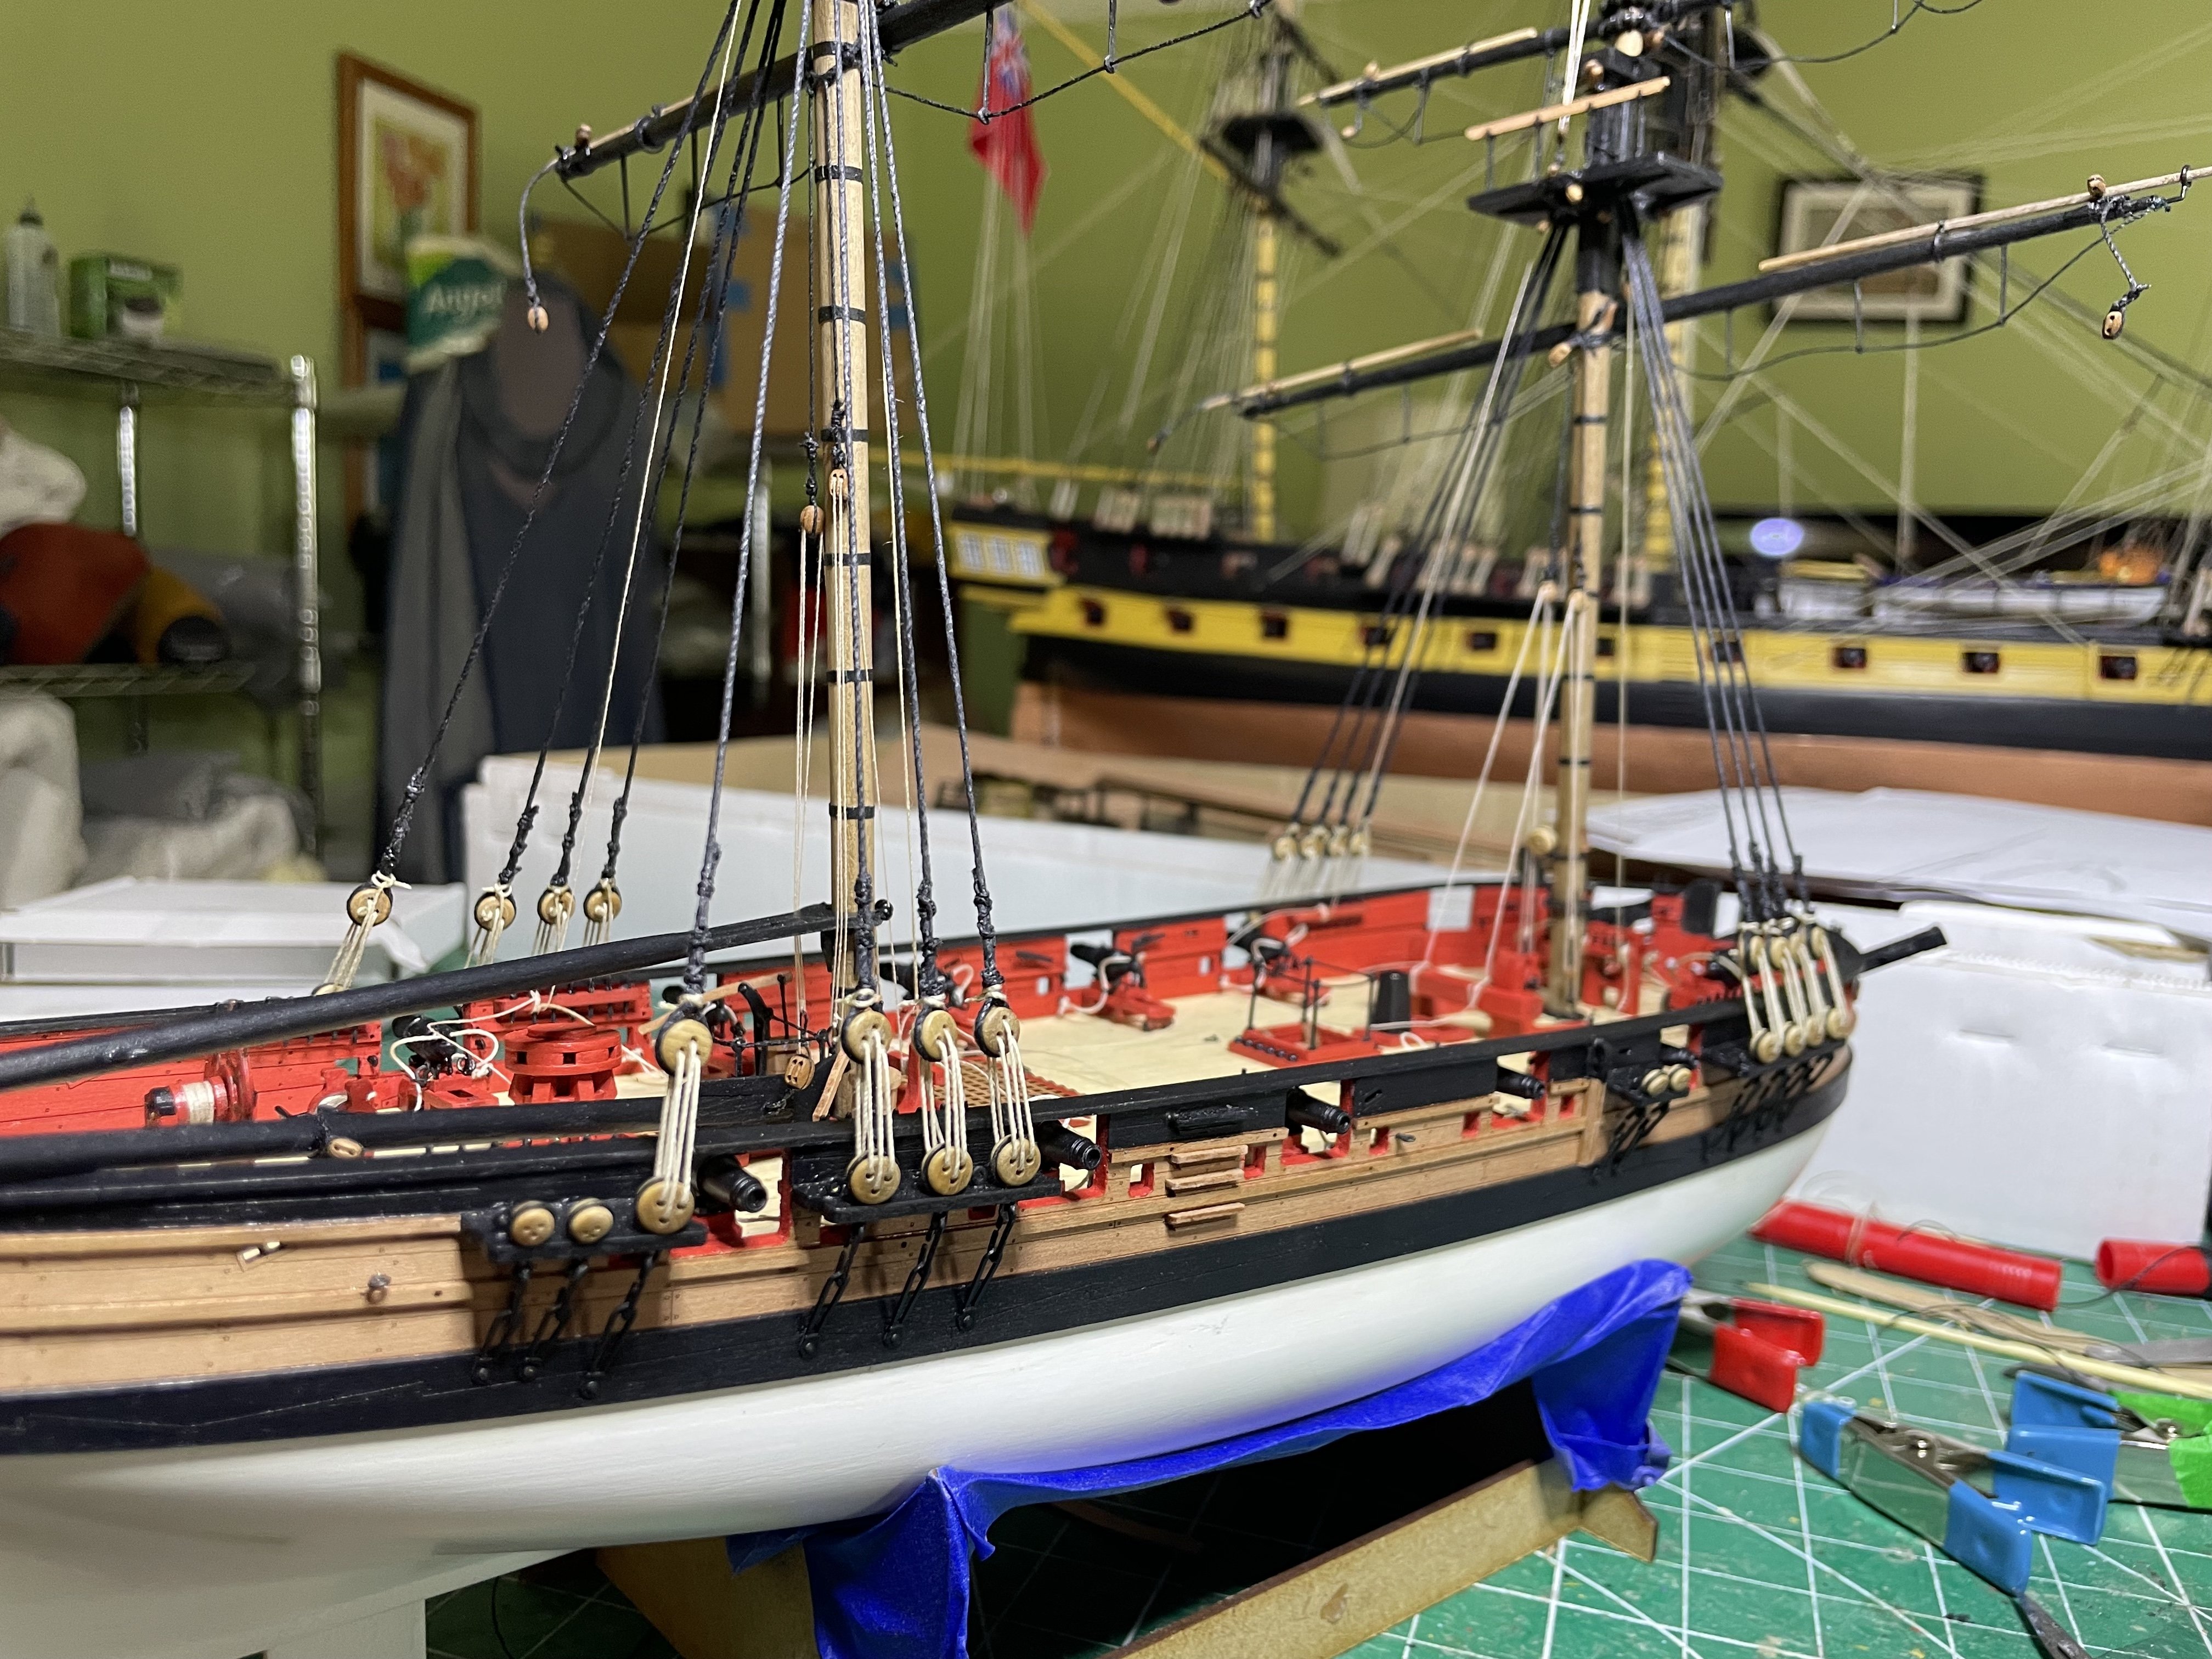
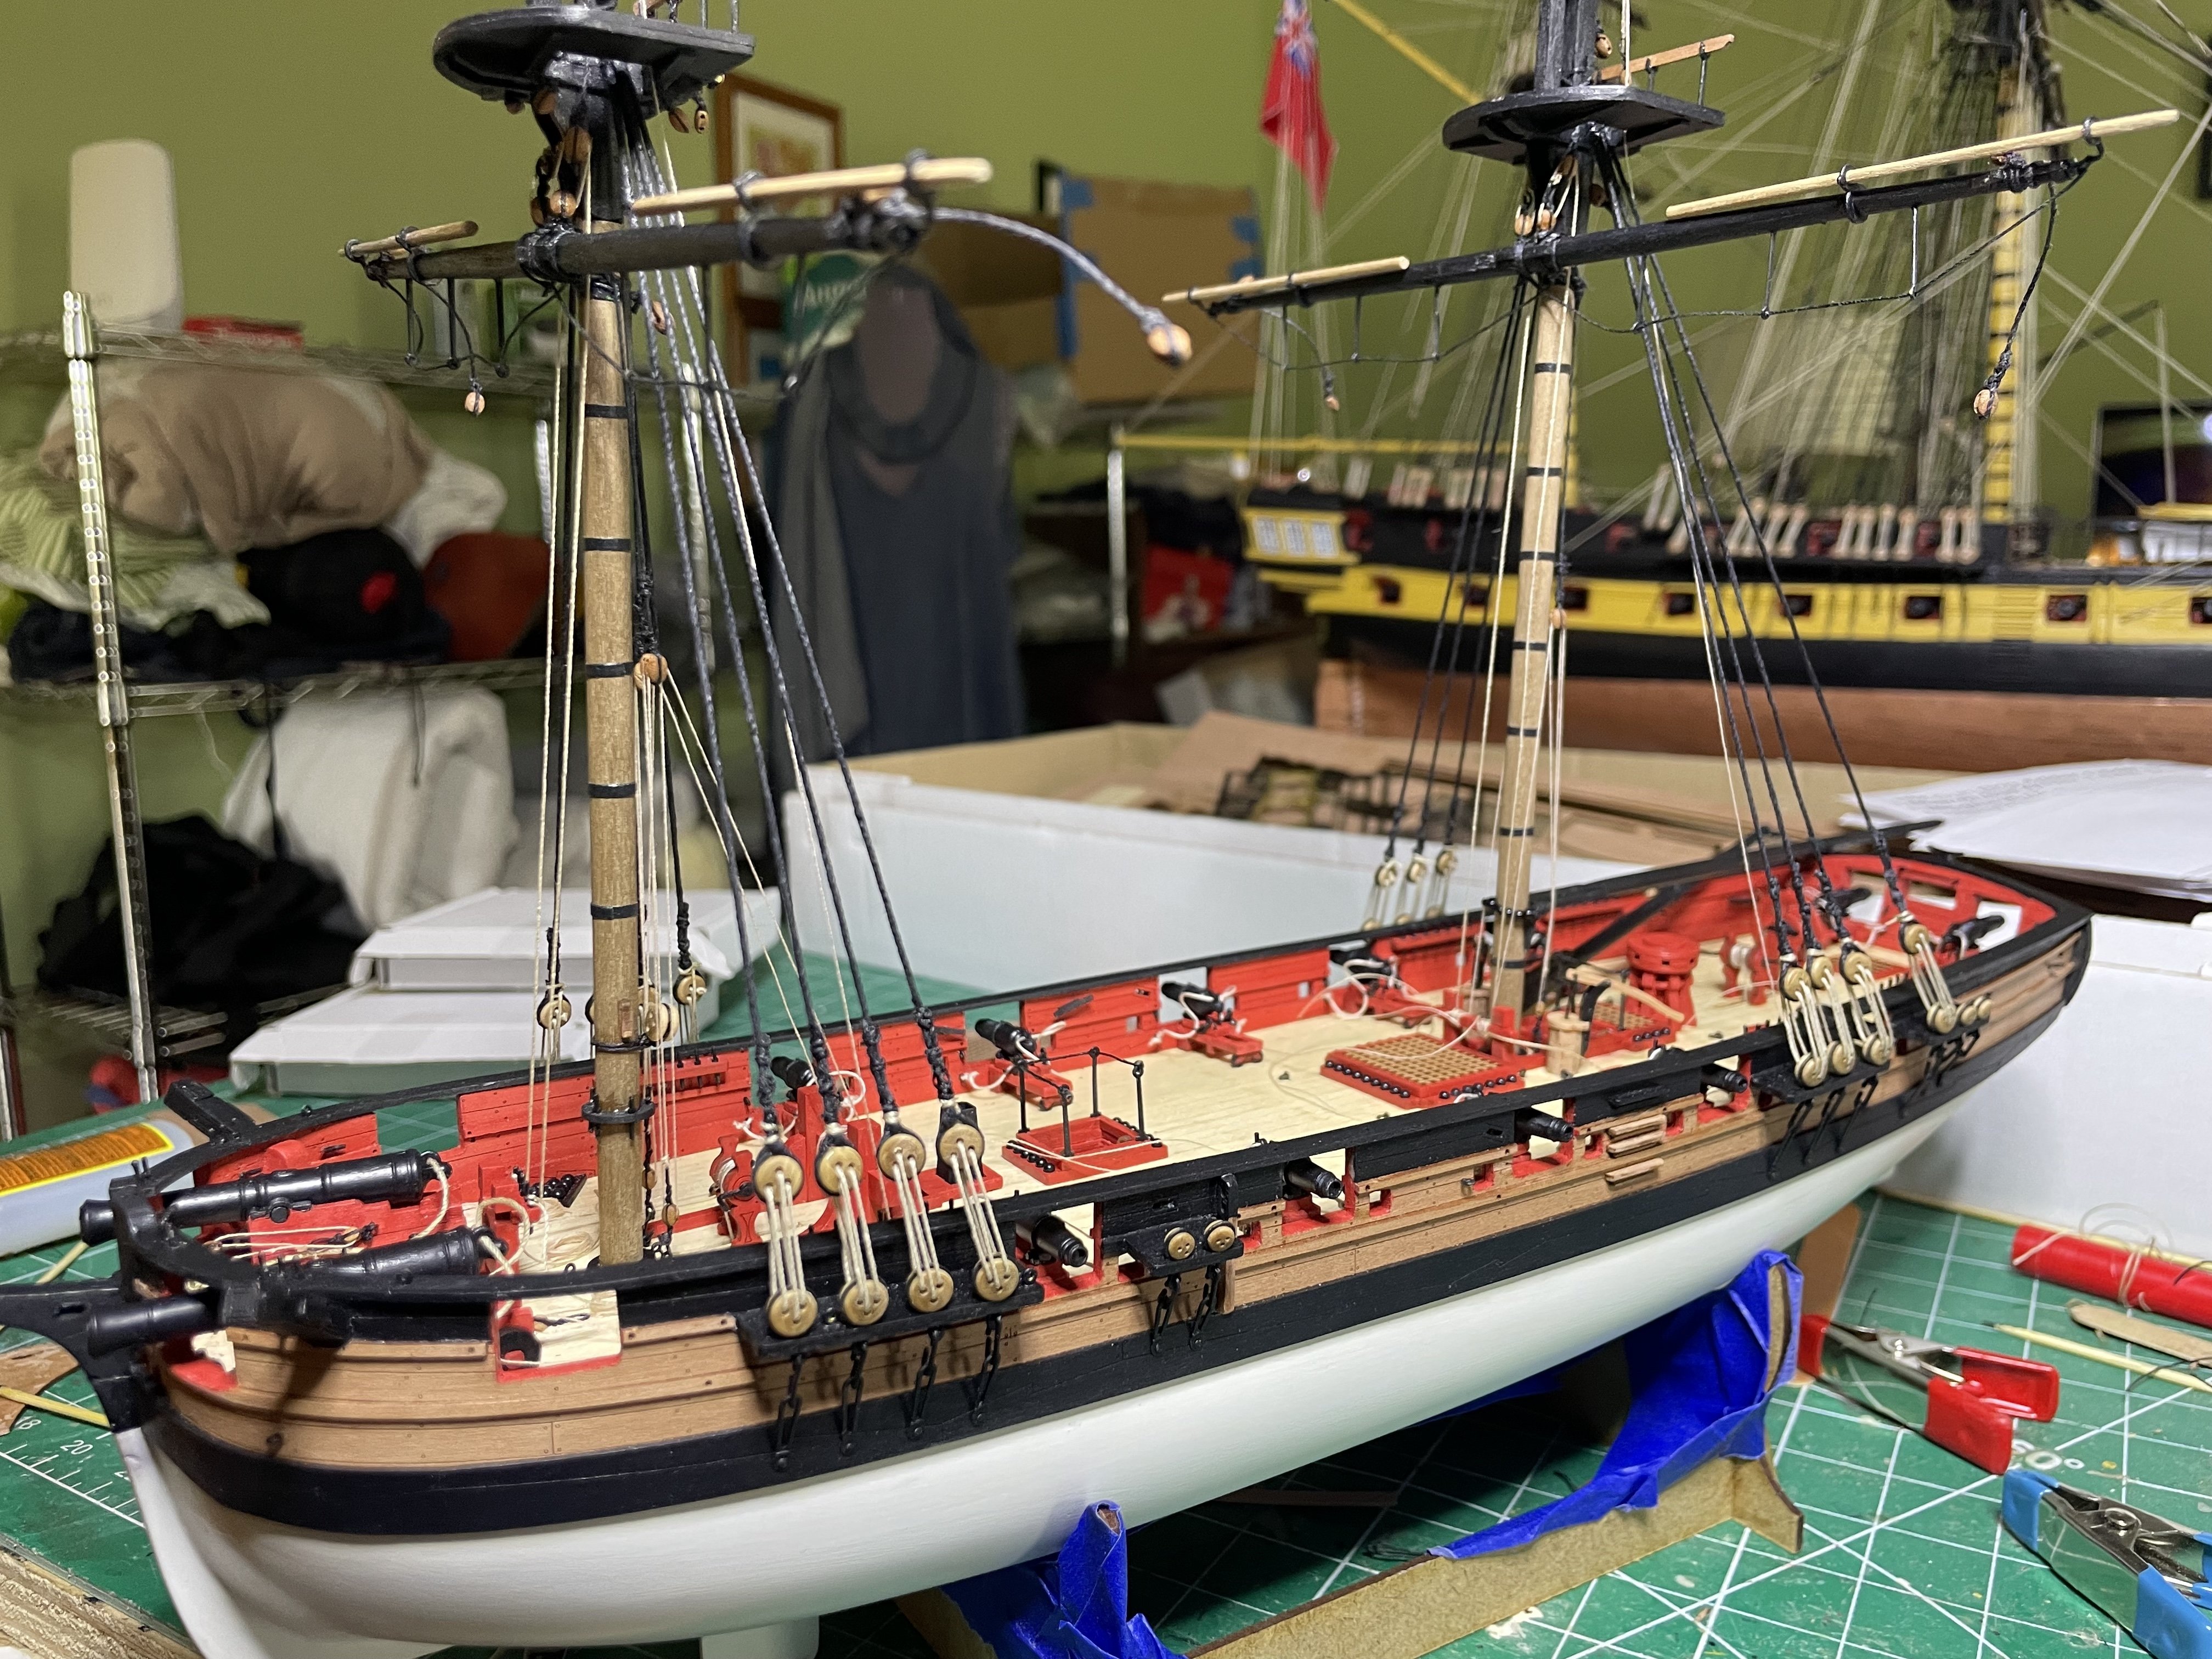
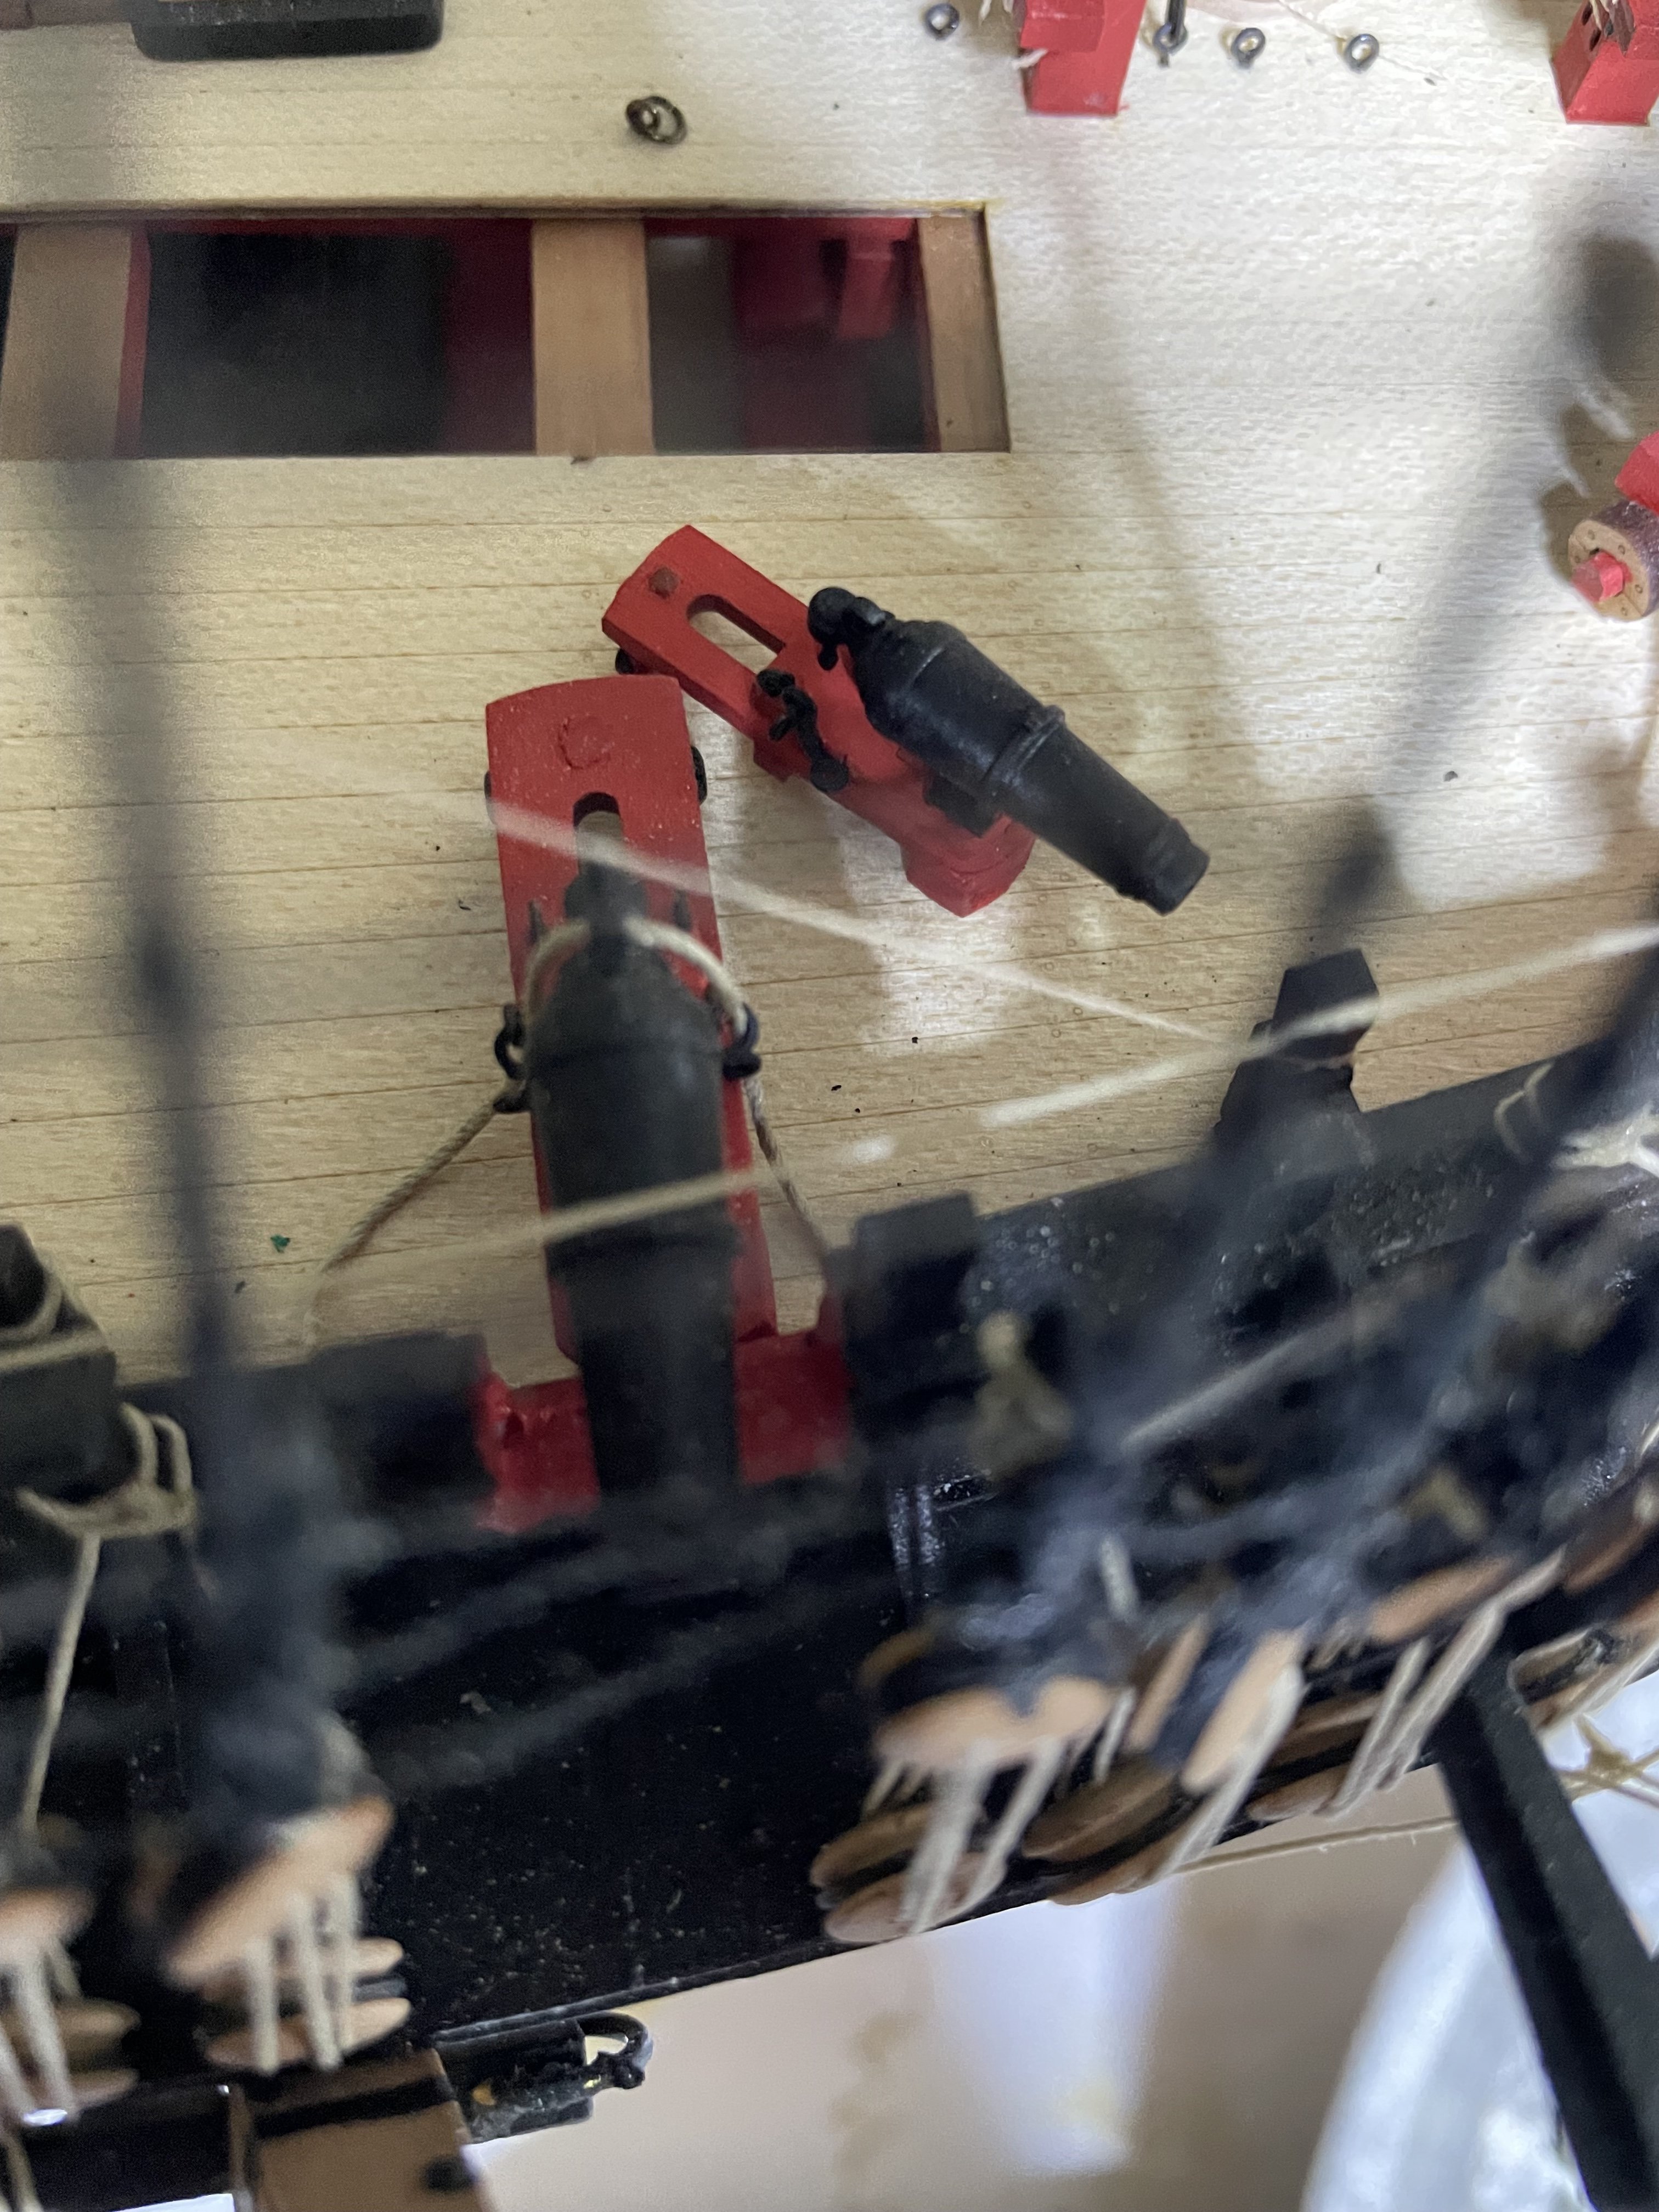
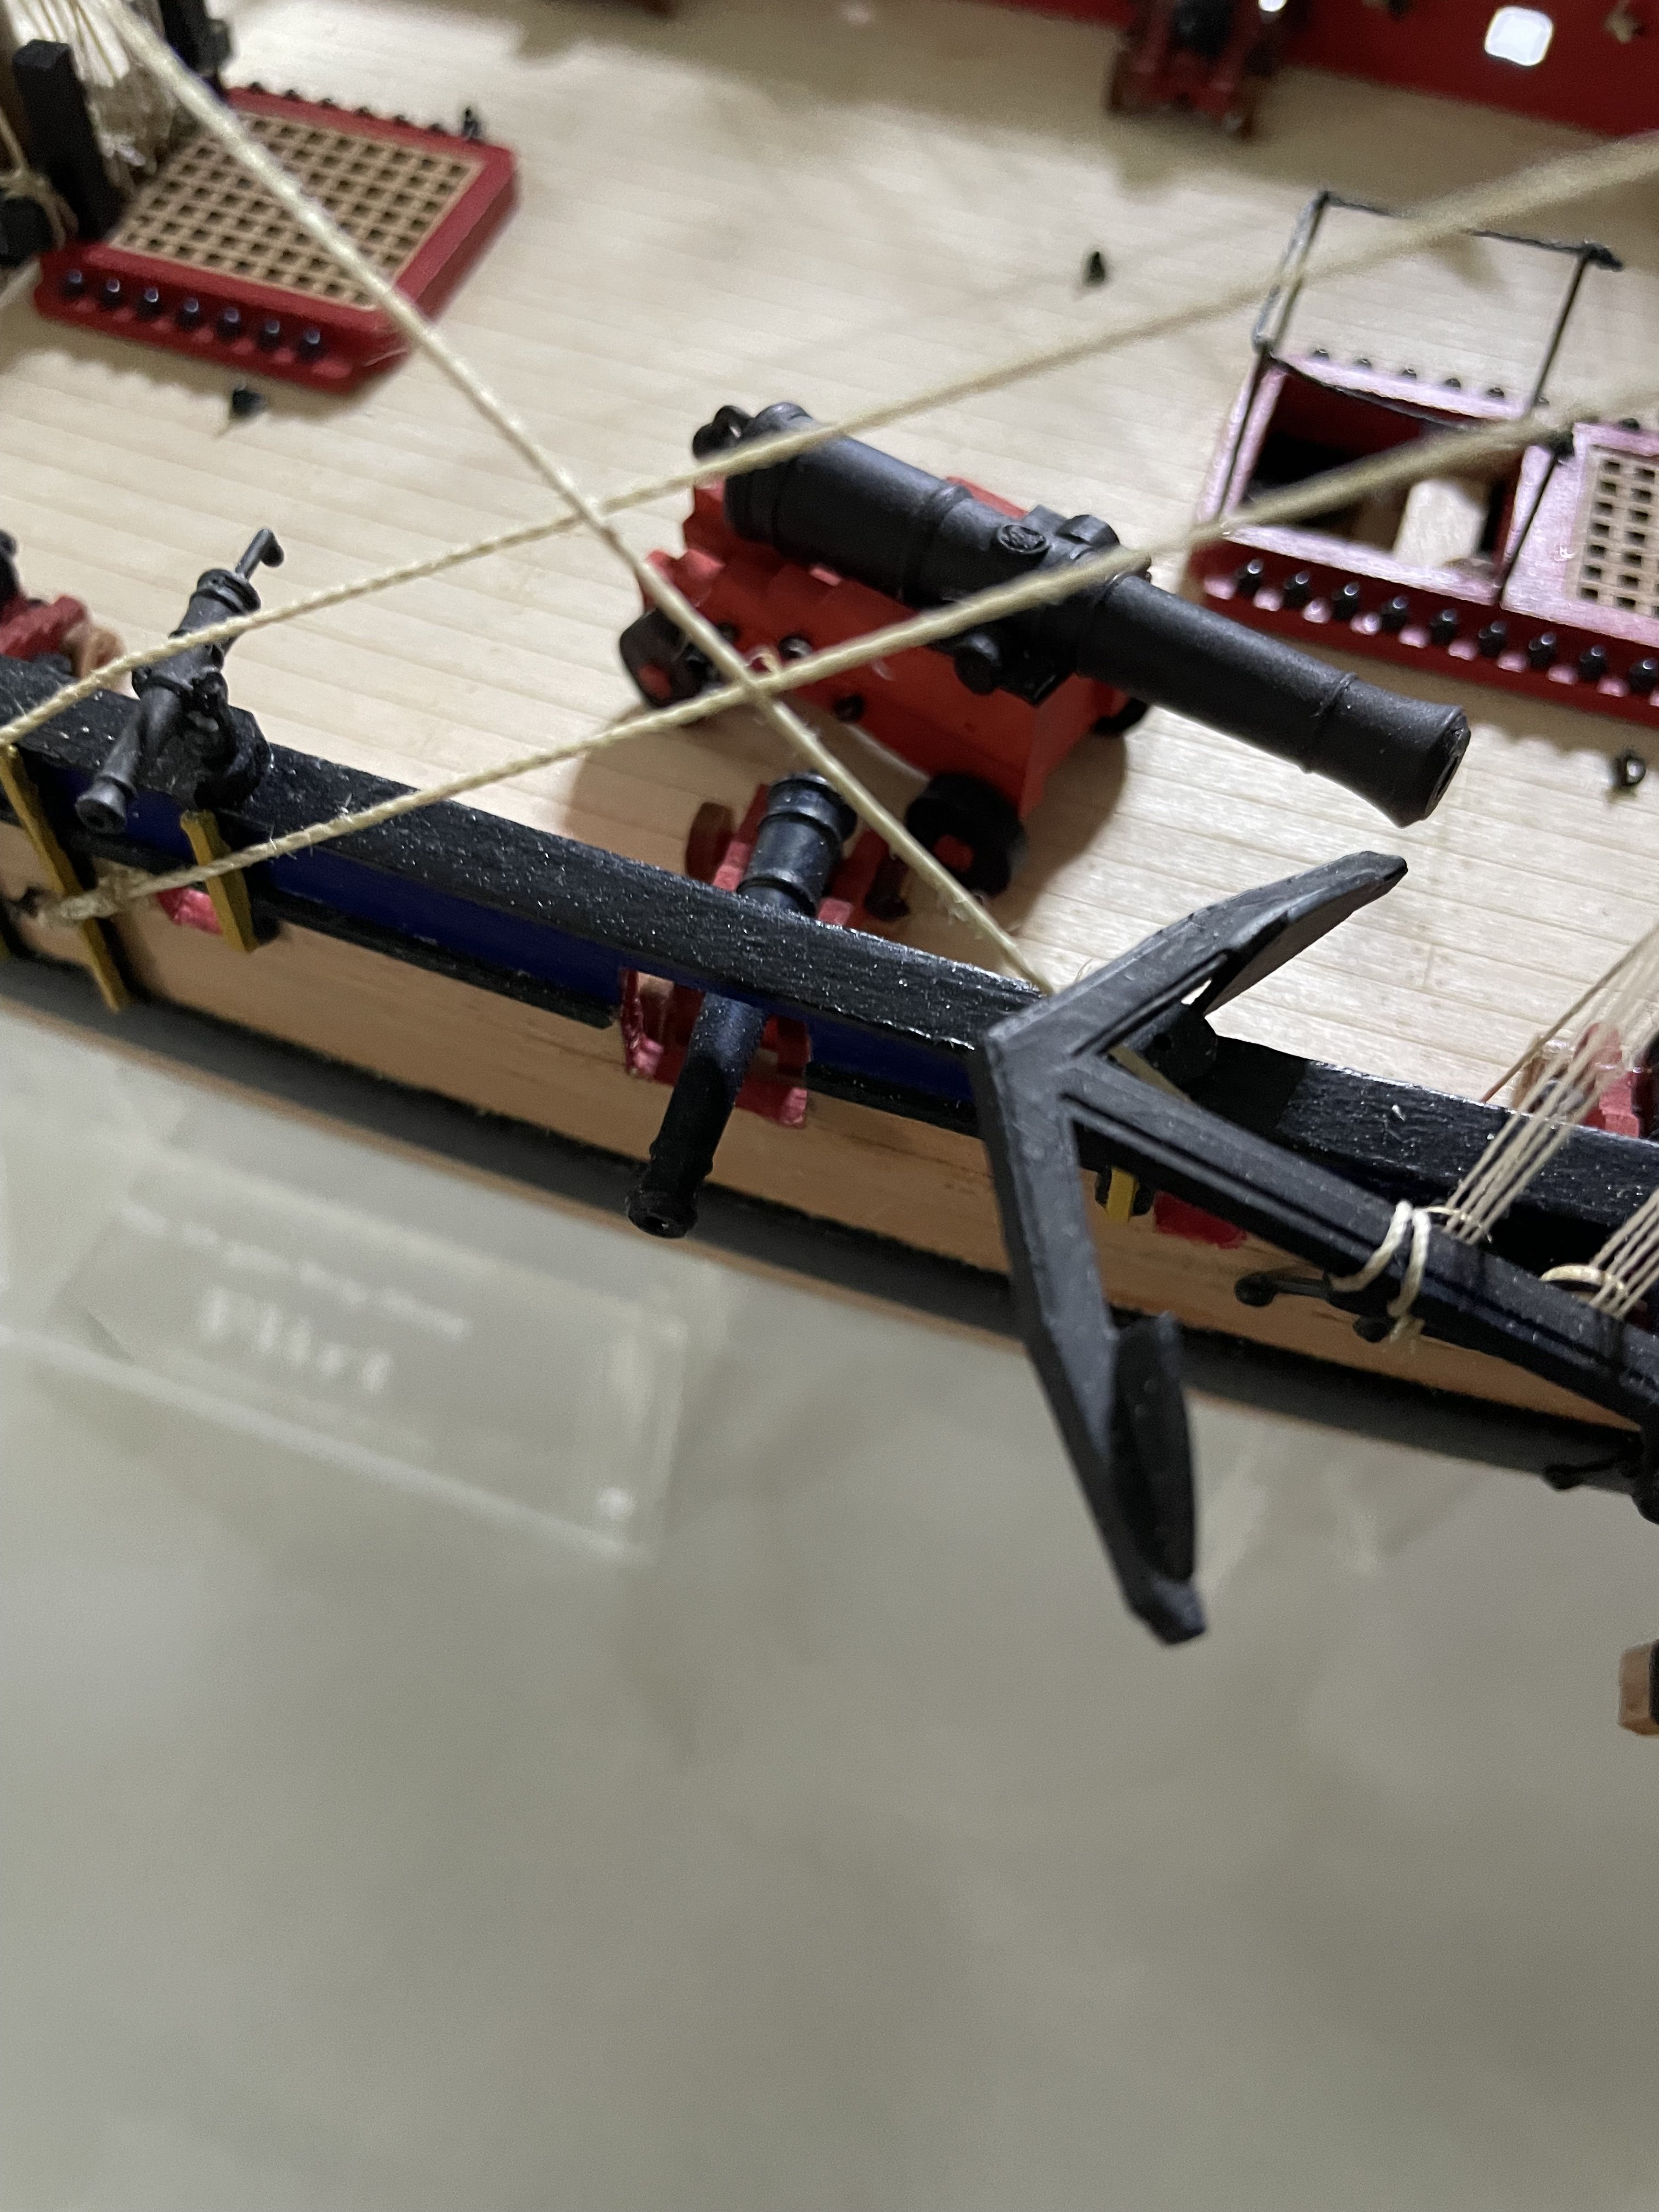
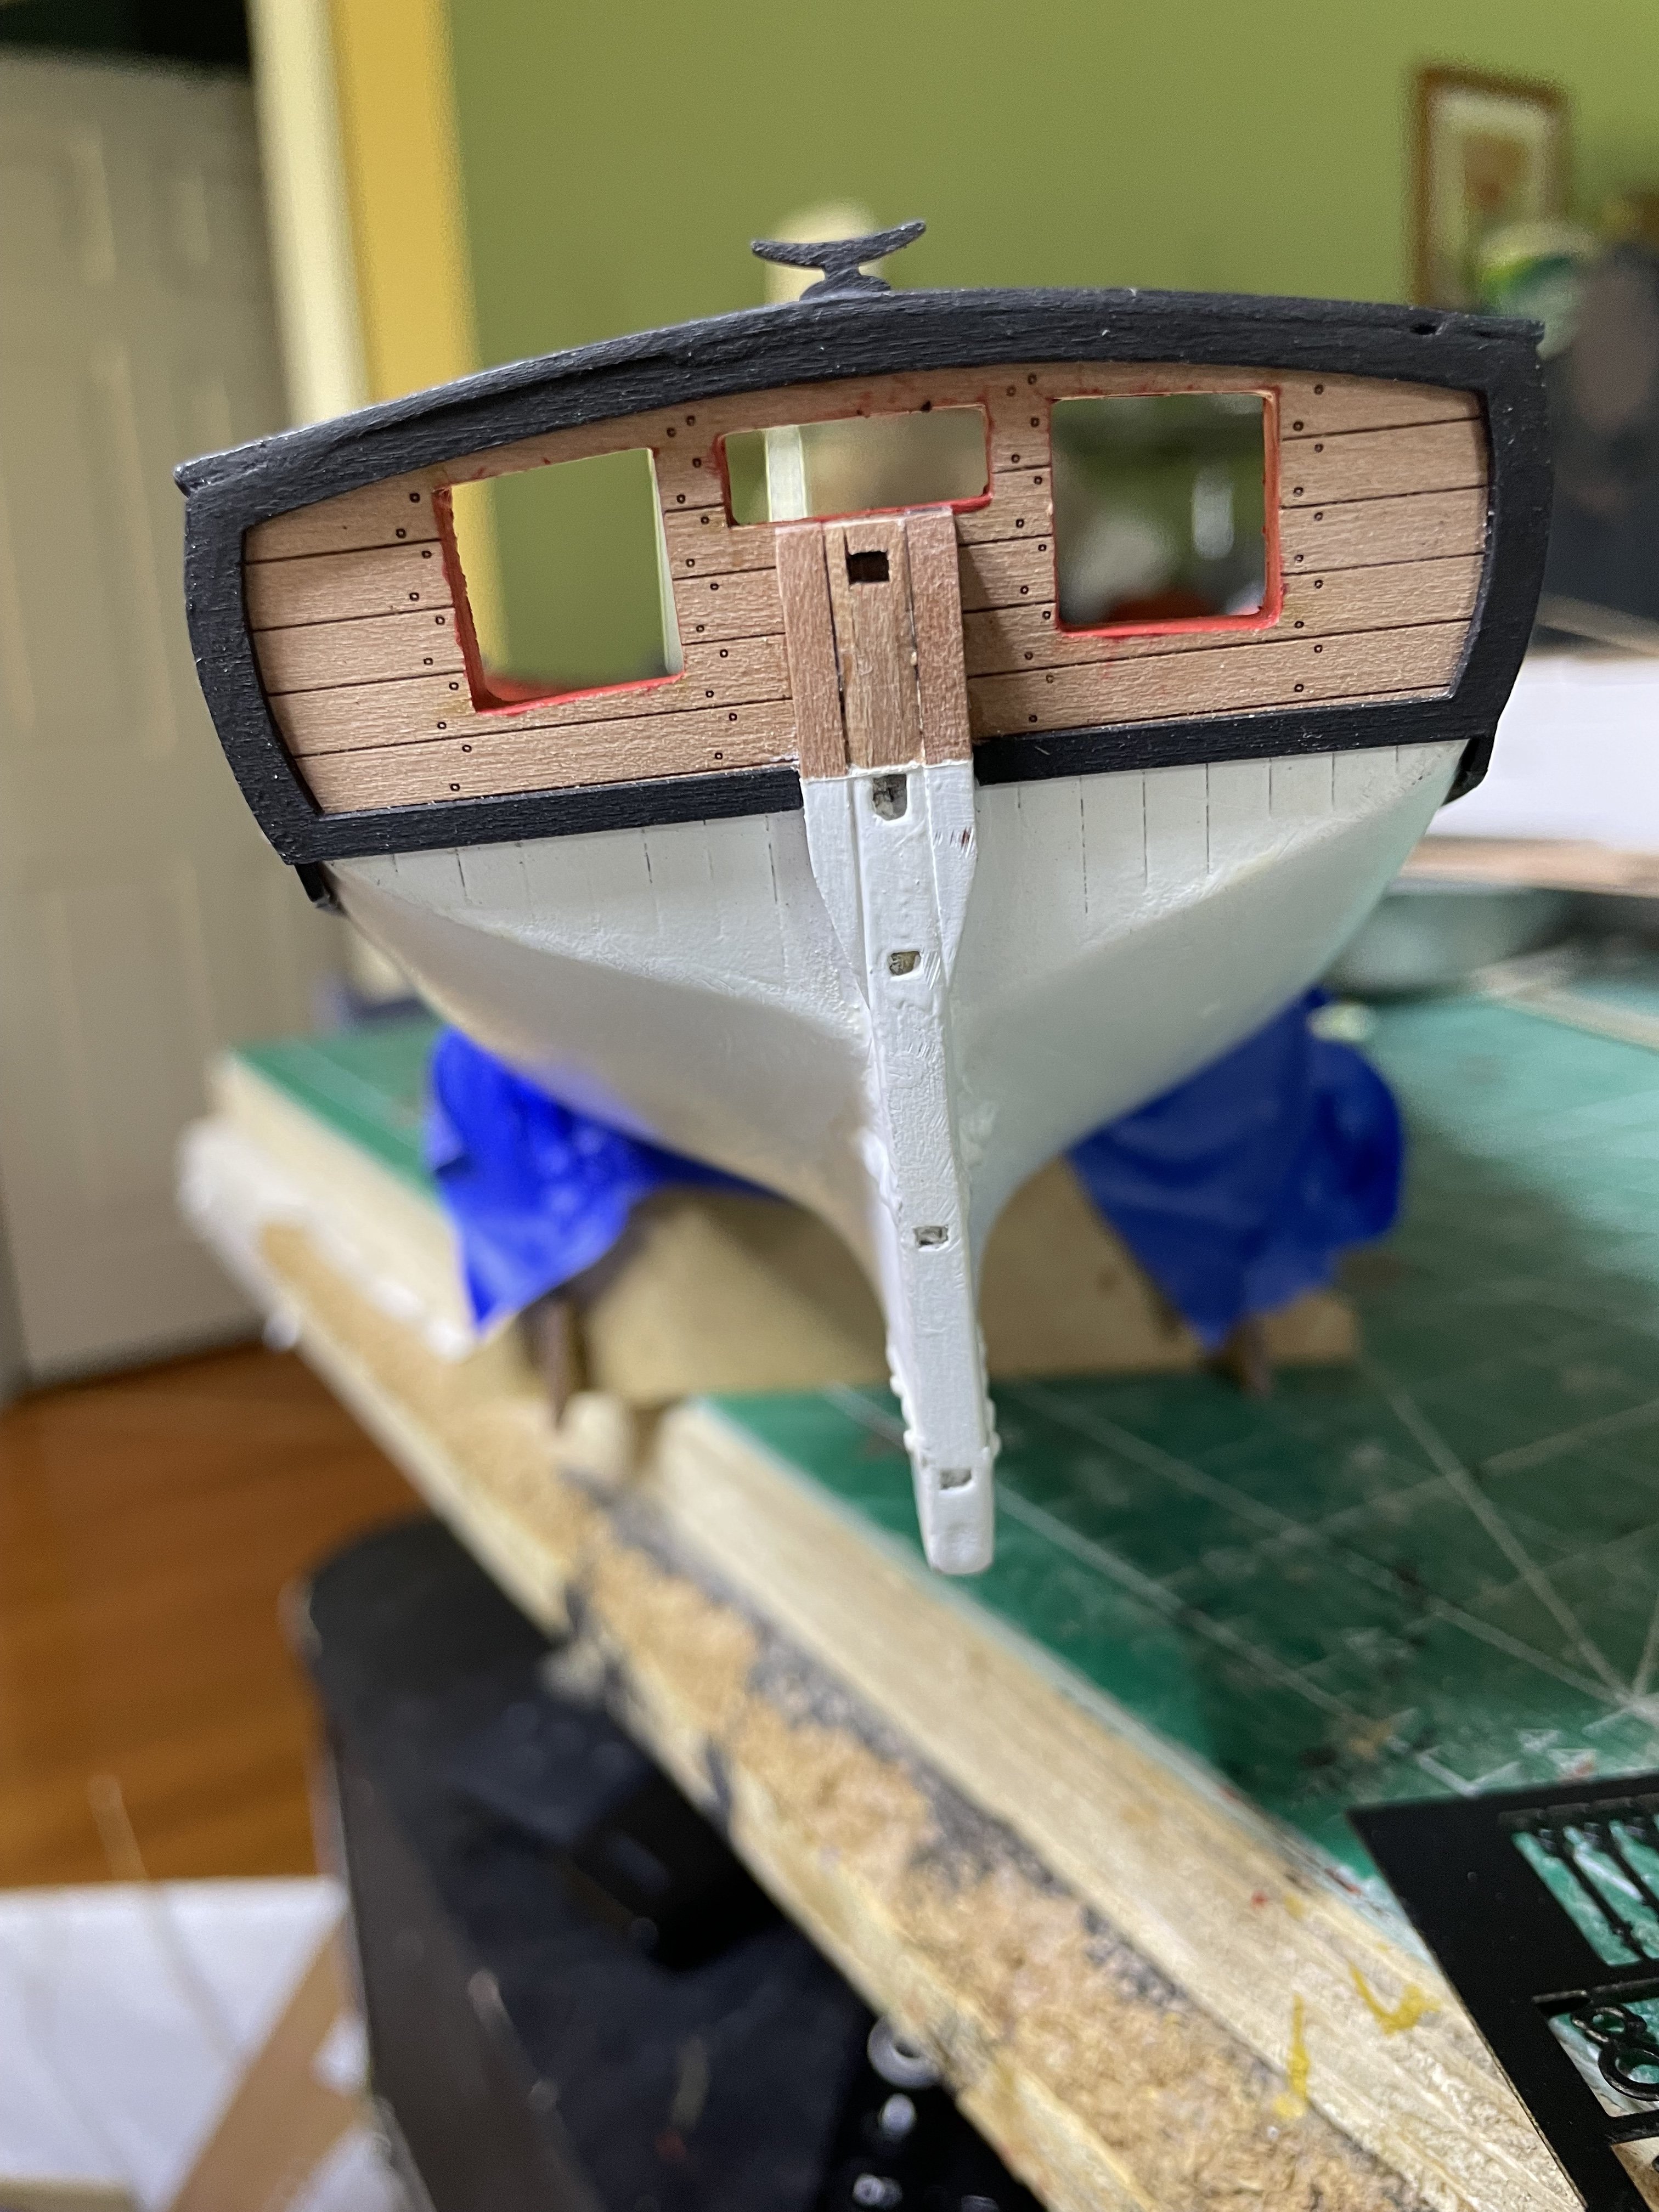
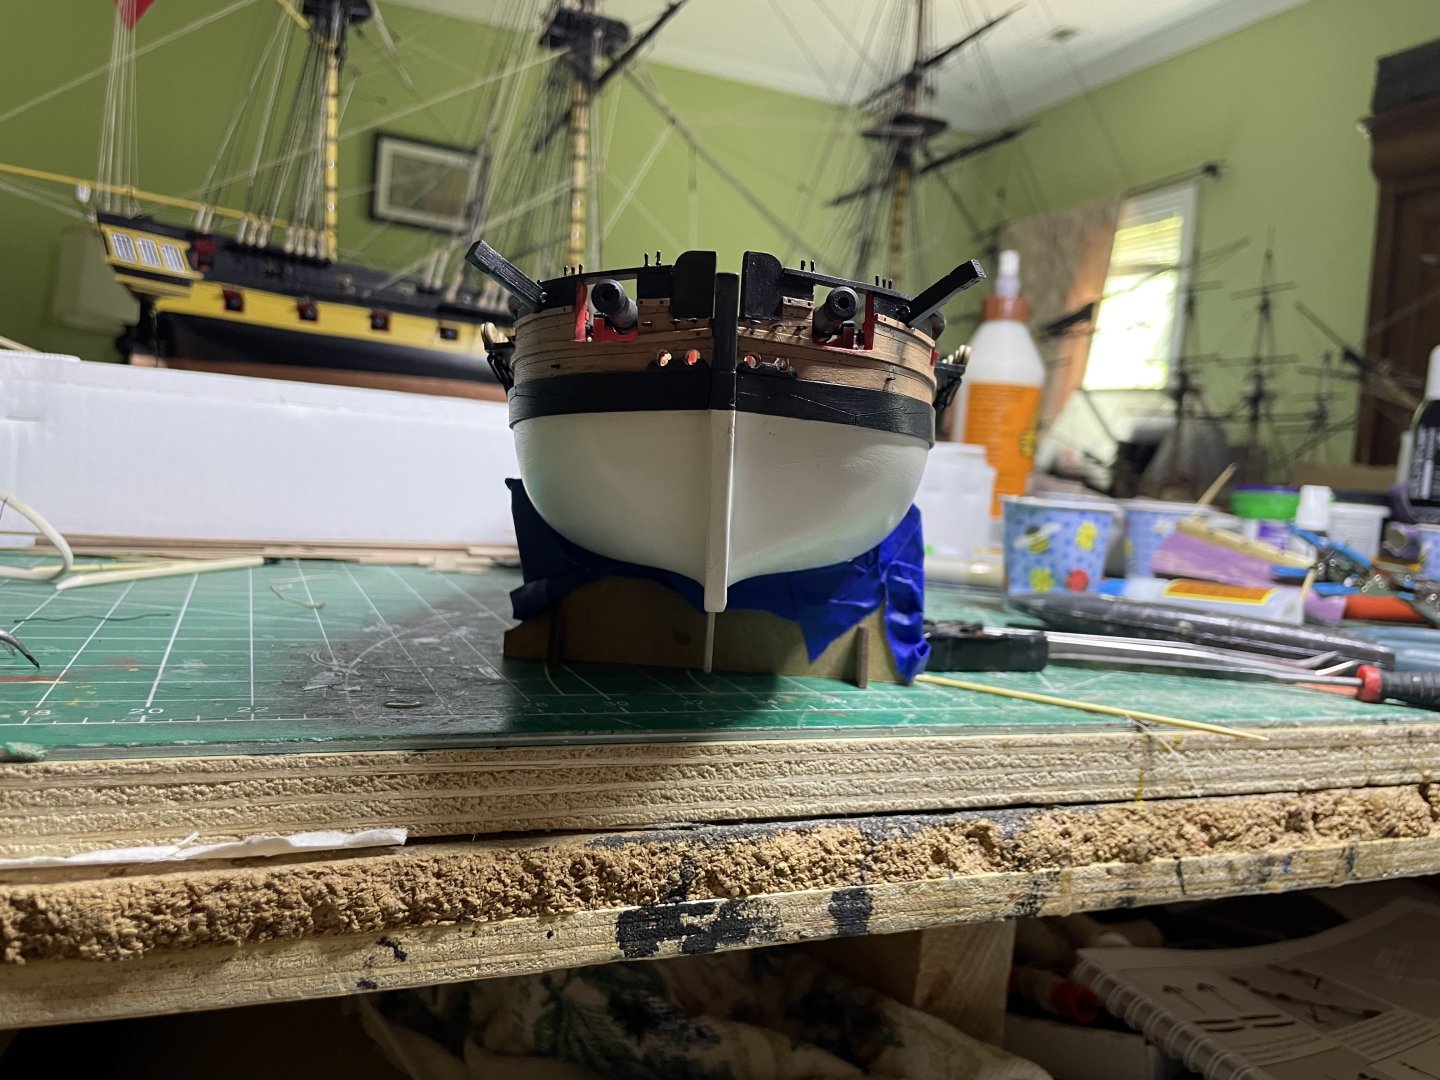
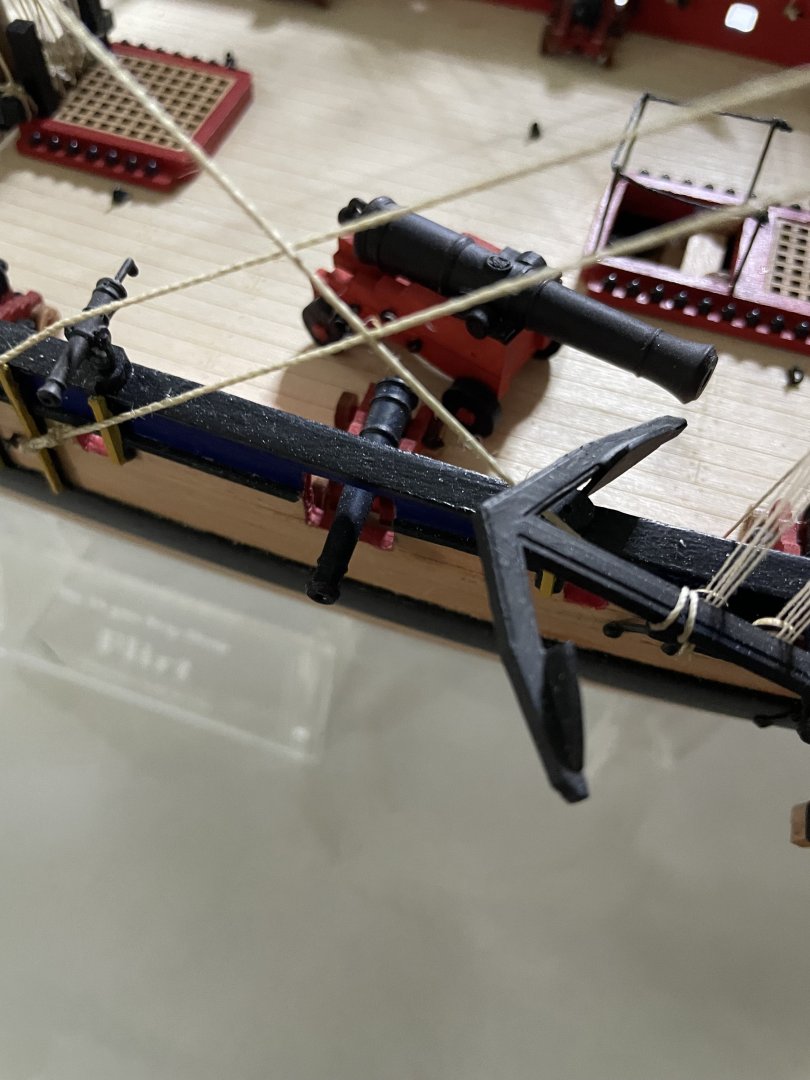
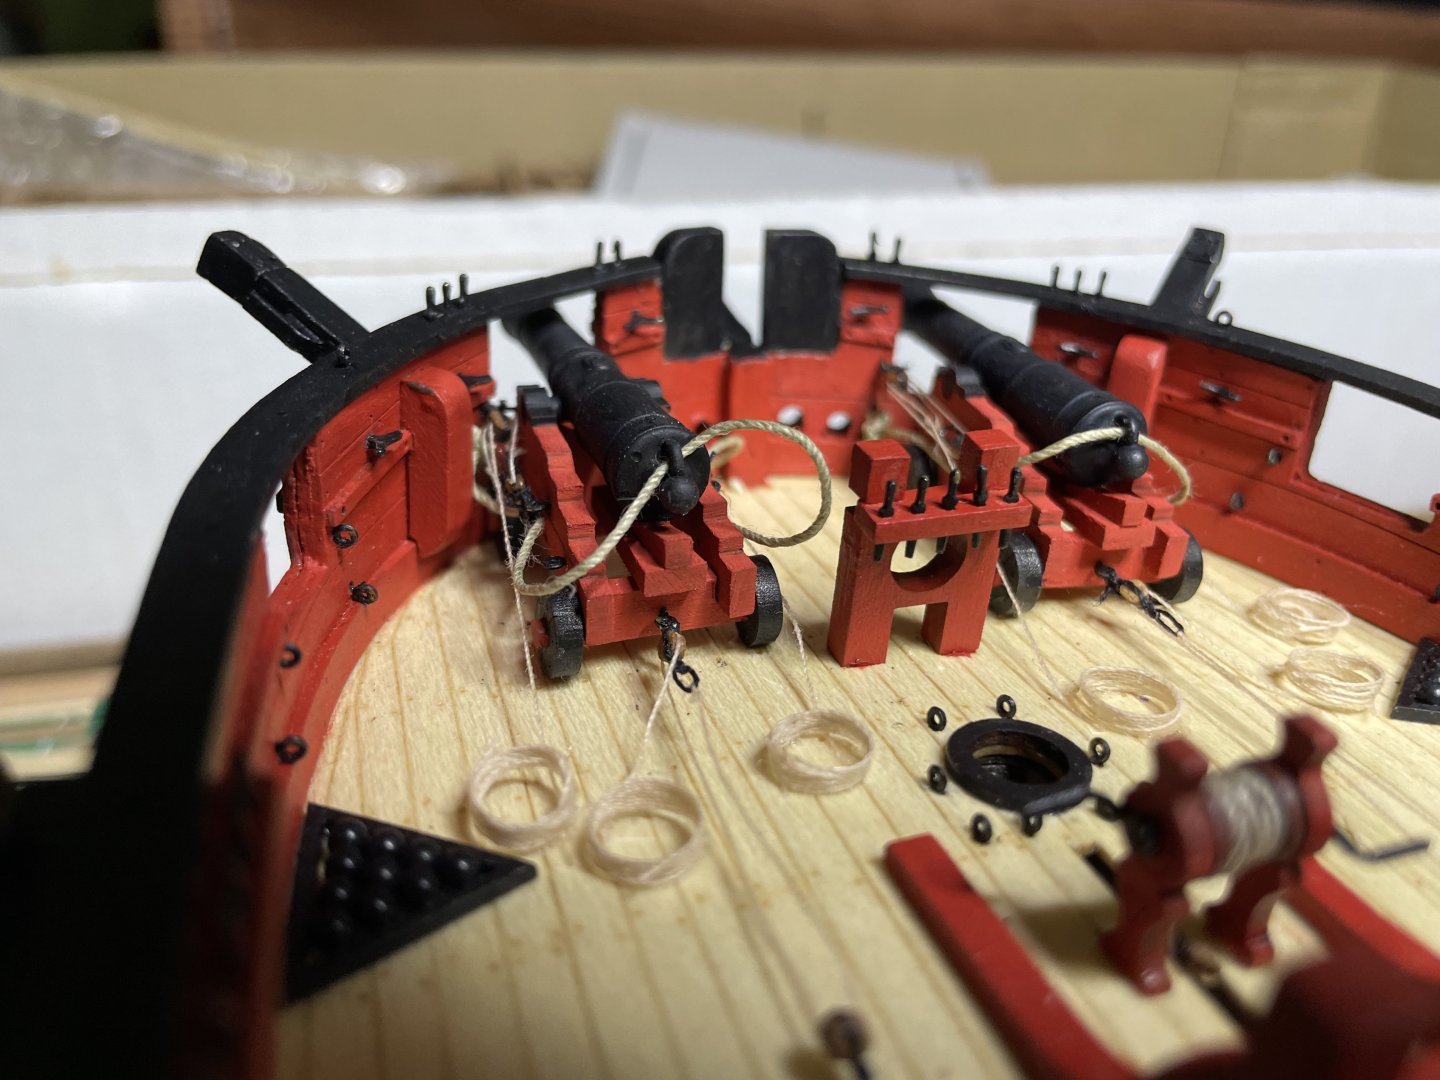
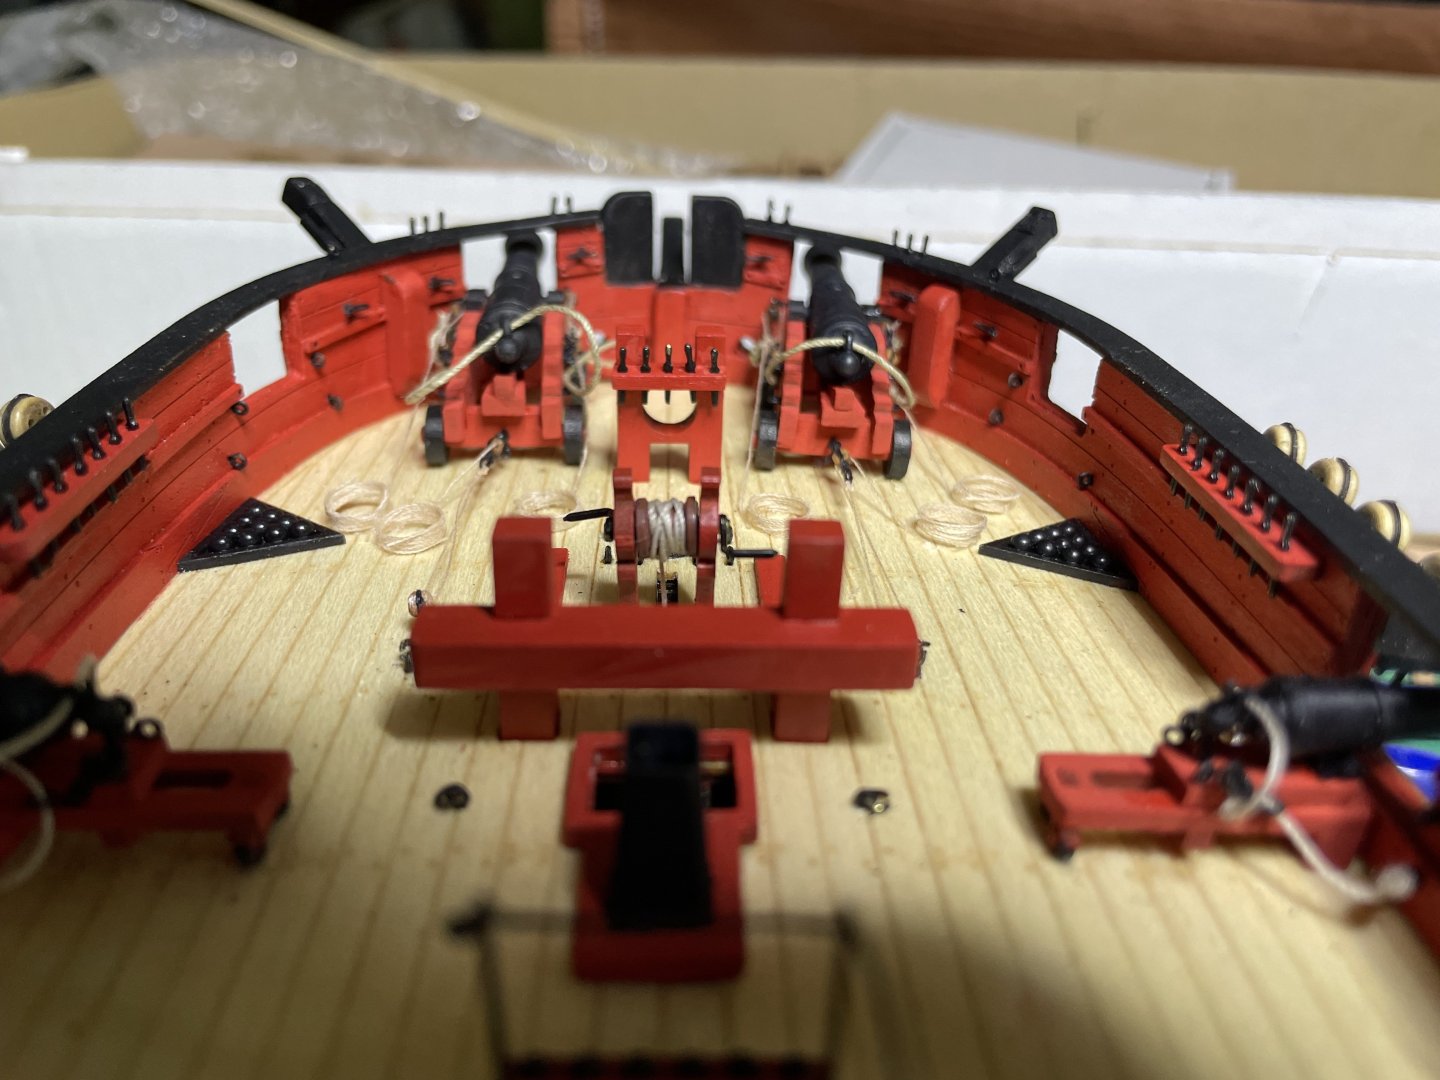
Nice work. Always a few niggling at the edges. I do think the bow 24 ponders need to face forward as the recoil at that angle would slam into the bowsprit base.
-
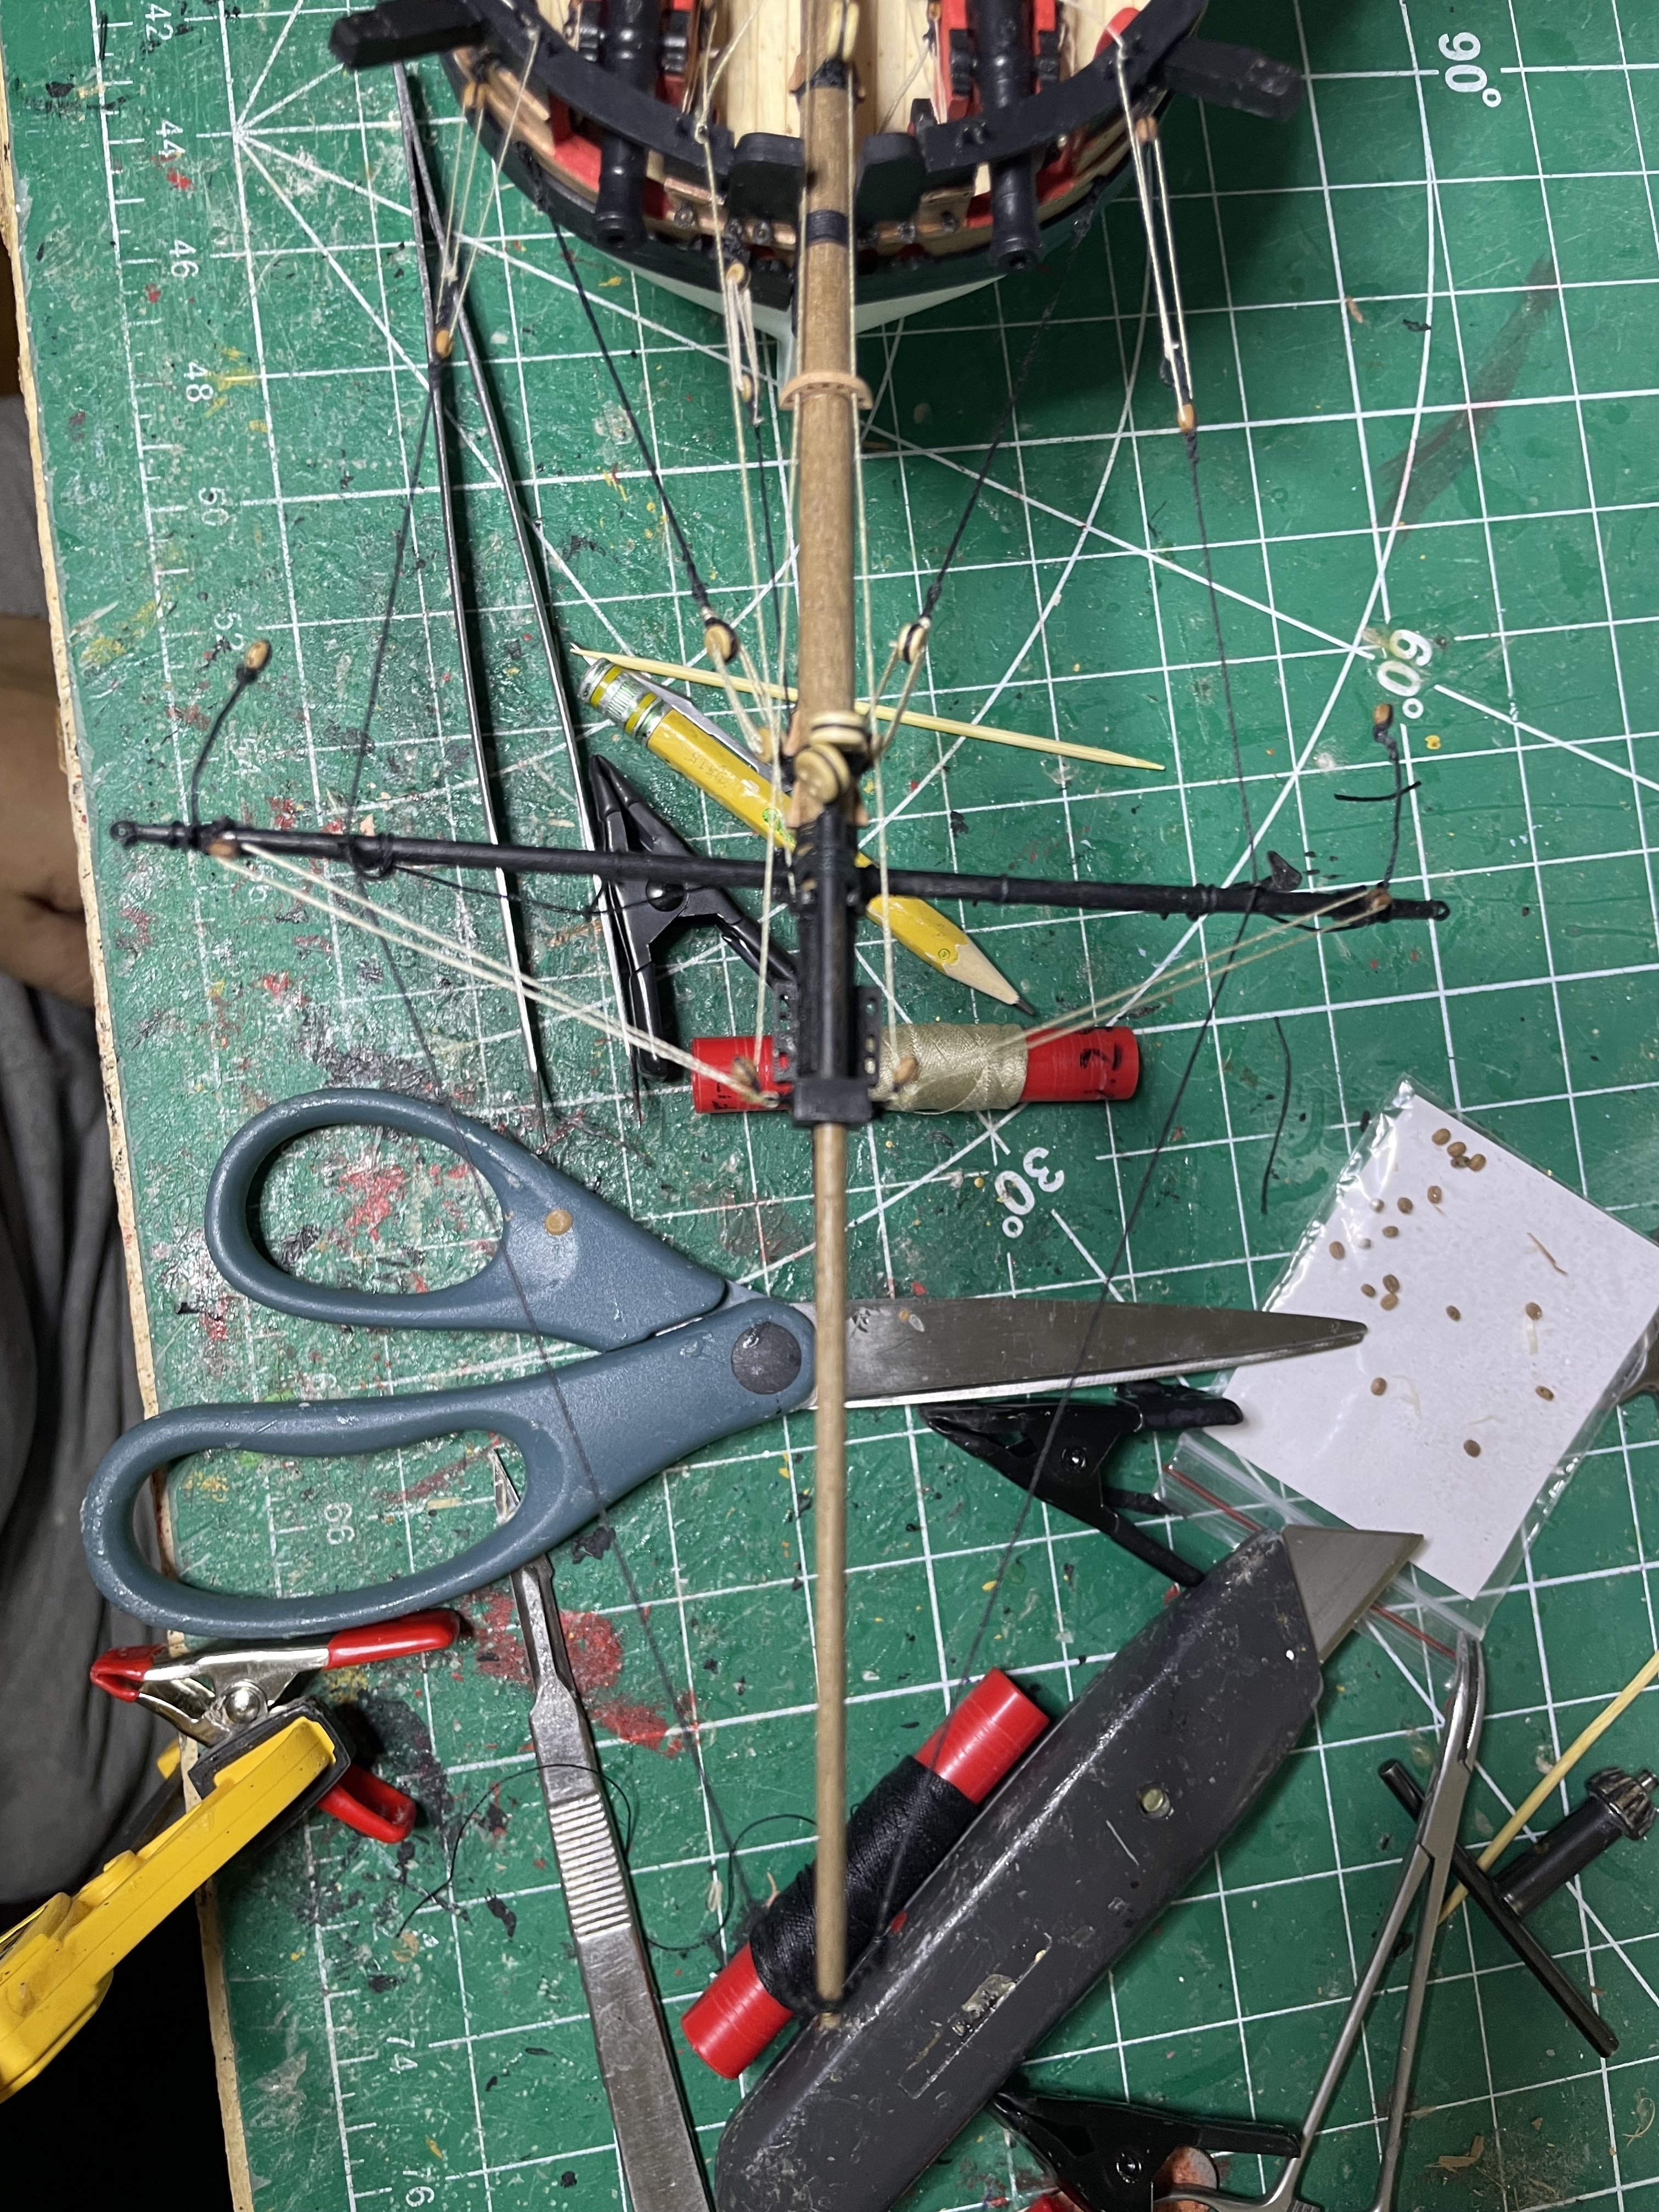
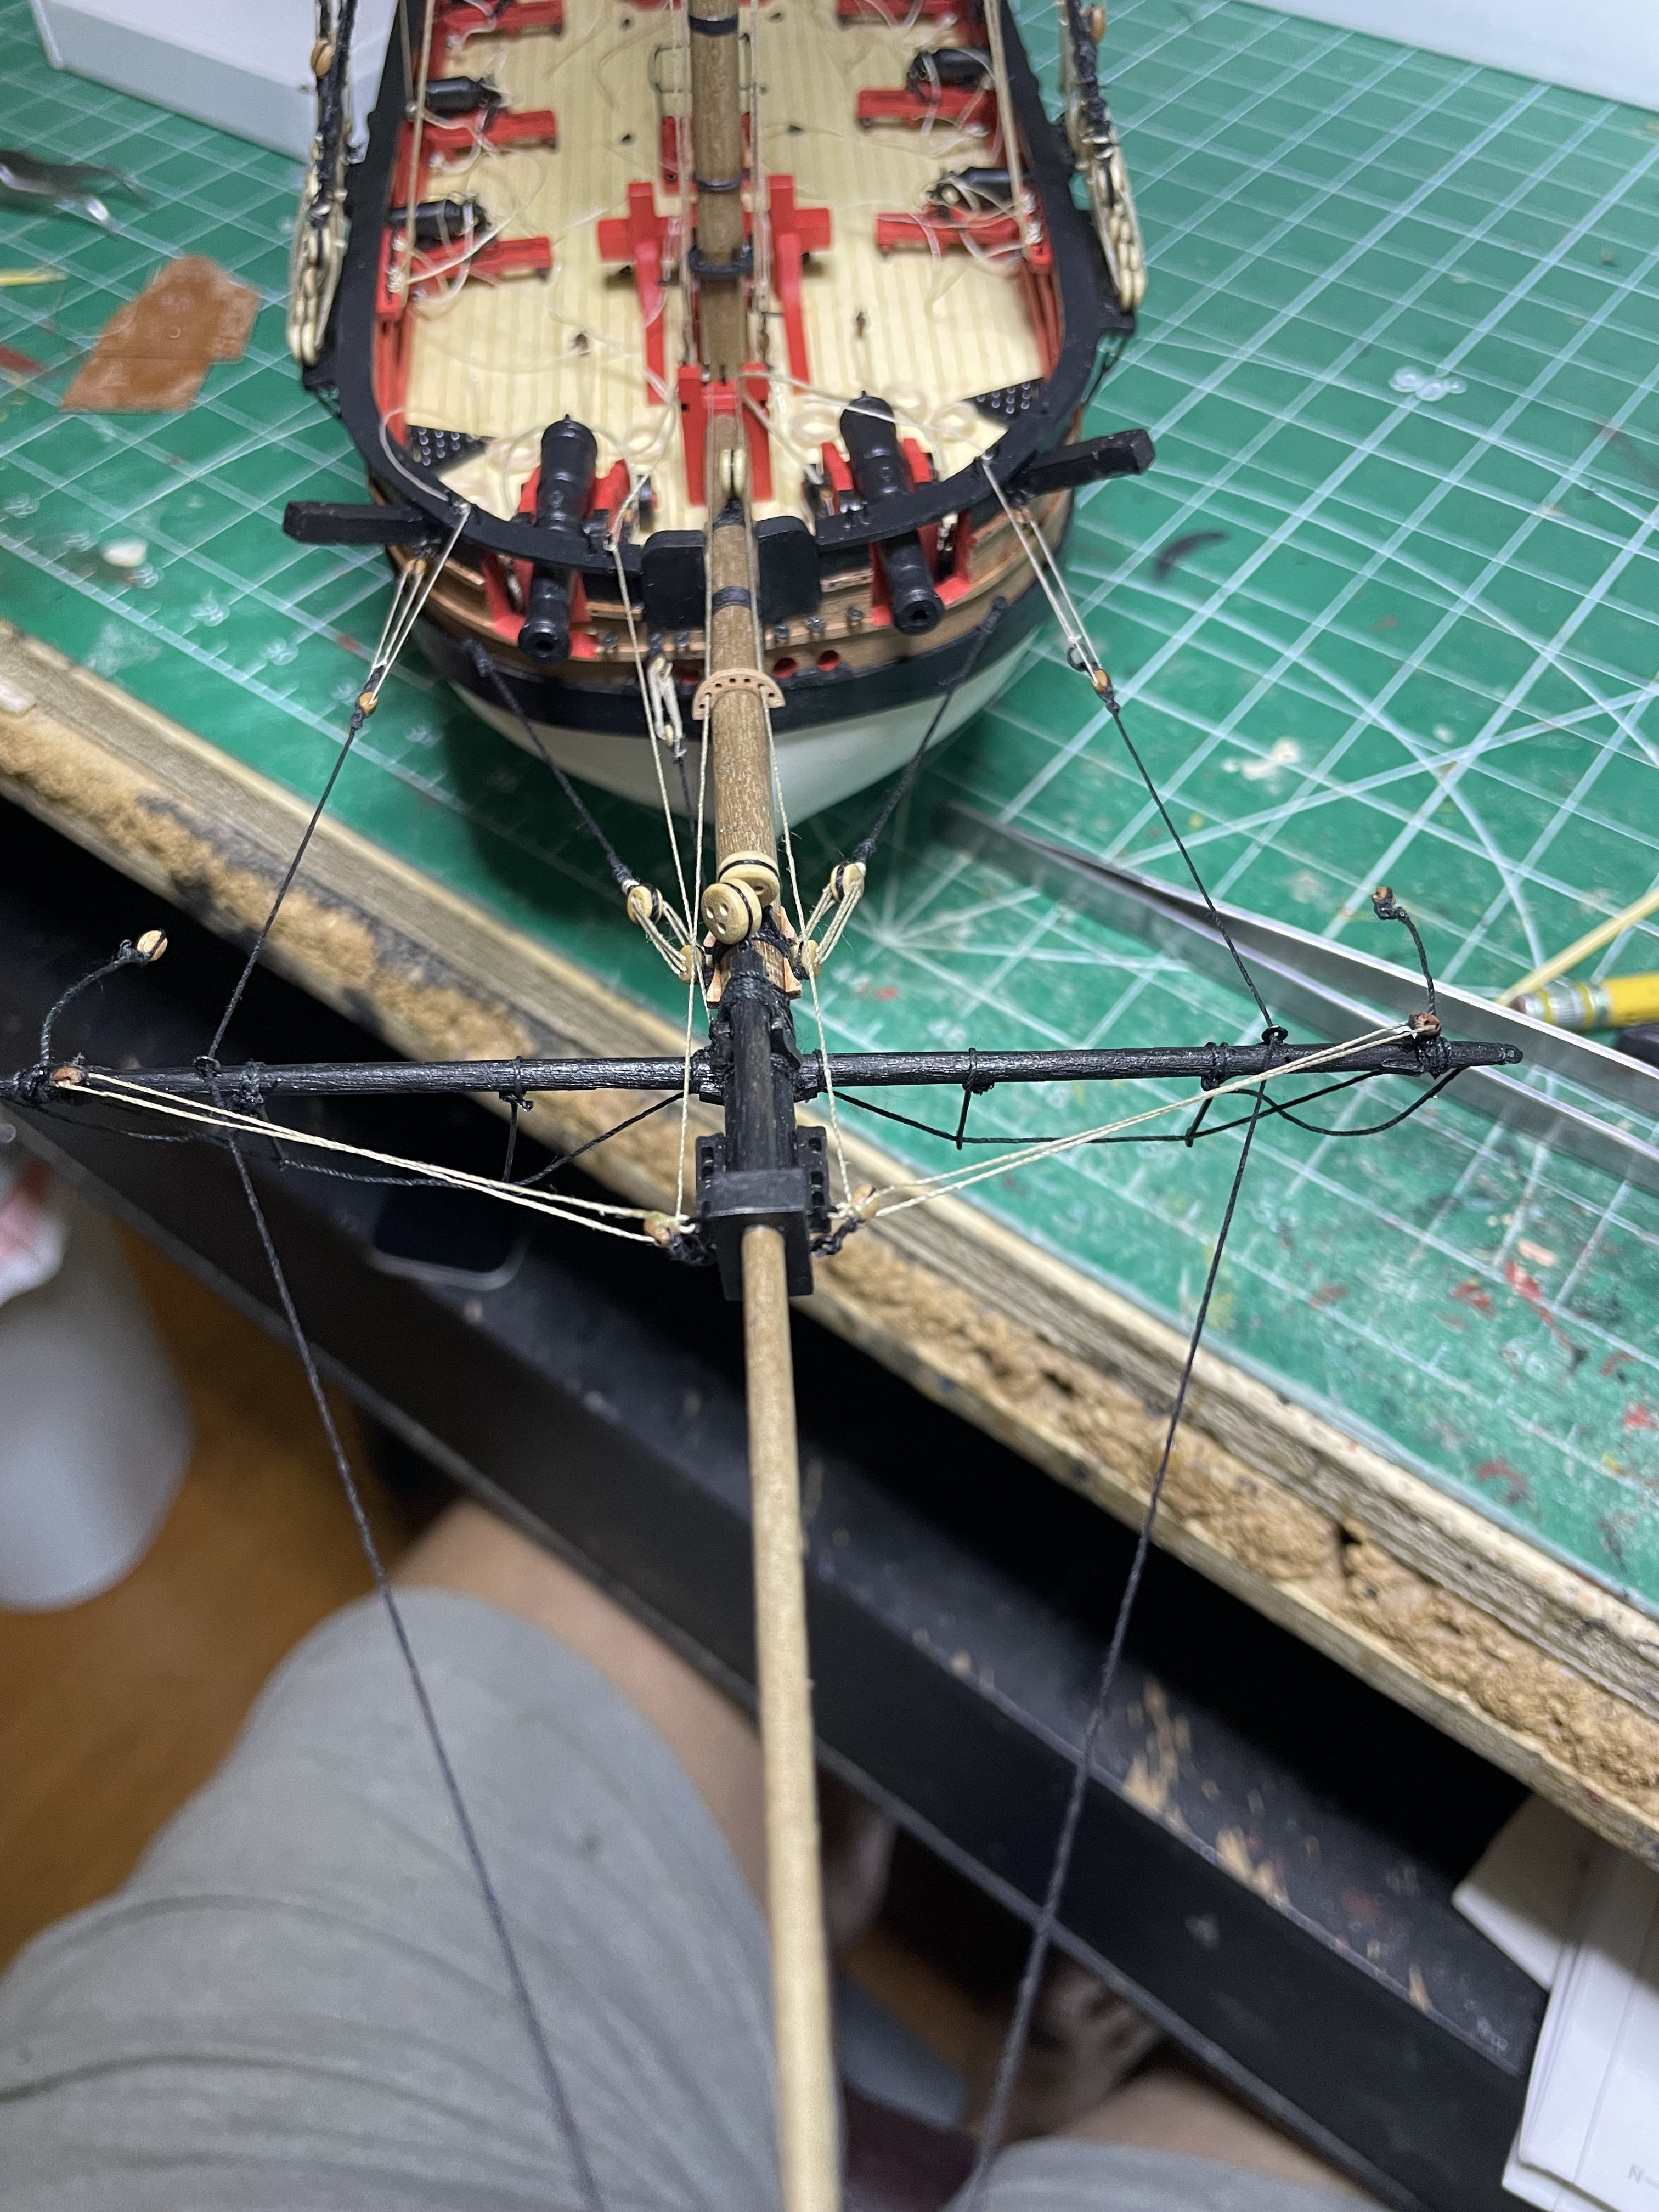
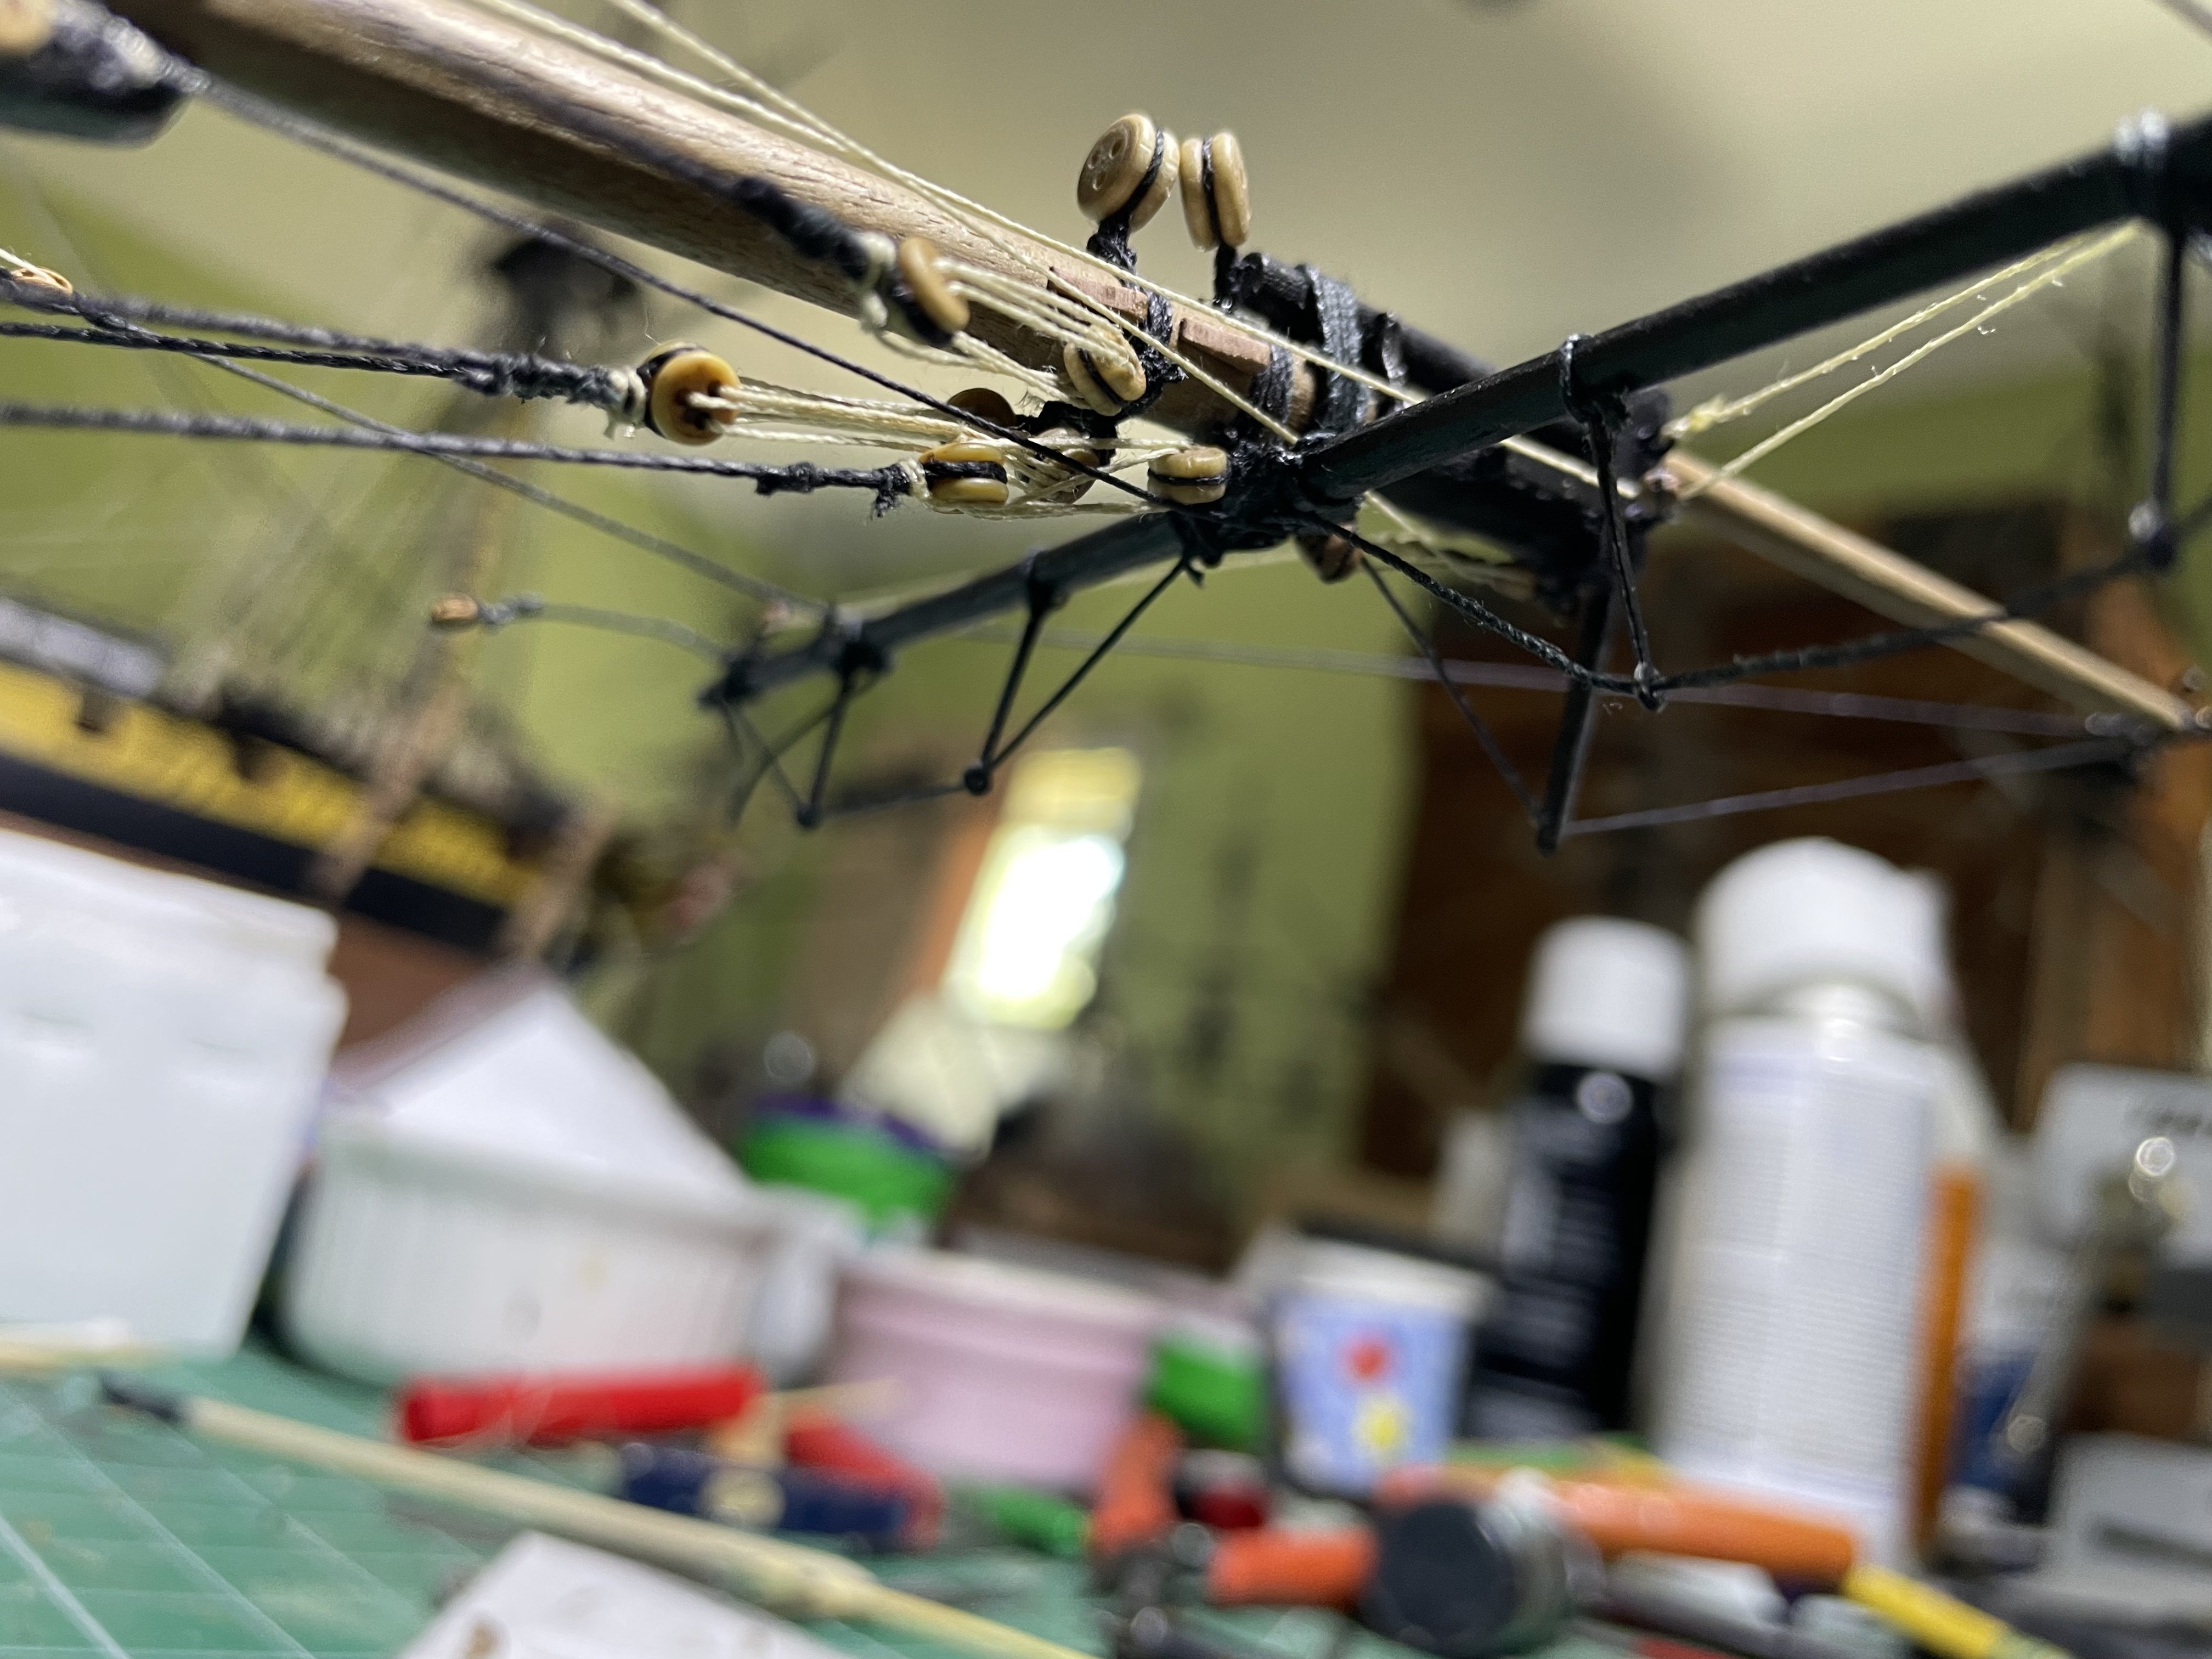
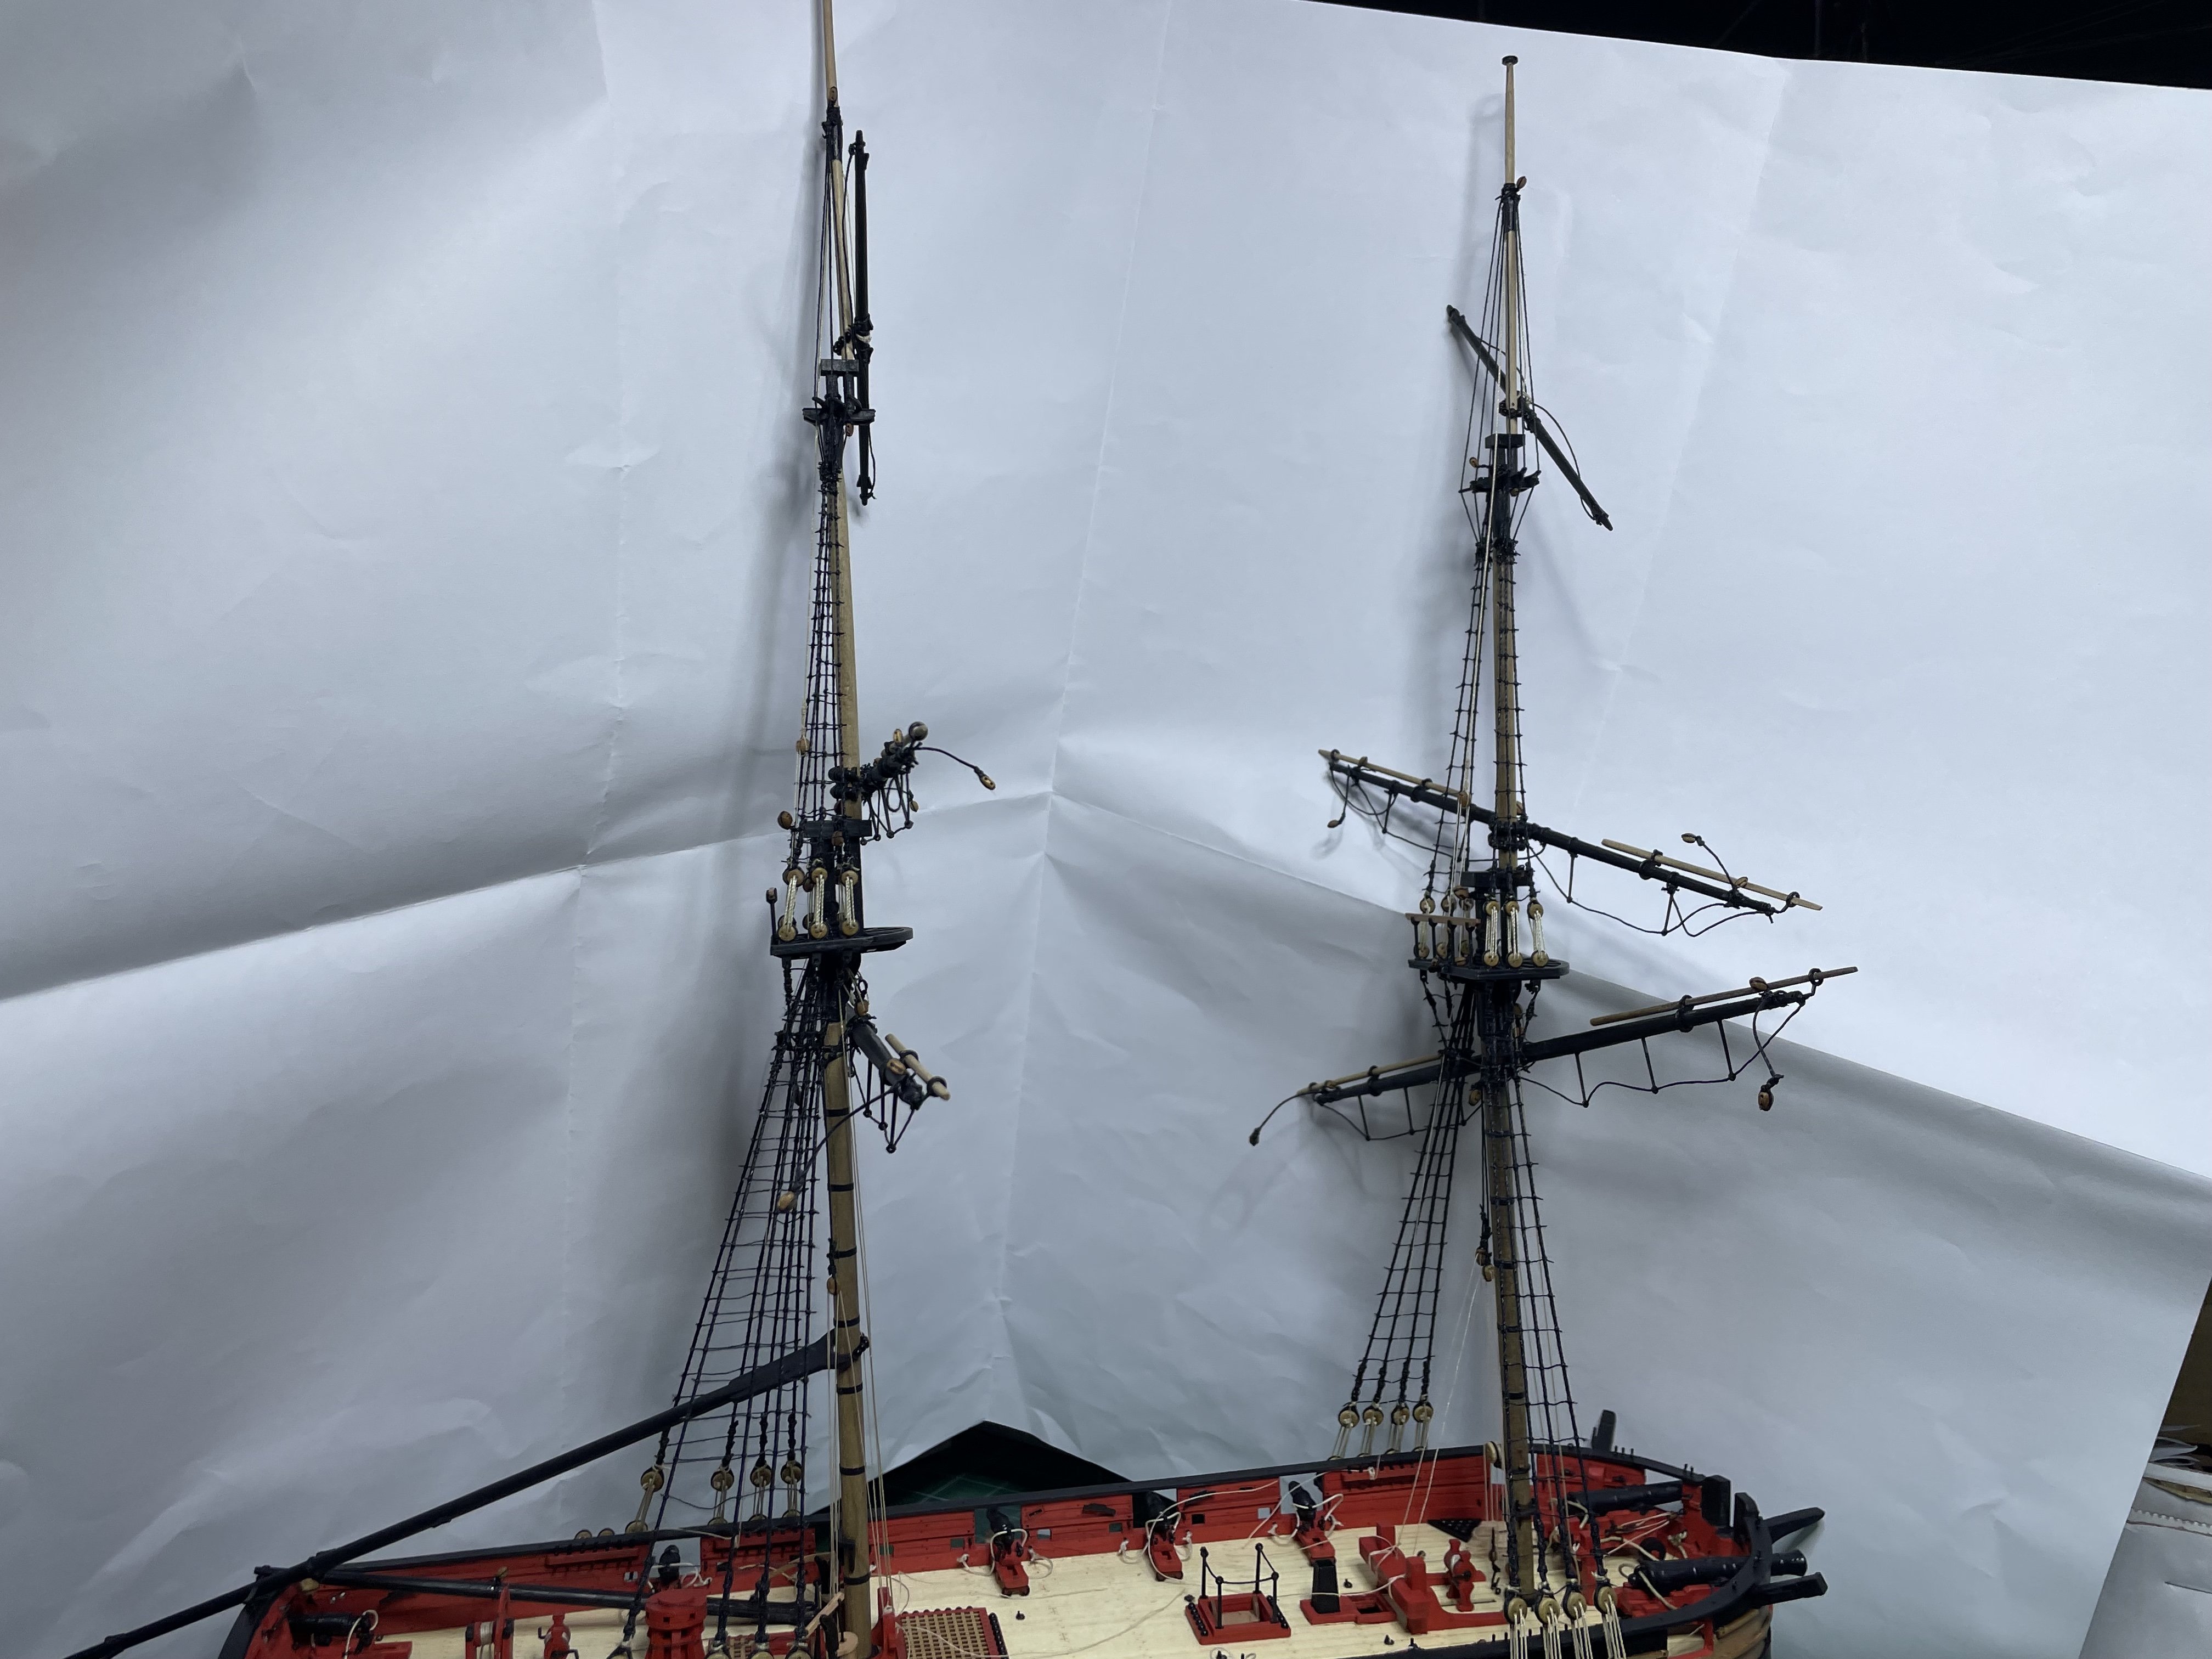
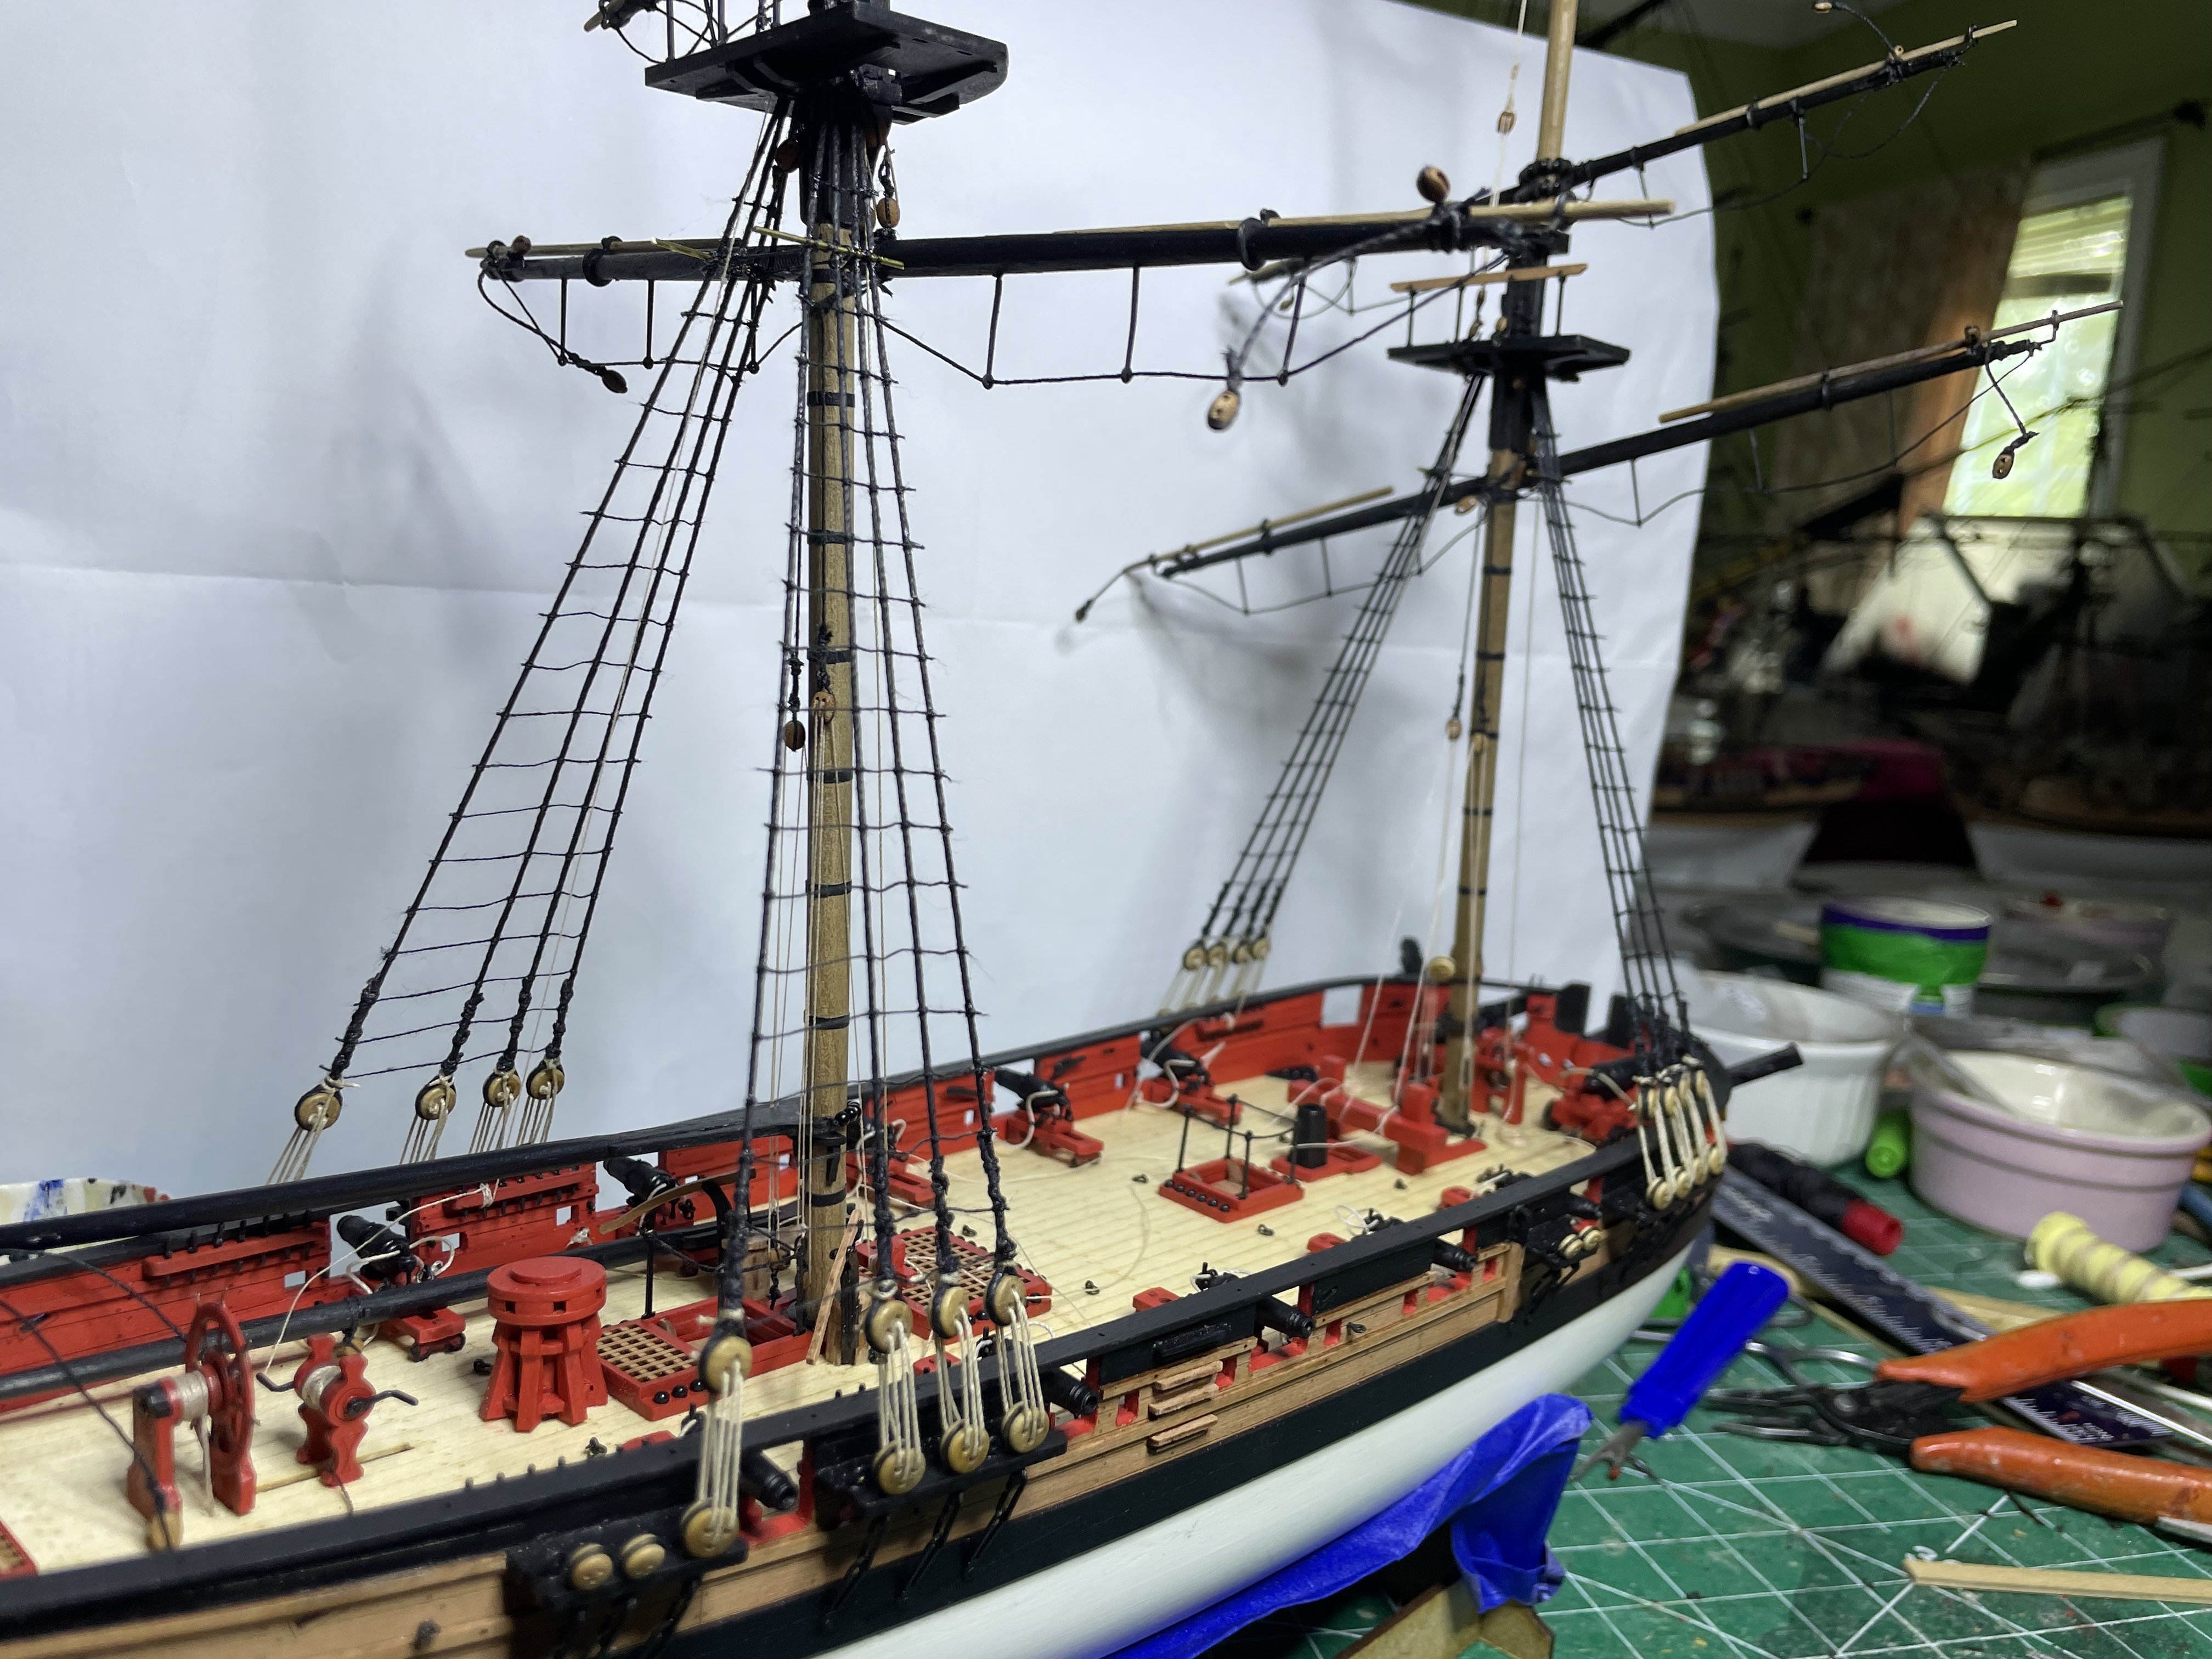
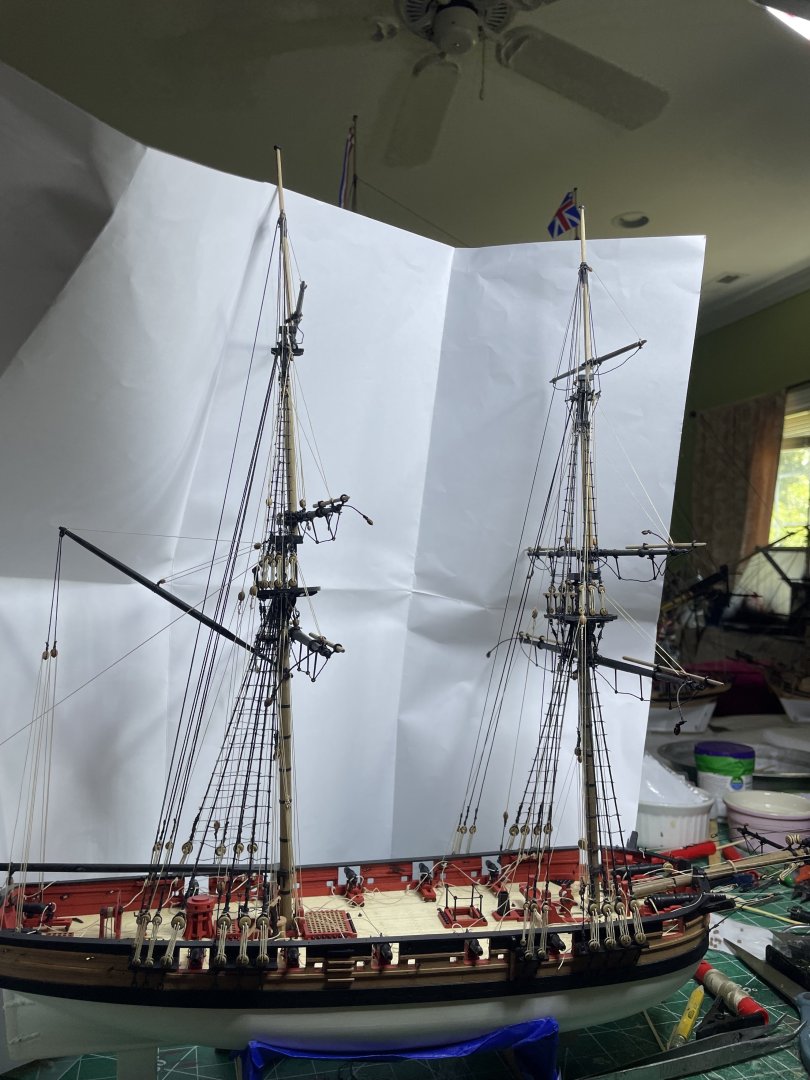
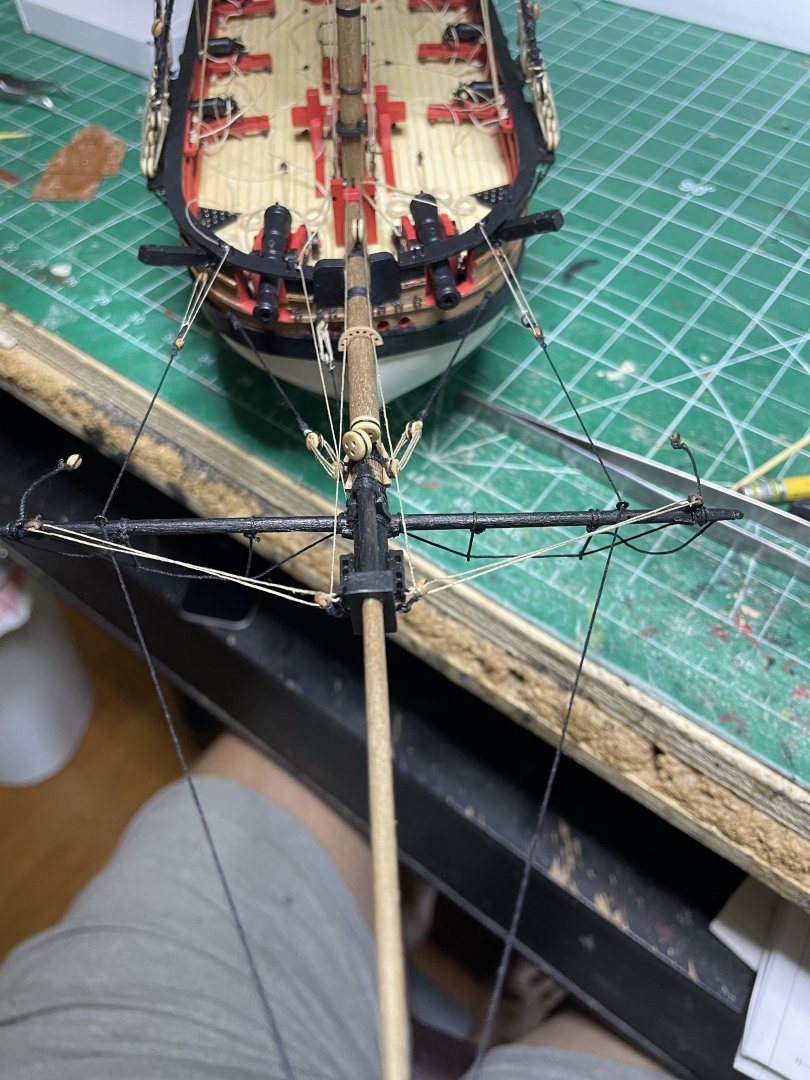
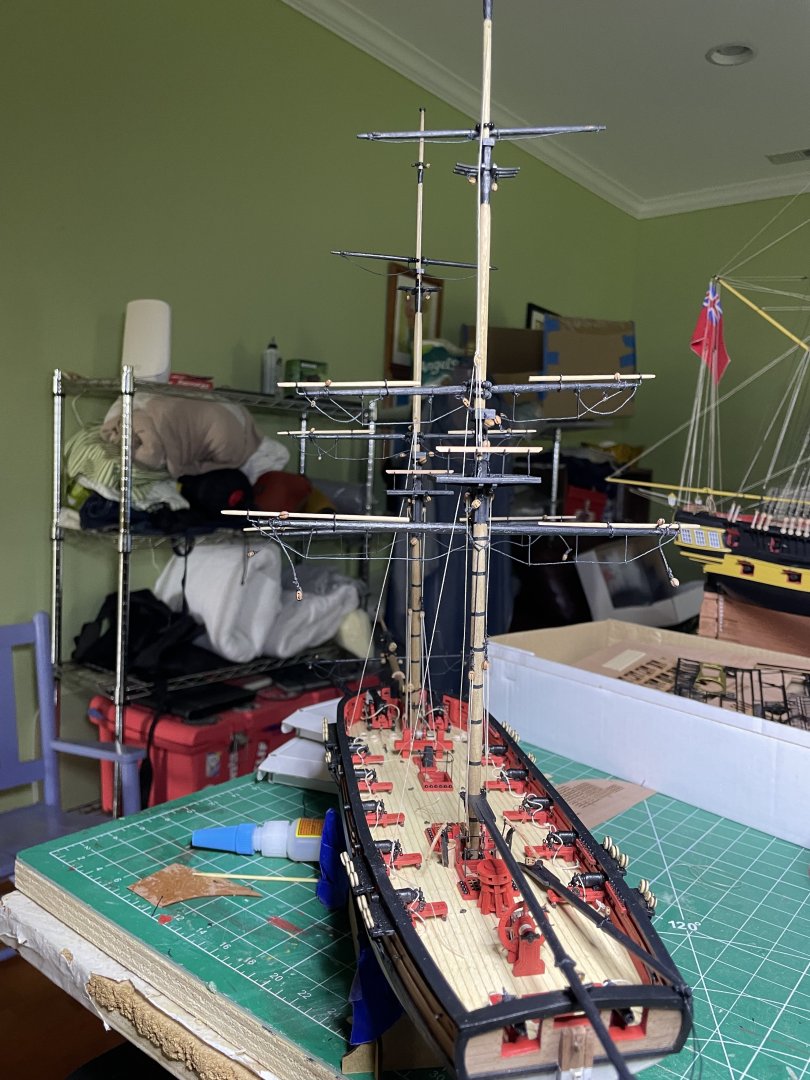
Next came the backstays The the bowsprit Now some of the forestays


- 66 replies
-
- 14
-

-
- Adder
- Vanguard Models
- (and 1 more)
-
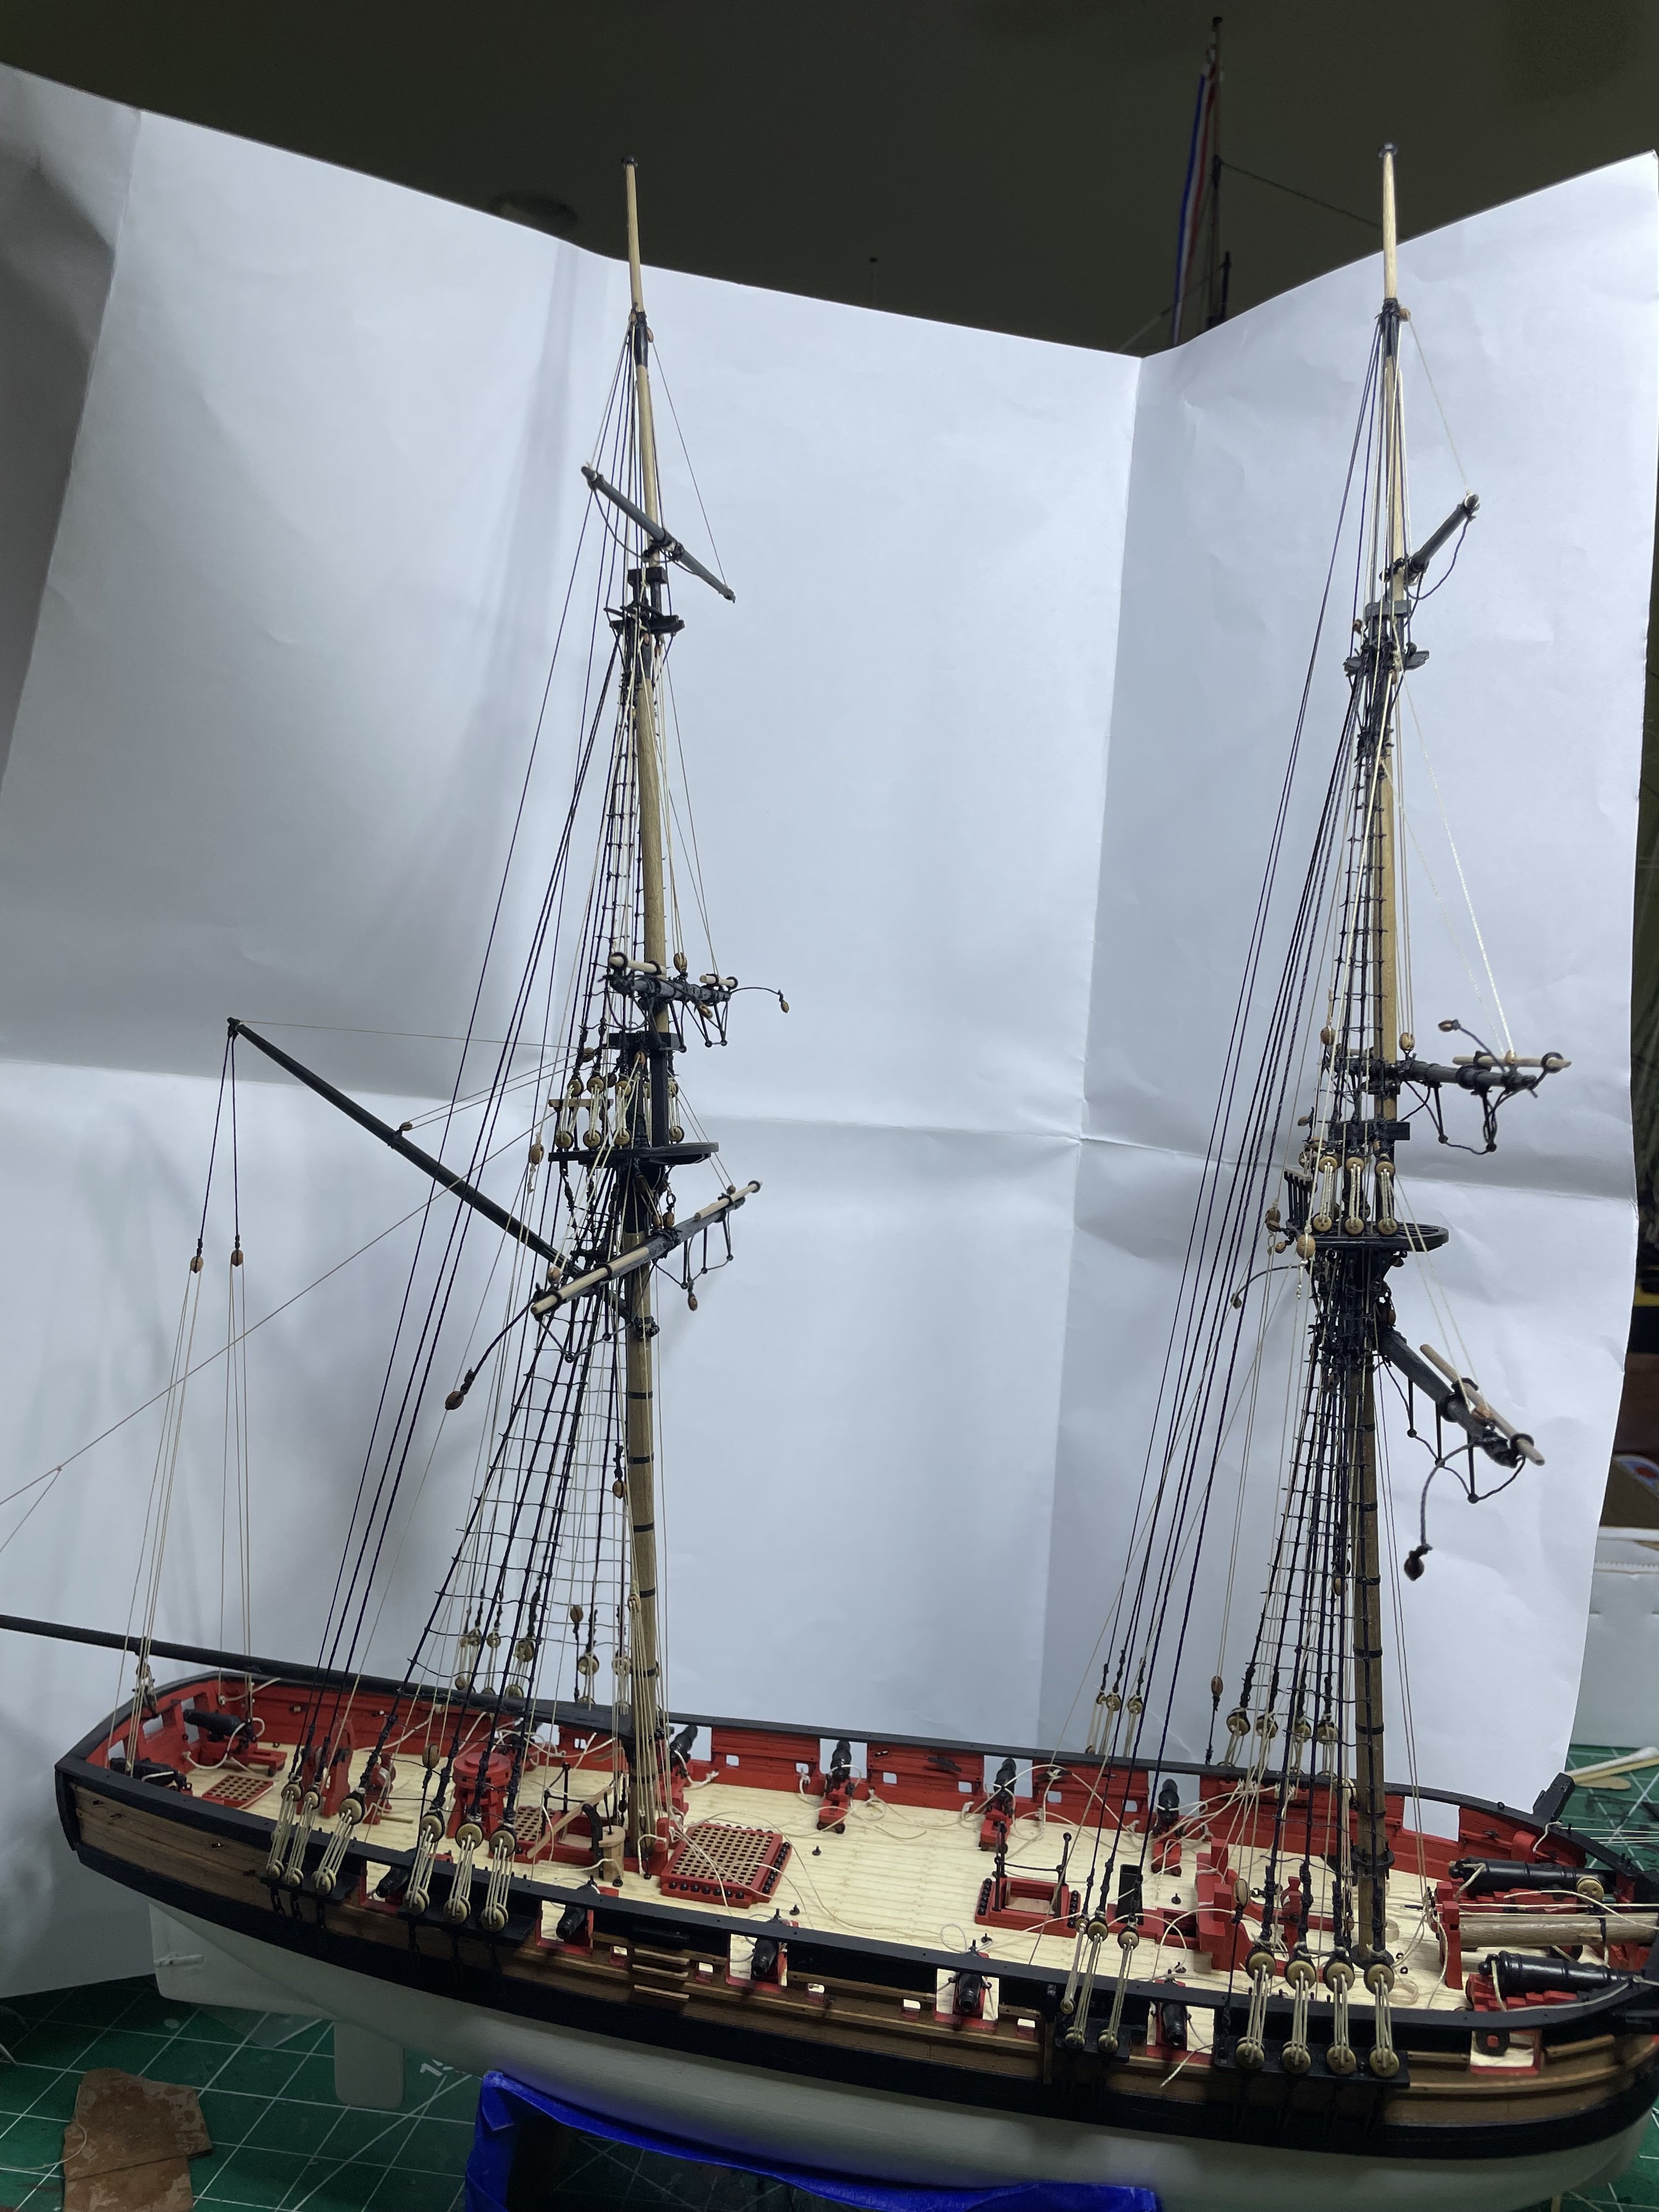
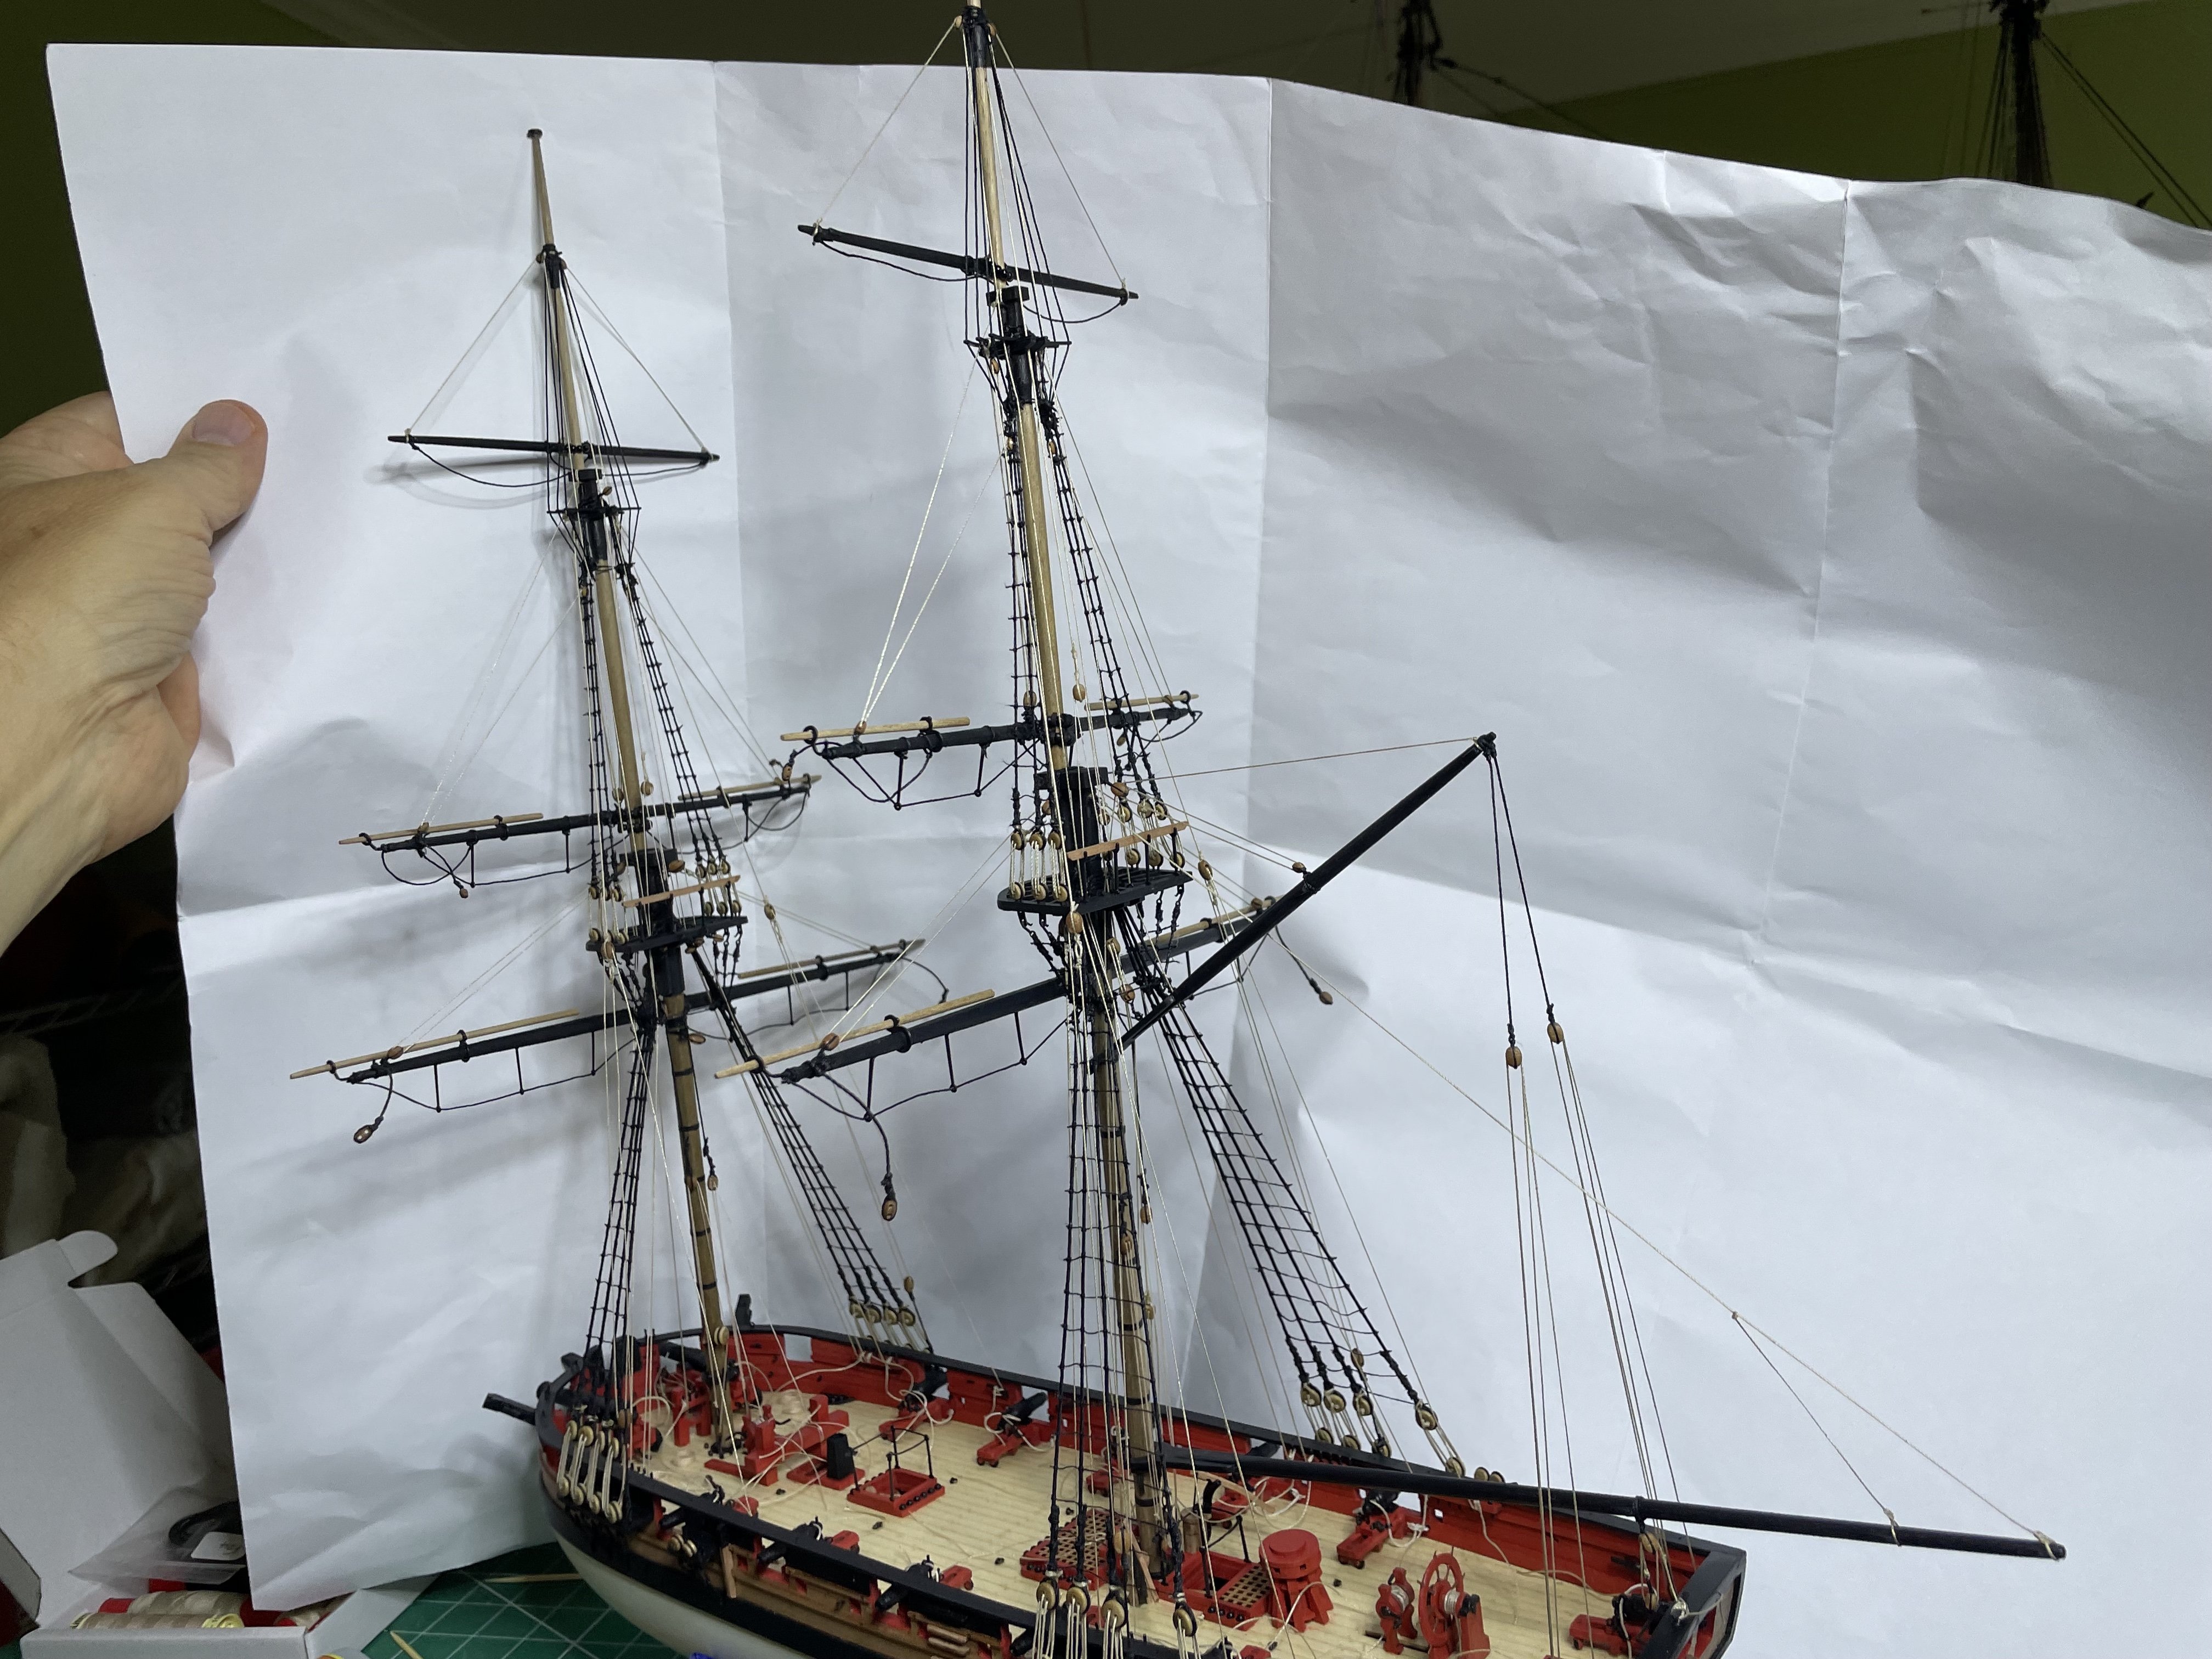
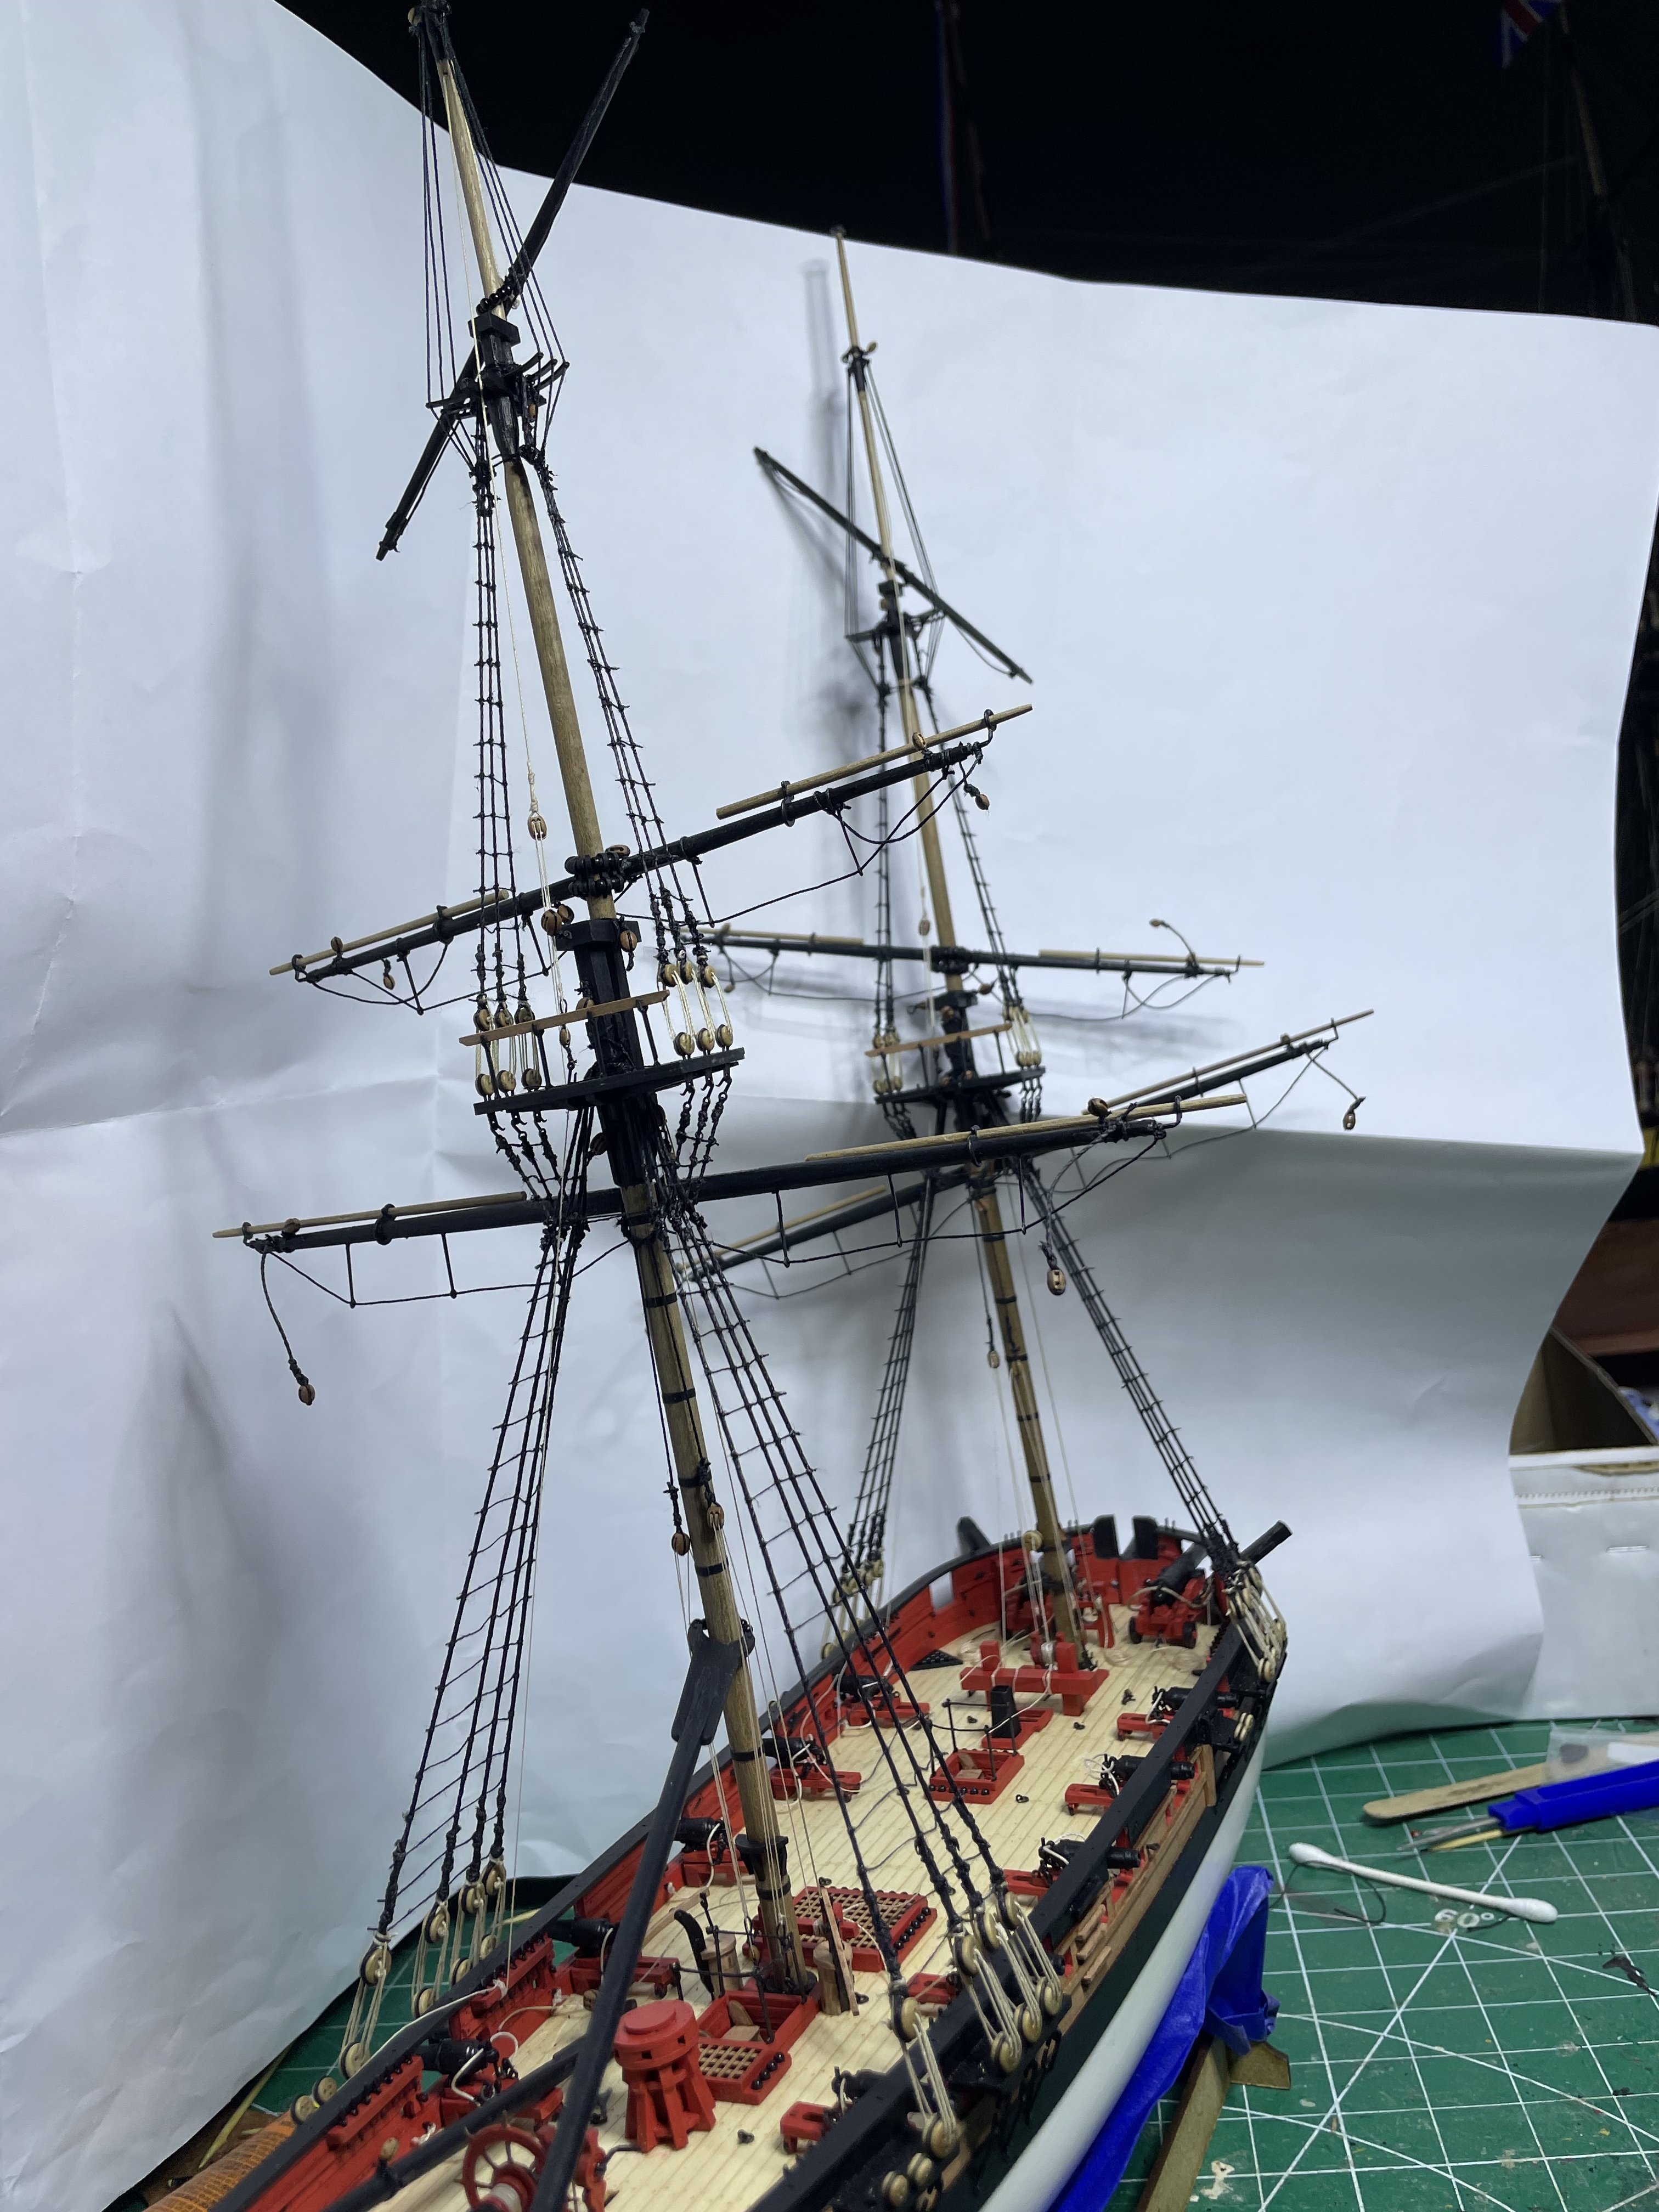
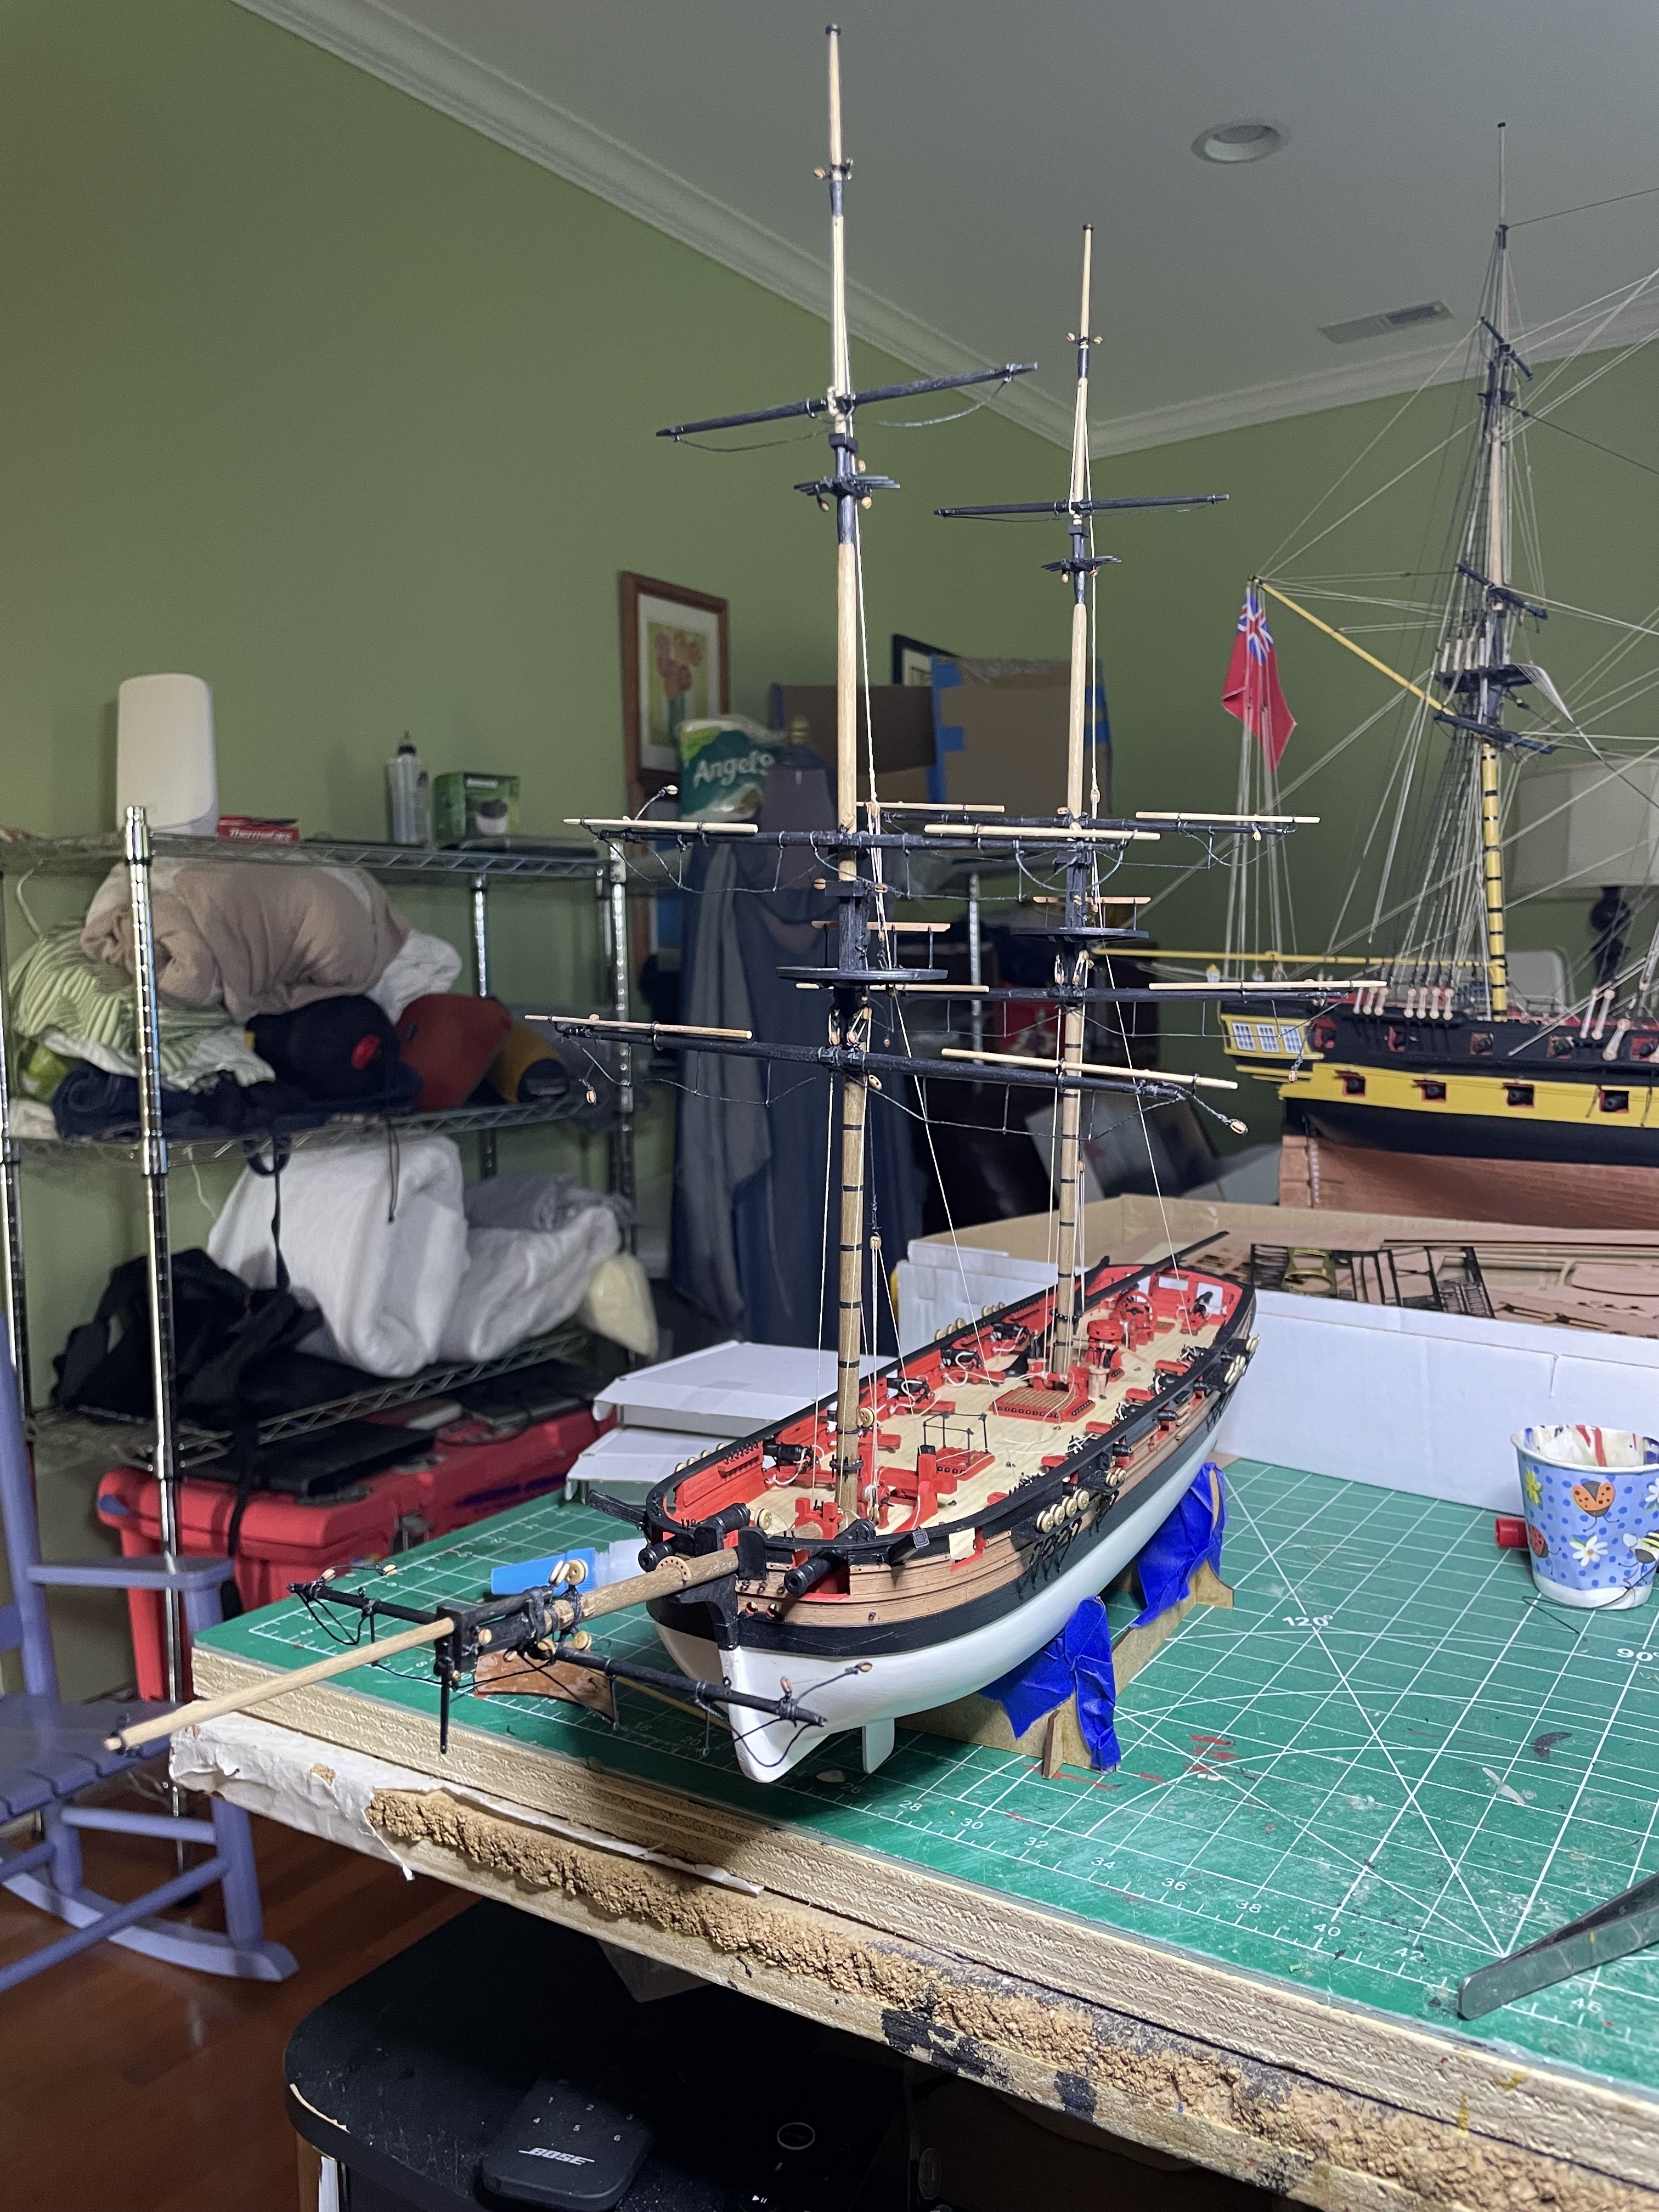
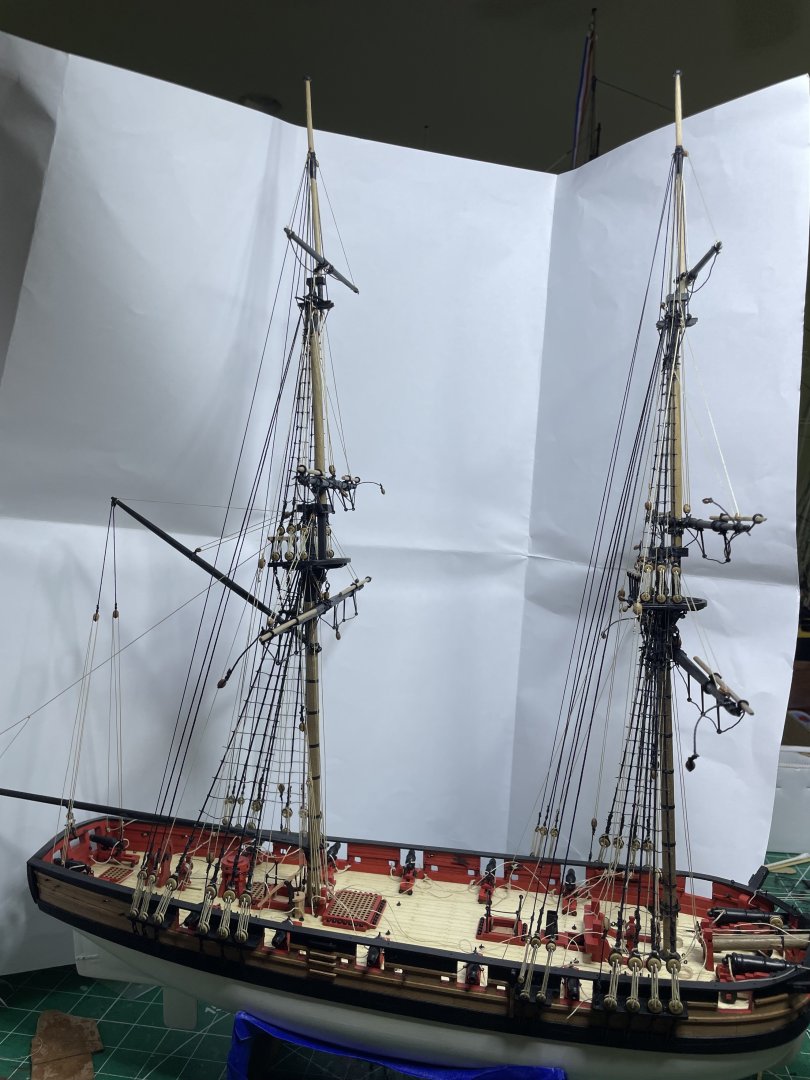
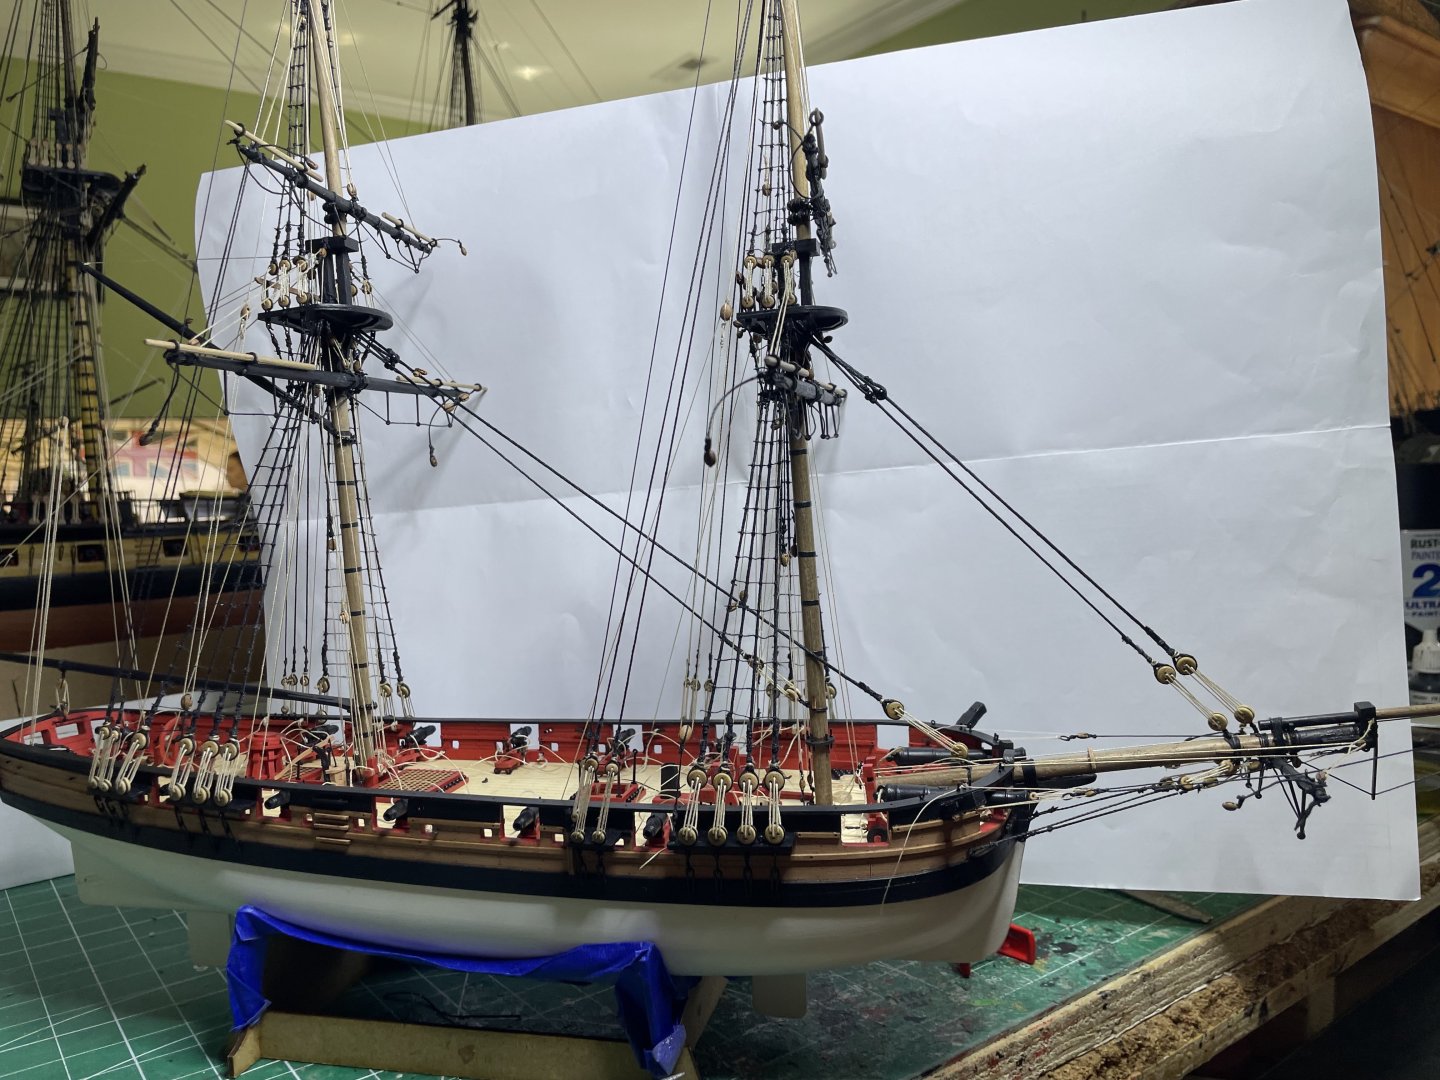
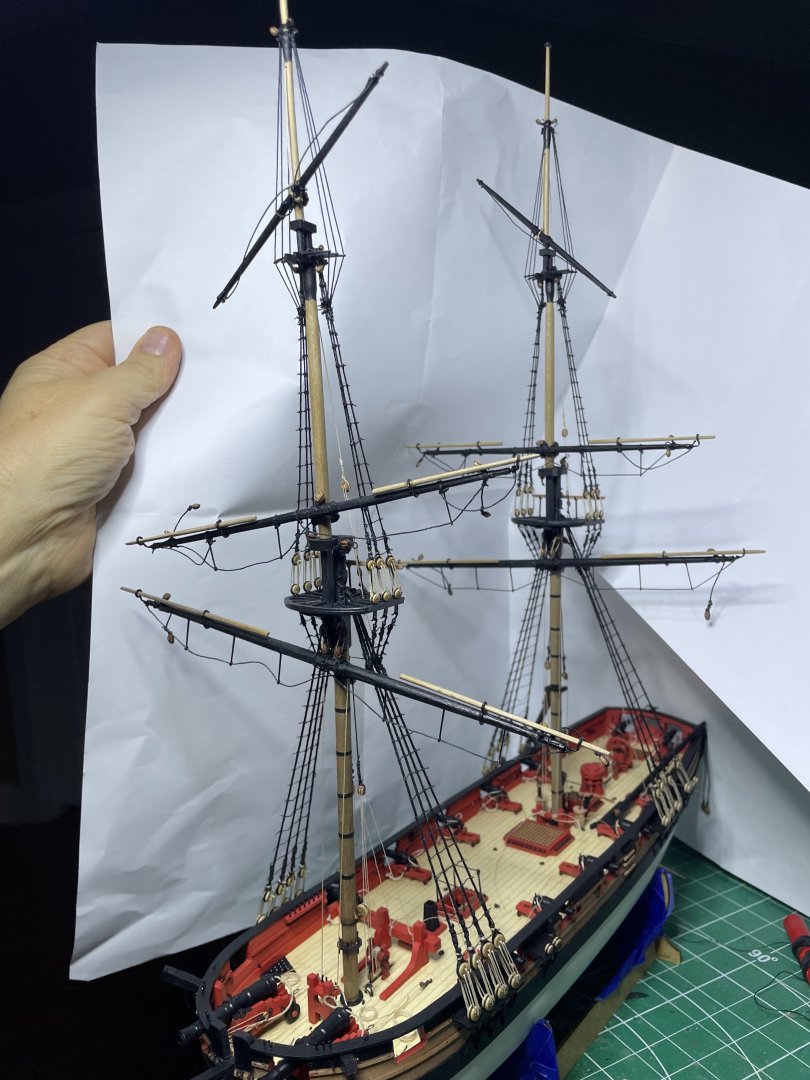
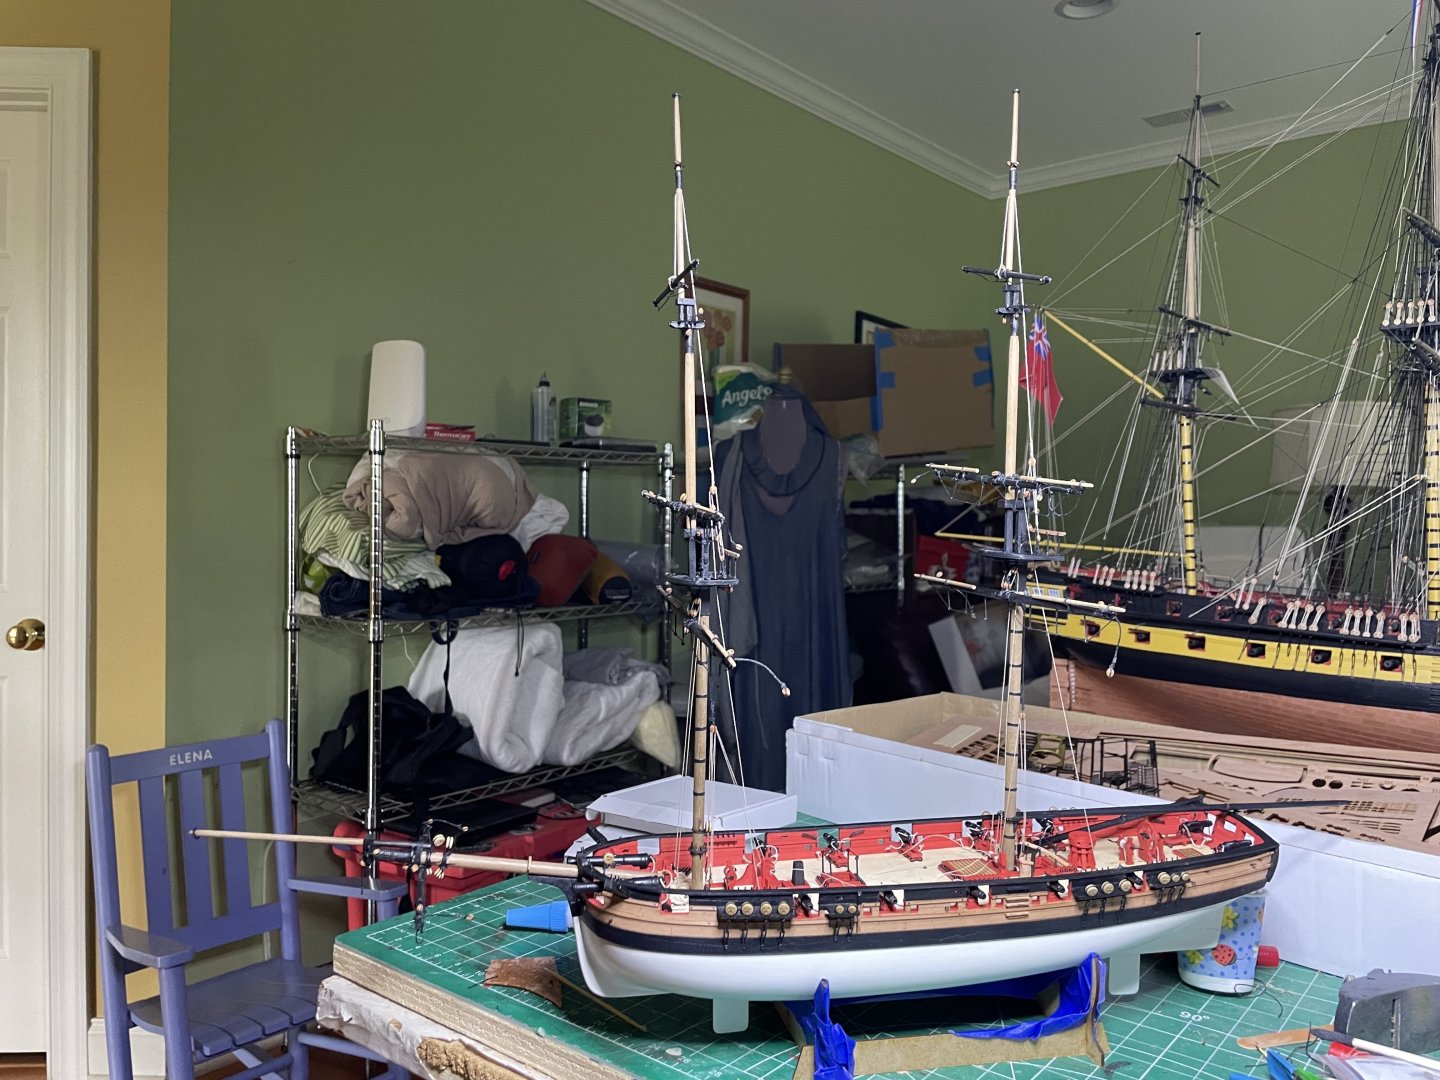
Back from vacation. Boom, gaff, lifts, jeers done so yards squared off. Next will be the back stays then attaching the bow and rigging it.


- 66 replies
-
- 11
-
-
- Adder
- Vanguard Models
- (and 1 more)
-
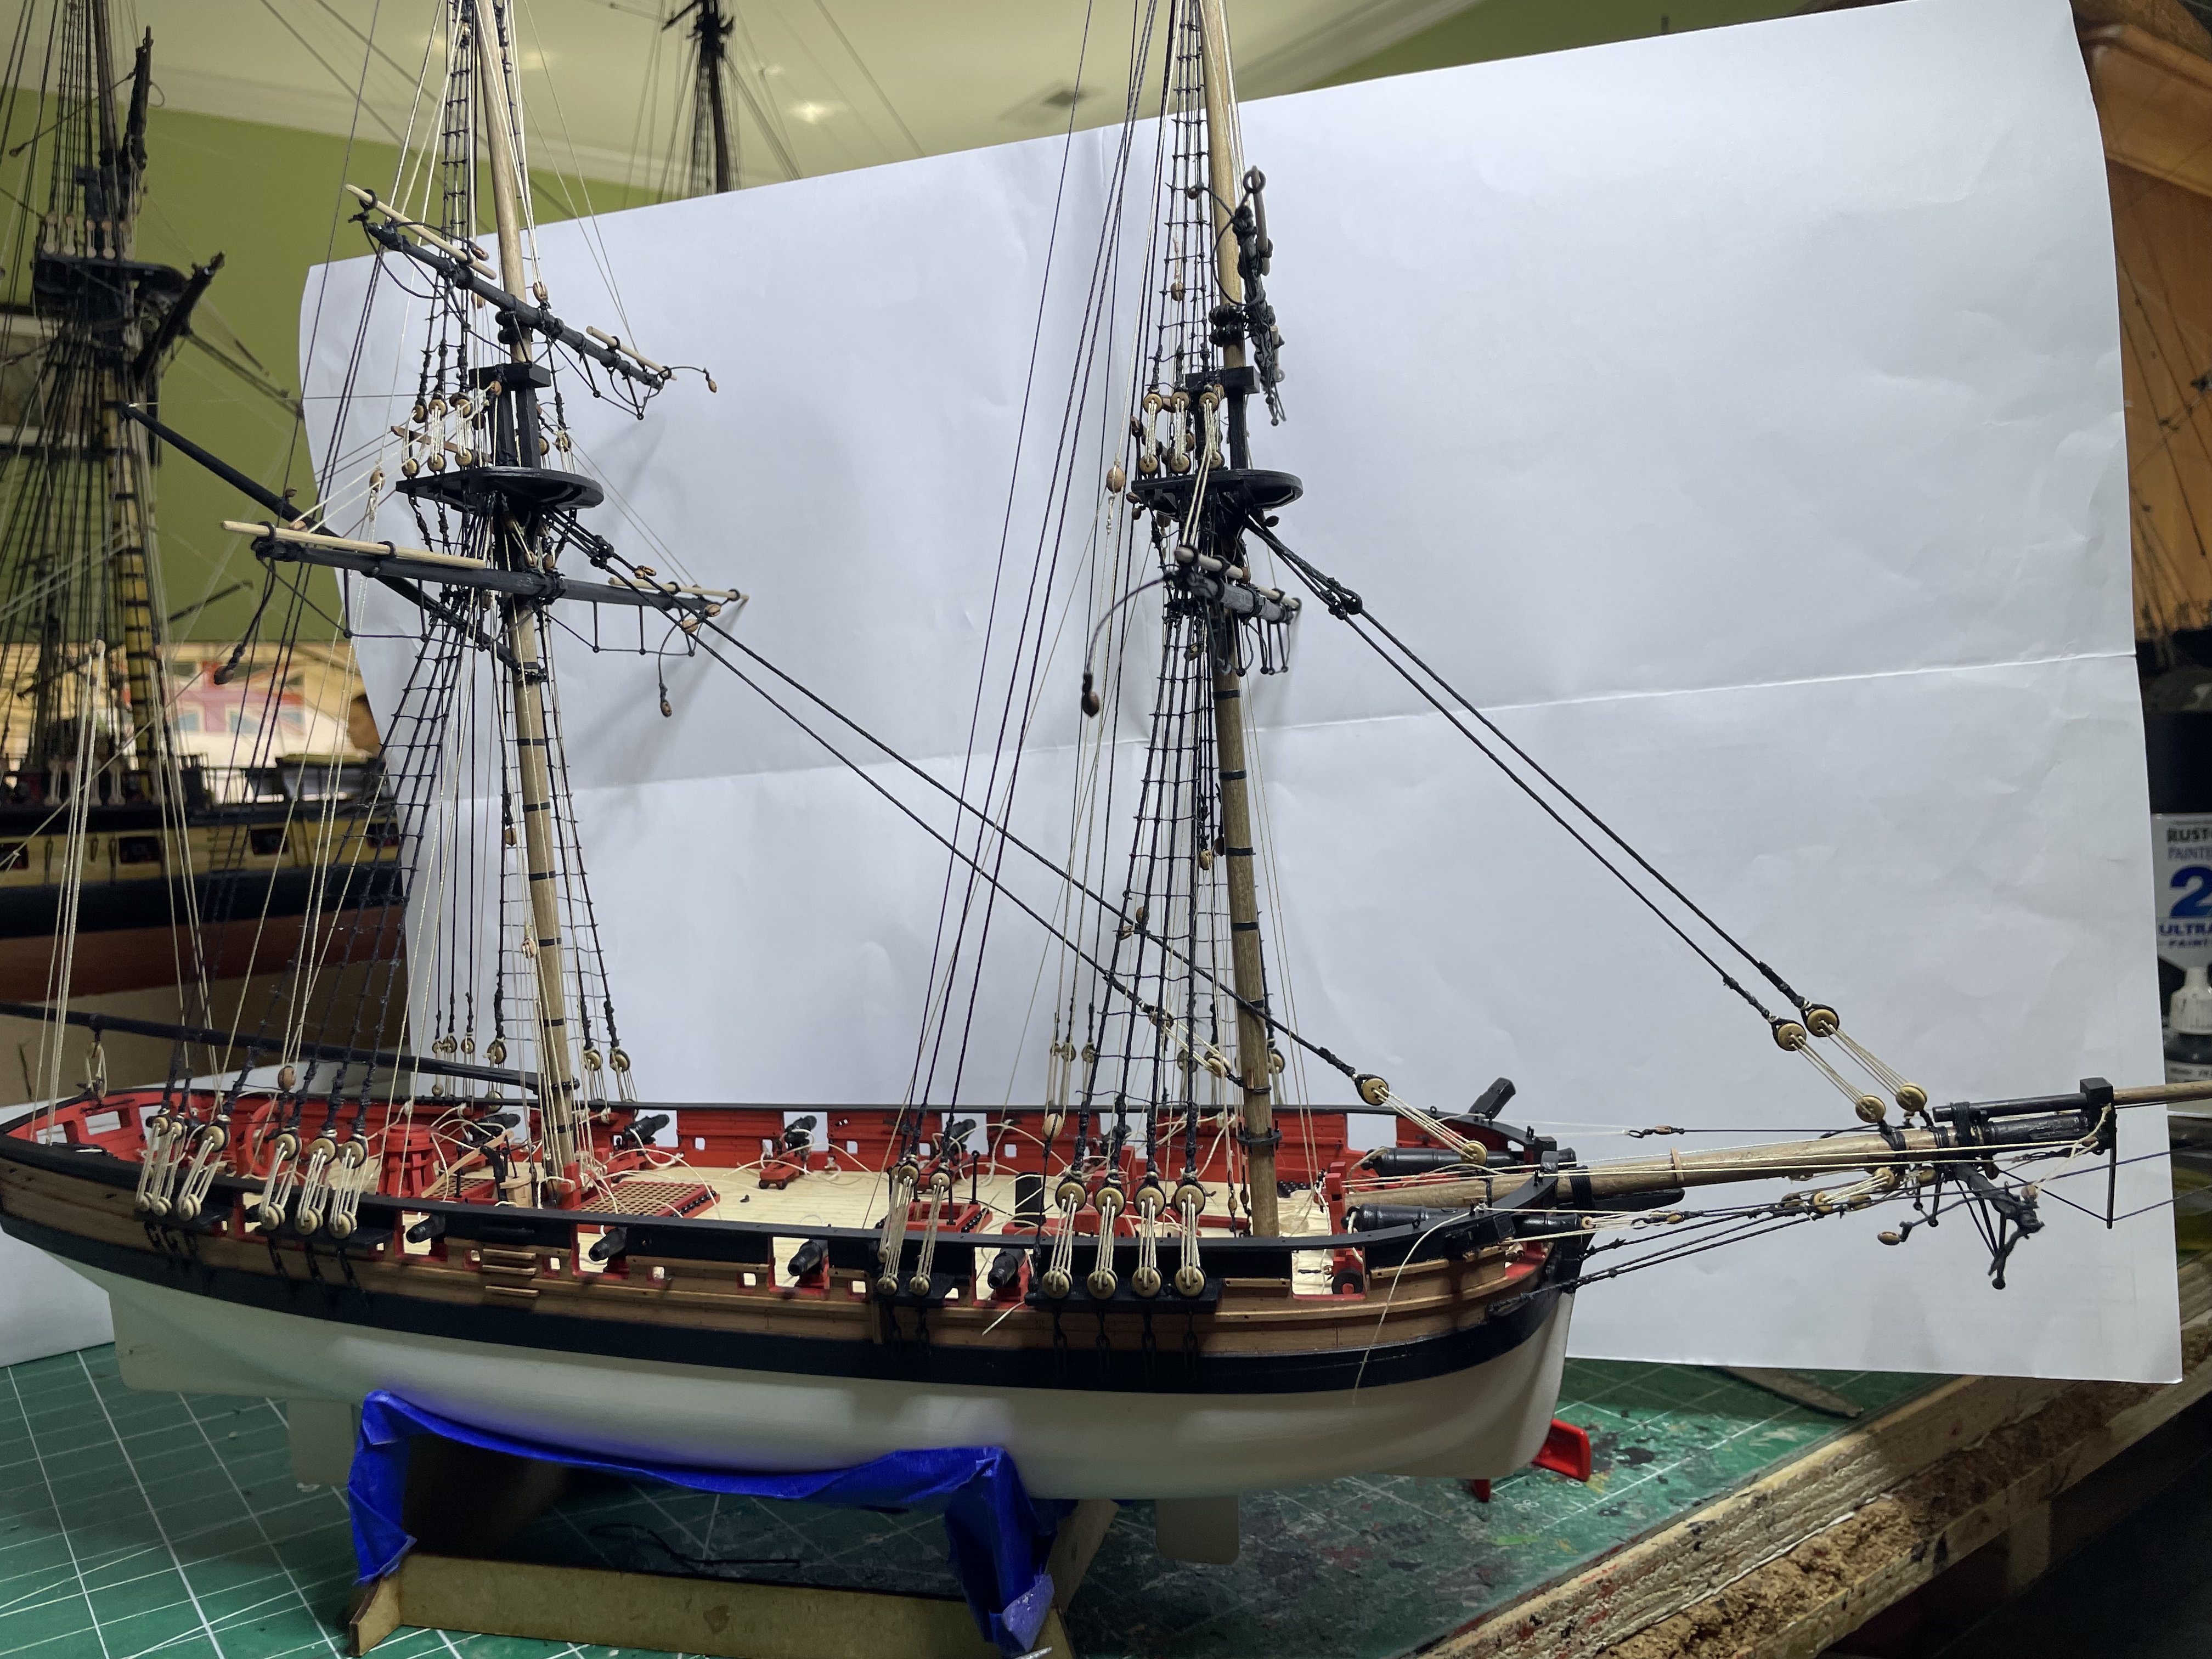
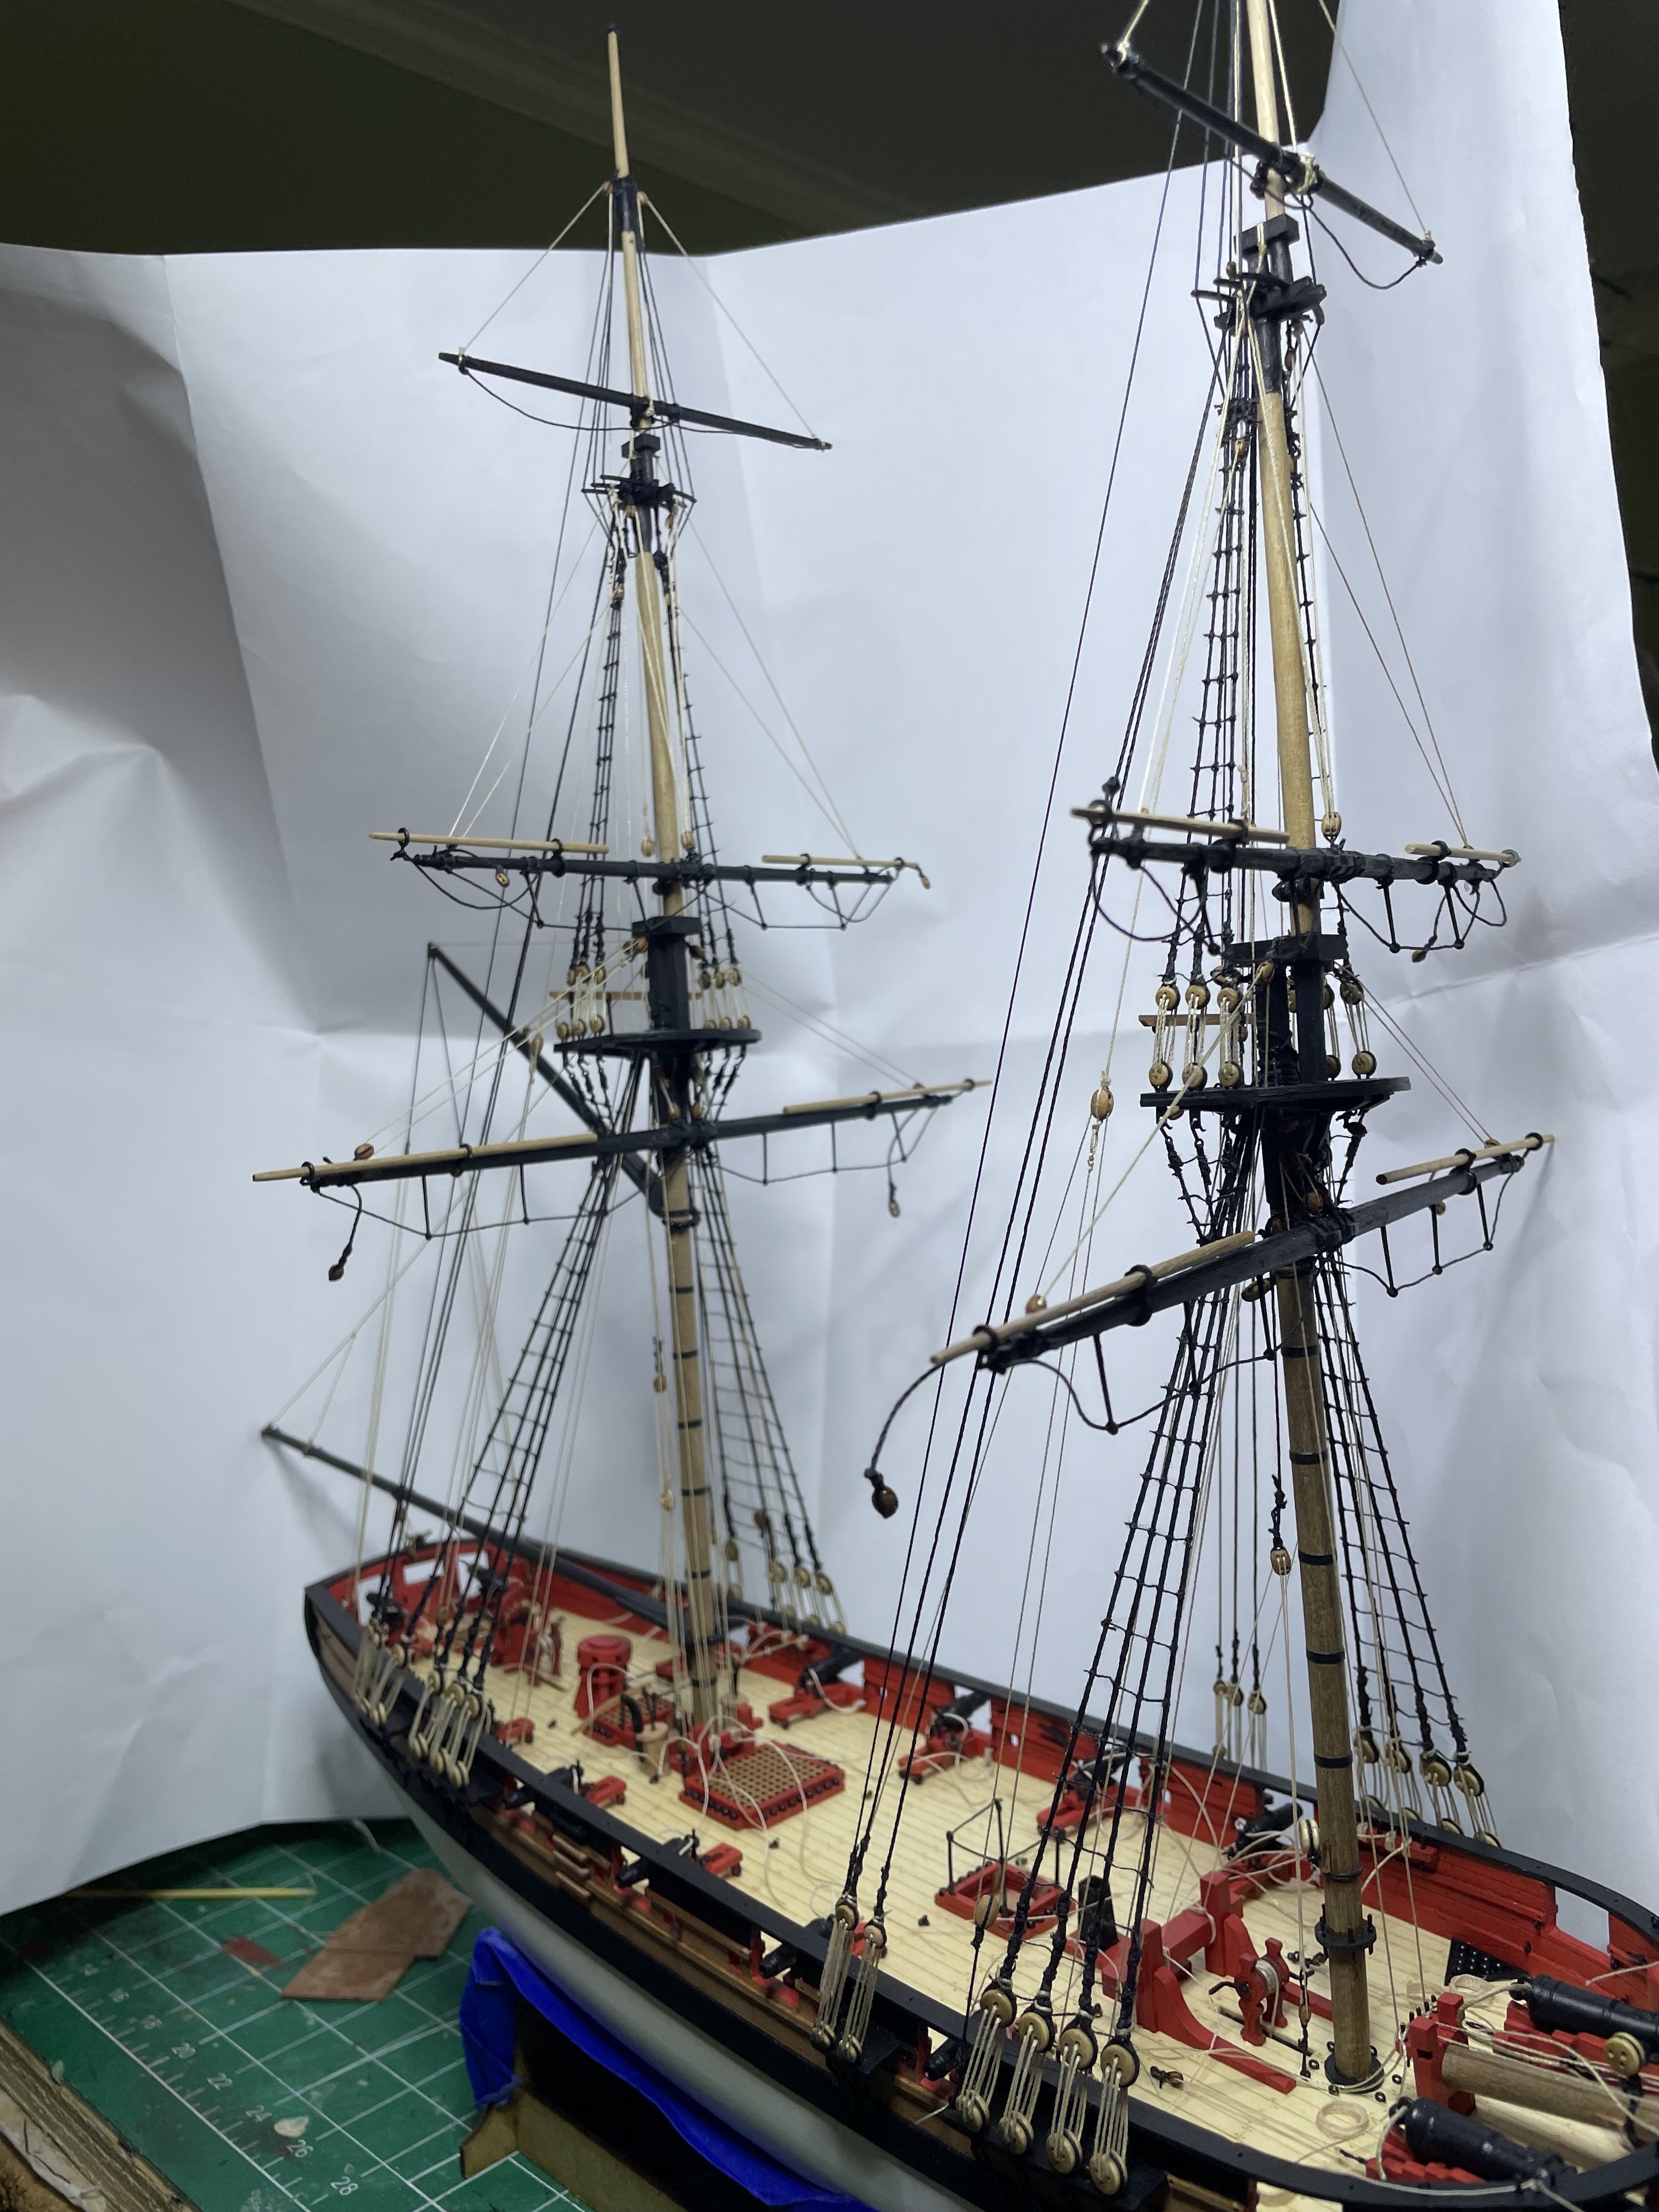
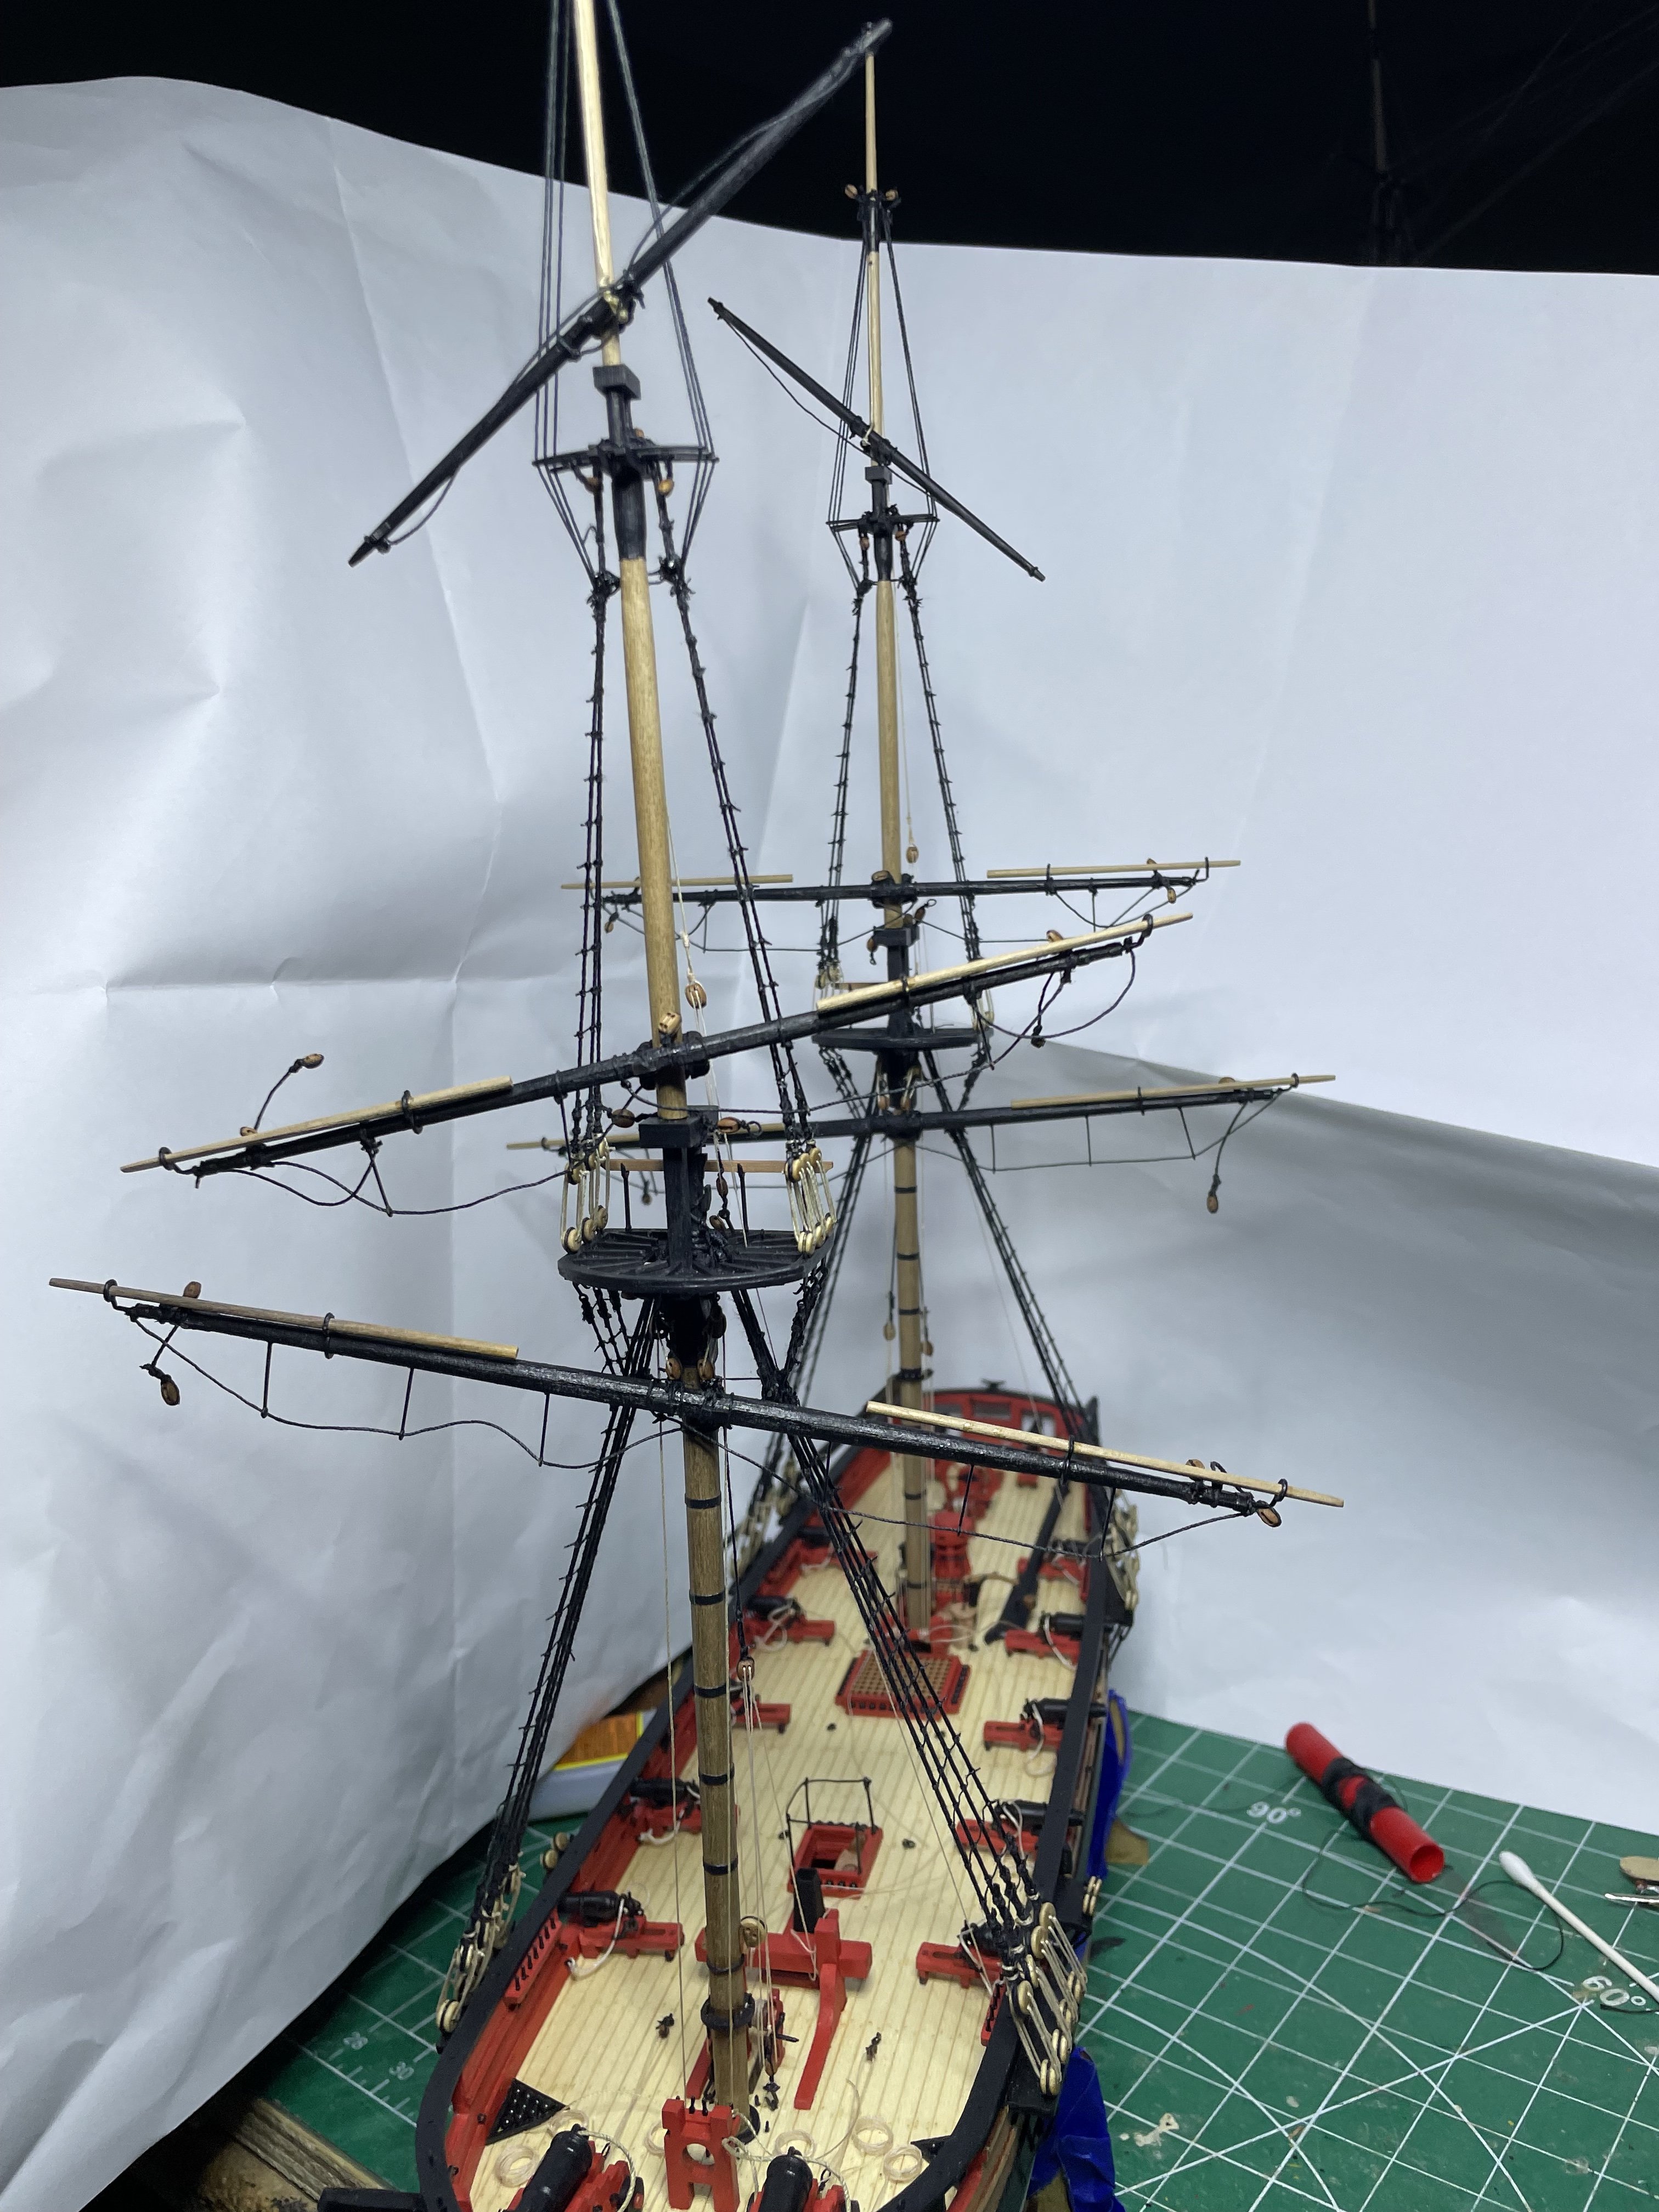
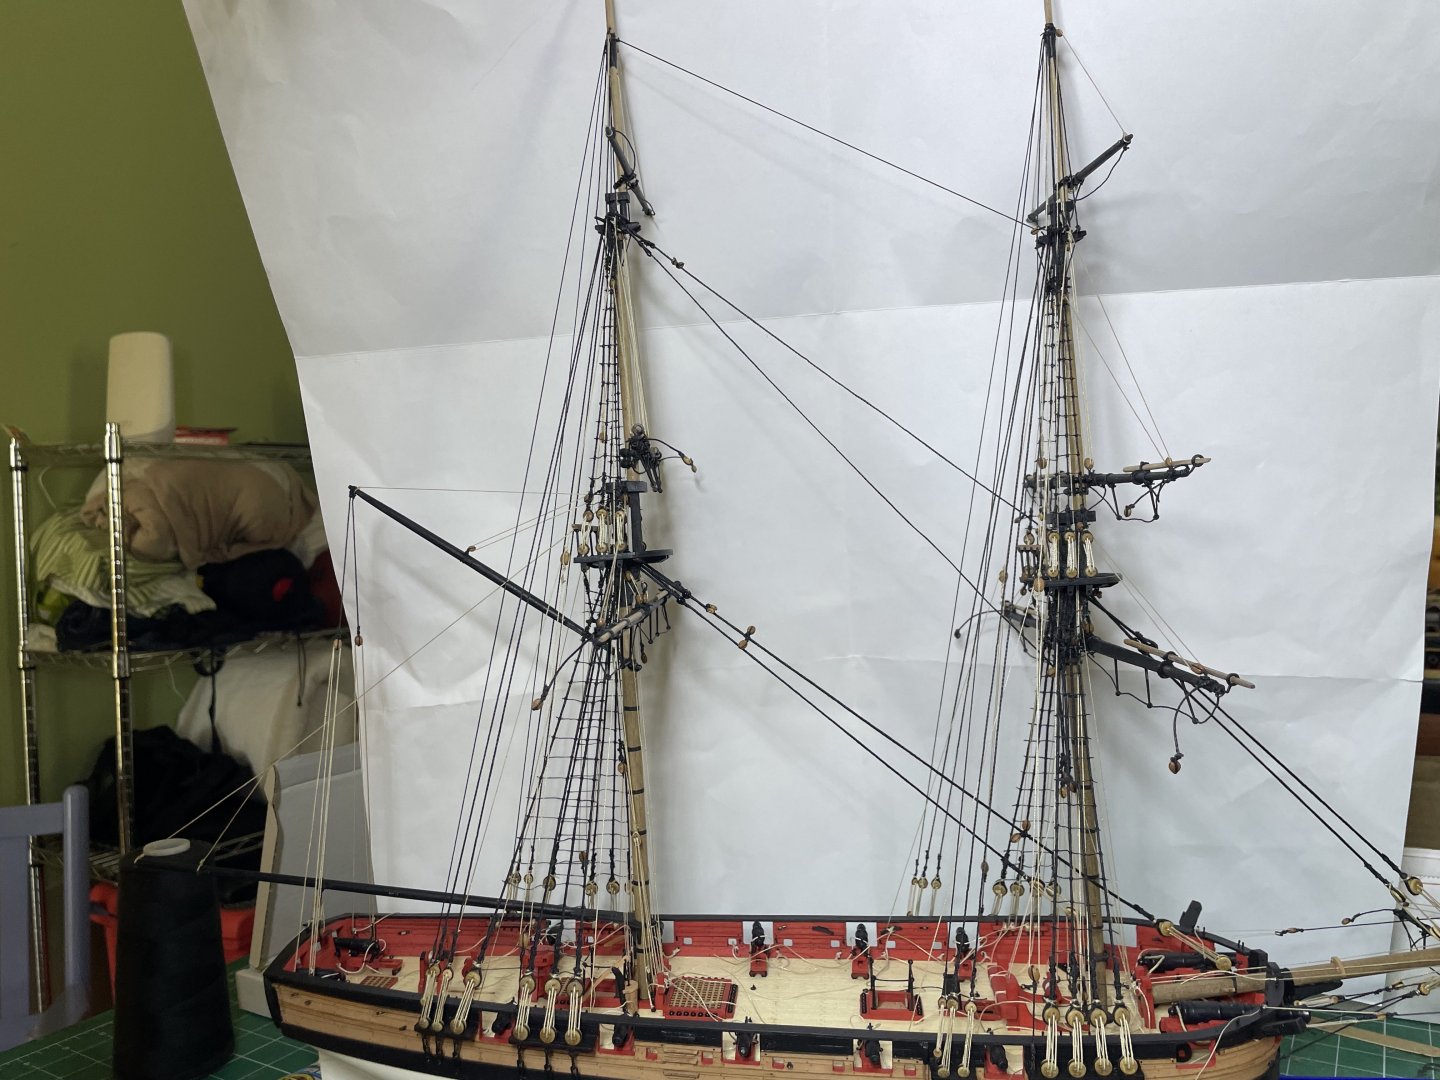
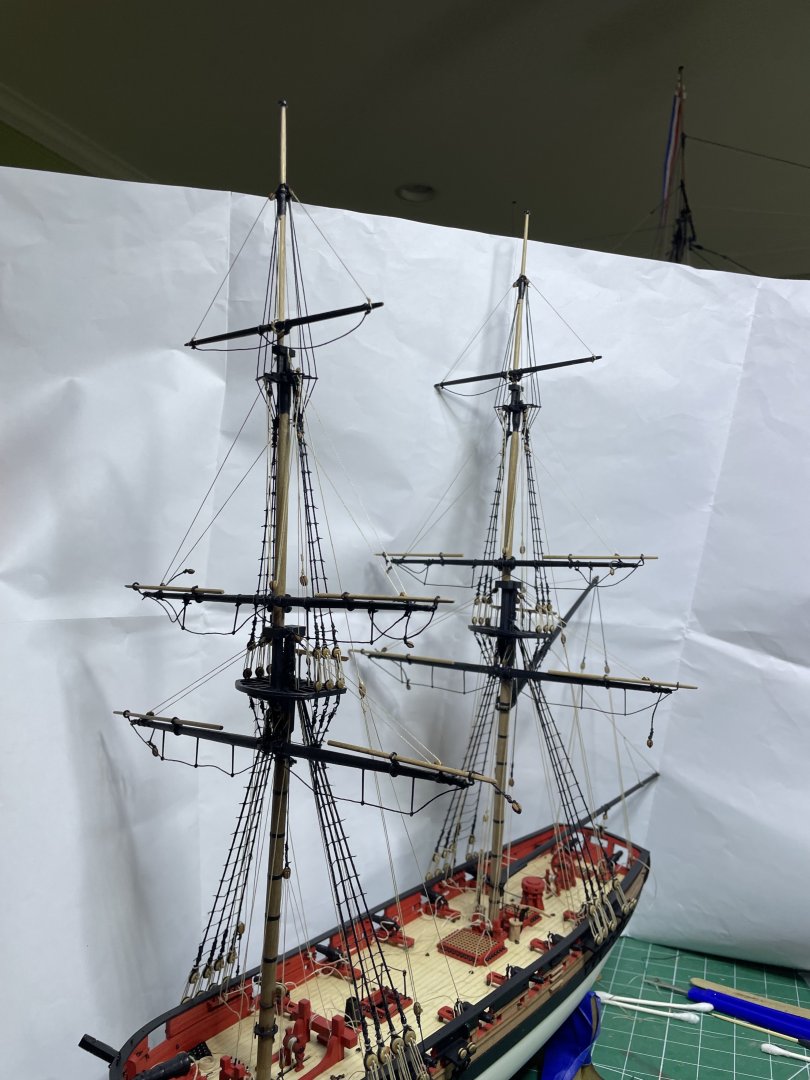
Finally finished the shrouds and ratlines. Will be off to the beach next week. Hopefully just a couple of weeks more to complete.


- 66 replies
-
- 11
-
-
- Adder
- Vanguard Models
- (and 1 more)
-
Very nice. I also found the curve of the hull at the bow made it difficult to plank .
-
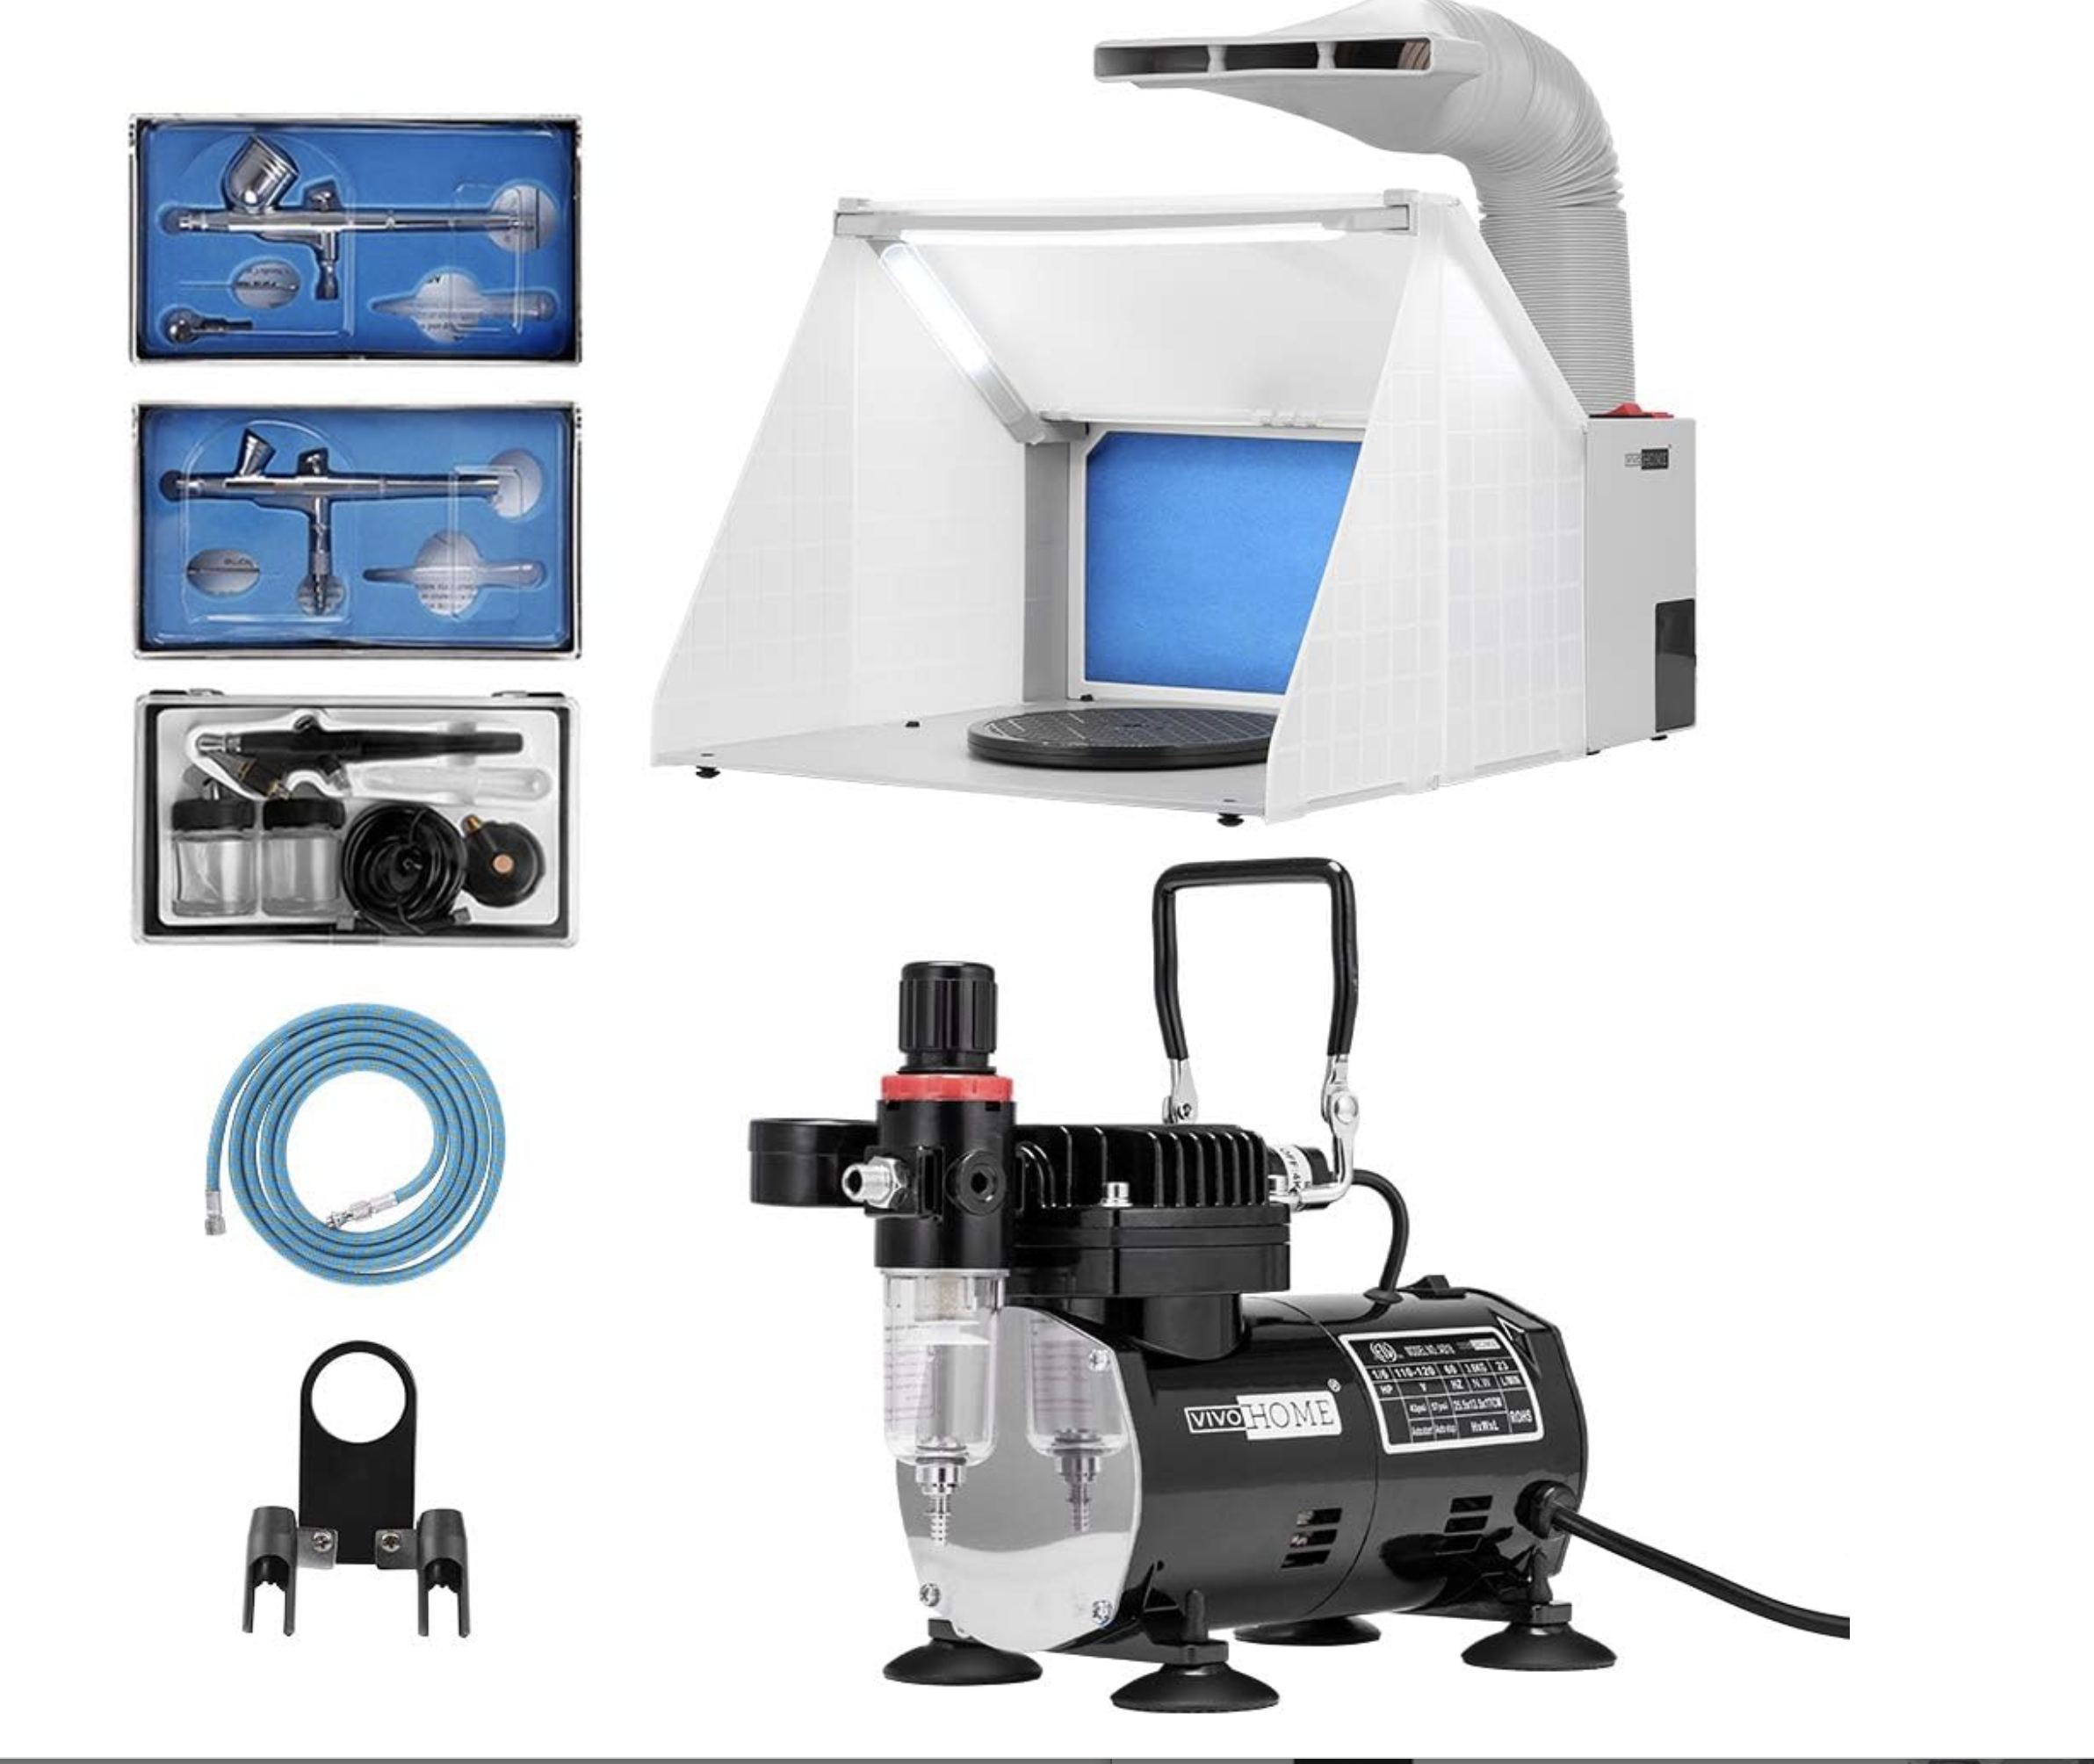
I brush on the poly especially over the bare wood It helps as if you accidentally get some paint on the bare area easier to scrape off if the poly is underneath. I also got this combo airbrush and venthood set. For most of the pieces the hood works well.For the white of the hull I use a lot of tape and mat combo spray can of primer and paint. I got the airbrush on amazon

- 66 replies
-
- 3
-
-
- Adder
- Vanguard Models
- (and 1 more)
-
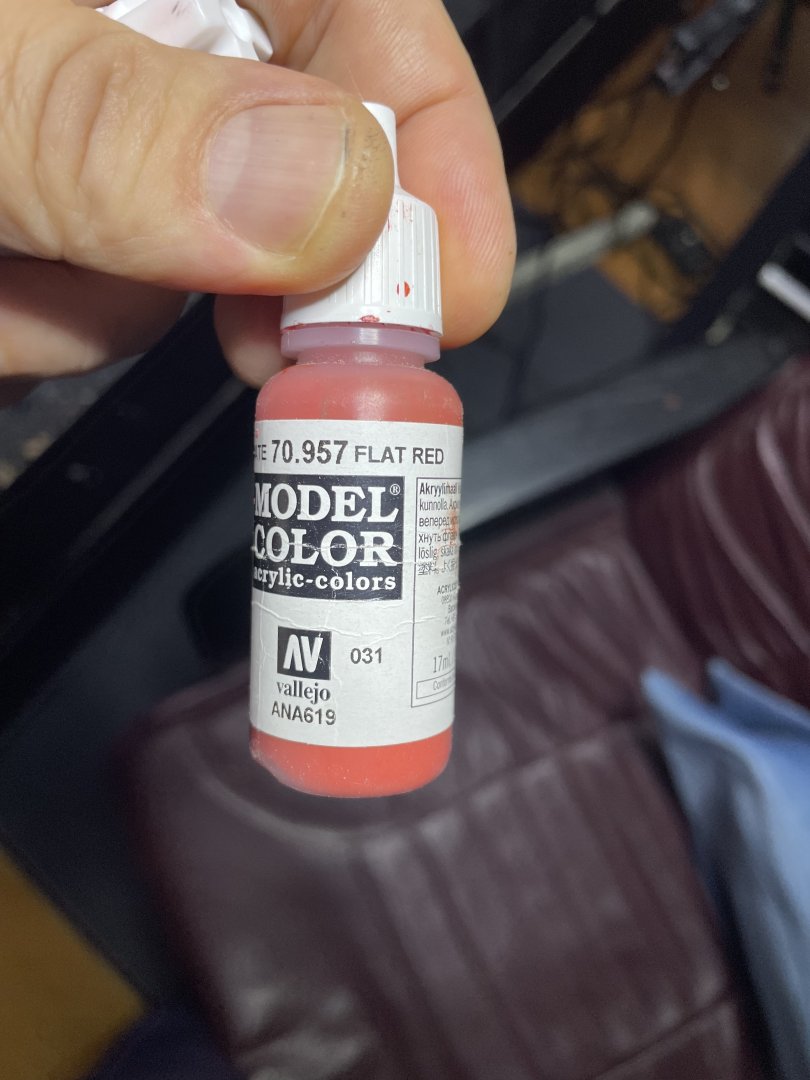
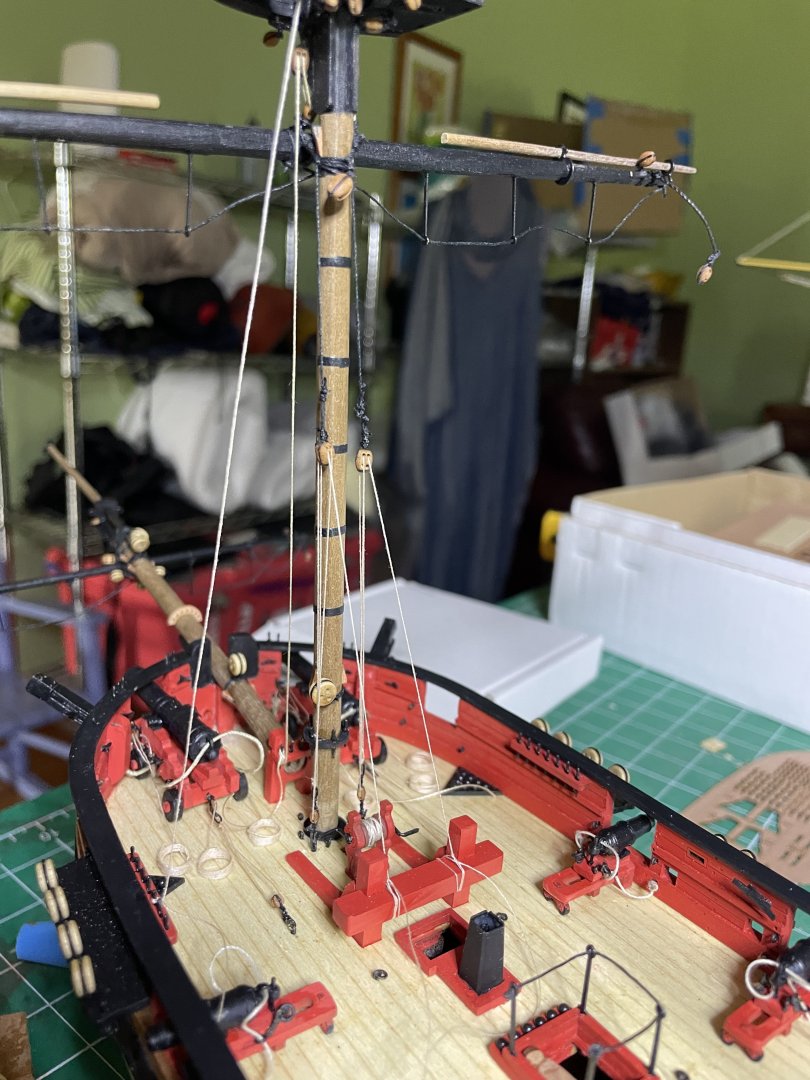
I use vallejo flat red, what Chris recommends on his ships. I soak and shape the inner forward bulkheads and let dry overnight. I then spray paint them and what ever else I can prior to installation. I find spraying leaves more of the detailed engraving visible compared to a thicker brush coating. Once in place I then paint a light layer of matt ploy.
- 66 replies
-
- 4
-
-
- Adder
- Vanguard Models
- (and 1 more)
-
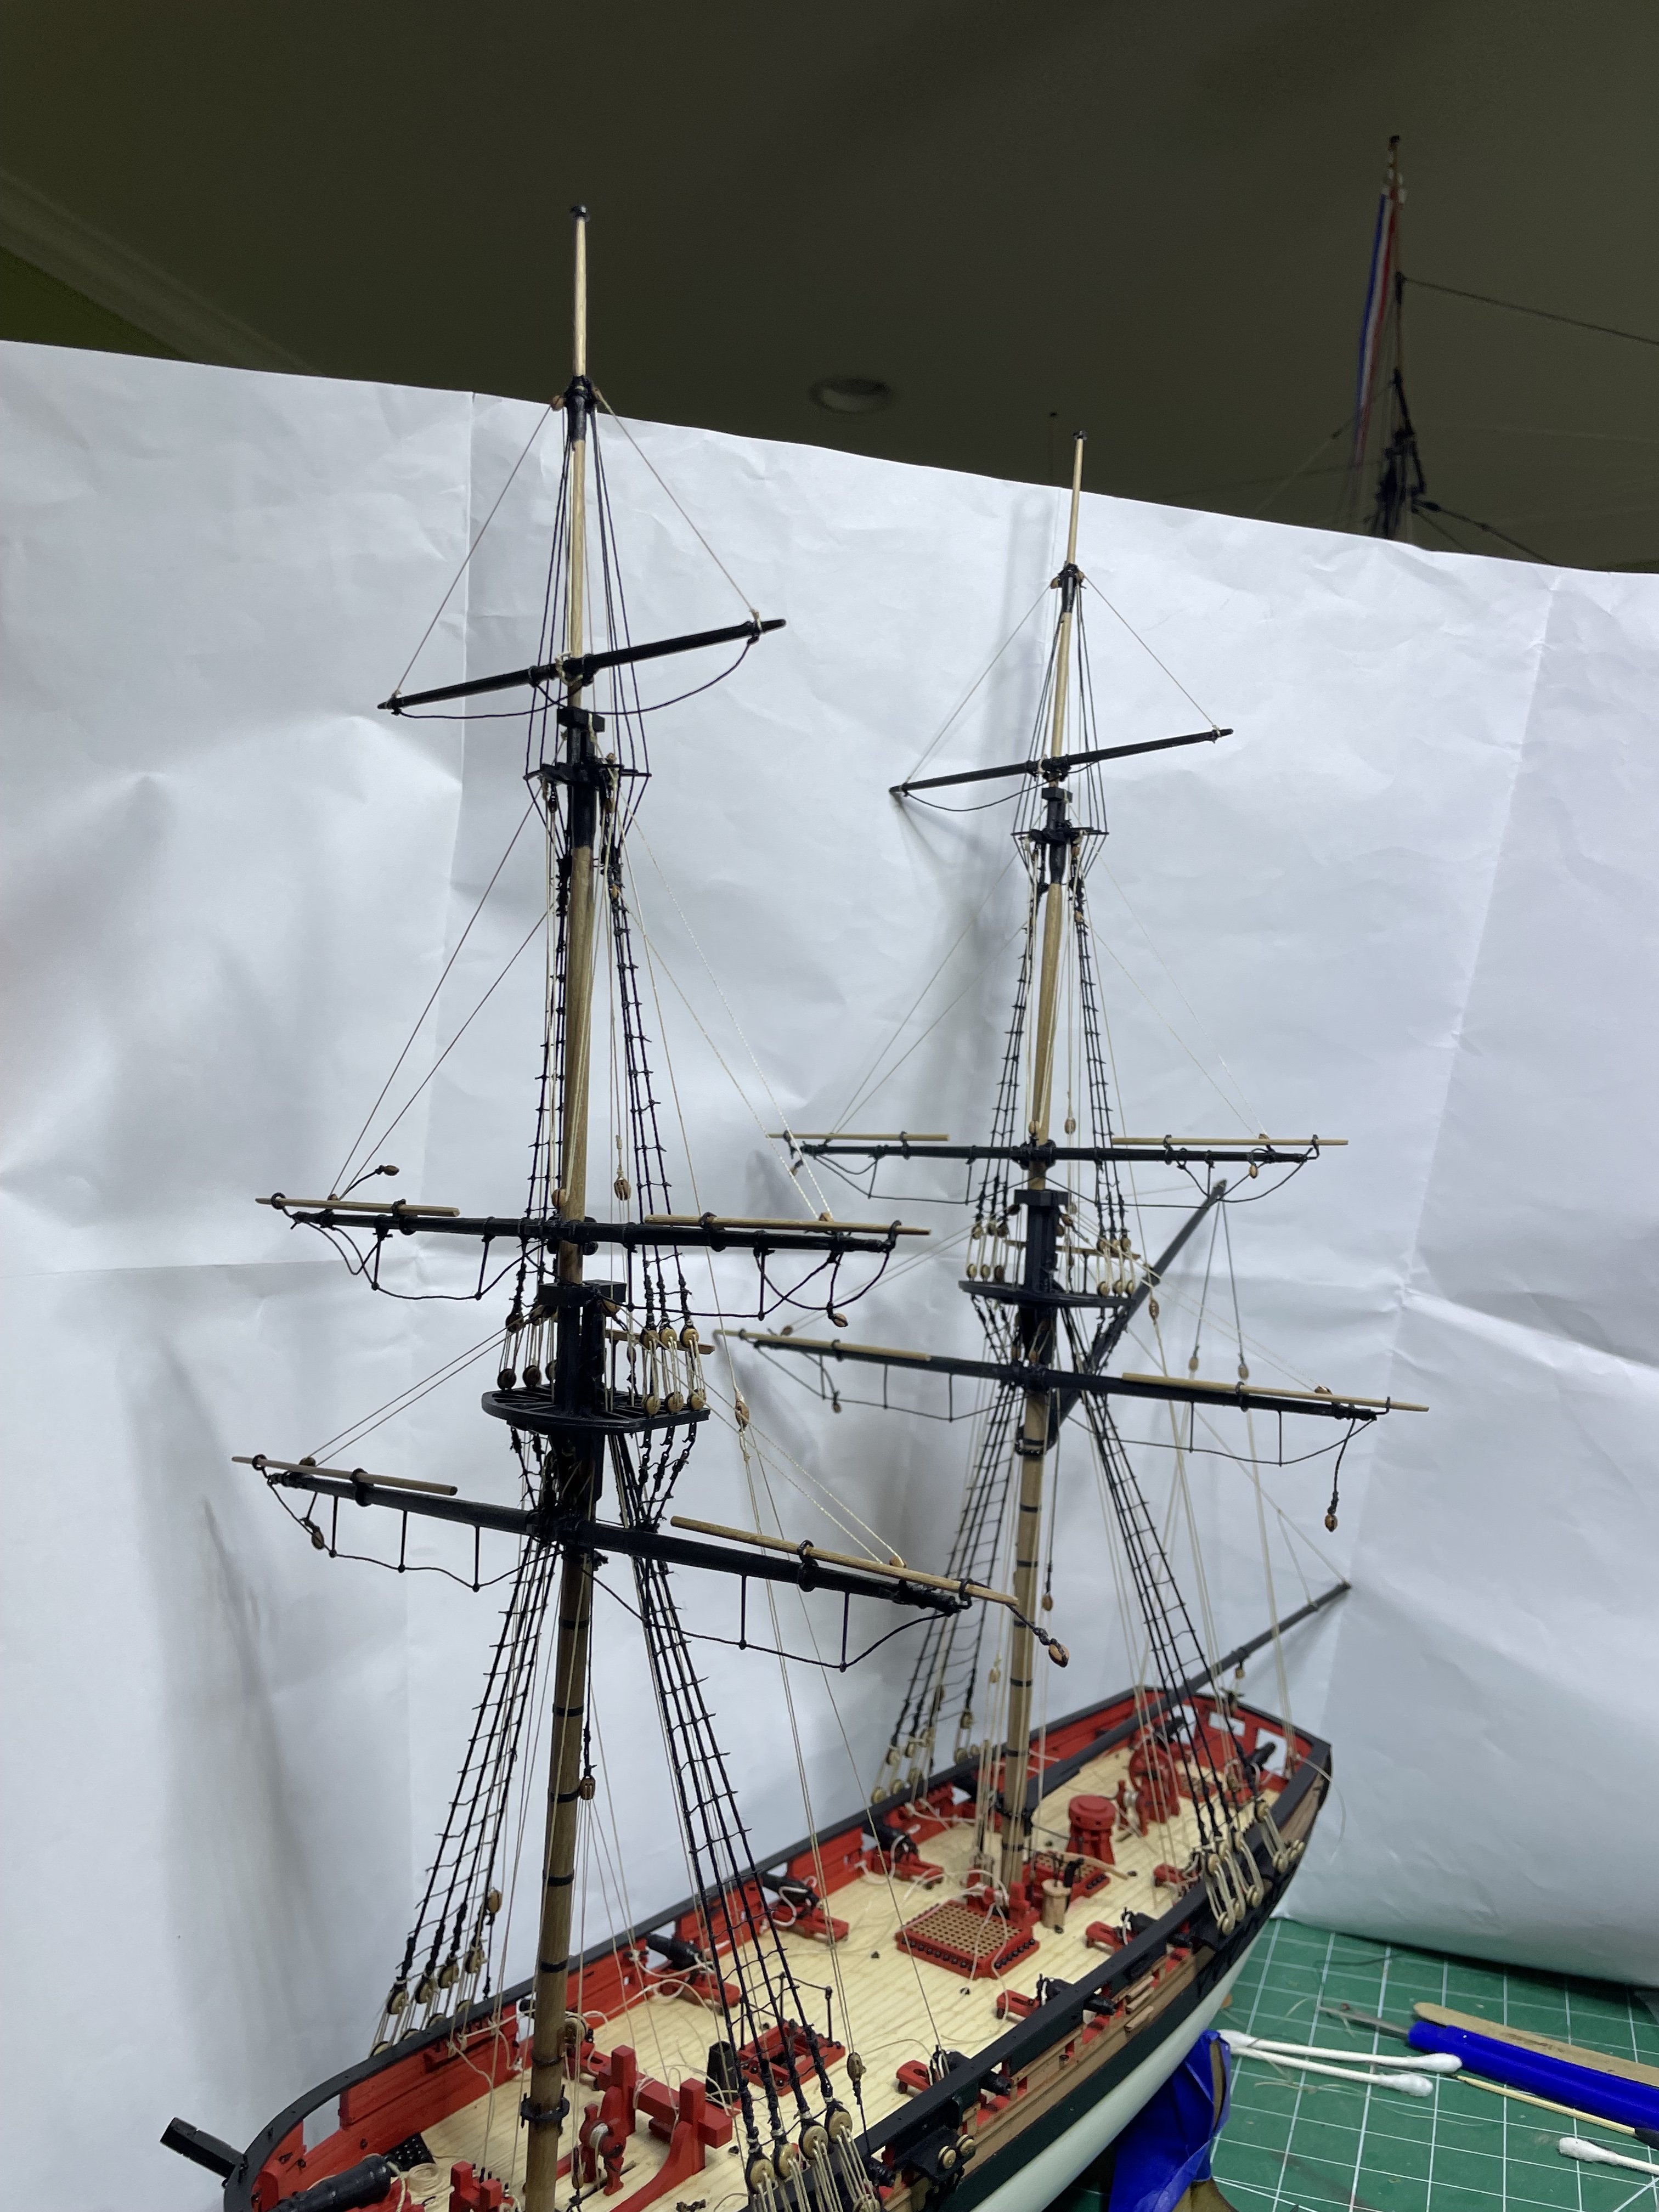
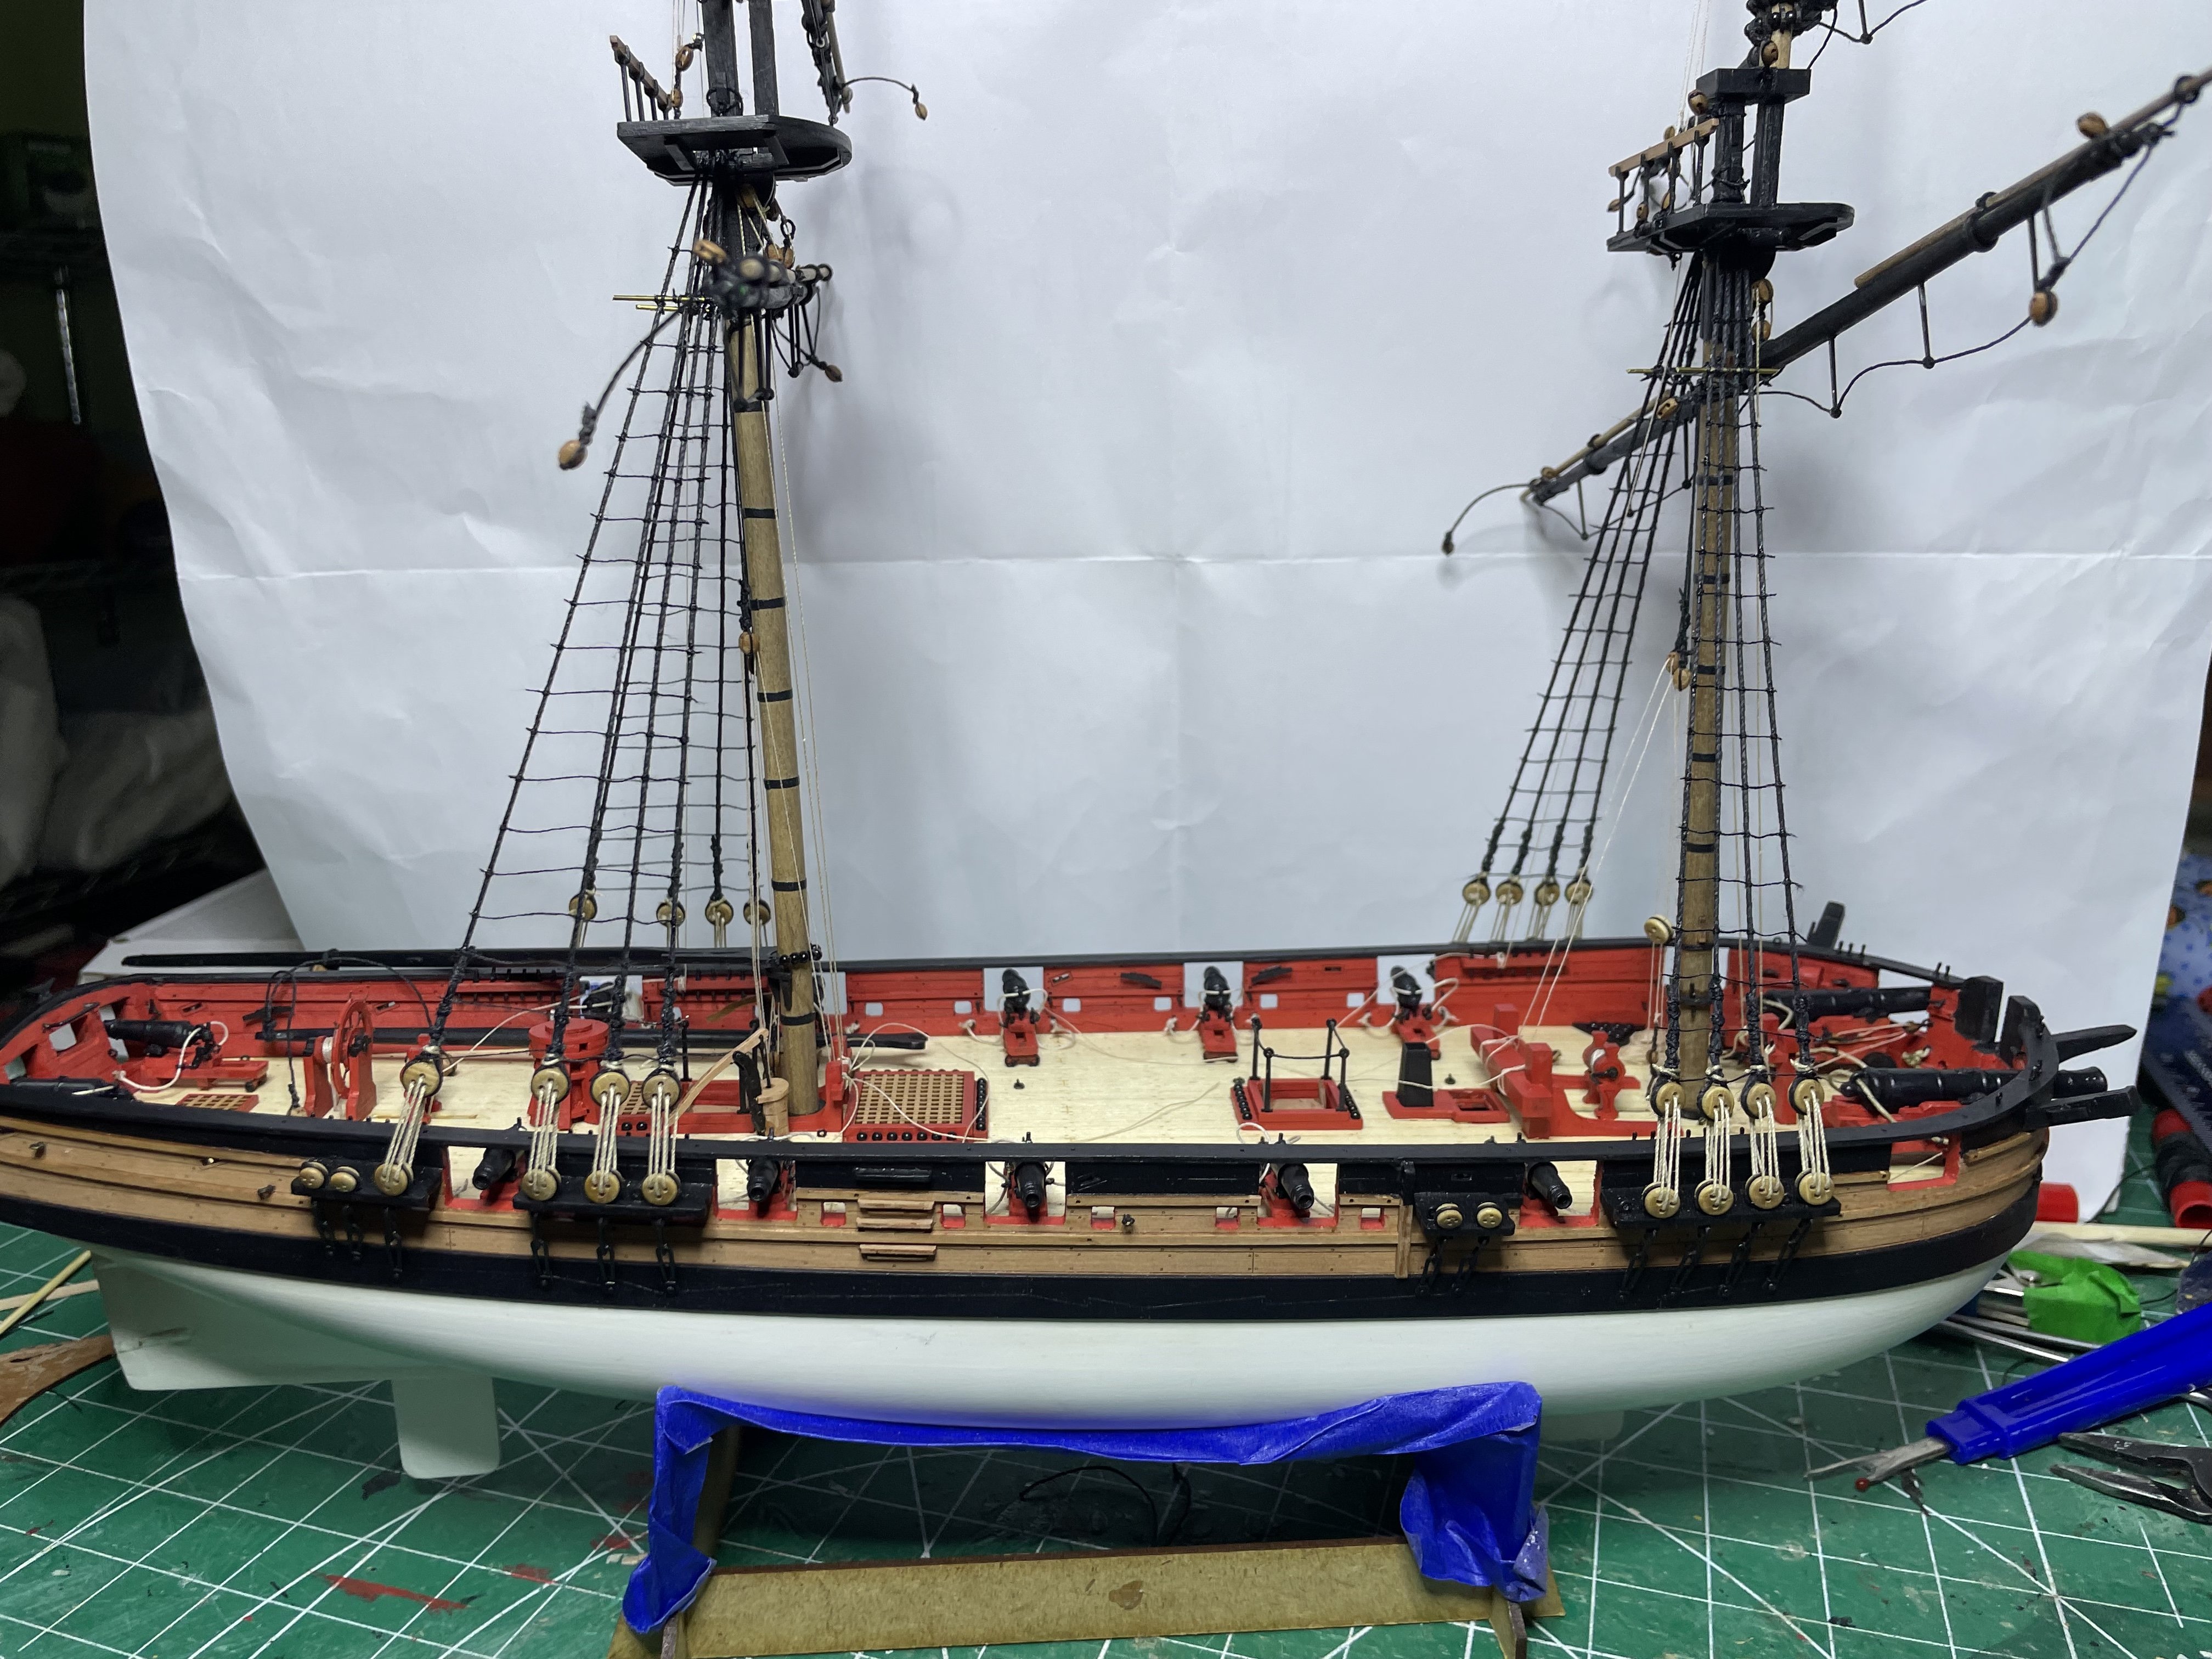
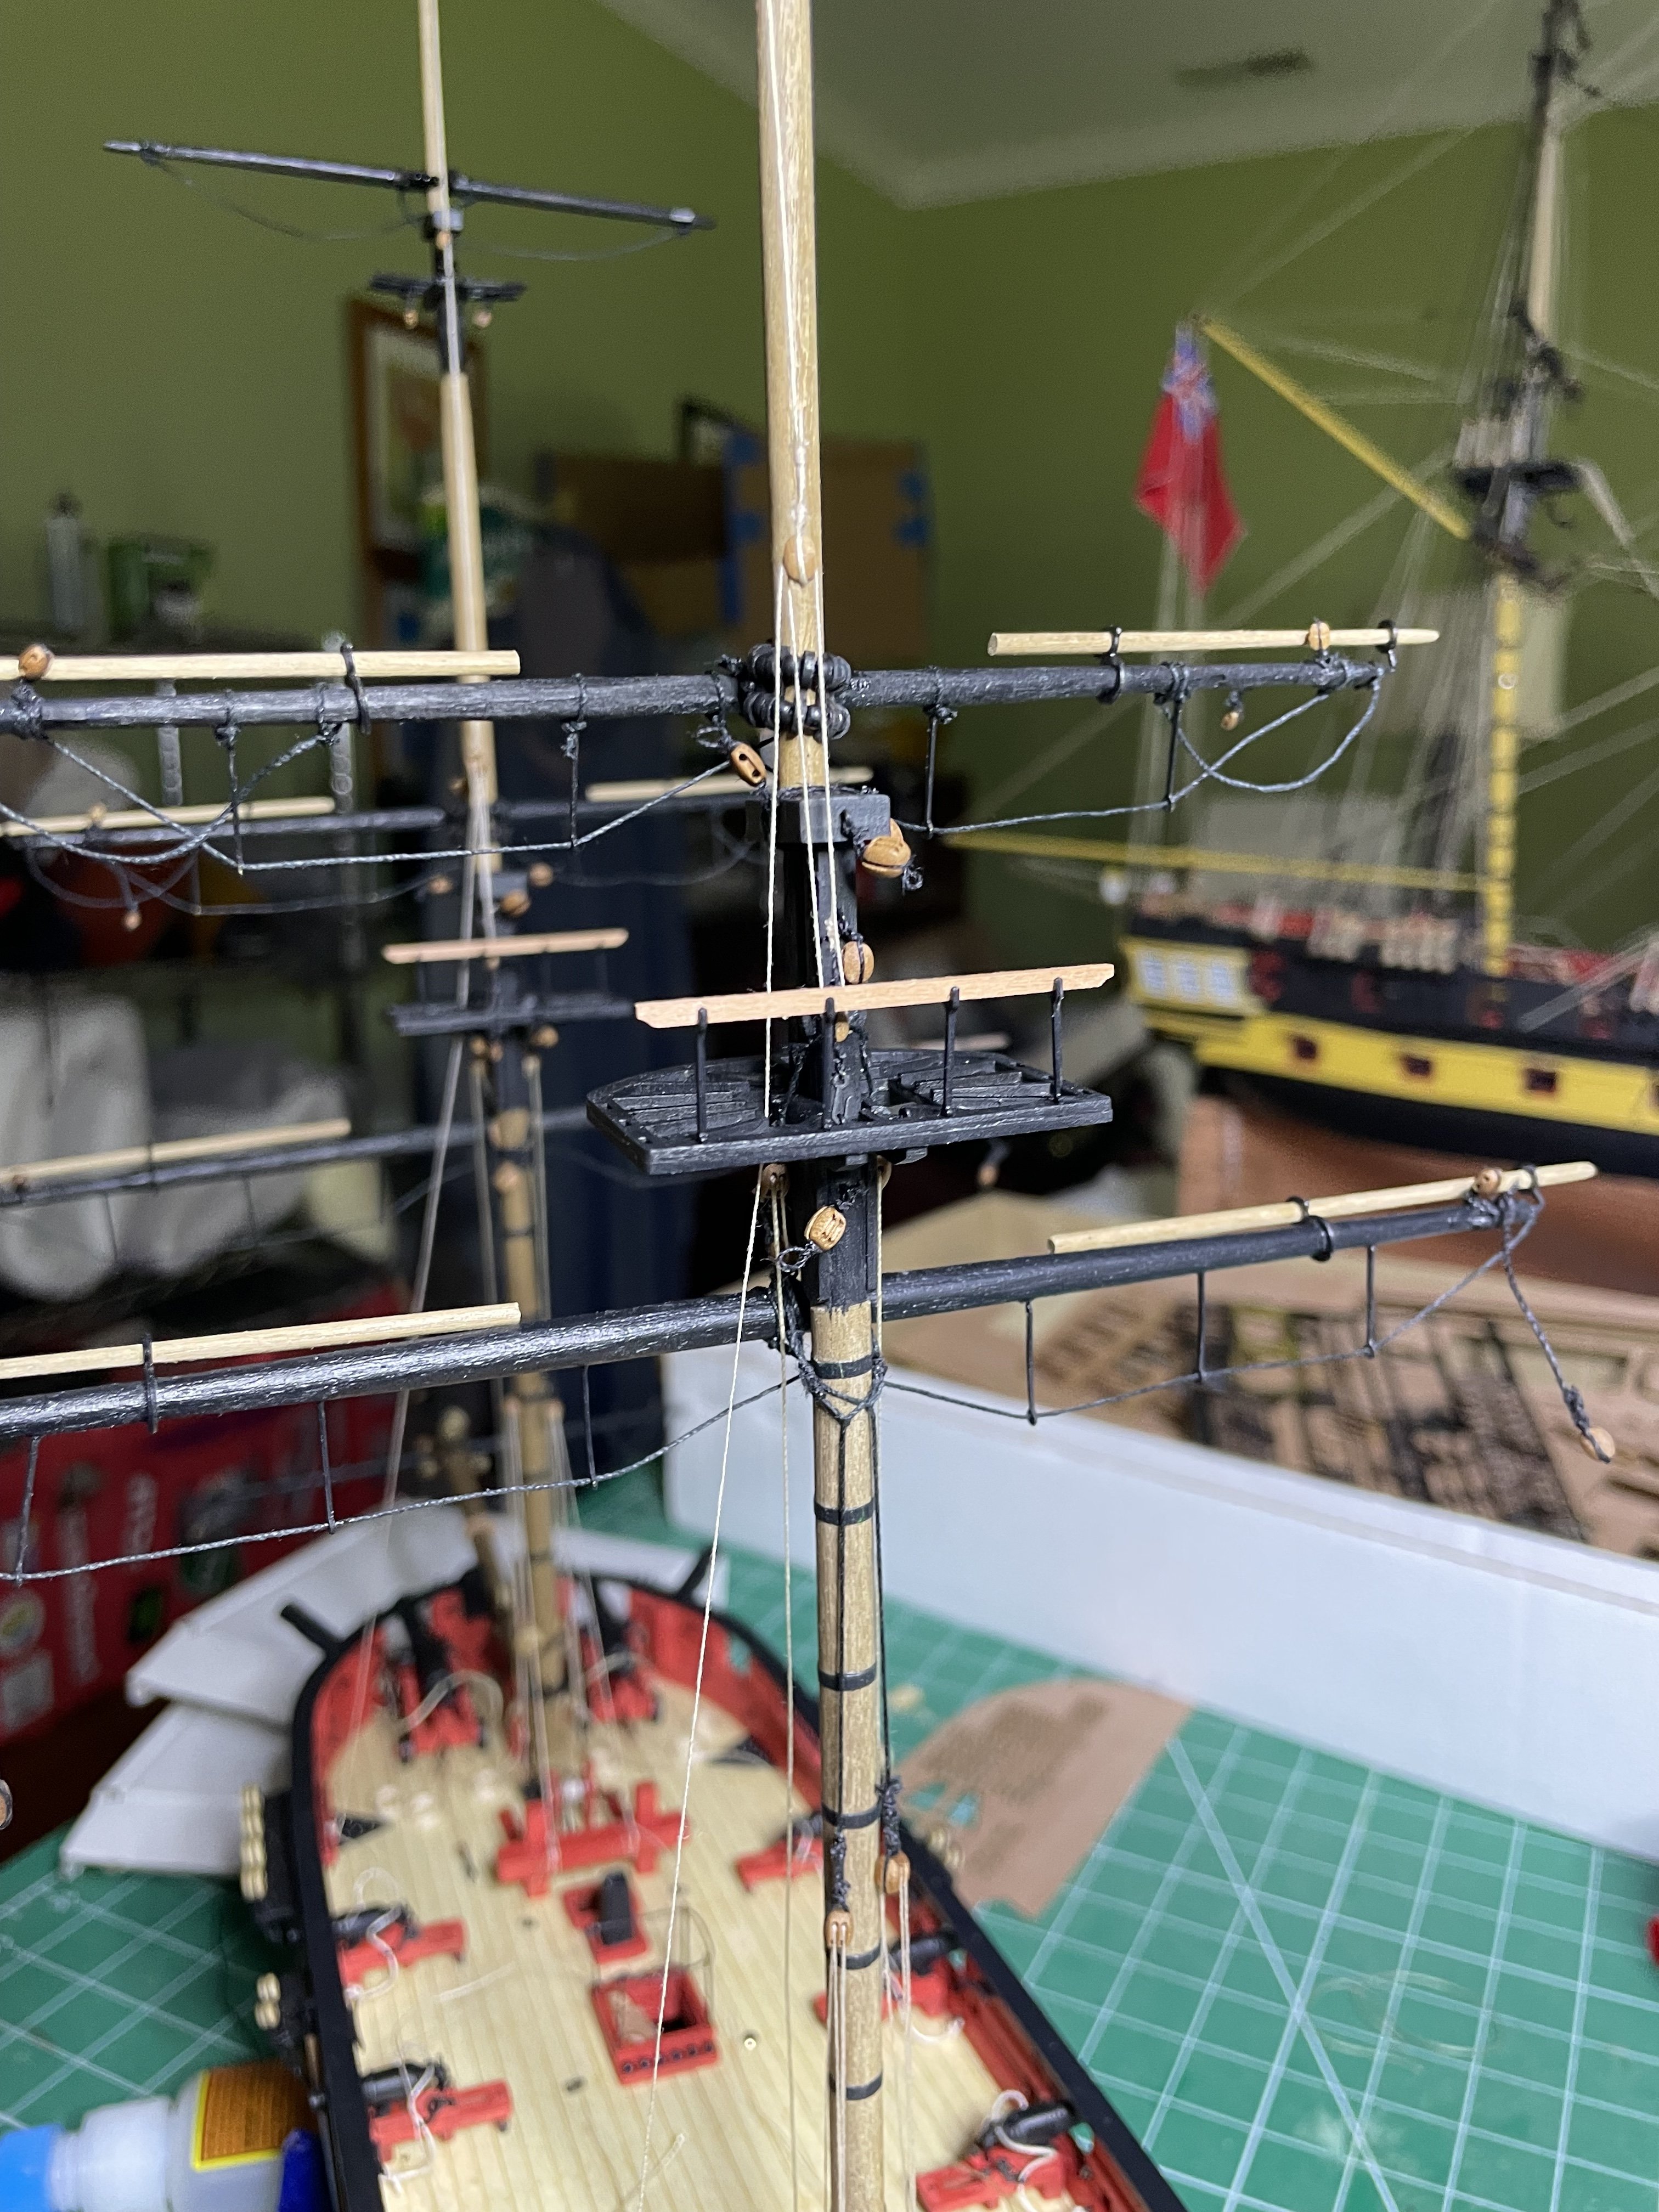
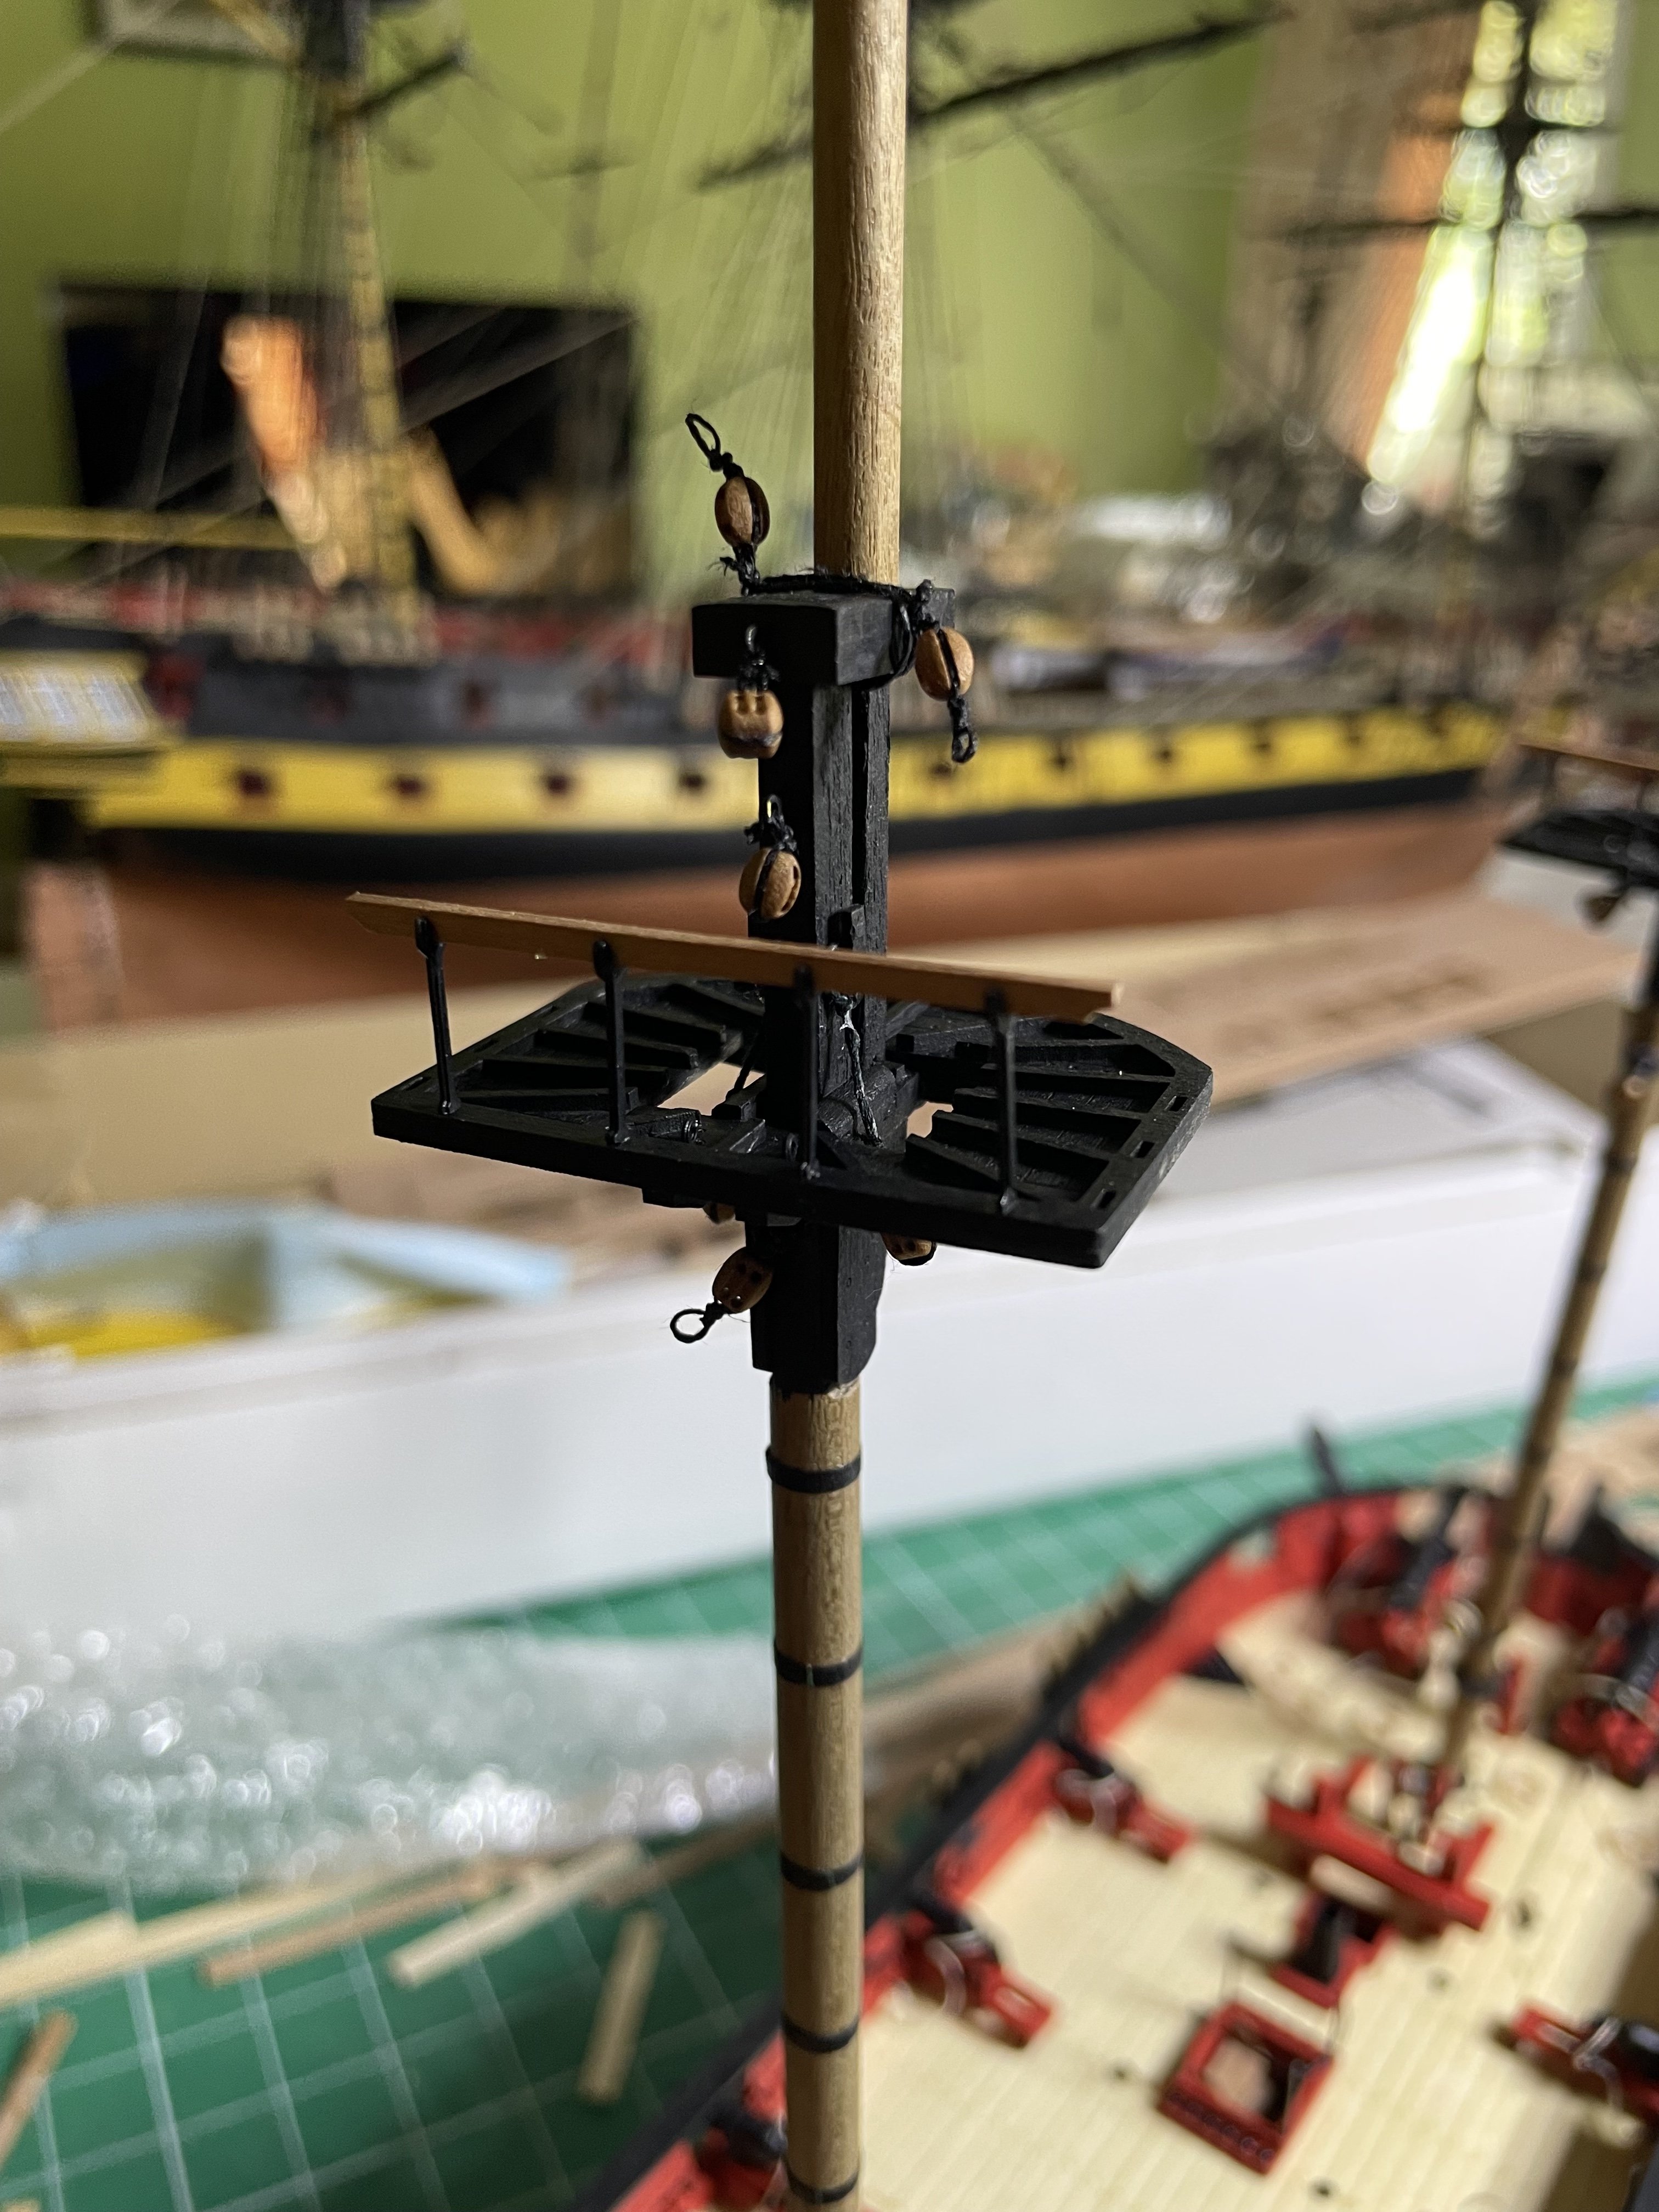
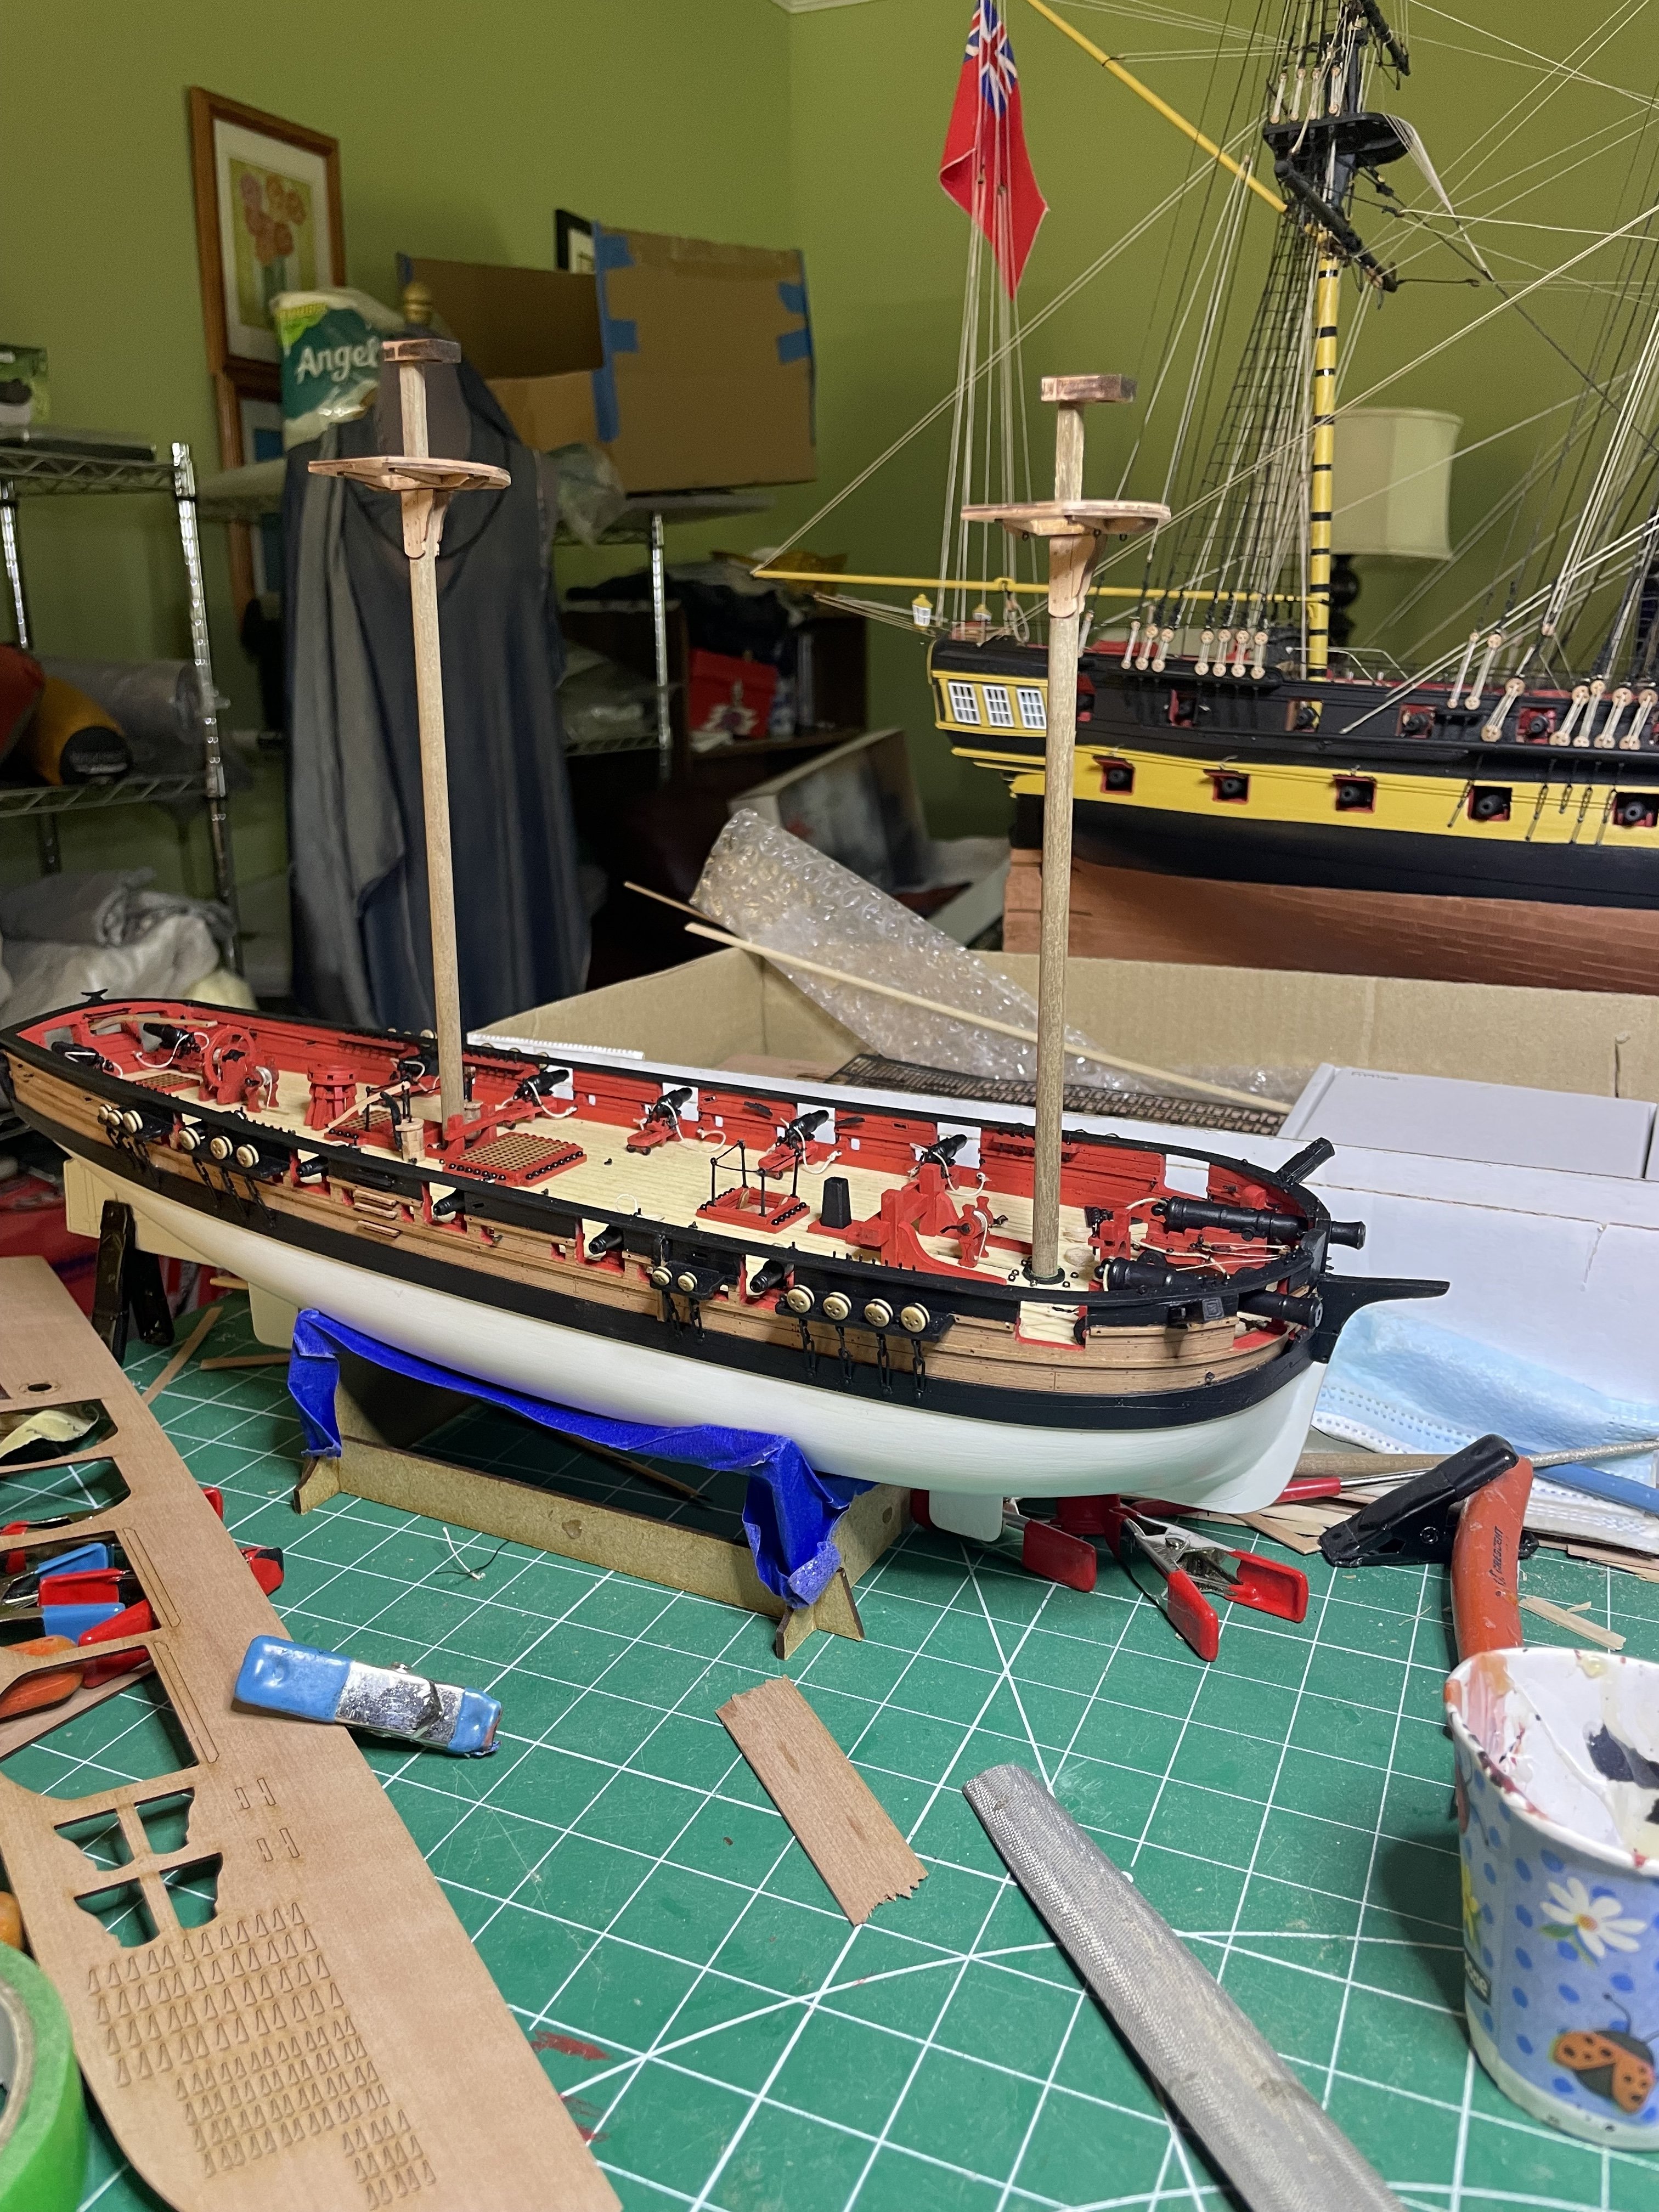
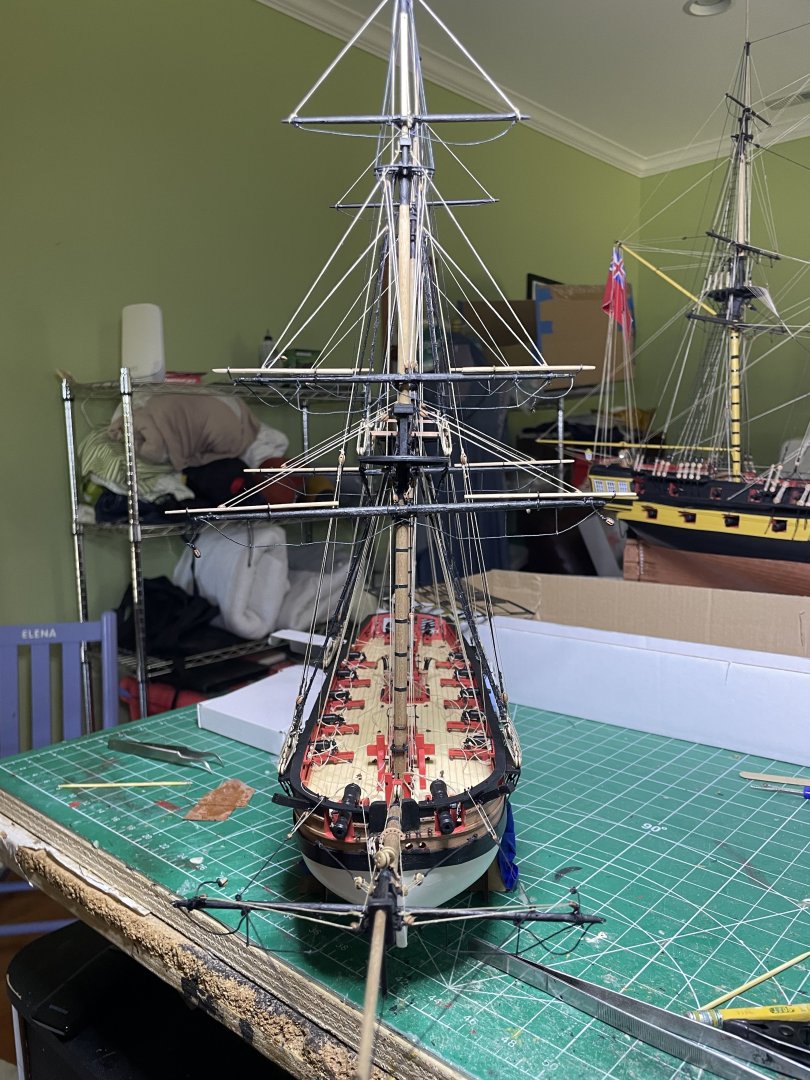
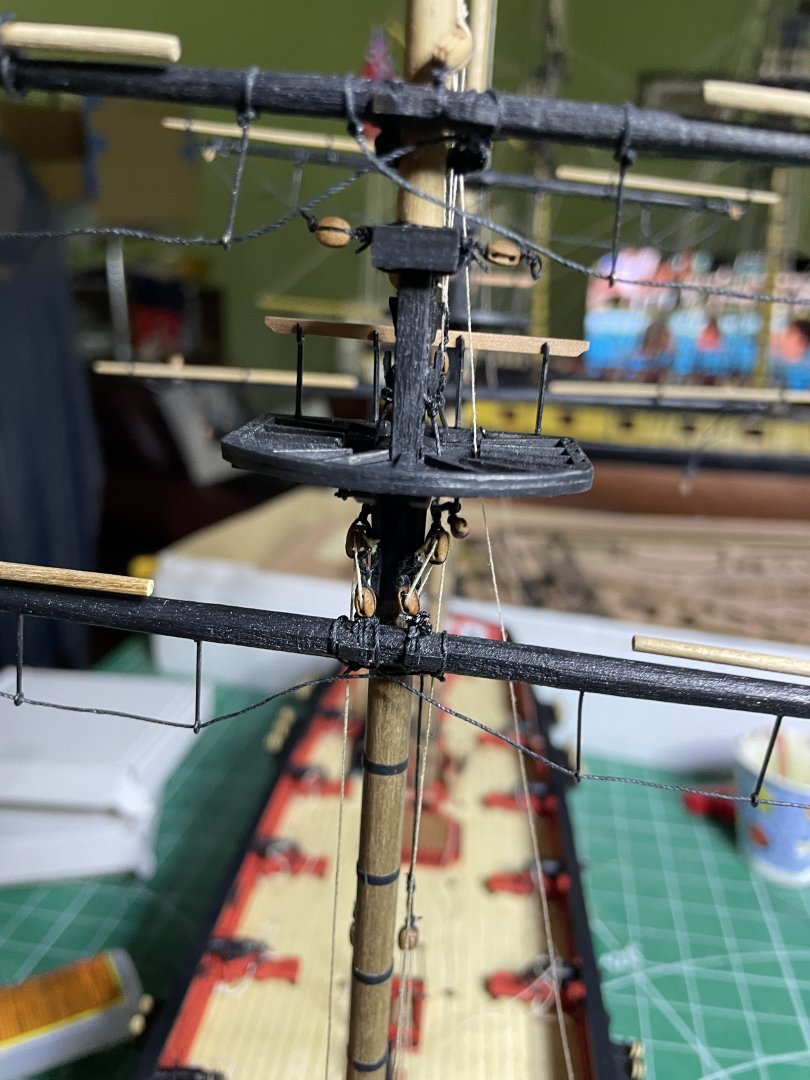
Have pinned the yards to the mast and done some of the jeers and tyes. Will remove bowsprit until after shrouds done as just gets in the way.I do this part now when access is much easier than after when the shrouds are in place


- 66 replies
-
- 12
-
-
- Adder
- Vanguard Models
- (and 1 more)
-
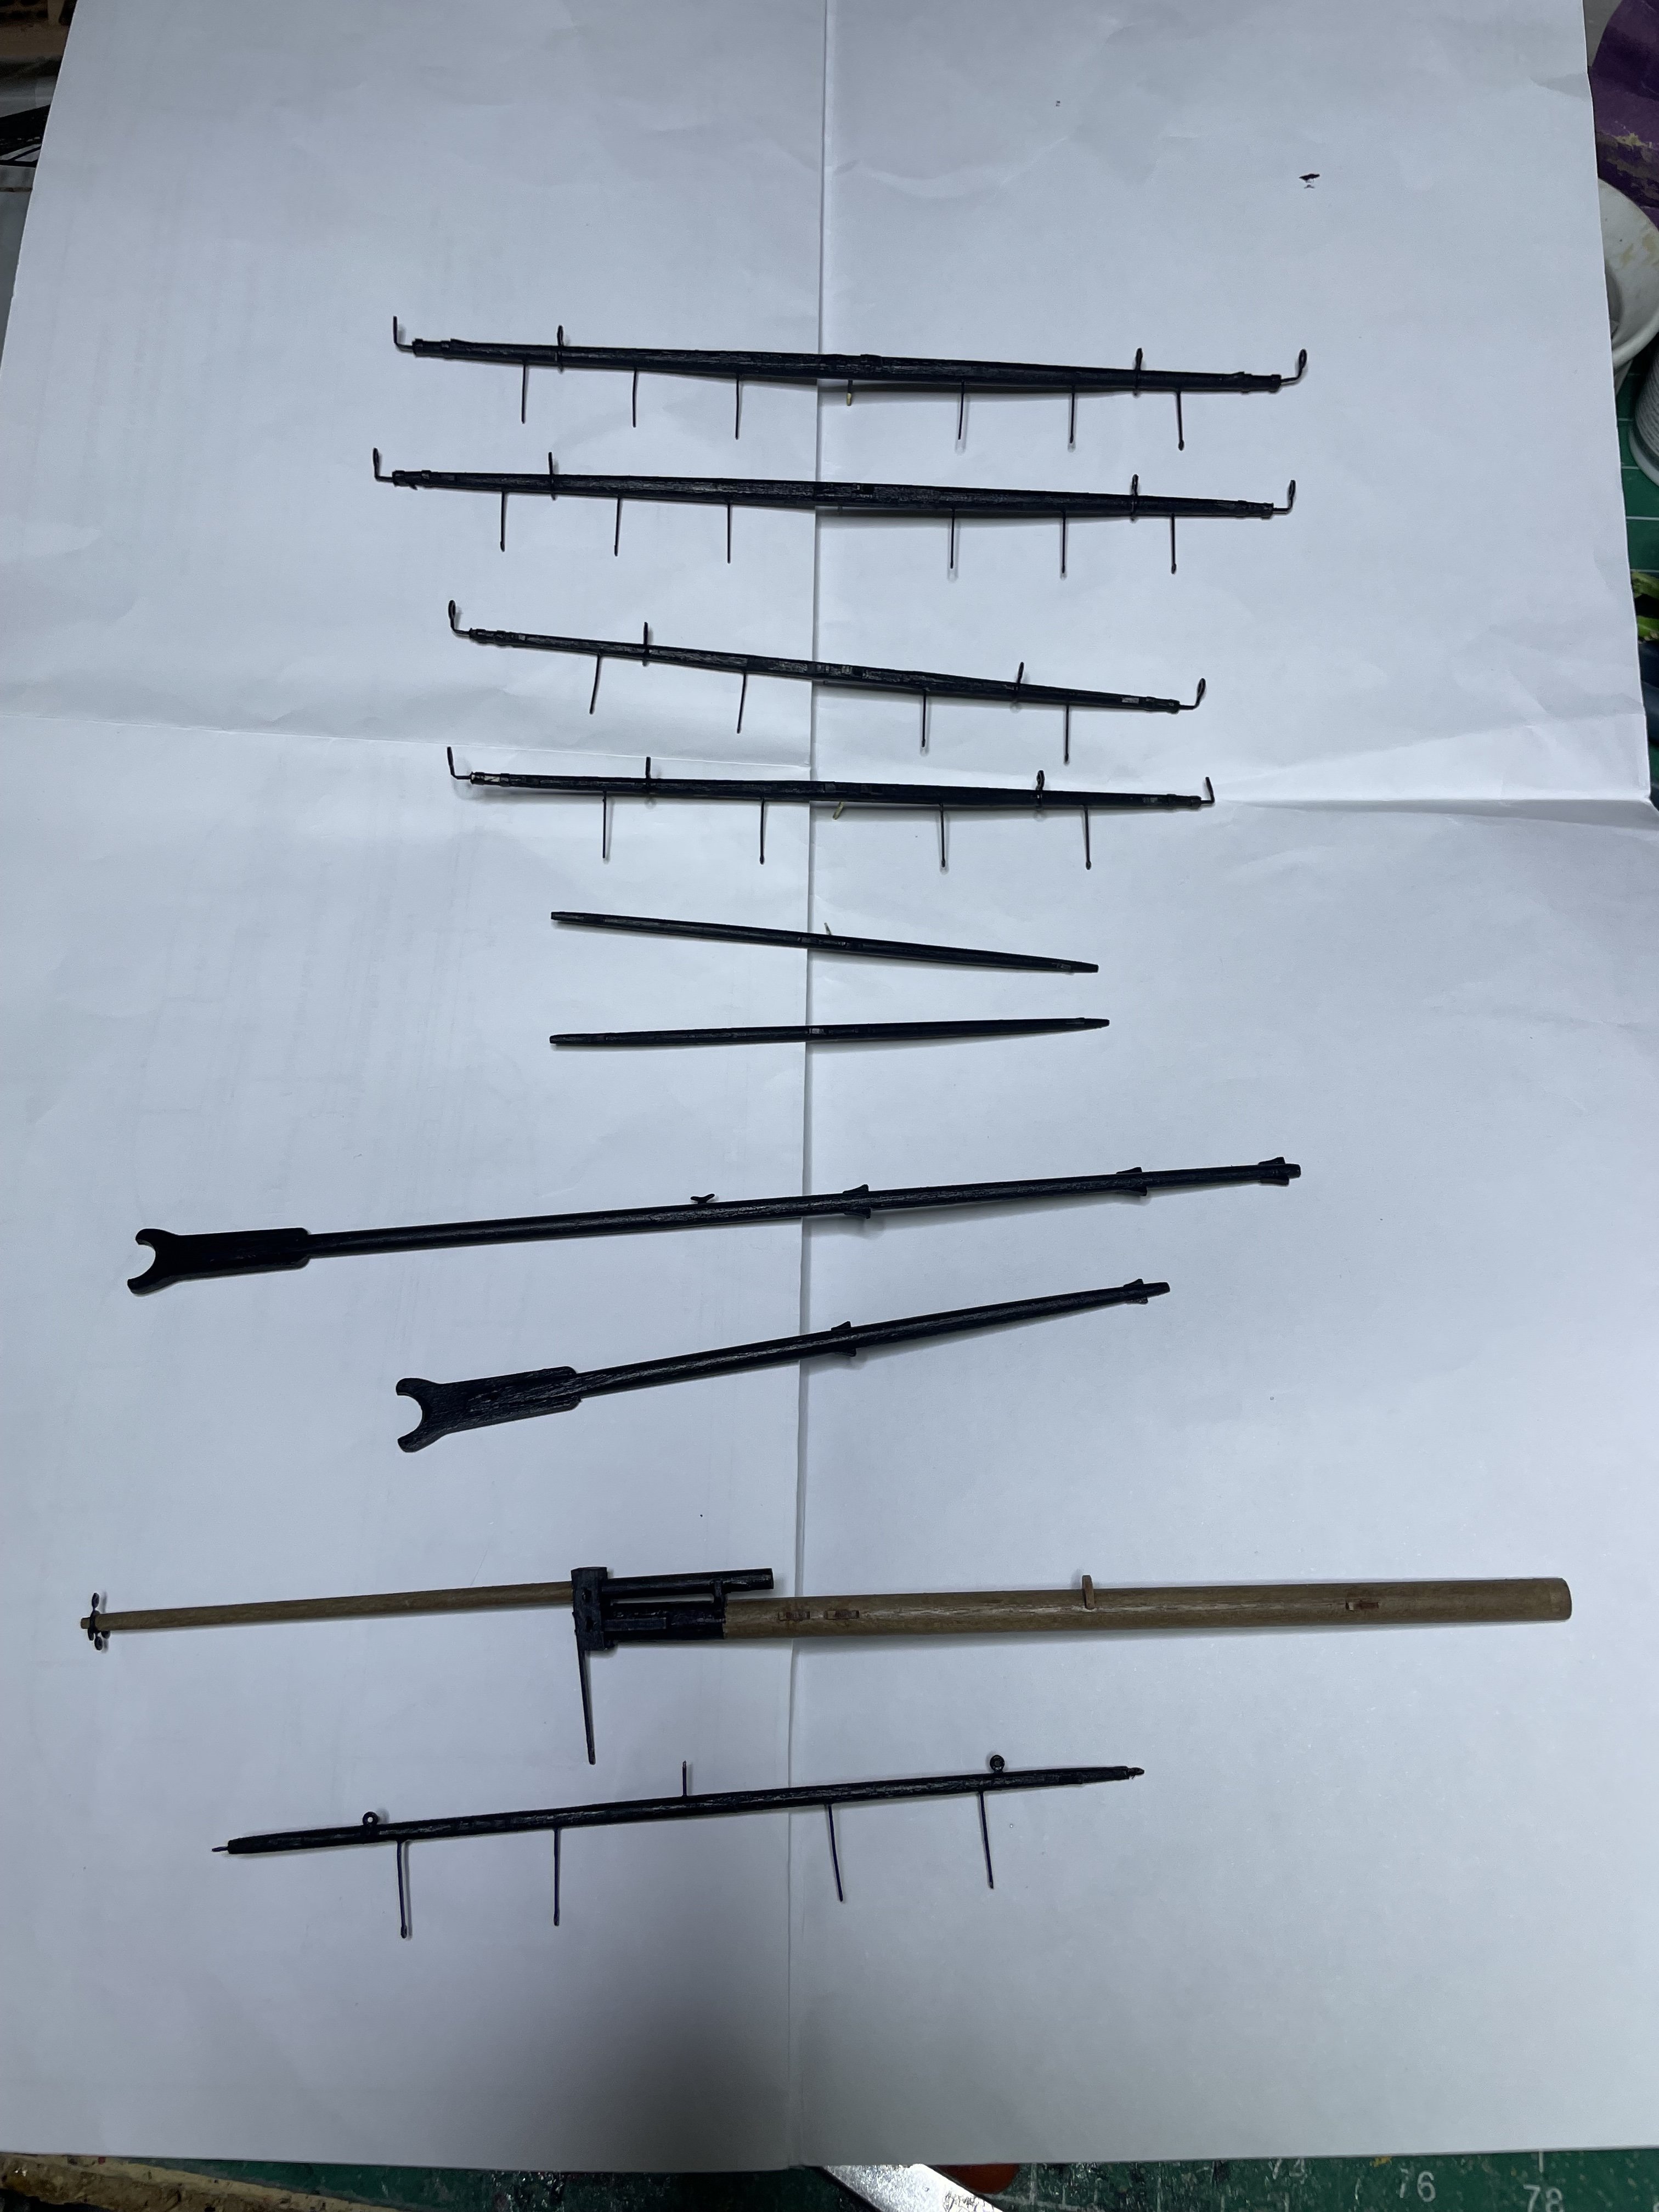
Yards all done. Pre-painting Post painting flat black Then mat poly


- 66 replies
-
- 8
-
-
- Adder
- Vanguard Models
- (and 1 more)
-
I used a touch of glue so things stay stable and keeps the shape. Not a real issue later as easy to take off sand and cover with inner bulwark.
-
If the hole are obscured by paint you can use a hand drill or needle to open it up and then just glue in an eyebolt.
- 146 replies
-
- 4
-
-
- Adder
- Vanguard Models
- (and 1 more)
-
Thanks. My 15th build so learned a few tricks especially once I joined the form and saw the great wokr/tips from others. You may noticed that I splurged and bought pear blocks for a more realistic look. Since I started building with real looking blocks, I find the final product just looks better although not obvious until you get closer to the model.
- 66 replies
-
- 5
-
-
- Adder
- Vanguard Models
- (and 1 more)
-
Far enough away. When I do real sanding I have a vacuum on pulling in the big dust or go outside. This filing does not spread far.
- 66 replies
-
- 3
-
-
- Adder
- Vanguard Models
- (and 1 more)
-
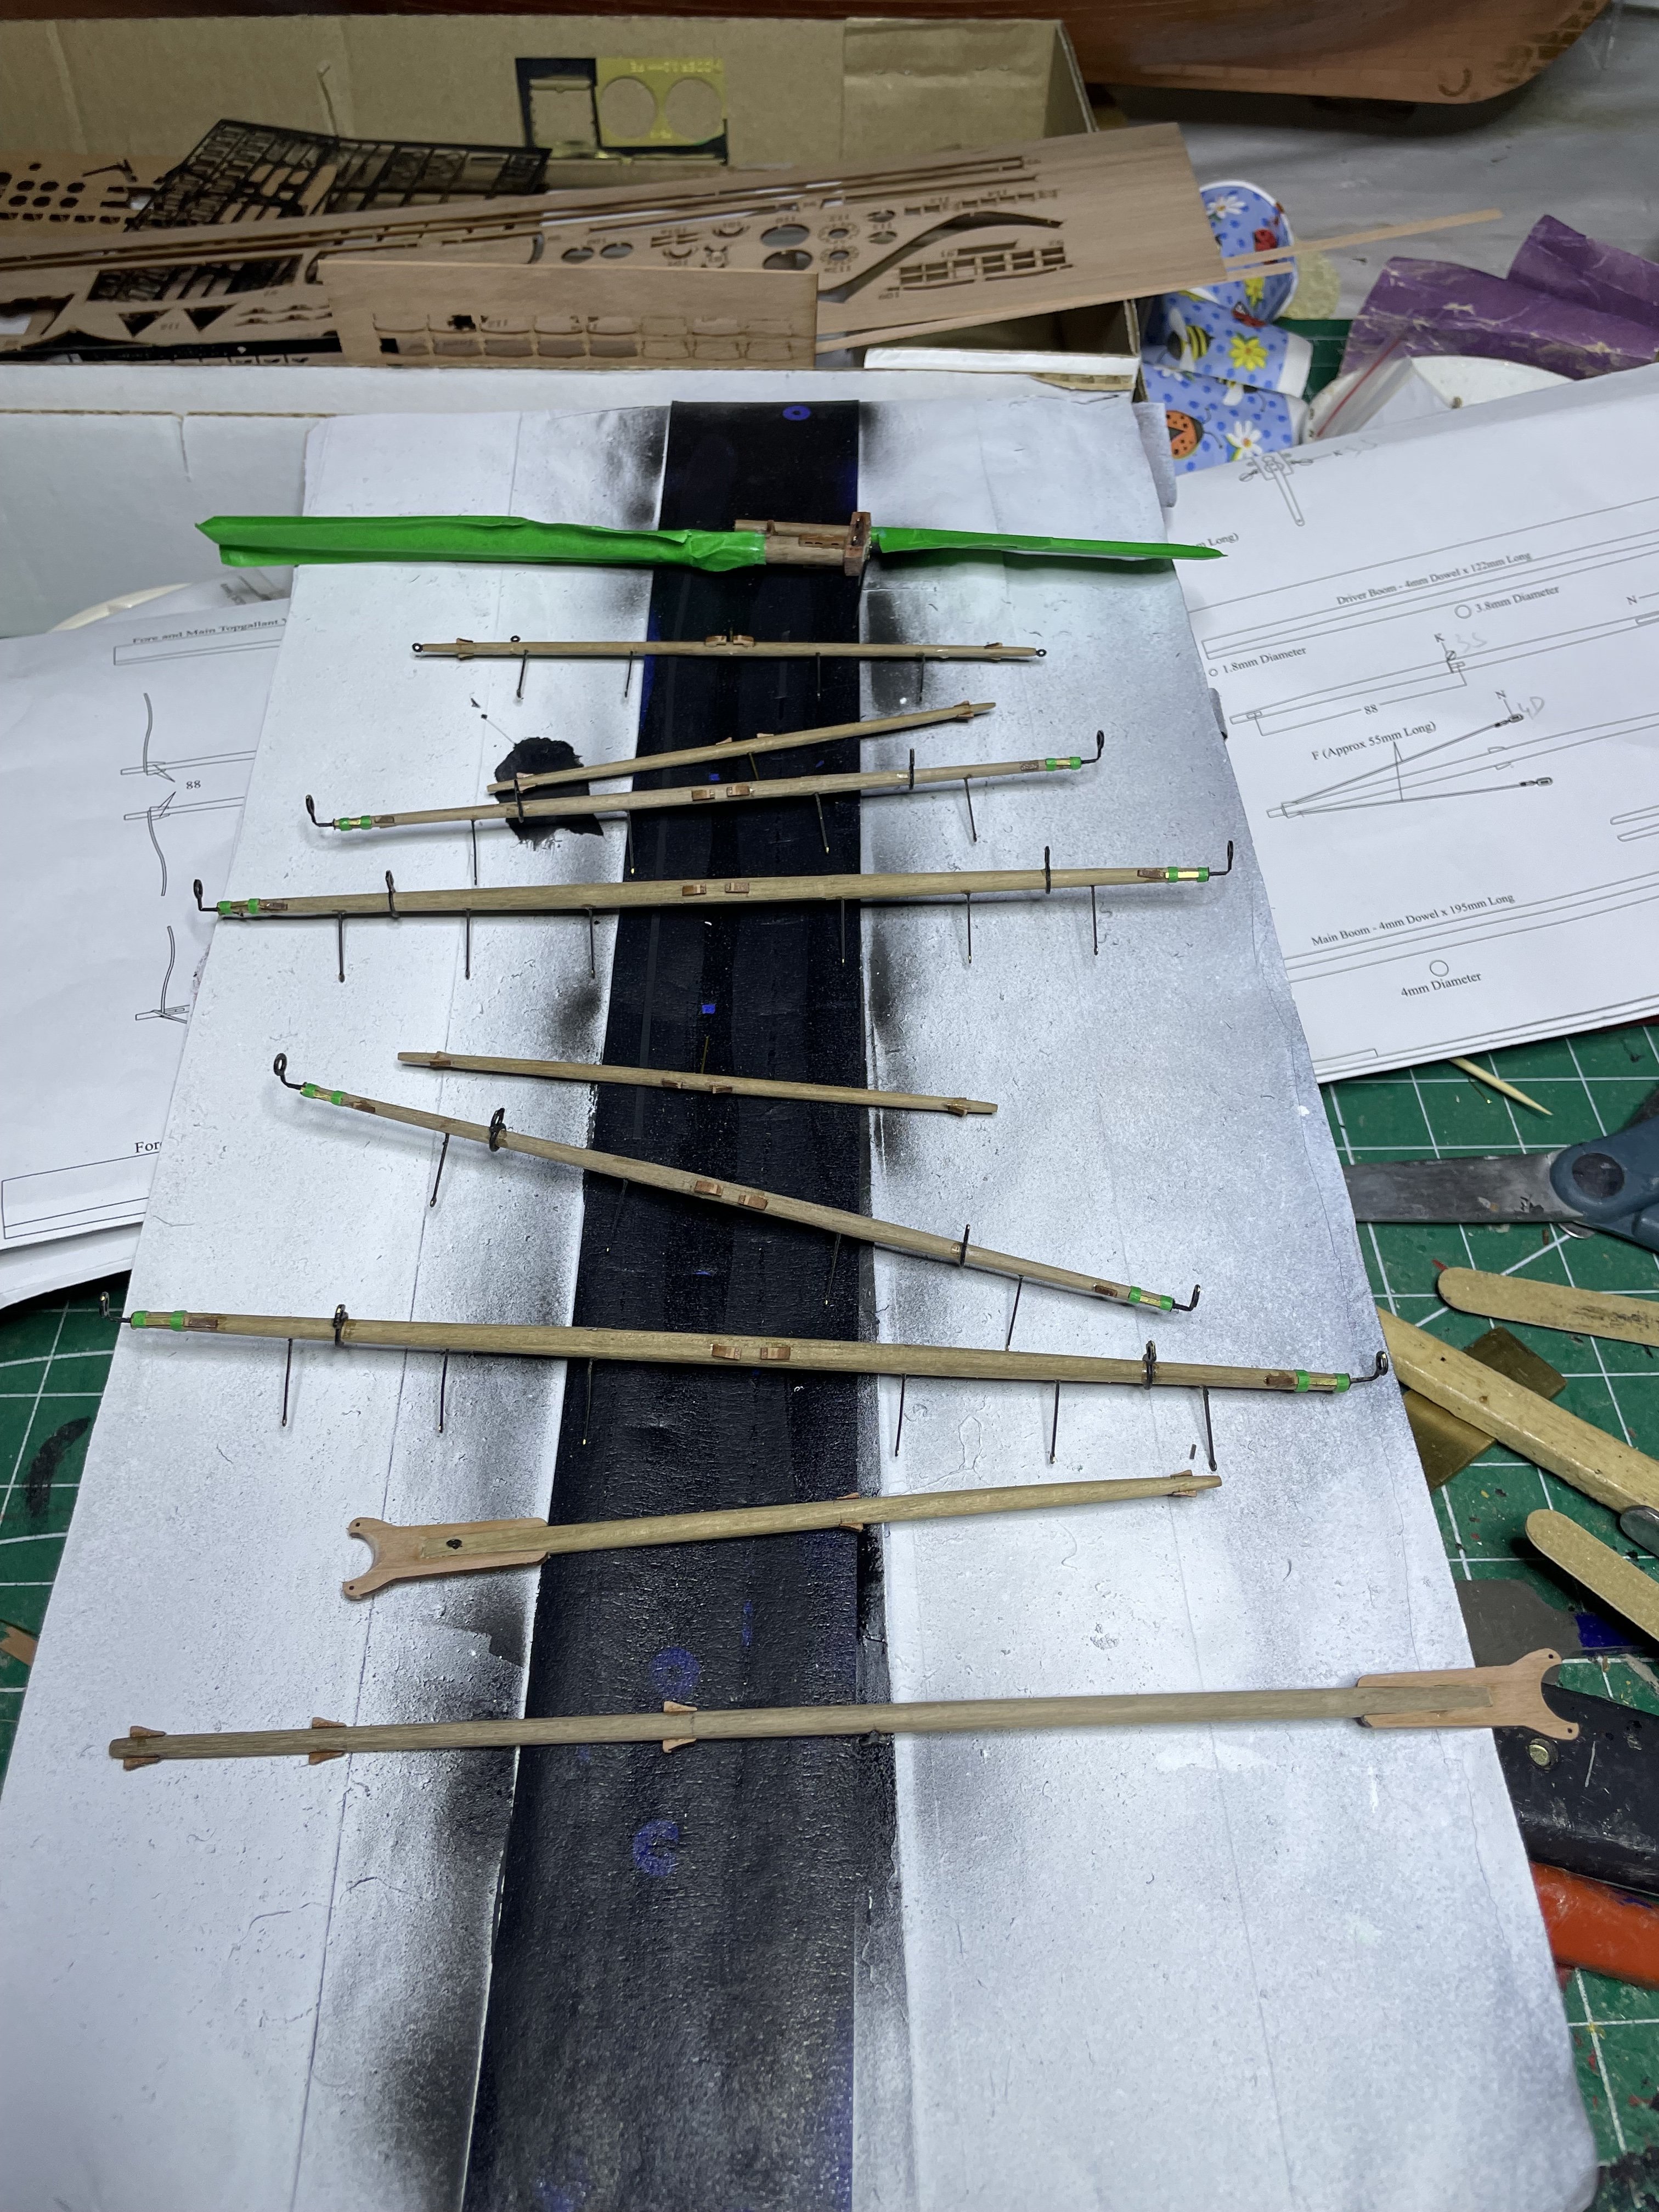
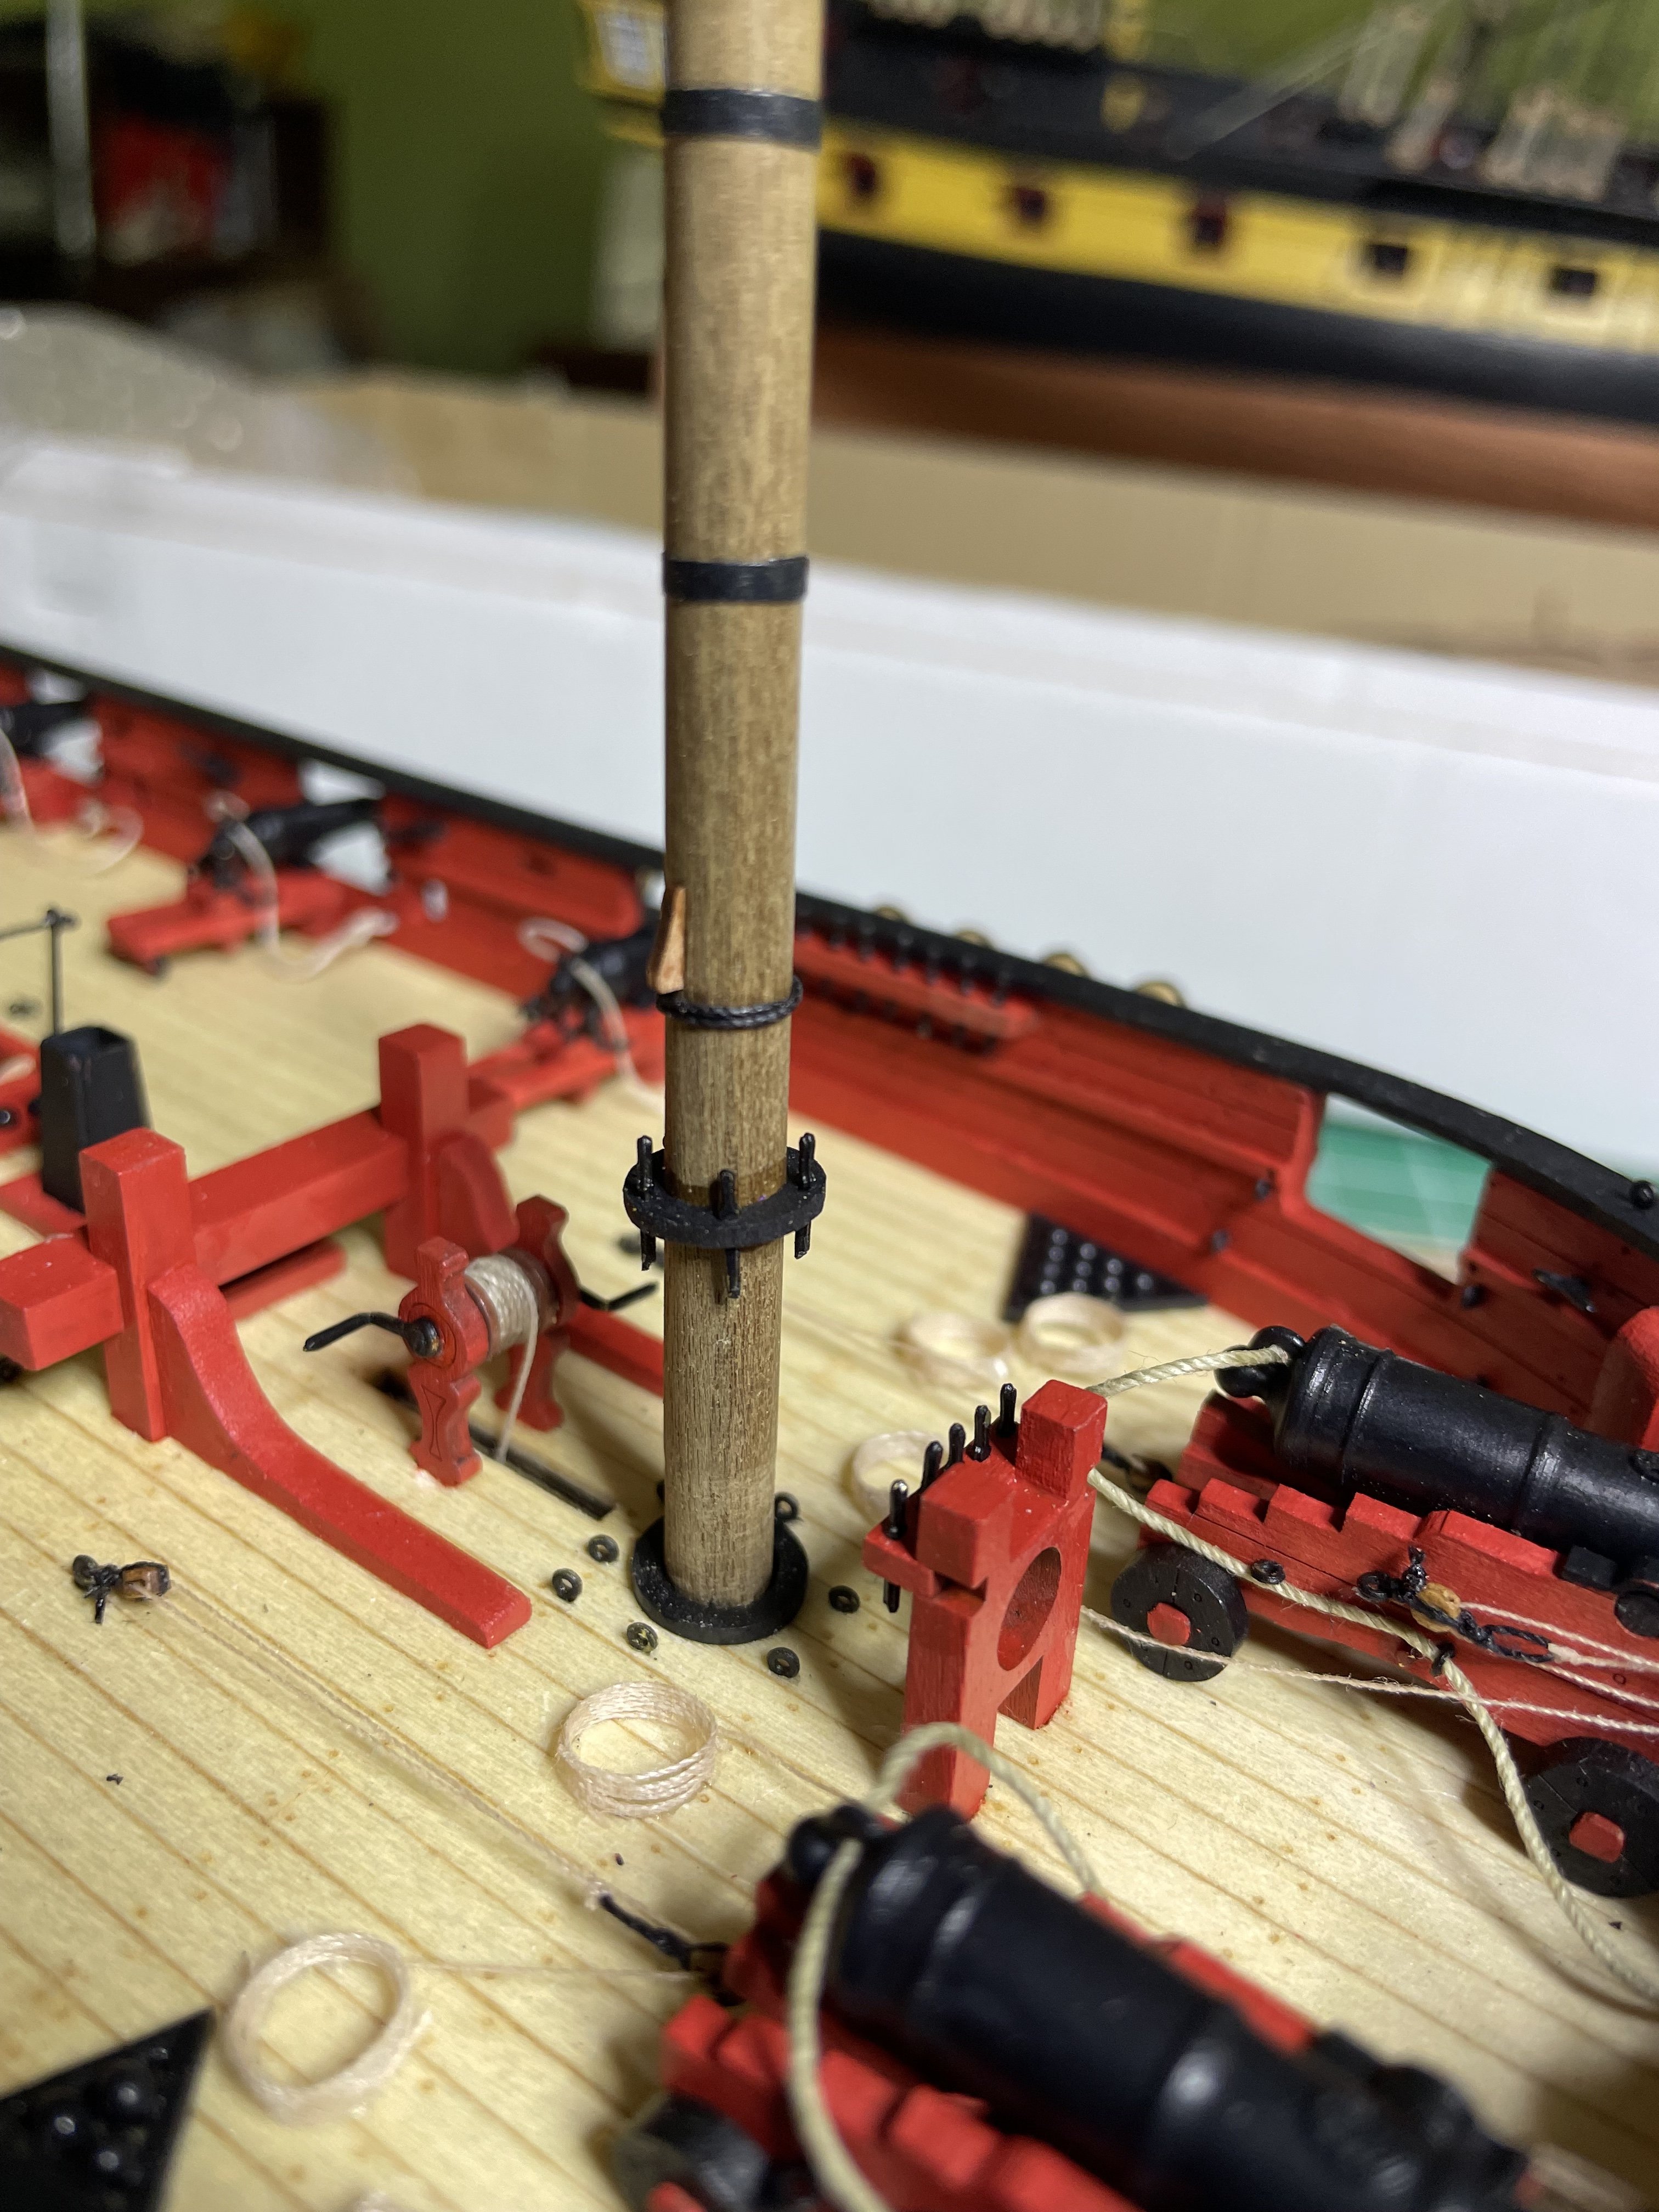
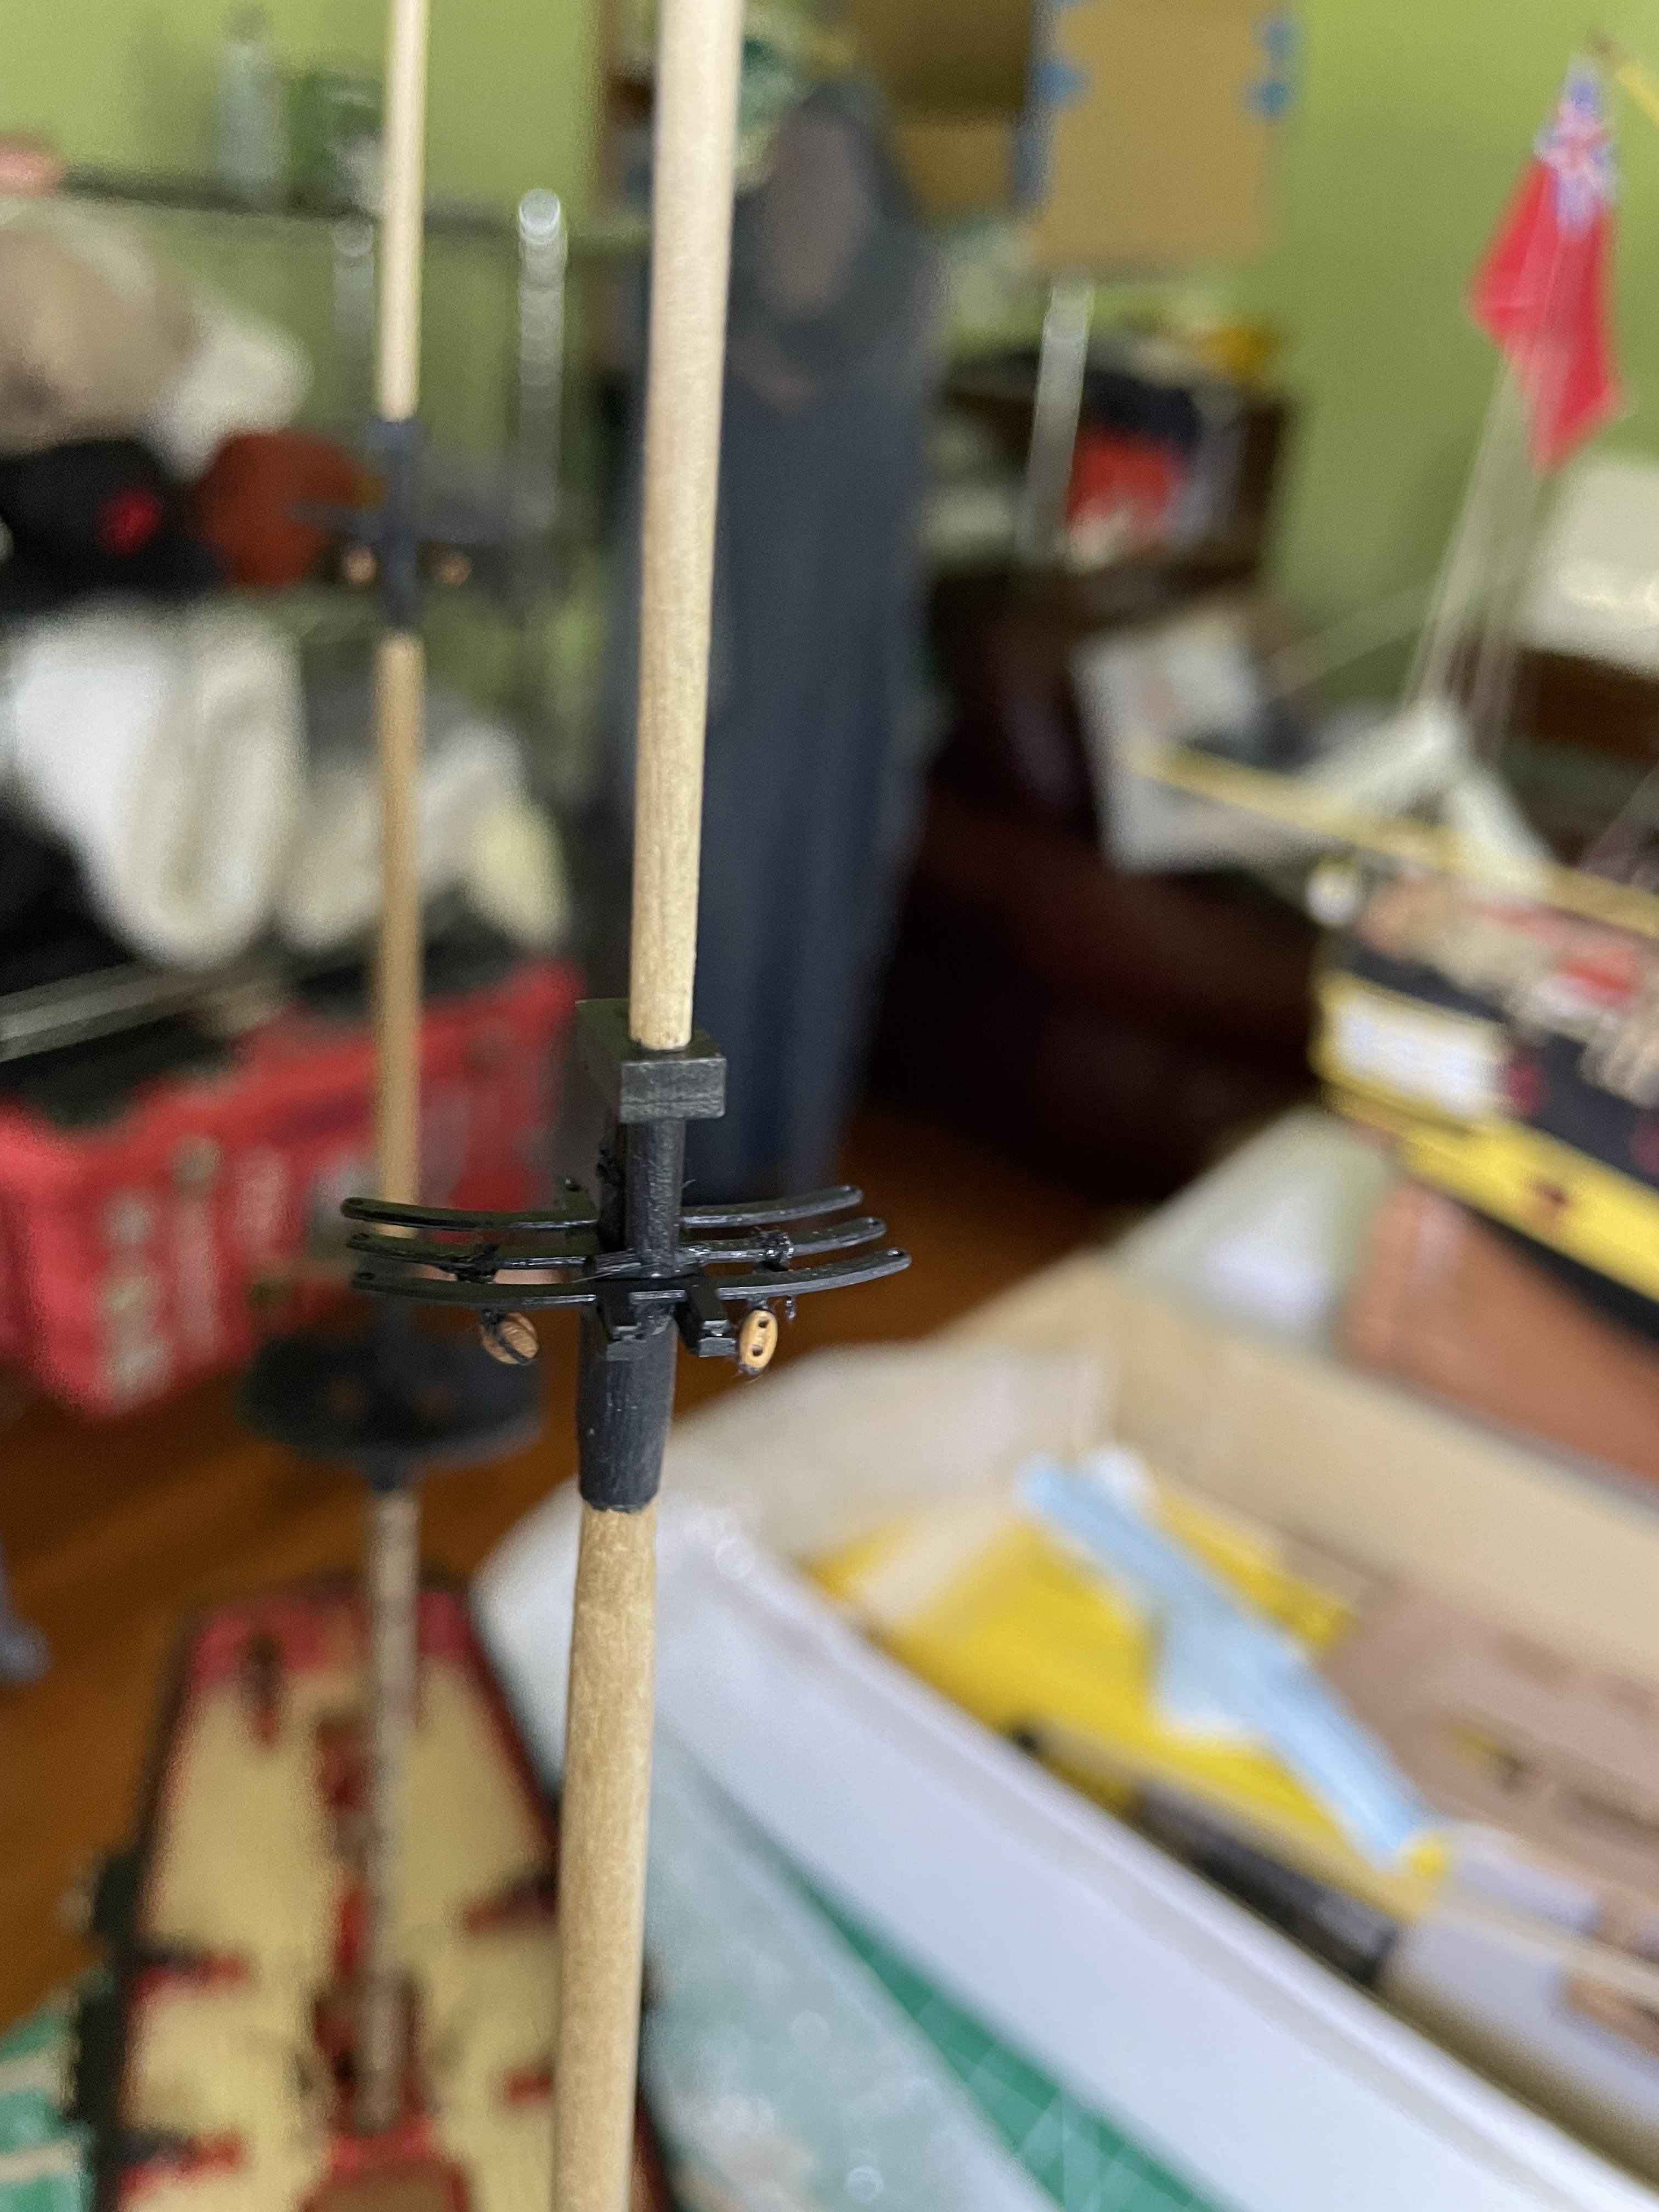
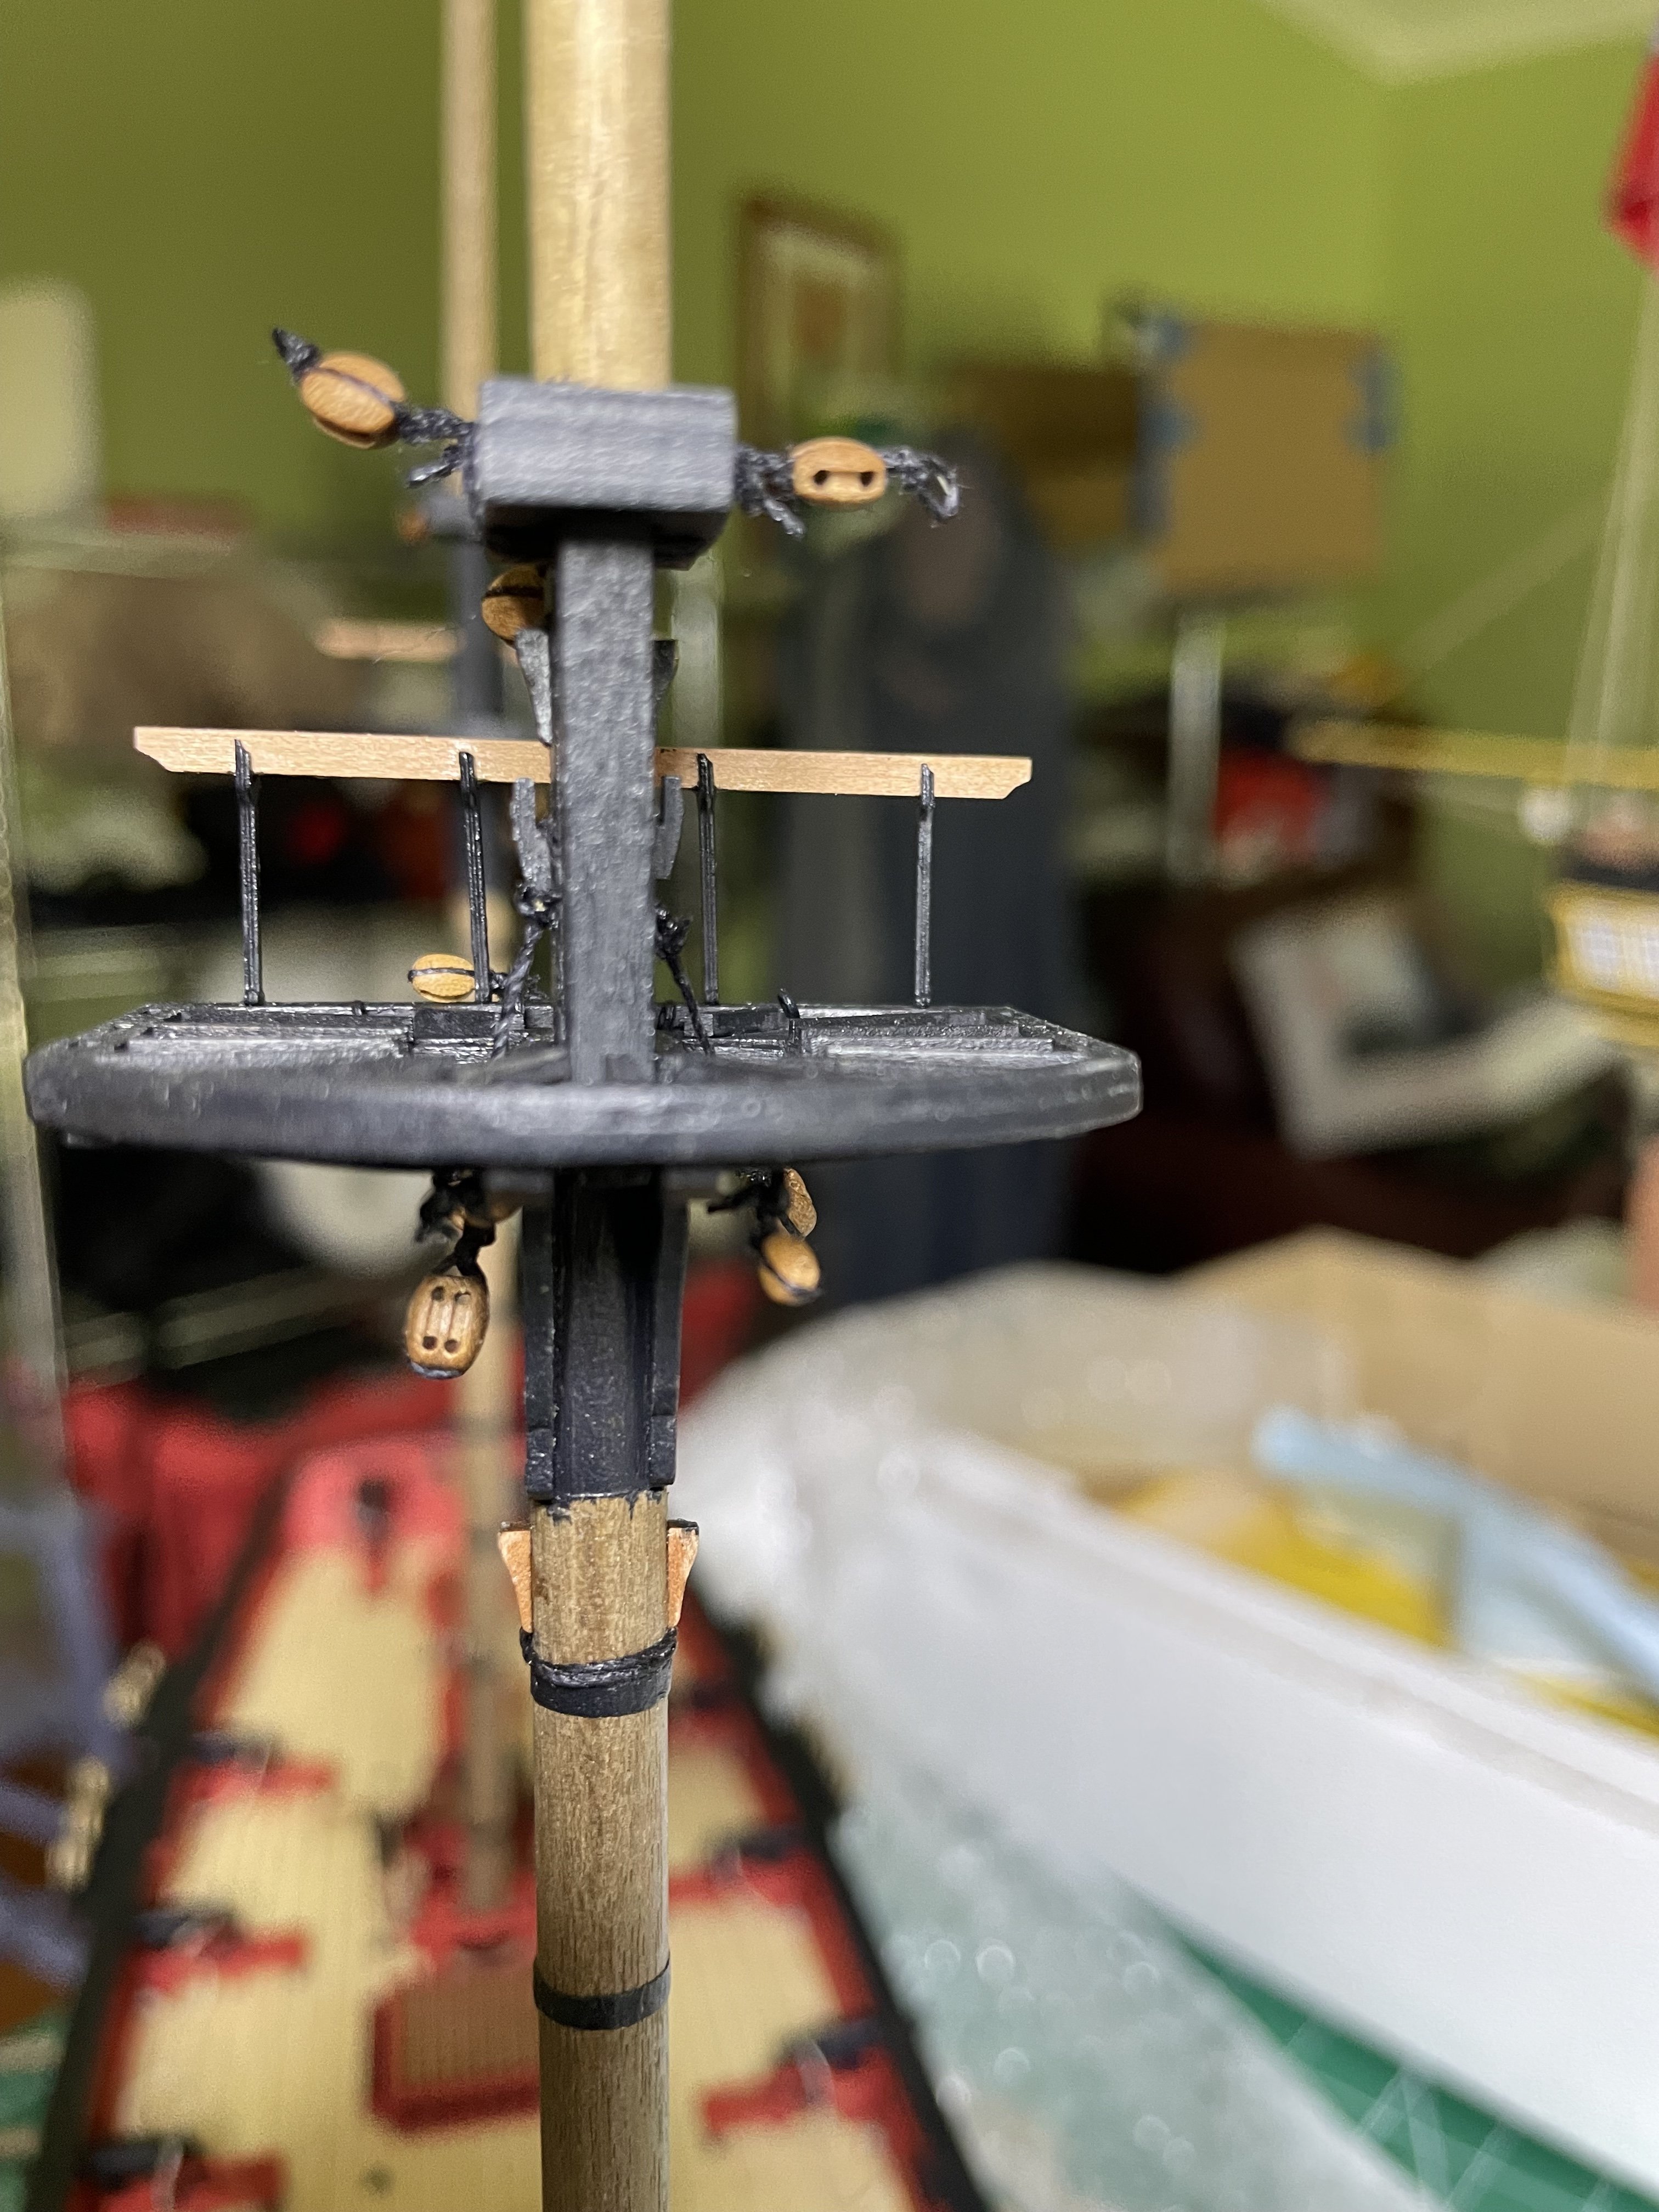
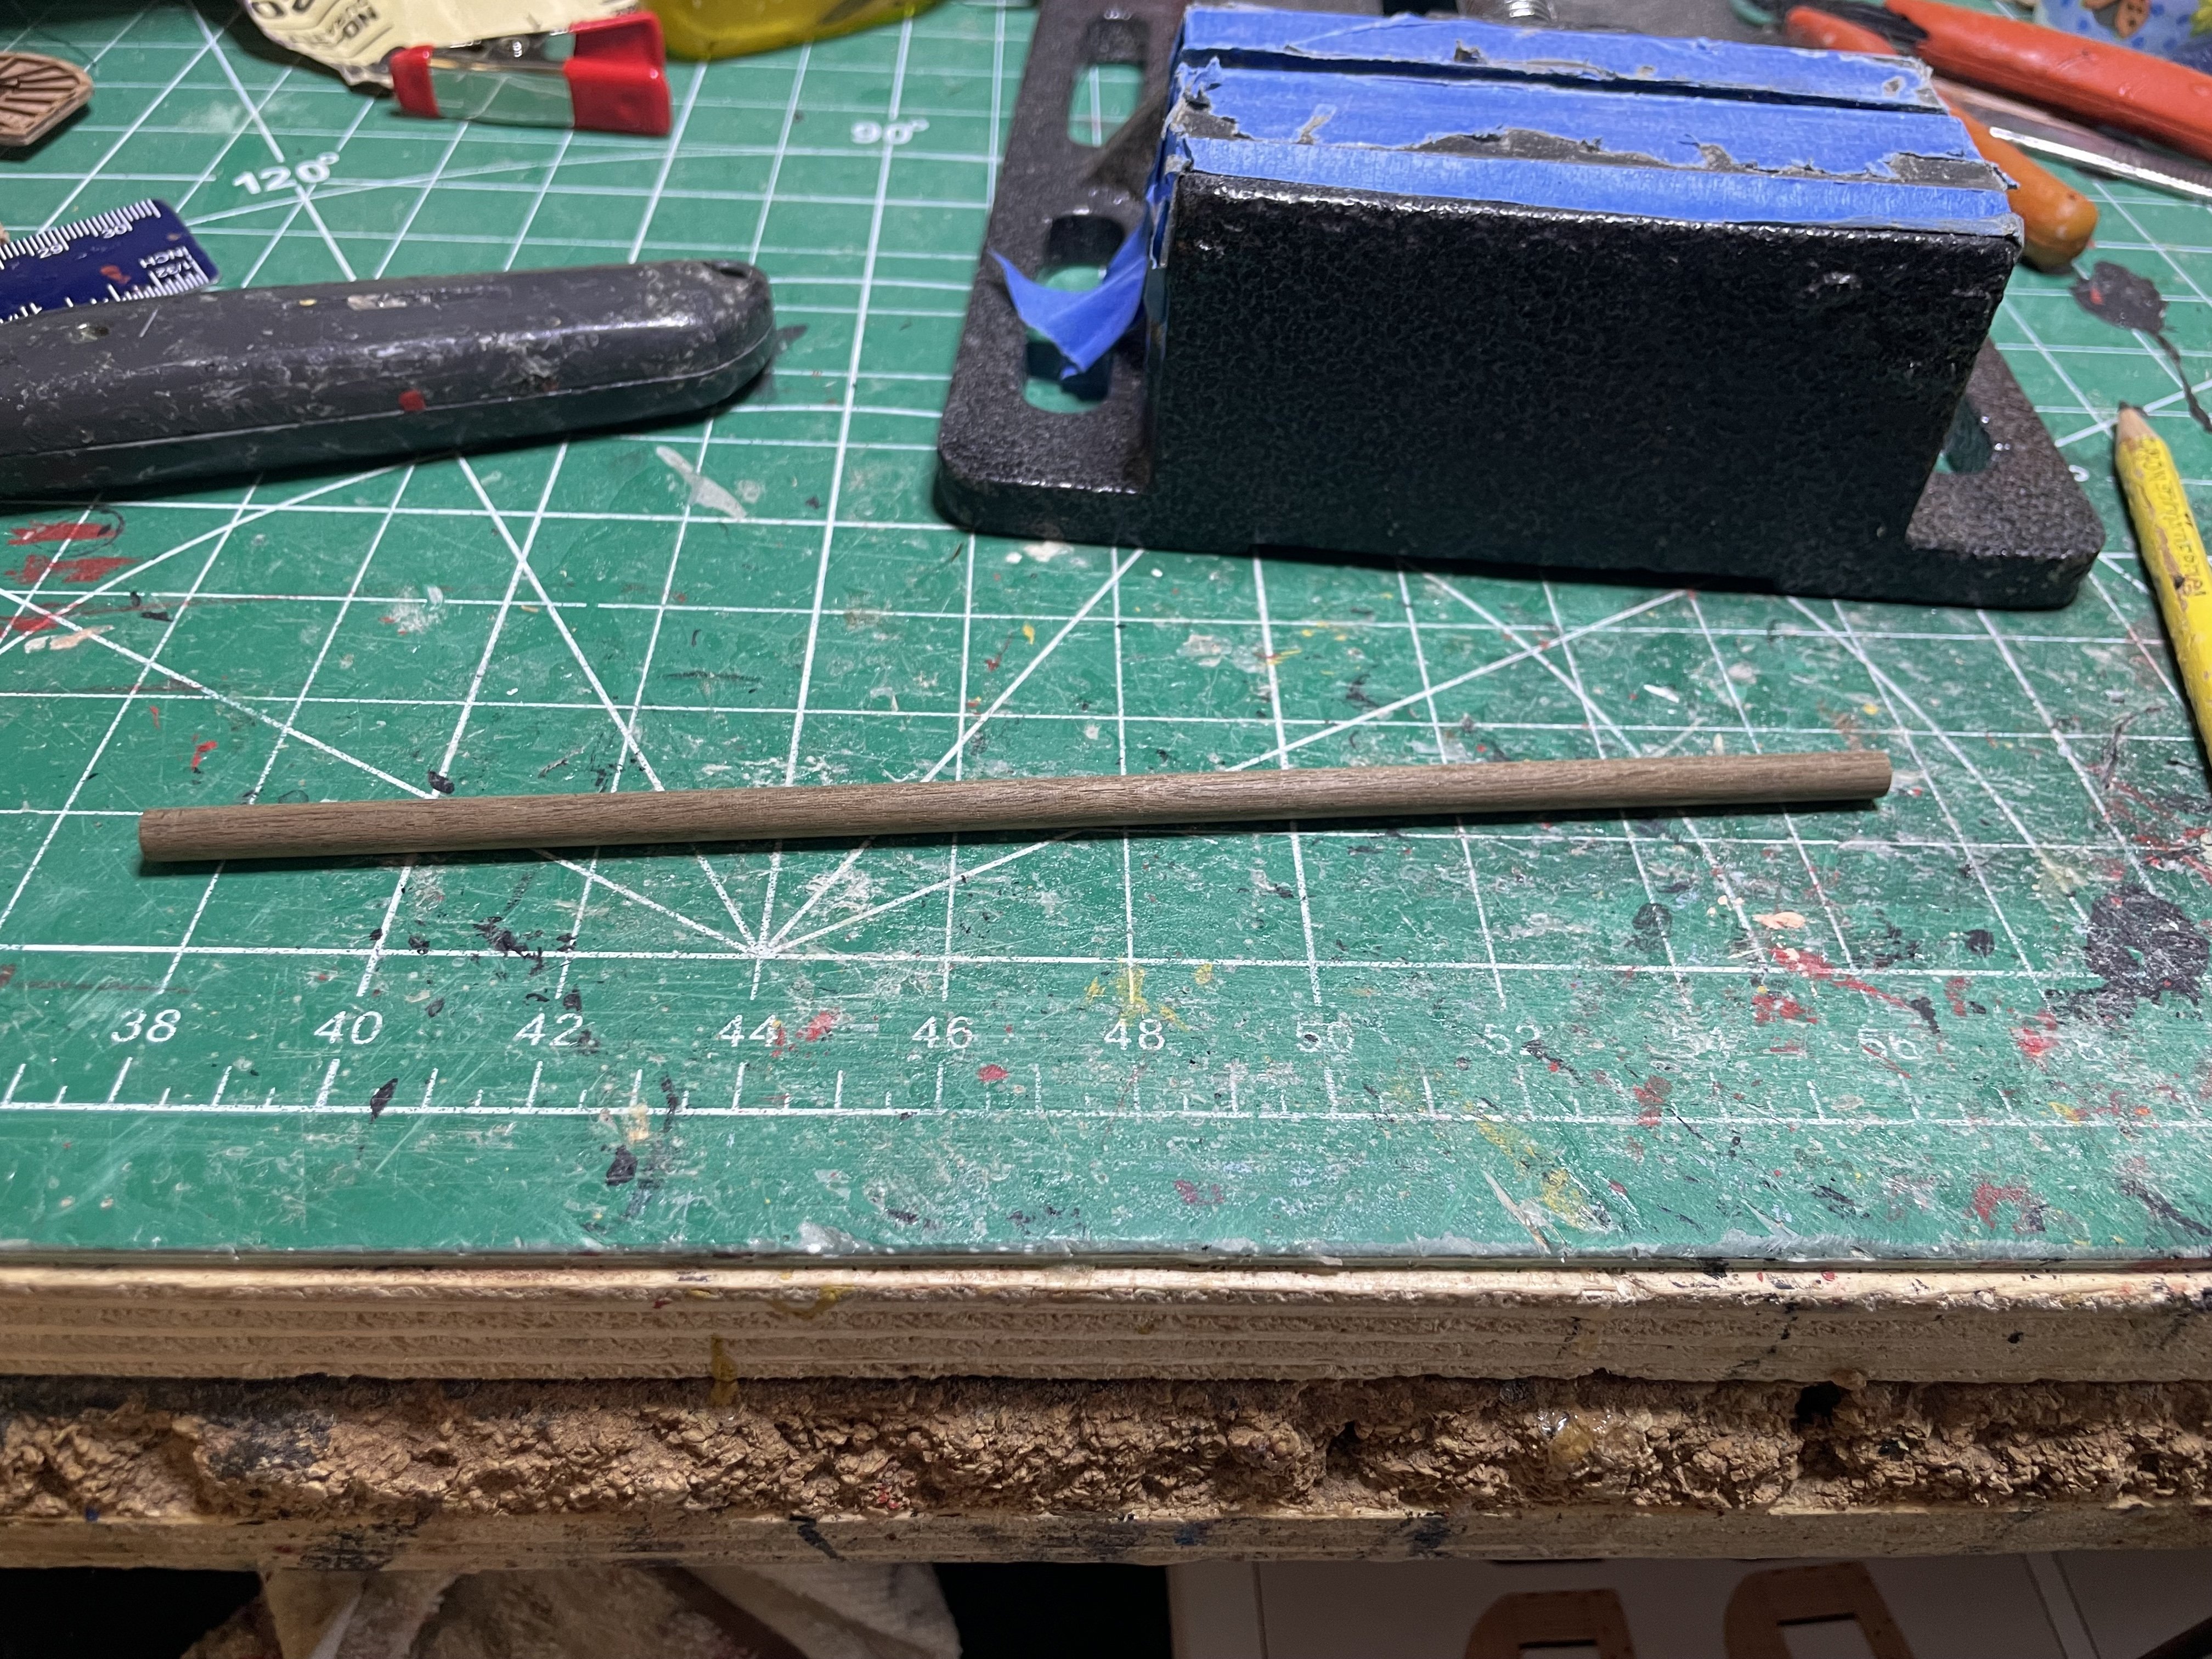
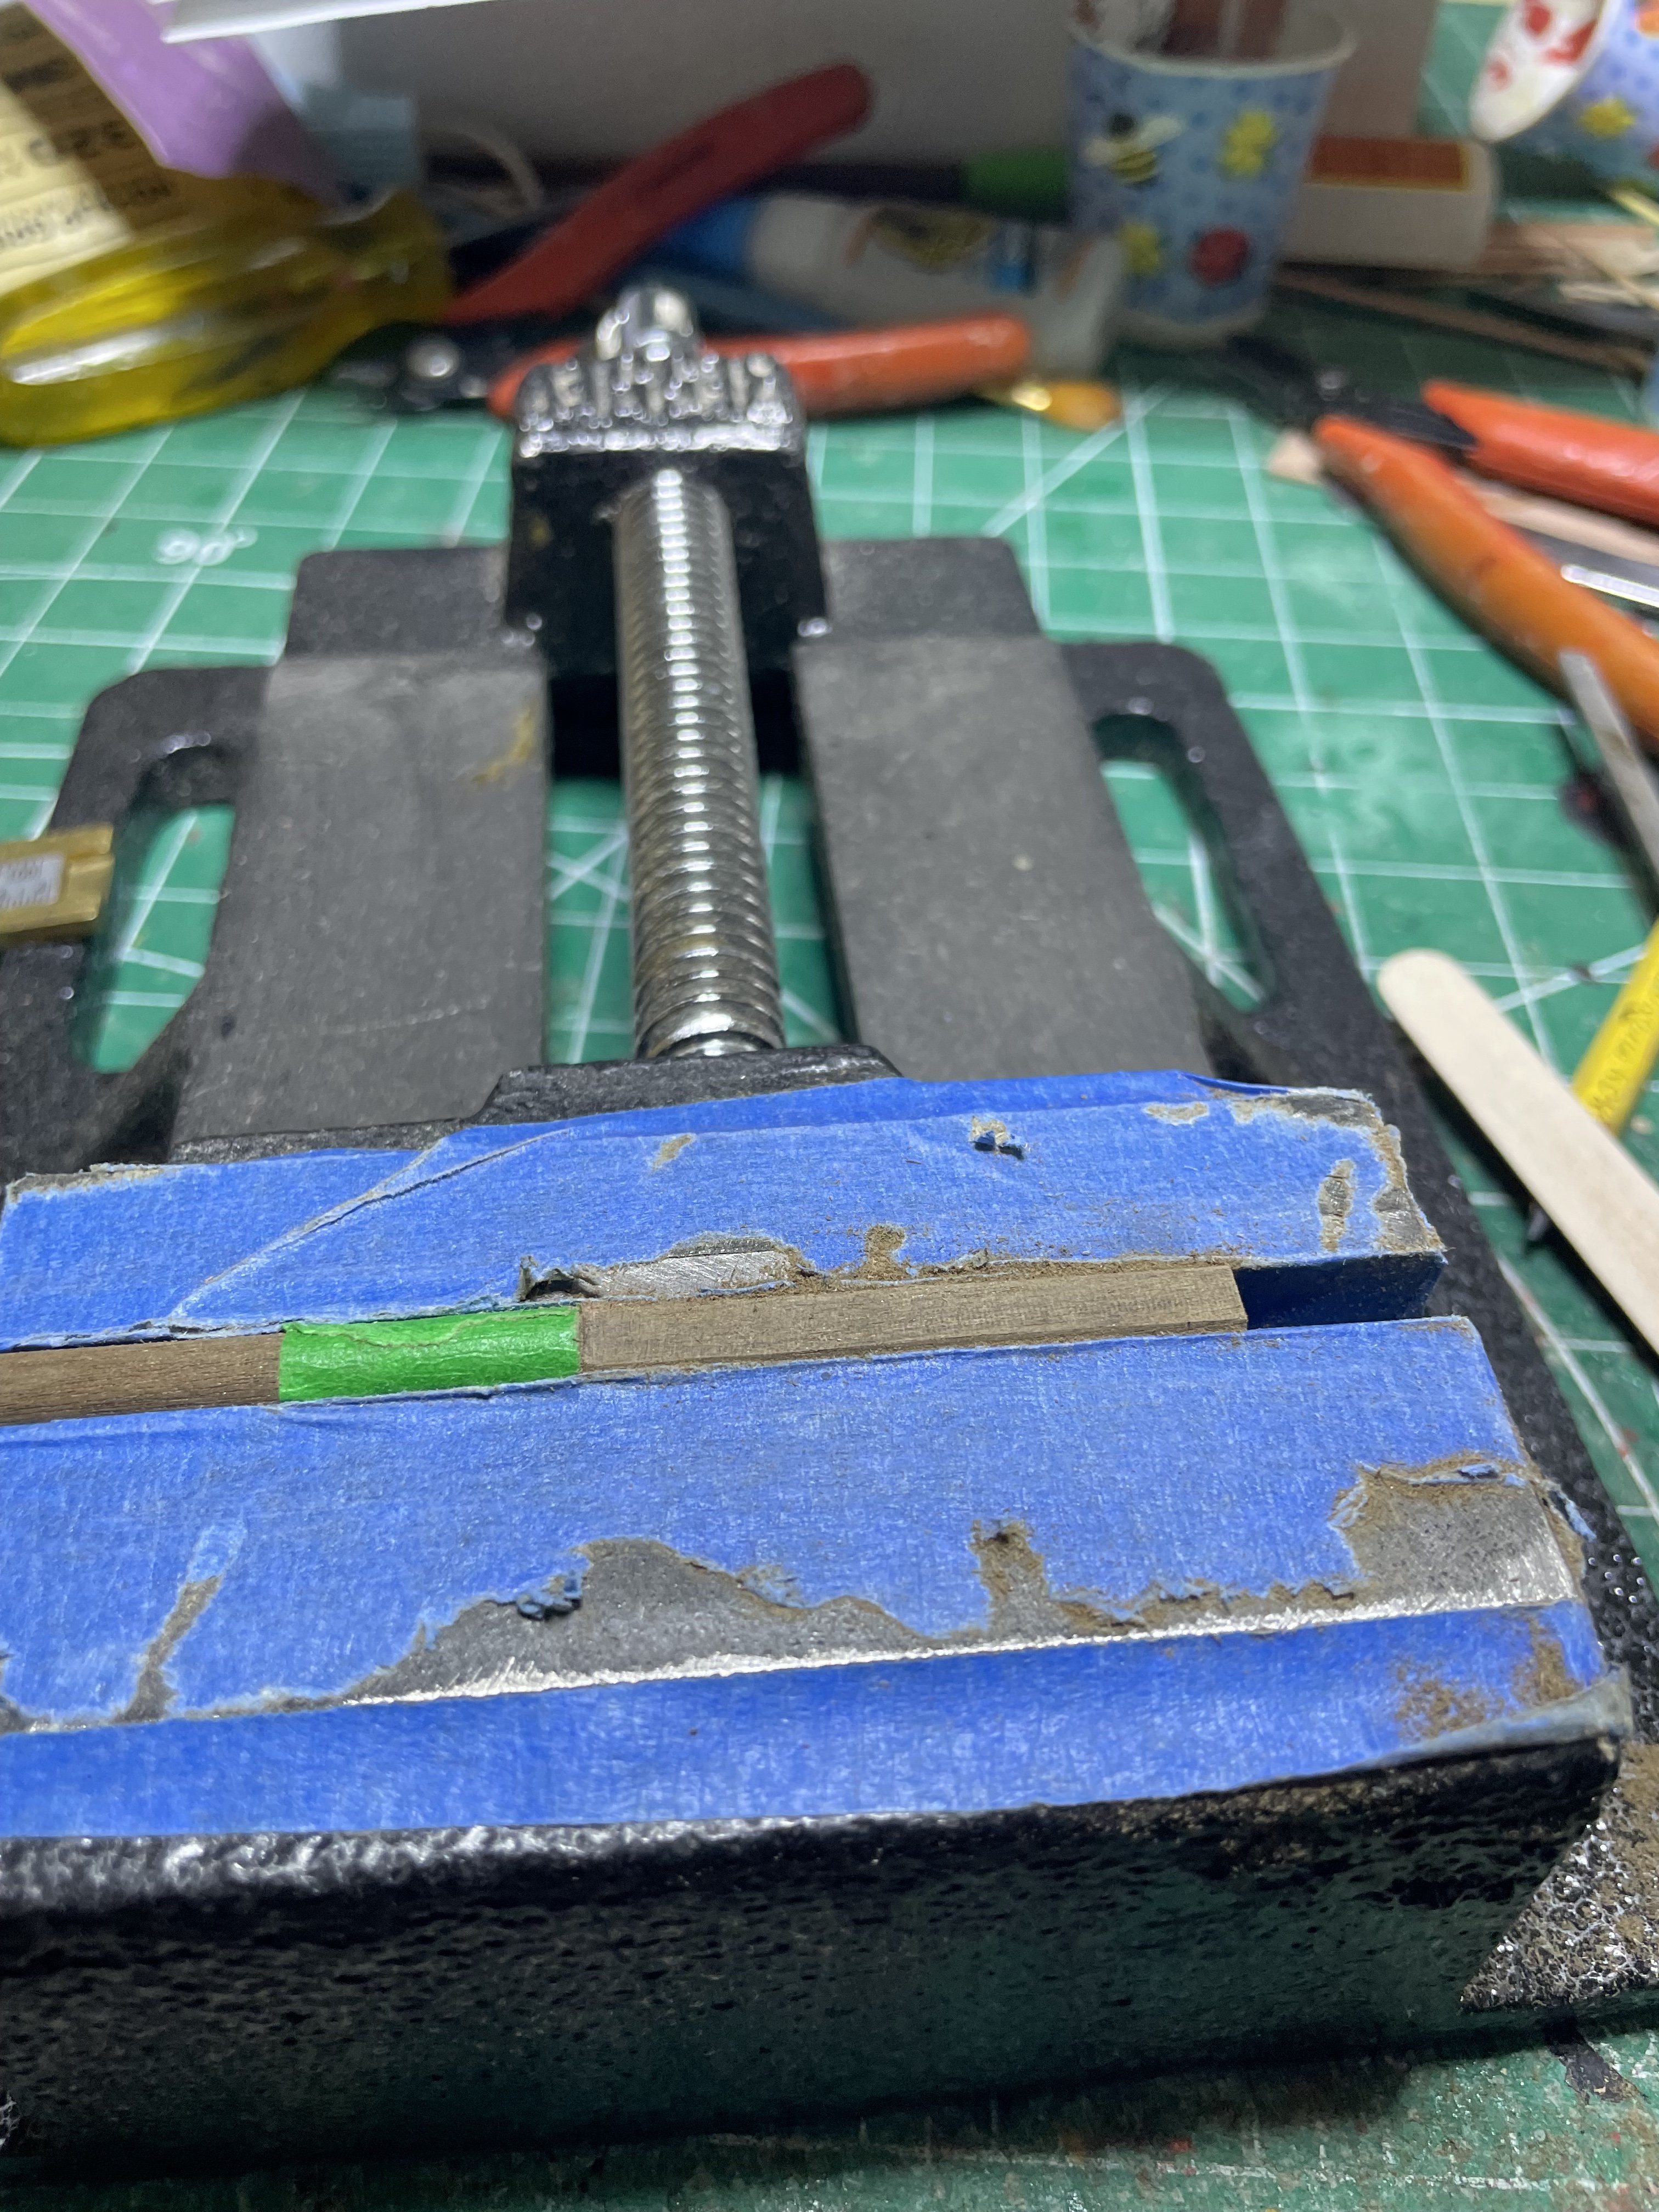
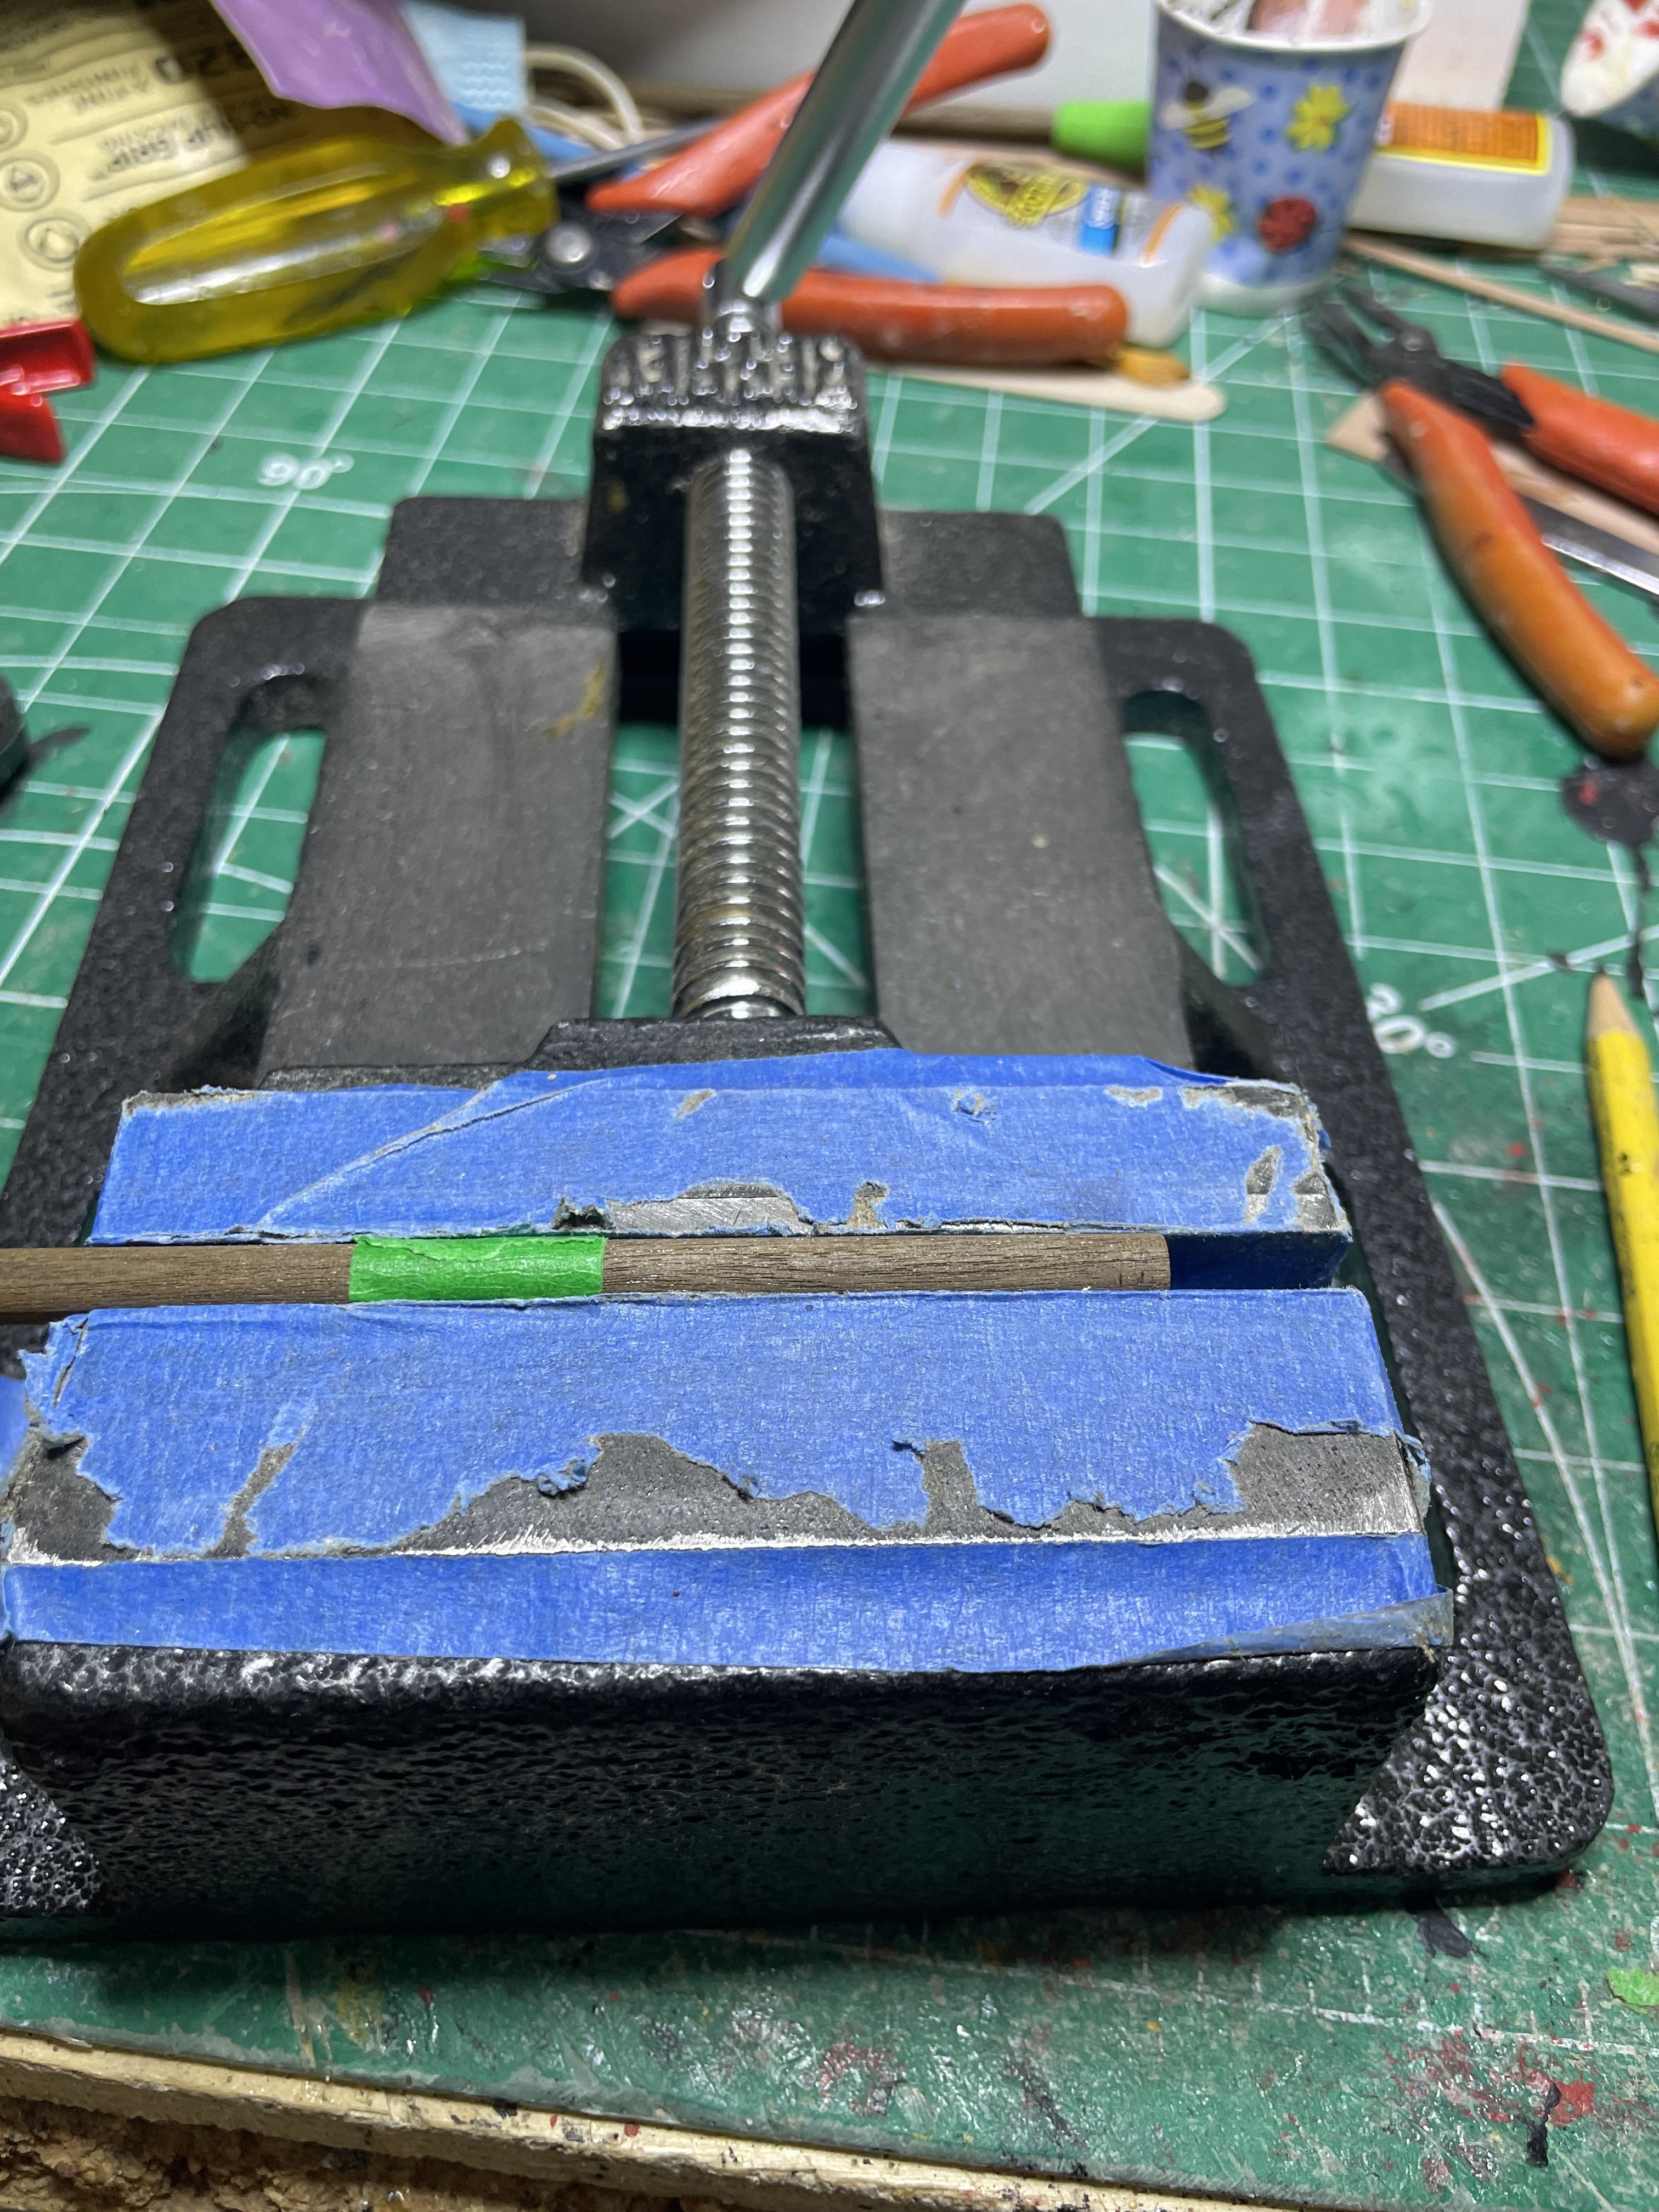
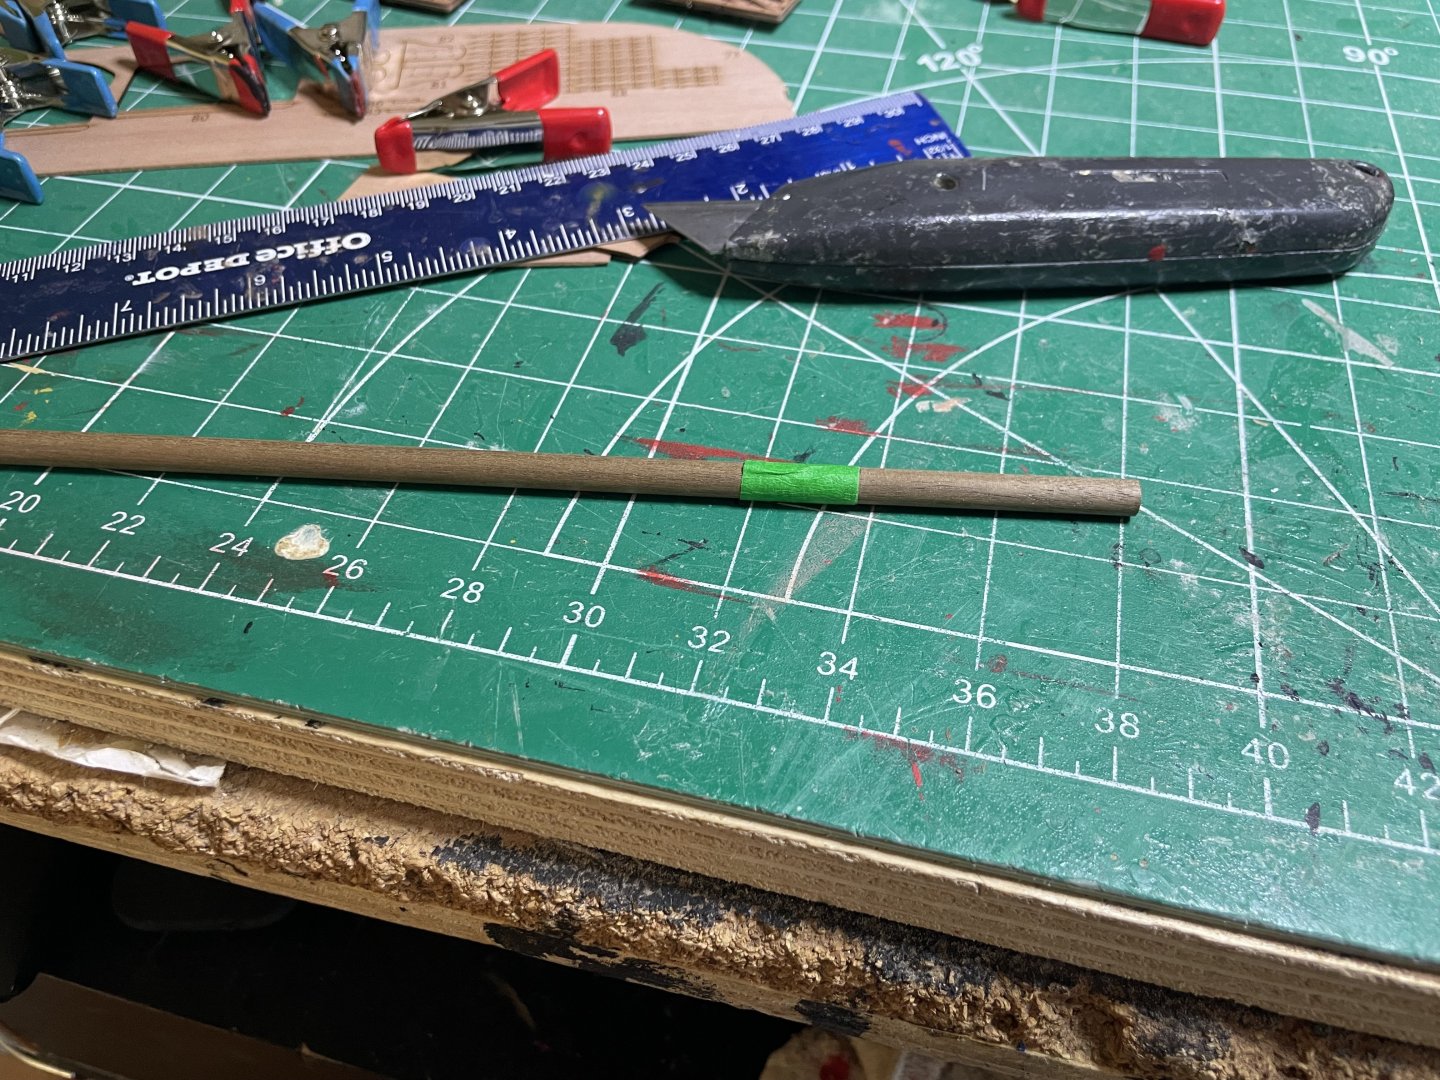
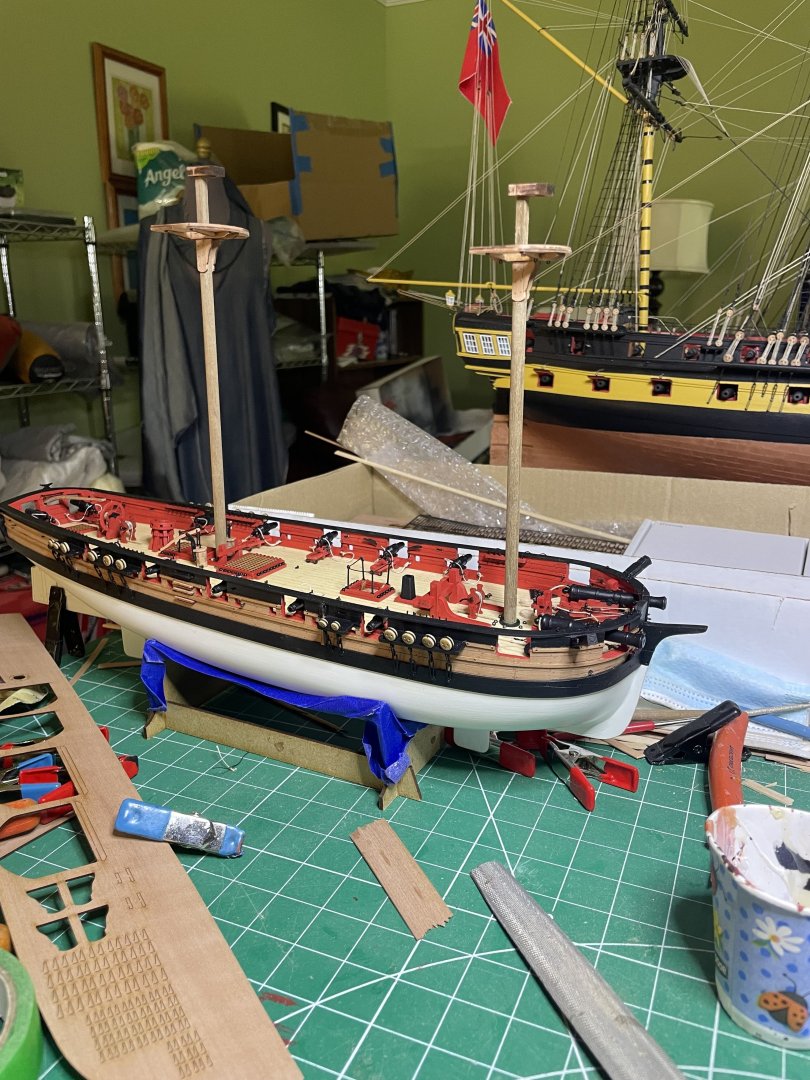
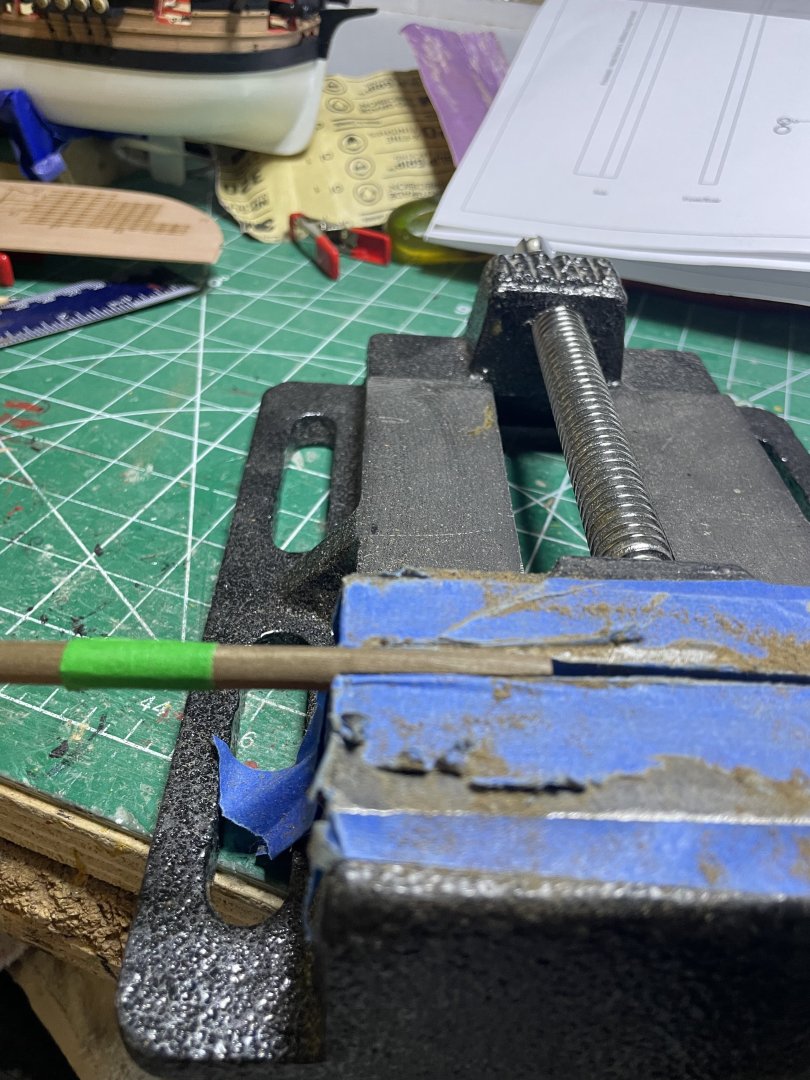
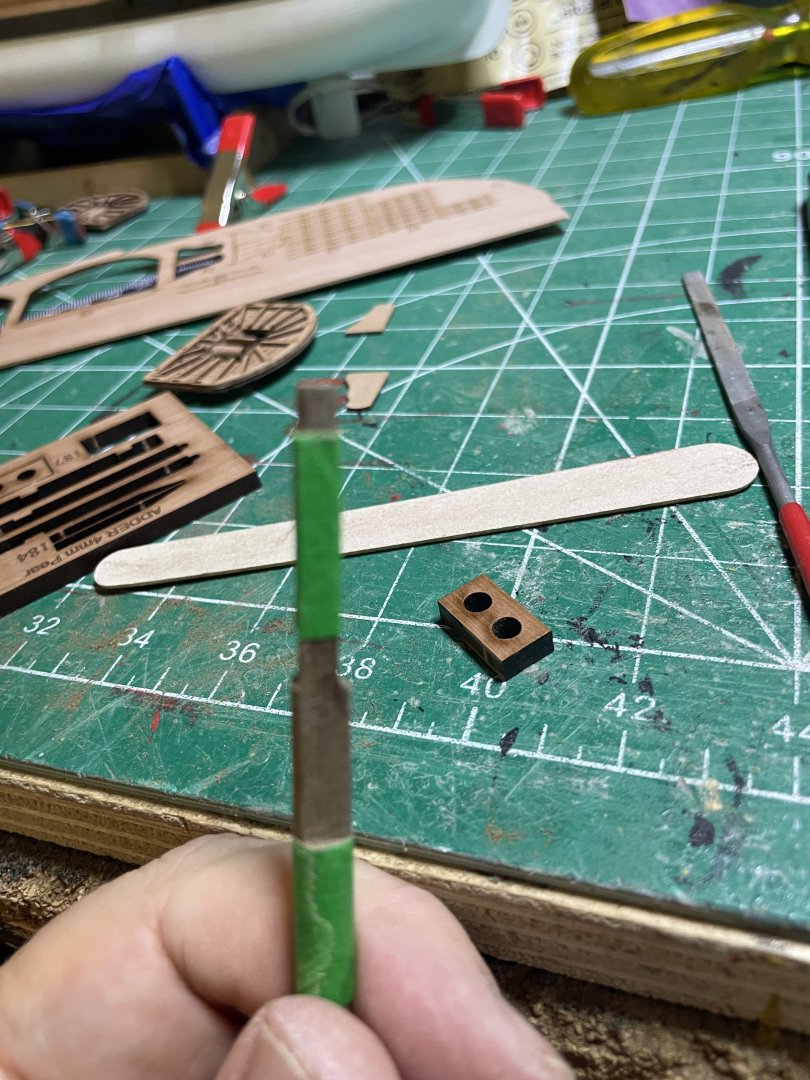
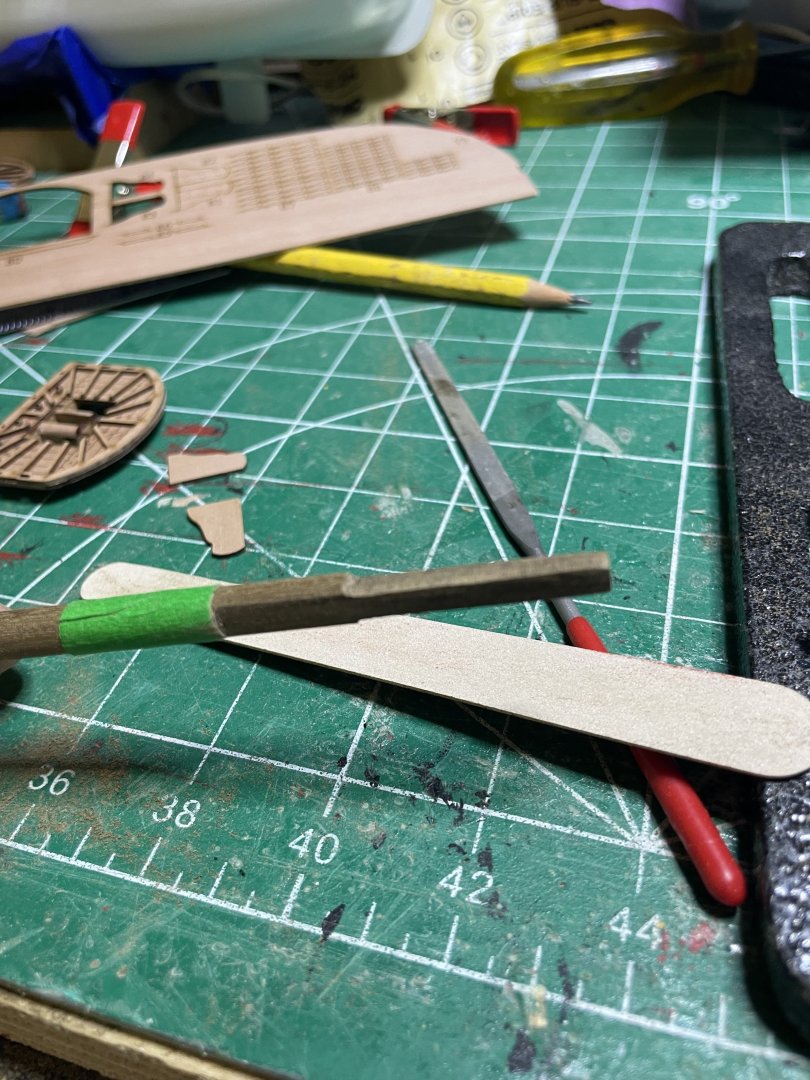
Started on lower masts. First Dowel cut to length: Then taped off lower area to be carved Placed in vice and long side filed down 1 mm Next marked off upper area, rotated 90 degrees and filled upper area ( with one side flat keeps things straight in vice) Kept rotating to finish then trimmed tip for cap


- 66 replies
-
- 9
-
-
- Adder
- Vanguard Models
- (and 1 more)
-
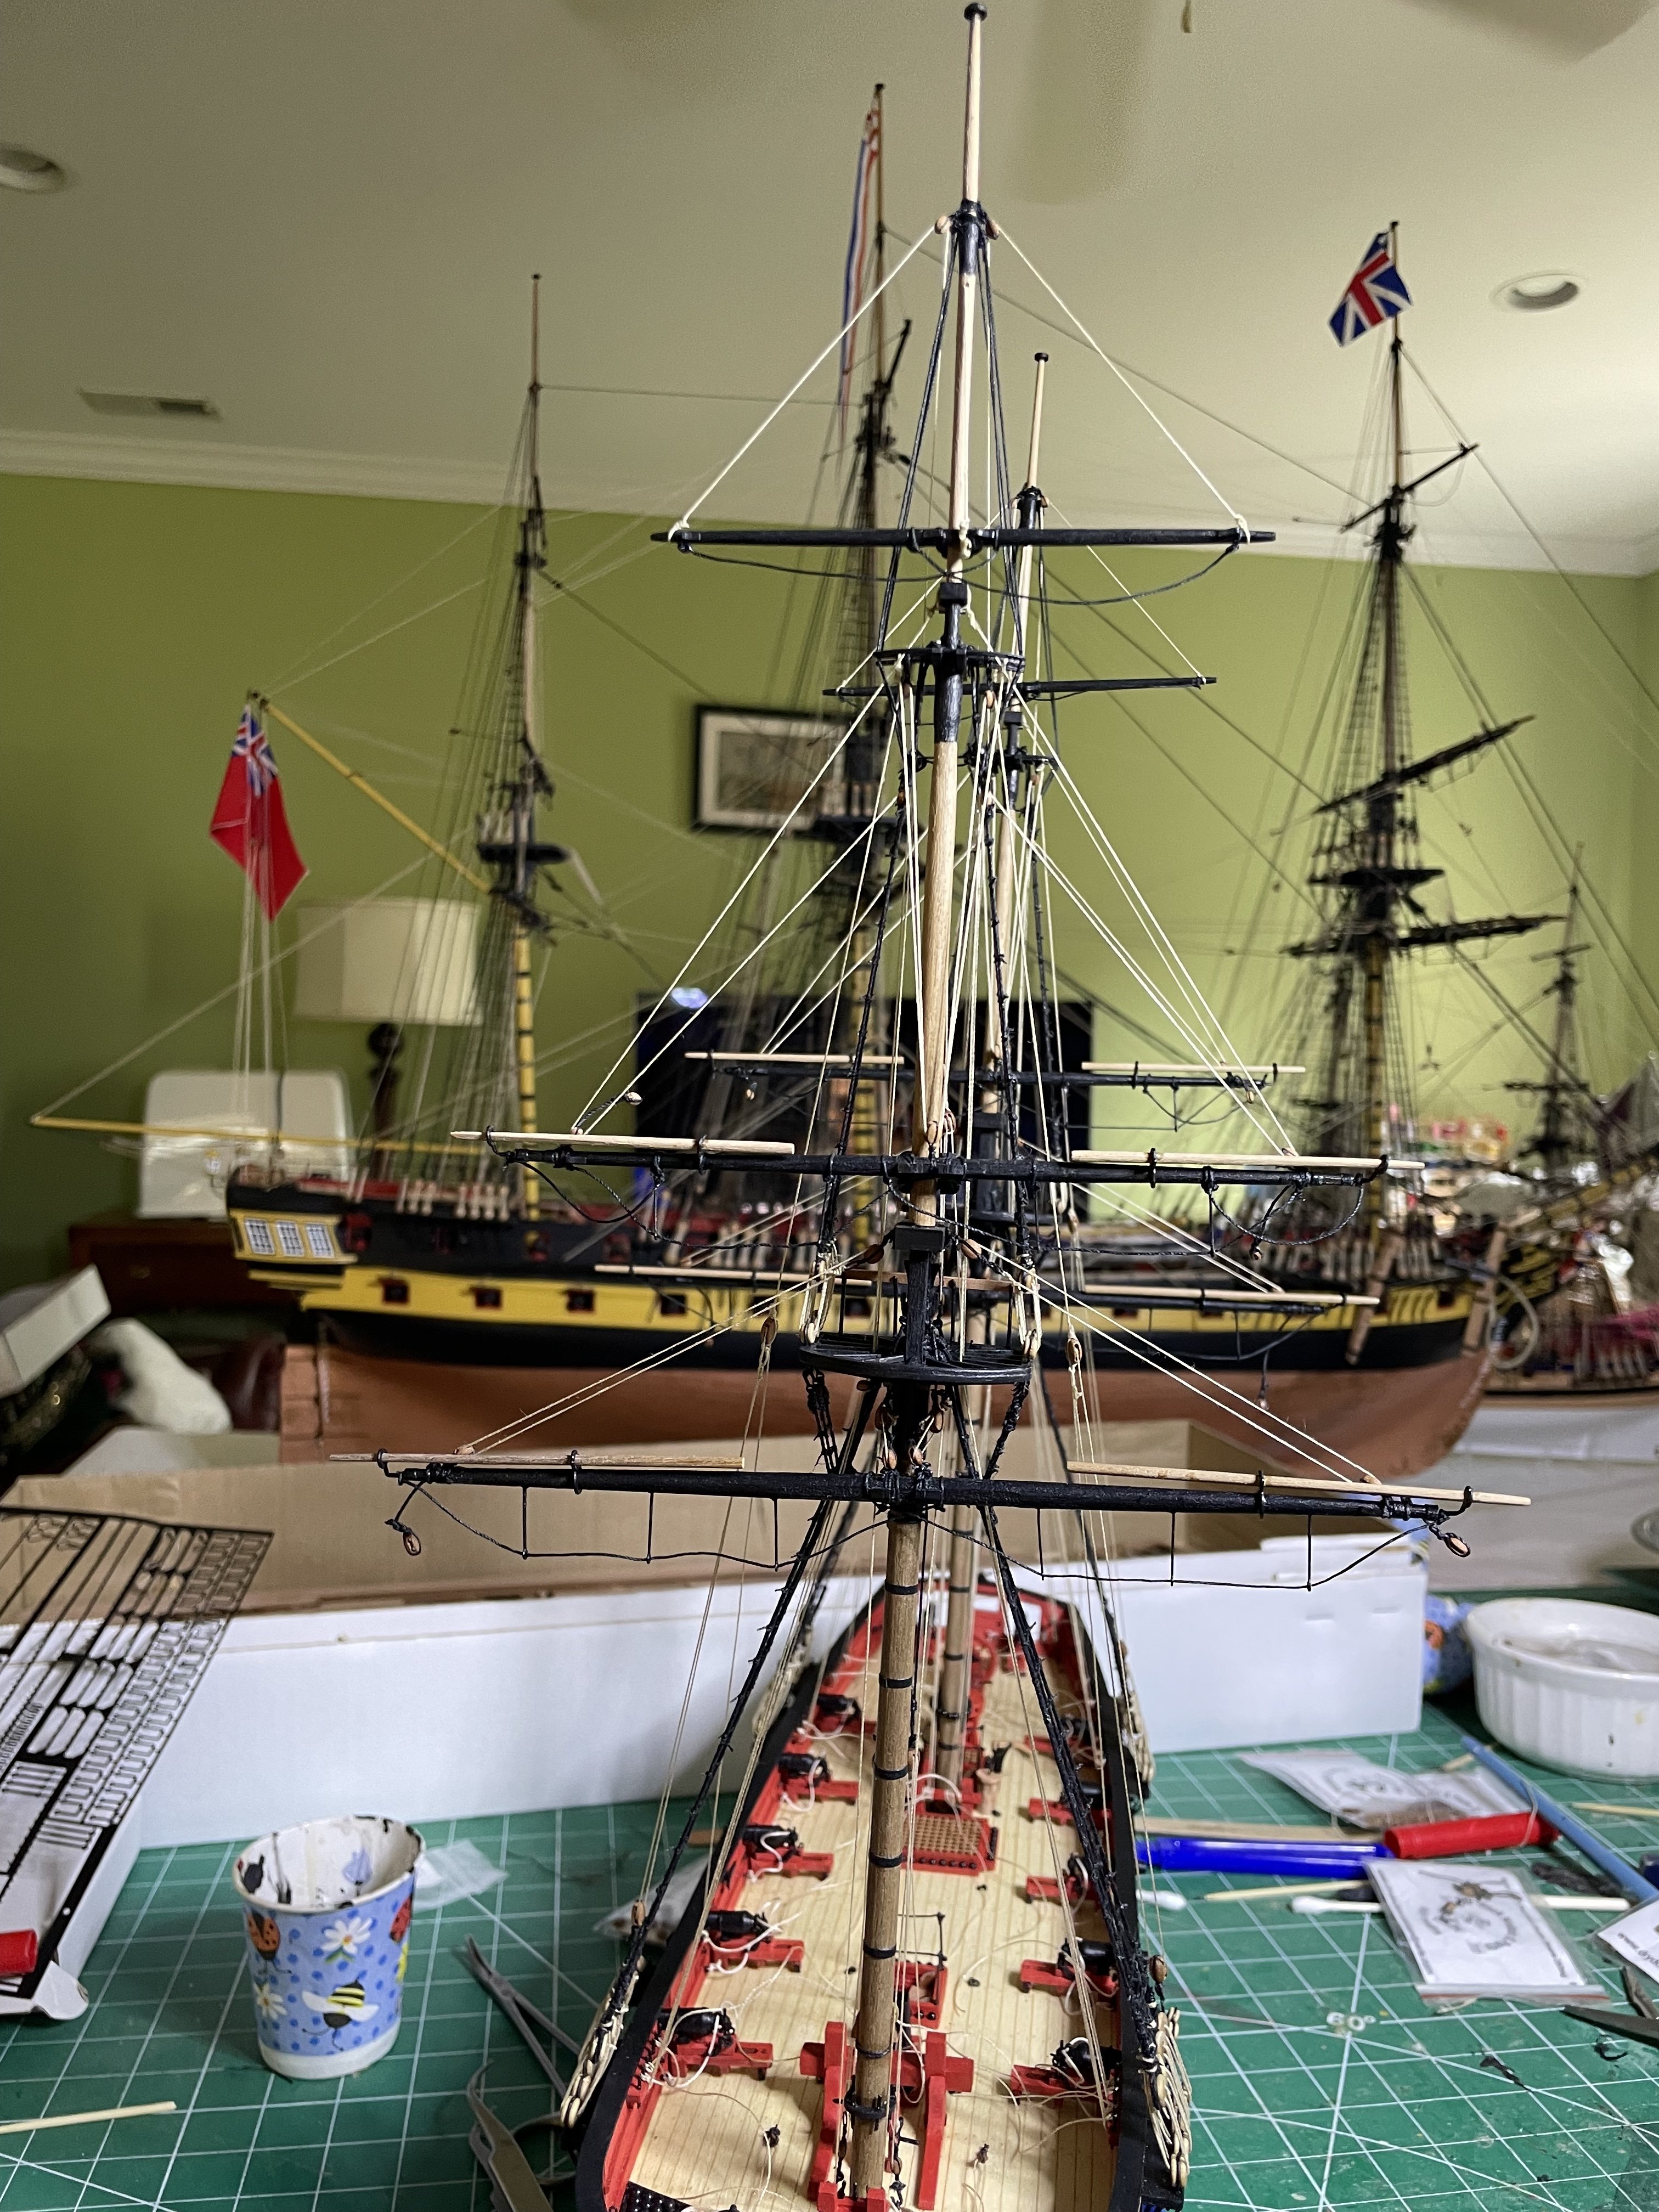
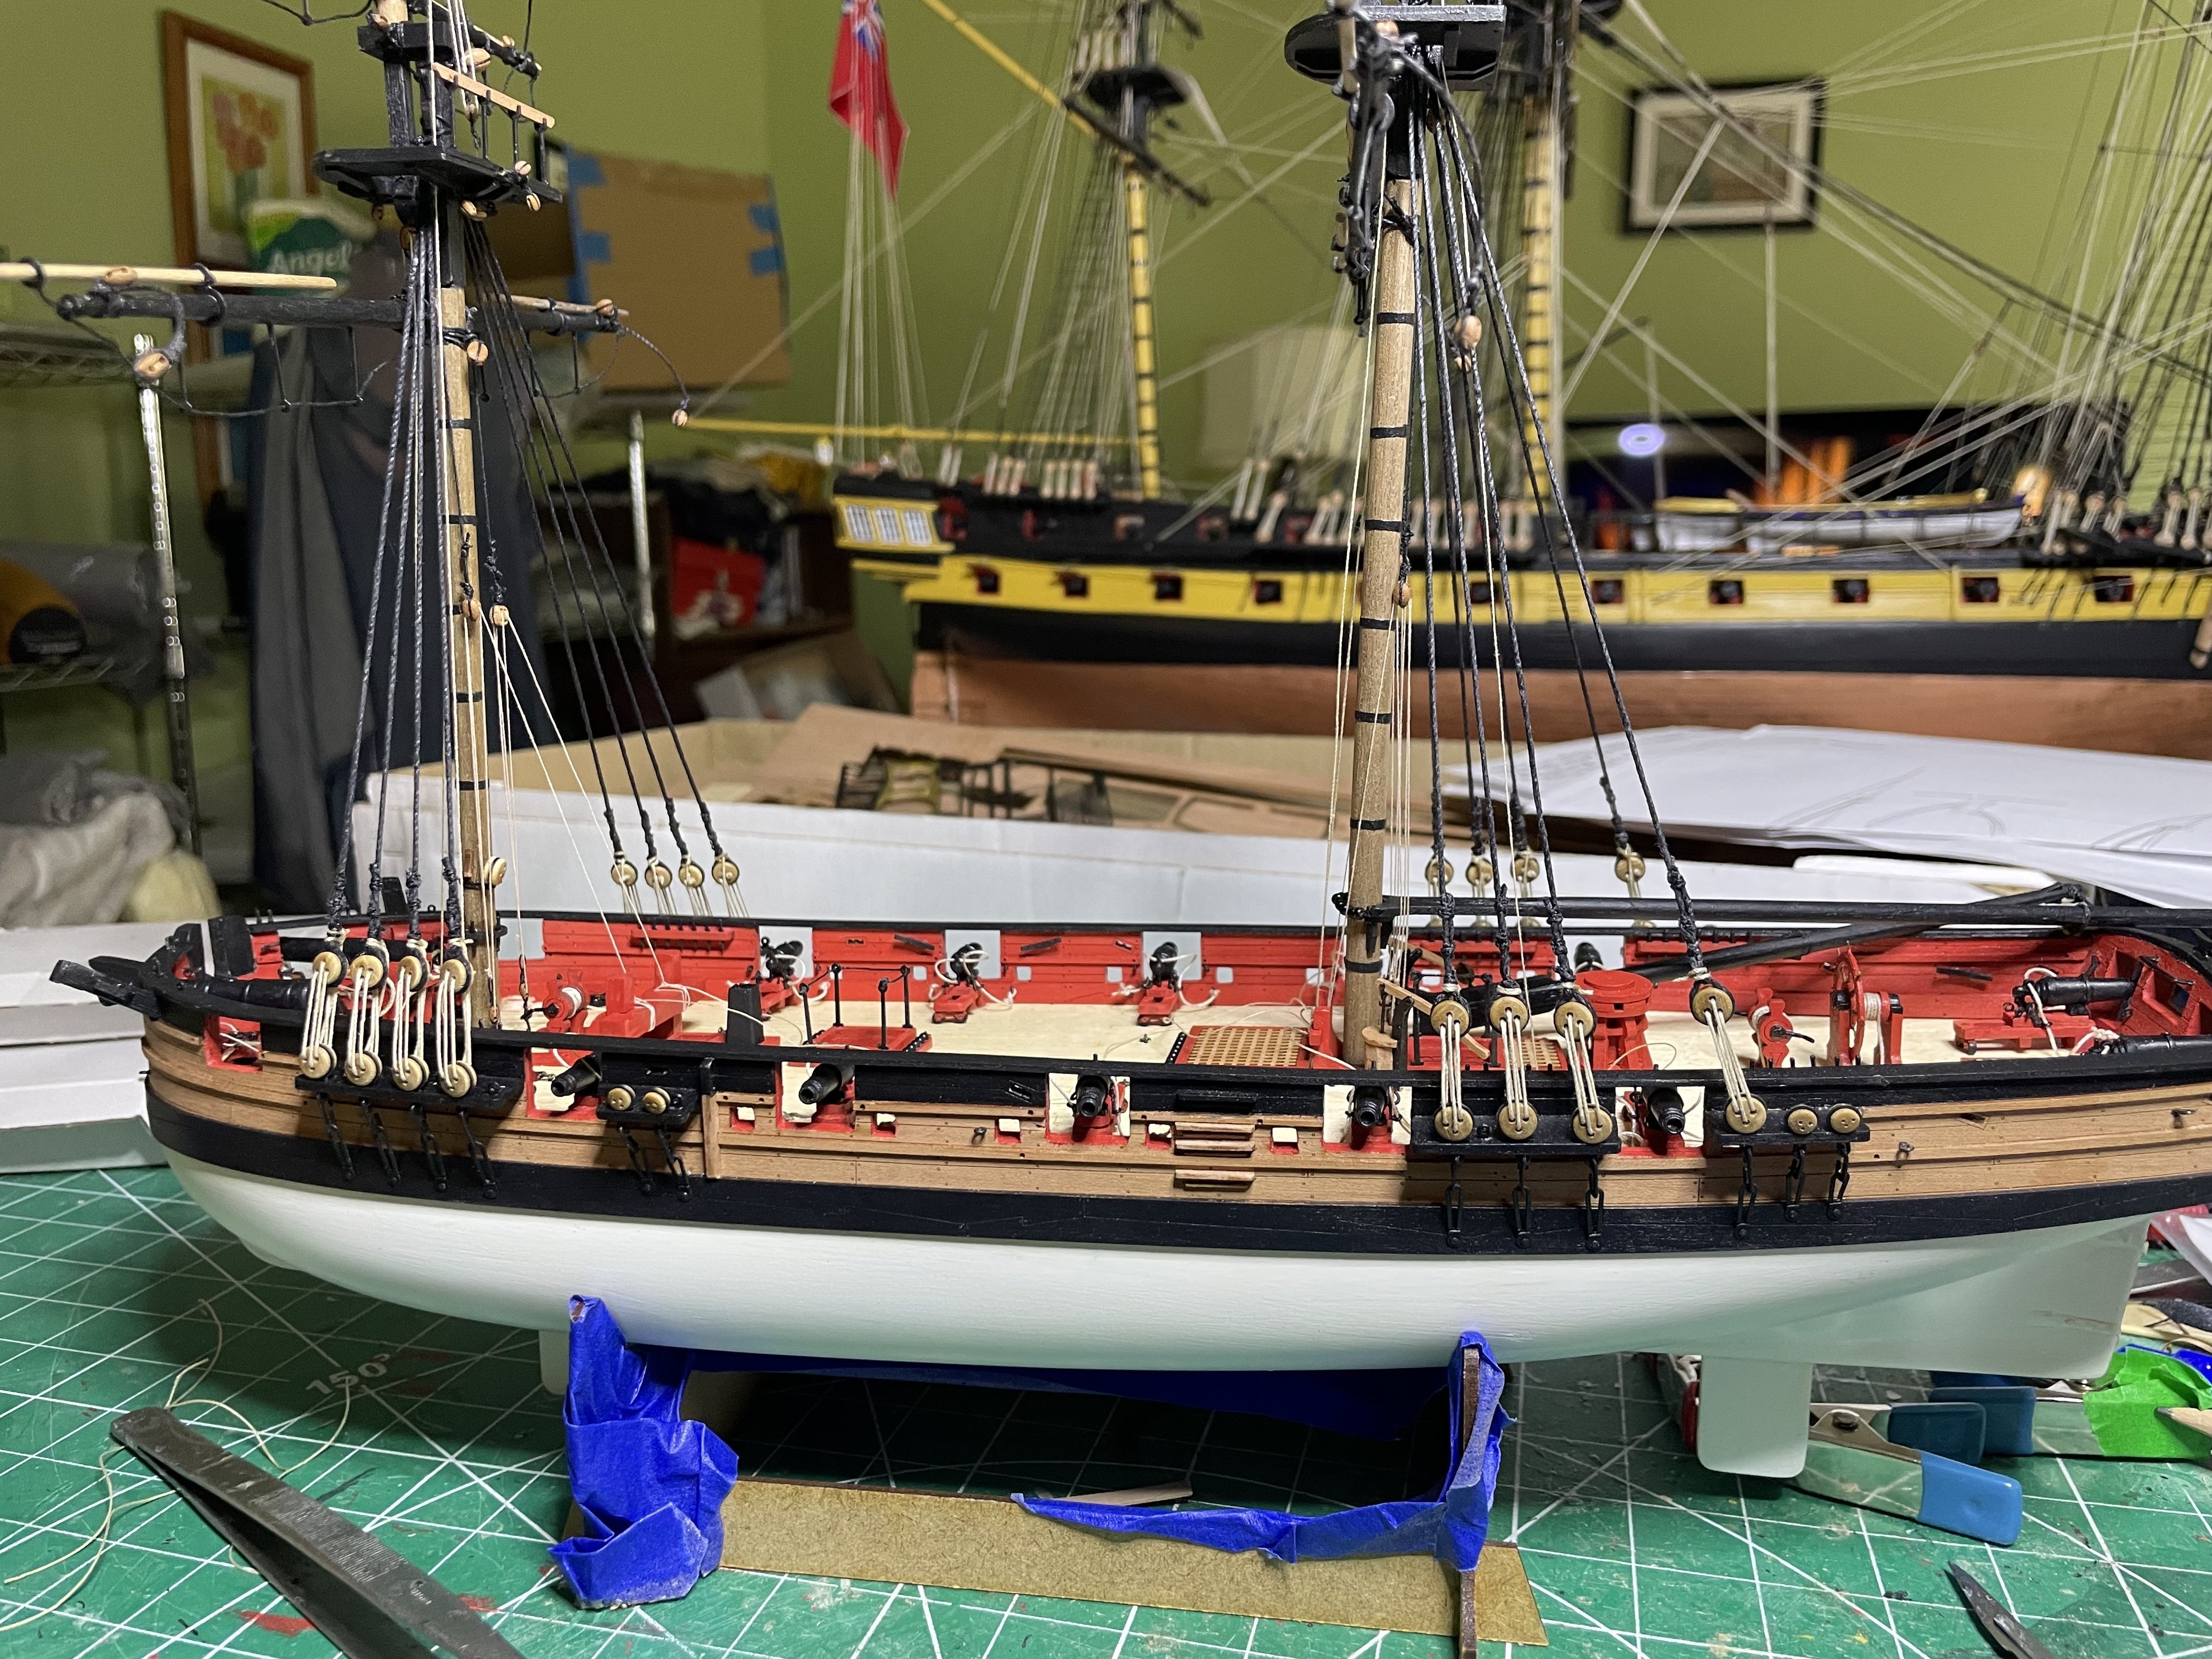
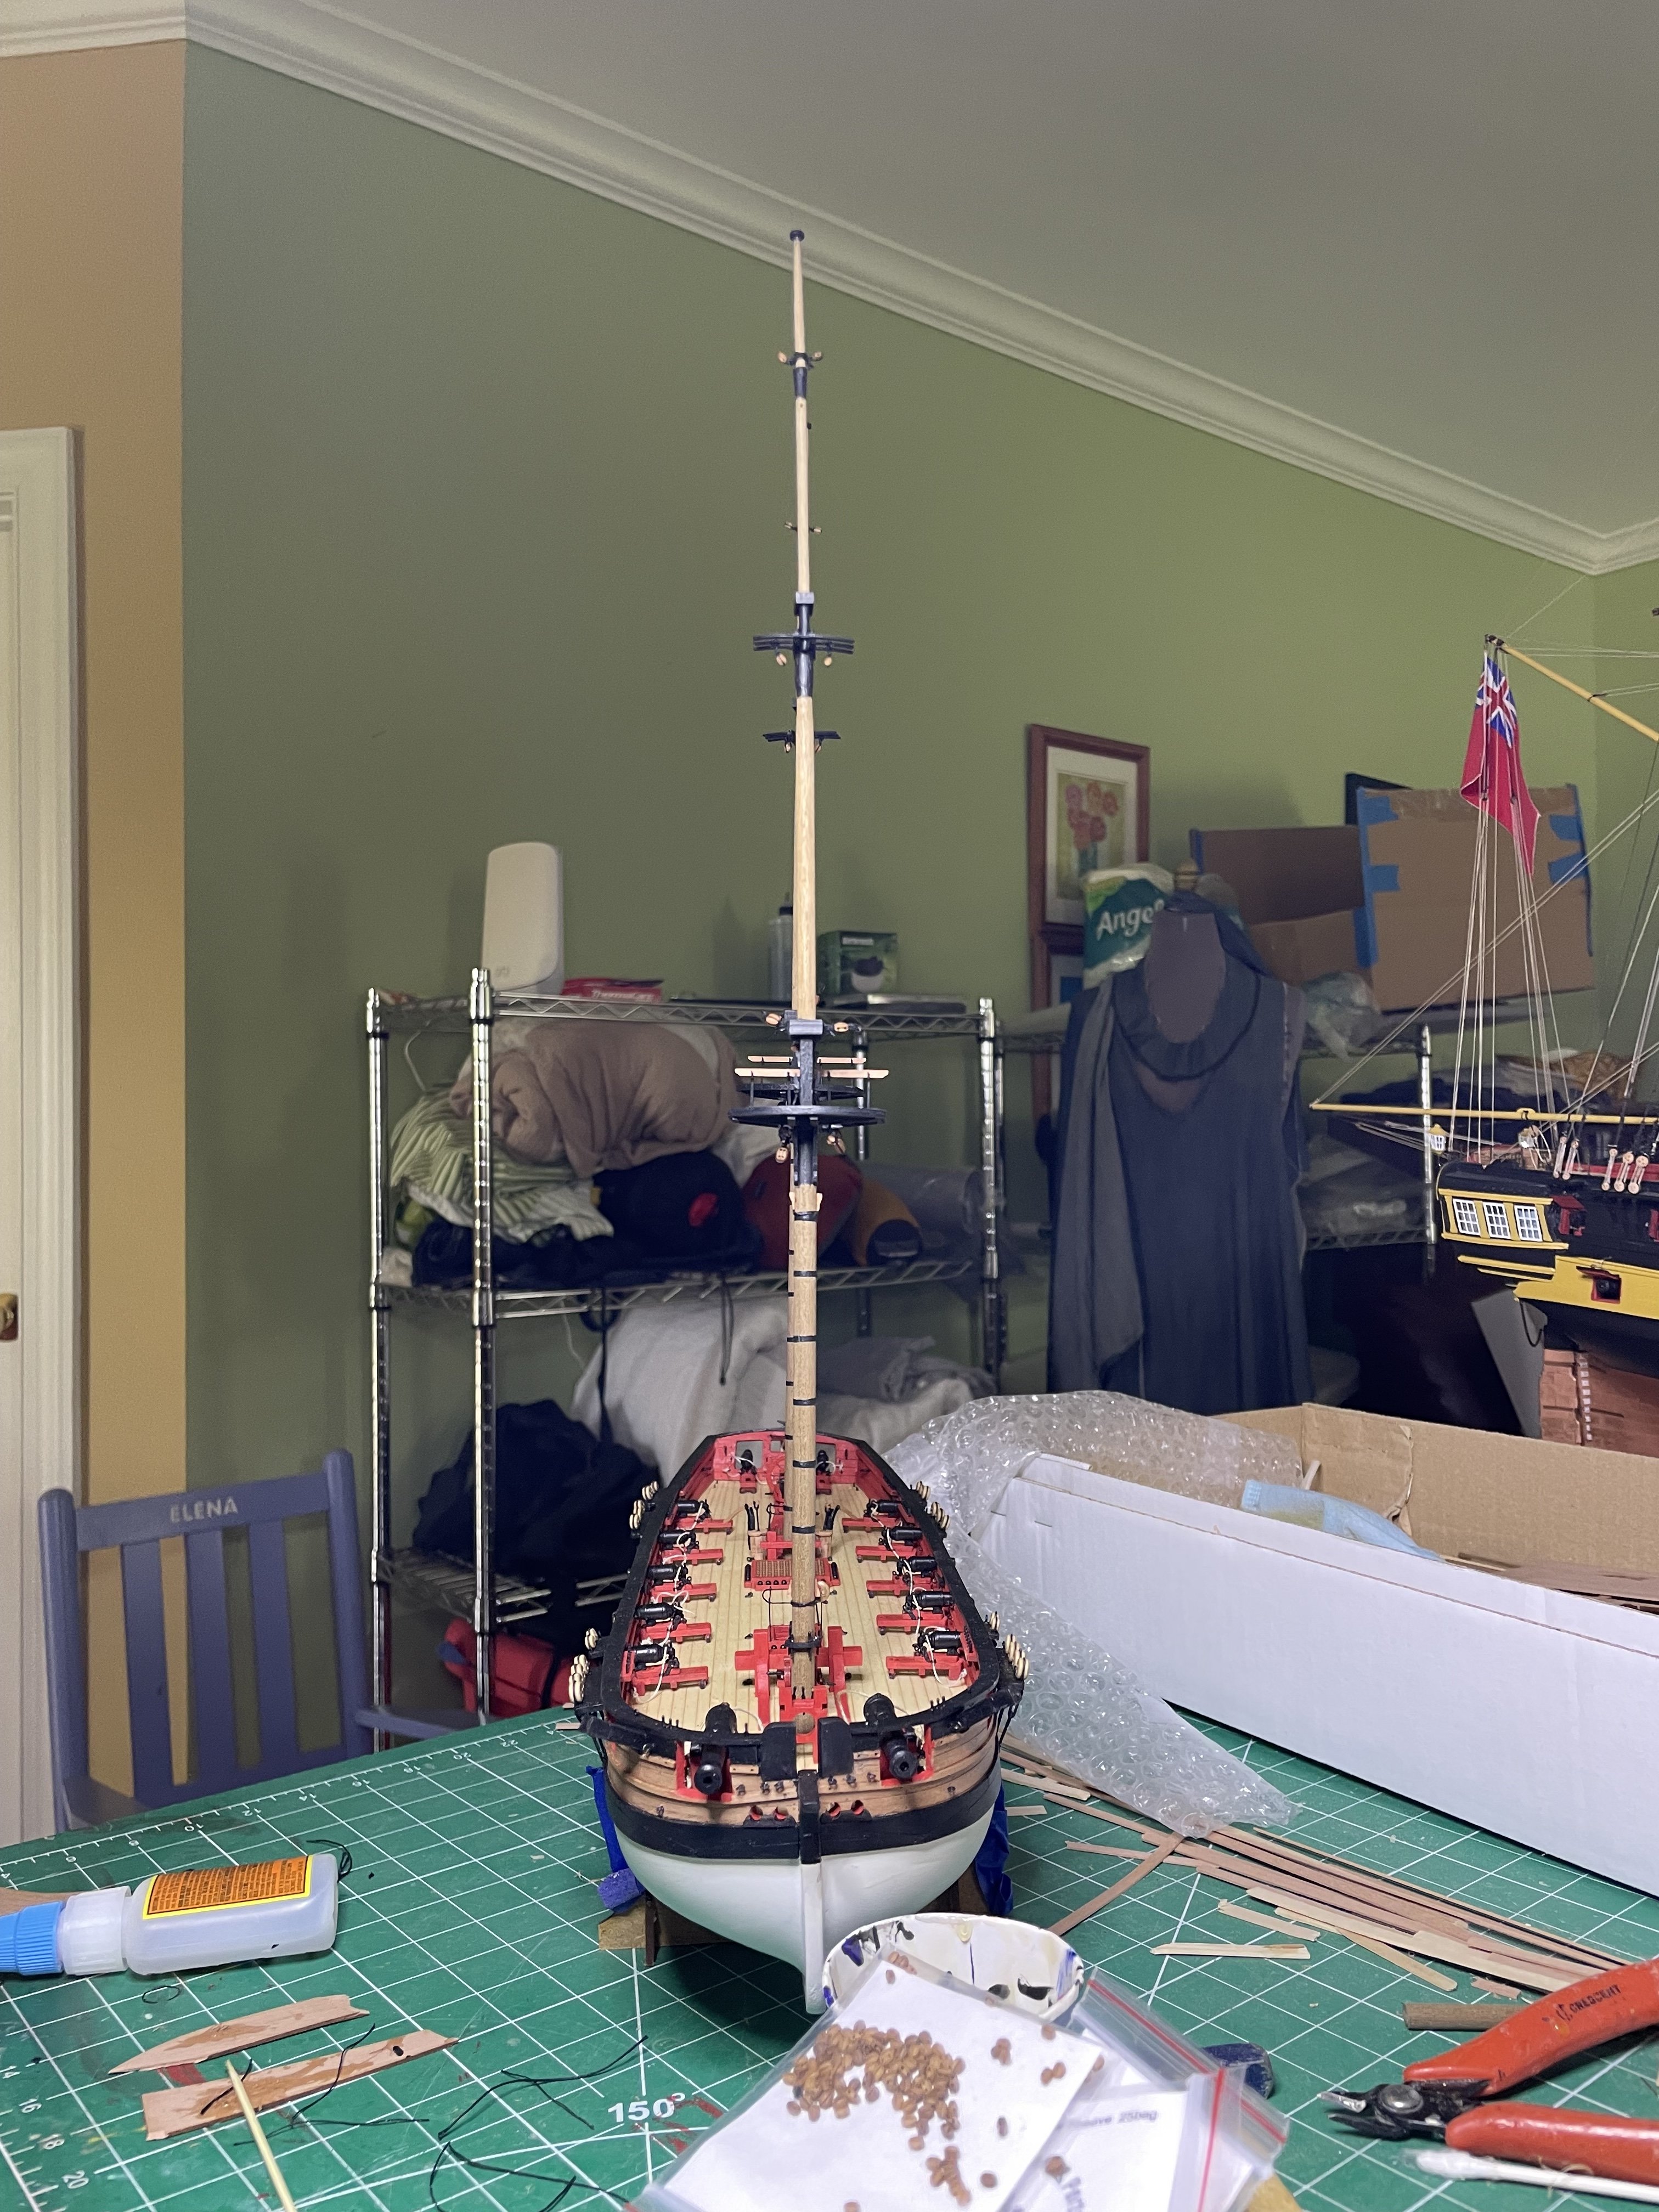
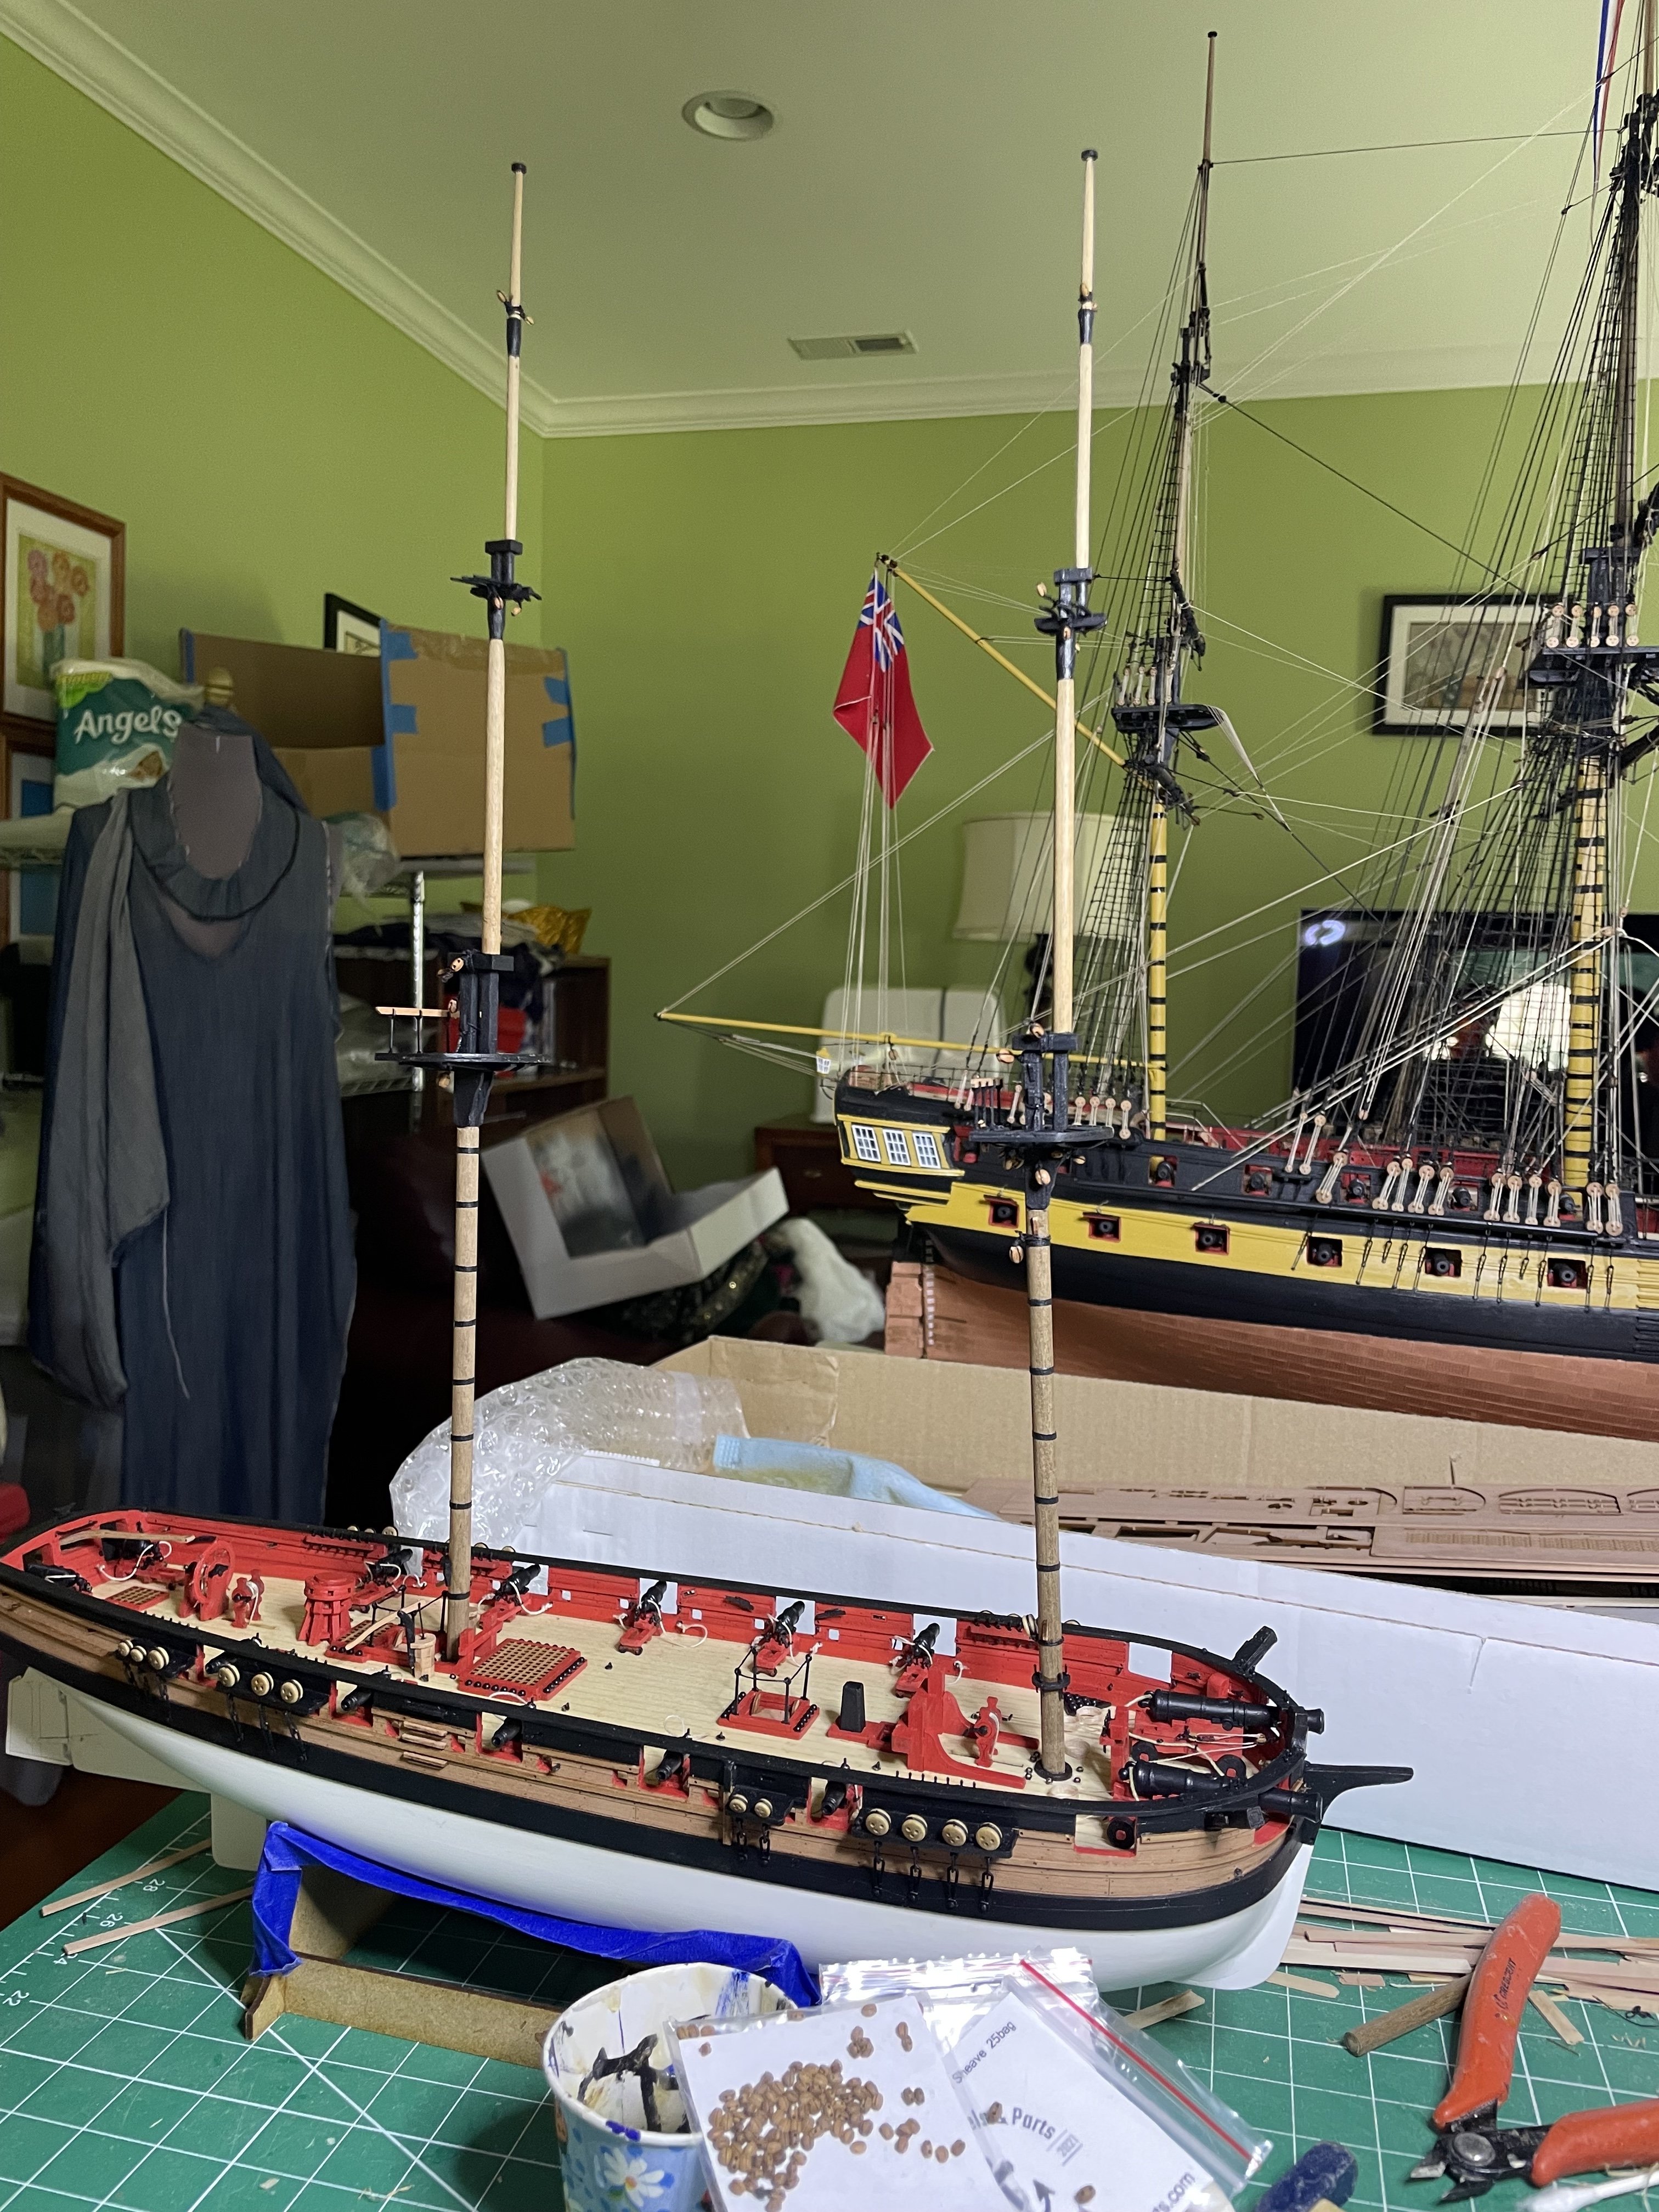
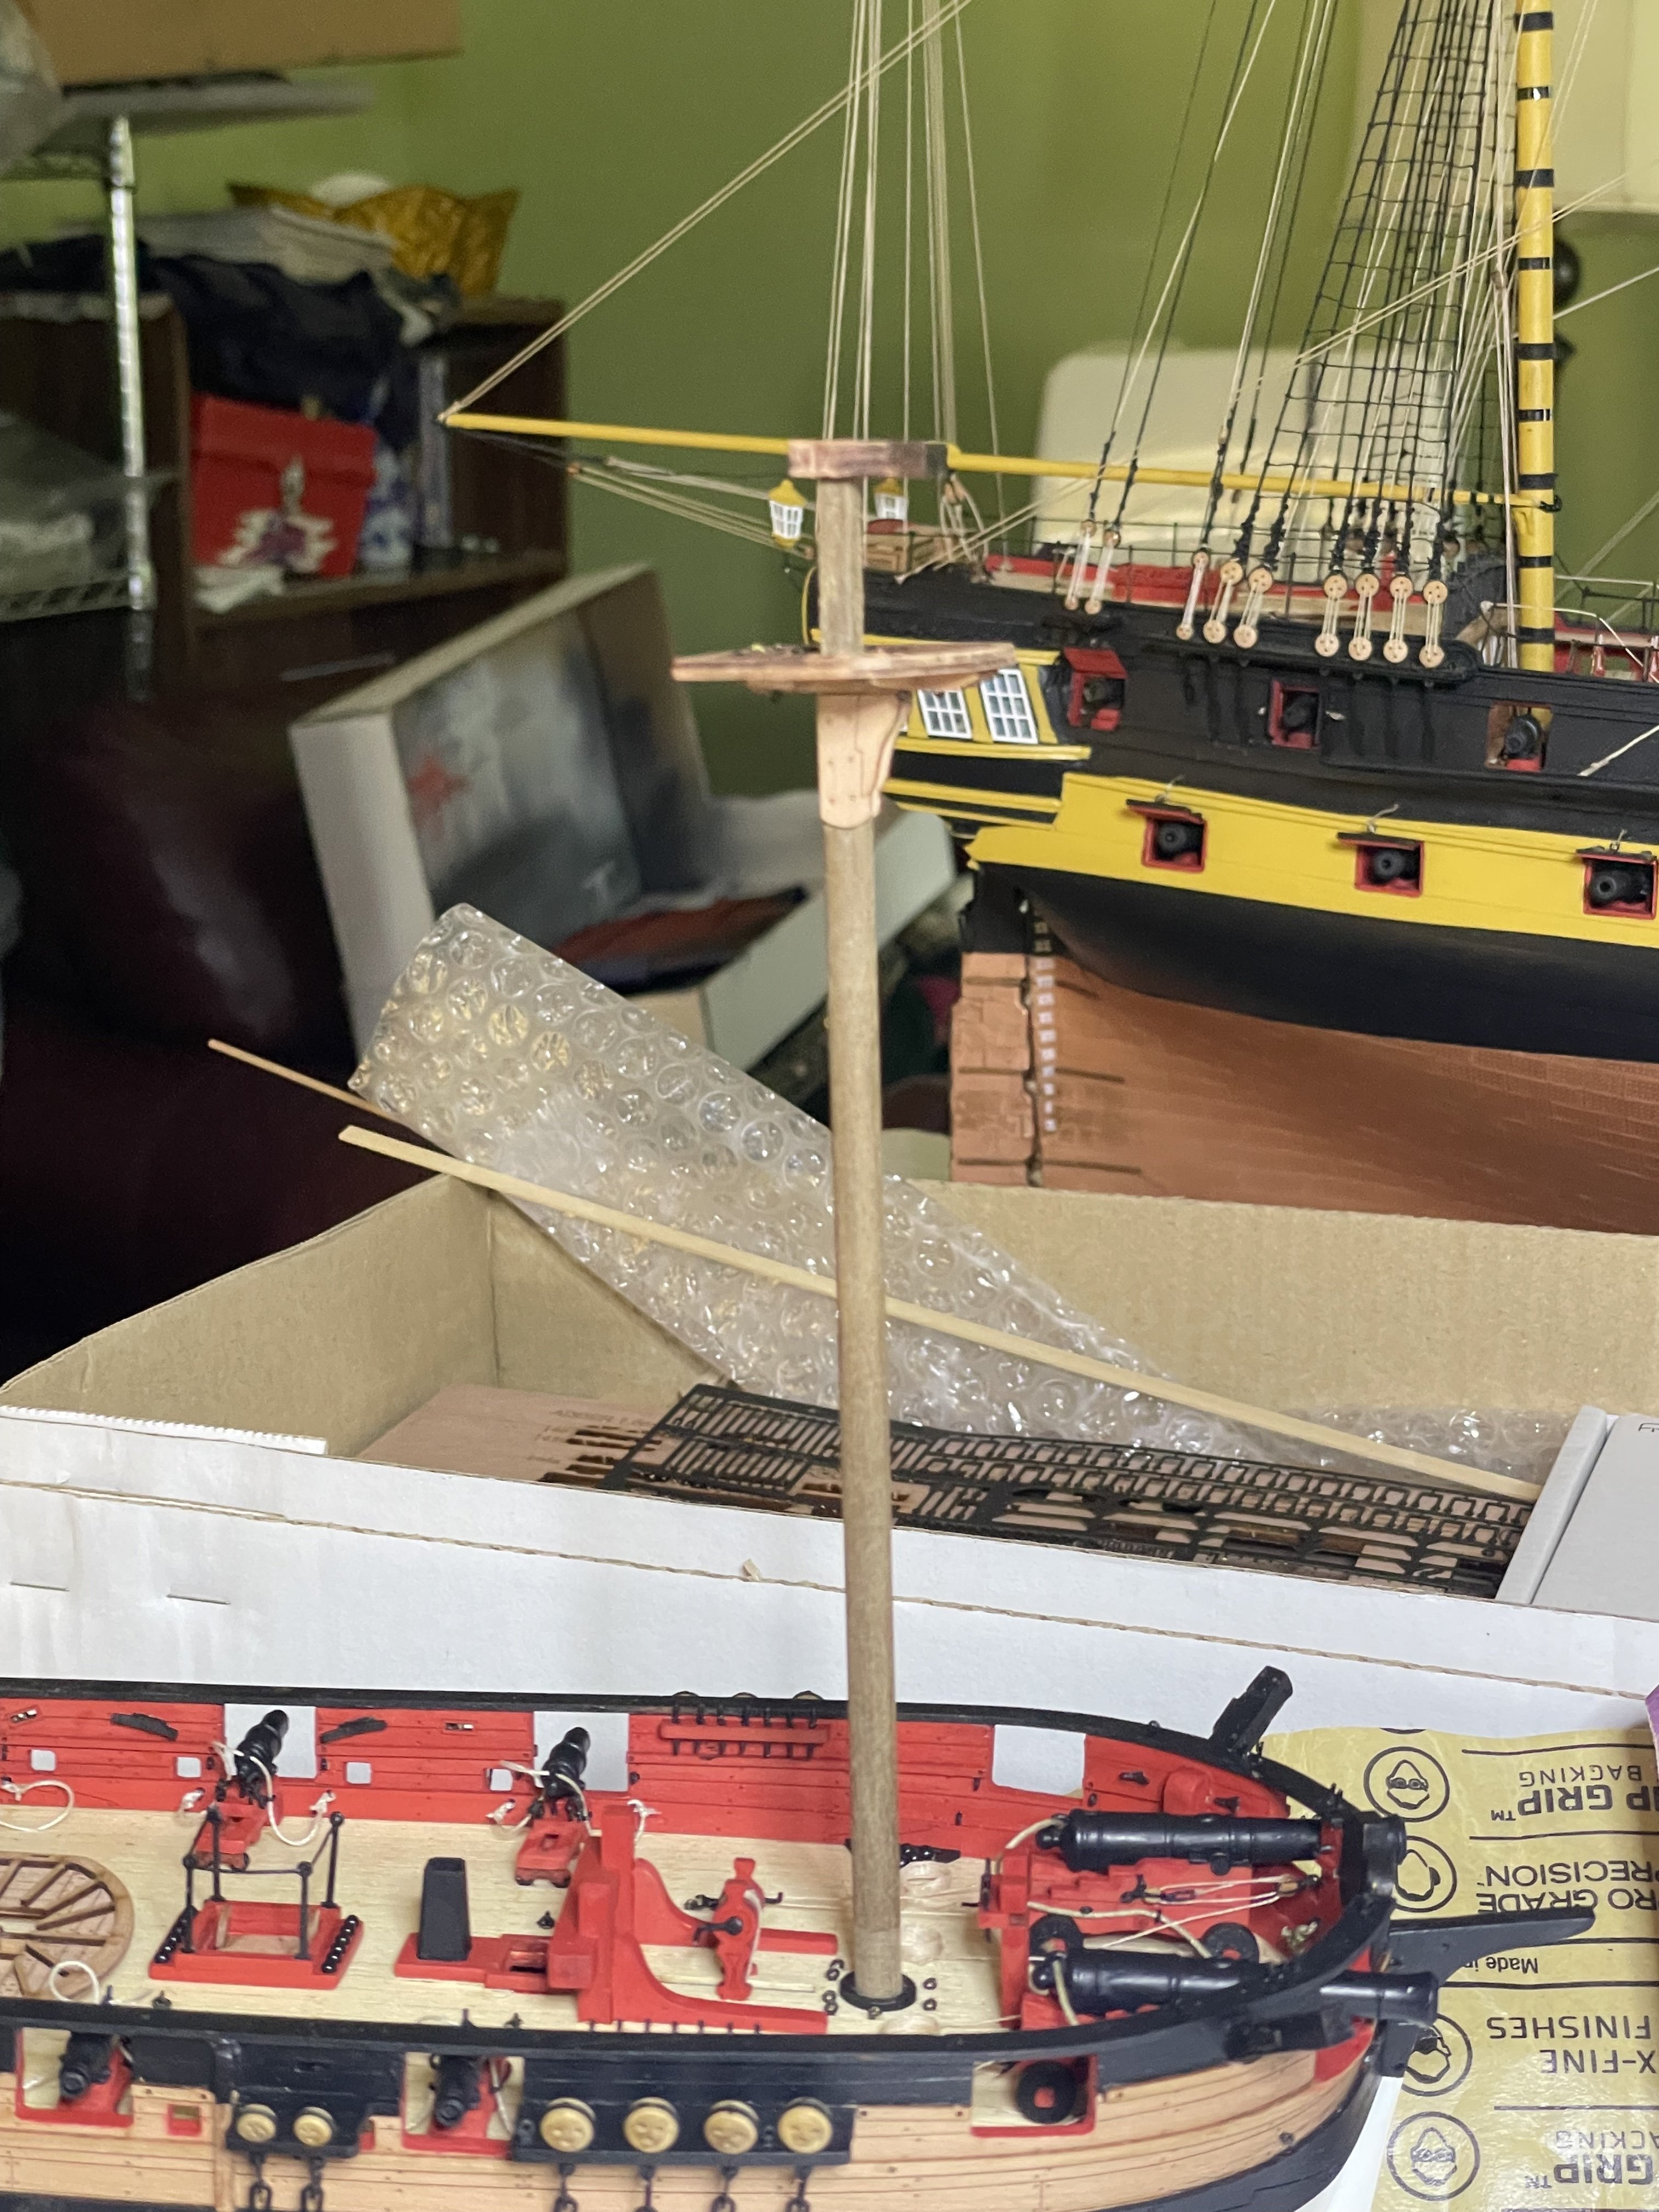
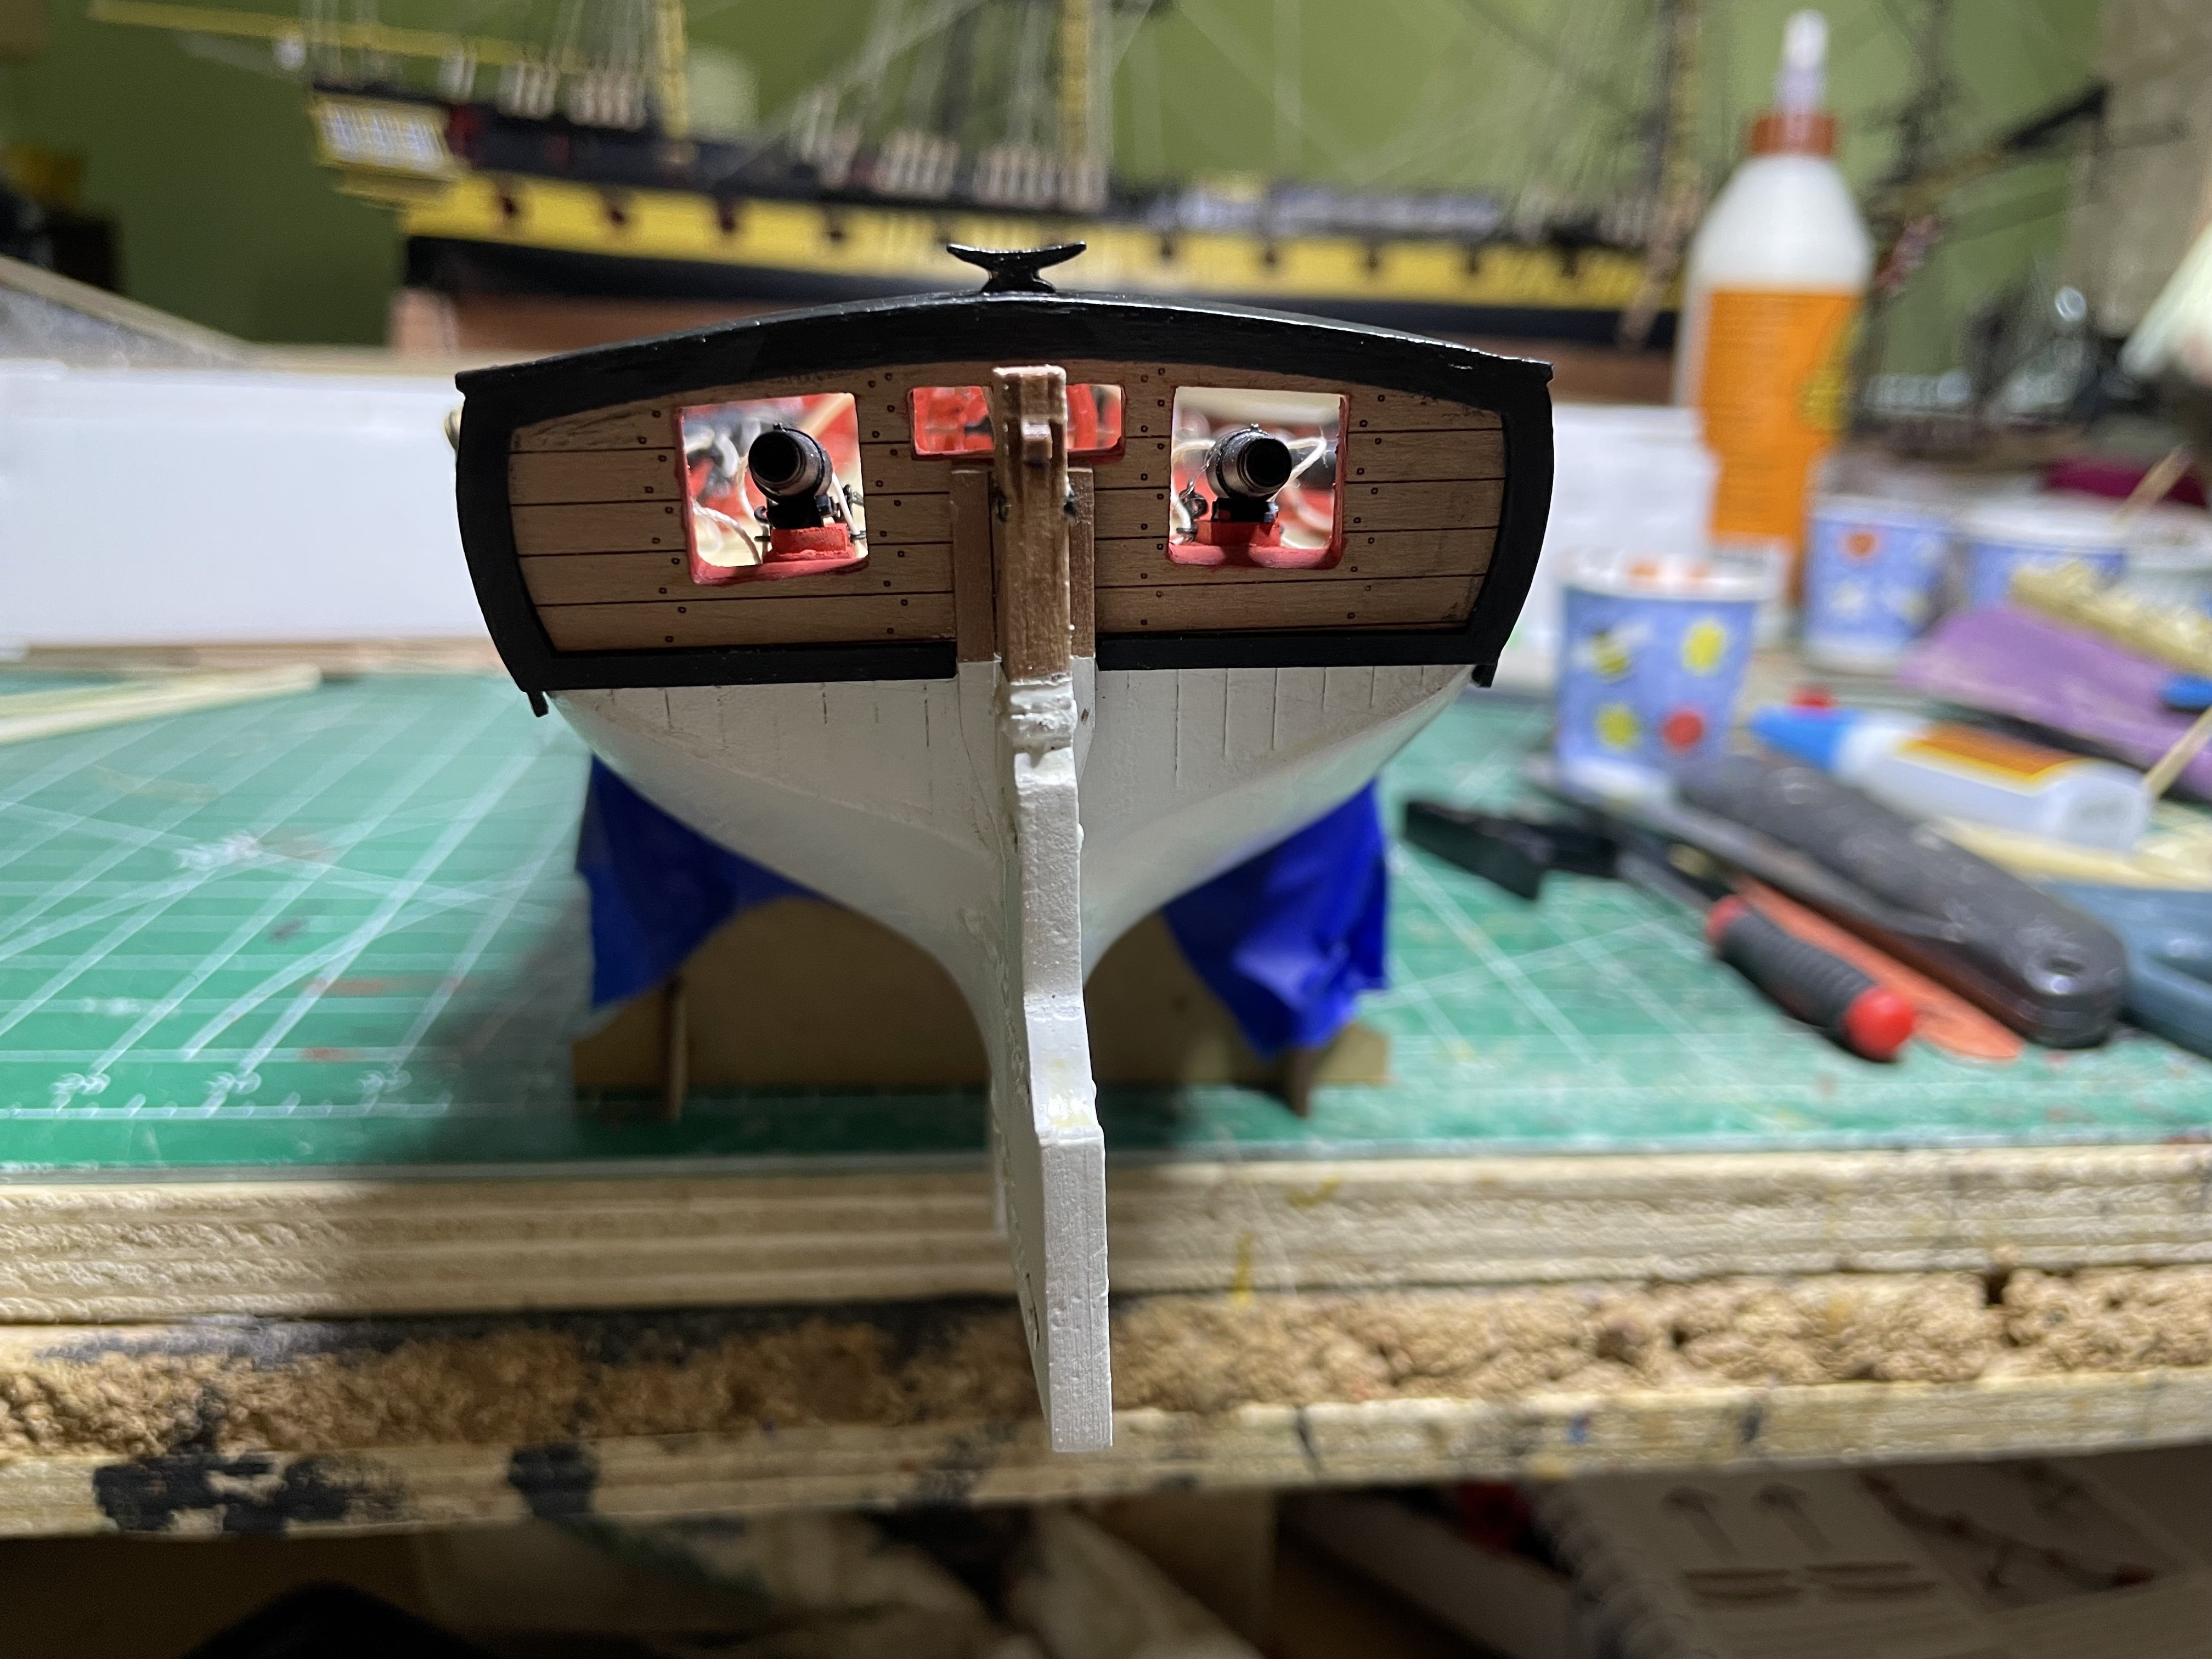
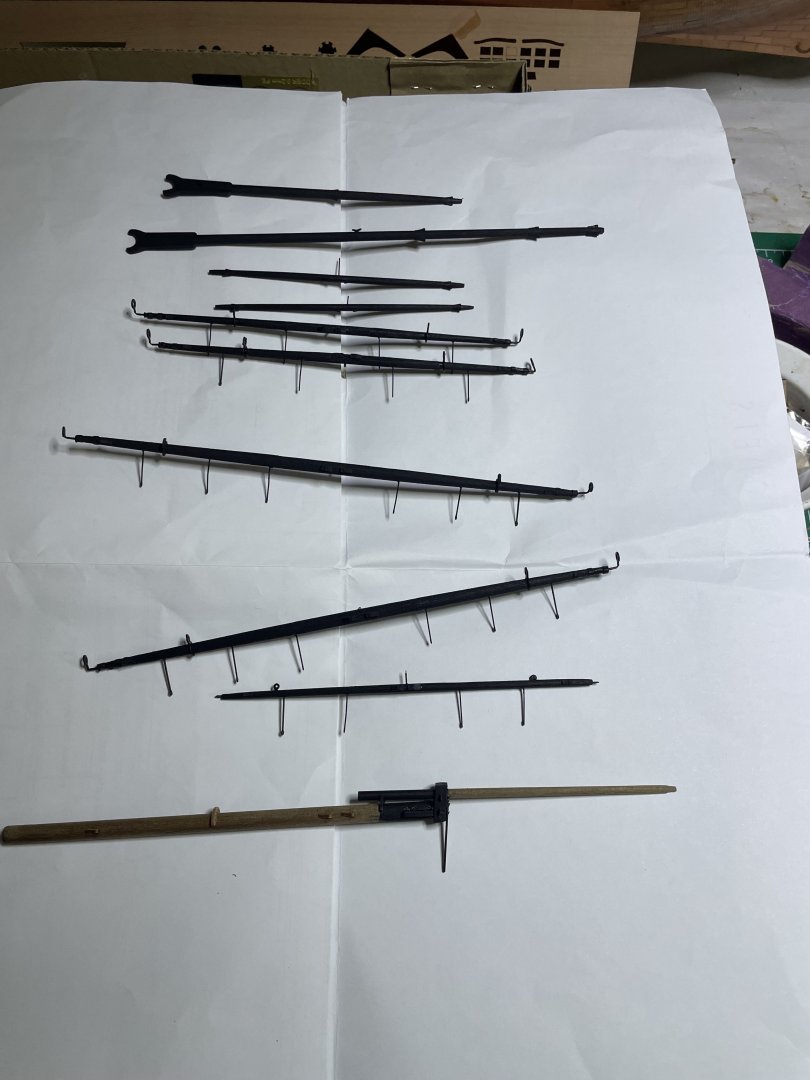
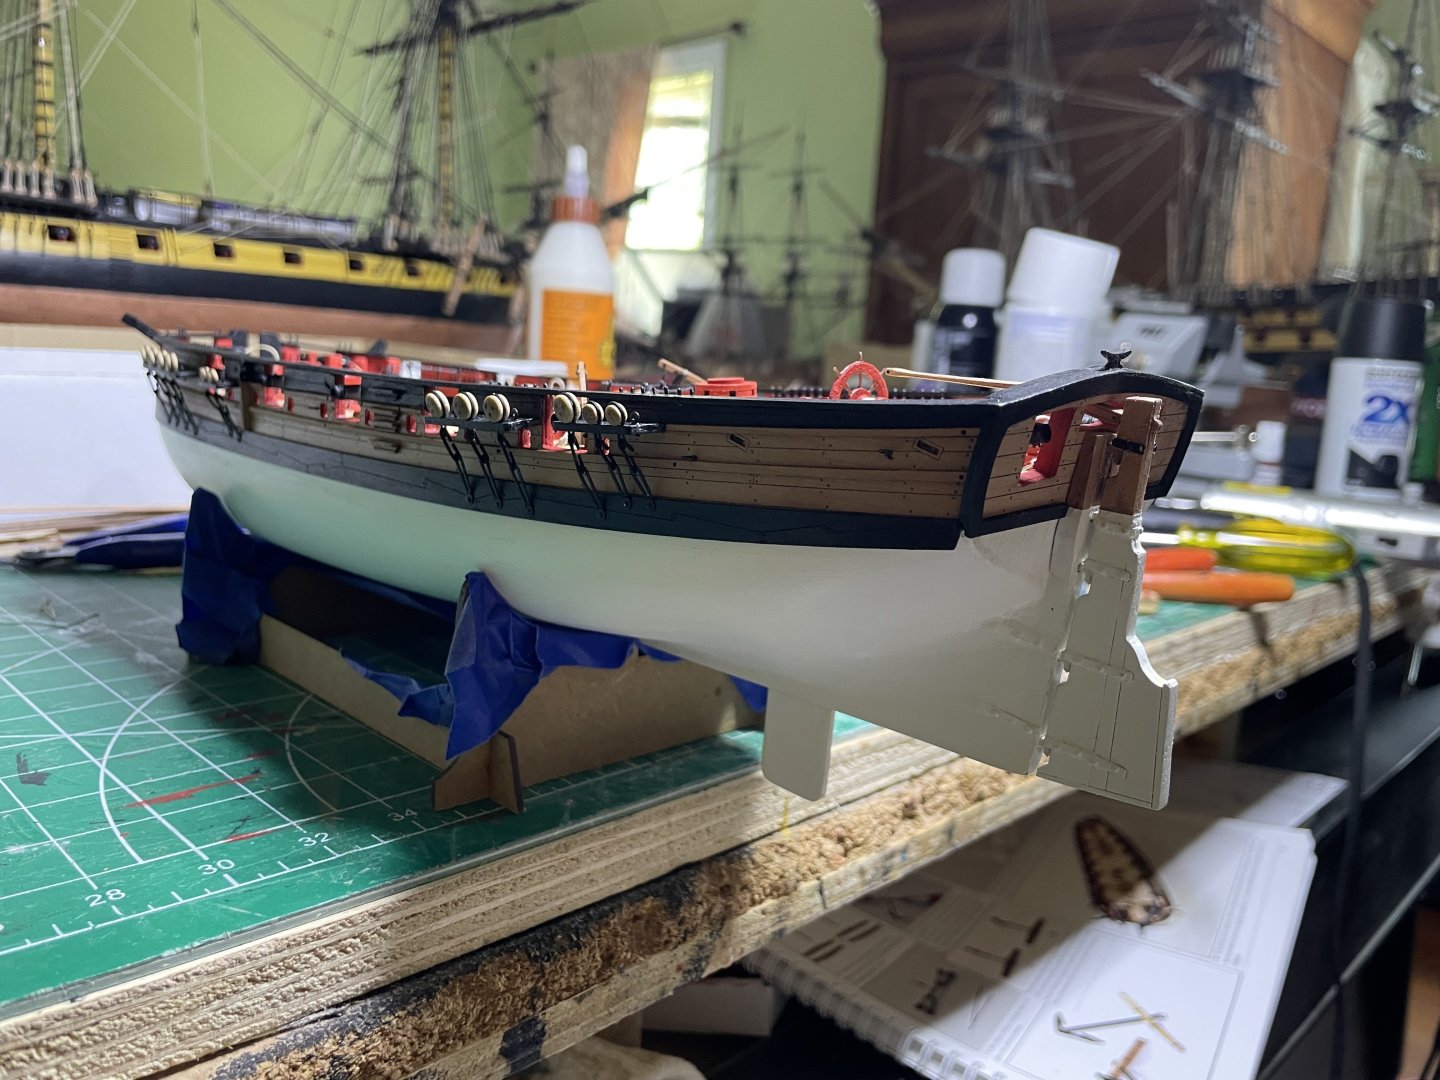
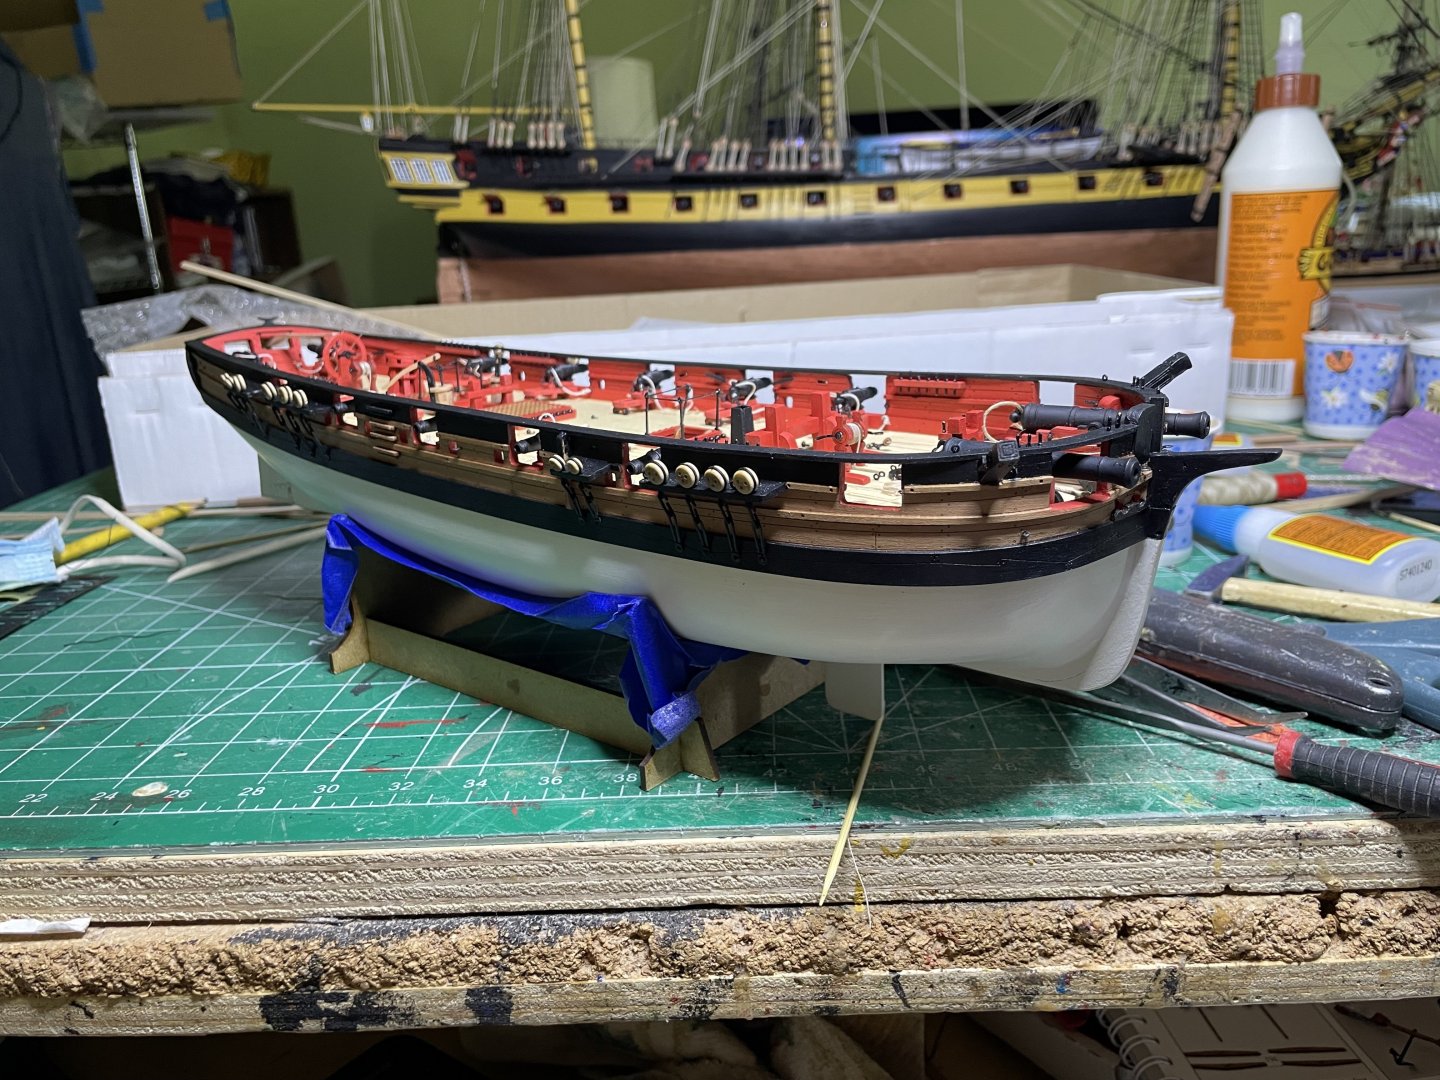
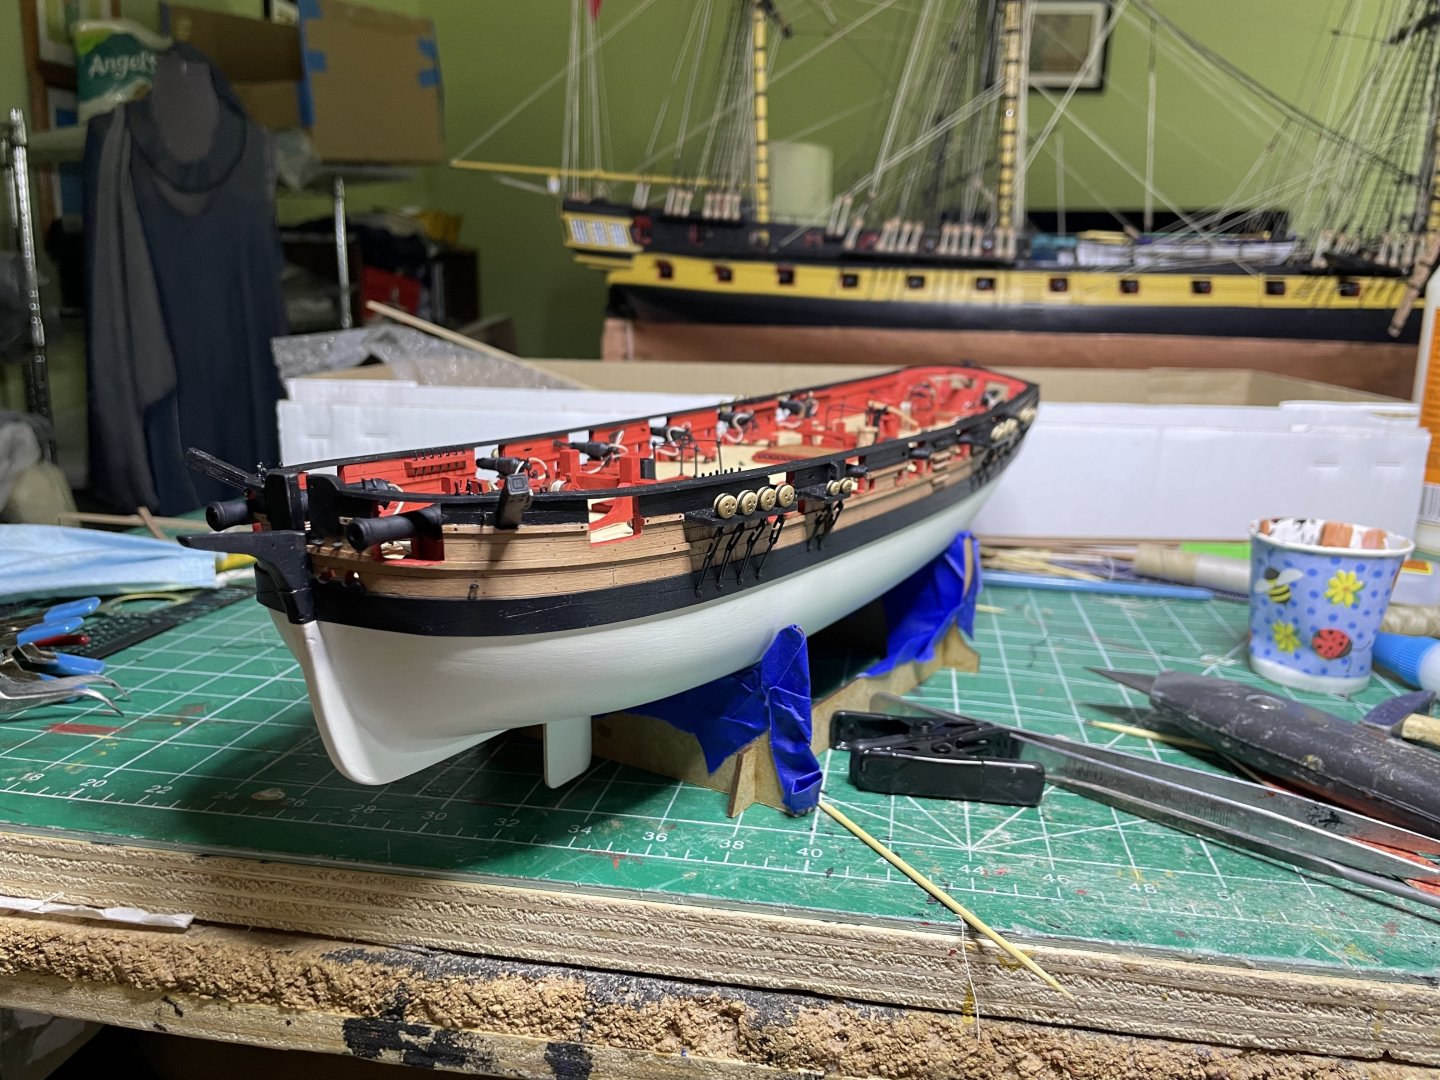
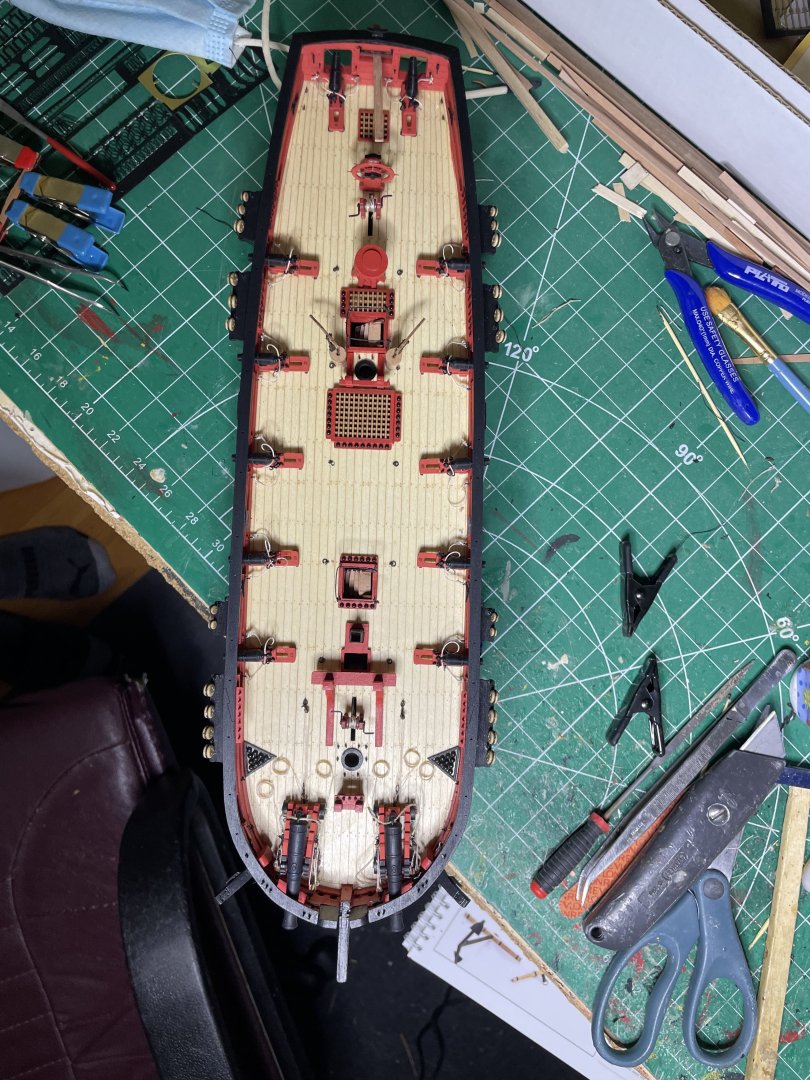
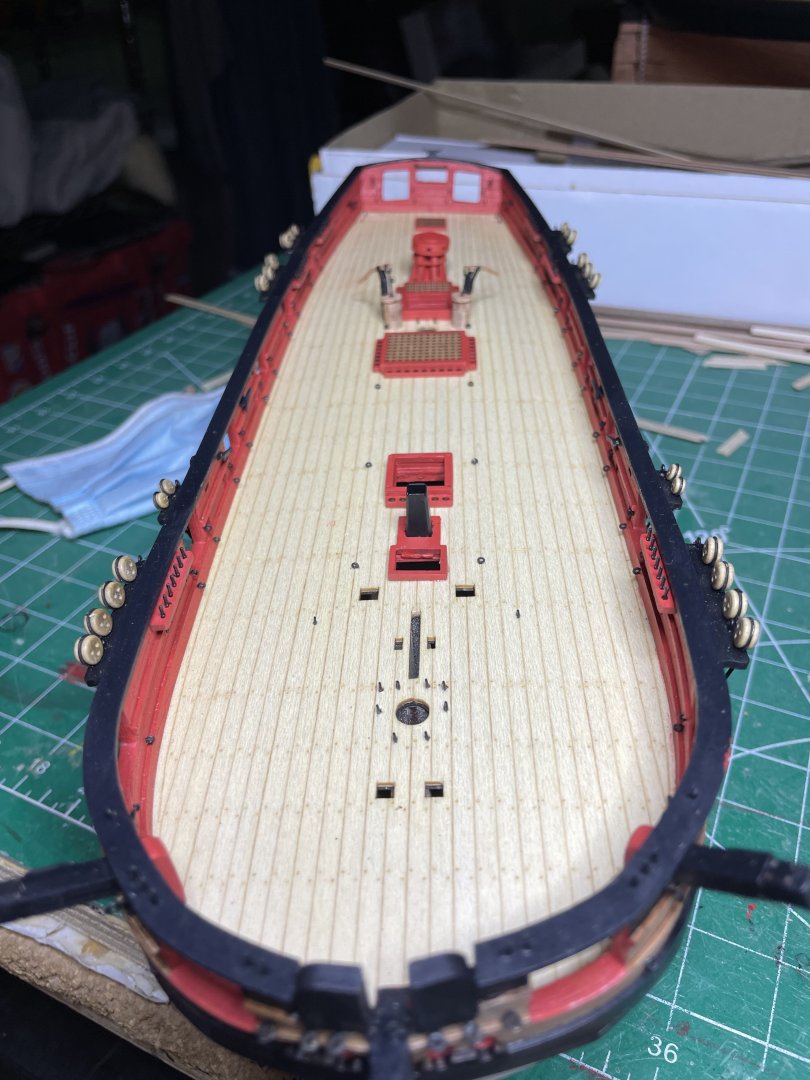
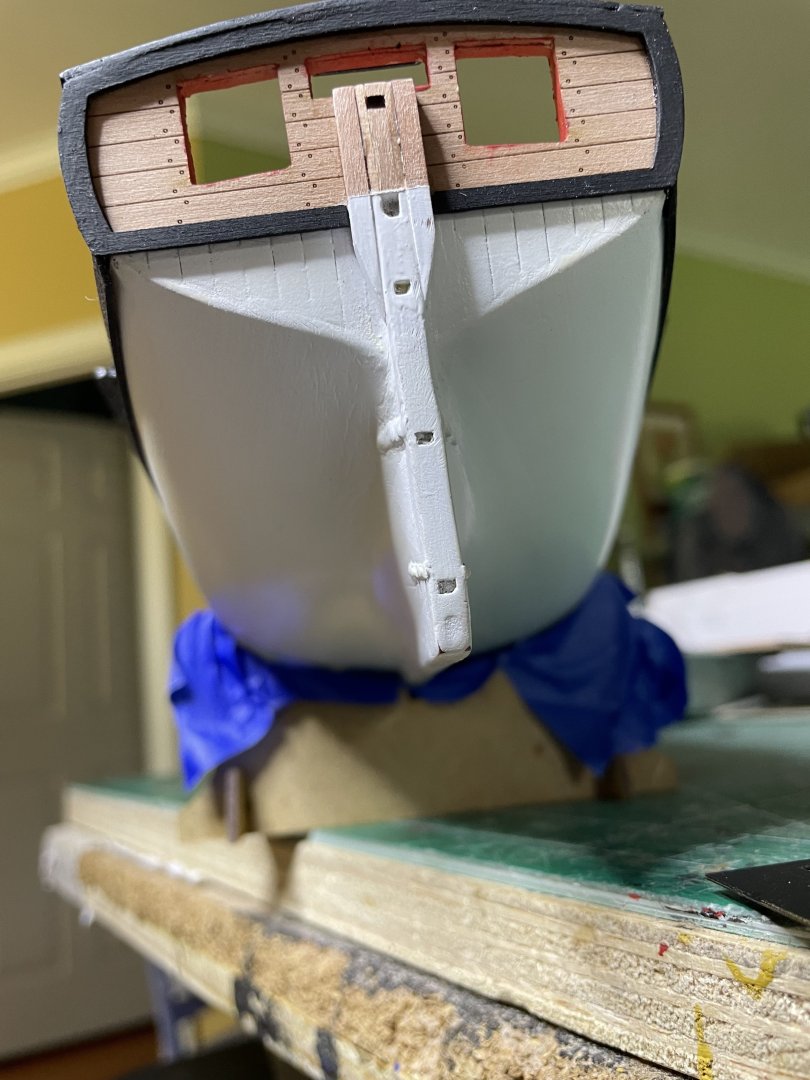
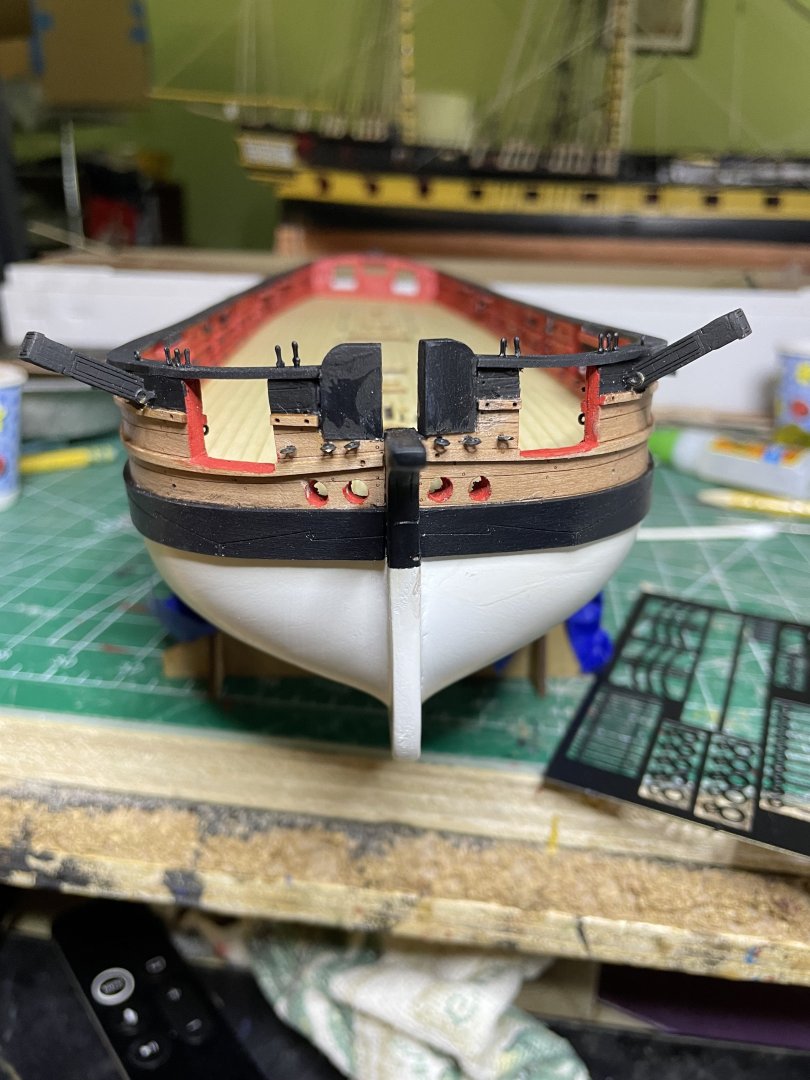
Well hull basically done. Hammock netting will go in at the very end as I always bend/break them while I am doing the rigging. I also put some tackle on the carronades and fully rigged the 24 pounders (a real pain , fortunately only 2. Use 2.5 mm double and 2 mm single blocks). Here is Adder's smasher next to the maindeck ones on Indy And 24 pounder here compared to Sherbournes's main guns


- 66 replies
-
- 12
-
-
- Adder
- Vanguard Models
- (and 1 more)
-
Thanks. I use Vallejo flat red followed by a coat of satin poly. It is the color Chris uses in his models.
- 66 replies
-
- 3
-
-
- Adder
- Vanguard Models
- (and 1 more)
-
Long journey, incredible job! Hope you will enjoy your next project as much as I am.
- 587 replies
-
- 1
-

-
- Indefatigable
- Vanguard Models
- (and 1 more)
-
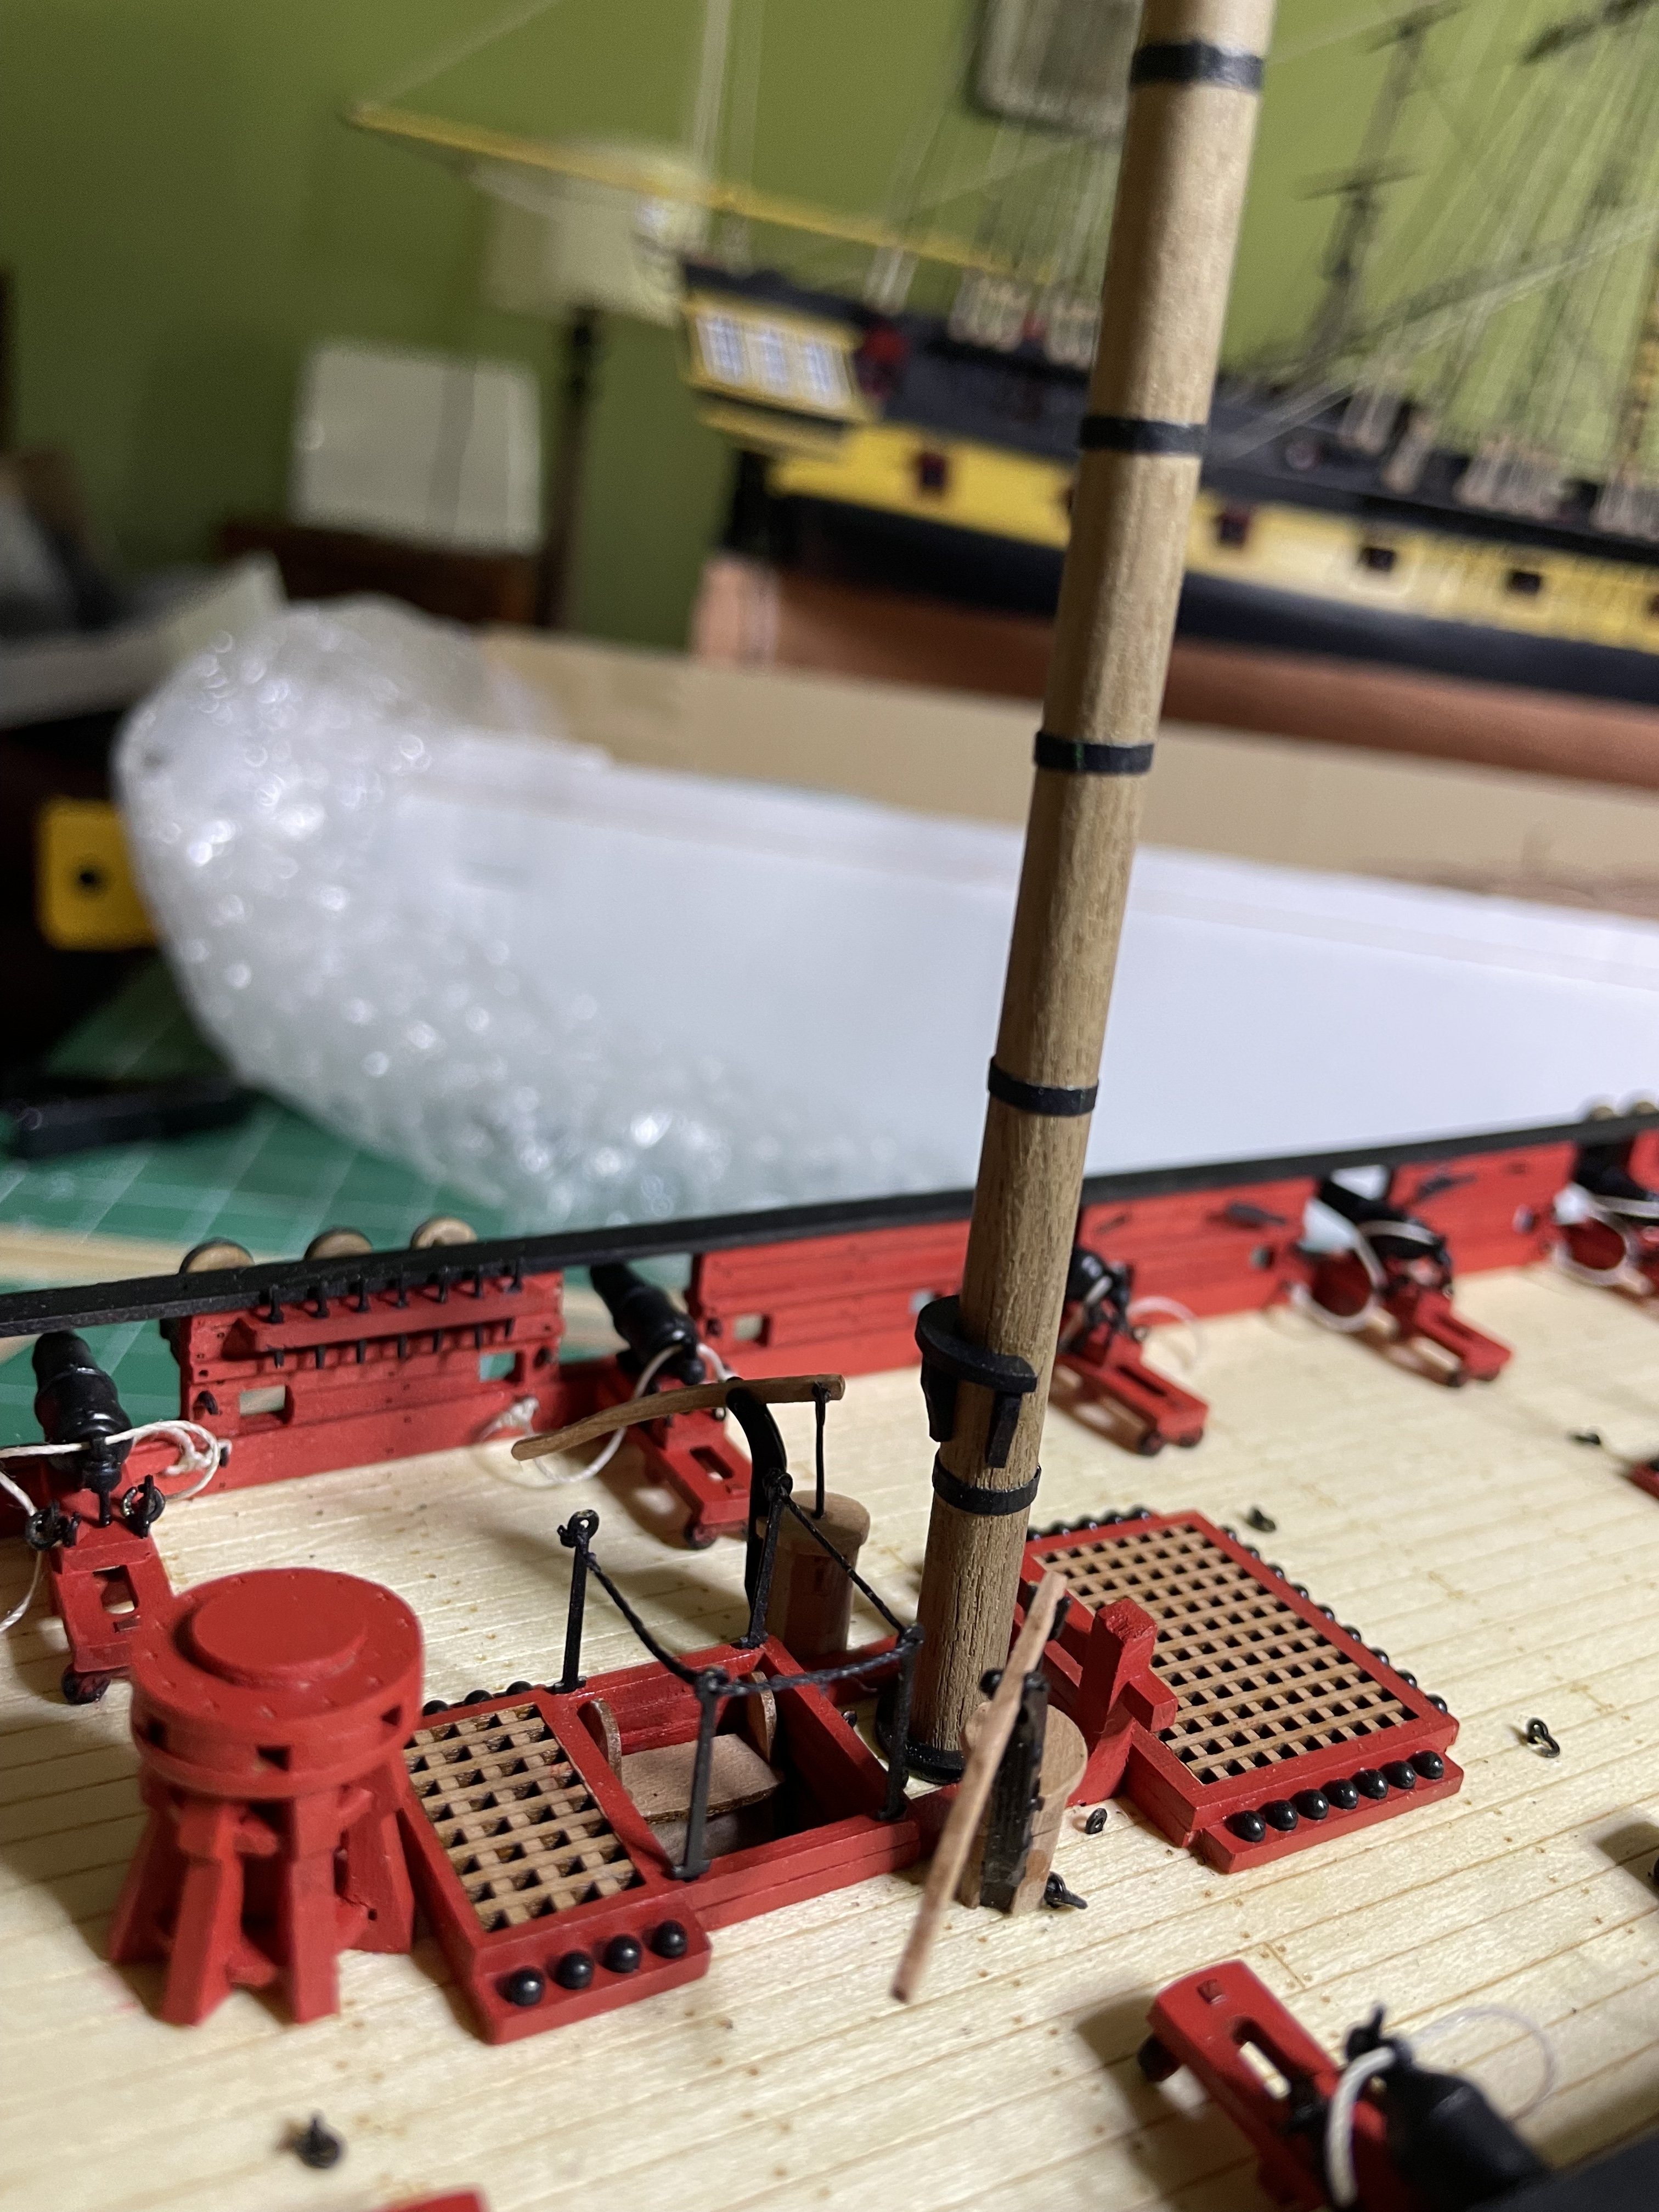
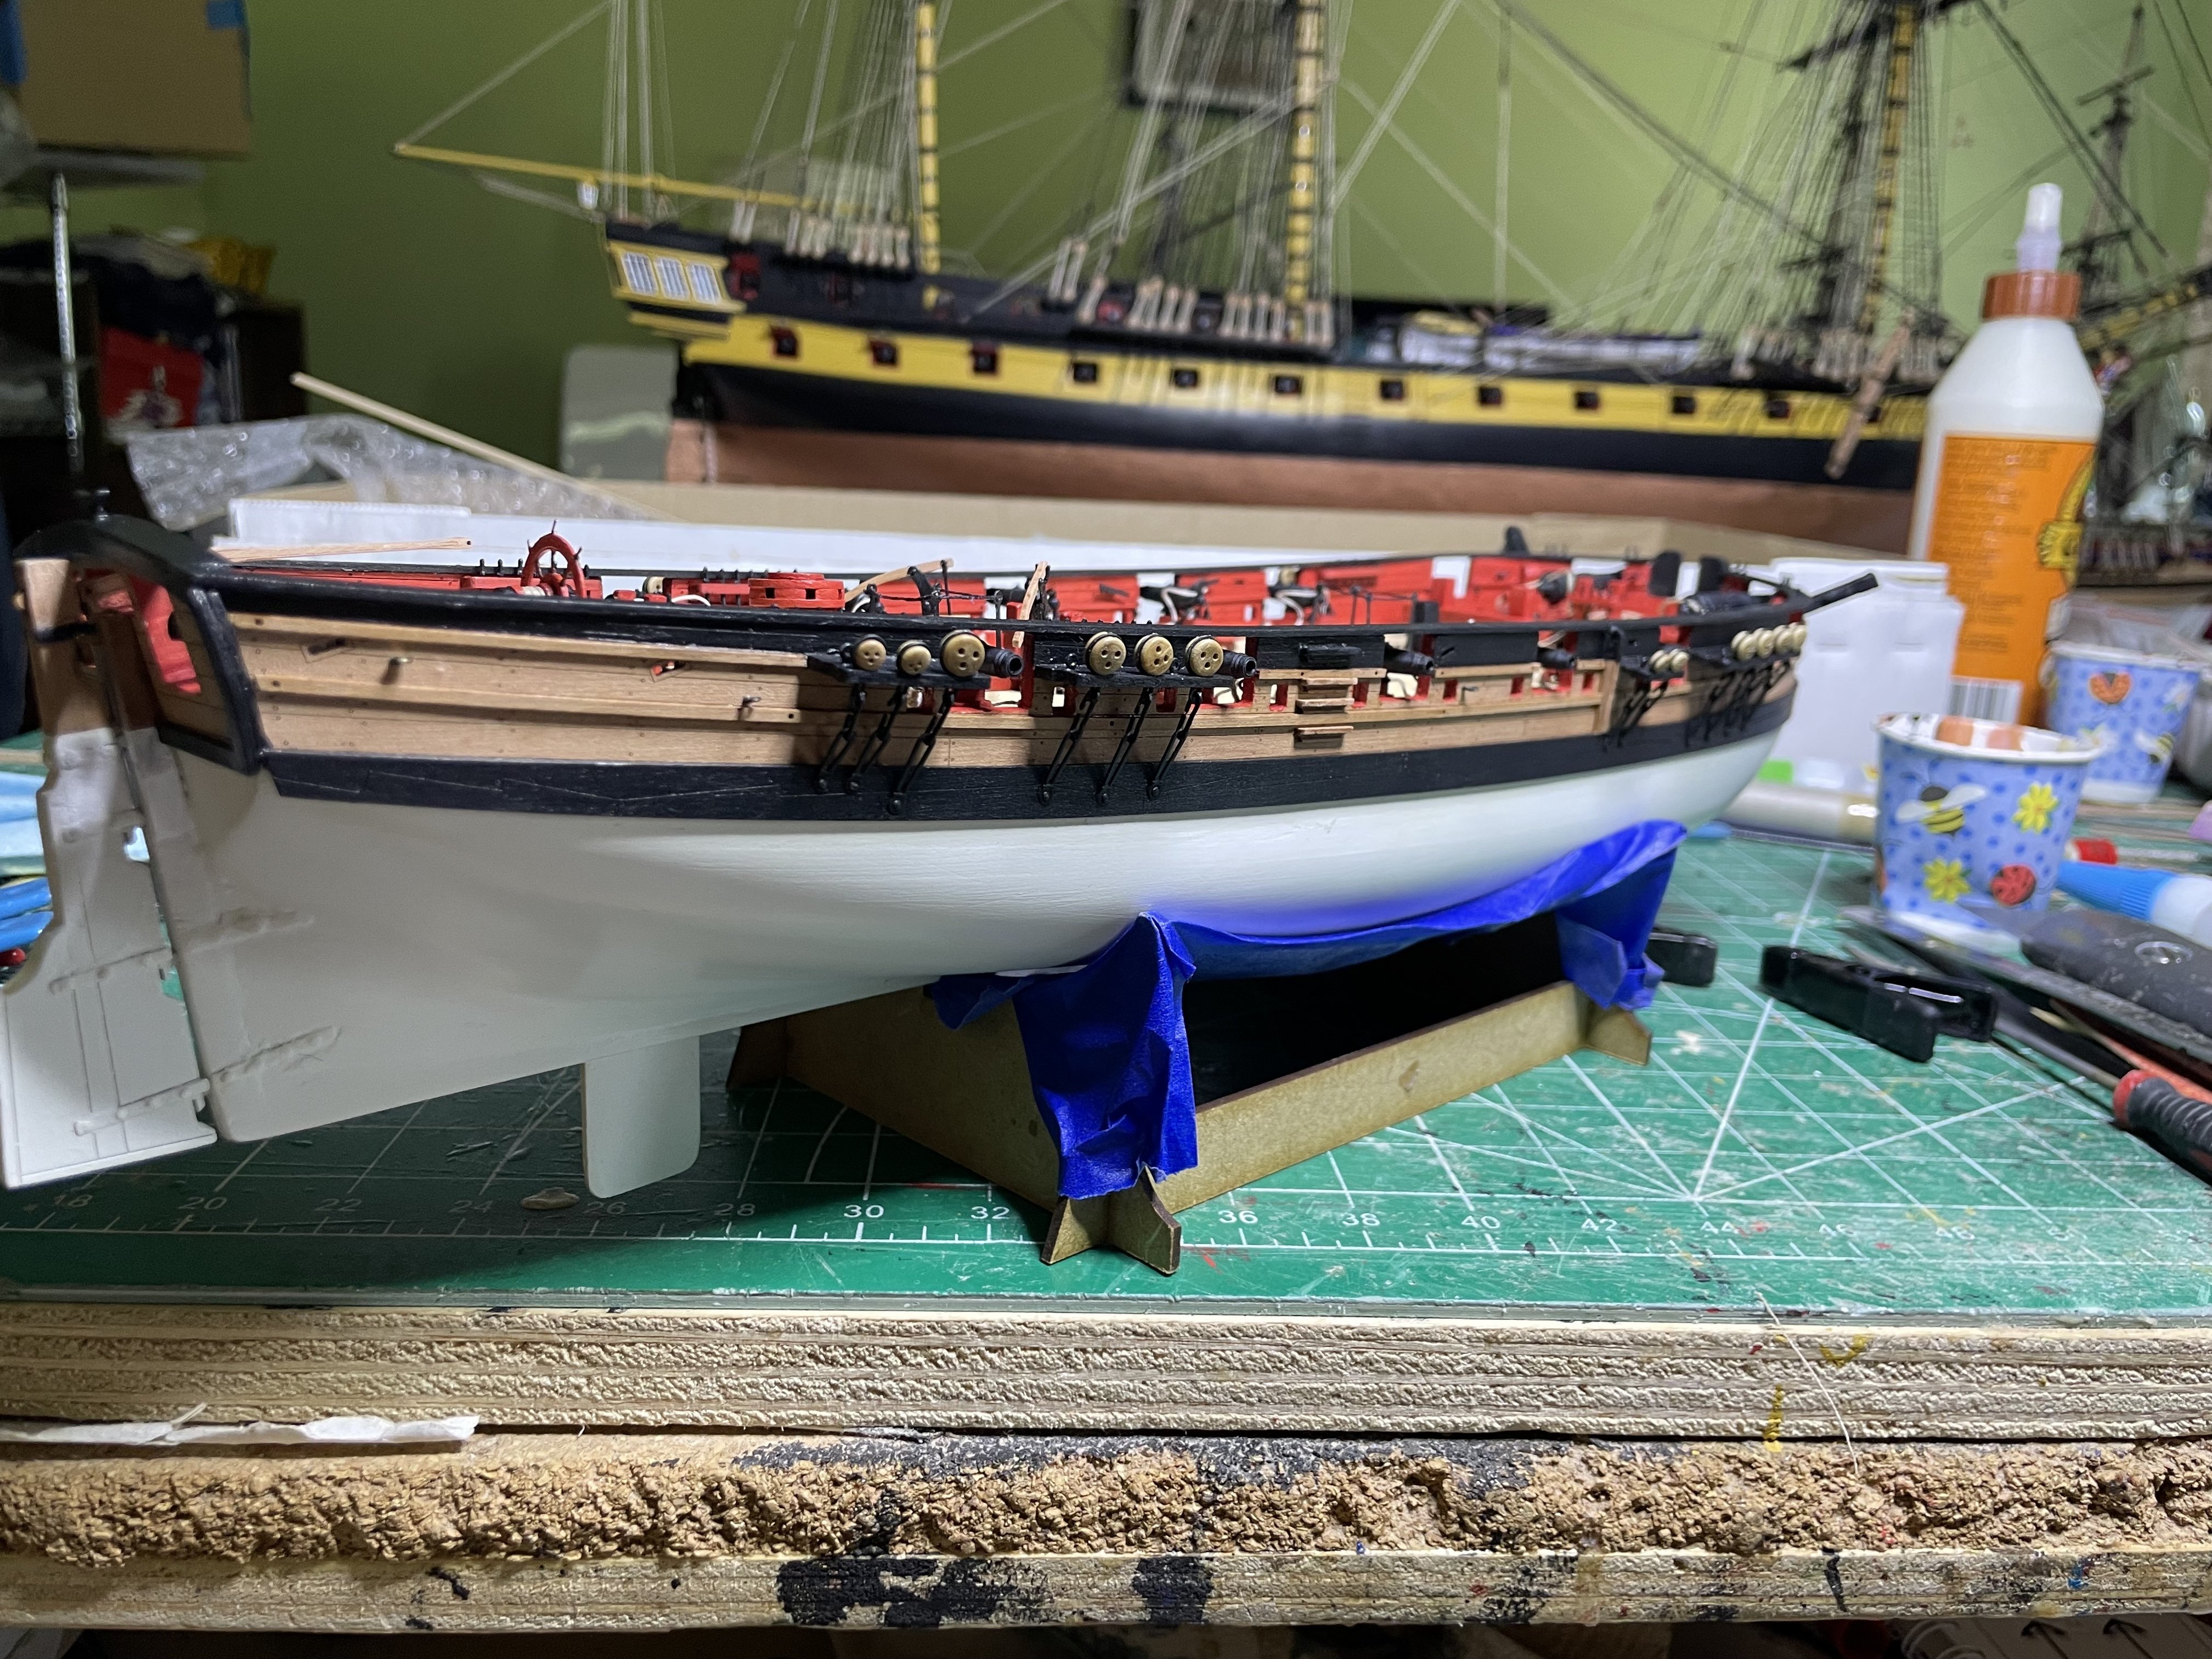
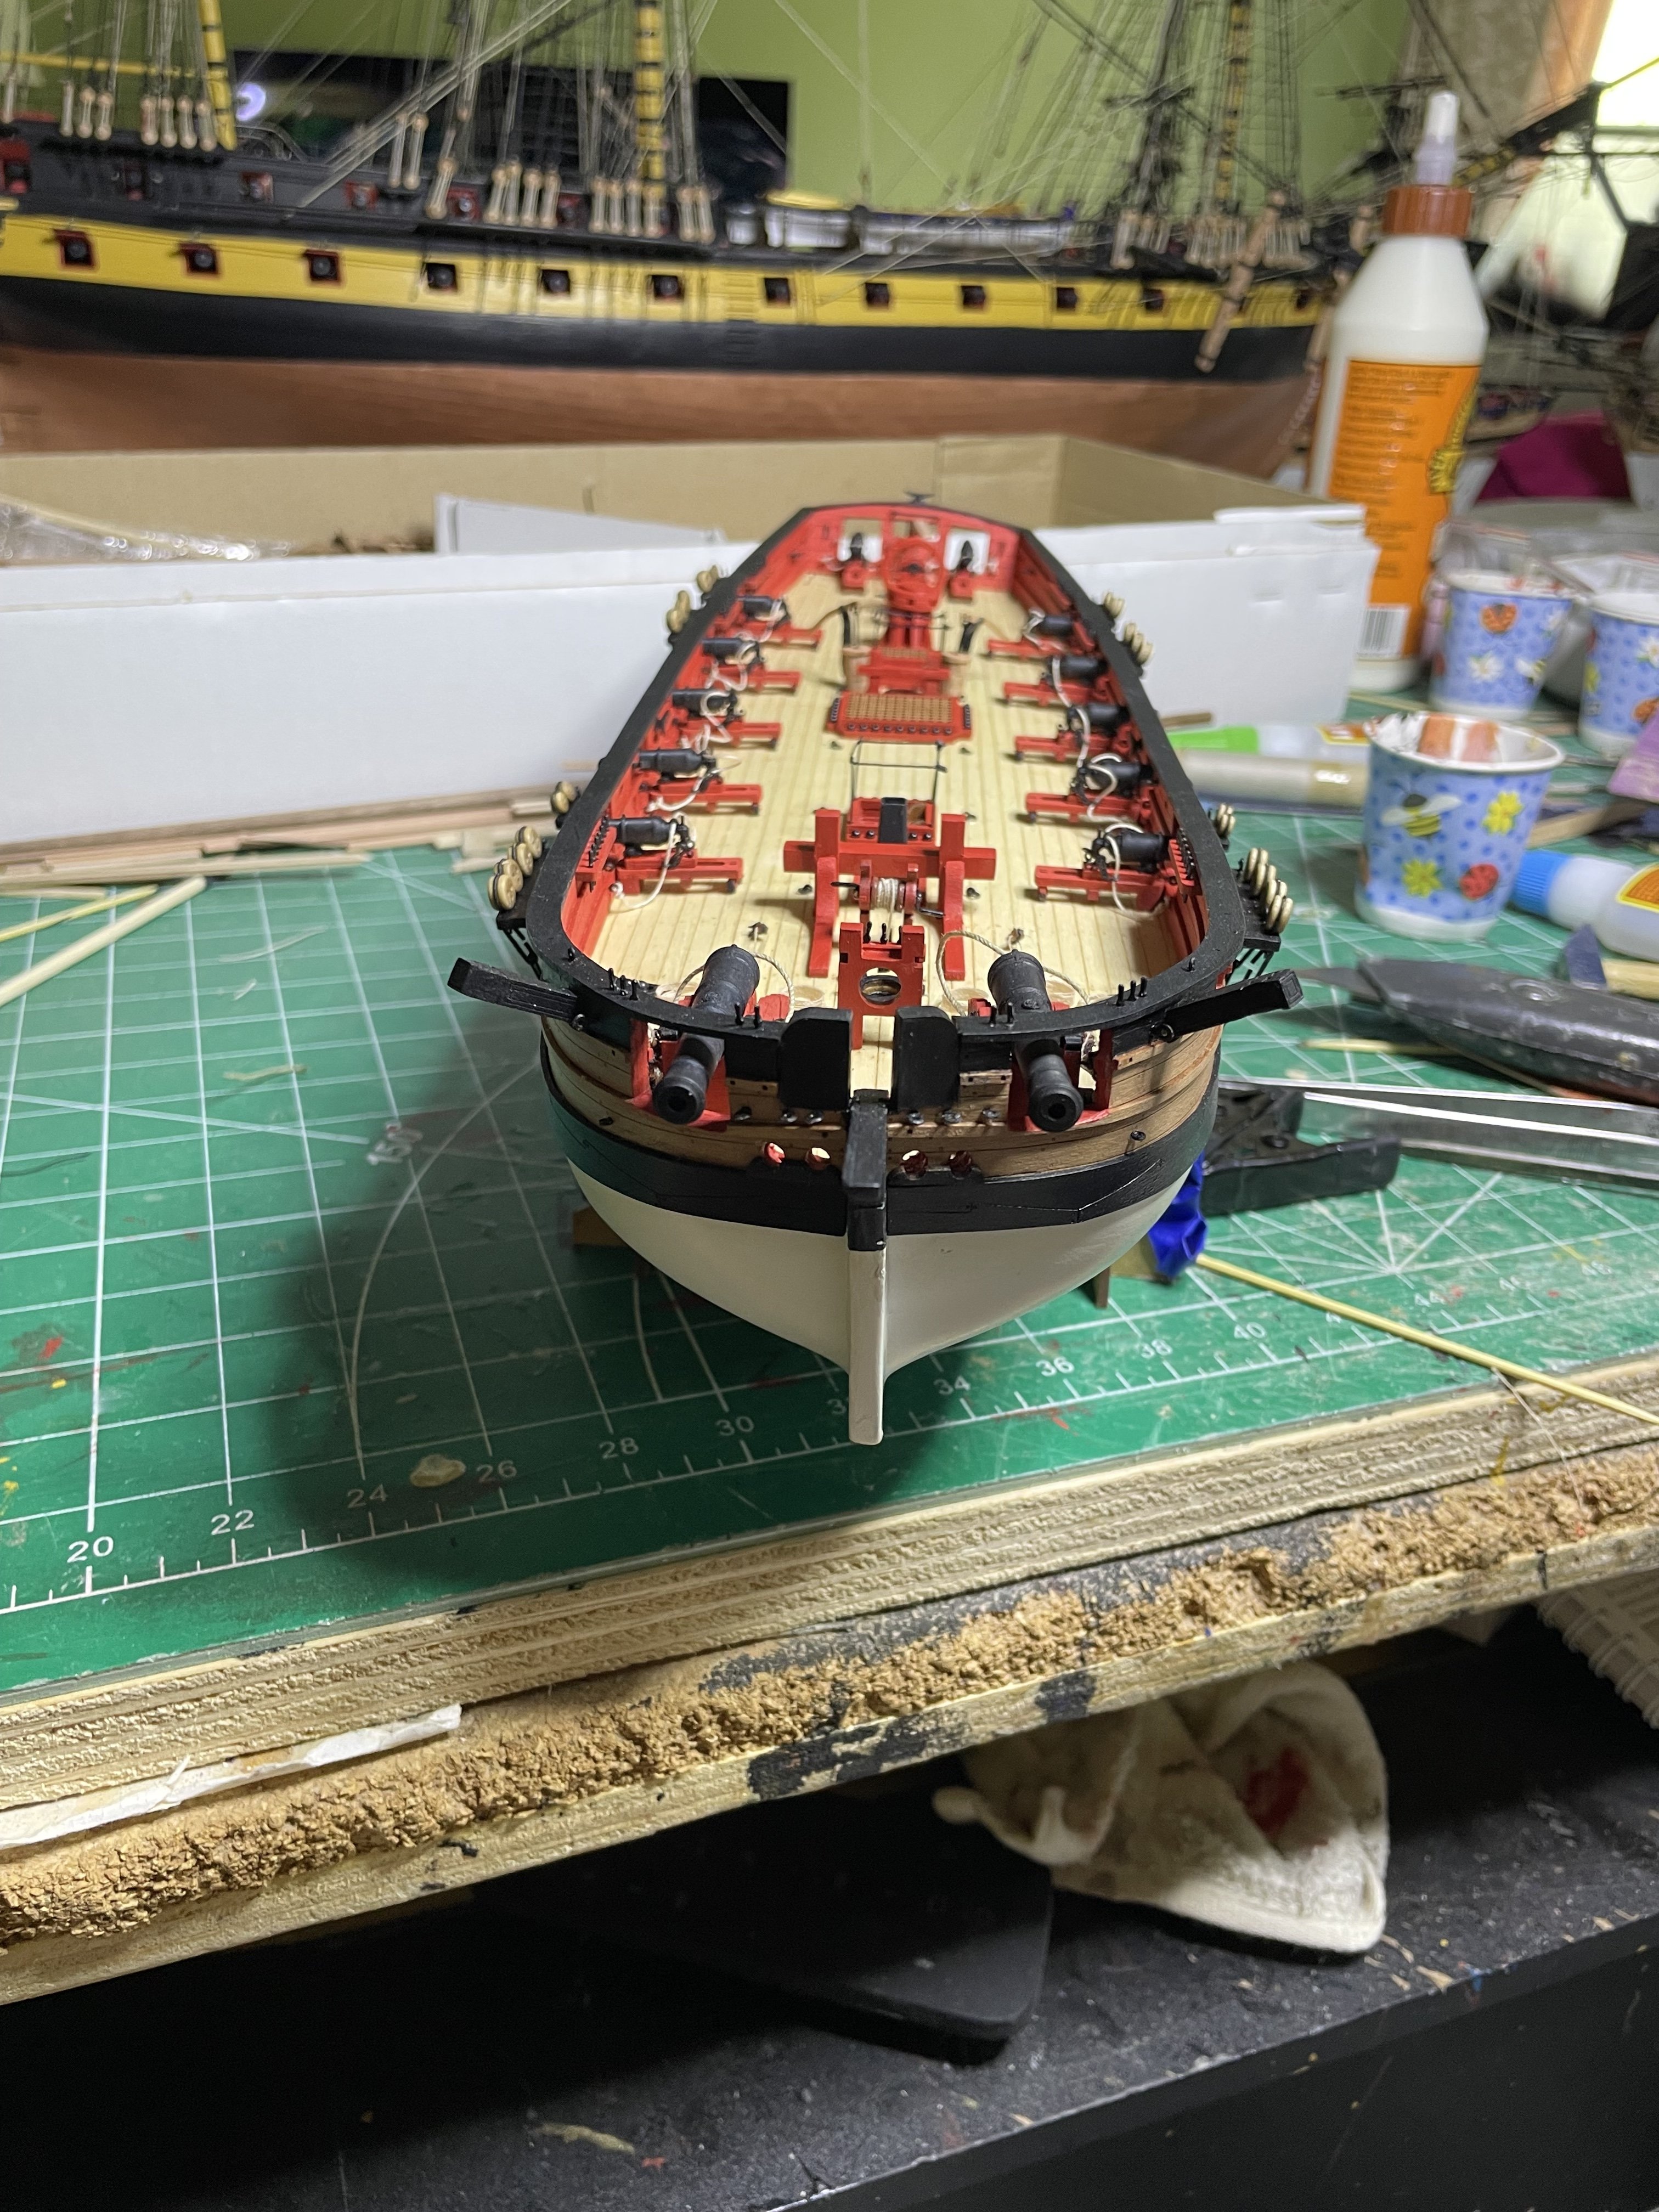
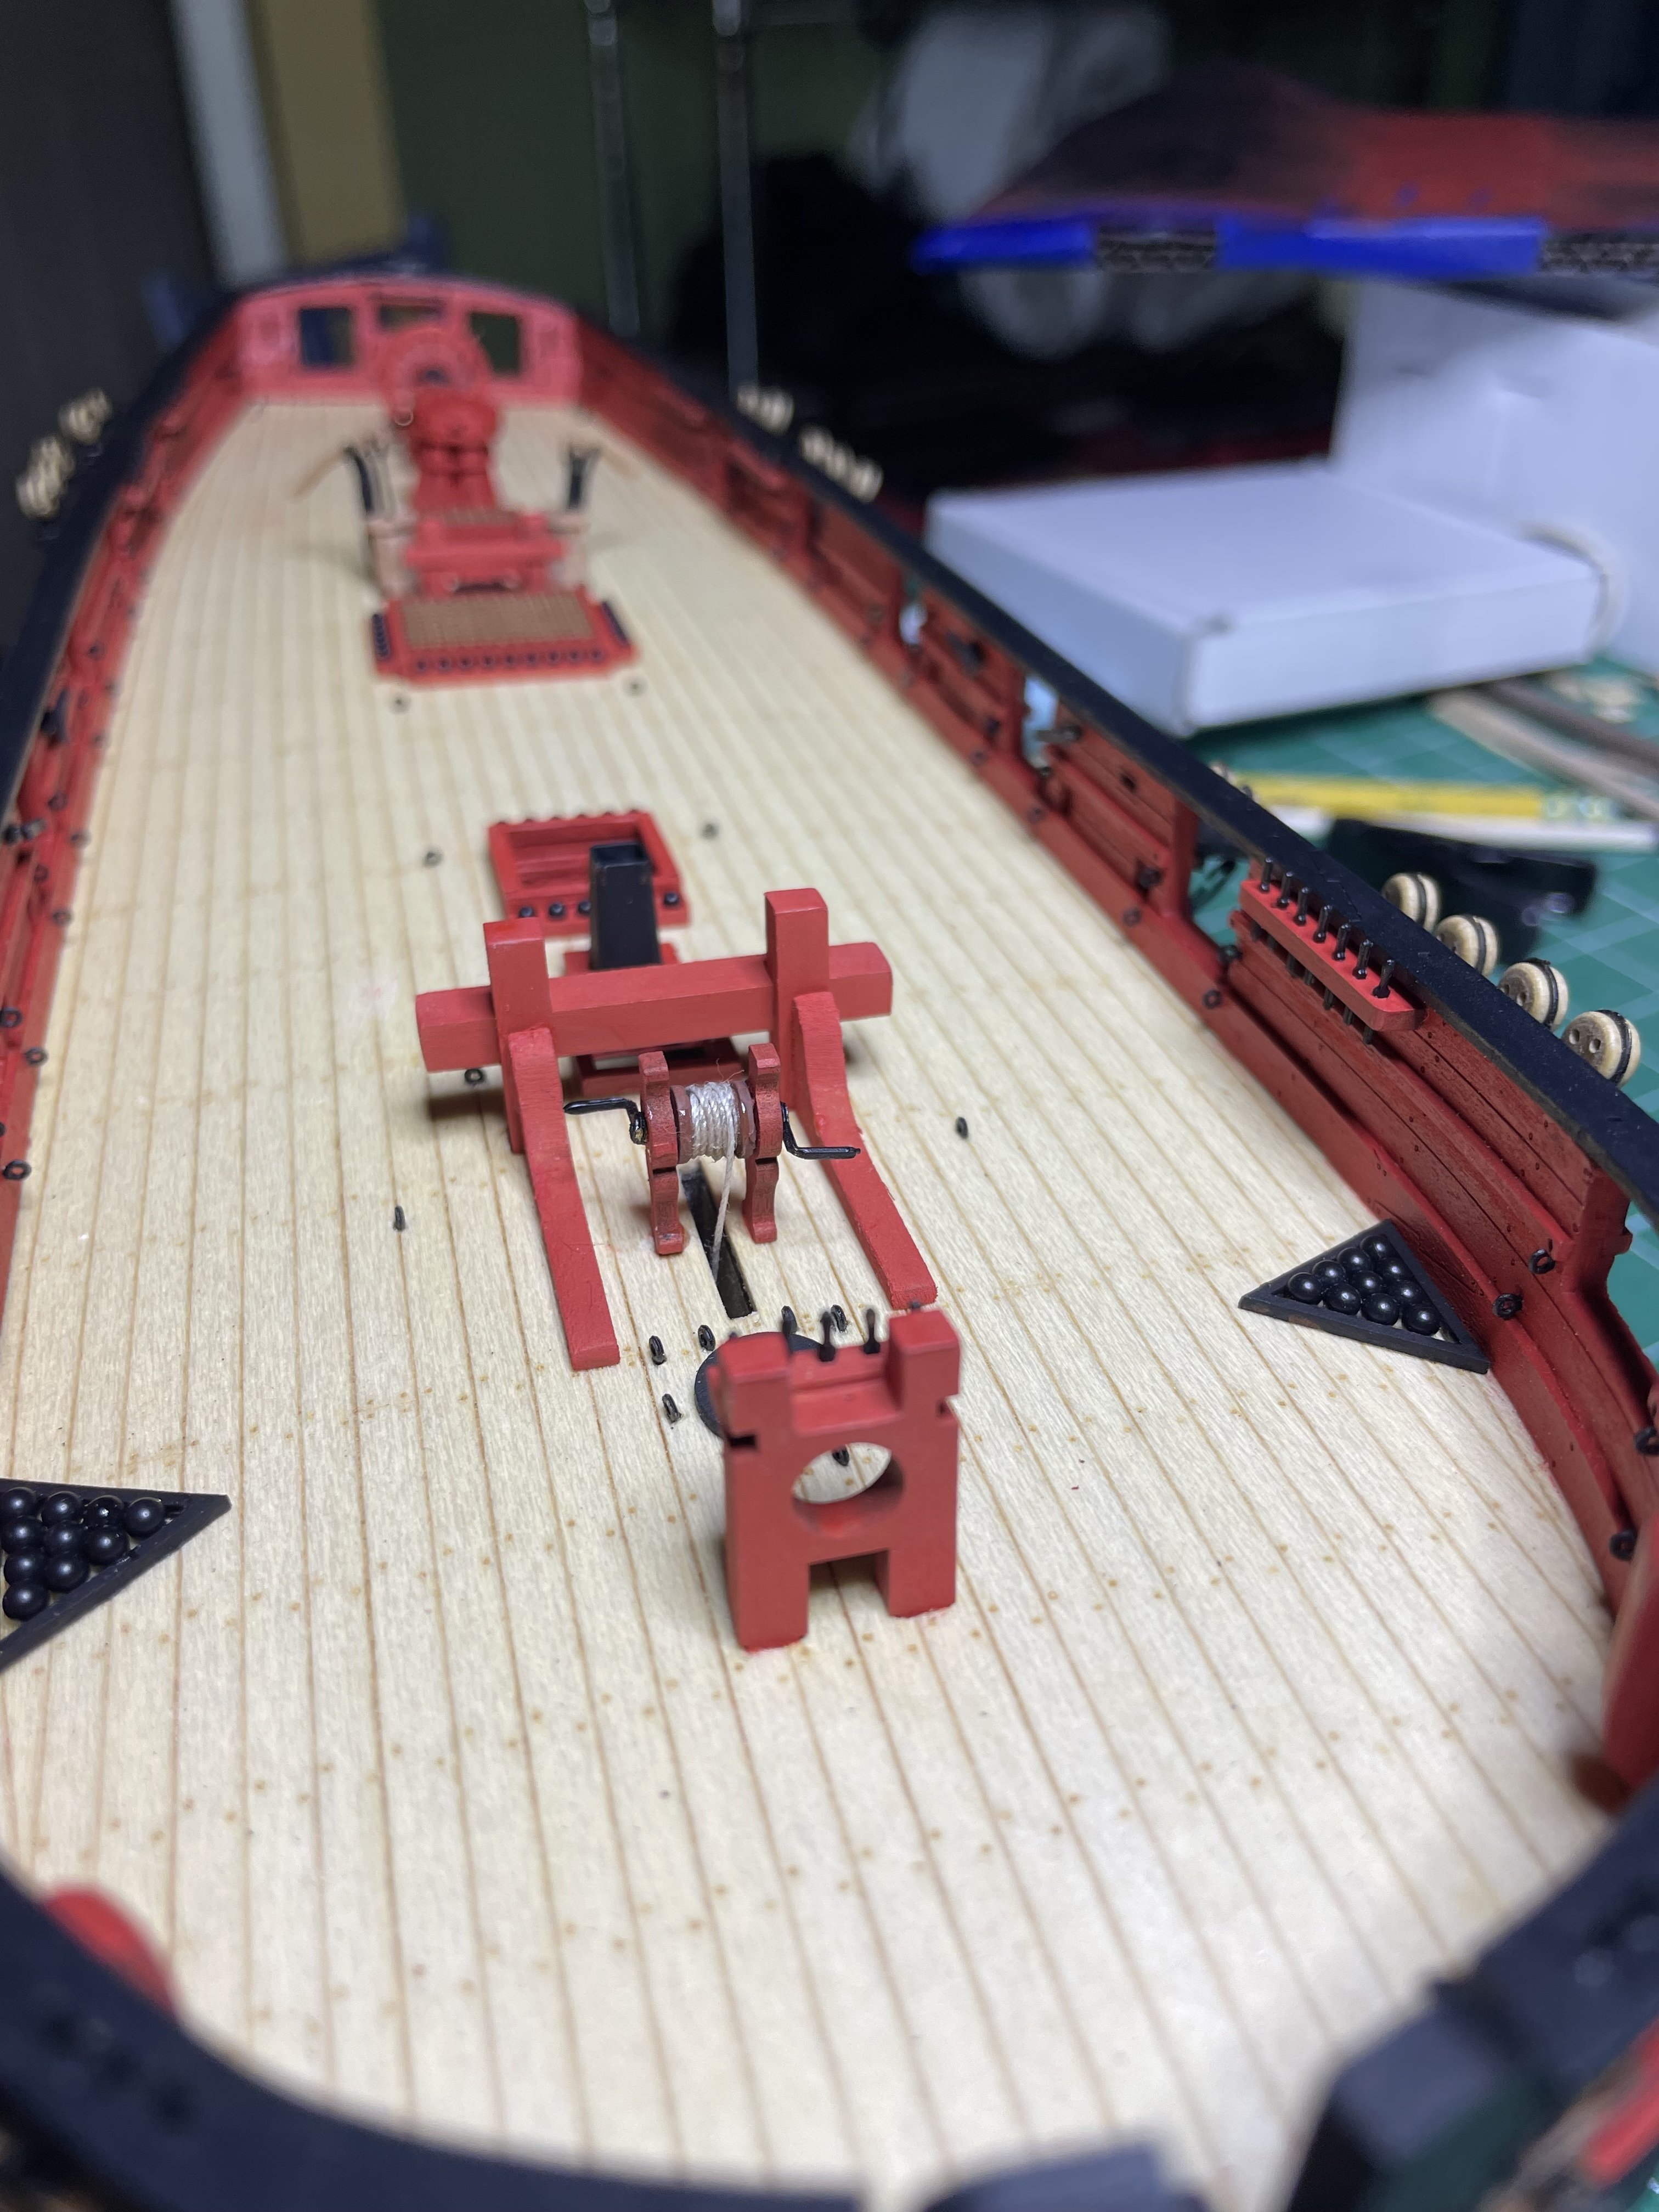
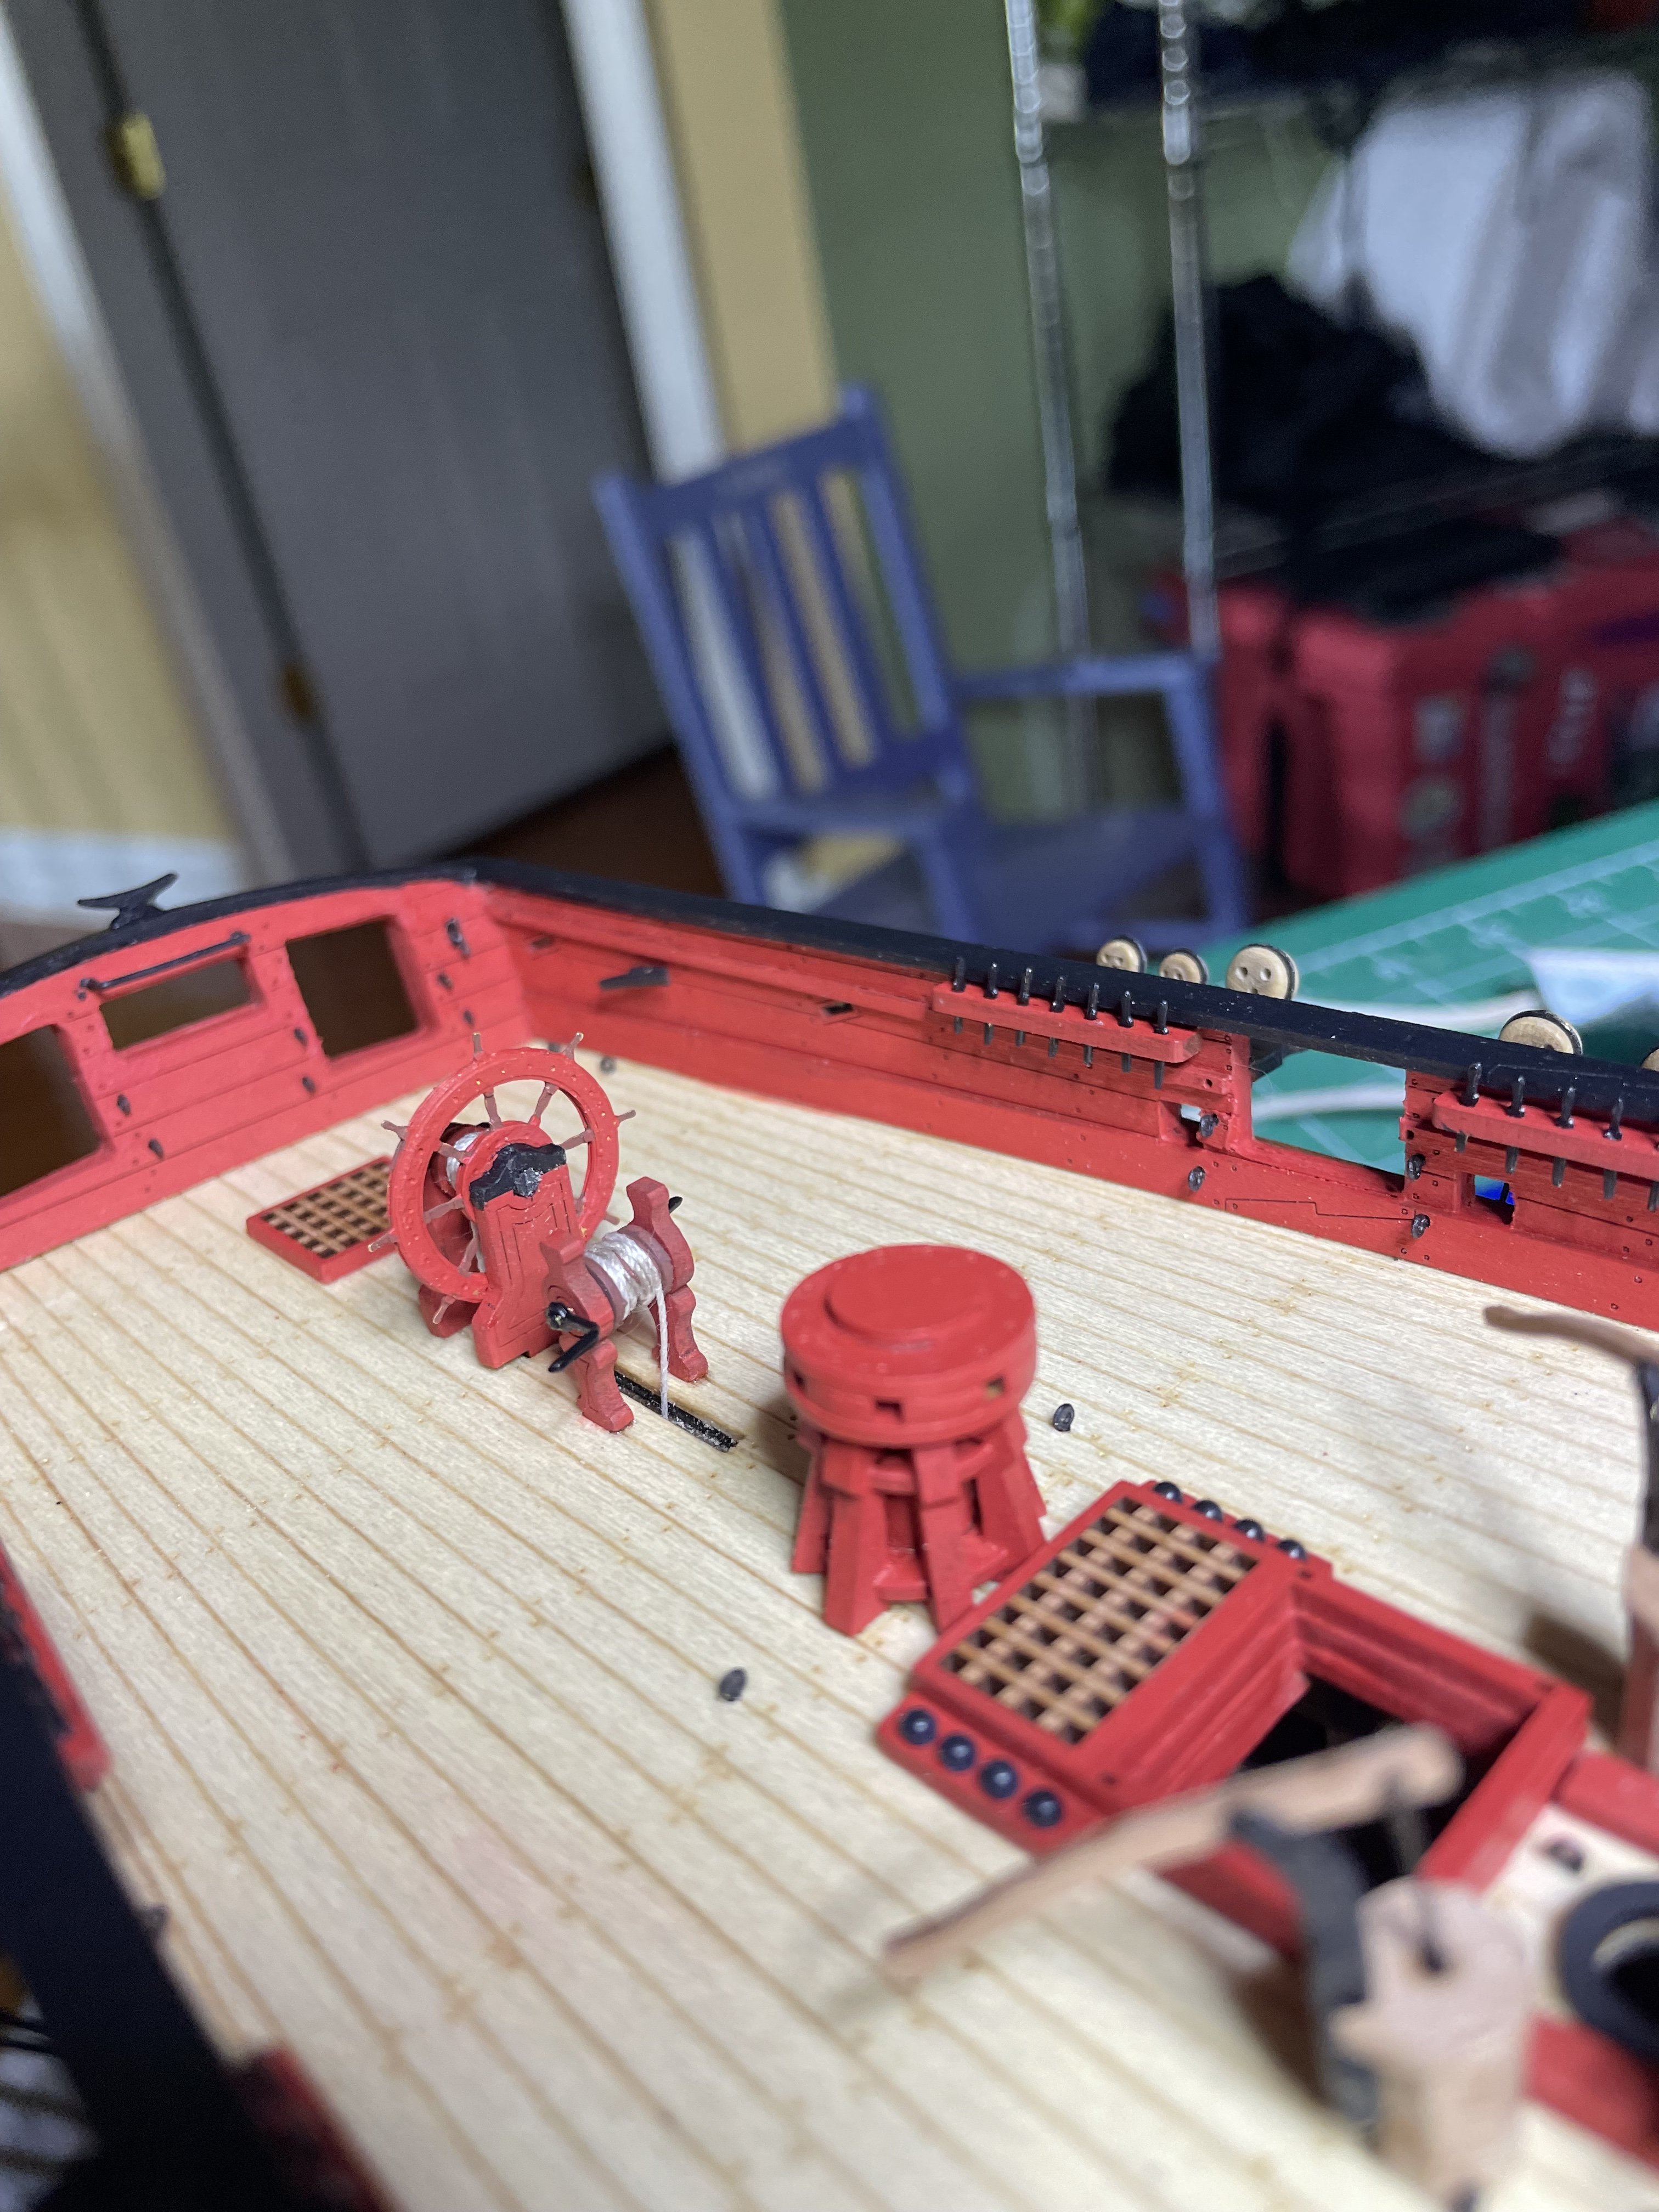
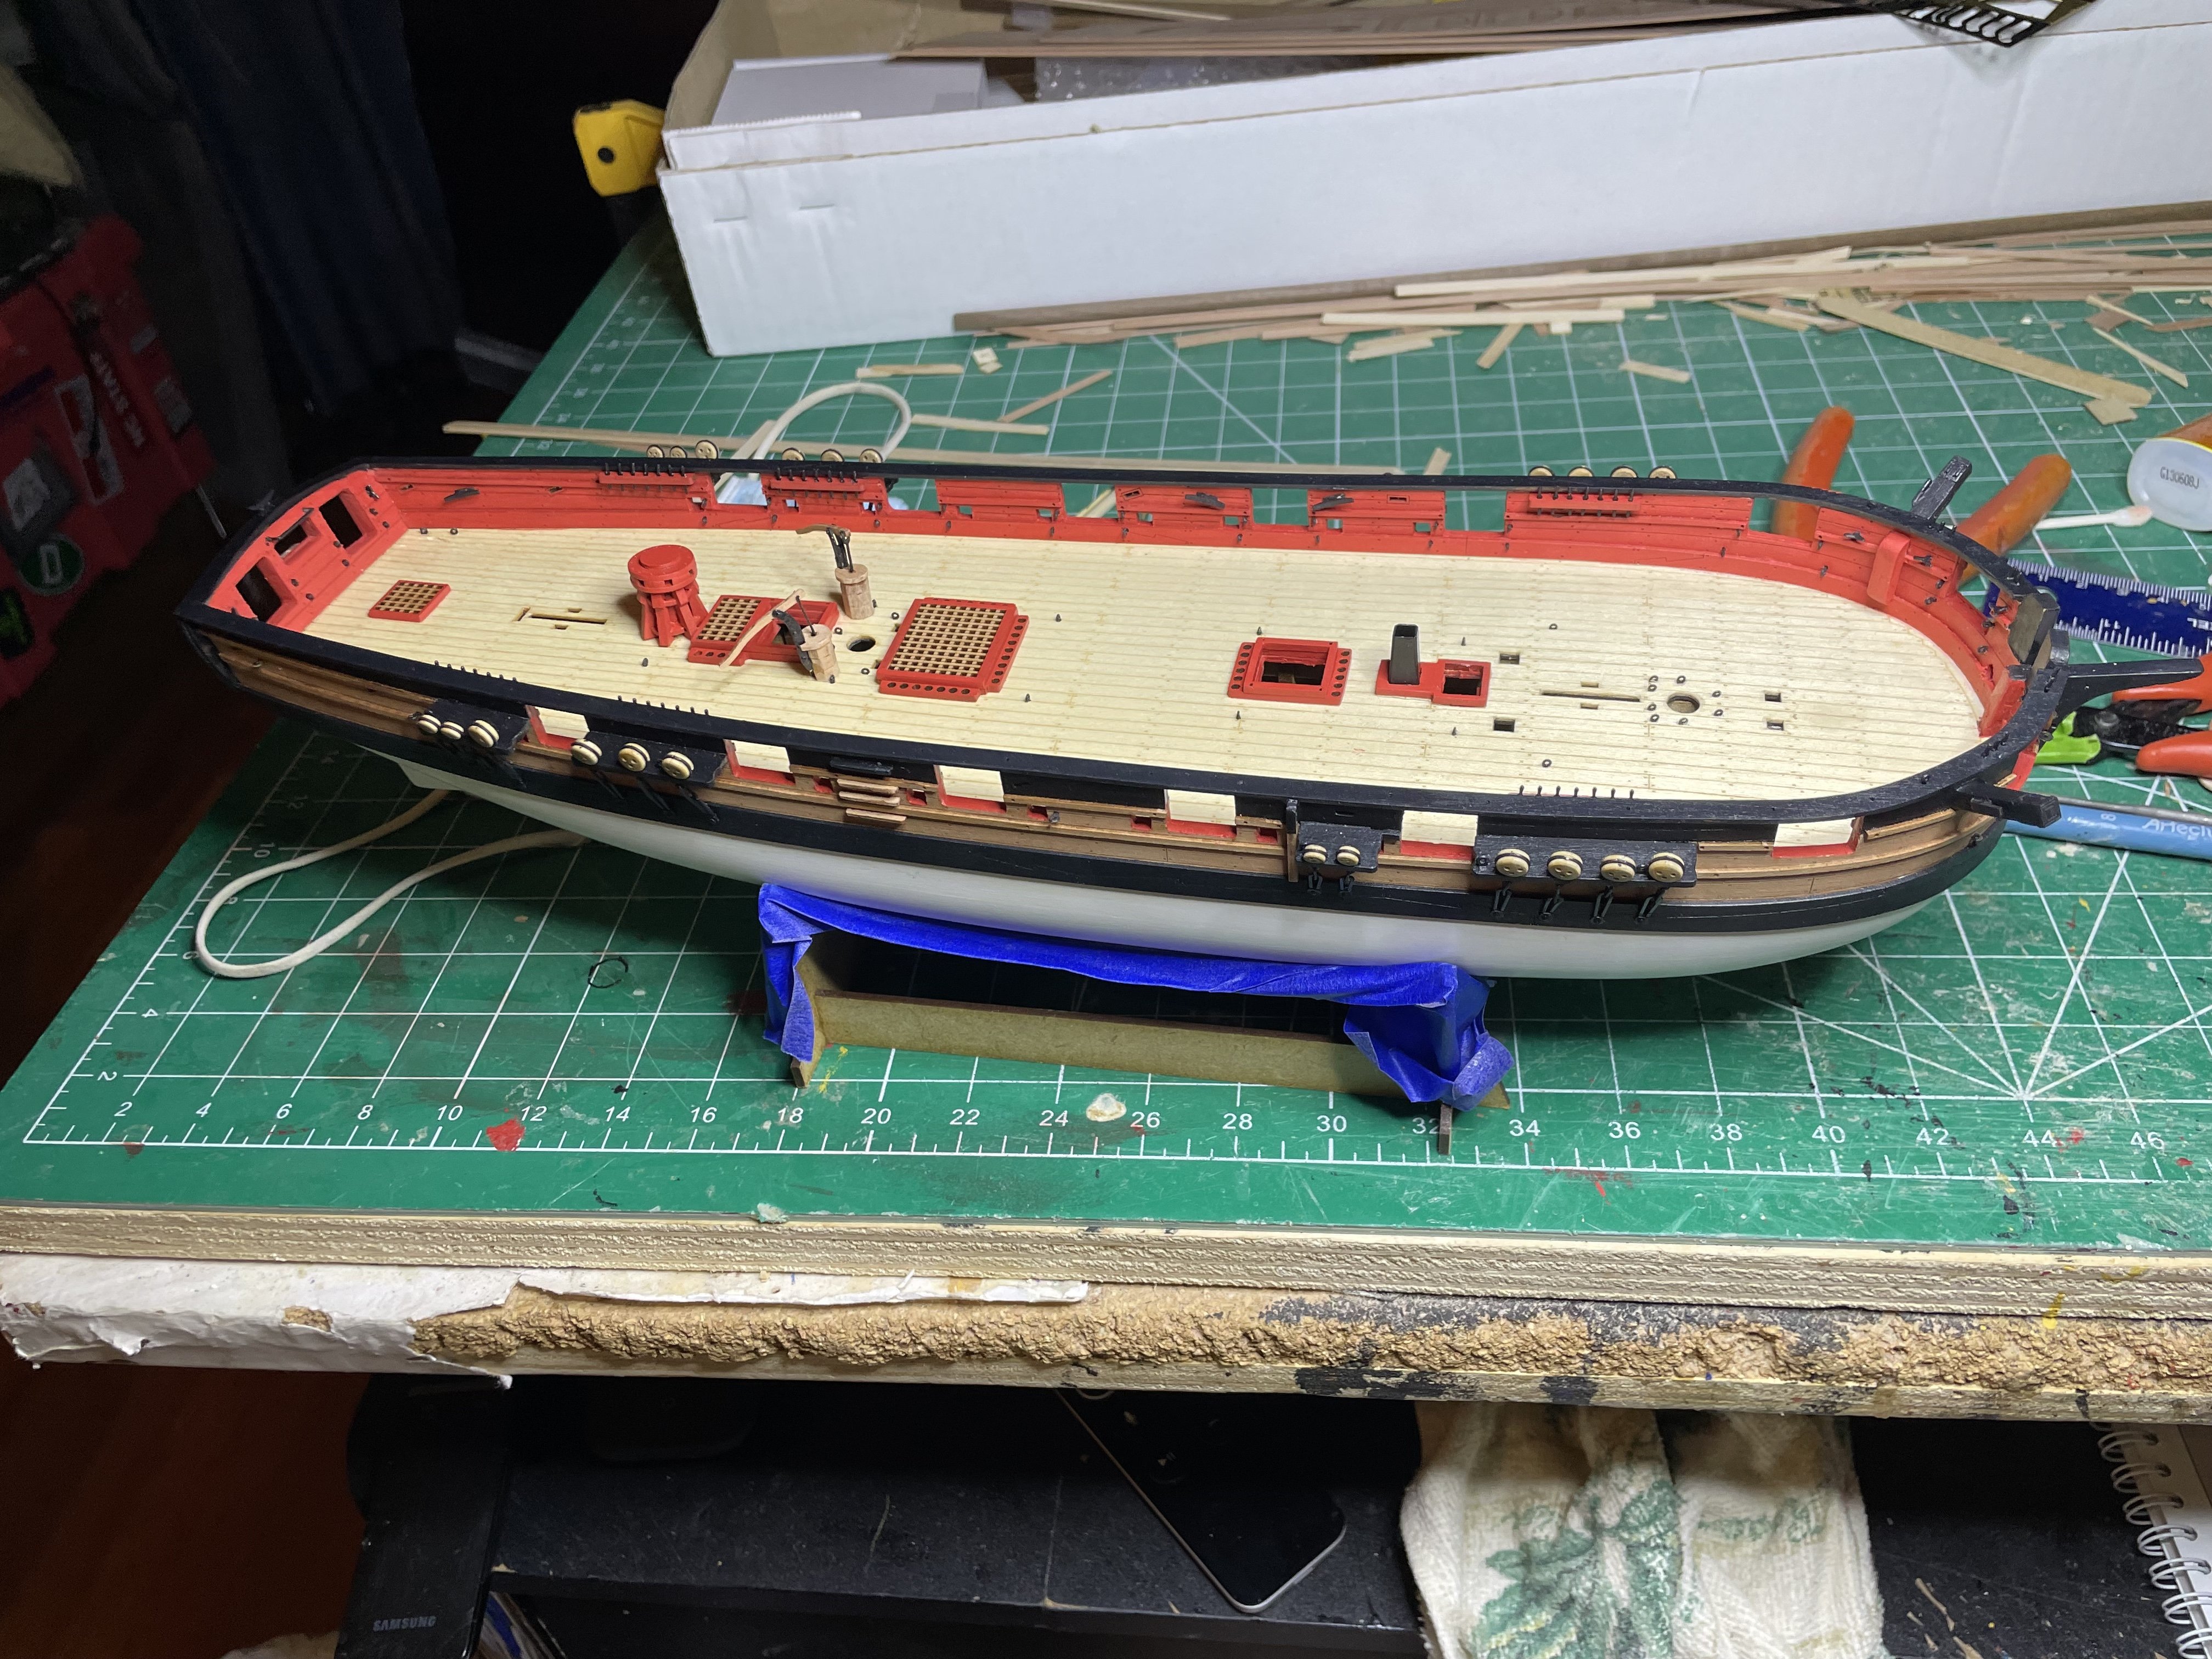
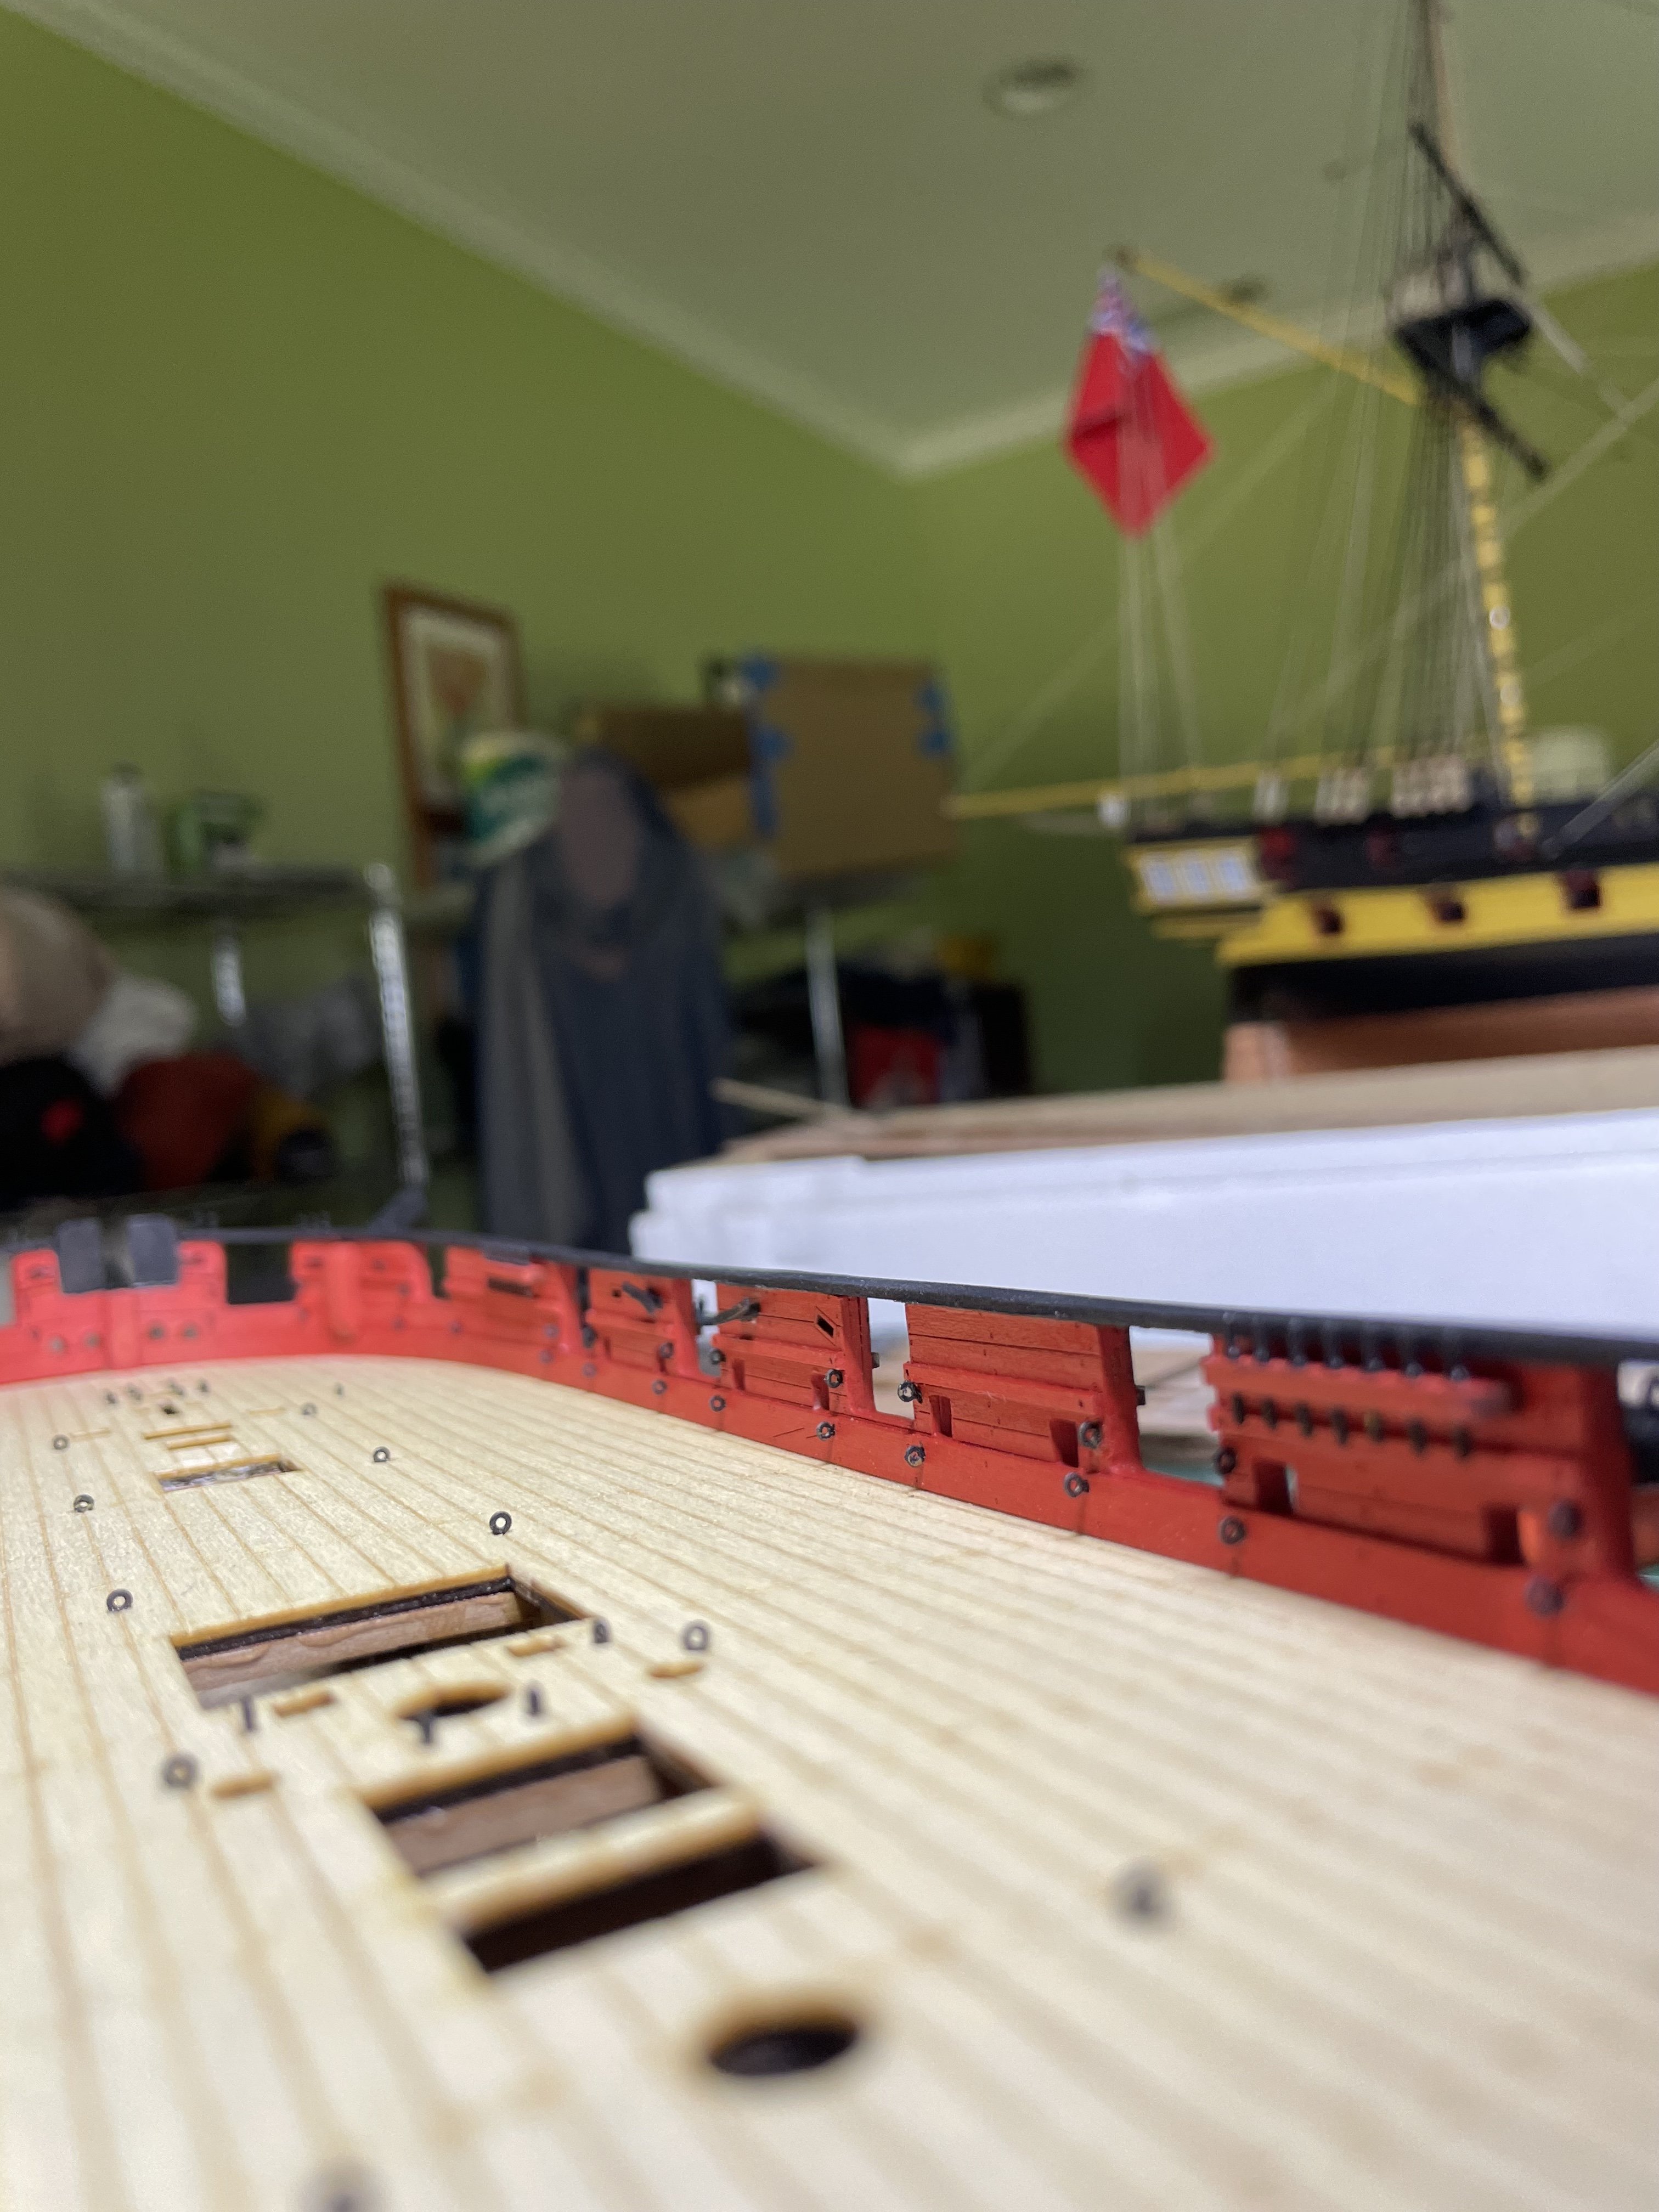
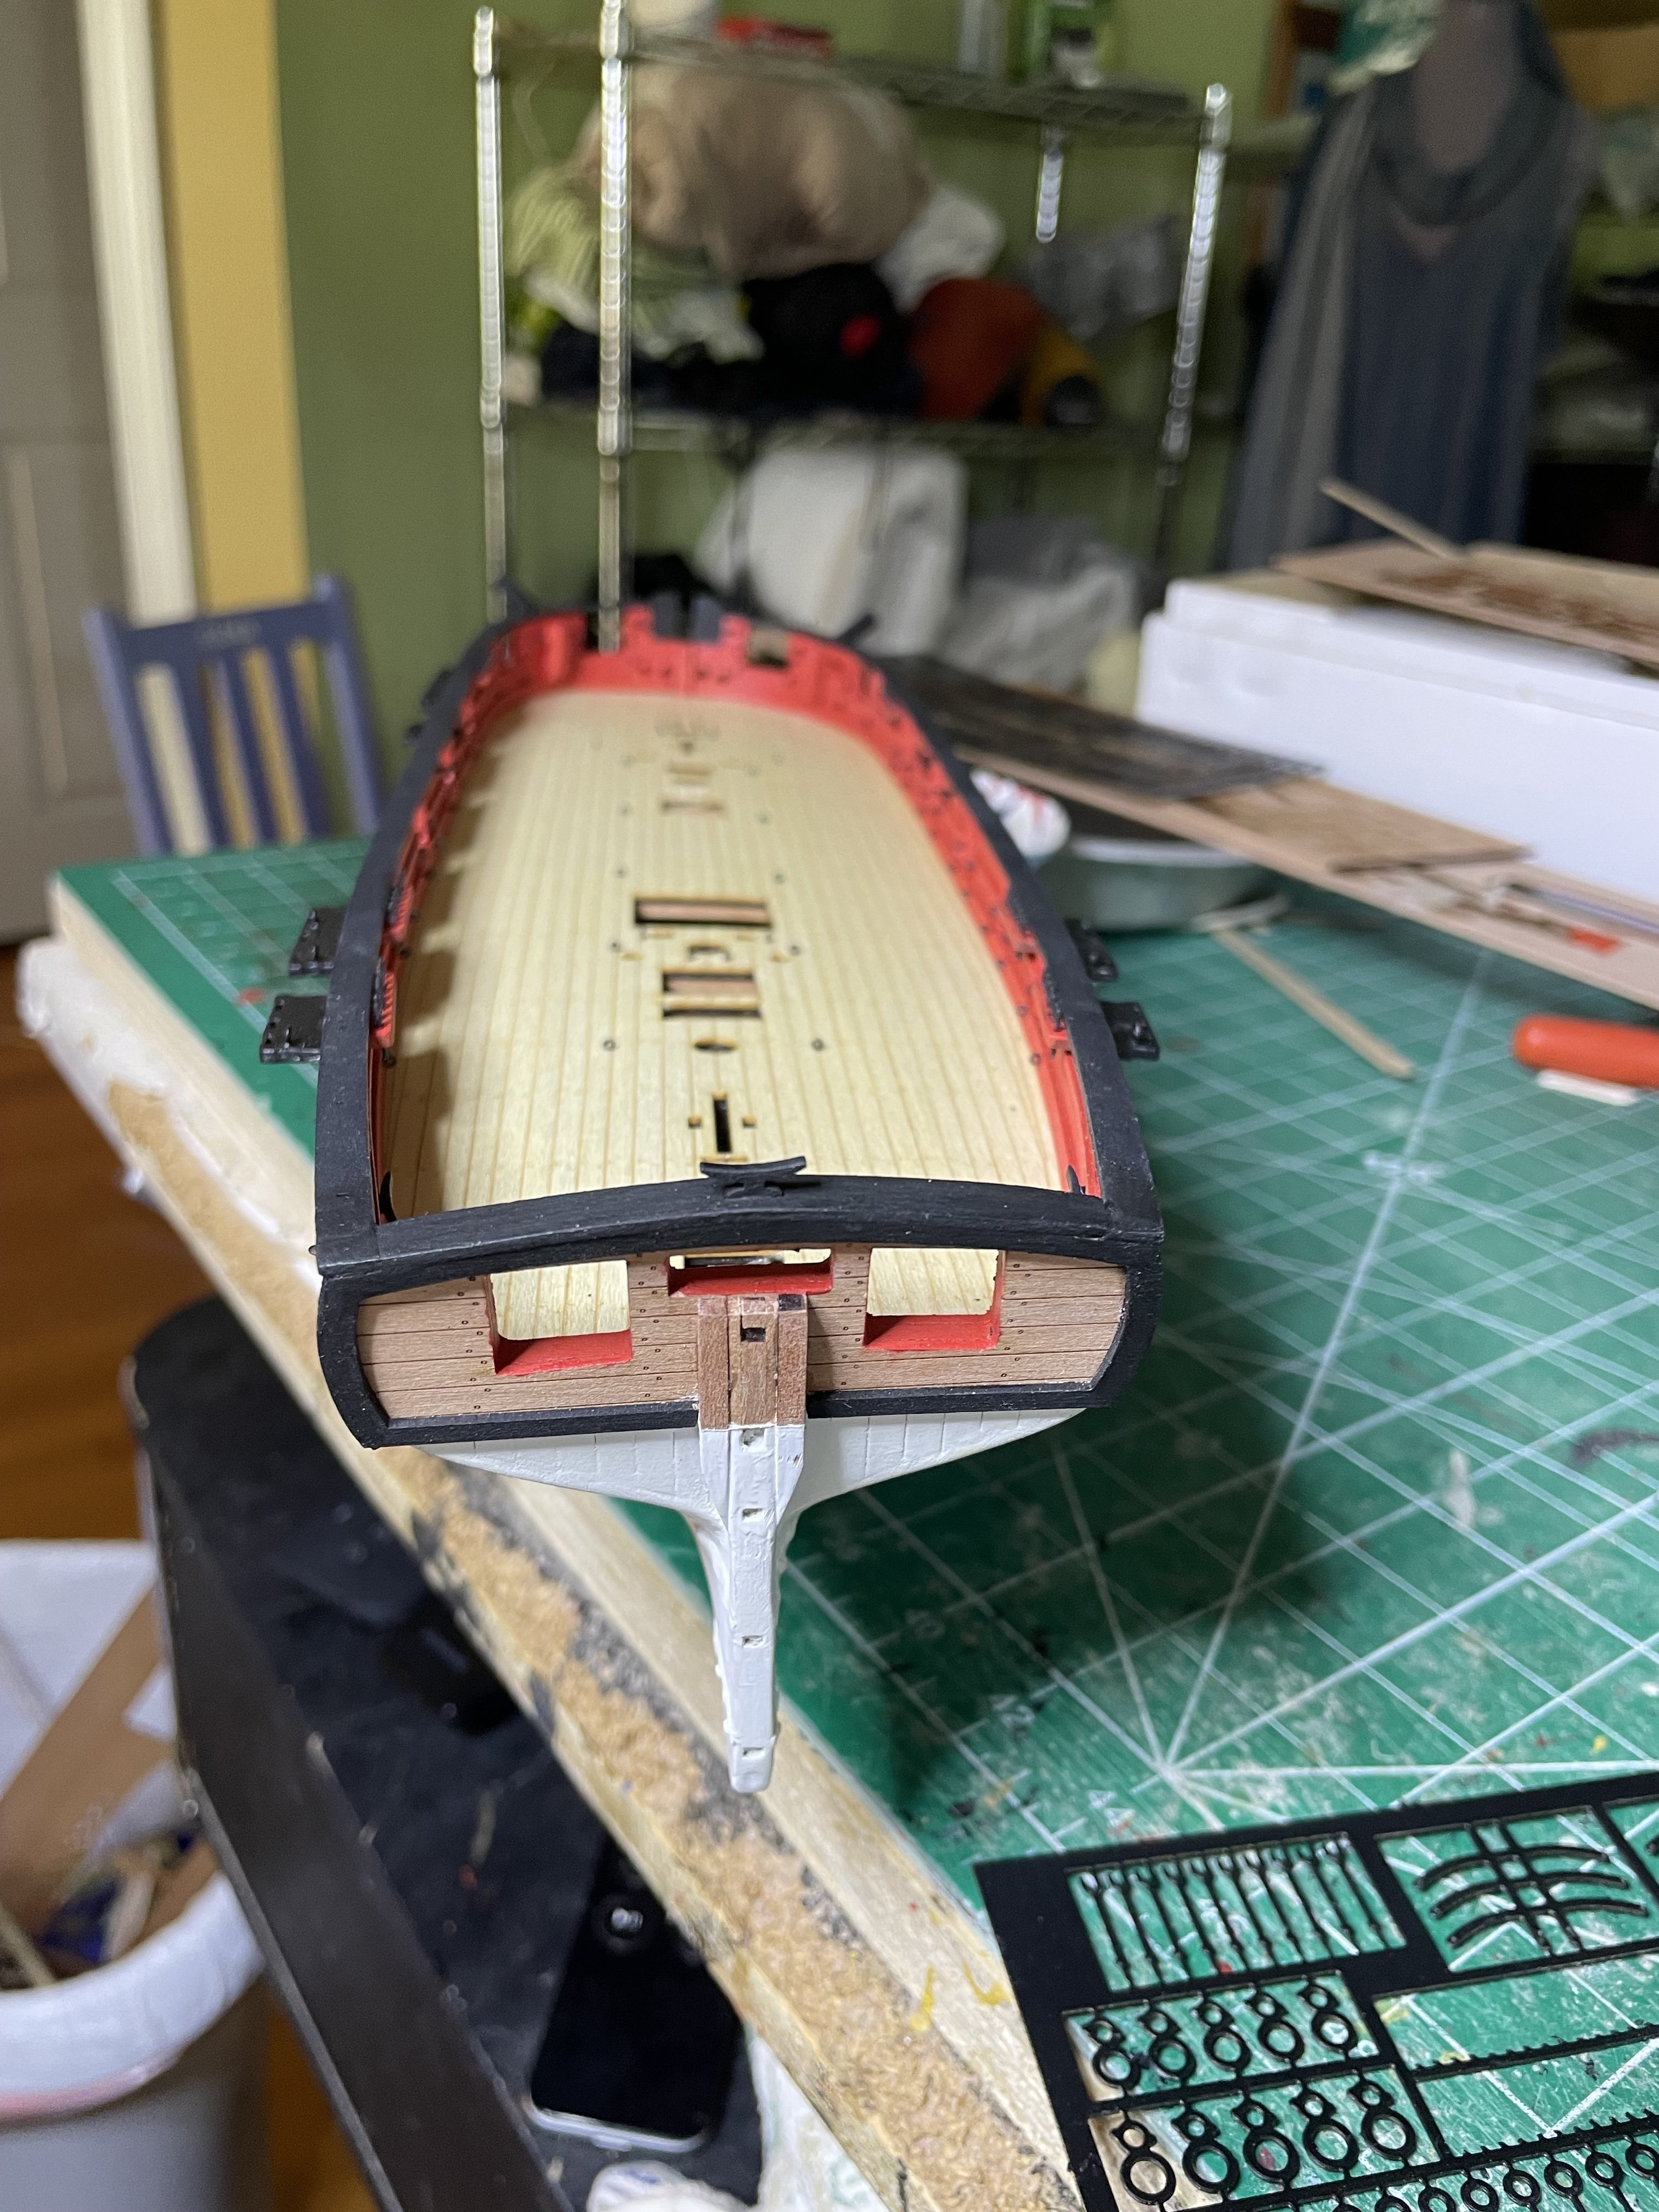
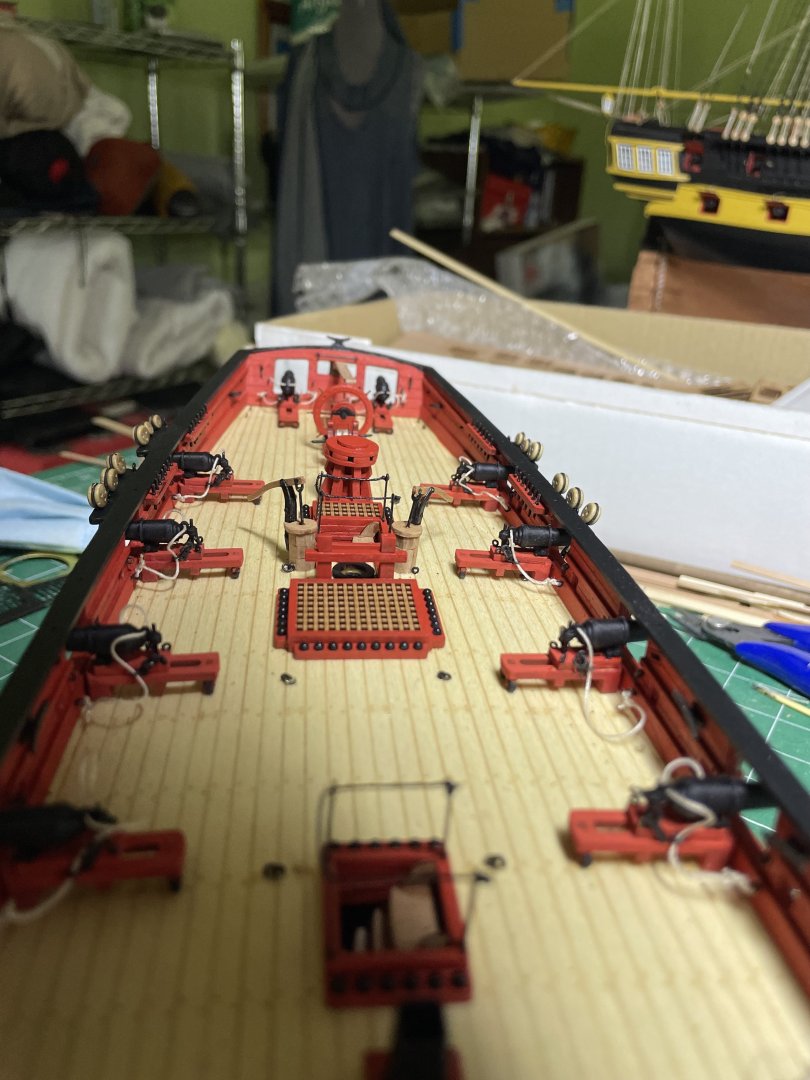
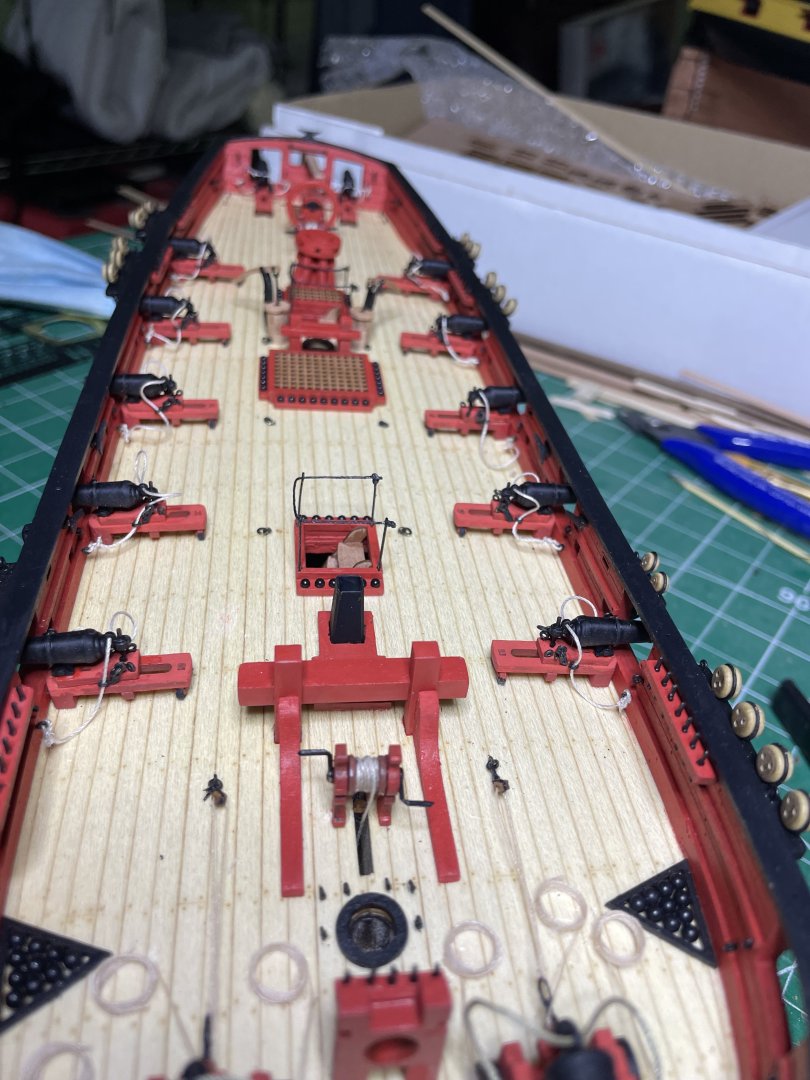
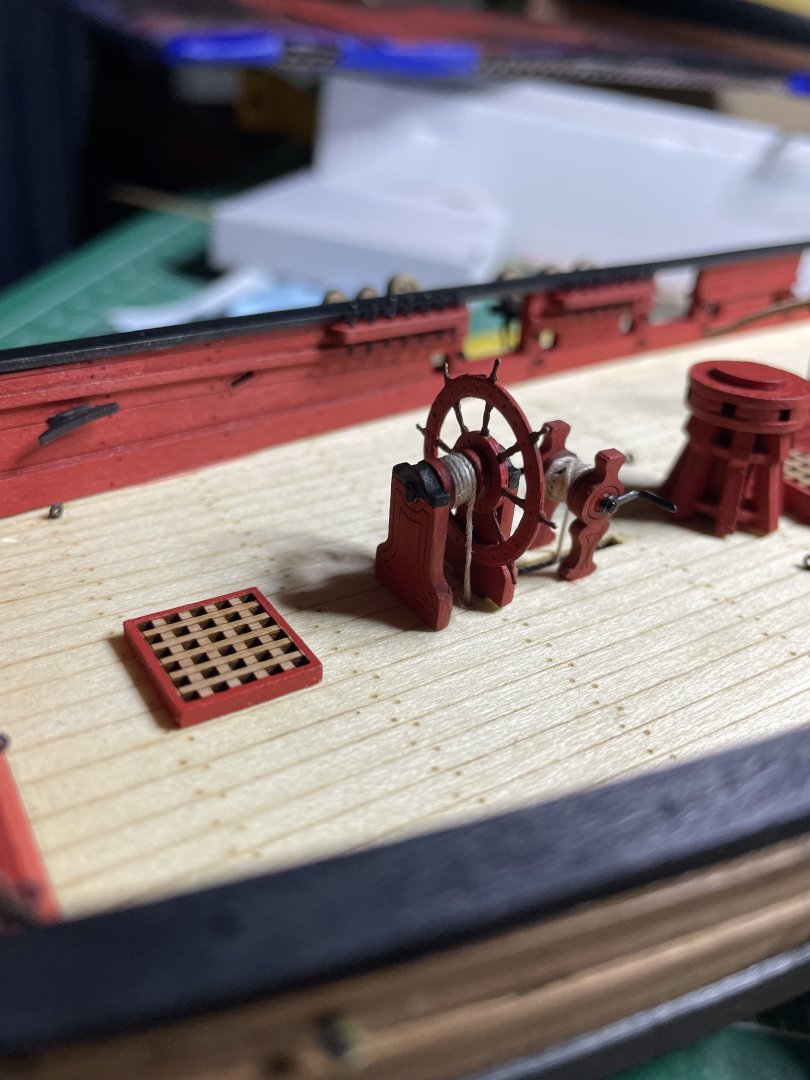
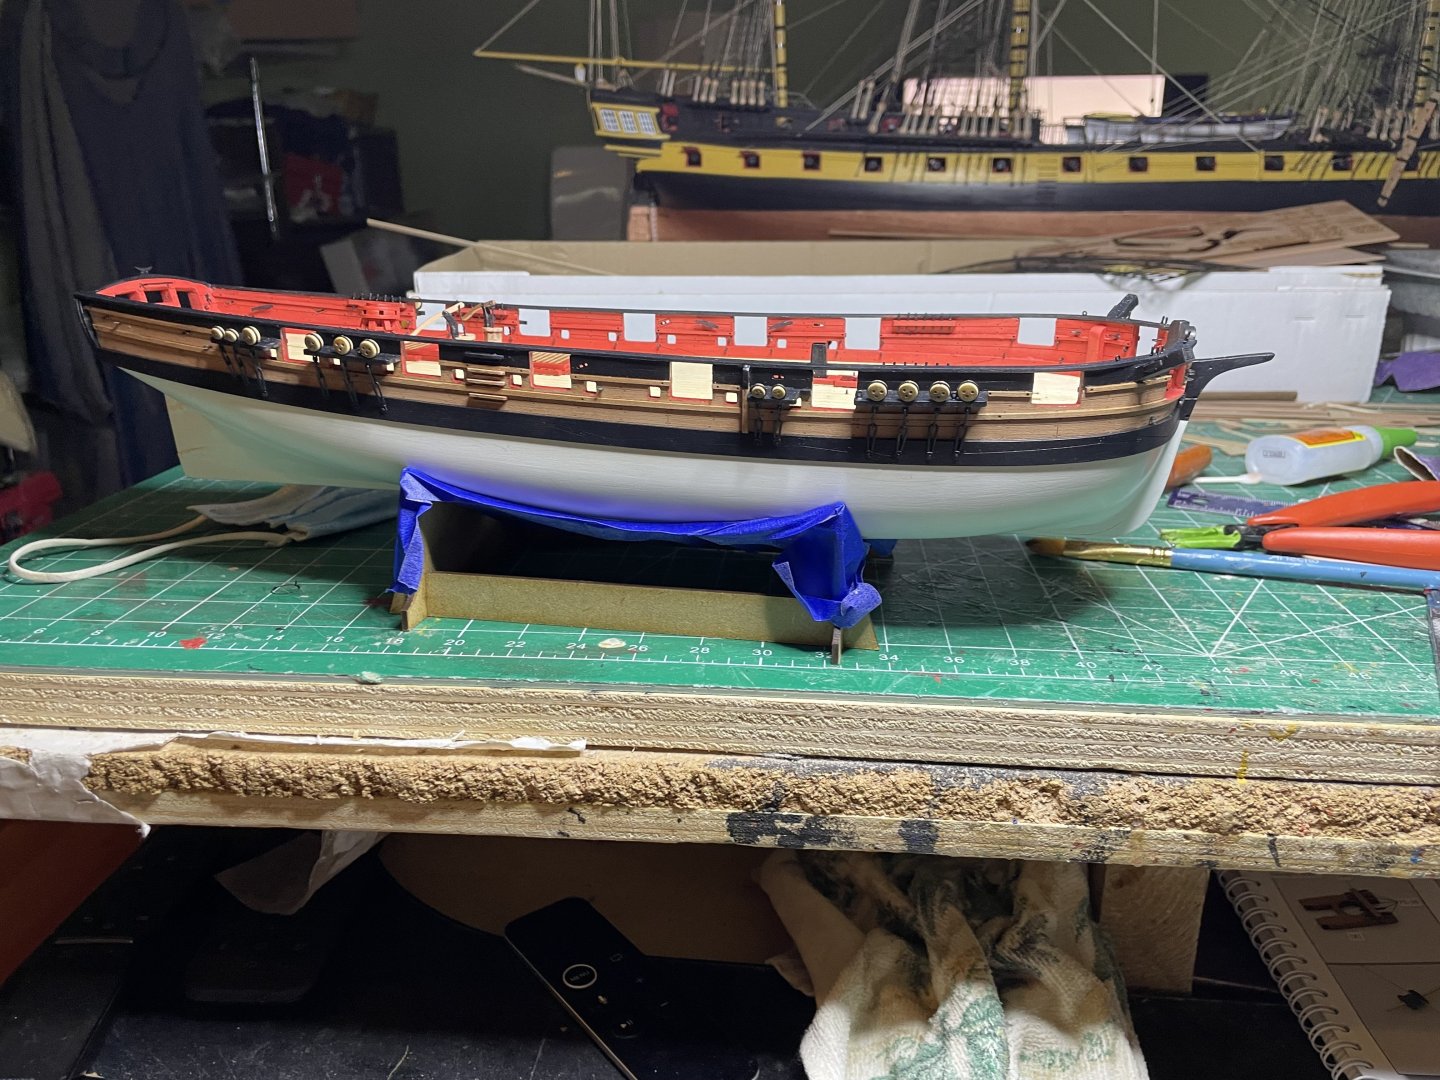
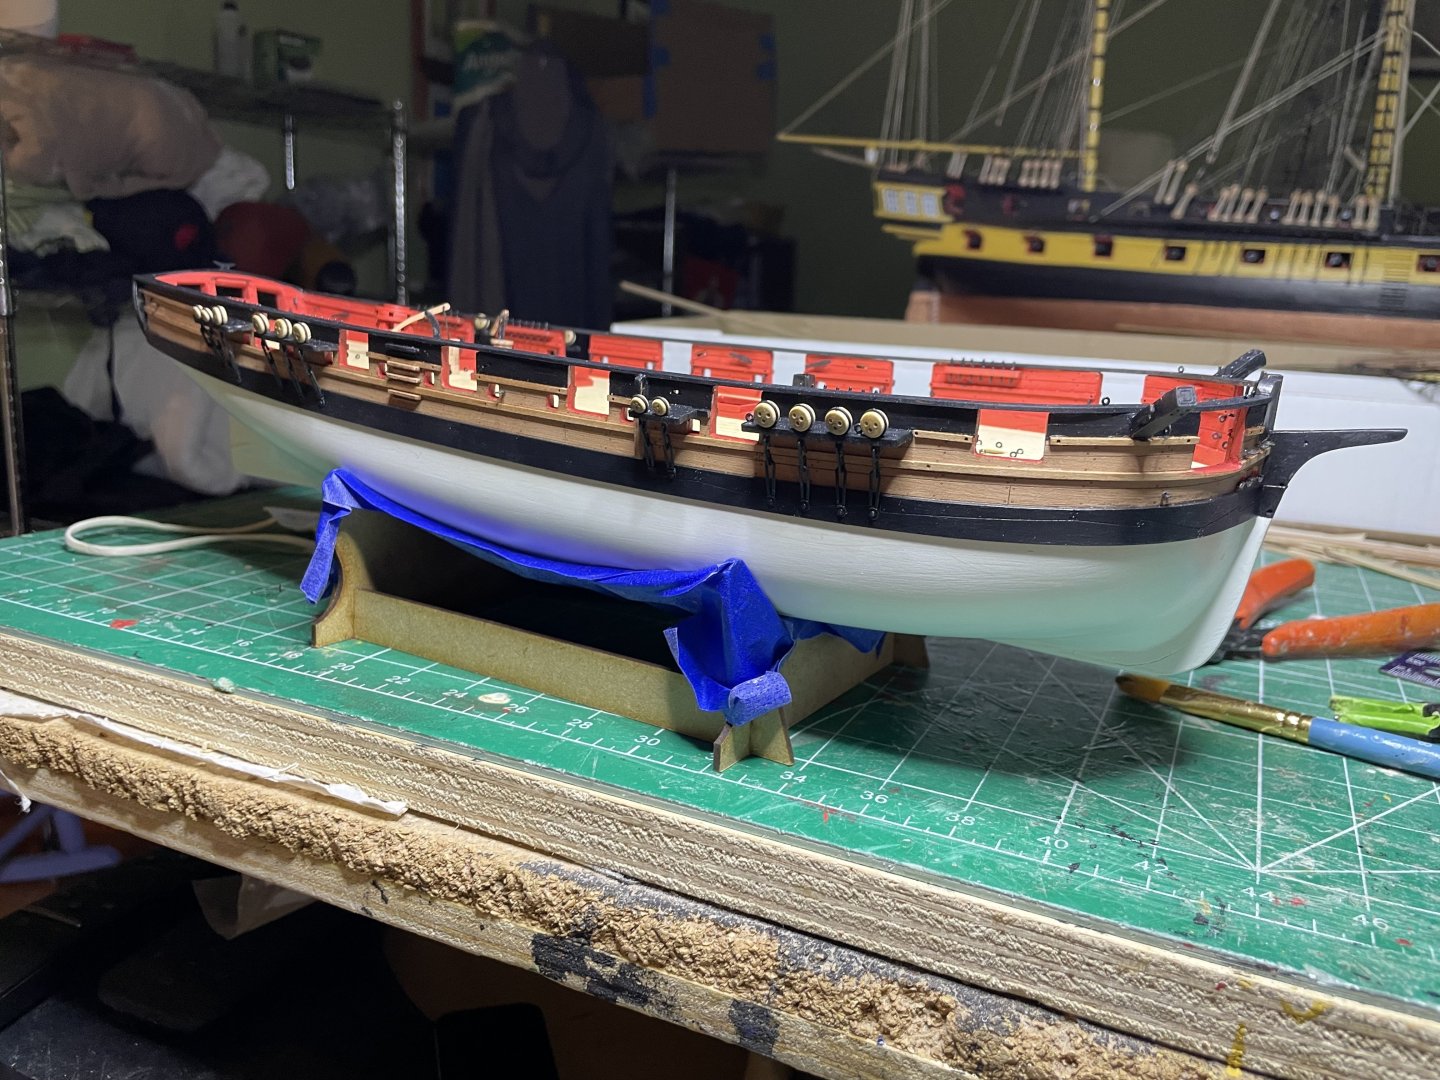
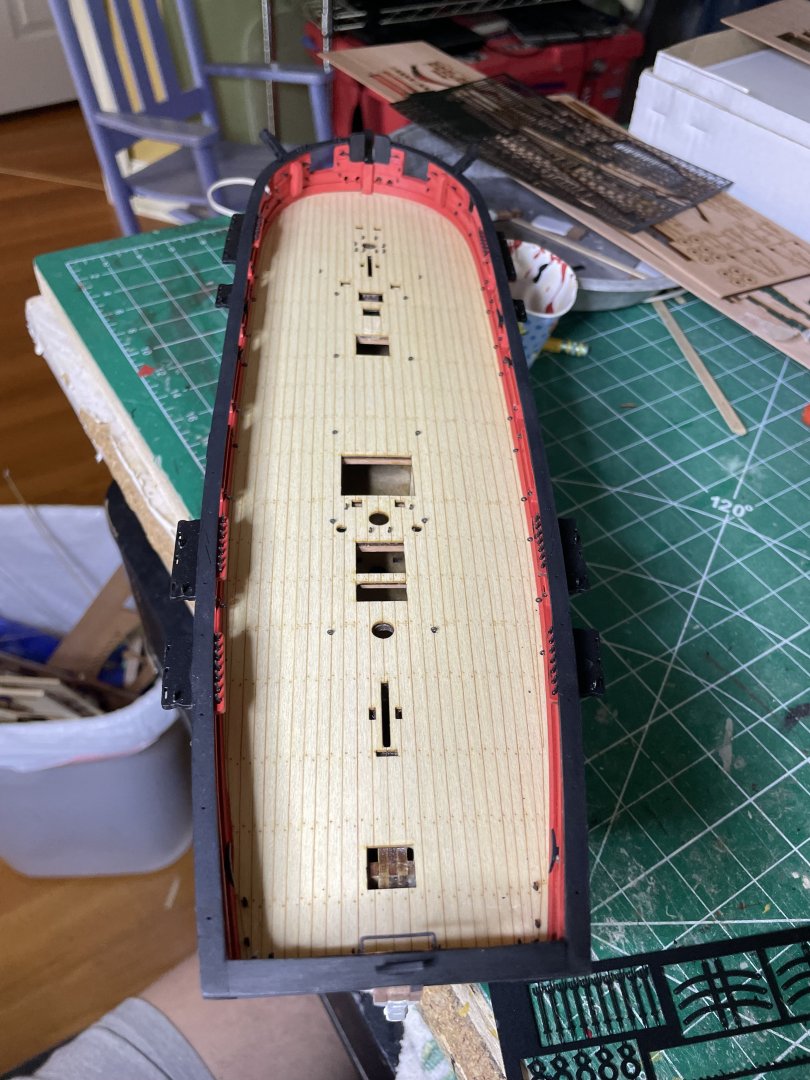
Some work today. Bits painted and placed, Wheel, keel s and keel winches, cannon balls.


- 66 replies
-
- 10
-
-
- Adder
- Vanguard Models
- (and 1 more)
-
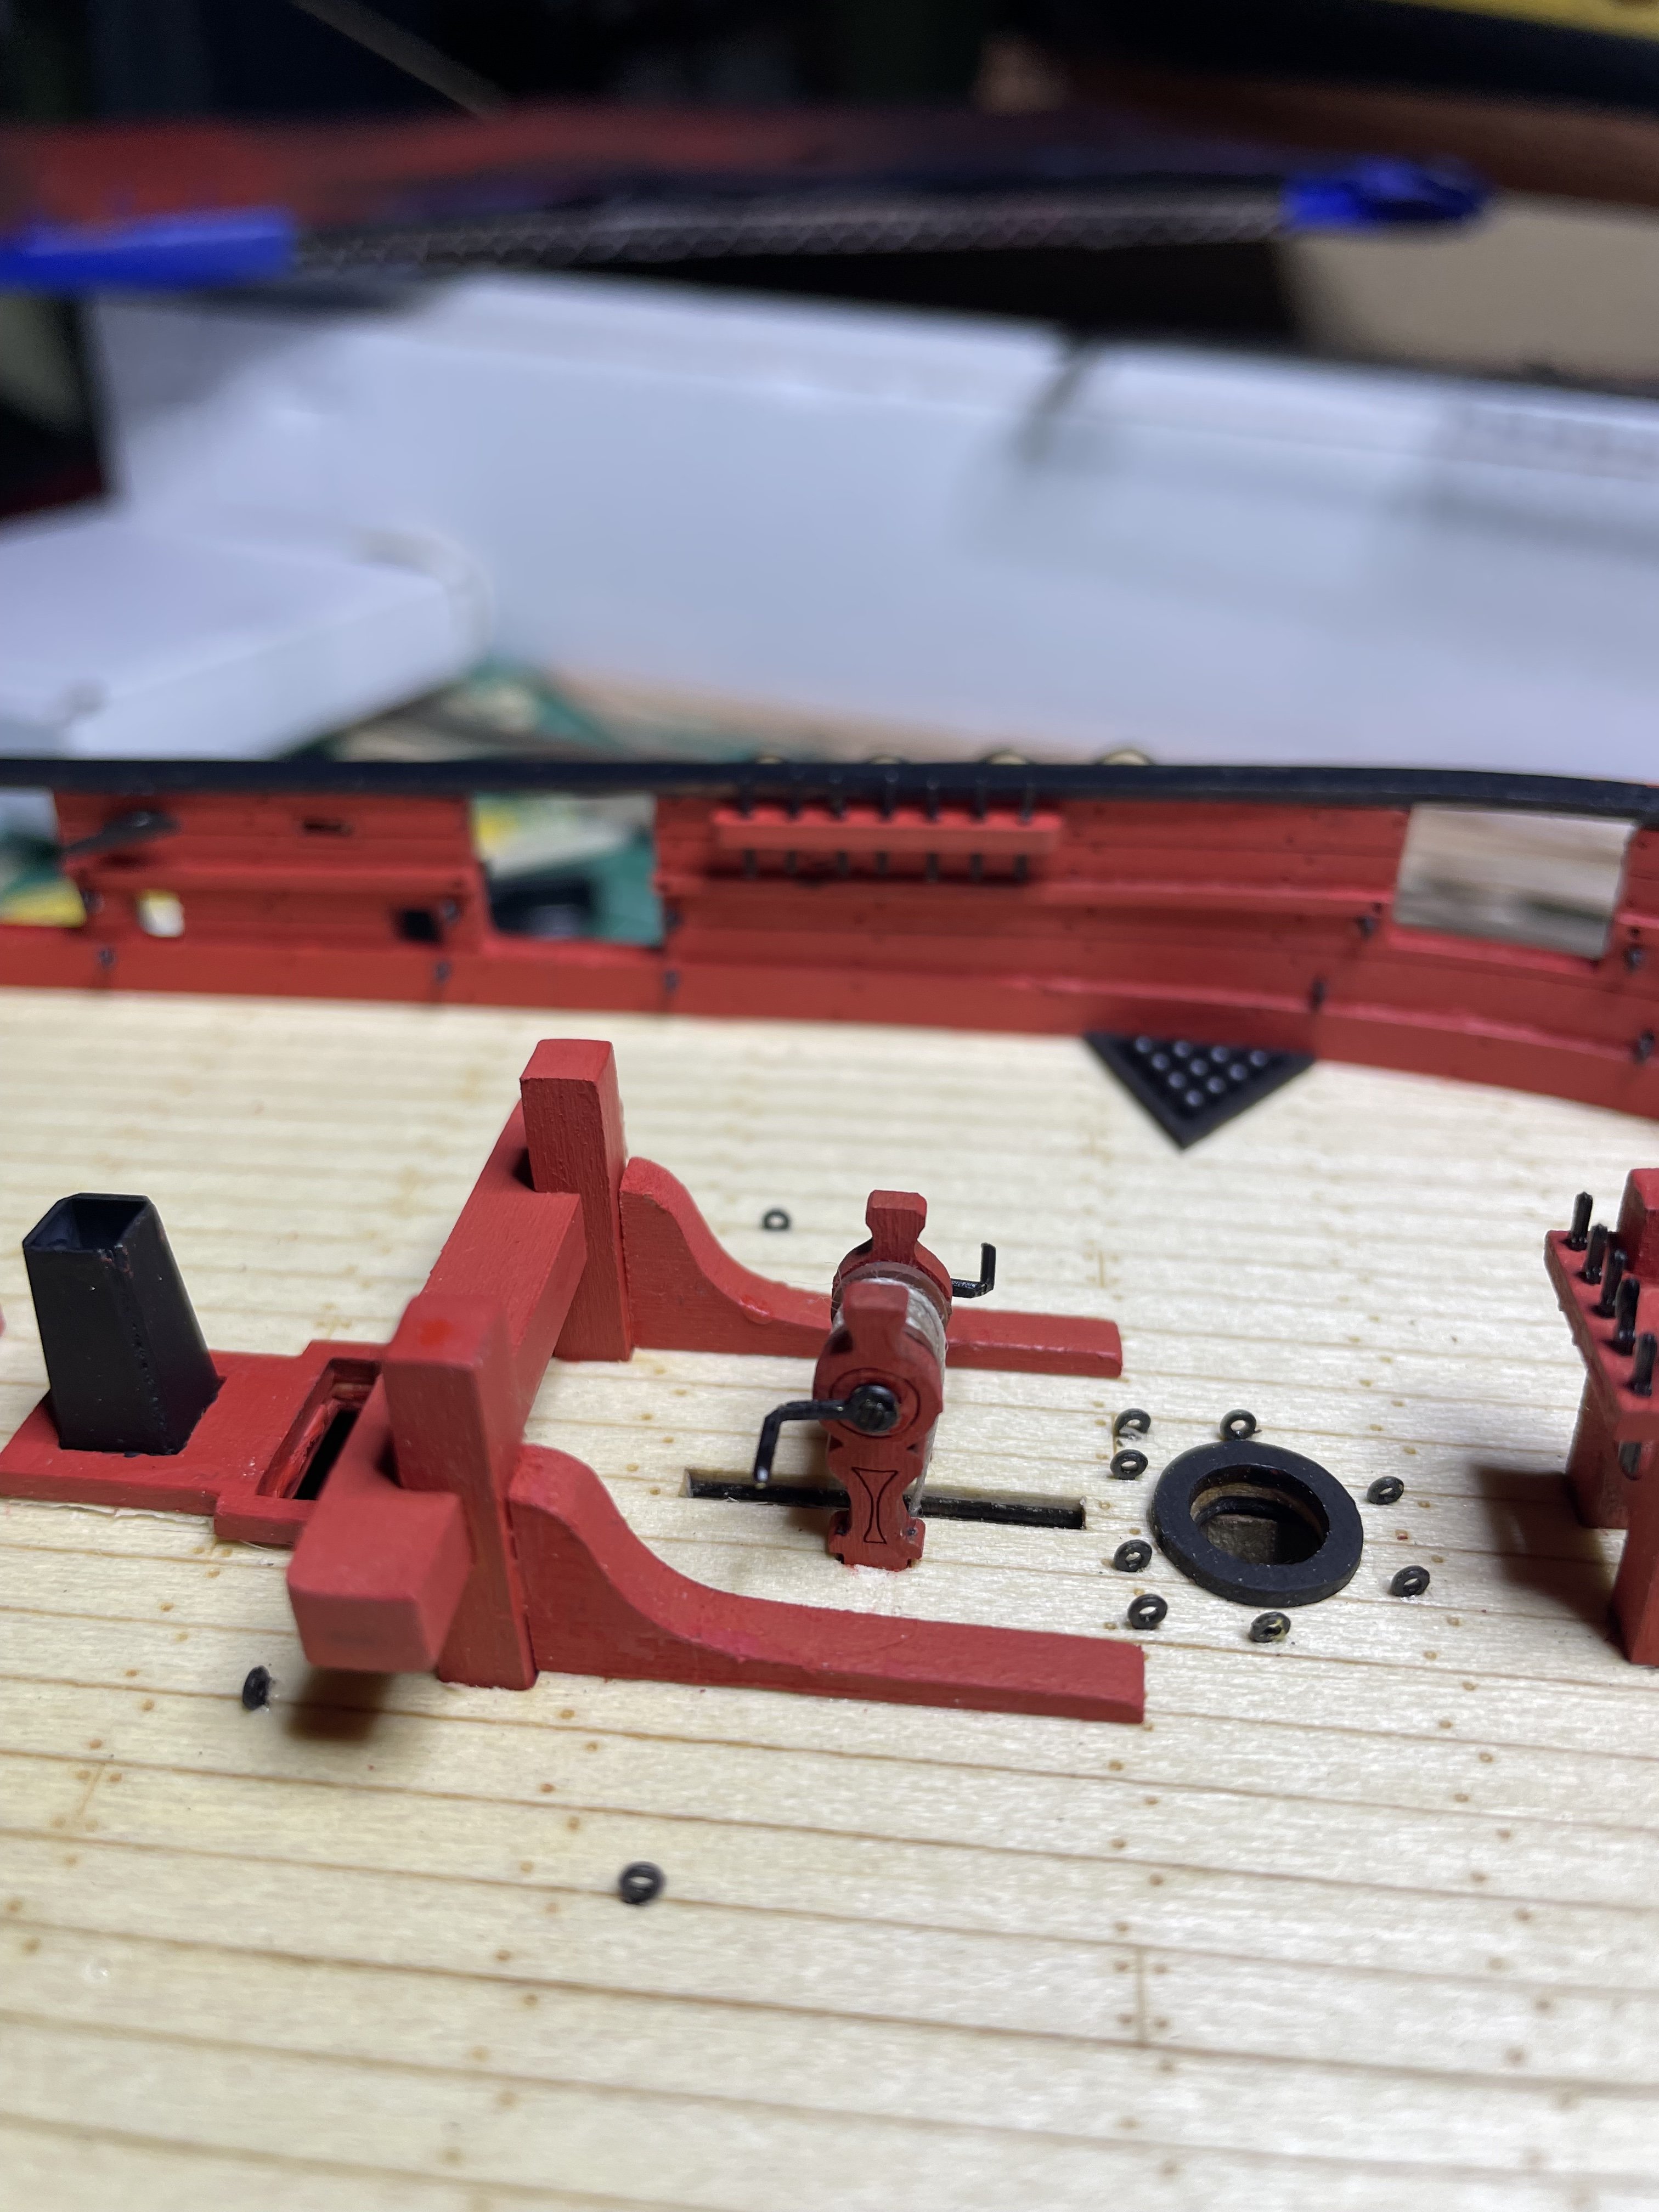
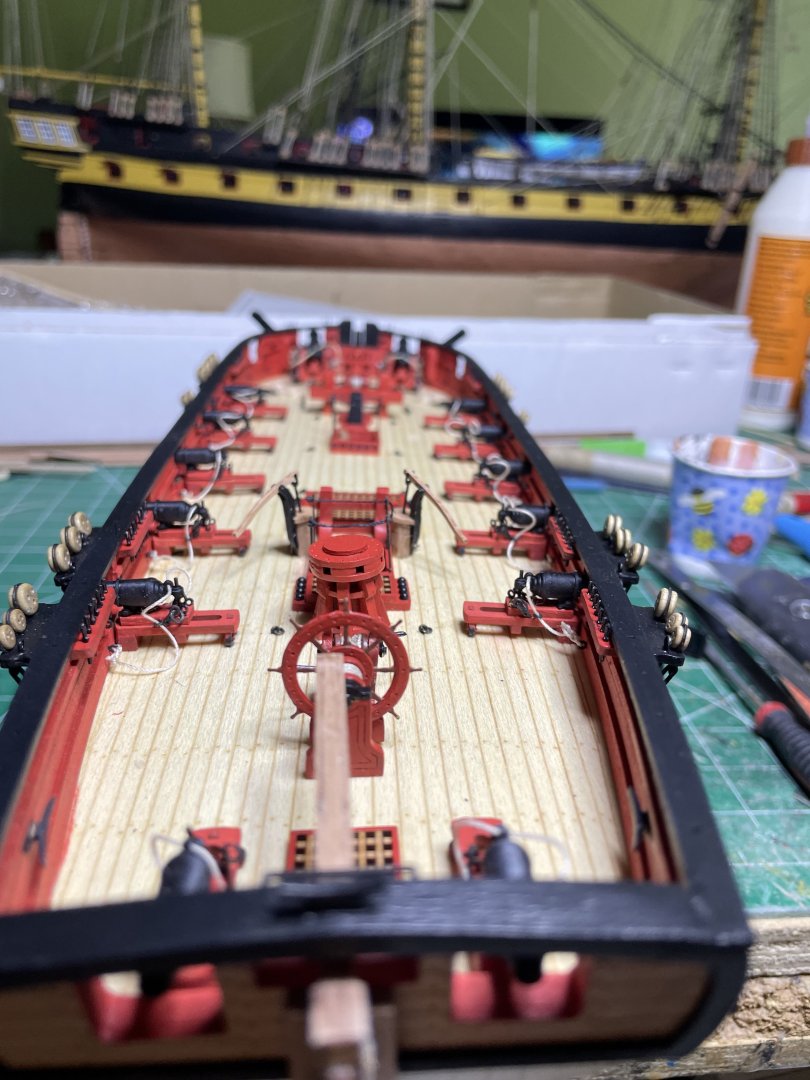
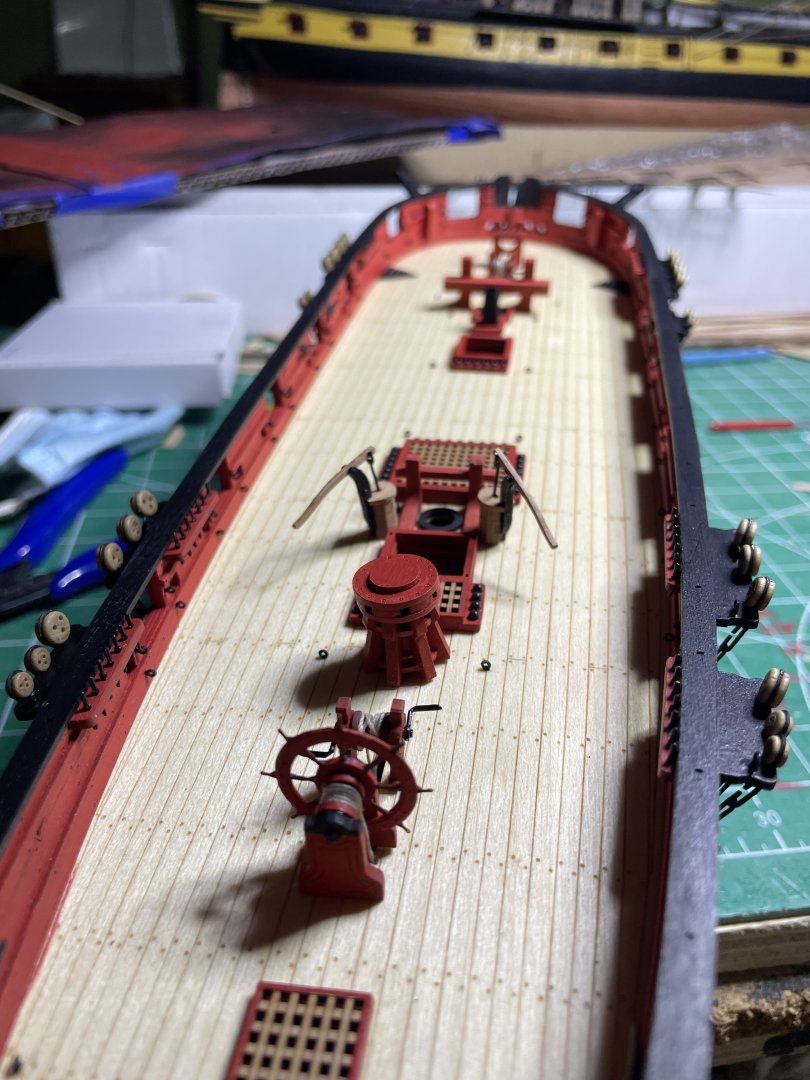
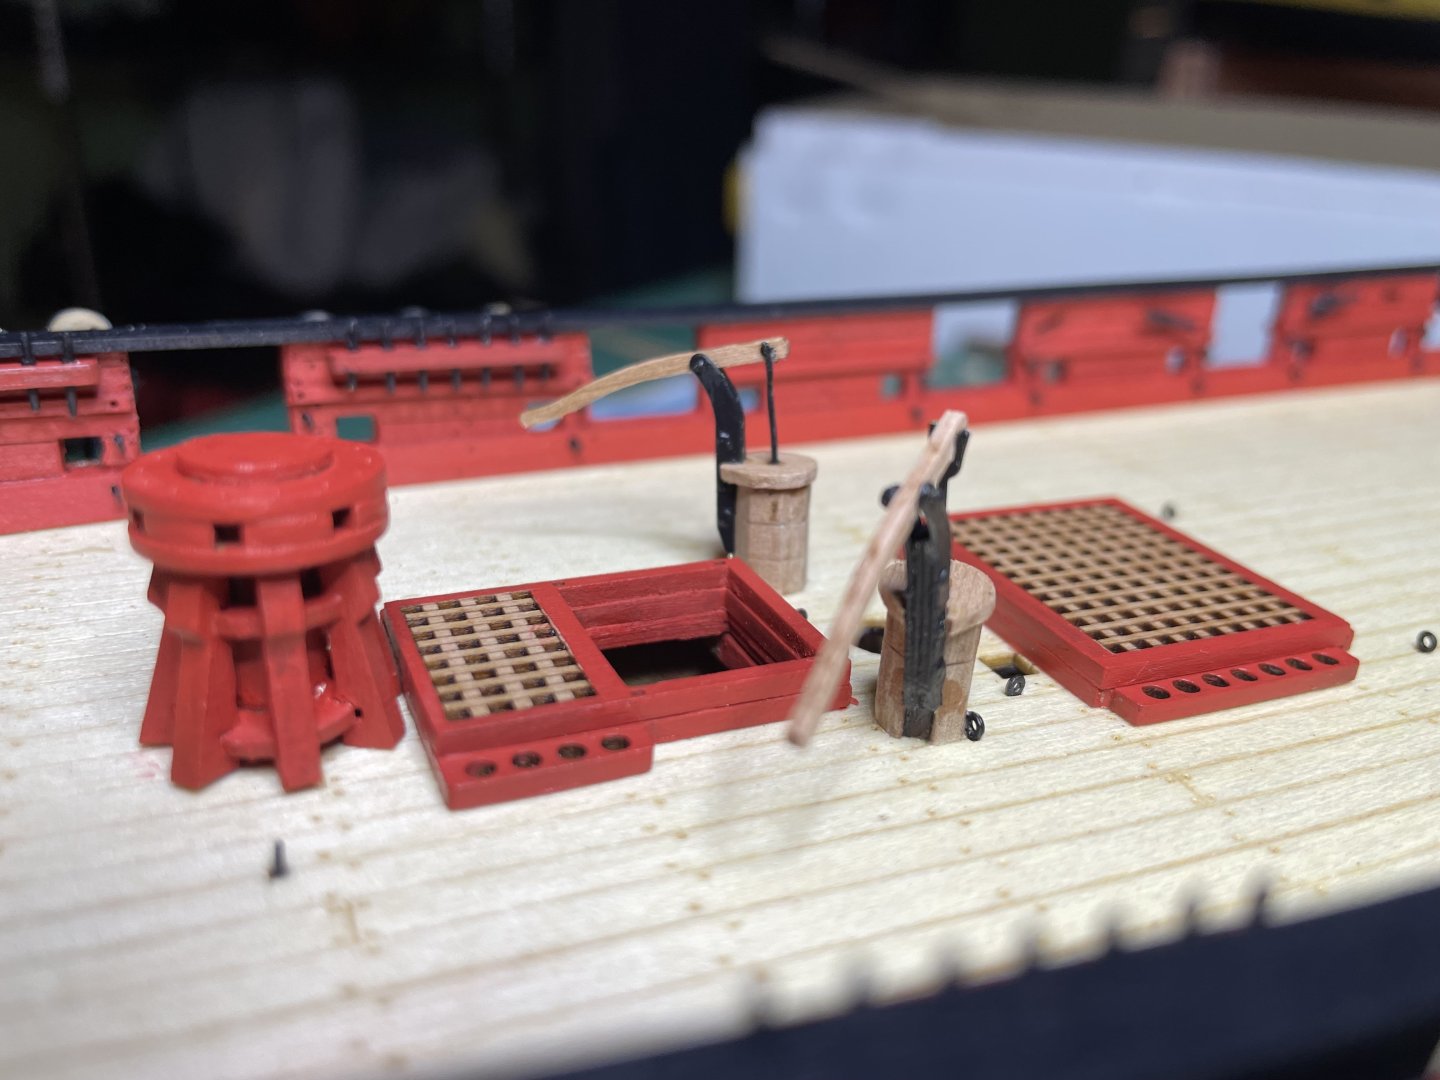
Done for the day. Installed deadeyes, hatches, grates as well as capstan and bilge pumps.


- 66 replies
-
- 10
-
-
- Adder
- Vanguard Models
- (and 1 more)
-
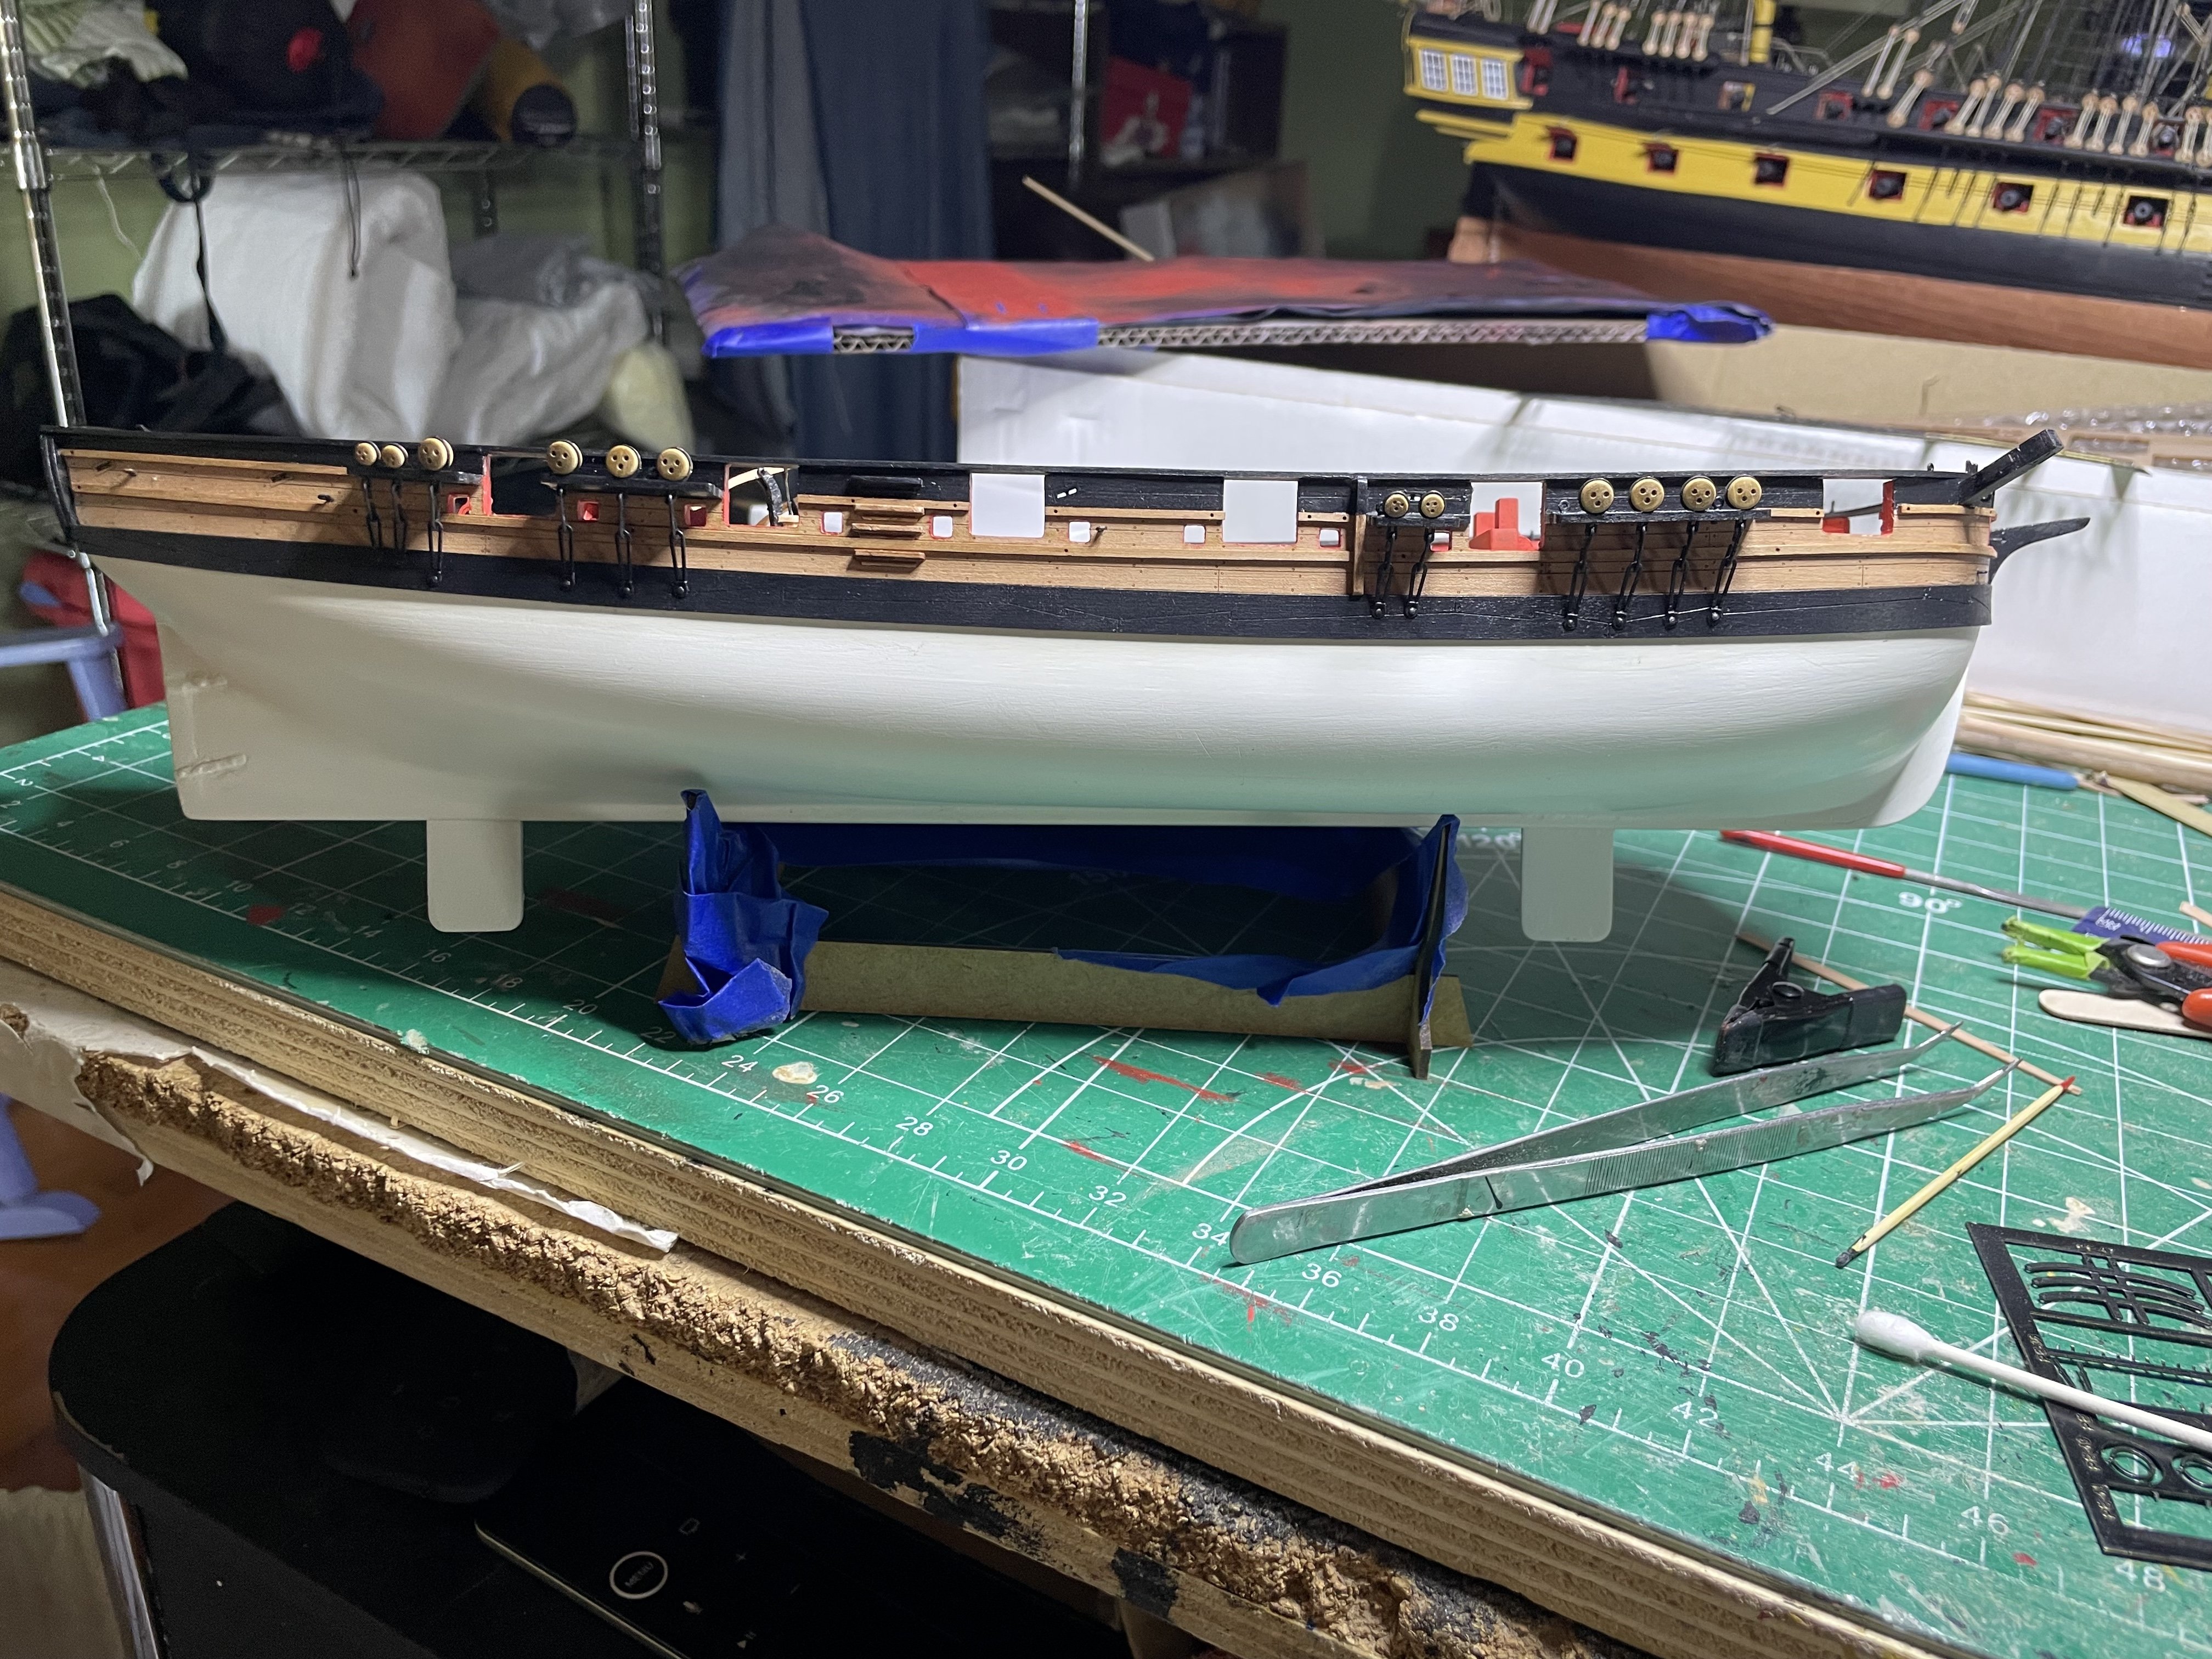
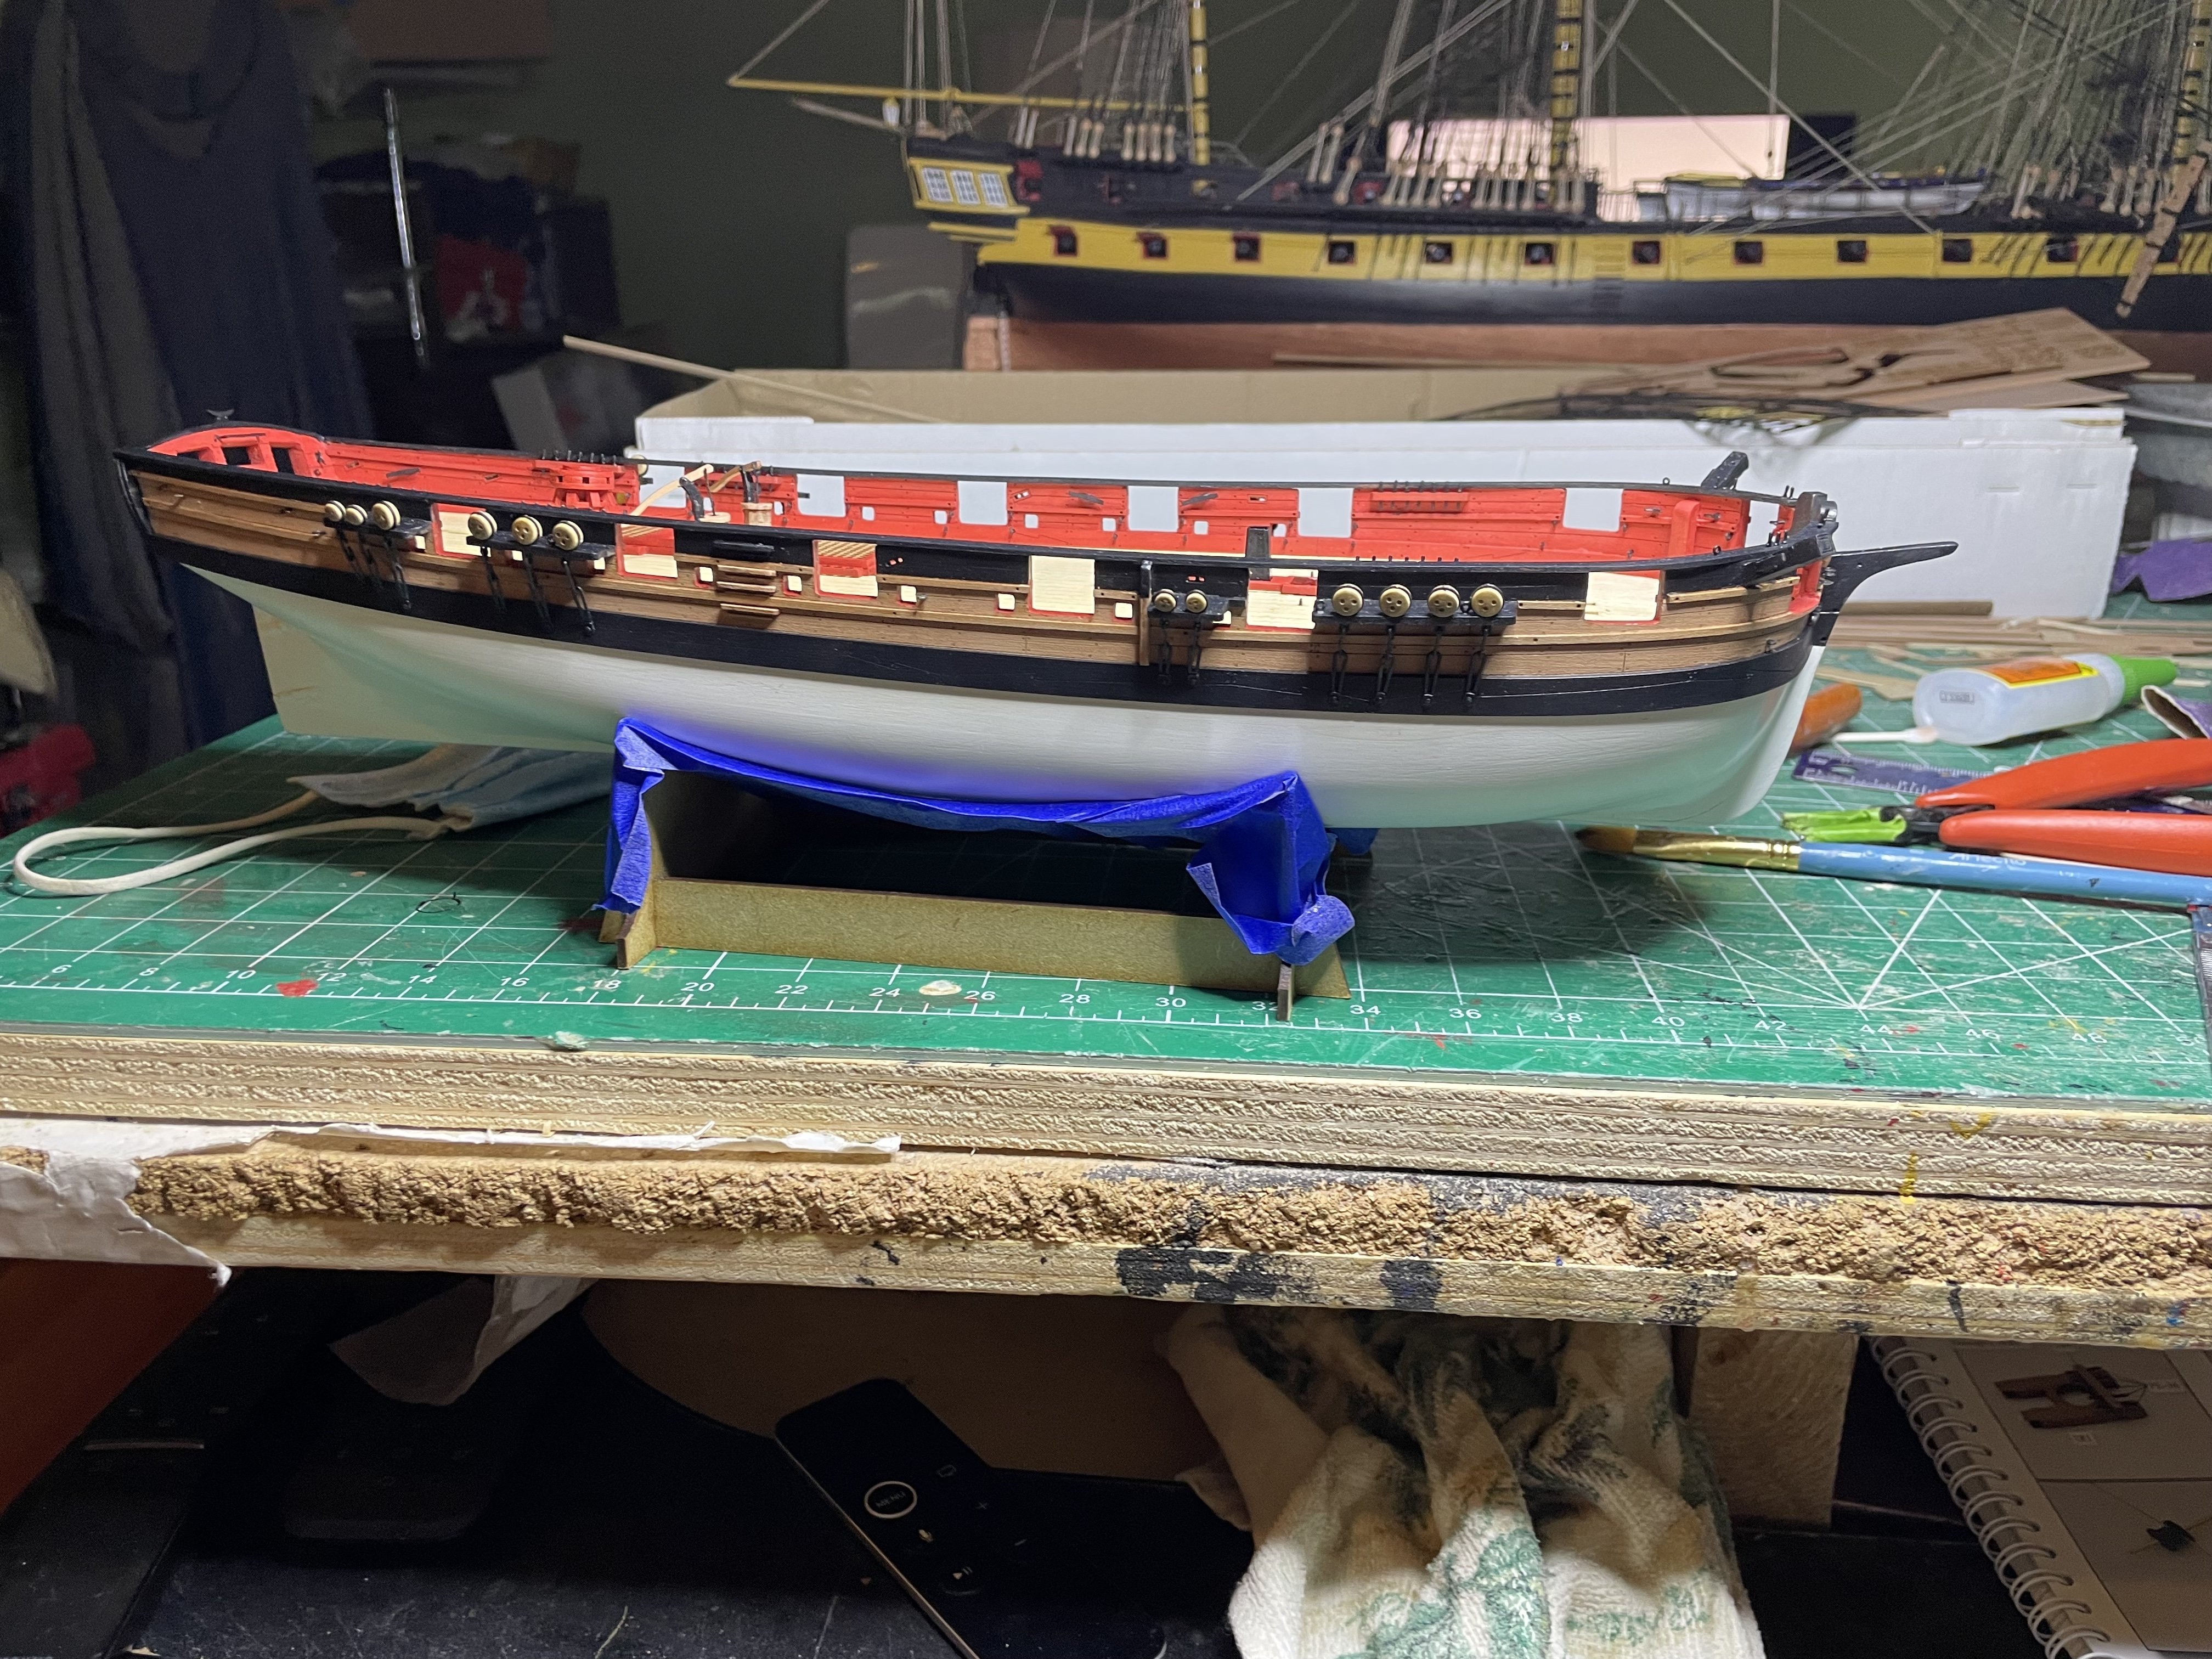
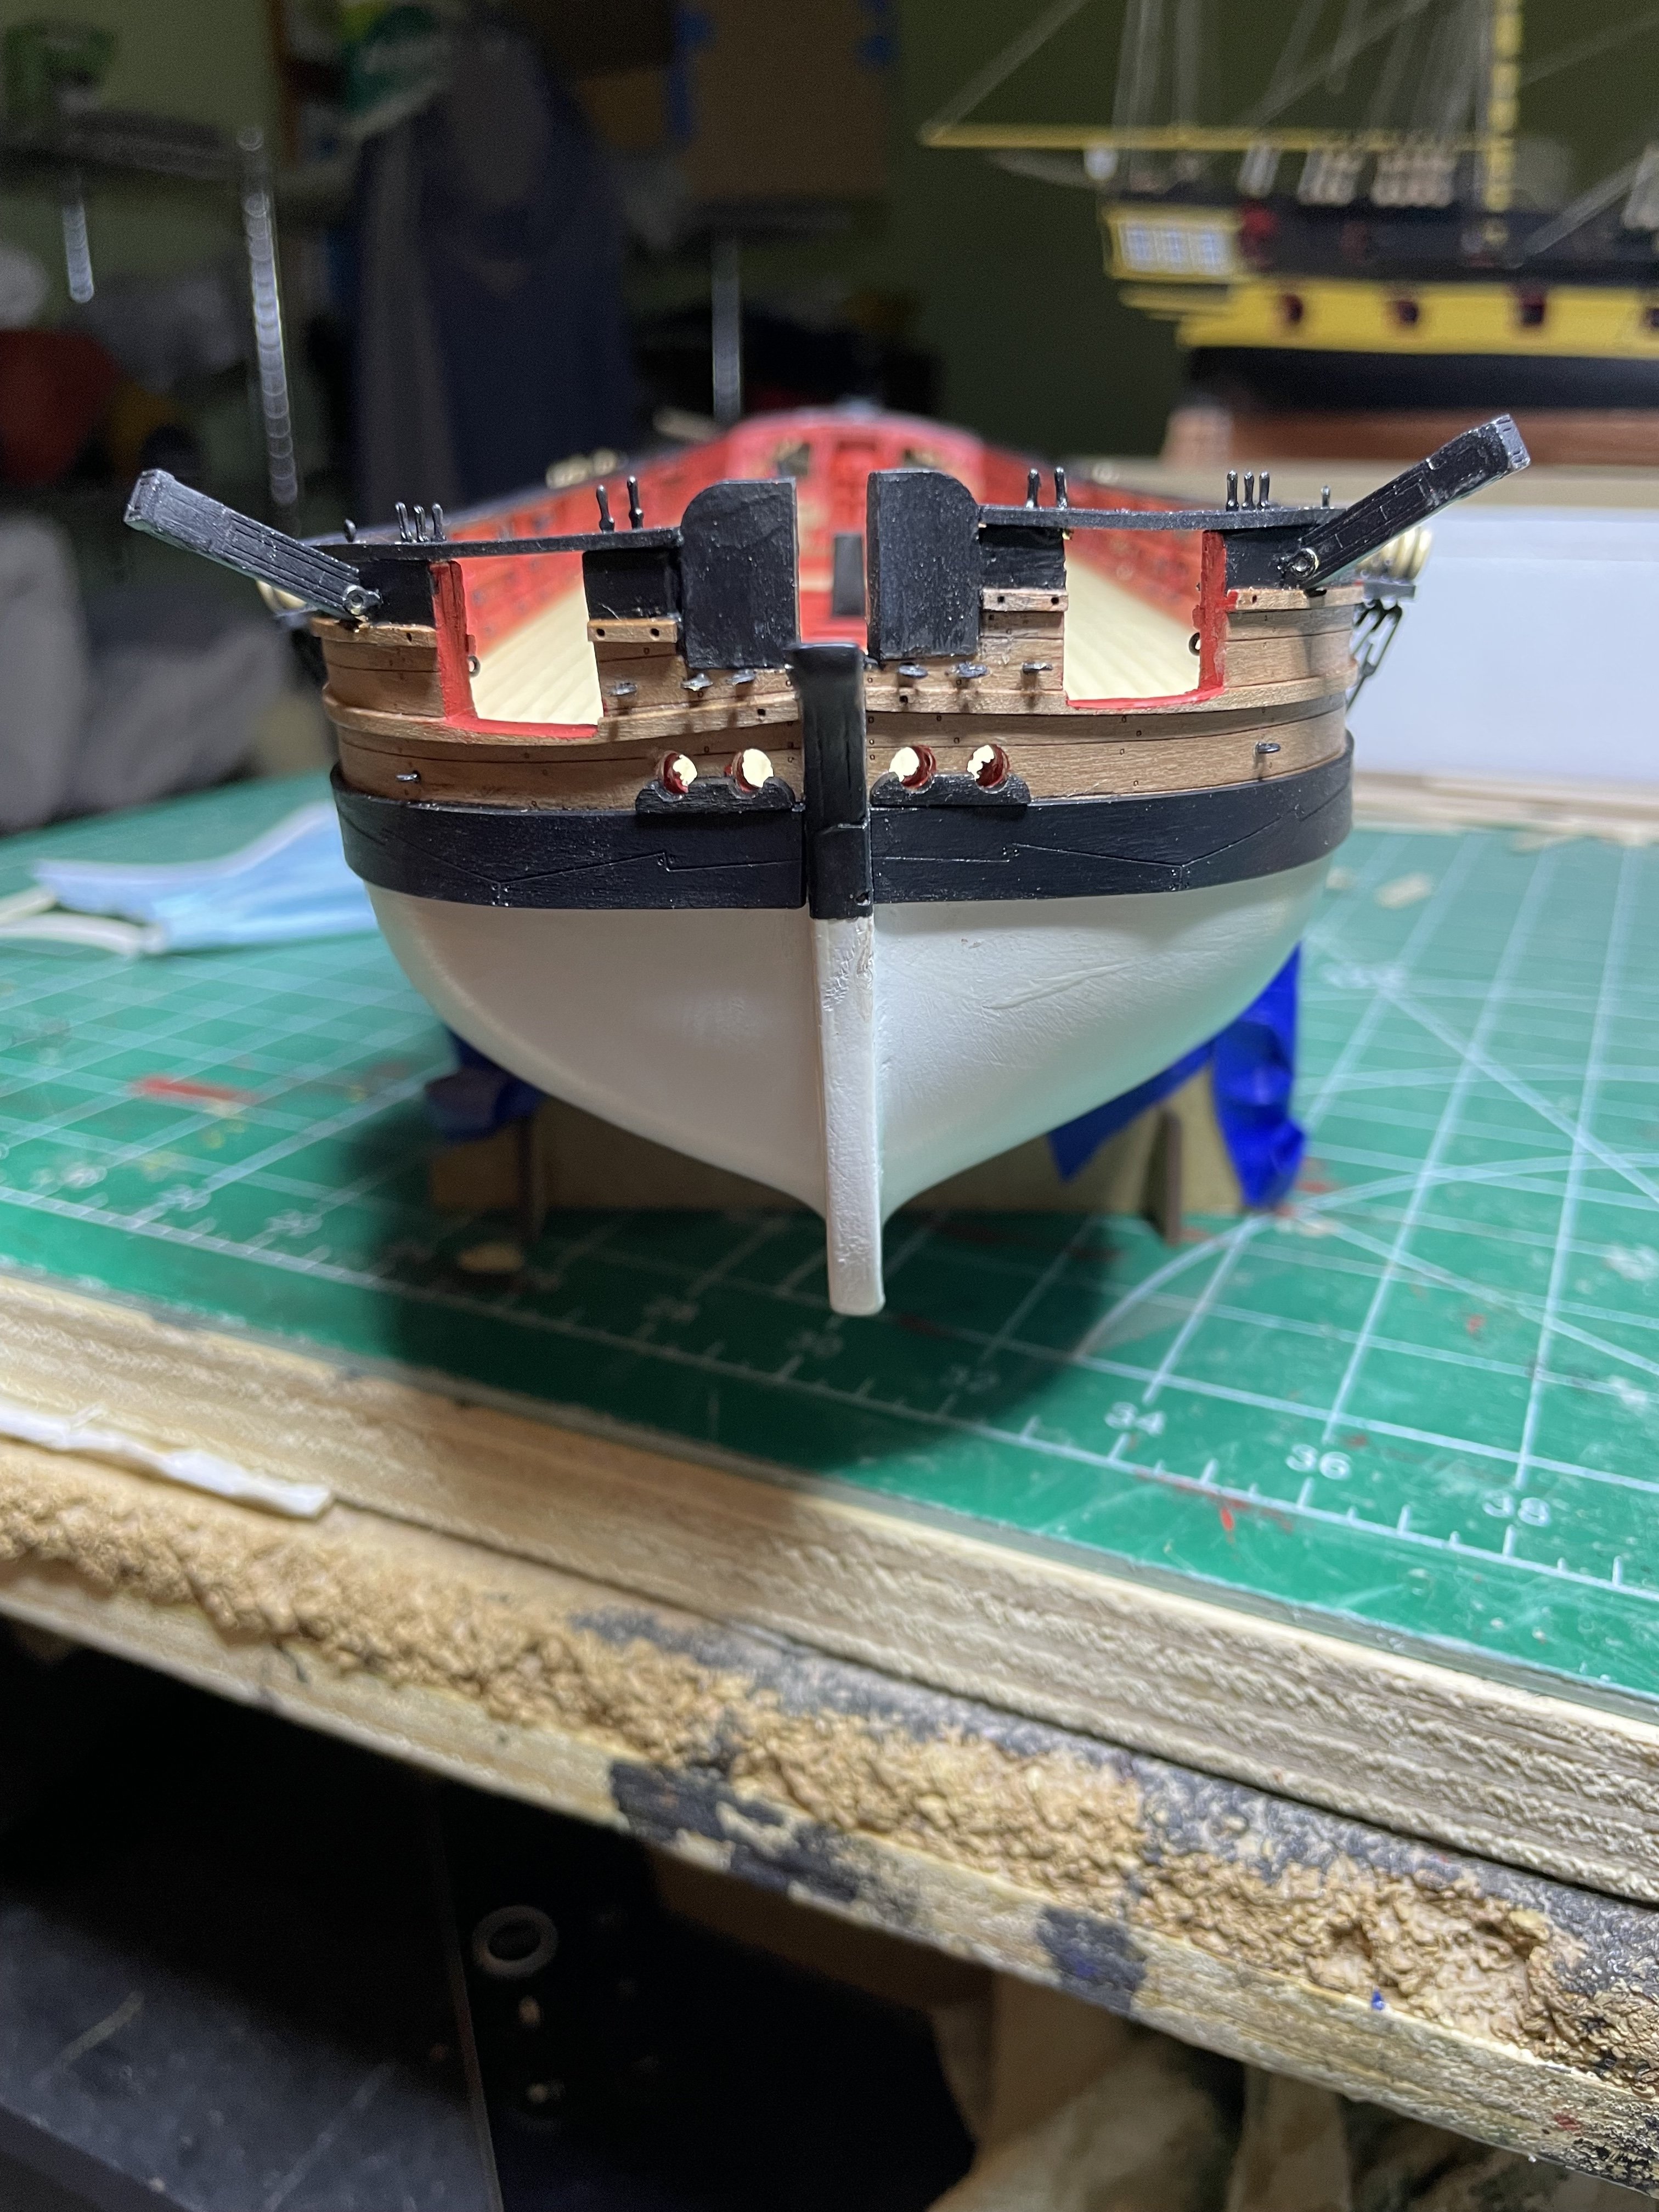
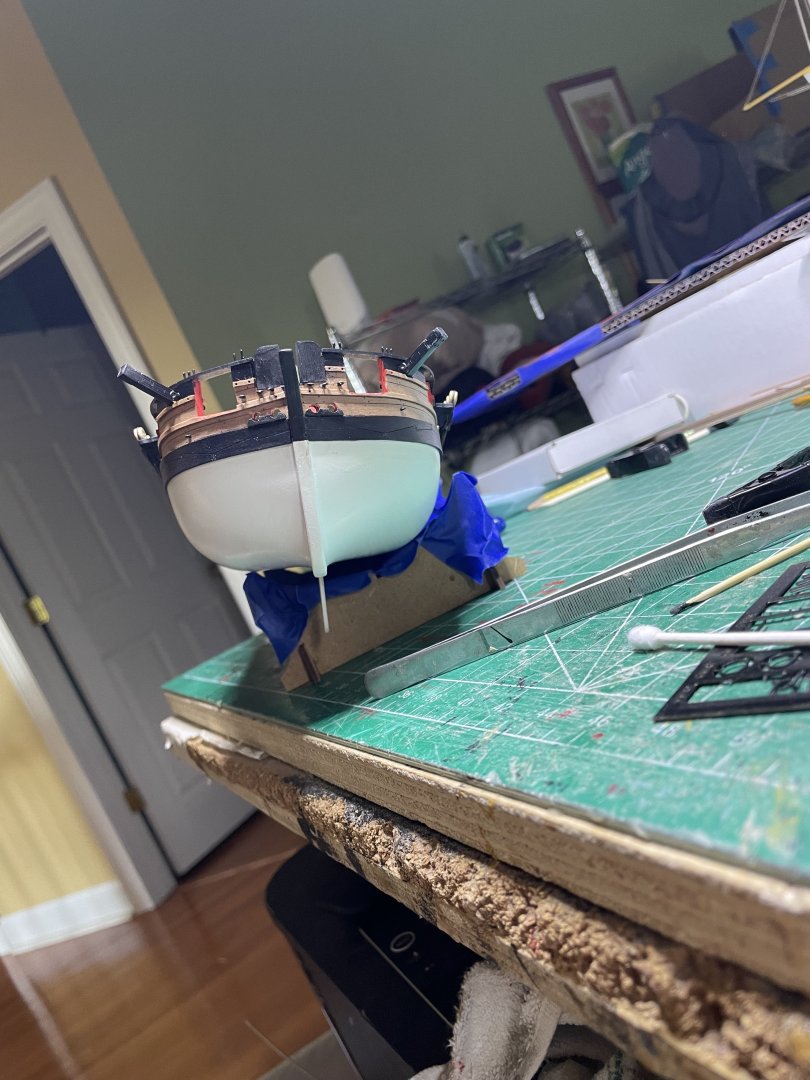
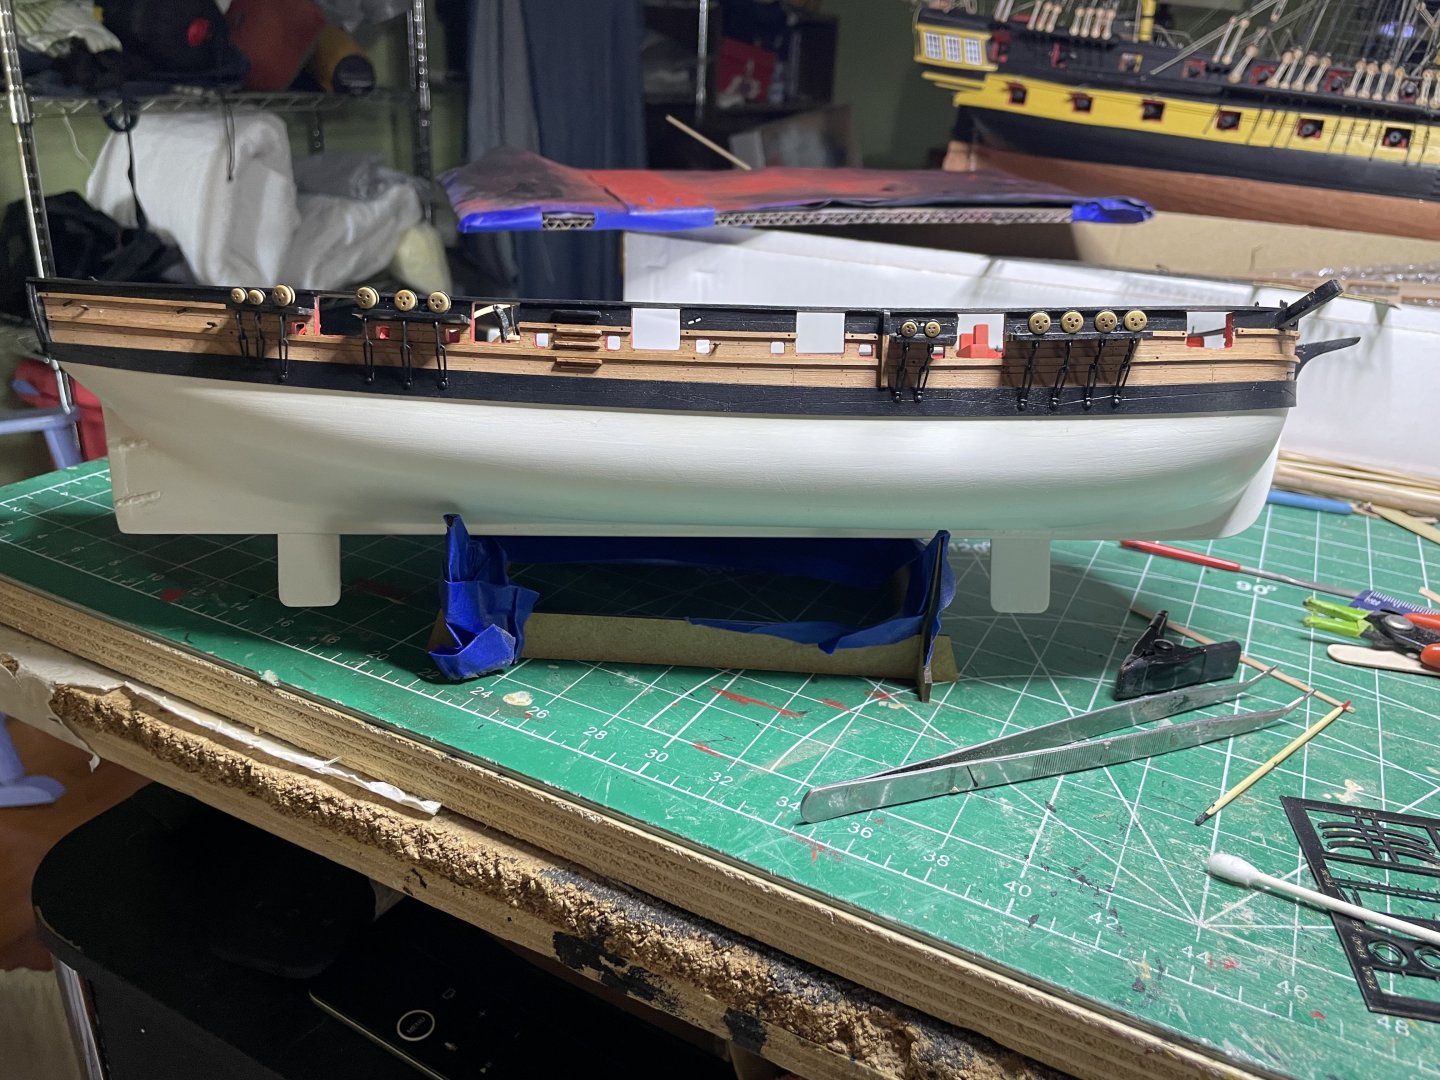
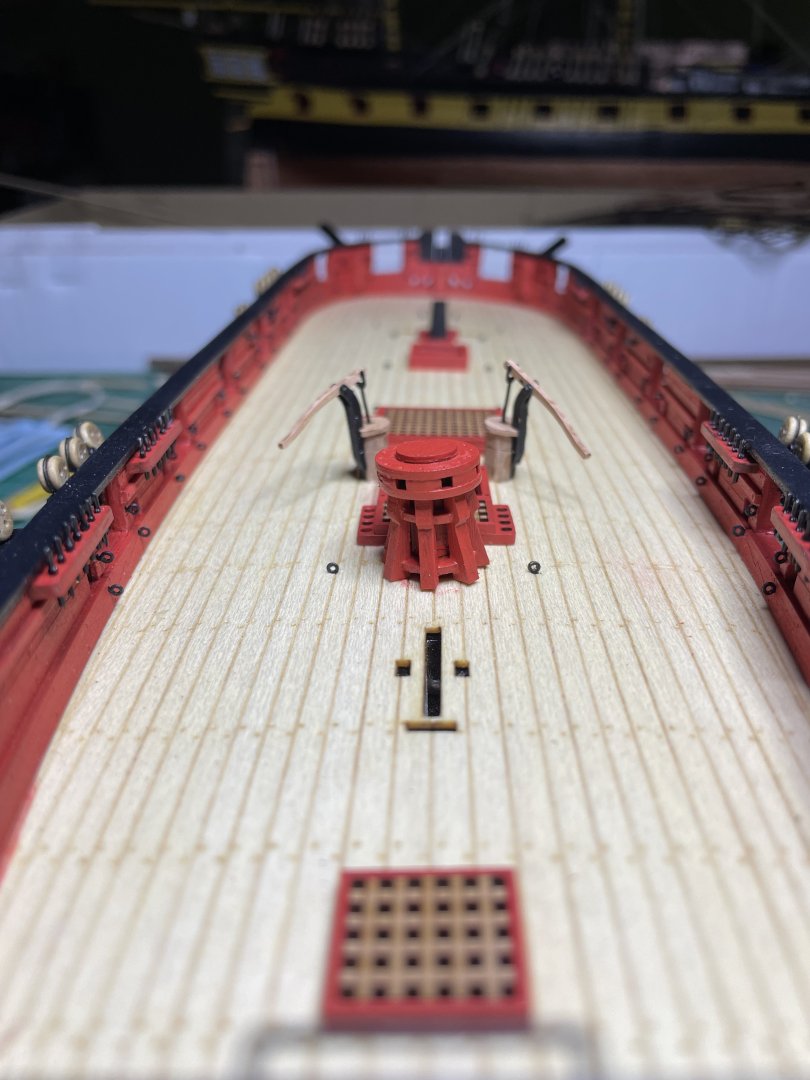
Work for the day done. Mainly adding belaying pins, various bolts, catheads, railing etc. Had not pun on the poly yet so some parts a bit dull


- 66 replies
-
- 10
-
-
- Adder
- Vanguard Models
- (and 1 more)